HOLIDAY DONATION DRIVE - SUPPORT MSW - DO YOUR PART TO KEEP THIS GREAT FORUM GOING! (Only 69 donations so far out of 49,000 members - Can we at least get 100? C'mon guys!)
×
norm1116
-
Posts
60 -
Joined
-
Last visited
Content Type
Profiles
Forums
Gallery
Events
Everything posted by norm1116
-
 Thanks John, I'll prime my paddle wheels first just in case. Got the templates ready for the sponsons and will be doing that soon! Getting ready to paint the paddle wheel boxes gold also. You have been a great wealth of information for me, and I appreciate it. Part information, part support, part "just do it", you have been instrumental in my process though this and I appreciate it!
 -
John, When you painted your paddle wheels, did you prime them first or just spray them with the Sante Fe Red? I want to avoid having the paint rub off the brass. I'm going to try to clean it a bit first, but it is not going to be easy. Thanks, and thanks for getting back to me on that light house. I used to live in Old Saybrook as a kid.
-
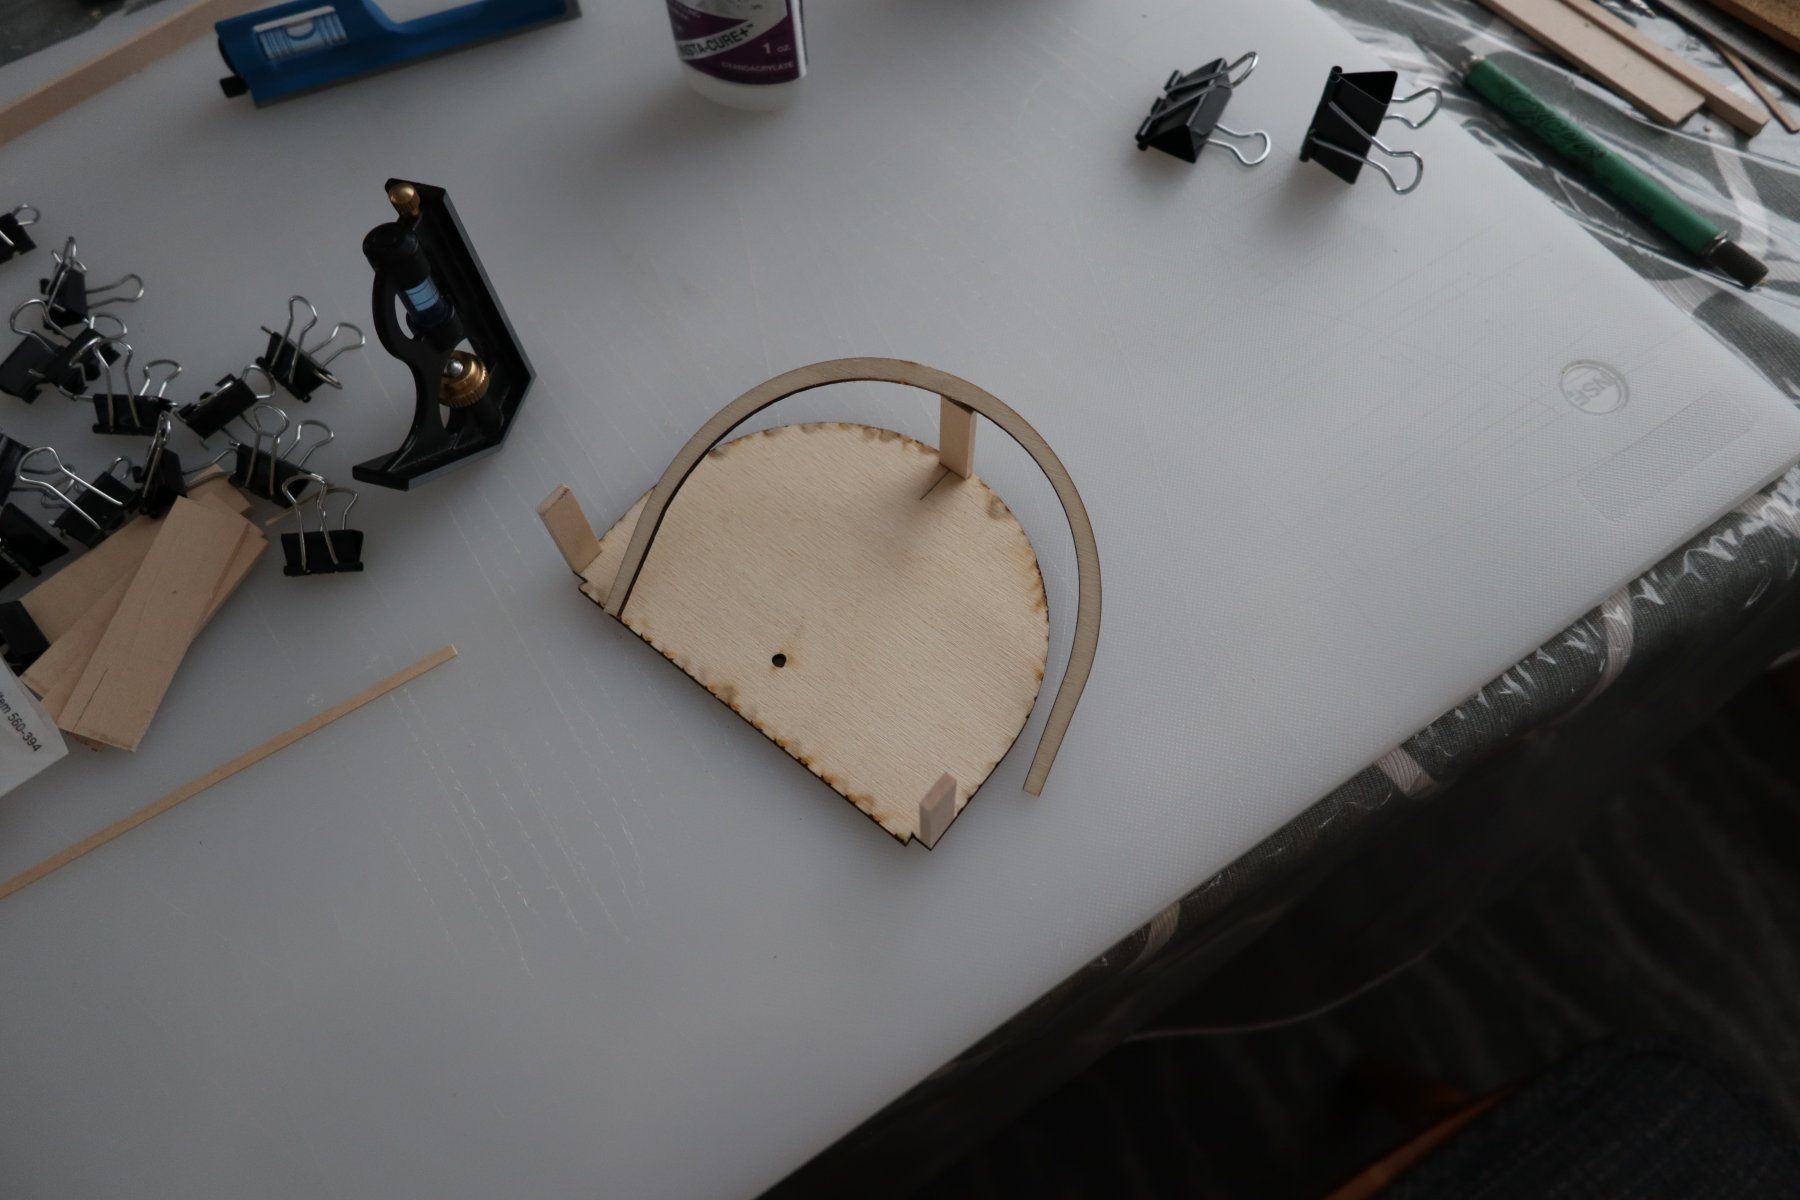
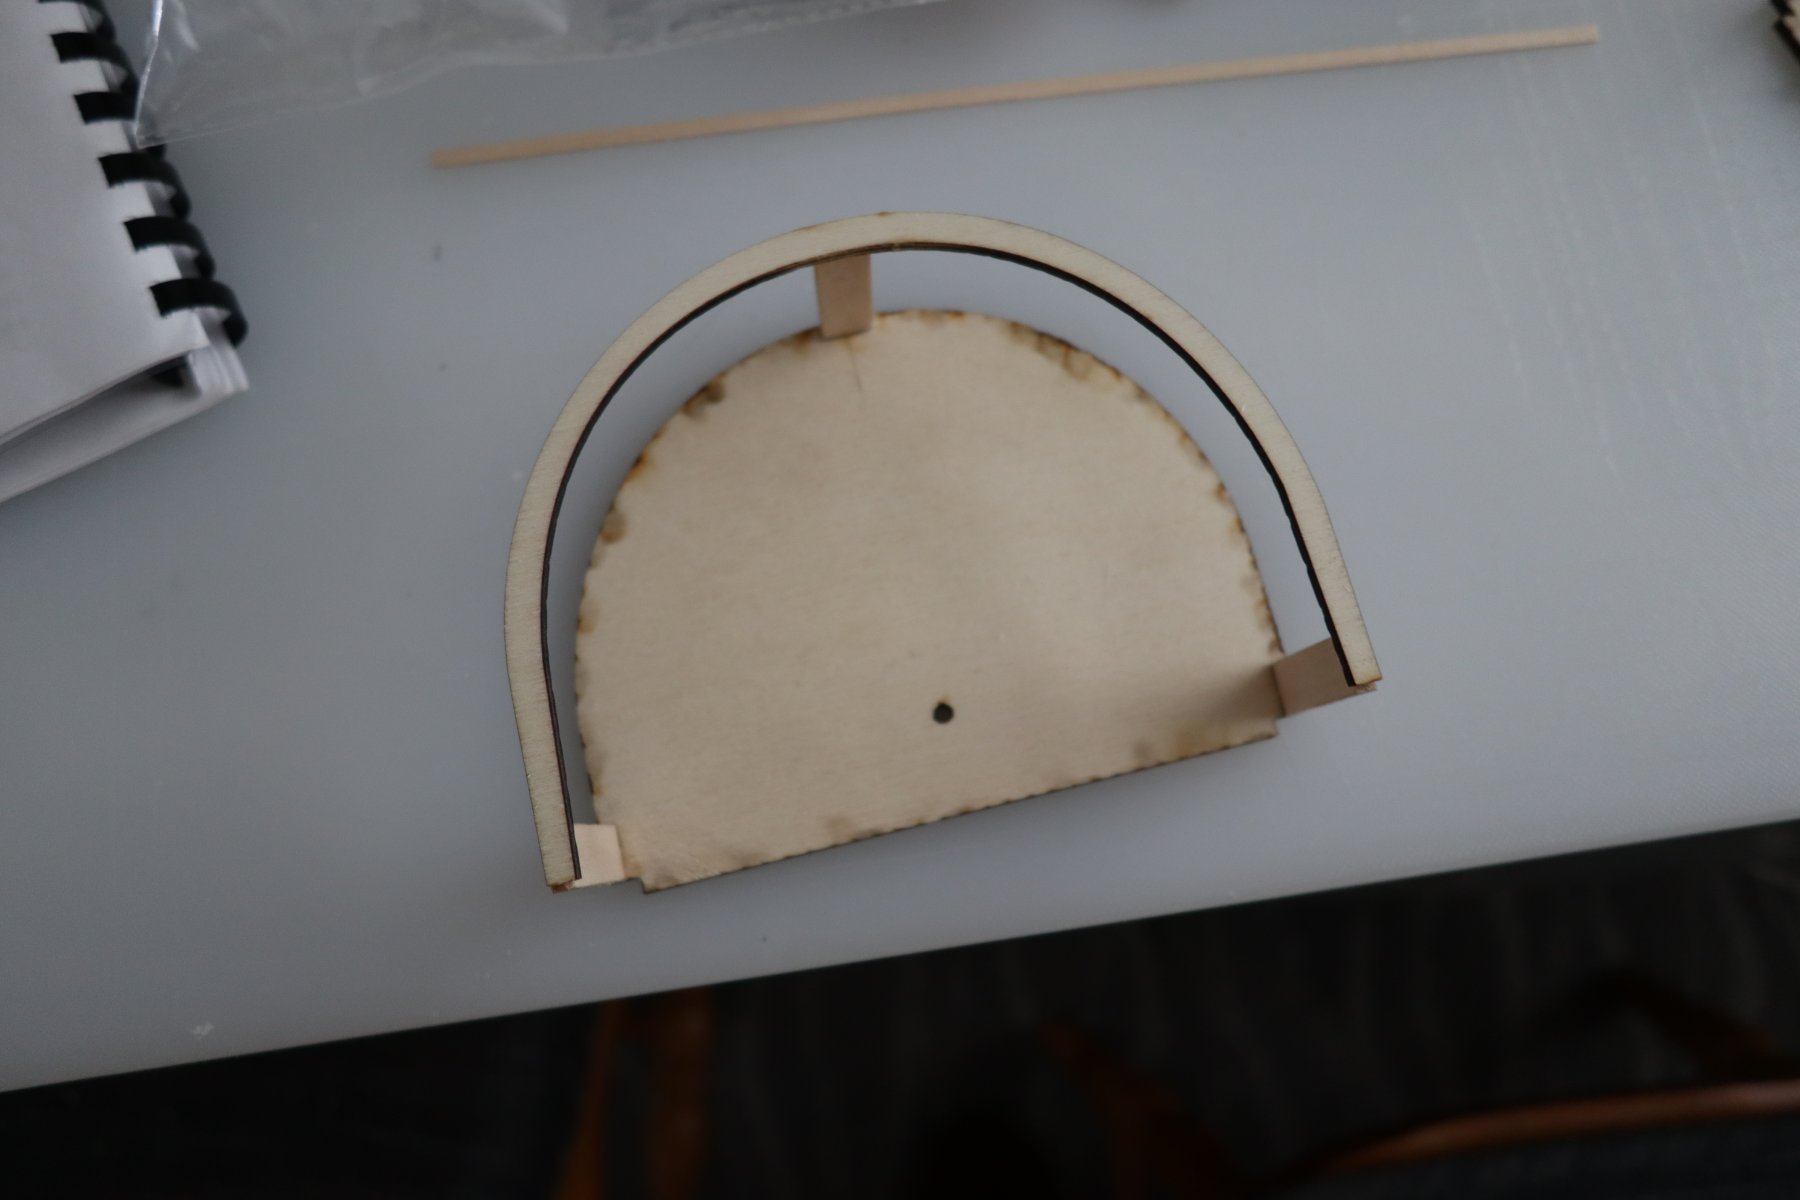
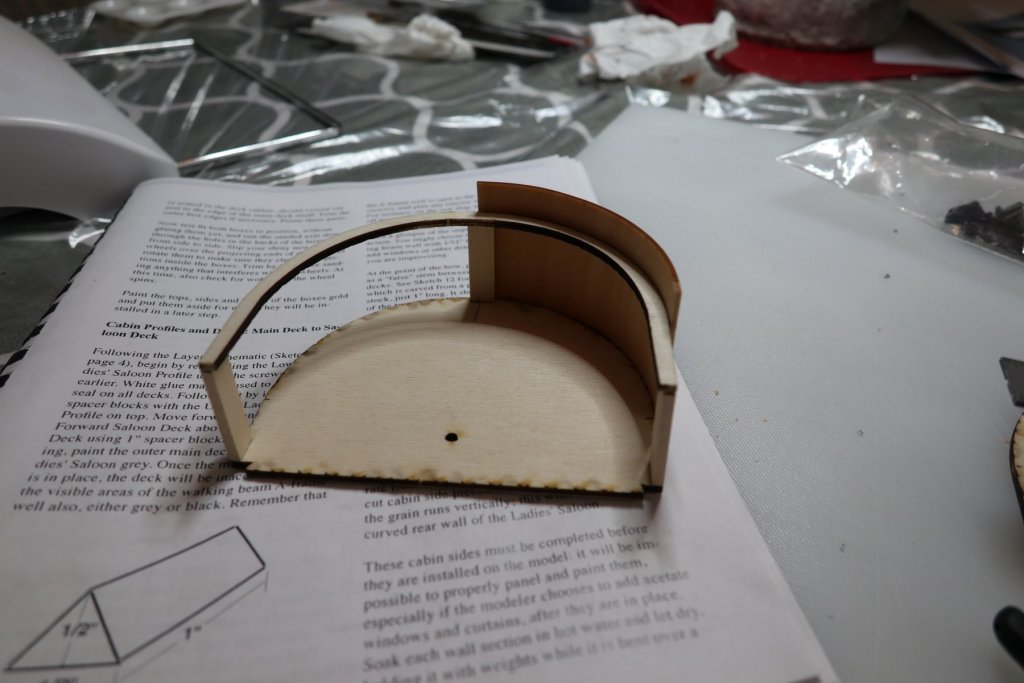
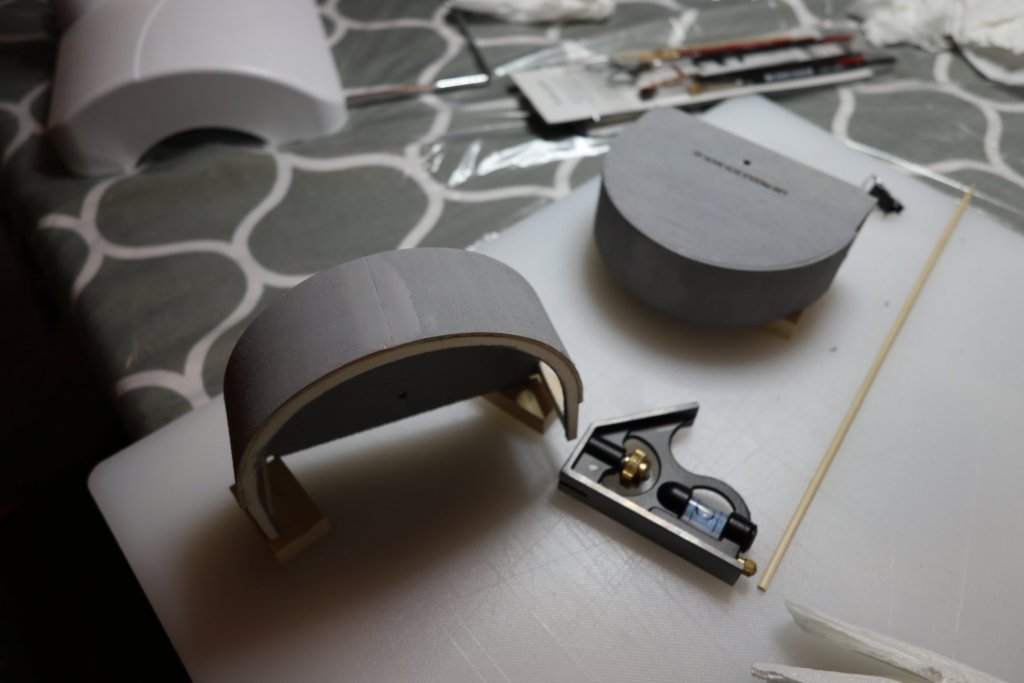
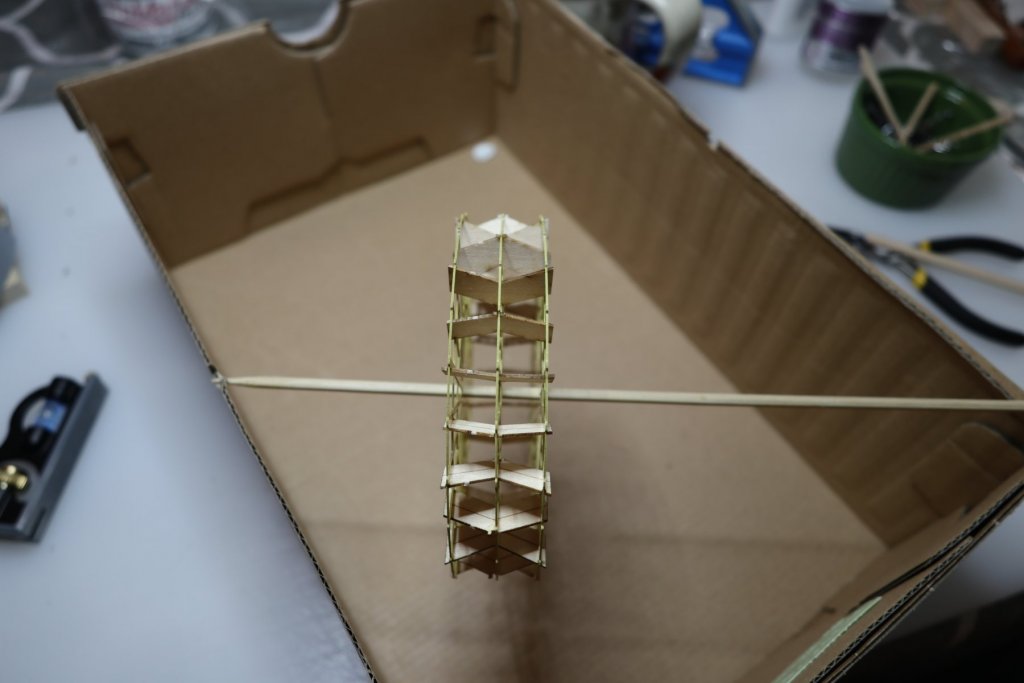
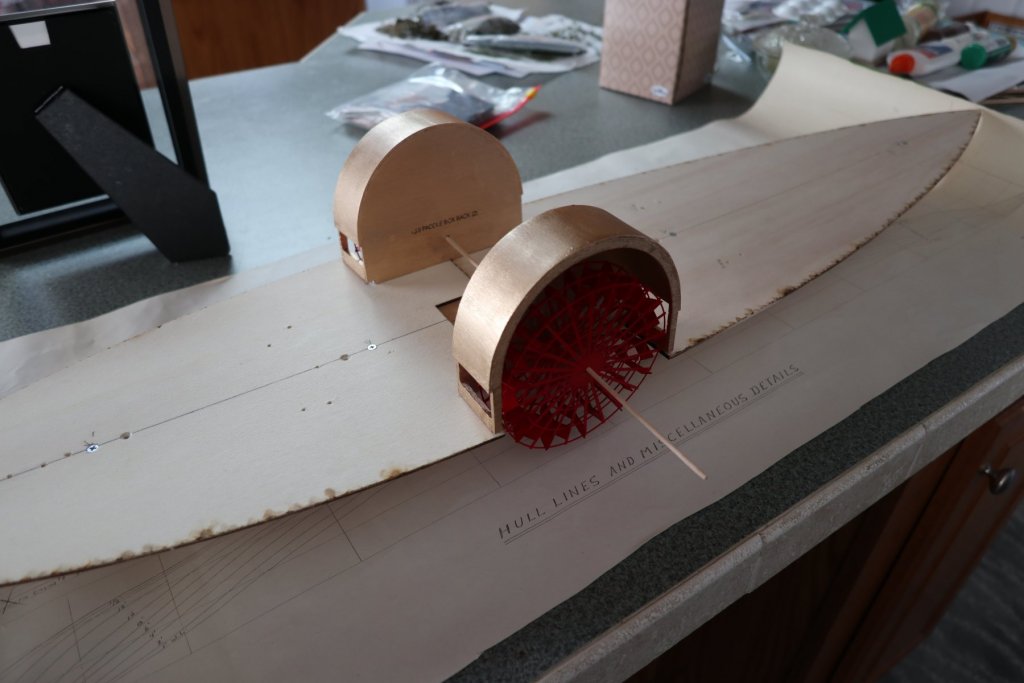
Paddle Wheel Boxes The instructions were fairly good. Here's how mine went together so far


-
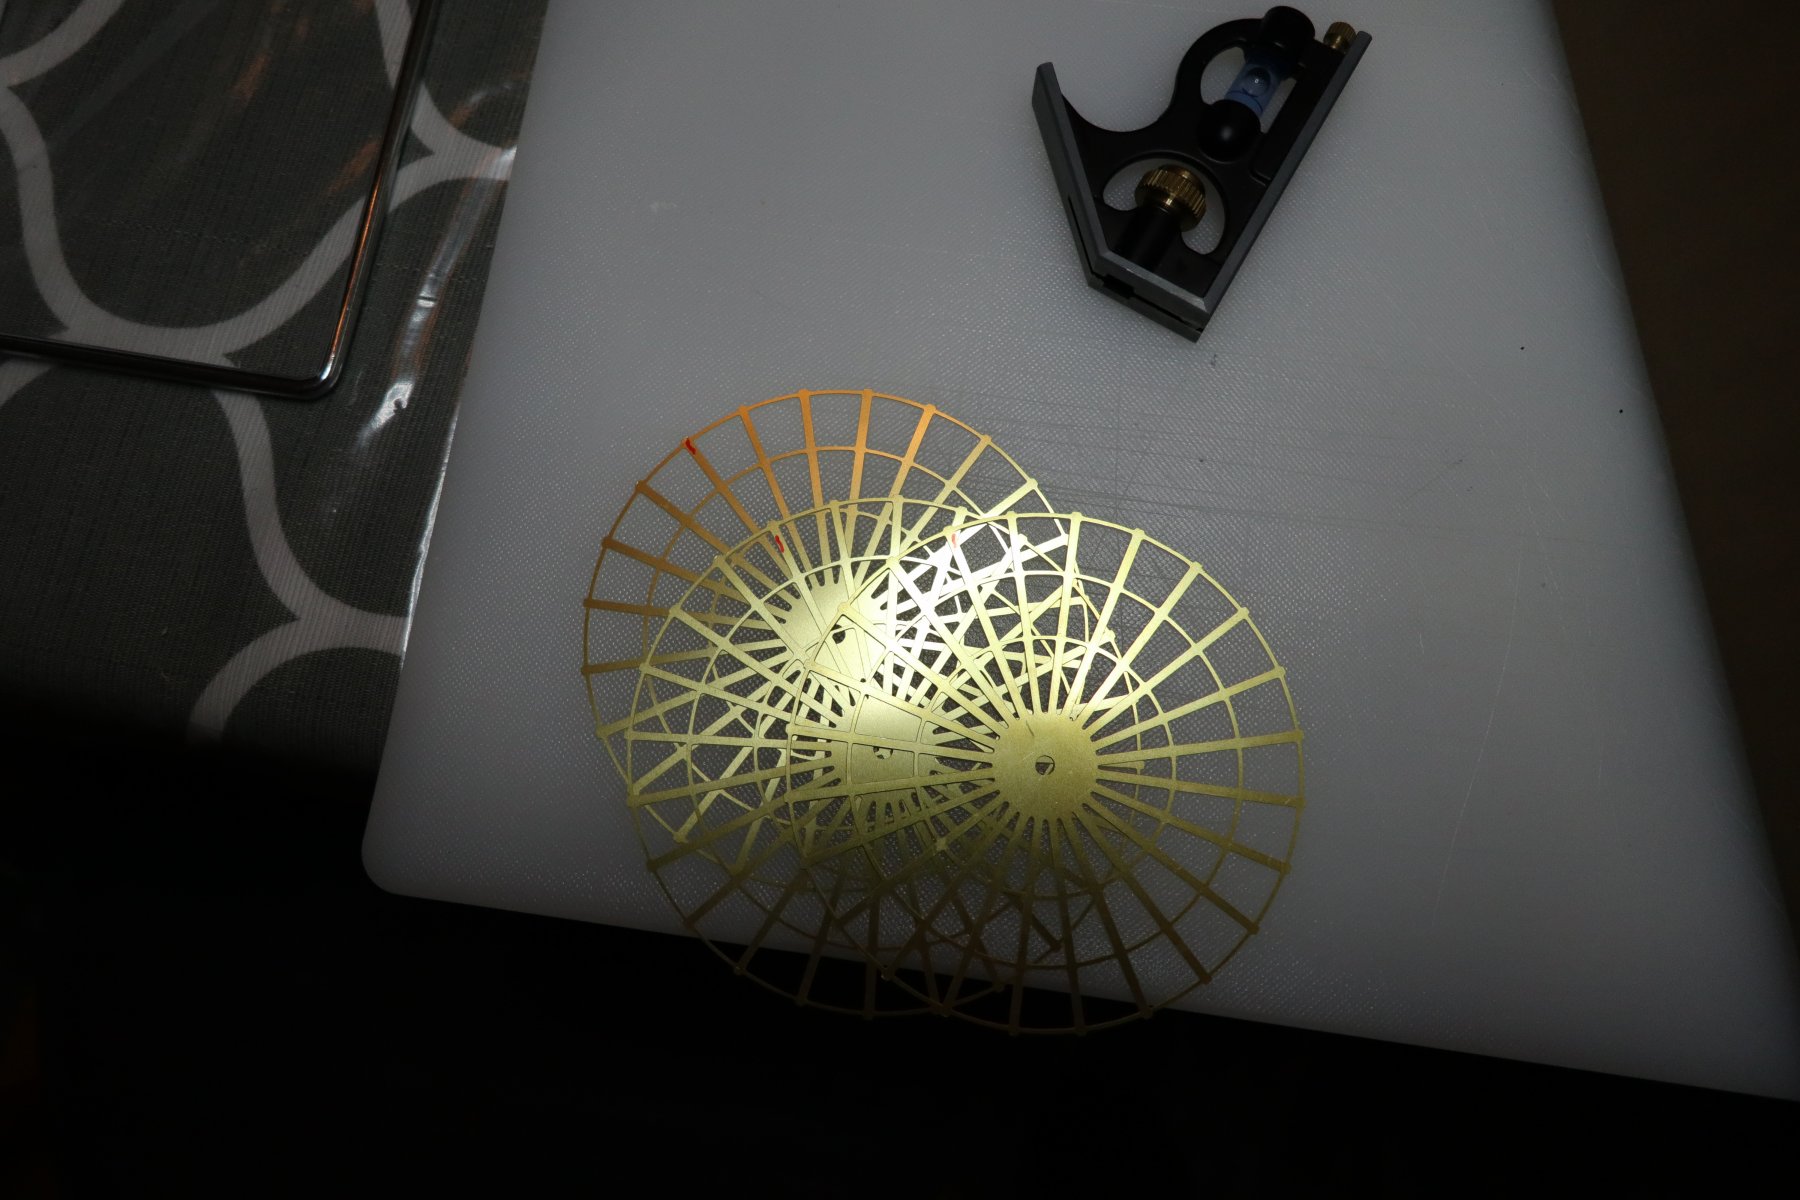
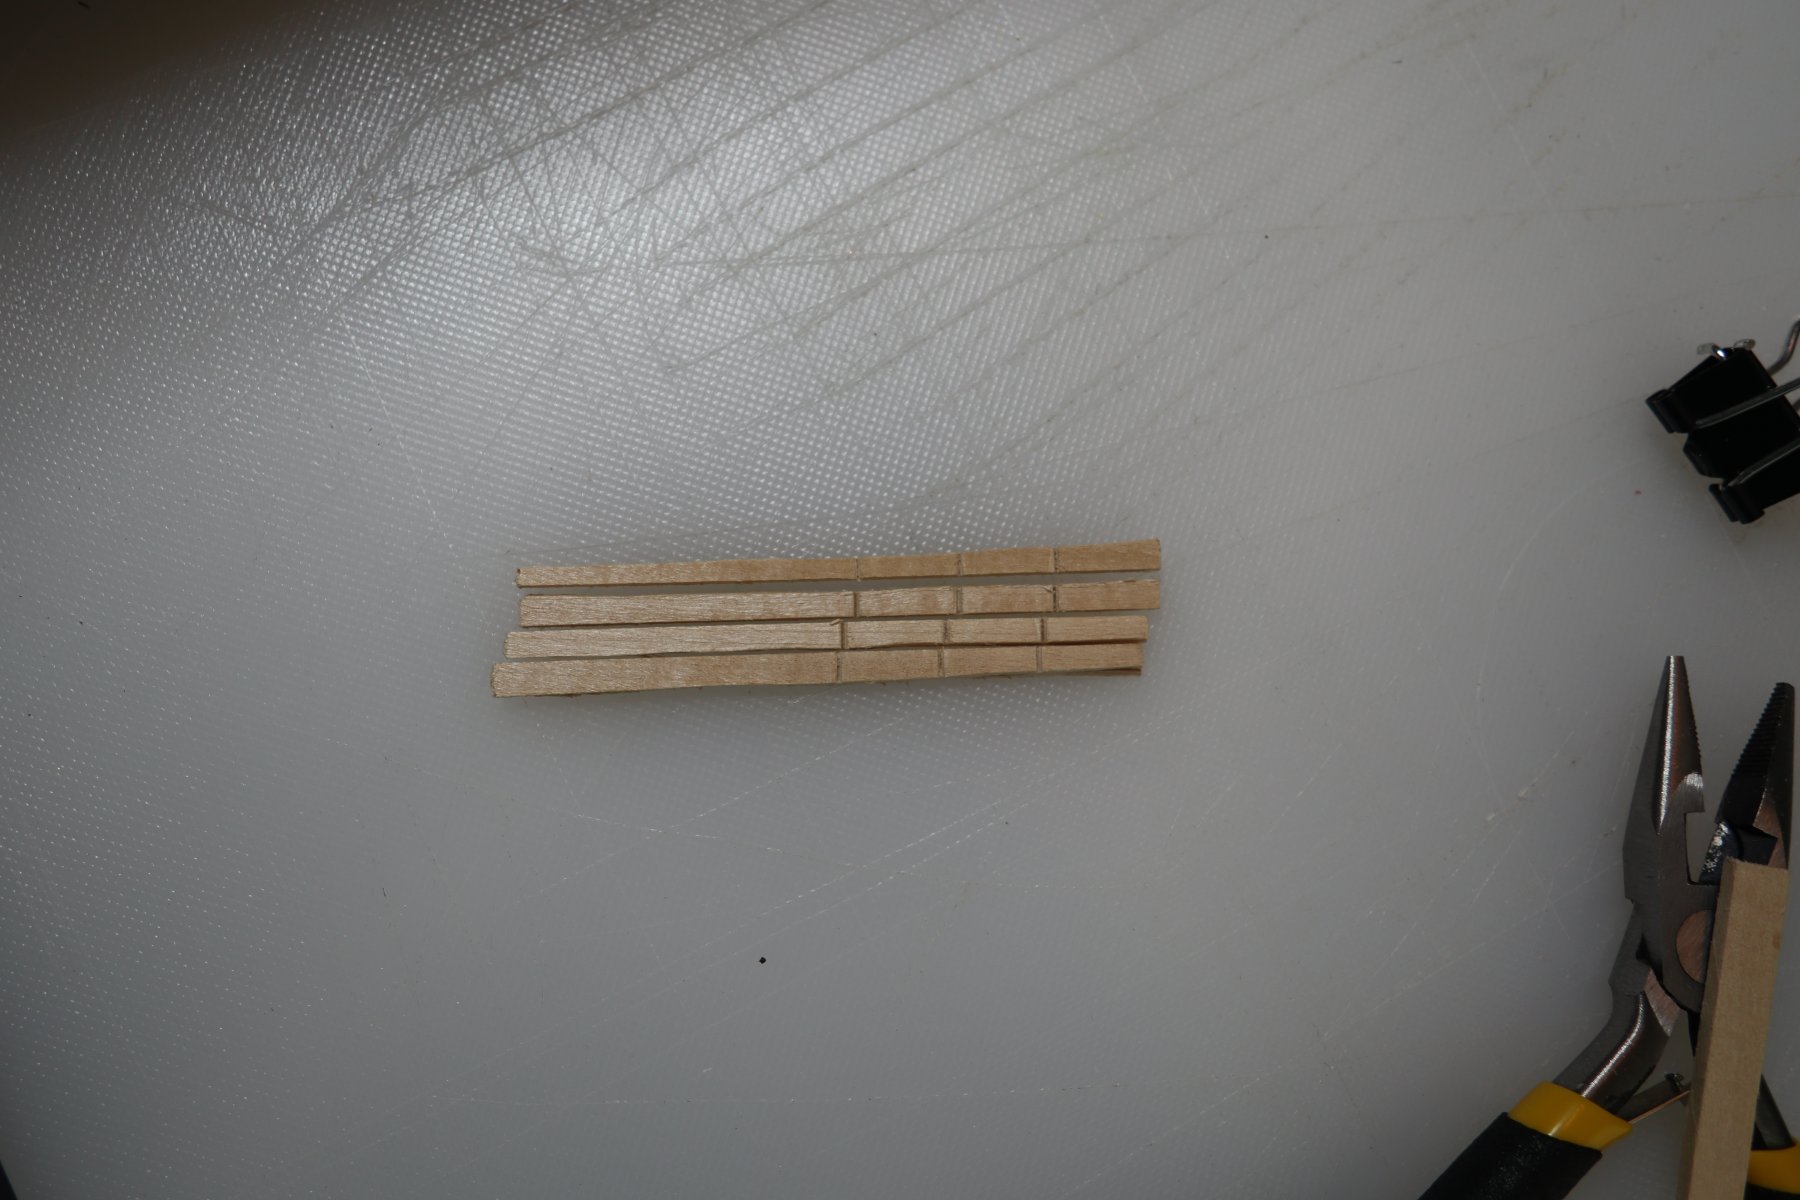
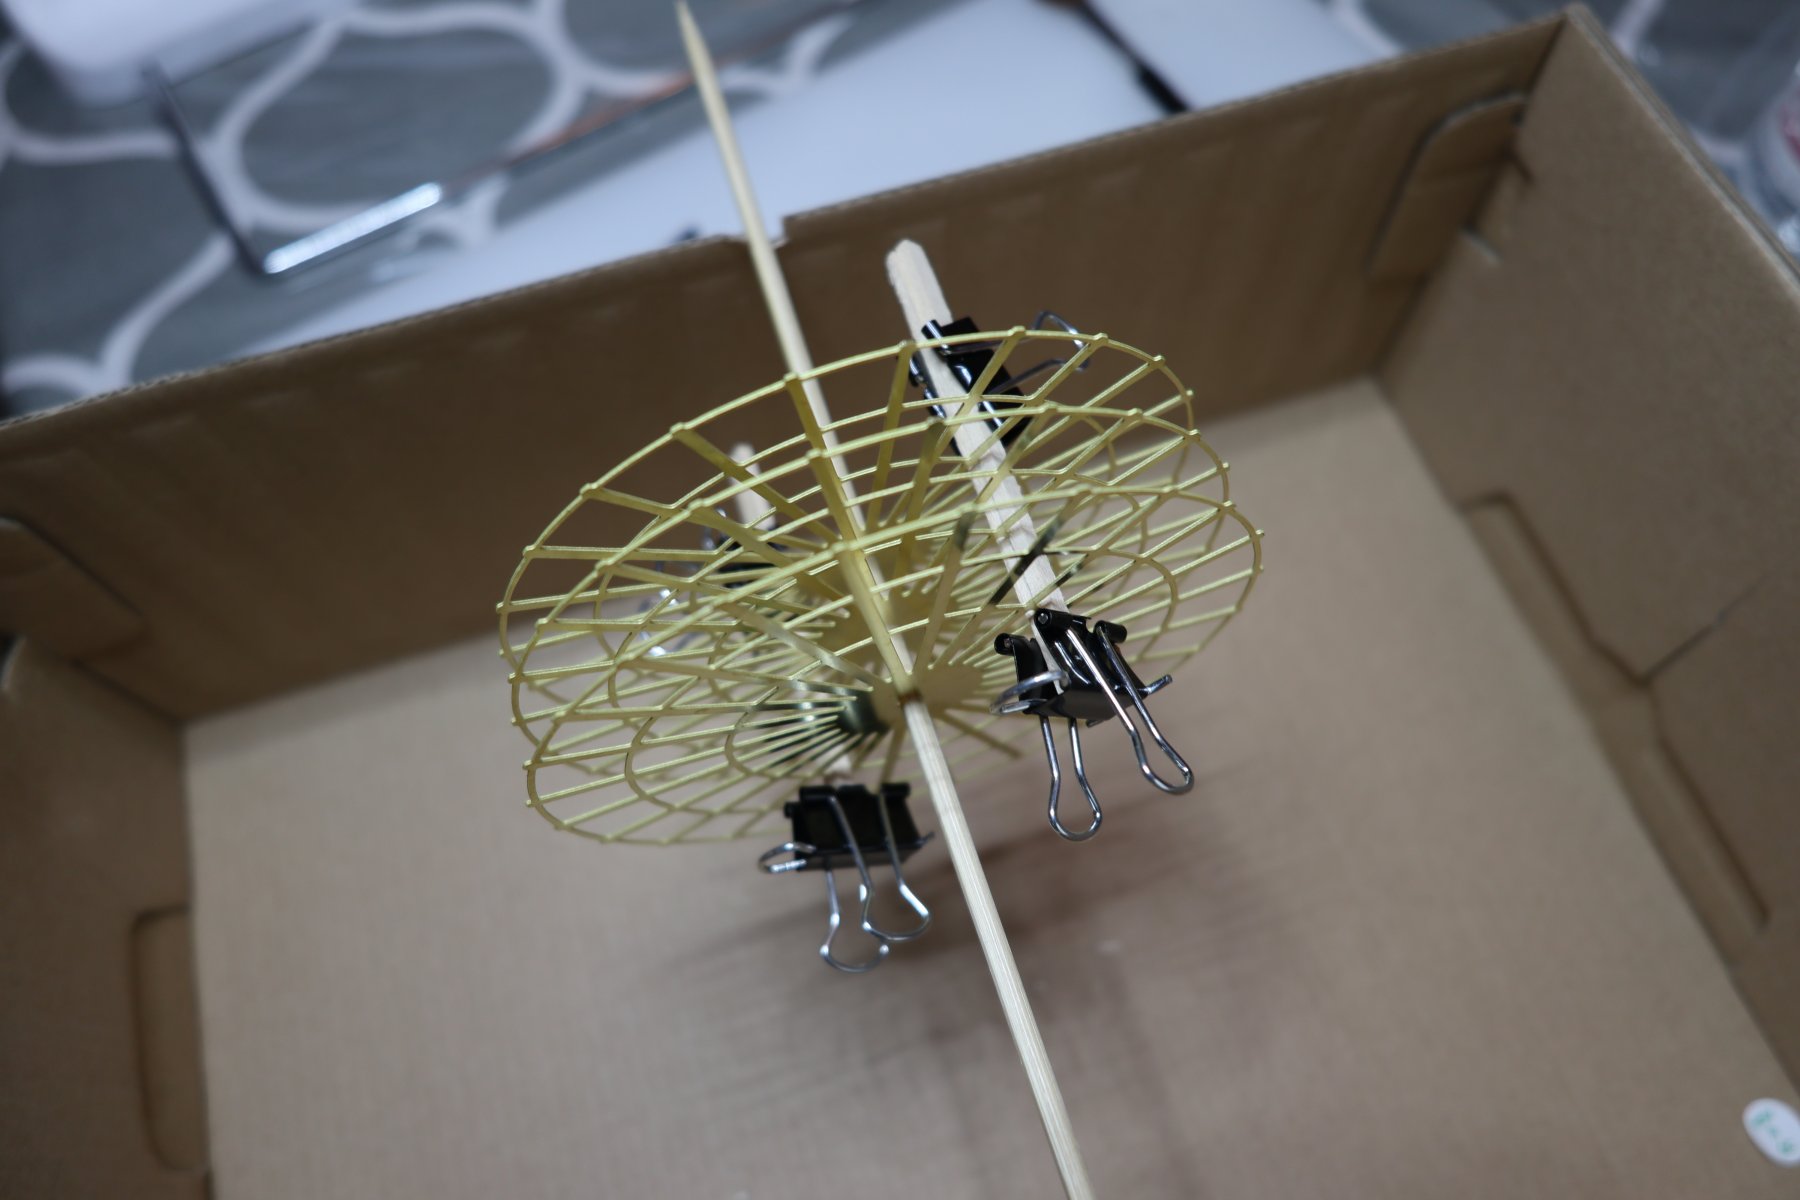
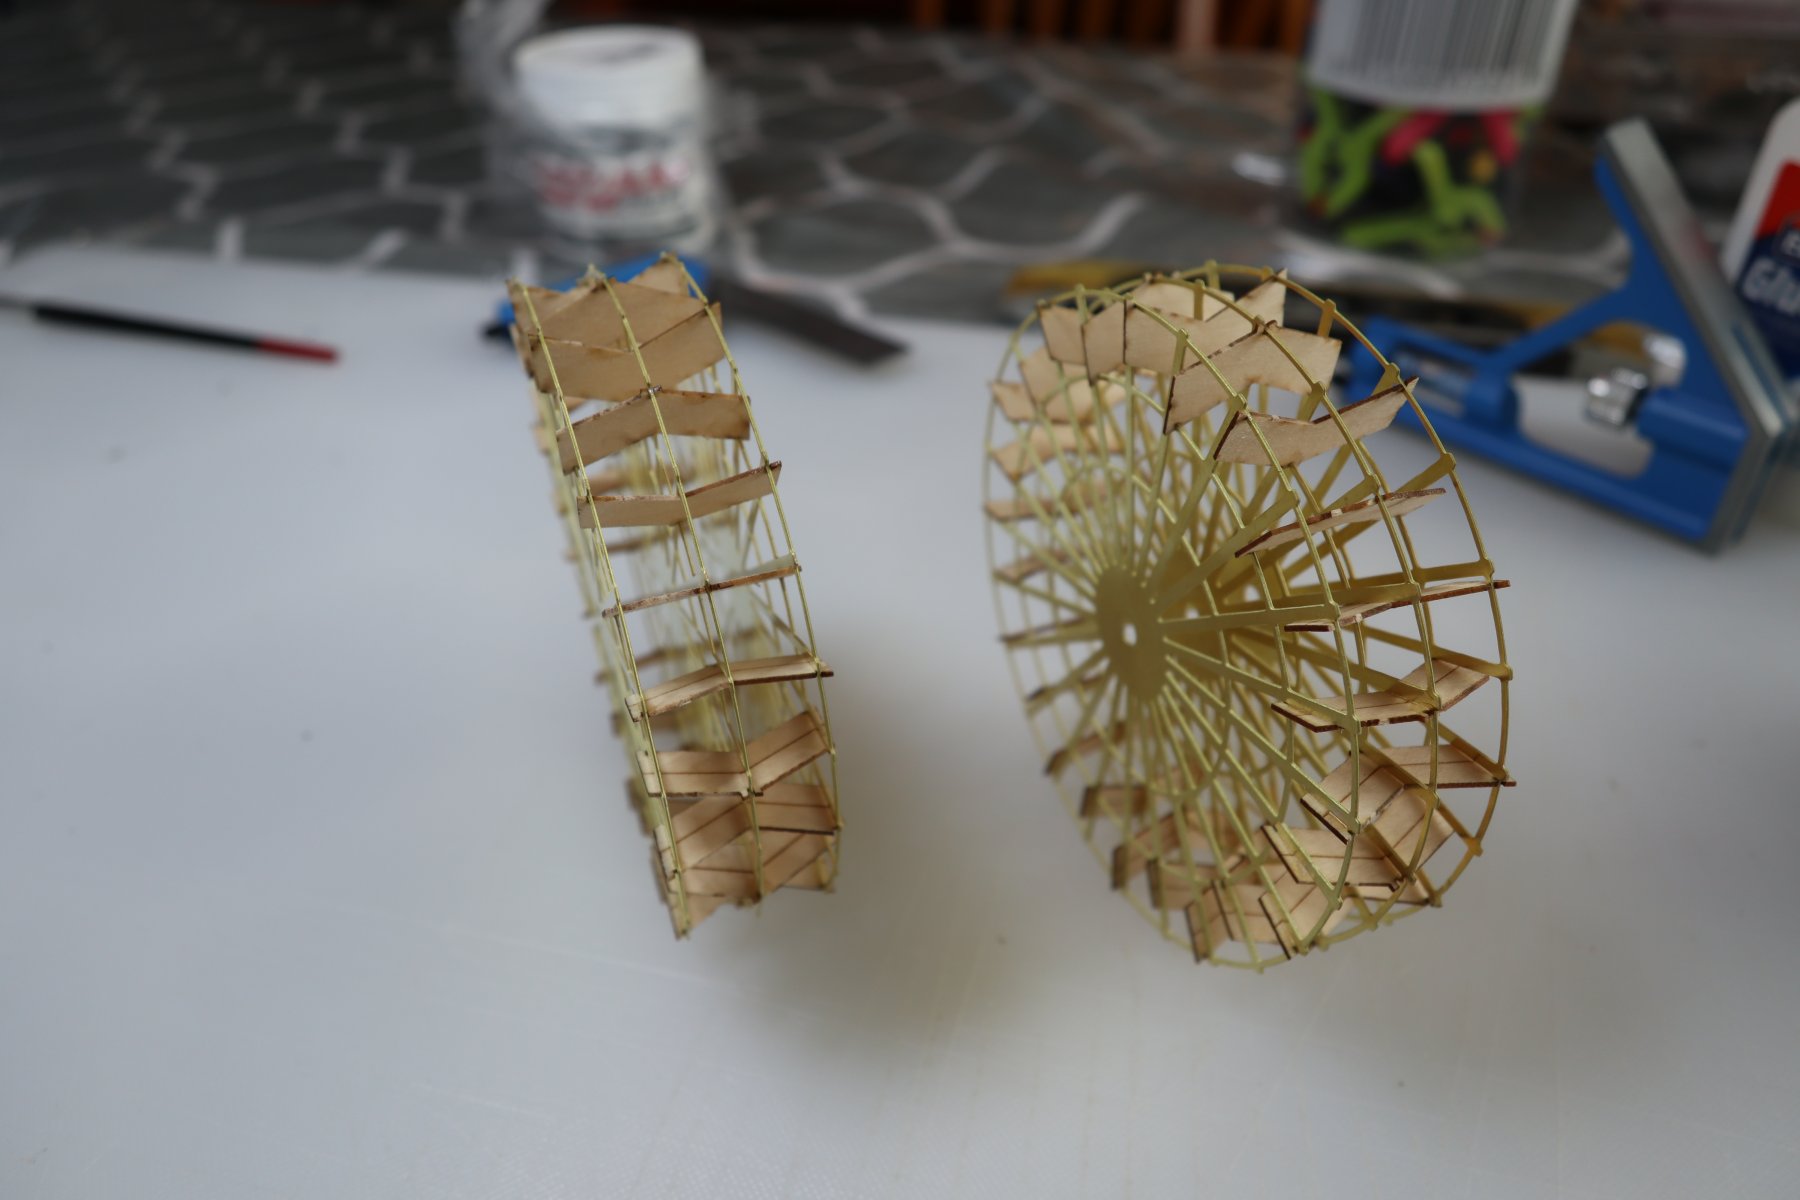
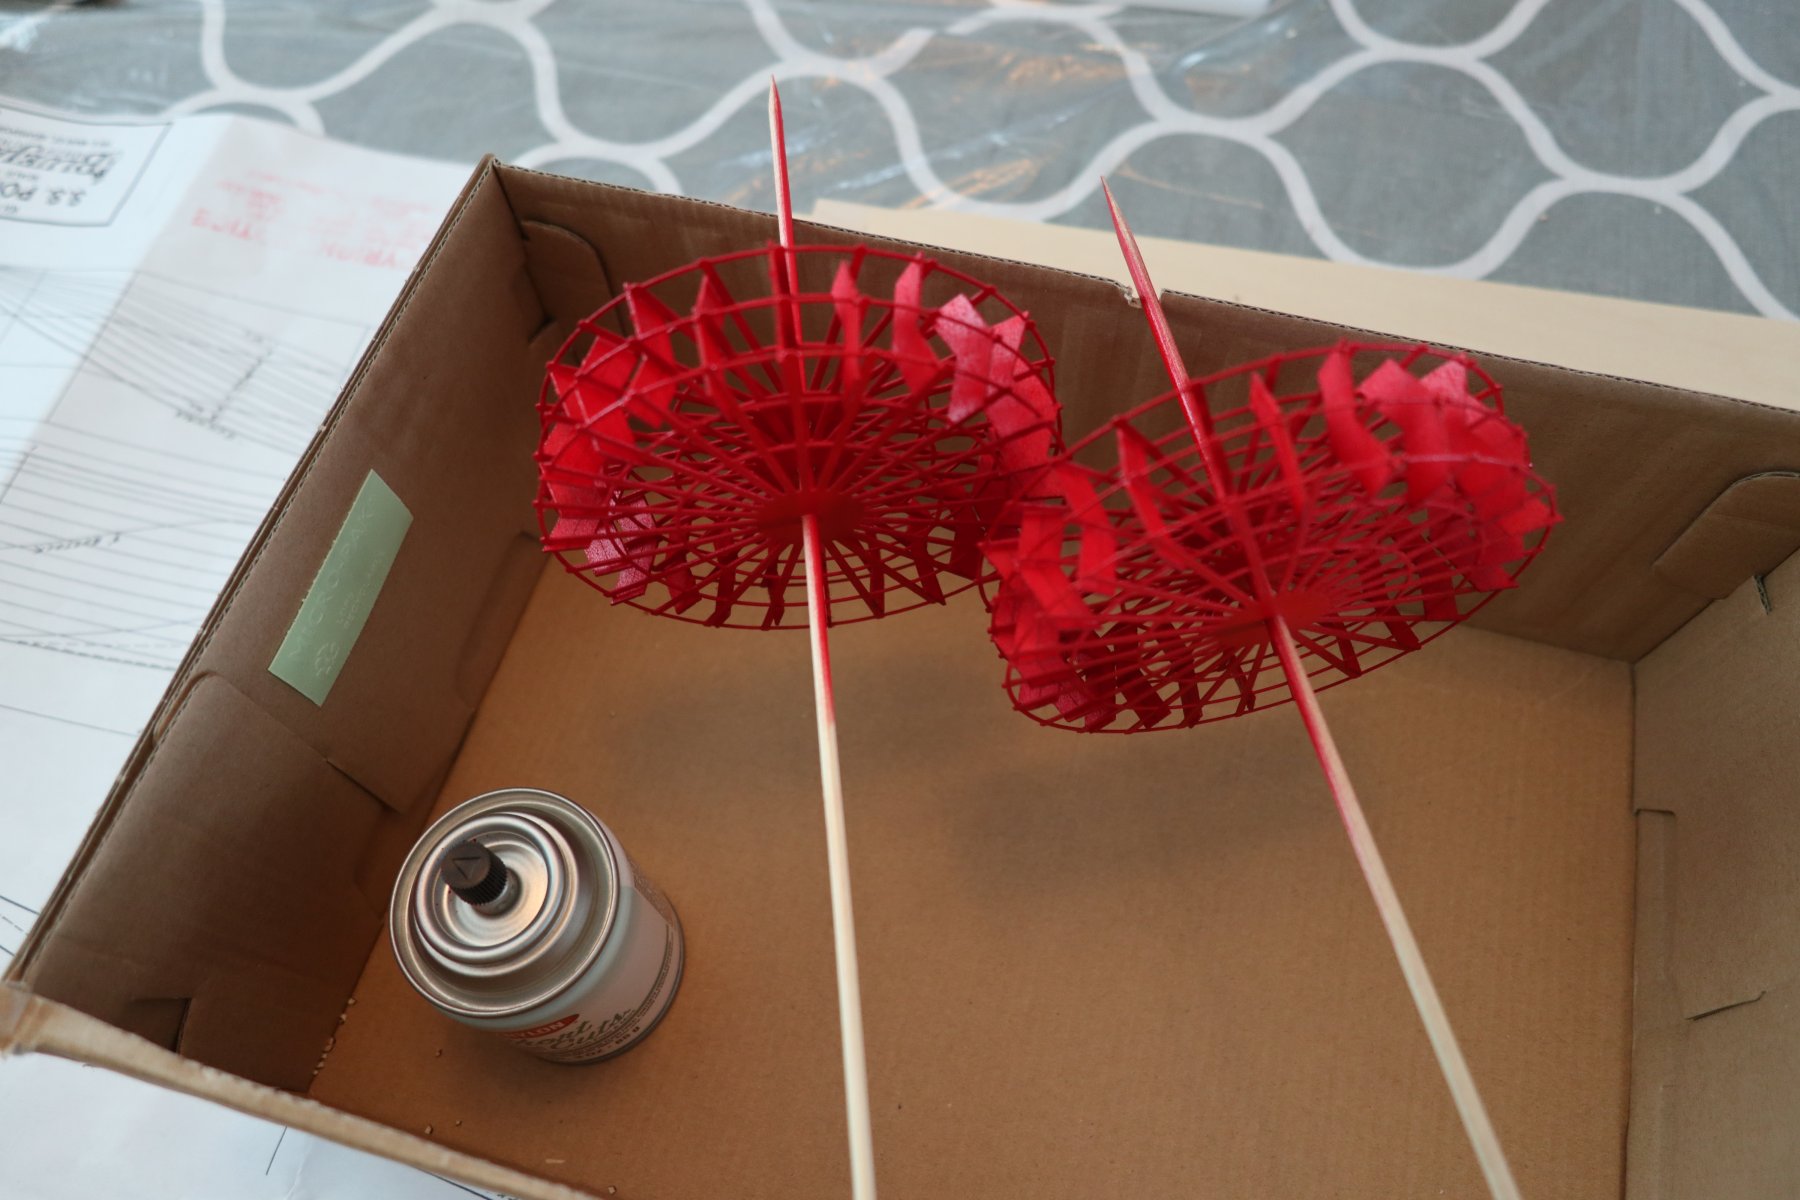
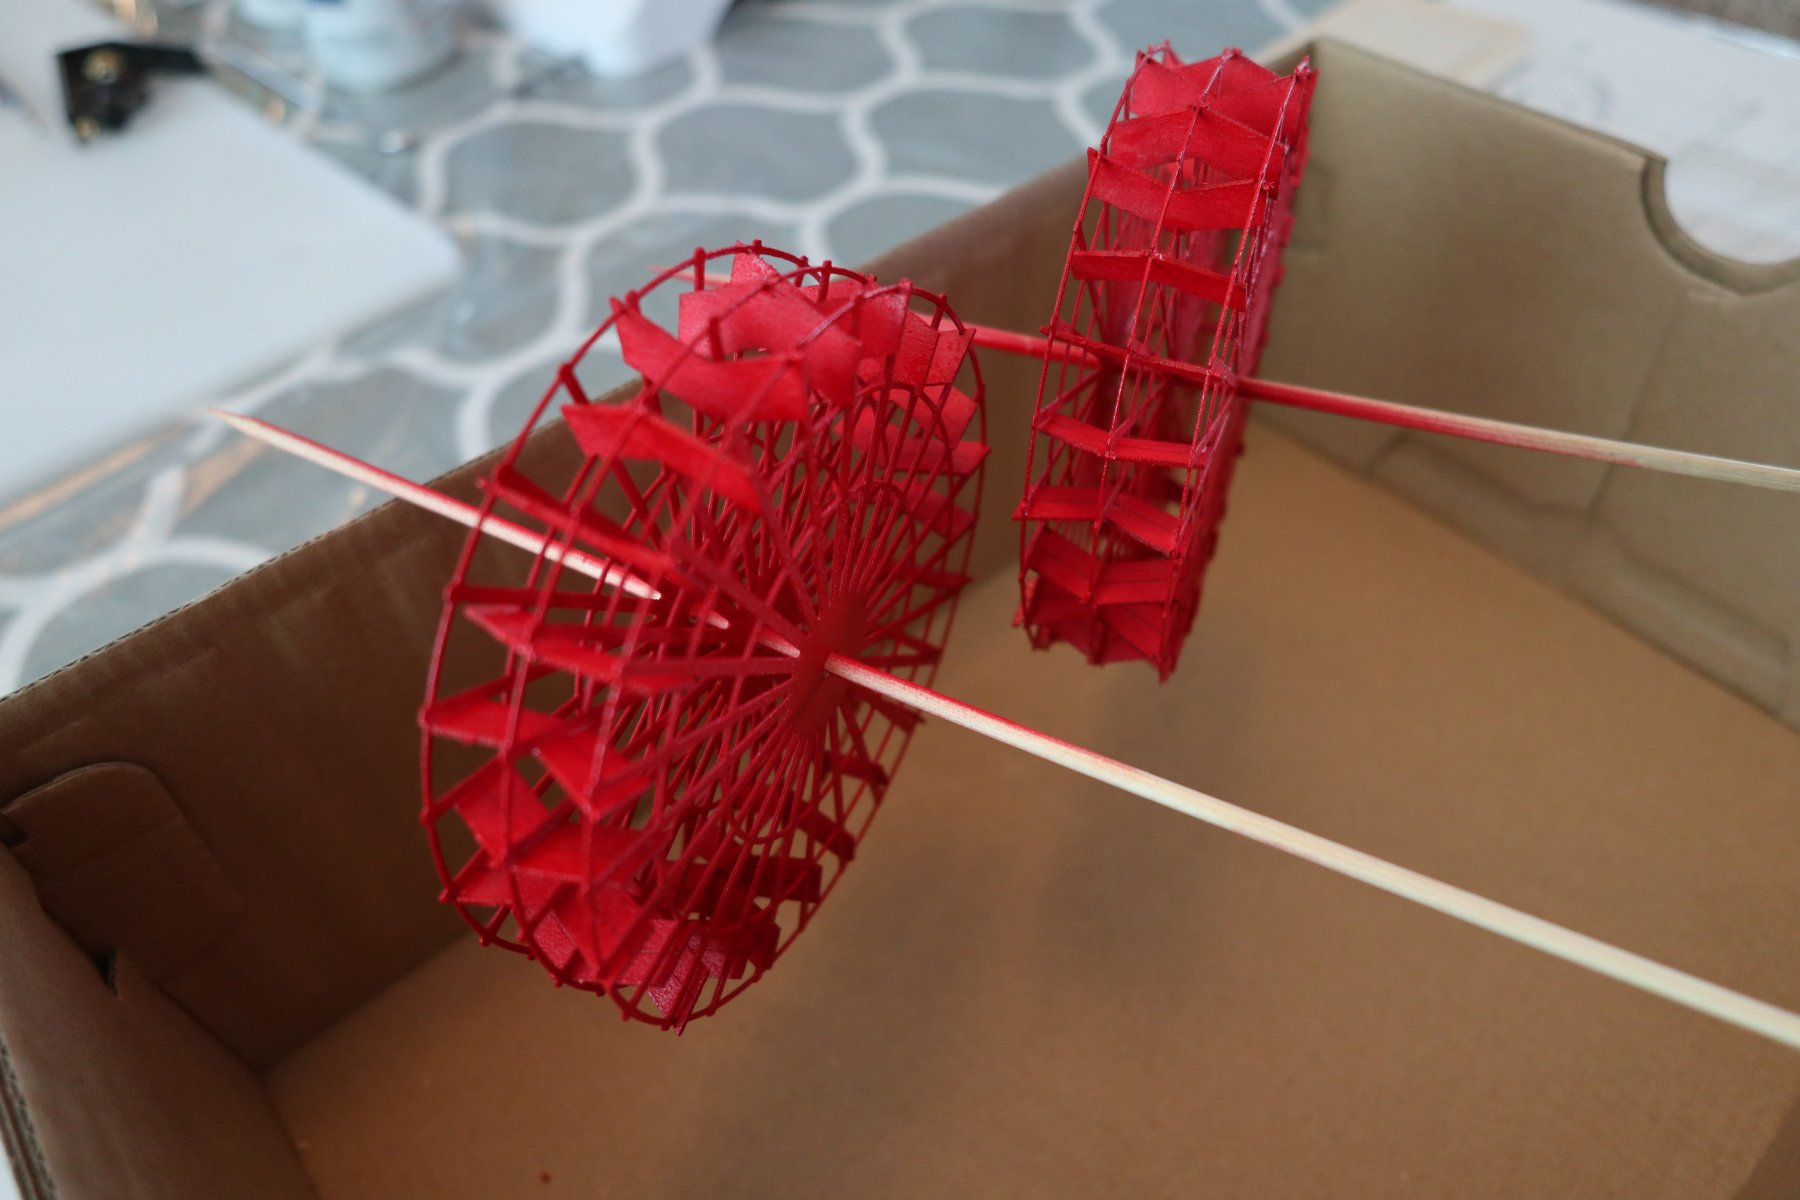
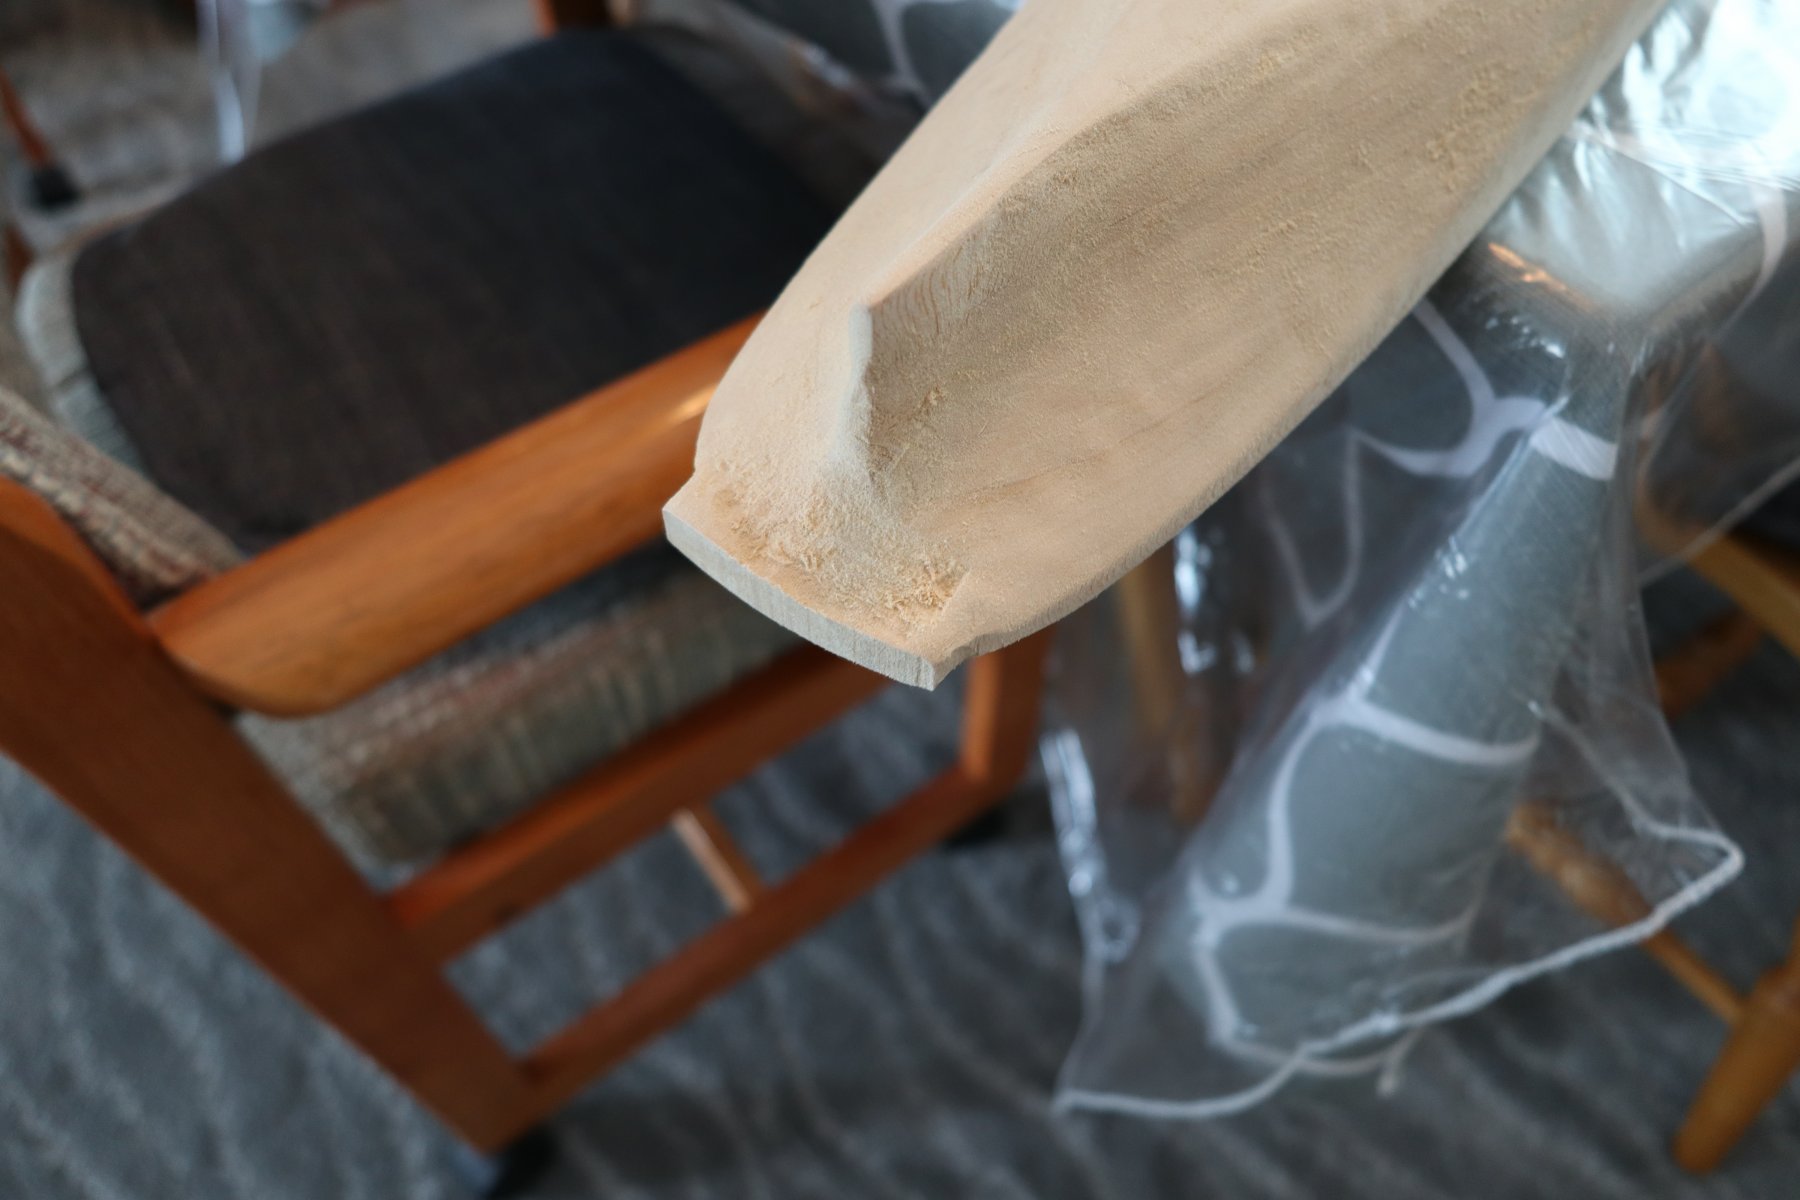
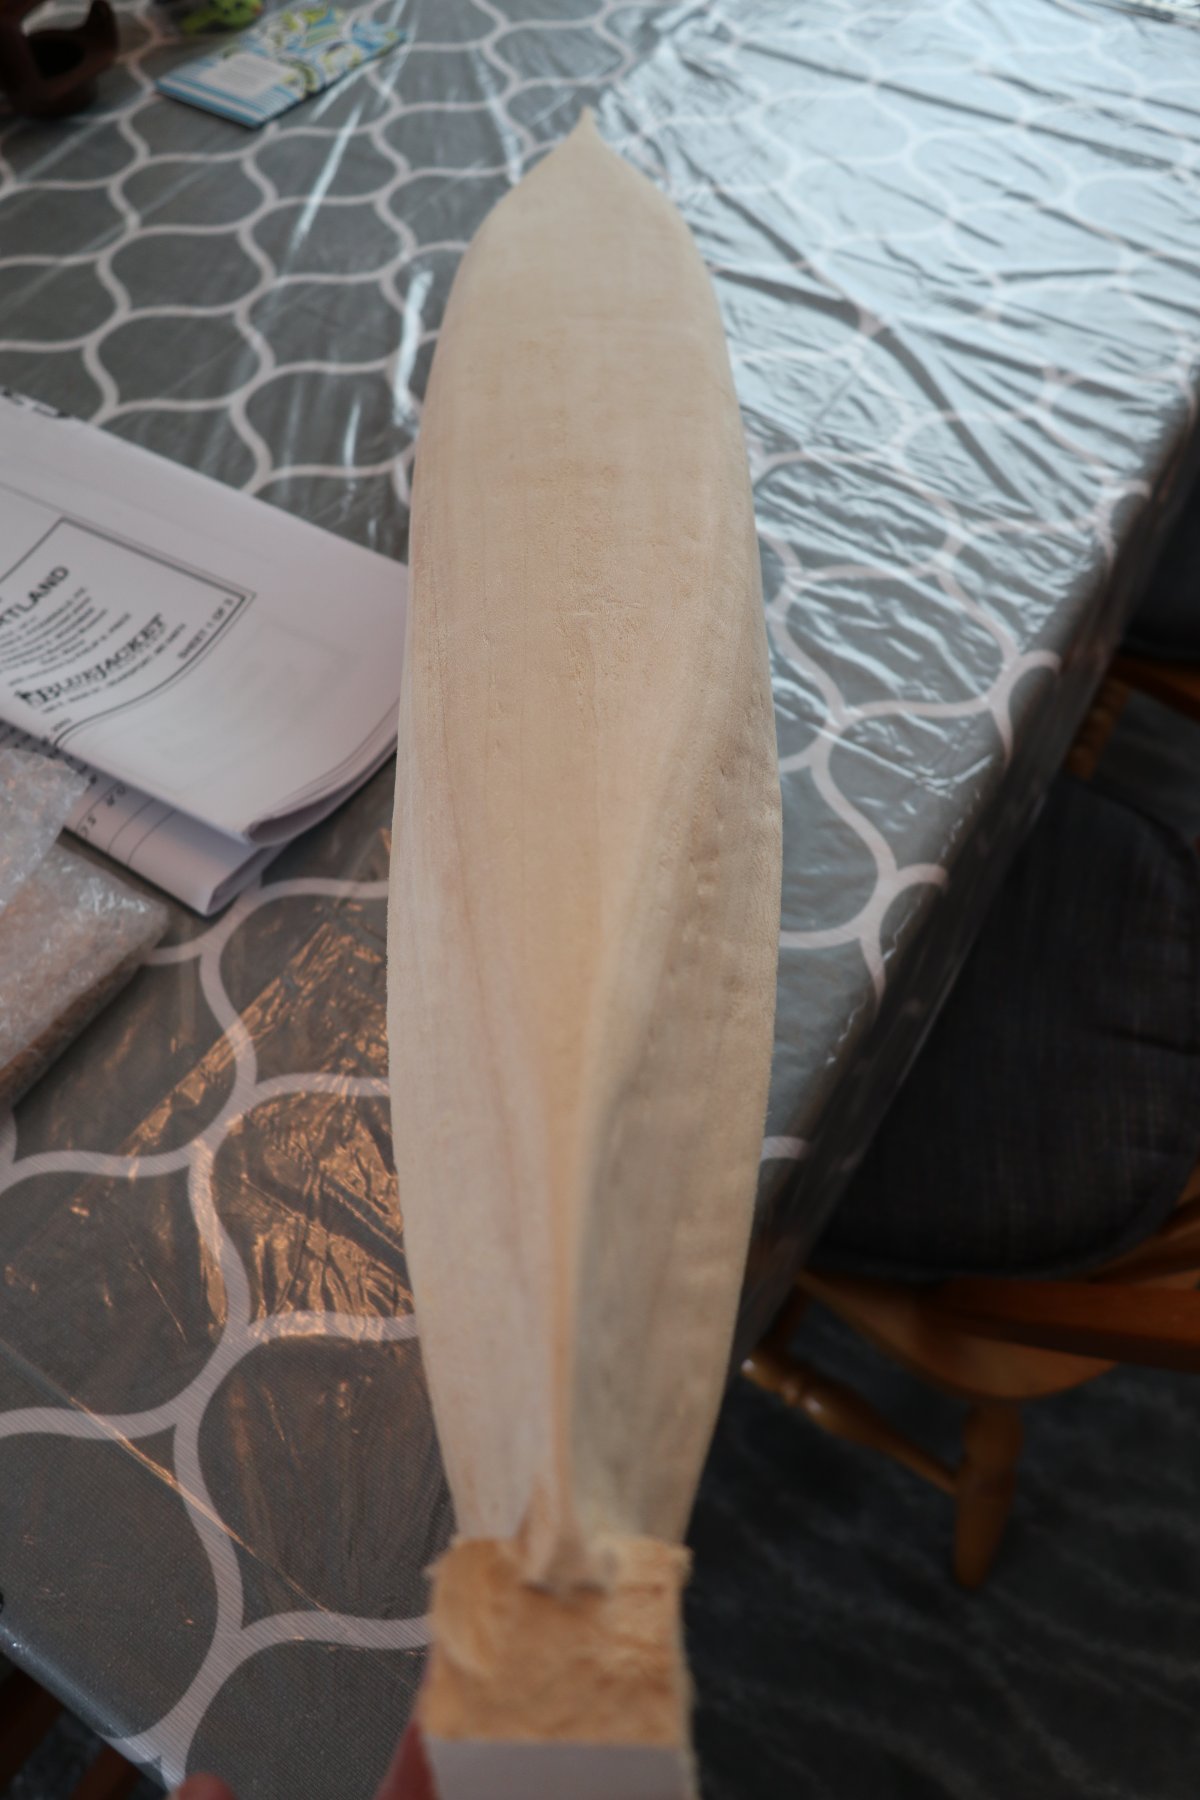
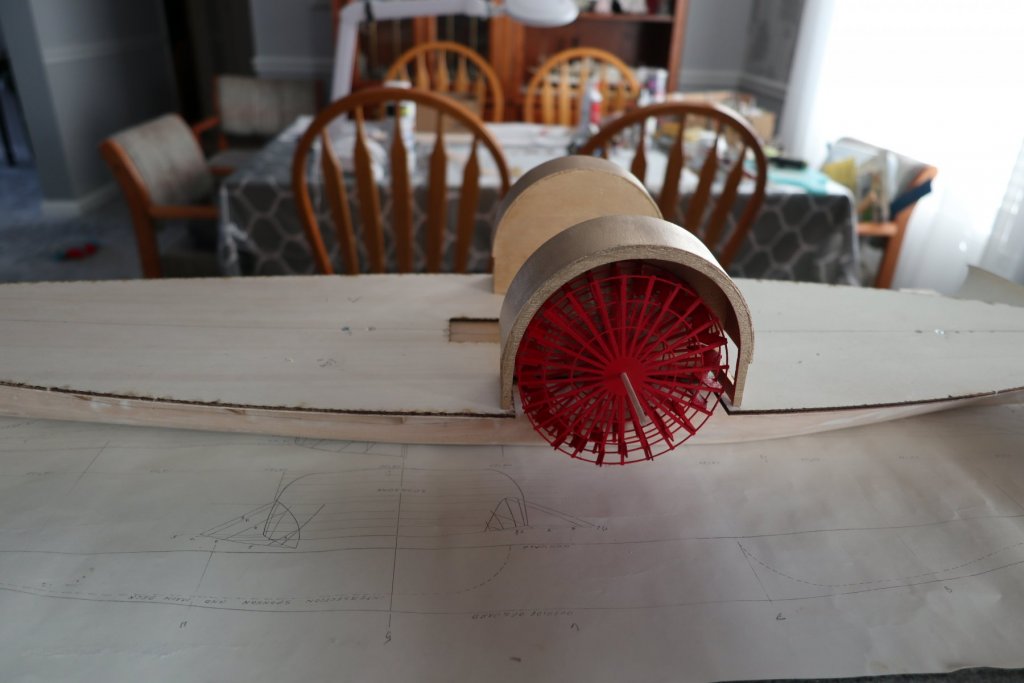
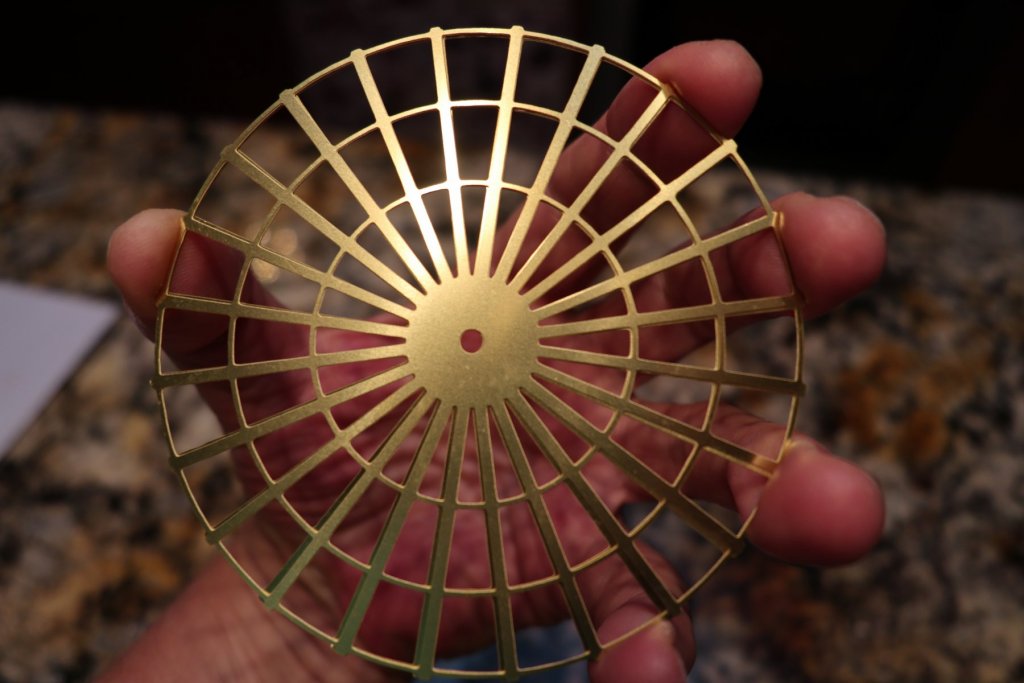
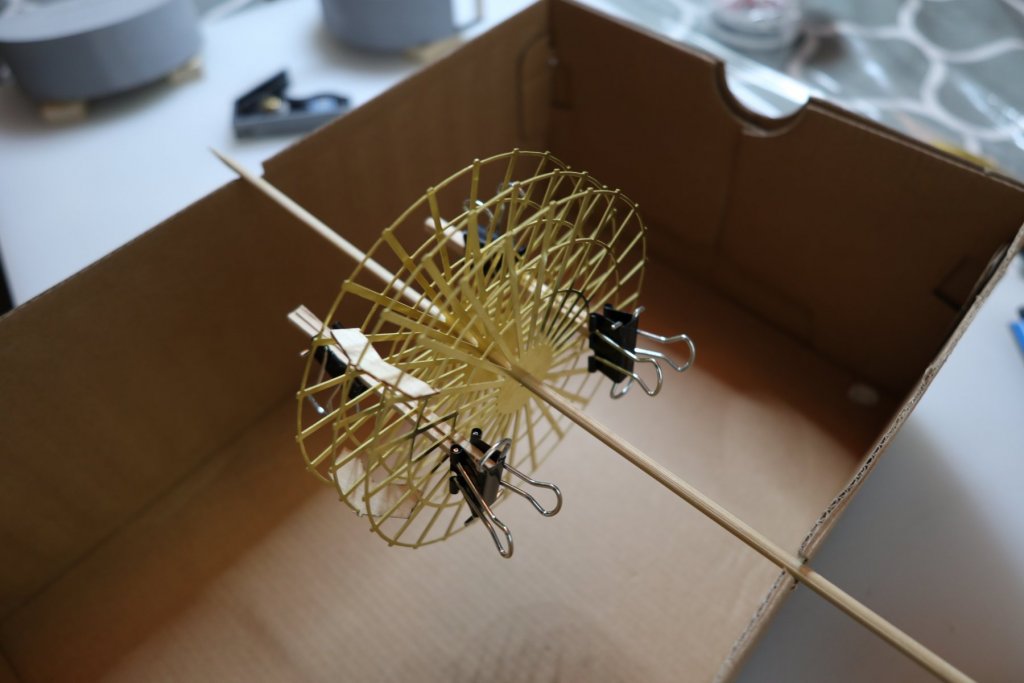
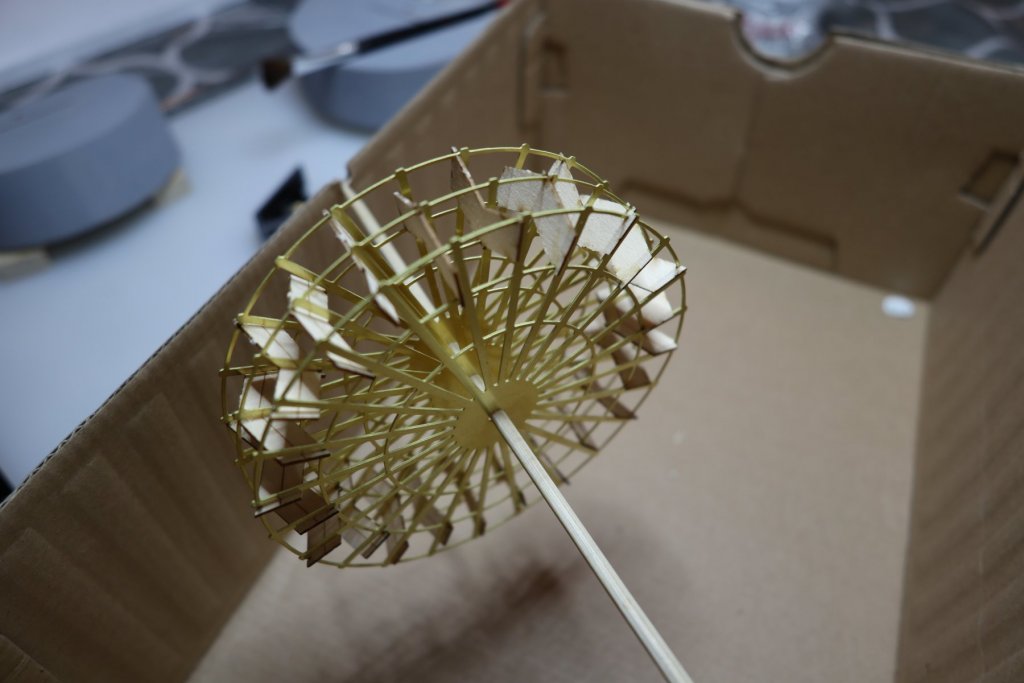
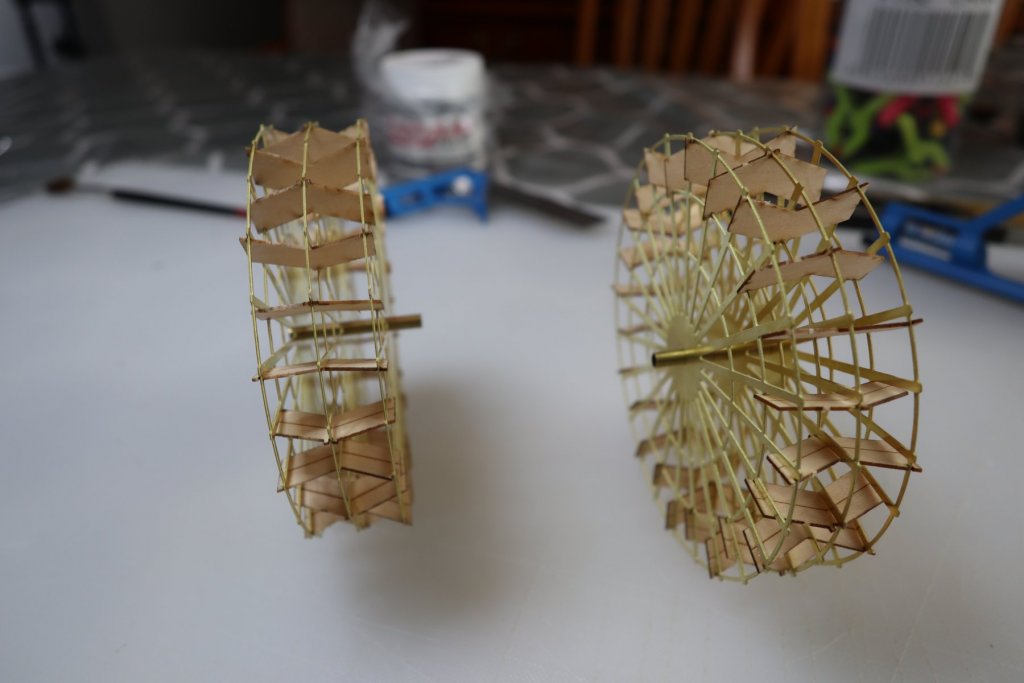
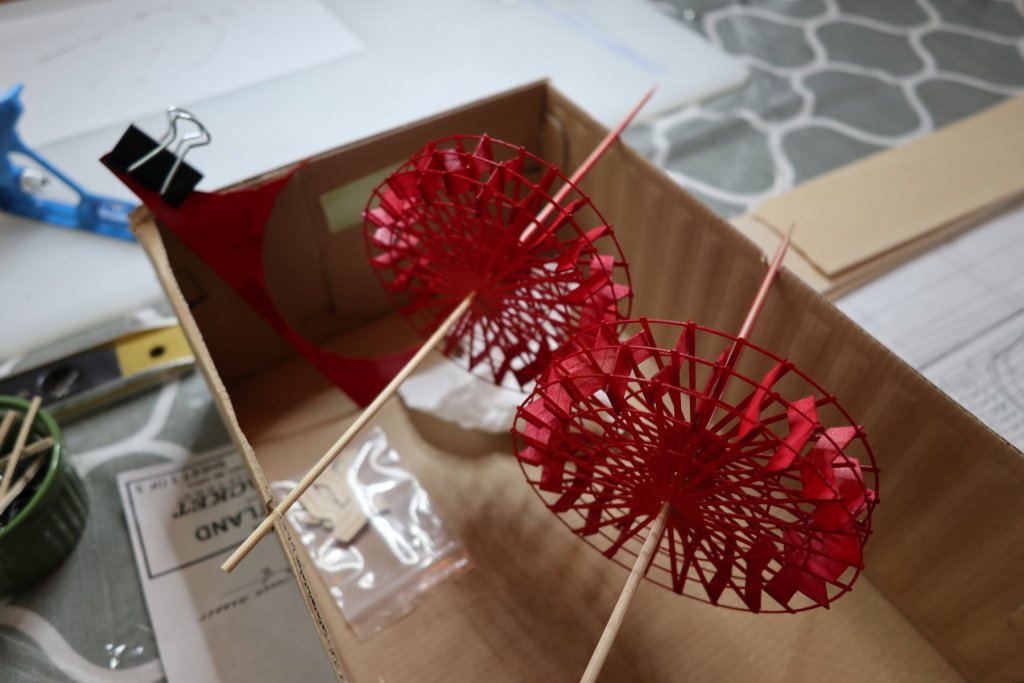
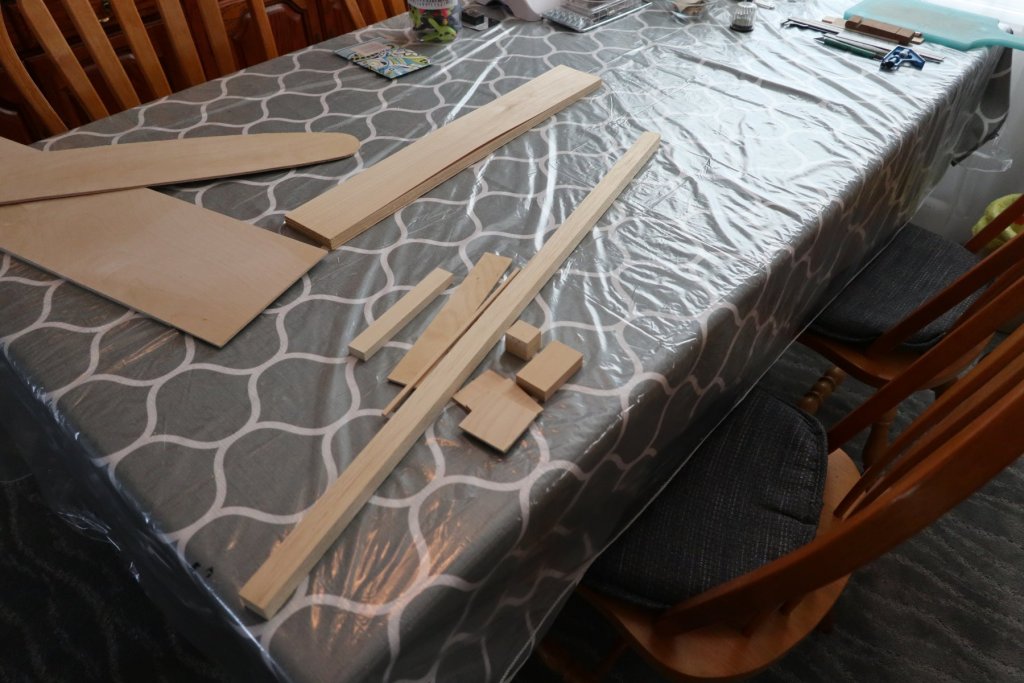
Paddle Wheels I saw John's post, and the build log of another Portland clamping spacers between the radials. I tried it and it gave me a run for my money, so I came up with a different plan. Here goes. The manual and John mentioned matching up the radials before doing anything else. As you can see, if each set of 3 is not properly matched, the floats will not look good when glued. (If you open the Portland manual, page 27, photo 12, it looks like the radials were not matched properly. Some of the floats do not make contact across all 3 radials. I may be looking at it wrong, or it might be an optical illusion, but it seems off to me.) In this photo, the radials are not matched. They do not line up around the 4 o'clock and 7 o'clock areas. Once I determined the matches, I marked the corresponding spoke on each radial with a red dot. The manual talks about each paddle wheel being mirror images of each other. One for port, one for starboard. The description of how it works was confusing to me. Here's what I think it is supposed to be. The floats have a blank side, and a side with a chevron laser marked in it. I'm assuming the laser mark side would be placed so it hit the water first. I hope it is not too noticeable, but I installed every one of mine backwards. You will see it in the next few photos. If you are looking at the starboard side of the ship, and the ship is moving forward, the wheel will be turning clockwise. The floats will hit the water supported by the radial beams behind them. If you are looking at the port side of the ship, and the ship is moving forward, the wheel will be turning counter clockwise. The floats will hit the water supported by the radial beams behind them. Back to the "mirror image" thing. The manual says to cut 2 hubs 1-7/16" long. It gives instructions on how to space the radials on the hub, then it says "Do not glue the radials in place yet". I assumed that means do not glue the radials to the hub yet. So, until the hub is glued in place, the 2 wheels are exact copies of each other. Technically, also mirror images, but way confusing in the instructions. Build 2 identical paddle wheels. At a later stage when you attach the wheels, orient them, and glue the hub in, they will become mirror images of themselves. So I'm ready to put it all together. I got a piece of scrap 1/2" wide, 3" long, and 3/32" thick. I used my mini miter box and sawed halfway through the scrap about 1/2" from one end. I then made another cut 15/32" from the first, and another 15/32" from the 2nd cut. from my calculations, there is a 15/32" gap between each radial. I then cut the 3" piece in half lengthwise, and each of those pieces in half again. I used an old shoe box. I cut support notches in each side. Put 3 matched radials on a skewer, matched up my marks, and using the notched scrap wood from the previous photo, I lined up one piece of the scrap wood on the bottom circle. I placed a 2nd piece above it and used binder clamps to hold it in place. I repeated that 180 degrees to the first one and ended up with this. One of the advantages I got out of this was there was a fair amount of "give" at the outer edges. It was easy to align and insert the floats. I only broke off a few of the little tabs. The instructions recommend installing all the floats prior to gluing, but that was challenging. I used a square scrap to visually align the float perpendicular to the radial and put a dab of CA on the center radial to keep it in place. I put in 4 floats, 1 every 6 spokes and glued the center of each. I was then able to adjust the outer radials, install the remaining floats and place a drop of CA on each of the float "tabs". Notice I put the marked side of the floats the wrong way. Because the hubs are installed, they are now mirror images of each other. Until the hubs are glued, they are exact copies. Again, notice I installed them all with the chevron laser line on the wrong side. I got them painted. Not excited about the quality of the paint, or my paint job, but most of it will be hidden. This is a tough one. There is no way to correct mistakes. I did spray paint them with Krylon paint. I have no idea what the actual color name is, it's not on the can. It is a bit "redder" than the paint supplied for the kit.


-
John, Great photos and explanation of these steps. I have a question though. After you drew the waterline in, did you apply tape to the line, or did you do it another way? On the train side, is that you in the YouTube video about the Olympic & Puget Sound Railway? Everything I've ever done in my life looks like crap compared to what I saw in that video. If that is you, I'm sure others here would like the link to that video. I started the paddle wheel boxes today.
-
John, I hope you are doing alright now. Ecoli is bad stuff. Your recommendation sounds good. I am not messing with the decks again until I get the paddle wheel boxes done. THey will provide the additional reference points I need. I'm probably reading too much into it again, but I don't want to glue something down to find I was off a quarter inch..... Looking forward to your water line and hull painting post. I have a couple of days scheduled to work, so it may be next week before I get anything accomplished.
-
All, I added some photos and continued steps to the deck mock up here.
-
Dan, I'm curious. What made you decide to go with the red highlights in the walking beam? My 1996 kit has the brass walking beam with red highlights, the 2019 kit is all brass.
-
I really like the lights and figures you added. Really looking forward to seeing the final product. Nice work!
-
Rob, Thanks, and I agree! John's info is going to be instrumental in my success, as is the build log Dan Evans recently started. John, Great paint shots. I'm working on the deck mock up now. I want to be sure the paddle wheel sub assembly fits in properly, so it will be a few days before I get there. I set the salon decks and took them off as they are not straight. Going to reset them in the next couple of days. I have just started a part time job with the main goal of getting some exercise through work. The other option was to join a fitness center, send them money each month, and probably never go.... I'll work on the Portland, but things may slow down a bit. Keep the photos coming (everyone!!) As we go along, I'll include each segment in the index for future builders.
-
John (and Clarence), Thanks for the sponson idea. The plank on frame would be filled and sanded anyway, and would have turned out exactly the same. I like how yours came out and will probably do the same.
-
Dan, Happy to see you here. Looking forward to seeing your build.
-
John, Thanks for verifying that deck sizing for me. I'm also going to do a full deck mock up complete with screws to get it all aligned. I will be up to the sponsons soon and am looking forward to reading what you did. As for deck color, I thought it was medium grey. Did you go in another direction on that? The instruction book mentions completing some sub assemblies prior to final deck attachment. So here's what I think I'm reading: Install main deck Do full deck mock up with screws. Mark it all and take it apart. build and install Sponsons Sub assemblies - walking beam, smoke stacks, pilot house, and one other (hurricane deck house?) Install decks and bulwarks. Sound about right?
-
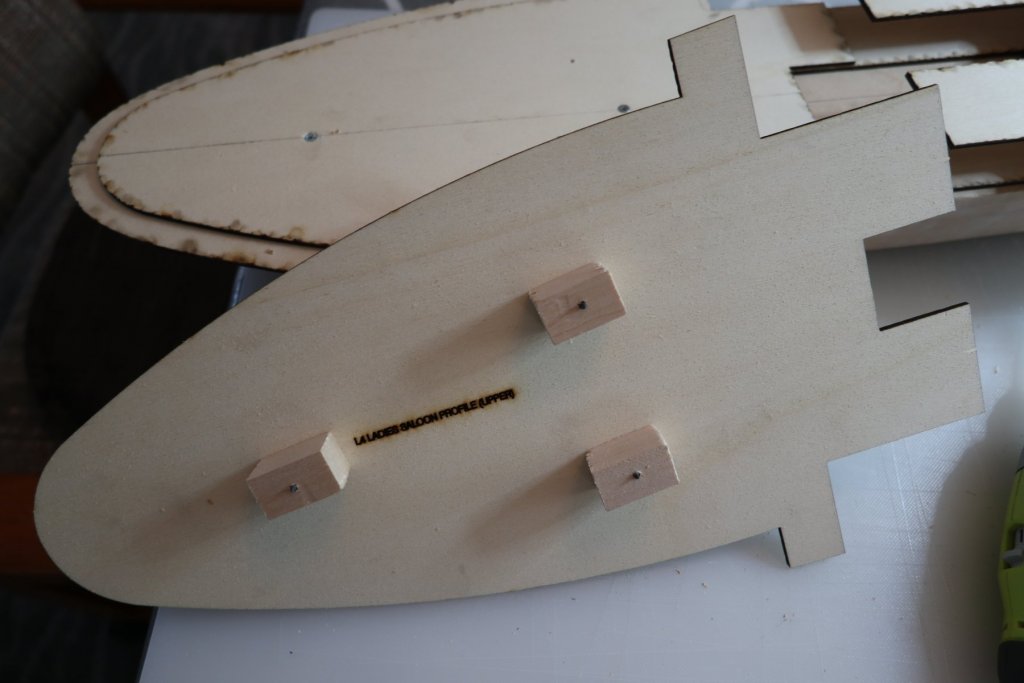
John, I have a deck question. Should the "main deck fore" have the same profile as the "Saloon deck fore" so the walls are straight up and down? My saloon deck fore is 3/16ths thinner at the paddle wheel end.
-
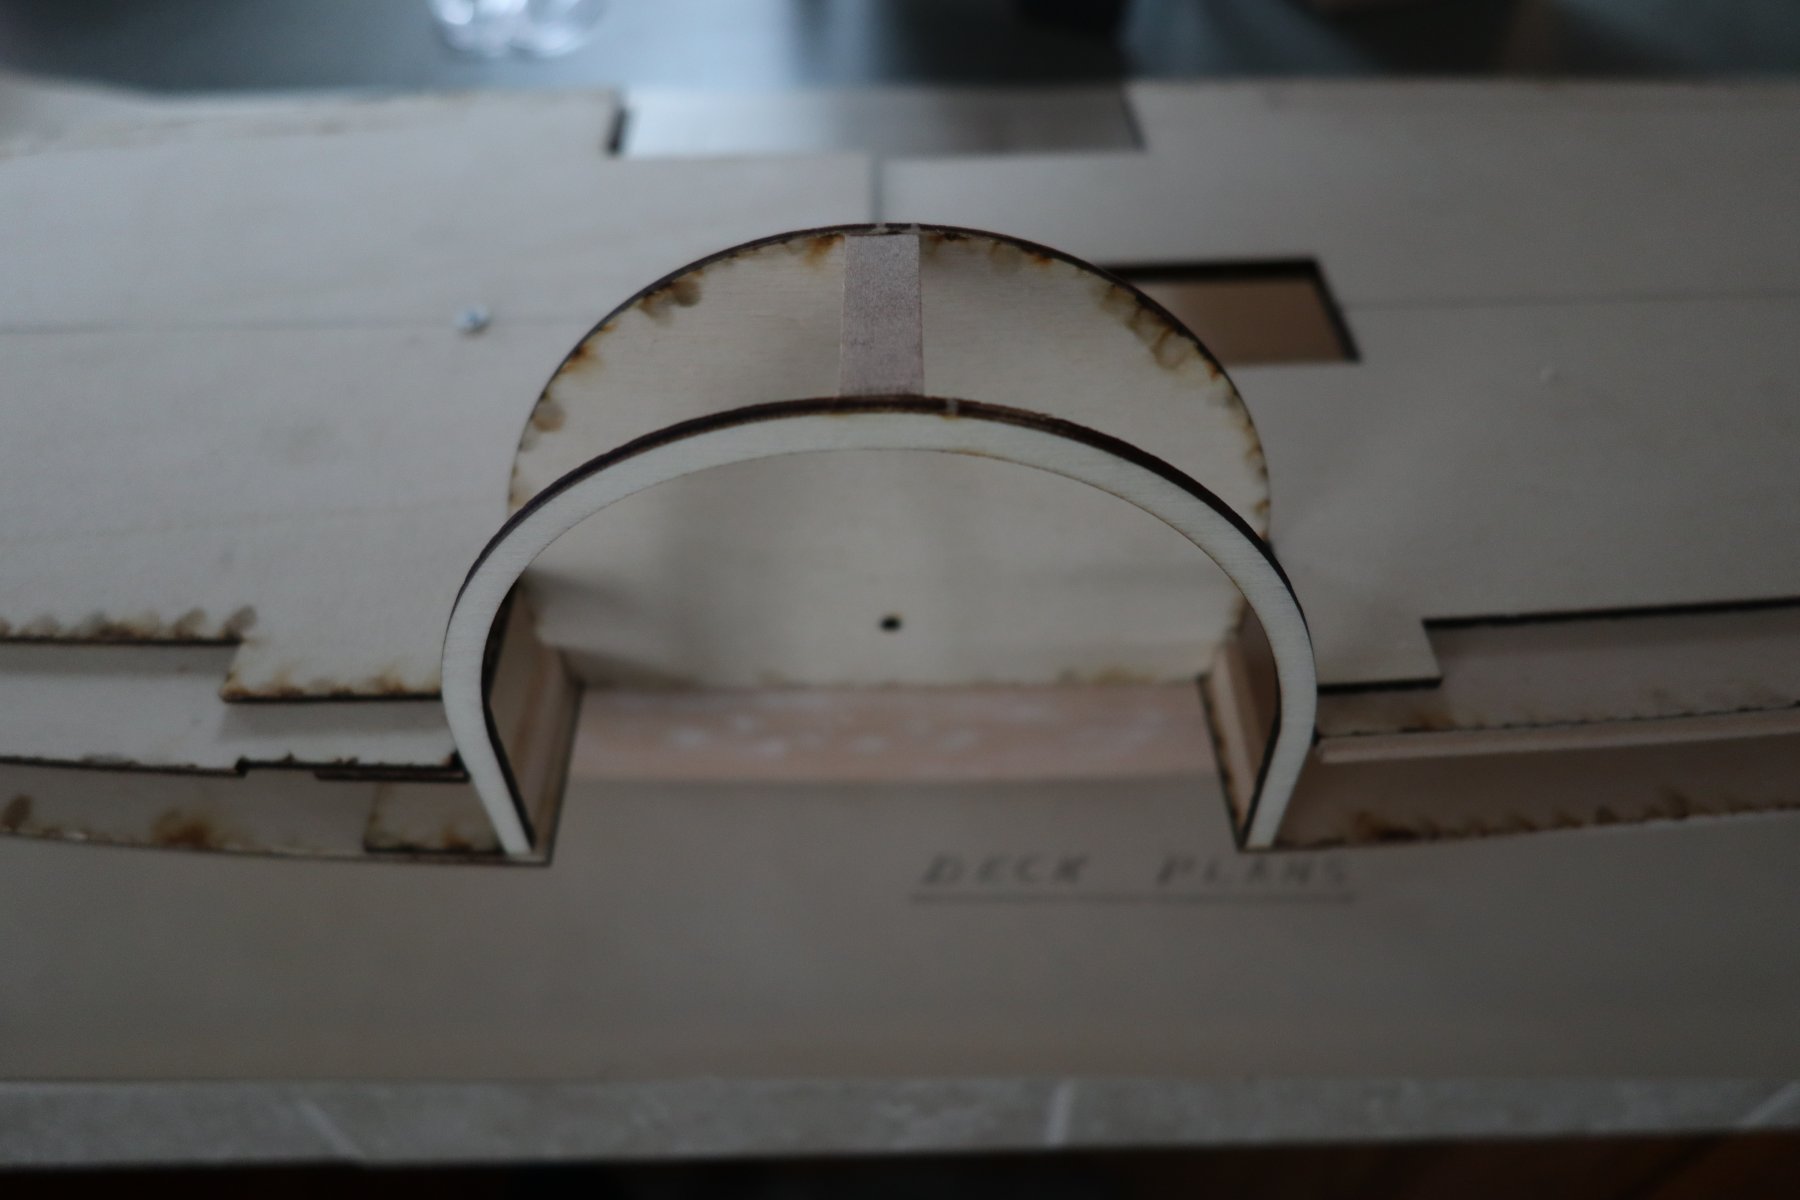
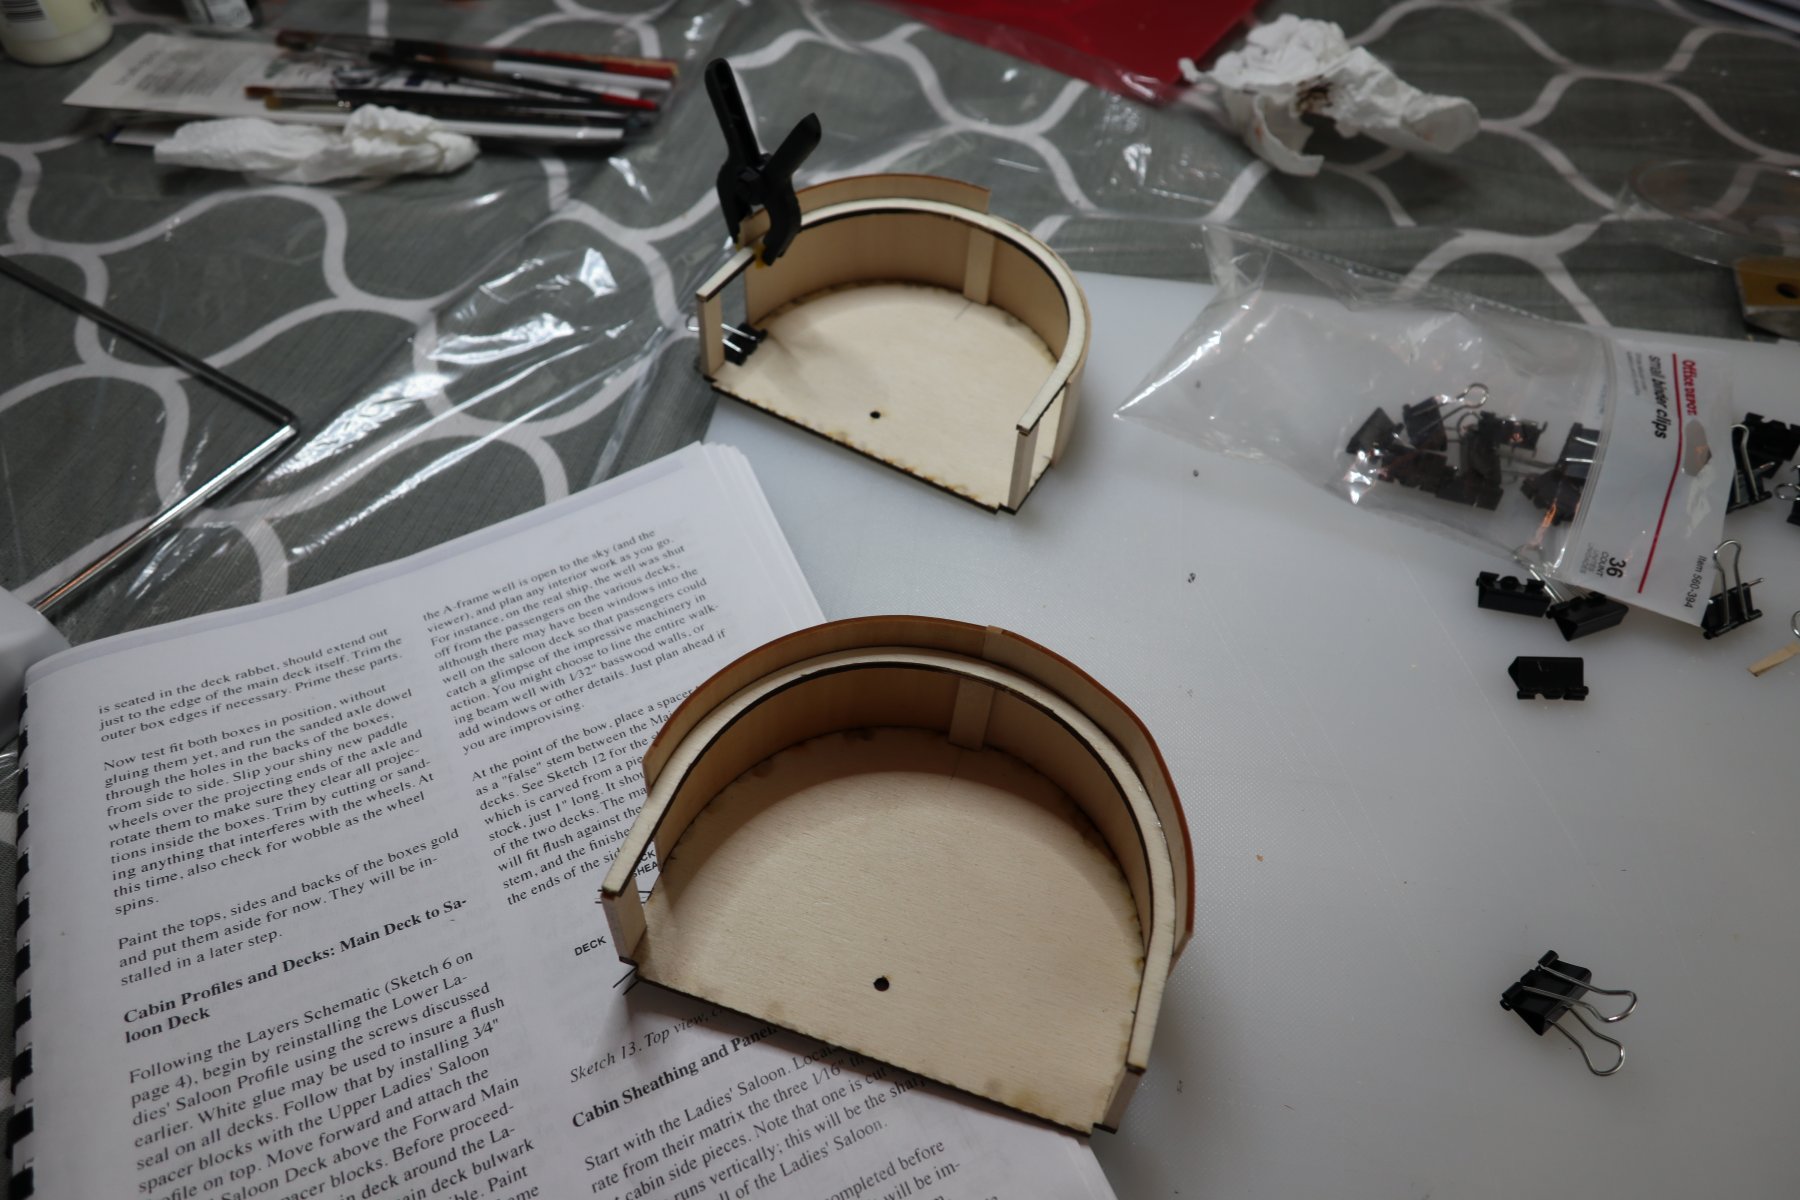
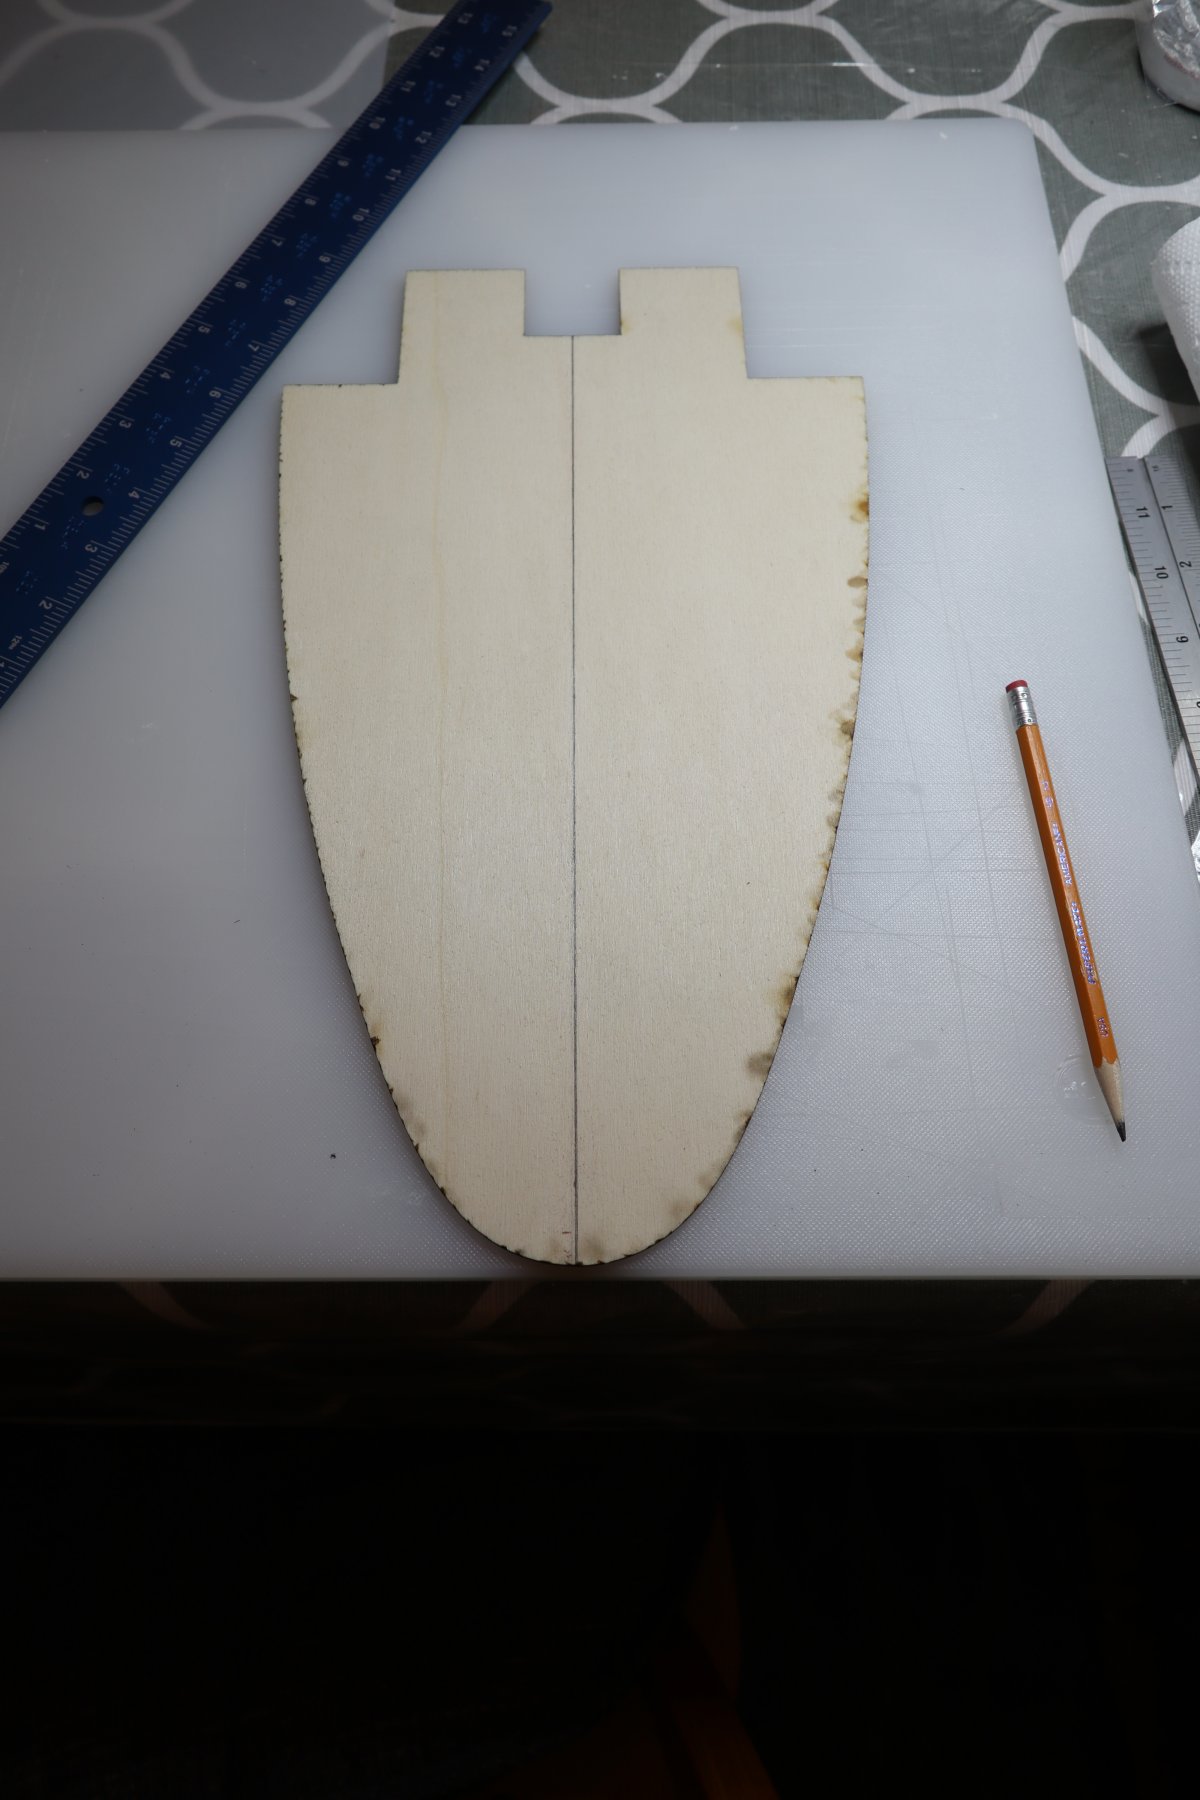
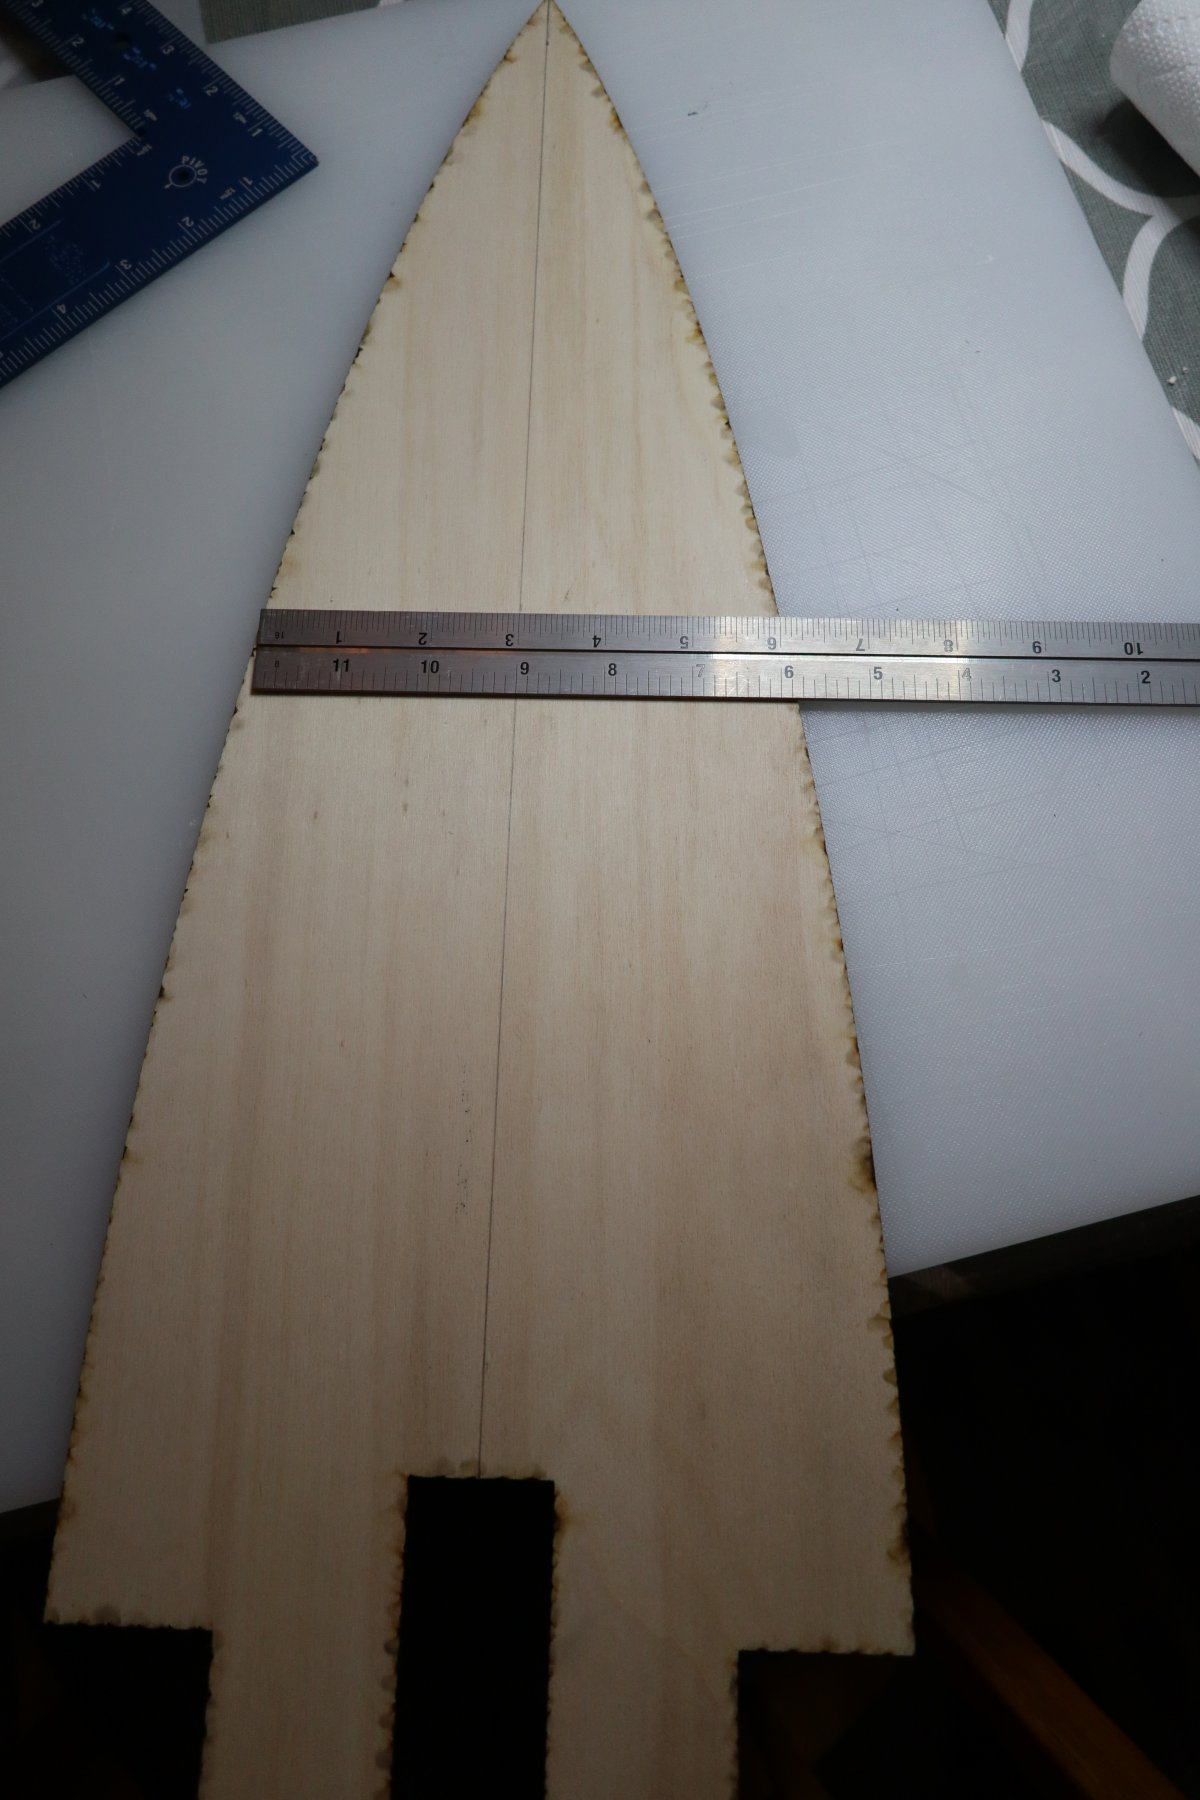
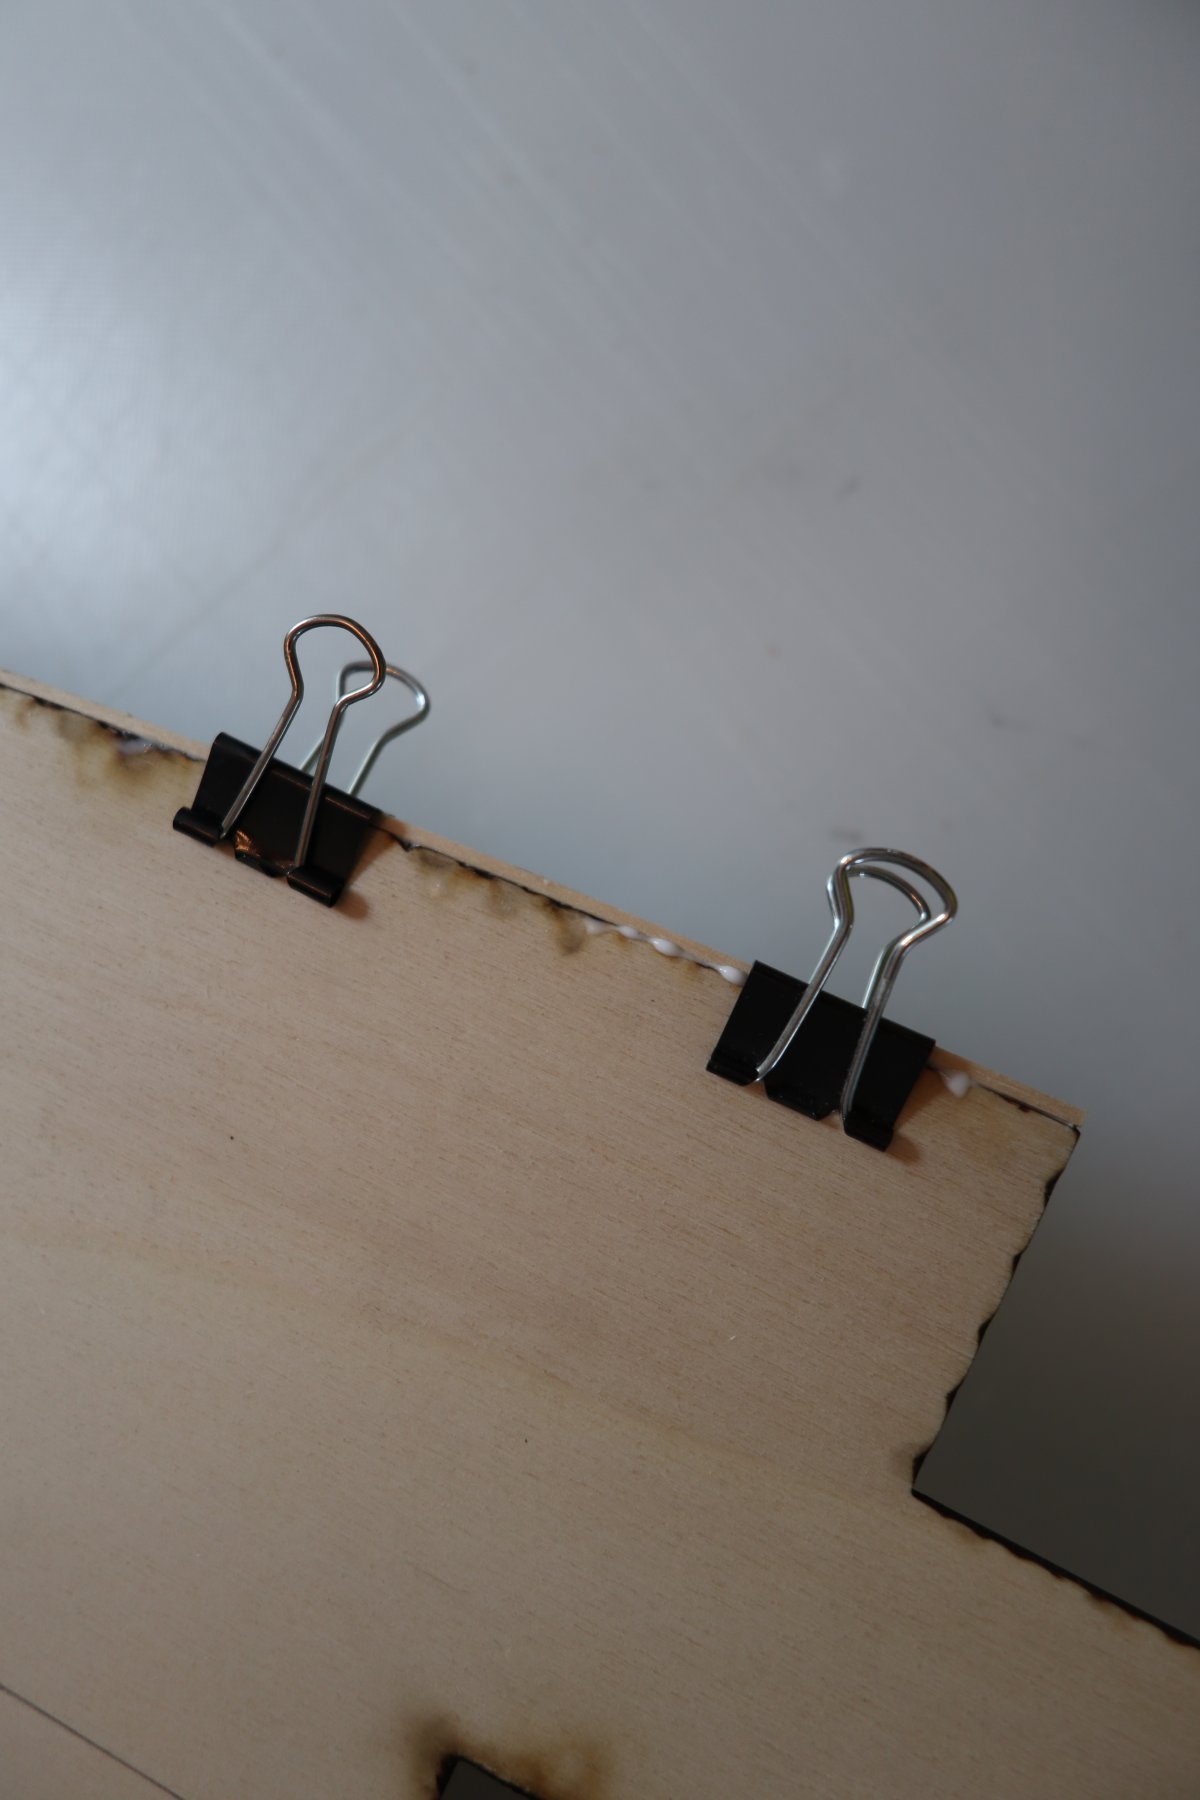
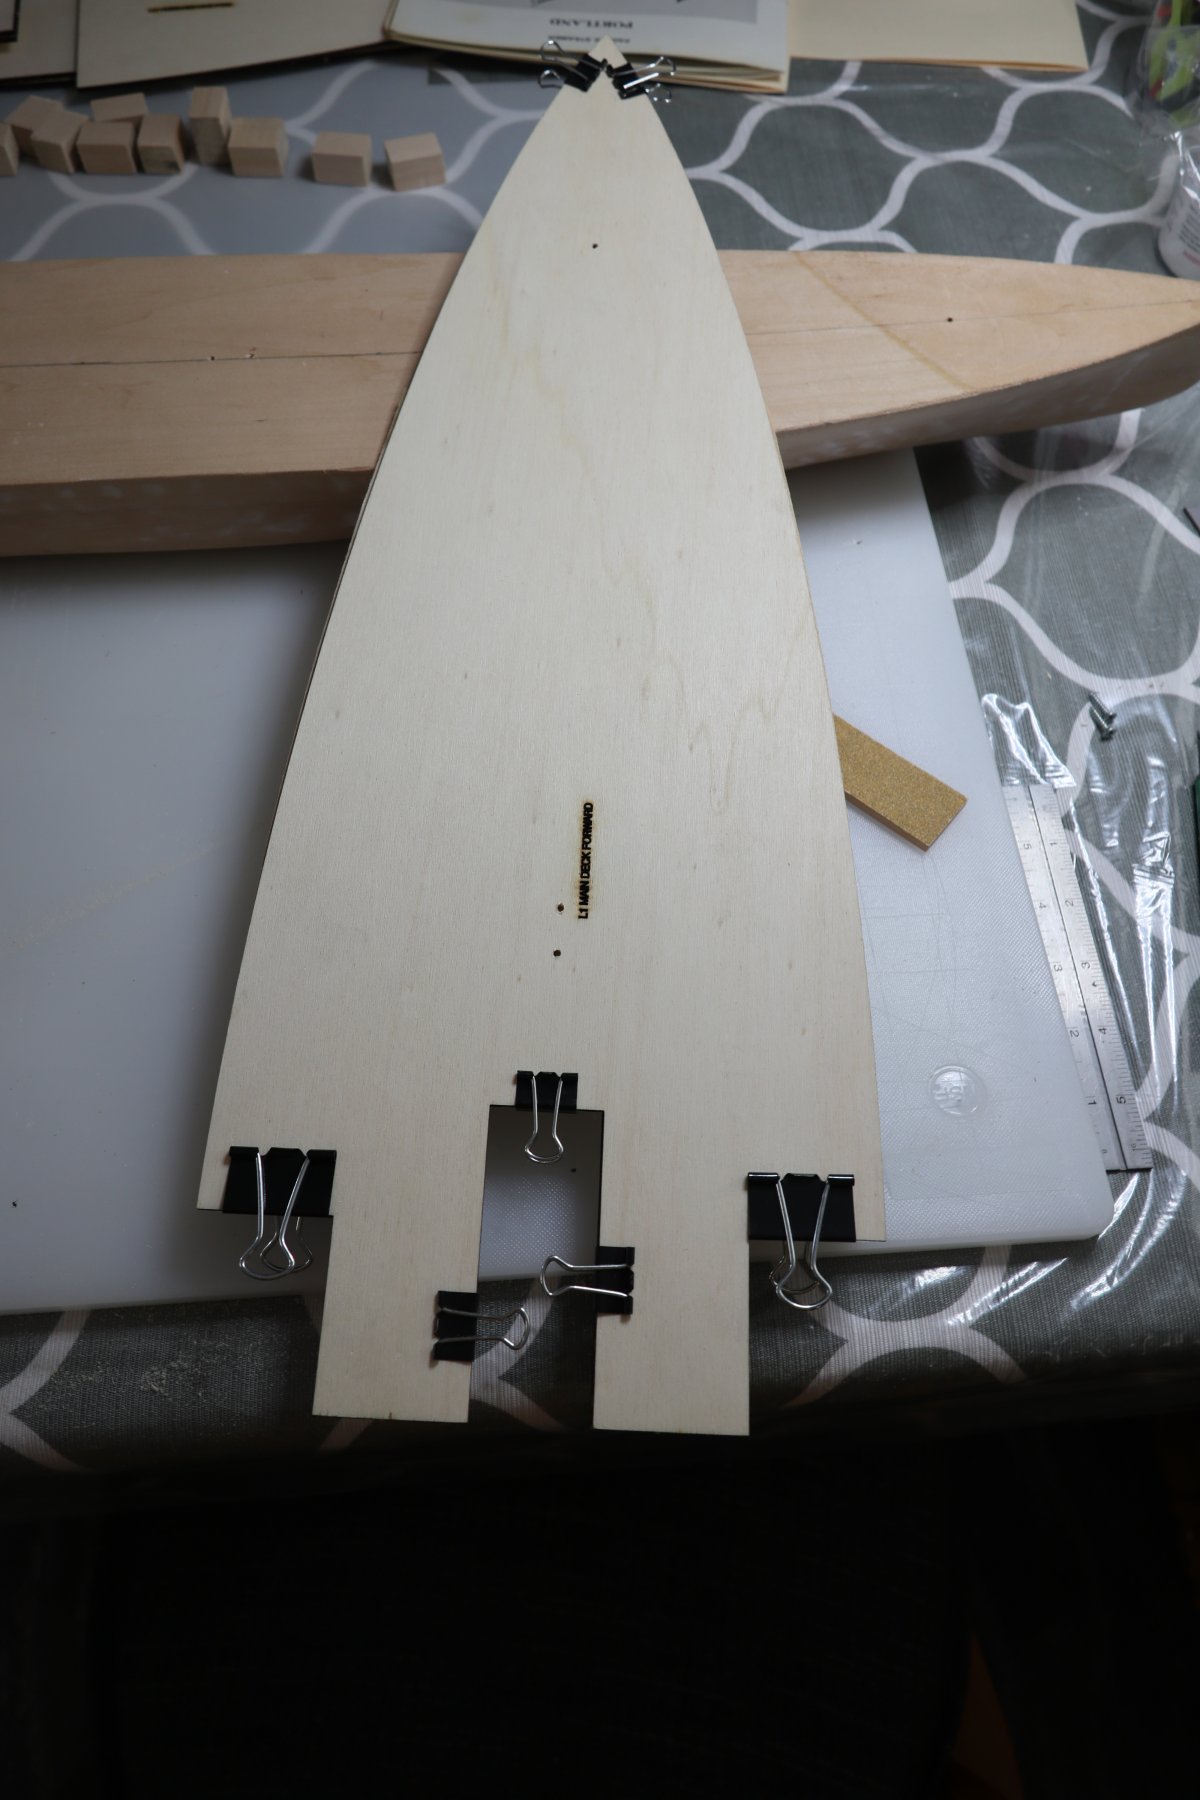
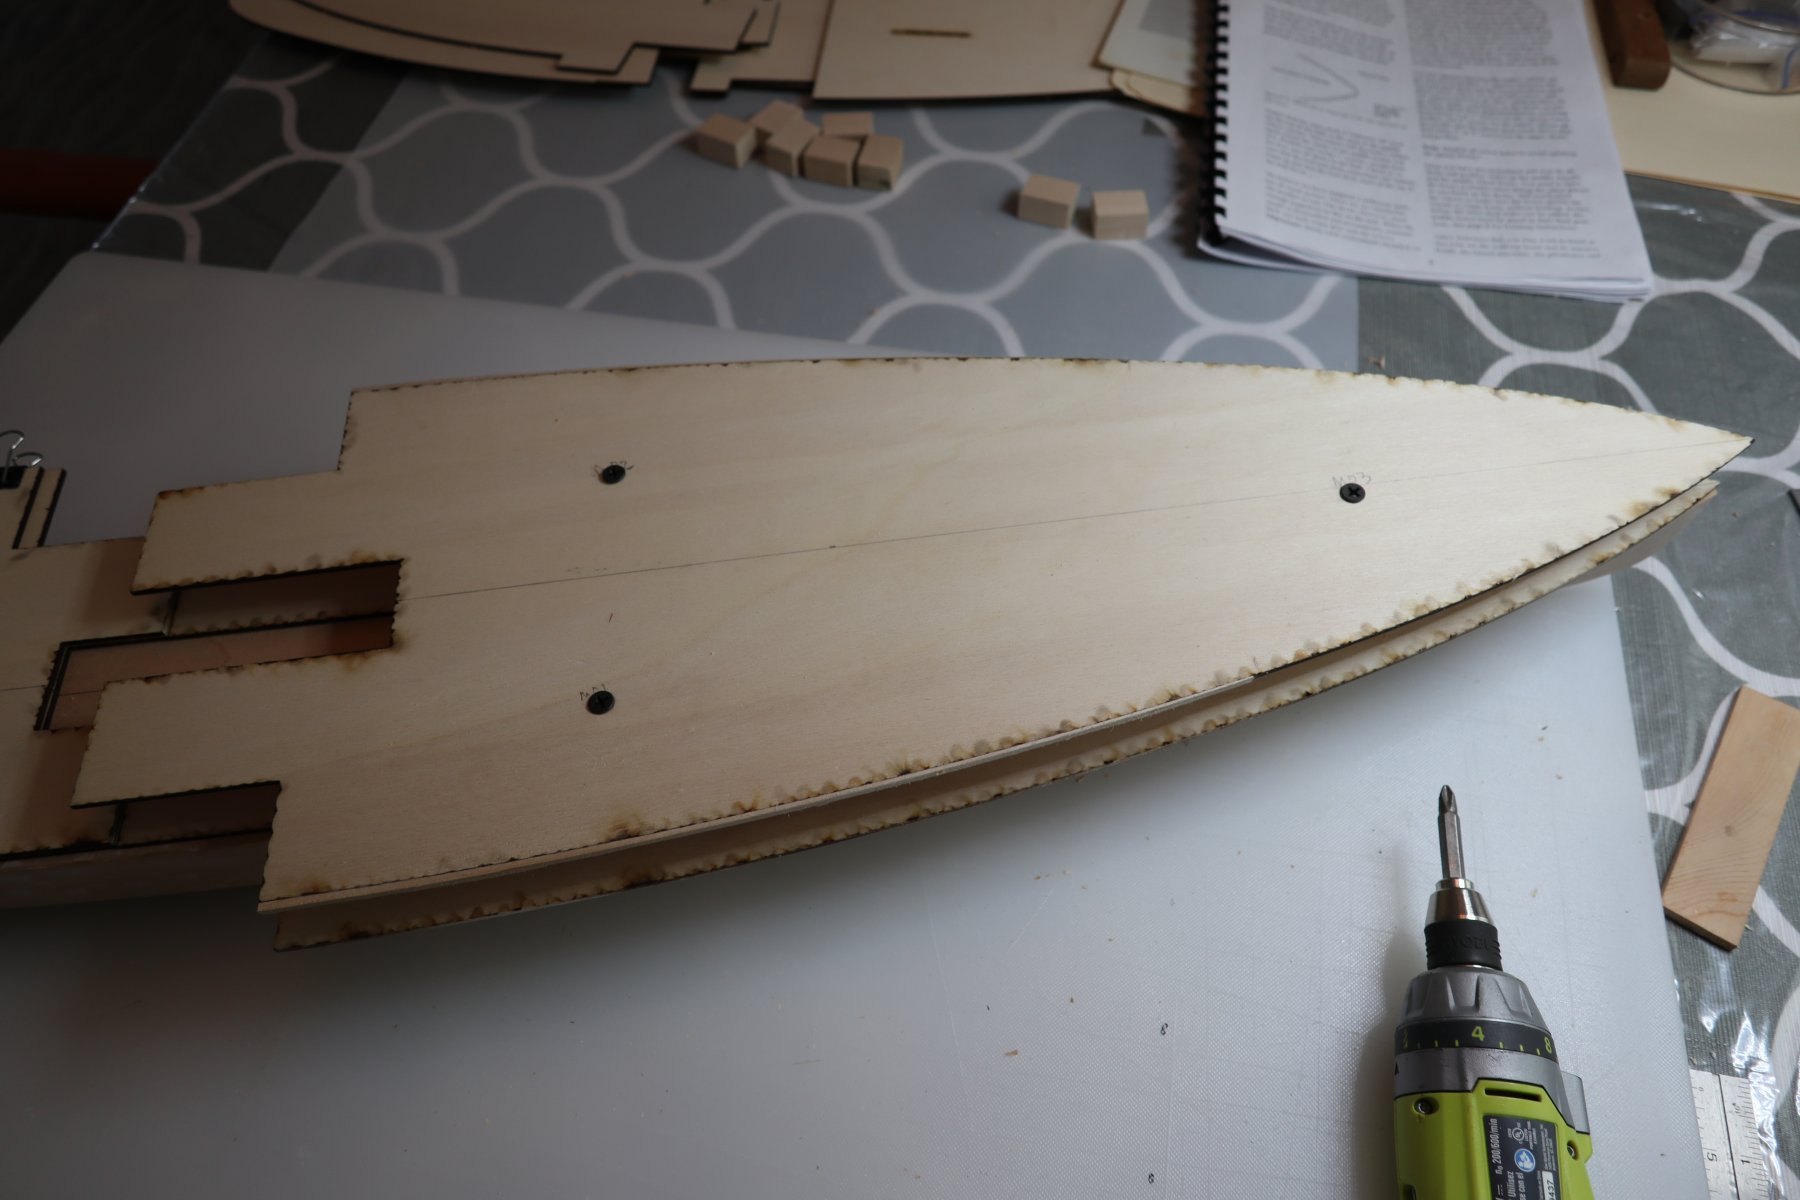
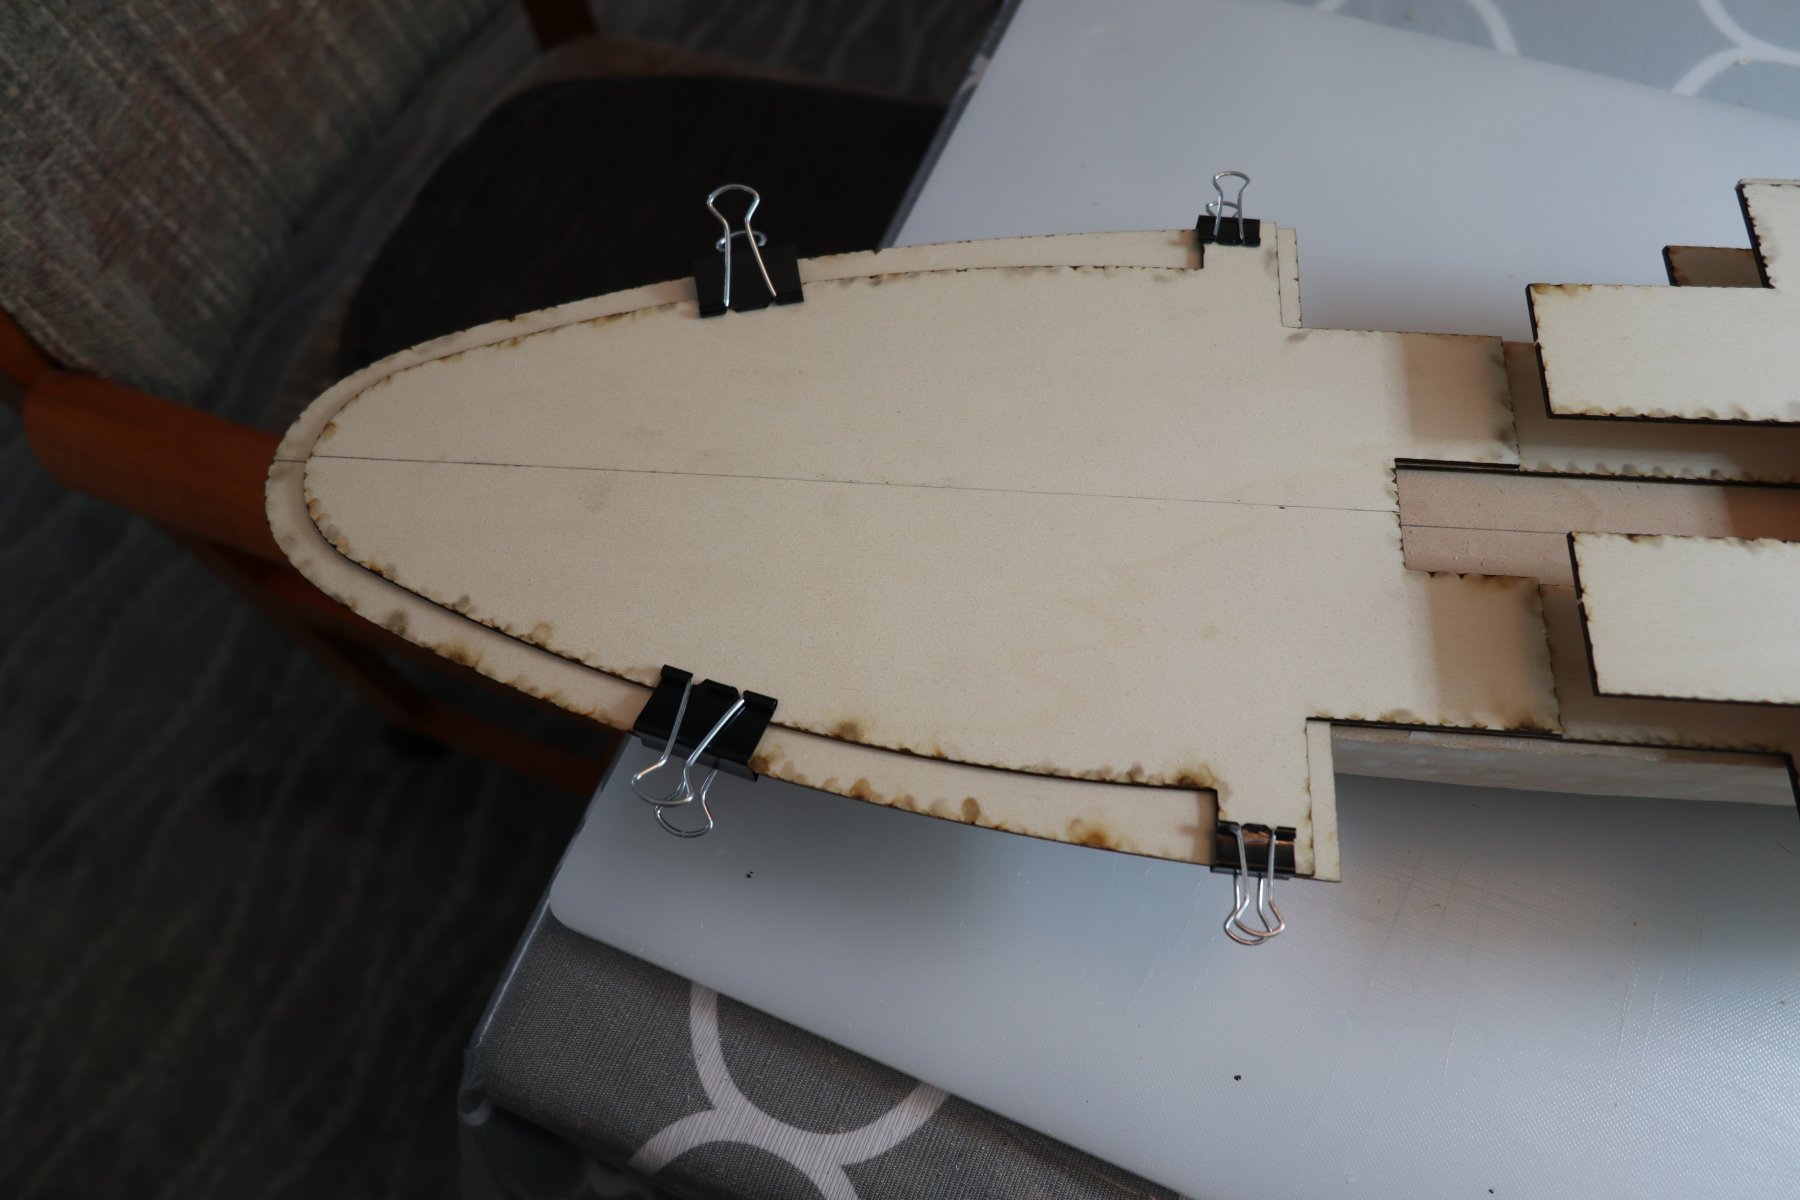
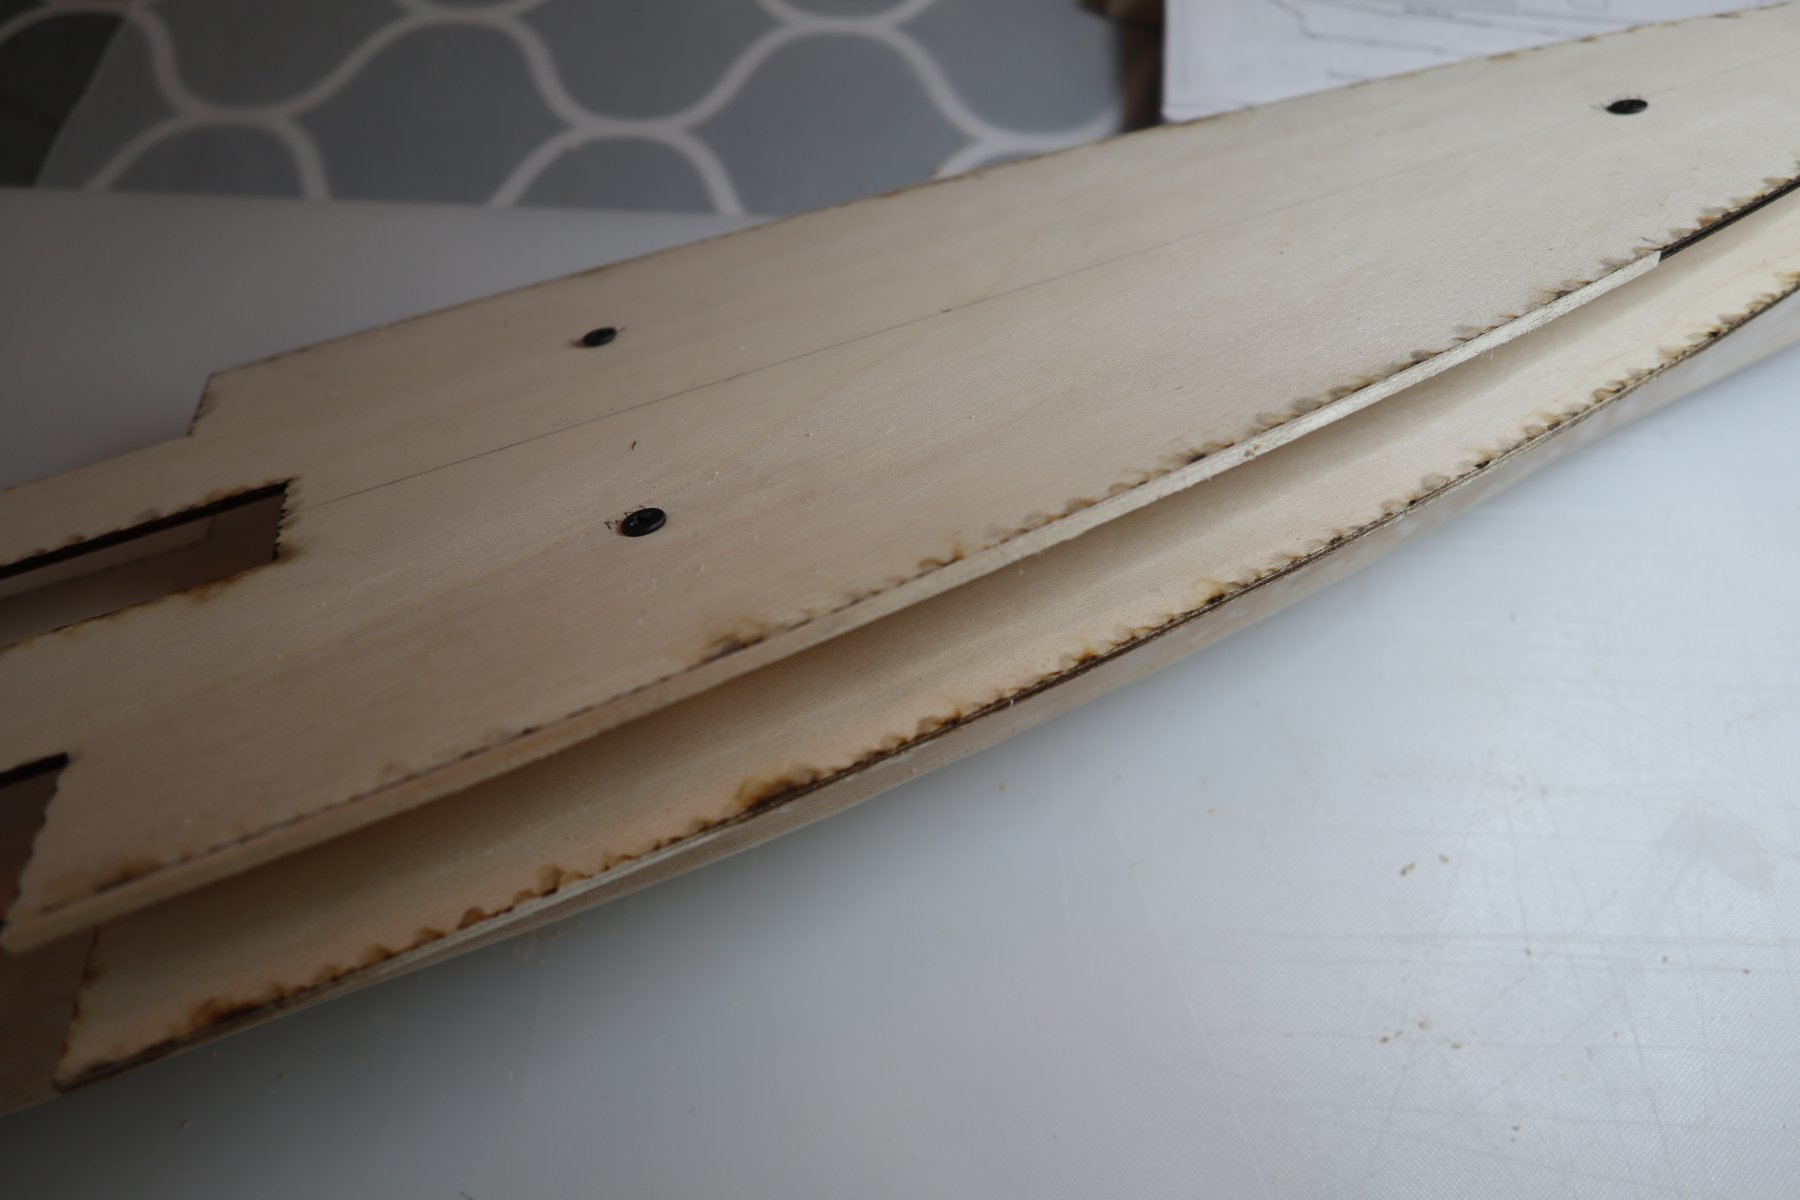
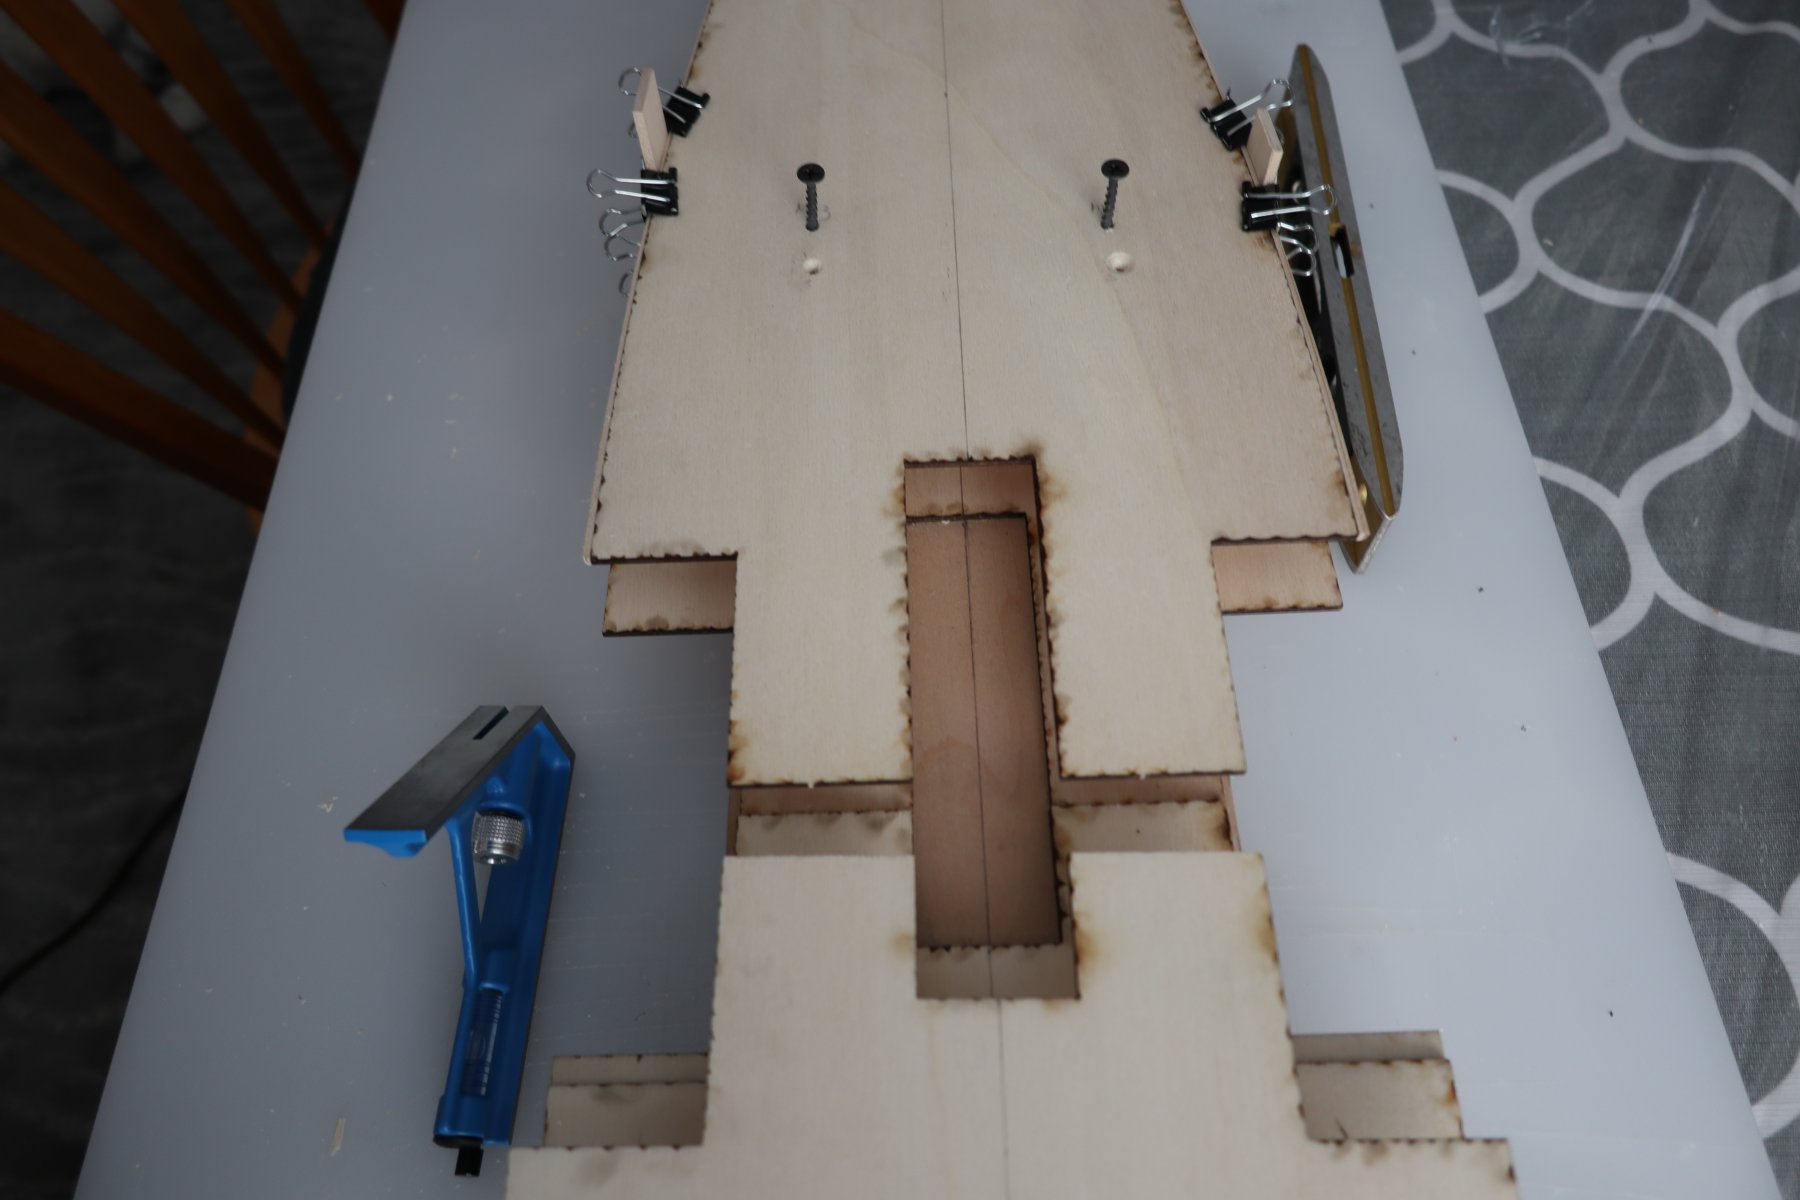
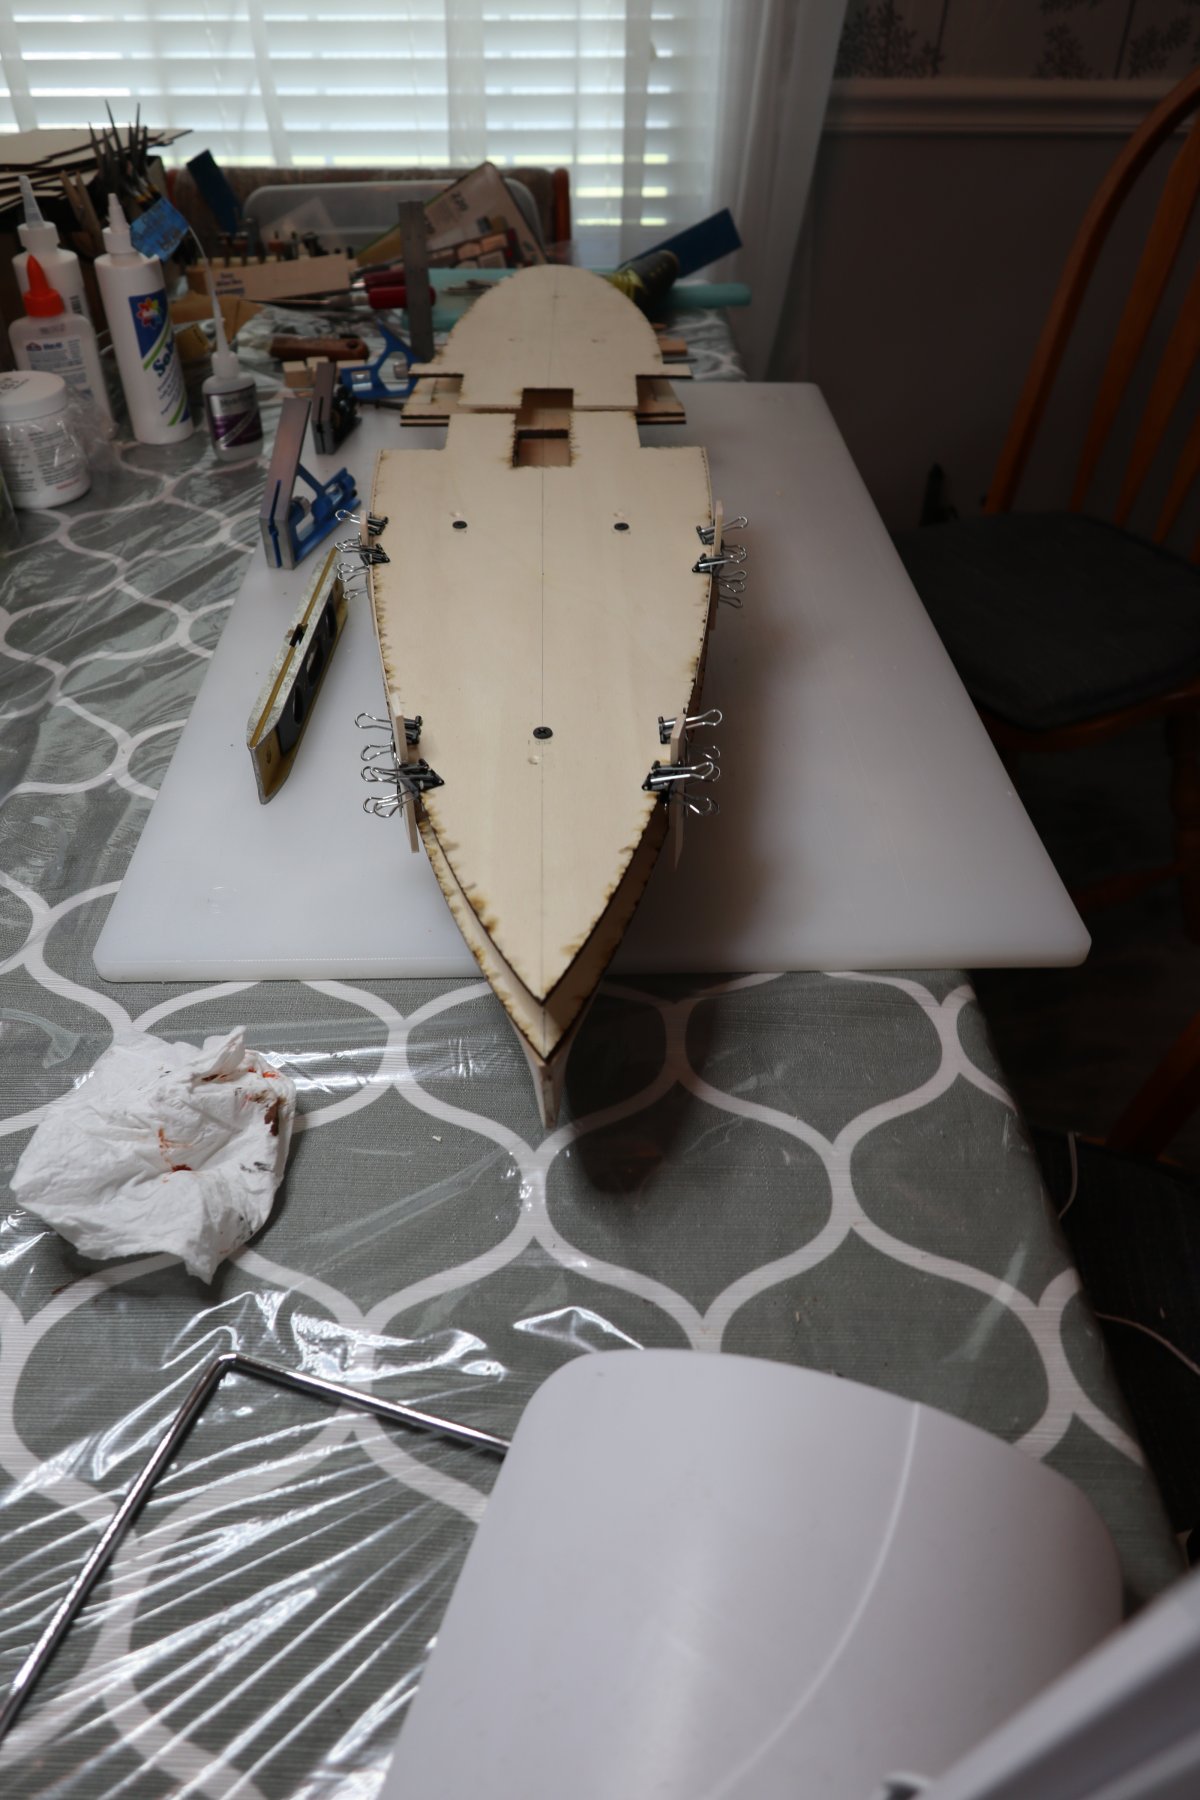
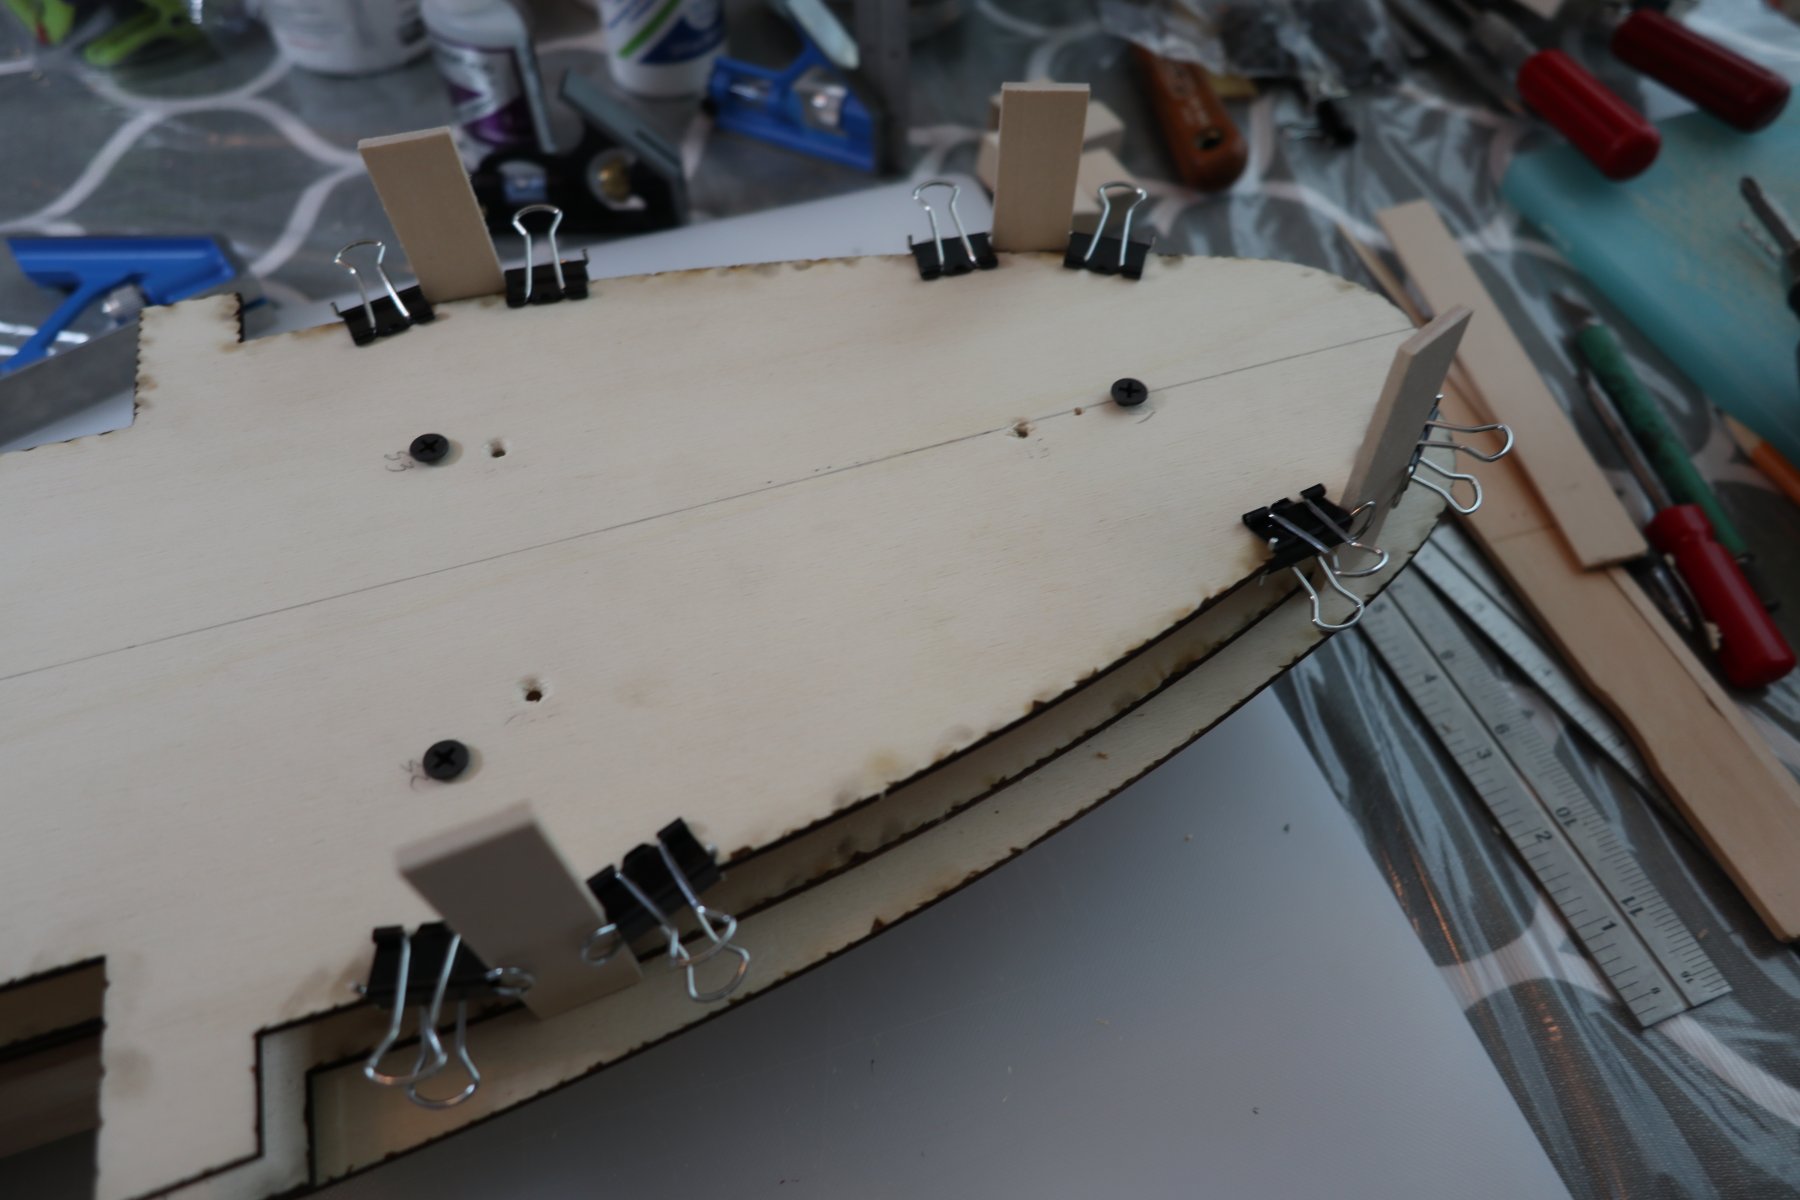
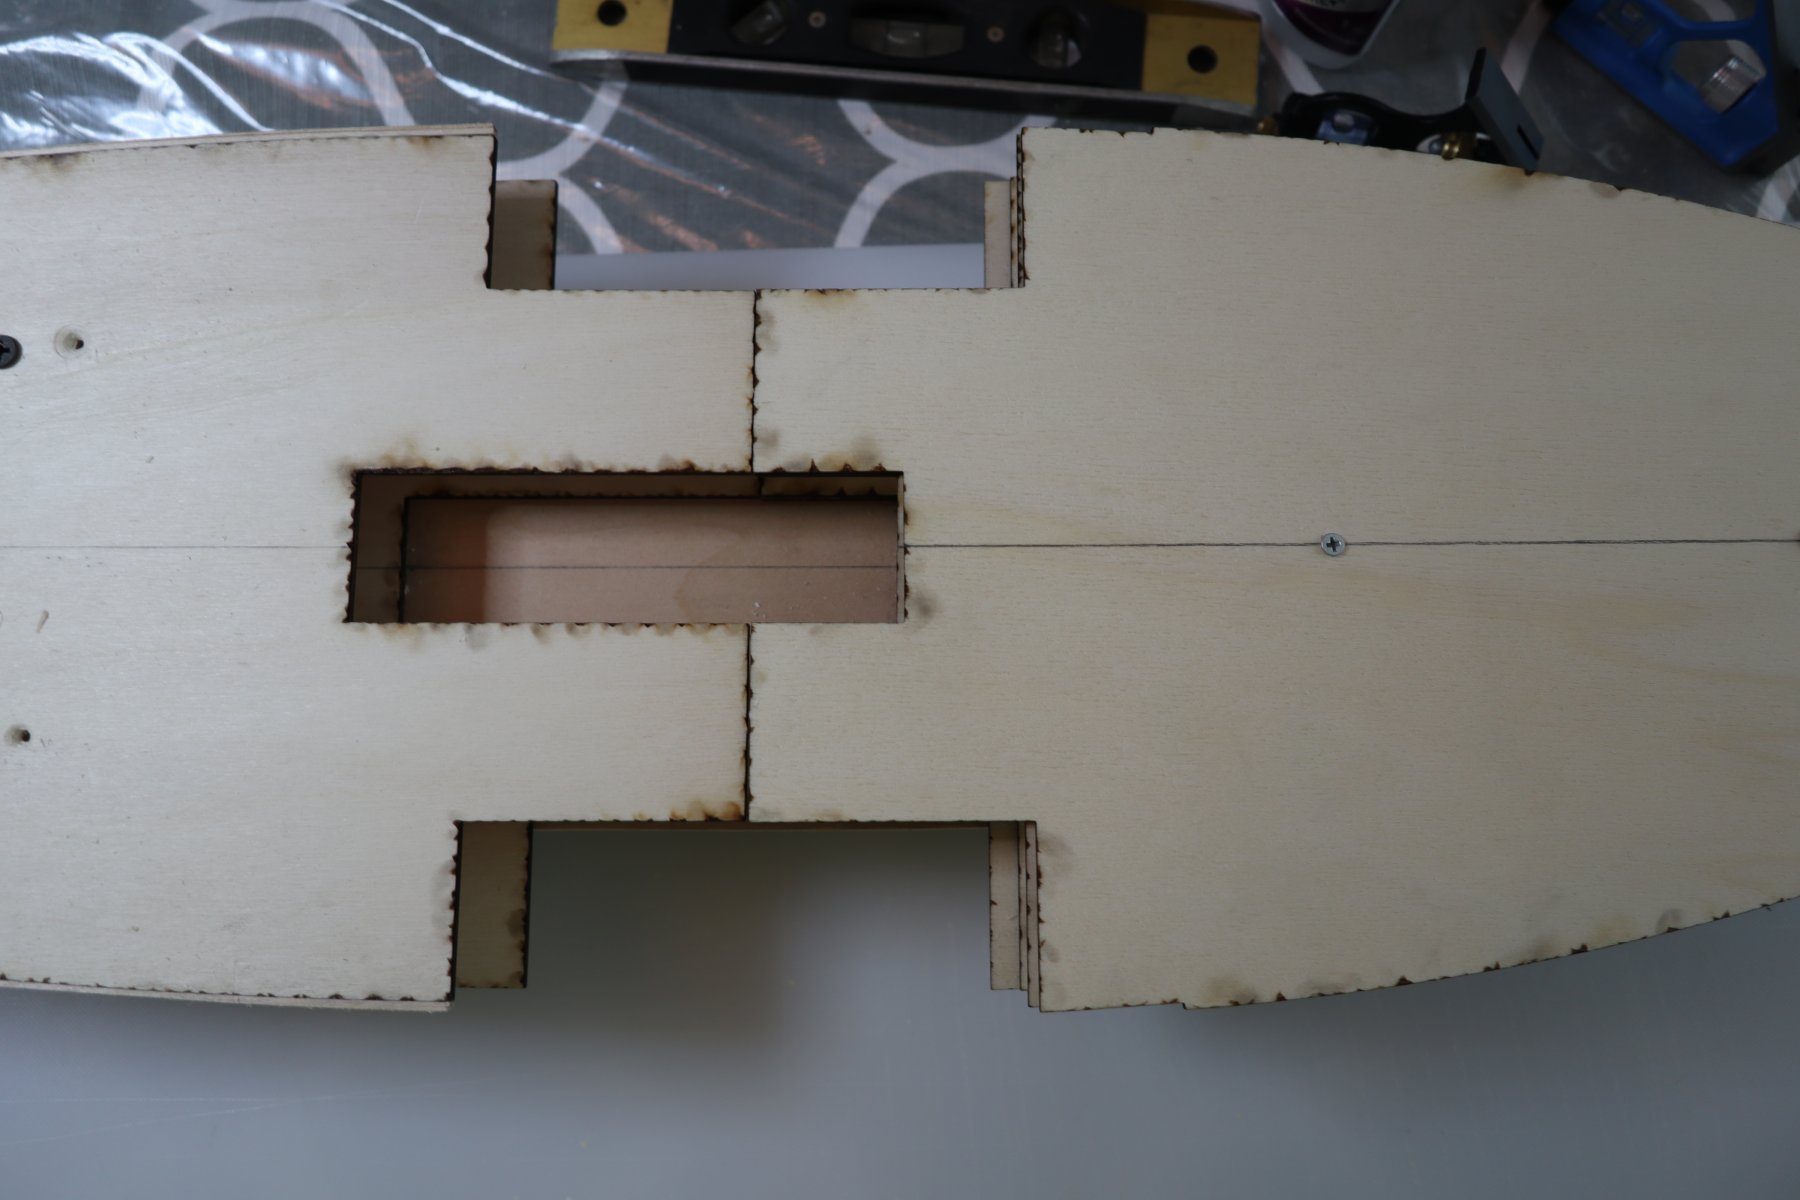
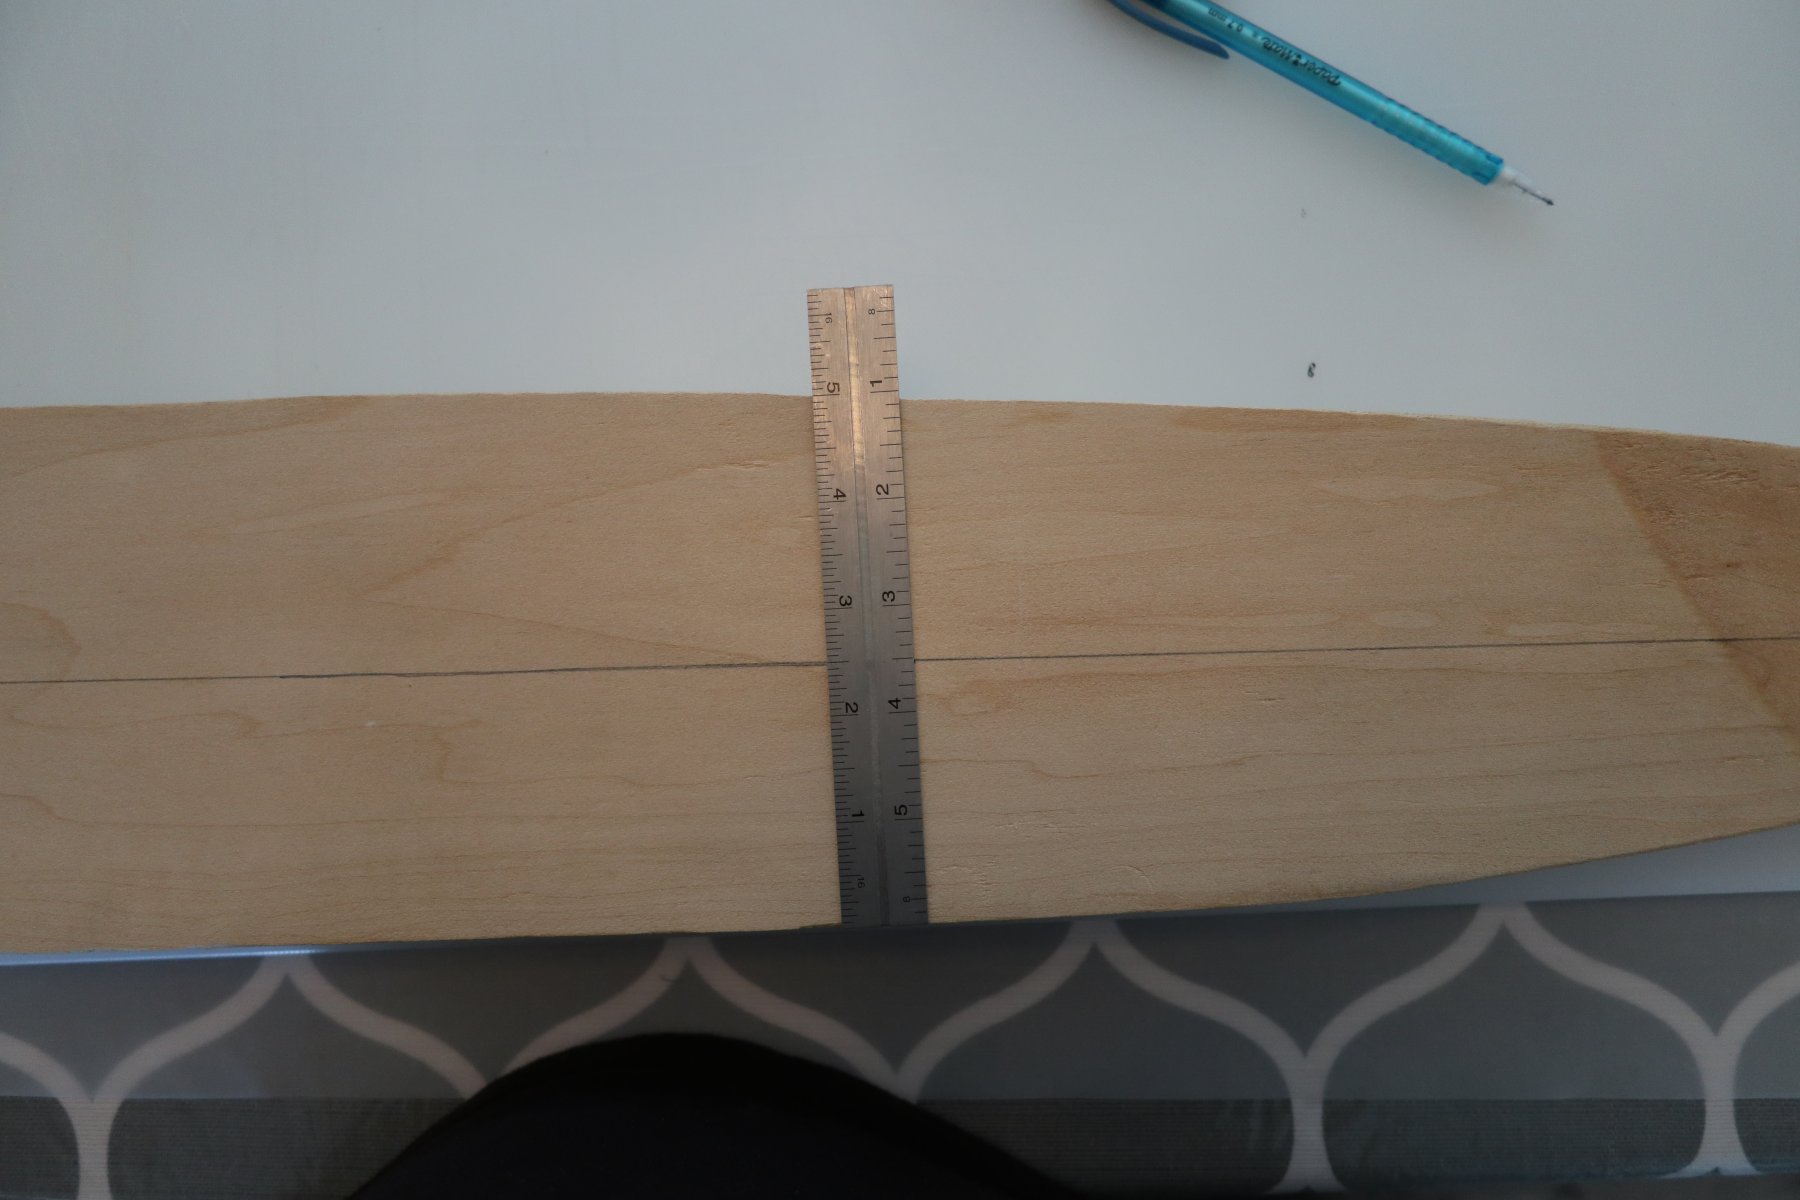
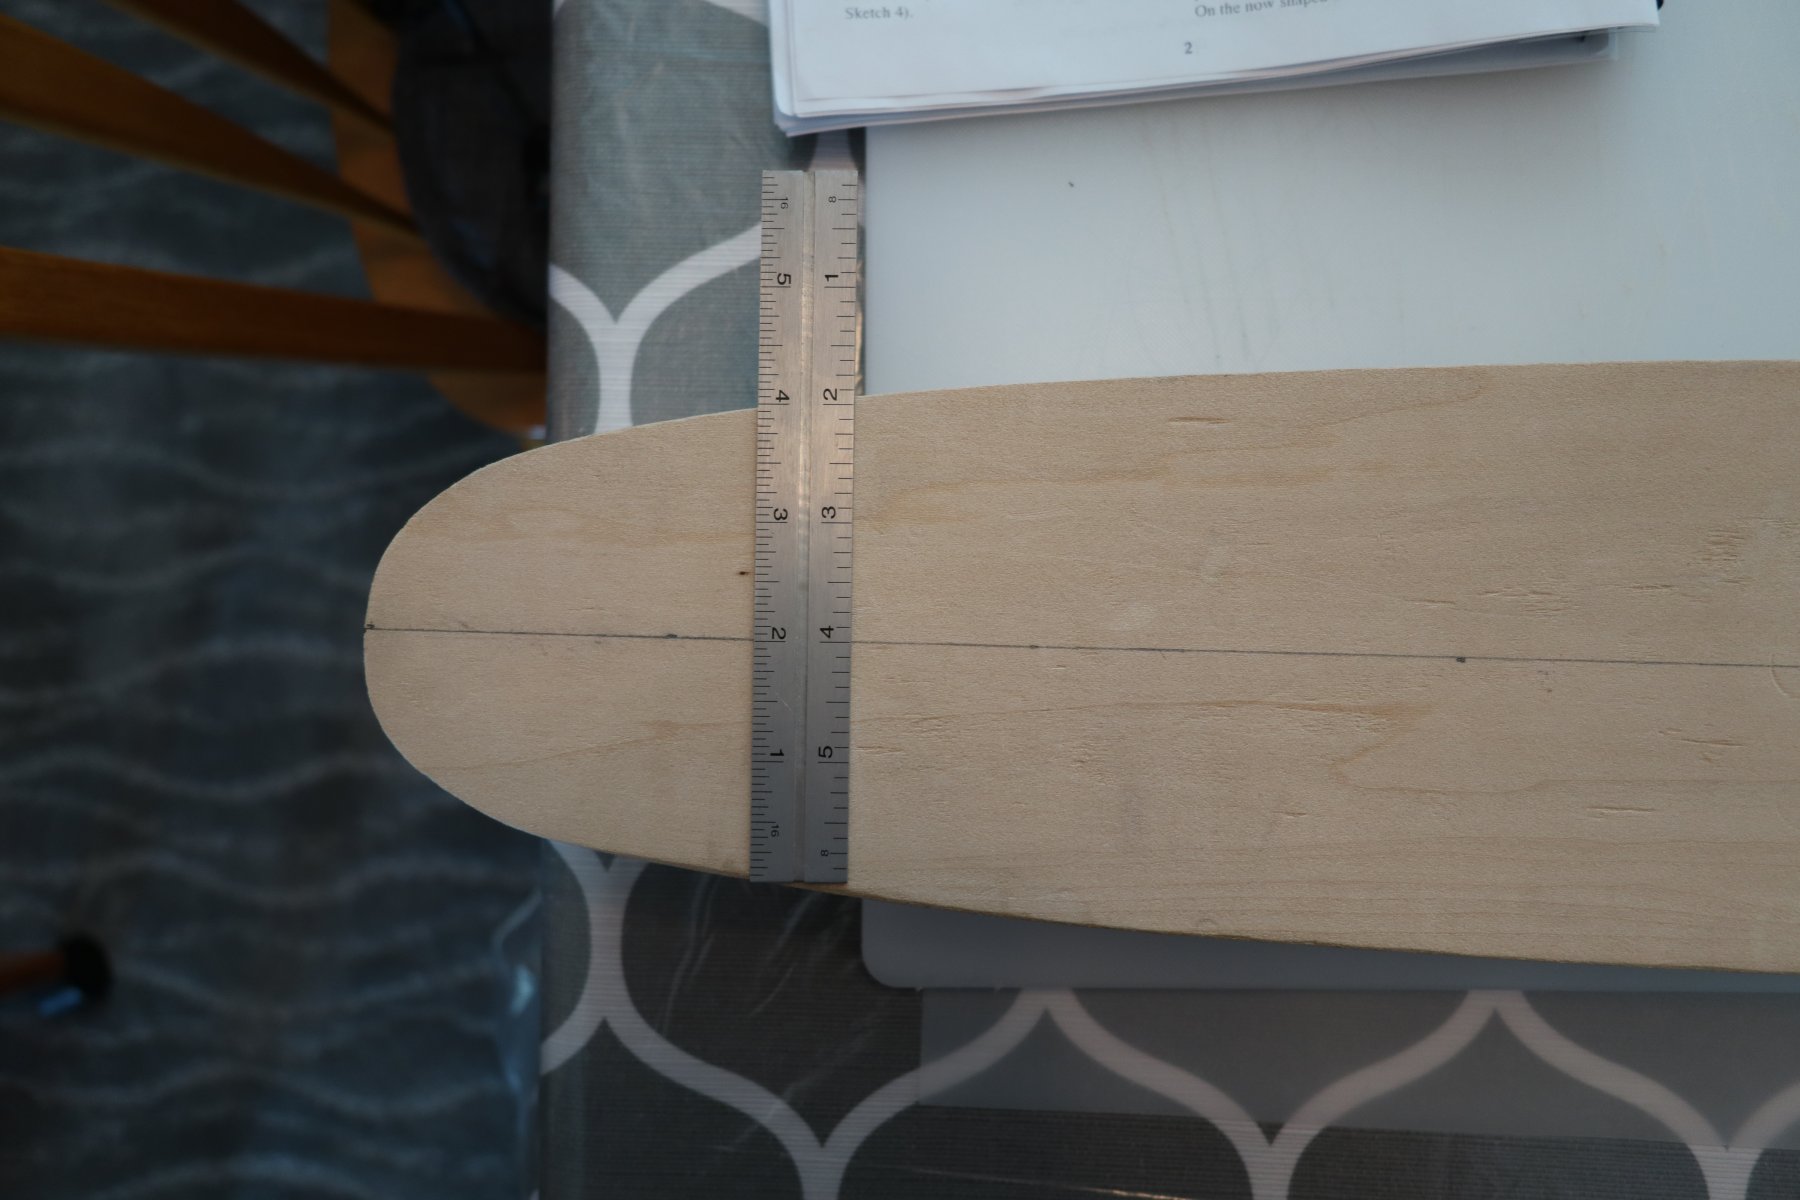
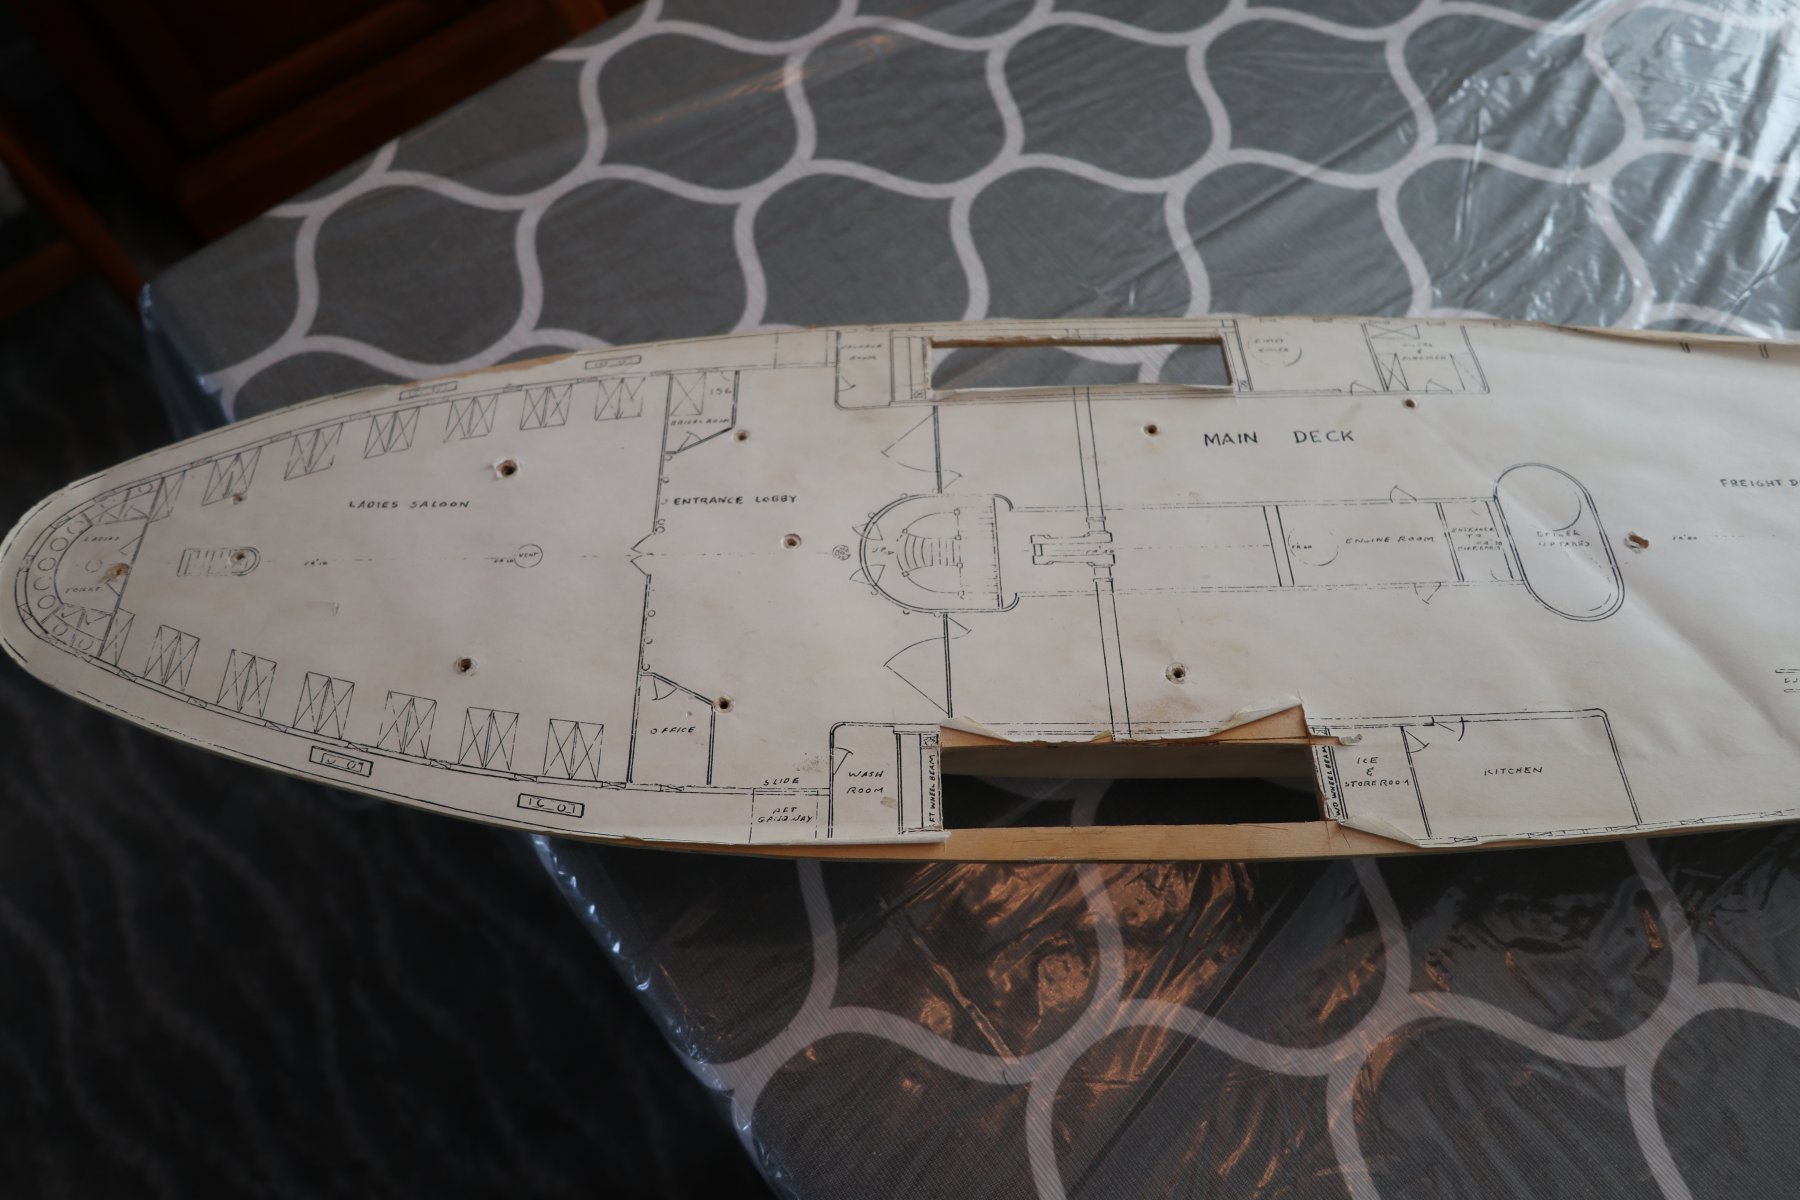
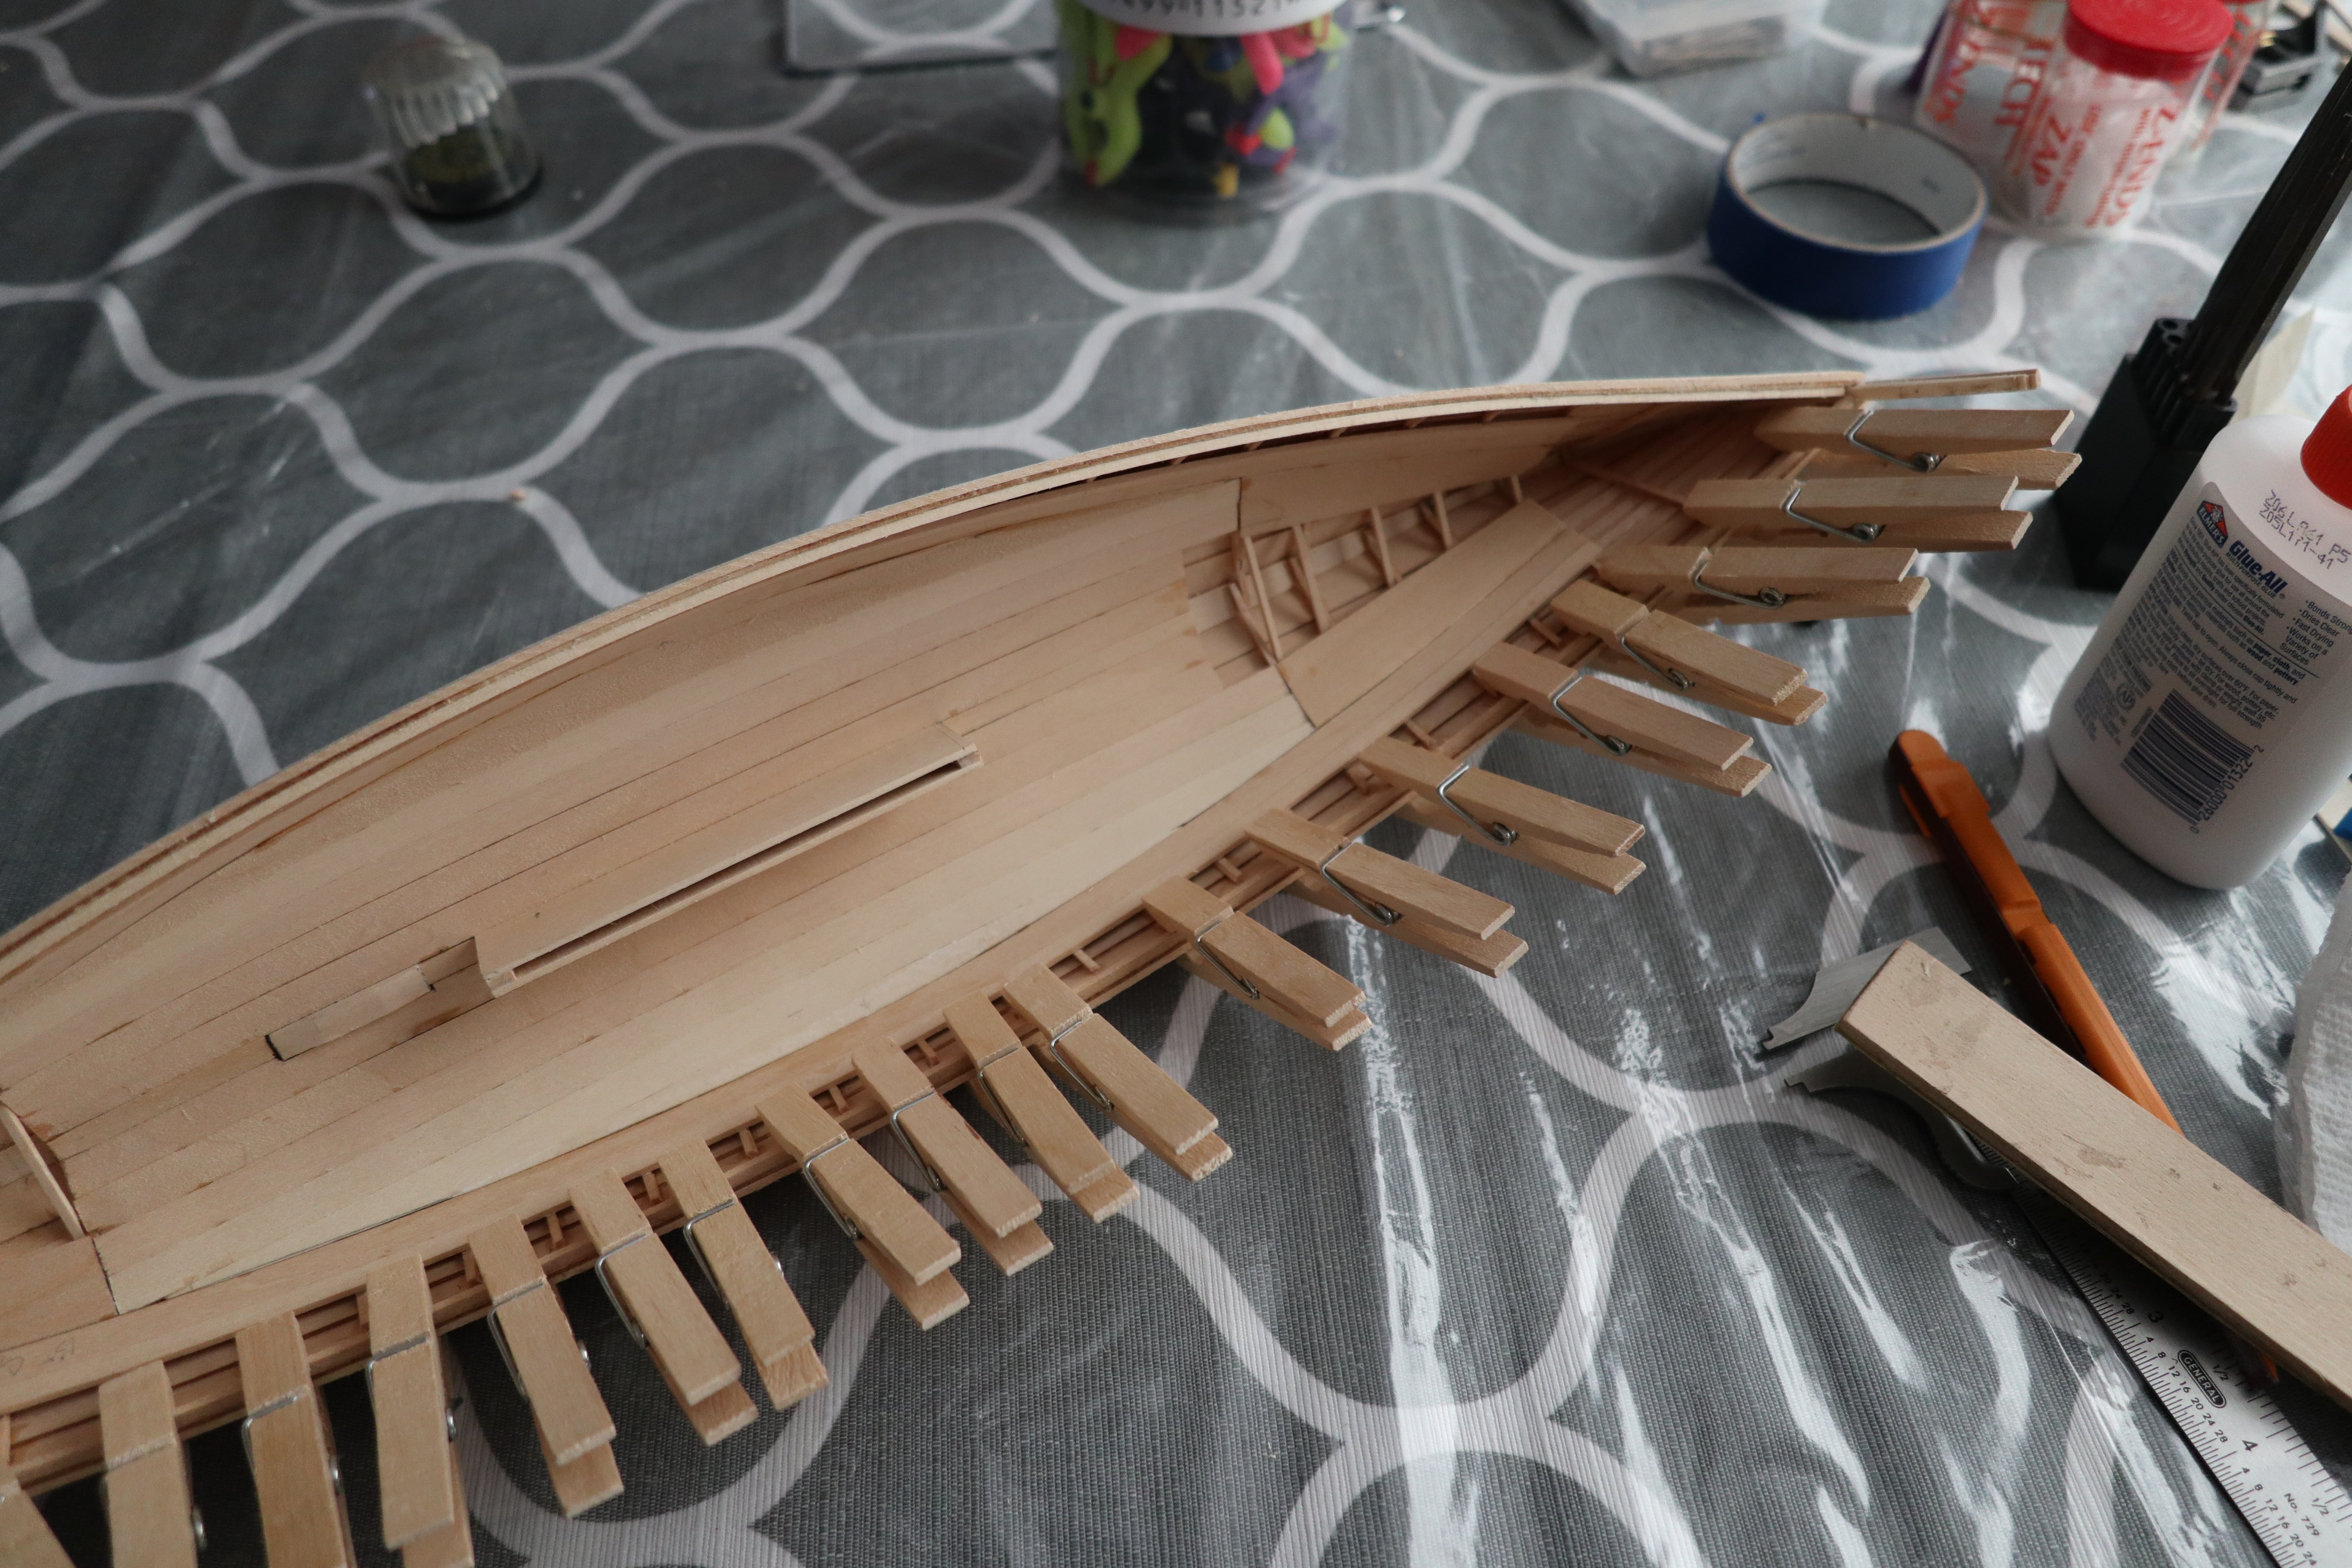
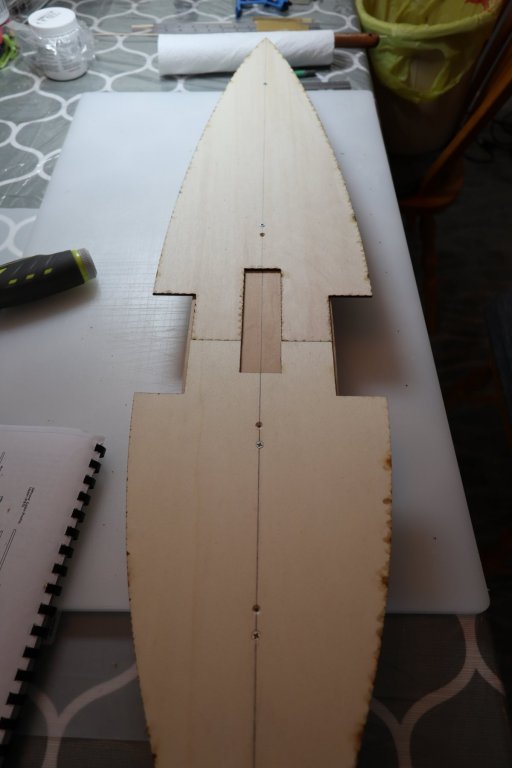
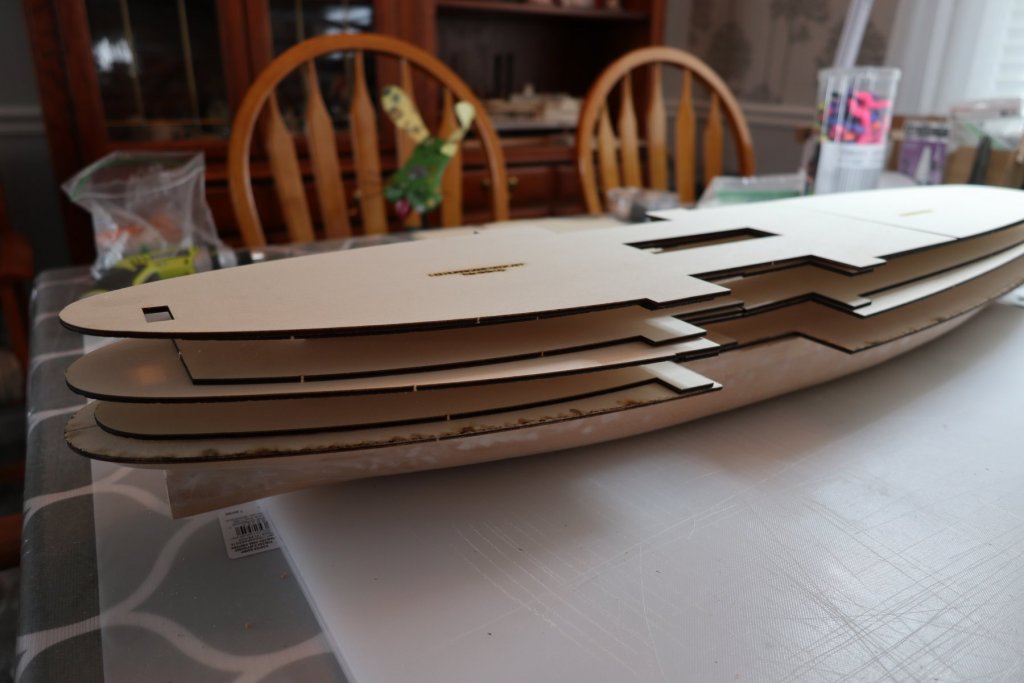
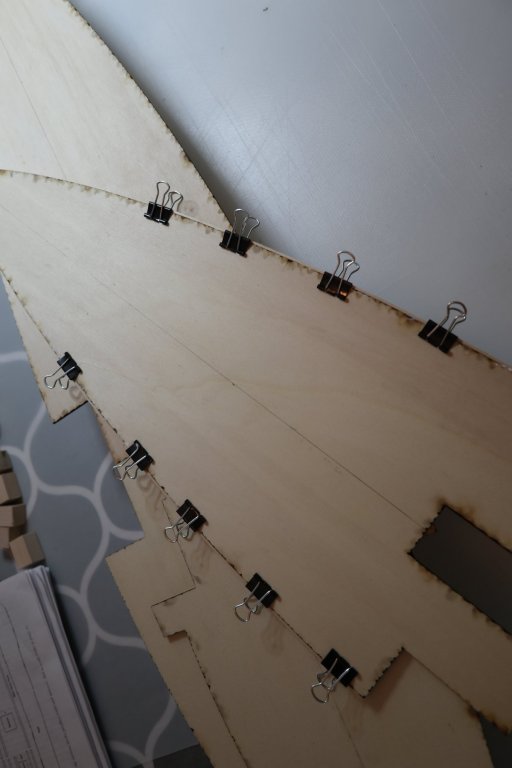
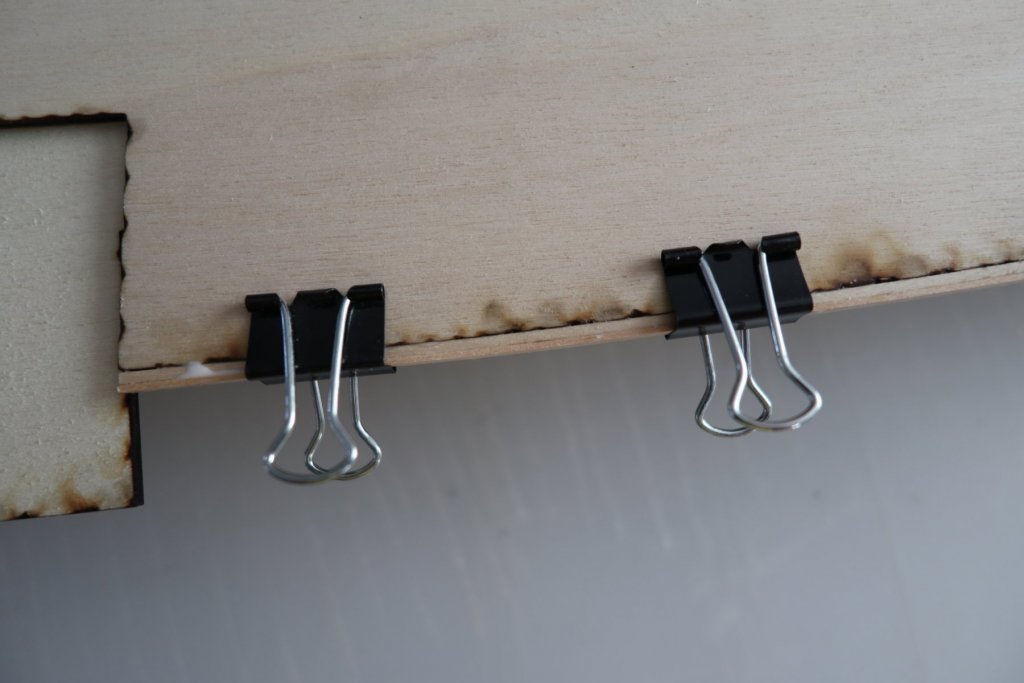
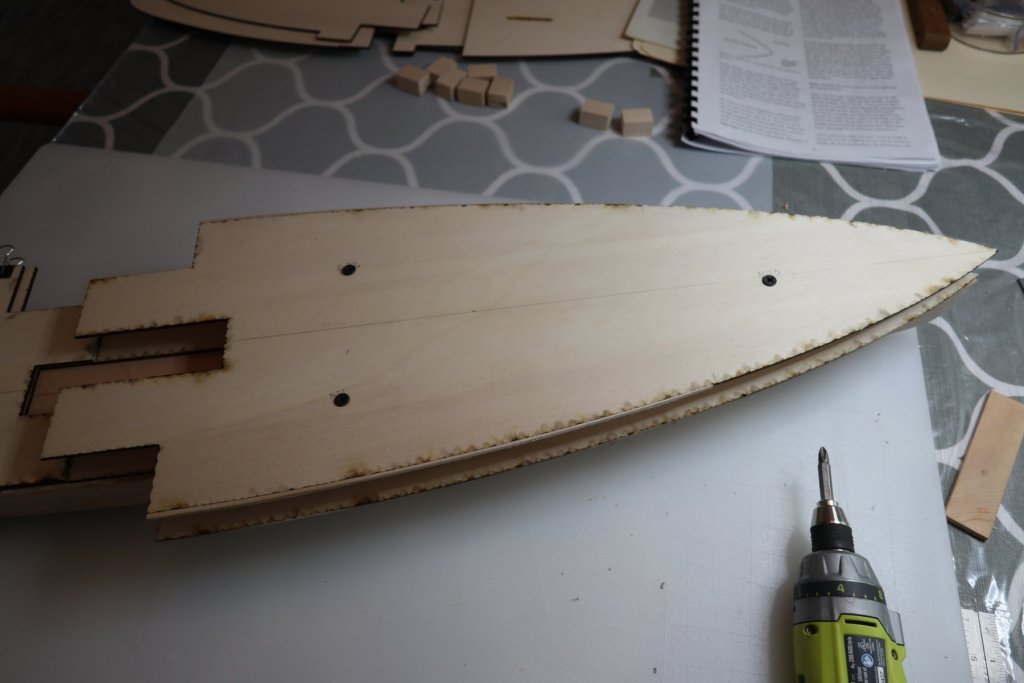
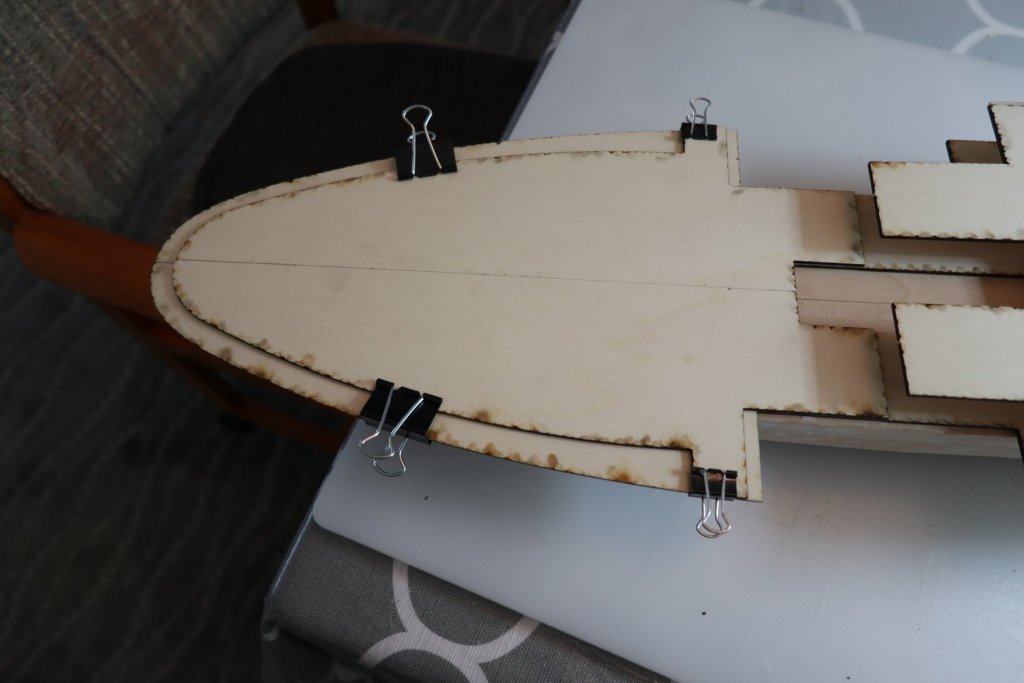
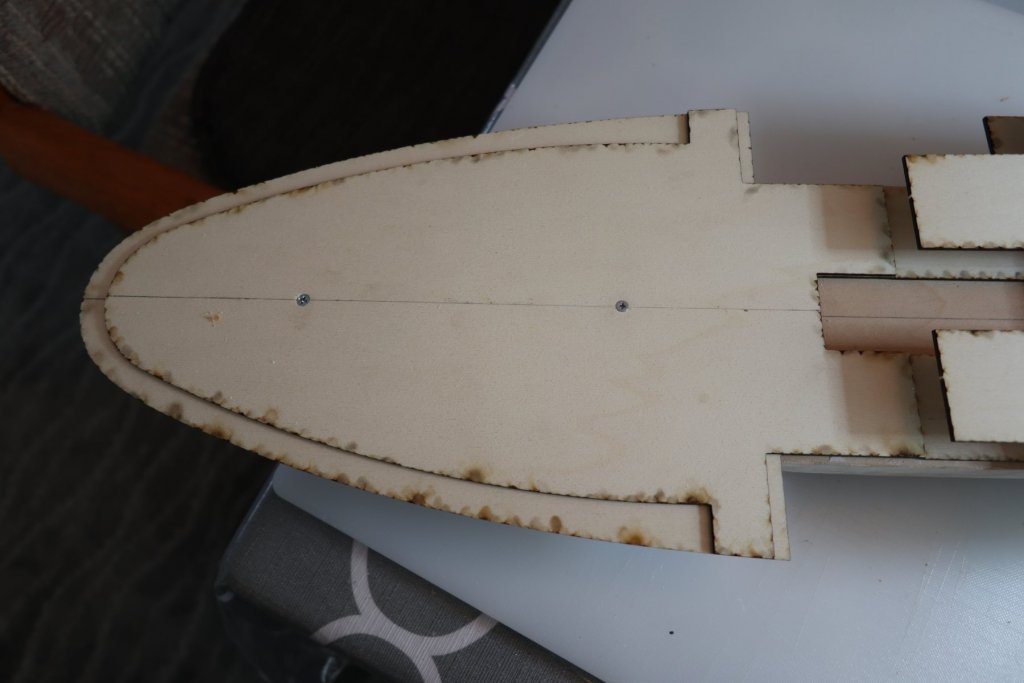
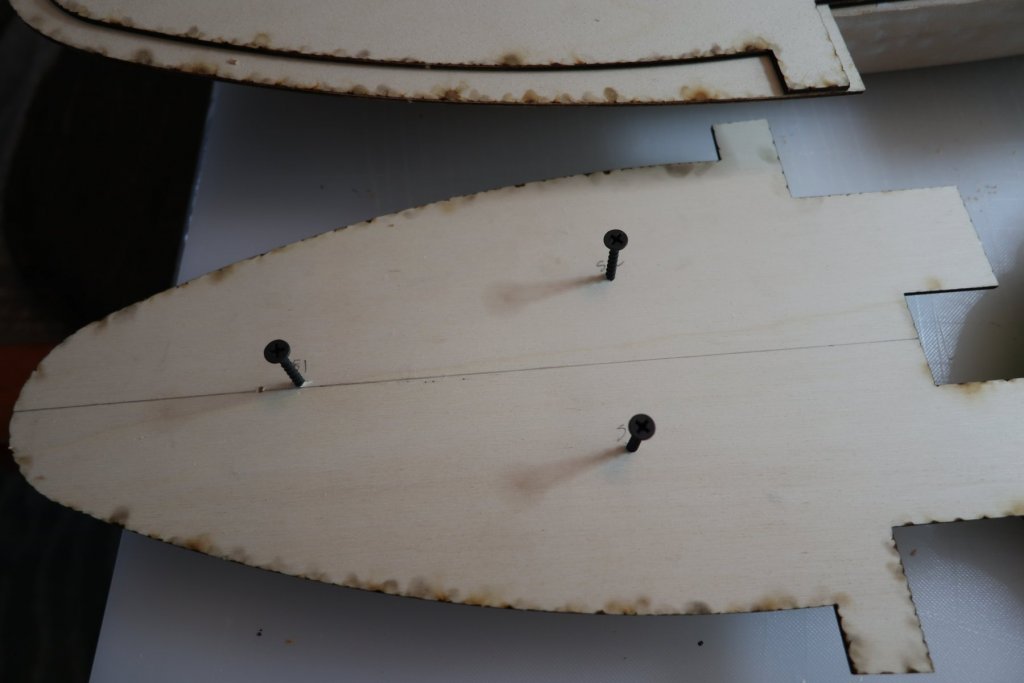
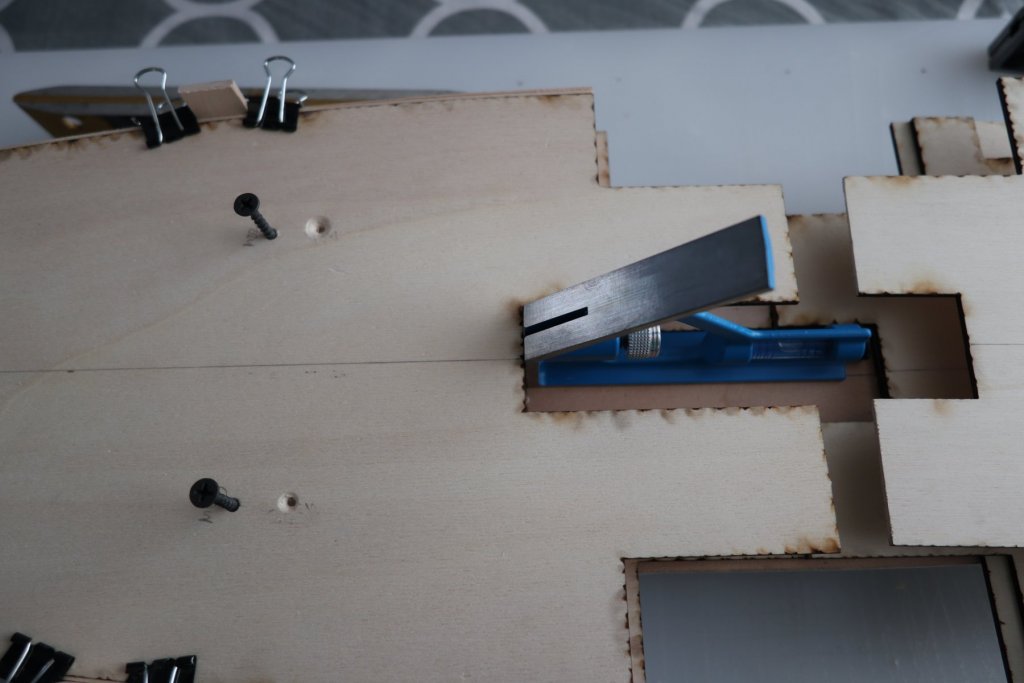
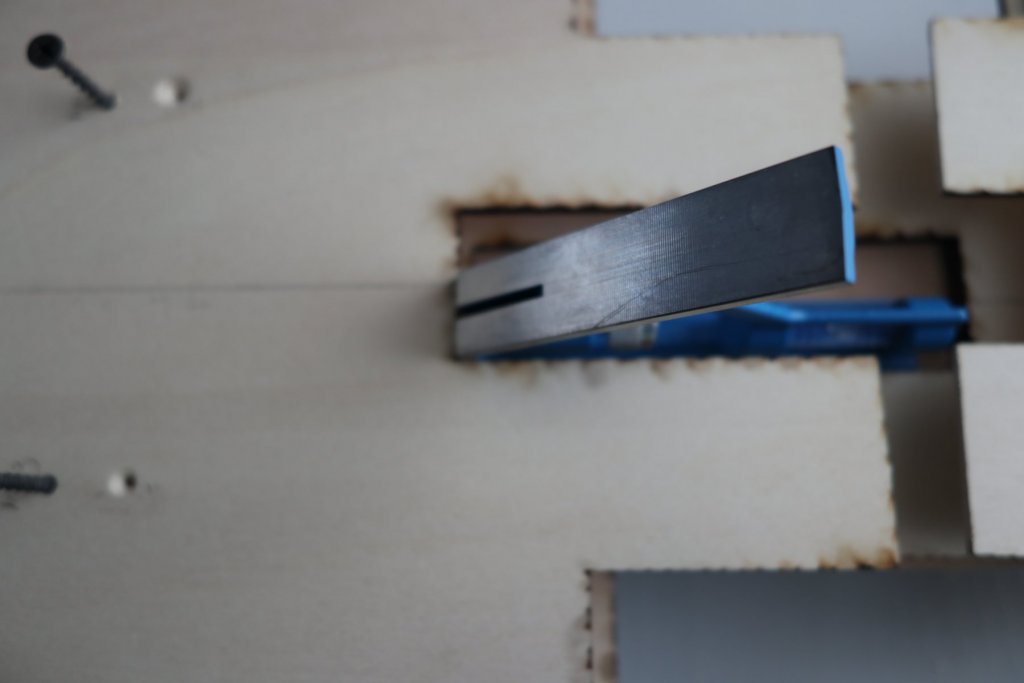
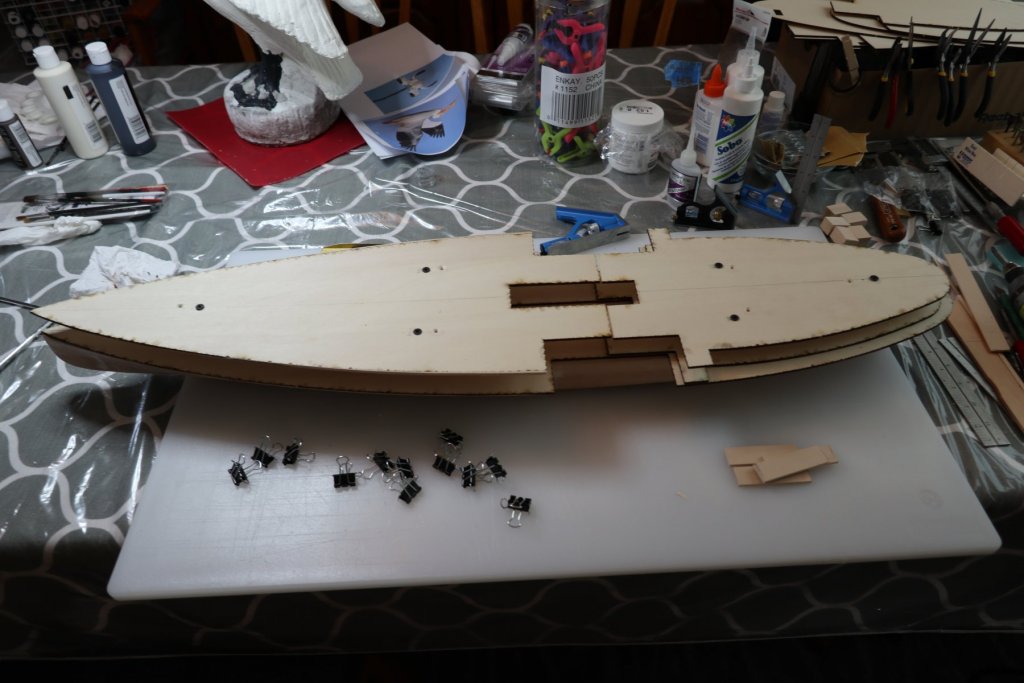
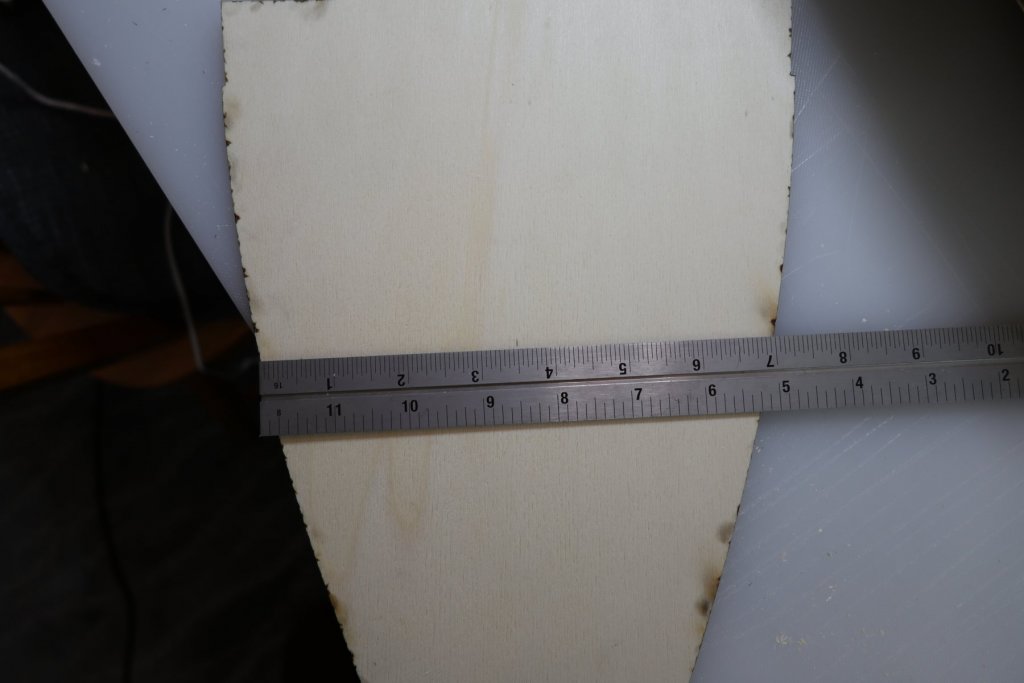
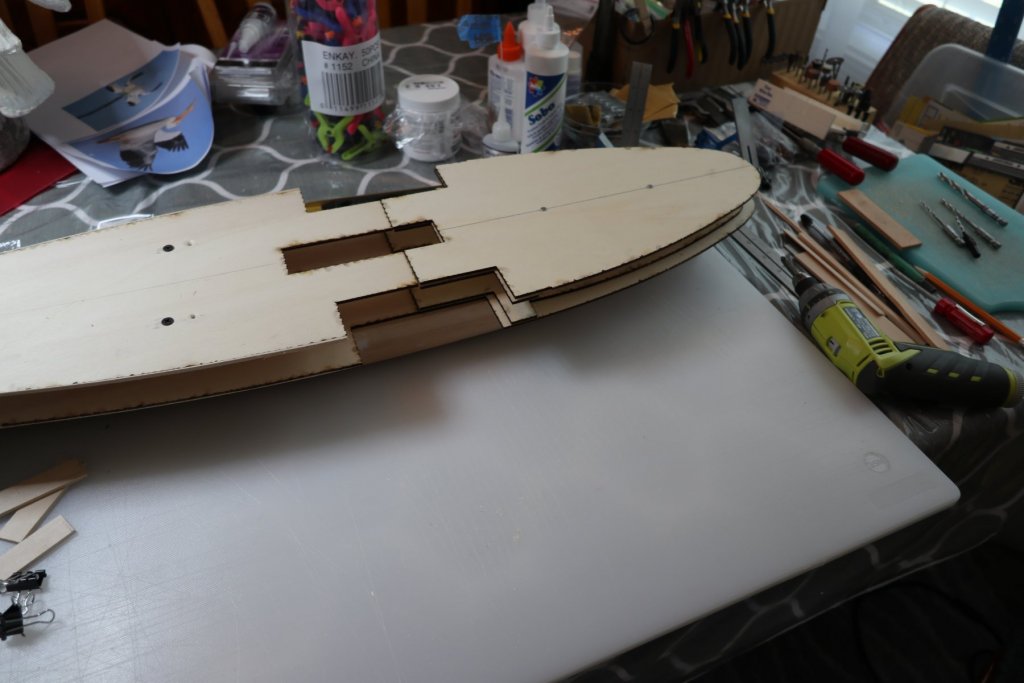
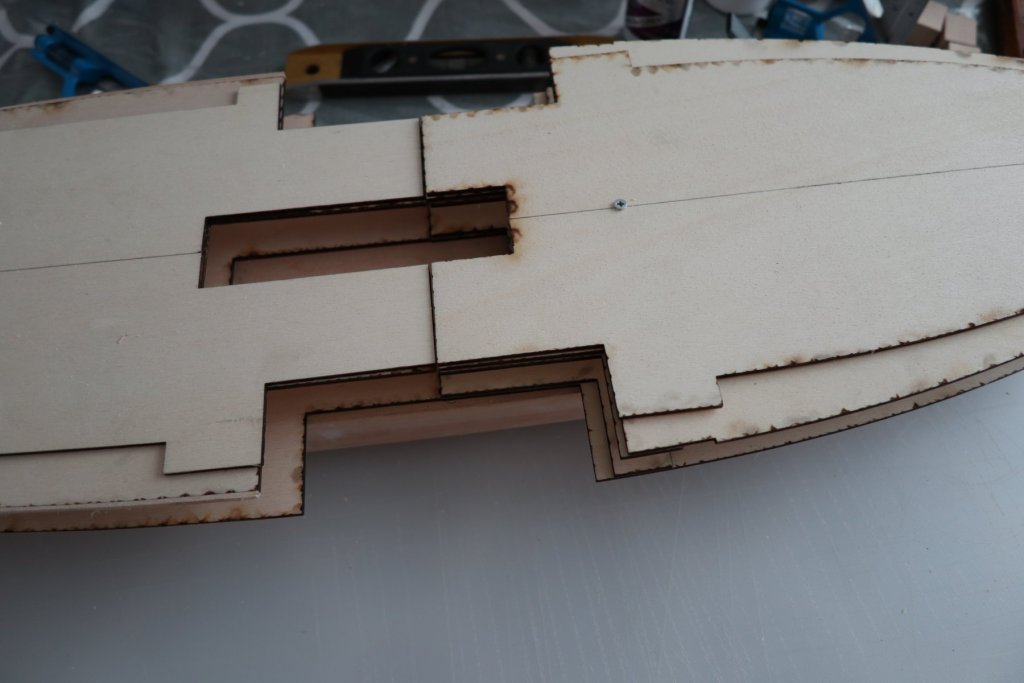
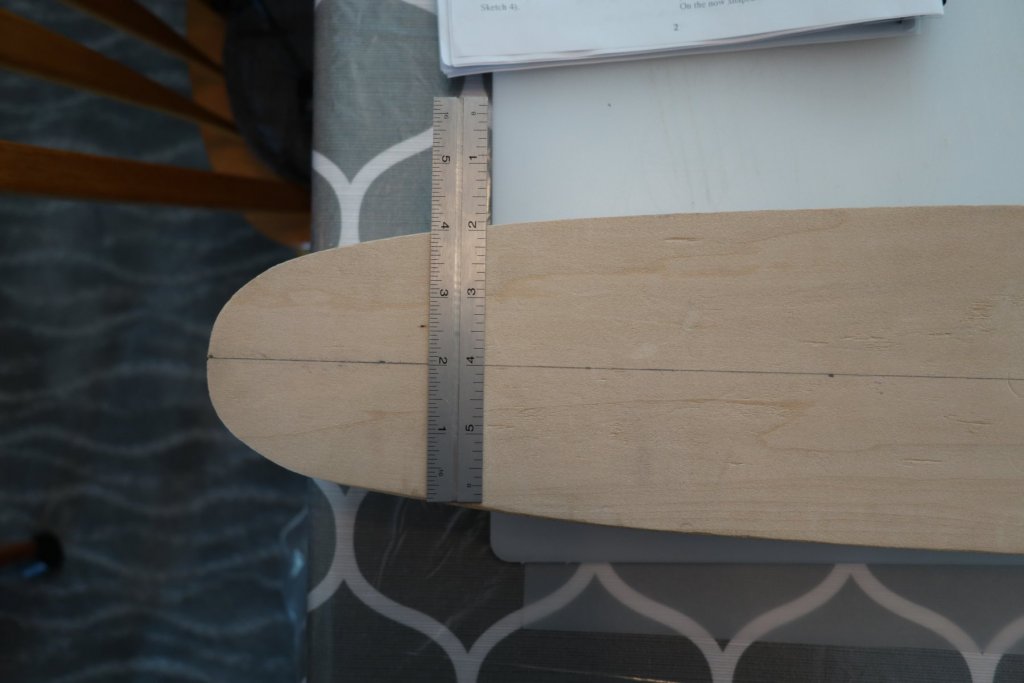
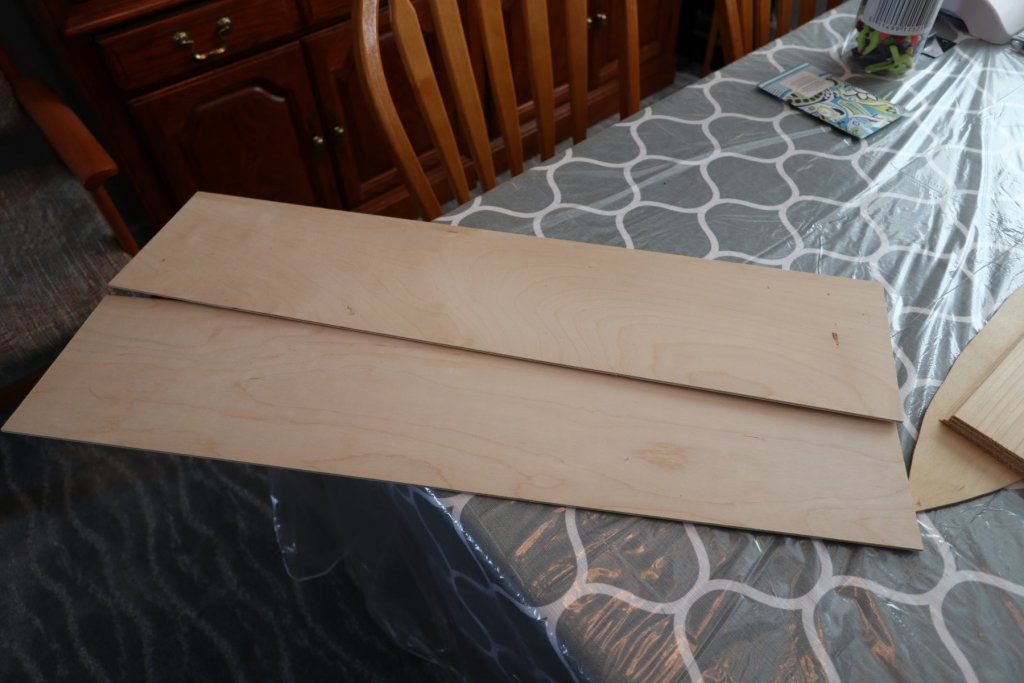
Deck mock up I drew center lines on the main deck and attached them to the hull temporarily. I tried to check the measurements in a few spots. I thought I did a good job lining the deck up to the hull, but missed by a bit. Took it off and got closer on the 2nd try. You can see by the stern marking that I'm still off by a small amount. I'm weighing whether I should try again or let it go. I did a quick mock up with most of the deck pieces in place. I'm hoping jbelwood and others can give me some tips on this process. What did you do to keep it all aligned? How many spacers did you use on each level? Any other hints/suggestions? Thanks! Edit - During a more detailed deck mock up, it appeared that the "saloon deck fore" was about 3/16" thinner than the "main deck fore". I thought they should be the same so the walls would be perpendicular to the deck. I attached a 1/16 x 1/8 strip to both edges of the deck from the paddle wheel end through where the two decks were the same size. It wasn't enough, so I glued a 2nd strip on each side. Once the glue dried, I clamped the 2 decks together. Using an X-Acto knife, I trimmed off the excess wood on the strip that was added to the edge. It came out very well. A bit of sanding and it looked good. I started to line up some of the spacers and decks, and got about this far - The last 6 photos, everything was loose. I attached it, didn't like the fit, took it off, re-positioned it, attached it, didn't like the fit and went in a different direction. I used a drill press to drill holes through the spacers. If the holes were at an angle, tightening the screw would pull the deck out of alignment, (or so my thought process told me). I made the holes just large enough so the screw could pass through it with minimal friction. I drilled holes in the upper deck so the screw could pass through with minimal friction. I put the screw in the deck, put CA glue on the spacer, and glued the spacer to the underside of the upper deck. This kept the screw upright as I adjusted the position of the deck. I used small binder clips to clamp strips of wood on the deck edges to keep them straight. I aligned the decks using the paddle wheel opening as a reference. At that point in time, I pressed one of the screws into the wood below it and started screwing it in. Did the same for the other 2 screws. Tightened all 3. I am really happy how this turned out so far. But now another issue came up. The screw heads need to be flush with the top of the decks. I had to remove both! Because I glued the spacers in place, it was no problem at all. I removed the screws, countersunk the openings, and put it back together. I measure up more decks, and tack them on with short screws, and end up with this: This last photo just does not look correct. I'm still happy with the center line, but it all looks out of alignment in the paddle wheel box area. I feel I must have done something wrong. I'm going to build the paddle wheel boxes and temporarily put them in place to be sure all of this is moving in the correct direction. If anyone has ideas/feedback on this part of the build, feel free to chime in!!!


-
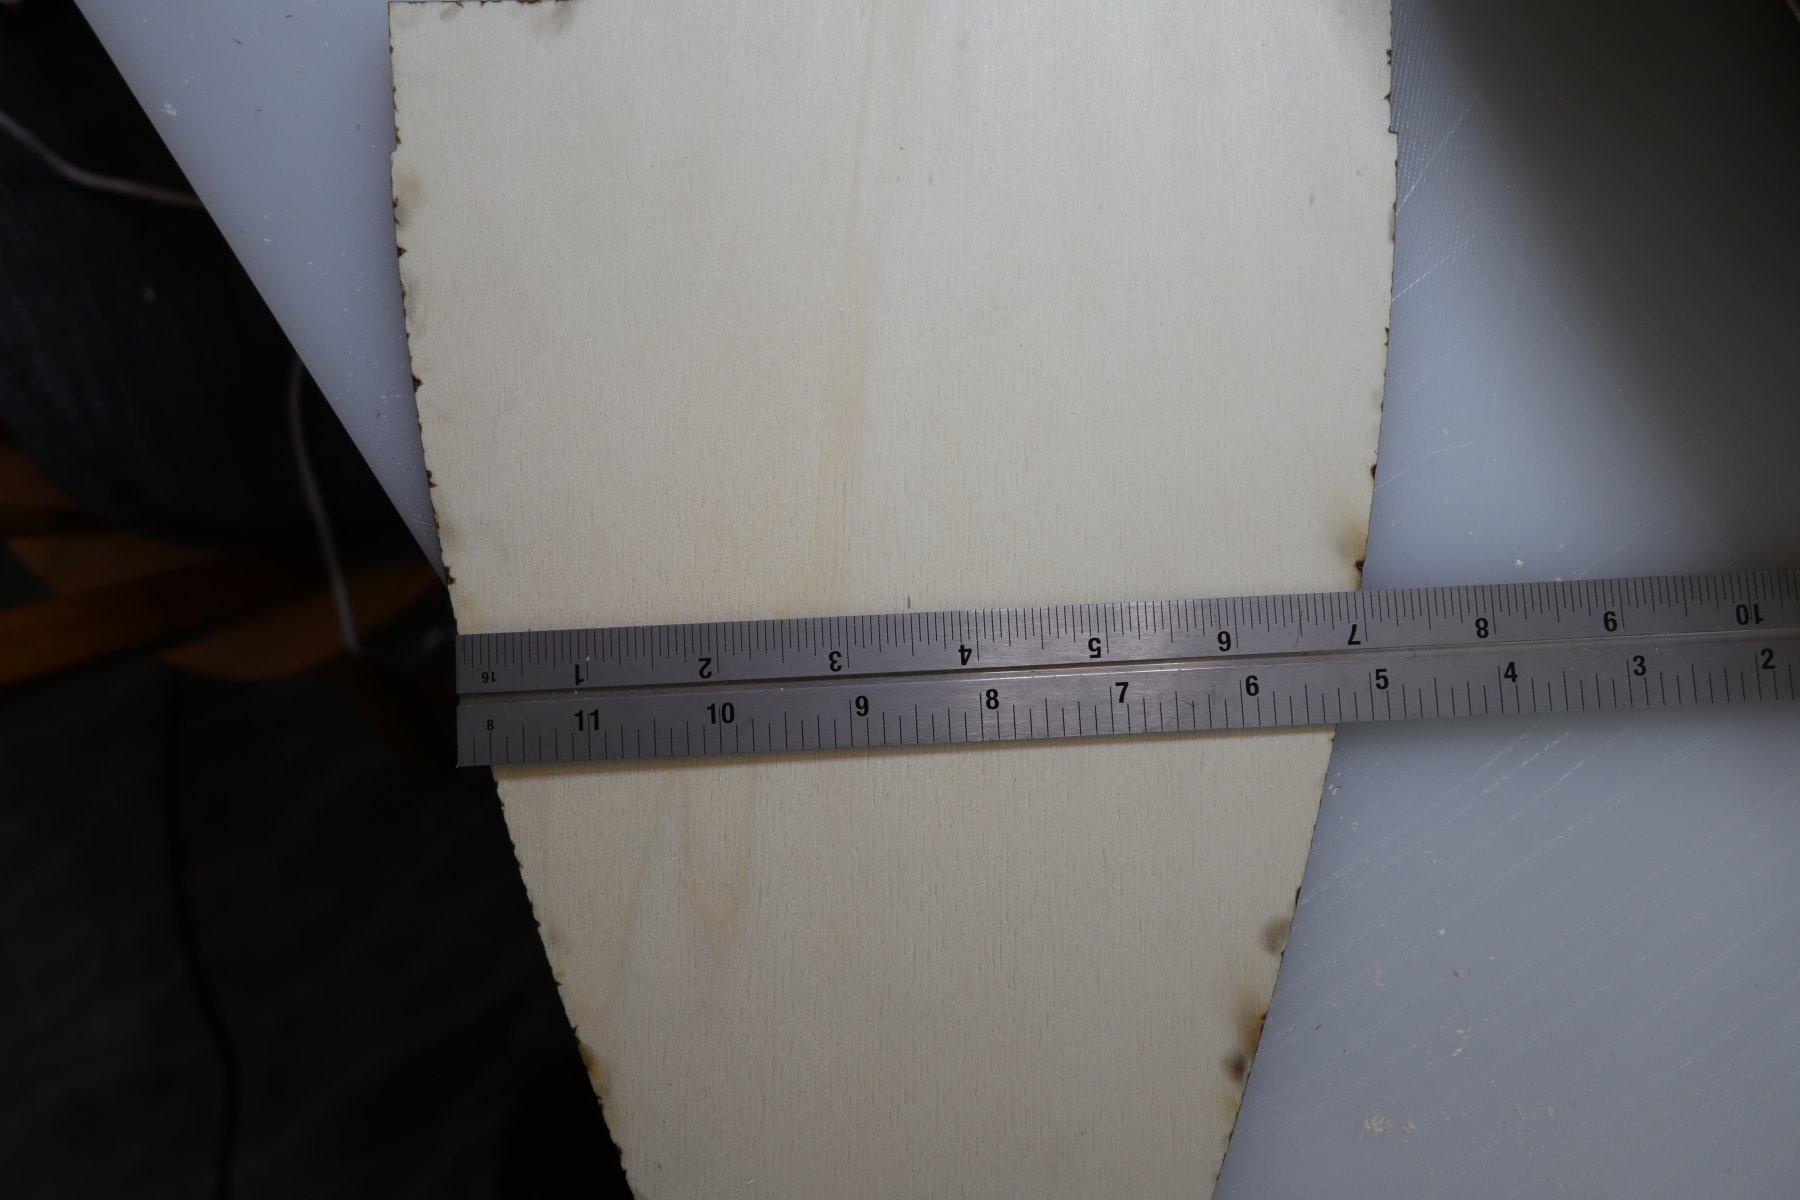
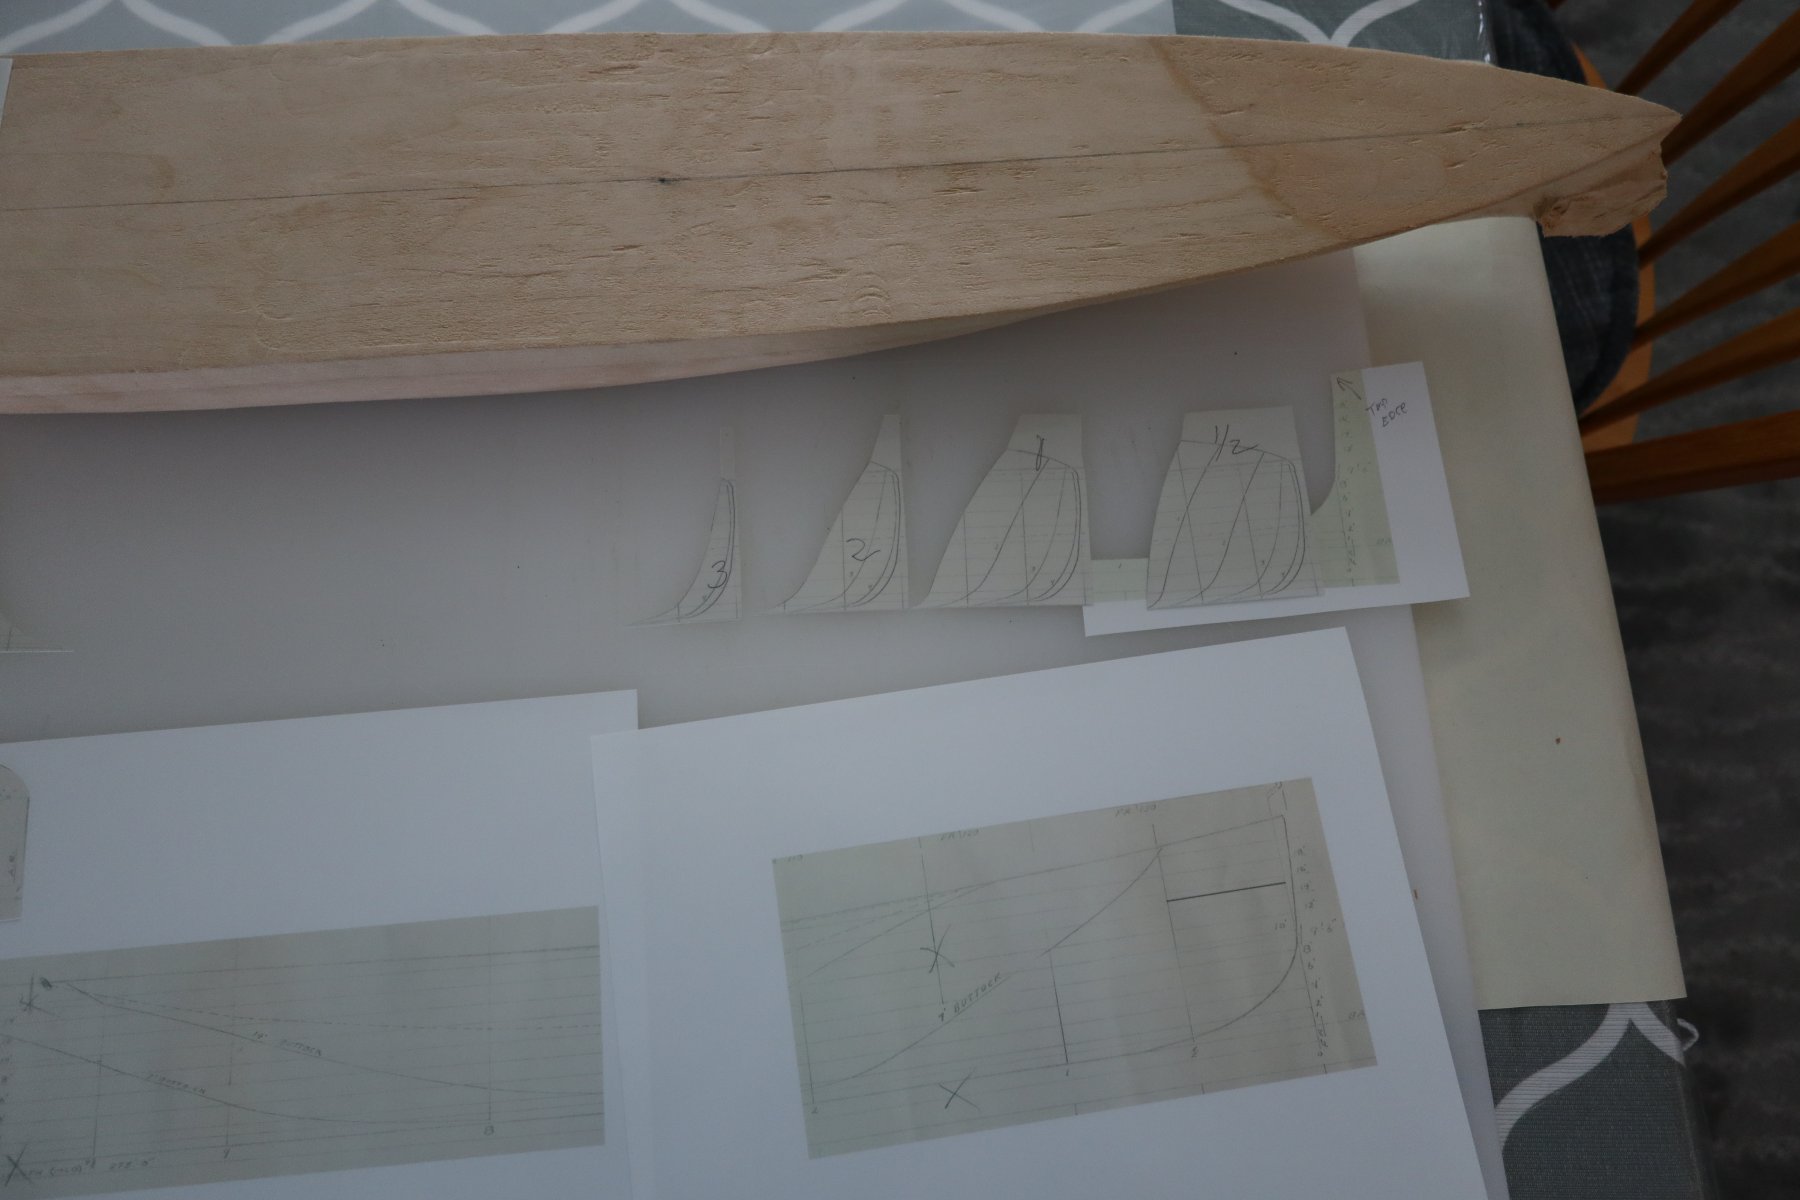
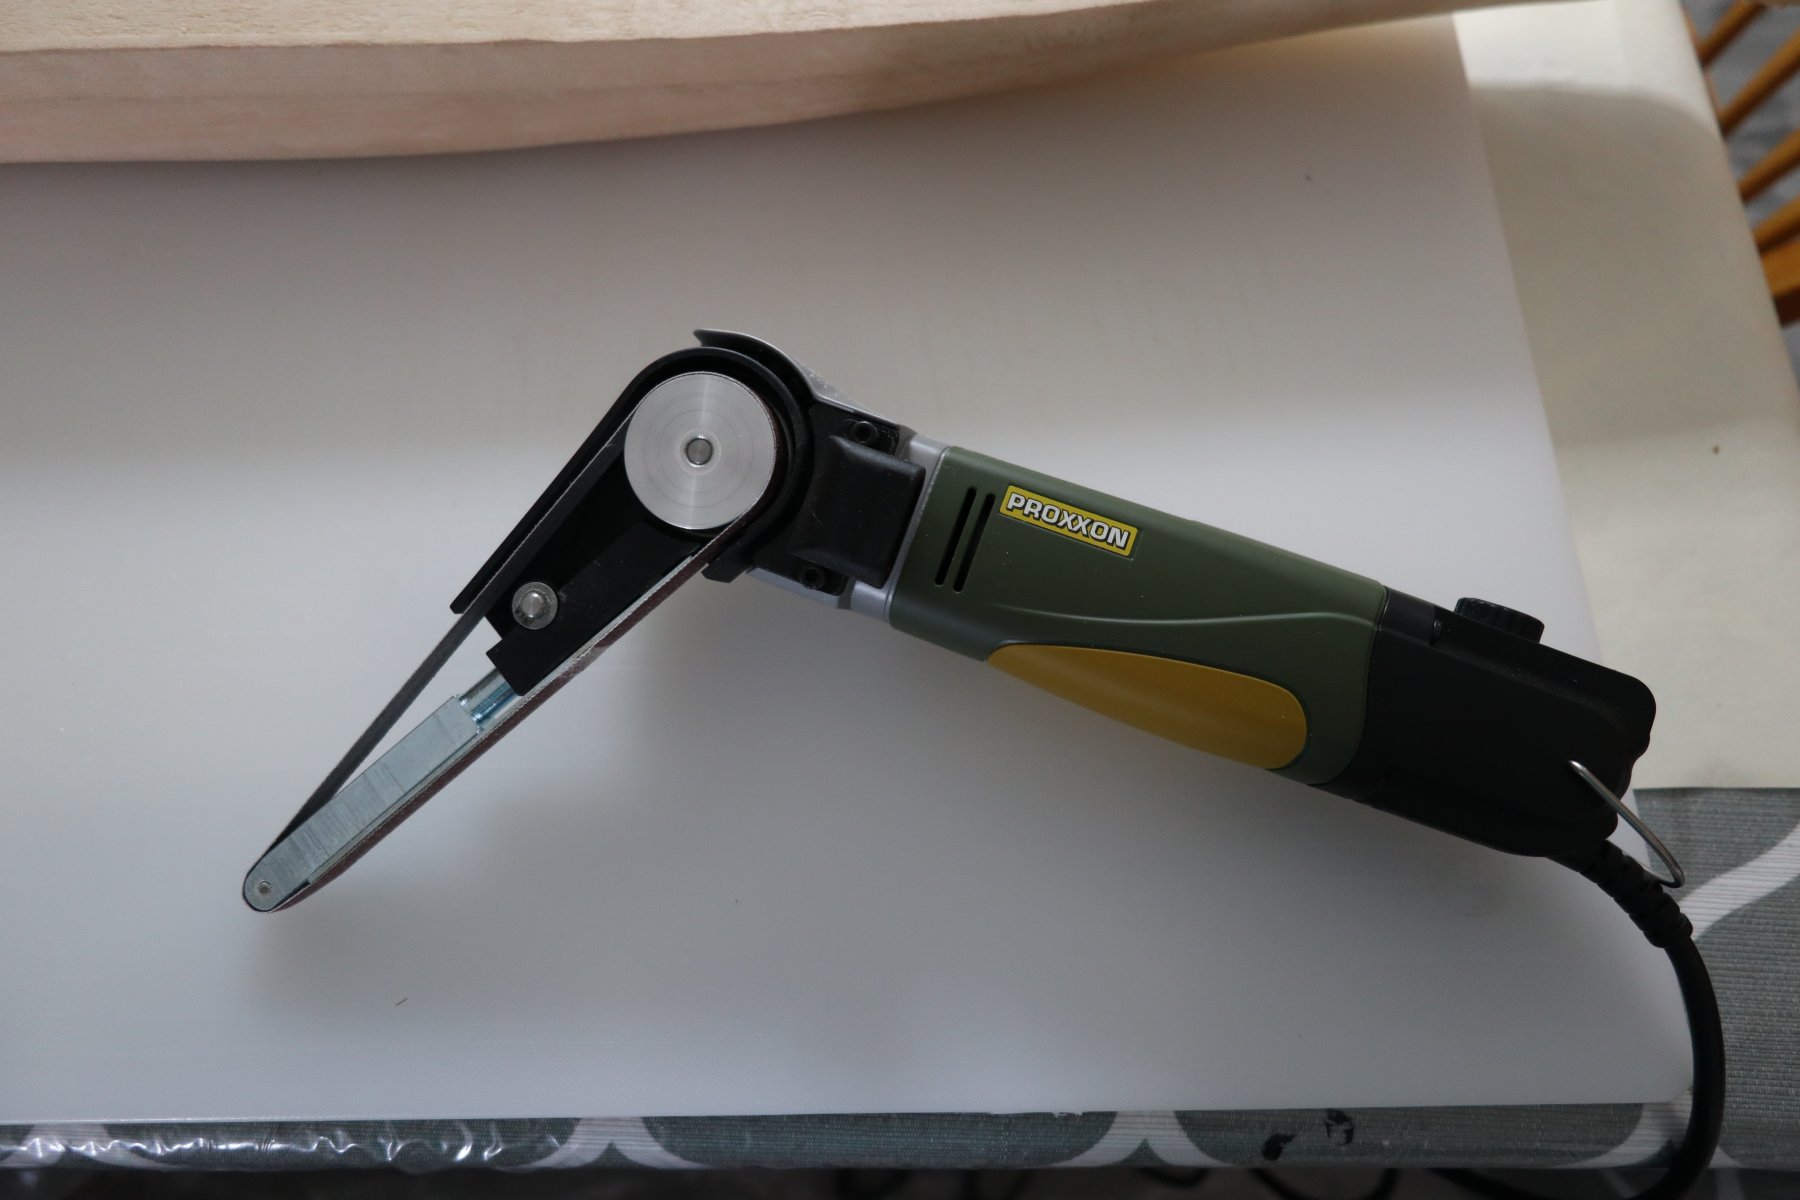
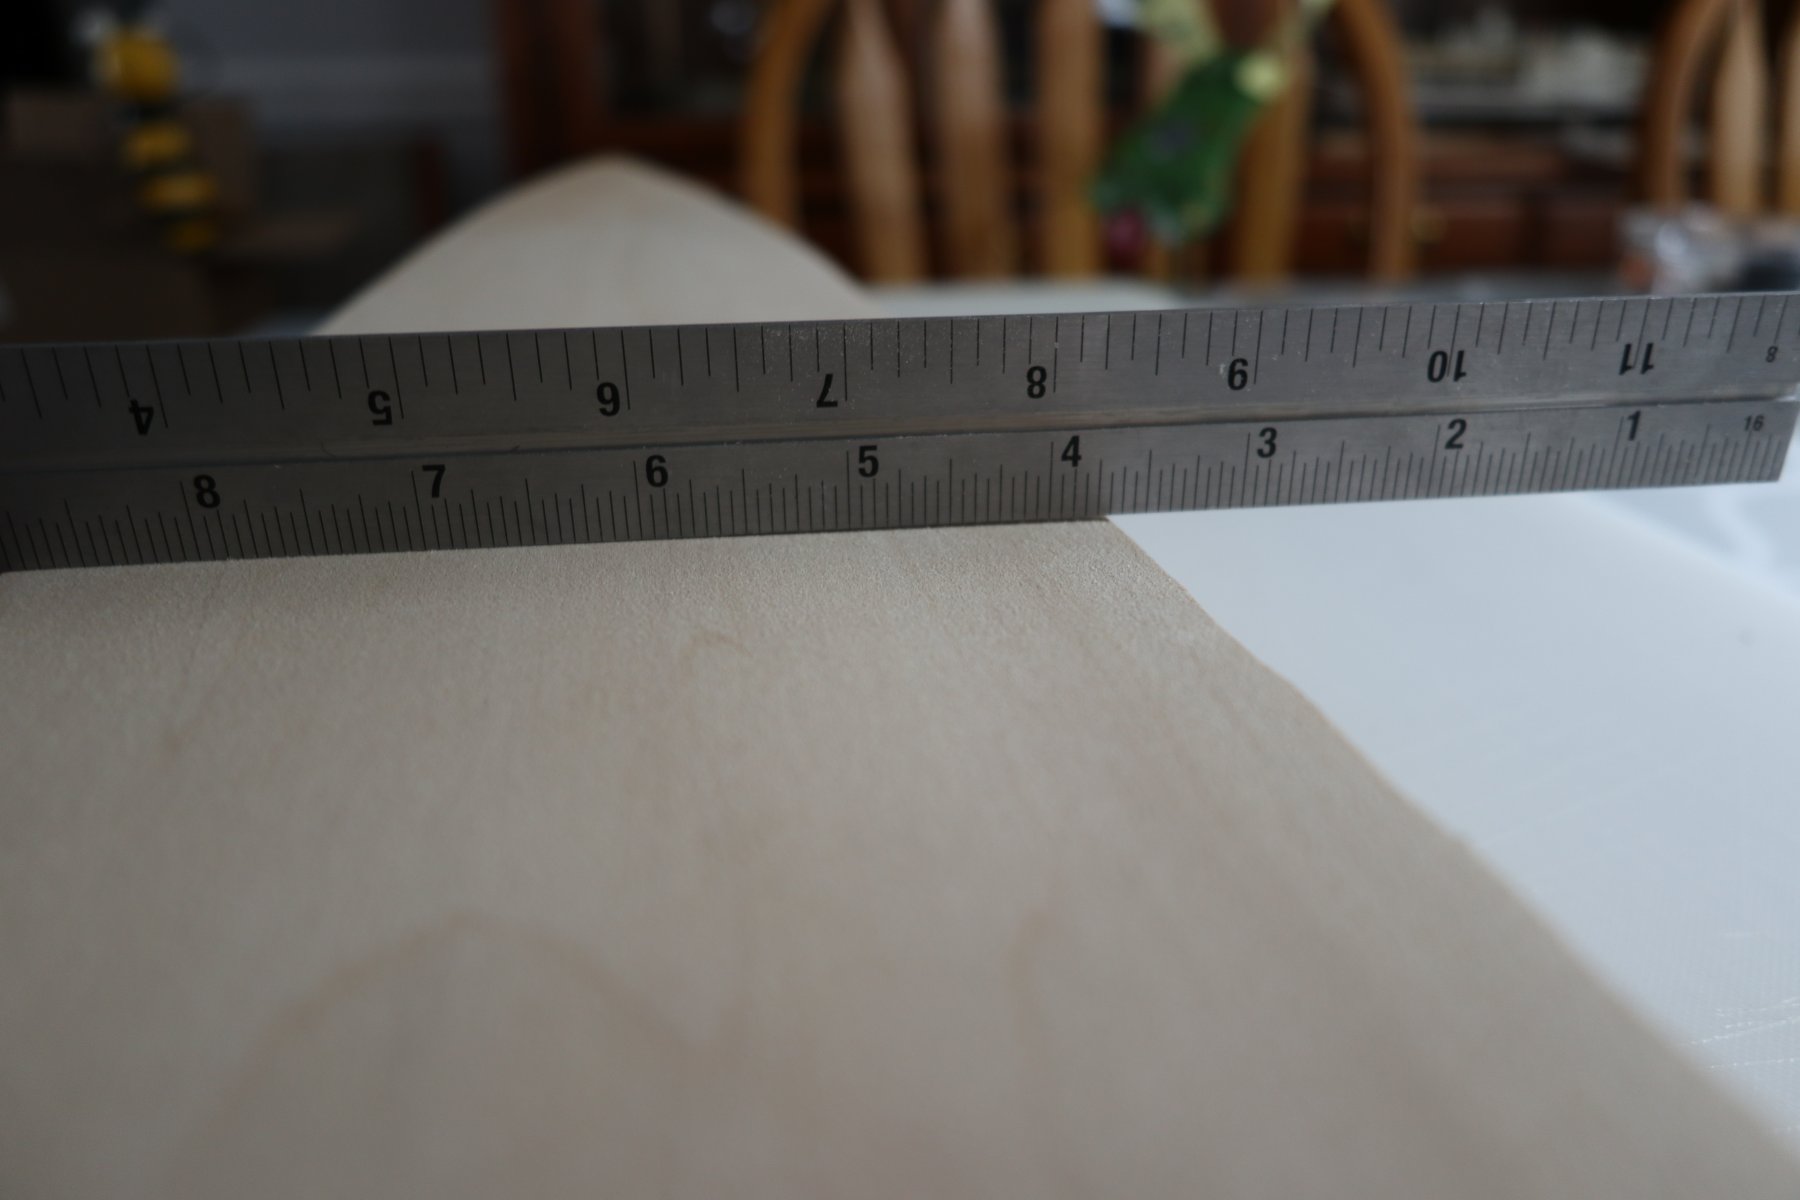
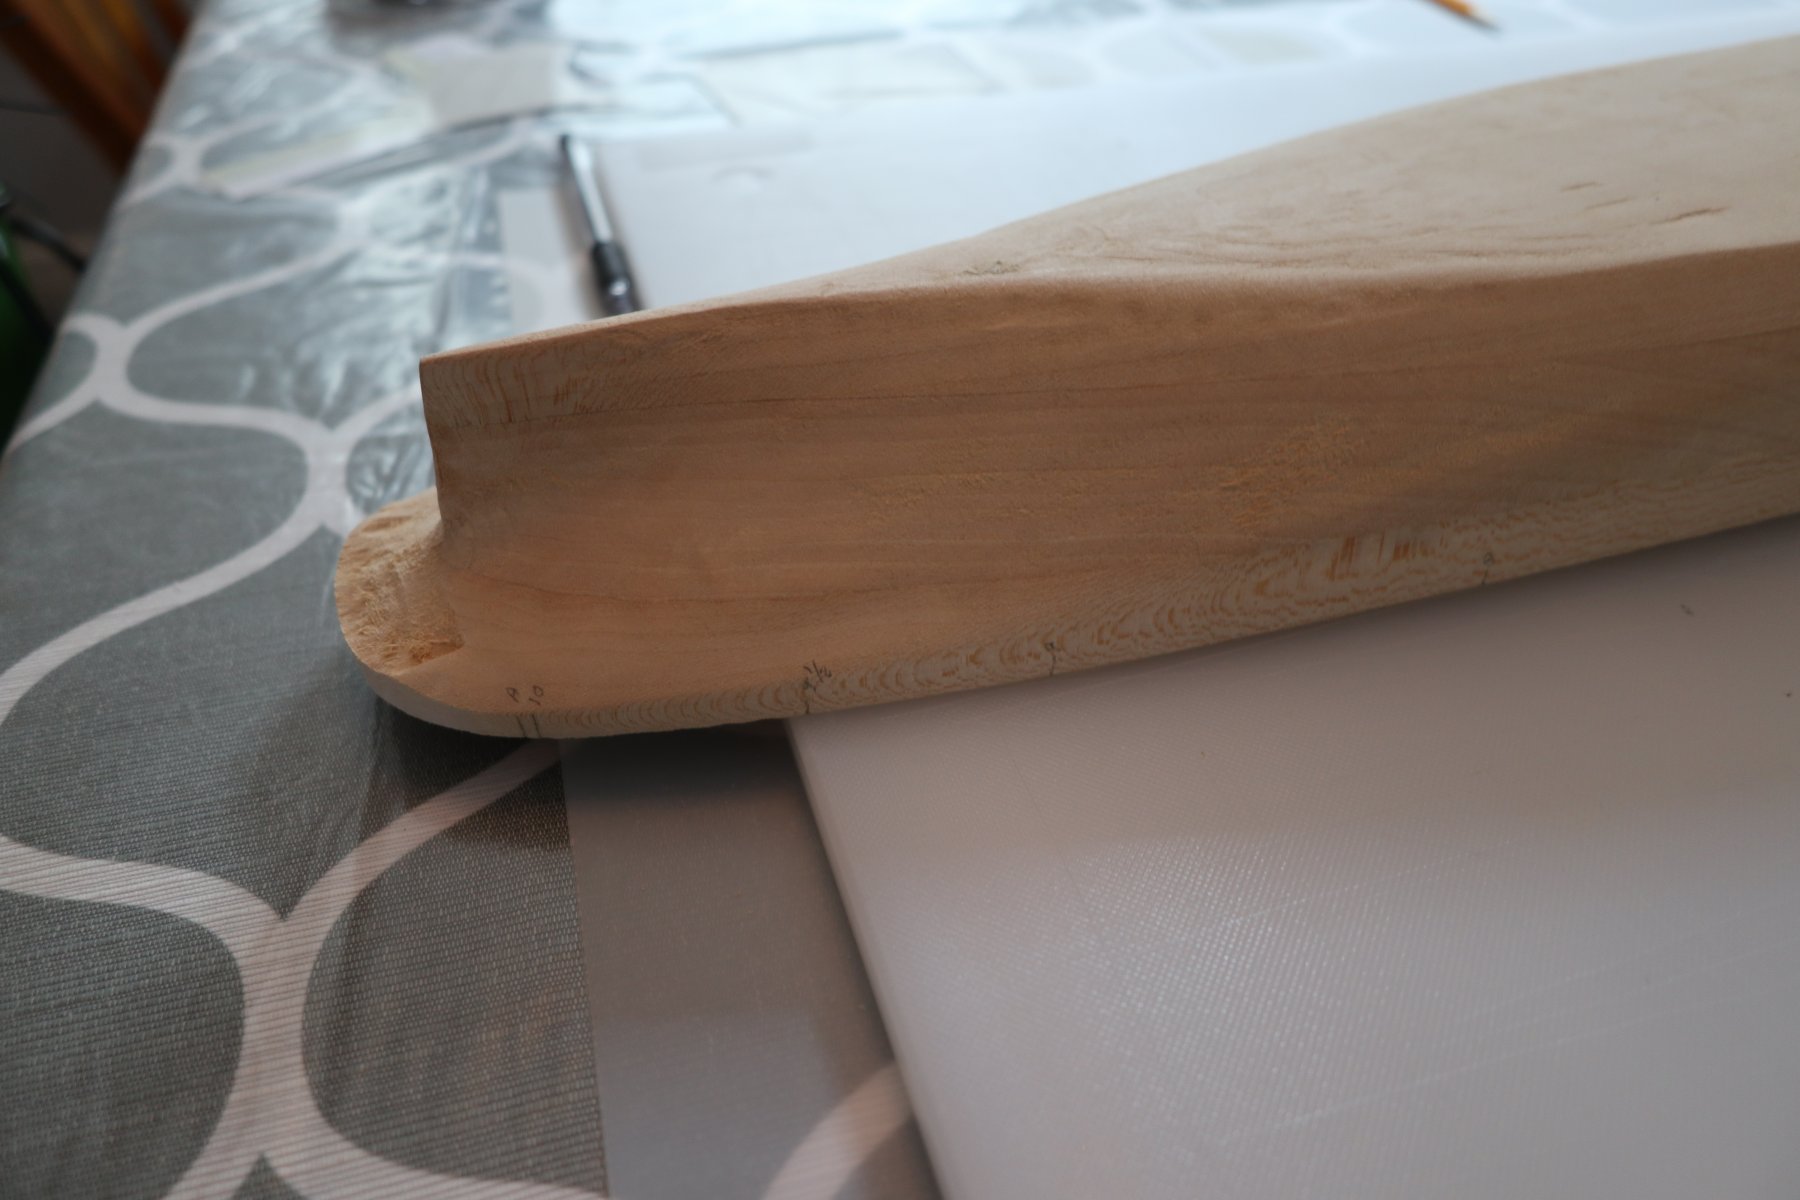
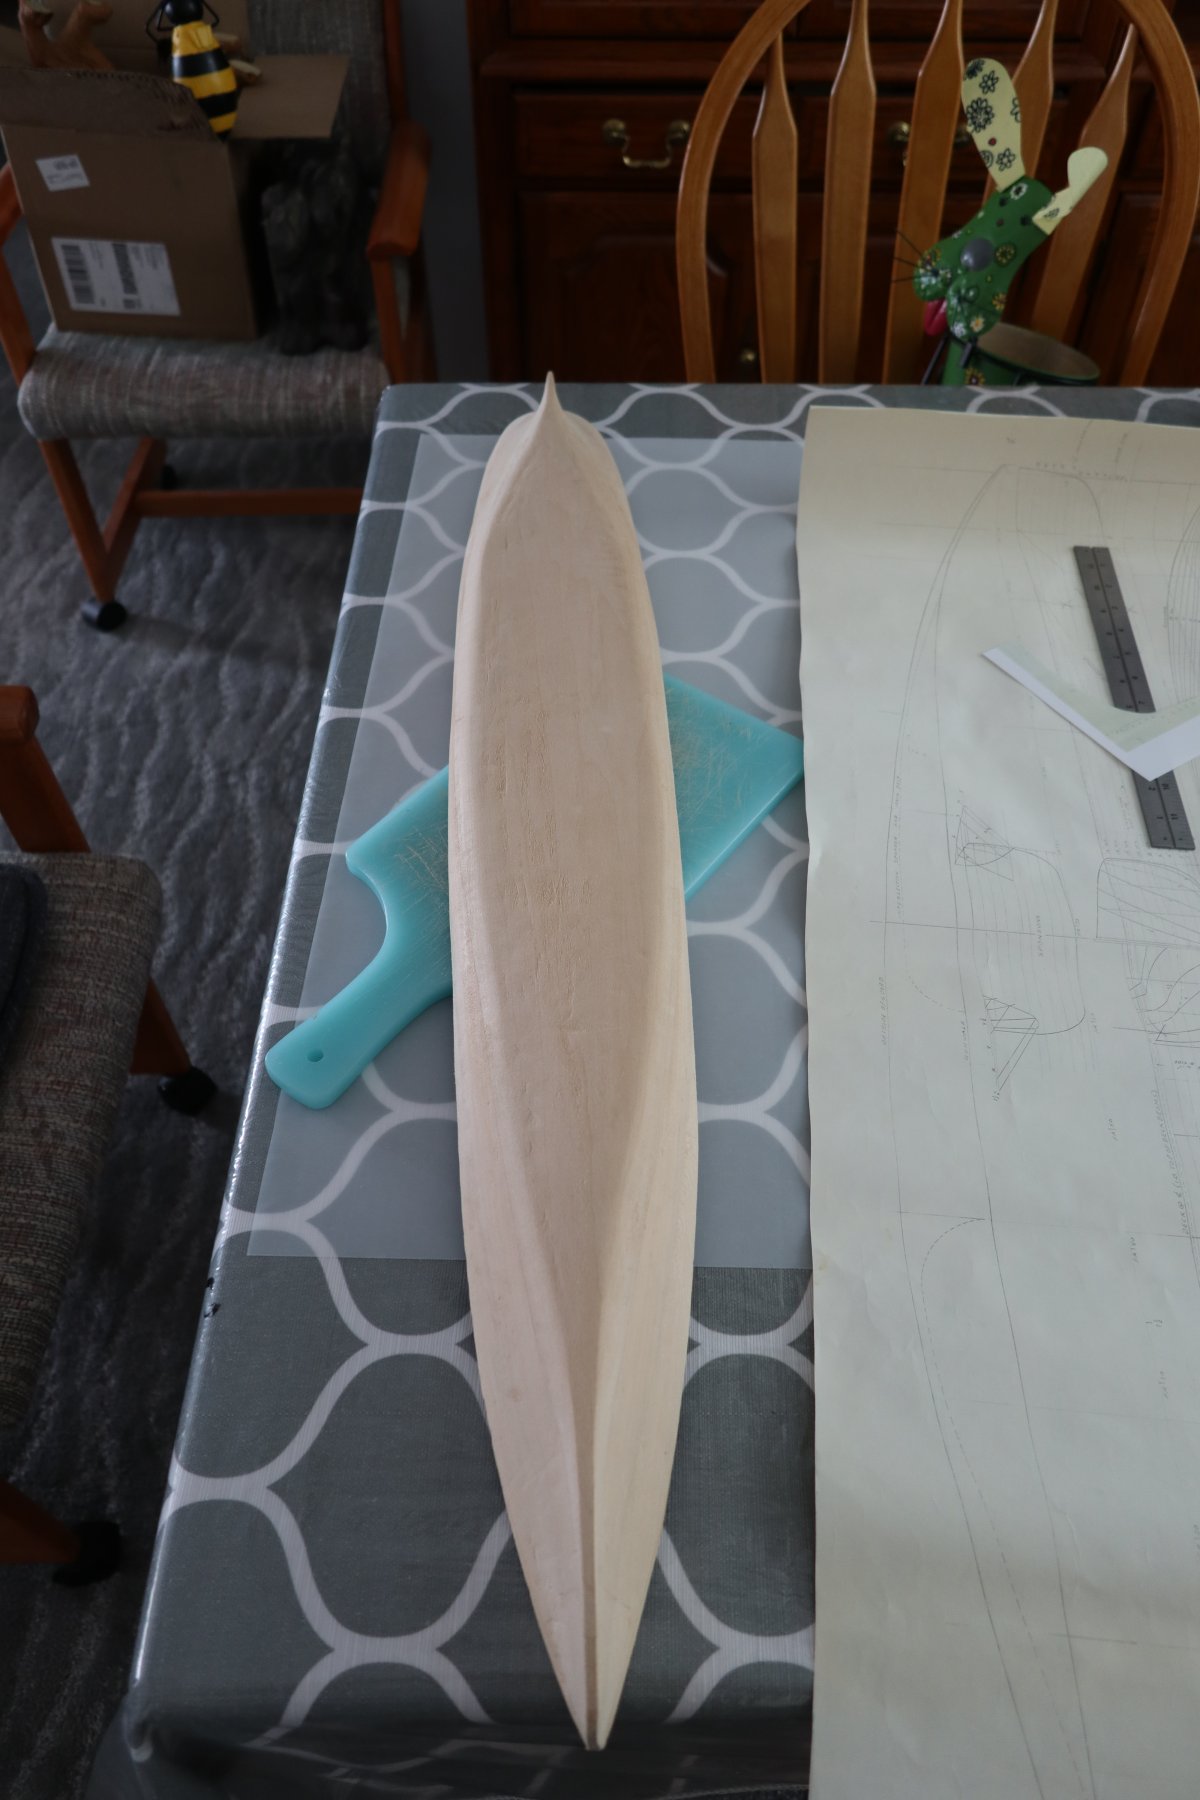
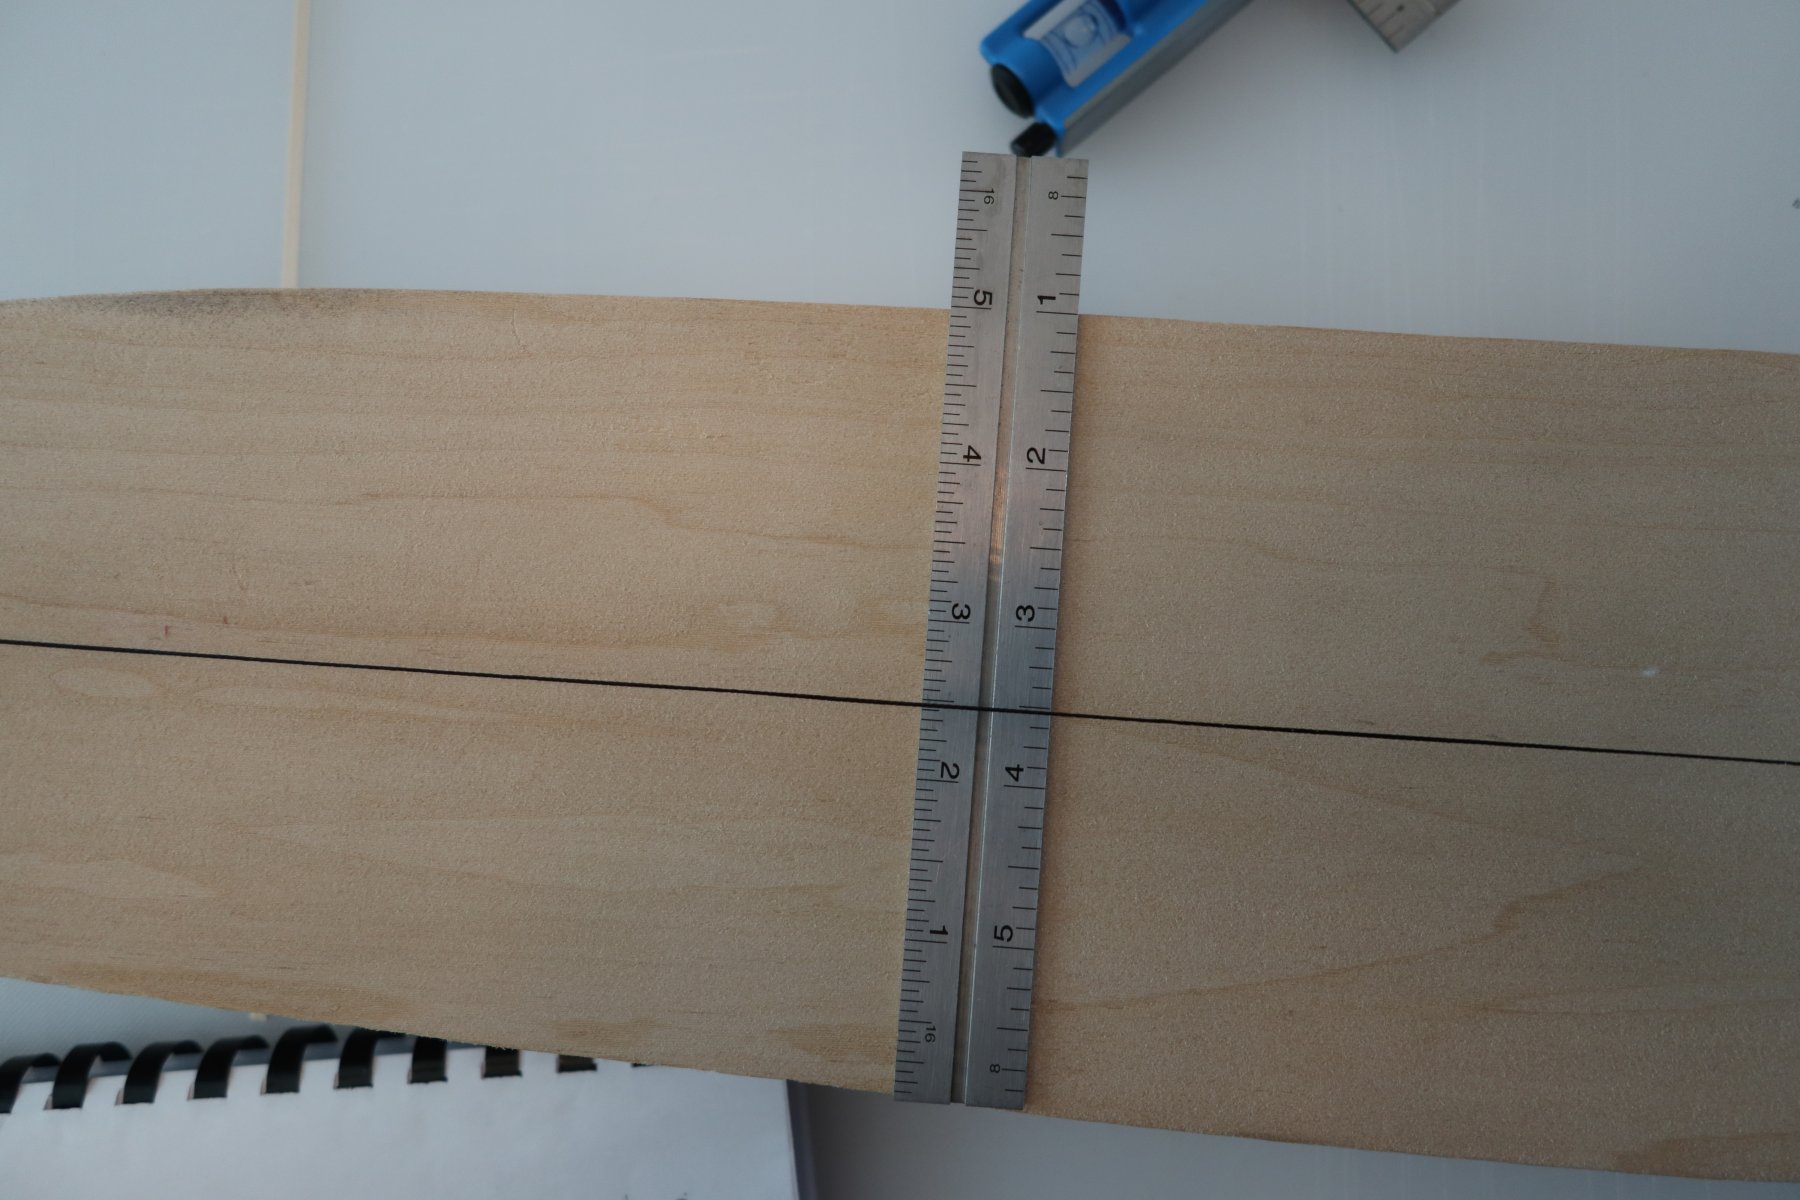
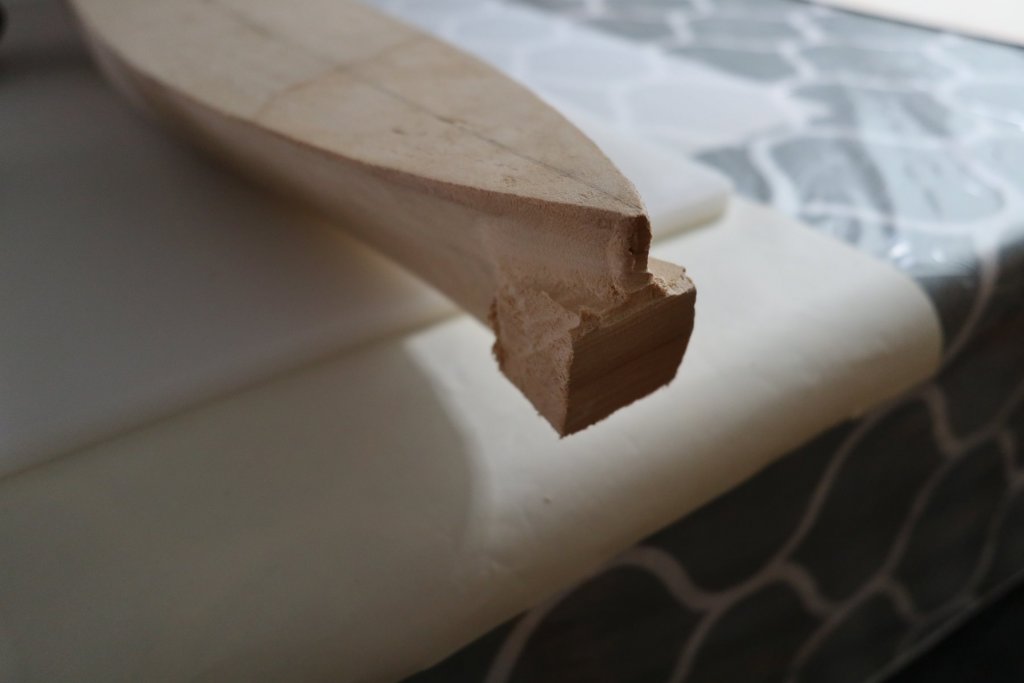
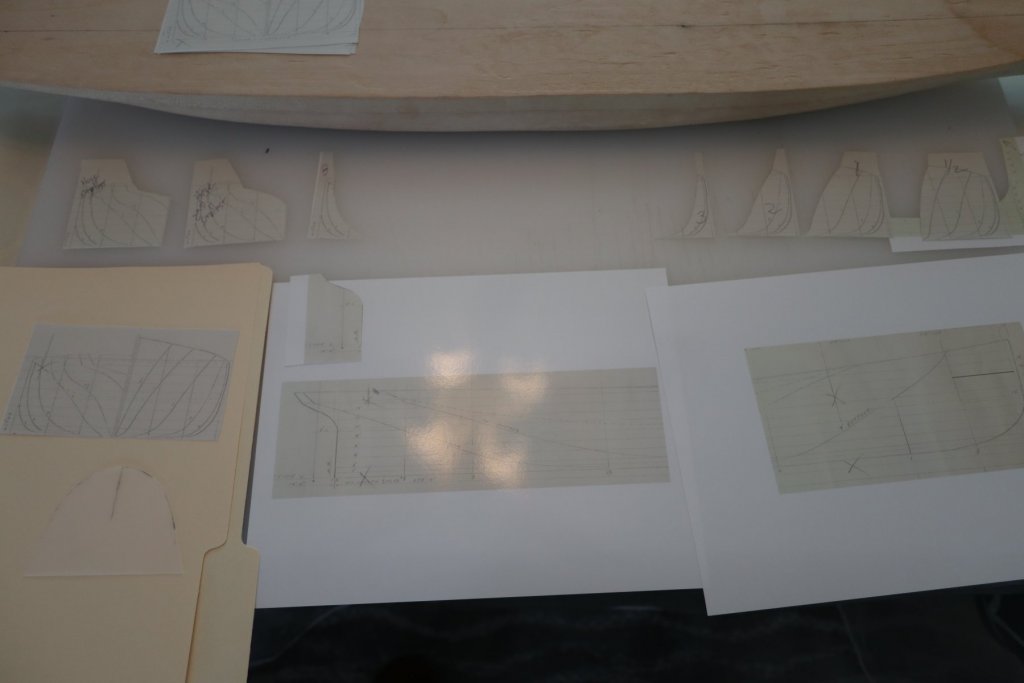
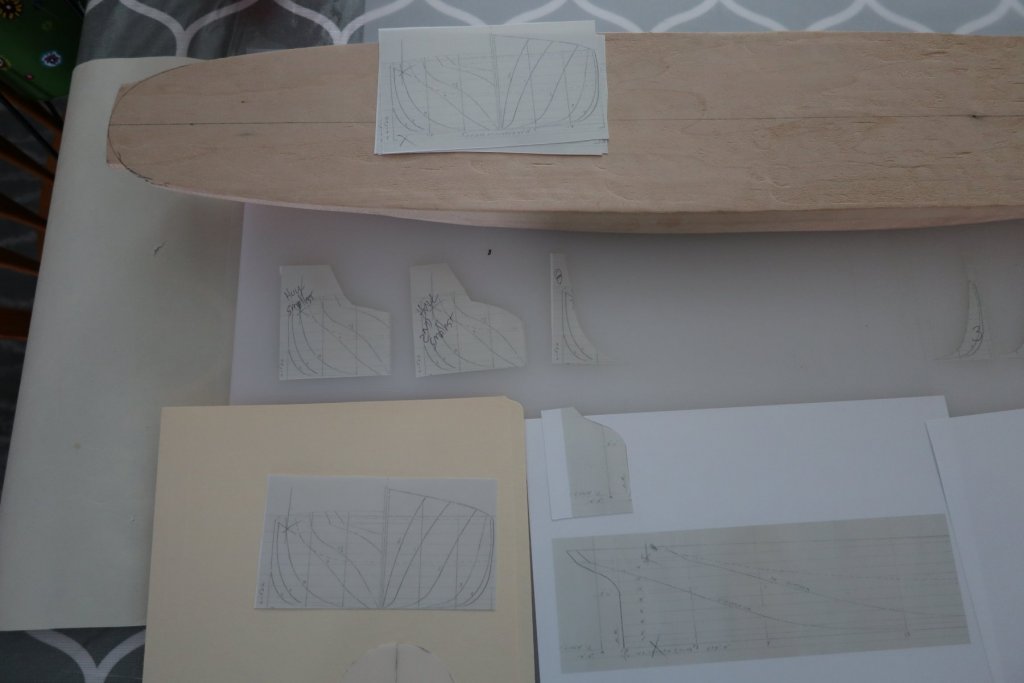
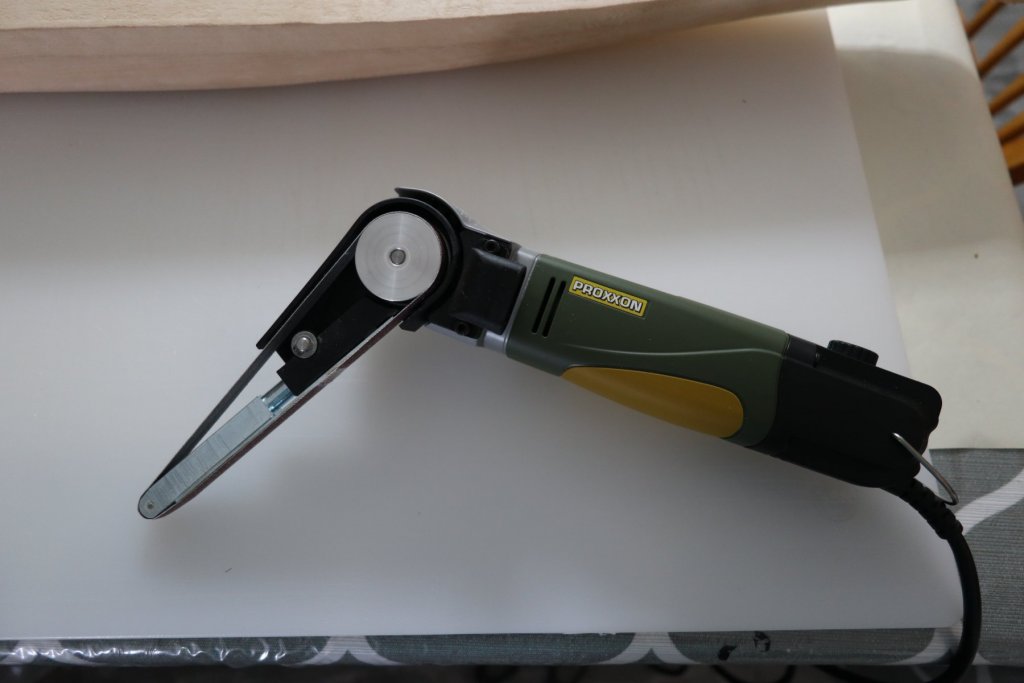
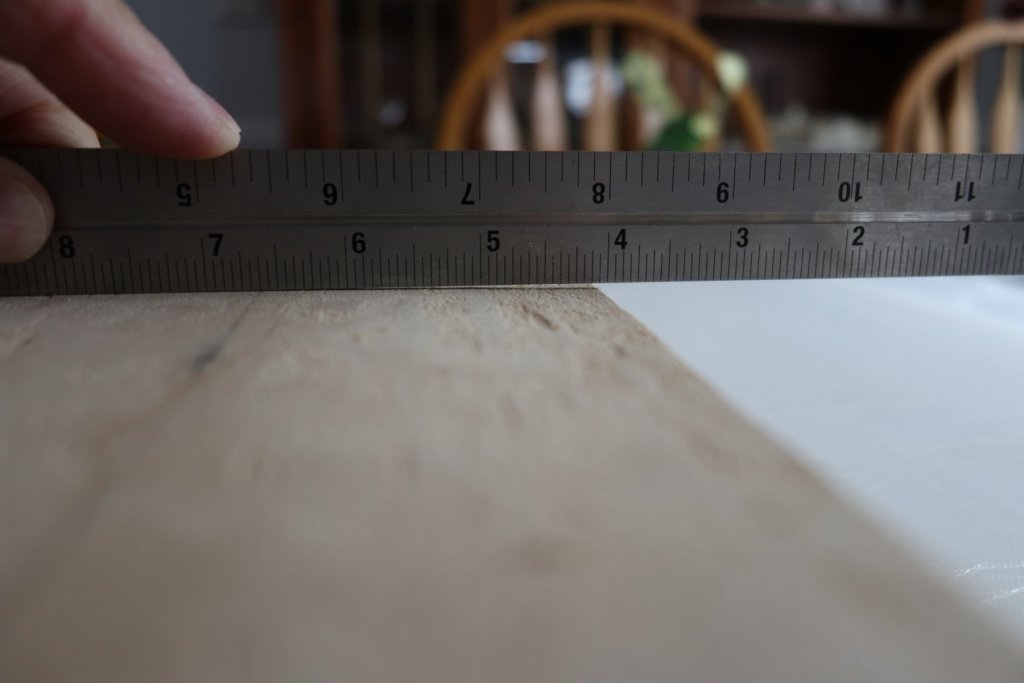
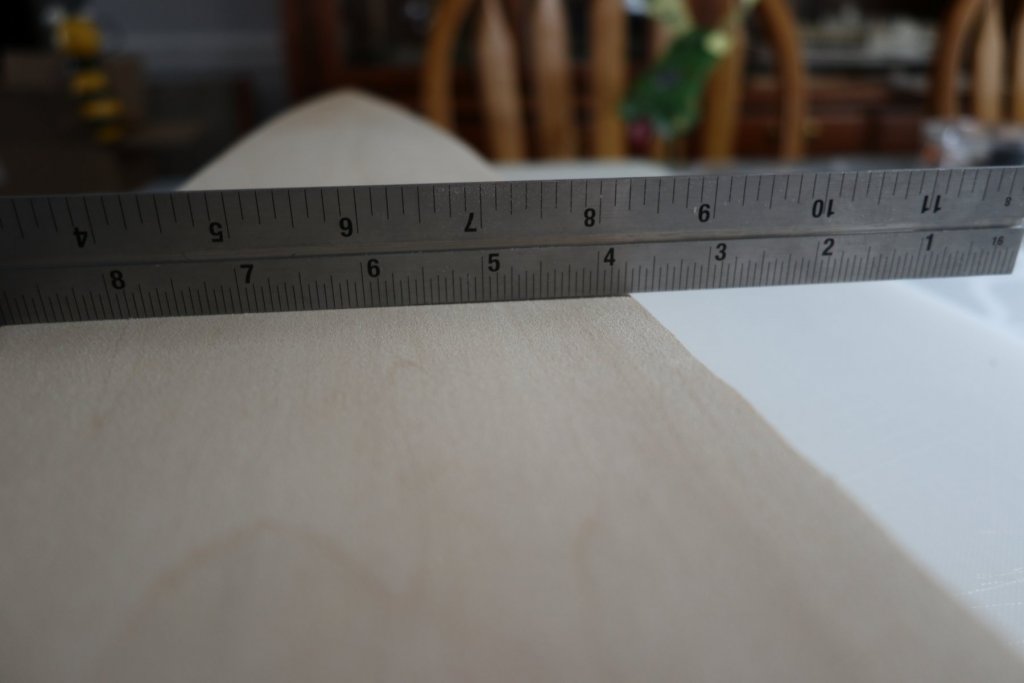
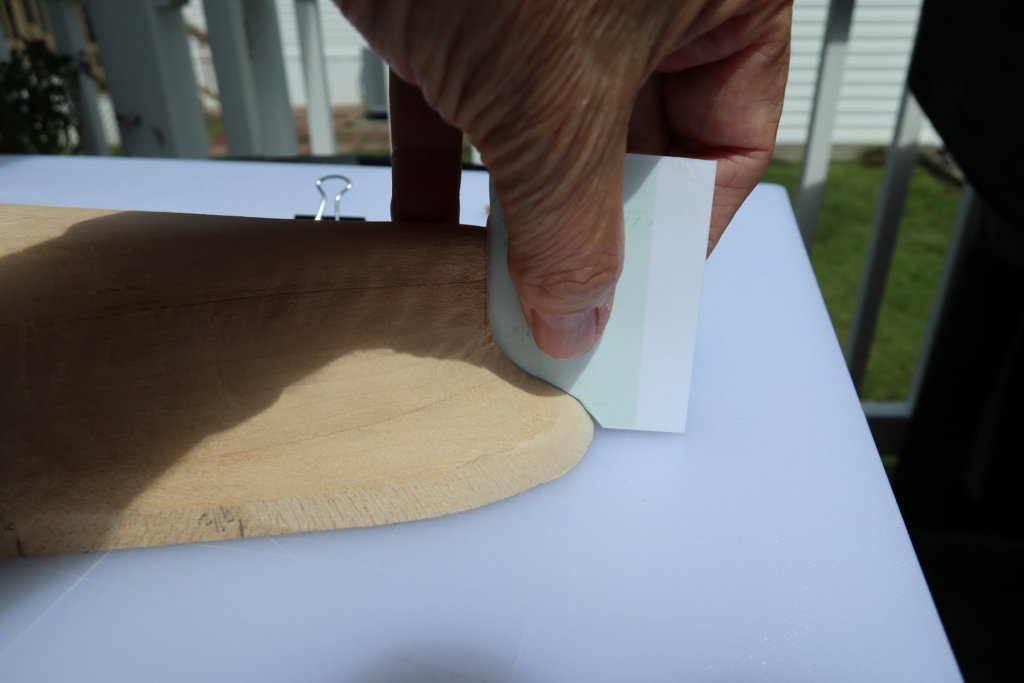
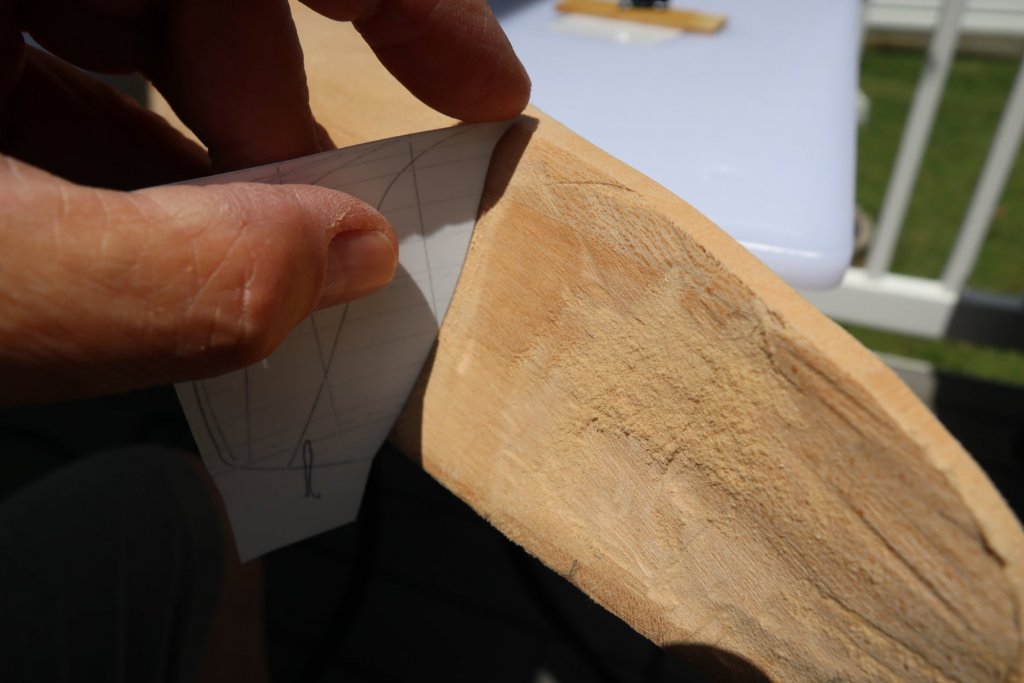
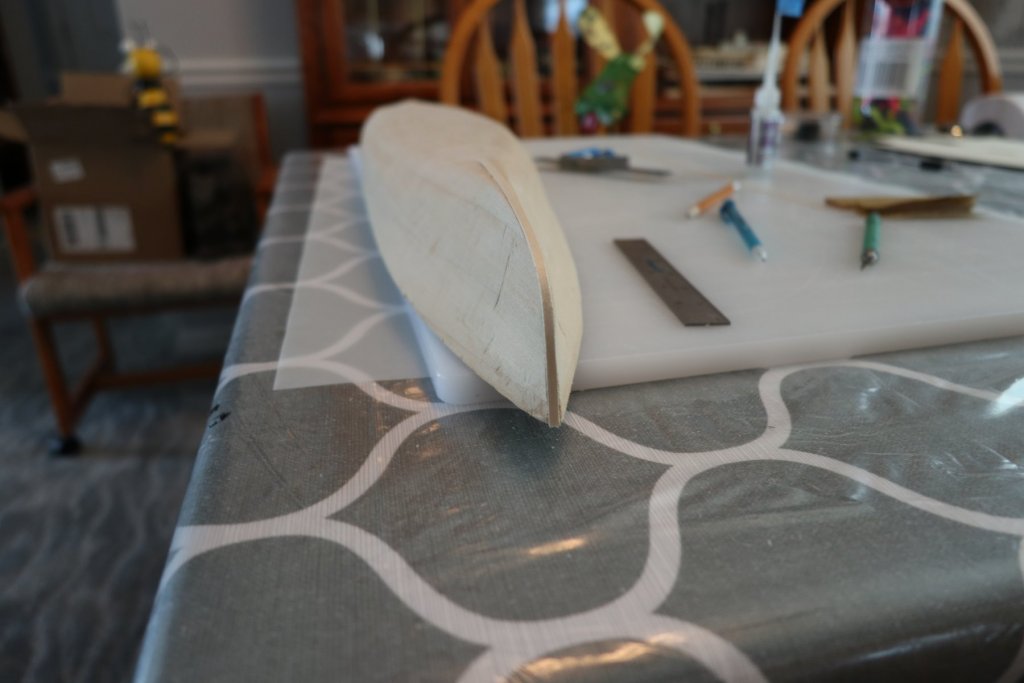
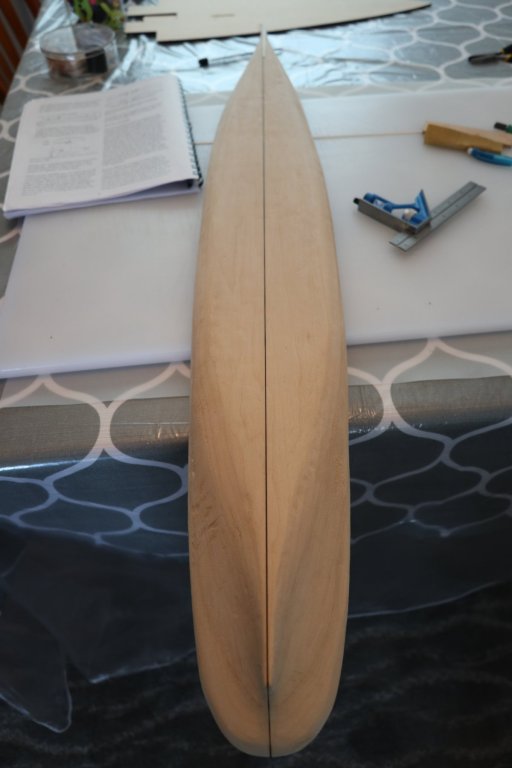
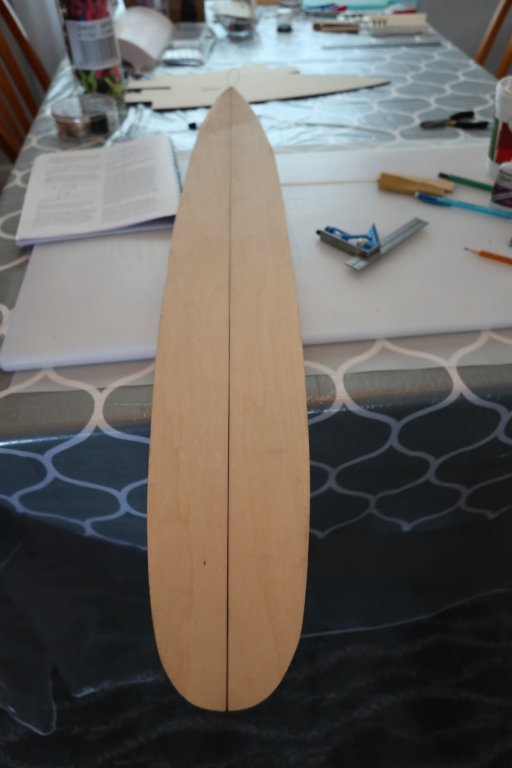
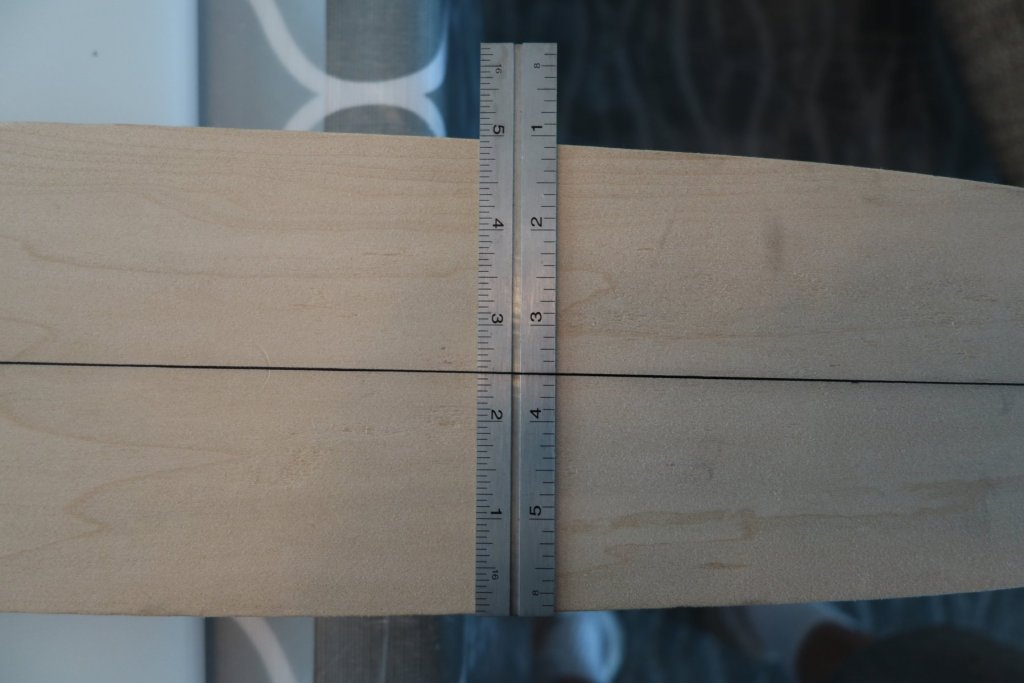
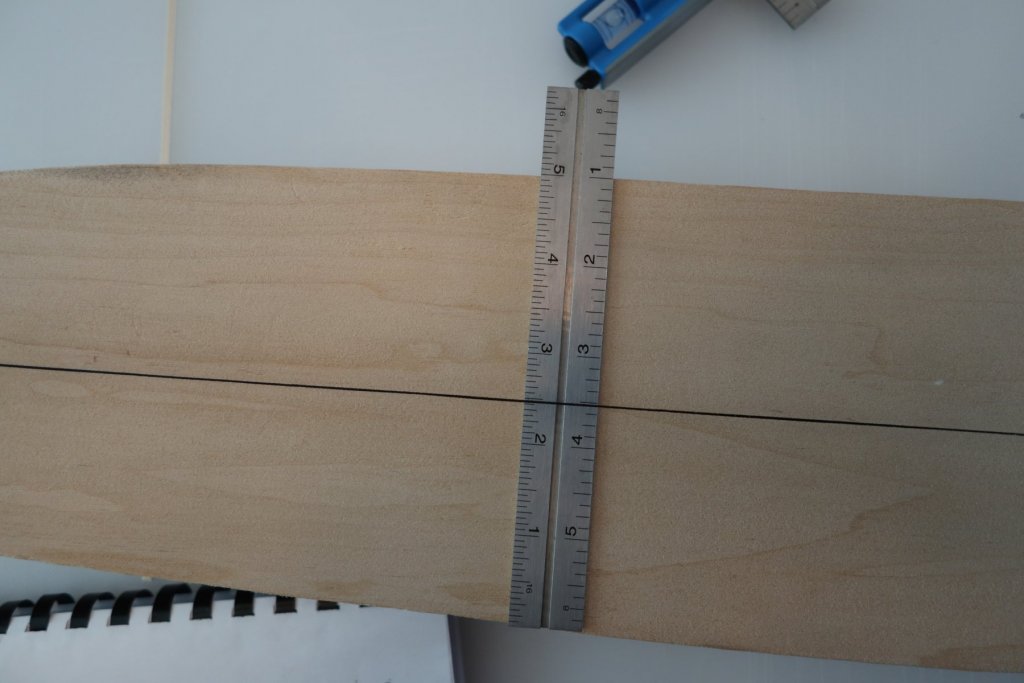
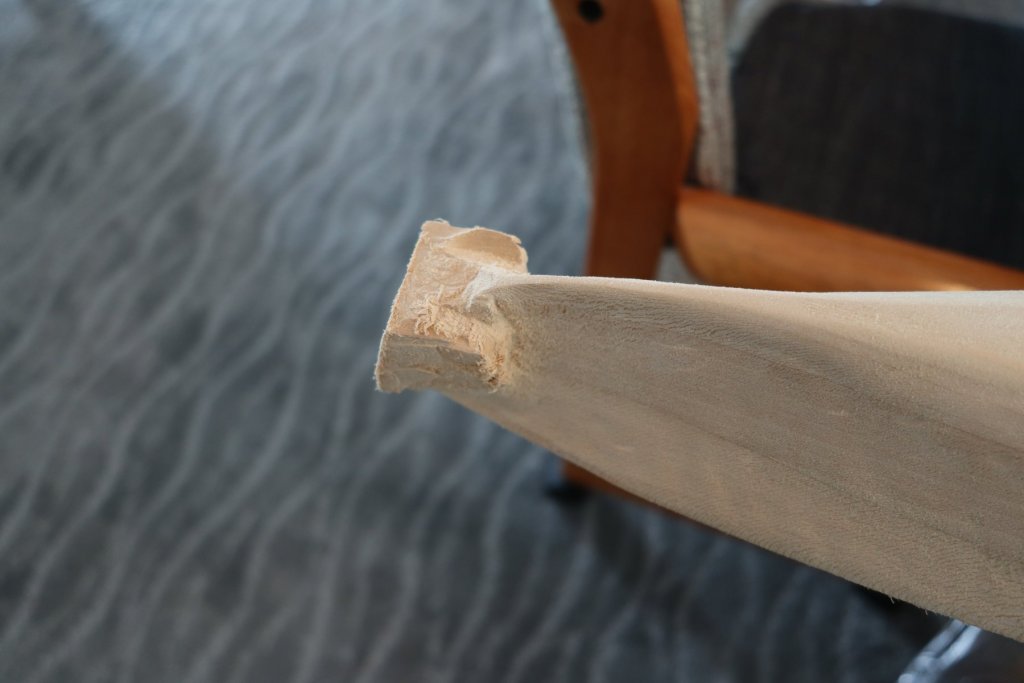
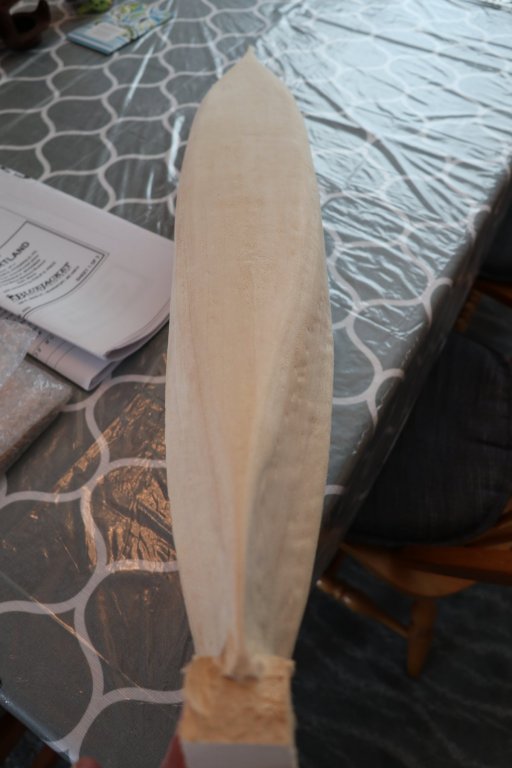
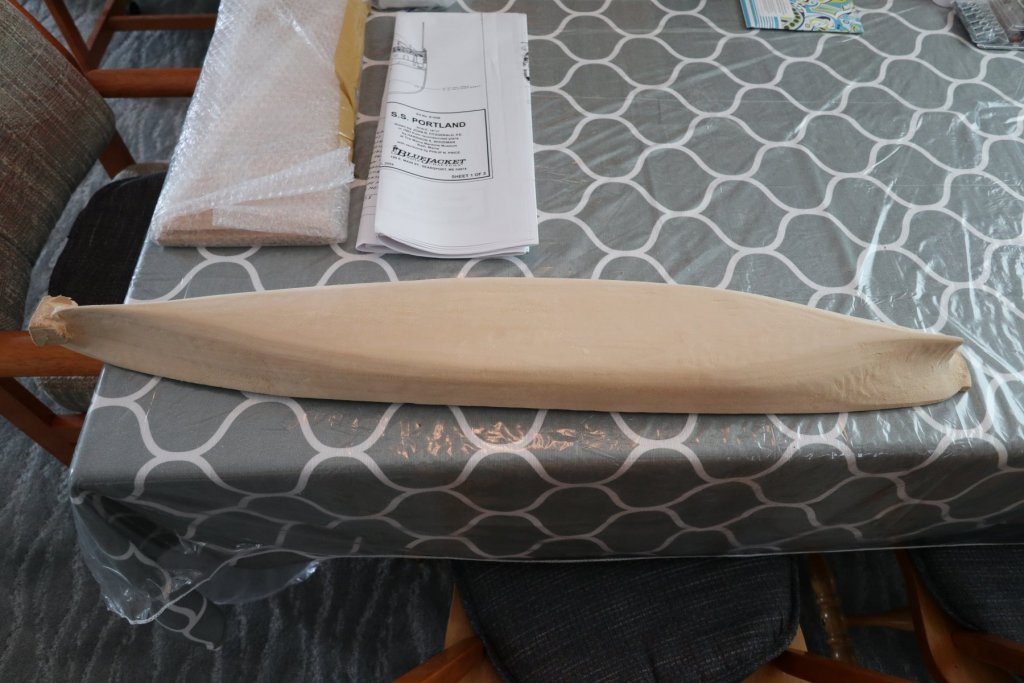
The hull I own a couple of Dremel's, and used that with a .5" drum sanding bit for most of the detailed work, but for the high speed removal of a lot of material, I used my Proxxon belt sander. I've used it only a few times, but it has been indispensable for certain tasks. It can be mounted in a vise or used as a hand tool. There is material that needs to be removed at each end of the hull. If I have this right, the excess wood is where the reproducing machine is attached to the blank. I scanned the stem/stern profiles and a few of the station profiles from the plans and used Publisher to correct any sizing issues. I printed them out on photo paper, which when cut is stiff enough to use to check the profiles. Was my work perfect? Not in a million years, but the stem and stern look close, and the overall profile is acceptable. Even if I am off a bit, I do not have the "eye" to do this freestyle. I needed the templates to get it acceptably close. jbelwood mentioned that he noticed an issue with camber on his hull. I never even considered that as a potential problem until I read his post. So I looked..... Yeah, that could be an issue. Easily resolved with a sander. Thanks jbelwood!!!! The instructions say to draw a line down the center of the hull, all the way around. Then draw another line 1/16th of an inch on both sides of the center line. The stem/stern needs to maintain a flat 1/8th inch for the keel. That was not going to work out for me. I always colored outside of the lines, hehe... I got the hull close to the 1/8th inch stern and stem. I spot glued a strip of 1/8th inch wood to the stem and stern. If I had done the pencil line thing, I would have sanded the pencil marks off the hull, destroyed the profiles, and ended up with a mess. It may be less than perfect, but I have to think ahead to prevent me from screwing things up. To get a "close" center line, I eyeballed putting a small nail into the center of the bow. I tied a string on it, and ran it all the way around the hull. I felt really good that the string was centered on the hull. I felt even better when I got the ruler out. I slipped it under the string and moved it so the ruler showed the width of the hull as something I could relate to, say 5" or 4". Then I looked at where the string crossed the ruler. To be fair, there was one spot where the hull was wider on one side than the other, but it was so small, I did not worry about it. I marked the center at a few points, then used a ruler to draw the center line on the hull. I'm feeling good about it. My hull came with a few imperfections. If I sanded them out, I think the hull would have shrunk a bit. I opted to use light weight HobbyLite filler to fill in the imperfections and sand it down. I'm sure there will be additional filler used when I do the first coat of primer on the hull, but I'm OK with things so far. The sponsons will cover a lot of the hull, so I can go from there.


-
jbelwood, I have some Gallery Glass on it's way so I can copy your idea. I have another product coming also, I'm going to test a few things with it.
-
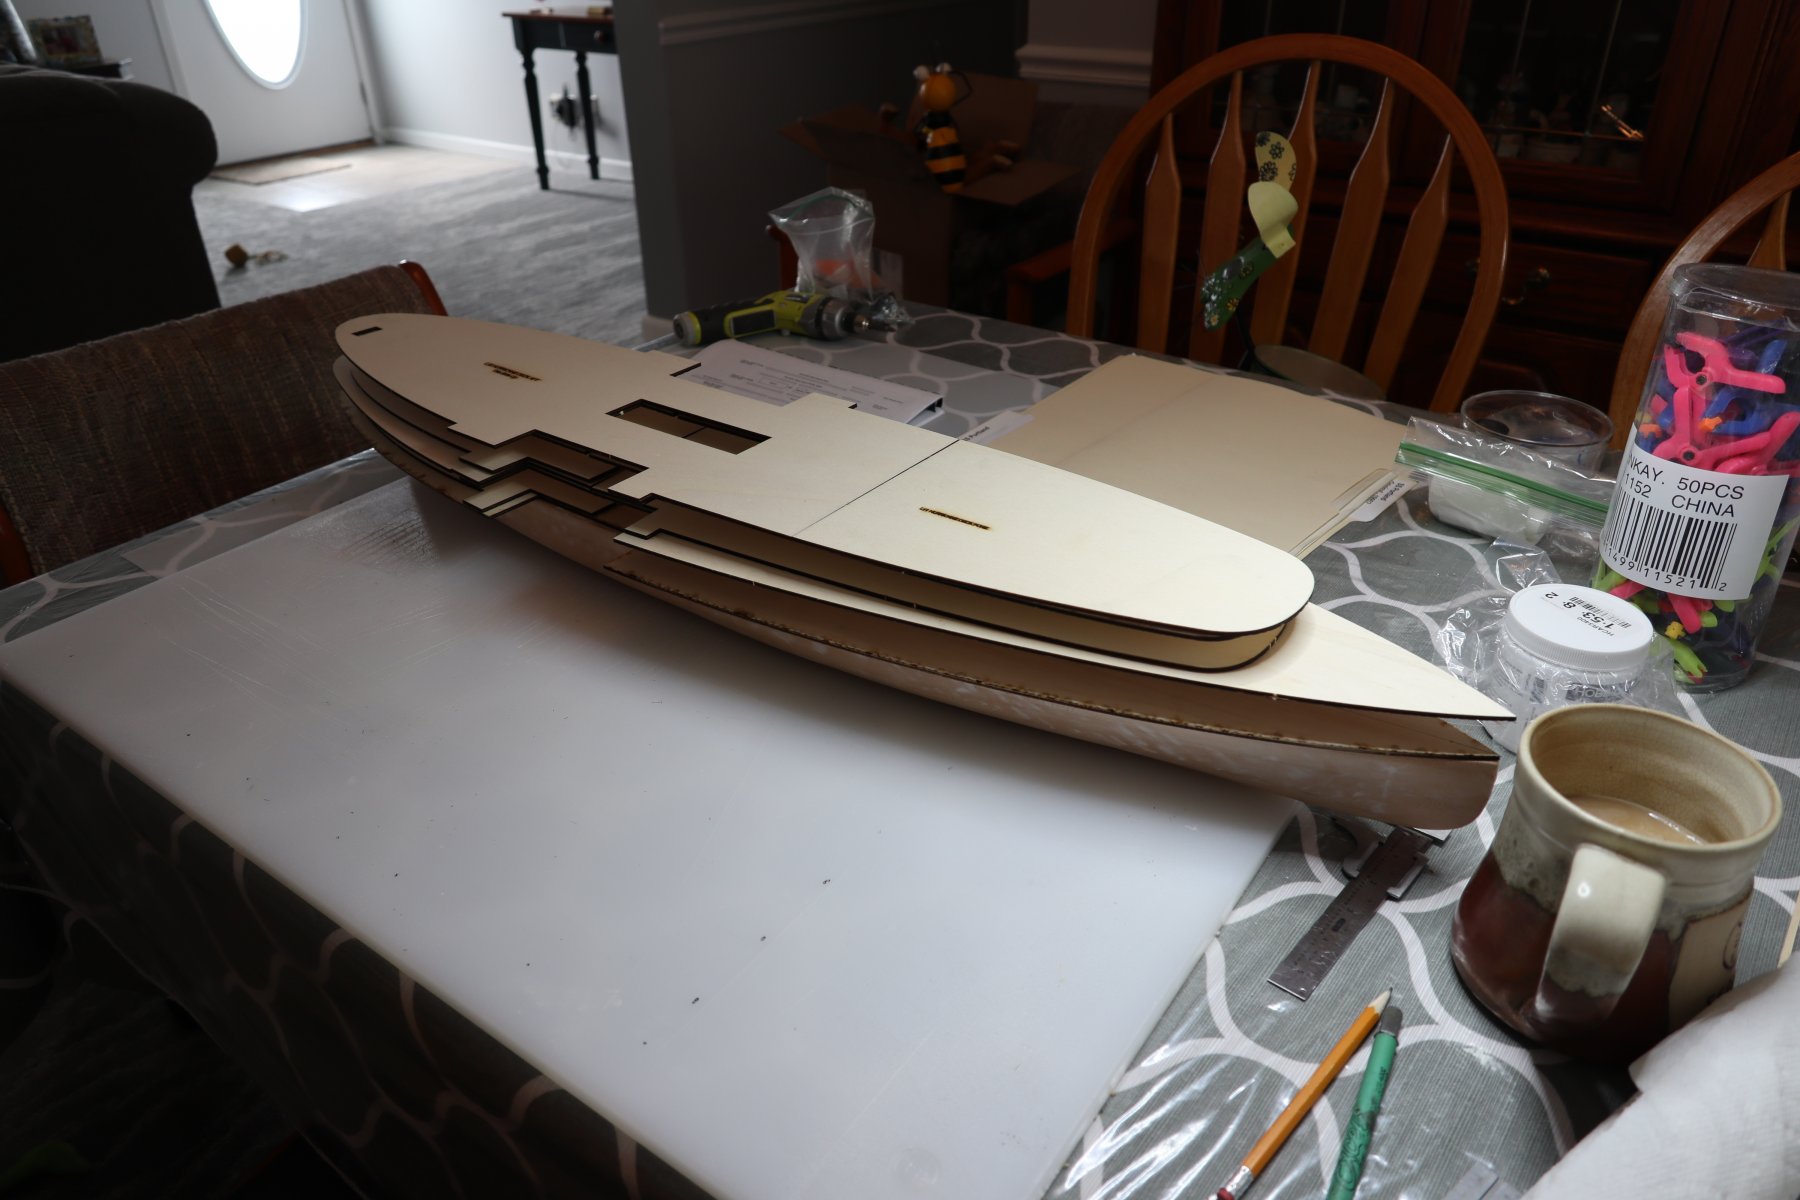
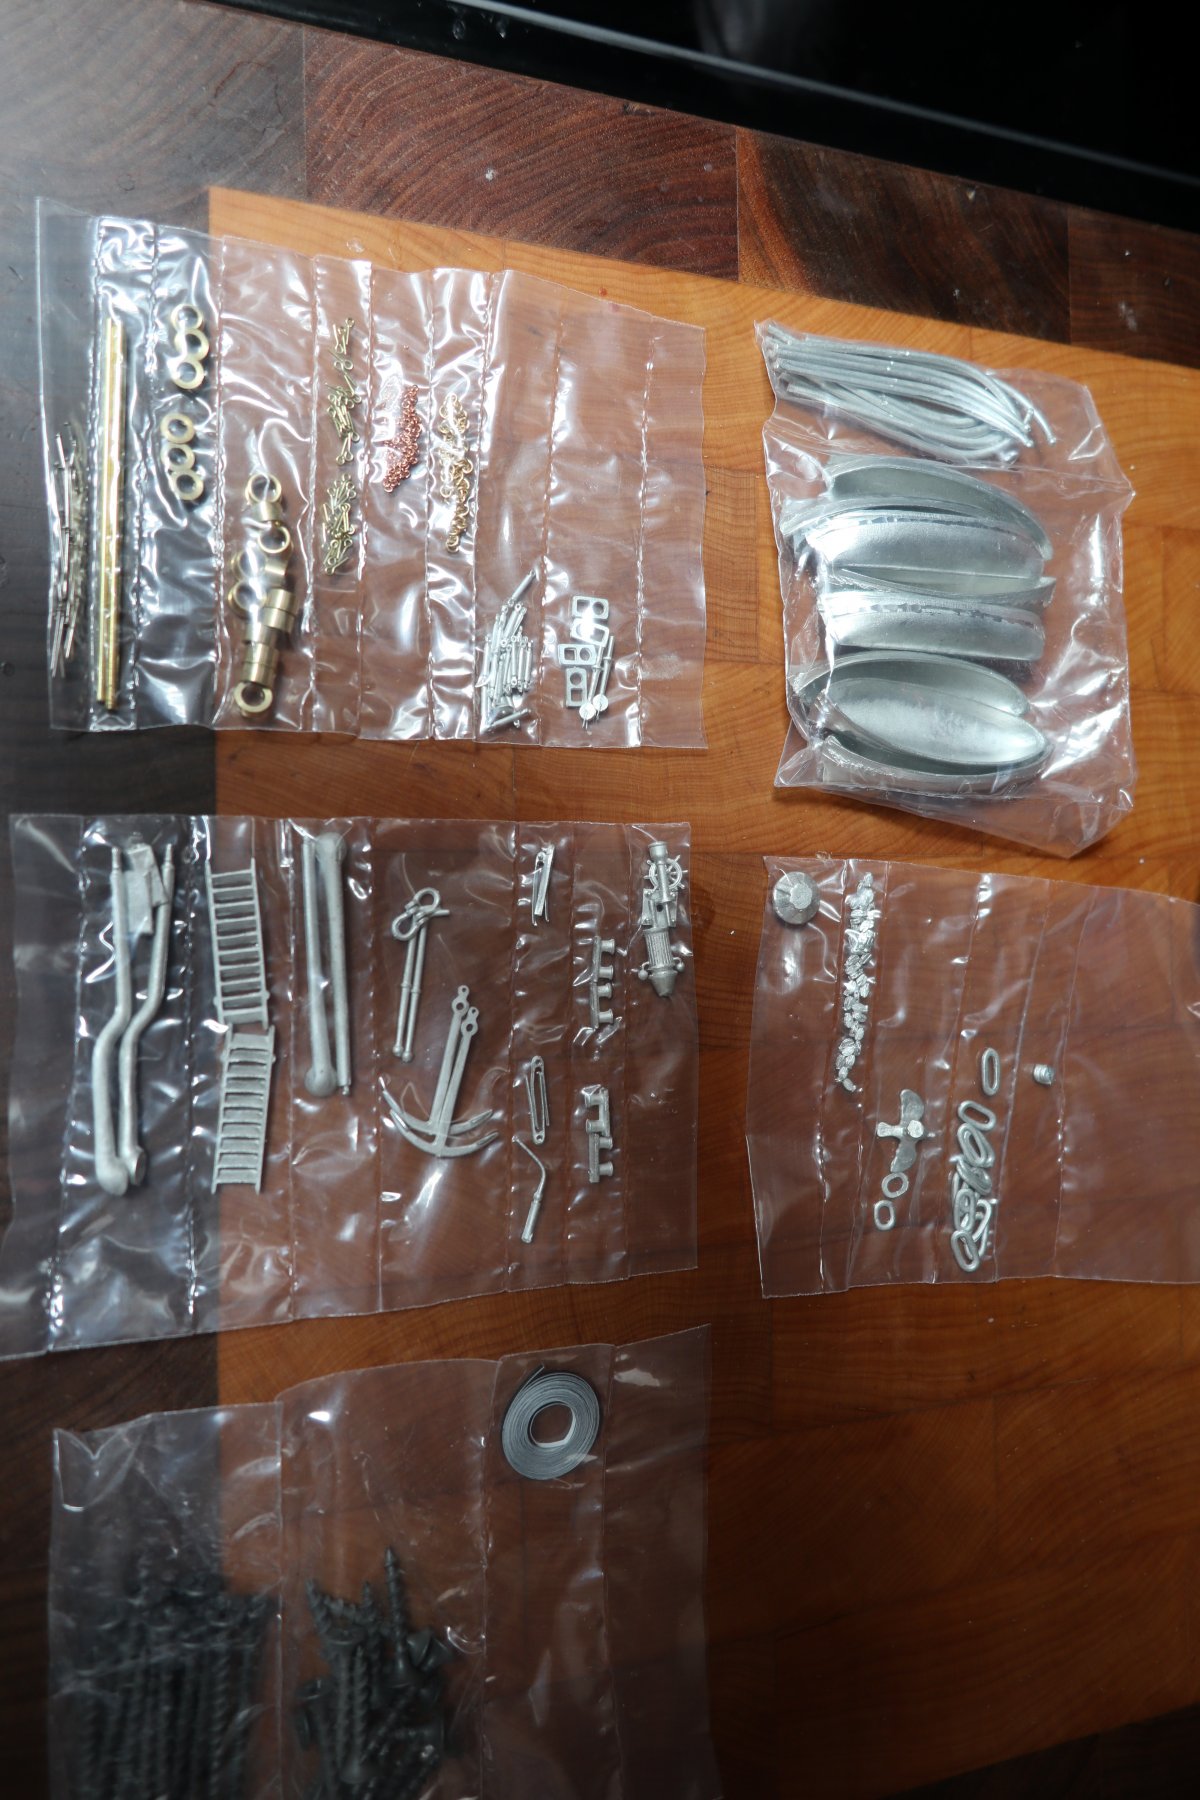
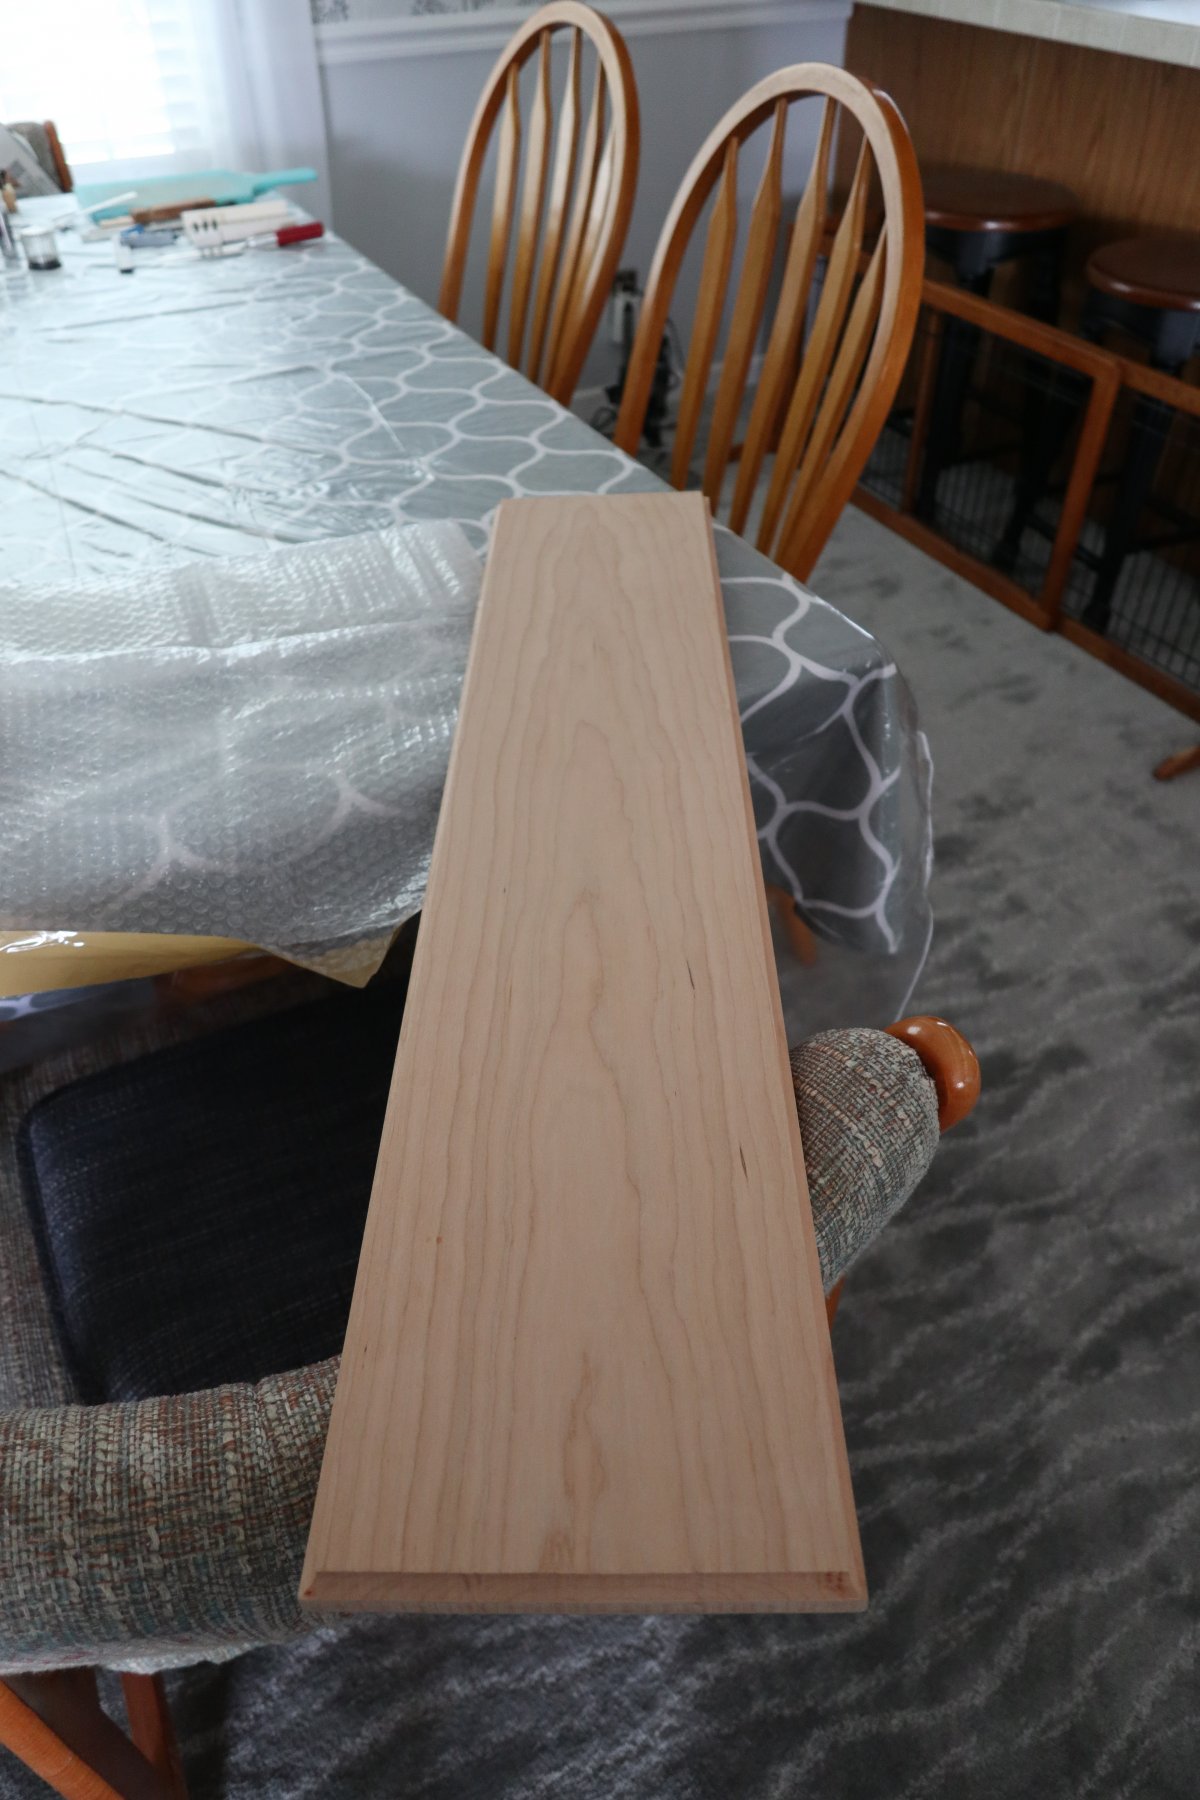
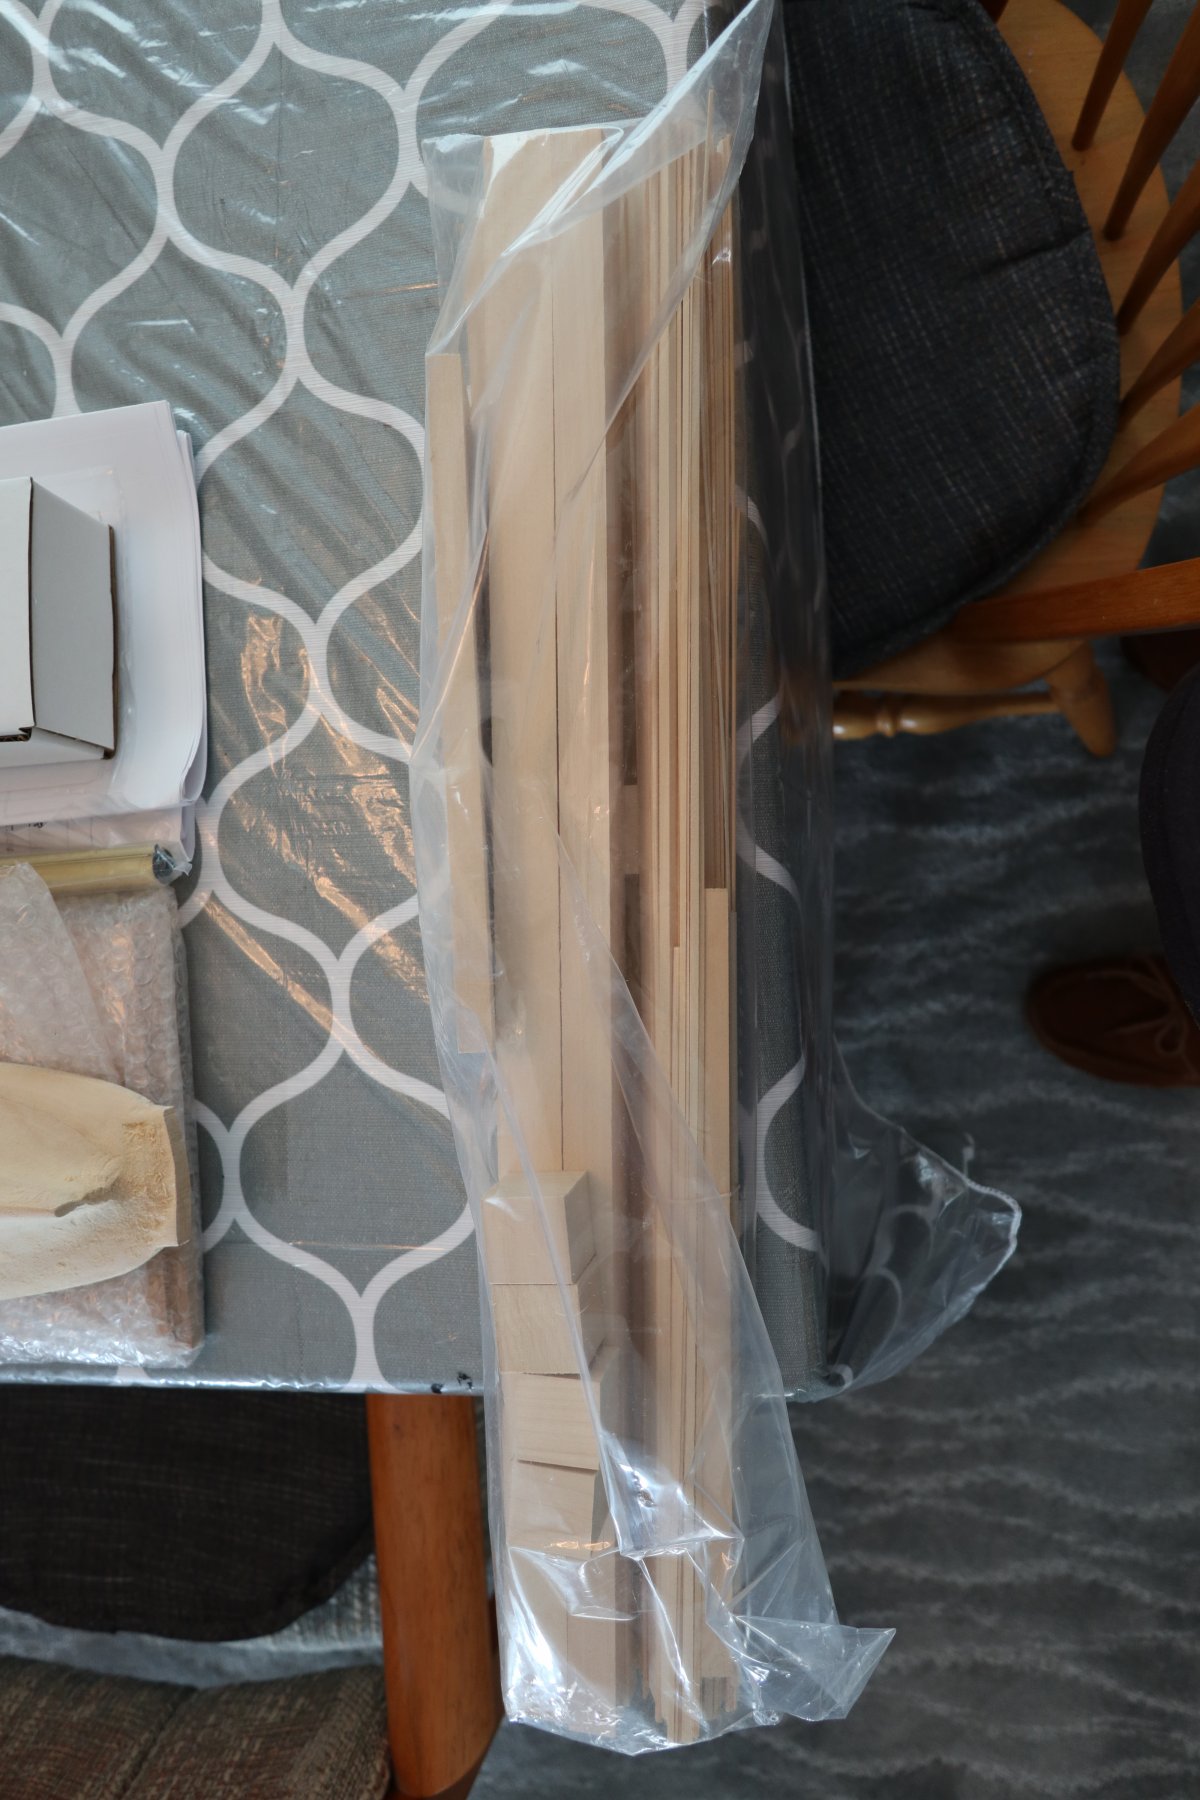
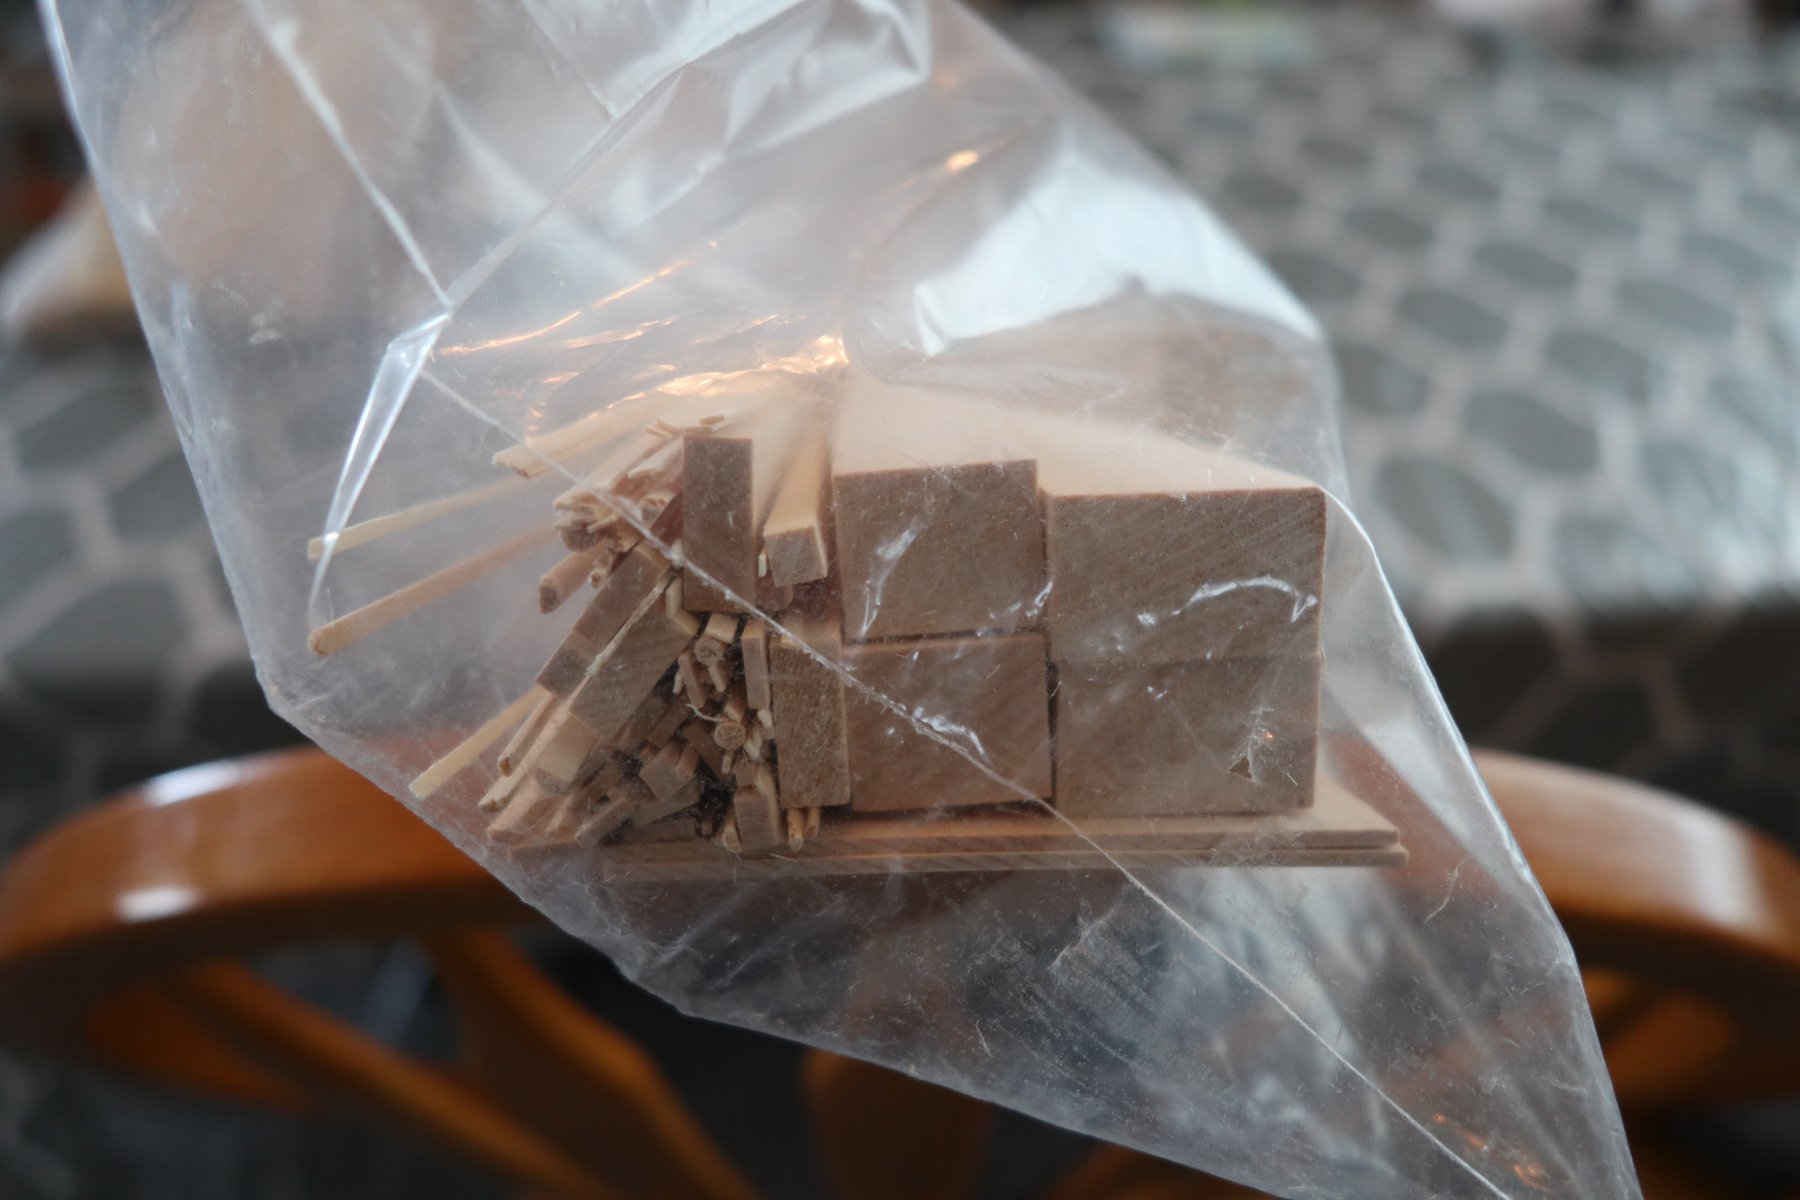
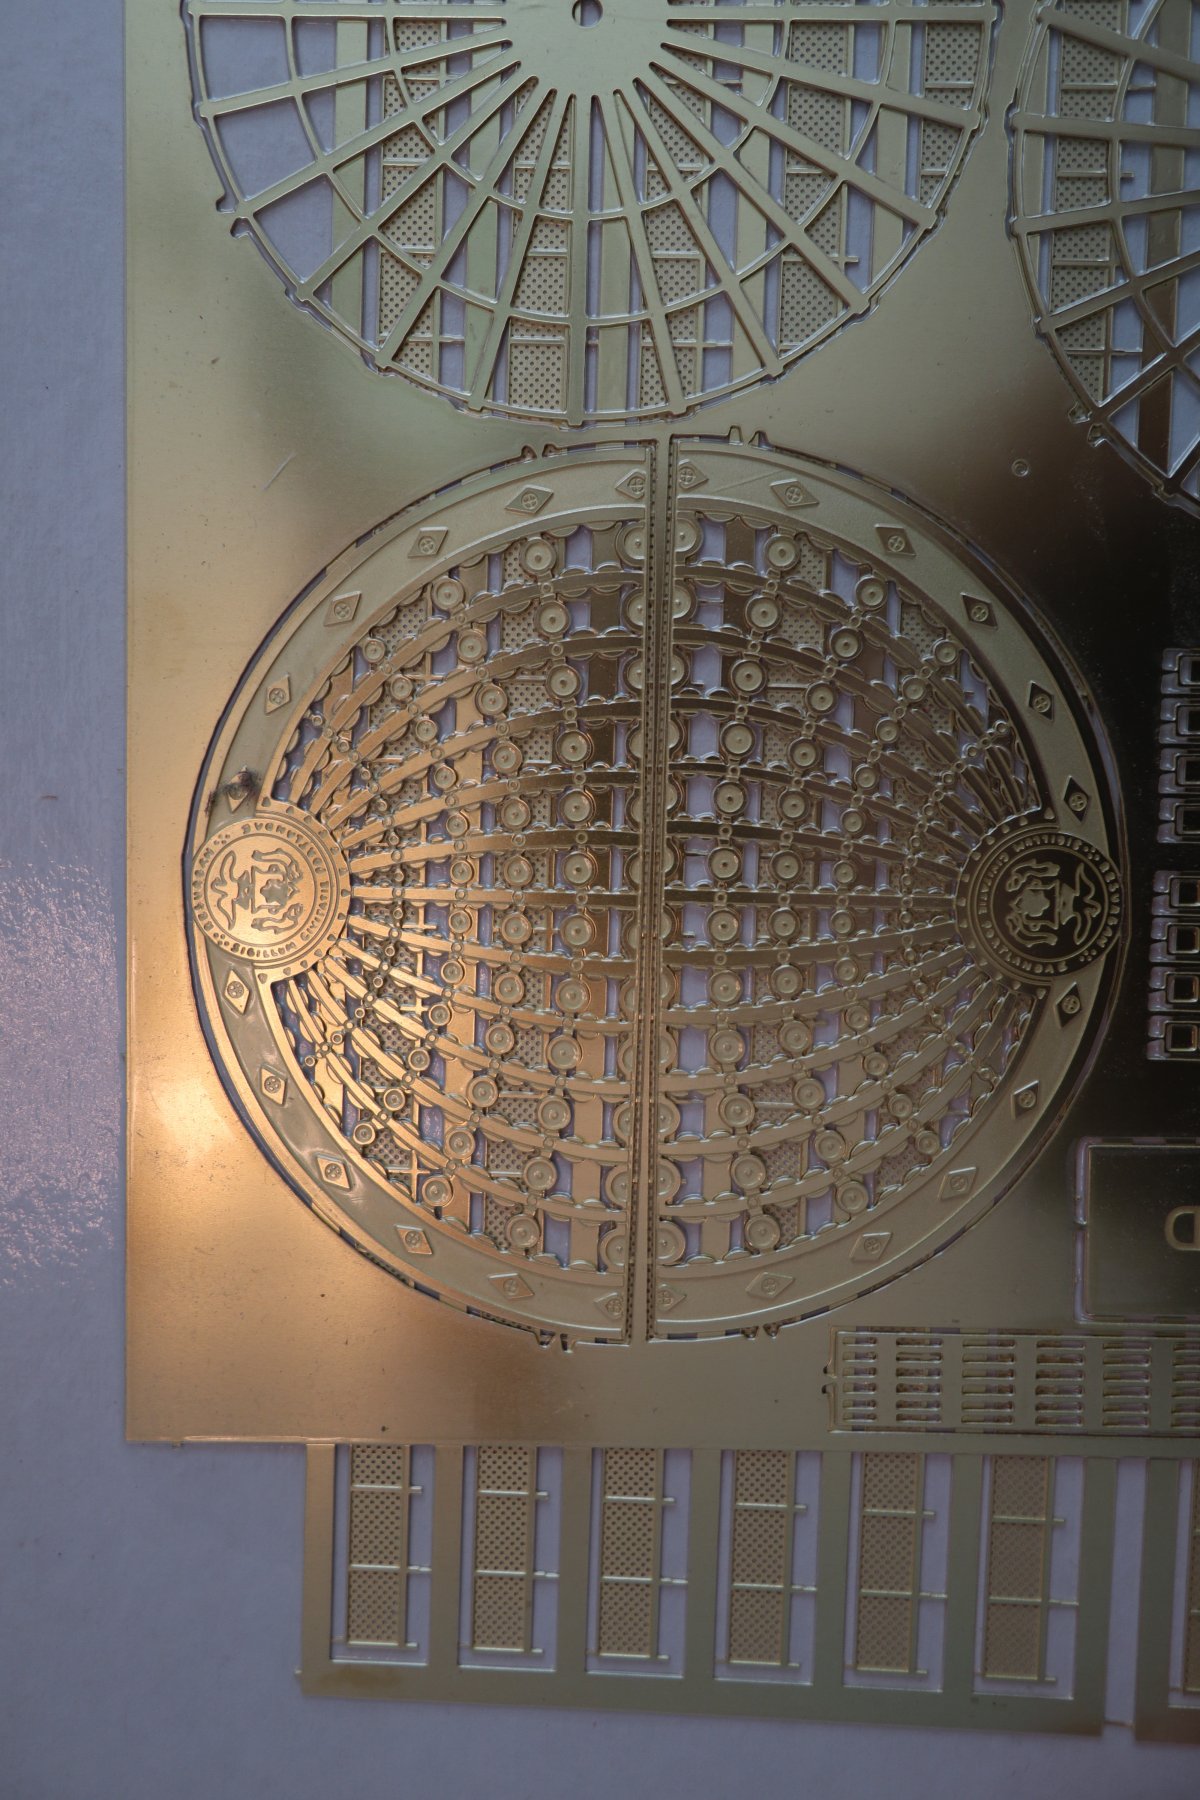
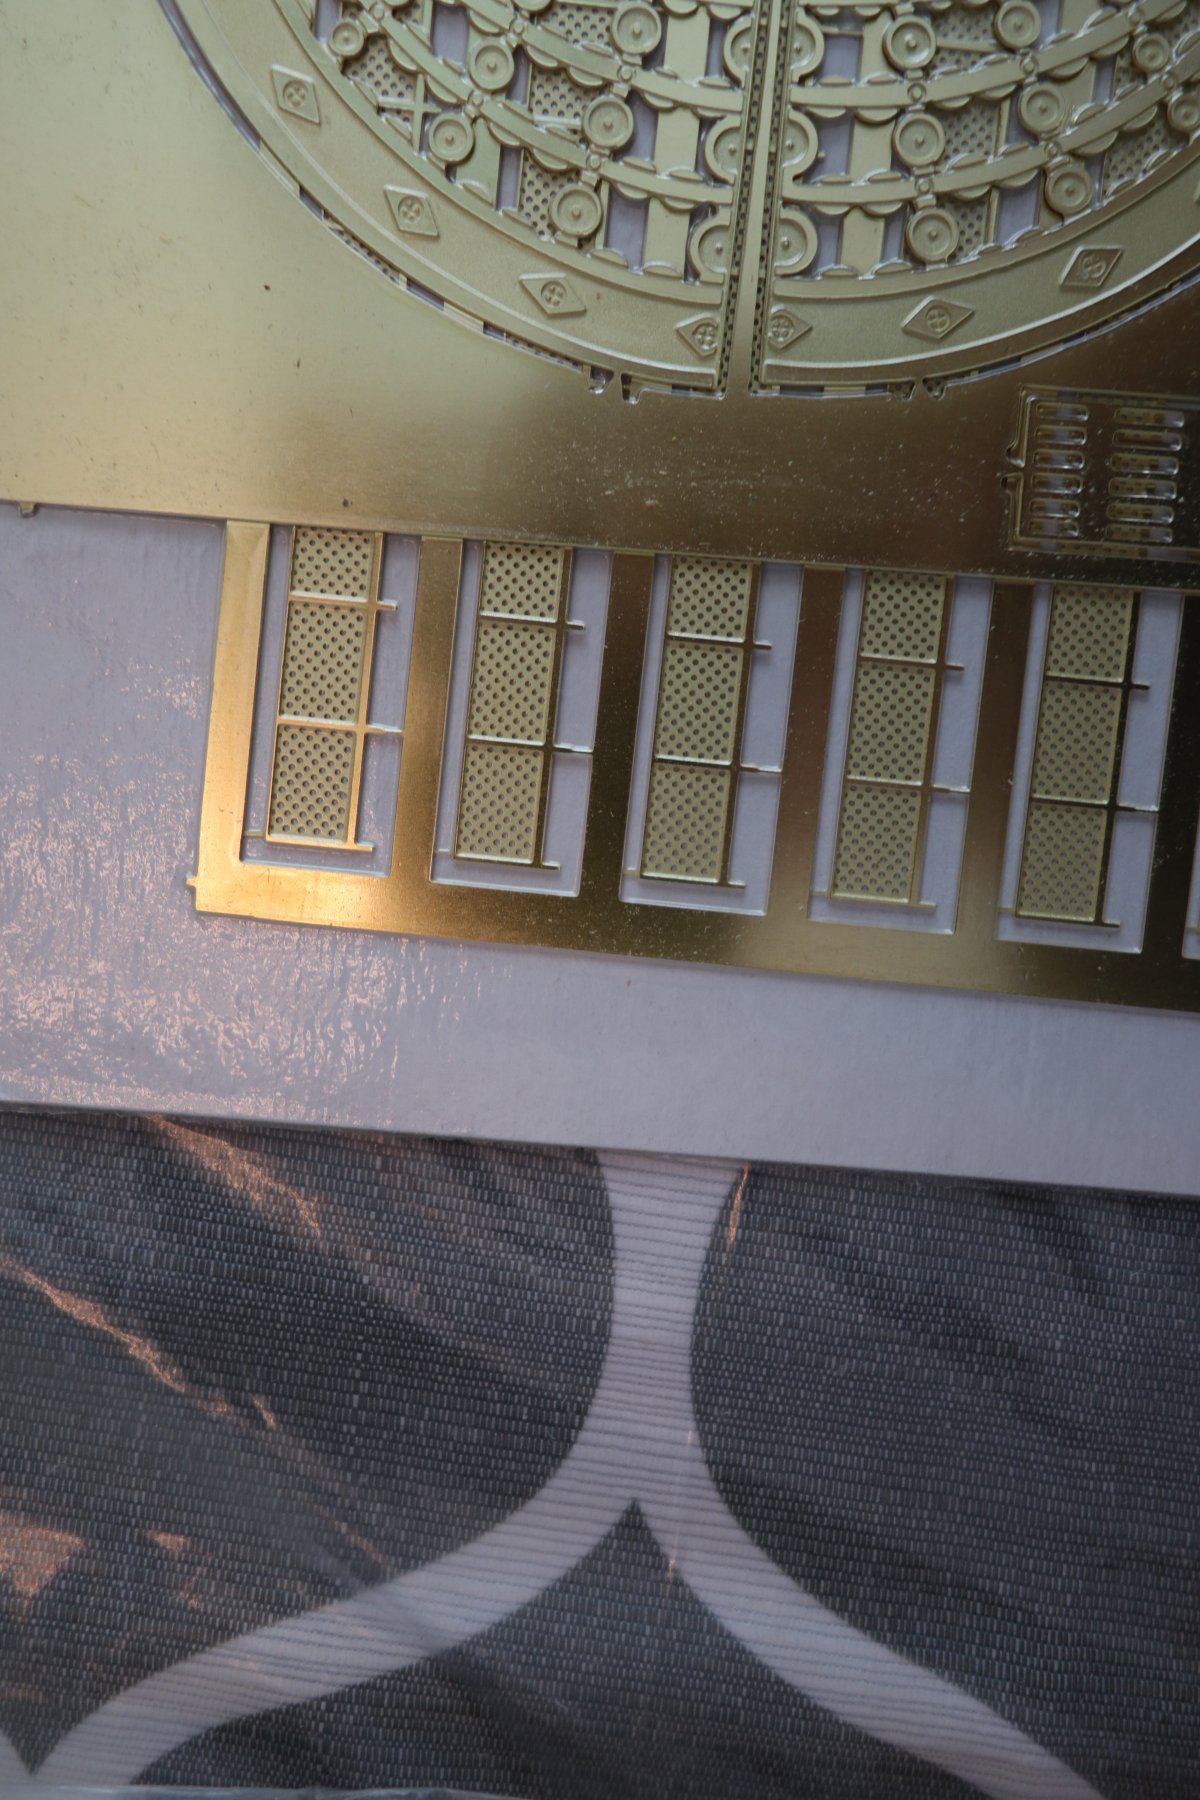
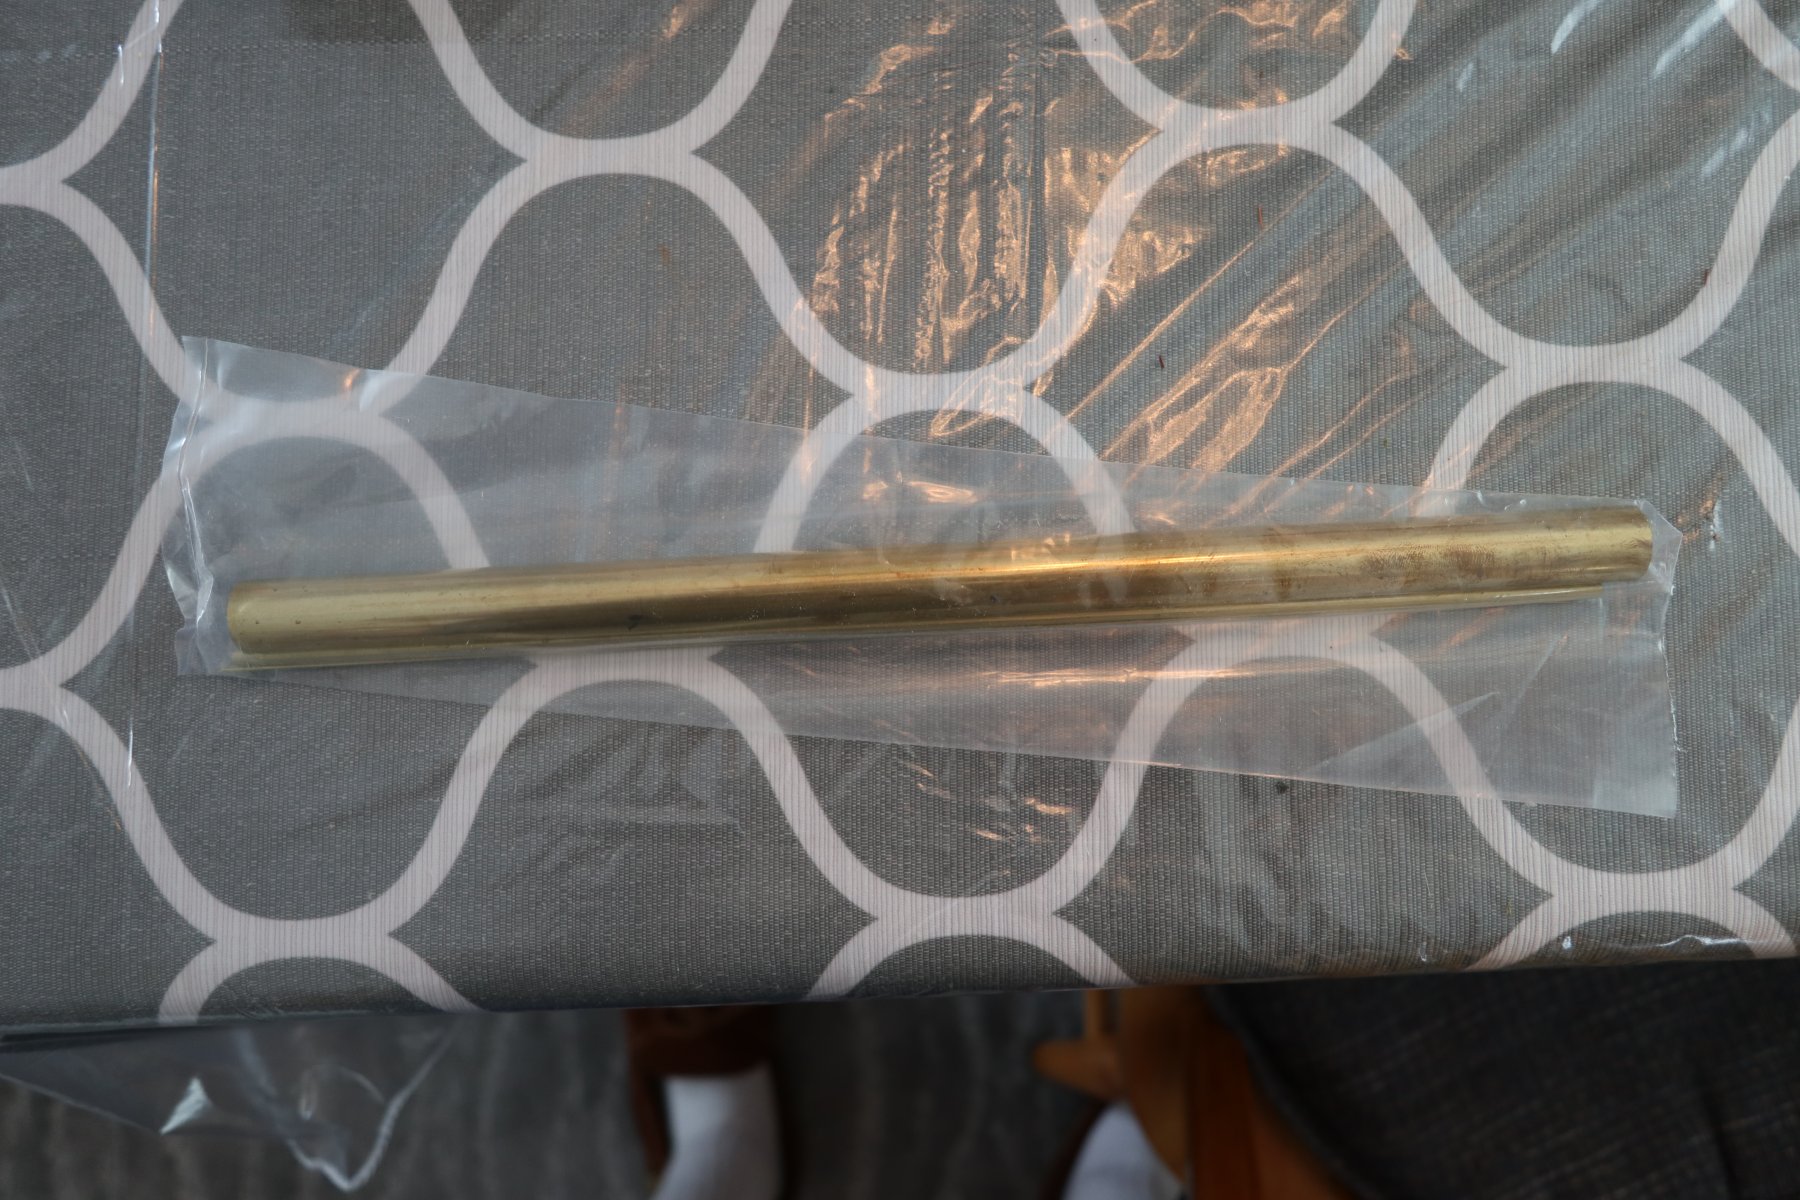
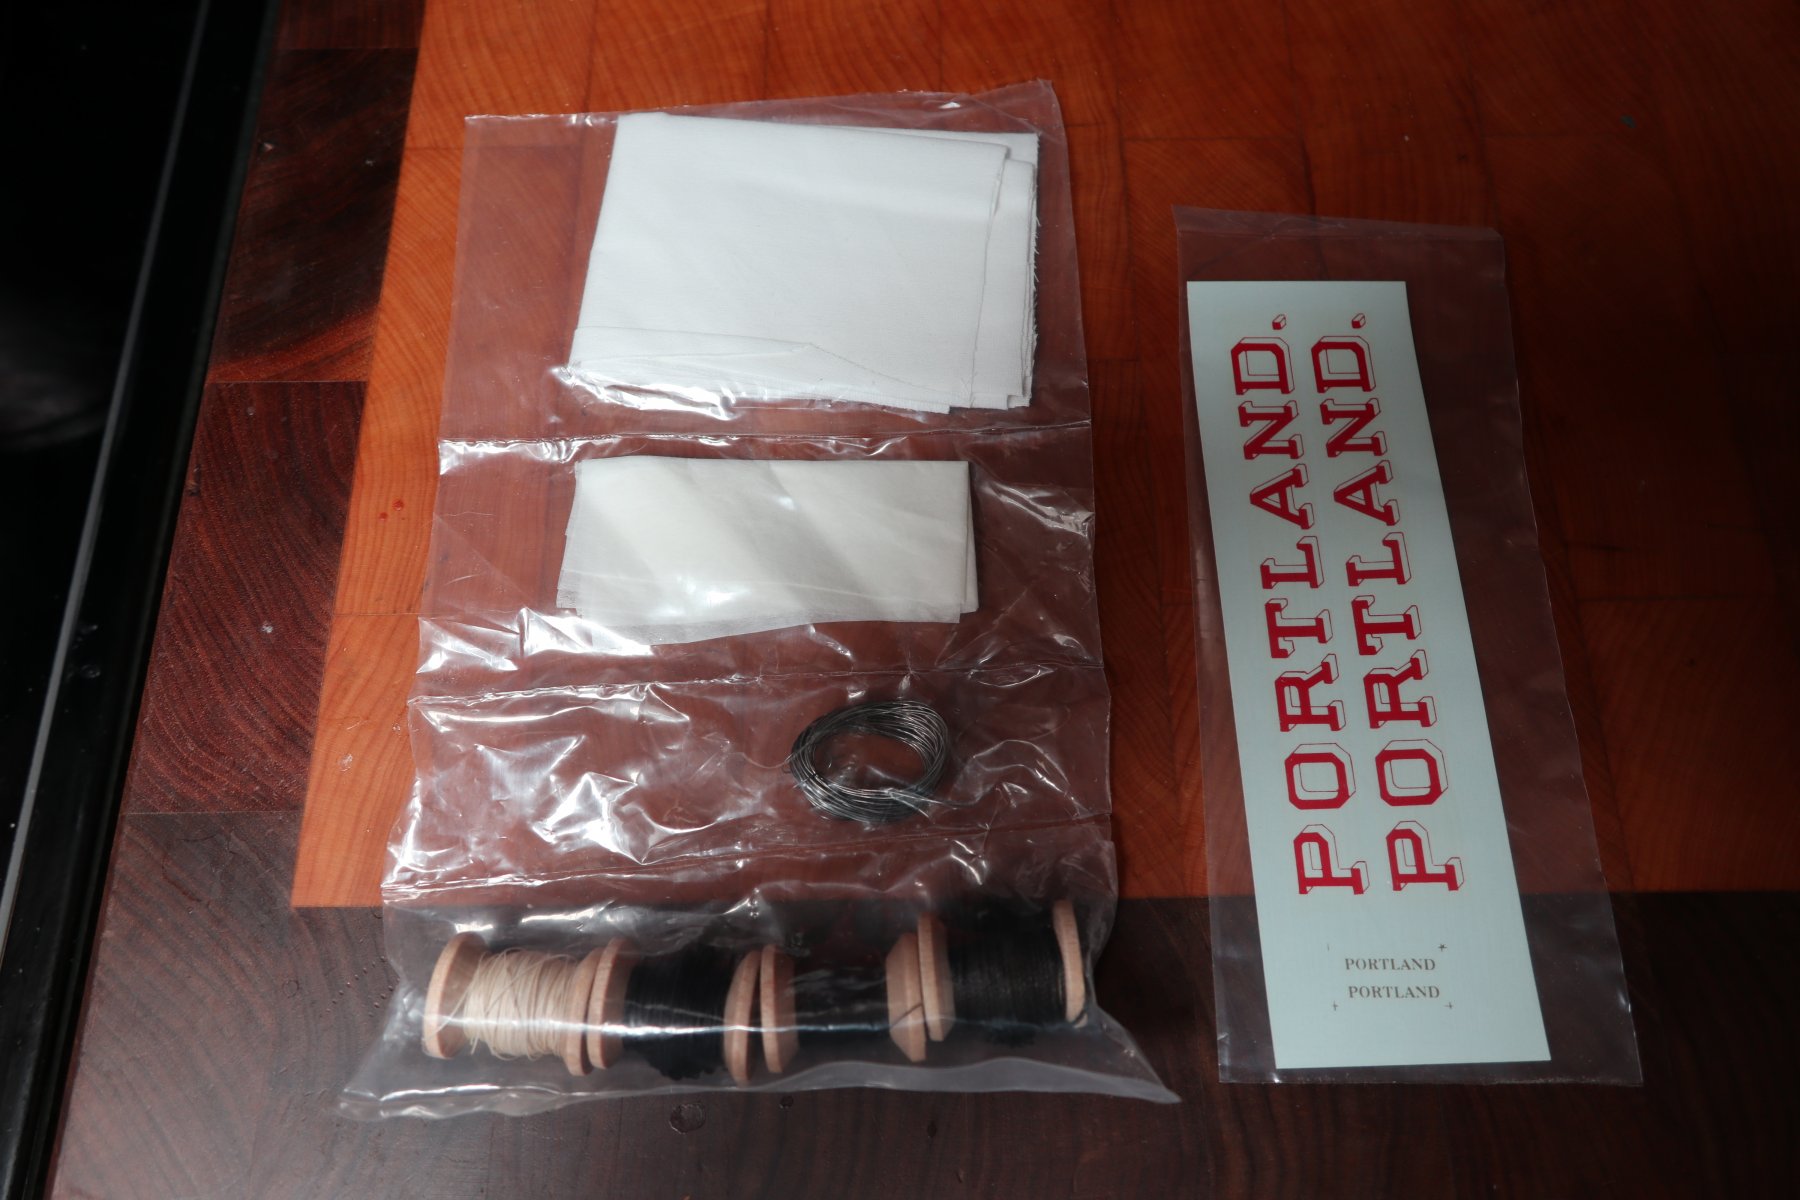
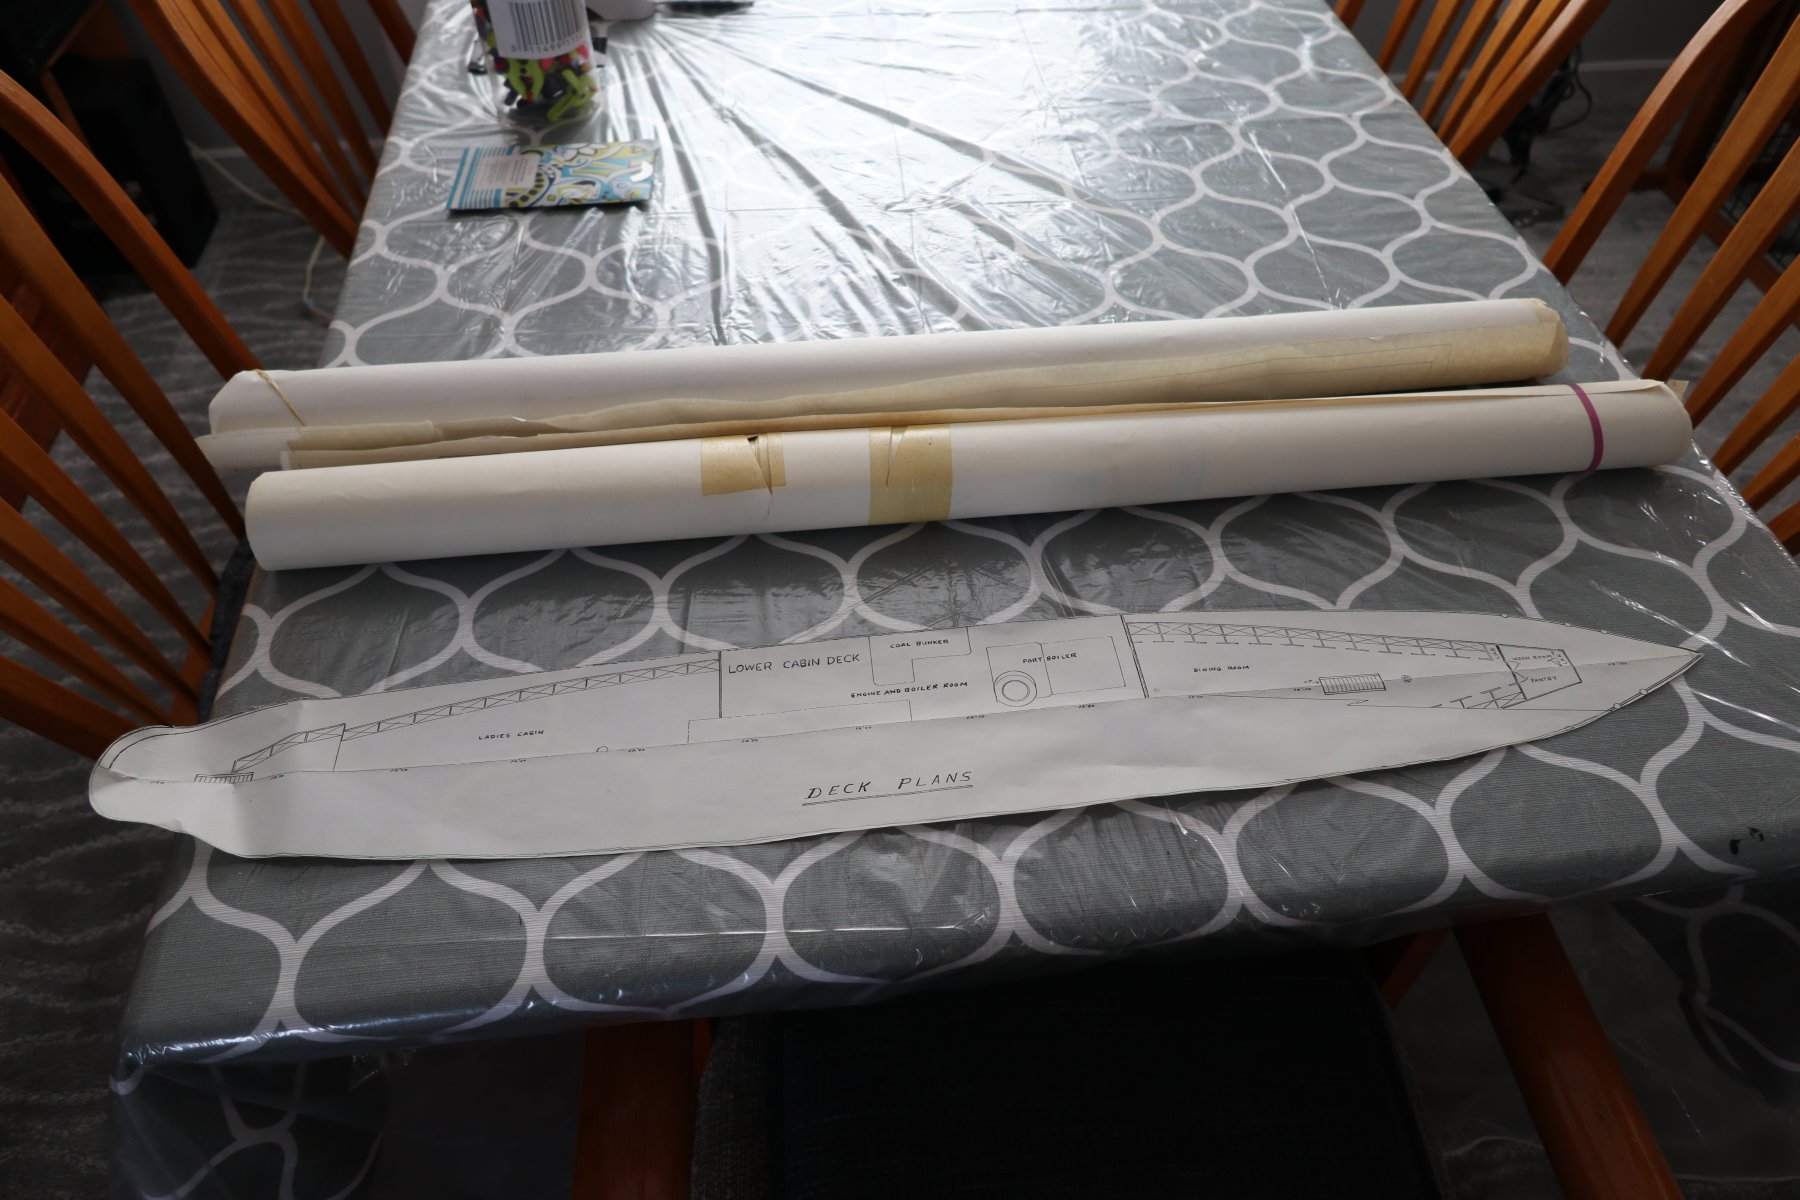
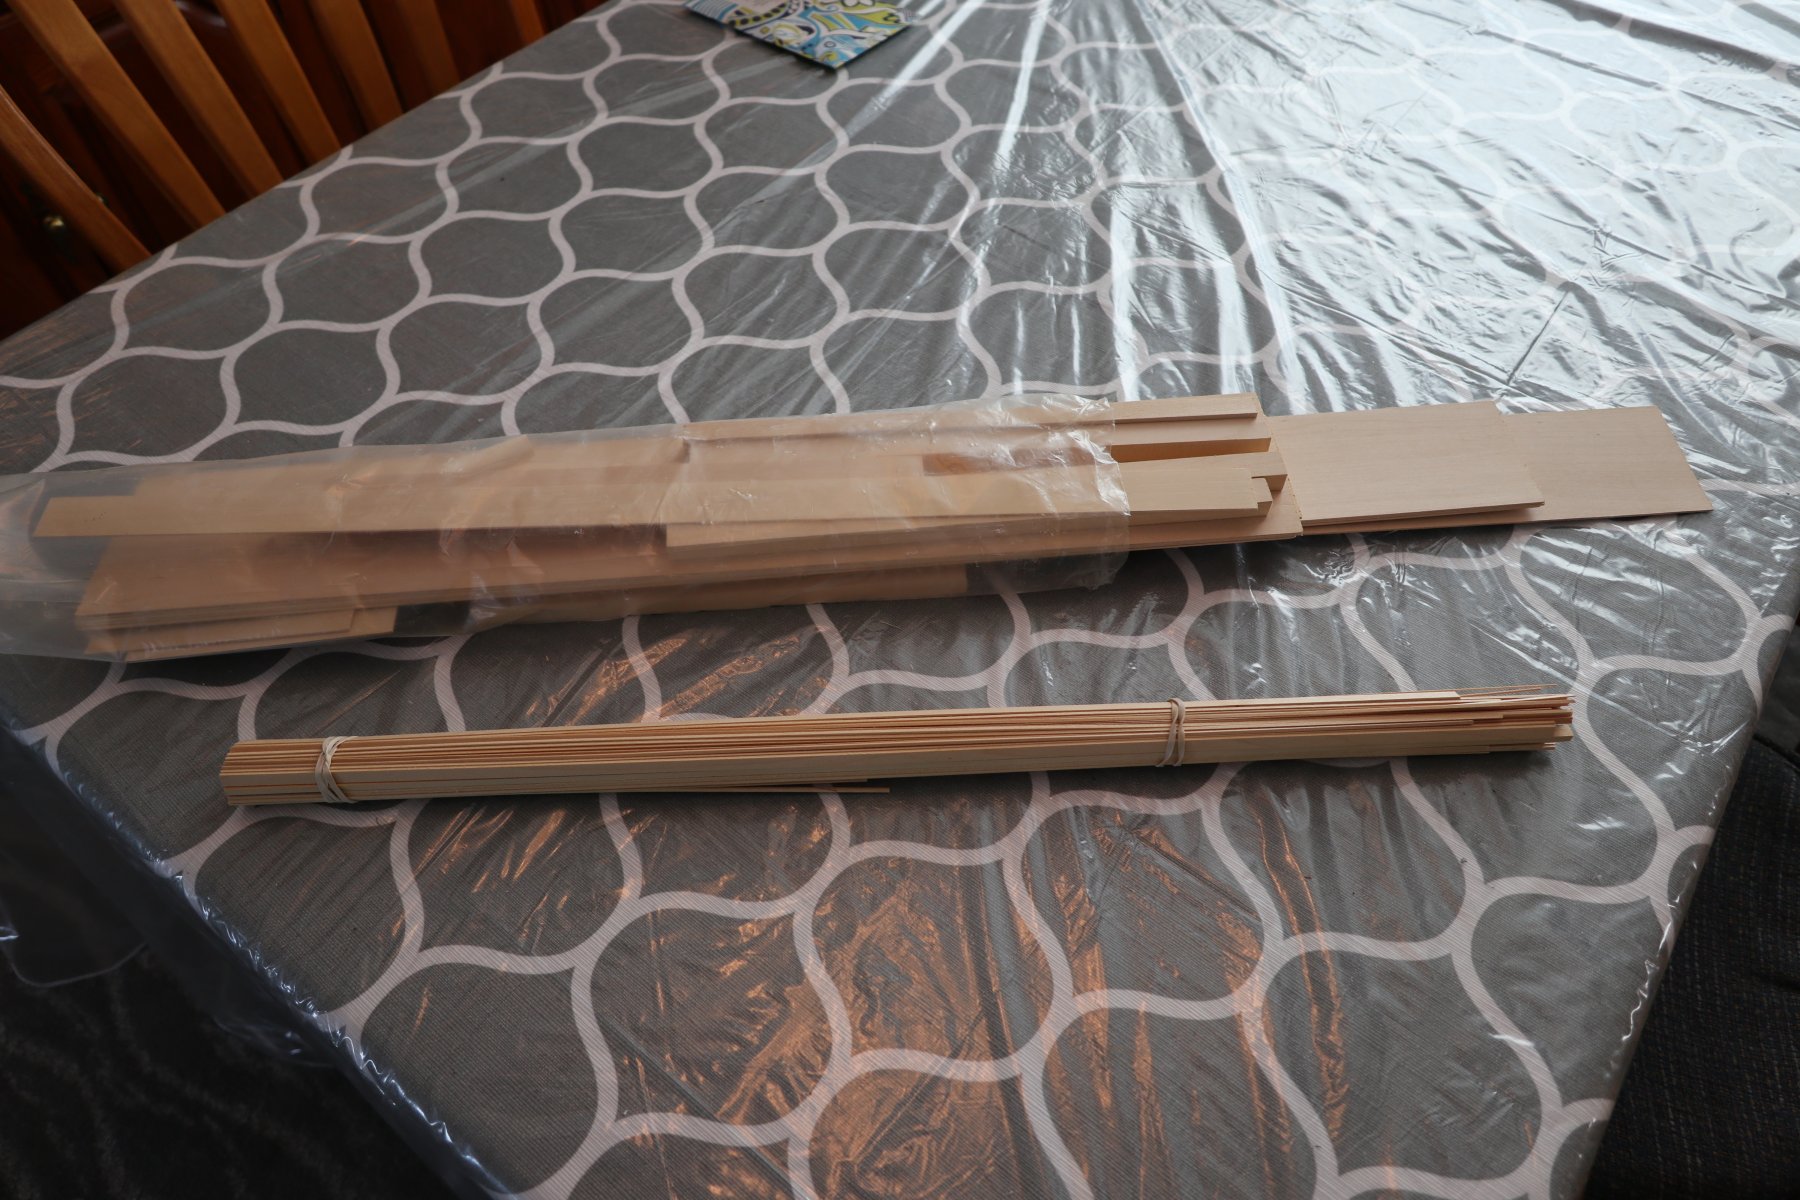
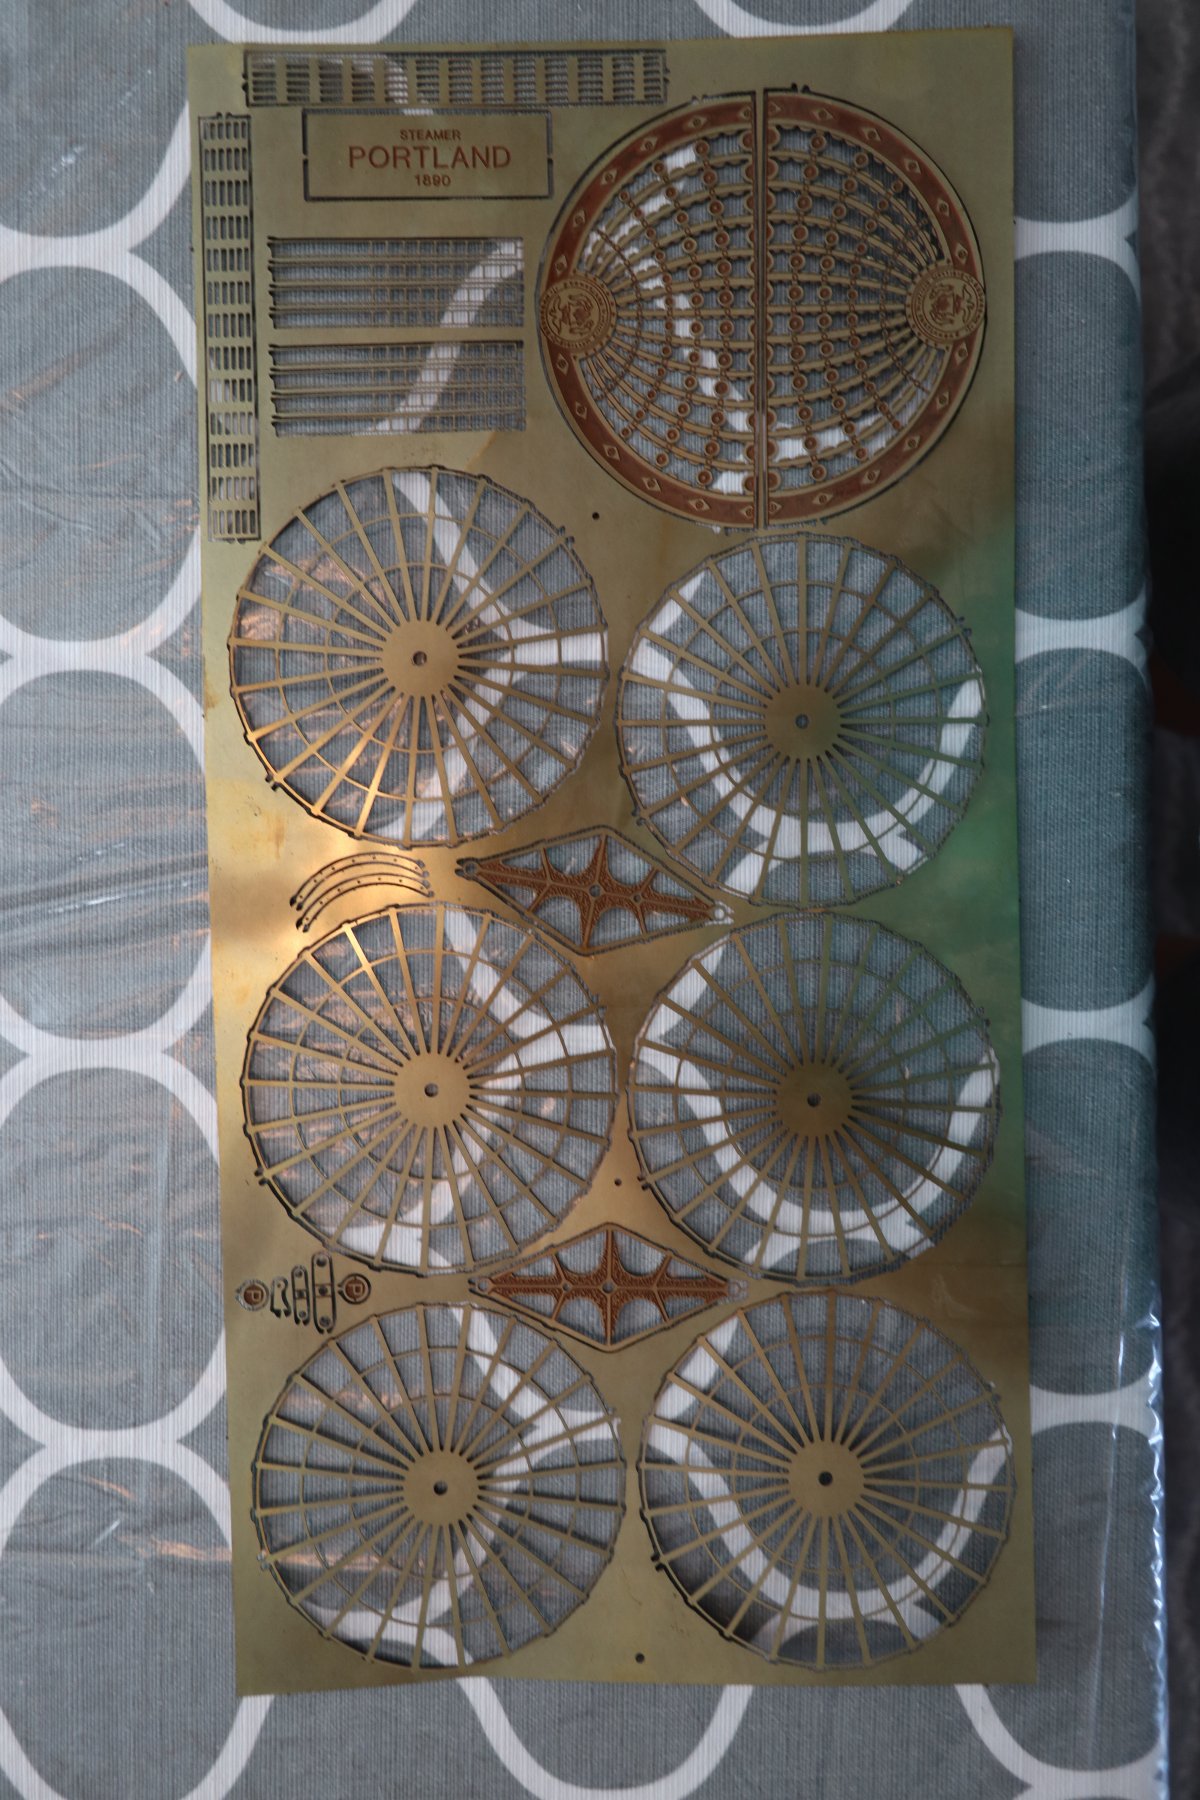
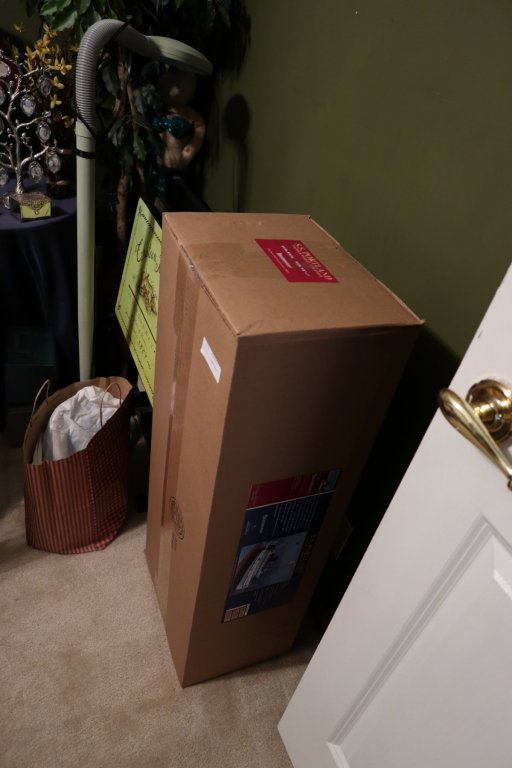
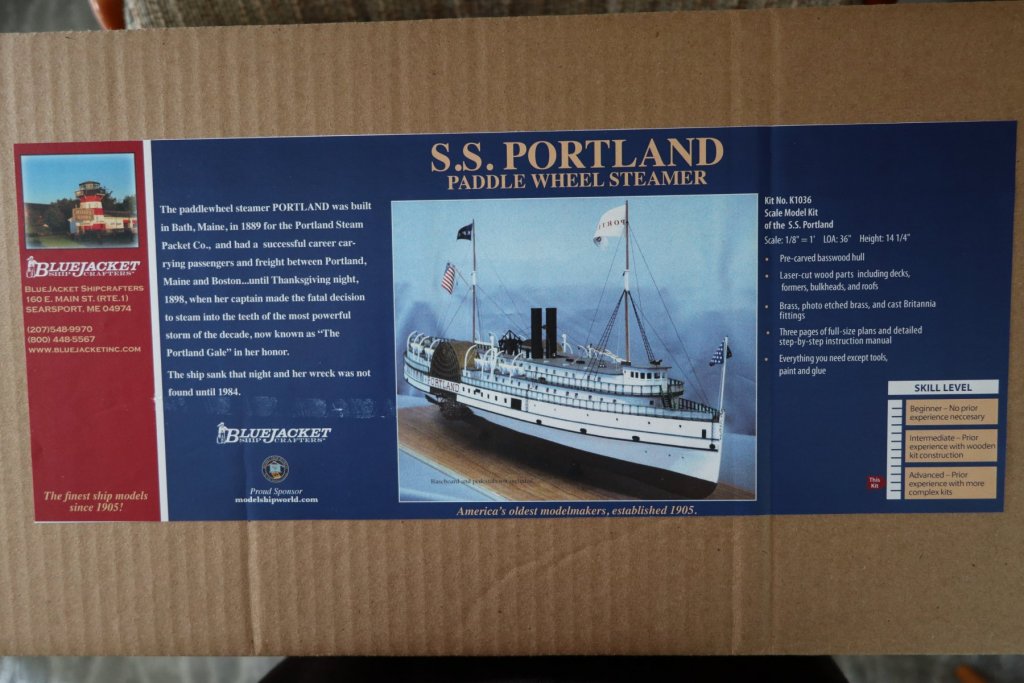
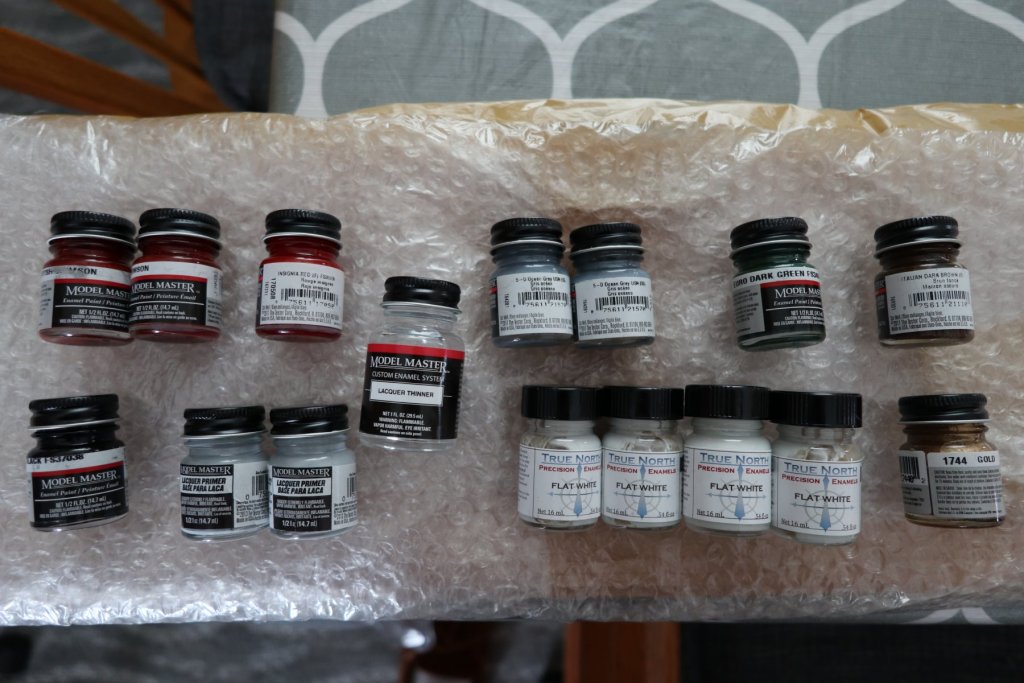
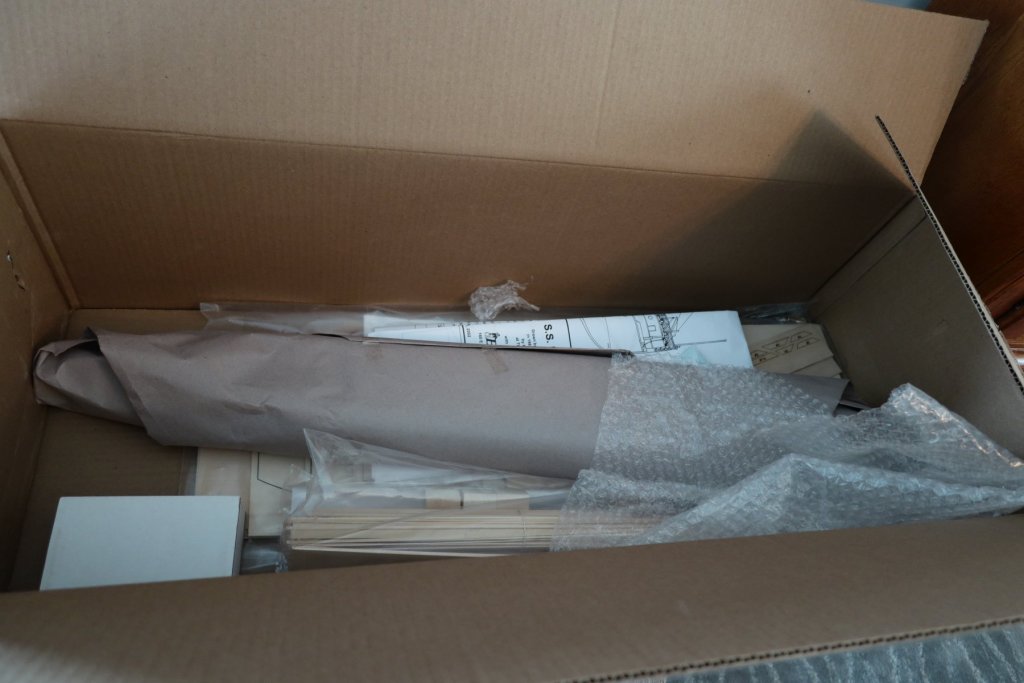
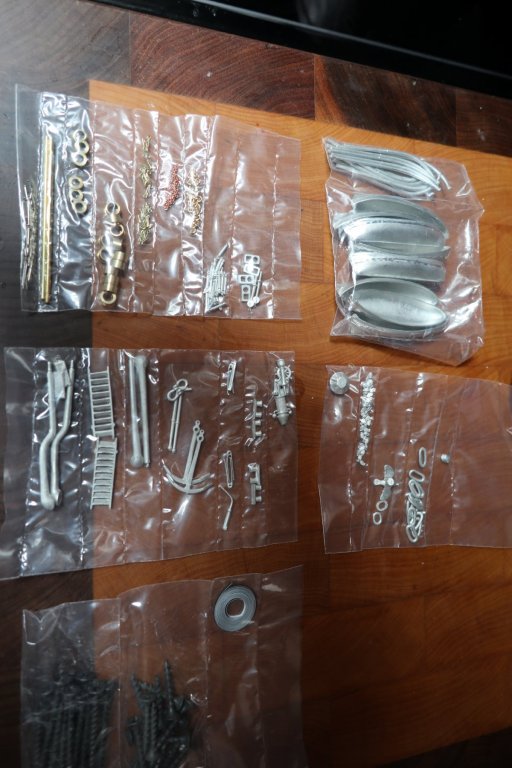
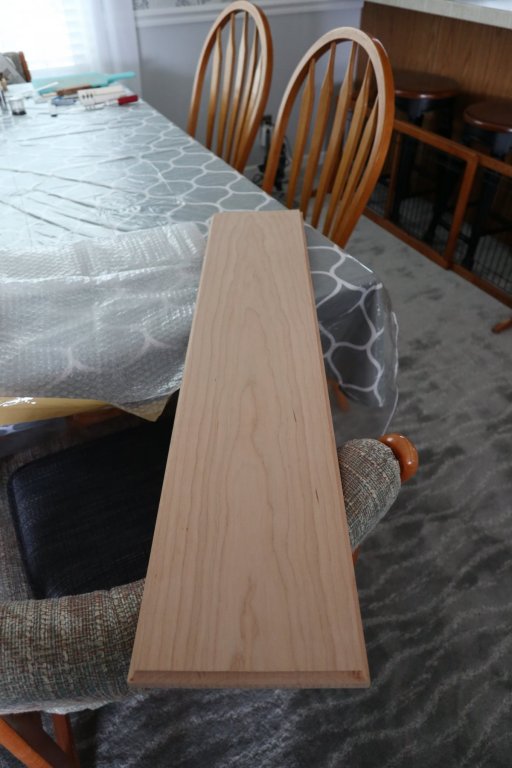
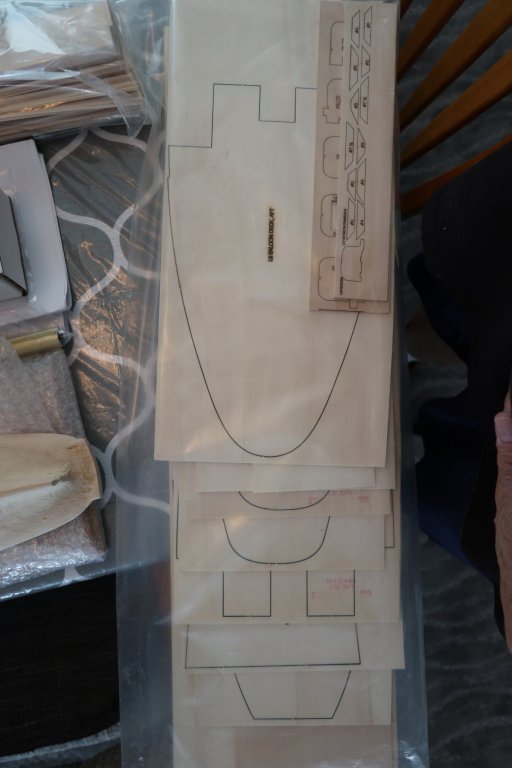
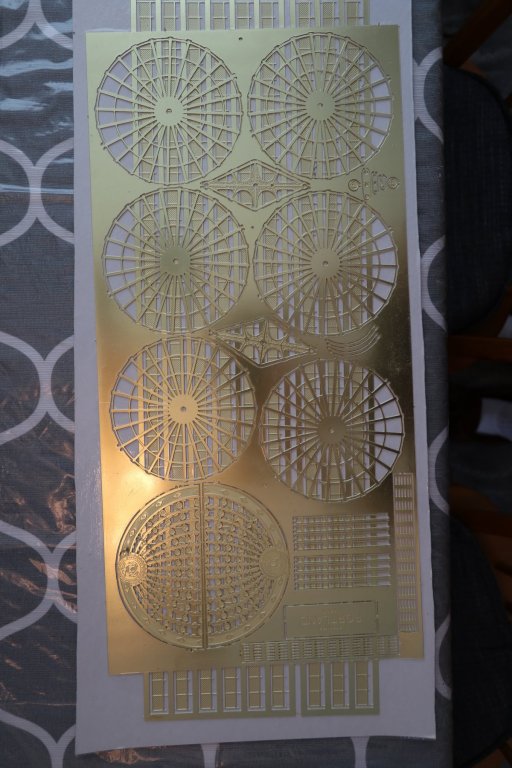
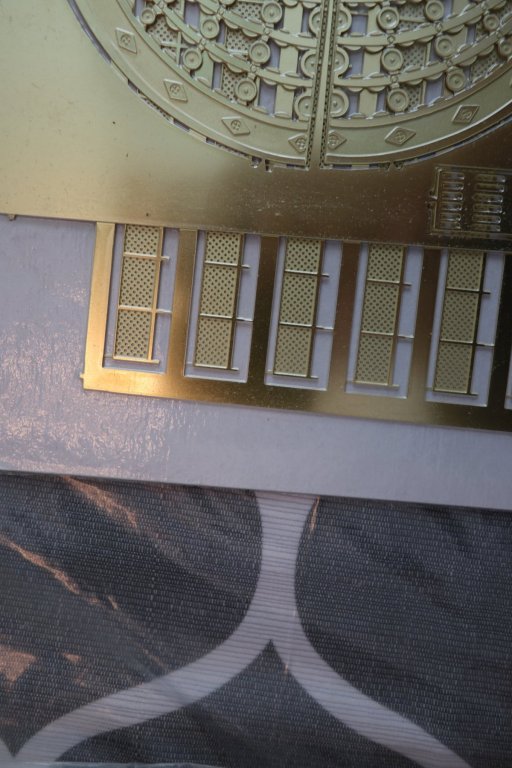
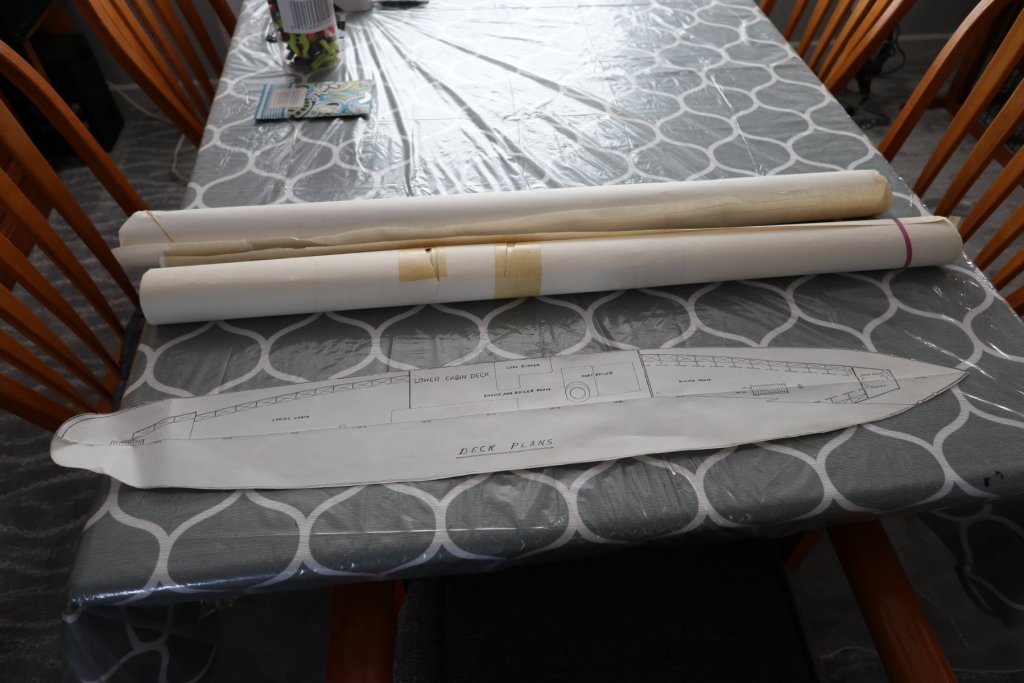
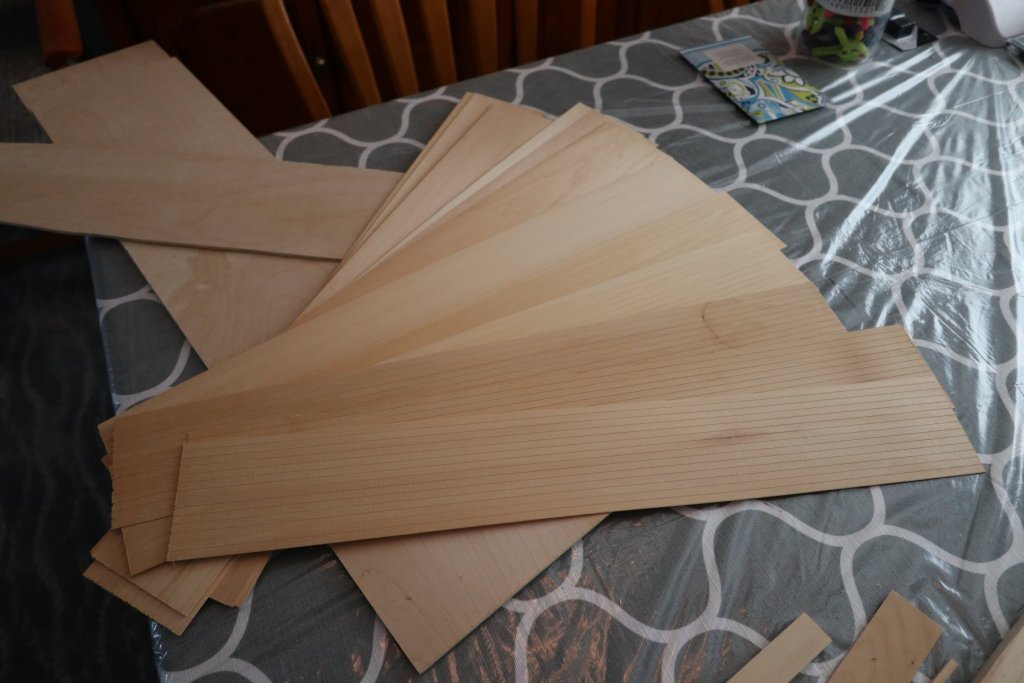
The 2019 kit This is the box it was delivered in. It was wrapped in a layer of cardboard and taped. This was a rock solid shipping container that arrived with no damage at all. Here's the contents. I think I removed the paints and display board already. The hull came wrapped in something that felt a bit heavier than butcher's paper. It was well protected. The baseboard came enclosed in bubble wrap. The plans. They come folded. I used an x-acto knife to trim the margins off the plans, and I cut them in half so they would be more manageable. Flattened them out the best I could under a heavy cutting board. The cherry baseboard. It comes with the edge routing. I'm glad I purchased it. It is really nice. (Not included with kit, it was an add on). The paint set (Not included with kit, it is an add on). Wood pieces The laser cut parts. Big improvement over the 1996 kit. These are really well done. The brass will take your eyes out if there is a lot of sun. It is all packed in what appears to be an airtight package. All the little "bits" Stanchions (Not included with kit, it was an add on). The hull


-
RFP, Thanks, and feel free to share any experiences that may help me pull this off better. I already got a great idea from a post jbelwood had a while back: Porthole glazing I'm wondering if any of those solutions would be a suitable replacement to the acetate windows. jbelwood, The photo of your Portland looks spectacular, so I would greatly appreciate having you share your experiences and photos here. If nothing else, maybe a ton of photos will help future builders. I'm going to be mocking up the decks in the next week or so, so I will be ready to hear your sponson solution when you have some time. I'm also thinking if you want, we could change the build log name to include you. Joint effort and all that. When you get back to your Portland, keep posting here, and this might be one heck of a build log! Portland by jbelwood and norm1116 - BlueJacket
-
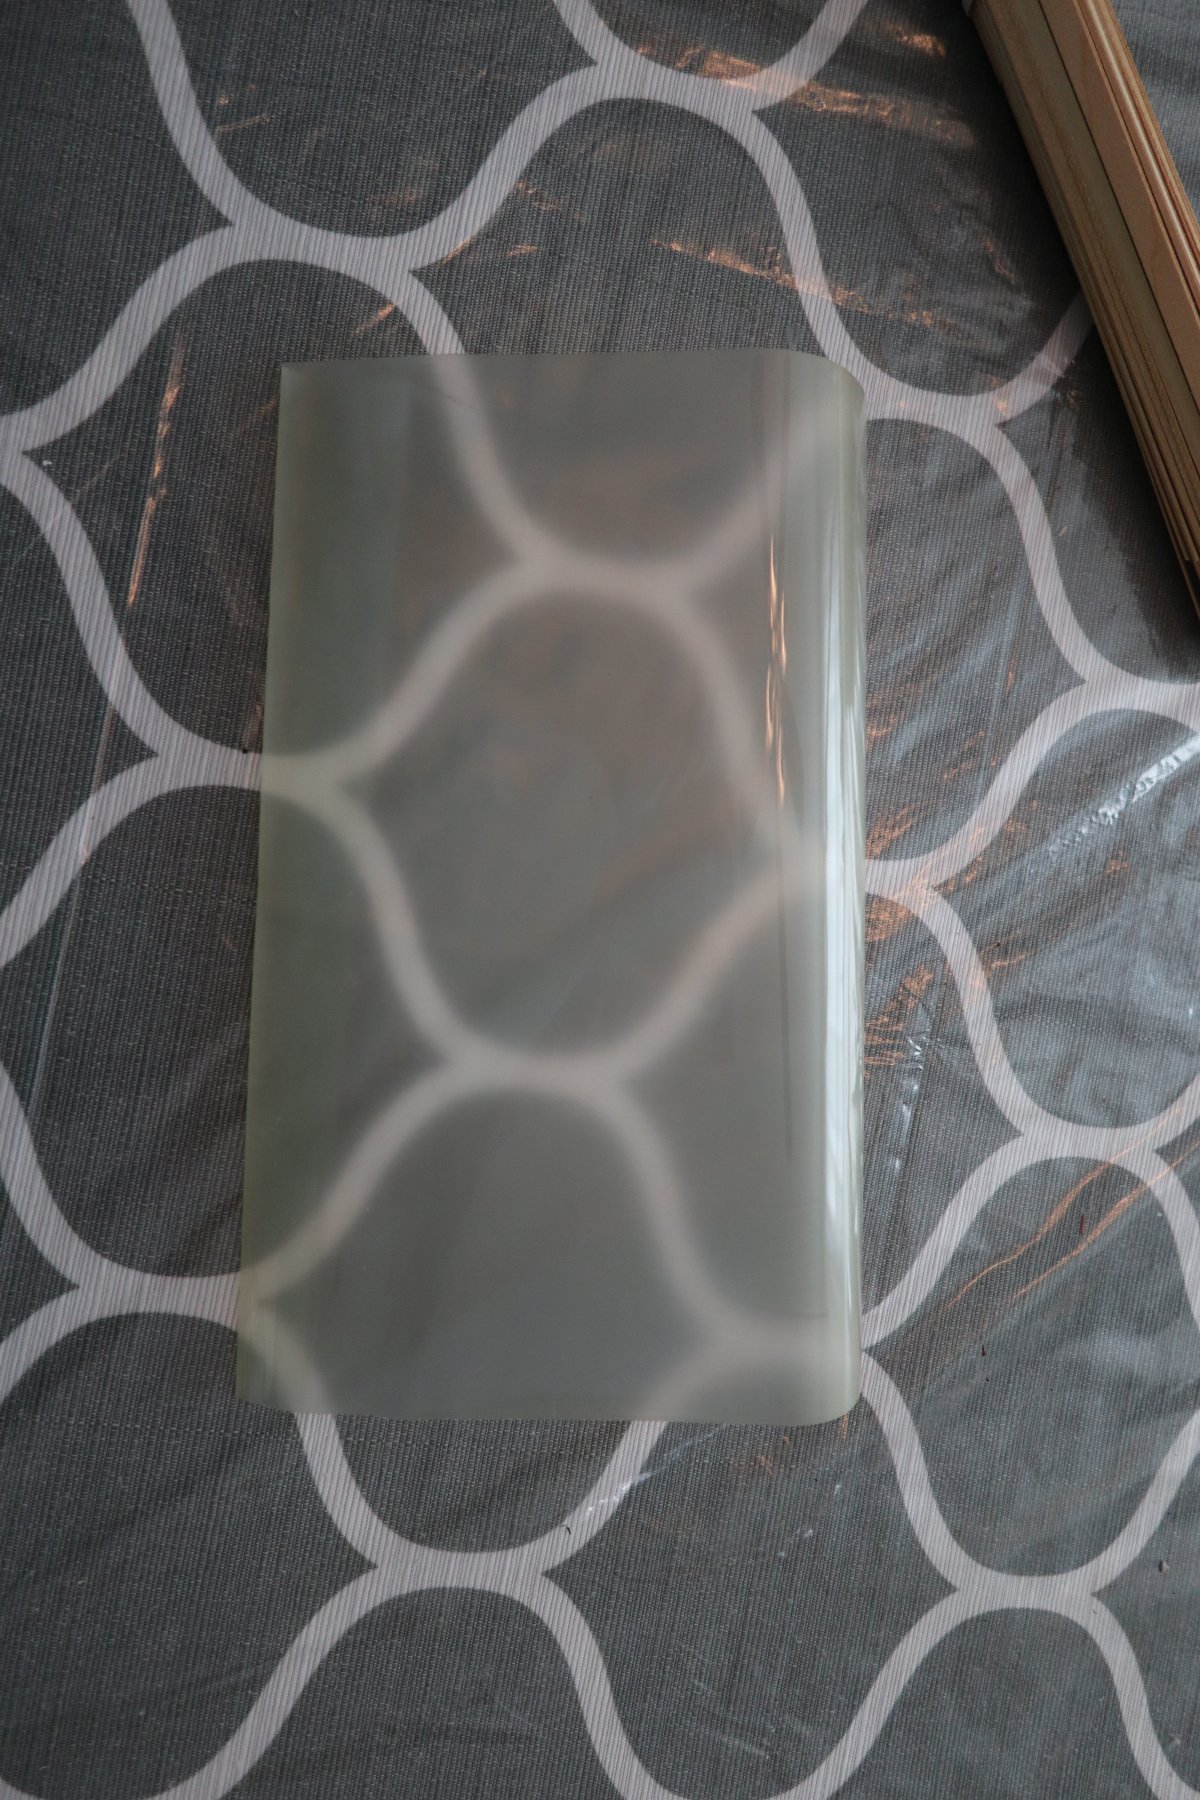
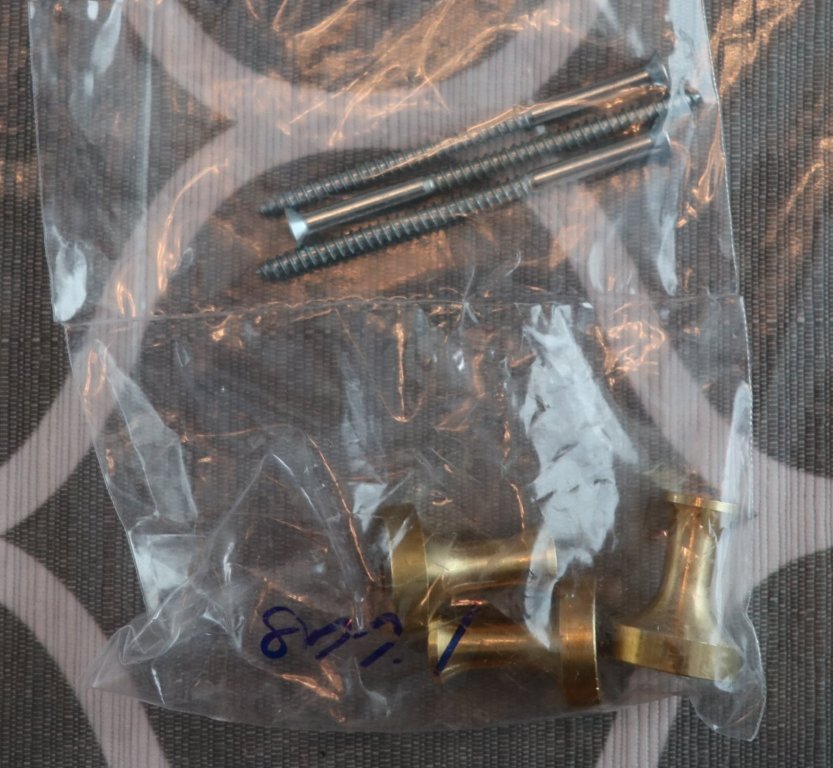
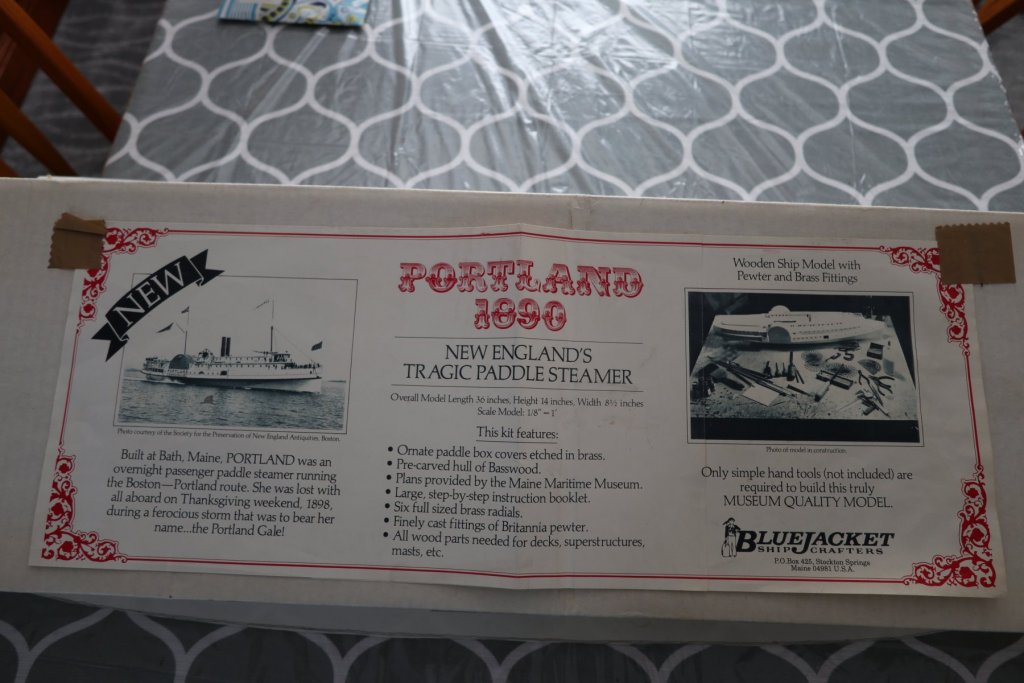
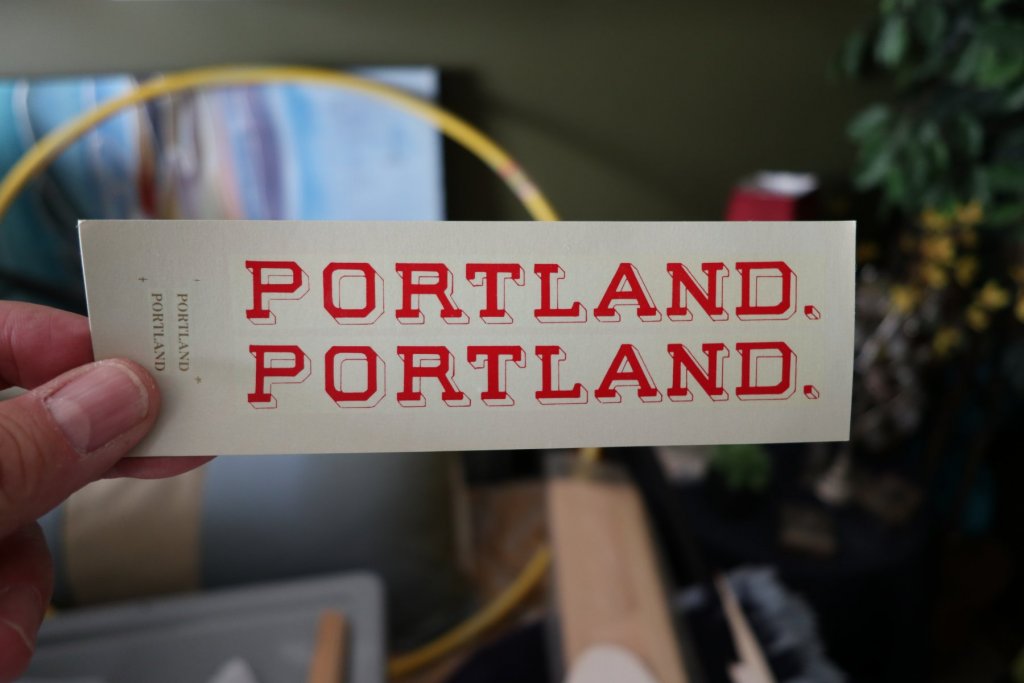
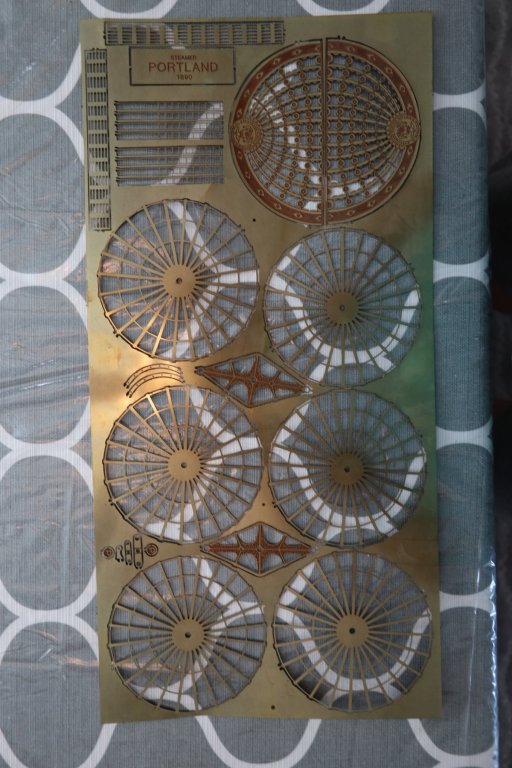
Kit purchased in 1996. My step son wanted to build this model. Brave undertaking for a 15 year old, but I was game. It did not work out, but he would have done a great job on it if he was able to keep going. I found an interesting article on BlueJacket here. The 1996 box label has an address in Stockton Springs, Maine, and the instruction manual has an address in Shelton, CT. You have to love the line "Only simple hand tools are required to build this"...... One of the first things we did was have the plans copied. I knew it was going to take some 2-sided tape and an extra set of plans to pull it off. You can see where the tape is and parts are cut out on the roll in front. The kit sat in my closet for 22 years. I'm amazed at how well it survived over the years. It looks brand new. The wood appears to be in great shape with no warping. The decal: The hull, sponsons installed on one side. The plans were attached to the plywood using 2-sided tape. Here's the main deck cut out with the plans attached: The window acetate. I think it may have hazed over. I do not remember how it was originally: The wood that came with the kit: The kit came with planking sheets. Here's some miscellaneous wood, and you can see another deck cut out, and the blank plywood that was supplied for decks: Here's another shot of the plywood for the decks. No markings, no stamping, no laser cuts. My step son put all the small parts in this caddy. The 2nd photo shows the rail netting, which appears to be in great condition. The brass has tarnished a bit, but can be shined up again. Notice how the paddle wheel covers have red in them, as well as the walking beam and name plate. The new kit is all brass. I plan on using the 1996 covers and nameplate on the 2019 kit.


-
Is anyone working on Bluejacket's 'Portland?'
norm1116 replied to RFP's topic in Wood ship model kits
-
I have a Portland kit that I purchased around 1996. One of the pre-laser kits. I also have the Portland kit I received on Memorial Day 2019. I'm going to post a few photos of both kits. I promise that anyone who built the pre-laser Portland must be a master kit builder. There was very little in that kit that was simple.