HOLIDAY DONATION DRIVE - SUPPORT MSW - DO YOUR PART TO KEEP THIS GREAT FORUM GOING! (Only 27 donations so far out of 49,000 members - C'mon guys!)
×


ETNZ
-
Posts
67 -
Joined
-
Last visited
Content Type
Profiles
Forums
Gallery
Events
Everything posted by ETNZ
-
Hi Mobbsie. Thanks for that, I was trawling the build log and found the discussion on the second planking but would like to get the deck looking good too. As for tree nails, I wasn't going to bother. On a real wooden deck, they are barely visible. With the weathered deck option, it is even less necessary. I have fond the bow decking around the heads area and the tea and vinegar gave a lovely blue which I have sanded lightly to a more representative grey/silver.. Thebonys us that the stain picks up the plank edge and you get a natural caulk line. Thanks for the decking ideas. The weekend looks foul. So apart from some domestic chores, Ii will try and get the cannon dummy carriers opainted and glued together with a few planks on the lower deck then I can get the cross beams in too ready for the main gun deck.. Oh the local rugby franchise is playing too so I'll have to watch that too! Thanks again, all the best Eric
- 44 replies
-
- 1
-

-
- agamemnon
- caldercraft
- (and 1 more)
-
Hi Wayne, I think I've seen a post or two from you before elsewhere on the site. I hope you enjoy the build, I think you may have many years of ongoing pleasure as days are taken up at work plus evenings during the week, then stock and block over the weekend. Oh, not to neglect my wife, family and friends. Then there is the rugby too. That might end this weekend though! Go the mighty Chiefs! I am playing with weathering the deck now as suggested by riverboat Frank. Mobbsie, the guy is a guru! I had thought of the tea but that was just a darkened, the steel wool and vinegar on the tannin in the tea will be a cracker I'm sure. Did I see mention on your build log of the correct length for the planks for decking ? I'll have to go back and check. On the decking question, I have seen black cotton, pencil, black nylon fishing line and nothing but fresh air used as a representative caulk on decking. Anyone have any other brilliant ideas? Enjoy the rest of your days wherever you are. All the best Eric T
-
Thanks Mobbsie. No problem with delay. I understand all too well. I'll try Frank as you suggest. I am really enjoying this build. The shapes of the bulkheads and the developing shape are beautiful. I may change my opinion by the time I have got through the planking (but I somehow doubt it!). Cheers Eric
-
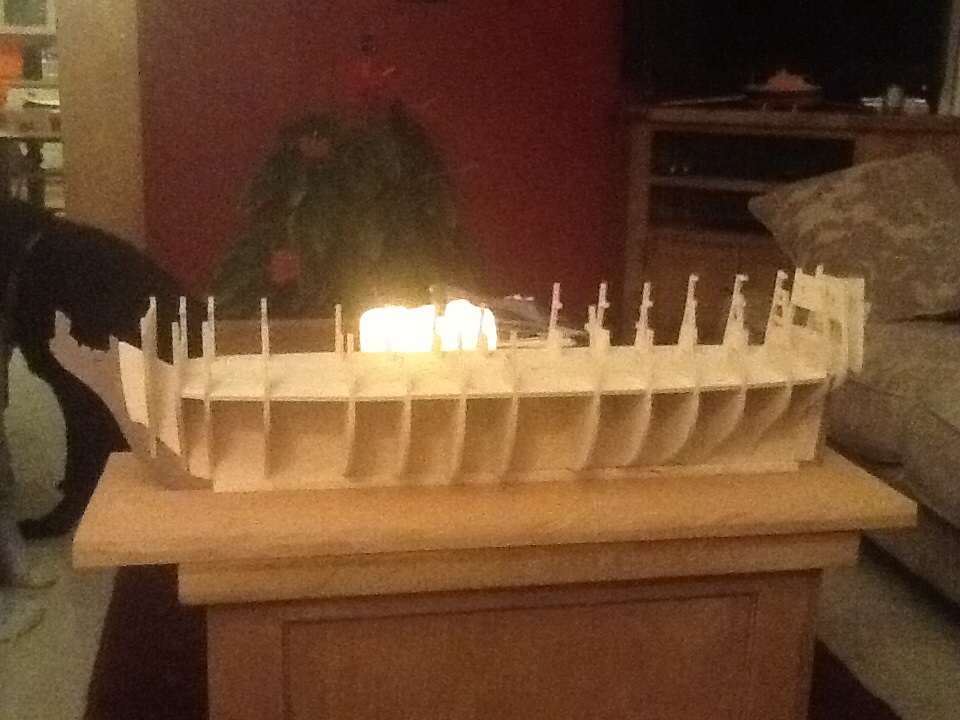
I think on second reading and establishing what a plank terminal piece is I have answered my own question! Bulkheads all glued in position and false cannon supports in place. I am thinking of a weathered deck which should be at least fifty shades of grey! Whoops wrong site! Seriously though, that grey weathered look is what I'm after. 'Weatherit' I understand has been removed from the market. has anyone tried household ammonia? Just a thought. Cheers all Eric
- 44 replies
-
- 2
-
-
- agamemnon
- caldercraft
- (and 1 more)
-
Thanks Mobbsie and Jason for your thoughts on that one. The dowel option is far preferable for me Jason. Bio security here in NZ is such that I think my kit which was purchased from Australia was fumigated. I would have to wait an interminable time to obtain a replacement which could be equally damaged when I receive it. I considered buying a sheet of 5mm birch ply and copying the pattern off too. Did you put a rebate on your keel Mobbsie? There appears to be no mention in the instructions. As it is an expert level kit, perhaps it is taken as read. I was considering a butt joint. Cheers Eric
- 44 replies
-
- 1
-
-
- agamemnon
- caldercraft
- (and 1 more)
-
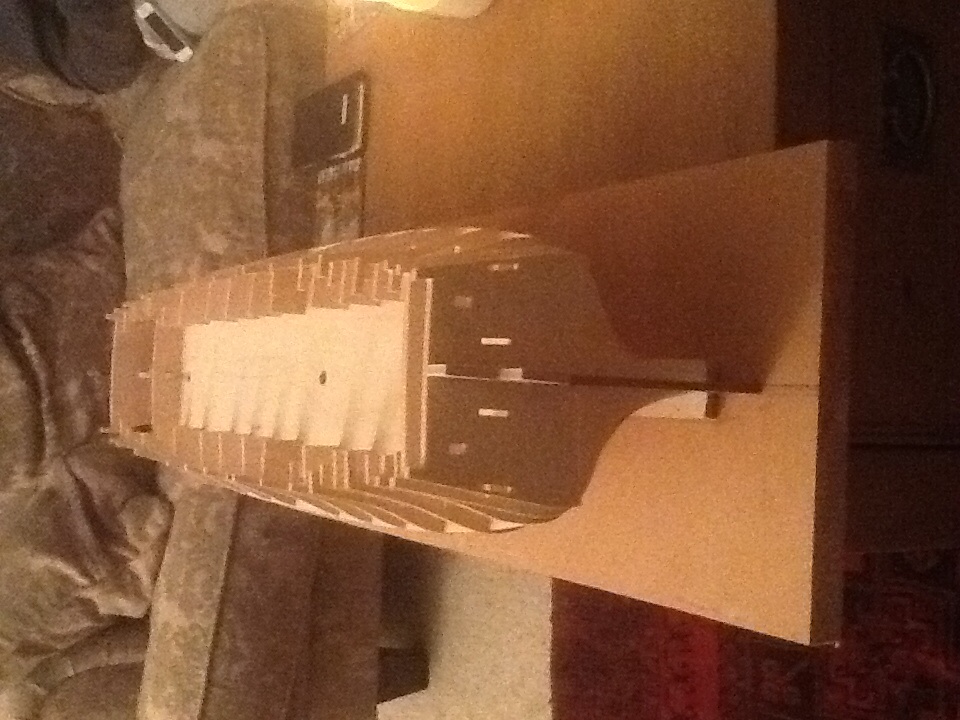
Slight issue with the main keel piece in that it is warped. Be this through storage, fumigation or what I don't know. The build board helps but I am concerned that once out it will resume pretending that it was made out of banana wood rather than birch ply! I had hoped gluing the false keel on would assist but apparently not. It wA easy to flatten with the aid of a panel pin onto the board but you guessed it sprang back to its delicate curvature on release.
-
Ok, a few issues with my iPhone not syncing photos but here we go. Press fit stage complete ready to begin the gluing process.

- 44 replies
-
- 4
-
-
- agamemnon
- caldercraft
- (and 1 more)
-
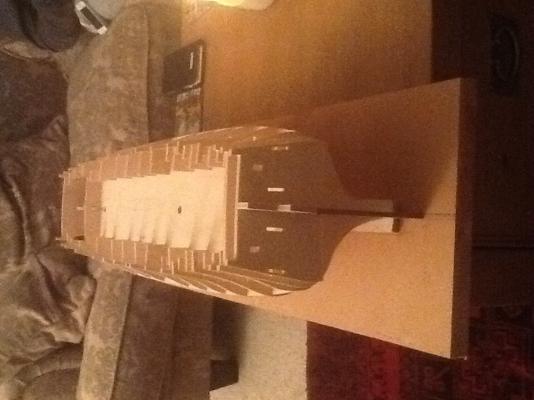
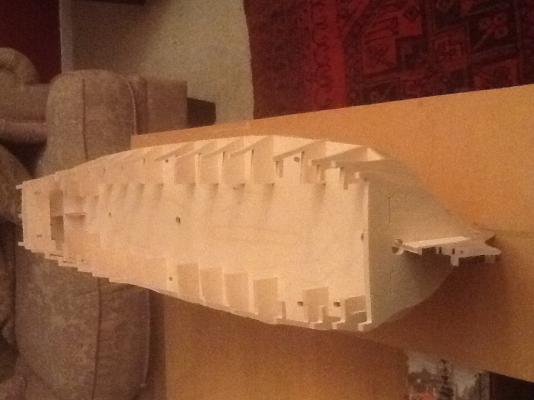
First stage complete. Keel in place and first bulkhead. Photo to follow. The cut outs are not fantastic to be honest but then I didn't want it to be a simple matter of push fit and done, but one of the aft cut outs is rediculously out of true. I shall spend the week working through them and then start gluing the bulkheads tried up with bulldog clips. A question for anyone who has made this vessel, is the rabbet line cut after dry fitting to get the line where the end of the bulkheads run or is it not bothered with on this model? There is no mention of it in the instructions. All the best, Eric
-
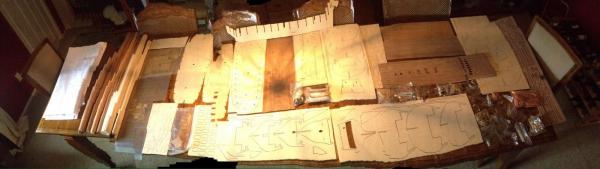
Thanks Mike, my research so far has been to find out how to build this model and do service to the kit. Anyway, it finally arrived at my offices on Friday and I opened it on Saturday morning. This will bore some but I was just checking the parts off before starting anything. Our dining room table is one metre wide and three metres long just to put the photo in context. The wobbly edges were my fault as it was my format panoramic photo on my phone too. A day of firsts! I shall update with photos as I go and to those that have gone before, please expect questions! Best wishes to all Eric
- 44 replies
-
- 5
-
-
- agamemnon
- caldercraft
- (and 1 more)
-
HiMartin, thanks for the idea but I'm a stubborn bugger at the best of times. I'm expected ting about ten years if it is any less I'll be very happy. She has just arrived and I start tomorrow with a check on parts followed by the base board.
-
Well, she has berthed in Matamata after a brief sourjourn with Customs and Excise. So tomorrow, opening photos of the complete kit as I check the content followed by a base board and then the keel. Wish me luck.
-
Thanks Guys, All the support and I haven't got the old girl yet! I look forward to having photos to post. Take care and enjoy what is for us a long Queens Birthday weekend. All the Best Eric
-
Thanks Martin, just as well that I am the patient type then. I knew it would be one of the tasks of Hercules when i decided to go ahead but the more I read the more certain i am that this is a life sentence!
-
Hi Mobbsie, Thank you I hope so too. I don't know whether you know what you have left yourself open for with that comment about Help!
-
Just opening a build log to get me underway. The kit is still in Auckland having travelled from Australia. I think I am in for a reasonable tax bill before Customs release her. It has been a week now and I am getting impatient to get the call from the post office to collect my hernia. That is not what I am nicknaming her yet, simply that I have heard the kit is very heavy. I read Mobbsie's build log. And once I saw the ship in the case I wandered what I had got myself into. It is huge! However, off to work to pay for the tax now. I shall update the log when I get it. All the best everyone. Eric
- 44 replies
-
- 1
-
-
- agamemnon
- caldercraft
- (and 1 more)
-
Hi Martin, I noted your earlier entries on Mobbsie's build log. I am awaiting delivery of the kit still. I think it is held up until I pay some tax! Still , this will be my first and I reckon on ten years in the making, production. I shall follow the remainder of your build with interest.
-
Oh dear! I'm just wandering what I've let myself in for. A moments lunacy led me to buy this thinking a larger scale would be better to work on for a newbie. I read the size but really, it is not until you see it in position like those last shots that you really understand the size of her. Mobbsie, you have my admiration for your work and speed. I think I have just written off the next ten years of my life outside work! I shall do a build log as this one has done two things, inspired me and has loads of helpful tips and suggestions from members which I have no doubt I will need by the bucket load. Oh yeah, I forgot to mention, my first build too. Idiot certainly, foolish probably but I like a challenge, a real challenge! Well done again and I hope that I can pick a couple of things up from all the good members out there. One question I already have is what did you use for the hammock nets? They look fantastic. All the best eric
- 1,279 replies
-
- 6
-
-
- agamemnon
- caldercraft
- (and 1 more)
-
Thank you all. I chickened out and went for the Caldercraft HMS Agamemnon. I figured a larger scale would be an easier starting point, plus it was reduced in price. Nelson's favourite ship is no come down in my estimation. I look forward to starting a log once I receive it.
-
Thanks Mark and John. I can see an evening of prowling the site is in order to view these kits is in order.
-
Thanks Nenad. I'm sure I will.
-
Hi all, I'm new to this having been involved with the sea and a lifetime's love of it, I find myself beached but dreaming. I am looking to buy a wooden ship model, something I have yearned to do for years. I have made plenty of models and even small wooden craft before. I know many will think that I am biting off more than I can chew and running before I can walk but I really want to tackle HMS Victory. There is a family connection, I love the ship and have the time to spend on it. I am patient and meticulous in what I do. I am looking at a Billings kit but have heard that the directions are minimal which makes me hesitant. does anyone have any ideas as to which kit I should look at? Thanks in advance.