ETNZ
-
Posts
67 -
Joined
-
Last visited
Content Type
Profiles
Forums
Gallery
Events
Everything posted by ETNZ
-
Planking finished, first coat of paint on the body and fixing the brass rubbing strips. I have decided to work on the hull inside and out to get it squared away before I tackle the coppering. I hate the repetitive nature of the planking so I don’t know how coppering will go. Still persevere and overcome. I’m still trying to get photos to upload so bear with me ?
-
Well after just over three years, I have completed the second planking (almost). It does need a little filler rubbing in here and there but it isn’t too bad in my mind. The two wales are on the Port side and tonight, I’ll perhaps tackle to Starboard side. When rubbing down on a wet and windy winter day in the workshop, I took the opportunity to blow away the cobwebs with the compressor. I have decided to treat myself and take a break from big and boring once the planking is tidied up. I will paint the hull drill for the lower deck cannon add some of the additional trim then.... tackle the coppering but not until after we get back from the UK. I will persevere with trying to get some photos up but bear with me on that. I think I will start enjoying her again now the planking is over!
-
Hi Alexey, I see that this is a very old thread. Your machines look awesome on YouTube. Can you advise the current cost including delivery to New Zealand for the v3 ropewalk? thanks in advance. Eric
-
What do you know everyone? I made the same mistake as Mobbsie when it came to lining the gun ports! Damn, b***er and blast! Now I shall have to cut the walls down further to accept the linings. Spent much of last night trimming up with the old No11 and modelling knife handle whittling away waste and trimming to keep the holes tidy only to have to repeat it today. Maybe the dremmel will get a work out with a milling piece to cut out the extra. Great minds think alike it is just a shame that the great minds aren't quite right in what they are thinking!!!! Oh well try try and try again. I am having trouble with adding photos of the slowly developing vessel. Previously if I added a photo from my phone it went up without problem. I don't know if it is the new phone with a better spec camera or what but it says that the res is too high. Is this an easy fix? I am a bit of a technophobe so no long sciency answers pleas.
-
Awesome Hennie. I have just got around to sorting the first planking and tonight I have sealed with ova ready for the filler and rub down. I must say, I didn't know what I had taken on with this build but I have enjoyed it so far. Whilst mentally assessing my options, I had been playing with the ship's boats and cannon. Anyhow, well done.
-
Ok it has been some time but I hit a problem. Well, I perceived it to be a problem! My planks wouldn't line up enough to allow the correct number at the bow where they came to a point. Having looked at other builds, I decided that this wasn't the end of the world, but just pretty near it. As a complete novice, I think it has actually come together pretty well so far. I have made up cannon and started on the ships boats which I am enjoying very much. Piccies of the eighteen footer and pinnacle to follow. Save gluing my fingers to the damn thing every night, these mini models are great fun. So, with rain and rugby to watch in the middle of the day, I began planking again. Well, I seem to have lost my download button. I was going to put up some photos of the planking of the hull. Very long and drawn out proscess but necessary!Ahha, just found it again so I can disappoint you all after all.Except my phone is not transferring to my iPad. My camera photos are too high a quality so that doesn't work either. Ok you'll just have to be patient.
-
Very nice Hennie, you are making awesome progress. I've overcome my planking issues. Having viewed not a few other members builds, I decided that I was being too pernikity over my planking. Particularly as it was to be planked and coppered too. So two planks at a time it is slowly coming on. Looking forward to finishing the first planking and having it filled and rubbed down. The weather here is slowly getting better so when I'm at that stage, it should be summer and I can make all my mess outside!
- 214 replies
-
- 4
-

-
- agamemnon
- caldercraft
- (and 1 more)
-
Thanks Mike. As I said, they are actually grey not brown. The first photo is probably closest in colour. I hope to update the build log soon as I have been tinkering around the edges when I have time. I hit a problem with the first planking which has left me high and dry for a while but I think I'll just work outside the (perfectly square to work around the problem and see how that goes. In the meantime, ships boats and guns have been toyed with. Regards
-
Thanks Sjors, I shall have to trawl the model shop.
- 1,616 replies
-
- 3
-
-
- caldercraft
- agamemnon
- (and 1 more)
-
Tools and Supplies for My "Shipyard"
ETNZ replied to daveward's topic in Modeling tools and Workshop Equipment
Thanks Toni, being in the far flung reaches of New Zealand, I'm not sure what Elmer's wood filler is but I'll try and keep away from the others. I was trying to keep it generic so that I can work the various types of filler out. Google it is then! Cheers Guys Eric -
Tools and Supplies for My "Shipyard"
ETNZ replied to daveward's topic in Modeling tools and Workshop Equipment
Not really off topic but also a beginner in this field. What would you all suggest as filler for covering the first planking blemishes and (yes) gaps prior to rubbing down for the second planking on my HMS Agamemnon model? Something soft to sand would be good like a drywall superfine finisher but is it too soft? Or a car body filler? Look forward to hearing from you guys as I'm a little lost here. Cheers -
Sjors, the ship's boats are great. Please tell me what filler do you use? My 18 footer is at the end of its first planking and according to my daughter she would rather get into a sieve than the one built by me if any boat she was on was sinking! I feel that just a touch of filler before the second planking would make it look so much better. Cheers Eric
- 1,616 replies
-
- 5
-
-
- caldercraft
- agamemnon
- (and 1 more)
-
Awesome Hennie, I am enjoying your build better than my own! I hit an issue with the planking as it descends below the main gun deck which I am going to take by the scruff of the neck and deal with this weekend. In the interim, I have played with the 18' cutter and am just gluing up the framework. Rigging cannon and making eyelets and hooks etc. Your work is fantastic and I hope that mine can match it in due course. Regards
- 214 replies
-
- 4
-
-
- agamemnon
- caldercraft
- (and 1 more)
-
In view of the review going ahead presently, a comment, please do not remove this log! I am still working on the build just very slowly due to work and family commitments.
- 44 replies
-
- 1
-
-
- agamemnon
- caldercraft
- (and 1 more)
-
Looks great Sjors and is a great reference point for my build which is still in the first planking stage. Work has a habit of getting in the way along with the new kitchen, making firewood, watching the rugby etc!
- 1,616 replies
-
- 5
-
-
- caldercraft
- agamemnon
- (and 1 more)
-
Thanks guys. I guess in those days, the sailors were a far different stature to today's! Thanks for the descriptive info too bilge rat.
-
Hi all, I am just working my way through the planking on my 1/64 caldercraft Aggie. During the drying time, and I play putting the canon together. Can anyone tell me what size cord to use for the main breech rope?
-
Wow, I hope that my Aggie looks as good as this one when I reach this stage! Awesome work Klaas
-
I have at long last, started the planking. After holidays and other work have prevented progress. Does anyone who has built this beastie recall whether they cut a rebate for the deadwood area or not? It makes sense to me to do so but I cannot see on the logs whether anyone else has done this. Secondly, what routine did people find best? Sectioning off the hull and working from top then bottom and then moving to the top again or just working down from the top?i look forward to gearing from you.
-
Interesting. I was on the Sir Malcolm Miller, Sir Winston's twin. The only real difference being the door tops on the Miller were rounded and not square.or, may have been the other way around, it was over thirty years ago! I thought of building this with rounded tops just for old times sake. I'll follow your build with interest. Oh, the other difference was the Miller fell over in dry dock during refit and ended up slightly bent. For some reason, this seemed to make her faster when the two raced at the end of a cruise. Good luck with her.
-
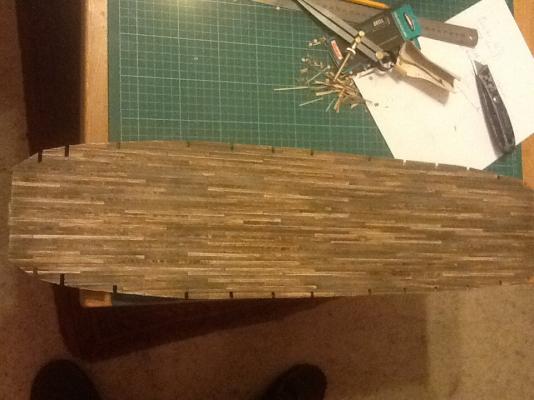
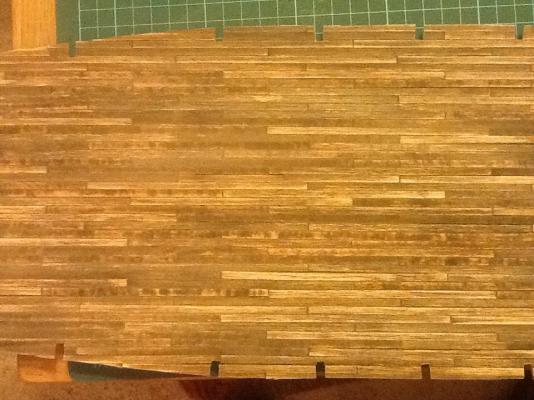
Winlich, my apologies for the brevity of the post. Following the gluing of the deck planking, a butt shift of 24mm and repeat pattern of every fifth plank, the entire deck was painted with a fresh cup of tea. Actually this was a second cup of tea as the dog knocked the first one over my fresh cut planks and the deck base. I think that led to the deep variation in colour as I forced the drying on the aga top. I then painted the deck with a white vinegar and steel wool mix which turns the deck very blue. A rub down with fine sandpaper brings the colour back to a light silver grey. As this was the main gun deck as stated by Mobbsie, most of it will be covered but I wanted to see what it looked like. Top deck and poop should be a little lighter without the second dunking!. My thanks for the recipie to Frank. A master ship builder and chemist sir. My thanks and appreciation. All the best all. E
- 44 replies
-
- 1
-
-
- agamemnon
- caldercraft
- (and 1 more)
-
The main gun deck being covered so much was the main reason I gave it a go. Thank you both for your comments and I'll try and use my proper camera in daylight rather than my IPad in false lighting. Mobbsie, I enjoy cricket too but I follow my old woodwork master who used to have it on the radio. It is so much better and relaxing that way. Rugger on the other hand is a full on spectator sport down here. Onwards and upwards I'll get a bit more dome over the weekend. All the best E
-
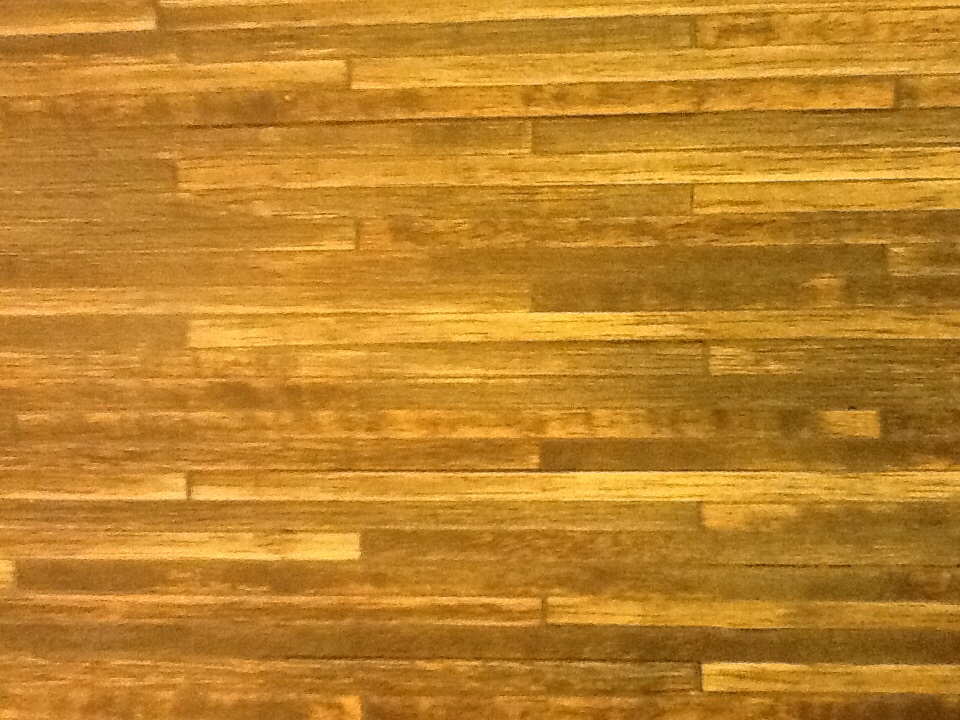
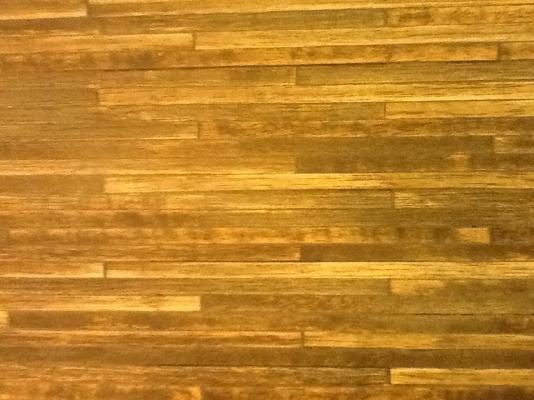
Deck weathered and holy stoned . I like the effect and my thanks to Frank and Mobbsie for putting me in touch. Now to cut out the various mast holes etc. but here's some photos of the deck weathered overnight ! These look more brown in the photo. The effect is a grey blue in fact. More anon everyone. Take care Eric
- 44 replies
-
- 5
-
-
- agamemnon
- caldercraft
- (and 1 more)
-
Well, the weather was as predicted. What wasn't was the cottage flooding and having to clear out the children's accumulated flat ting bits and bobs from university in order to assess the damage. I was also getting stuck into ripping out the fencing and realigning it with the drive to accommodate my new cattle yards which should be arriving this week. Still, posts are in and all I have to do now is the rail and wire work. This weekend? Just starting the decking. I have decided to do two things. One cut the deck through the middle and two, go for a five plank pattern with a butt shift of 24 mm. This will give me six planks in length almost exactly. I didn't enjoy cutting the stack of planks and my self heal cutting mat suffered with not being able to heal. Too many cuts in the exact spot. Anyway, when just about to set too, the dog wagged his tail and knocked over the wife's tea. Wet planks and rapidly bending deck. Still, that was quickly sorted and I moved onto gluing in the deck supports. Off to bed now, night all