CDW
-
Posts
7,755 -
Joined
-
Last visited
Content Type
Profiles
Forums
Gallery
Events
Everything posted by CDW
-

Tiger 1 by Javlin - RFM - 1/35 - Early Version
CDW replied to Javlin's topic in Non-ship/categorised builds
Looks great Kevin! Intimidating with all those parts. Tons of detail painting too. -
1966 Buick Riviera by CDW - FINISHED - AMT - 1:25 Scale
CDW replied to CDW's topic in Non-ship/categorised builds
There are a couple of classic muscle car dealerships in Tennessee I’ve been watching. They have some very nice cars come through there for sale, at prices more reasonable than I suspected they would be. I would much rather have one of those rather than a new Kia or something like that. -
1966 Buick Riviera by CDW - FINISHED - AMT - 1:25 Scale
CDW replied to CDW's topic in Non-ship/categorised builds
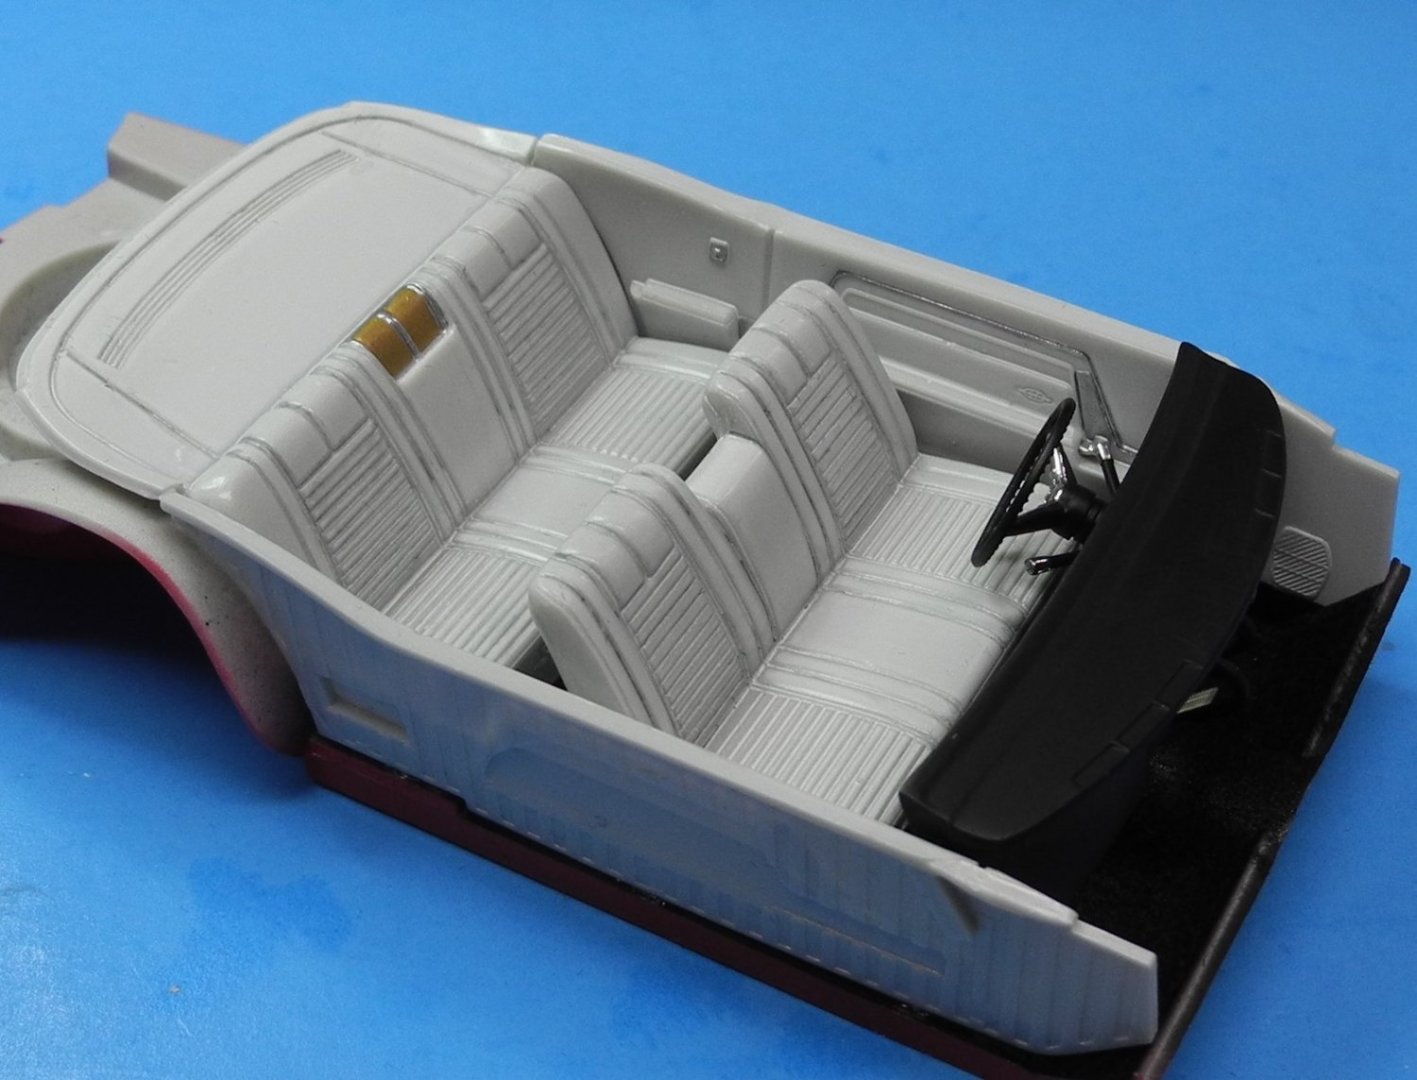
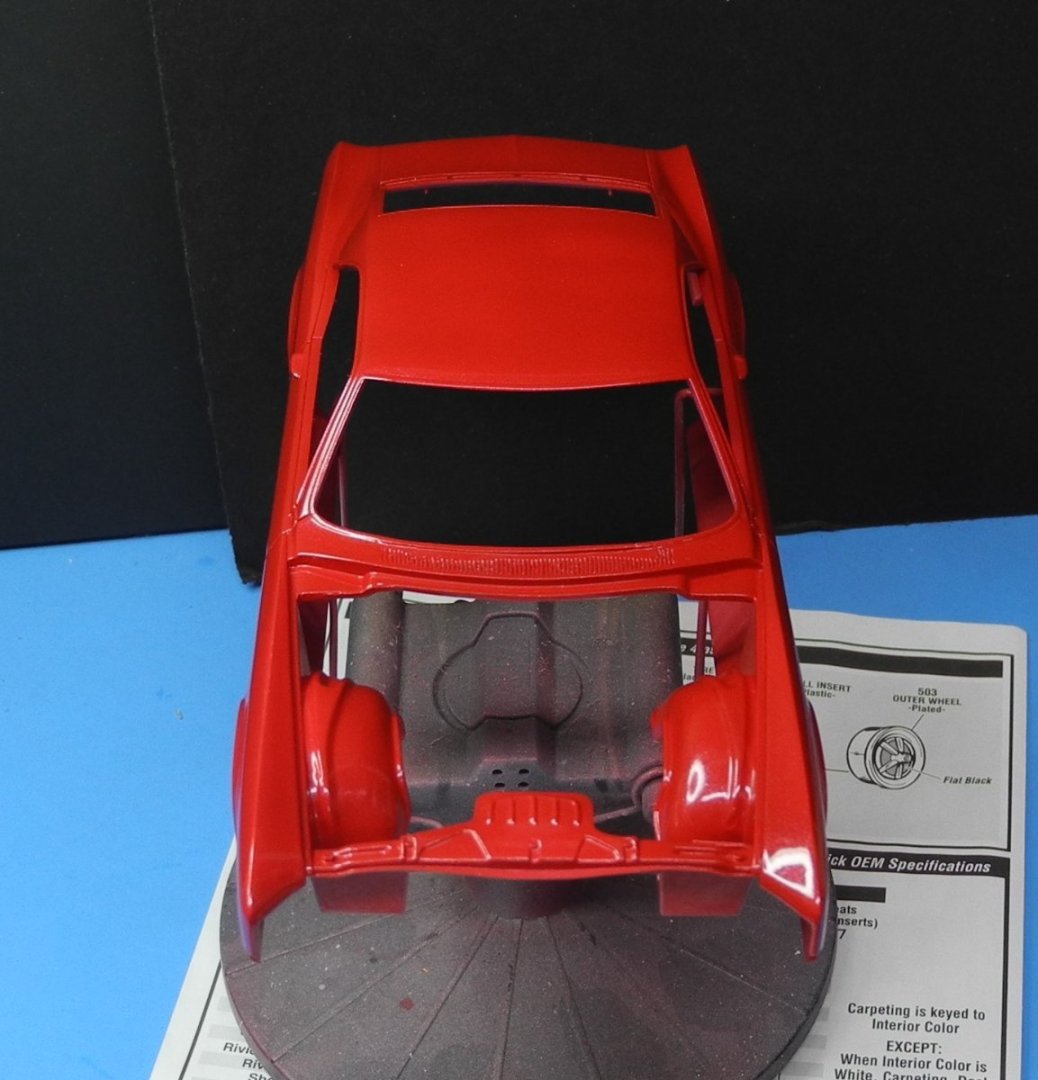
Interior dry-fit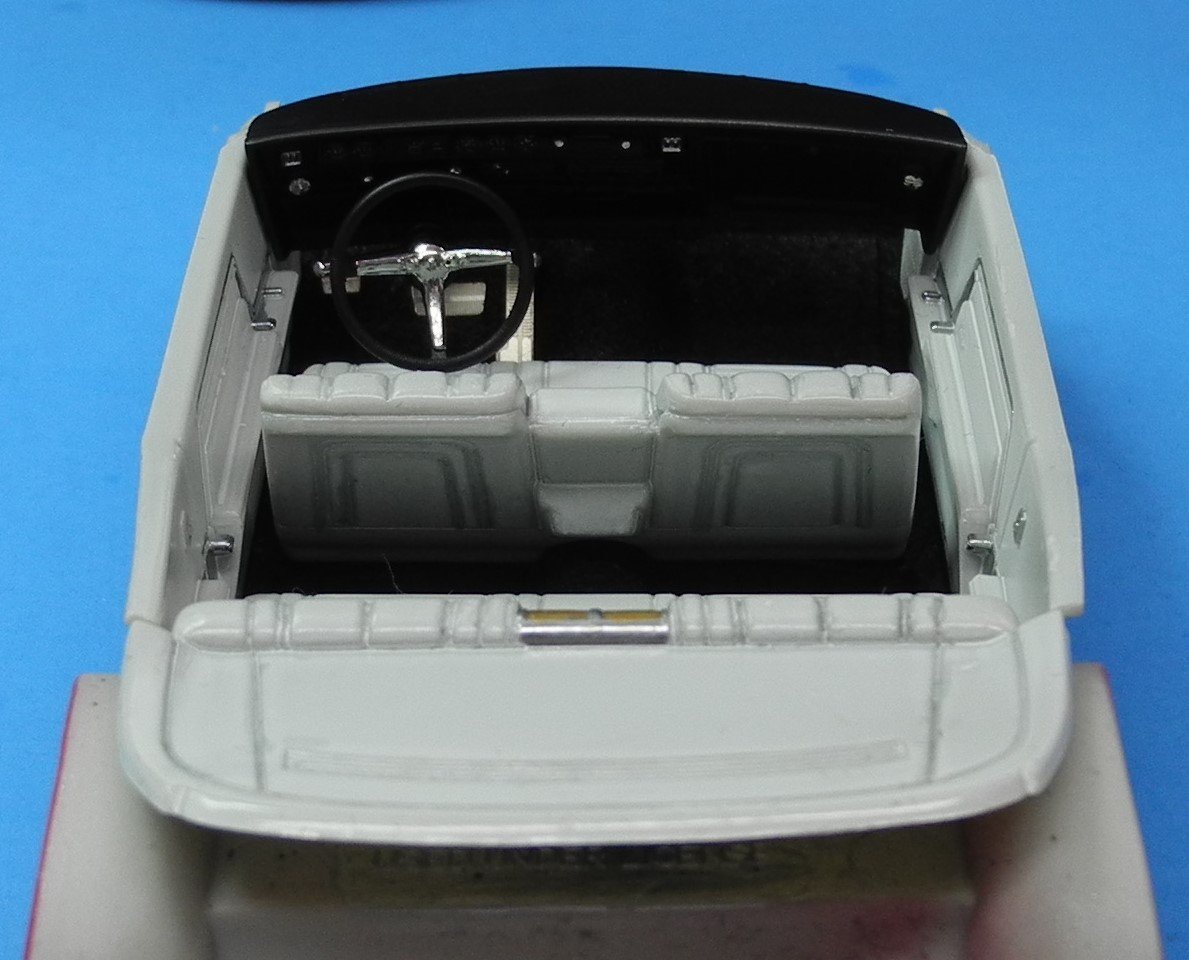
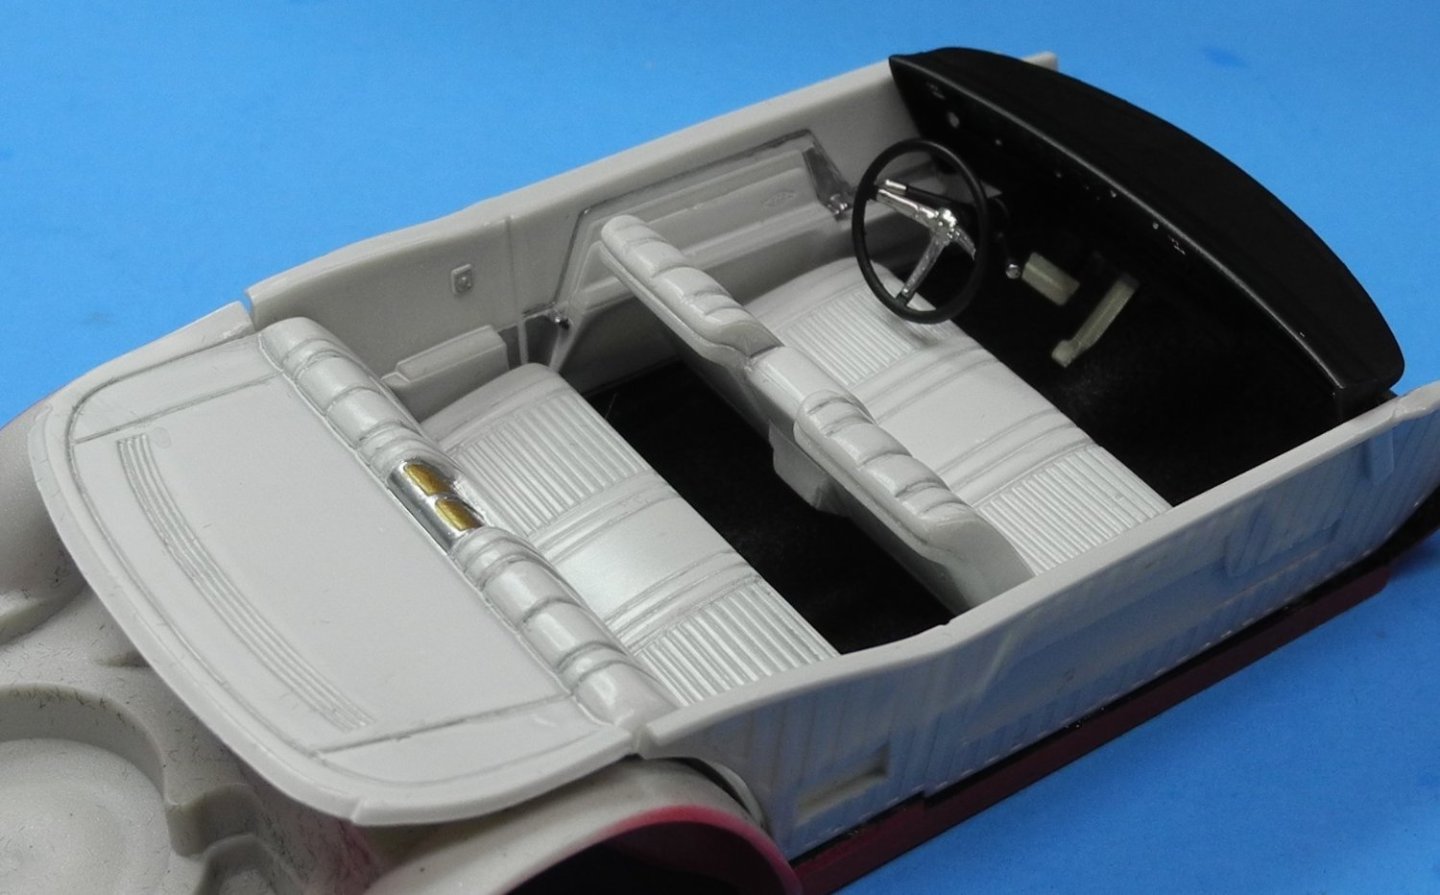

- 106 replies
-
- 11
-

-
1966 Buick Riviera by CDW - FINISHED - AMT - 1:25 Scale
CDW replied to CDW's topic in Non-ship/categorised builds
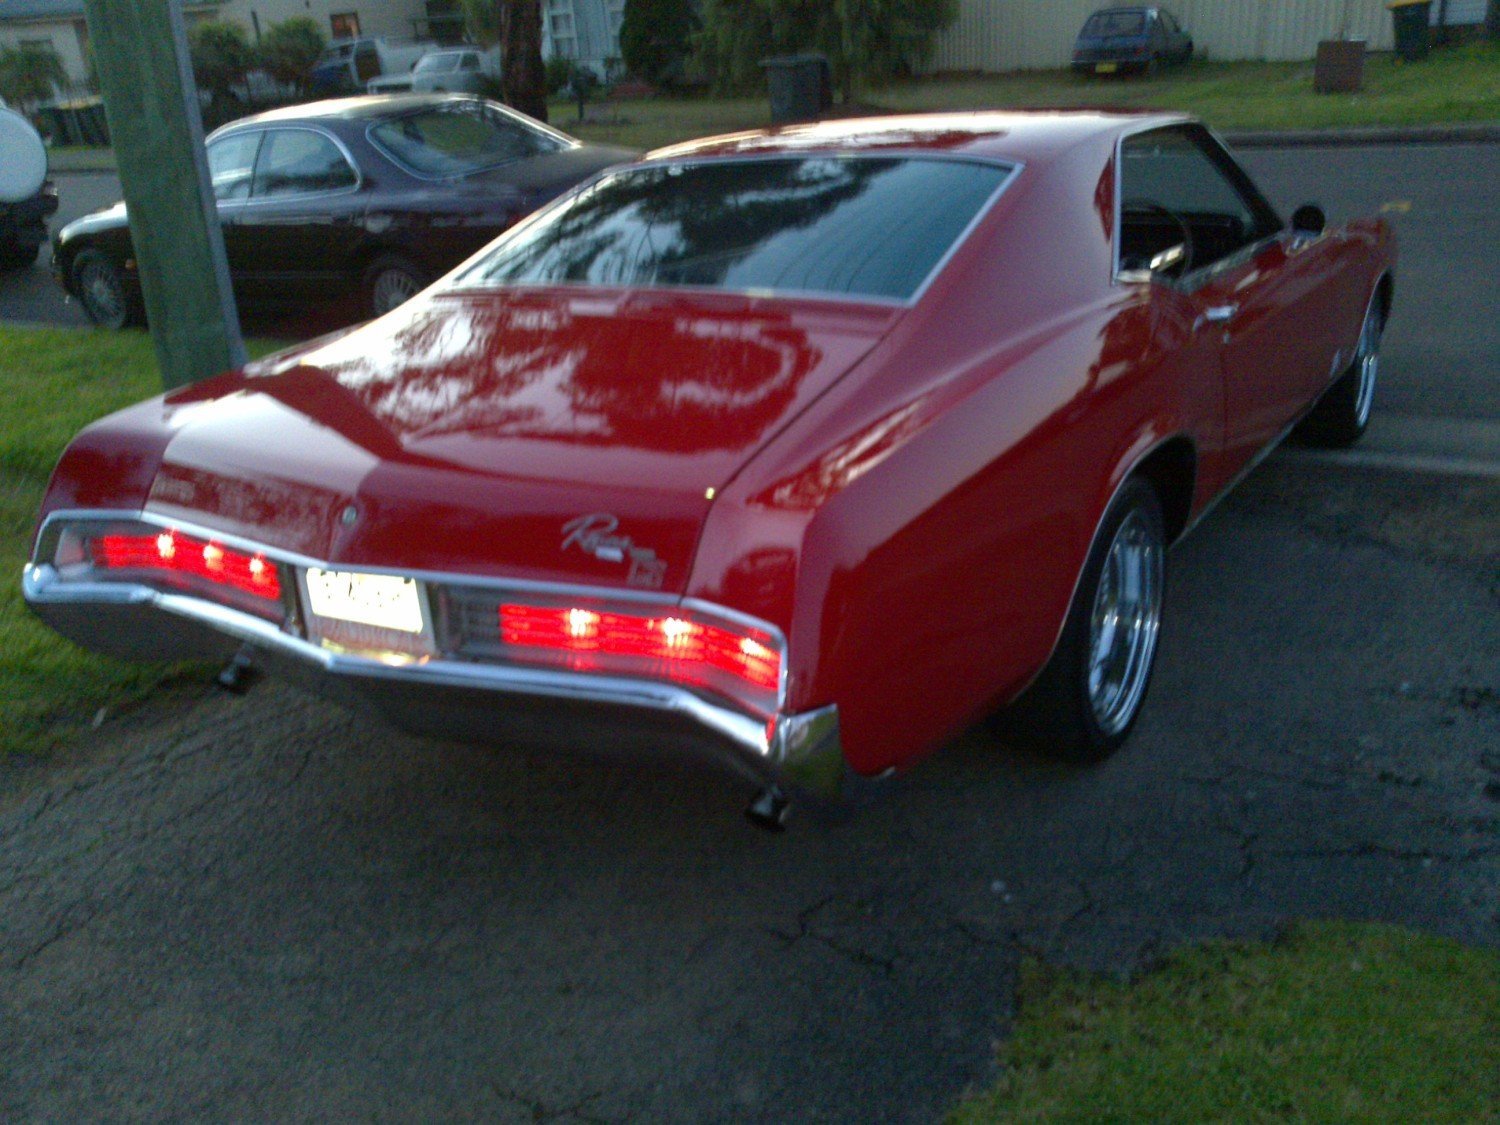
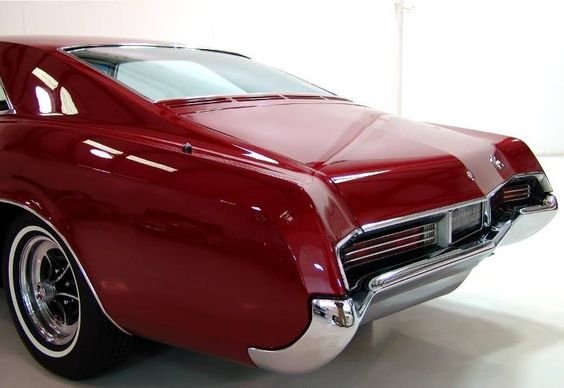
A 1:1 1966 Buick Riviera in red..thumb.jpg.607c6987ce6758484fc78d6dd87b8bba.jpg)
.thumb.jpg.bffeb2721be377da5e4d8397af8b0a37.jpg)

-
1966 Buick Riviera by CDW - FINISHED - AMT - 1:25 Scale
CDW replied to CDW's topic in Non-ship/categorised builds
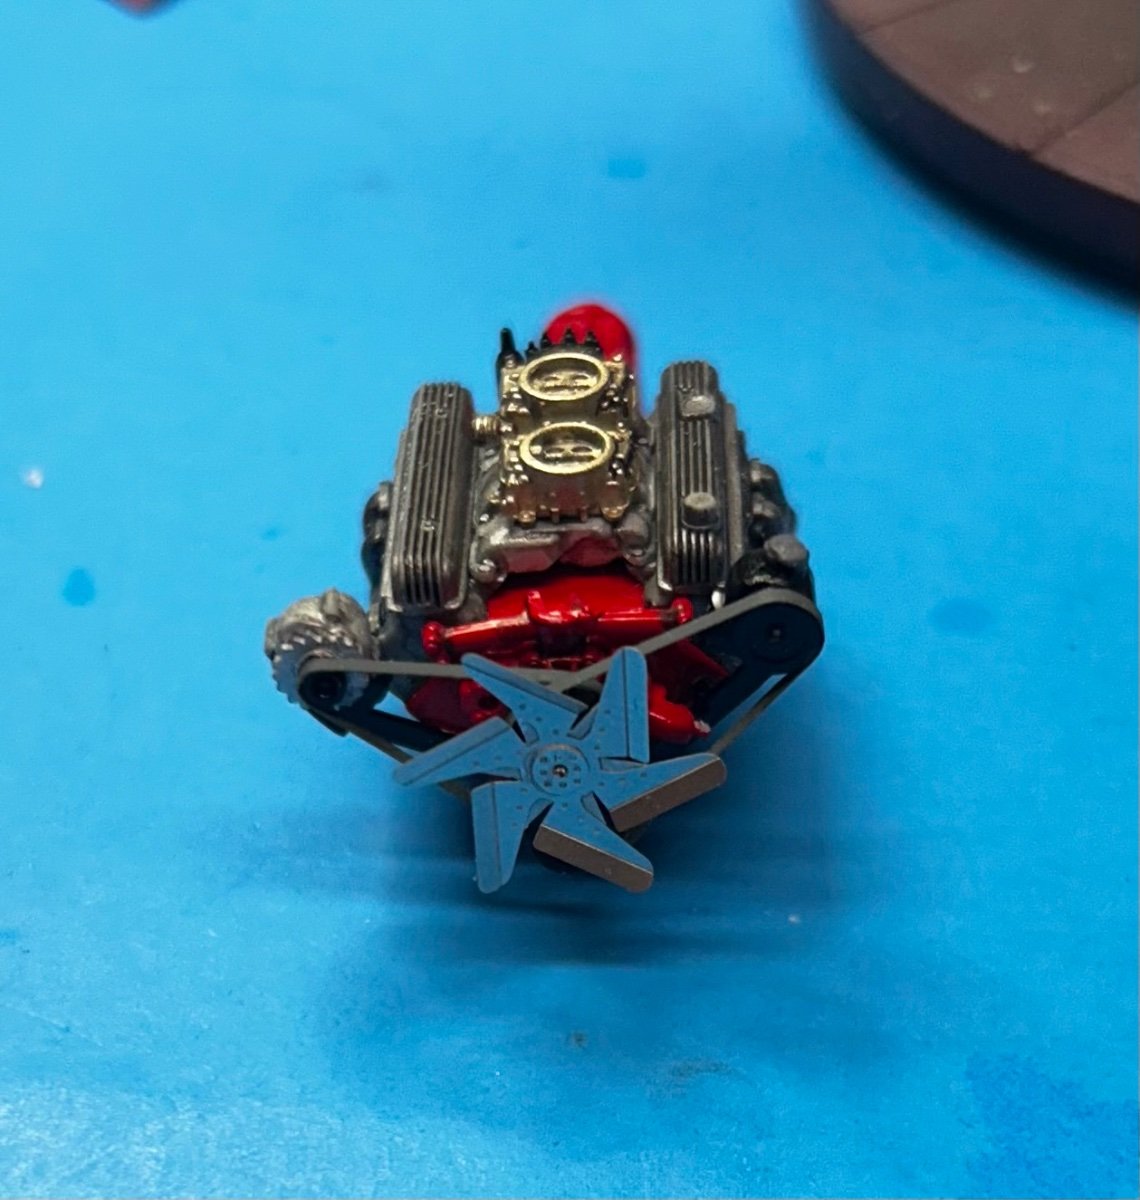
The photo etch flex fan kit from Detail Master adds a greater level of realism.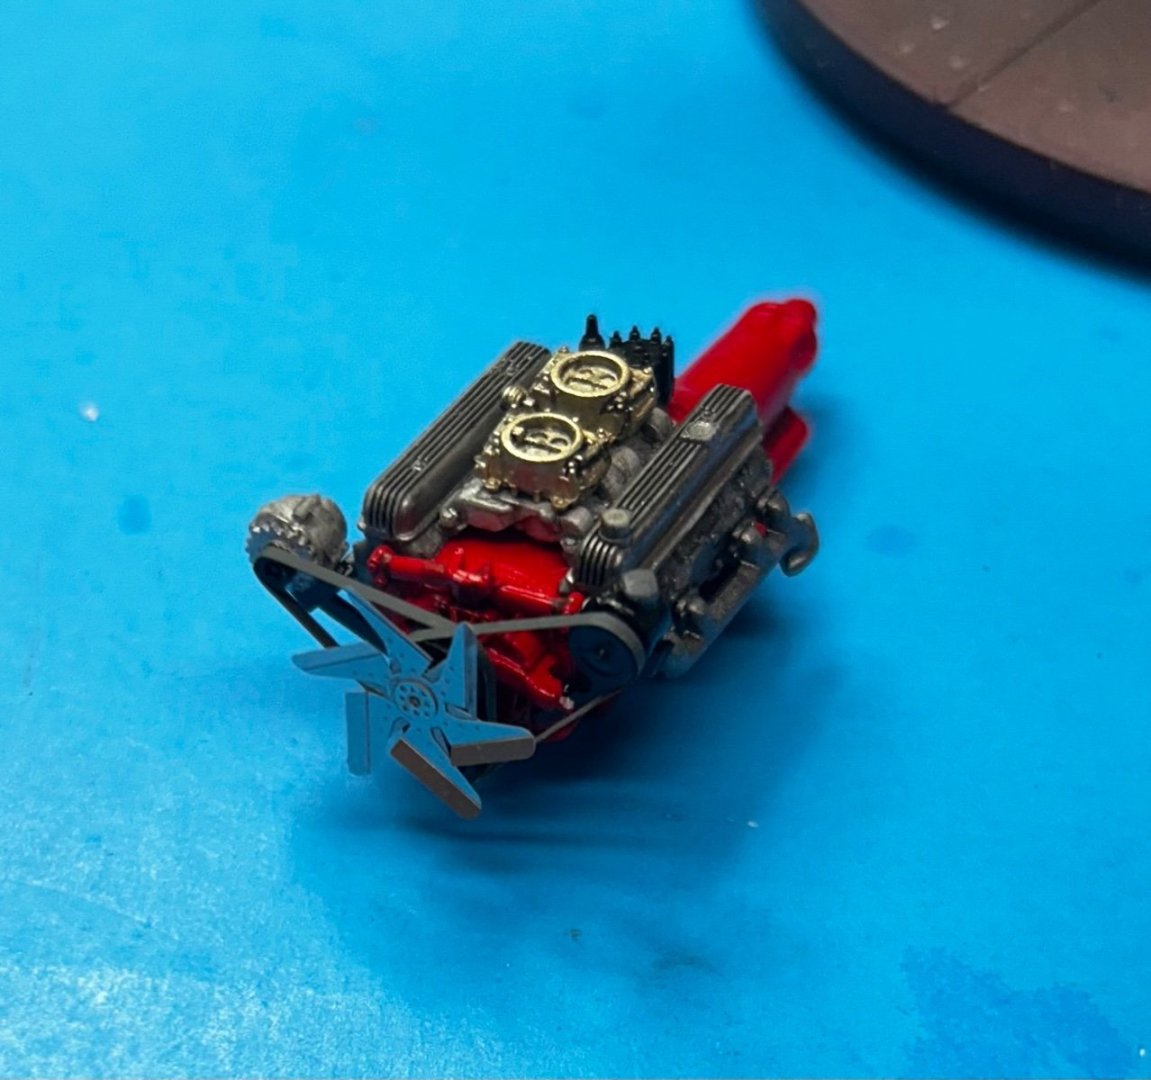

-
1966 Buick Riviera by CDW - FINISHED - AMT - 1:25 Scale
CDW replied to CDW's topic in Non-ship/categorised builds
Now that I've thought about it for a bit, I think I shall continue as it is and simultaneously look for a replacement hood. I can paint up the replacement when/if I find one. -
Loarre Castle (Spain) by King Derelict - Aedes Ars 1/200
CDW replied to king derelict's topic in Non-ship/categorised builds
It looks so much larger than the actual dimensions. -
1966 Buick Riviera by CDW - FINISHED - AMT - 1:25 Scale
CDW replied to CDW's topic in Non-ship/categorised builds
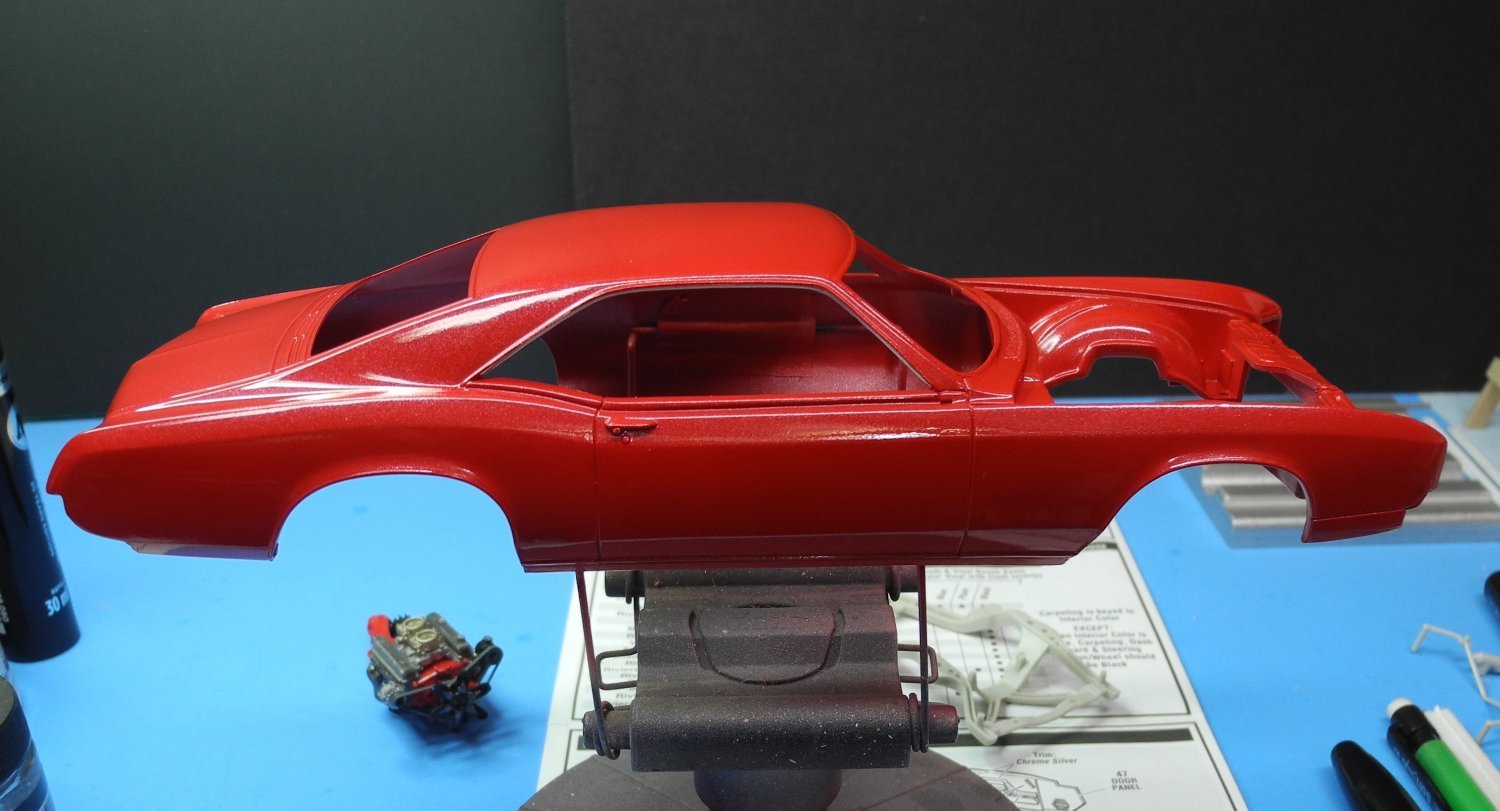
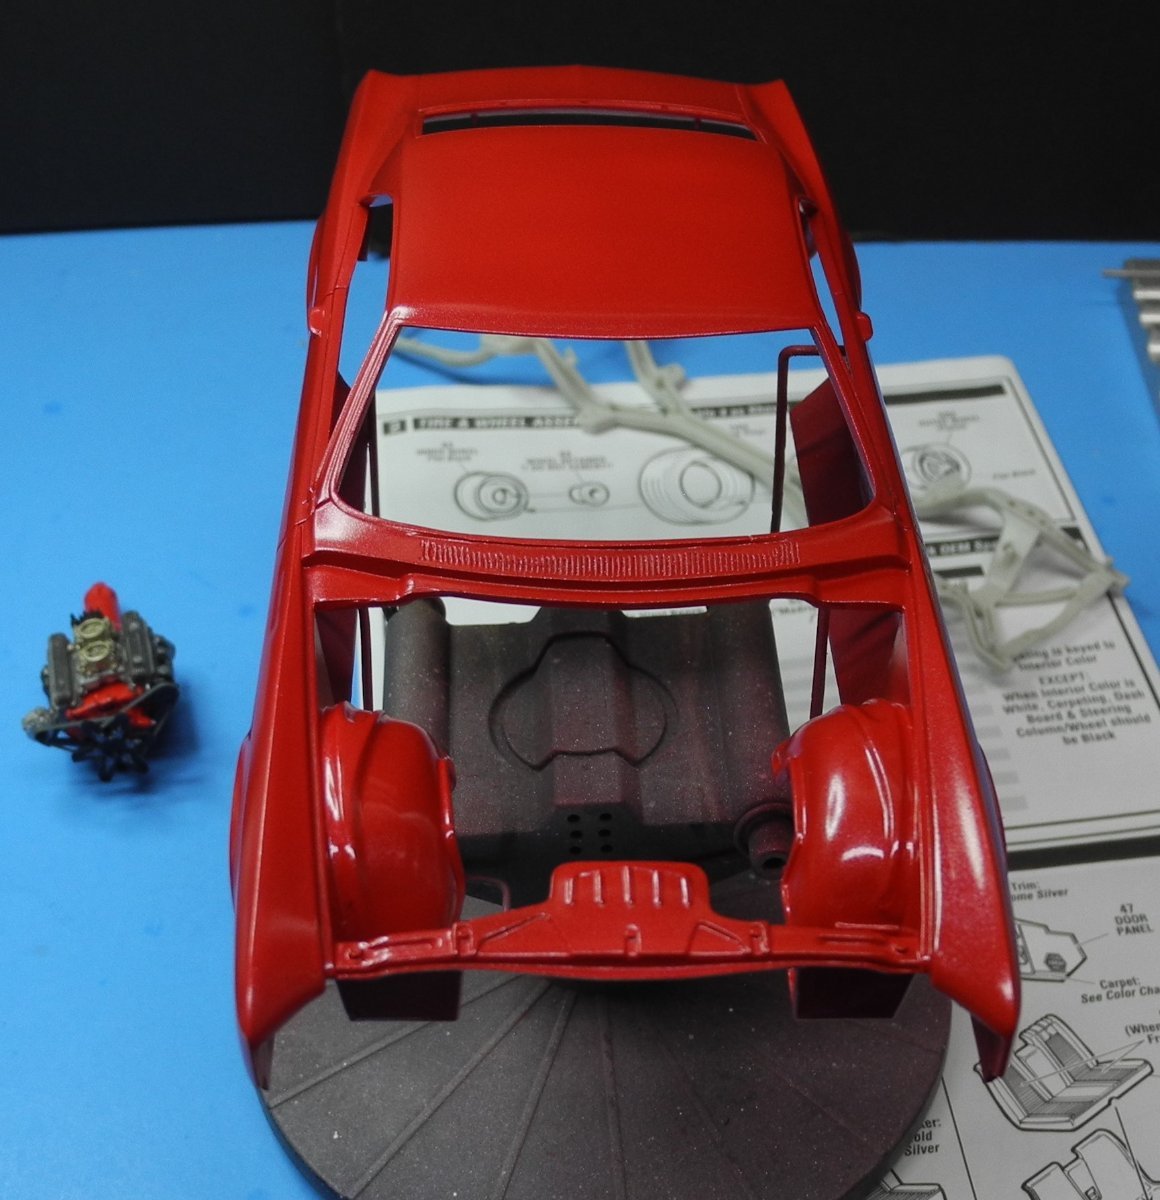
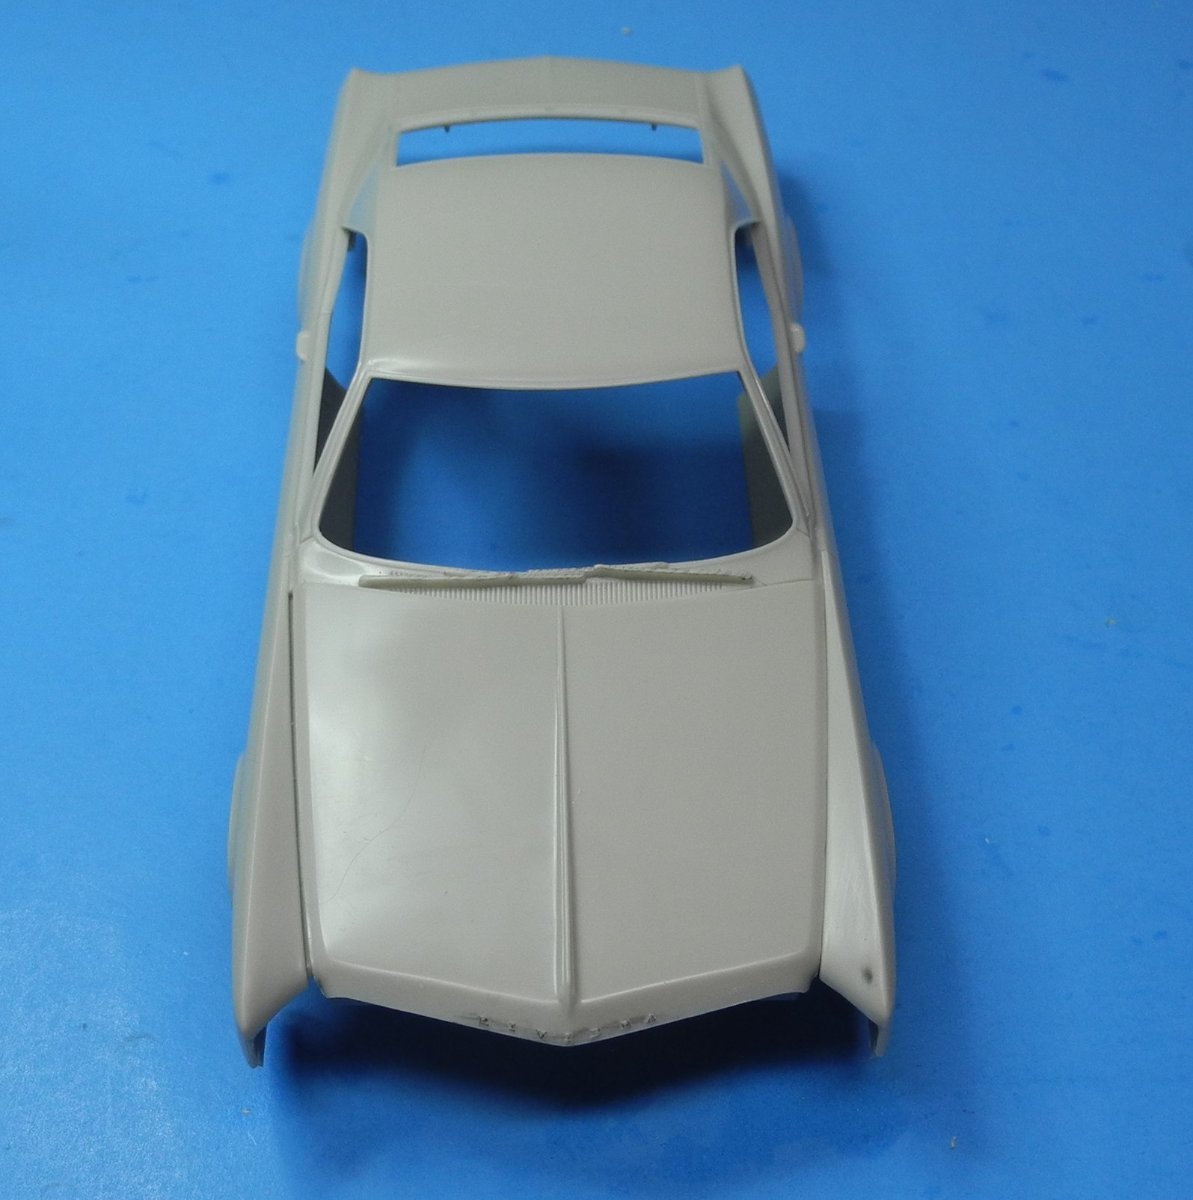
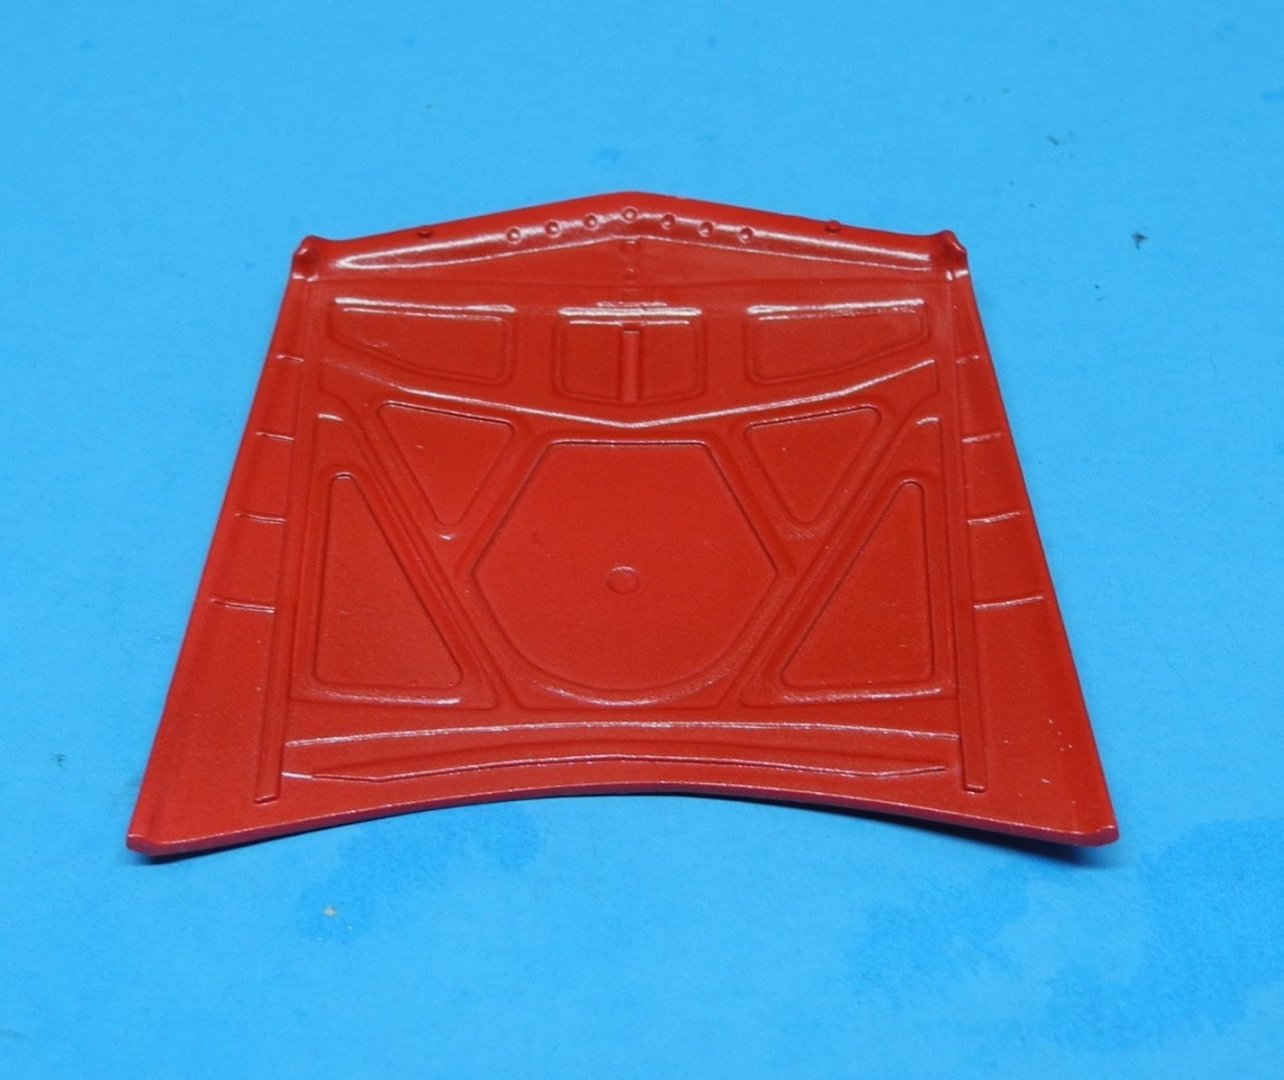
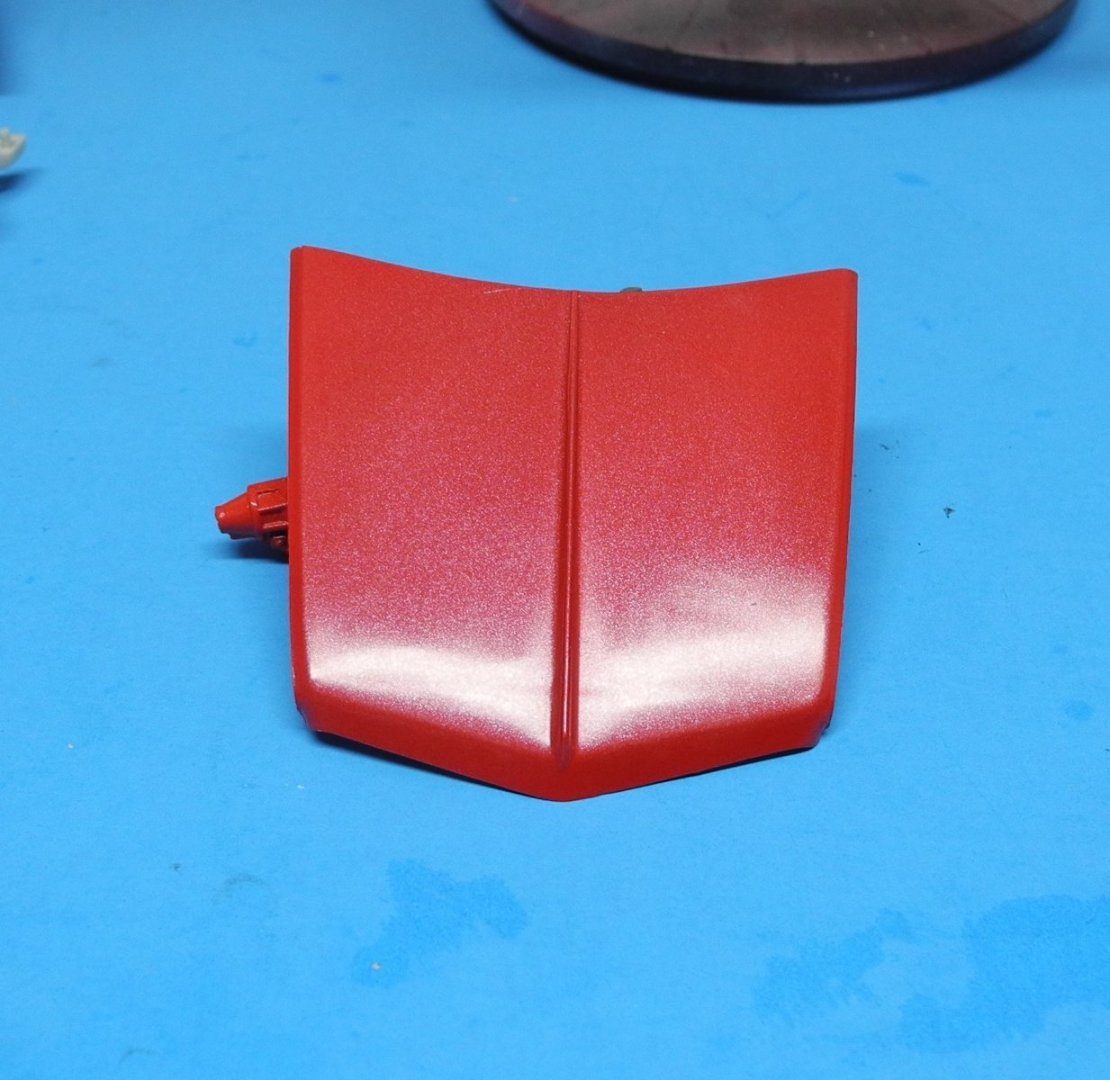
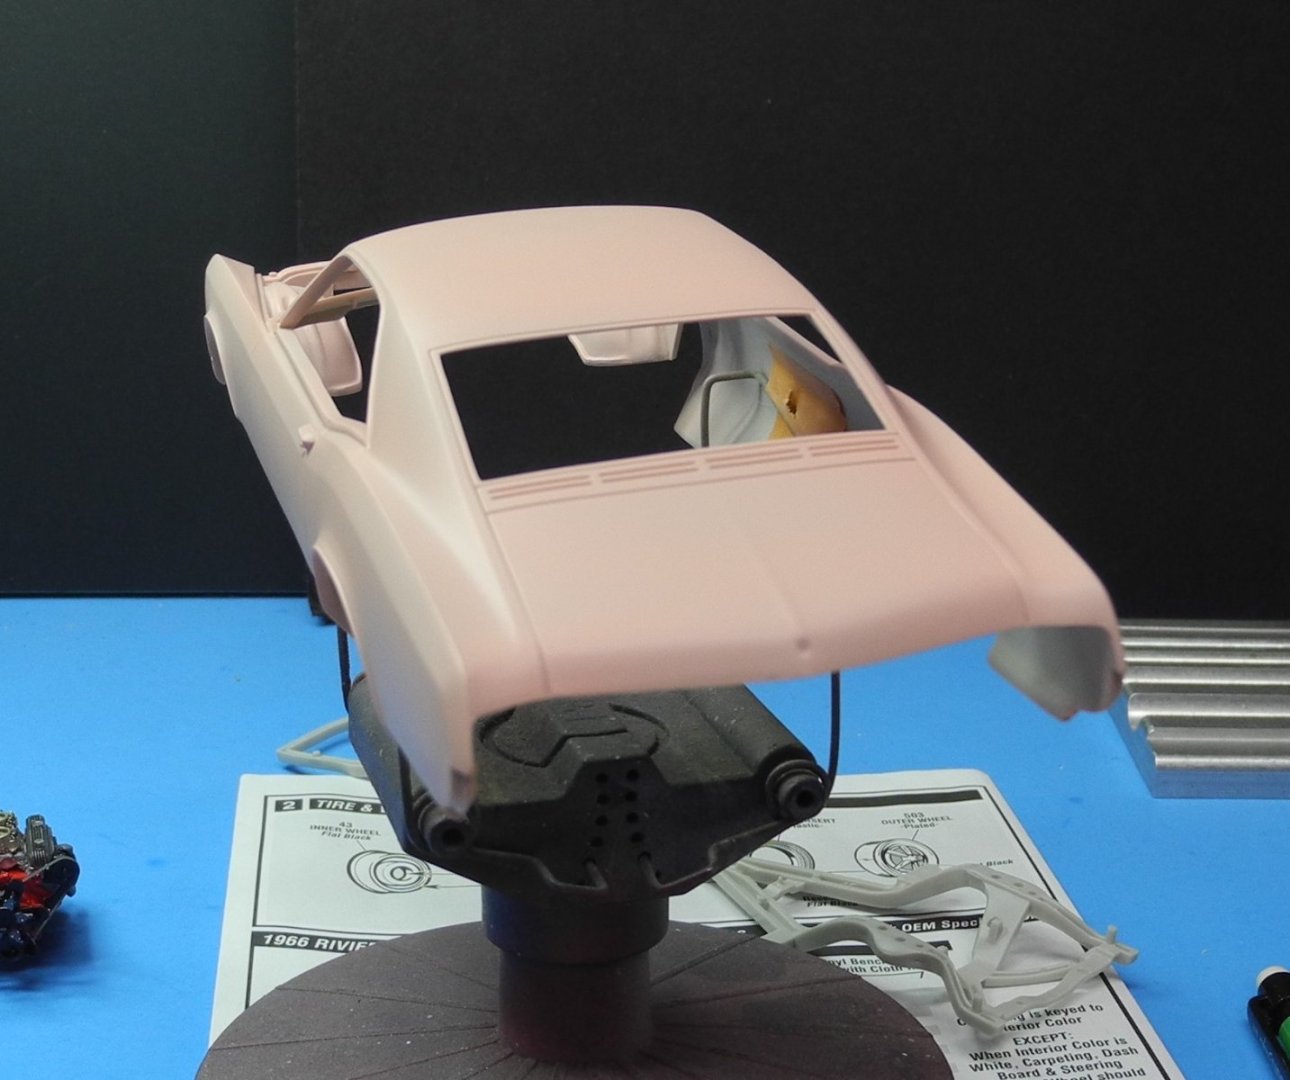
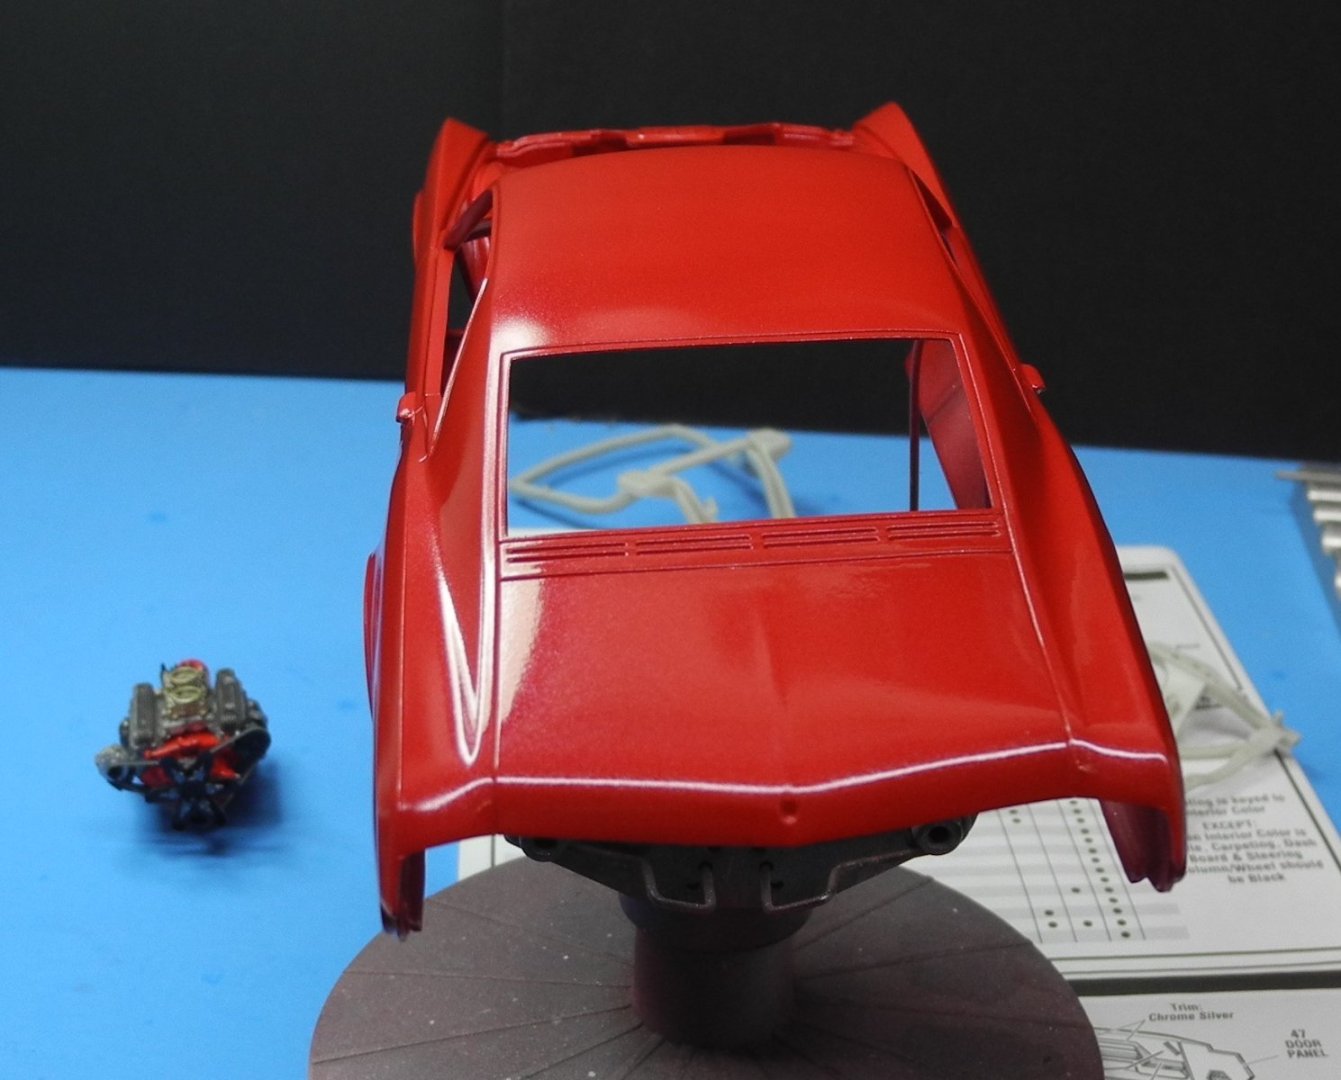
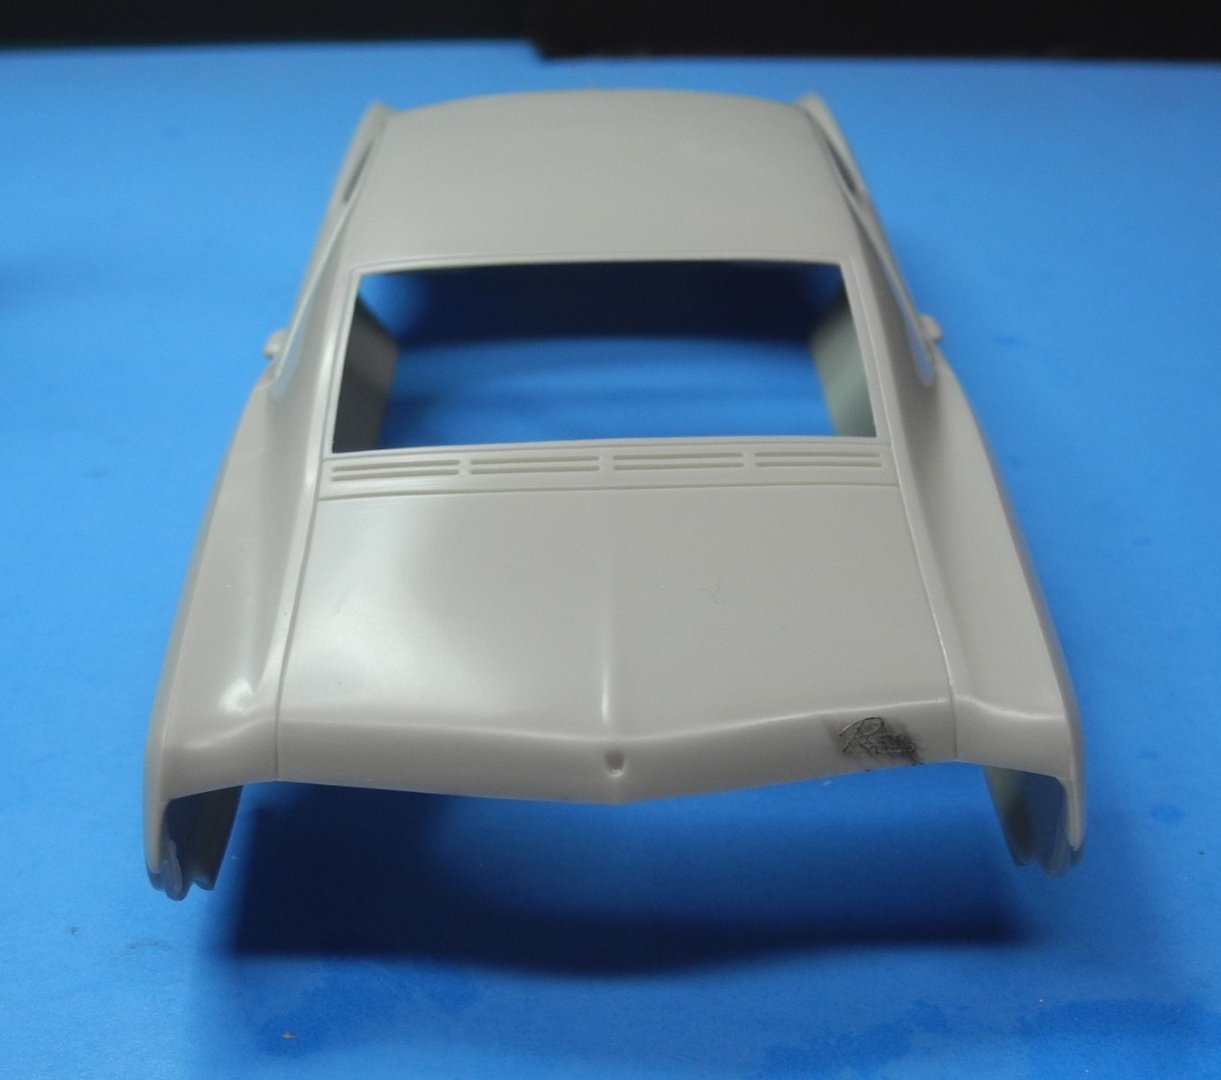
Earlier in this thread, I mentioned the hood is slightly warped and does not cleanly match/lay down in the closed position. Now that I've laid down the color coats, I've realized another issue I did not notice before now. On close inspection in preparation for clear coats, on top of the hood appears ghosting of the structural reinforcement on the inside of the hood. It's difficult to pick up the detail in a photograph, but it can be clearly seen with the naked eye. In order to fix this, I need to strip all the paint off the hood and do some body work to hide the ghosting. Since the hood is slightly warped, I'm inclined to seek out another, replacement hood. Either way I go, it's going to delay my progress, but it seems to me I would be better off with a replacement (if I can find one). Either way, it will cause a delay.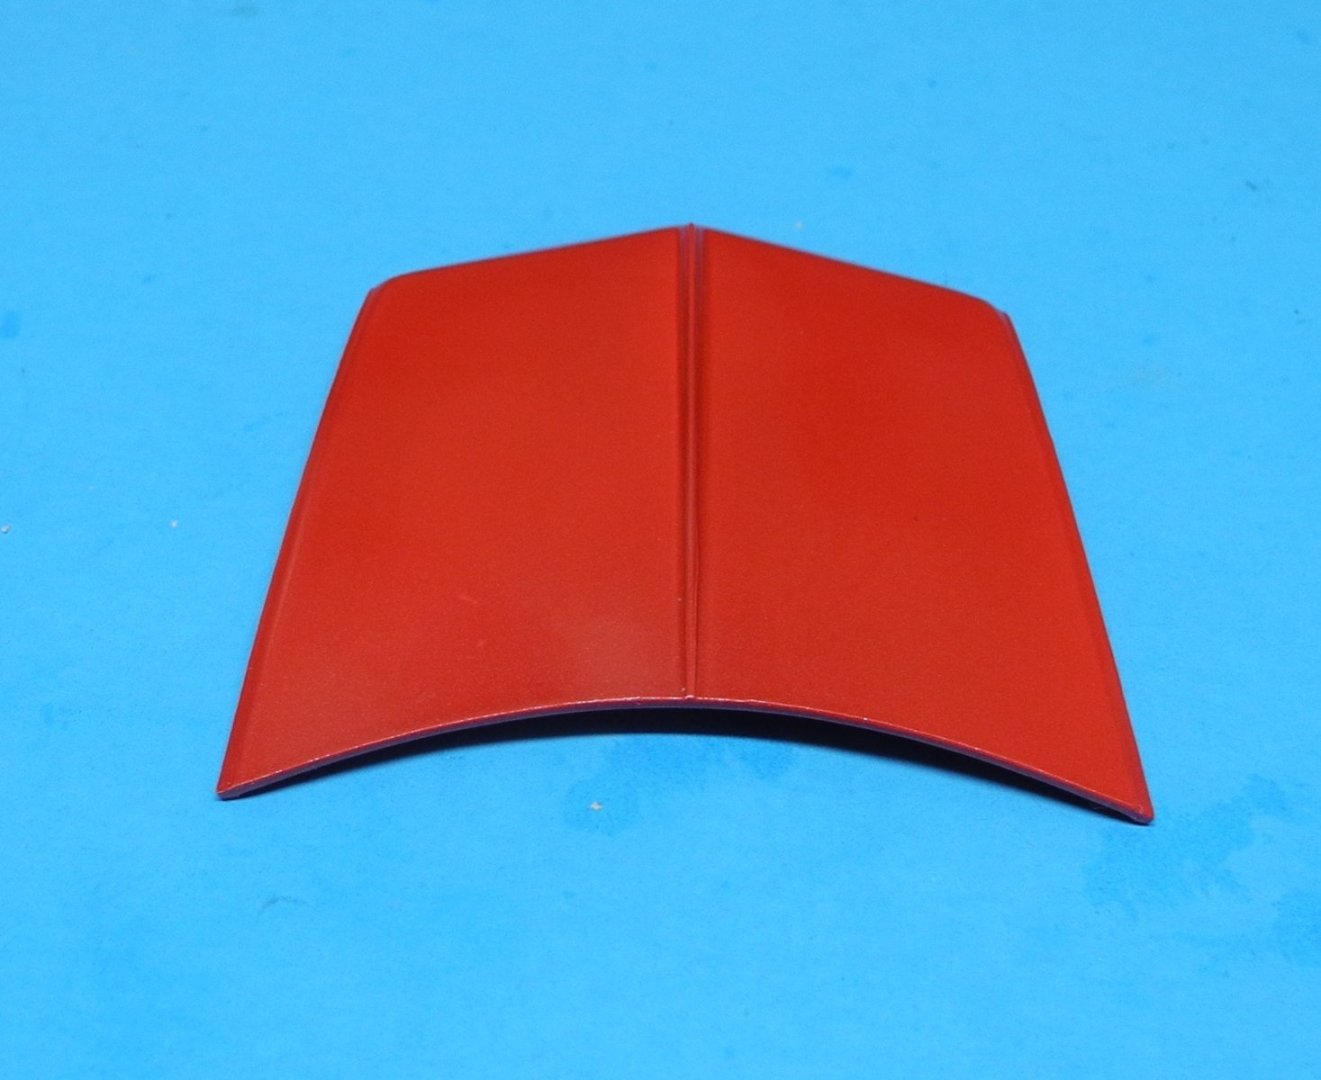
-
1966 Buick Riviera by CDW - FINISHED - AMT - 1:25 Scale
CDW replied to CDW's topic in Non-ship/categorised builds
Thanks Gary. There are different schools of thought on whether or not to clear coat over decals. Some top competition modelers say they never clear coat over their decals. They achieve their finish first, then apply decals last with nothing on top. My own personal experience with clear coat over decals has been a mixed bag. At times it came out great, other times disaster. The main thing that can be said in favor of no clear over decals is the fact that decals can be removed and replaced later on without spoiling the entire paint job whereas clear over the decals means stripping the entire model back down to bare plastic if the decals are under a clear coat. -
1966 Buick Riviera by CDW - FINISHED - AMT - 1:25 Scale
CDW replied to CDW's topic in Non-ship/categorised builds
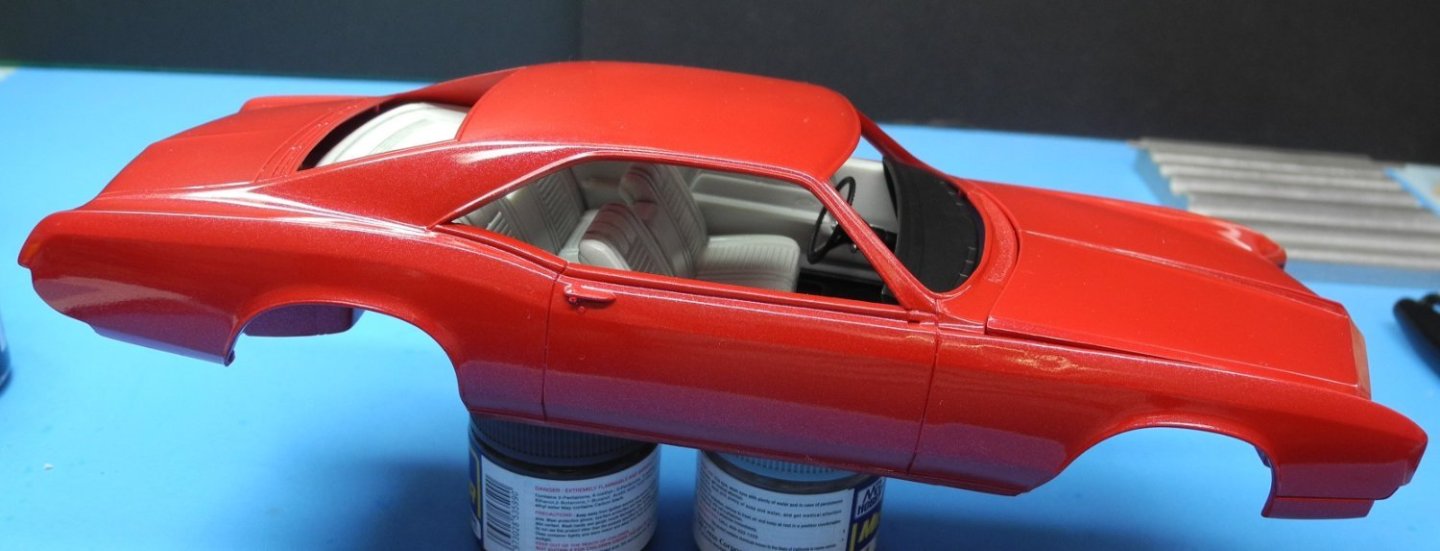
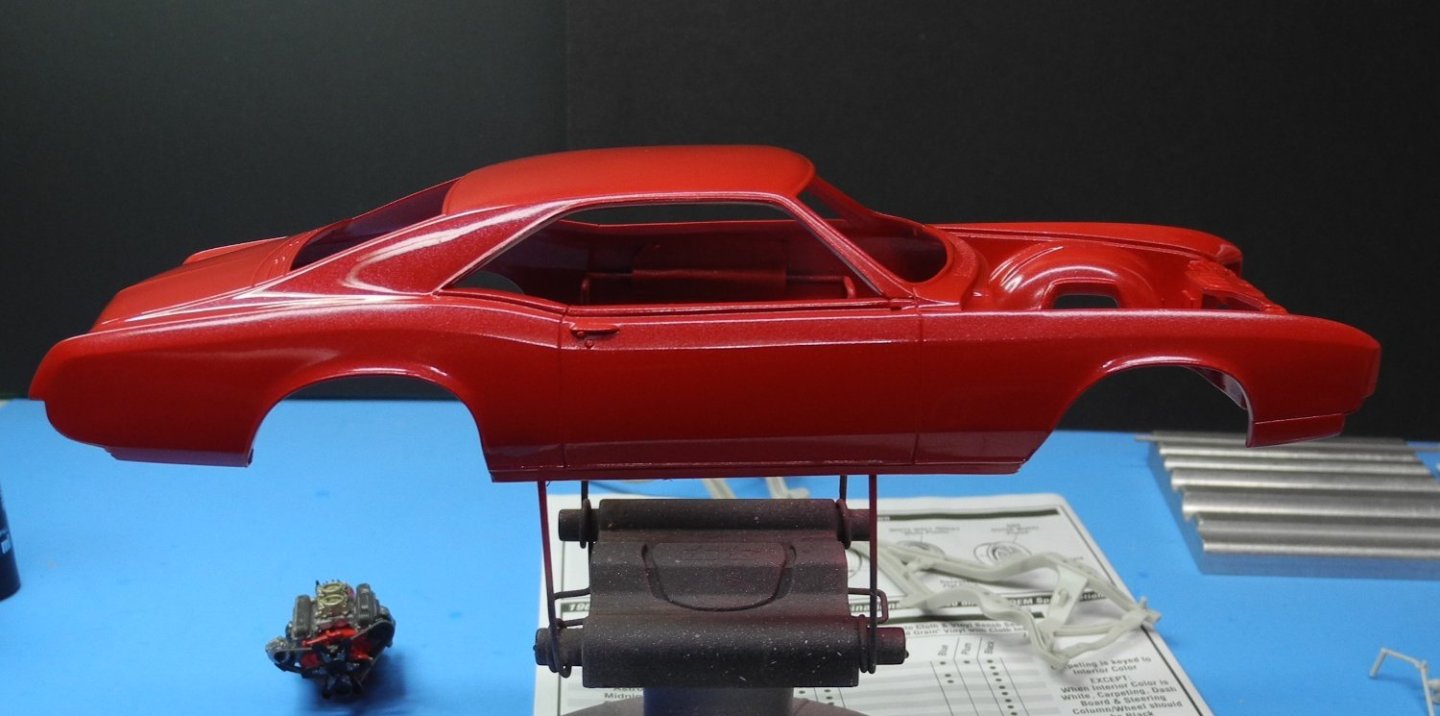
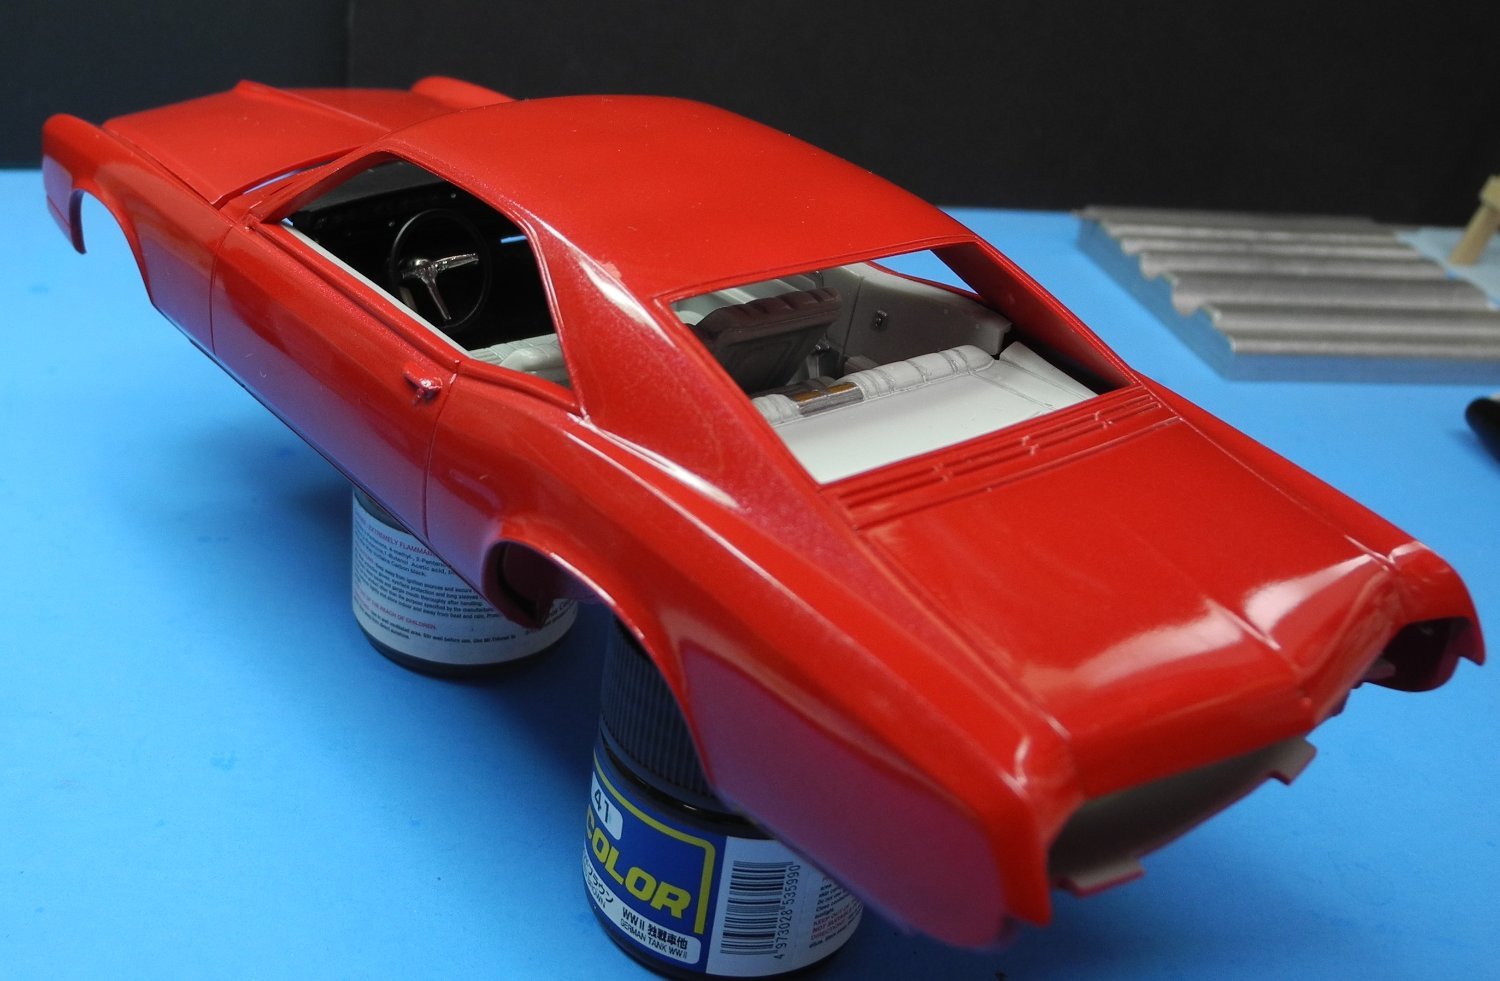
Instead of compound in this step, decided to do one more wet sanding with all the grades of micromesh polishing cloths to remove any tiny traces of dust, then another liberal coat of clear lacquer. Next, THIS coat of lacquer will get polished with finishing compound followed by a protective wax.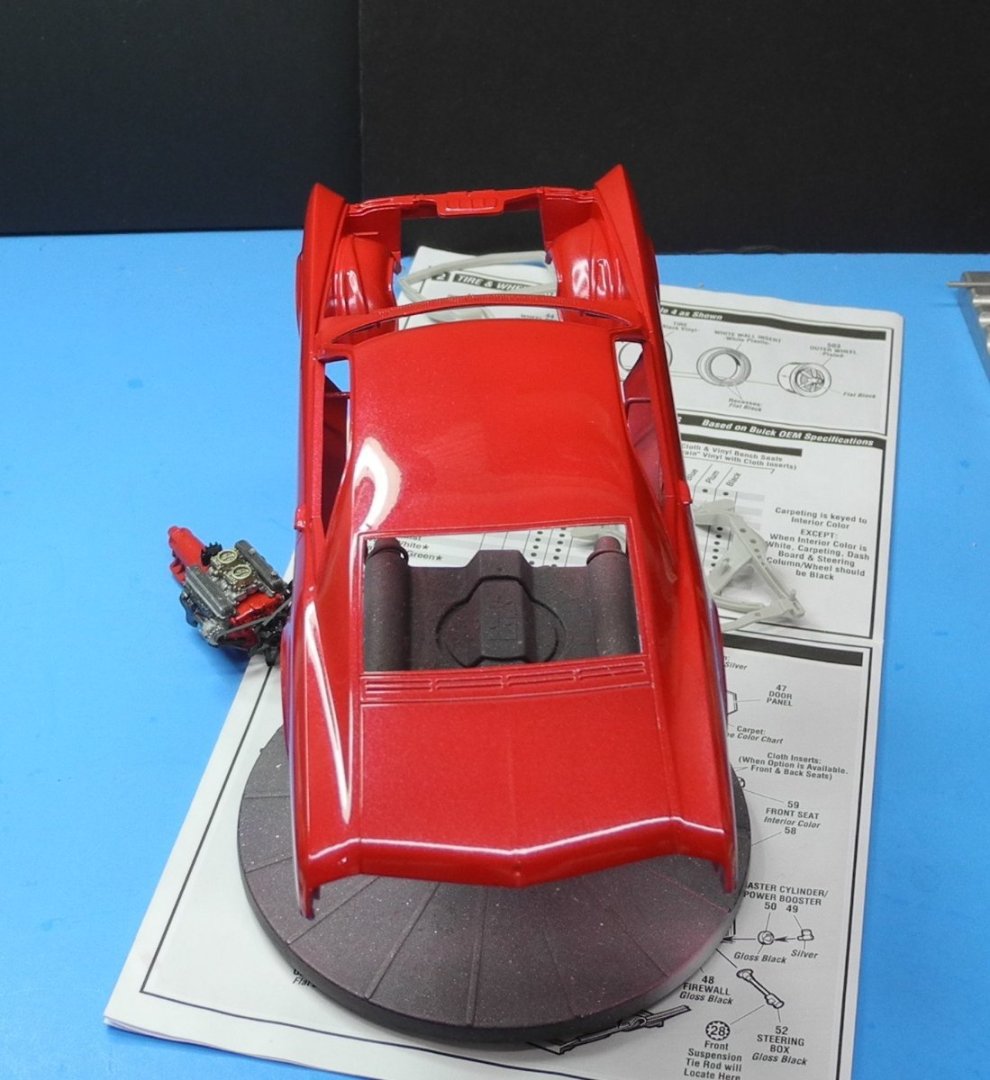


-
1966 Buick Riviera by CDW - FINISHED - AMT - 1:25 Scale
CDW replied to CDW's topic in Non-ship/categorised builds
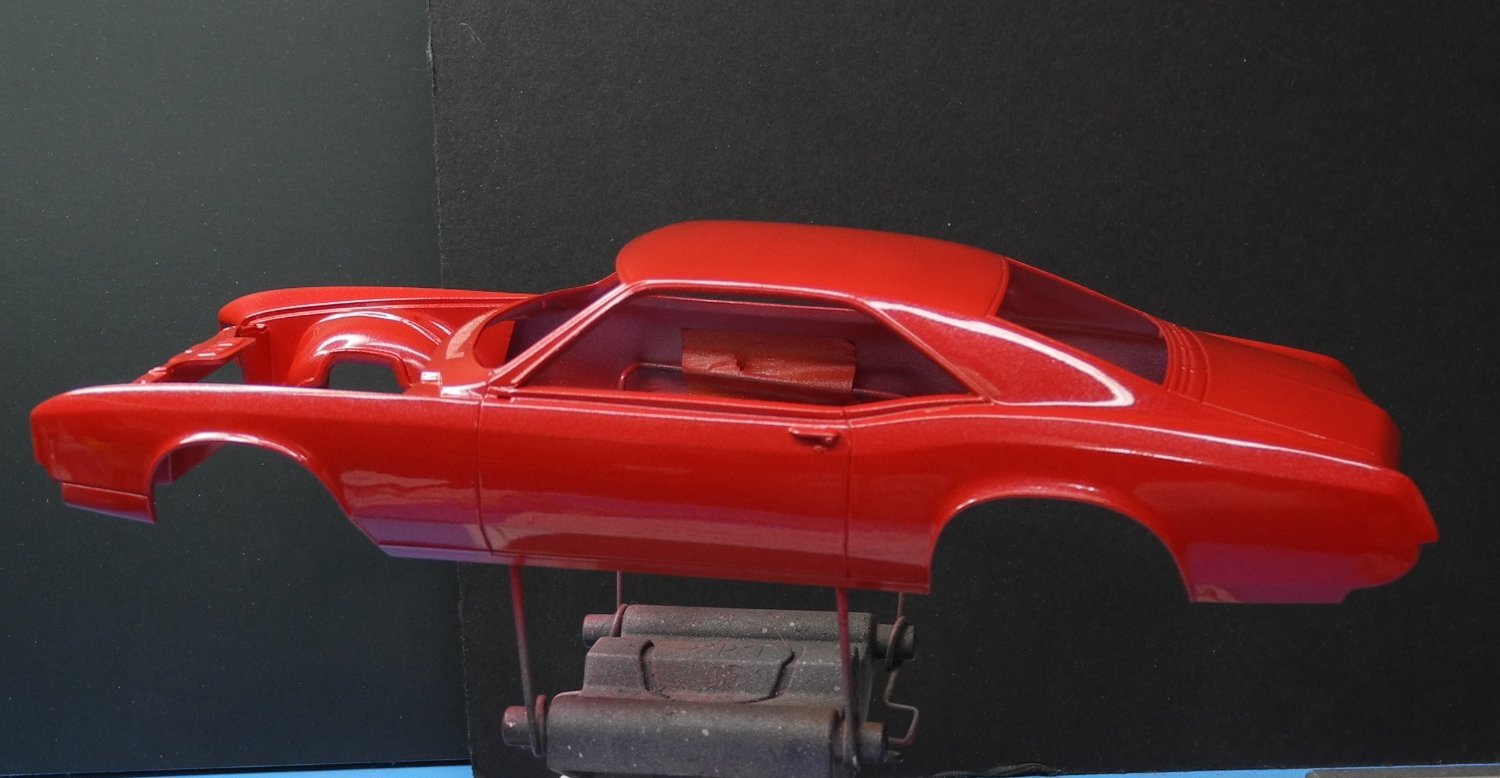
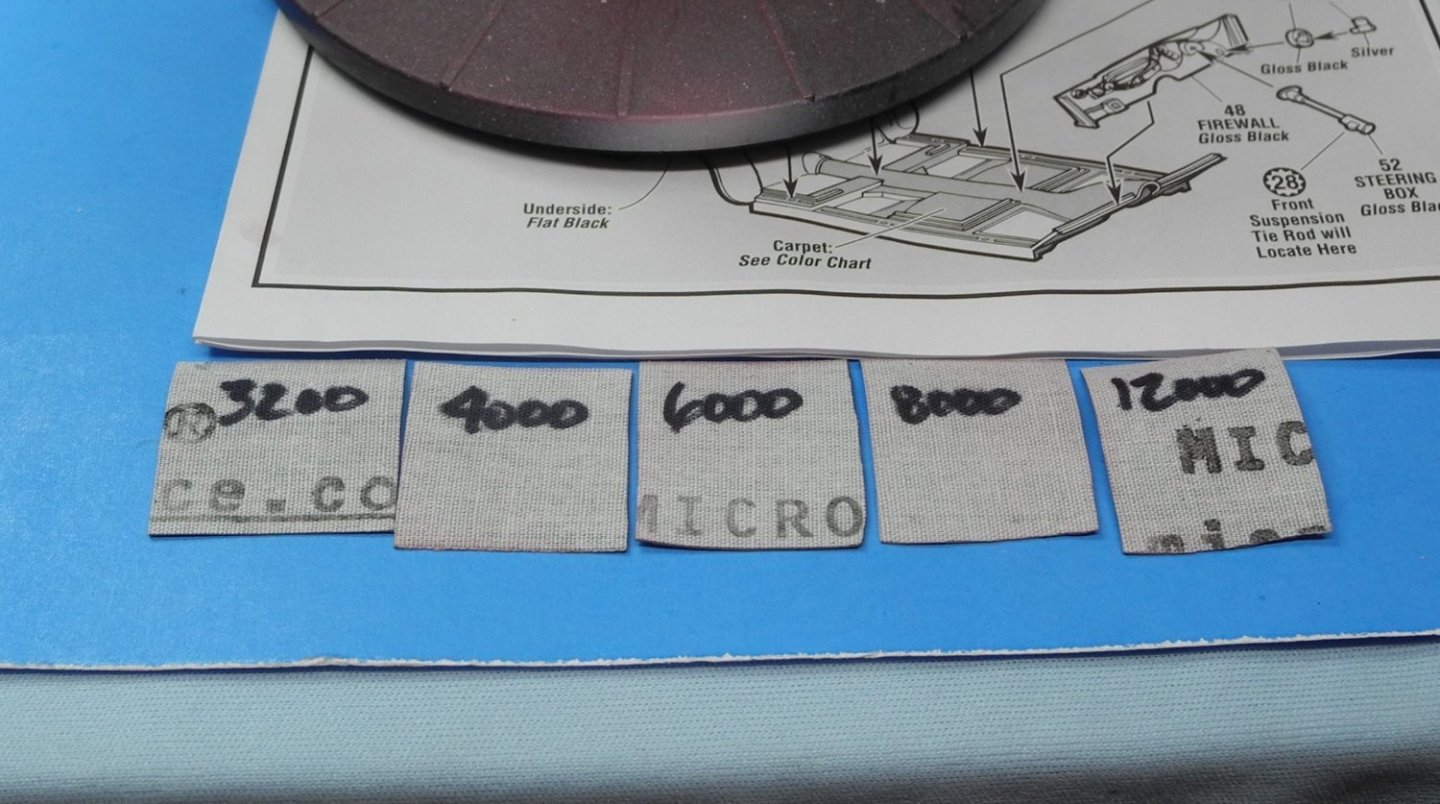
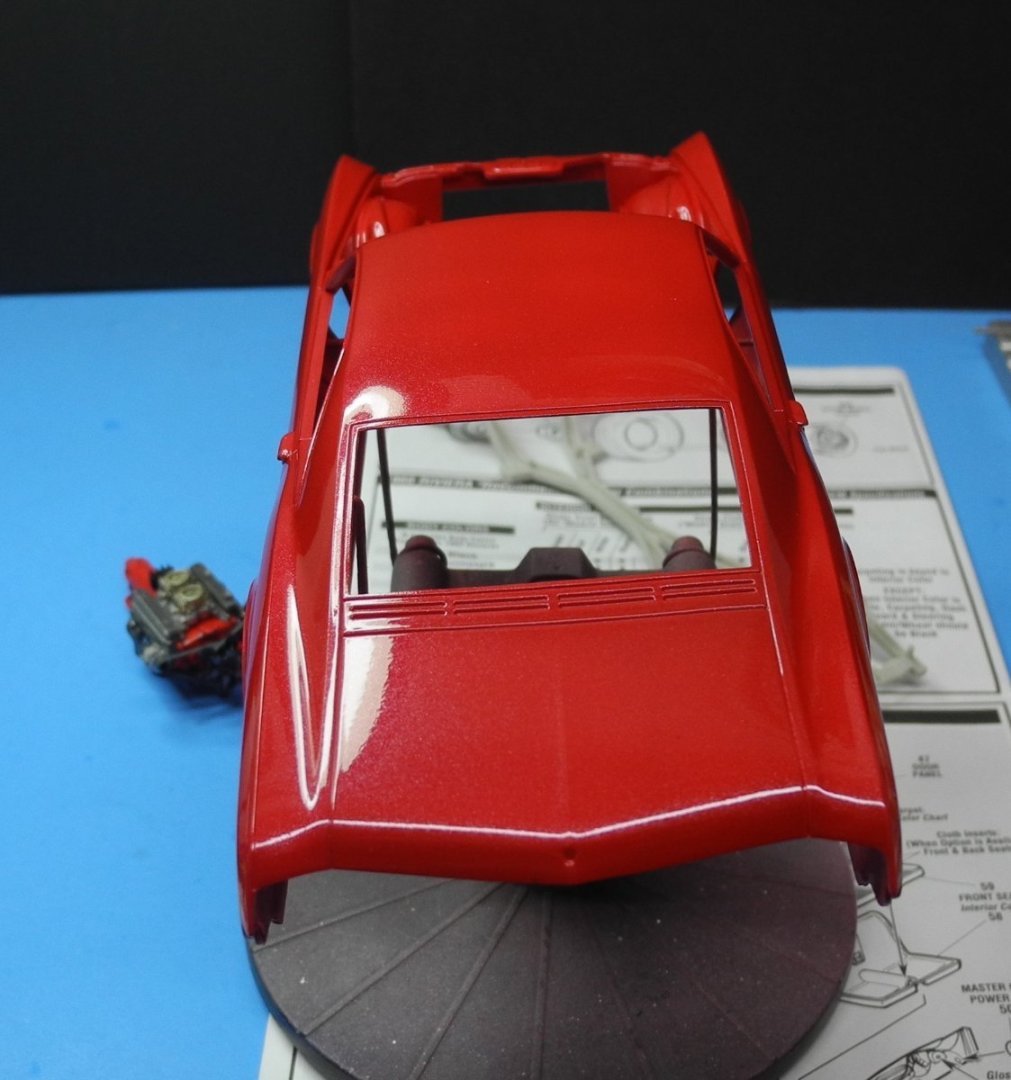
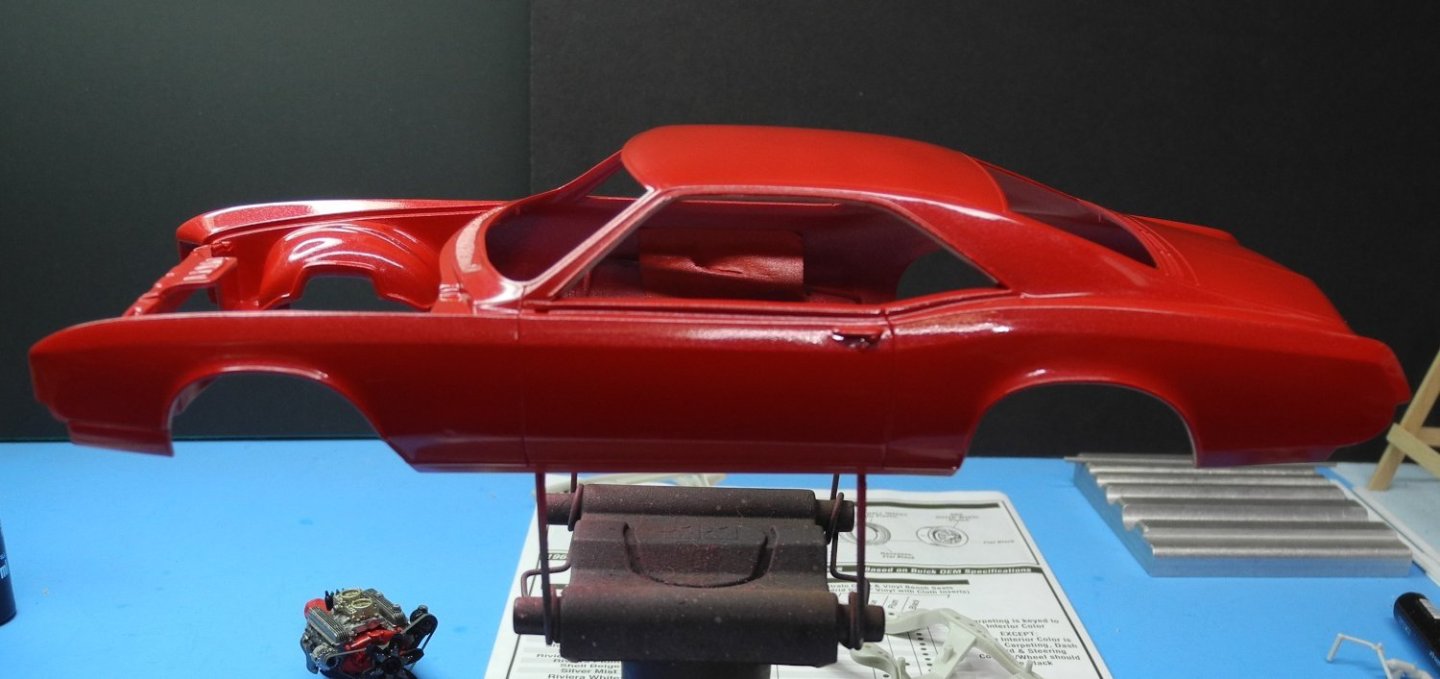
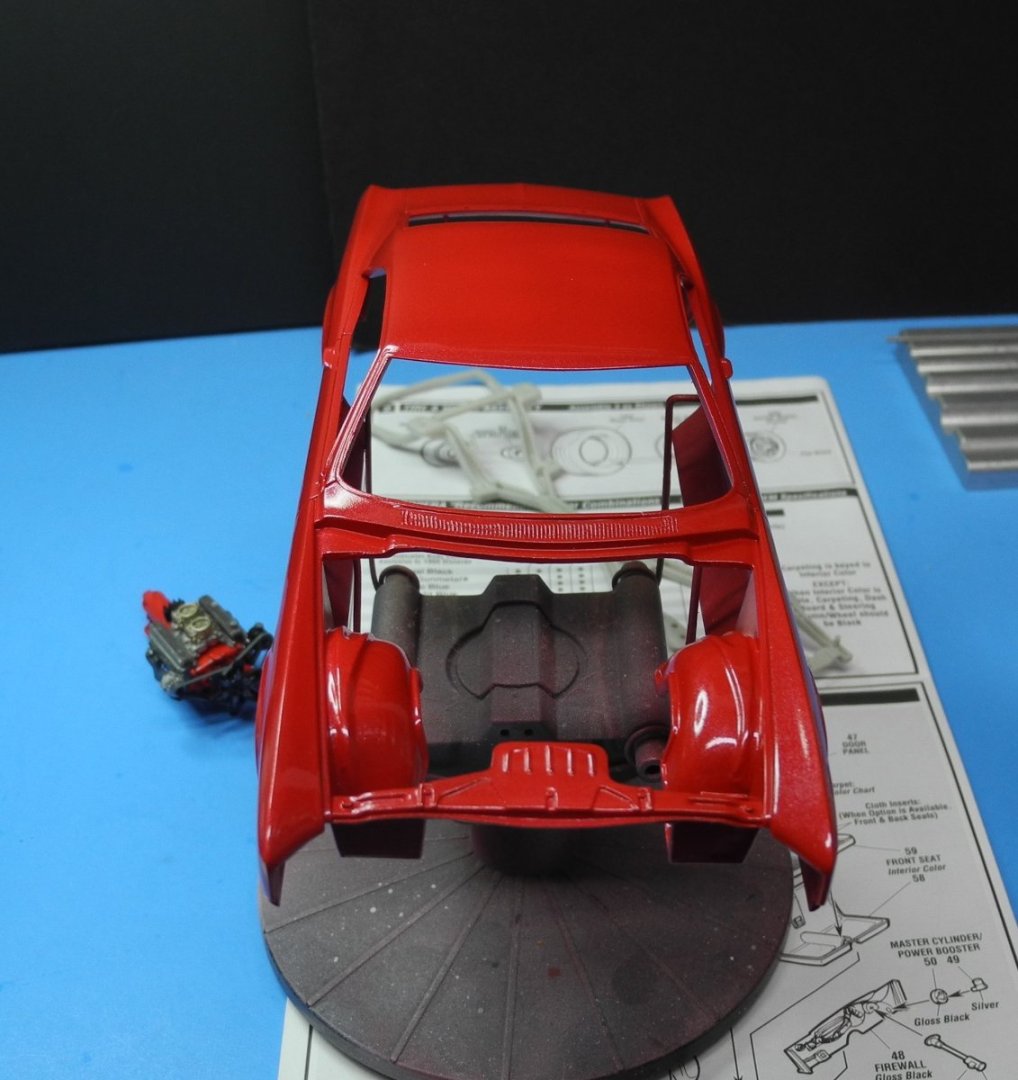
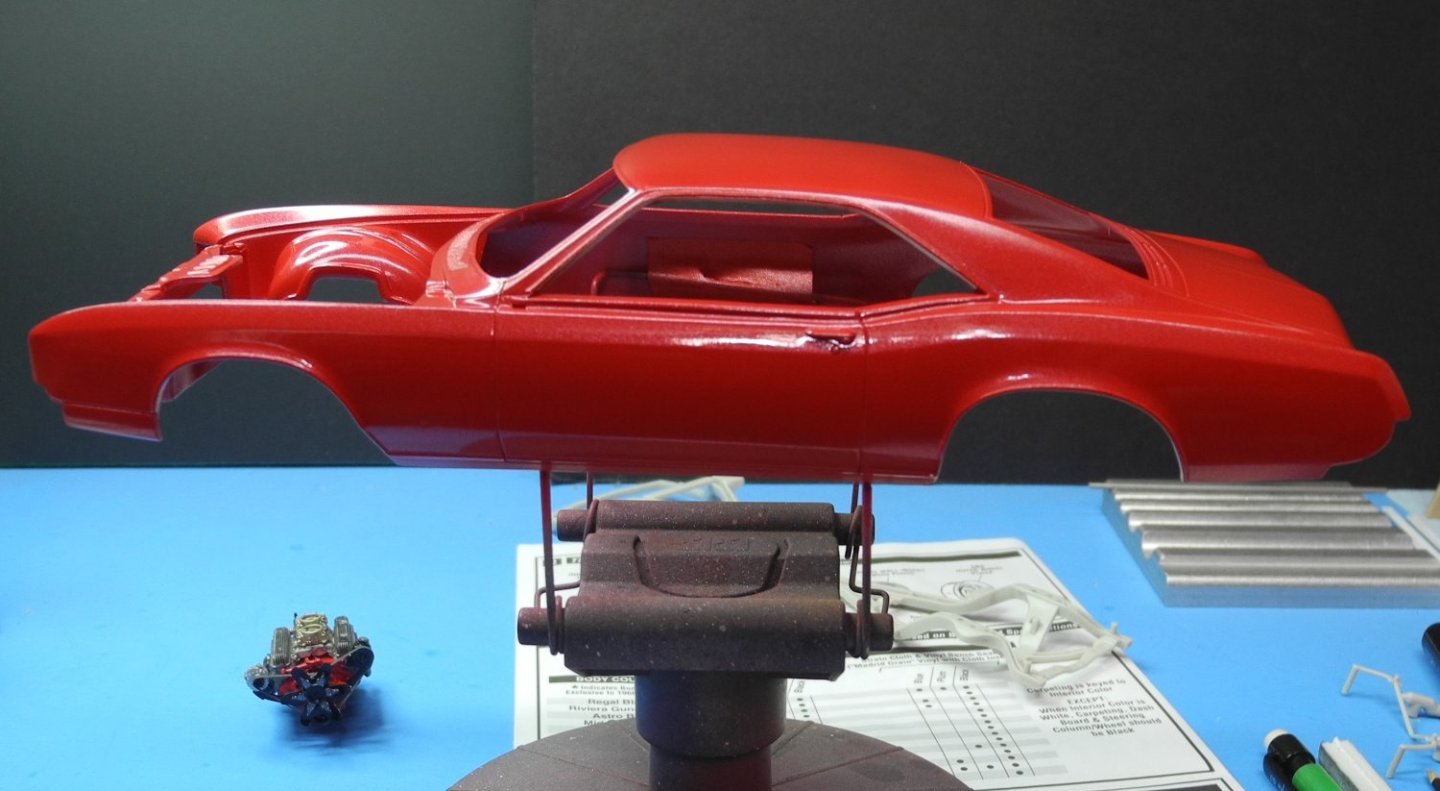
The next steps involve polishing and clear coat application. I went over the entire painted model, wet sanding using sequentially, 3200, 4000, 6000, 8000, then 12000 micro mesh polishing cloths over the red metallic paint. Once it was dry, then sprayed on my clear lacquer, Mr Color Super Clear II. There are a few specks of dust in my clear, which I will polish out with compound in later steps.
- 106 replies
-
- 10
-

-
-
Loarre Castle (Spain) by King Derelict - Aedes Ars 1/200
CDW replied to king derelict's topic in Non-ship/categorised builds
What are the dimensions you need for the display? -
1966 Buick Riviera by CDW - FINISHED - AMT - 1:25 Scale
CDW replied to CDW's topic in Non-ship/categorised builds
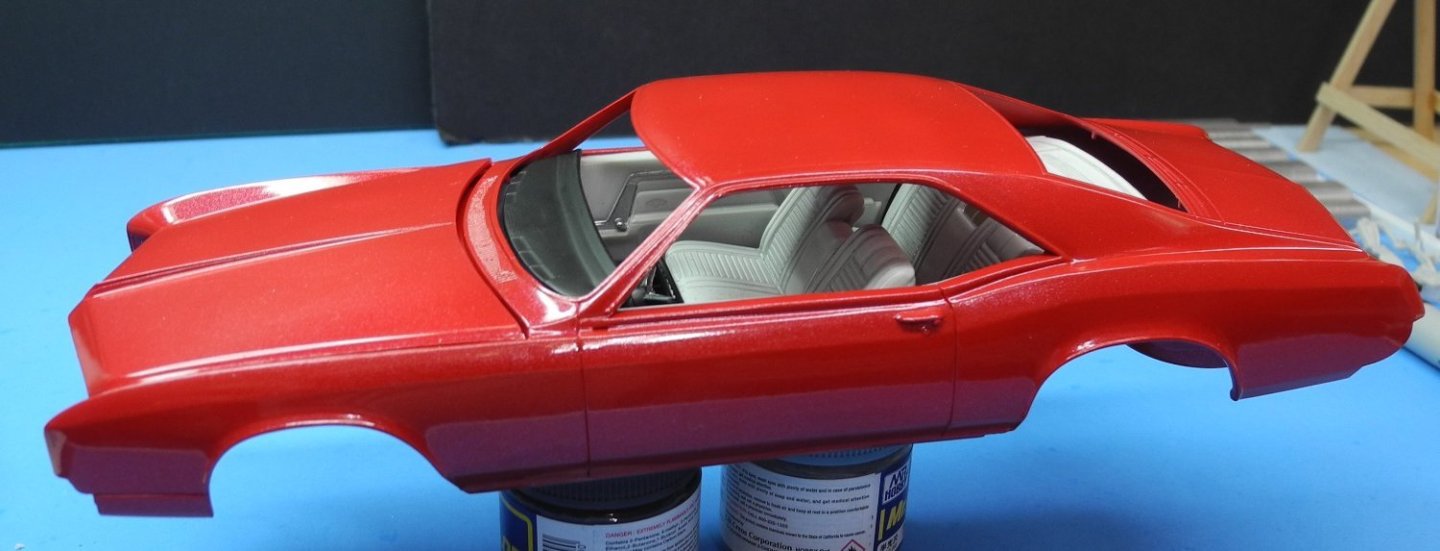
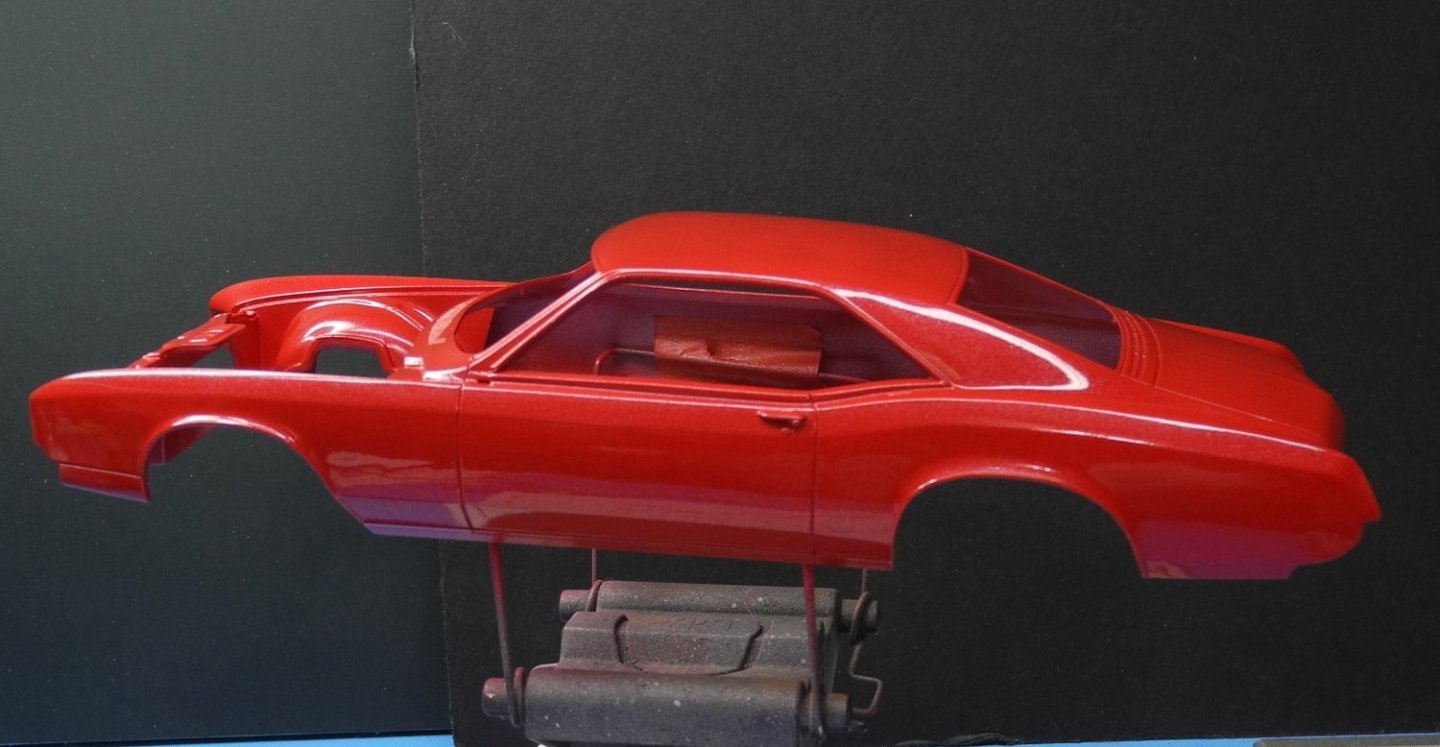
That pretty pink primer again... Followed by red metallic, Mr Color lacquer variety...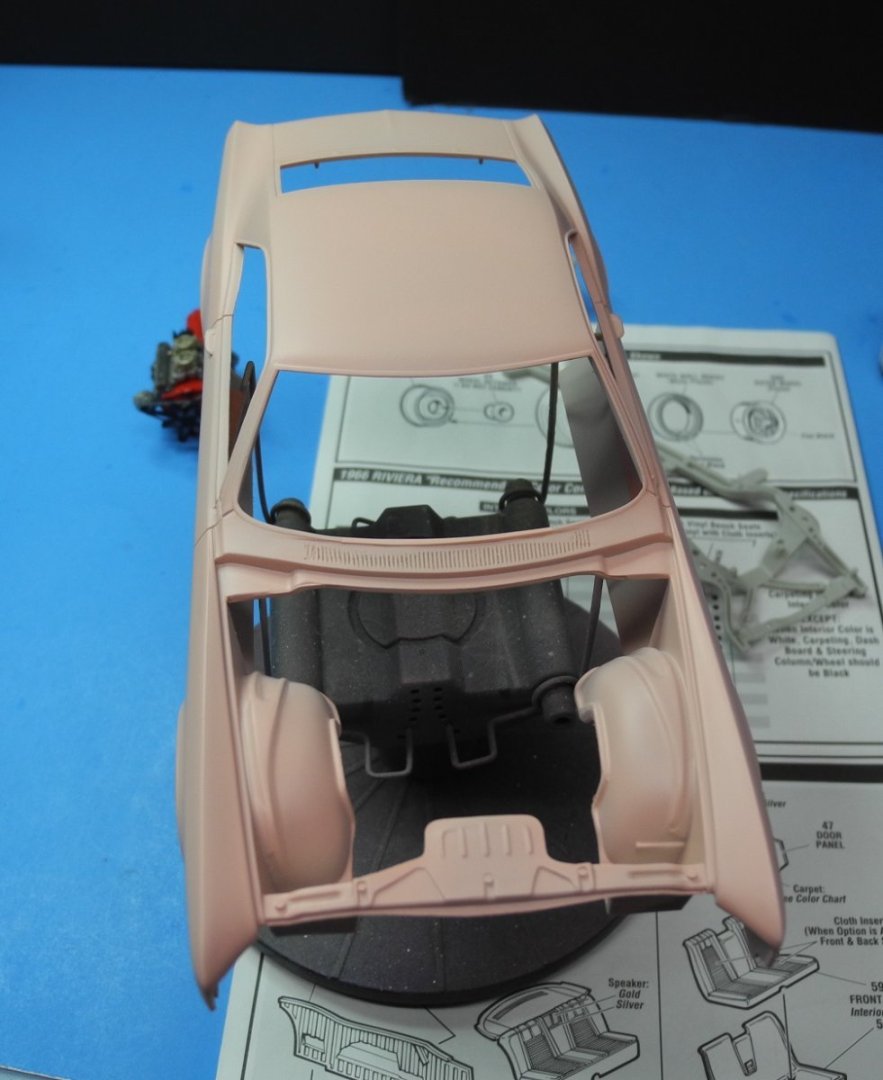

- 106 replies
-
- 11
-
-
Loarre Castle (Spain) by King Derelict - Aedes Ars 1/200
CDW replied to king derelict's topic in Non-ship/categorised builds
Where will you display this masterpiece, Alan? Visitors will love seeing this. All the little ones will want to touch it, though. Yesterday I was at Lowes Home Improvement store searching their plexiglass inventory. Covid caused prices for it to skyrocket according to the clerk. Hasn't come down in price since that surge in demand. Are you considering enclosing the castle behind protection, like plexiglass? -
Loarre Castle (Spain) by King Derelict - Aedes Ars 1/200
CDW replied to king derelict's topic in Non-ship/categorised builds
I agree with you, Jack. Looking Very real indeed. Impressive, Alan! -
Thanks for the comments Dan, Ken. Pink primer makes sense and will give it a try next yellow paint job i do. Yellow is always one of the more difficult colors to get right for me.
-
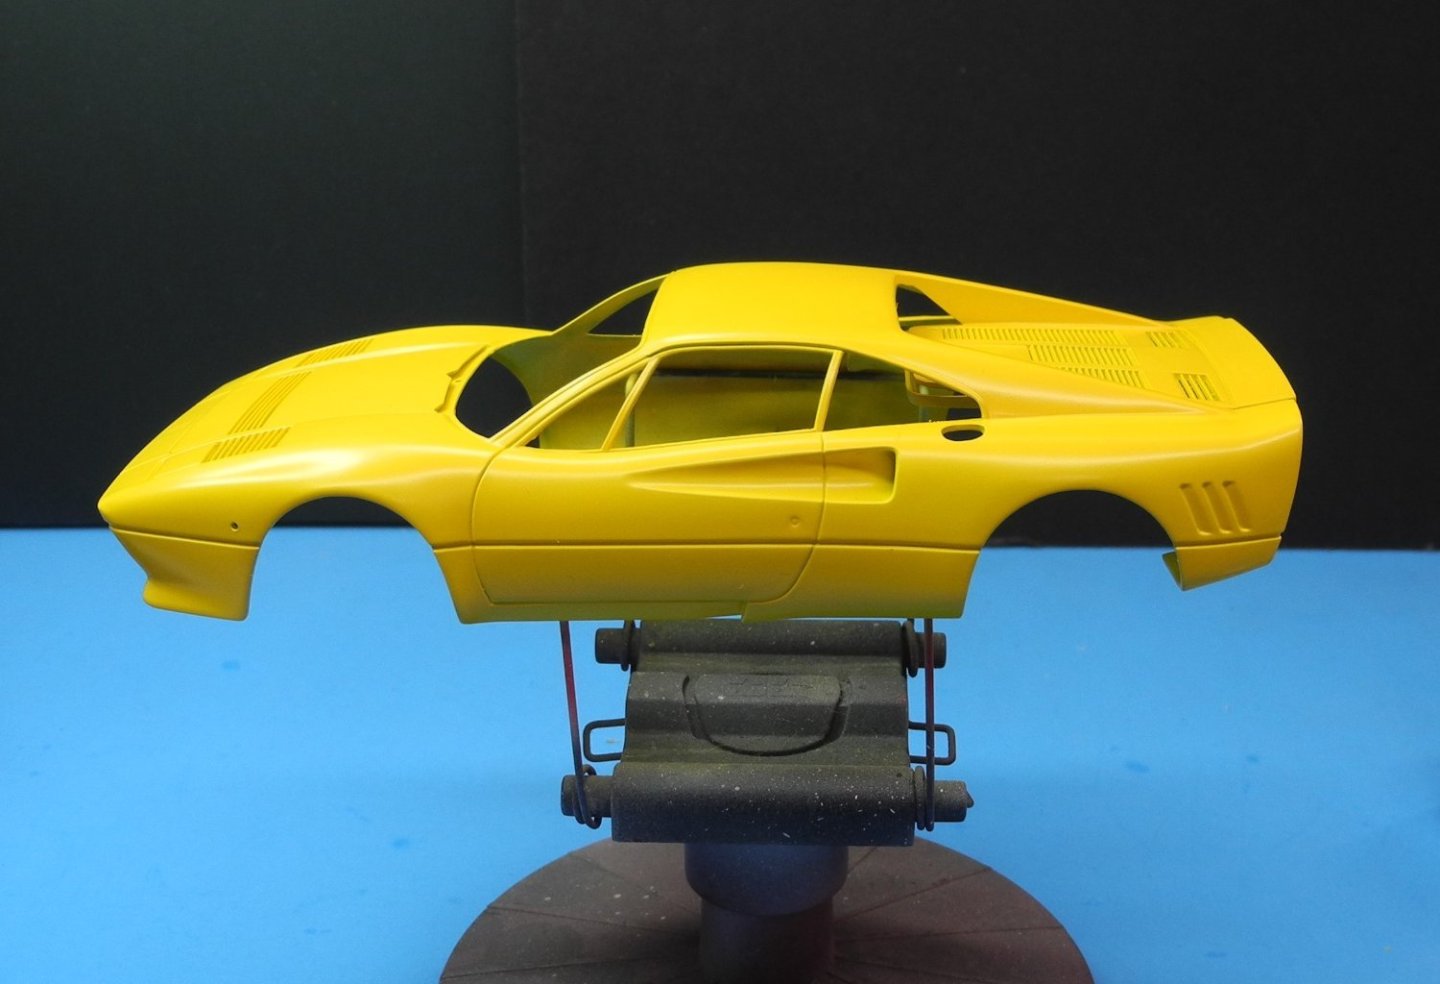
The Ferrari 288 GTO yellow body was set aside for paint drying/curing time. Yesterday I wet sanded it with 4000 grit. As I kept looking at it, it just seemed to me the yellow was not the correct shade for Ferrari. I would have sworn the Mr Color yellow I used was the same as the paint on my Enzo Ferrari I built a couple of years ago, and that color seemed perfect to me. So, I put the two models side by side for a close examination and sure enough, the Enzo Ferrari shade of yellow was a tad darker than what was on the 288 GTO. My instinct was right, the current project was NOT the same color as the former one. So, I went back and found my build thread for the Enzo, and sure enough, the paint brand and color I used for the Enzo was Splash paint, Giallo Modena color. Lucky for me, I had the remainder of the unused portion from the Enzo project. However, the paint was far too thick, I suppose that much of the reducer evaporated out over the past two years. I took a chance and reduced it to a viscosity I felt was appropriate using Mr Color Levelling Thinner. I wasn't certain the two would be compatible even though both are lacquer paints. To my delight, it seems all will be fine. I sprayed on the Splash Giallo Modena shade of yellow and am MUCH more satisfied with the results. The shade of yellow looks perfect to me. Splash paints dry flat and require subsequent clear coats to give a deep shine. I will give the model at least a week drying time before applying a clear coat.
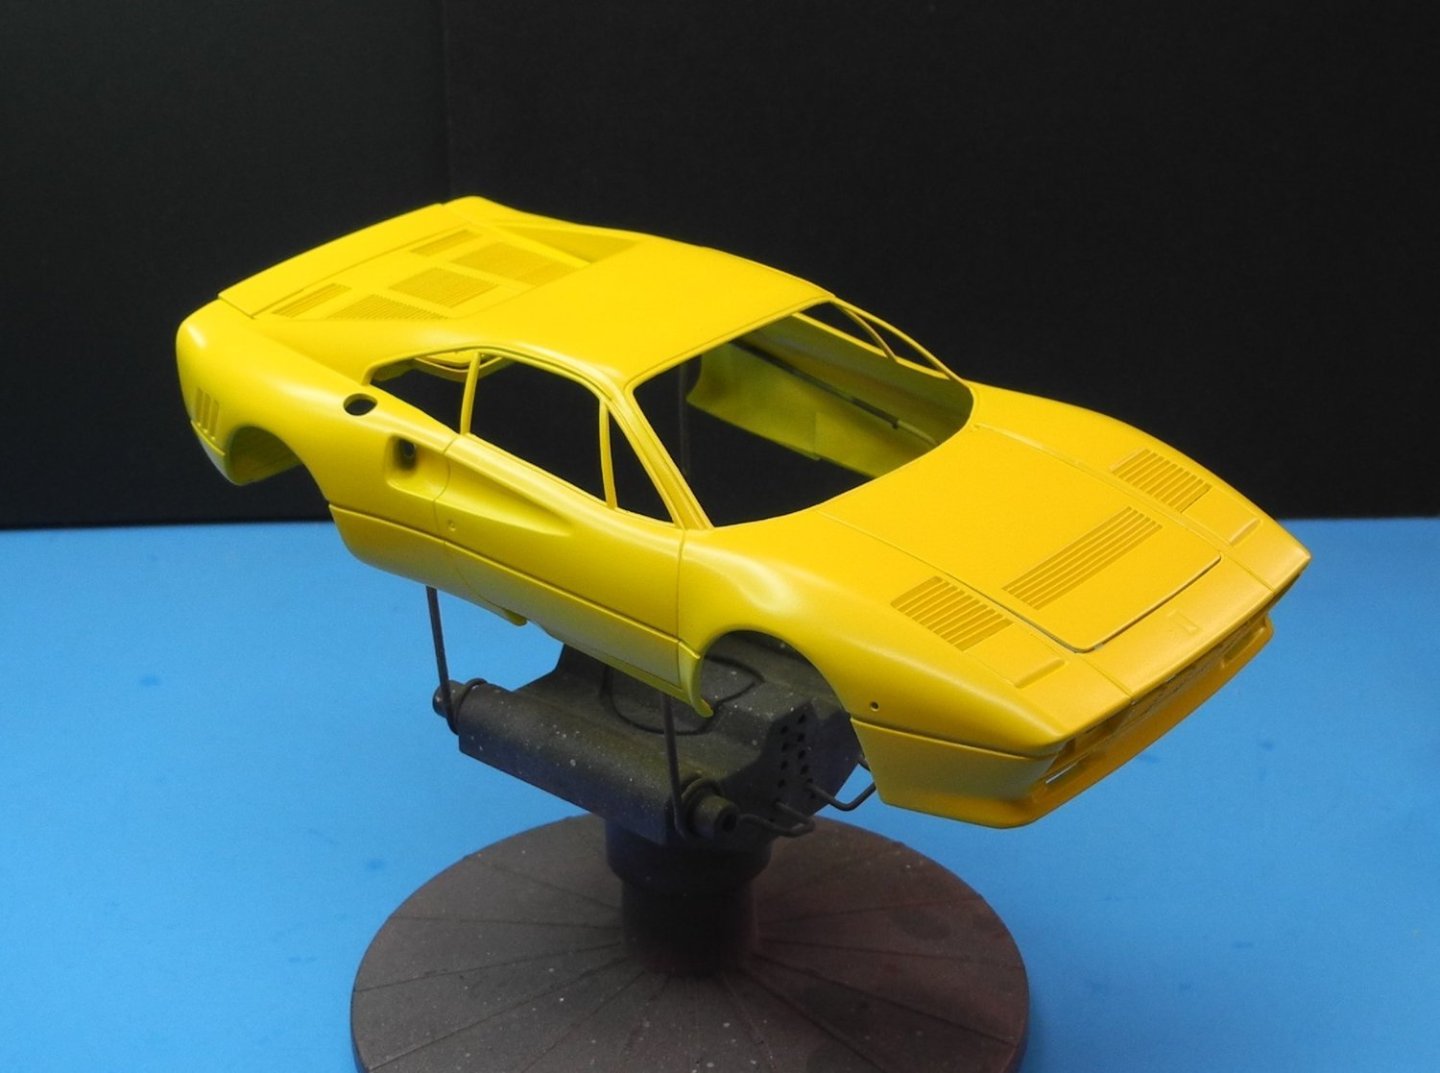
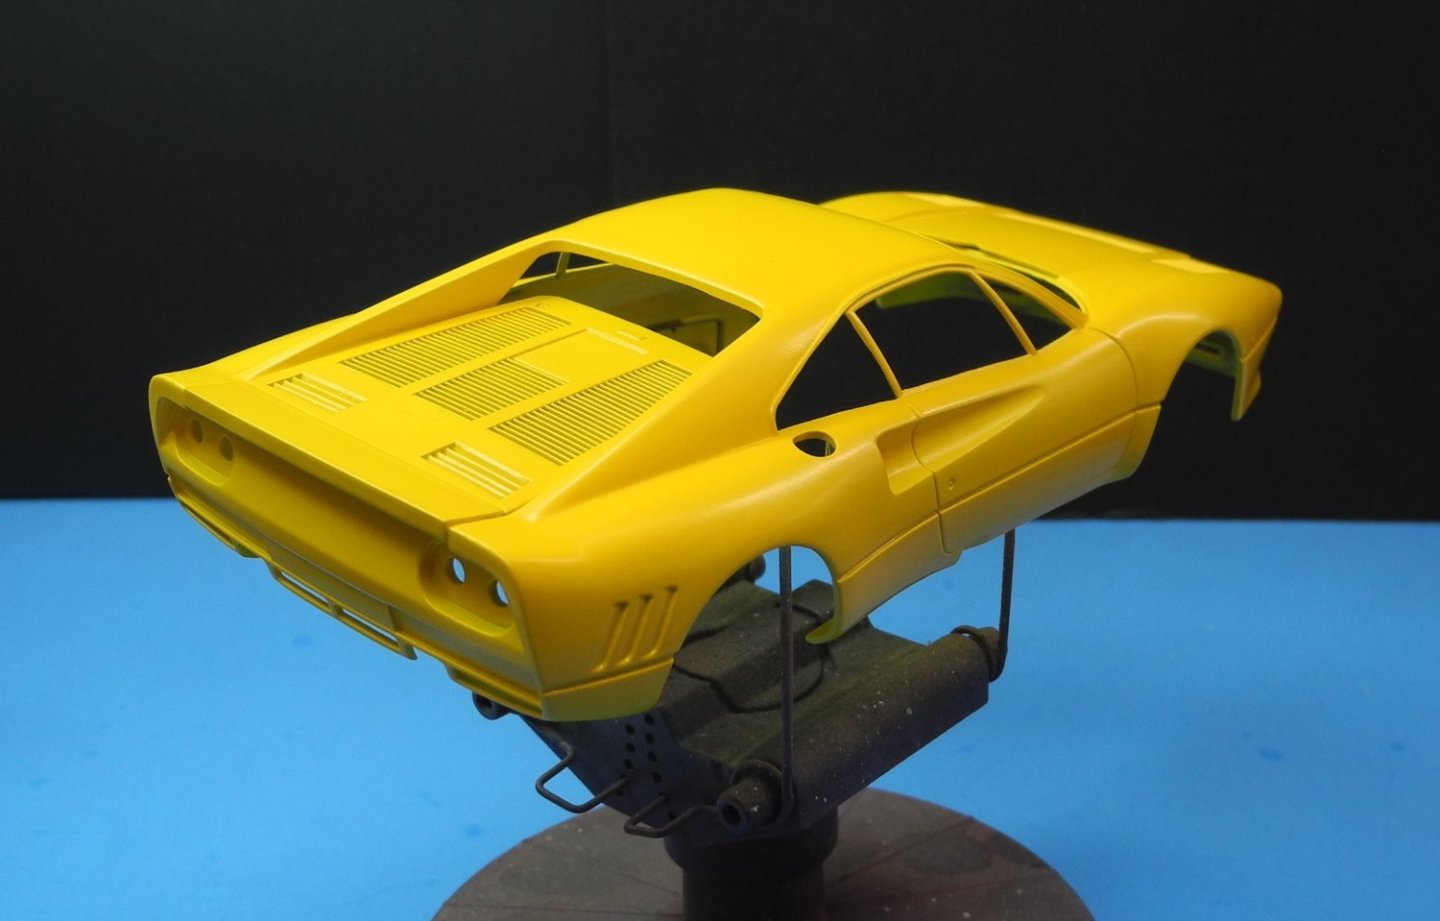
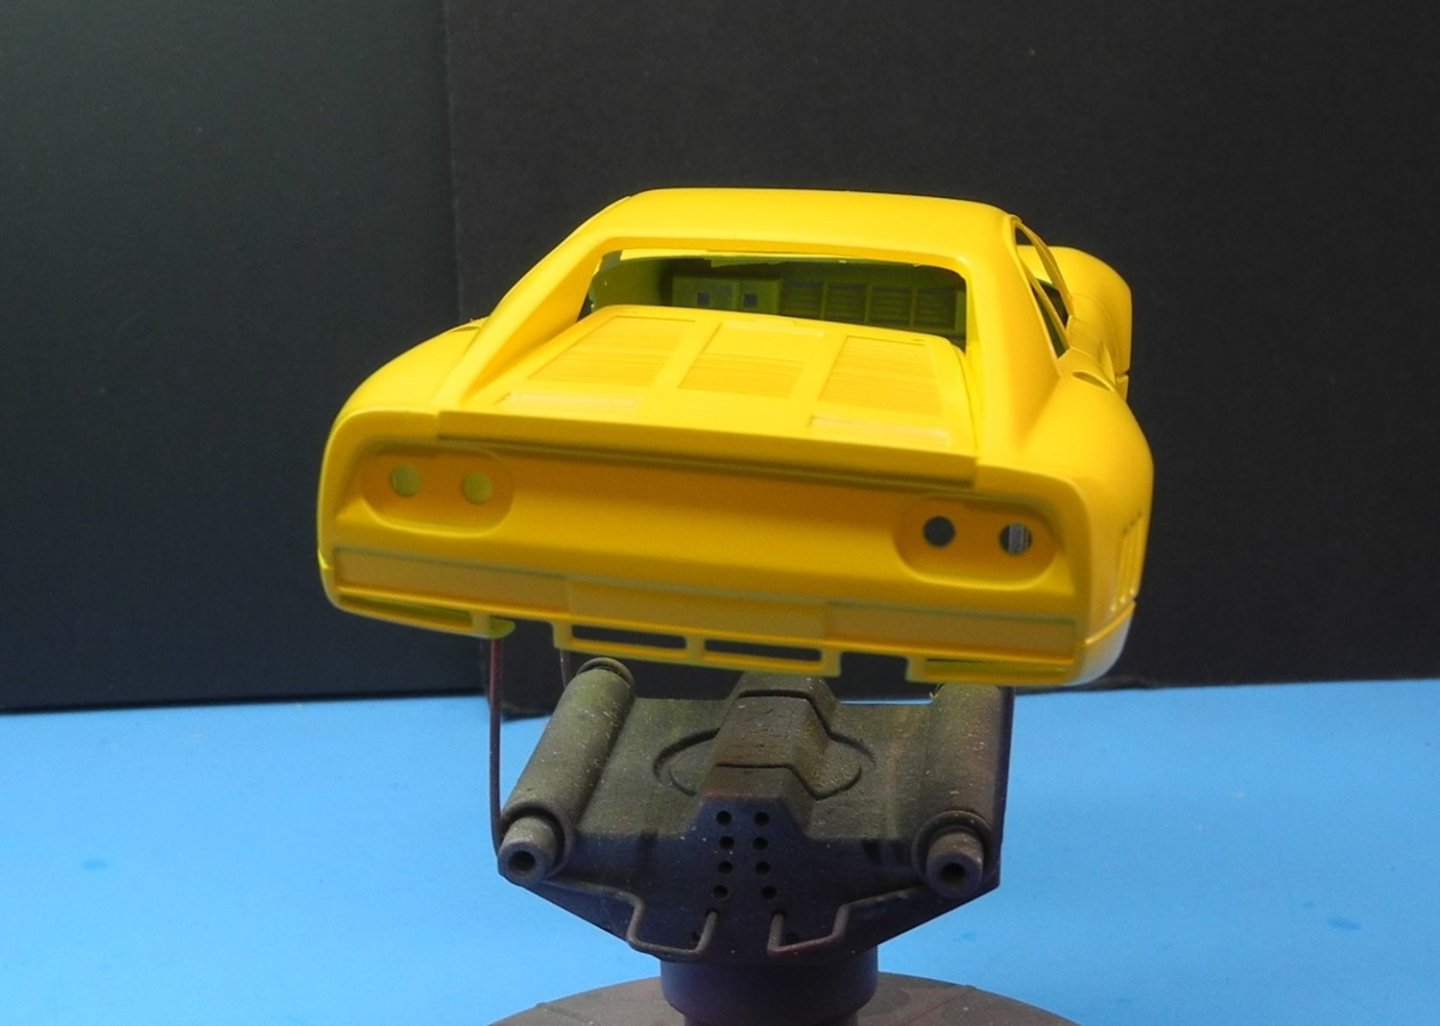
- 127 replies
-
- 14
-
-
Team Suzuki ECSTAR GSX-RR '20 by wvdhee - Tamiya - 1/12
CDW replied to wvdhee's topic in Completed non-ship models
Beautiful! -
1966 Buick Riviera by CDW - FINISHED - AMT - 1:25 Scale
CDW replied to CDW's topic in Non-ship/categorised builds
Of course you may. it's a viable option. -
1966 Buick Riviera by CDW - FINISHED - AMT - 1:25 Scale
CDW replied to CDW's topic in Non-ship/categorised builds
Mike I won't attach the scripts and badges until the very end of the project and then I will likely use an acrylic clear floor polish as glue, such as "Future" or whatever it's called today. An alternative could be a gloss clear acrylic paint as well. Again, I won't do any of that until after the model has been fully painted and assembled. -
1966 Buick Riviera by CDW - FINISHED - AMT - 1:25 Scale
CDW replied to CDW's topic in Non-ship/categorised builds
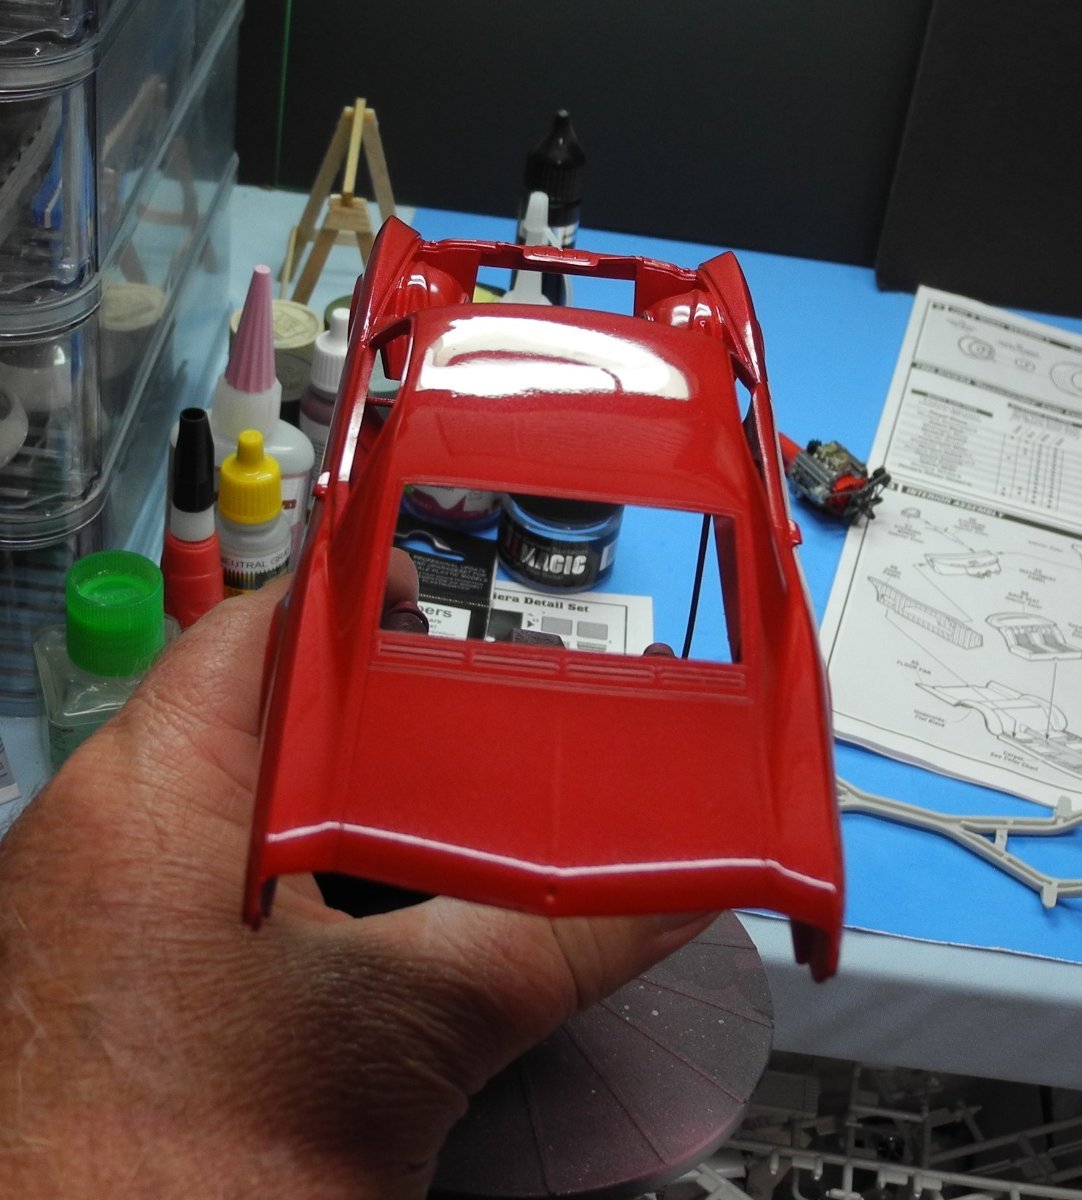
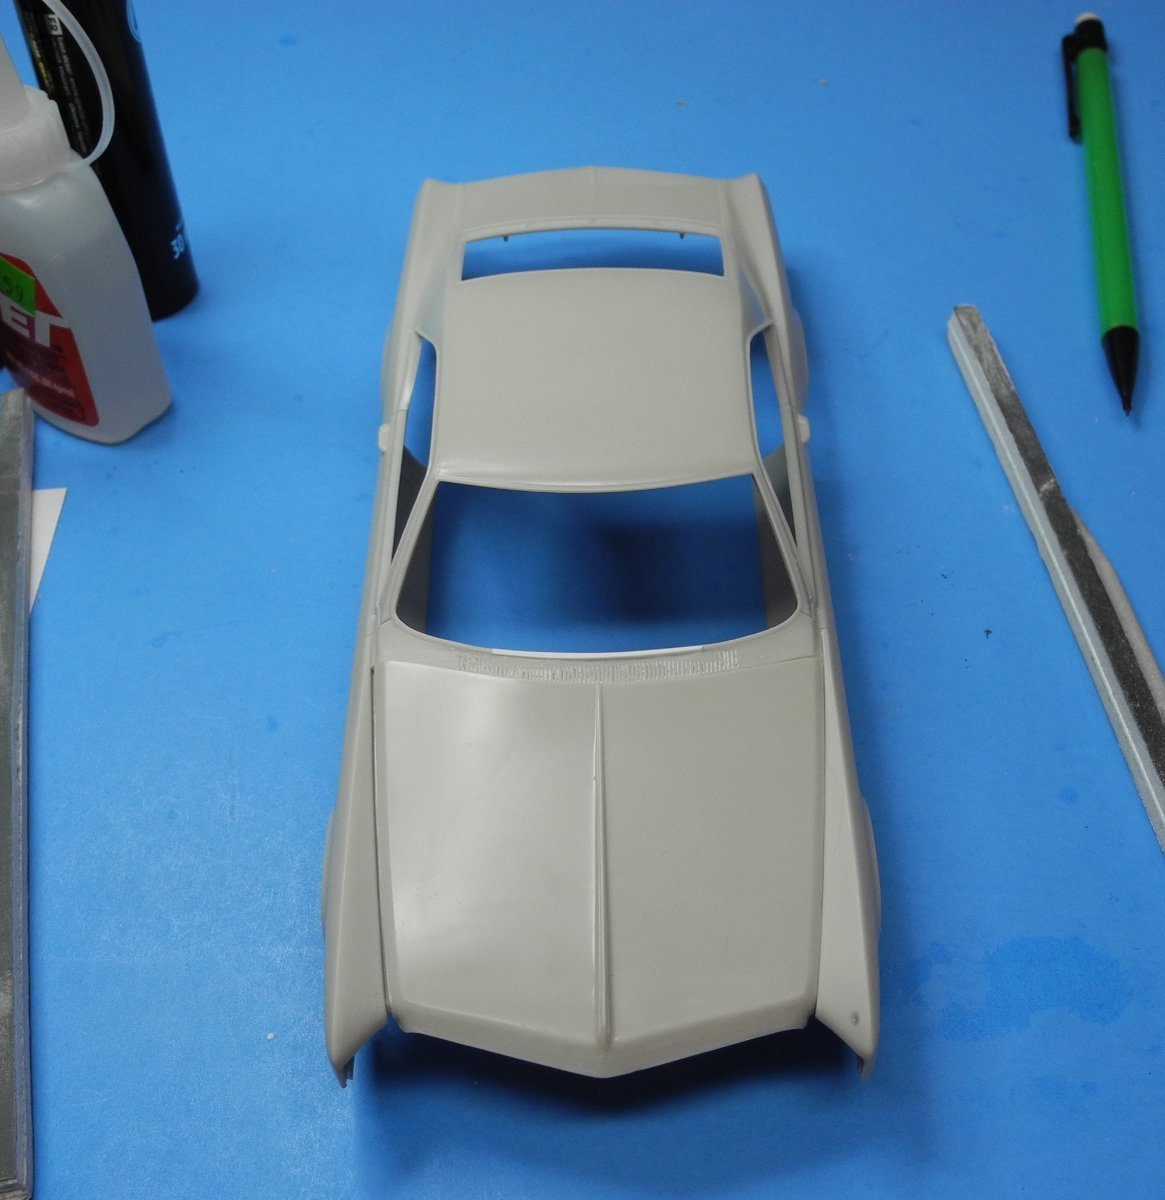
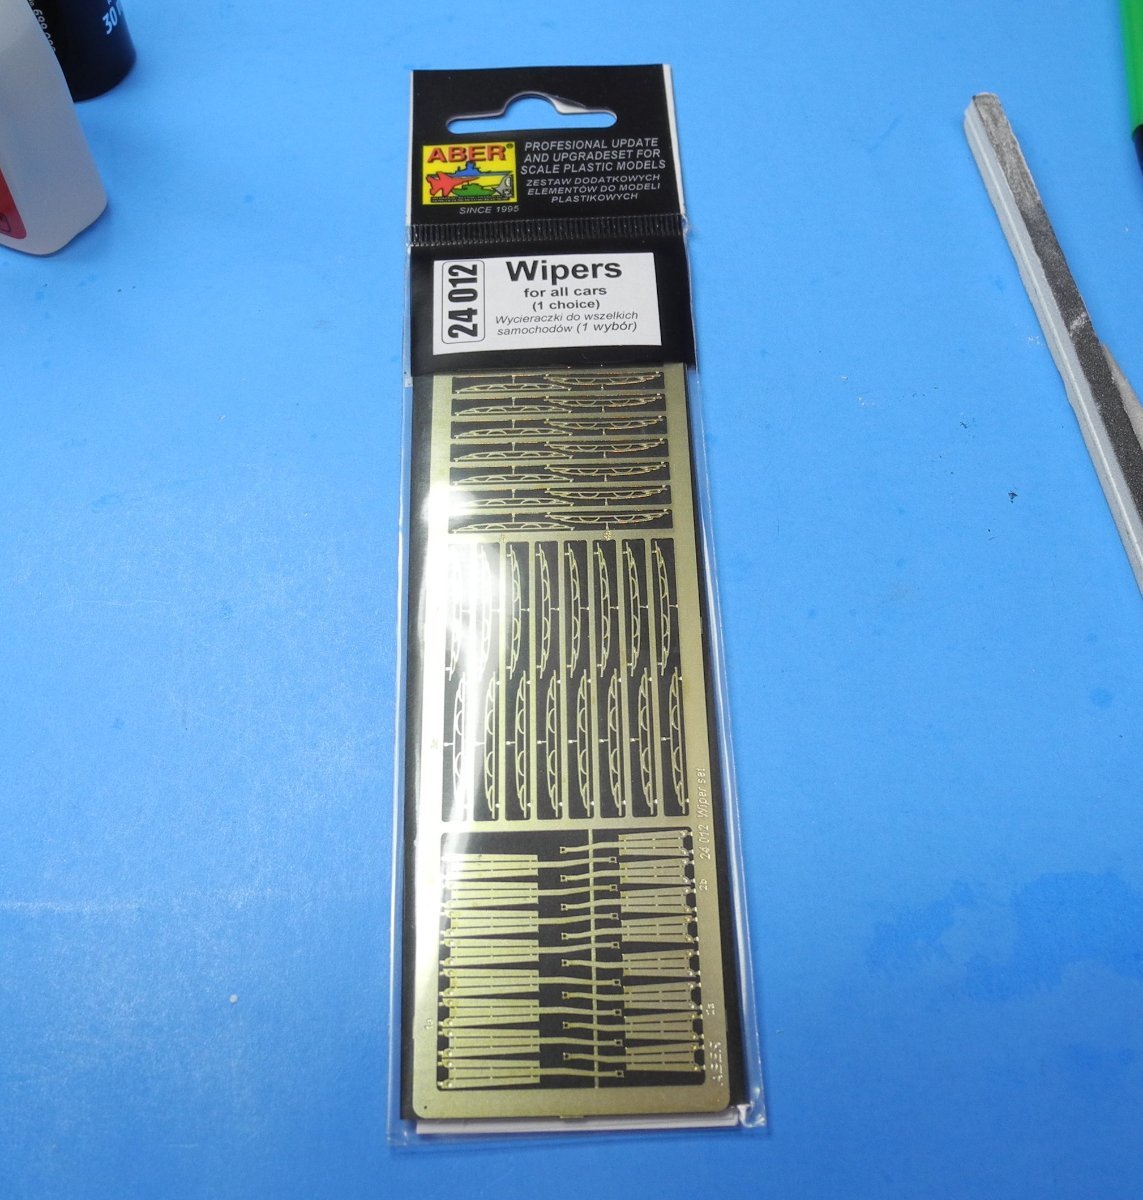
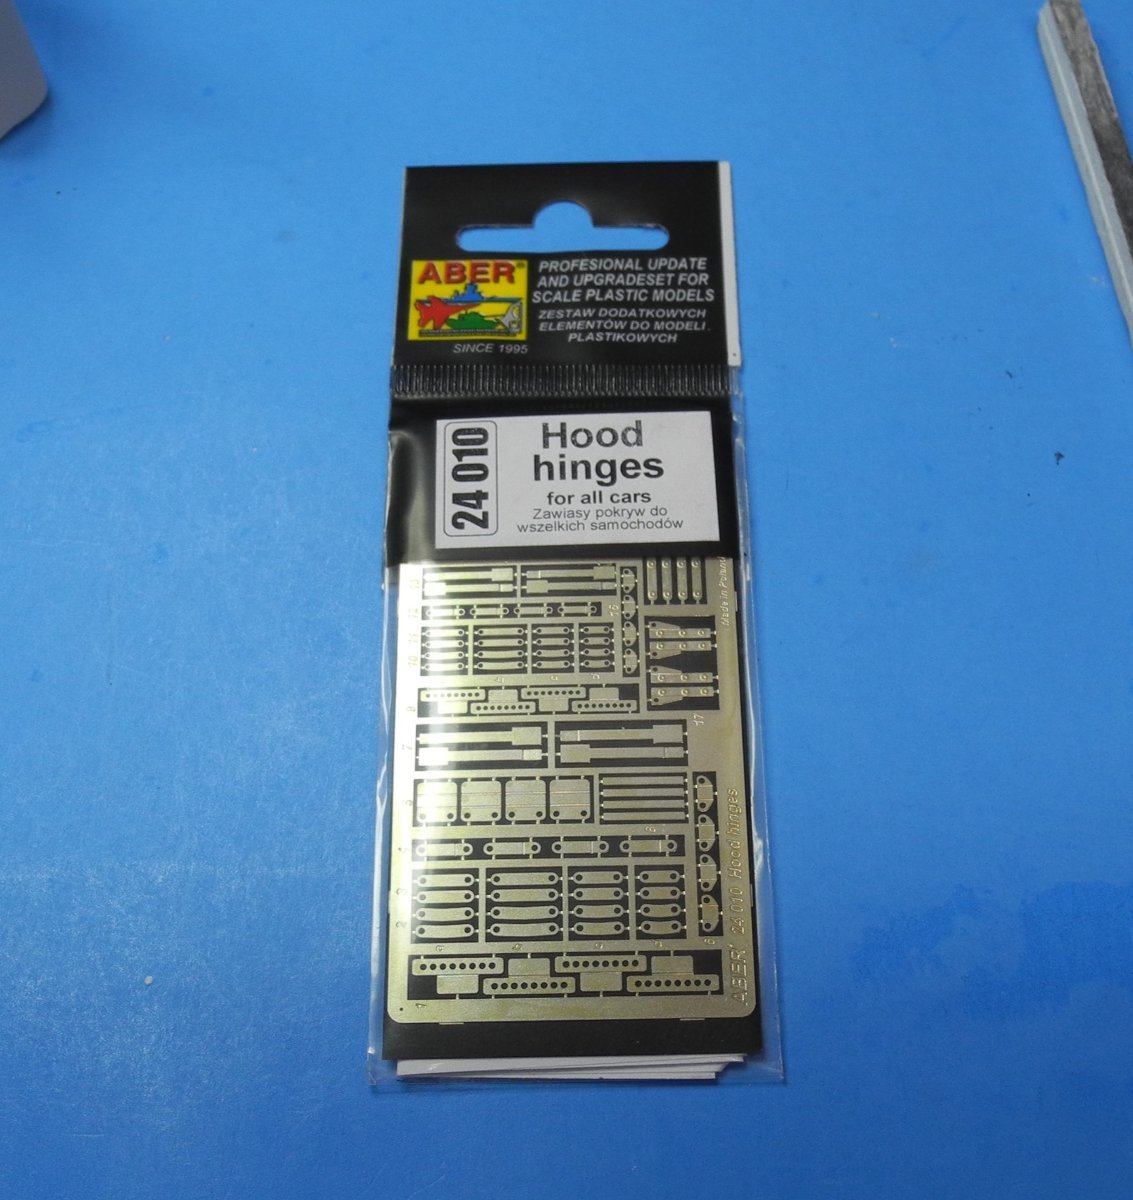
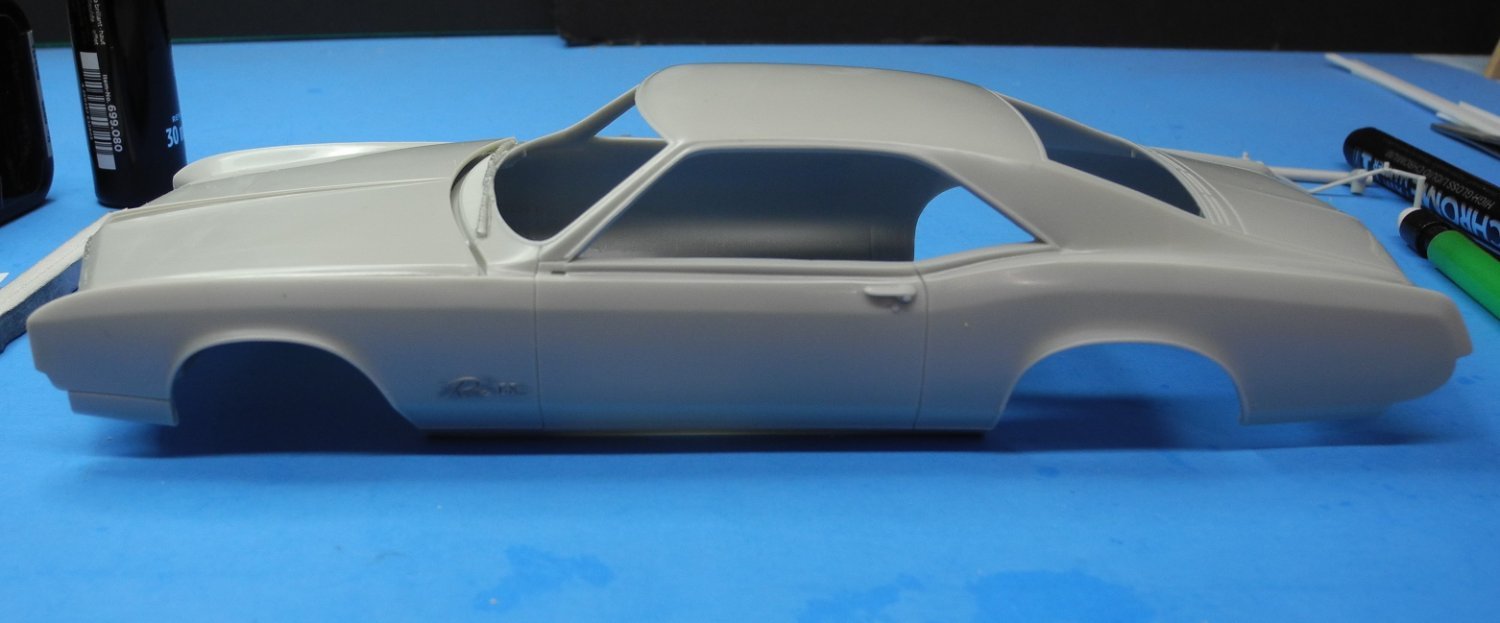
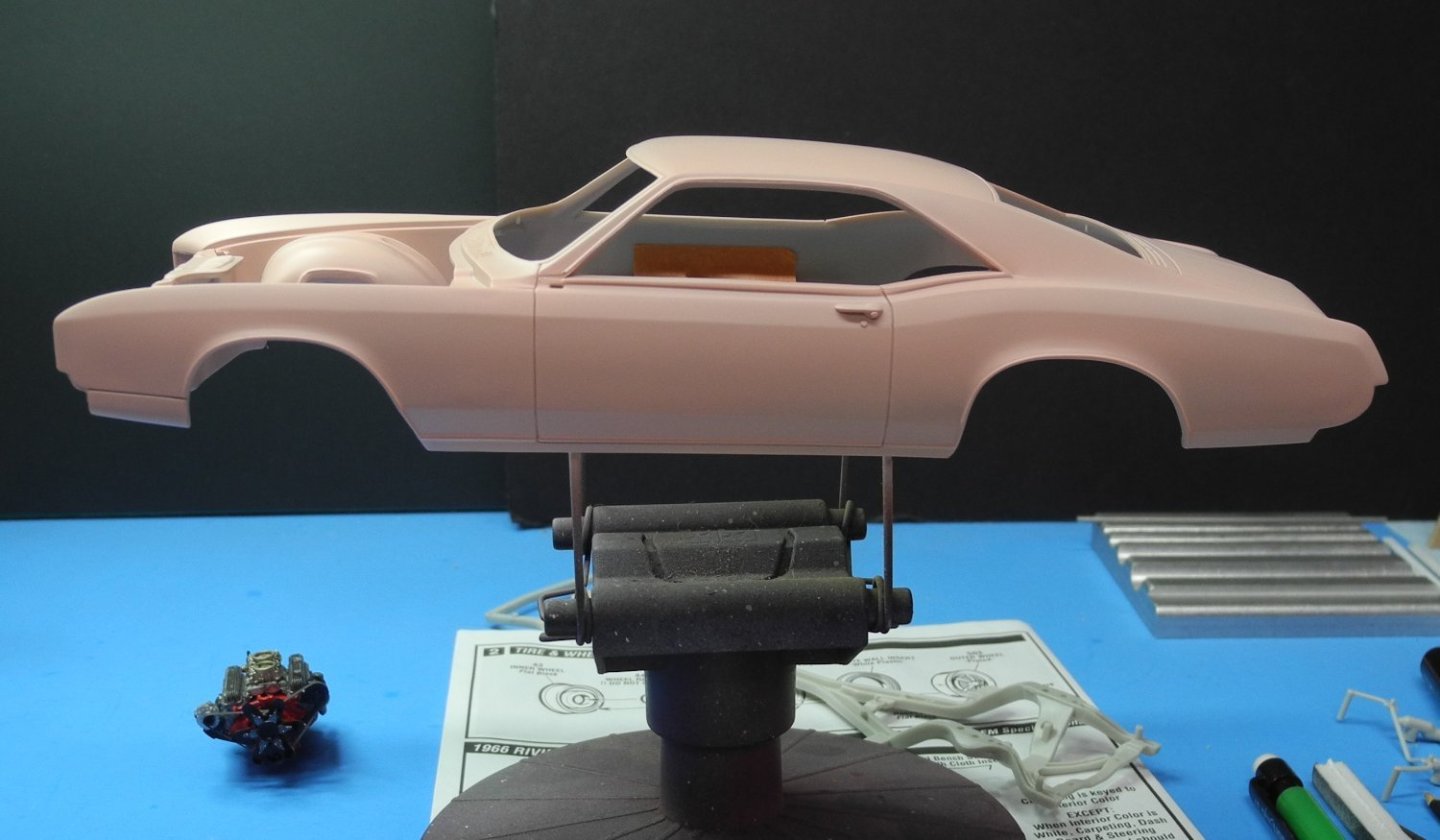
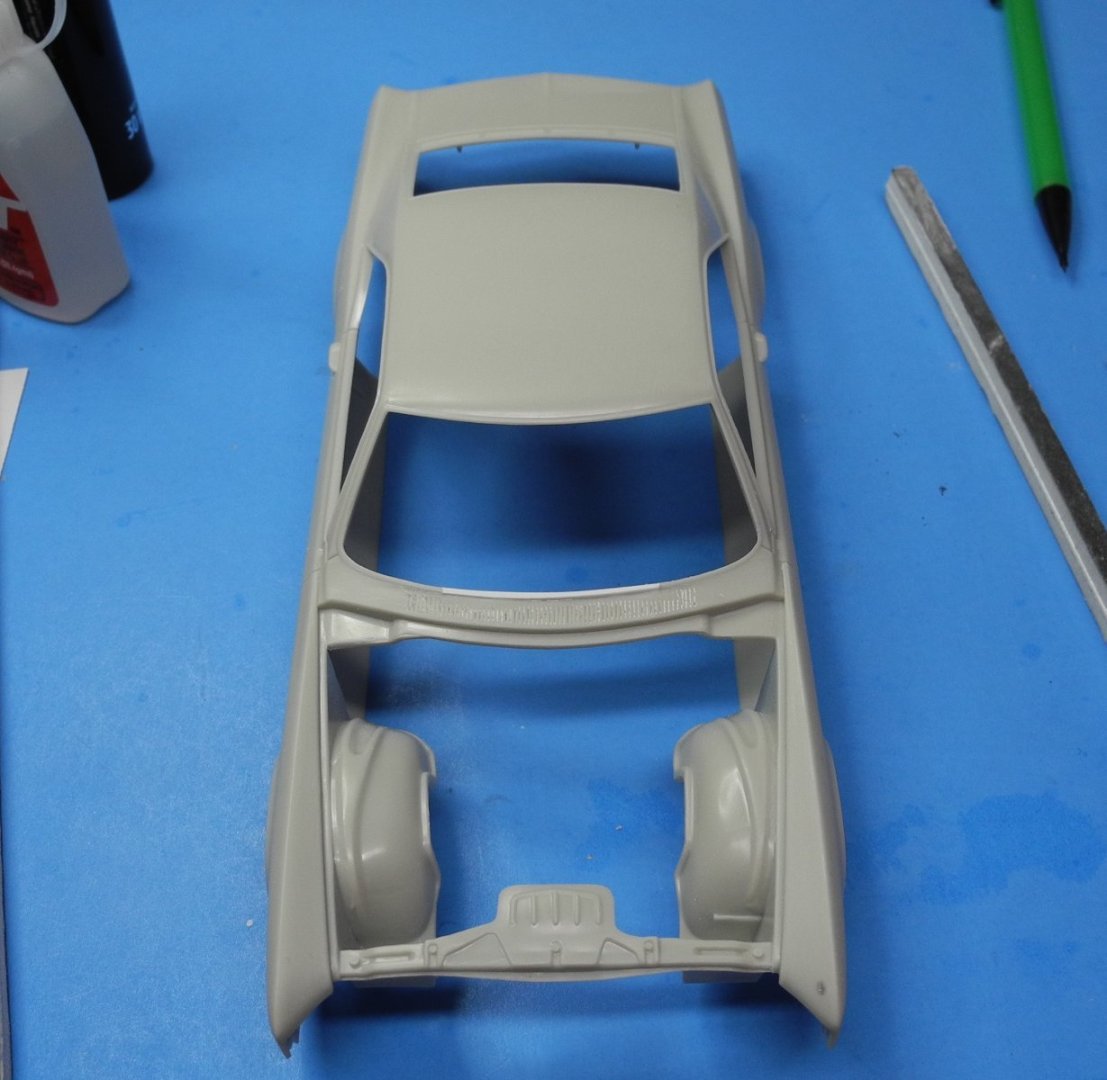
Once the stock, molded-on windshield wipers have been cut and sanded away, some of the windshield trim is lost. It can be replaced with styrene strip stock and some careful trimming/sanding. The hood does not fit as well as I would like and will try to achieve a better fit by manipulating the portion of the body in the windshield wiper area and/or the hood itself. There are some curves molded into each of those parts, but the curves don't exactly match, causing the fit to be less than desirable. A corner of the rear portion of the hood does not lay flush with the body. To replace the molded-on wipers, I have a set of photo etch wipers from Aber, a company out of Poland. From the same company, I have a set of generic hood hinges of various types. Perhaps I may use one of the sets of hinges on my model. One of the shortcomings of the kit is that it comes with no hood hinges out of the box. The hood just lies in place until it's removed to display the engine. Another option I'm considering is installing micro-size magnets to hold the hood in a closed position. This may also help the hood to body fit.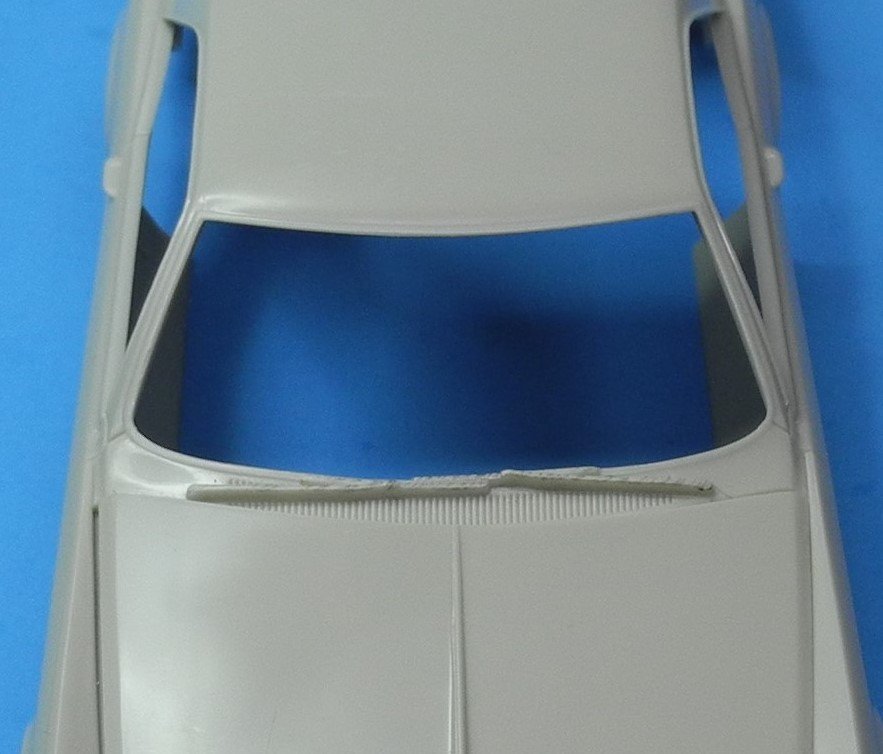


- 106 replies
-
- 10
-
-
1966 Buick Riviera by CDW - FINISHED - AMT - 1:25 Scale
CDW replied to CDW's topic in Non-ship/categorised builds
A true story...in the early 70's had just bought my first Harley Davidson motorcycle. My brother and I took out bikes out for a ride that night and my bike stopped running as we were travelling down a dark, country highway. I kicked and kicked, then kicked some more trying to restart it but no luck. Nothing. My brother asked, did you run out of gas? I said that was impossible as I had just put 50 cents worth of gas in it the day before (50 cents would buy 2 gallons of gasoline at the time.) I had no idea that Harley's got such poor fuel economy. I could have kicked all night and it would not have started, my gas tank was bone dry. But can you imagine that nowadays? Impossible...I just put 50 cents worth of gas in it? 😅 -
1966 Buick Riviera by CDW - FINISHED - AMT - 1:25 Scale
CDW replied to CDW's topic in Non-ship/categorised builds
It was a real head-turner in its day, 1966. Big, heavy, and fast. Drank high octane gasoline like it was going out of style. -
1966 Buick Riviera by CDW - FINISHED - AMT - 1:25 Scale
CDW replied to CDW's topic in Non-ship/categorised builds
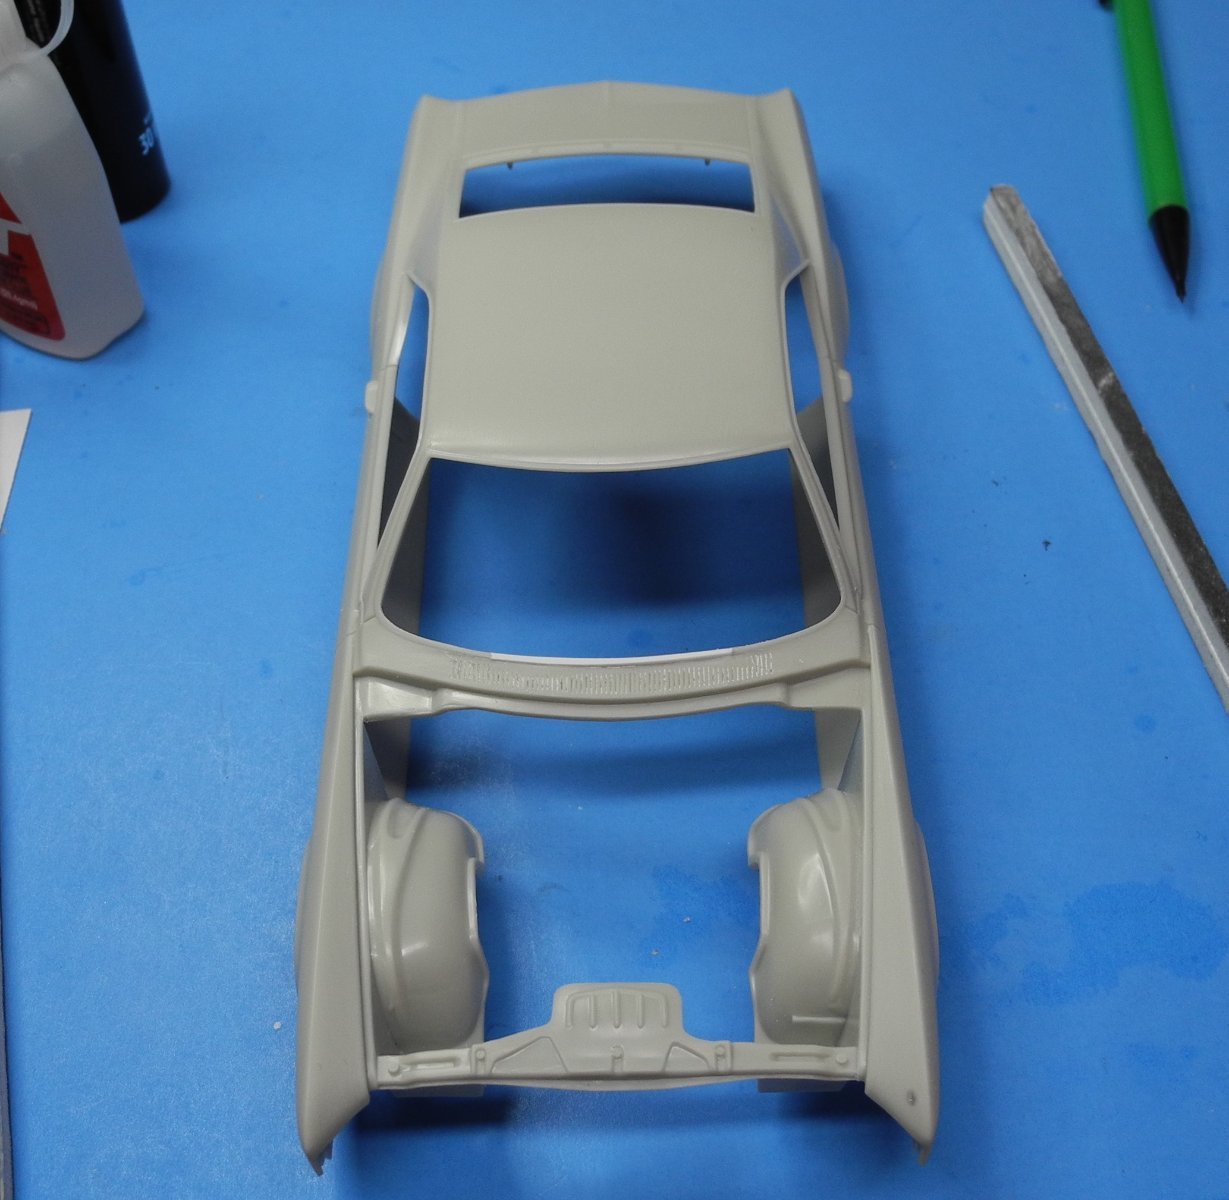
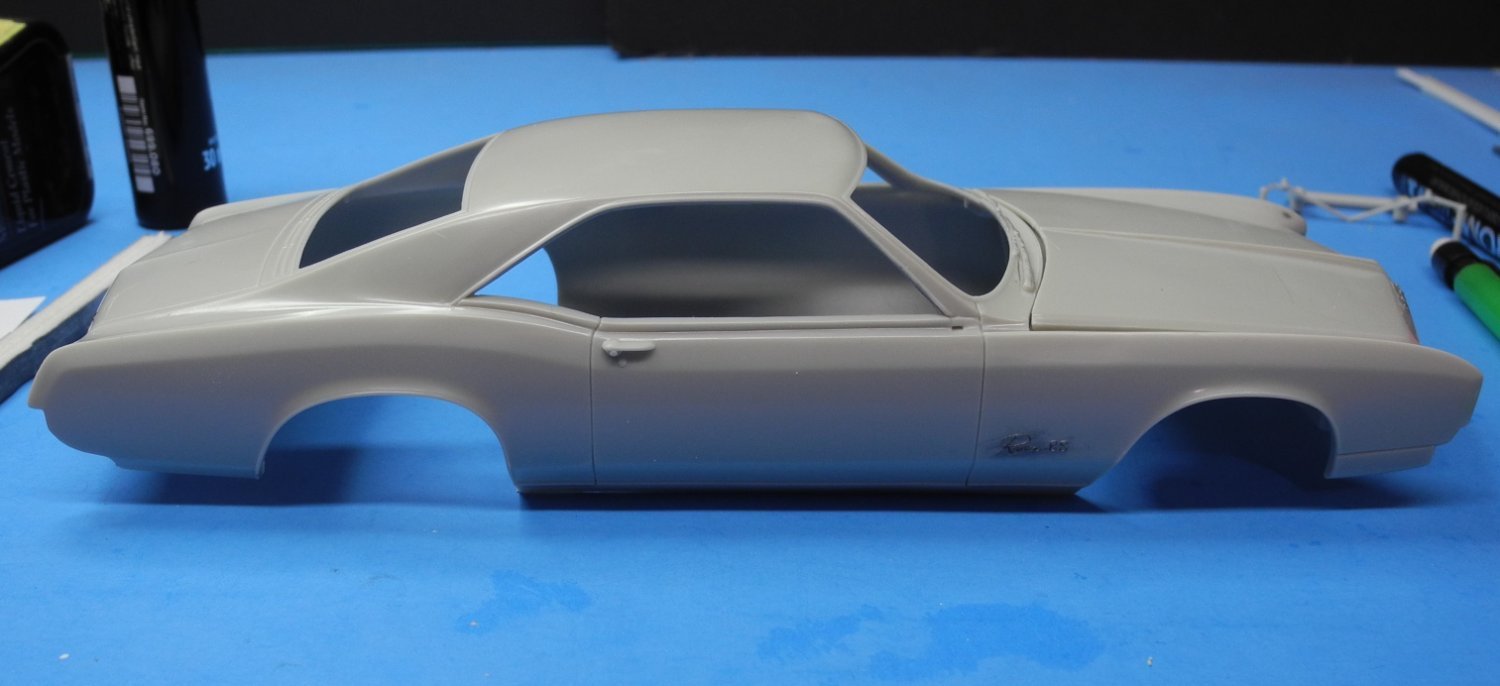
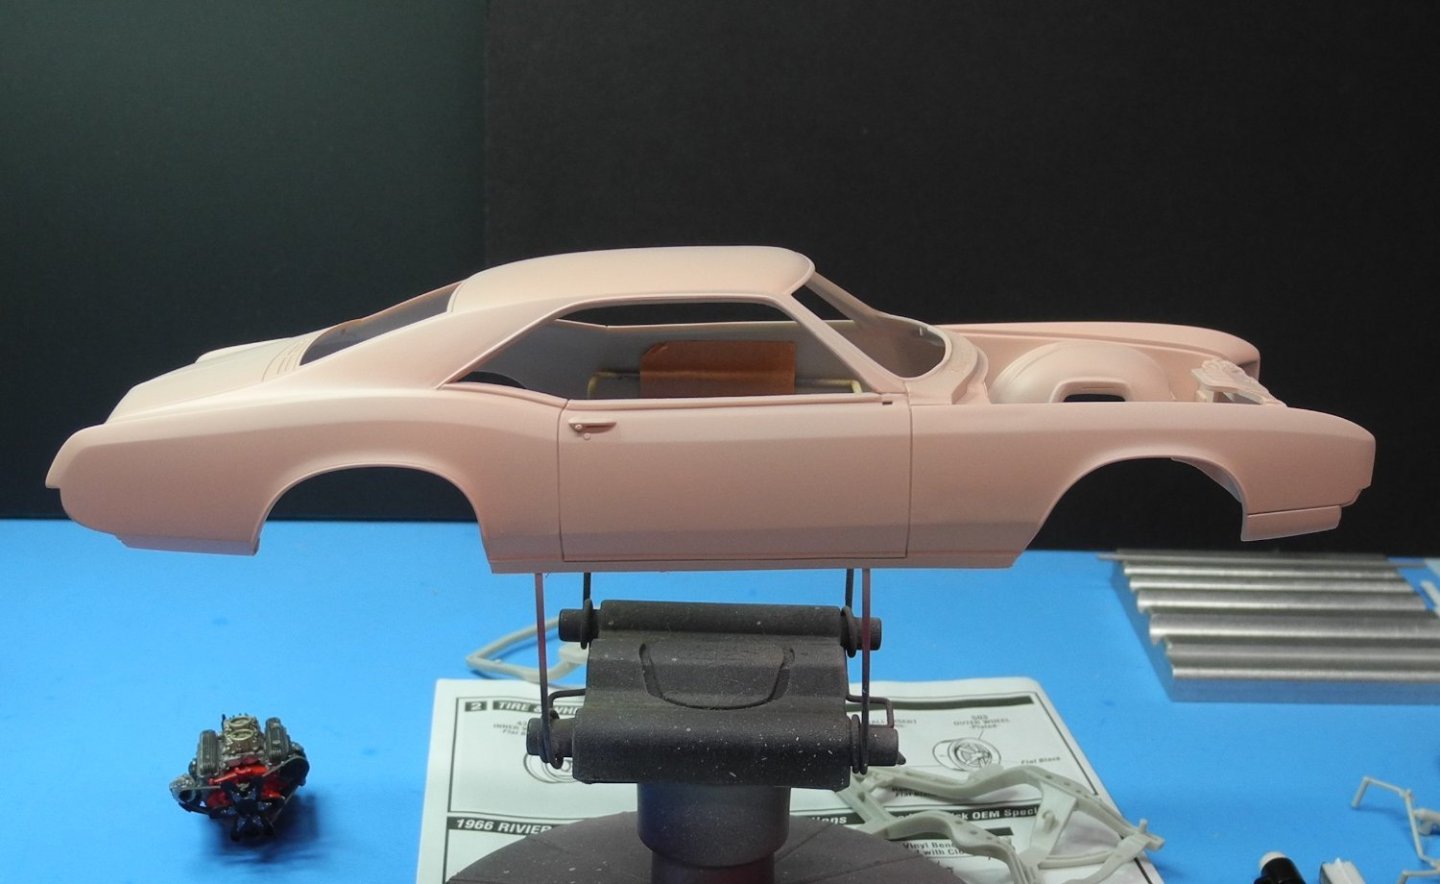
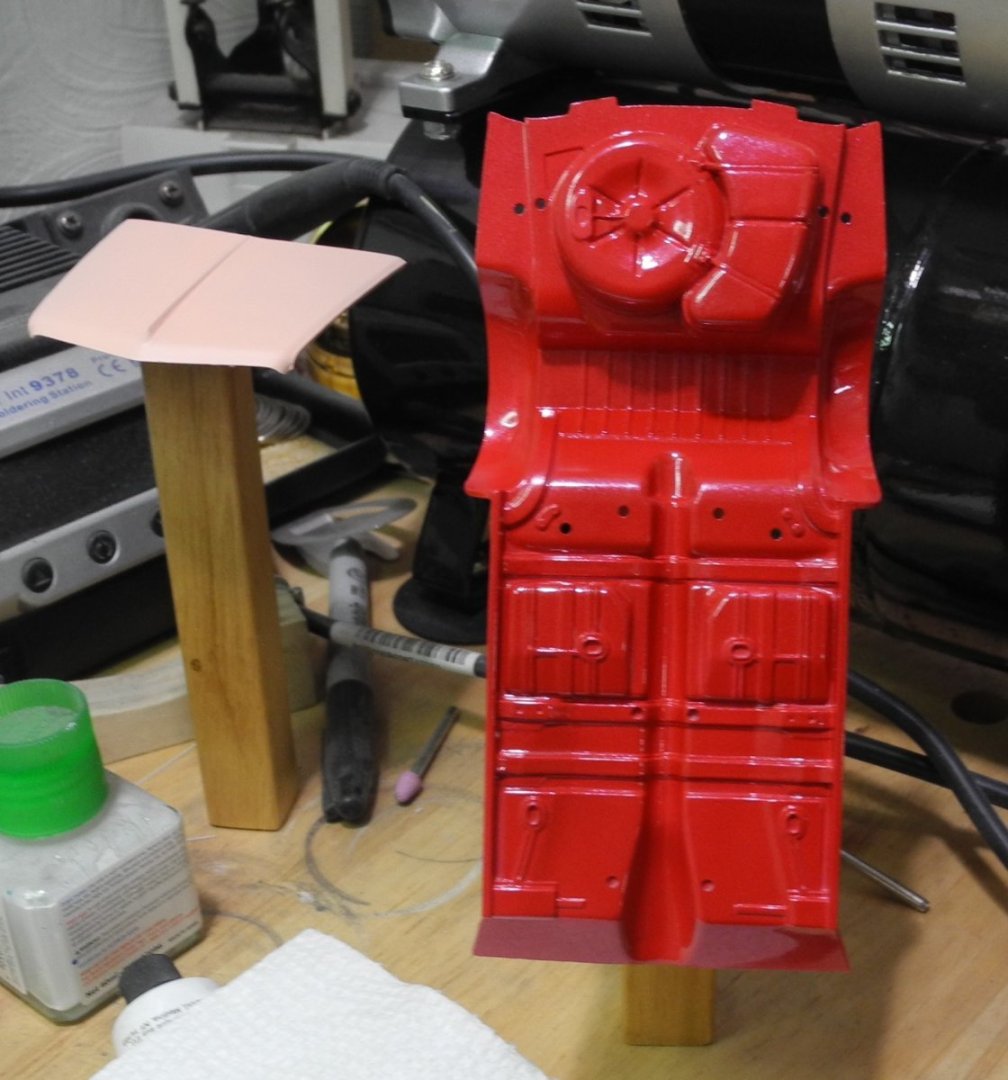
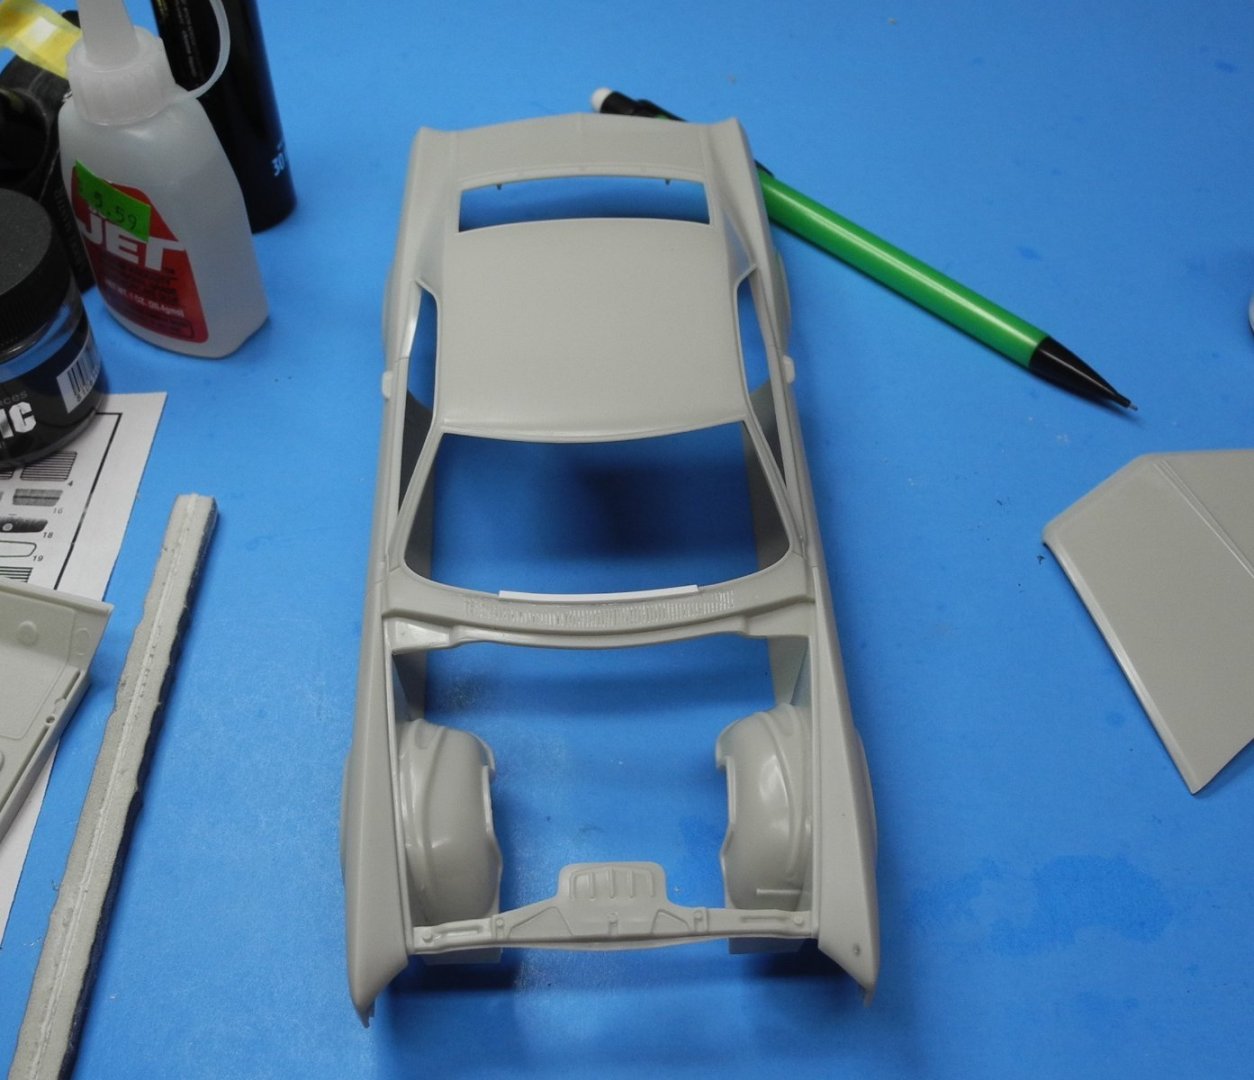
Time to move on to body work. I want the finished and painted body to have plenty of time to cure before all the handling that will take place later when assembling the model. There's a small sink mark on the driver's side top front fender that needs to be filled (marked with a pencil). Also, will remove the molded on windshield wipers and later replace with a proper 3D aftermarket set. Next there are the molded scripts to be removed and later replaced with the photo etched ones from the set I ordered. Again, the scripts are marked in pencil.


- 106 replies
-
- 12
-
-
Loarre Castle (Spain) by King Derelict - Aedes Ars 1/200
CDW replied to king derelict's topic in Non-ship/categorised builds
It's like you're painting a portrait, Alan. Really enjoying watching your progress.


.jpg.9b08dc5d51f966f1be9c41904ef28298.jpg)
.jpg.dac04b2d2cae5bca6df46ccf2122460d.jpg)