CDW
-
Posts
7,725 -
Joined
-
Last visited
Content Type
Profiles
Forums
Gallery
Events
Everything posted by CDW
-

P-51D Mustang by CDW - FINISHED - Dragon - 1:32 Scale
CDW replied to CDW's topic in Non-ship/categorised builds
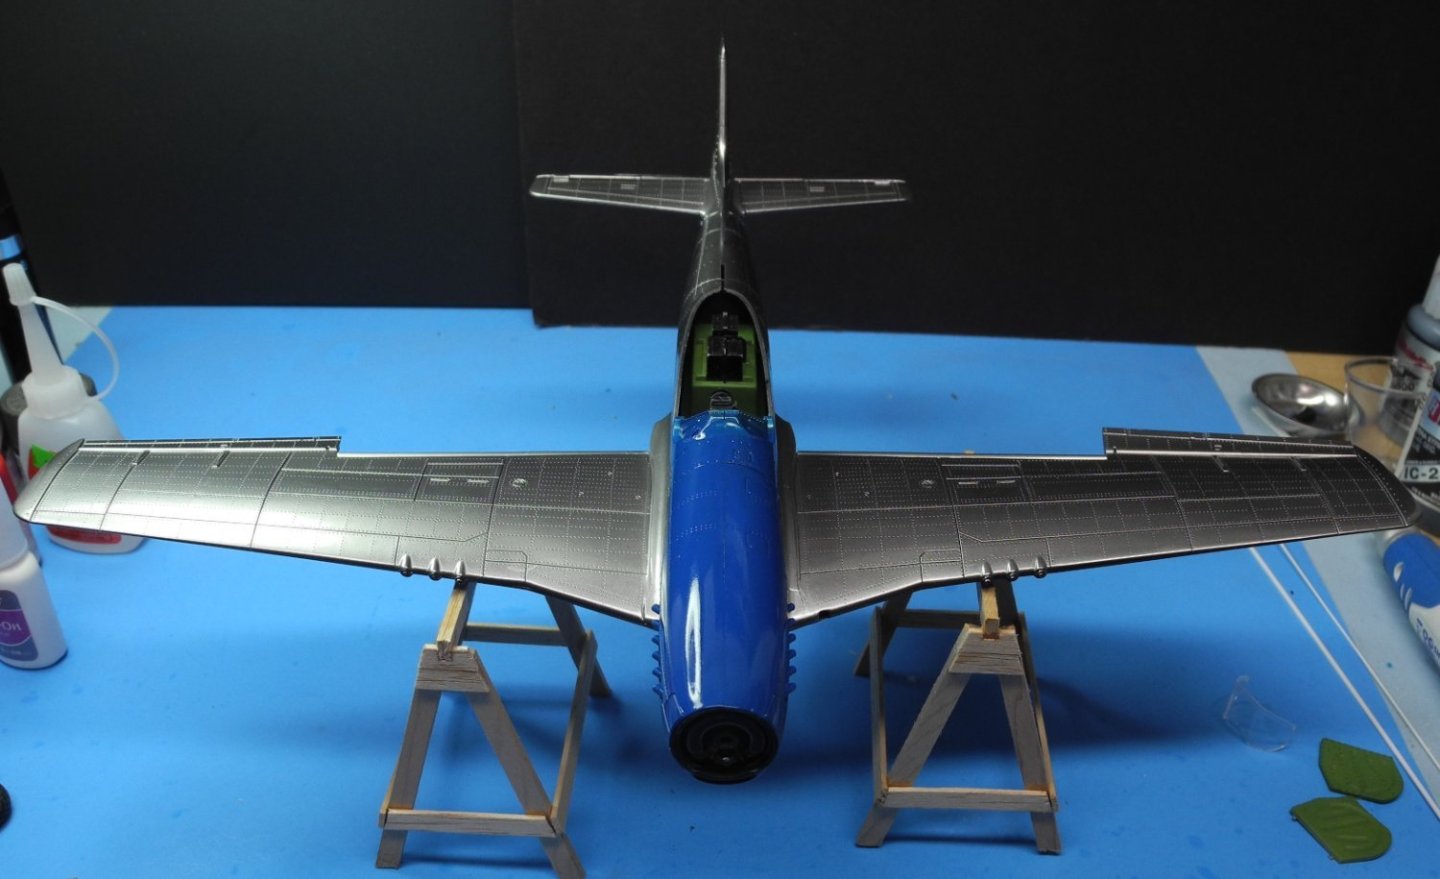
I'm committed to the Petie 2 scheme now as I masked and painted the blue nose.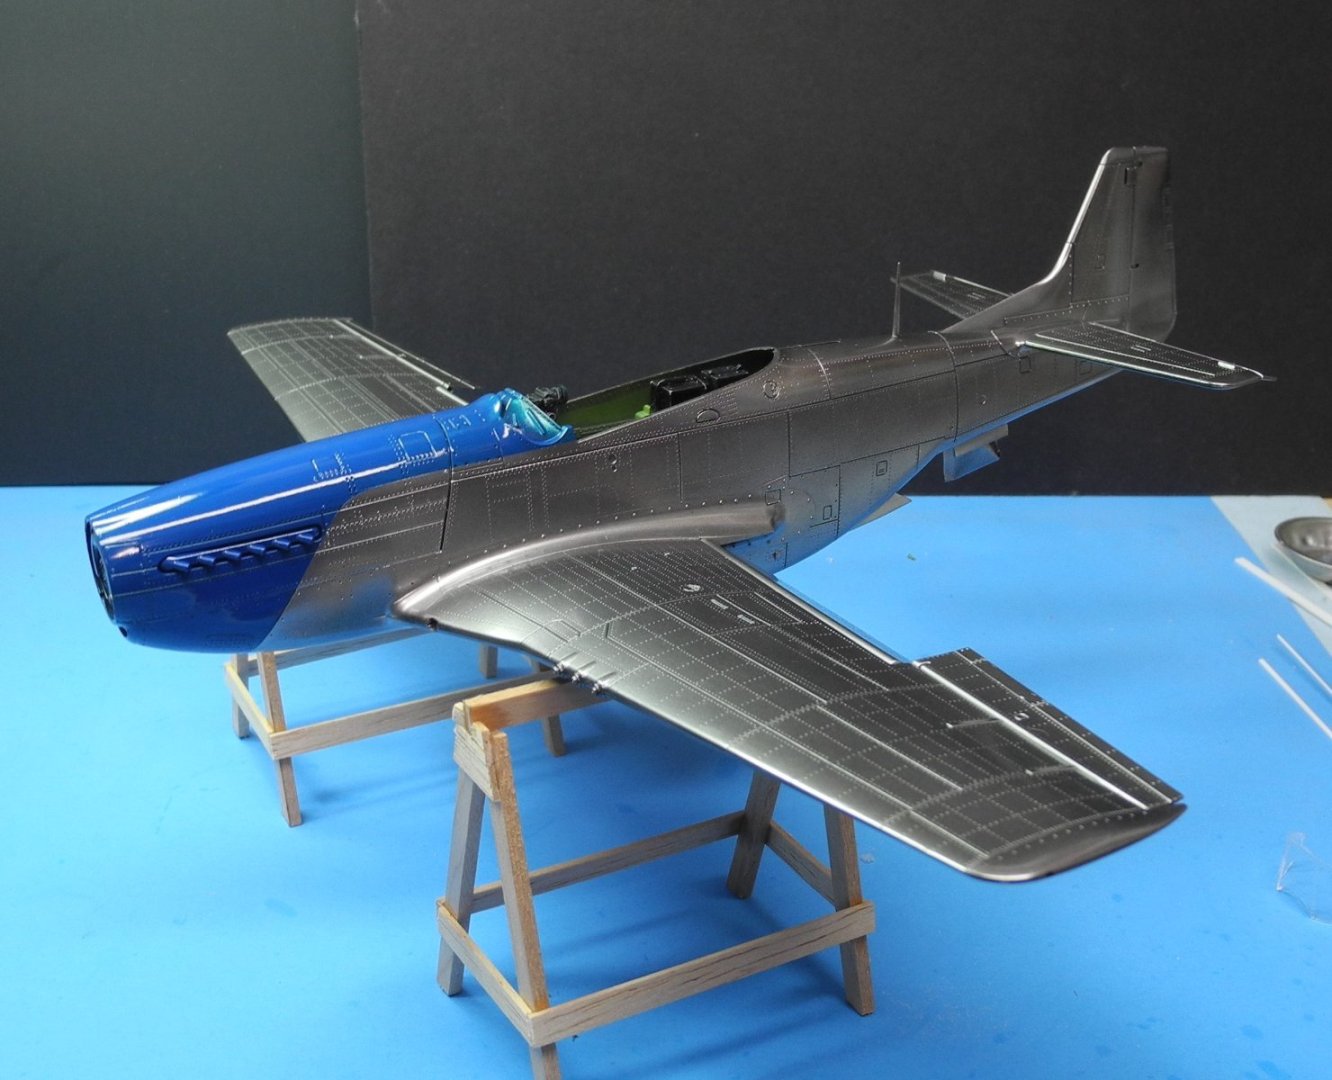
- 122 replies
-
- 14
-

-

-
Following along.
-
Beautiful airplane and a great-looking model. The detail is excellent. What’s your next project?
-
Great looking project, Jack. I've often wondered the same thing about products from Ukraine. How the heck are they doing it with all that's happening. I own quite a few of their figure kits but have yet to crack open one to finish. Your work is inspirational. That could be a beer-bong, Ken. A high-speed libations dispenser of sorts.
-
P-51D Mustang by CDW - FINISHED - Dragon - 1:32 Scale
CDW replied to CDW's topic in Non-ship/categorised builds
mostly it’s trial and error experience. What’s worked for me in the past I stick with and the rest I discard. I suspect Pledge works best as it has no adverse effect on the Alclad finish, plus it’s cheap and readily available. The airbrush tends to be unreliable as it’s hard to lay it down smoothly without pooling, sags, and runs. I get more control with a soft brush and Pledge self-levels. -
P-51D Mustang by CDW - FINISHED - Dragon - 1:32 Scale
CDW replied to CDW's topic in Non-ship/categorised builds
Using Pledge, applied with a soft, wide brush to protect the Alclad chrome finish. Keeping brush strokes gentle and minimal to avoid marring the bright finish of the Alclad. Being careful not to allow droplets to appear along edges from over applying the Pledge. Less is more. The self-leveling qualities of the clear acrylic will take care of itself, so don't "over-brush" it. I'll lay down two coats before it's finished then allow a couple of days for it to cure before masking or decals.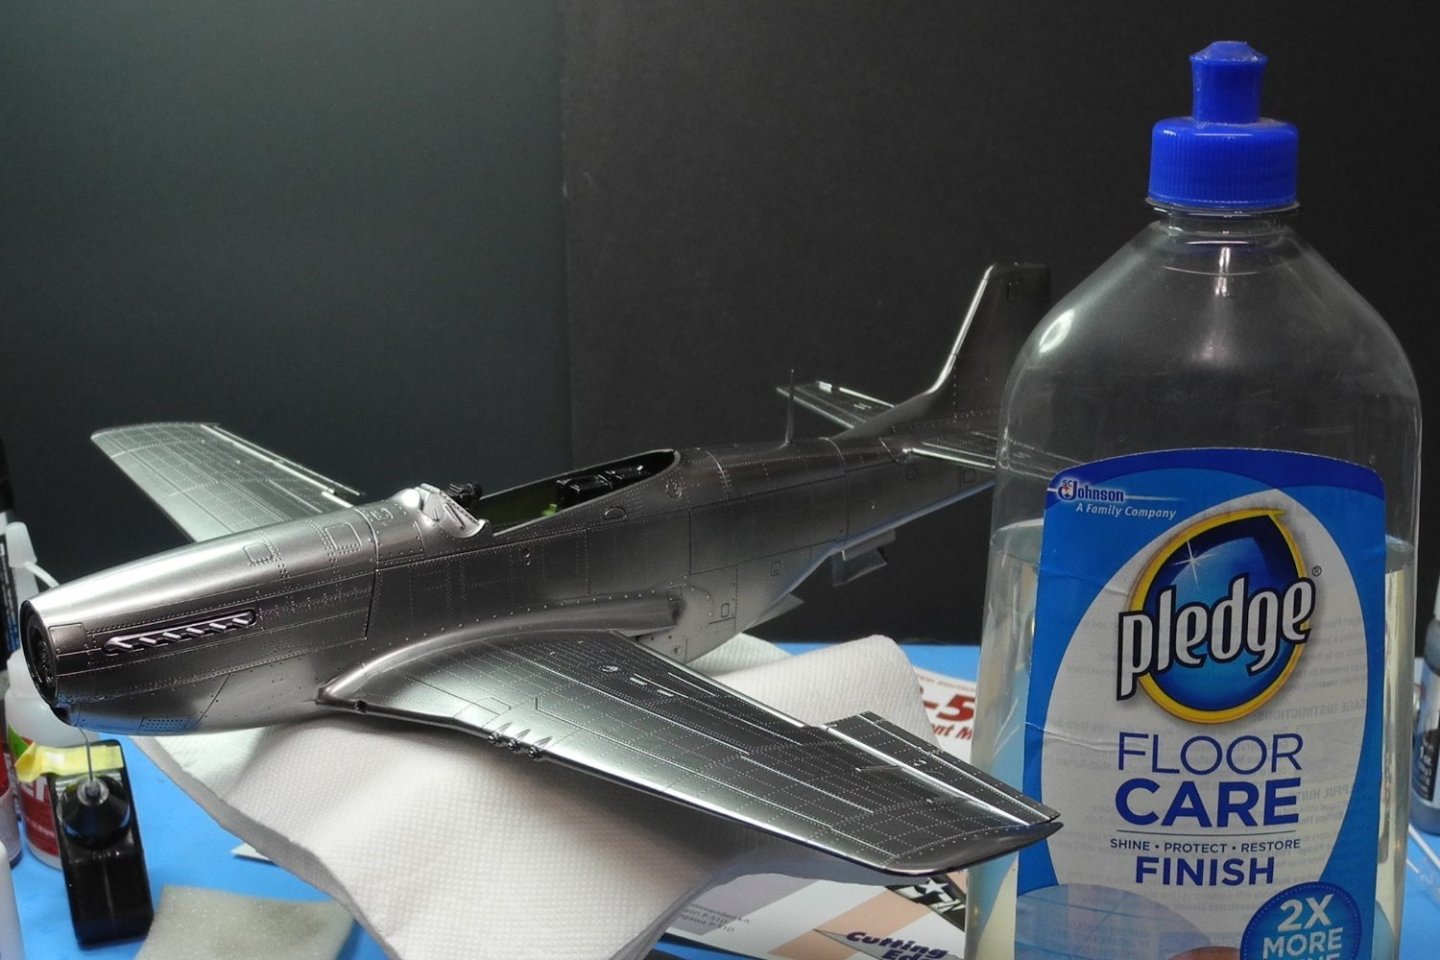
- 122 replies
-
- 14
-
-
P-51D Mustang by CDW - FINISHED - Dragon - 1:32 Scale
CDW replied to CDW's topic in Non-ship/categorised builds
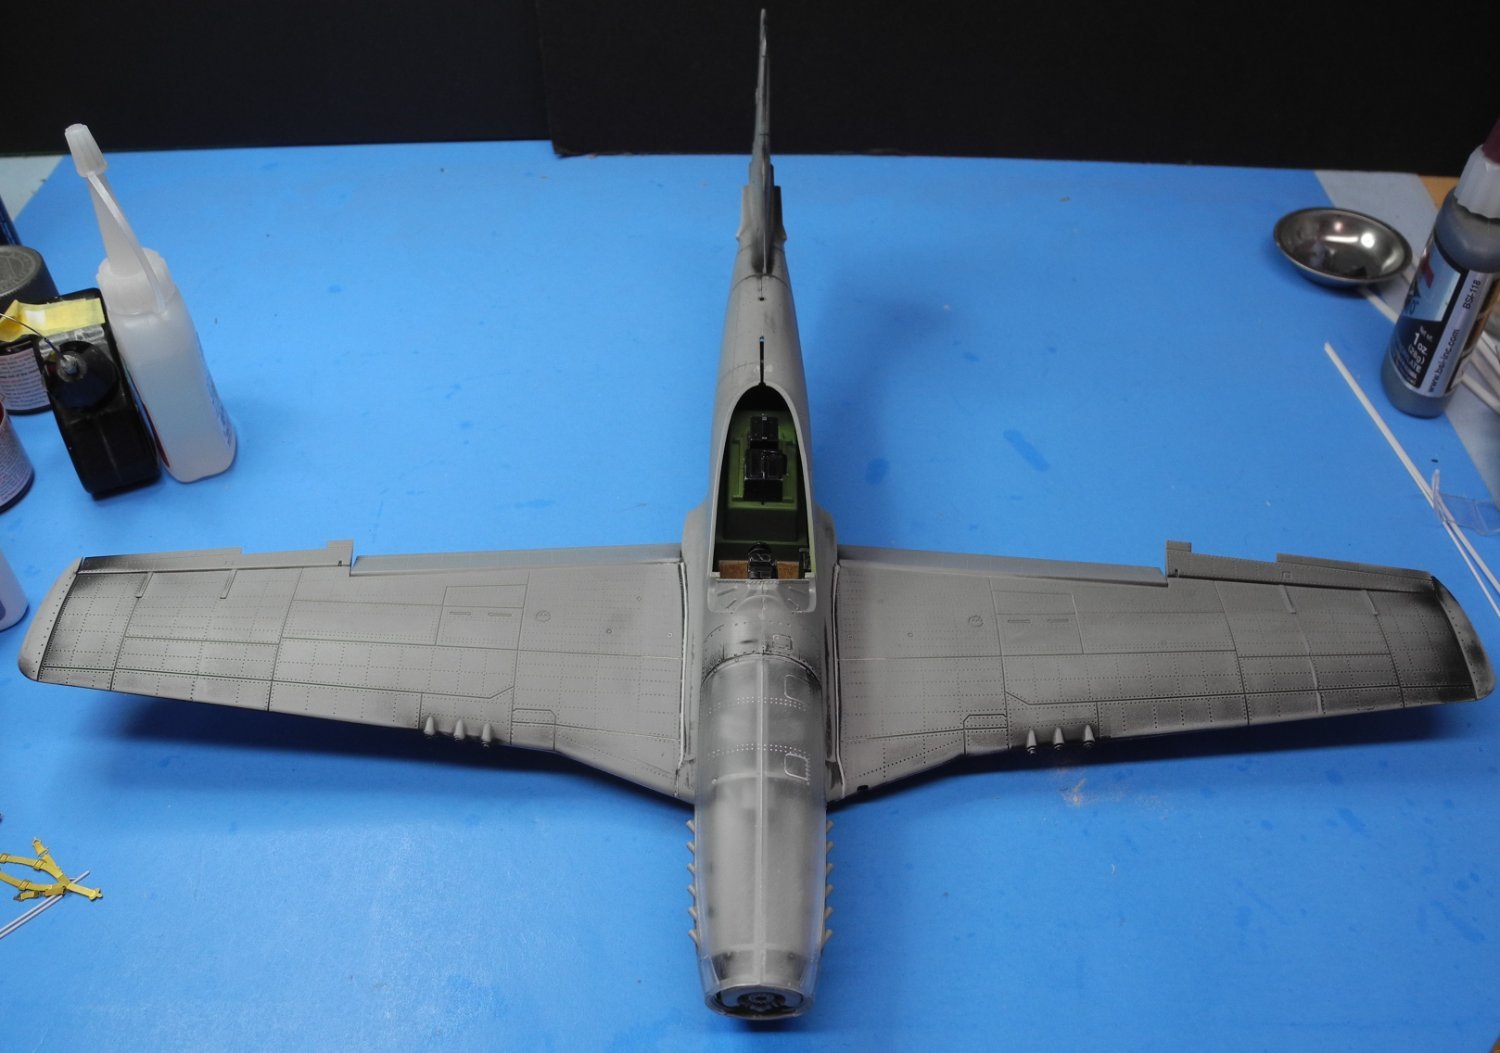
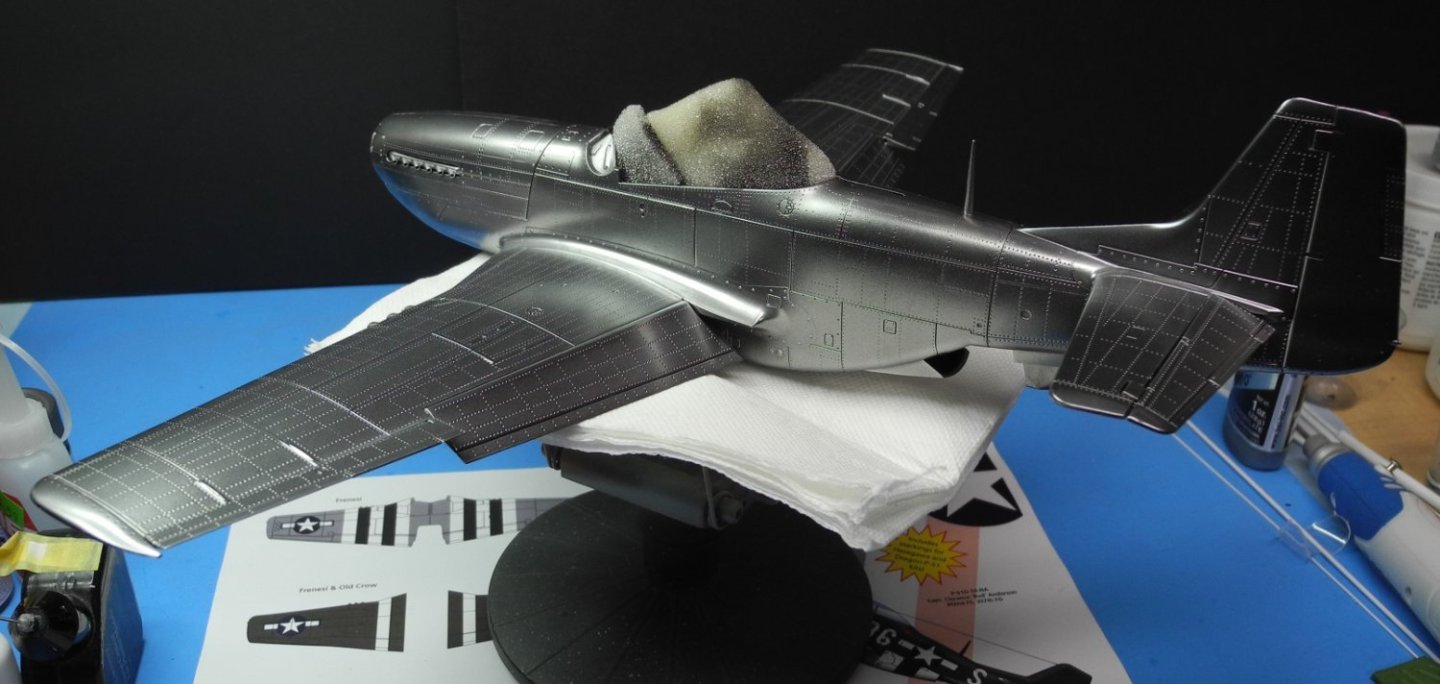
Thank you, James. The color is Alclad chrome. That particular metallic shade gives the effect with the most shine. Before I start handling or decaling and masking the model, I'll need to apply a clear acrylic gloss coat. Alclad is very susceptible to fingerprints and decal carrier film will look distorted on the model without the clear coat first.- 122 replies
-
- 10
-
-

-
P-51D Mustang by CDW - FINISHED - Dragon - 1:32 Scale
CDW replied to CDW's topic in Non-ship/categorised builds
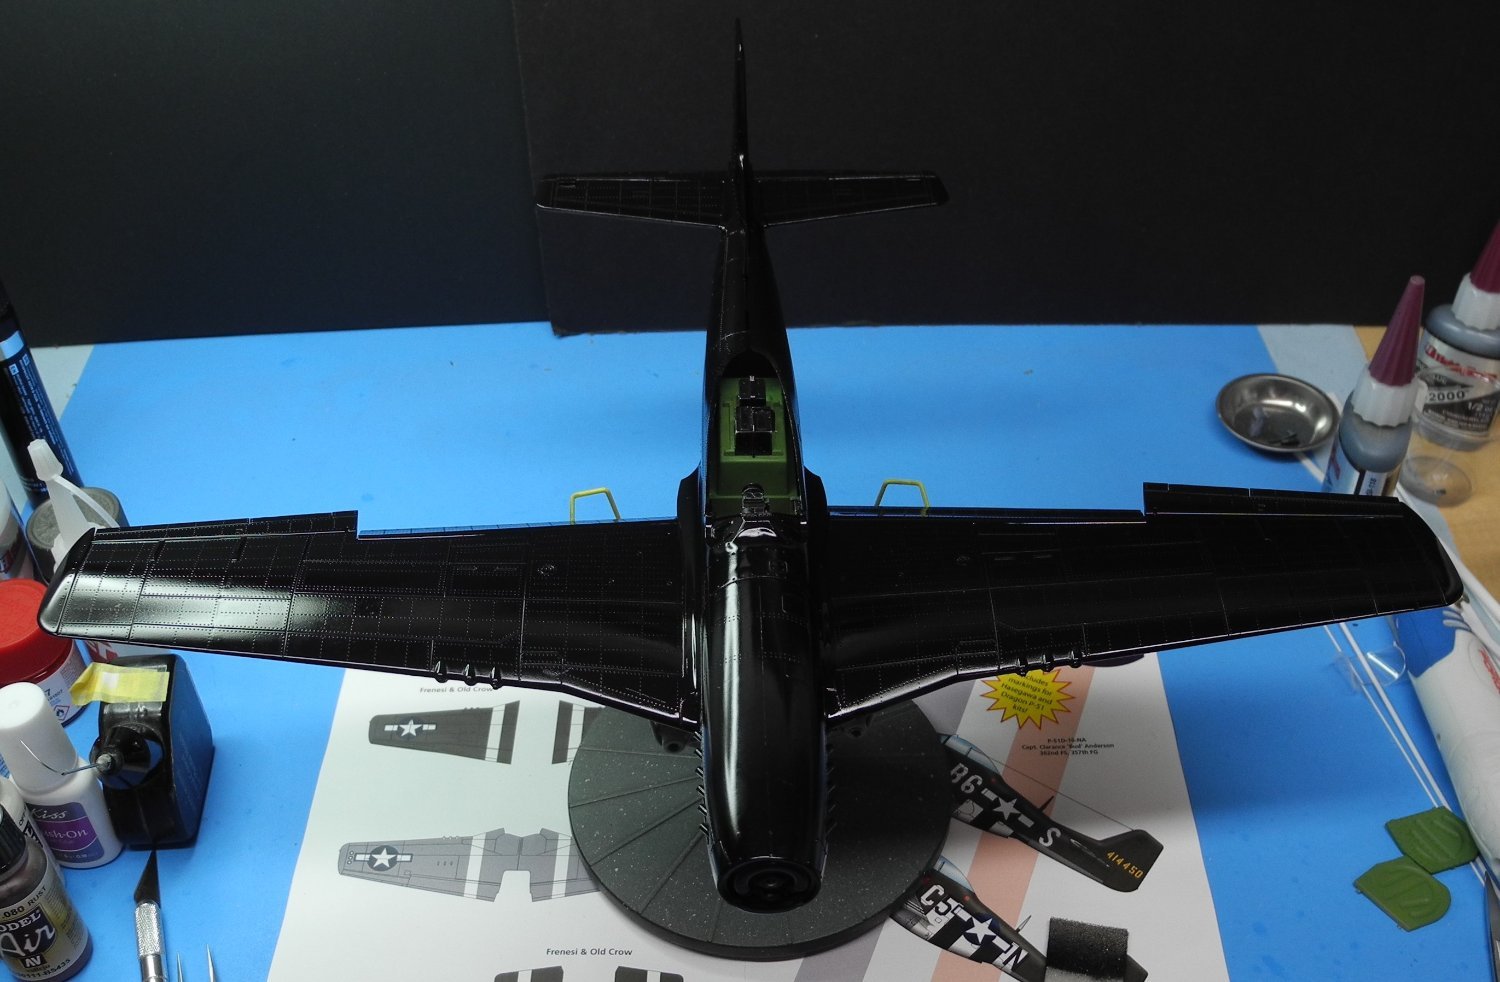
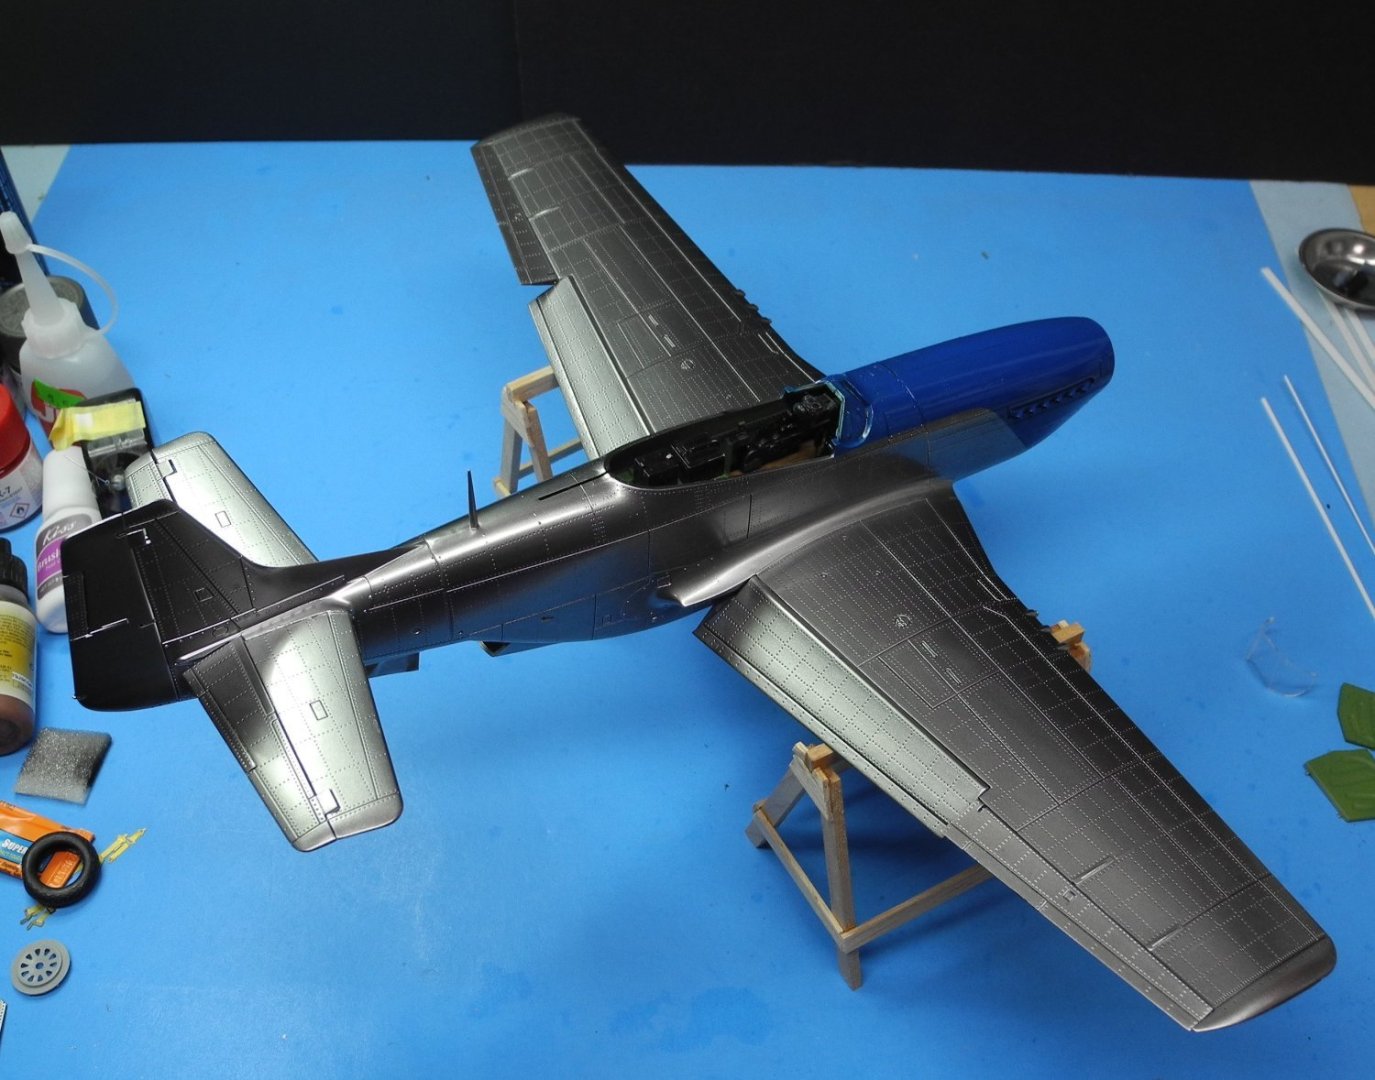
Early to bed, early to rise... She's shiny! Decided at the last minute to use Alclad rather than experiment on her with the Mr Color super silver 2. I'll experiment with the Mr Color silver when I paint the fuel tanks, racks and rocket mounts. Wheels, and UC too. I'm satisfied with the way the Alclad turned out.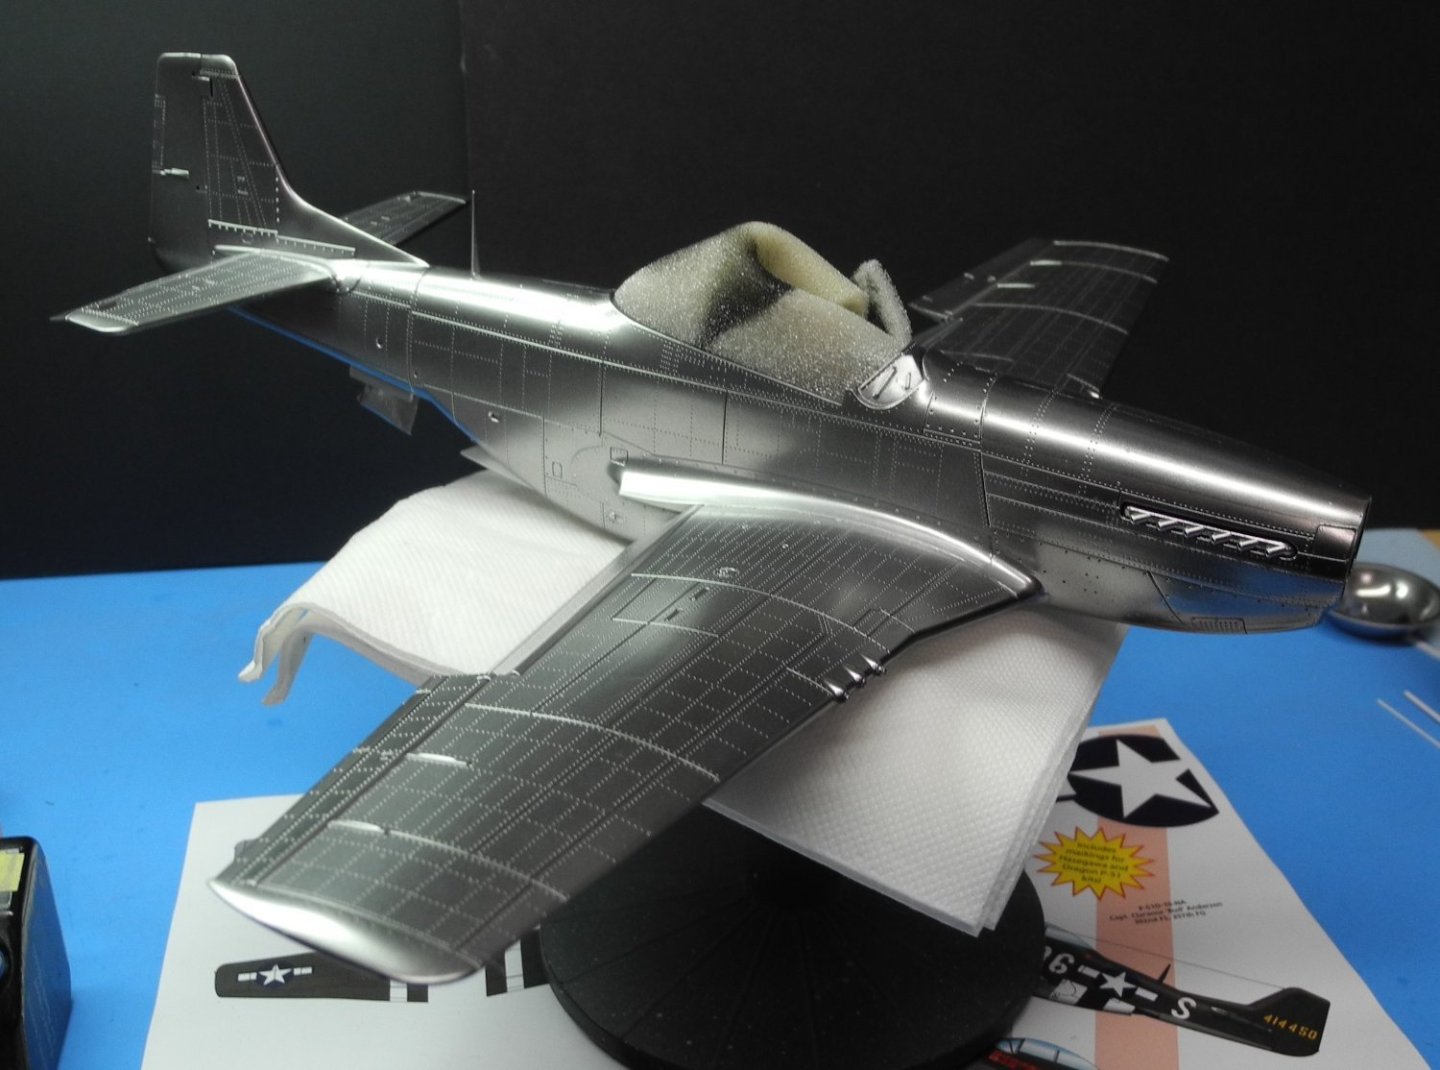

- 122 replies
-
- 16
-
-
-
P-51D Mustang by CDW - FINISHED - Dragon - 1:32 Scale
CDW replied to CDW's topic in Non-ship/categorised builds
I've heard from reliable source that Mr Color super silver 2, heavily reduced, then sprayed on in light mist coats similar to using Alclad, gives great results. I'm going to give it a try and see what happens. Won't try it until tomorrow giving this Tamiya gloss black a full day to cure. -
P-51D Mustang by CDW - FINISHED - Dragon - 1:32 Scale
CDW replied to CDW's topic in Non-ship/categorised builds
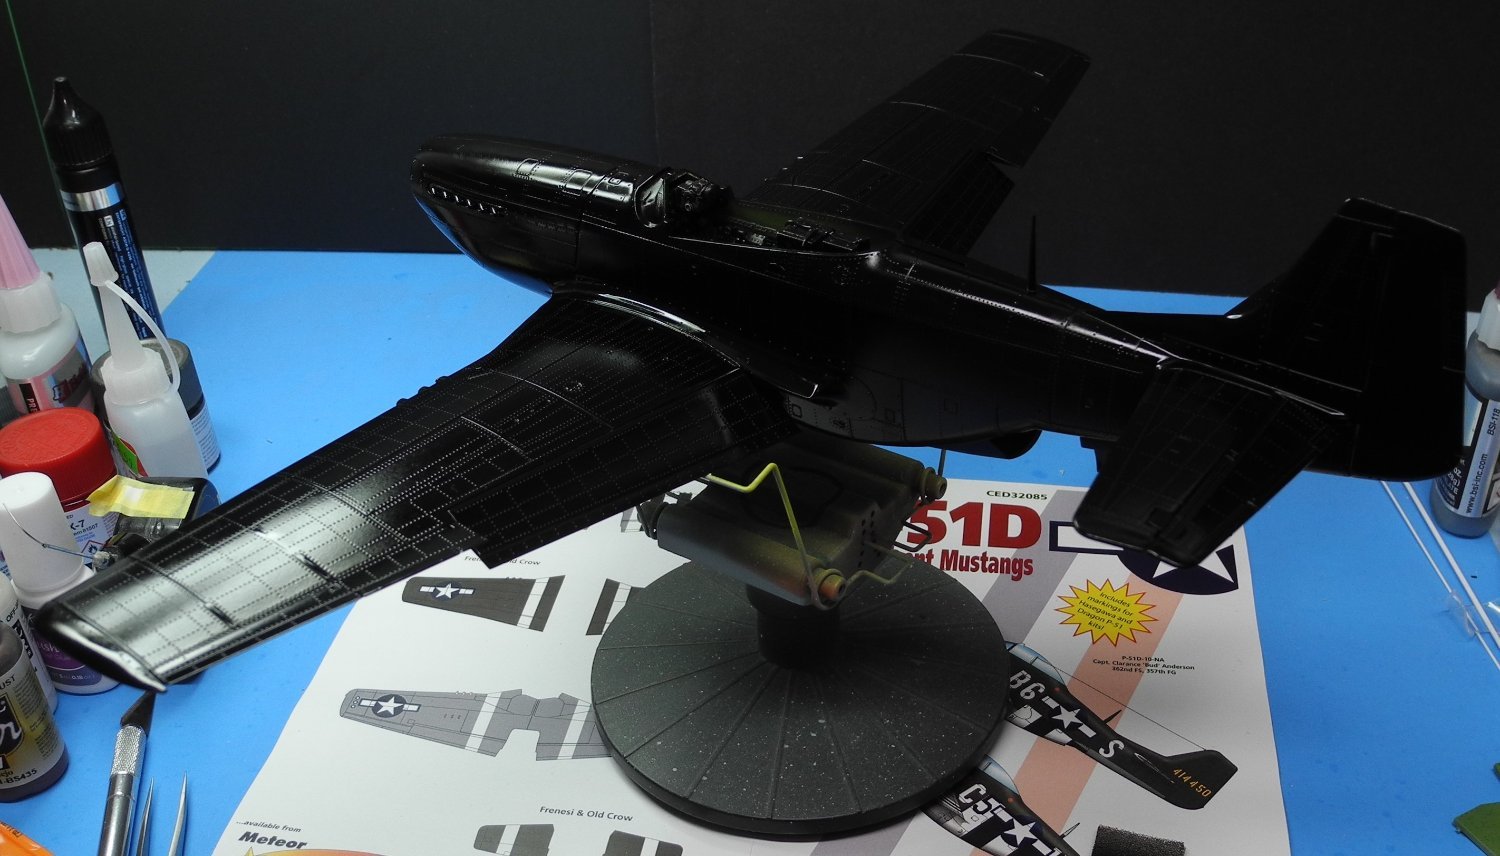
I take that back...it looks like I did paint something green once on that stand. But it definitely is a stand for model car bodies. And it's been seldom used so far. -
P-51D Mustang by CDW - FINISHED - Dragon - 1:32 Scale
CDW replied to CDW's topic in Non-ship/categorised builds
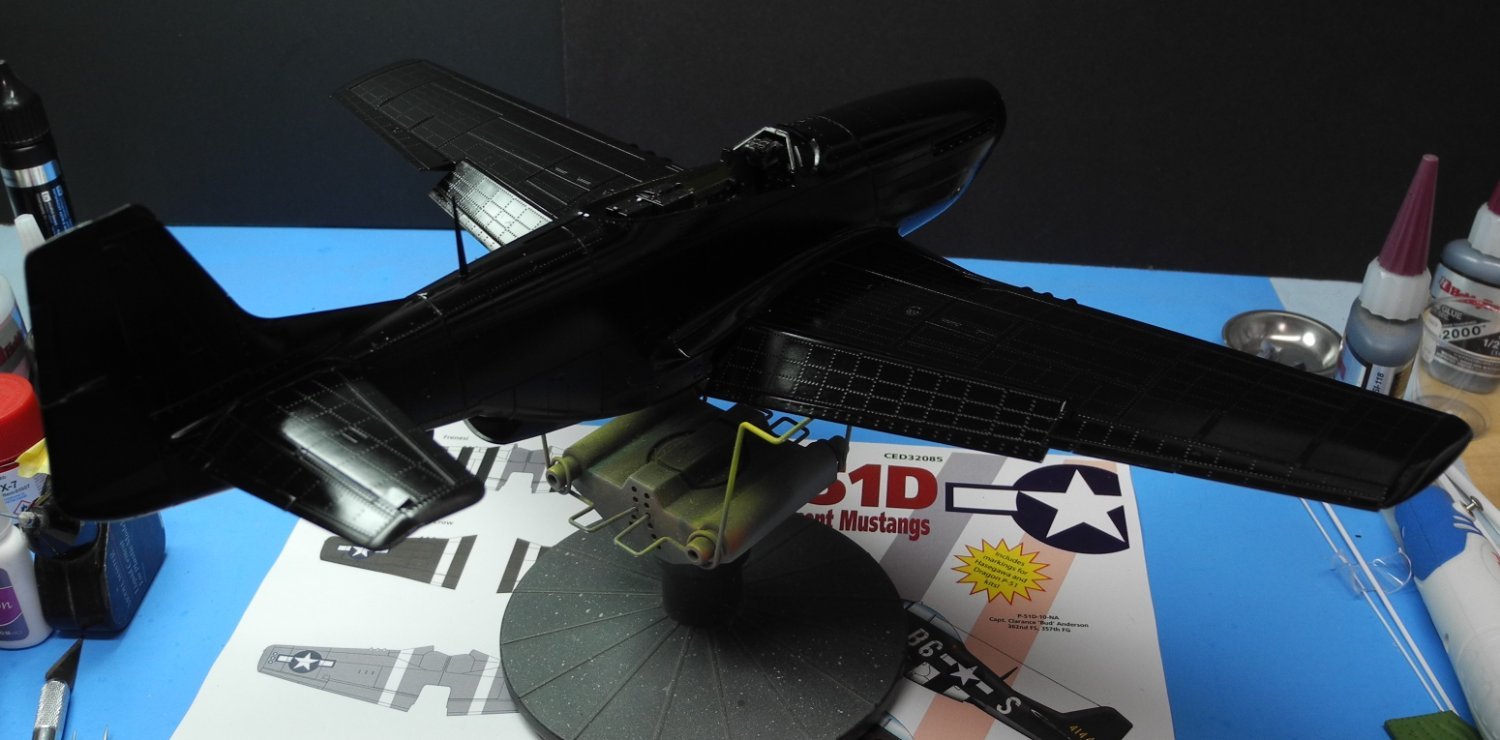
I have several of those stands. That one is new and I have never painted anything on it yet. That particular stand is designed to hold model car bodies for painting. The spring wires go up inside the body and hold it tight while you paint and rotate the car body. I only used that stand because it was handy to sit the model on top while I took the photos. When I paint an airplane like the P-51, I push a metal rod of the correct diameter up through the engine crankshaft/hole to hold and rotate the model while I paint it. If it's a jet, run an appropriate diameter dowel up through the engine nozzle for the same purpose.- 122 replies
-
- 10
-
-
P-51D Mustang by CDW - FINISHED - Dragon - 1:32 Scale
CDW replied to CDW's topic in Non-ship/categorised builds
The gloss black (Tamiya X-1) has been laid down and so far, it appears satisfactory. Smooth and glossy. The real test will be how it looks once the metallic is applied. Keeping my fingers crossed until then.


- 122 replies
-
- 13
-
-
P-51D Mustang by CDW - FINISHED - Dragon - 1:32 Scale
CDW replied to CDW's topic in Non-ship/categorised builds
Thanks Ken. It will be far from perfect but a nice shelf model to represent whichever pilot option I decide to take. Trying to decide between Old Crow and Pete II. I prefer the color scheme of Pete II but love the Bud Anderson story. -
P-51D Mustang by CDW - FINISHED - Dragon - 1:32 Scale
CDW replied to CDW's topic in Non-ship/categorised builds
The worst gaps were found at the wing roots. There I used some styrene to fill them in. After that used Mr Surfacer 500 to go over all the join areas on the fuselage. Once dry sanded it all down with a fine sanding sponge. Next I used Mr Surfacer 1500 along the joints then sanded that down with an extra fine sanding sponge to see what I might have missed. Once I touch up a few small areas and add some parts, will be ready to lay down my gloss black primer.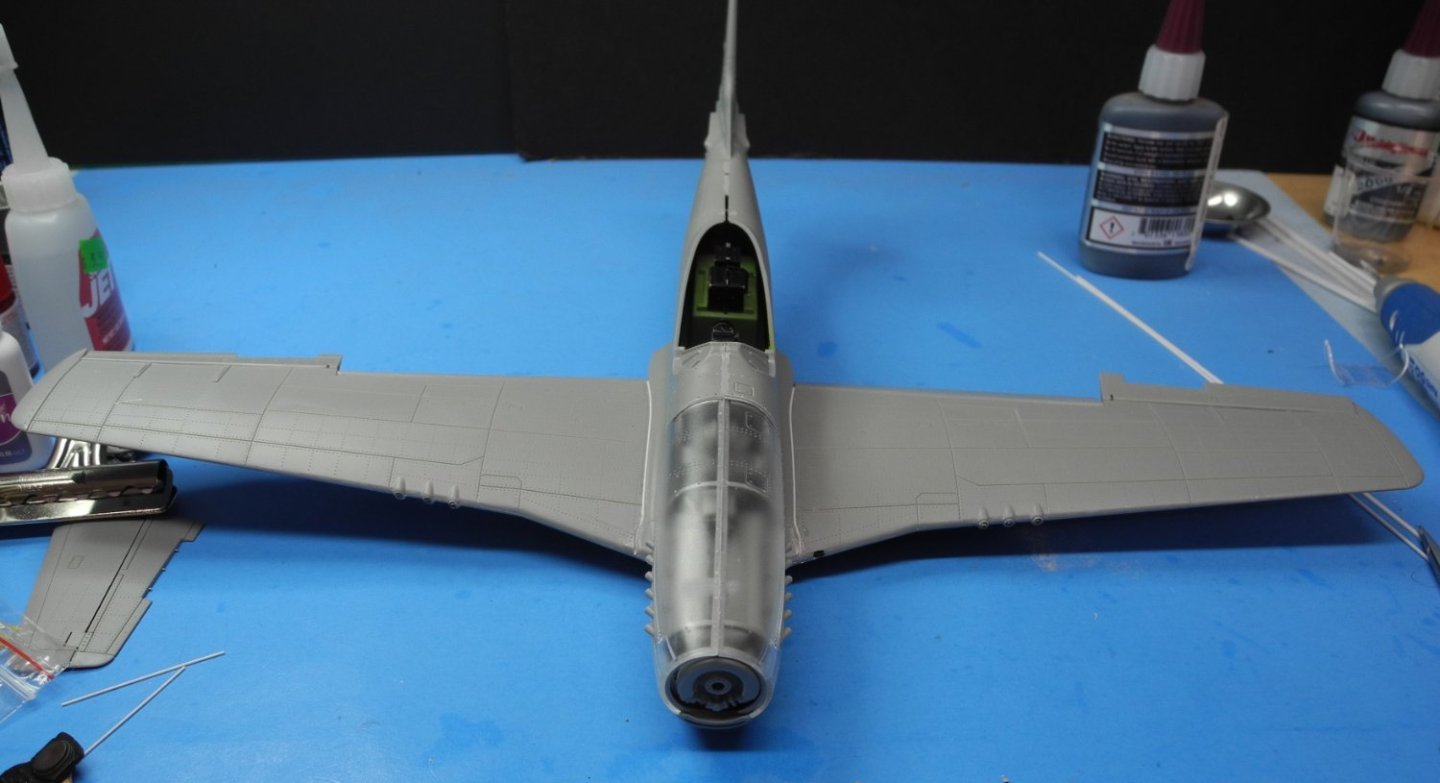


- 122 replies
-
- 17
-
-
Thanks for that link EG. They have some great looking model, don't they?
-
Beautiful work, Rob. Have you or any others who may read this have any experience with Lukgraph resin kits? They offer a range of various 1:32 WW1 multimedia kits that are priced in the range of current WnW kit prices...average price point seems to be in the $200 - $225 range. The only place I've seen the kits offered for sale are on Ebay. No place local to me nor my regular online suppliers carry them. Here are a few examples: 1/32 LukGraph #32-30 Resin FF.33L Friedrichshafen ESY 53 | eBay LUKGRAPH 1/32 Royal Aircraft Factory B.E.2 | eBay LUKGRAPH ALBATROS C.III 1/32 | eBay
-
P-51D Mustang by CDW - FINISHED - Dragon - 1:32 Scale
CDW replied to CDW's topic in Non-ship/categorised builds
And one heck of a battle that must be. That stuff has taken over down South! Are you using 2-4-D to control it? -
P-51D Mustang by CDW - FINISHED - Dragon - 1:32 Scale
CDW replied to CDW's topic in Non-ship/categorised builds
Thanks for sharing that video Andy. I really enjoyed watching it. -
P-51D Mustang by CDW - FINISHED - Dragon - 1:32 Scale
CDW replied to CDW's topic in Non-ship/categorised builds
Actually, I think the fastest piston driven fighter of WW2 was the German DO 335 Arrow. -
P-51D Mustang by CDW - FINISHED - Dragon - 1:32 Scale
CDW replied to CDW's topic in Non-ship/categorised builds
- 122 replies
-
- 10
-
-
-
P-51D Mustang by CDW - FINISHED - Dragon - 1:32 Scale
CDW replied to CDW's topic in Non-ship/categorised builds
As I work through this model, it's all coming clearer to me as to why I stopped building it so many years ago. It had a very bad reputation with other modelers who tried to build it and they talked about it. As years have gone by, I'm not nearly so particular and fussy about everything being just right. Just build it and make a reasonable effort to overcome the short comings. It will never be a show winner, but it will make a reasonable replica of a famous aircraft and that's what I want on my shelf. To be able to show the grandkids and tell them about the men that flew the aircraft. One of the choices I have for decals is for Bud Anderson's "Old Crow". I just watched him narrate a video where he told the story about flying a winter mission and realizing his olive-green camo was too easy to see from above against the snow-covered terrain below. On his return from the mission, he mentioned to his ground crew that the aircraft would be much more difficult for enemies above to see if it were NMF rather than green. The next time he suited up for a mission, his crew stood there with their hands bloody, having just finished stripping and polishing the aircraft to NMF. They had worked all night to do it. He showed nothing less than love, honor and respect for his ground crew. Made me have a very good feeling to hear that story from such an accomplished pilot/ace.- 122 replies
-
- 11
-
-
P-51D Mustang by CDW - FINISHED - Dragon - 1:32 Scale
CDW replied to CDW's topic in Non-ship/categorised builds
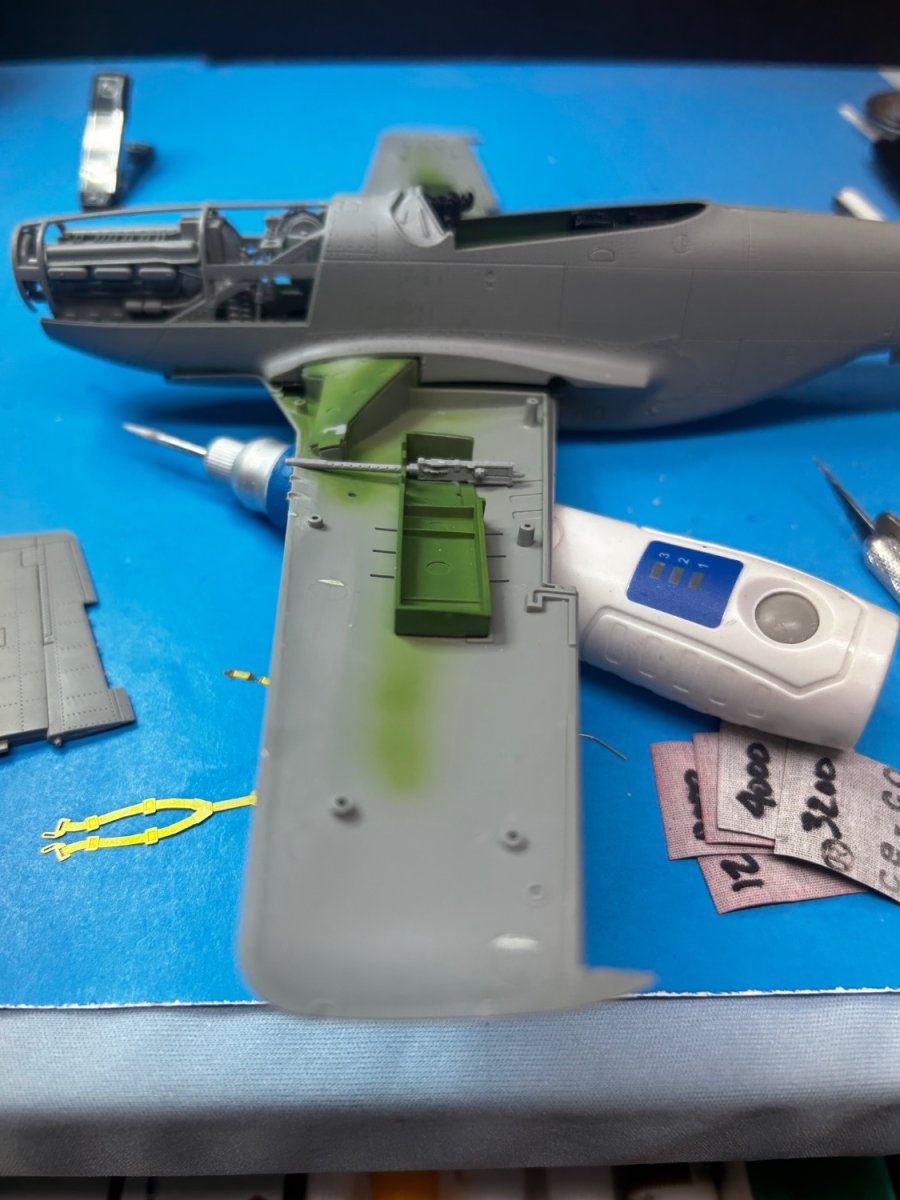
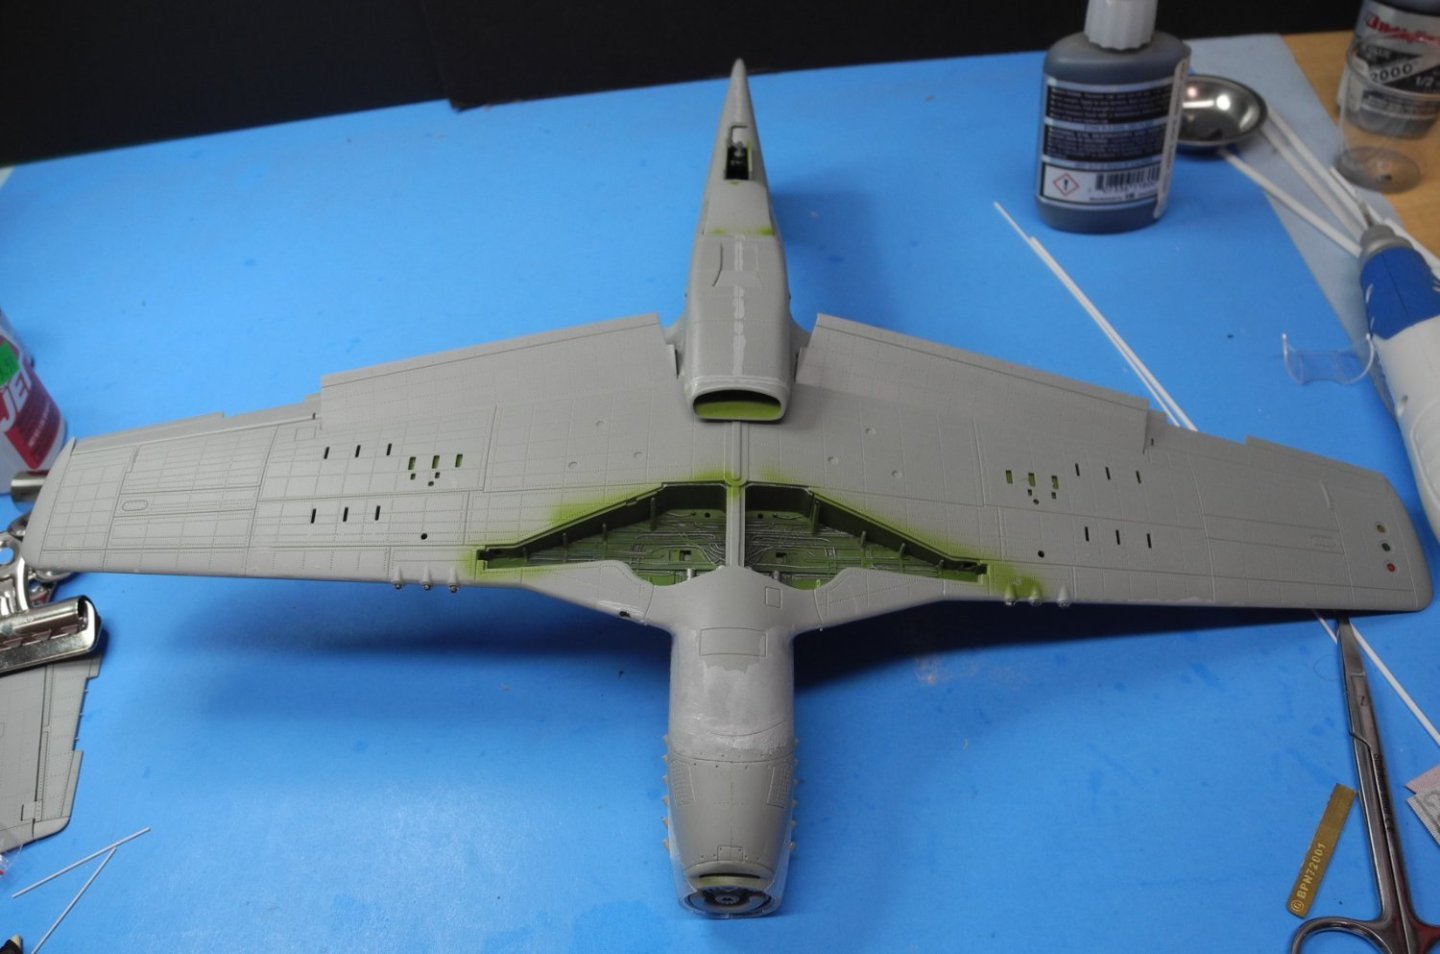
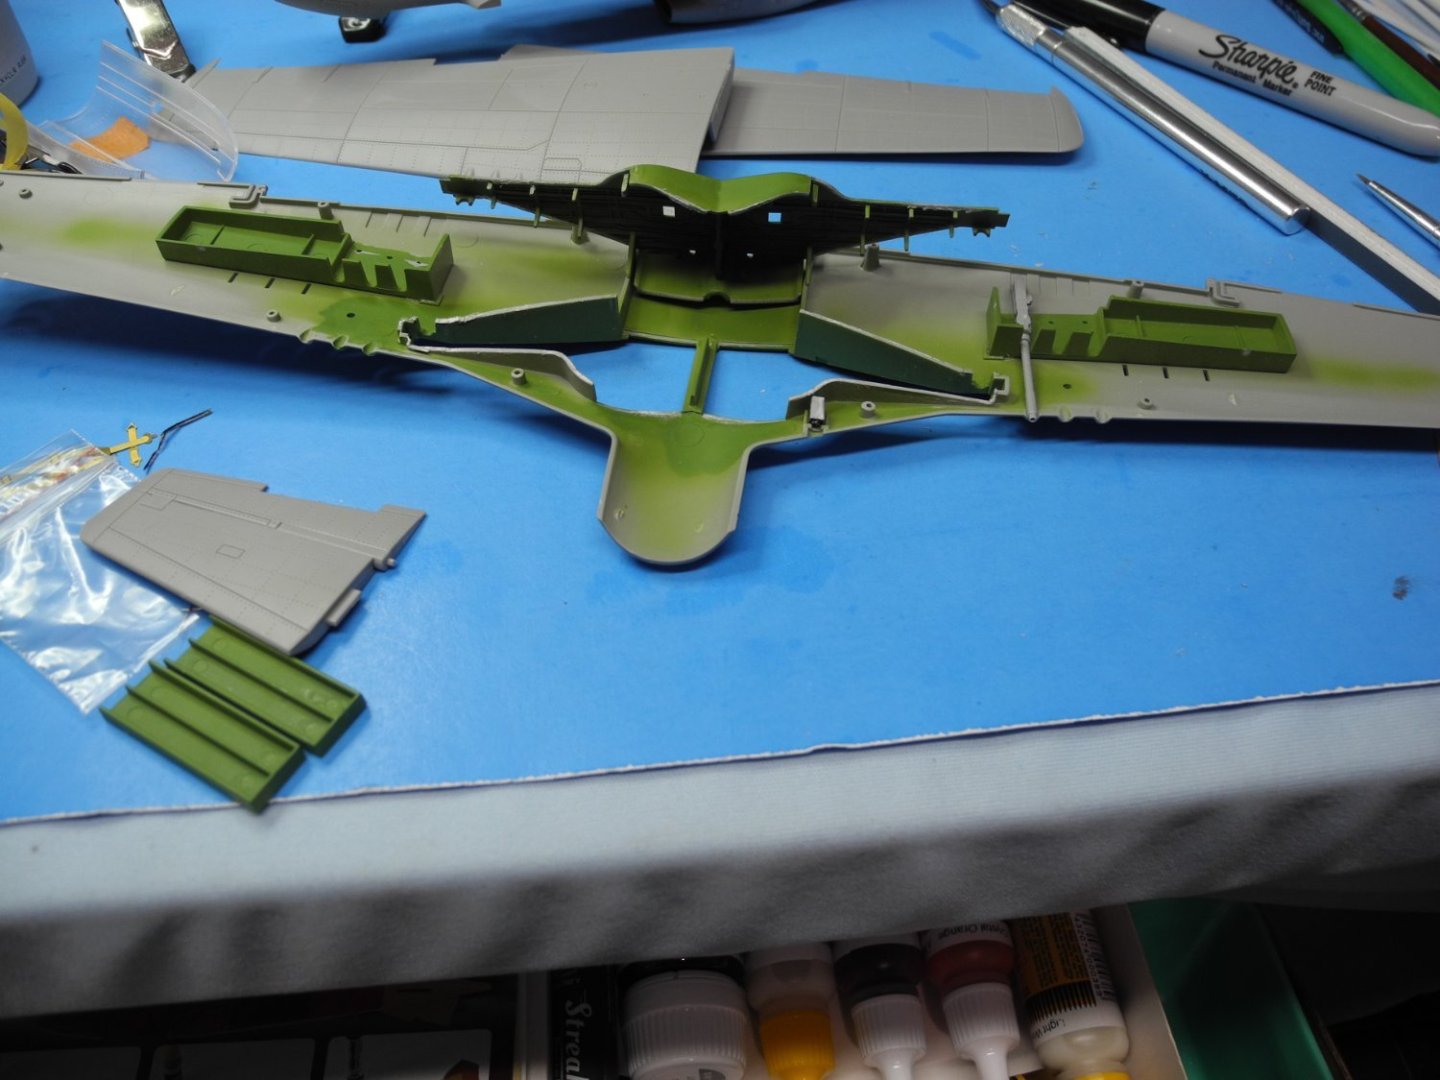
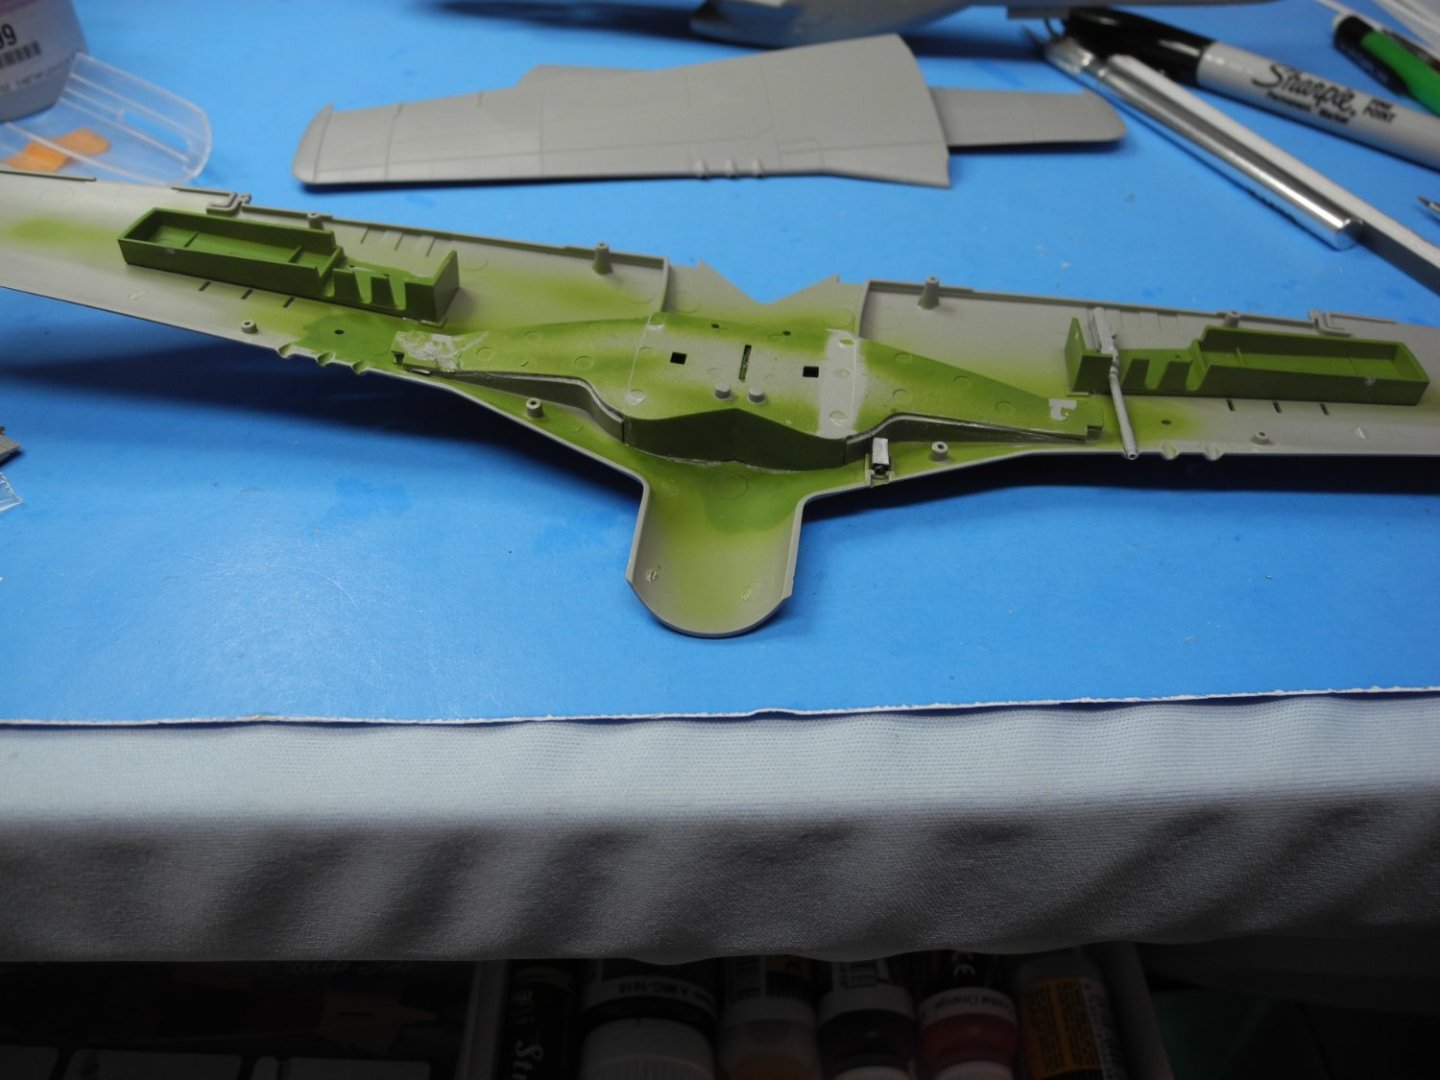
Shortened the wheel well height by about 2mm by cutting away plastic. No way that wing could have fit without doing that. A ton of leaves and Oak tree bloom. Raked and bagged about 40 of the 42 gallon contractor bags from the front yard alone. There will be close to that much in the back yard, yet to be done. The leaves and bloom have almost finished dropping now. One more pass will be required in a couple of weeks from now. We also spread a ton of new mulch in the front yard flower beds. The joys of home ownership. 😀 -
P-51D Mustang by CDW - FINISHED - Dragon - 1:32 Scale
CDW replied to CDW's topic in Non-ship/categorised builds
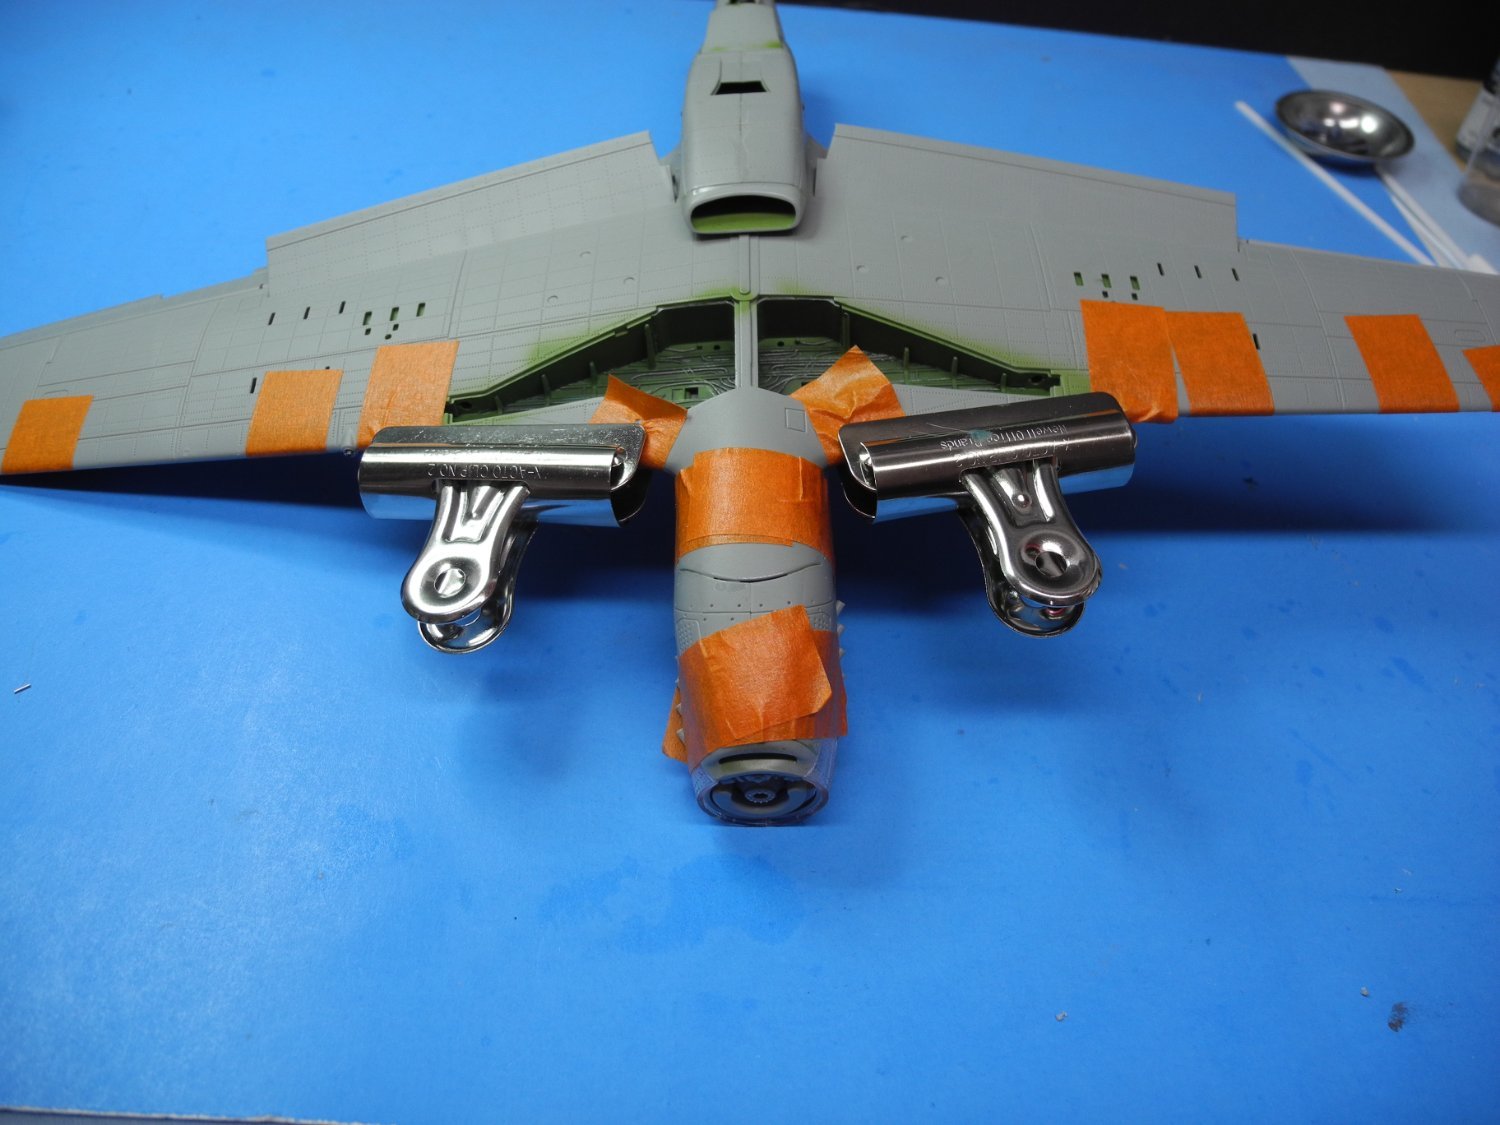
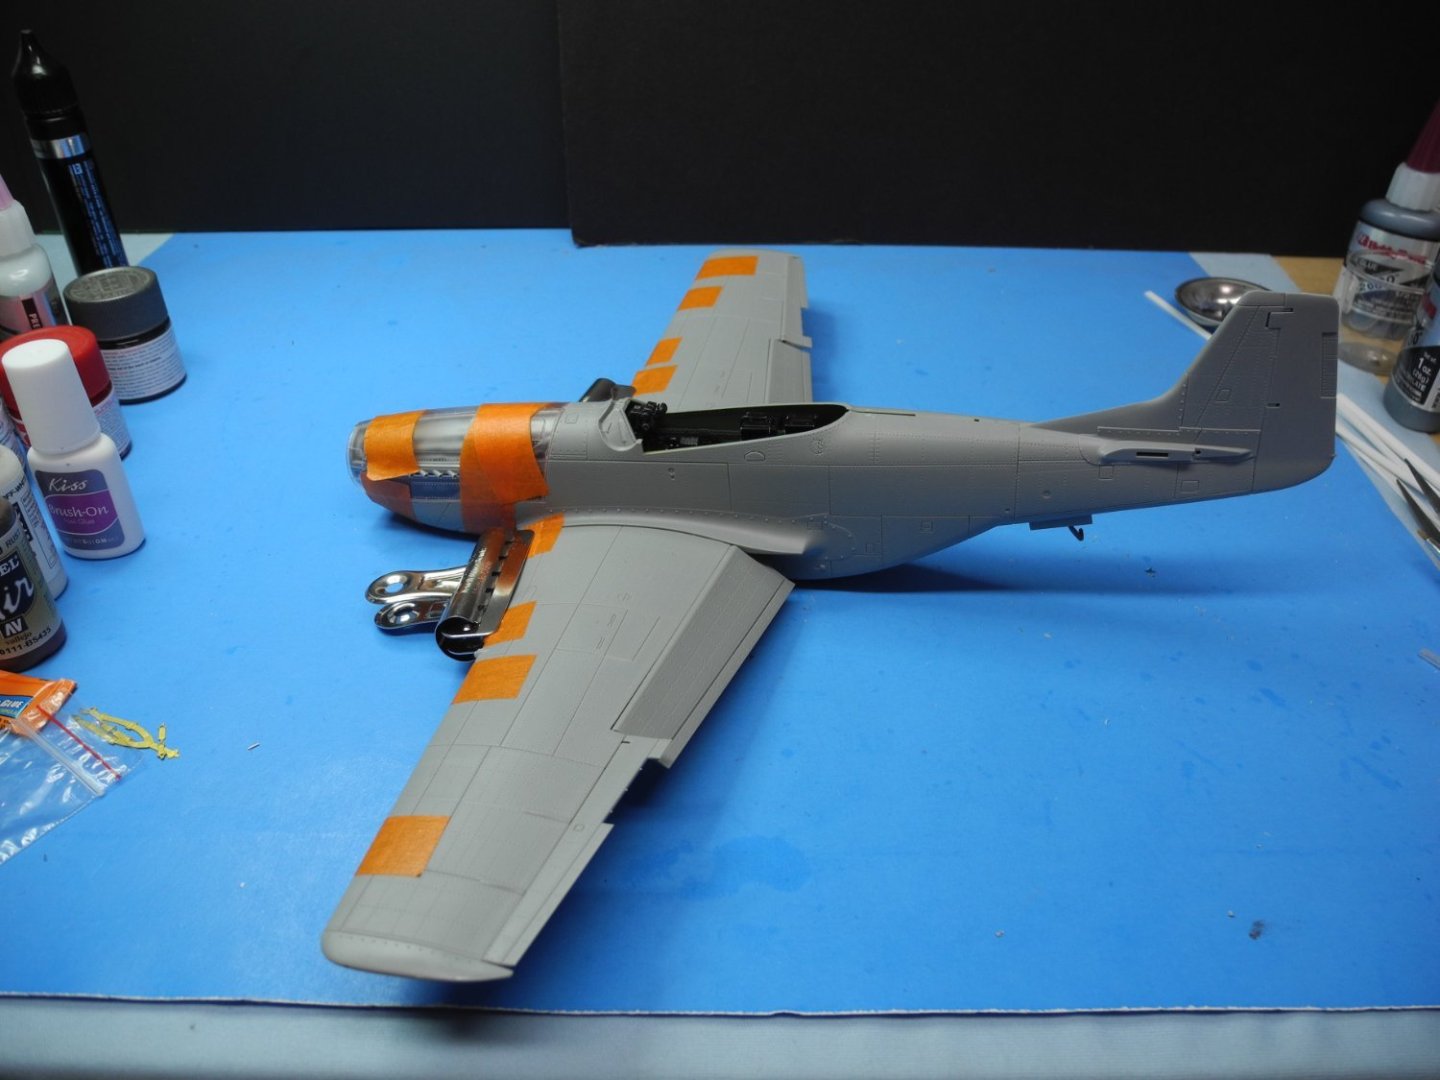
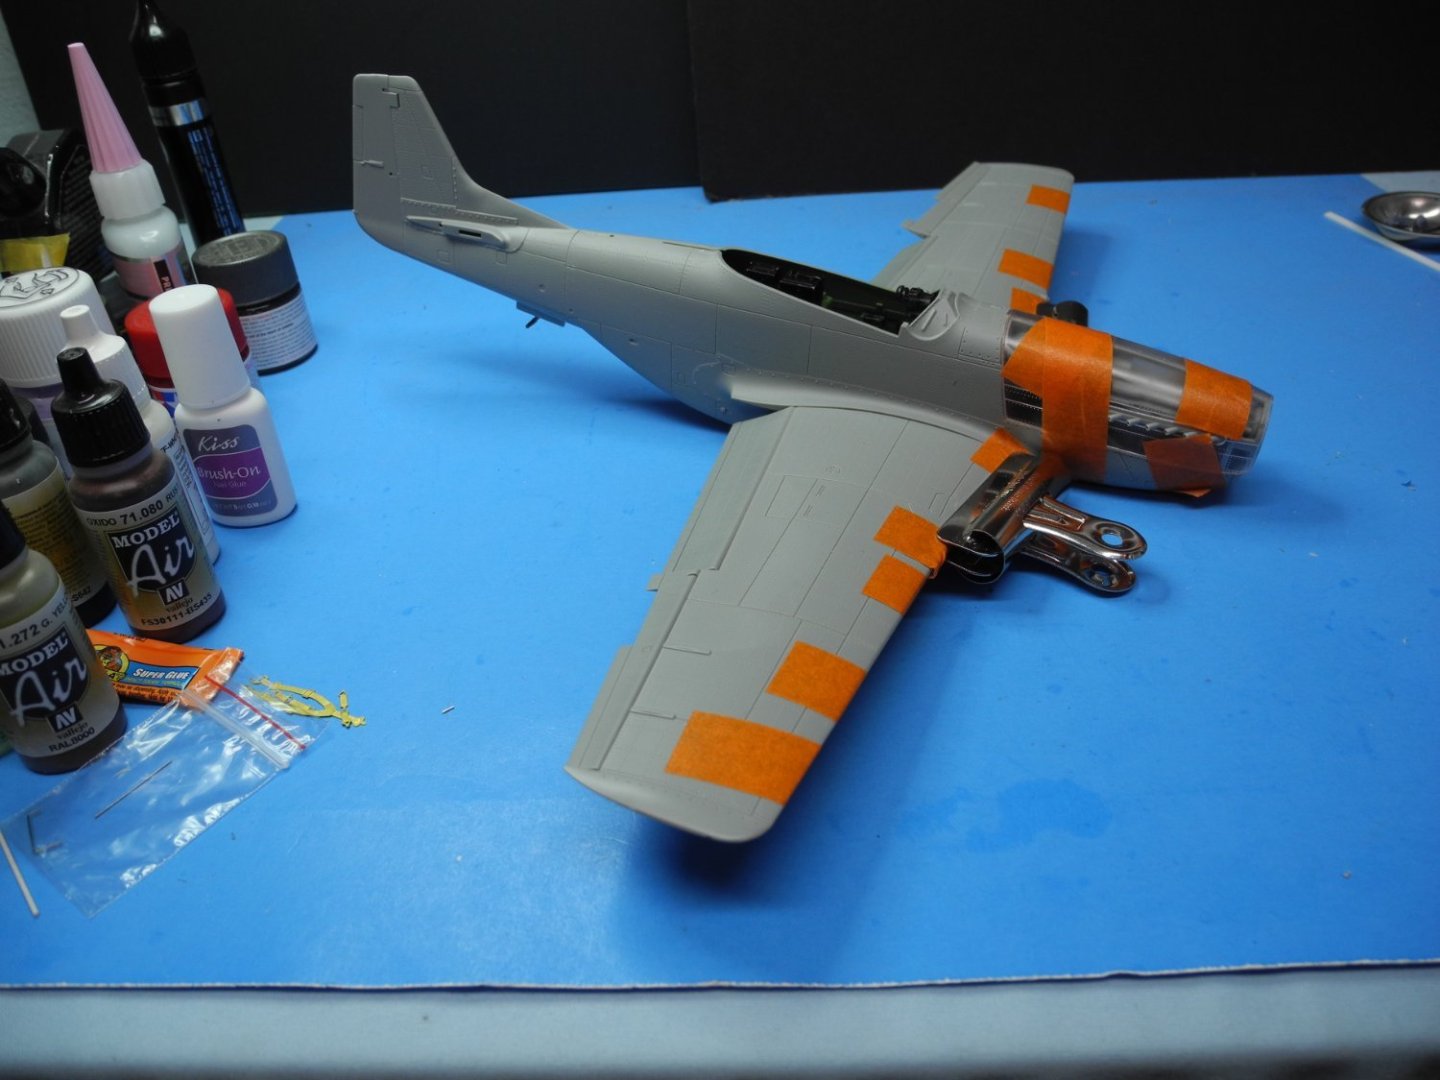
I've wrestled the wing to the fuselage using tape and clamps to bind it as best I could while the glue sets up to dry. Plenty of gaps to fill in and smooth out before any painting can be done. I have several choices I can make to finish the bird. Whether I do it in NMF or camouflage will depend on how well I can make the joints look when it's all said and done. My preference is a NMF, but won't hesitate to do it in camo if the joints are not up to par. I used my own version of "high powered clamps" to close the final gap between the leading edge/wing root join of the wing and fuselage. Here in Florida, Spring cleaning is the order of the day/s. I dread this time of year for all the clean-up that's required. Most of my time is occupied in that endeavor so modeling time is hard to come by until it all (spring cleaning) gets done.

- 122 replies
-
- 15
-
-
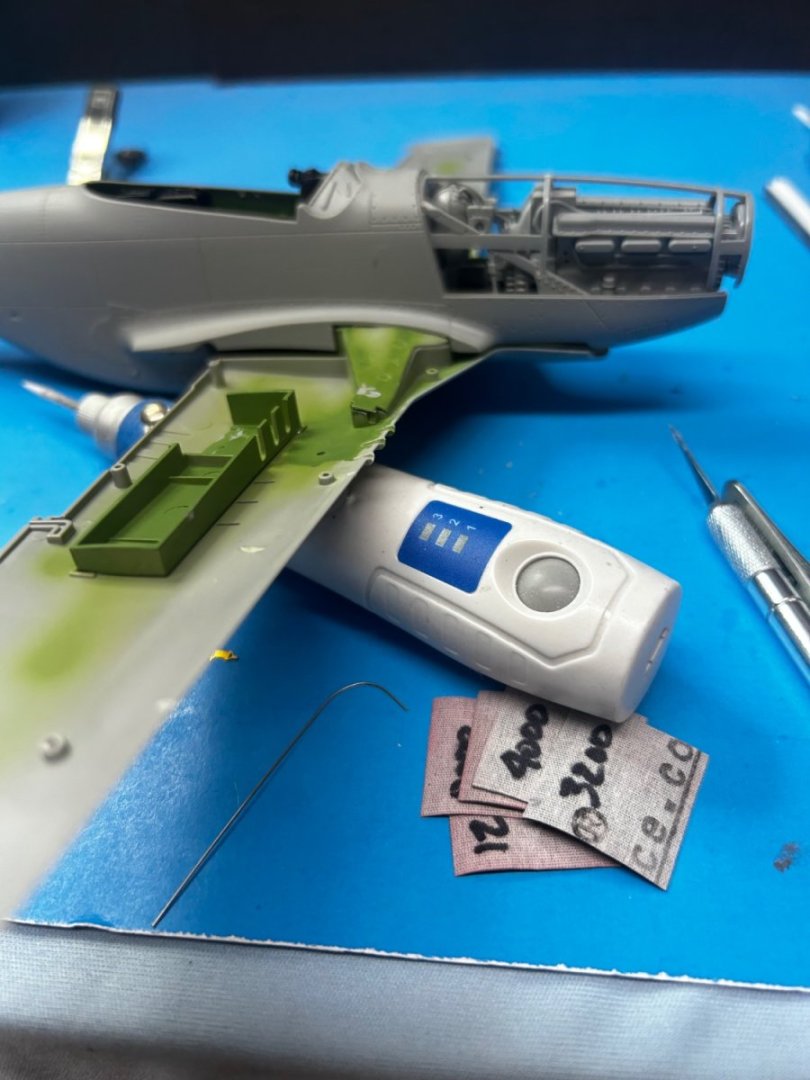
P-51D Mustang by CDW - FINISHED - Dragon - 1:32 Scale
CDW replied to CDW's topic in Non-ship/categorised builds
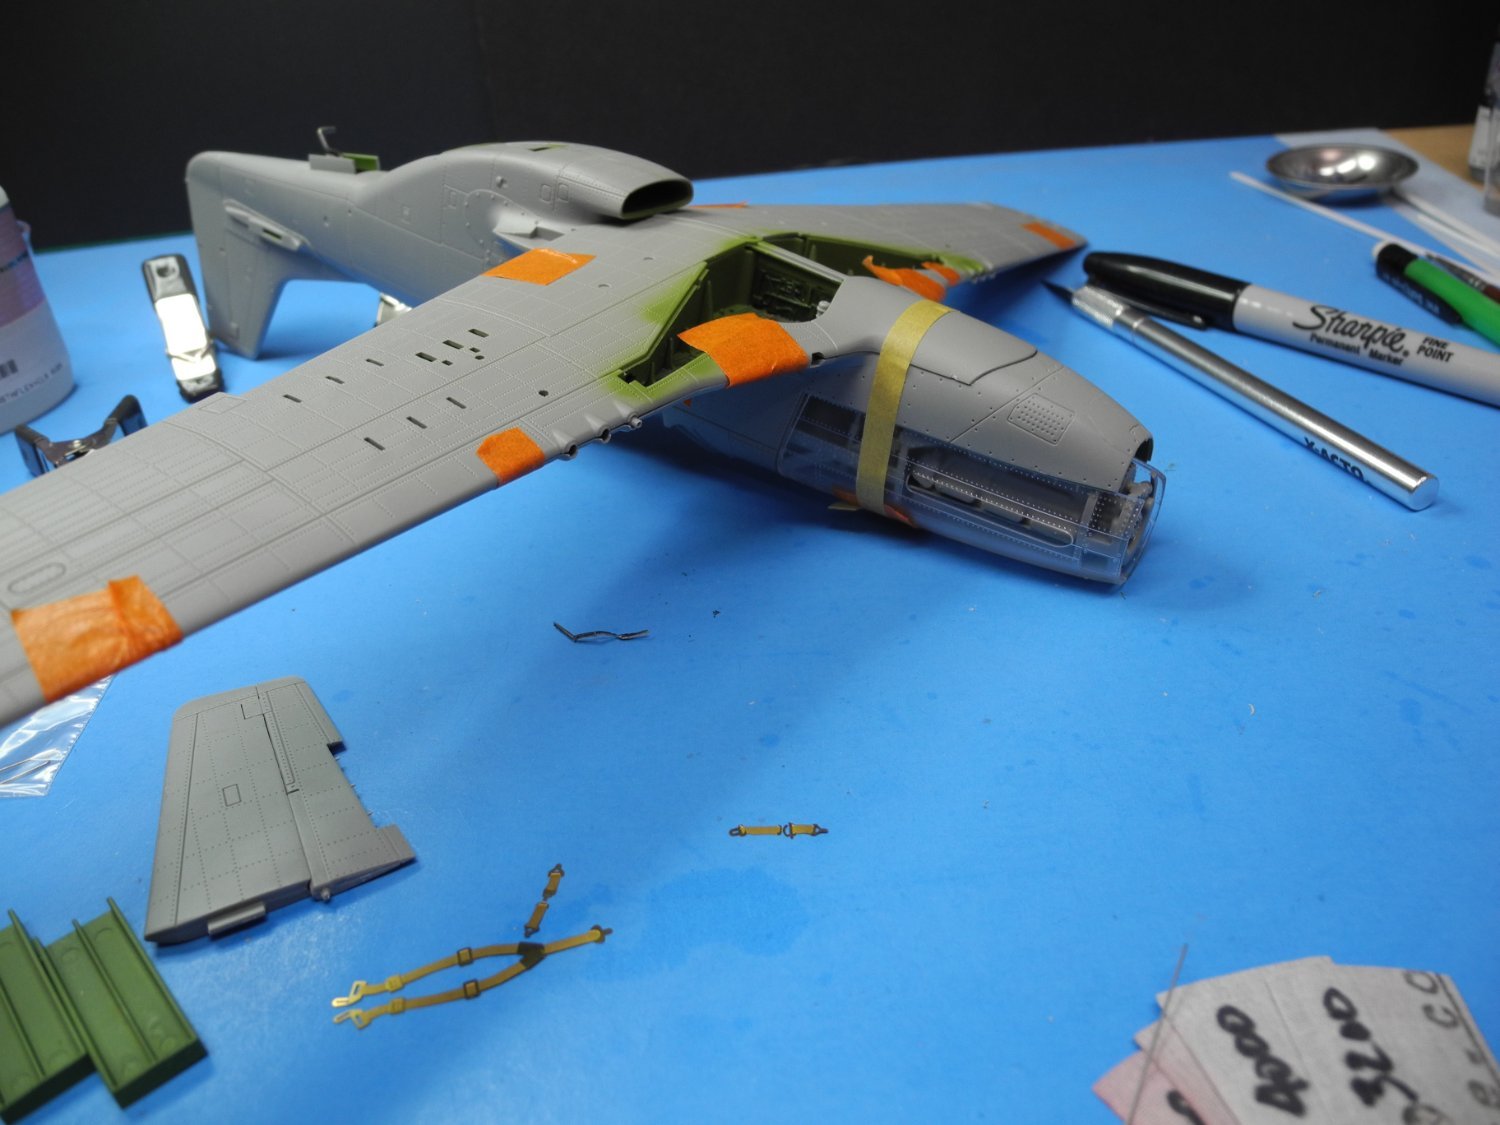
Yes indeed, the landing gear bay is too high. A Dragon models design flaw among several others I've found in the kit. To correct the LG bay, I cut approximately 2.5mm from the height of it then glued the top of the bay back on. This gave me the clearance I needed for the fit. As far as whether the wing sits too far forward, I cannot say. I have not taken any detailed measurements and scaled it to the actual P-51 airframe. If it was/is off a bit, I will just live with it. The photoetch set included with the model is rather useless. Much of it doesn't fit and must be trimmed and filed to make it fit. The cockpit detail is weak as well as are other features which are designed to be displayed open if the modeler so chooses. The panel lines and rivet detail is too heavy as well. In my opinion, buying lots of aftermarket parts to upgrade this model would be a waste of time and money. If one intended to build a highly detailed 1:32 P-51, the kit of my choice to use as a base model for that would be the Tamiya kit, hands down. This Dragon kit certainly has its flaws, but I think it might finish up looking decent as a shelf model. My first clue that this model might have flaws was when I only found one build video of it on YouTube. Flory Models did a four-part video series of the kit a few years ago. At the 2 minutes 20 second mark of this video, Flory briefly described his encounter with the wing/wheel bay/fuselage fit by stating that he used some "high powered" clamps to squeeze and force the wing into position to join to the fuselage. Not sure why he chose that method instead of cutting down the height of the LG bay. -
P-51D Mustang by CDW - FINISHED - Dragon - 1:32 Scale
CDW replied to CDW's topic in Non-ship/categorised builds
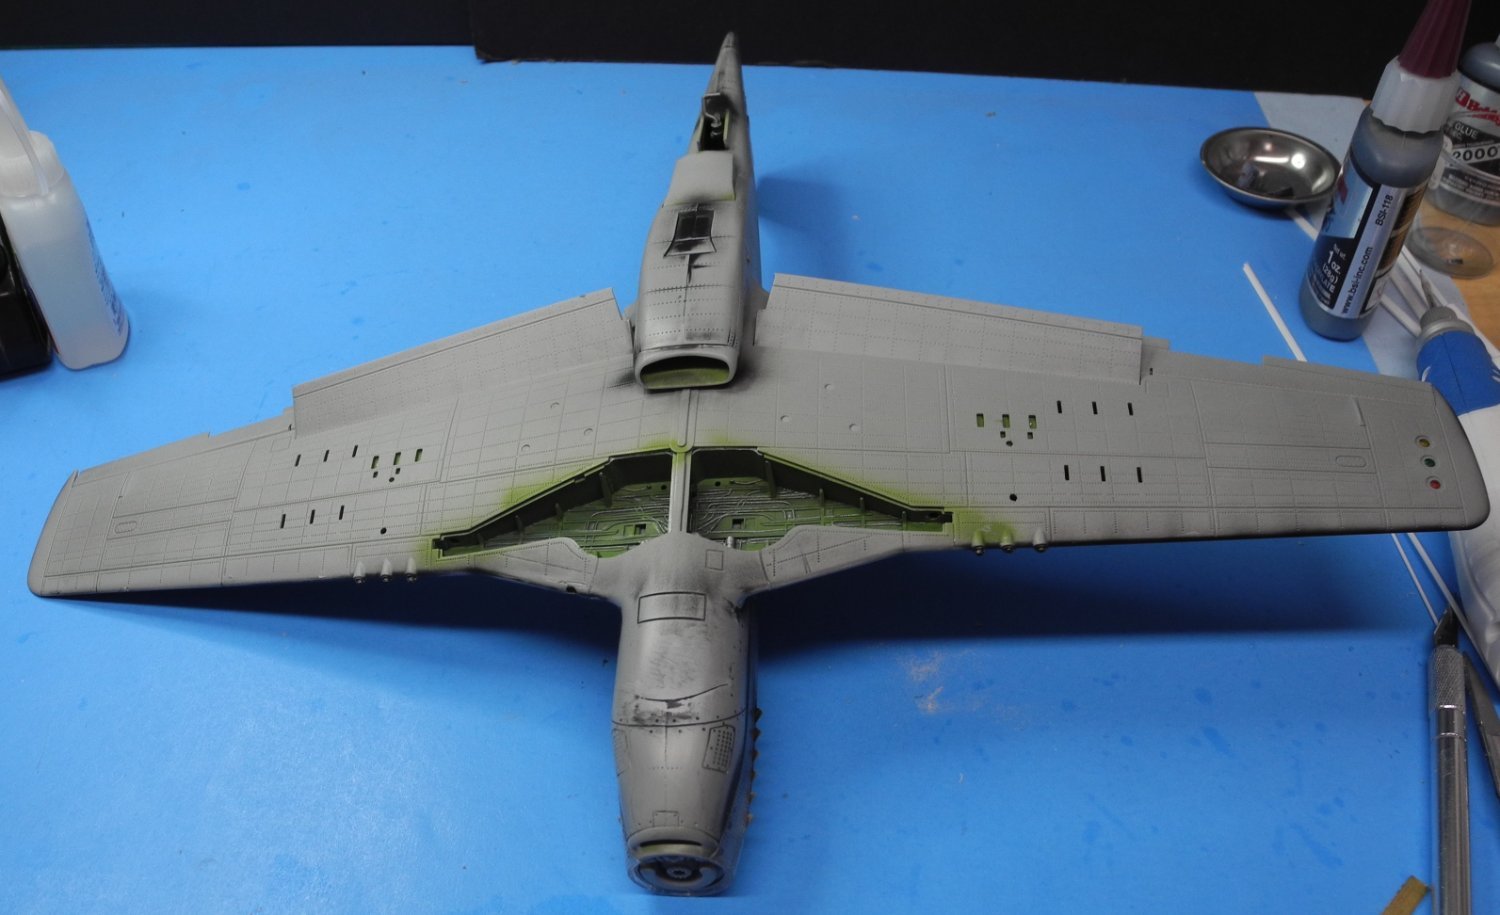
With the fuselage halves glued together, a dry-fit of the lower wing to fuselage reveals a problematic join. It’s going to require some relief between the wheel wells and the fuselage to get a proper fit. Even then, the way the forward part of the wing joins the fuselage seems peculiar.
- 122 replies
-
- 12
-