HOLIDAY DONATION DRIVE - SUPPORT MSW - DO YOUR PART TO KEEP THIS GREAT FORUM GOING! (Only 20 donations so far - C'mon guys!)
×


laps
-
Posts
118 -
Joined
-
Last visited
Content Type
Profiles
Forums
Gallery
Events
Everything posted by laps
-
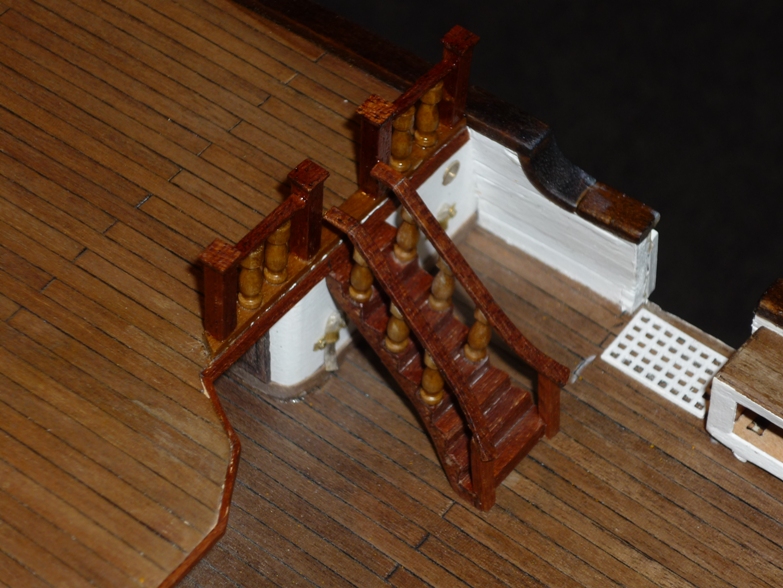
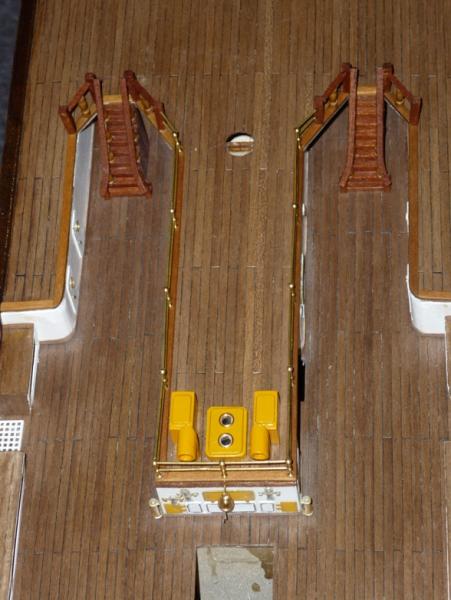
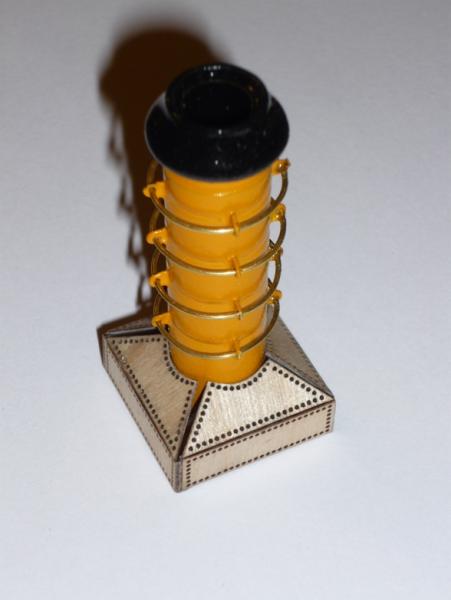
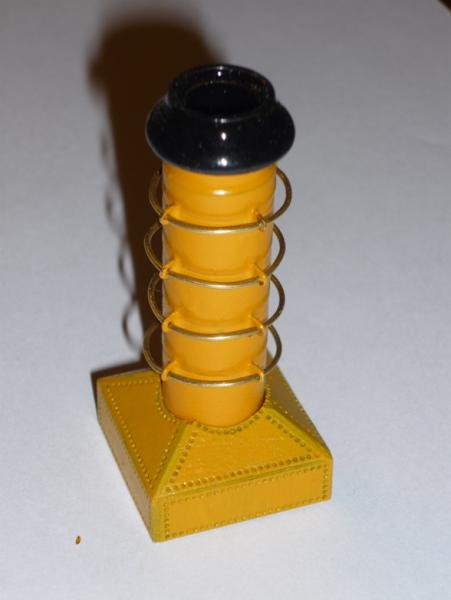
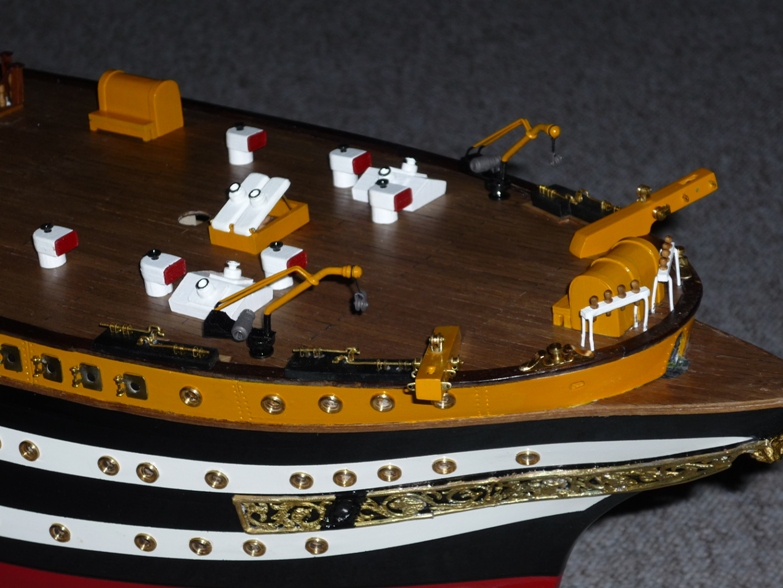
 Deck details The number of items that goes on the dek is huge (basically I hadn't seen any other models with this many parts). I will large present this huge job in photos and only mention things when I had to deviate from the instruction to solve any problems. Anchor davits and anchor locks I had to shorten the two small lockers on each side of the deck, obviously because I cut the entry ways in the wrong place One of four stairs The chimney required a bit of work. The lasercut pieces to form the box around the bottom of the chimney didn't fit. I filled the cracks, sanded and painted - the end results wasn't too bad. Here the chimney is glued in place together with the assembled crane hoist. The latter took hours to make And finally a photo of the fore deck with more pieces in place. The open hatch cover is not yet glued because it may interfere with the rigging job later on. /Lars Peter
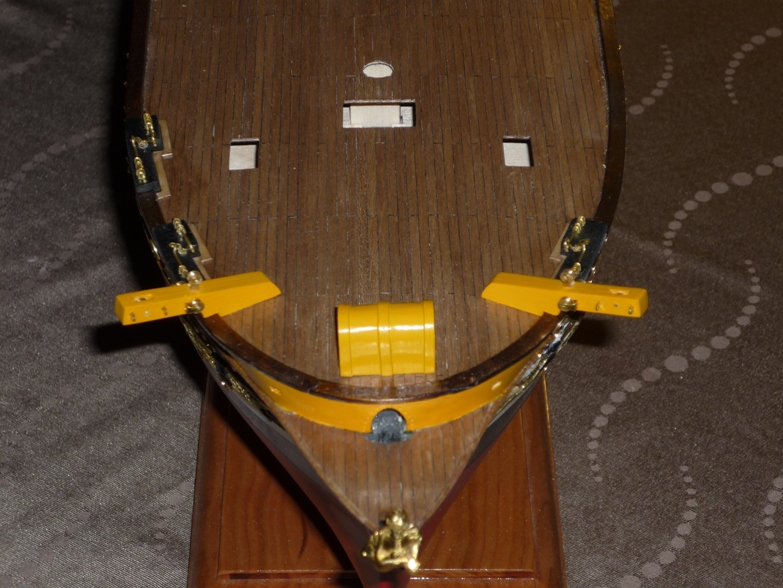

-
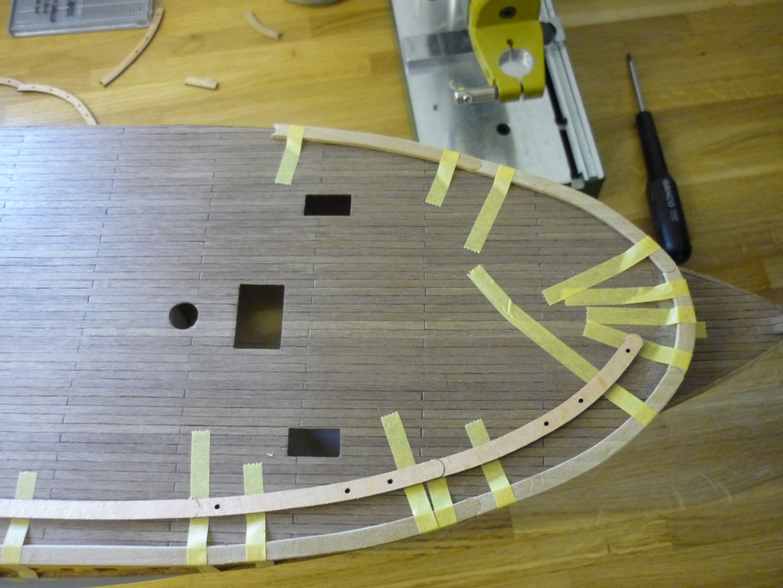
Deck mouldings After planking the decks had finished it was time to consider the mouldings along the edges. They came with the kit as laser cut plywood. I was worried about using them because it was probably difficult to achieve a uniform stain especially along the ugle plywood egdes. So I orded some 2 mm walnut sheets and started cutting my own mouldings. Here the dry fit is in progress. You may notice that the colour of the walnut mouldings is quite different from the deck colour. I varnished a piece to see whether it was possible to achieve the same colour as the deck - it was not. So I had to rely on walnut stain instead. The corner pieces were carved from a solid piece of walnut and glued in place. With all the pieces glued in place a coat of walnut stain was applied. At first I didn't like the much darker colour but someone here at MSW mentioned that it added a nice contrast to the deck colour. Much later I agree on this. /Lars Peter


-
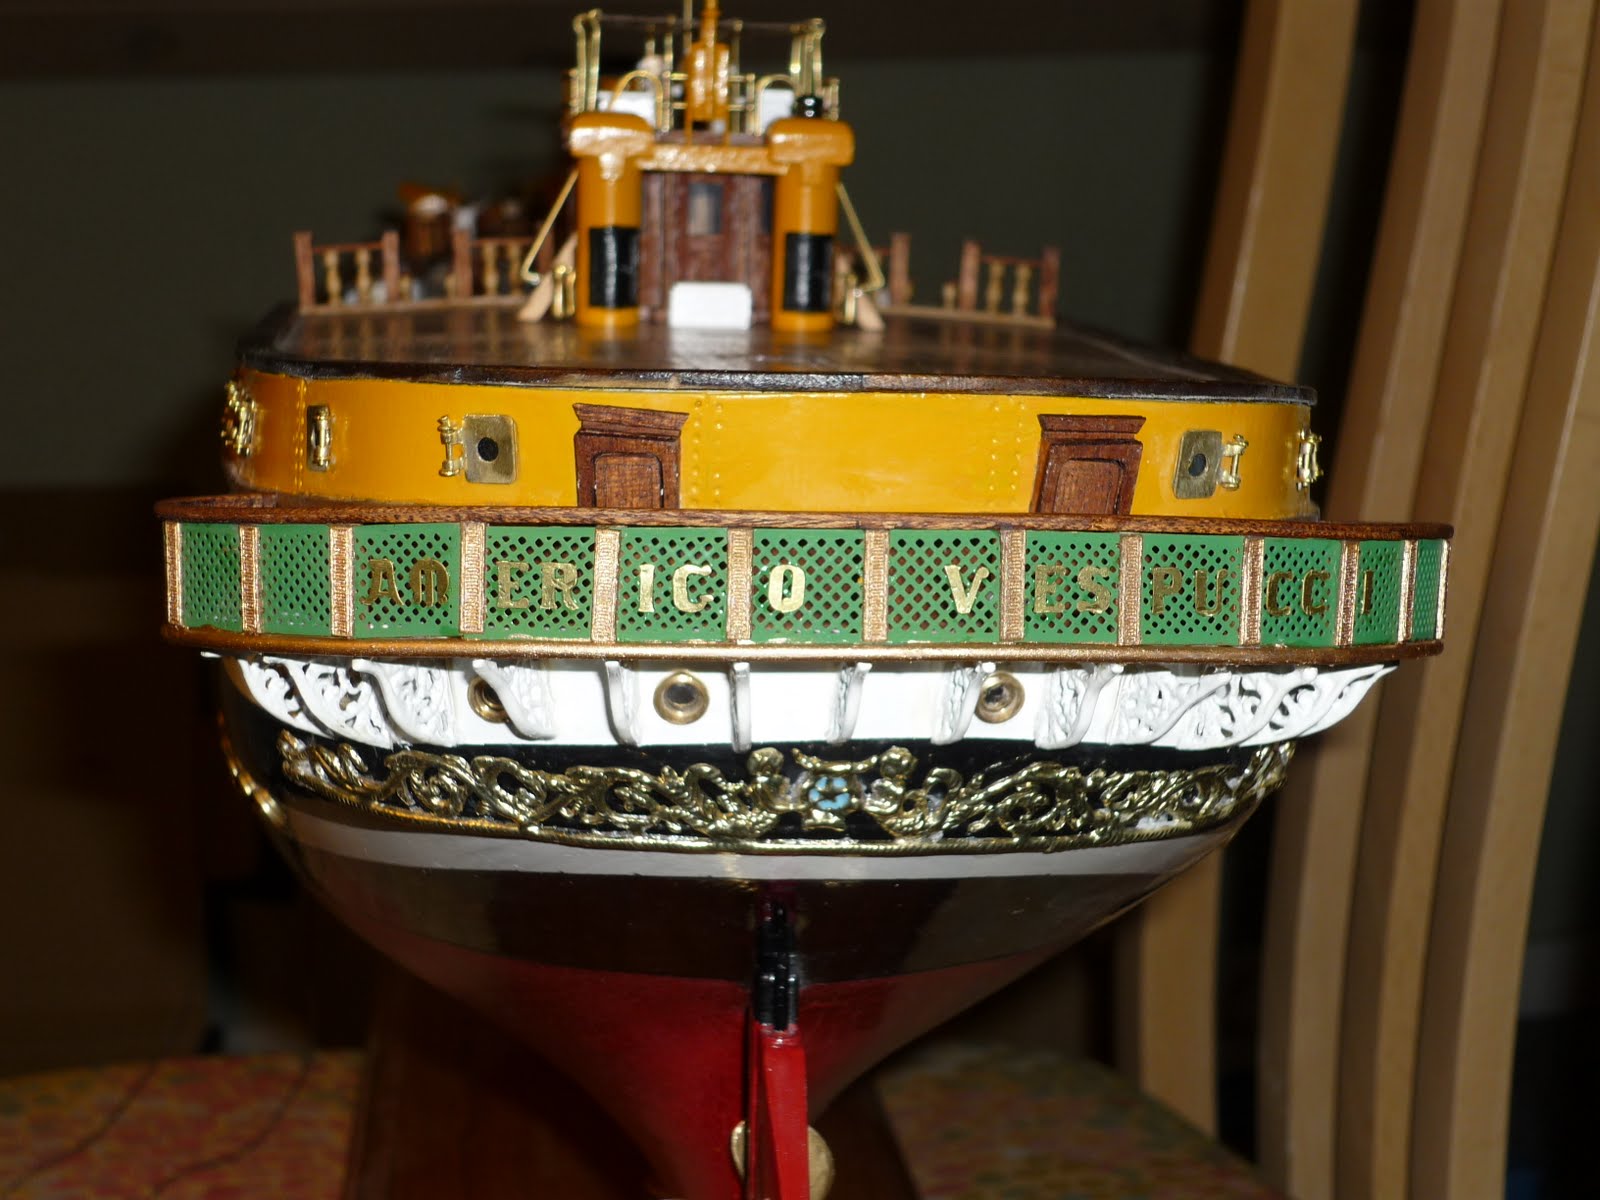
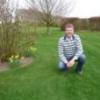
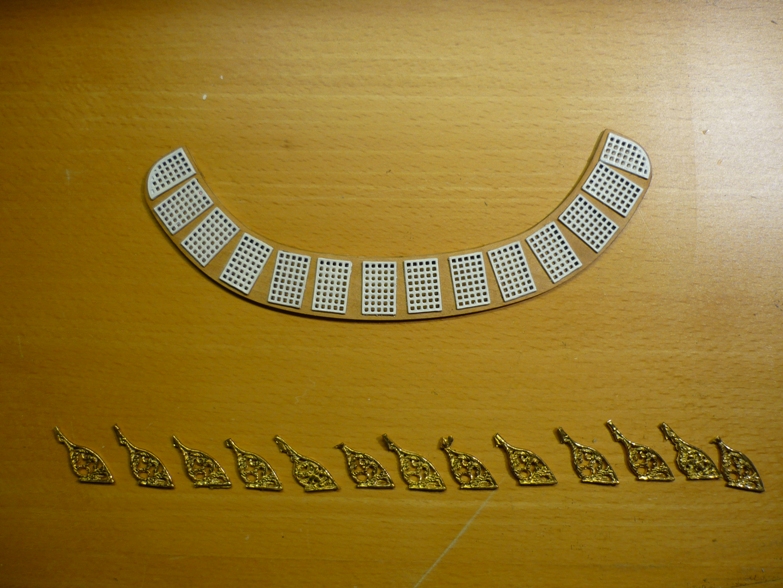
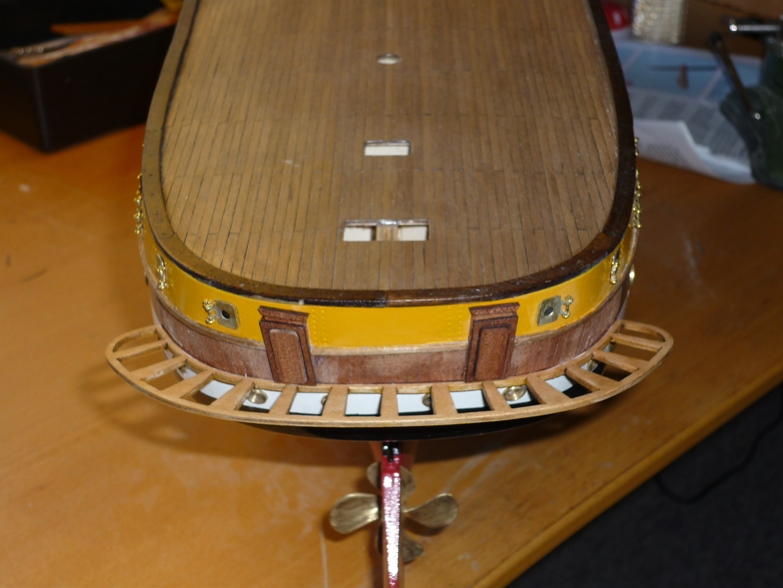
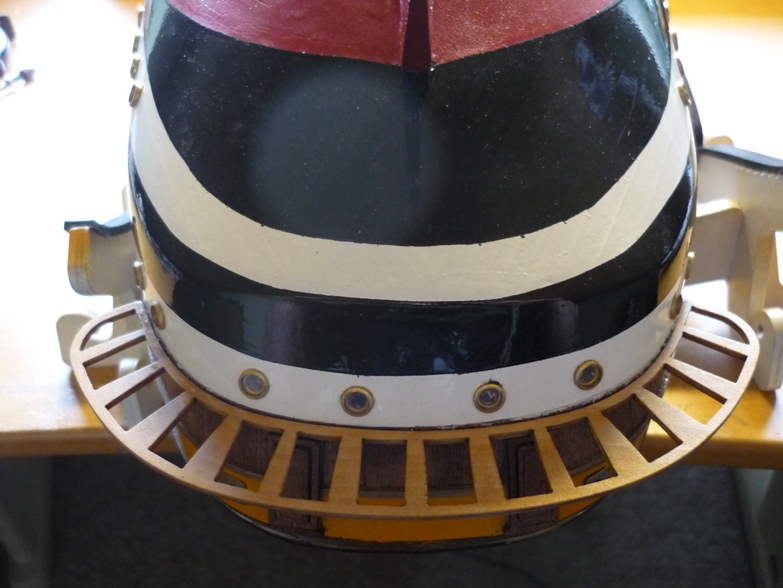
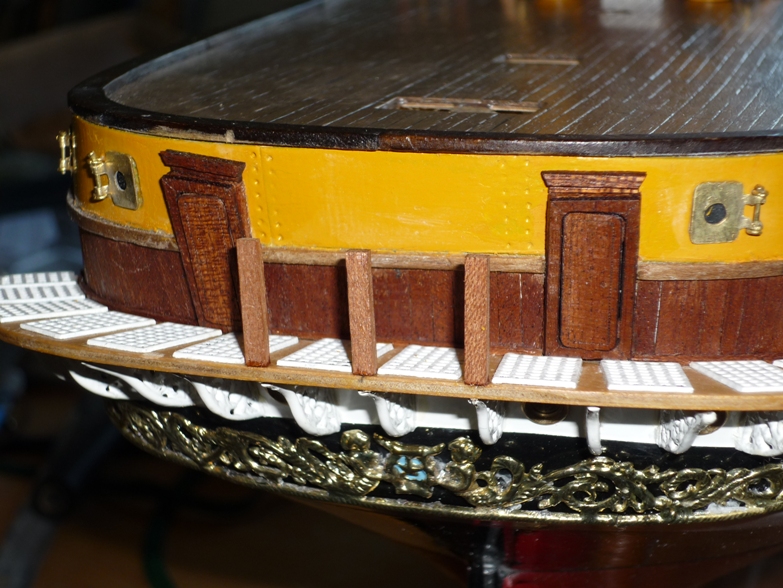
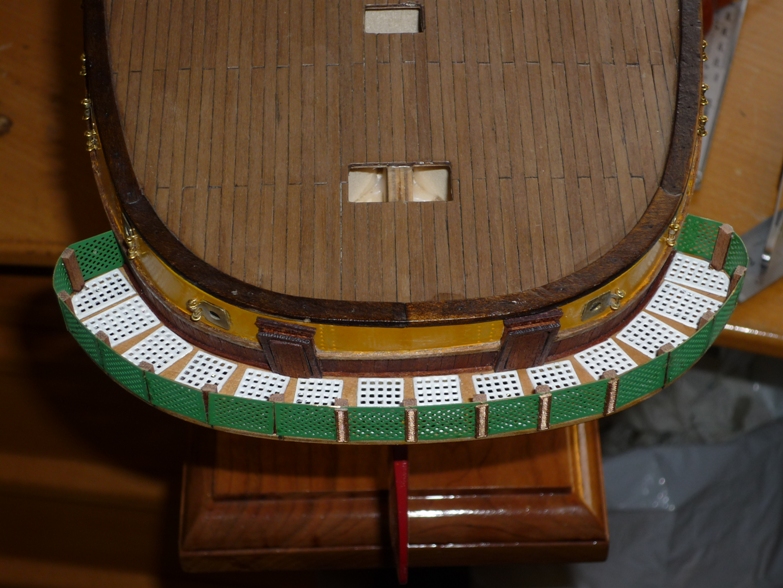
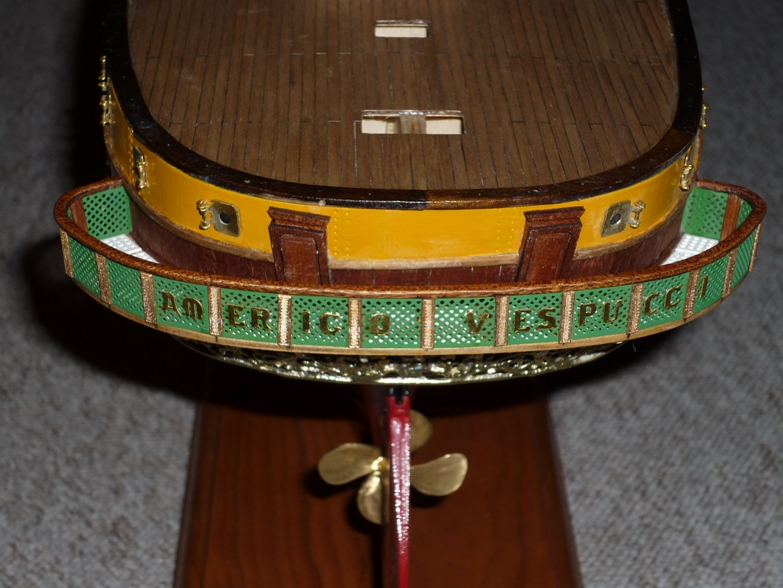
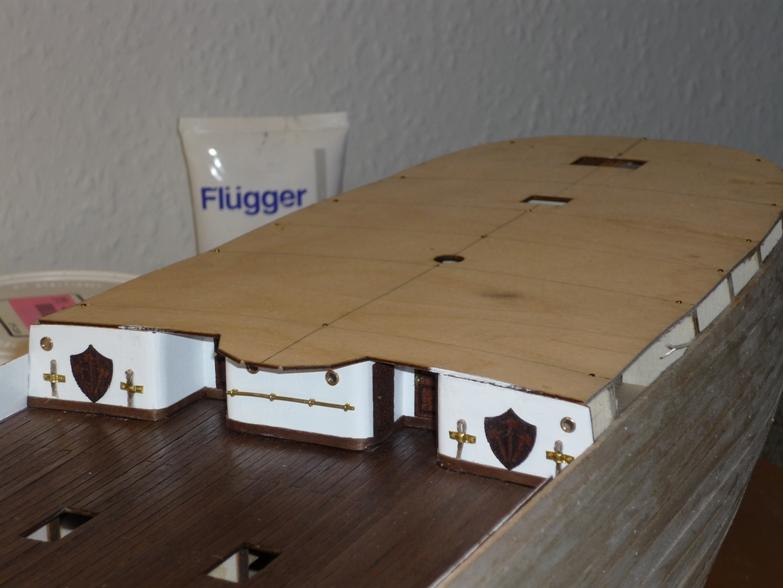
Balcony. This part was a bit of a pain to make and attach to the hull. First I had to cut holes in the hull for the doors and plank the area beneath the trim piece easy enough. Next up was to prepare the balcony floor. It conmsisted of a piece of laser cut ply that fitted ok around the hul. The grating (also ply) were painted and glued in place. However, the cast metal supports for the balcony were a pain. The casting was at a very poor quality and basically not two were alike. I cleaned them up the best I could and painted them white. Test fitting and gluing the balcony floor in place went ok. Here I noticed that some of the port holes below the balcony were in the wrong place and would interfere with the balcony supports. So a bit of work went in to closing up the holes and making new ones. Here the supports are glued in place and I had begun on the vertical supports for the hand rail. Here the photo etched "mesh" are in place and decorate pieces are added to hide the joints between the mesh. The laser cut mahogany hand rail very glued in place, sanded and varnished (very fragile peice). The ship's name was glued in place. Finally, a half round piece of Evergreen styrene was glued to the edge of the balcony floor and painted gold. The balcony was now finished. Also, the decorative casting below the balcony was cleaned up, painted where necessary and glued in place with epoxy. /Lars Peter

-
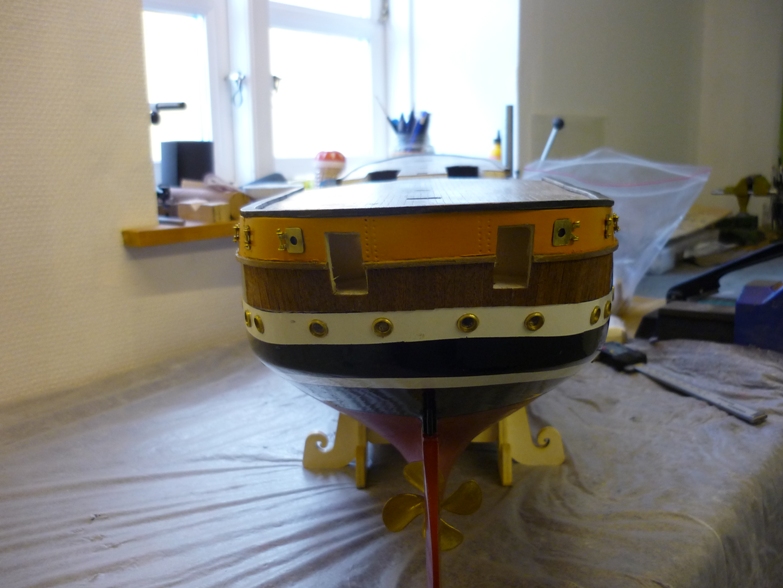
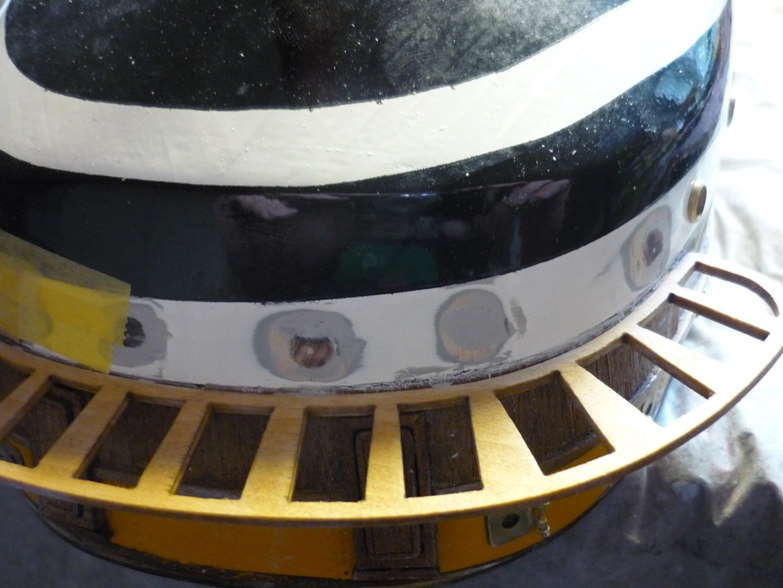
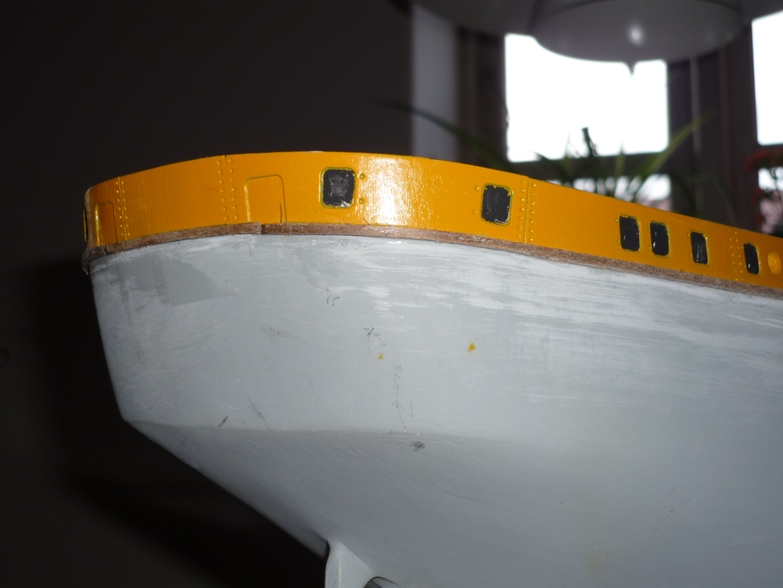
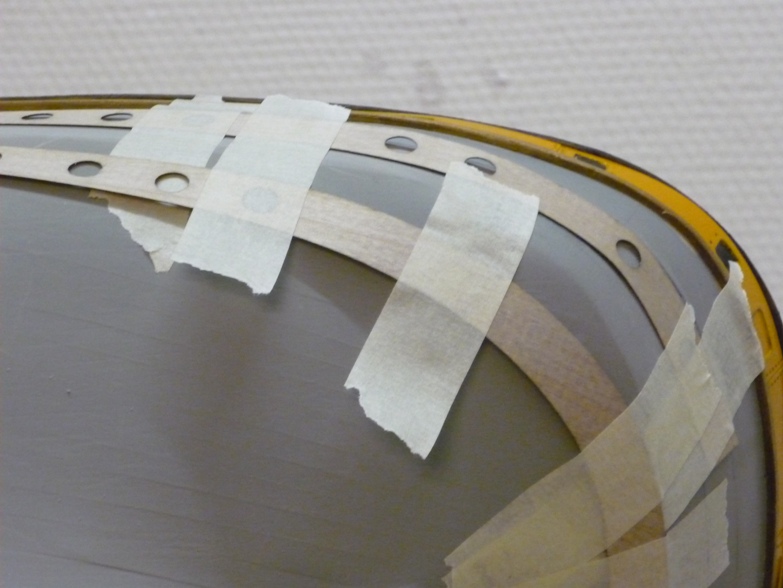
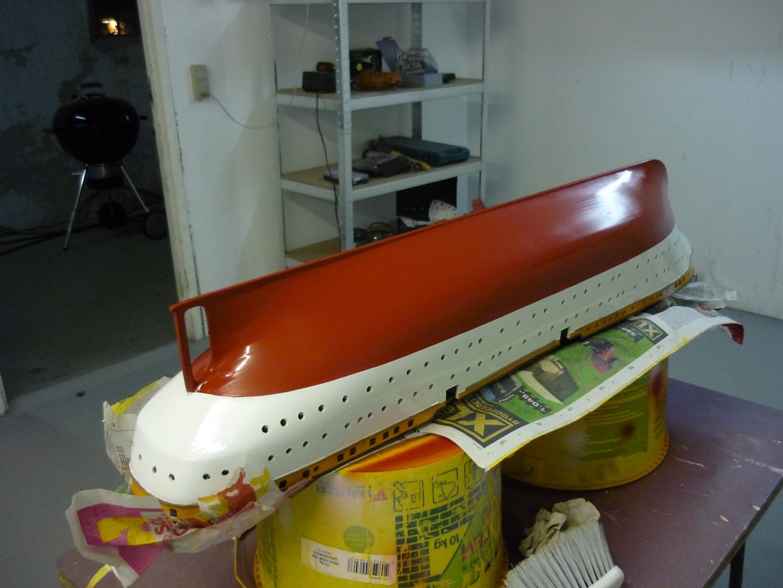
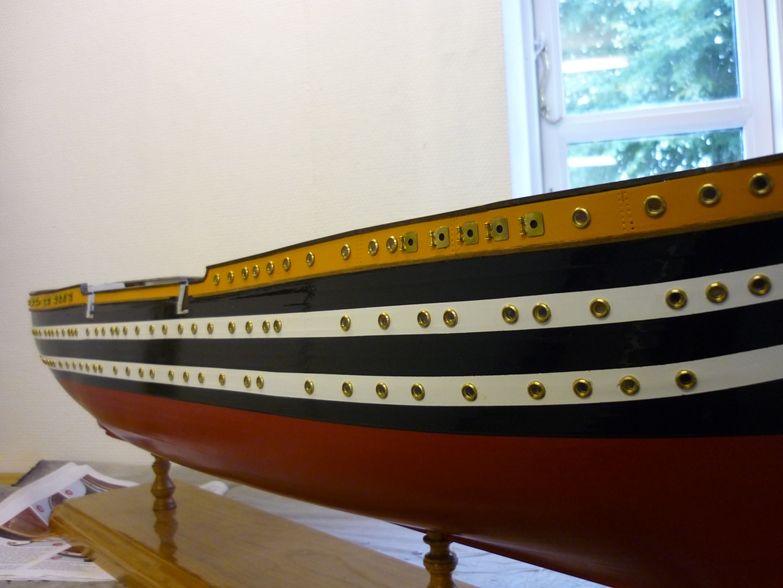
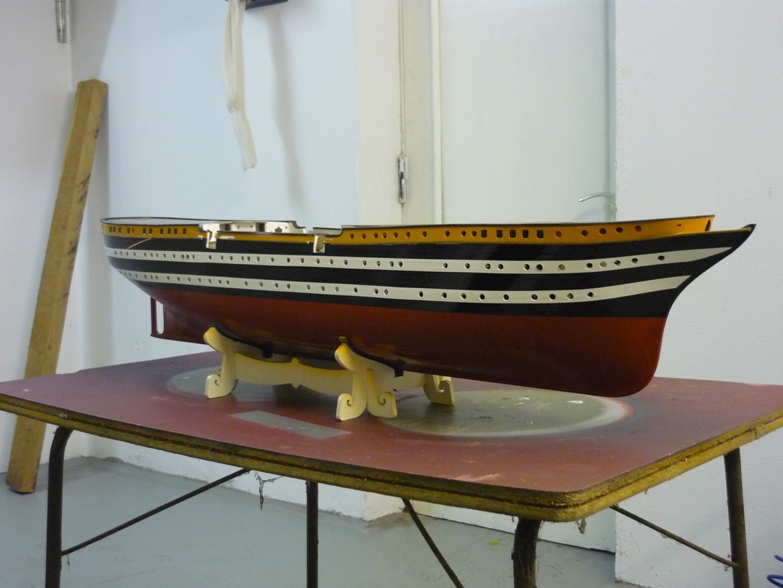
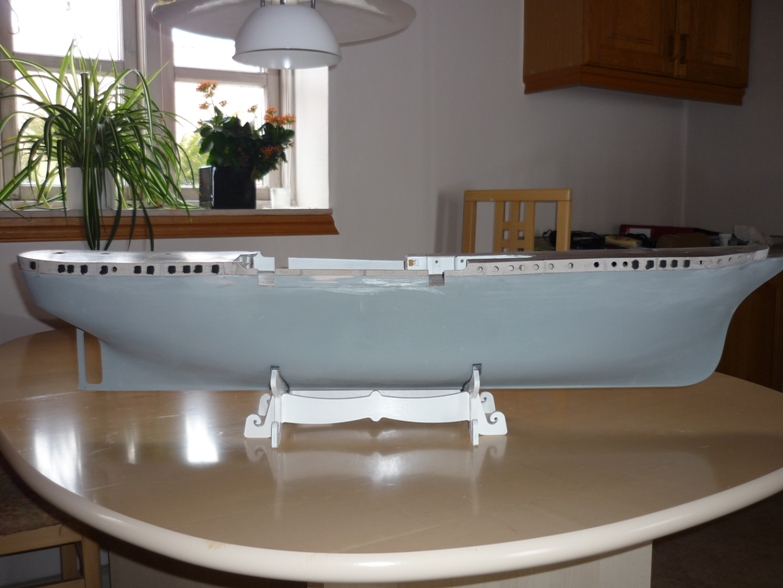
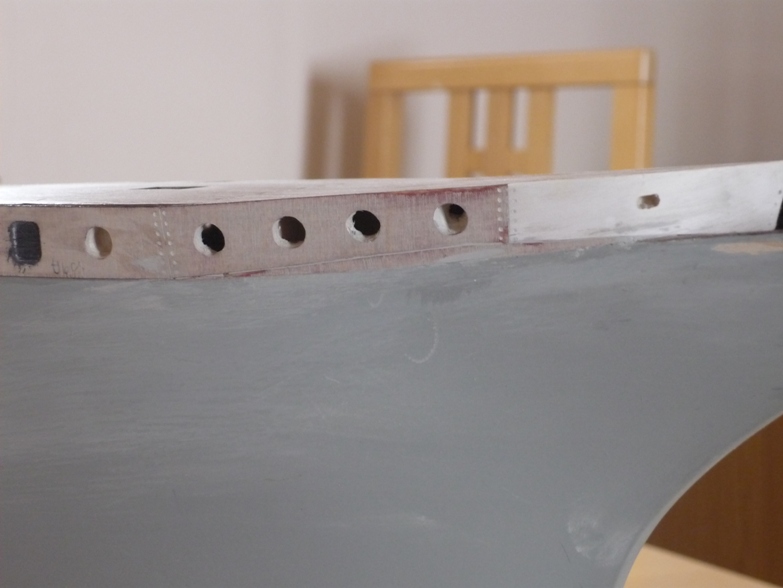
A walnut trim was pre-bended and glued on just below the top patterns. Port hole pattern were also supplied for the two lower rows of port holes. However, I choosed not to use them bacause the were really difficult to fit. Instead I used them as a guide for drilling the holes for the port holes. The hull was now basically finished and ready for painting after a final light sanding. First the top half was painted white. Then the water line was painted red. On most models of AV the hull below the waterline is painted either white or black. The real ship is red (brown) below the waterline and I choosed to go that way. Masking tape was used to define the black bands and this is the final result after painting. The port holes were glued in place and glazing added. According to the real ship the port holes should have been the same colour as the hull. But I was afraid that it made placing the glazing very difficult so they were left unpainted (and brass is also nice). The square port hole covers were shaped and also left unpainted before fixing in place. Lars Peter
-
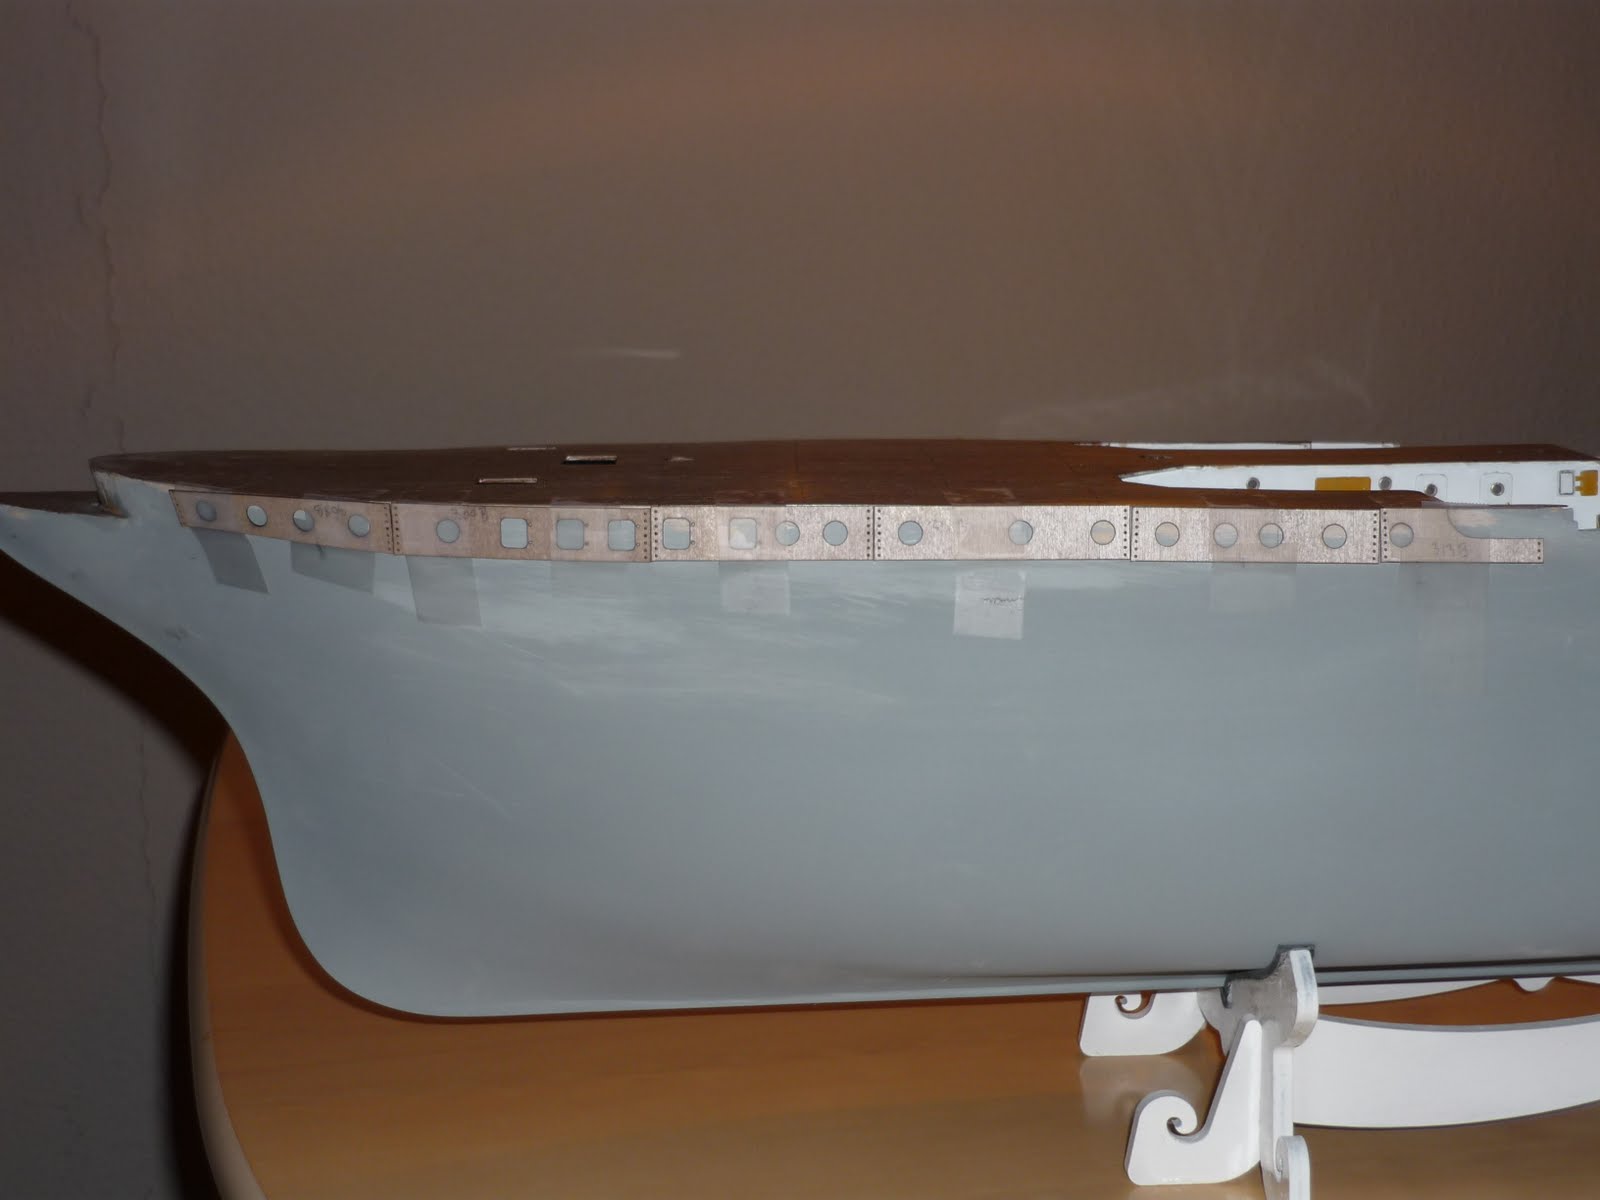
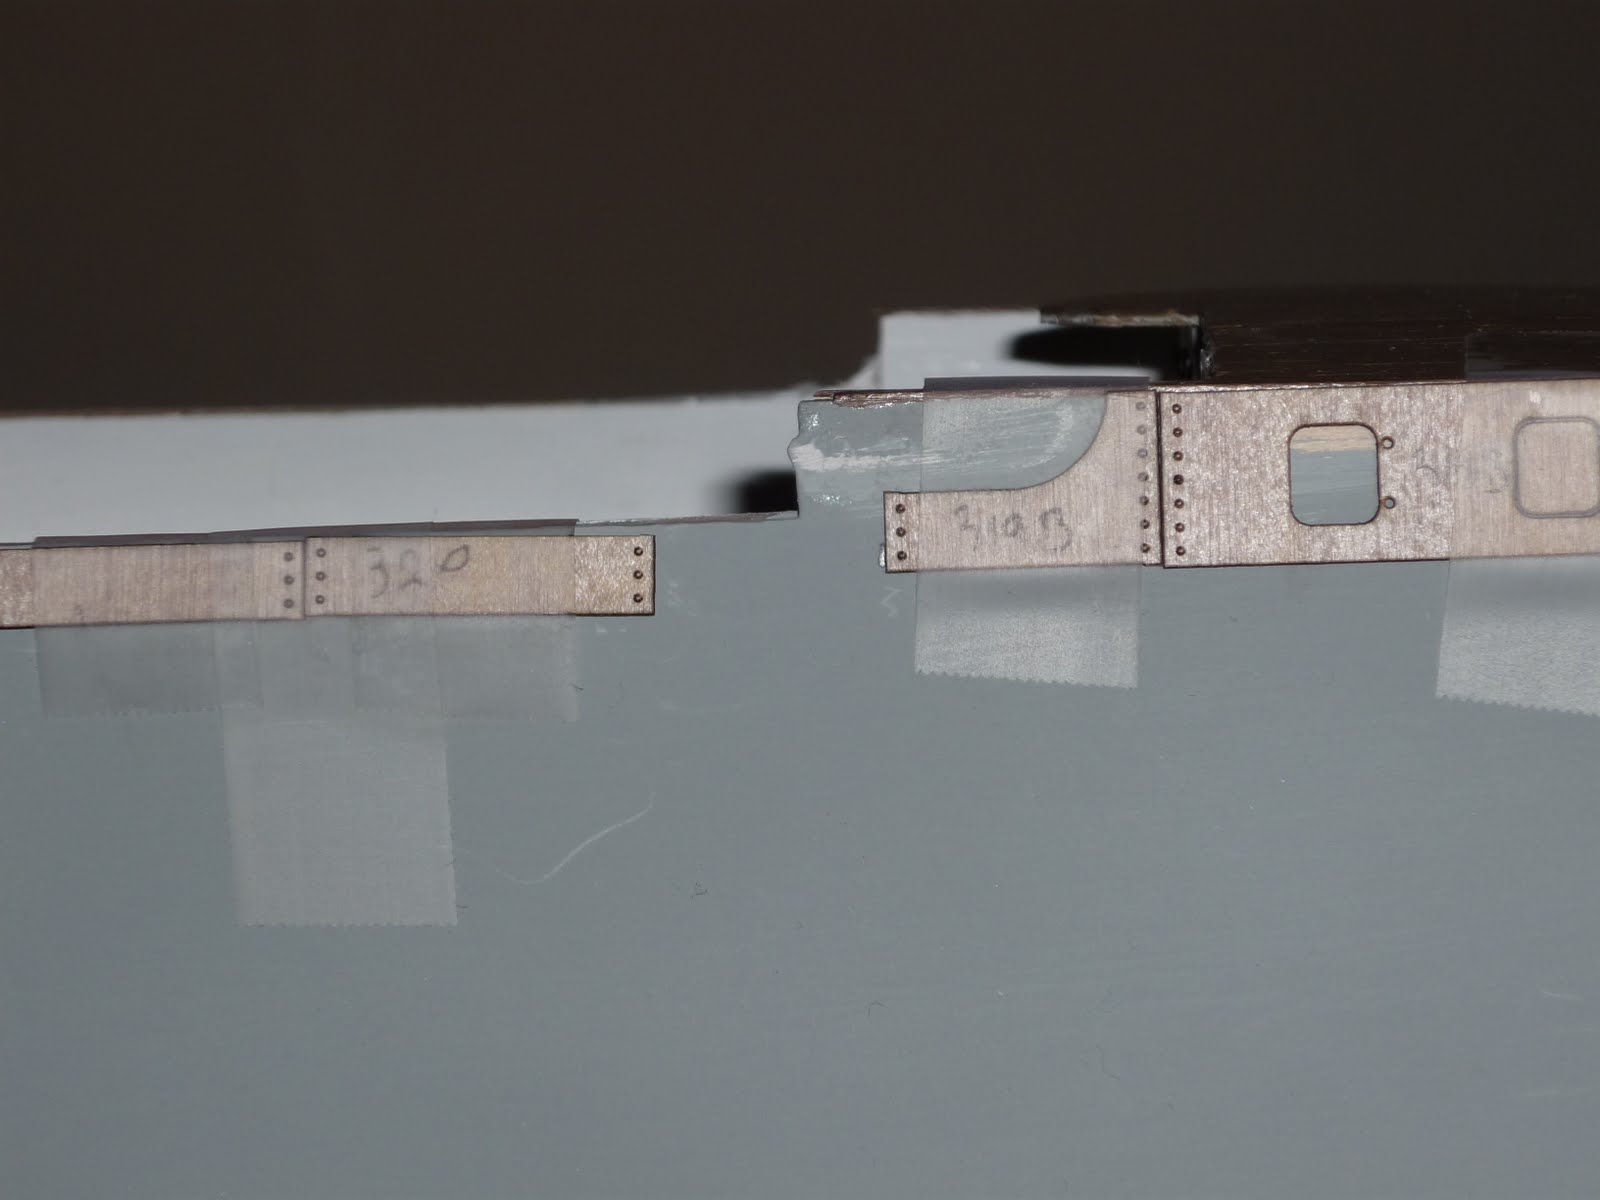
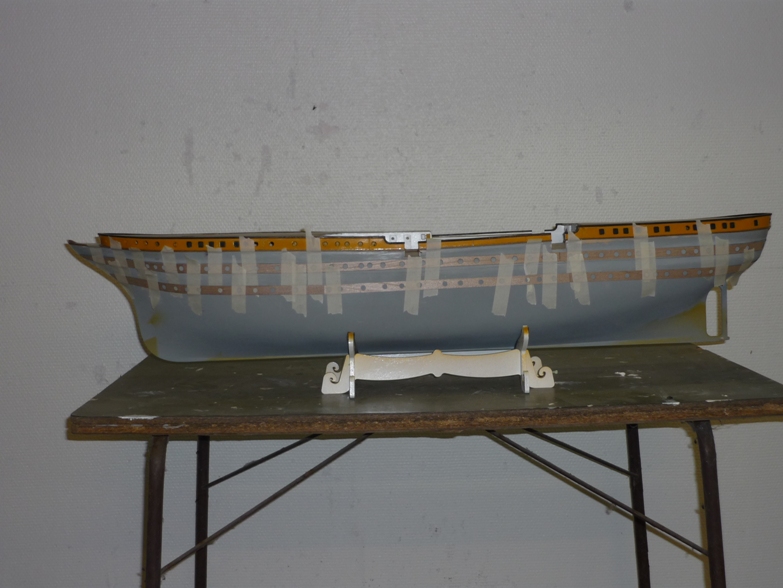
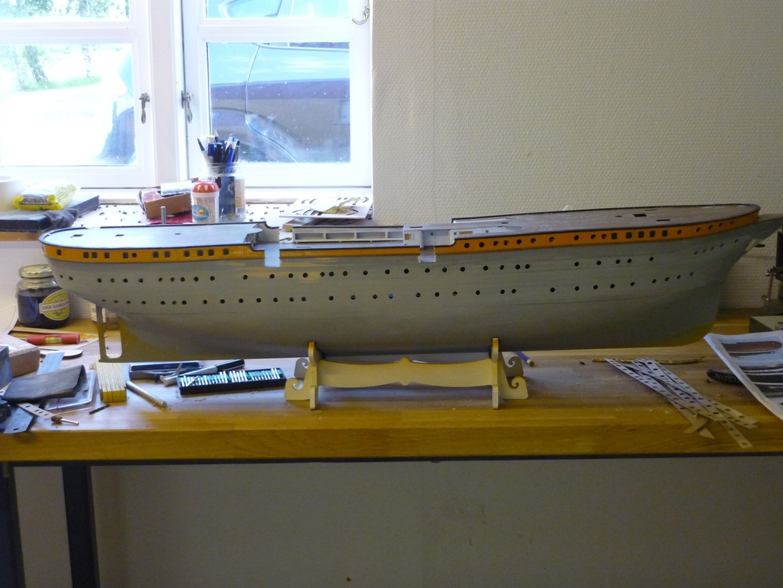
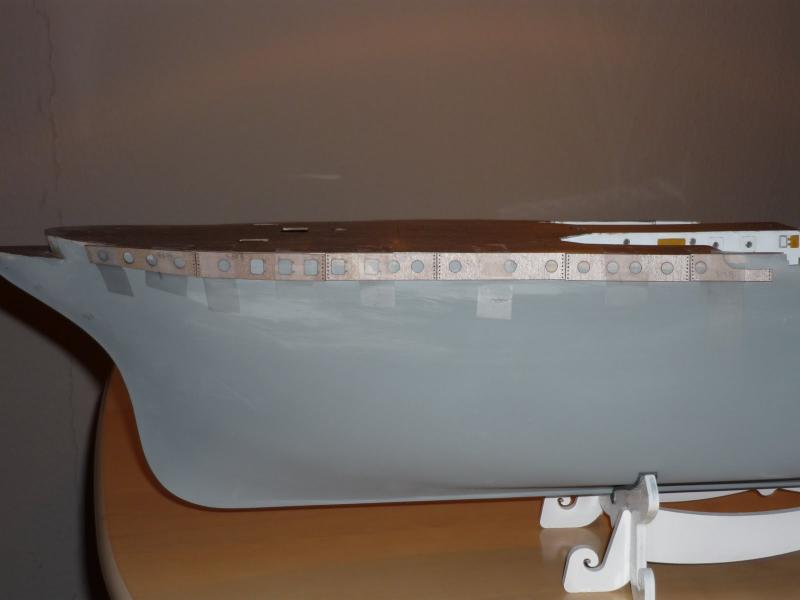
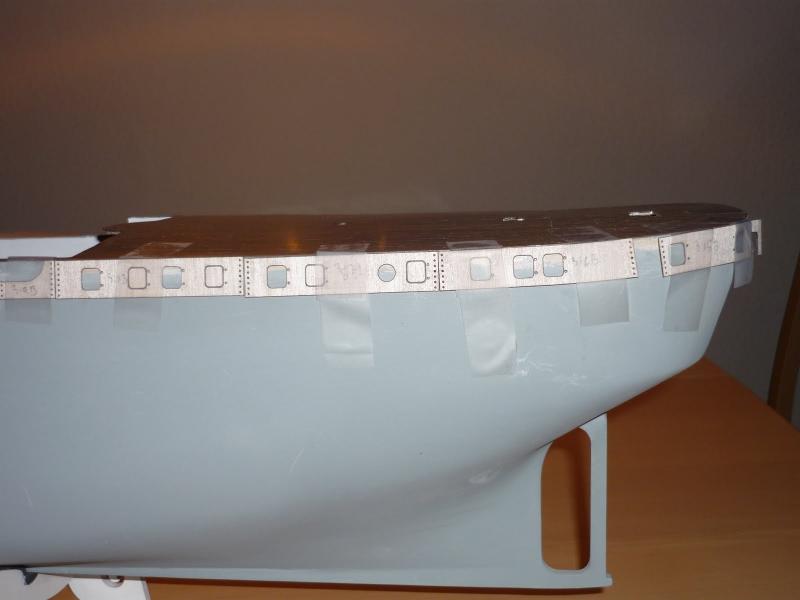
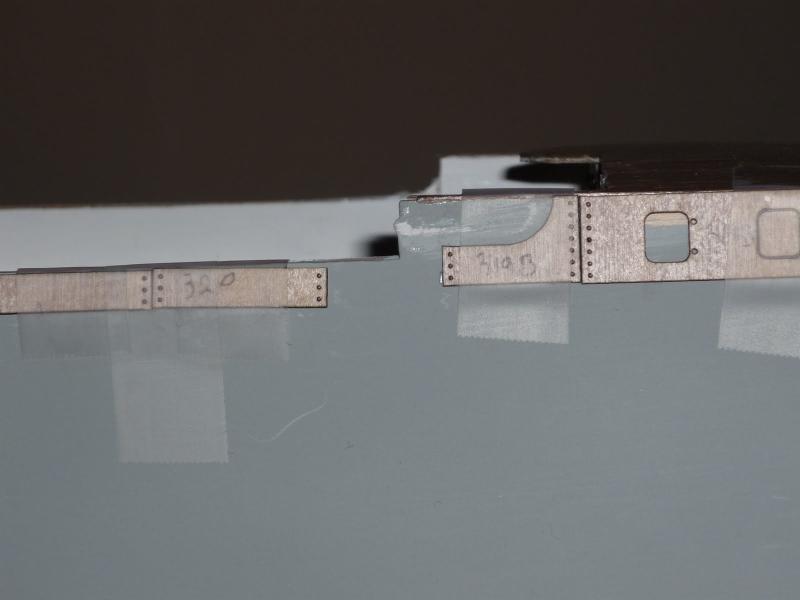
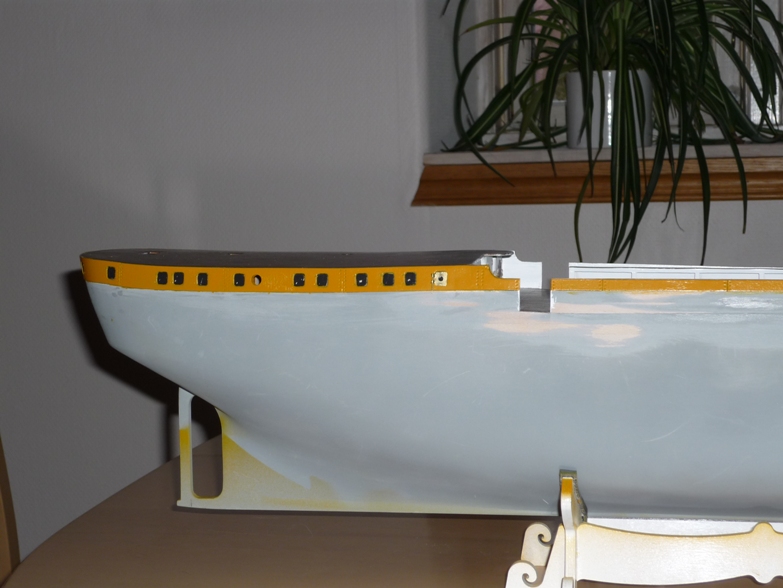
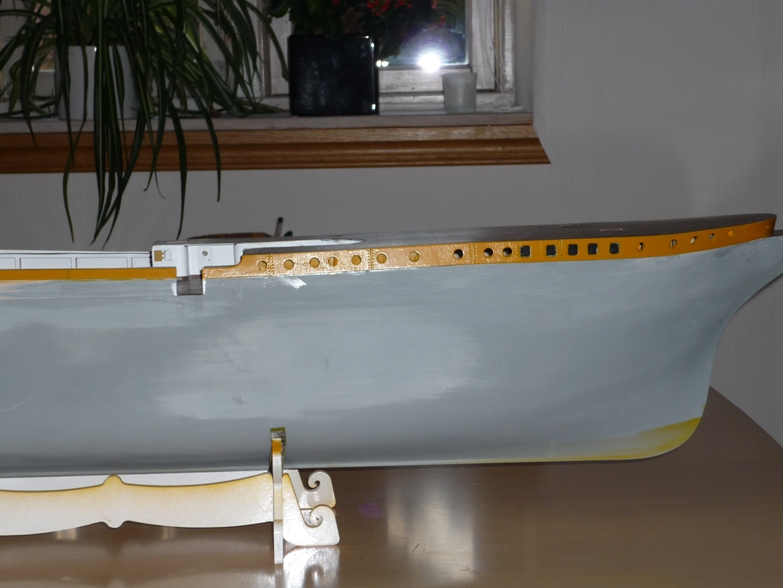
Time to do a bit more re-construction of this build log. Next up was to start fitting the top port hole patterns. This task was not without problems. Firstly, the patterns didn't fit the hull very well so I had to do a few mods in some places. Secondly, I made a major error way back when I fitted the frames resulting in a slightly dip in the middle (the deck and port hole patterns have to follow a straight line). This could have been avoided if Panart had chosen to include full scale plan drawings in the kit. Nothing I can do about it except live with it In the last picture you can clearly see the mistake I made. The patterns were supposed to follow the blue line. Holes for port hole were drilled and the square port holes were painted blak before gluing the patterns into place. Finally, the patterns were painted. /Lars Peter


-
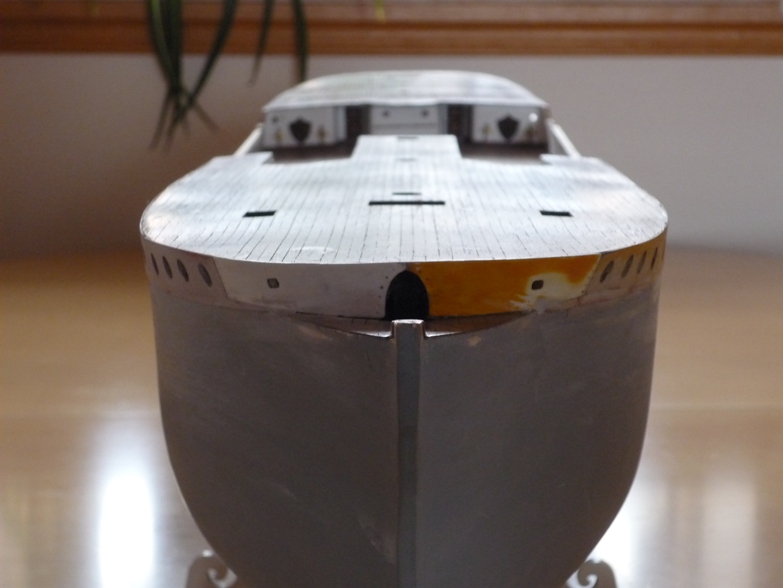
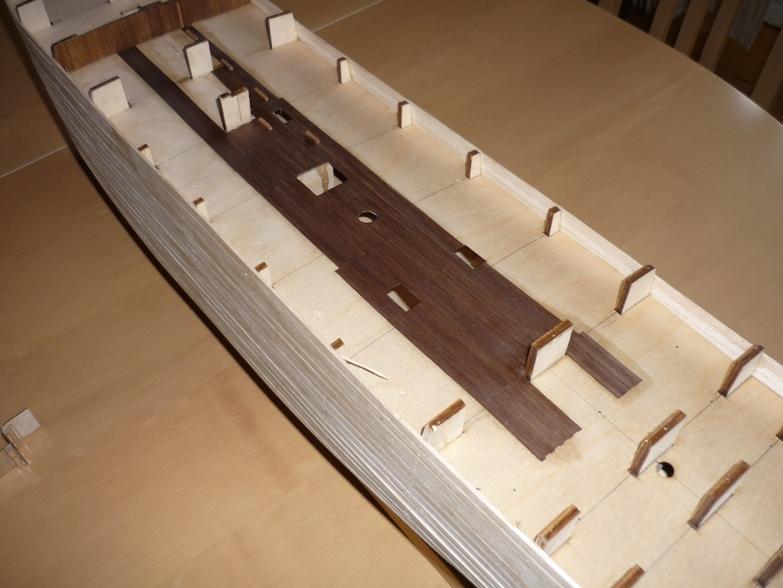
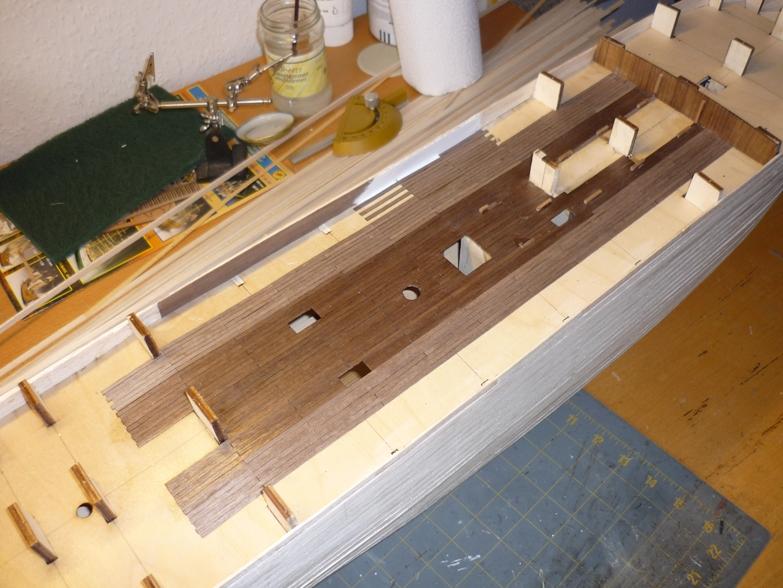
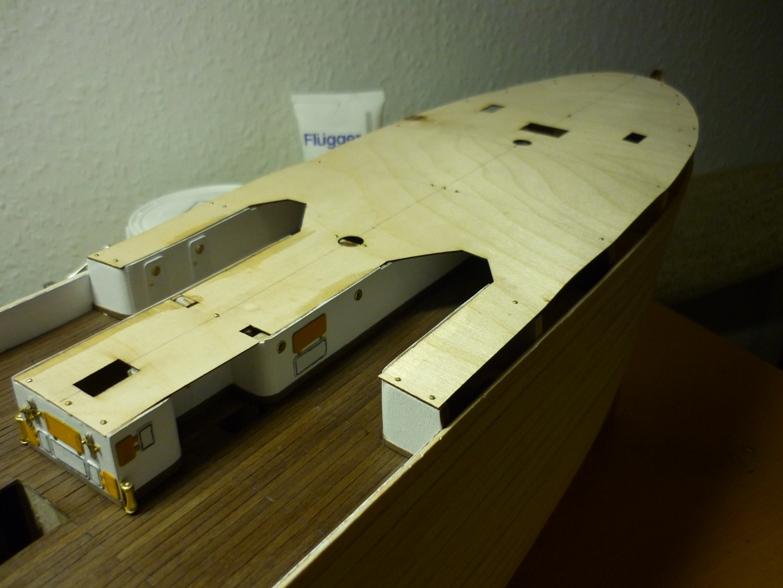
I was a bit of sequence in my last post. Actually, boefore I could finish the planking and paint the hull, I had to do a bit of work on the decks (actually quite a bit. I did not follow the sequence given by the instructions here. Before the quarter deck and the fore deck cut be fitted I needed to plank some of the main deck and add the internal walls. on the main deck. All deck were planked with walnut strips and varnished. They may be too dark to resemble the real ship but I think it looks nice (I like dark wood). The internal walls didn't quite fit and some had to be extended before they matched the fore deck. Also, pieces of wood were glued to the deck to support the thin plywood walls that didn't want to be straight at all. The bulkwarks need to be planked inside and painted before the remaining main deck could be laid. The internal wall under the quarter deck was made and glued in place and the quarter deck could be added. And the fore deck Once all this was completed the outside planking was finished. /Lars Peter

-
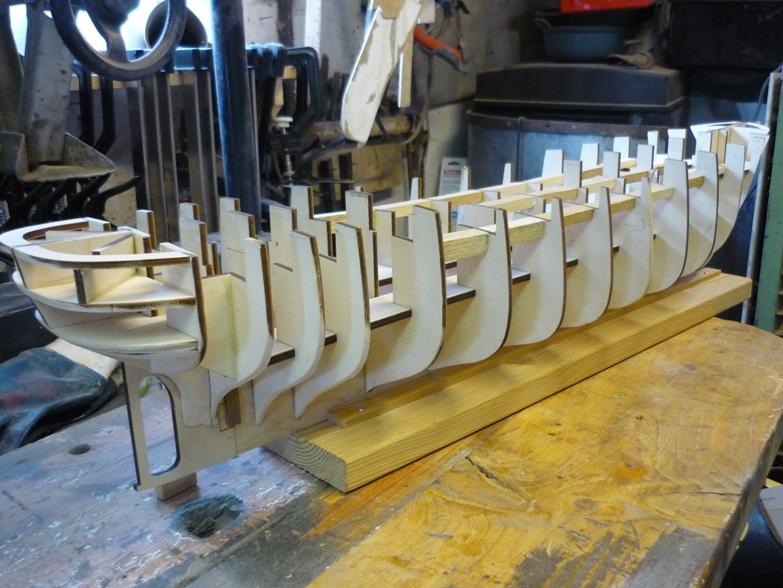
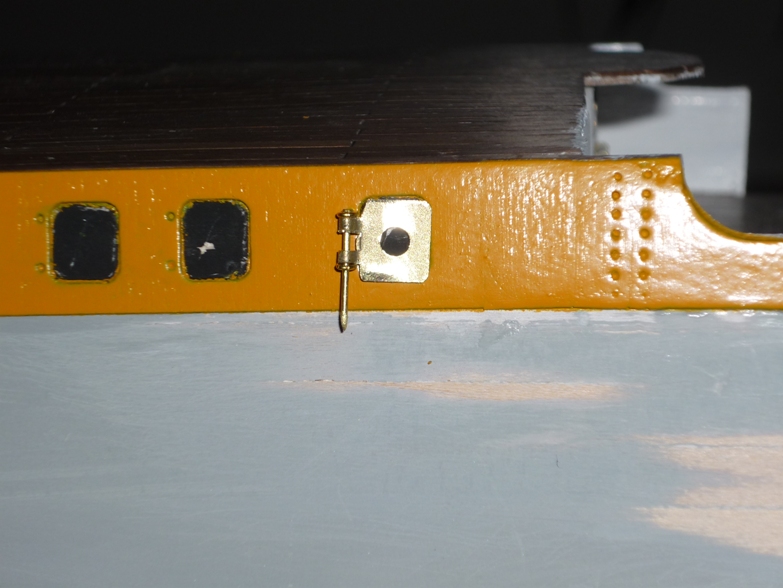
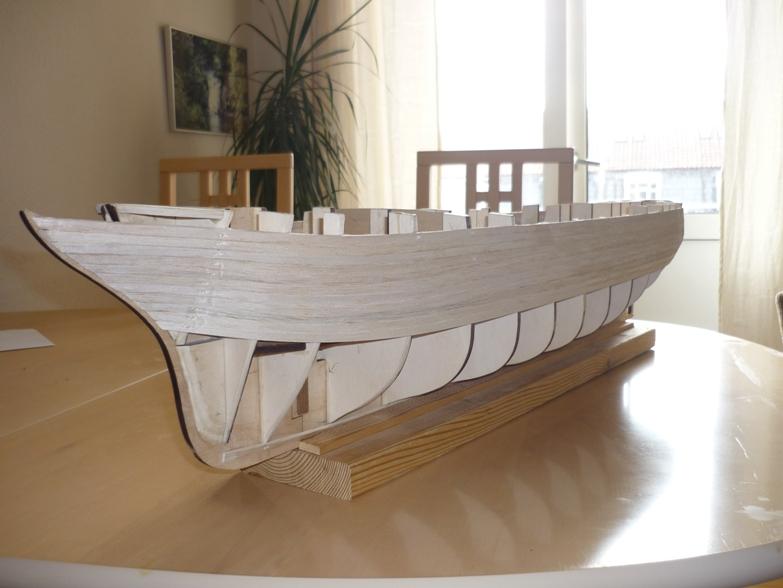
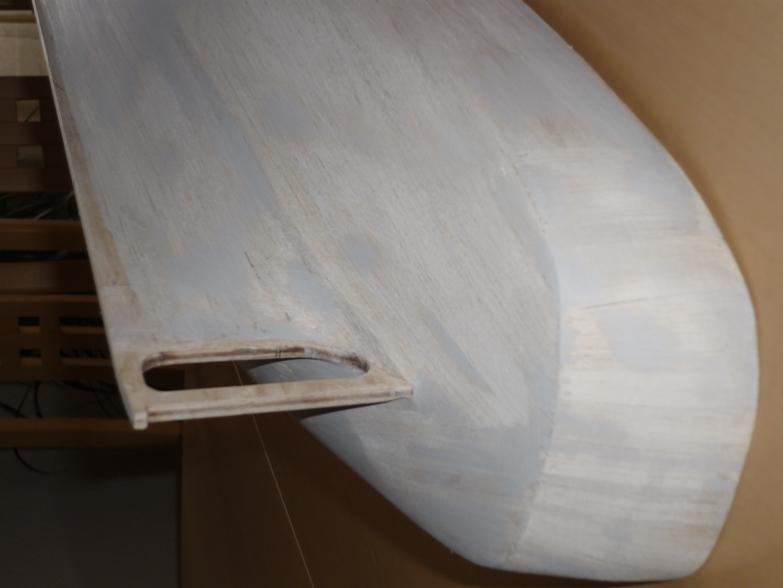
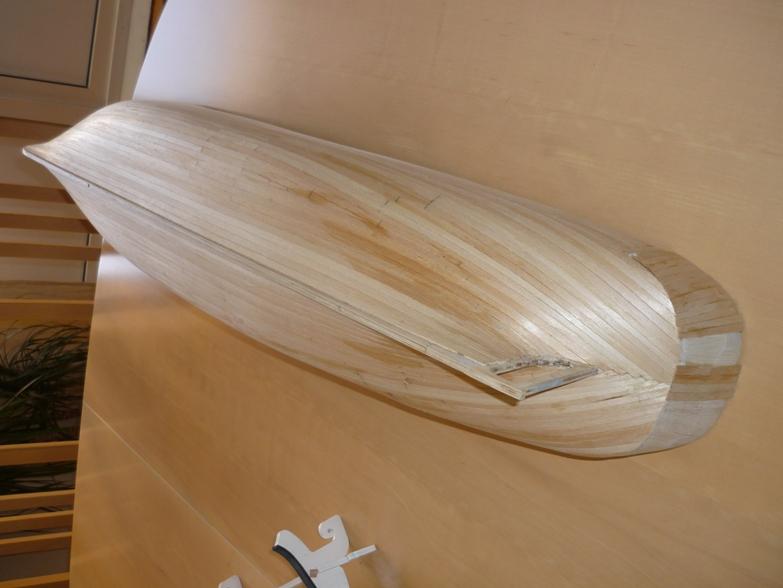
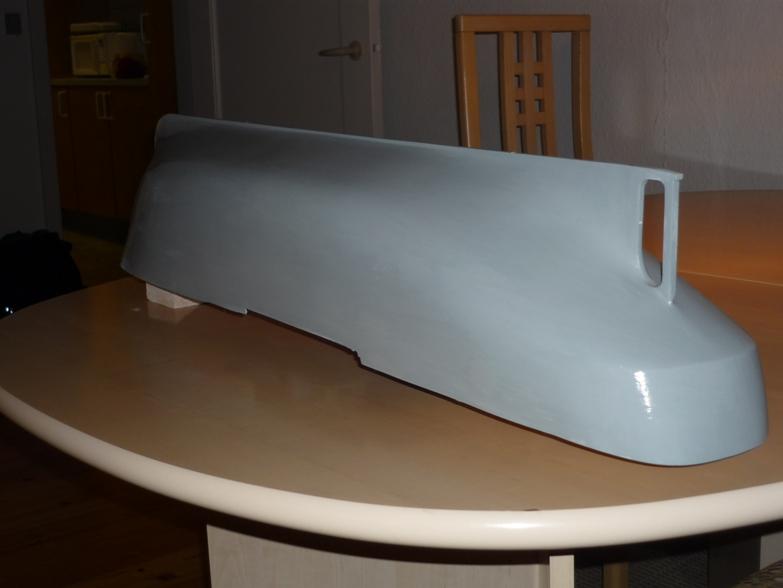
Thank you for your comments, guys. I'm very busy at work at the moment so the work on the AV continues very slowly. So it seems to be a good opportunity to re-build part of my old build log. With the internal framwork in place and placement of mounting nuts it was time to start the planking job. I went per instructions and used balsa strips for the first planking. Some people choose to discarge the balsa but I think it was very nice to work with - easy to bend and cut. But you have to be aware that it is very soft and damages easily. After the first planking was finished I did a light sanding (it was fast work) and filled any cracks and dips with car body filler. And then more sanding (not so fast this time around). I then had the option of either covering the hull with some kind of cloth in replacement of a second layer of planking. I didn't have the guts to use the cloth so I used lime strips glued on with contact glue to avoid nail holes. Today, I would probably have covered the hull with fiber glass. It is quite easy do do and provide and absolutely smooth and hard surface for the paint. Then some more sanding and filling until I was satisfied with the finish. Finally, the hull was primed. /Lars Peter
-
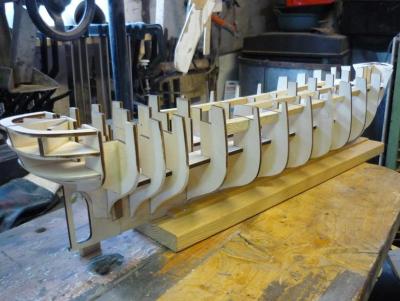
Time to re-construct my build log of Panart's Amerigo Vespucci 1:84. I still have all the photos I've taken during the build so far but unfortunately I do not have all the text I had written for the old build log. So this log will start with a summary of the build until present stage. All my photos can be found here: Photo album It all started around 3 years ago. I began with some of the small boats as I didn't had room to start on the main hull. However, here I will start with the main hull. Internal framework To be continued... /Lars Peter