HOLIDAY DONATION DRIVE - SUPPORT MSW - DO YOUR PART TO KEEP THIS GREAT FORUM GOING! (Only 20 donations so far - C'mon guys!)
×


laps
-
Posts
118 -
Joined
-
Last visited
Content Type
Profiles
Forums
Gallery
Events
Everything posted by laps
-
I also have written instruction for Hjejlen (the old VHT kit). It is 5 typewritten pages in Danish but I can translate it is necessary. Just say the word. /Lars Peter
-
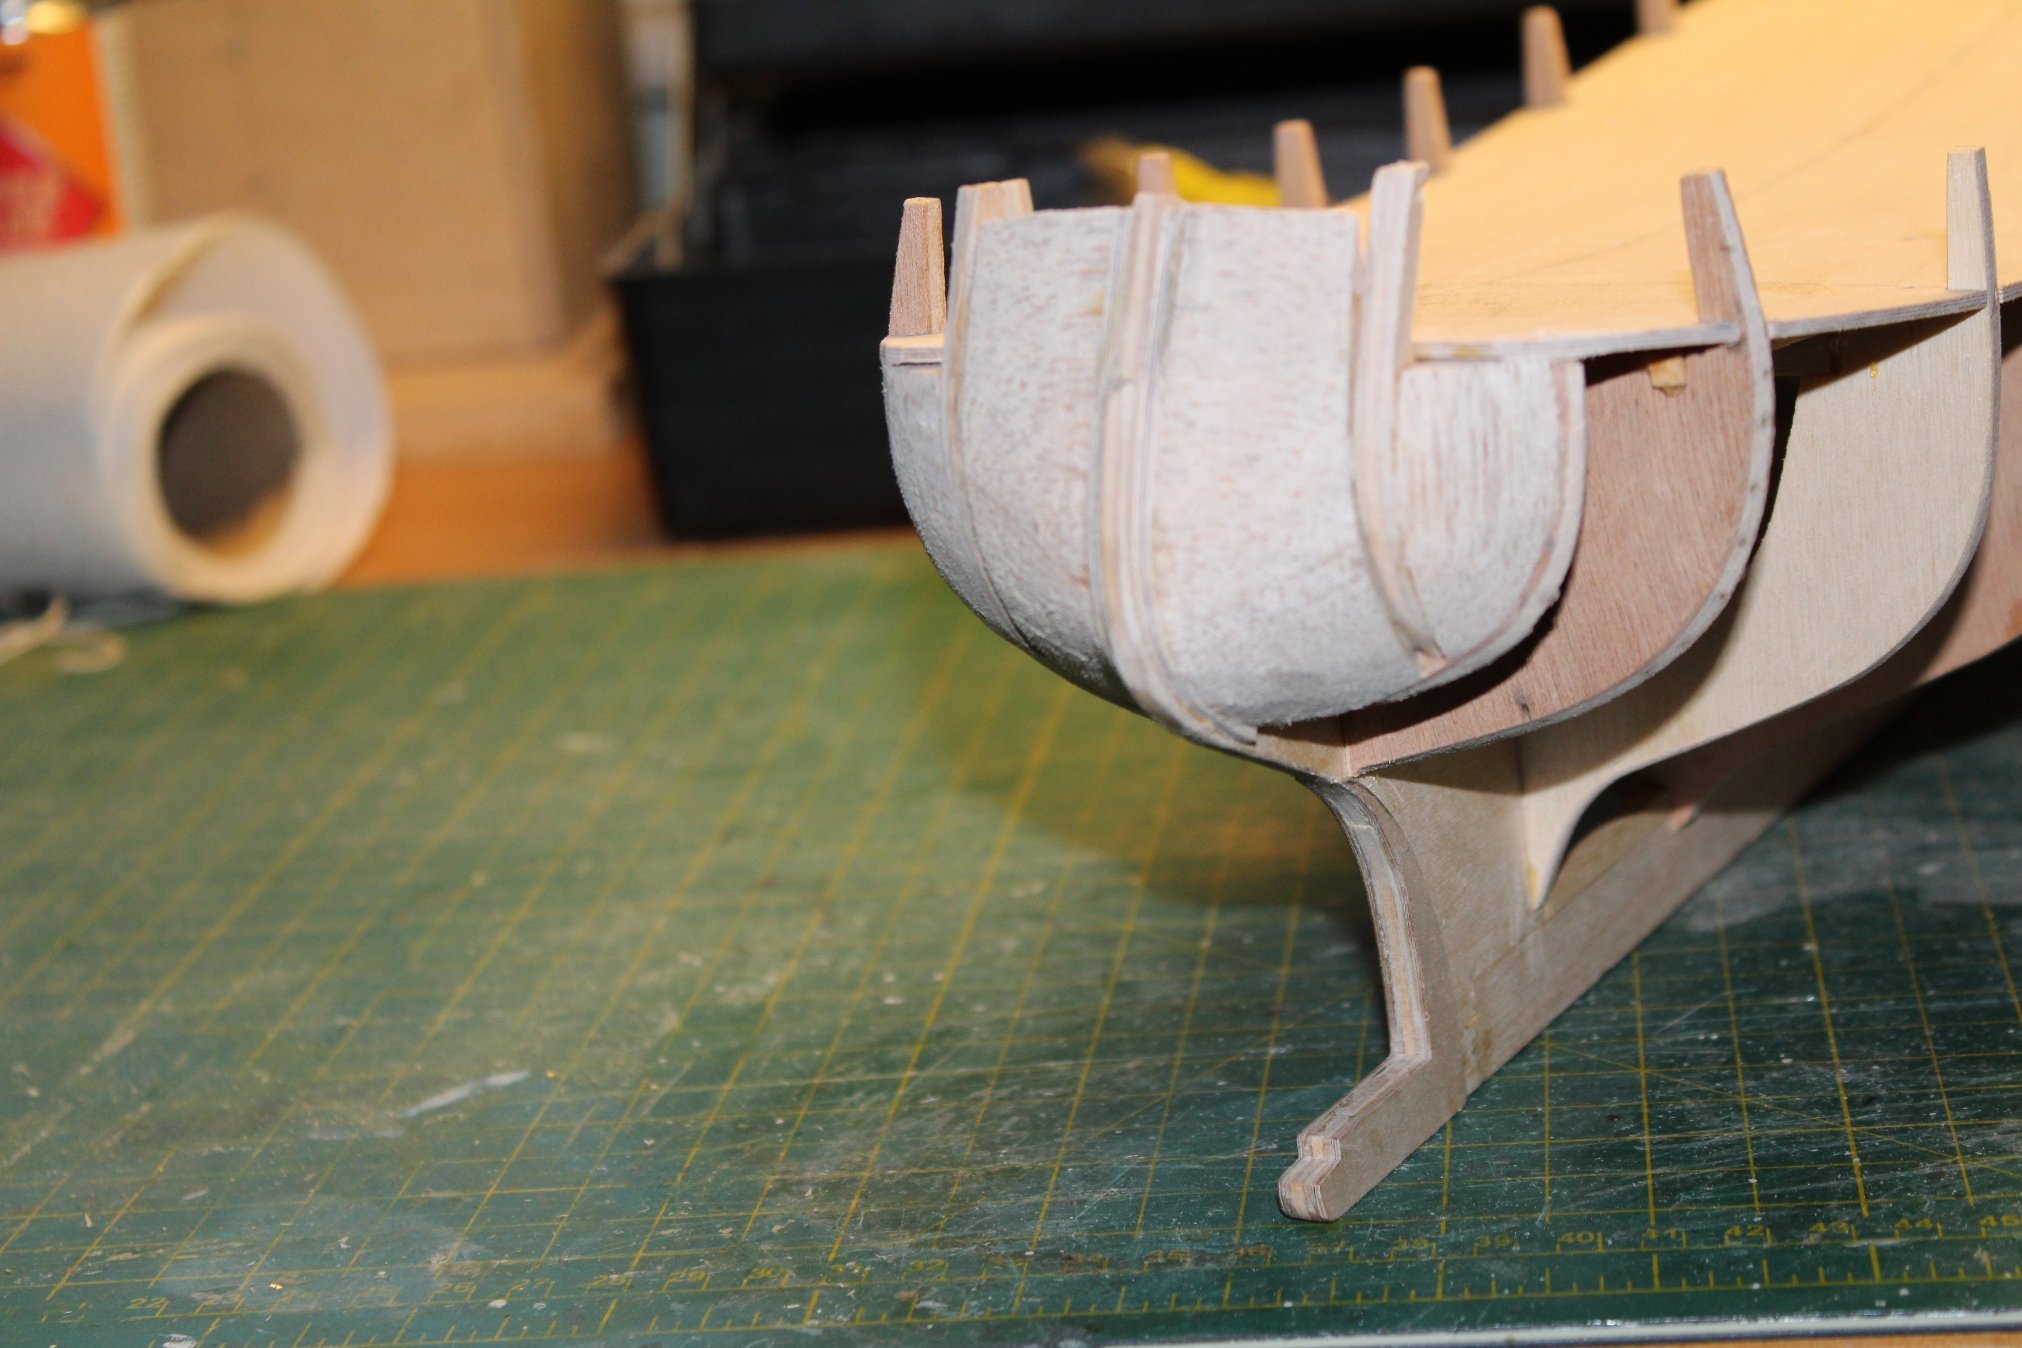
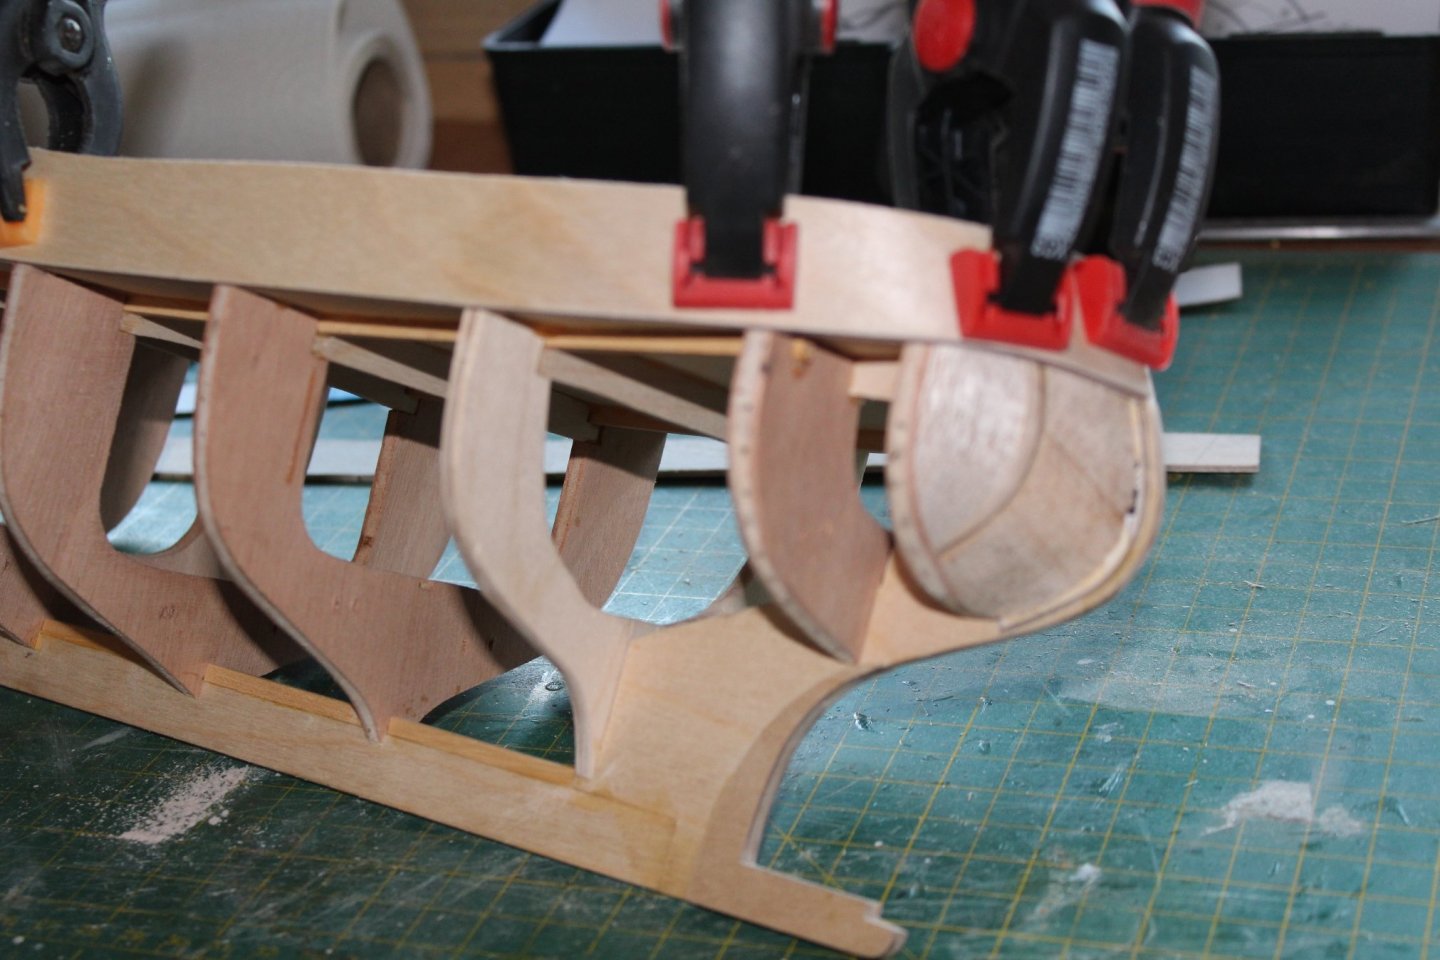
 Thank you Popeye. I think the filler pieces were a wise choice. The 2 mm birch plywood held the shape nicely. I have now started gluing the first in place. I do this in two steps - mainly because I do not have enough strong clamps. I'll post a picture once both pieces a glued in place. /Lars Petet
 -
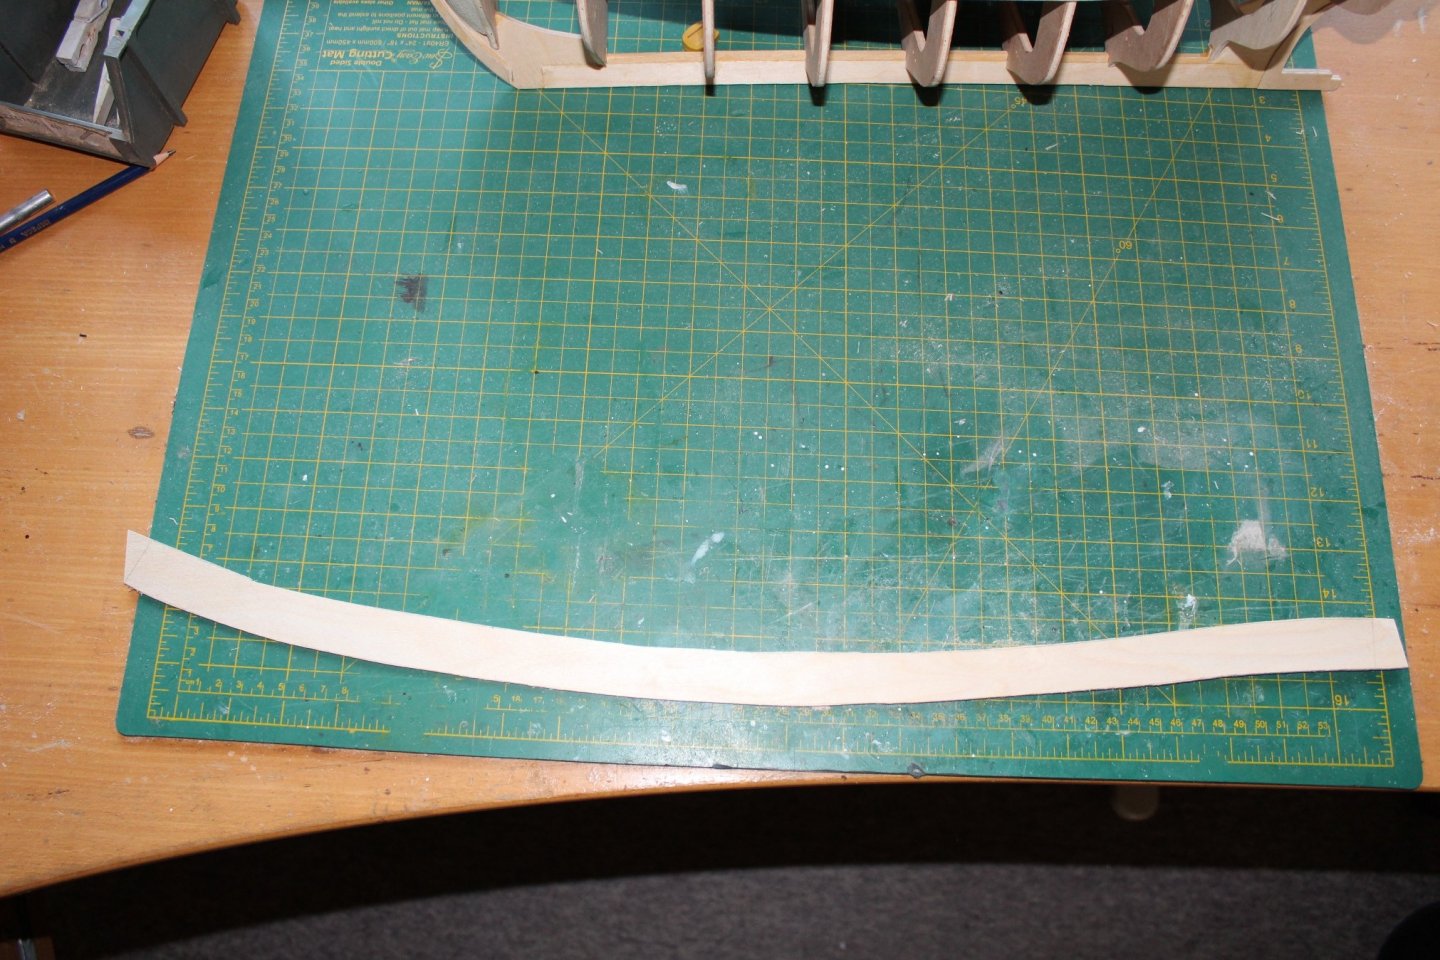
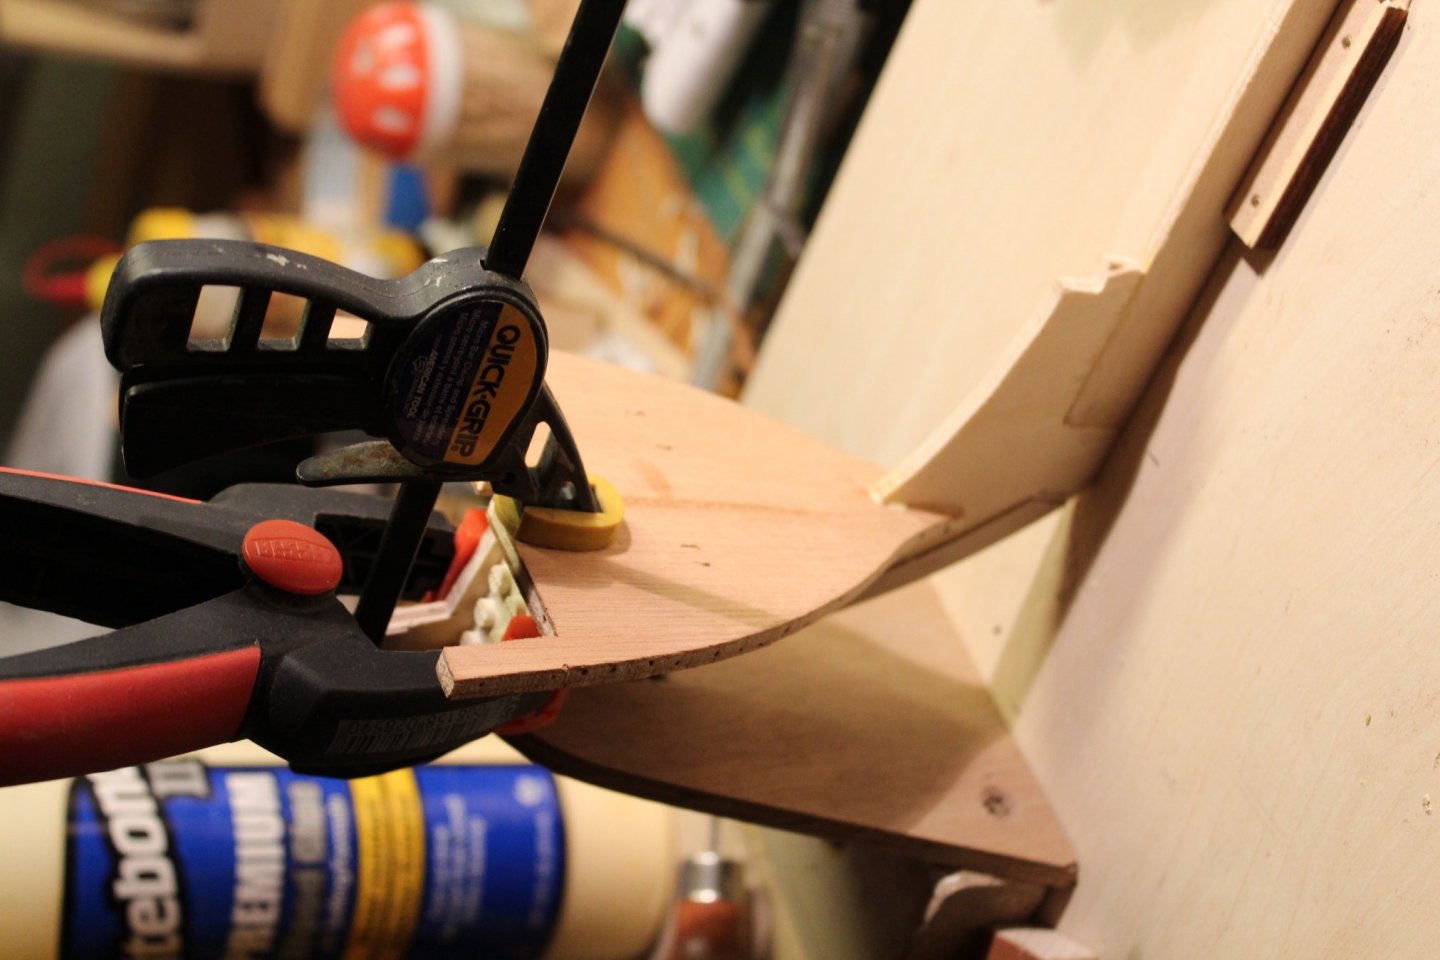
I've made a cardboard template for the bulwark walls. In the kit each wall was supplied in two pieces, probably because of the dimension of the plywood sheet. My 2 mm sheet were big enough to make the walls in one piece; thus the odd shape. The wall sits flush with the false deck. The top will be sanded flush with frames once the walls are glued in place. I soaked the ends of the wall in hot water and clamped it to the hull. It went quite well - no kinks or other issues. Once dry I will glue it in place. No I'm off to Finland for a couple of days so the model will have to wait. /Lars Peter

-
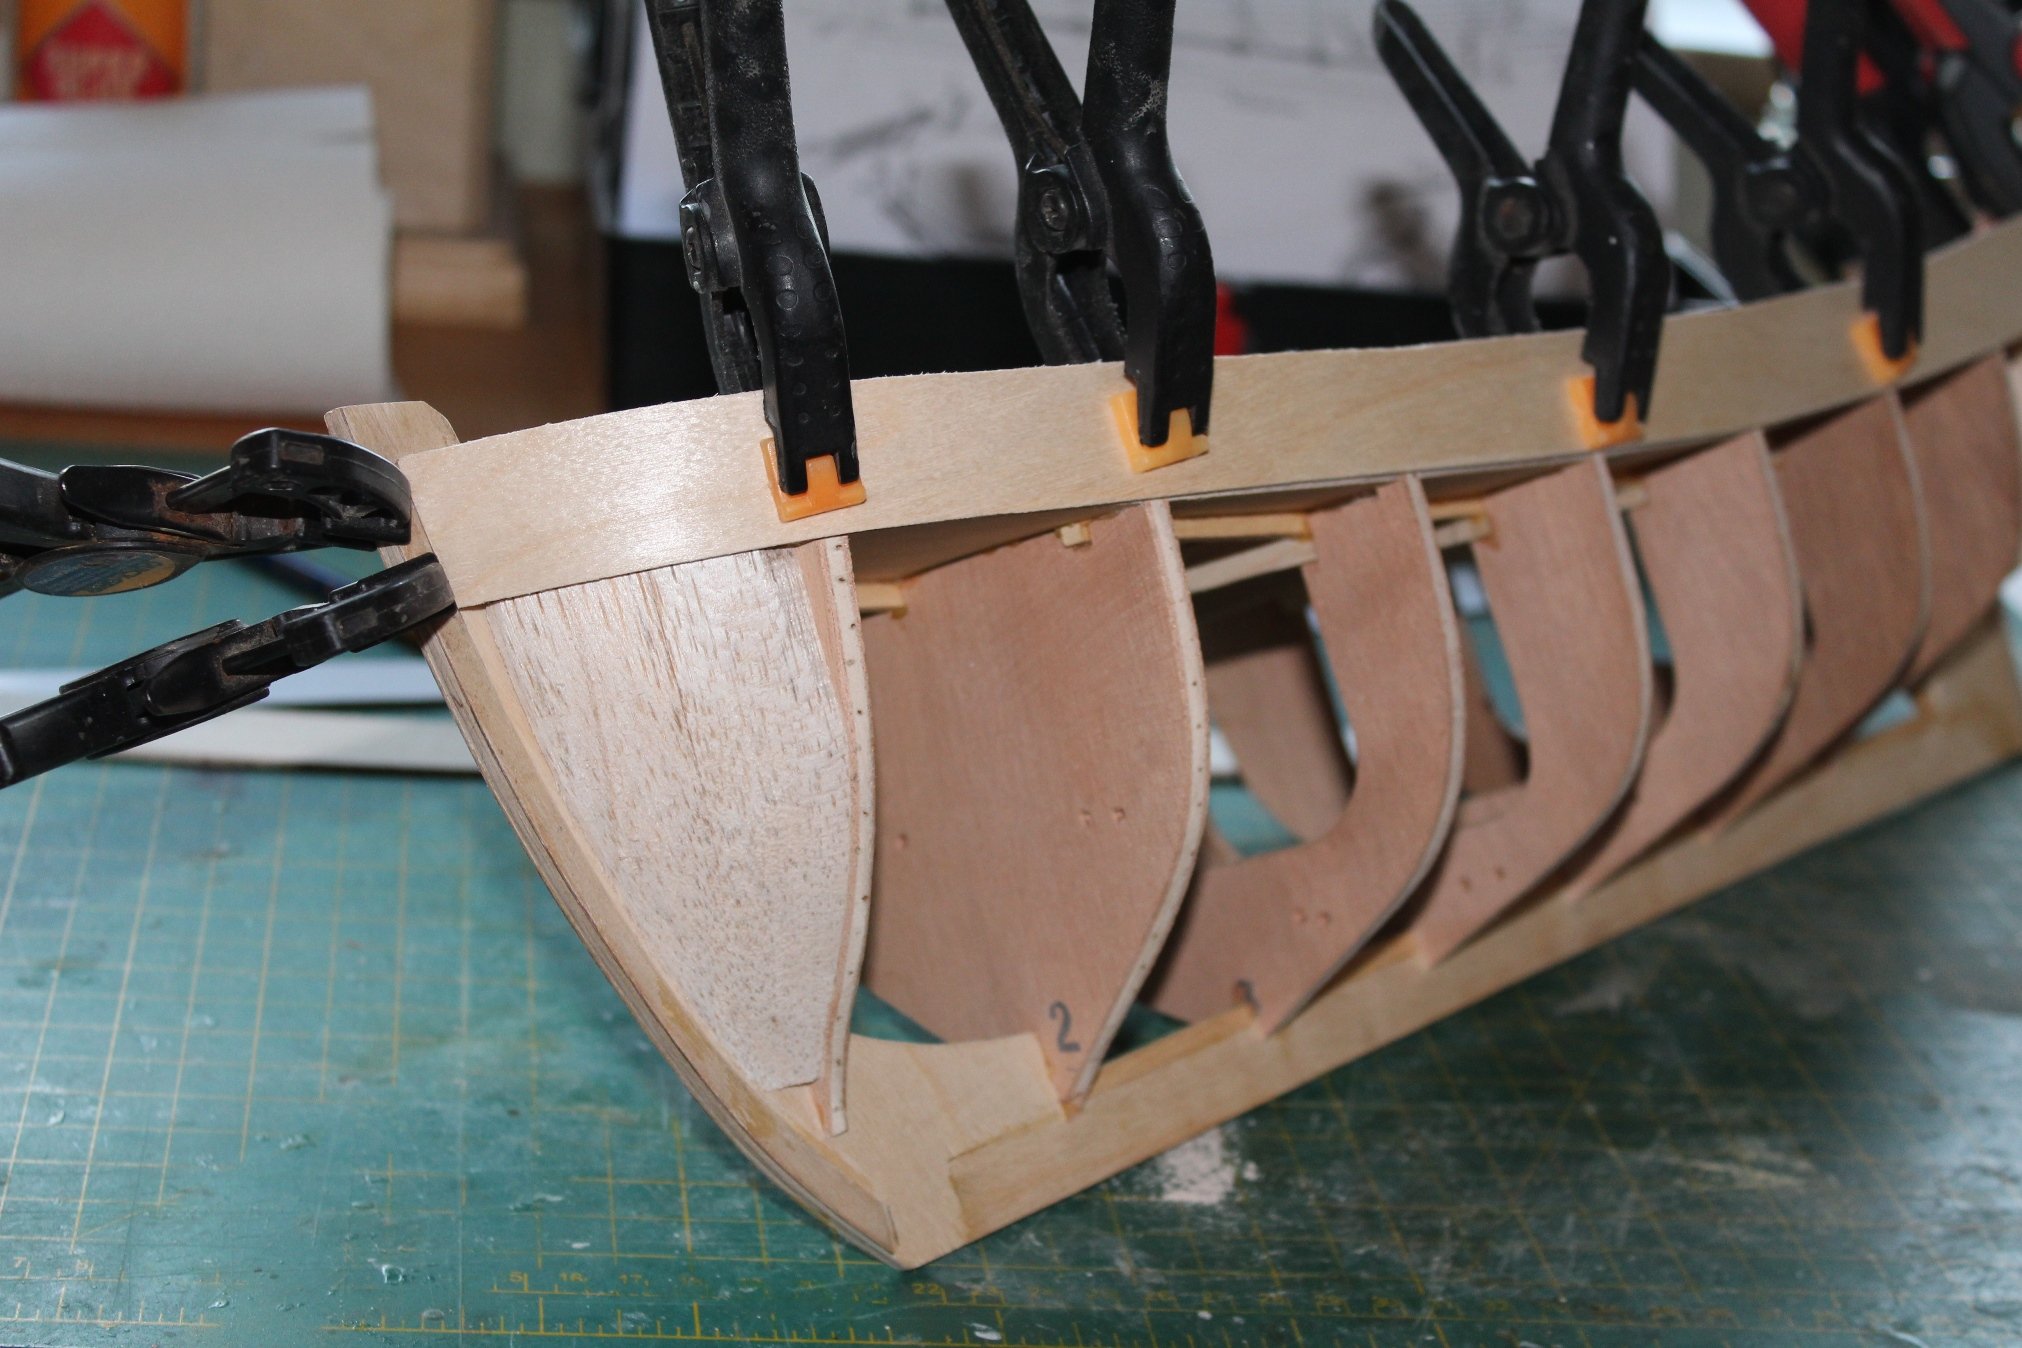
I decided to play it safe and added some balsa filler pieces at the bow and stern. Doing some fitting with a test plank, I didn't think the curvature looked right. It looks much better now and the increased gluing surface won't hurt either. This morning I spend some putting everything into shape for planking. Now I have to turn my attention to make the bulwark pieces. There are also missing so I will have to bring out my trusted cardboard once again and make a template for cutting the plywood. /Lars Peter


-
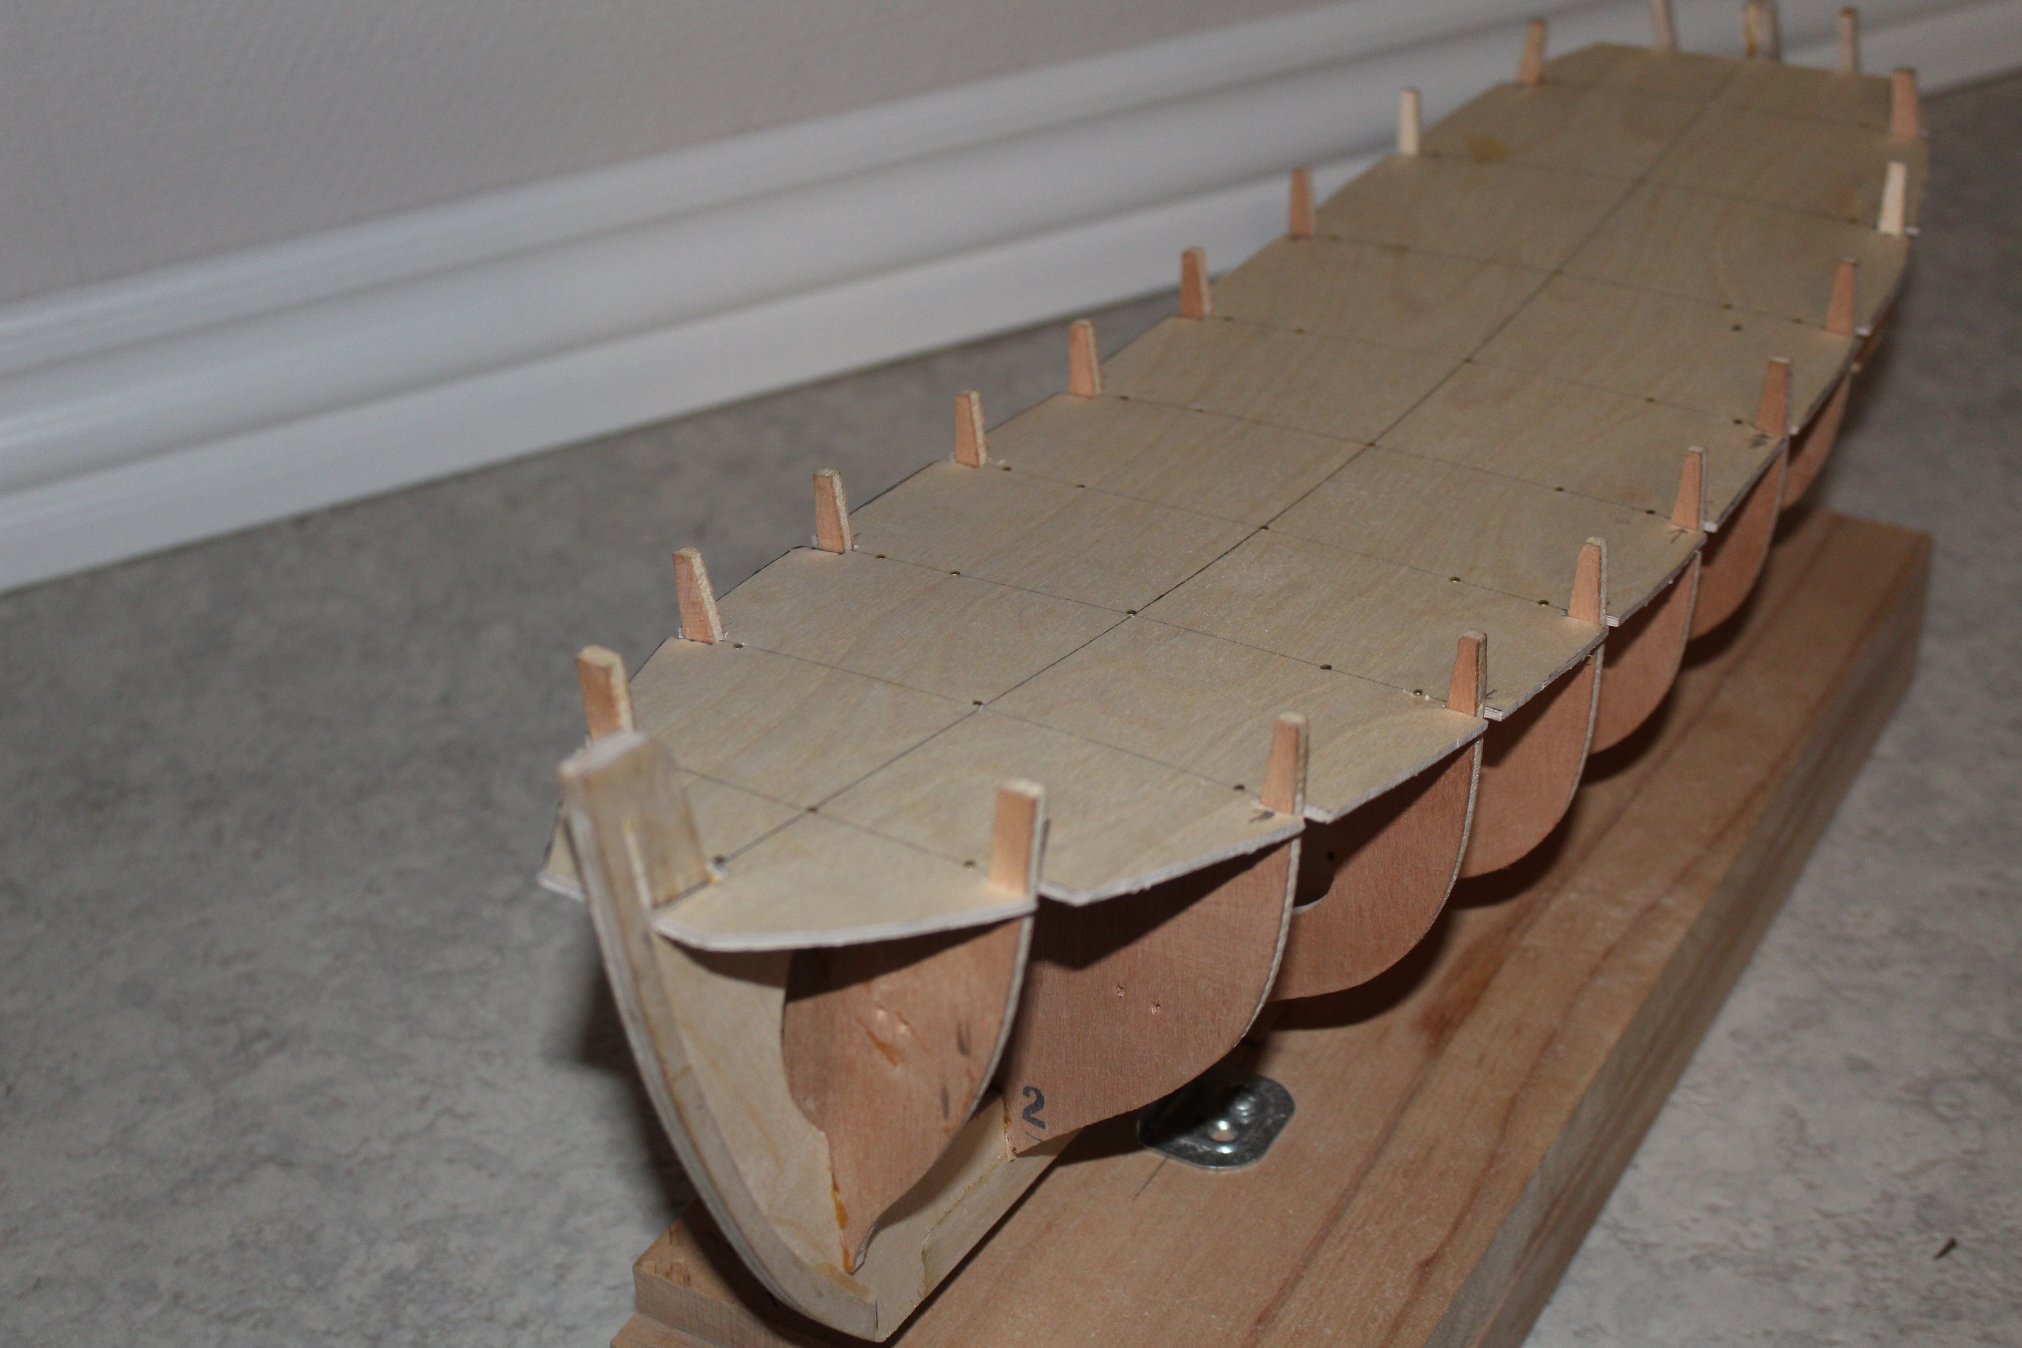
Well, it wasn't as difficult as I thought. I cut out the false deck, didn't cut it in half and it fit on the first try 😊 False deck is now glued in place - plenty of Tightbond and some nails did the trick. Once dry, it is not going anywhere. The deck has a slight chamfer as it should. A perfect fit of the false deck is not crucial as it will be planked later anyway. Now the dreaded sanding. /Lars Peter

-
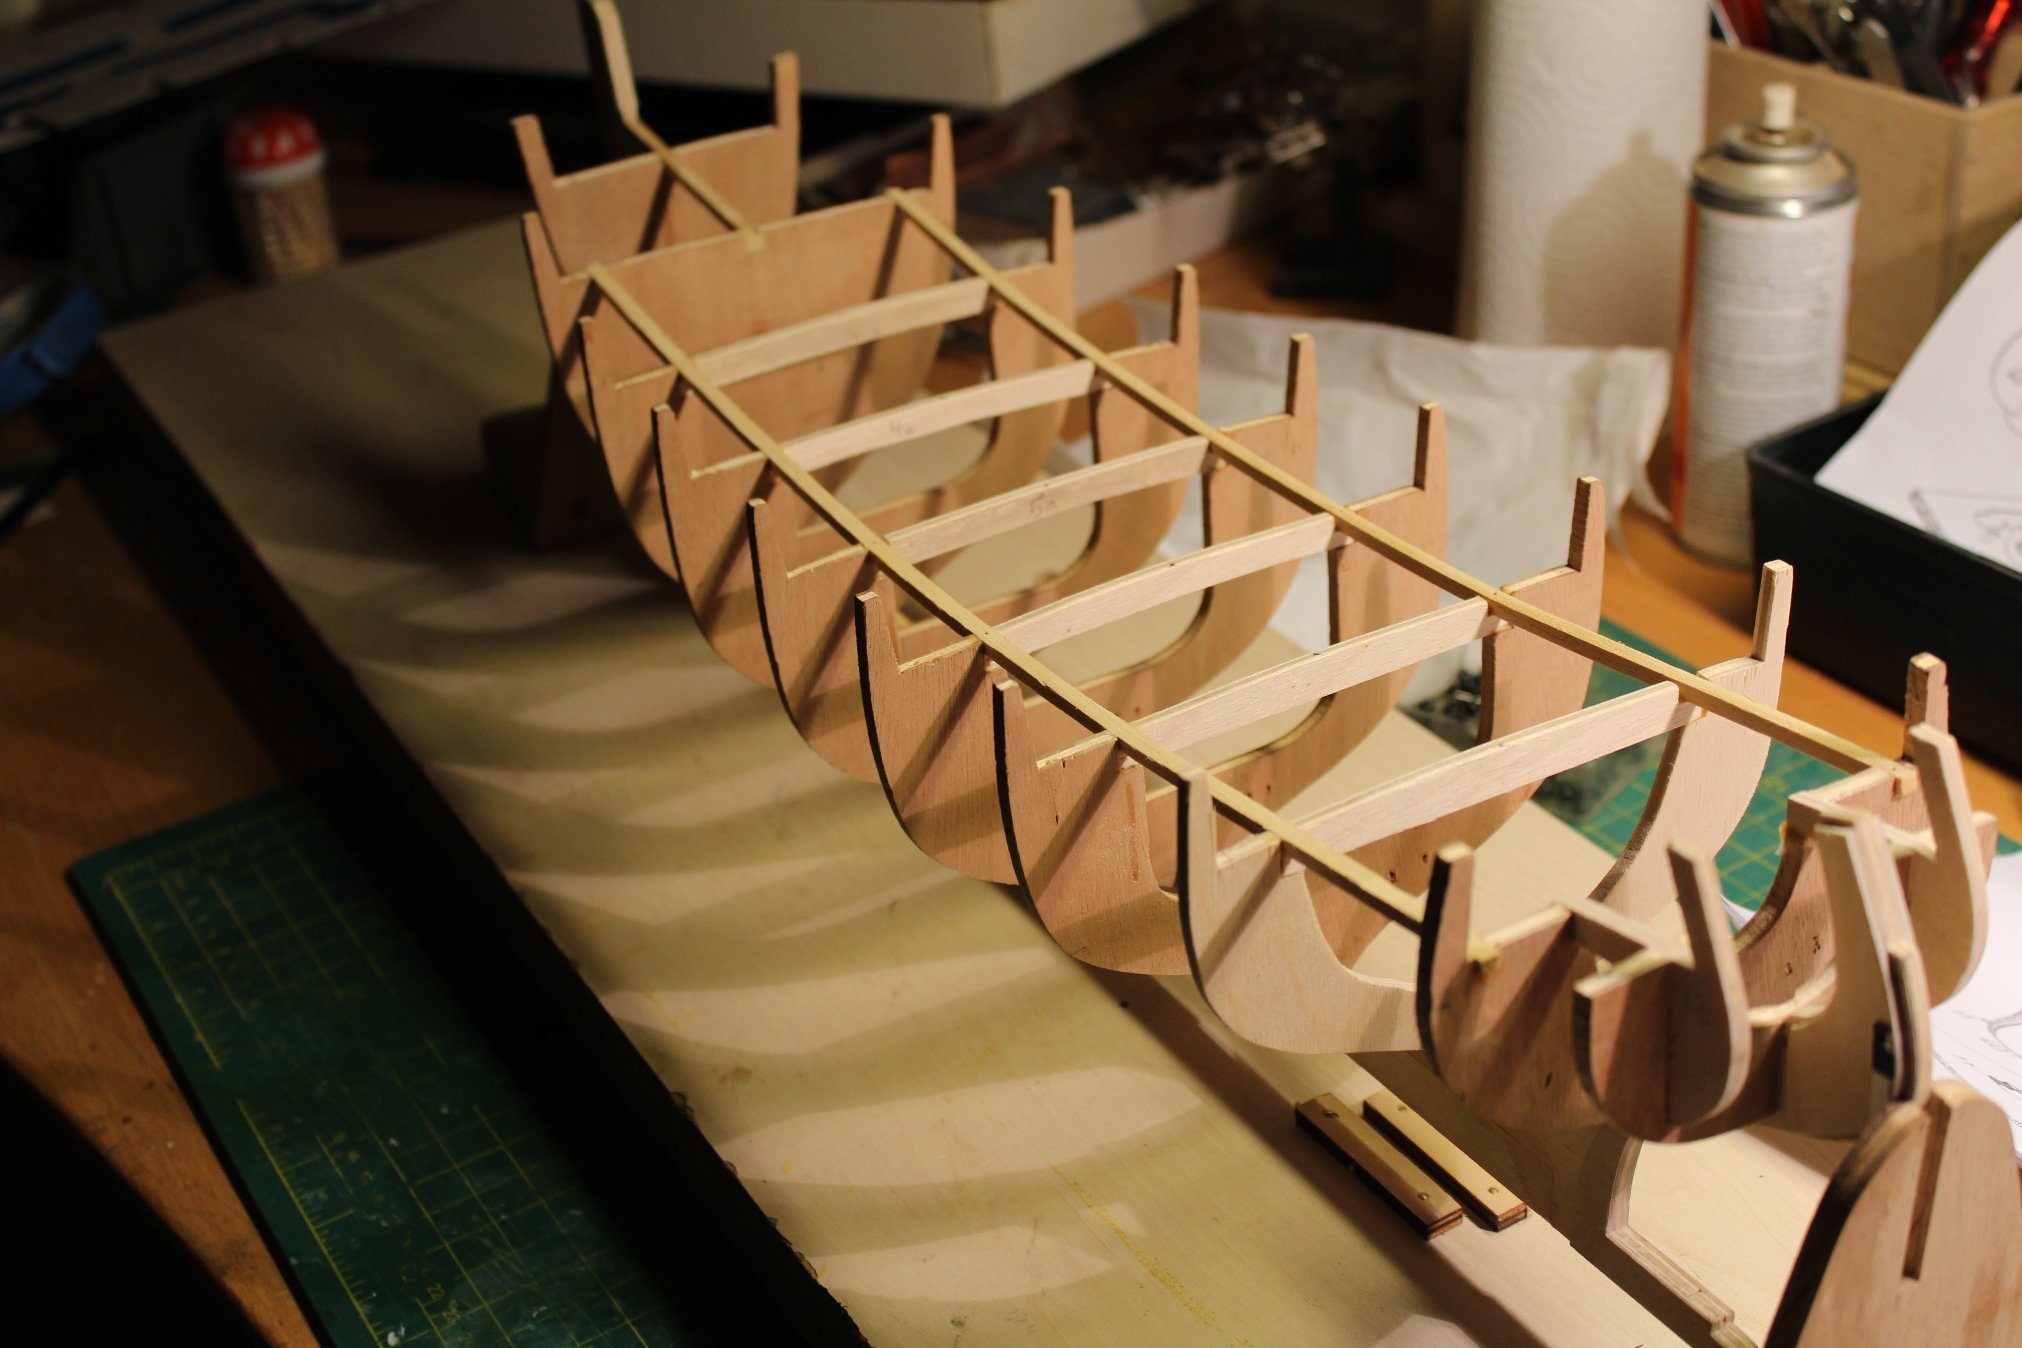
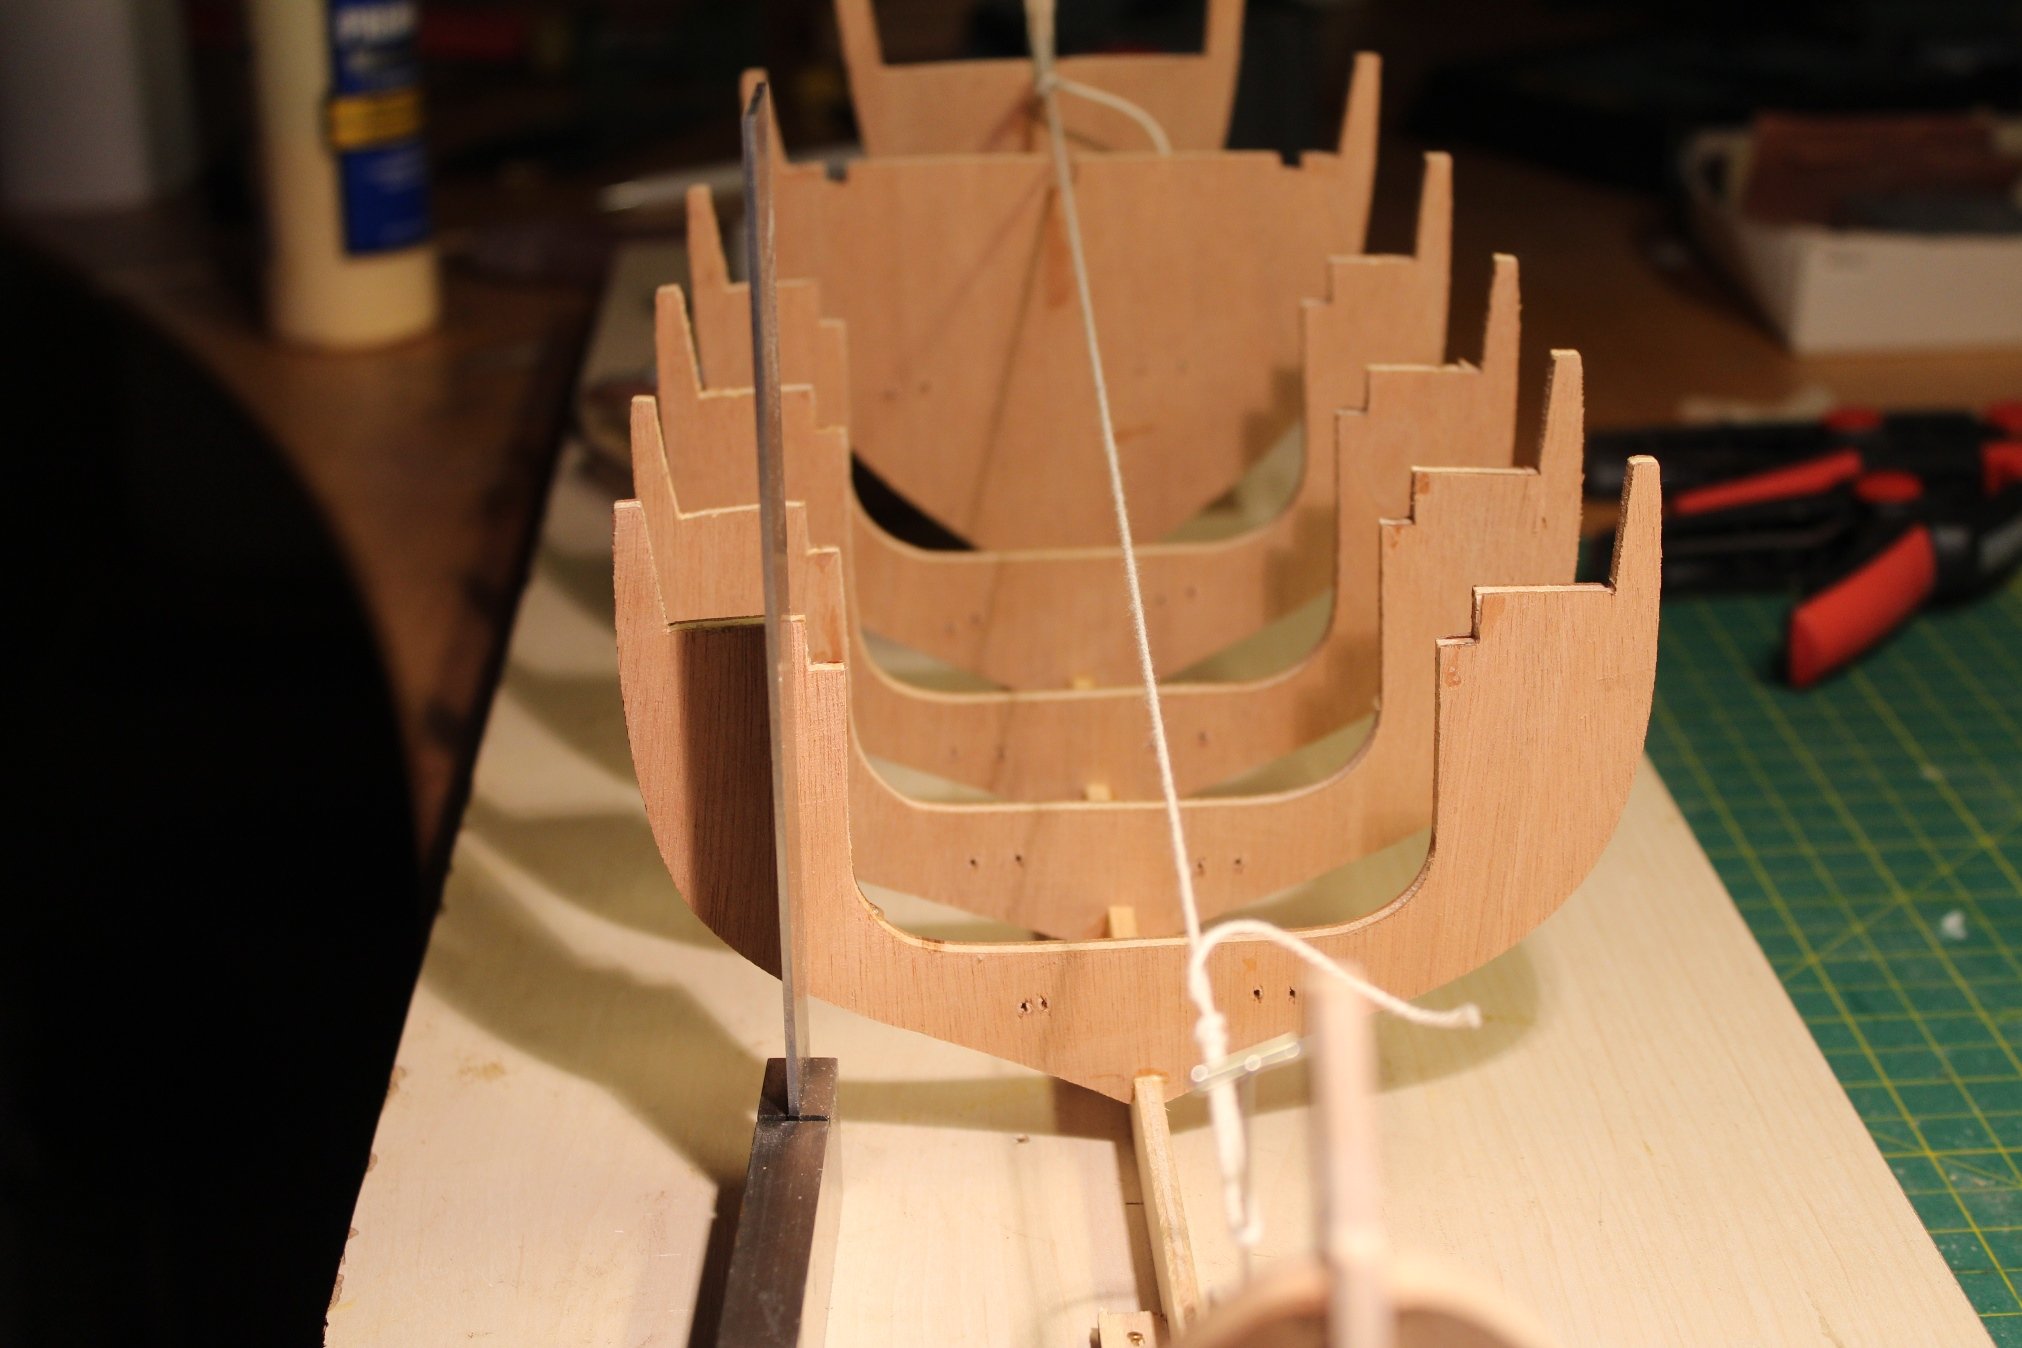
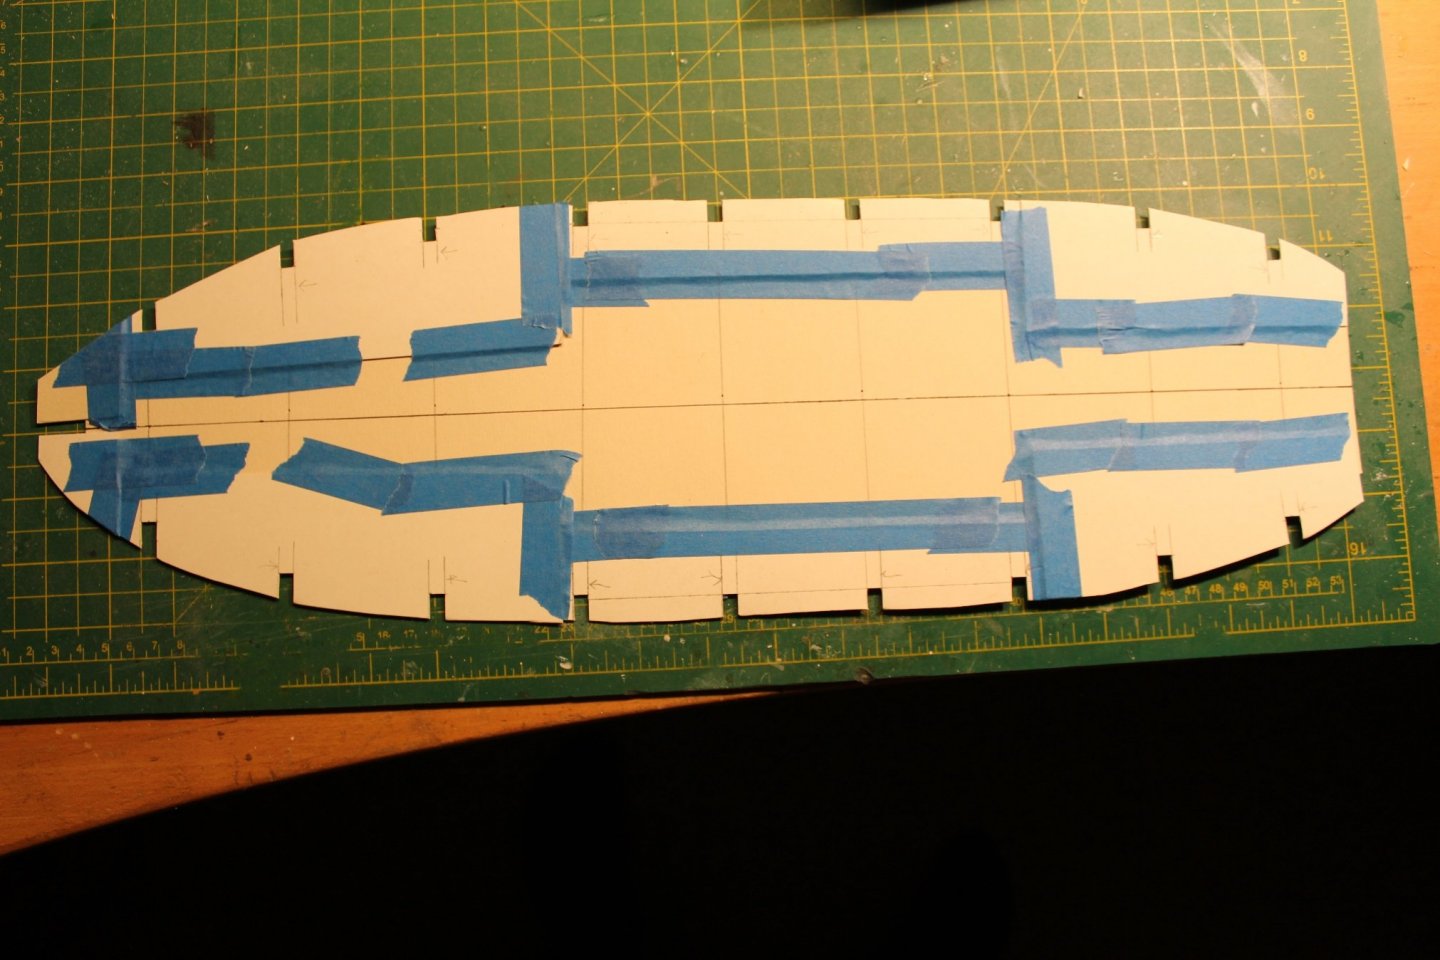
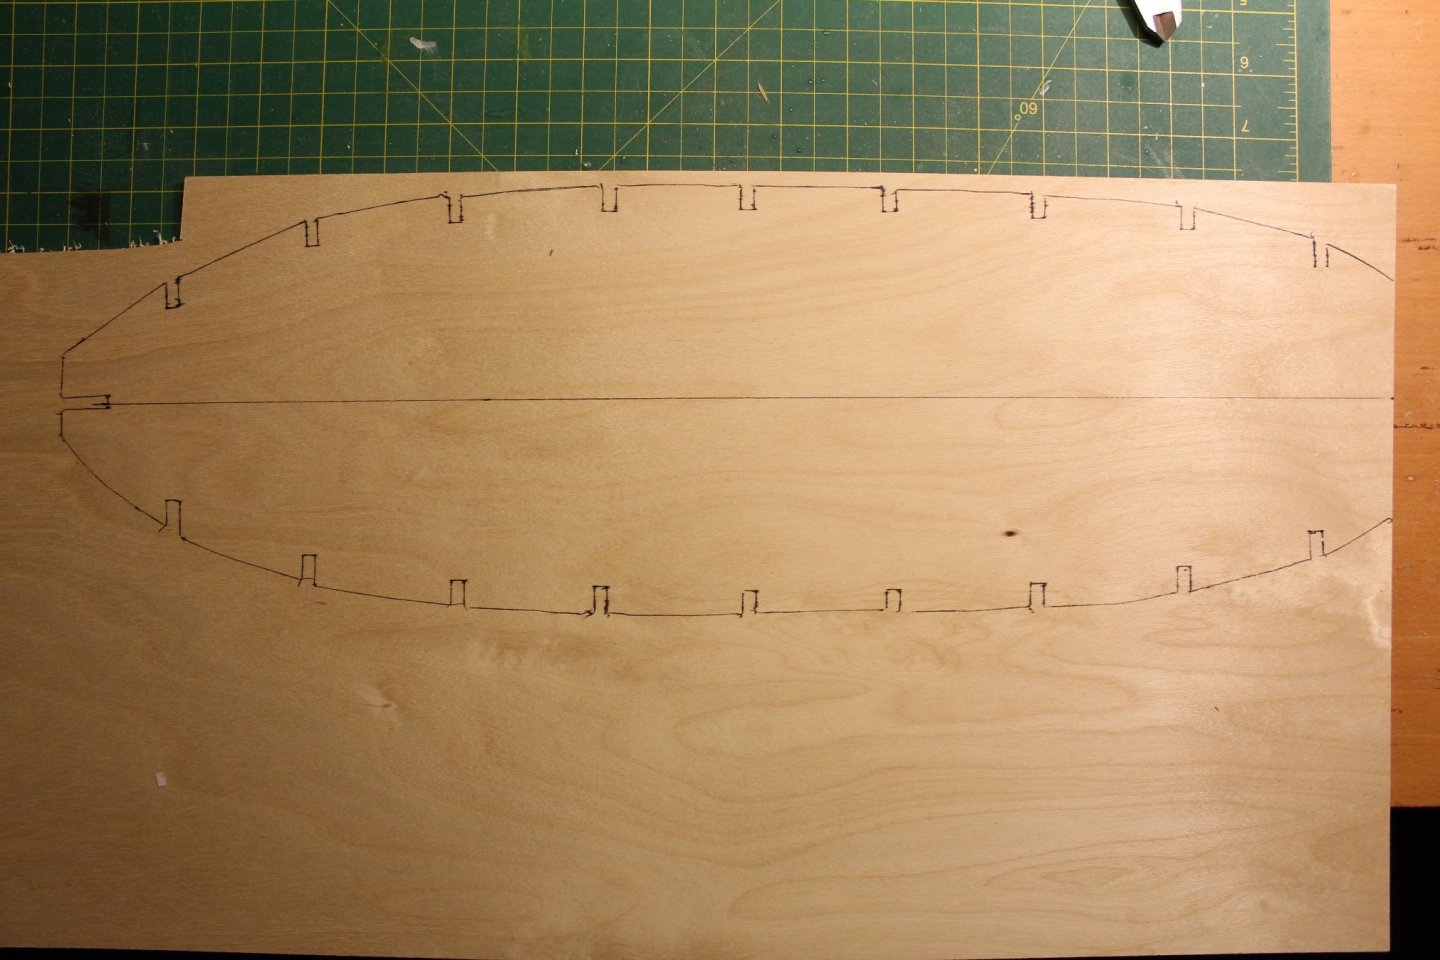
No filler pieces are included in the kit. I was actually thinking of adding them but after adding the deck supports the framing structure is actually quite rigid. Planking will be done using 1.8x6 mm strips so I think I may be able to do without filler blocks. I do a test when I have fared the hull. The model is proceeding quite well. I have finished gluing the frames into place, added the the longitudinal deck supports and added the last to rabbet pieces at the stern. Still have to add the keel rabbet pieces. I will do that once the hull are ready for planking. Next task was to make the false deck (yeah, it is also missing). I began be making a pattern out of cardboard. I marked the center line. Then I removed the pattern from the model, draw the center line and cut of most of the overhang. The pattern was then traced onto a piece of 2 mm plywood. Now come the fiddly job of cutting out the false deck and fitting it to the hull. I will have to cut in half for fitting. /Lars Peter


-
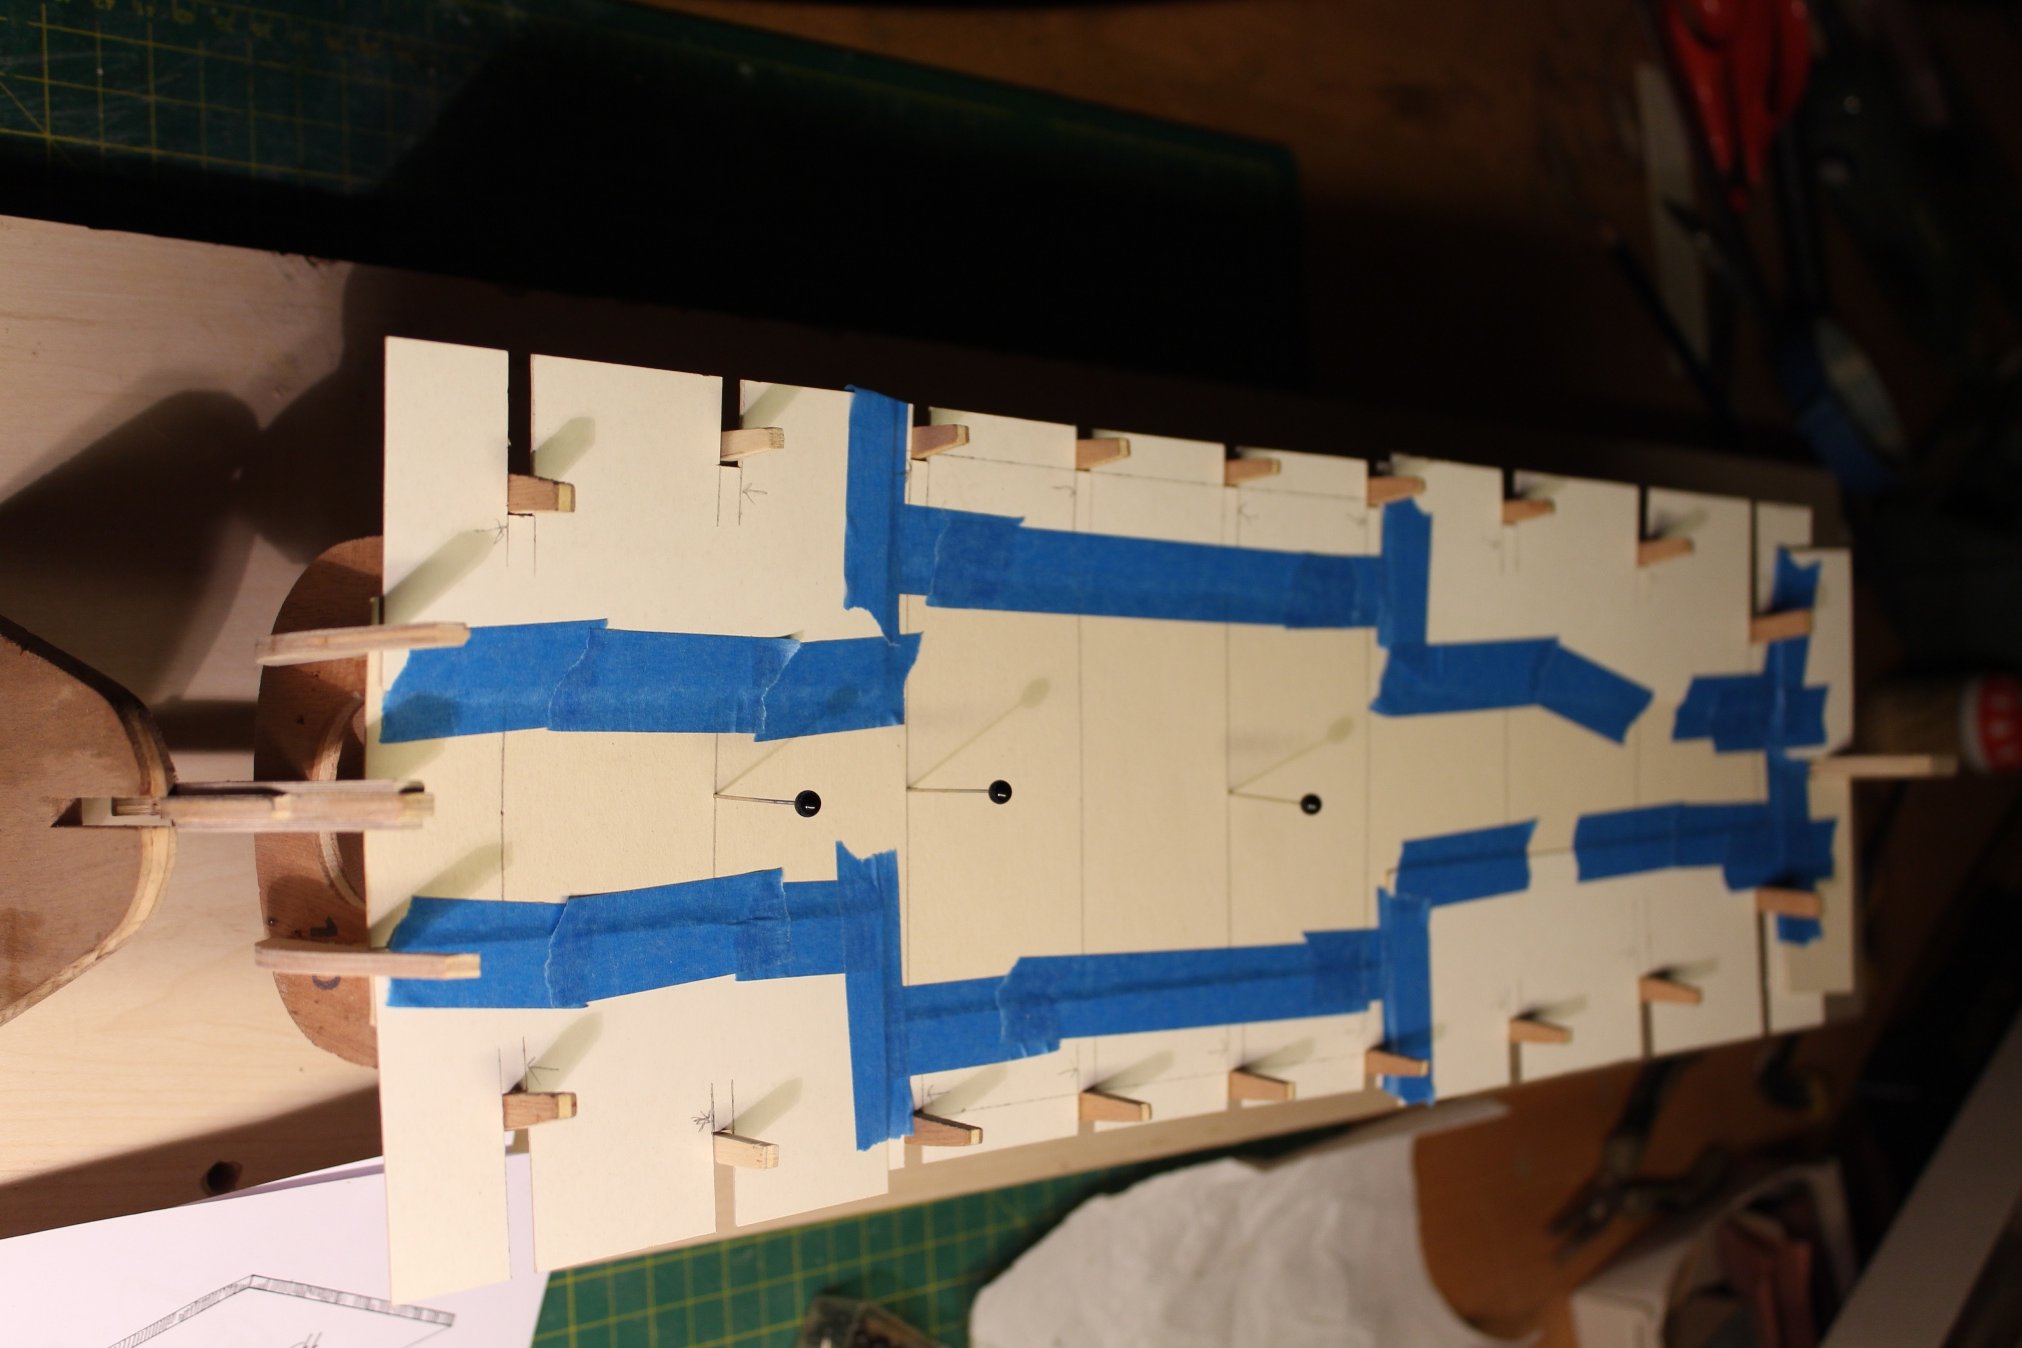
Framing of Mary Ann is progressing nicely. No issues so far except that the length of the filler pieces has to be adjusted to accommodate the thickness of the frames which deviates from the instruction a bit. I hope I got each frame in the almost correct position. I put up a string to mark the center line, using this and a square to ensure a 90 degree angle in both planes. 4 more frames to go before I can move on to the deck supports. /Lars Peter

-
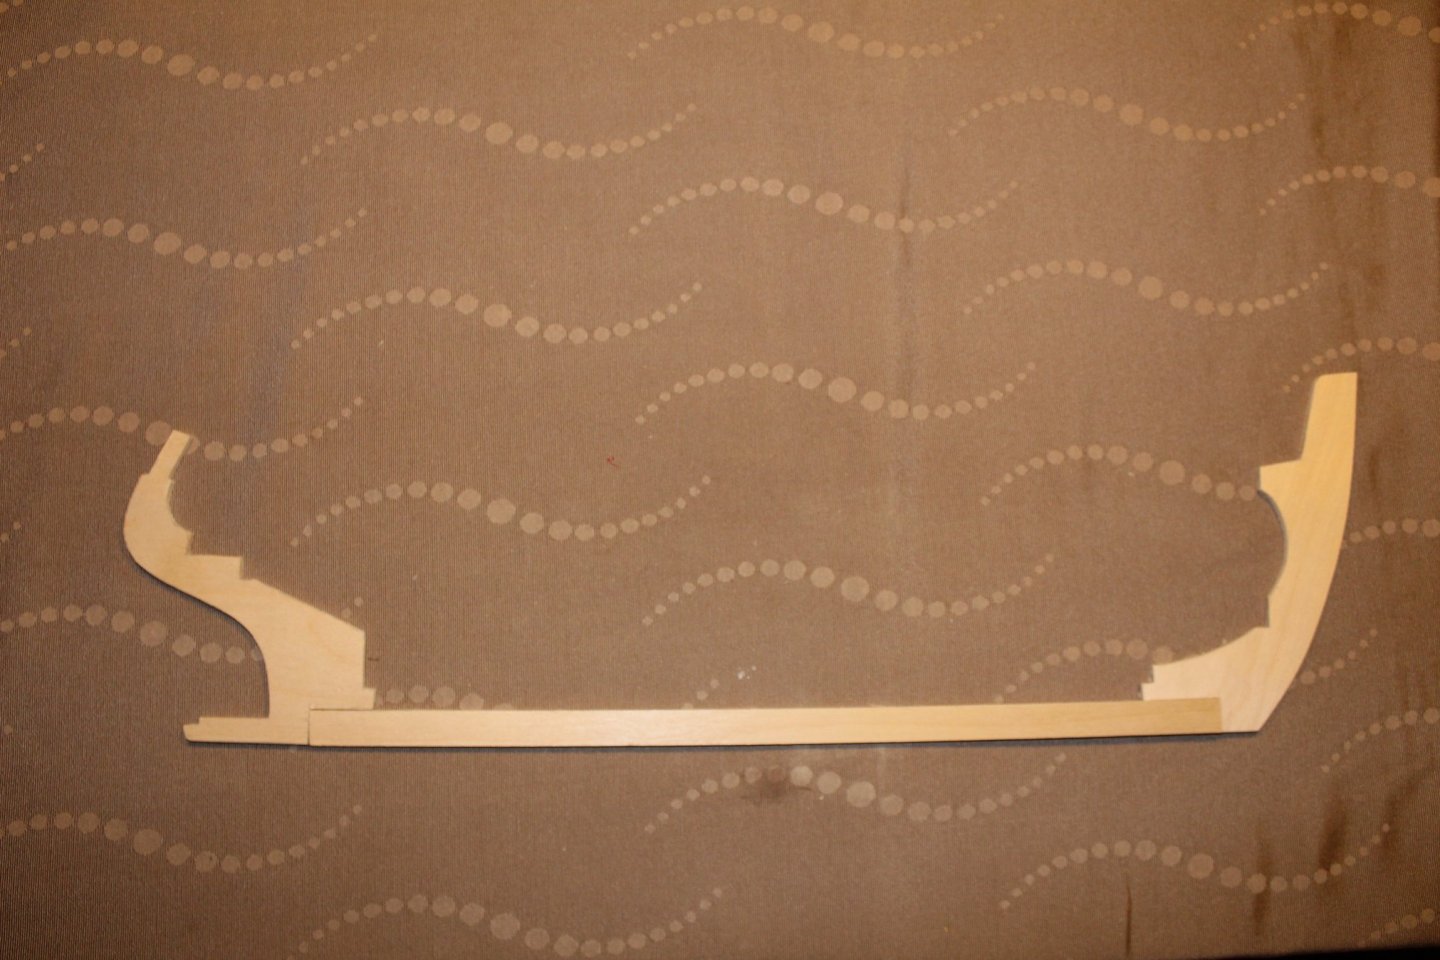
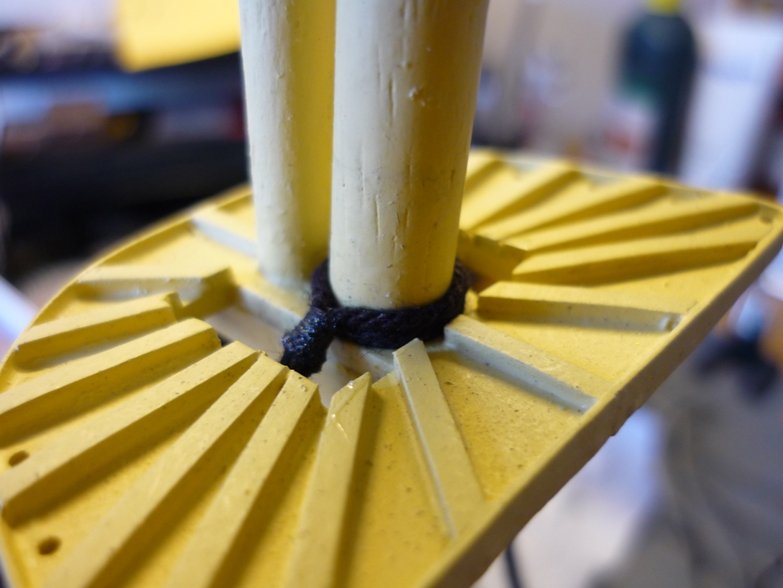
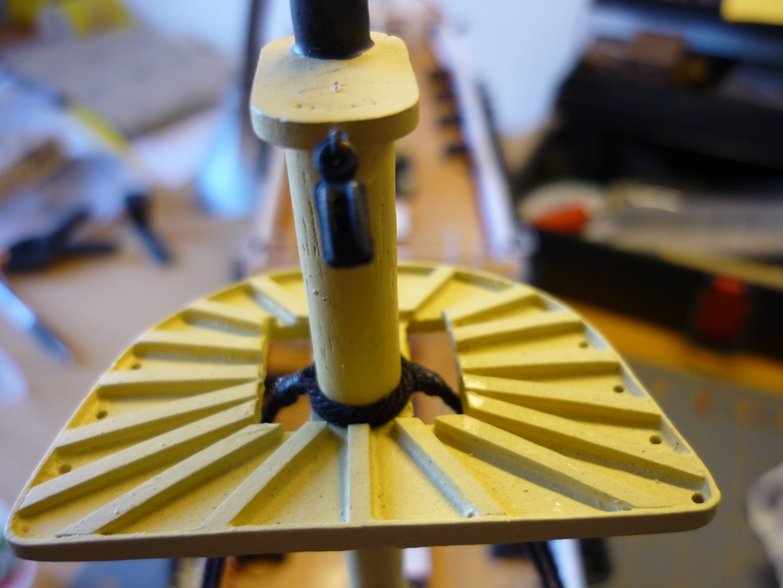
I have now added the stern and bow rabbet pieces. Made them the same way as the deck supports in my previous post. I made a quick framing jig and has now started the framing process. The first frame has been glued in place ensuring 90 degree angle all the way around. I have two more rabbet pieces for the stern to attach. I will not do that until all the frames are in potions as it may have to adjusted to fit with frame 10. /Lars Peter This photo is supposed to added in portrait format not landscape. But my skills are obviously not good enough to figure out how to do that. So please tilt you screen 90 degress 😉
-
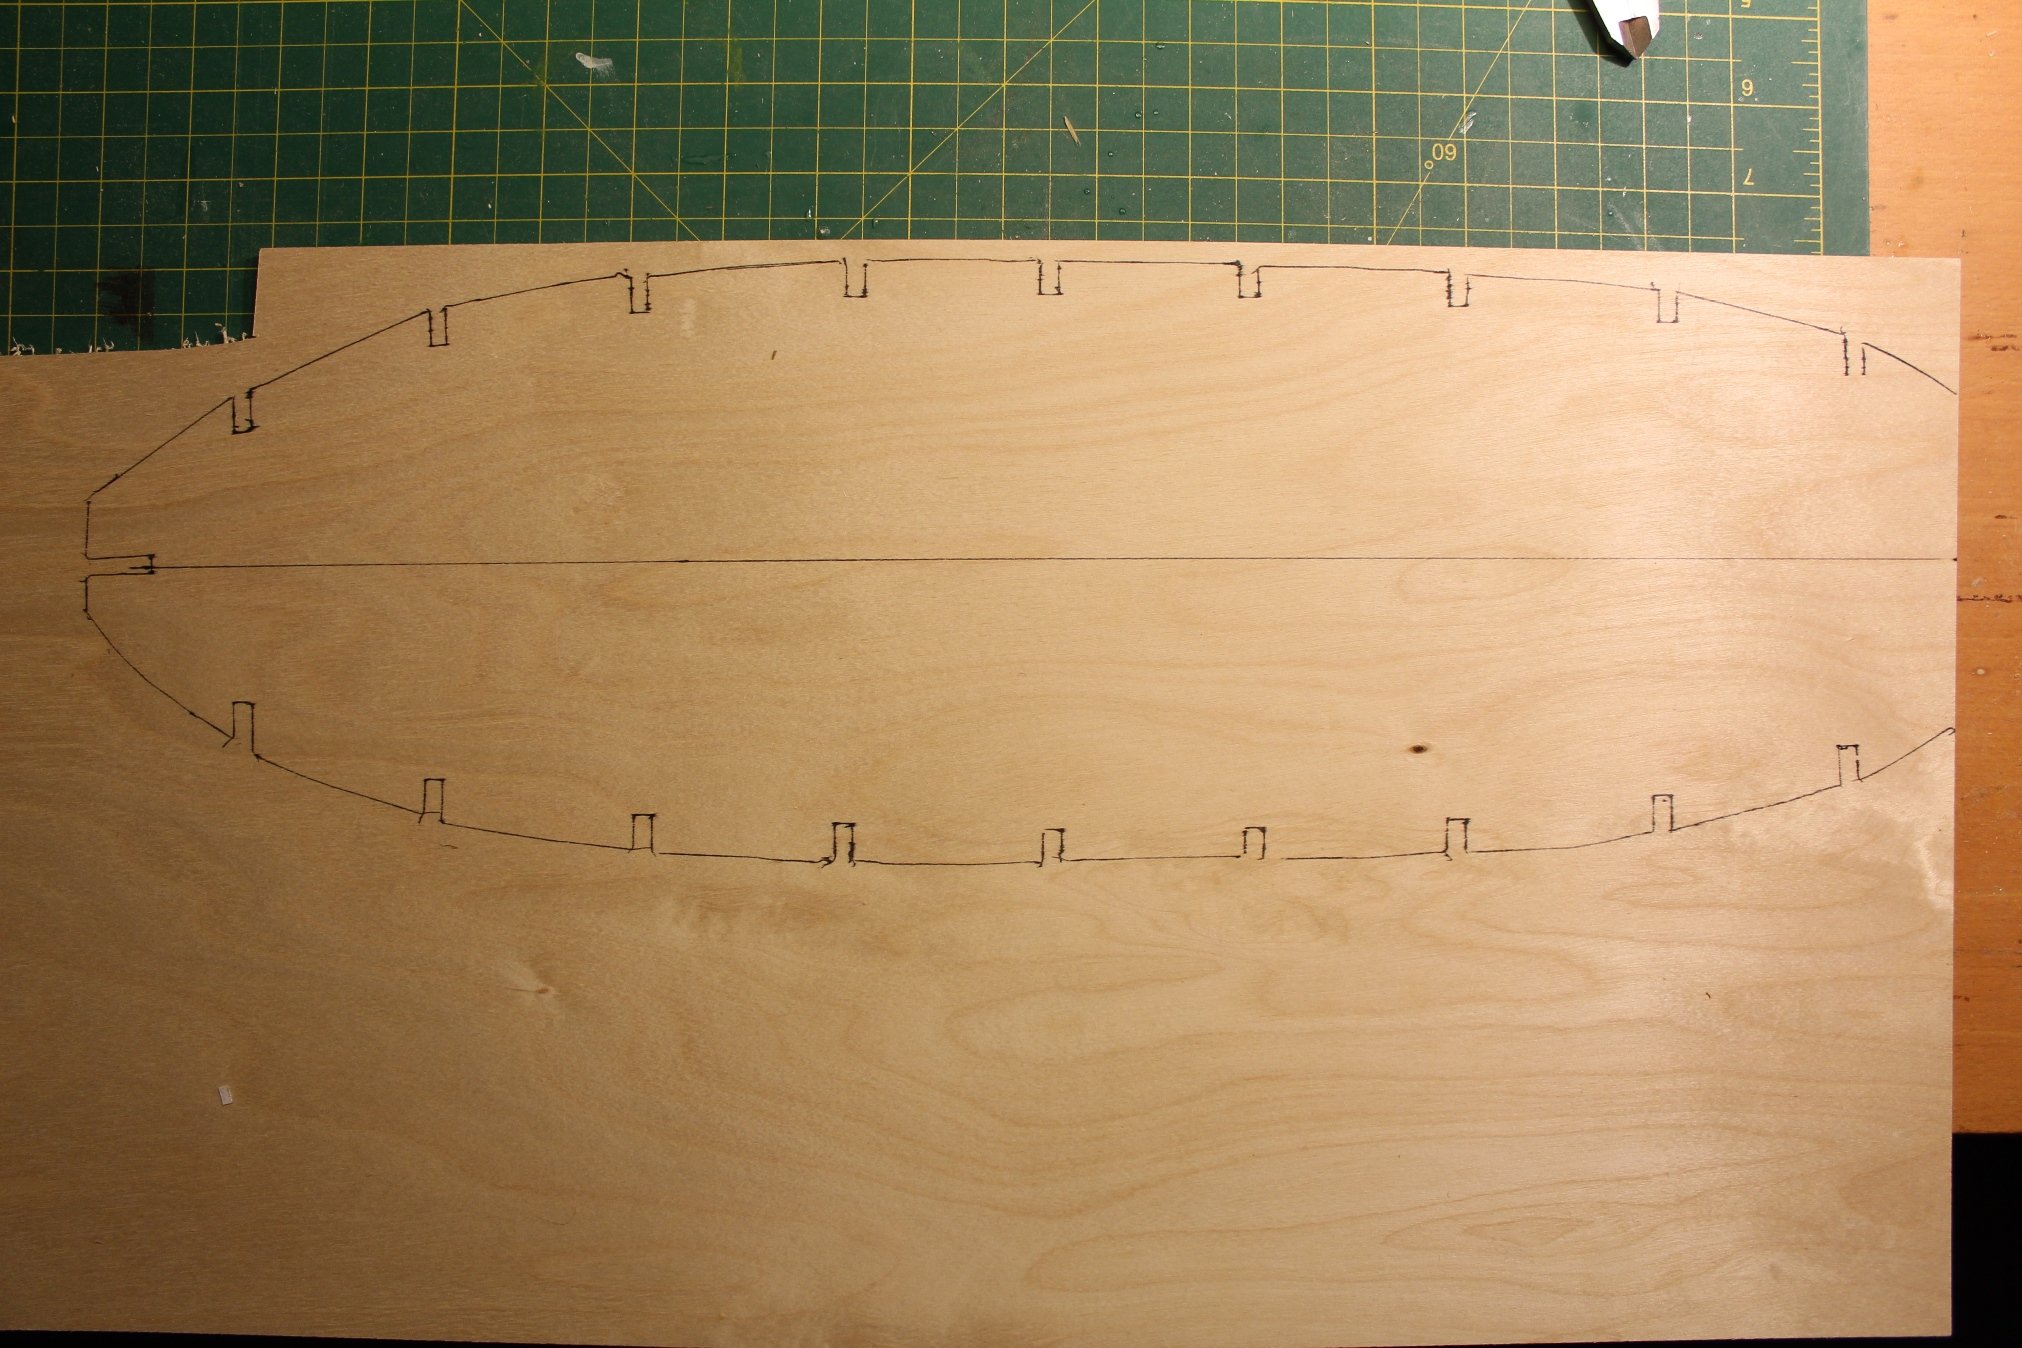
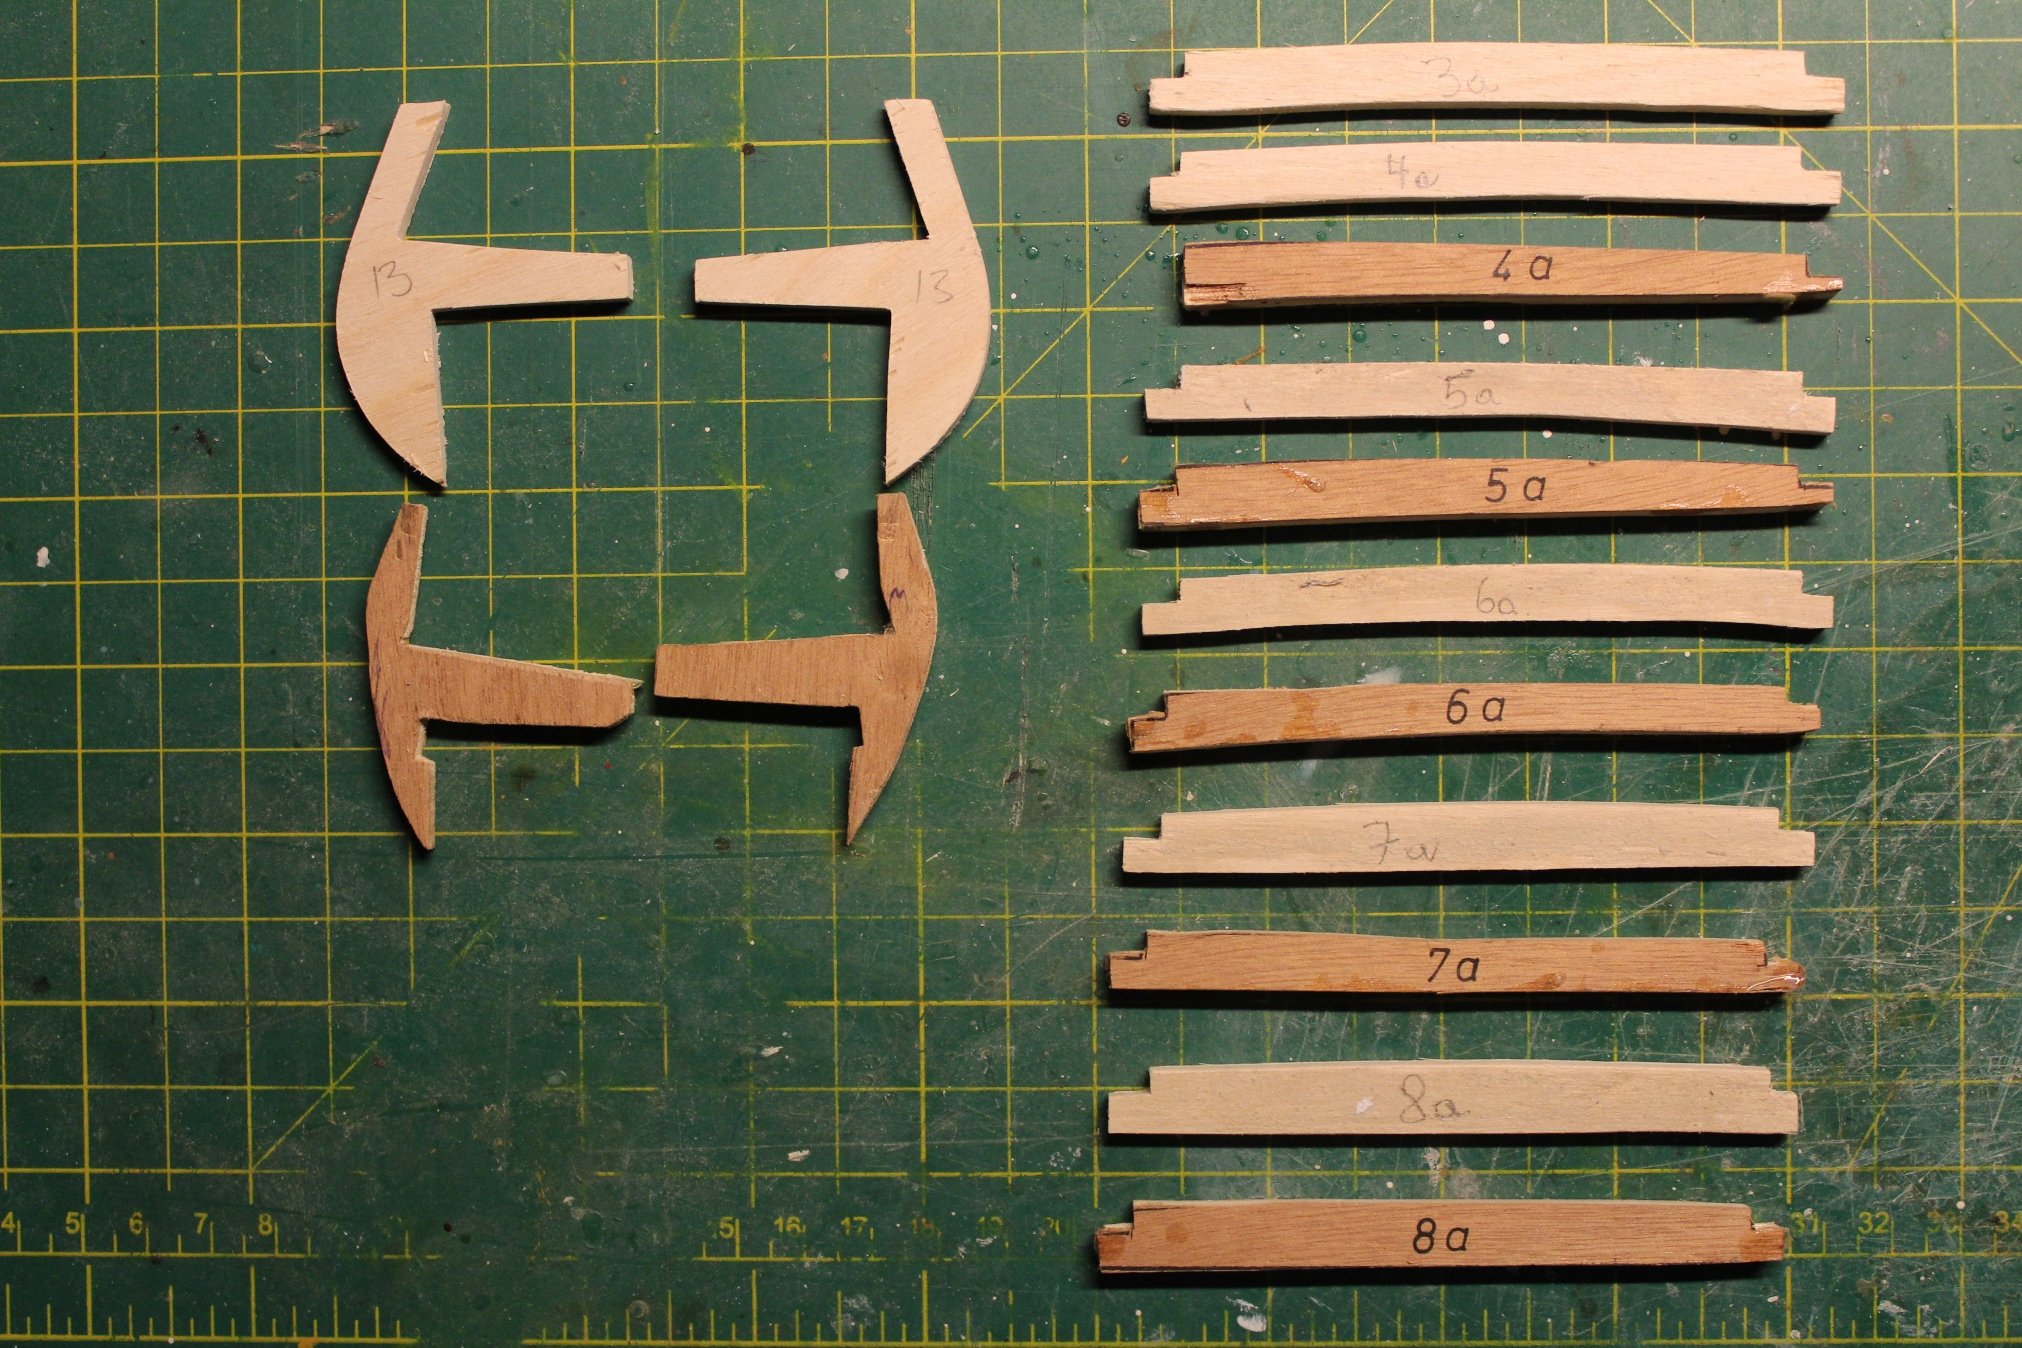
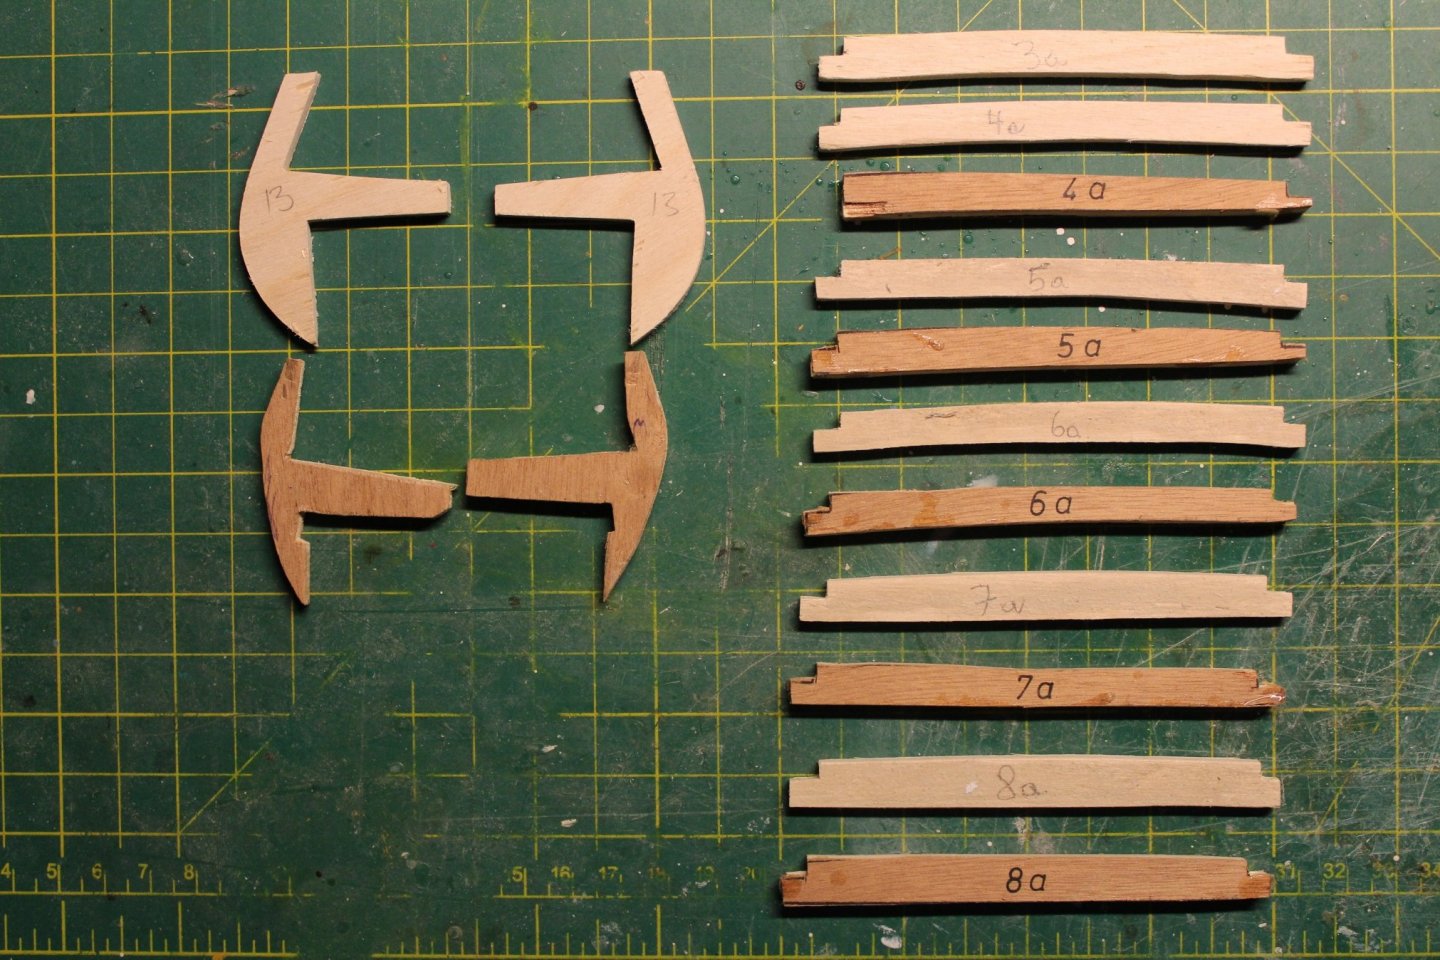
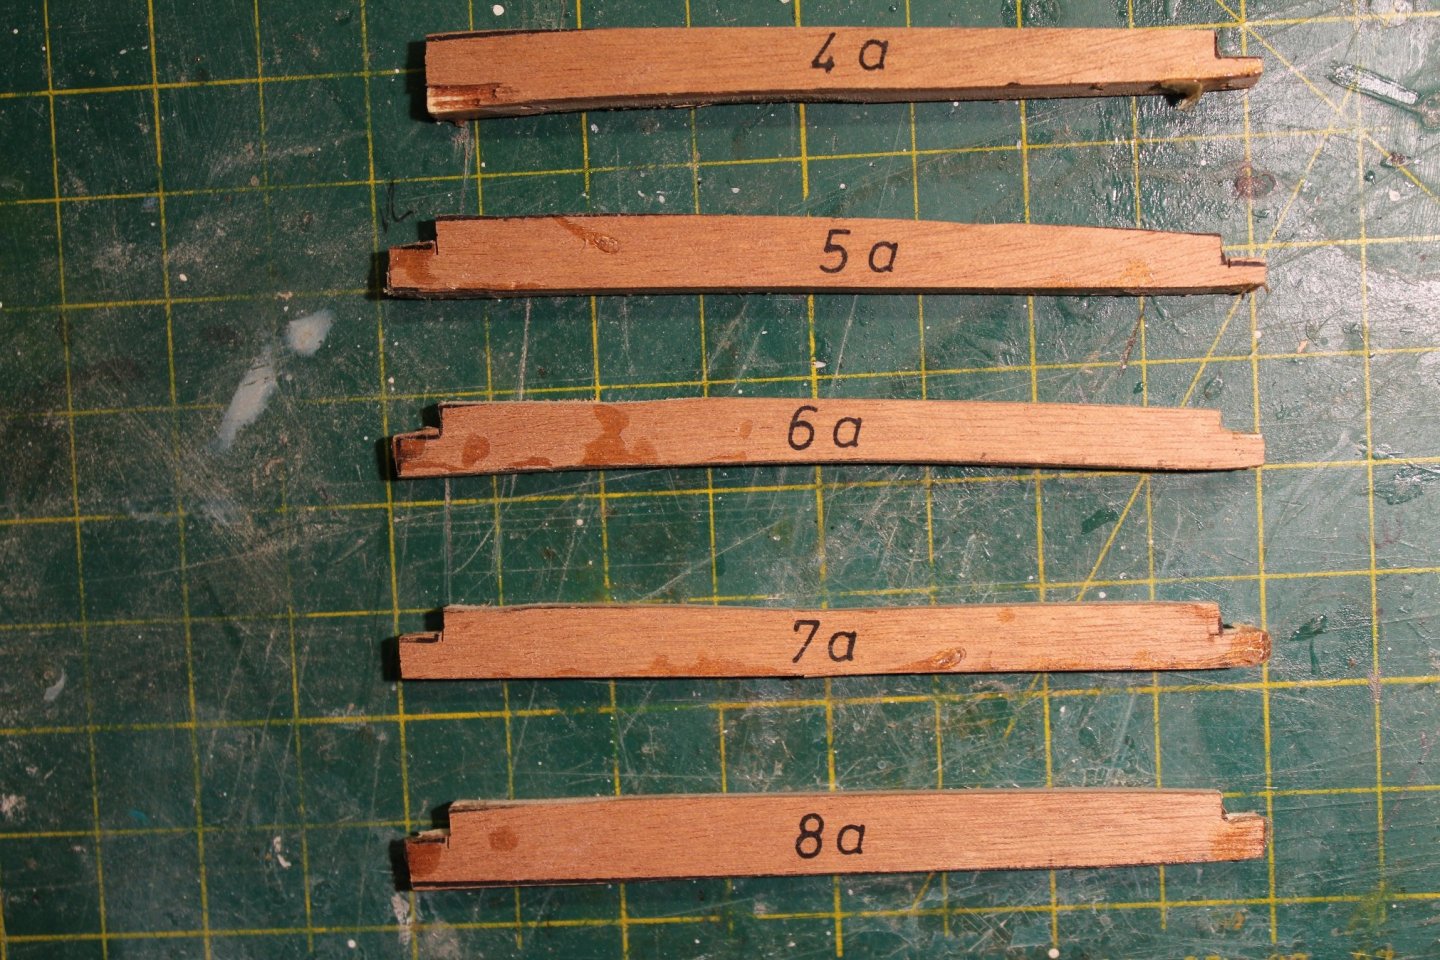
I have solved the deck chamfer problem. Looking at the parts list in the instructions I noticed that the pieces showed in my previous post indeed should have a slight chamfer. I played around with my laptop and a printer and managed to print out the needed parts at the correct scale. I cut them out, glued them to a piece of 4 m plywood, cut them out and voila new parts ready. I realized that part 3a was missing entirely. Didn't clean up the bottom of deck supports because it will be hidden anyway; thus, the crooked look of some of the parts. Regarding part 13, I don't really know what was going on with the original parts, but the new parts have the correct shape 😲 Next up the rabbet pieces. /Lars Peter
-
I was looking at some of the deck supports (some are missing) cut out by the previous builder. It is difficult to determine whether there should be a slight chamfer to the deck. From the visible lines it seems like some are completely flat while others seem to have a slight curve. No help from the instruction or plans. Does any of you have any idea whether there is a slight chamfer or whether the deck sits completely flat. Perhaps someone with a newer version of the kit (laser cut parts) have noticed anything related to this. Of course it is easier to make flat parts but I would like to make it right. /Lars Peter
-
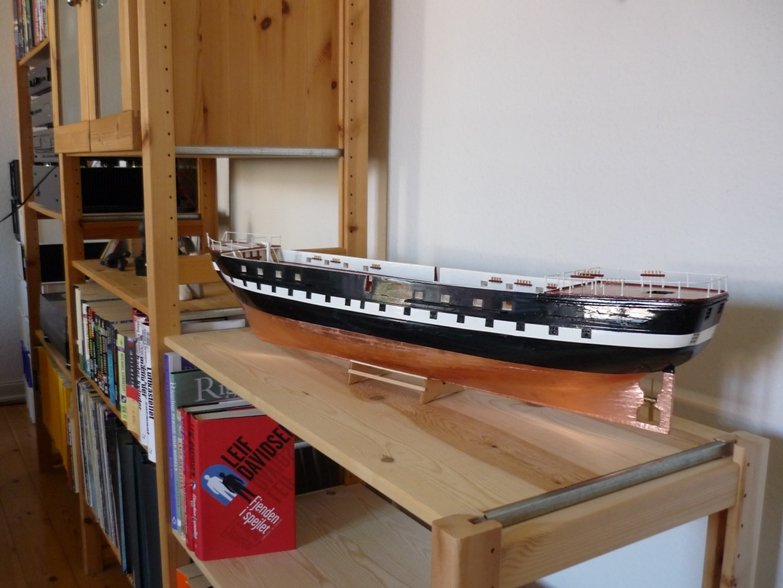
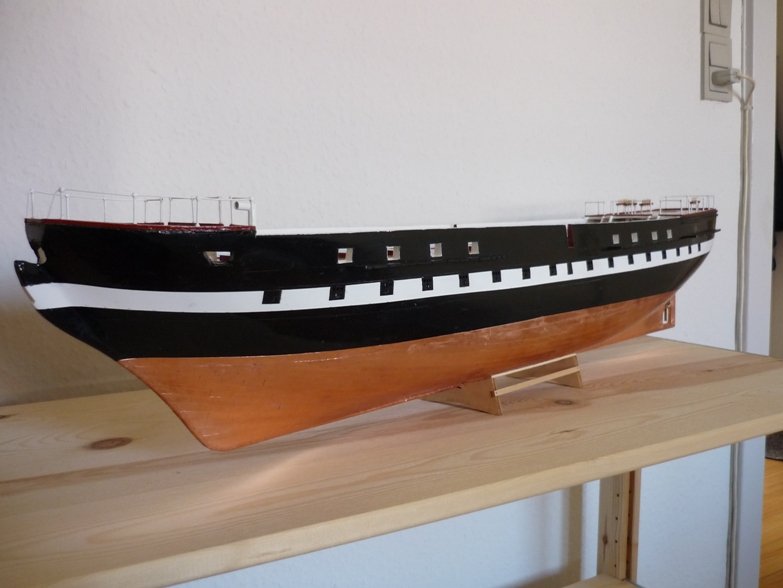
Today I got a stack of new plywood, 1.0, 2.0 and 4.0 mm and went straight to the shipyard. I remade the 3 pieces for the keel assembly and a new frame 8. Only downside is that the new 4 mm ply is slightly thinner, 0.6 mm, than the old 4 mm plywood supplied with kit 😒 Thus, the remaining old frames do not fit snugly on the keel. So I will have to glue on some filler pieces and then file the slots down to fit. Not a big deal but still a bit annoying. The keel structure is now ready for gluing. Before I fit any frame I will have to remake all the rabbet pieces. Some were already glued on the stern pieces and the rest is poorly cut out and cannot be used. But compared to fiddling with the small boats for my AV, this is easy - big pieces to work with 😊 The overall length of the finished model will be somewhere around 550 mm. /Lars Peter
-
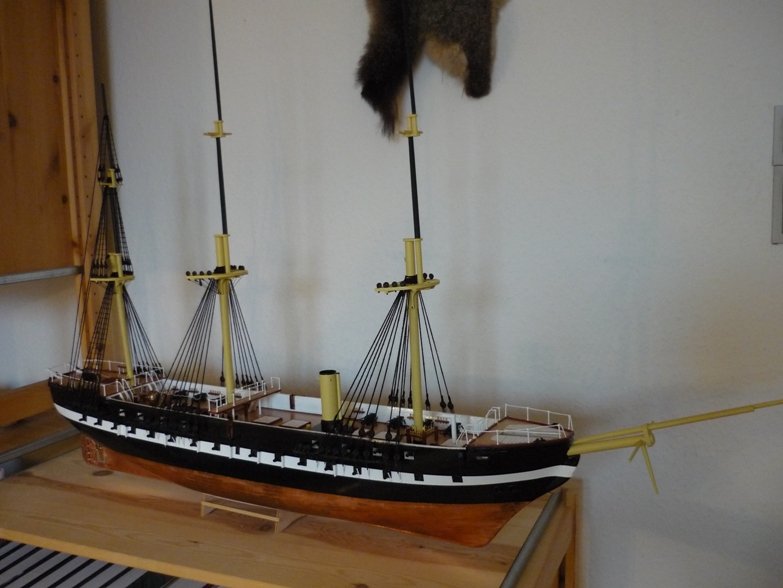
Posted: Sat Nov 14, 2009 12:02 pm•Post subject: As promised, here is a couple of pictures showing the current status on the rigging of Jylland. I've finished all lower shrouds and will start on the remaining top shrouds as soon as I get some more rigging thread. Also, I've completed the rat lines on one side of the mizzen mast. However, I may not do any more ratlines until I've done the running rigging. /Lars Peter
-
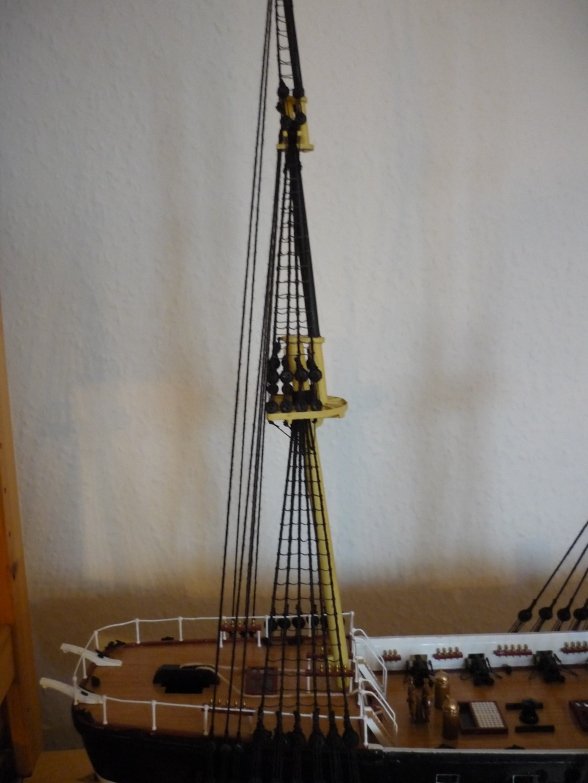
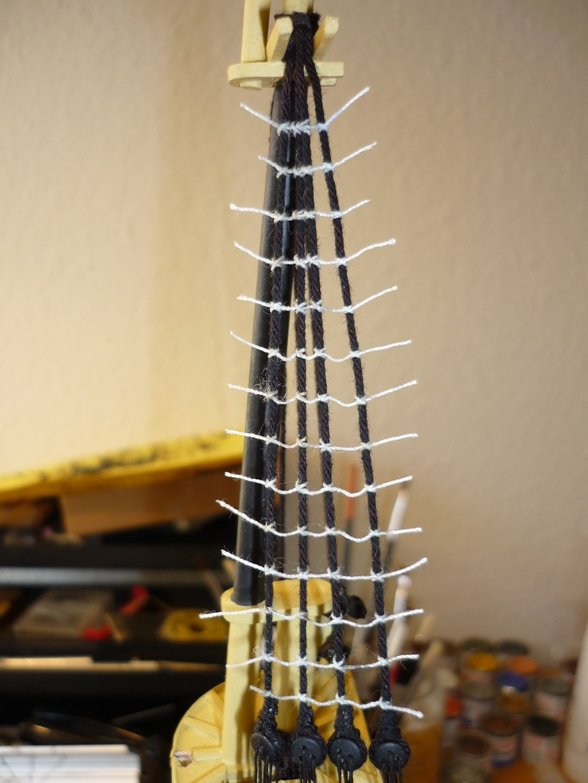
Posted: Fri Oct 16, 2009 1:09 pm•Post subject: I finished the second half of the top ratlines for the mizzen mast. I think they came out slightly better than the first half. The work is slow as I have to wait for the PVA to dry on one knot before I can do the next knot, otherwise, the knots loosen up again. As you can see from the first picture, the black ink I use doesn't seem to soak into the white thread I use for the ratlines.It looks OK right after I add the ink but when it is dry the white tread shines through the ink. I have some black Indian ink waiting at the post office and hopefully it will prove better. Another solution is to avoid that people get to close to the model I also did the futtock shrouds on the mizzen mast which add a more natural appearance in contrast to the kit plans. The main mast has now been glued to the hull and I can start on the shrouds for this mast and when I get tired of tying shrouds I can continue the standing rigging for the mizzen mast. The rigging of the three masts is quite similar so hopefully I get the hang of it and can speed up the process a bit. /Lars Peter
-
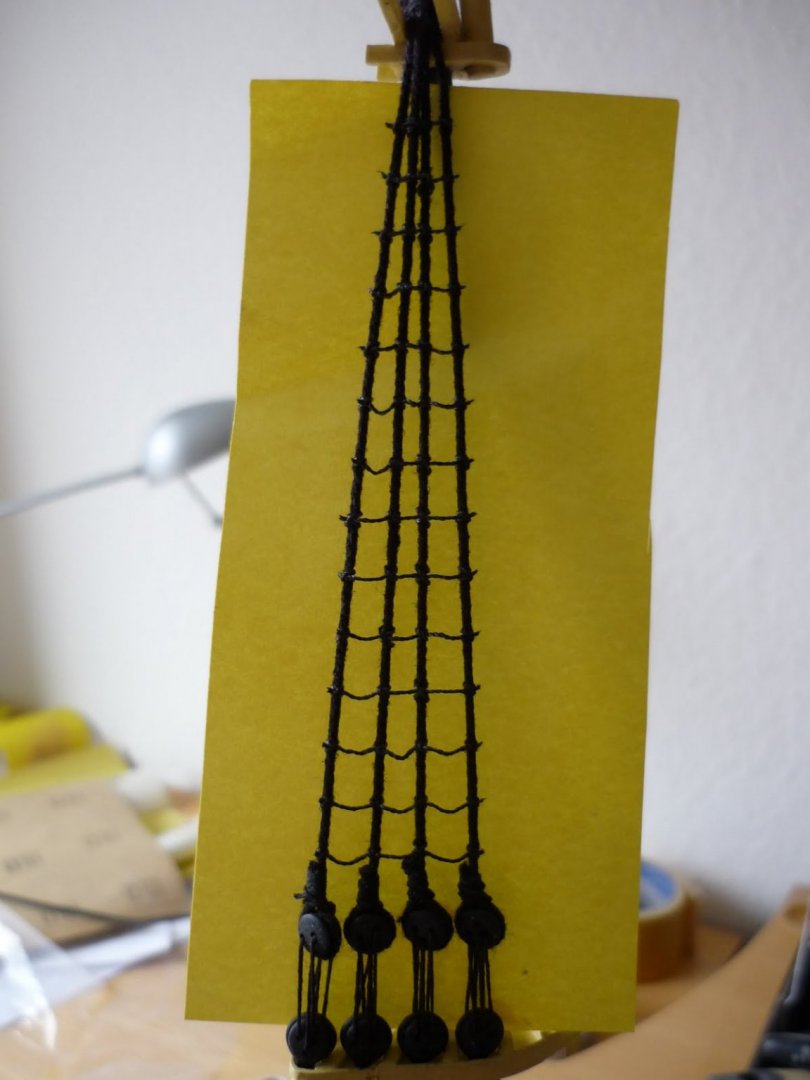
Posted: Wed Oct 14, 2009 2:20 pm•Post subject: I've finished the top shrouds on the mizzen mast and did the ratlines on one side. I printed a piece of paper with lines 7 mm apart (following the plans). I used a very soft white thread for the rat lines. However, this thread is very soft so I have to secure each clove hitch with diluted PVA before I do the next one otherwise the knots come loose again (quite time consuming and a lot of waiting). I tried using thin CA on the first knot but soaks the thread about 1 cm on each side of the knot making it impossible to do the next knot. Moreover, the ink won't stick to the CA coated tread. After finishing the knots I trimmed the lines and used black ink to achieve a black color. The ink I have at the moment is not water resistant but I finally managed to find some black Indian ink at a store in Copenhagen. This is water resistant and should prove better for staining white thread. I'm not completely satisfied with these rat lines but hopefully I found the best way to do them now so the remaining lines will look better. I LOOOOVE tying ratlines -but at least there are only about 1450 clove hitches left before all ratlines are tied. /Lars Peter
-
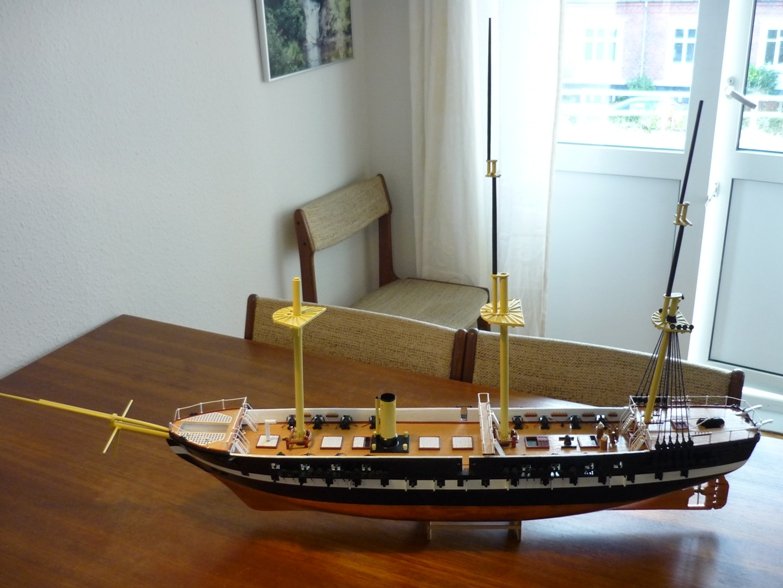
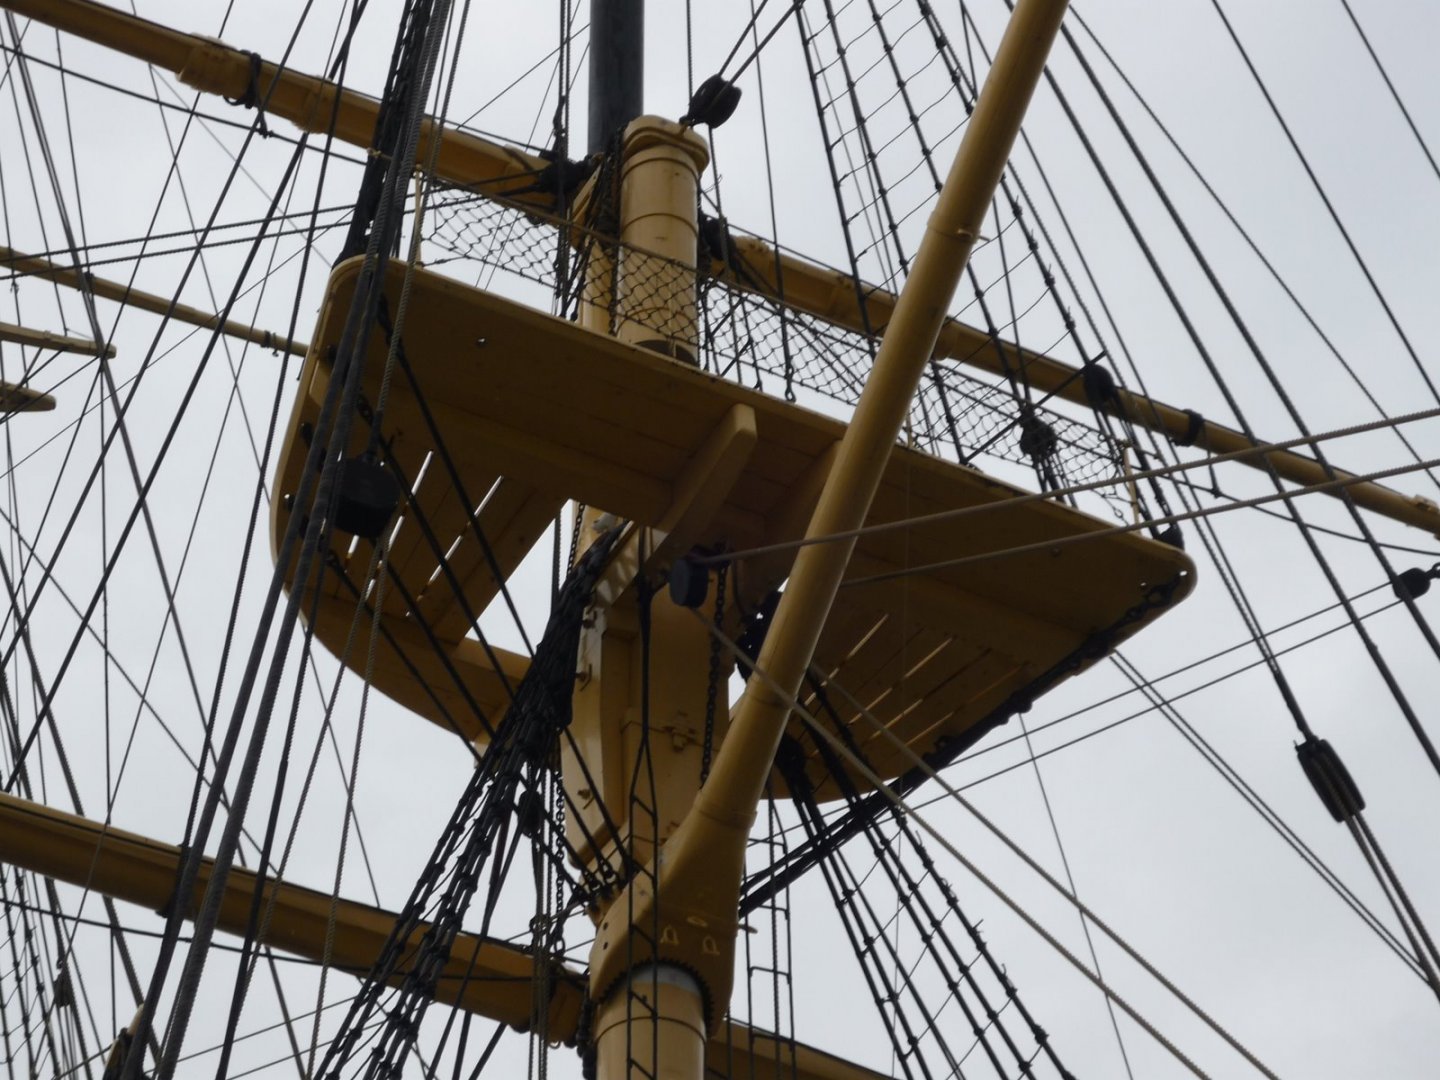
Posted: Thu Oct 08, 2009 2:49 pm•Post subject: Thank you, for you advise John. I think I can wait doing the ratlines. Even with all the running rigging attached I think there should be enough room to work with a couple of tweezers for doing the ratlines. Just a small update. I managed to attach the futtock straps to the top. Making the hooks on the lower side was NOT and easy task with the 1 mm brass wire but I managed to bend them around a 1 mm drill bit -at least it's going to be easier with the two remaining masts as they have not been attached to the hull. Also, Jyllandnow has a full set of teeth. The dummy gun barrels for the lower gun deck have been glued on with epoxy and painted. The last picture just show the overall picture of the ship at the current stage. Bowsprit, fore and main masts in various stages of assembly have just been put on the model for this picture. I'll keep you updated when I get some more strings on the model. /Lars Peter
-
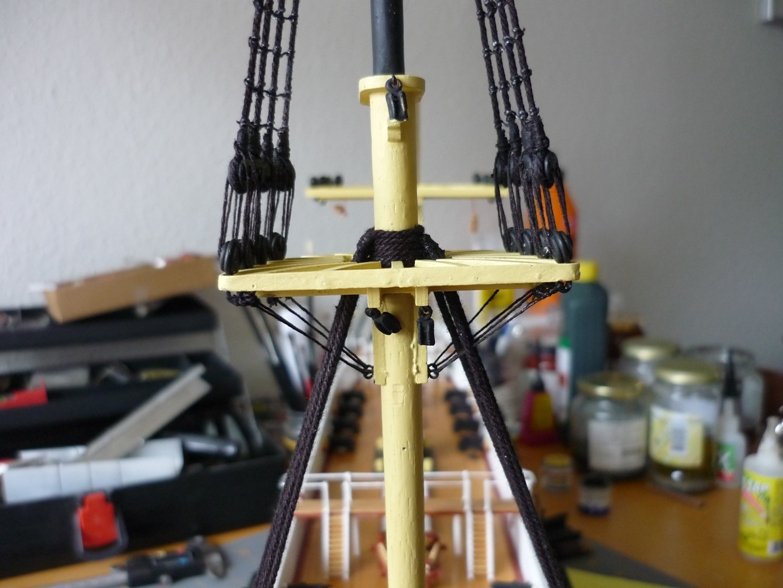
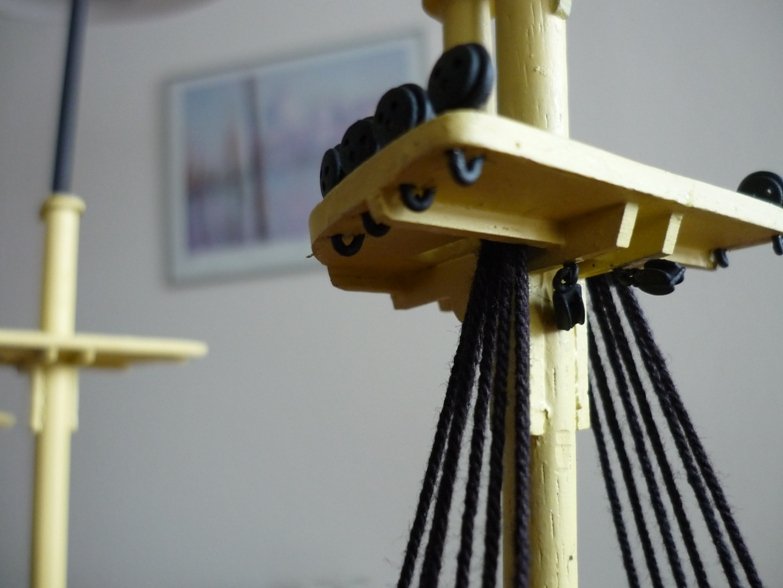
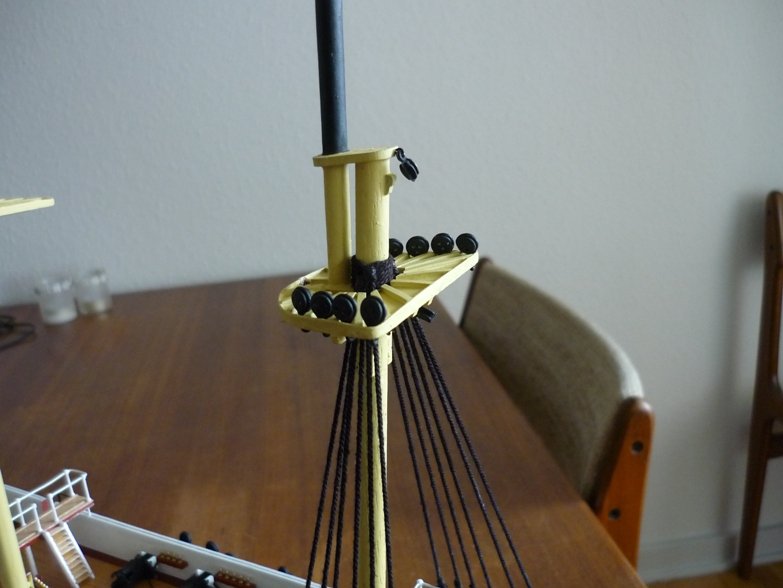
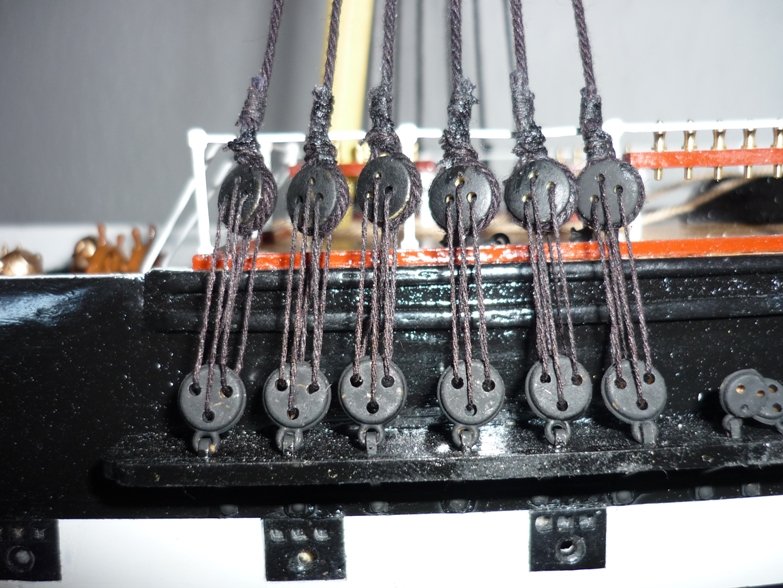
Posted: Wed Oct 07, 2009 3:54 pm•Post subject: I've finished the shrouds for the mizzen mast. As you can see, I've cheated a bit! I got wooden dead eyes from Model Expo a few days after I started fitting the plastic dead eyes provided with the kit to the chain plates. Then I had to made a decision: continue with the plastic dead eyes or use the wooden ones. I decided on the latter mainly because they were without the eyelet and looked better when tied to the shrouds. Yes, there is a differencein appearance close up but I guess only few will notice when they see the model from ½ a meter away. Still have to do a bit of tidying up with paint and ink. One more thing to think about: how to attach the dead eyes for the top shrouds to the top. The rigging plan is without futtock shrouds. However as you can see from the picture of the real ships, futtock shrouds are indeed present. After a bit of thinking, I went for the solution presented in the last 3 pictures: I made the futtock plate of a piece of brass wire, soldered it before fitting it through the top (without burning the dead eye too much). After painting, I think I can bend a hook on the bottom side before a final touching up with paint. Then the futtock shroud can be attached and fitted to the mast. This work should be done before the masts are fitted to the hull . Well, the mizzen mast is already fitted to hull so this is going to be a fiddly job to make the hooks -but you learn as you go. So the next couple of days I'll work on fitting dead eyes to the tops. One question about rat lines. Should I start fitting those whenever I want or would it be wiser to do this at the final stages of the rigging? Just to have more room to move around between the shrouds. The shrouds are pretty secure and shouldn't go anywhere -at least that's the plan /Lars Peter
-
Posted: Sun Oct 04, 2009 9:35 pm•Post subject: Photoes I visited the Frigate Jylland(Fregatten Jylland) yesterday. I took a bunch of pictures which I've uploaded to my web album: https://photos.app.goo.gl/pGrgk7NAqTv5Kh2Q9 I've also added all the pictures I've taken since I started at the model. You can find them here: https://photos.app.goo.gl/vuNby3wEruHYAcNE7 /Lars Peter
-
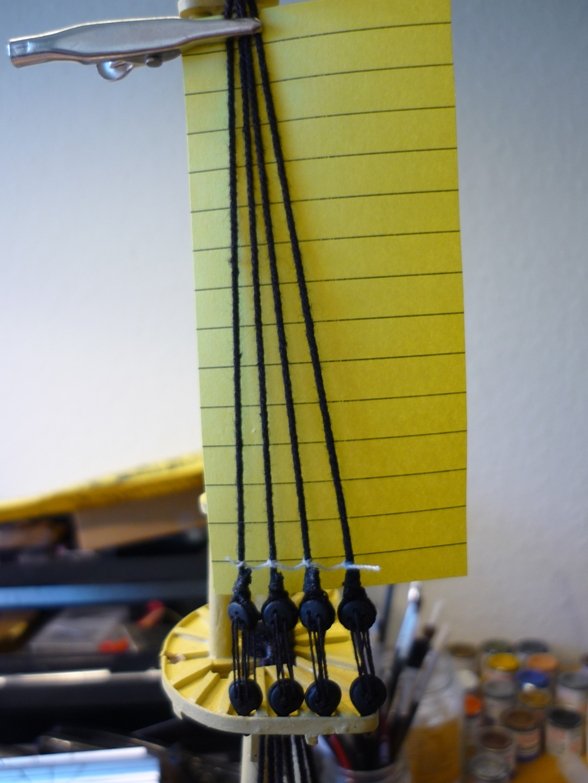
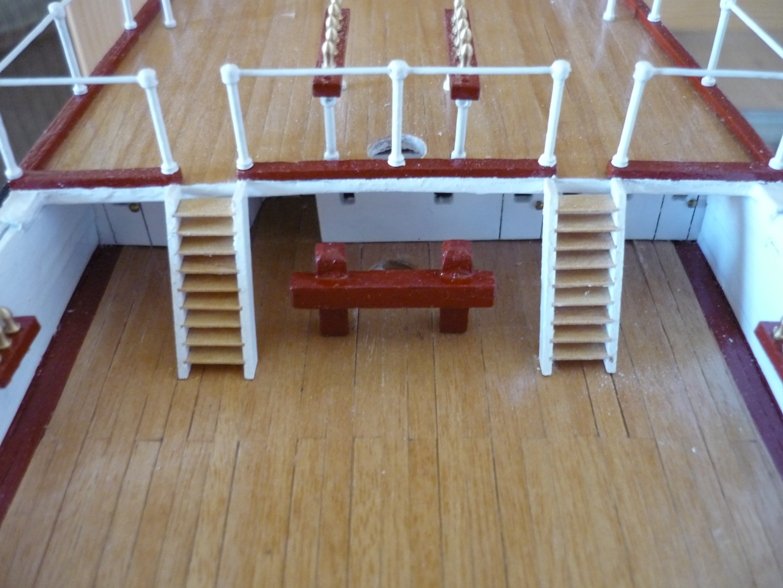
Posted: Fri Oct 02, 2009 9:41 am•Post subject: Started on the rigging I am slowly starting on the rigging while I finish up the rest of deck details. The bridge has now been put on but I still have to attach the second ladder which I made a step to short So I have to add another step and the ladder rails. I have also finished attaching all the deadeyes to the hull so now it's time to begin my favorite task -the rigging. I've studied the rigging plan. It's not going to be easy to figure out where all the lines go. The plan is NOT very detailed so I may have to ask a questions as I proceed. I've decided to start at the back and work my way forward. The first four shrouds for the mizzen mast has been attached to the mast. I think the provided rigging line for these are a bit too thick but it will have to do. I've decided to keep all the standing rigging in a dark color. All the rigging thread provided in the kit is white so the first task is to soak the lines in black ink and let it dry before I can work with it. It does not produce a completely black color but a dark brown very much like tarred rope. I use the knot no 48-49 in this link (http://www.twine-rope.dk/sider/viden/knob.html). When finished you can slide the knot up and down the rope and easily tighten in before securing it with a drop of CA. /Lars Peter
-
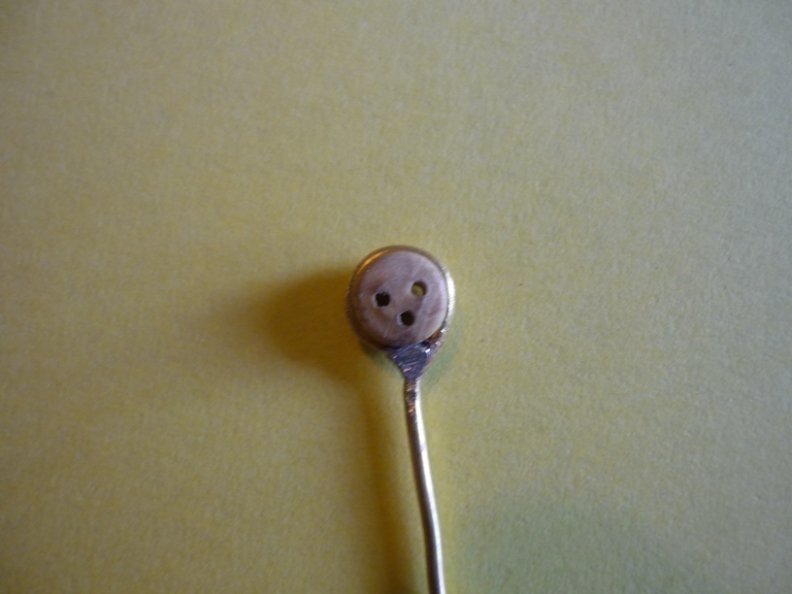
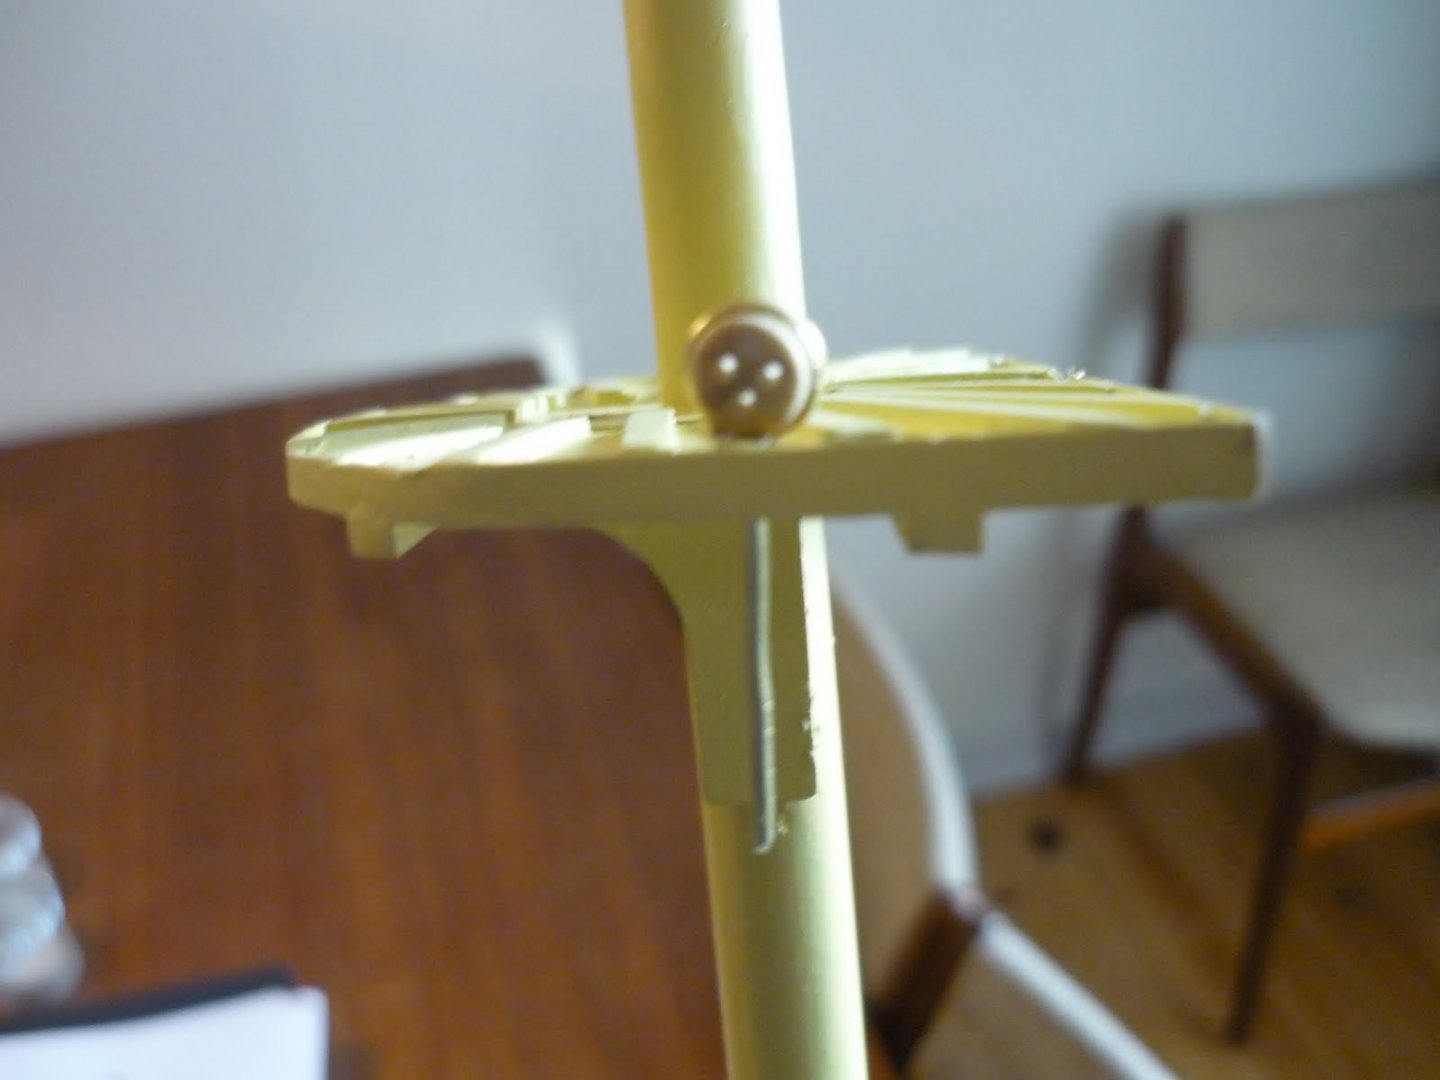
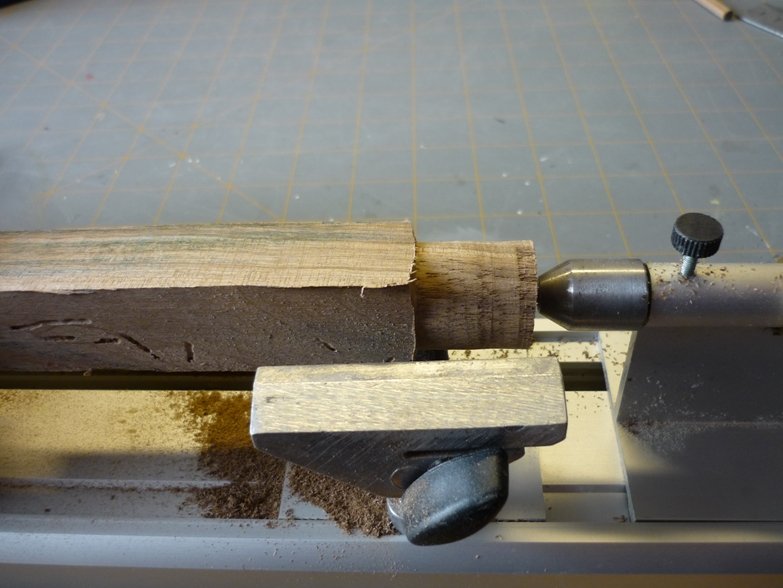
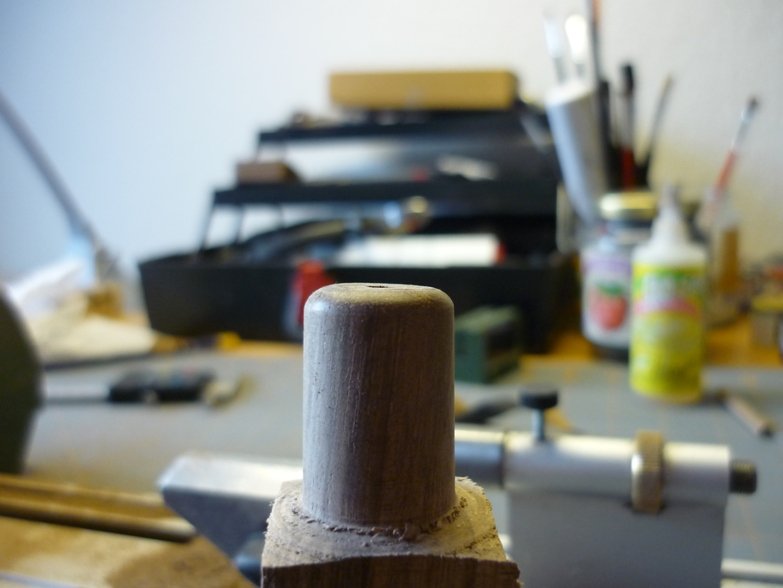
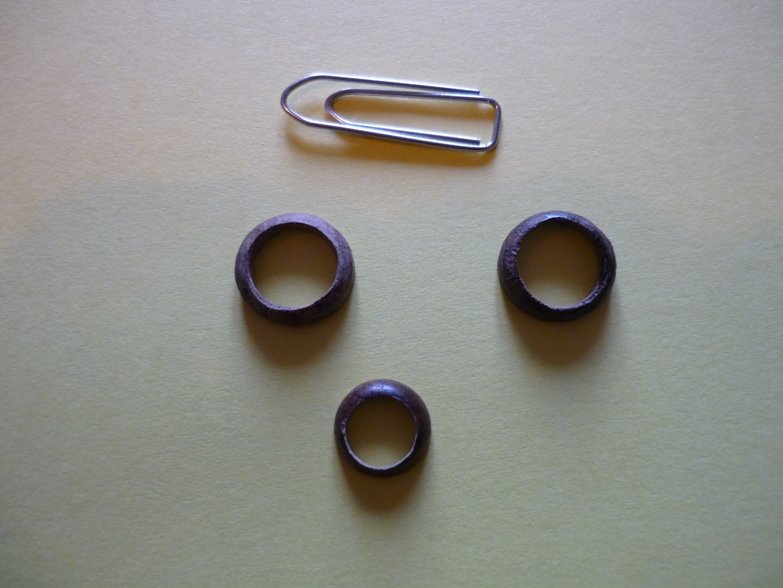
Posted: Tue Sep 29, 2009 12:56 pm•Post subject: I've started attaching the deadeyes to the hull. This is a straight forward job. However, there's a deviation from the real ship. For deadeye straps I used the brass straps supplied with the kit. On the real ship chains were used. Also, I've decided to use the plastic deadeyes supplied with the kit. And as someone mentioned, they have to be painted anyway. Overall, this make this task quite easy -and fun too! Also, I decided to test my scratch building skills by turning some mast rings on my small lathe. Actually, it was quite easy to do the shaping of the rings. The most difficult part was to drill the holes before I cut off the ring as the big drill bit tended to move a bit off center. For the mizzen mast the hole had to be drilled at a 82 degree angle. Actually, I think the small ring for the mizzen mast came out best. However, you can judge the results by yourself. /Lars Peter
-
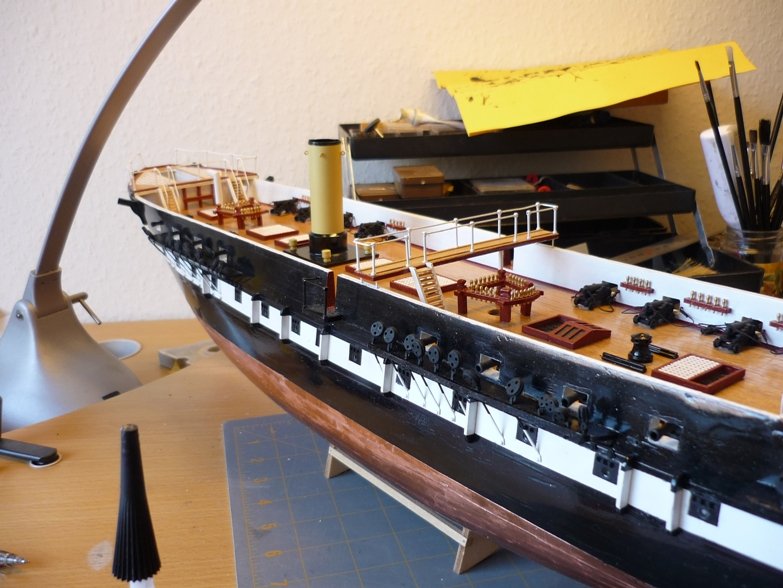
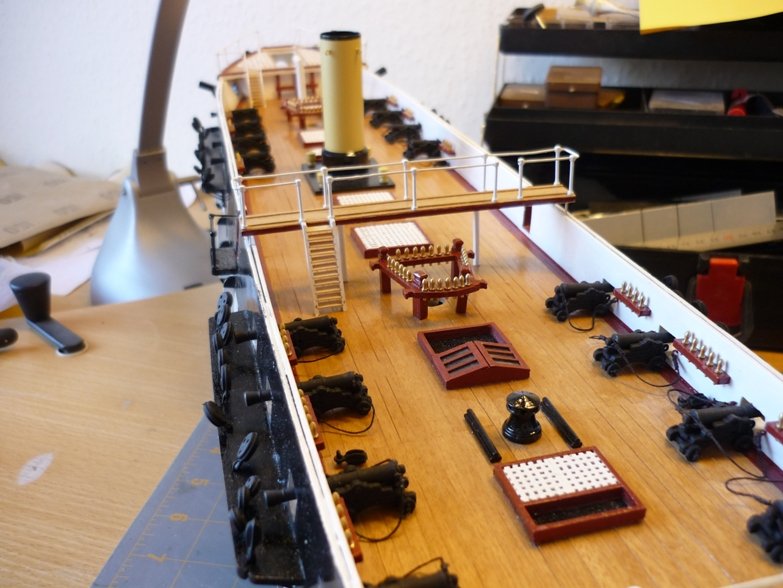
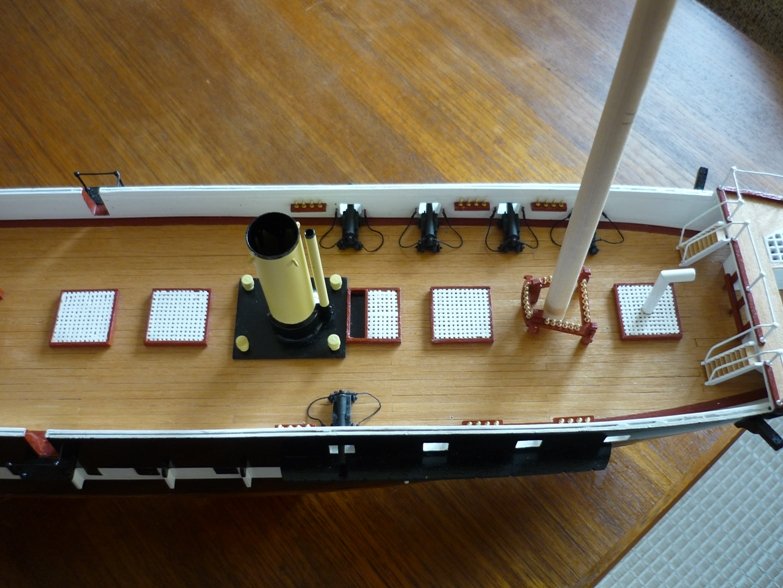
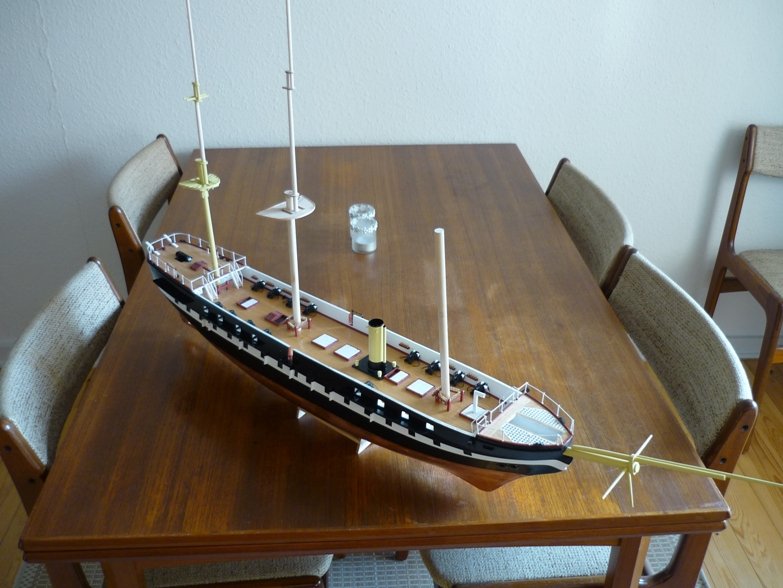
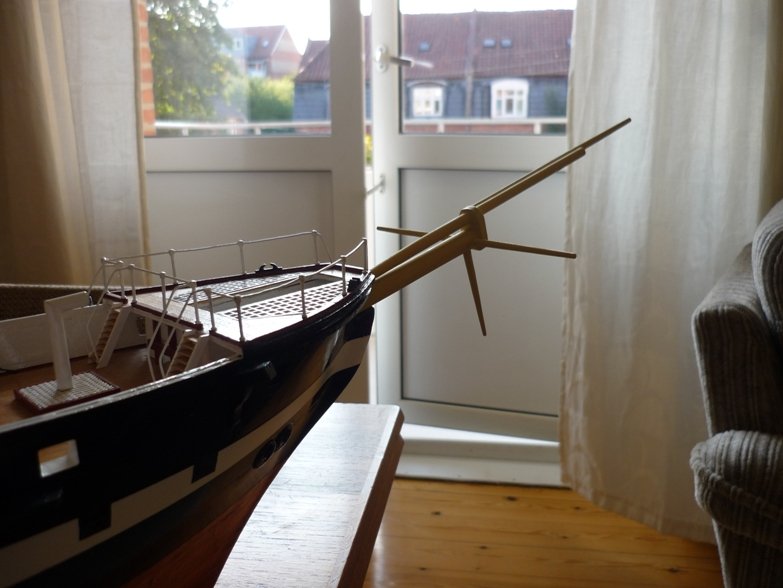
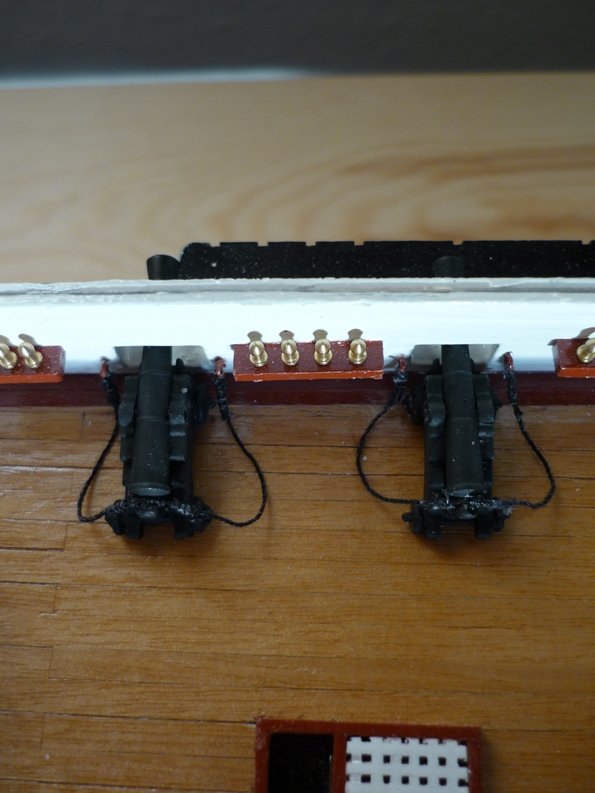
Posted: Tue Sep 22, 2009 11:51 am•Post subject: Hi all I've now started on the masts and bowsprit. Nice change for fitting the cannons. Also, I've added some more details to the deck. Regarding the cannons, I've would like a more natural appearance of the breeching ropes. Do you have any suggestions how to do this? The CA glue tends to stiffen the ropes in certain places. Perhaps I could use a thin solution of PVA glue and then hold the ropes in place until they dry? Otherwise, I think the pictures speak for themselves. /Lars Peter
-
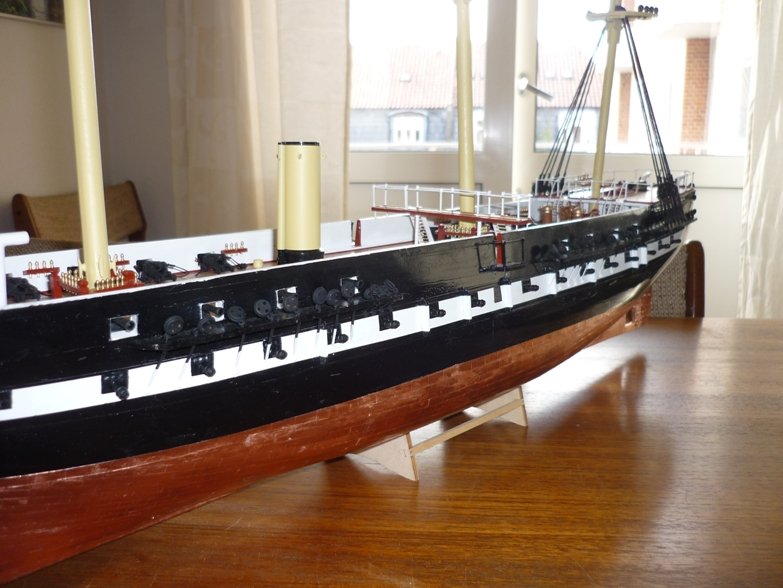
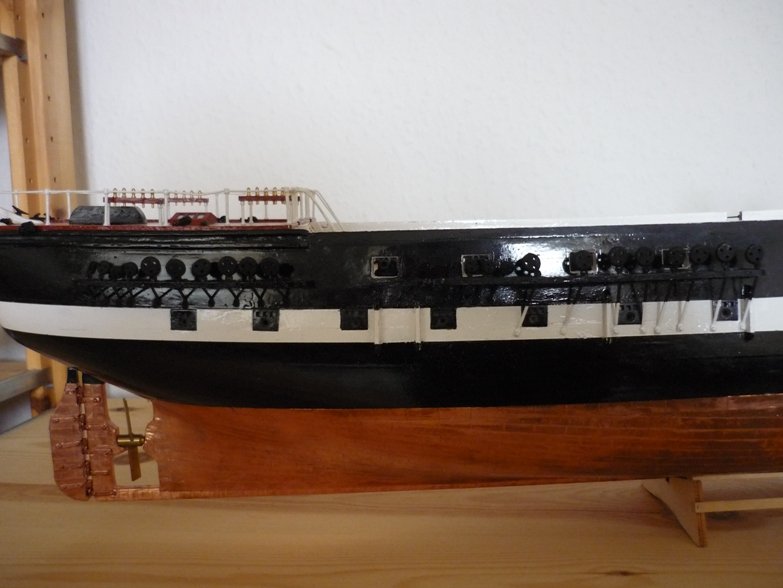
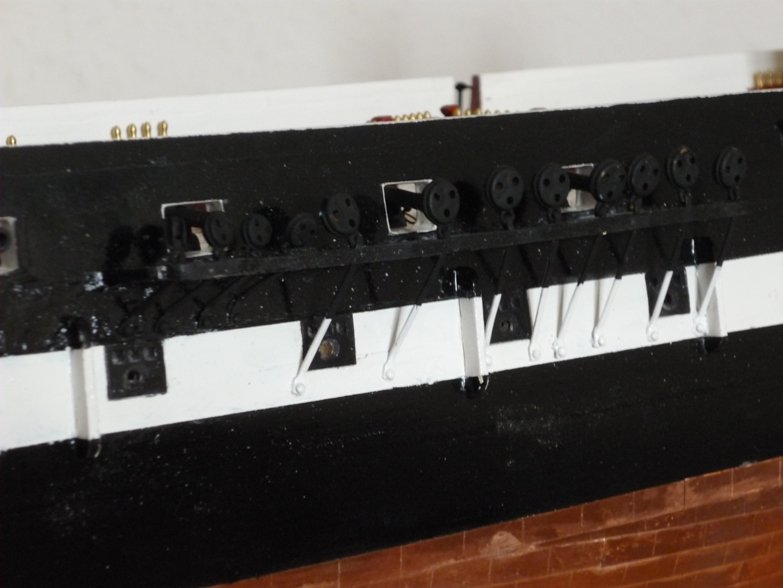
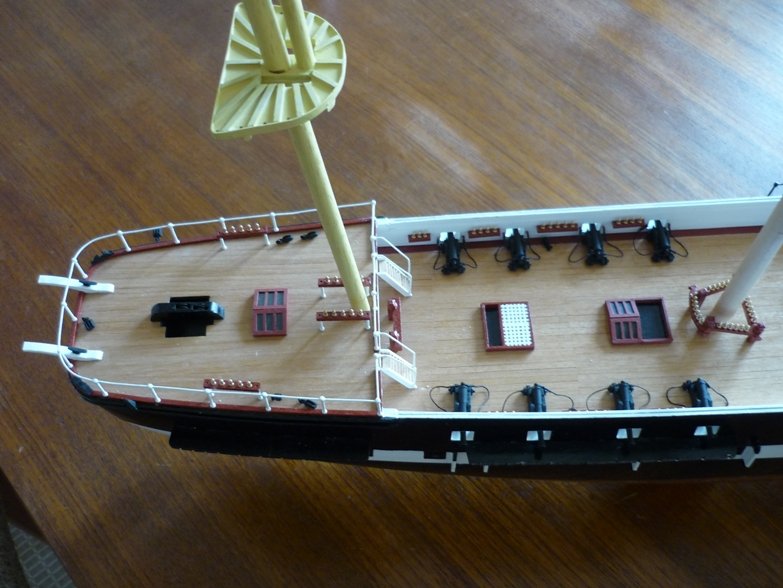
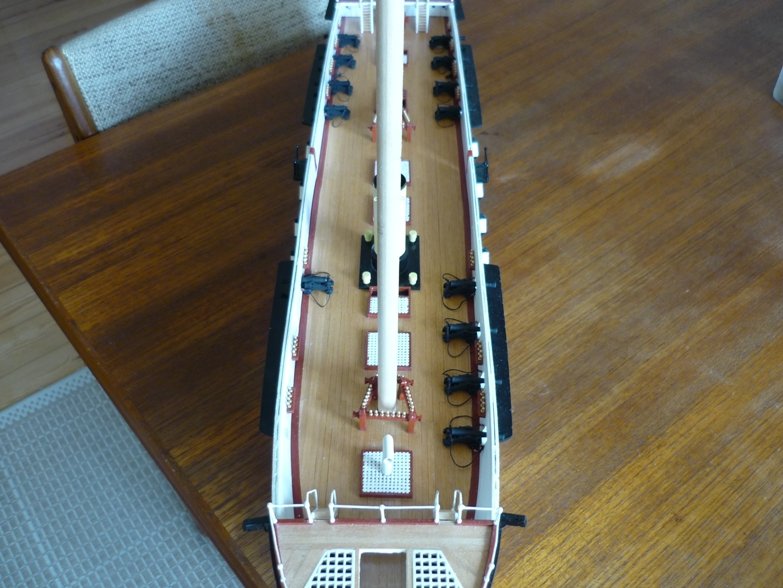
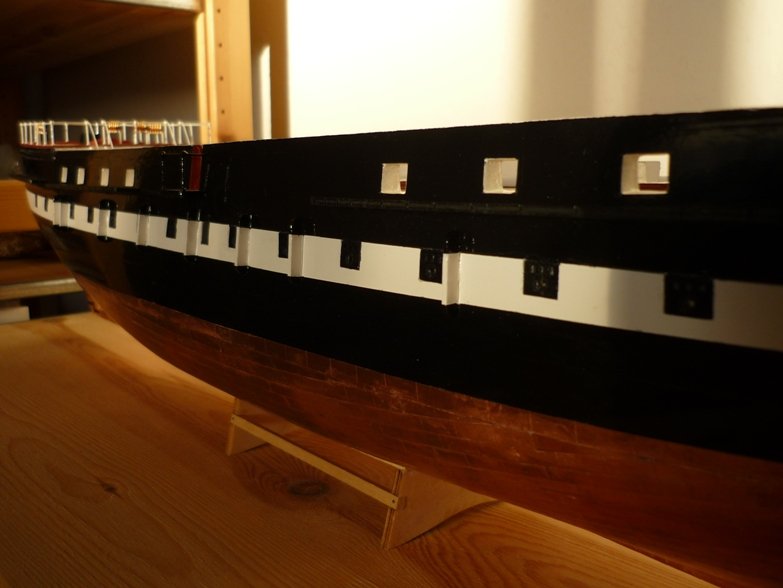
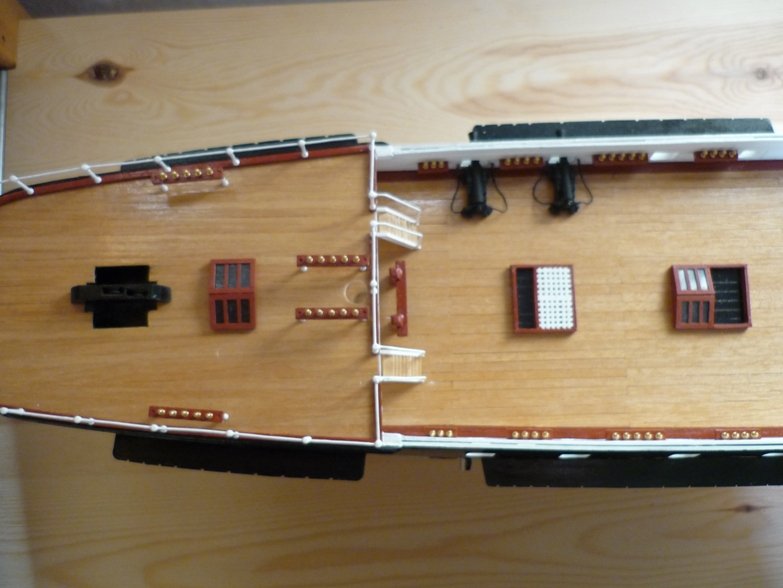
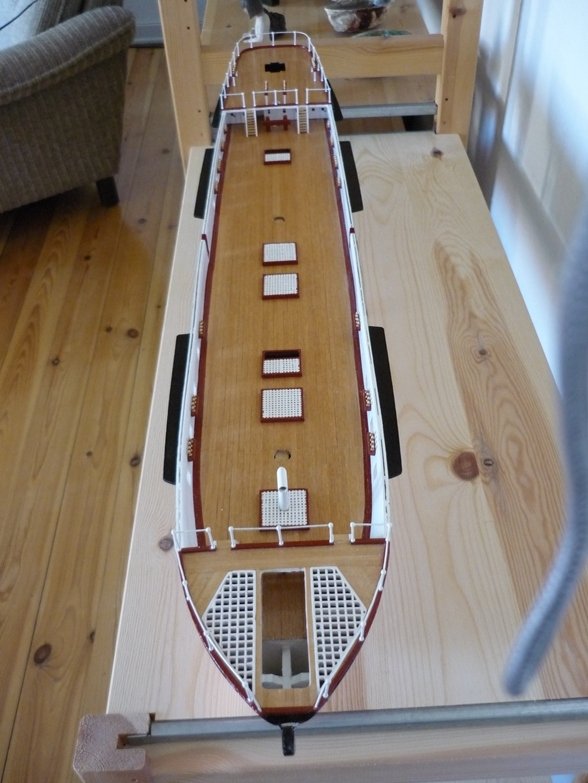
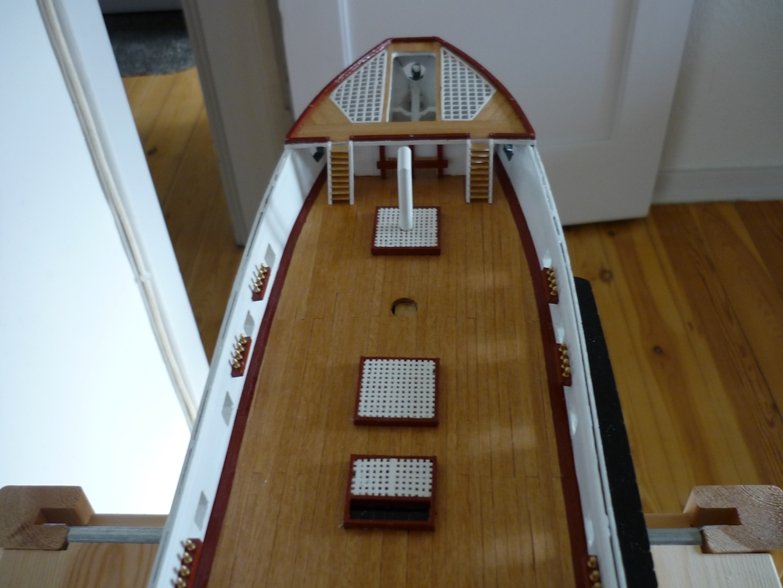
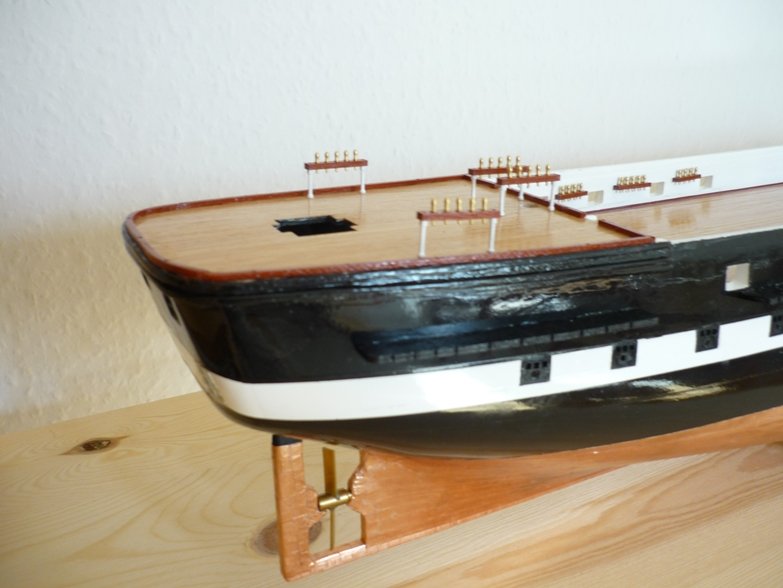
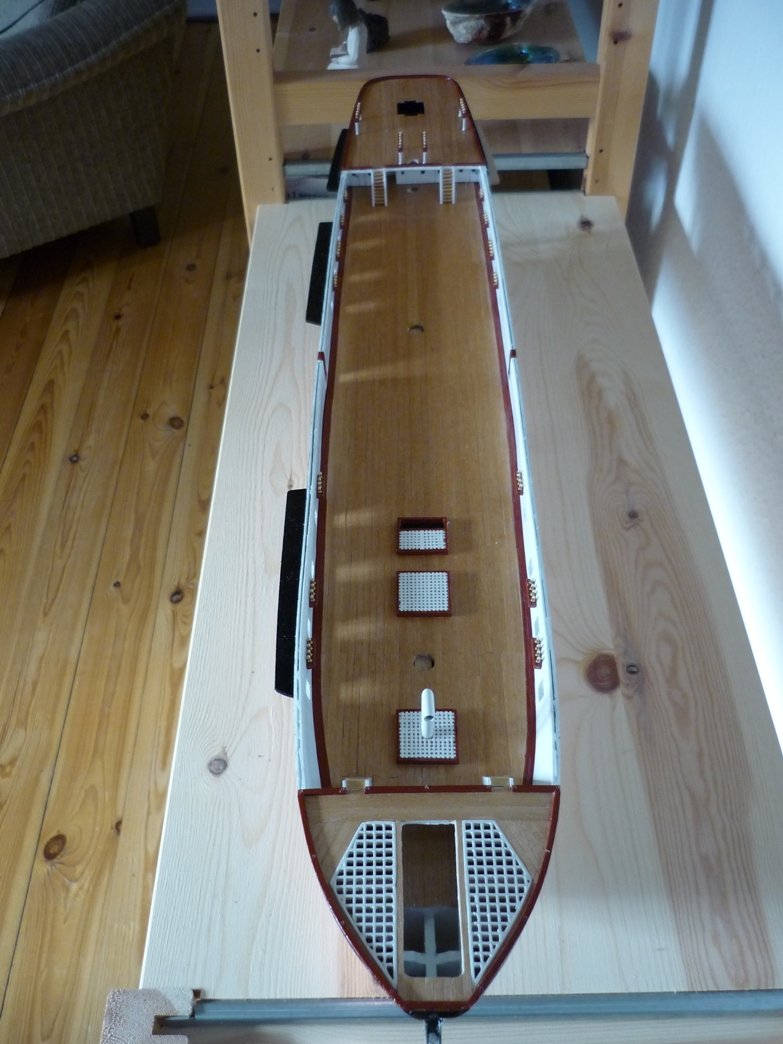
Posted: Wed Sep 09, 2009 7:40 pm•Post subject: Building log update Building on the Jylland has been close to nothing this summer due to various other things that had to be done. However, I managed a bit. The rudder has been attached to the hull with brass hinges, I bought. I didn't get the Blacken-It, I tried to order in May -still out of stock it seems, so I decided to paint the hinges matt black instead. Only thing left with rudder is to find something to use as a sleeve between the rudder and the hull. I didn't cut a hole in the hull as the rudder was to short to go through the hull anyway. I'm thinking of using thin black paper for the sleeve. Do you have other suggestions for material that may be easier to work with? On the real ship there are vertical supports along the lower gun deck which are not mentioned in the kit. I decided to add those on both sides of the hull. Do any of you know the function of these vertical structures? They are not evenly spaced along the hull as you can see. On deck, various deck furniture have been added. Hoist for the rudder, skylights, rails for ladders etc. The skylights I madefrom scrap as I wanted something that looked like glazing. The kit supplied skylights only features water transfers for windows. Companion ways for the lower gun deck are just illustrated with black paint. More accurate would have been to cut holes and add ladders. But pieces of the lower gun deck should have been added before I assembled the hull, and I didn't think about it back then. I have started installing the guns on the gun deck. Because of the scale, I decided to add breeching ropes only. This is really time consuming work but at least I have only 14 guns left and very difficult with my clumsy hands. Moreover, the ropes may be too short but I'm not going to change it. The guns are painted matt black. And the white rope supplied with the kit I dyed with black ink. /Lars Peter
-
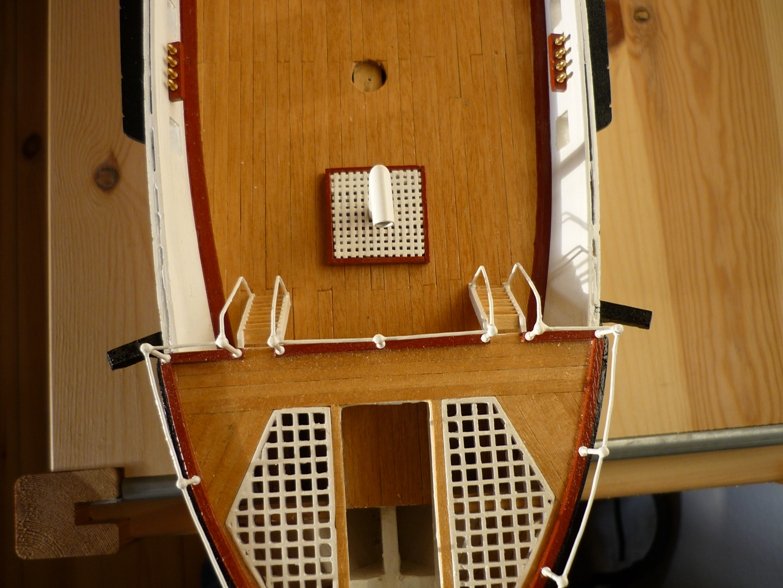
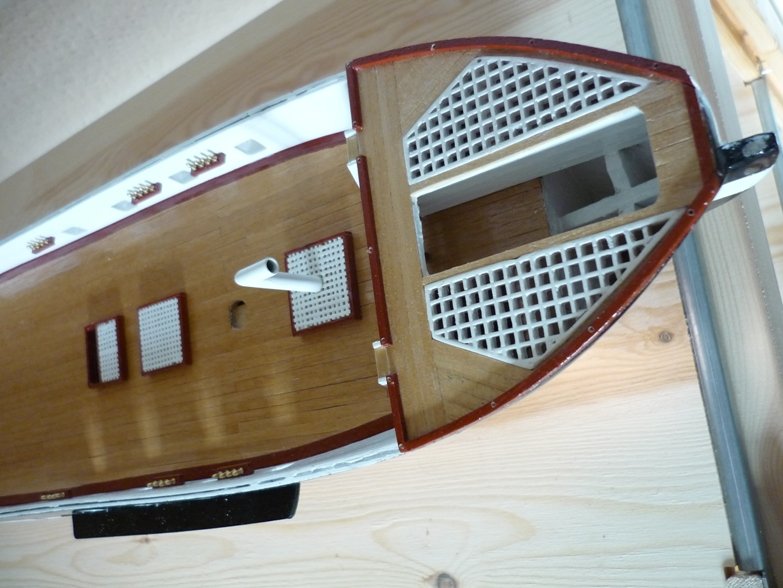
Recreation of build log continued. Posted: Fri May 29, 2009 8:46 am•Post subject: Bulding log update One milestone accomplished -I finished the gun ports on the lower gun deck. I'm kind of stuck with the deck fittings at the moment. I've ordered wooden dead eyes and blocks from ModelExpo. They have not arrived yet so I can't start working on fitting those to the hull. I've also ordered some Blacken-It from a Swedish company a long time ago. It was out of stock but hopefully it will arrive soon, too. Before that I cannot start rigging the canons, finishing the rudder, attaching dead eyes etc. On the deck I've finished the gratings and rails. Still have to make handlebars for the stairs -a bit fiddly job. The last picture show some kind of rack. It is not mentioned in the instruction. However, on the pictures I've seen of the real ship this rack secures the ropes that are used to raise and lower the screw. I'll keep you updated when I finish some more stuff.
-
Recreation of build log continued. Te following is copied from the original build log back in 2009. Posted: Fri May 22, 2009 5:05 pm•Post subject: I'm still doing gun ports (only 5 to go!) This task is getting quite boring so I've started doing the various deck furniture.I deviated slightly from the instructions regarding gratings and ladders. Following the instructions gratings are supposed to be painted onto supplied plywood pieces. Instead I bought new gratings which were very difficult to assemble because of bad quality strips. However, I managed to get enough more or less unbroken pieces to get the gratings done. They were painted white and lined with 1x3 mm pine strips afterwards. The supplied ladders are made of plastic and the steps are not angled. So these ladders are only good as vertical ladders. Again I bought some wooden ones from Billing Boats. I think these are much nicer. The pin rails has been attached to the hull and belaying pins were added. I decided not to paint the brass belaying pins. Finally, I've started work on the chainboards. Some of them have already been pinned and glued to the hull. When I finish the gun ports I'll continue work on the deck furniture, cannons etc. and after that it's almost time to start work on the rigging. /Lars Peter

-
Hmm, looks like I never finished the rebuild of this build log. Have patience, I will do it. /Lars Peter
-
No laser cut parts in this kit. However, the frames seem to be precut. The original builder was not very skilled with a saw so I will have to redo at least the supports for the false deck. I have bookmarked your build log on Wordpress. That turned into a very nice model There are plenty of fitting sets for Mary Ann for sale but they are quite pricey, I think. Have to look into the instructions what I actually need to purchase. By the way it seems like this was the first model BB designed all the way back in 1958. There are 4 different version of the kit - mine is probably from the 1980s (best guess). /Lars Peter