MORE HANDBOOKS ARE ON THEIR WAY! We will let you know when they get here.
×


stripehunter
-
Posts
104 -
Joined
-
Last visited
Content Type
Profiles
Forums
Gallery
Events
Everything posted by stripehunter
-
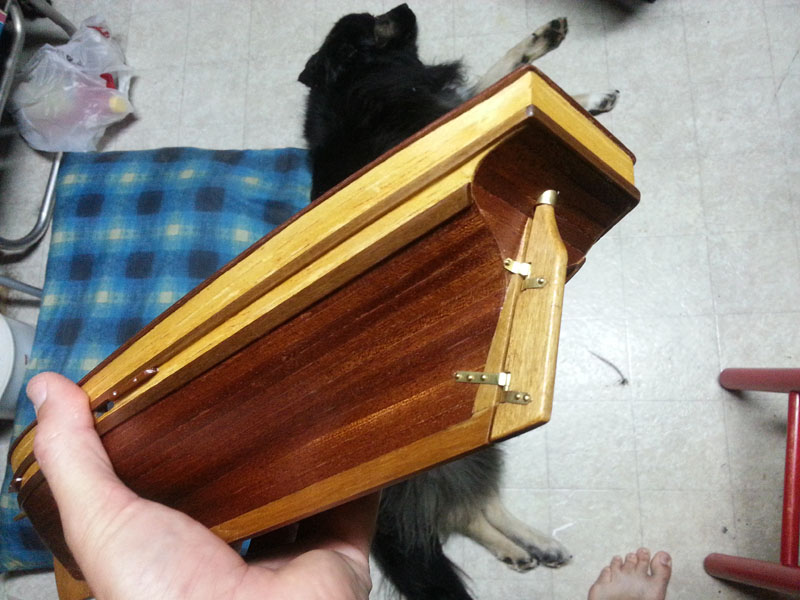
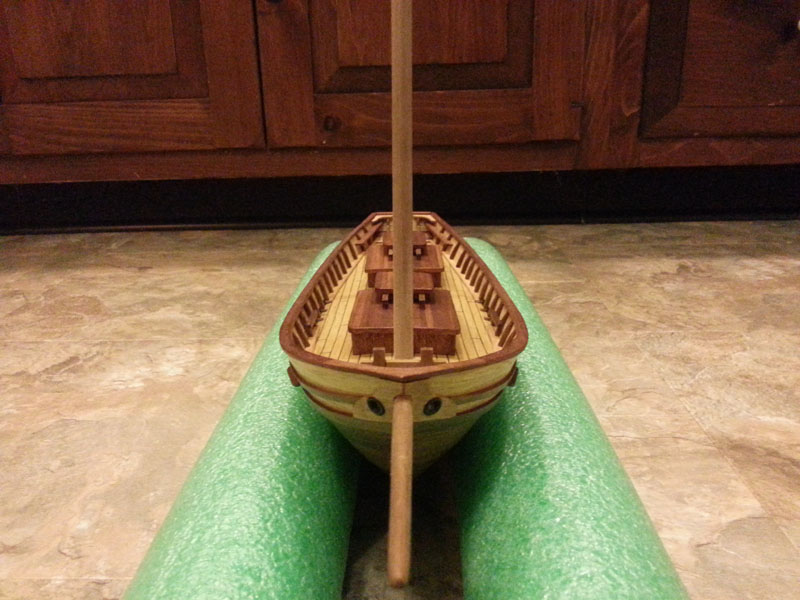
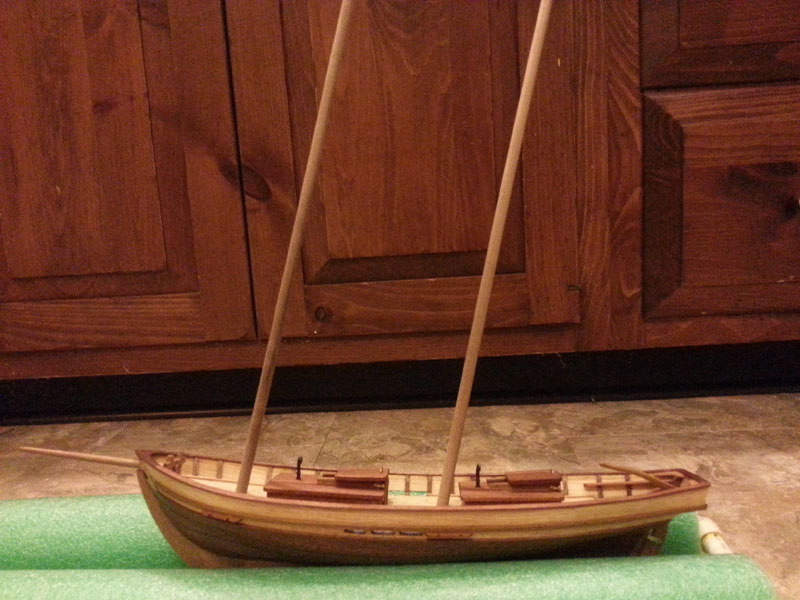
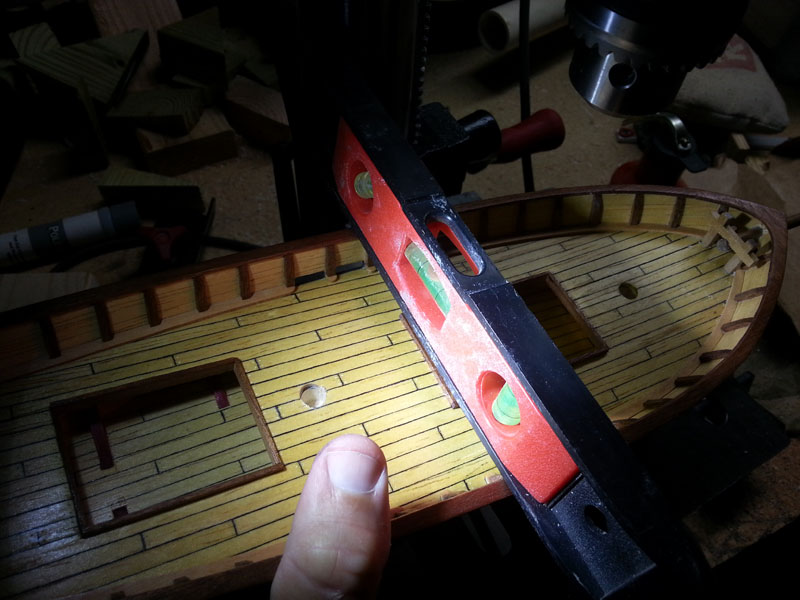
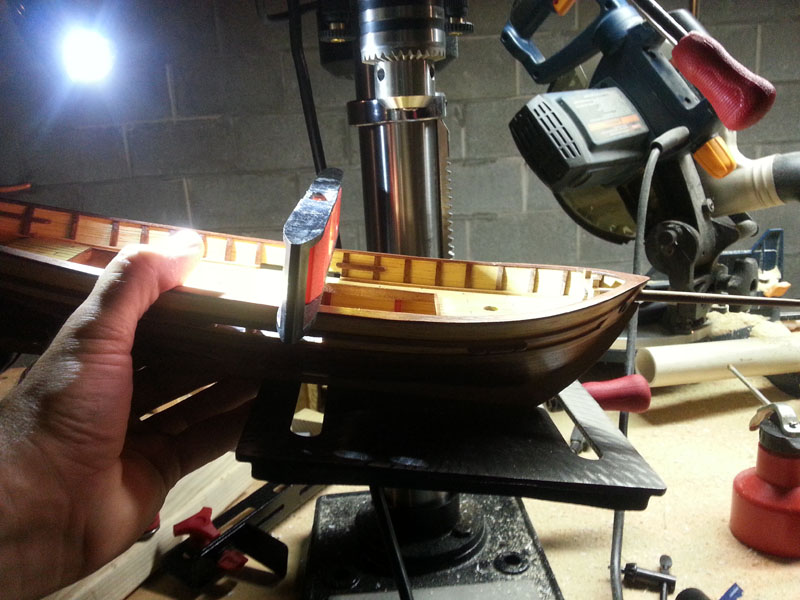
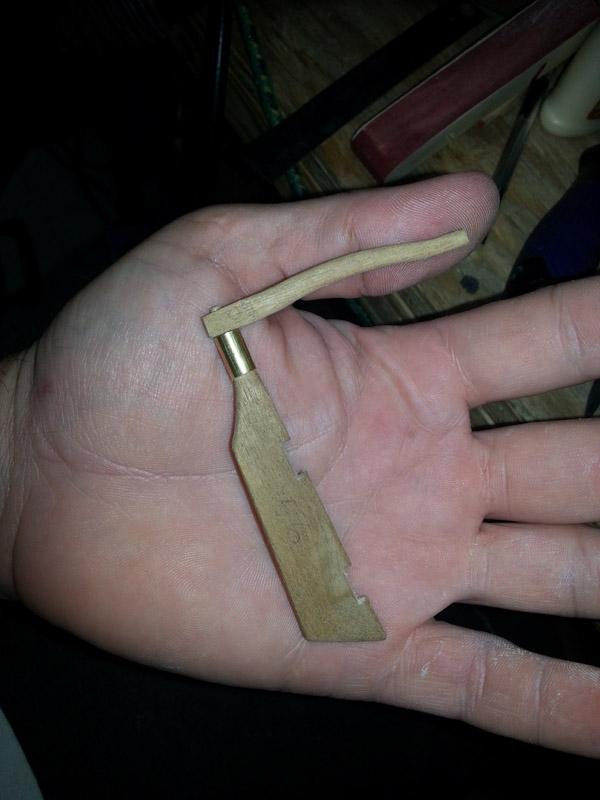
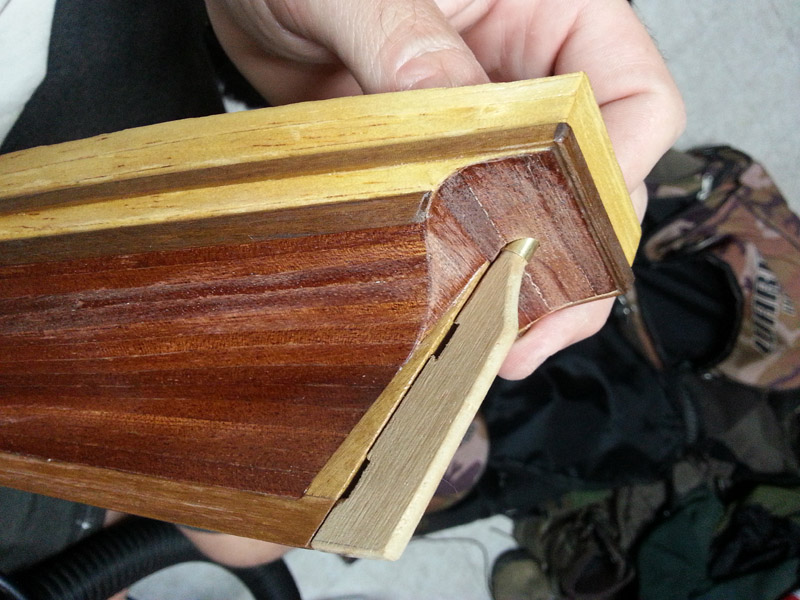
 Had a very productive couple of days. I got the hinges on the rudder. I soldered the hinge pin to the rudder side of the hinges before mounting to the rudder. I then got the whole deal fixed to the stern post finally. Took me a while to figure out how to trim the top hinge, whether to wrap it around the hull or just go short. I kept it short. I glued on the tiller handle which I had previously fit and shaped. I also finished the mounting cross timbers for the bowsprit and got them all poly'd. Then I figured it was time to drill two more holes I had been dreading; the fore and main mast sockets. It ended up not being bad at all, just had to go slowly and carefully. Using a nice sharp brad point bit, got my drill press table set to the correct rake angle, then rested my keel right on it. Then I used a level across the rail to make sure I was perpendicular. Worked quite well. Test fitting the masts shows I did a pretty good job at drilling those holes.
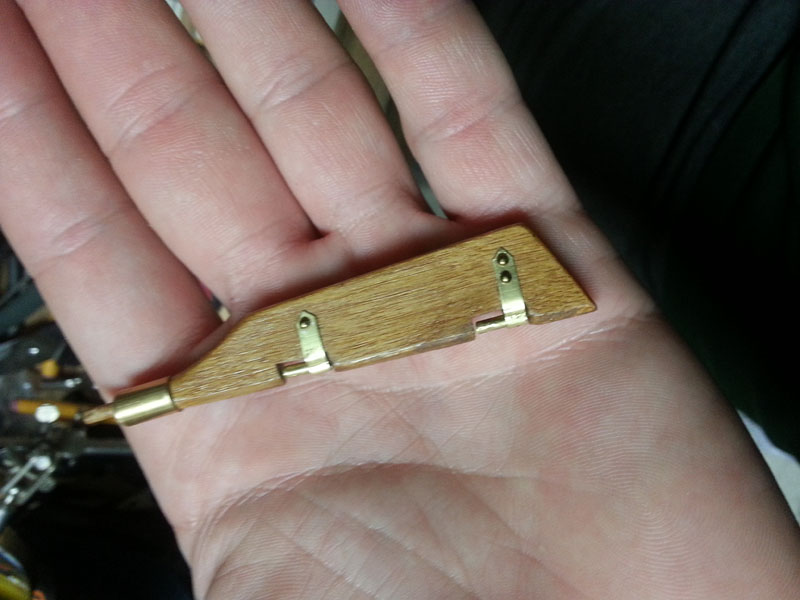
- 114 replies
-
- 6
-

-
- swift
- artesania latina
- (and 2 more)
-
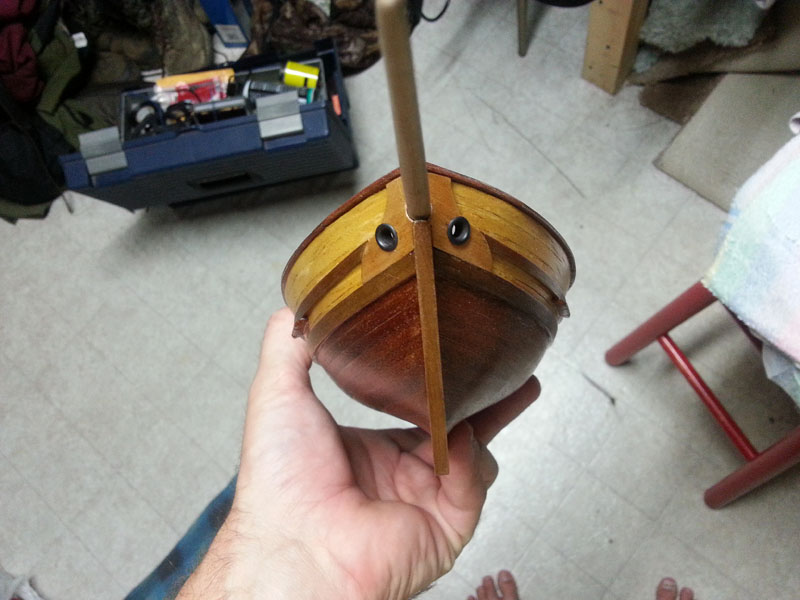
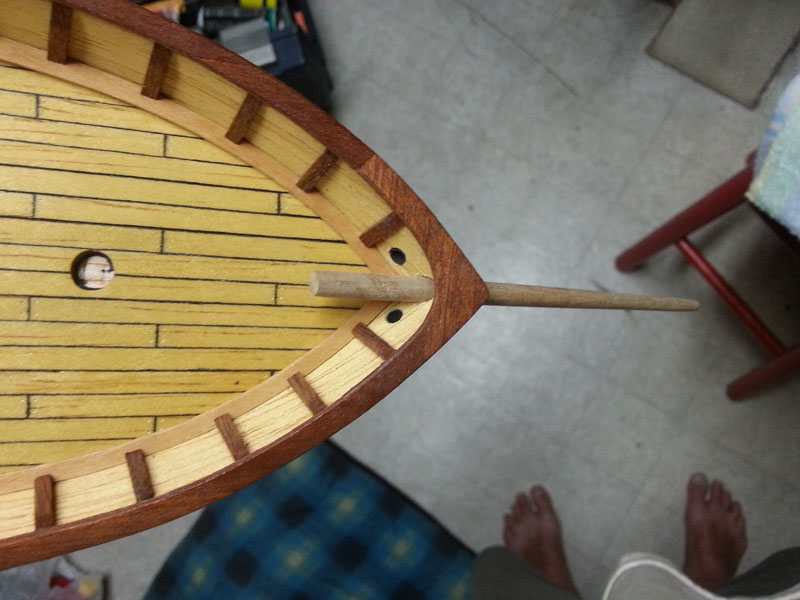
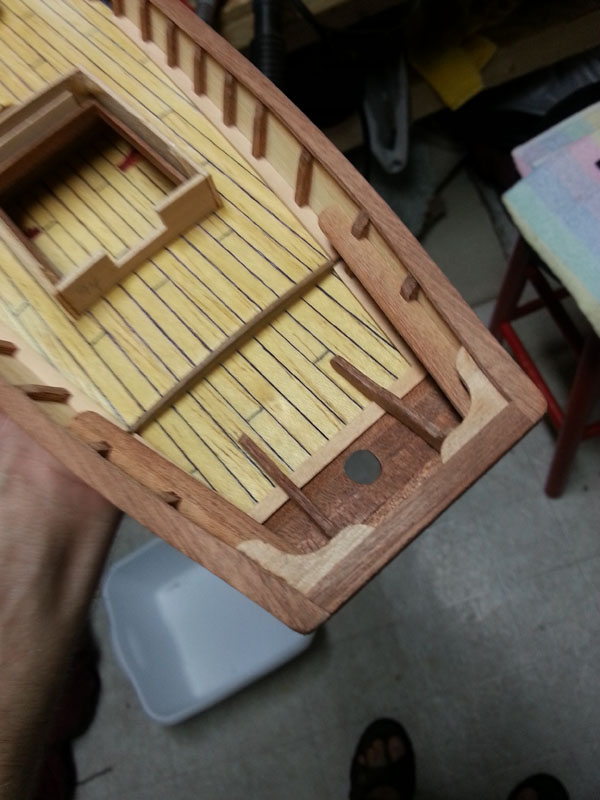
I had to carve out the openings in the rudder a bit deeper to accommodate the hinges, which required refinishing the rudder afterwards. So, with no more work I could do on that while poly dried, I turned my attention to the front of the boat, and got my bowsprit formed, and the holes for it and the anchor lines drilled, etc. The rudder will need to wait for another day.
- 114 replies
-
- 4
-
-
- swift
- artesania latina
- (and 2 more)
-
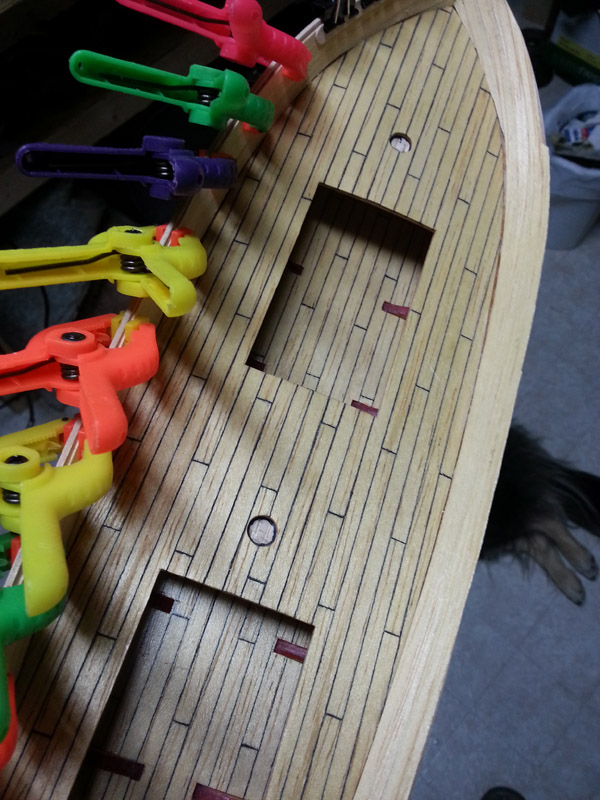
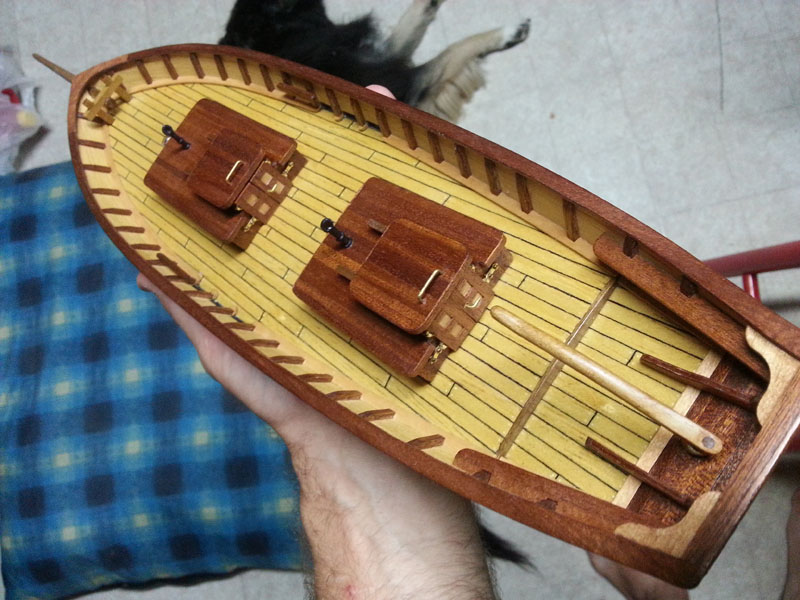
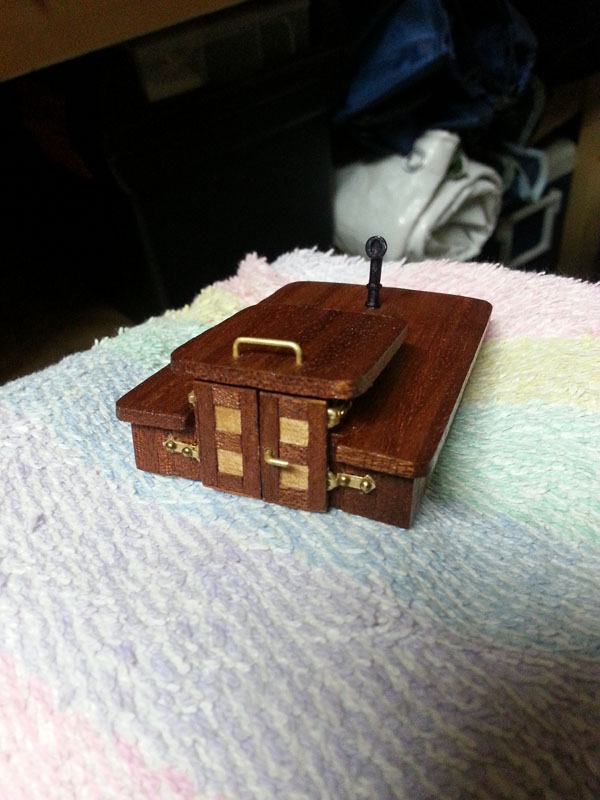
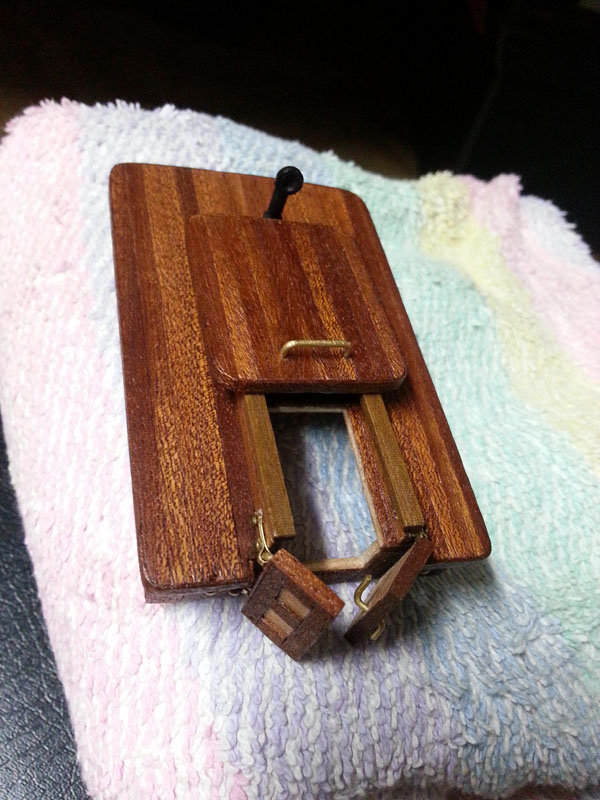
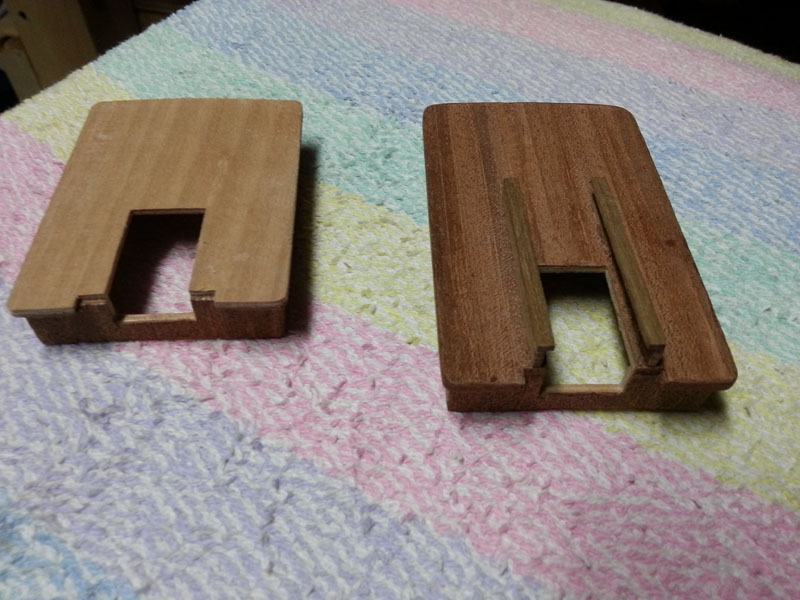
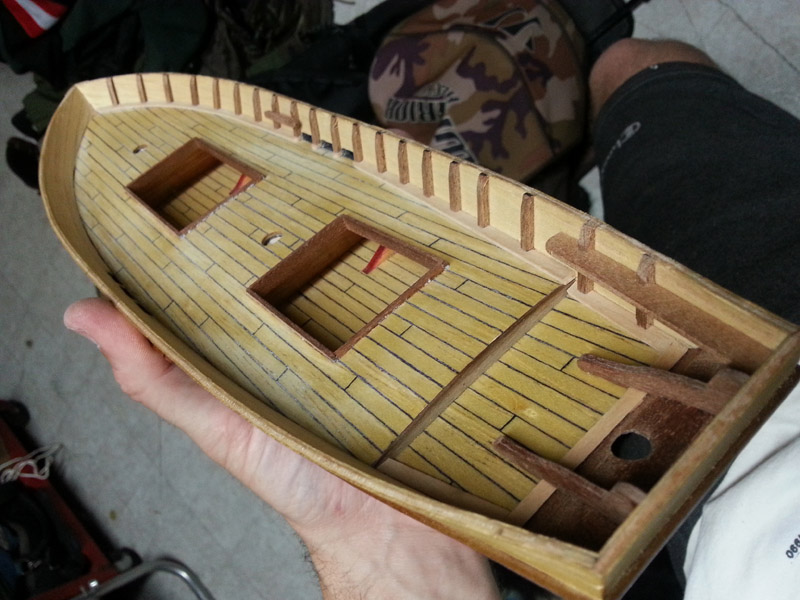
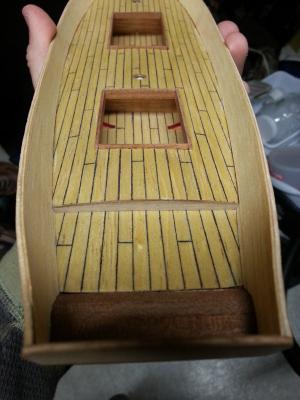
Got my second set of hatch doors done. Was much easier than the first one. Next step will be fitting the rudder. After many months I'm starting to see light at the end of the tunnel.
- 114 replies
-
- 6
-
-
- swift
- artesania latina
- (and 2 more)
-
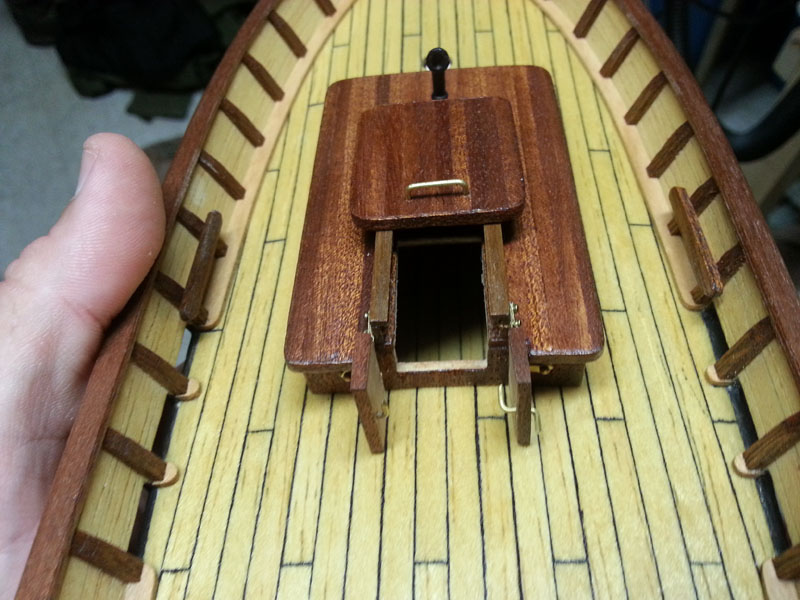
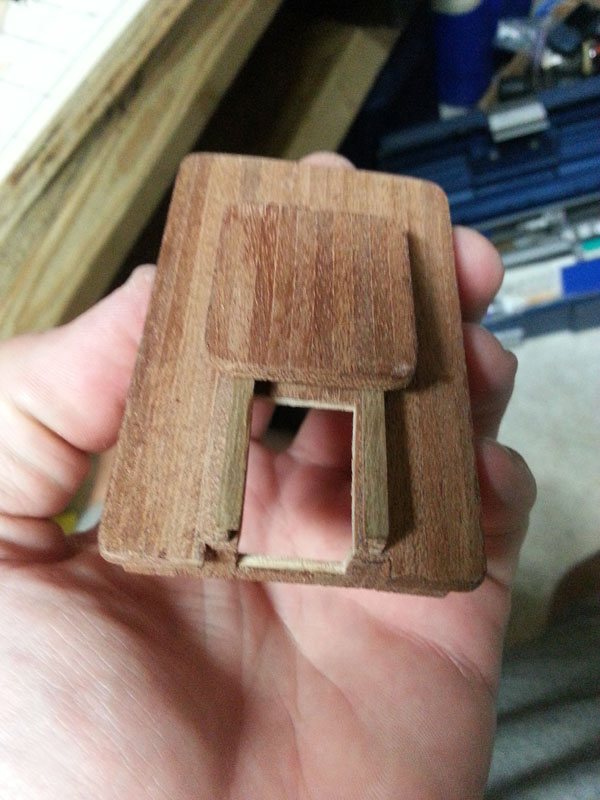
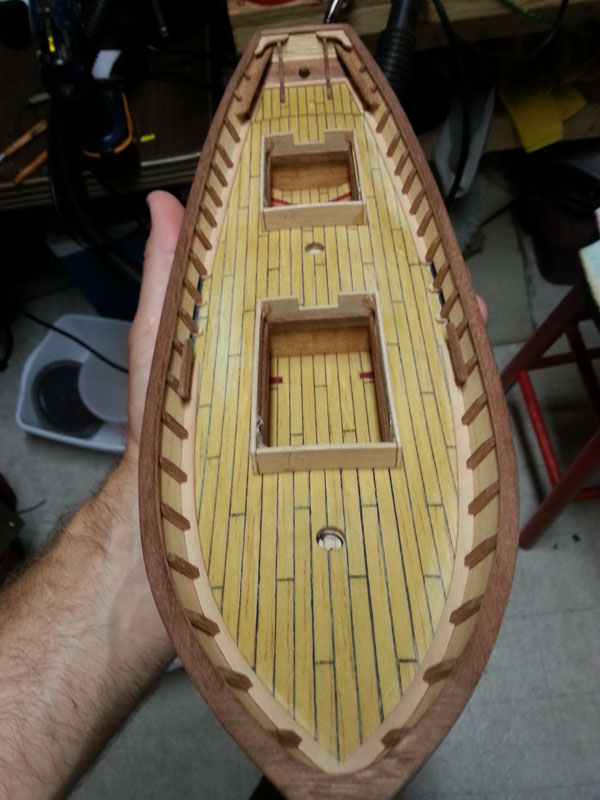
I was successful in my attempt to widen the door opening without destroying anything. Full operation now. also widened the other hatch too in anticipation or the doors it doesnt have yet.
- 114 replies
-
- 7
-
-
- swift
- artesania latina
- (and 2 more)
-
I've decided that i spent too much time hinging the doors for them to not open fully. I'm gong to try and shave off some material on the corners that is hitting the open doors. hopefully i wont regret it.
- 114 replies
-
- 1
-
-
- swift
- artesania latina
- (and 2 more)
-
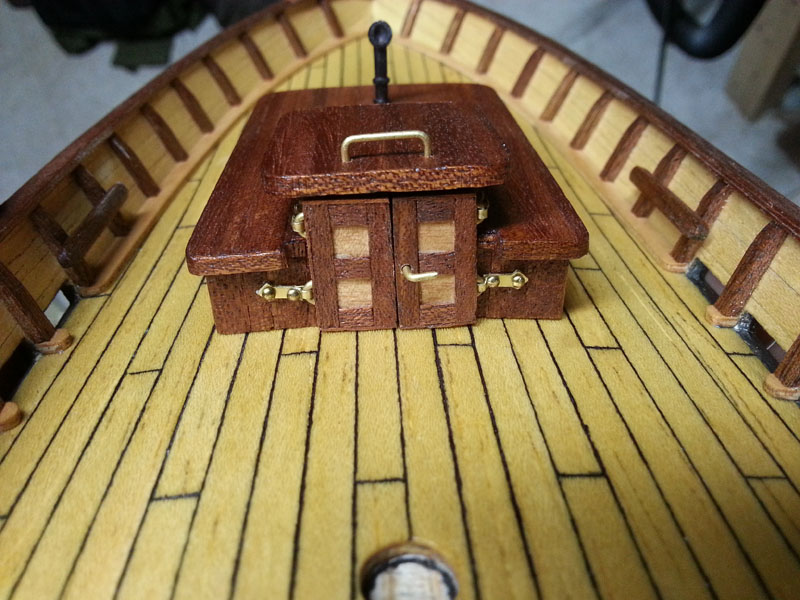
My front hatch is now completely done. I went with hinged doors. I don't have a full range of motion with them, but not much I can do about it now. It's not like they'll ever be opened up anyway once finished. These little hinges was I say about the most frustrating piece of work so far.
- 114 replies
-
- 6
-
-
- swift
- artesania latina
- (and 2 more)
-
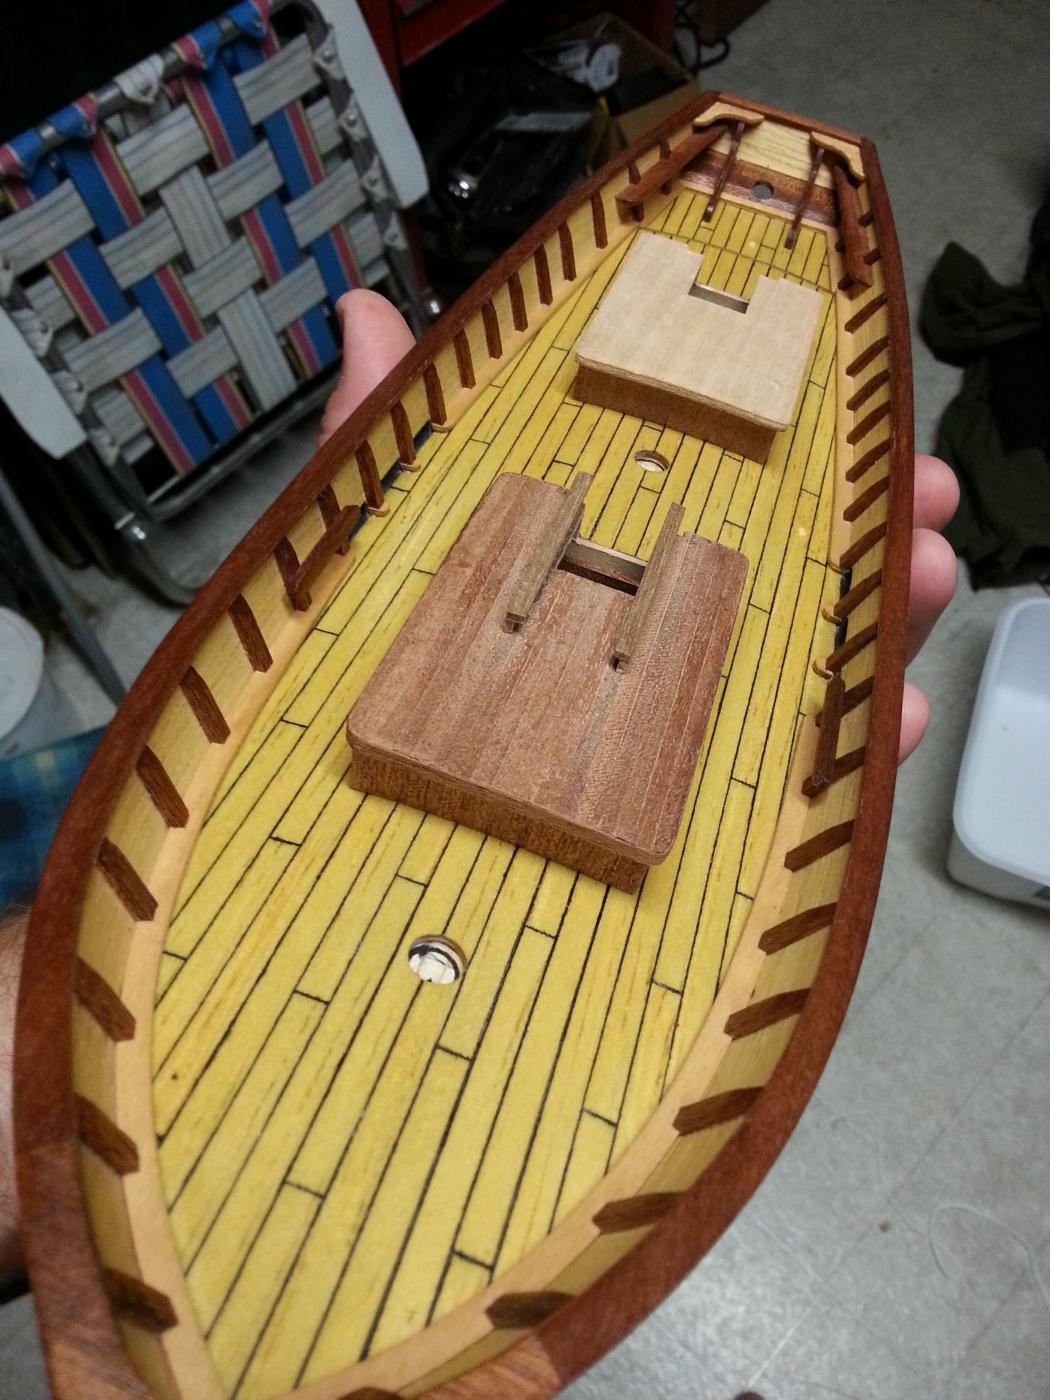
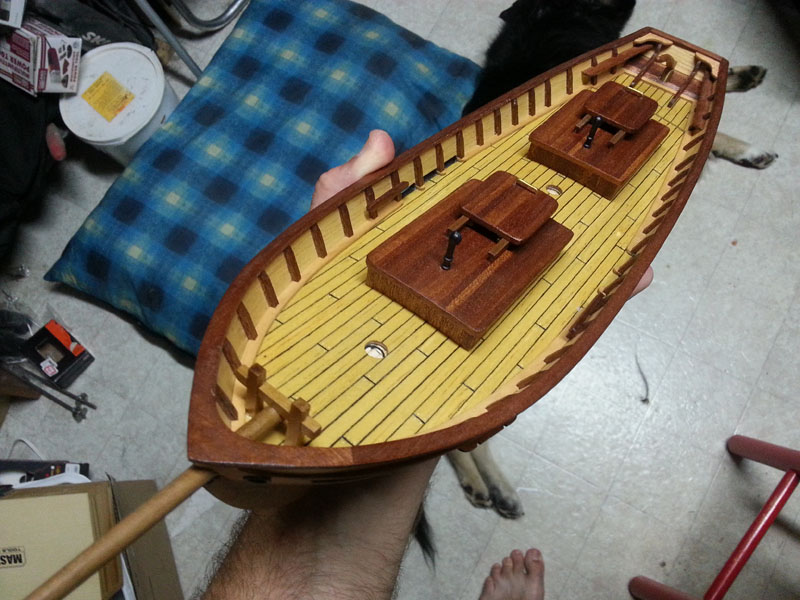
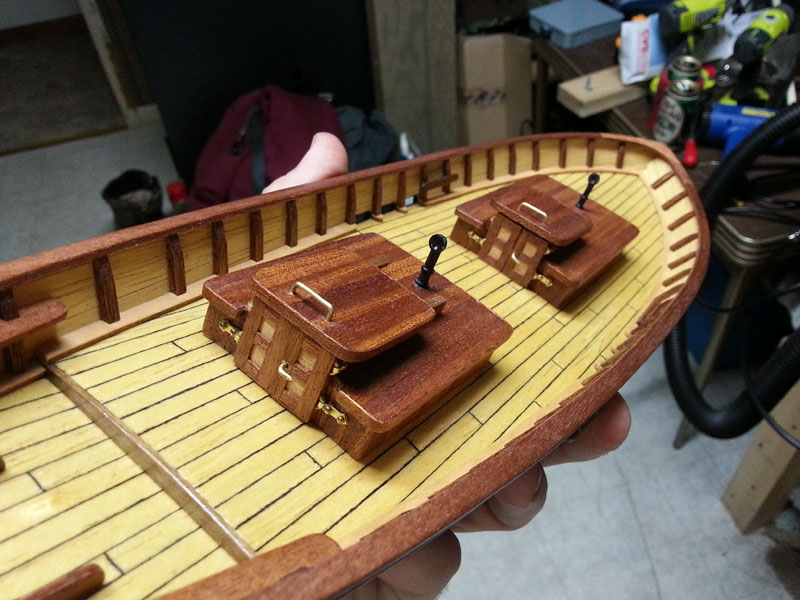
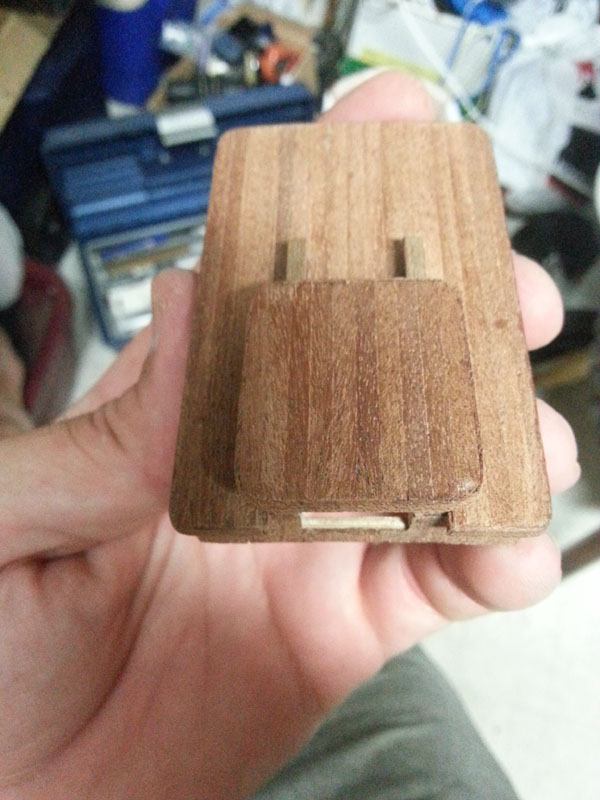
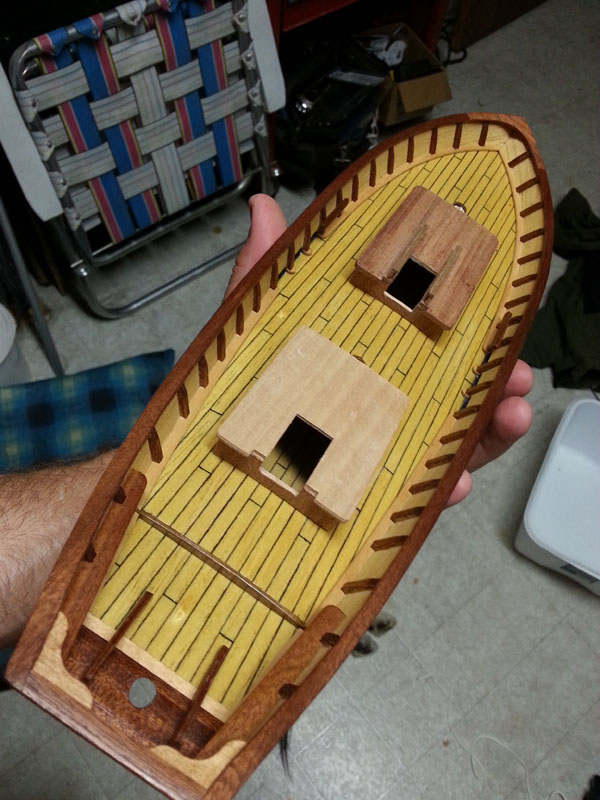
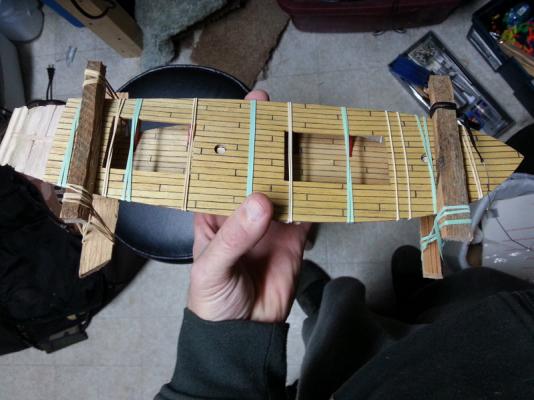
I did some more work on my other hatch today, and I also got one of the sliding tops done and installed.
- 114 replies
-
- 6
-
-
- swift
- artesania latina
- (and 2 more)
-
got some more work done. Put a coat of poly on the topside surfaces. Also did a lot of finish work on the hatches. Those things are small little models in their own right. I have the larger of the two almost done. I kept the rounded corners of the roof, which made it a bit of a task to curve a strip of wood around them to cover the plywood. I got it figured out though finally.

- 114 replies
-
- 6
-
-
- swift
- artesania latina
- (and 2 more)
-
weather kept me indoors this weekend, so i got my gunwails finished, as well as the stern. i also started assembling the cabins. I'm very pleased with how the cap on the stern came out after i decided to make it flush across.
- 114 replies
-
- 7
-
-
- swift
- artesania latina
- (and 2 more)
-
work and life have kept me from working on the swift for some time. I finally spared a couple of hours to do some work. I finished off my timberheads, and cut out new gunnels from the big piece of sapele plywood I made before. Now that they are glued, i'll need to do some more sanding/trimming, etc. of course. Hopefully that won't be very long.

- 114 replies
-
- 6
-
-
- swift
- artesania latina
- (and 2 more)
-
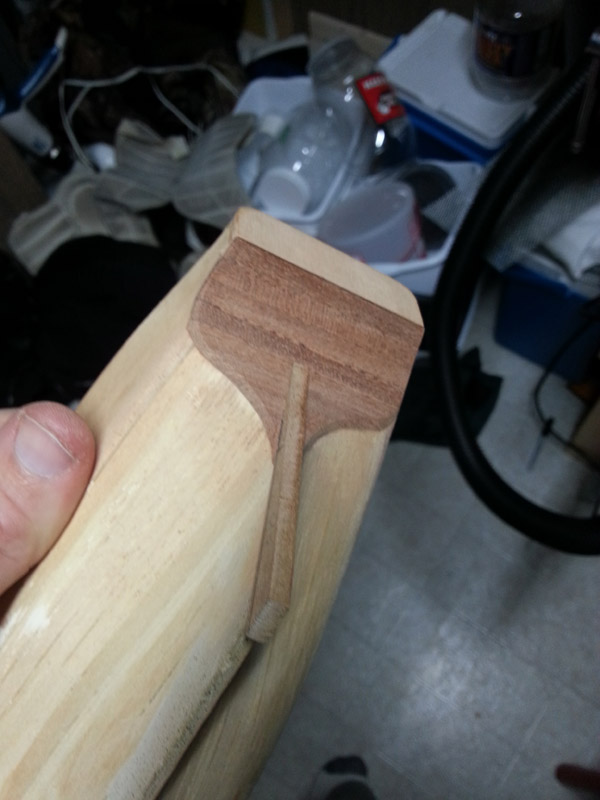
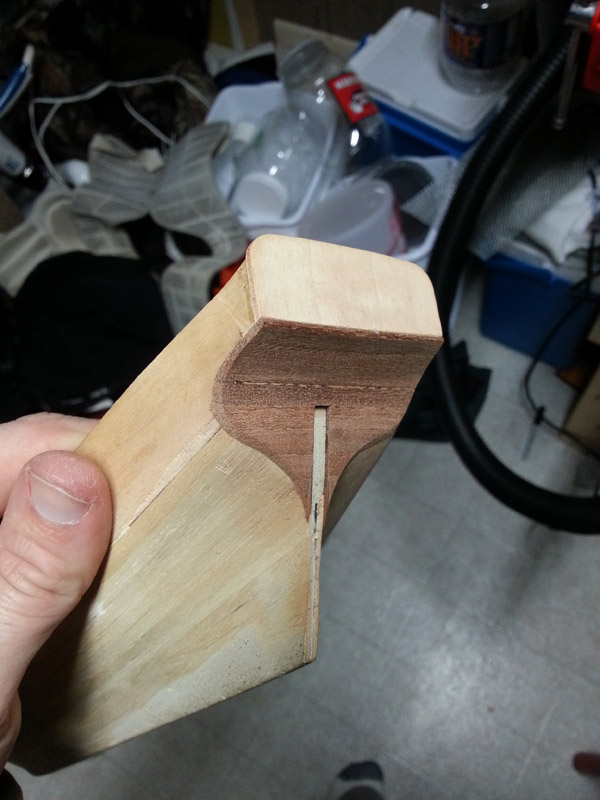
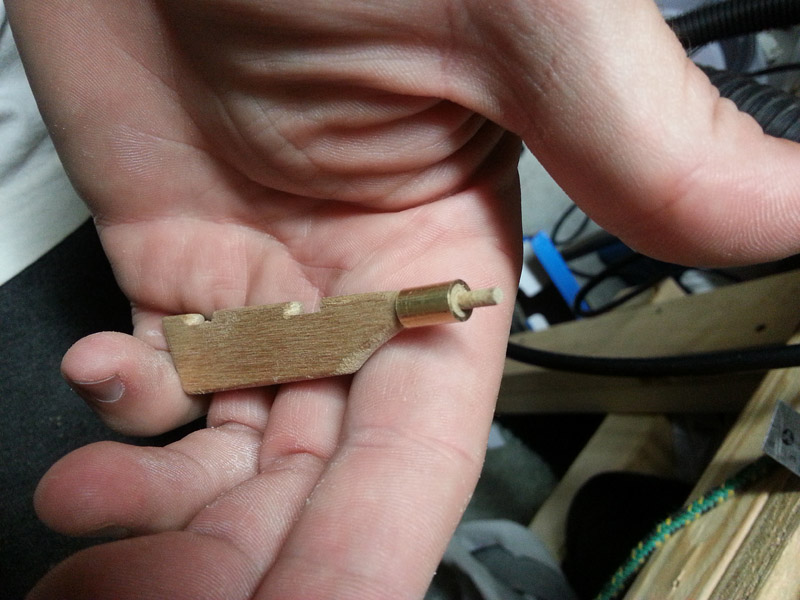
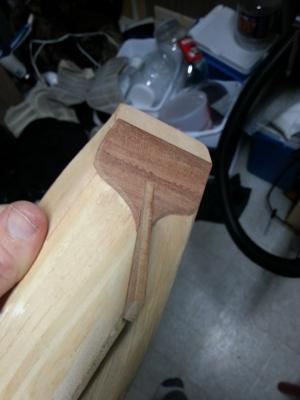
continued with the timberheads, and got my homemade knees in place. Rudder hole bored, and rudder all lined up. Tenon carved into the end of the rutter. dry fit with tiller handle More dry fitting
- 114 replies
-
- 5
-
-
- swift
- artesania latina
- (and 2 more)
-
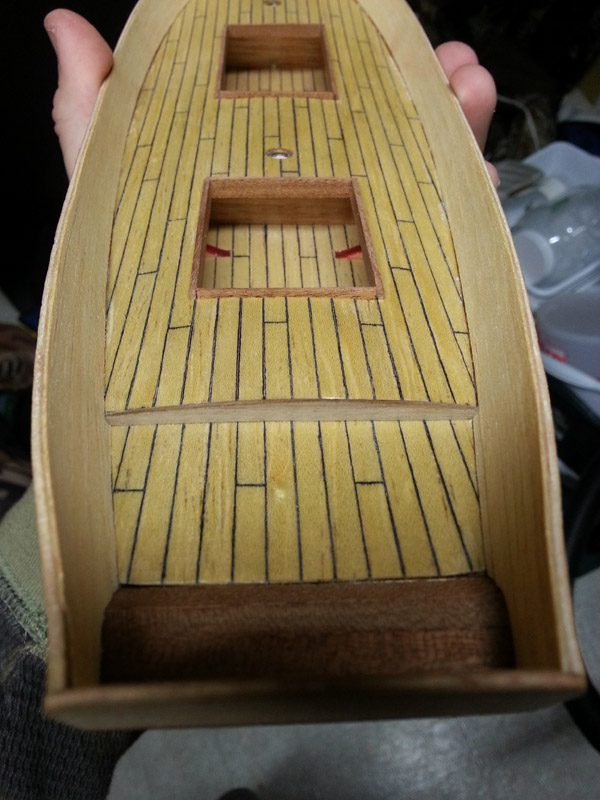
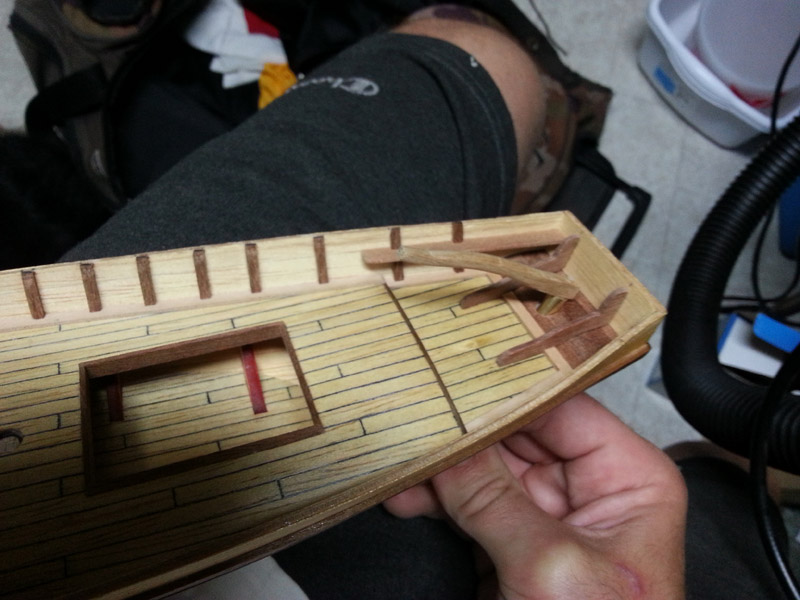
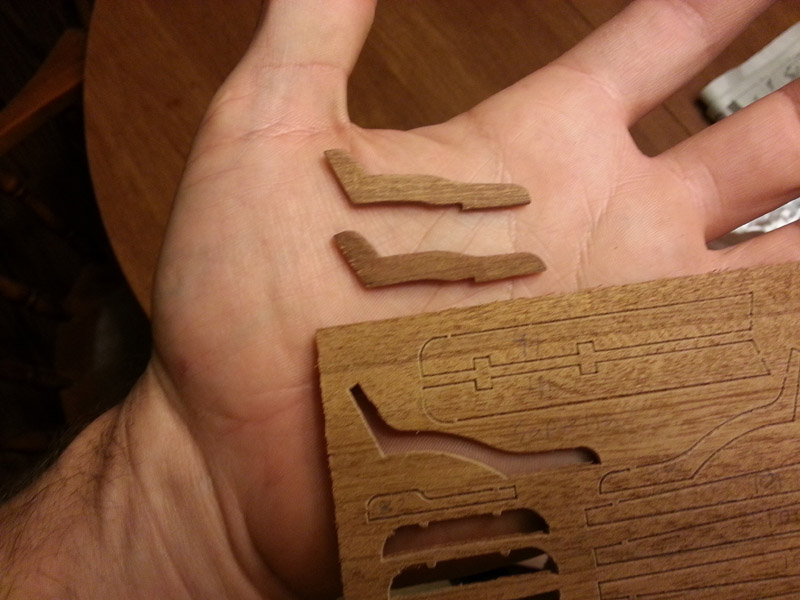
Work on the timberheads continues. I didn't like my seam between the deck and curved part by the tiller, so I continued the deck border around the stern. Like many, my stern knees weren't even close to the right shape/size. Combine that with the trim piece I added across the stern, I had to make new ones. I have some sapelle veneer I have been saving for a future project. I glue laminated four layers of this to make a sapelle slab from which I could make new pieces. The new pieces fit perfectly, and I like them a little more stout than the original shapes. The glue lamination also had the effect of making very strong little pieces with no fear of snapping them in half as I worked. It made the pieces tougher so I didn't have to worry about removing too much material in one pass as I carved them to shape. I will need to remember that trick.
- 114 replies
-
- 5
-
-
- swift
- artesania latina
- (and 2 more)
-
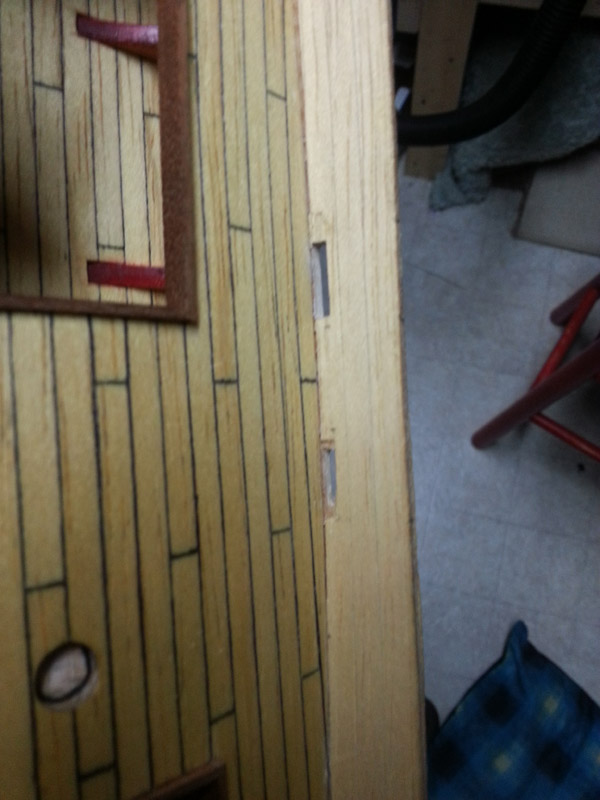
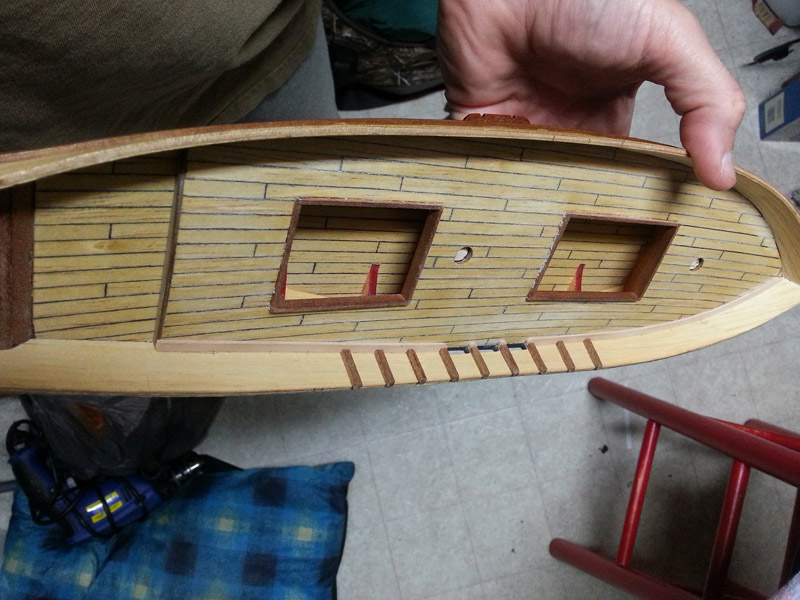
A few more weeks time. I decided to square off the upper transom. Then I gave the exterior a coat of poly to look for and fix any dried glue seepage, and just because I wanted to see it with some finish on it. Then I started cutting in the scuppers. Made a couple little mistakes on them. Mainly side to side disparities. Live and learn. After the scuppers were cut out, I started working on the timberheads on one side.

- 114 replies
-
- 8
-
-
- swift
- artesania latina
- (and 2 more)
-
I think I'm going to leave the bowsprit as is; I have seen pilot cutters like this with a similar arrangement, plus I don't feel I'm at a stage in my skill to do much modifying. I am unsure of what to do with the stern. Many variations of this kit have the top of the upper transom squared off and flush with top edge of the bulwarks. My vintage has a curved arc going above the bulwarks. I like the curve, but I'm not sure how I would cap off the plywood as of yet. If I can't figure out something I like, I will probably end up cutting it flush down to the bulwarks.
- 114 replies
-
- 1
-
-
- swift
- artesania latina
- (and 2 more)
-
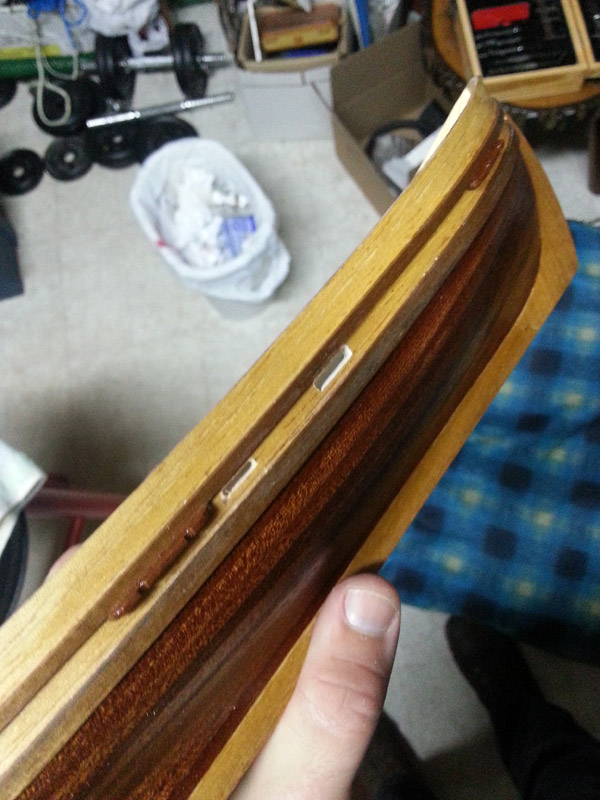
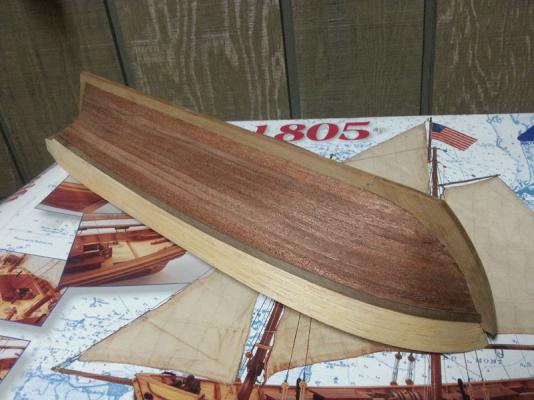
Got the rub rails in place, and the cutwater reinforcements too. I need to trim off the top rail at the stern yet.
- 114 replies
-
- 10
-
-
- swift
- artesania latina
- (and 2 more)
-
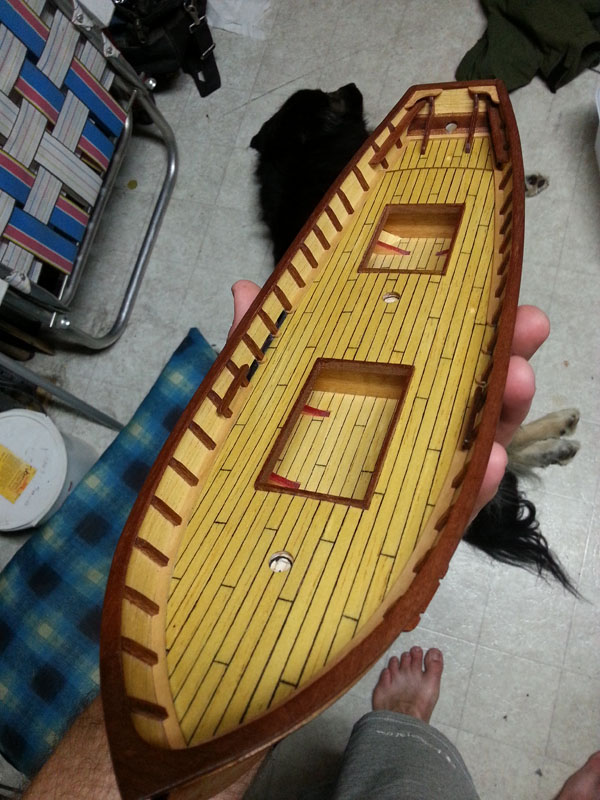
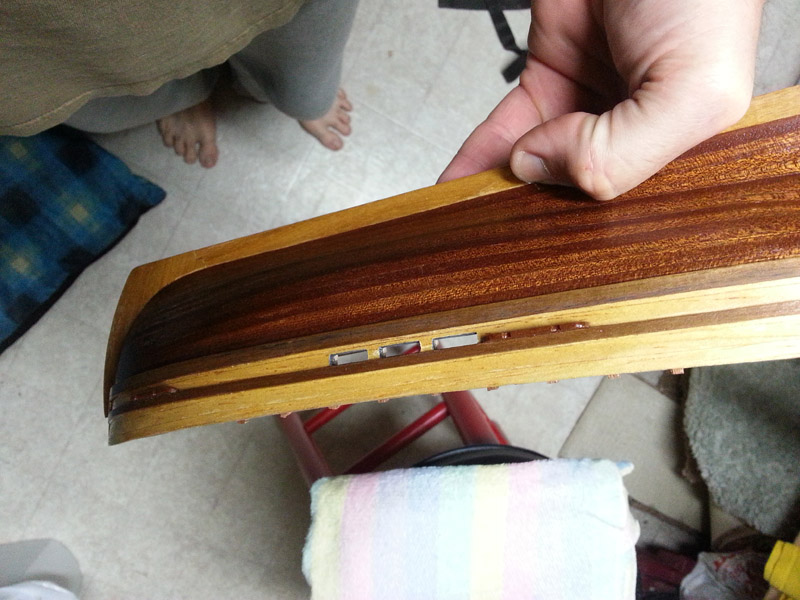
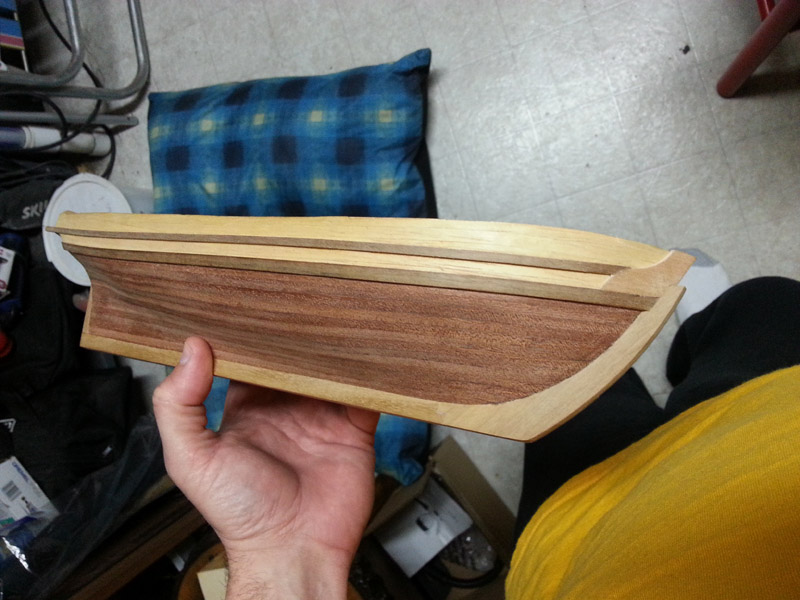
I got the outer planking finished, sanded, and have the lower rails shaped and installed. Starting to resemble the box now.

- 114 replies
-
- 7
-
-
- swift
- artesania latina
- (and 2 more)
-
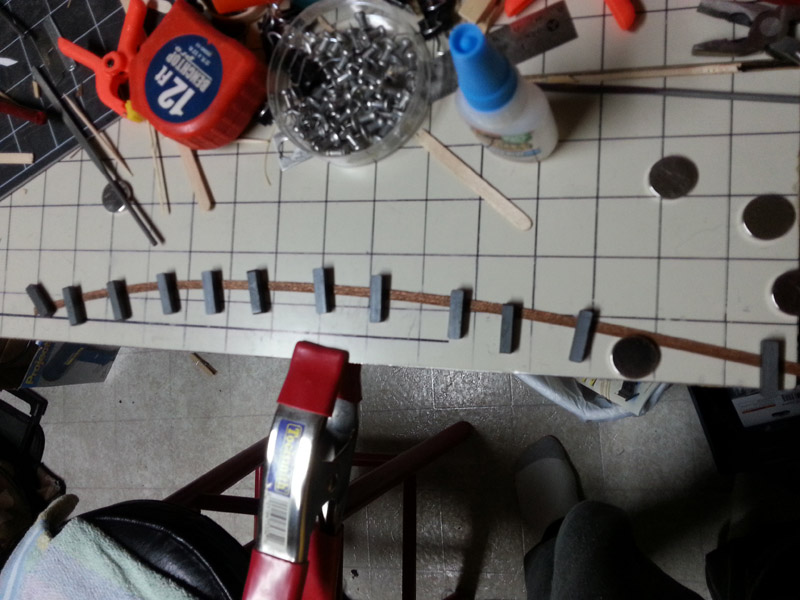
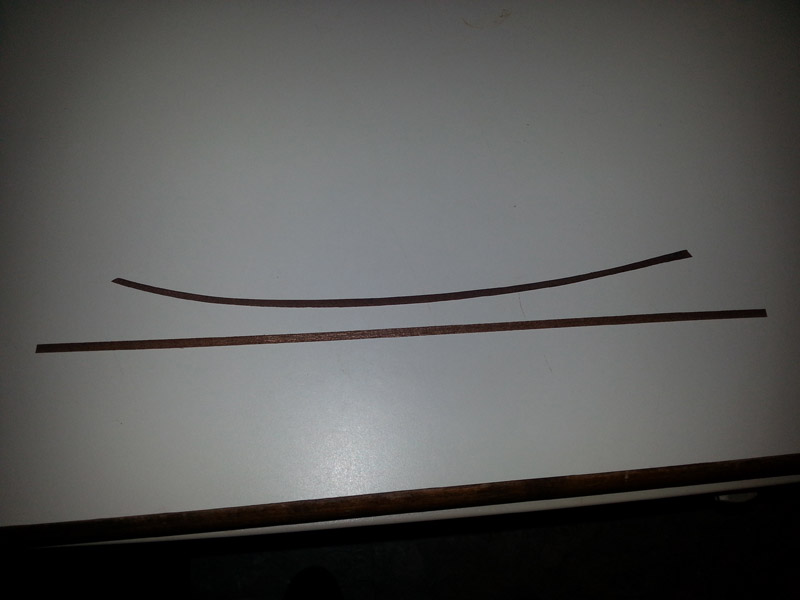
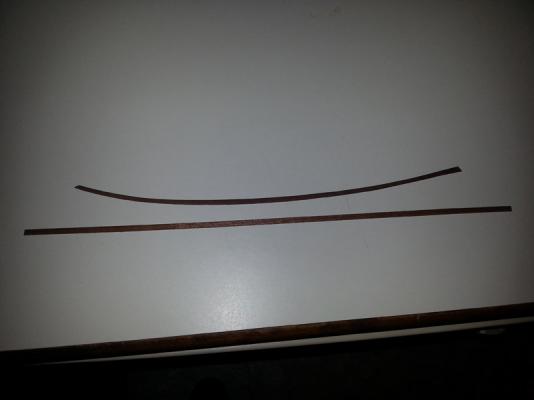
After trying a variety of different methods, I finally found what is working best for me for curving these planks. I lay 2" clear tape over the plank edge on the hull, trace it as if I were spiling, and cut out a template from the tape. I stick the tape to my metal work surface, then after soaking the planks (I've found ammonia works better than hot water), I lay them to match the curve in the tape. I use a bunch of strong magnets to hold down and flatten the inside edge of the curve to prevent the bacon ripple effect. Then I hit everything with a heat gun to rapidly dry and set the planks. It only curves in one plane, but as thin as these planks are I find it takes no effort for the glue to hold them in place once the edge shape is correct. The flat metallic disc magnets are very good for flattening those ripples. Once dry and cool, I have a plank that looks as if it were cut that way from flat stock. Hopefully the next time I can spare a few hours I will get the outer hull finished.

- 114 replies
-
- 3
-
-
- swift
- artesania latina
- (and 2 more)
-
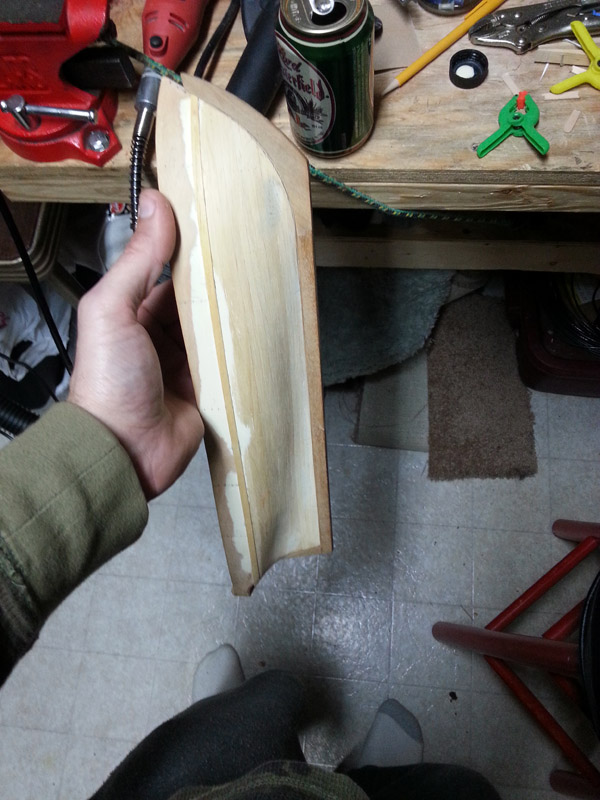
top planking continues. After lining off my bow I realized I needed to adjust the forward edge of the garboard planks. I should have lined off before laying them I was able to trim them where needed.

- 114 replies
-
- 5
-
-
- swift
- artesania latina
- (and 2 more)
-
today I got the bulwarks finished, and the garboard plank on one side done. getting these thin planks to bend across grain is an acquired skill i find. I think it would be easier if they gave sheets of veneer to let us cut our own spiled planks from scratch.

- 114 replies
-
- 7
-
-
- swift
- artesania latina
- (and 2 more)
-
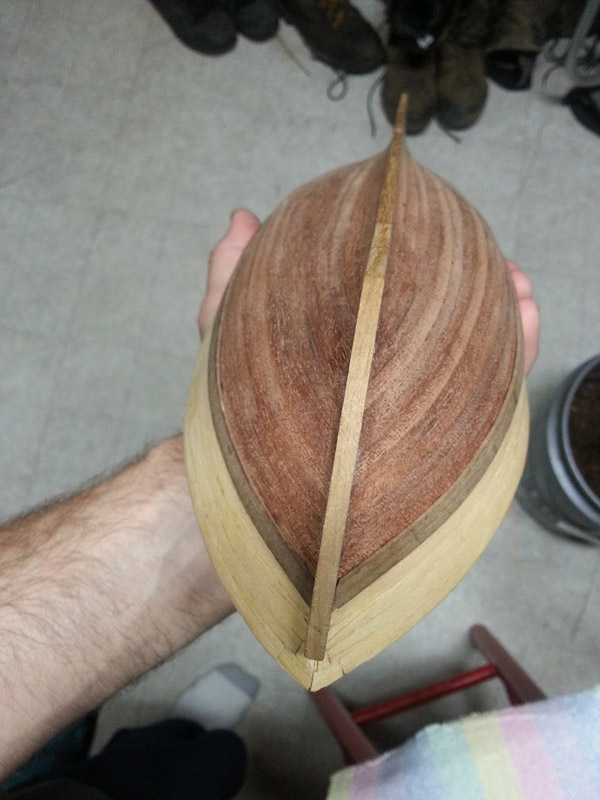
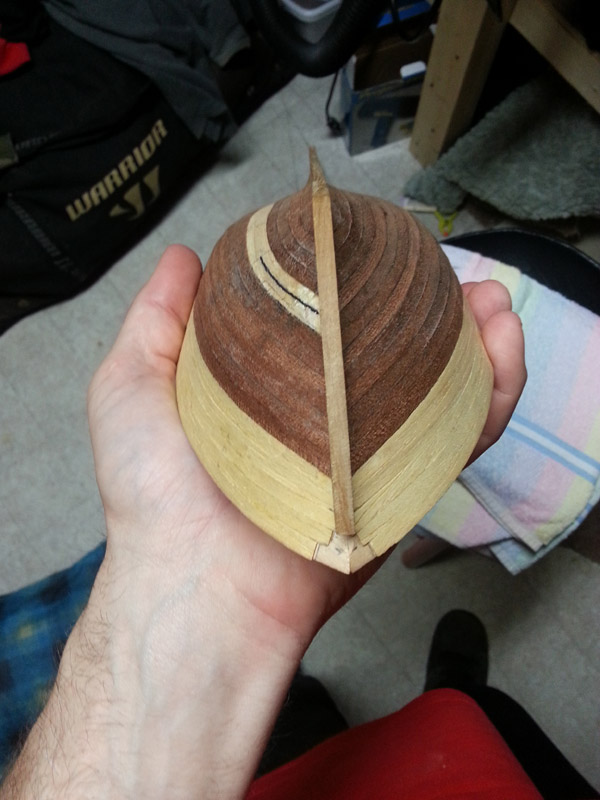
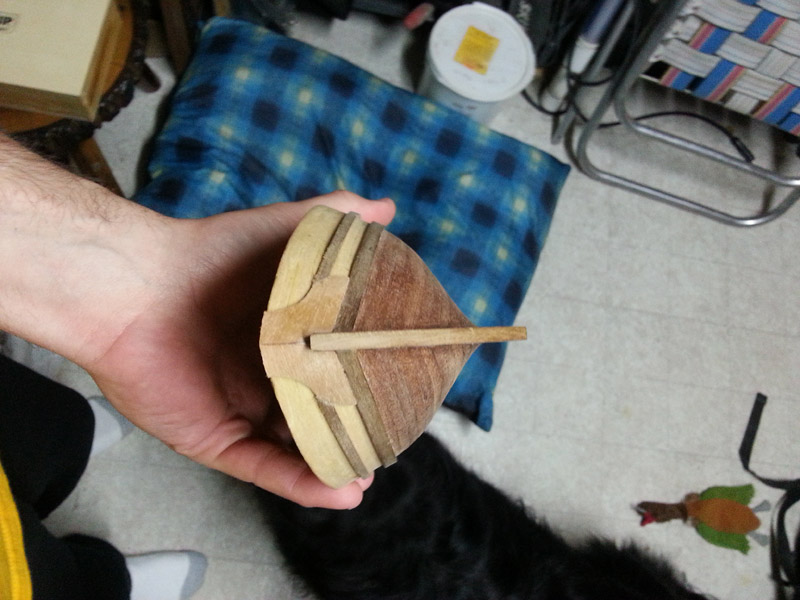
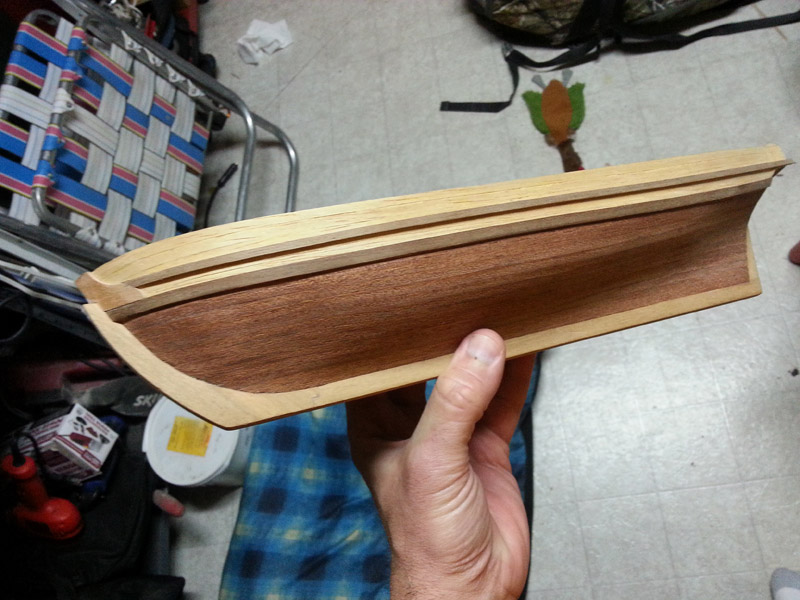
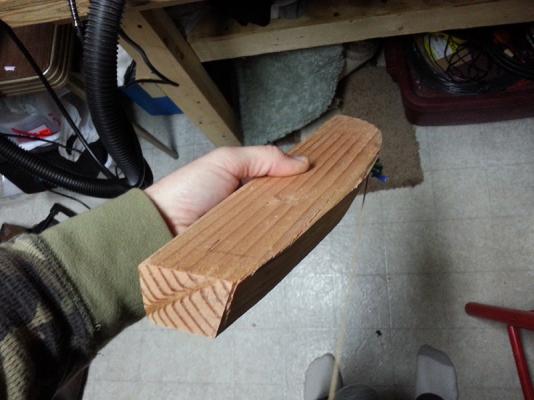
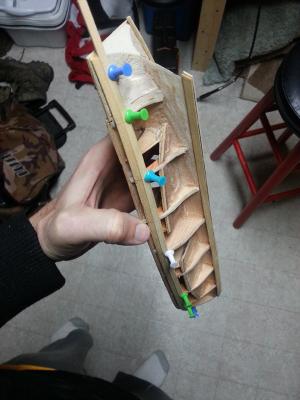
After much shaping and adjusting, I finally had the keel pieces ready to glue. (I had glued the stem and the two keel pieces together previously). I did cut a very small rabbet into these pieces to make for a nice edge on the final planking. I have also decided that anything else inside the boat will wait until the outside hull is to my satisfaction. That way I won't have to worry about wood conservation if/when I want to add extra trims. After several months working here and there, this is now where I am currently. I started my outer planking starting on the bulwark edge and working up. Now I shall start posting in real time.


- 114 replies
-
- 5
-
-
- swift
- artesania latina
- (and 2 more)
-
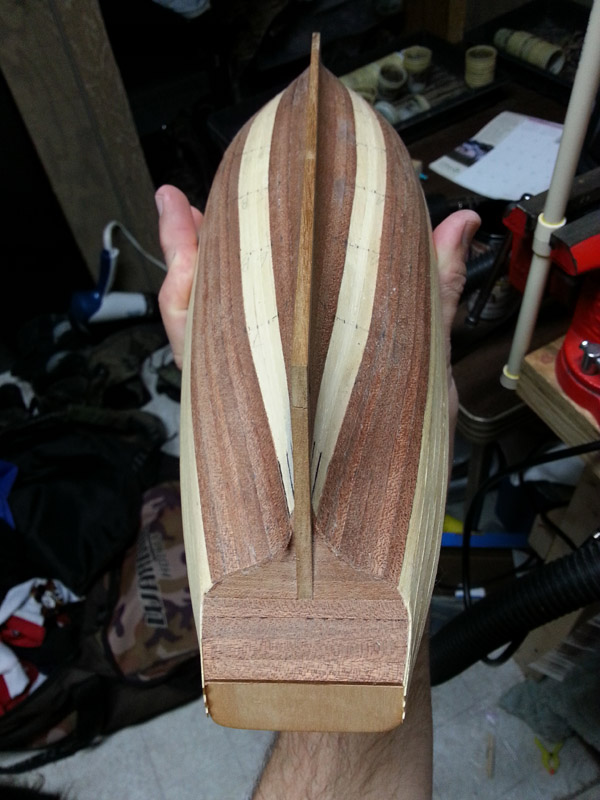
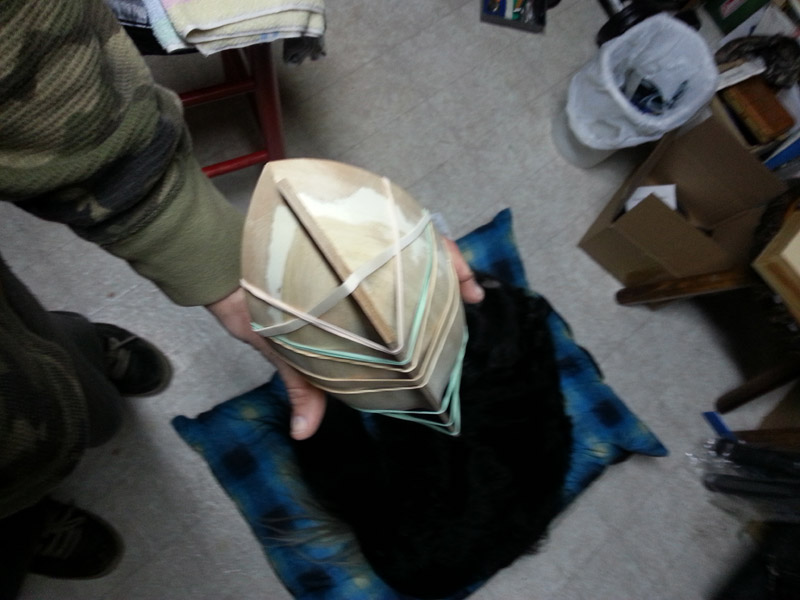
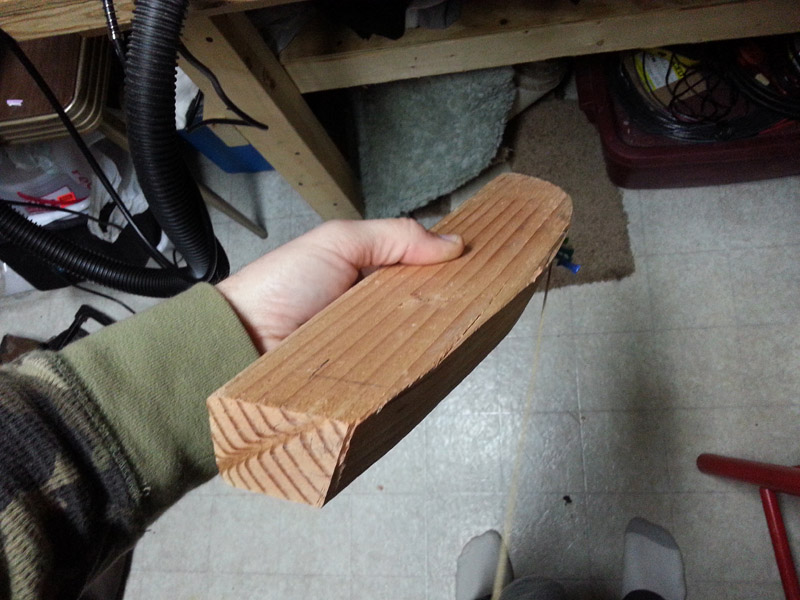
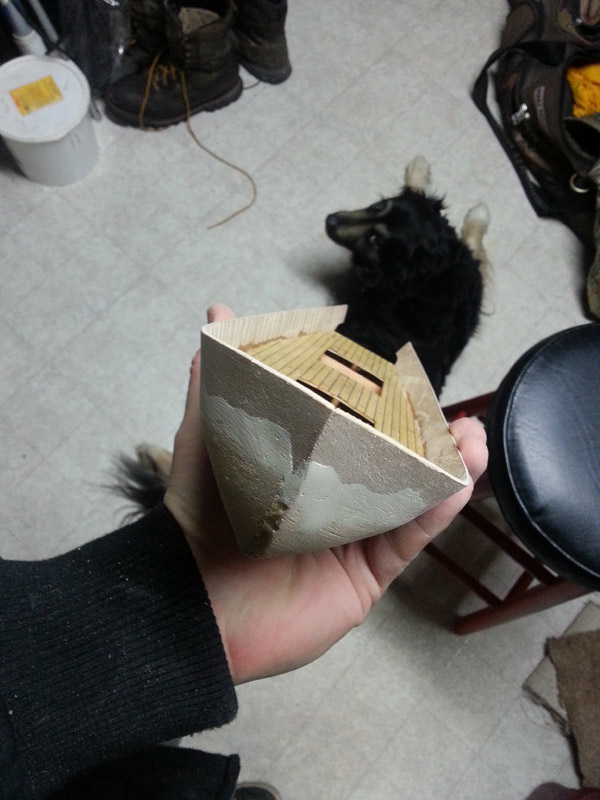
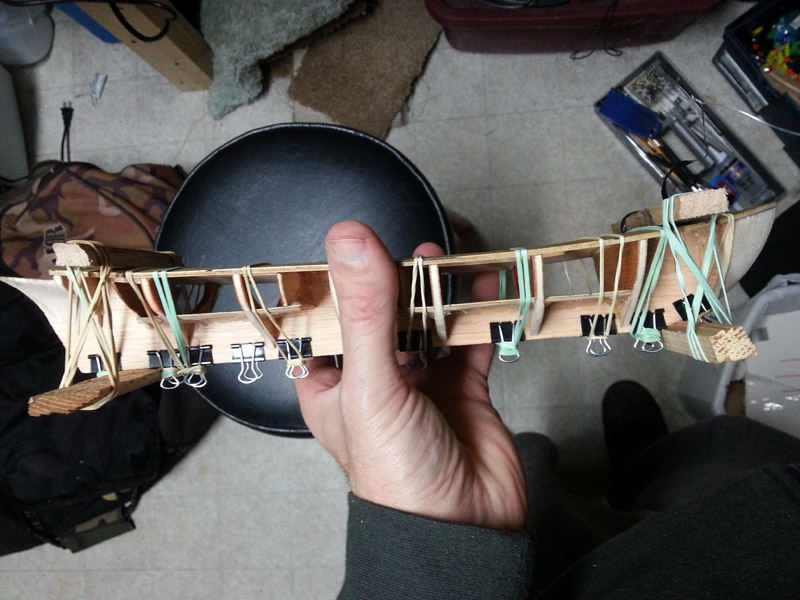
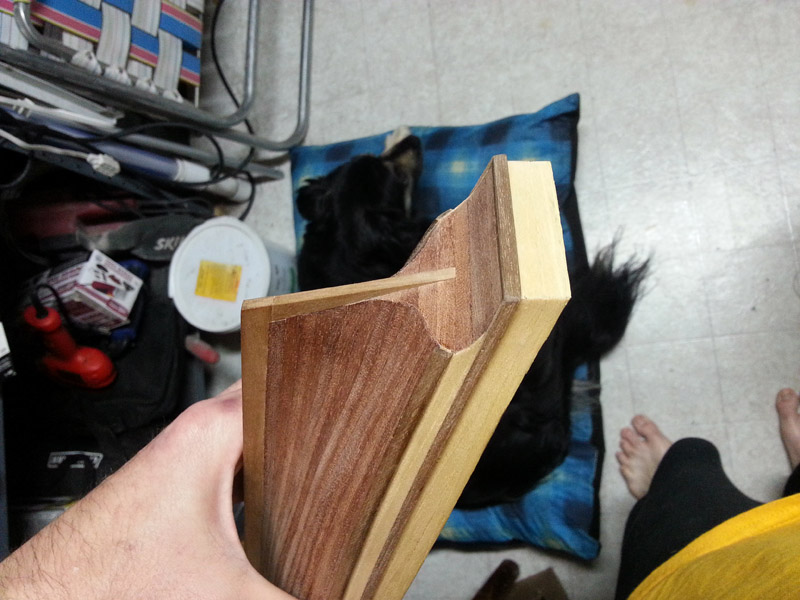
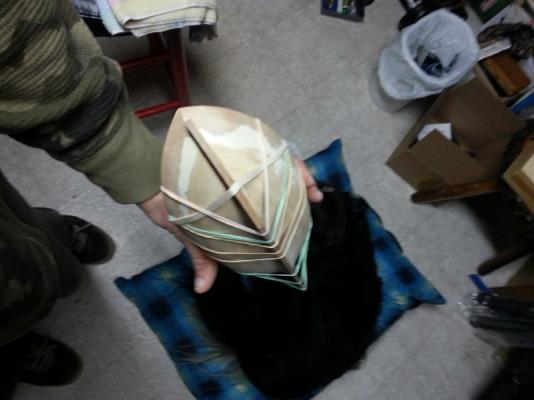
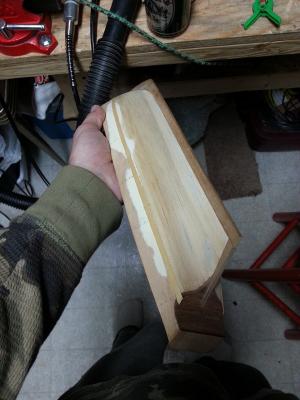
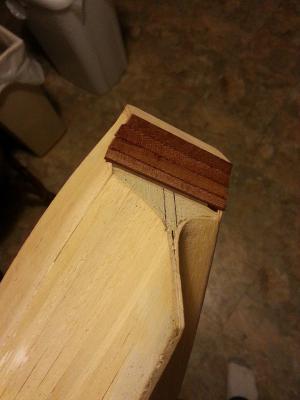
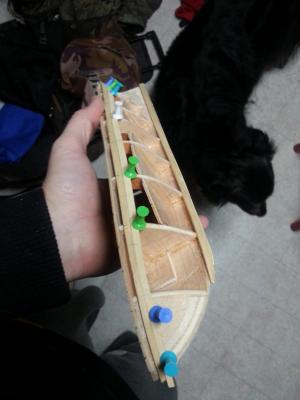
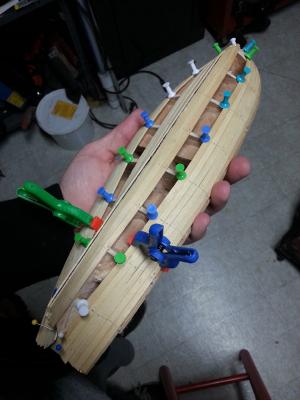
My bulwarks seemed a little too angular in the stern. I steamed the back portion of them and clamped them to dry and square things up. Given the little irregularities in the lay of my deck, I opted to plank the bulwarks after application. My first working with the thin planking, I decided to let it take the shape of the bulwarks, angling up at the bow. In hindsight, I probably would have used my jig to shape these planks, as I did on the outside. Live and learn, although I must say I'm not opposed to the angular appearance. Most of this will be concealed anyway. At this point, I decided that I would apply the keel/stem/post before the second planking. I applied the stern piece, and started filling it in. At this point, I wasn't sure what to do about the stern and the post; whether to transition to thinner planking, etc. There's not good pictures or instruction detail regarding this area. After giving it much thought, I decided to use thick wood over the entire stern/rudder area. This would make my keel too short, so I opted to inlay the post into this wood. It should put the rudder in a nice spot still, and I like the results so far. I glued the post in place there before doing the rest of the keel pieces.

- 114 replies
-
- 4
-
-
- swift
- artesania latina
- (and 2 more)
-
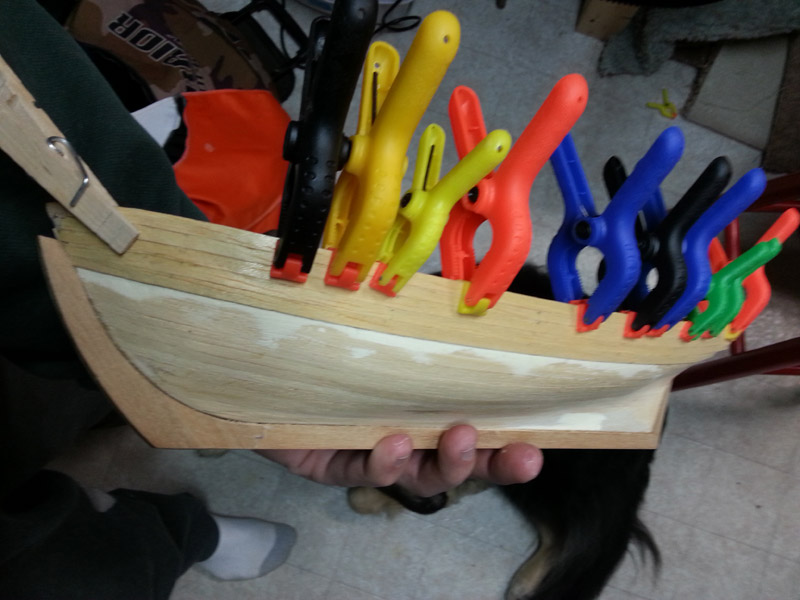
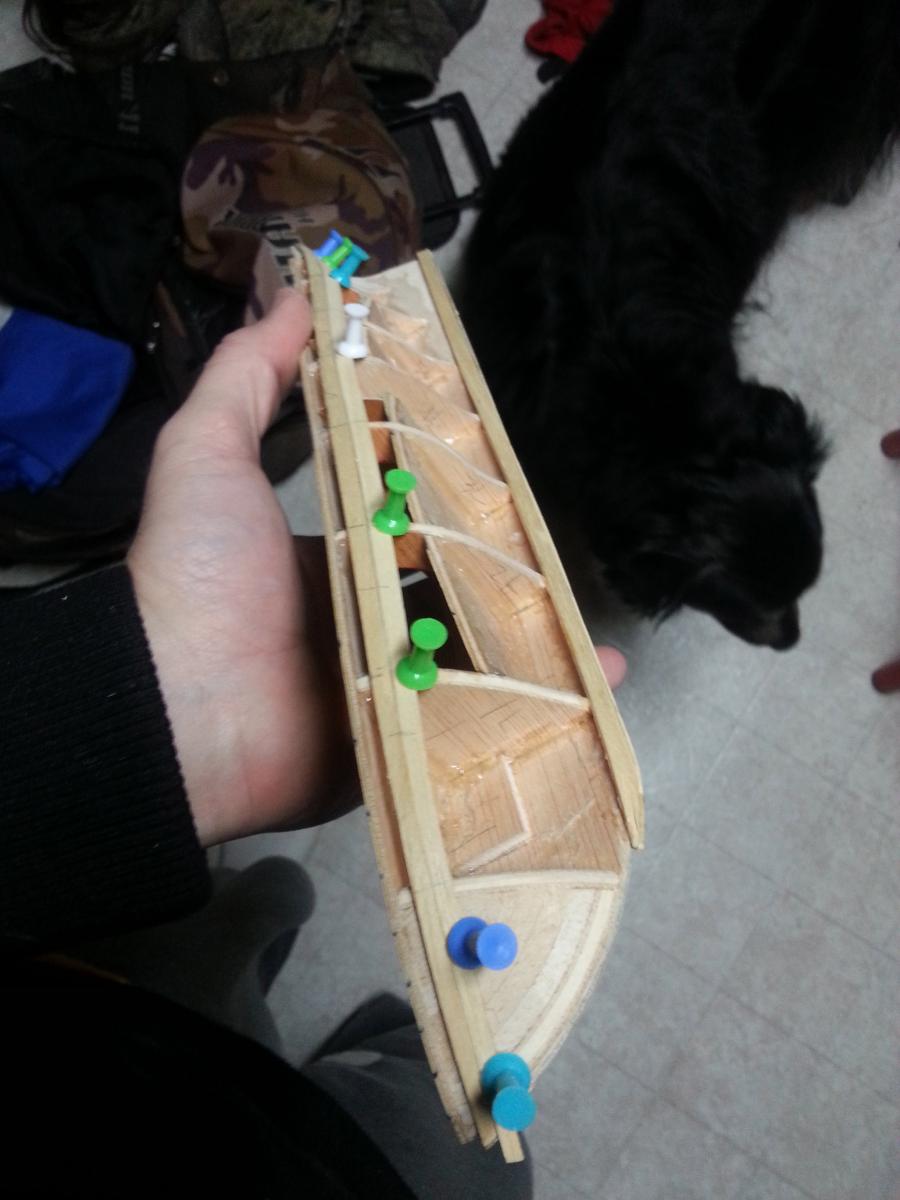
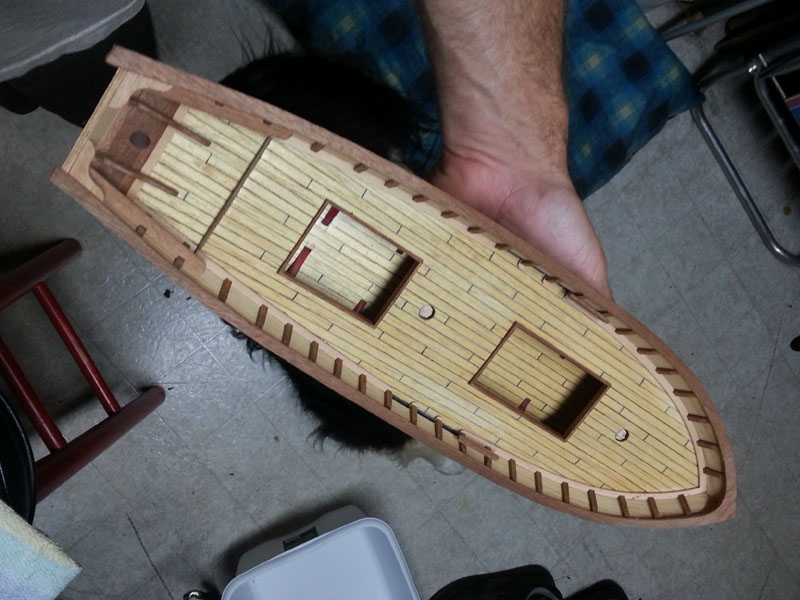
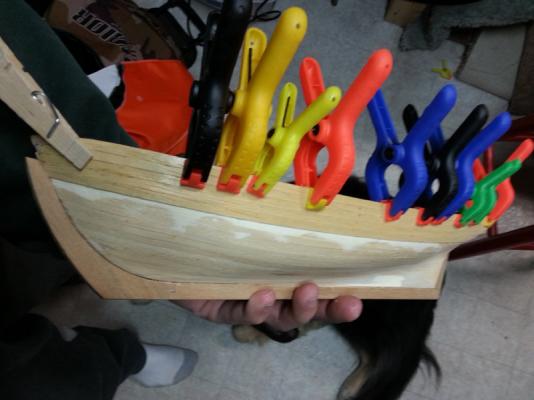
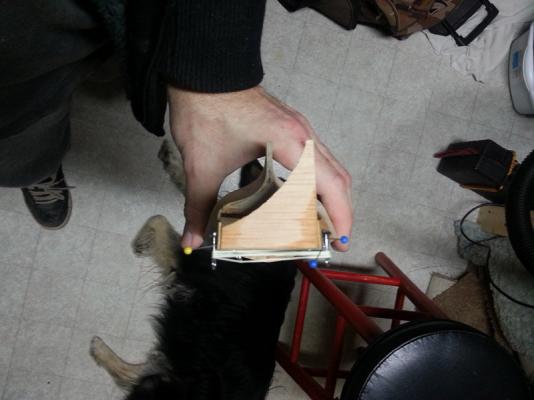
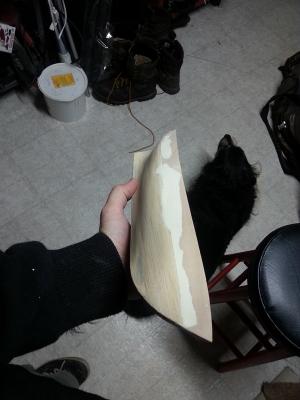
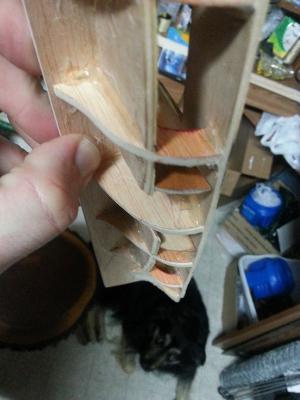
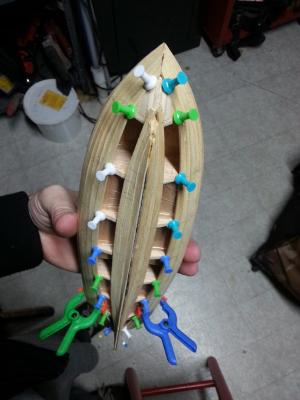
After first sanding: The plywood bulwarks always seem to be a problem with this kit. I halfway cracked one just trying to dry fit. The crack was only through one ply; i was able to CA glue it to hold. I made sure to put the week spot on the inside of the curve. I bent the bulwarks using a pair of jigs I made from 2x4s. I traced the curve of the deck, and estimated the angle of the deck. Little hot water soak, and drying on the jigs made it easy. The jigs have come in handy for some other bending tasks as well. they were well worth the time to make them. More putty and sanding after bulwark application. I wanted a smooth transition between them and the planked hull.


- 114 replies
-
- 5
-
-
- swift
- artesania latina
- (and 2 more)
-
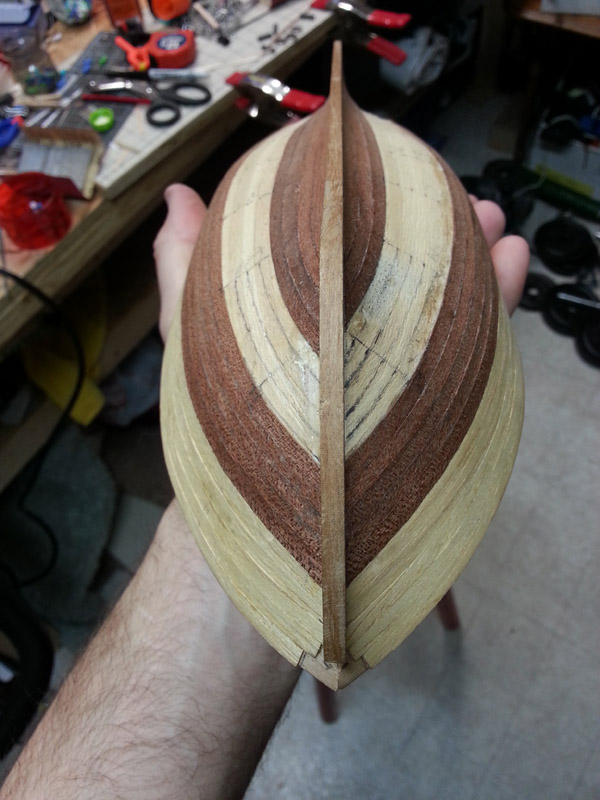
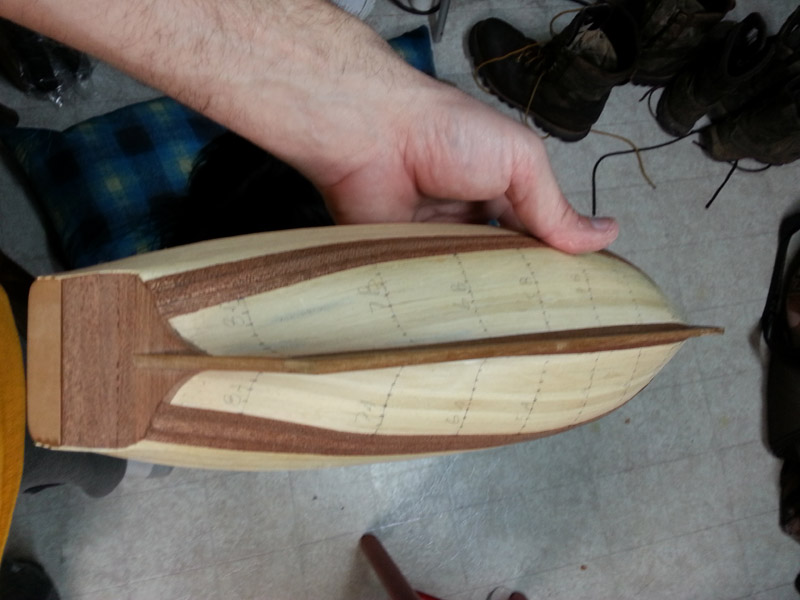
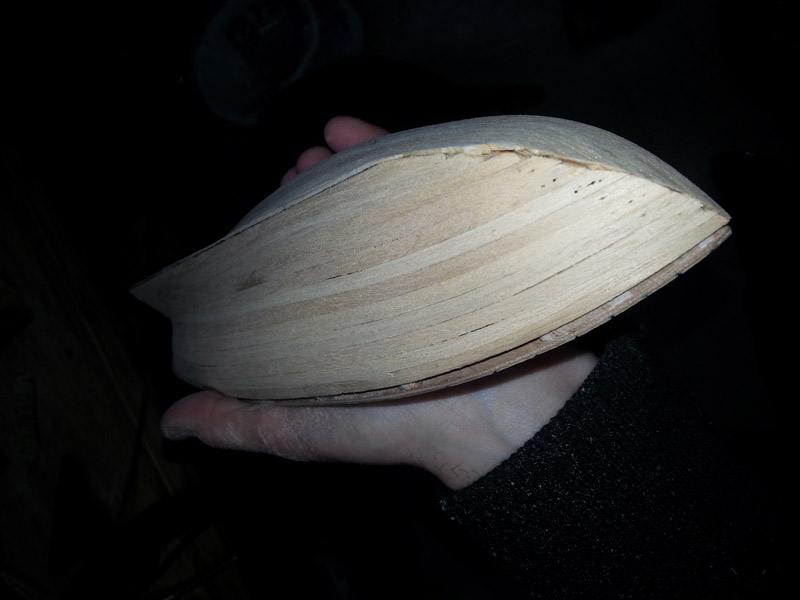
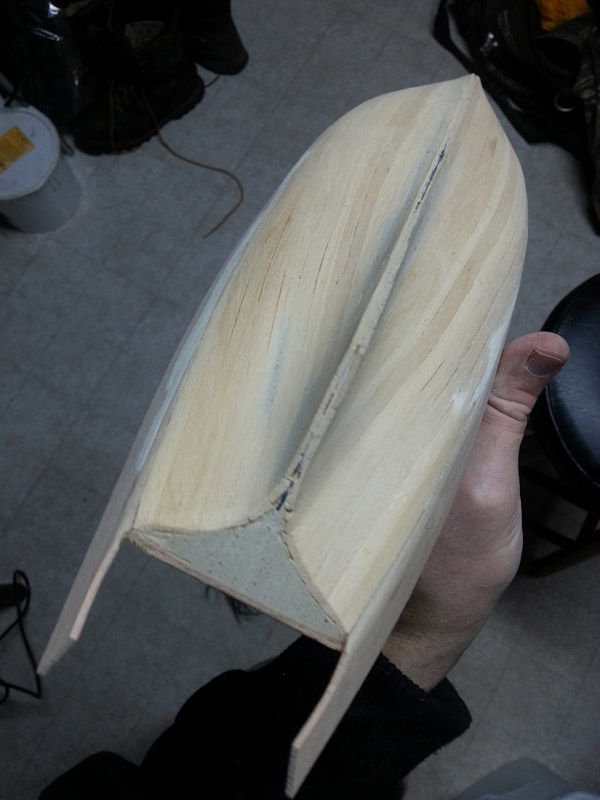
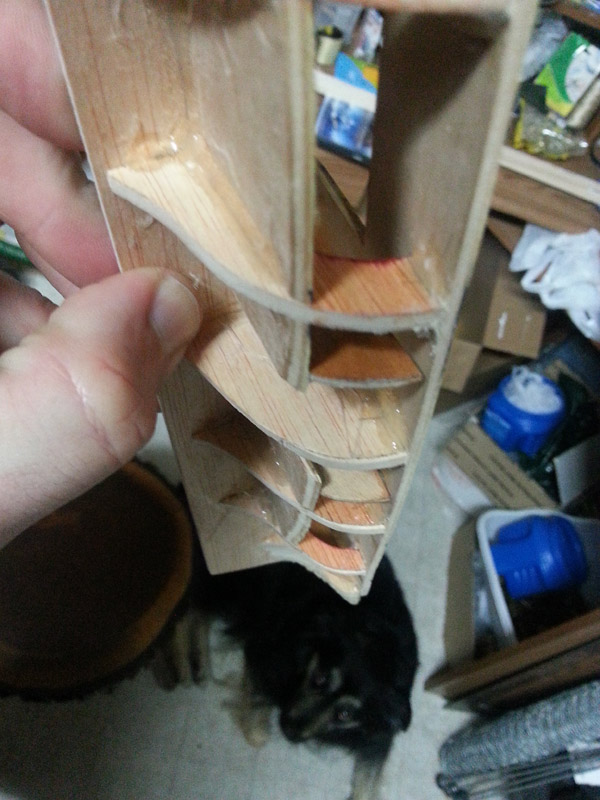
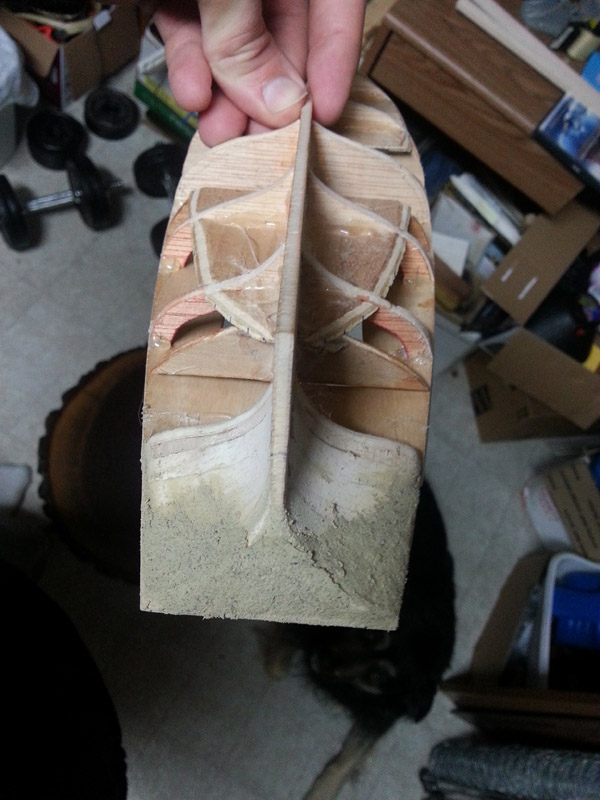
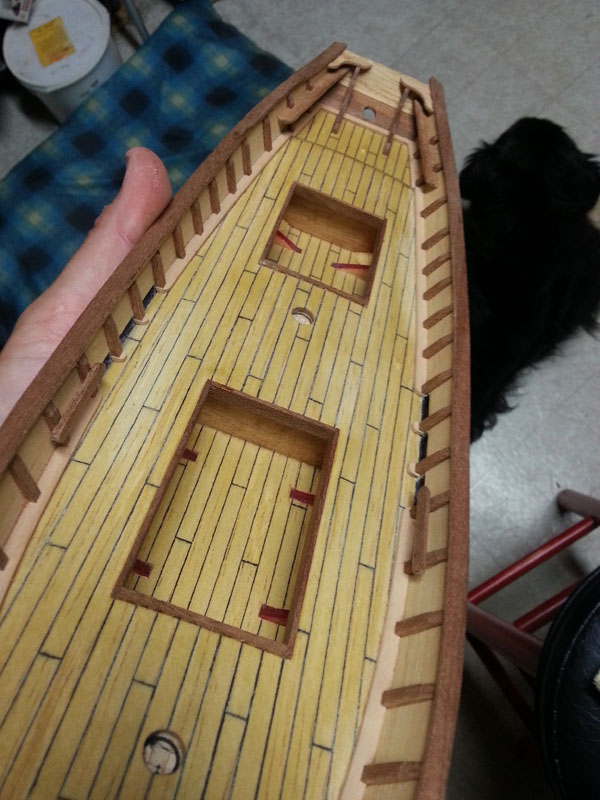
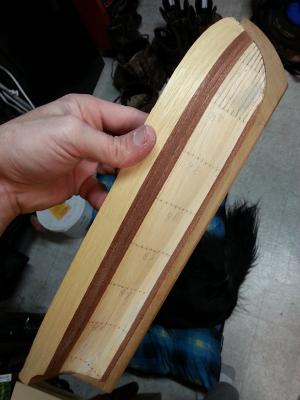
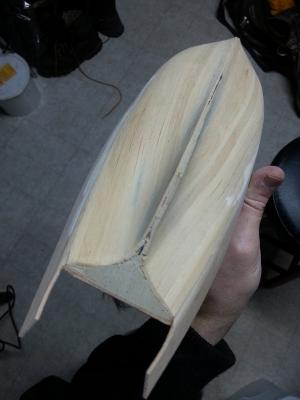
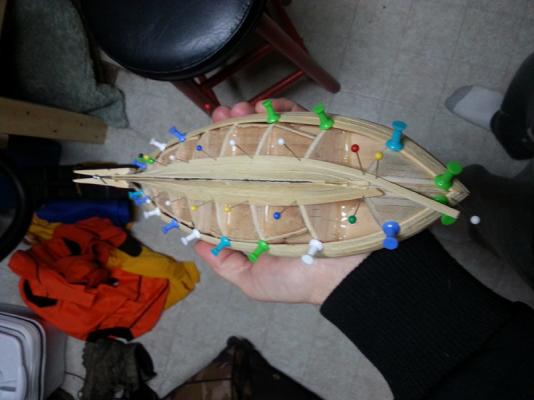
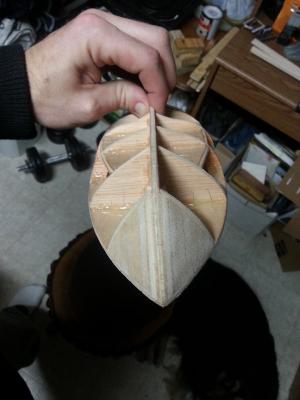
My one big mistake at this point was having one of the bulkheads be a little low up top. I should have shimmed it to raise the deck. Instead, there is a little divot there. I didn't think it a problem since I evened it out, but it made for a little hiccup when putting the bulwarks on and planking later. I did a lot of shaving to the bottom of the false keel and dead wood area, so I could plank the whole hull with the first layer. Though not being seen, I was determined to do the first layer as 'right' as possible. The AL instructions in this regard are far from what I'd consider 'right'. I wasn't so picky about the first layer's meeting at the keel and bow, since it would get flattened off anyway.
- 114 replies
-
- 4
-
-
- swift
- artesania latina
- (and 2 more)
-
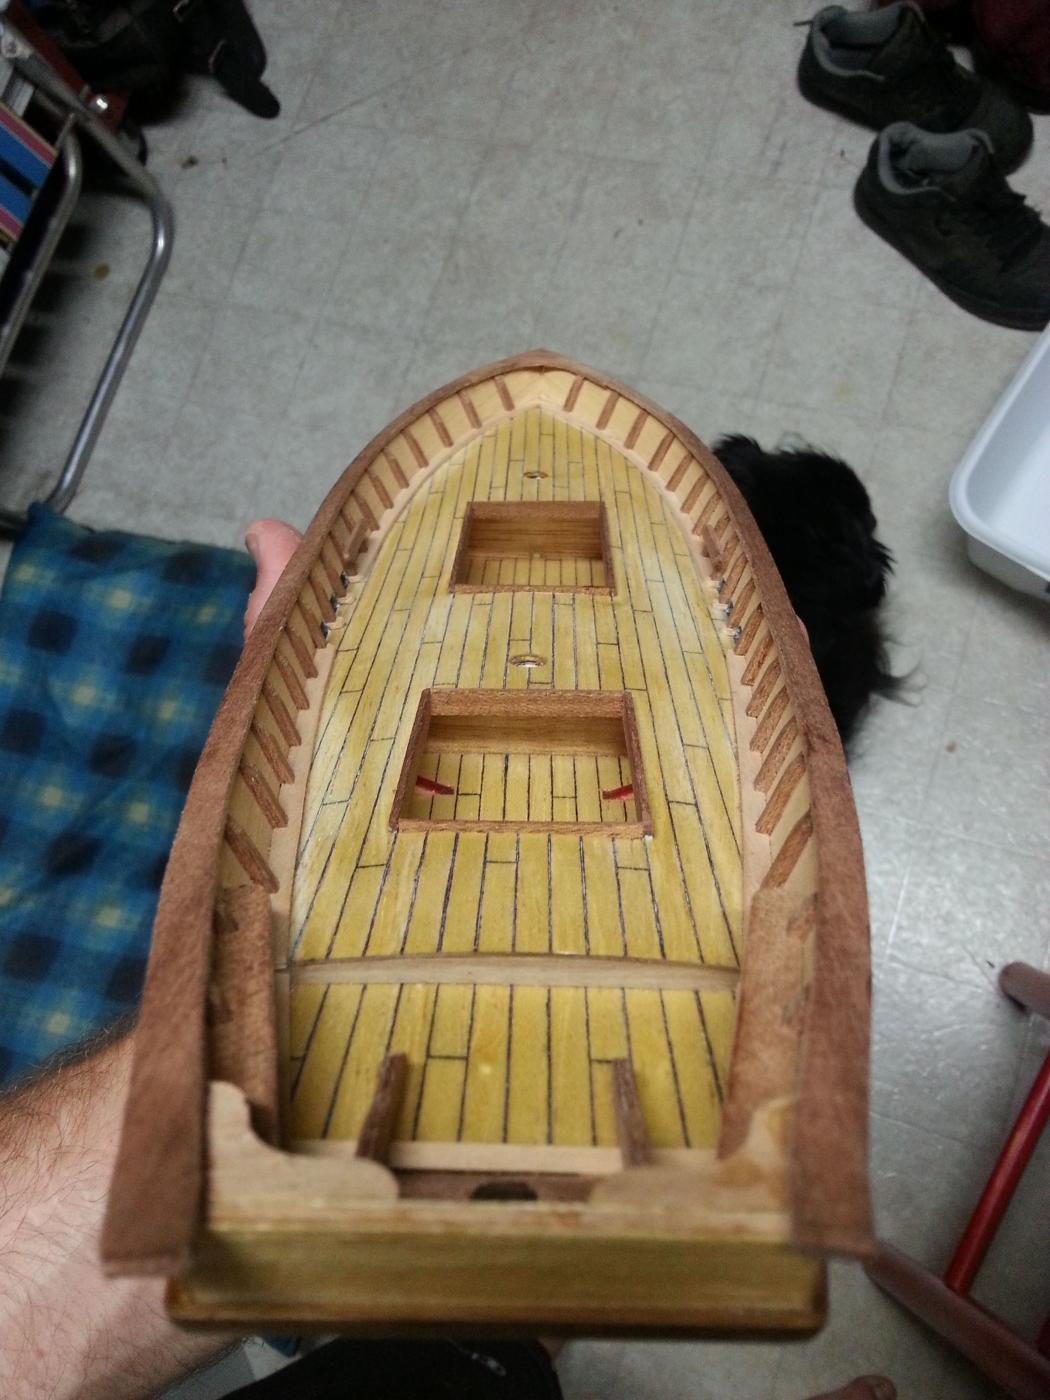
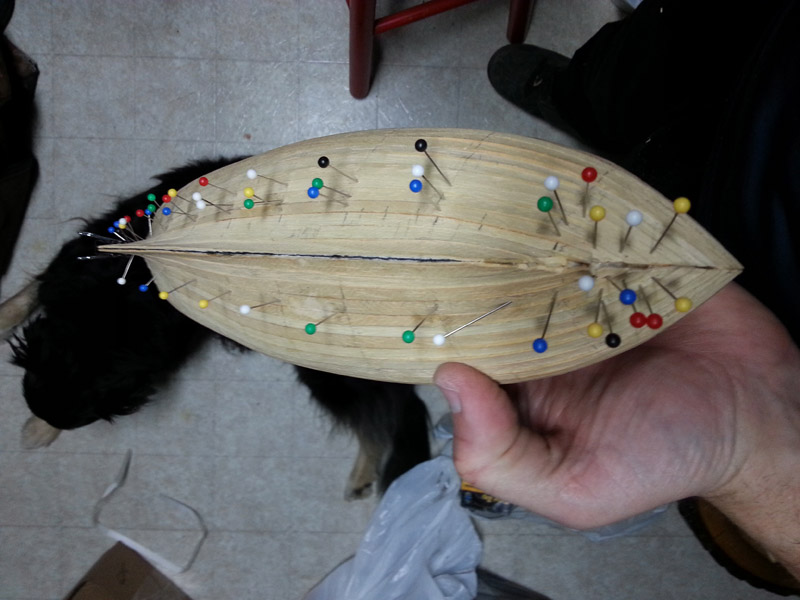
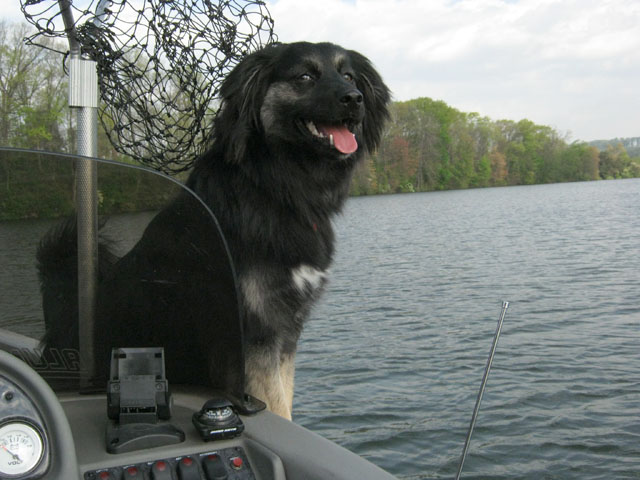
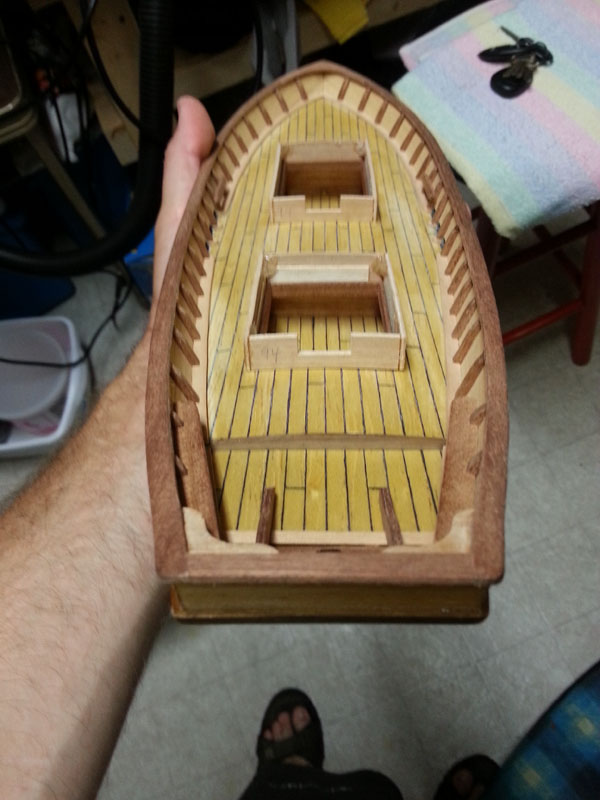
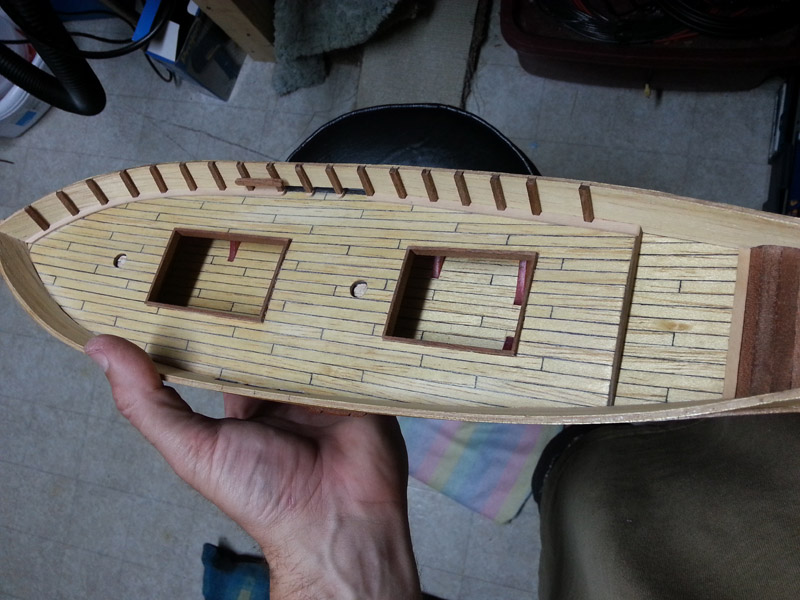
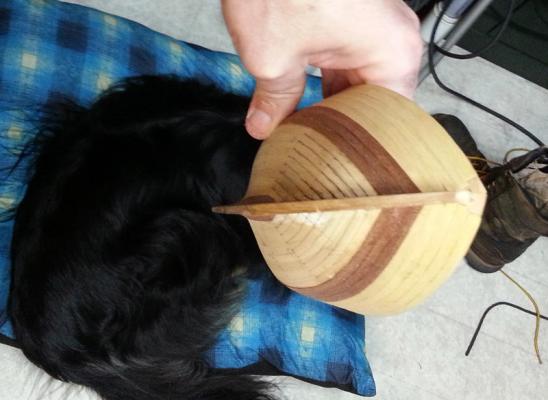
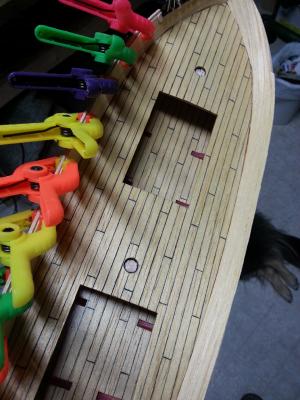
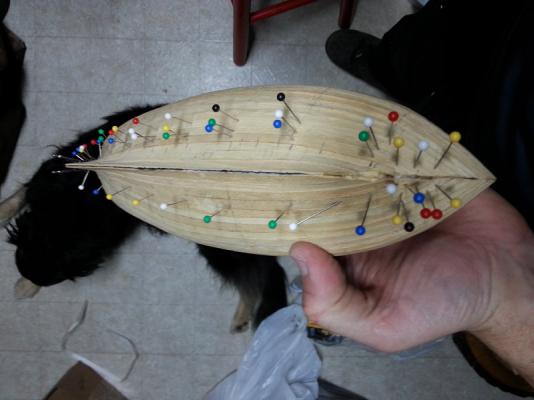
Gluing down the deck. Added some more hot glue to the underside. Then added some more filler to the stern area. I should add my navigator likes to bomb most of my photos.


- 114 replies
-
- 3
-
-
- swift
- artesania latina
- (and 2 more)