MORE HANDBOOKS ARE ON THEIR WAY! We will let you know when they get here.
×


stripehunter
-
Posts
104 -
Joined
-
Last visited
Content Type
Profiles
Forums
Gallery
Events
Everything posted by stripehunter
-
 I have this kit in my closet for the future if i can ever get myself back into modelling. This kit is a bit odd as there are some major features that dont seem to belong to either version of the connie. Since you are going back in time this might not be much use to you but i have a bunch of pics taken from a modellers perspective of interest of the late version down in baltimore. https://modelshipworld.com/topic/15595-reference-photos-from-vist-to-uss-constellation-in-baltimore-md/?tab=comments#comment-484865
 -
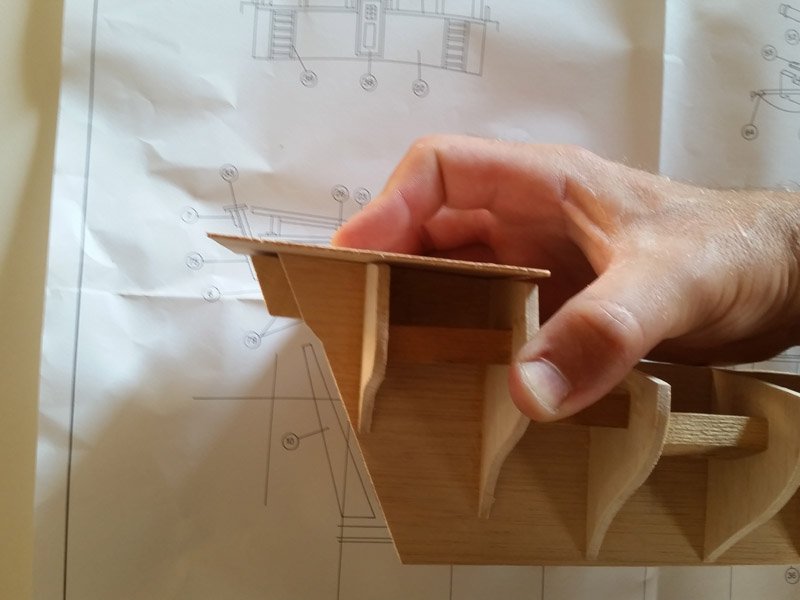
I realized after clamping down the deck that I had a bulkhead misshaped, and had a bit of a dip right in the center on both sides. Once the glue set I razored the glue on that bulkhead and got it shimmed up to level out. My log has me up to about 65 hours invested. Lost a lot of time on the deck.
-
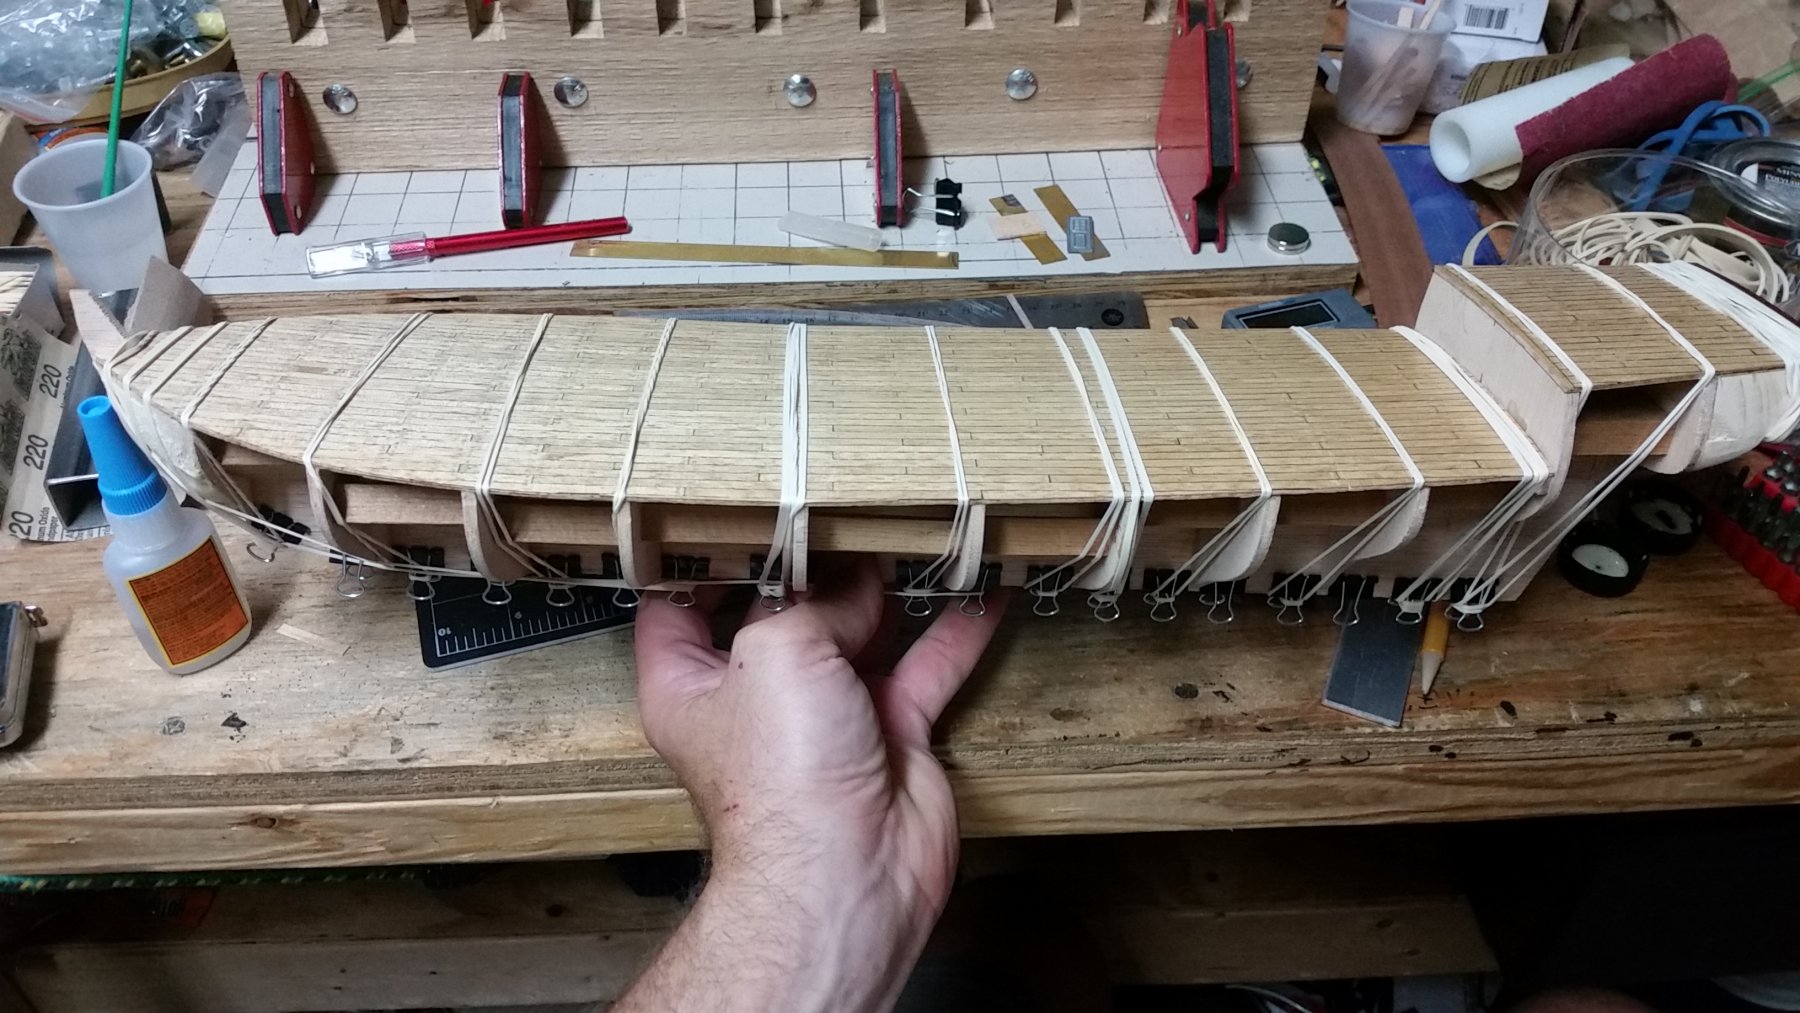
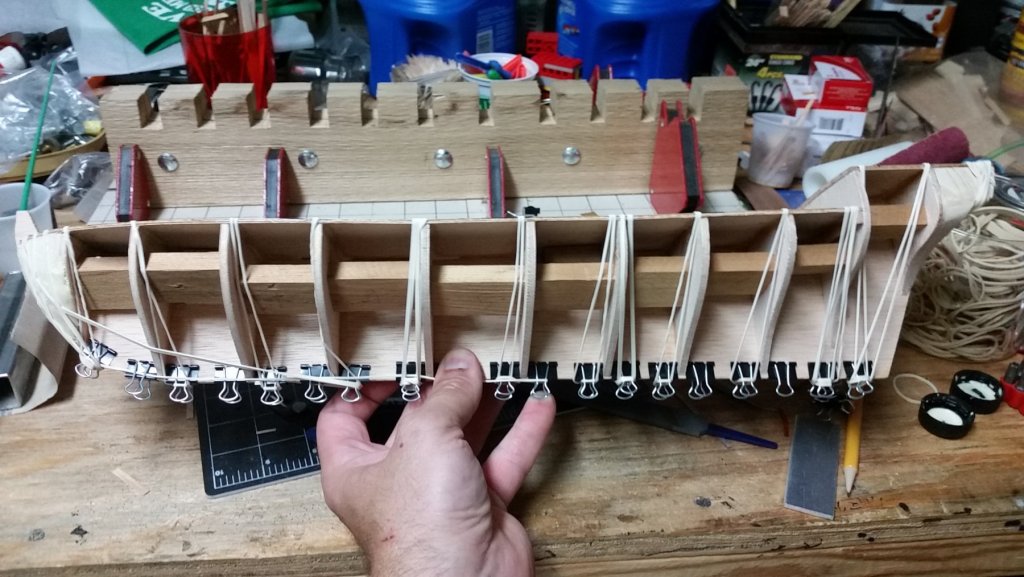
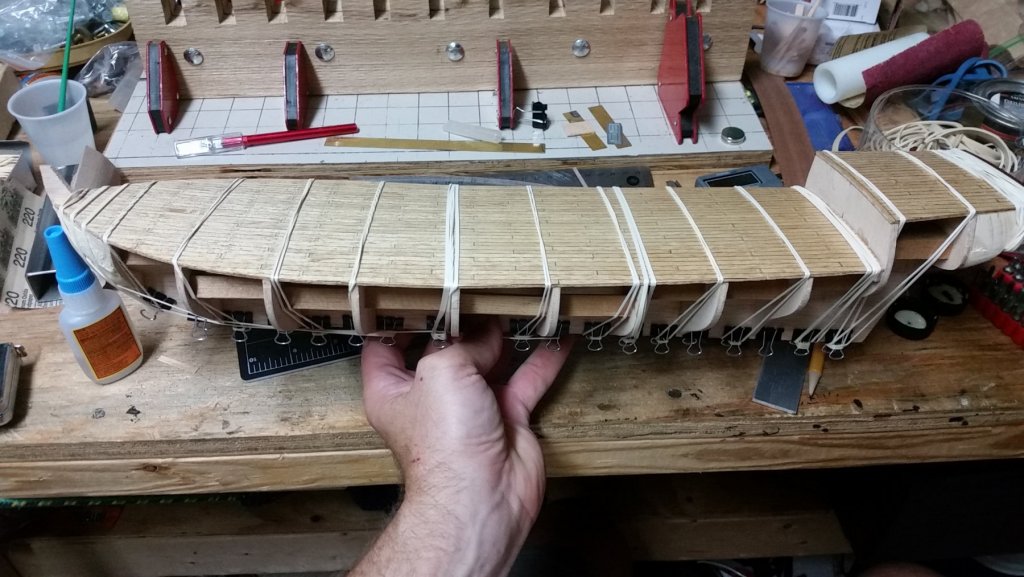
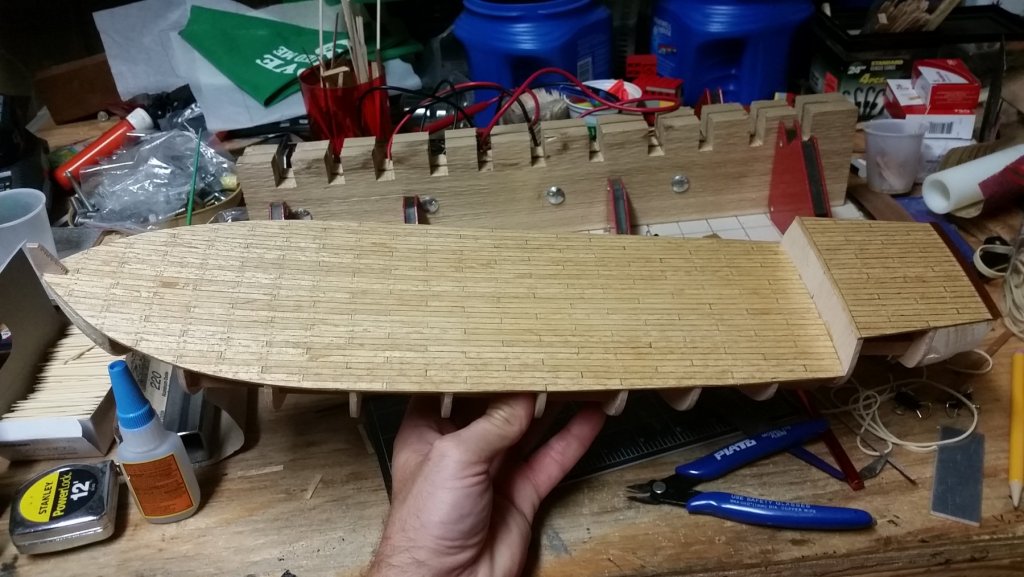
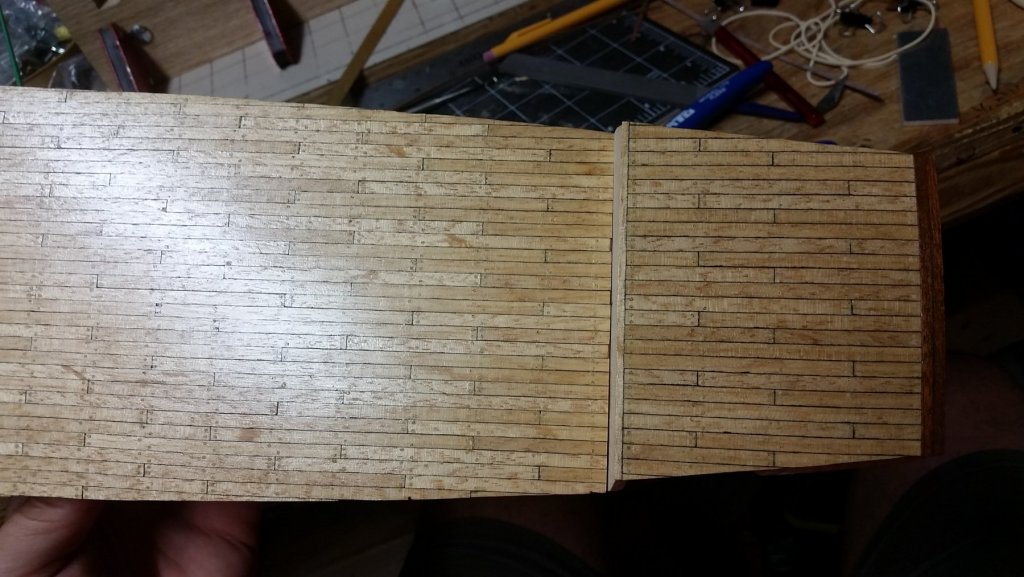
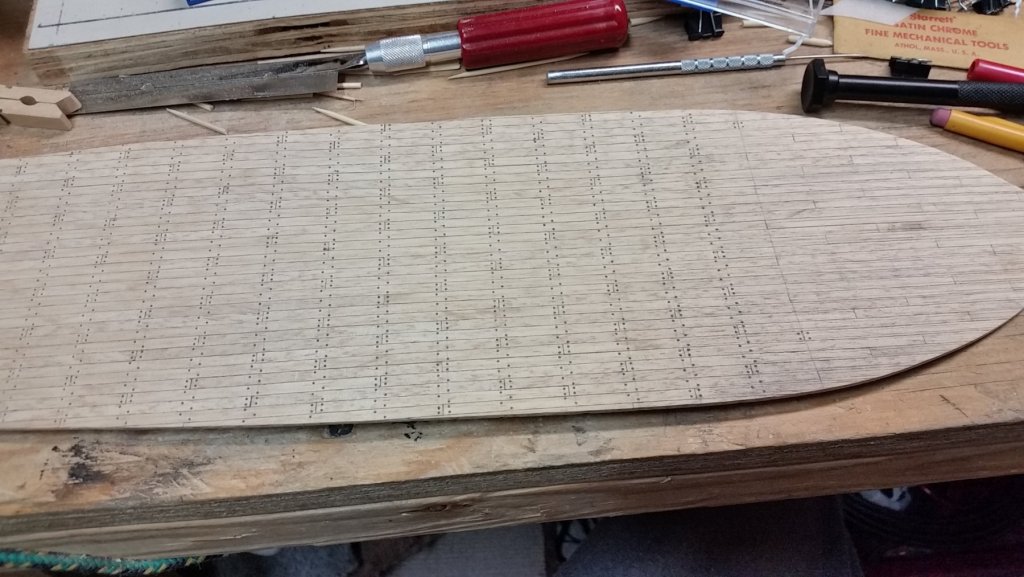
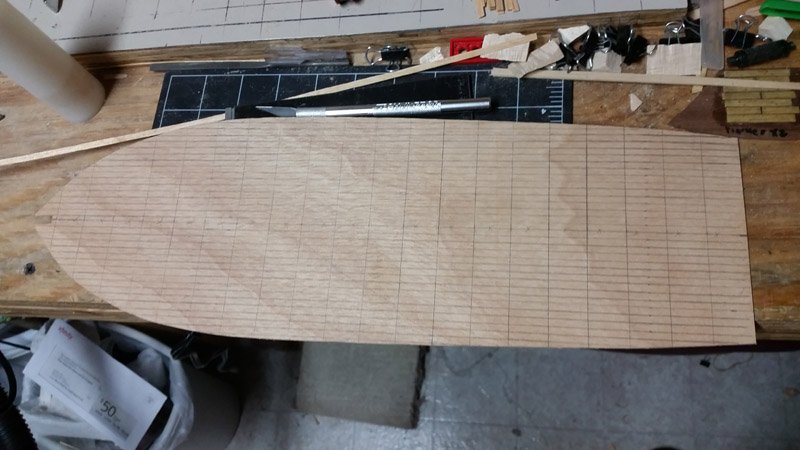
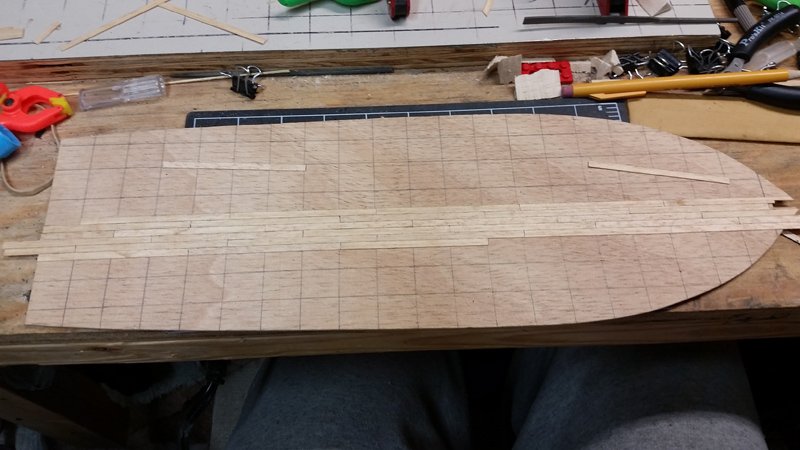
Main deck completed. upper deck started. Took extra care to synch the planking pattern with that of the main deck. Gluing down decks:

-
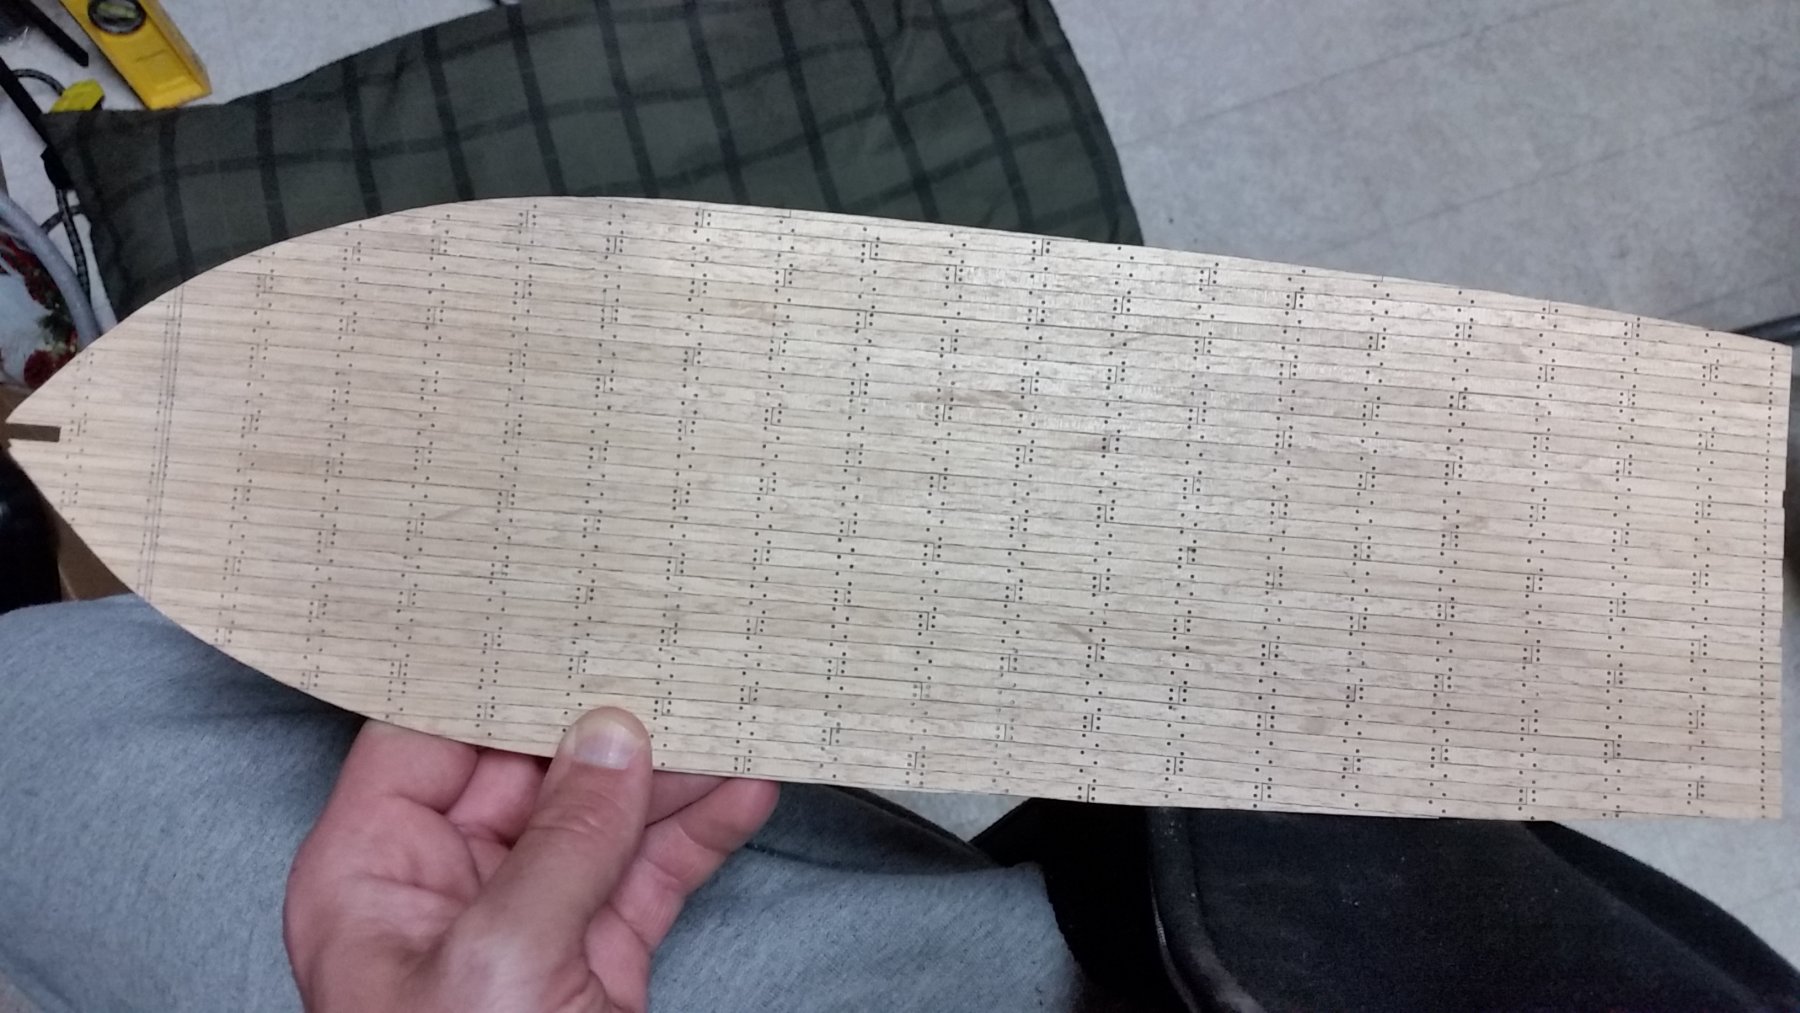
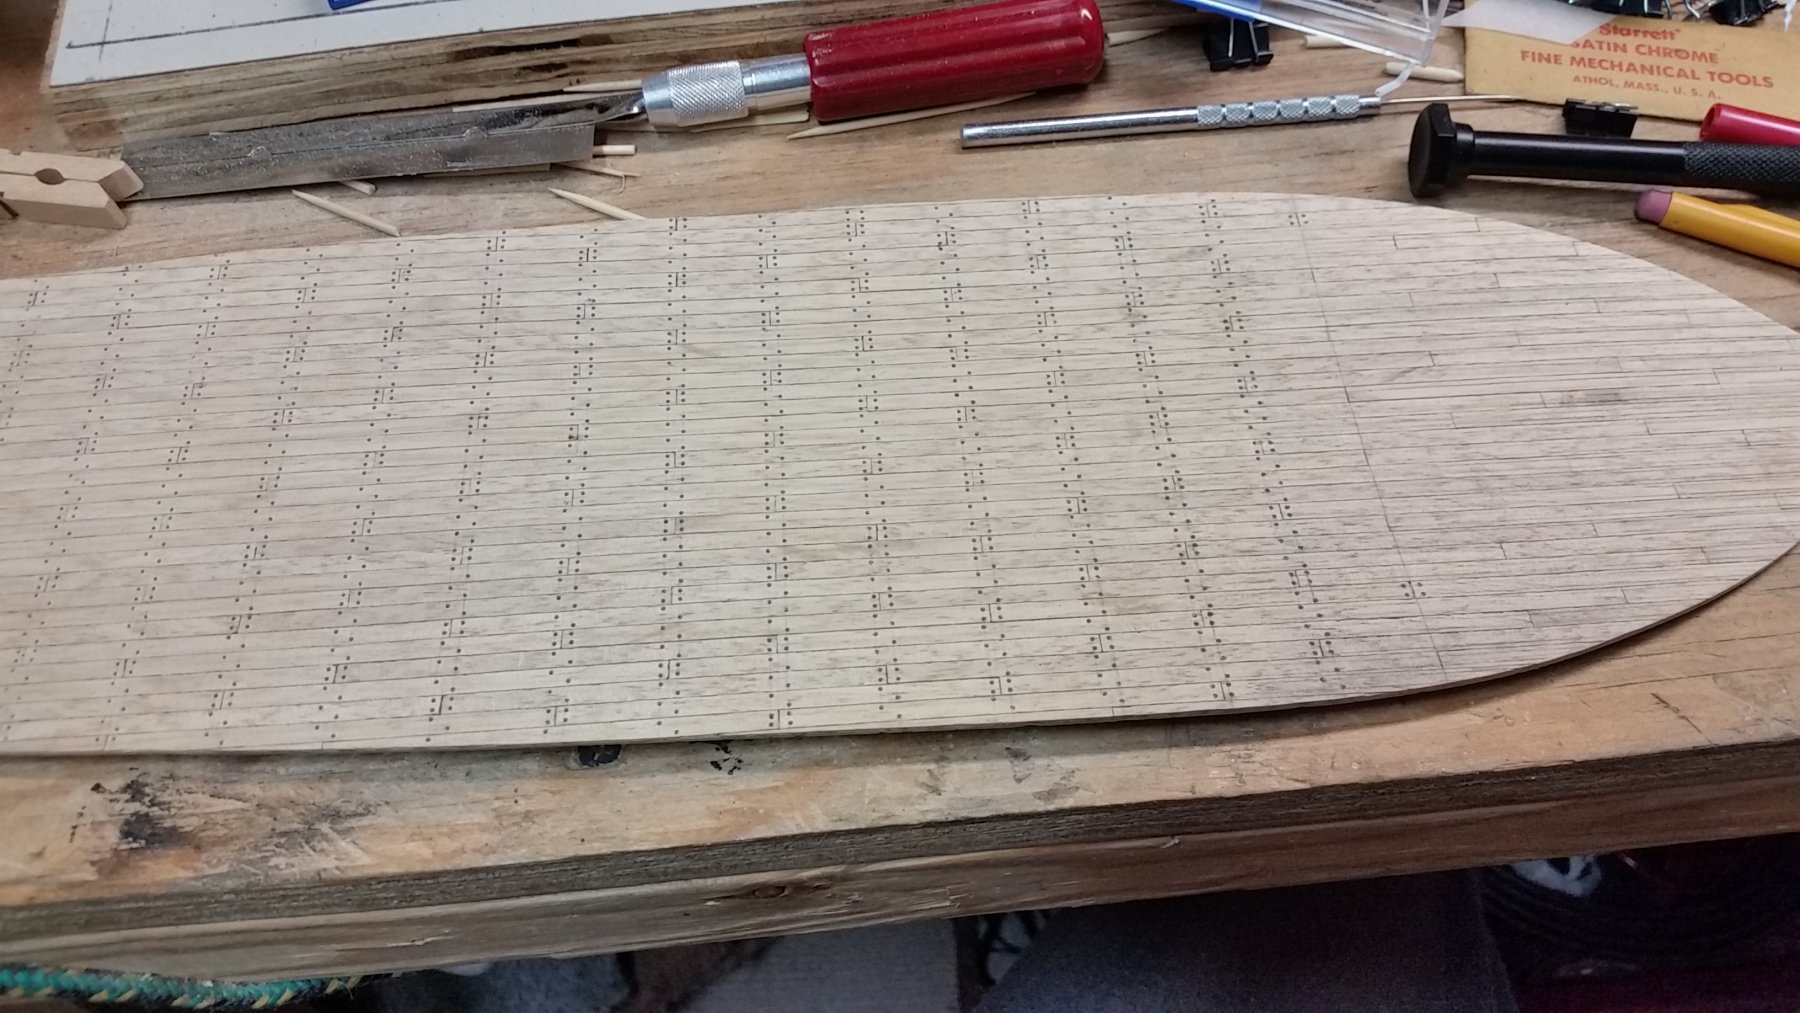
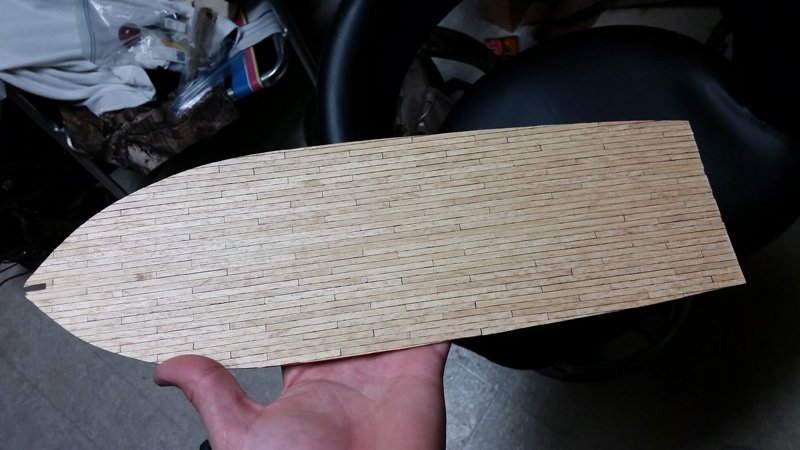
After some long interruptions by life, trenailing continues.


-
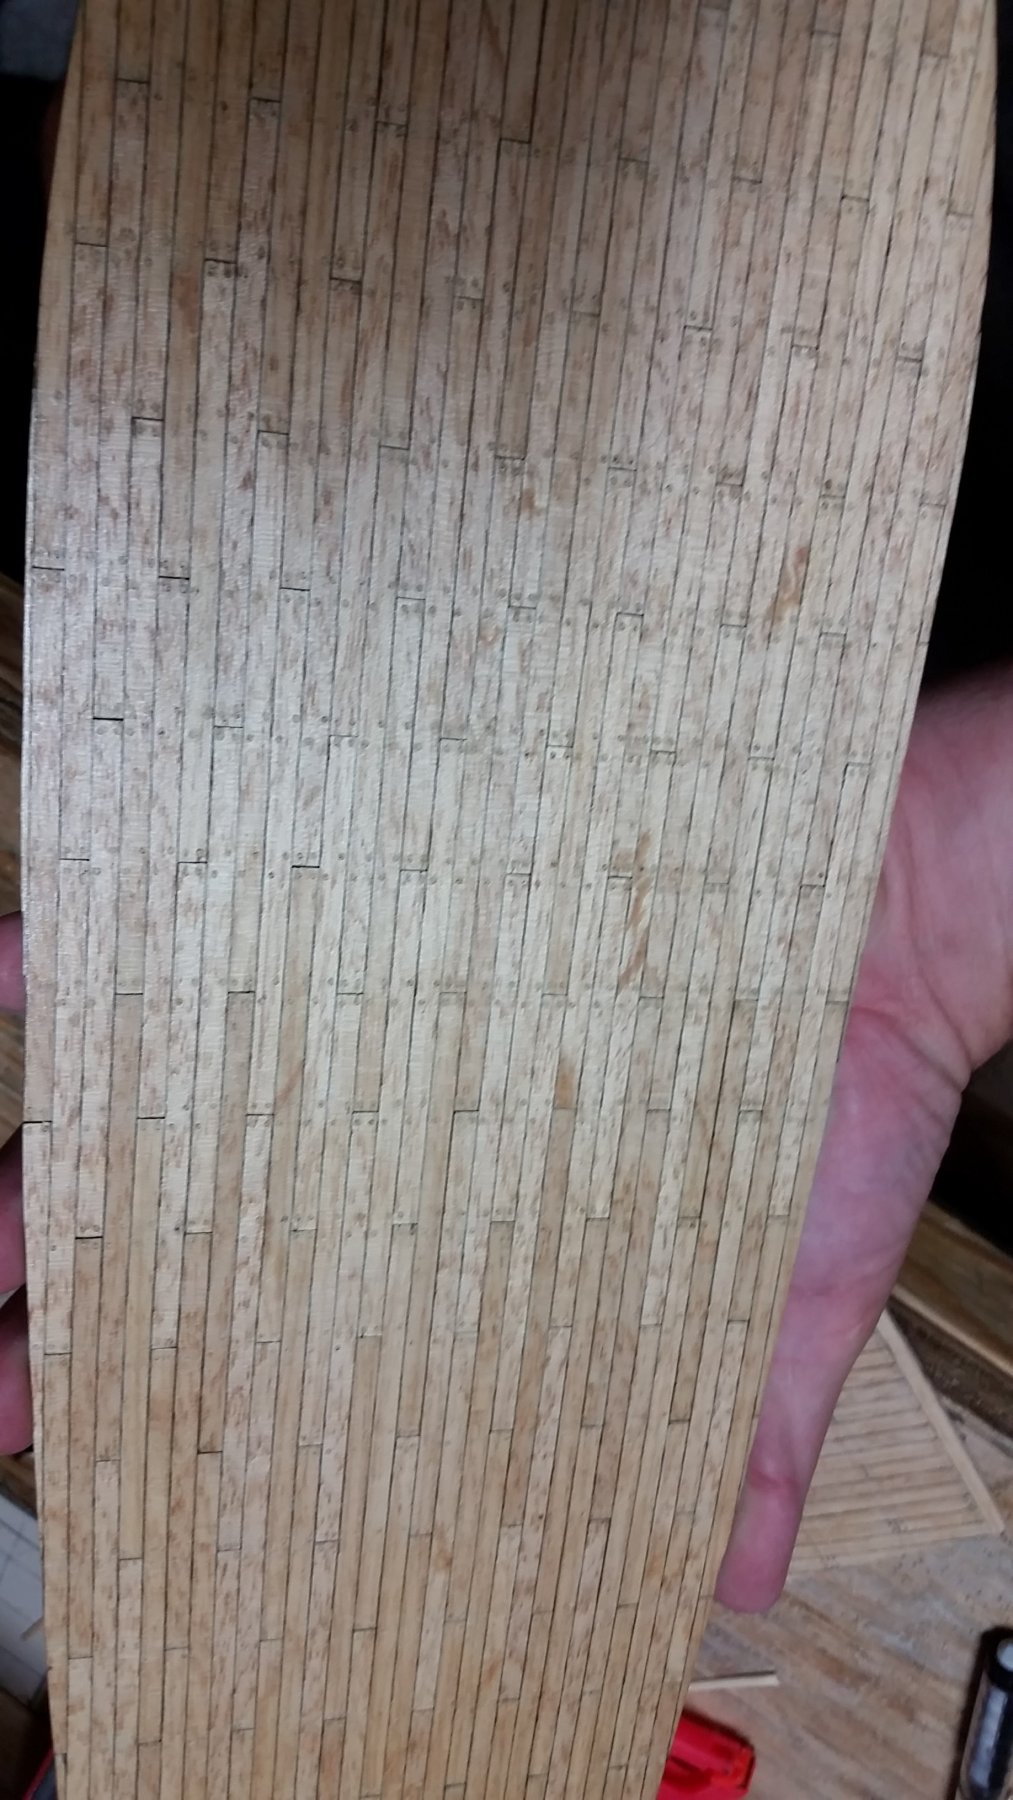
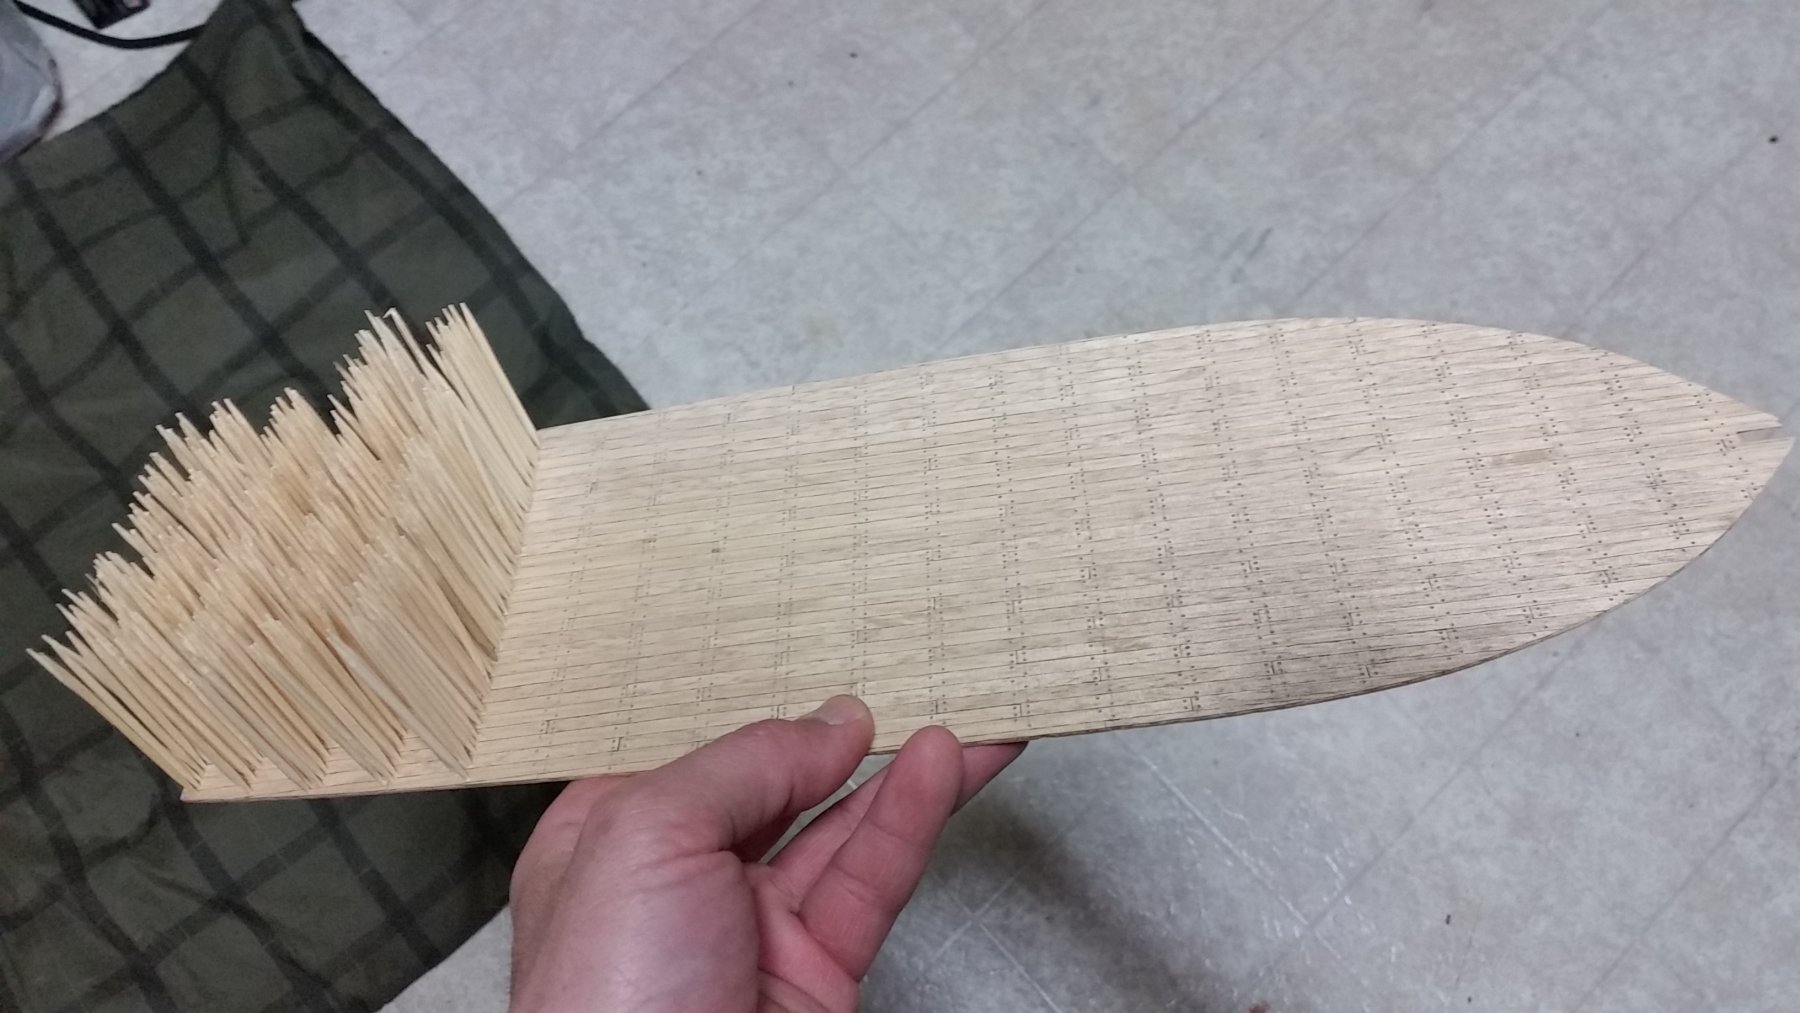
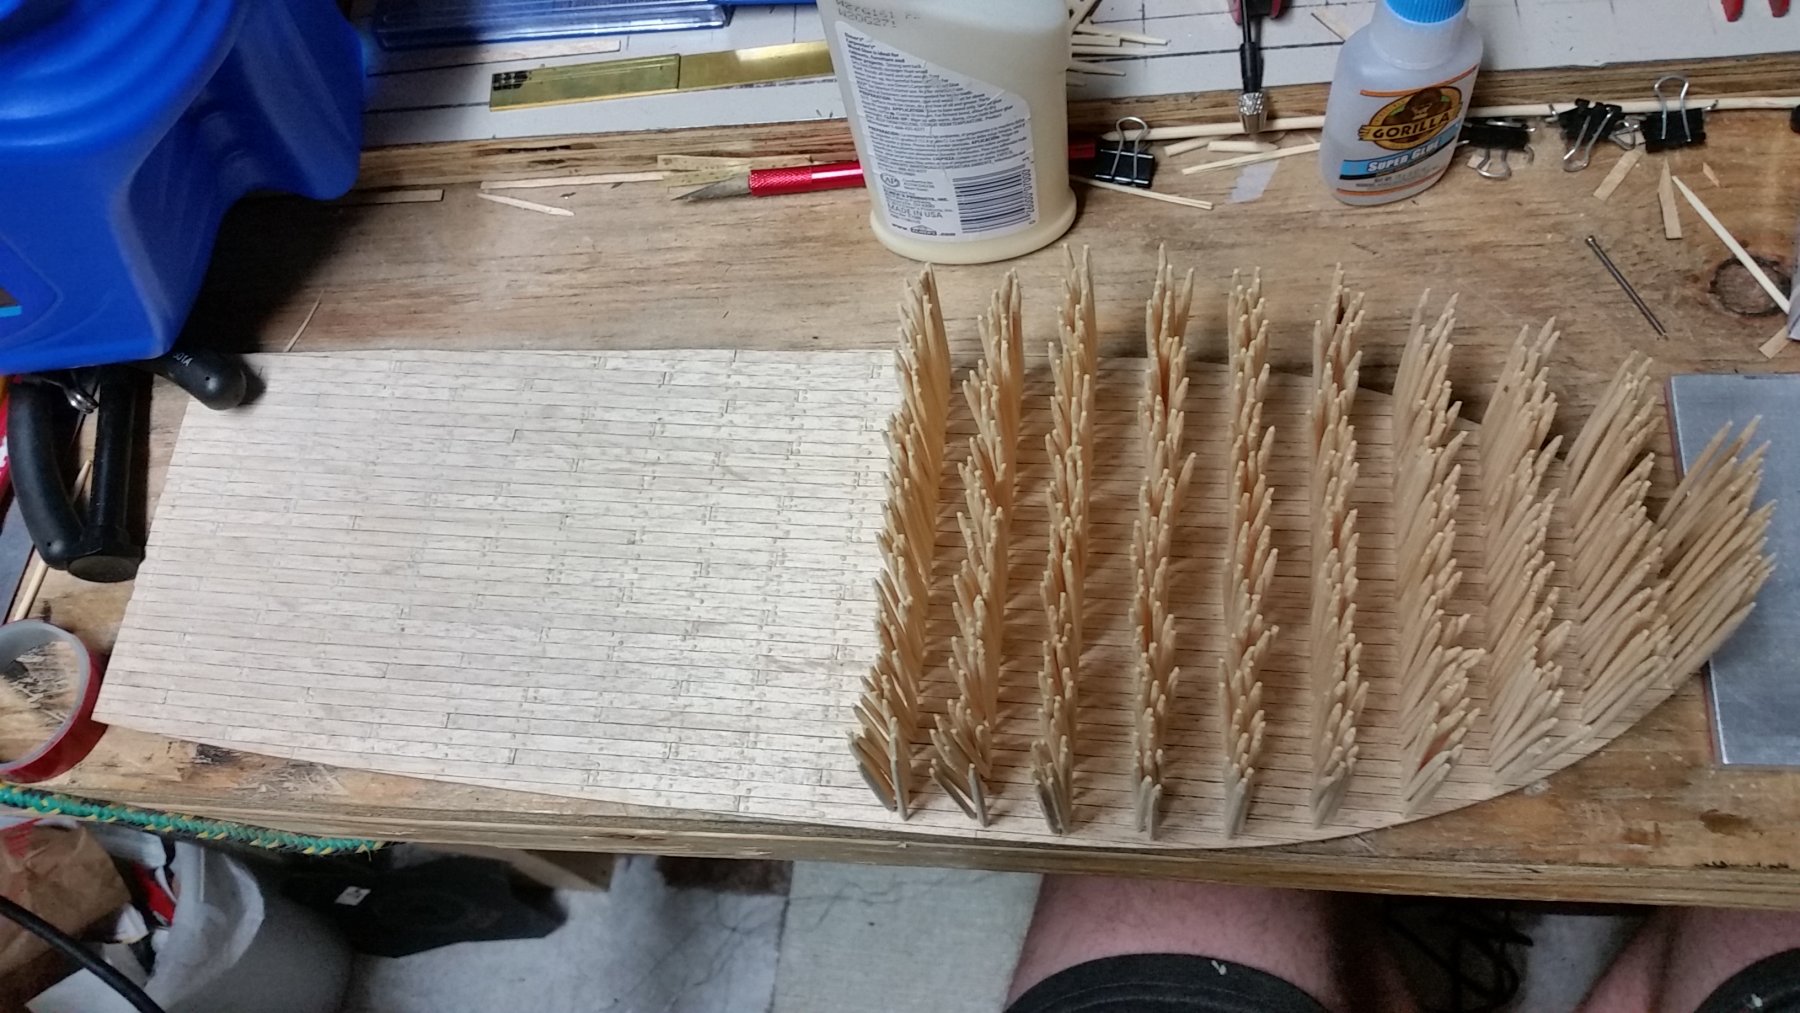
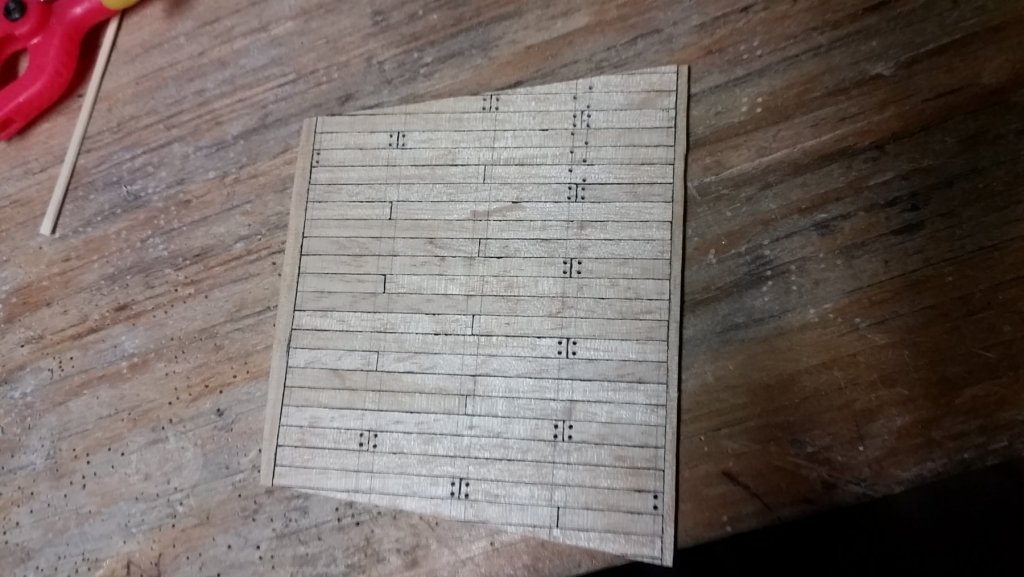
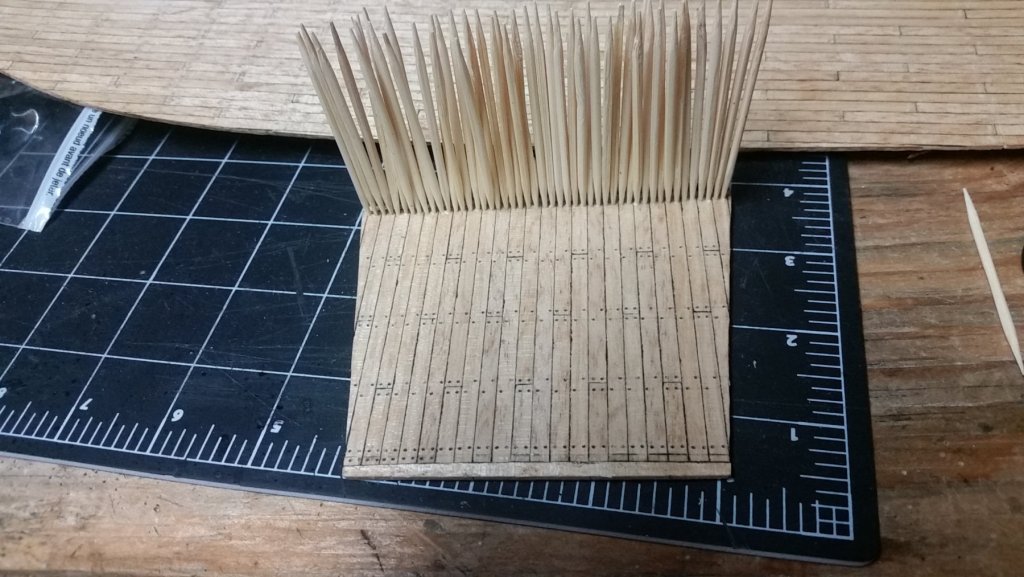
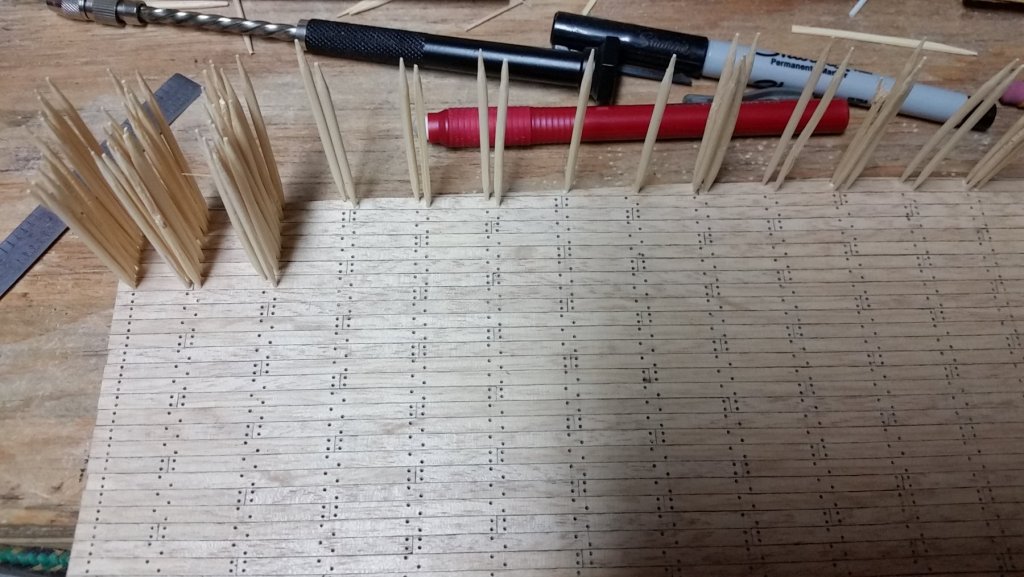
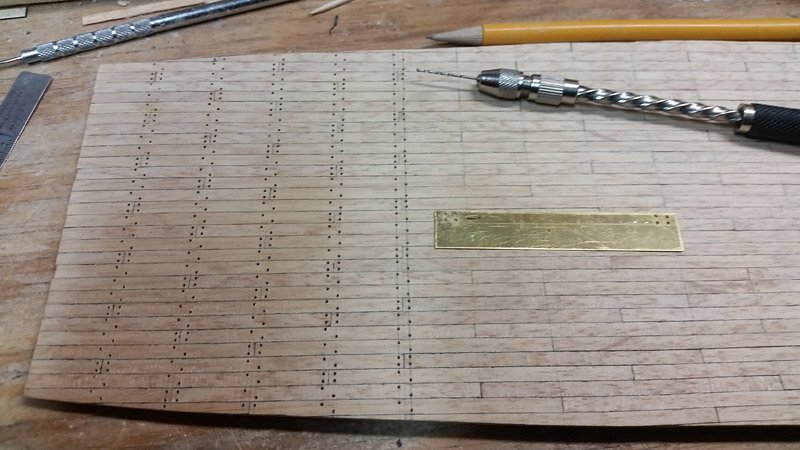
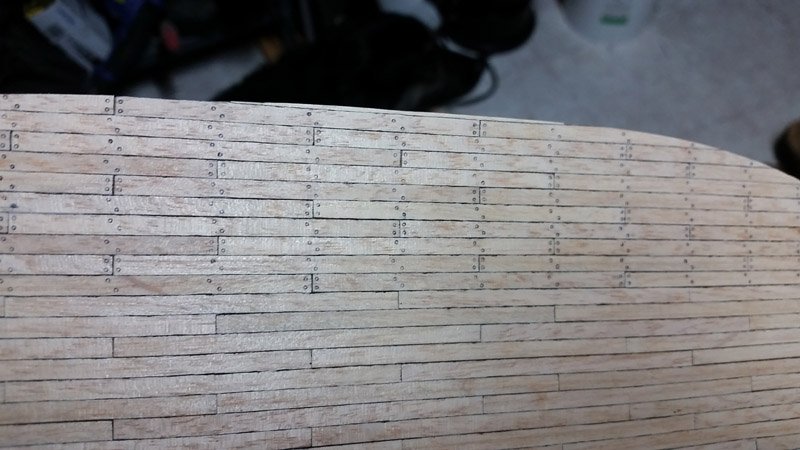
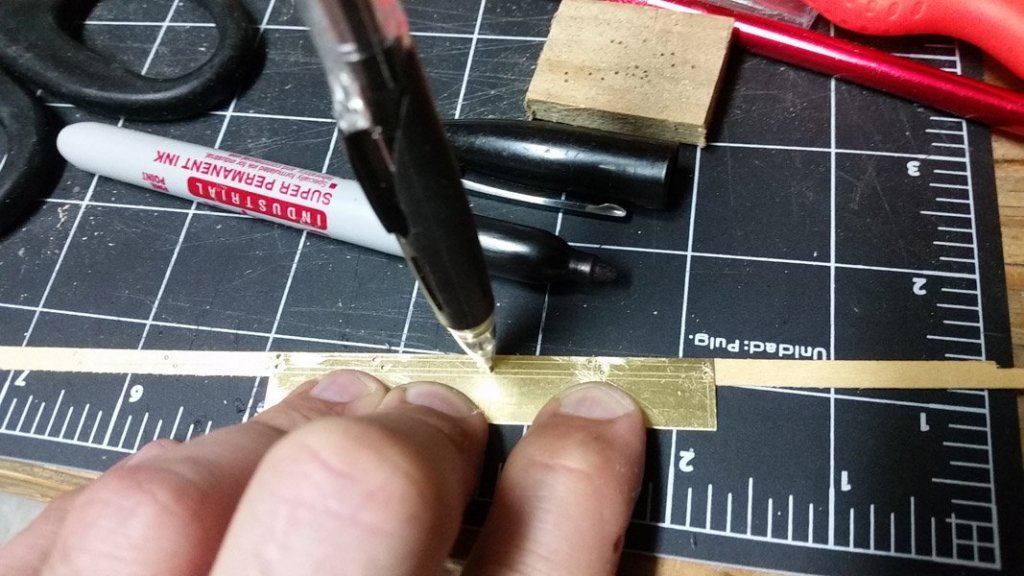
A pic of the final version of my drilling template. I would draw a line across the deck at the butt joints, then center the 4 hole pattern on that over a butt joint at opposite ends of the deck and drill. Then i'd draw two lines through all the holes. To drill the remaining holes i'd center the holes in the pattern over these lines, then center the plank edge under the reference holes, hold down and drill. I tried tracing out lines and drilling free hand, but even after starting with a sharp point i found the template to be quicker and more consistent. I started toothpicking with bamboo. First area confirms i got exactly the effect i was going for. Very subtle but noticeable at the same time.
-
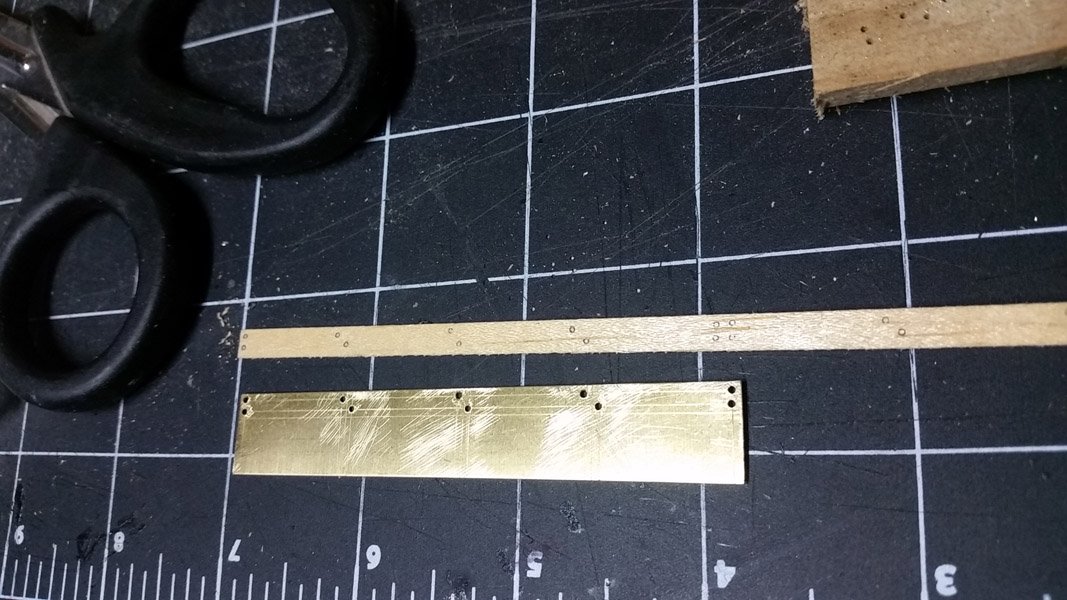
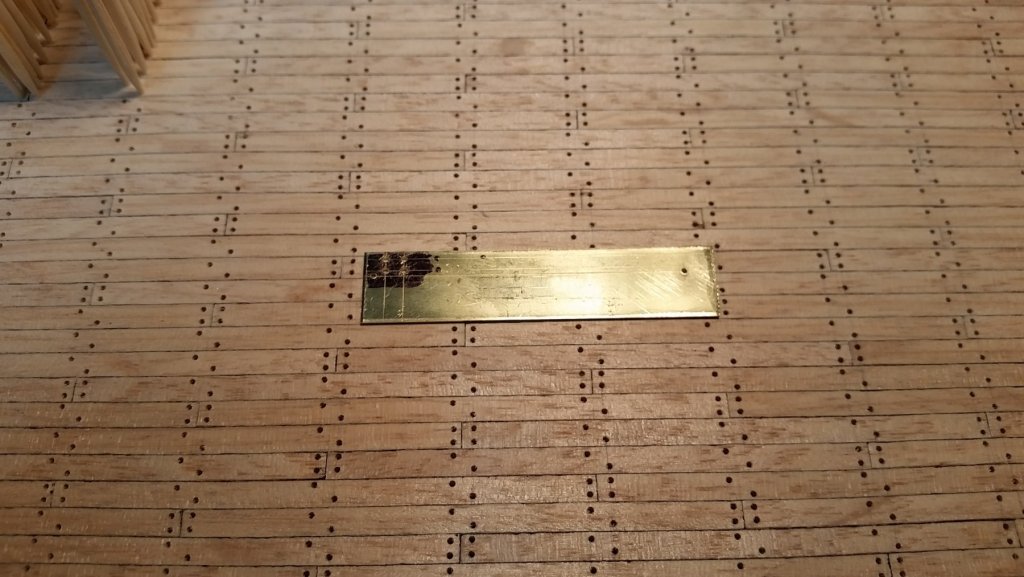
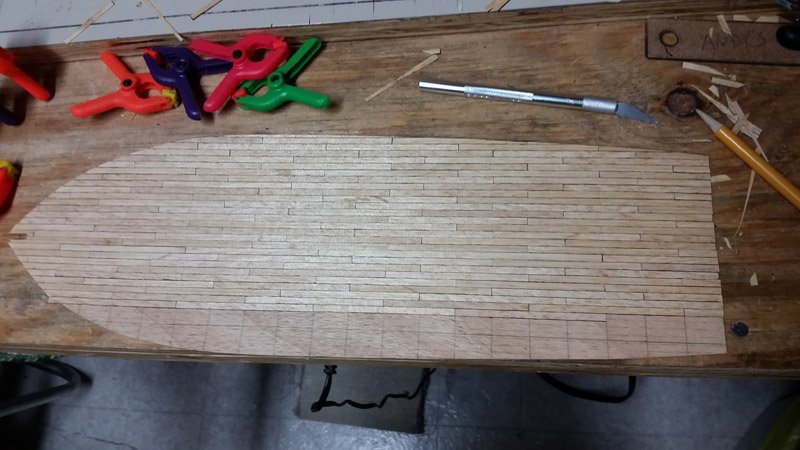
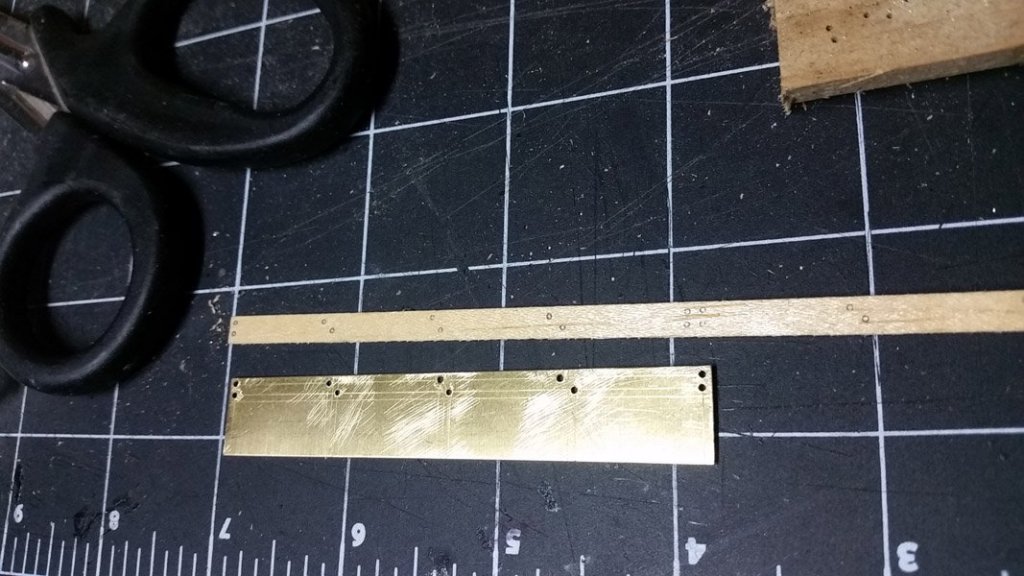
A sports injury wrecked my shoulder so ive not been able to work for some time. I finally got all the holes on the main deck done. Will start plugging them soon. The templates i was using for drilling my holes were of very thin brass. As I used them for drill guides, the bit would ovee time enlarge the holes in the template. I replaced it a couple times before finally using some much thicker brass. Getting the holes lined up and drilled in the thicker brass was a challenge in its own right but finally got it done. Then i immediately made a duplicate to use as a master if i need to redrill another. Another thing i did with the new template was to include holes for referencing it. All i need to do now is line up the plank edge seems under the holes on both ends and i know its centered properly.

-
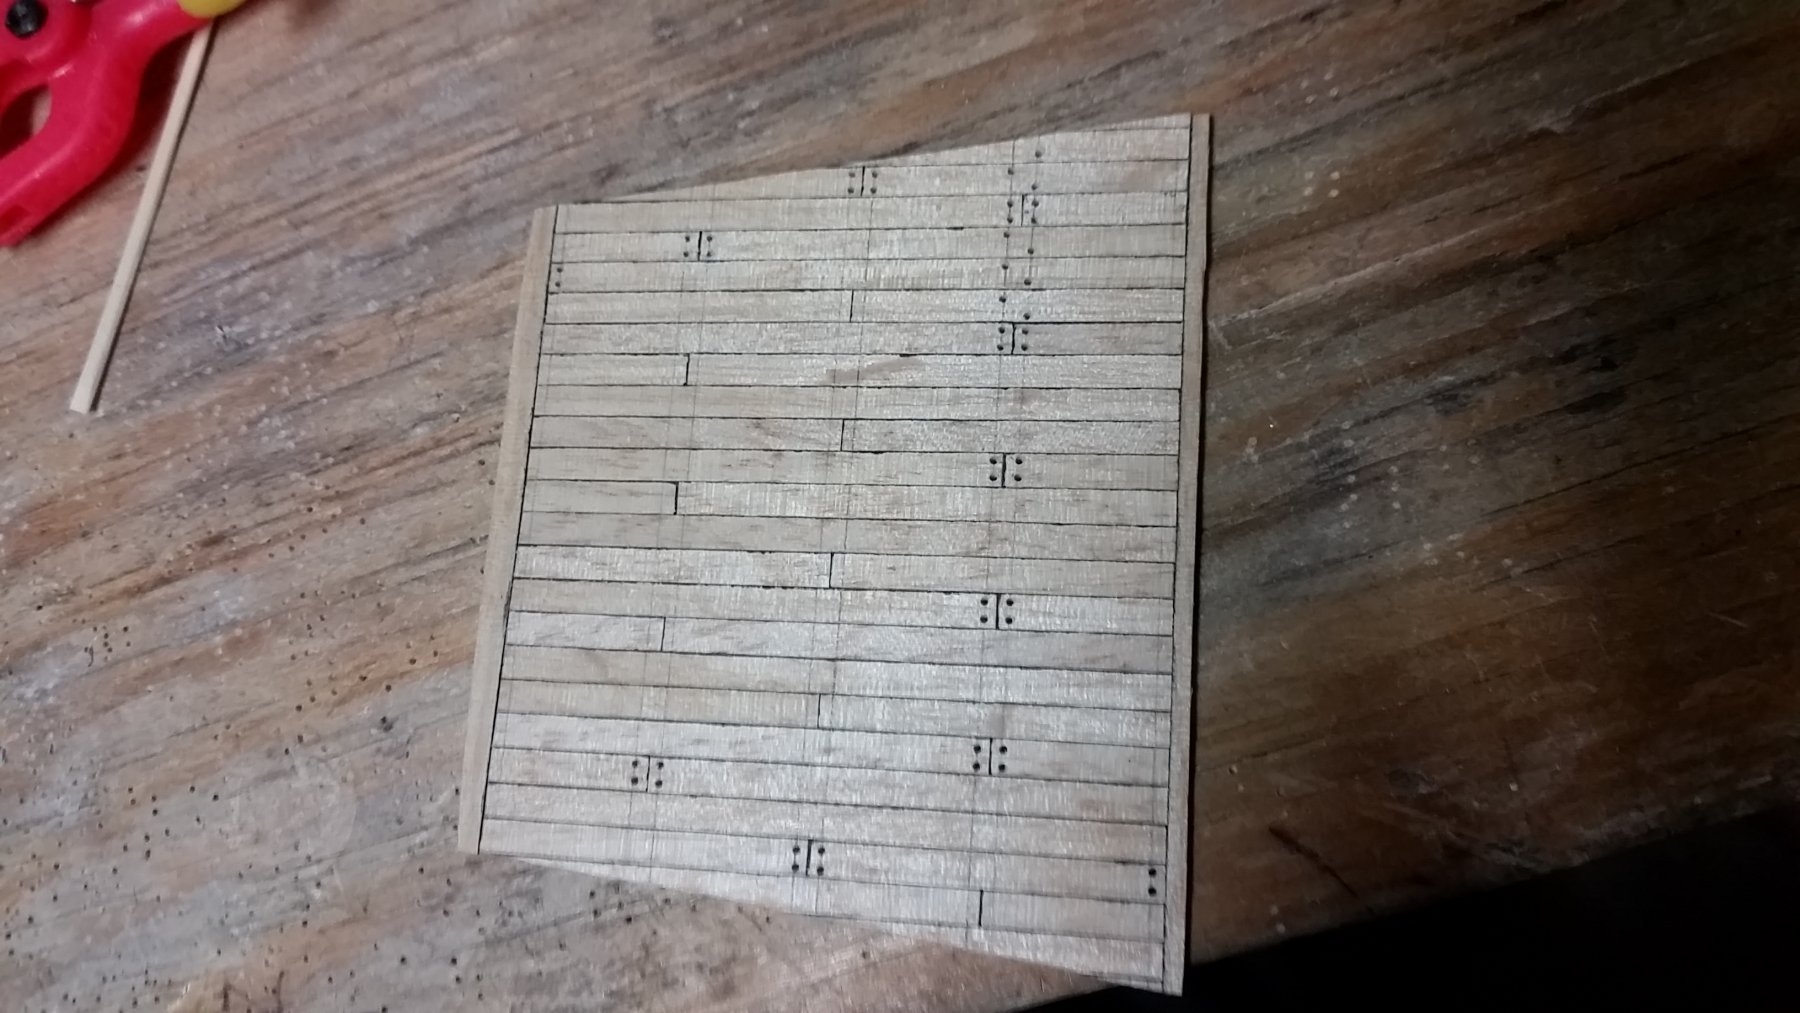
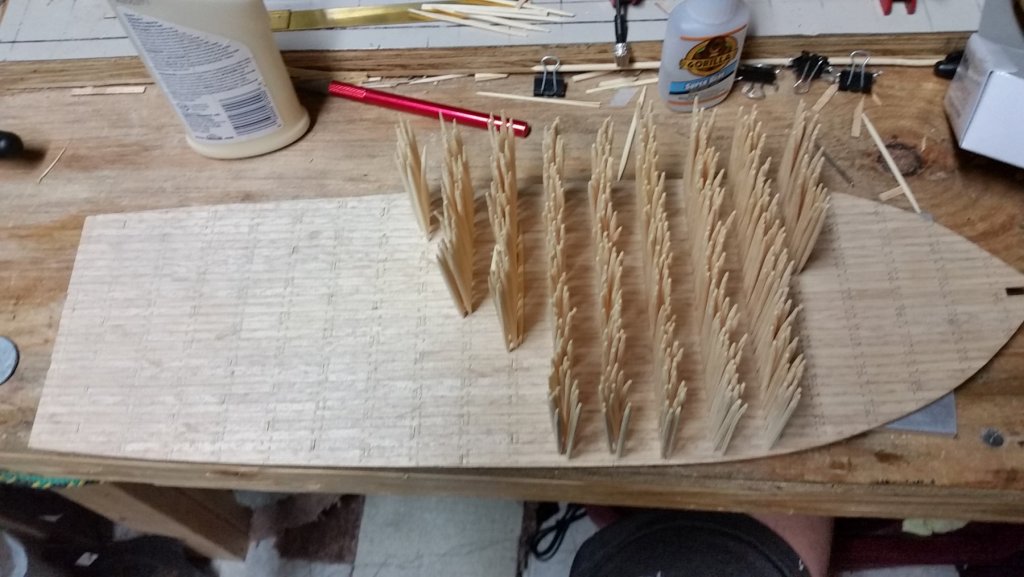
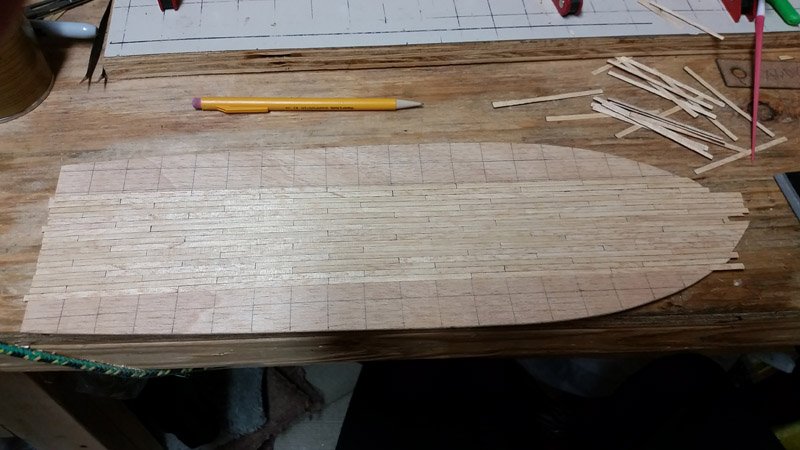
Been getting some work in. Not much progress, but up to about 1000 holes. Admiral was giving me some fresh orders while i was drilling, and i accidentally made a 4 pattern where there should have been a two pattern (after this pic was taken). Oops. Going to leave it as is and hope i can cover it with a cannon or something. As subtle as the nails will be i doubt it will be noticed by anyone but me. Tried lining off and freehanding the holes, but i find my brass strip templates to be quicker and more accurate. I drill two four patterns at butt joints on far ends of the deck then line through the holes. Then just center the lines under the holes of my template. Problem is the holes wear larger as i drill and i need to keep making new templates. Got some thicker brass to use hoping it will be more durable. If i can drill through it that is.
-
Will be watching closely. I have this kit in the closet and hope to get to it sometime in the next year or two. Great work so far as always.
- 75 replies
-
- 2
-

-
- constitution
- mamoli
- (and 2 more)
-
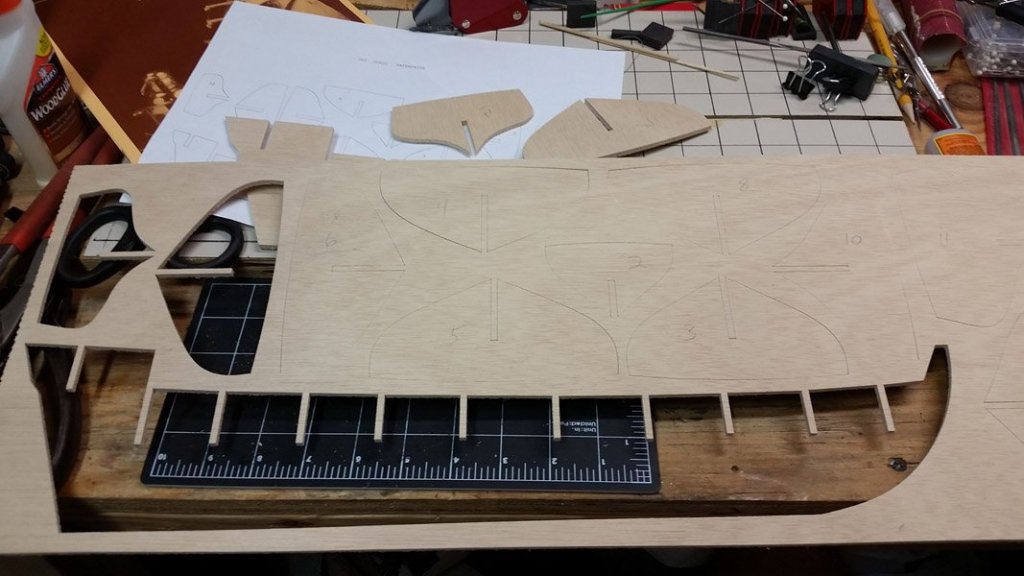
Sanded off the ink stamped nails. Began drilling out to use toothpicks. I made a new template, and am making my holes and rows much more consistently than I had before.
-
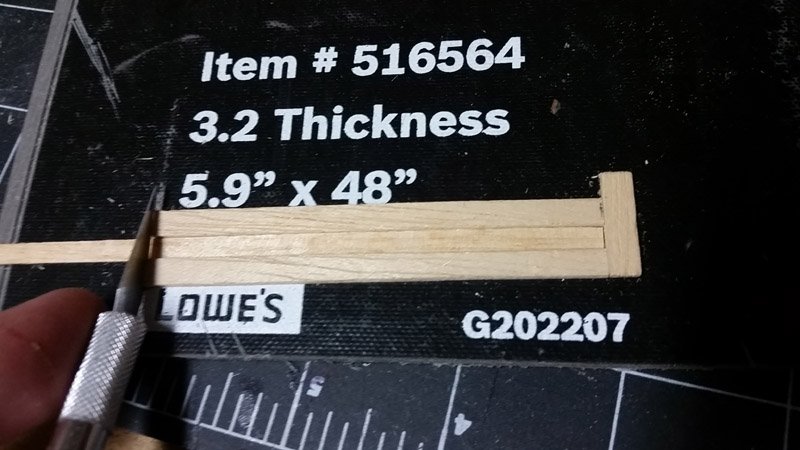
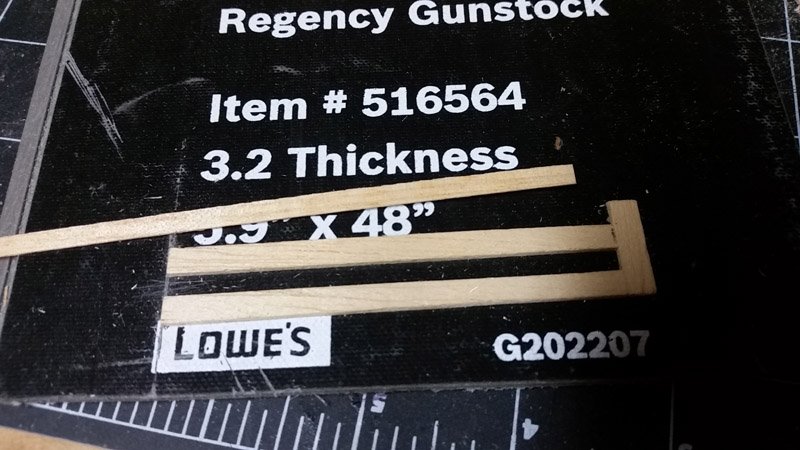
catching up on my deck progress. The Jig I made for cutting consistent planks using scrap wood and an old vinyl floor sample. I used black acrylic paint on one side and one end for caulking. My simulated trenails before I decided to sand them out and start over.
-
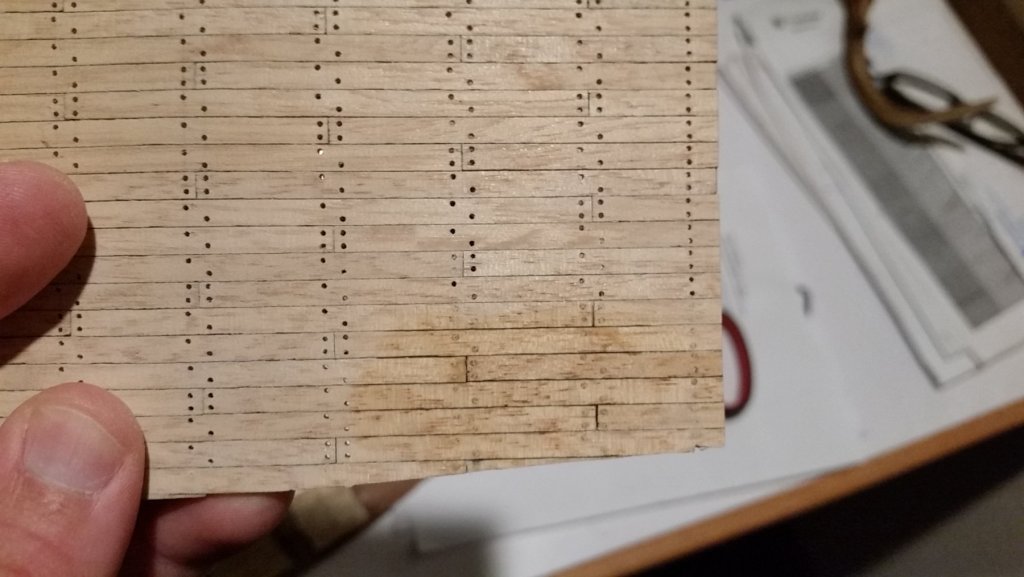
Thanks all. I've already sanded them out and started drilling holes. I didn't like the pattern either. I had some sloppiness in the template I made for making them. I did a poor job of getting my holes dead center on my layout lines. What I did this time, I drilled a hole in one sheet of brass, then centered that hole over the bottom sheet of brass with the marks on it. centered the hole on the cross mark, clamped in position, and used the top sheet as basically a drill bit holder to keep the bit from walking and removing an inaccurate punch process. Looking back at some pics I took last year of the Constellation down in Baltimore, I'm going to try to mimic it as much as possible. I already started some tests with drilling and toothpicks, and didn't mind the process as much as I thought I would. The white wood toothpicks I have seem a hair dark for my tastes once the poly soaks in. I have some bamboo ones coming that I will compare on a mockup to make my final decision. In the mean time i'll keep drilling holes. This is my goal. and as for stripehunter, you guessed it. Andy

-
Life has kept me from doing much work for some time. Ive been working on my deck planking. I have some more log photos to post as time permits. In the meantime though im looking for opinions on my simulated trenails. Im thinking i dont like the results so much. Not as subtle as id hoped. Im seriously contemplating sanding them out and trying something else. Thoughts please?

-
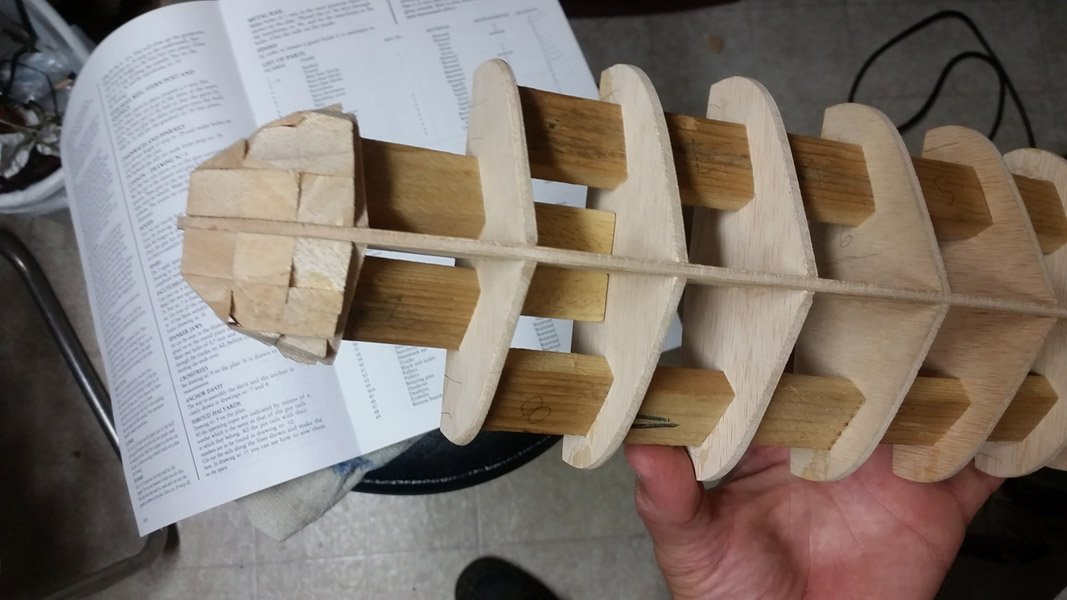
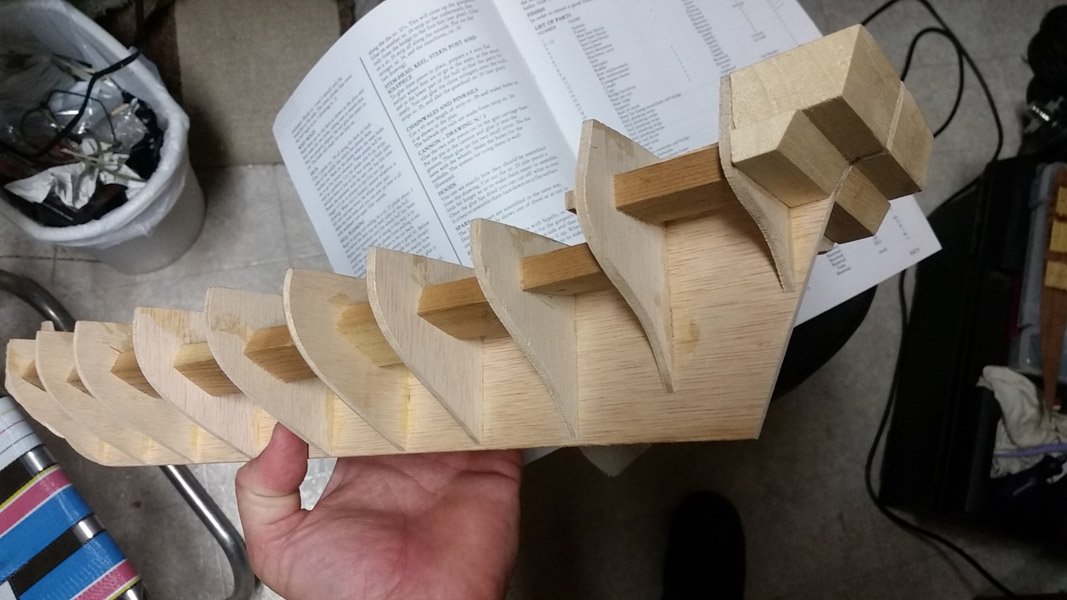
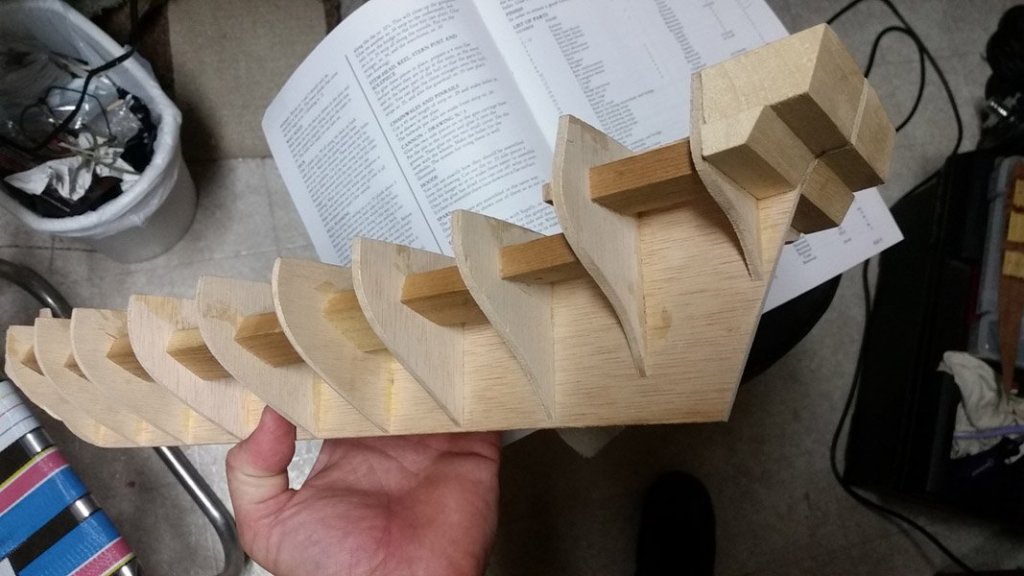
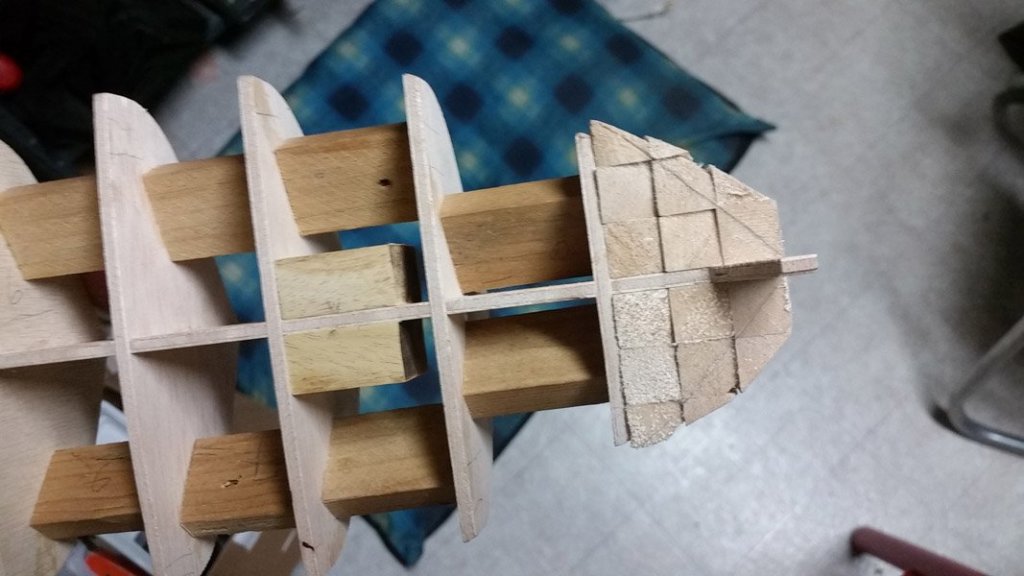
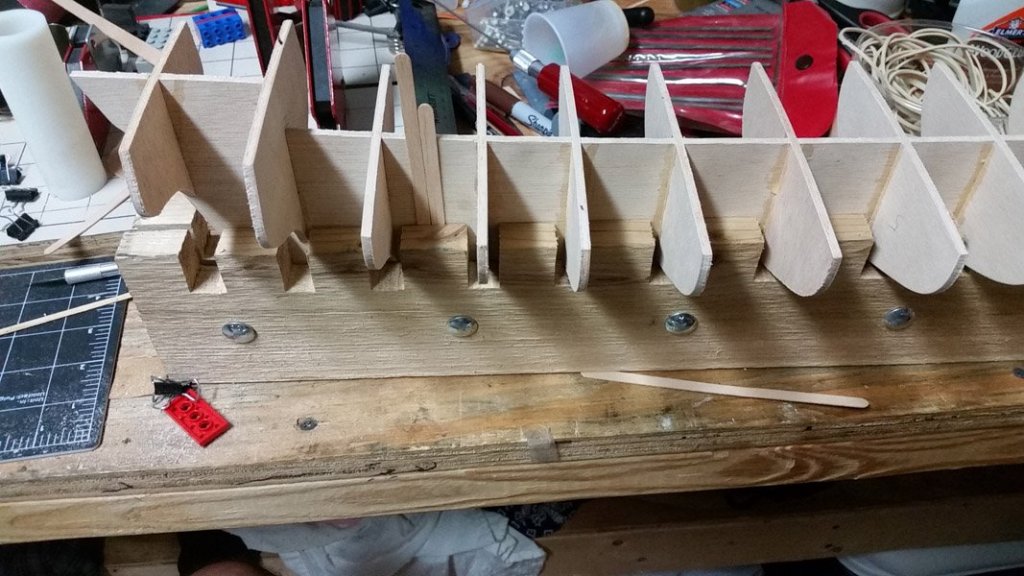
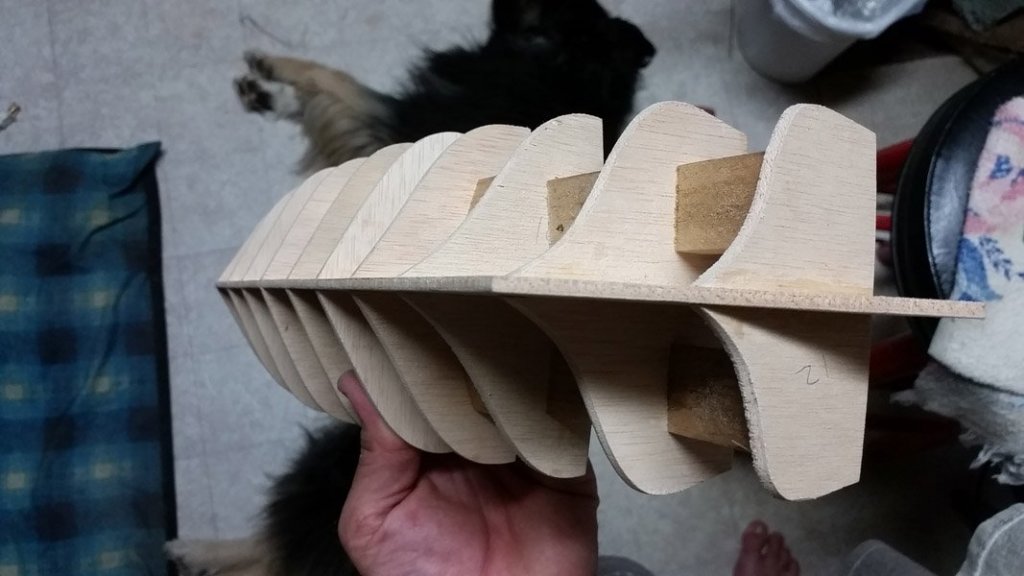
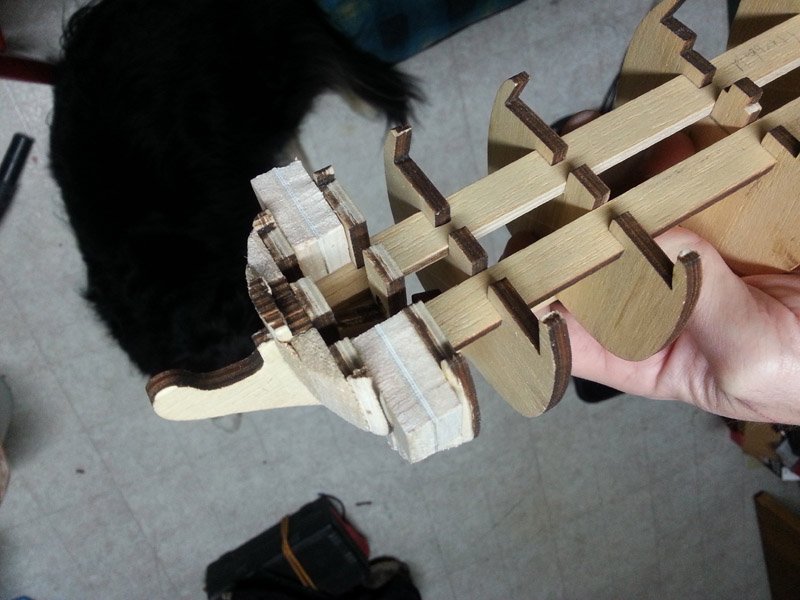
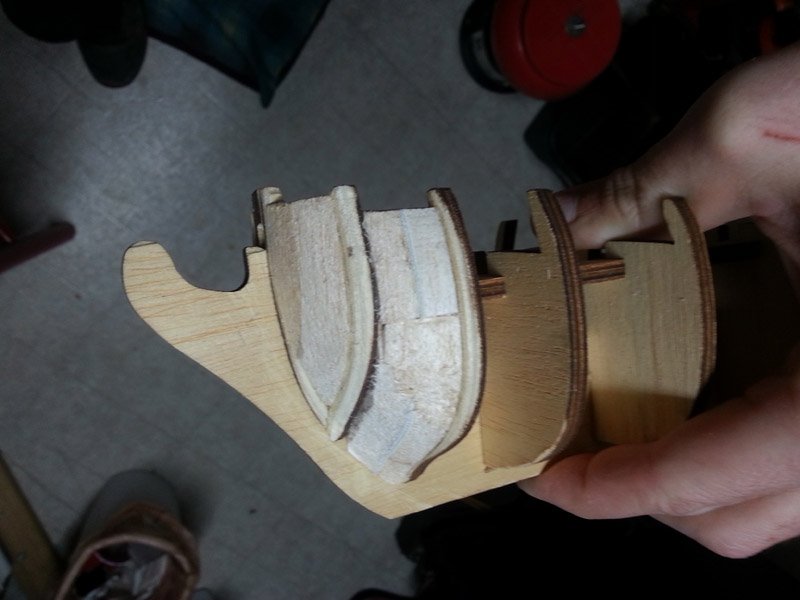
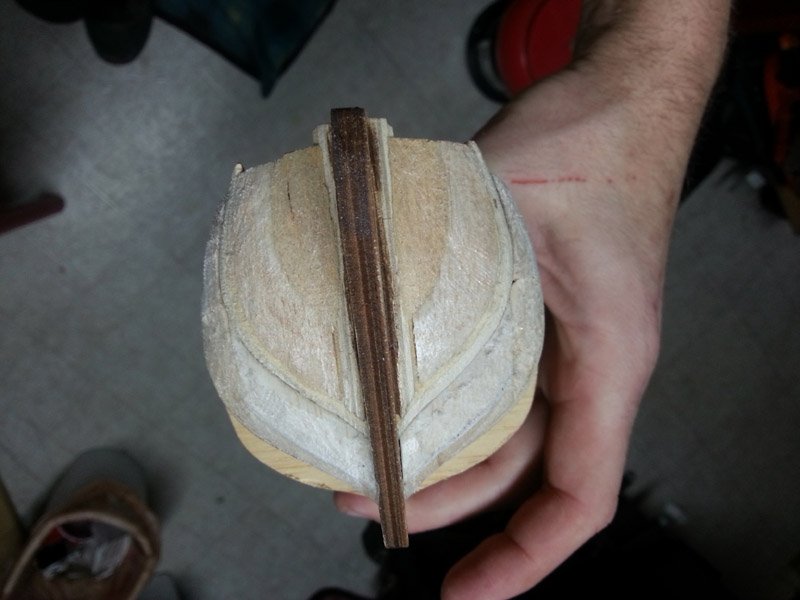
continued working and shaping bow and stern blocks. Working one side of the bow to start. first two bulkheads seem a bit 'off'. The first one seems too small in places, and the 2nd is mostly too big. Will take some more work to find a happy medium between them.

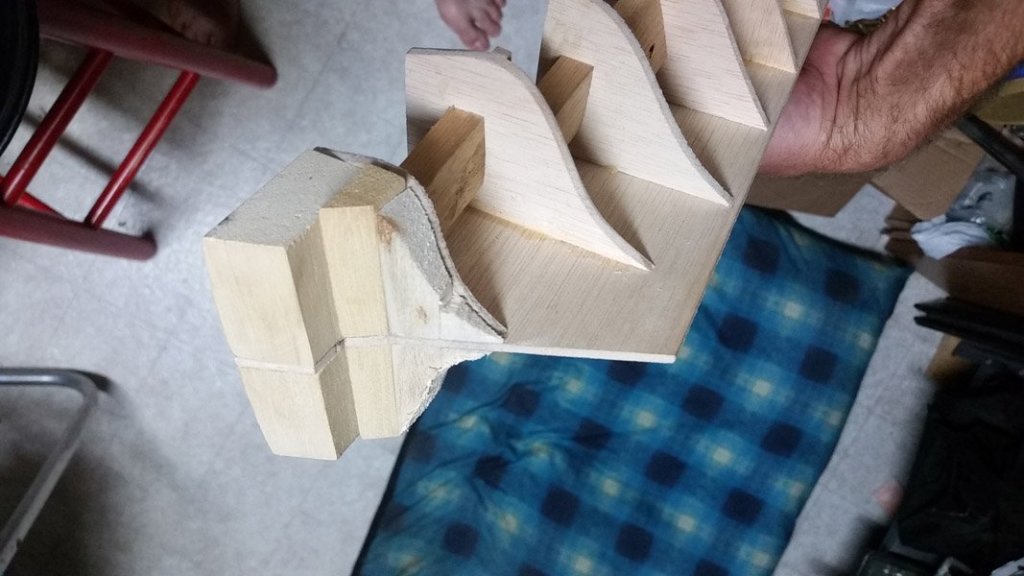
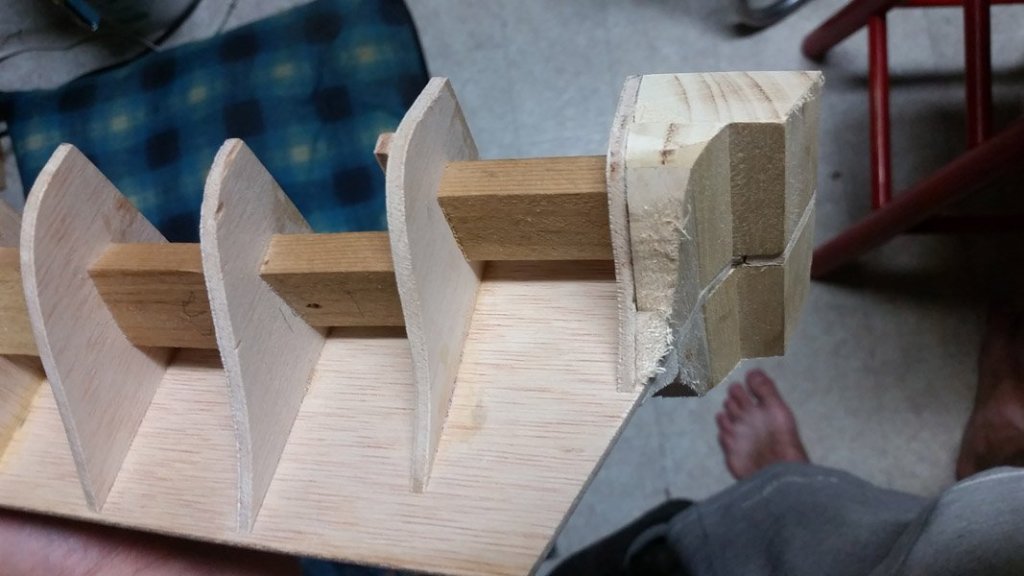

-
encountered my first oddity with the kit when starting to work on my bow and stern fillers. The upper deck extends way beyond the back of the keelson, as do the filler blocks provided. I compared all to the scale drawing, and it looks like the stern filler blocks are the desired dimension to use. The plywood keelson is cut out way too short in the stern. Once I made that decision, I started shaping and gluing bow and stern filler blocks. Still have much work to go on that.
-
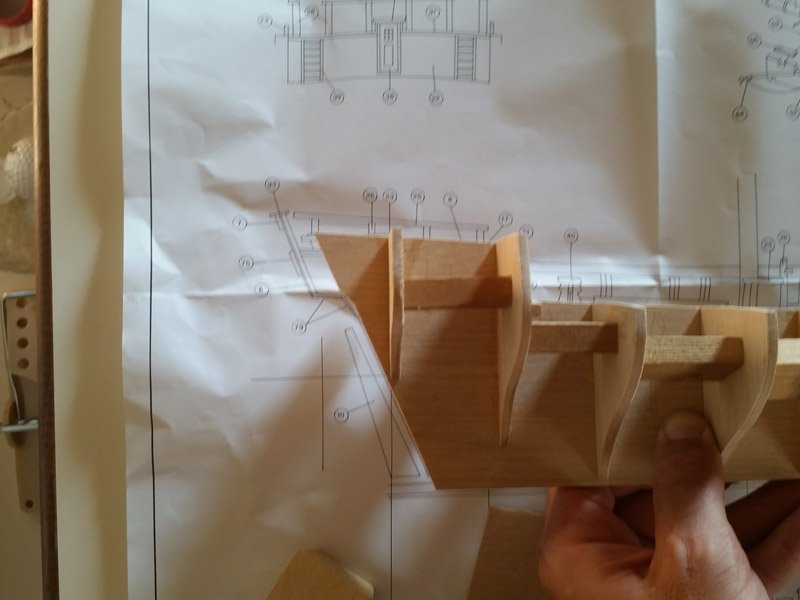
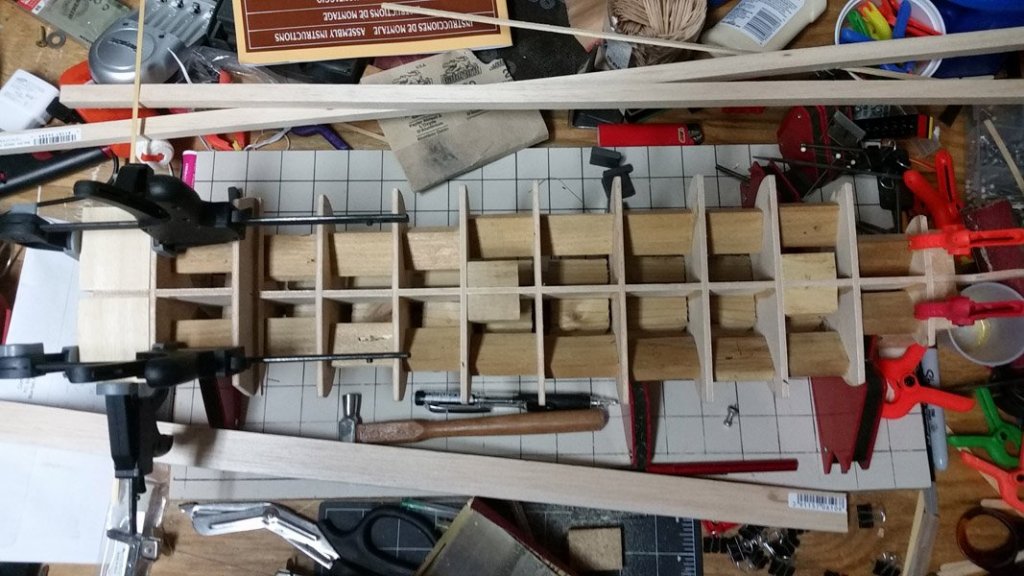
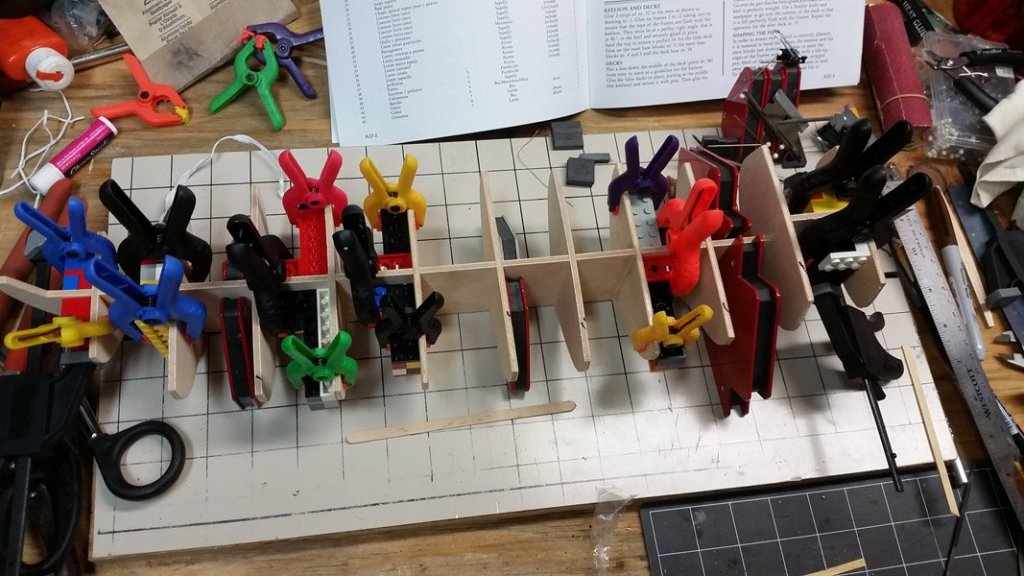
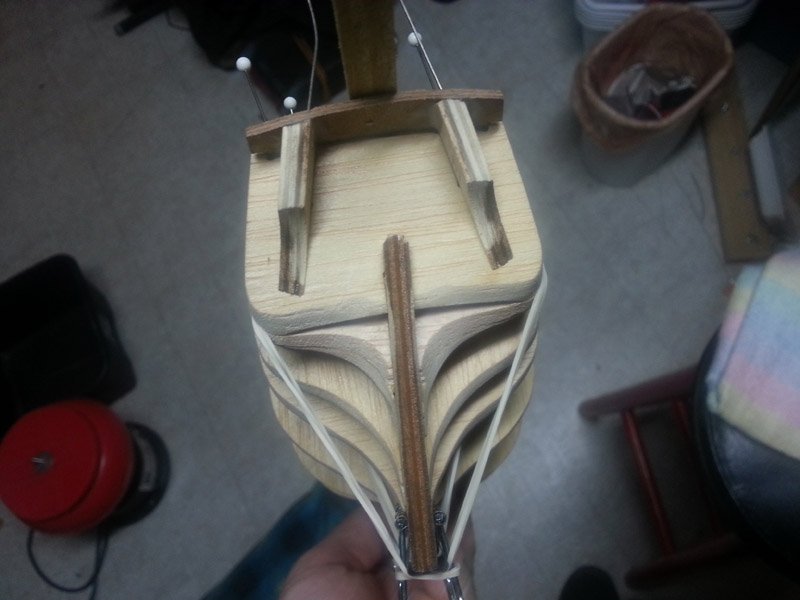
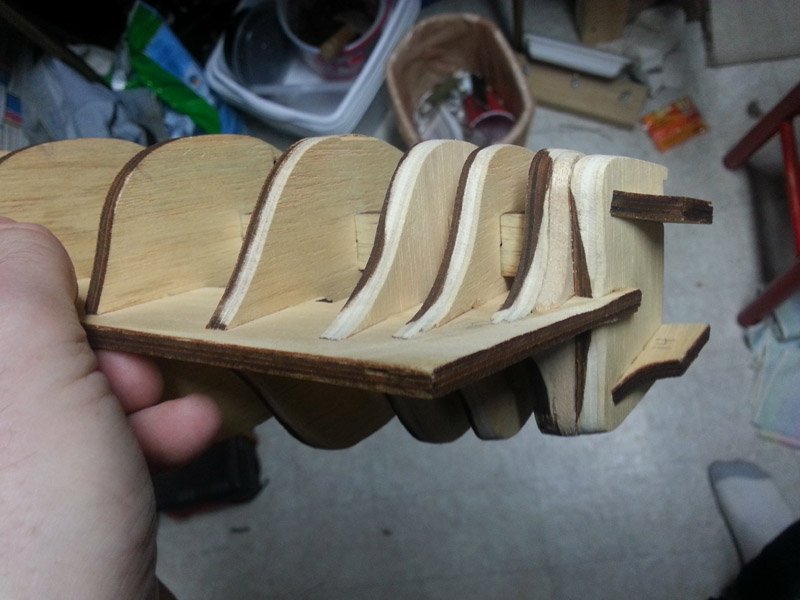
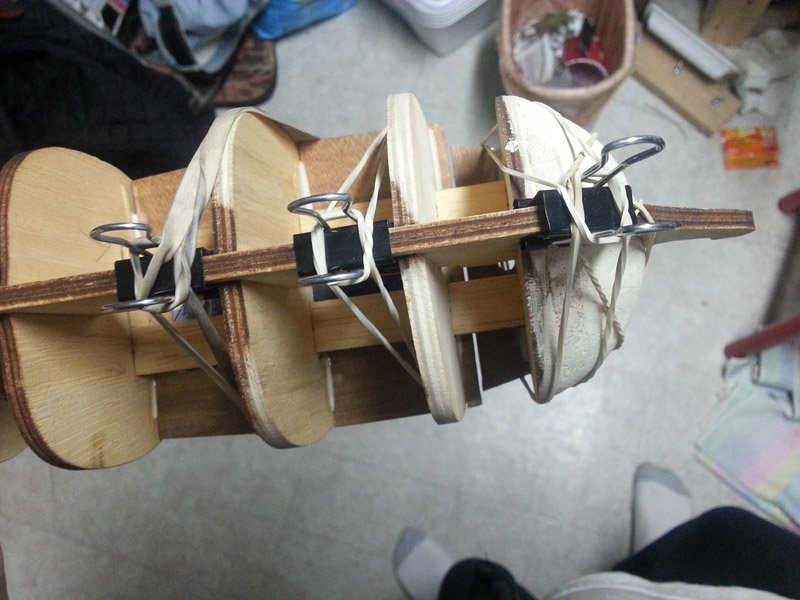
Somewhere along the way my frame picked up a slight warp in it. Modified one of my clamps to allow the bulkheads to pass through, steamed the keelson and clamped up with a shim to straighten. This got most of the warp out, but still had a hair. So I decided to put back in the clamp, and cut/fit strengthening blocks between each bulkhead. This locked everything dead on straight, and the frame is rock solid strong as well. Will definitely do this again. Took a lot of sanding to get the perfect fit on each block but well worth the effort. I'm planning on simulating trenails on the deck using a sort of a stamping technique with a pencil tip touched to a marker and rotated to make a small circle. I made a jig that should help me do this consistently. We'll see how it goes. I like the look, not sure how the logistics will work out though. test plank is wider than the deck planks will be so proportions look a bit off.
-
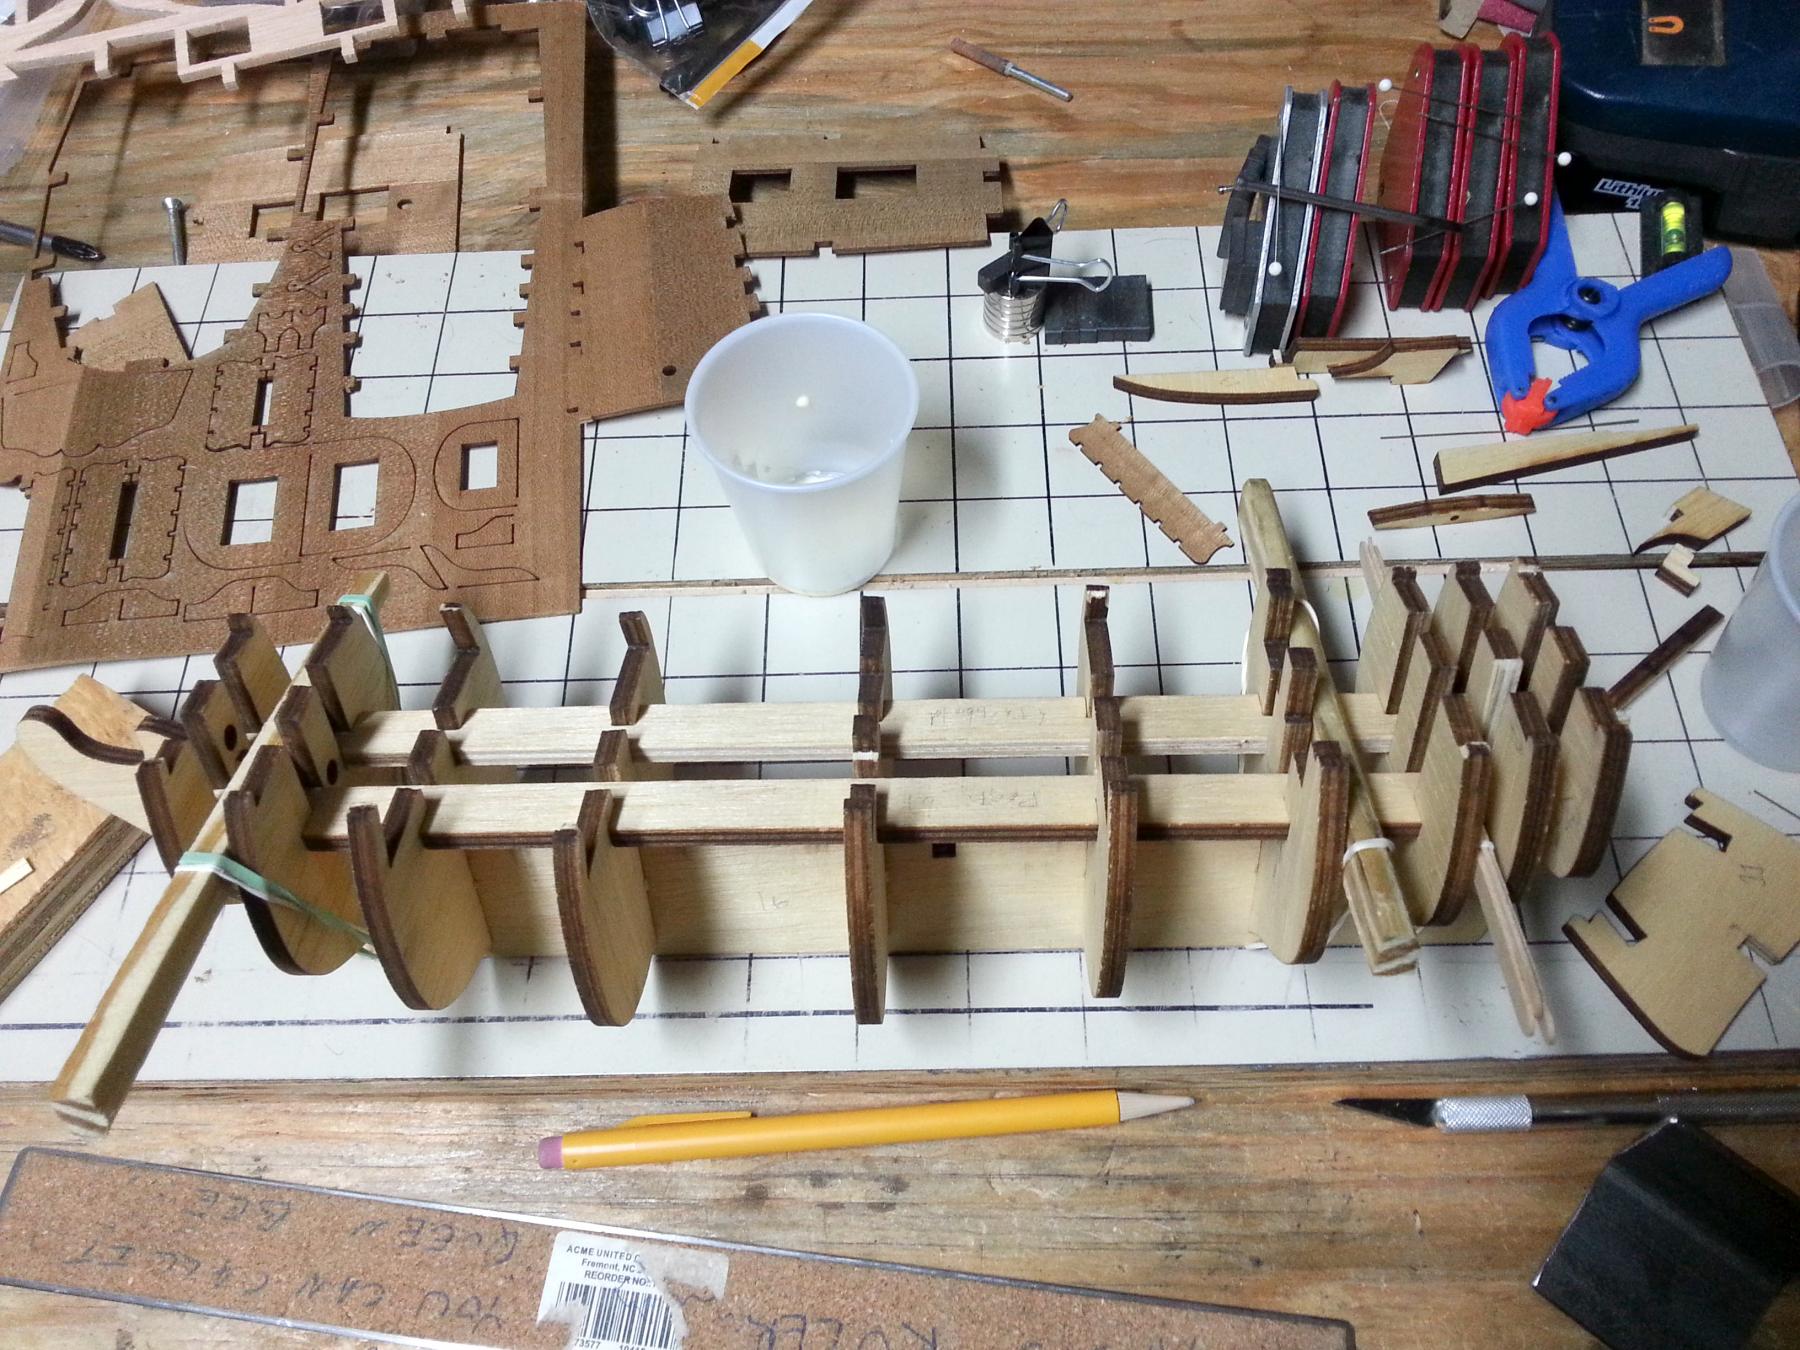
I've really wanted this kit for some time. Got a deal I couldn't pass up on it, so I decided to shelf the other build life and motivation had caused to stall. laser cuts on main plywood sheet are very good. Popped out with out any additional cutting required. fit together was top notch too, didn't require much if any filing for snug square fit. glue up went well.

-
Life kept me away from modelling for a long time. When determined to get back in, i decided to shelve this build for the time being. I had a very hard time getting into this kit from the get go. Quality and design of the kit, the small scale of it as well as my indifference to the ship itself made it more like work than pleasure. Found a deal i couldnt pass up on another kit ive had my eye on which led me to set this aside for now. Will pick it up again some day.
-
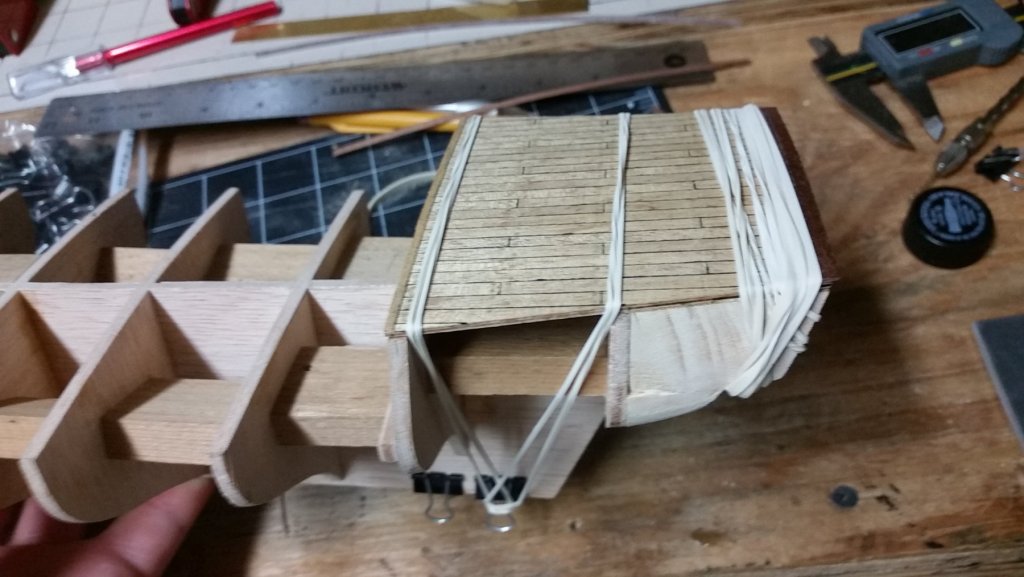
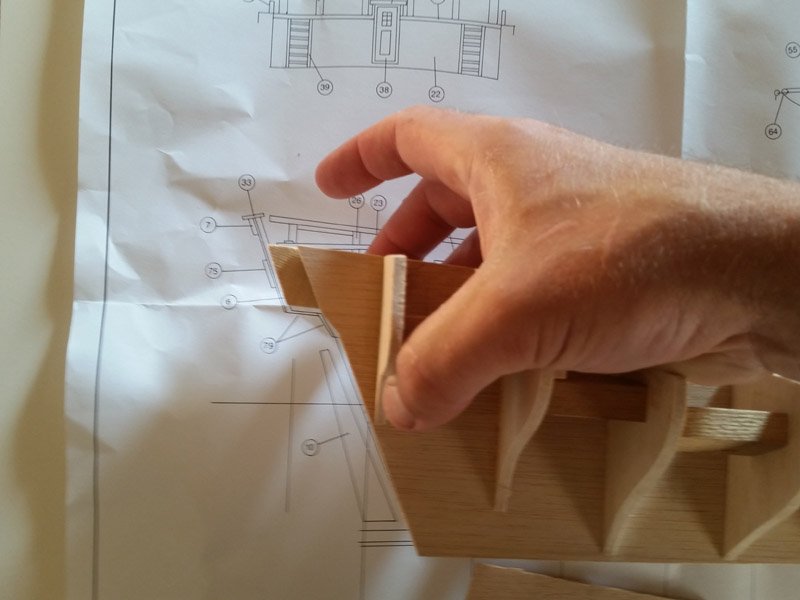
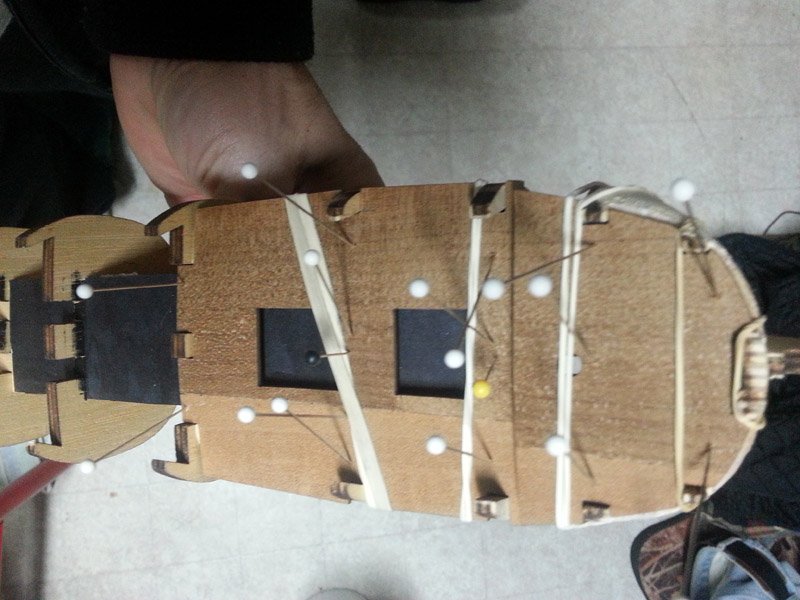
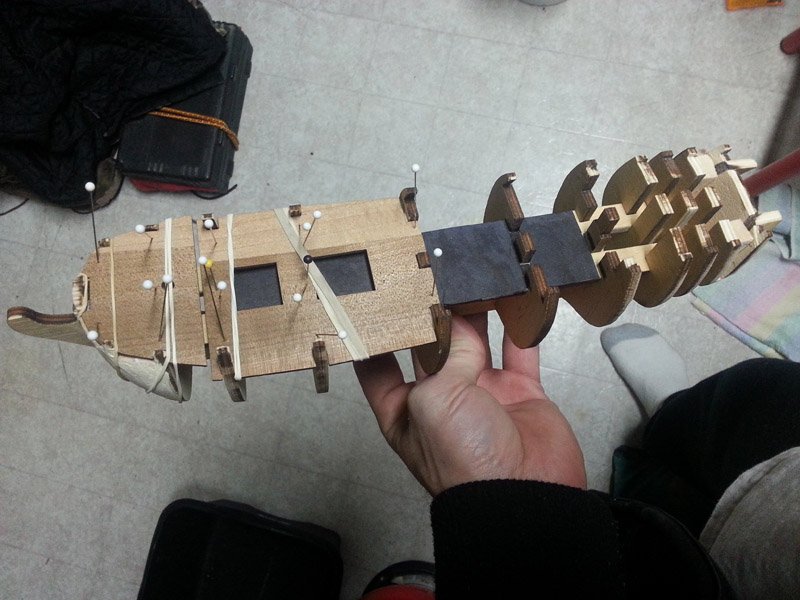
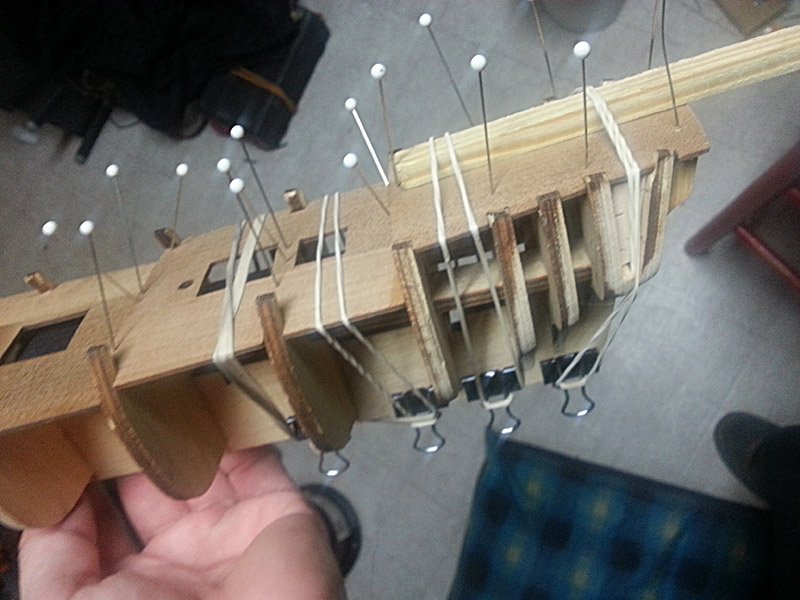
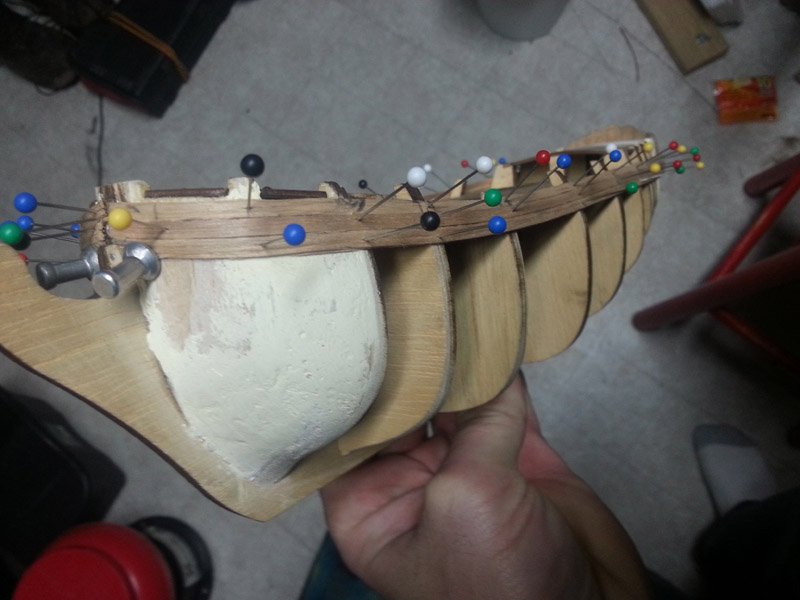
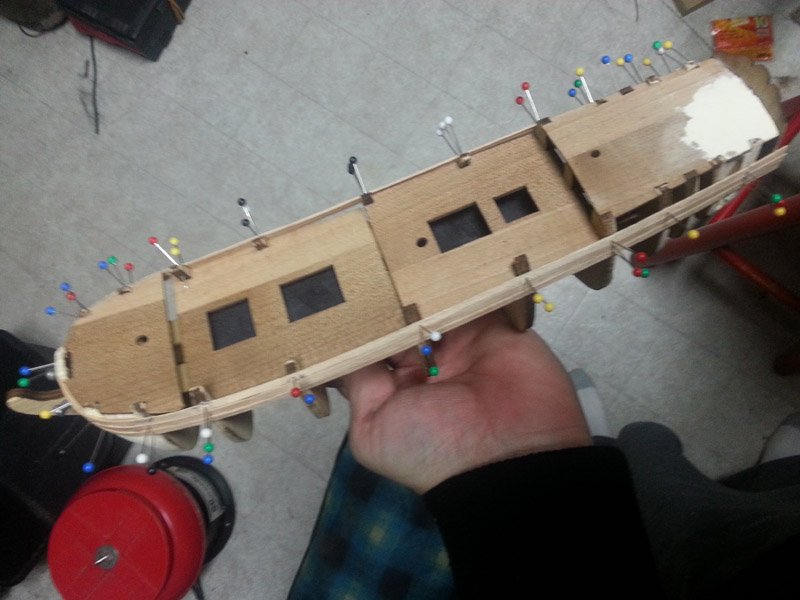
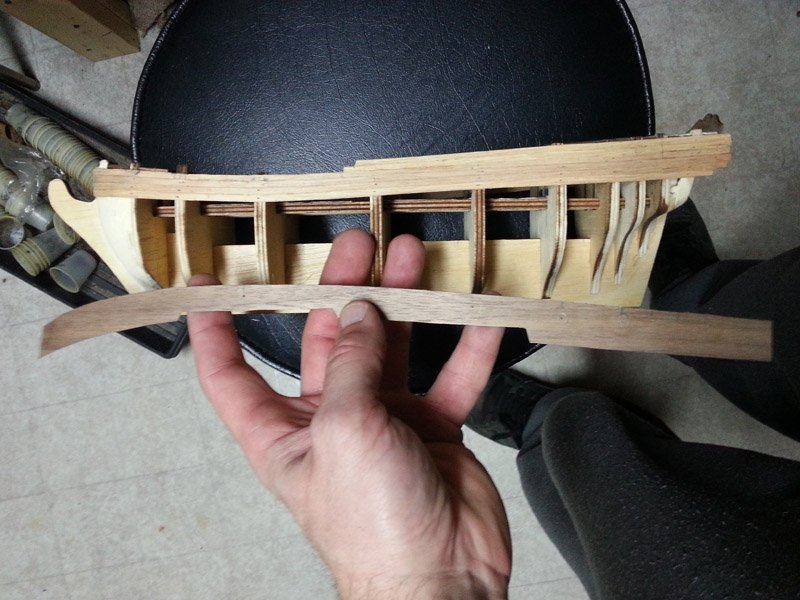
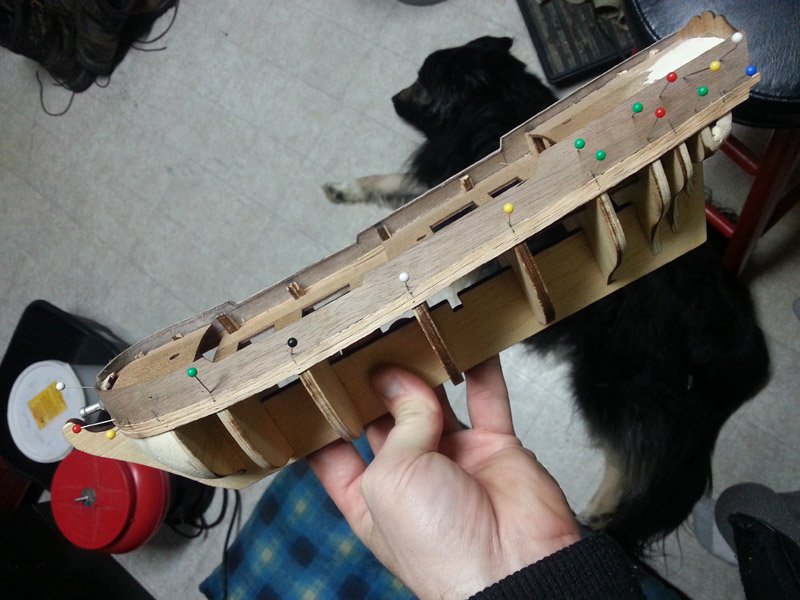
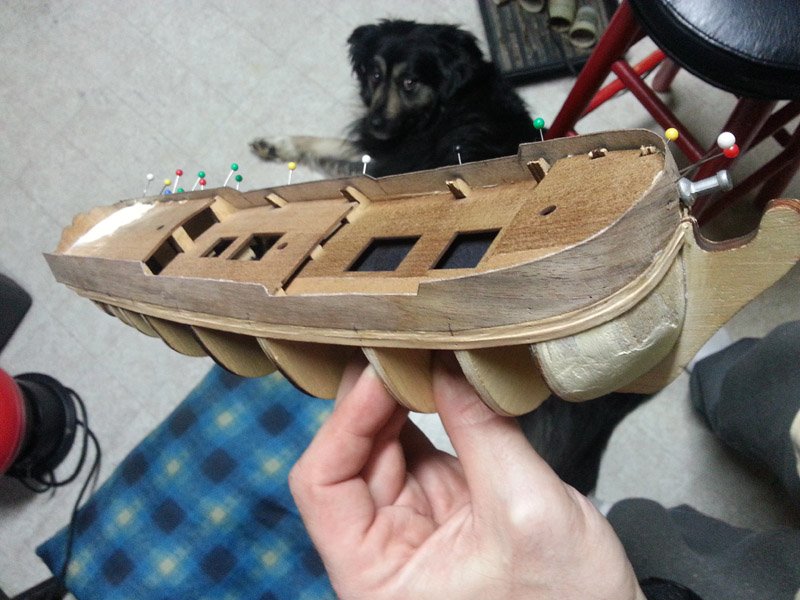
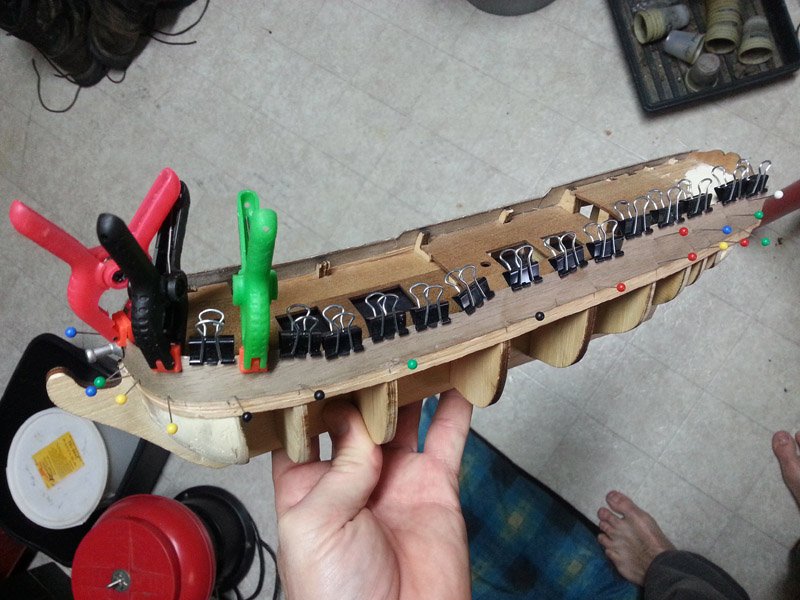
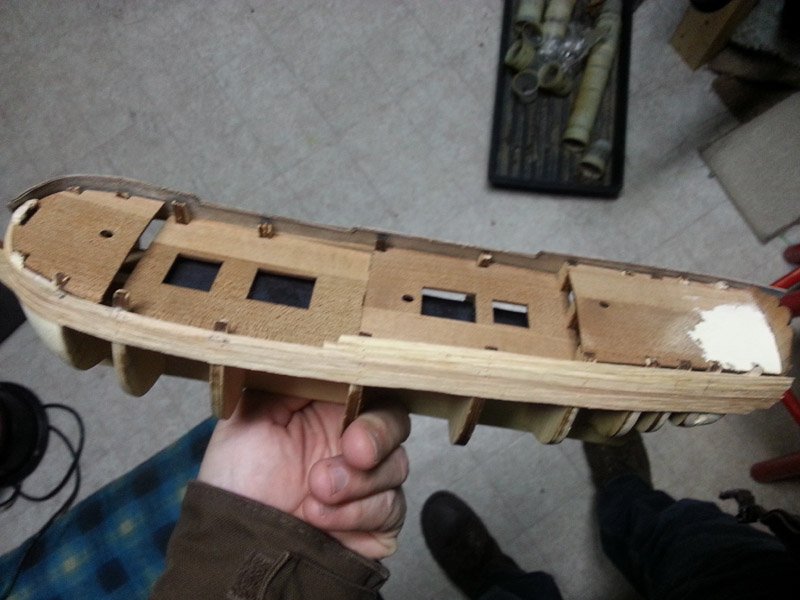
Gluing decks continued. I installed some blackened cardboard under where the deck gratings will be to hide the structure and add to the dark hold affect. first planking started. As I planked upwards into the bulwarks, this is where I decided I really disliked the design of this kit. They want you to plank the whole way up to the top of the bulkheads sticking up above the deck. However, you can't glue to the bulkheads. You have to cut them all off flush to the deck. The only thing holding the planks in place after you do this is the edge to edge glue. I really did not like this concept. Figured they'd be very weak, and difficult to do. Plus, the tops of some of the bulkheads do not stick up far enough above deck level to accomplish this. I combined this with the other things I dislike about this kit, and seriously thought about setting it aside and starting the one I really want to work on. However, I thought some more, and decided to take a new tack. I gently cut out all the planks I had installed above the lowest deck level. Using a wide strip of veneer walnut, I cut out a one piece bulwark that can be glued solidly to the bulkheads. I used the clear tape tracing technique as if I were spiling a normal plank, then soak bent the bow curve before gluing down. Doubling this veneer will equal the thickness of the other planks, and laminating two layers together with glue would make a very stiff/strong piece I think. Adding the second layer of wood, laminated with pva. Now I am back 'into' this kit again. Next challenge will be how I plank and handle the beard line, since I plan to laminate the keel piece with walnut which will serve double duty as a rabbet. Also will need to figure out what to do with the stern and quarter galleries, as I really dislike the brass pieces supplied for this. Since I worked around the bulwark issue, I'm liking the need to figure out alternate ways to build this kit. It was to be an intermediate learning experience for me, and it's filling in that niche better now.
-
I had a significant injury that kept me off the workbench for quite a while. I'm back at it again now. Bow filler blocks: fairing bulkheads continues Gluing the decks.
-
My chains came pre cut and preflattened on one end. I just needed to drill them out and bend them
-
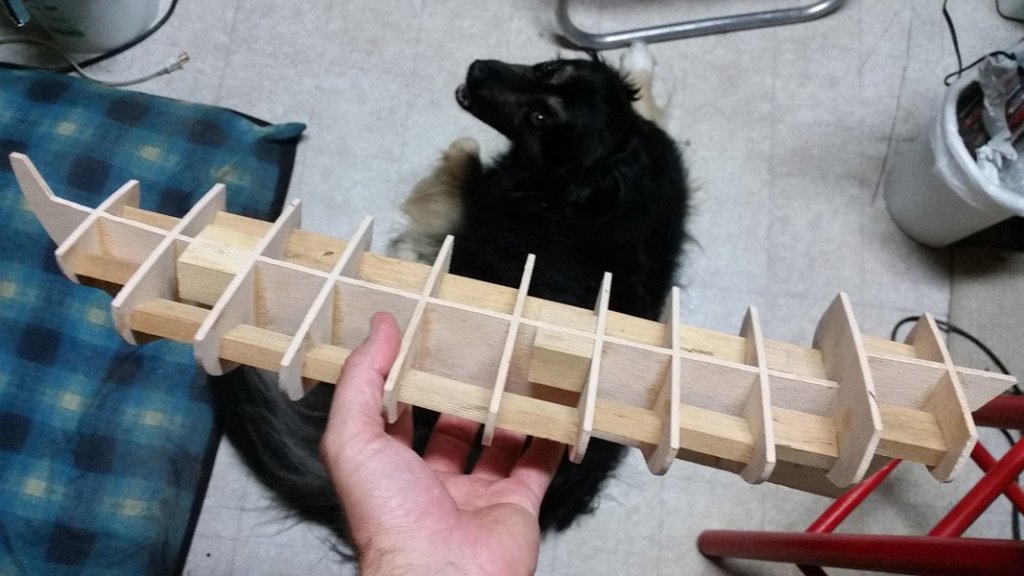
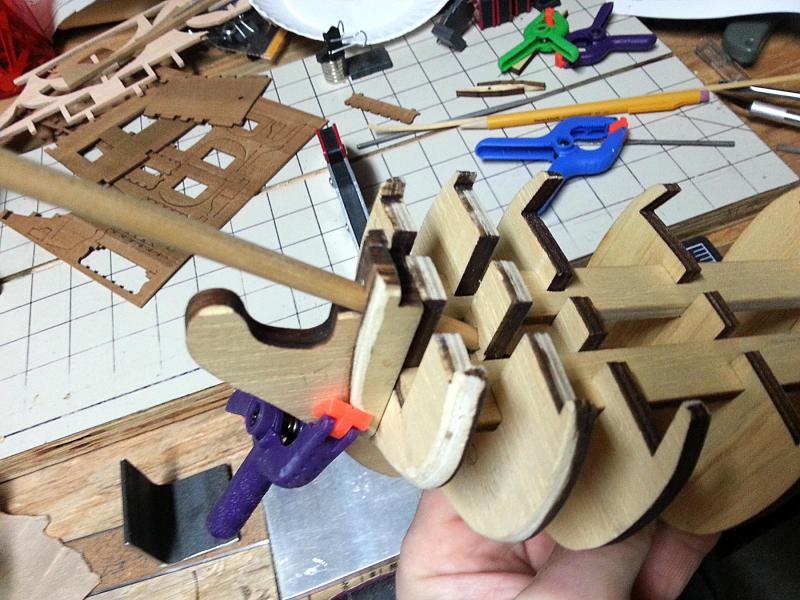
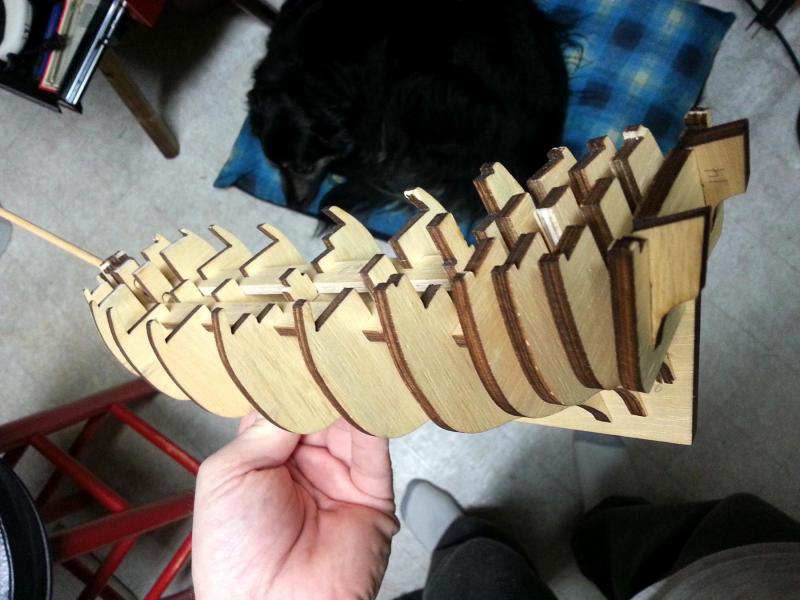
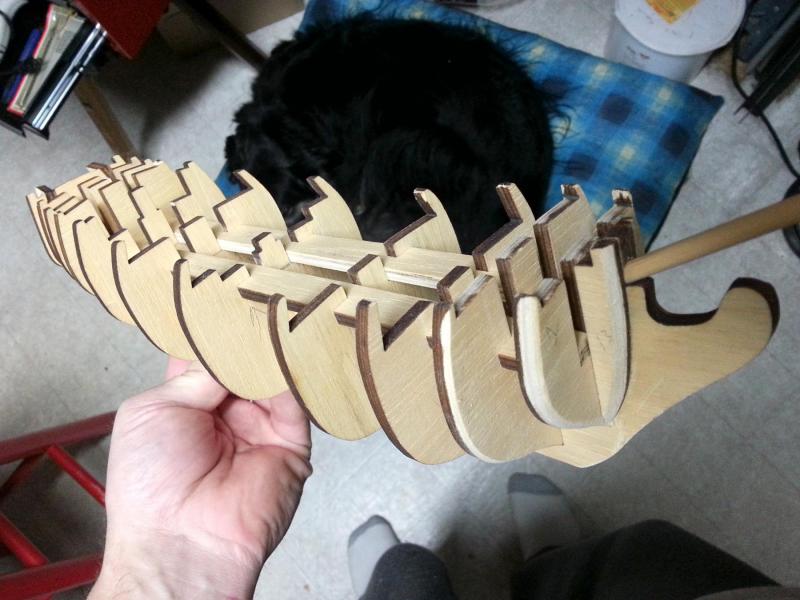
I've finally been able to get a couple of hours into the model. Another couple of weeks and I'll be back to having lots of free time. I got the skeleton all glued up, and have begun fairing. I'm going to add balsa blocks in the bow and stern but wanted to rough in first. The thick plywood is going to take a lot of time in fairing, at least as slowly as I work. One note, the fairing blocks provided for the bow, they have a small piece that fills the gap between them above the bowsprit. you need to fit this around the bowsprit before gluing it in. otherwise it would be much harder to fit the bowsprit once you found it didn't fit later.

-
Thank you for your continuing log. I've finally got to get back to mine a bit. I'm a big fan of some of the mods you've made. I hope you don't mind if I take some inspiration from them in my own.
-
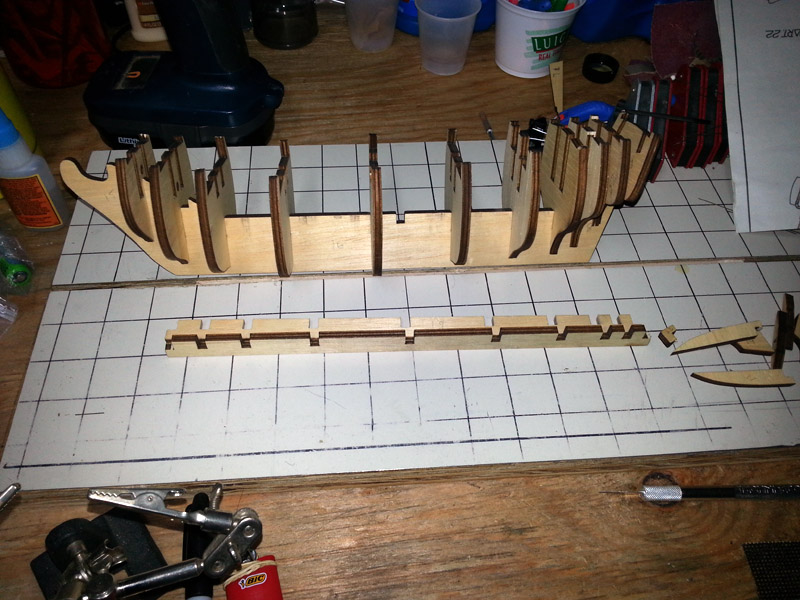
Spent another 1.5 hours filing and dry fitting bulkheads. Still have some fitting to do on the longitudinal reinforcements before I start gluing.
-
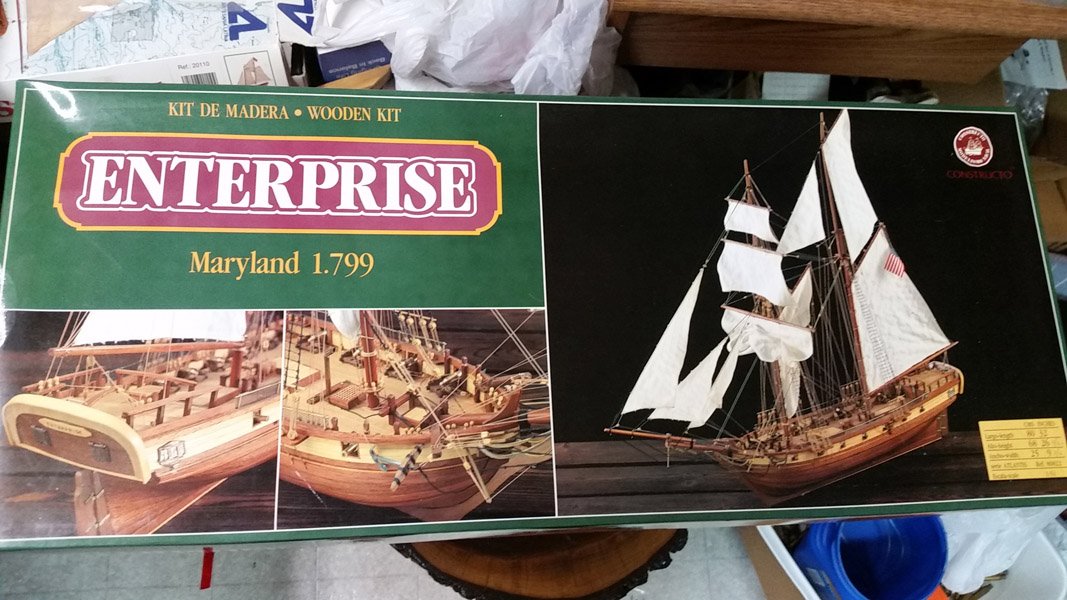
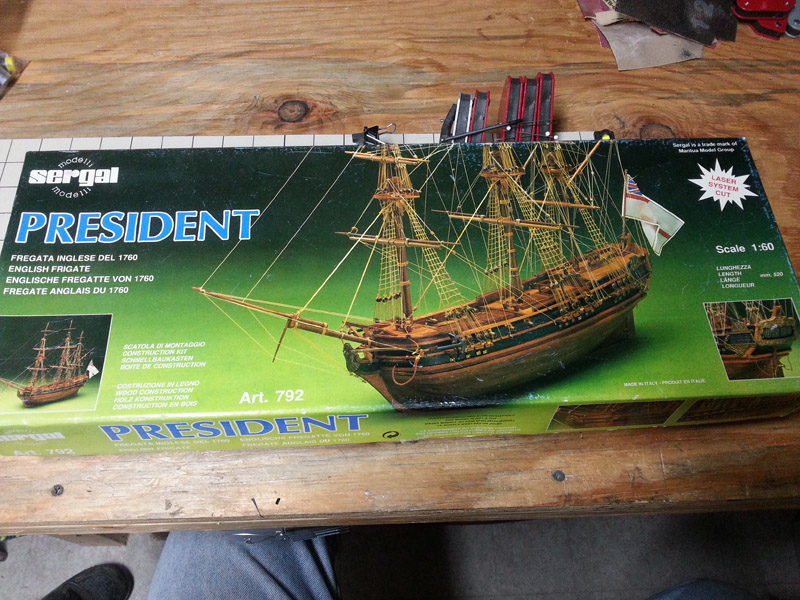
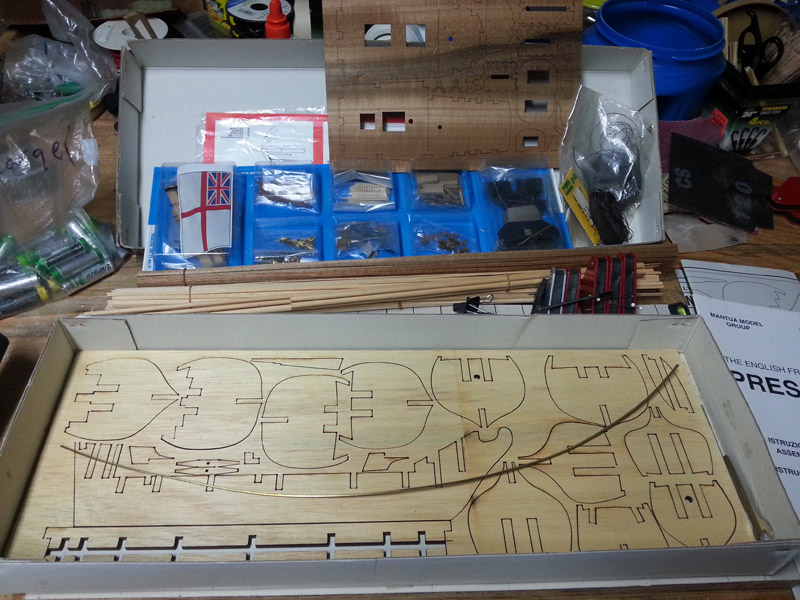
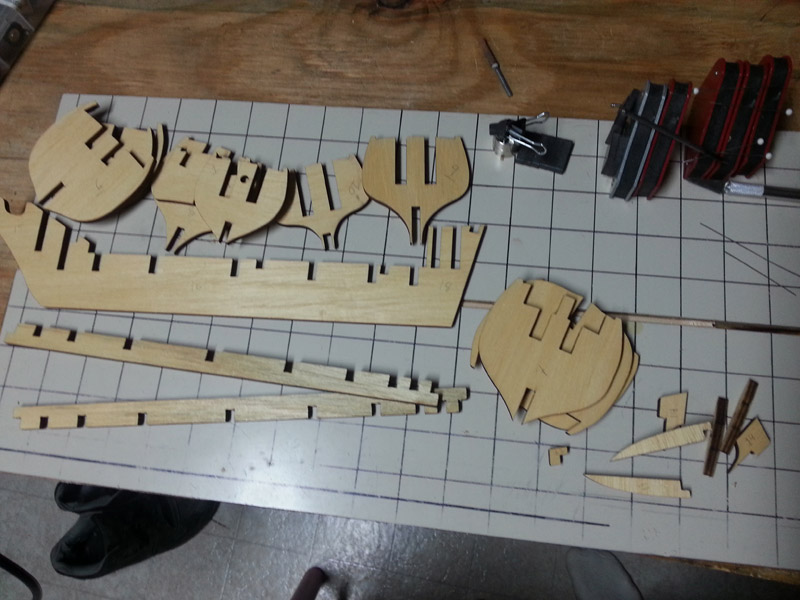
Back at it again. Cracked open the box on one of my shelf kits, the sergal president. I want to build this kit pretty much as designed documenting it as well as I can. The internet is rather empty of logs for this kit. Considering this kit is often found cheaply online, this log could be of good use to people. As a ship, it has some issues. It's a fictitious ship, described as a frigate but more appropriately a sloop of war I think. Armed only with 12 carronades, many of which lie behind the main chains. I think they took a kit designed as a merchant hull, slapped some carronades on it and called it a frigate. Still, i think it a nice enough looking little ship. My main interest in it is that the hull and size look very similar to my first swift build, but there's a significant step up in rigging complexity as well as some gun ports to cut. Hopefully this ship will give me the confidence to move into the more advanced ships I really really want to build (first of which being the latina constellation I also have on the shelf already) Instructions could probably be considered horrible. Consists of two pages of translated text mostly referring to the drawing/illustrations. I think for the most part I'll be winging it just going by the pictures. The only modification I see making is to shift the chains or gunports or both so the carronades wouldn't dismast or burn the ship just by firing. I'm determined to log my hours this build. I got the main plywood sheet cut out. First evening unboxing and cutting out all the pieces was 1.5 hours. I will say the laser cuts were much cleaner and clearer than those on my AL Swift.
-
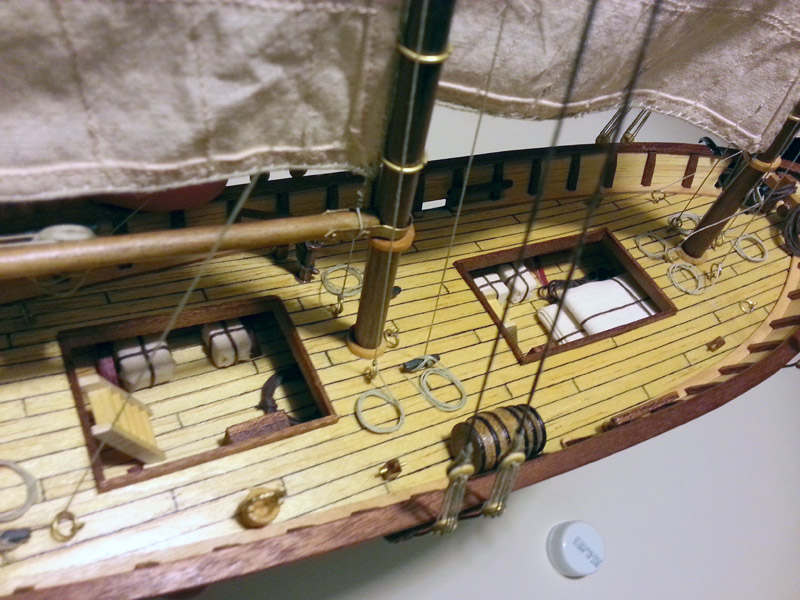
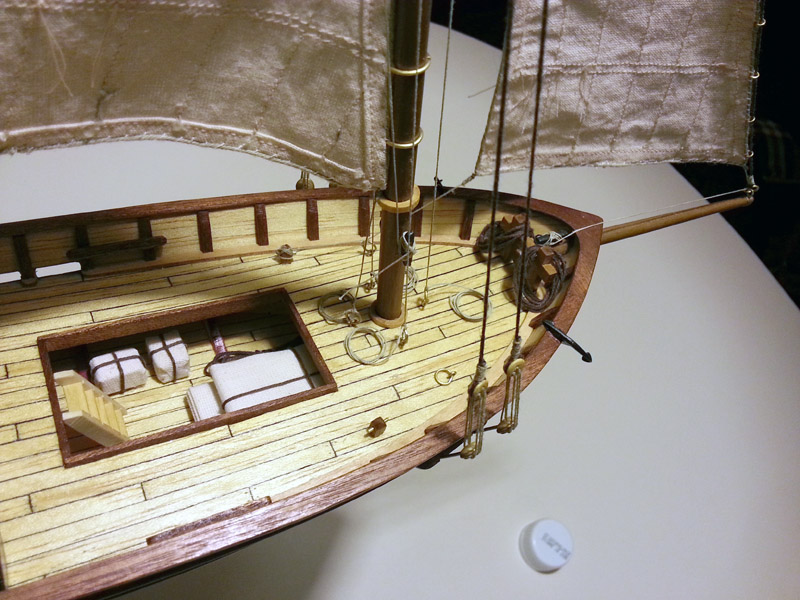
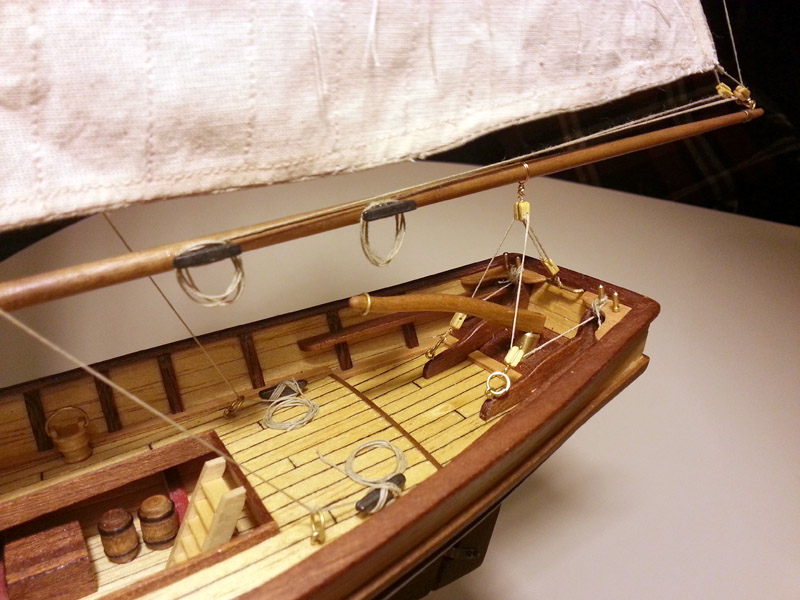
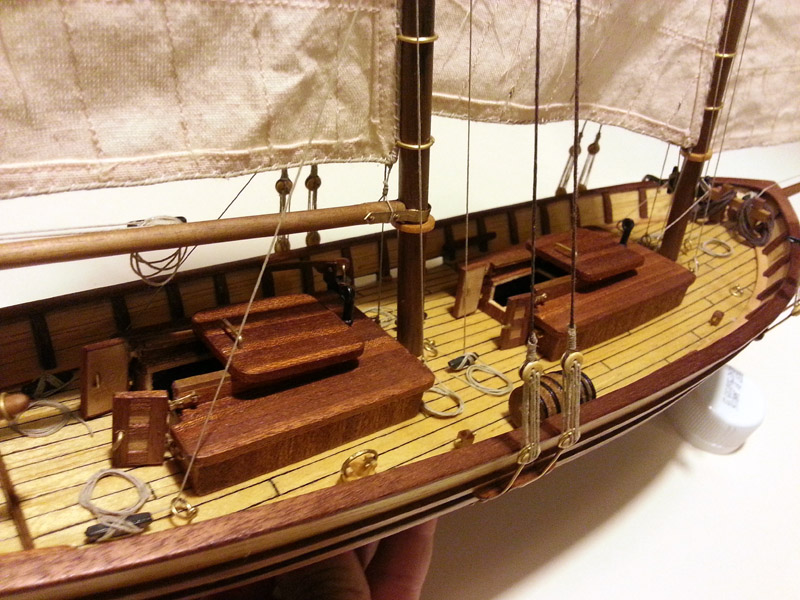
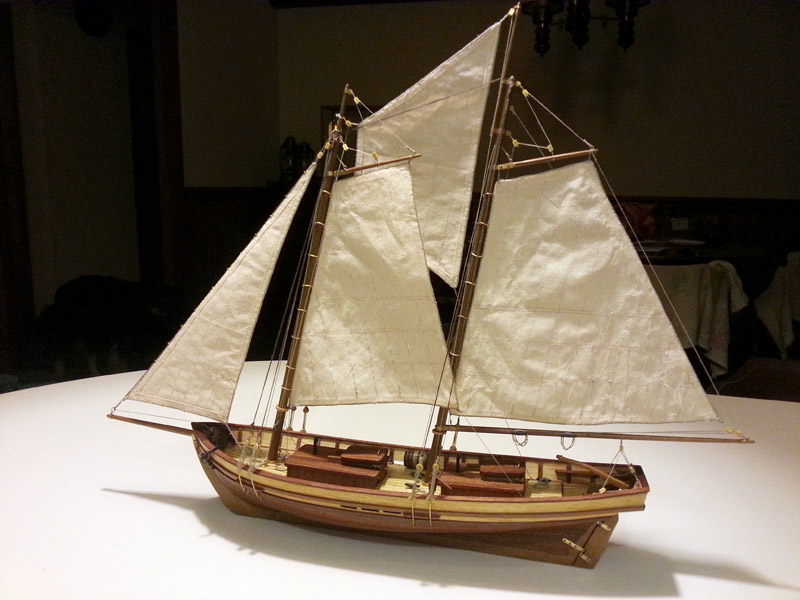
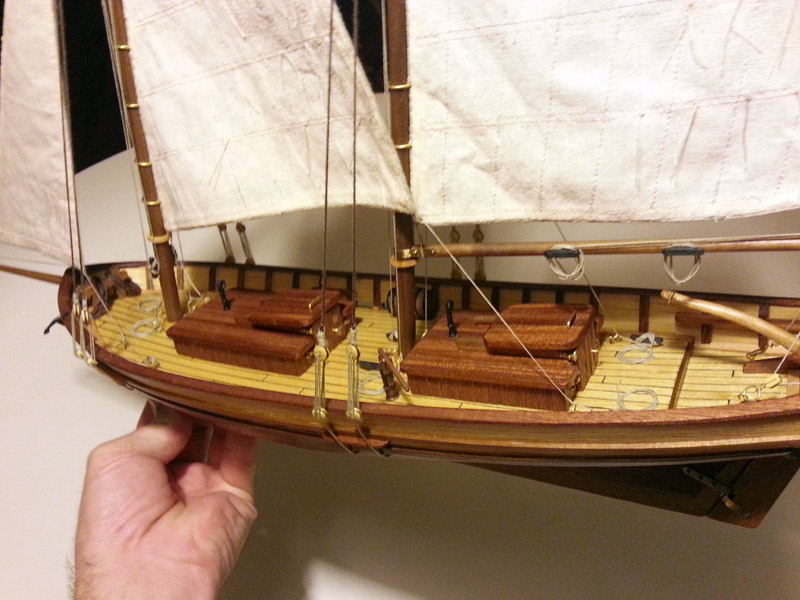
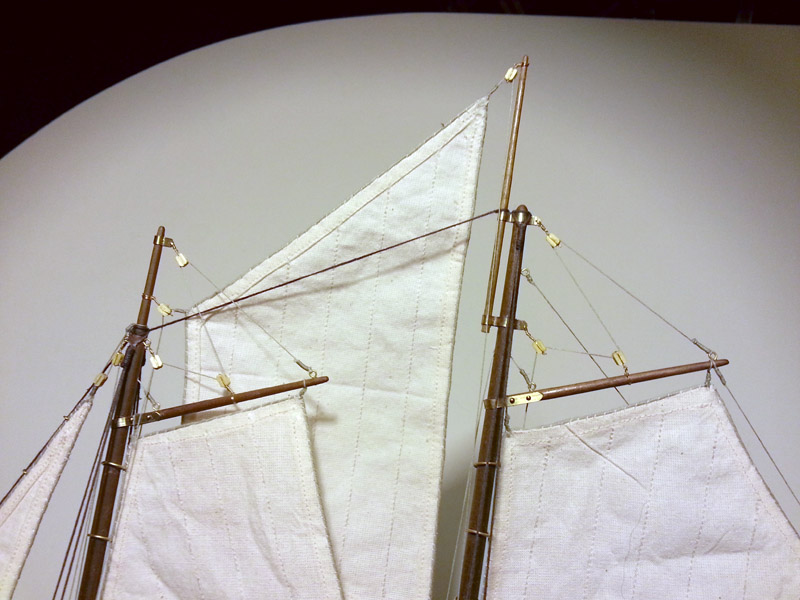
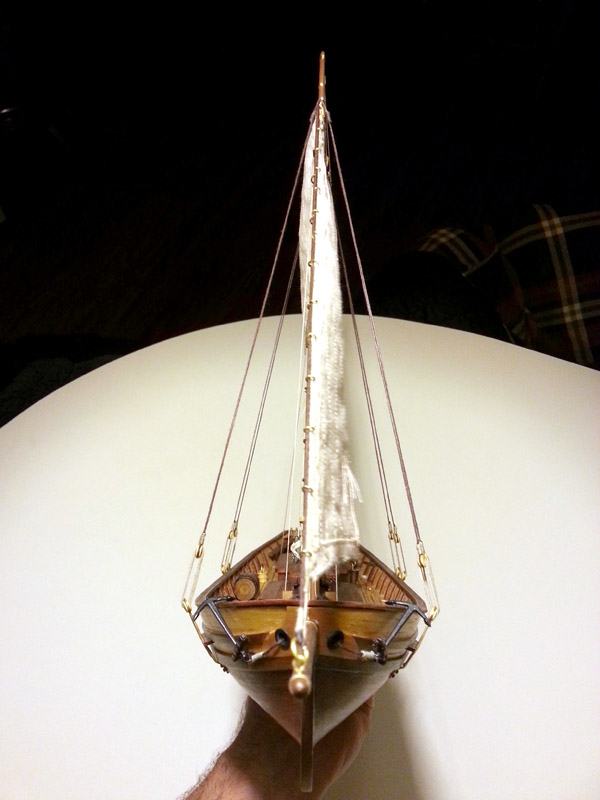
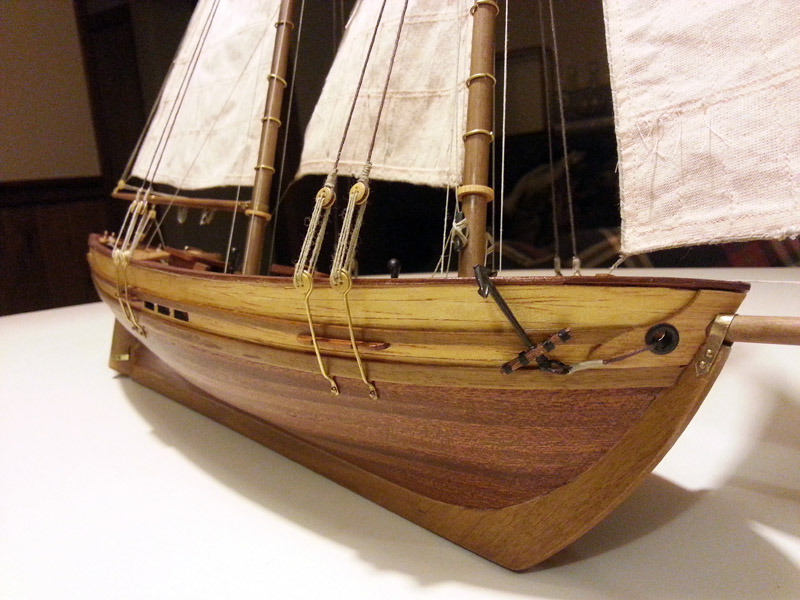
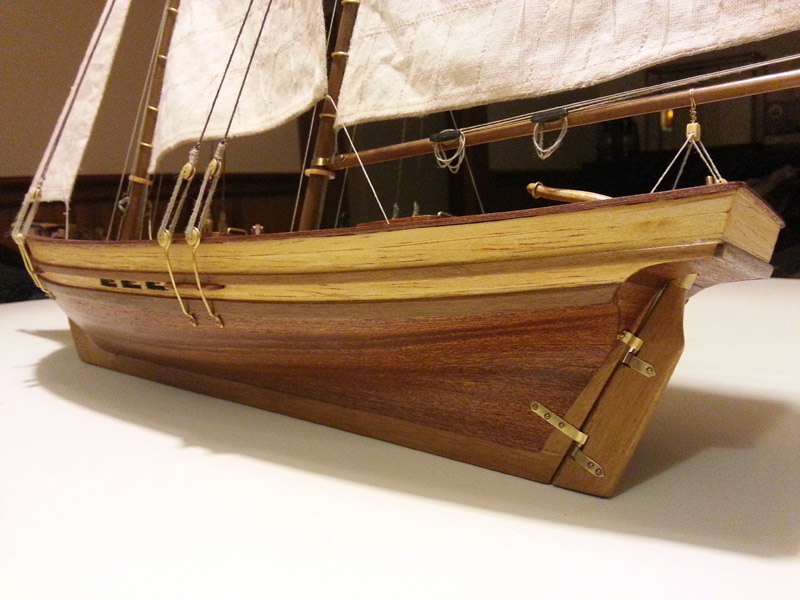
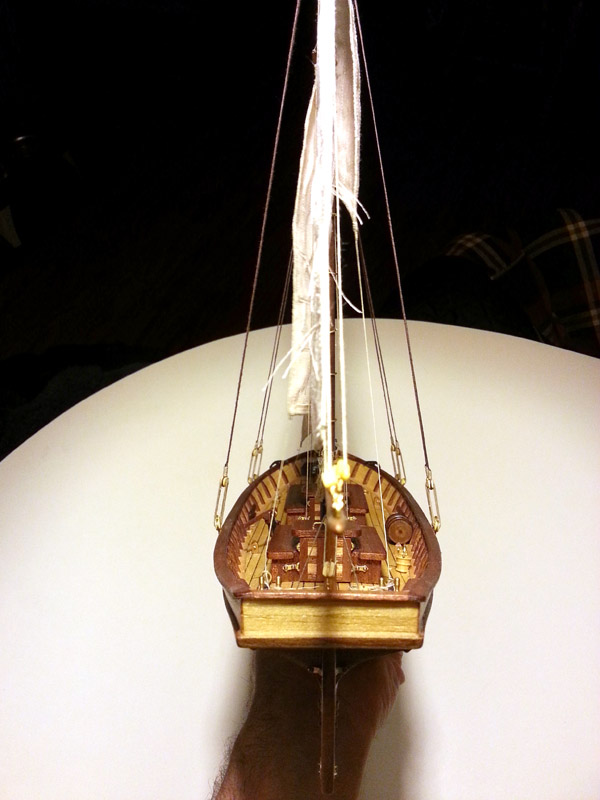
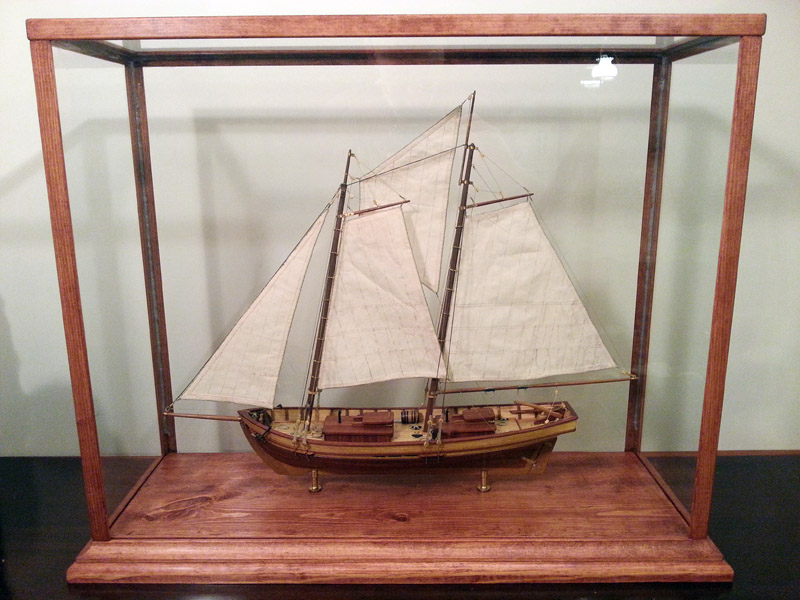
A year to the day since I bought the kit, I am finished. My only regret is I wish I would have kept track of my total hours worked. Will do that next time. Thanks for all the likes and kind words along the way.

- 114 replies
-
- 17
-
-
- swift
- artesania latina
- (and 2 more)