
MORE HANDBOOKS ARE ON THEIR WAY! We will let you know when they get here.
×


stripehunter
-
Posts
104 -
Joined
-
Last visited
Content Type
Profiles
Forums
Gallery
Events
Everything posted by stripehunter
-
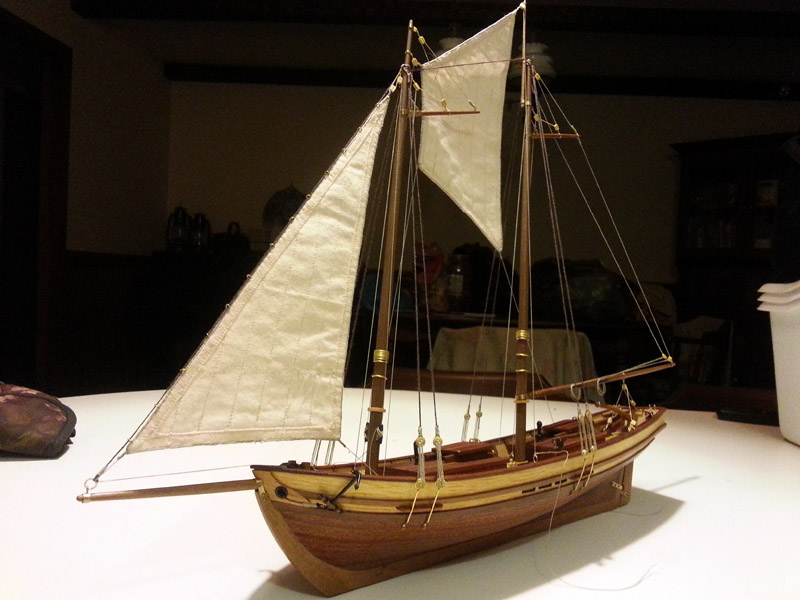
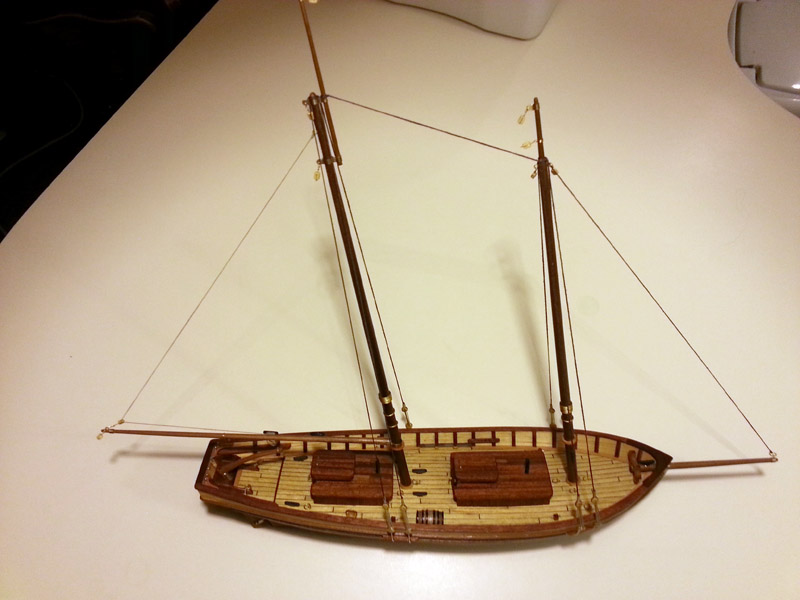
 One more sail left to go. I hope to call her 'done' sometime this weekend
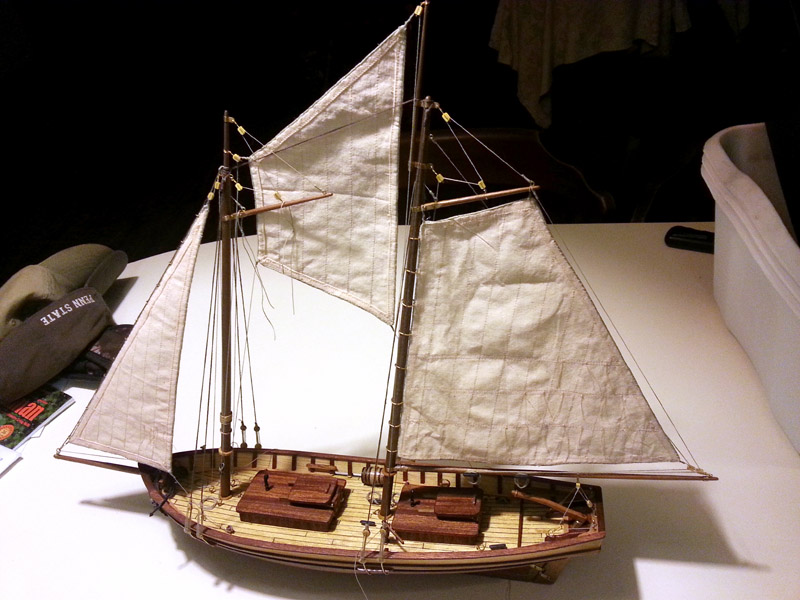
- 114 replies
-
- 5
-

-
- swift
- artesania latina
- (and 2 more)
-
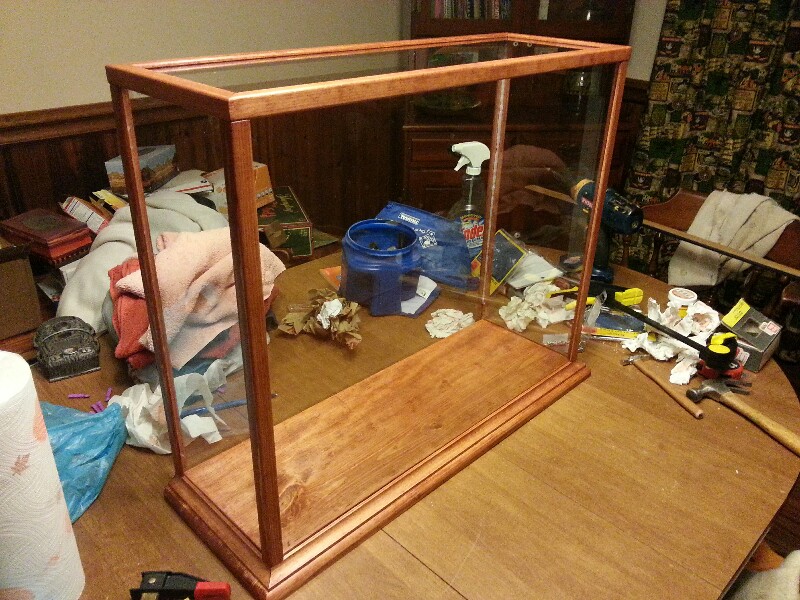
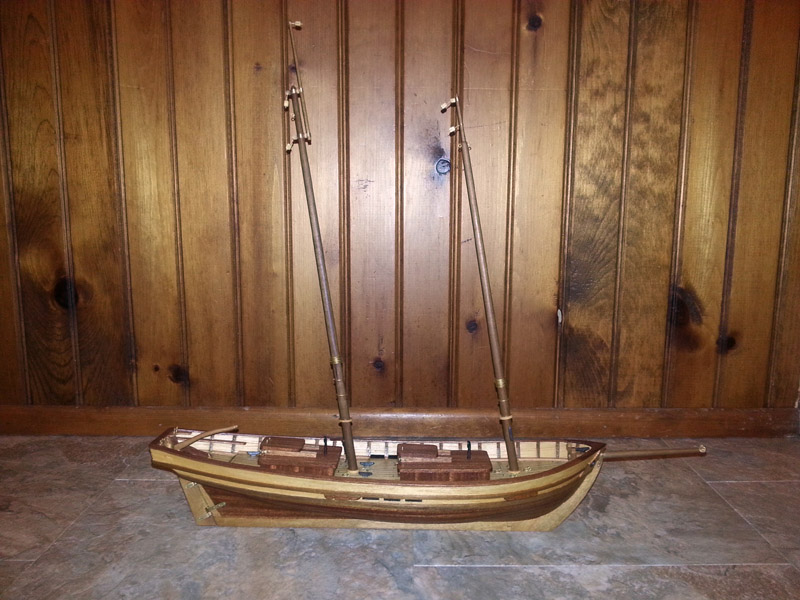
Case is done except for the pedestal mounts ill put in when the ship is done. The red chestnut stain came out a little lighter than i would have liked but not much i can do about it now.
- 114 replies
-
- 6
-
-
- swift
- artesania latina
- (and 2 more)
-
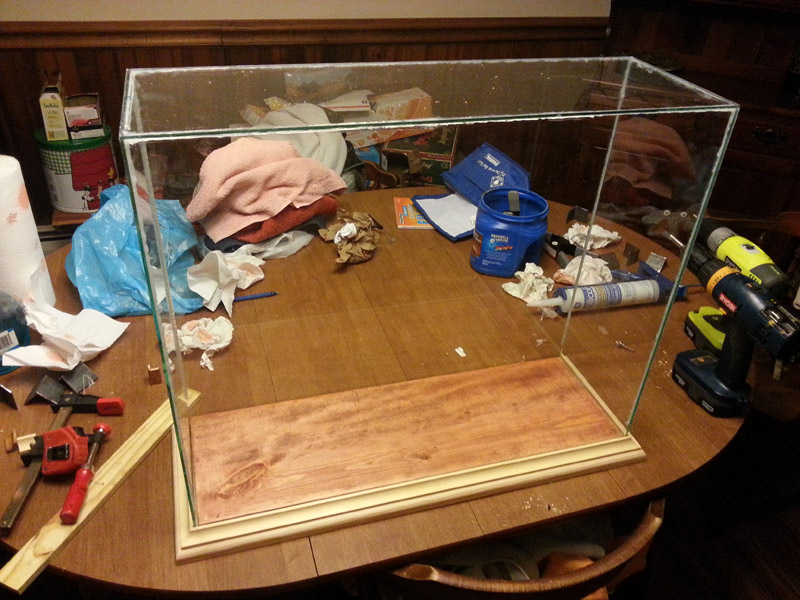
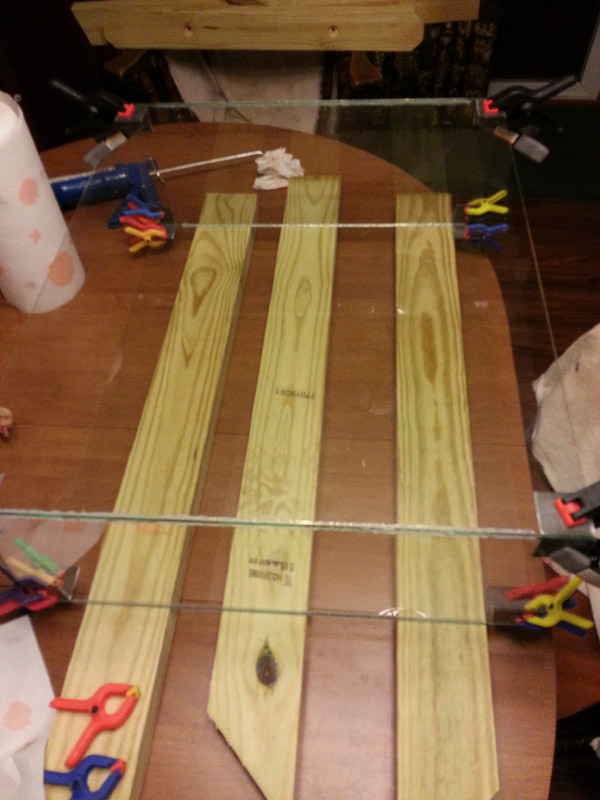
work on the case continues. all the wood is cut now, just waiting for the finish to dry before assembling. Will be wood angle trim over all the glass corners.
- 114 replies
-
- 6
-
-
- swift
- artesania latina
- (and 2 more)
-
I bought the swift kit a week shy of one year ago. Given my pace and the increasing complexity i plan on, i have lots of time to decide on that. Regardless this one will always be very special to me. Got the top glued on this morning.


- 114 replies
-
- 4
-
-
- swift
- artesania latina
- (and 2 more)
-
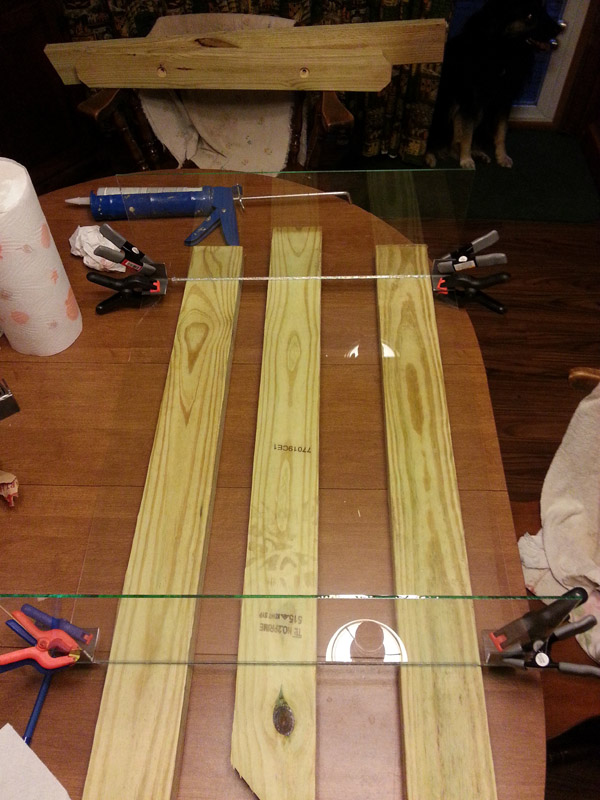
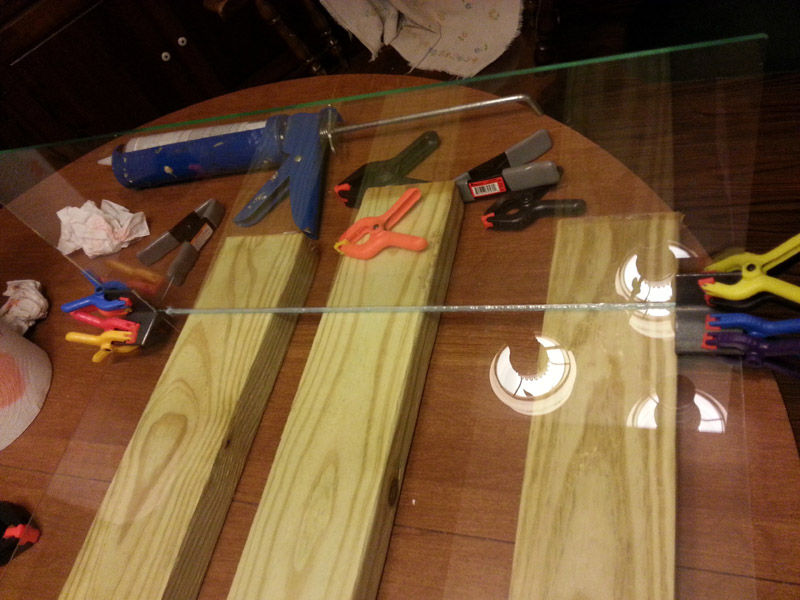
In preparation for the inevitable, I began work on a glass case to keep the dust off when I do get finished. Used some clamps and angle iron pieces to keep everything lined up while the silicone cures.
- 114 replies
-
- 3
-
-
- swift
- artesania latina
- (and 2 more)
-
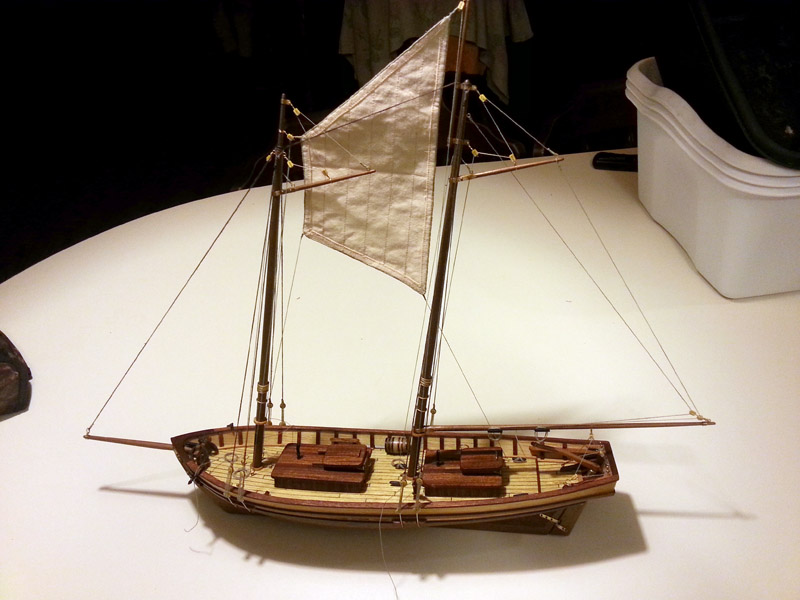
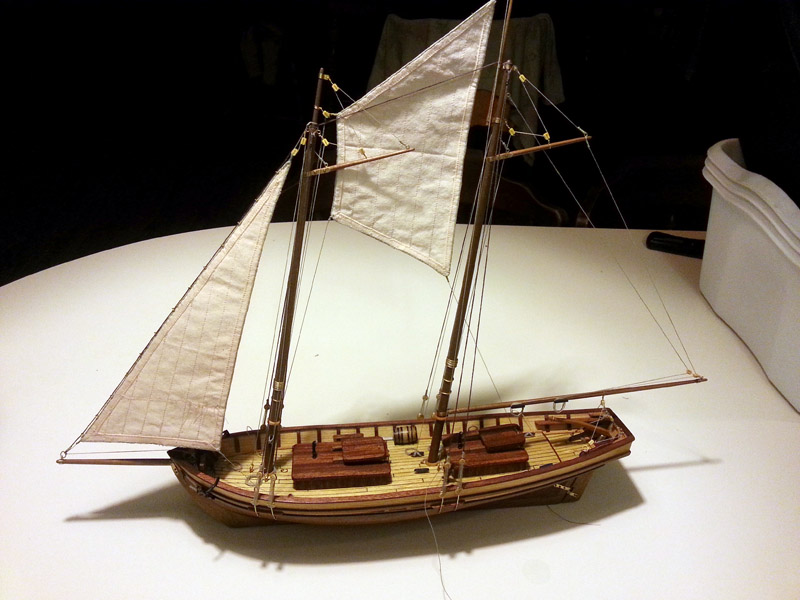
I stained the sails to age them a bit by soaking them in Tea. I read that somewhere, and like the outcome. my tet sail is centered unstained for comparison. First sail rigged up: With the jib added: If all goes well I may have this completed within the next week.

- 114 replies
-
- 8
-
-
- swift
- artesania latina
- (and 2 more)
-
I agree there are some oddities there. I decided to just go with them and build pretty much as-is given my lack of experience. I think i'll be improvising a lot more when i get to the president.
- 114 replies
-
- 1
-
-
- swift
- artesania latina
- (and 2 more)
-
Got my anchors rigged and installed. I spent the day with the admiral's sewing machine stitching up sails. I suppose I could toss them in the trash and basically be done, but I think I'm going to string them up and have a look.


- 114 replies
-
- 5
-
-
- swift
- artesania latina
- (and 2 more)
-
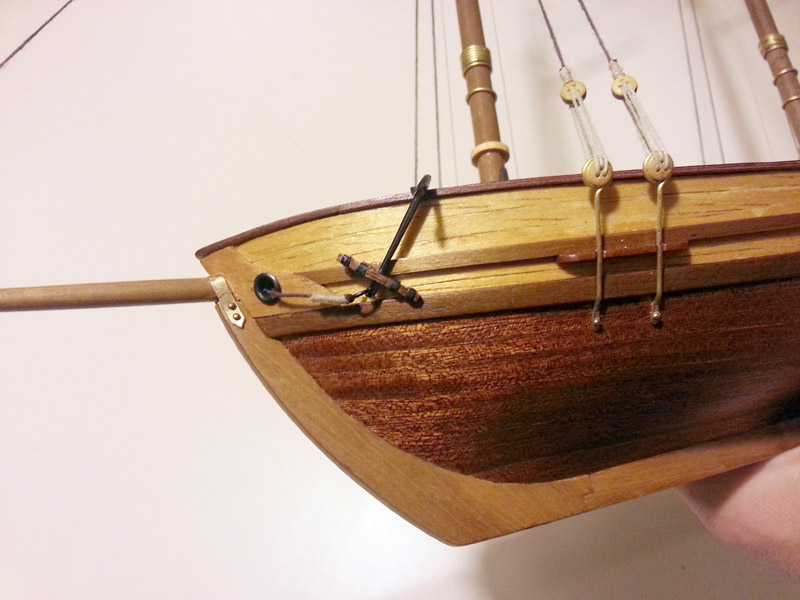
I got my anchors done. Still need to blacken the rings. I wanted real wood stocks which were easy enough to make. For the bands i used electrical tape for one then went out and bought some car pin stripe for the other. The pin stripe was a hundred times easier to work with. One of the better tips i picked up here. I decided to sew up and rig one sail then decide if i want to continue with the rest or remove it based on how it comes out.

- 114 replies
-
- 7
-
-
- swift
- artesania latina
- (and 2 more)
-
I'm sure you've seen my active build almost complete. Hopefully I can be of assistance. Your kit is a different generation than mine ( I think there are three unique variants) but my biggest mistakes should be common to all. 1. I didn't fair the top of the bulkheads well; I focused on the sides. I had one come out a little low. While I had it balanced perfectly side to side, it resulted in a slight dip in my deck. It looked good in fishbone form, but became noticeable when I applied the deck. I guess that's more of a first build issue than a kit specific issue. 2. Biggest mistake I made was in the rub rail in relation to the scuppers. I measured the rub rail based on the top edge of the bulwarks. My one side bulwark must have been a hair lower than the other in relation to the deck at that point. Result is, my rail was a bit low on one side. When I went to cut the scuppers, I found I had to cut that side at a downward angle and rely on some clever optical trickery else it would have punched through the bottom portion of the rail. I'd definitely cut those scuppers in before applying that rub rail to ensure it goes in exactly the right place despite measurements. it can't be the slightest bit off in relation to the scuppers. 3. finish your companion hatch doors before installing the rails for the sliding top and finishing the roofs. The door widths will dictate how wide apart those slide rails need to be. Also if you go with working doors, the cutout for them in the roof panel may not be wide enough to allow them to open fully. After finishing my doors I found I needed to reposition my rails and enlarge and refinish the roof notch to have them open completely. 4. I saw it coming and didn't get burned, but there is no false keel rabbet in the plans. My instructions implied you shouldn't first plank the deadwood area; only second plank it. I think it should all be first planked to keep a nice shape, but if you do, you will need to really thin out the false keel down to almost nothing in that area. Otherwise the planking will end up much thicker than the sternpost and keel. Enjoy her. I'll be happy to watch.
-
Rigging continues. All i need yet are my anchors, and sails if I decide to add them or not. I keep alternating my stance on the sails.
- 114 replies
-
- 6
-
-
- swift
- artesania latina
- (and 2 more)
-
Got the smaller booms to the masts. Ready to string them up next time i can work

- 114 replies
-
- 2
-
-
- swift
- artesania latina
- (and 2 more)
-
Thanks. I still have not yet made up my mind on sails. In general, I'm not a fan of sails on model ships (IMO it's hard to make them look genuine, and they hide lots of details), but I think this one may suit my eccentric tastes better with them. Perhaps I may see how she looks when done, I can always go back and add them later. I have a couple of kits on the shelf; my next one will either be a sergal president (ship rigged sloop of war) or a corel victory cross section. The president isn't the best looking ship in the world ( a total fantasy with some design issues), but I bought it as I found one dirt cheap, and thought it a perfect step up in complexity compared to the swift. Similar size, but more complex square rig and some carronades to port and rig. On the other hand I like the cross section a lot too, and it looks like I should be able to knock it out much quicker than another full ship. Both will be done before I move into the AL Constellation I also have on the shelf. At the pace I work I have enough to keep me busy for a couple years I think. Although, I am getting much faster at things as I do them more.
-
Rigging continues. Finally got the rest of my deadeyes rigged. I think i used a different technique on each one. I finally got the seizing knots how I wanted by the time I got to the last one. I also got the boom strung up. Rigging figure 8s around the belaying pins was a bit of an adventure but worked out in the end. Next will be the two smaller booms but im not sure how that will go without weight to hold against the lines.


- 114 replies
-
- 8
-
-
- swift
- artesania latina
- (and 2 more)
-
As I near completion of my AL swift, I need to start thinking about my next build. I had planned on working a sergal president (fictional ship rigged sloop) i have on the shelf, but i just acquired a corel victory cross section. Which would be a better next step in improving my skills, considering the swift im almost done with?
-
finally started my first rope work. Took a while getting things snug, but will go quicker as I progress.

- 114 replies
-
- 6
-
-
- swift
- artesania latina
- (and 2 more)
-
I very much like your use of wood hues in lieu of paint. I plan to do something similar on a section of my next build. My own tastes prefer natural wood over paint, even though not historically accurate
-
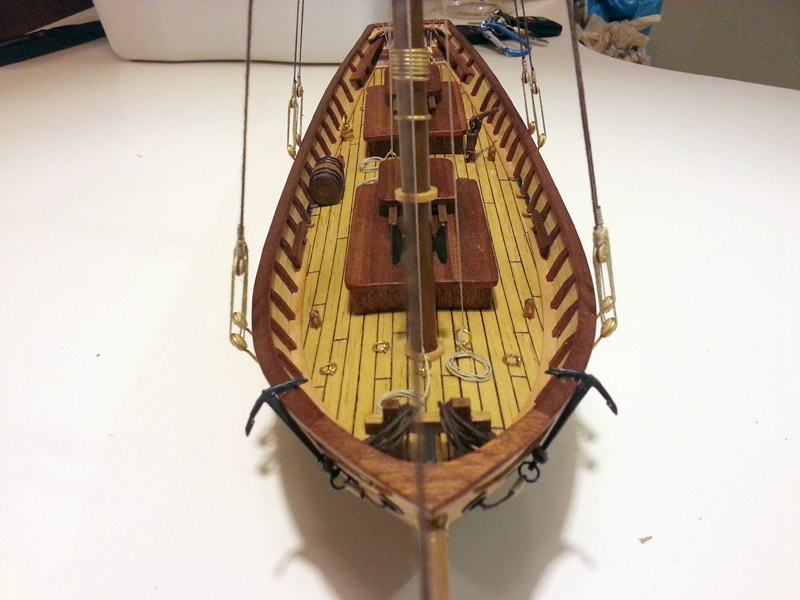
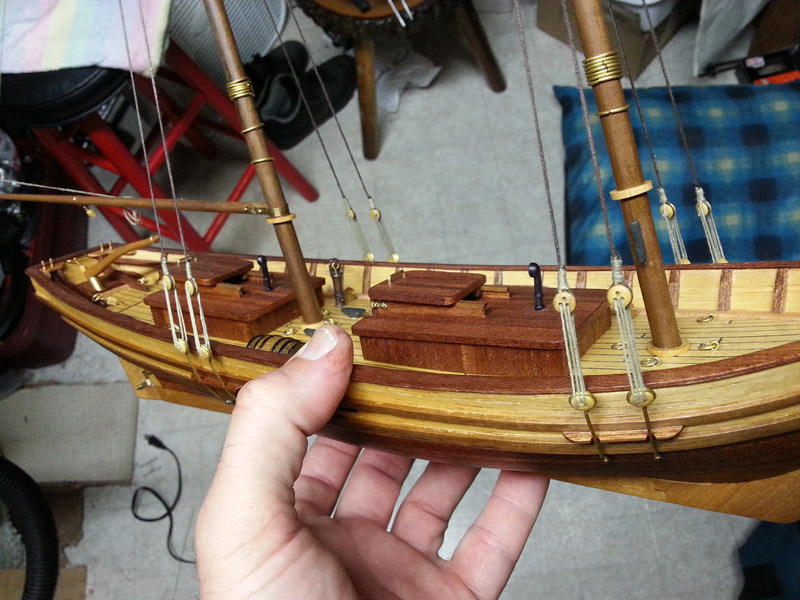
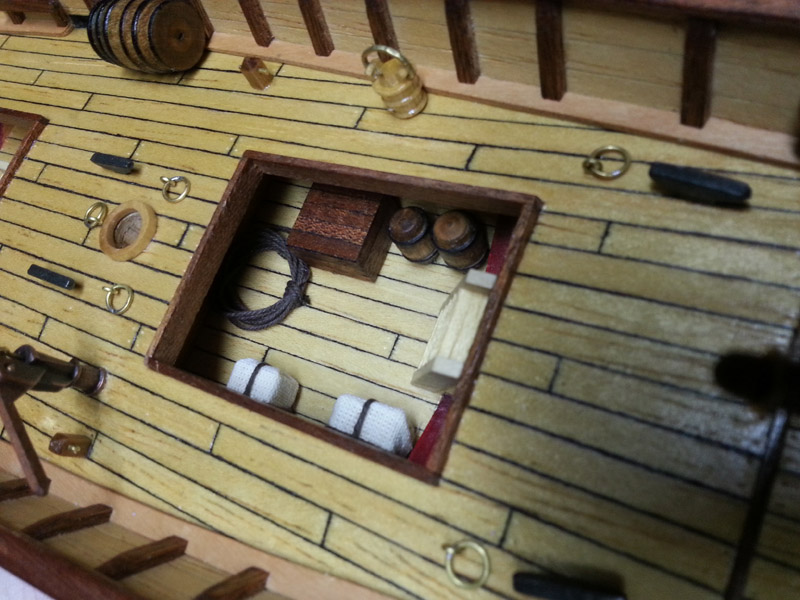
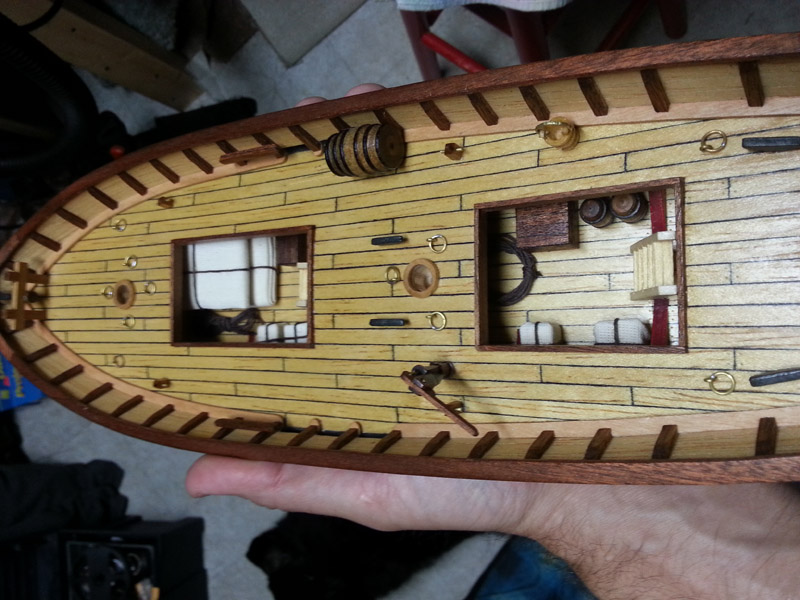
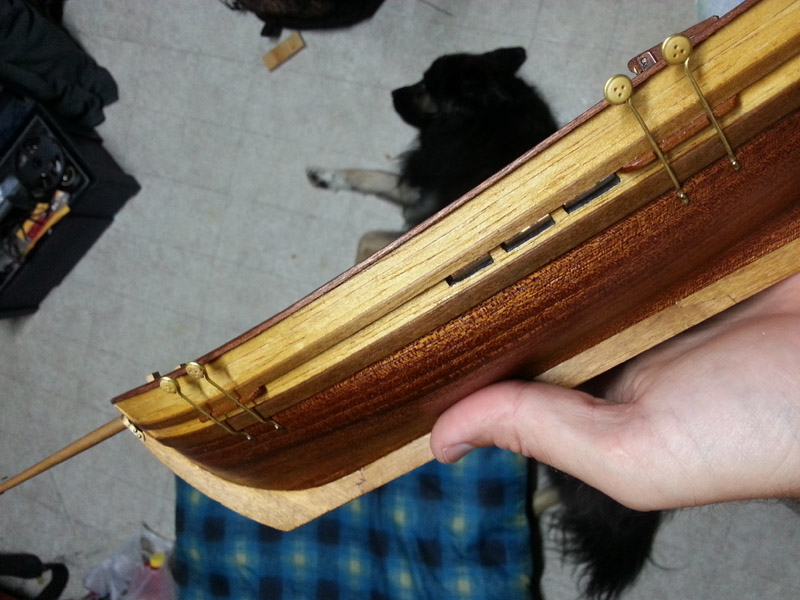
Thanks all. I think my admiral is more excited than I about finally nearing completion. Been almost a year I've tinkered with this off and on now. Tonight I got all my cargo done and installed. I made a couple of wooden boxes to add to the mix. I also finally got around to working on the chain plates. One side done.
- 114 replies
-
- 9
-
-
- swift
- artesania latina
- (and 2 more)
-
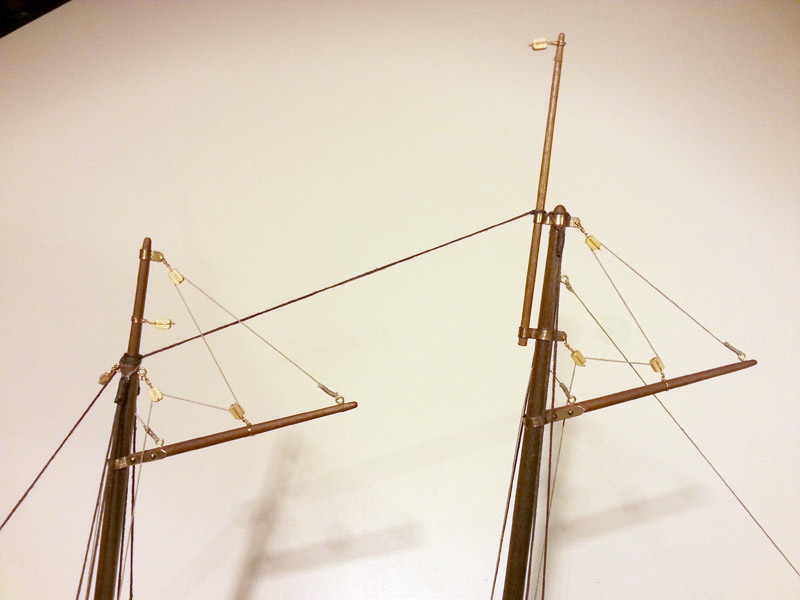
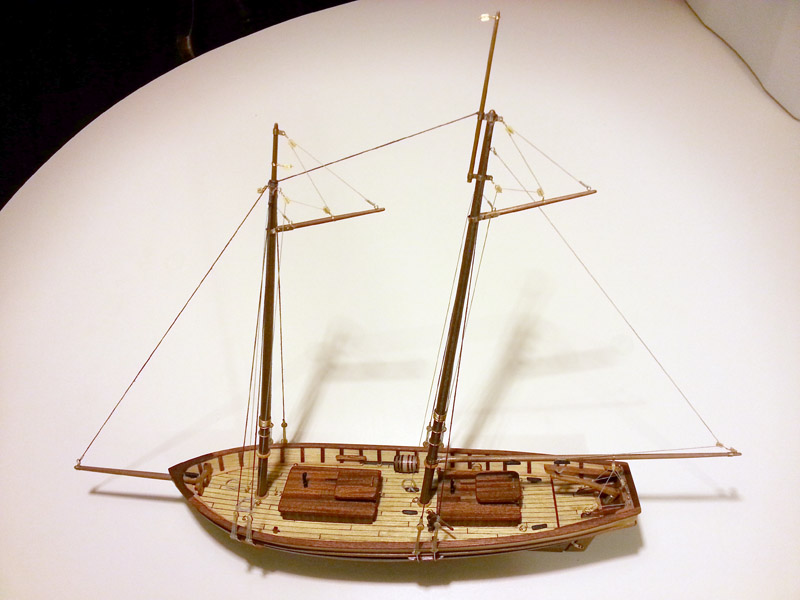
Mast work continues. getting the brass work for the topmast mounting took me a while to figure out how to form the brass tight, solder it shut, etc. I was quite happy with how it turned out. Dry fitted the masts again just for quick look. Just need to get my booms finished, then I can start pulling line.
- 114 replies
-
- 6
-
-
- swift
- artesania latina
- (and 2 more)
-
Your build has nice timing. This is not a popular kit, and its nice to see someone working it. I have it on my shelf to start soon once i finish my swift. The provided quarter galleries annoy me, i plan on fabing my own too.
-
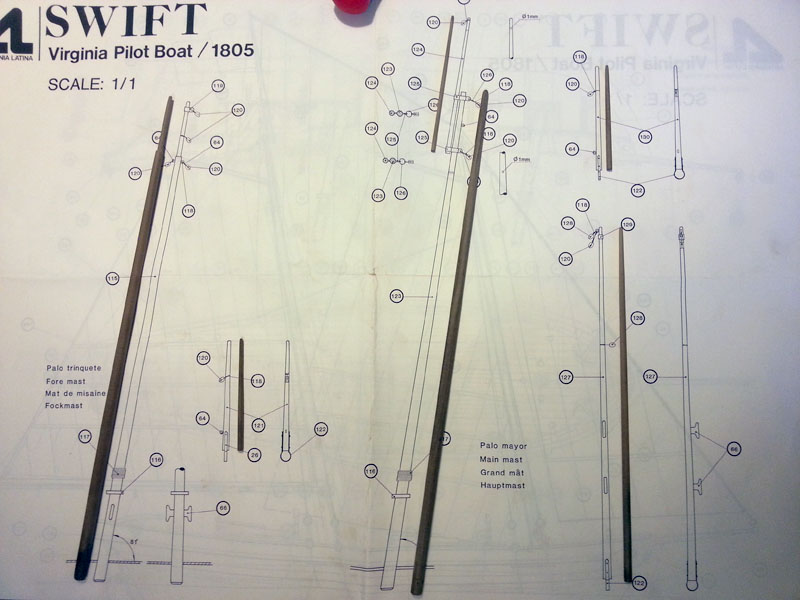
was home sick today with a cold. I made use of the time to get all of my masts and booms cut and shaped. Chucked the dowels in my hand drill, and with some 80 grit in a gloved hand spun them down to the right taper. A lathe would have made things easier, but have one I do not. The hand drill and 80 grit worked fine. just need to remember to cut the dowel long at first so the chuck doesn't mar good mast.
- 114 replies
-
- 5
-
-
- swift
- artesania latina
- (and 2 more)
-
I'm in the deck hardware and starting rigging phase. If you have the little bucket with a brass handle, my advise would be to make up a rope handle for it. The brass gave me all kinds of fits. if I had it to do over again I would have done rope. And when you dril out holes for the cast hardware (smokestacks, cleats, pump, etc.) don't make them too tight. If you need to twist or push too much to get them in place, you'll likely break it off in the hole. Don't ask me how I know.
- 7 replies
-
- 1
-
-
- swift
- artesania latina
- (and 1 more)
-
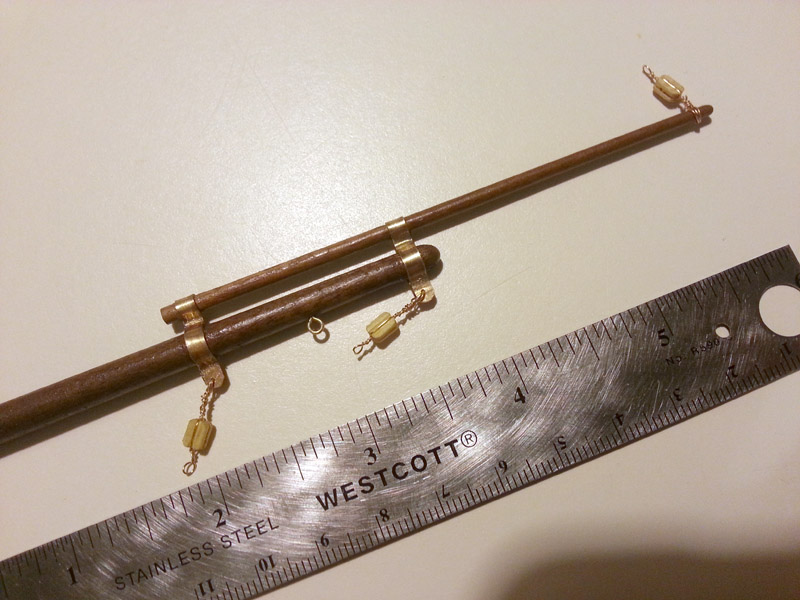
Regards. I've been working on my own swift for some months now. A trick that may be of use in the future, i made the shaft of my rudder by carving roughly a diameter then made an improvised draw plate by drilling holes in a metal ruler. Twisting through the progressively smaller holes gave a perfectly shaped and sized shaft to fit the tiller handle.
-
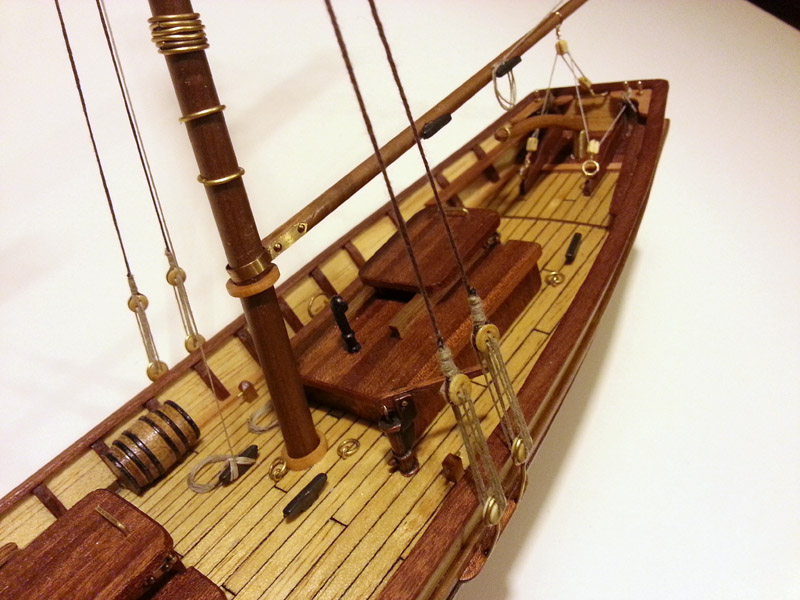
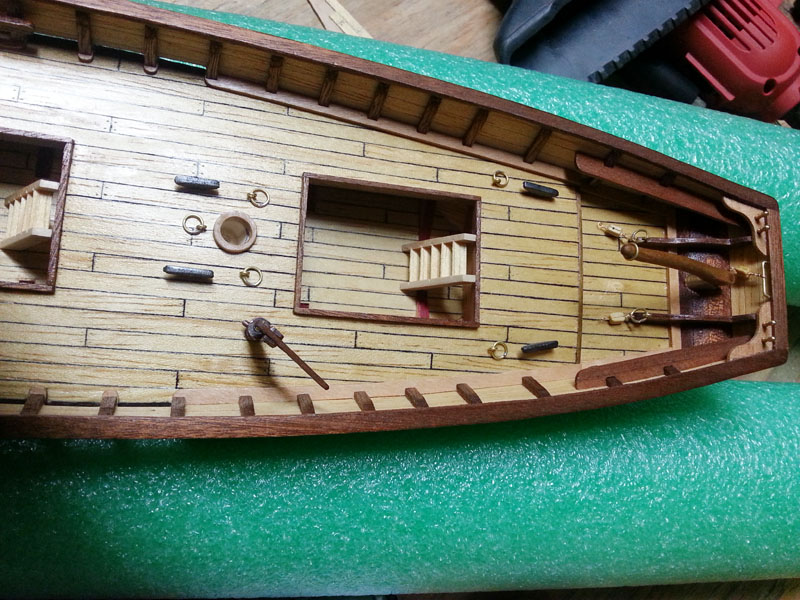
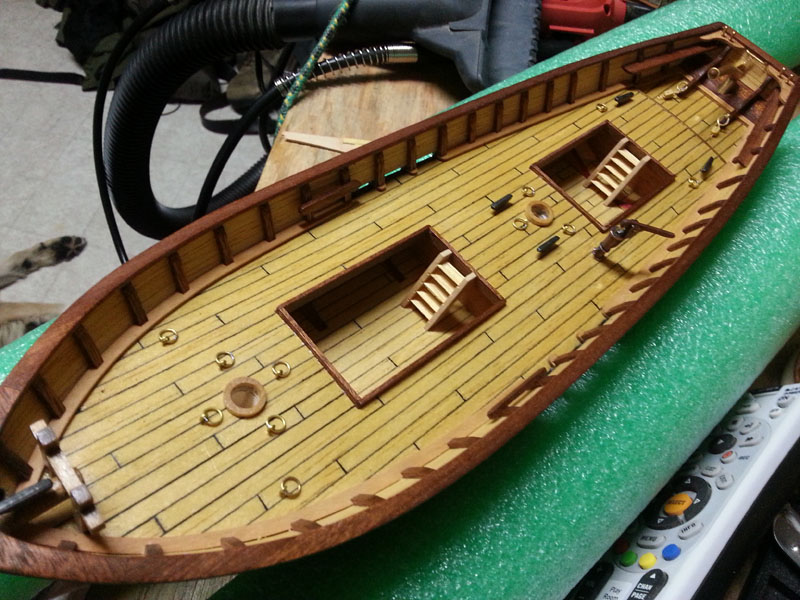
spent a few more hours working on things today. Worked on more eyebolts and cleats. wired up a few blocks as well. I also got the ladders assembled and mounted, and the pump put together and working.
- 114 replies
-
- 6
-
-
- swift
- artesania latina
- (and 2 more)
-
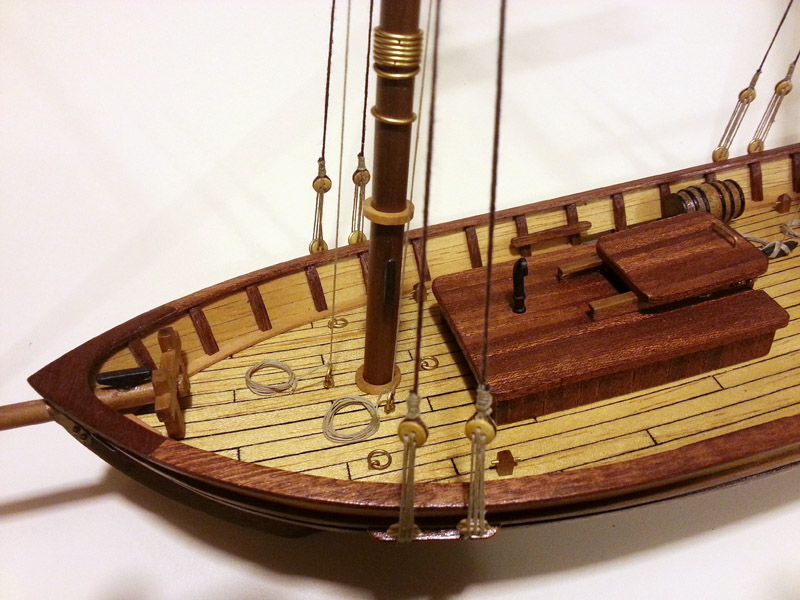
I had a bit of time, so got the mast trim pieces shaped and mounted, and started working on rings and eyebolts.

- 114 replies
-
- 5
-
-
- swift
- artesania latina
- (and 2 more)