DONATION DRIVE - SUPPORT MSW - DO YOUR PART TO KEEP THIS GREAT FORUM GOING!
×


Karinmutter
-
Posts
103 -
Joined
-
Last visited
Content Type
Profiles
Forums
Gallery
Events
Everything posted by Karinmutter
-
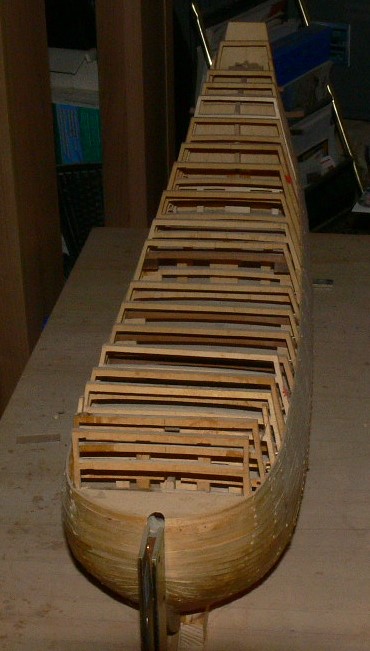
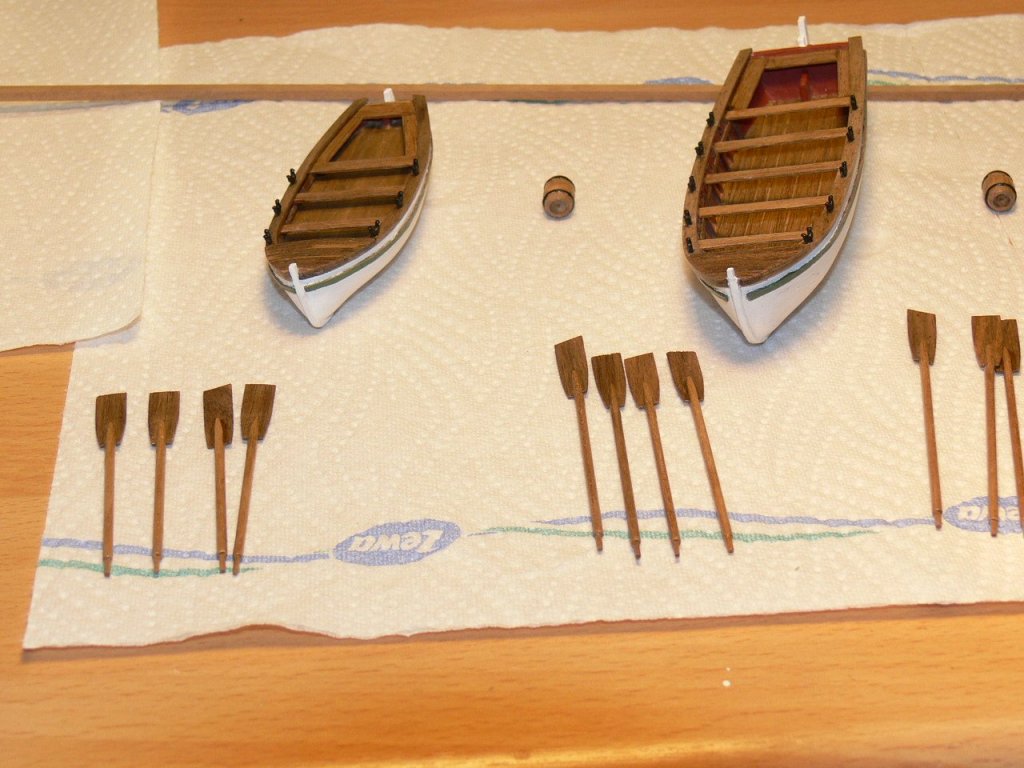
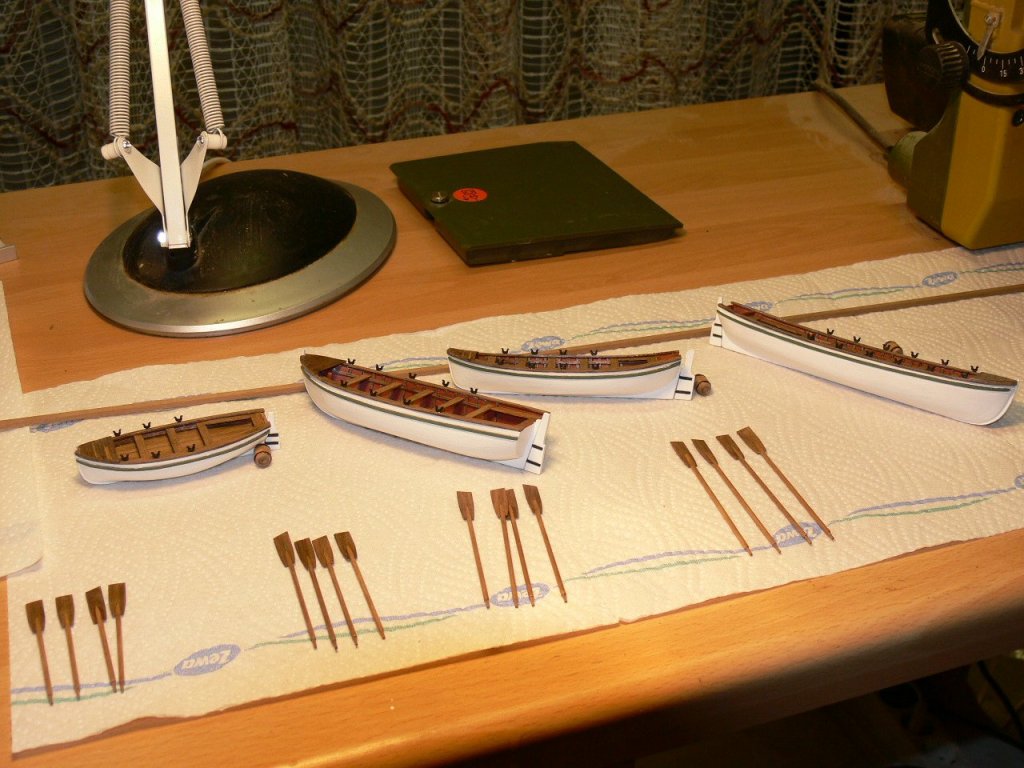
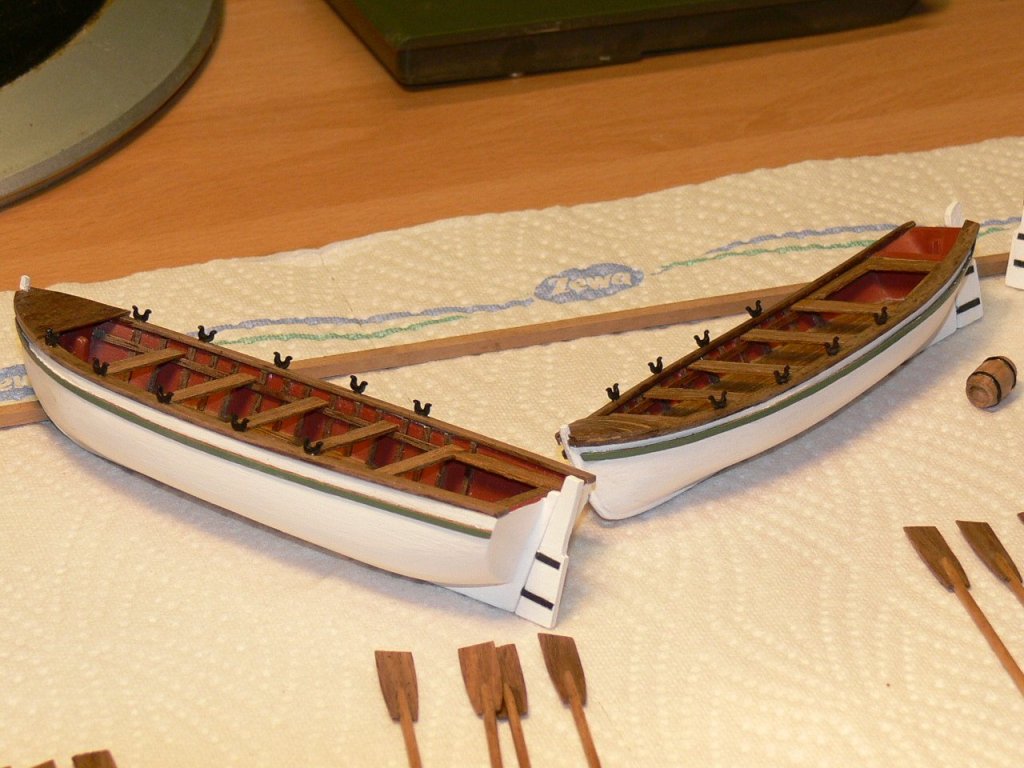
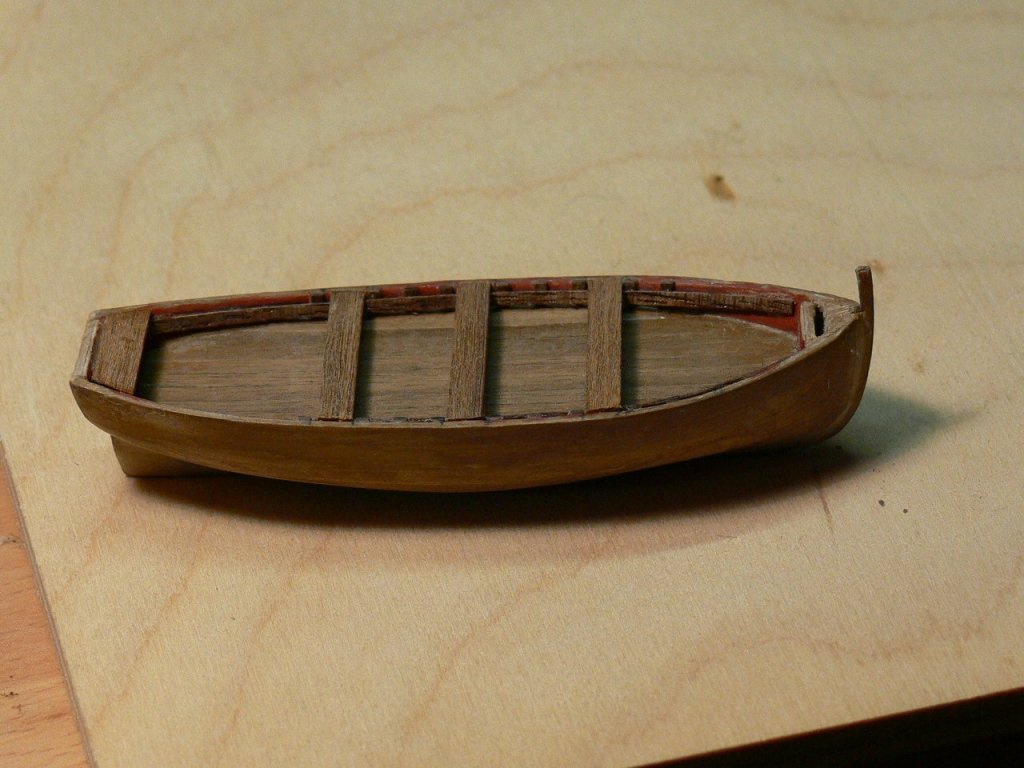
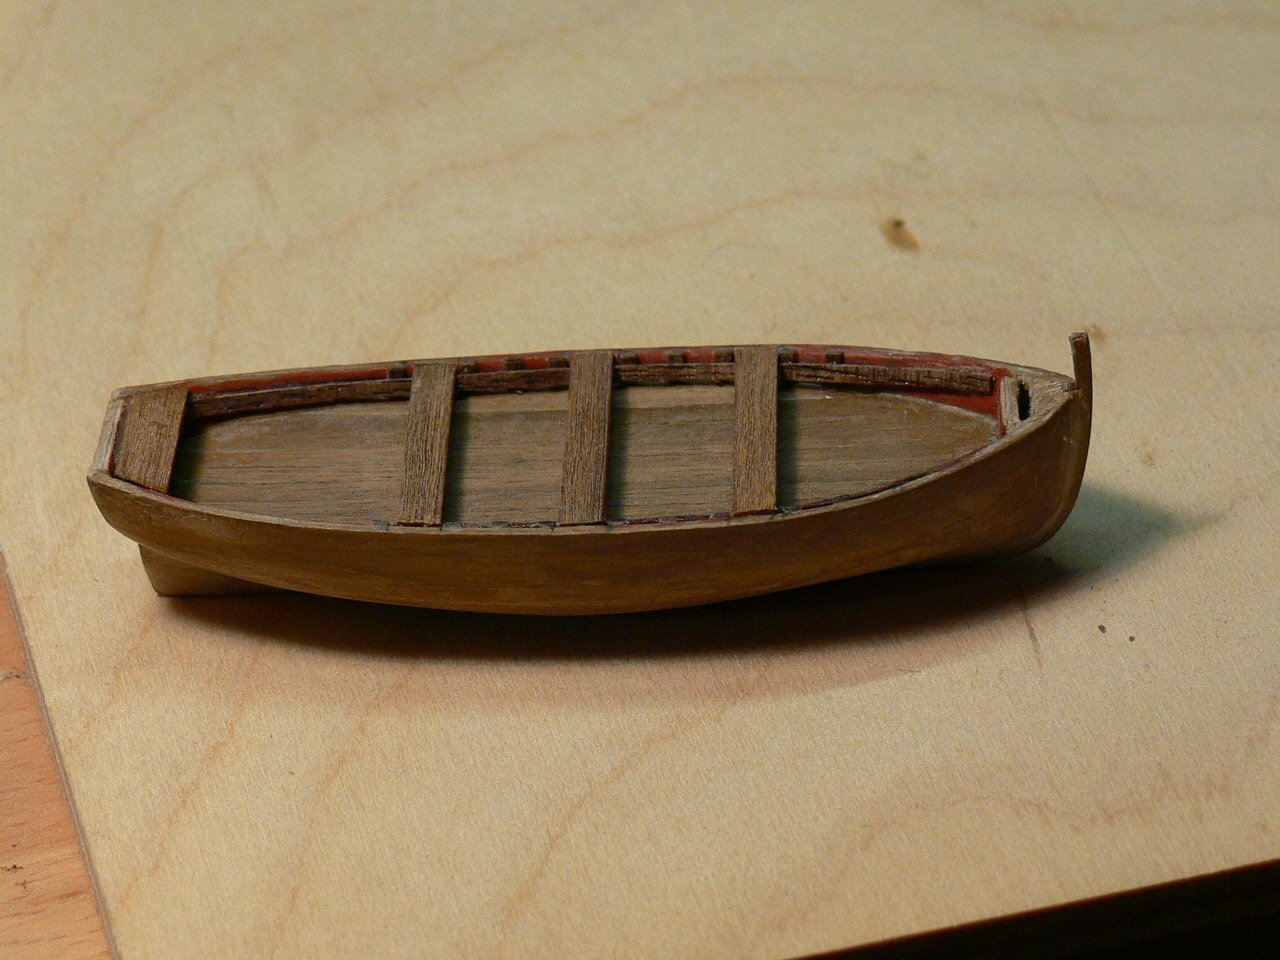
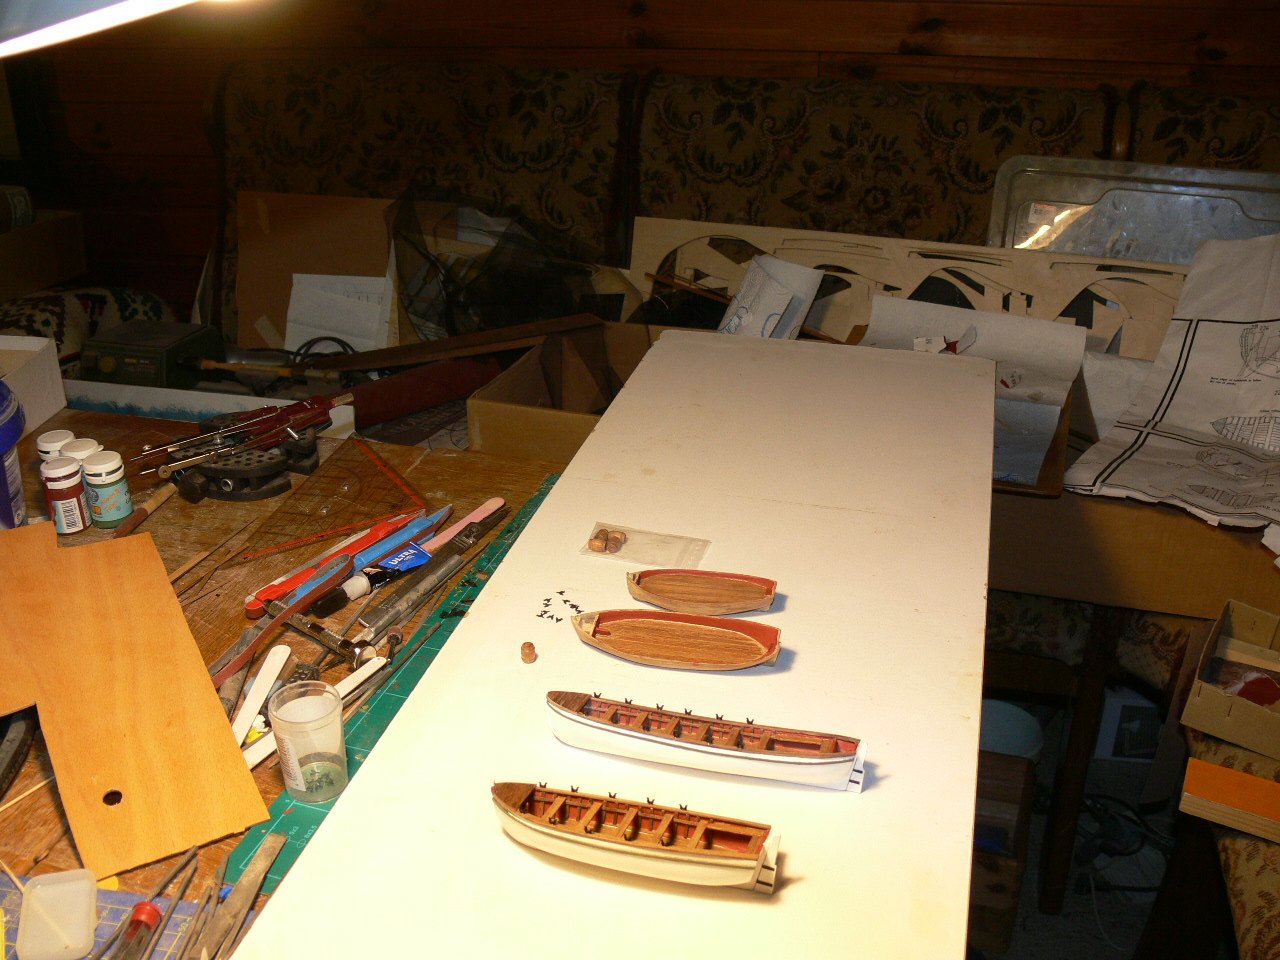
 I have finished the small boats now. It took more time than I expected. The oars were also relatively time consuming. Now I am looking forward to thenext step: The construction of the masts , yards and spars!
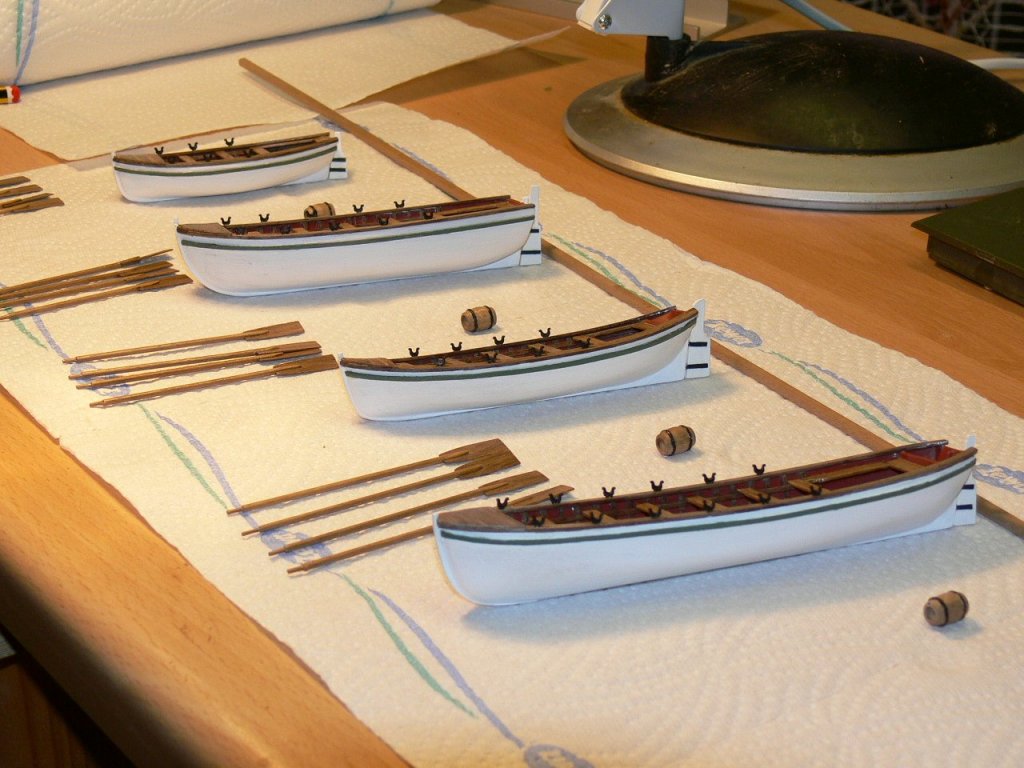
- 122 replies
-
- 10
-

-
- caldercraft
- agamemnon
- (and 1 more)
-
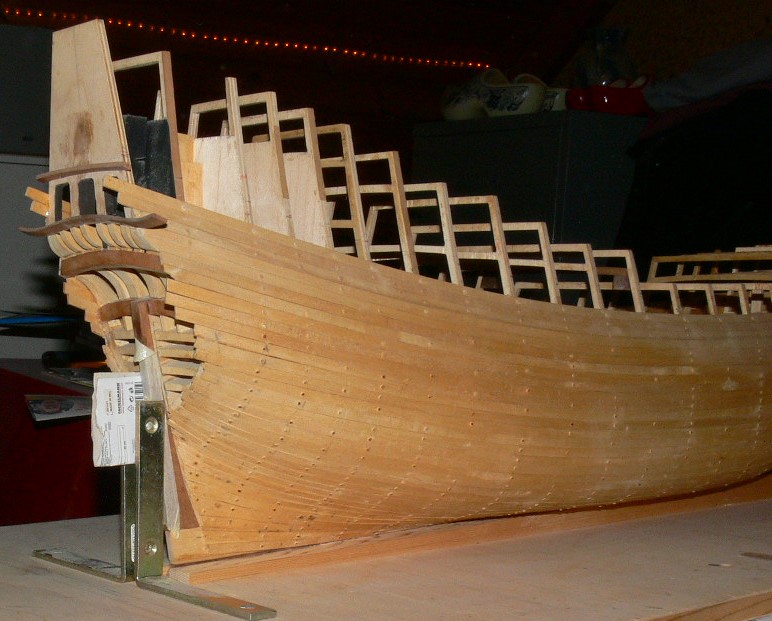
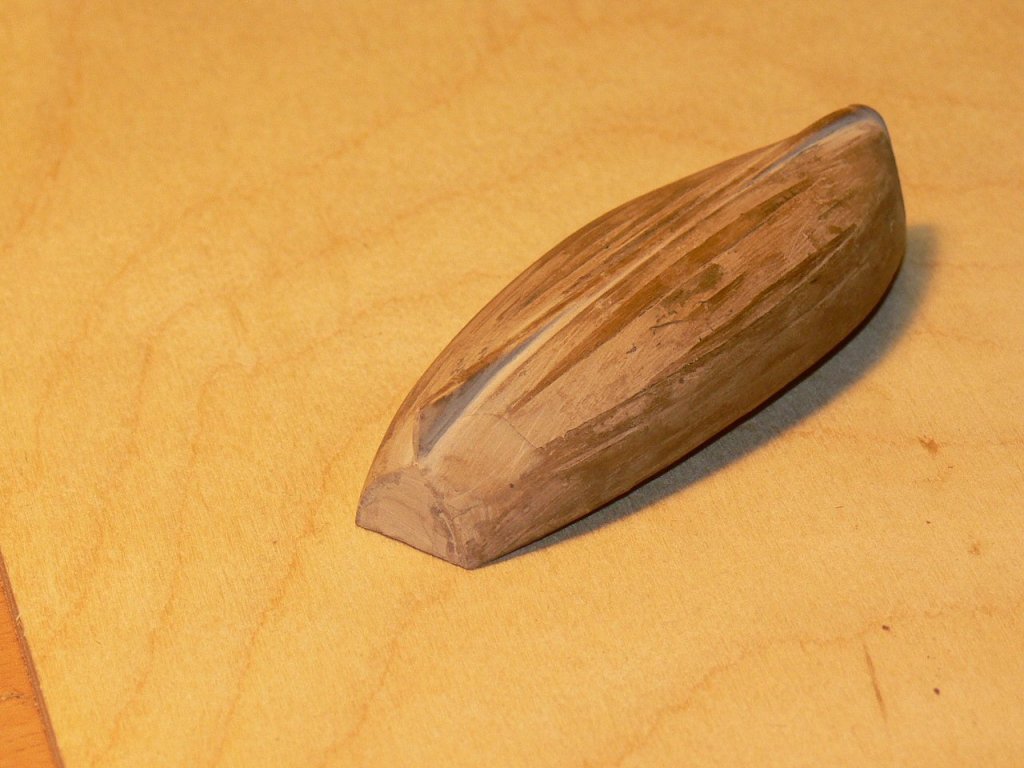
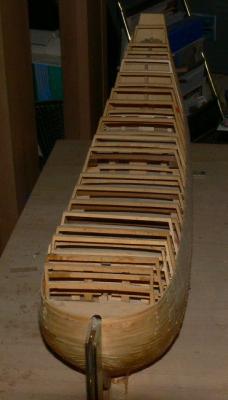
I have finished the first three small boats. Currently I am working on the last and smallest boat. It is not easy to fit in the benches, because there is only a very small distance from the floor to the railing. Again , I glued a second keel on top of the first one .

.thumb.JPG.fdae356729c0b8f492e191e0bda58dc5.JPG)
- 122 replies
-
- 3
-
-
- caldercraft
- agamemnon
- (and 1 more)
-
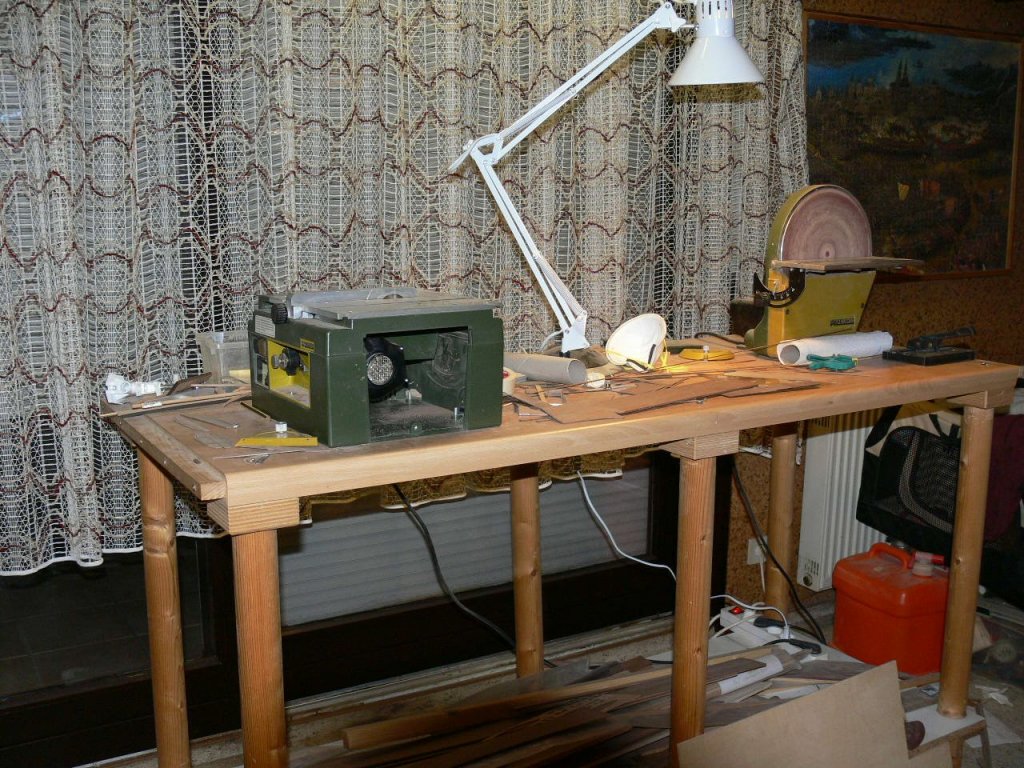
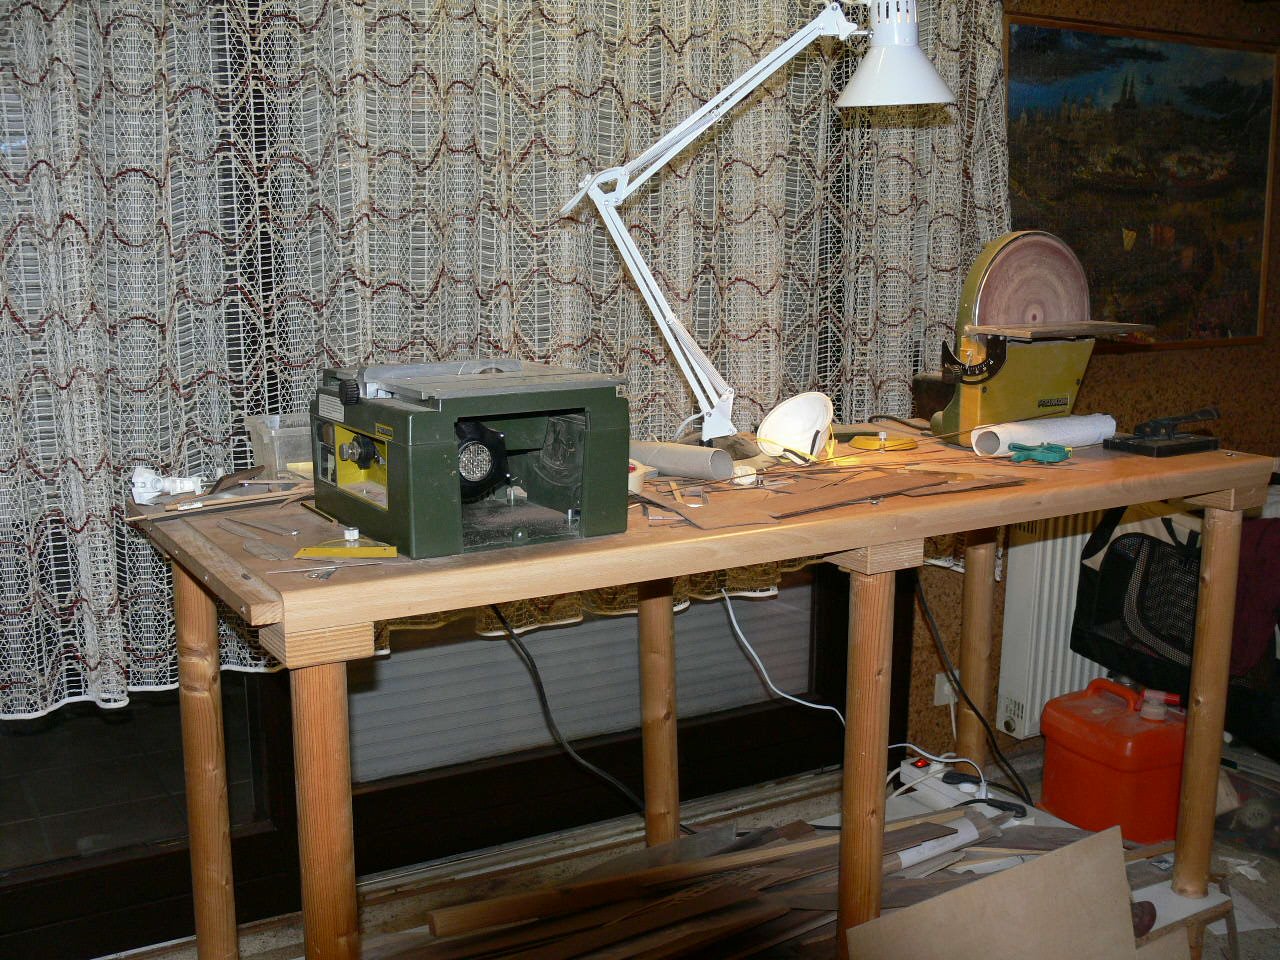
Hello ETNZ, respect that you picked the Aggie as your first build. I can imagine that it is a complicated endeavor. I hope you will solve your neck problems. I have a disease myself that might influence the feeling in my fingers (polyneuropathie). So far "only" my feet are beginning to get numb. But as long as I can, I will continue modelling! I have a proxxon table saw. It is an older type. The saw is very good, but has no"finetune". You have to test with a scrap piece of wood, whether your adjustment is okay. Good bye, Martin
-
Thank you, vulcanbomber! I am looking forward to the rigging. So far the kit is very good. The material as well as the plans. Martin
-
Hello Jim, Good to hear from you, too! Thanks for the kind words, ship modelling can indeed be a good therapy!
-
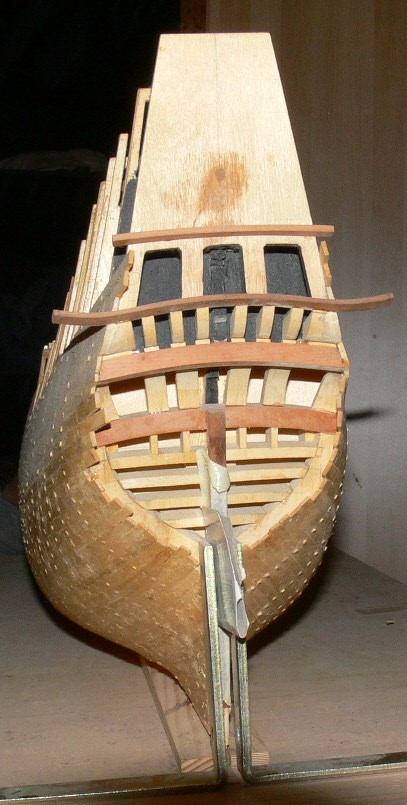
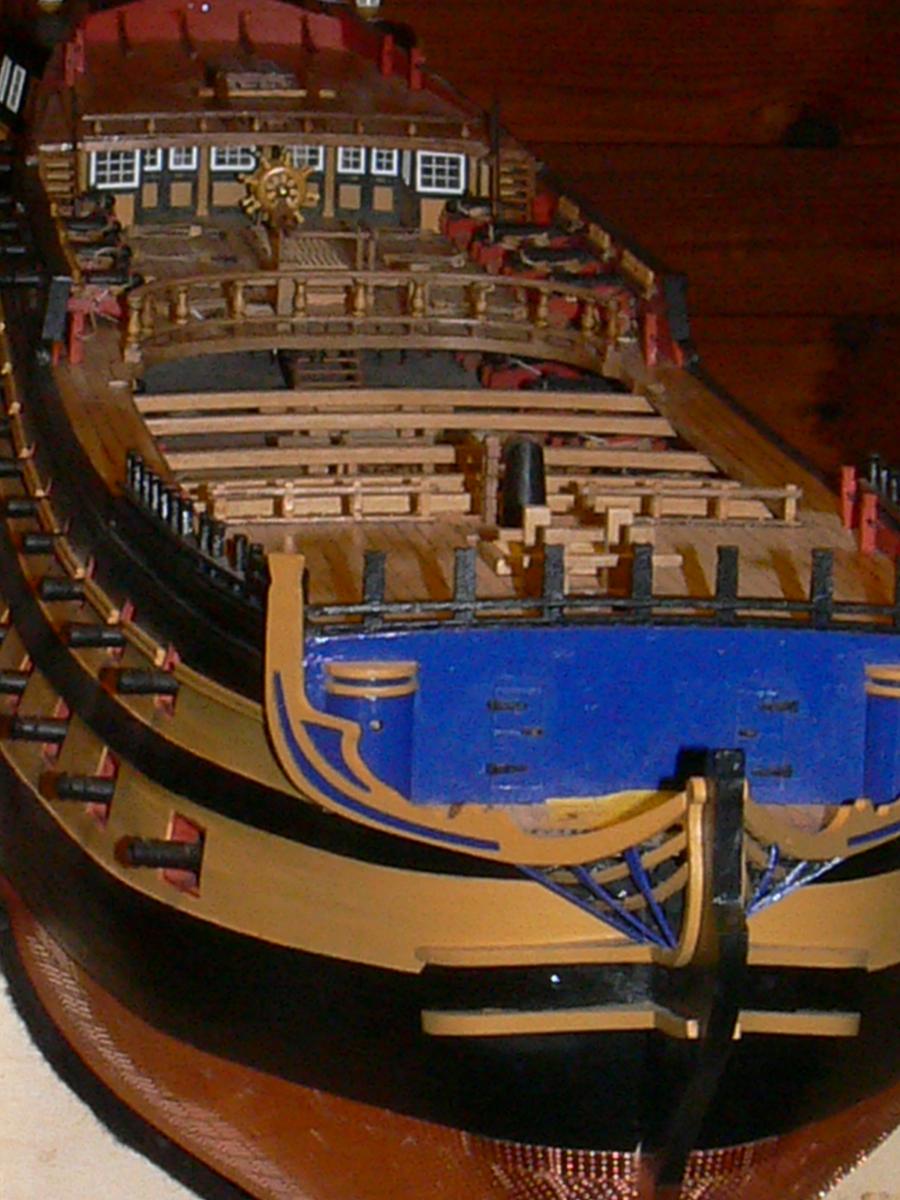
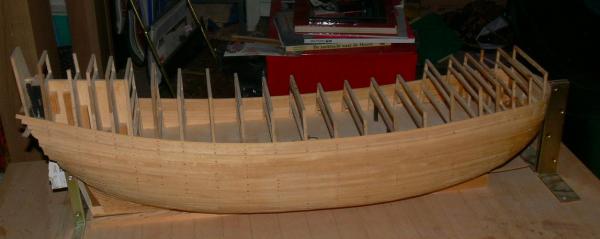
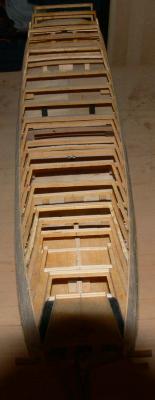
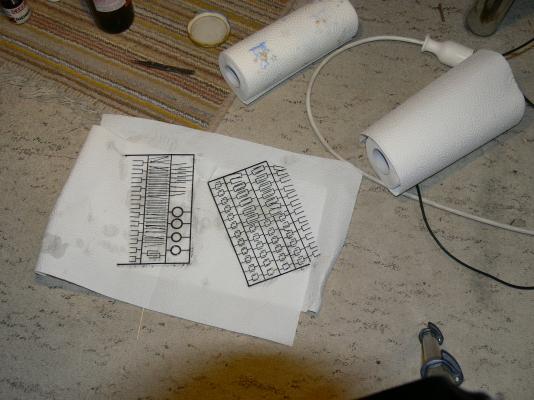
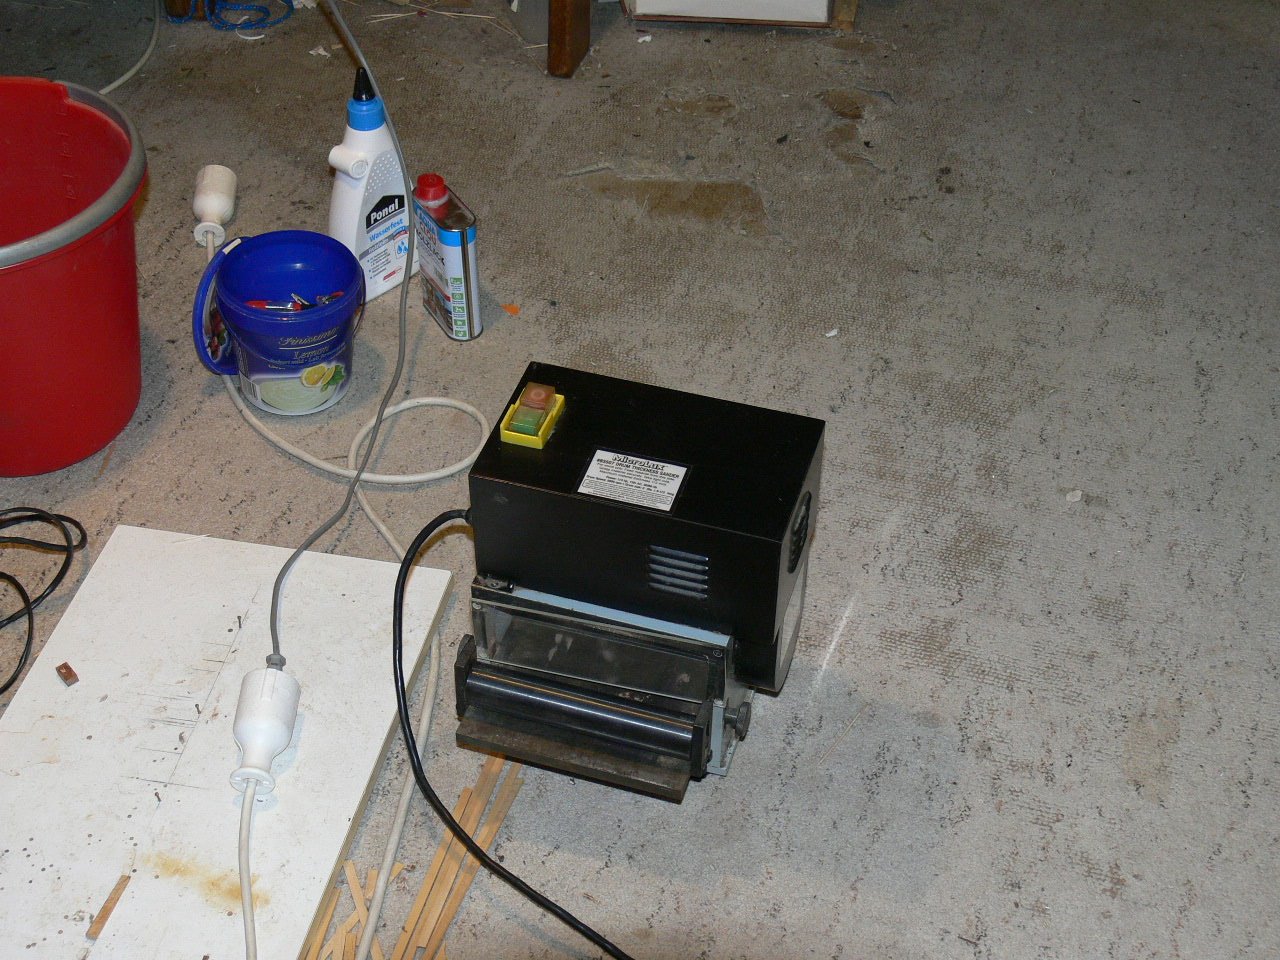
After a looong break ( I had to deal with personal losses, including the death of my two dogs), I finally resumed working on my Agamemnon about 6 months ago. I am currently working on the small boats. I encountered a few problems. 1. The space for the planks is often not enough, You can fit the planks, but then the keel more or less disappears. Therefore I added a second keel on top of the first one. 2. To get a natural look, I added a railing by cutting a piece of wood out of a 1 mm board that follows the contours of the boats. 3. To get a good shape, I put a layer of wood spackle over the first layer of planks and sanded it down. It can also be done on the second layer, because it will be painted. 4. I did not cut the 3 mm wood strips in the middle as recommended. Instead I used my thickness sander (picture) and sanded down a 3 mm board to 1.5 mms. Then I cut 0,5 mm slices with my table saw. Use a fine saw blade, You might need two or three.
- 122 replies
-
- 1
-
-
- caldercraft
- agamemnon
- (and 1 more)
-
Good to hear that you like it, Nils. Actually it is quite time consuming, but I hope it is worth it... Have a good day, Martin
-
I am sure it will be not that bad, but it will probably take you a few years. Another suggestion: If you are getting frustrated in the building process and you think it is too much, you could as well put the "Aggie" aside for now and improve your skills and your abilities by working on an easier kit first. My first kit was the "Santa Maria", one of Columbus`s ships going to Amerika. It was an Amati kit and it was quite rewarding. You can learn all the things you need from wood bending to the rigging. It will take only 6 months to build it and it is really fun! Martin
-
Hello Hans, Thx for positive comments, but you are right I will work on the Agamemnon first, otherwise it would be too confusing for me! Greetings, Martin
-
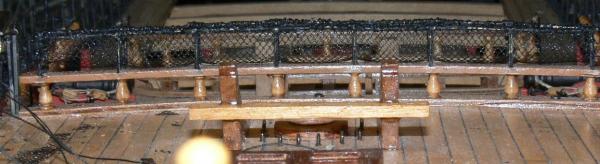
Hello, I have not made much progress lately, due to having been busy otherwise, but I started to attach the clamps of the hammock netting. After that was finished, I connected the little holes with 0,6mm brass wire. I had to straighten it before using becose it comes rolled up. I also blackened it chemically. Normally this would be the end according to plan, but I decided to add netting to the clamps. I bought very fine tulle for that, glued it to the clamps and the wire at a few contact points. Afterwards I cut off the excess and sewed the tulle to the wire. I am still doing that and will be probably for the next four weeks... For explanation: I used a plank, 6 mms wide (from the original hull planking) to push the netting down to the ground. I fixed that plank with a few clamps at its place. Greetings, Martin

- 122 replies
-
- 3
-
-
- caldercraft
- agamemnon
- (and 1 more)
-
I would be happy if I could give you any useful information! You are welcome to ask questions anytime. As a first ship it will not be easy, but you can make it with patience and persistance. I found out that it pays to put a lot of thinking in all of your moves LONG BEFORE you actually do something. It will pay in the long run. Have fun with your ship! Martin
- 122 replies
-
- 1
-
-
- caldercraft
- agamemnon
- (and 1 more)
-
Thank you for your inspiration picture! I think it is a good idea to work with clay instead of real carving. As long as it looks good, who cares? I do not have carving experience at all to be honest. The ship is in 1:50 scale. Happy modelling, Martin
- 122 replies
-
- 1
-
-
- caldercraft
- agamemnon
- (and 1 more)
-
Hello Hans, thank you very much for offering me help, I might need it as soon as I will continue with the Batavia, By the way ypur model looks really fantastic! I was busy, so excuse me that I could not answer you earlier! Martin
- 122 replies
-
- 2
-
-
- caldercraft
- agamemnon
- (and 1 more)
-
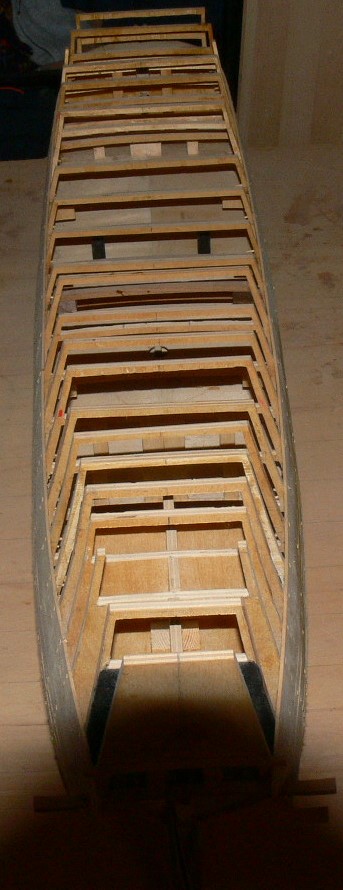
Hello Nils, Again thank you for the positive feedback. Like you, I also like the lines of the Batavia and the hull shape. After having finished the Agamemnon (might take one more year...) I will putting all my efforts in the "Batavia" I was in Lelystad (Holland) three times already. I took many pictures of the Replica and actually bought the plans there. The figurines will be hard, but I do not intend to carve them . There exists a special clay that looks exactly like wood after you paint it. I have not used it yet, but it is recommended by Wolfram zu Mondfeld for example, a famous modeller and author. There will be a lot of other problems, I am sure, but I will do my best , hope that is good enough.. I attached the planks with cut toothpicks to the frames/bulkheads. I predrilled a hole of 2 mms through planks and bulkhead, then dipped the toothpick in woodglue and drove the toothpick in with a small hammer. This worked perfect for me. Treenailing is something I might consider for the second layer of planking. I have thin bamboo dowels that have to be cut in little pieces for that. But right now all my attention is on the Agamemnon. Some modellers work on different models simultaneously, but I think that would drive me crazy... Happy modelling und Grüße nach Schleswig-Holstein von Bayreuth (Oberfranken) Martin
- 122 replies
-
- 1
-
-
- caldercraft
- agamemnon
- (and 1 more)
-
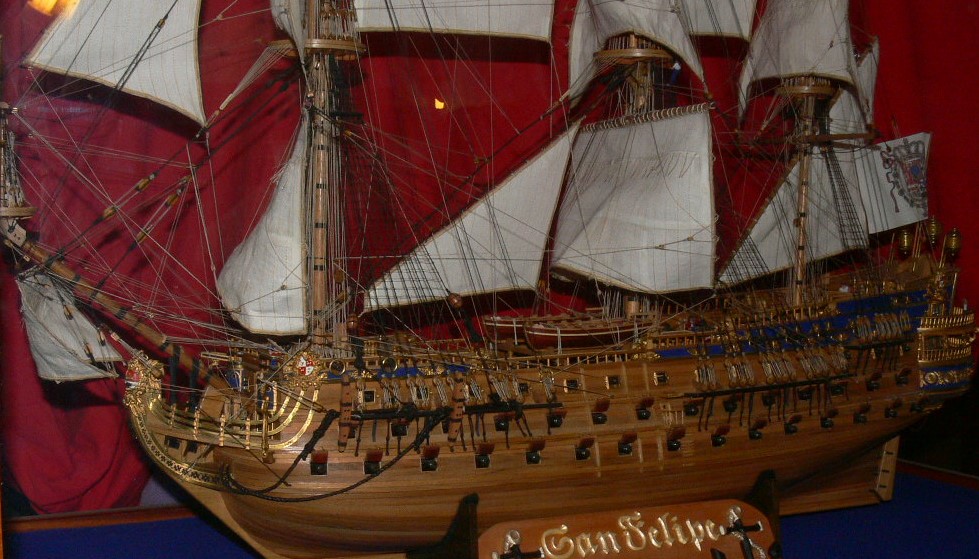
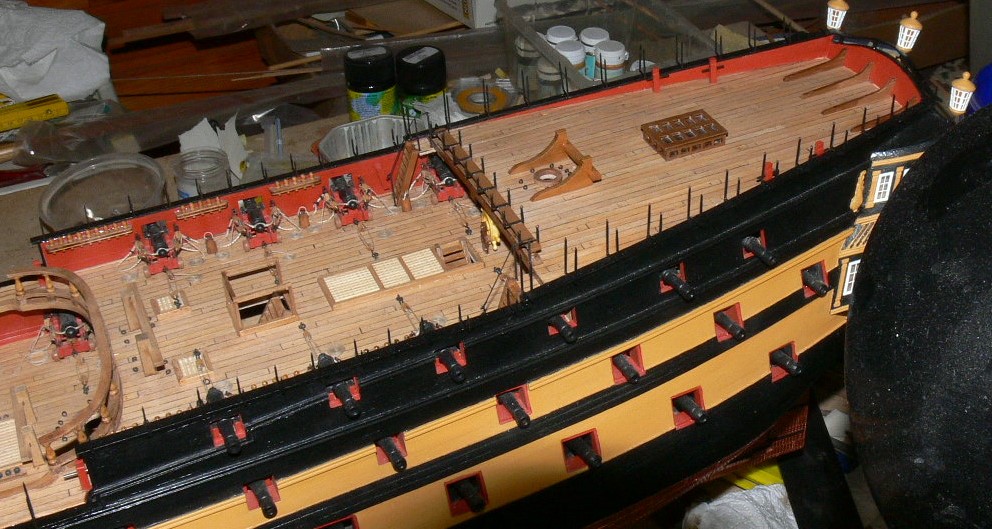
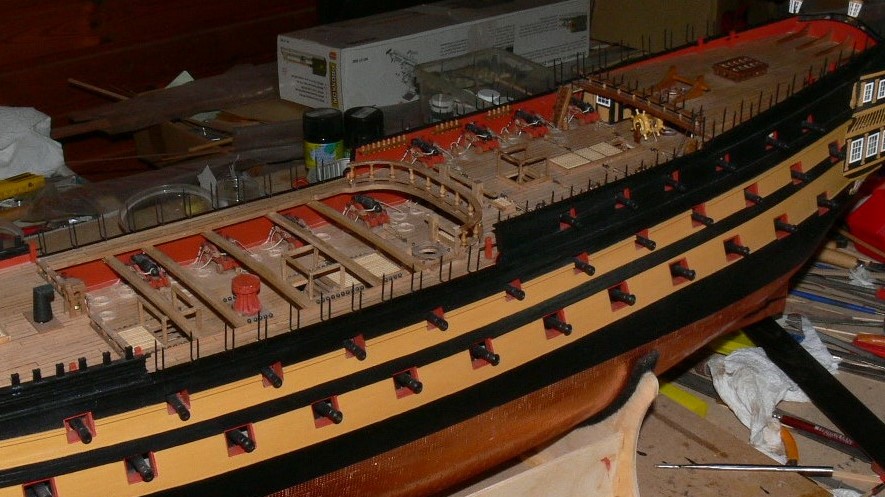
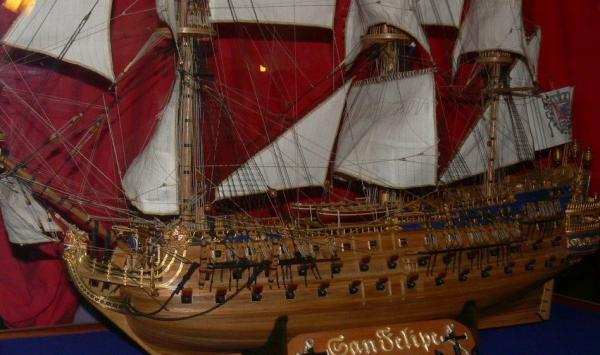
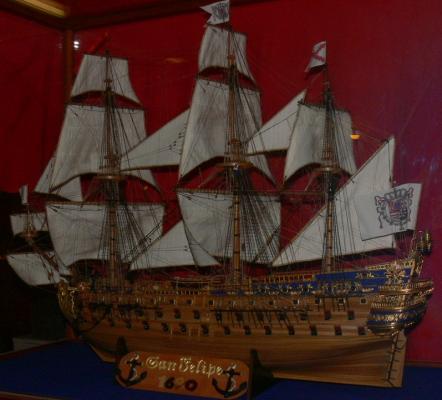
For anybody, who is interested: My last two projects." San Felipe", finished kit with a lot of own input. and "Batavia, scratch built in early stages... Martin


- 122 replies
-
- 5
-
-
- caldercraft
- agamemnon
- (and 1 more)
-
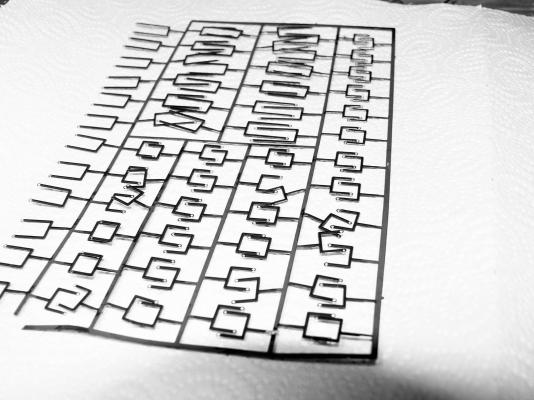
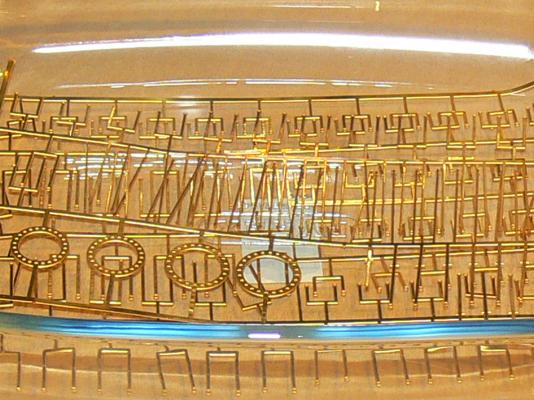
Hello Nils, Thank you for the positive comment. No I am not putting sails on this one. The Caldercraft kit does not give you that option. I am sure it would still be possible, but I wanted it to be a bit easier this time... My previous model was the San Felipe. A kit ( but I used a lot of parts I manufactured myself) that also had sails. I am also working on the "Batavia" a scratch built model. It is on dock right now, but I plan to continue after I have finished the "Aggie"... I will add two pictures to give you (and other interested builders) an idea what I am talking about. To be honest I am not sure if I will ever finish the Batavia, these figurines will be a real challenge... Happy modelling, Martin
- 122 replies
-
- 1
-
-
- caldercraft
- agamemnon
- (and 1 more)
-
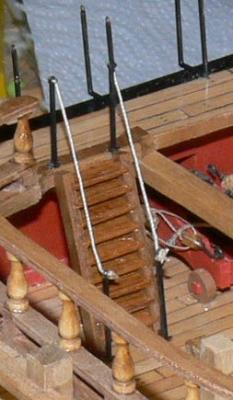
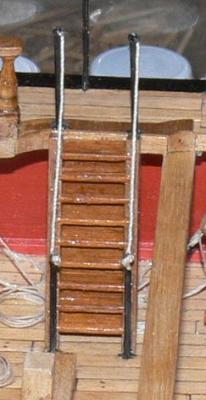
Some new pictures of the ladders I made. While waiting for the mailman to deliver the brass wire for the hammock netting...

- 122 replies
-
- 3
-
-
- caldercraft
- agamemnon
- (and 1 more)
-
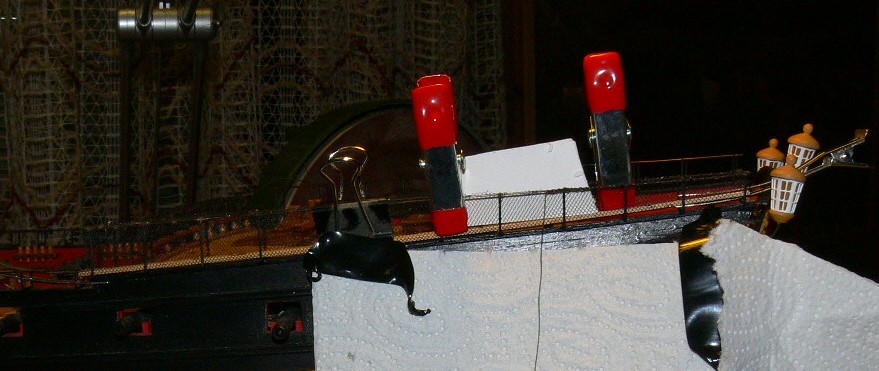
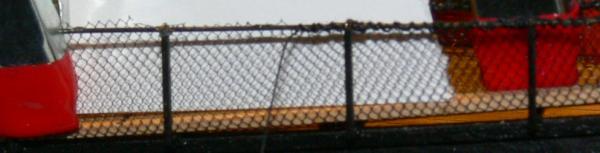
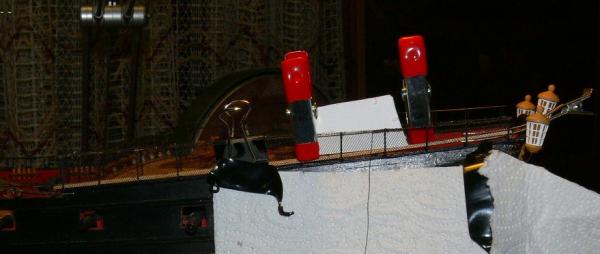
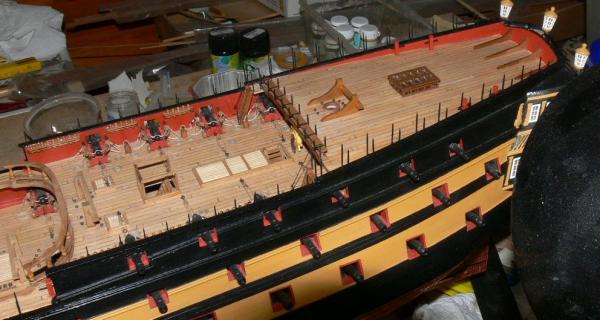
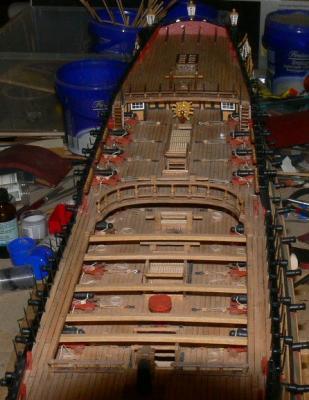
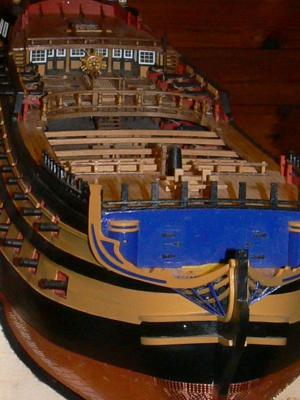
Hello fellow builders! The hammock netting will be next! I showed you how to blacken the brass cranes earlier. Now I have glued them to the railing permanently. I drilled a 1 mm hole through the railing planks according to plan and used epoxy- 2- compound glue.That gave me 5 minutes to adjust their position. The next step will be to attach the hammock netting. My friend mobbsie helped me out and sent me a few pictures of the way he had made it. (Looks great by the way!) I purchased the fabric in a store in my city. Now I am waiting for the 0.6 mm brass wire (online order) that will go through the holes. It has to be blackened, too, of course. The netting (fabric) will be attached (glued and sewn) to that wire. I hope it will go as easy as mobbsie described it . I uploaded a few pictures that show the cranes and my latest progress.

- 122 replies
-
- 6
-
-
- caldercraft
- agamemnon
- (and 1 more)
-
These are the chemically blackened brass parts after two coats of "Electrofix". If there are still spots that have no blackening , just use a thin coat of acrylic paint. Anyone, who might try it: Good luck! Martin

- 122 replies
-
- 2
-
-
- caldercraft
- agamemnon
- (and 1 more)
-
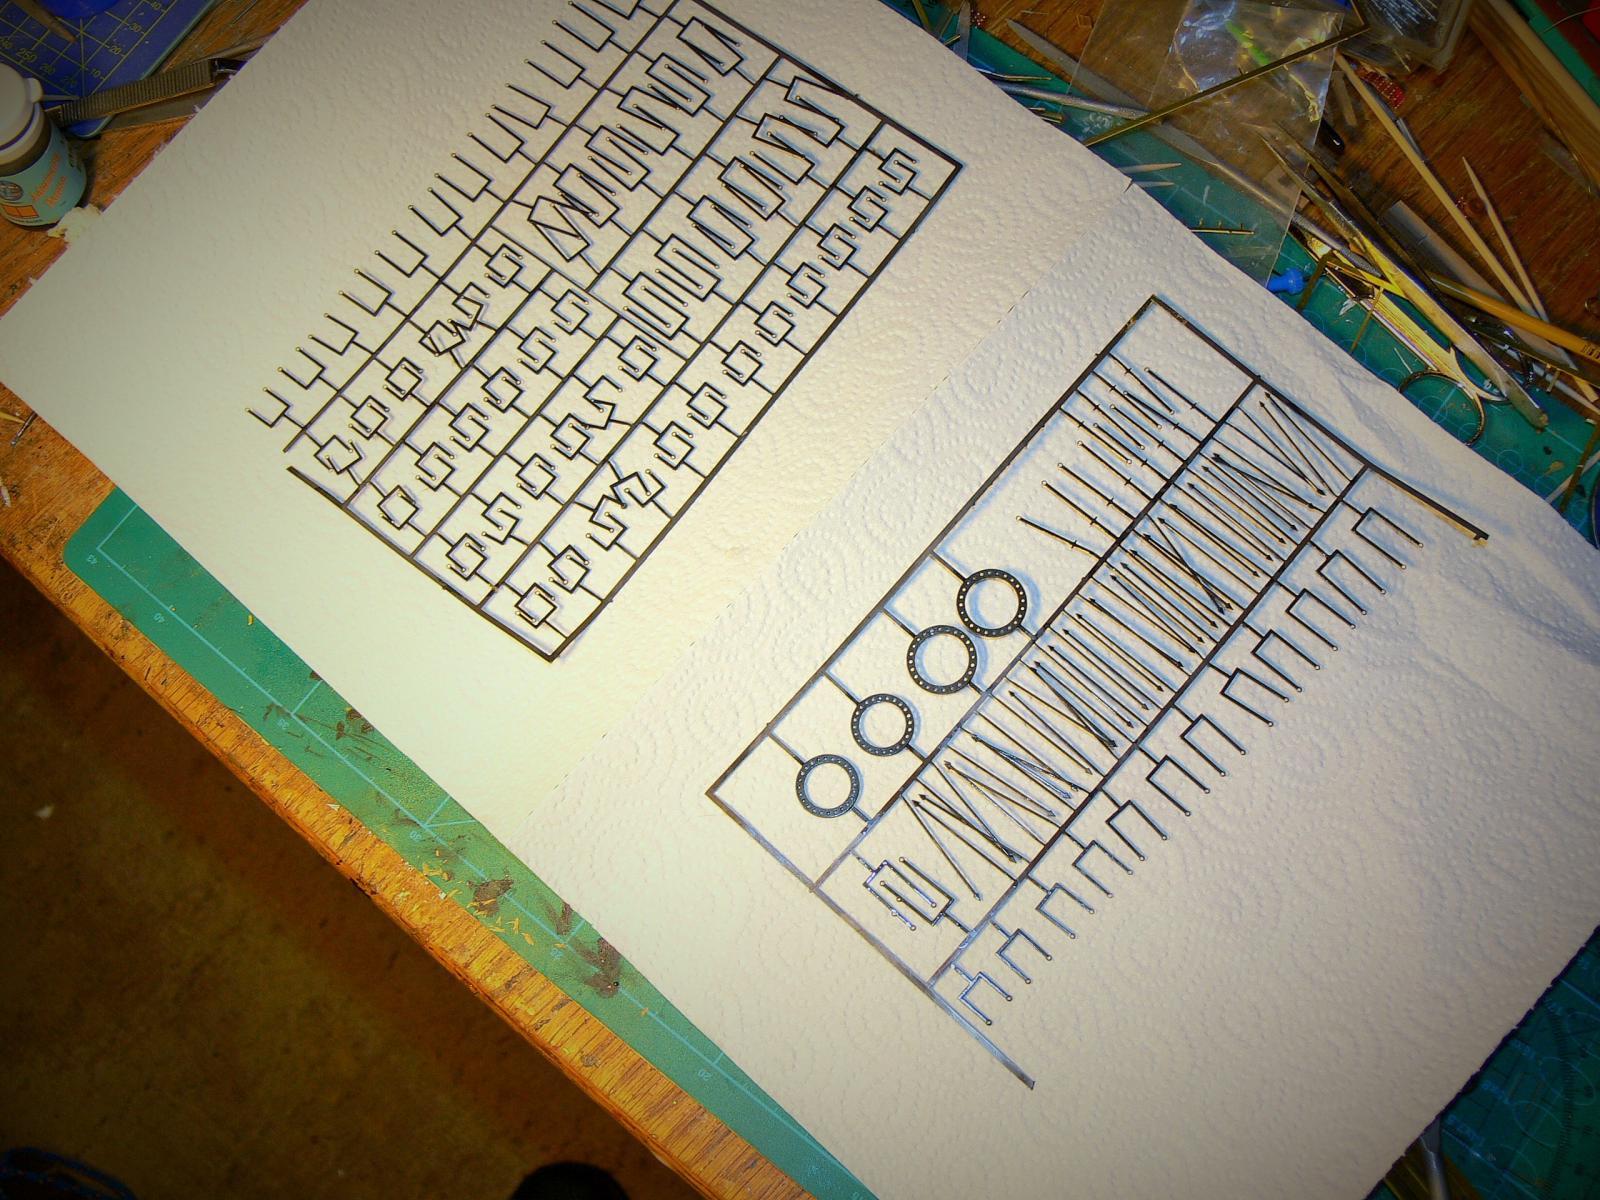
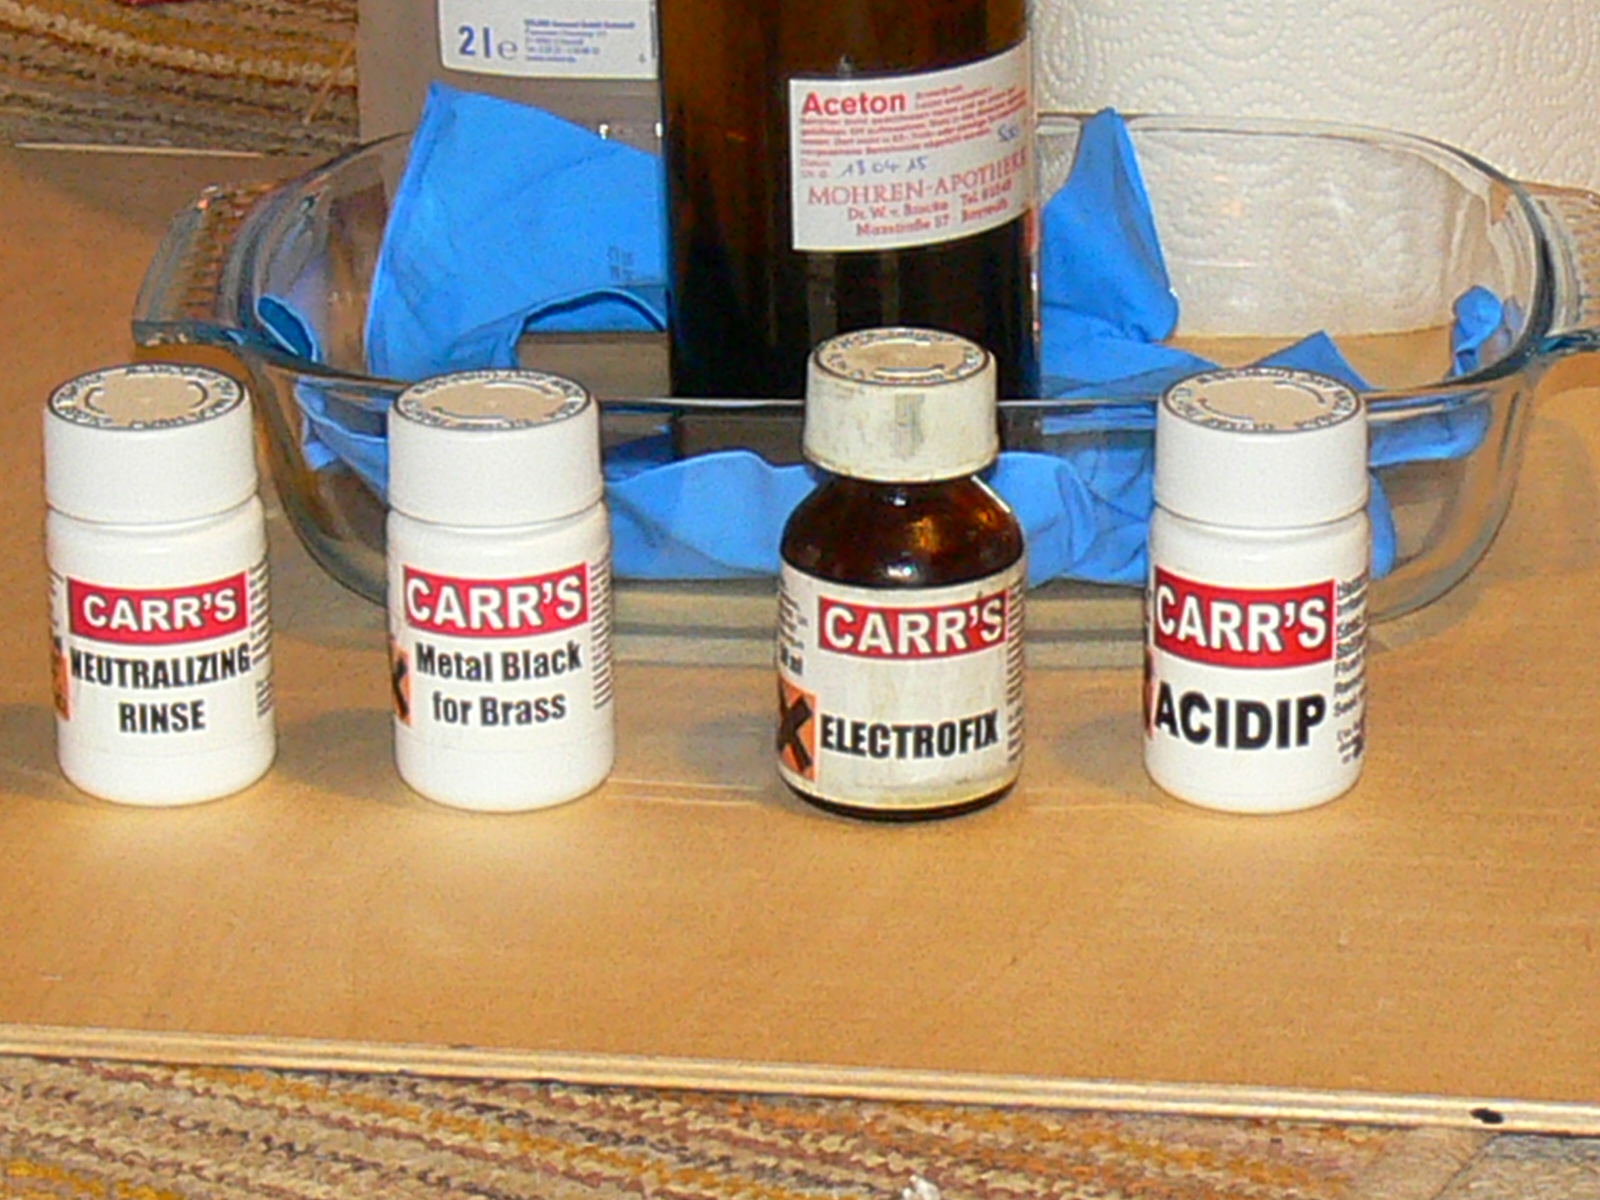
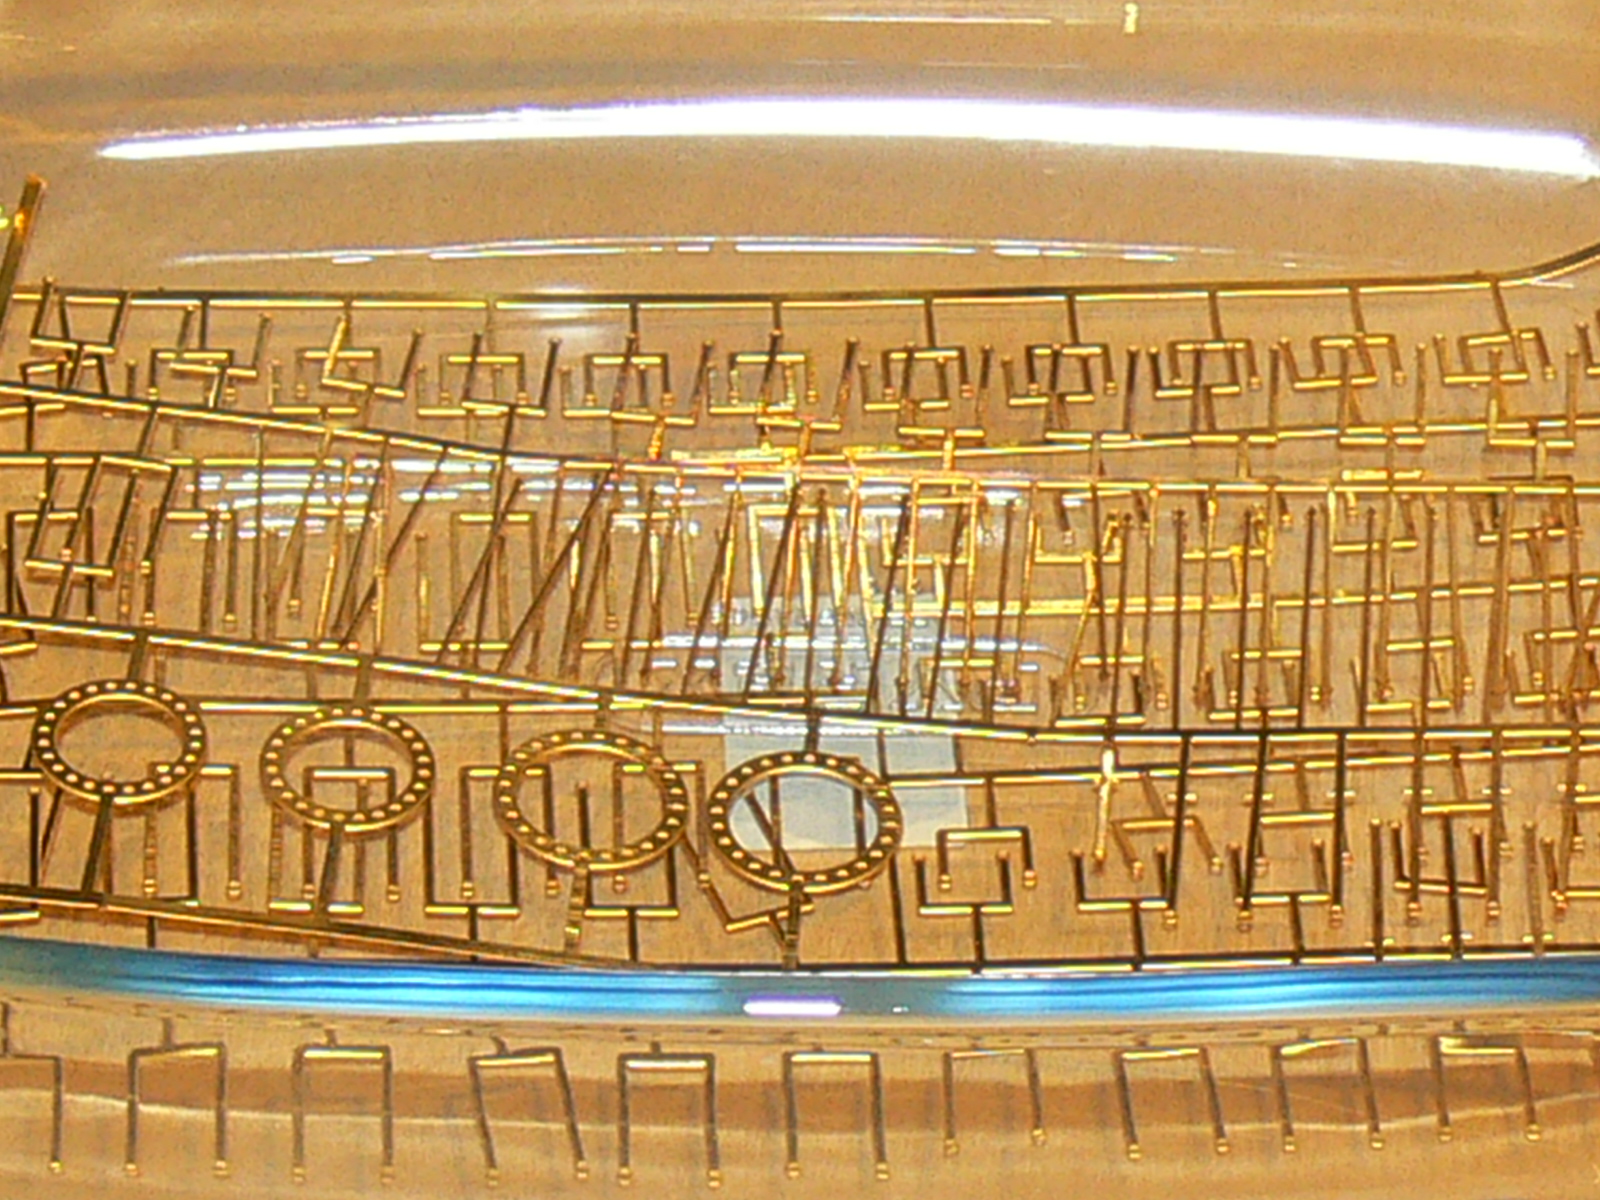
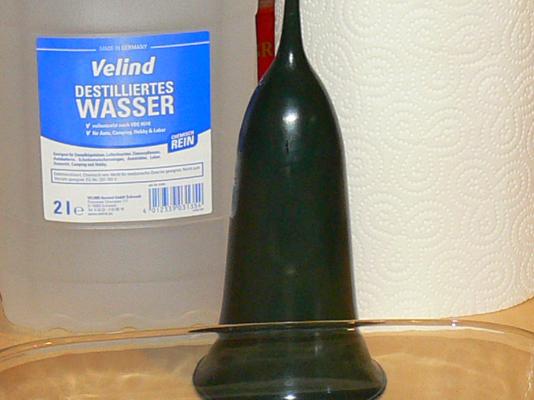
Here is the way I blackened my cannons and other brass parts: 1. I soak the brass 10 minutes in Aceton and 5 minutes in "Acidip" (from Carr`s) to get a surface where the blackening agent can attach to. 2. Then the parts have to be rinsed with "Neutralising rinse" (Carr`s) 3.I put the brass parts in "metal black for brass" (Carr`s) 4.After 2 minutes (very small parts) up to 15 minutes (cannons) you can take them out. 4. Important: Rinse all parts in water, preferably destilled water to stop the blackening process. 5.Let everything dry. 6. Remove the crusts with a fine cloth until it is a bit shiny. 7. To make sure it stays, seal everything with clear lacquer: "Electrofix" is good (carr`s) It is important to use latex gloves all the time and open the windows , because the fumes are not healthy! In my pictures you see the parts BEFORE removing the crusts and BEFORE application of clear lacquer. There are many ways to do the blackening but this worked best for me. Martin

- 122 replies
-
- 3
-
-
- caldercraft
- agamemnon
- (and 1 more)
-
Hello Pierre , Thank you very much for your positive comment. Now I regret that I did not start the log more than 2 years ago.. I had the camera equipment, but had never used it (It was a gift for my former wife). She had made all the pictures on my last ship. But fortunately the basic use of the camera is not that hard. I still have problems with the lighting and the sharpness, but I hope I will master that sooner or later... Hope you are doing o.k. I am not an expert myself, but I will try to help you, in case you should need it, because I have been through some of the difficulties already that might come in the future ... Greetings from Germany Martin
-
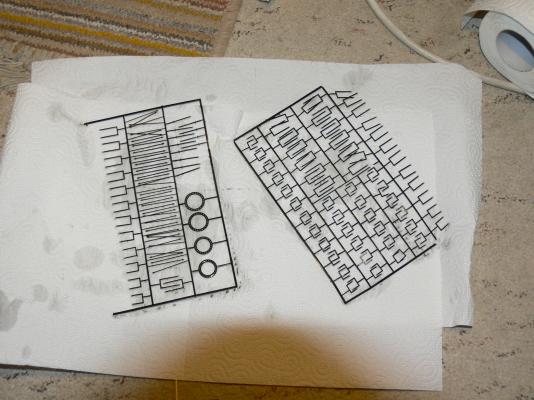
Another try, I hope my pictures are in the right position now... Martin

- 122 replies
-
- 3
-
-
- caldercraft
- agamemnon
- (and 1 more)
-
Sorry that two pictures are not in the right direction. They are o.k. on my computer. I have no idea why they are turned or how to turn them again... Greetings, Martin


.JPG.f52b4bc1424b86628924c8613a0a31d6.JPG)

.JPG.8a0bf5fe228484b1e4a78cad31f3063e.JPG)
.JPG.7a6f9609f618acd2aeb52c0a60a15a98.JPG)
.JPG.8187e407e81bf95a0ef6760b52ed6cae.JPG)
.JPG.462b760055c9be61cea19de5c5ba10a4.JPG)
.JPG.6b3b47c366c151f06c2b8c7f60a35dca.JPG)
.JPG.64303ee87cb848a32cbaa0e0f39fef6c.JPG)
.JPG.ce8976fcdbf4fdffffa328d011bd2d15.JPG)
.JPG.6af052e6924ca20884174f045080288f.JPG)
.JPG.d2bd278cf72075385dcb8bed9dfb6542.JPG)
.JPG.baccc5c0a67f97d8a6a016a188f0b650.JPG)
.JPG.90b0fb4f8311c0907ac8cce179603a75.JPG)
.JPG.4f4f6f7b04afb6f36f8c355301d9e667.JPG)
.JPG.f51e46873e0ba76e2f90fb3c13a67bf2.JPG)
.JPG.5fe11fc3d57ce7501989c7295b3c3f37.JPG)
.JPG.f0fff12ec6c752cc003757625fc7c637.JPG)
.JPG.9ac11e414cae06c6925d1af143e6733b.JPG)