mbp521
-
Posts
1,003 -
Joined
-
Last visited
Content Type
Profiles
Forums
Gallery
Events
Everything posted by mbp521
-
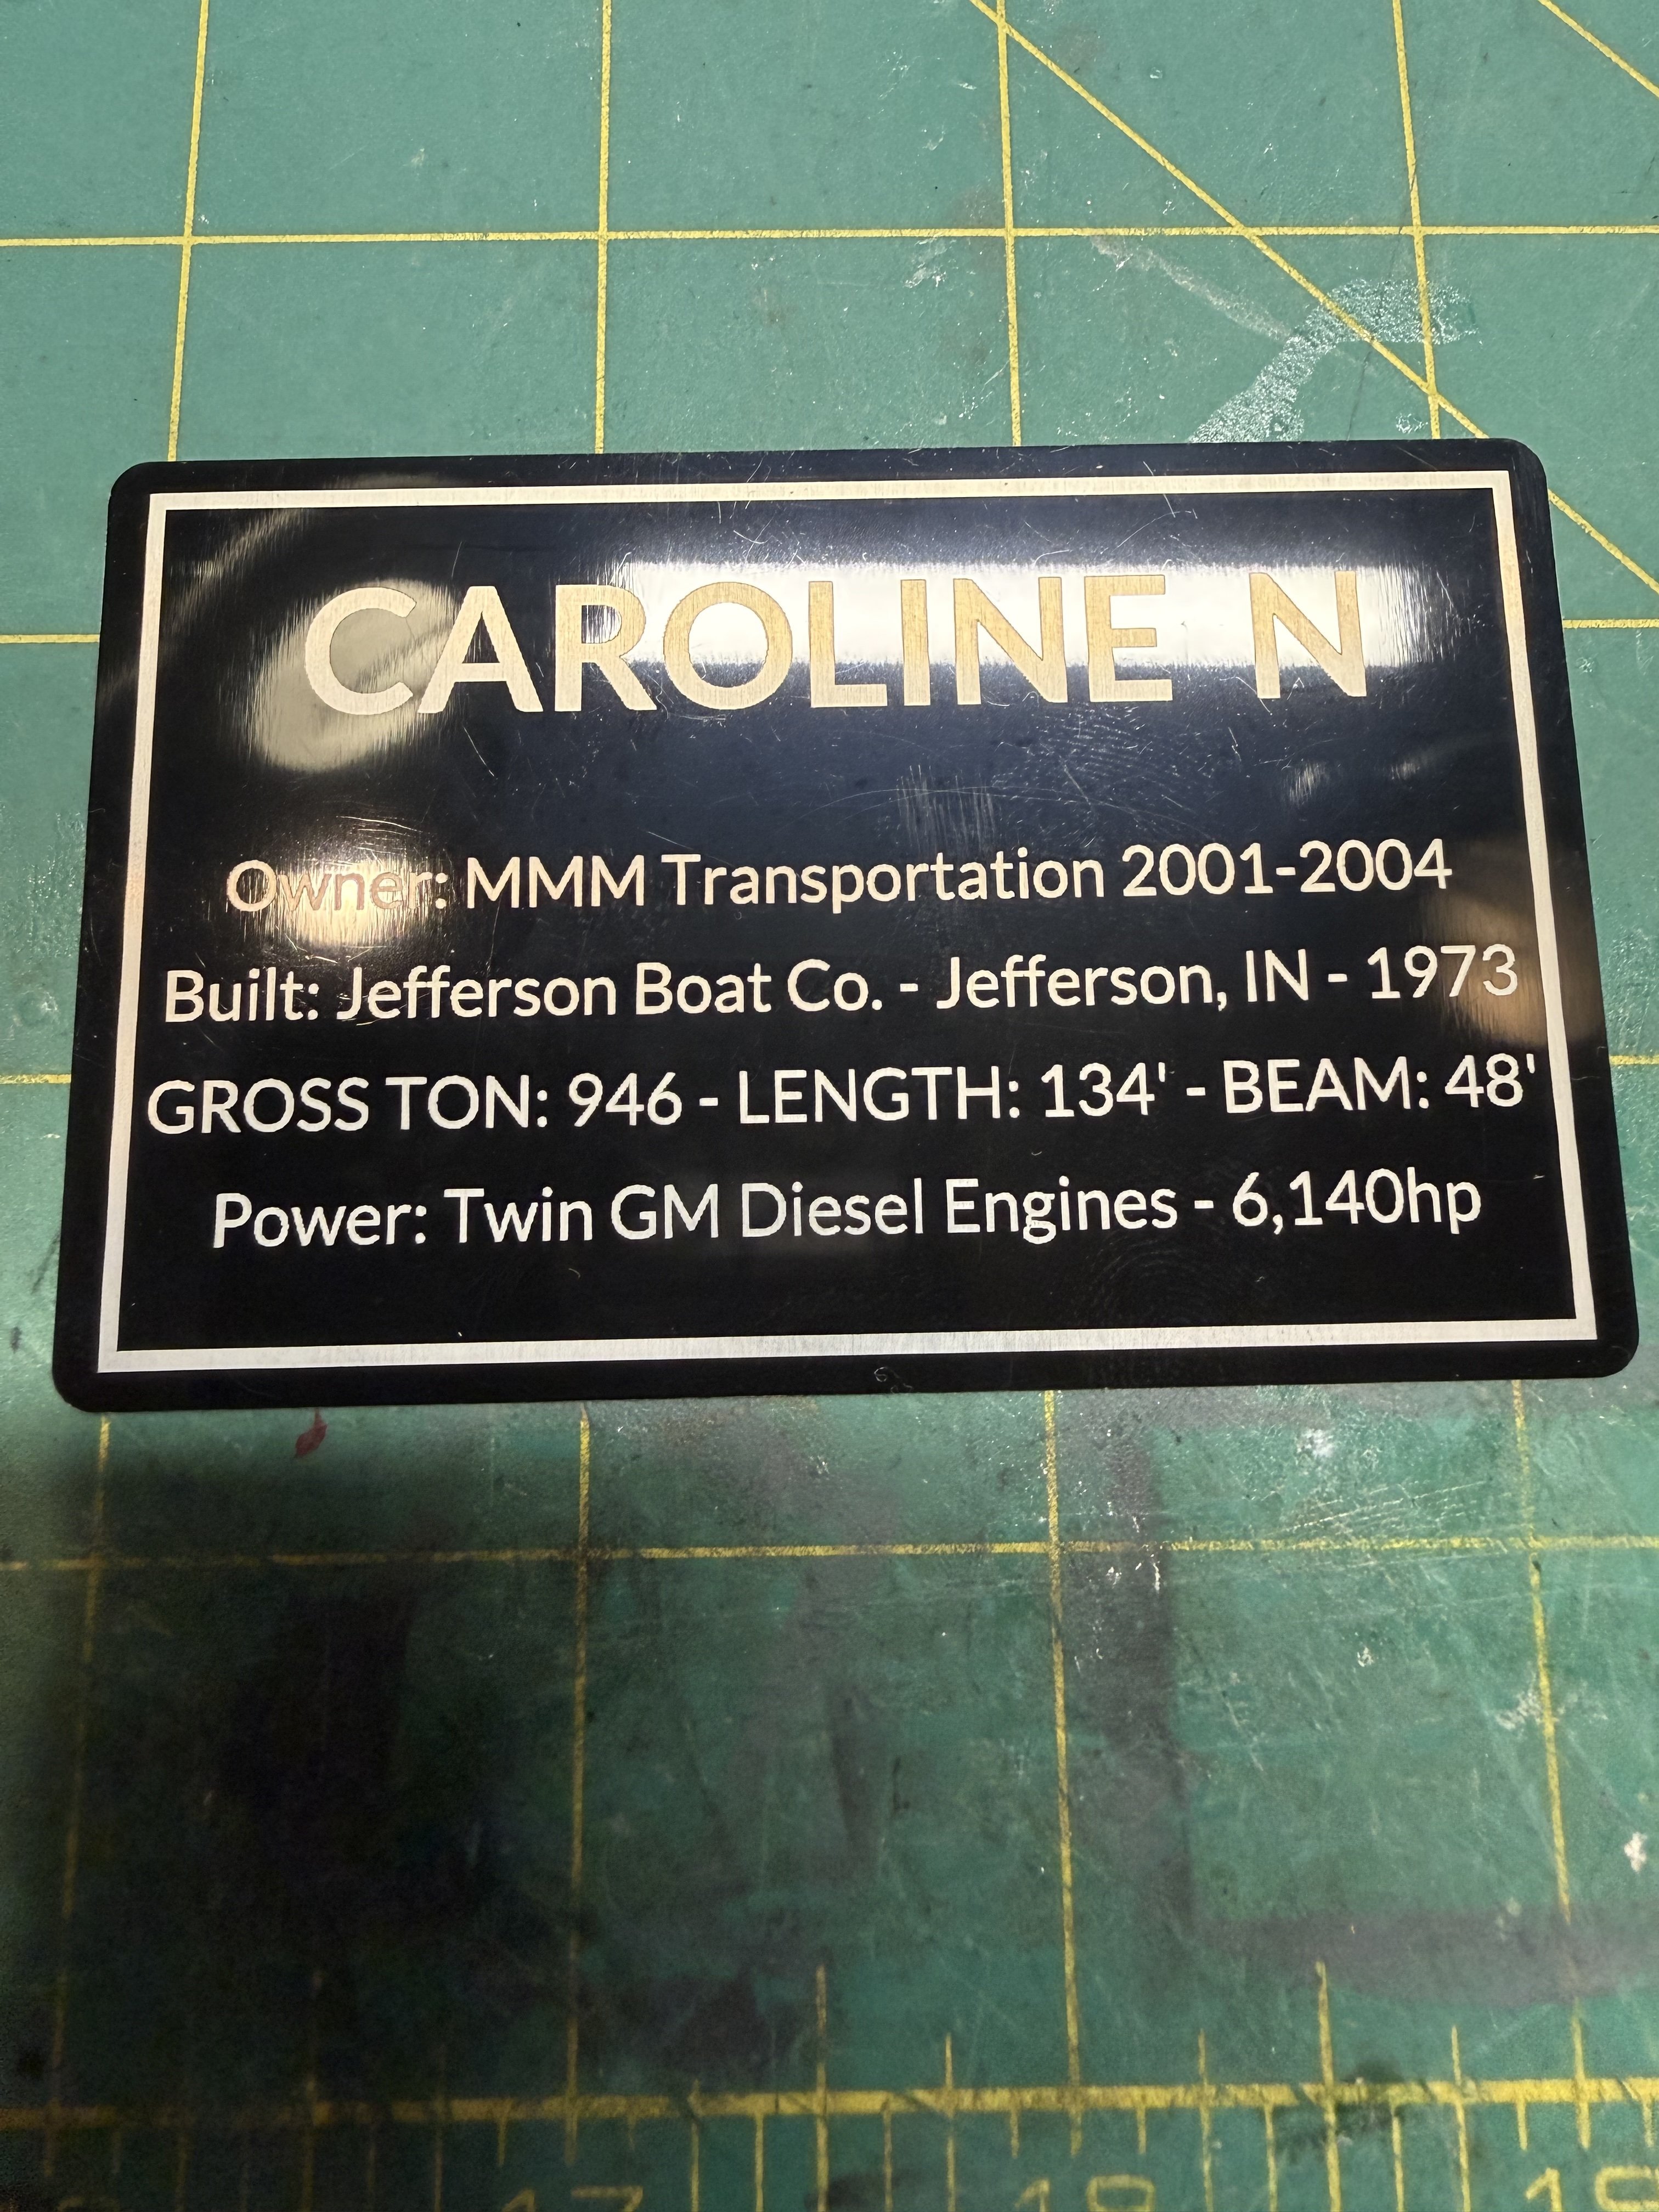
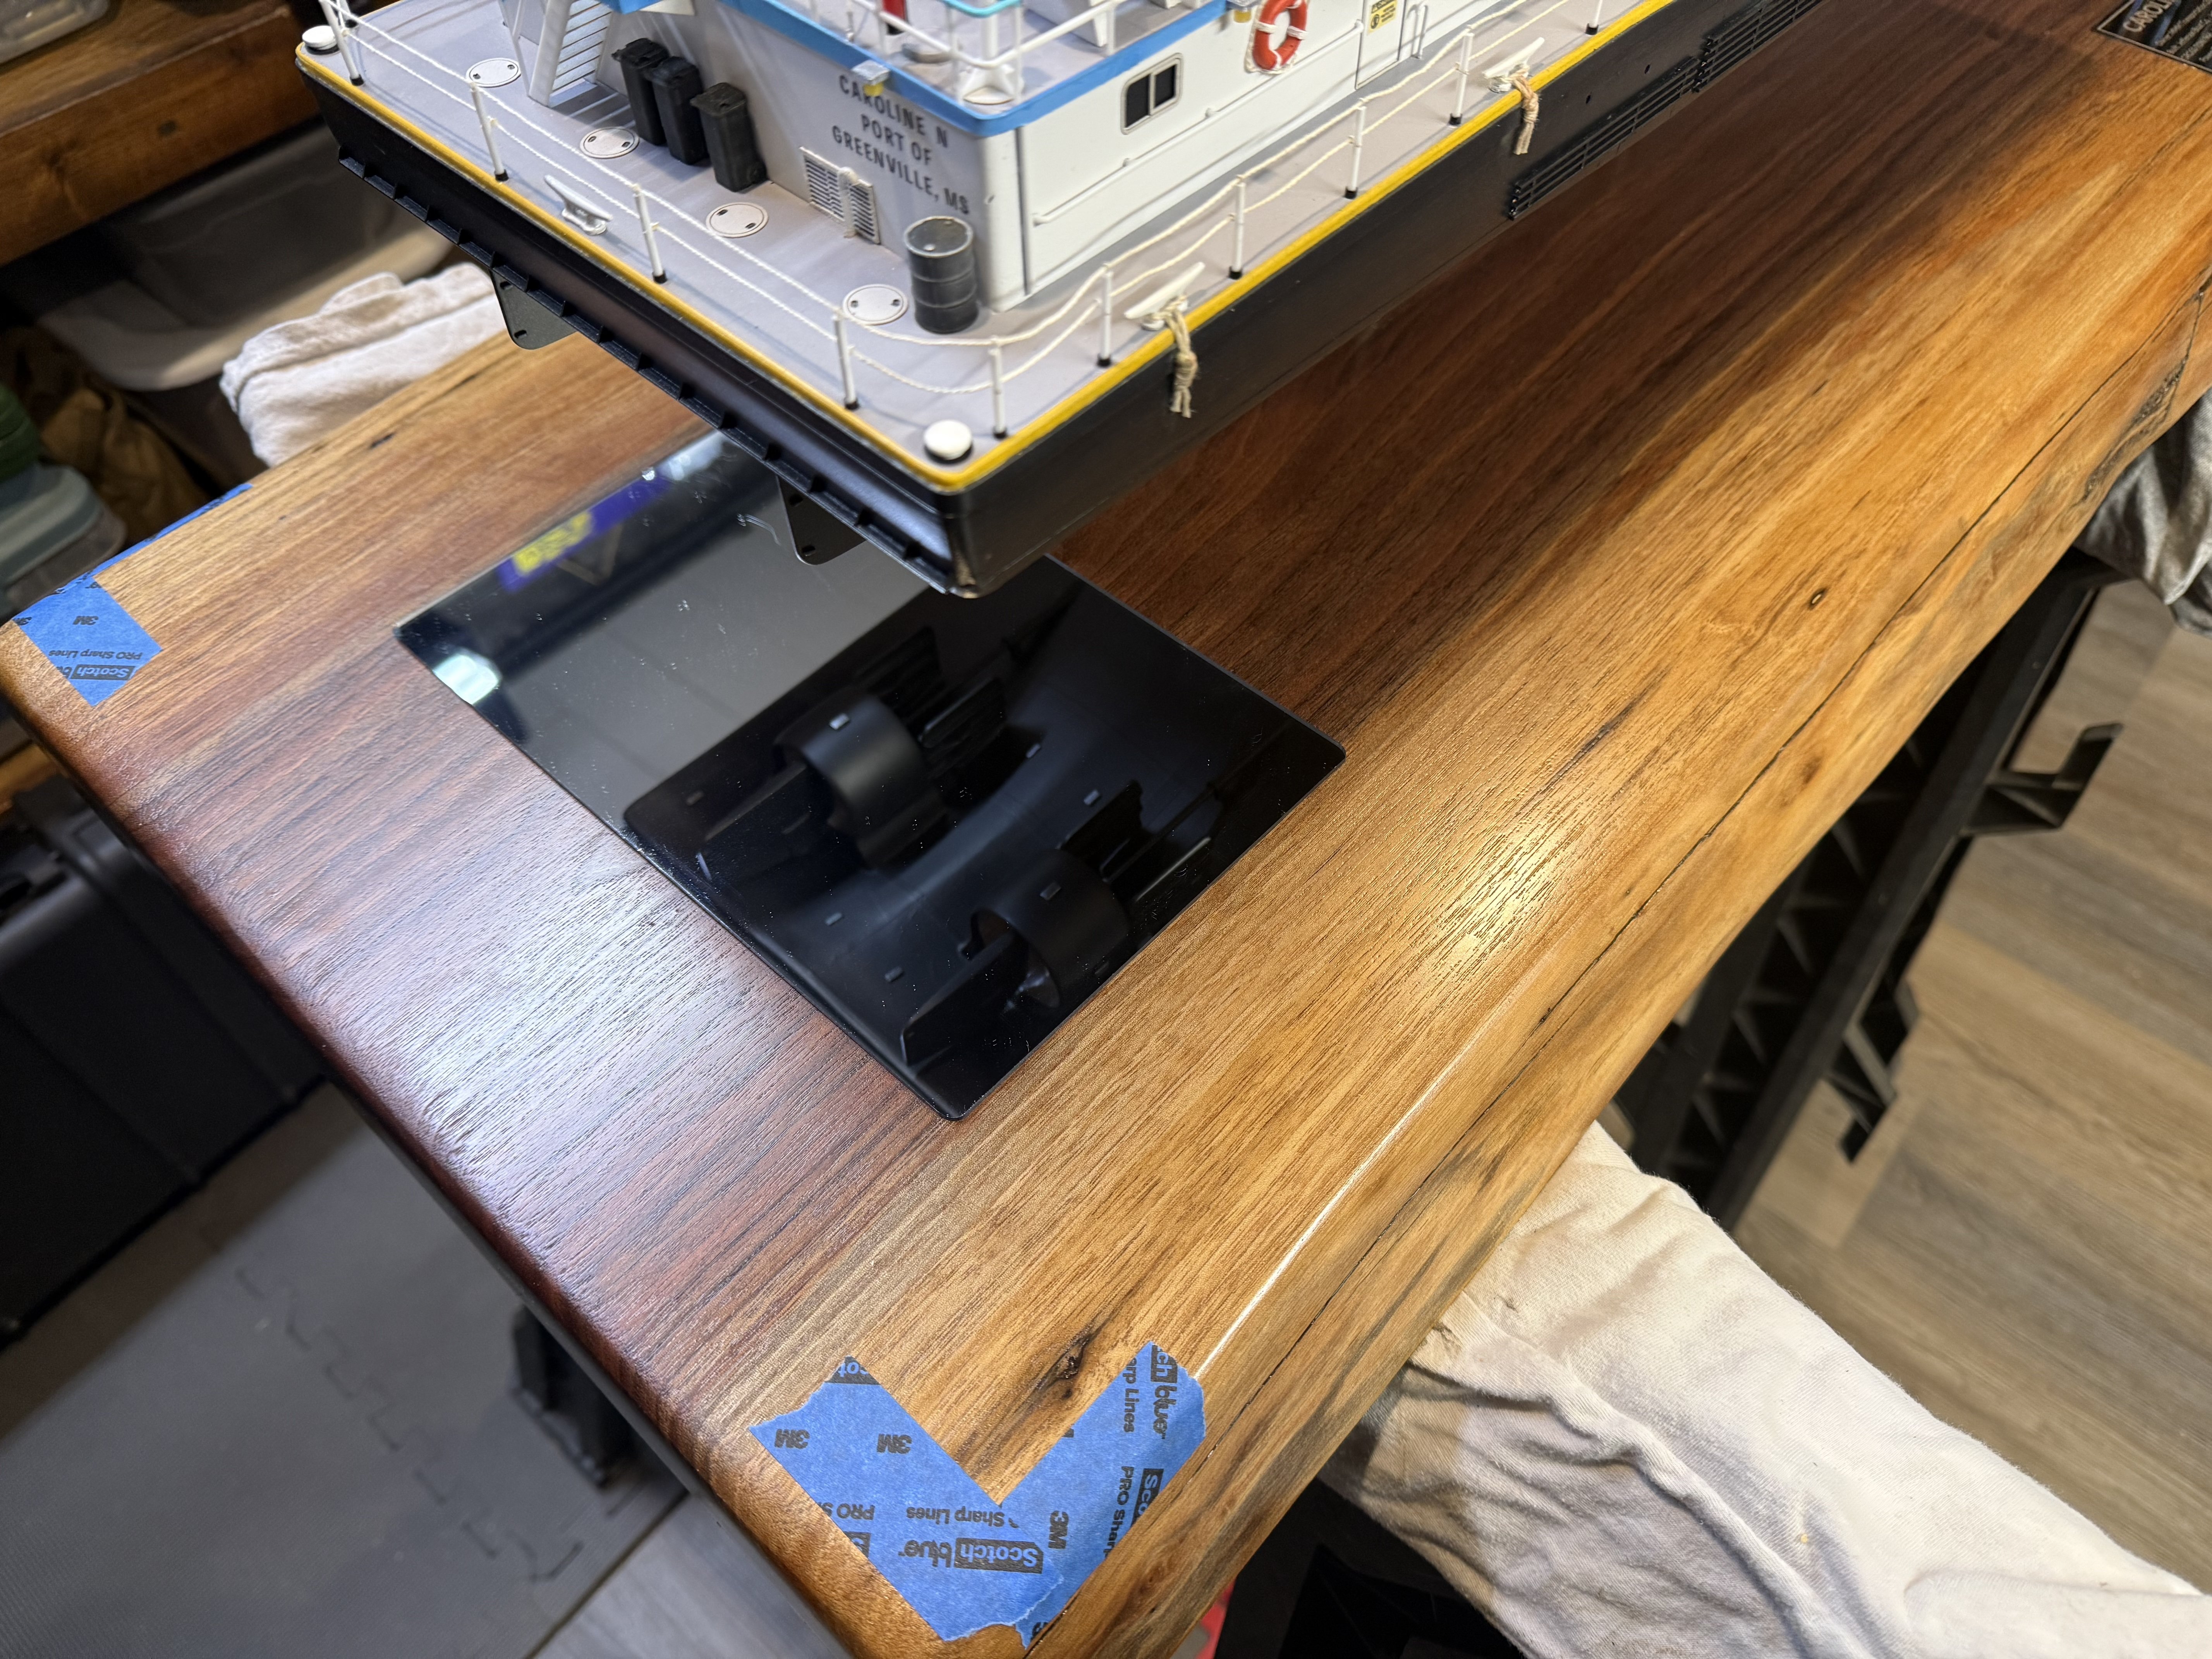
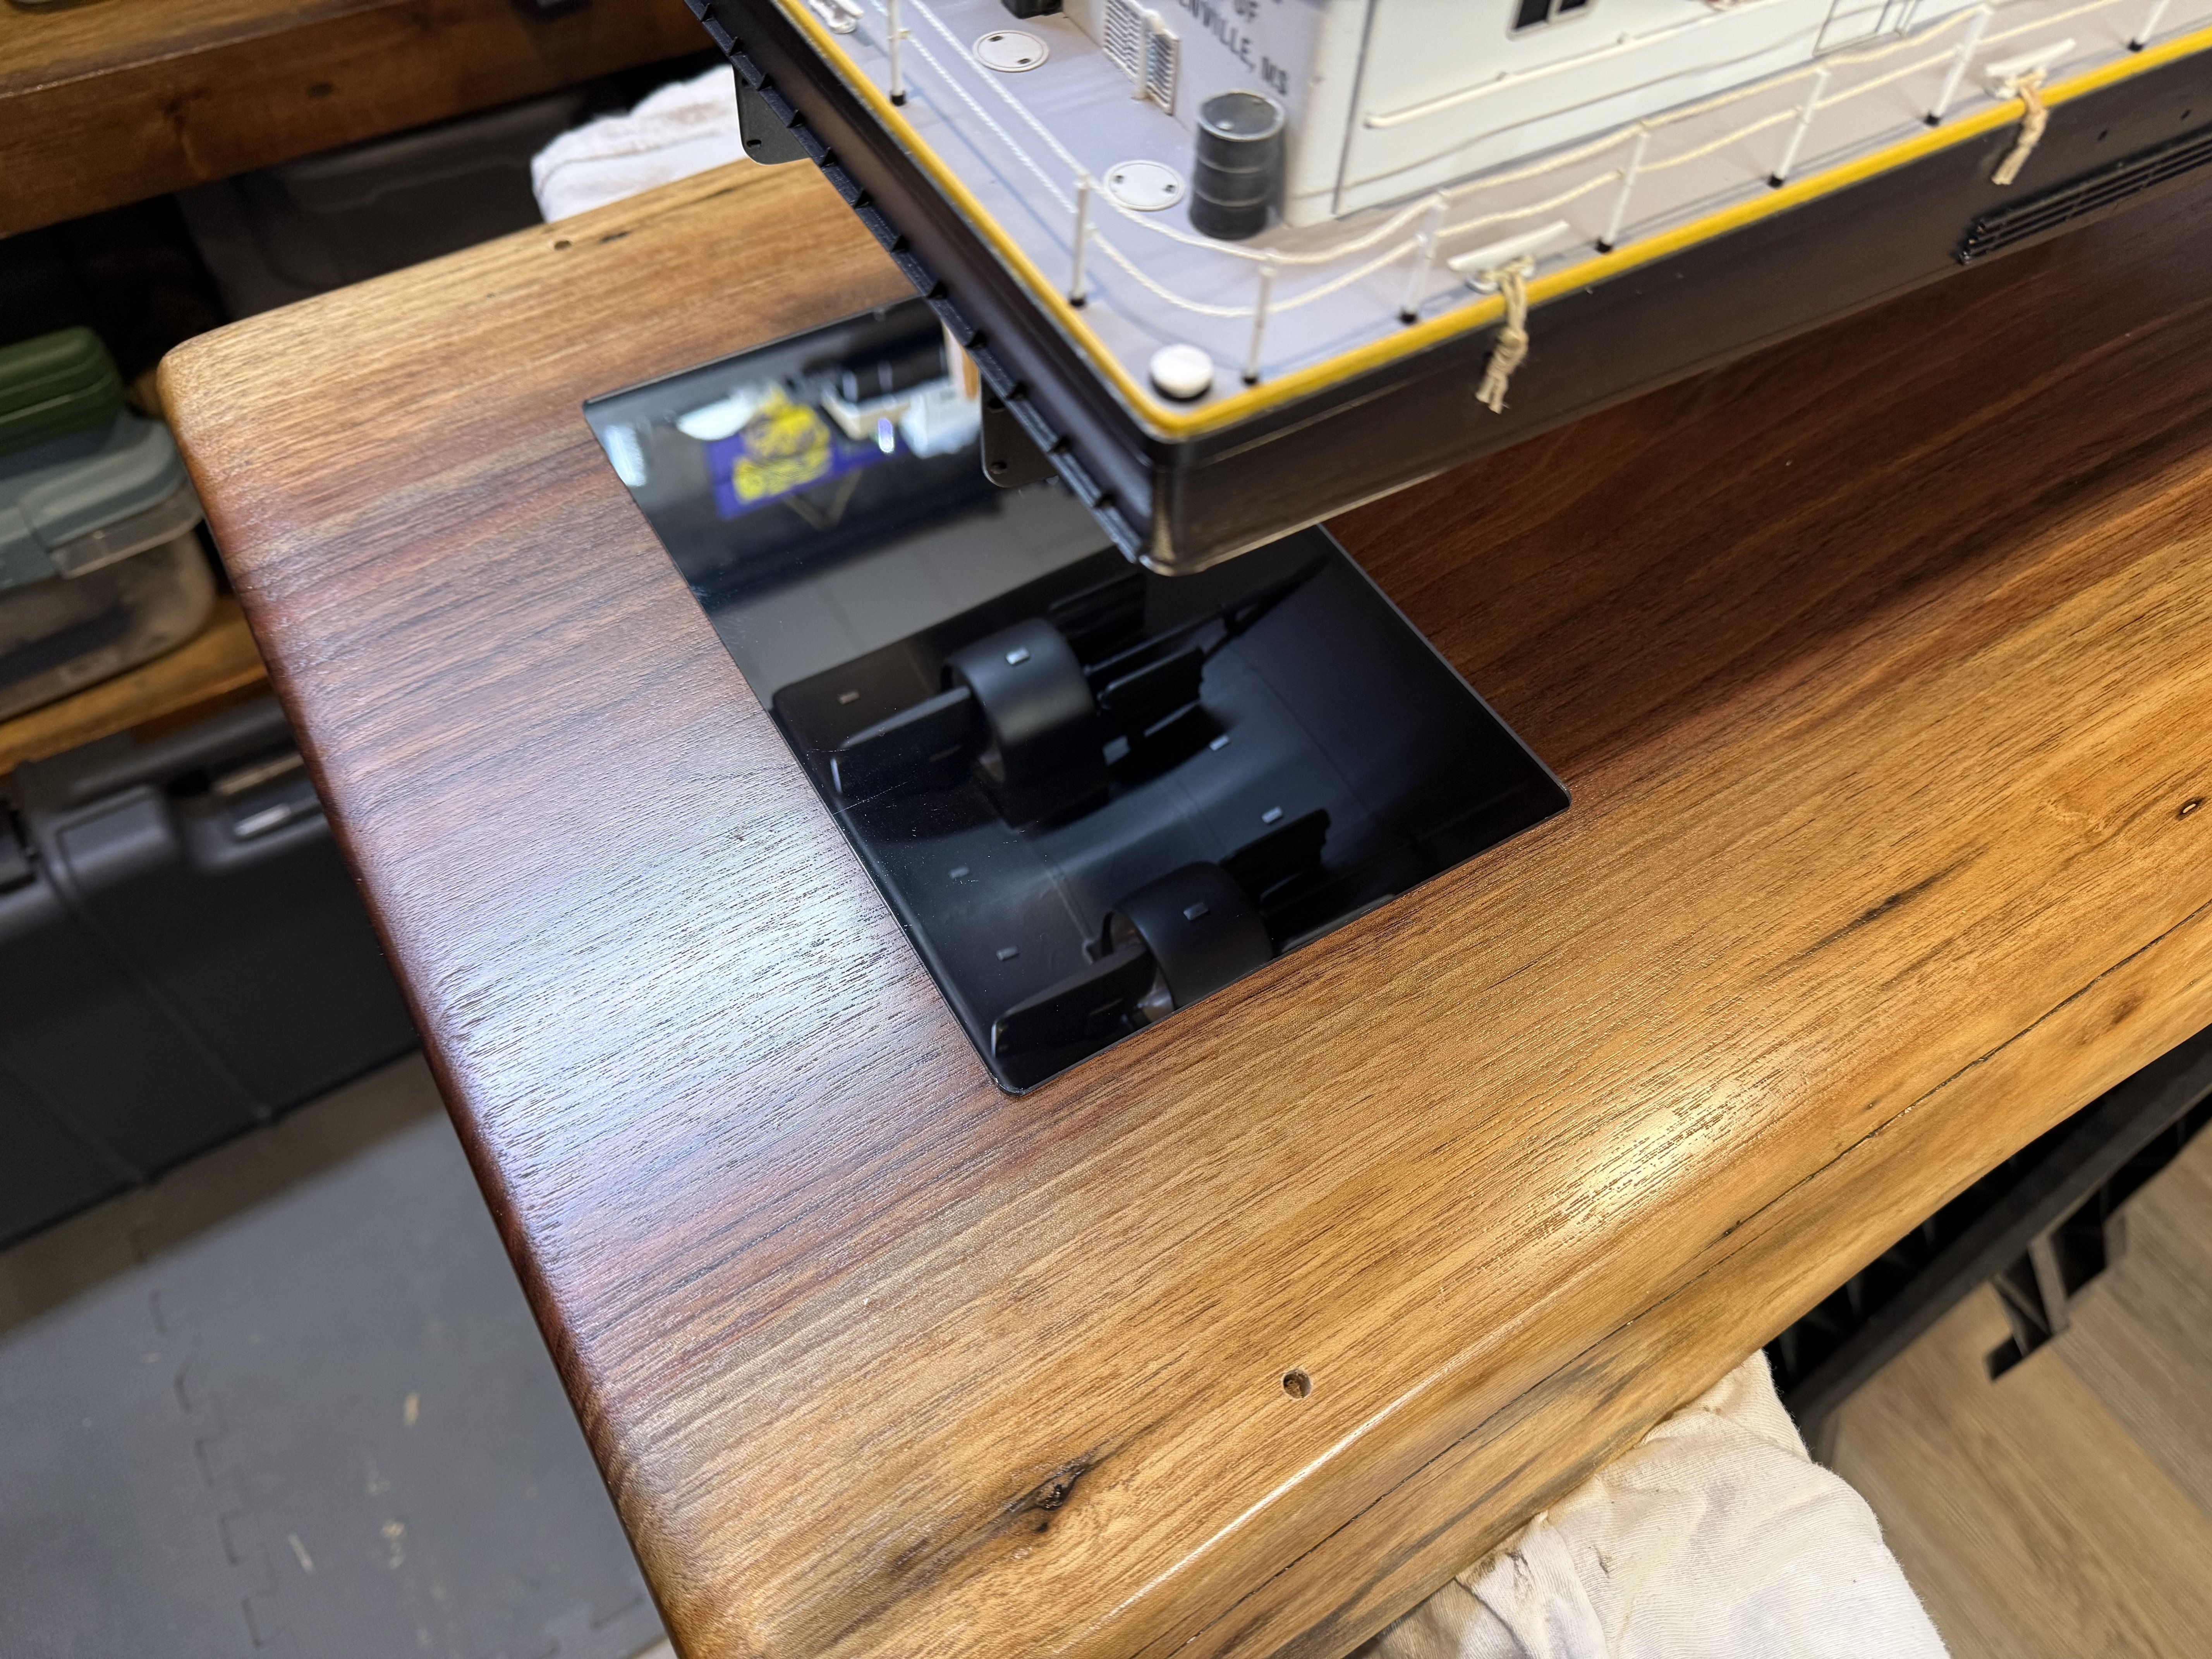
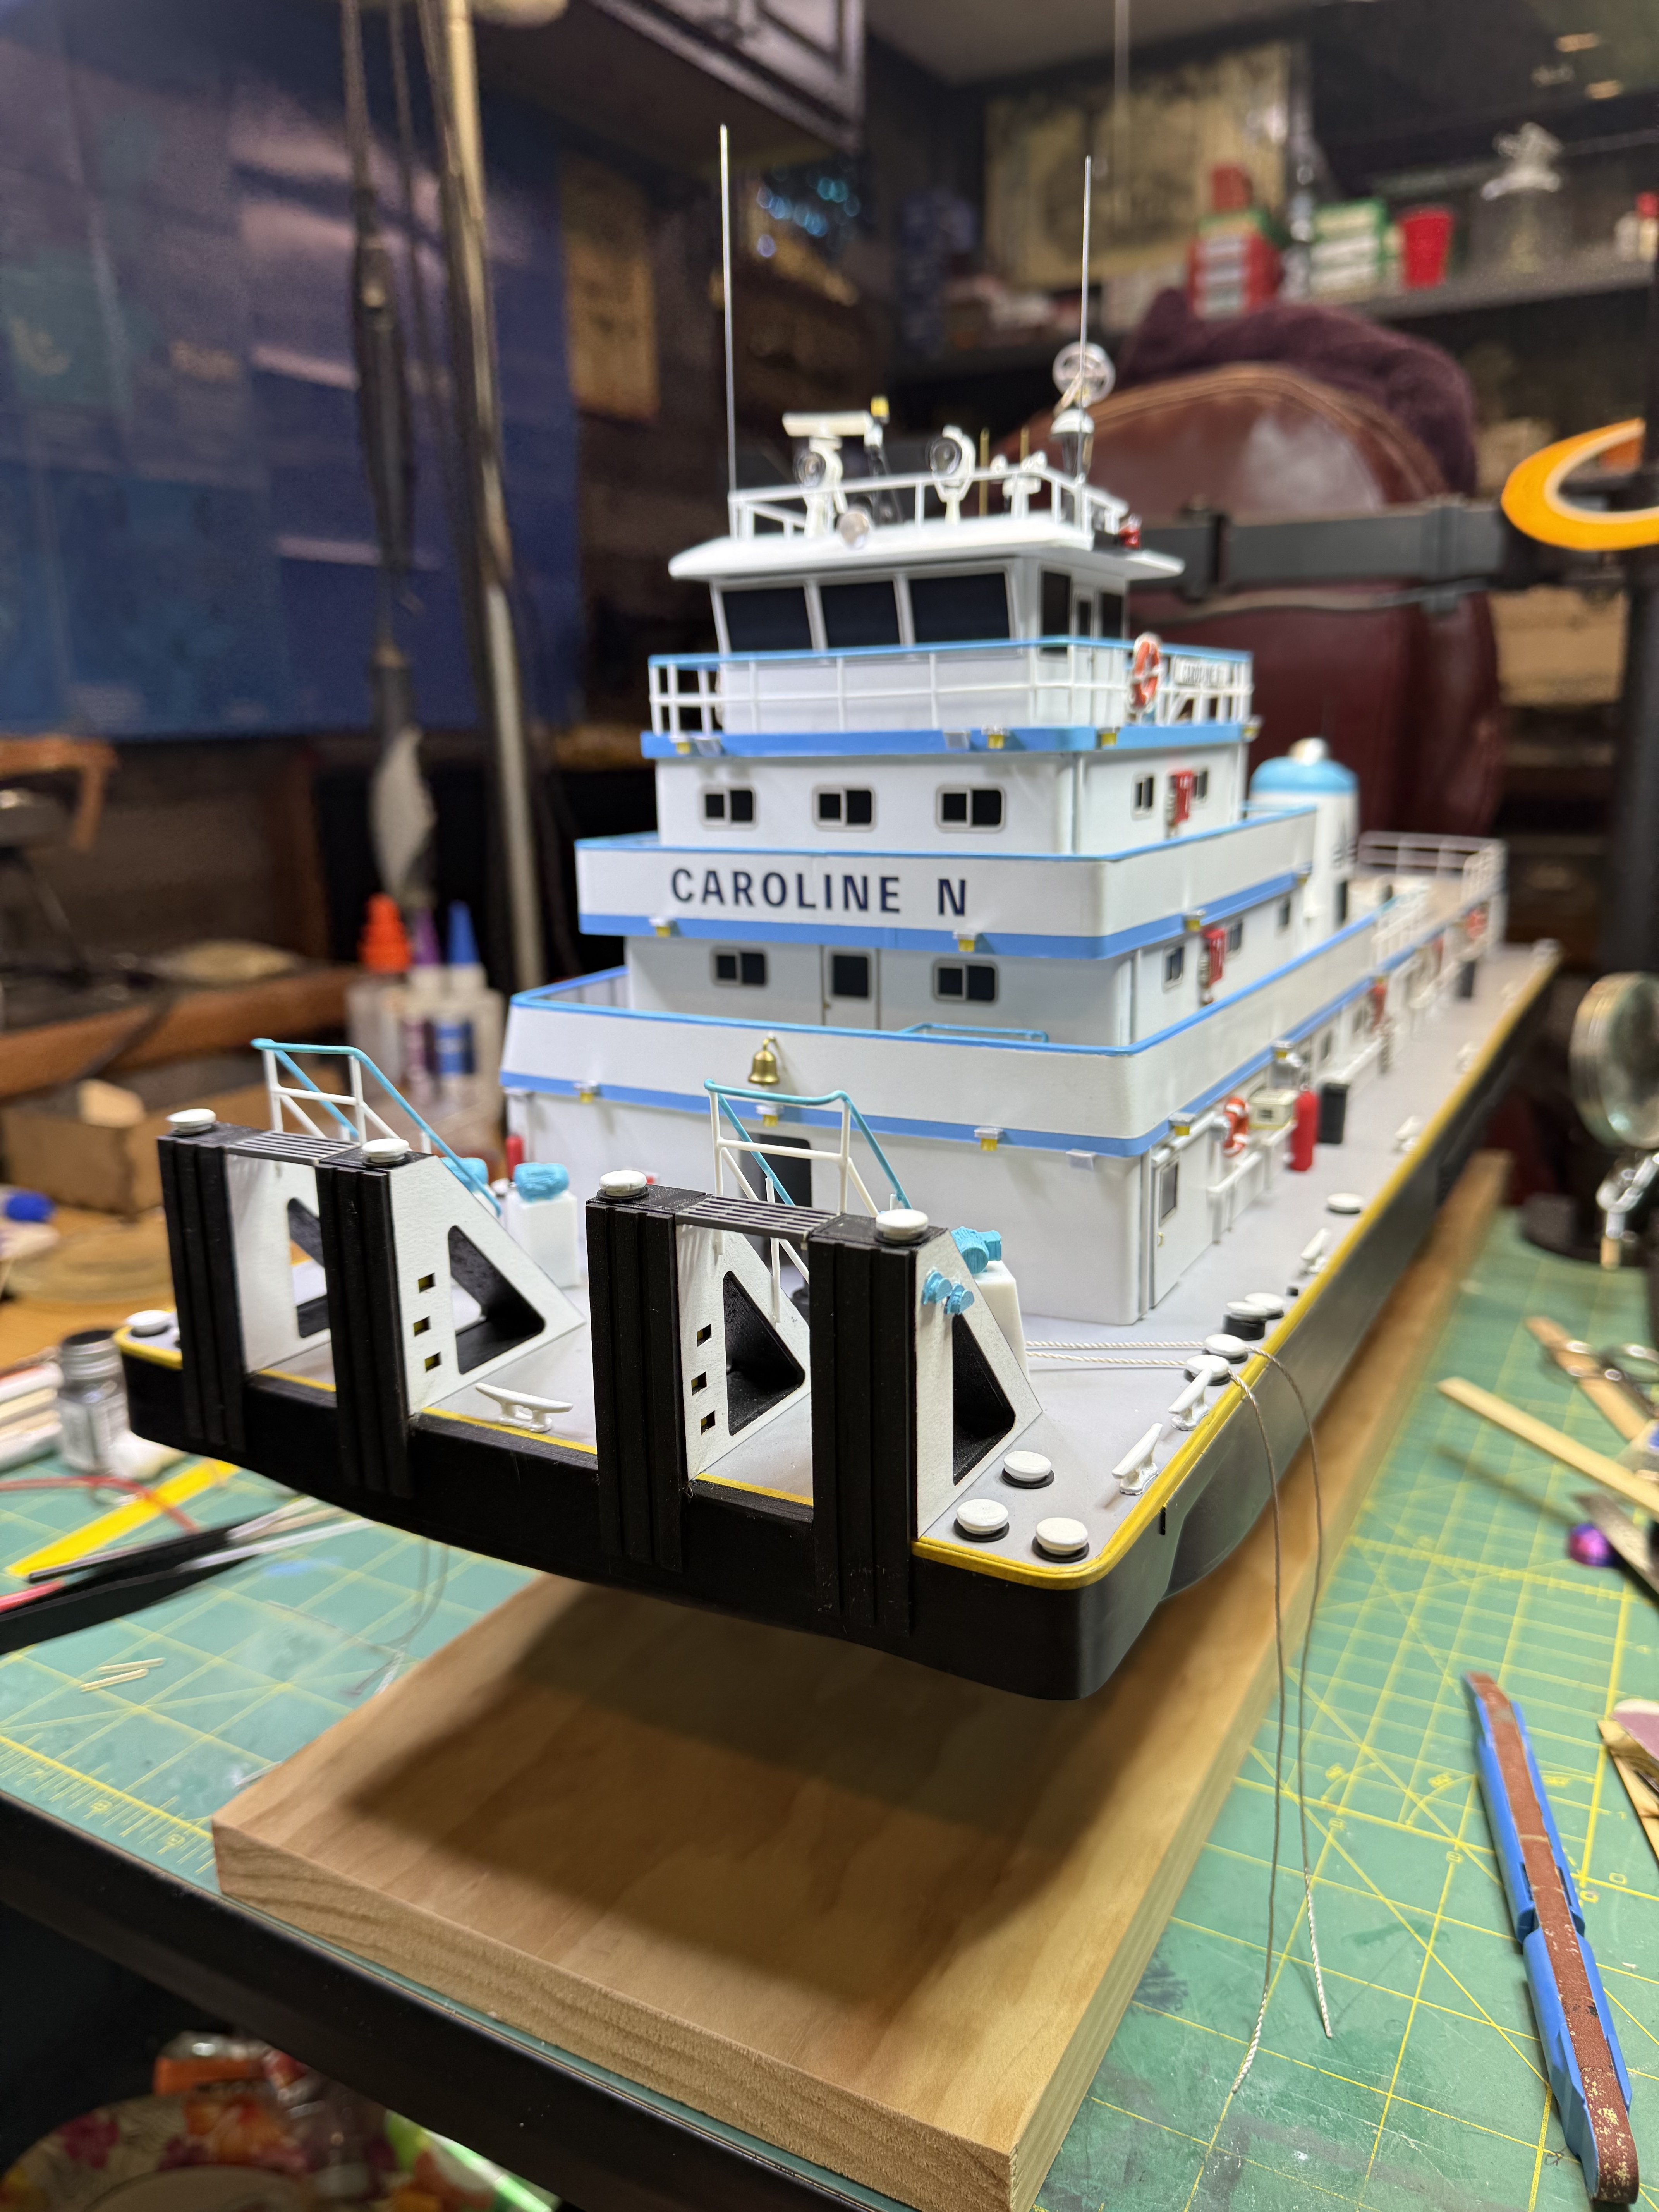
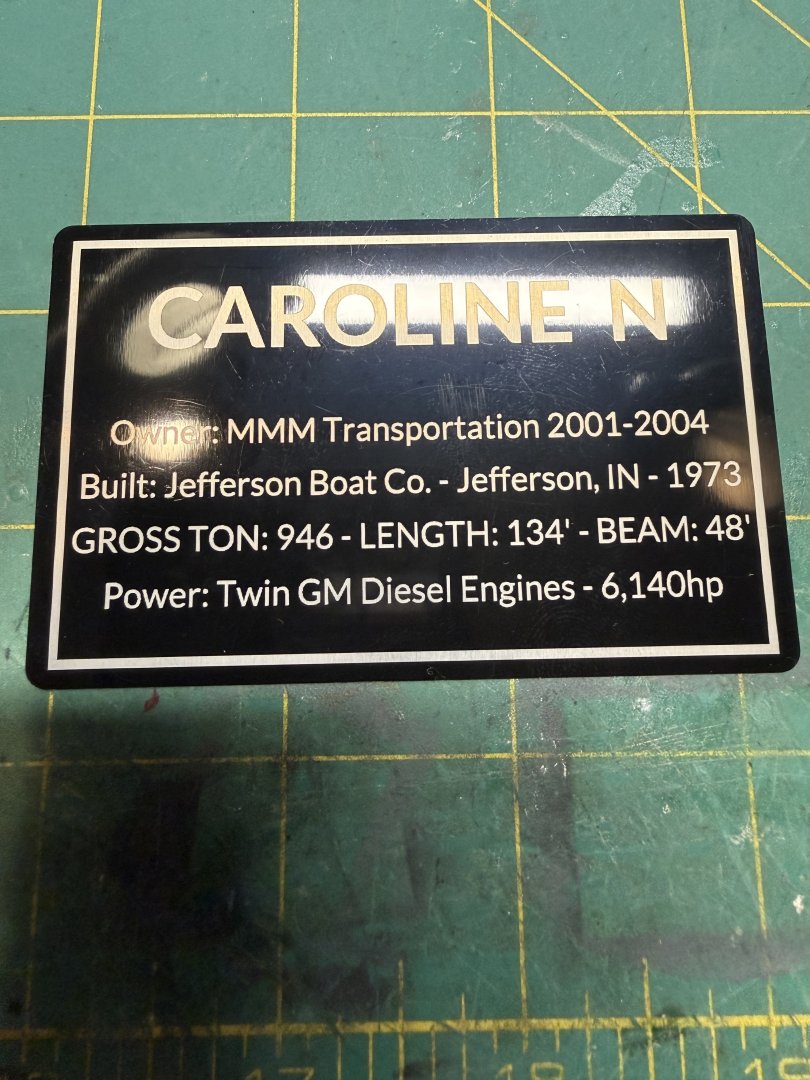
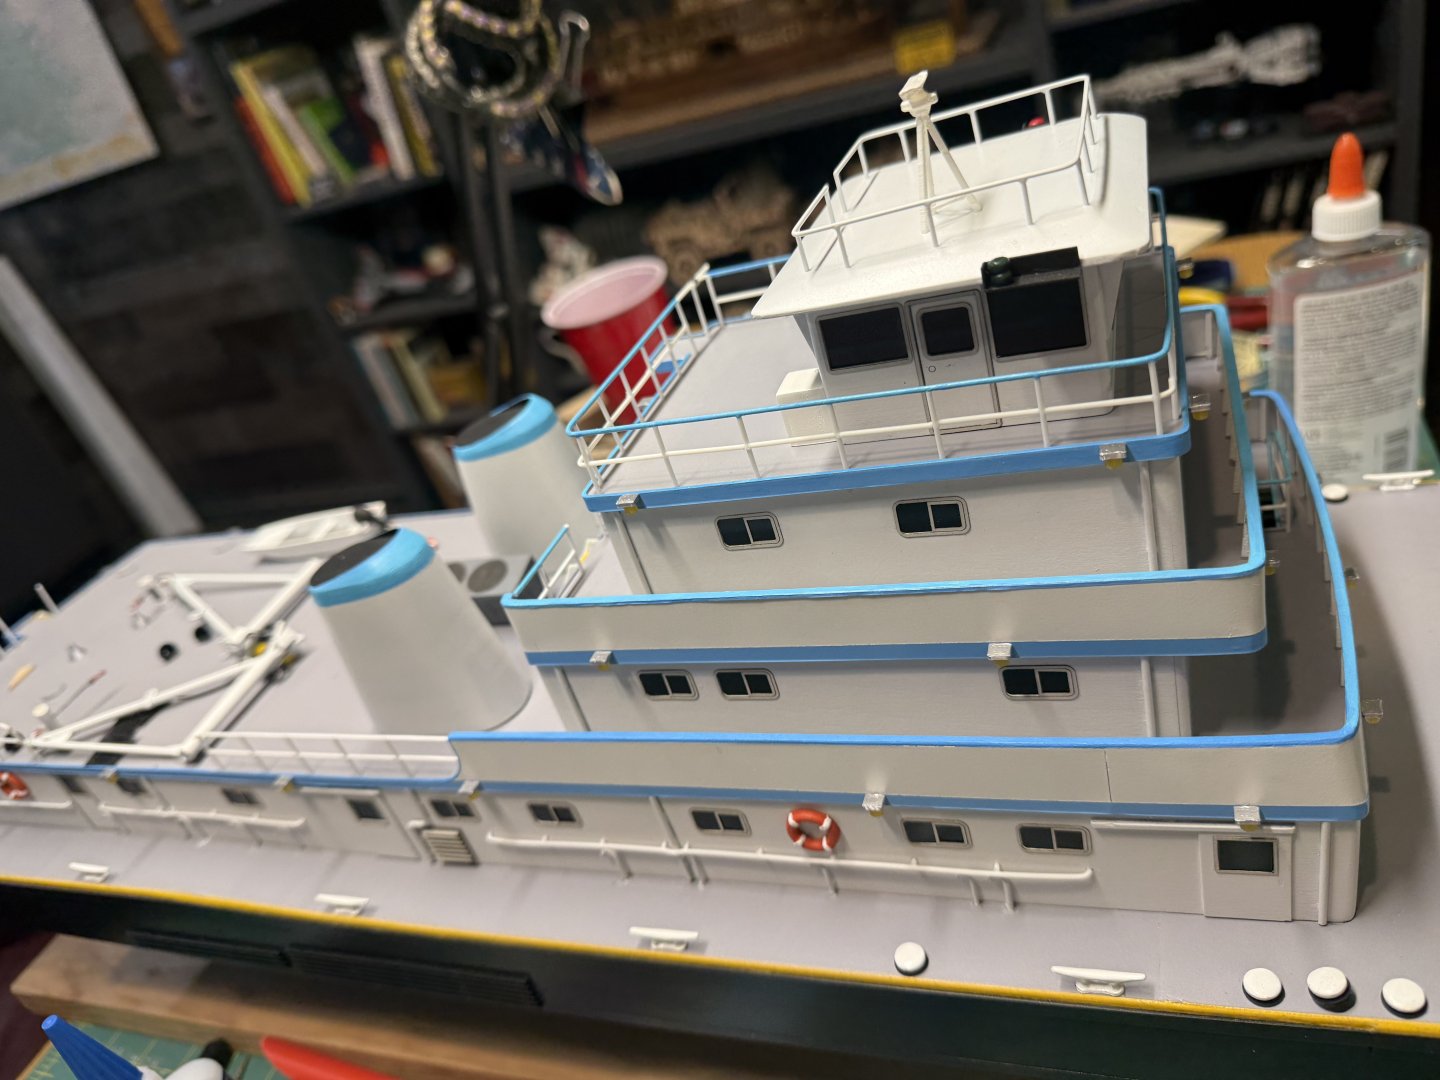
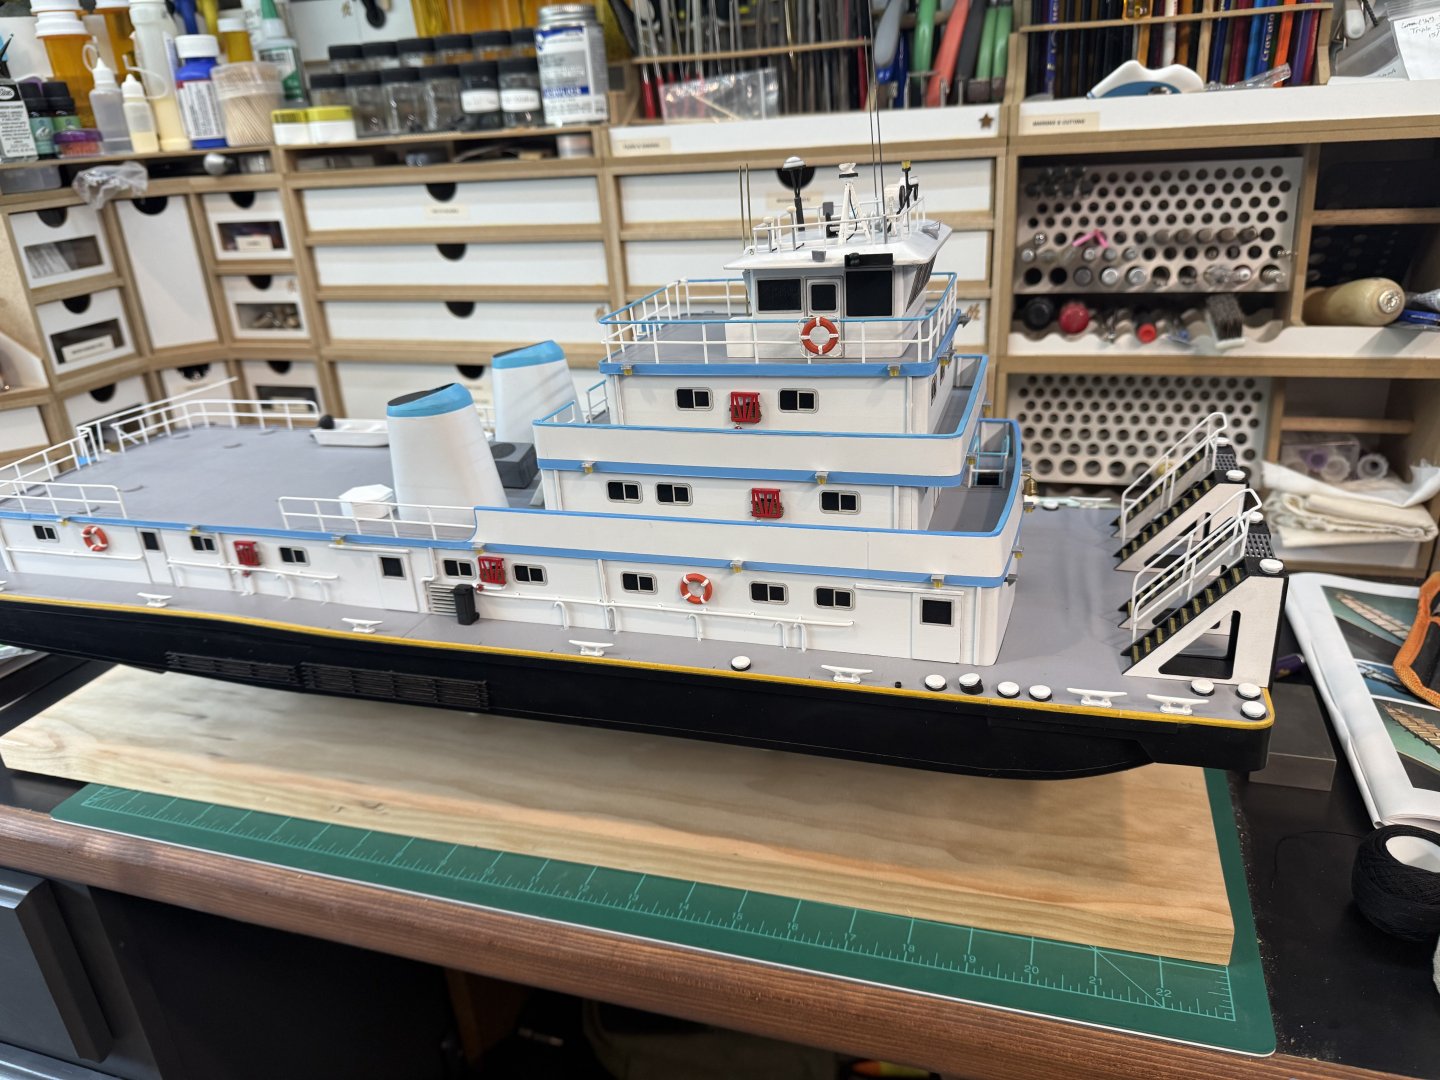
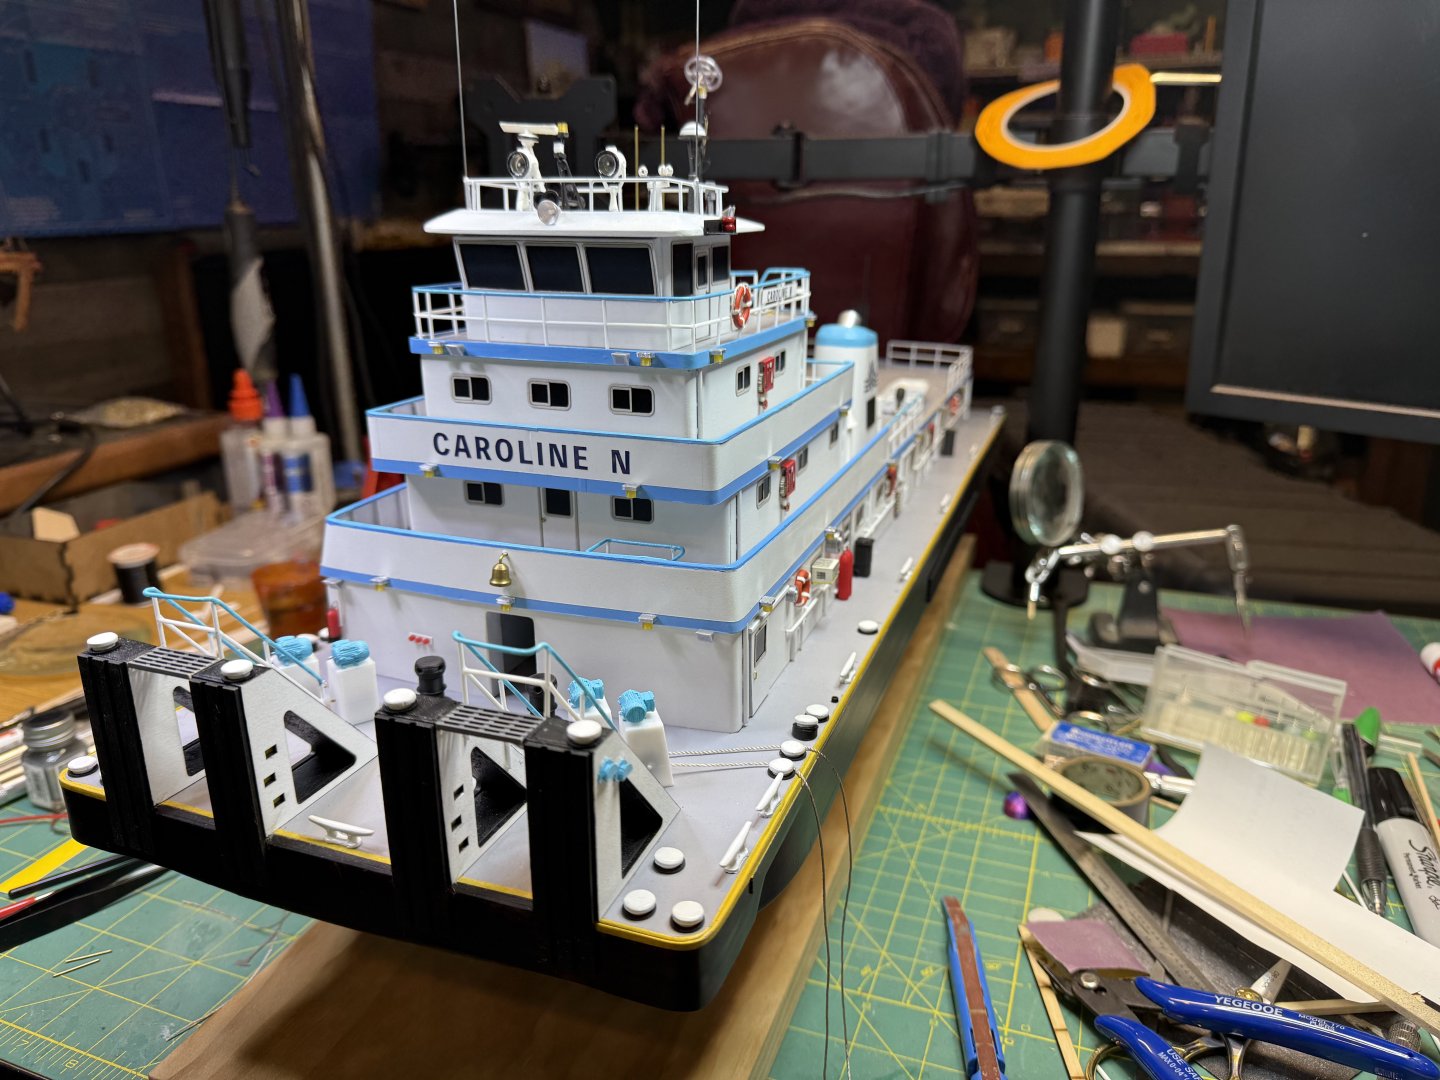
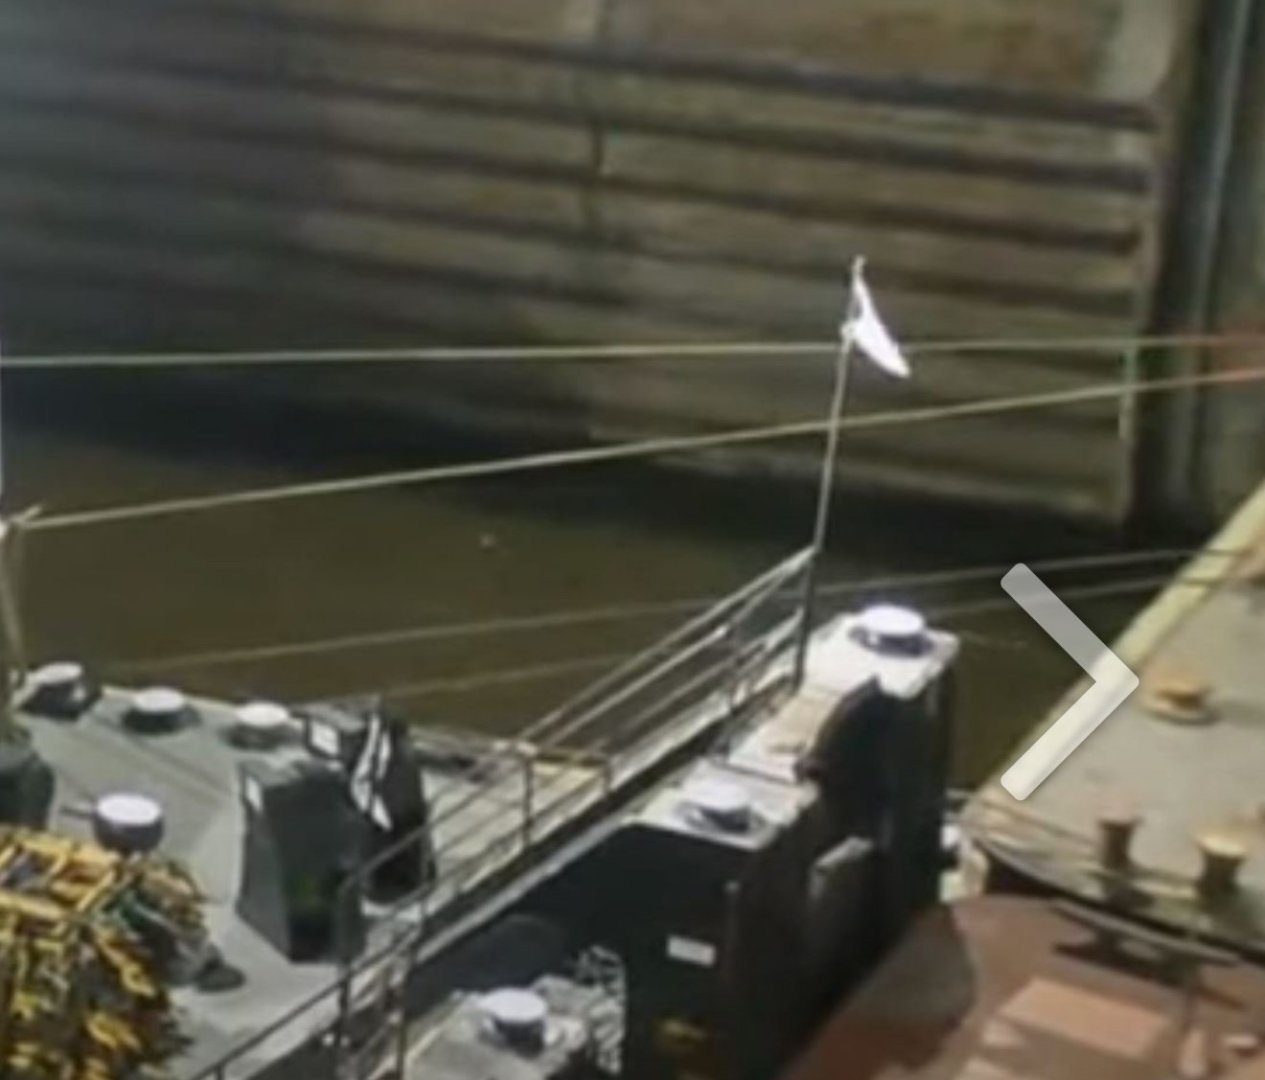
 Hello everyone, The time has finally come to wrap this build up. The last bits of detail have been completed. Paint touchups have been done and time to install the ensign, mount the boat to its permanent base, get it under glass and send it to its new home. I made the ensign the way I normally do. I printed the image on a sheet of copy paper, folded and glued the sides together then crumpled it until it was soft and pliable. I then trimmed up the edges and touched up the color along the edges so the white paper would not show through, then mounted the flag to the halyard. Next step was to engrave the data plate. This was accomplished with the laser tool. I'm still trying to figure out how I have gotten along without this thing for so long. Anyway, I added a few little tidbits of info on the plate for the display. I thought it makes a nice professional touch to the build. Then it was on to mounting the model to its new base. The base is a Black Walnut slab that was sanded and varnished by another friend of mine and the person I am building the model for. The boat was centered on the slab and with great hesitation, the holes were drilled in the beautiful piece of wood for the mounting pedestals. The mirror and data plate were held into place with some double-sided tape. More pictures of it on the base. Then it was time to install the cover. This was special ordered by the soon to be new boat owner, I haven't developed the talent to cut and glue plexiglass yet so I didn't want to risk messing that project up. Since the model has a 300+ mile trip to make to its new home I left most of the masking on to protect the plexiglass from getting scratched. So that is it for this build. It has been an adventure. There were a few times where I felt that I was never going to get this finished due to life getting in the way, but determination persevered and here we are. I want to thank everyone that followed along for sticking with me throughout this journey, your words of encouragement are what kept me going. As for what is next, I am still not sure. I have several ideas rolling around in my head. I may scan through some of the other MSW builds to get some ideas, but for now I am going to clean the bench and enjoy the holidays before I make a decision. Whatever I come up with I'll be sure to include everyone on the next journey. Once the Caroline N is at her new home, I've asked my friend to send me pictures of her proudly displayed so I can share them here. For now, thank you all for hanging out with me on this build. I want to wish you all a Happy Holidays in whichever way you celebrate. Be safe, stay warm and cherish all the time you get to spend with loved ones. - Brian


-
Thank you Eric for confirming that. At least from this article I still have some time to get up there for a visit. Hopefully they are able to pin down a location that better suits their needs soon. - Brian
-
Thank you Eric! This may well be what it is called, I was just struggling to find the correct term for it. And not knowing what to call it makes it that much more difficult to research. On a side note, I saw somewhere that the Arabia Museum will be closing the first of the year. I always take things I see on the internet with a grain of salt, but do you know if there is any truth to the rumor? I hope this is not true, I would love to visit one of these days. Thank you Keith! You haven't missed a whole lot, this year has take up more of my build time than I like, but appreciate you sticking with me. The laser tool is a wonderful thing, it has stepped up my game tremendously. The good thing about them is they are getting cheaper every day. Well worth the investment. Thank you Craig! I am a very process driven person, so to step out of my comfort zone takes some ambition and a lot of self coaxing. With the Cairo I felt that I had enough research to kick things off but I still ran into issues with what steps to take first and had to backtrack or tear things out because of not getting them right the first time around. With the Caroline it was much the same way, and I tried to learn from my mistakes on the Cairo, but this build posed its own set of challenges and rework had to be done as well. I'm sure that poor planning on my part was the contributing factor, but that is what makes this hobby so much fun. Each mistake is a learning opportunity. - Brian
-
Thank you Ken. It's amazing what you can learn on You Tube. I used the methods to make the tarps on my Cairo build, but learned the techniques from watching videos of people building lifelike dioramas. It's actually pretty easy to do. - Brian
-
Not sure. I’d like to do a sort of hybrid sail and steam. Maybe CSS Alabama or USCG Harriet Lane. However, I’m still not ruling out the USS Choctaw ironclad. Time will tell, but I’m holding off on any new builds until after the holidays. I have a few projects around the house I want to wrap up before it gets too cold. - Brian
-
Thank you Keith. This build has definitely been a challenge and tested my resolve, but it has also taught me a lot. One of the lesson learned is that this is not my genre of boats. I can look back and say that I was able to take on a new challenge outside of my wheelhouse (pun intended) and get through it, but I am so ready to get back to something a lot less modern. These steel boats are just not for me. I miss the planking, the roughness of the wood, the old machinery and most of all, no steel railings. I will not be disappointed if I never have to build another steel railing. I still don't know what boat is next for the bench, but I do know that it will be something pre-twentieth century, wood and fun. - Brian
-
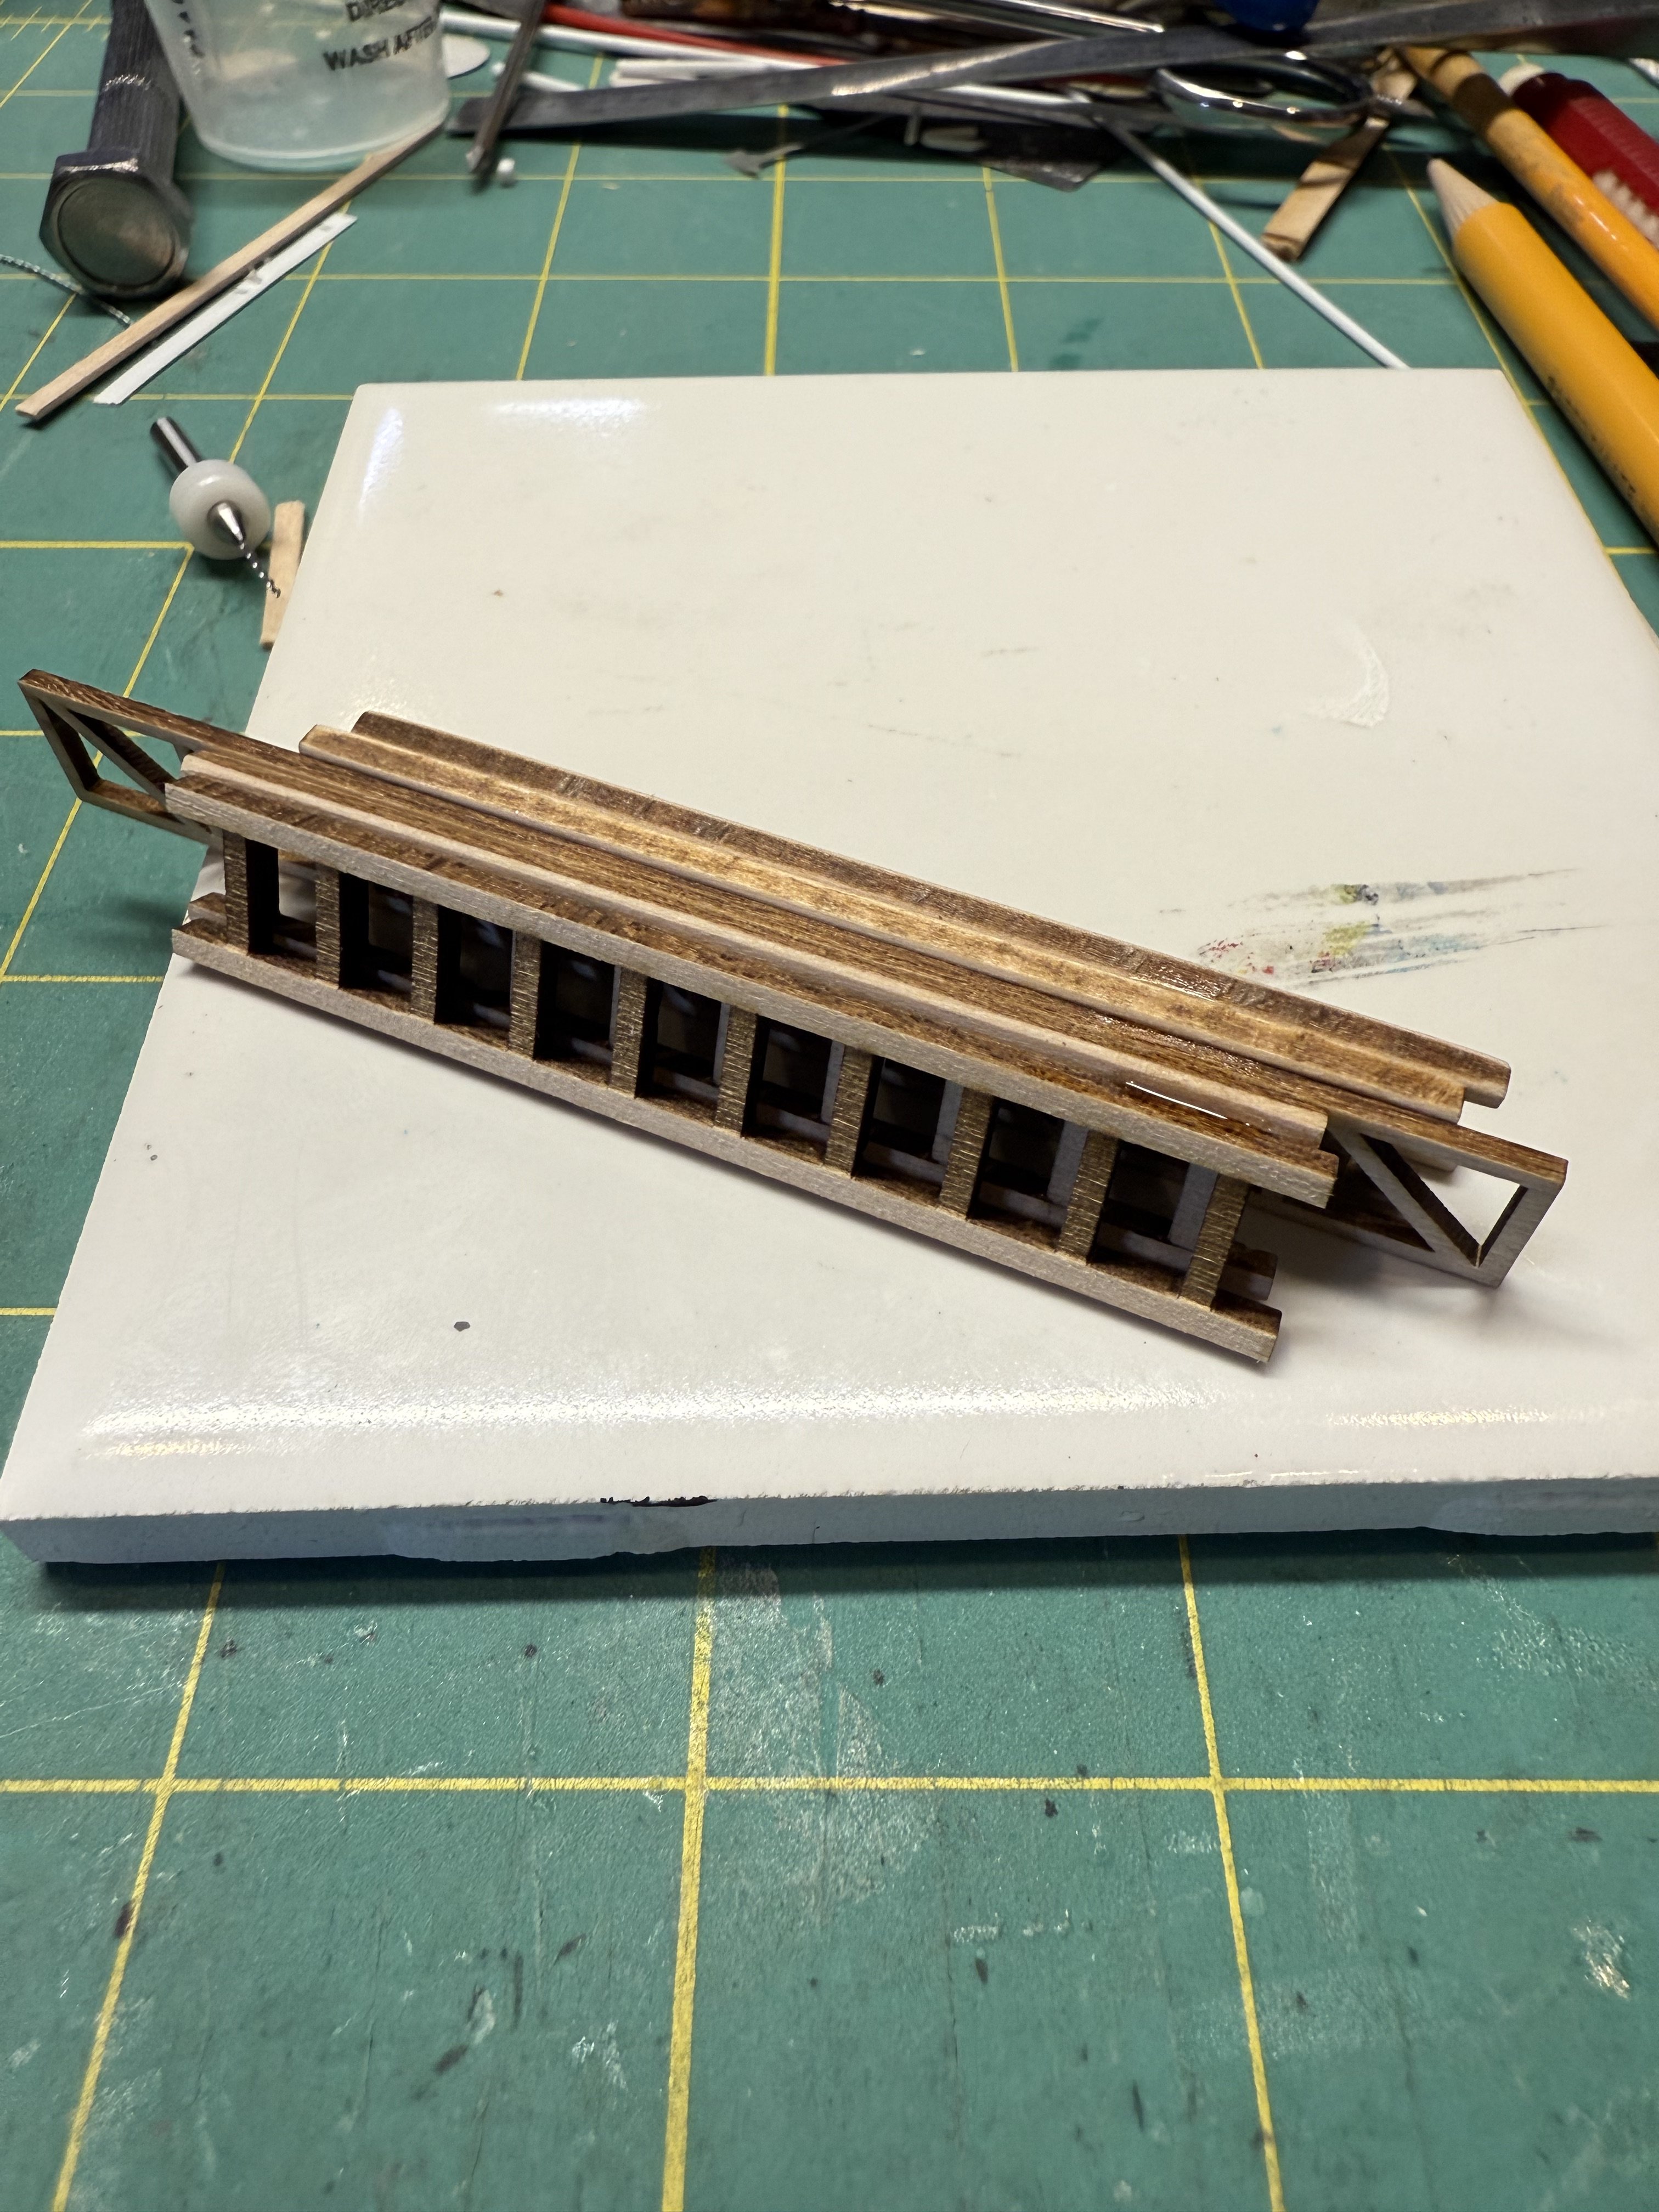
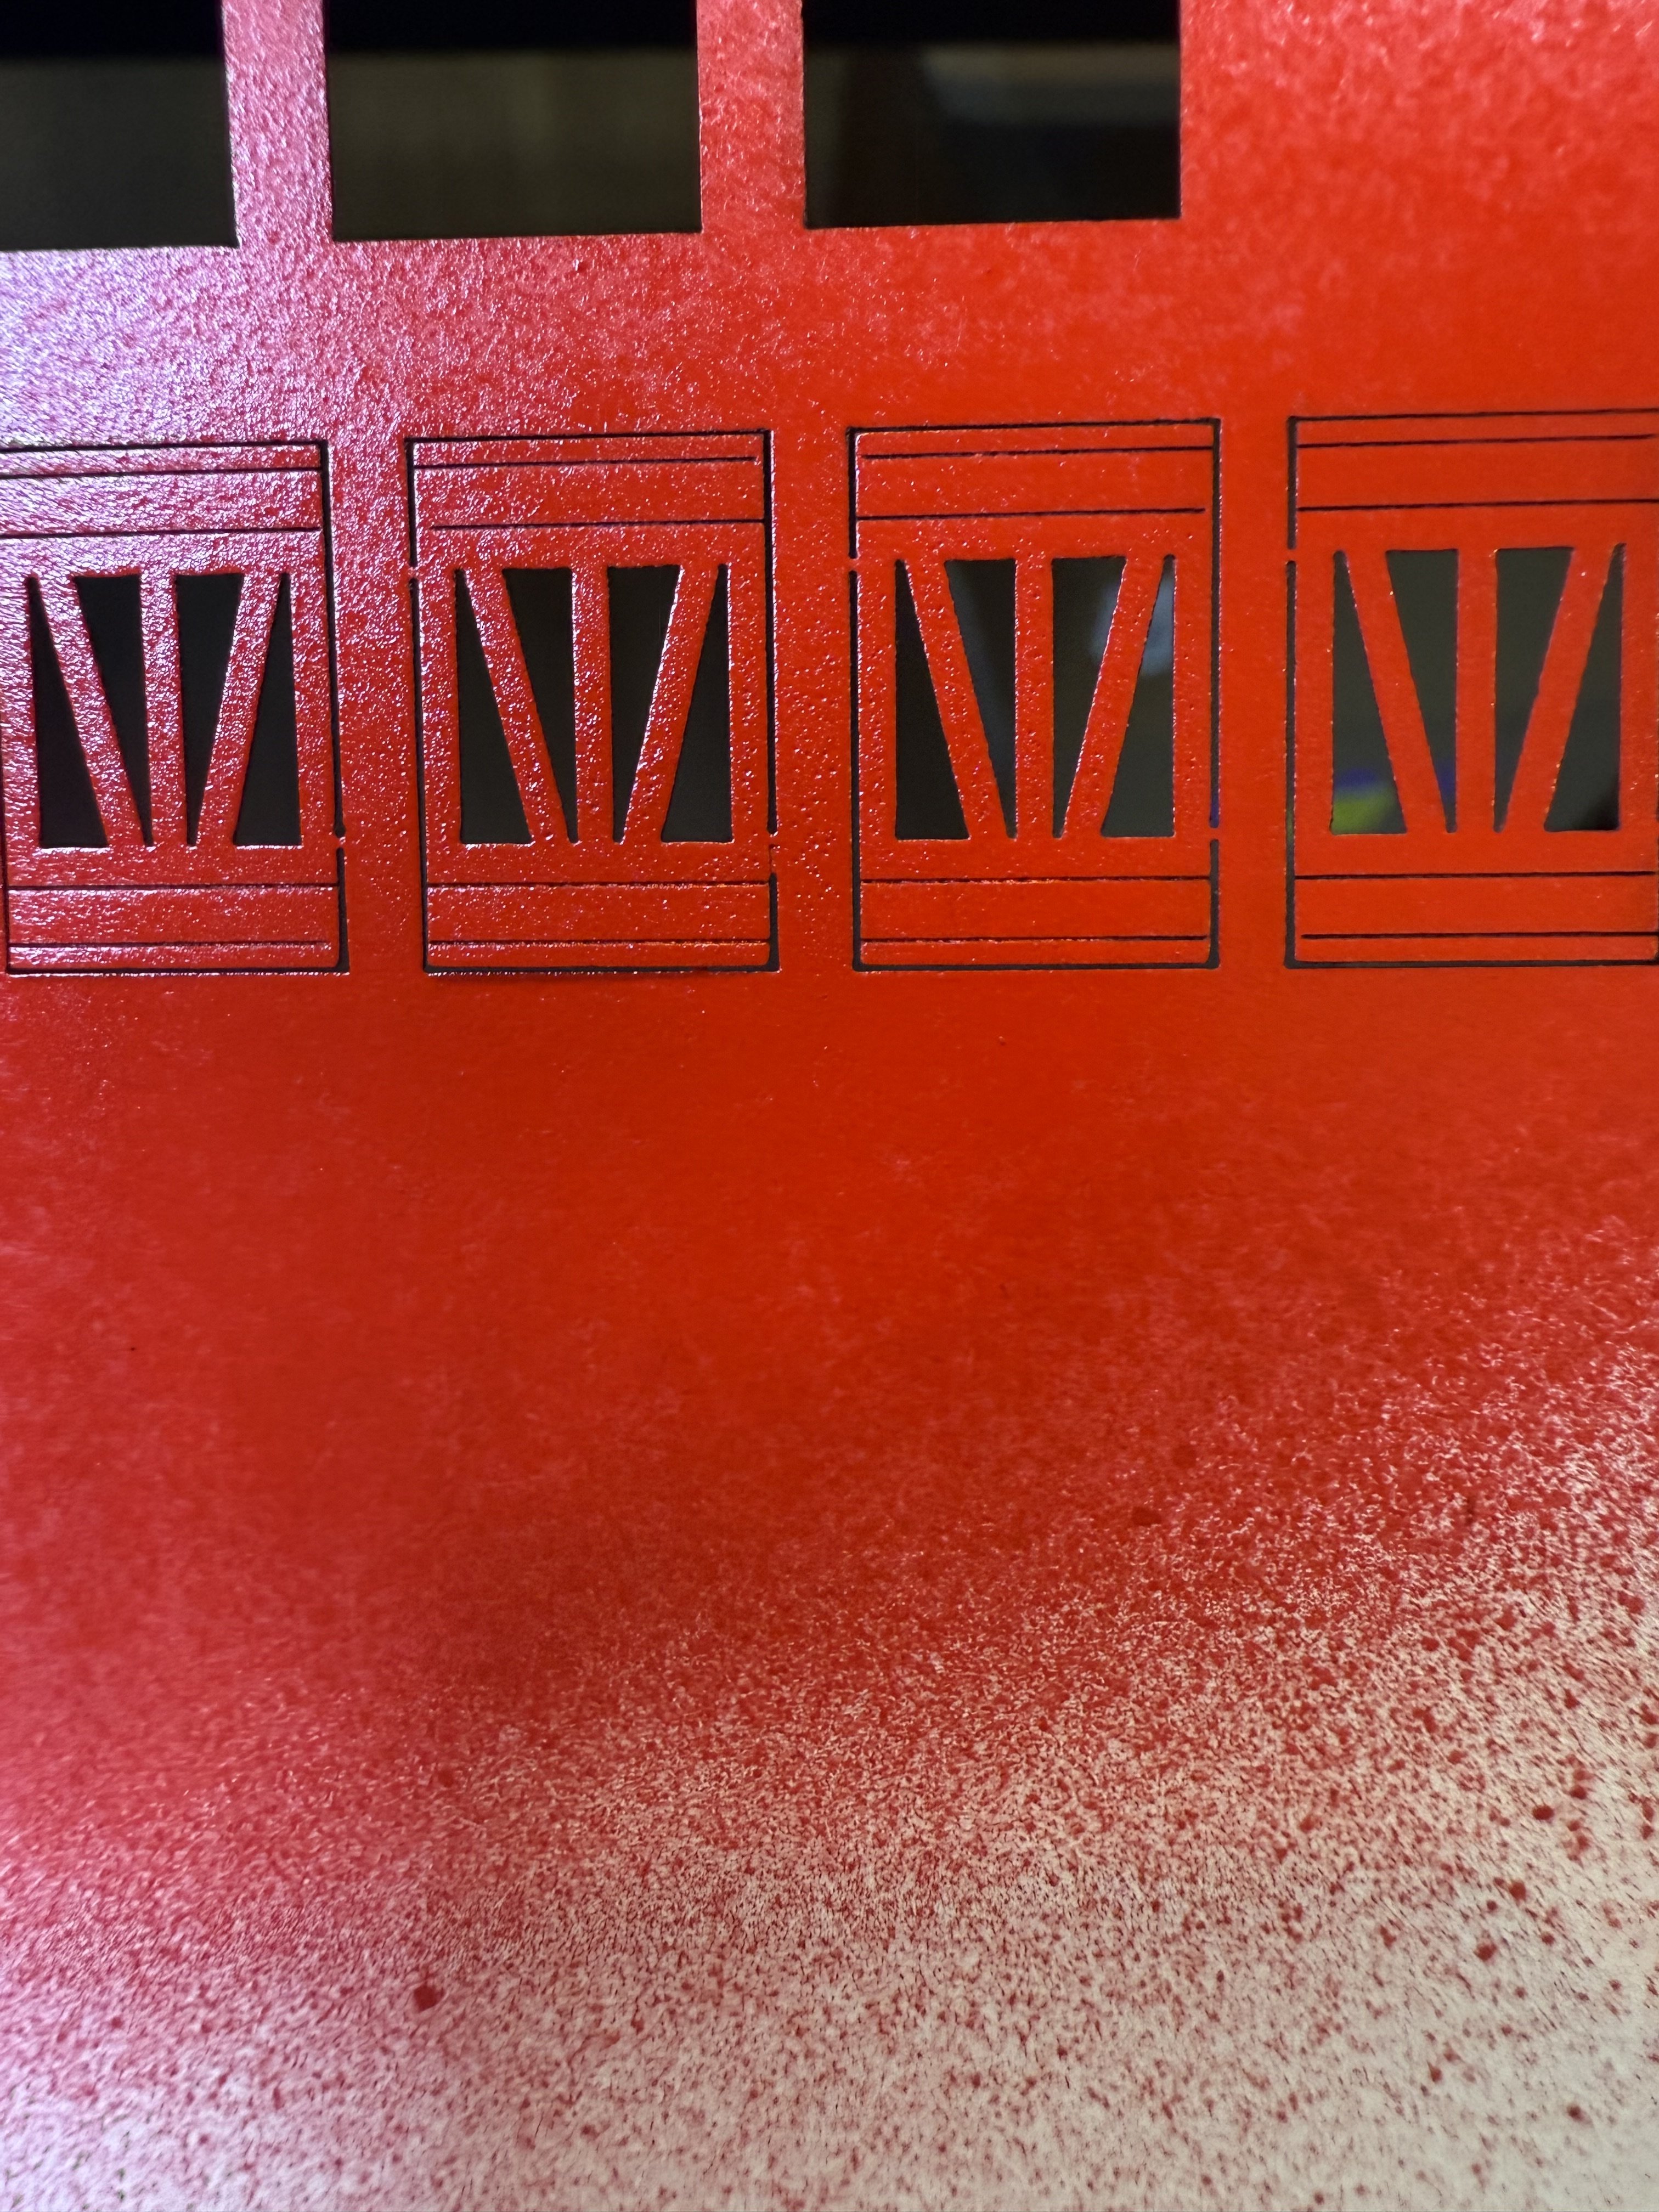
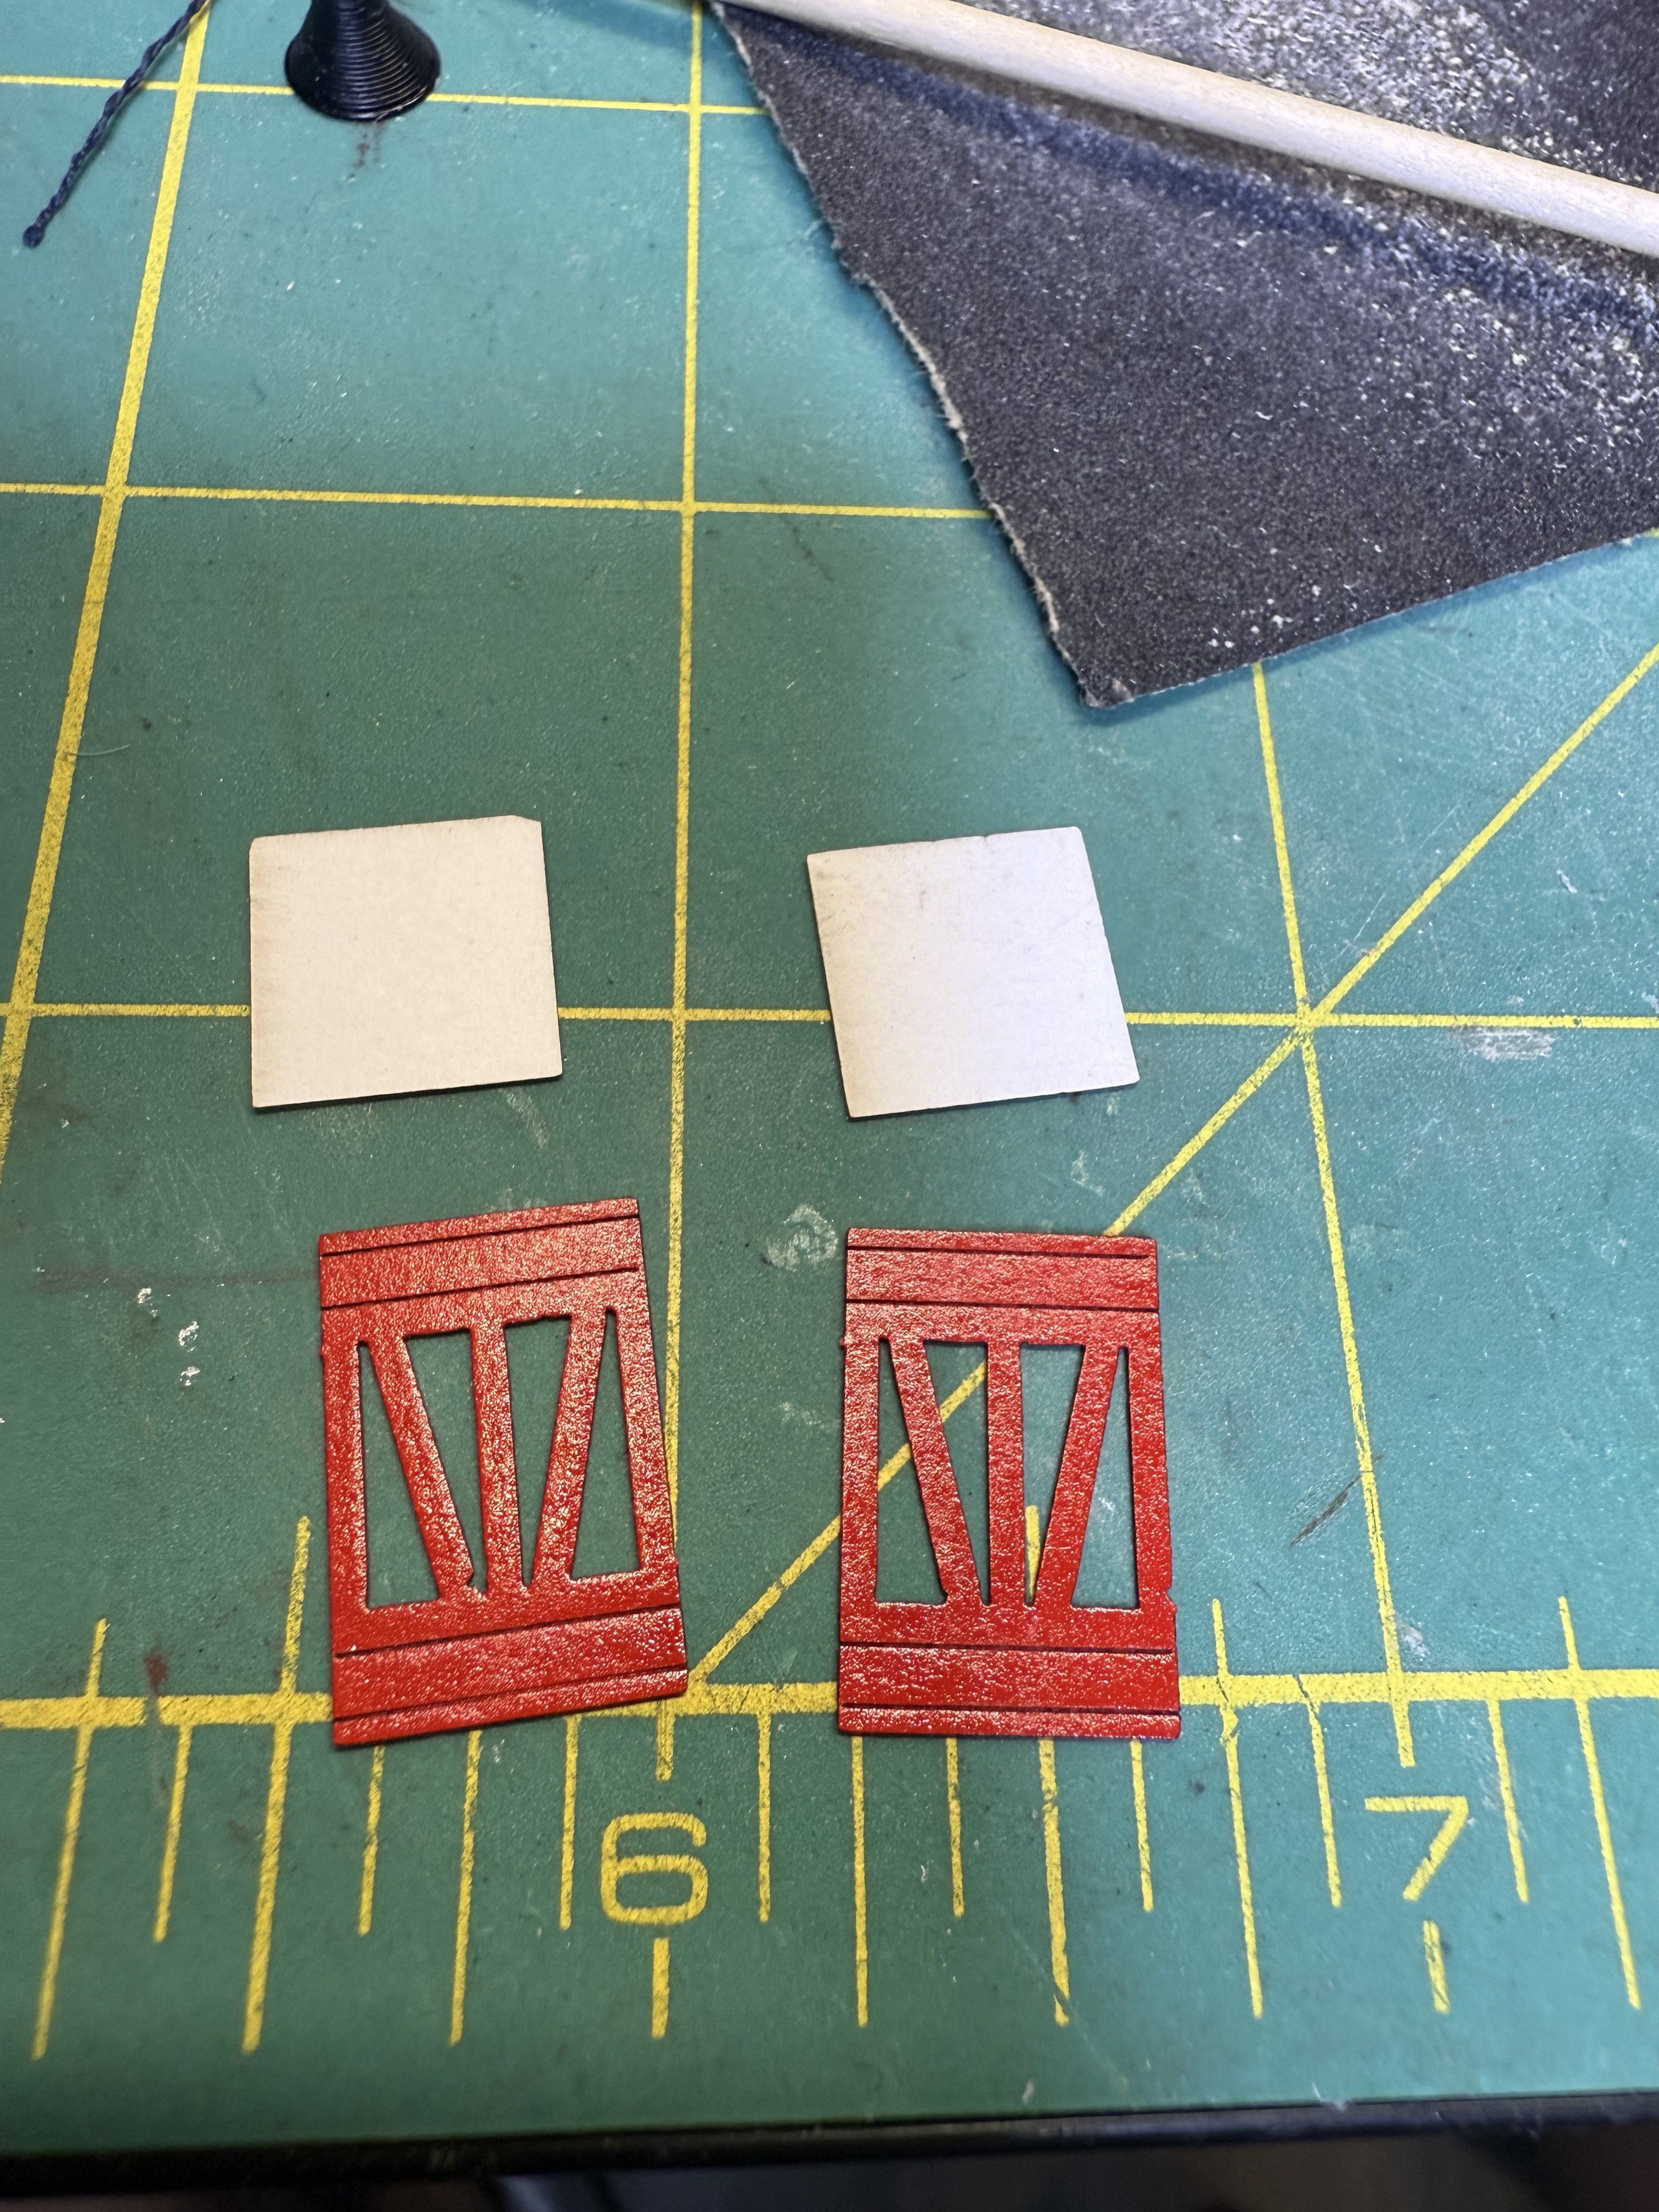
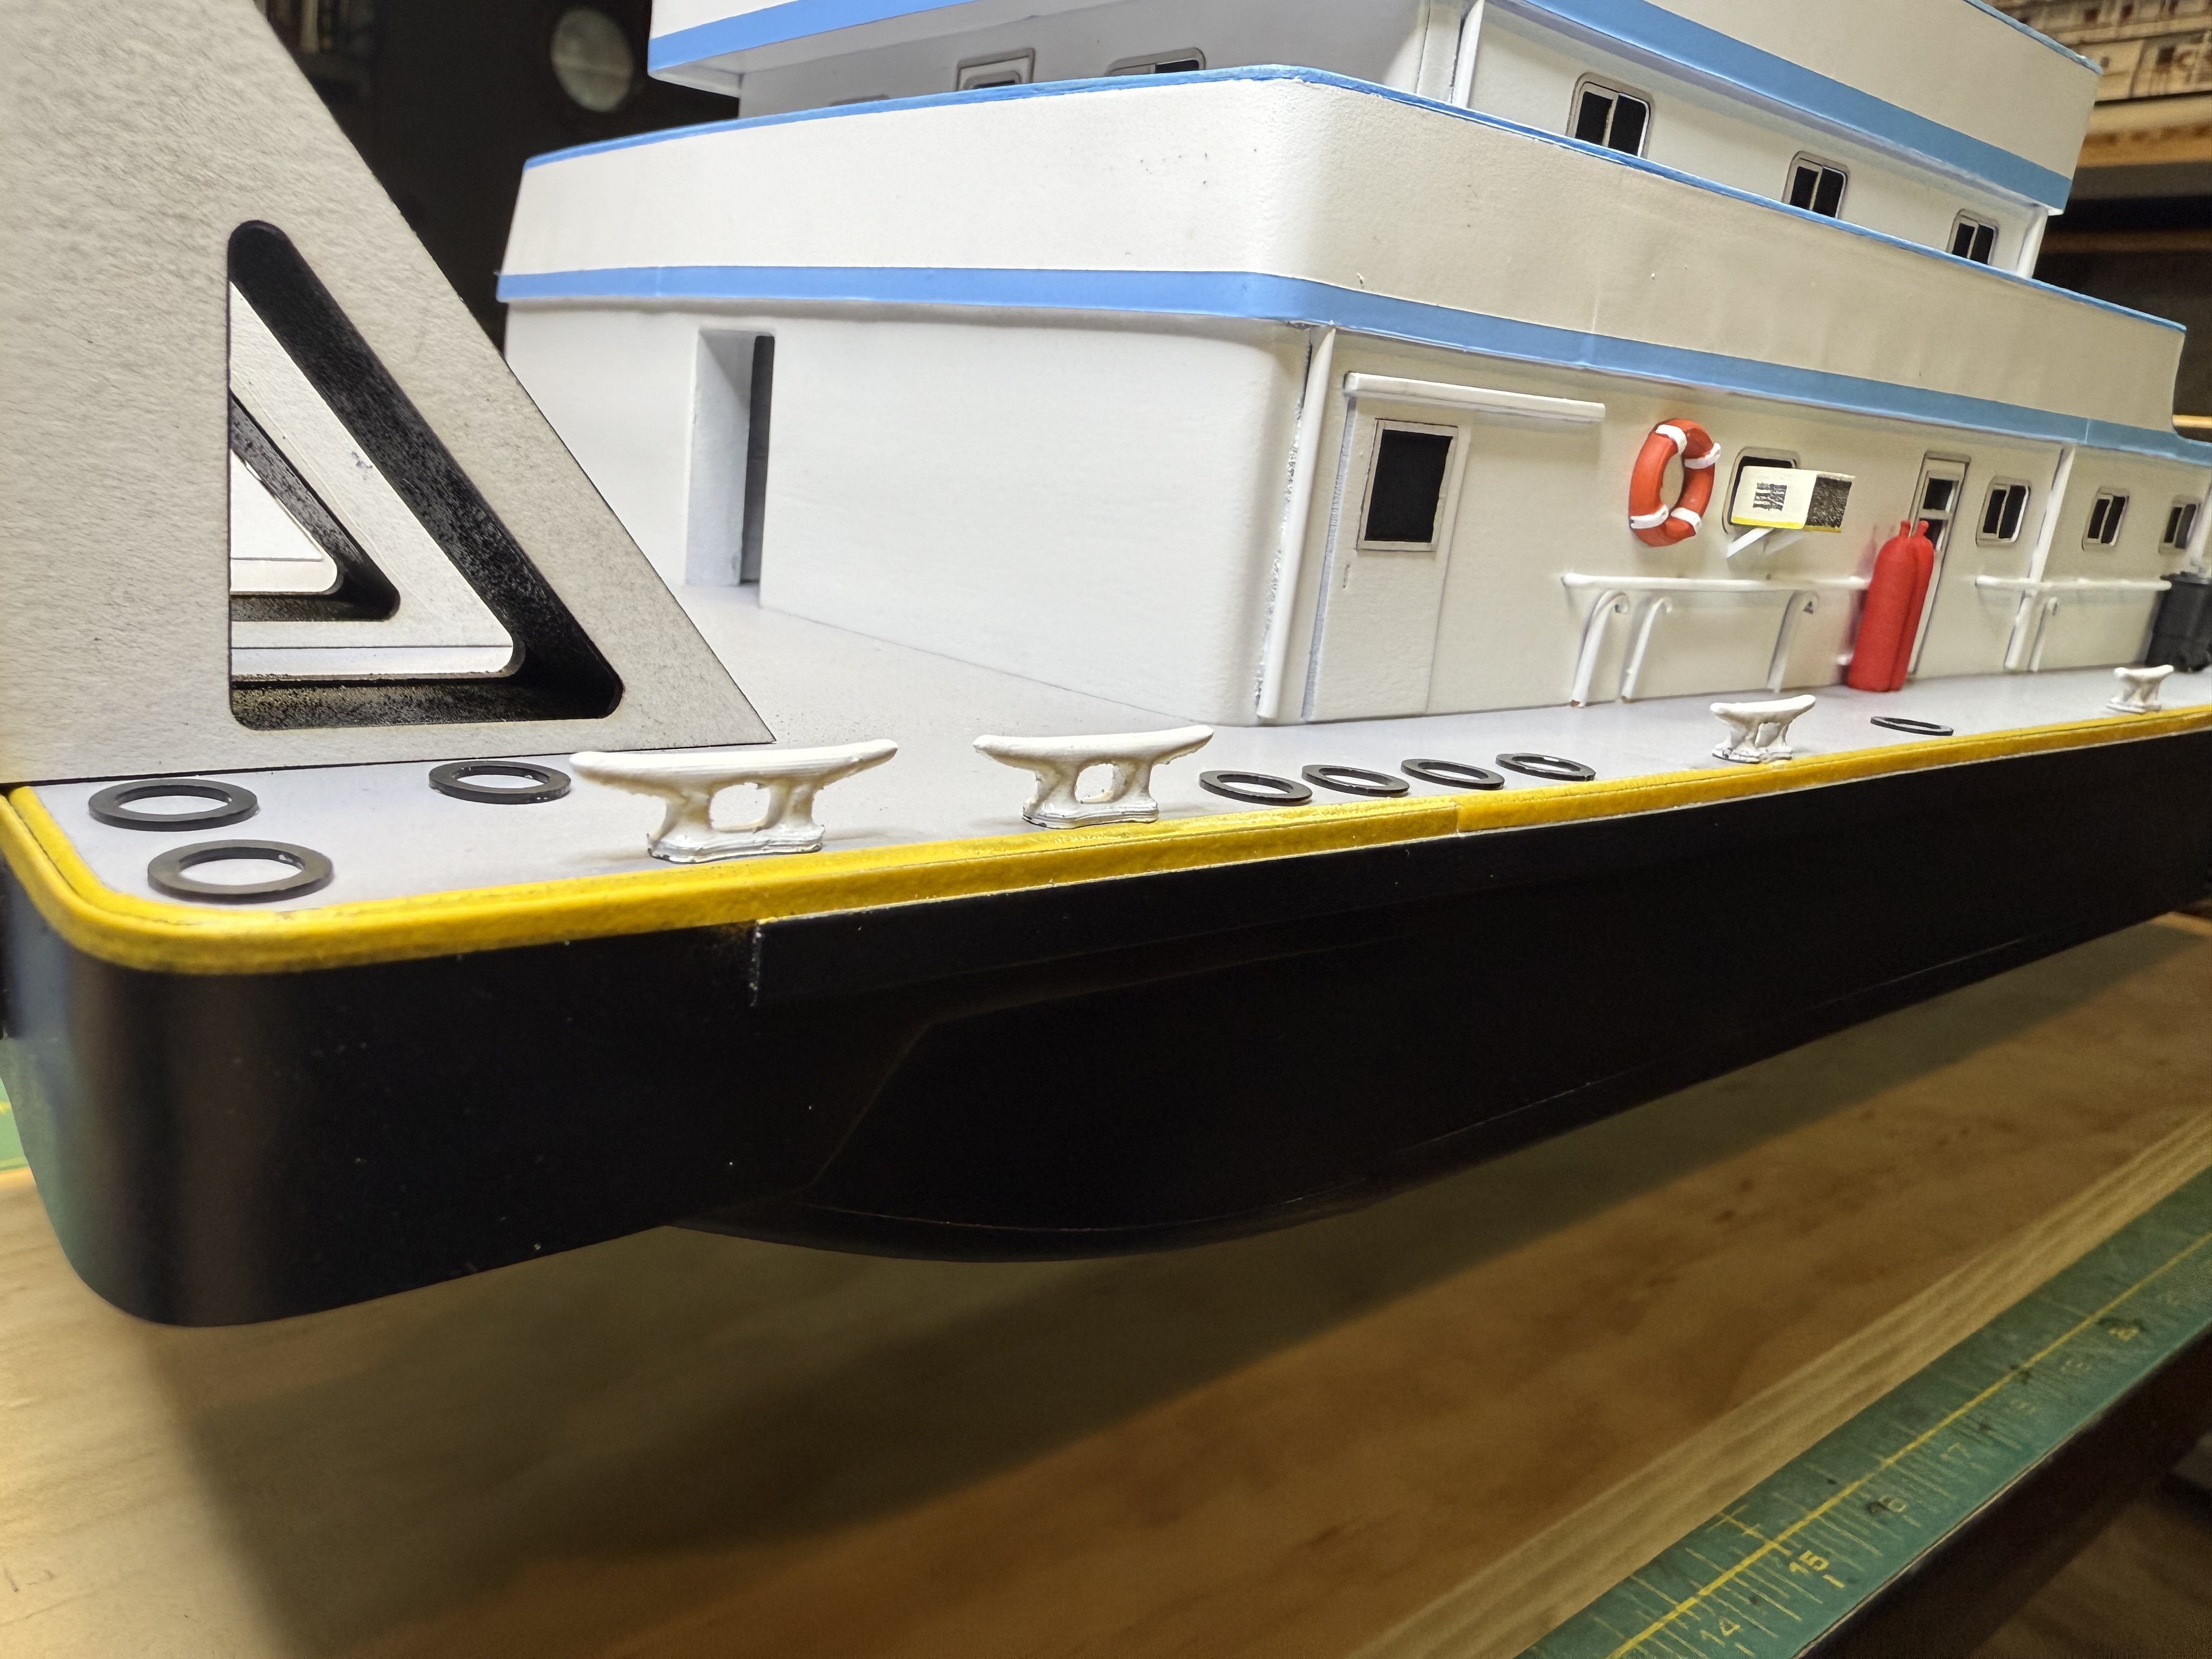
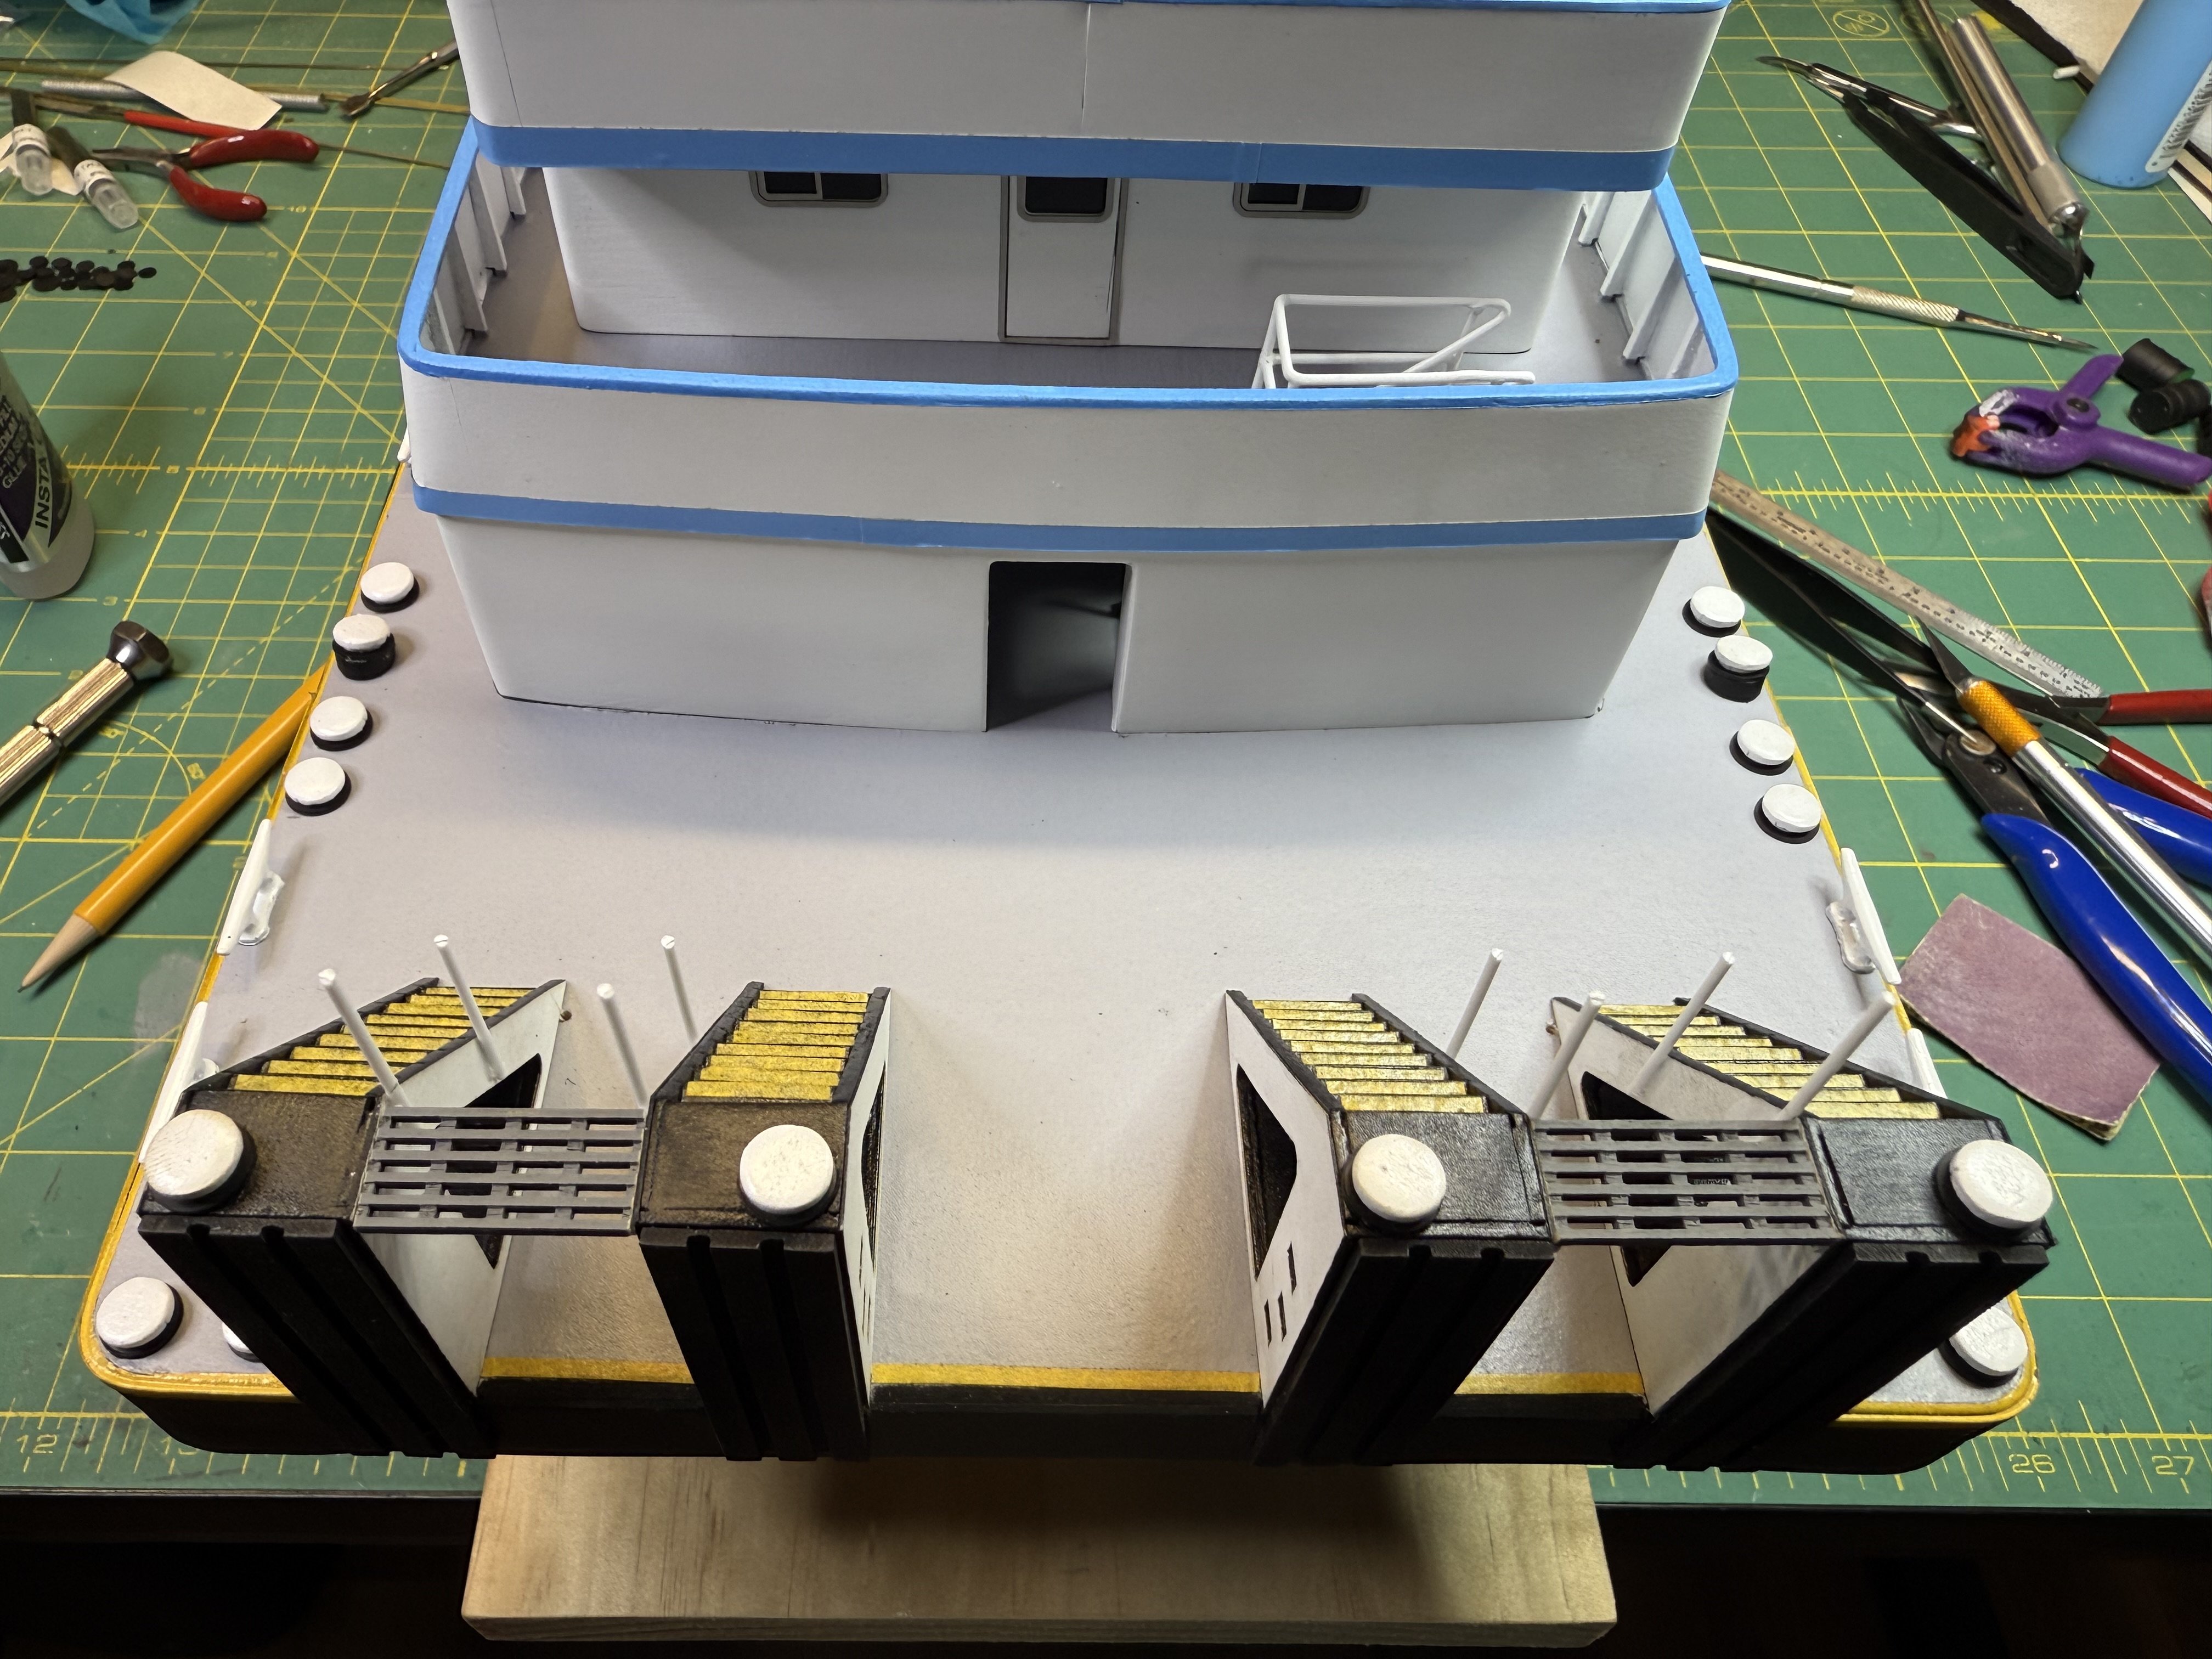
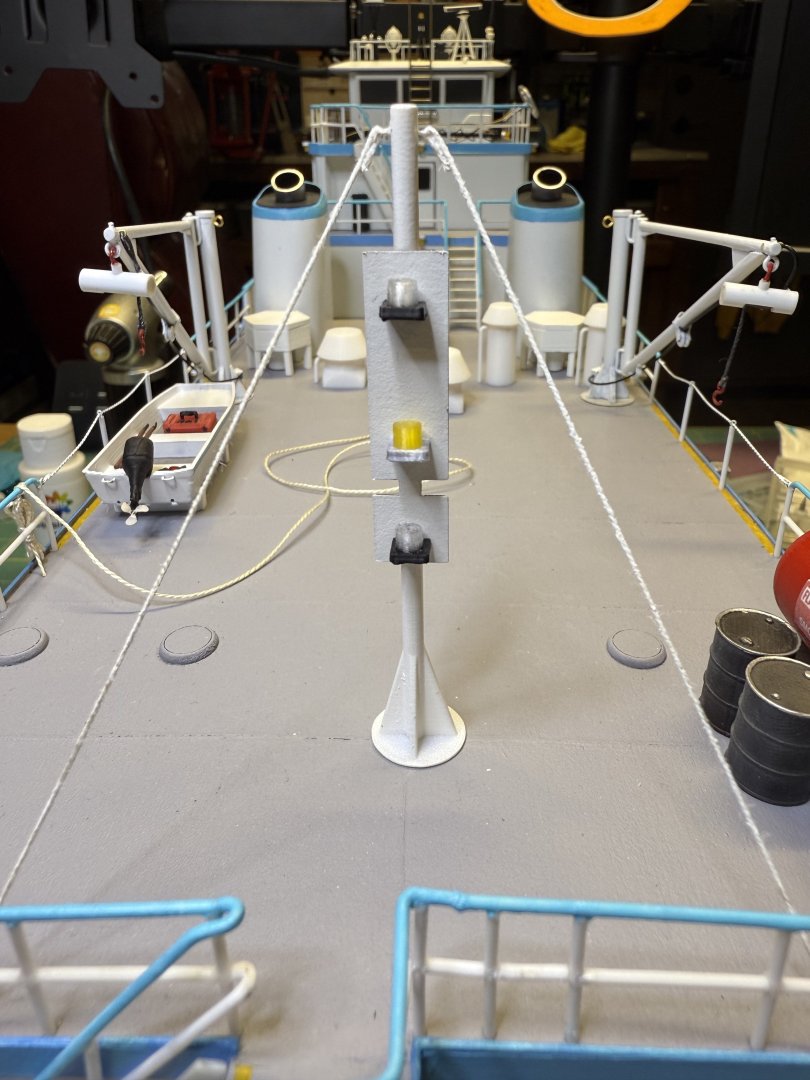
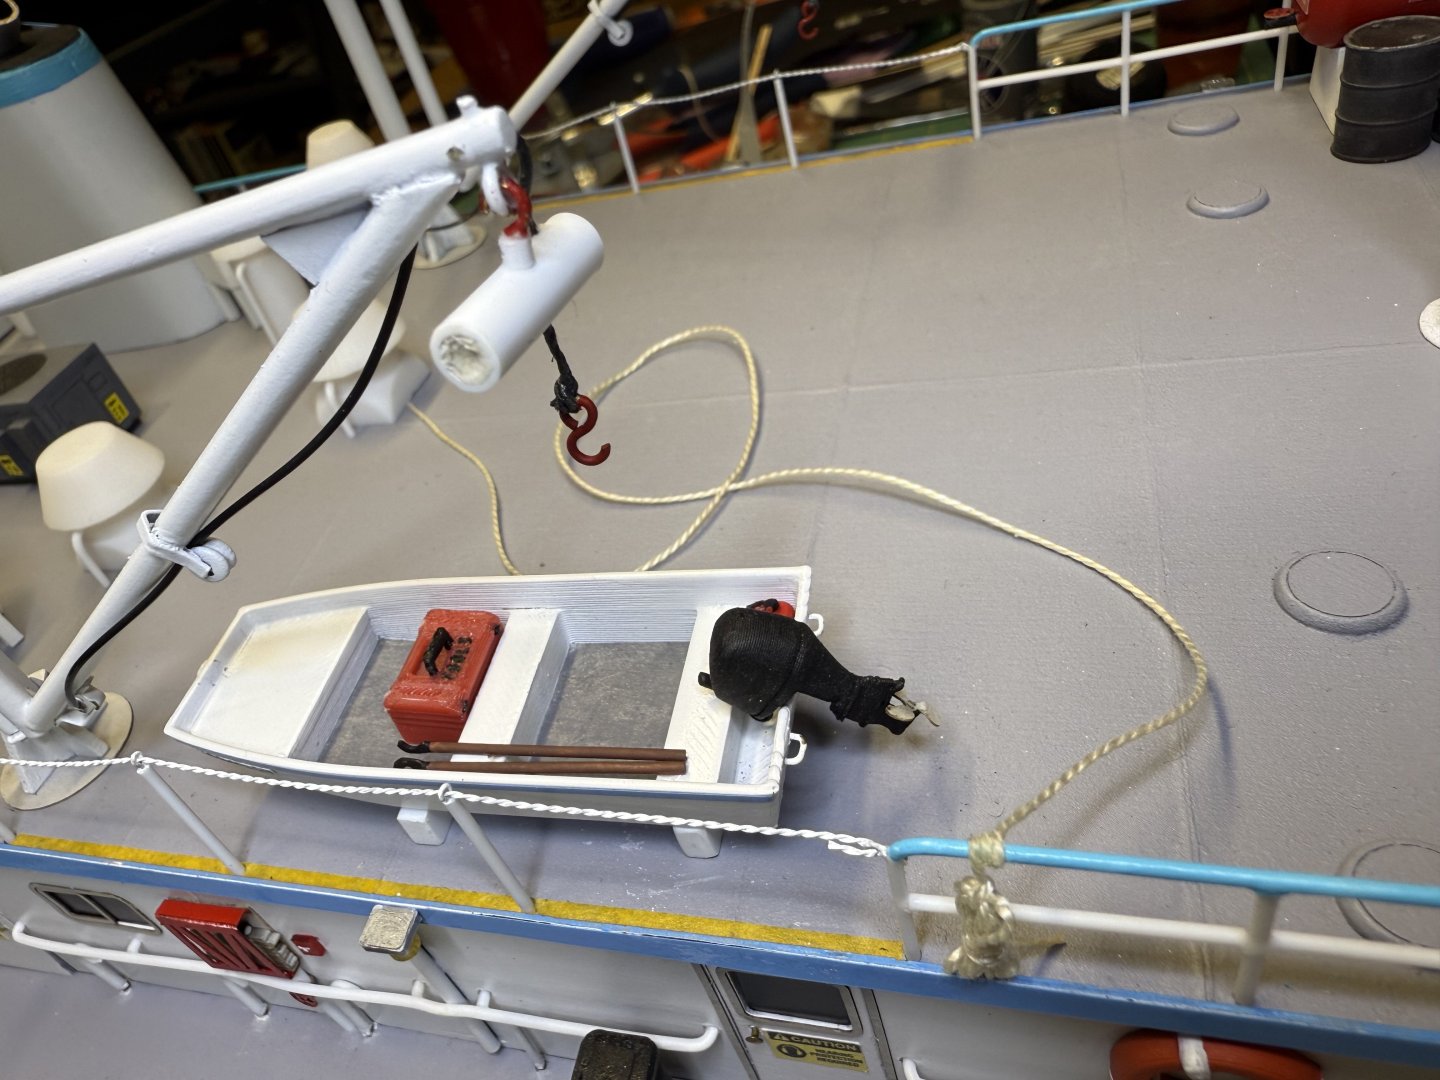
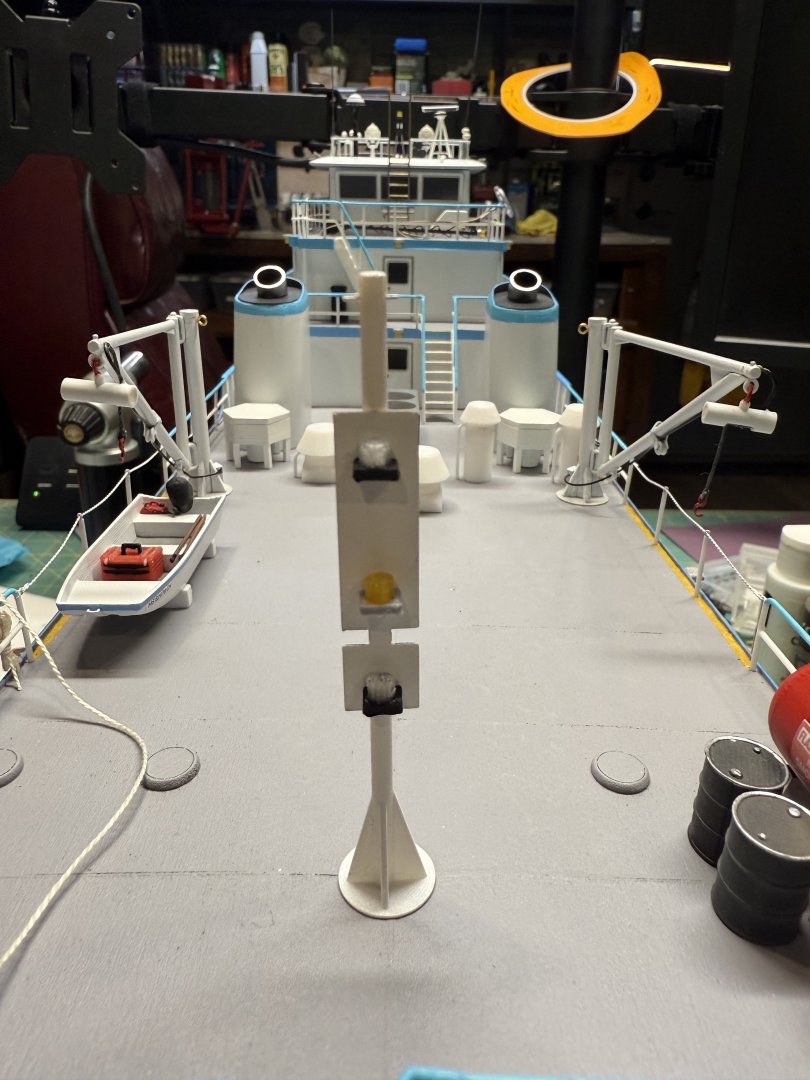
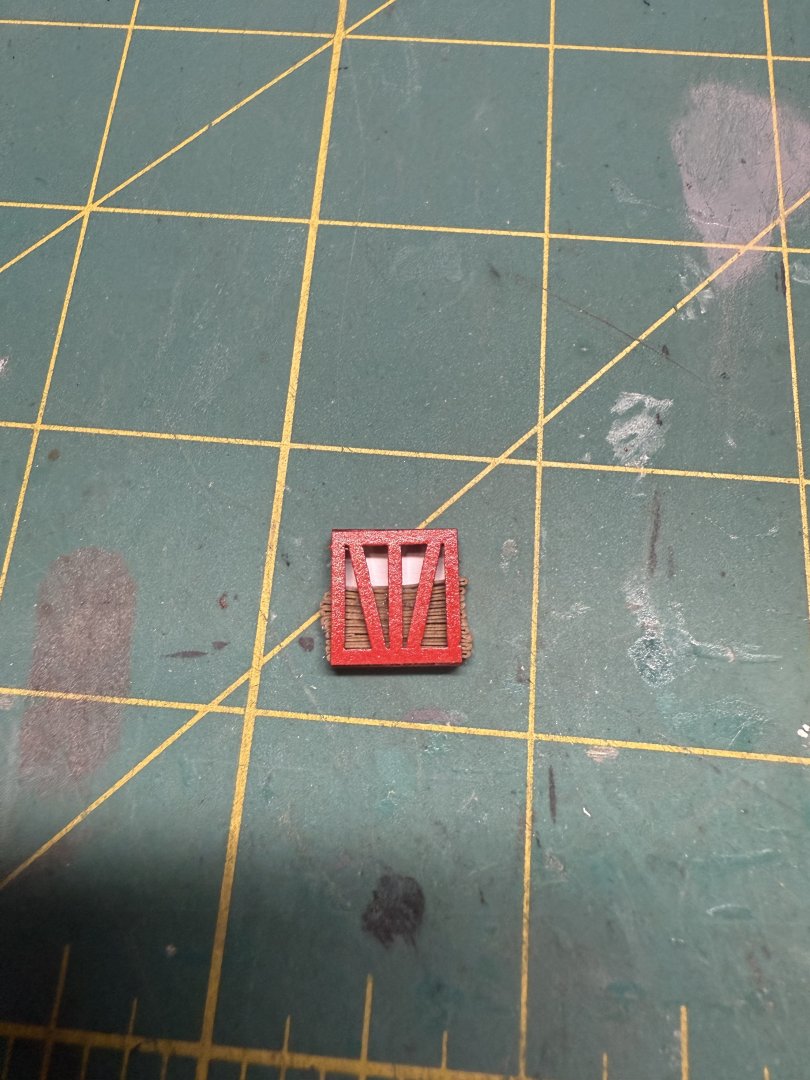
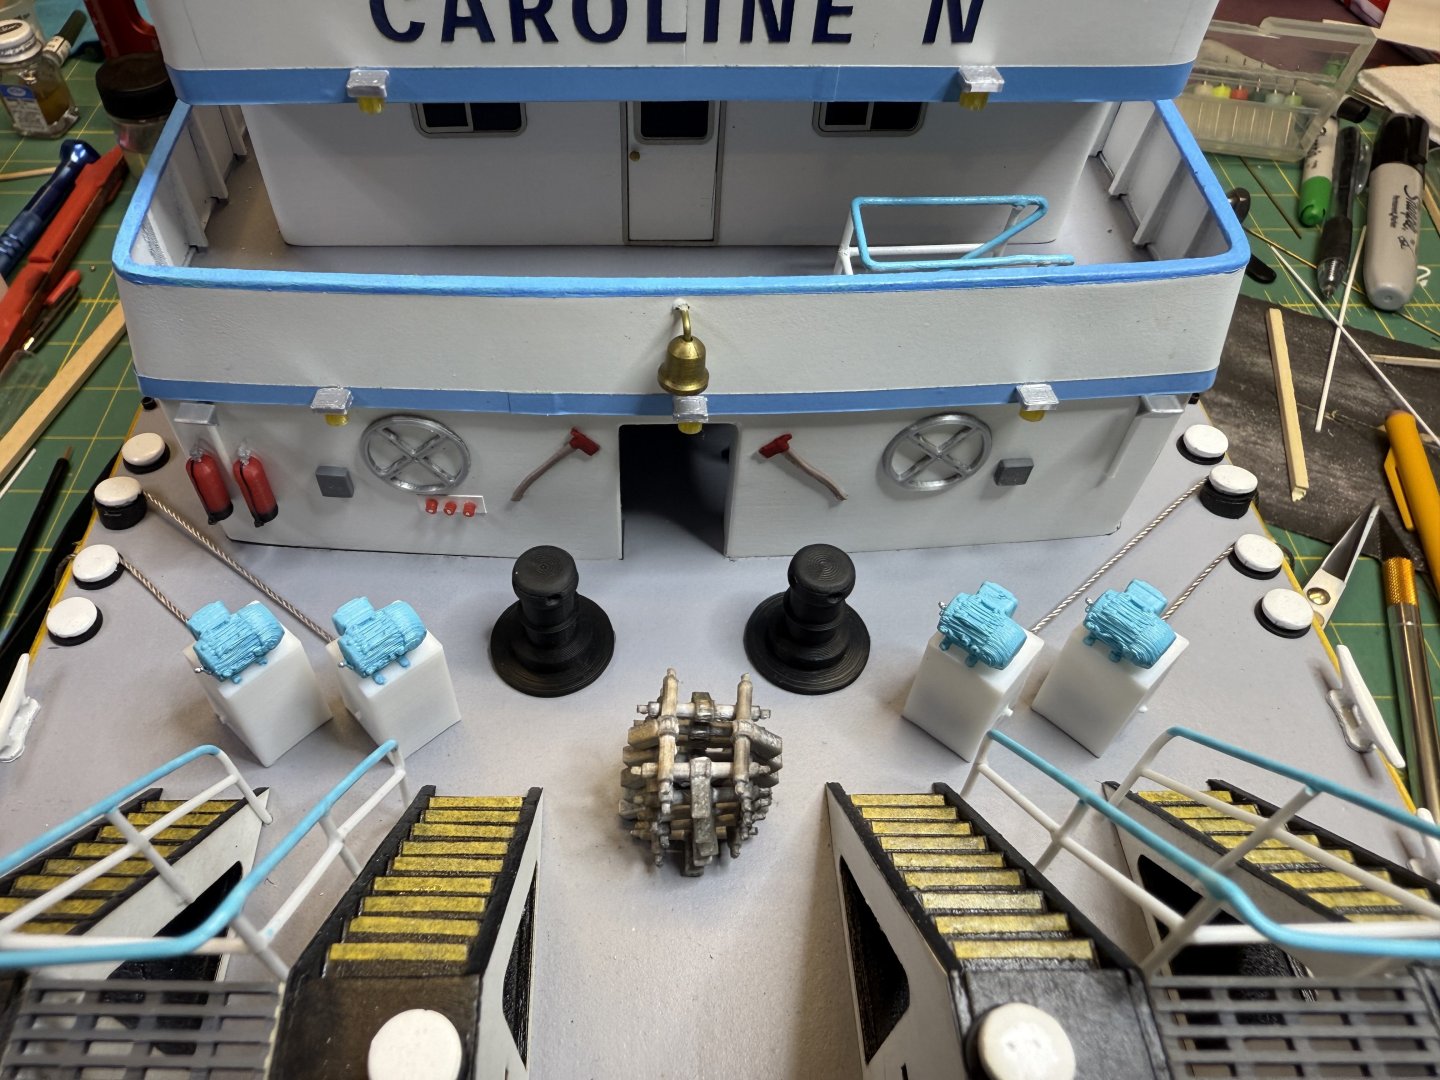
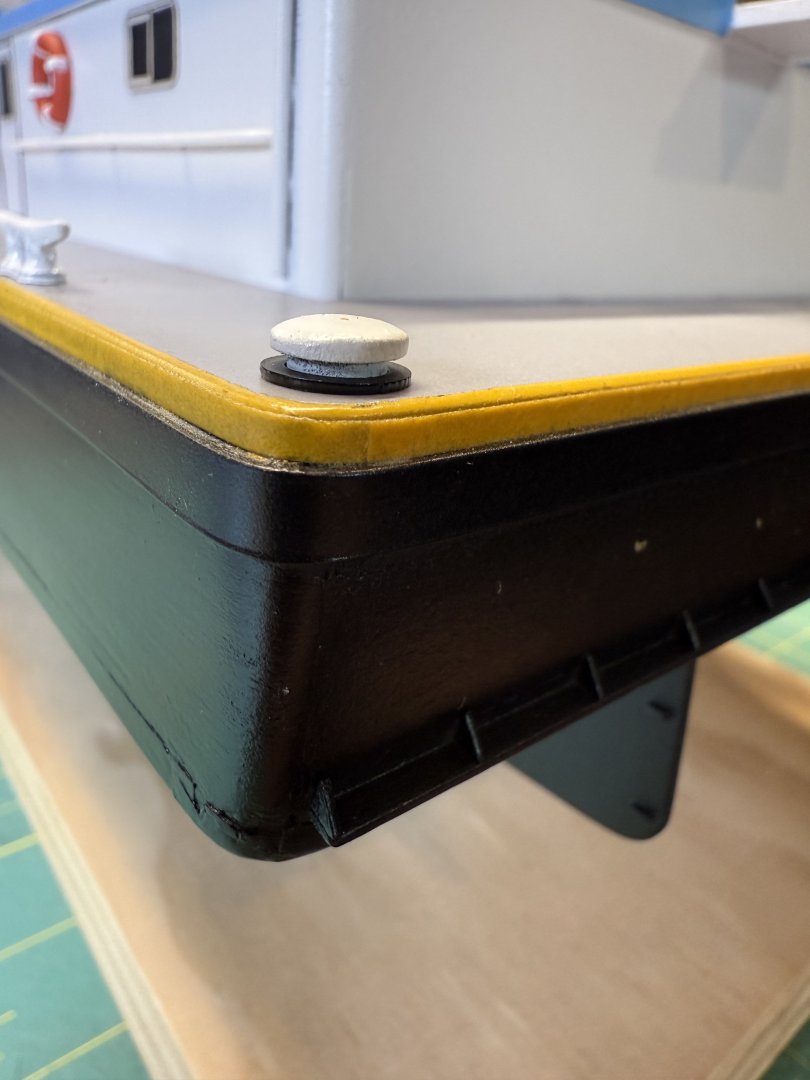
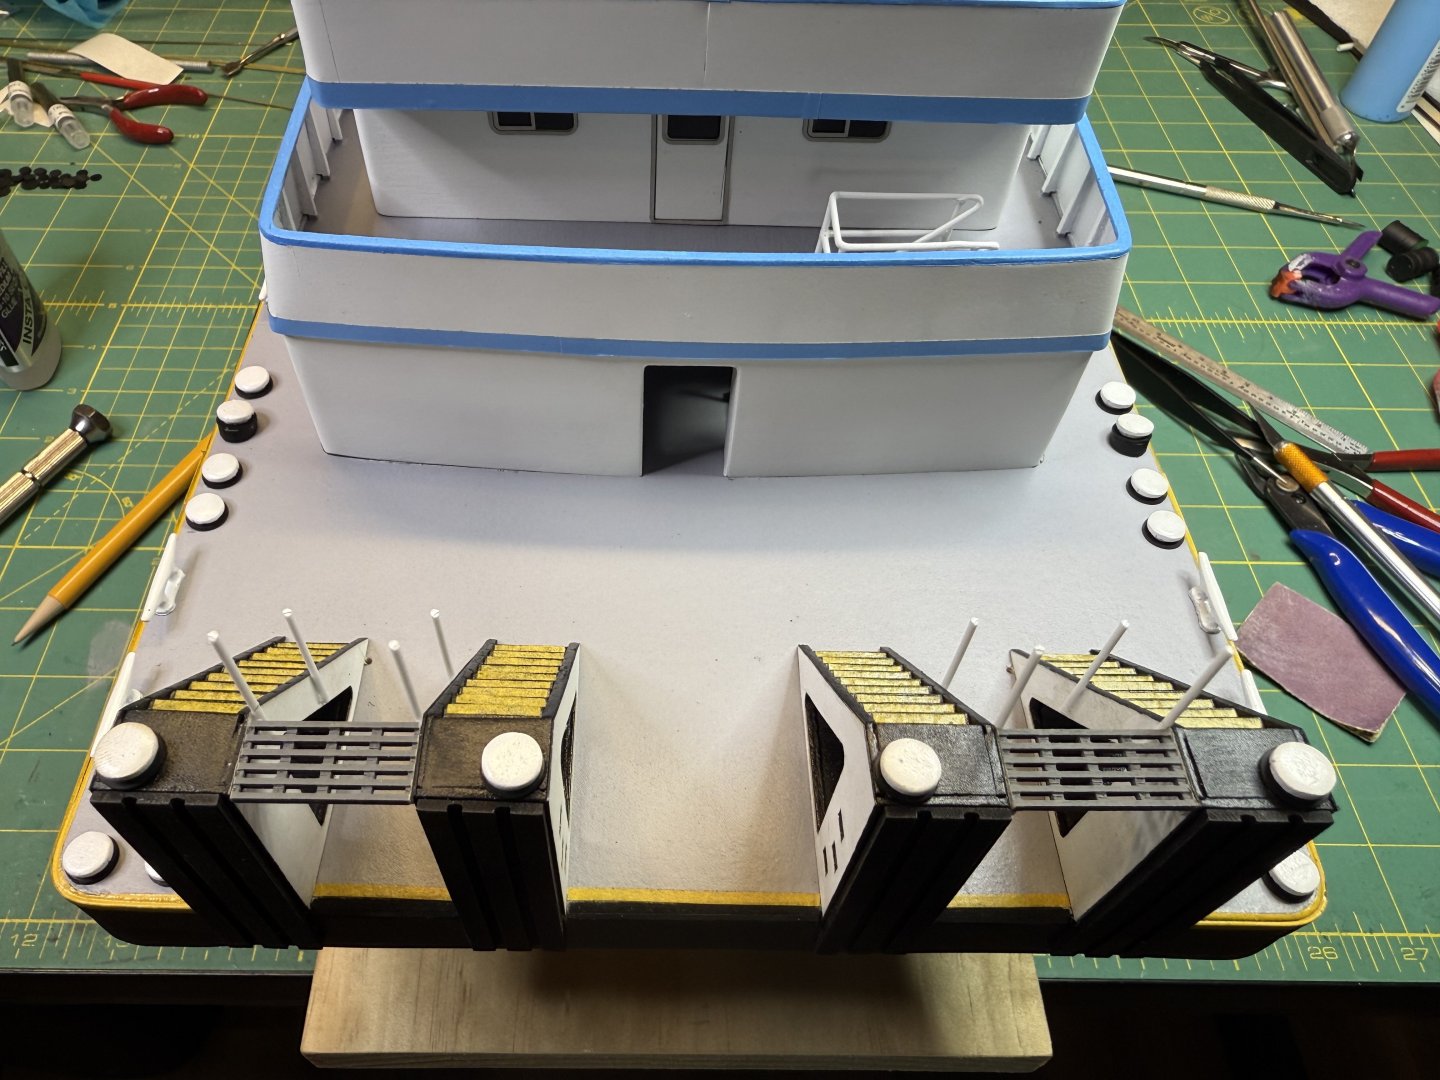
Back again with another update, I can finally see the light at the end of the tunnel. I finished up with the tarp, I let everything dry then weathered it with pastels and glued into place. Next it was on to adding the windshield wipers. I had to get these installed before securing the pilot house roof in place since they were tucked up under the overhang. I made these from card stock and cut them out on the laser cutter. They were made in two pieces to give them some depth. The wipers going on. And all three in place. As hesitant as I was, I started work on the safety ropes. Since the stanchions were so fragile, this was nerve wracking to do. I had to be extra cautious when pulling the ropes through the eyelets so I didn't break them off. Even being as careful as I could I still managed to knock of about 6 or 7 of them. Nothing a little CA couldn't fix, but still having to do rework was a pain. I wrestled with this part for several days trying to figure out how I wanted to secure the stanchions. If you look at the actual boats, they are somewhat all over the place. They all aren't placed perfectly perpendicular to the deck. This internal struggle to mount them this way and that was tough. My OCD finally won out and I had to mount them all perfectly upright. To me, having them all over the place just didn't sit right with me. So realistic looking or not, I did what gave me peace. So I started with the top rope to make sure the alignment of the stanchions was good, then glued them all in place. Once they were all secured, I went back and painted all the eyelets, like I should have before mounting them. One of the drawback of scratch building, there are no instructions on which step comes first. Once the eyelet were all painted up, the bottom rope was installed. This was another decision that took me a bit to come to terms with. I liked the ease of having the ropes straight but it didn't look right, so I finally decided to add a little sag to them to give it a more natural look. In the end I think I made the right choice. The only trouble I had with this was getting the ropes to hand straight down. The twist of the string that I used caused some of the sections to hand inboard or outboard, but all in all I am happy with the results. Working my way around the back stanchions. On to the top run of the ropes. This picture shows what I was talking about with the ropes not hanging straight down. Next step was to finish up on some of the upper deck features. I mounted the workboat into place and added the ropes. Then I finished up on the boom guys and mounted them in place. I cut small triangles to use as the deck mounts, drilled holes through them and installed a polystyrene rod to simulated the pins. . With the wipers installed and the pilot house roof securely in place it was time to mount the antenna mast/flagpole. Last up was the guide poles that mount to the tow knees. I'm not sure of the correct term for these and their function, but I'm sure they are used to align the tows when setting up the barges as well as river navigation. These were made up of simple styrene rod and a card stock flag. Finally this is the way she currently sits. Only a few more things to do and some touch up work and I can wrap this baby up. Well that is all for now. I have some vacation time coming up next week for Thanksgiving, so my goal is neatly wrap this thing up and put a bow on it. Thank you all for stopping by and taking a look. - Brian


-
Anytime you are in the path of an A-10 it can be a bit intimidating. Training run or not. That 30mm Gatling gun can lay waste to anything in its path. When I was in the Air Force I worked the flight line and loved seeing those bad boys come in. I was in a C-130 training squadron so I can totally relate. It was always fun the see the instructor pilots faces when they were disembarking after a day of flying around with new pilots. -Brian
-
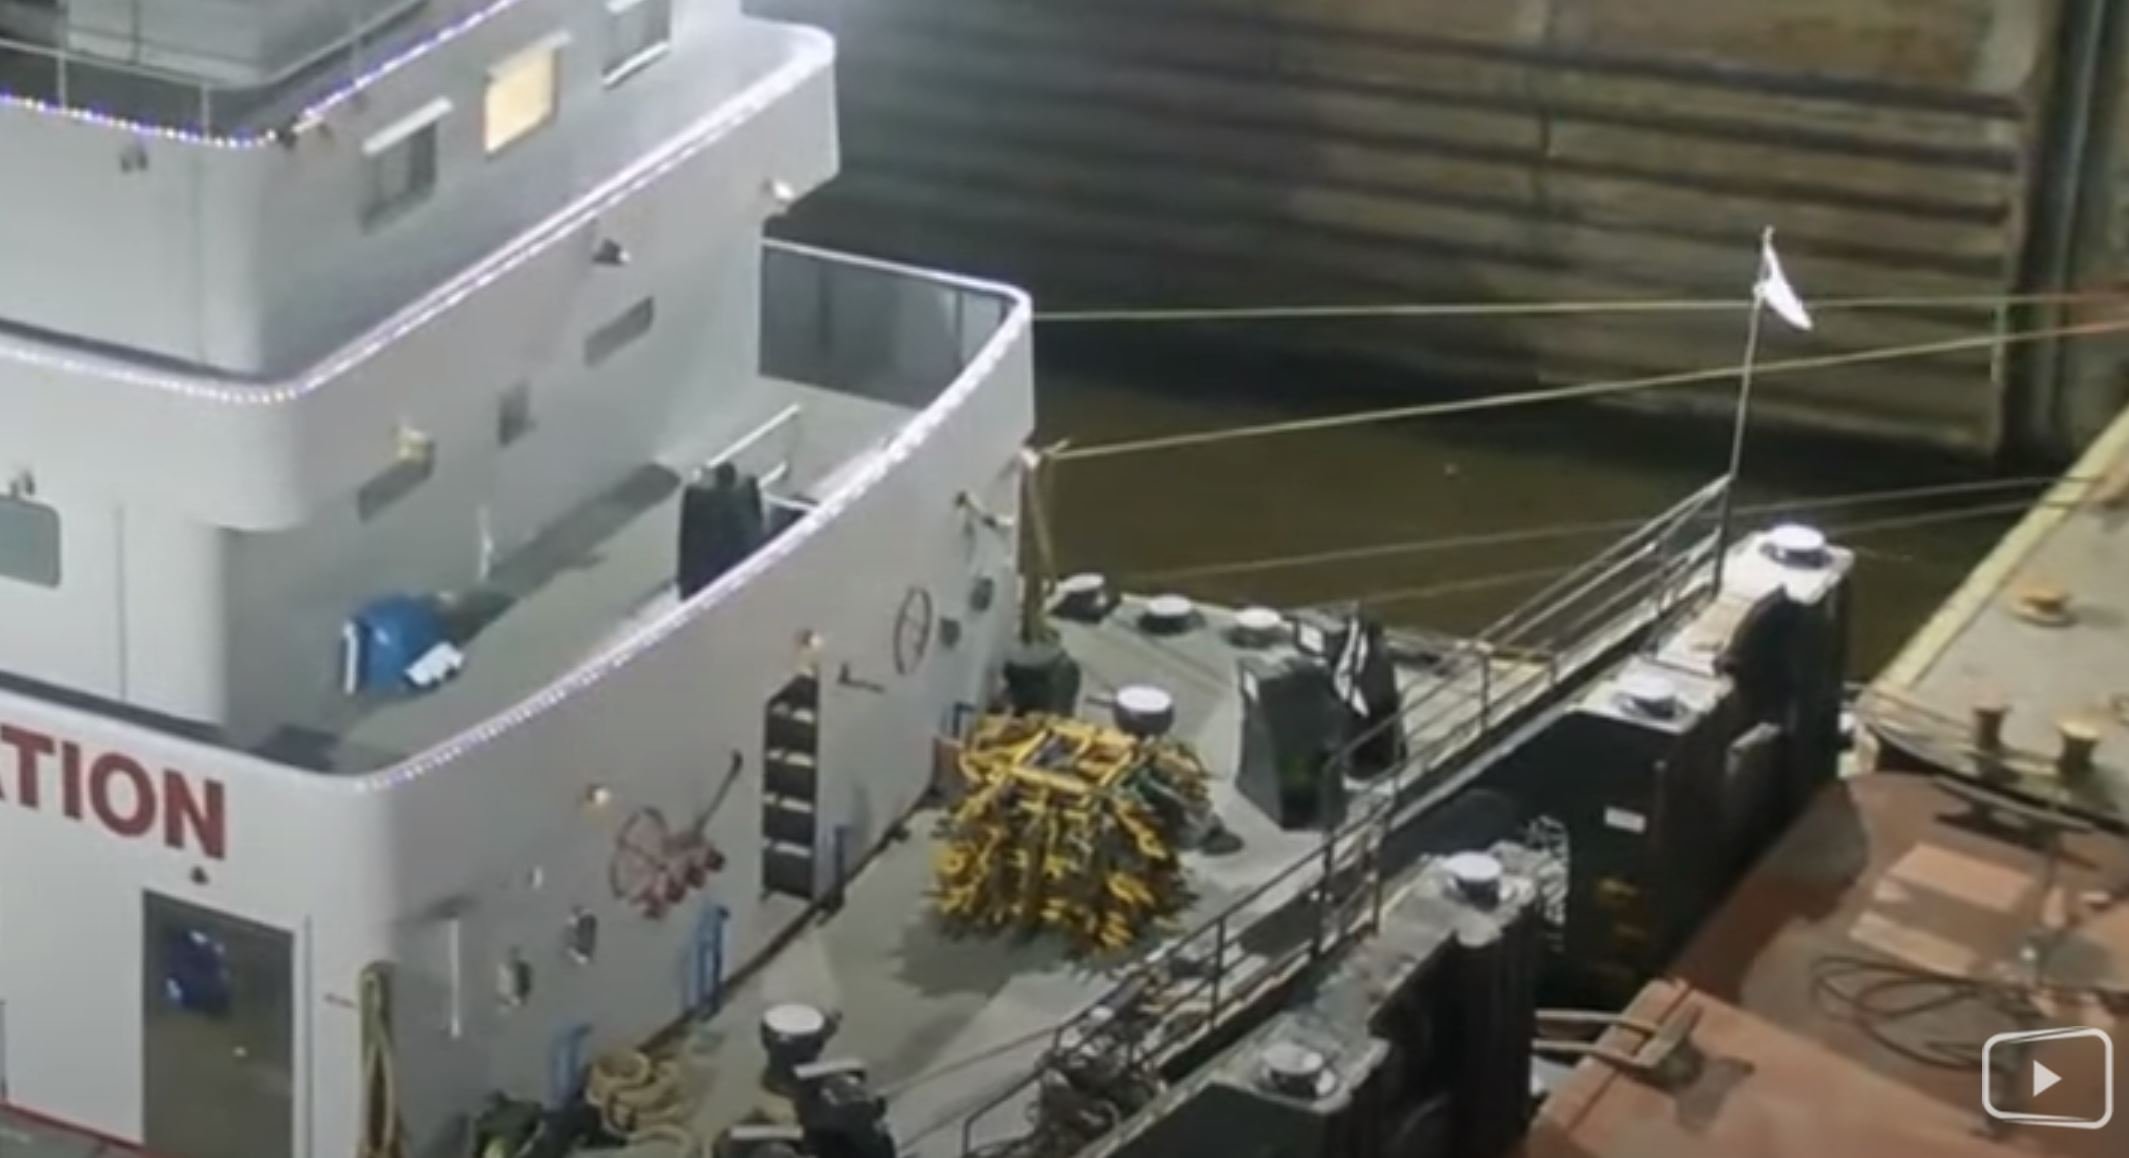
Thank you Phil. Growing up on the Mississippi River, there were always reports of barges breaking loose. I remember on several occasions they would break loose and hit the bridges. Not too often would they do much damage, most of the time it was empty ones they had tied along the shorelines waiting to be loaded that someone failed to secure properly. Always made for an interesting story. Being buzzed by a helicopter would be a serious eye opener. I can see the paddlers and fishermen needing the warnings, not too many of them are equipped with radios, but that is strange that the comms equipment on the research vessel was not able to warn them. I would love to tour the current MV Mississippi, she’s a monster. I have toured the MV Mississippi IV on display at Vicksburg. Very nice setup they have there. I love that you are able to walk around the hull and explore the interior freely. The crew was certainly living it up on this boat. I can only imagine what the new Mississippi is like. -Brian
-
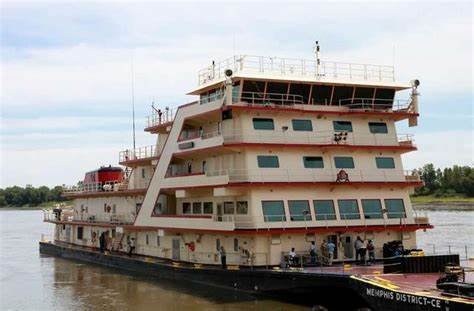
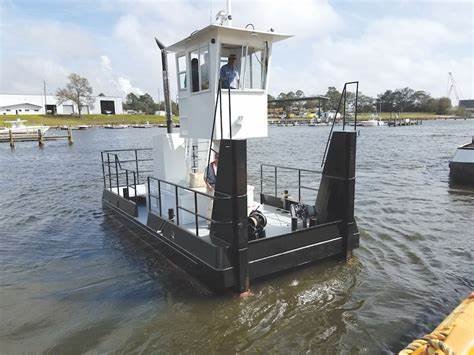
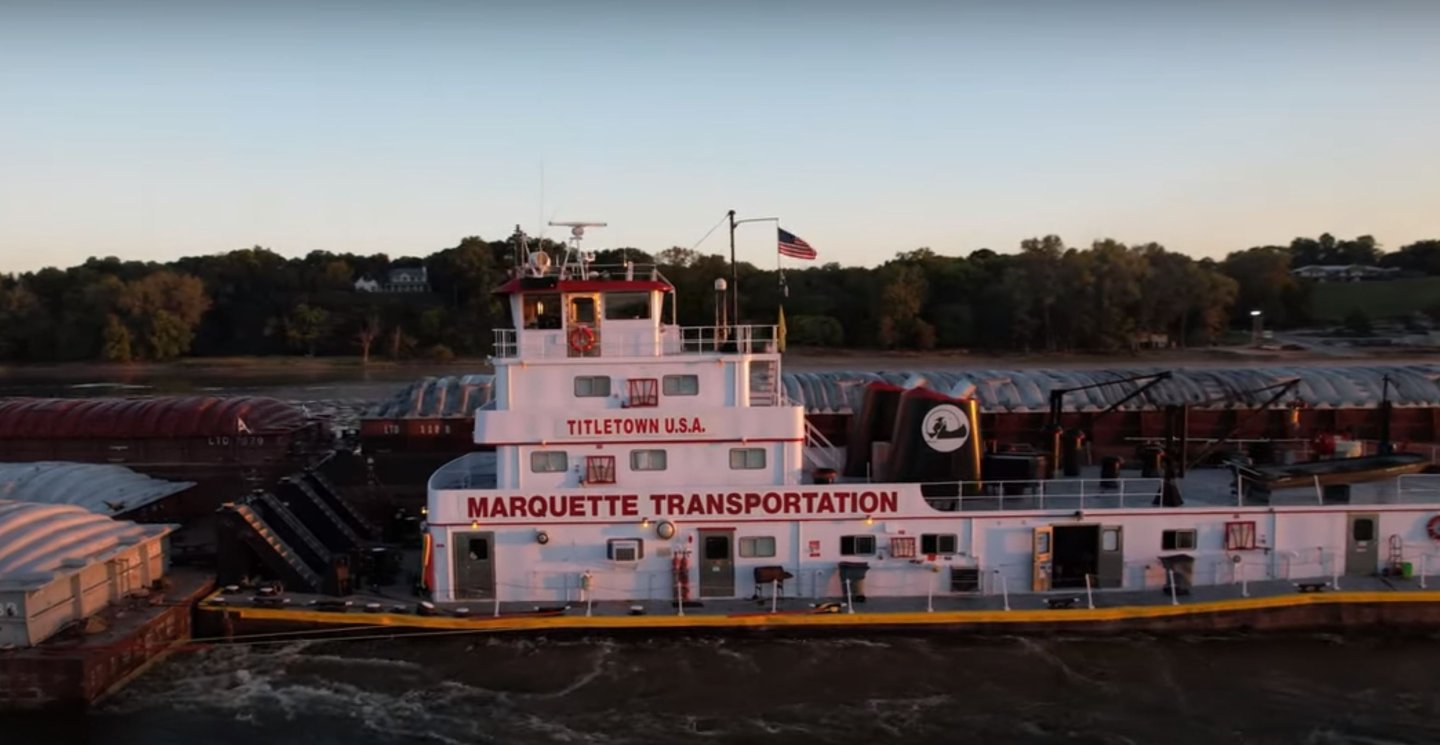
Thank you Keith! It’s always fun to throw these little details into a build, even if some go unnoticed. The gas tank was one that didn’t go unnoticed this time but there are still several little nuggets that have been thrown in that are still hidden. I know they are there though. 😁 Thank you Ken. I had a lot of fun adding those to my Cairo build so I wanted to include them here as well. That, and there was just too much empty space on the back and wanted to fill it with something. Thank you Eric, no distraction at all. I love these pictures that you post, they show just how diverse these modern riverboats are. During my research for this project I have run across so many varieties of towboats that it’s hard to keep up with. From the biggest, the MV Mississippi To this little fellow. All have their purpose, and fun to discover. Not my pictures, but used by permission from their respective sites terms of use they were posted on. -Brian
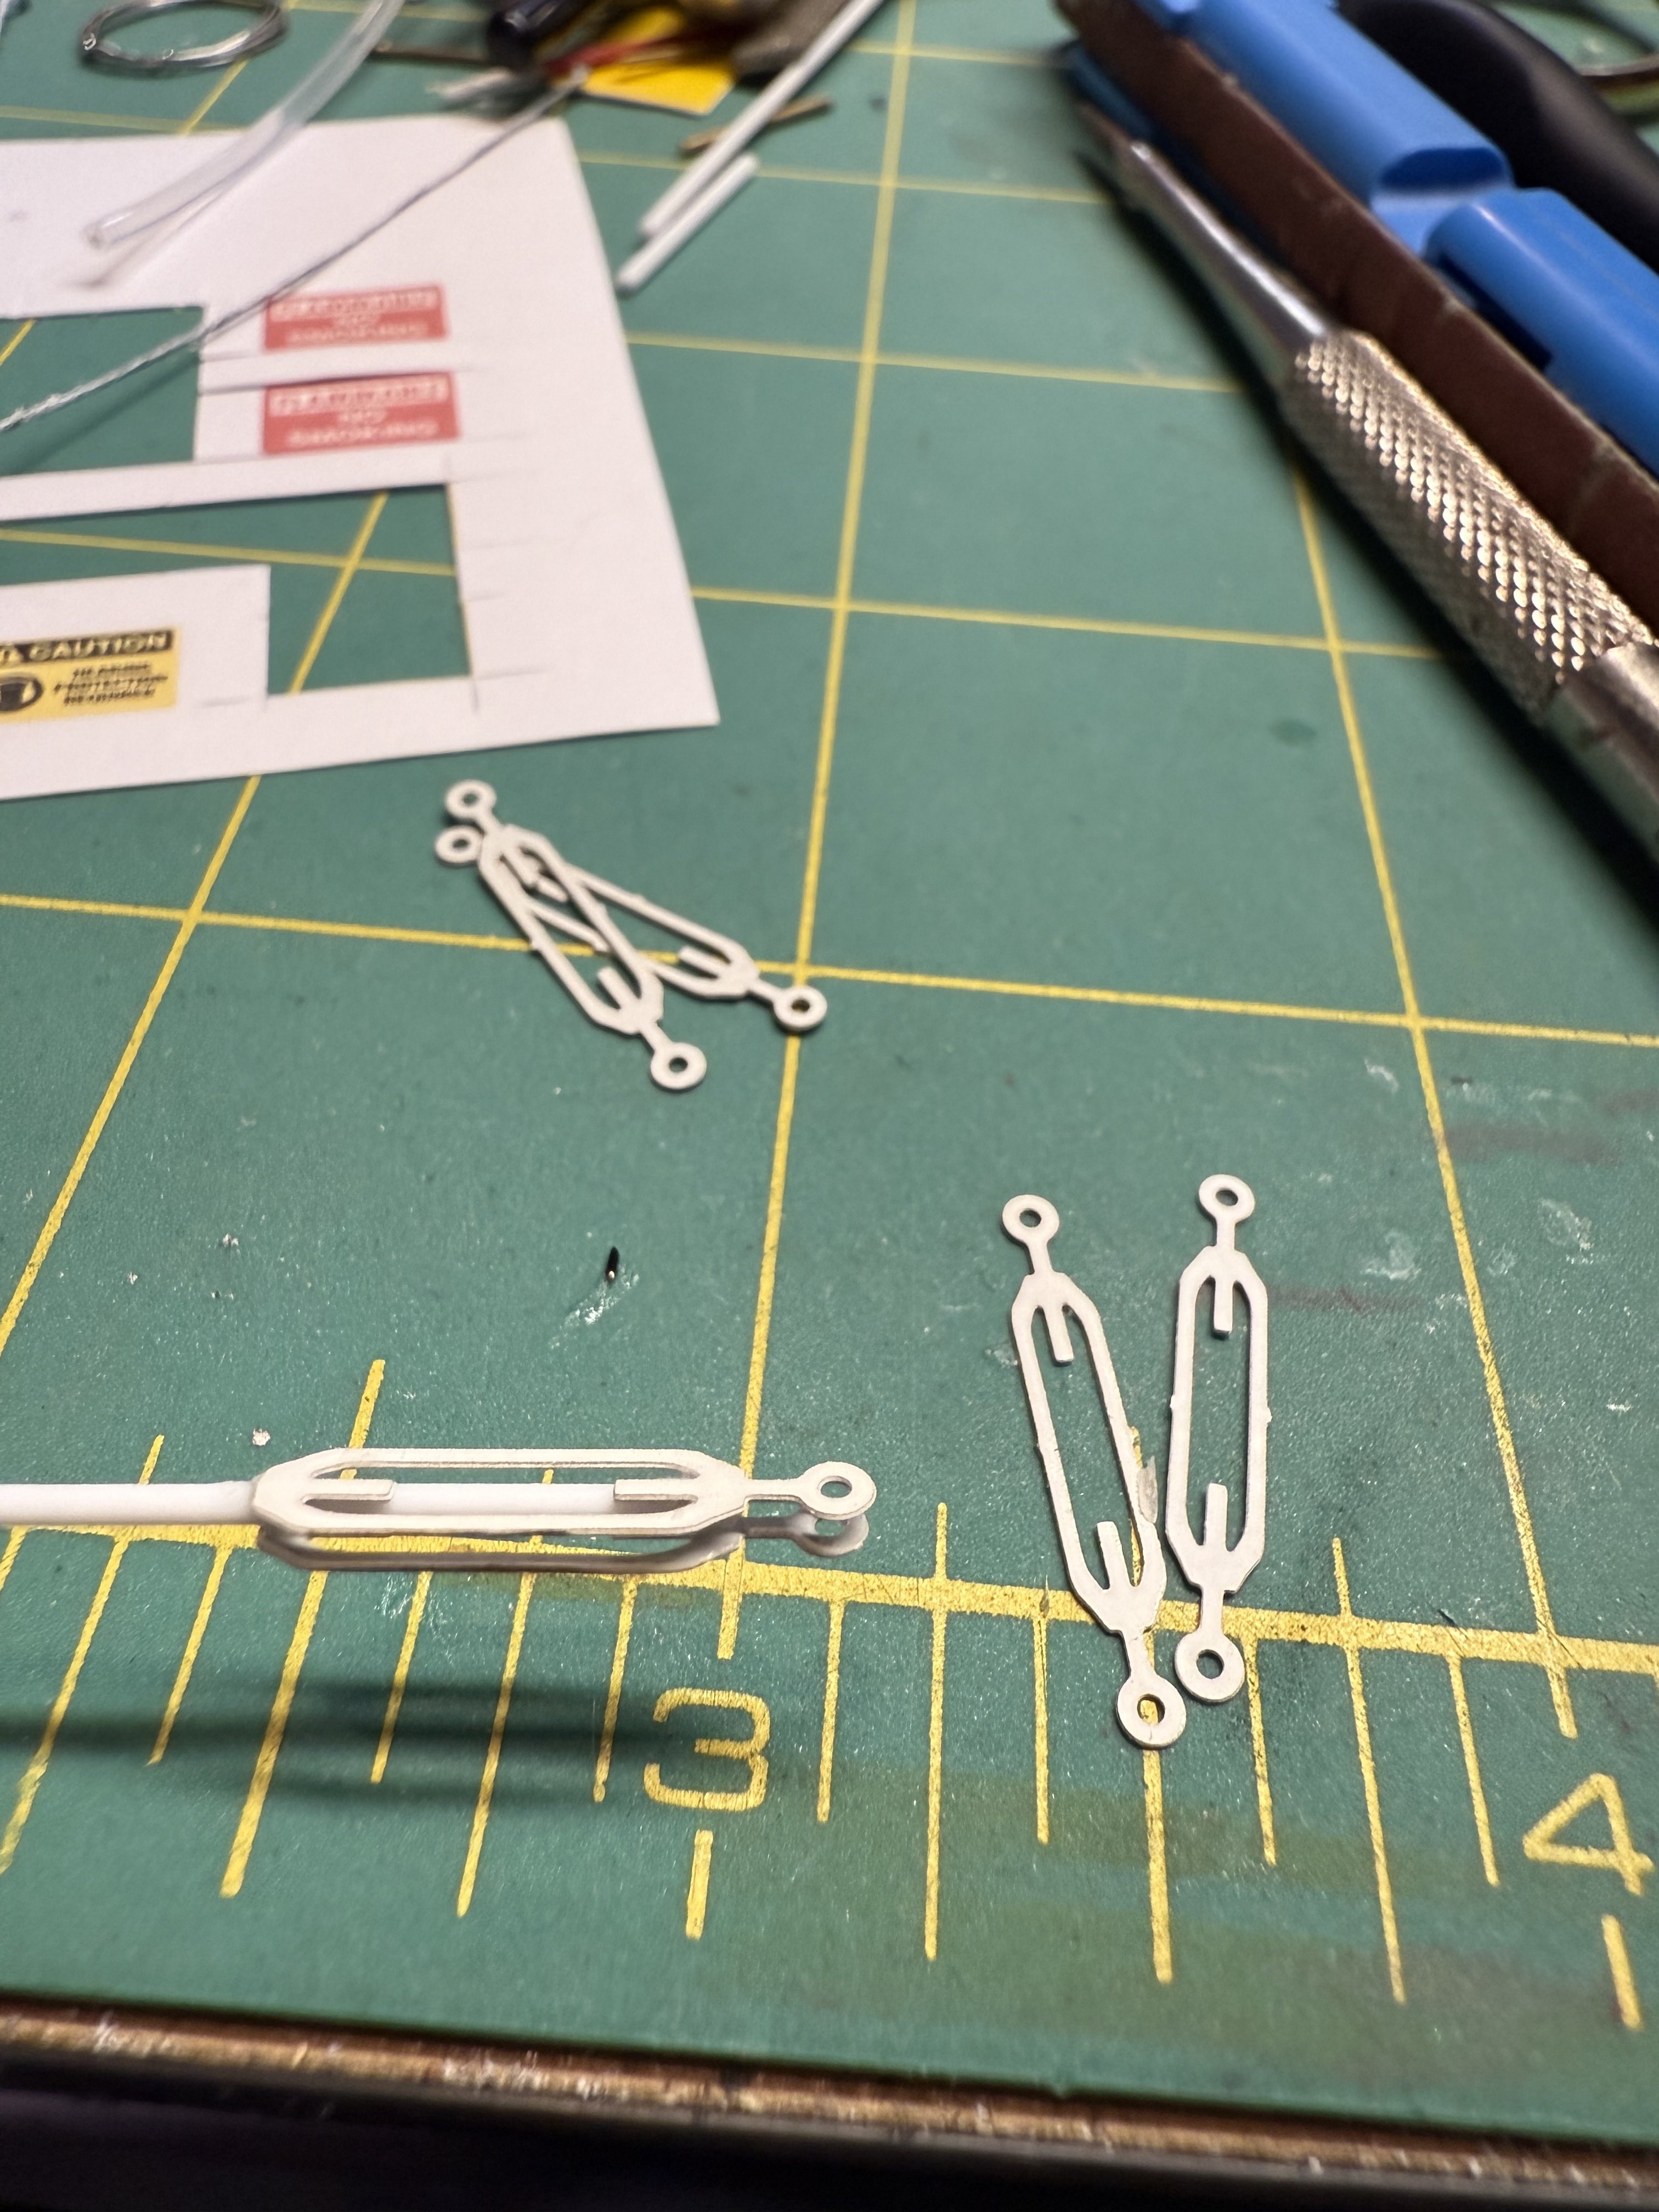
-
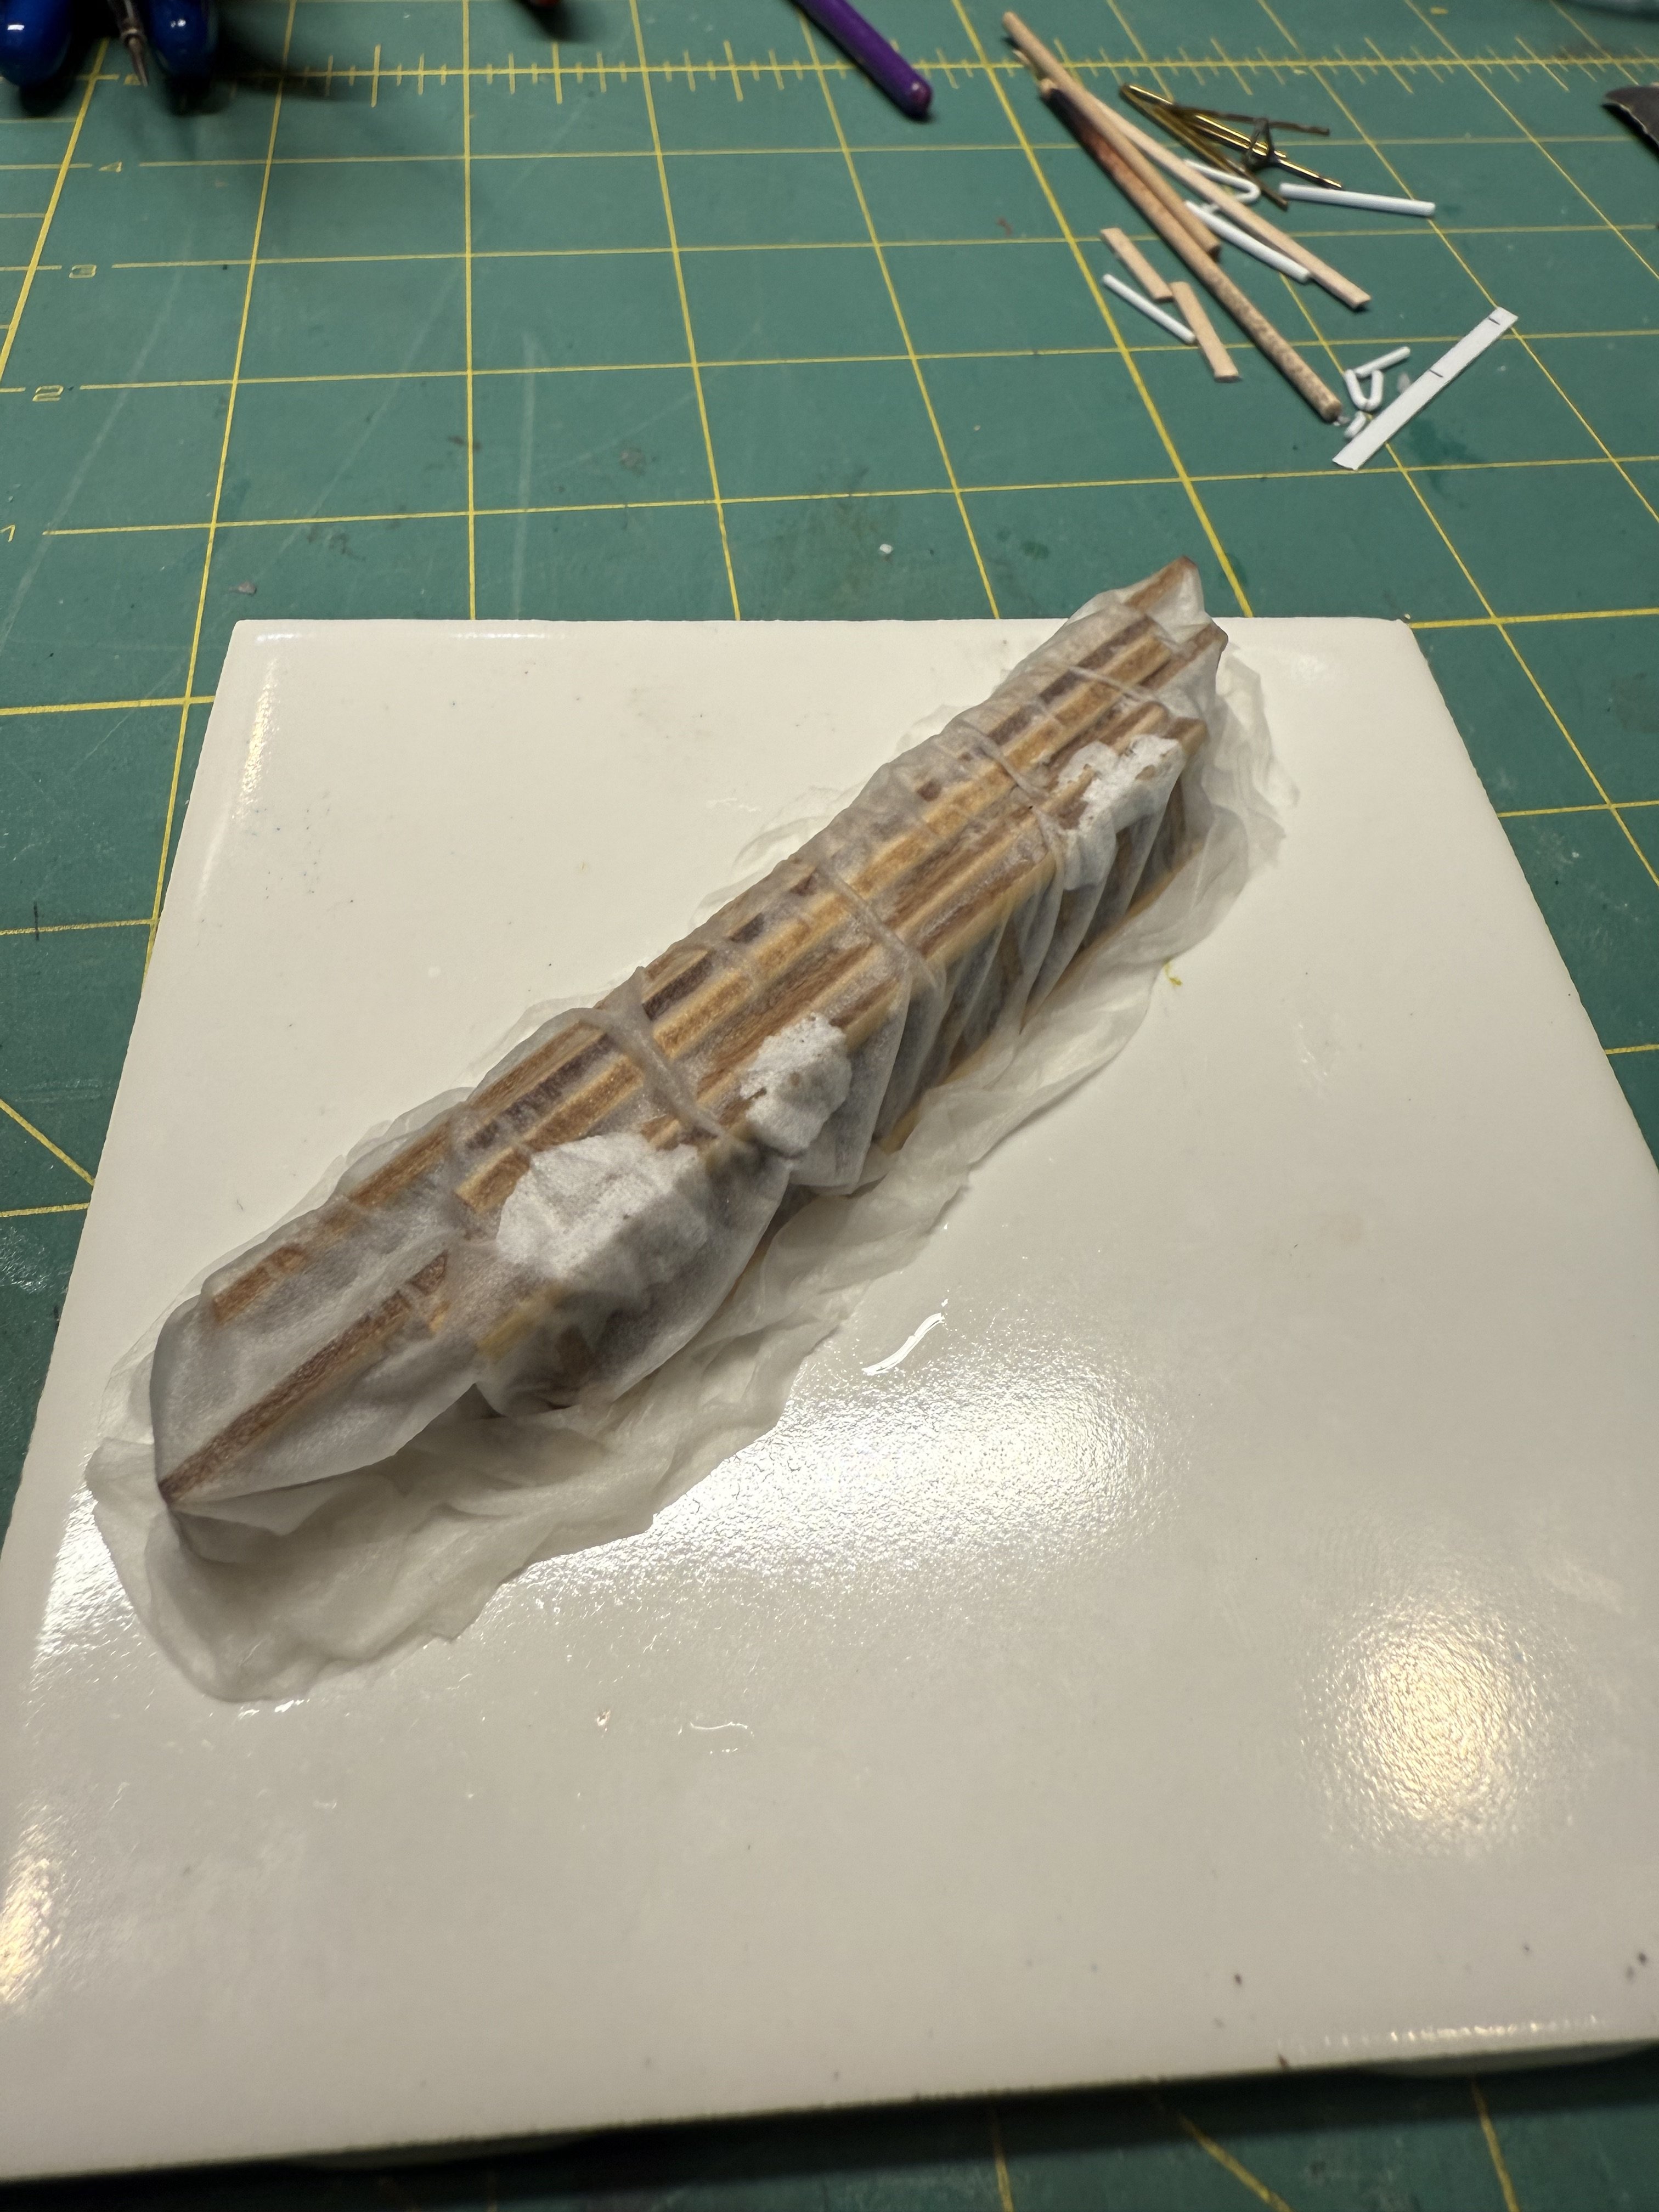
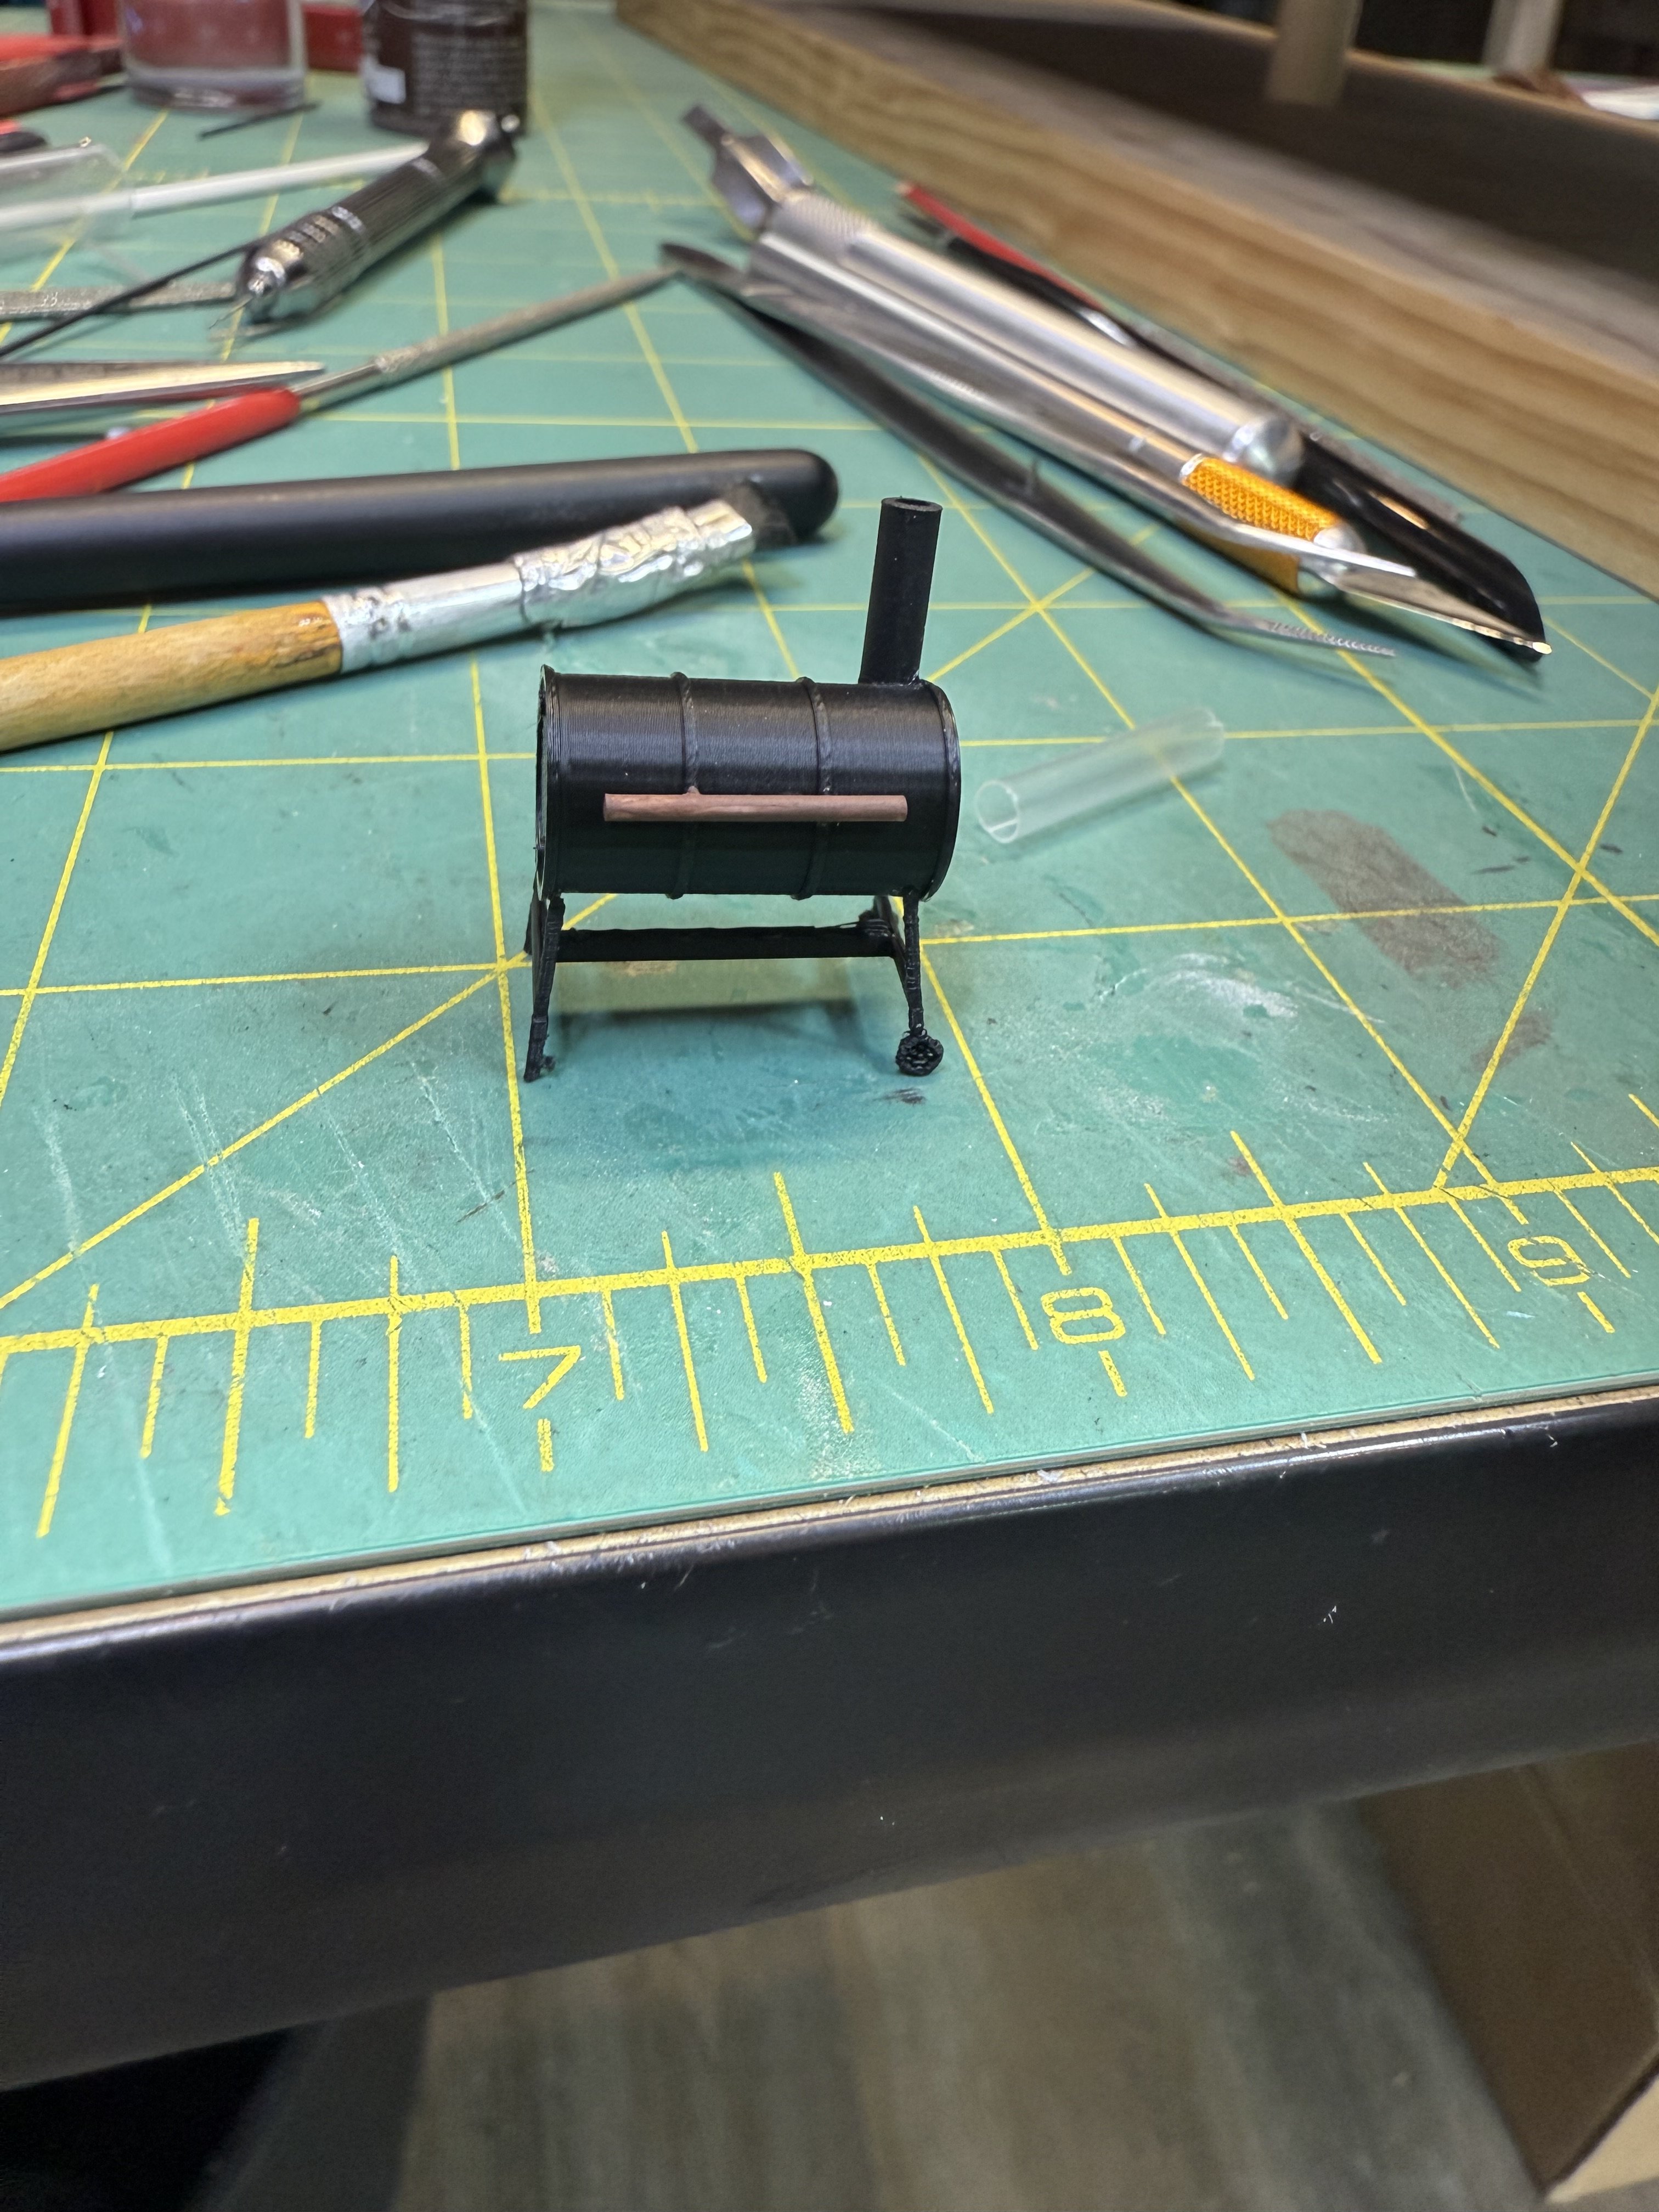
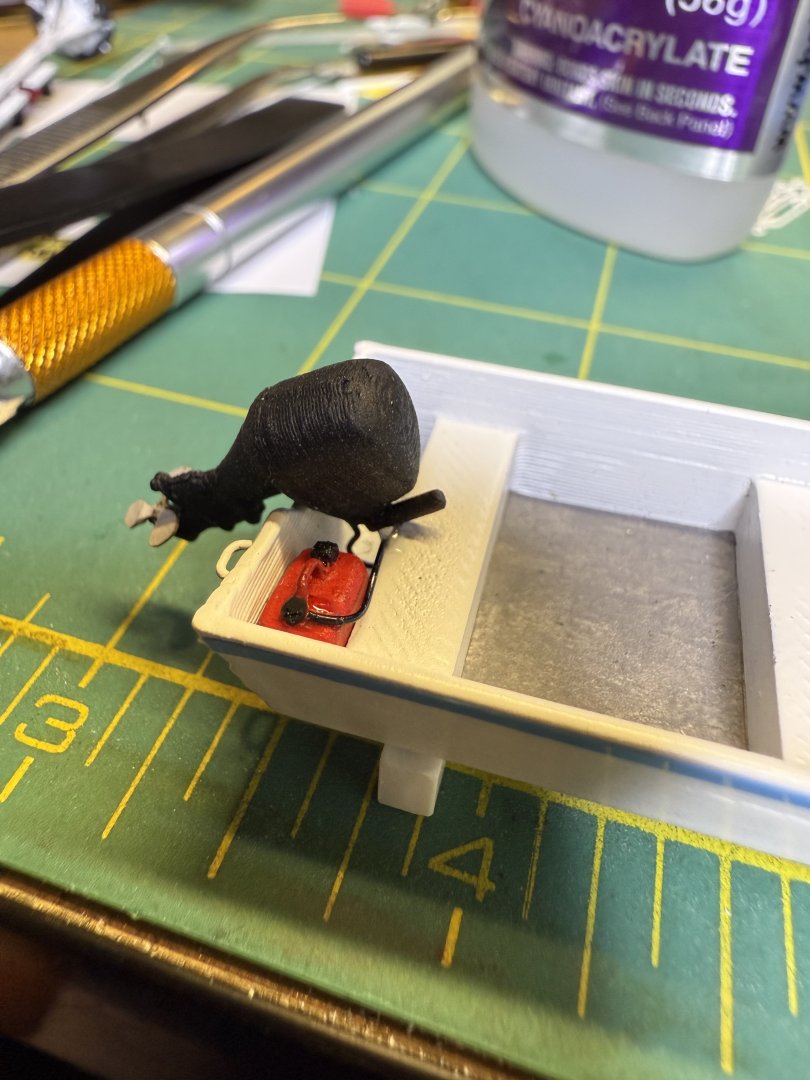
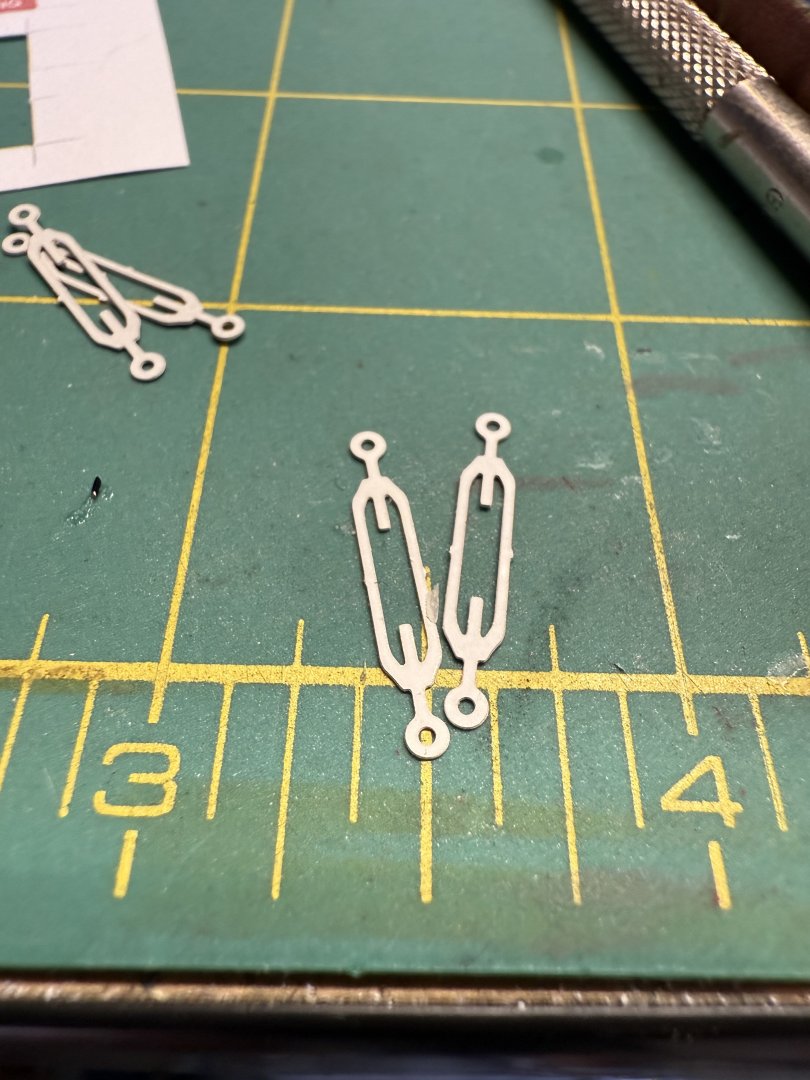
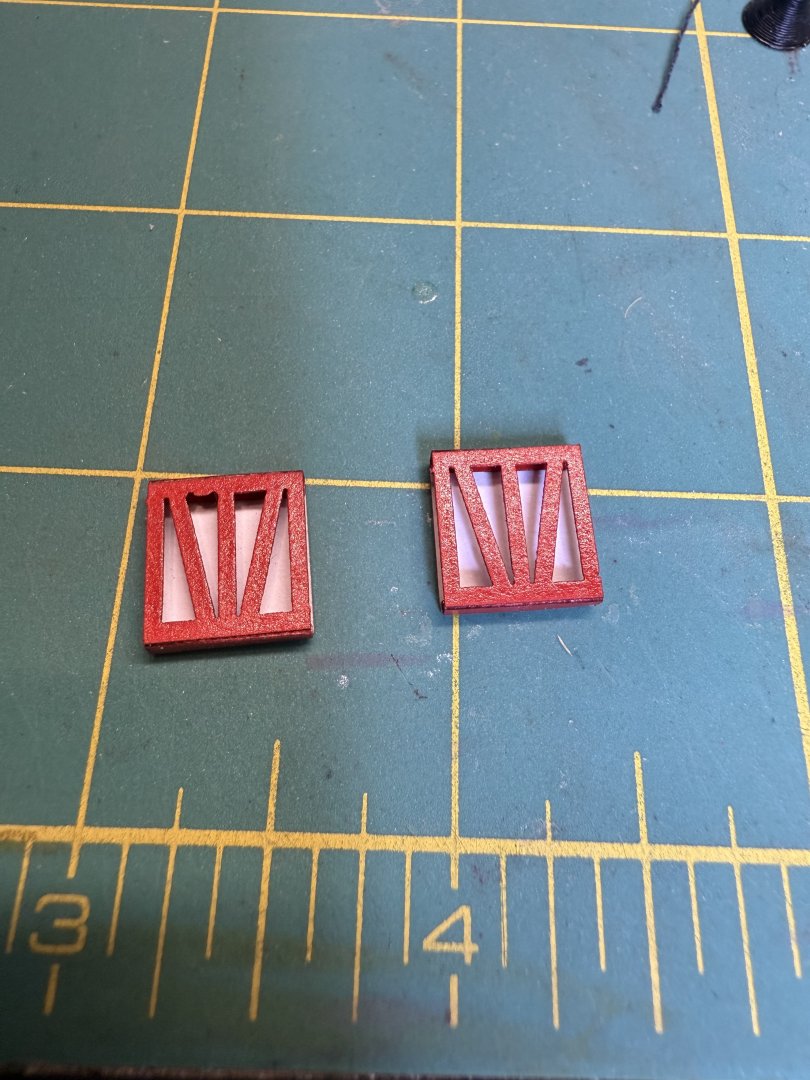
Greeting all, back with another update. Not a lot of work done, but wanted to get something posted since it's been a couple of weeks. Finished up work on the workboat. This was 3D printed along with the motor. I carved the gas tank out of a scrap piece of basswood, painted it up and used a pice of black wire for the fuel line. Have to keep everything legal so I printed out the registration numbers and added them. I added a couple of other details like a toolbox and grappling poles then mounted it in place. I'll go back in and add some ropes and a few more details. Next, I rebuilt the aft navigation light mast for a few reasons. 1. I didn't have the right color lights on it, red and clear were not correct. 2. When I painted it originally I used the wrong reference photo, it was supposed to be white, not black. 3. Lastly, I was not happy with the way the panels were lined up or the whole construction. My second version I am much more happy with. Next up I mounted all the stanchions that run along the sides that support the safety ropes. I have not glued the in place yet, I'm holding off until I make sure there are no other features that I want to add. Don't want to risk knocking them off, the bases are extremely fragile. I'll get the brass eyebolts painted up shortly so they be ready for glue and ropes. I also started working on the boom guys. These will be constructed off the model and then put in place. I started with some unused photo-etched turnbuckles that I had from my Chaperon build. I glued these to a piece of 1mm styrene rod and will build up mounting braces for the tops and bottoms. I haven't gotten that far yet, so more to come on these. Last up, I started work on some additional deck features. These are just some pieces that I cut out on the laser tool a while back, just playing around with it. I glued these together in no particular order and will cover them with a tarp just to put more on the deck. To simulate the tarp, I just took some tissue paper and watered down clear Elmers to shape it. Once dried, I get it painted up and weathered. That's it for this update, more to come soon. Thanks for continuing to follow along and all the likes and comments. -Brian


-
All caught up Keith, what an amazing build! Your attention to detail is outstanding. It still boggles my mind as to how you can cram so much into these small scale builds. One good thing about them is they don't take up much shelf space, something I'm quickly running out of. -Brian
- 457 replies
-
- 6
-

-

-
- sternwheeler
- Hard Coal Navy
- (and 1 more)
-
Looks like I decided to get back to MSW just in time to start this adventure with you Keith. You always seem to find some of the more interesting builds. Still amazes me at how much detail you are able to put into such a small scale. Settling in and pulling up a chair.
-
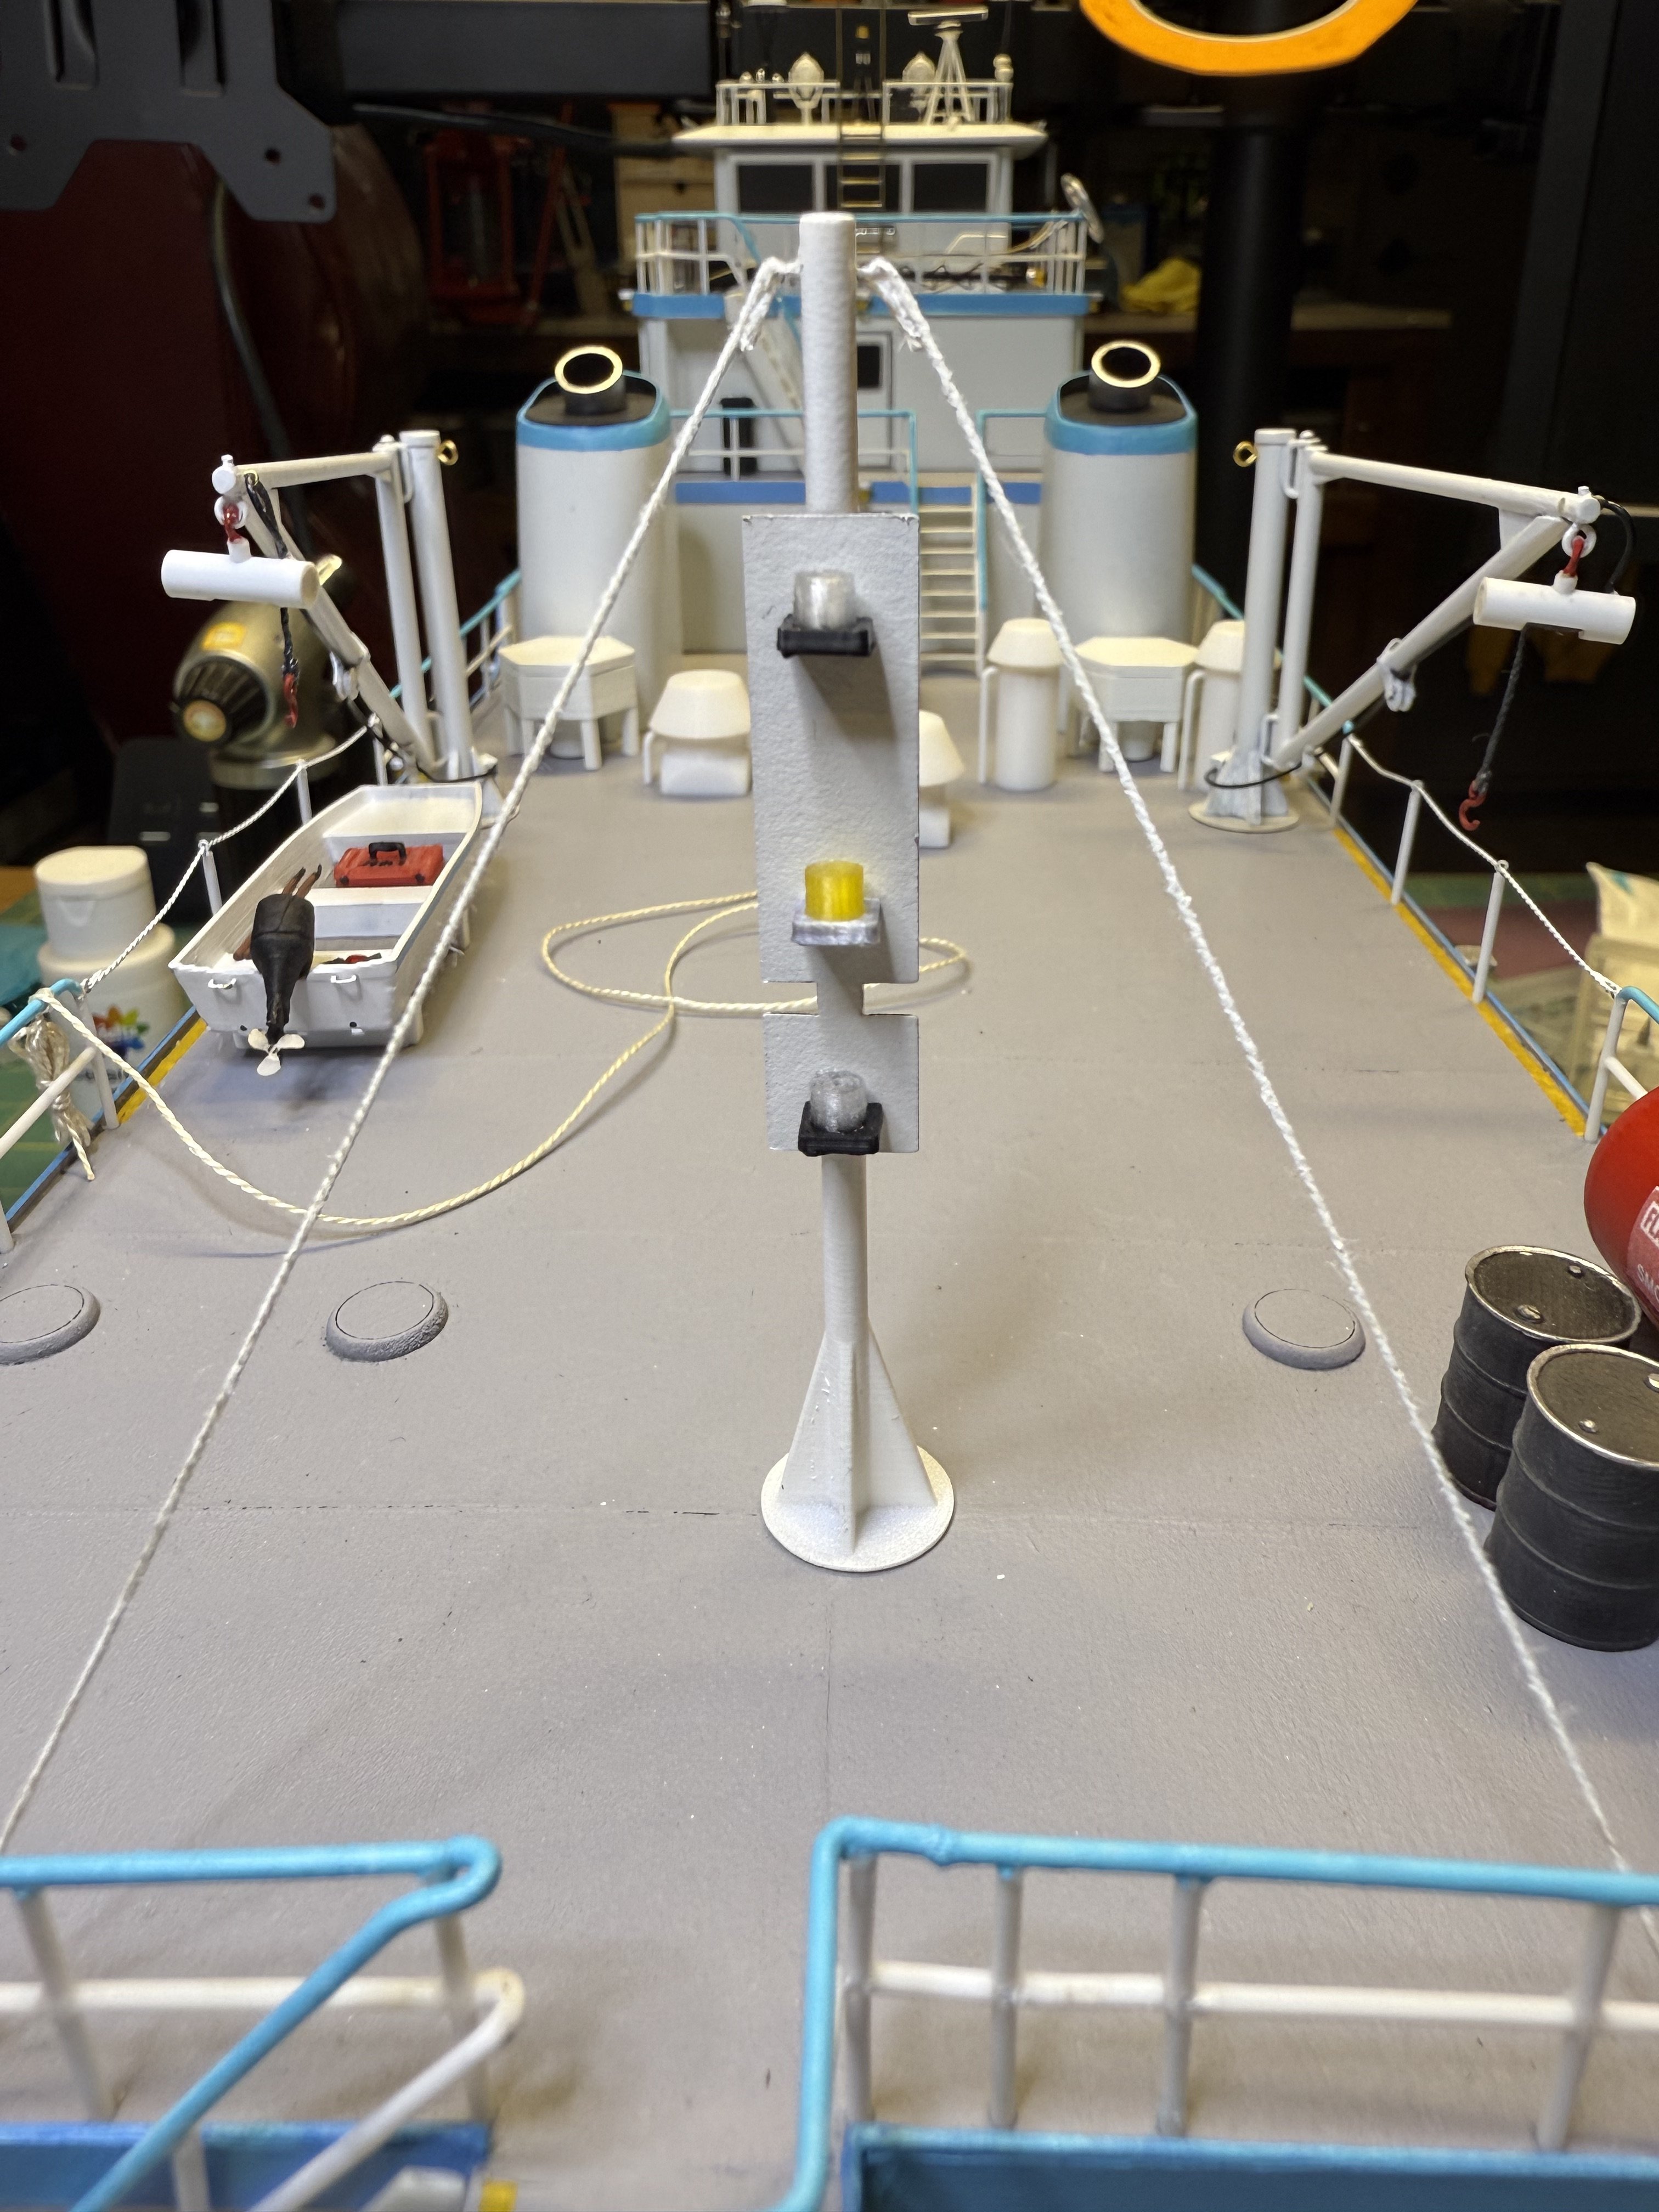
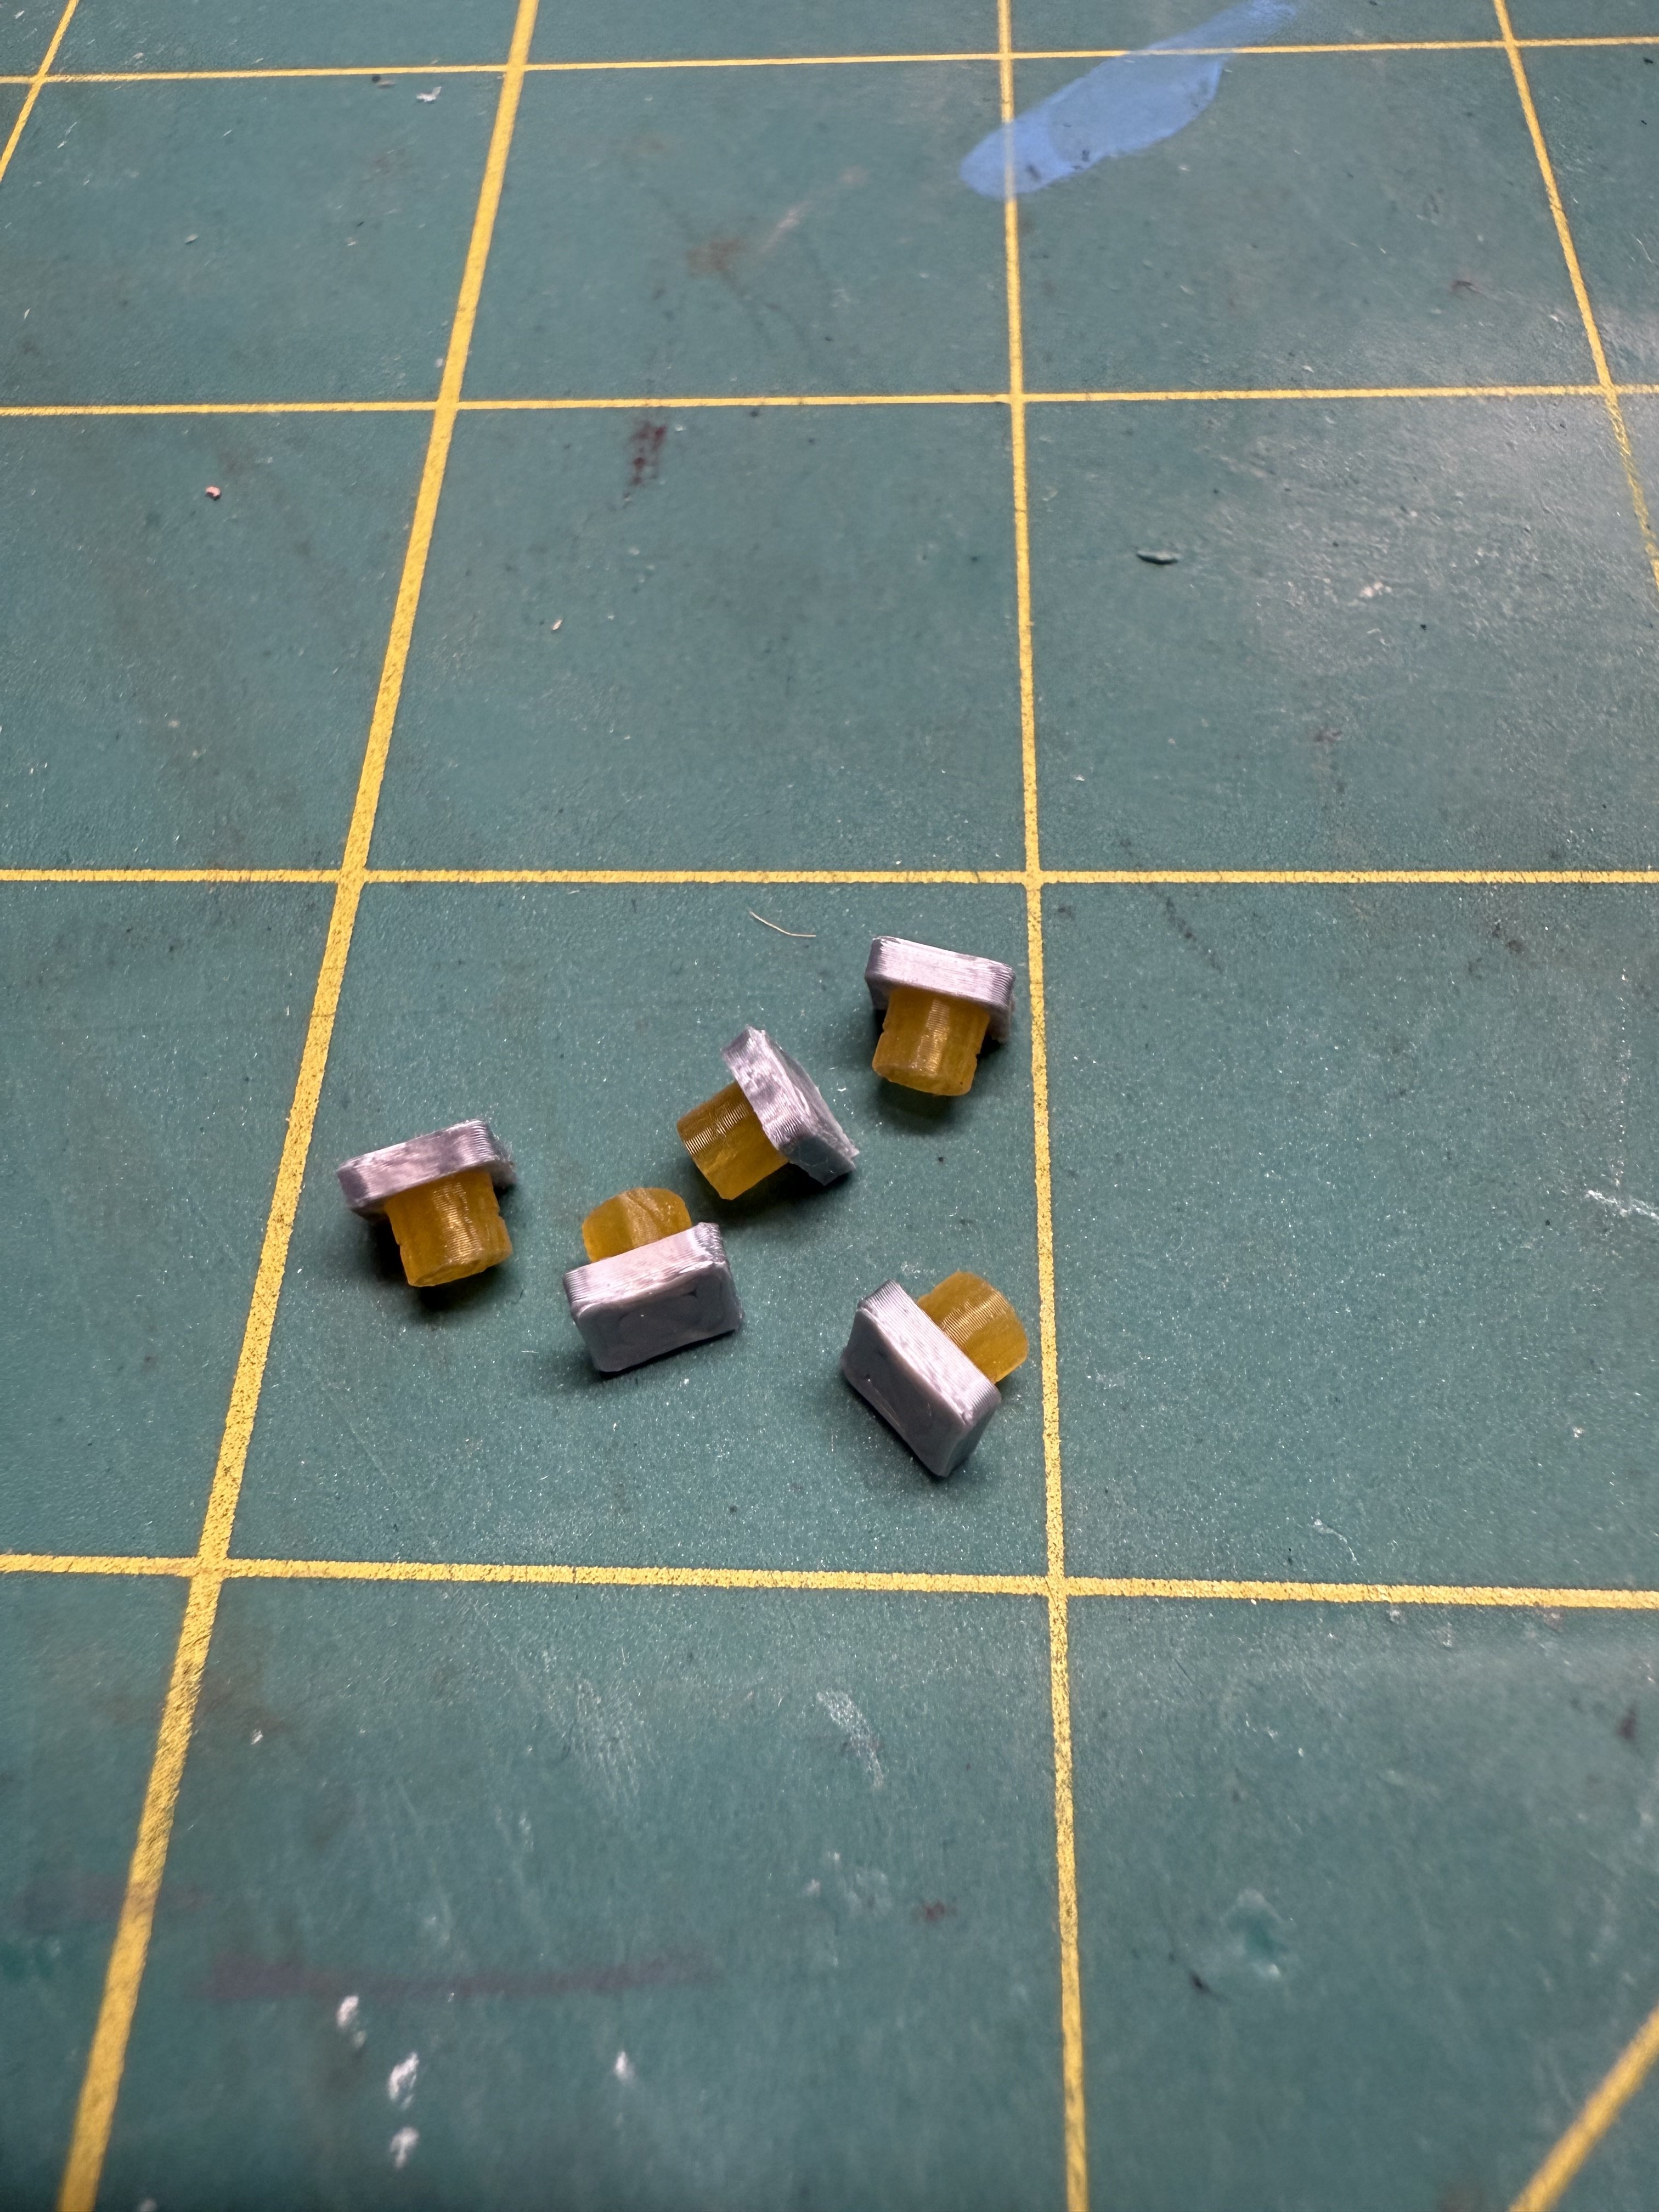
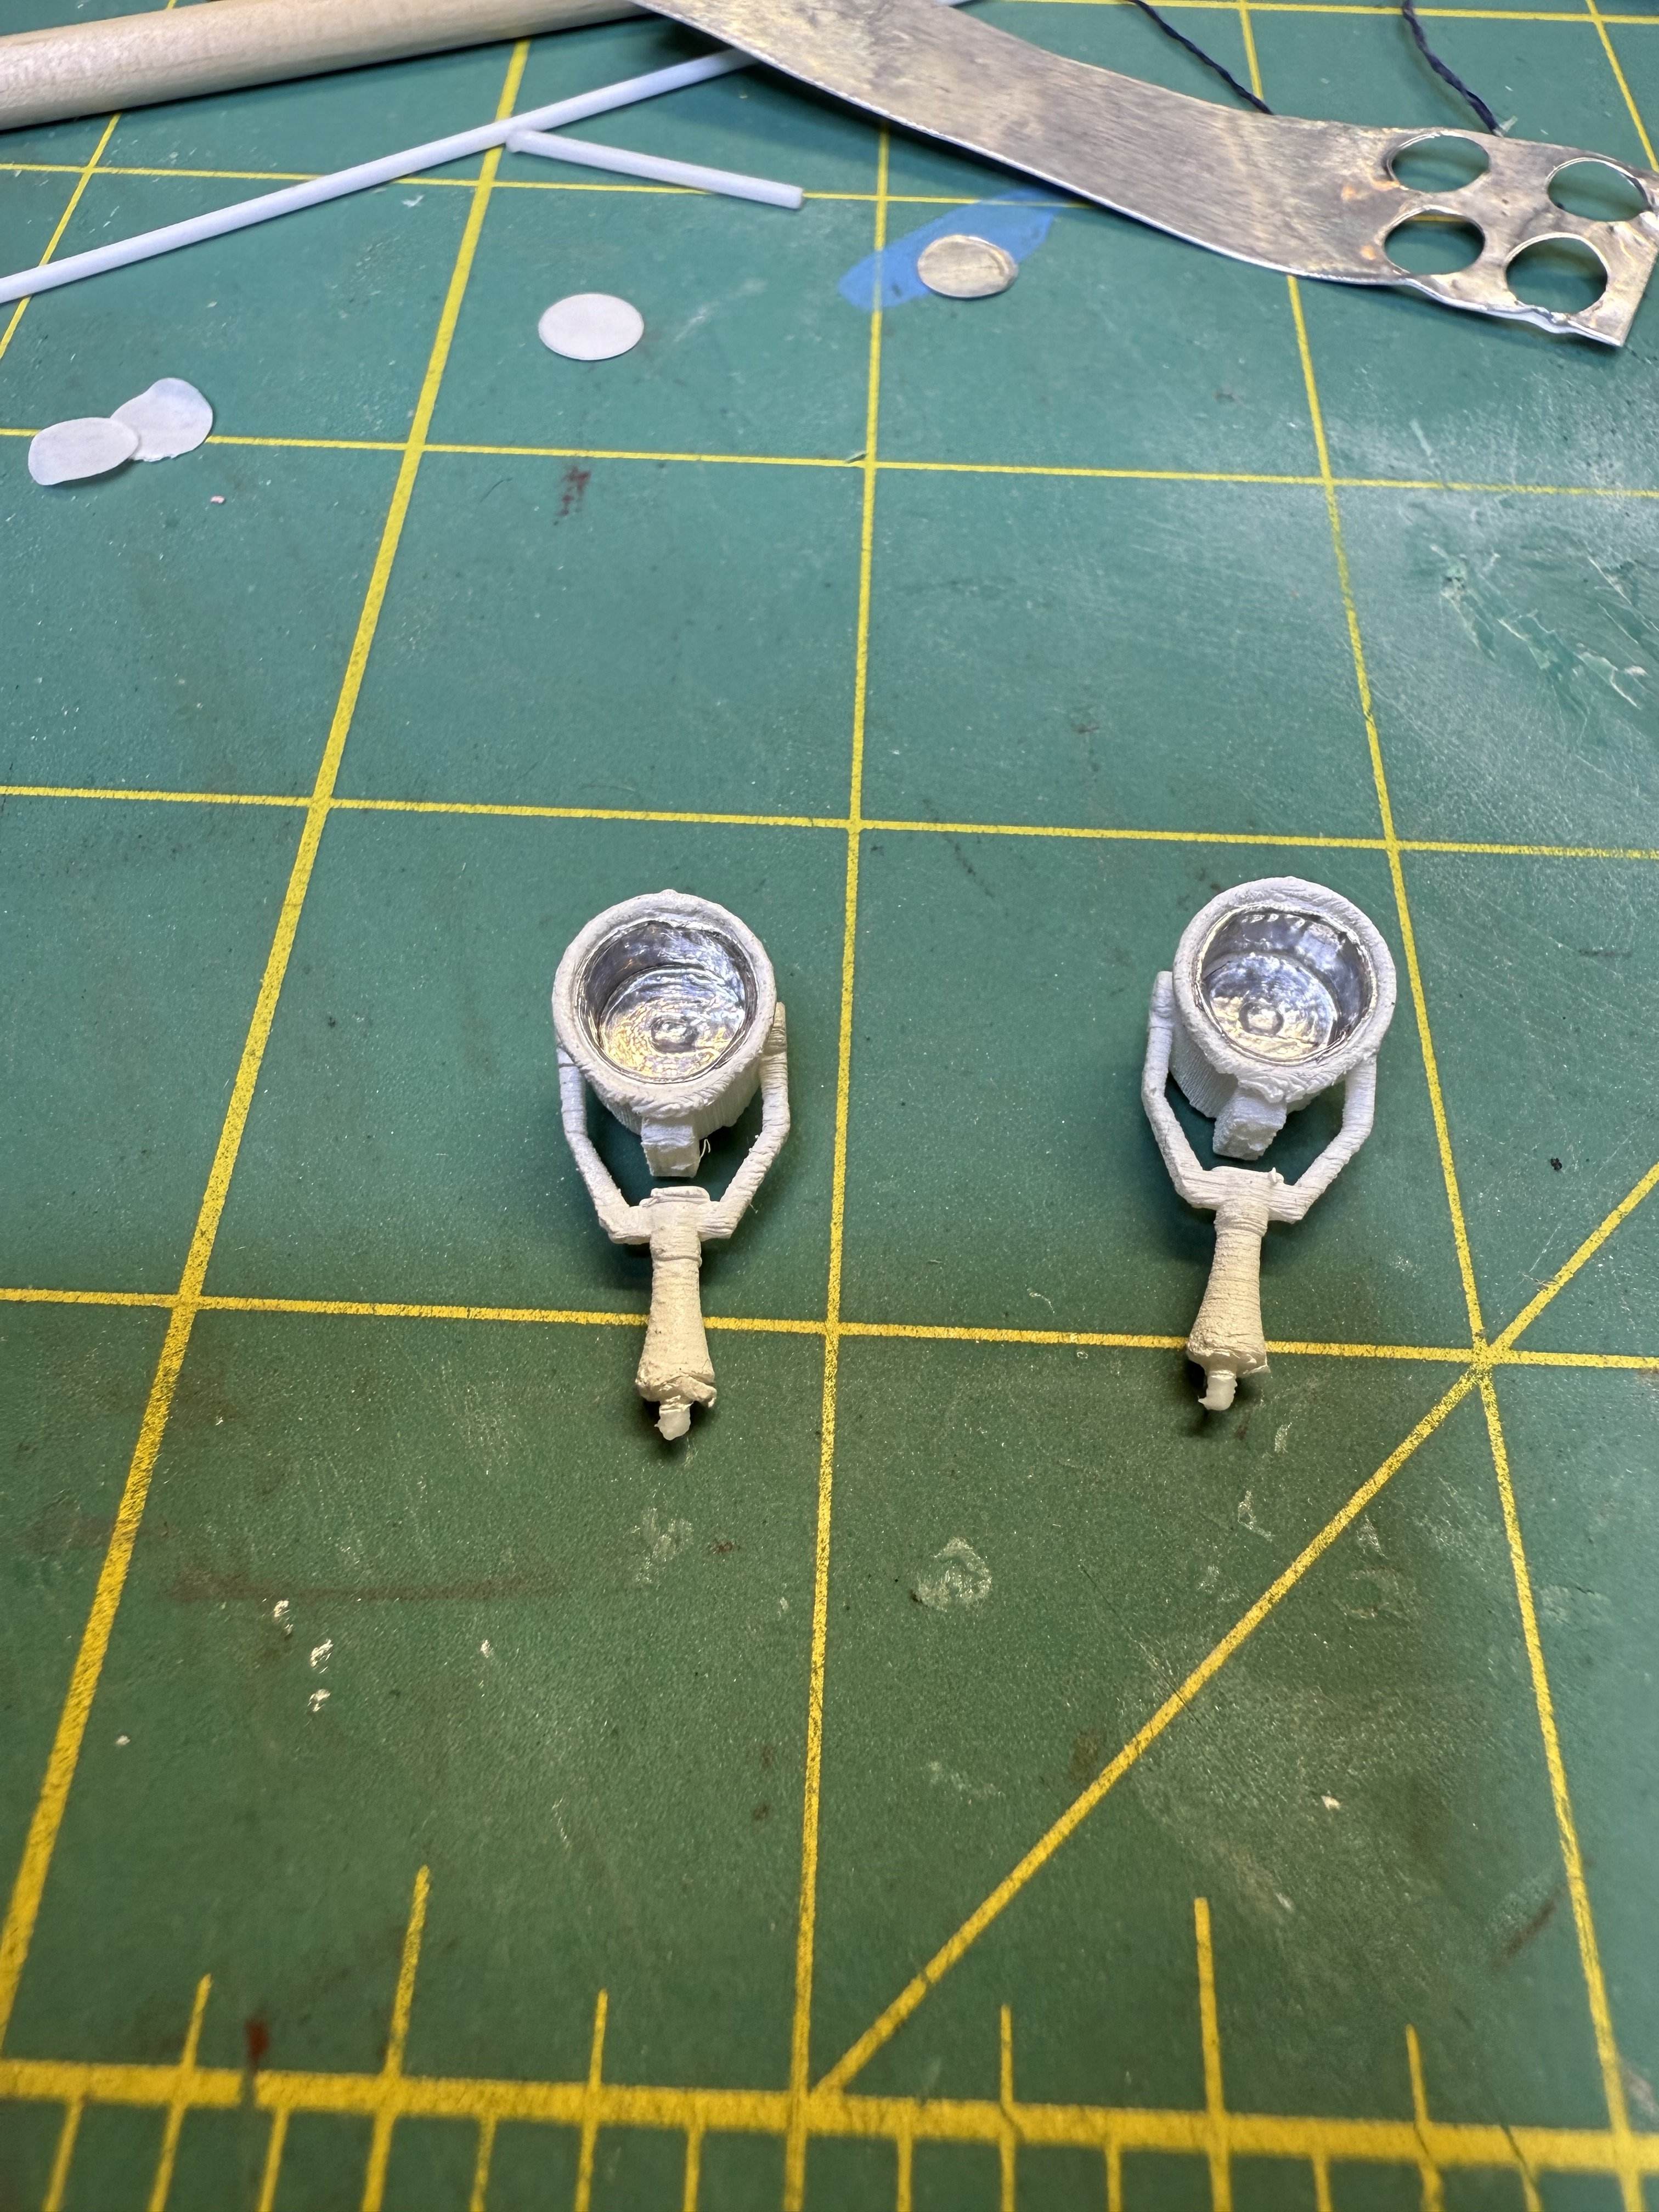
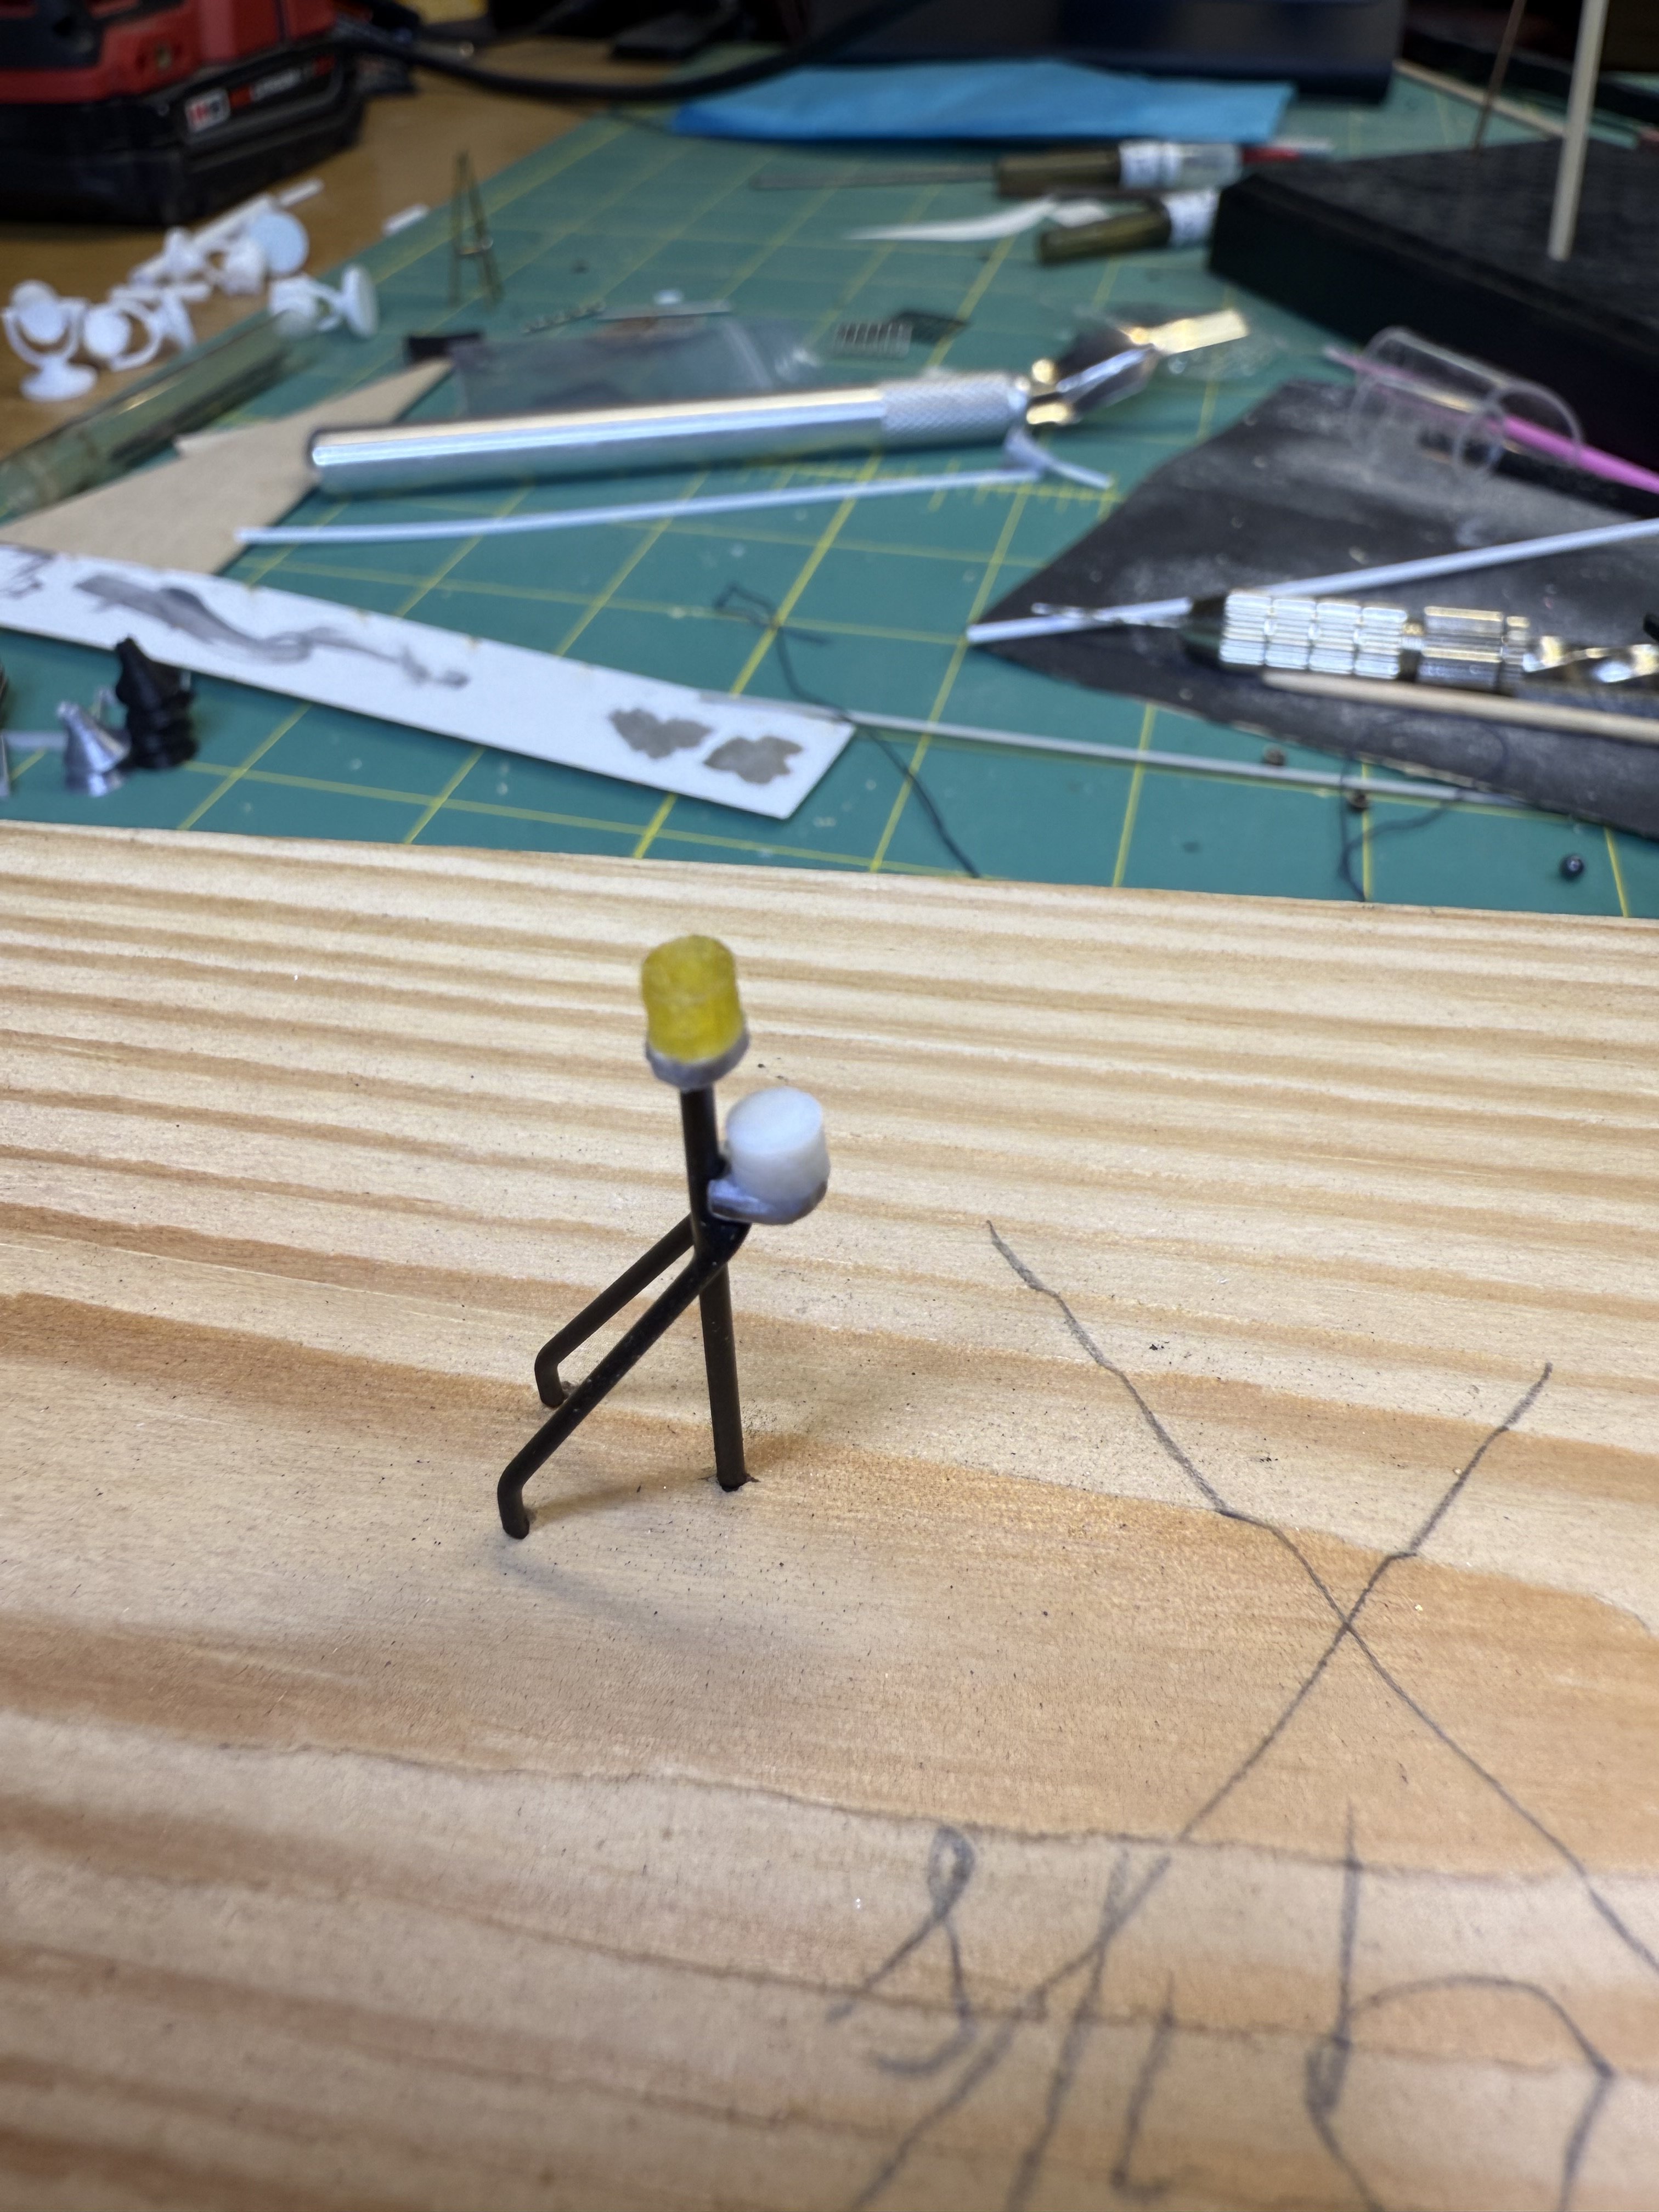
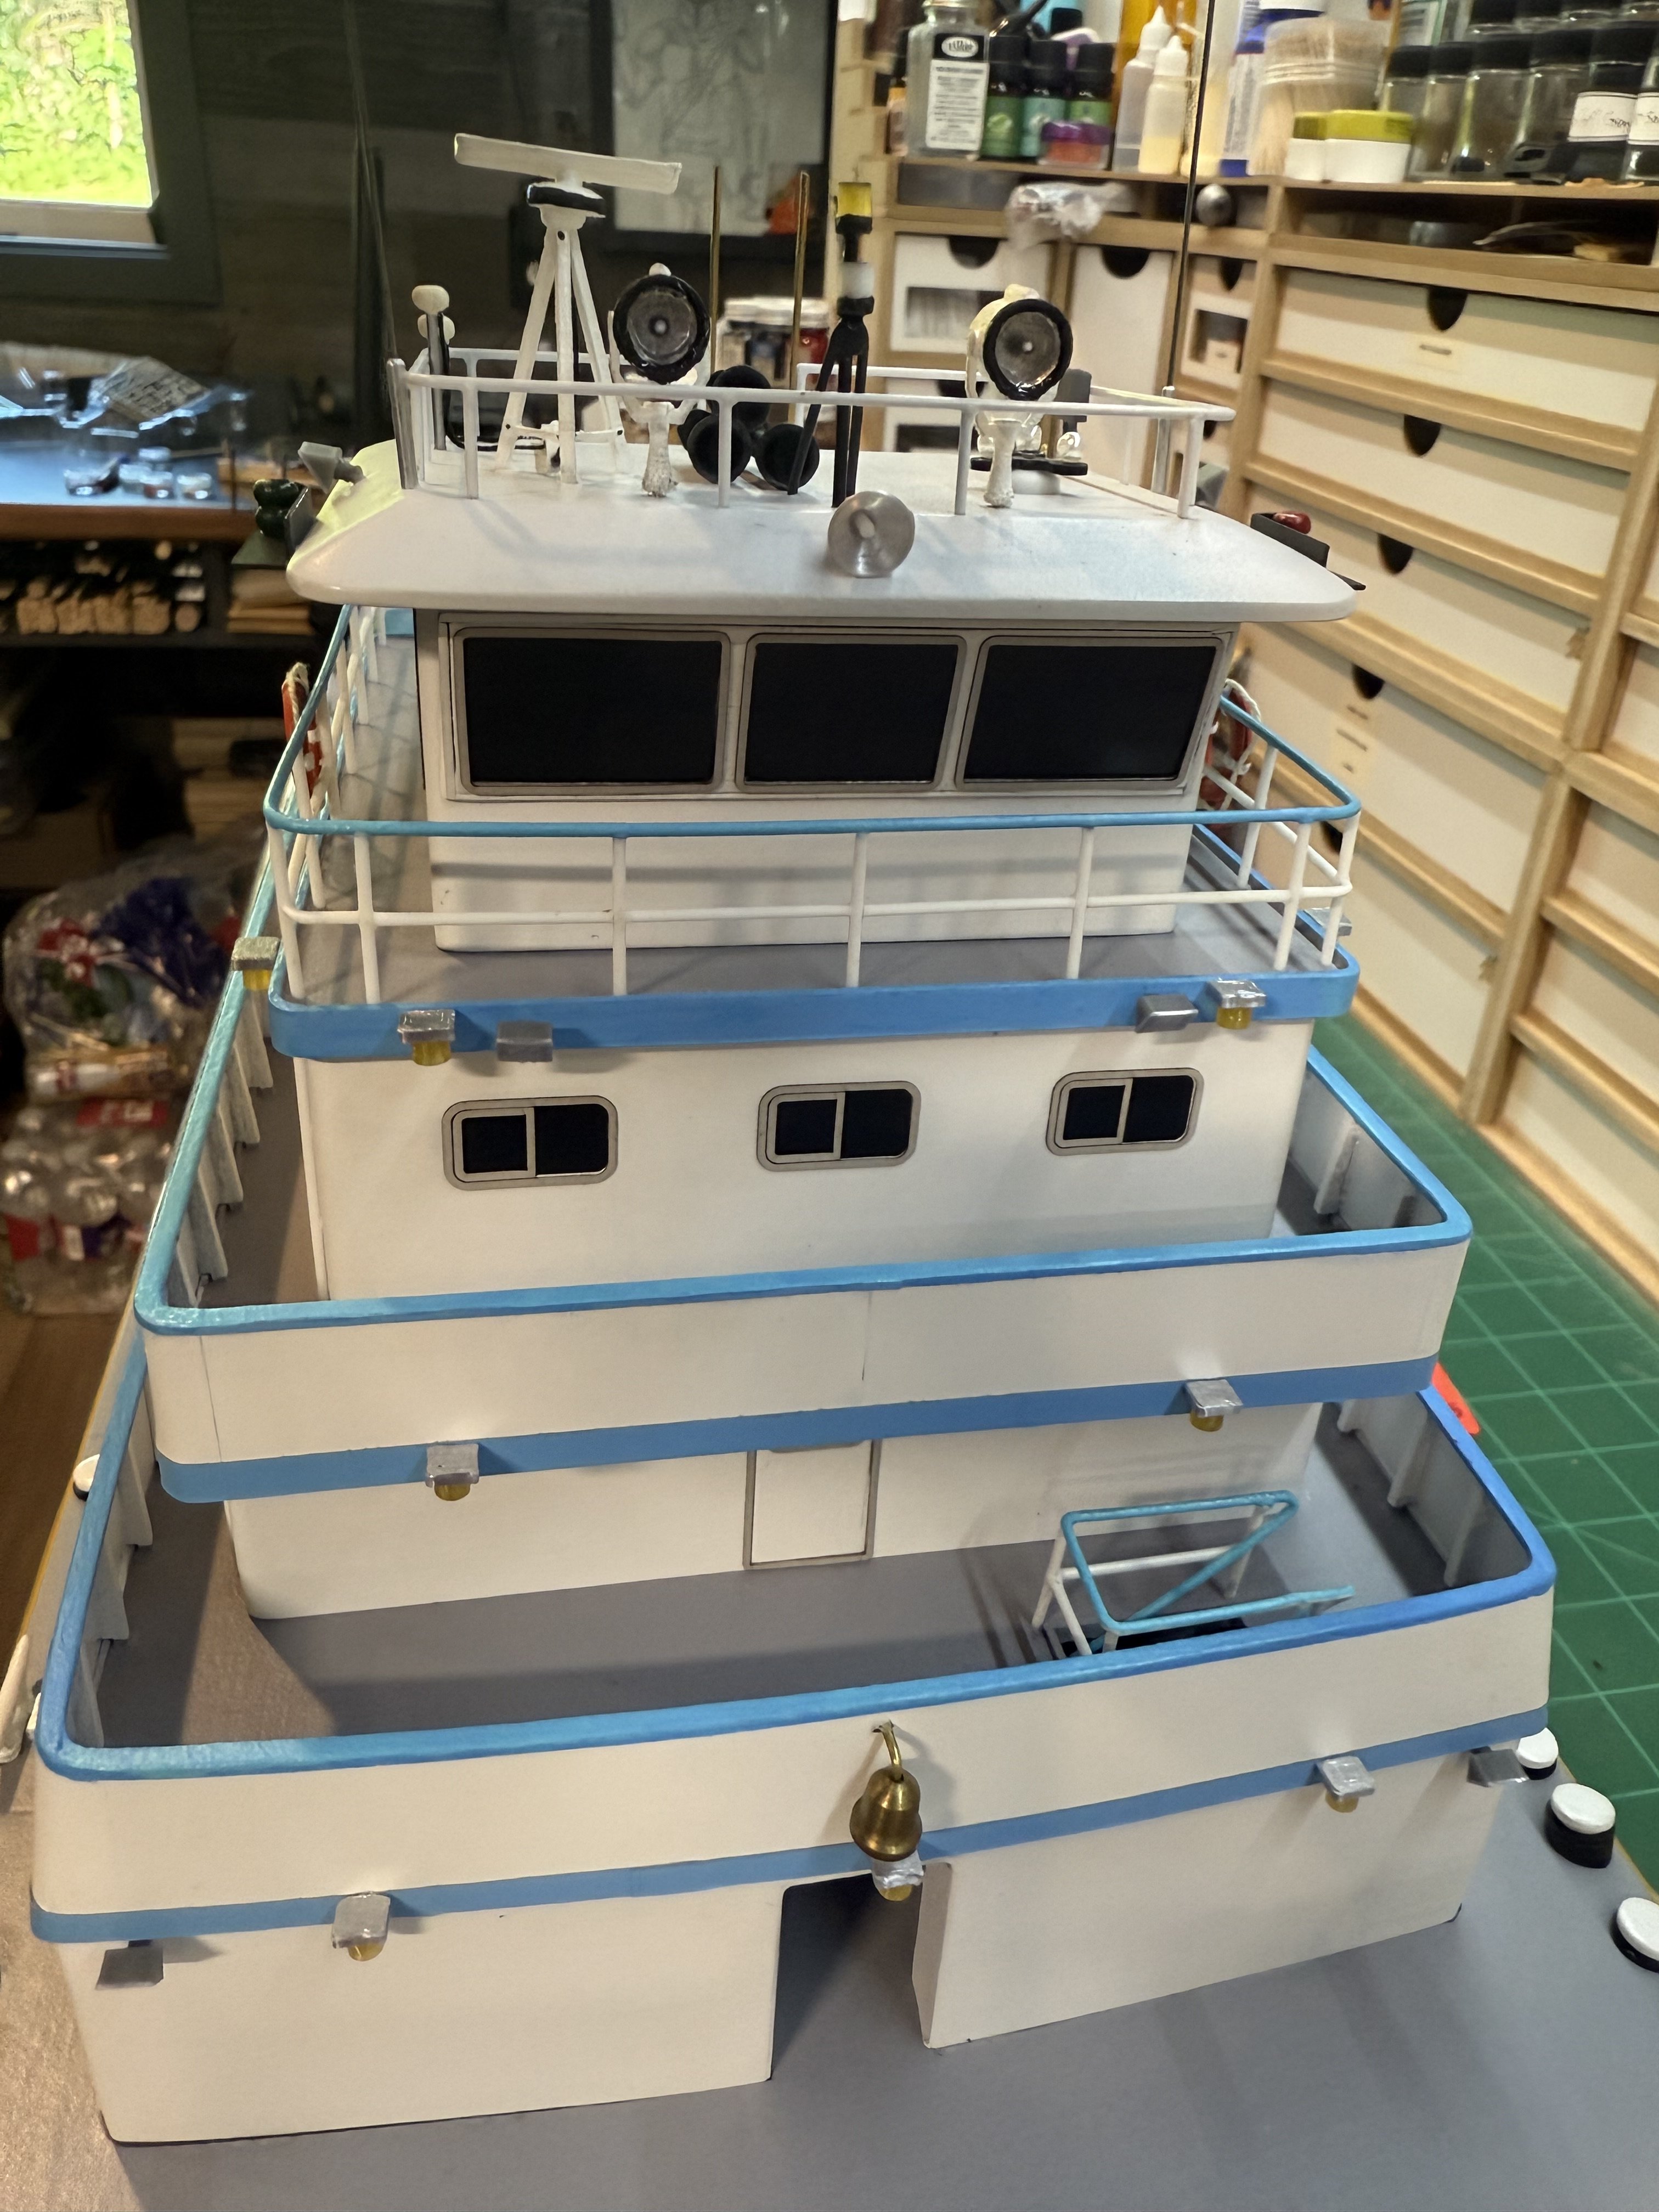
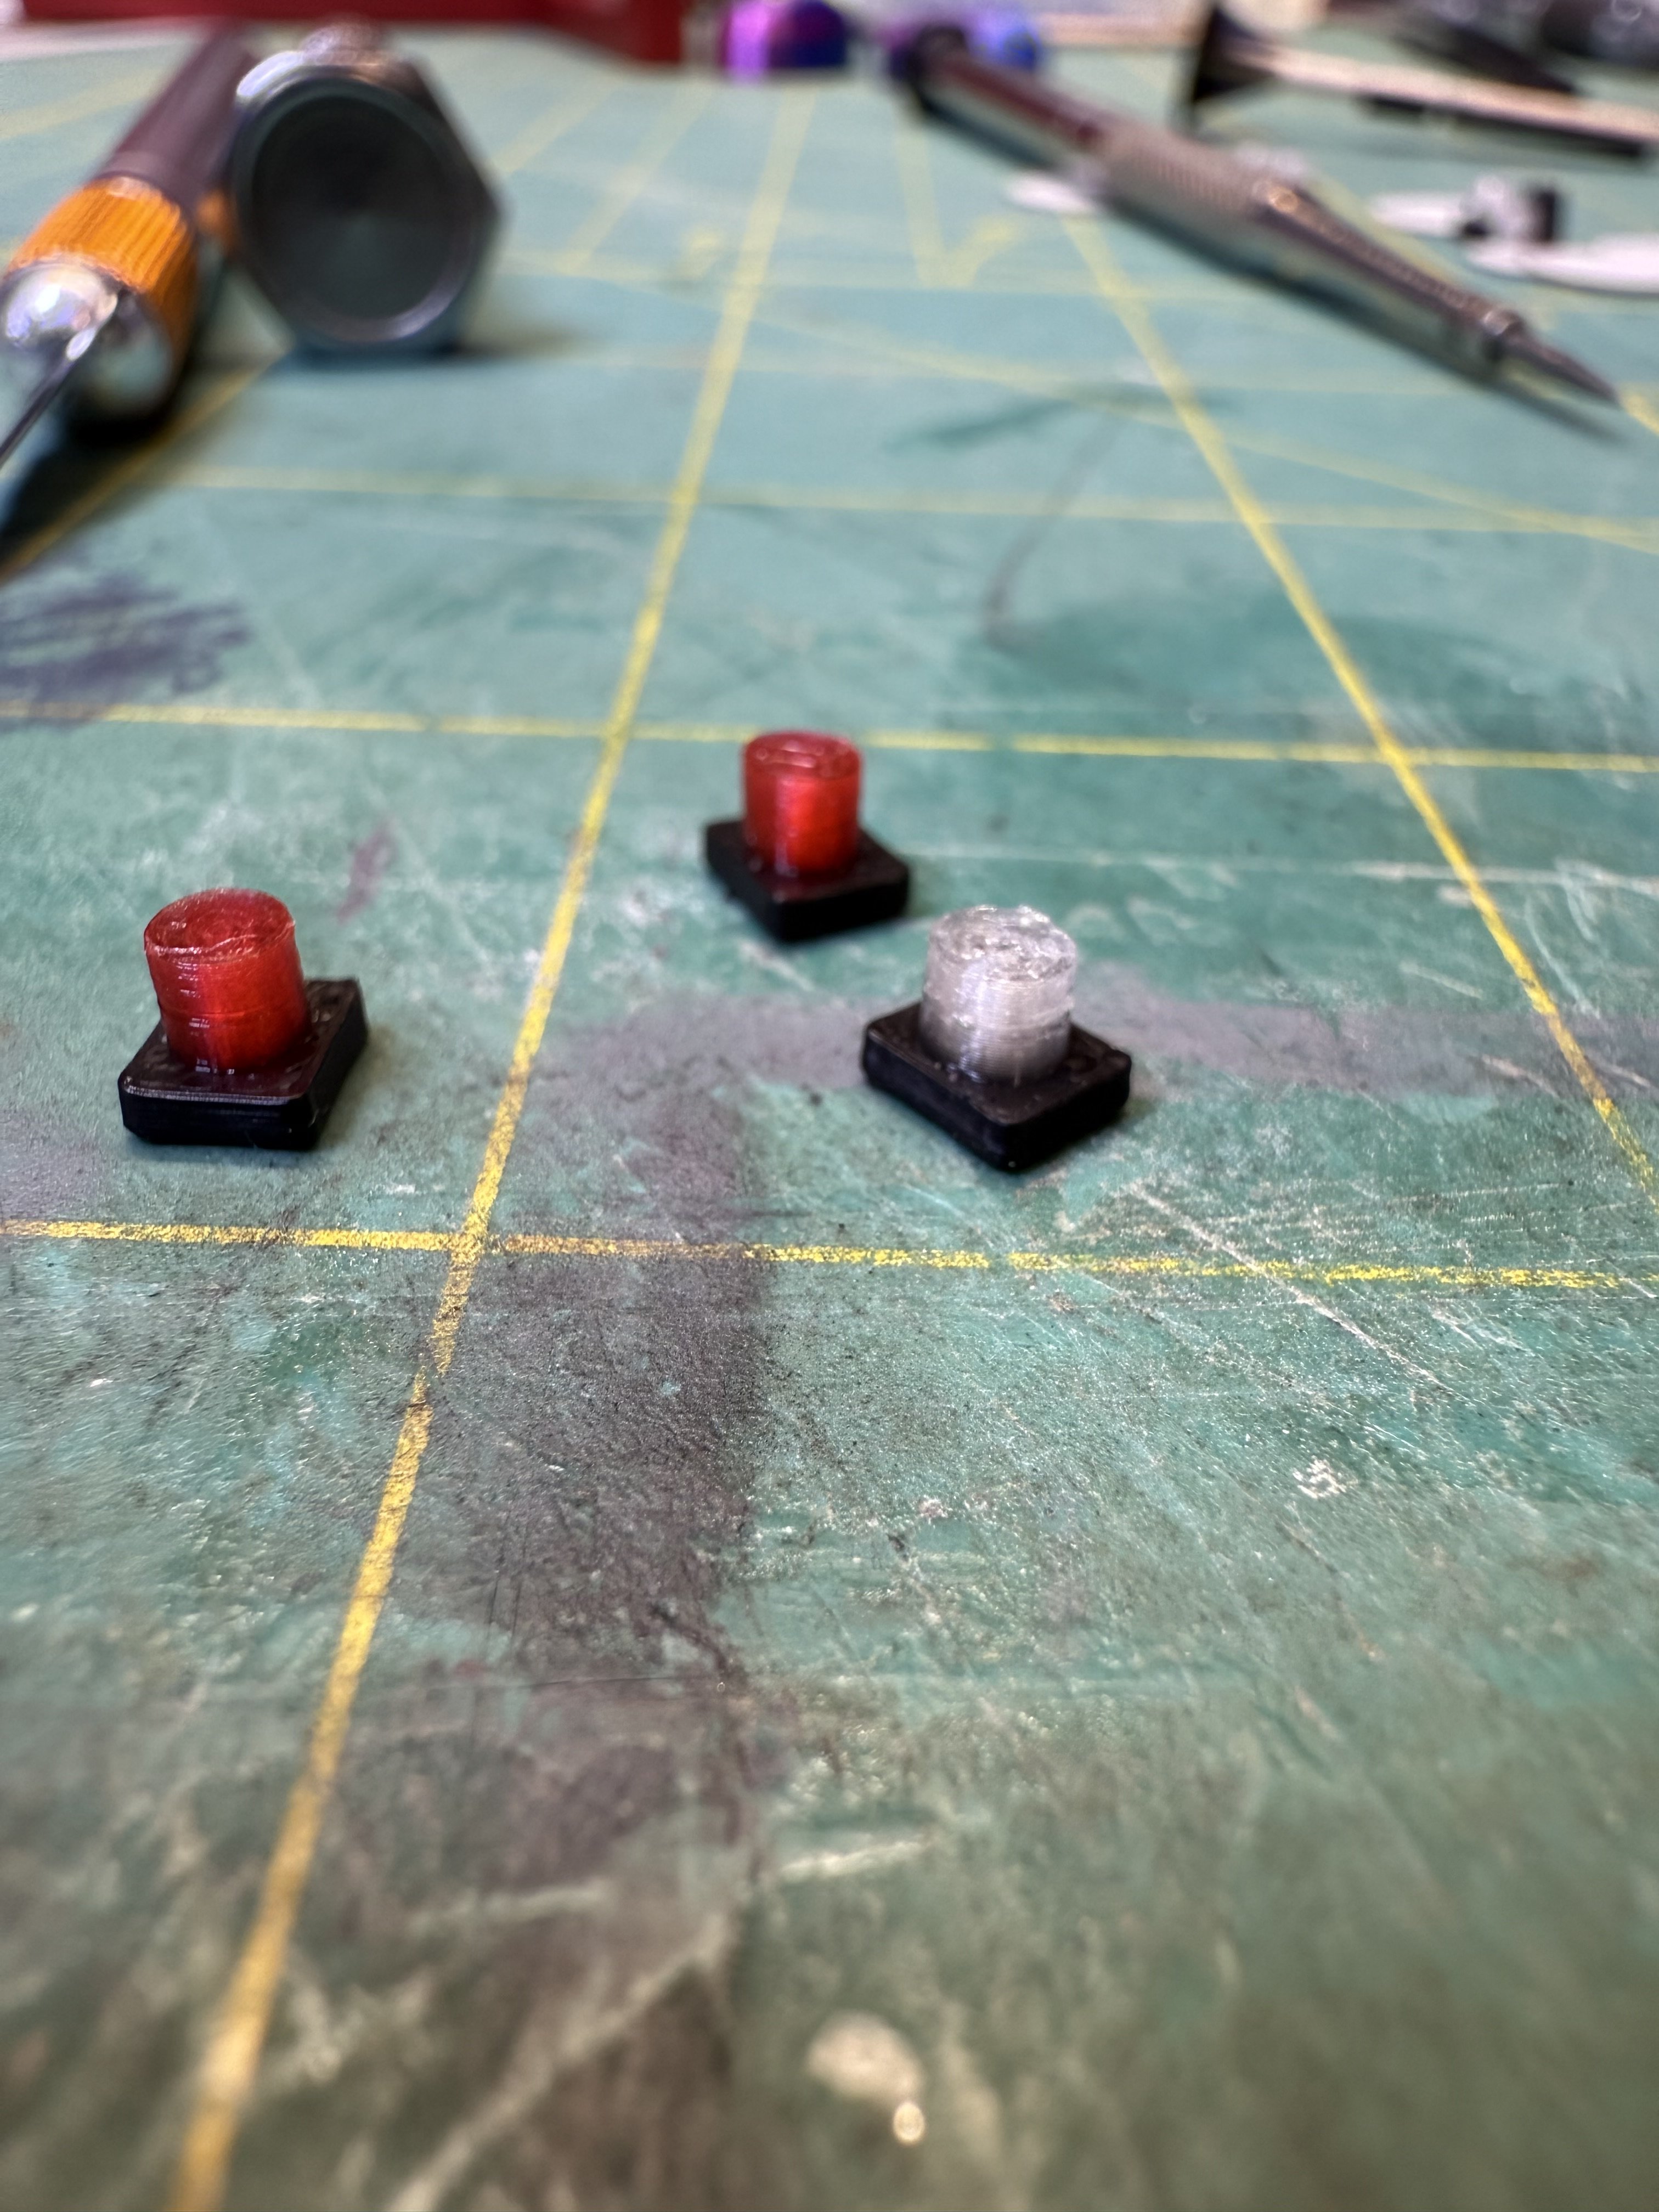
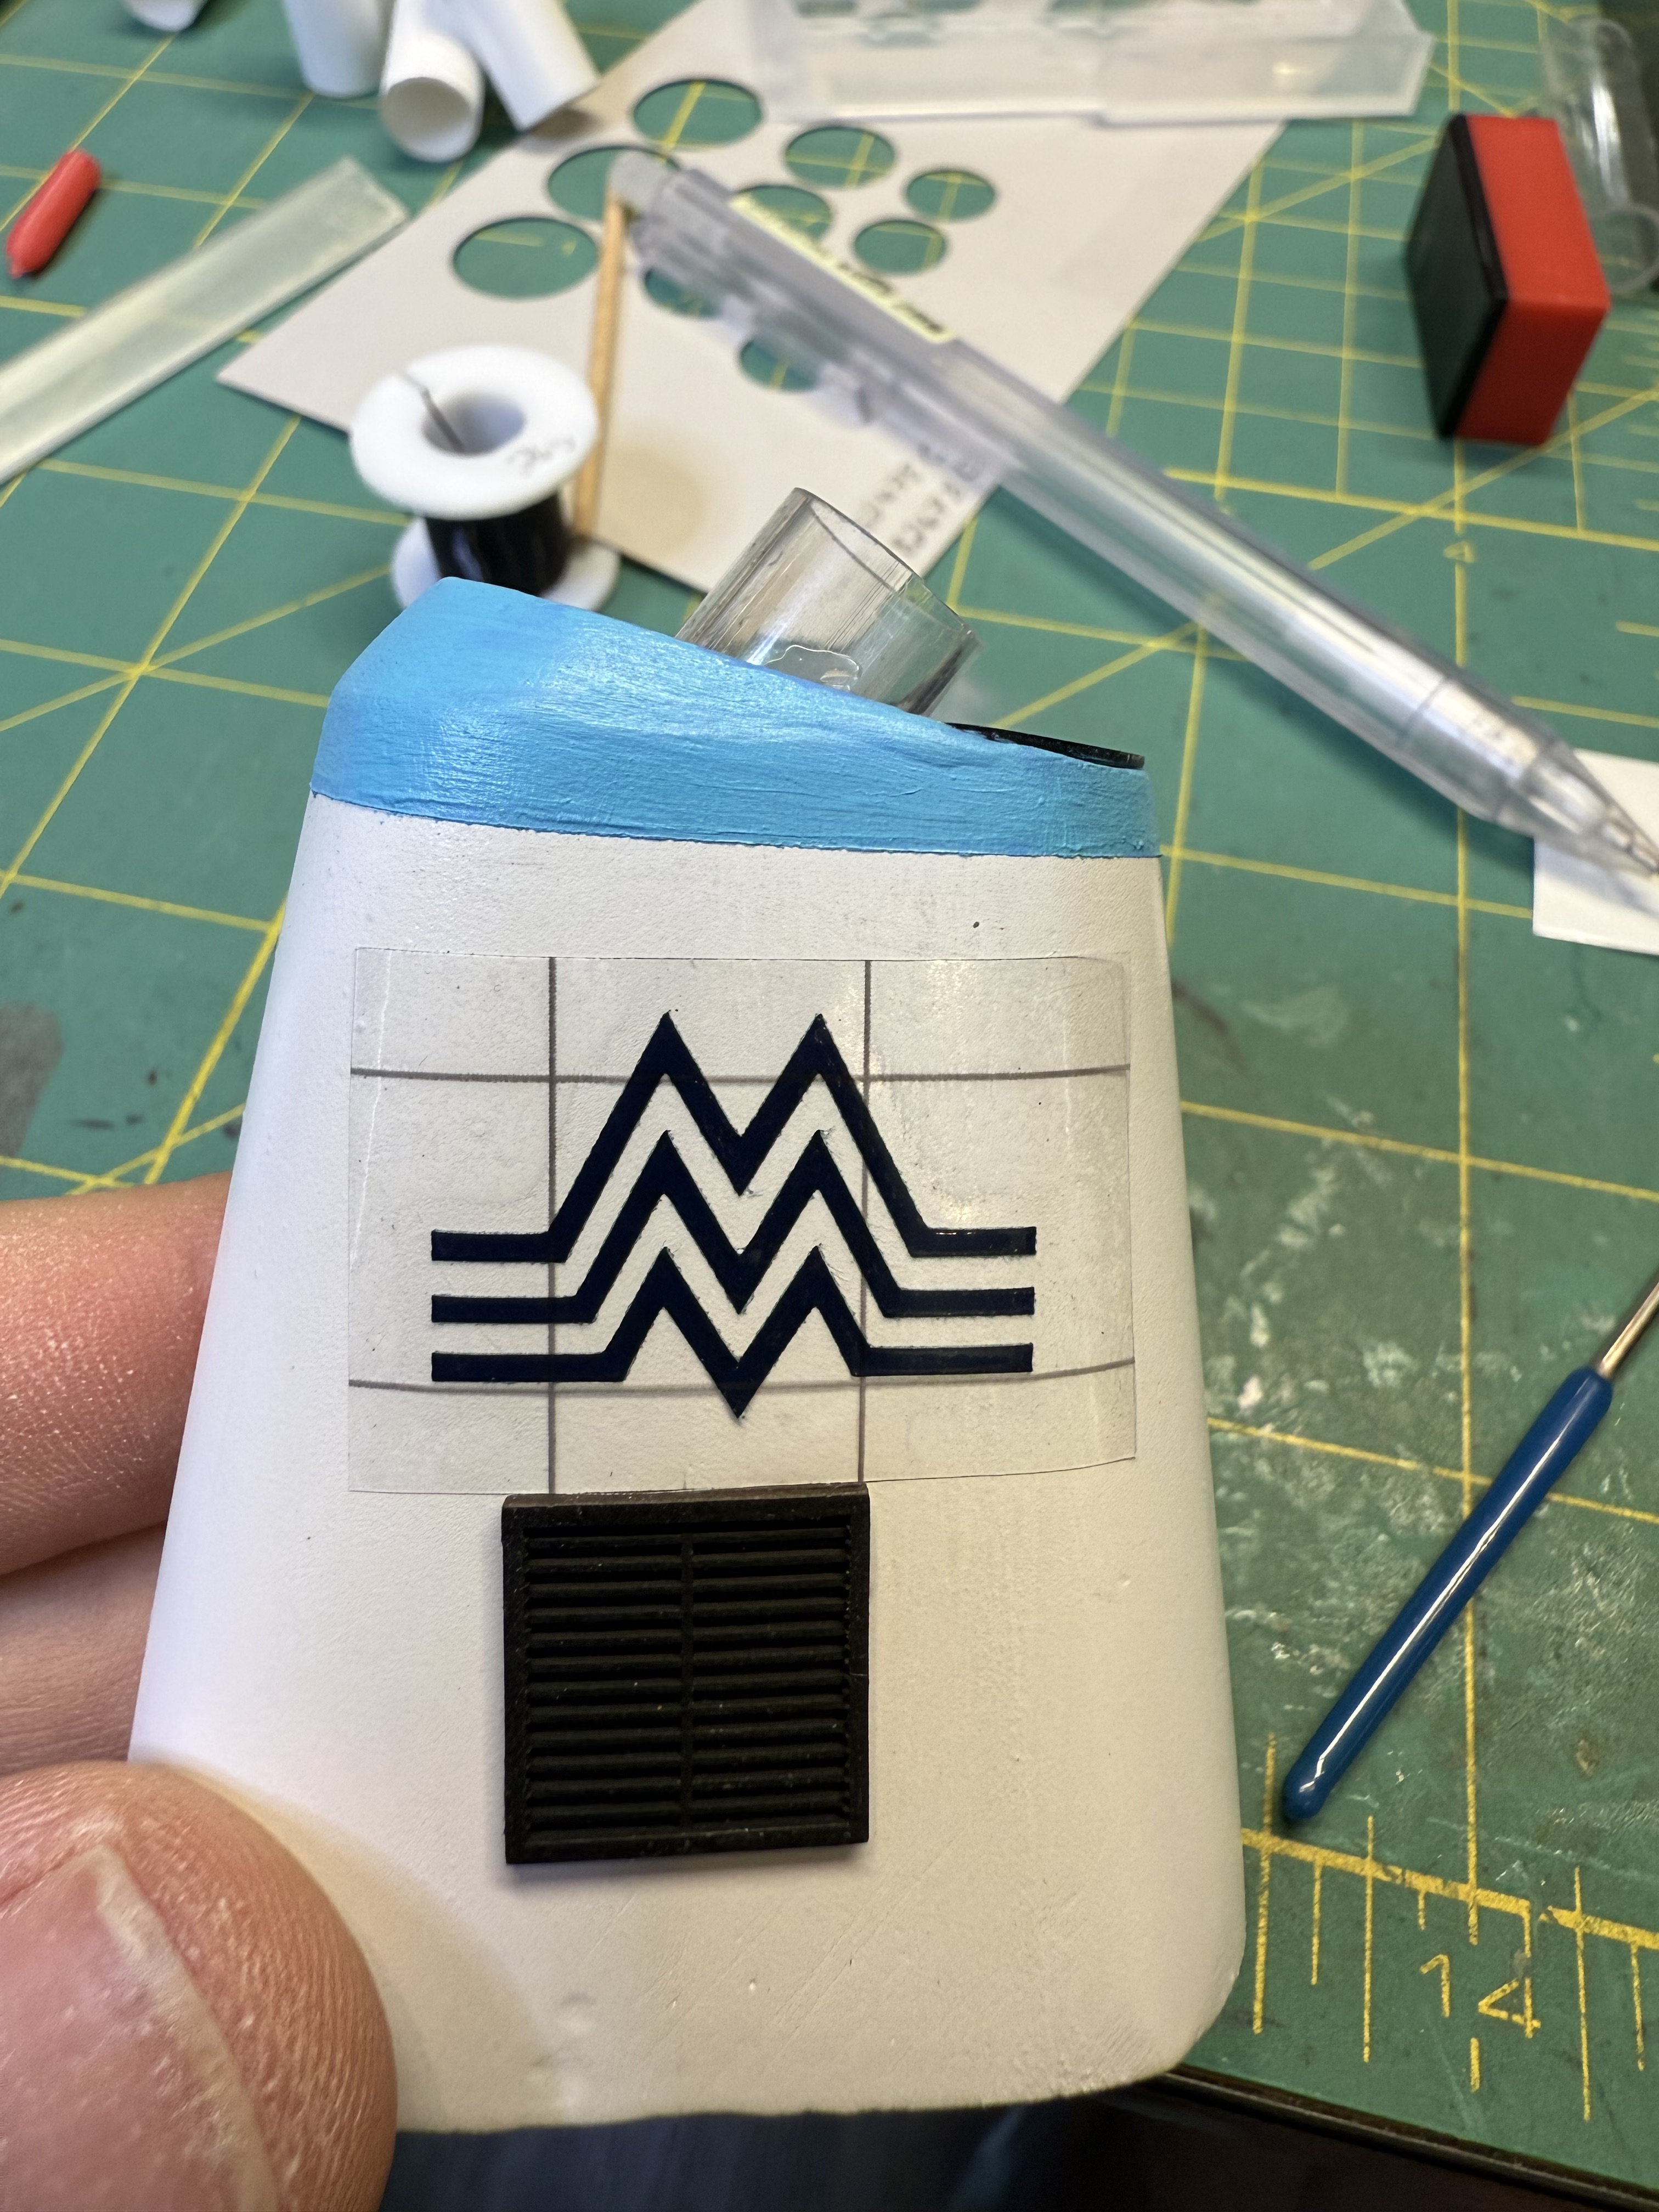
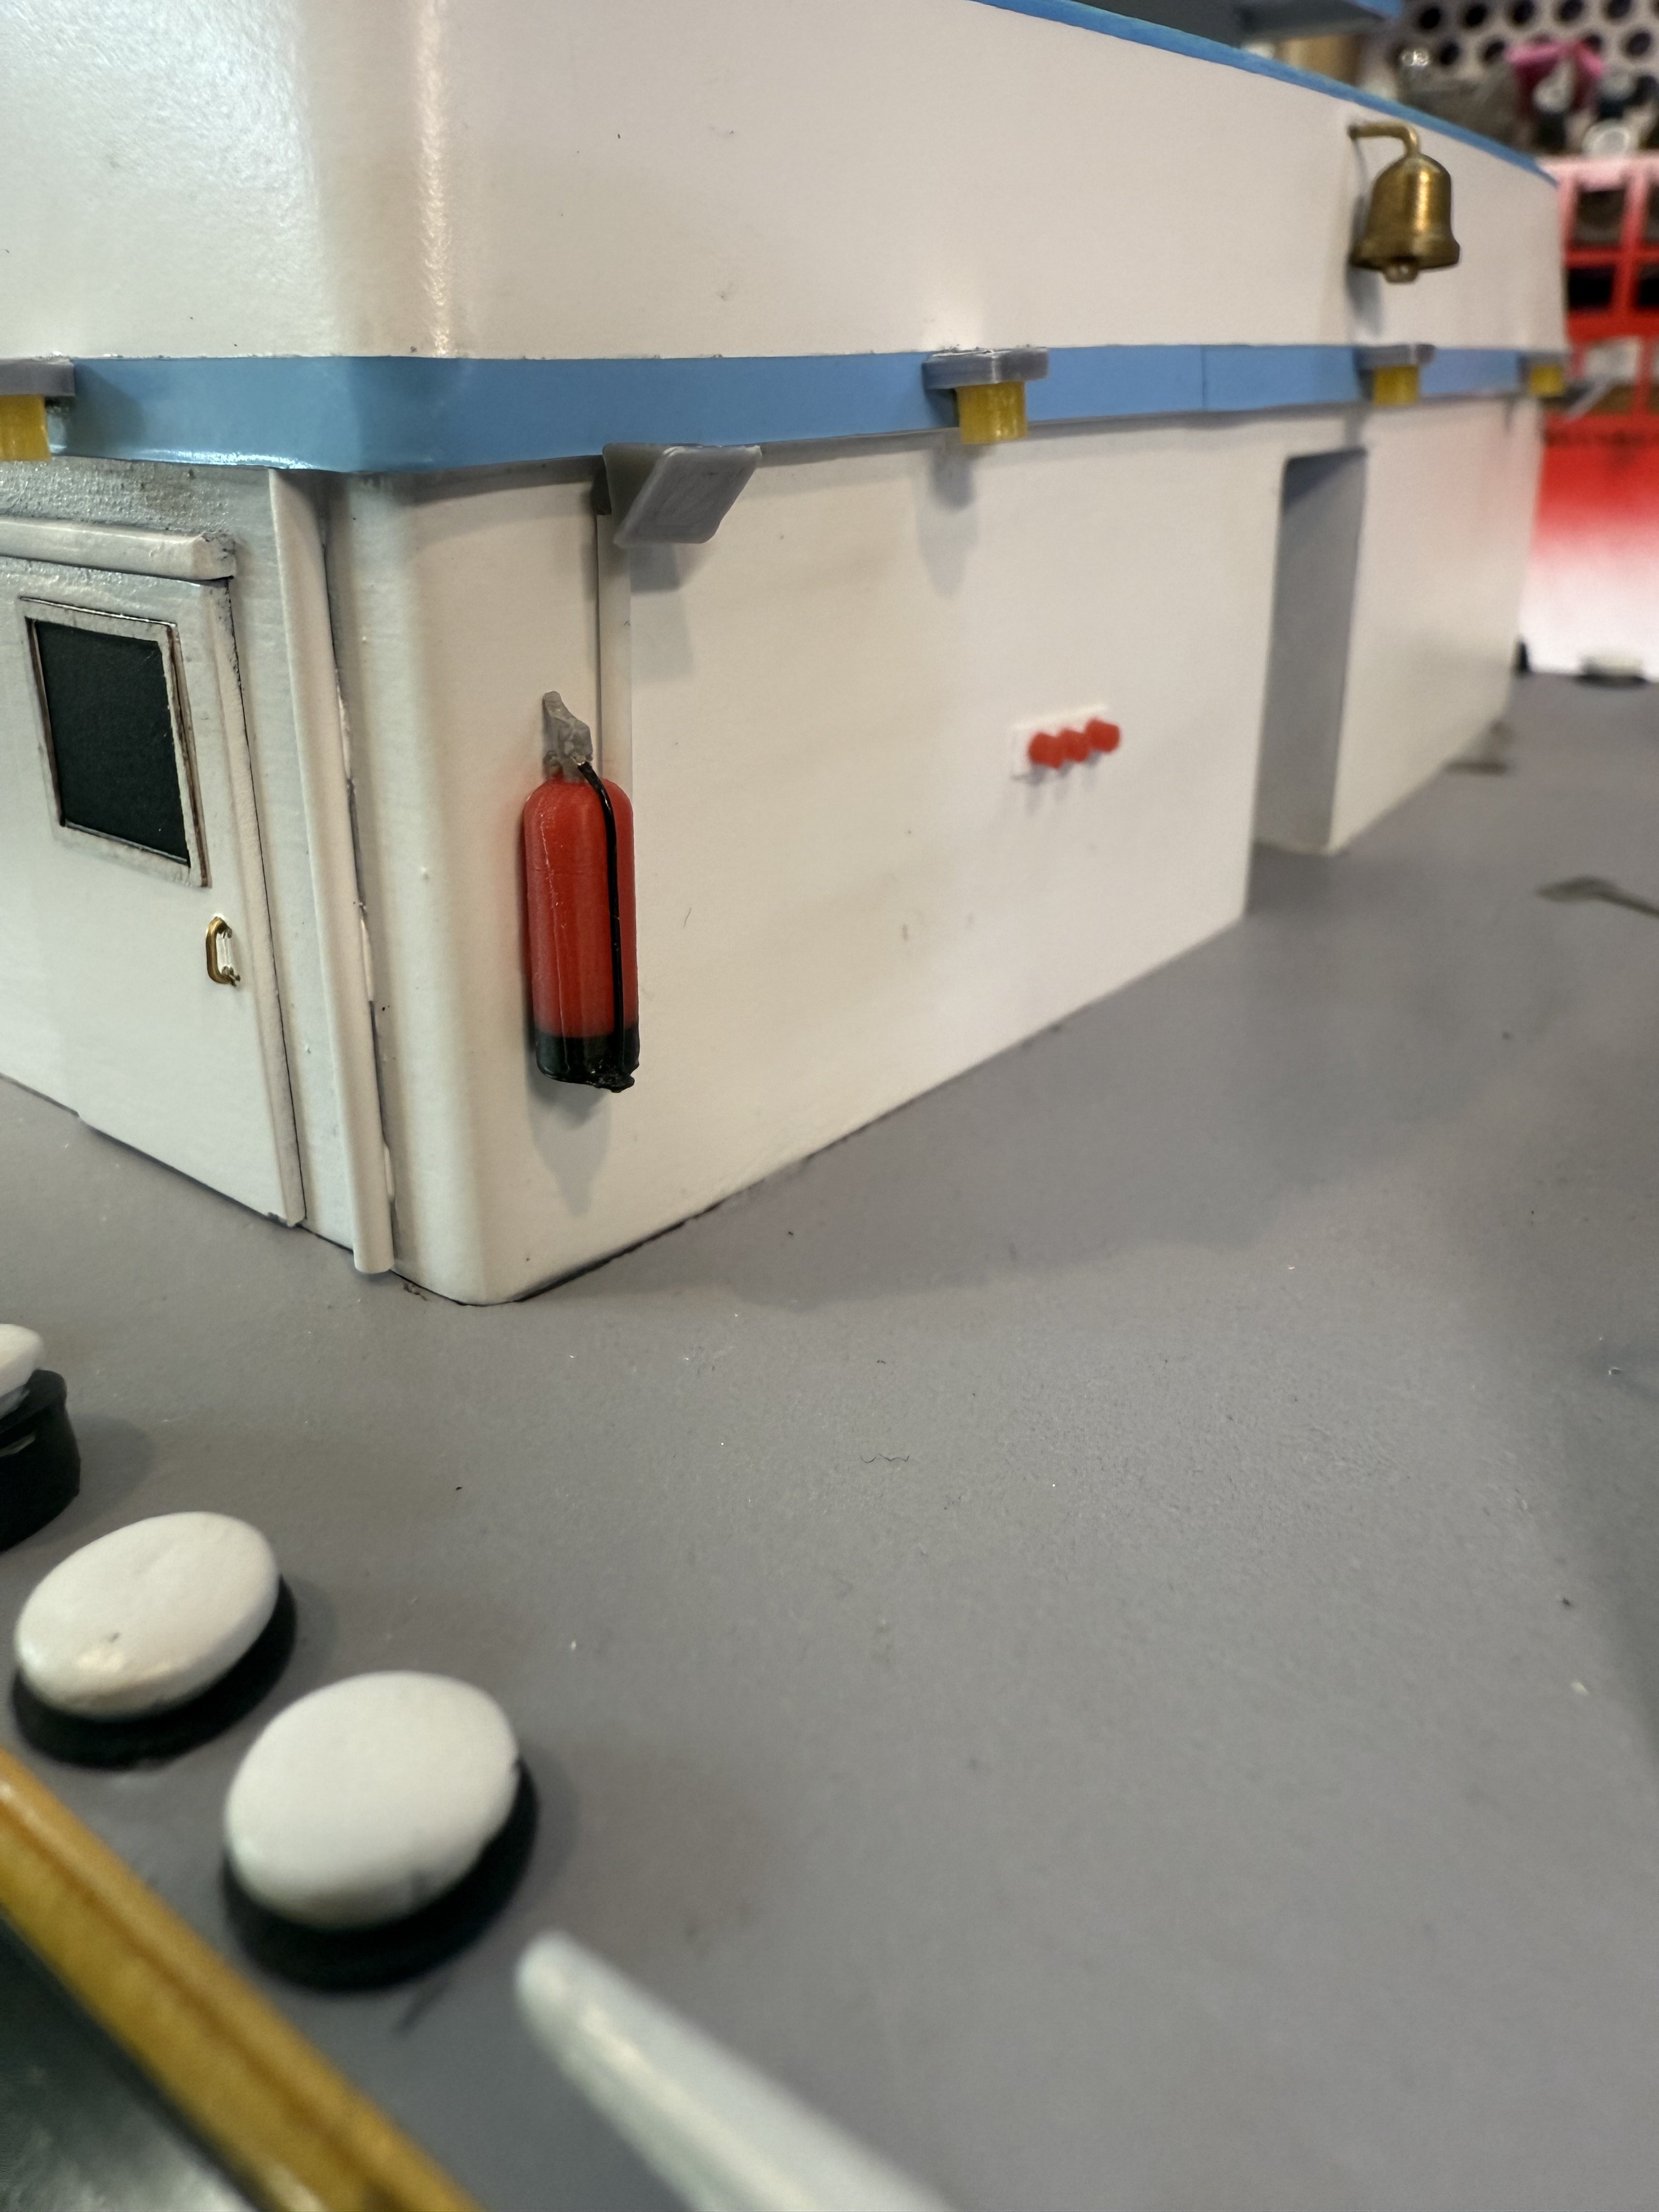
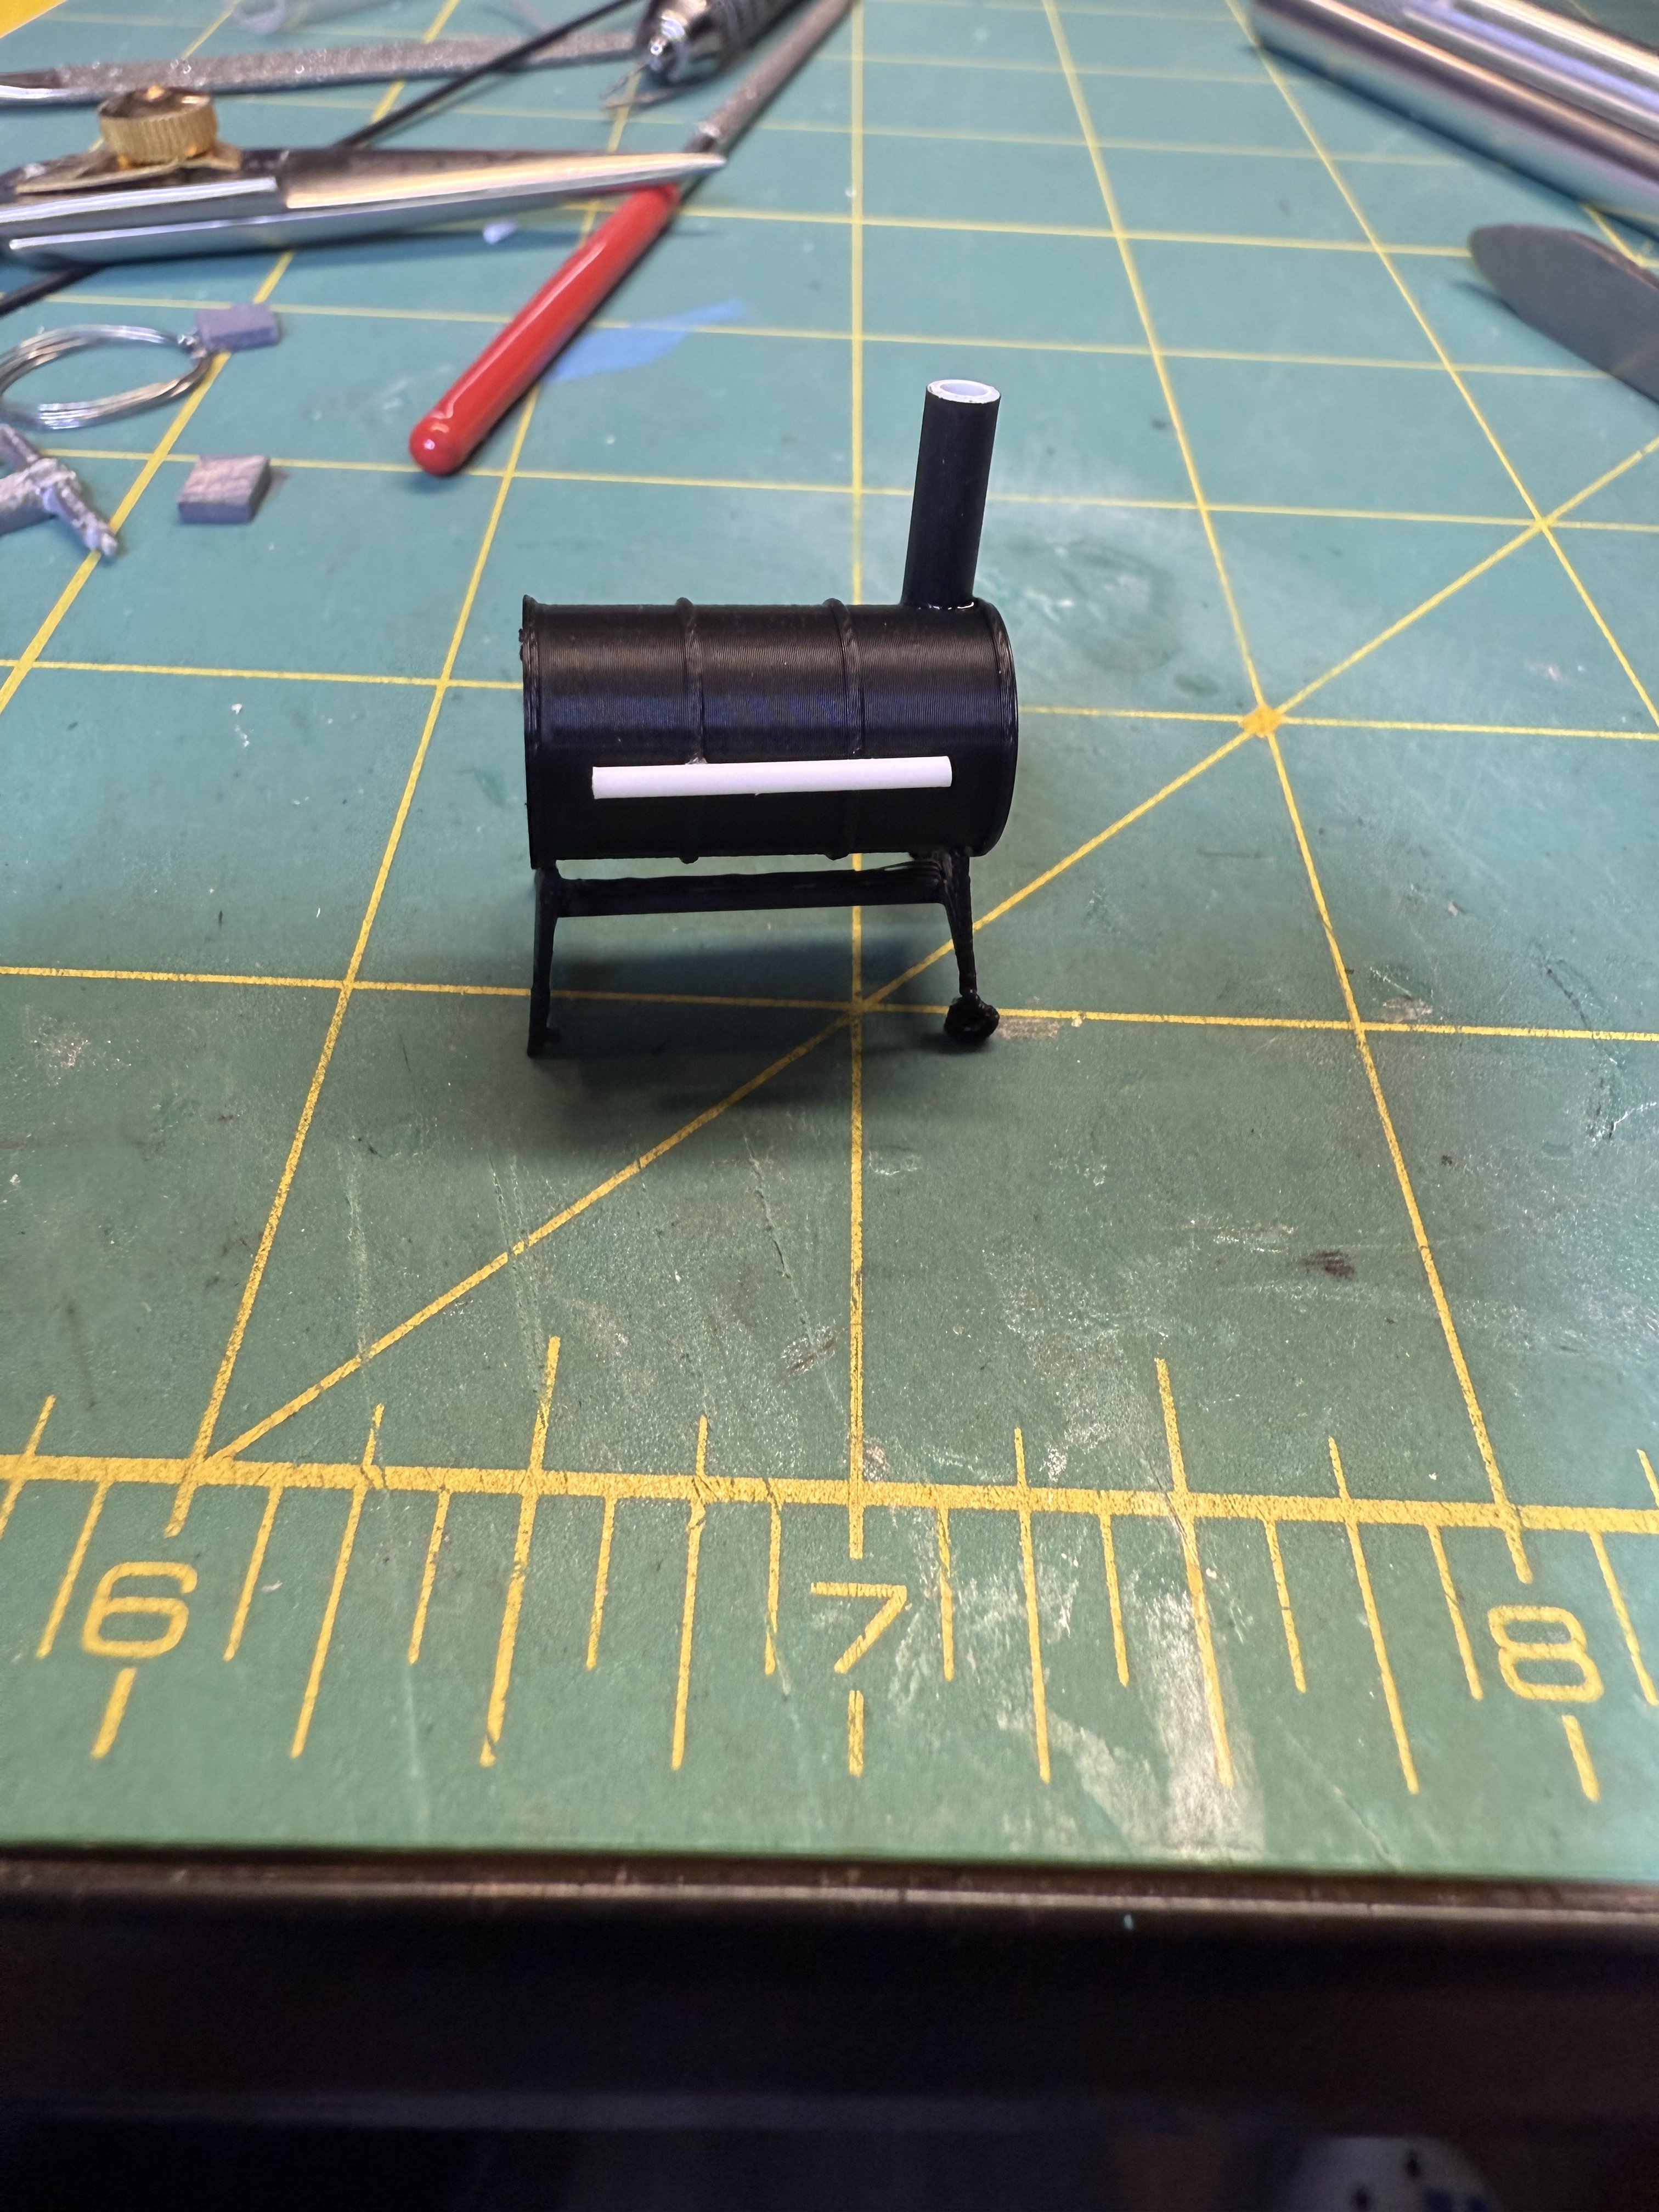
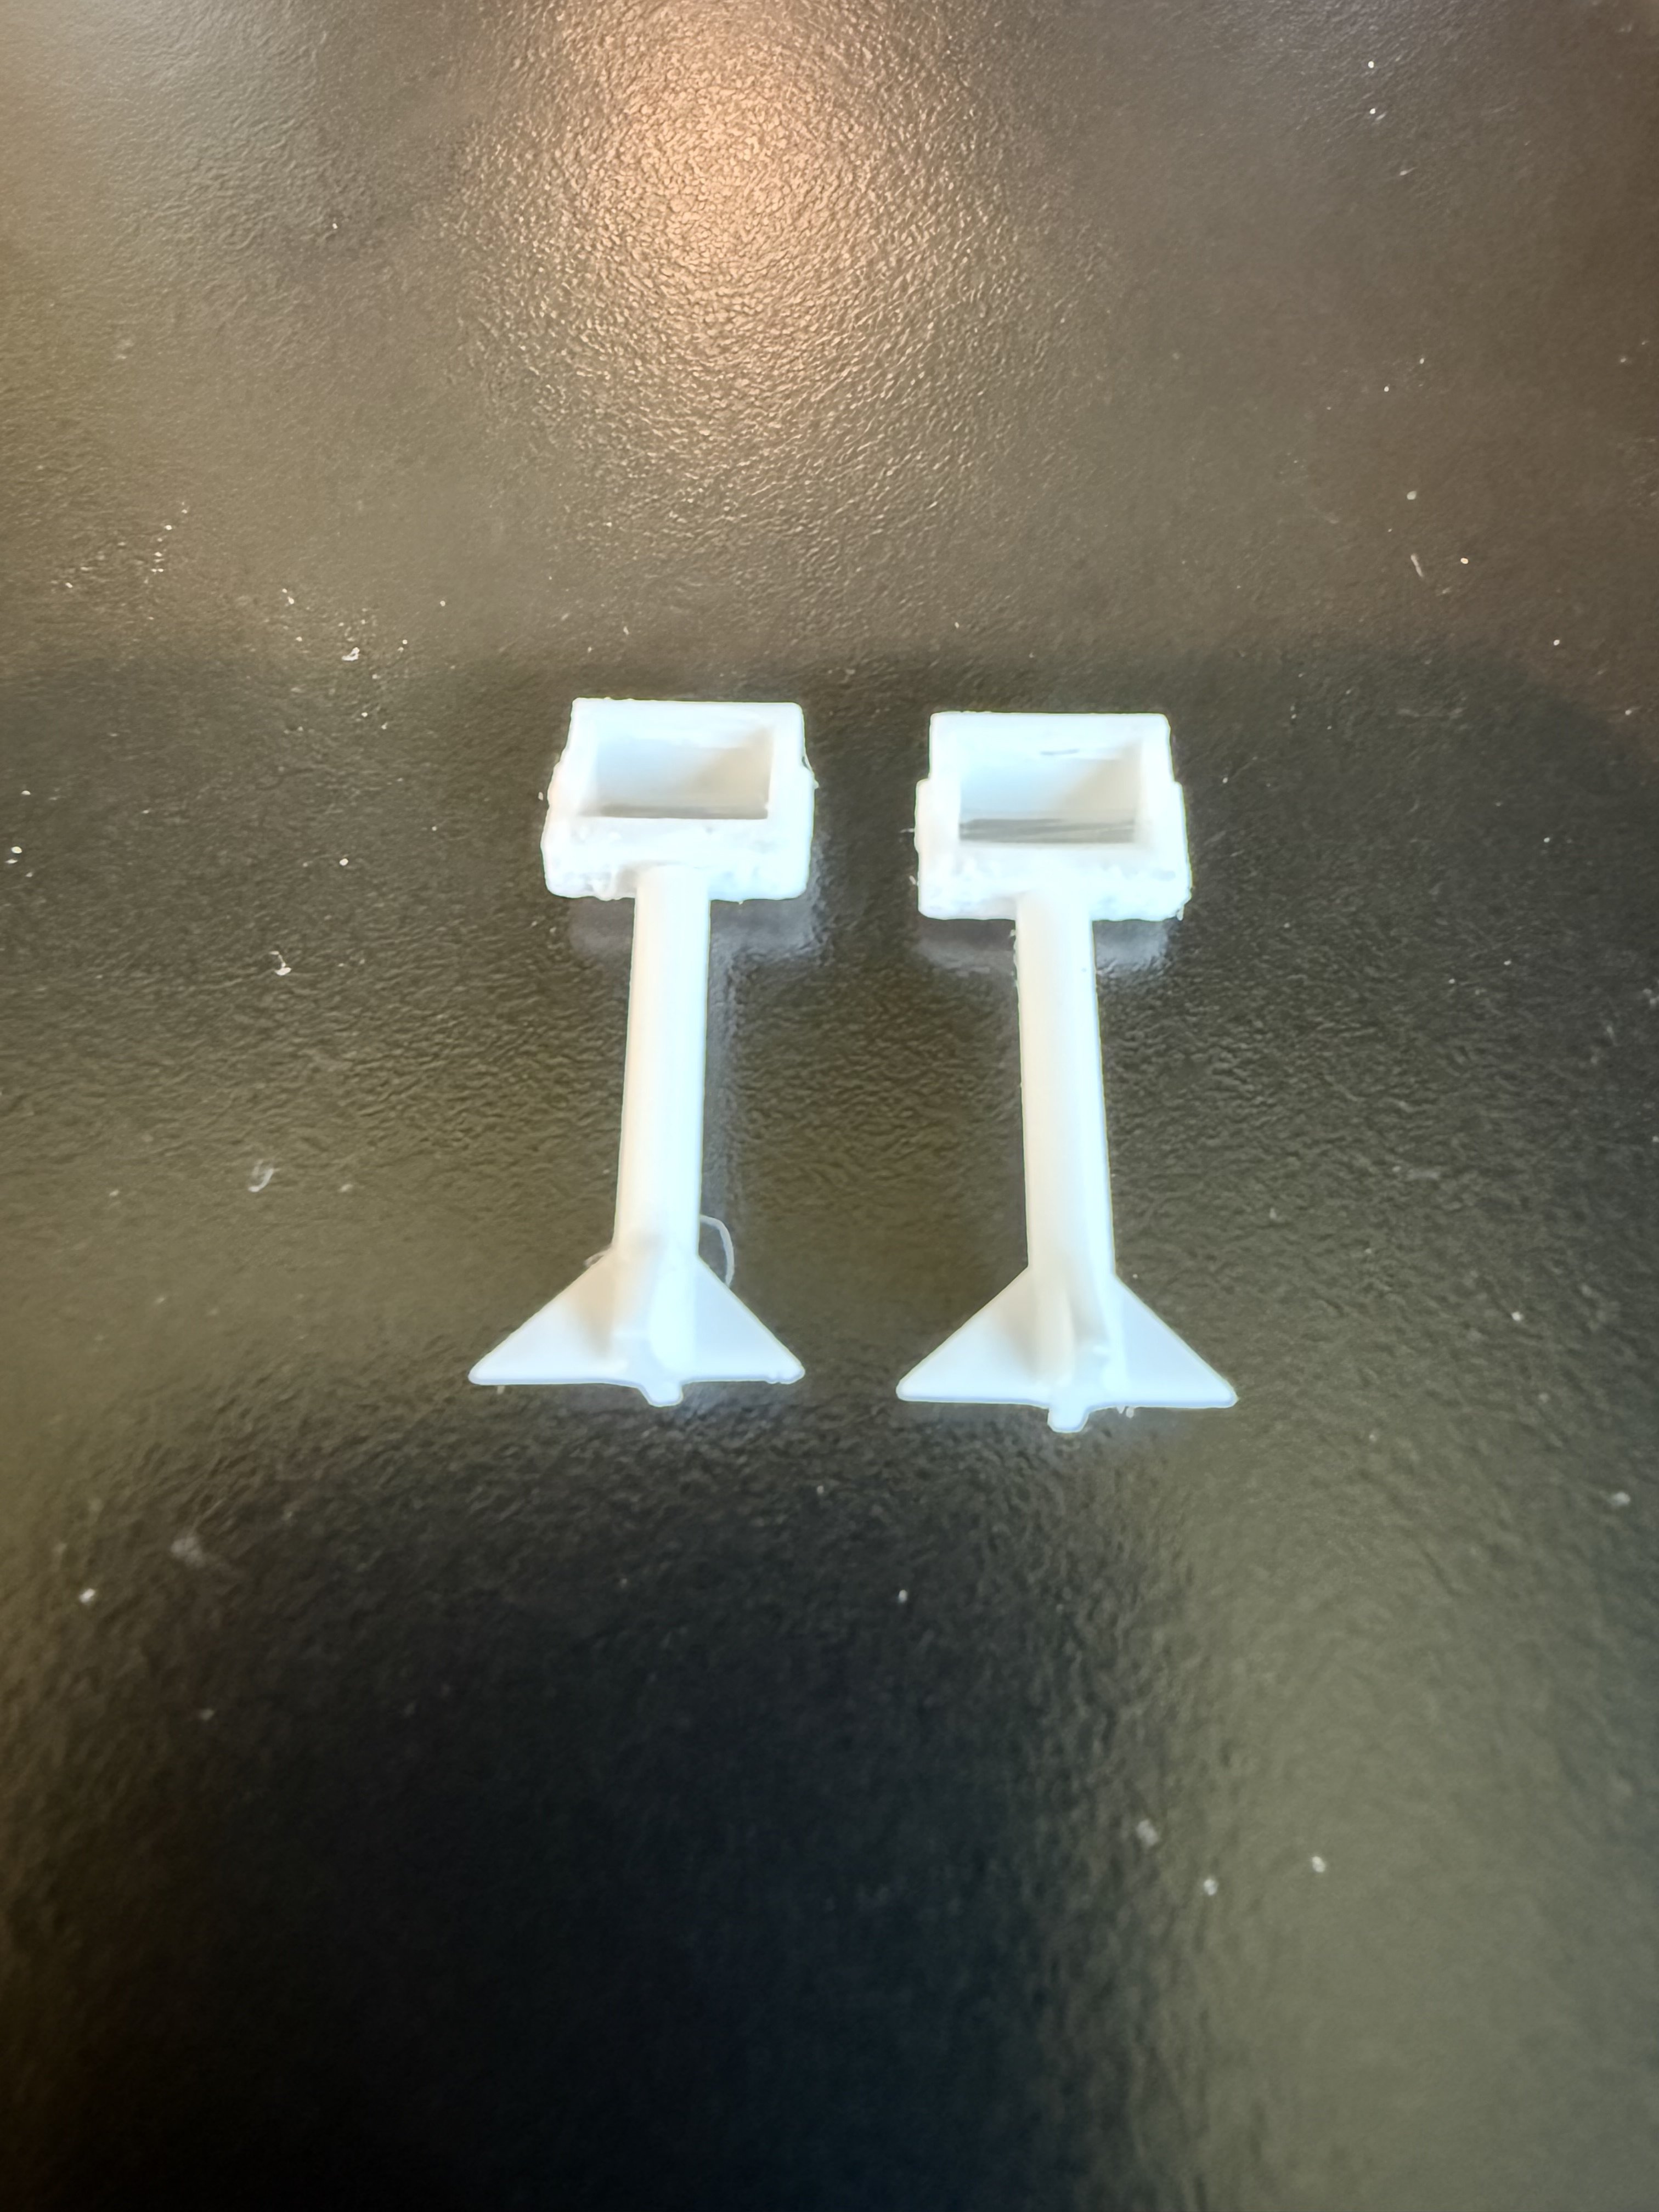
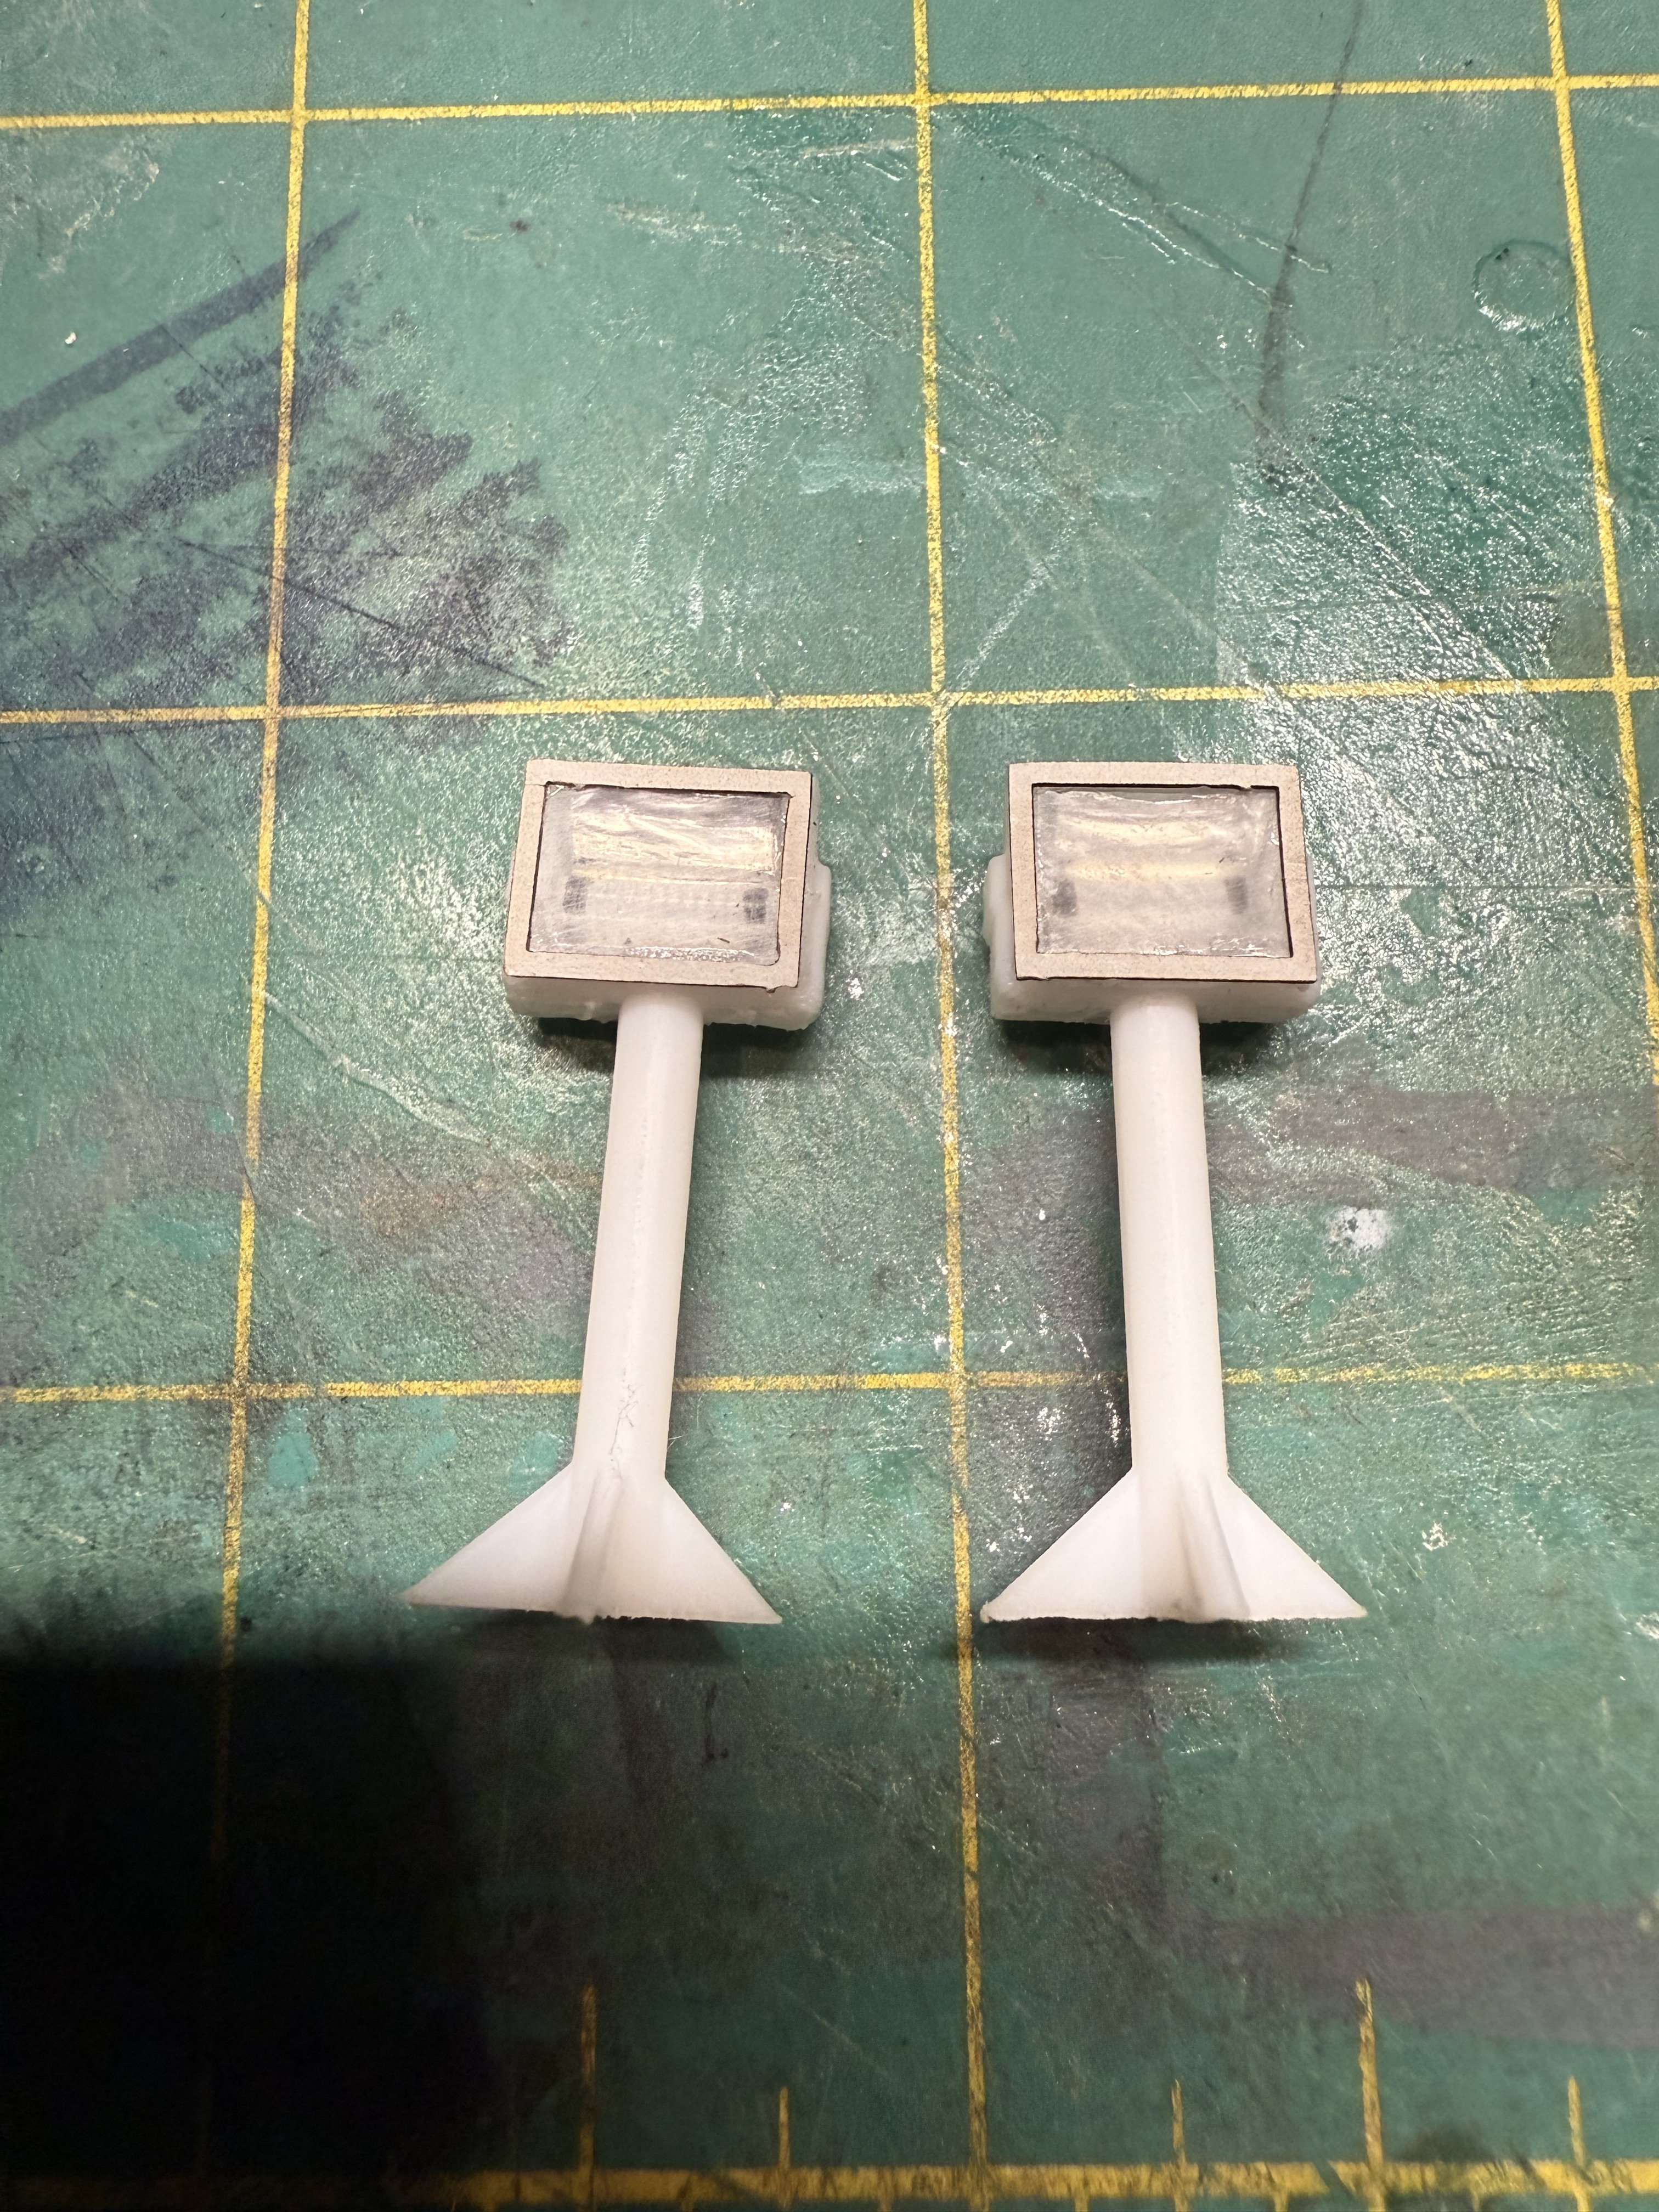
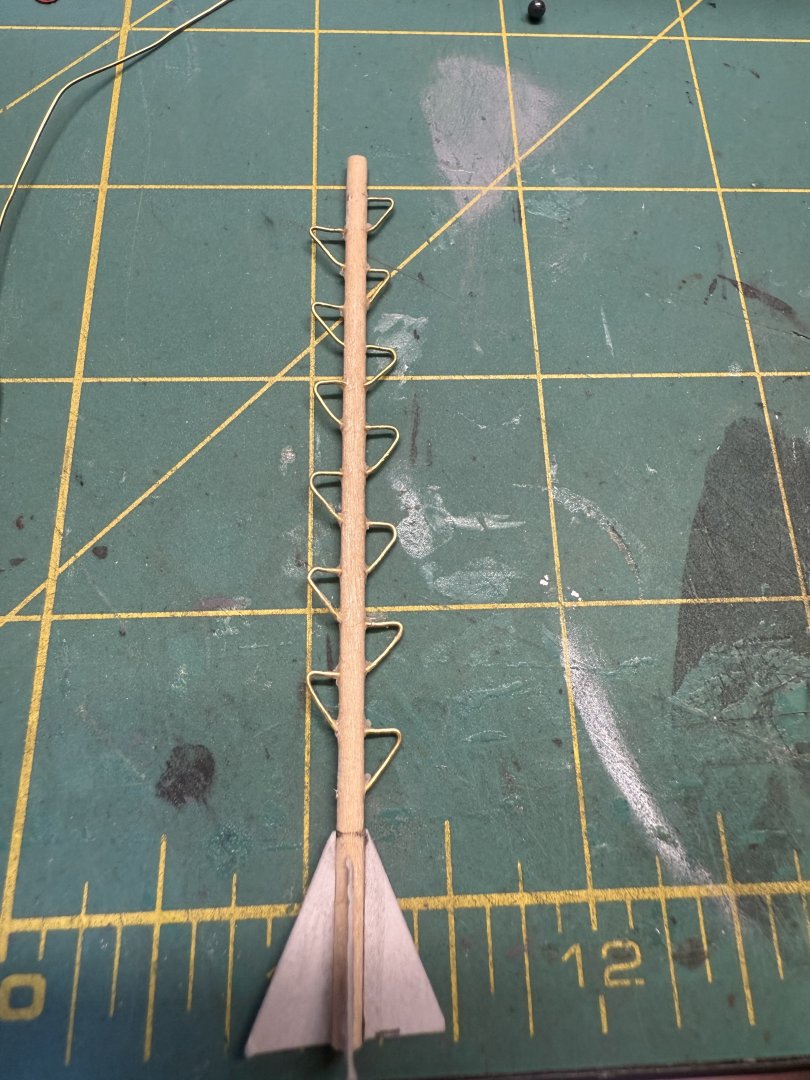
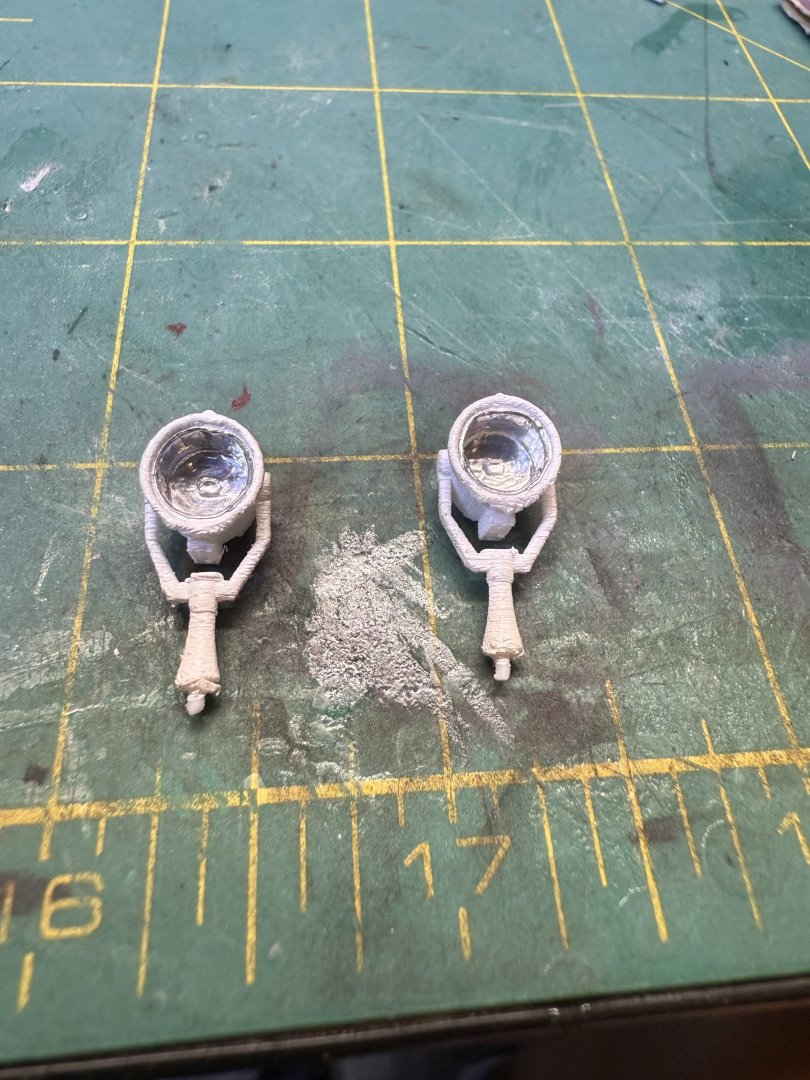
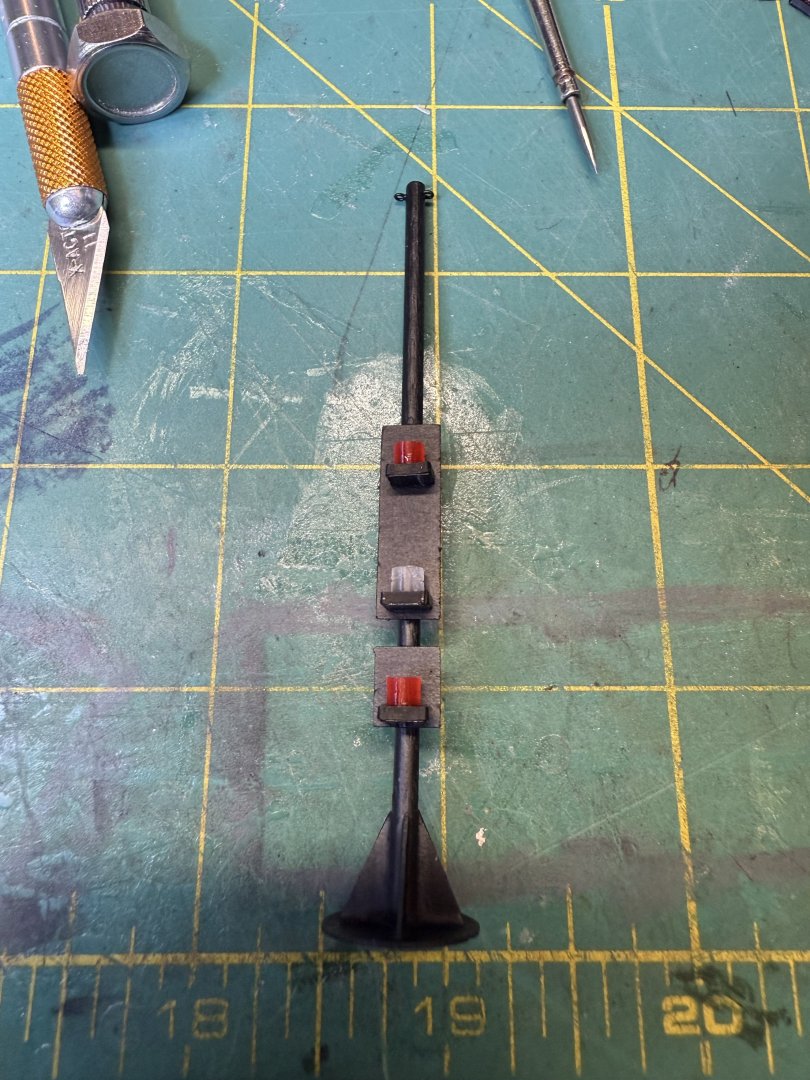
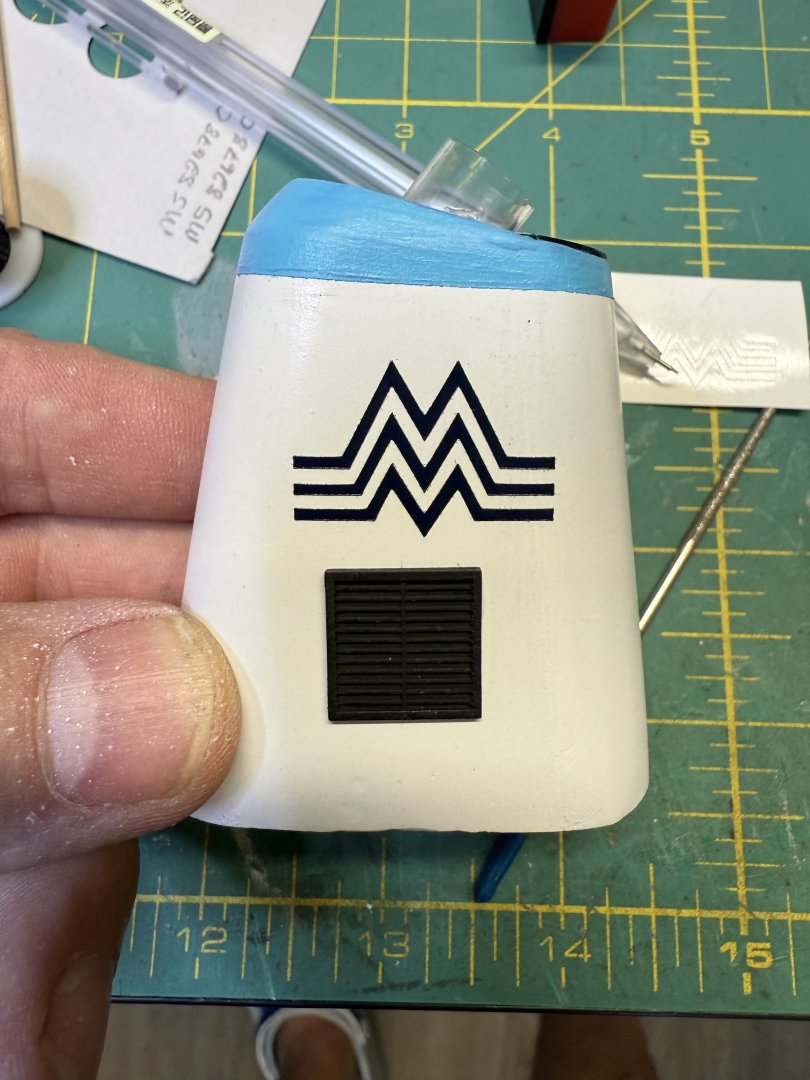
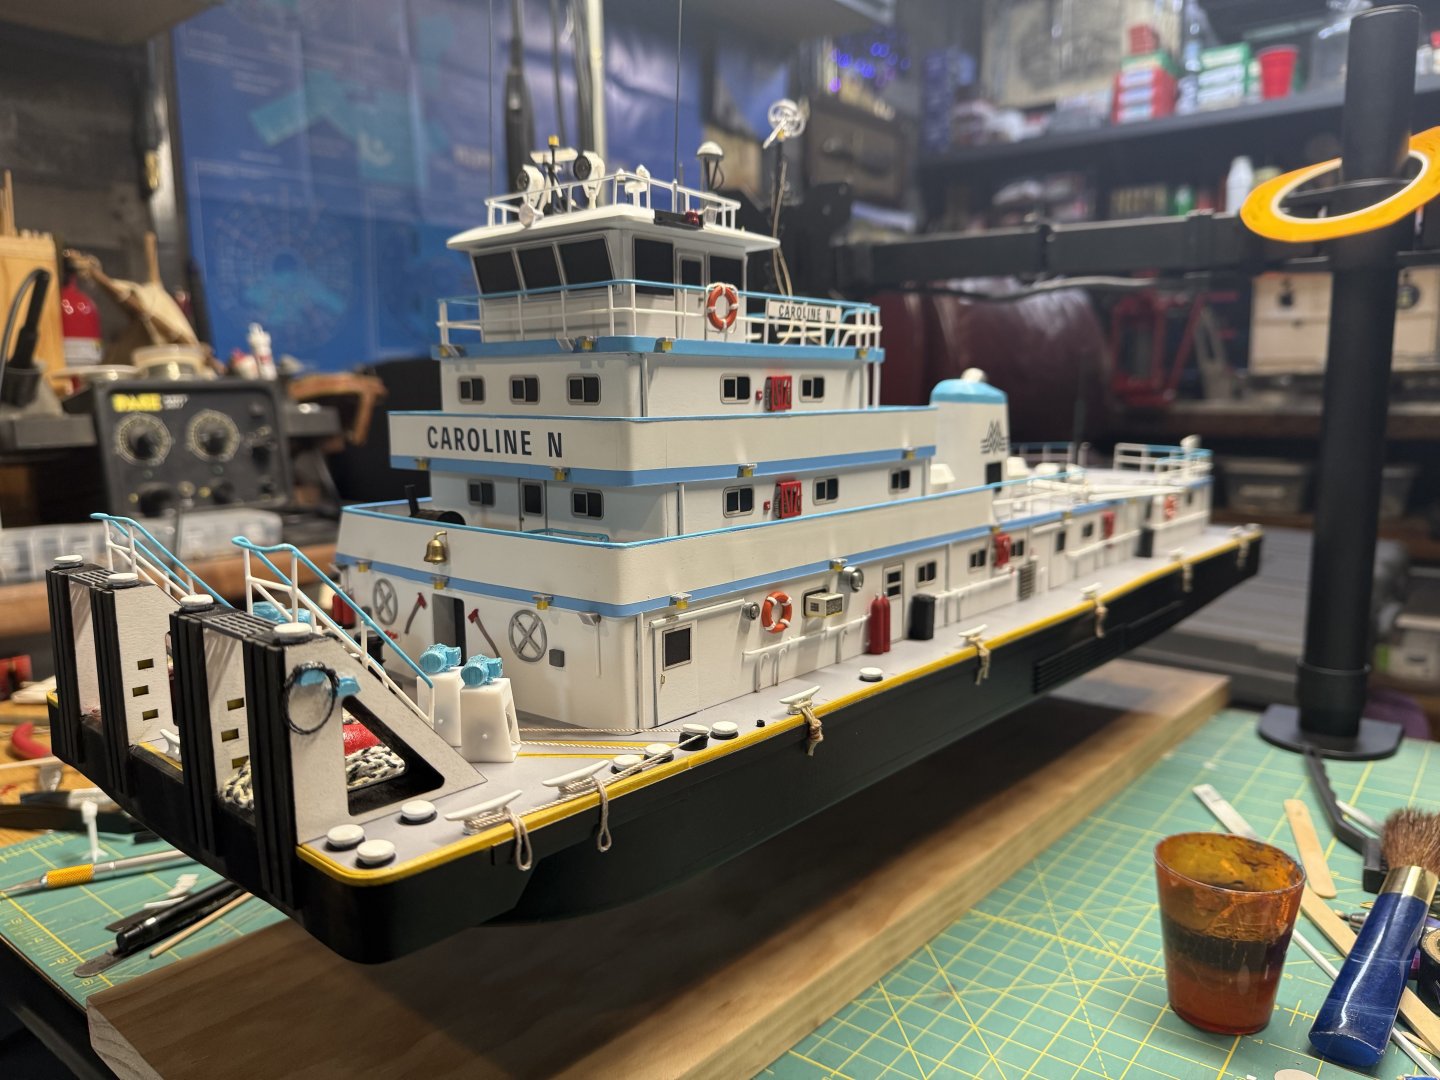
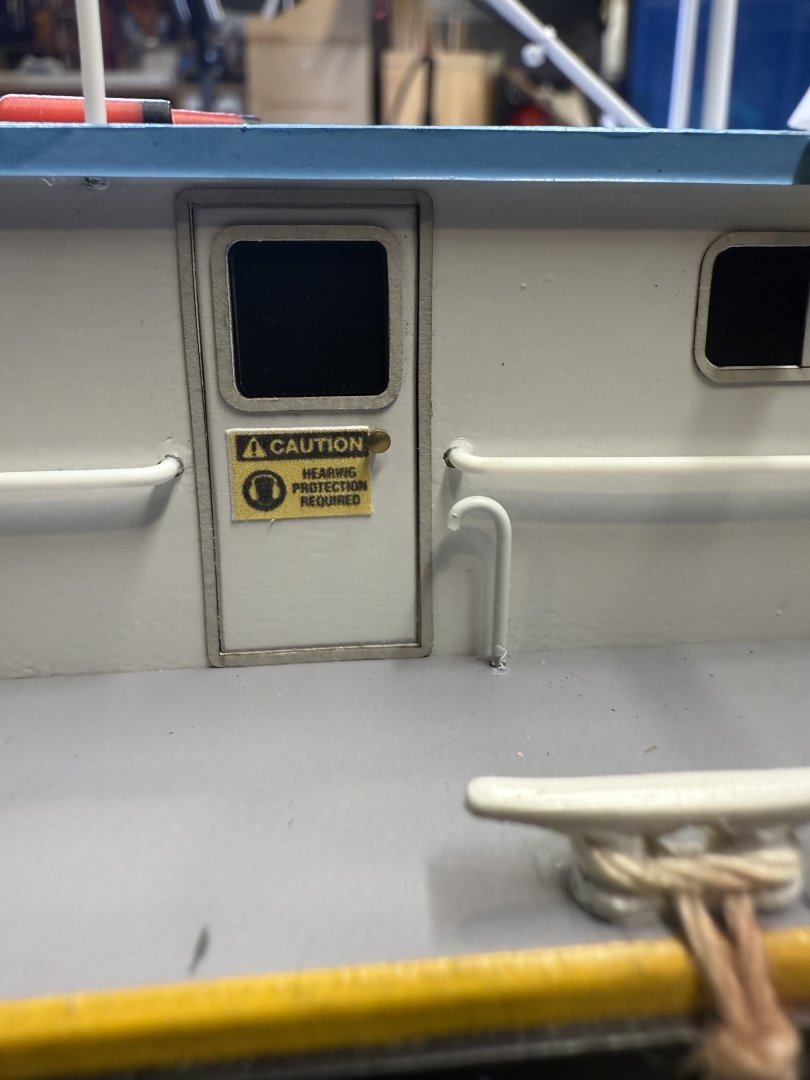
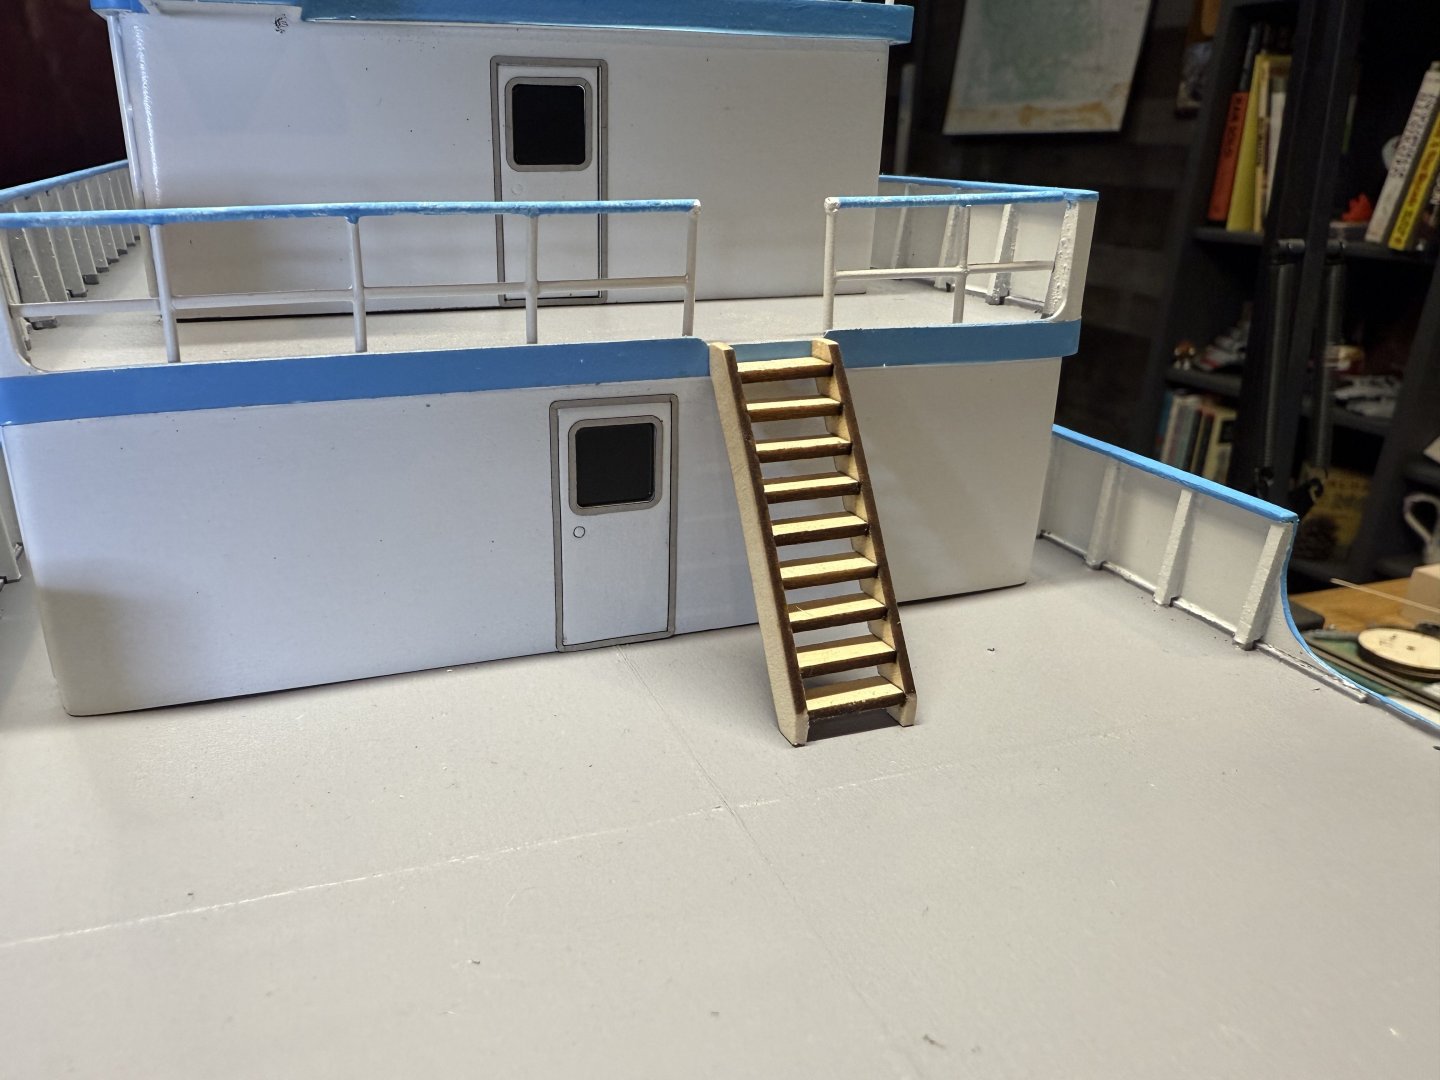
Greeting everyone, I'm sure by now all have just about counted me out on this build. Well, I had to put the build and MSW on hold for a while, while we sorted out some family things. The loss of our daughter in law brought more pains than I care to bring up on this forum, but we have all finally got our lives on track and it's time to get back to it. My initial plan was to have this build completed by the end of August, but the plan fell through. So I picked things back up around the first of September and have taken advantage of the hot late summer days and spent a few weekends just working on the build. Now my new goal is to be done by December. In no particular order, I'll do my best to describe each step as I went along. First up is the construction of the deck lights. I created these using my 3D printer, just a simple two color print with amber and silver. Once they were printed they were placed on the superstructure. Next was the construction of the fire hoses. I used the laser cutter to cut the frame work from card stock. I painted to yardstick first then drew up the pattern on the computer. I also used the card stock cut in thin strips to simulate the collapsed and stowed fire hose. The completed hose reels. Next I added the water line and valves to the reels. Then it was getting them mounted to the superstructure. Once all the fire hose reels were in place, I built up the flagpole/antenna mast. This was built from a wooden dowel, using brass wire woven thought the dowel to form the steps. The antenna was 3D printed and installed at the top of the mast. Next it was the construction of the radar, searchlights, and other details that are installed on top of the pilothouse roof. Searchlights. These were 3D printed as well and I used aluminum tape for the reflectors. I didn't take any pictures of them once they were finished, but there are some of them installed in later pictures. Radar and GPS heads. Forward navigation light. Radar and painted GPS heads. Horns, anemometer, searchlights and other features installed. And as she sits up to this point. Next up, I wanted to get the name and company logo put on. These were all cut on the laser tool from adhesive vinyl. I just size the letters and then the tool do all the detail work. After the name was installed I built the aft navigation light mast. This was built the same as the flagpole/antenna mast. Wooden dowel and 3D printed lights. Then it was time to knock out some of the more fiddly bits. These are the stanchions that run along side the main deck and are removable when the boat is docked in port. These took the better part of a day, having to drill all the small, no tiny holes in the 1mm styrene rod. A true test of patience. It was back to the 3D printer to print up the deck winches and fire extinguishers. Once the winches were painted up, I printed the capstans and installed them on the foredeck. More images of the foredeck details. More details added to the foredeck. Axes, ratchets and standpipes. I thought the tow knees looked a bit naked so I added some ropes and bouys coiled up between them. Something to fill in the space and give the deck some "life". Speaking of adding some life, what's boat life without barbecue? I ran across a video of the Titletown USA that had a BBQ grill on the deck and figured I'd add that as a neat little detail. I 3D printed this as well and fastened it in place up front. One of the last things that I have completed were the aft work lights. I 3D printed the main structure of these and used the aluminum tape for the reflector. Once the selector was installed I used some of the clear 3D printer filament painted black on each end to simulate the light bulb. Once the bulb was installed I covered face with clear acetate paper then cut a face frame on the laser tool. I have not installed these yet, I didn't want to knock them loose while working on some of the other features on the deck. After the lights were completed, I started adding the deck features. Engine room vents, oil baths, the funnels were secured in place and the booms were glued into place. Finally, I printed up some warning signs and put them in place. Well that is all for now, hopefully I didn't lose too much of my audience, but I understand. If you are still following, I appreciate you sticking with me. More to come soon now that I have some motivation. Thank you all for stopping by. -Brian


-
Keith, My MSW time has been almost nonexistent over the past few months or so, but I finally found some time to catch up. I must say, Lula is looking magnificent! I am truly sorry to hear of your health issues, and wish the best for you on the 30th, and a speedy recovery. -Brian
- 732 replies
-
- 4
-
-
-
- Lula
- sternwheeler
- (and 1 more)
-
Thank you Kieth. I’m trying to make it look like some work has been done. Gotta keep things interesting. 😁 Good question Eberhard. Most of the time that is the case. If you closely at the second live photo I posted you can see the multiple lines tied to the tow. I’m no expert on these, but they use several tow lines secured to several bollards to distribute the tow. some are also tied to the cleats as well. I’ve watched several videos on tow operations and the crew is constantly going in and checking and resecuring the line tension every few hours to make sure nothing breaks loose. Dang, you caught me! I usually try to keep my mess out of the pictures, I just wasn’t as careful this time. 🤪 Most of the time it’s total chaos and needs a good cleaning every now and then. I’m just glad I didn’t get the whole bench in the photo. -Brian
-
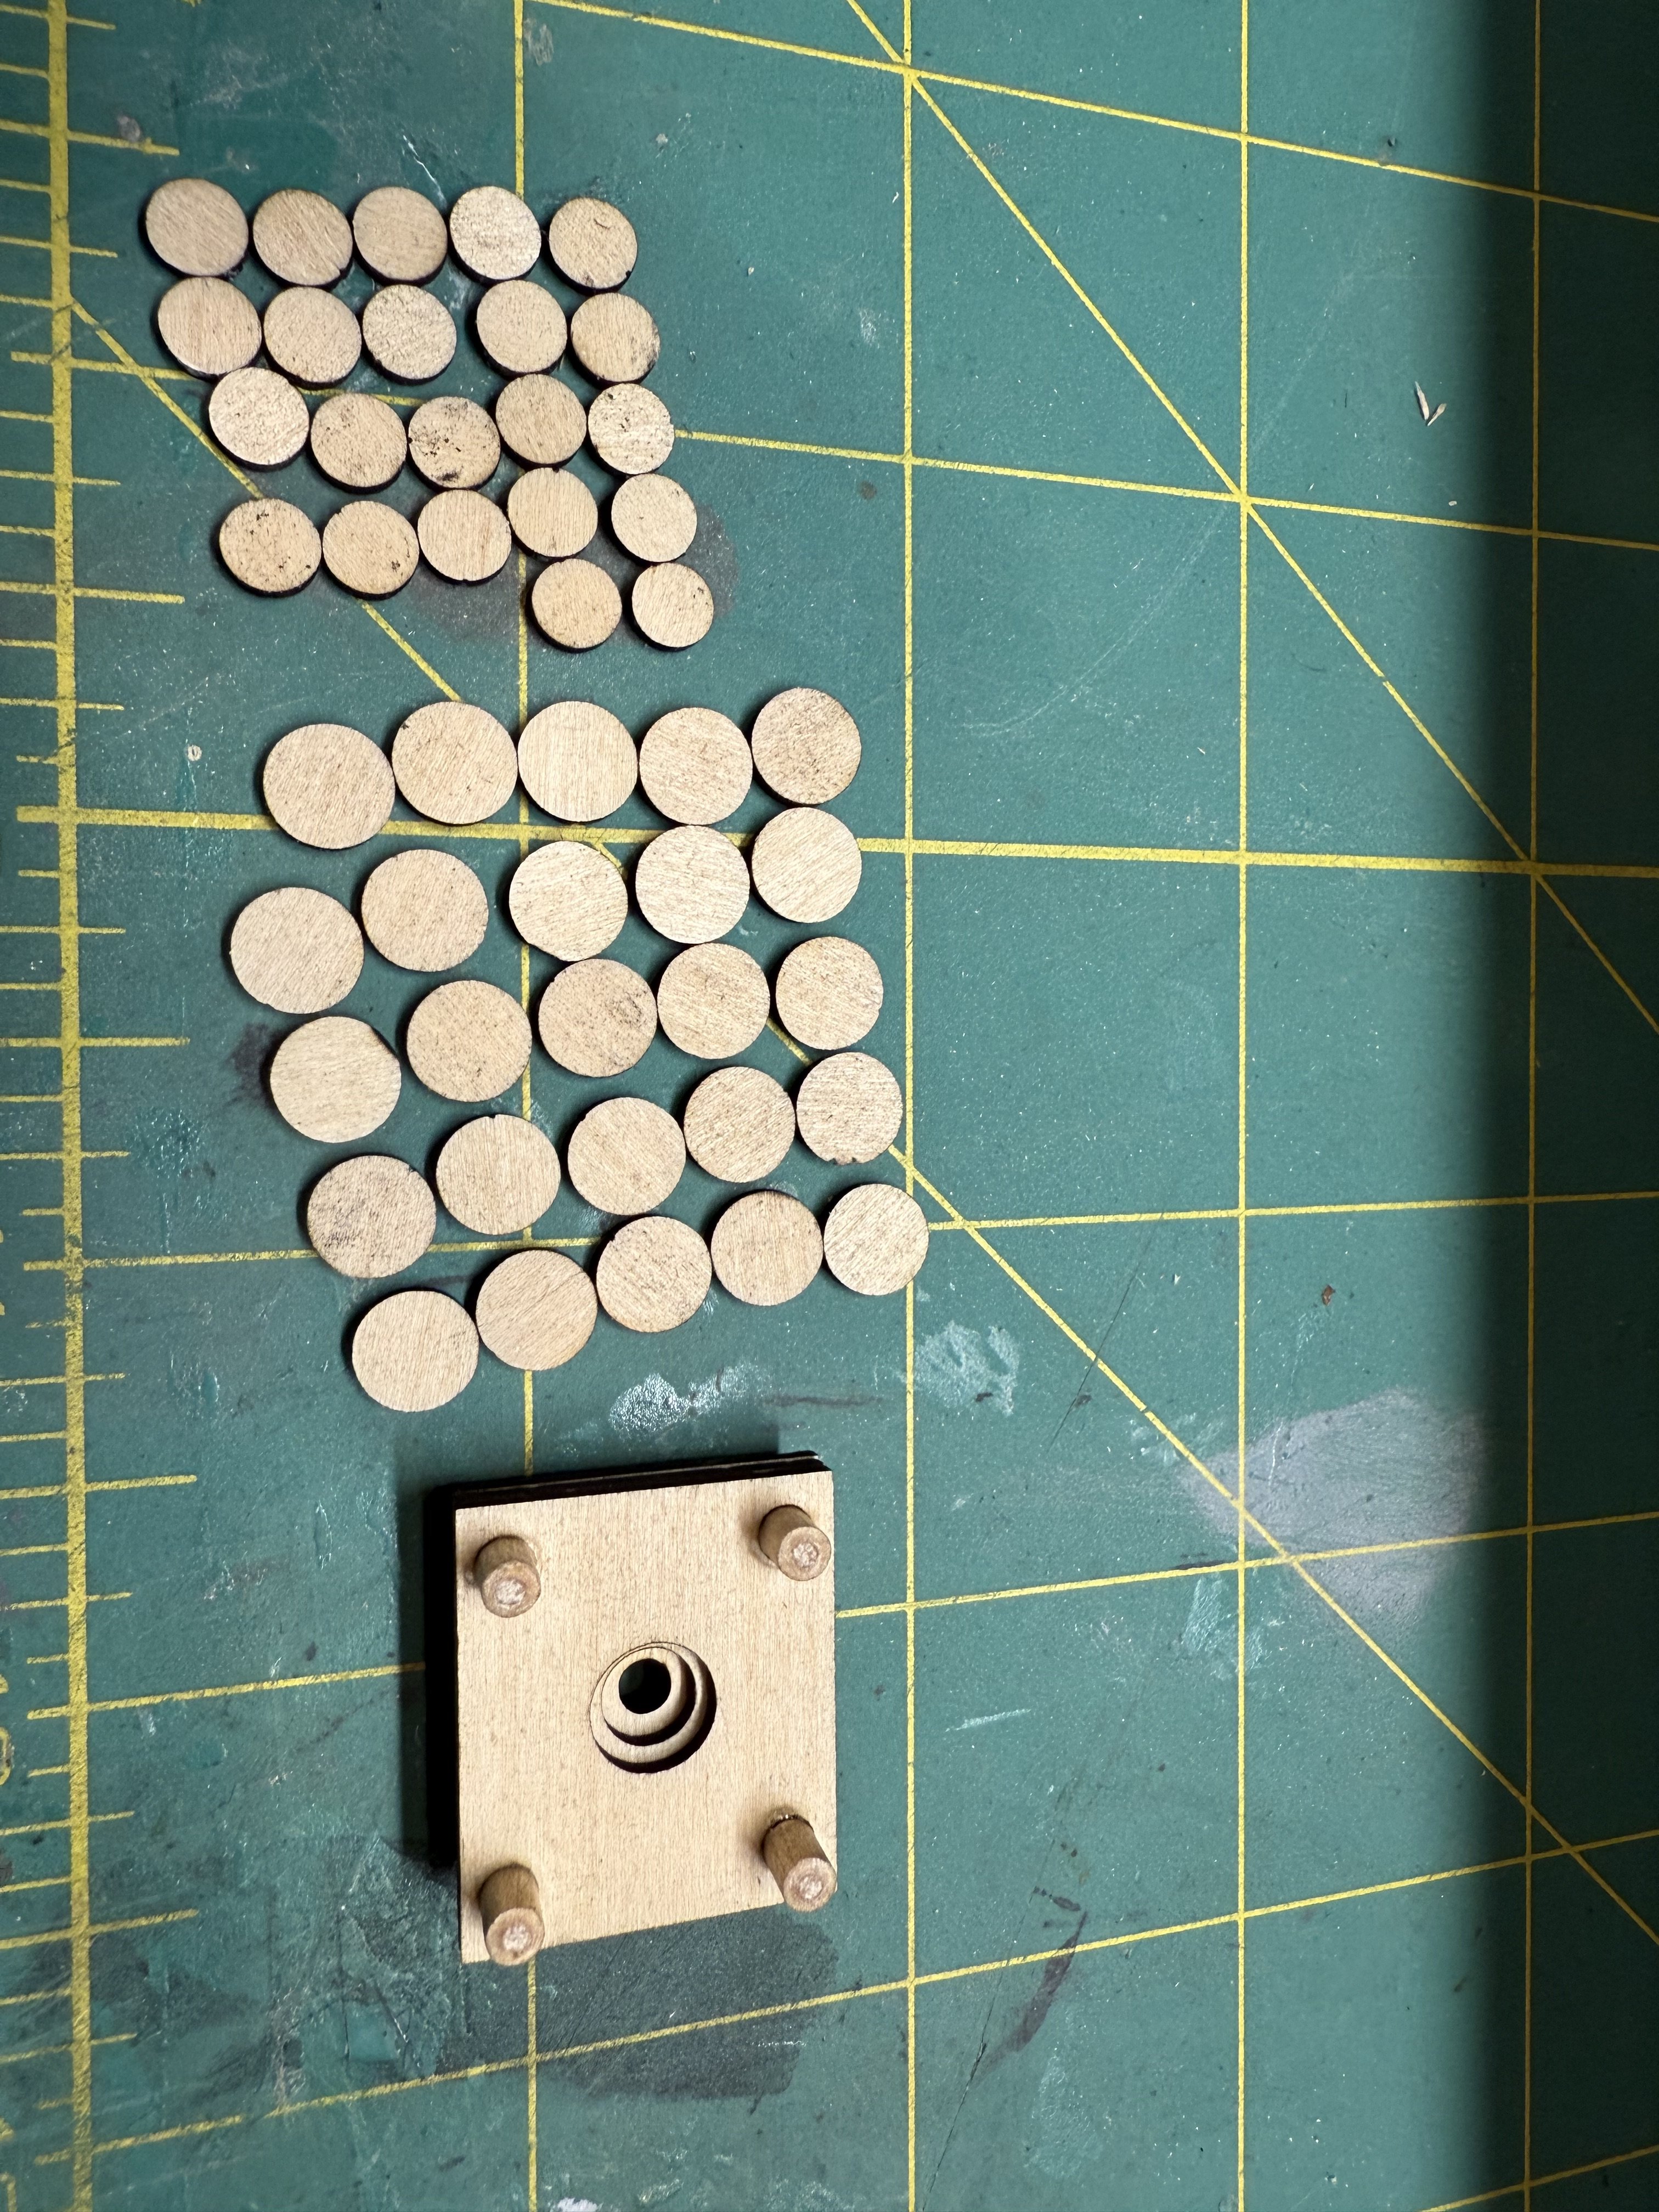
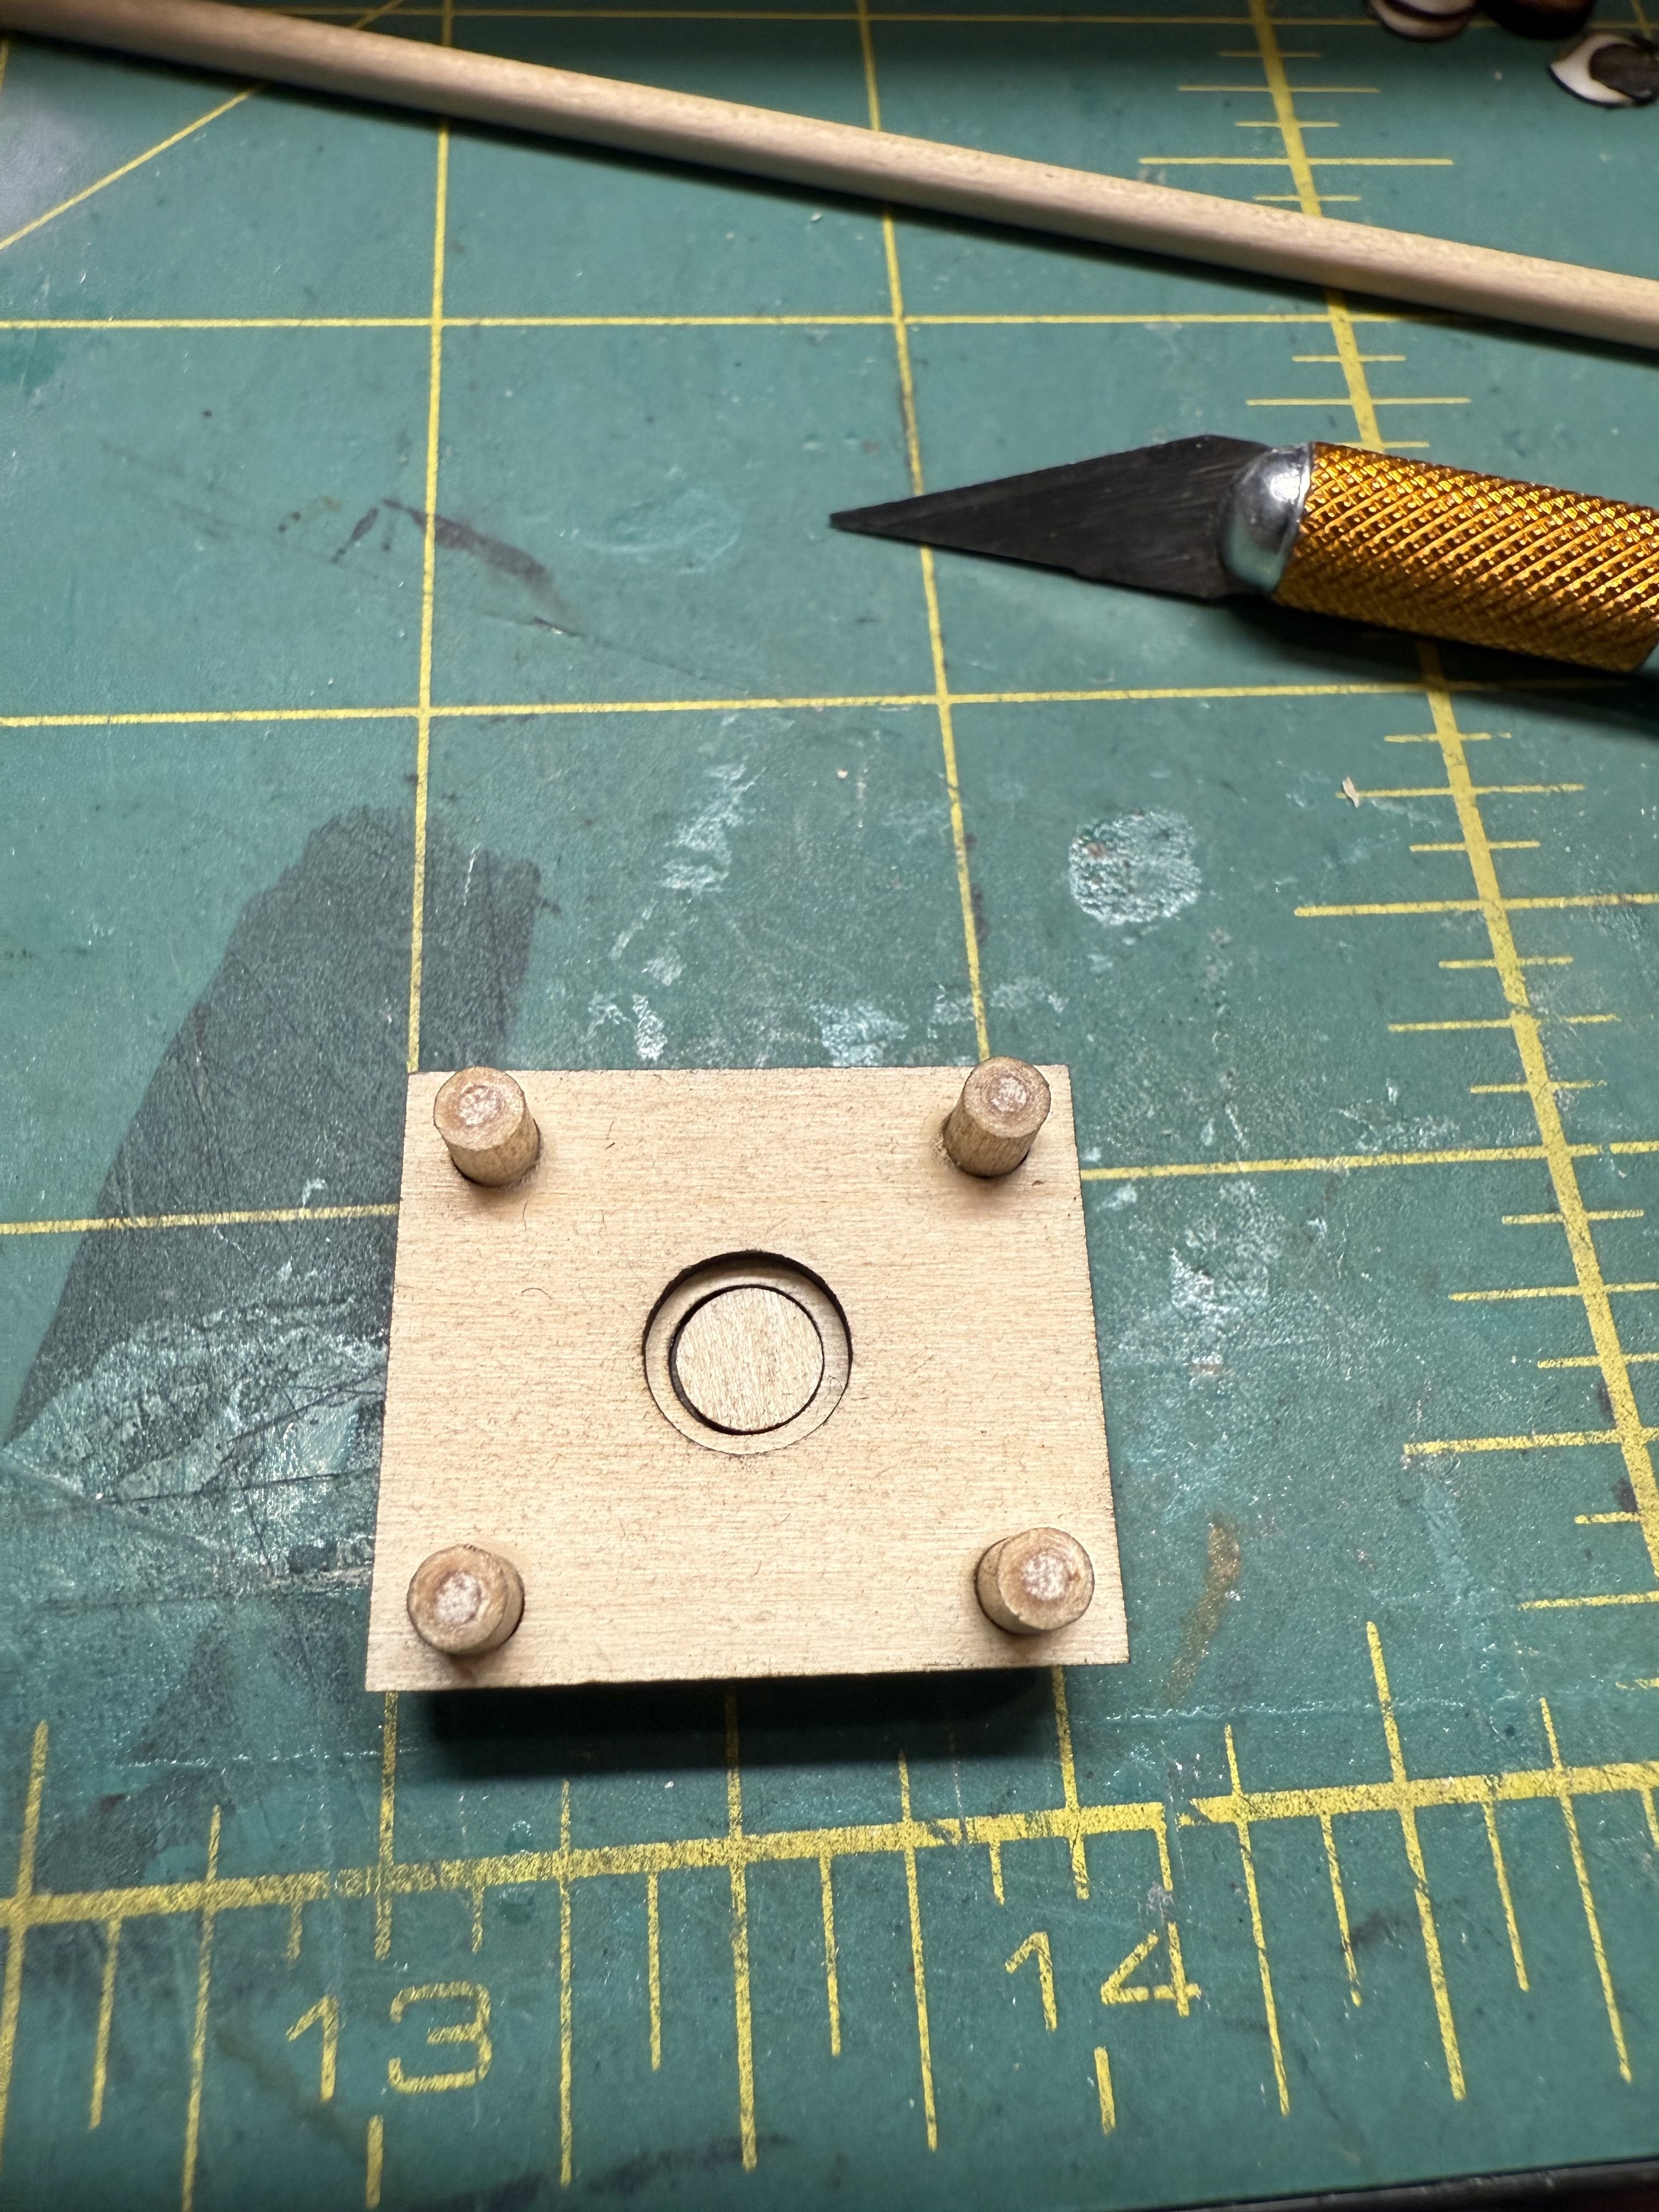
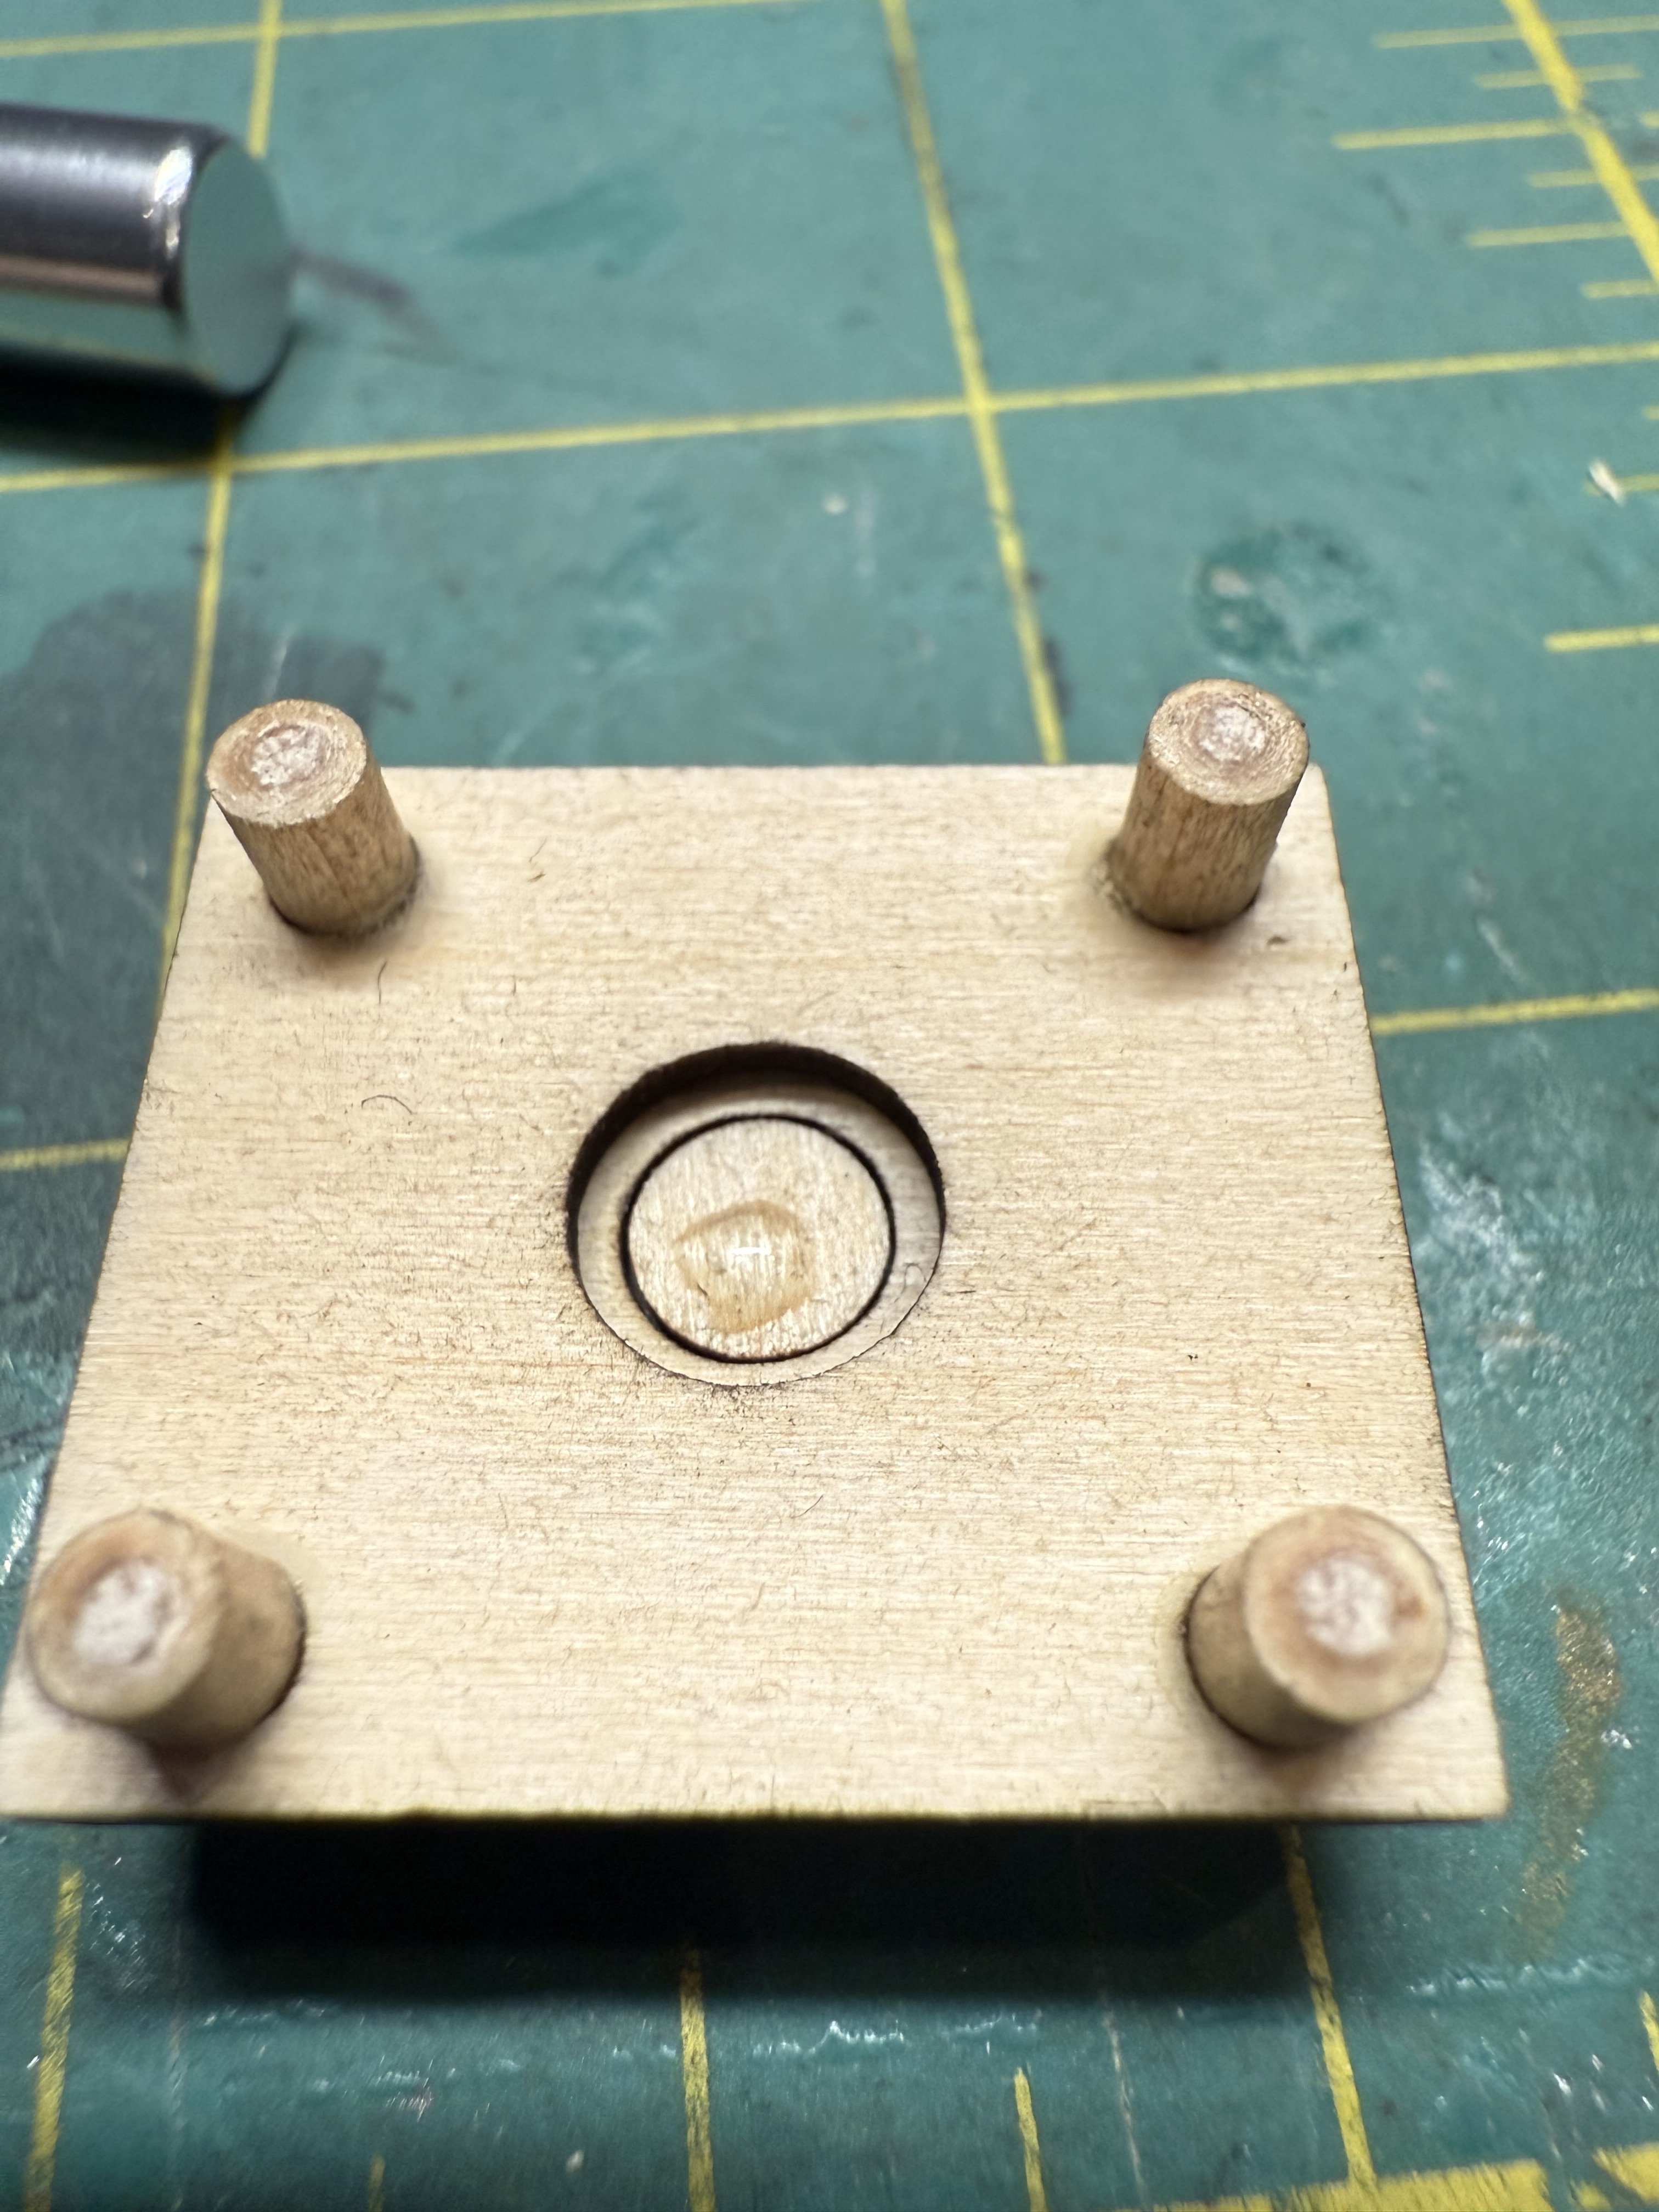
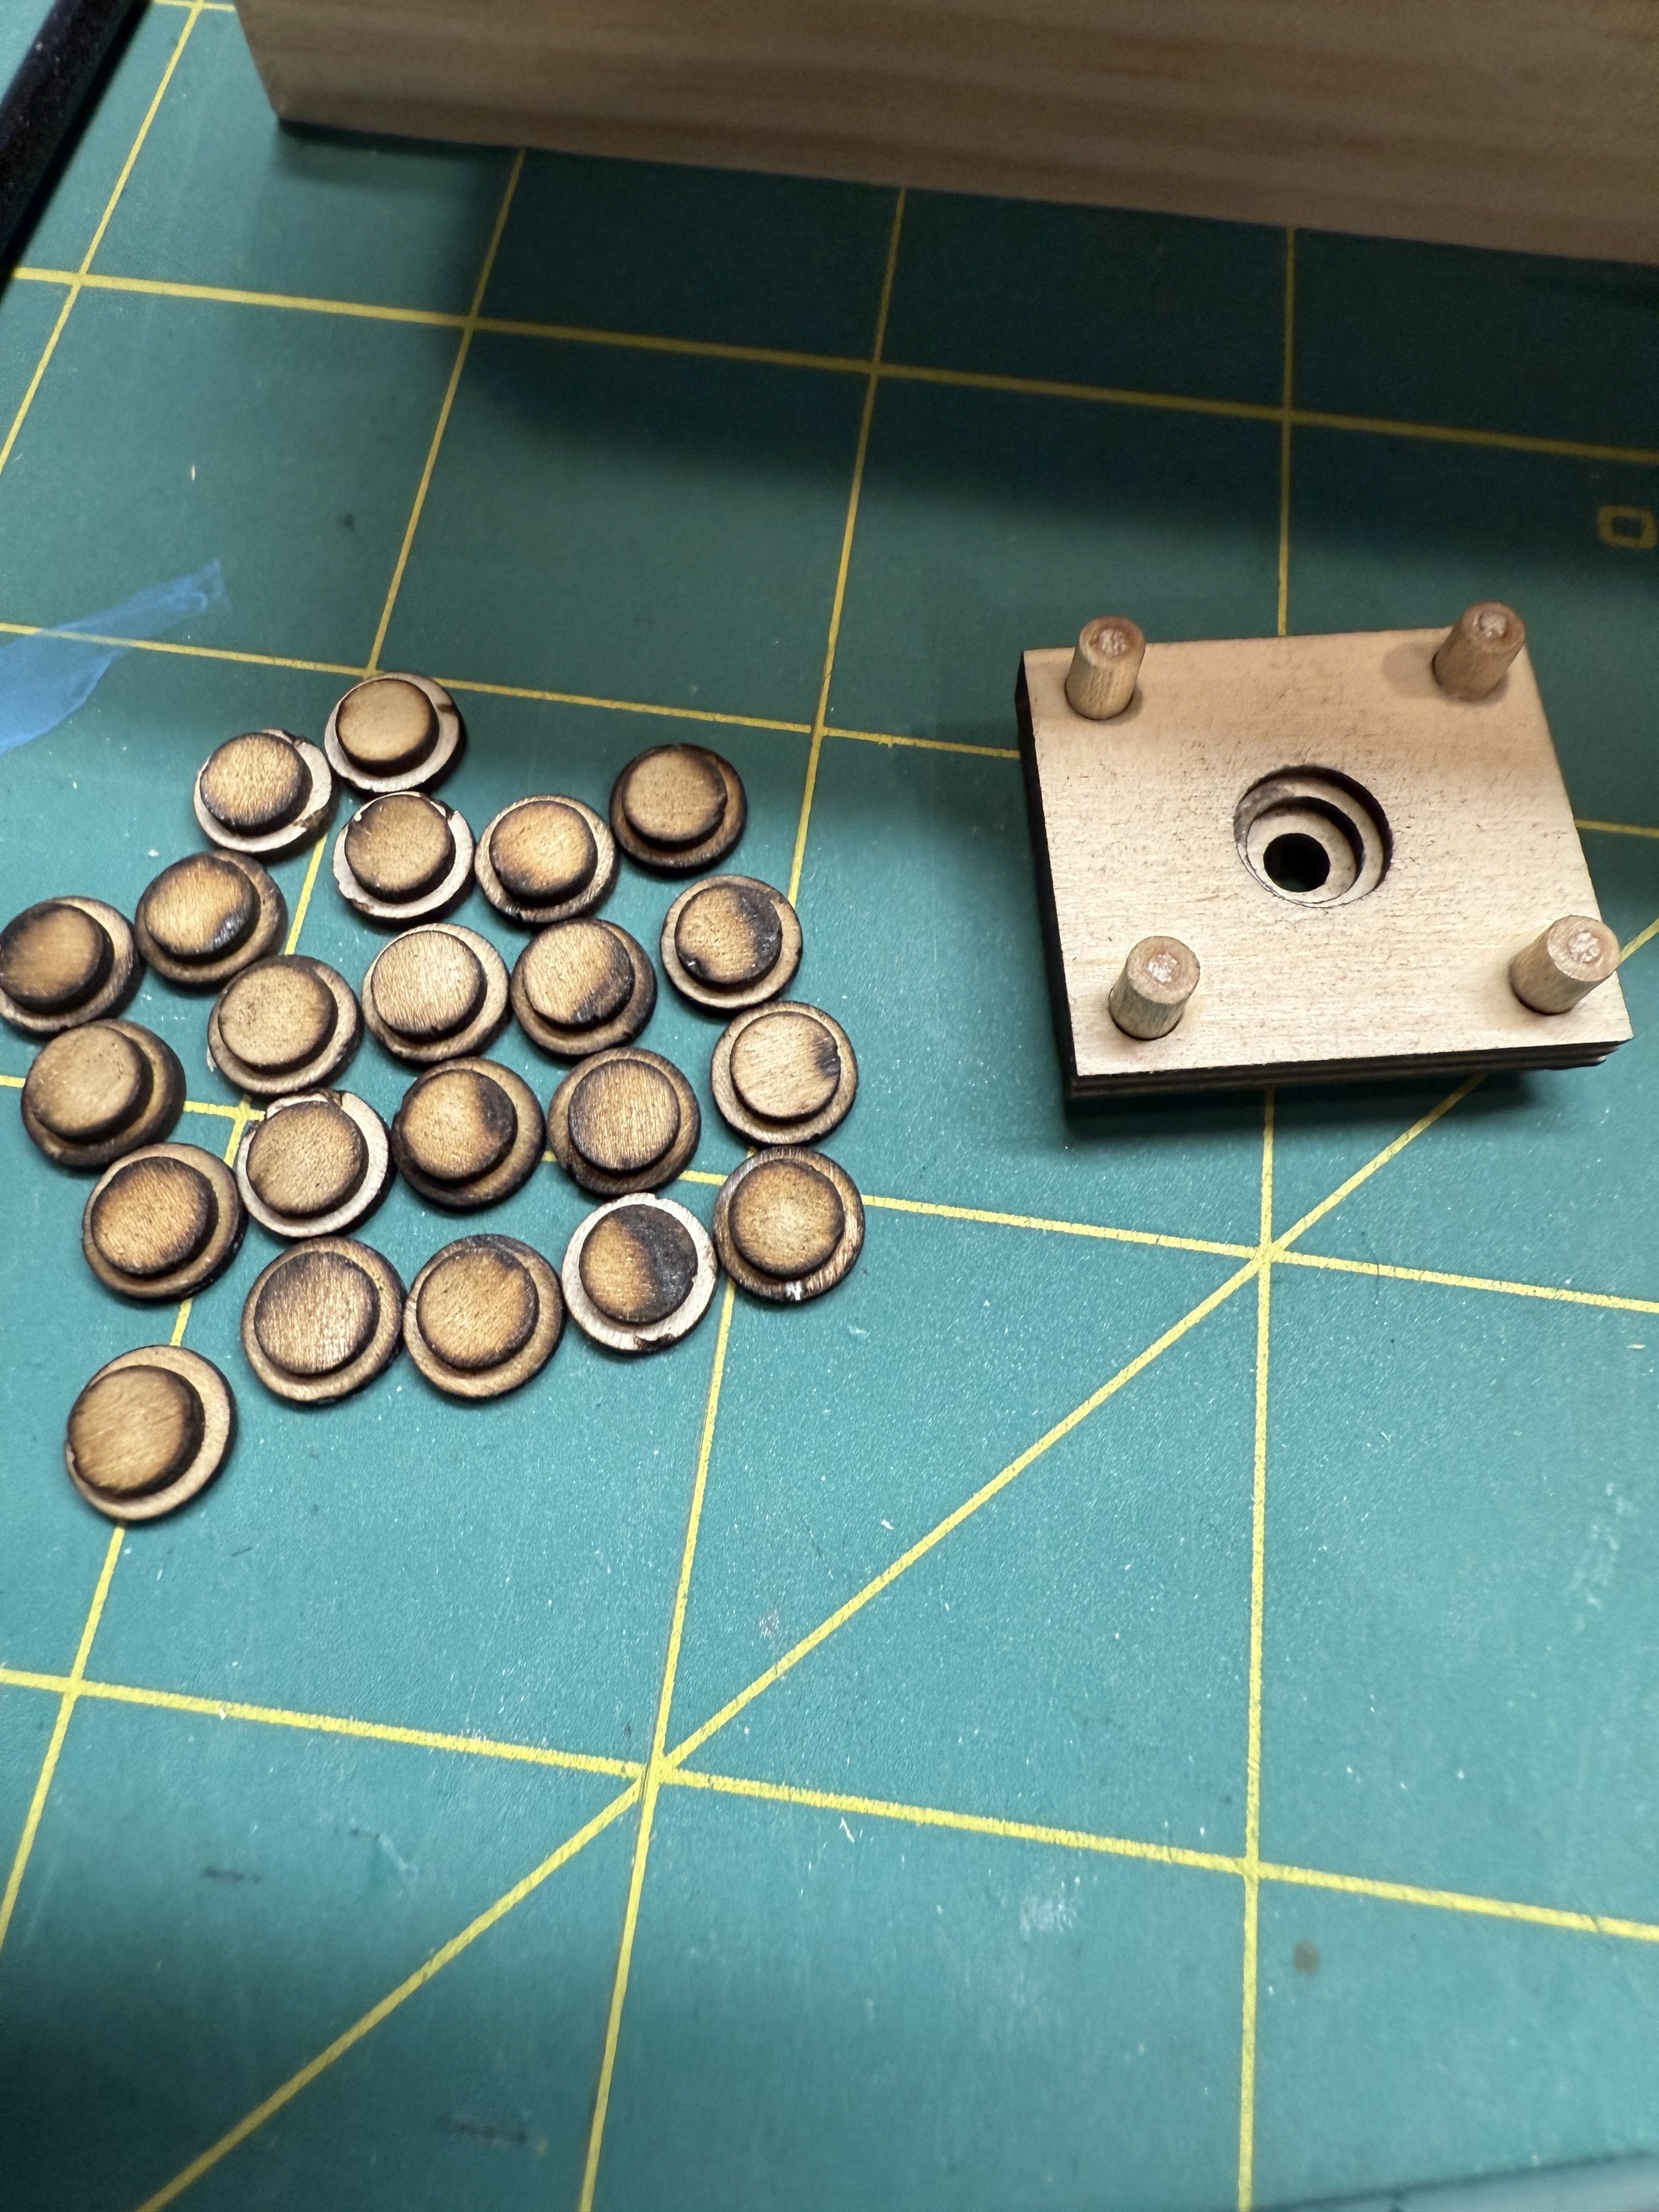
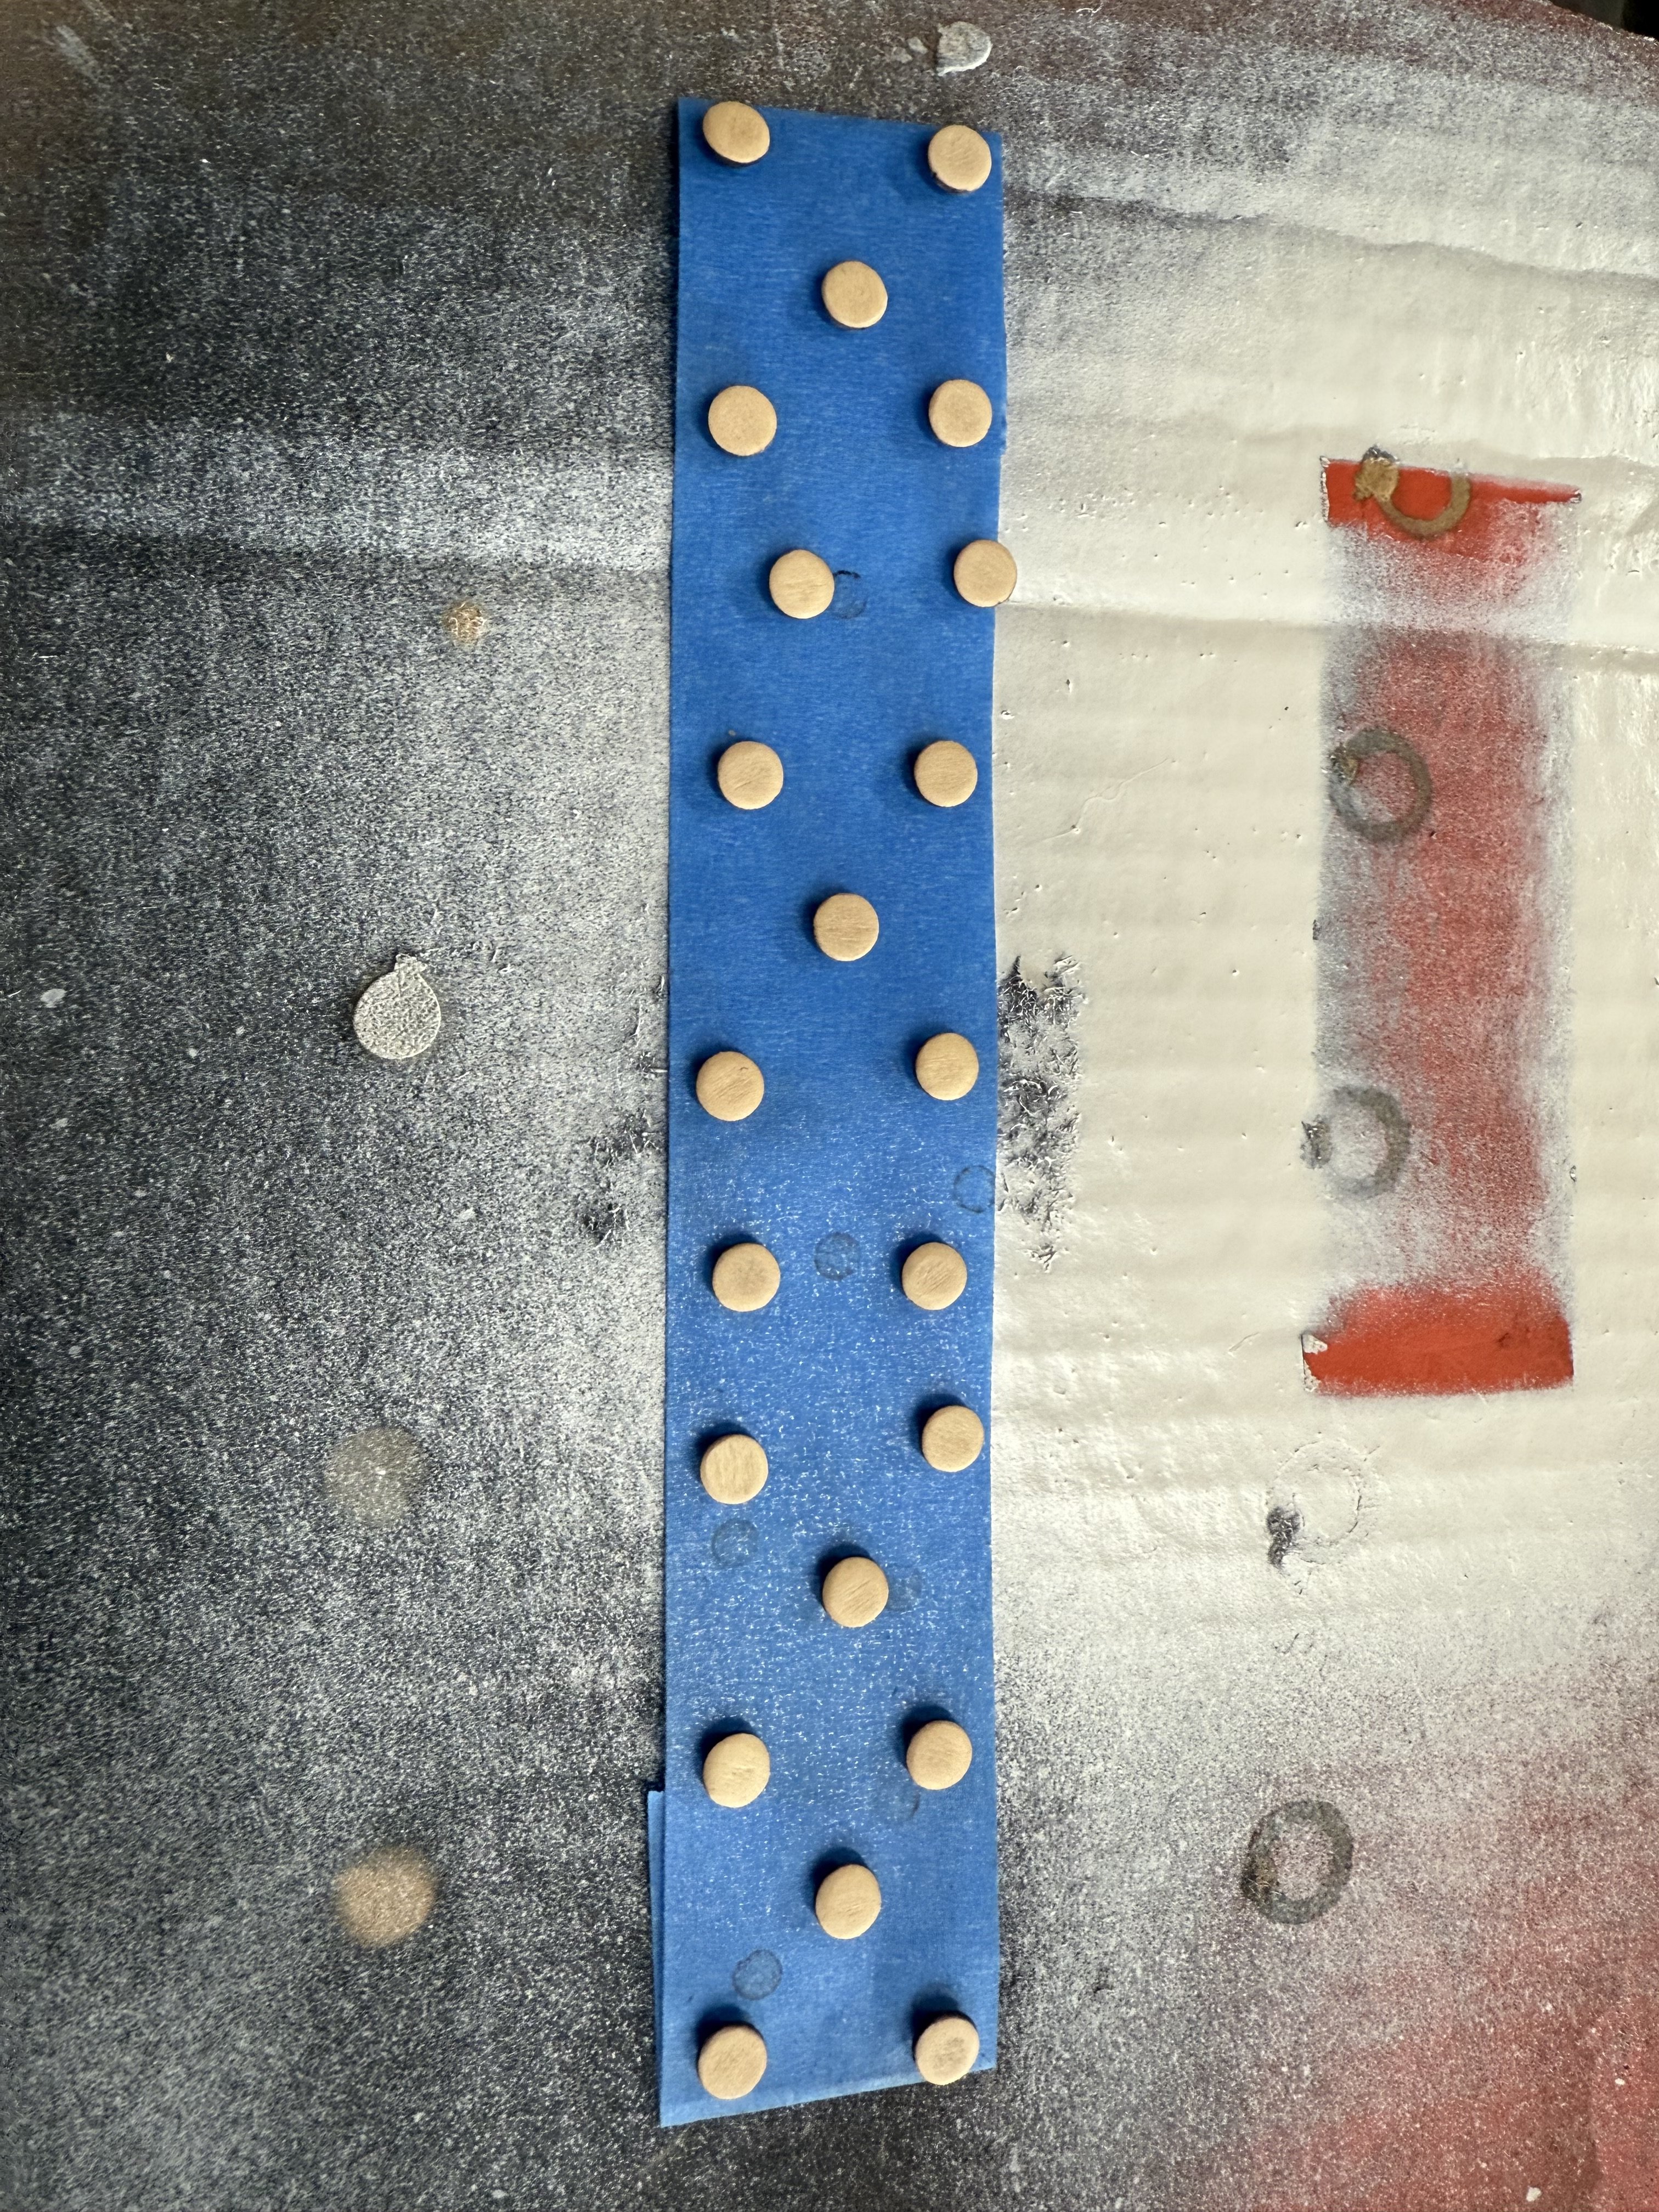
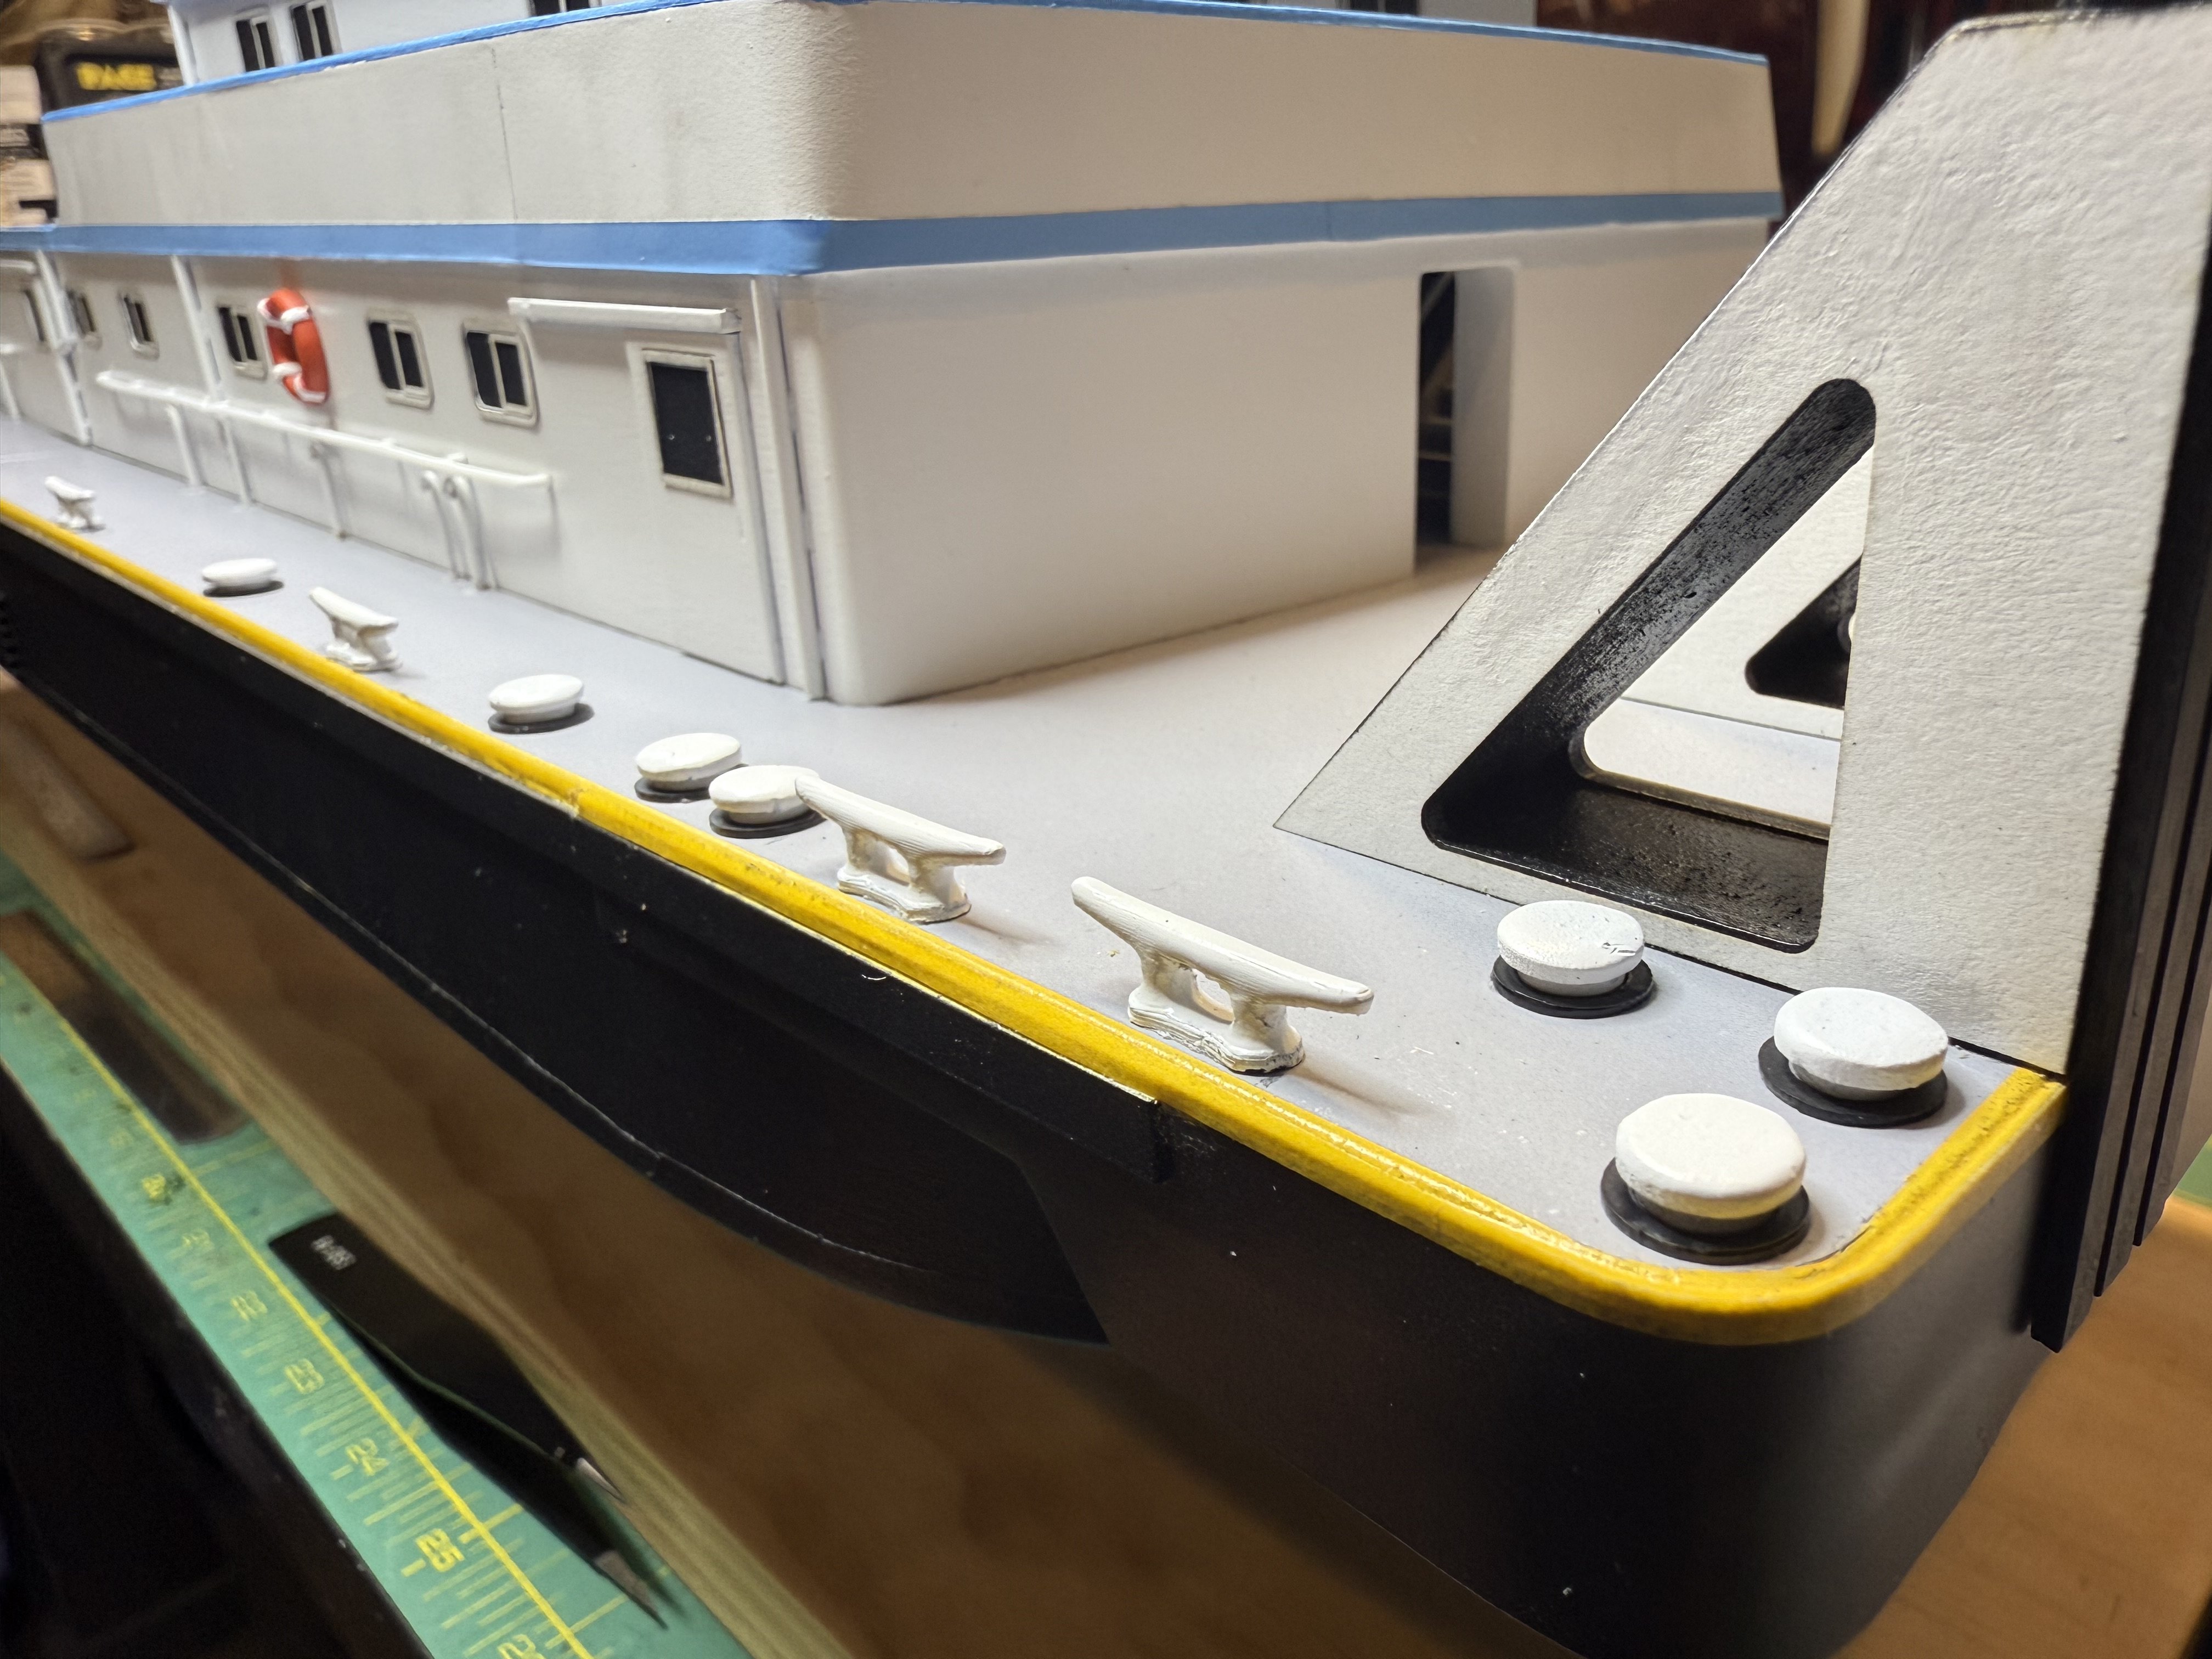
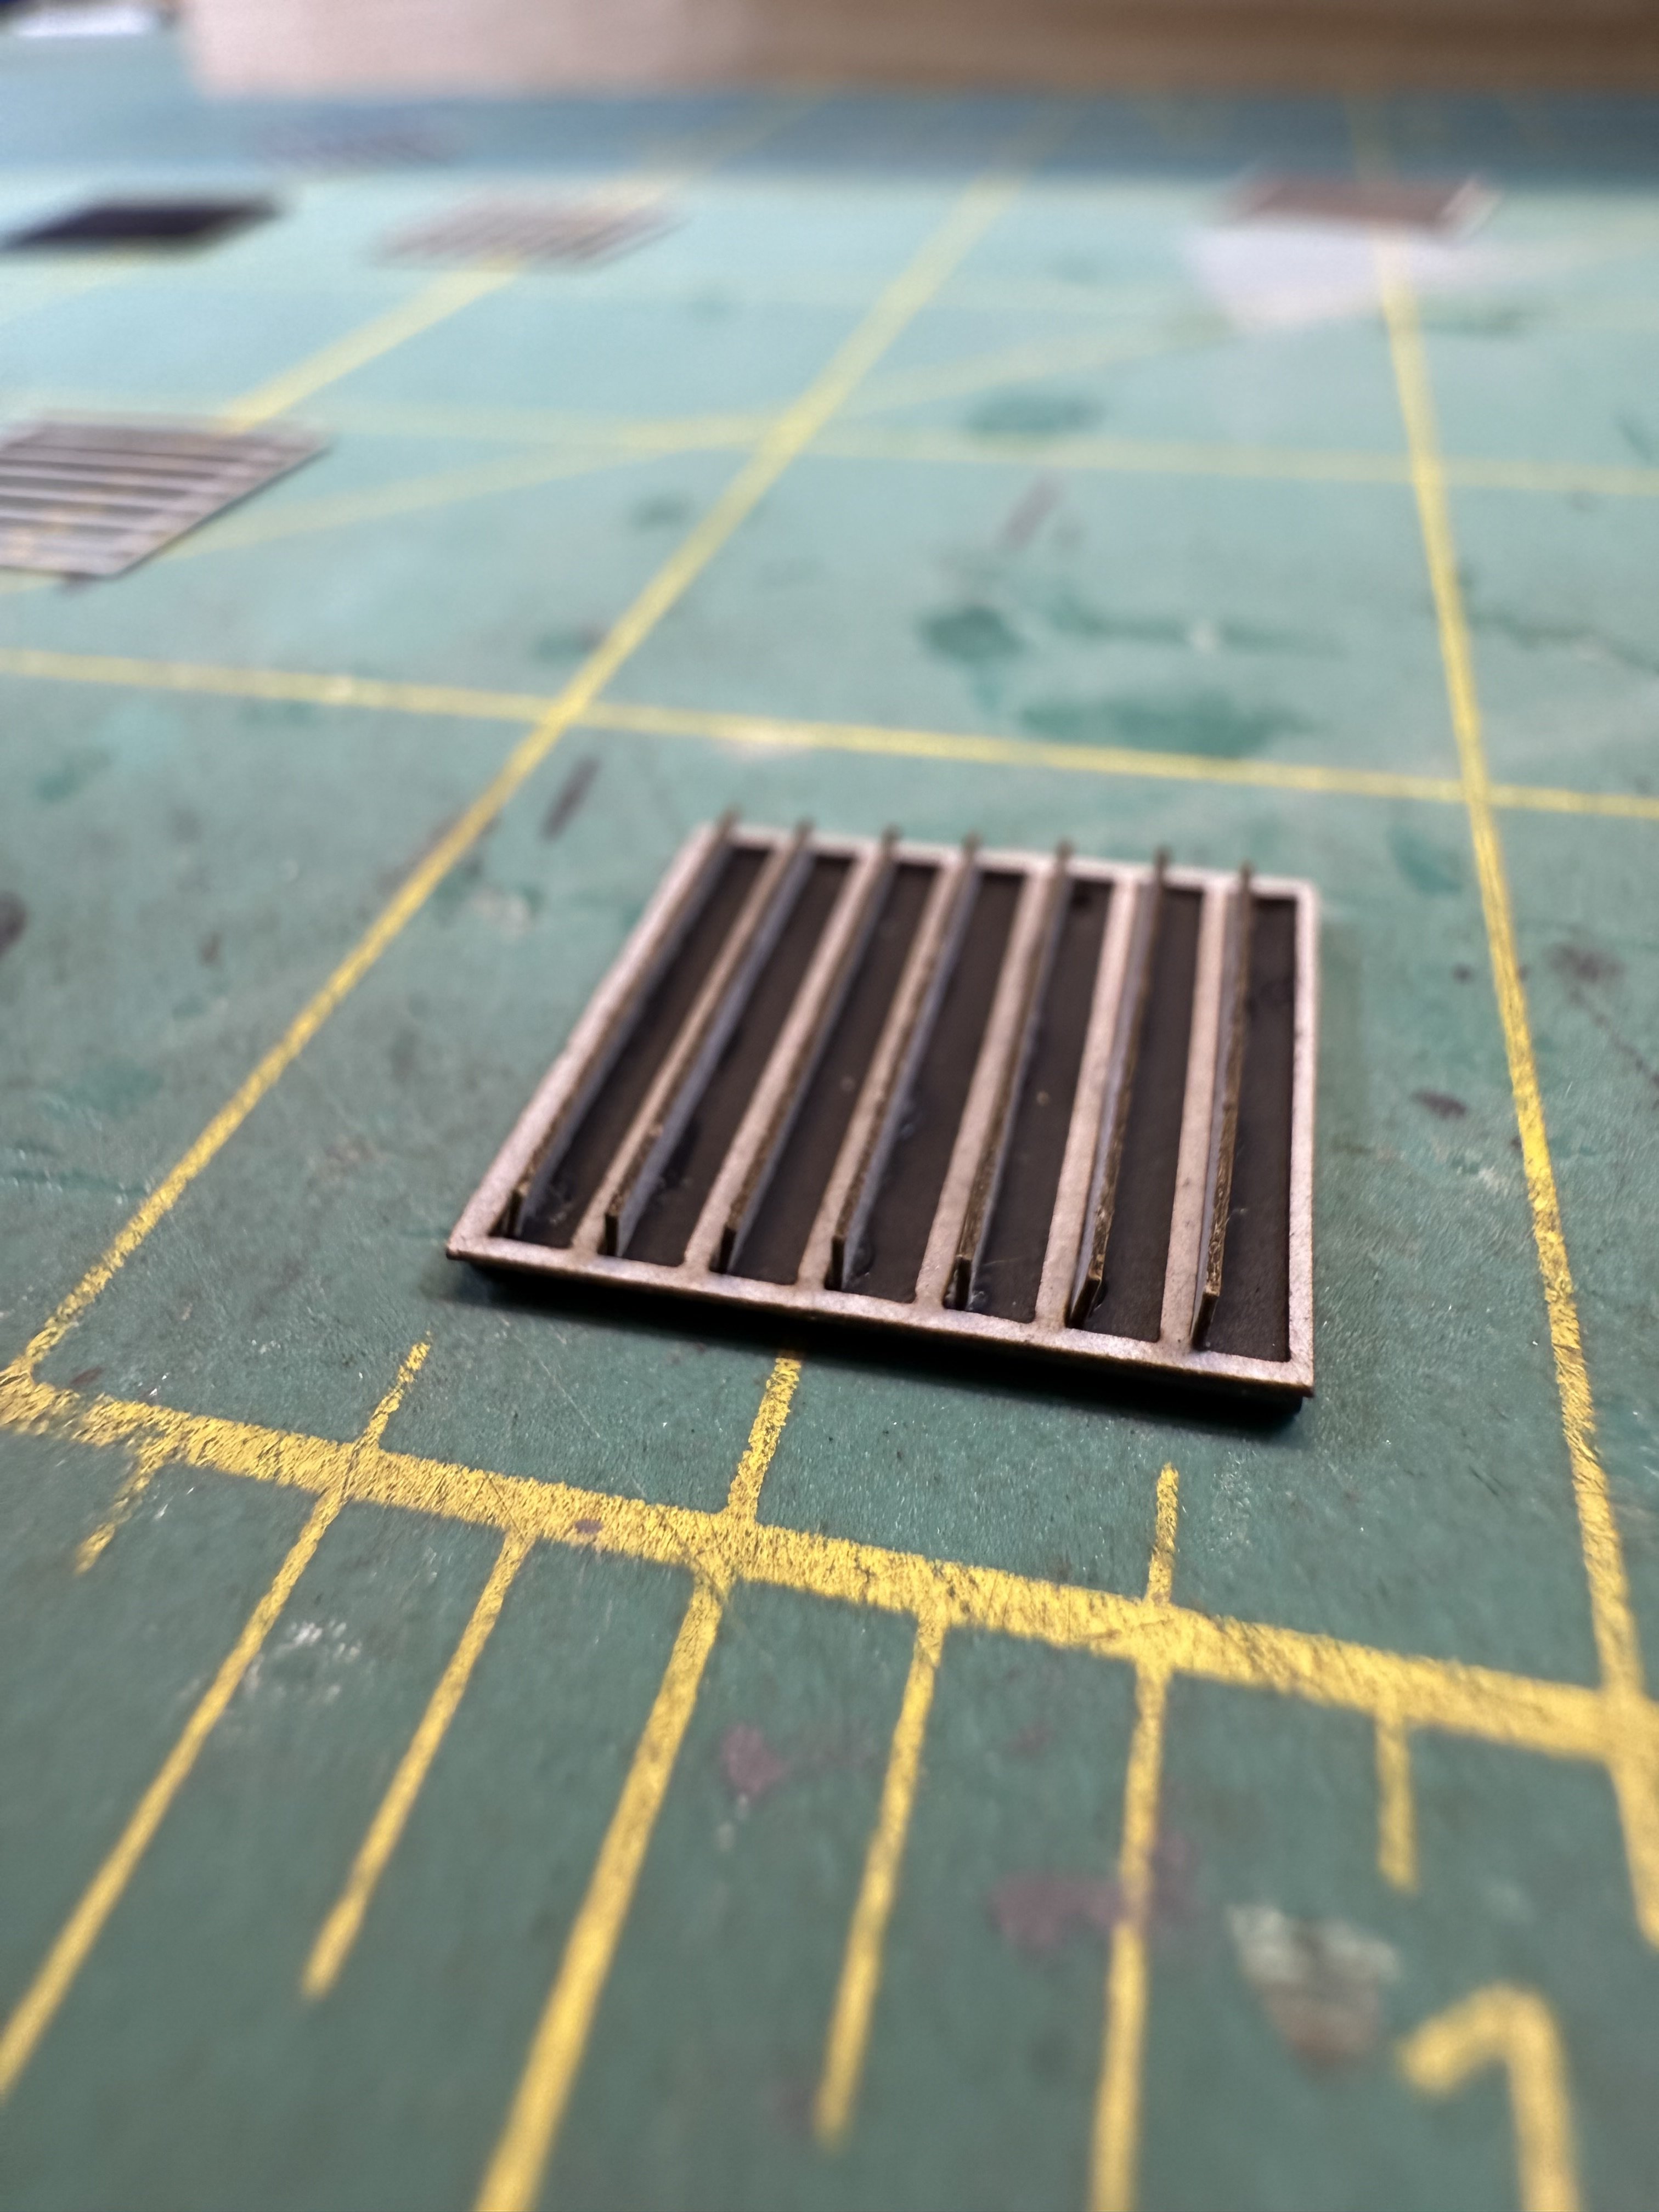
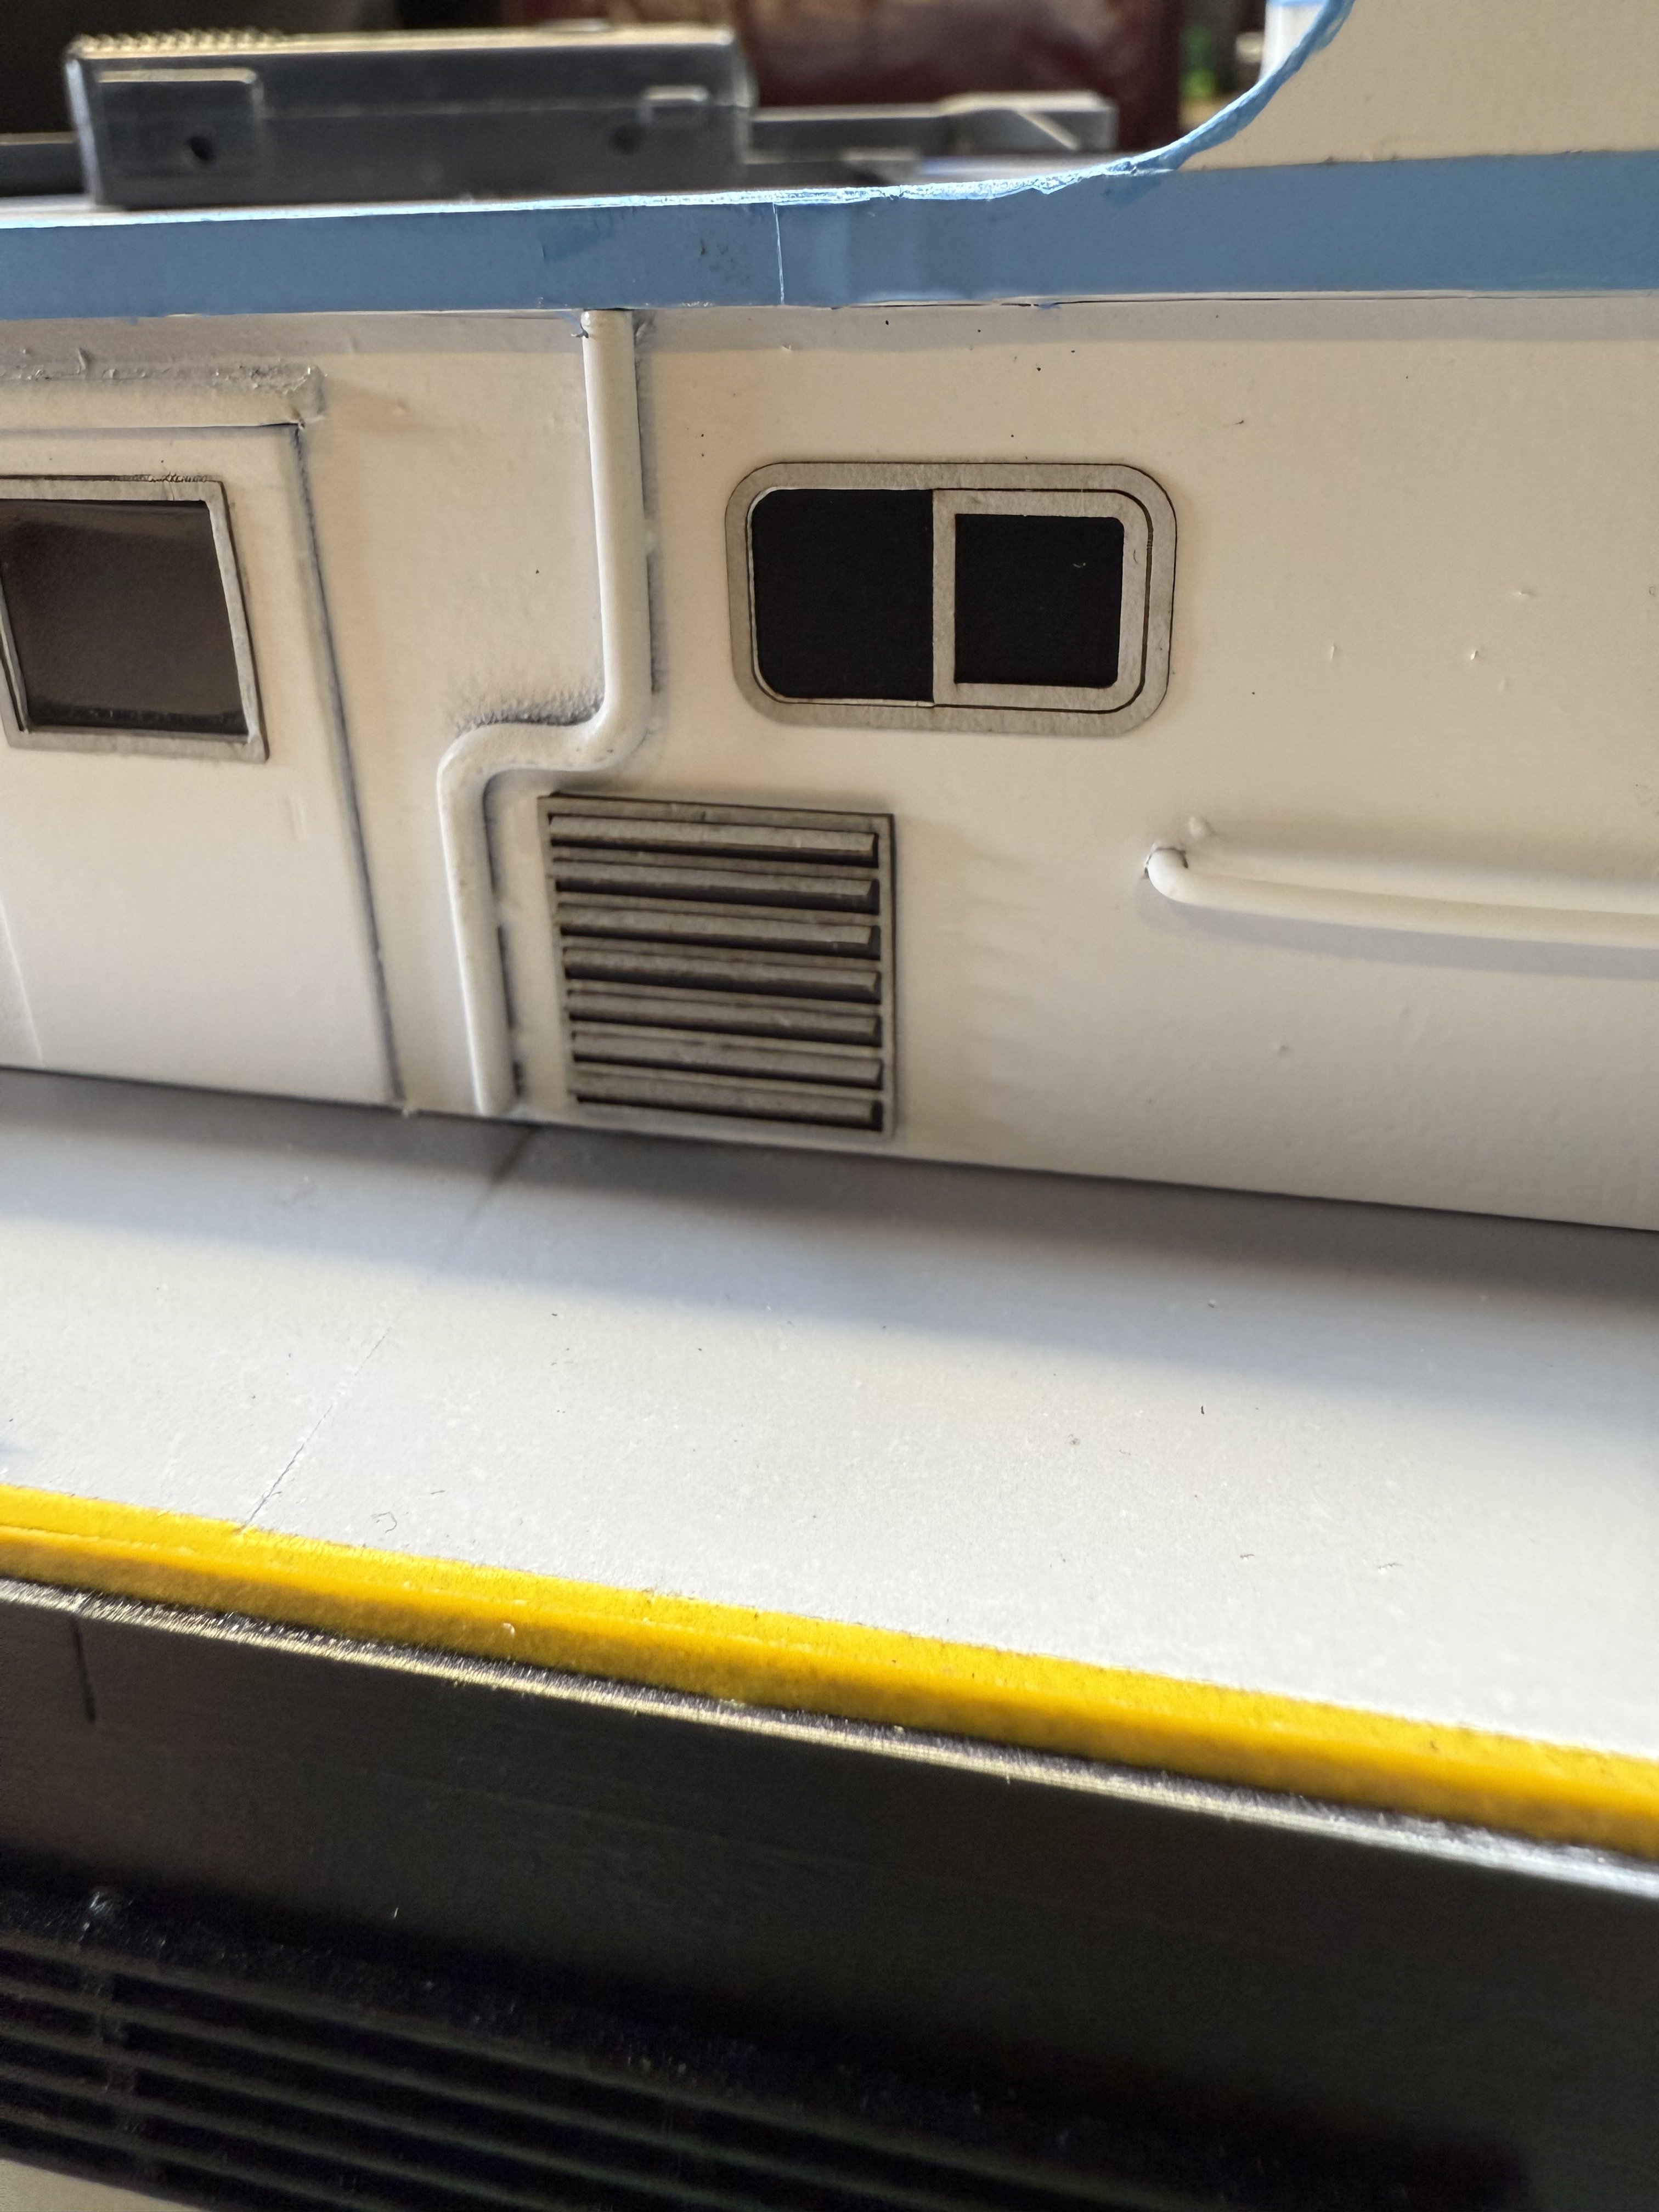
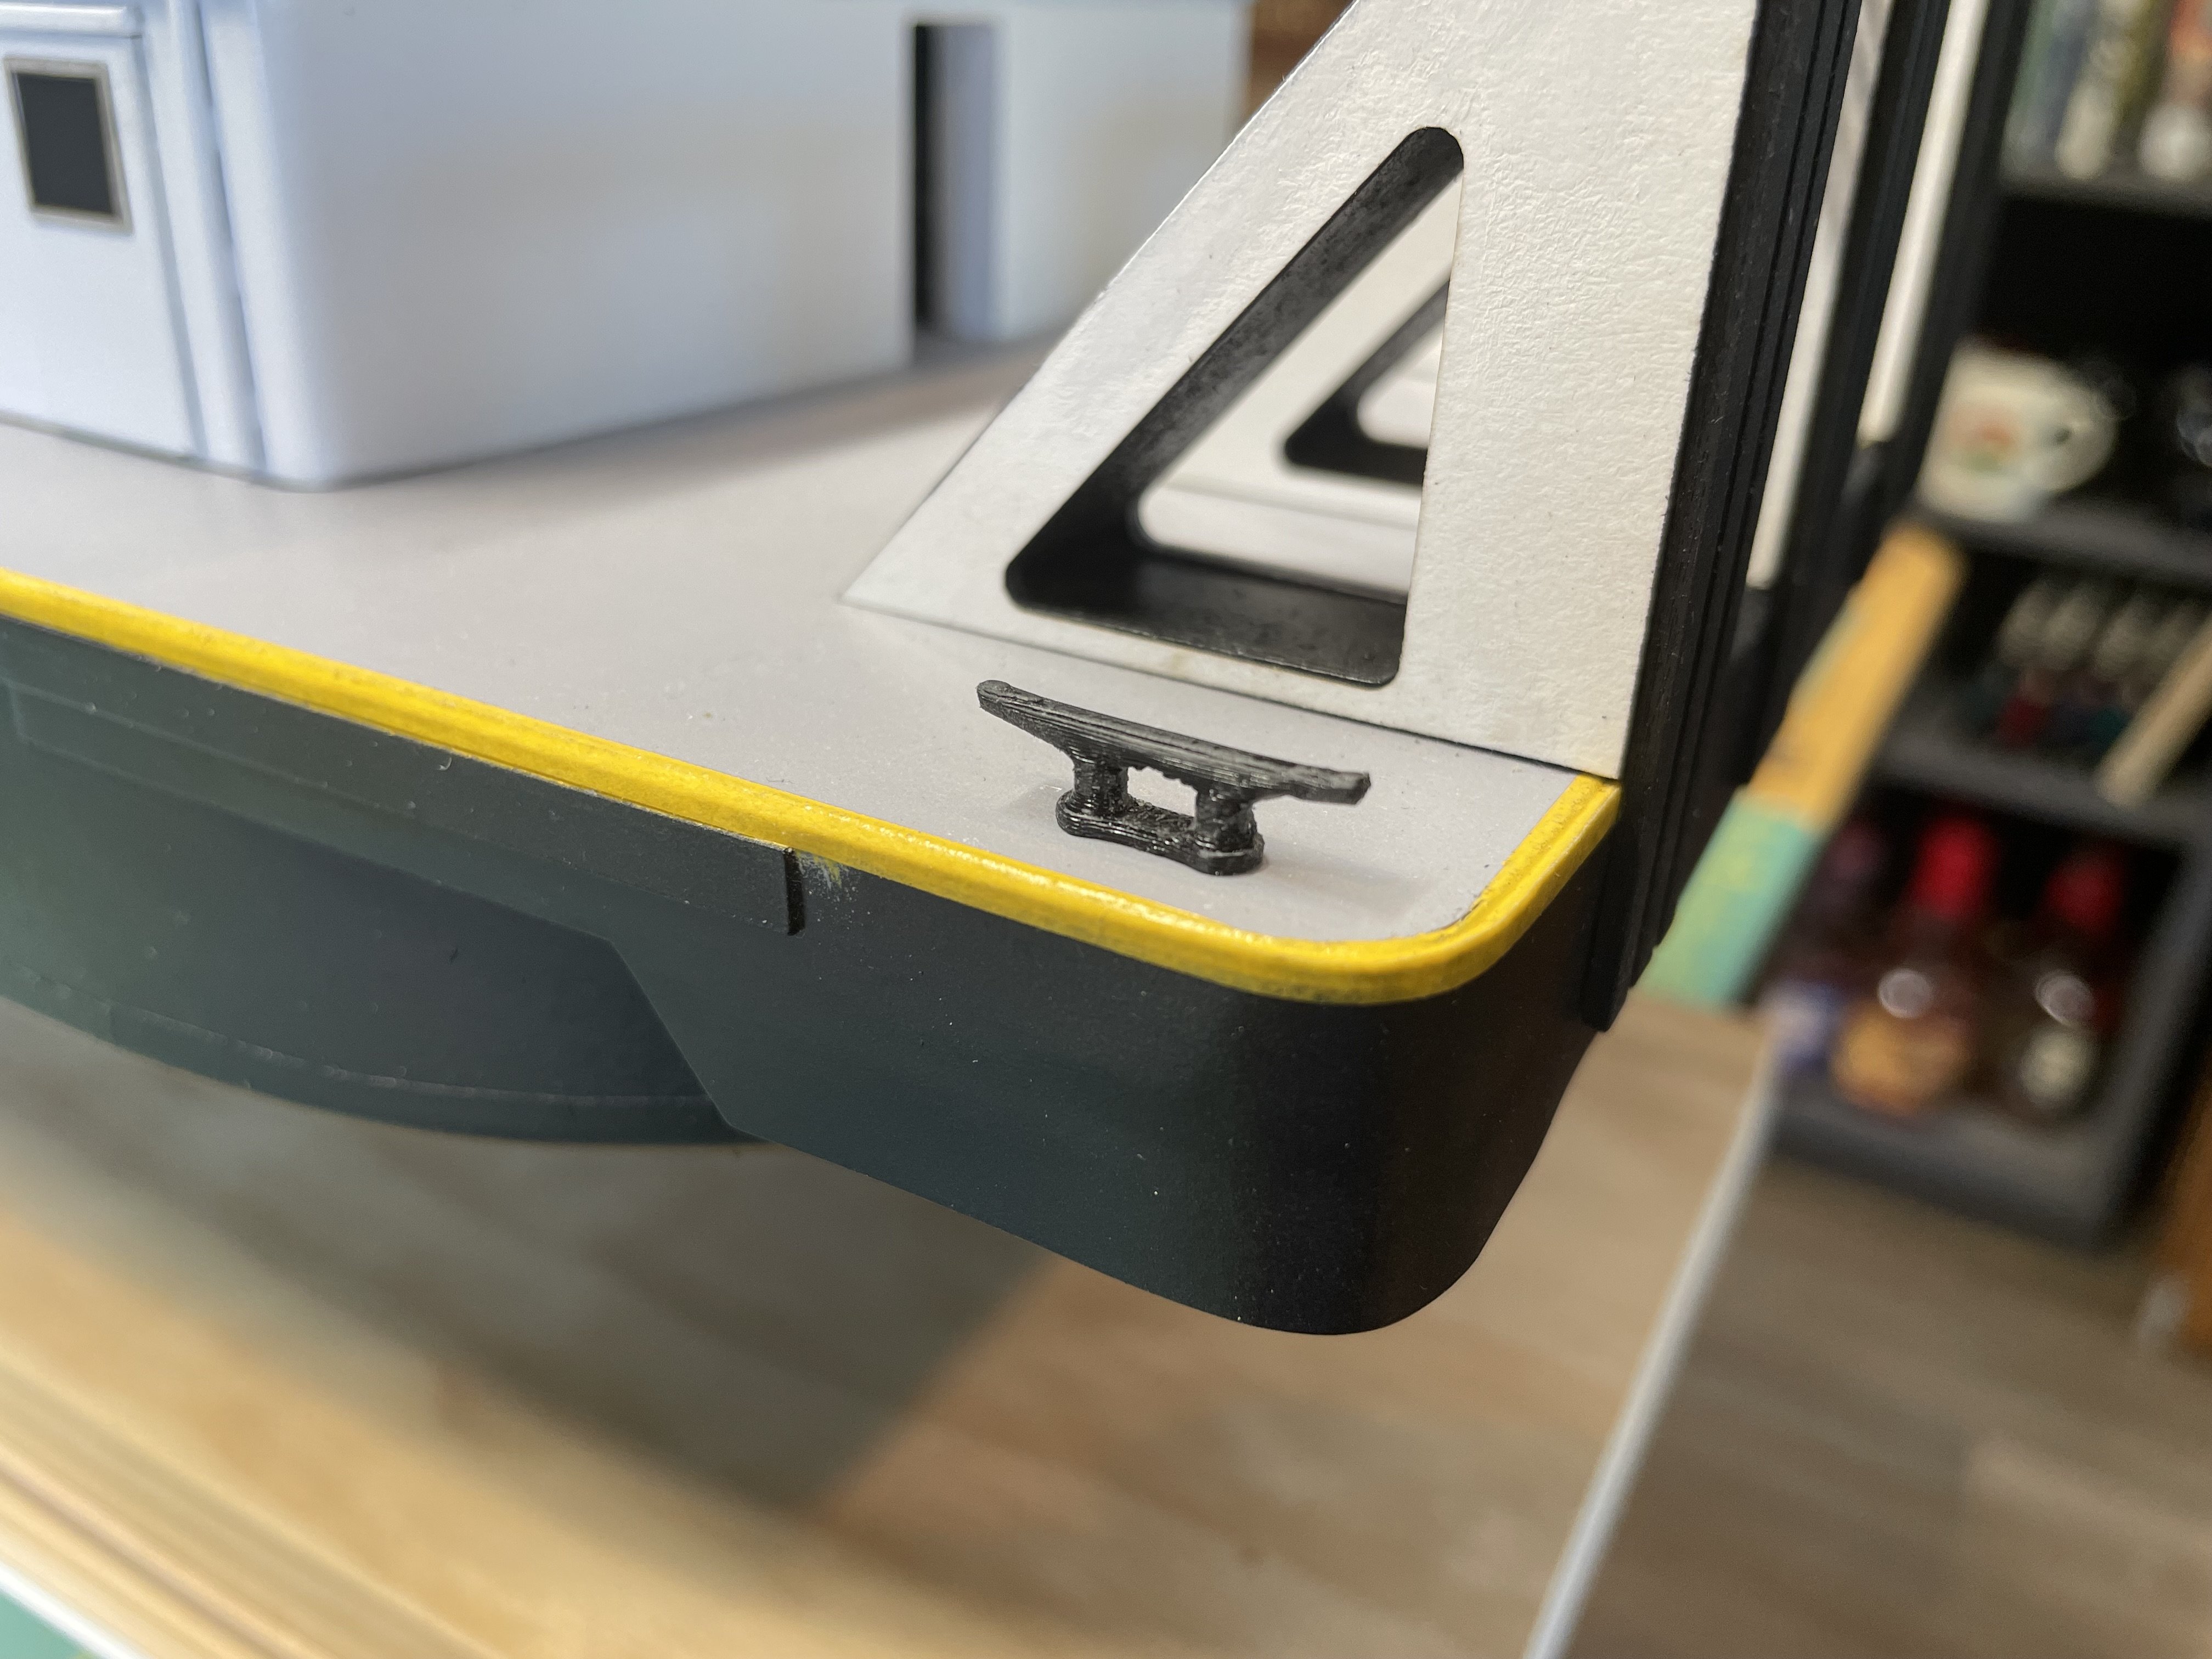
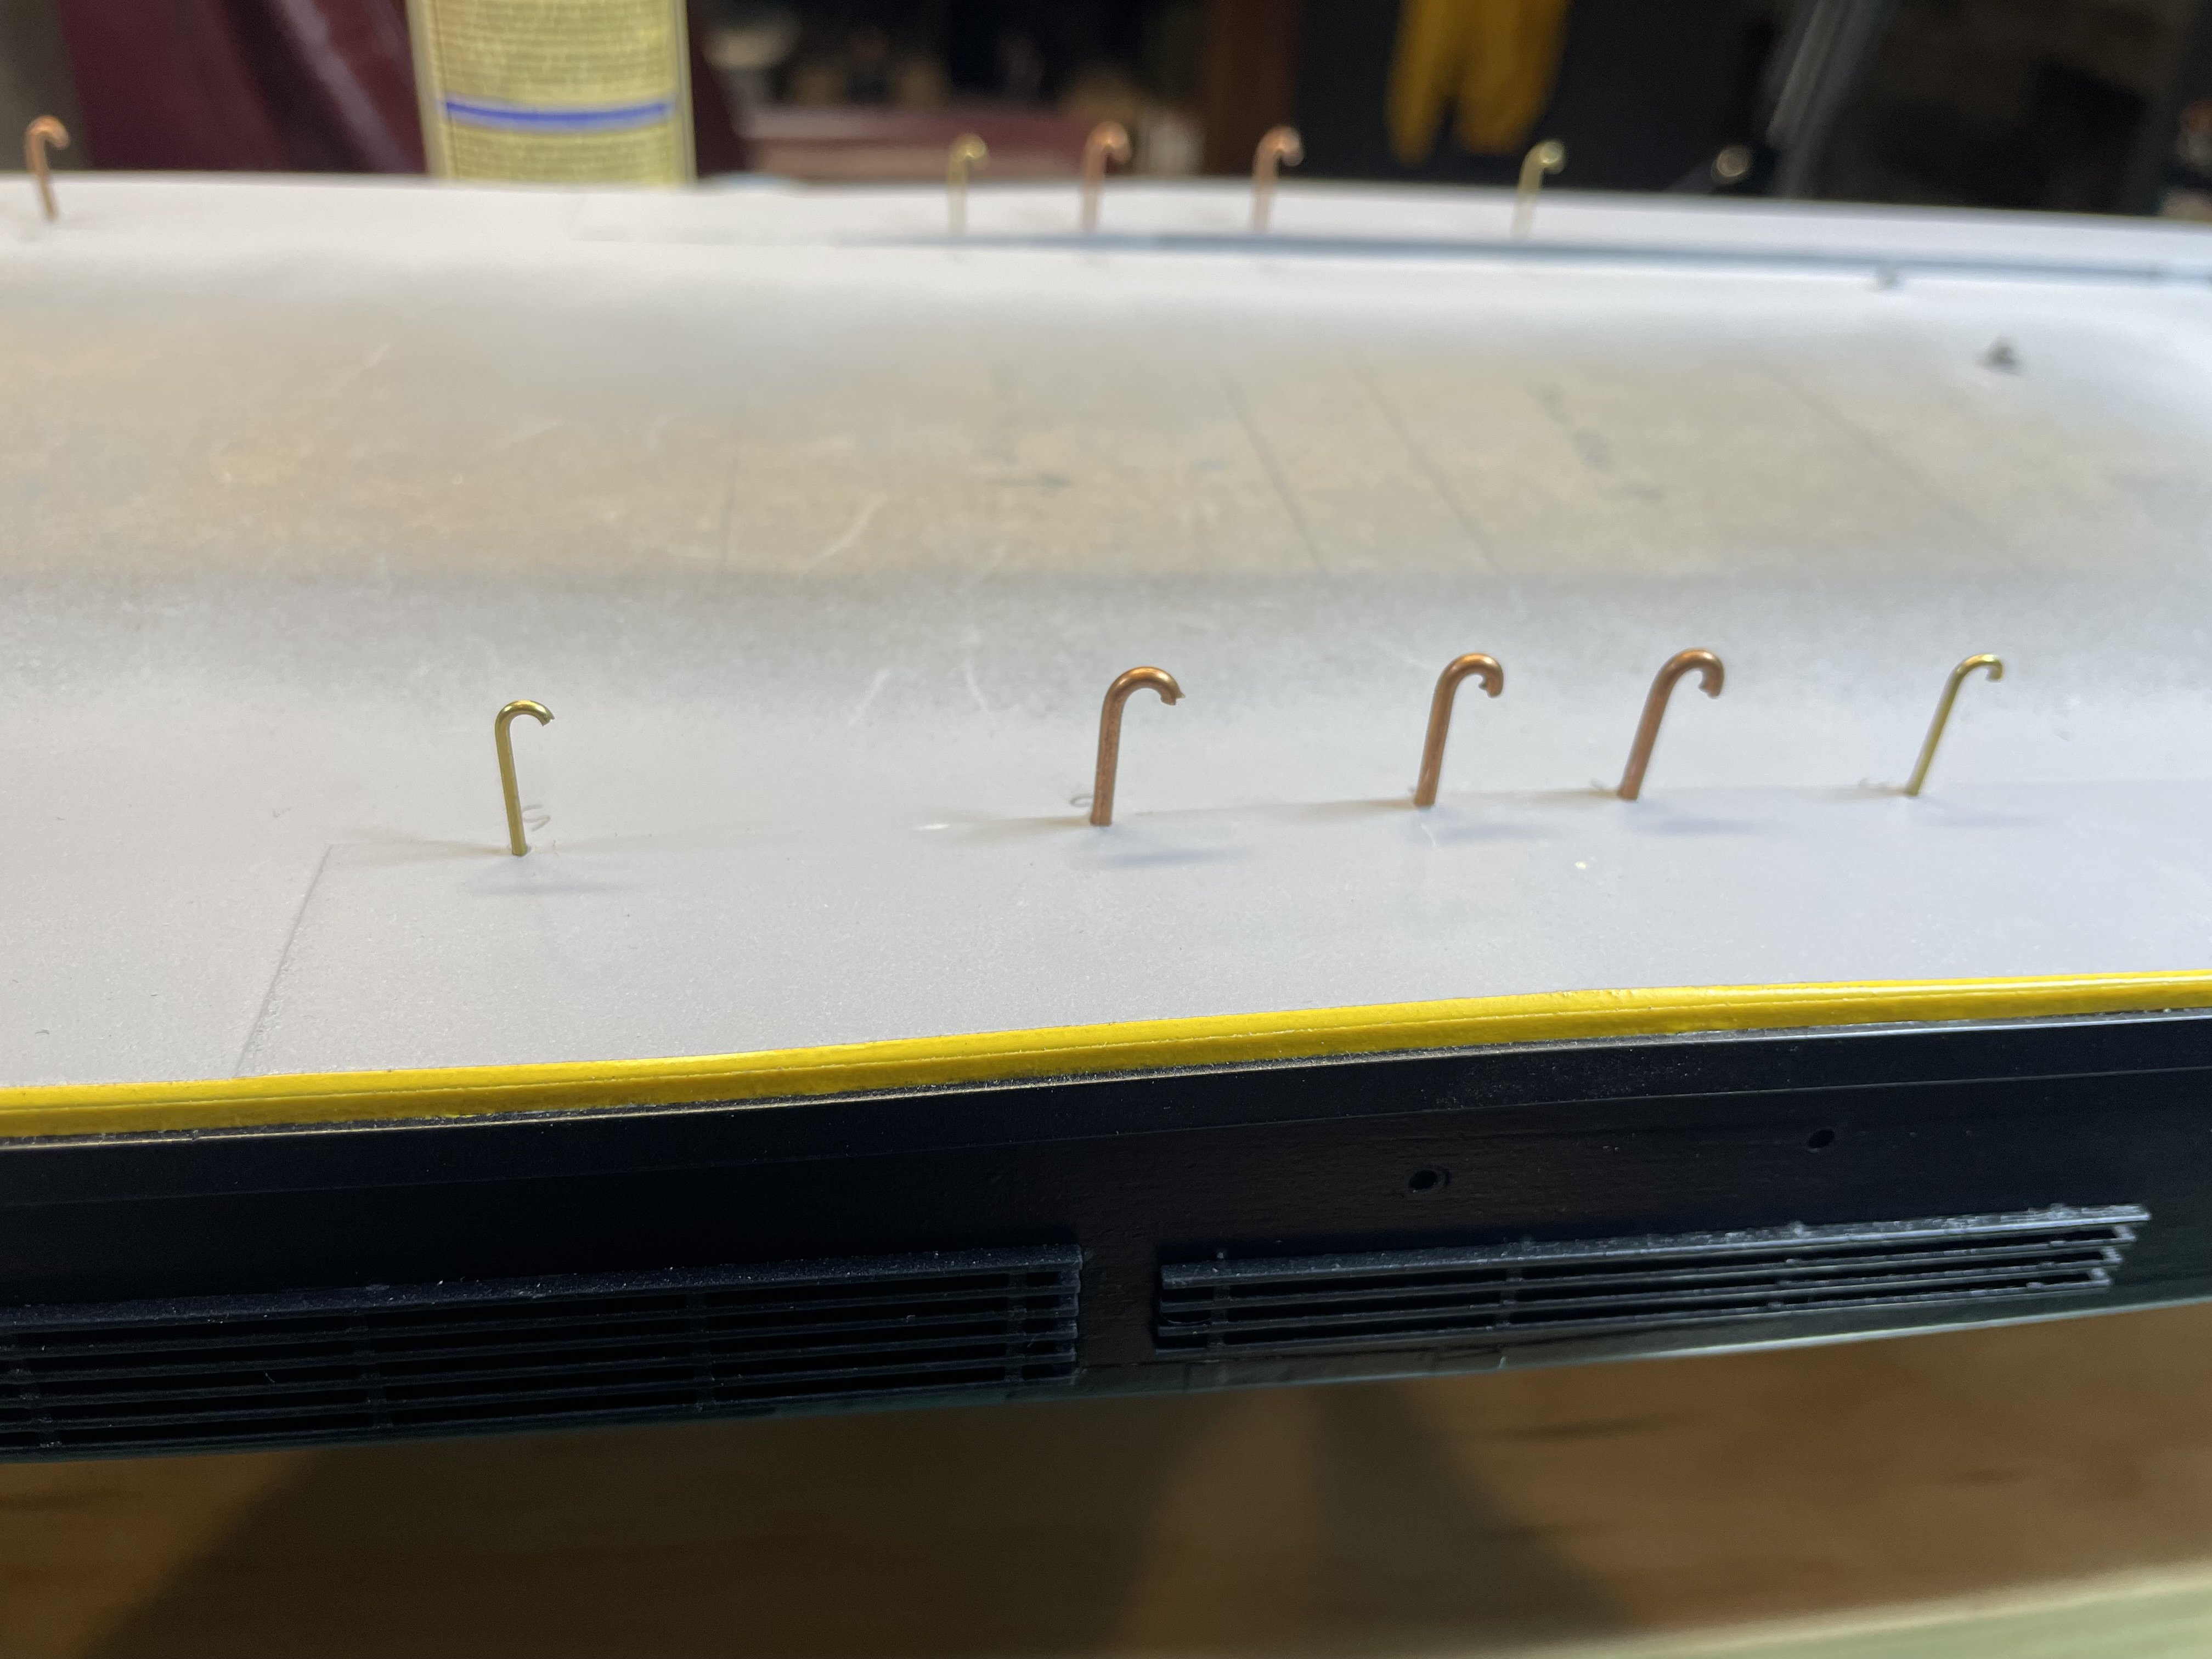
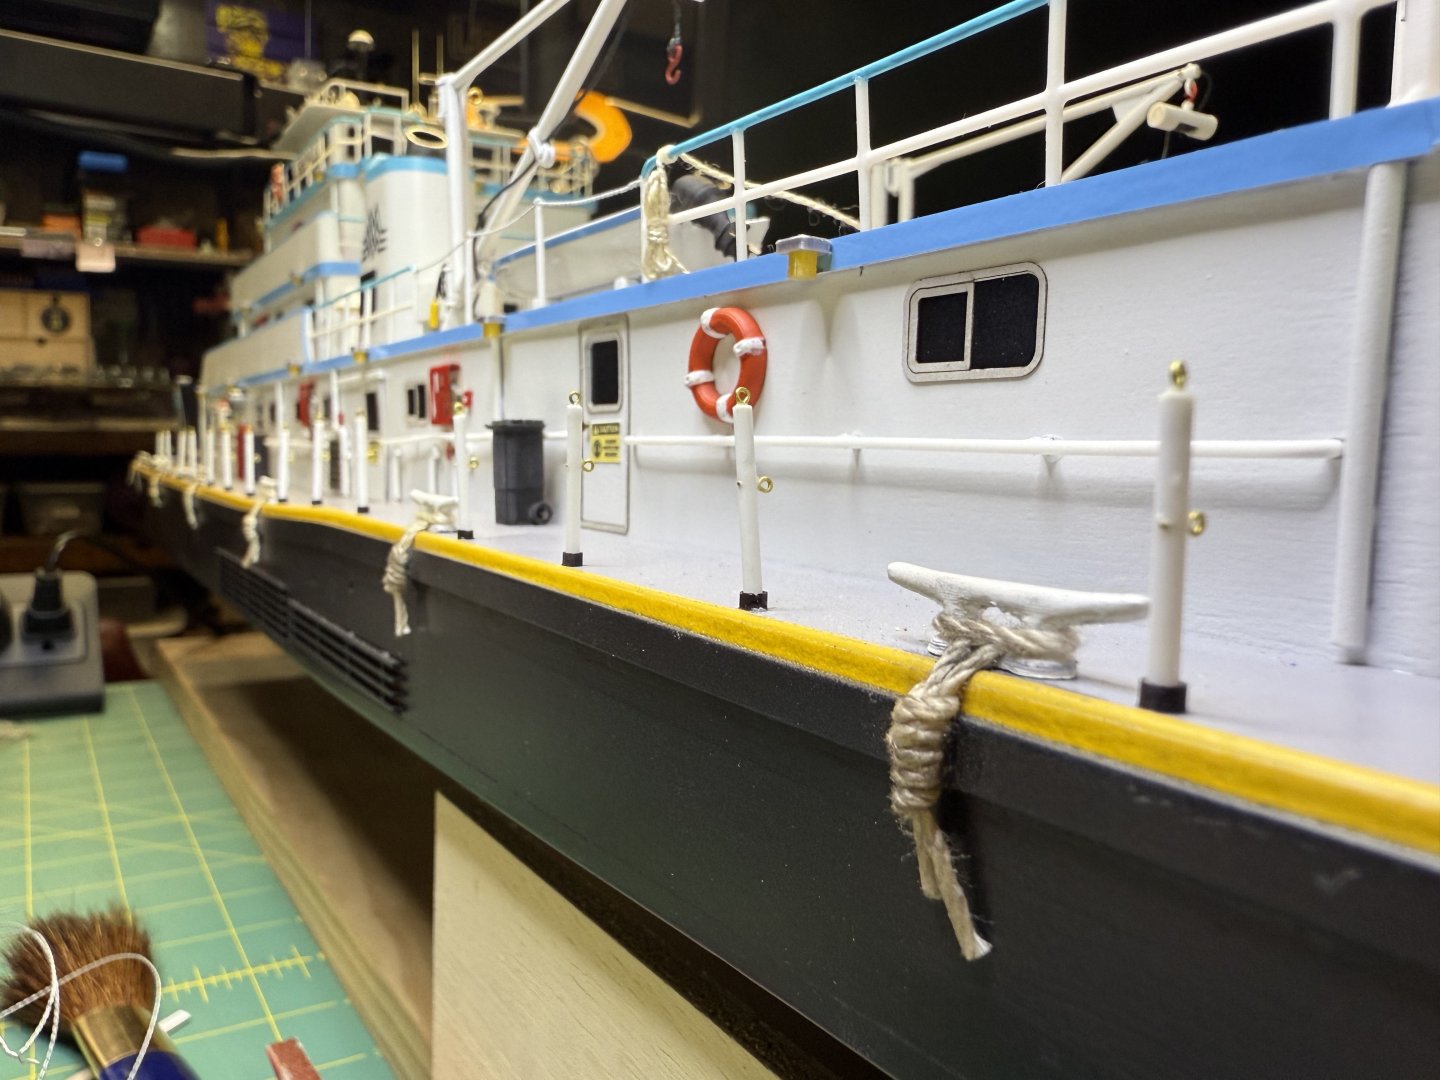
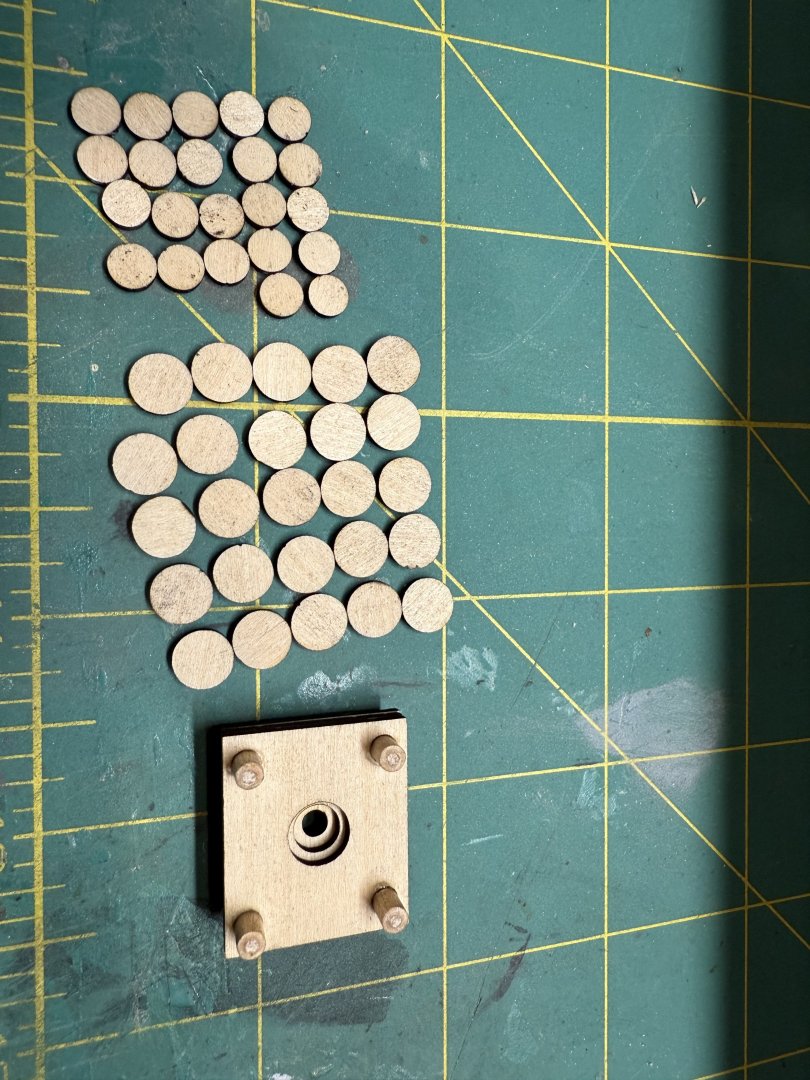
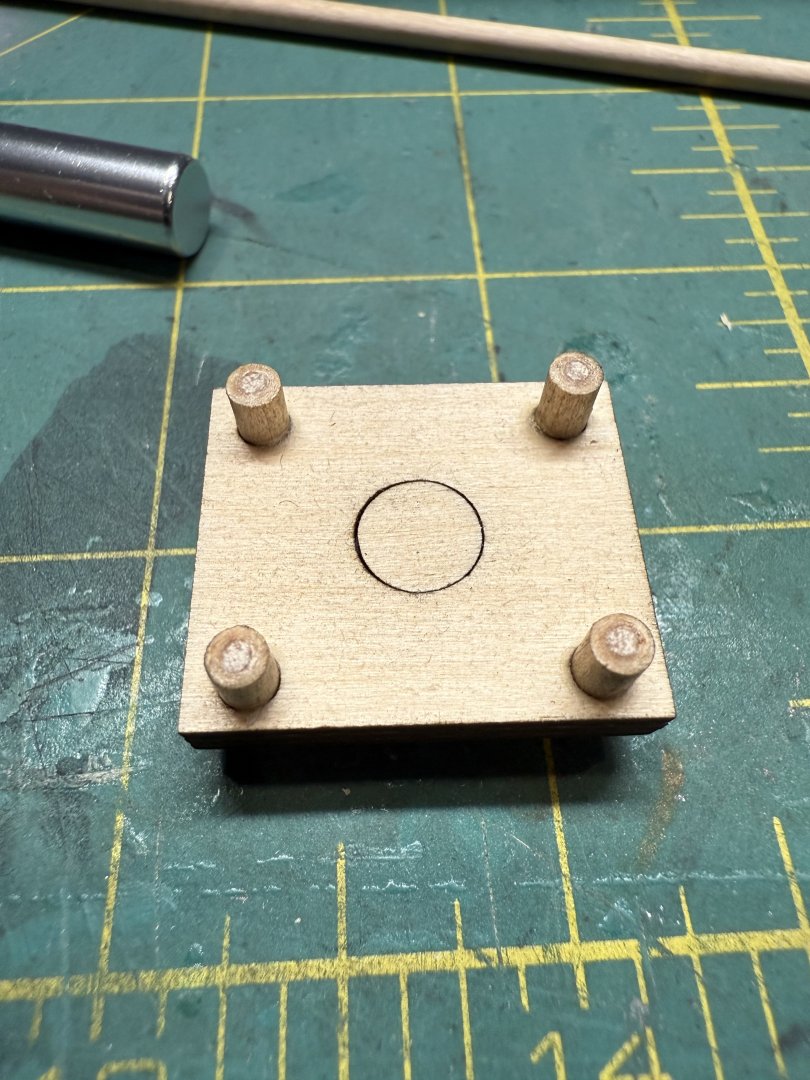
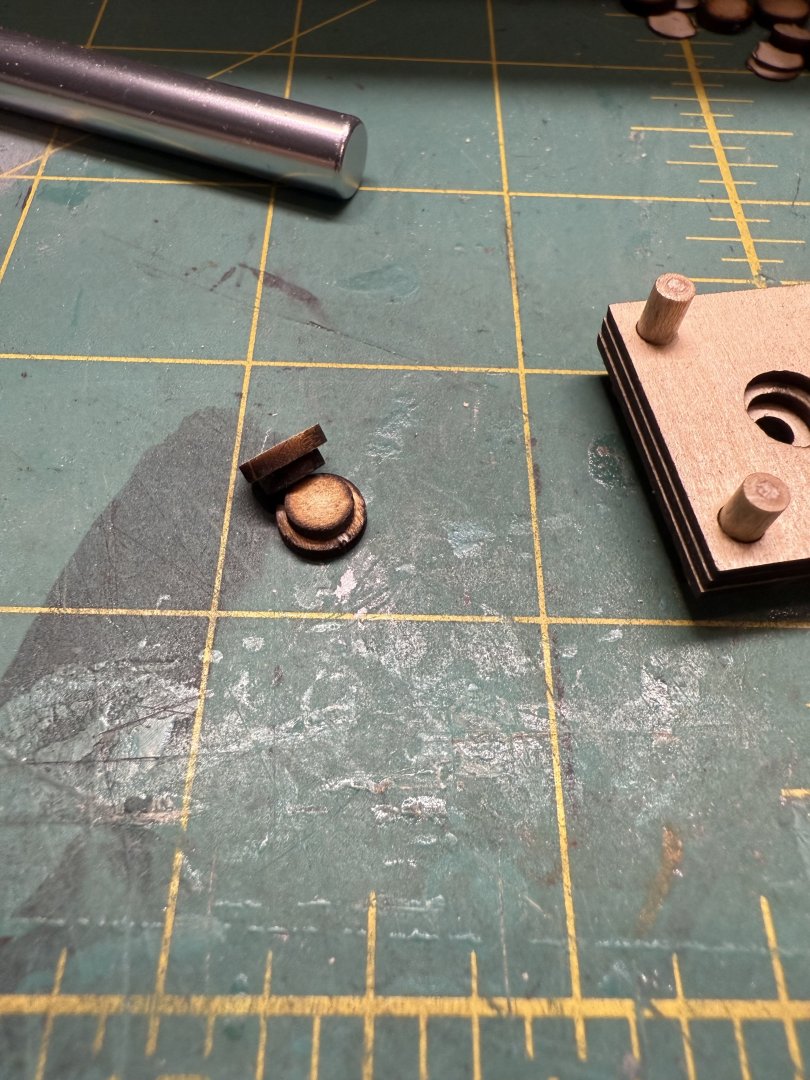
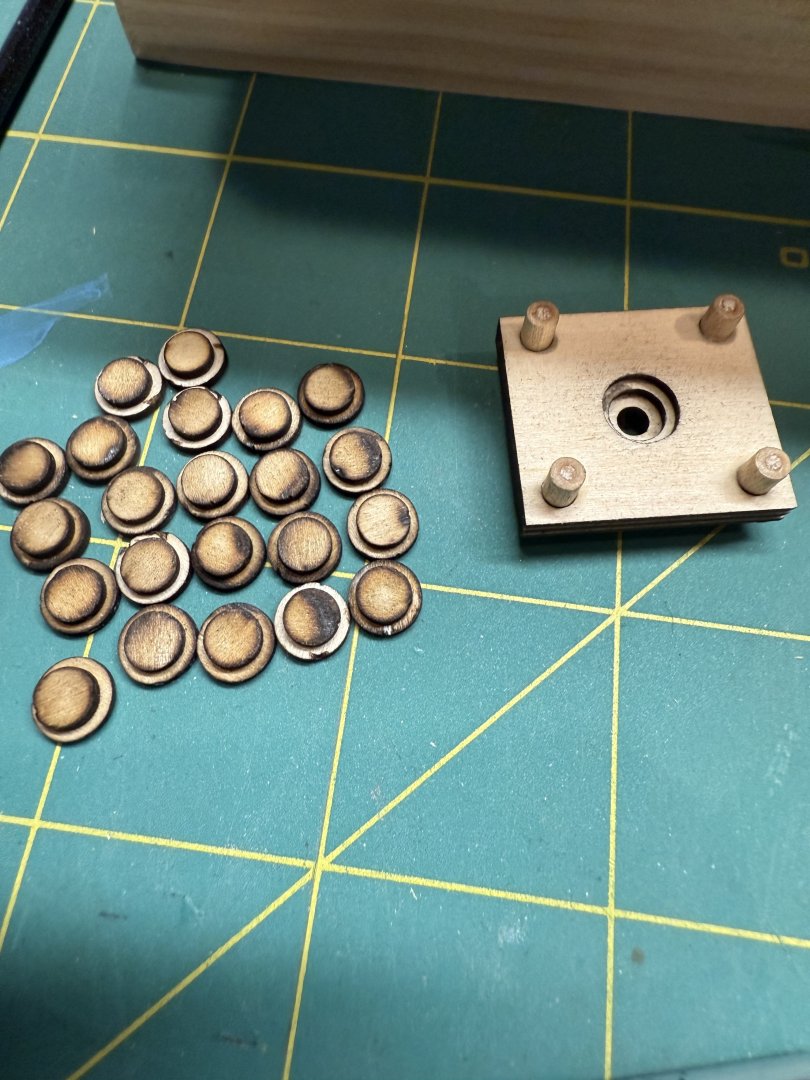
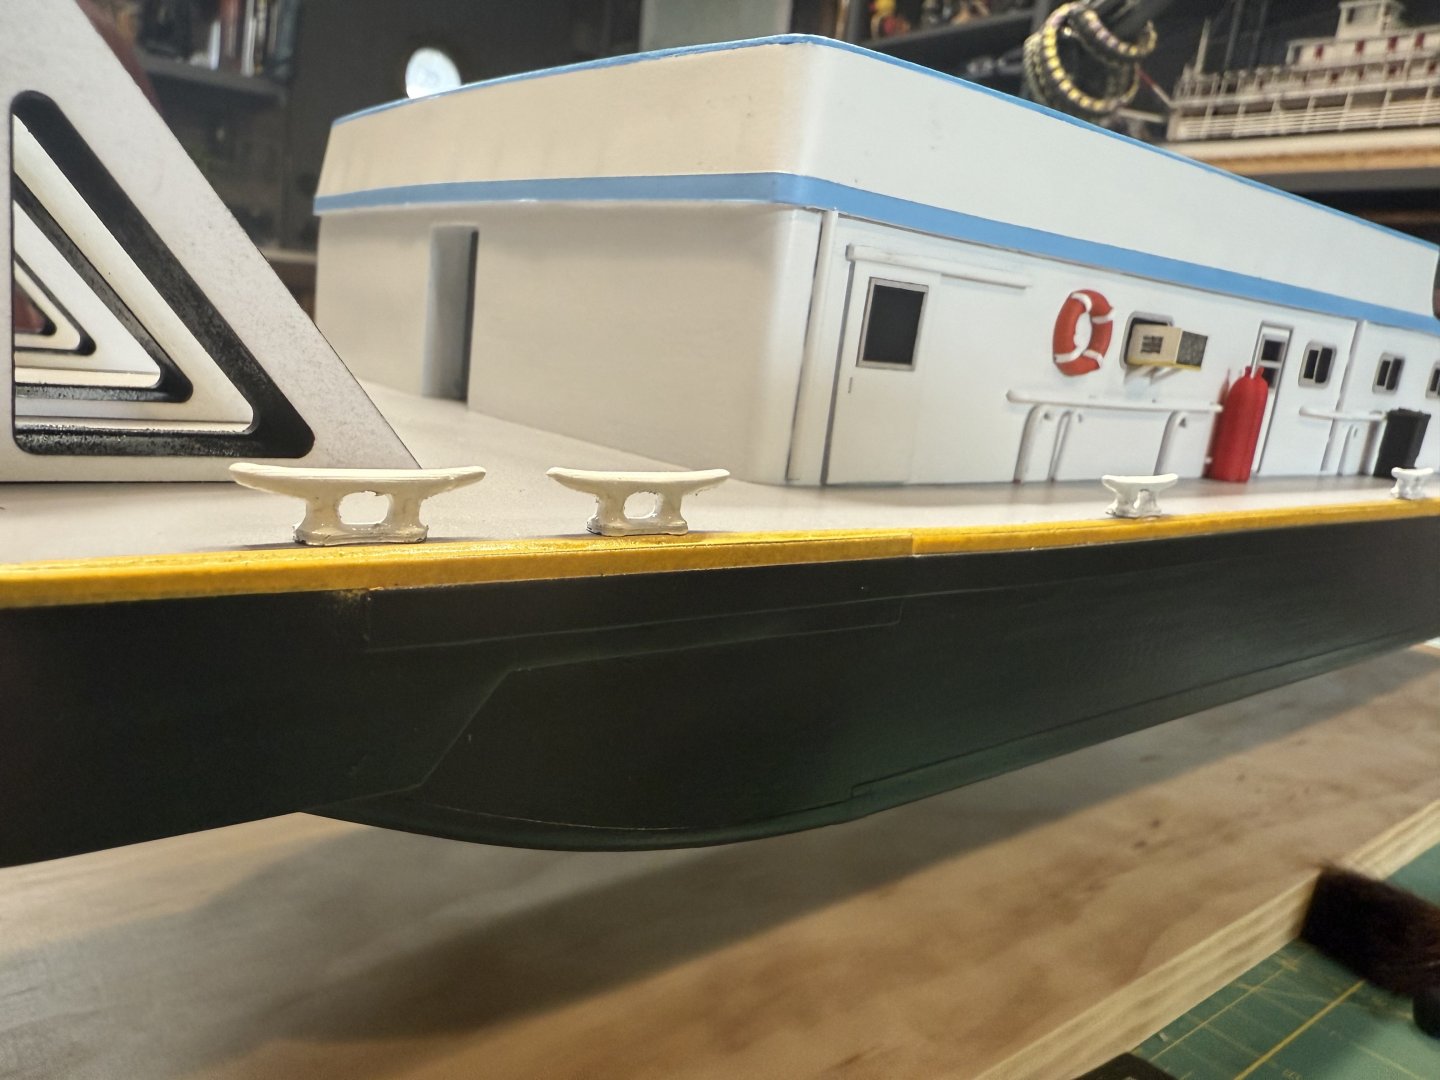
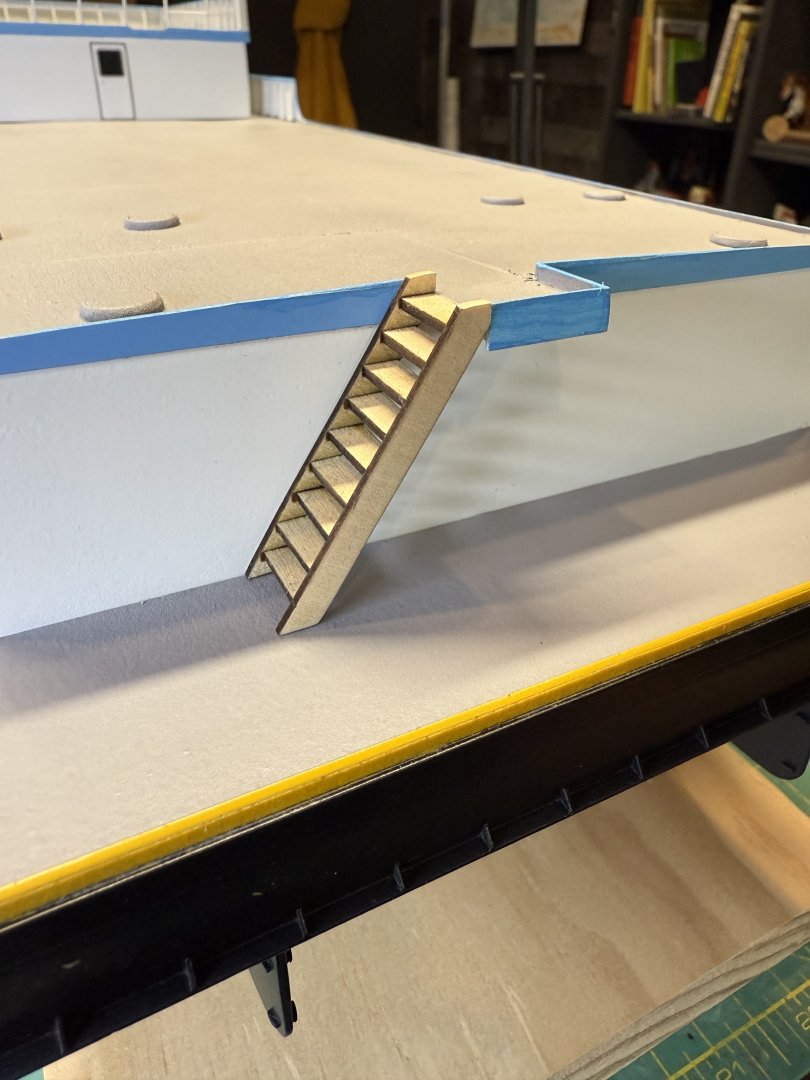
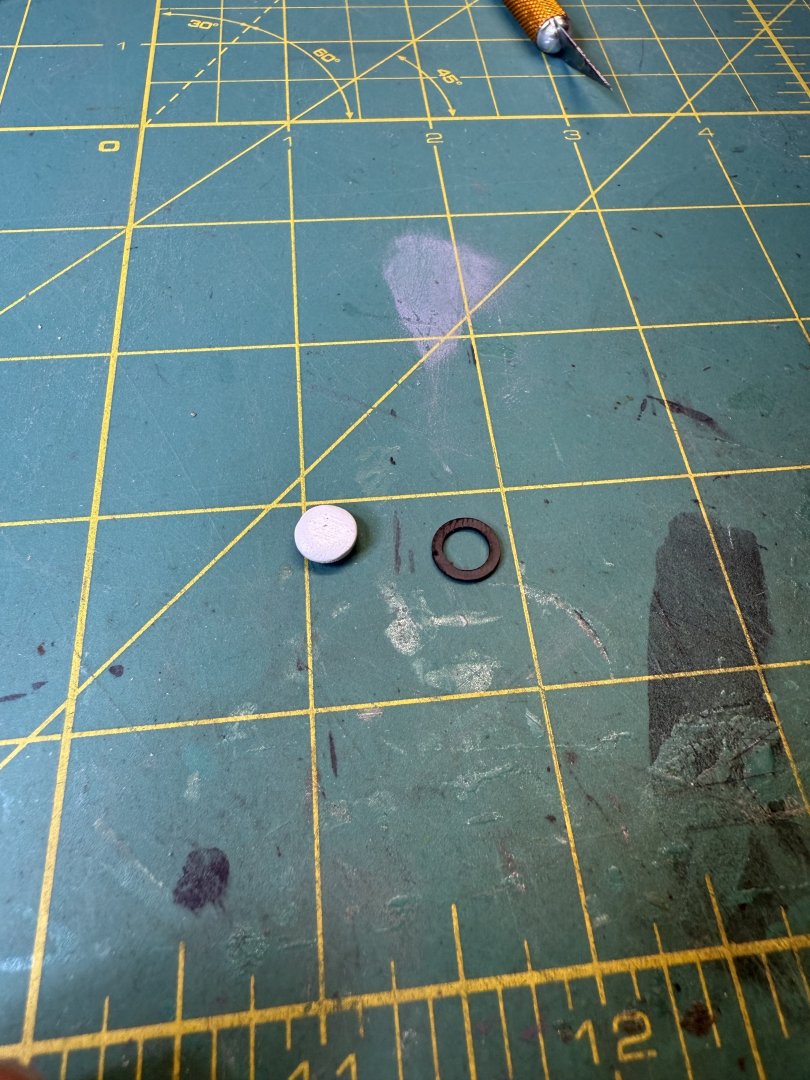
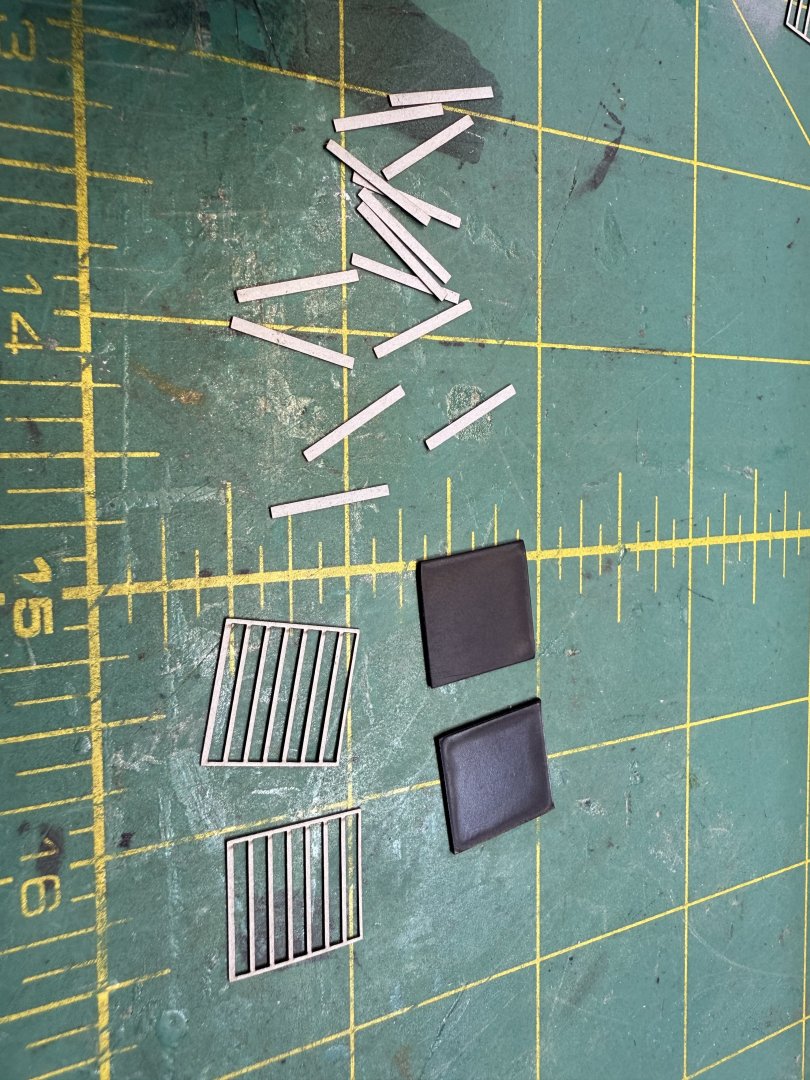
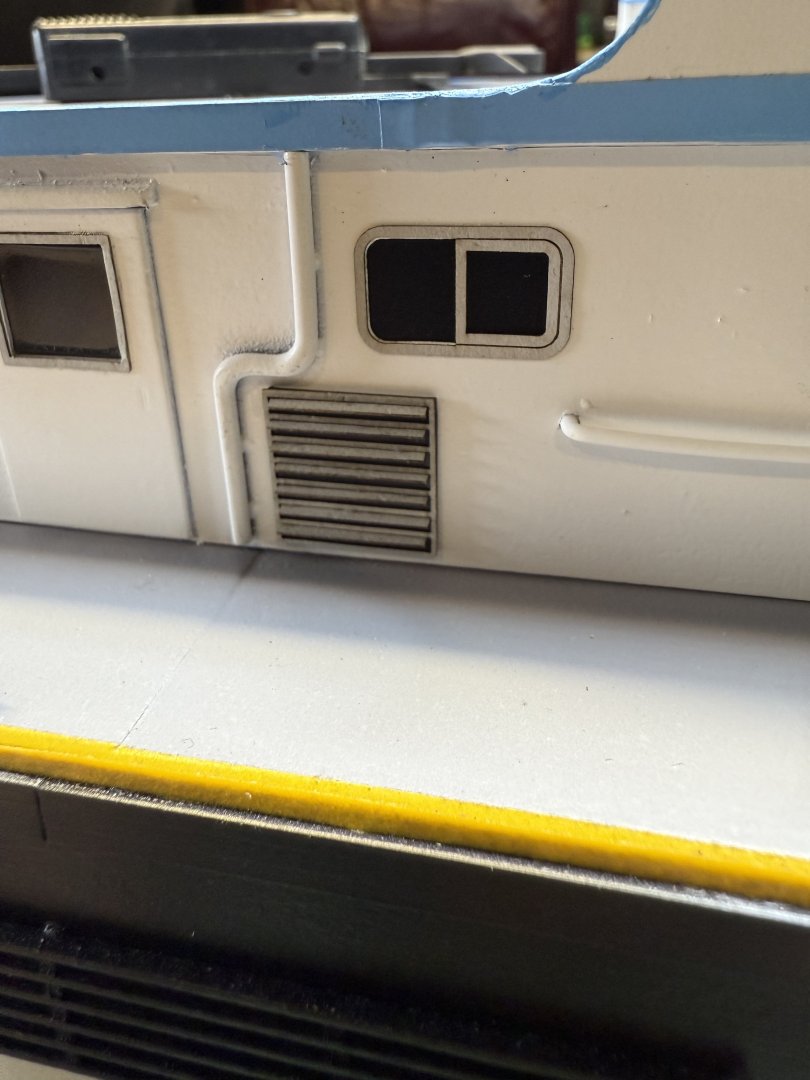
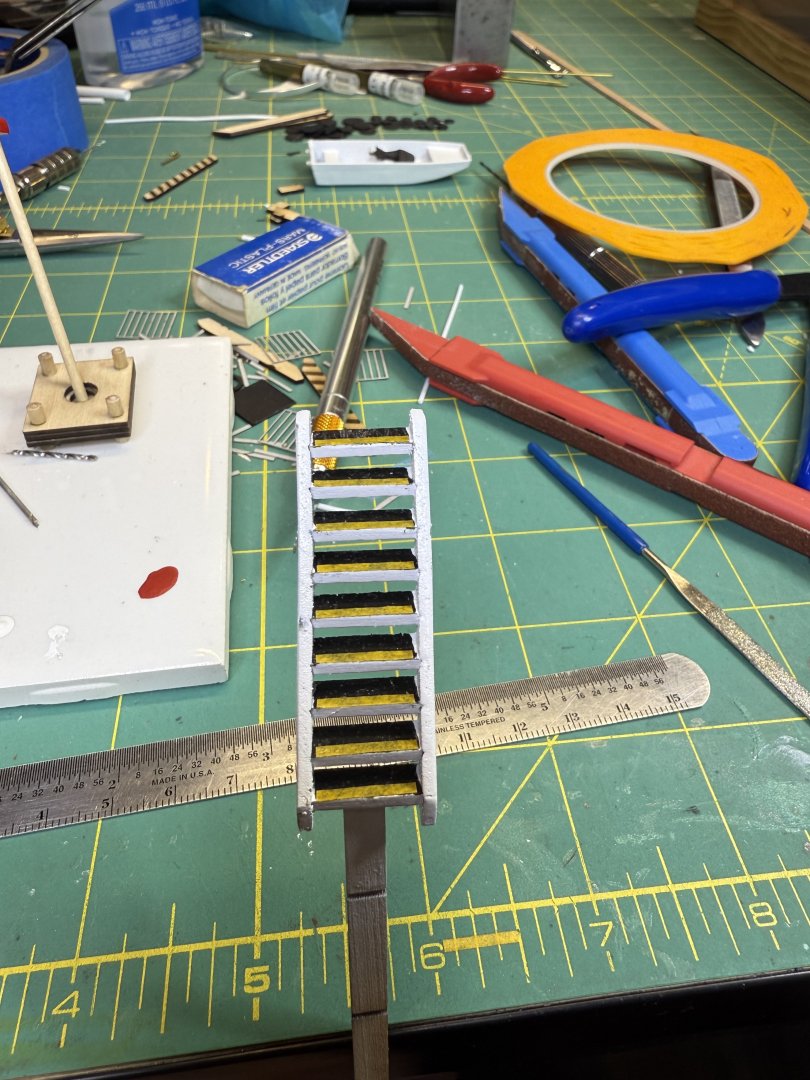
Hello again everyone, the journey continues. Slowly making more progress as I find the time to work on the Caroline. I managed to get the cleats all painted up and installed. As I post the photos I can clearly see some of the imperfections in them, I'll need to go back and clean some of them up. The resolution on today's phone cameras is almost too good. Next was getting the motor painted up for the work/life boat. Still need to build the propeller, but I'll get there. I'm also going to put some decking in the floor to clean up the printer lines and add a few other details such as a fuel tanks and fuel lines and whatever else I can think of to throw in there. Moving on to some of the main deck details, I built the exhaust fan vents that flank each side of the engine room. These I made from thick card stock and ABS plastic. The ABS provided the black background for the vents then the frames and louvers were cut from the card stock. The louvers are hinged so that when the fans are off they swing closed and lay flat, I didn't like the way they looked closed so I decided to have the fans on and the lovers open. Adds a little more life to them. Once the vents were completed they were installed in their locations on each side of the main deck. The work continued on the main deck with the bollards. I used the laser cutter to design and build up a jig that would help me line the pieces of the bollards up while I built them. This was a simple tool made up of three layers of scrap wood glued together. The first layer had a hole cut in the center with room enough to fit a small dowel that will be used to push the completed bollard out of the jig. the second layer has a hole in the center for the smaller, center section of the bollard and the third layer has the hole for the top part of the bollard. All three layers had holes cut on the corners for dowel pins to help keep everything in line. All layers and centering dowels were then glued together. The center (smaller) ring of the bollard was place in the jig. A dab of CA. Then the top ring was glued in place. The bollard removal dowel was then used to push the completed bollard out and viola! perfectly centered bollards. 2 down, 23 more to go. All of the bollards have been built and ready for sanding. All sanded up, now to shoot some paint on them. Next was cutting the rings that will form the bottom of the bollards. These I also made from ABS plastic. Here is one of the setups temp installed on the deck to see how they look. Having the ABS rings separate also allowed me to get a clearer measurement for proper placement of the bollards by being able to see the measurement lines through their centers. It was much harder to try and line everything up with the completed assembly. I just glued the rings in place then came back in and placed the bollard tops in the rings. So much easier. More bollards on the tow knees. There are two bollards on each side that are built up or elevated and slightly angled. I think these are setup this way to allow for tows that are either empty or sit higher in the water than the boats deck to keep the tow lines from slipping off. Here are a couple of photos of the bollards on the actual Caroline (aka Titletown USA) The first shows the angle of the bollard, located right in line with the forward part of the main deck structure. The second photo shows the angled tow line secured to the bollard. Here is the completed construction of the angled bollards. Here is an overall view of the bow with all bollards and cleats in place. I also started work on the tow knee railing, but have not entirely figured out how I want to do them (and got a bit frustrated with them, so I moved on to something else). That is the reason you see the vertical railing supports installed. Right now they provide a good place to snag my sleeve or hands when working on other parts of the forward deck. Finally, while I contemplate the tow knee railings I got started on the deck ladders. These were just a standard build, I din't take many pictures of their construction, I just cut them out on my laser cutter, glued the runners together and painted them up. Here are a couple temp installed to make sure the angle is right. Here is another, painted up. The only bad thing about these is that they require more railing. I am really starting to not like railing. That is all for now. I appreciate all of the likes and comments. Thanks to all for stopping by. More to come. -Brian


-
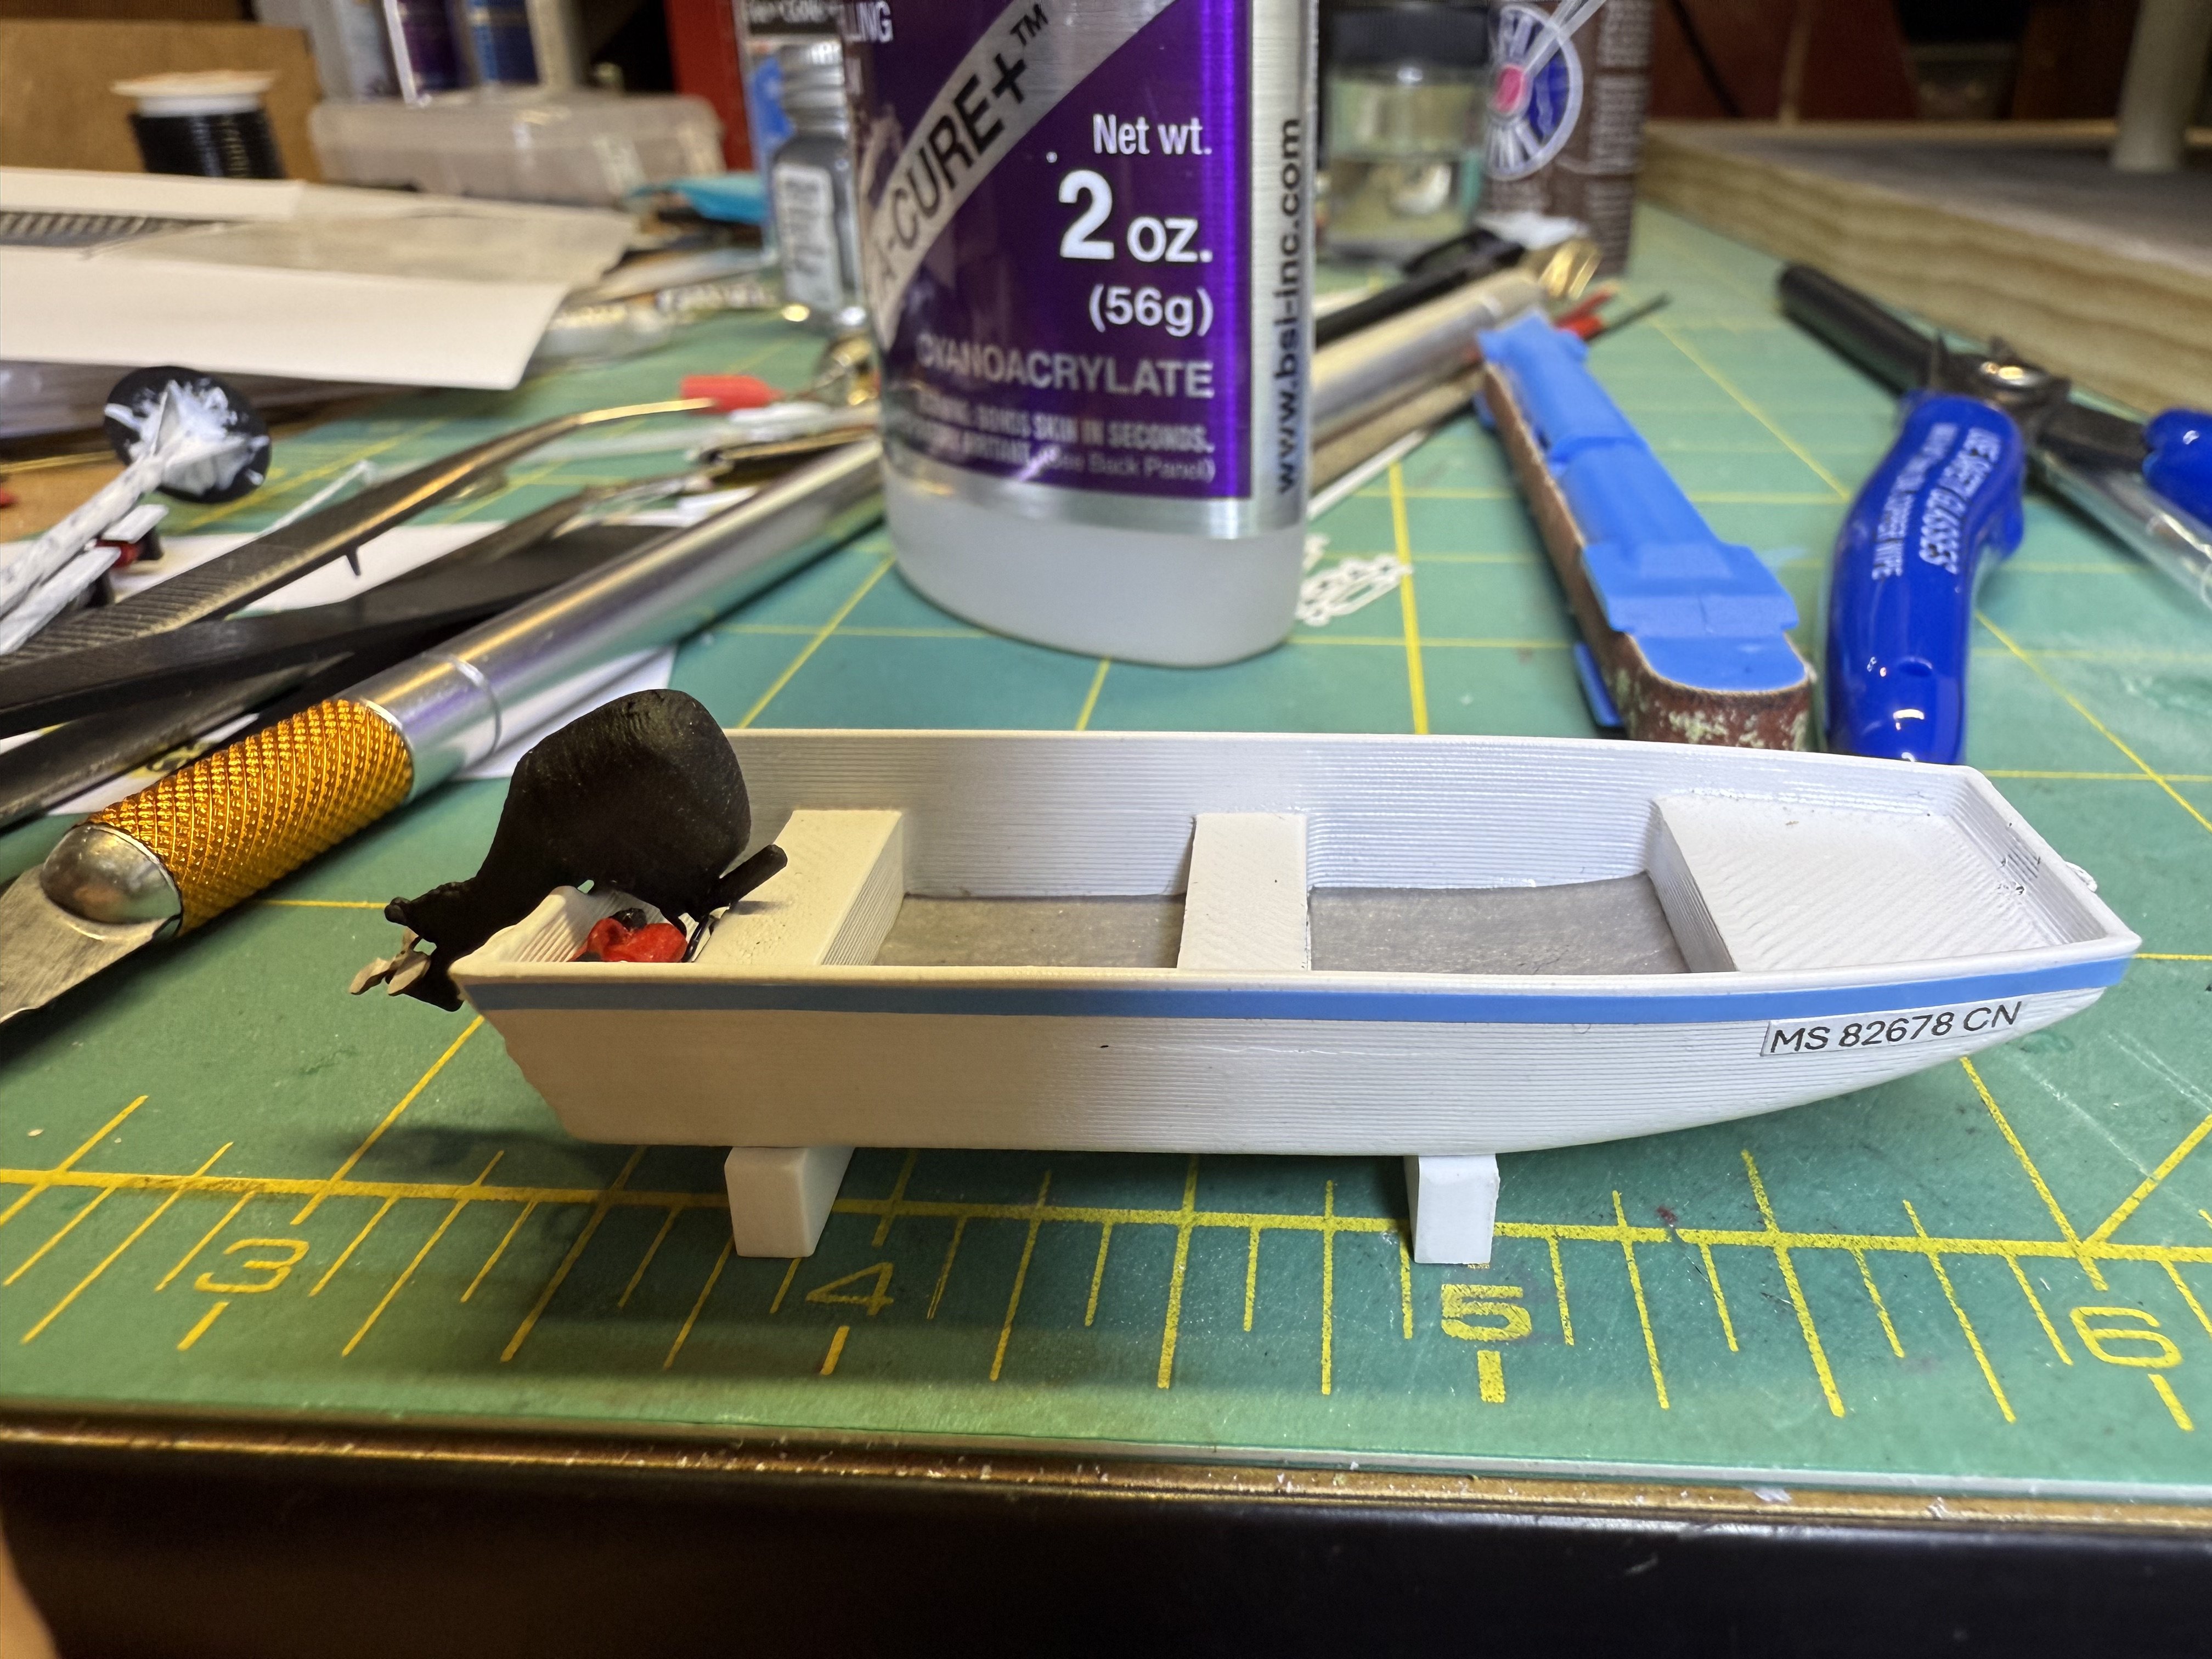
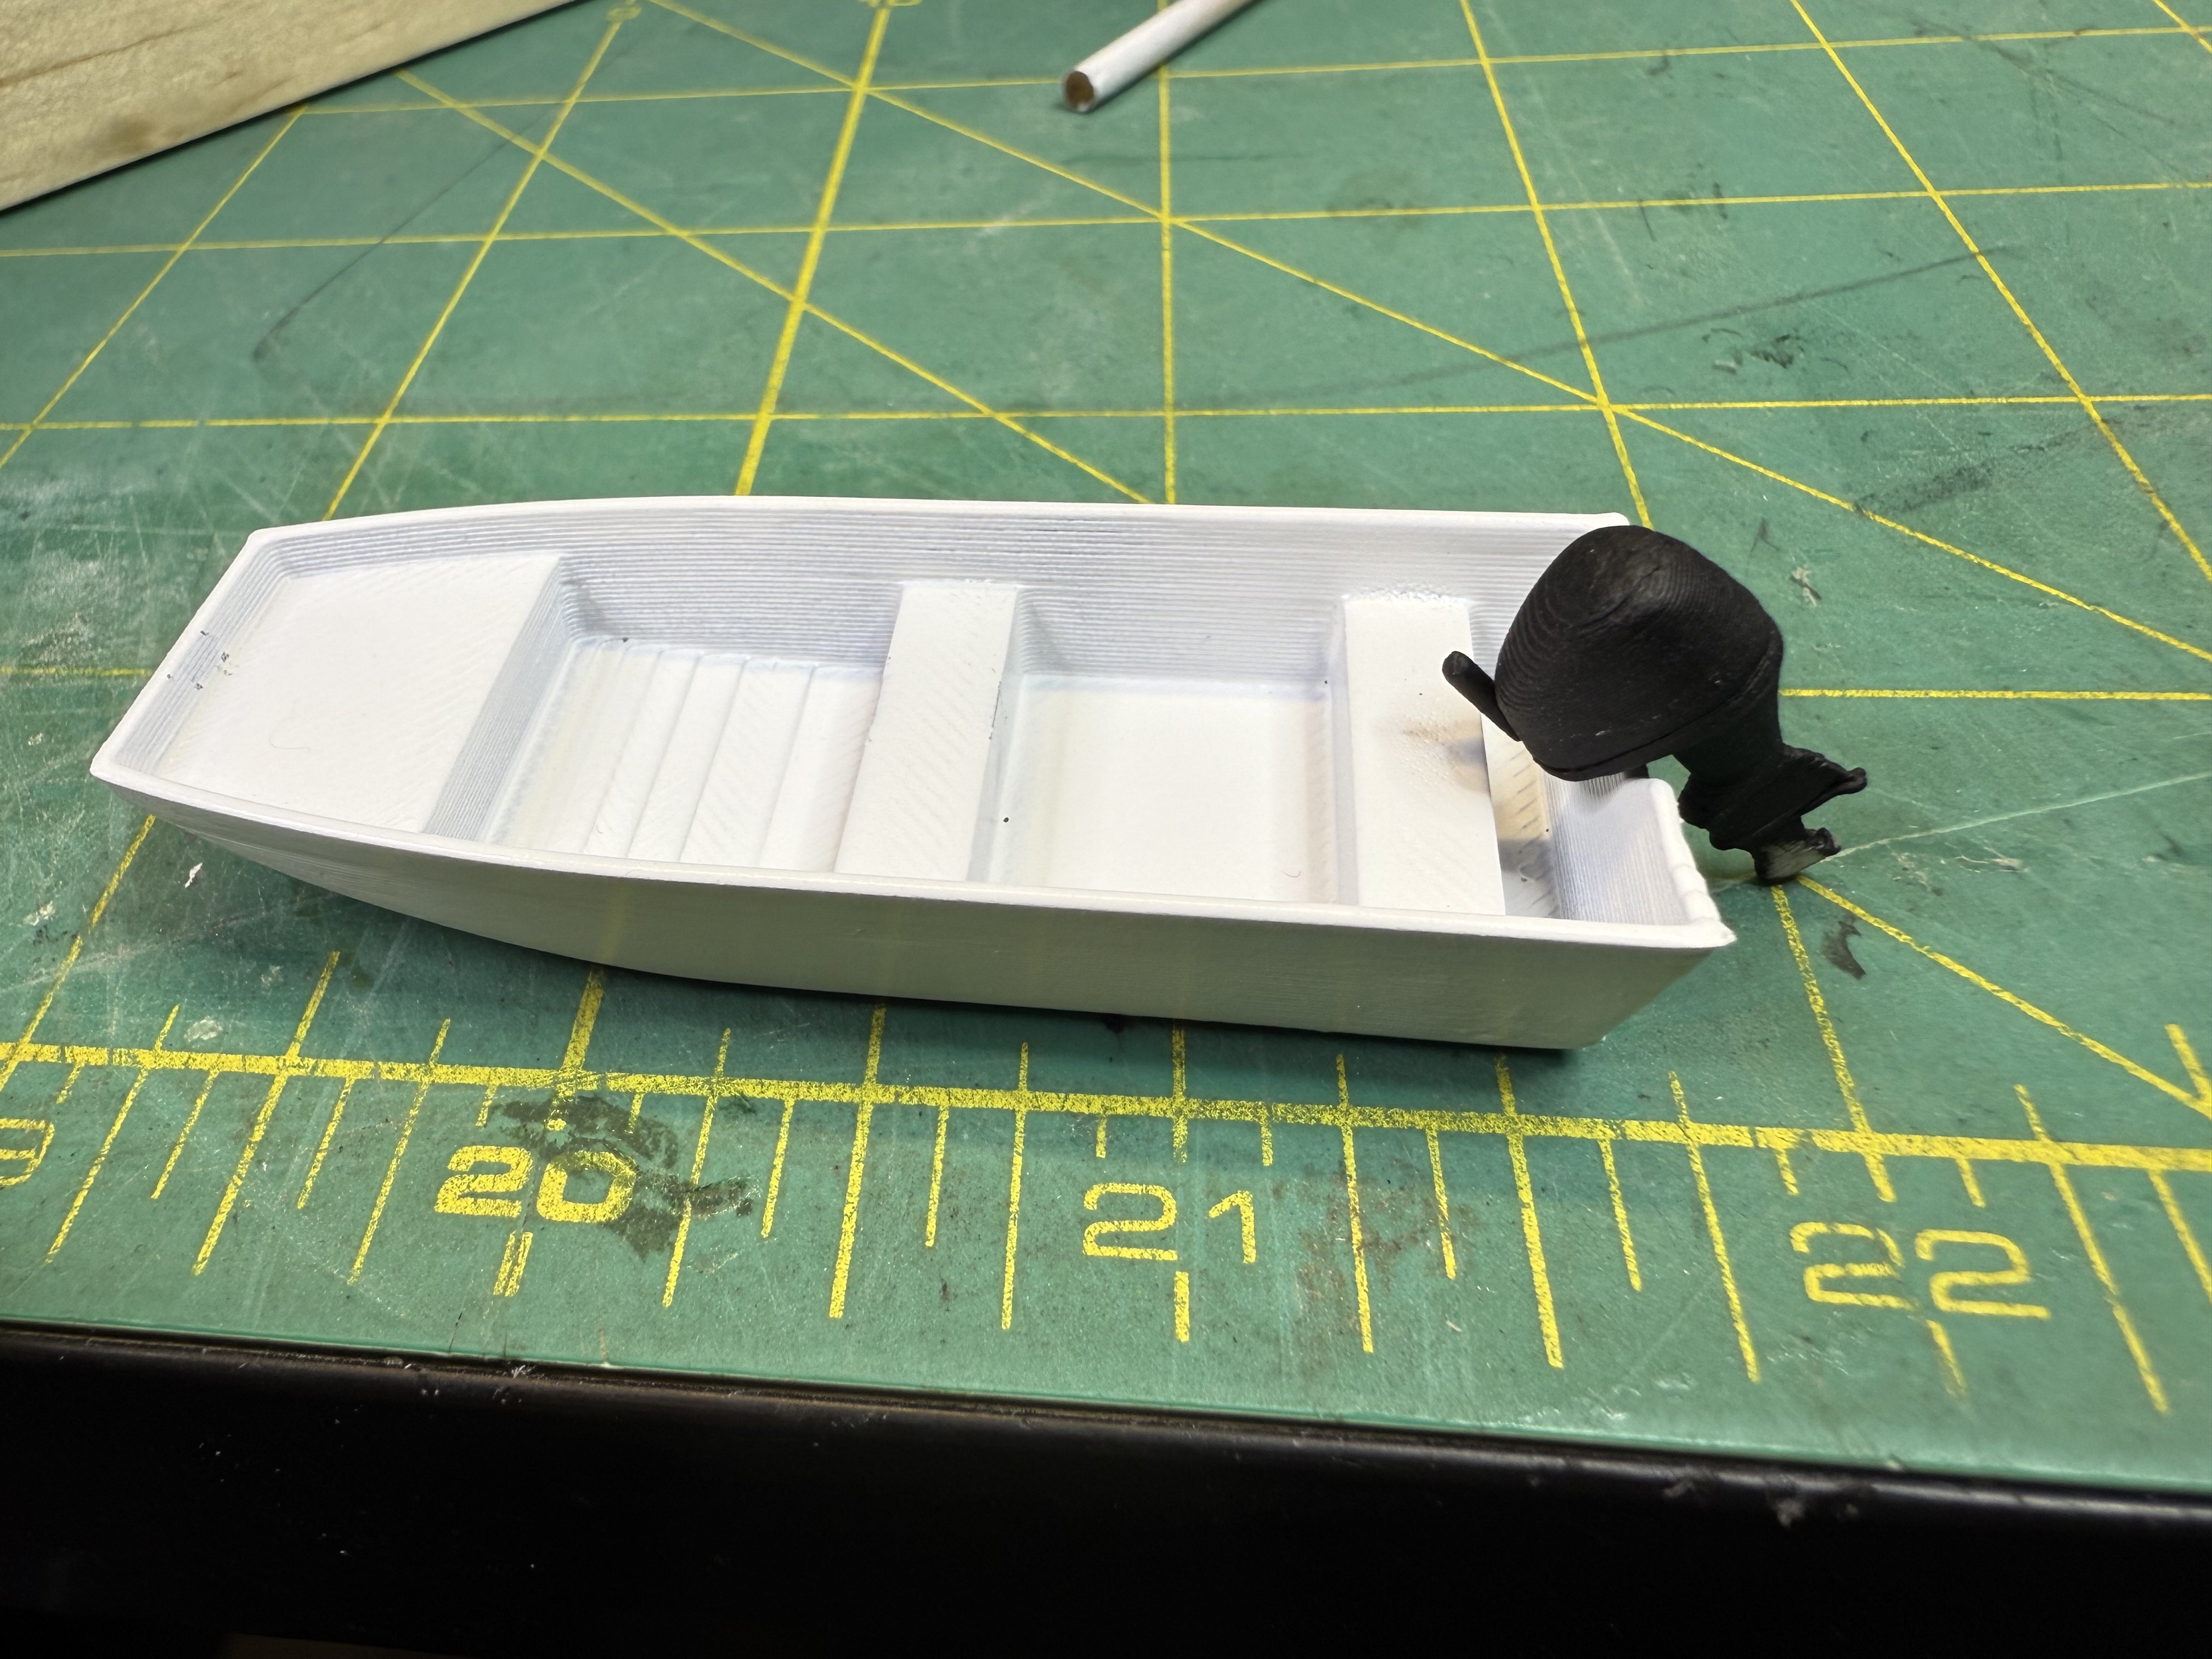
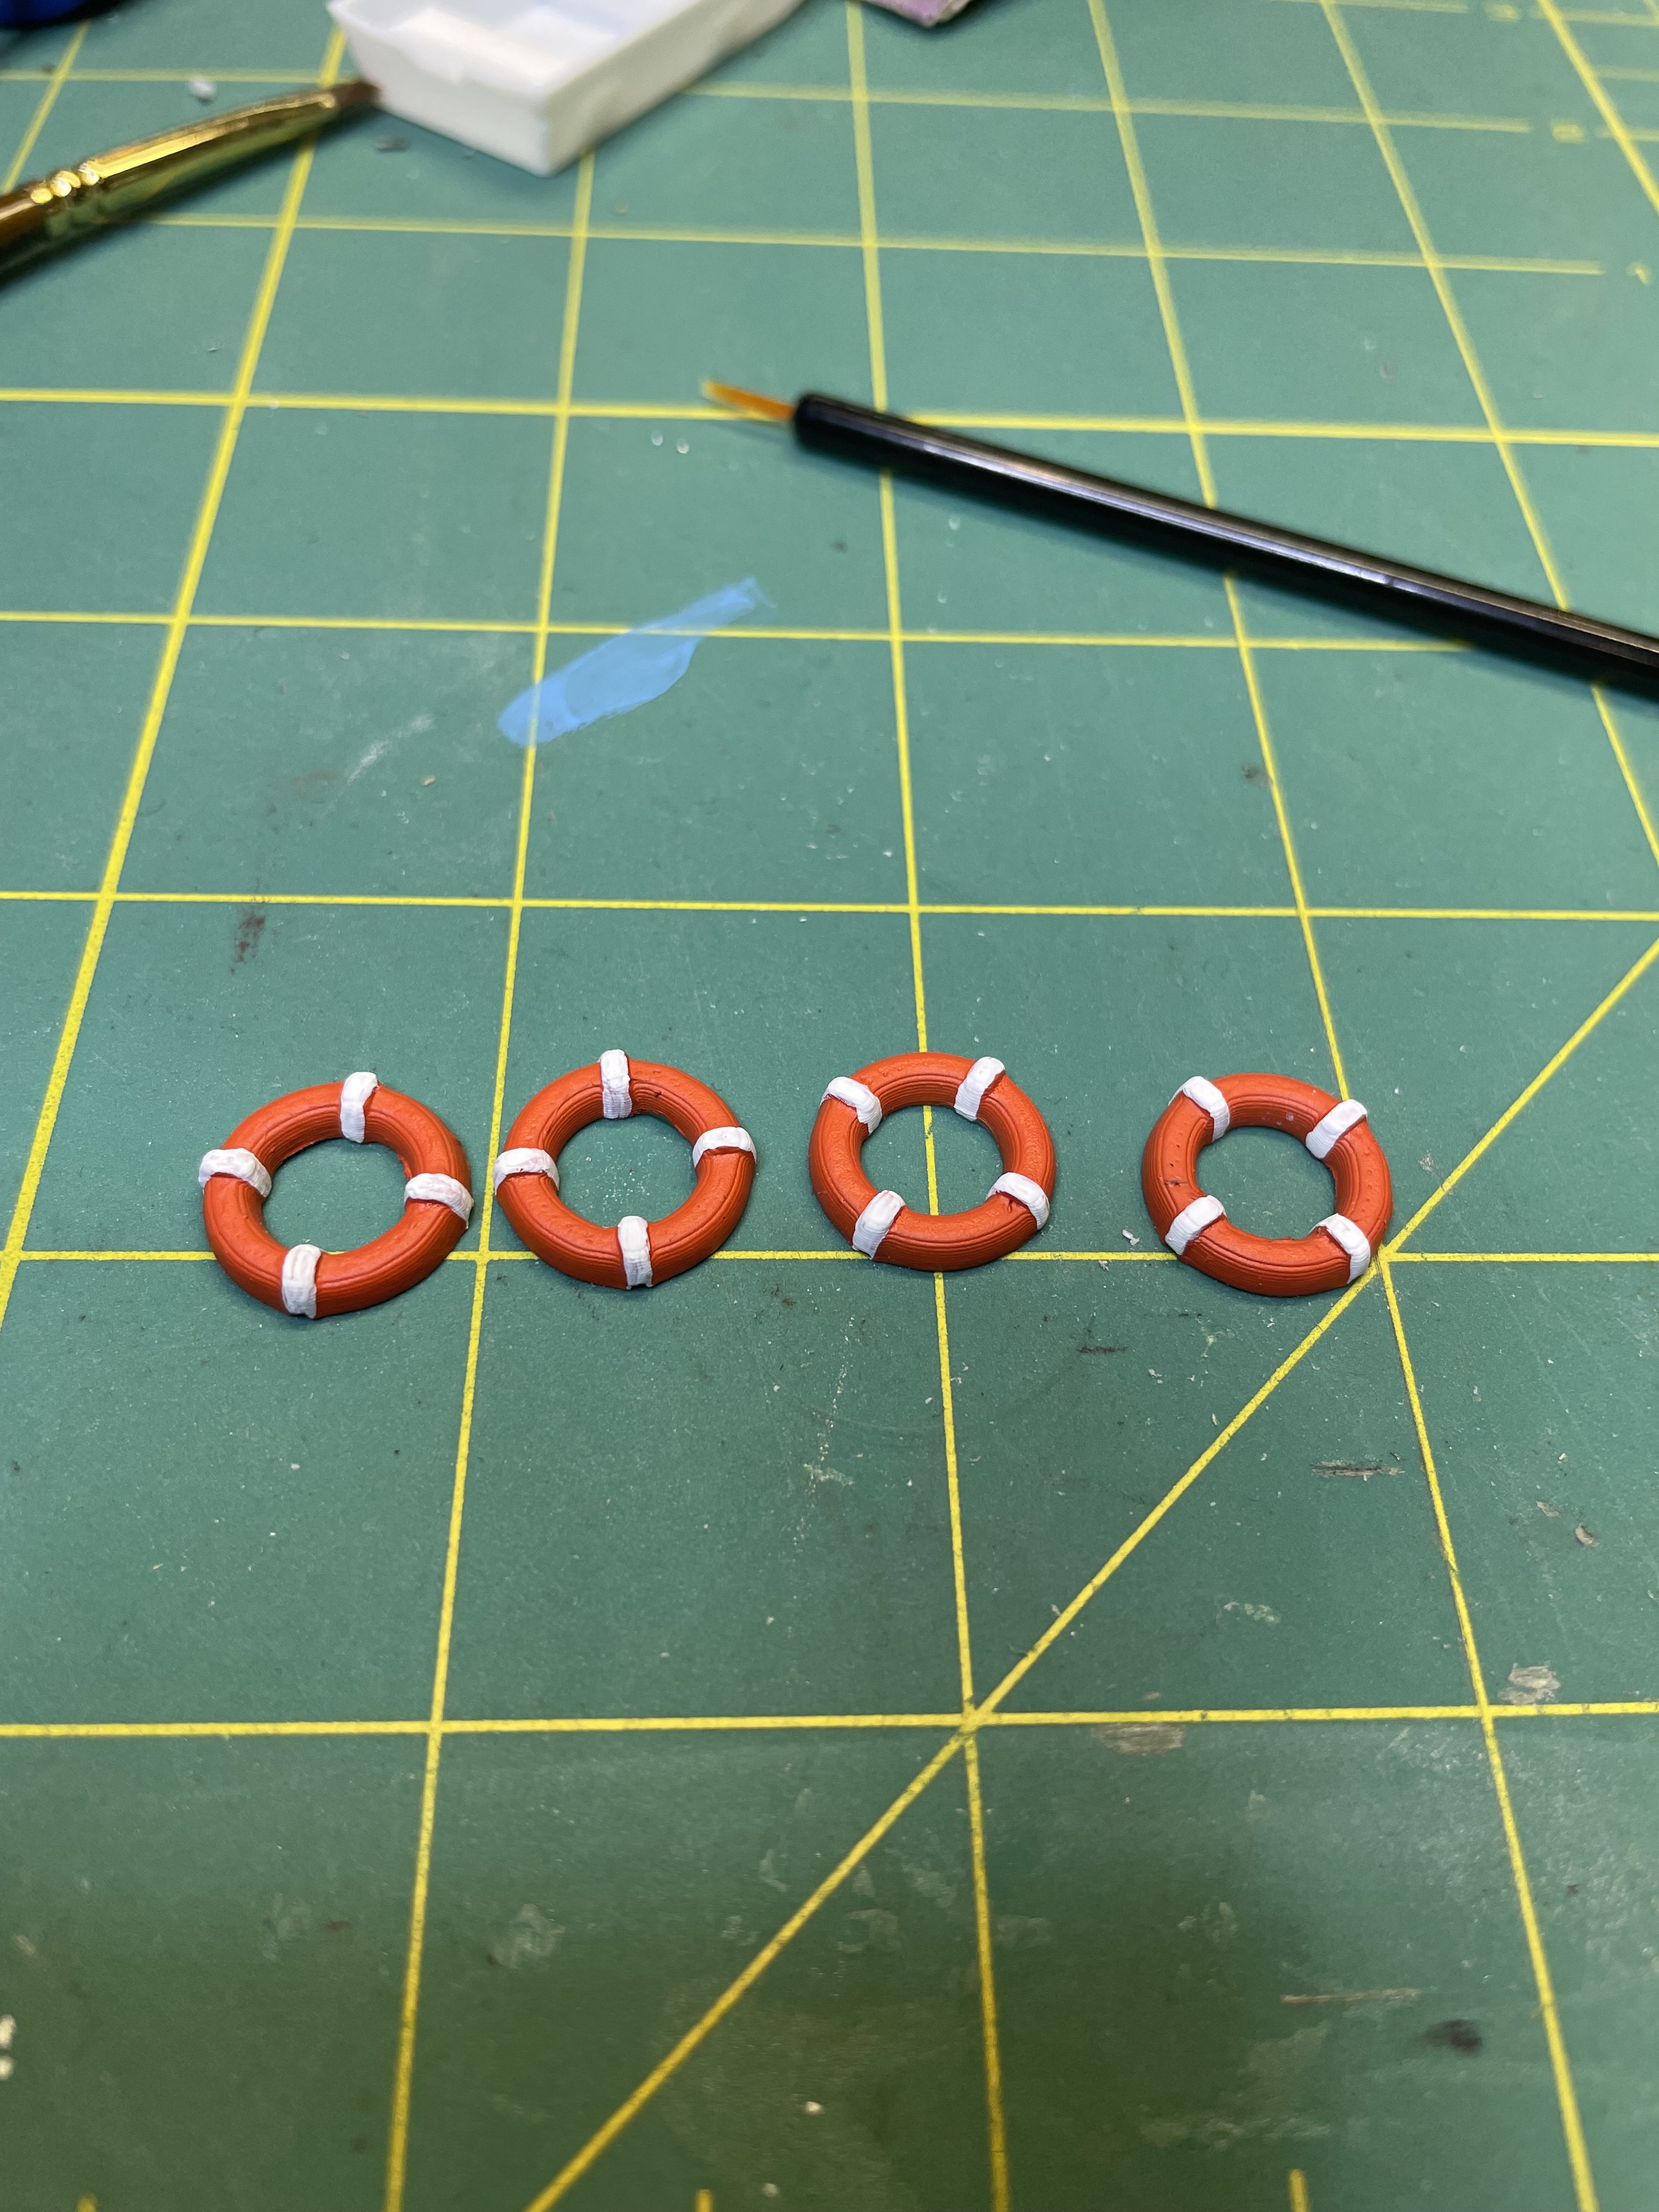
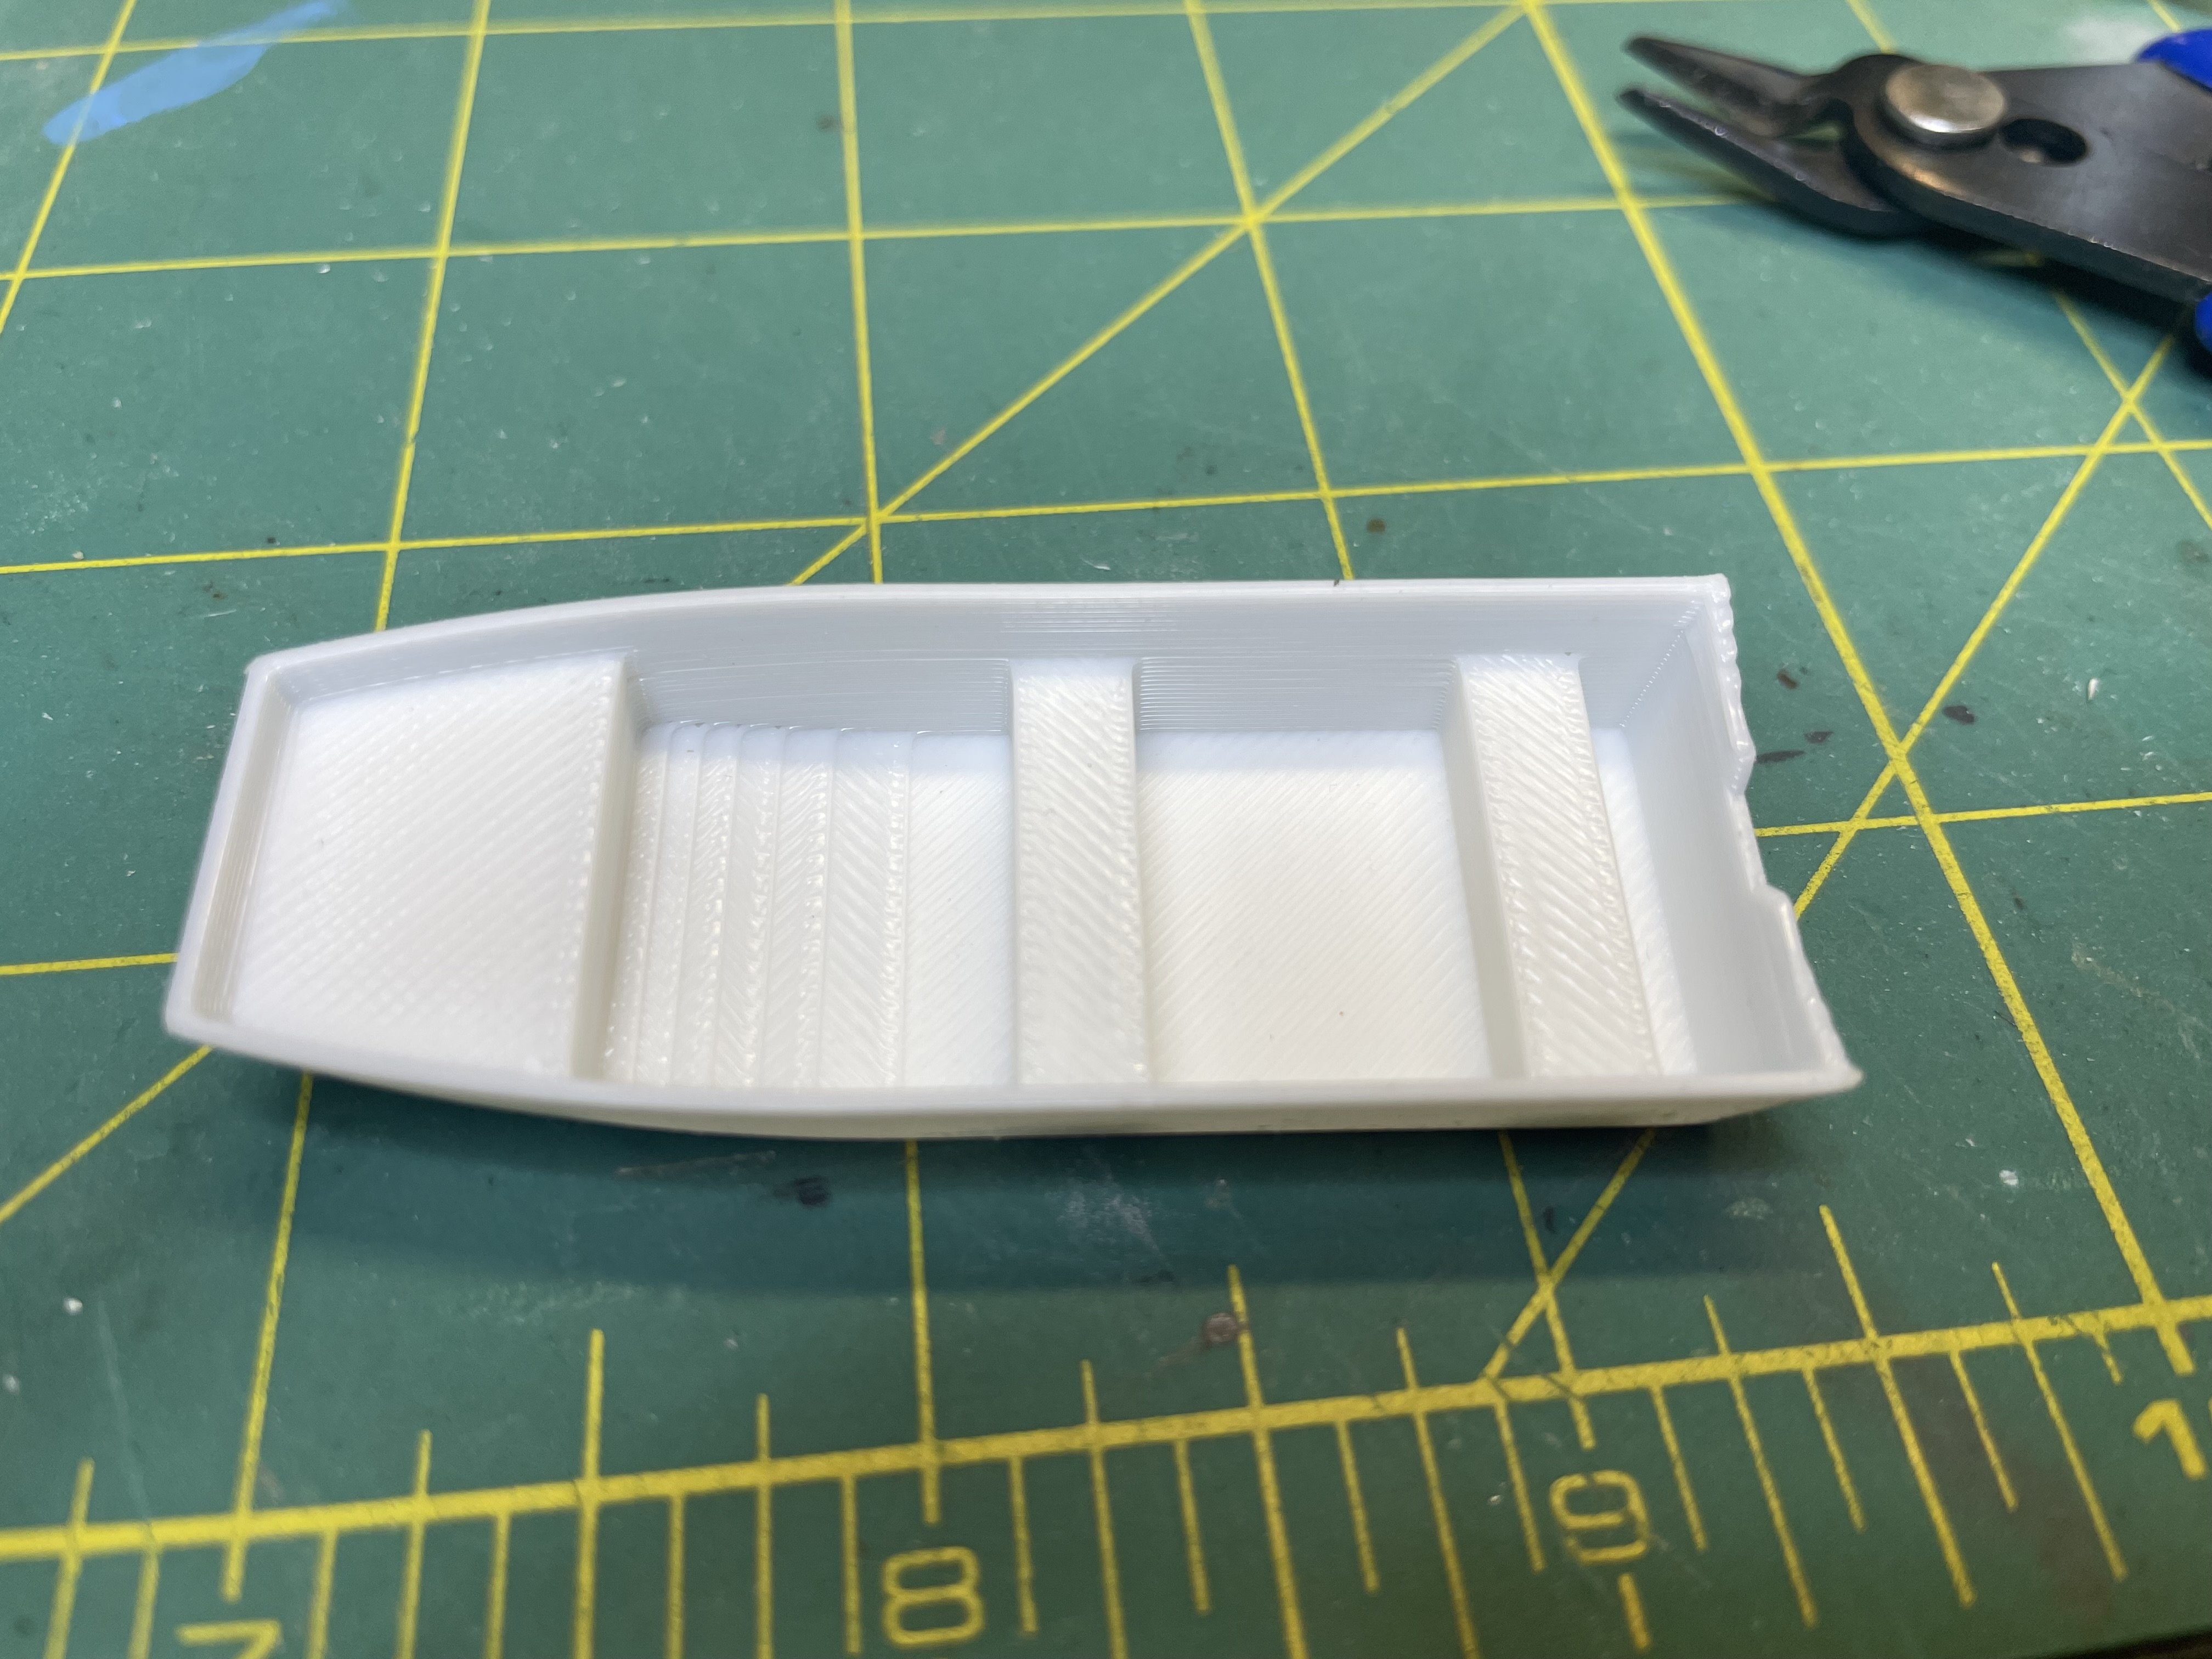
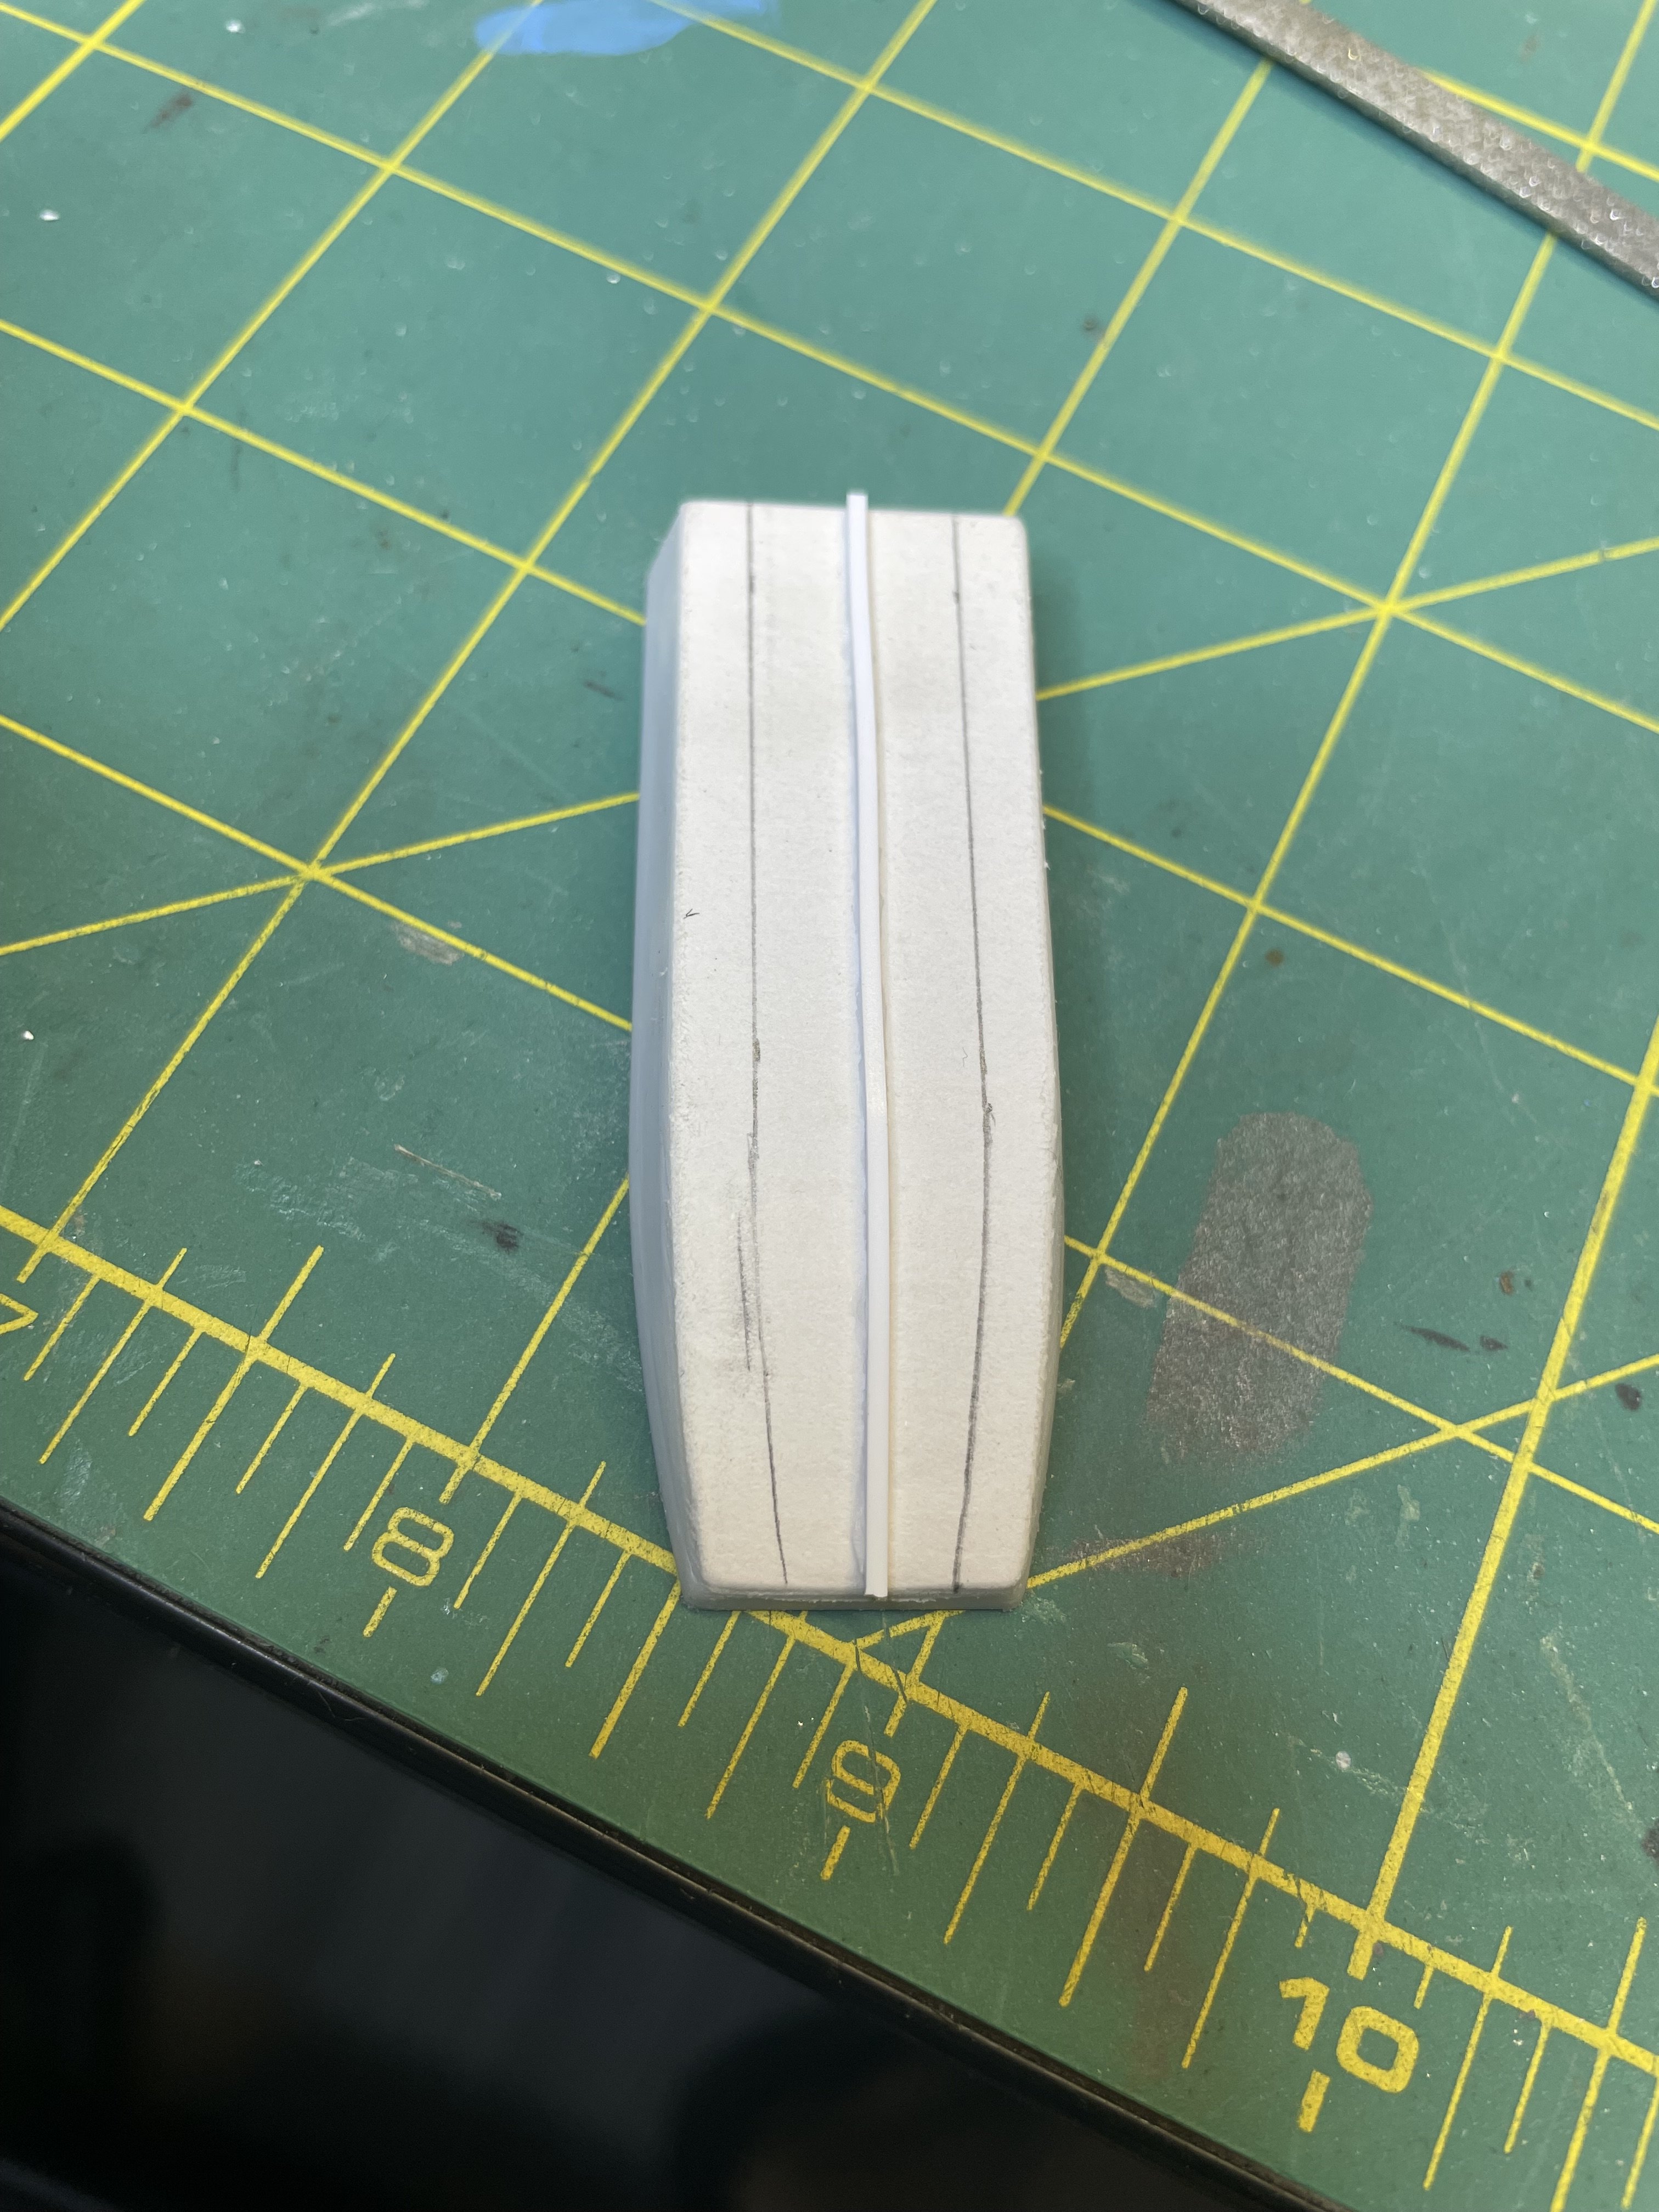
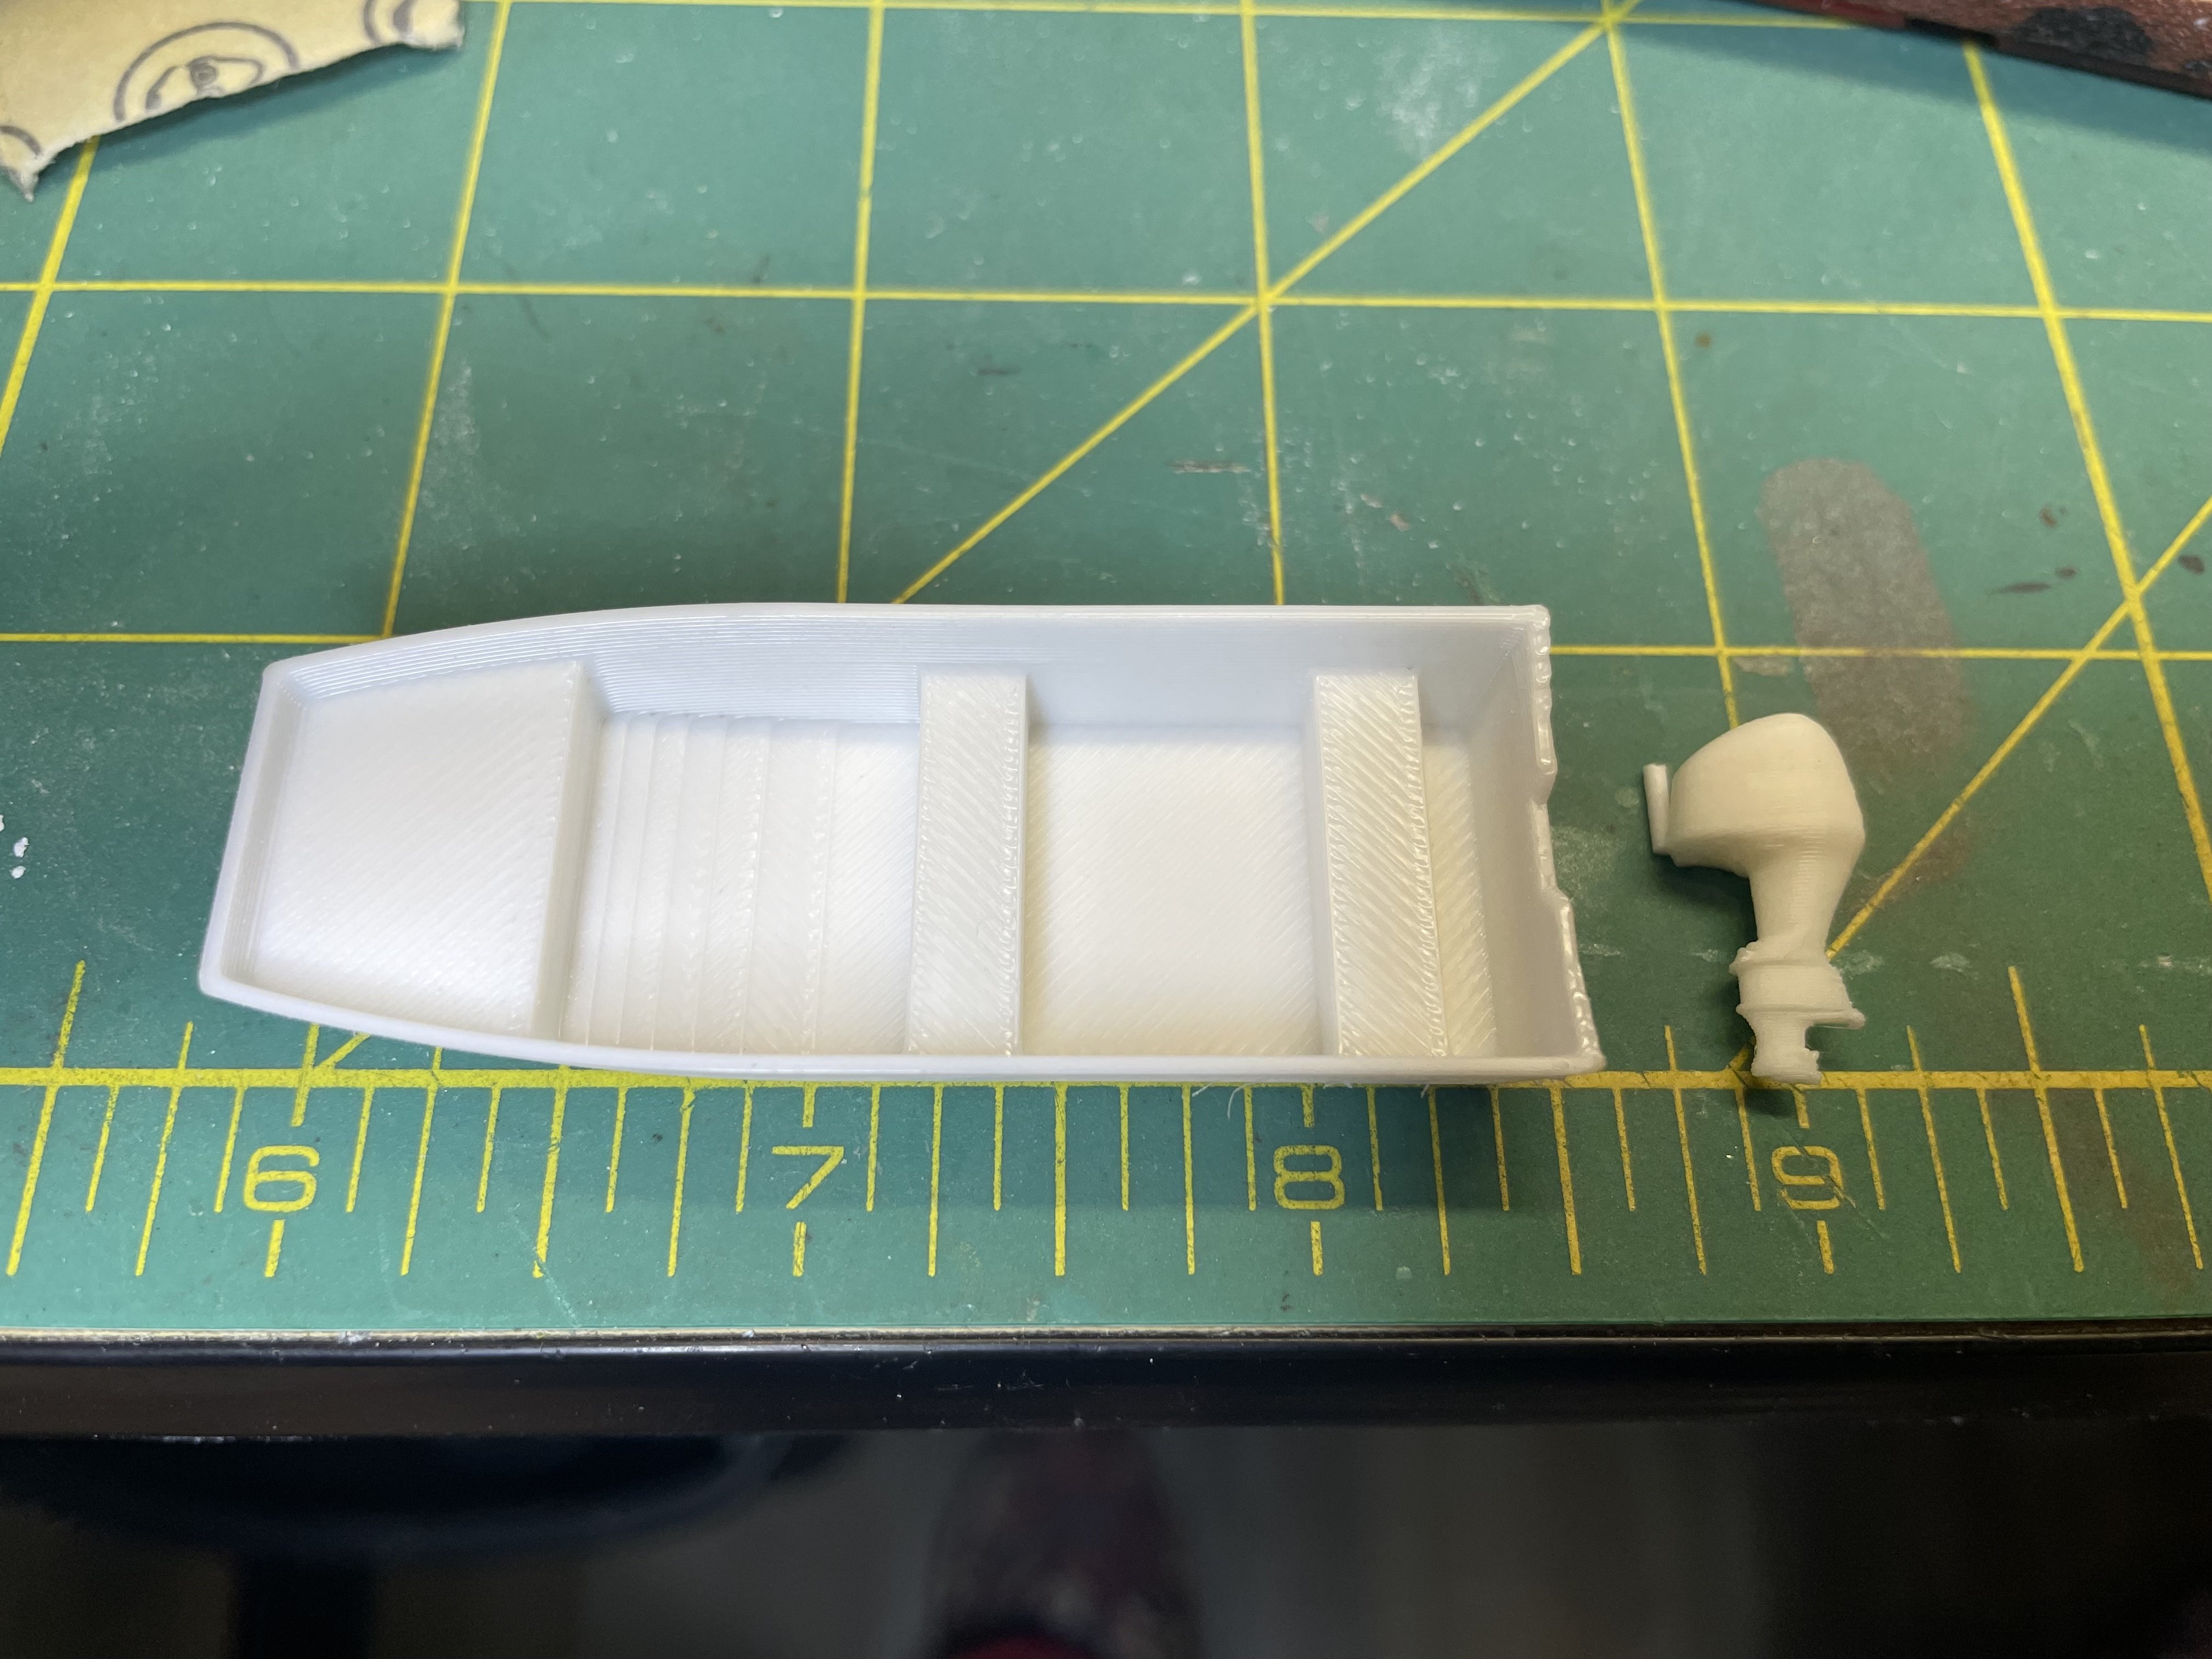
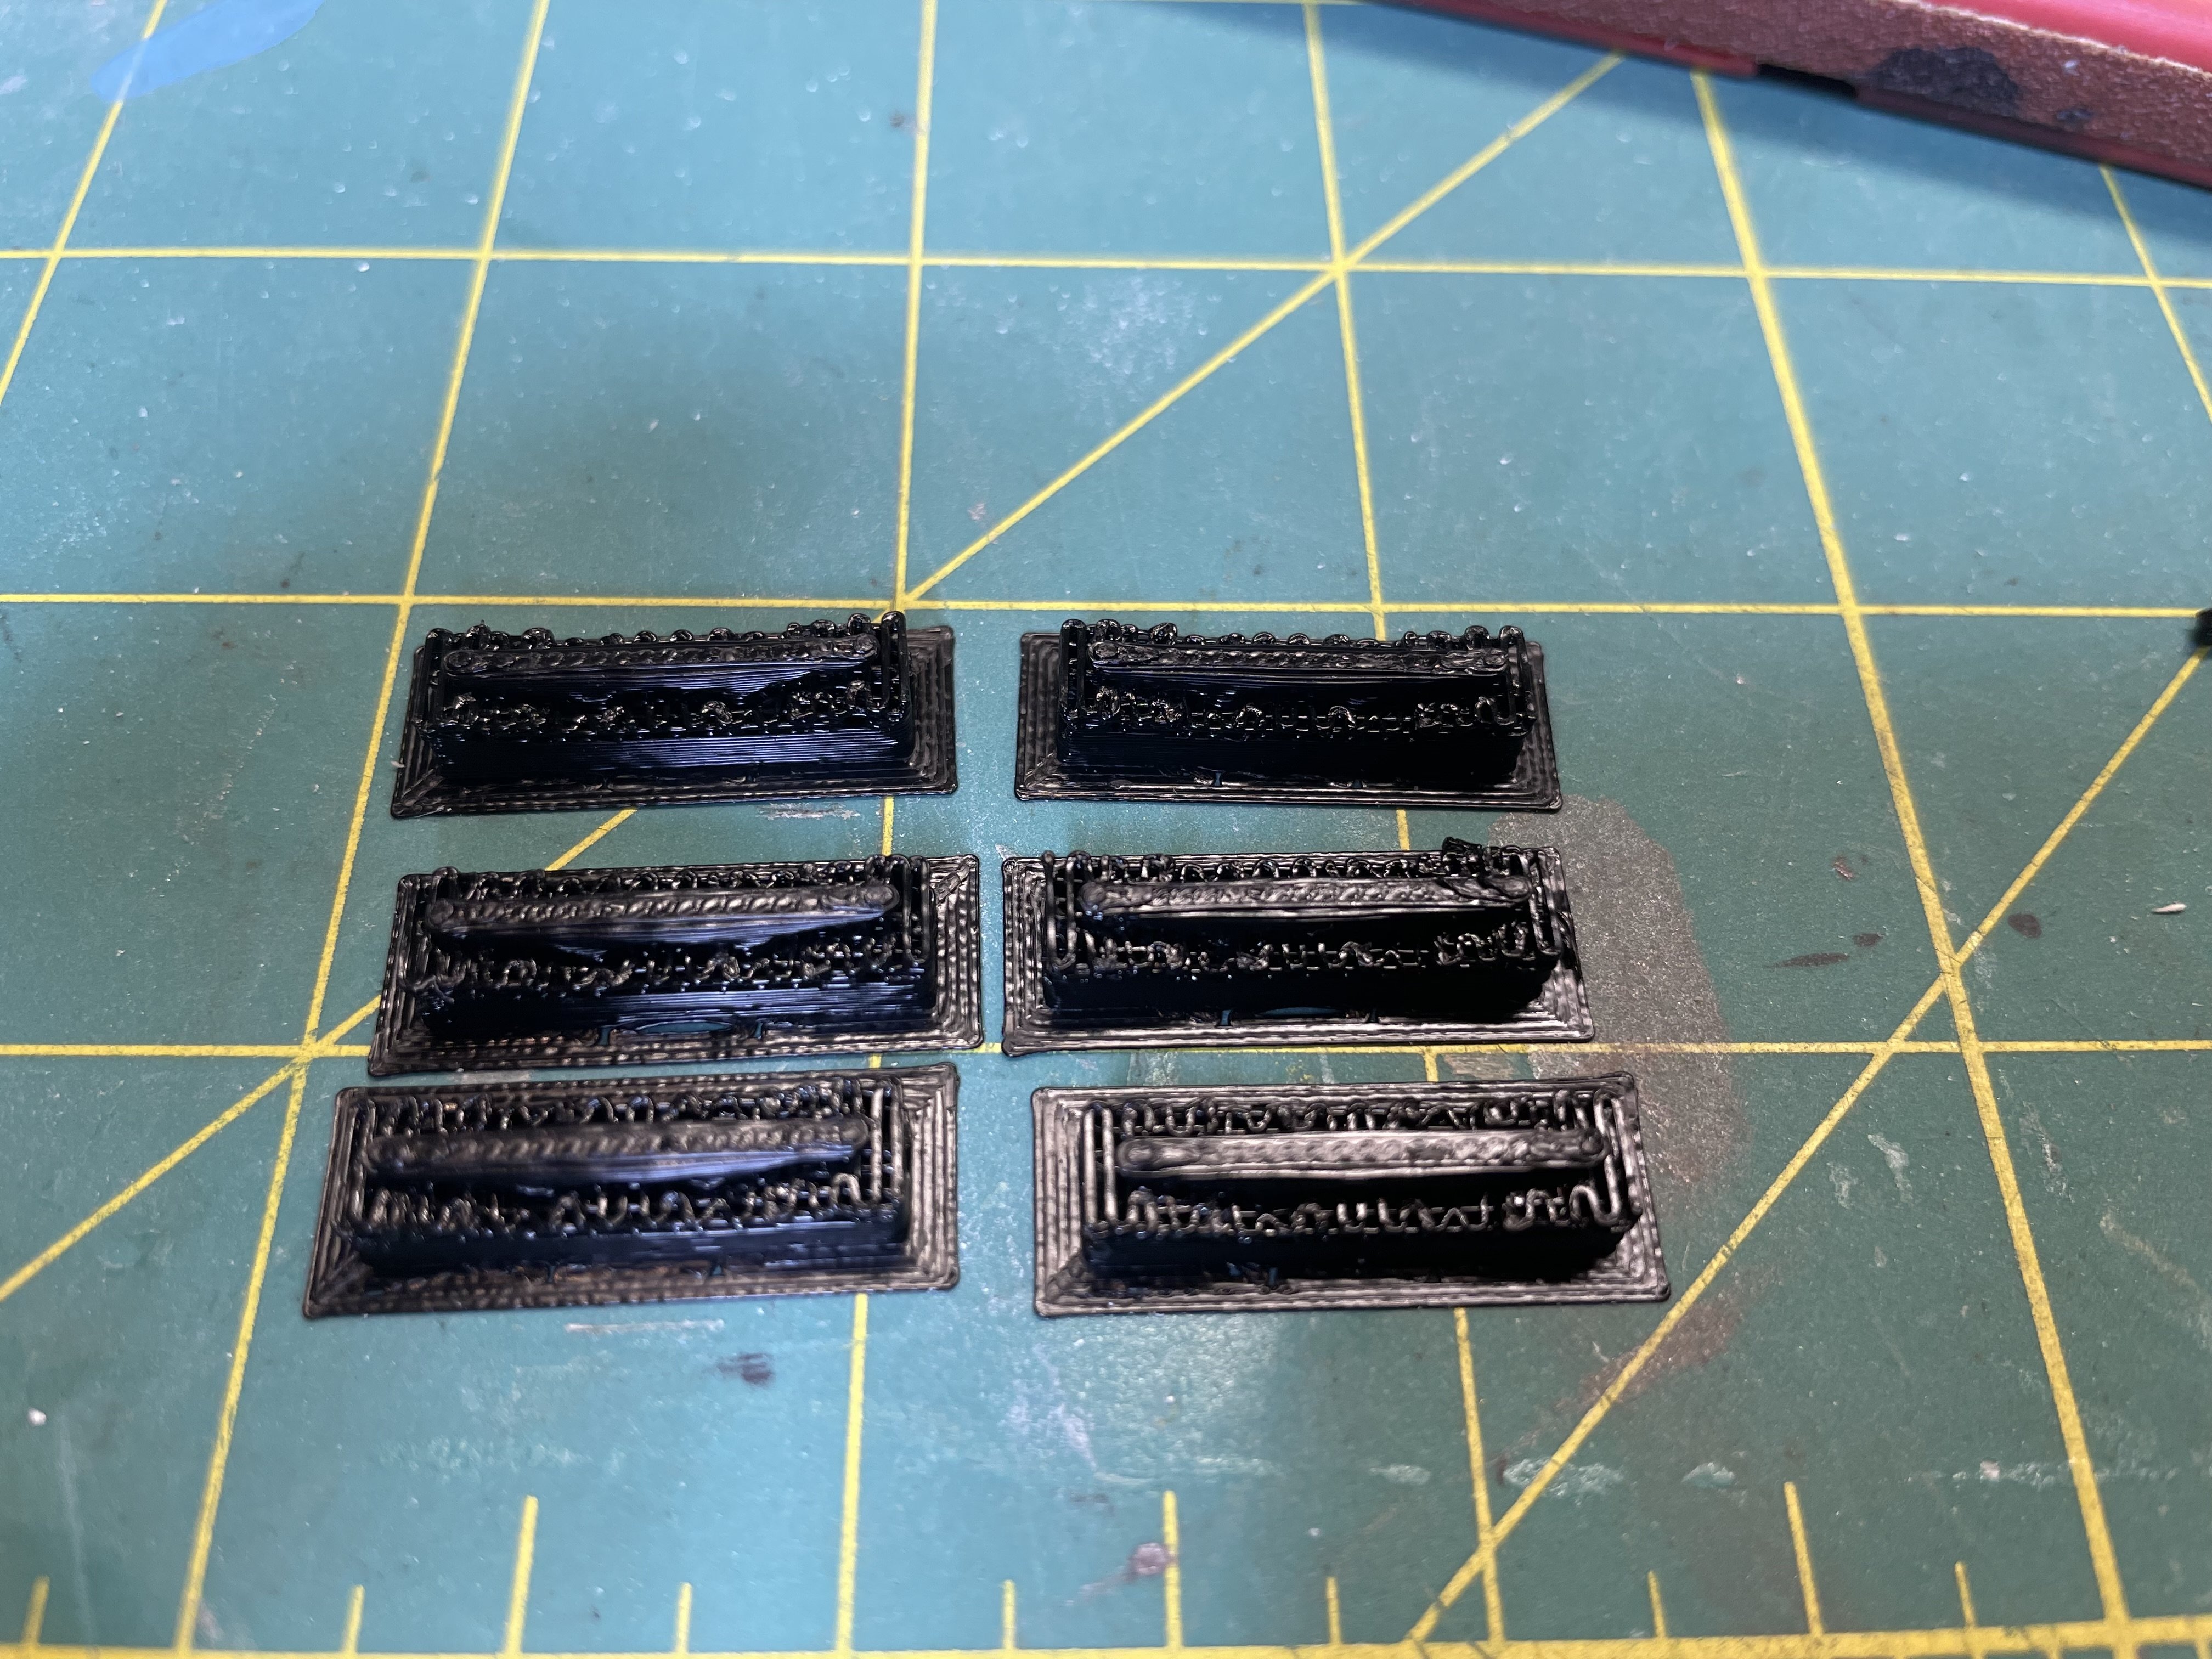
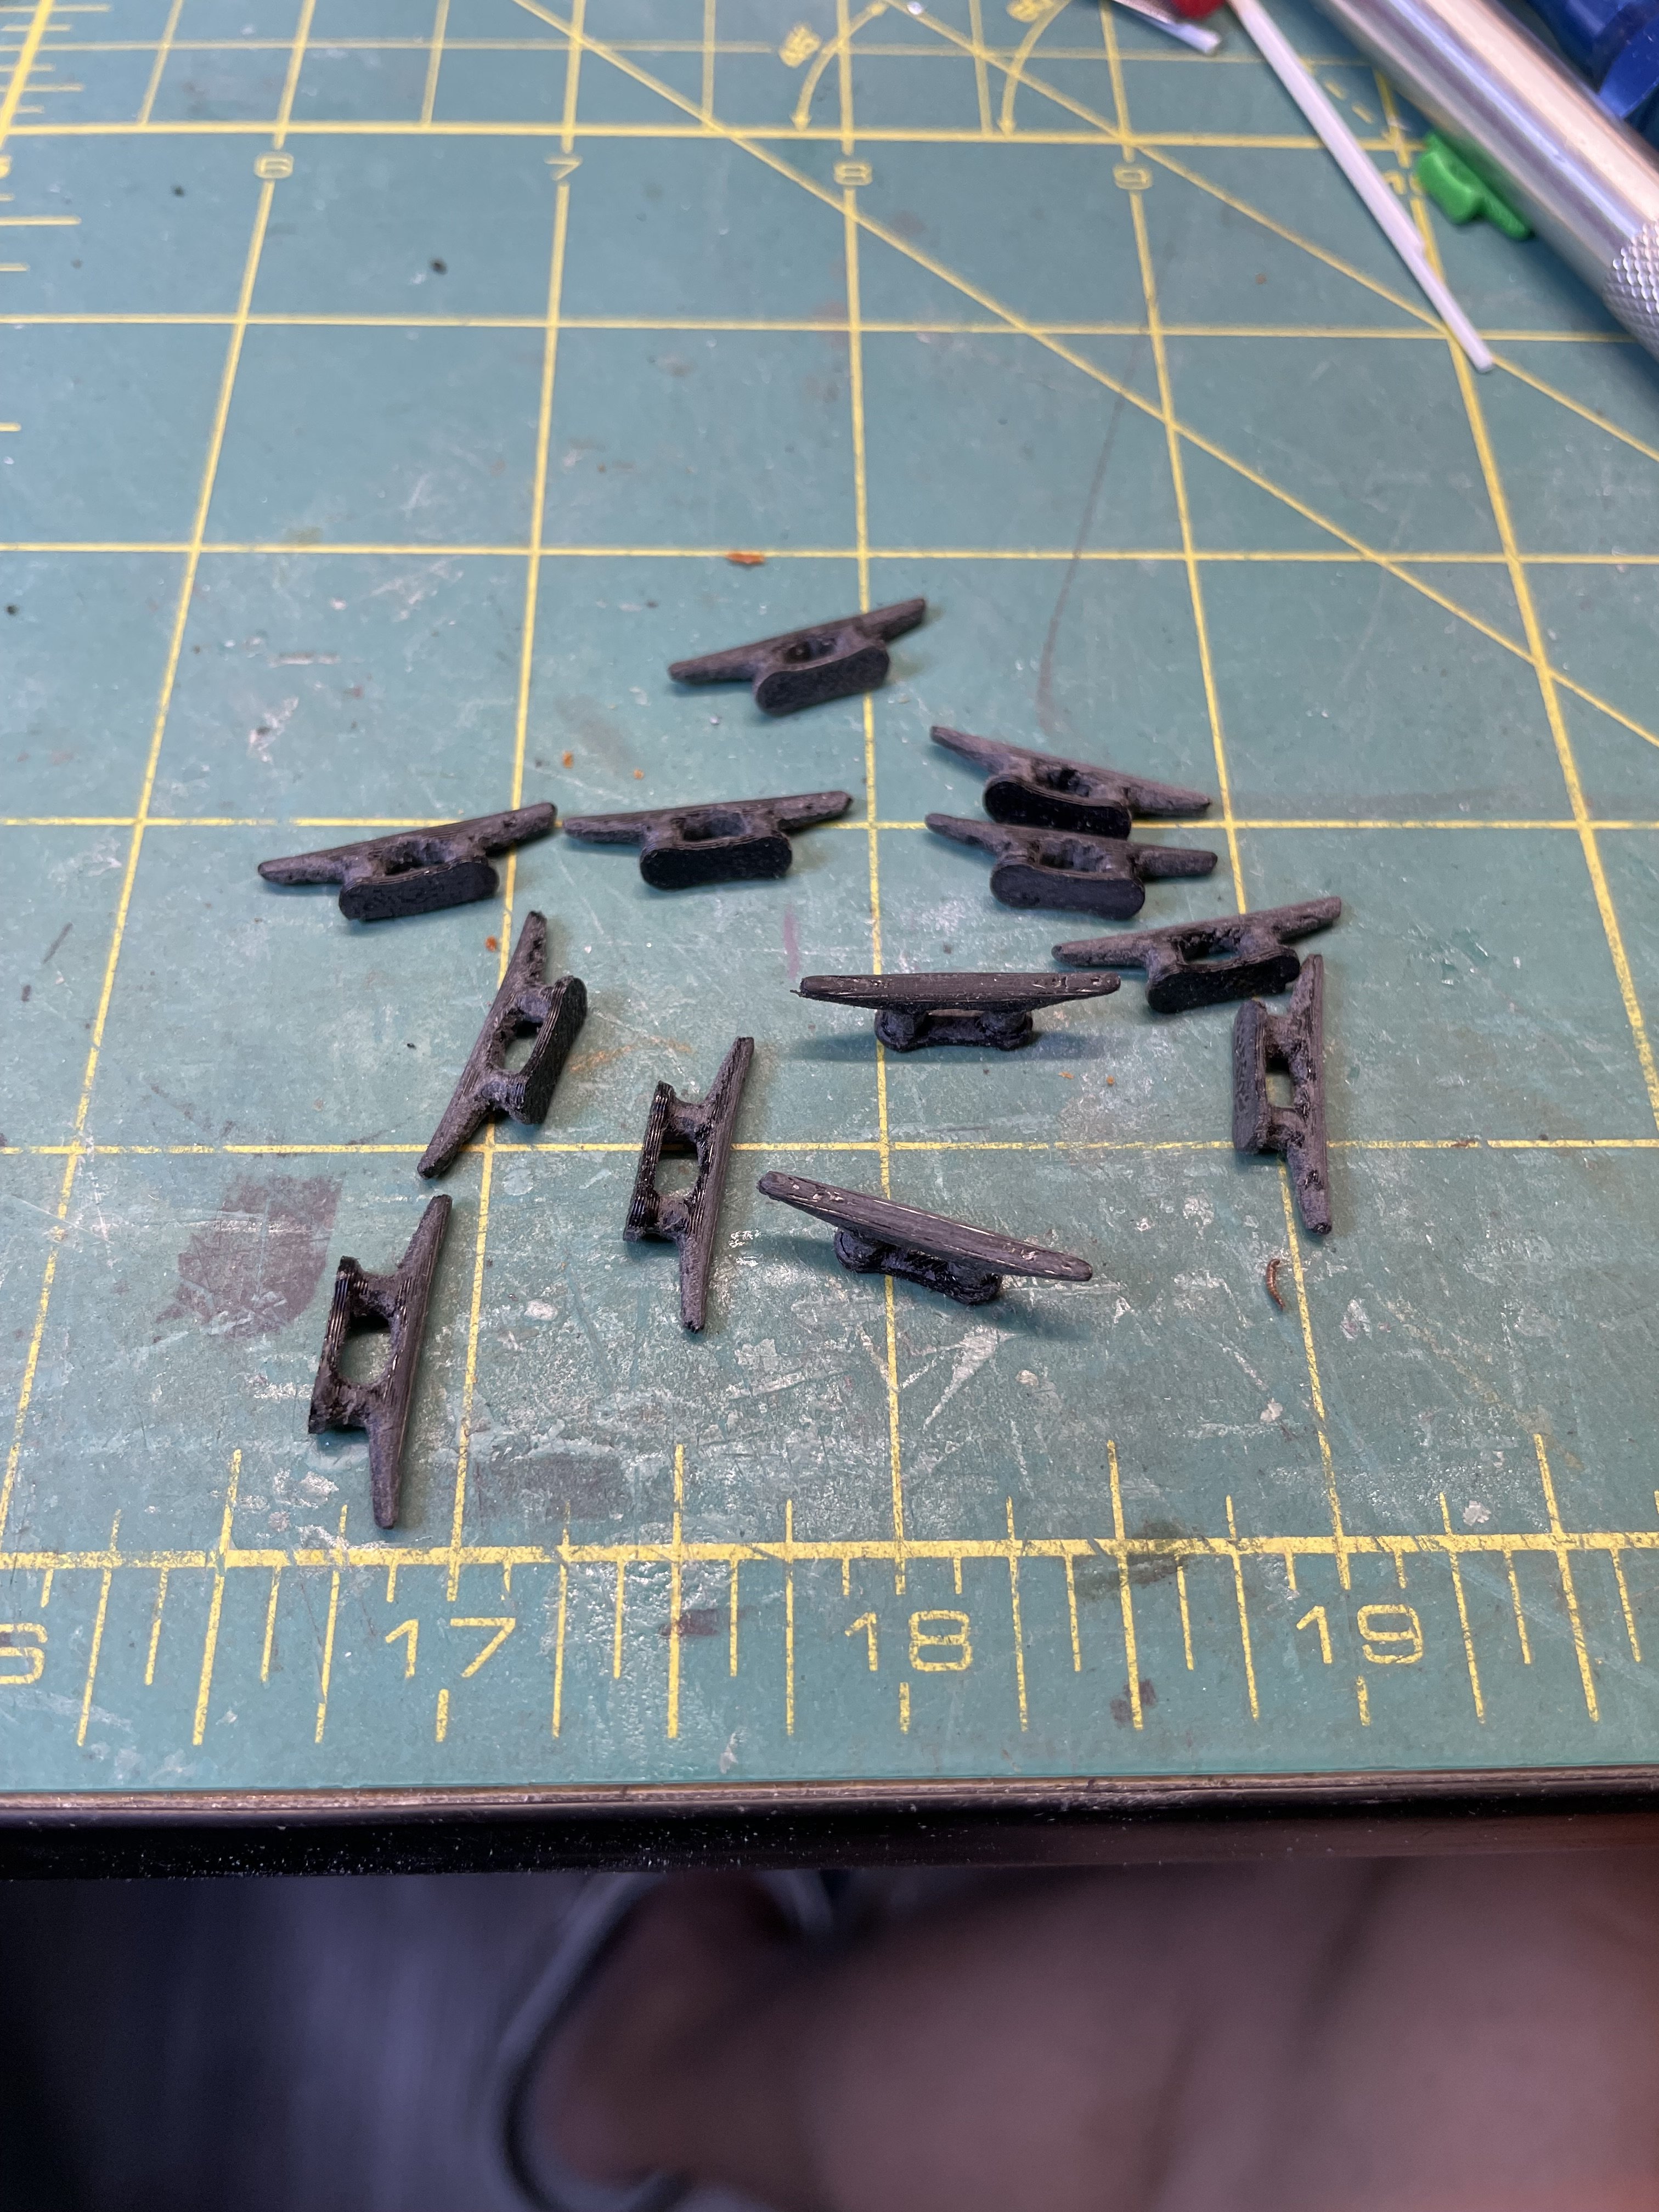
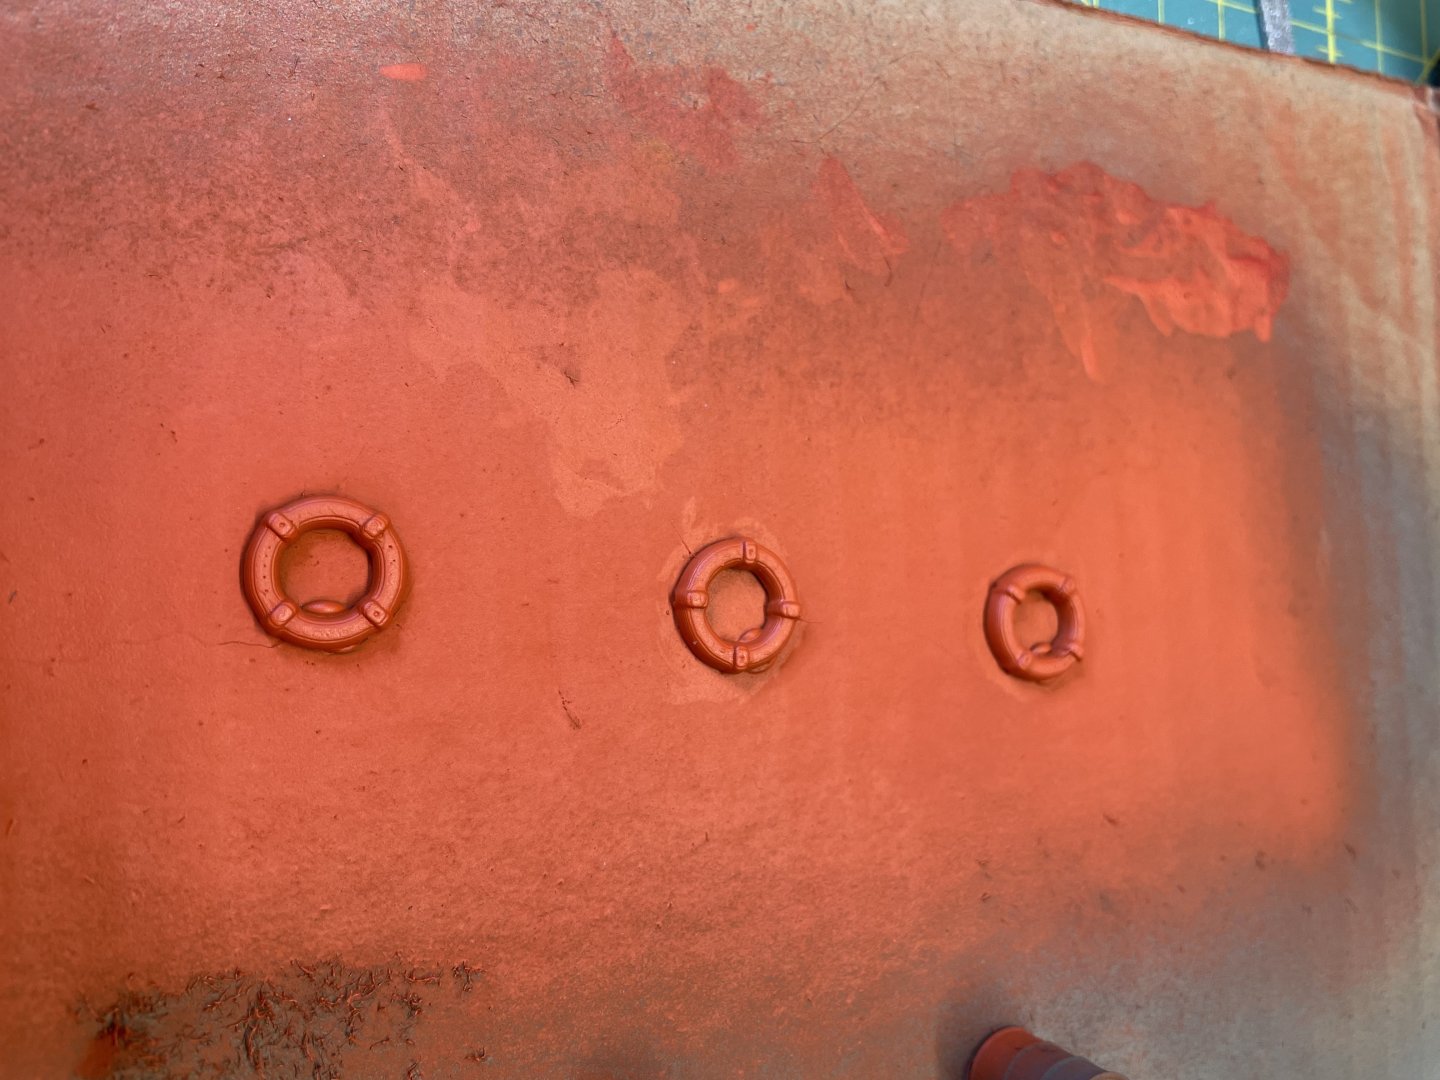
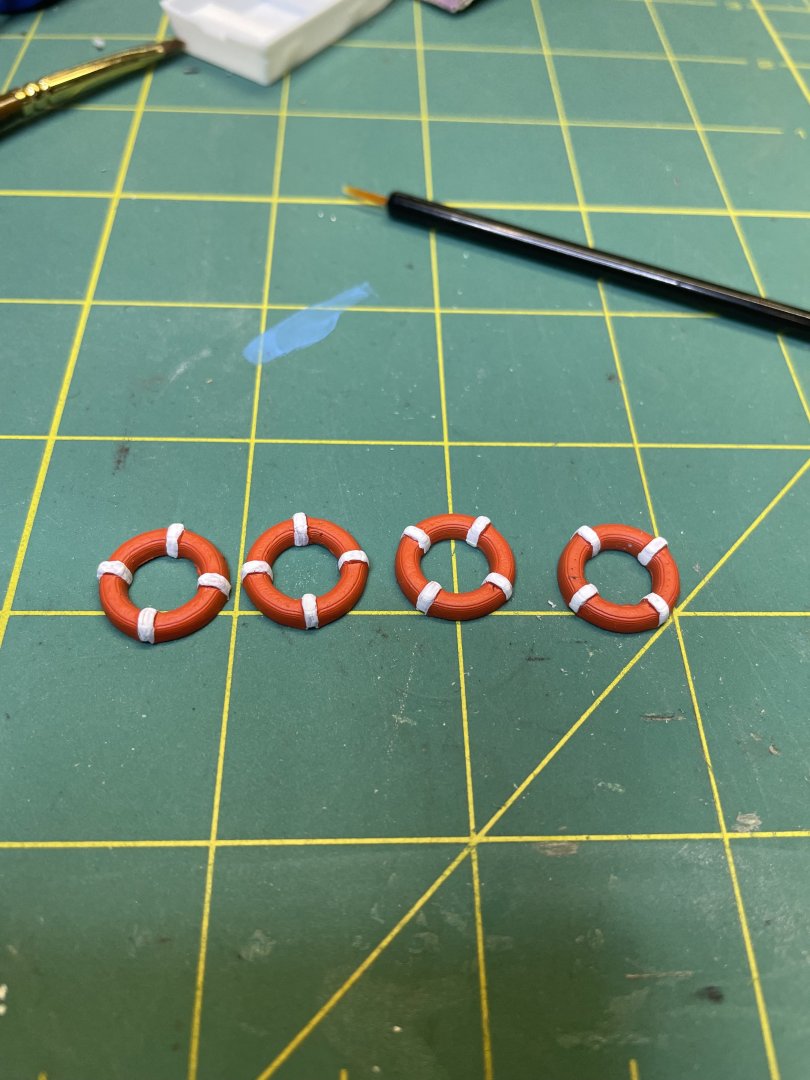
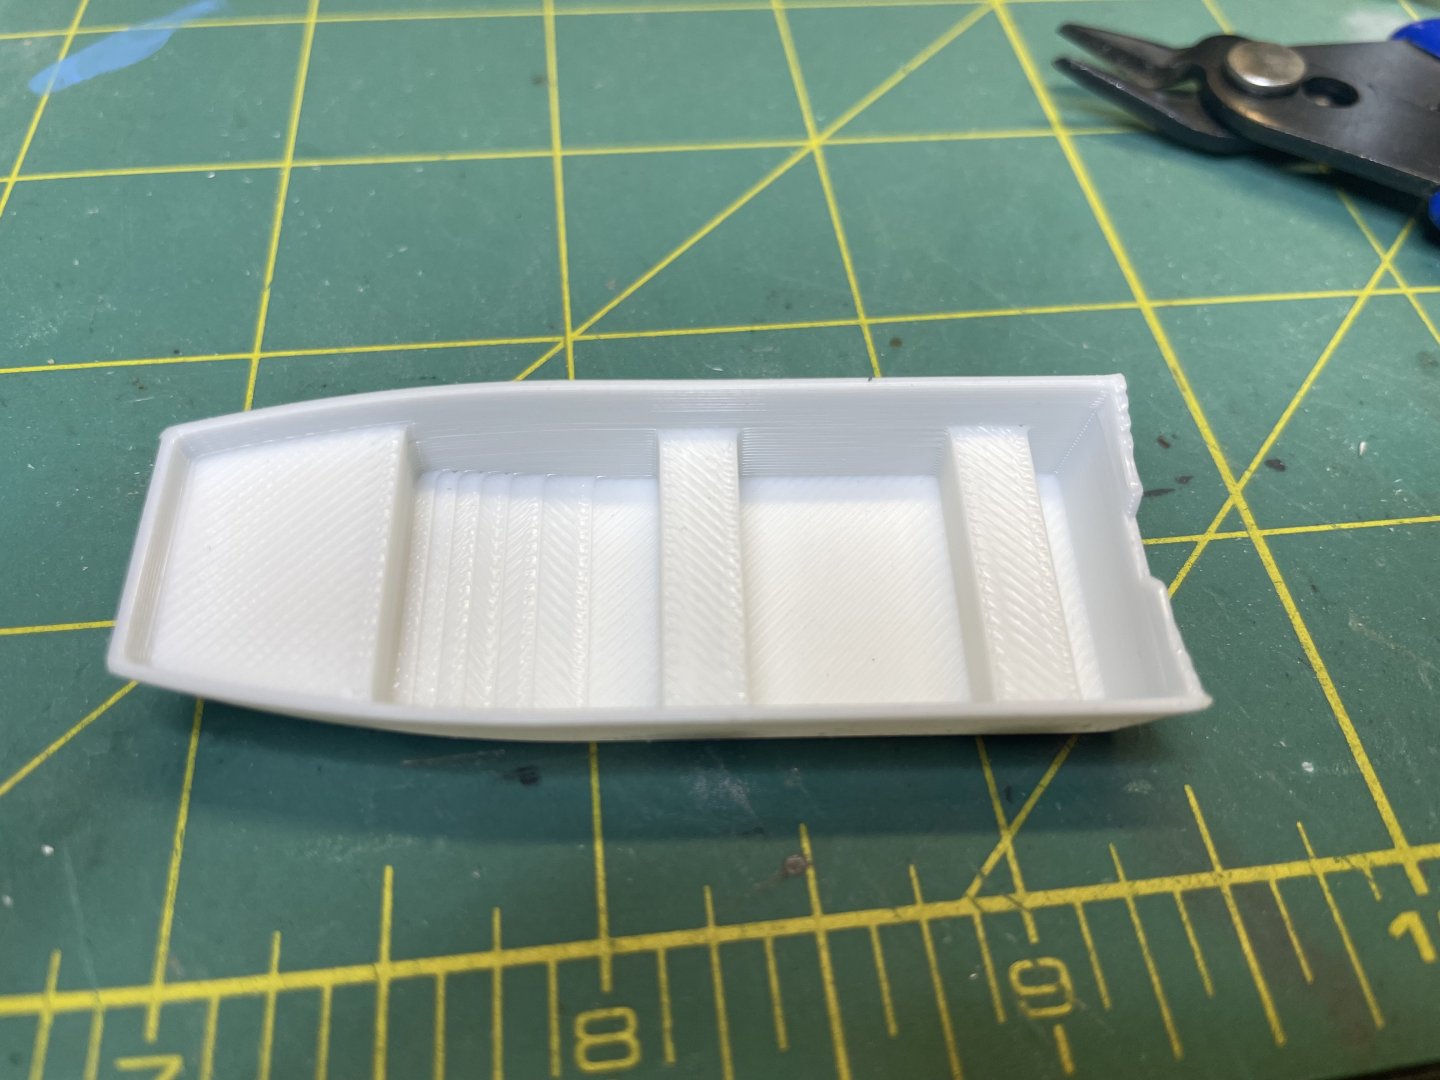
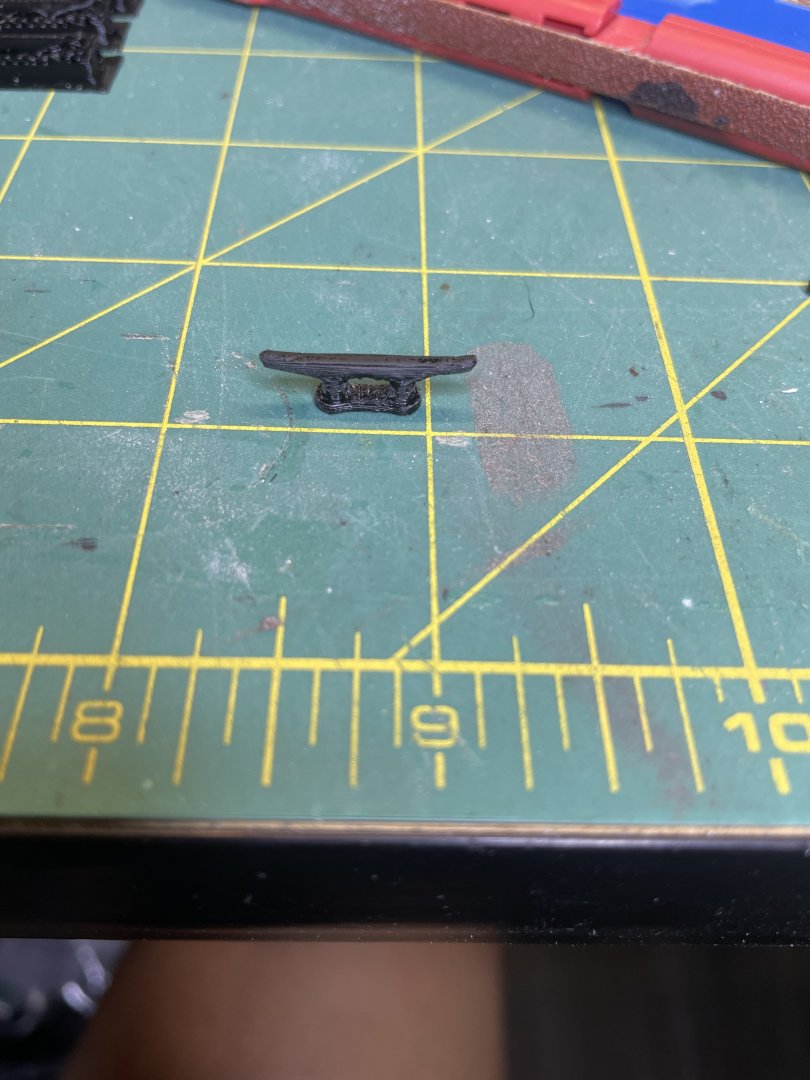
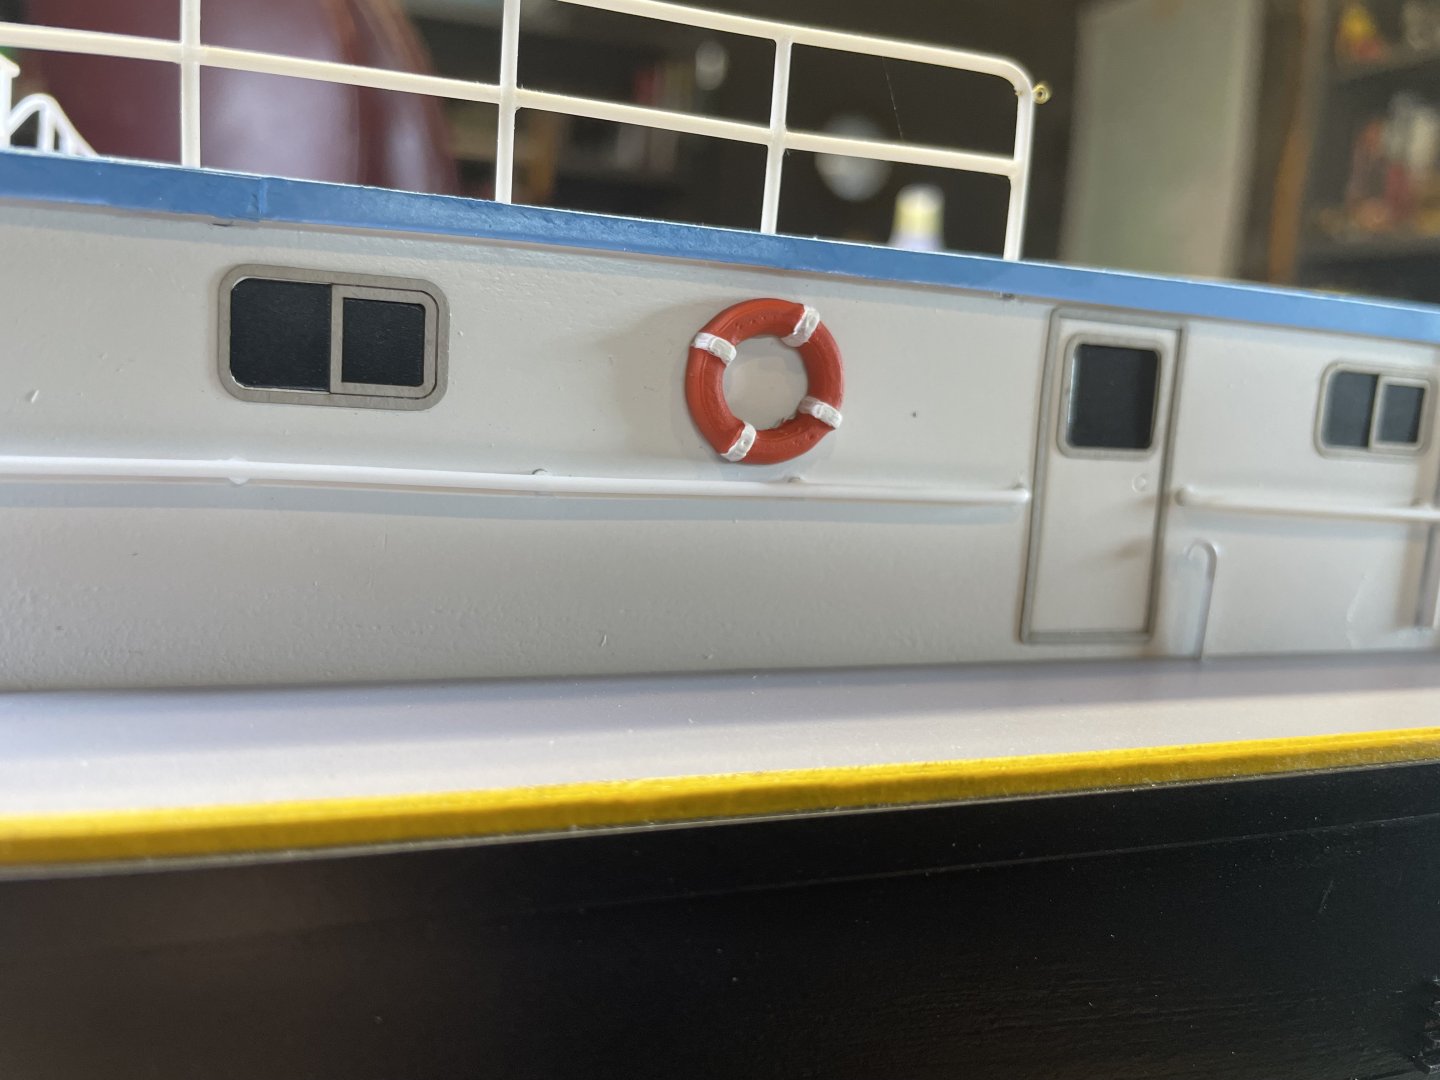
Hello again everyone, I have finally returned to working on the Caroline. It has been a while, but I finally got around to sitting down and getting a few things done over the last couple weeks. First thing, I fired up the 3D printer and made up the lifeboat/work boat. Not really sure of what it would be called in this instance. I tried my hand at designing and printing this time, and I am quite please with the results. I wasn't able to get the runners on the hull to come out right due to the small scale of the boat so I ended up just printing it out with a flat bottom and glued some styrene strips to get the effect. The outboard motor was a little more of a challenge. I managed to find a predesigned version, but couldn't get the prop to print. Again due to the small scale, my printer just wouldn't do it. I'll see if I can make up a small version with some of the materials I have on hand. Here are the results. Still need to paint things up. Next up were the life rings. These were pretty straightforward, just printed them up, gave them a coat of orange paint and finally the white details. And one of them in place. While the 3D printer was warmed up, I went ahead and printed out the cleats as well. A little more clean up to do on these, but they came out nicely. All I need to do now is to get them painted up and glued into place. Lastly, it's about time to start nailing down the main deck so I formed up and installed the vents that run along the walls. I'll get these all painted up and glued into place shortly then work on gluing down the main deck walls. That is all for this update. I realize it is not much, but I'm just getting back into the groove of things and wanted to get something out there. I appreciate everyone sticking with me, and hopefully I can keep a steady rhythm with the progress and updates. Thank you all for stopping by. -Brian


-
Thank you Eric & Keith. I’m hoping the new year will bring new photos of progress on the Caroline. The past few months have been a little rough, the bench has been collecting dust (unfortunately not sawdust) and my MSW time has been neglected. We lost our daughter in law in an automobile accident and a lot of my (our) time has been helping my son and granddaughter get through things. Life is a strange being at times. It can be sublime and it can be cruel, but we do the best we can to deal with what it gives us and move on. I have made myself a promise to get back at it after the holidays, so new material will be headed this way soon. Thank you all for following along and sticking with me. This voyage is far from over and we will reach our destination. -Brian
-
Thank you Keith! Merry Christmas to you and your family as well. Merry Christmas to all of my MSW Family too. - Brian
-
Beautiful job Keith. Congratulations on a job well done!! I’ll be on the look out for the beginning of the Lula build log. -Brian
-
I can only come up with two words Keith, “outstanding realism”. The weathering, distressed side rails, and grit, are top notch workmanship. Looking forward to Lula. -Brian
-
More like a beautiful swan Keith!! -Brian
-
Holy cow Keith! It’s amazing the amount of realism the pastels bring out. You also have me convinced the shaker roof is the right decision. I think it looks great. However, if you are proceeding with the metal roof I will be anxiously awaiting those results as well. This is such a true statement. When I first started painting my Cairo, I chose black for the topside color. I found out real quick that it was not the route to go. After several attempts I found that the dark bluish-gray was perfect. It gave everything the perfect depth and helped highlight certain features. The same holds true with your build. Fantastic work on the weathering! -Brian
-
Thank you Gary! My grandfather always told me, “why pay someone to do something for you when you can do it yourself cheaper”, and I have lived by these words most of my life. I do know my limitations and there have been times where I just have to get someone else to do it. It’s not for lack of trying, but it would be cheaper in the long run for fear of screwing it up and having to redo the project. I took these words into consideration when ordering the printer, now I can build the parts myself and not have to pay someone else for them. I’ve been in the technology field for almost 30 years and have been using CAD software for almost the entire time. Many of the software packages these devices use are based on CAD so the learning curve is fairly easy. Most of them come with a free version that is simplistic and scaled down for the standard user. There are other programs out there that are more robust and allow for much better renderings and manipulation of the project you are working on, but I’ve found the free ones get the job done for what I need. Not to mention the better programs are stupid expensive. My 3D printer is a Bambu Labs P1S and came with its proprietary software Bambu Studio, but like many of the other programs out there it uses the standard file types, and there are several sites out there that have free files that you can upload to the device, and you can scale them to the size you need as well as make alterations to them. Somewhat like my laser engraver/cutter, there were a few days of beating my head on the table trying to figure it all out but it didn’t take too much time before I was off and running. -Brian