


mbp521
-
Posts
1,002 -
Joined
-
Last visited
Content Type
Profiles
Forums
Gallery
Events
Everything posted by mbp521
-

Barncave Shipyard by mbp521 - Scale 1:1
mbp521 replied to mbp521's topic in Non-ship/categorised builds
Thank you Yves! She’ll have a proper, dust free place once I get the bookcase completed. I just wanted to make sure she’d fit and at a good viewing angle so thats the reason for her sitting there right now. -Brian -
Barncave Shipyard by mbp521 - Scale 1:1
mbp521 replied to mbp521's topic in Non-ship/categorised builds
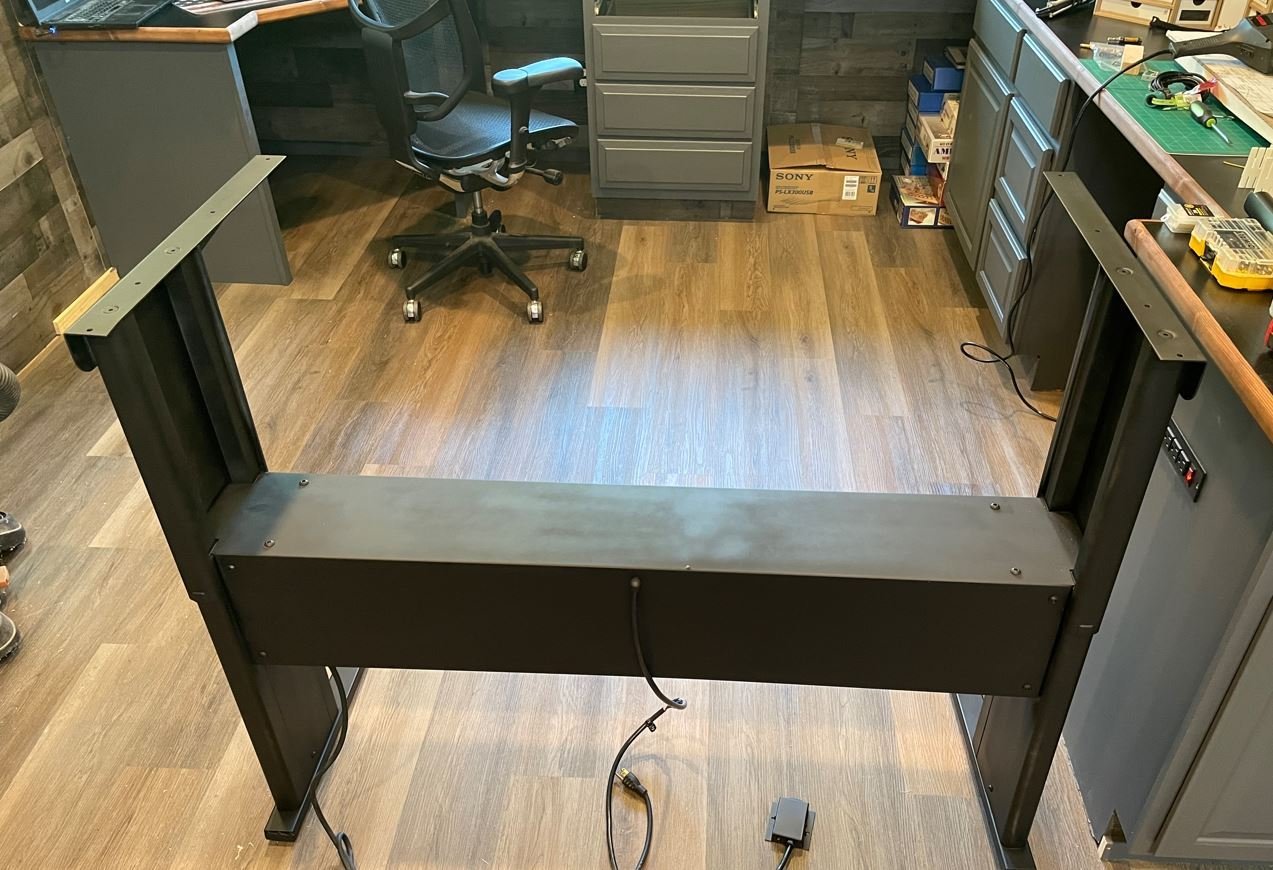
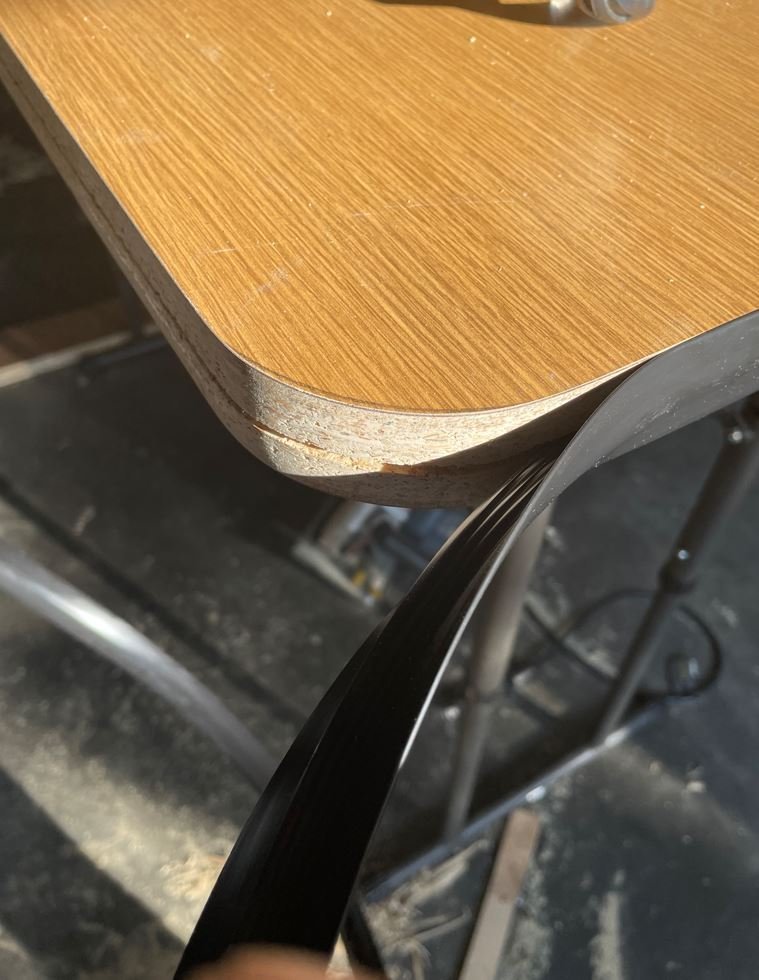
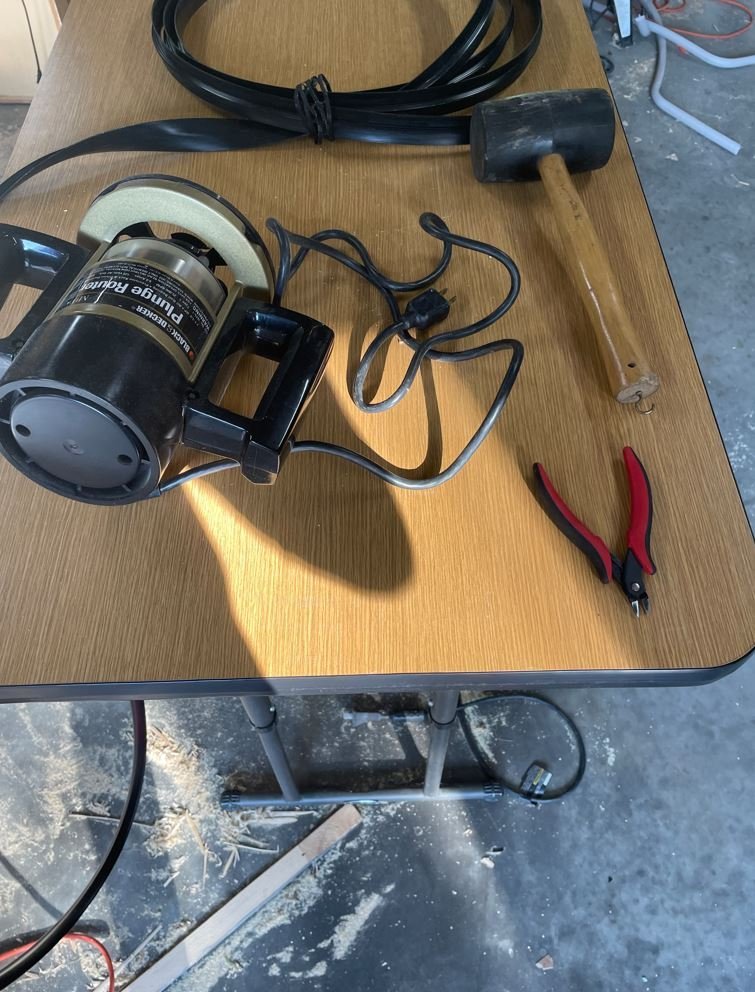
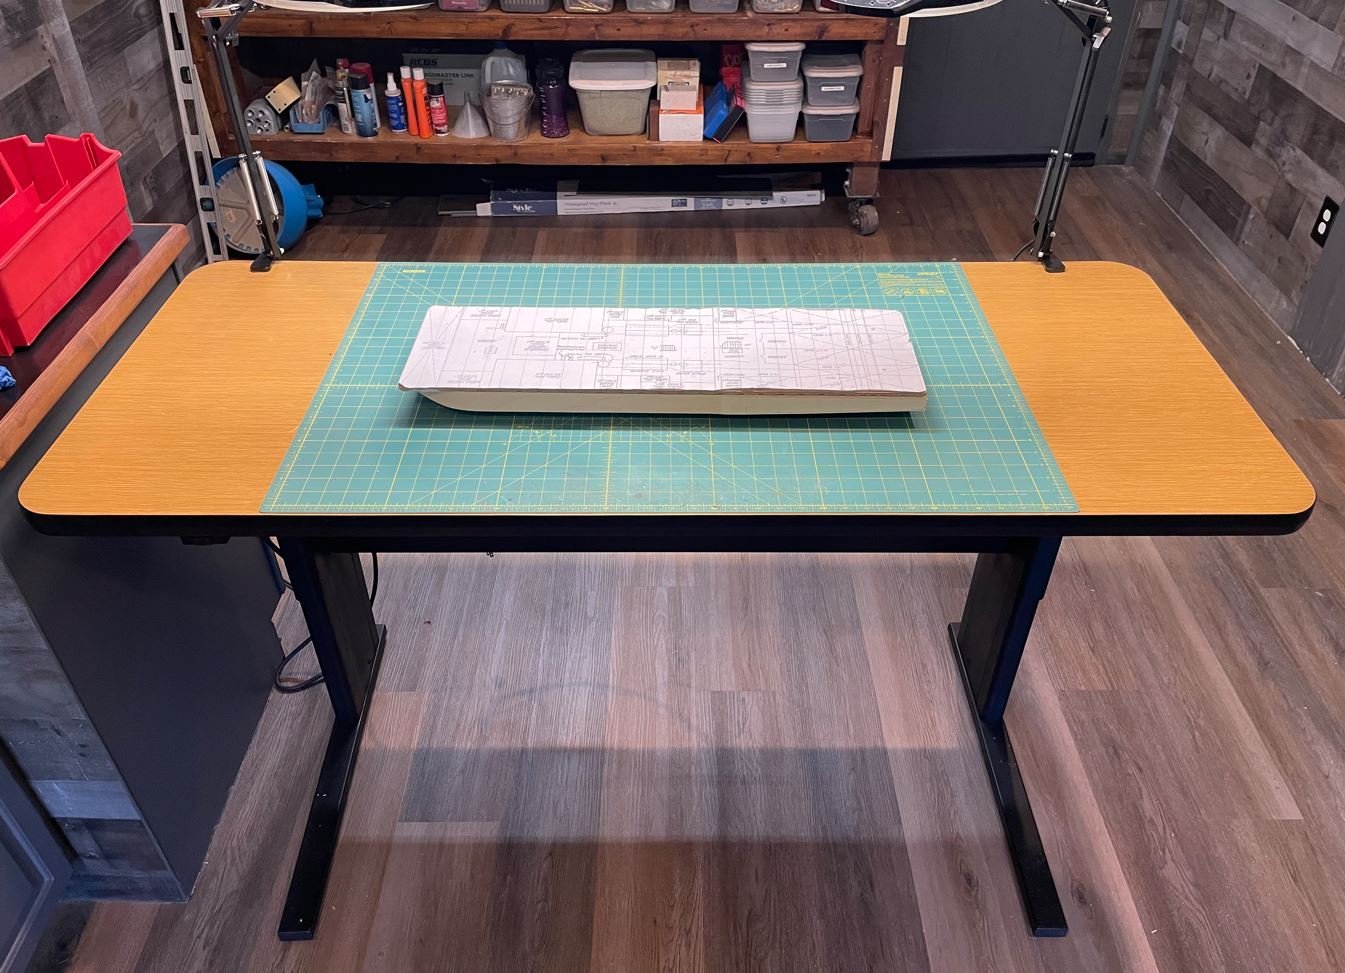
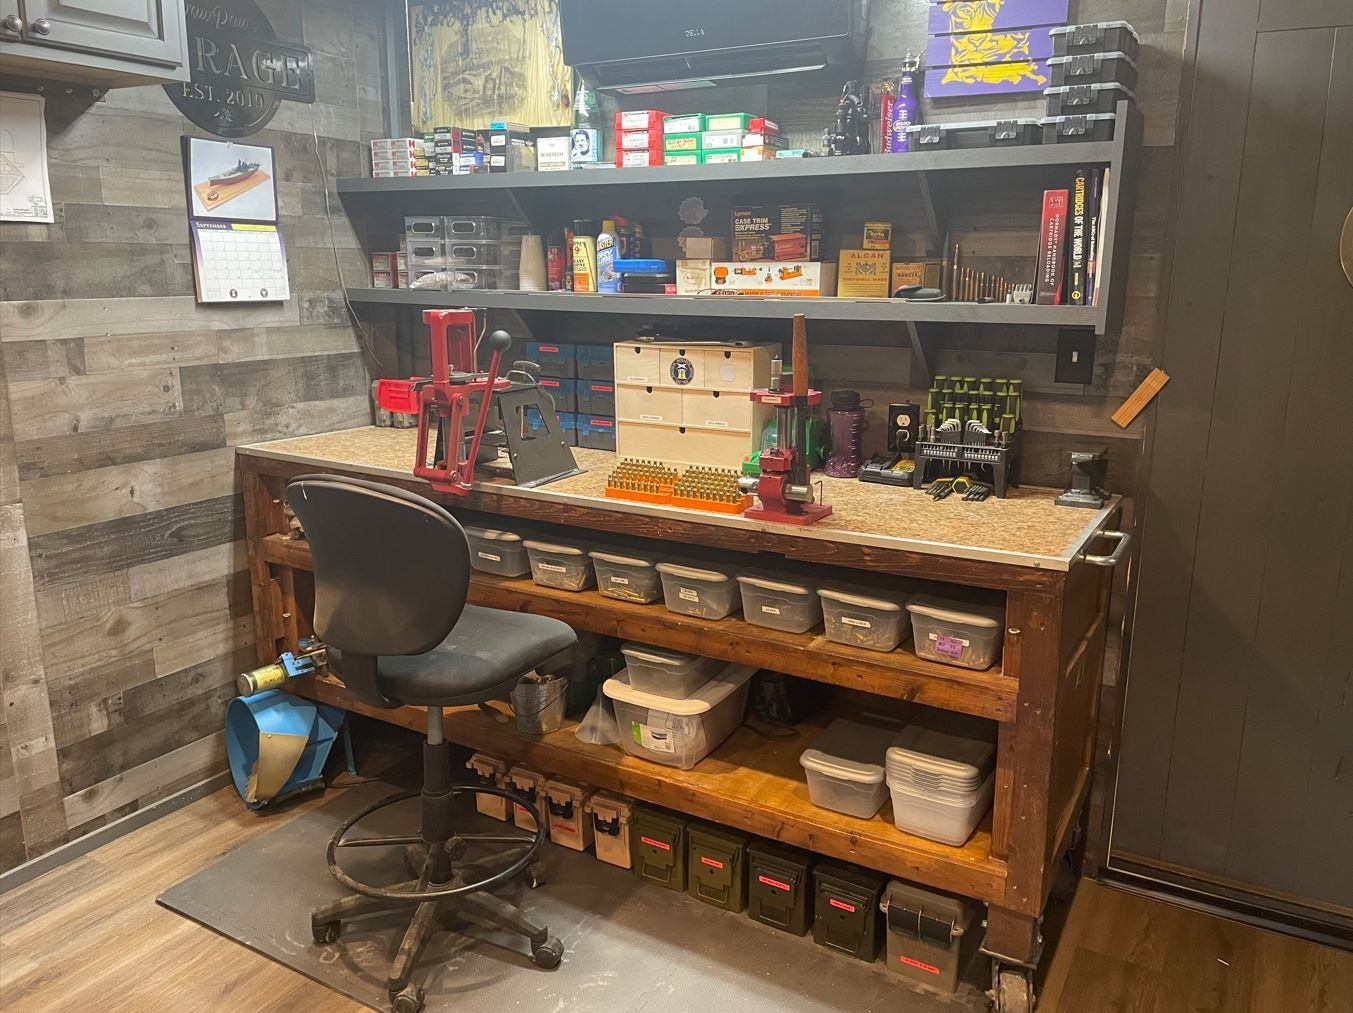
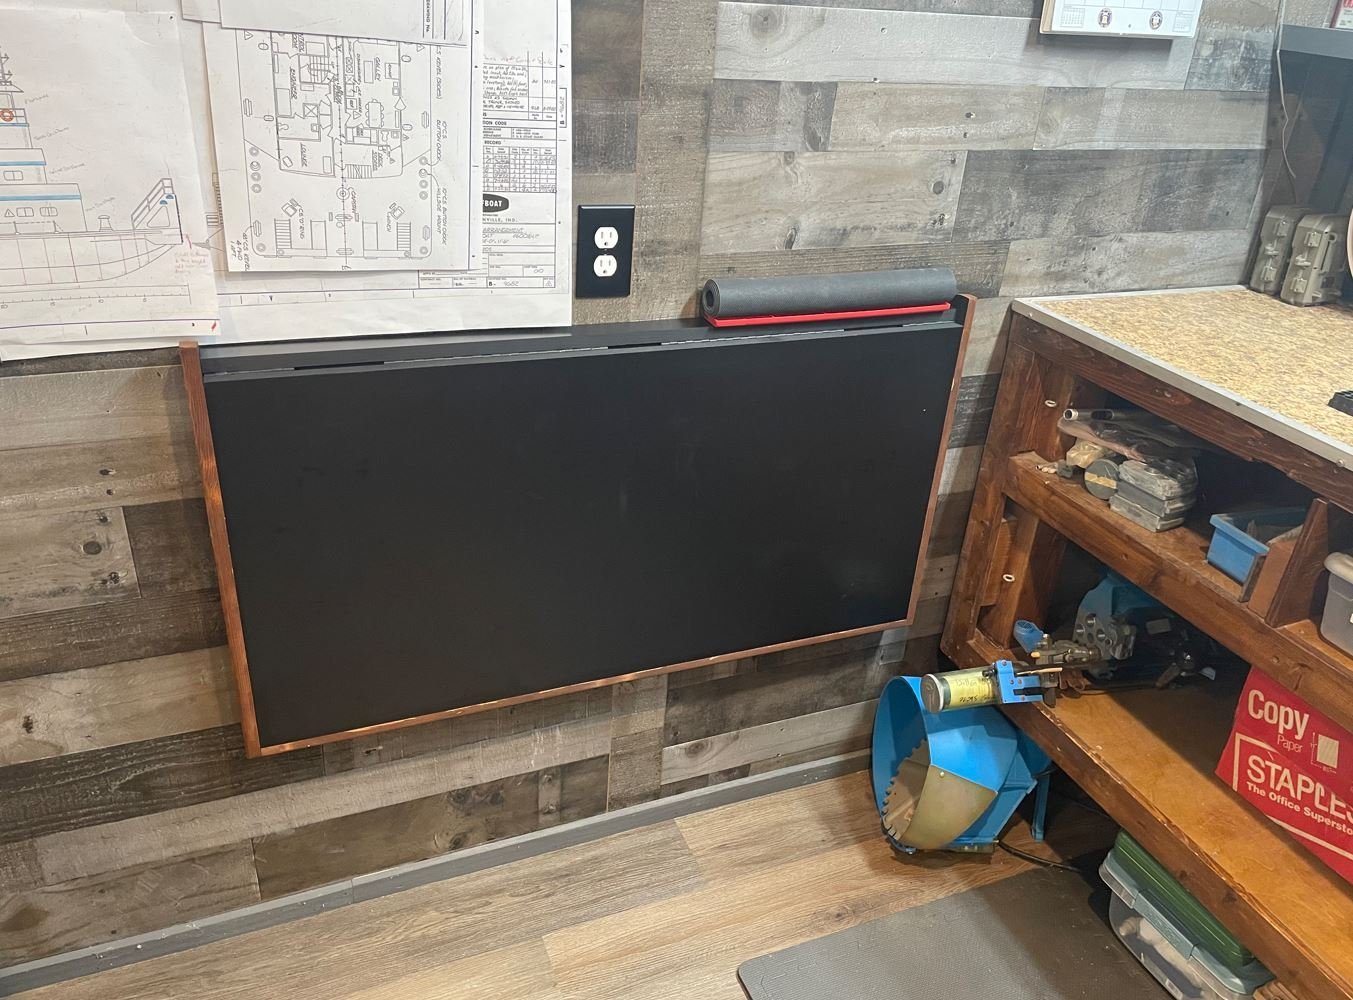
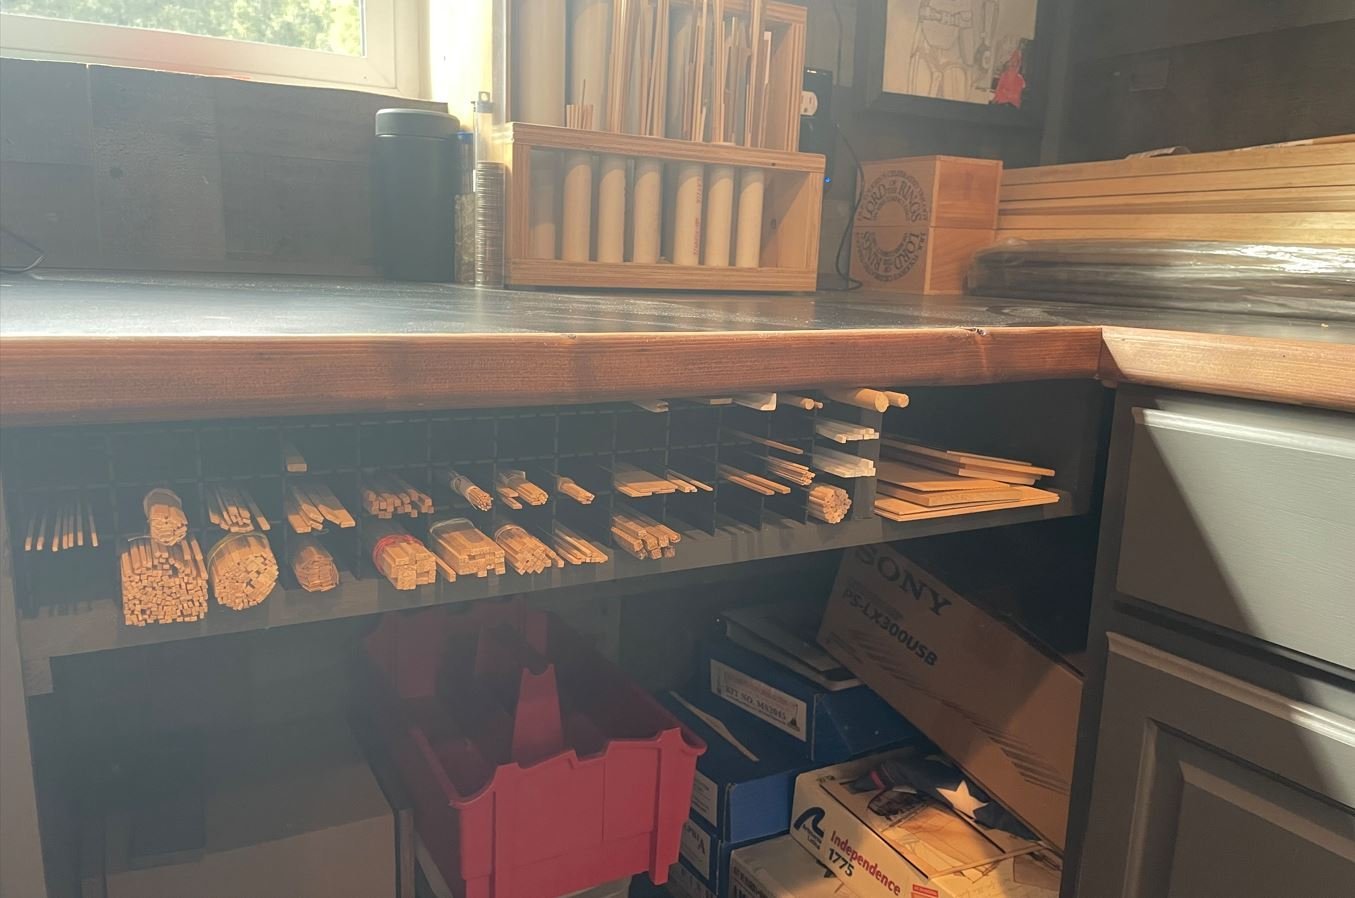
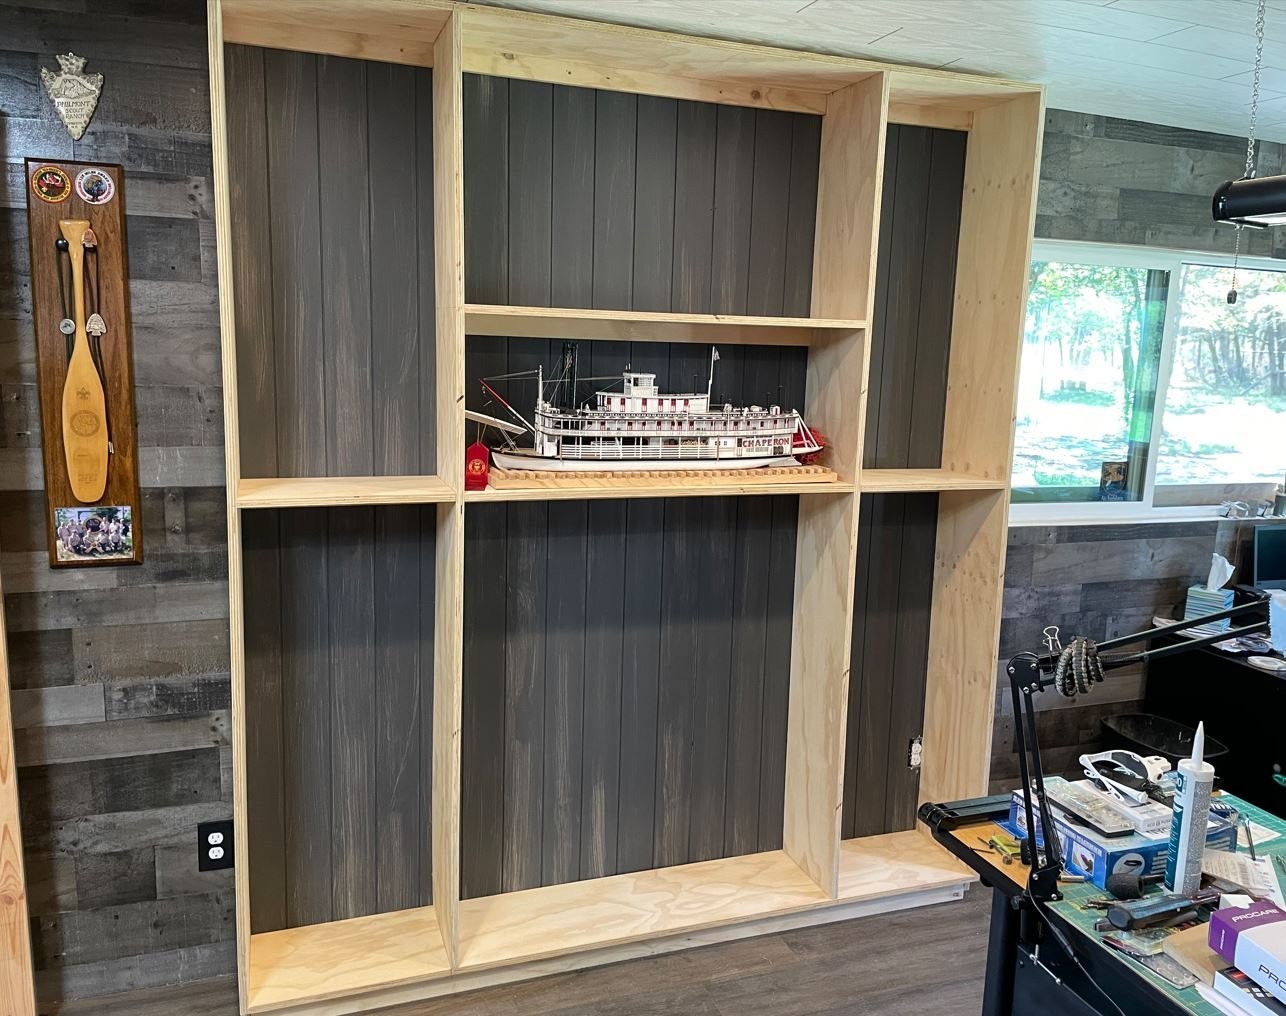
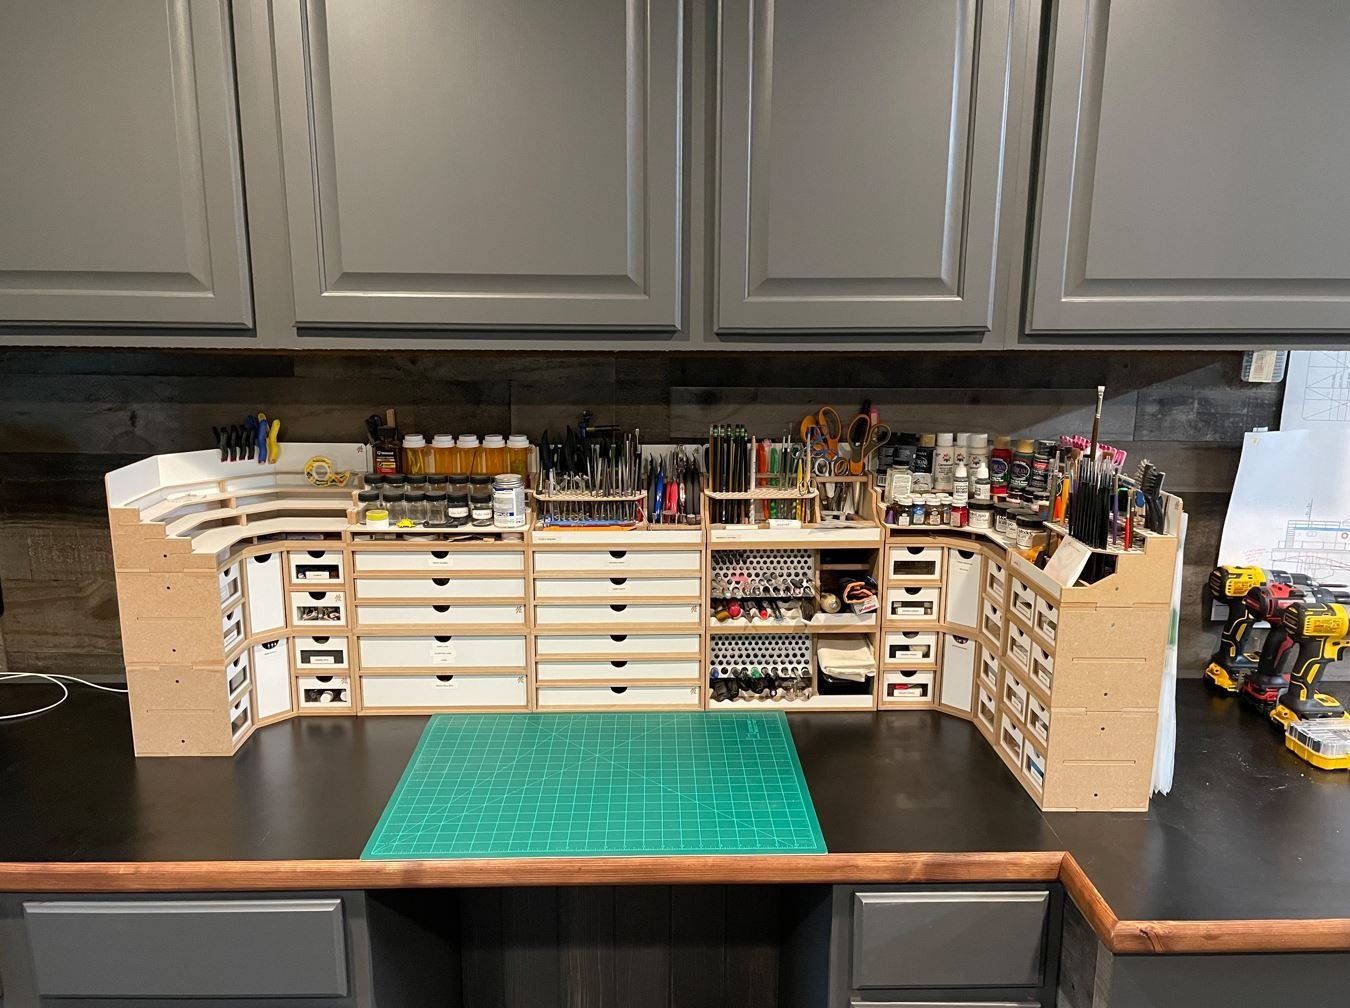
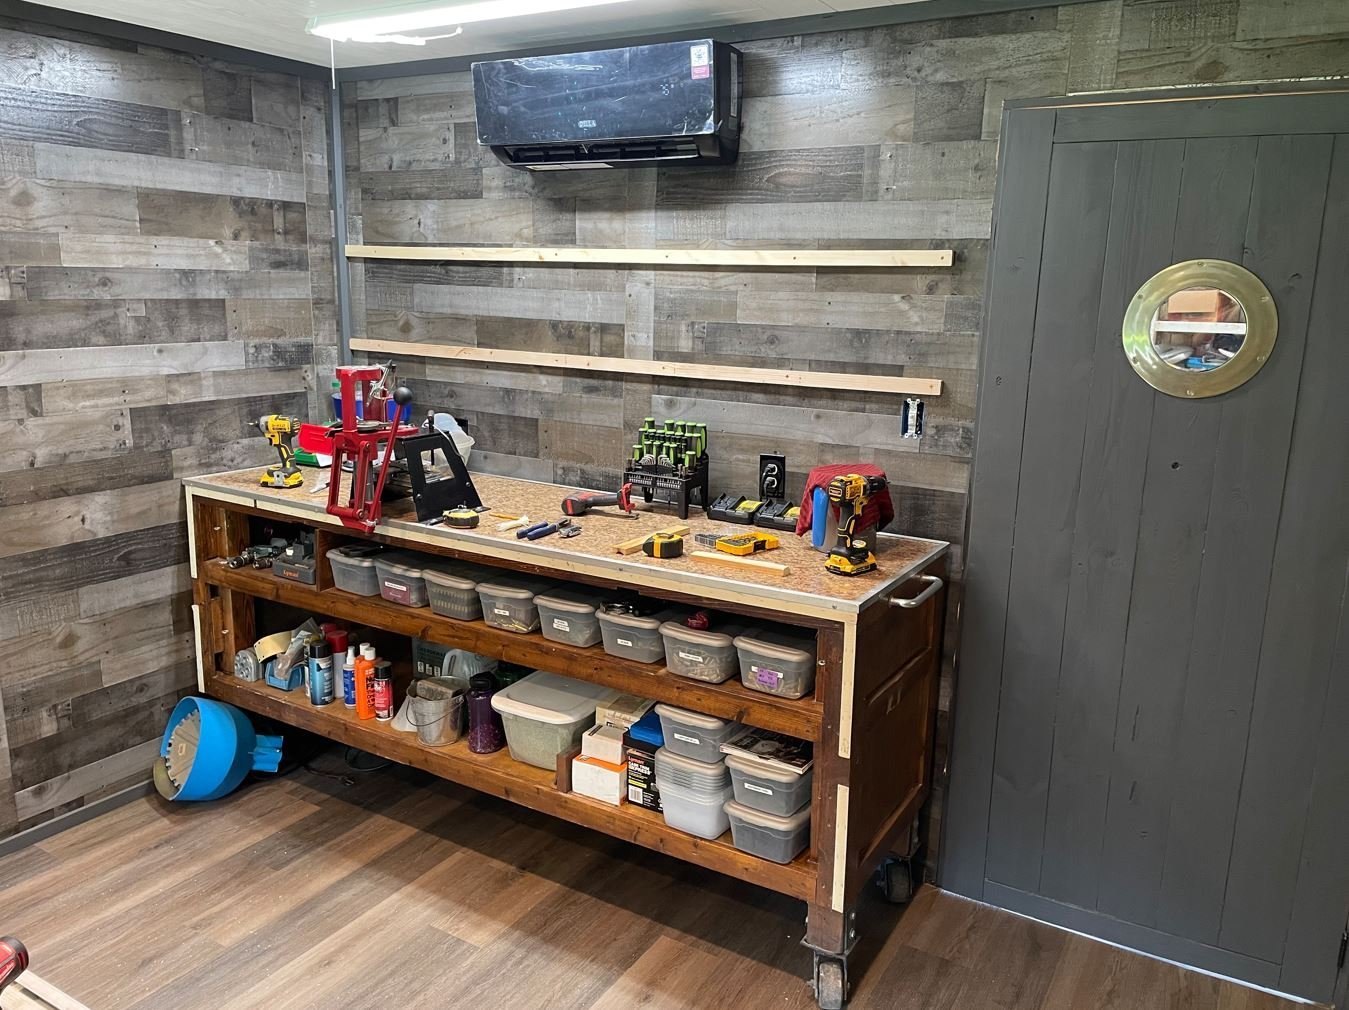
Howdy everyone, I know it has been a while since I last updated this log, This has been one busy summer and I have hardly had time to work on any personal projects. Most of the last few months have been spent helping my daughter and son-in-law get their house finished, most of the stuff they didn't want to contract out like running the 900' water line, fencing, dirt work, tree clearing and other odds and ends. However with the bulk of the work done I finally found some time focus on my projects and get some work done on the shipyard. I am not real sure what day I left off on so I will just post some of the things that I have accomplished. First, I took ,my adjustable work bench and scaled sown the top a bit to fit in the room. The length had to be cut down to 5' from 6' and I squared off the front to make it more uniform. I took the old gray, dinged up bottom and gave it a fresh coat of flat black, to fit my color scheme of the room a little better. Next, I wanted to dress off the edges of the top, so I purchased some vinyl trim to protect the edges, routed the groove and installed the edging. The final product, I am completely satisfied with. Then it was on to building the shelves for my reloading bench to help organize some of the clutter. I didn't take any pictures of the building process, but this is the finished results. Next, I wanted to have a place that I could use to clean my guns, or work on them, or other tasks, but didn't want to take up more space, so I decide to build a Murphy Desk. Some thing that would fold up out of the way, but could be setup quickly if I needed the extra counter space. Again, I failed to take pictures of the build, but this is what I came up with. Finally, needed a place to store all of my wood strips that wouldn't take up valuable counter top space. Some place out of the way, but with easy access. I decided that a small shelf under my storage area was the perfect place. I just purchased some inexpensive drawer dividers, turned them on their side and glued them into place on the shelf. Now I can keep them nice and organized and out of the way, and all I have to do is a 180 from the workbench and grab what I need. I've started work on the book/display case. So far I have managed to get the main framework of it built, I just need to cut and install the facing and trim, then paint it all up. I plan on running lights to the display area, where my Chaperon proudly sits temporarily and I will also install a glass panel on the front to help keep the dust off of her. More to come soon. The brutal Texas summer has finally started to subside and the weather is getting a bit more tolerable to work out in the barn. Thanks again for stopping by, and I hope to not wait so long between updates. I'm really ready to be done with this project and get back to the Caroline. Her hull has been sitting on the workbench, neglected and untouched for way too long. -Brian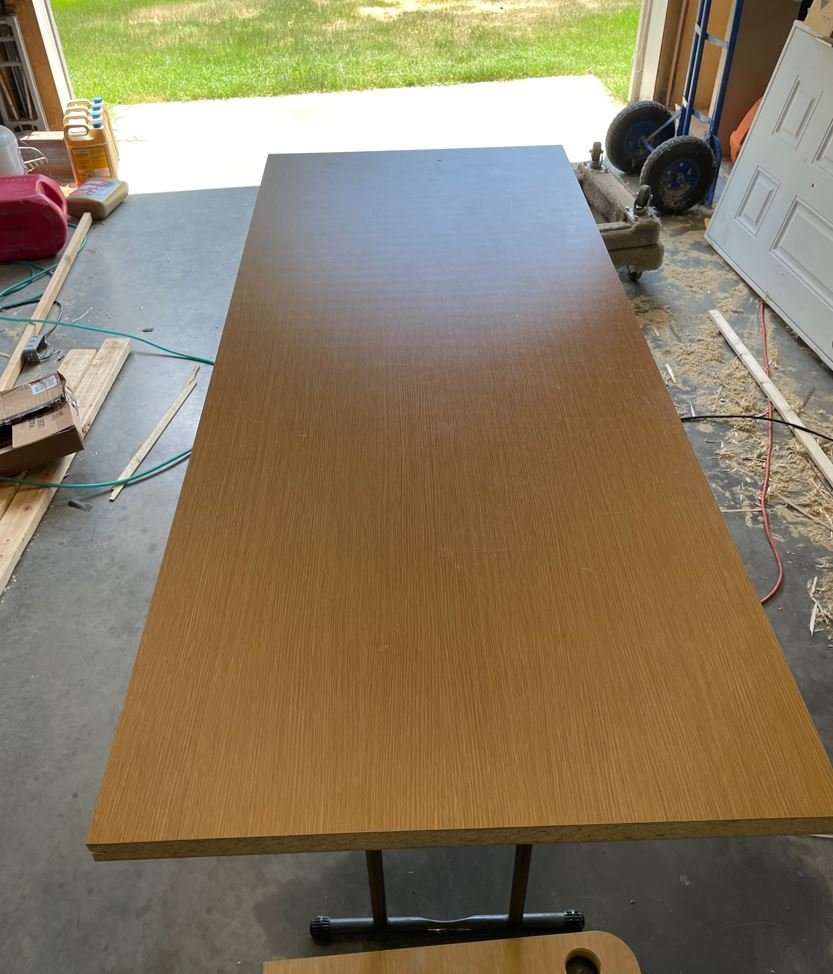

- 70 replies
-
- 17
-

-

-
That’s one way to put it. 😁. Through all the monotony, the end result is well worth it. -Brian
- 157 replies
-
- 1
-
-
- chaperon
- Model Shipways
- (and 1 more)
-
Agreed! But not near as monotonous as all those battens on the Boiler and Texas deck cabin walls. 😁 -Brian
- 157 replies
-
- 2
-
-
- chaperon
- Model Shipways
- (and 1 more)
-
Nicely done John! Your frustration and patience paid off. They definitely look more realistic mounted on the correct side of the stationeries. -Brian
- 157 replies
-
- 1
-
-
- chaperon
- Model Shipways
- (and 1 more)
-
I feel your pain Eric. So many other projects keeping me away from my build, but I hope to be wrapping them up soon. To me, winter has always been prime building season. Beautiful work on the deck, the rough, rustic look brings out the true beauty of these boats. I do like your idea of wanting to build the boiler deck off the boat to save a lot of frustration of breakage when sanding the planks. I’ll be anxious to see the method that you will use getting all the posts lined up with the main deck below. I’ll just sit back and watch and learn. 😁 -Brian
-
I still think it’s impressive that you harvest and mill your own wood on property, then turn out beautiful work. -Brian
-
Beautiful work by everyone on the project. So much more detail on this larger scale than I was able to cram into my build. Keep the updates coming. 😁 -Brian
-
Great insight on the construction history of these freighters. Doesn’t sound like the engineers were focusing on safety and integrity of the hull as much as they were for functionality and capacity. She’s really starting to look like a ship now. -Brian
-
Timber-framed outdoor kitchen - Cathead - 1:1 scale
mbp521 replied to Cathead's topic in Non-ship/categorised builds
Absolutely beautiful Eric, thanks for sharing your adventure of the build. Time to now go and enjoy the fruits of your labor. Looking forward to what you cook up next in the kitchen. -Brian -
Very nice Roger. A lot of work for such a tiny piece. -Brian
-
Barncave Shipyard by mbp521 - Scale 1:1
mbp521 replied to mbp521's topic in Non-ship/categorised builds
Beautiful door Javlin! I love the smell and look of cedar and I have an over abundance of it on my property that I could harvest and make one like that out of (and would love to), unfortunately I just don't have the tools to mill it it. Definitely don't have to worry about the termites with that door though. -Brian -
Barncave Shipyard by mbp521 - Scale 1:1
mbp521 replied to mbp521's topic in Non-ship/categorised builds
Javlin, I am starting to have an issue with the way that I built the door. With the cooler temperature and lower humidity in the room and the heat and high humidity outside, the door is starting to warp a bit and not closing properly at the bottom. I have been looking up different ways to to somehow latch the door at the top and bottom to hold it evenly in the jamb, but most store bought methods are pretty expensive, so I've been trying to come up with a DIY method. Still working on that. Mike, I haven't posted updates yet, but I have a 42" 4k TV mounted above my work station area and a mini fridge is in the works. Won't be long and the only reason I'll need to go into the house is to shower every now and then. 😁 -Brian- 70 replies
-
- 10
-
-

-
Roger, another great question. When researching the City Class boats all the references that I found referred to a painted band as an identifier for which boat it was. Not once did I run across anything that stated whether or not the band was painted directly on the stack, or a separate band. I never even gave any thought to the fact that the heat could burn the paint off, also the boats very rarely had any down time and had to be ready to go in a moments notice, so the boilers were constantly stoked. I did go back and review some of the old photos that I had from my research and from what I can tell, it looks like the bands were painted directly on the stacks. Nothing that I can see shows that the stacks were any wider where the bands are that would indicate they were double walled in this area, and unfortunately neither of the stacks of the Cairo were recovered (they were knocked down by one of the other boats on patrol with her that fateful day to hide her location) and they may have rusted away over the 100 years she sat on the bottom of the river. So my guess is that they had some good paint that held up to the heat, or they kept a good supply of paint on board for touch ups. -Brian

-
I think you may be on to something here. It’s is a strong possibility that this could be where the stairs are/were located. The walled area you circled seems like the typical construction of the day to surround stairwells and would be a prime location for them. From past experience of staring at old black and white photos it’s sometimes hard to get a good perspective of where details are located. I find my brain tends to put things that are not there in places where I think they should be. -Brian
-
No model is ever complete without a sampling of blood, sweat and tears. One down, two to go. 😁 Could it be possible that the stairs were just forward of the engine room and run perpendicular to the center line of the boat and come up to the boiler deck, just under the covered area of the boiler deck structure? Just a thought. It wouldn’t be the most ideal place but given the diminutive size of this boat, there’s not much room anywhere else. -Brian
-
Looking good John! I definitely remember those tight bends on the Texas deck being quite the pain, but you did a great job using household materials to get them nice and clean. A cheaper alternative to silkspan, as Yves suggested, is regular tissue paper and ModgePodge. I used this method on my Cairo for the deck structure roofs. I painted the ModgePodge on the wood, then laid down the tissue paper strips, overlapping them just slightly. With each strip I painted on a thin line of ModgePodge at the seams and let it stick out a bit to simulate the tar seeping from under the tarpaper. The results were very convincing since the ModgePodge leaves a little bit more of a shinier finish than the tissue paper when painted. I can’t take credit for the method I used though, I borrowed it from @kurtvd19 who had suggested it on my Chaperon build. -Brian
- 157 replies
-
- 1
-
-
- chaperon
- Model Shipways
- (and 1 more)
-
Timber-framed outdoor kitchen - Cathead - 1:1 scale
mbp521 replied to Cathead's topic in Non-ship/categorised builds
No complaints here. Post all the food pics you want. Everything looks delicious! And you had me at pickled beets. One of my all time favorites! -Brian -
Nice work Eric. Having the guards the same length as the depth of your clips is a happy accident. Almost as if you planned it that way. 😁 I’ve used both methods of decking, each with their own advantages and disadvantages. Building the superstructure over the planks is less cutting and give you nice clean lines, but you have to make sure that your planks are laid out evenly so they balance out on each side. Using the guides gives you a chance to have the superstructure wall locations in place before planking so you balance everything out ahead of time, it’s just a little more labor intensive. Personally I think putting the guides down first is the way to go. -Brian
-
Another casualty of giving into peer pressure. 😁 Truth be told, I think it was the right decision. Blame or no blame. But if it turns out we were right, you have to invite us all over for smoked salmon. 😁 -Brian
-
Timber-framed outdoor kitchen - Cathead - 1:1 scale
mbp521 replied to Cathead's topic in Non-ship/categorised builds
Looking good. It won’t be long now. I’m guessing that the process of curing the concrete and stucco will also season the inside as well. Also, there are very few things that compare to the flavor of smoked meats. 😁 -Brian -
I’m thinking you’re on the right path. You’ll have more cuts to make, but in the end you’ll also save a lot of wood. Since you are also milling your own wood, it’s more time saved. Plus, the gaps will never be seen. -Brian
-
Barncave Shipyard by mbp521 - Scale 1:1
mbp521 replied to mbp521's topic in Non-ship/categorised builds
Thank you Brad! The Dillon has been collecting dust since I got the Hornady a couple of years ago. I need to get off my duff and sell it. My bench isn’t quite as heavy as yours, but with the 4x4 & 2x4 construction it’s pushing 300 lbs. It sure was fun trying to move it in to place by myself and I don’t plan on moving it again anytime soon. -Brian- 70 replies
-
- 10
-
-
Barncave Shipyard by mbp521 - Scale 1:1
mbp521 replied to mbp521's topic in Non-ship/categorised builds
Thank you all for the kind words! No DM’s yet Eric. 😁 While it has been fun planning and building my shipyard, it’s not something I’m ready to do again for a while (that is unless the misses decides she wants a room as well). This project has seriously got me jonesing to get back to working on shipbuilding. Shouldn’t be too much longer. -Brian -
Barncave Shipyard by mbp521 - Scale 1:1
mbp521 replied to mbp521's topic in Non-ship/categorised builds
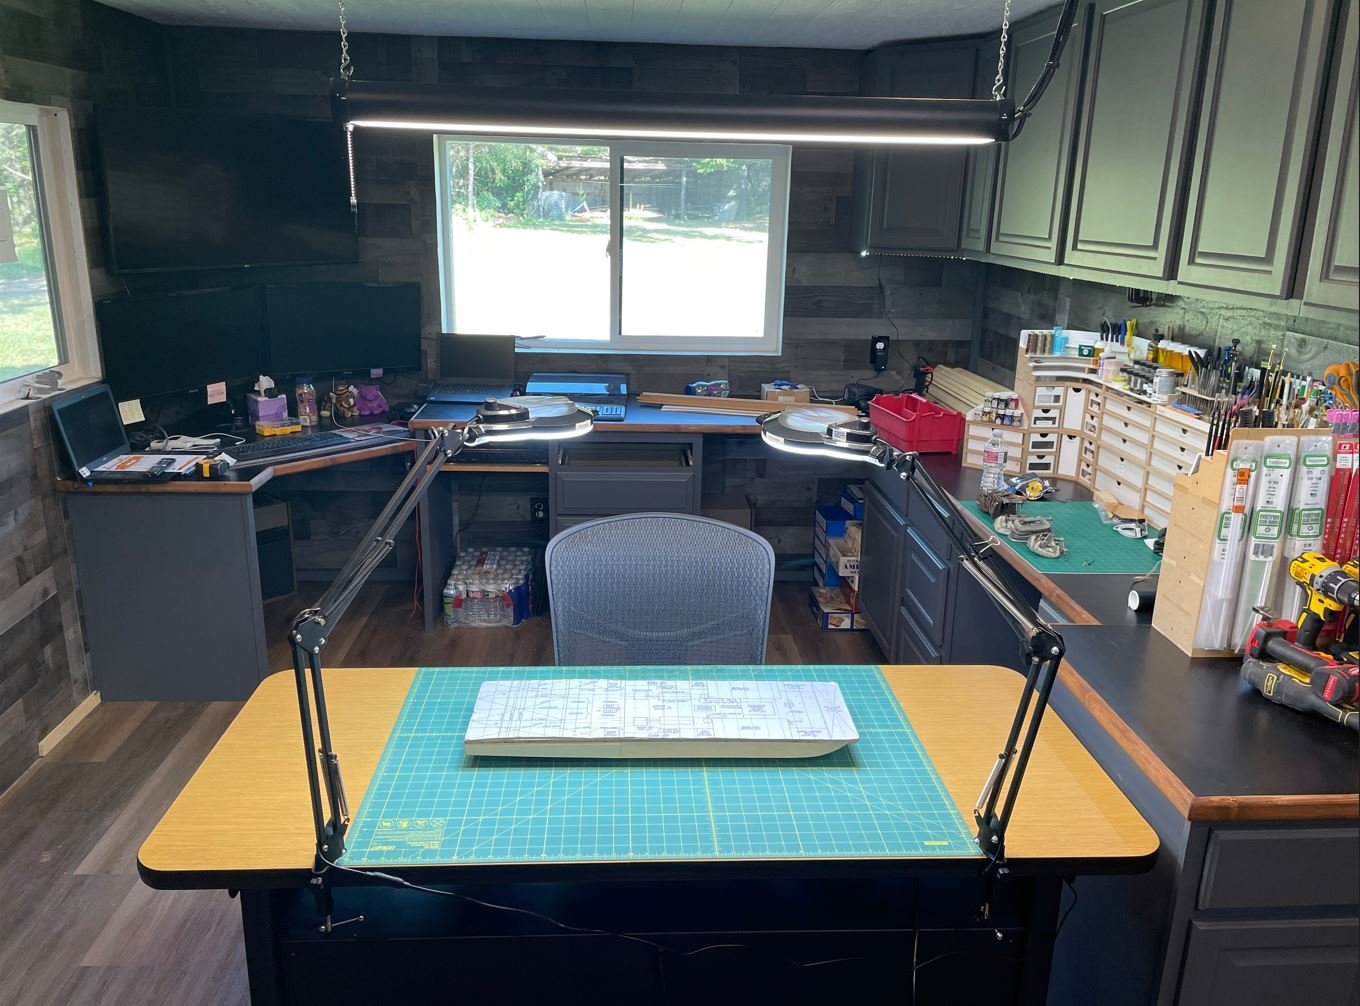
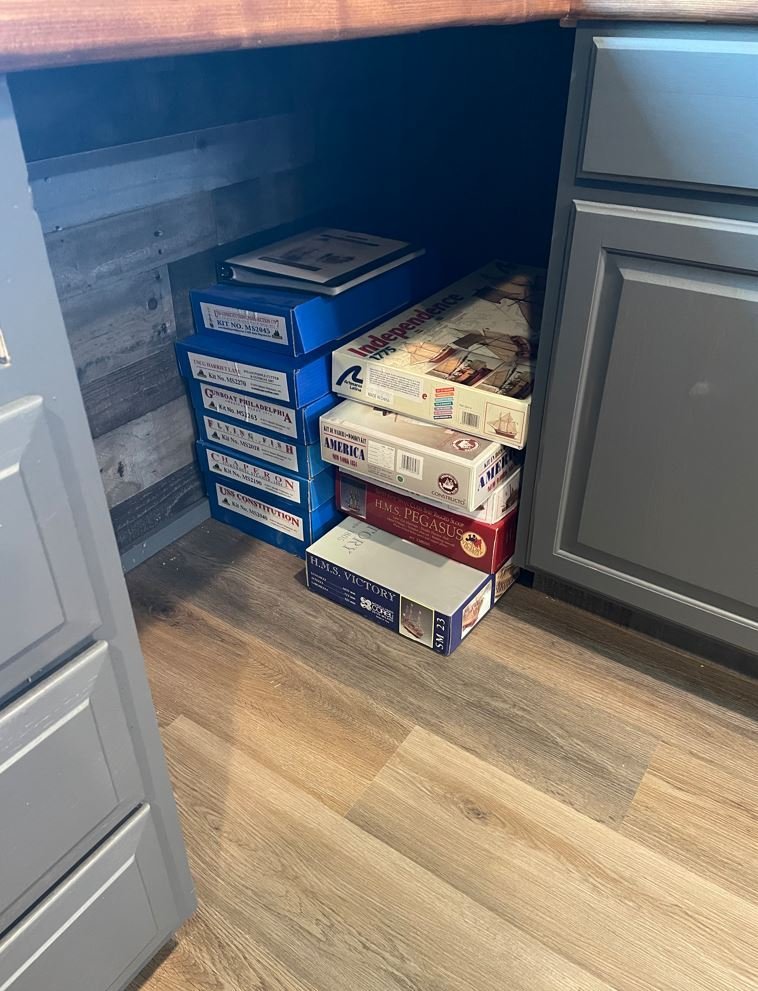
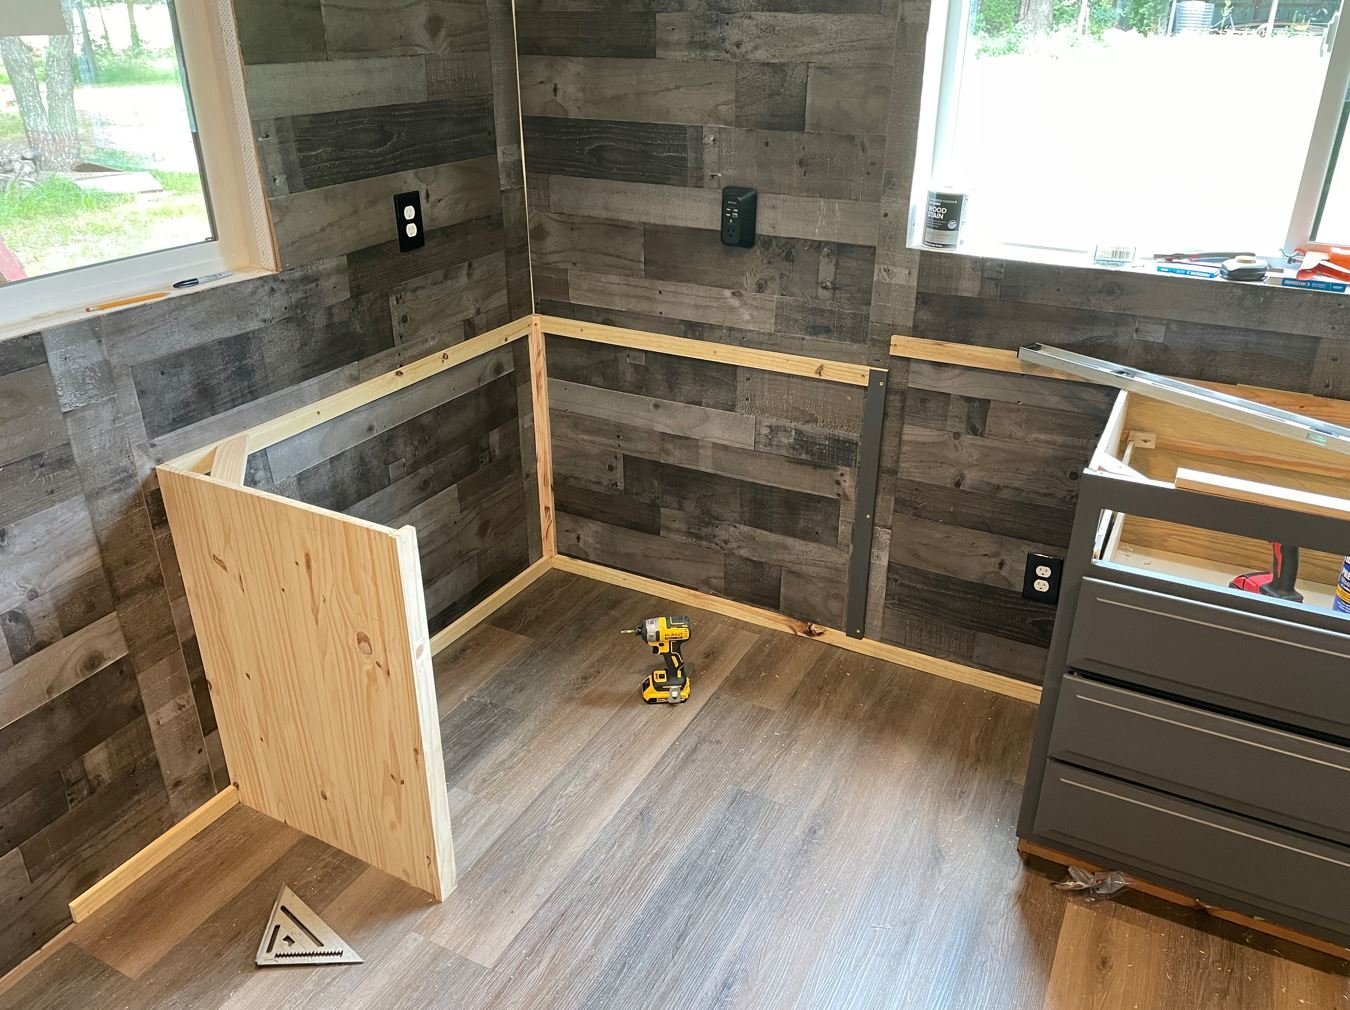
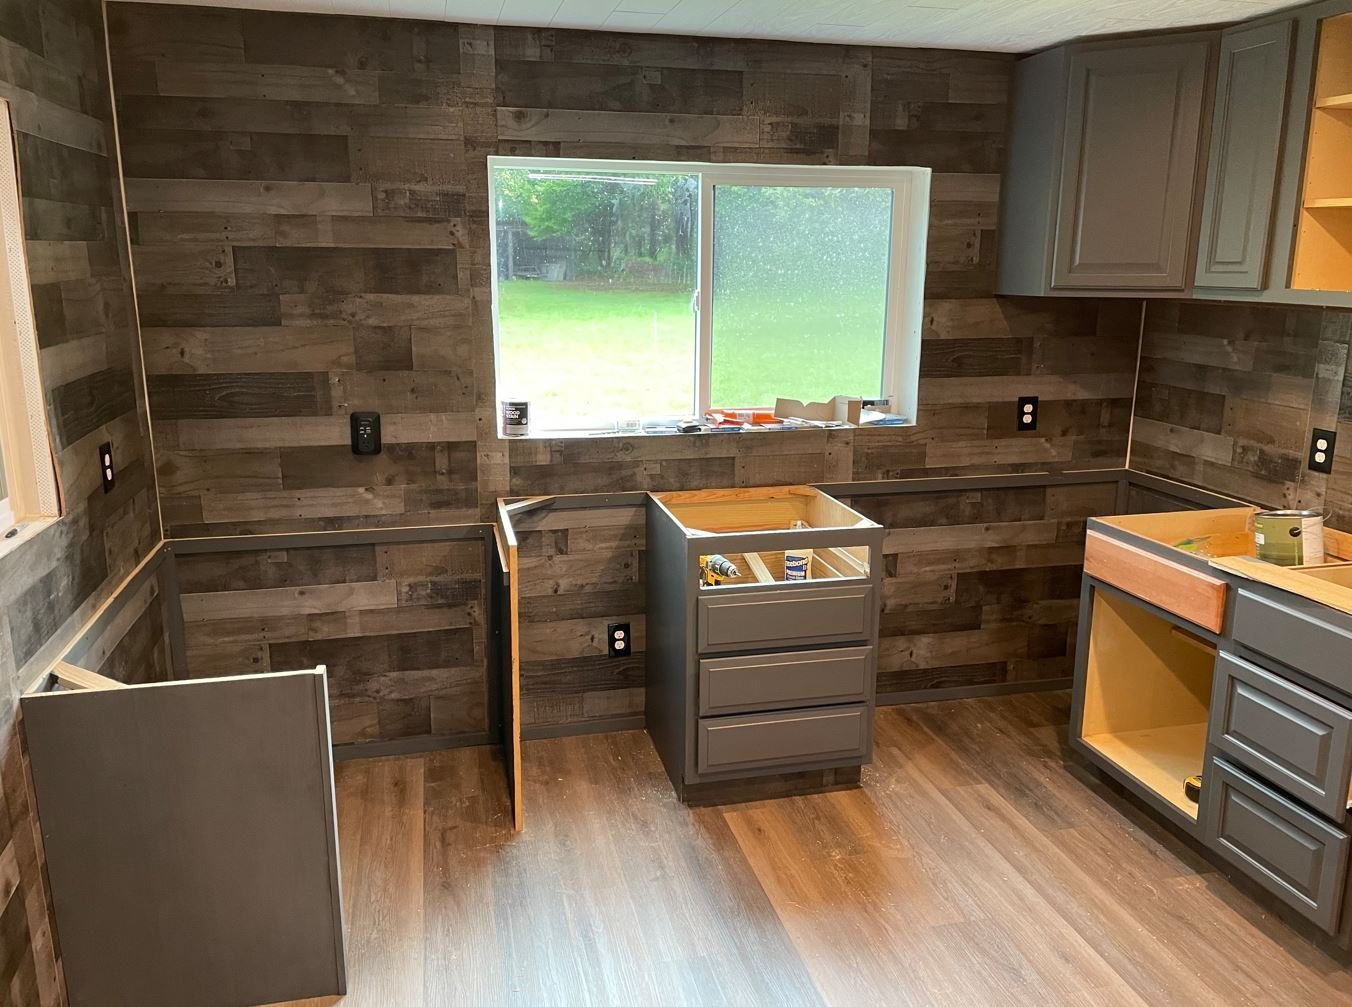
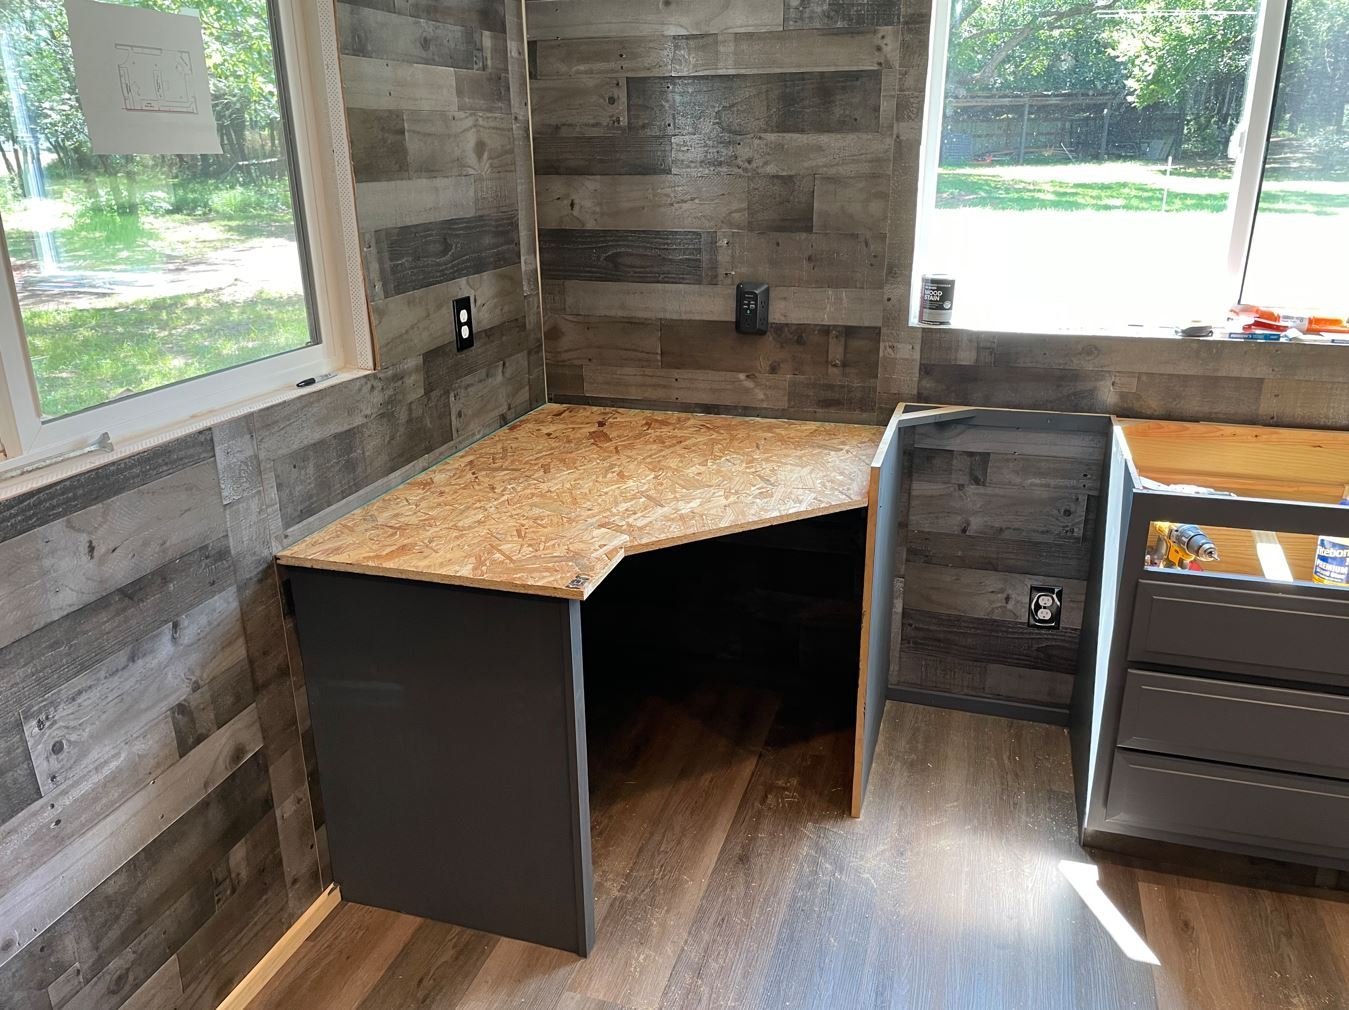
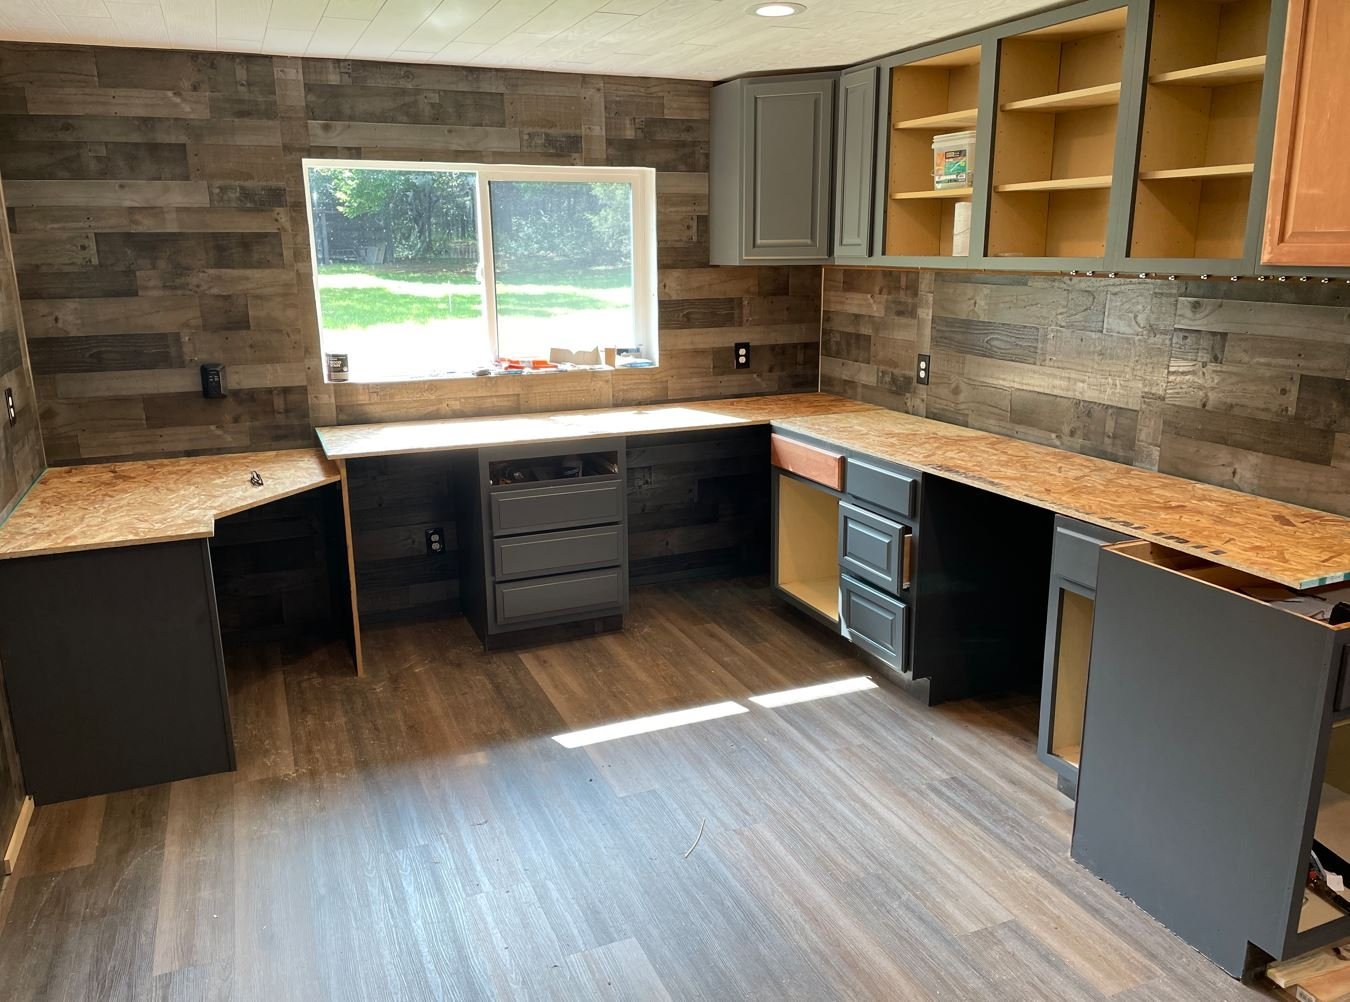
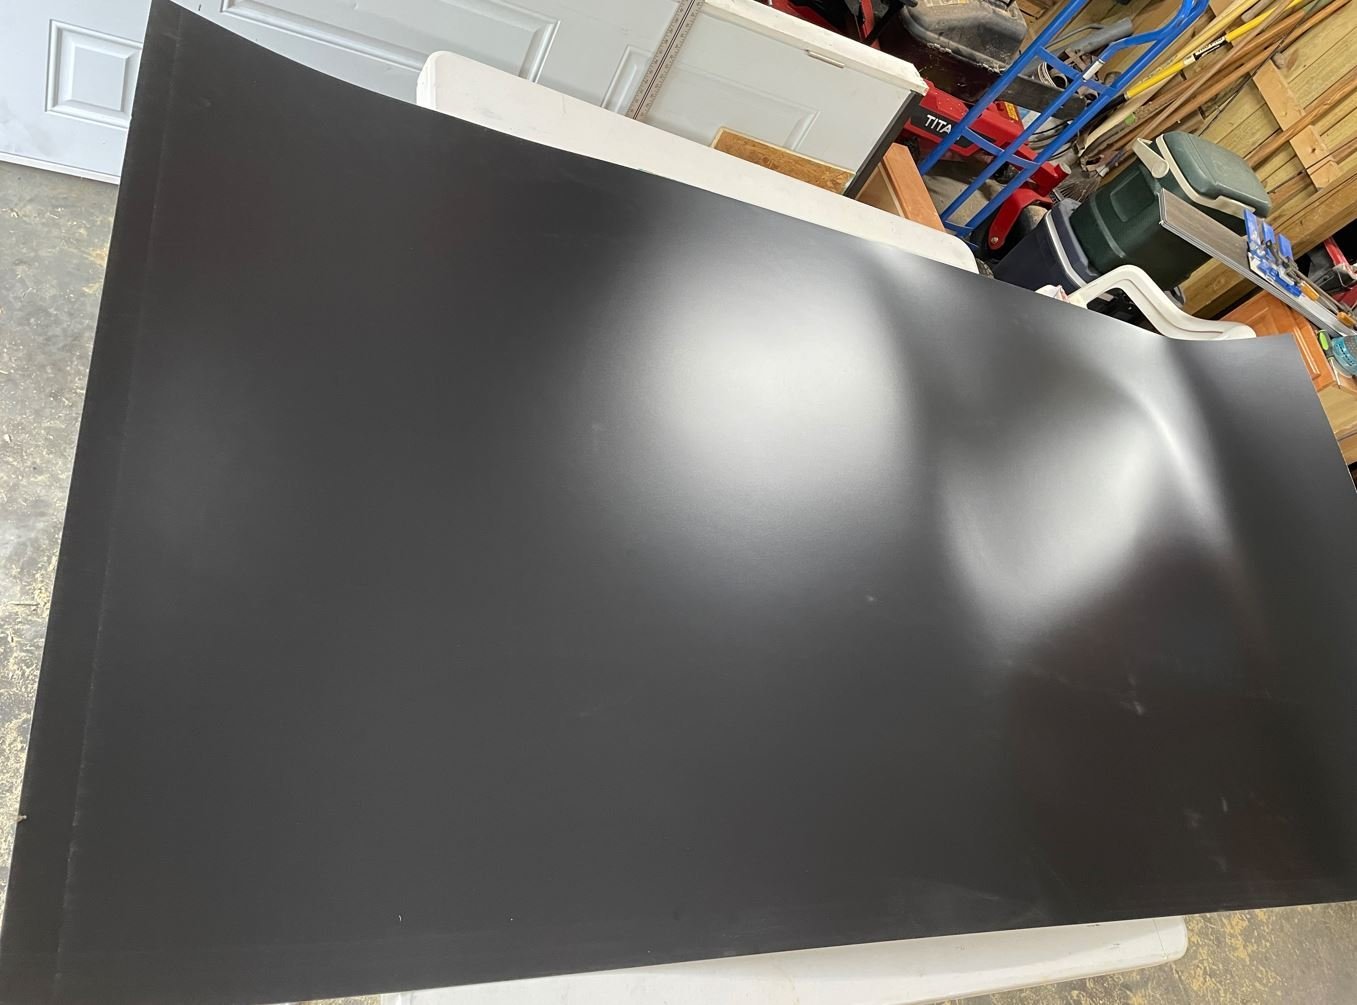
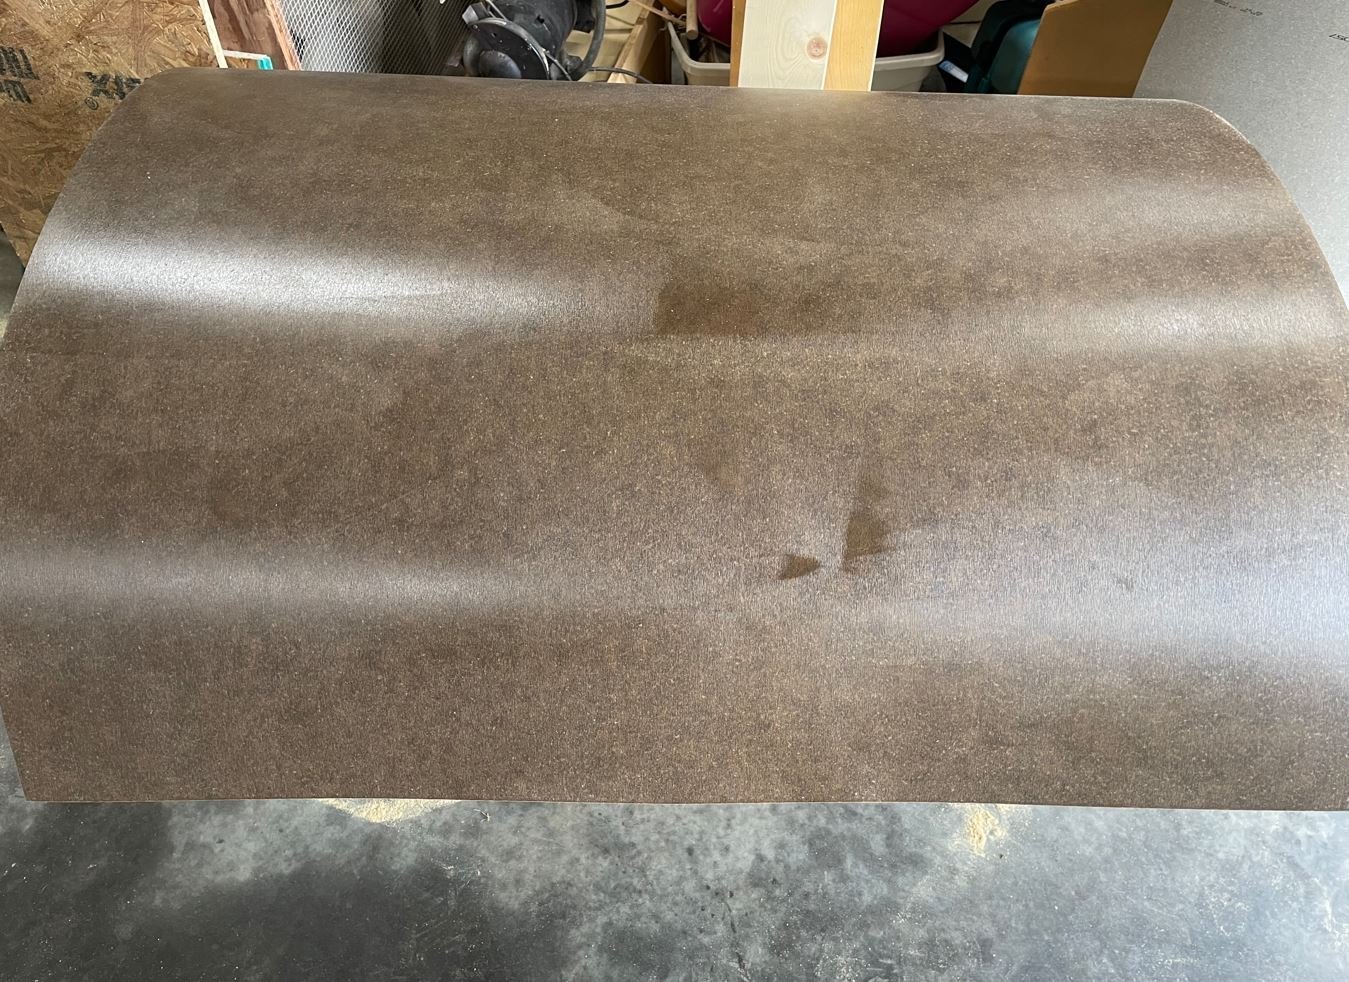
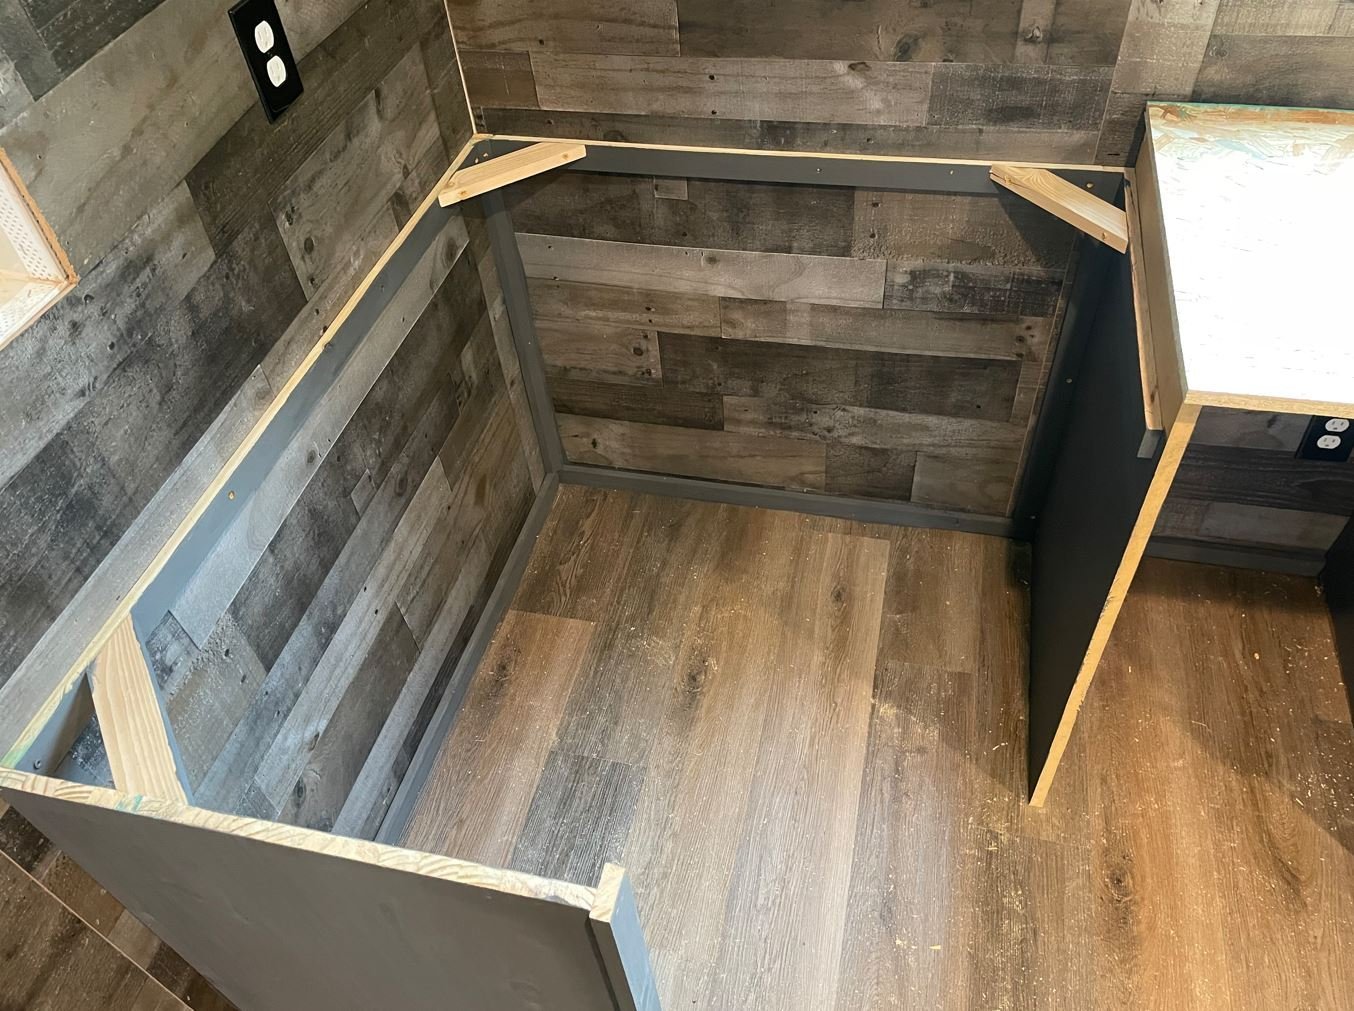
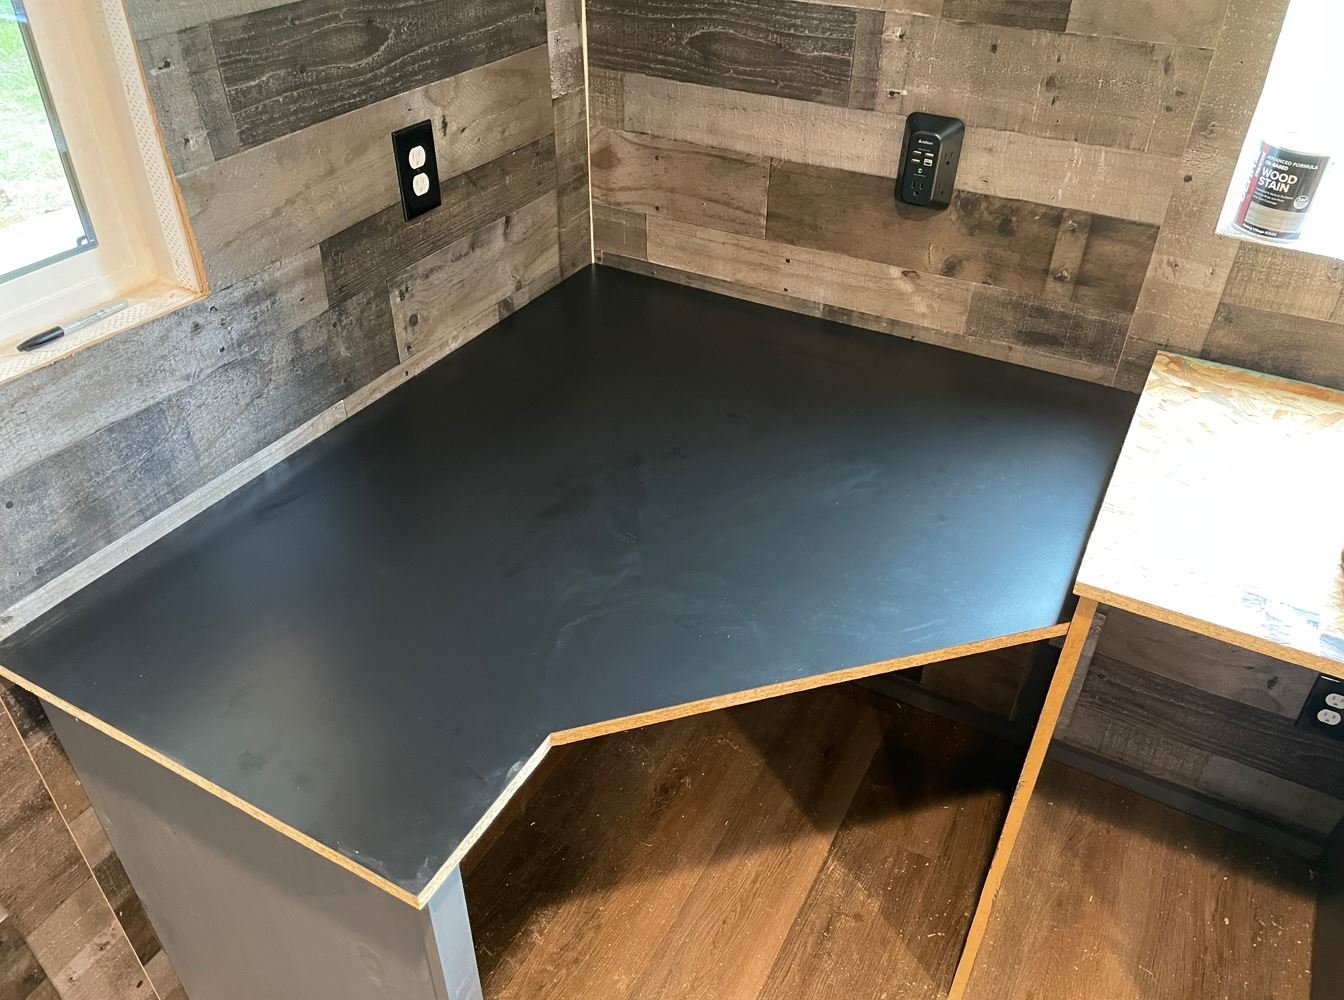
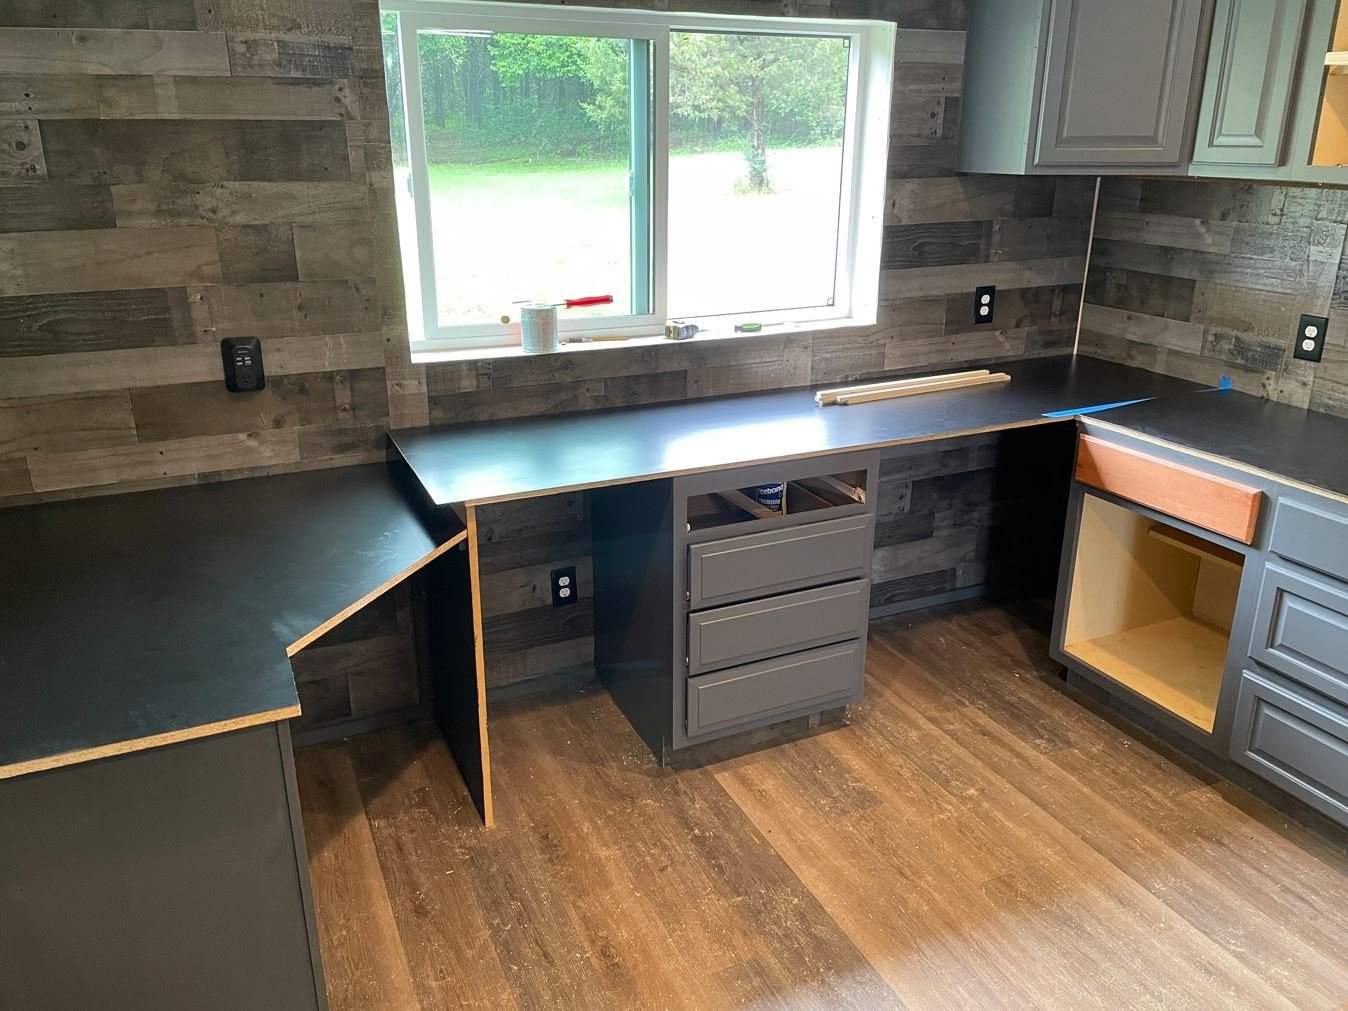
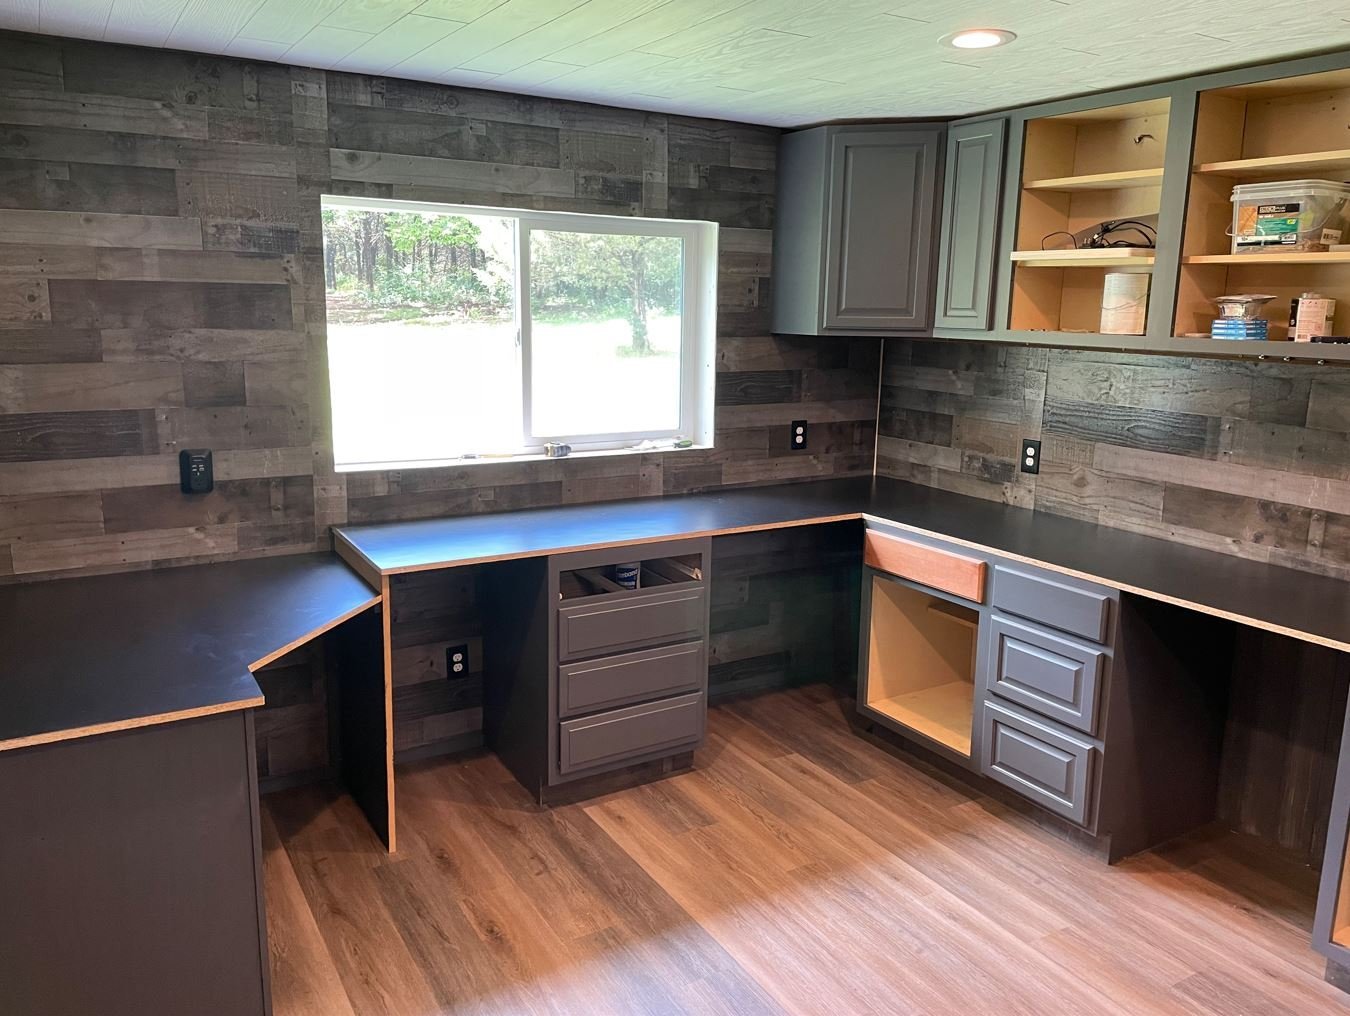
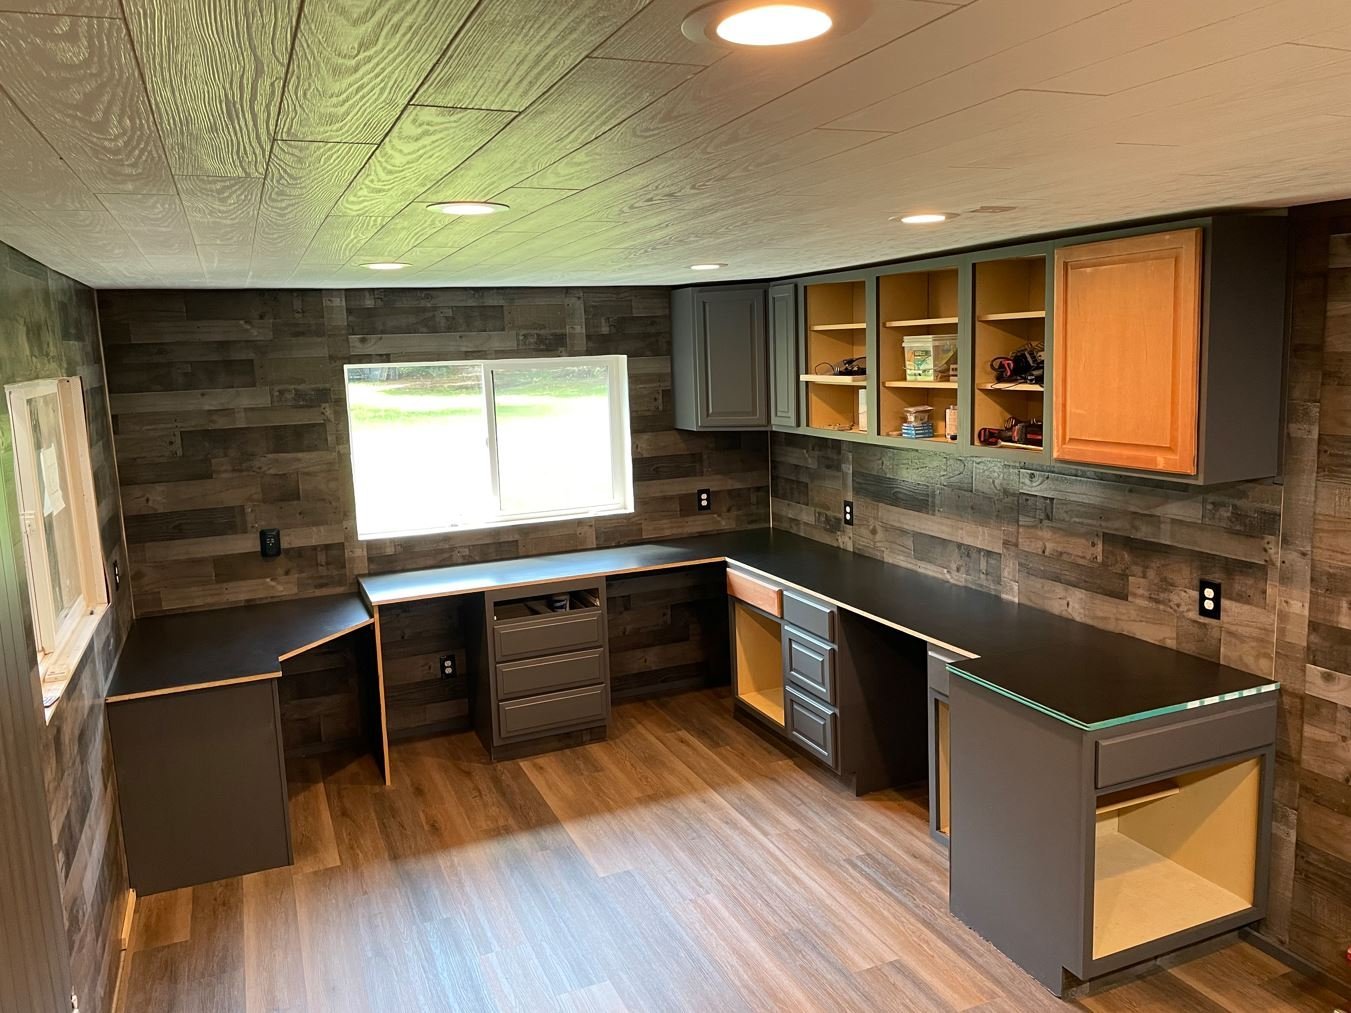
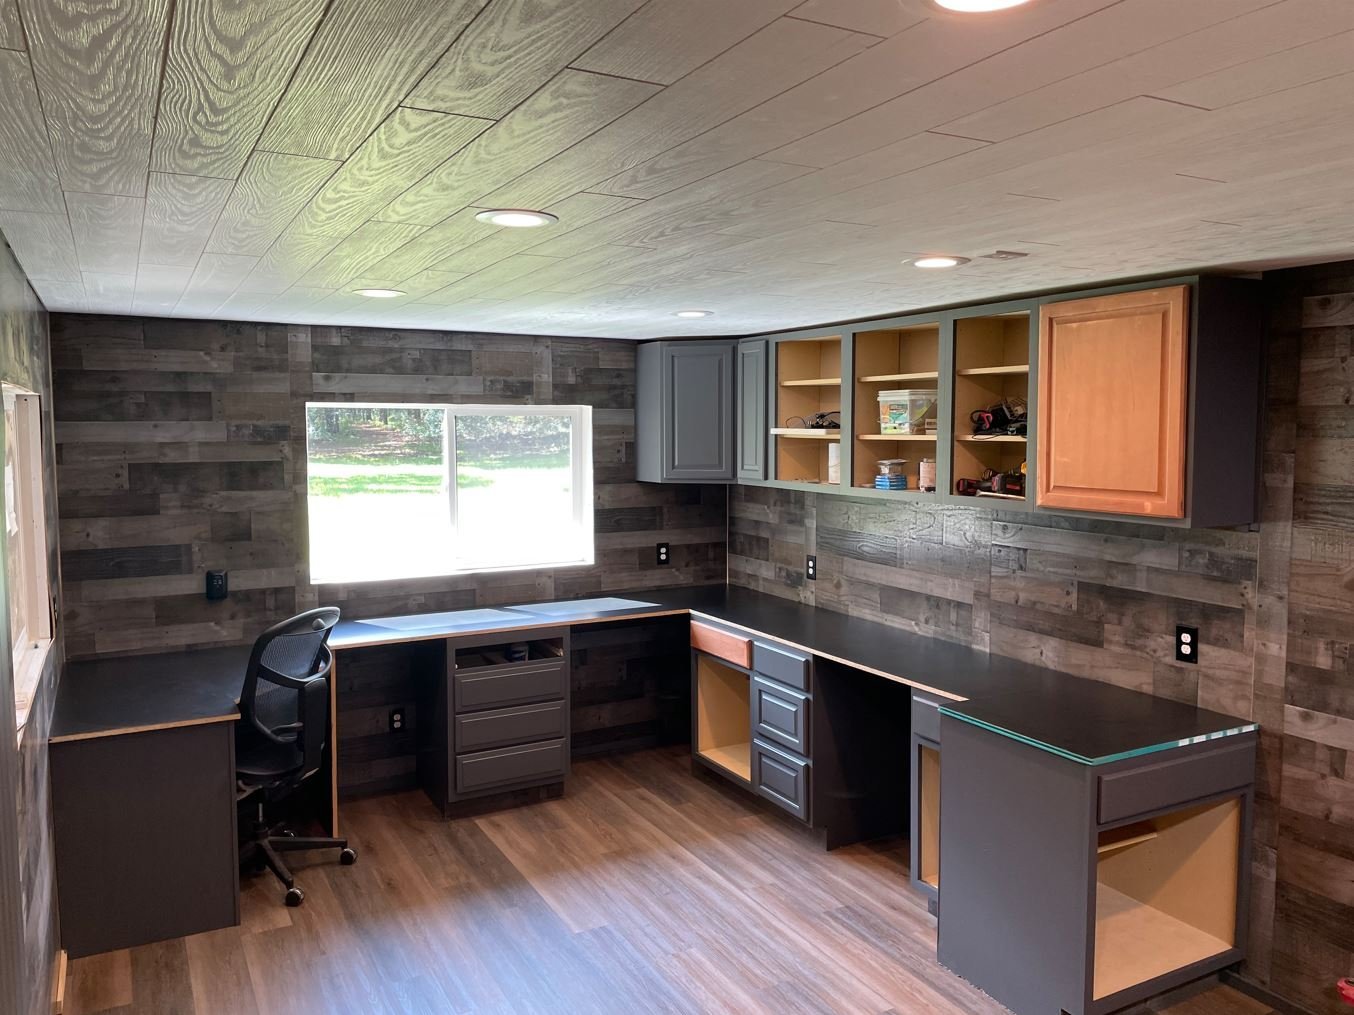
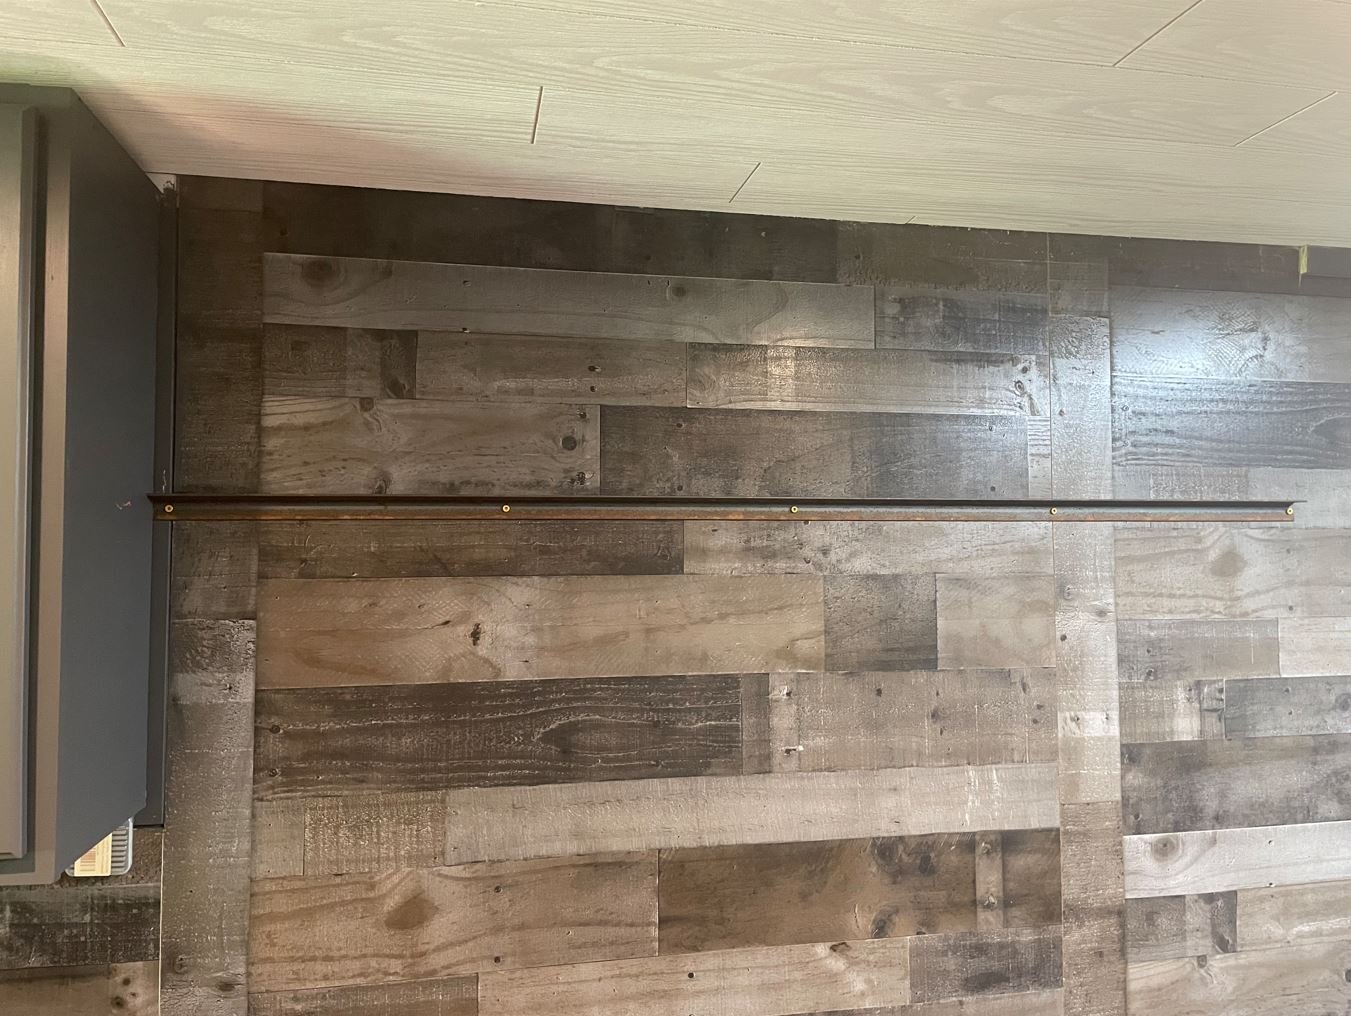
Hello everyone, it's been a while since I last updated my progress on the shipyard but I managed to find some time to get an update in. Day 25 I was able to get most of the cabinets painted up and finally started work on the benchtops. I forgot to take pictures of the painting, but who really wants to watch paint dry anyway? Started off with my workstation area, just a simple corner desk that will hold my monitors and other assorted computer accessories. This section will be a few inches lower than the rest of the bench, for ergonomic reasons. I've found it hard to spend 8-10 hours a day at work on a 36" desktop. All of the bracing up, painted and ready for the tops to be installed. Corner top installed. More of the benchtops cut and installed. Day 26 My original plan for the benchtop was to build it out of MDF, paint it black, then print out a bunch of old ship pictures and plans and glue then to the benchtop, then coat the whole thing in clear epoxy resin. That was until I found out that the price of MDF has just gotten stupid expensive. So I did some re-thinking and decided to go with some OSB and matte black Formica. This cut the benchtop cost in half. Prepping the first piece of Formica for gluing. and the first section is in. Moving along with the Formica. Day 27 With the Formica all installed it was time to trim the edges of the benchtop out. I went the cheap method with this and used 2x4's to make the trim. I ripped the 2x4's and rounded them on both sides to give a nice bullnose edge that is easy on the forearms. Again I forgot to take pictures of the ripping an rounding process, but here is the first piece going in. Day 28 With the trim work in it was time to start moving a few things in. I had to clear off my current adjustable workbench so that I could get it painted up and the top modified to where it will work in my new shipyard. The benchtop edging was given a coat of stain and varnish and I moved my organizers in. Day 29 I had a few short upper cabinets left over that I couldn't figure out what to do with, when it finally hit me. The would provide great overhead storage for my reloading powders and primers. They would be high enough to keep the grandkids from getting into them and still be accessible to my reloading bench. Had planned on installing a piece of 1" flat steel on the wall in this area and use magnets to hold my building plans on. Instead I installed a piece of steel angle iron to help support the uppers and also function as magnetic plan holder. Finally I started moving my stash in. I left this corner open for the sole purpose of storing my future builds. And I moved my reloading bench in as well. There will be additional shelves above the bench mounted to the stringers that are currently on the wall. Just need to get those built. I'm going to also make a few modifications to this bench to help hide some of the clutter, but that will come later on. I've got my adjustable workbench out of the house and is currently waiting on paint and some trim. I'll have photos of that project on my next update. Just a few more items on my to-do list and the room should be ready to start creating some sawdust again. Thank you all for stopping by. -Brian

- 70 replies
-
- 22
-
-
