
HOLIDAY DONATION DRIVE - SUPPORT MSW - DO YOUR PART TO KEEP THIS GREAT FORUM GOING! (Only 24 donations so far out of 49,000 members - C'mon guys!)
×


rebekb
-
Posts
40 -
Joined
-
Last visited
Content Type
Profiles
Forums
Gallery
Events
Everything posted by rebekb
-
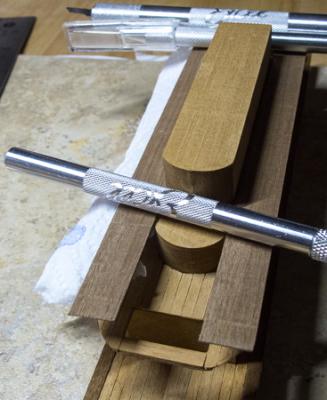
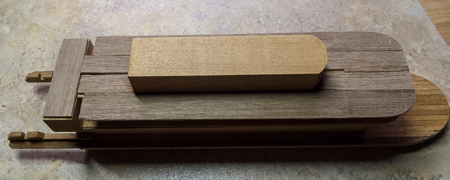
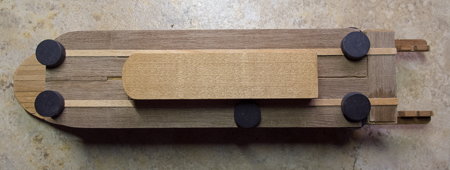
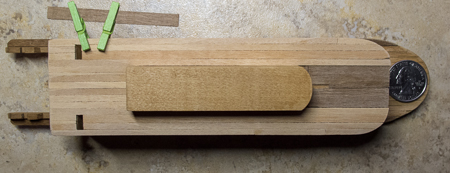
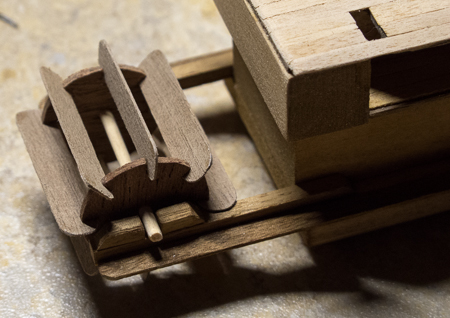
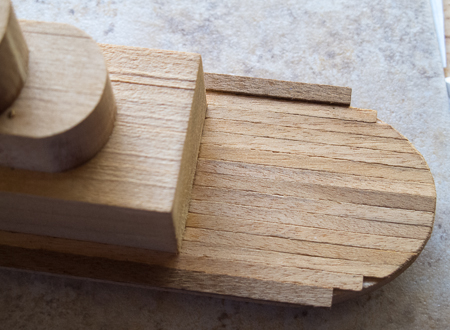
 I've gottten a couple more decks done on my mini - sort of... The second deck is built out from the block using a couple of 1x13 mm planks. On the bow end, a space needed to be built for the staircase coming up from the first deck. I had to do a little reinforcing from underneath for the cross-bar, which the plans called for to float magically between the two end planks. In addition, rather than cut curves for the under-deck (a procedure I have no idea how to do), I pieced in scrap instead. I planked the second deck and proceeded to build out the third deck. There is a problem here with the plans - they expect the built-out portion (from 1x13 mm strips) to adhere to the teeny-tiny edges that run alongside the fourth deck block. I will likely reinforce this deck from underneath also. This deck required openings for two staircases (stern end). I found a useful clamp for thin woods - I have a pile of small magnets -- good for holding down strip on strip: And then...I ran into a problem. The kit is woefully short of planking strip. I had kept every bit of scrap thus far, and using that and a couple planks of a larger size I don't need (due to some alterations), this is as far as I got: Since not only the third deck needs finishing, but the fourth deck will need planking as well, it looks like I'll have to order some appropriate planking. The kit should have included at least another half dozen strips of 0.5x3mm. In the meantime, I finished the paddlewheel. It took a bit of work to get the planks the right size, all eight of them. Although it doesn't appear so in the picture (wheel is over a little), I set it up so the wheel can spin free. Since I'm a new builder, I'd be happy to hear any suggestions for improvements! Rebecca
-
Robbyn, I like the use of the pins for holding the planks on while drying - I am going to remember that when I get around to my first POB model! Rebecca
-
Plank edge sanding
rebekb replied to rebekb's topic in Building, Framing, Planking and plating a ships hull and deck
Great ideas, thank you! -
Great build log John, you've given me some ideas for a better treatment of windows & doors on my mini-Mamoli sternwheeler. It isn't large enough to go the full cutout route, but I think I might print some windows & doors and back onto wood - has to be better looking than what came in the kit! Rebecca
-
Thanks for the encouragement - I see build logs I can now raid for ideas
-
I've seen those kits, they are tempting - it looks like a fun build! Rebecca
-
Thanks! I do hope it turns out. Minis could be quite addicting for me. Yes, book binding, but more book & paper conservation (book binding is tedious, repairing stuff is fun), but I've been winding down on that after a decade. I've always been an inveterate crafter as well, but the last few years have been focused on two hobbies: astronomy & photography. Lately though I've been hunting for something that would give me a break from the computer (I'm on it all day for work) and be relaxing, and I've always loved ships
- 41 replies
-
- 1
-

-
- steamboat
- paddlewheel
- (and 2 more)
-
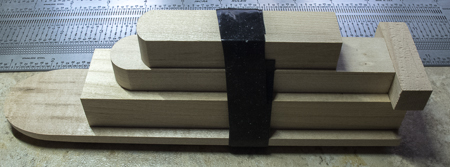
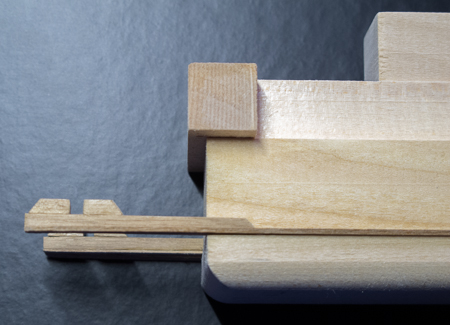
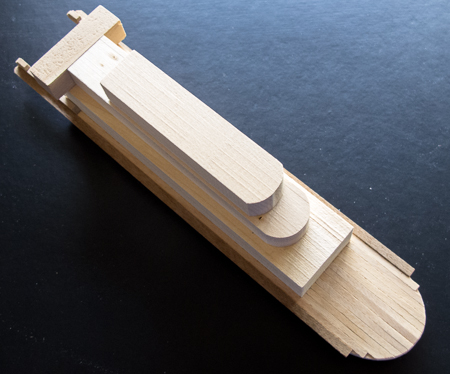
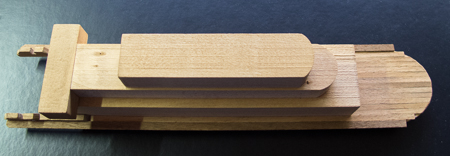
As shown in my post above, the kit has precision shaped solid blocks for each deck structure - four decks in all plus a sternpiece on the second deck. Figure 1 of the instruction sheet calls for these blocks to be glued together to form the basic structure of the hull. The figure is drawn to size, so I measured and wrote the spacing for the decks on the instructions (all in millimeters) and then marked up the blocks to match the alignment. I glued them together using Gorilla fast-set wood glue and tried out "clamp tape" for holding them while drying. I always use heavy-duty nylon brushes for gluing (a habit I picked up from bookbinding). I then cut the long planks for the sides of the first deck - my first time using a mitre box! I cut & glued on the bow end planking (from 0.5 x 3 mm strip), then used a flush cutter to cut the plank ends even with the hull shape and lightly sanded them to fit the rounded curve of the bow. I then used the mitre box and various sanding tools to cut and shape the angled stern pieces that will hold the paddlewheel and glued them on. They aren't perfect, but I made sure the central rod of the paddlewheel will sit snugly between the blocks. Finally, before going any farther, I decided to give the hull a little attention. I first water painted it to raise the grain, let it dry, and gave it a quick sand. I then gave the entire ship a light coat of stain (which raised the grain further, more sanding in its future). You might be interested to know that the "stain" in this case is strong coffee! I've been experimenting on waste wood with different all-natural stains. (Due to severe allergies & asthma, I'm unable to tolerate most chemical products.) A few natural items I found that give differing degrees of darkness are vanilla, tea, coffee, and bitters. A final coat of sealant will ensure the model is not delicious to passing critters. Rebecca

-
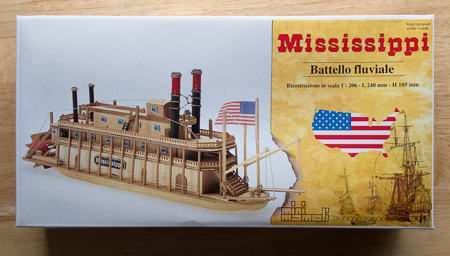
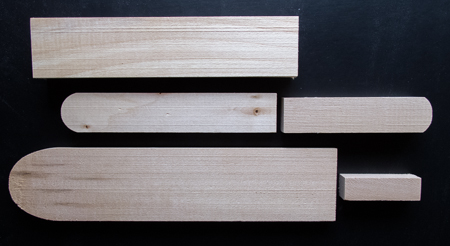
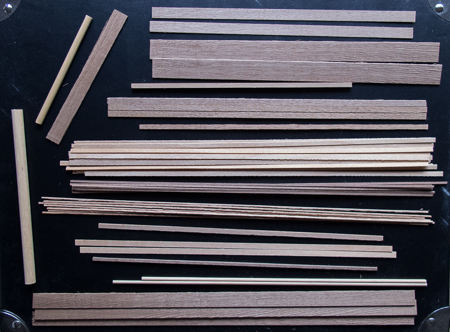
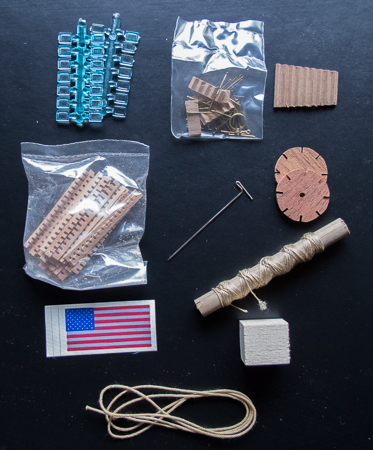
Hi all, my first wooden ship build is a solid hull model by Mamoli, from their "mini" line. These are simple kits for learning basic skills - measure, cut, sand, glue, & generally work with wood & tools. Complete, the model will be about 10 inches long. This post shows the kit contents (except for the copyrighted plans/instructions). There is no parts list on the double-sided, four-language instruction sheet/plans, but there is a "strips and rods sizes survey table" that shows the size of each wooden strip. I used this to label all the strip bundles before starting. Rebecca

-
Plank edge sanding
rebekb replied to rebekb's topic in Building, Framing, Planking and plating a ships hull and deck
Neat idea Jay! -
Plank edge sanding
rebekb replied to rebekb's topic in Building, Framing, Planking and plating a ships hull and deck
Thanks, it's the "narrow" edge that abuts - I"ll try the emory board! -
I'm working on a simple solid hull model, which requires some deck planking. The wood strips are rather rough on the edges. What is the preferred way to sand plank edges (these are thin, 0.5mm) - or is it worth doing? Thanks, Rebecca - New builder -
