Sexyauthor
-
Posts
101 -
Joined
-
Last visited
Content Type
Profiles
Forums
Gallery
Events
Everything posted by Sexyauthor
-
 Hi Steve! Yes, the solid hull of the St Helena required a good bit of sanding but no carving. However, this isn't always the case. My current build, the Harriet Lane, is also a solid hull but it required a LOT of carving as well as sanding to get the correct profile. The deck was a scored piece of wood (ribbed) that simply glued onto the top of the hull. I added the horizontal score marks to make it look a bit more plank-like, but I don't see any reason you couldn't just plank the deck instead of using the ribbed piece of wood supplied. In fact, depending on your patience and dexterity, you could slice up that piece of wood and use the resulting thin strips as the planking material 😜 The sails were made from a single piece of supplied cloth and were hand-sewn to mimic the panels... i hope this has helped. And good luck with your build. Have fun! - Brian
 -
I'm glad I could help! I would be interested in seeing your progress as well. Although it's been a bit, if you have questions that my build doesn't address, feel free to ask - I may remember something!
-
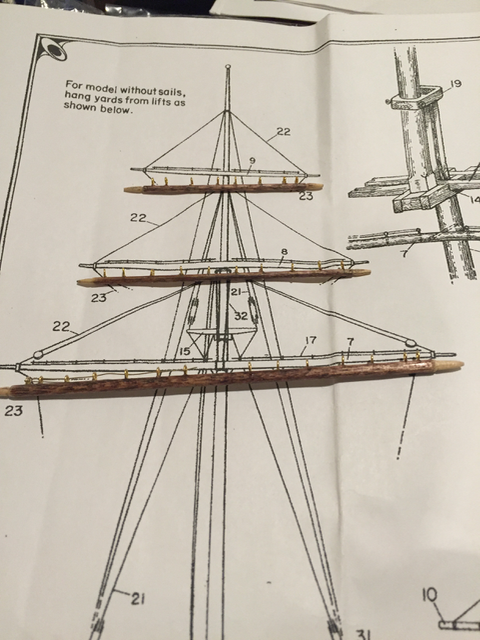
yards.... shoulders have been created on the ends, but they need to be re-stained...
-
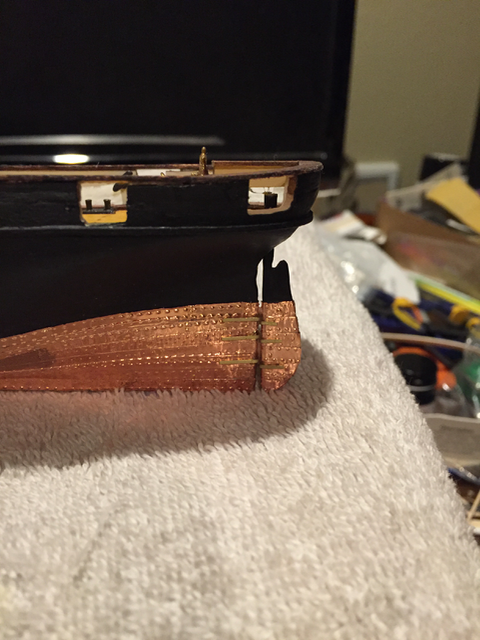
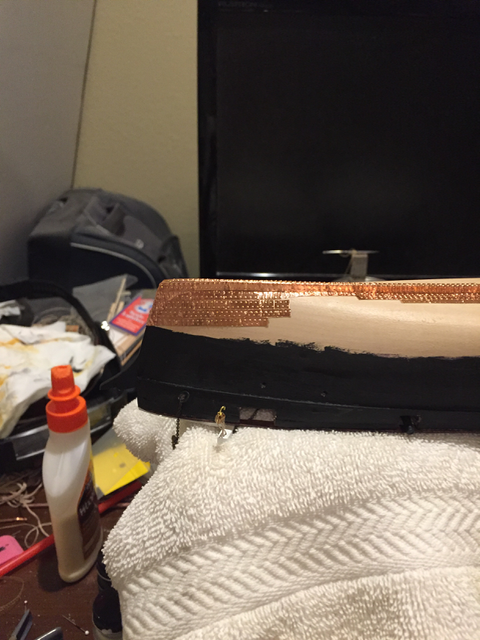
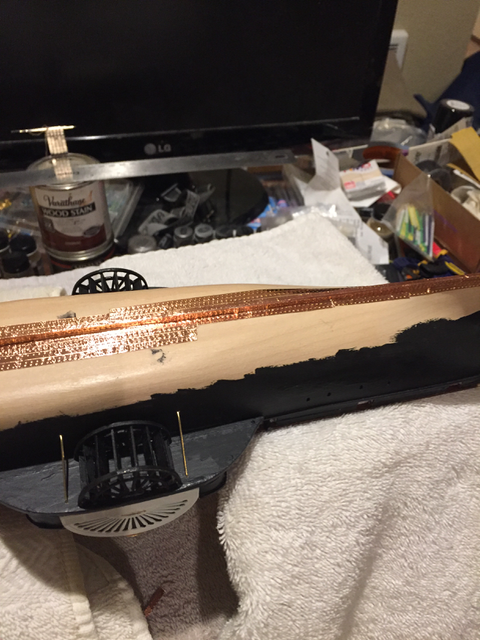
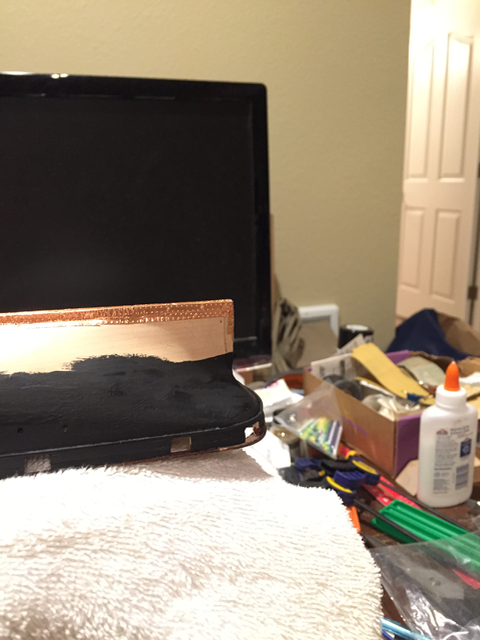
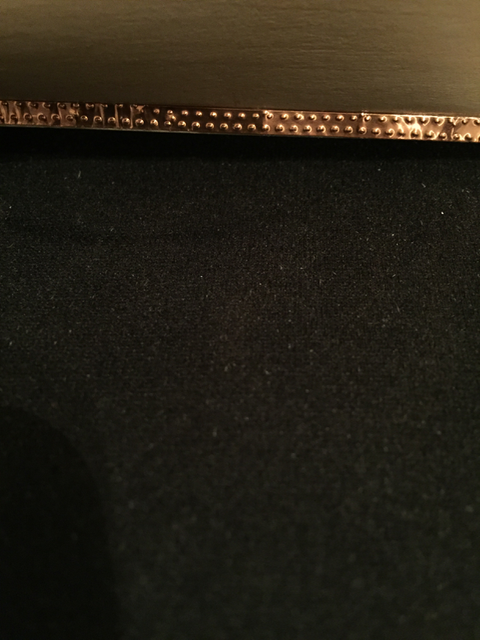
Mark, The kit supplied a roll of 1/4" self-adhesive copper. I cut 4" to 5" lengths, cut it in half length-wise (giving me two 1/8" strips). I then used a pounce wheel to add the bolt marks along both edges and then a smaller pounce wheel to add the marks to separate the plates. So, I didn't go the route of individual plates... I think it looks pretty good, and they are already beginning to take on a patina, so I don't think they'll be that shiny for long. I may polish them up and then apply a coat of varnish when I'm all done. I'm playing it by ear for now... Thanks!
-
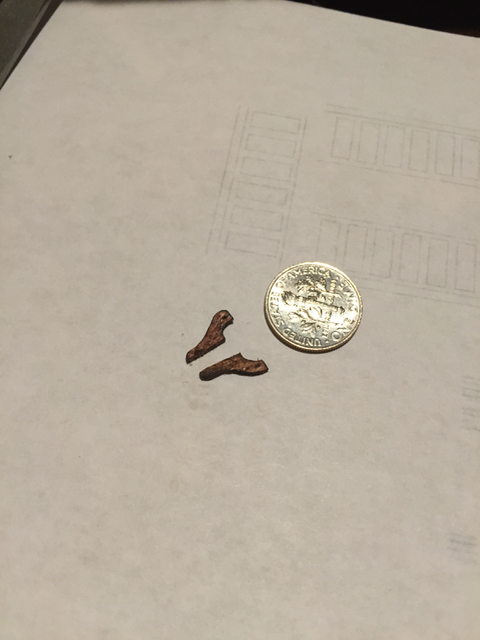
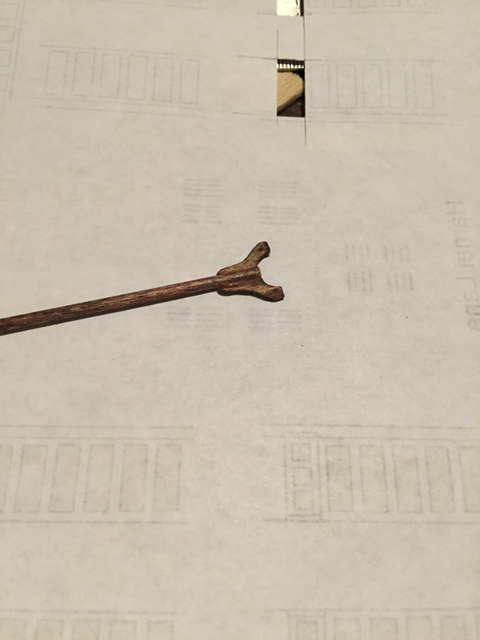
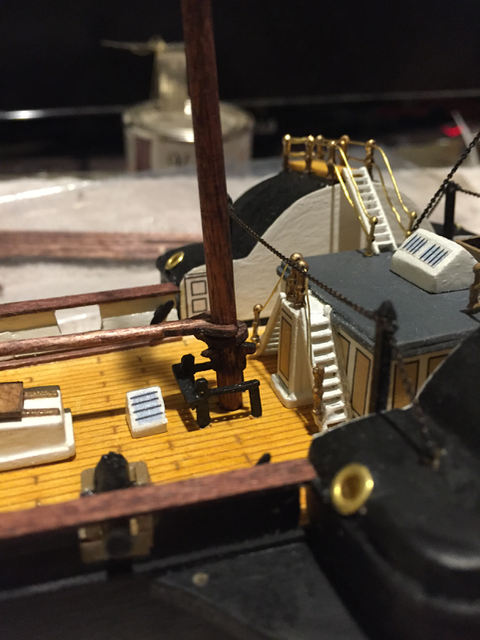
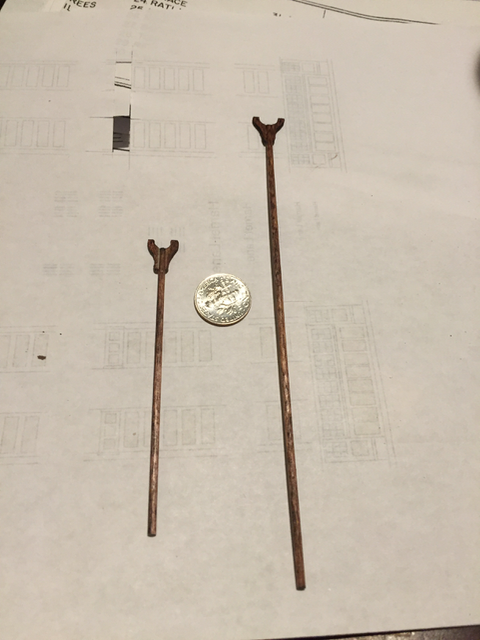
Carved jaws for boom (another set for the gaff not pictured). Holes for parrel drilled also (whew!) - Now where am I going to find parrel beads to go on the rope (ha ha)? Jaws attached to boom: Boom and gaff: Boom resting on main mast (parrel still needs to be added):
-
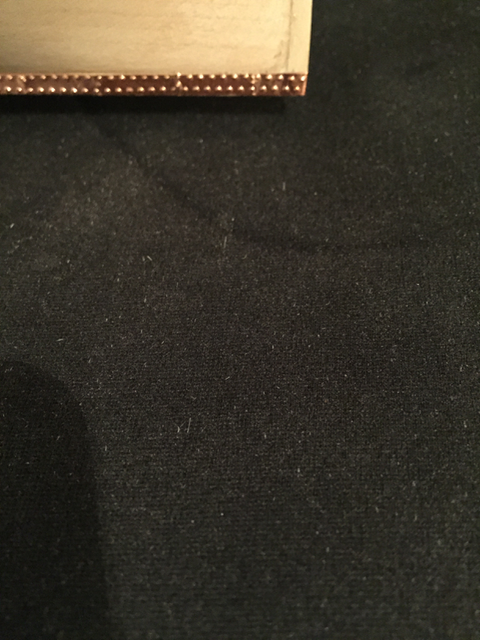
Port side coppering complete: Rudder with gudgeons and pintles:
-
Starboard side coppering complete...

-
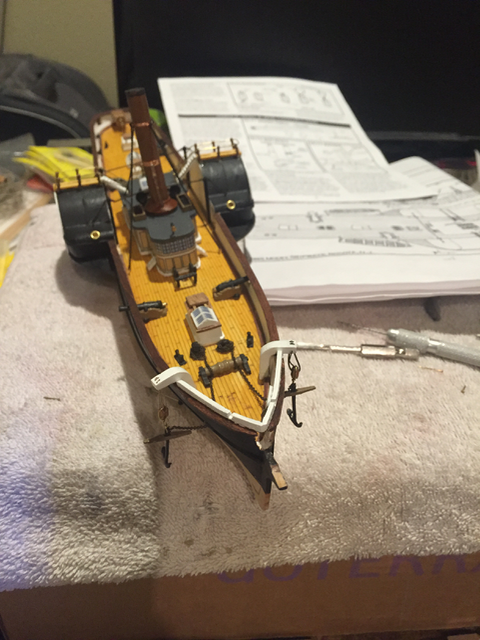
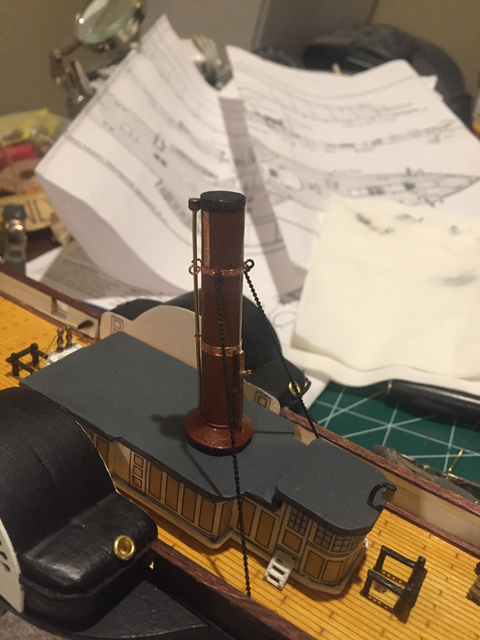
I probably should have done the coppering a while back (certainly before adding the funnel). Since I didn't, I had to make up this ridiculous rig... However, it let me proceed and here are the beginnings.... I've poured over the instructions, both old and new, and I couldn't find any statement along the lines of "at this point, you may want to copper the hull....". Live and learn....
-
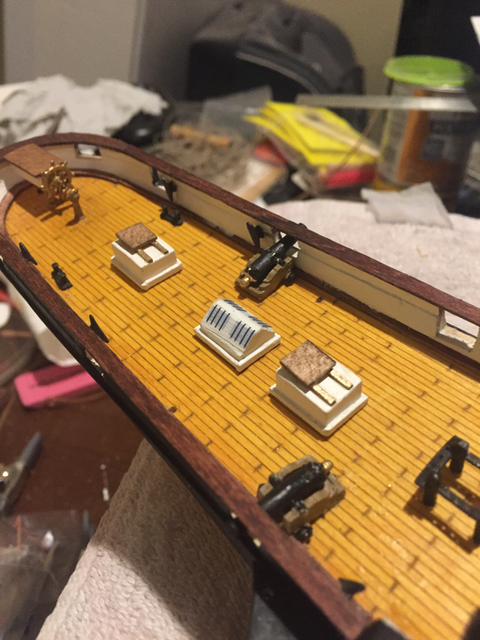
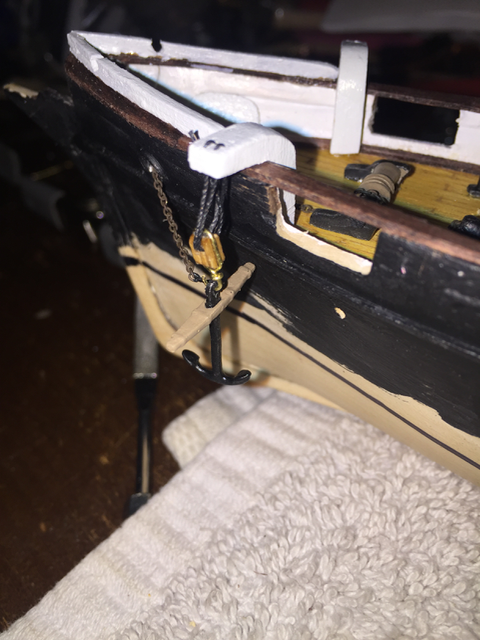
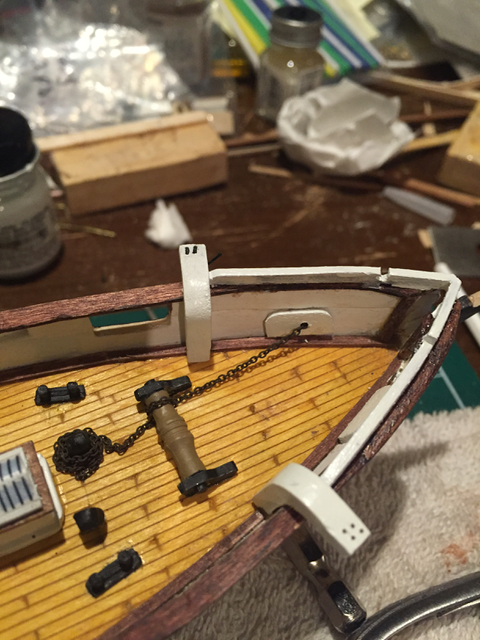
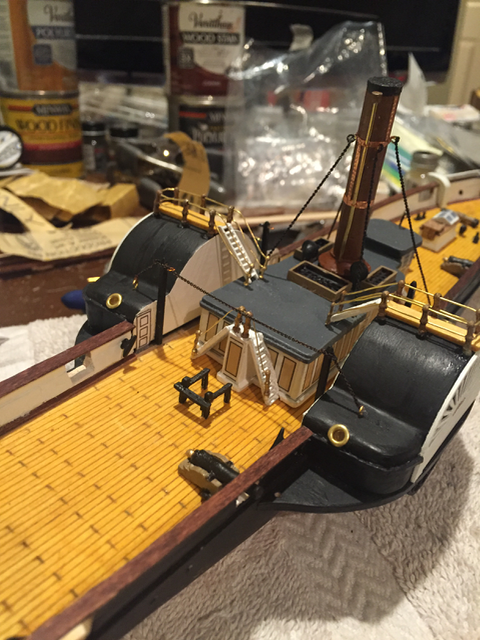
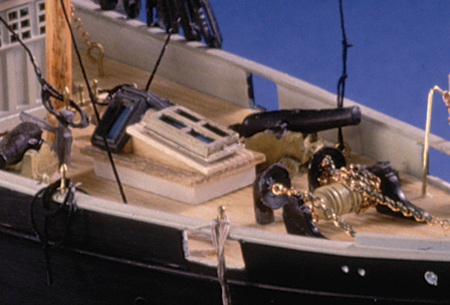
All the deck furniture is now in place. Both anchors rigged.... (phew!)
-
First anchor with cathead, block, rigging and chain. Top view of deck with chain running through hawse pipe, around windlass and to the spurling pipe. Excess chain wrapped around pipe until I figure out final resting place of anchor. Once that is done, excess chain will be cut and the end glued to center of the front of the spurling pipe.
-
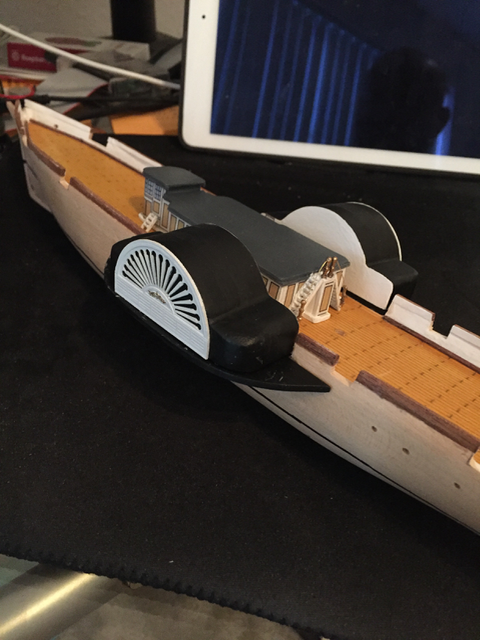
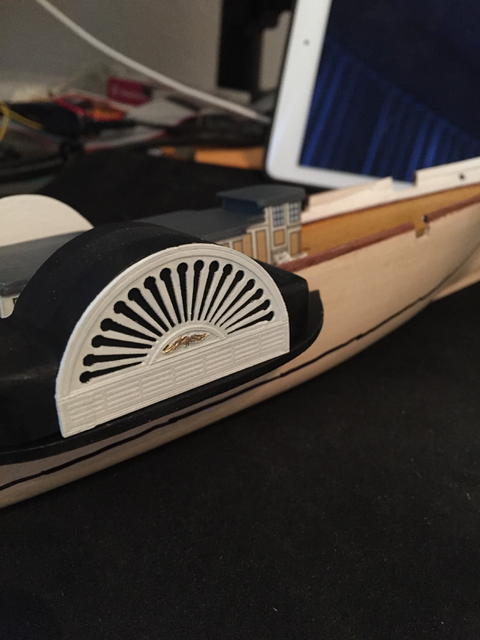
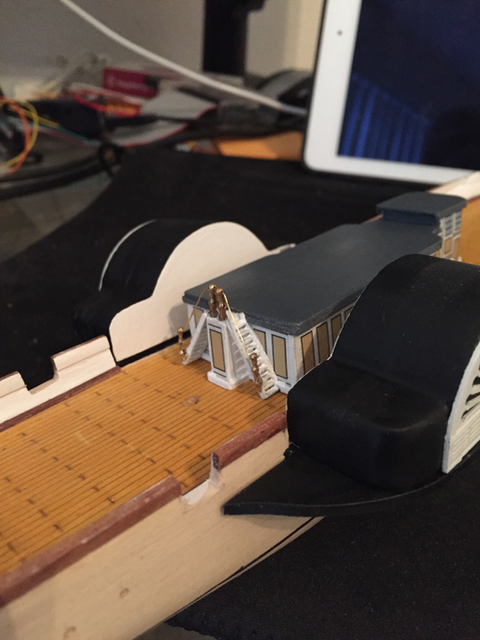
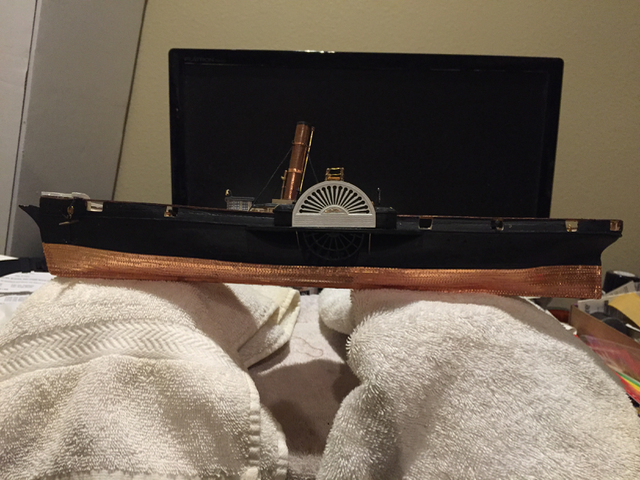
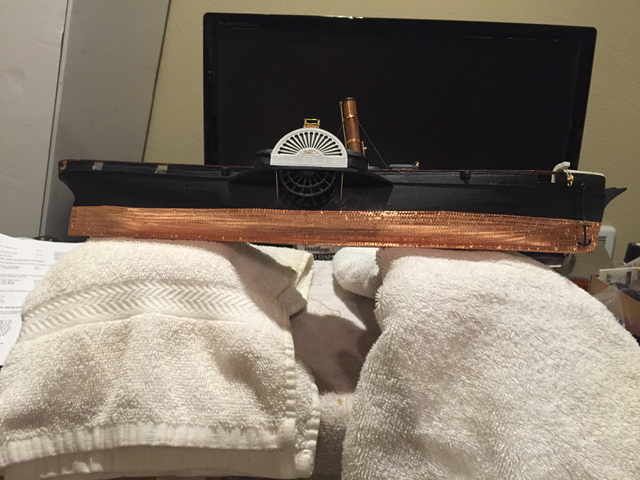
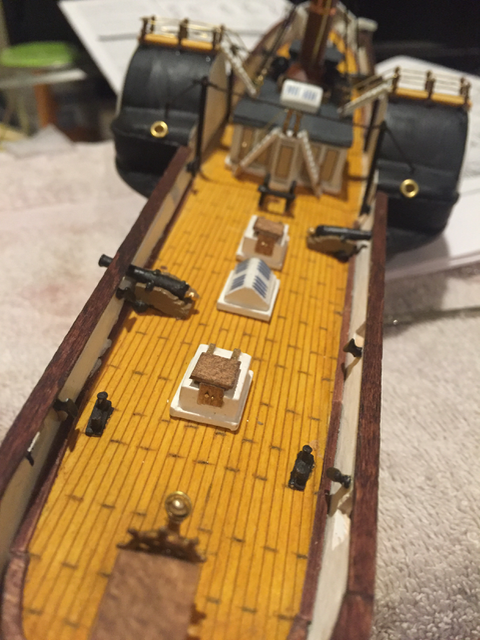
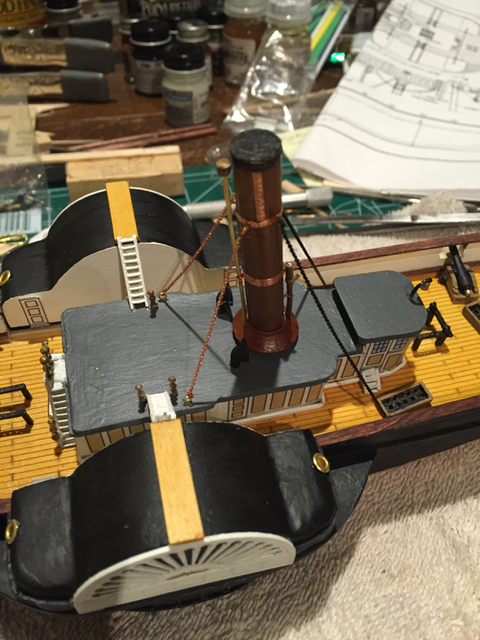
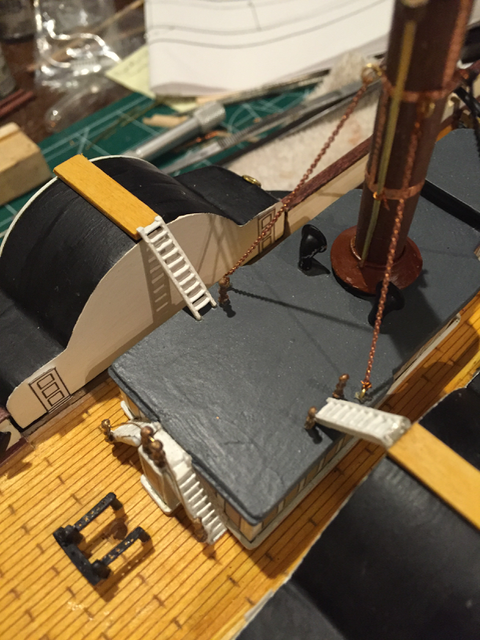
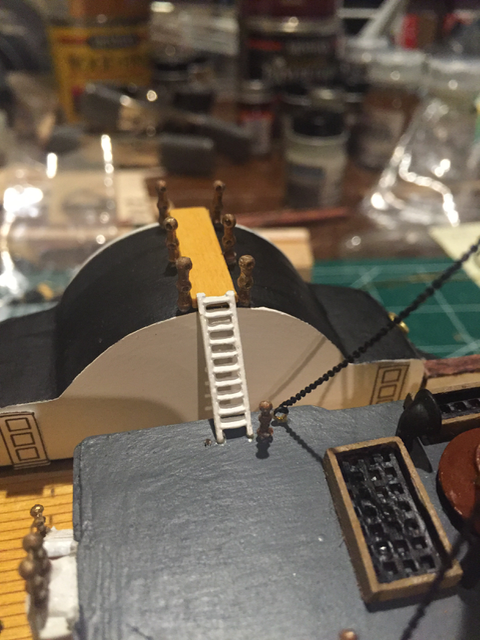
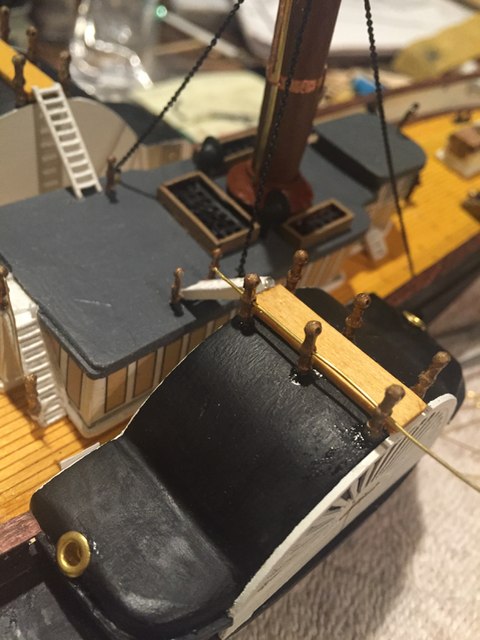
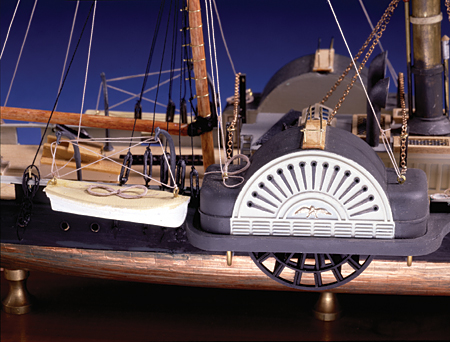
Guy chains added to back of funnel (still need to be painted black). Bridge platform with stanchions and the start of a railing... .... Bridge platforms complete with ladders and railings... Kingposts for paddlebox support (one set with chains)....
-
Ron, thanks for the input on the guy chains. I agree that the plans indicate that the aft guy chains attach at the top of the deckhouse. My confusion stems from all the images I've looked at - a fair number of them show the chains attached to the deck (all 4, not just the front two). But this seems like it would have been problematic for anyone walking the deck between the paddle boxes and the deckhouse. So, I'm going with the top of the deckhouse as you (and the plans) suggest. Thank you!
-
Roger, I wondered about that. I looked at several images (both here and elsewhere on the 'net) and the vents atop the deckhouse seem larger (i.e. have a longer "stem" if you will, that places the "bowl" much higher) than the small cowl vents. Here's an example I found which bolstered my renditiion: And this one - look how tall the vents are behind the funnel... I am leaning toward moving those vents from behind the windlass to the deckhouse as you suggest, but with what do I replace them? How do the pipes that lead to the chain locker look? [Edit] - OK - I guess those things behind the windlass are called spurling pipes and I found images of modern day pipes. Looks like I have more carving to do :-)
-
Working on the funnel - progress so far - installed with the two forward guy chains. Need to do the two back ones but am unclear whether they anchor at the ship's deck or on top of the deckhouse. The plans aren't real clear... More research needed....
-
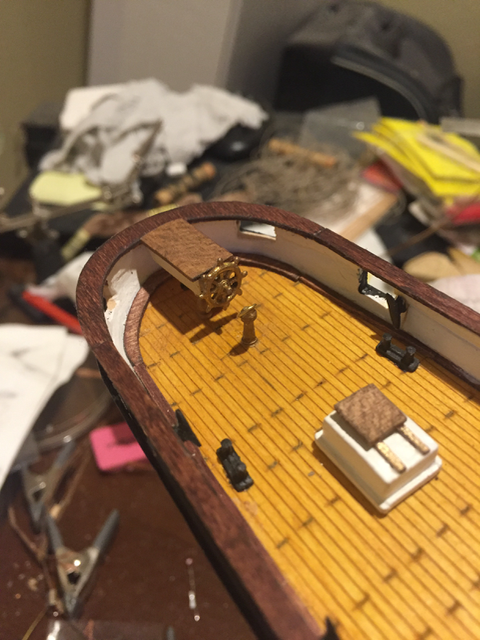
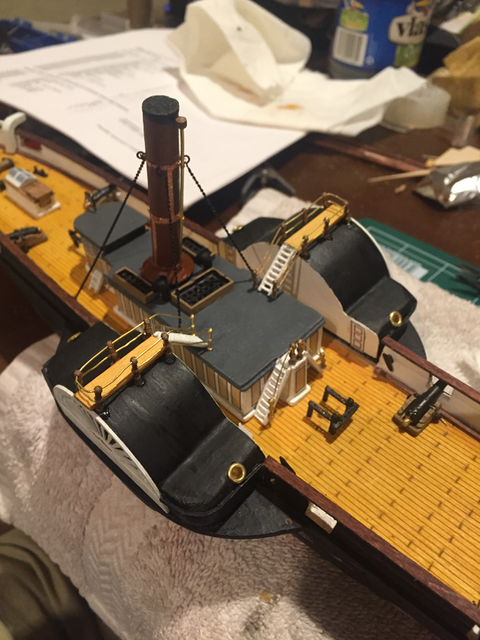
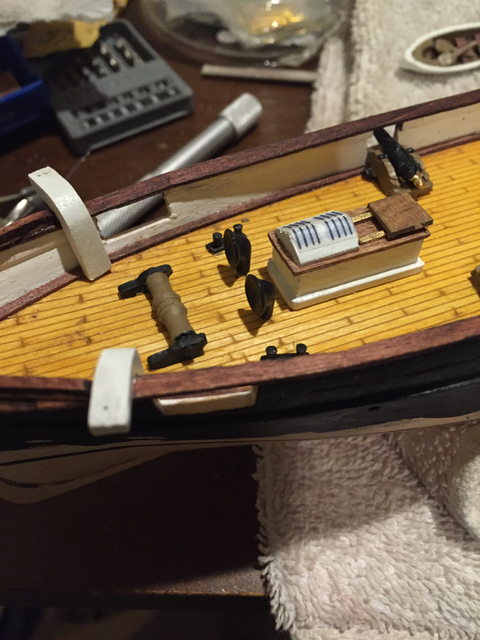
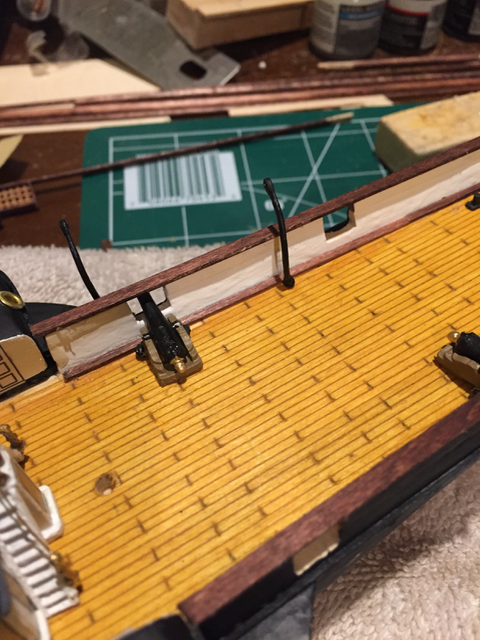
Progress with deck fittings - main companionway, windlass, small vents, catheads, ship's bell on pilot house, bitts (fore and aft), davits, ship's compass....


-
Thanks Wayne! It's interesting that the "official" pictures shows one gunport (aft of the paddle wheel) open with no cap rail and the fore gunport closed with what appears to be hinges on the top and a continuous cap rail over the port. The first picture (with the bottom-opening gunport lid) has a cap rail over the port, while the next two pictures (with no gunport lids) are also missing a cap rail over the gunport. One view on the plans included with the kit show top-opening gunport lids. It looks like I could find "evidence" to support any choice I make (no lids, top-opening lids, bottom-opening lids, with or without a cap rail)...
-
The instructions say to create gunport lids from 1/32" stock, use the copper tape to simulate hinges and glue them (open) at the top of the gunports... In all the images I've seen of a completed Harriet Lane model ship, I haven't seen the gunport lids. Should I skip this step? Thoughts? Can anyone point me to examples of the Harriet Lane which have gunport lids?
-
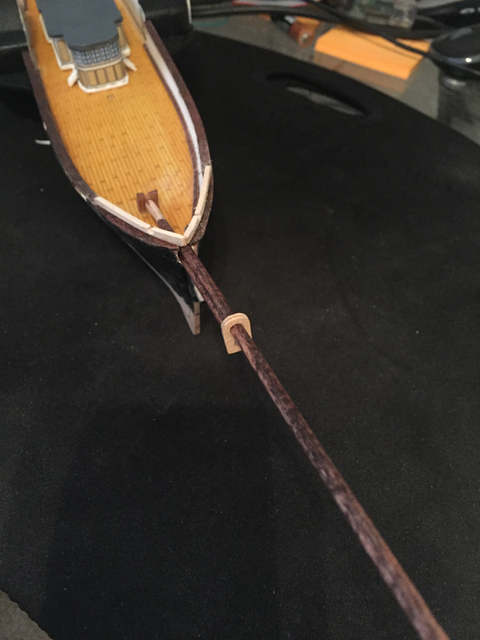
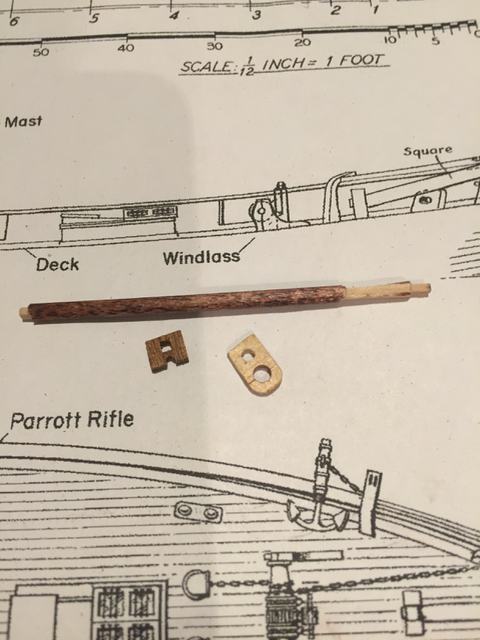
Test fit bowsprit, bitt, cap, jib boom.... Can also see the sprayrail (bowrail) with chocks carved out...
-
Did a little more work on the vents. Carved the catheads and a couple of more skylights. Carved bowsprit cap and bowsprit bitt and shaped the bowsprit...
-
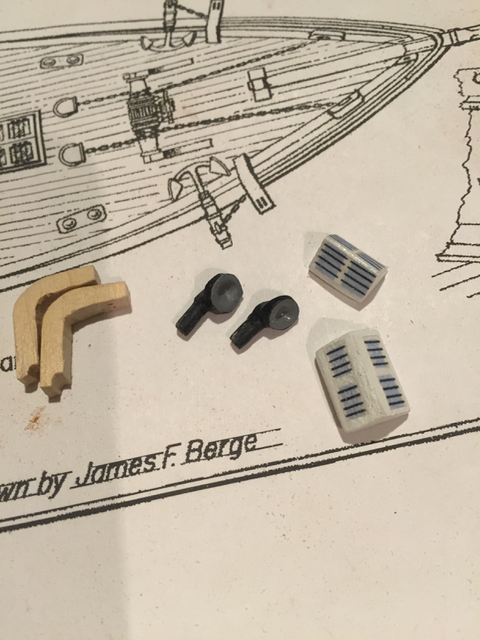
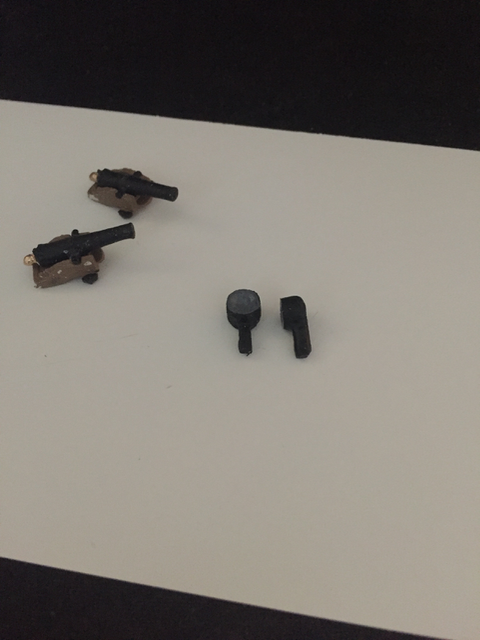
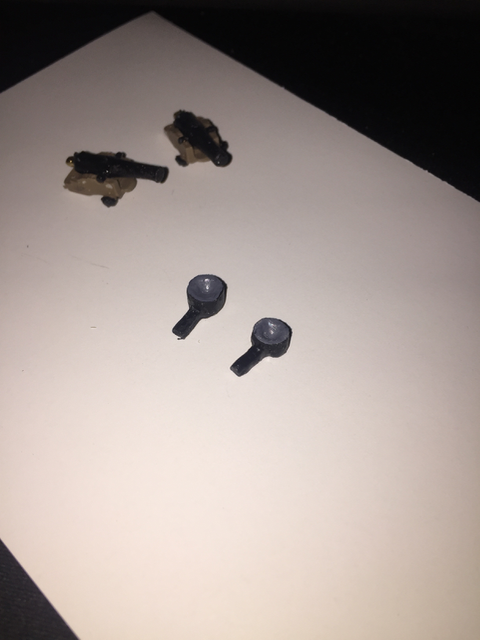
There were 2 small vents included in the kit (From studying the pictures of completed models and looking at the plans, they go right behind the windlass). But there are 2 larger vents behind the smokestack on top of the deckhouse. They weren't in the parts list (like the coaling rings which also show on the plan), so I tried my hand at carving them. Presented for your critique (along with 2 cannons on carriages)....
-
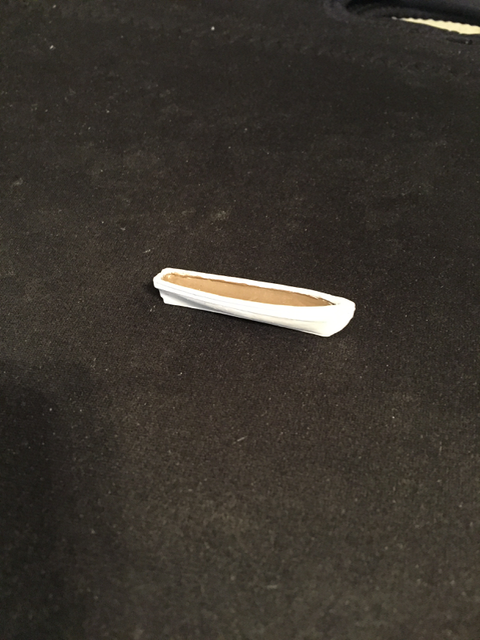
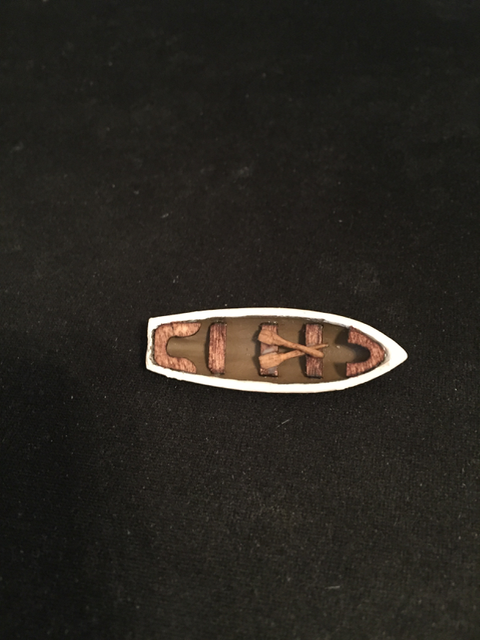
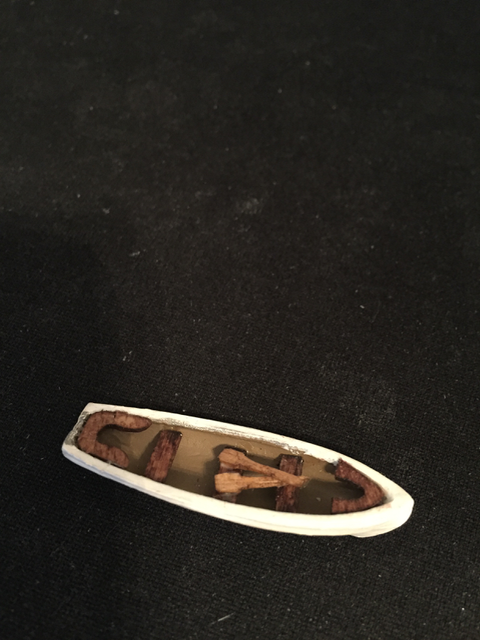
Lifeboats - before and after... Need to do a little touch-up on paint....

-
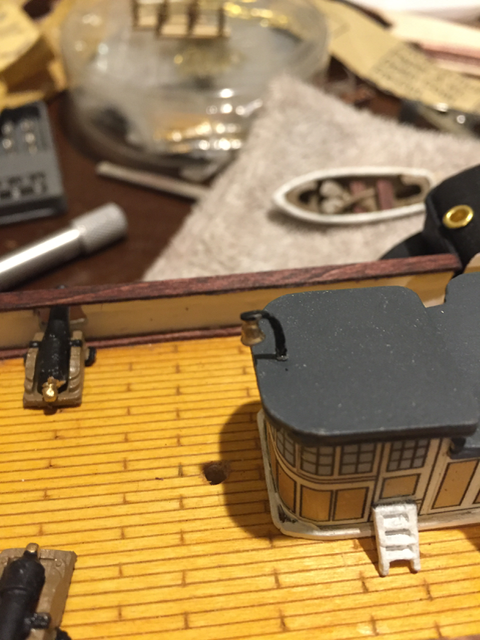
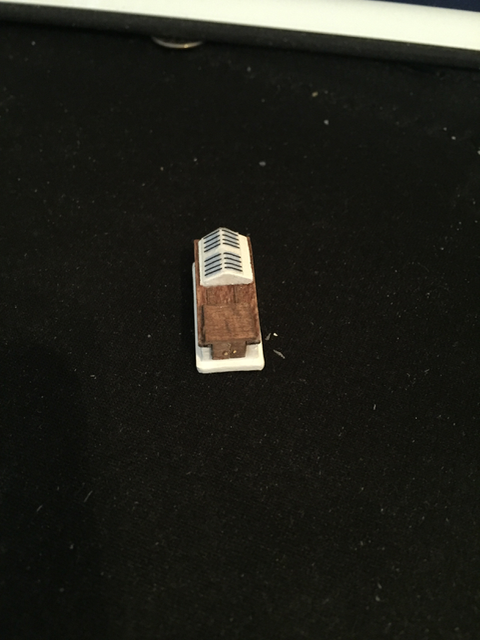
Main companionway, complete with doors and skylights! I used the shaft of nails (i.e. cut off the head) for the doorknobs...

-
First paddle wheel assembled...
-
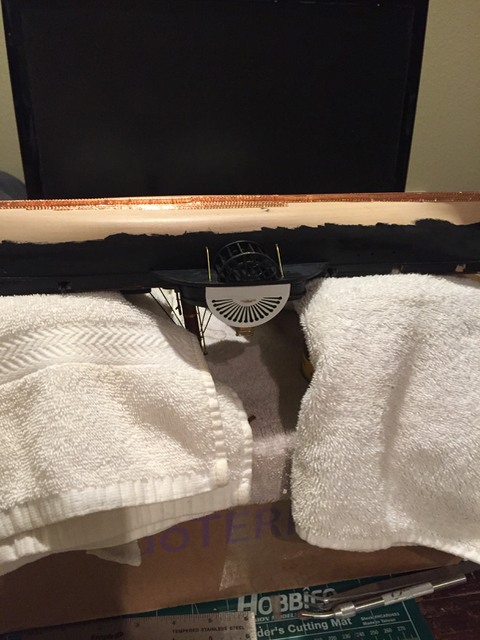
Testing out how my method of coppering is going to look. I took the supplied 1/4" copper tape and cut it in half lengthwise (so it's now 2 strips 1/8" wide). I then used a pounce wheel and steel ruler to create the bolt indentations and applied the result to the keel. Thoughts?
-
Paddlewheel boxes, decorations and sponsons in place...