


LMDAVE
-
Posts
172 -
Joined
-
Last visited
Content Type
Profiles
Forums
Gallery
Events
Posts posted by LMDAVE
-
-
I'm trying to recall, but I believe I did my bluenose build with only a cordless drill, a rather bulky one at that, every thing else was hand cut, filed, shaped.
I want to add some tools also. Sounds like a table saw and drill press are most useful. I already have a Dremel.
-
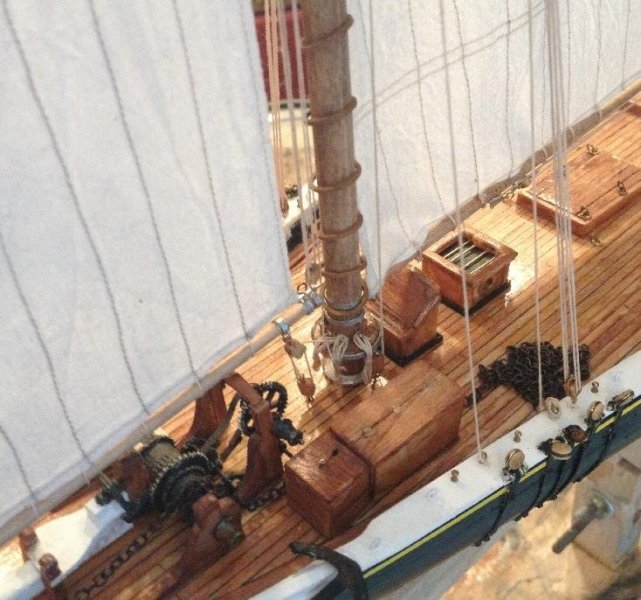
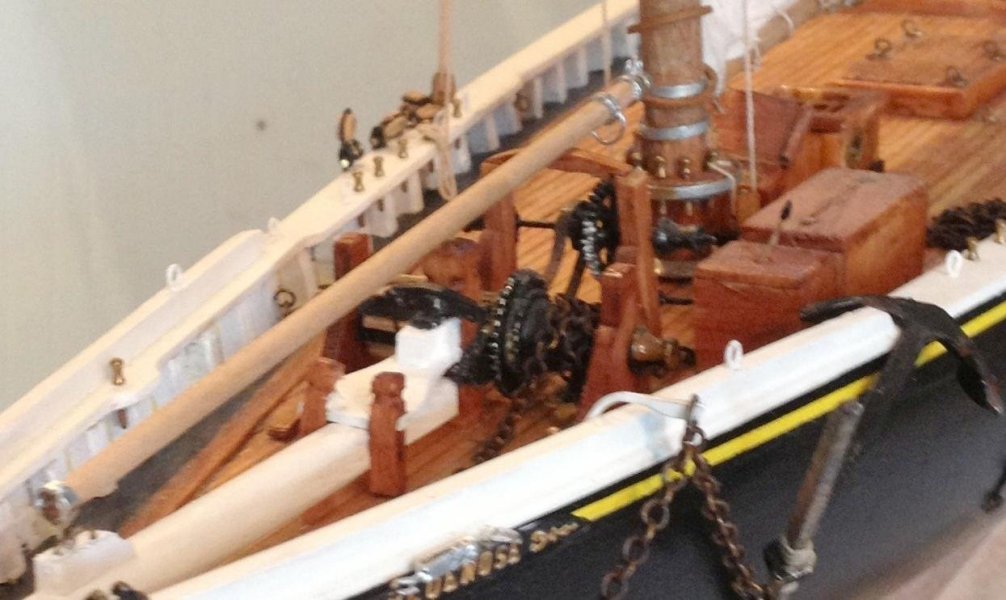
But, lets get back to the build. I did add one thing to the deck. The chain box. I think this is optional, but since a did have a pile of chain and no where to put it, I added it in. On the actual ship the chain was routed around the other side of the gear box, but it flowed better this way,

-
Thanks Russ, yes they are very snug.
-
Thanks Jerry!
OK, went through installing the display stand today and here's the end result. Not bad, but not perfect. The forward pedestal has a slight lean, and (not shown) the overall perpendicular lie of the ship has a very slight lean to the starboard side. Now that everything is in and snug, I don't want to take the screws out, so the small imperfection I can live with....At least I say that for now.
My only concern now is working on the remainder on the boat. I need to cover the stand so I don't accidentally get CA glue drops on it or paint. I really just have mainly rigging and shrouds left, but have proabbly a month or so of work left.
Thanks for the advice.
-
OK, went through with it today and here's the end result. Not bad, but not perfect. The forward pedestal has a slight lean, and (not shown) the overall perpendicular lie of the ship has a very slight lean to the starboard side. Now that everything is in and snug, I don't want to take the screws out, so the small imperfection I can live with....At least I say that for now.
My only concern now is working on the remainder on the boat. I need to cover the stand so I don't accidentally get CA glue drops on it or paint. I really just have mainly rigging and shrouds left, but have proabbly a month or so of work left.
Thanks for the advice.
-
OK, I need to get back to my actual build. I've been focusing more on display over the last week or so. I'm actually almost complete building my display case. I purchased a foyer type table, but I'm building the case itself. This case is huge and will be pretty heavy when all the glass is in, the problem is my method for putting the case over the boat was over the top like a hat. The case ended up being so big that I'll probably hit my ceiling while removing it. So, I'm going to have to have and ingenious way of getting the boat in and out if I have to.
Another neat little thing I just bid on was an actual vintage rigging block to display with my ship. The block I got is just like the one in the picture below but has the hook with it. In worse conidtion and has been thru a fire. I will probably refinish the wood on it some for display purposes, but think it will be a nice touch.
I got the idea from seeing this picture of a bluenose on display and thought it looked nice:

-
Thanks for the ideas, I'll definitely plan ahead on my next build.
The trick is now finding a suitable angle for drill into the keel on a finished model.
-
Bob/Russ/Dave Thanks guys for the advice. YEah, I think the trickest past is just turning an aalmost finished boat on it's side for drilling.
I needed to order new pedestals with the wider slot. I feel comfortable with the pedestal slot holding the area so that splitting is not likely to happen.
-
I couldn't get any responses in the support section so trying on my log also.
Since, I'm coming close to finishing my first wooden ship build. I like the look of the brass pedestal stands, and have to admit, wasn't too sure how the boat's keel stays in the little slots. Then my parts came in.
Am I suppose to drill pilot holes in the bottom of the finished boat keel to take these screws from the bottom? If so, now it makes sense how it's held on the slots. Just hard to get myself to put screws in the bottom out of fear of splitting the keel.

-
I'm coming close to finishing my first wooden ship build. I like the look of the brass pedestal stands, and have to admit, wasn't too sure how the boat's keel stays in the little slots. Then my parts came in.
Am I suppose to drill pilot holes in the bottom of the finished boat keel to take these screws from the bottom? If so, now it makes sense how it's held on the slots. Just hard to get myself to put screws in the bottom out of fear of splitting the keel.
-
Thanks Russ, yeah, I posted shots that didn't bring it out. Certain flash shots brought it out.
-
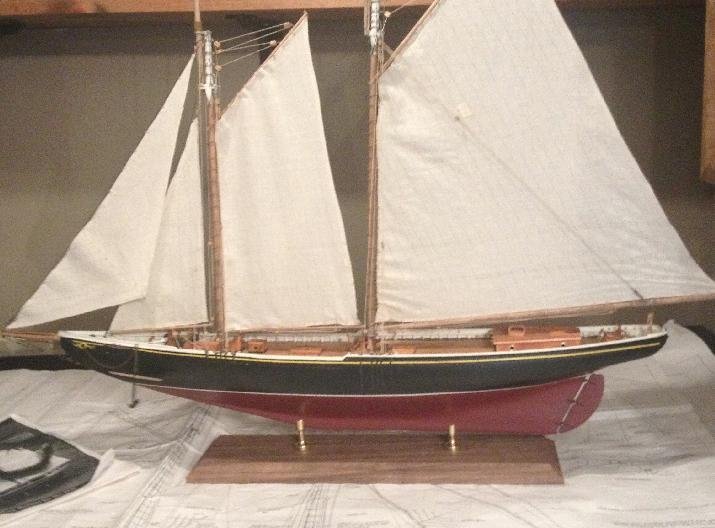
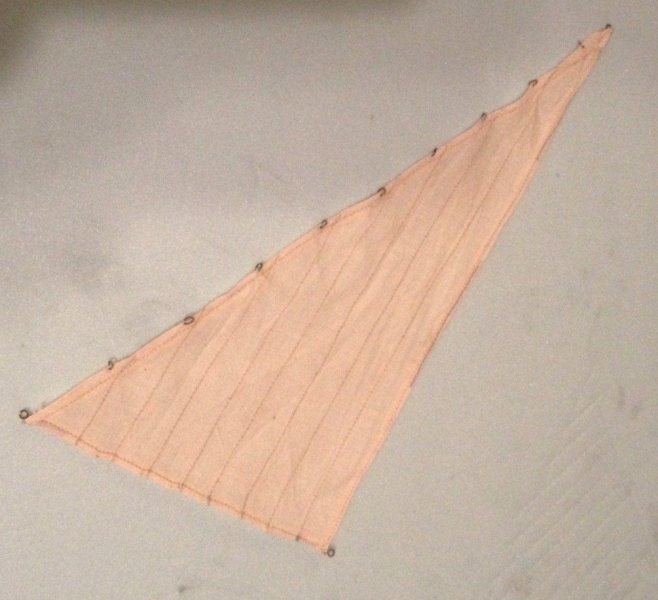
Finished the Jib sail, which will probably end up being my last sail. This full shot is kind of a spoiler shot, because now all is left is all the "trimmings". remaining shrouds, and rigging, and dressing up the deck more.
This was probably my worst sail, but I'm still happy with it. A couple of stain mark got on it but I'll leave them as character spots....not bad enough to redo the whole sail.


-
Thanks Russ/Bob. Yeah I like the coils also, cotton thread with beeswax was definitely the way to go.
-
Pretty much finished the jumbo jib sail, minus one or two rope coils. So much rigging for each sail!


- tasmanian and M. Pajulahti
-
 2
2
-
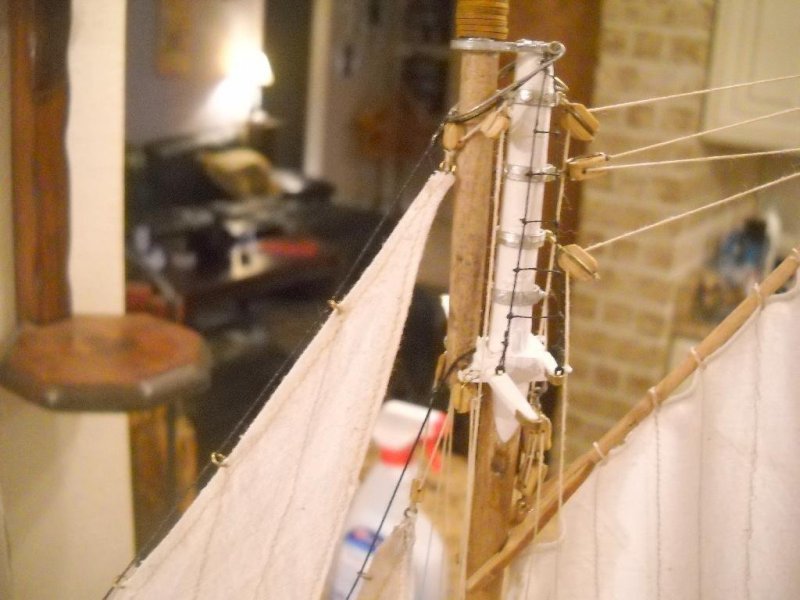
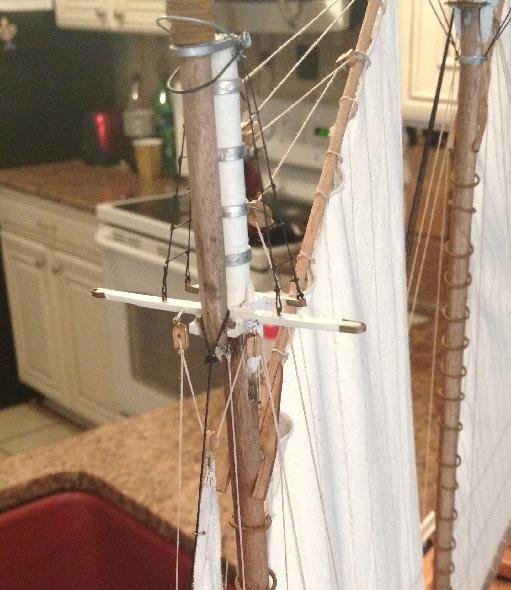
Thanks. I was looking for actual pics of that stay connected at the mast. Only thing I found was on a different version of this model was a bail around the mast also for this to tie to. But I'm happy with what I did
-
Started assembling the foresail. I must have missed having to add a bail on the bowsprit for the standing rigging for the sail, but I was able to fit it in. And wasn't sure on how to attach the black standing rigging on the upper end, so, I looped it on the mast and seized it. So until I have the remainer of the running rigging for the sail installed and tightened up, I have a loose moving sail that could be coiled up and shown in the stowed position if desired at this point.


blurry pic... sorry

-
-
Thanks dragzz, I can start to see the light at the end of the tunnel on this build. I'd like to start planing my next build also. I'm really partial a racing yatch for my next build. I really like the Amati Endeavour 1:35, the 1:80 already has a premade hull and that take the fun out of it, but the 1:35 is 46" long, and 56" high! I love the boat, buy didn't want the model that big. Who knows what I'll end up with as my second wooden build.
-
Back to the foreboom/sail, with a rainy Sunday I was able to cut/sew/hem/wash/dry/iron and put the eyelets in the fore sail. Only one more sail to make after this unless I decide to do upper sails. But, I'll install and rig this sail next before moving on.
-
Another little side project I worked on were the deck barrels. The real Bluenose had 3 behind the main cabin. My barrels were just slightly bigger than scale so with the barrel holder assembly I went with 2 barrels. I may dress it up a little more with some rope coils.

-
Back from another 6 week break again. After the first attempt at the rat lines I decided to get back on track from where I left off with the booms. I still had to make the jumbo jib boom and traveller block. Maybe I'll complete the foresails before getting back to finishing the other ratlines.
Here's the jumbo jib boom added.

-
Well, I completed the first set of ratlines. First, this is a set that will be one the non-displayed side of the ship, so if I want to make some improvements on the next side I can. I didn't go the professional route of clove hitches on every knot, started with a know on the left and then a dap of glue to simulate a knot with a touch of flat black over it for the other two knots. Maybe in the future I'll attempt a true to ship clove hitch on every knot of ratlines.
The only other thing was the shrouds converge at the top that the rungs of the ratline disappear before fully reaching the top. Also, Bluenose had two different assembly of their ratlines over the years. Covering all four shrouds was actually done at some time, but reducing it to 3 shrouds was done for racing. Almost all pictures I've seen have it covering just 3 shrouds.


-
Finished the starboard side main shrouds , now adding the rat lines. very tedious. I decided to break here and show progress, there are about 20 more steps to go. I have a backing paper with lines to help keep the spacing even.

-
Its cool that you're finding all of these old posts. I miss having ThorBob's finished model to steal ideas from. I have a good majority of his pictures, but don't have the final that he had posted in the Completed Ship Gallery...he had a cool thing he did with the anchor and rope I wanted to steal.
Bluenose by LMDAVE - FINISHED - Model Shipways - 1/64
in - Kit build logs for subjects built from 1901 - Present Day
Posted · Edited by LMDAVE
Floyd, yeah plexi-glass probably would have made my case much lighter. I'm going to be happy about the my case looks, but getting the boat in and out may be a two or 3 person job.
Thanks Dave B, I plan steal what a previous builder (ThorBob) did for the other anchor. He made a neat jig for coiling the anchor rope and soaked it in a blackwash to give it a very used look, and have the anchor stowed on the deck. Too bad his build got lost with the website change. He should come back and repost finished pics.