LMDAVE
-
Posts
172 -
Joined
-
Last visited


-
 GrandpaPhil reacted to a post in a topic:
Miss Unlimited by LMDAVE - FINISHED - Dumas
GrandpaPhil reacted to a post in a topic:
Miss Unlimited by LMDAVE - FINISHED - Dumas
-
schooner reacted to a post in a topic:
Miss Unlimited by LMDAVE - FINISHED - Dumas
-
ccoyle reacted to a post in a topic:
Miss Unlimited by LMDAVE - FINISHED - Dumas
-
Blackreed reacted to a post in a topic:
Miss Unlimited by LMDAVE - FINISHED - Dumas
-
Diver reacted to a post in a topic:
Miss Unlimited by LMDAVE - FINISHED - Dumas
-
GrandpaPhil reacted to a post in a topic:
Miss Unlimited by LMDAVE - FINISHED - Dumas
-
GrandpaPhil reacted to a post in a topic:
Miss Unlimited by LMDAVE - FINISHED - Dumas
-
GrandpaPhil reacted to a post in a topic:
Miss Unlimited by LMDAVE - FINISHED - Dumas
-
GrandpaPhil reacted to a post in a topic:
Miss Unlimited by LMDAVE - FINISHED - Dumas
-
GrandpaPhil reacted to a post in a topic:
Miss Unlimited by LMDAVE - FINISHED - Dumas
-
LMDAVE reacted to a post in a topic:
Miss Unlimited by LMDAVE - FINISHED - Dumas
-
LMDAVE reacted to a post in a topic:
Miss Unlimited by LMDAVE - FINISHED - Dumas
-
LMDAVE reacted to a post in a topic:
Miss Unlimited by LMDAVE - FINISHED - Dumas
-
LMDAVE reacted to a post in a topic:
Miss Unlimited by LMDAVE - FINISHED - Dumas
-
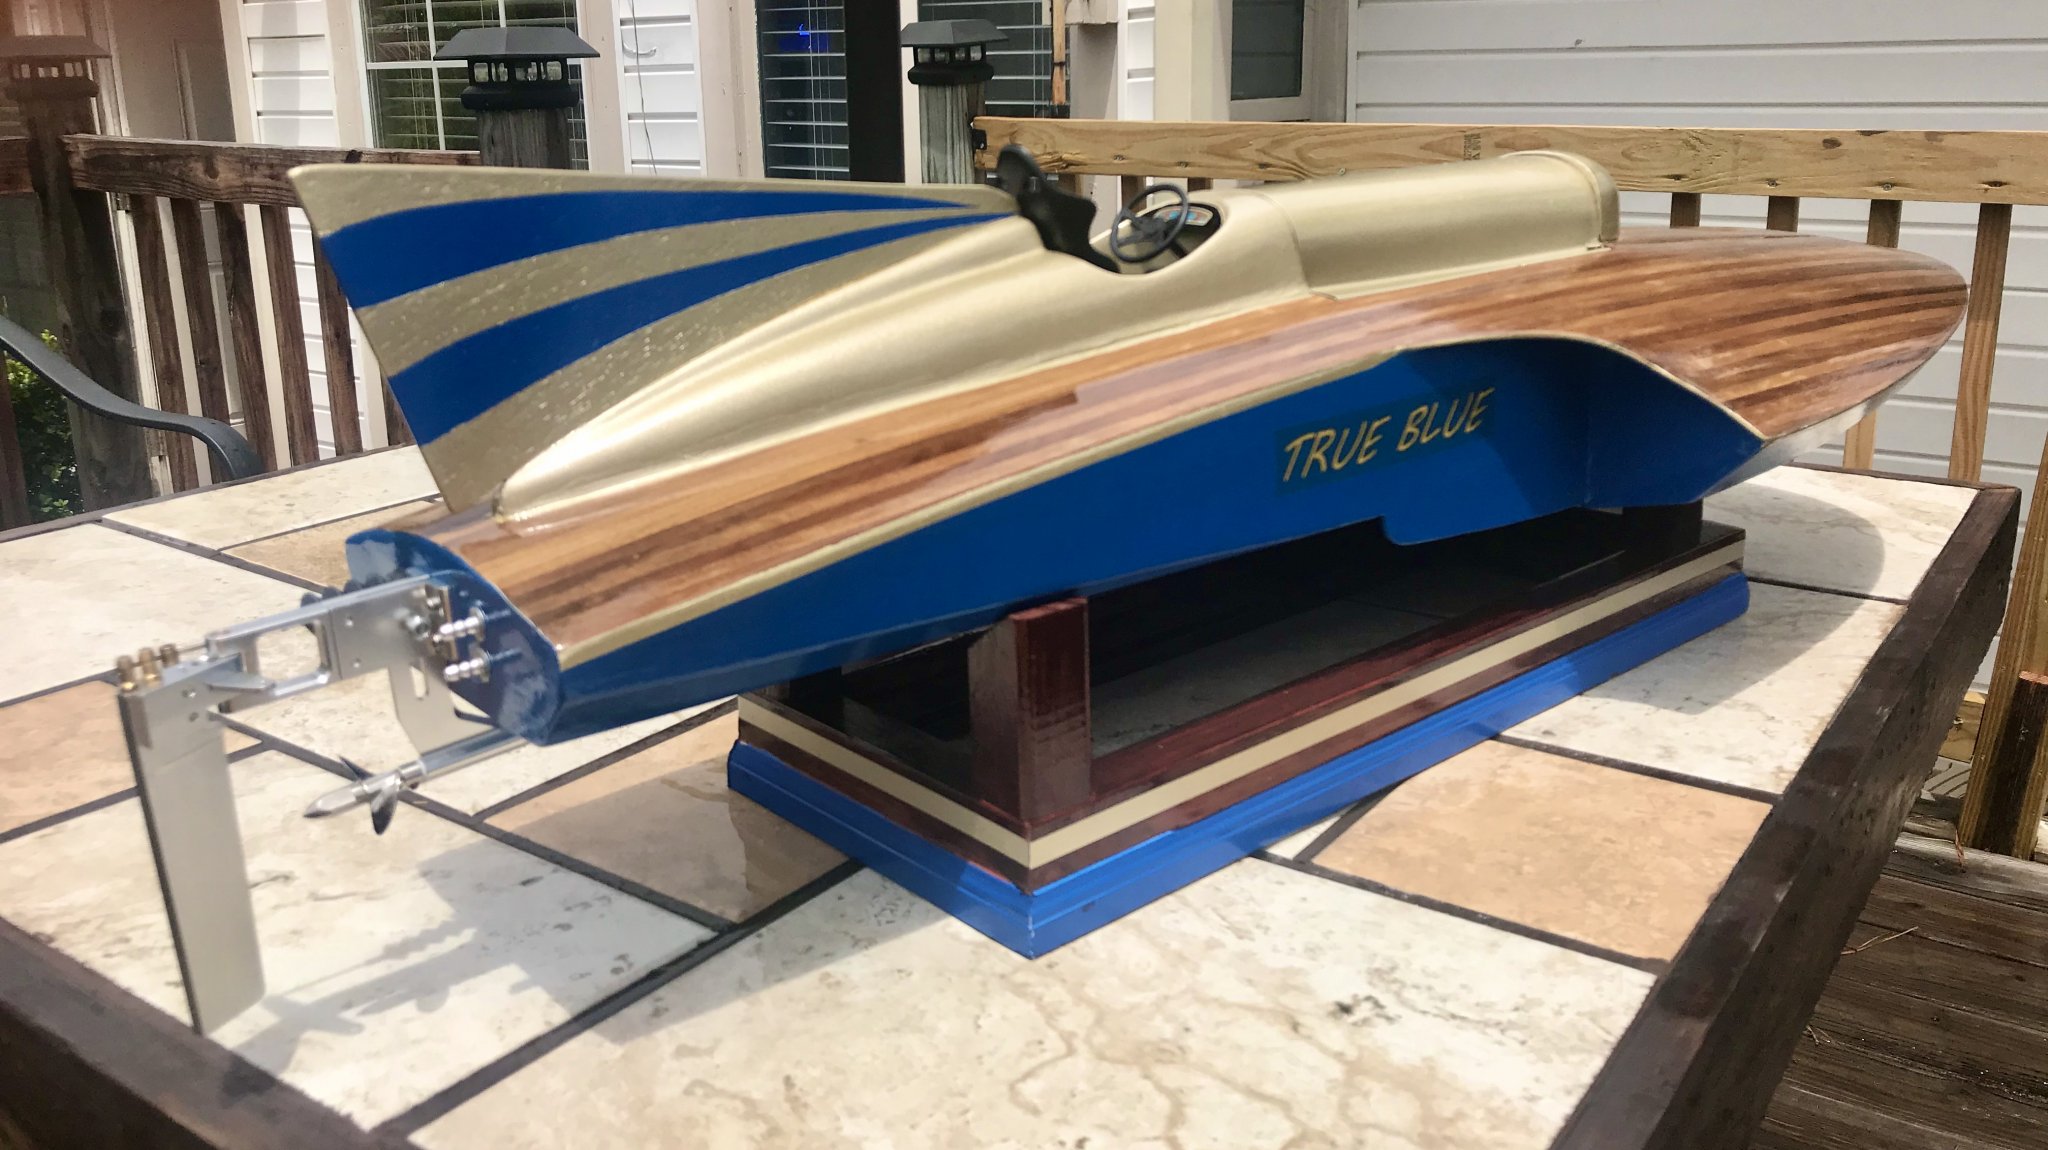
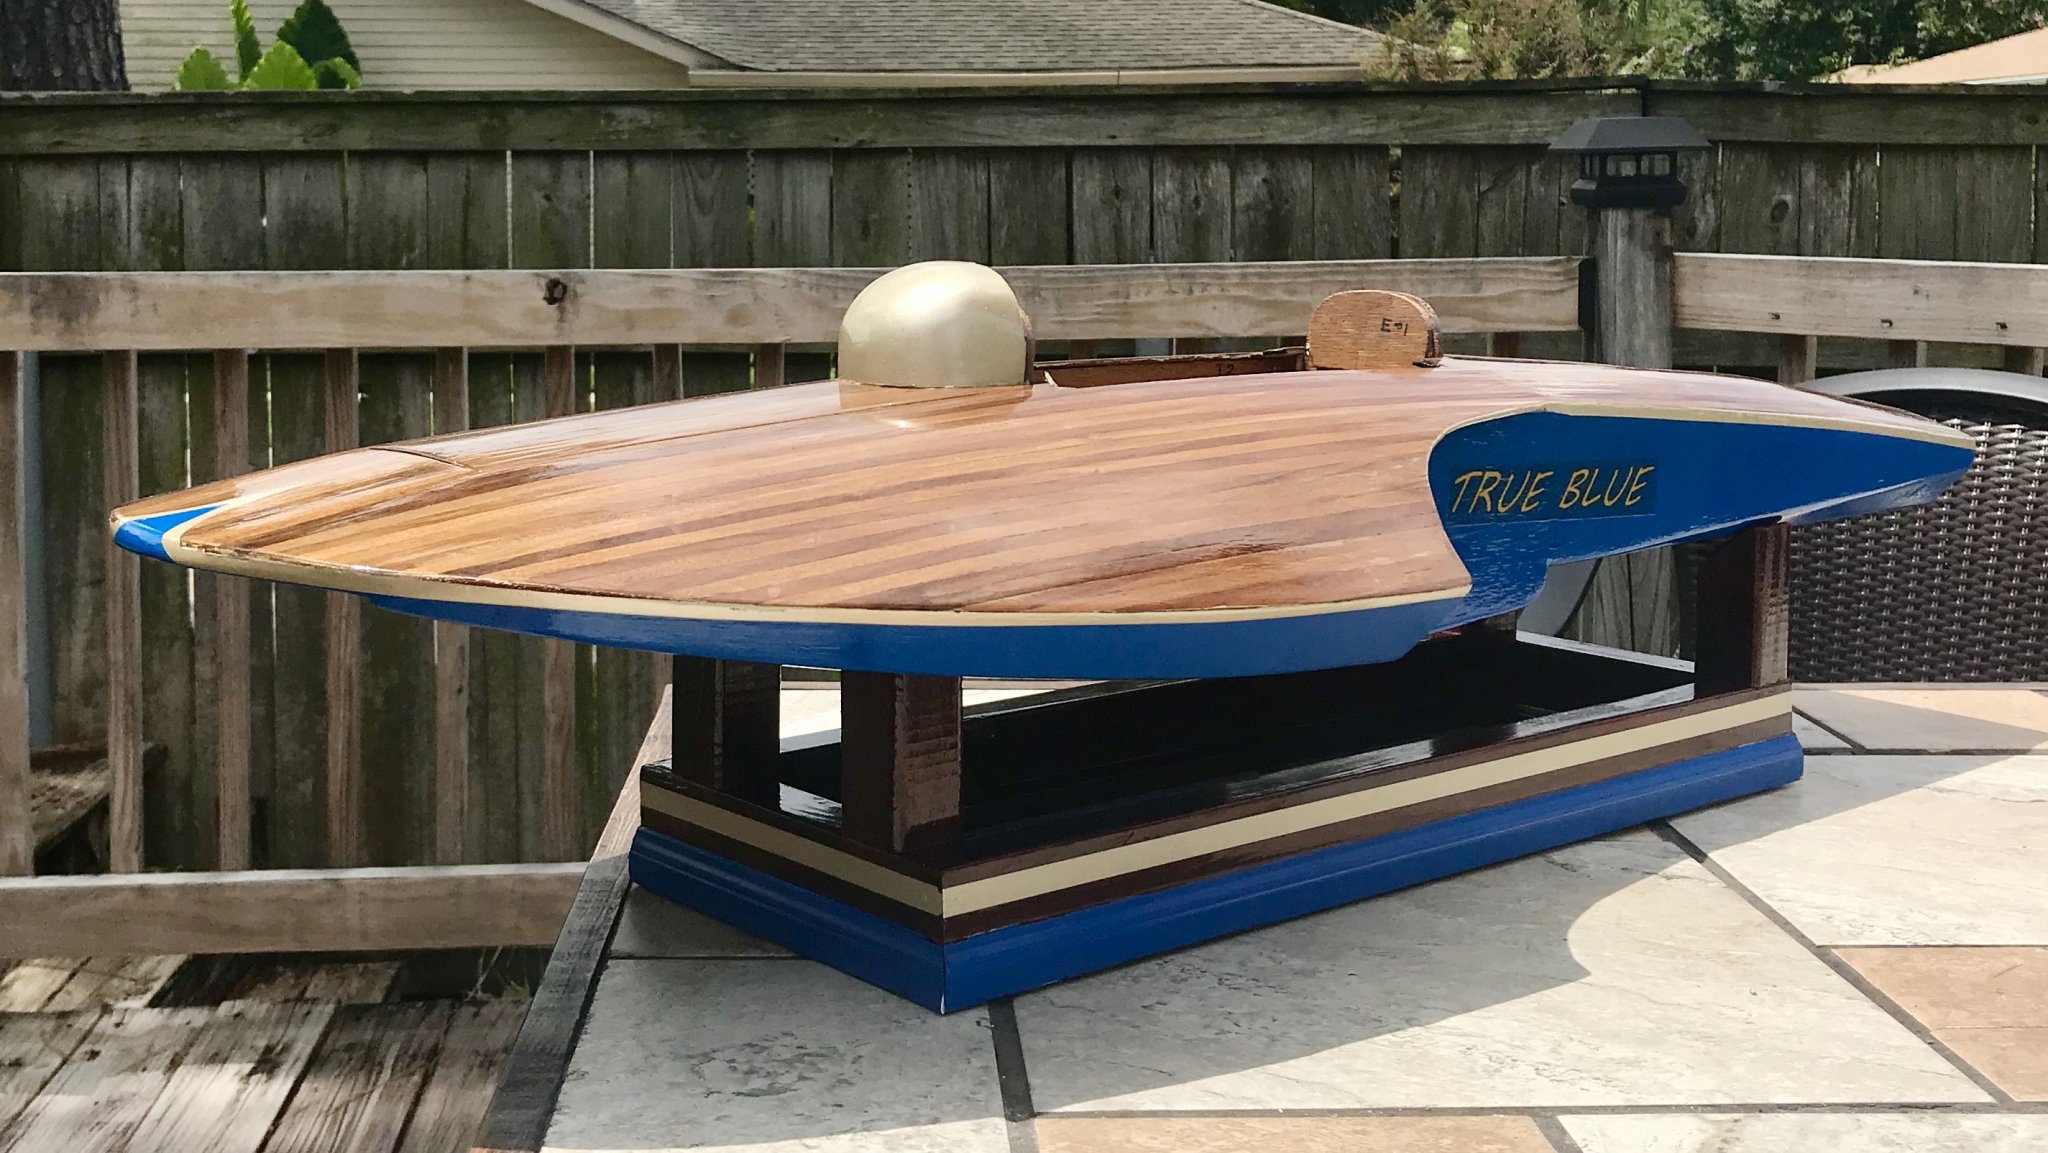
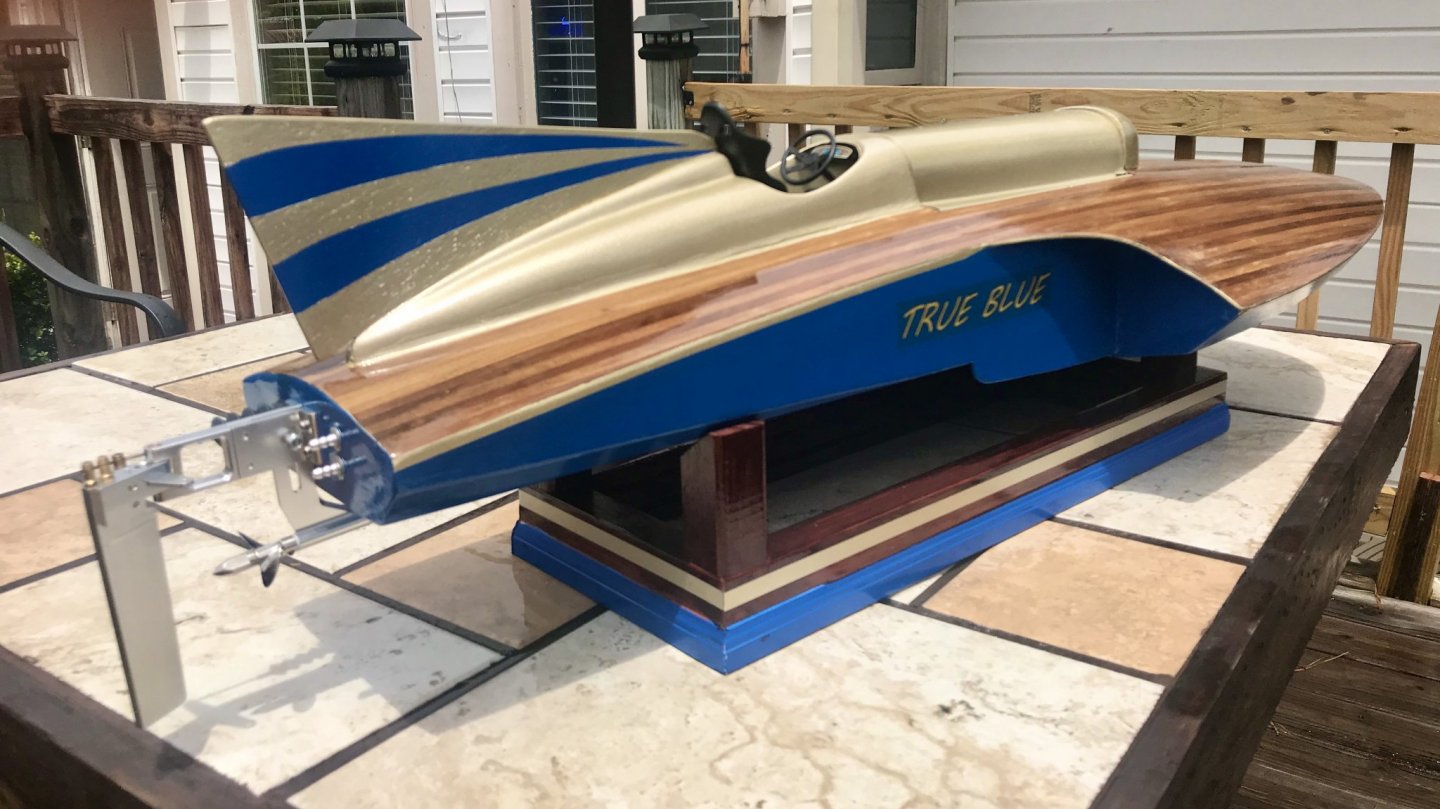
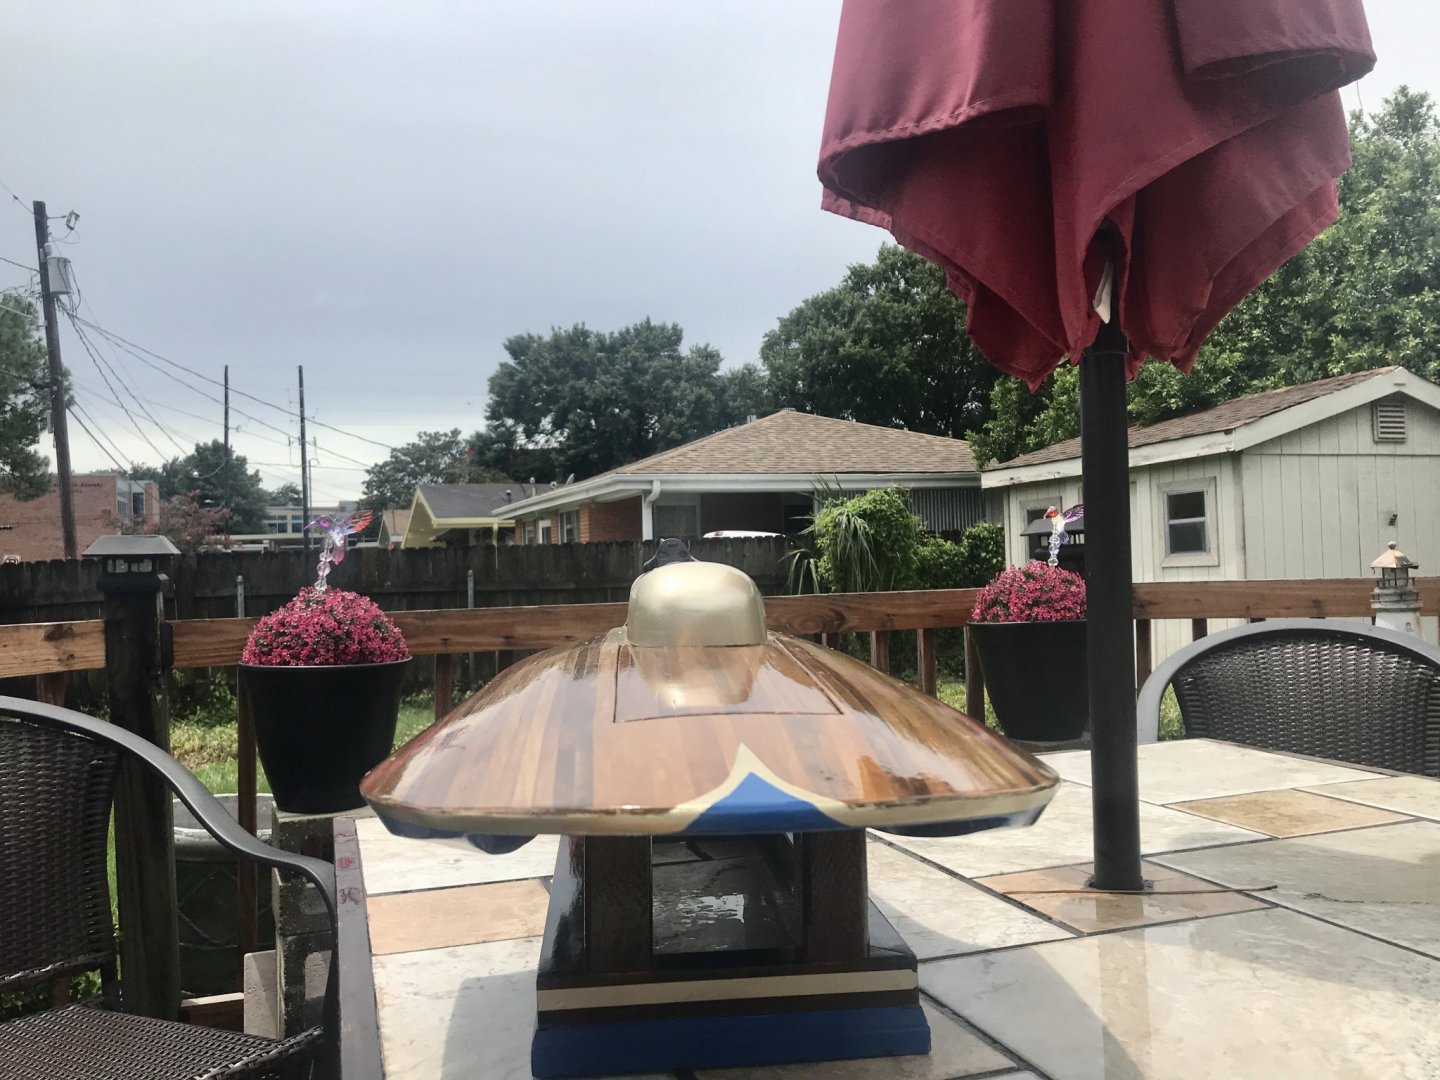
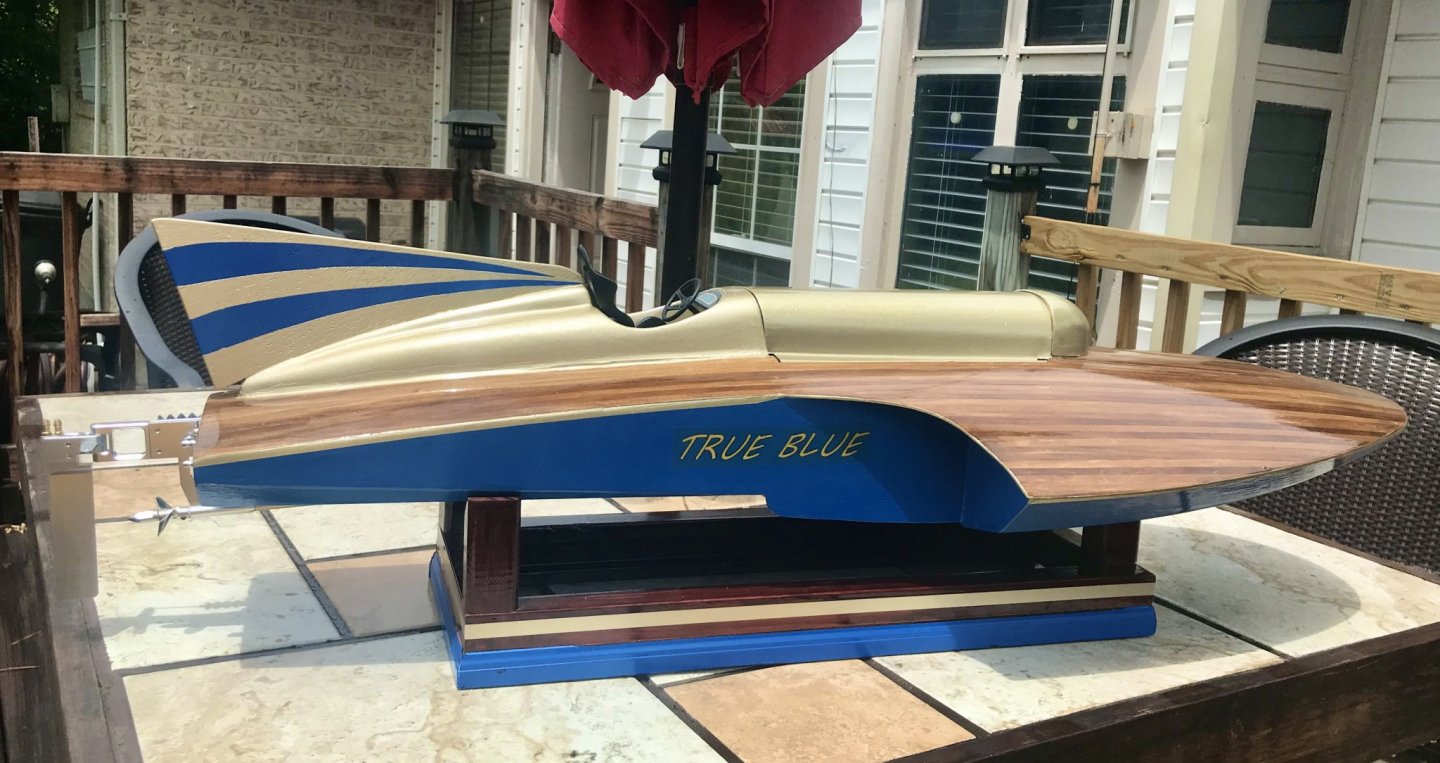
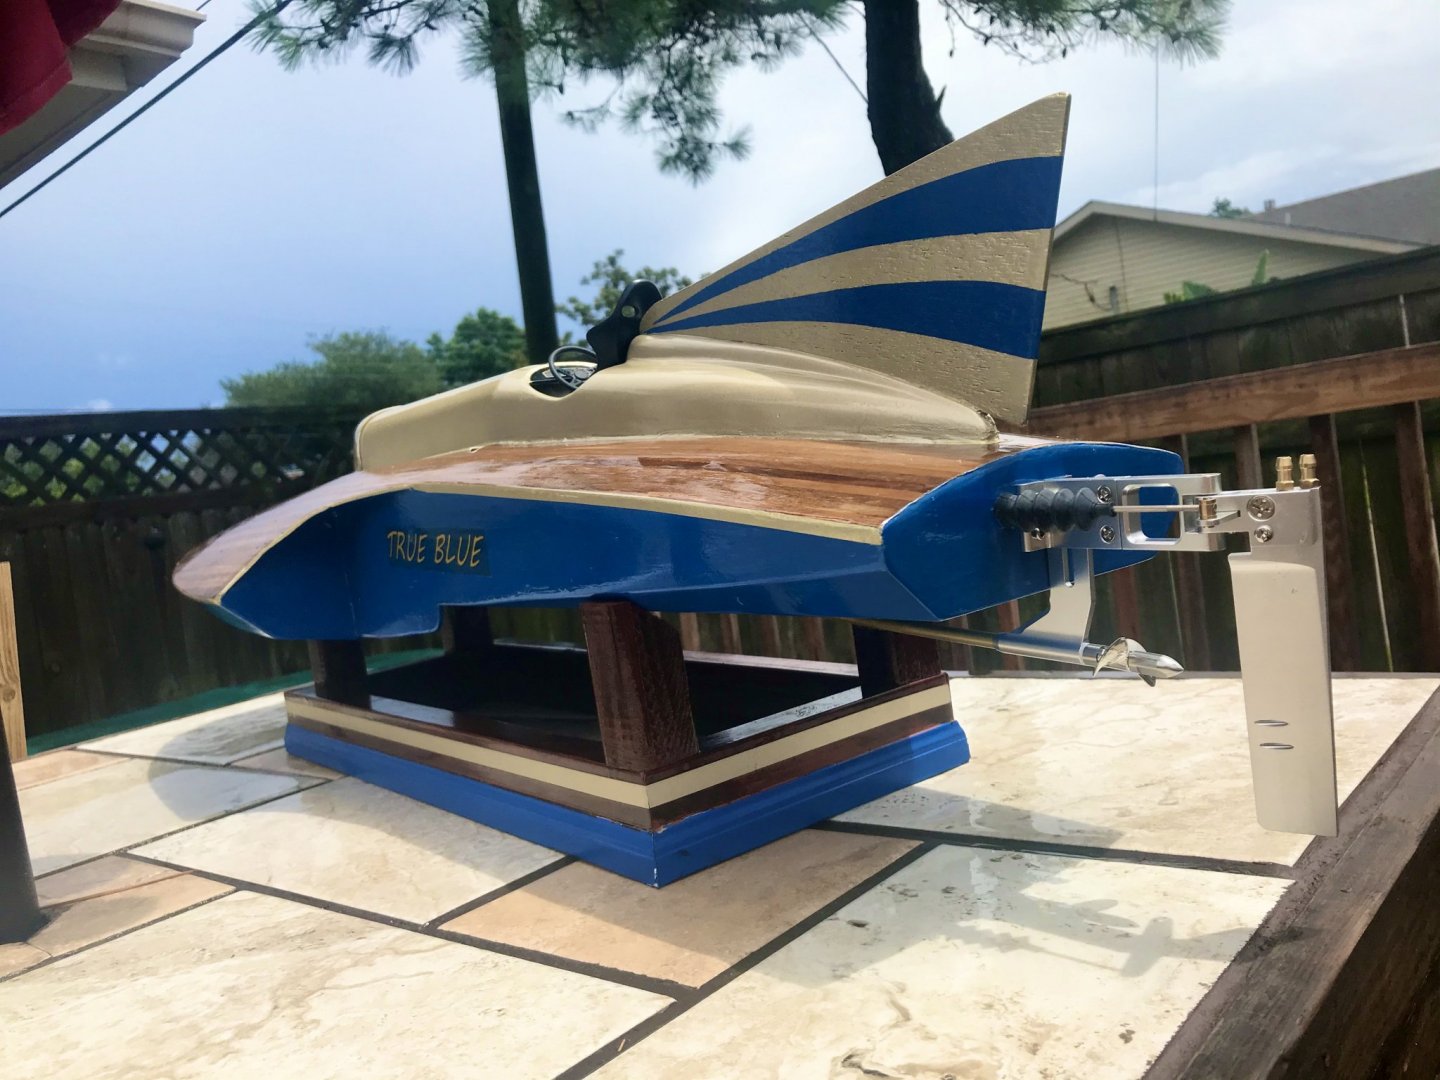
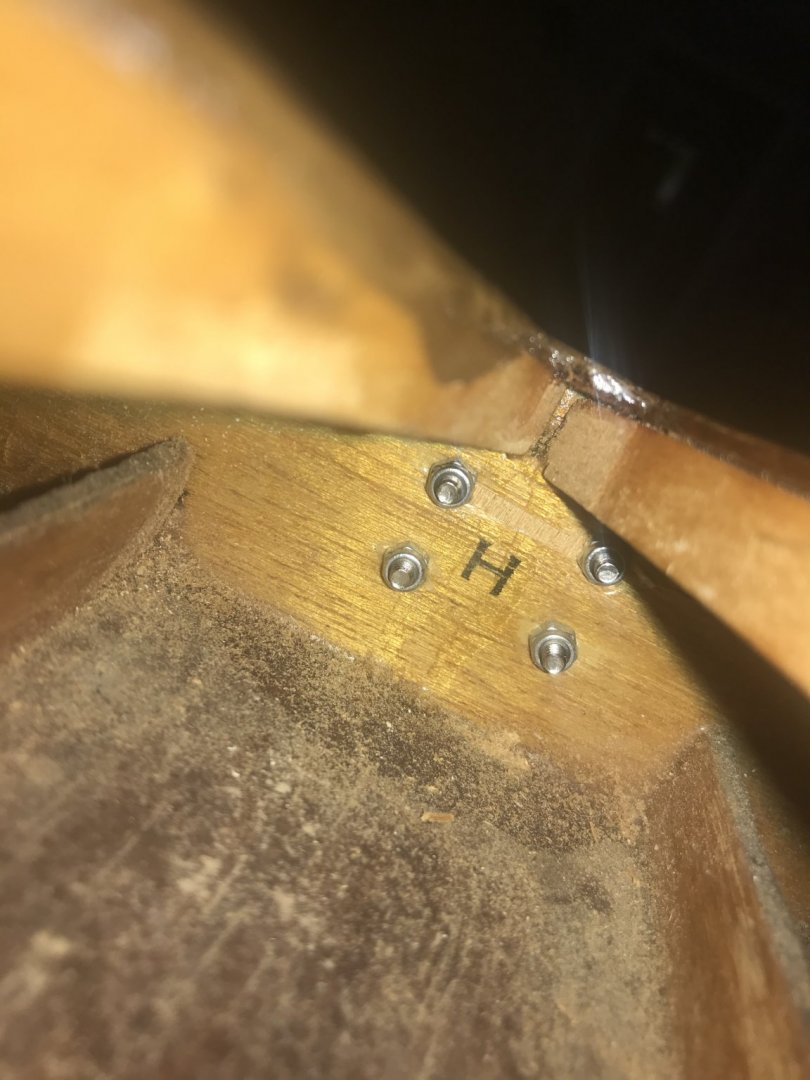
Finished the final hardware and sealed the back fin. This will be the final of the static model for display only ...for now. Thanks for following.

- 51 replies
-
- 13
-
-
- miss unlimited
- dumas
- (and 1 more)
-
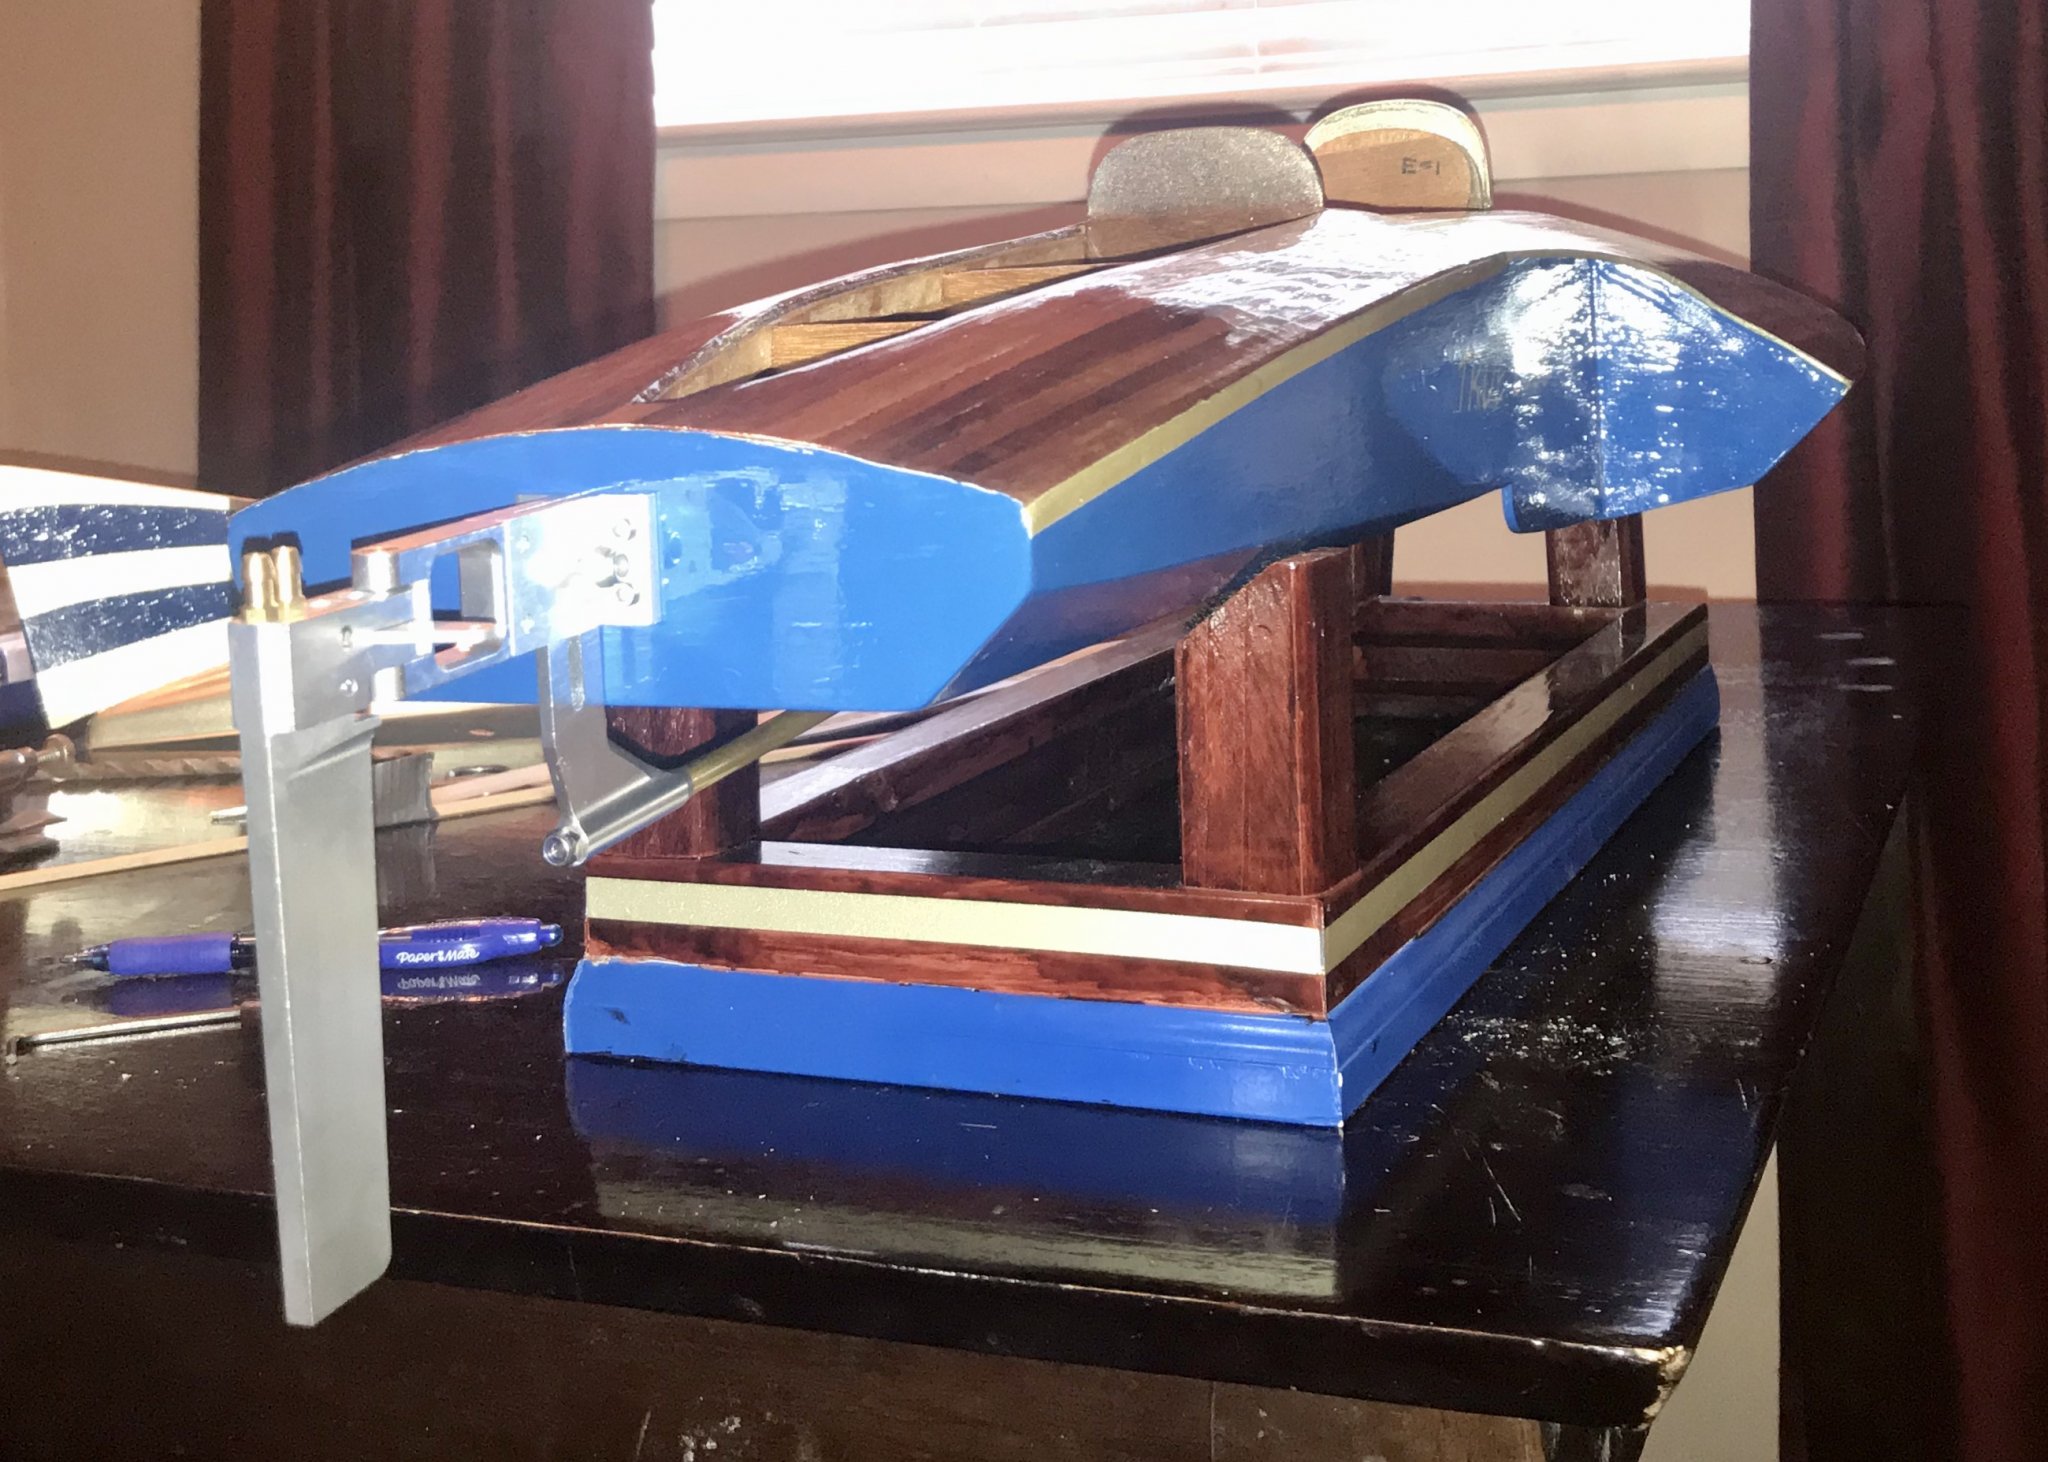
Thanks, those seats look cool, but almost $100 to get them and have them covered. So, not sure I'm going that route. Here's a sneak peak of the boat with upper sections temp installed. My main hold up is the fact that I am trying to tool this thing for possible future RC control, because the back cowl section will be permanently mounted, and running stuff from middle to transom would require breaking it apart. It wasn't really set up for removal. So I'm going to be installing bulkheads on the transom and linkage to control the rudder, and I just found out those water tubes coming out the back of rc boats to the rudder do. It's a cooling water system for the motor. So, I guess I'll be installing two bulkheads for that and pre running some tubing through the back section to the middle. I'm probably going about this all wrong, the learning RC as I go, the intent was for this to be a nice static model, but more and more the idea of it running one day still intrigues me. So, that's why I'm pre running all of this tooling once it comes in then, I can permanently install the back cowl and caulk and paint it.

- 51 replies
-
- 6
-
-
- miss unlimited
- dumas
- (and 1 more)
-
LMDAVE reacted to a post in a topic:
Miss Unlimited by LMDAVE - FINISHED - Dumas
-
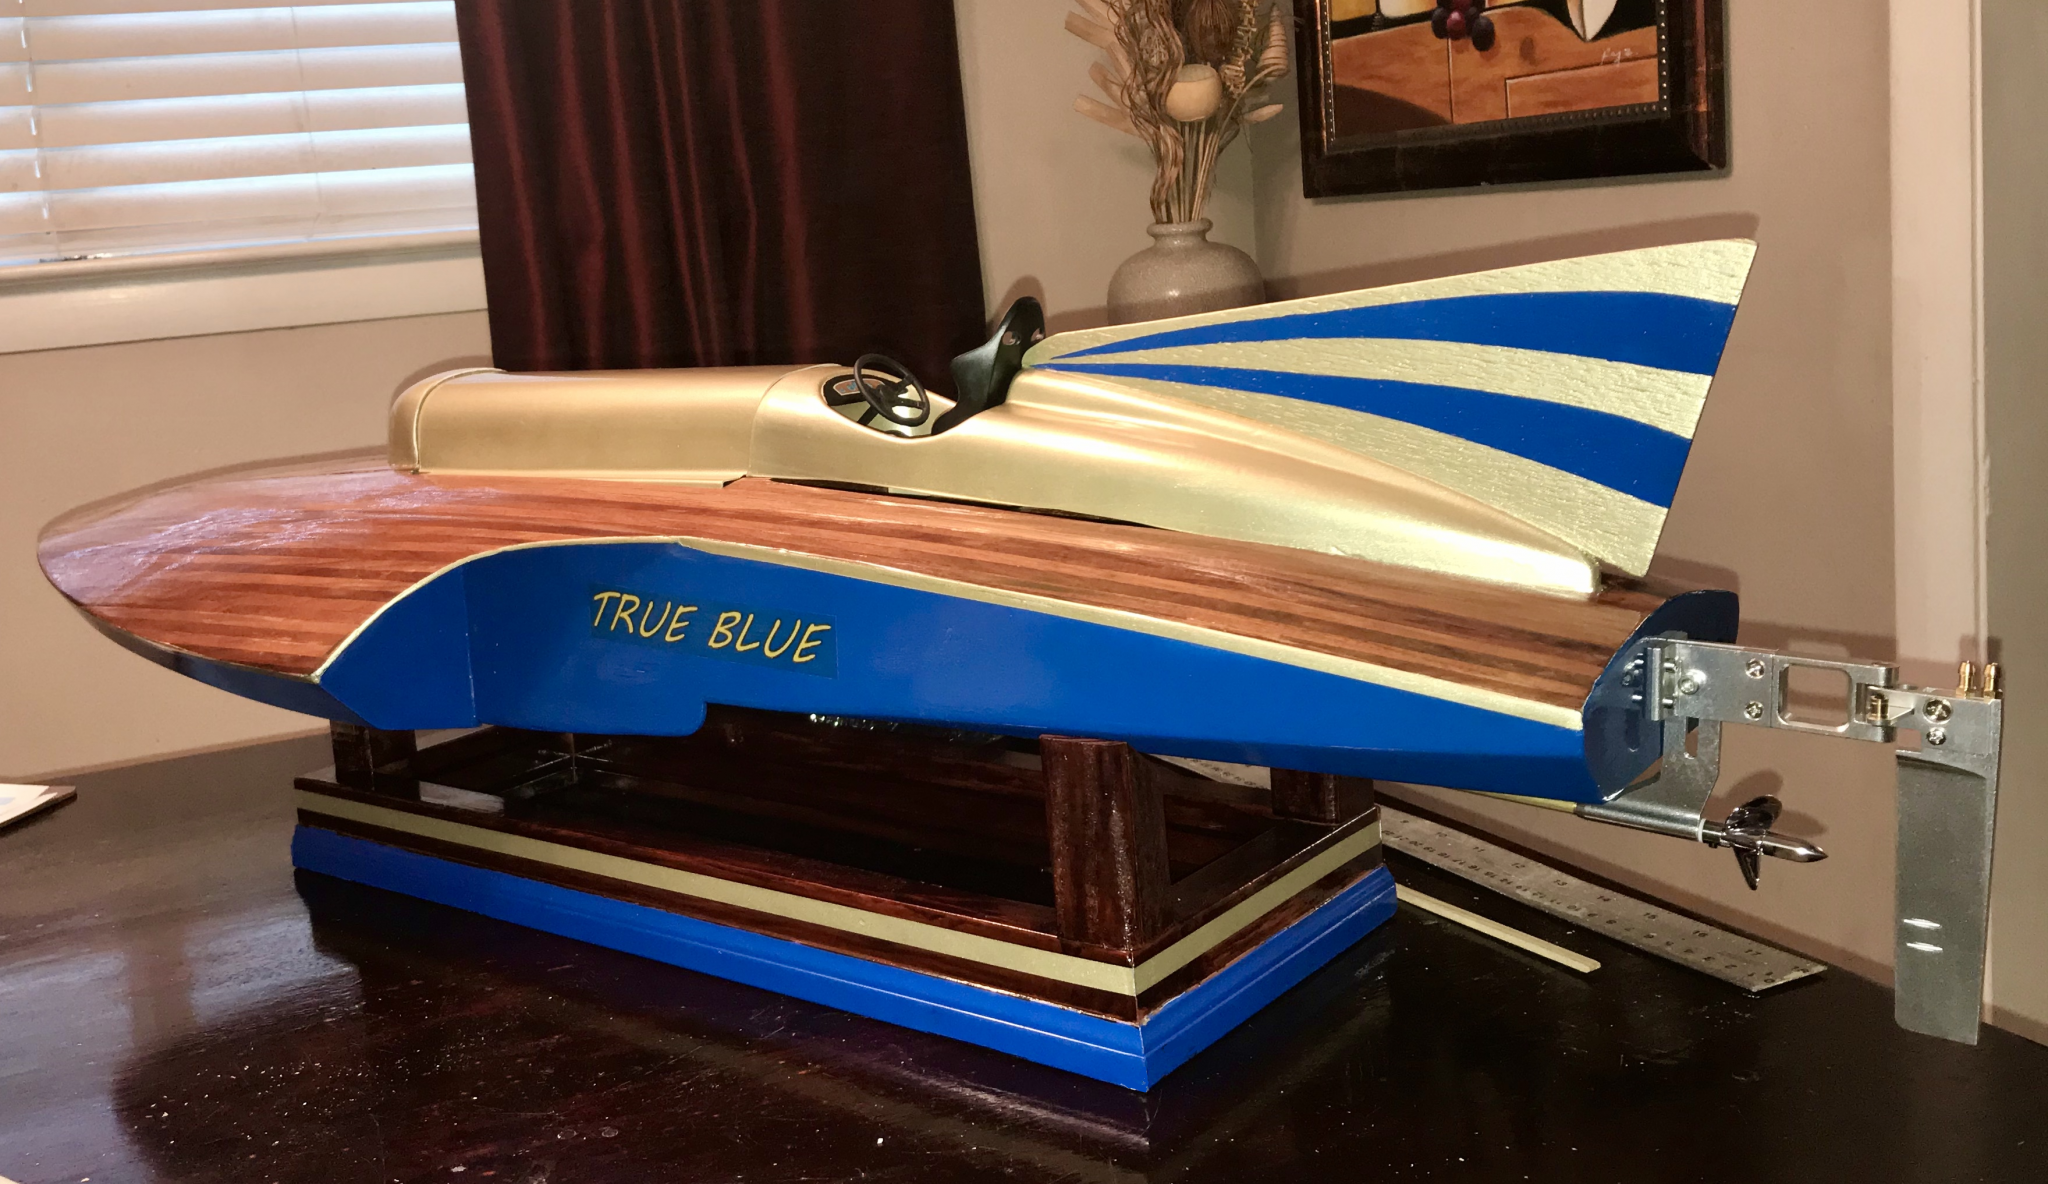
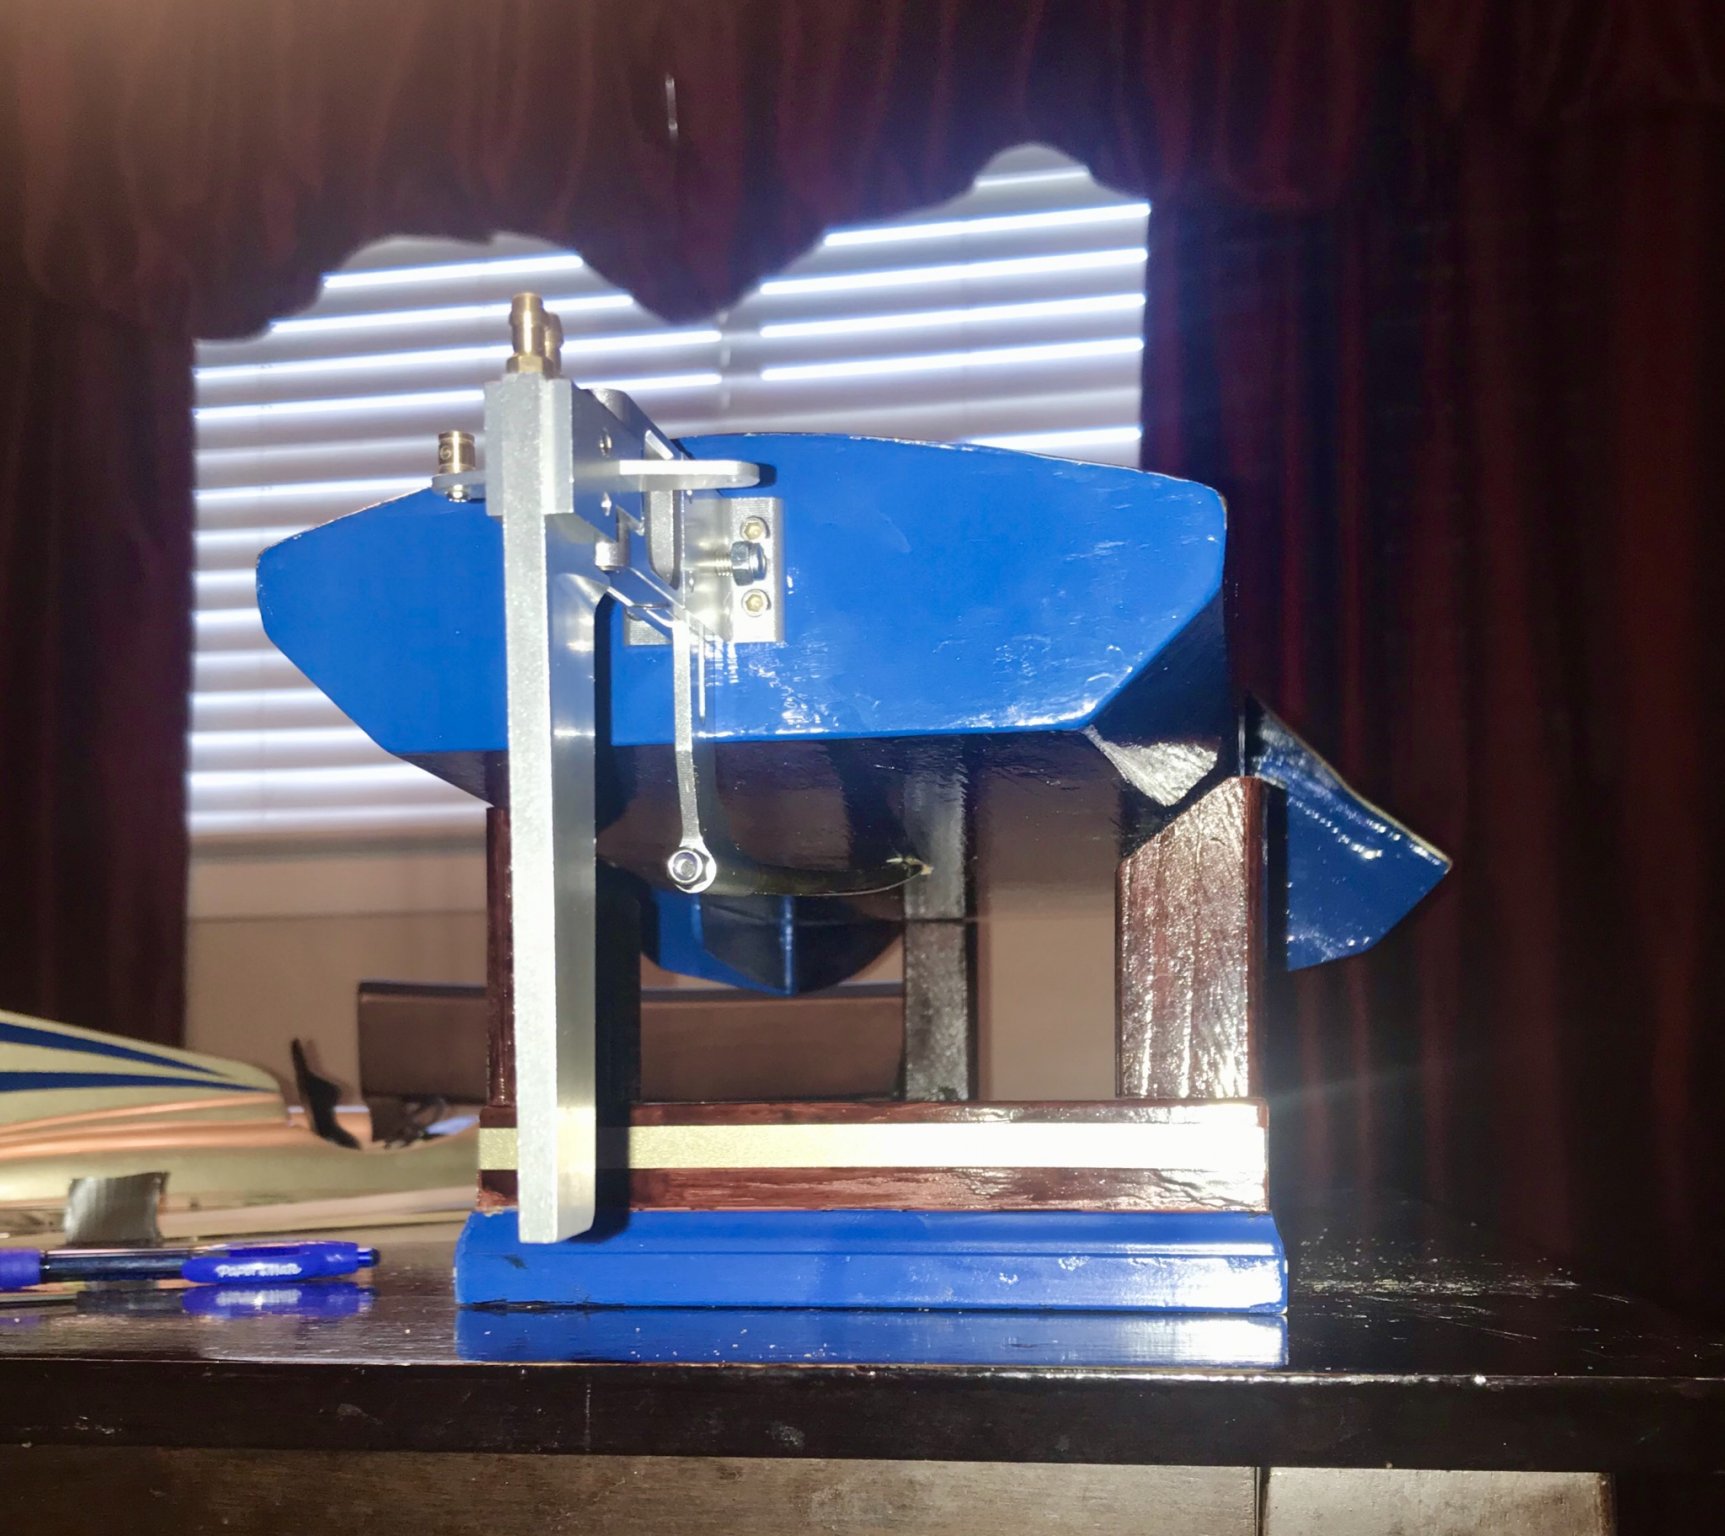
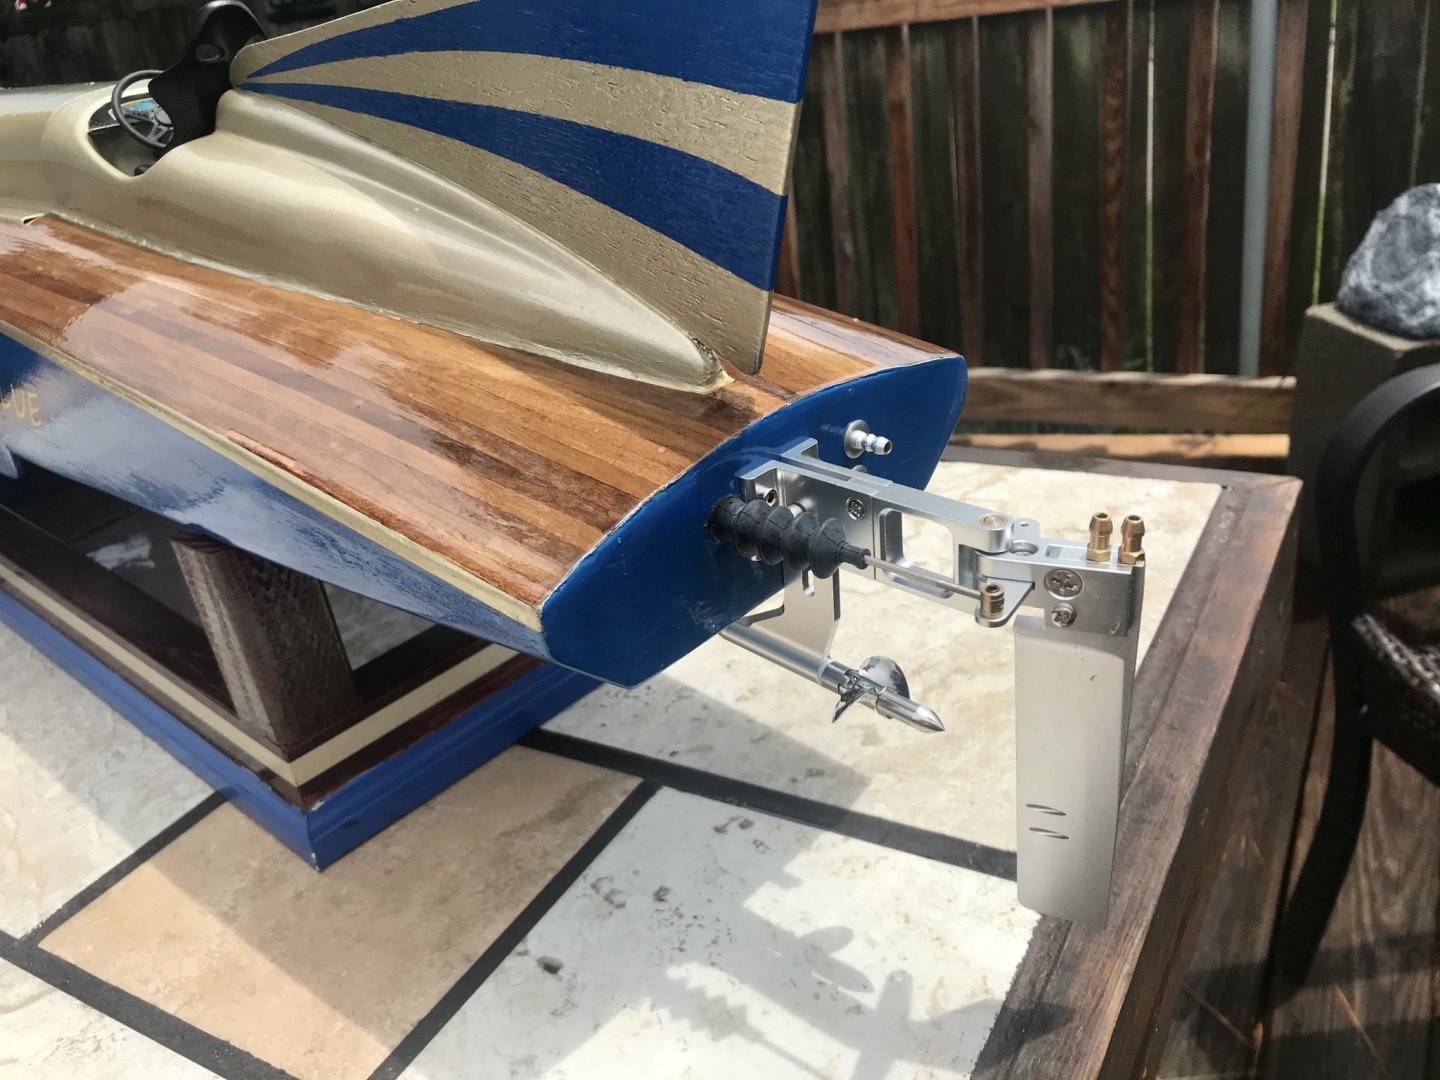
Installed the rudder/propeller bracket on. It was pain holding a socket on those lock nuts from the inside.


- 51 replies
-
- 7
-
-
- miss unlimited
- dumas
- (and 1 more)
-
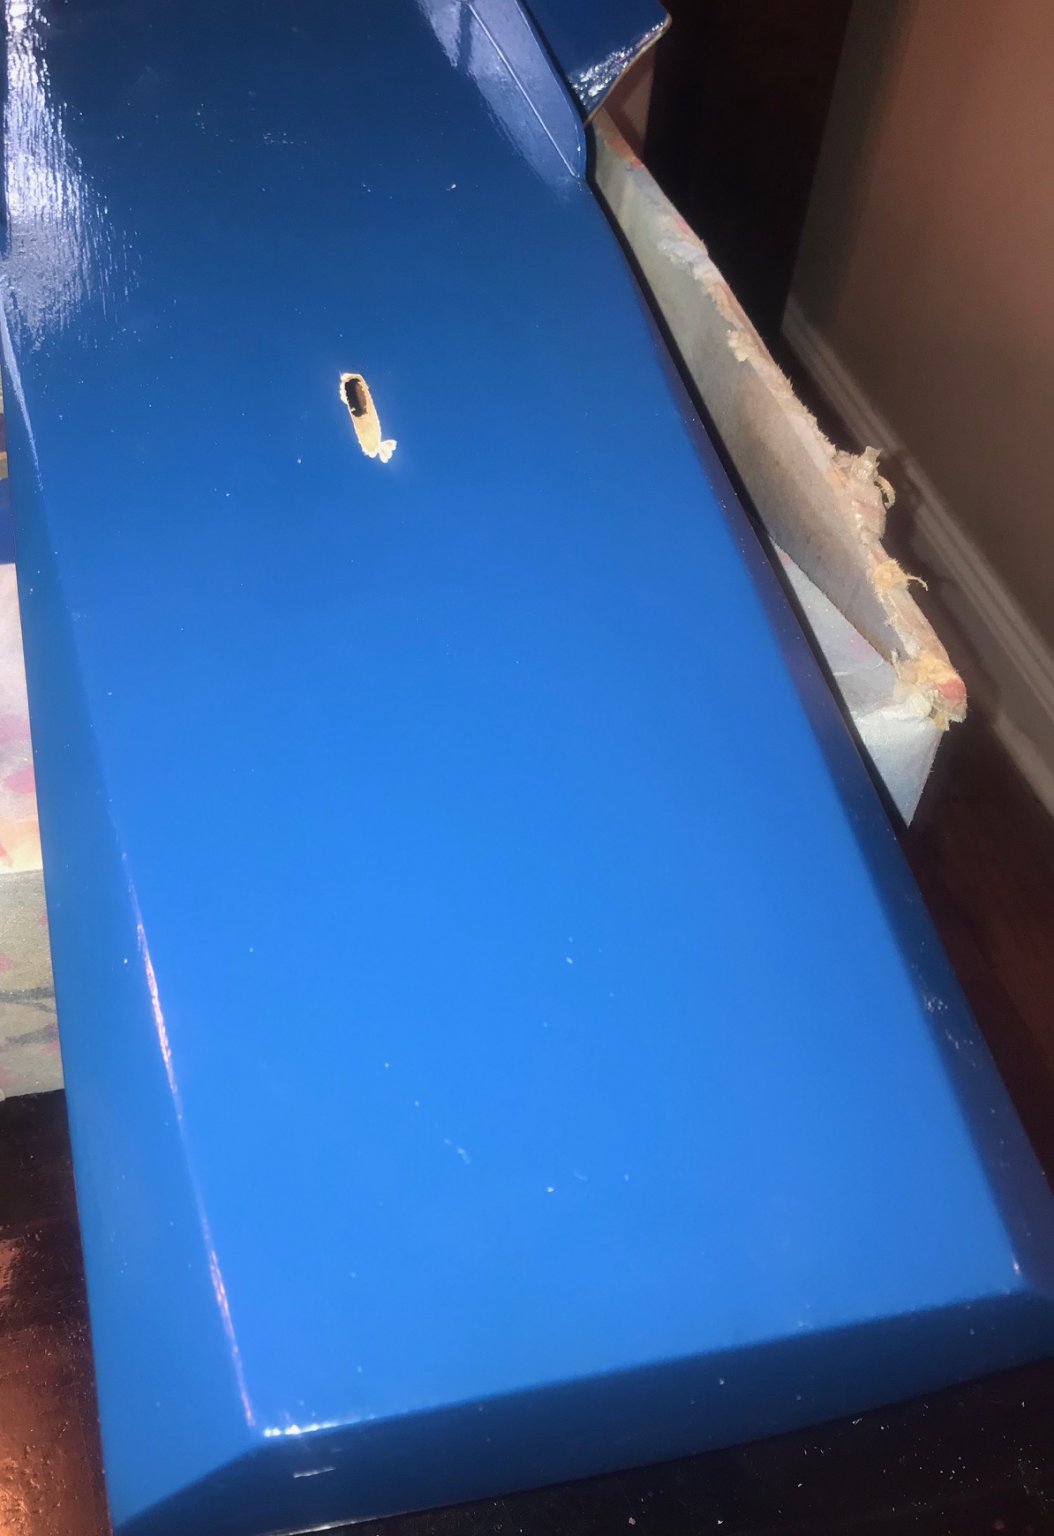
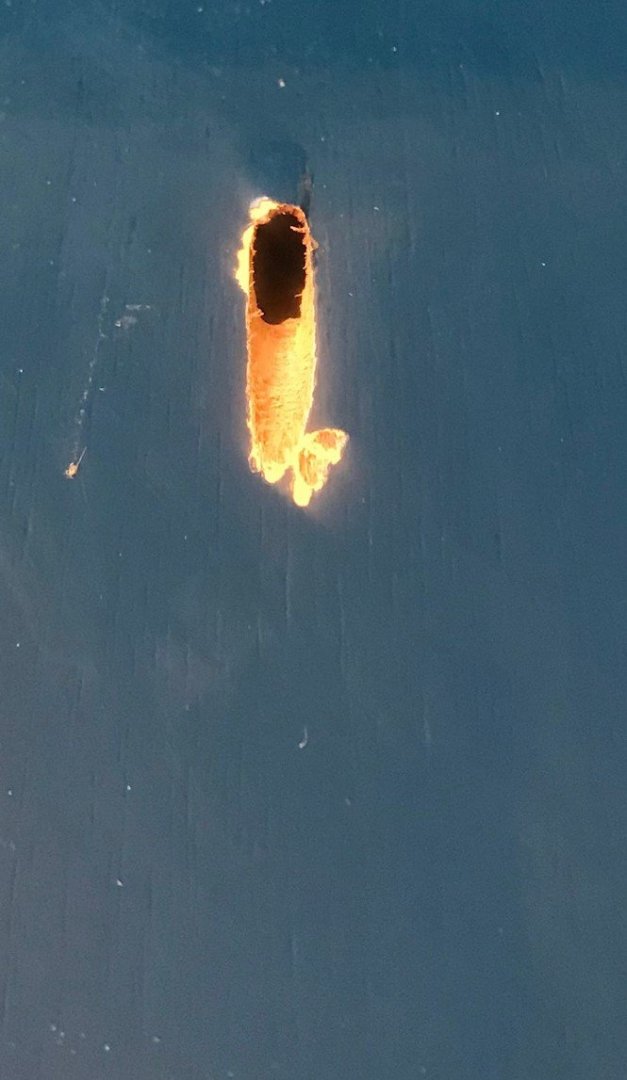
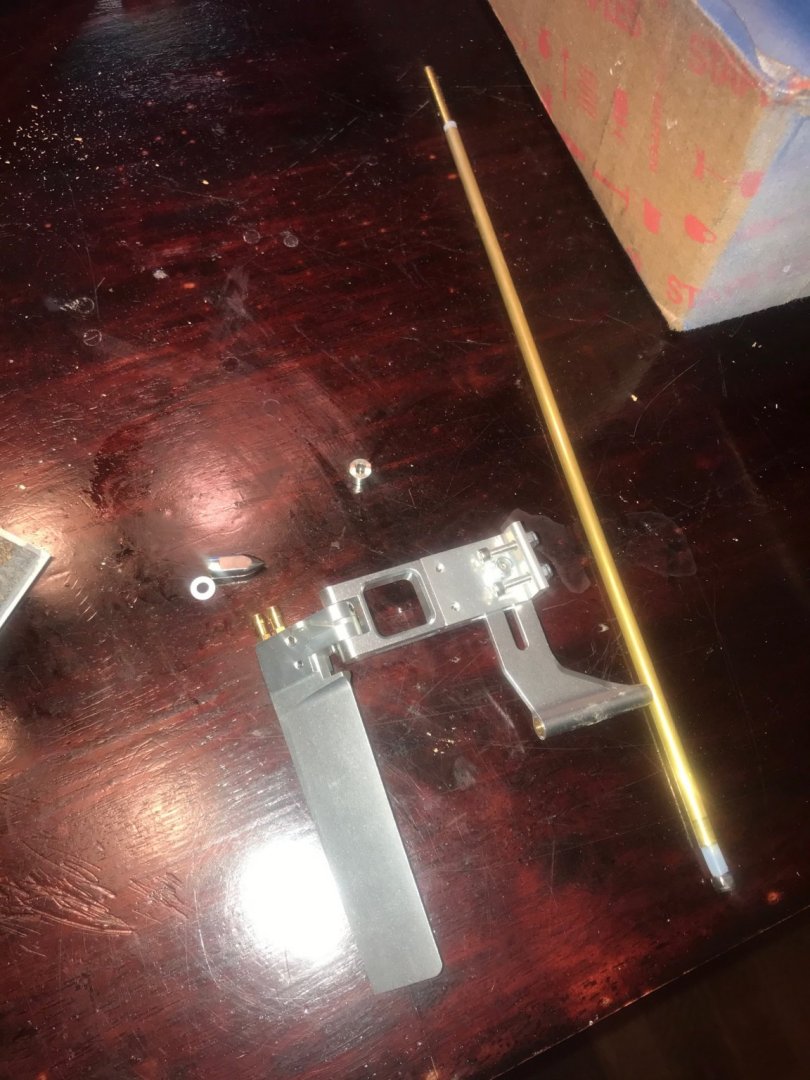
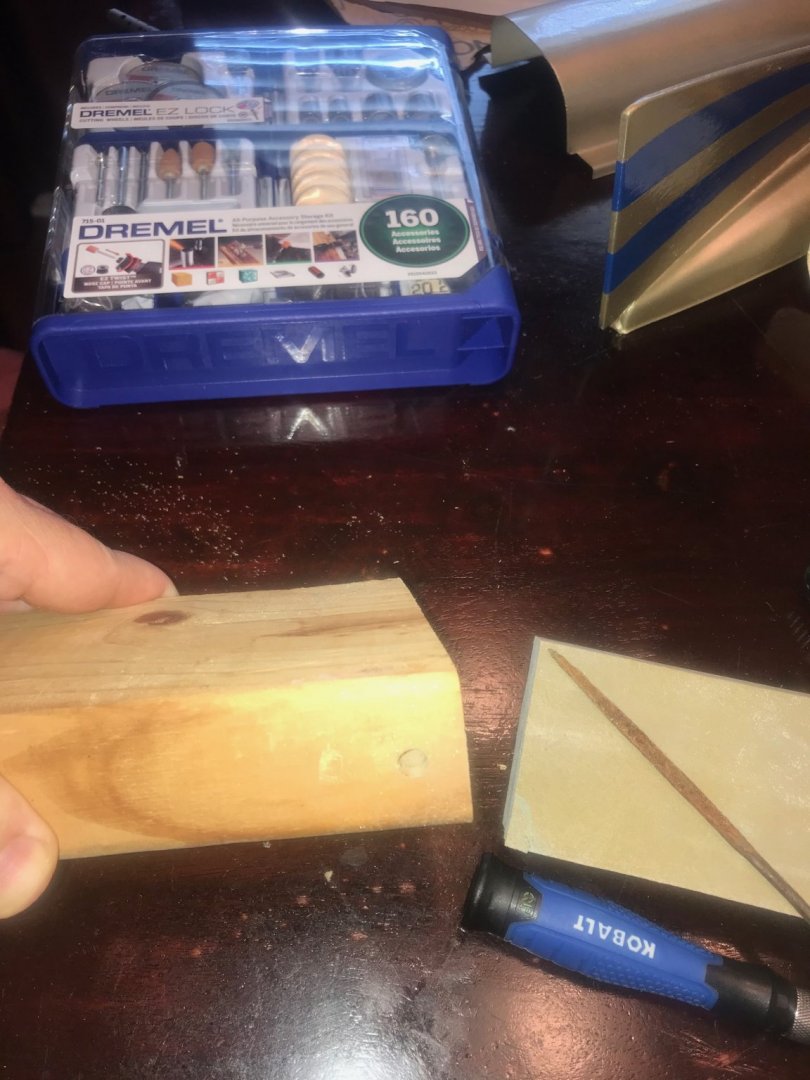
So, I've been waiting on the aluminum rudder and propeller bracket to come in before moving on any further. It finally came in. Even though I'm still up in the air about making this official RC, I will be installing the closest to correct hardware for visual appearance and for any future decision. The "stuffing tube" that came with the propeller bracket I will be installing at the best angle to meet up with a potential future motor. Drilling a hole at the correct angle on this existing boat was kind of a challenge. I already had this 12" 1/4" drill bit. Once I determine my angle needed to be about 8-9 degrees. I drill a hole in a 2 x 4, then cut the 2x4 on my miter saw set to 8.5 degrees, and this made a "jig" for me to use. It work out pretty well. Yes, I know a scarred up some of the blue bottom , but touching this up after sealing the stuffing tube should be an easy touch up.


- 51 replies
-
- 5
-
-
- miss unlimited
- dumas
- (and 1 more)
-
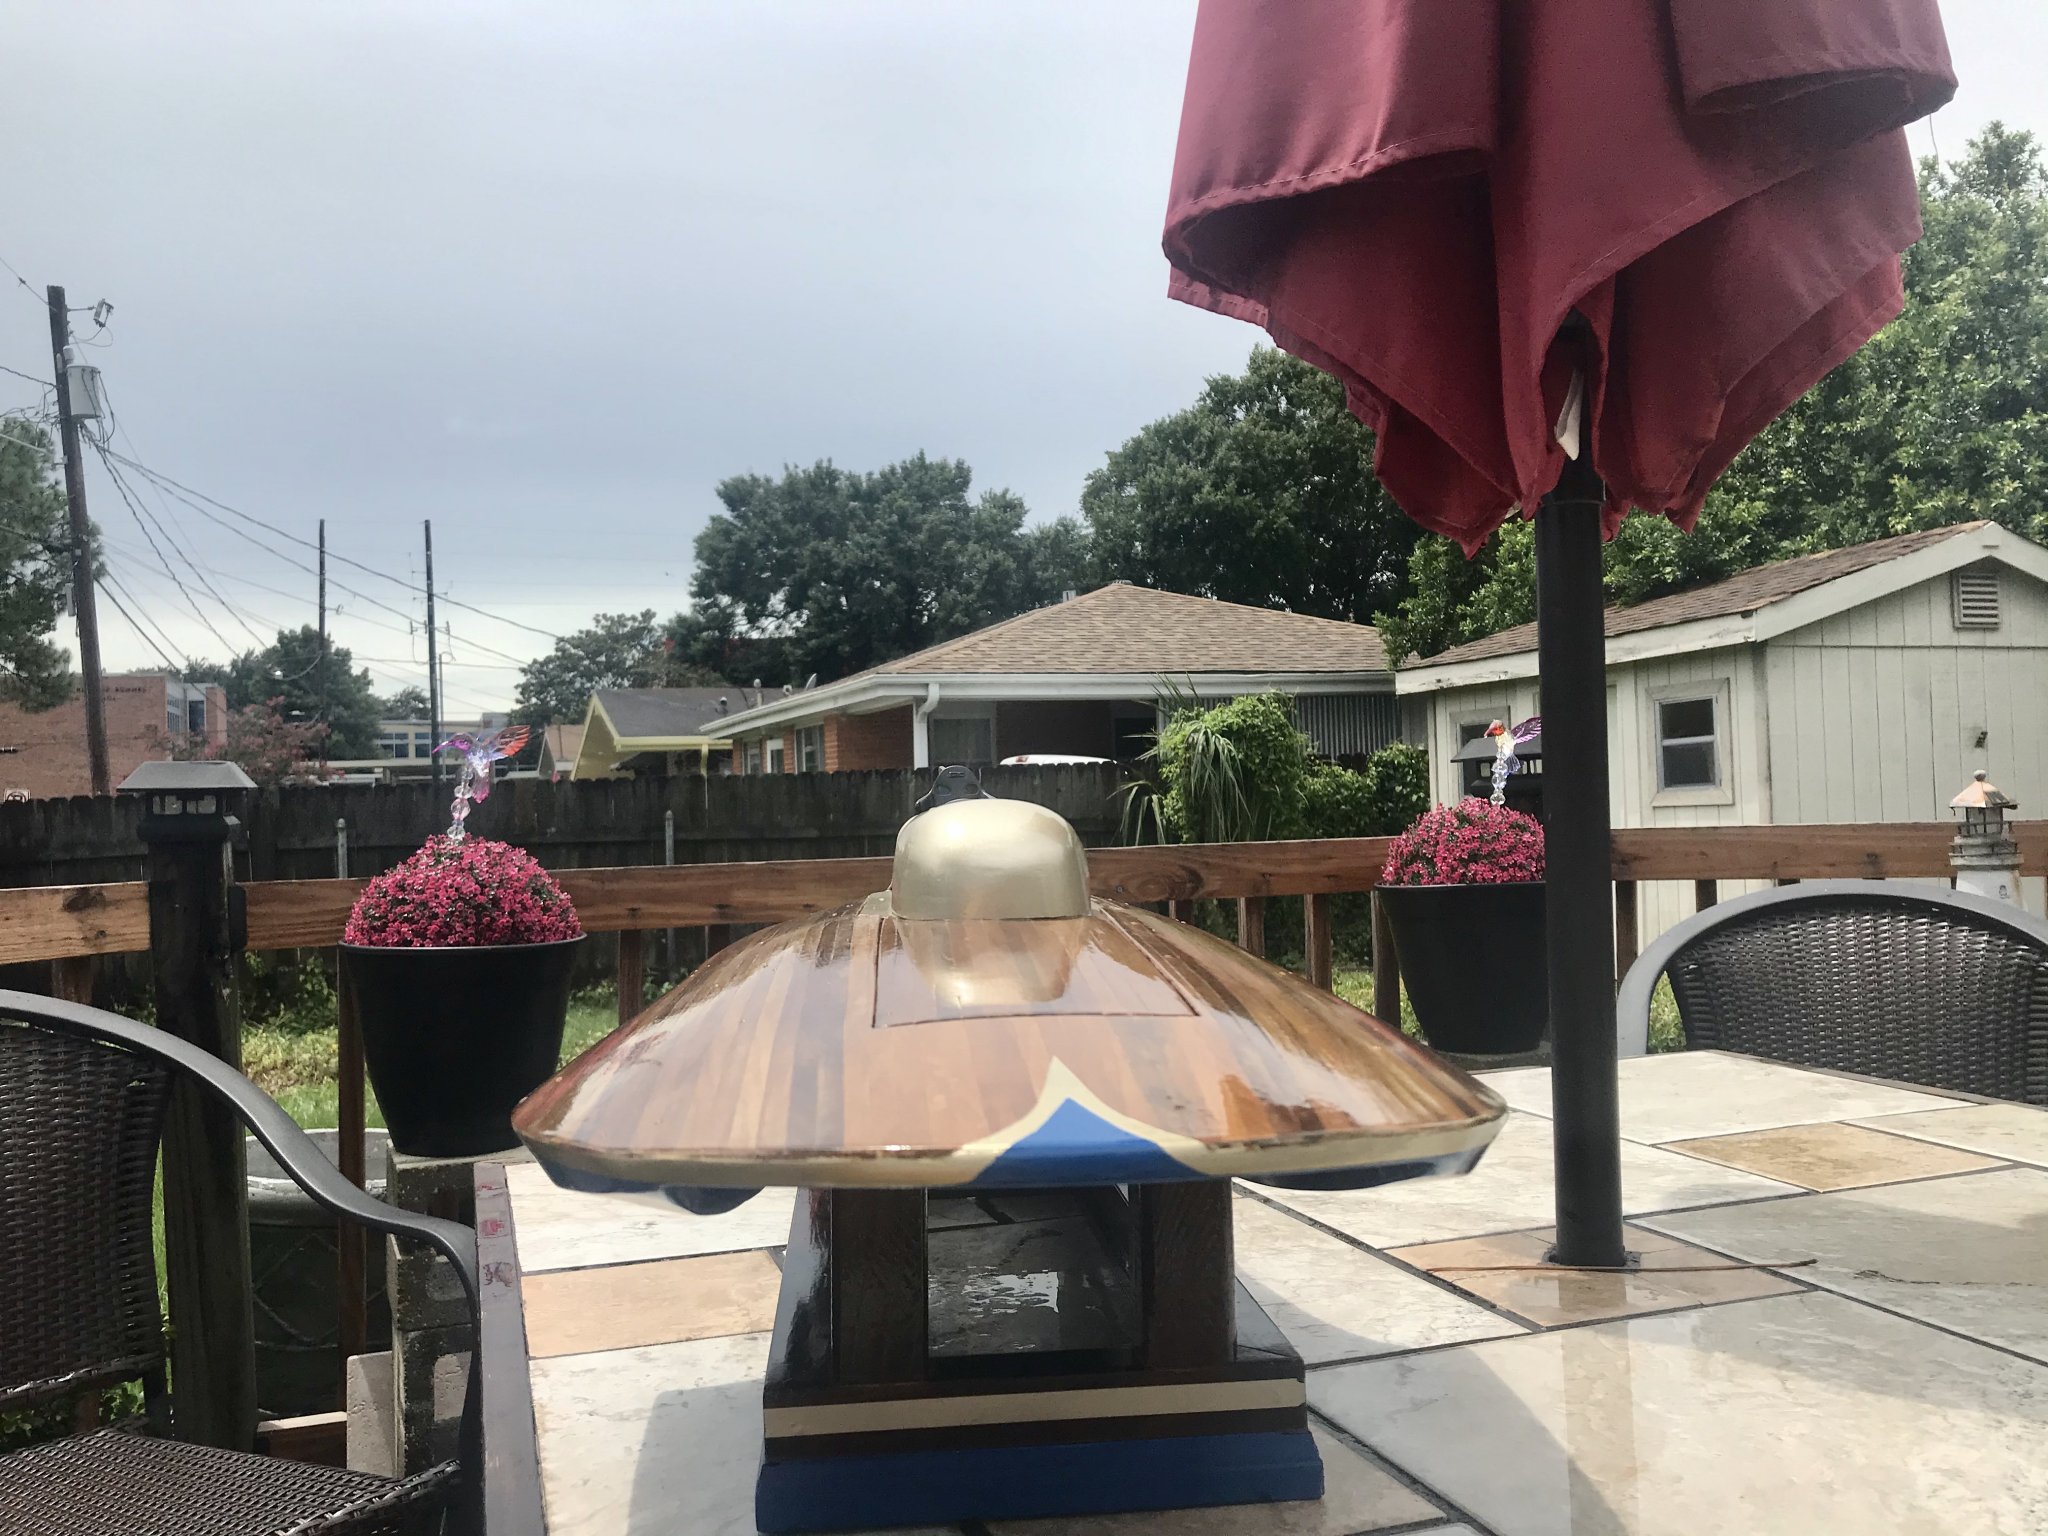
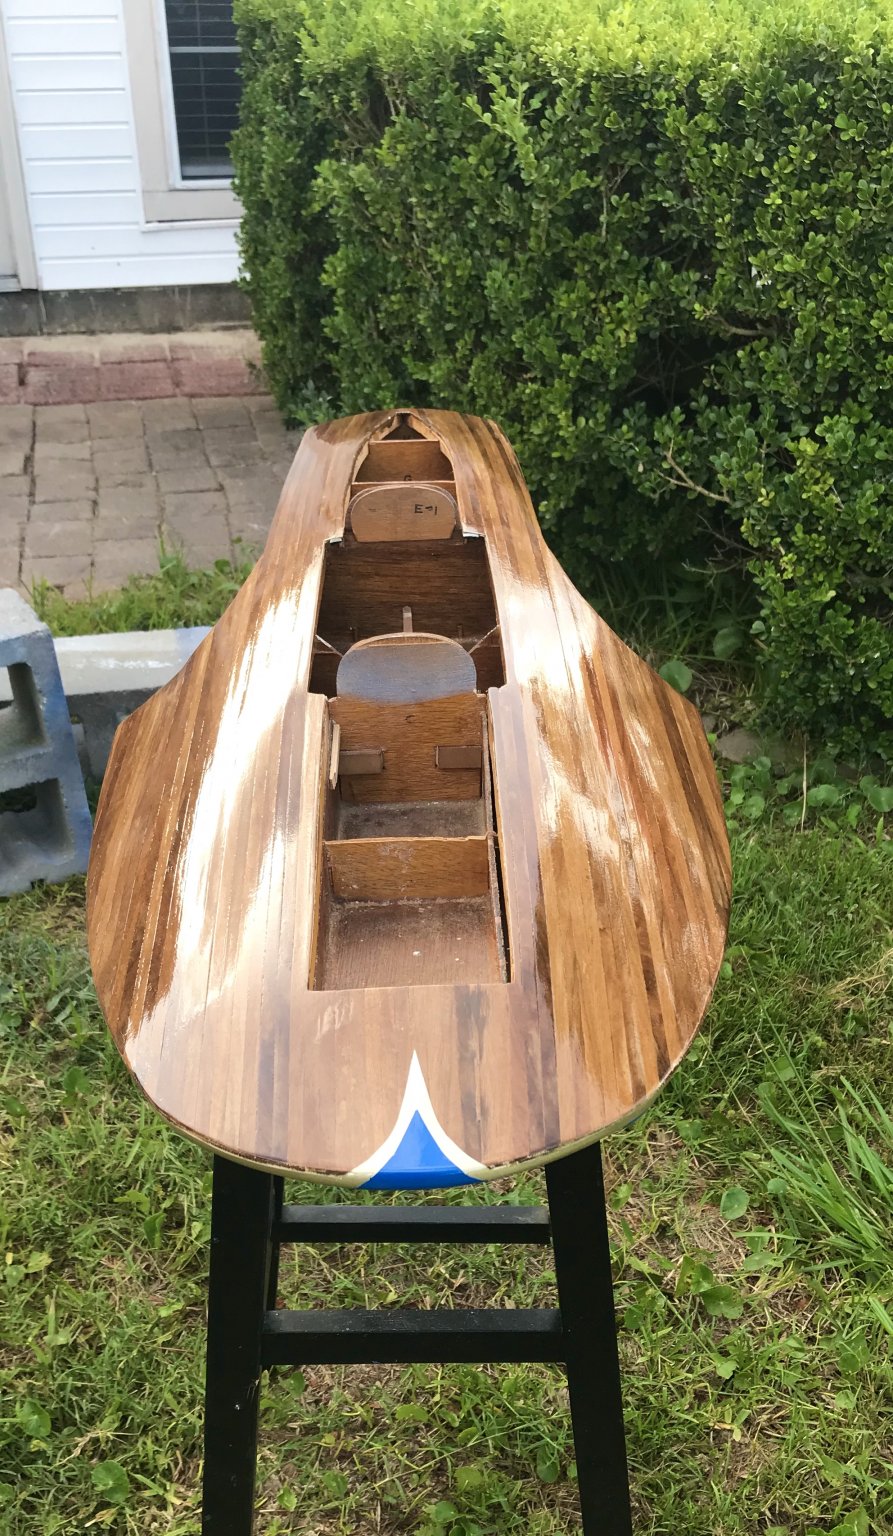
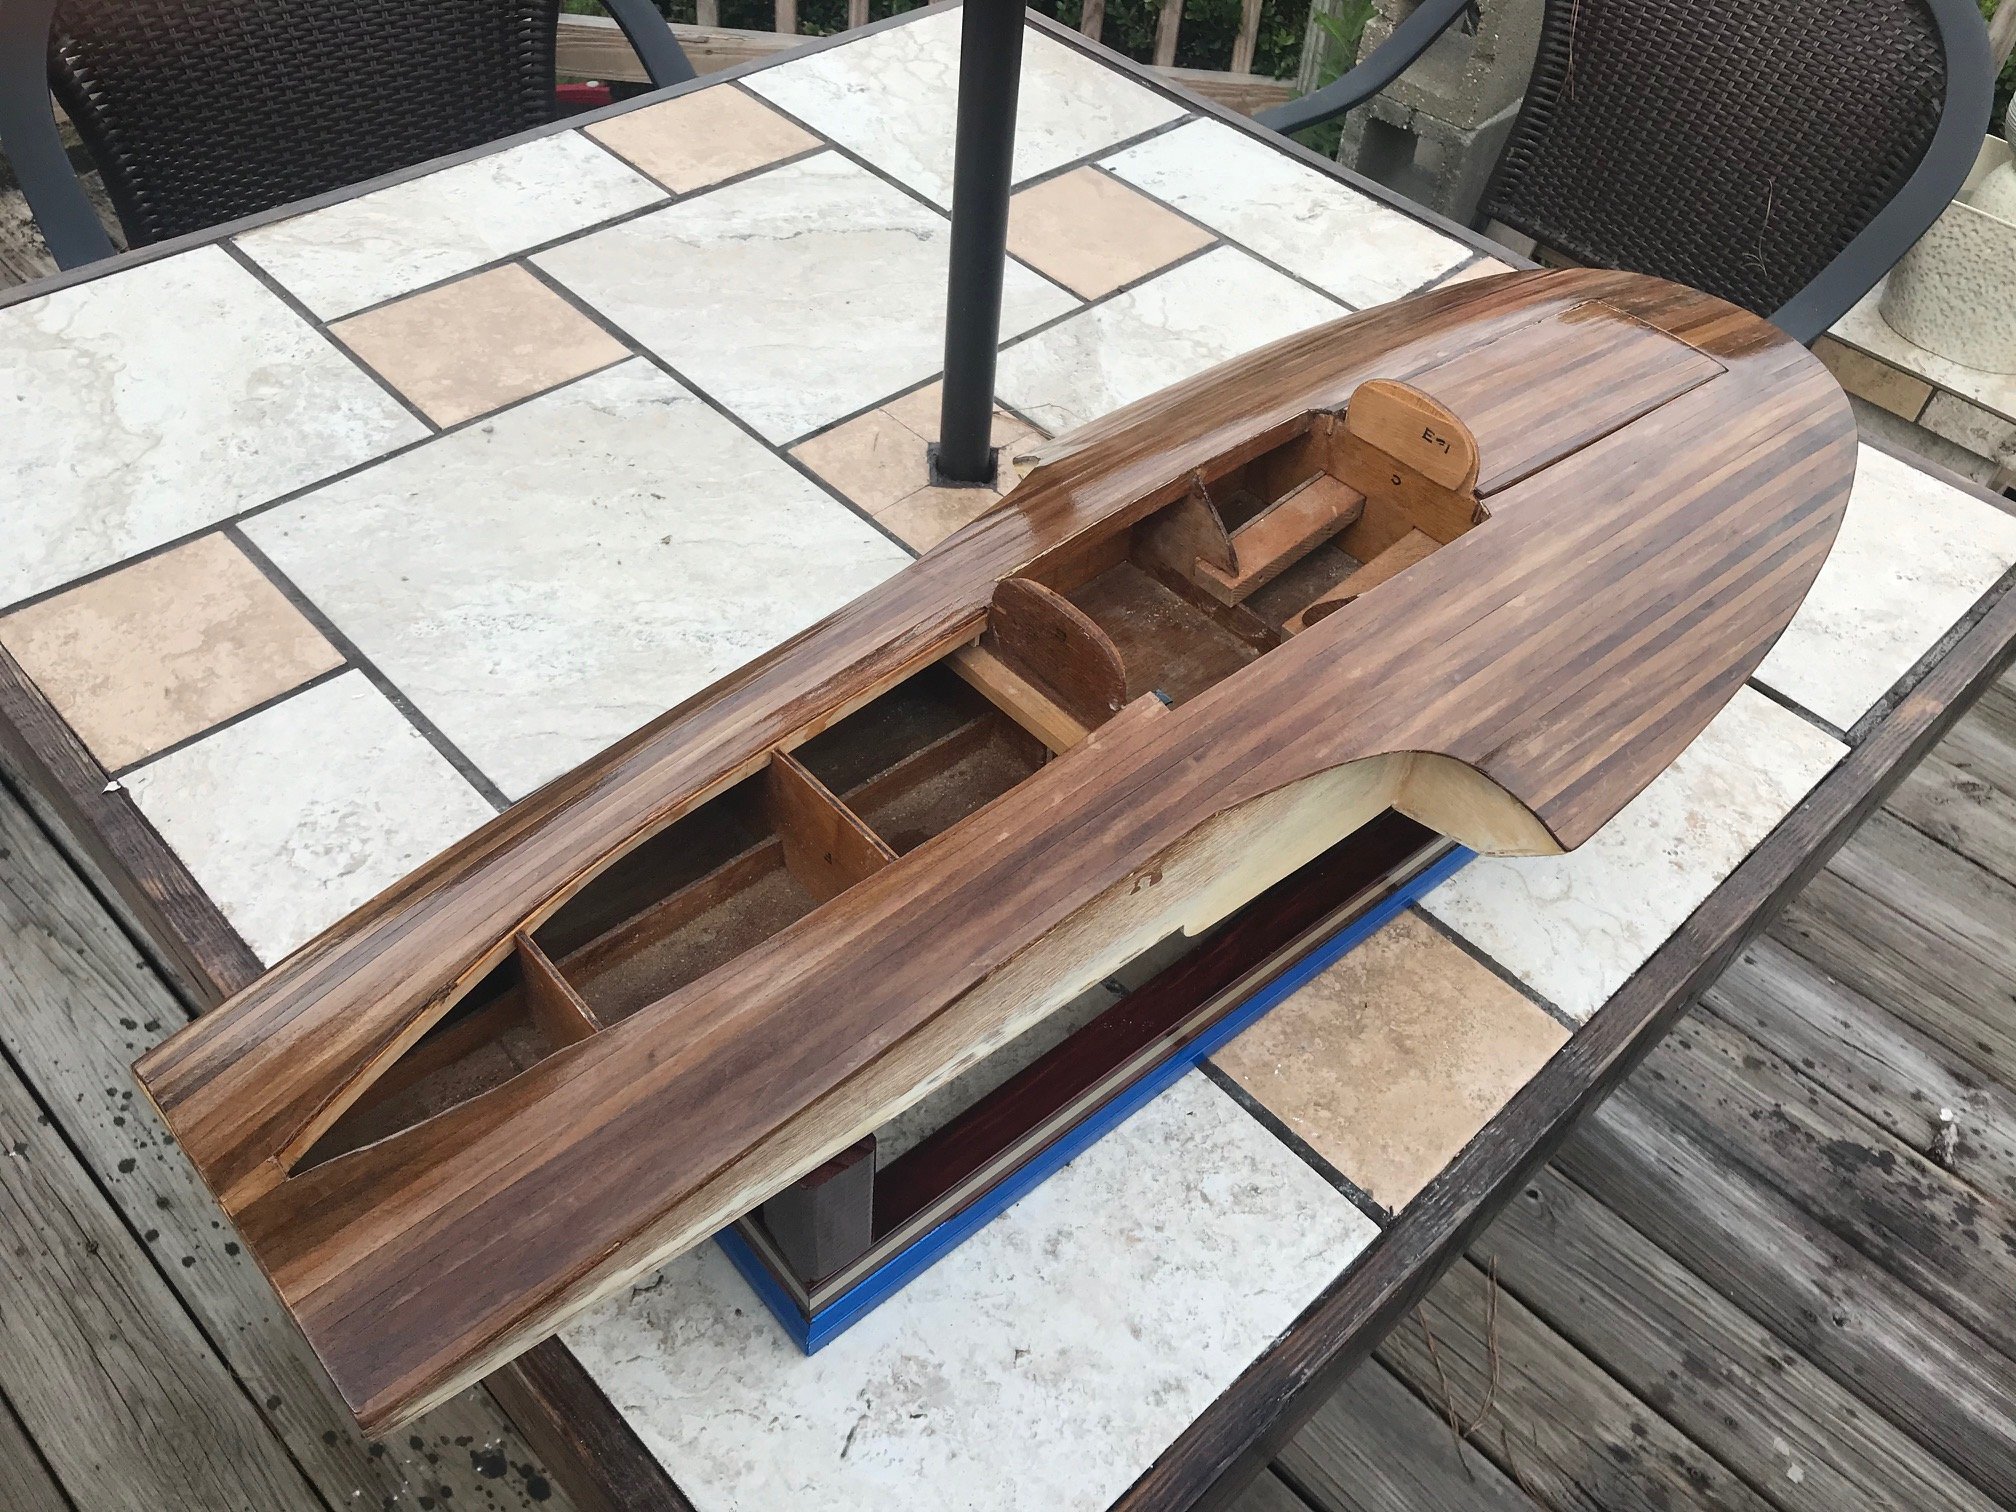
OK, may need a little advice here. Working on the cockpit of the hydroplane. I made a dashboard, and ordered a scale steering wheel, also got the only scale racing seat I could find, but does the high back look off on this? If anyone can find a low profile seat for a 1:8 scale that may look better, I may go that way

- 51 replies
-
- 5
-
-
- miss unlimited
- dumas
- (and 1 more)
-
I saw a few models displayed like that, but I also like the way it sits on my stand. Both are cool.
- 51 replies
-
- 2
-
-
- miss unlimited
- dumas
- (and 1 more)
-
LMDAVE reacted to a post in a topic:
Miss Unlimited by LMDAVE - FINISHED - Dumas
-
LMDAVE reacted to a post in a topic:
Miss Unlimited by LMDAVE - FINISHED - Dumas
-
LMDAVE reacted to a post in a topic:
Miss Unlimited by LMDAVE - FINISHED - Dumas
-
LMDAVE reacted to a post in a topic:
Miss Unlimited by LMDAVE - FINISHED - Dumas
-
Thanks, yeah I have these polishing pads, 10 pads that go in series from 1500 to 12000 grit.
- 51 replies
-
- 2
-
-
- miss unlimited
- dumas
- (and 1 more)
-
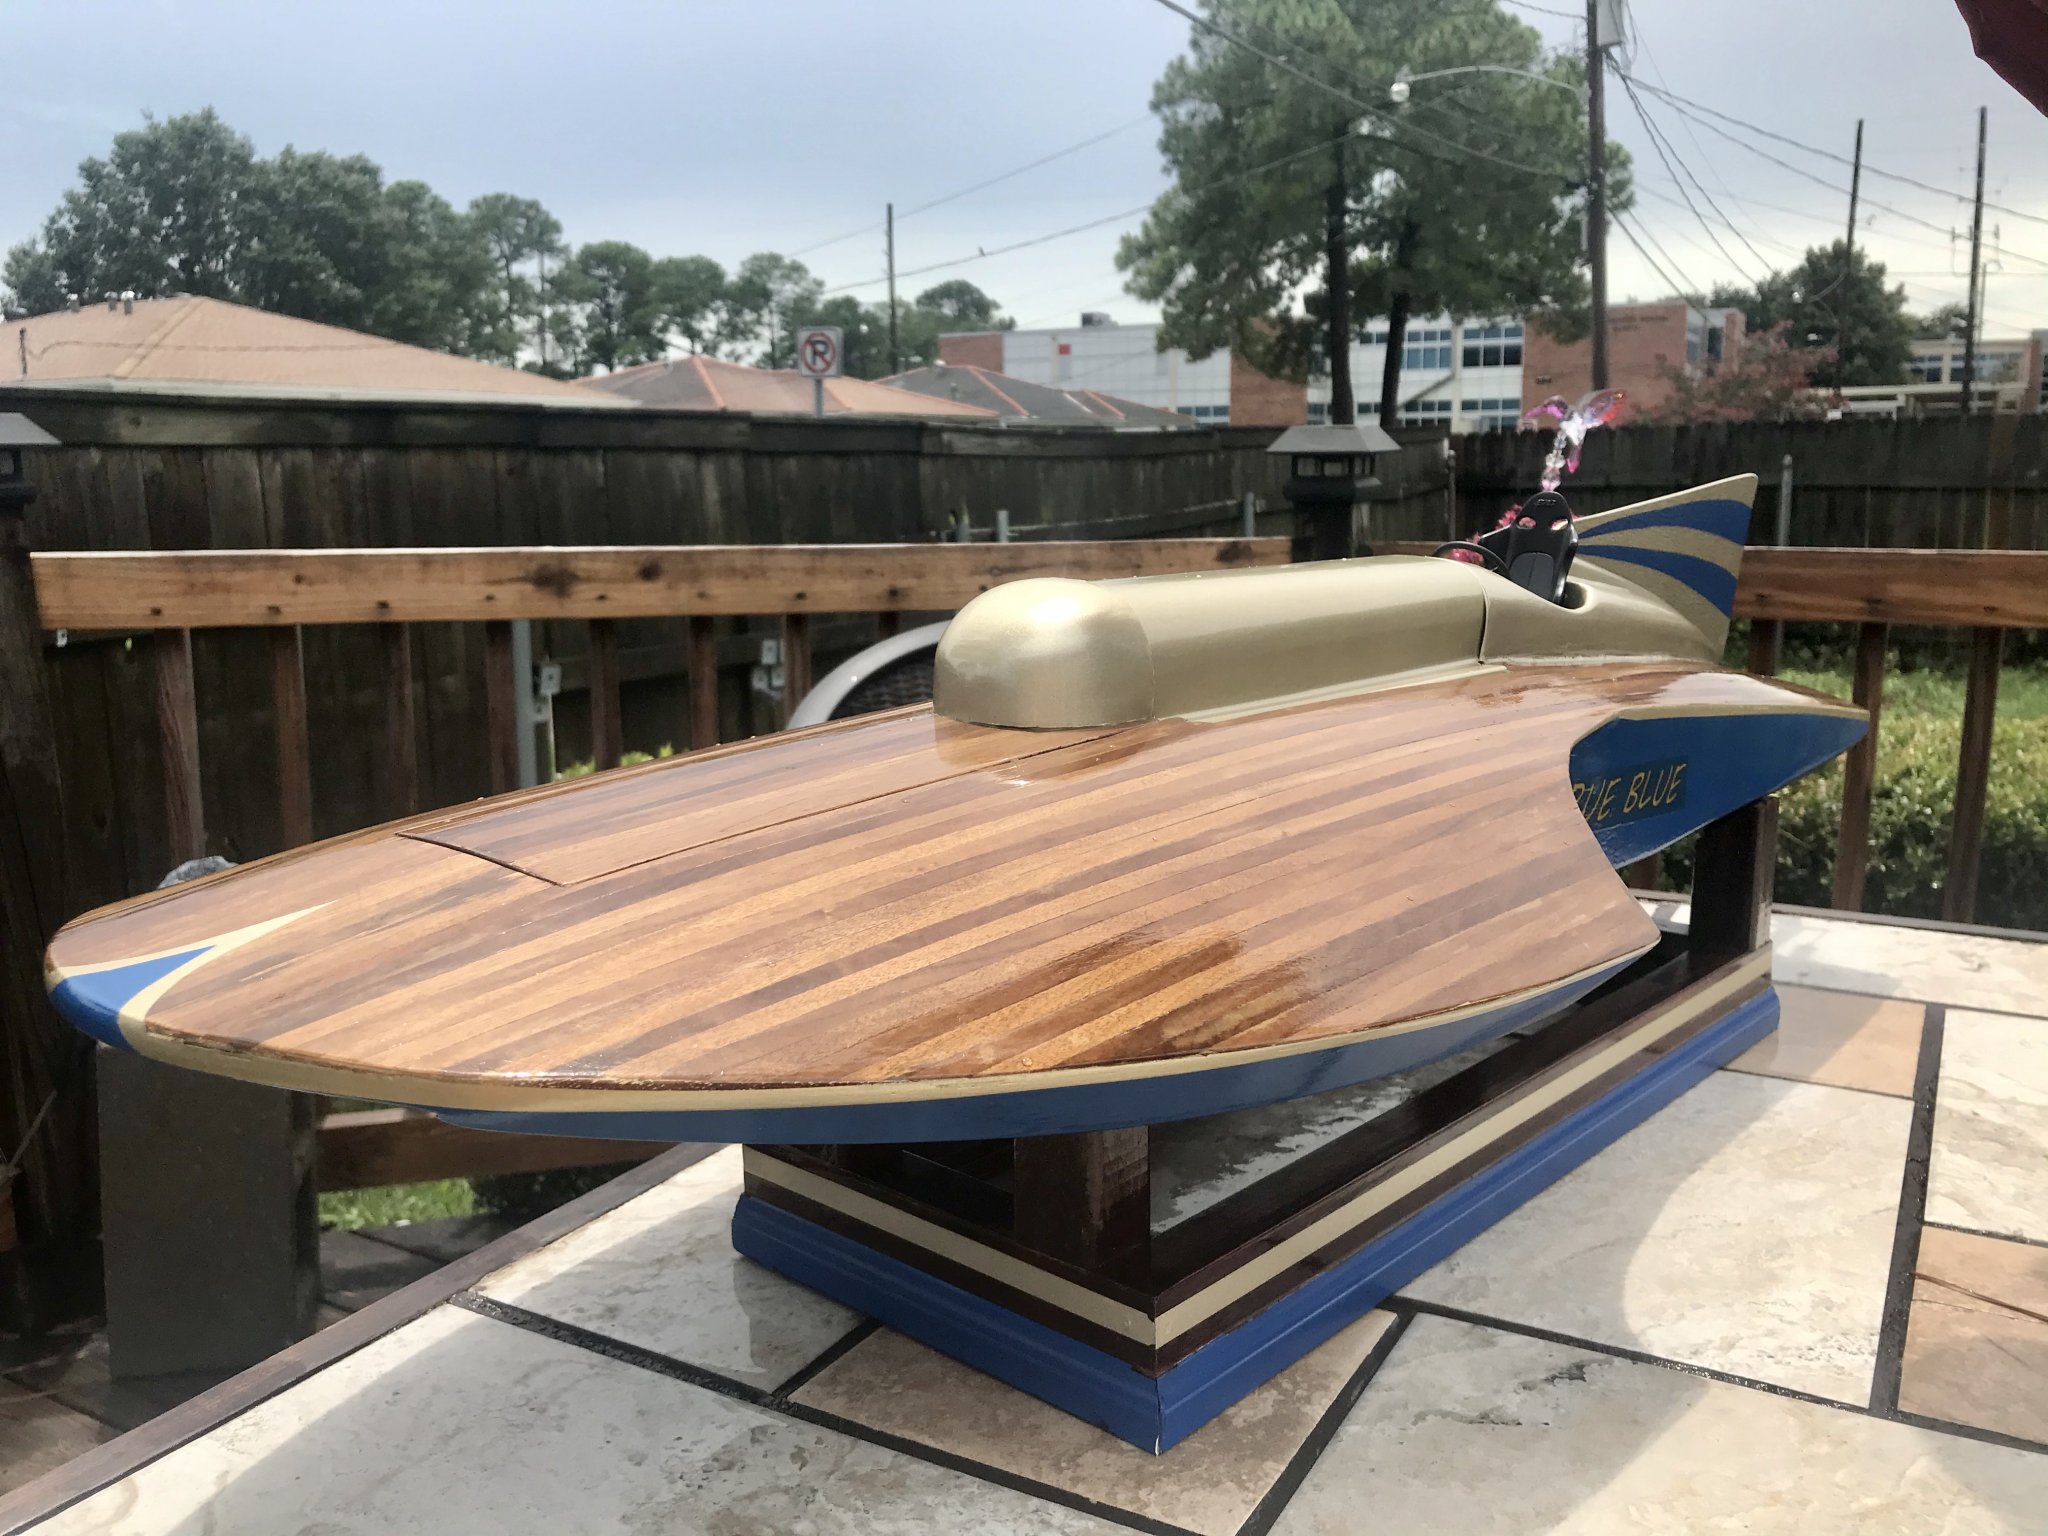
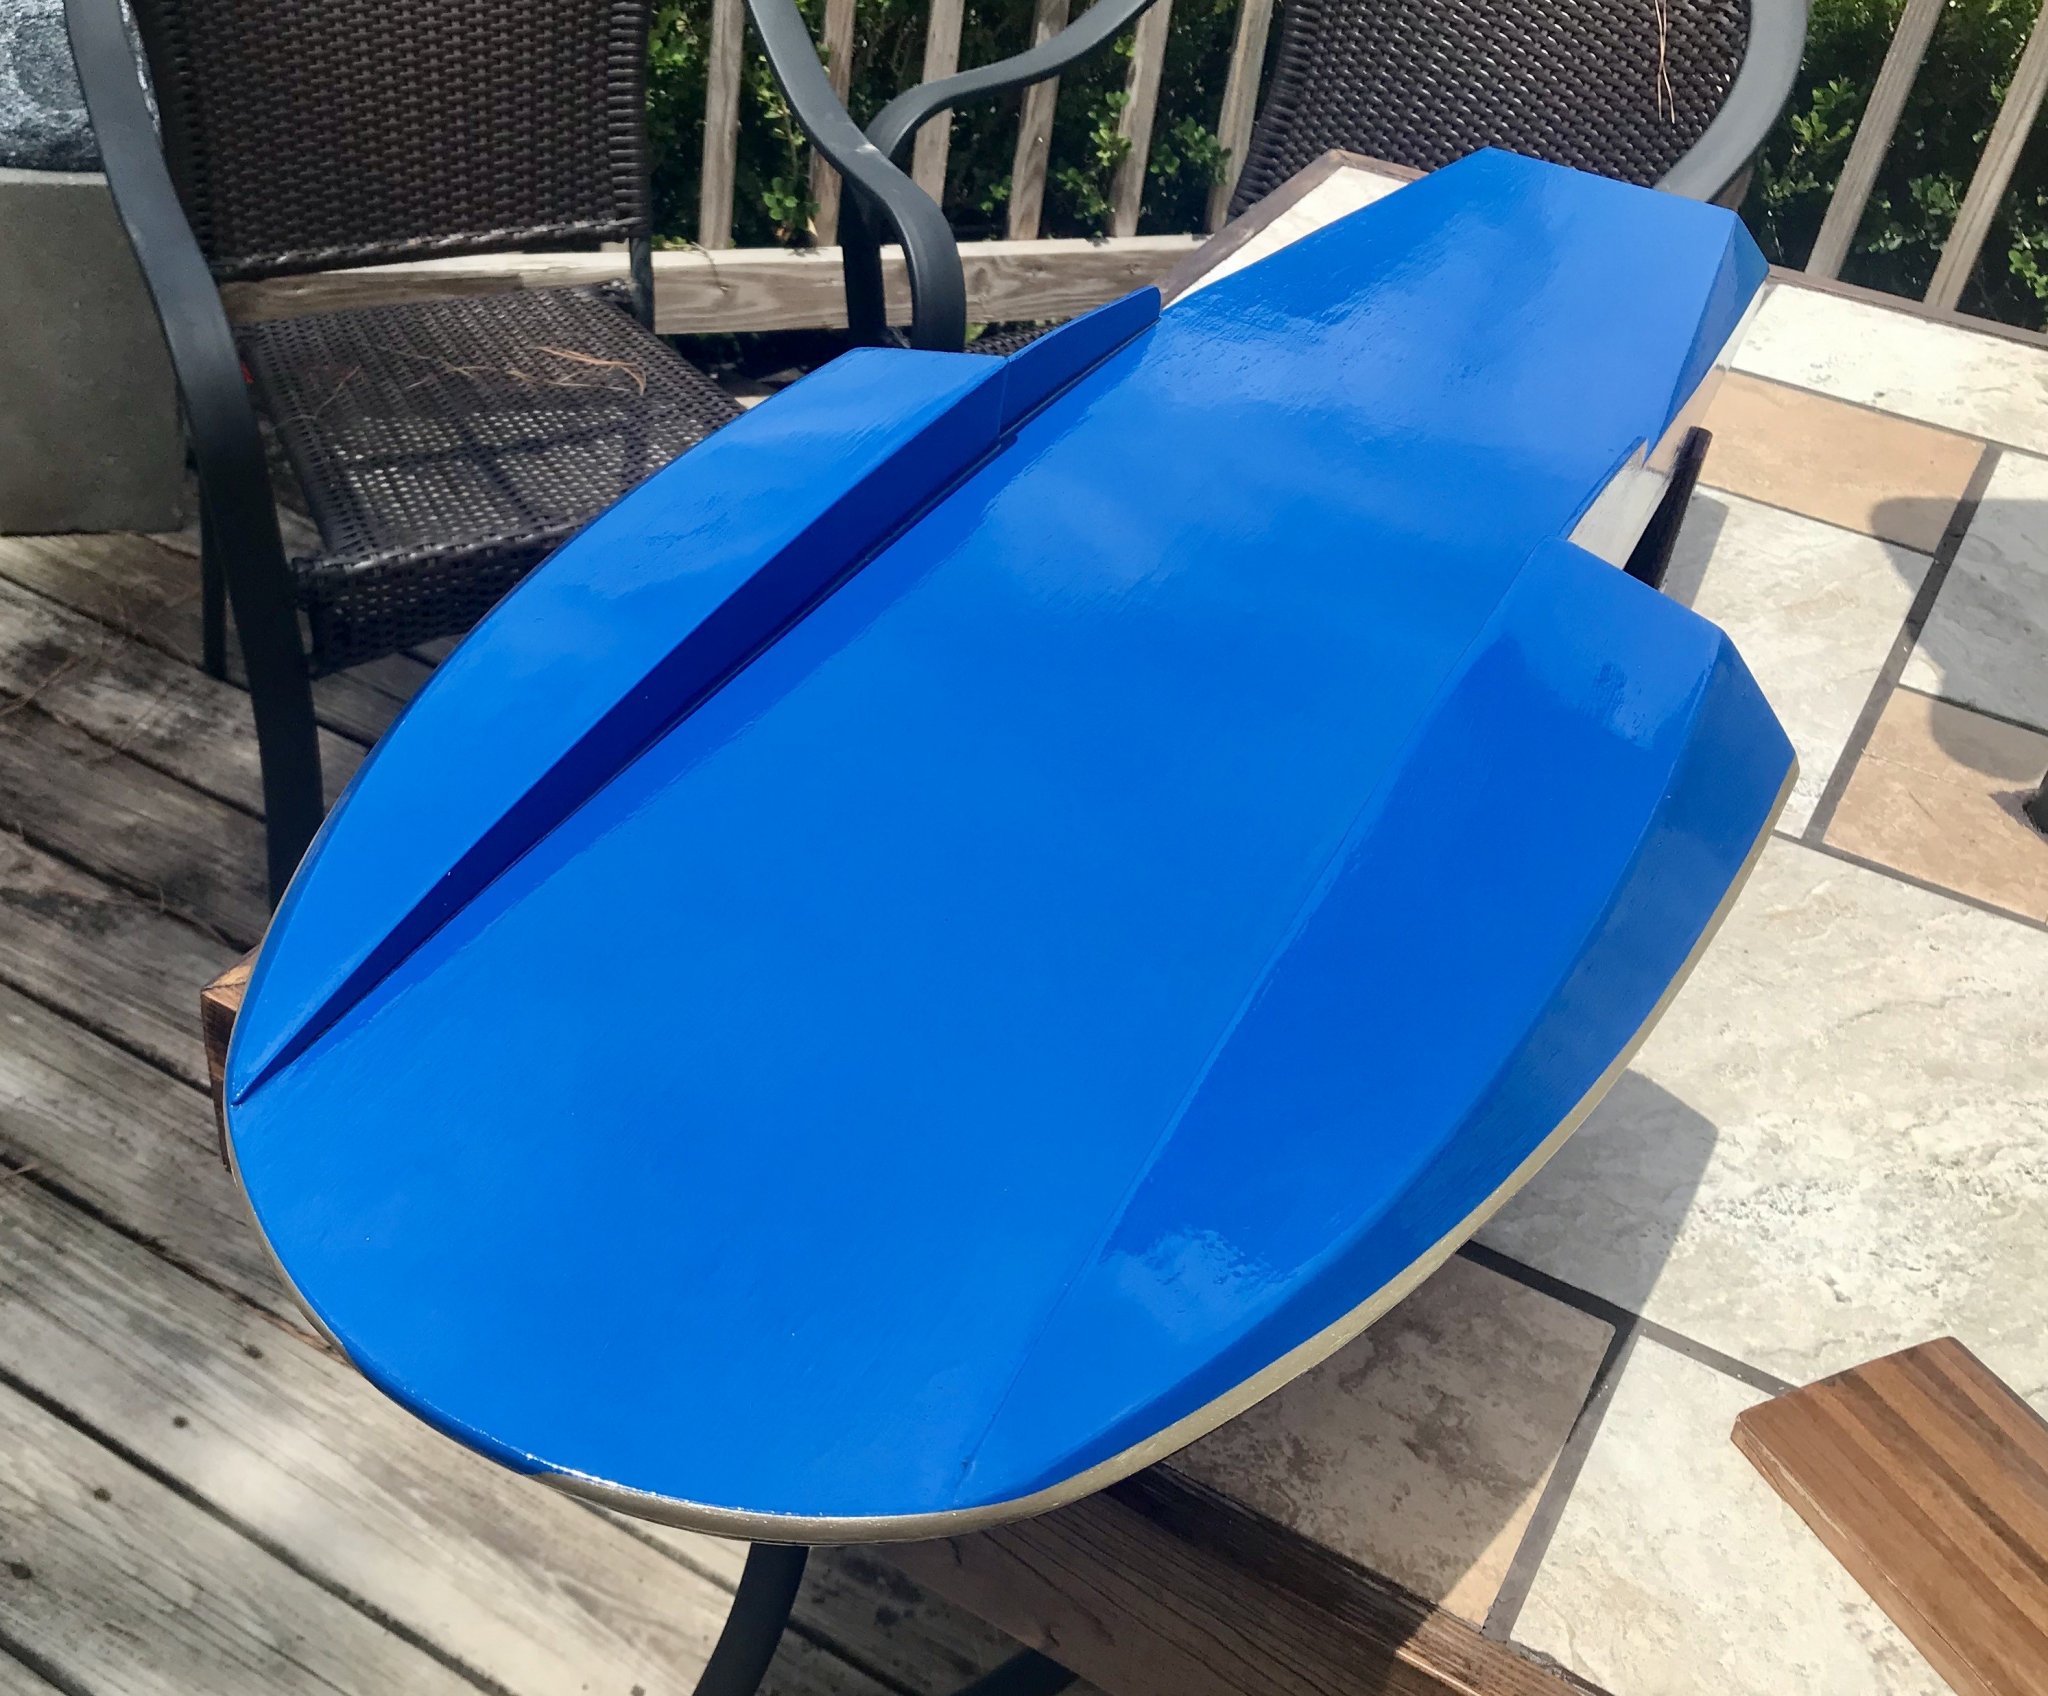
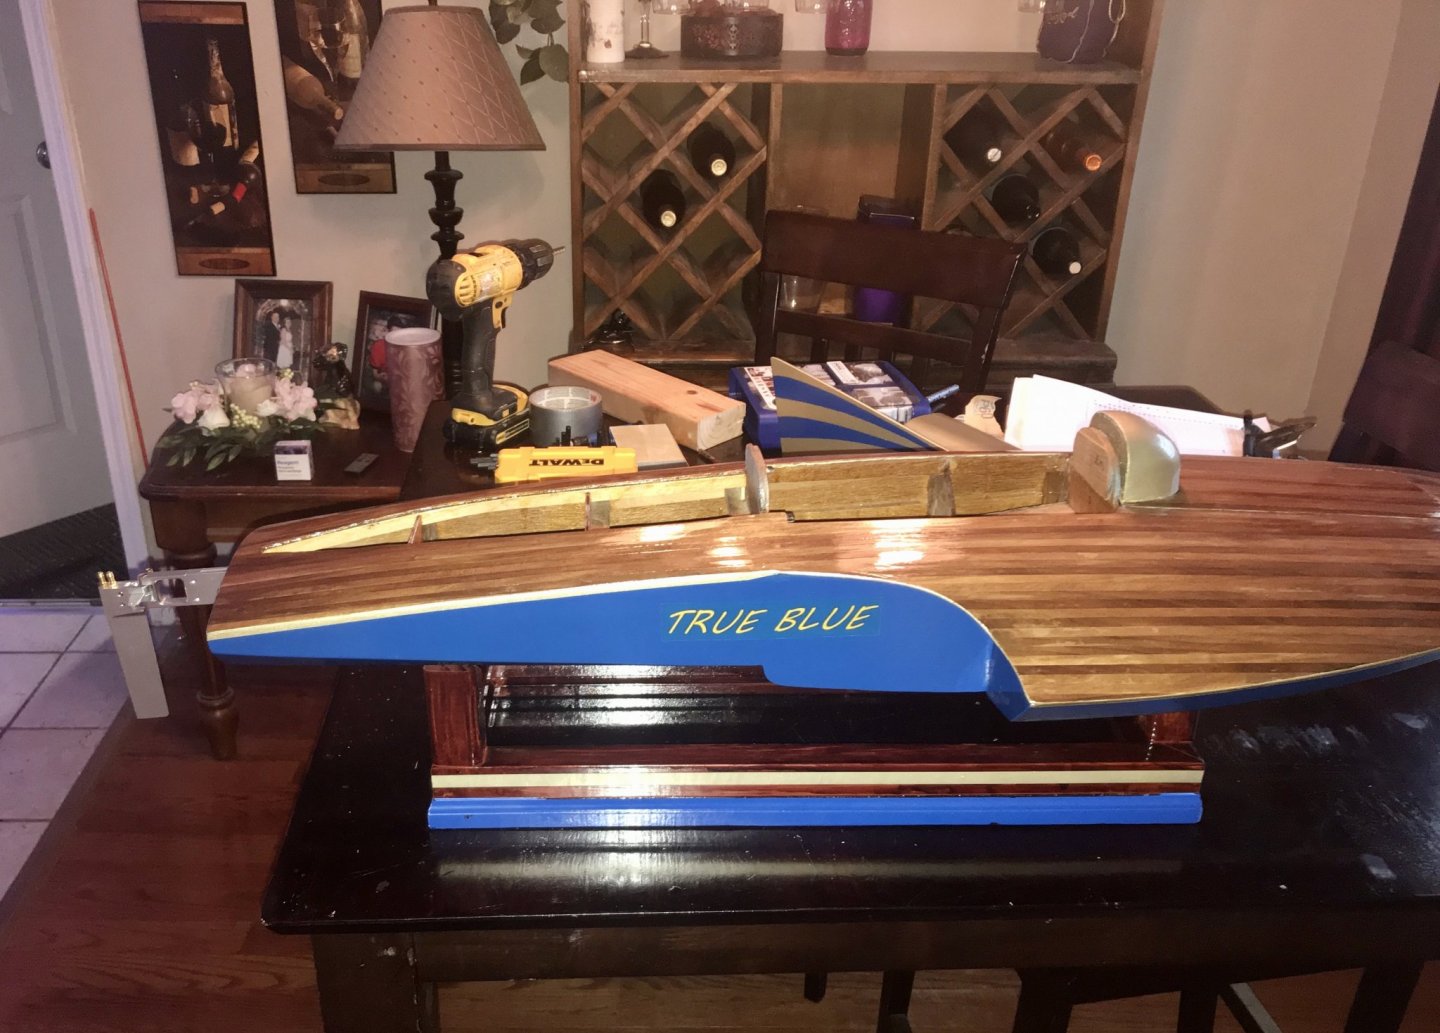
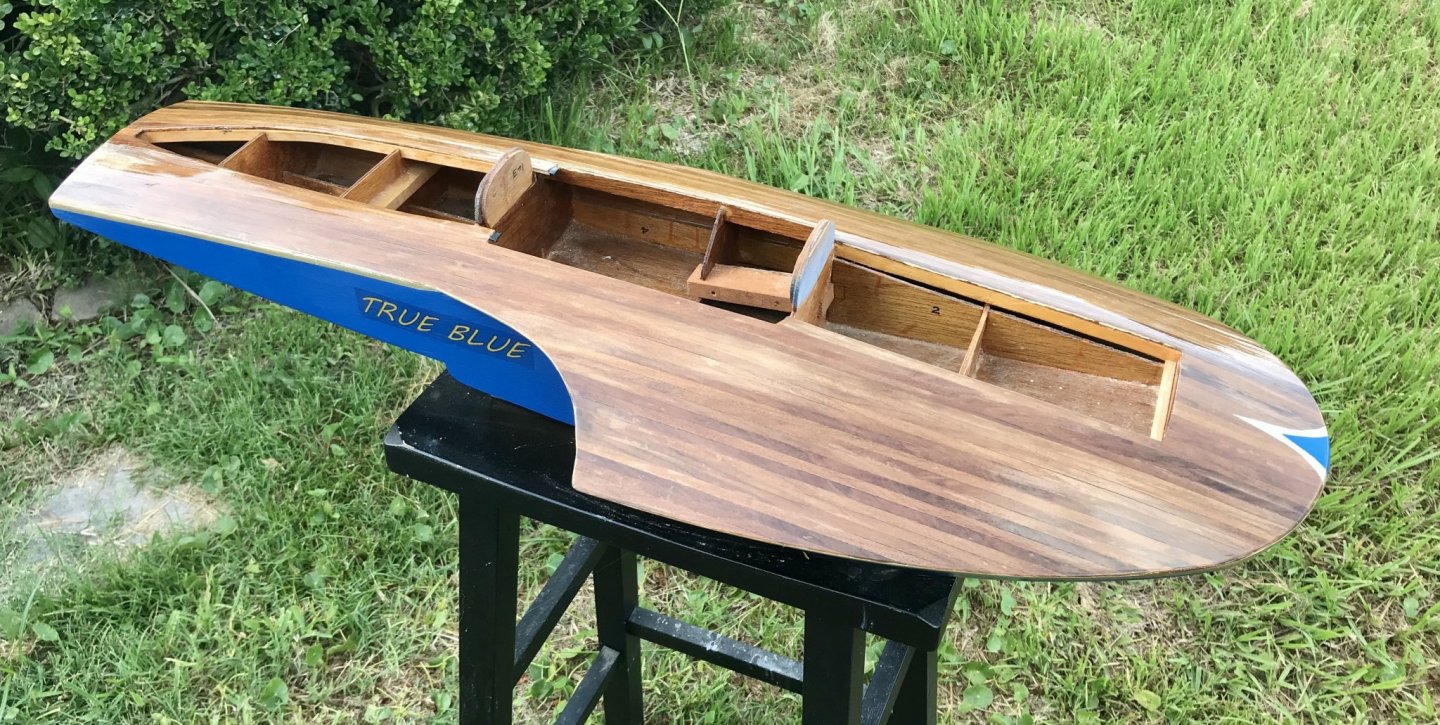
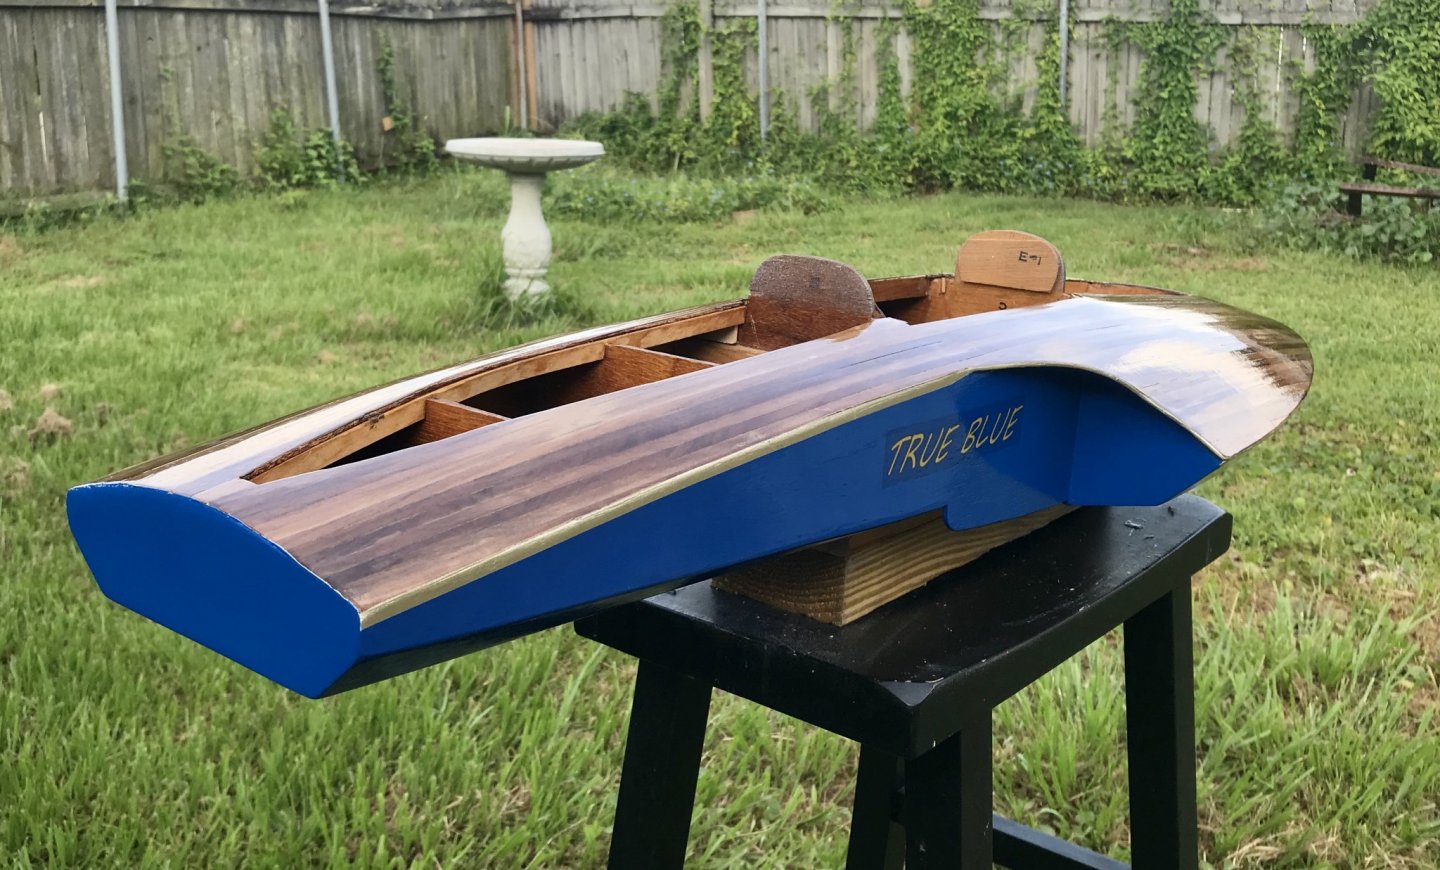
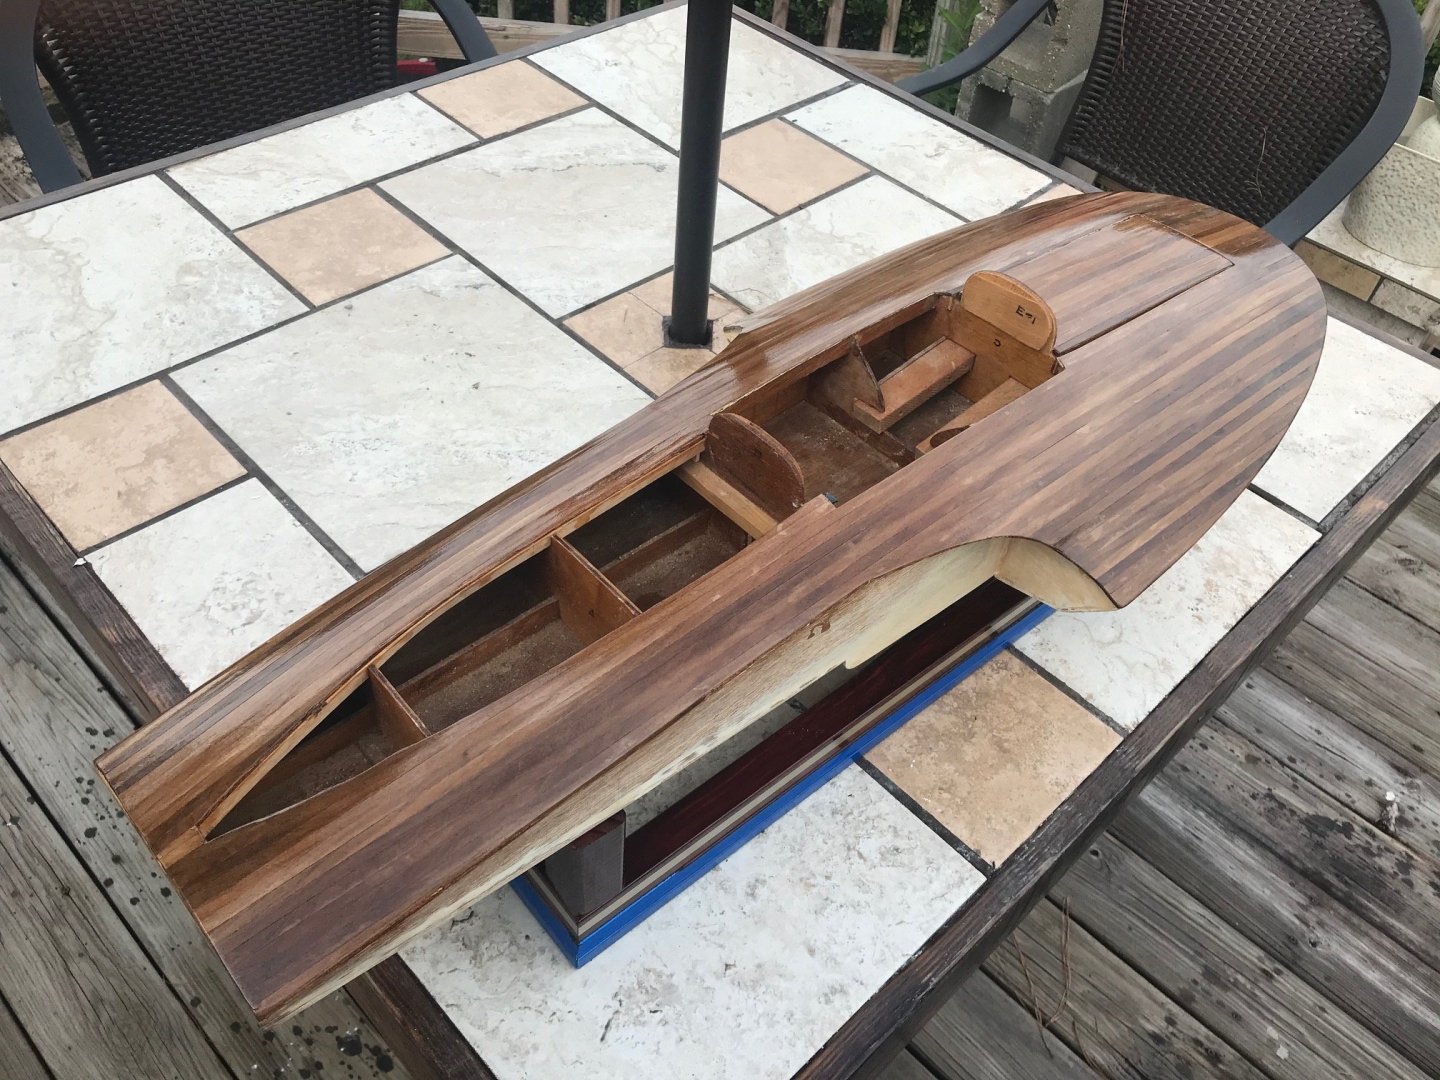
Well this is the painted hull, with several coats of clear on it. I still need to polish it down several times and when I put the cowl on I'll have to blend the clear into it. But this gives a basic shot of paint. The decal was an issue because I could print clear backing decals because it's transparent, so had to pick a blue background of closest match. So, you see the square.


- 51 replies
-
- 5
-
-
- miss unlimited
- dumas
- (and 1 more)
-
Well, I'm not saying it's going to come out as nice as an auto body shop. I've painted a few guitars over the years, and to me, a nice finish is based on the body prep and the clear coat, and not so much the color coat. But that being said, not all areas of the hull was smooth as glass before painting, but hopefully the final product will be to my liking.
- 51 replies
-
- 2
-
-
- miss unlimited
- dumas
- (and 1 more)
-
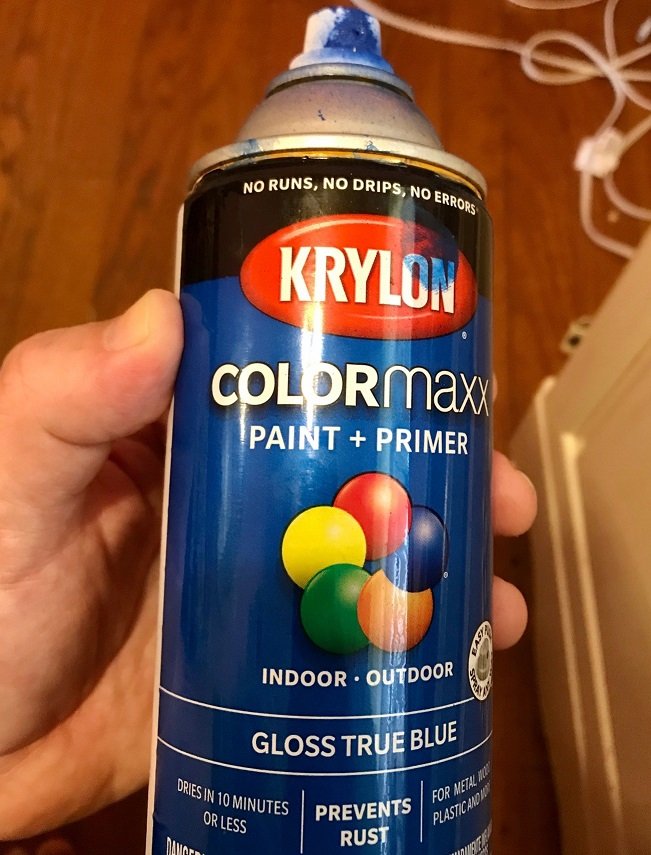
This is another interesting "sign" that happen while doing this, and true story. I know I wanted to call it true blue and had some shades of blue I was looking for, so I went to the paint store and was looking through the cans with my wife, and when I saw the color I wanted, look at the name of the paint:
- 51 replies
-
- 4
-
-
- miss unlimited
- dumas
- (and 1 more)
-
Thanks, I've been doing what I've been doing to finish this boat without any serious pre-planning, So, its been working out so far. I have a few hurdles to cross finishing the upper section so it doesn't look "cheesy". That was the only part about this kit that I was worried about is merging the cheap plastic cowl pieces on top of a beautiful wood mood boat. But I have some ideas to help it along.
- 51 replies
-
- 1
-
-
- miss unlimited
- dumas
- (and 1 more)
-
Thanks. I painted the boat over the last couple of days. That was the part I was most nervous about, the lines and color scheme and how it would look. I have a few more touch ups to do before posting update pictures. This boat is a good tribute to my dad, hence the name "True Blue" I gave it. (I know a male associated boat name is against tradition but seemed fitting this time).
- 51 replies
-
- 1
-
-
- miss unlimited
- dumas
- (and 1 more)
-
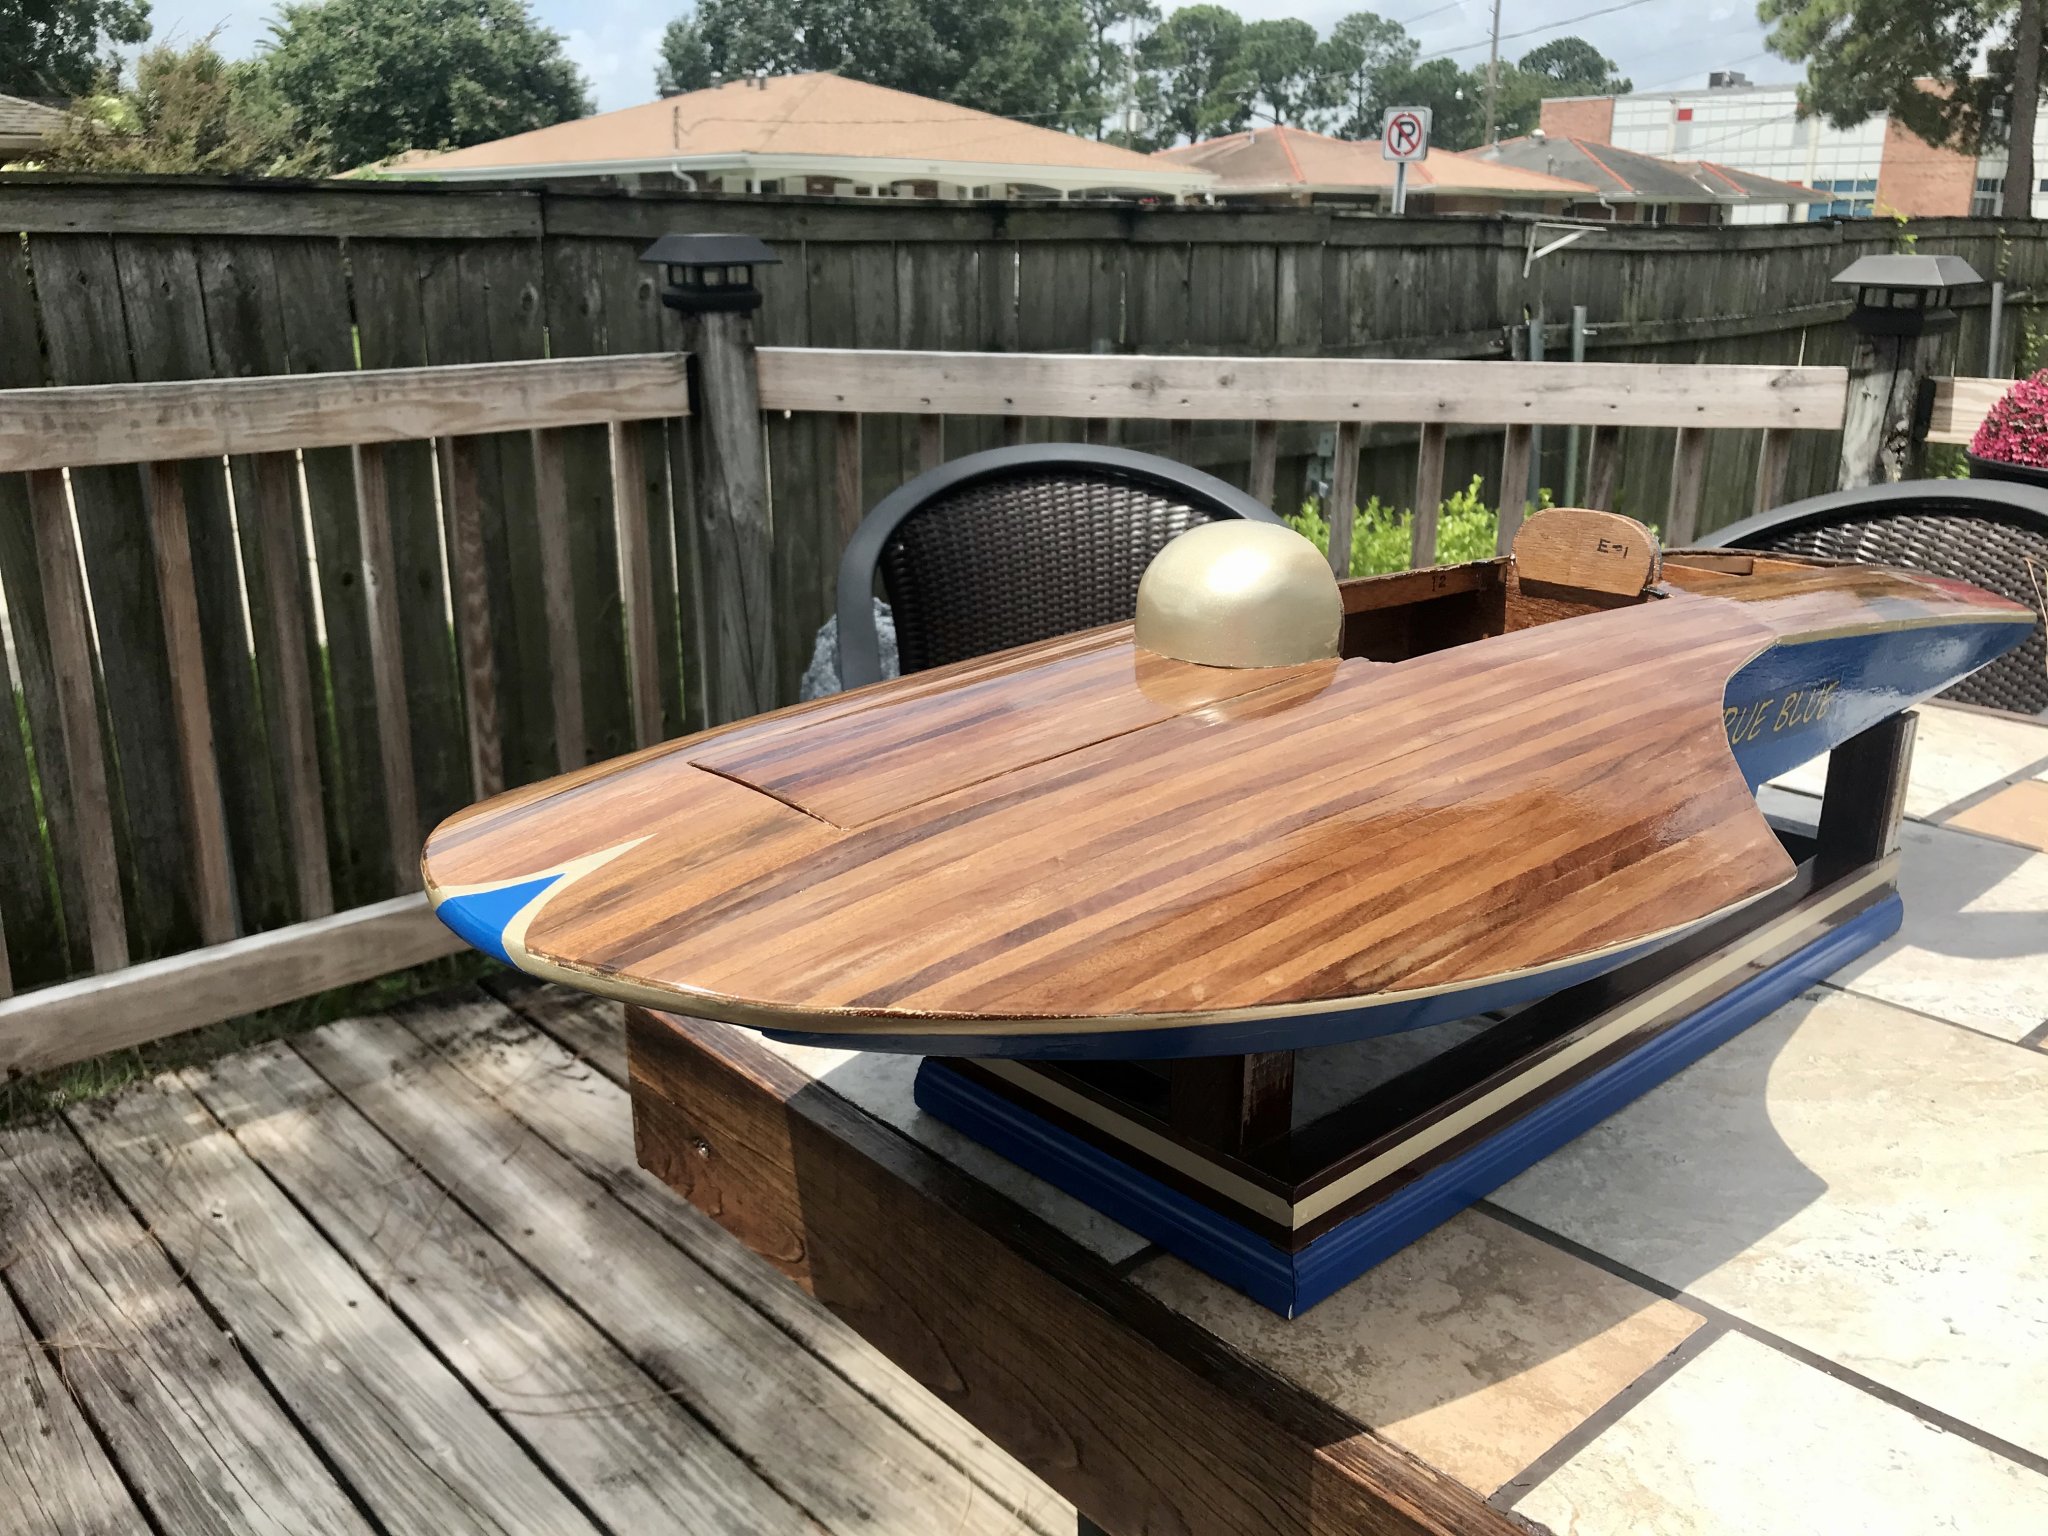
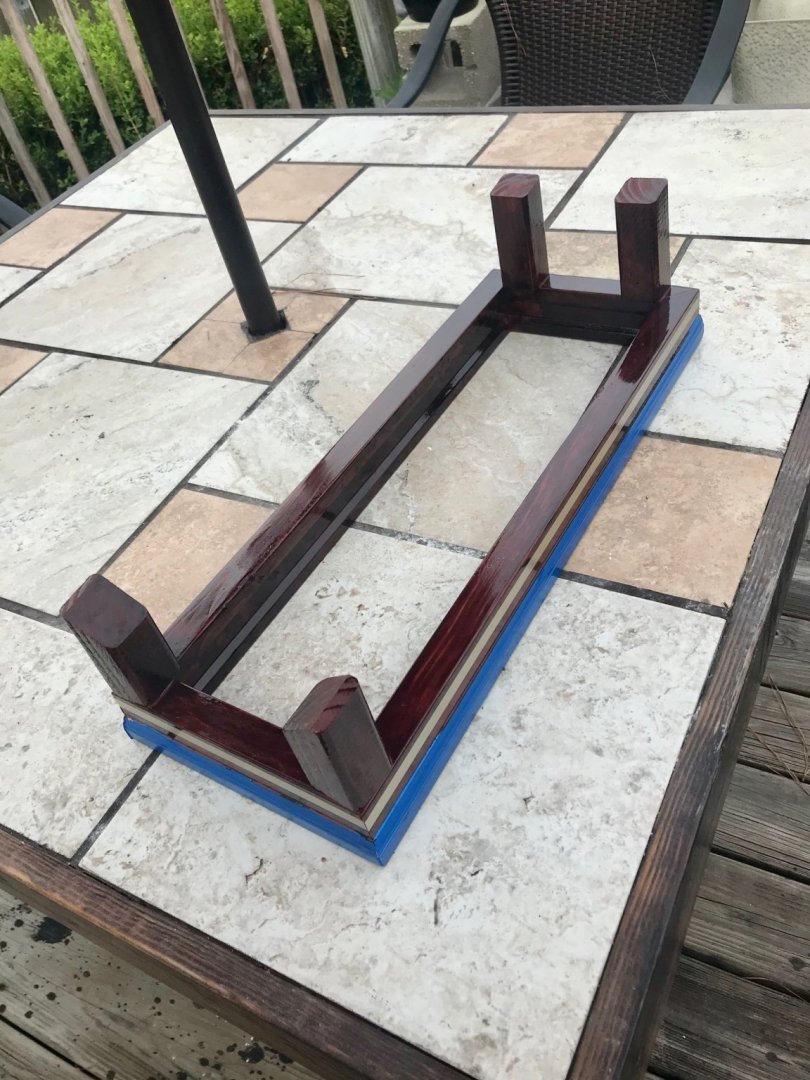
I've been busy the last couple of days with this. I've put on 3 coats of poly. Plan to continue sanding and coat, but this is enough for now before taping off the upper deck and paint the sides. I plan to poly over all coats together after that to get a uniform finish. Also, as a side project, I made this stand out of some scrap wood in the shed, and I trimmed it off with the two colors that will be on the boat hull.
- 51 replies
-
- 9
-
-
- miss unlimited
- dumas
- (and 1 more)