AndrewW
-
Posts
30 -
Joined
-
Last visited
Content Type
Profiles
Forums
Gallery
Events
Everything posted by AndrewW
-
 No way ... 5 years since I put this in the too hard basket and got distracted by other endeavours. Well today I pulled the plans back out of the box and I will be slowly working on the masts. Wish me luck!
 -
Ah the flashbacks to my planking procrastination. It is slower, but definitely worth the effort to clamp the wet planks in place until they are dry and then glue them the next day. Your boat is looking good, will keep on eye on her as you continue on.
-
You don't know how much that means to mean. I am super self-critical of my work so good to hear that someone likes it. Sorry for the slow reply, been on a bit of a procrastination phase, unable to get myself started on the masts and booms, but finally put the instructions and plans down after reading them for the 1000th time and started on the bowsprit today.
-
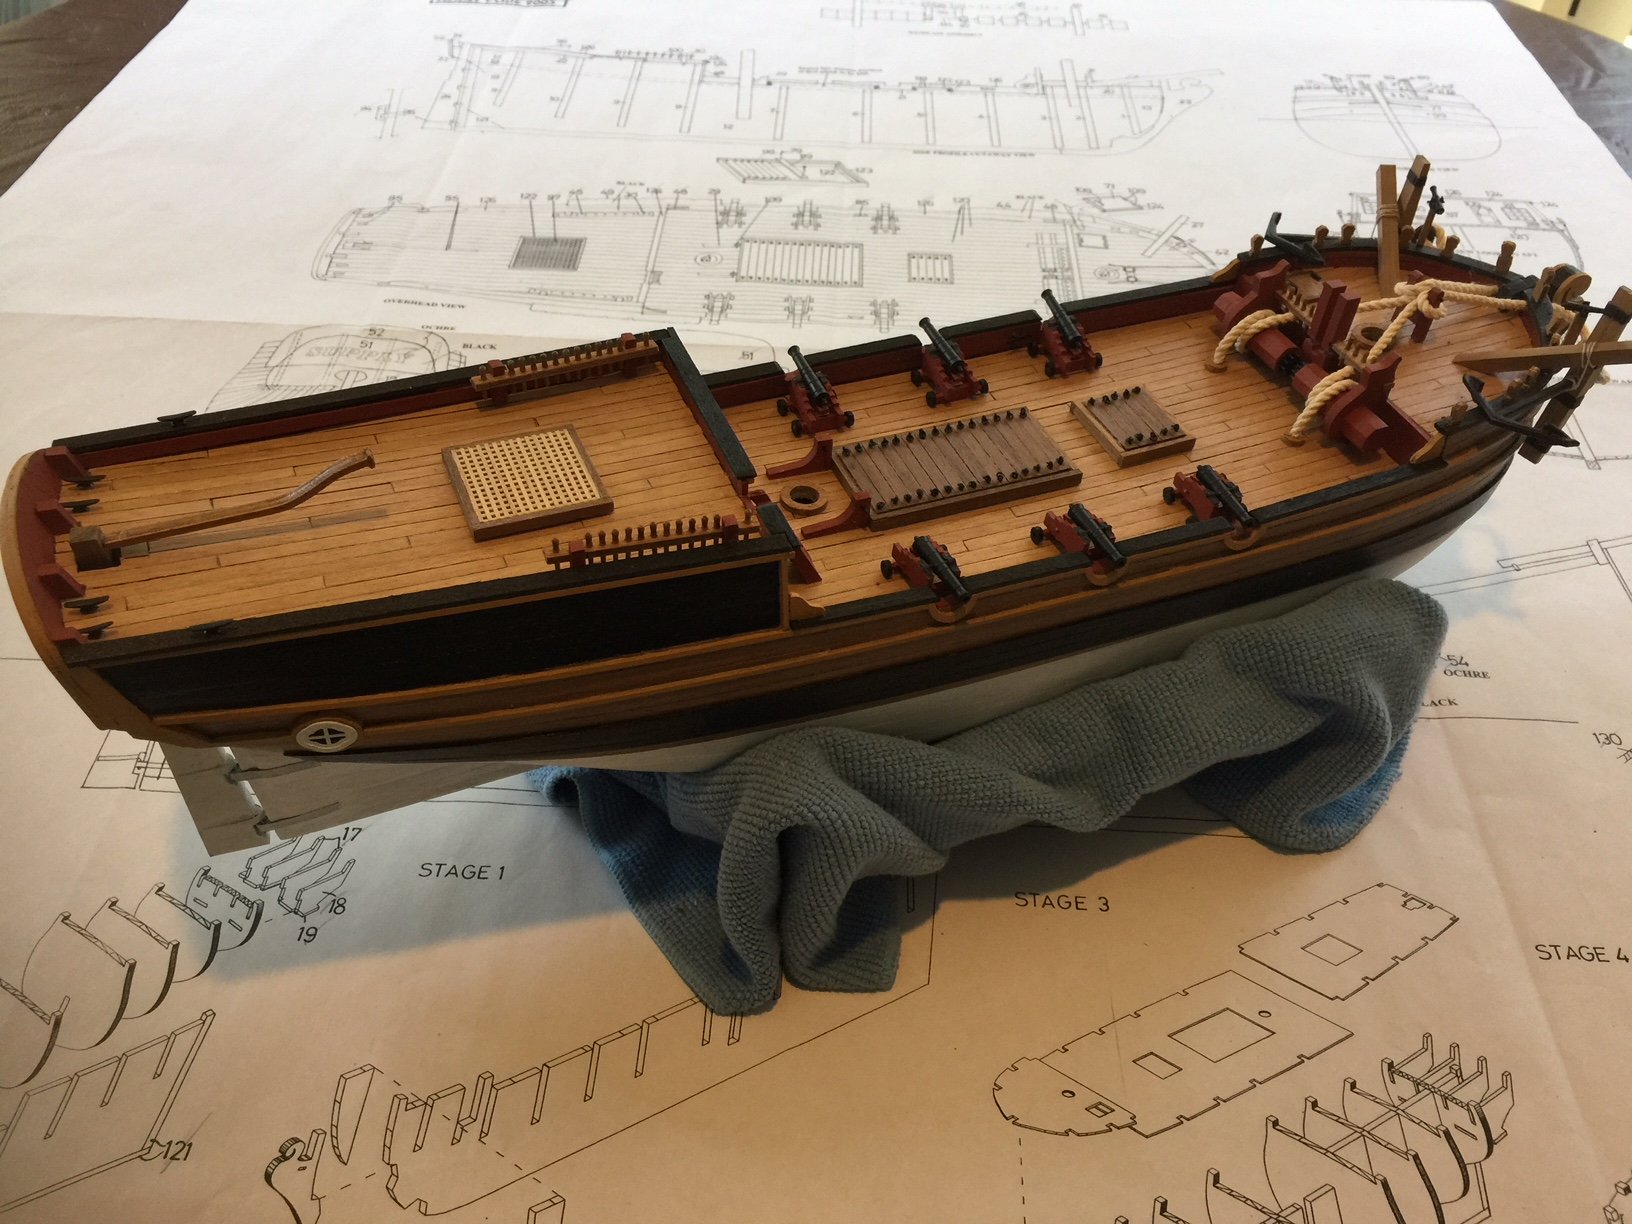
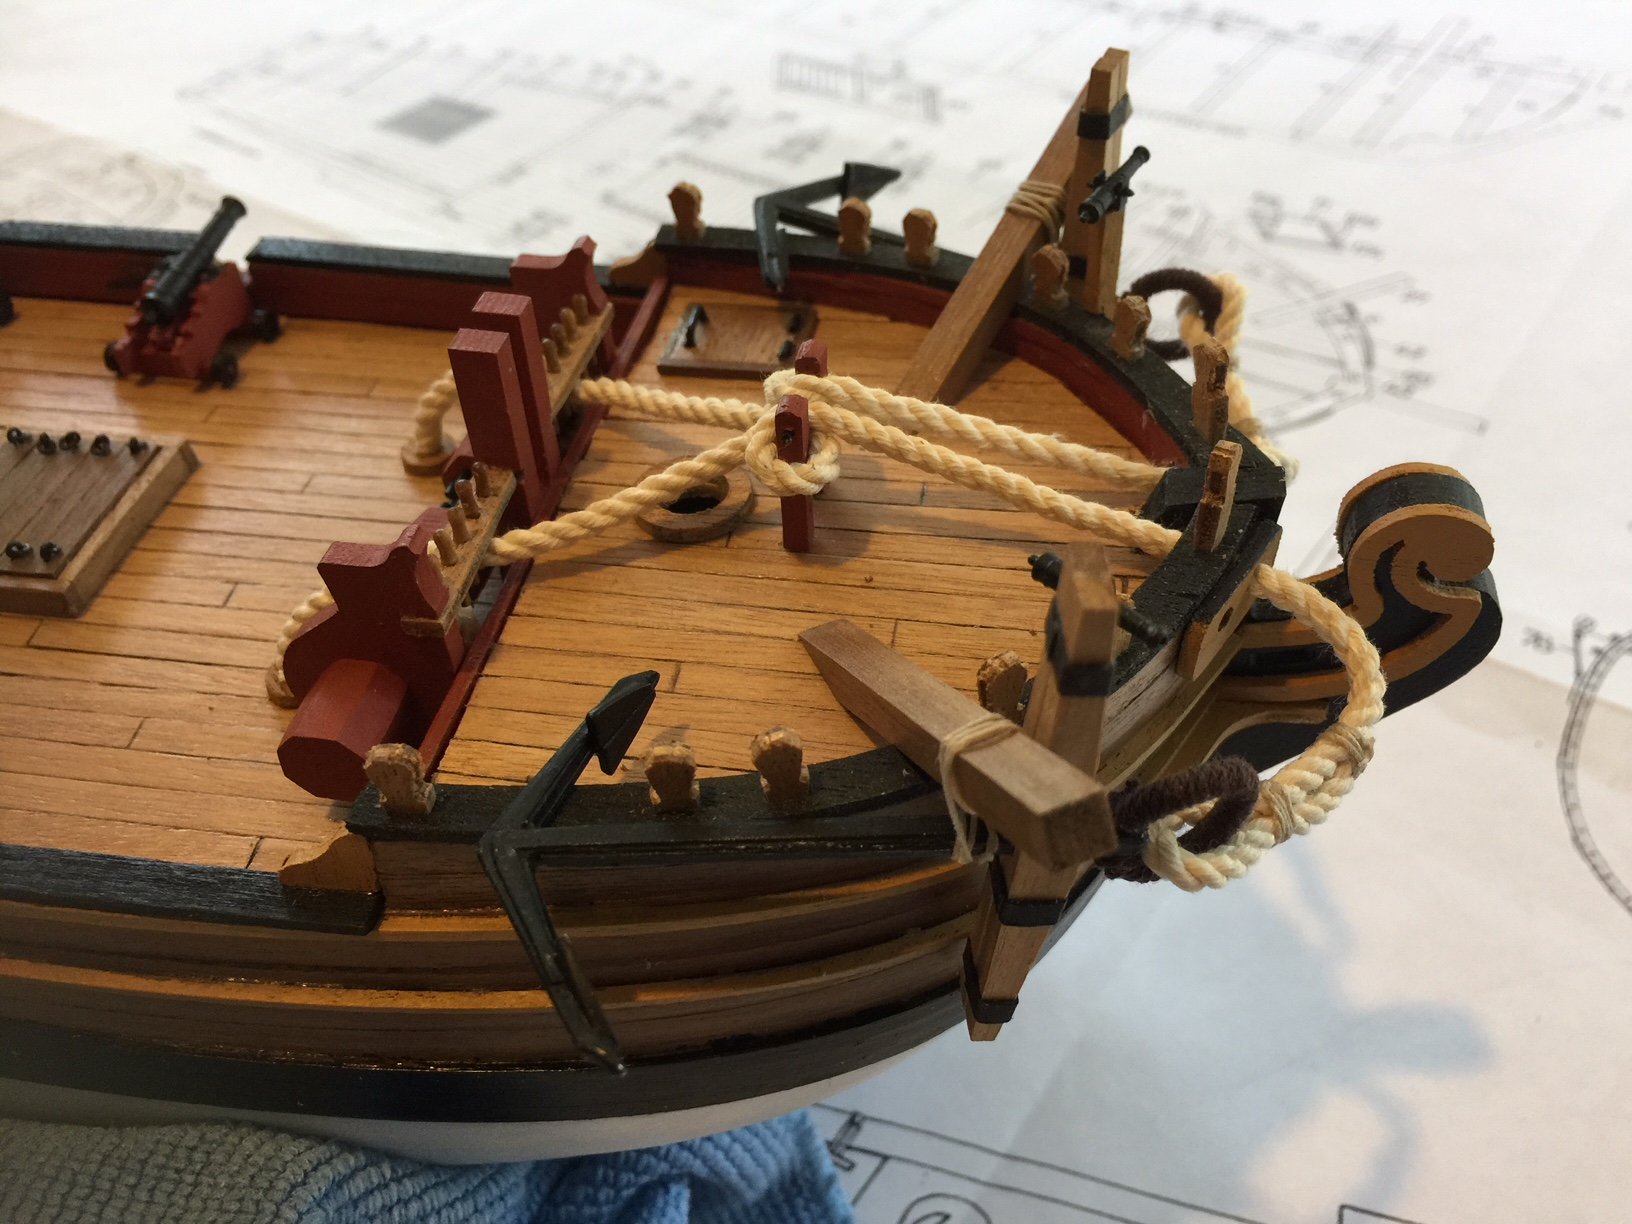
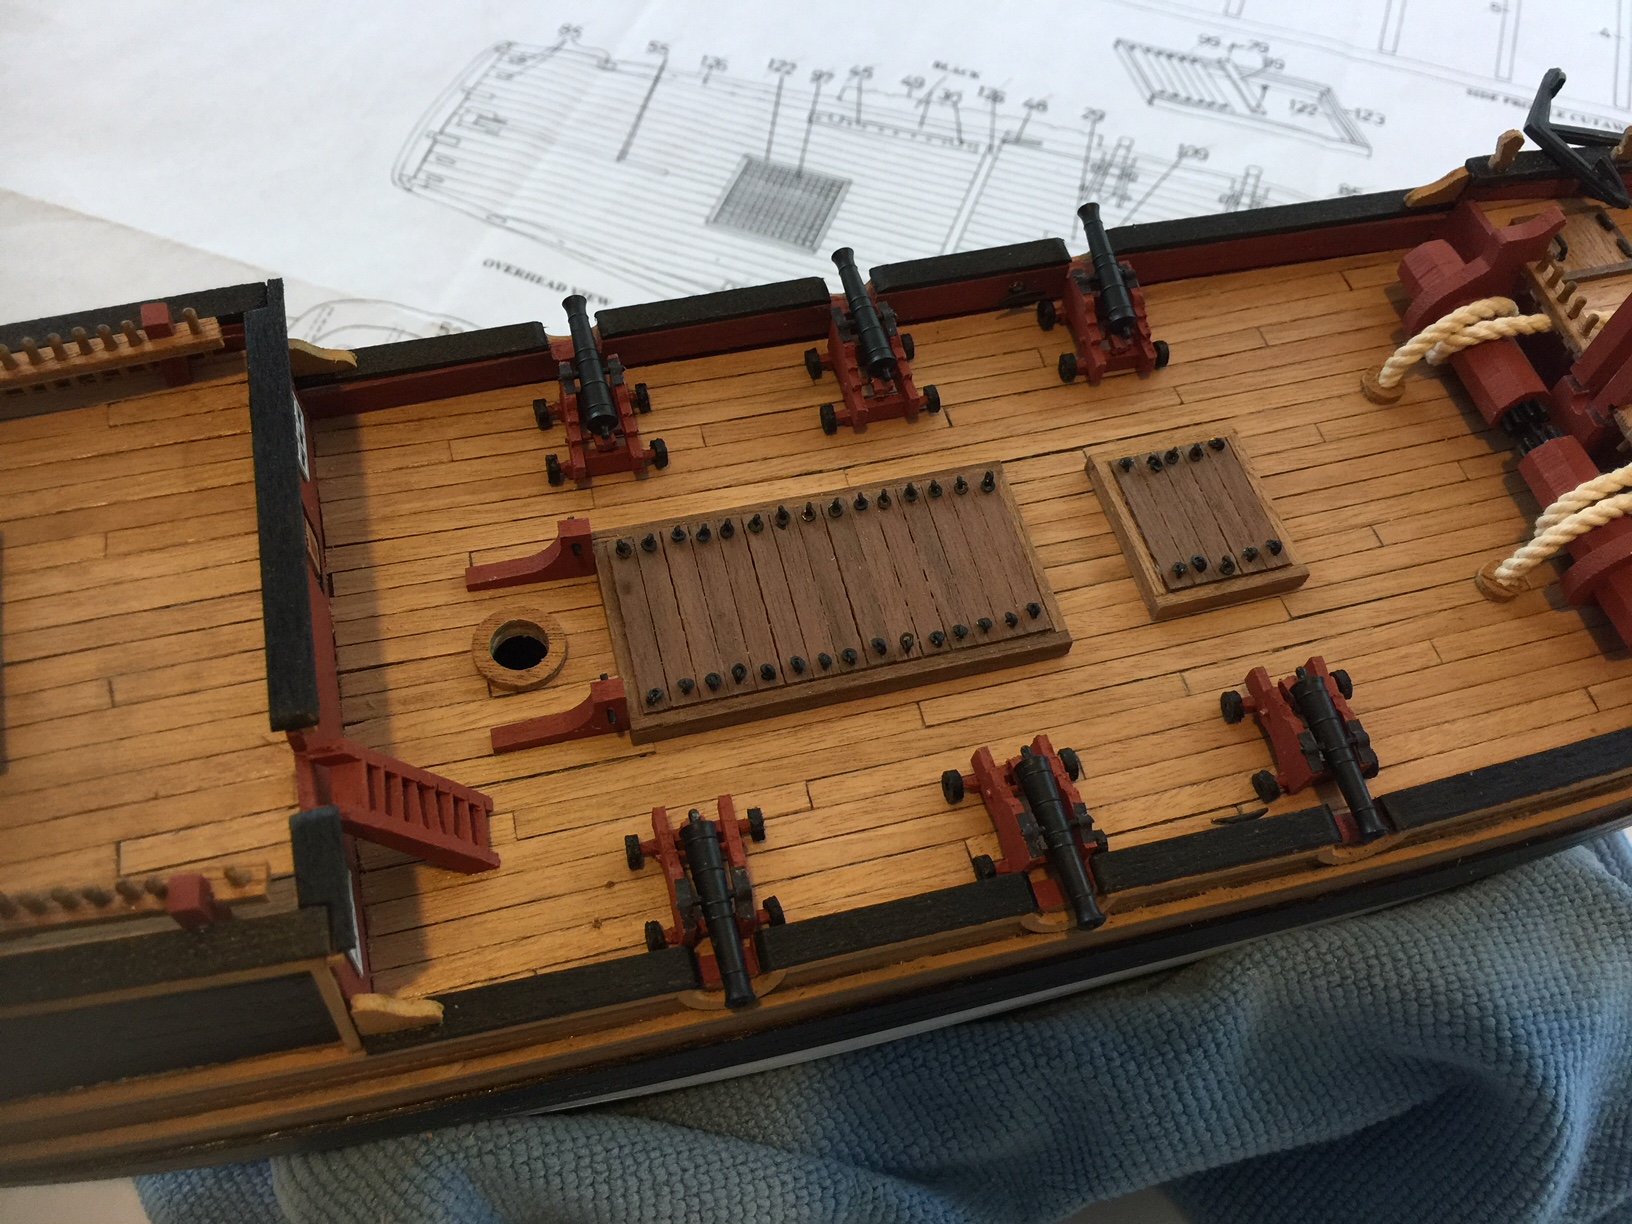
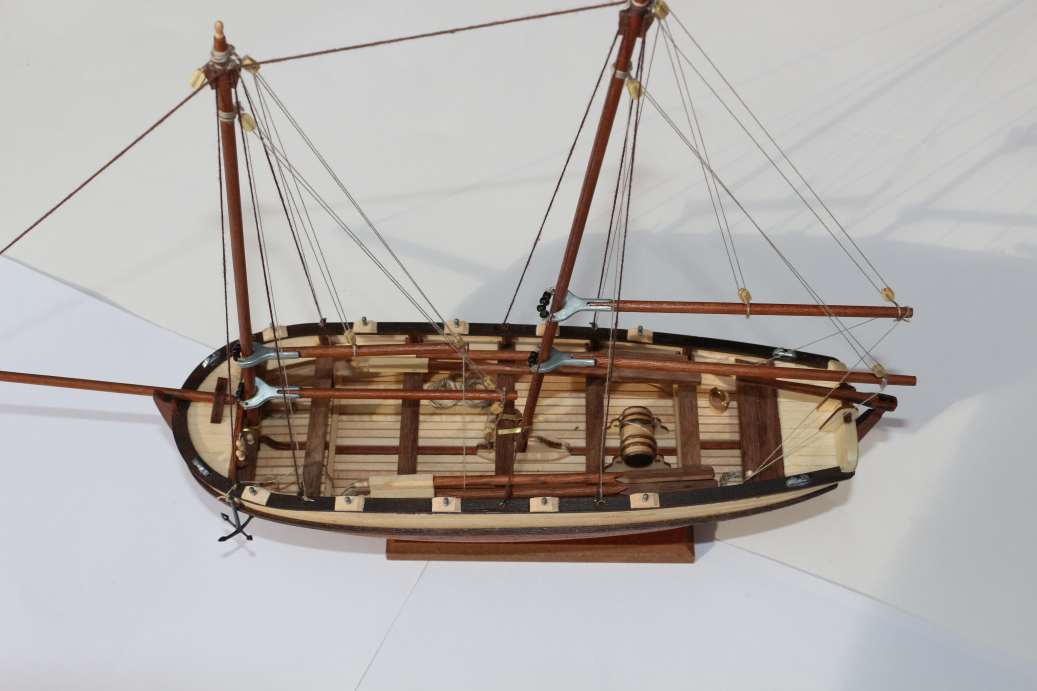
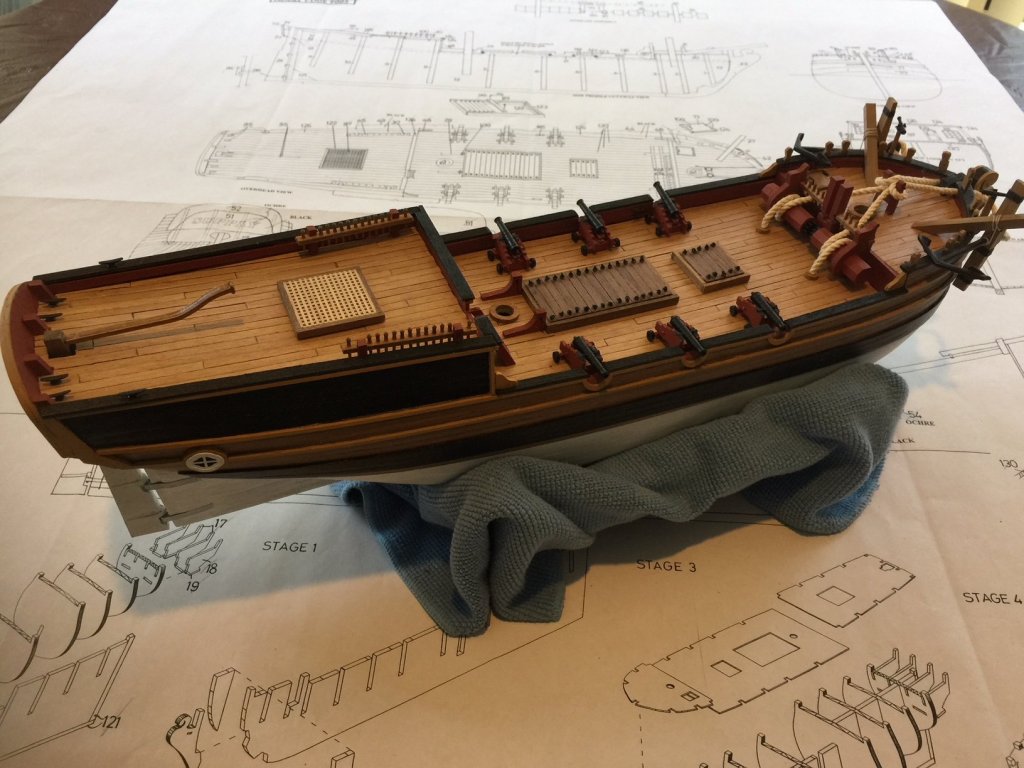
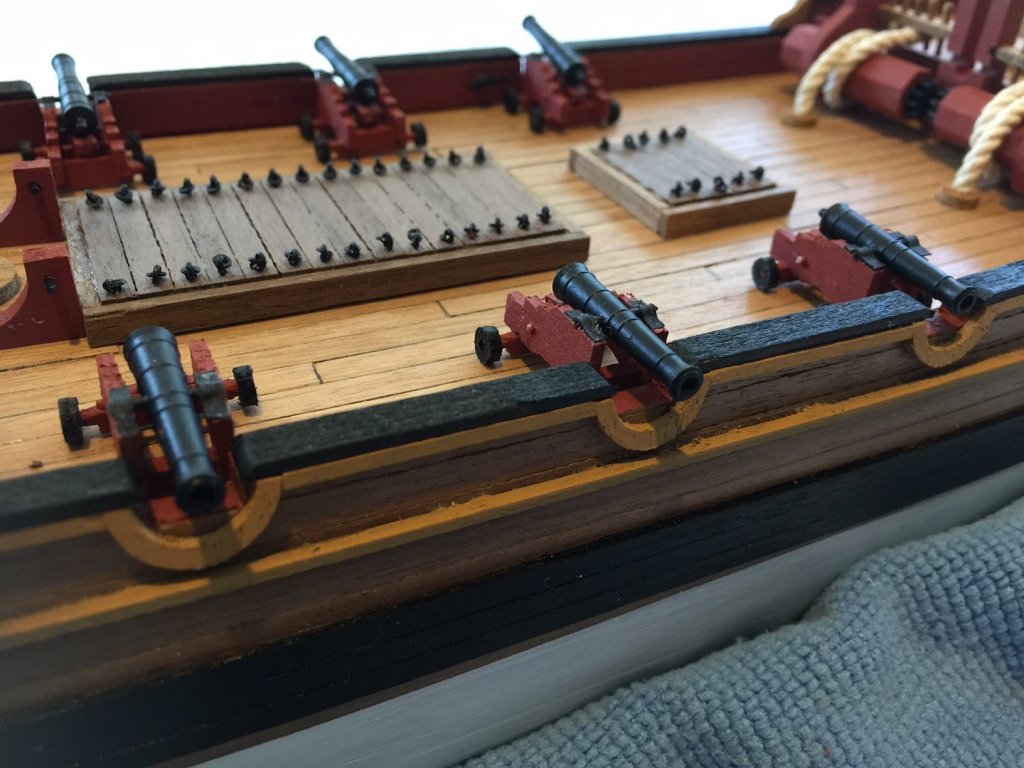
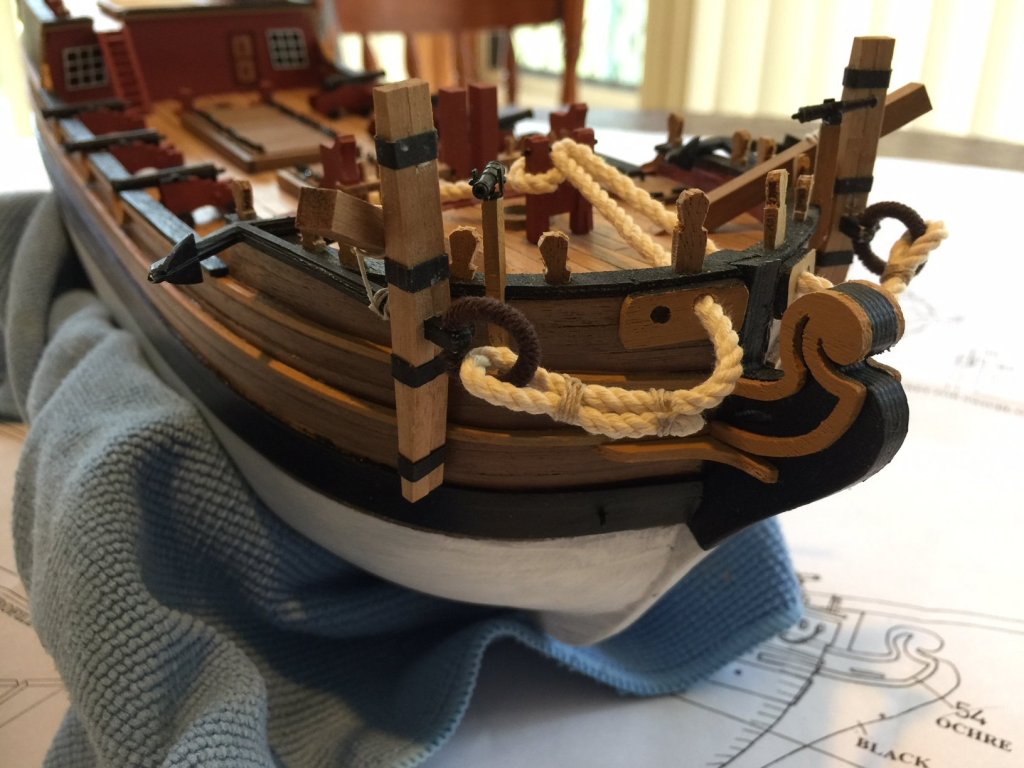
Another busy couple of weeks. I have effectively finished the deck level. Still need to build the ship's boat (bought the Jotika one, it is a project all in itself) and scratch build a cradle for it. Would like to have a go at doing the rigging for the cannons and I still need to scratch build some windows for the stern, my first two attempts did not turn out well. There are definitely some places where the paint could do with a touch up, but looking the photos I am seeing stuff that I have never seen with my naked eye. I also know that I need to redo the lashing on the anchors, the current version is definitely temporary. I've made a few mistakes along the way, some corrected, some too far gone and I will just have to live with. But I am ecstatic with the results so far considering this is my first "big" ship. Also, I curse whoever came up with the hatch rings design to a life of eternal scurvy!


-
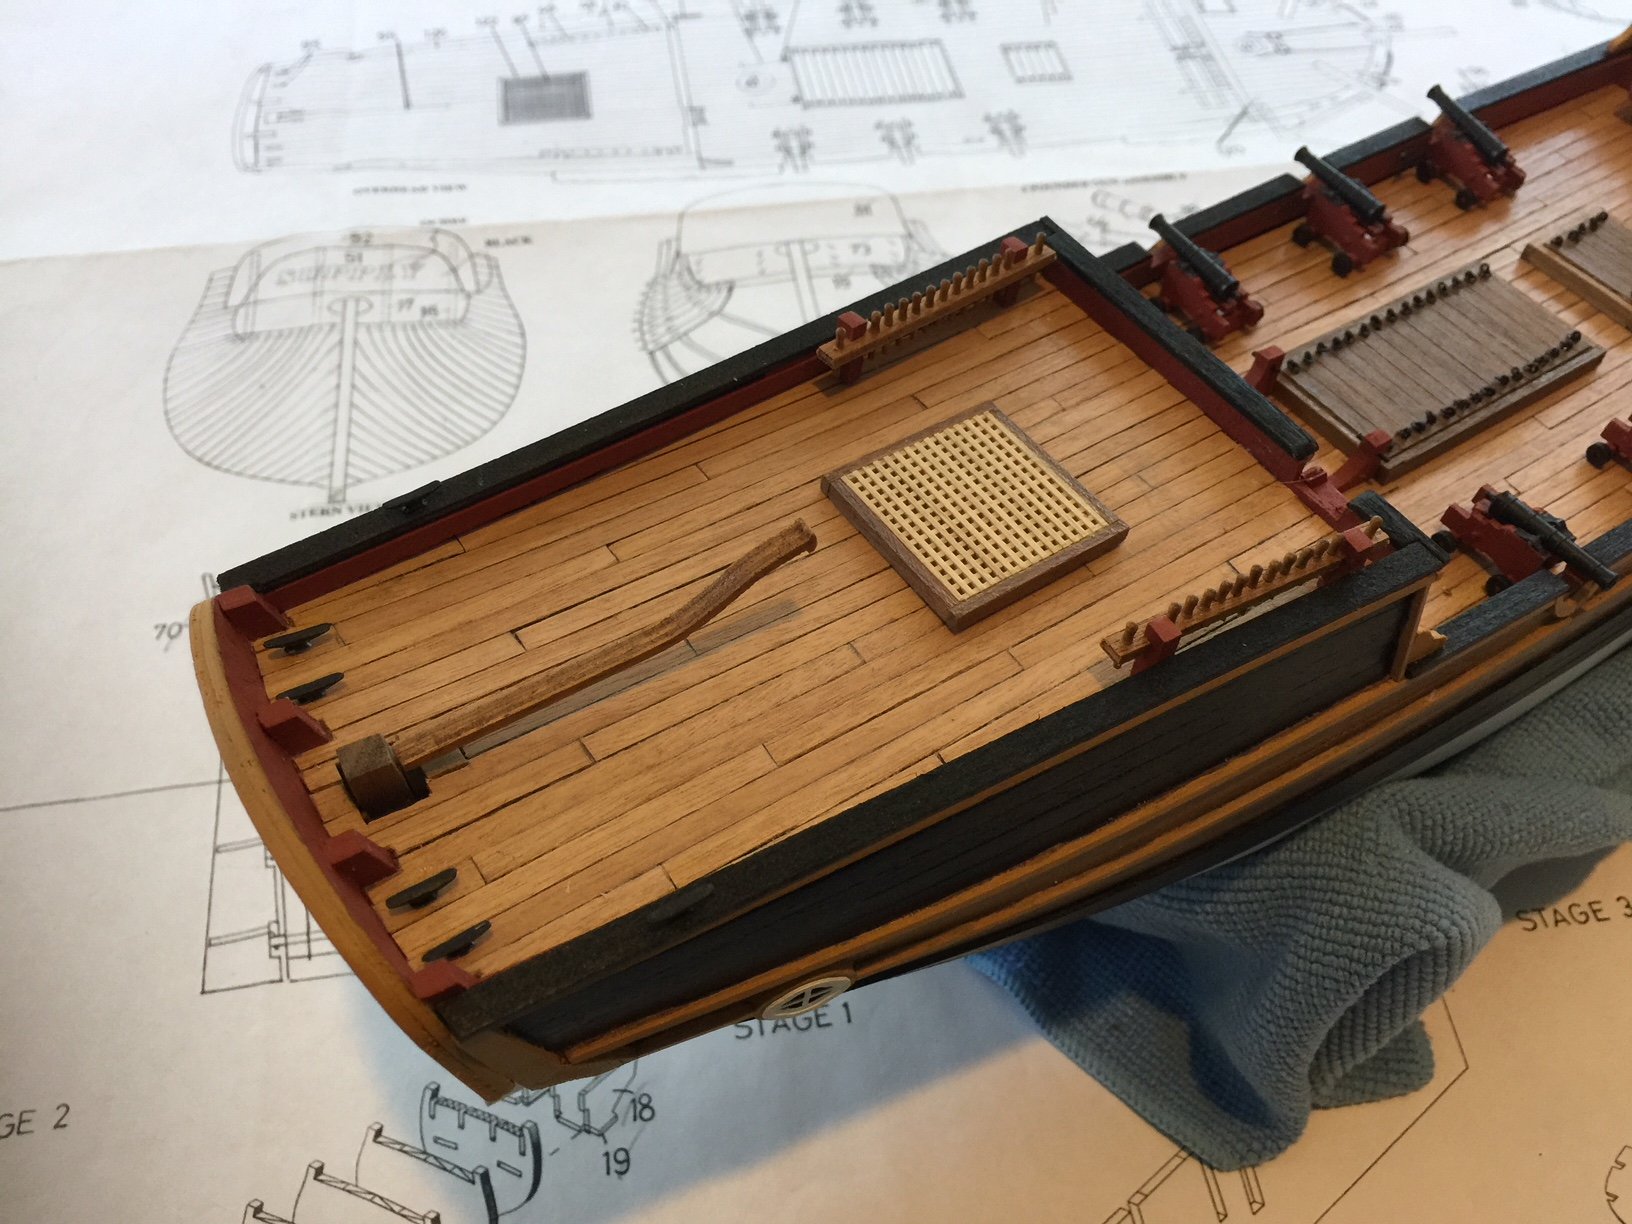
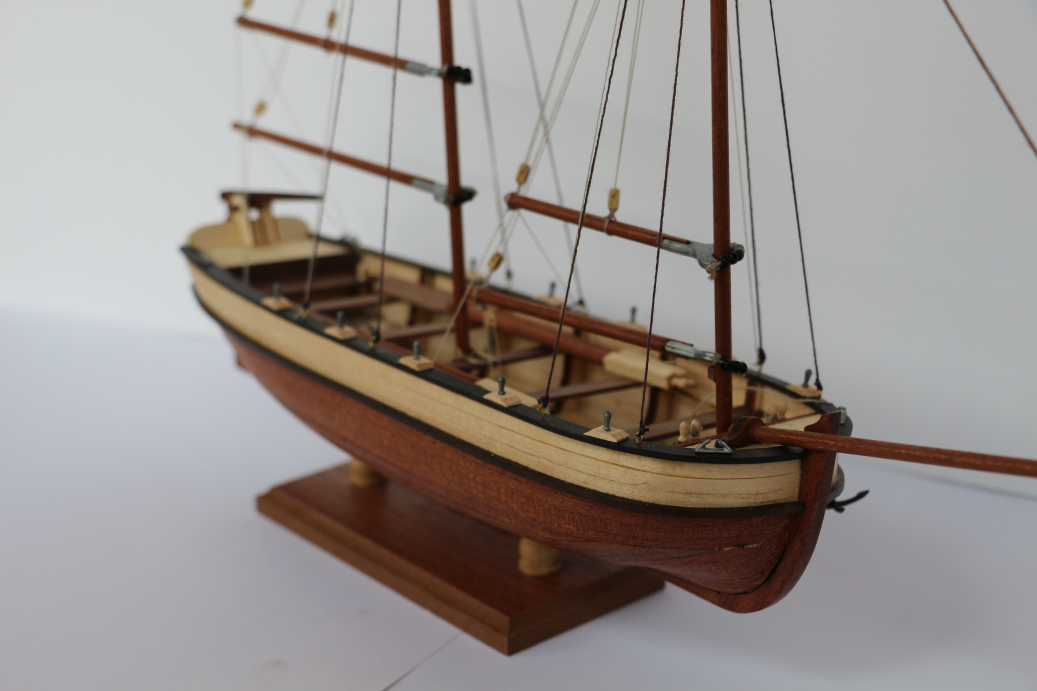
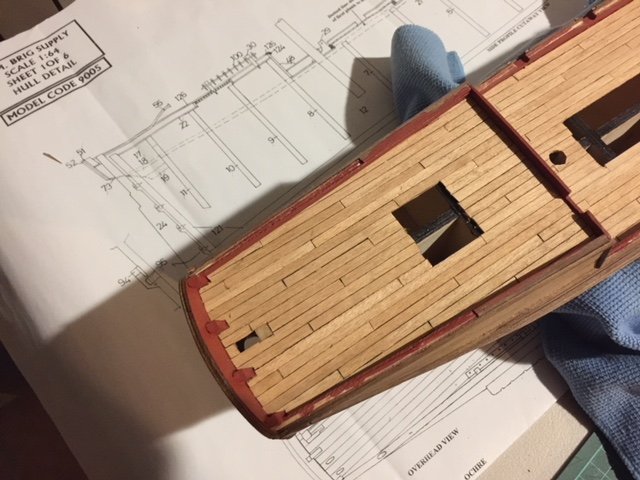
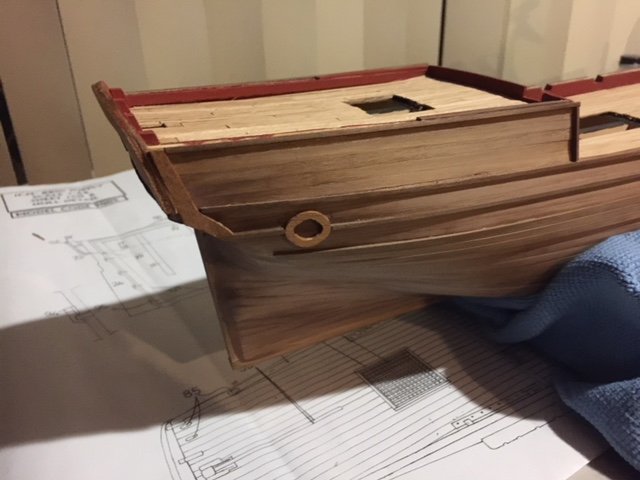
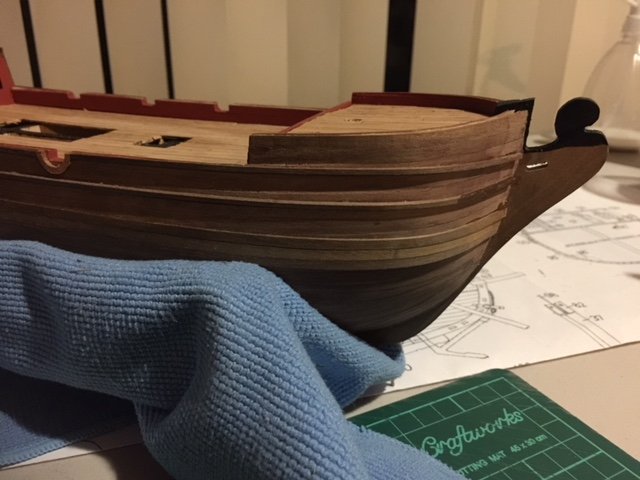
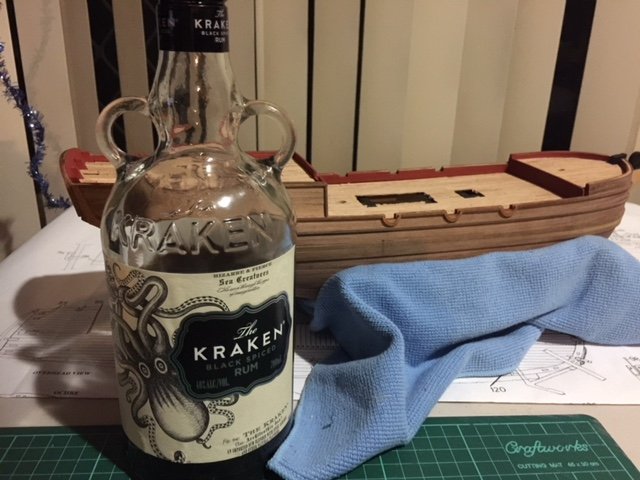
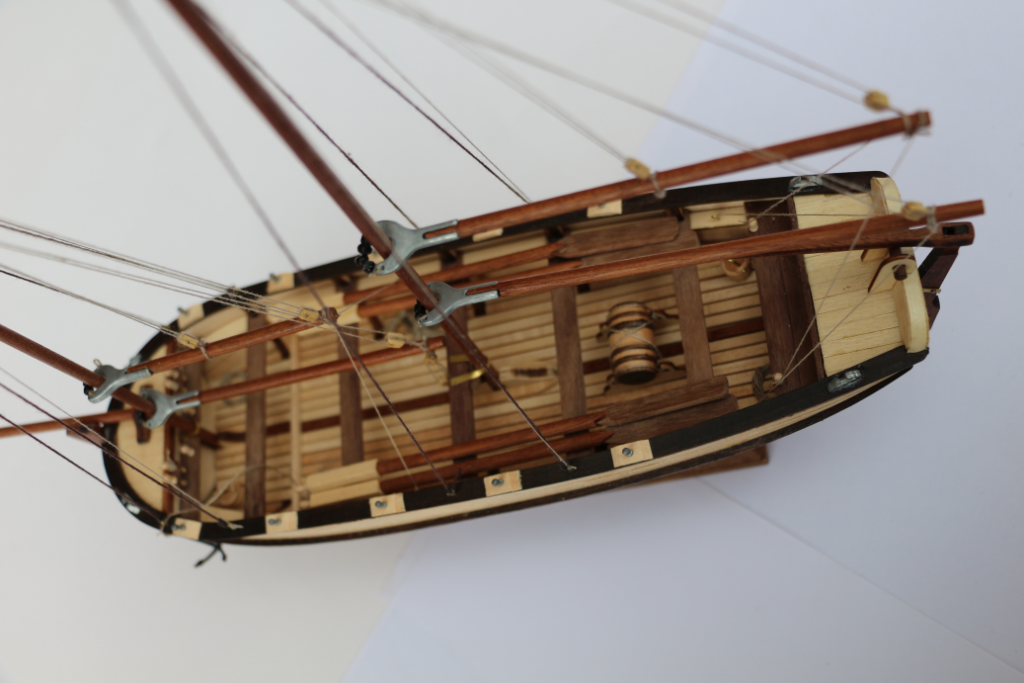
Well that was challenging .. but fun. I thought the main whale was going to be difficult but it turned out pretty easy. The decking on the other hand ... I decided to go for a 5 pank pattern with 100mm planks (21 foot scale). Not based on any historical documents, just because it looked "right". I used an HB pencil to colour in the 4 edges of every plank. All up it took me 12 hours (4 hours Friday night and then 8 hours today). I did a bit of trial sanding and it looks amazing, but I didn't want to push my luck after such a long day and will sand the rest tomorrow before assembling the rudder and varnishing the hull. As you can imagine, when it was all done it was very much time to "release the kraken" The keen eyed might notice that the opening for the larger hatch is narrower than on the plans. As others have noted I believe it is too wide and will interfere with the operation of the adjacent cannon, so I have decided to make it a more sensible width. Should help with he ship's boat that I have on order that will need to sit above it as well. Can't wait to get the bulwark rails on to really finish off the look of the deck, but unfortunately the required timber was completely missing from the box. I have ordered some replacement from cornwall model boats, just waiting for it to arrive.
-
How do I attach Caldercraft deadeye strop to chainplate?
AndrewW replied to AndrewW's topic in Masting, rigging and sails
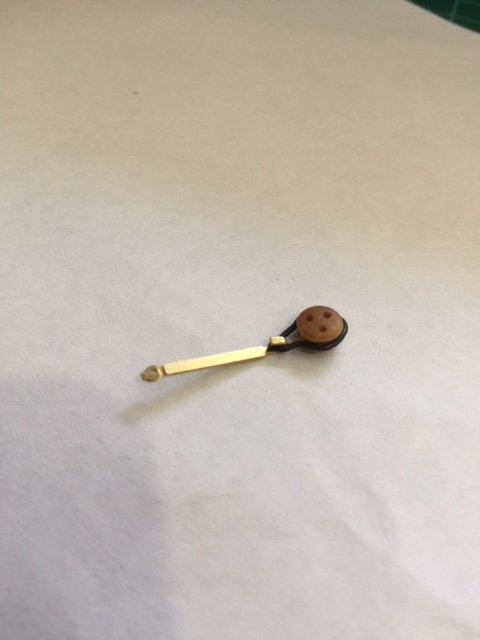
Dan Vadas gave me the required answer on my build thread, reposted here for anyone else who happens to be searching for this info: And a photo of my efforts, will have to look into silver soldering.
- 1 reply
-
- 4
-

-
Thanks Dan, I think I get what you are saying, time to go and tinker! edit: that seems to have done the trick, thanks for the help.
-
I posted this question in my HM Brig Supply build thread, but thought I'd put it here for better visibility. I can not for the life of me work out how I am supposed to attach the Caldercraft supplied deadeye strops to the top of the chain plate. I have searched for hours and can't find any images of Caldercraft style items, so any help would me massively appreciated.

-
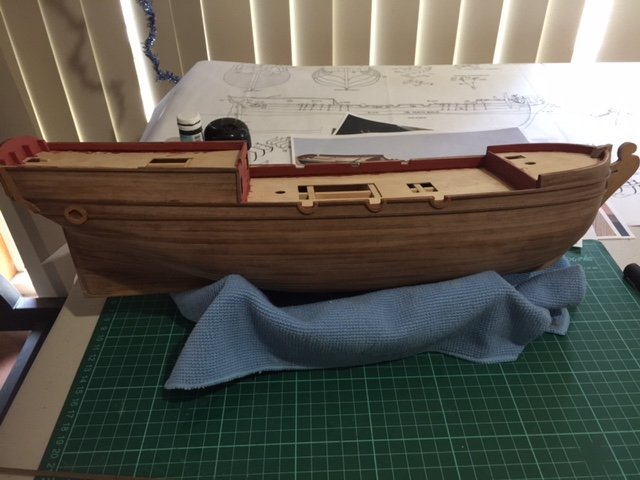
Things are coming along nicely, inner bulwarks are painted, gun port surrounds, port windows and upper rails installed. Now I've hit a snag. The last thing I need to install in preparation for varnishing the hull is the main whale. I am not 100% confident that I have it in the right position, and I want to make sure that it is in the right location so that the deadeye straps will sit properly. And this is my snag. How do I attach the deadeye strops? (I hope I'm using the correct terminology). If you look in the photo, I have no idea how to connect the open end of the deadeye strop to the end of the brass etched piece. Any help greatly appreciated.

-
Thanks for the detailed reply Doug. I've just spent the last 2 hours looking at all your photos and cross-referencing with the instructions and plans. It is amazing how many parts are shown on the plans and not referenced at all in the instructions other than the parts list. Thankfully your build is so clean that I can really tell how these extra part go together. Painted the first coat of red on the inside of the bulwarks today, came up pretty nice. Photos in a couple of days.
-
Hi Doug, Love your work, you are my inspiration and my reference when it comes to colours and painting of my Supply. I was looking at your photos on the first post again today and noticed that it looks as though you varnished the entire hull before applying the white paint. Is that correct? I wasn't sure if I should paint on the raw timber or over varnish. On a test piece I did the paint seems to take to the varnish, but would appreciate your feedback. Andrew.
-
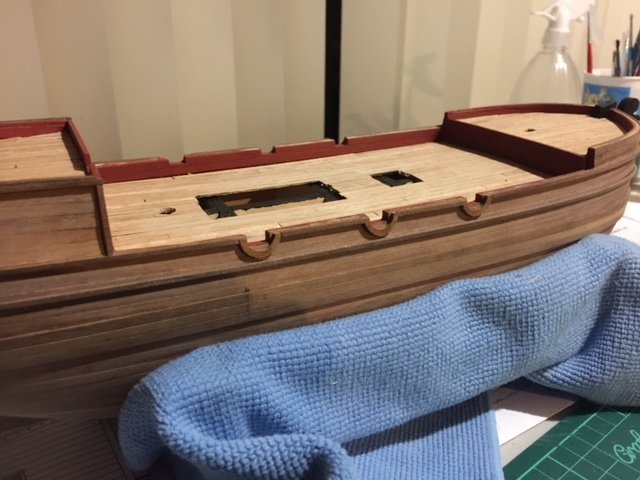
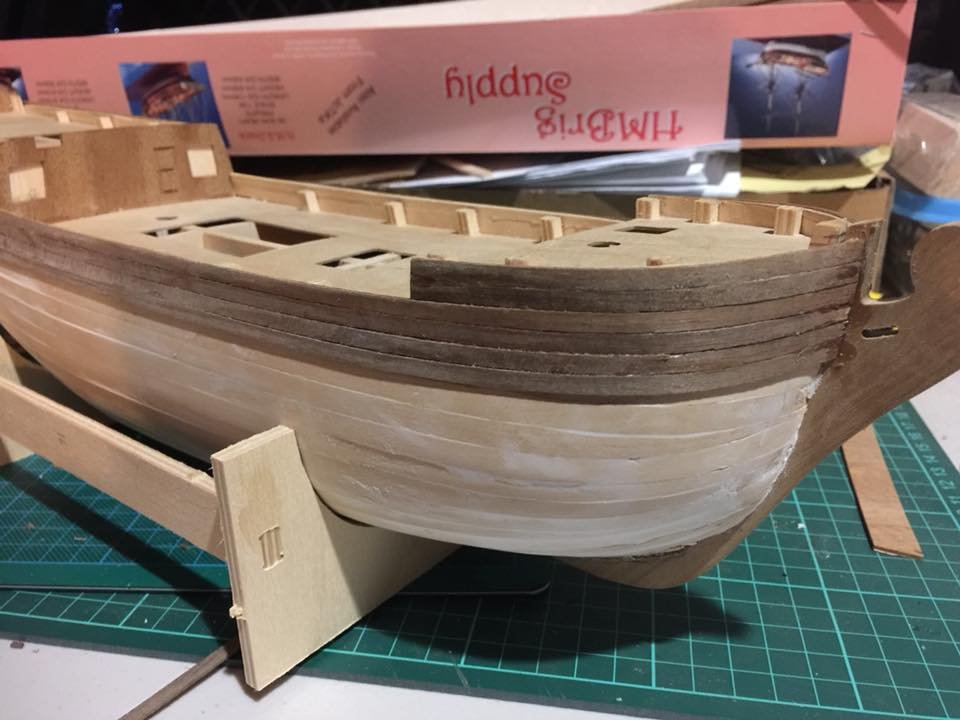
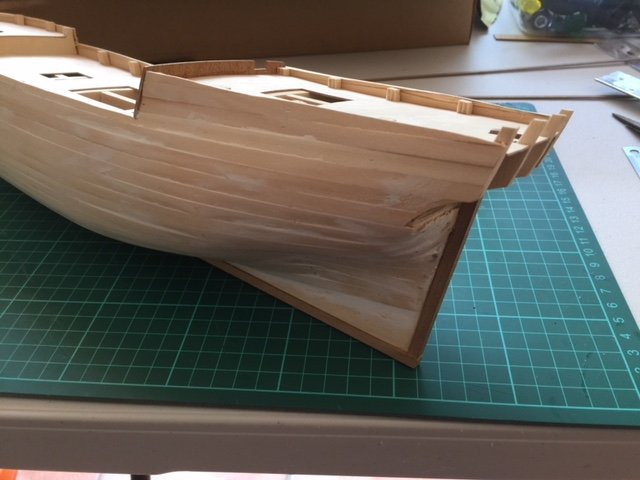
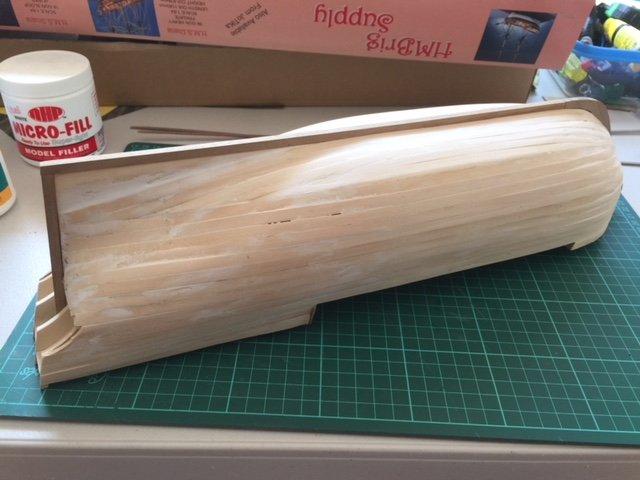
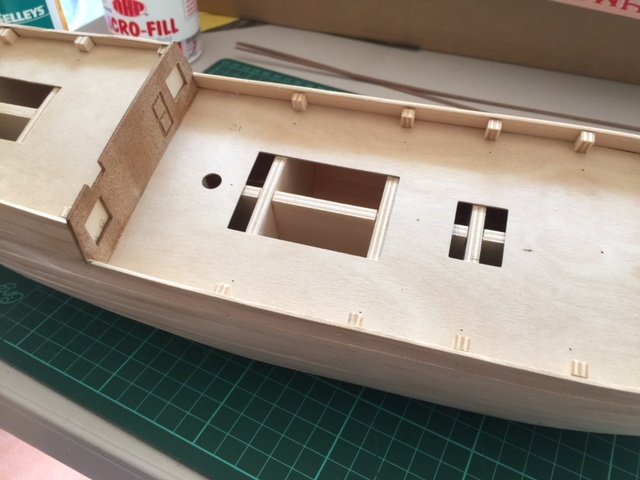
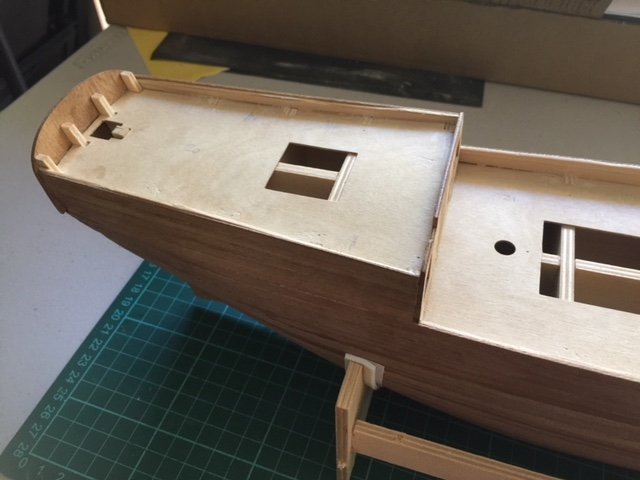
I've been really slack in updating this build log. Since my last post, I have completed the first and second planking, removed the inner bulwark tabs, planked the inner bulwarks and cut the gun ports. I realise that my planking is incorrect, I was following the written instructions and the plans, but it wasn't until I was almost done that I found an awesome article that explained the proper way to do stealers etc. So I have pointy, triangular stealers but thankfully once I have done the final filling and sanding and paint the hull I don't think it is going to be really noticeable. I have learnt my lesson for the next ship though! The other lesson I learnt is that I sanded my filler blocks too "flat" at the bow. I needed to leave them rounder to give the bow a fuller shape and to give a smoother run for the planking.


-
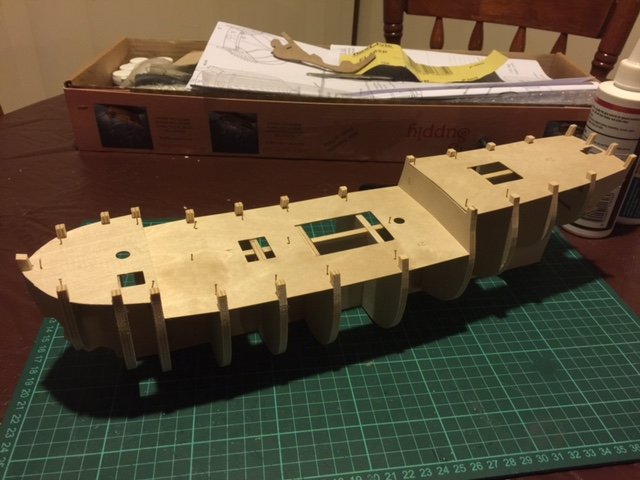
Tip: I was reading another build log where there was an issue with the cutouts in the decks not being big enough for the bulkheads to fit. I experienced the same issue and was all ready to trim the holes to make them larger, when I realised they were actually exactly the right size but looked too small due to the curve of the bulkheads. The solution was to line the holes up on one side of the ship and then incredibly carefully and with lots of sweating bend the deck along the centre line until it could be slotted behind the bulkheads on the opposite side and the slid down into place.
-
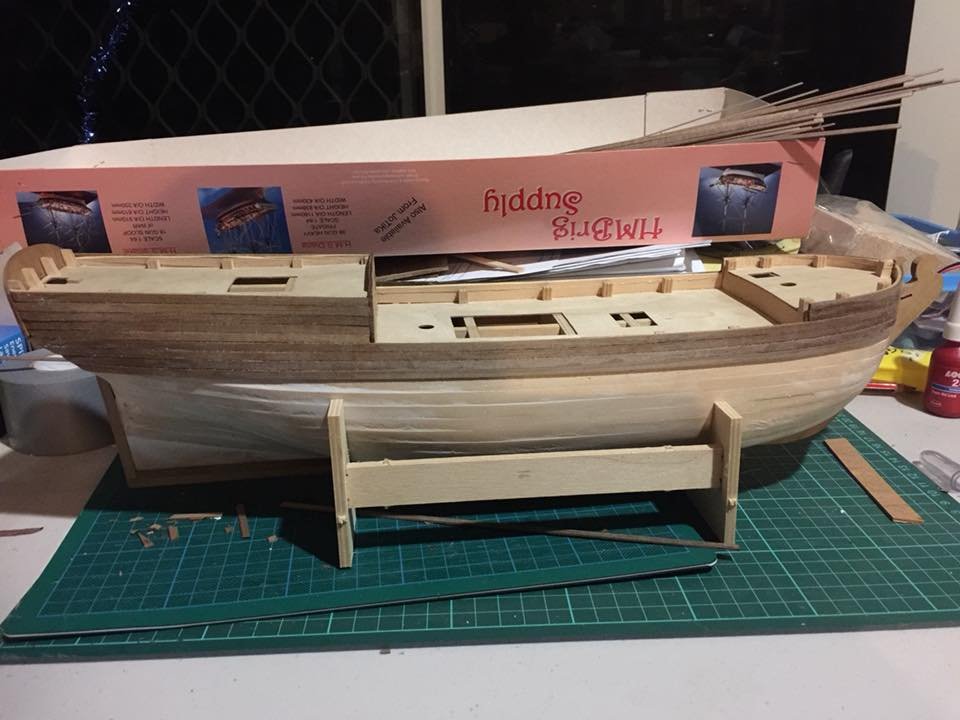
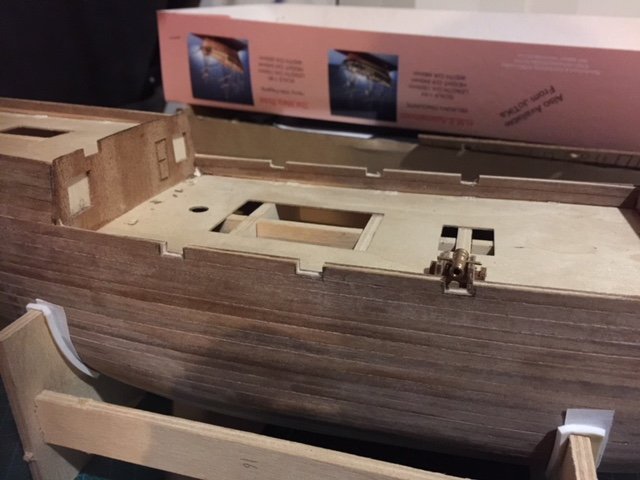
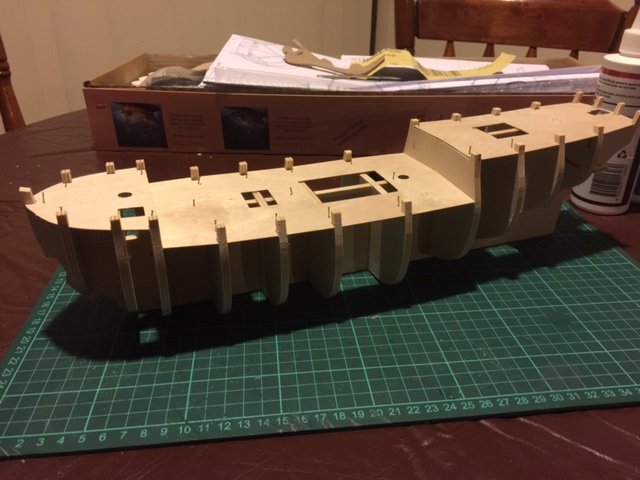
And so it begins ... I got the kit out and started dry-fitting the hull components. Before you now it I had fitted the bulkheads to the false keel and also fitted the decks! There was a bit of time head-scratching as the written instructions differed from the pictorial instructions on sheet 1. Written instructions say to attach the bulkheads and decks then attach the bow, keel and stern piece, whereas the pictorial instructions say to fit the bow, keel and stern piece first. In the end I followed the written instructions but I did take the opportunity to cut the keel and stern piece while I had easy access to the false keel. Time will tell (tomorrow) as to whether I made the correct design when it comes to attaching these parts. Hint: The written instructions say to attach all three deck pieces before attaching the stern patterns. In this case I followed the pictorial instructions and did the stern patterns first otherwise it would have been very difficult to fit them after the aft deck. Apologise for the rubbish iPhone photos in poor light. 5 hours down, many more to go Tomorrow: Attaching the keel components, sourcing timber for and installing filler blocks and sanding/shaping the bulkheads ready for the first lot of planking.
-
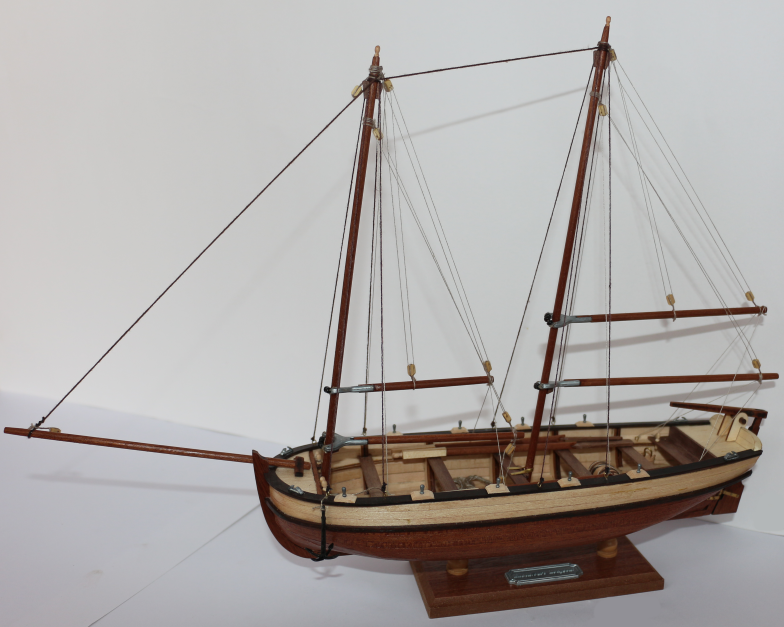
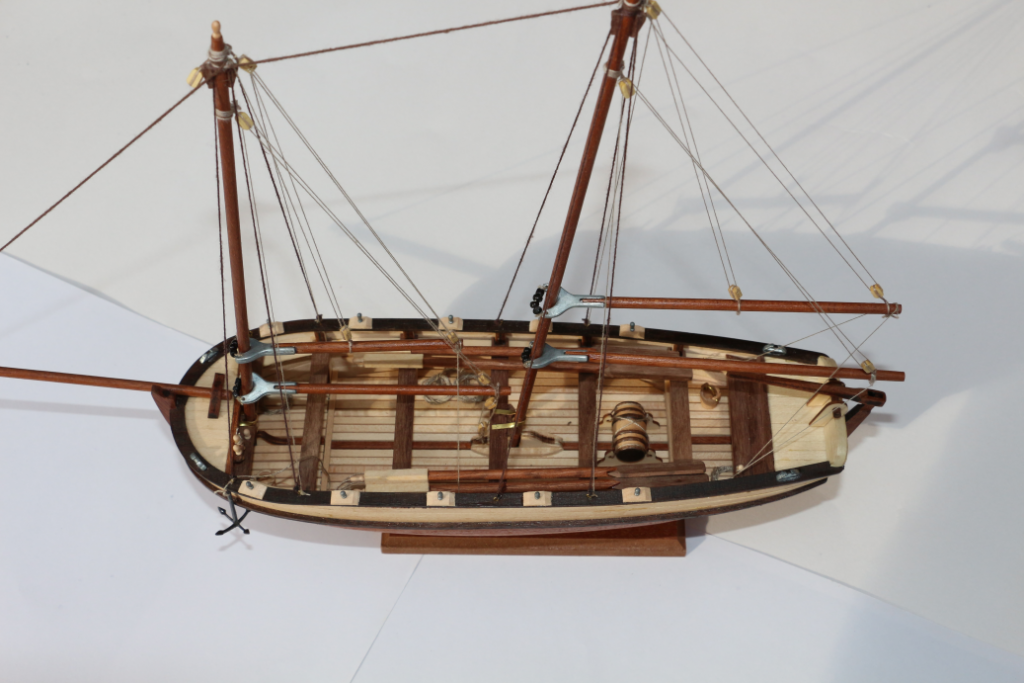
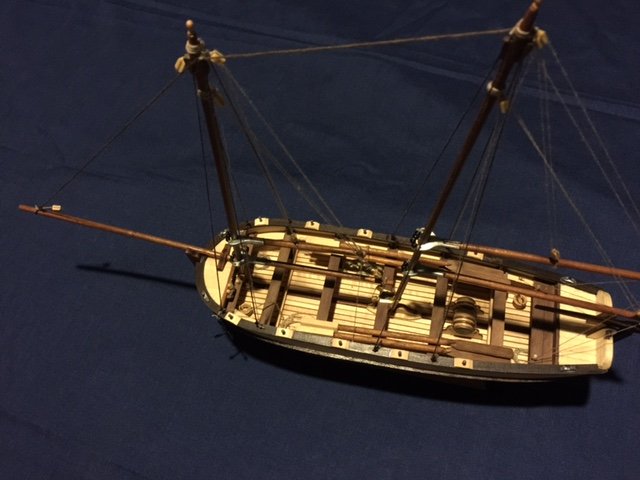
I realised I never came back with the final photos. Here they are, not the best but they turned out ok I think.

- 20 replies
-
- 4
-
-
- longboat
- artesania latina
- (and 2 more)
-
I finished my Endeavour Longboat a couple of weeks ago and procrastinated over what to build next. I decided on the HM Brig Supply by Caldercraft wanting a more detailed kit with better instructions, preferably with 2 or less masts, definitely preferably with cannons and ideally something historically significant to Australia. After a couple of weeks of nervous anticipation the big brown box arrived from Cornwall Model Boats today. I quickly opened it to have a look and firstly was blown away by how much bigger everything was than on the longboat kit. However, I was disappointed in the instructions which amounted to 4.5 photocopied pages. I had previously looked at the multi-volume instructions available on the Jokati website and had assumed all the Caldercraft kits had the same detailed instructions. Lesson learnt! However the full size plans are awesome. Thankfully this is my second model and not the first or I reckon I might have packed it away never to see the light of day again. But with the experience from the longboat and the awesome resources on this site I am sure I get it done. That's it for now, I will do an inventory check tomorrow and then plan to start building on the weekend.
-
I've recently been through the same thought process after finishing my Endeavour Longboat. I was looking at the Caldercraft Shelbourne due to its single mast, but in the end I went with a model that I actually wanted to build, the Caldercraft HM Brig Supply. For the smaller models, cornwallmodelboats.co.uk actually works out cheaper than the local supplier, even taking shipping into account, I ordered my Supply from them.
-
I definitely won't be using superglue on knots on the next build, PVA all the way ... Although it is almost a good thing that this rigging is superglued as it removes the temptation to remove the rigging and do it "better".
-
Thanks Paul, appreciated. Yes, tying knots on such a tiny model has stretched my fine motor skills and eyesight. Whilst I am a Scout Leader and not afraid of knots, I have never had to tie them using tweezers before! My one disappointment that only myself and experts on a forum like this will notices is that I have not used the proper knots, in most cases I just used a simple knot, added a dot of super glue and trimmed the end of the rope. I like your idea of practising with ever decreasing sized ropes. Once I get myself a good book on rigging I will be giving that a go.
-
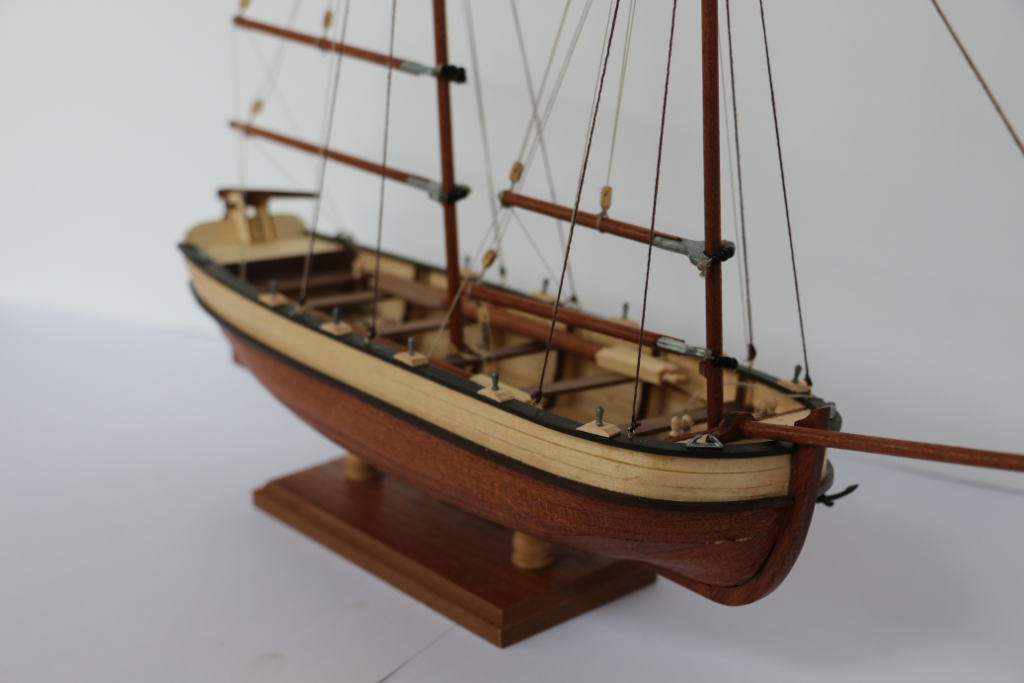
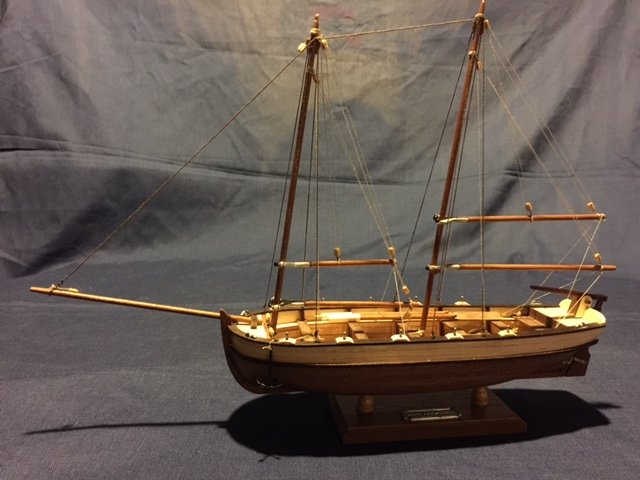
Thanks for the further information Rick. In the end I decided to ditch the sails and now she looks awfully like yours Telp, thanks for the information as well. I had considered gluing the parell beads, but it felt wrong. Happy with the solution of losing the sails though. I am very keen to hear how you are getting on with your HM Brig Supply as a second model? I am very keen on that model my heart says yes but my head says pick something with a single mast! Anyways, after a couple of hours of sail removal and re-rigging. She is complete. Done. Dusted. Only problem now is I have nothing to do ... time to make a decision on the next model. Sorry about the rubbish iPhone photos, will take better photos that do her justice tomorrow in the sunlight.


- 20 replies
-
- 3
-
-
- longboat
- artesania latina
- (and 2 more)
-
Thanks Rick. I did read a lot of build logs before I started, and yes I did read yours but I must have missed the bit about the gunwale covers. Thanks for the help on the block and tackle on the forward boom, I can see how moving that to the centre line will fix my problems there. Had a look at the instructions again and the drawing still looks like it is attached at the port side, but the centre obviously makes sense. As to the missing rigging, I agree it seems to me that it would require it, I am looking at your build log again now to plan a way forward. Perhaps I will indeed remove the sails and lower the gaffs ... it looks pretty good on yours
-
MSW/NRG member in profile
AndrewW replied to AndrewW's topic in How to use the MSW forum - **NO MODELING CONTENT**
Thanks for the quick reply -
I went to update my profile and it wouldn't let me save it until I had checked at least one of the MSW/NRG member checkboxes. I wasn't actually sure what it meant to be a member, I checked MSW seeing as that's where I'm posting, but I didn't want to do the wrong thing ... Any feedback appreciated.
-
Without wanting to hide my problem that I'm hoping someone can help me with because I'm not quite done yet ... What have I learnt from this model? 1. These things can be frustrating but incredibly rewarding 2. I have learnt how to cover mistakes. Wood is so much more forgiving in that respect that plastic 3. Always do a full check of the kits contents when you first open it! 4. Don't rush the planking 5. I need to do some serious reading up on rigging, knots etc. I know my knots are wrong, I just had no idea what I was doing. 6. Use filler blocks between the frames, I actually don't know how I managed to get the planks to bend around the bow without them 7. Measure 6 times and cut once! A mini-review of the kit: 1. Lots of spares for almost everything (I almost cried when I snapped a rubbing strake, but they had several spares) 2. The rudder issue is well known 3. The rigging instructions are atrocious 4. I ran out of rigging thread, as does everyone else on this kit. Luckily I found spare in my mate's stuff because AL were happy to post me some, if I could provide them a copy of my receipt (er, yeah, right) 5. The instructions aren't terrible, but there is a lot of assumed knowledge. 6. A trap for new players is that in contrast to a lot of bigger kits, the first layer of planking is visible from inside the boat. So you really need to make sure you do a good job, otherwise any filling would be visible and look terrible. Overall, not a bad starter kit if you take your time and use the awesome resources available on this site. So what's next? I was initially thinking the Endeavour to go with the longboat ... but I am now looking at the Caldercraft Sherbourne due to better instructions, better components, only a single mast and yet more complex/authentic rigging. There is definitely a Bounty, Supply and Endeavour in my future though
- 20 replies
-
- 2
-
-
- longboat
- artesania latina
- (and 2 more)
-
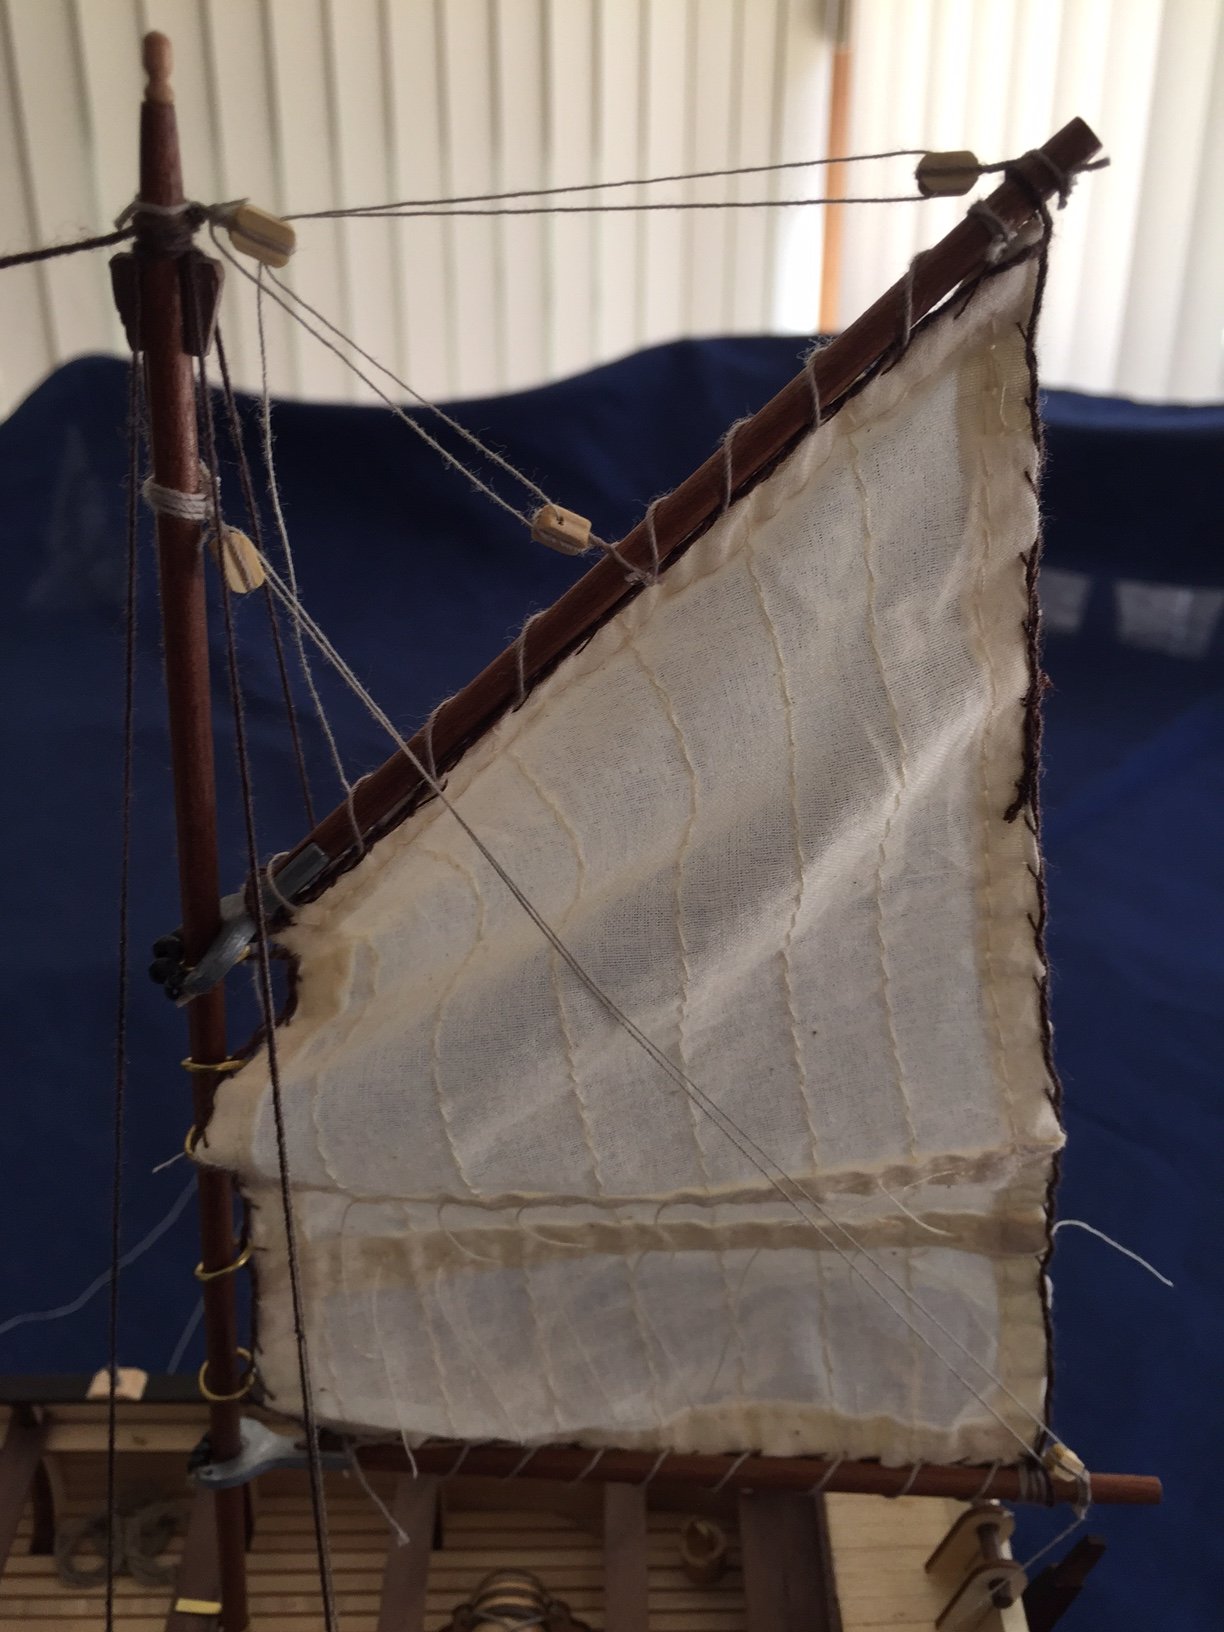
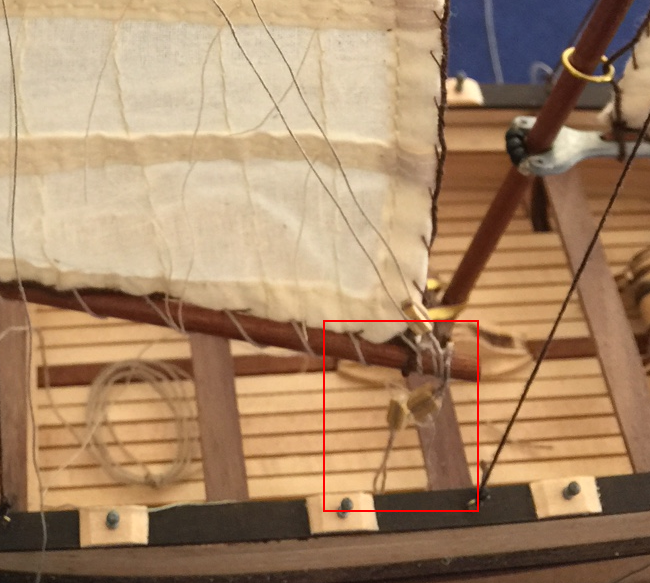
And here is my problem that I am seeking help with. In the previous photos I had loops of thread holding the gaffs up so that the sails are nice and taught ... When I remove these loops of thread this happens on both sails Can anyone tell me why this is happening? To my engineers brain it doesn't appear that the running rigging is able to support the forward end of the gaff where it attaches to the mast. The only other idea I have is to glue the gaff in the proper location, but I really don't want to have to do that. Also, and probably not as importantly, the rear boom has rigging on both sides holding it in place, whereas the forward boom only has rigging on the port side, so there is no way of keeping tension in that piece of rigging as the boom just flops around. It feels to me like there should be rigging running off to the starboard side as well, but there is not enough blocks in the kit to do this and it doesn't appear in the instructions or photos:

- 20 replies
-
- 1
-
-
- longboat
- artesania latina
- (and 2 more)