HOLIDAY DONATION DRIVE - SUPPORT MSW - DO YOUR PART TO KEEP THIS GREAT FORUM GOING! (Only 13 donations so far - C'mon guys!)
×
.jpg.4b9546914df2c235b4fe82d7c03670bd.jpg)

Worldway
-
Posts
628 -
Joined
-
Last visited
Content Type
Profiles
Forums
Gallery
Events
Everything posted by Worldway
-
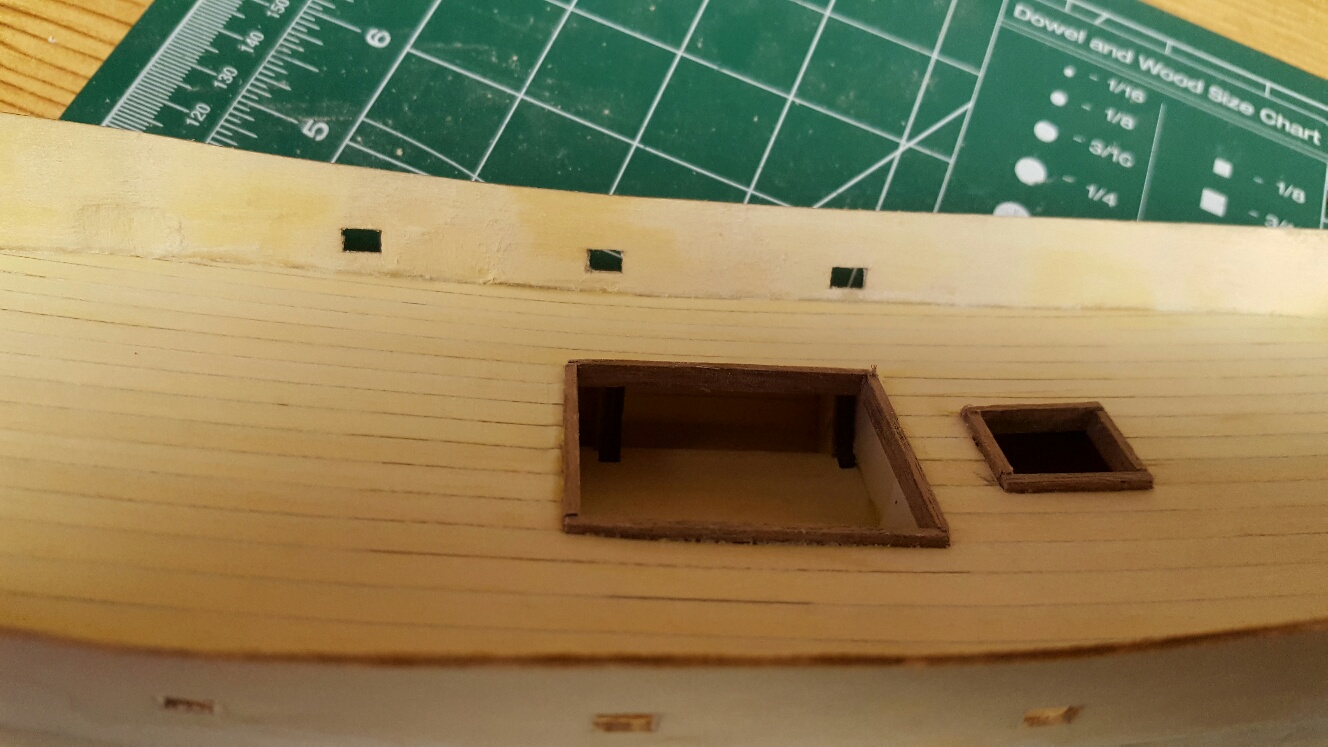
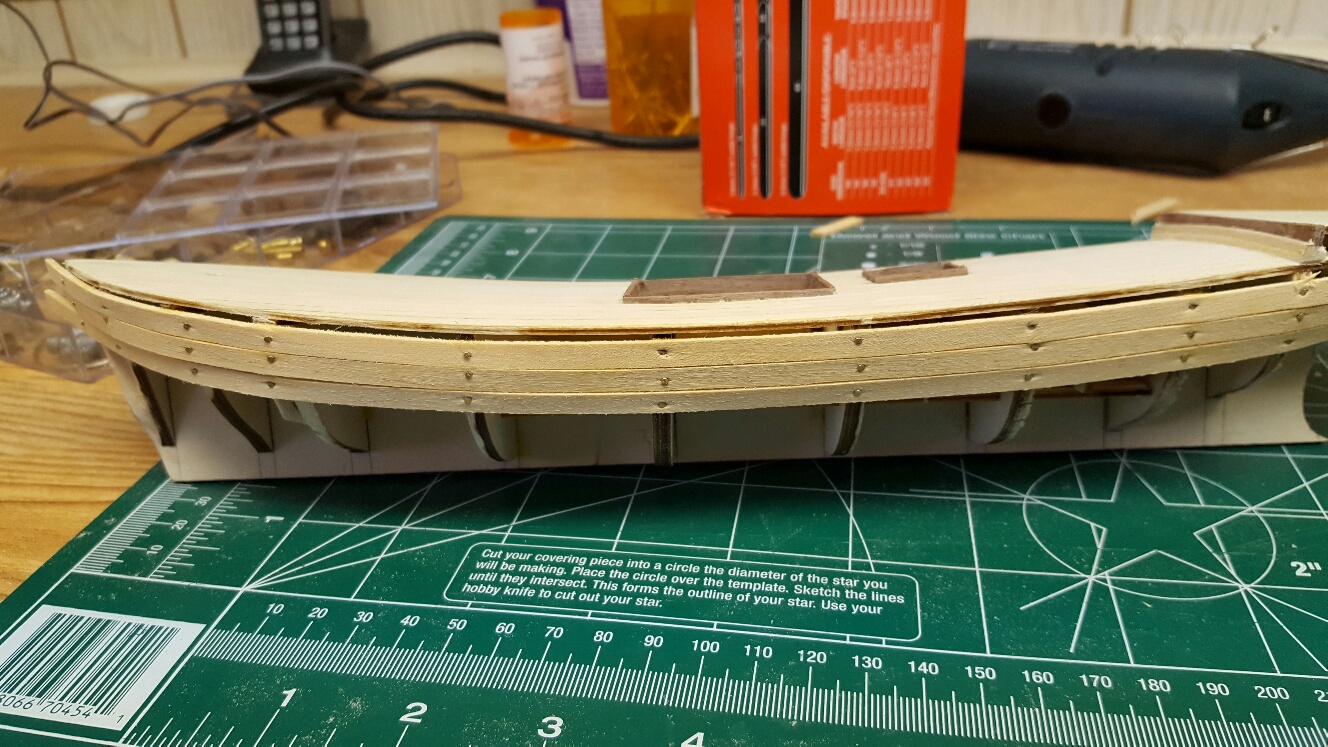
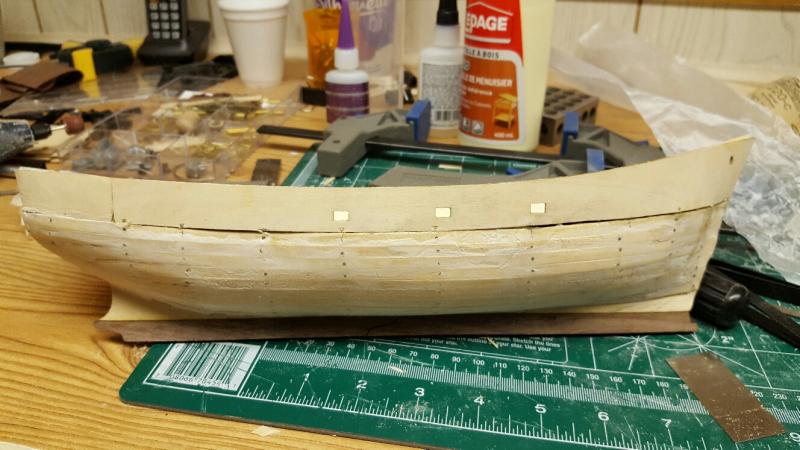
 As probablynot pointed out the scuppers are sitting too high on the deck. I was wondering how it might look if I cut the scuppers down to deck level. It would obviously be a bigger opening. I don't know if I have the ability to actually "move" the scupper and keep them in the same scale.
-
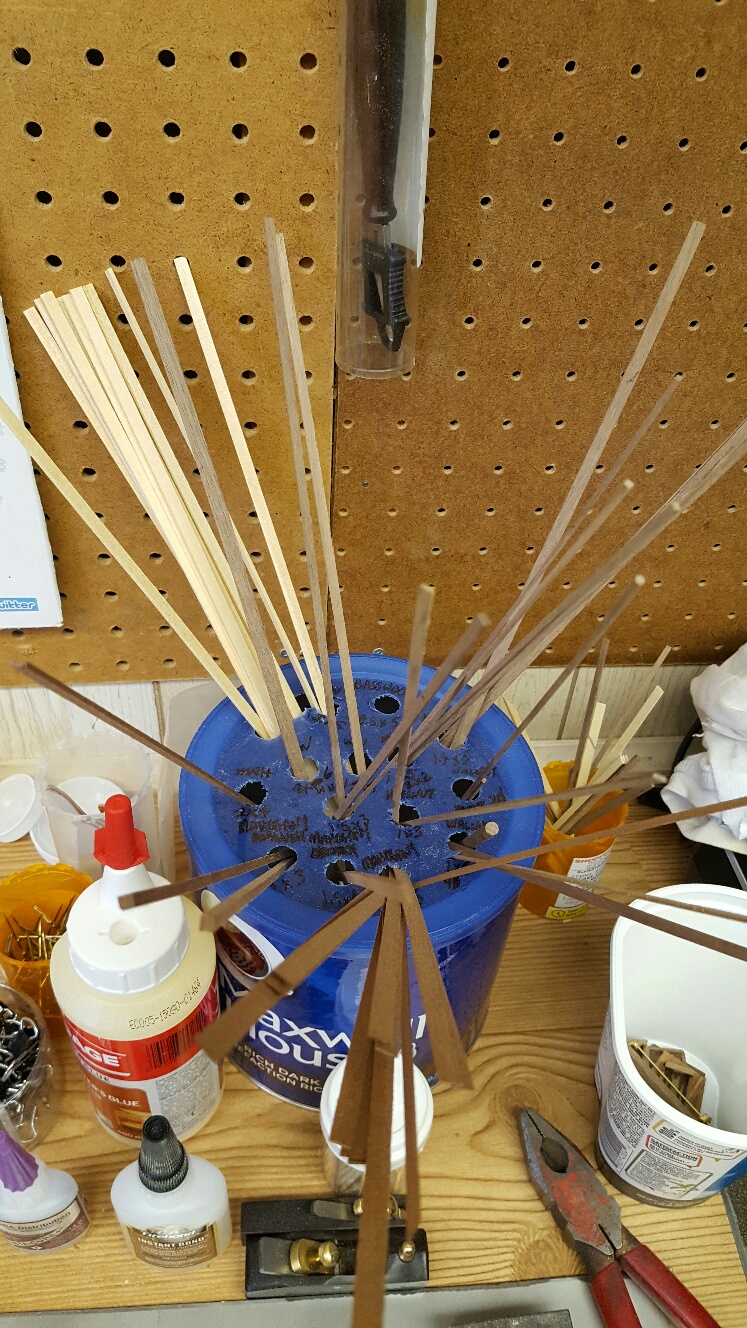
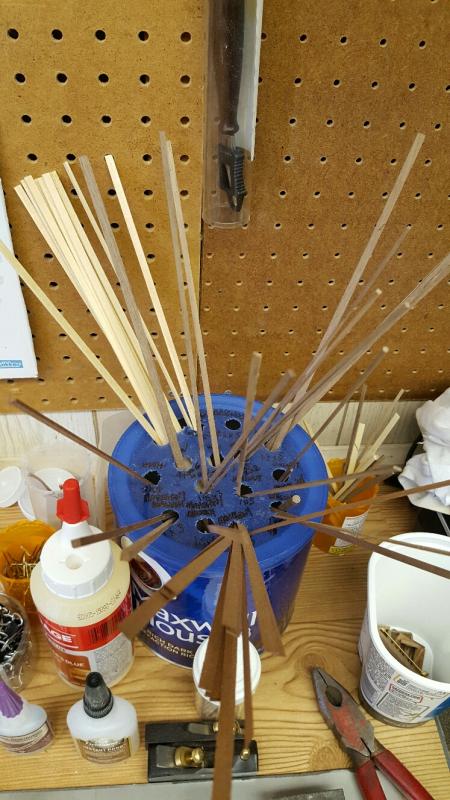
I'm not sure where I got this idea for organizing wood strips but I decided to use it. However, I don't like it. It is cluttered and doesn't organize the wood very well. I decided to start this topic to see how others out there handle their wood.
-
Probablynot, thanks for the advice / comments. I never clued in about the scuppers, you gave me an opportunity to slap my forehead. I thought about trying to relocate them but decided that they will go unnoticed to all but the serious builder. I am going to redo the hatch covers. I am still in the process of sanding the hull and bulwarks and adding body fill when required. Hopefully when I get to the final planking stage everything will look better. Again, this boat was bought with the full intention of using it as a learning tool. I have recently bought the Bluenose from Model Shipways and Bob Hunt's practicum. I don't plan on starting it until this one is fully complete. I am learning quite a lot. It's people like you and others that have helped me along the way. Because of the kind comments I have realized that sections of what I have done were not good enough and I have redone them. I have learned patience and perseverance. And The Admiral sits there every night listening to me gently explain to her how well the model is going. Life is busy and I haven't been spending as much time as I would like on it. Maybe only two hours a week. That's why the build is going so slow. I think this is a really good model for the beginner because there are so many opportunities to cover over poor work.
- 134 replies
-
- 1
-

-
- artesania latina
- mare nostrum
- (and 1 more)
-
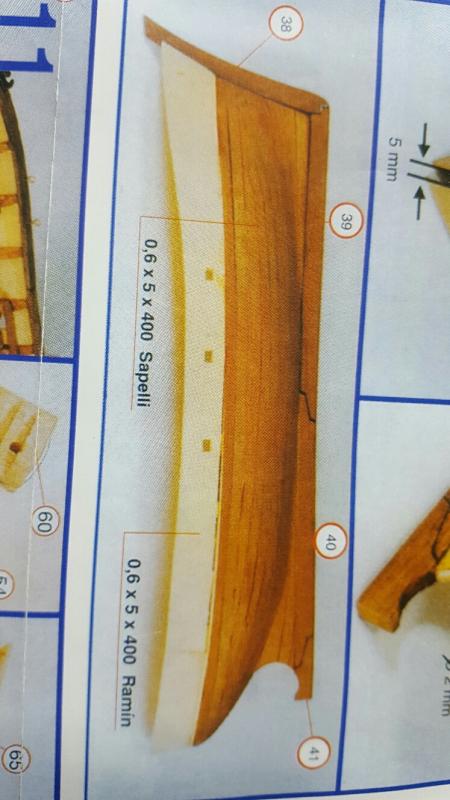
I asked them if they could provide 6mm thick veneers and he said no problem. Tonight I took my calipers to them and they average between 0.5 and 0.7 mm. So I have no problem with that at all. They should hopefully work out fine for me. Now i just need to find a way to make 5 mm wide strips out of them.
-
Just to update, I got off the phone with Model Expo. they said he would honour the sale price of $99.99. Thanks for the heads up Thibaultron.
-
thibaultron, I did order the model last week, before I saw your post. However, I didn't see any mention of a sale or discount even though I looked around on their site first. So I called them today but got voice mail and never a call back. Hopefully they will honor the sale price. Thanks for the lead.
-
So here is a rookie question but I'm curious about techniques, tips and tricks. I have to redo my reeling winch base and the forward quarters hatchway. I tried once already and i didn't like the way it turned out. I'm curious what others do to keep everything 90 degrees and all wood to proper lengths. I got a small piece of stainless steel plate knowing that yellow glue won't stick to it. I'm thinking I should get some type of 90 degree angle bracket to align the structures. Here is what it's supposed to be Here is my attempt


- 134 replies
-
- 1
-
-
- artesania latina
- mare nostrum
- (and 1 more)
-
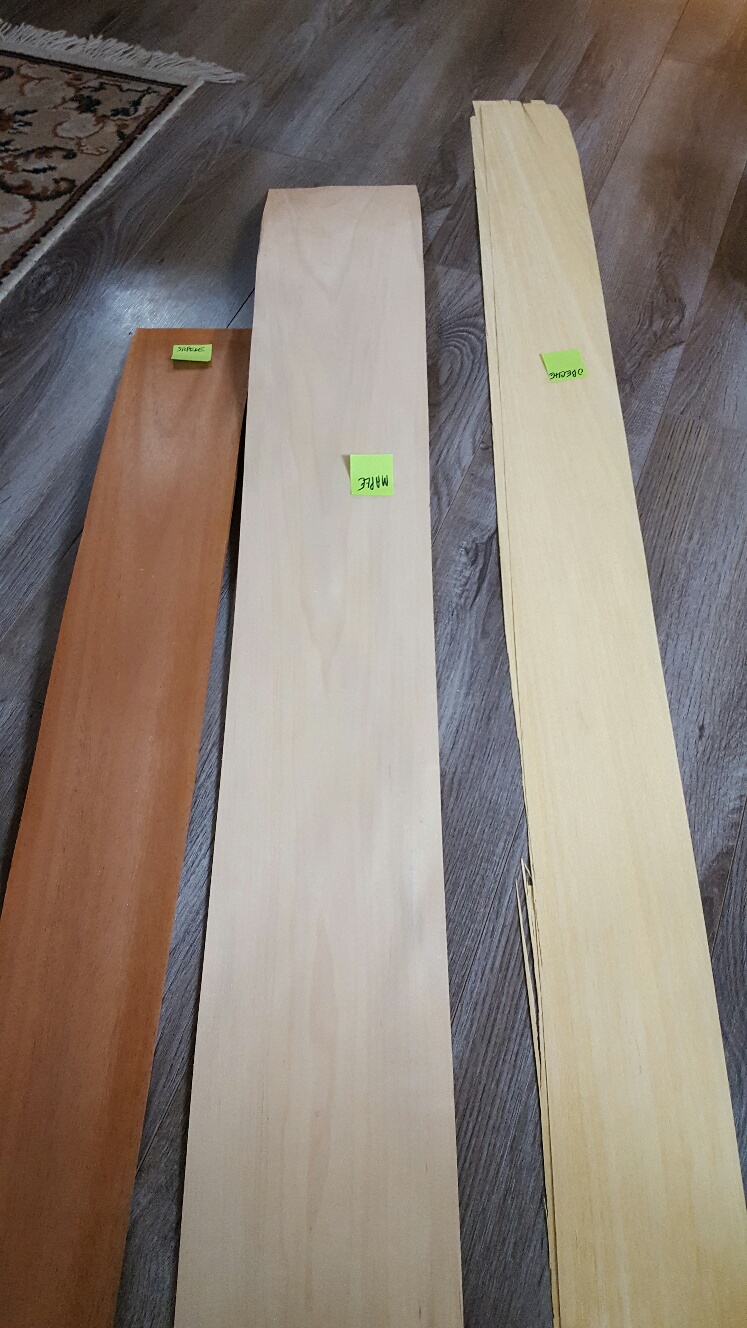
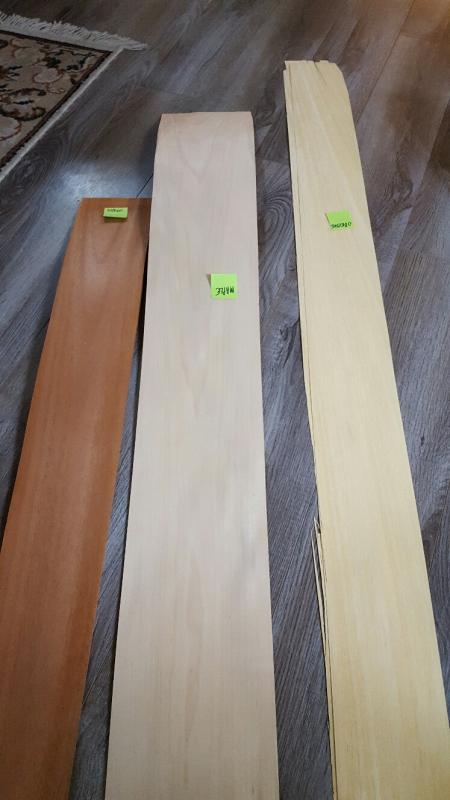
Just to update, I received my veneers from A & M Wood Specialty and would like to comment on them. I had asked for 5 sqft of Sapele and 5 sqft of something equivalent to Ramin. What i received was 8.2 sq ft of Sapele (in amazing condition). I also got 4.3 sq ft of obeche. It was splintering on the edges and ends but for the amount i needed i realy could have worked with it. However, I guess because of the condition, he also sent me 5.4 sq ft of maple. So for paying for a total of 10 sq ft of material (at $1.50 / sf) i ended up with 16.9 sq ft total. I would definitely recommend this company.
-
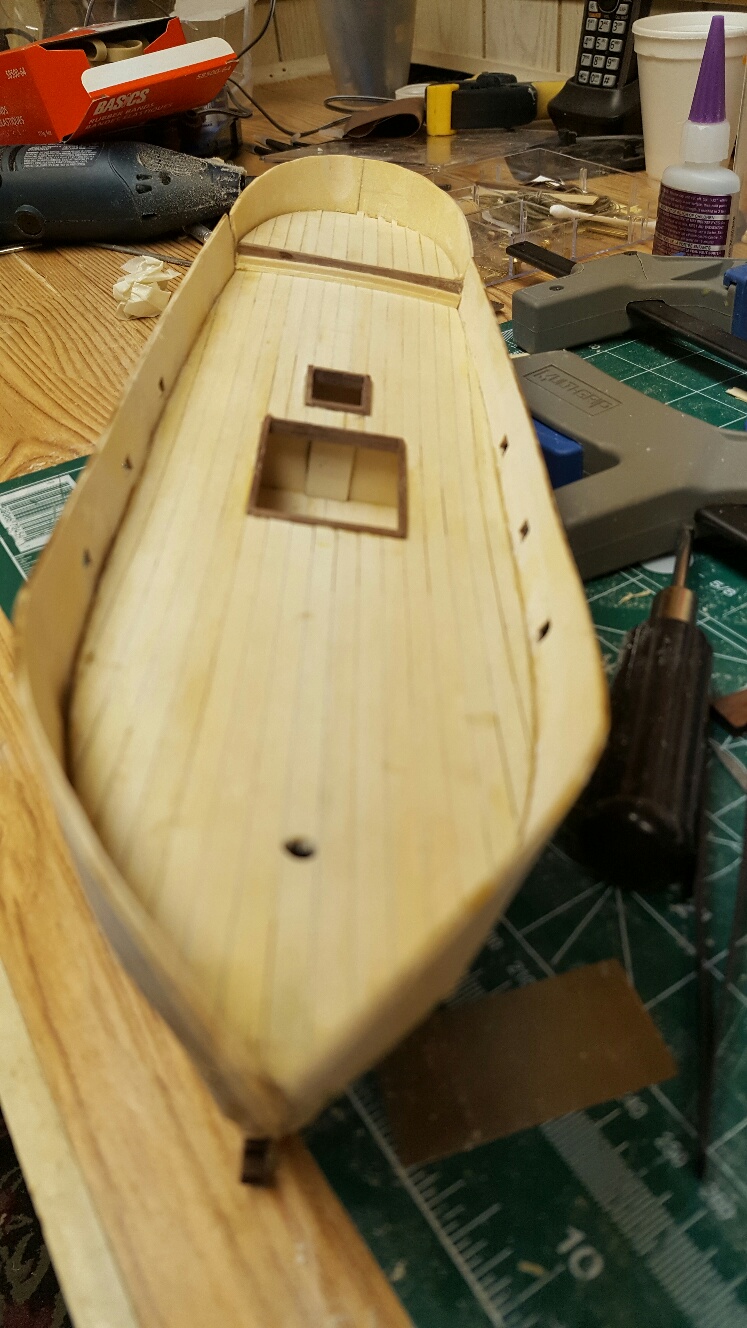
Here are the latest pics. Like I said, installing the bulwarks was the biggest challenge so far. I really had a lot of difficulty with it. The stern bulwark didn't install at the right height therefore the sternmost section is higher than the port and starboard sections. However, i don't think it looks that bad. I received my veneers today. I didn't have time to really unpack them but on quick inspection they look great and I got more than expected. I will definitely have enough planking for the hull and may use some for the interior structures. Can someone recommend, or point me to a forum topic, for cutting veneers. I need to cut them 5 mm wide and I'm not quite sure the best method. Knowing me, if I do it my way, the knife will follow the grain and it won't be the proper width.
-
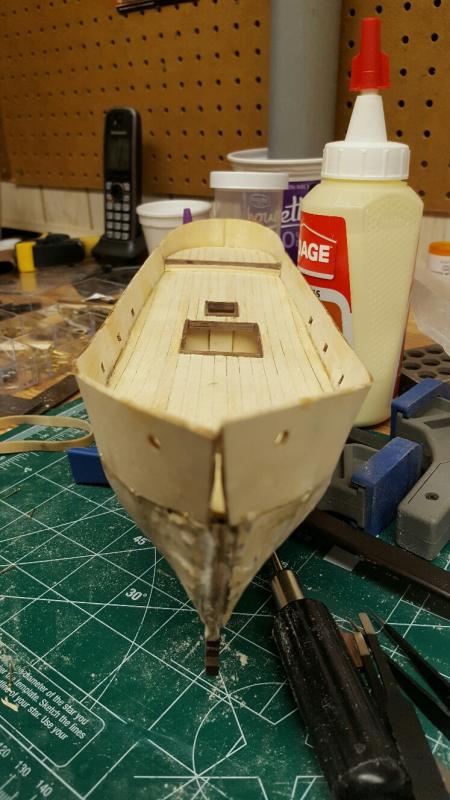
The bulwark has proven to be my biggest adversary so far. I decided to follow the instructions and plank the inner bulwark before installation. Bad move. This caused a slew of problems. Long story short I've had to remove the bulwarks and remove the inner planking. The inner planking also made bending difficult and I couldn't get the nails to hold the bulwark. I should have followed others who said they didn't plank the bulwark before installing. I've also learned a valuable lesson. If the first stages of construction aren't 100% true then your going to have issues further on which I am finding. It seems I have been doing a lot of rework but I guess it's all part of learning. I'm also going to redo my reeling winch base and the forward quarters hatchway which I am definitely not pleased with.
- 134 replies
-
- 1
-
-
- artesania latina
- mare nostrum
- (and 1 more)
-
My first build is the Mare Nostrum. I am still in the early stages but have been thinking about my next build. The Mare Nostrum has provided me with some challenges but so far I think I am working through them quite well (others may disagree). It has all the elements that one would expect with planking, some rigging, etc. So, because Christmas is fast approaching, and the Admiral wants a wish list from me I was considering the Bluenose II by Model Shipways. I thought of it because firstly the ship is a Canadian icon and secondly Model Shipways probably has one of the best set of instructions out there. I would like to hear your thoughts. Keep in mind, by the time I finish the Mare Nostrum I will still be a novice. But I can't see any other models out there that would be good for a beginner without going to a solid hull and I don't want to do that.
-
Haliburton, I took your advise and contacted A & M Wood Specialty. Very nice to deal with and very helpful. I ended up buying 5 sq ft of Sapele and 5 sq ft of (equivalent to) Ramin. Both were $1.50 / sq ft. They were really helpful and didn't seem to have a problem with small orders. I do tend to think though that the minimum is 5 sq ft. They are shipping it to me on UPS for a flat rate cost of $20. which is reasonable because for me to go there and back would take 4 hours plus a tank of gas anyway. Thanks for your help
-
Could someone please give me a suggestion as to how to clamp the front of the bulwark where it meets the keel until the glue sets. The keel isn't installed yet, not sure if that matters. I'm working on installing the bulwark and still finishing sanding the hull. I also still need to install the keel. i hope to start the second planking early next week. The veneer I purchased at my local building center wasn't quite what I was looking for. I ended up dealing with an out of town wood dealer who sells small quantities of veneer. He is going to send me 5 sq ft of Sapele and 5 sq ft of an equivalent to Ramin. Looking further into the instructions it seems that the second planking material is not supplied. I also noticed this on some other models i have been looking at. I was thinking of perhaps building the Bluenose II by Model Shipways next and i believe they do not supply the final planking as well. I haven't sent pictures in a while because in the past I have sent some ugly looking pictures which would indicate I have no idea what I'm doing. I would rather show the more positive side and send pictures after a process has been completed. Believe it or not, aside from trying to attach the bulwark, it's not looking too bad. At least in my mind. Pictures will come soon.
-
I keep forgetting about my local building centers. I just checked one such store online and they sell a good selection of veneers. They are 0.03" or 0.762 mm thick. I require 0.6 mm thick which I think is close enough. I wish I had thought of them when I bought wood filler. I paid 2 to 3 times as much from a local hobby store not thinking about a building center. I need to realize that I'm not building plastic models anymore. I'm dealing with a brand new set of rules. You are correct probablynot. However, I have managed to attach the stern bulwark. It's not uniform in depth, being higher at the rear and more toward proper height at the sides. I will leave it as is and apply the vertical planking accordingly. I don't think it looks too bad. I will post more pictures of my build a little later. I haven't done so yet because I wanted to get a bit more progress done first.
-
I'm wondering if I'm missing something. I did a wood inventory and I have enough wood to finish the project with the exception of planking the hull and bullwarks as shown. They don't list these materials in the BOM. I'm wondering if this is an option that I have to purchase separately vs. painting the boat. Perhaps someone could shed some light.
-
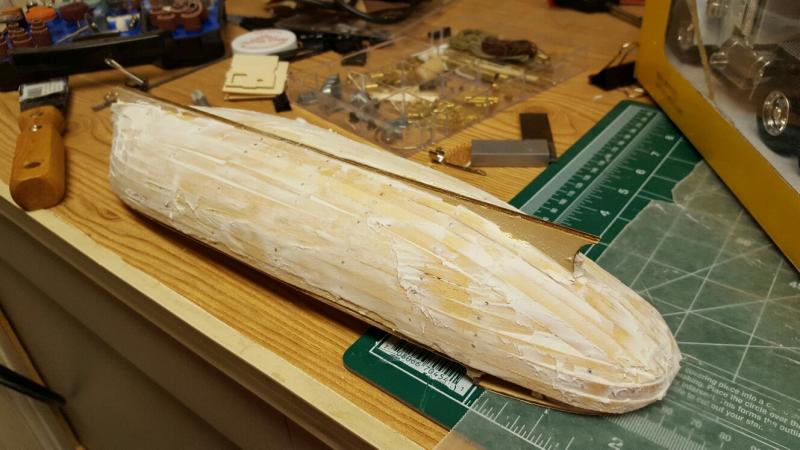
I'm starting to work on the hull. I added wood filler and am waiting for it to set. i think it will work out well and sand nicely. it's a filler that model airplane people use because it hasn't any weight to it. When i said earlier that the tub i bought was hard as a rock, apparently all you need to do is add a bit of water and it comes back to life. I'm slowly moving forward. Still working on a few sub assemblies.
- 134 replies
-
- 2
-
-
- artesania latina
- mare nostrum
- (and 1 more)
-
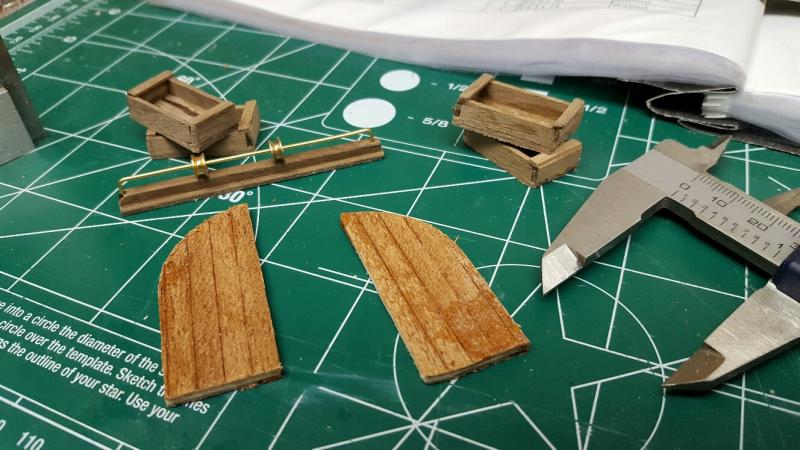
I did make the sleeping bunks knowing that they would never been seen. Or more accurately I should say that I hacked together two bunks and glued them down without the cloth "blanket" knowing that they would never been seen. I liked the detail on yours. I also liked that you added a handle and hinges on the entrance door. I'm not sure yet but I may add that detail on mine as well.
- 134 replies
-
- 1
-
-
- artesania latina
- mare nostrum
- (and 1 more)
-
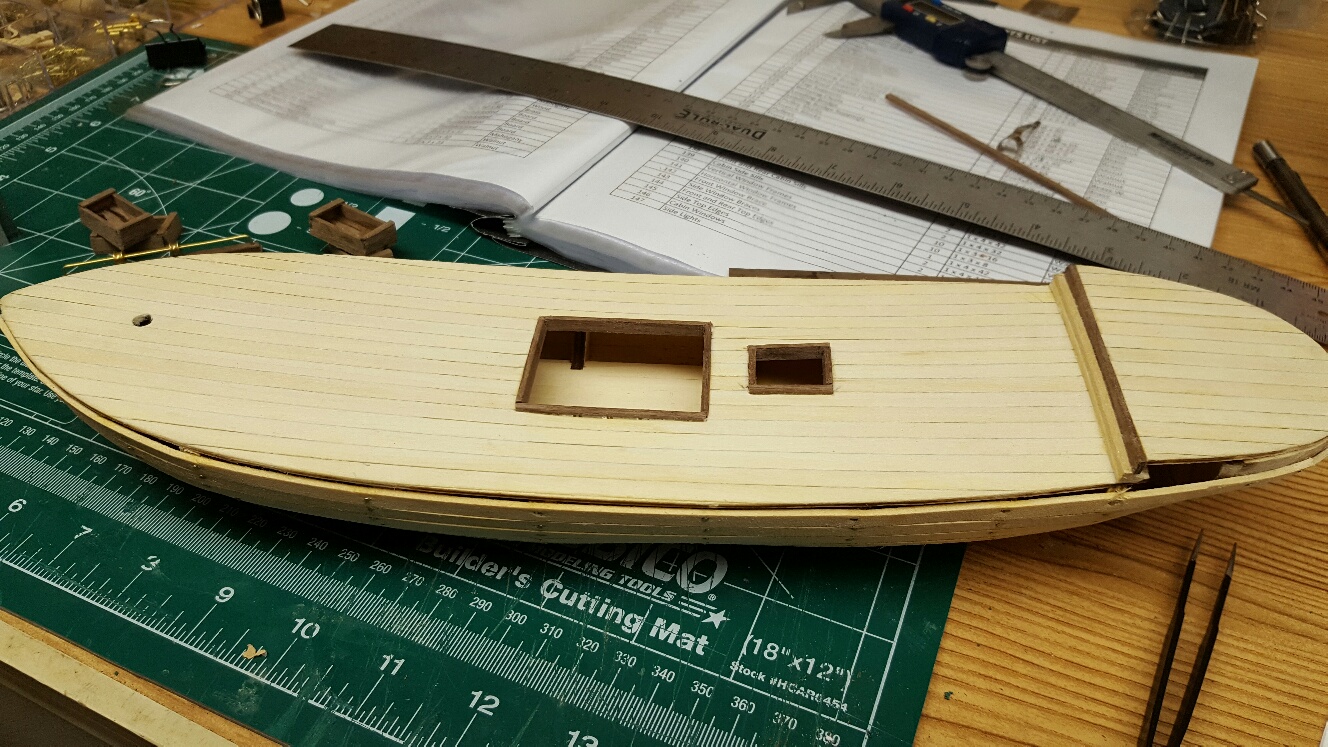
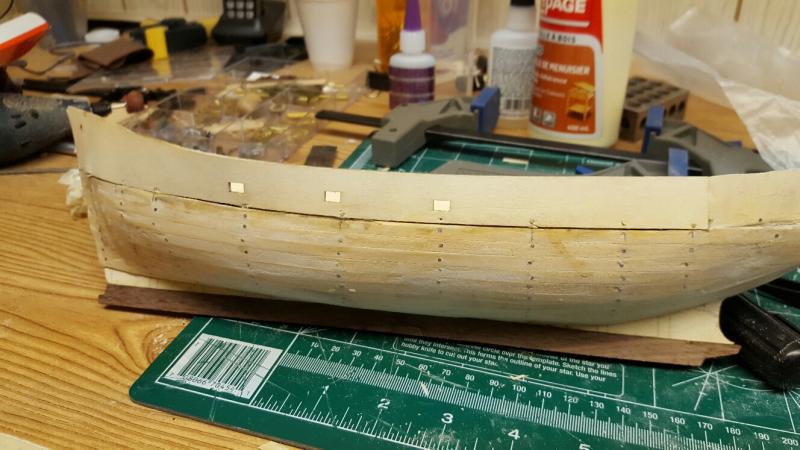
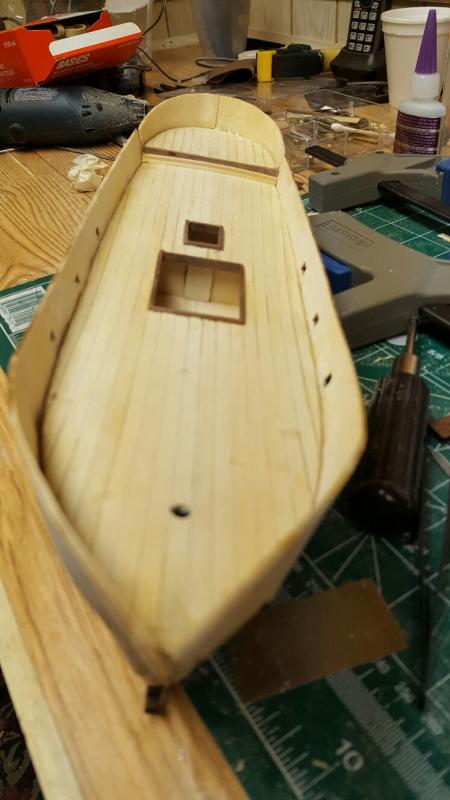
Thanks Probablynot. I was wondering when / hoping you would add your thoughts. I have looked at your build countless times and have used it quite a lot for reference. In reality the planking isn't as nasty as the pictures might appear. There are definitely areas which need body work but I'm hoping by the time I get to the second planking it will be fine. How did you attach the brass wire to the sliding doors; CA glue? I have been working on sub assemblies for the last bit and here are some recent photos


- 134 replies
-
- 1
-
-
- artesania latina
- mare nostrum
- (and 1 more)
-
I found some 1/32" thick board which should be OK for planking. The stern bulwarks are 1.5 mm thick or approximately 1/16". I plan on gluing 2 sheets together to get the thickness required. The stern bulwarks have to be bent around the keel. Should I bend the two layers separately then glue them together or glue them together first before bending? I was also thinking about using the panel that the original false keel was cut out of as a template. Is that a good idea or should I just bend them around the keel itself?
- 134 replies
-
- 1
-
-
- artesania latina
- mare nostrum
- (and 1 more)
-
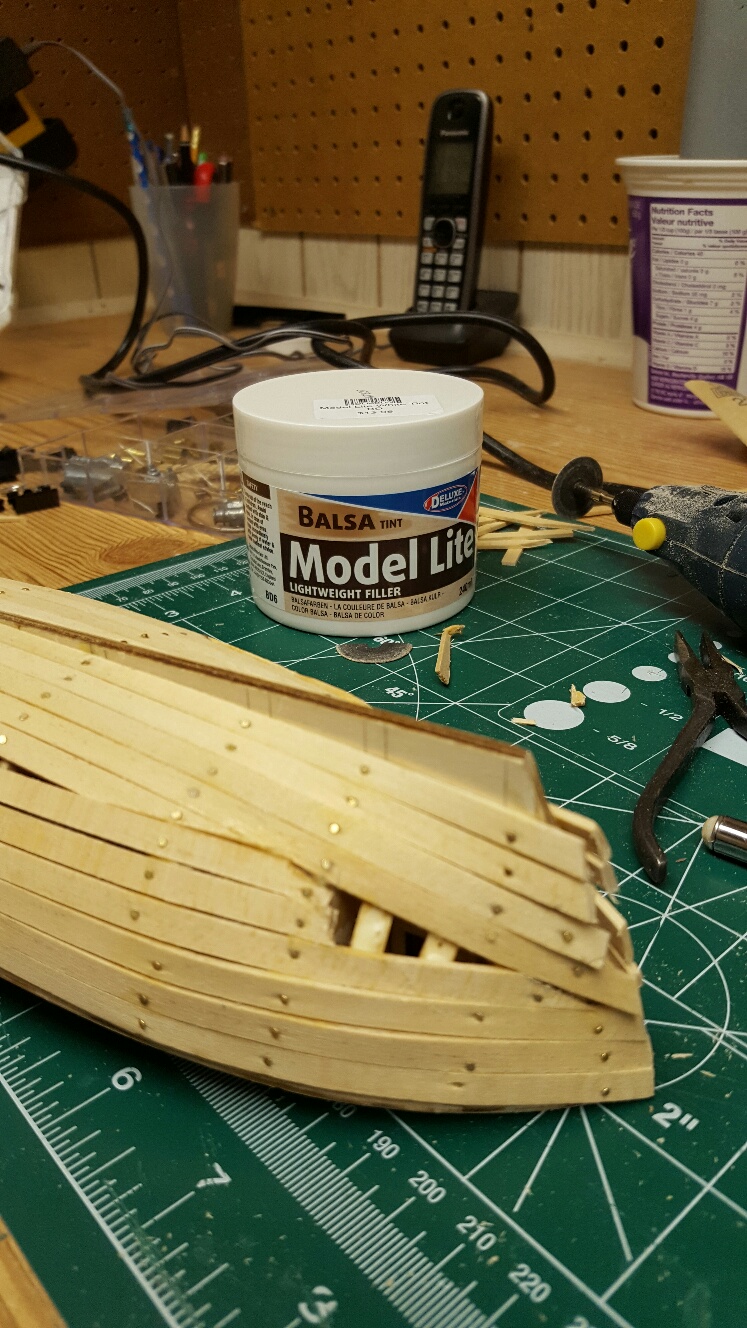
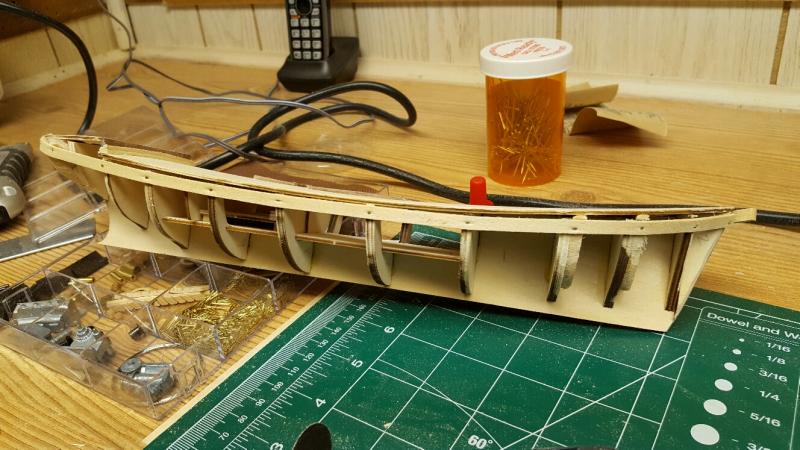
I made another mistake last night and need to completely redo the stern bulwark. I planked the interior of the other bulwarks and need to install them before i plank the exterior. I was going to start applying filler to the hull but realized that my brand new tub of filler is hard as a rock. So I need to get more. Unfortunately for me to get to a hobby store is at least a 45 minute drive so I will order online. I am running out of wood strips because of redoing things and don't know where to get more. I posted the question in the wood forum so hopefully I will get a few suggestions. I am determined to finish this model and make it look the way I want it. I am really enjoying this but I definitely need a lot more experience under my belt. I guess you have to learn somehow. Looking at some of the other builds it surprises me how much talent there is on this forum. Some of the work is mind blowing. If I can strive to be 5% as good as a lot of these guys I will be happy. I think I'm ranting a bit because I'm frustrated and I have nothing to do tonight. Out of wood and out of filler. I may be a few days before I get back to it.
- 134 replies
-
- 1
-
-
- artesania latina
- mare nostrum
- (and 1 more)
-
I apologize if this question has already been answered but I did do some searching without luck. As some of you may know I am building the Mare Norstrum and haven't had the best success so far. However I'm perservering and am determined to finish a fine looking model. However, I have to "re-do" a lot of the wood work because my first attempt didn't turn out the way I wanted. Having said that, I'm running out of wood in my kit. I'm looking to purchase regular, off the shelf, model wood such as basswood, mahogany and walnut. I'm looking for strips 0.6 mm thick by 5 mm wide in basswood plus I need some 1.5 mm thick basswood sheet. I would also like to add to my inventory for other sizes and types. Where in North America is there a place that has a good selection? I would prefer somewhere in Canada to avoid duty etc plus big freight charges and I would also prefer someone who sold metric sizes. Any suggestions would be welcomed.
-
Thanks Robin, I do think it can be repaired. Just a smidgen of oakum and I'm good.
- 134 replies
-
- 2
-
-
- artesania latina
- mare nostrum
- (and 1 more)
-
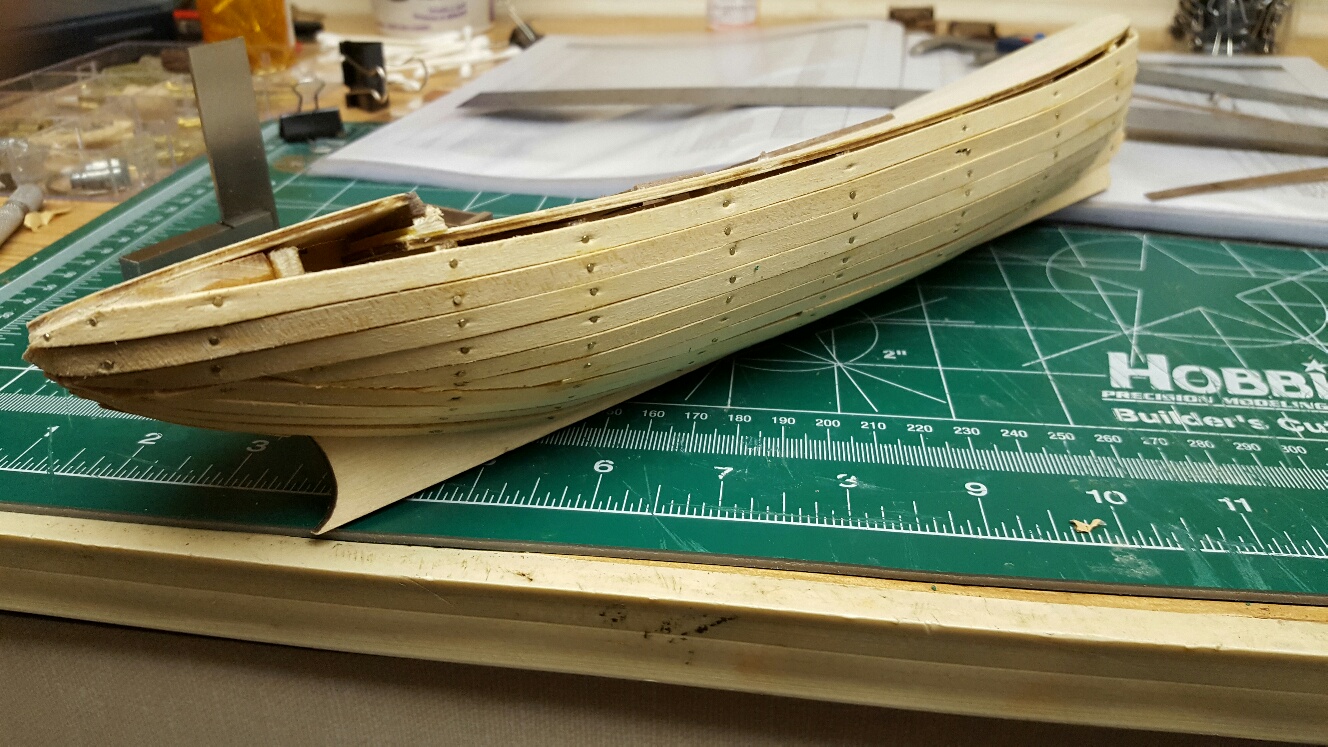
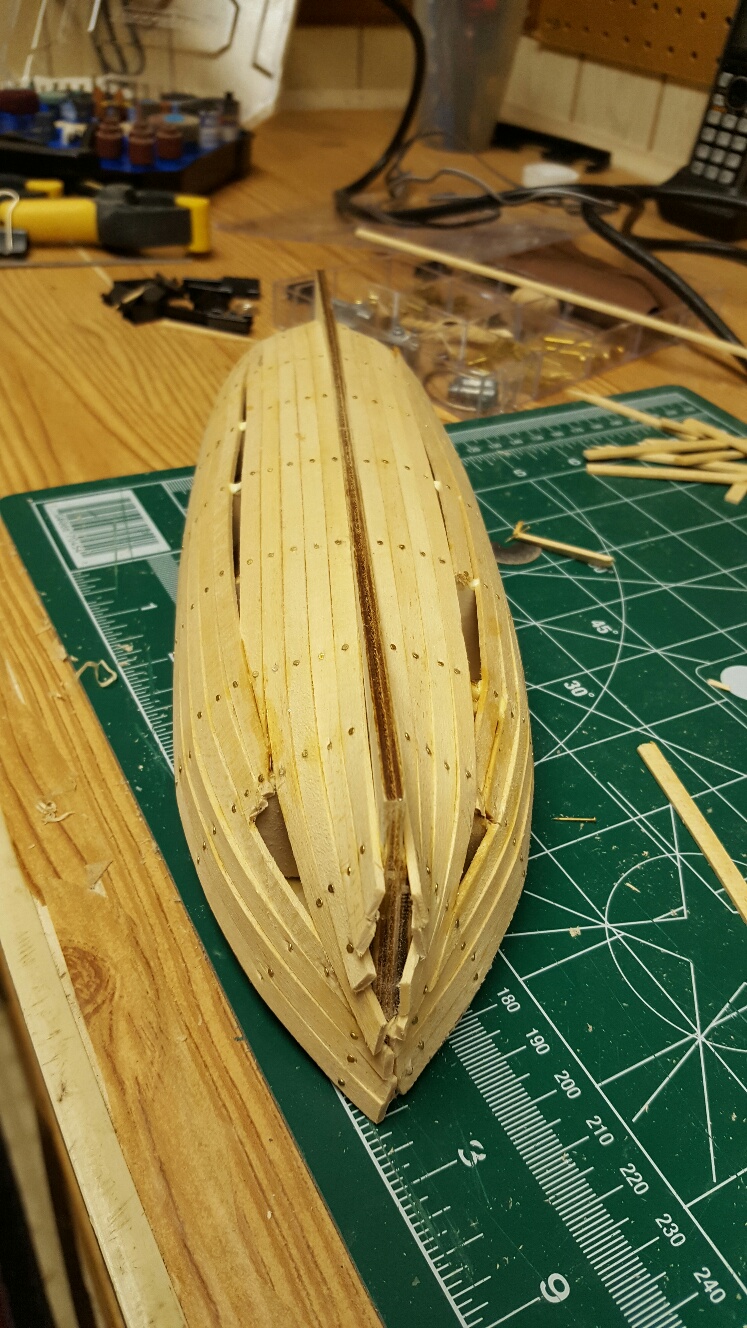
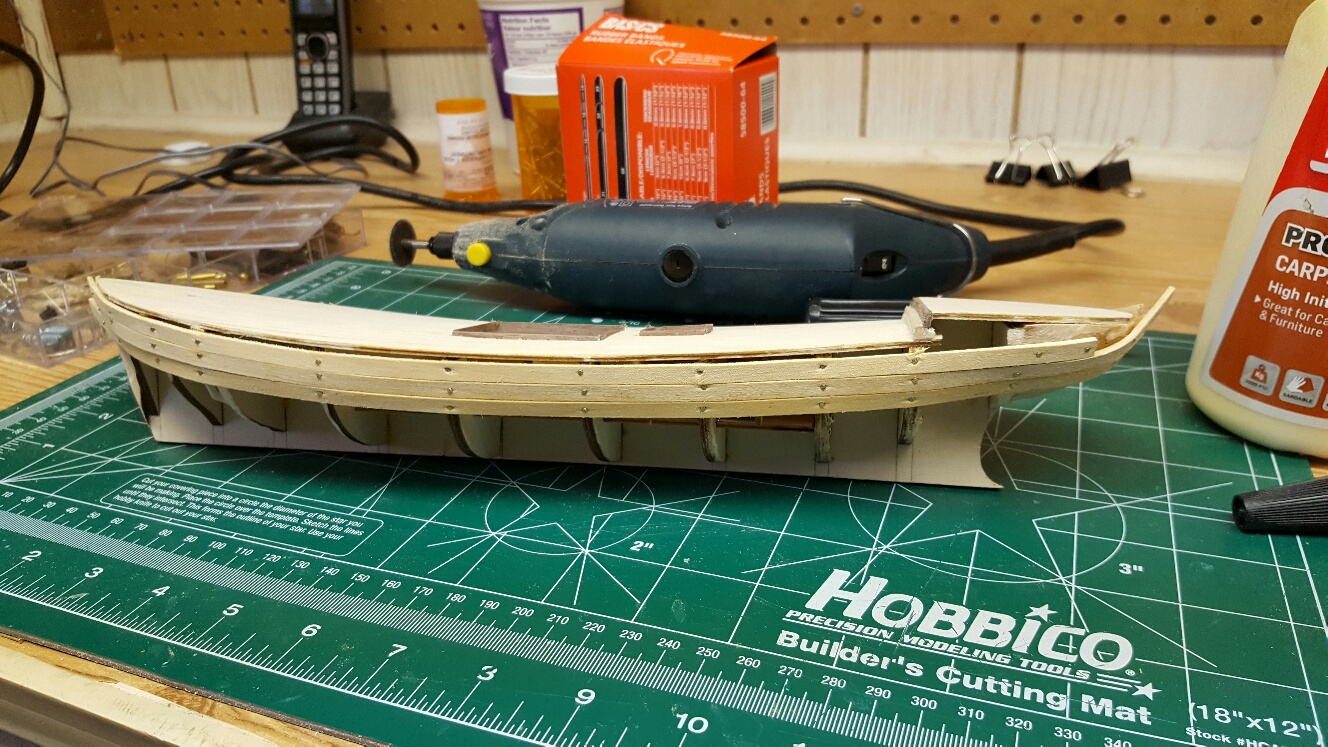
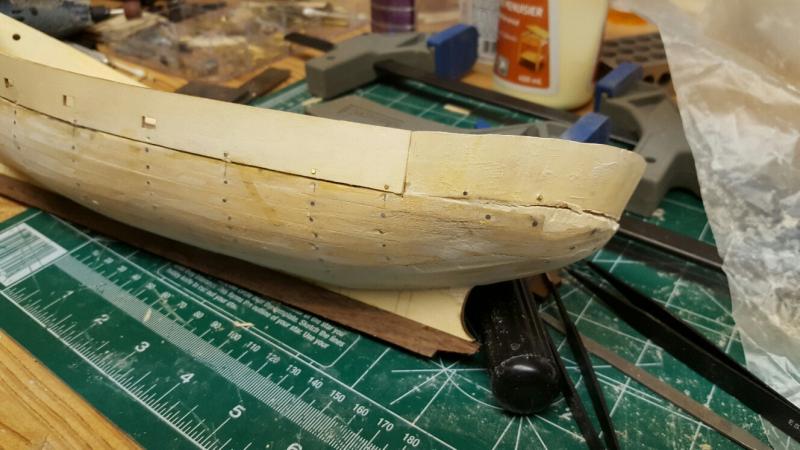
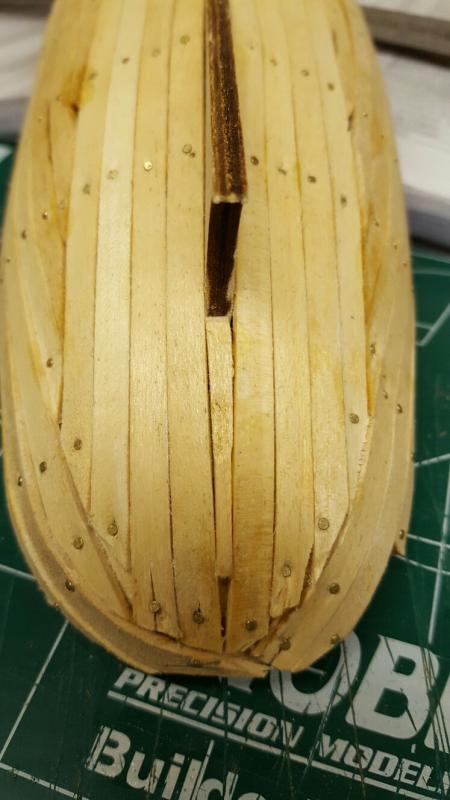
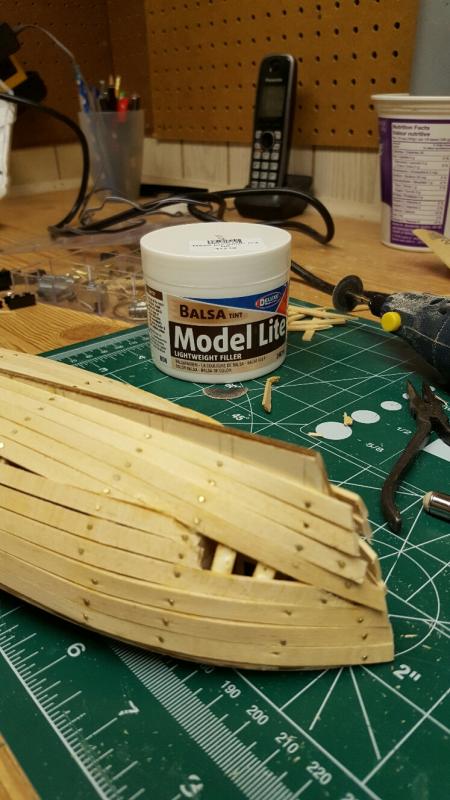
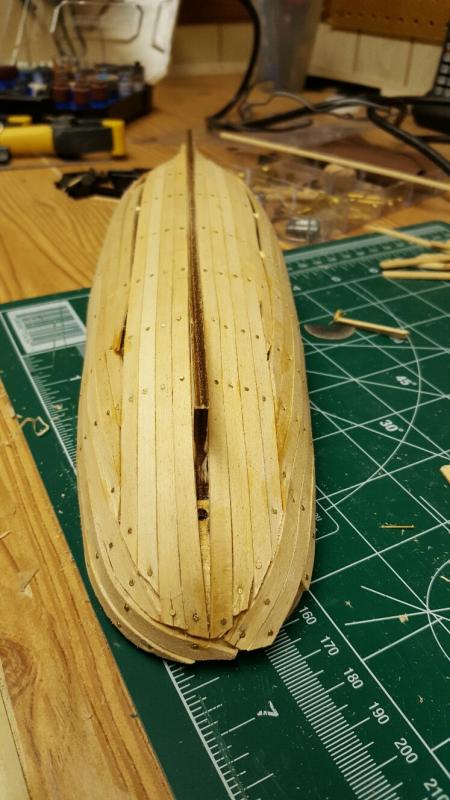
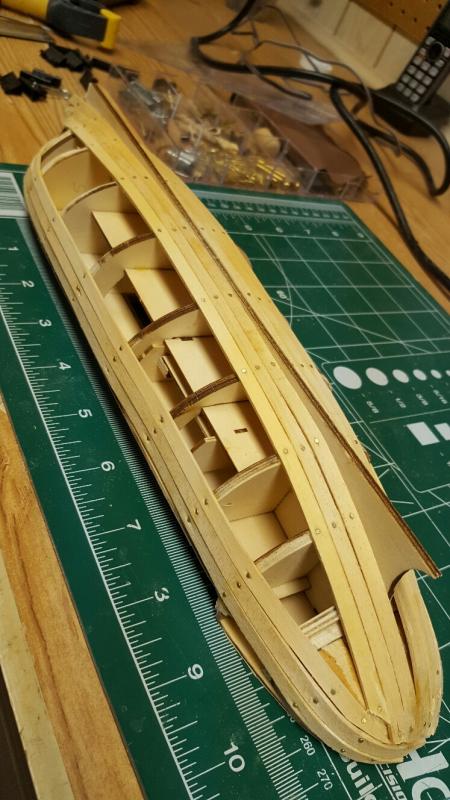
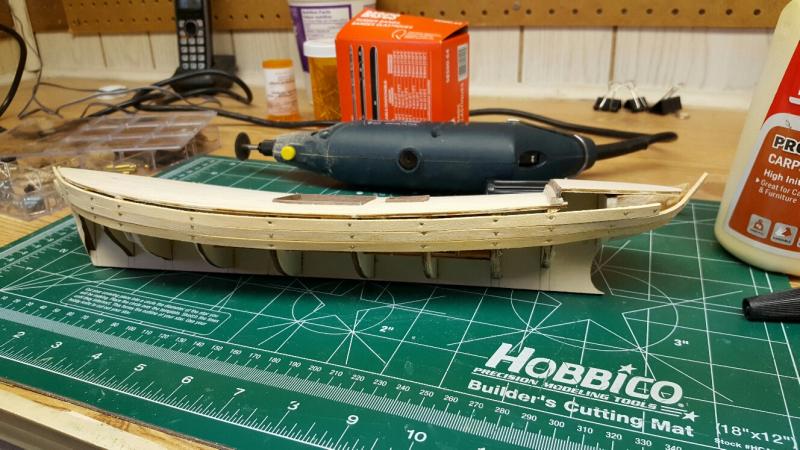
Well the first planking is complete and I've learned a valuable lesson. Planking order matters greatly. I found that I ended up with several planks that had no support on the ends. As you can see, I had to cut them off and add cross braces in order to add filler material. At this point I'm really hoping that the body fill and sanding will make it all better. I completely underestimated wood boat building and am gaining a new appreciation. It's changing how I think about the model and how I attack each phase. Like I said before my next model will also be a beginner / intermediate model as I'm sure it will also be used for learning technique. My first purchase years ago was a model which I now know was made for advanced builders. I never stood a chance of finishing it, or at least finishing it with any pride. I wish I had kept it because it would have been a fun build in a few years (and now it's worth a lot of money to buy). So now it's time for finishing and fine tuning. I imagine this next step will take some time.

- 134 replies
-
- 1
-
-
- artesania latina
- mare nostrum
- (and 1 more)
-
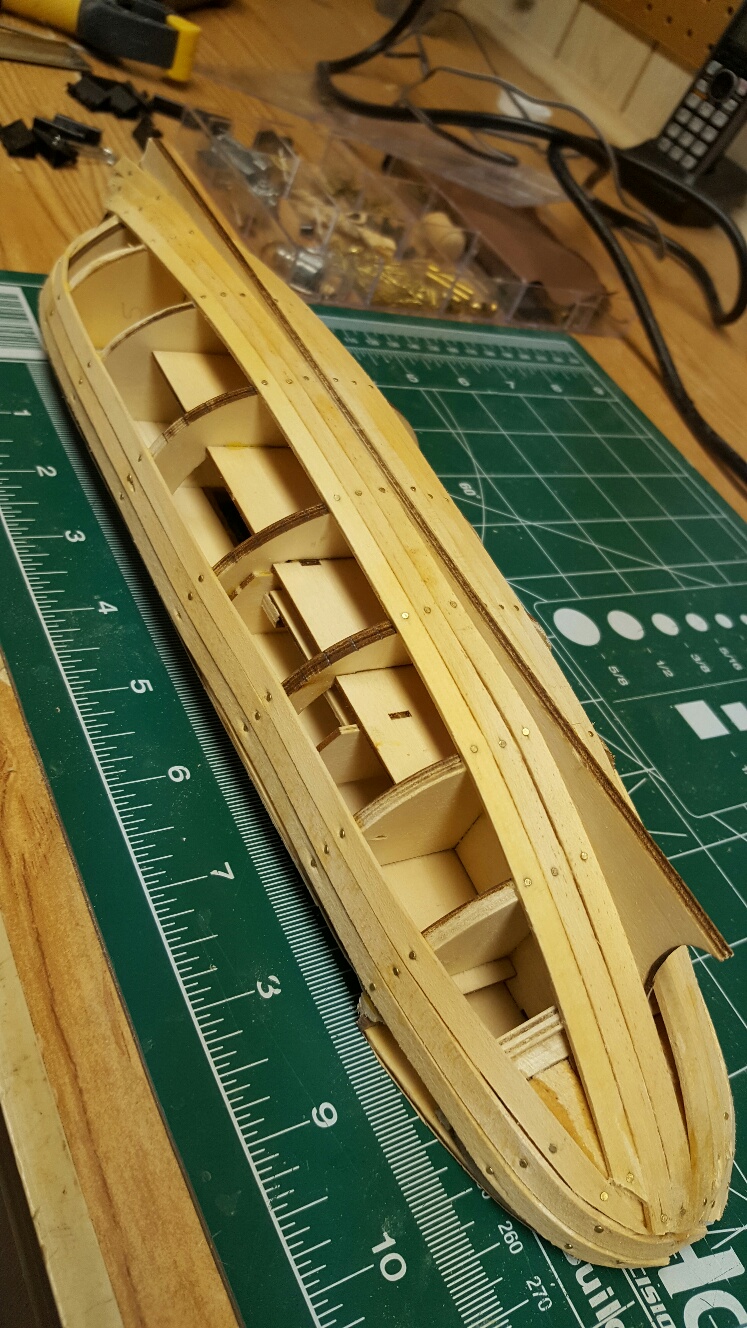
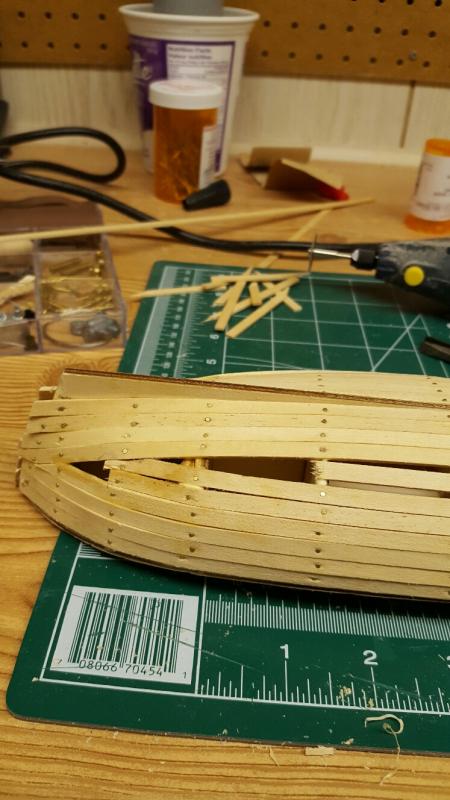
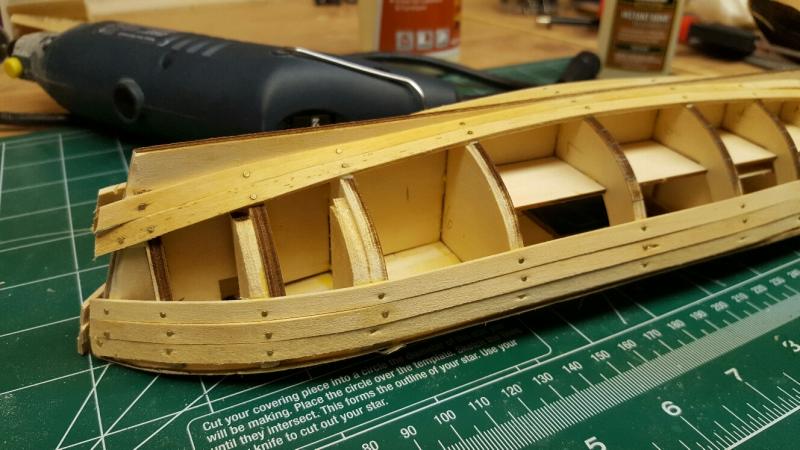
Planking is progressing although it's going slower than I anticipated. I also feel that it's better to add a few planks then let everything dry before continuing. I'm trying not to rush this build and take my time. It's not coming out as "professionally" as I had hoped but The Admiral keeps reminding me that it is only my first build. The stern area is a little rough looking but I think I can correct this with wood filler and sanding. Also, my pin nailer isn't the best so a lot of nails are sitting proud of the surface. I will have to go back and see if I can reset the nails before I start sanding. I am truly enjoying this though and am learning a lot along the way. I've also started gaining an appreciation for maritime history. My ultimate goal is to build a model such as the USS Constitution but I'm years away from that. Hopefully when I retire I'll be ready to tackle the challenge. I think my next build will also be a beginner/intermediate style of boat. I am a fan of fishing craft so will likely stay with that theme again. I took a piece of 2" PVC pipe 15" long and glued a cap to one end. I set it on my bench and secured it so it wouldn't tip over. I filled it with water to make a little plank soaker. The only think I didn't take into account was the fact that wood floats. So I use and empty upside down pill bottle to put on top of the plank to weigh it down into the water. I find this has been working really well.


- 134 replies
-
- 1
-
-
- artesania latina
- mare nostrum
- (and 1 more)
-
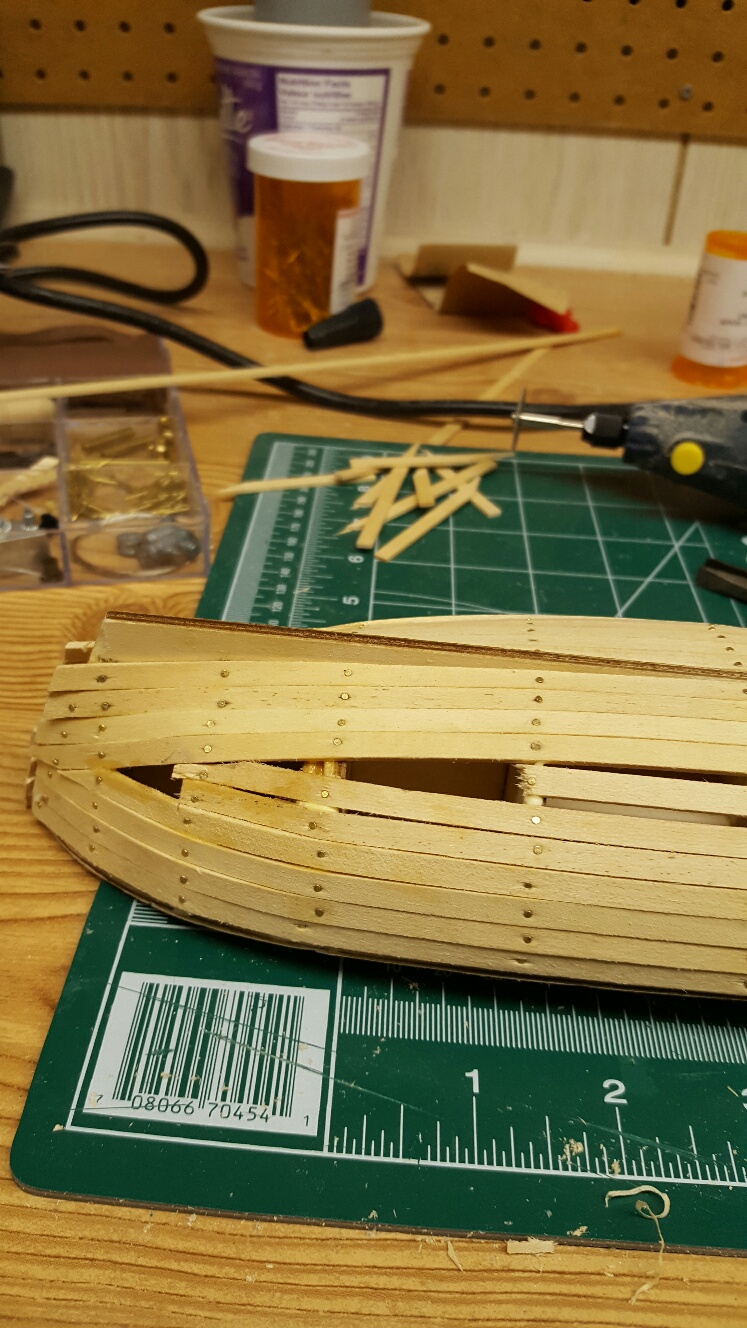
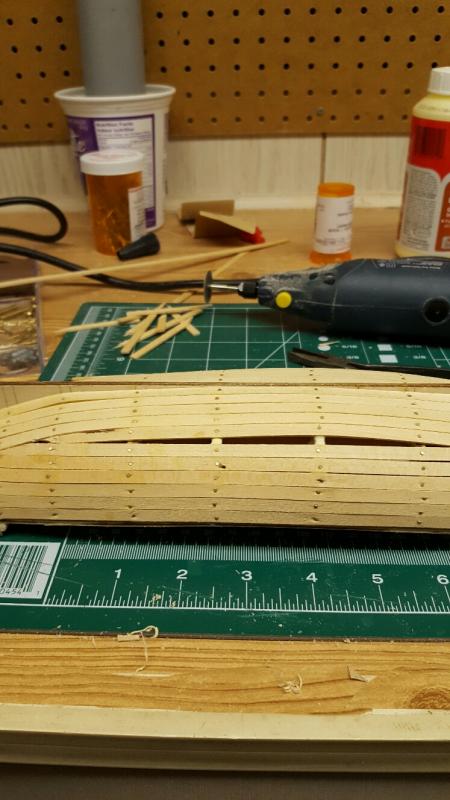
Sometimes you need to step back and reassess. The soaking of the planks question I had was actually in the limited instructions. I found that soaking for any longer than 5 minutes was counter productive. Luckily this is the first layer so hopefully I'll be experienced by the time I get to the second layer. I think I have some minor build errors so far but hopefully they will eventually be hidden to all but the trained eye. I've put on my first row of planks. LET THE PLANKING BEGIN.
- 134 replies
-
- 1
-
-
- artesania latina
- mare nostrum
- (and 1 more)