HOLIDAY DONATION DRIVE - SUPPORT MSW - DO YOUR PART TO KEEP THIS GREAT FORUM GOING! (89 donations so far out of 49,000 members - C'mon guys!)
×


Jackson7
-
Posts
186 -
Joined
-
Last visited
Content Type
Profiles
Forums
Gallery
Events
Everything posted by Jackson7
-
Thanks! Much appreciated.
-
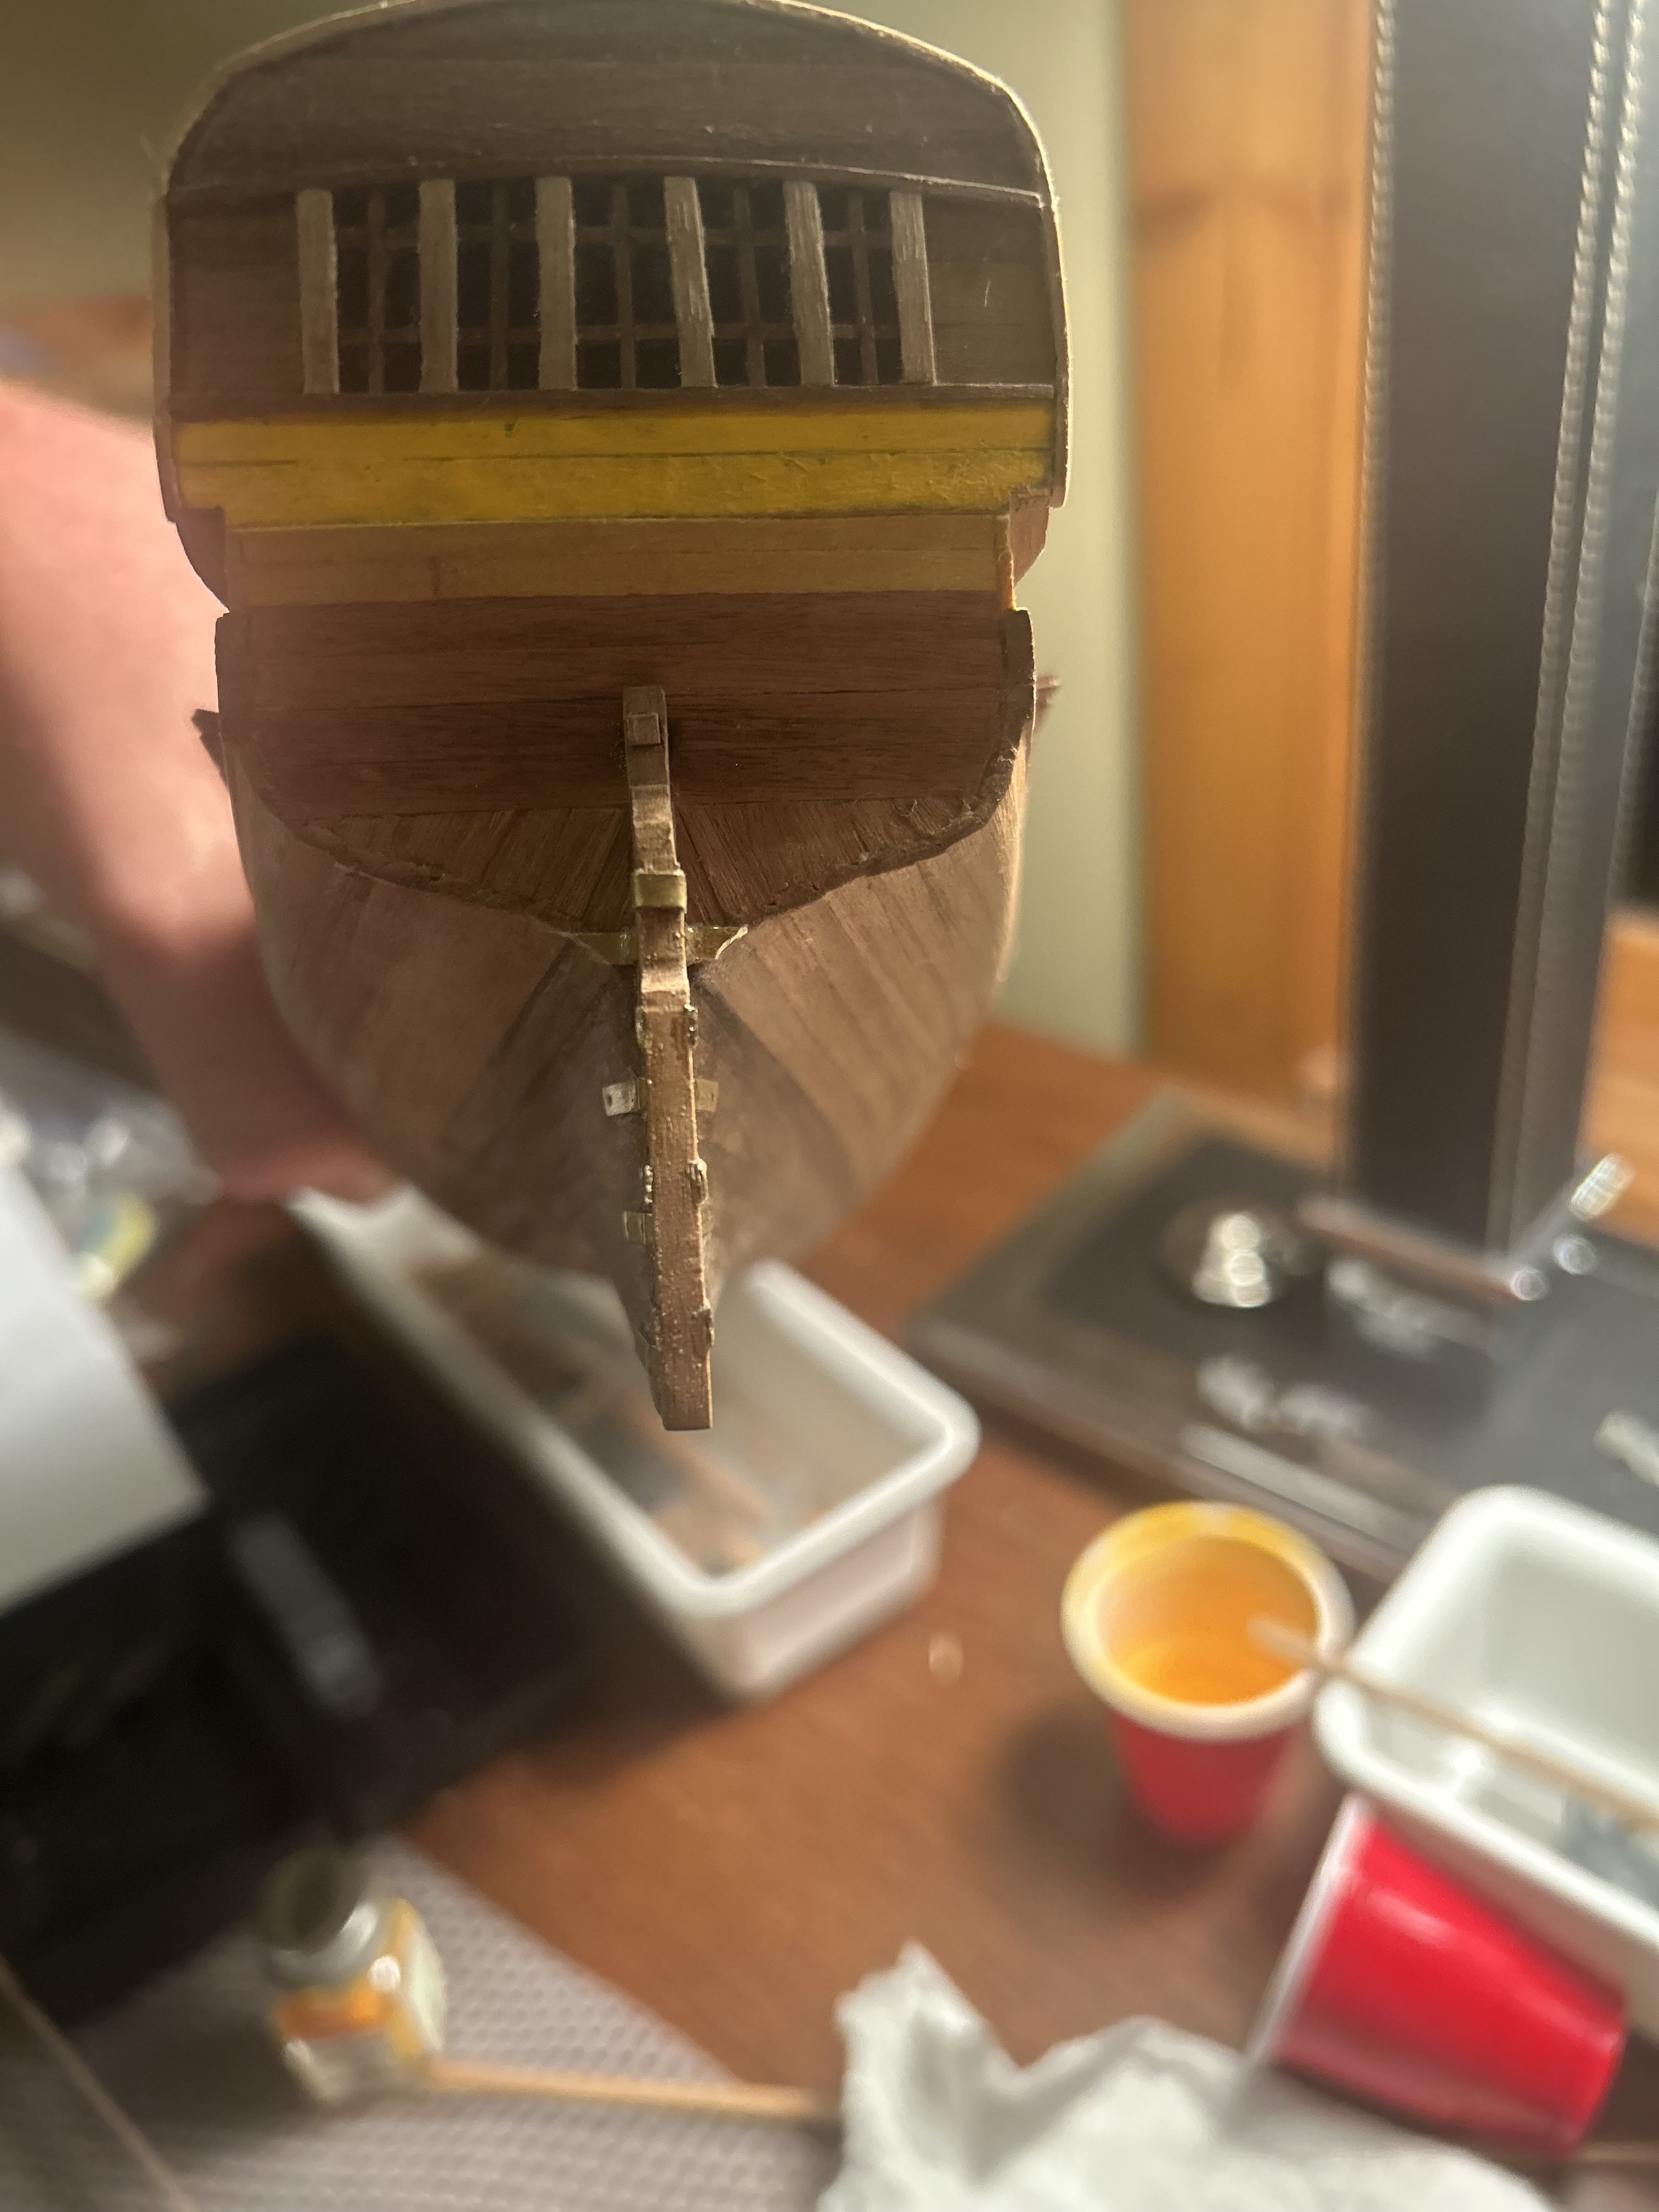
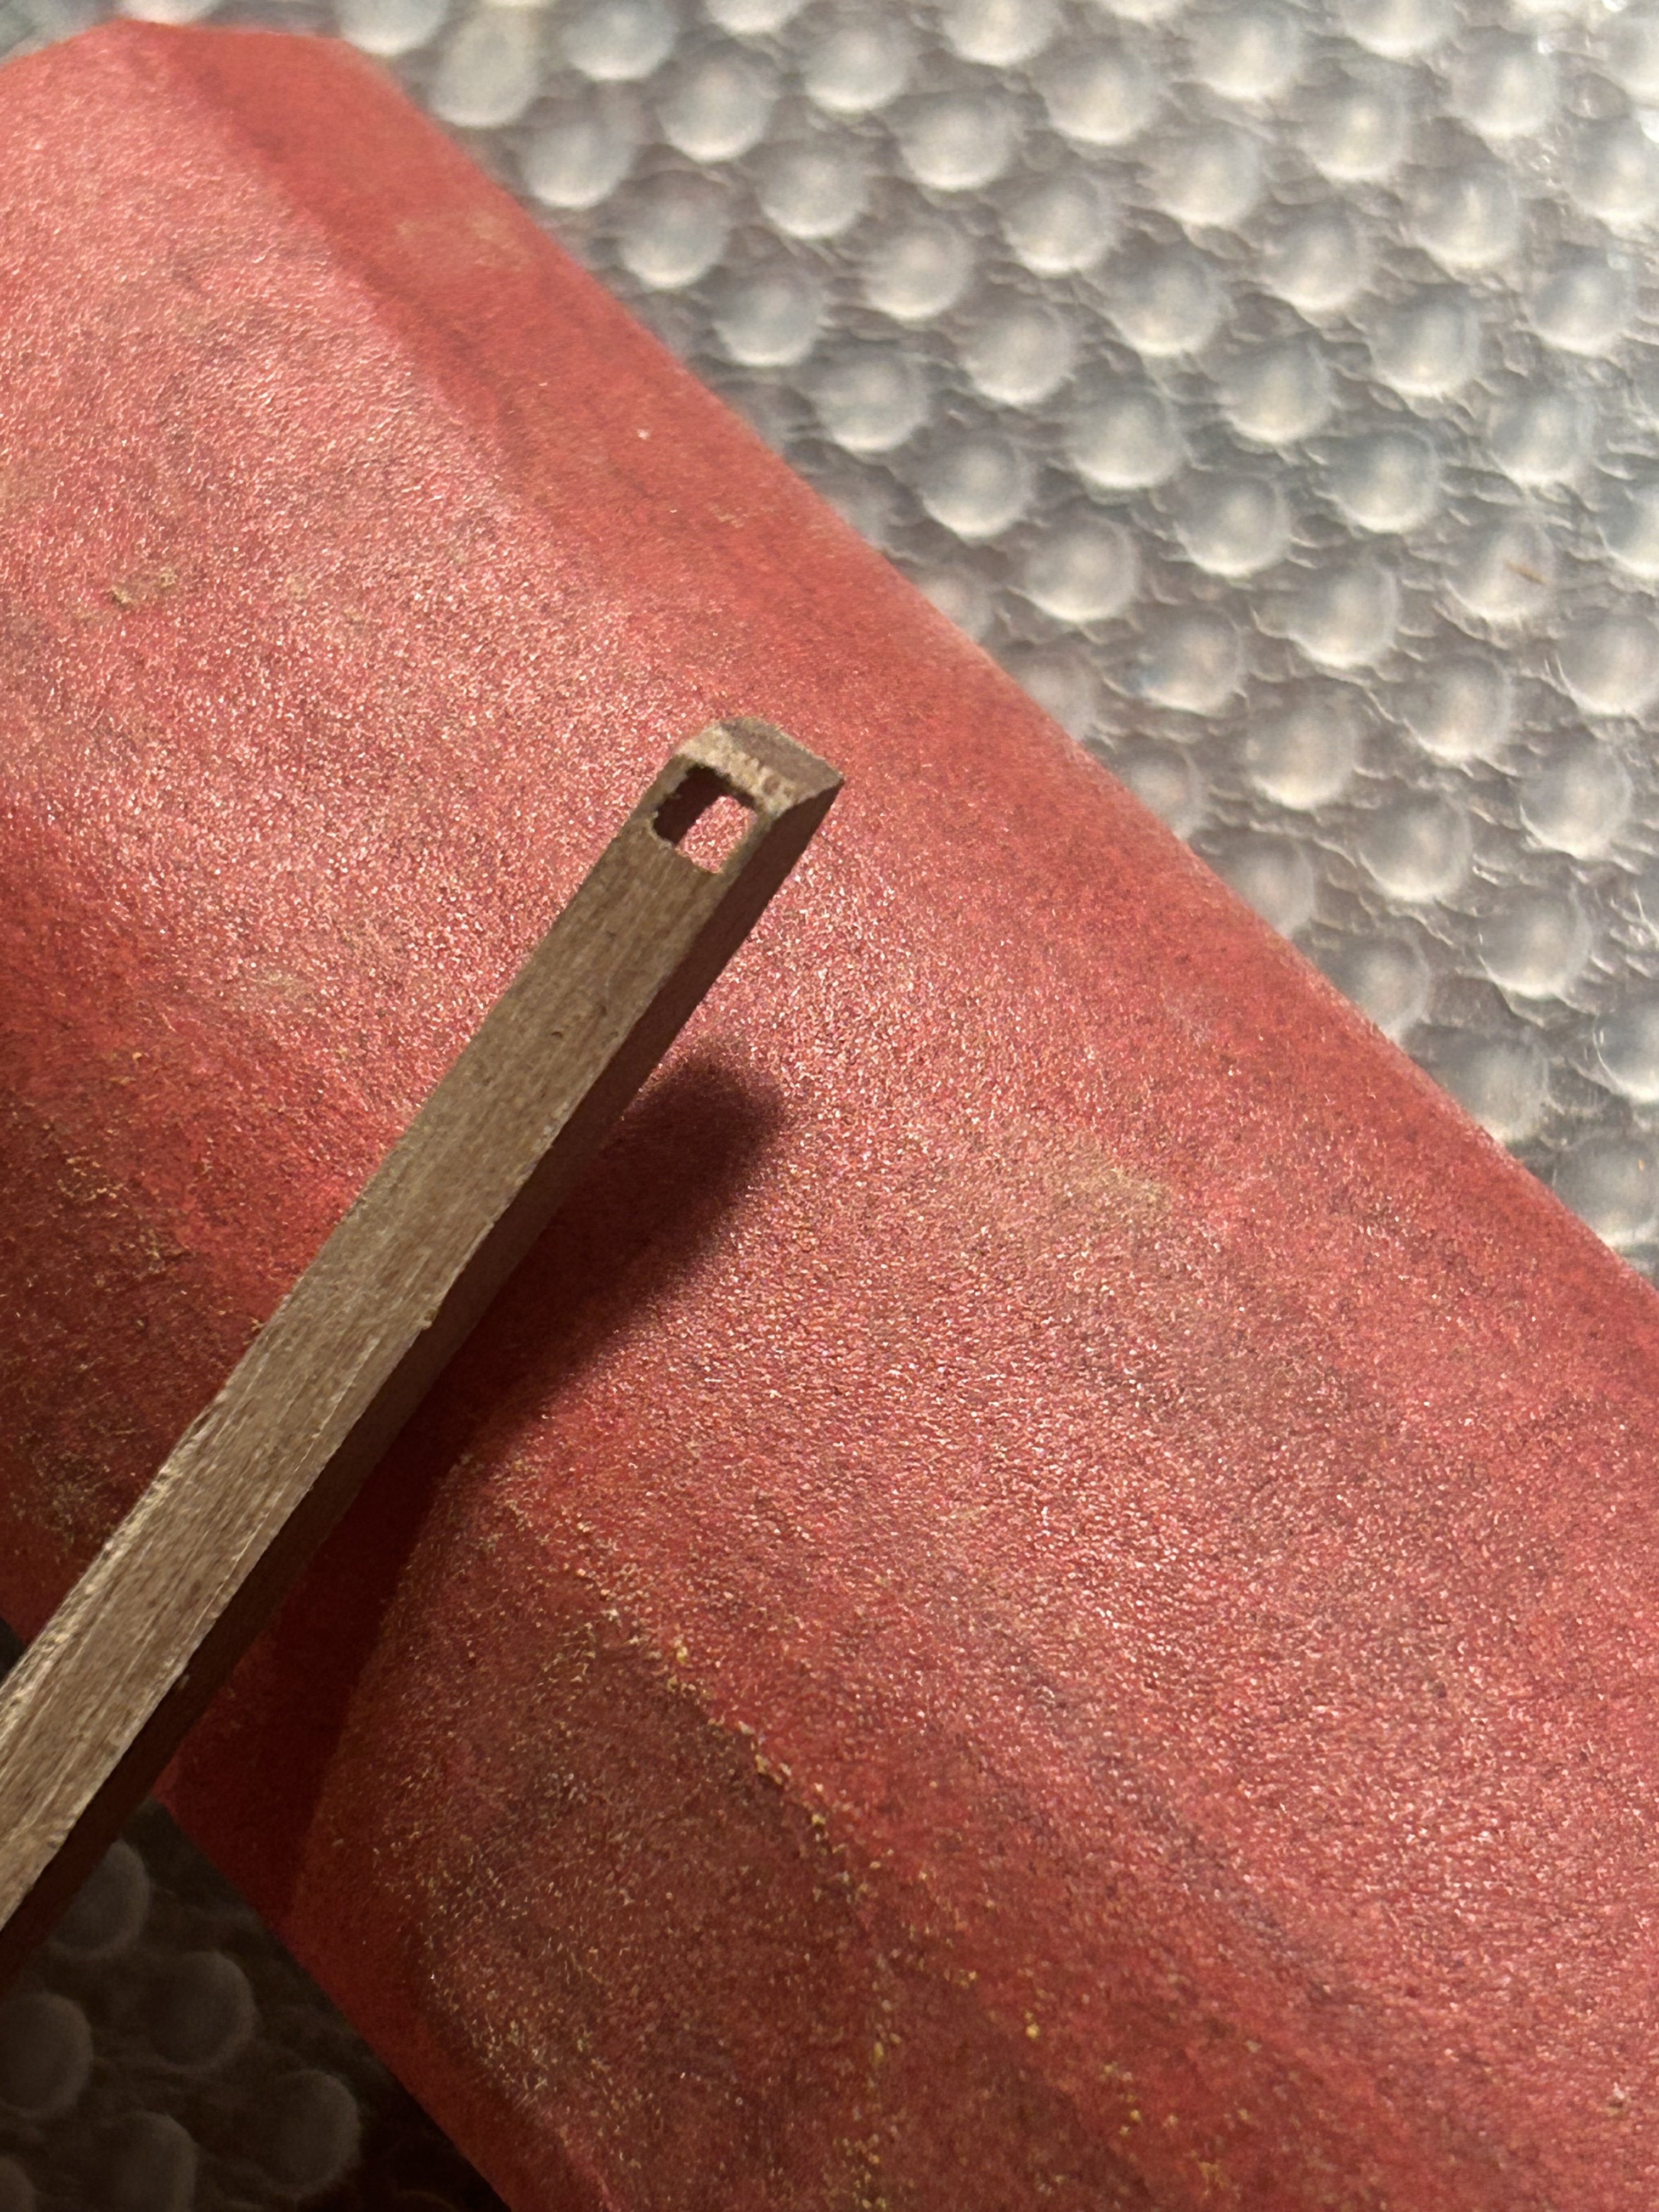
I attached the rudder at long last. Supergluing metal to wood isn't something I recommend, but it's something that sometimes proves necessary. With enough sanding, cutting and gentle persuasion, I think it ended up working. I'm playing with the idea of using thread to hold the deadeyes in place. The metal loops need so much painting, and I'm not sure it's even plausible to paint something so small without loads of trouble with chipping, even if I plan to paint hardcoat over them.


-
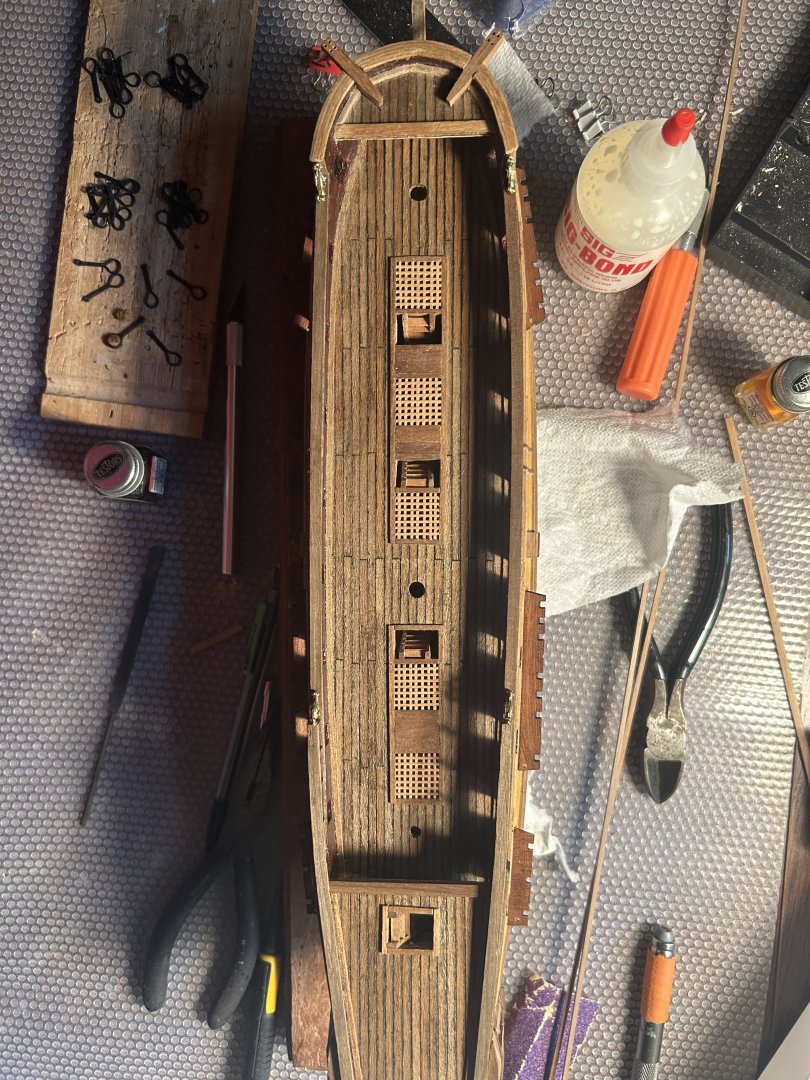
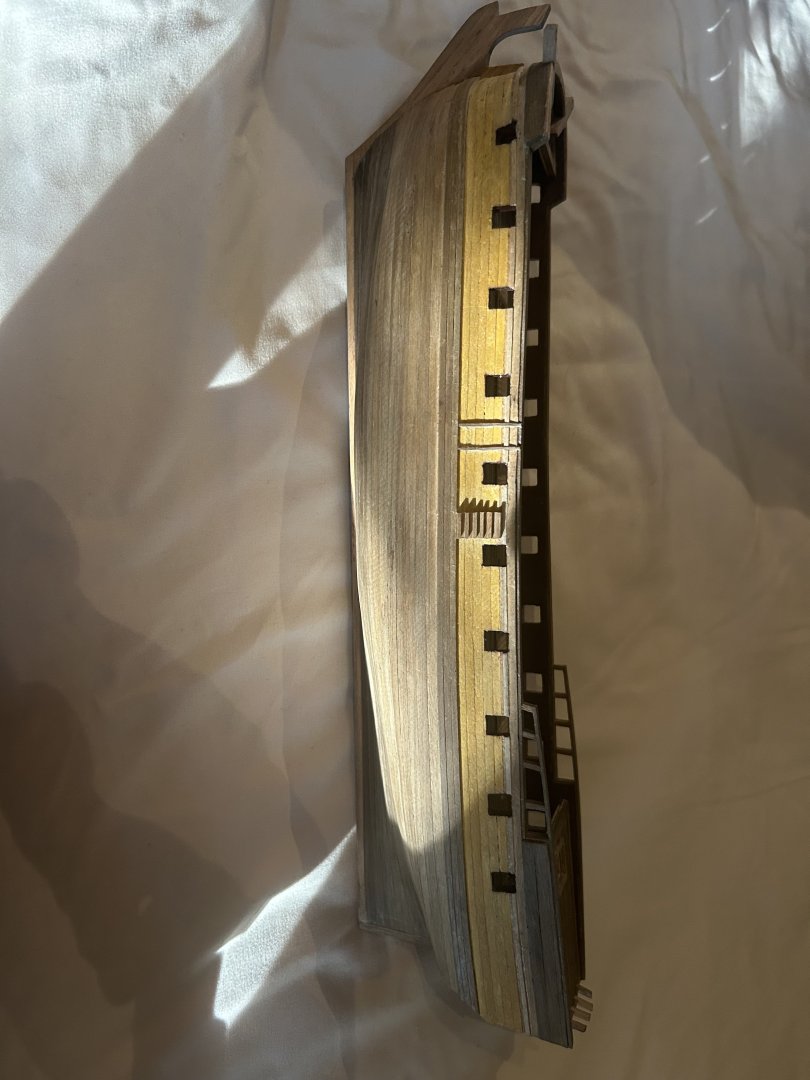
I just finished putting on the chain-wales. I supported them underneath with two small pieces of 2x2mm wood each. It was difficult to sand them to fit the curve of the hull, but the end product works well enough. I drilled holes in them where the pictures of the Greyhound show they need them. The instruction booklet should mention this part and advise builders to do it before putting them on the hull.

-
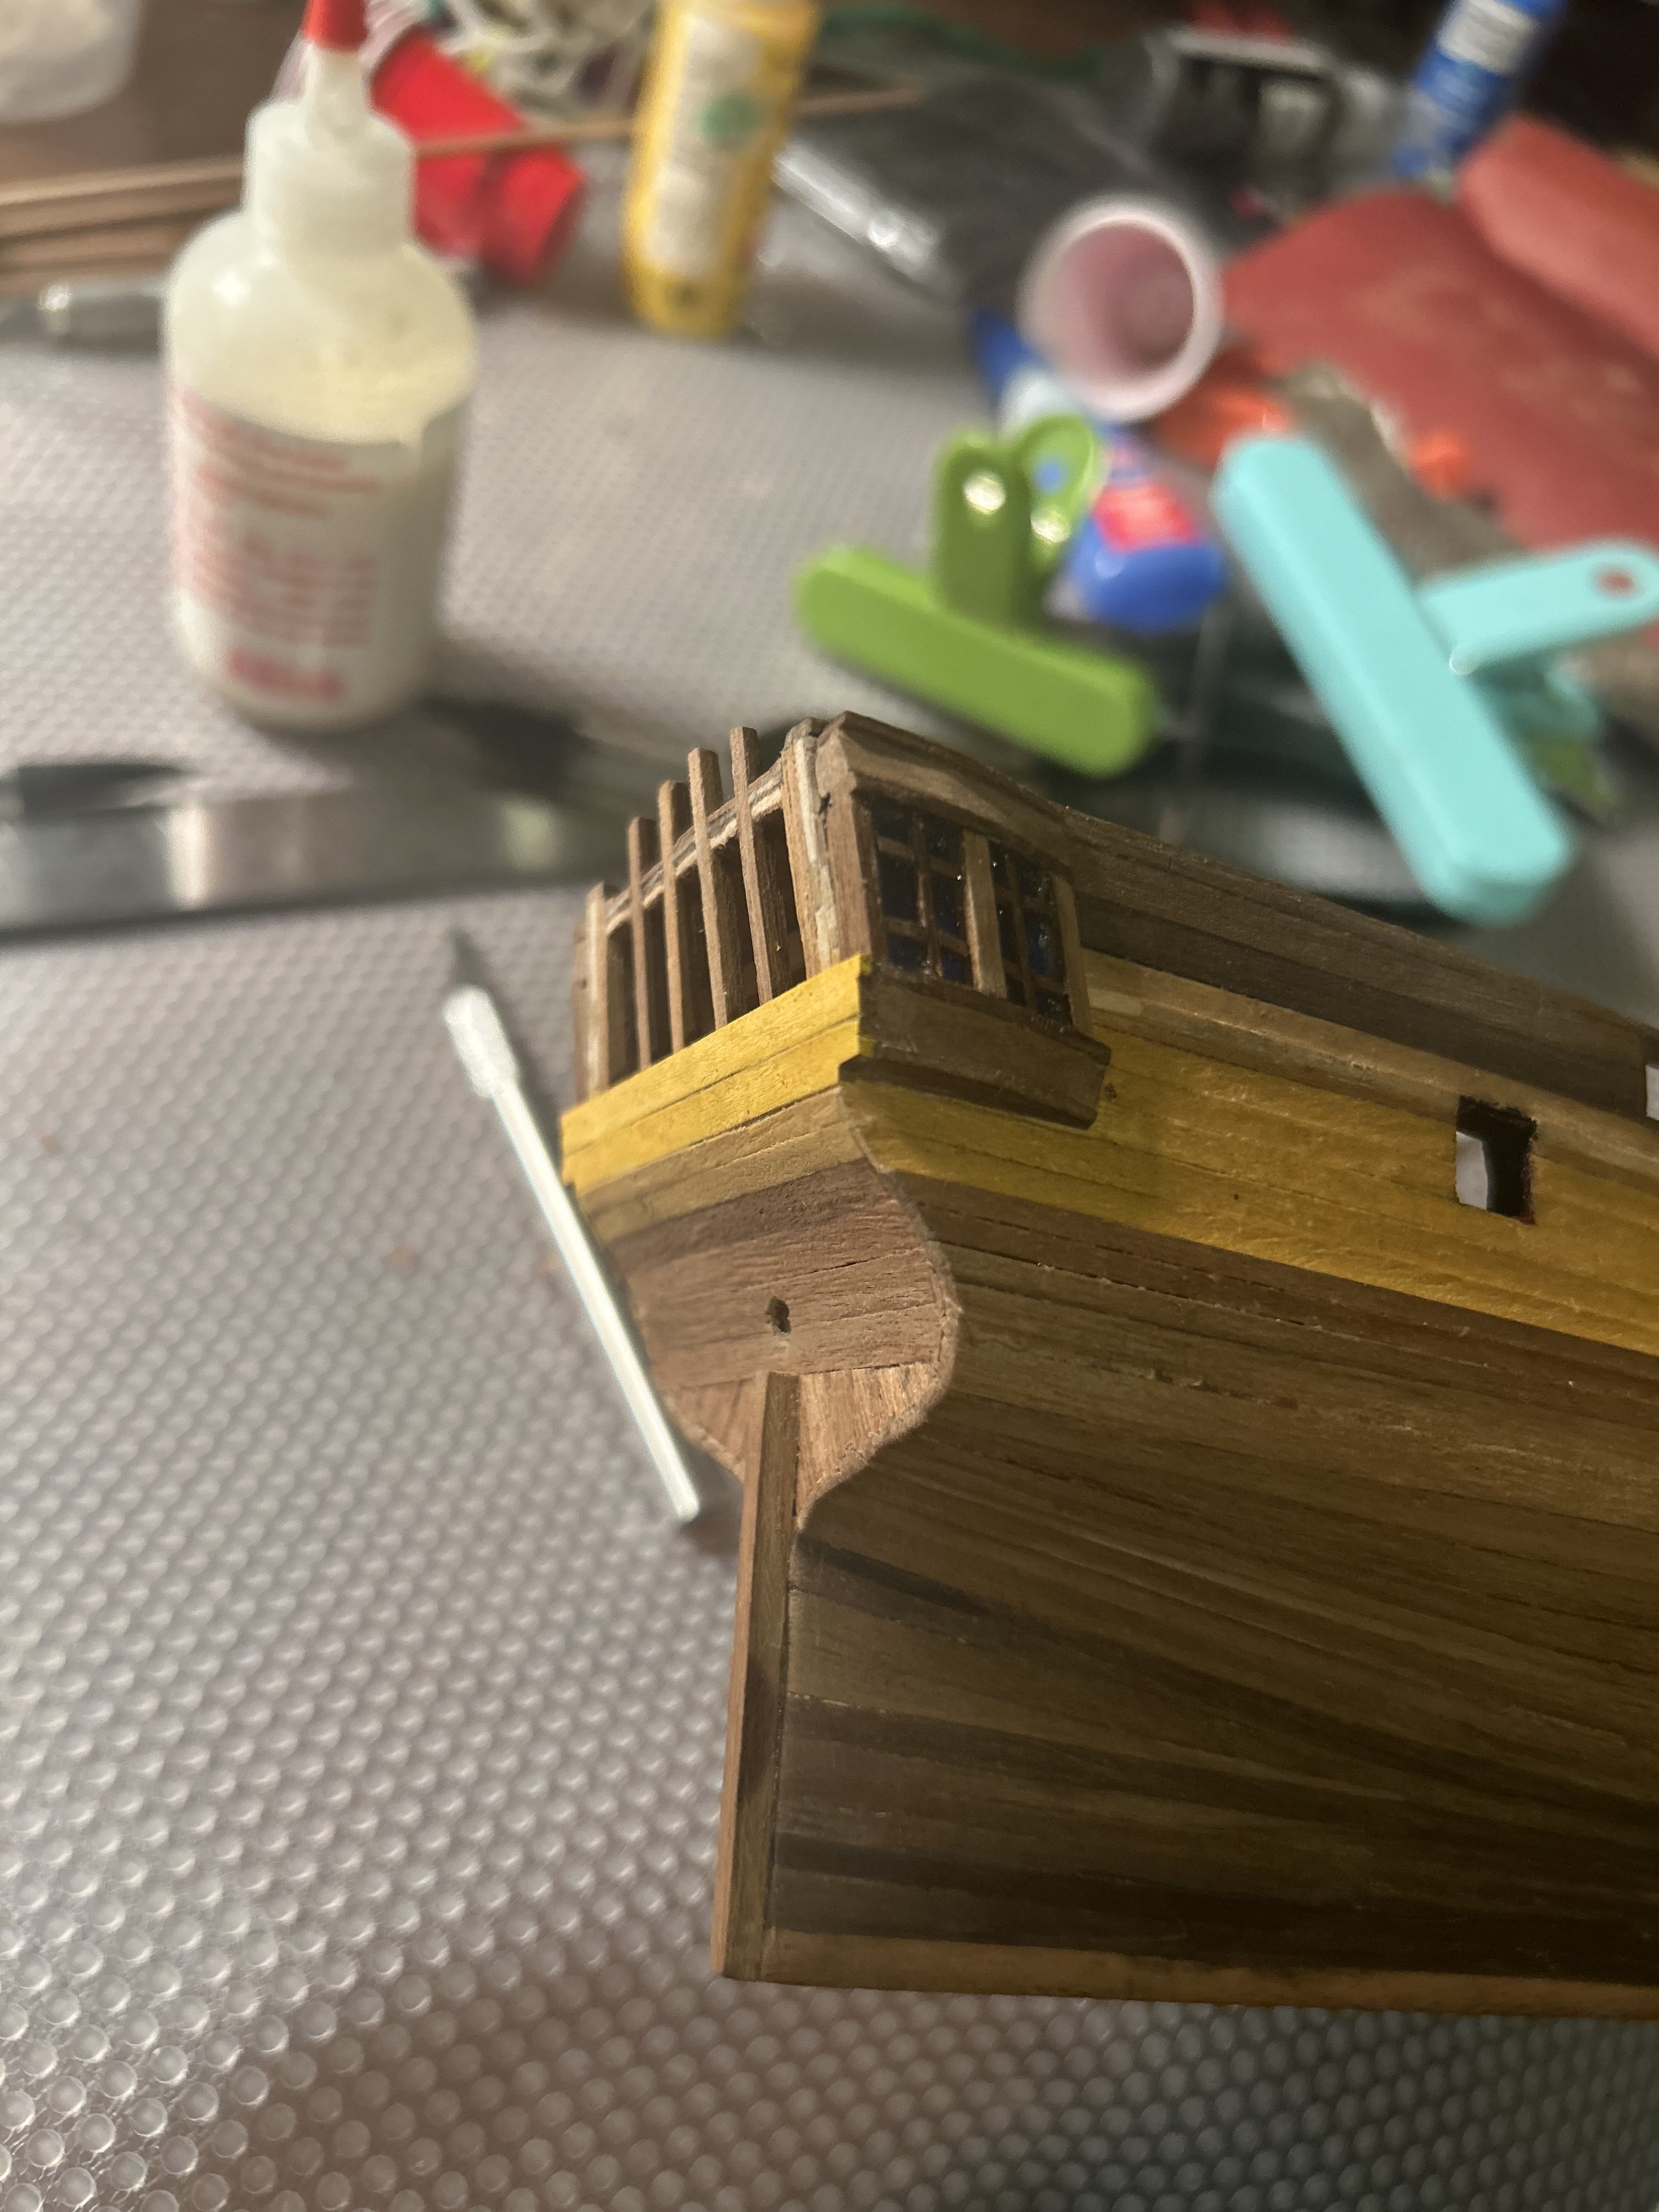
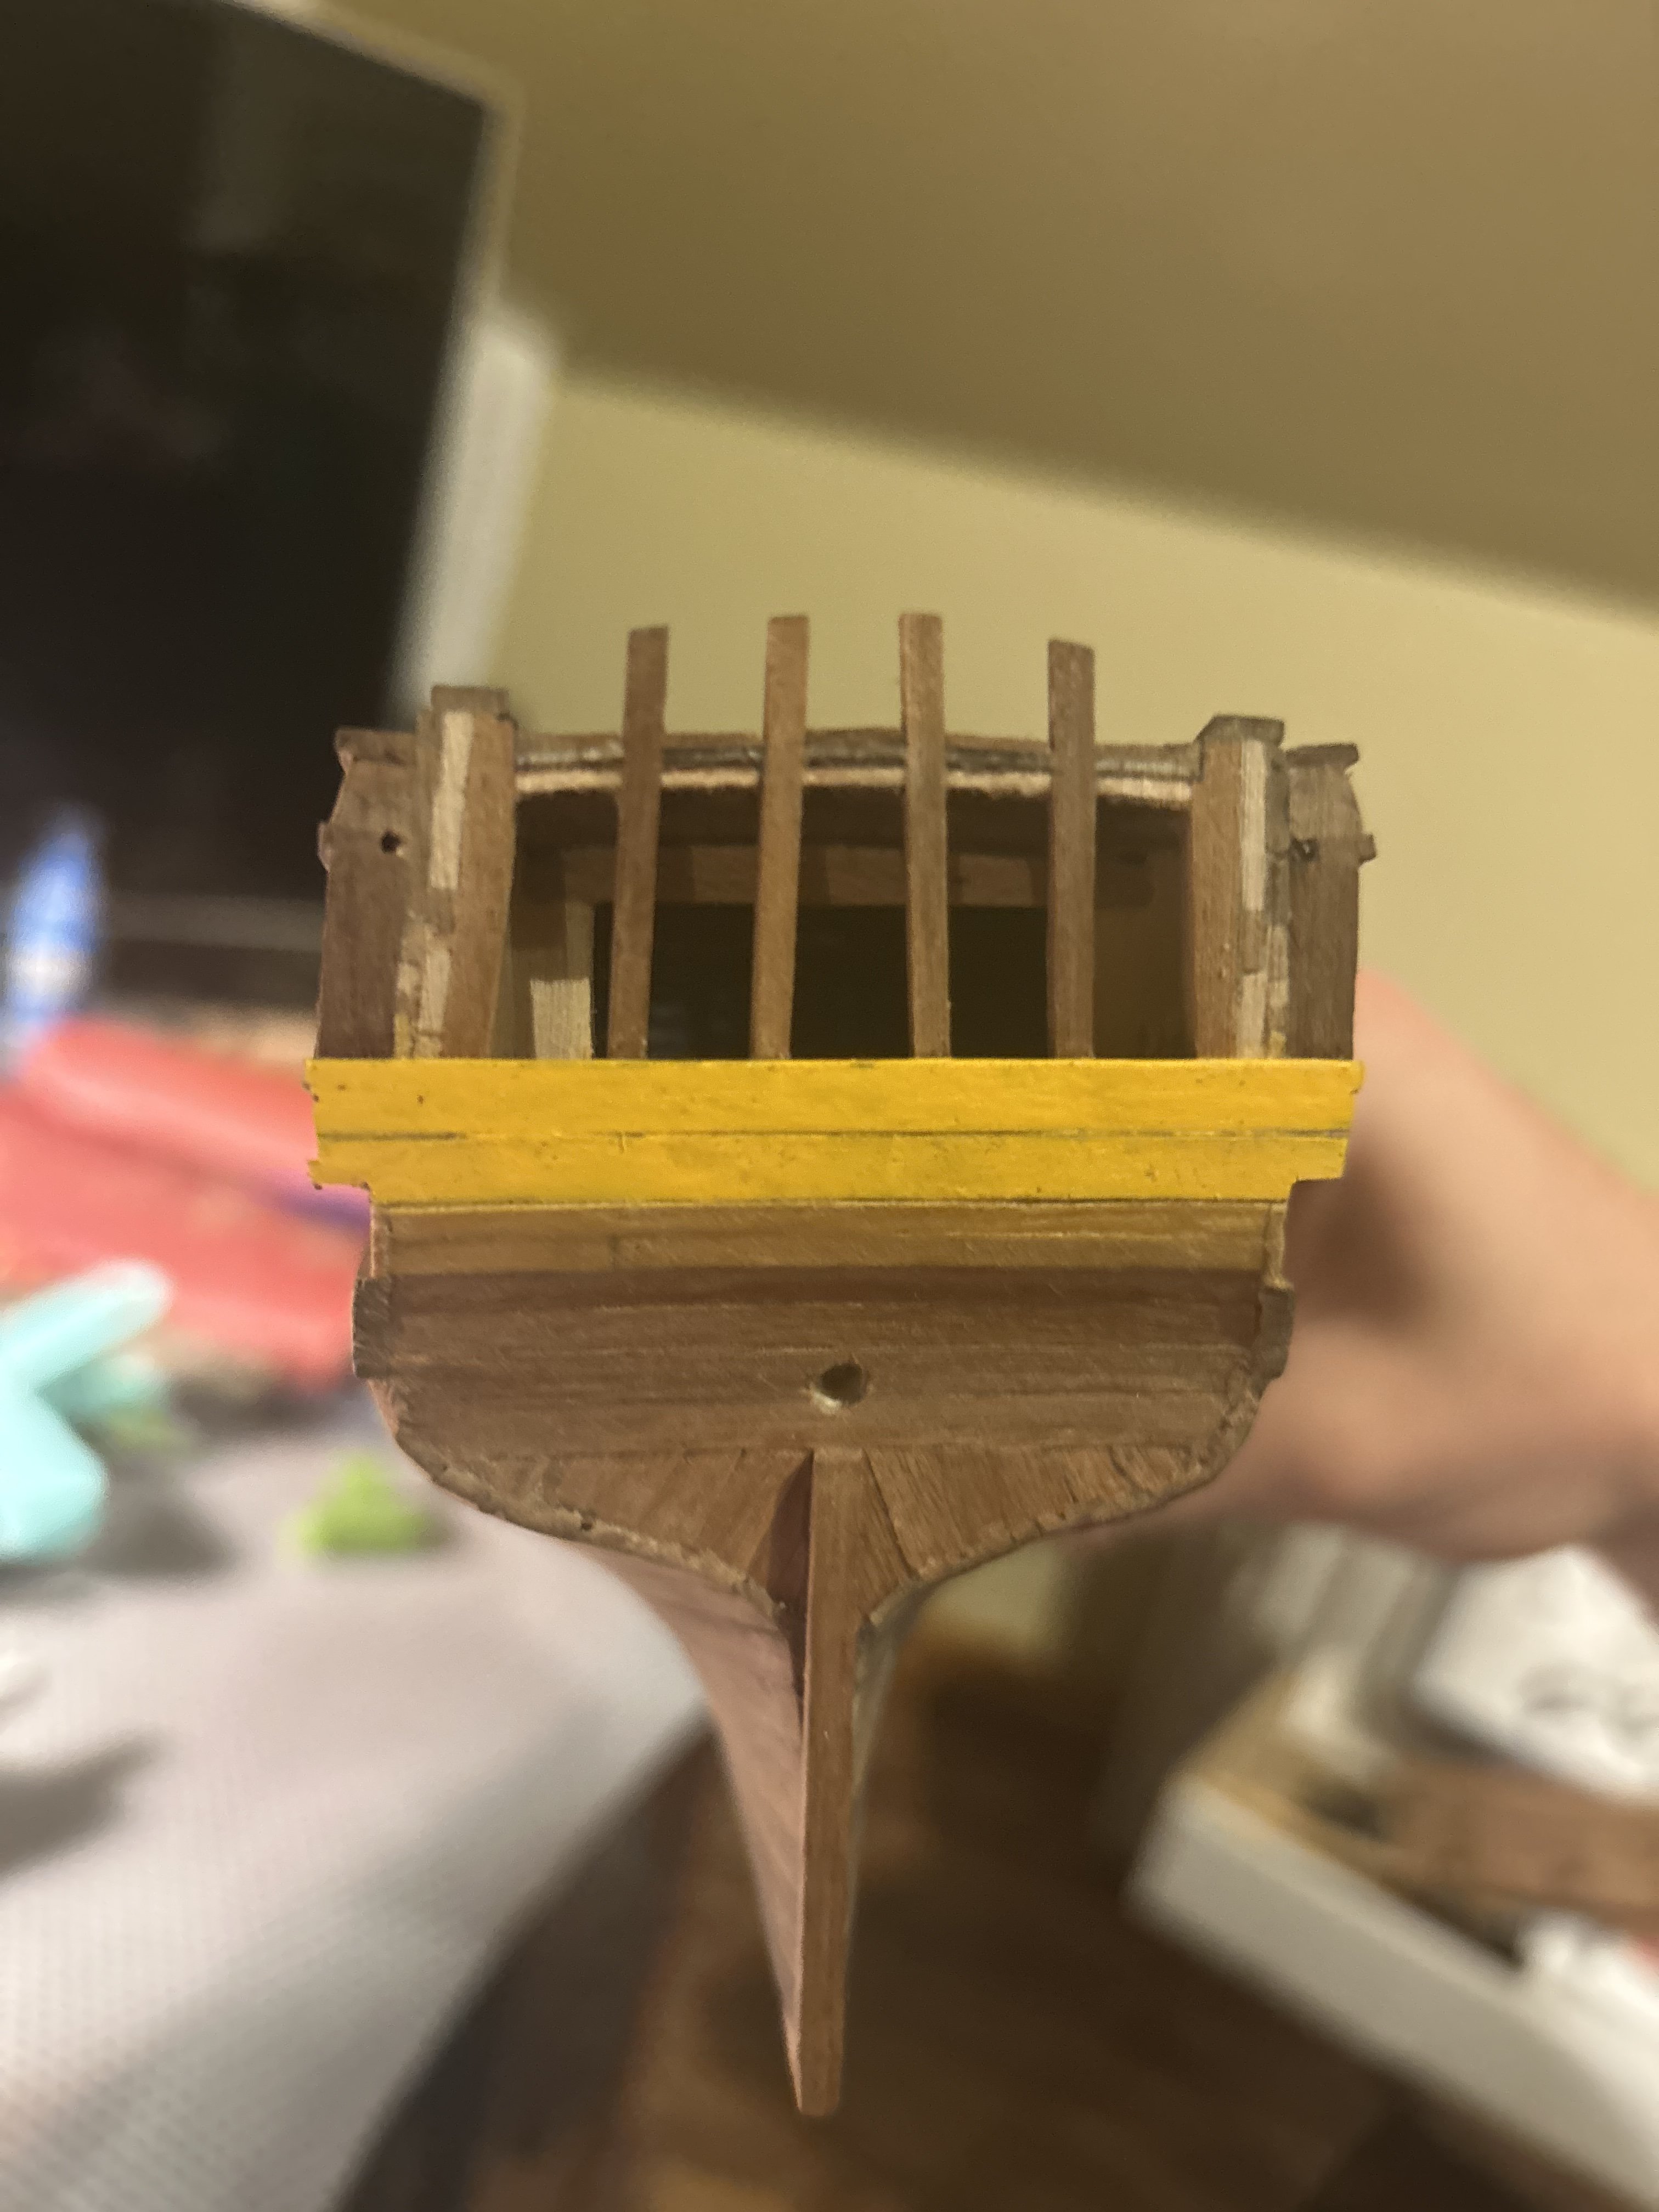
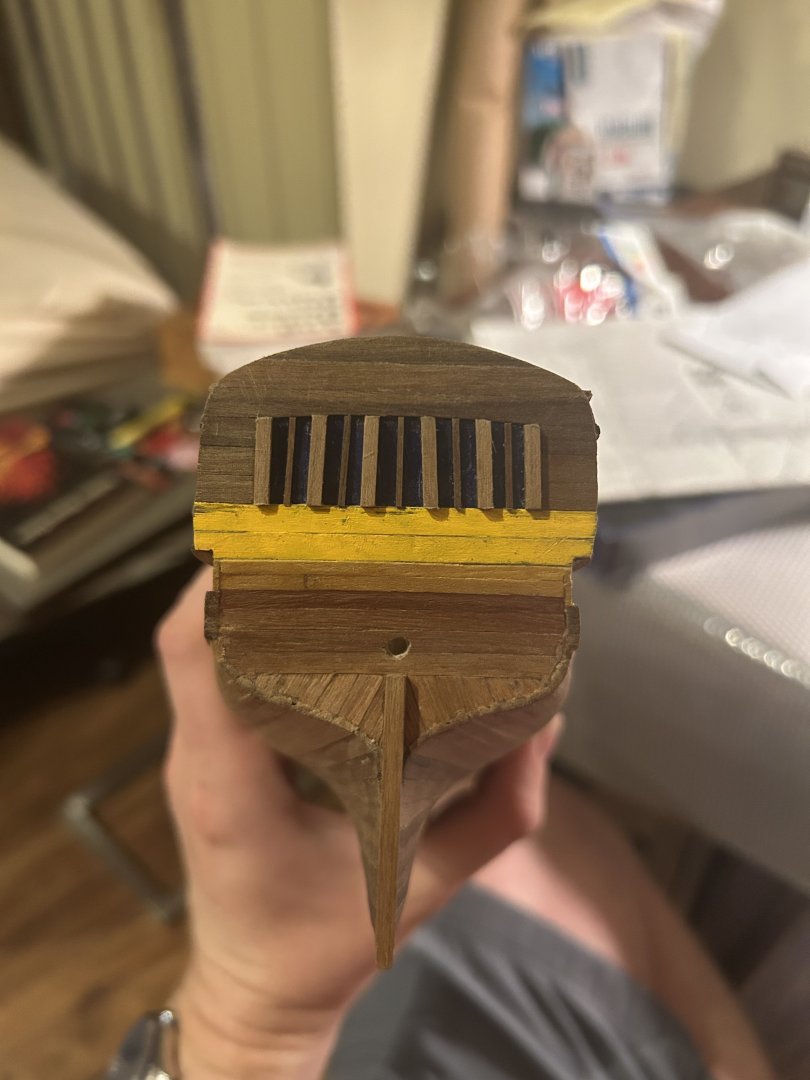
Done with the transom's structural parts at least. I'll have to contemplate what to do with any potential decorations. I used the trusty boil and bend technique to put the cap piece in place. 2 hours in a thermos of boiling water, 24 hours being bent to shape between nails, and then 15 minutes or so of pressure to glue to the hull. Unfortunately, the 1x3mm cap piece was too short by a tiny bit, so I had to patch it over on the side. It's hardly noticeable though. My final verdict is that it looks far better than the original metal kit part. Far more natural, and definitely a better fit.

-
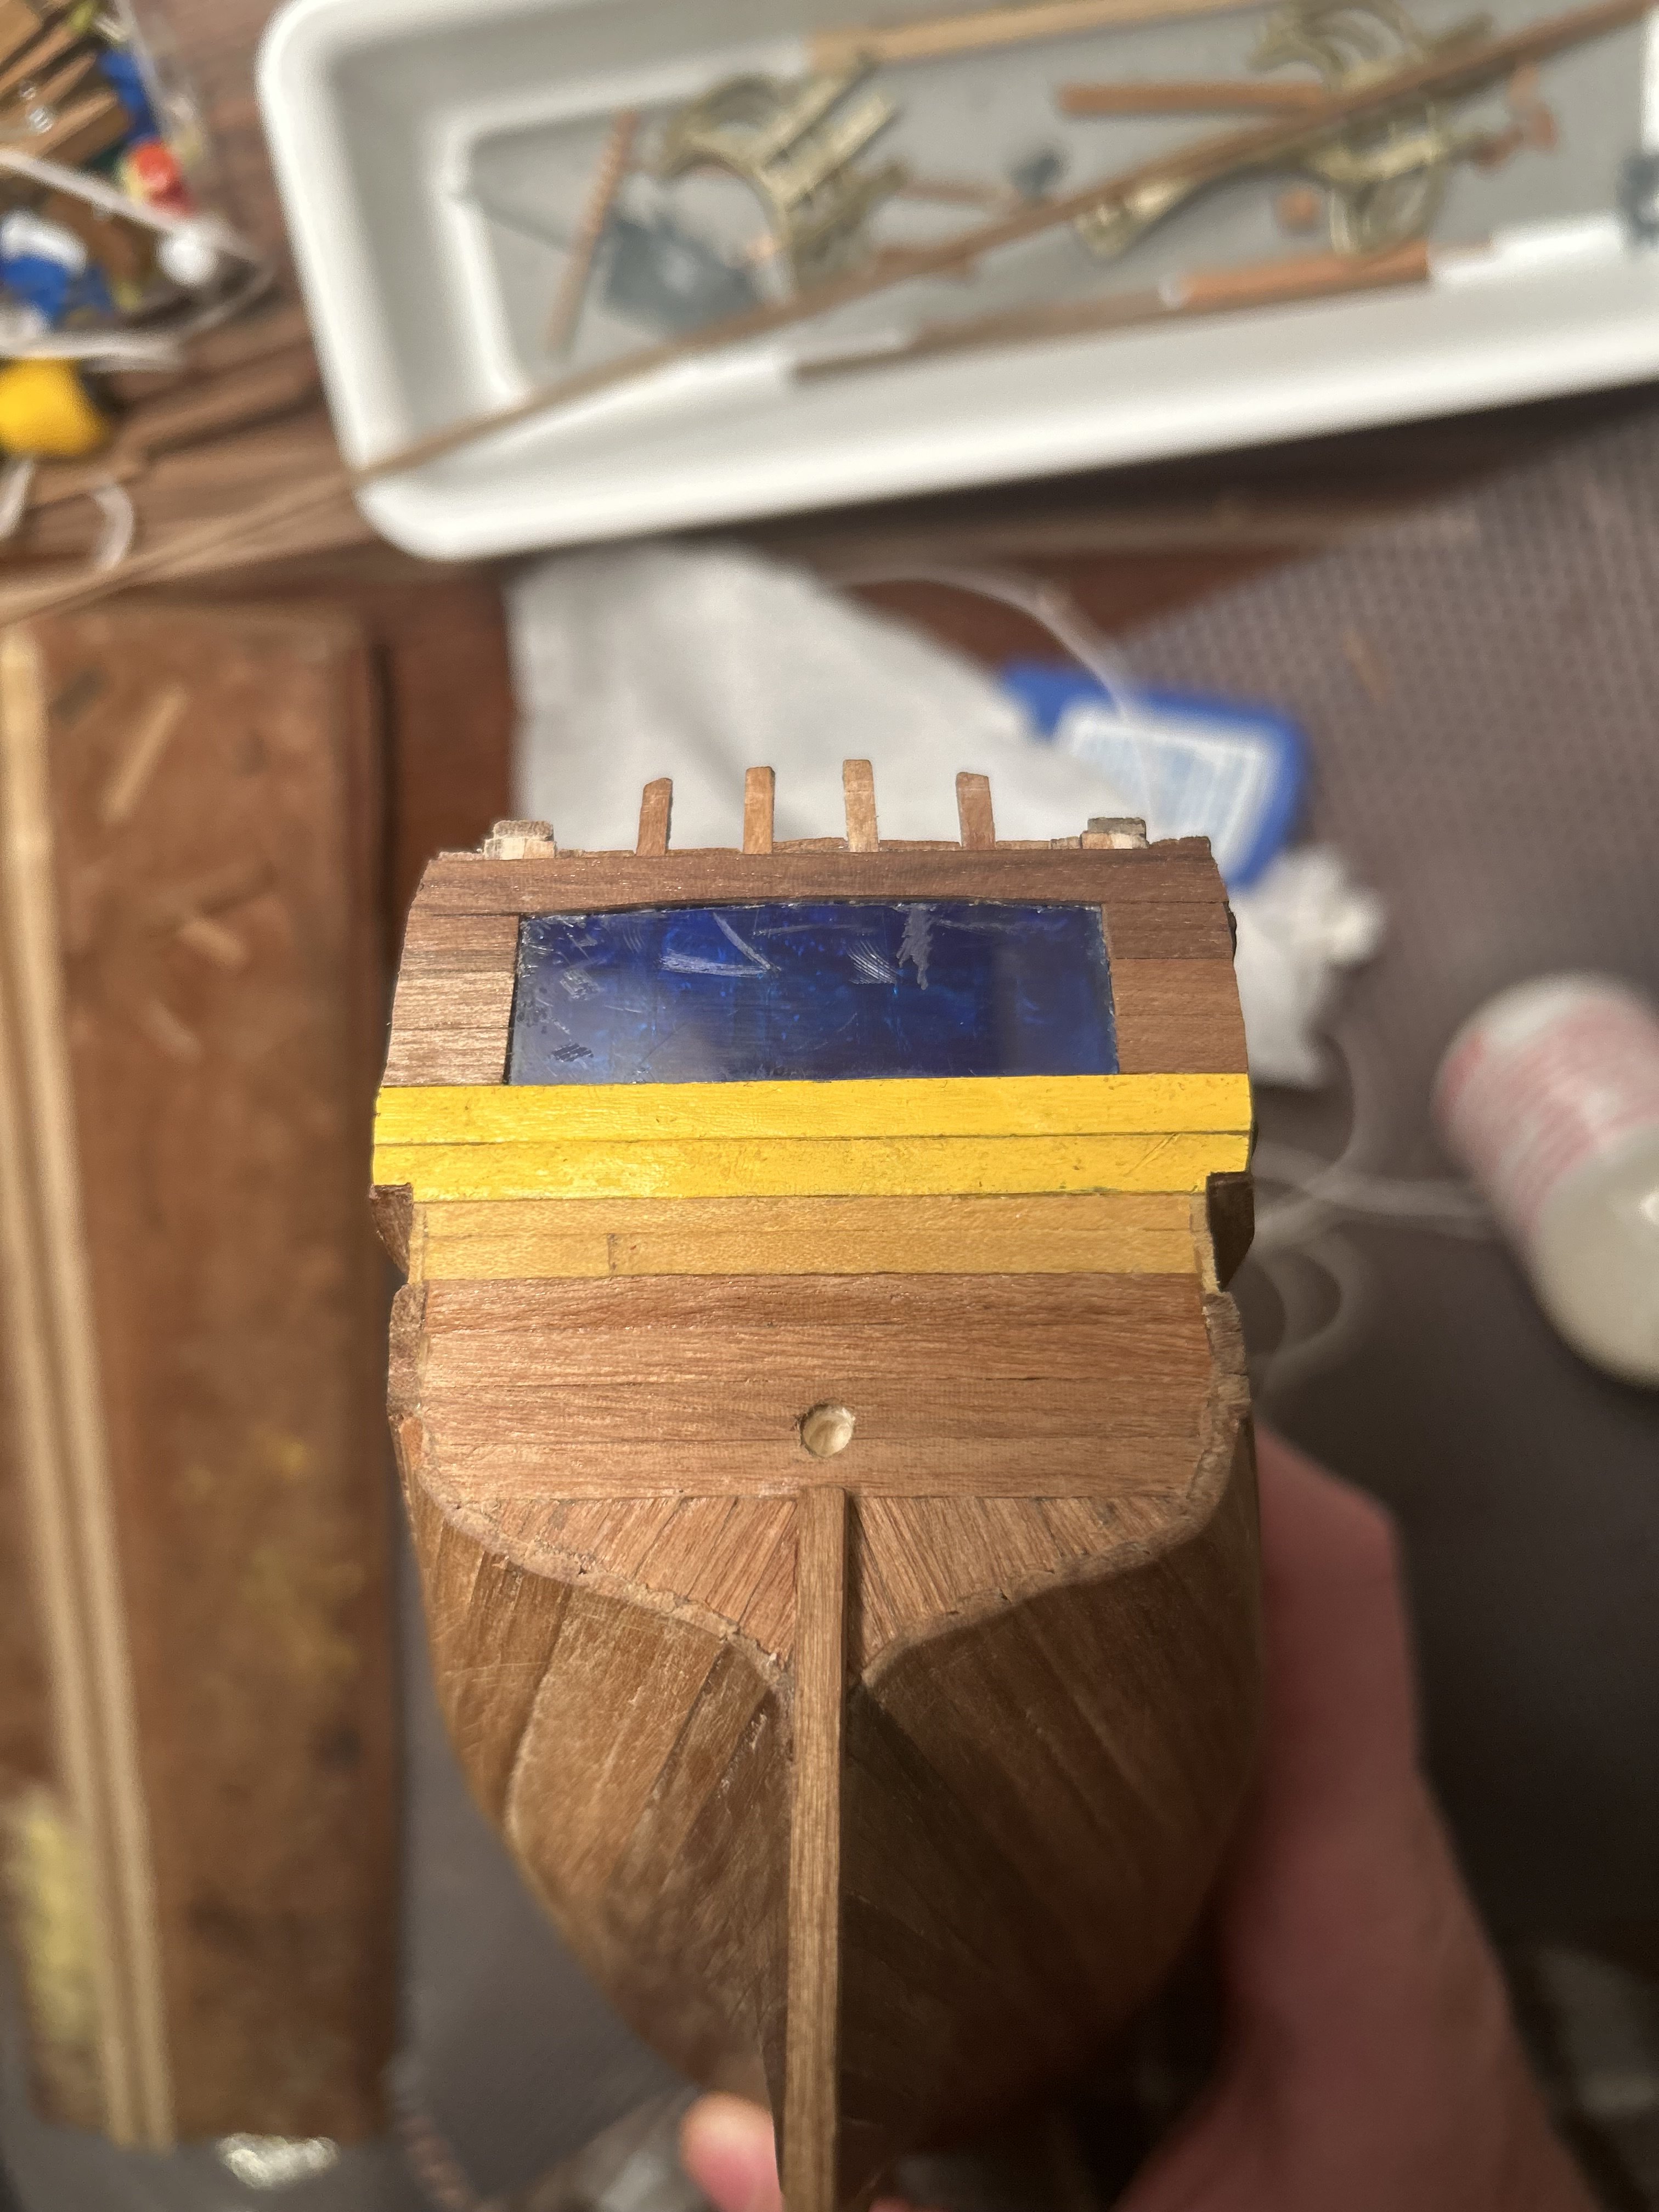
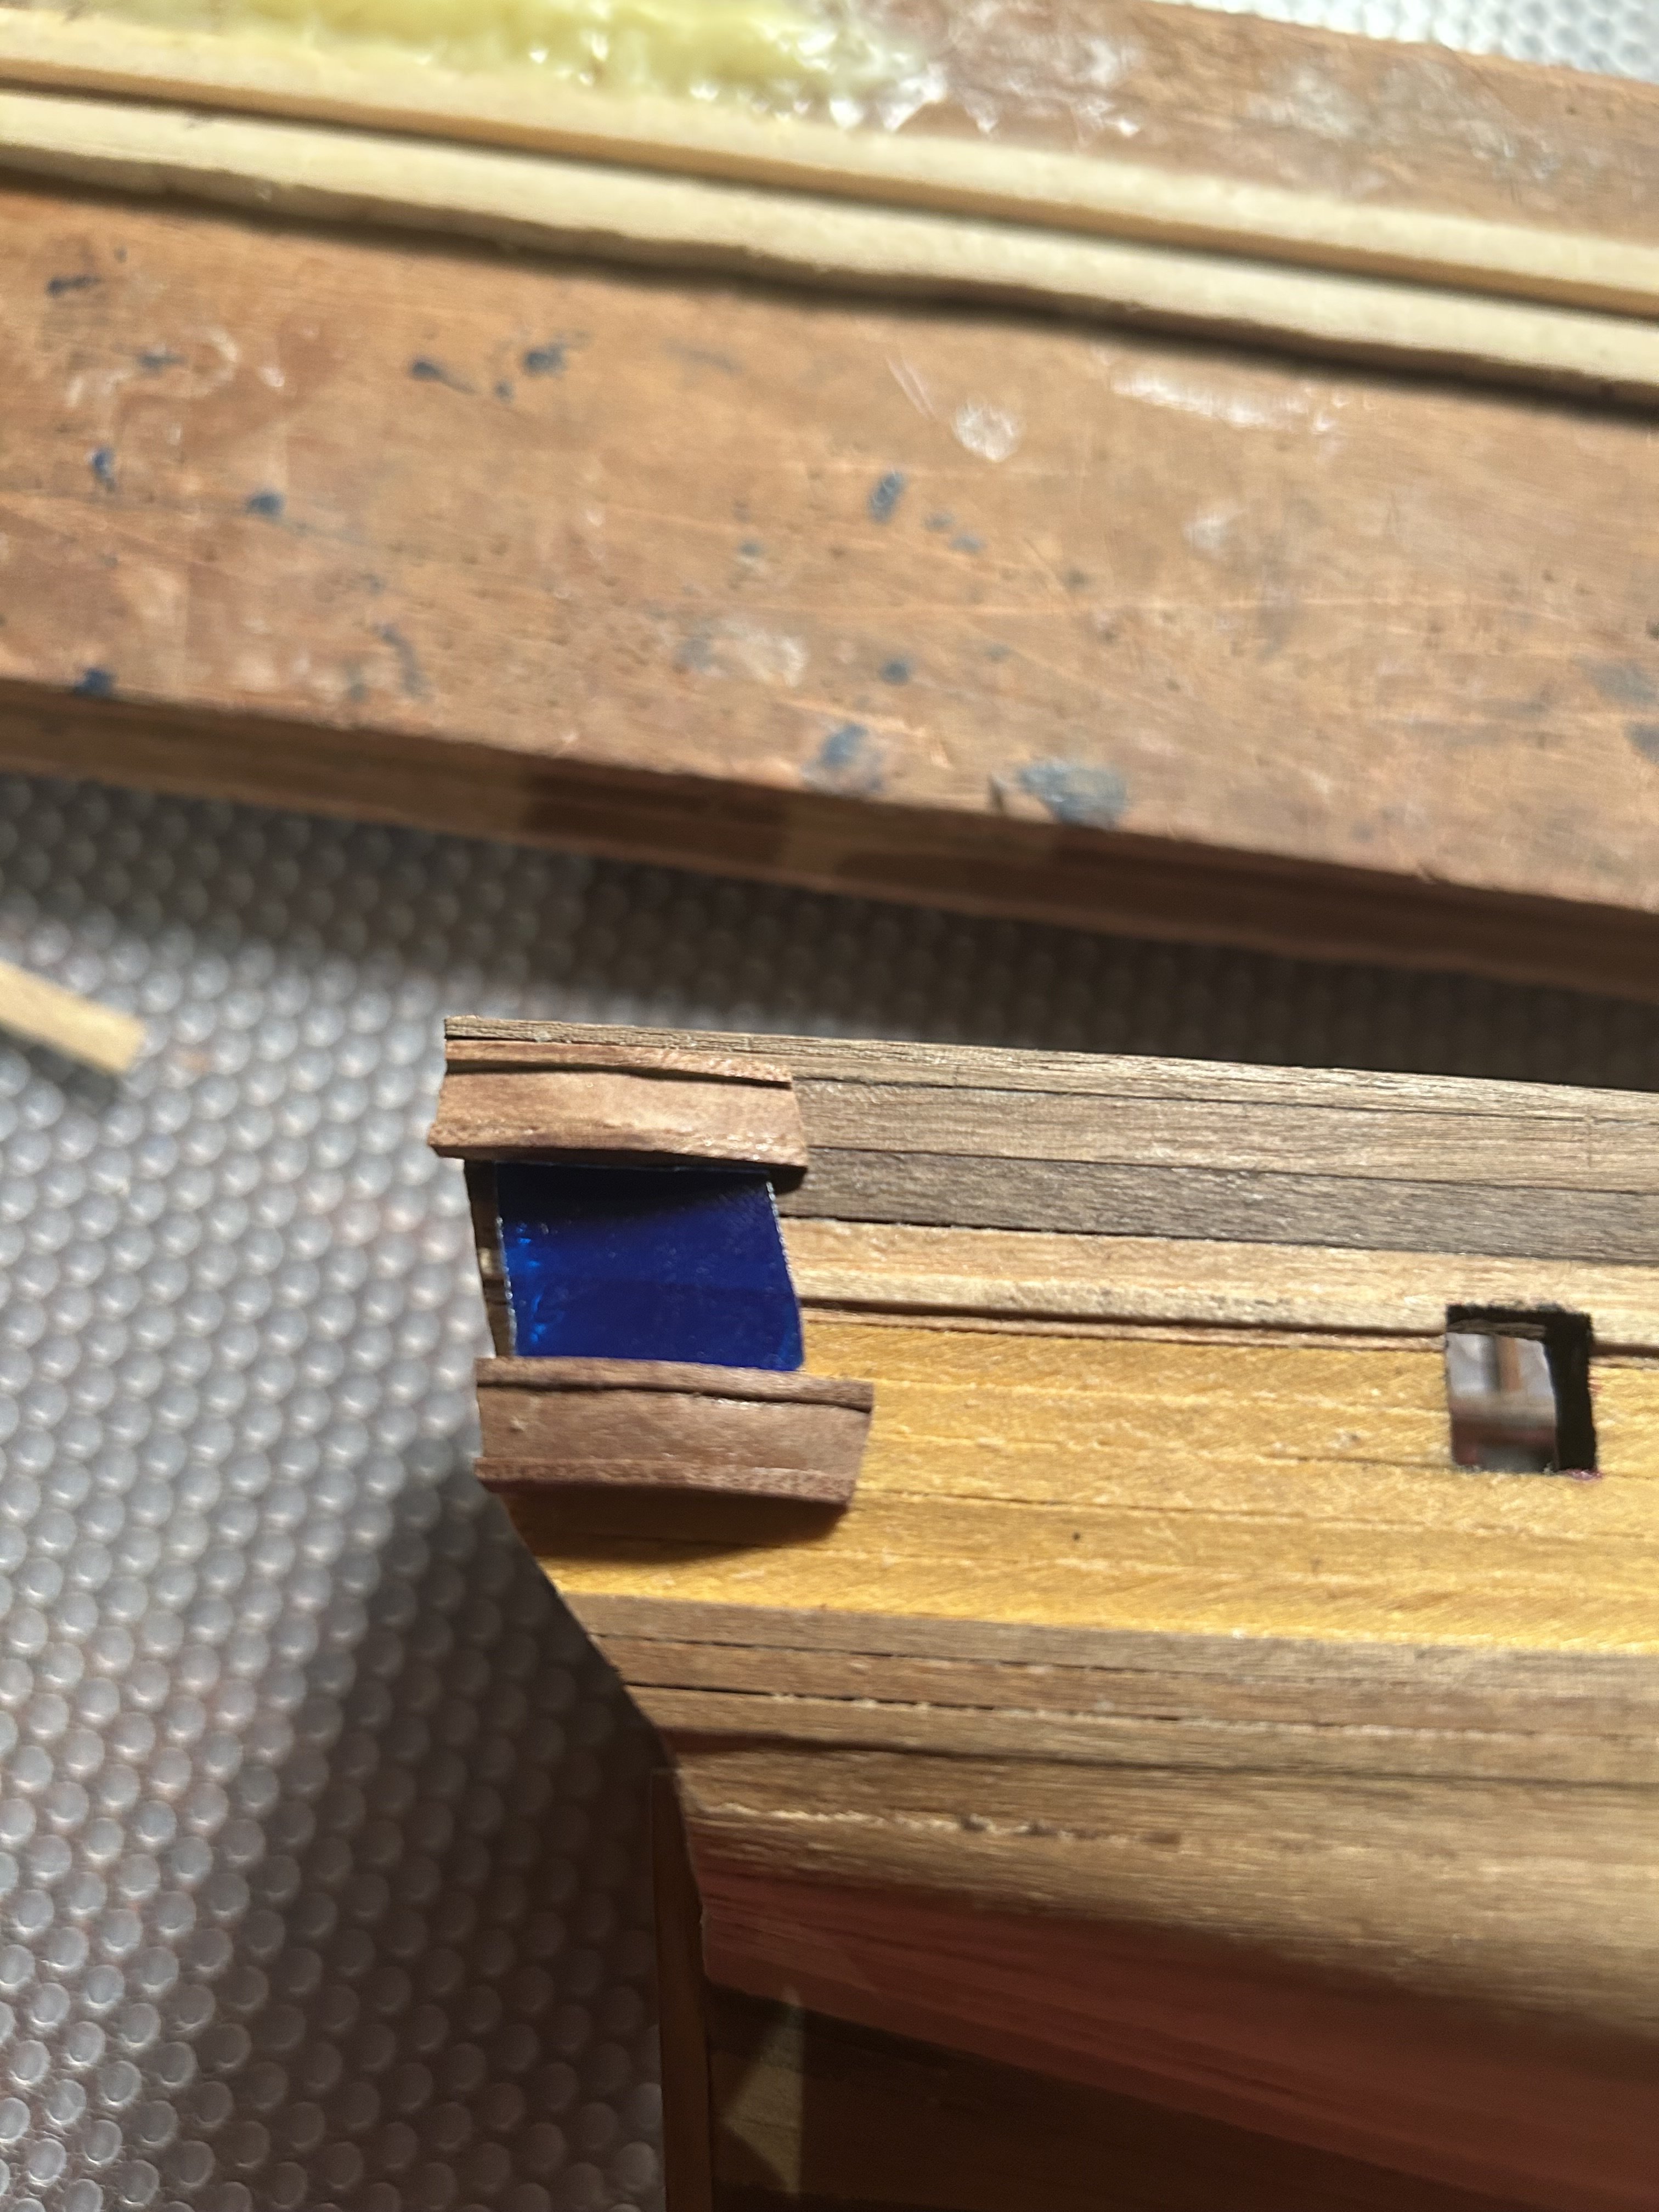
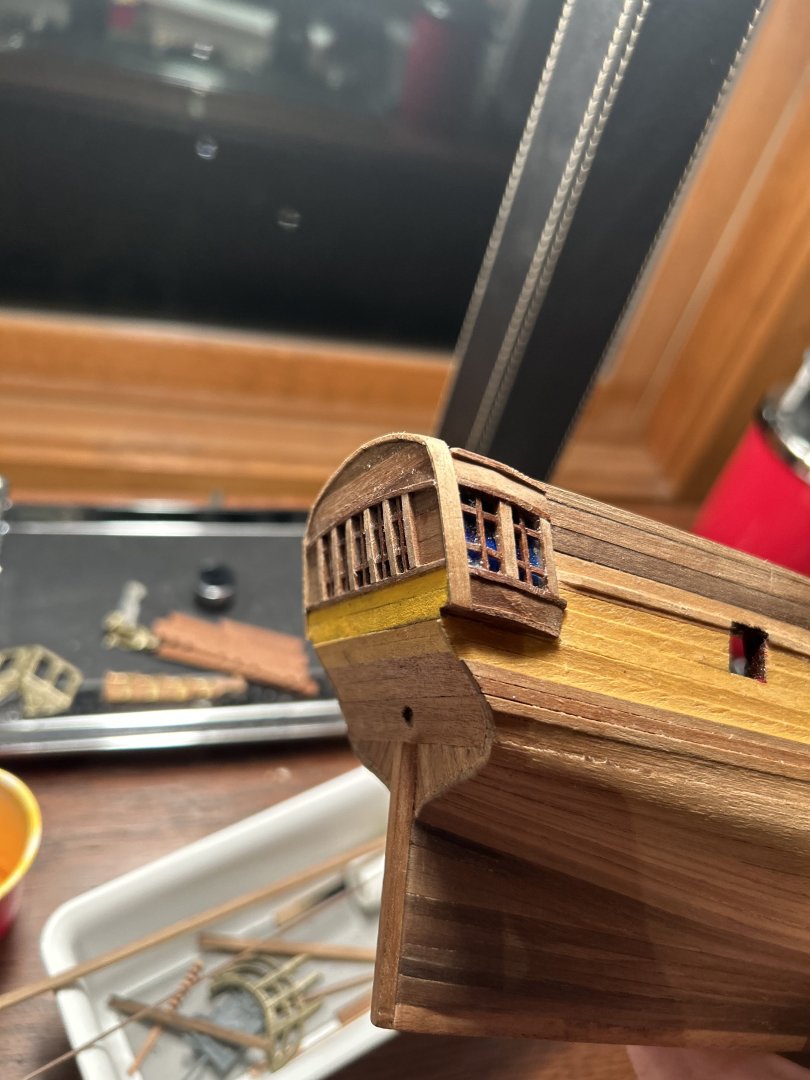
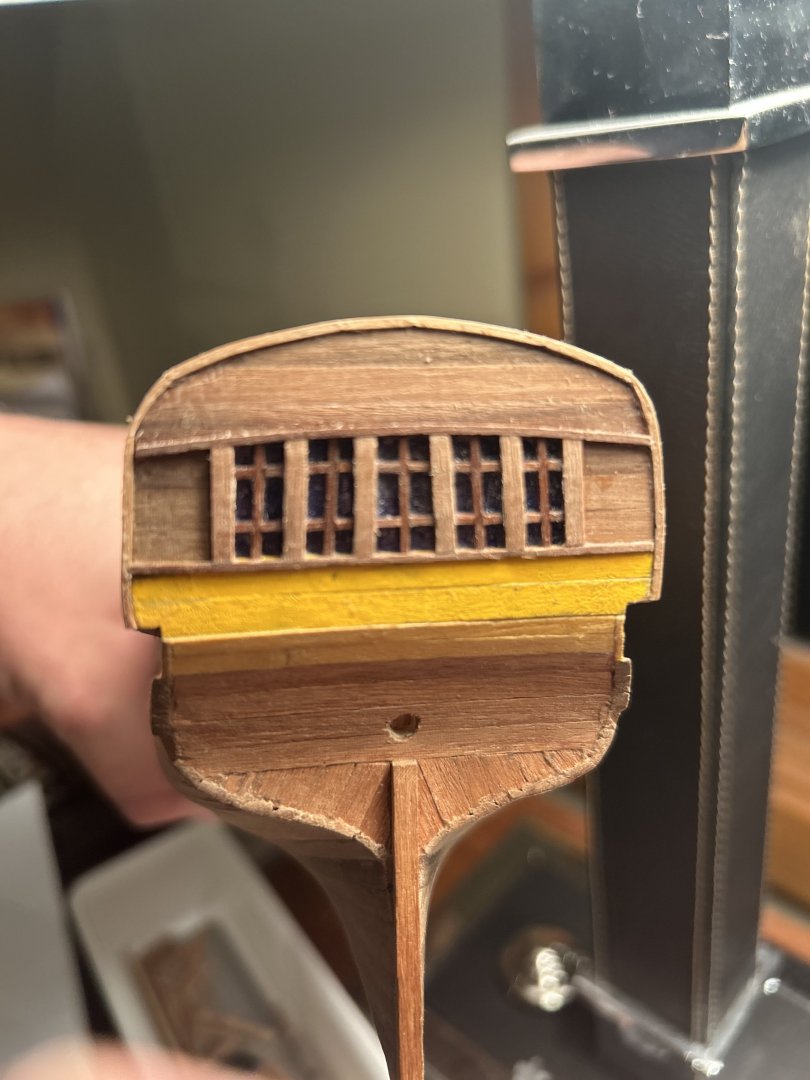
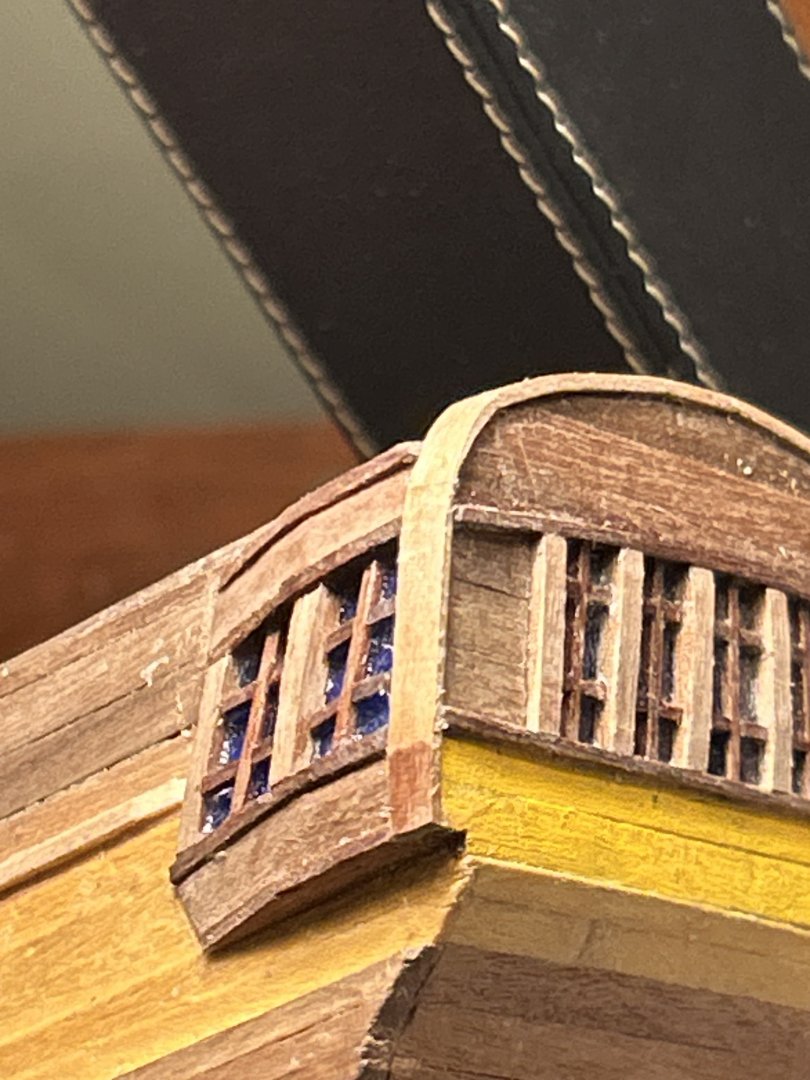
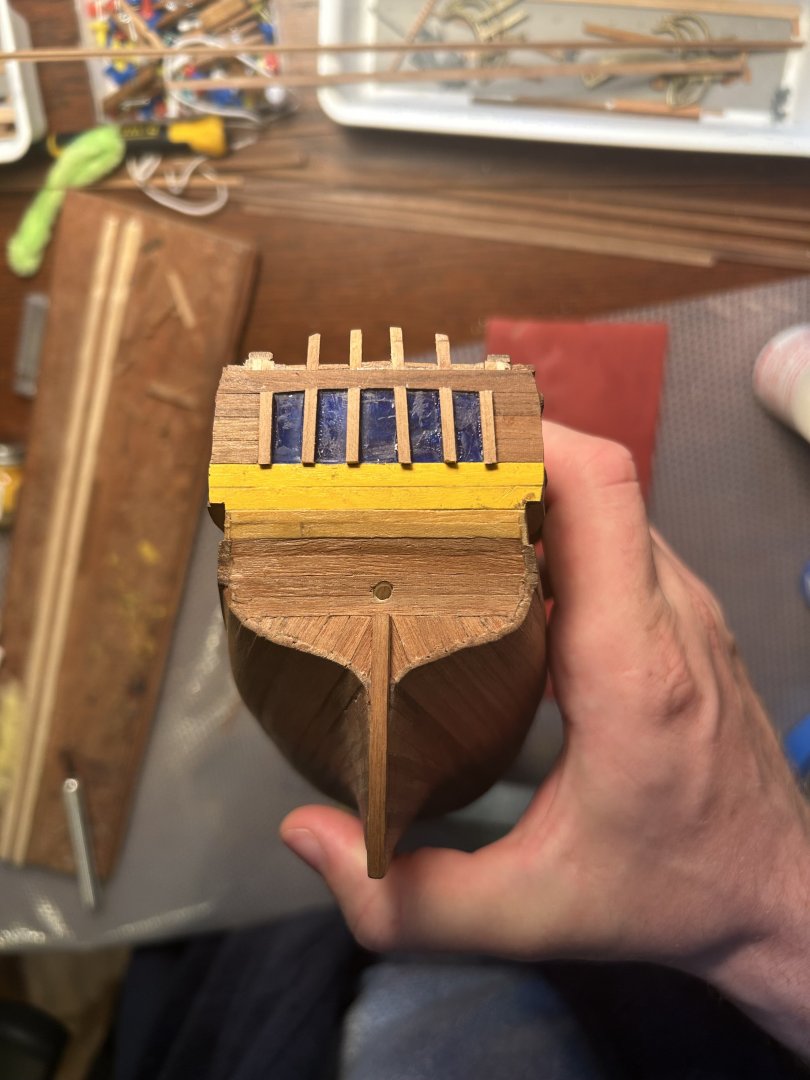
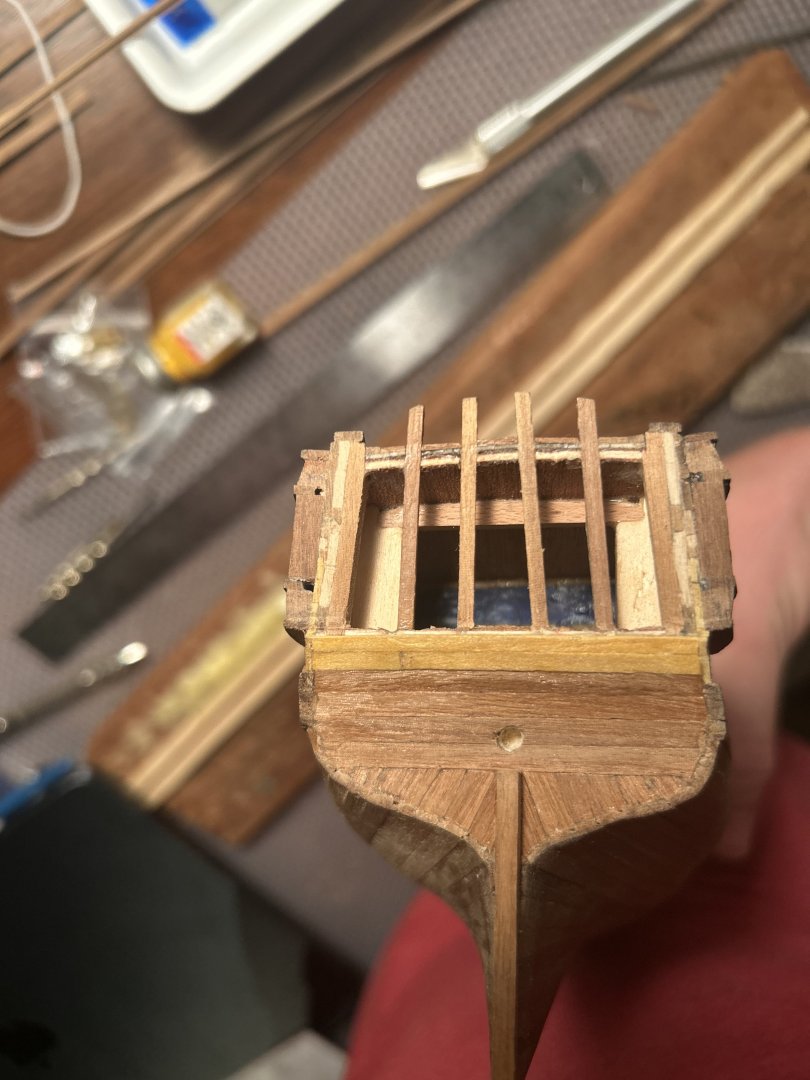
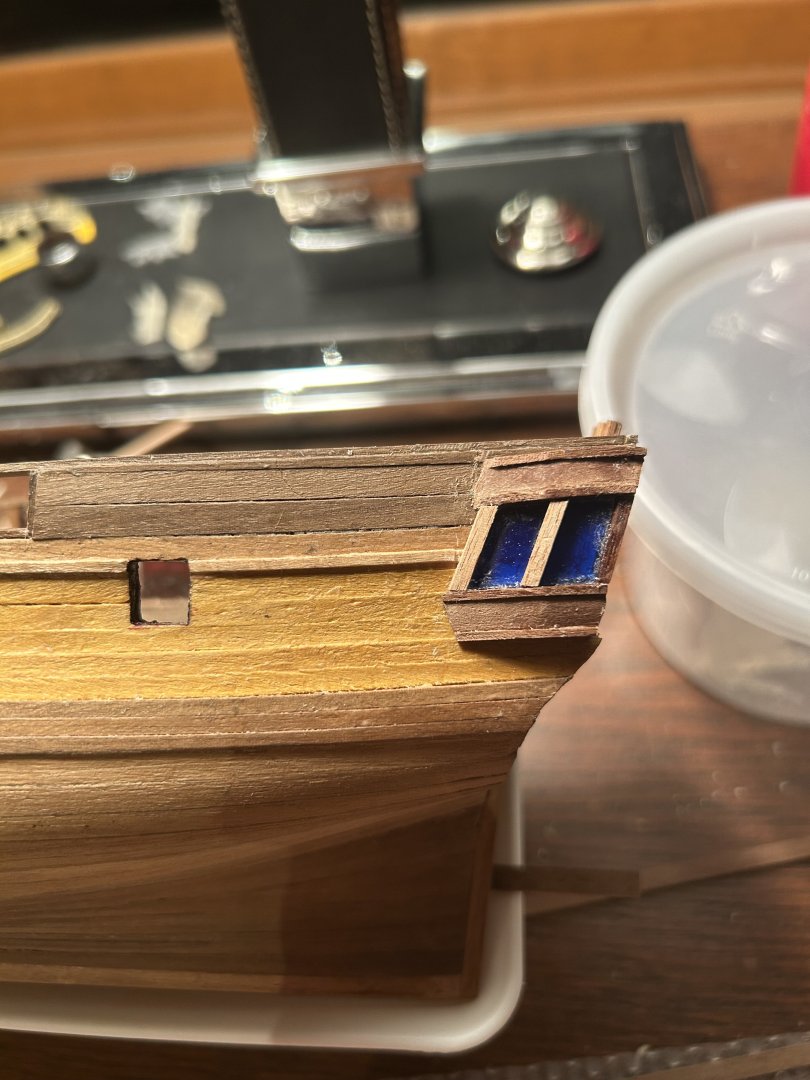
The transom windows are now complete. Given that the 3d printing is just too big, I've settled for a simple framing design reminescent of the HMS Surprise. I'm not sure if I want to paint the window pillars or the wood pieces above or below the windows.
-
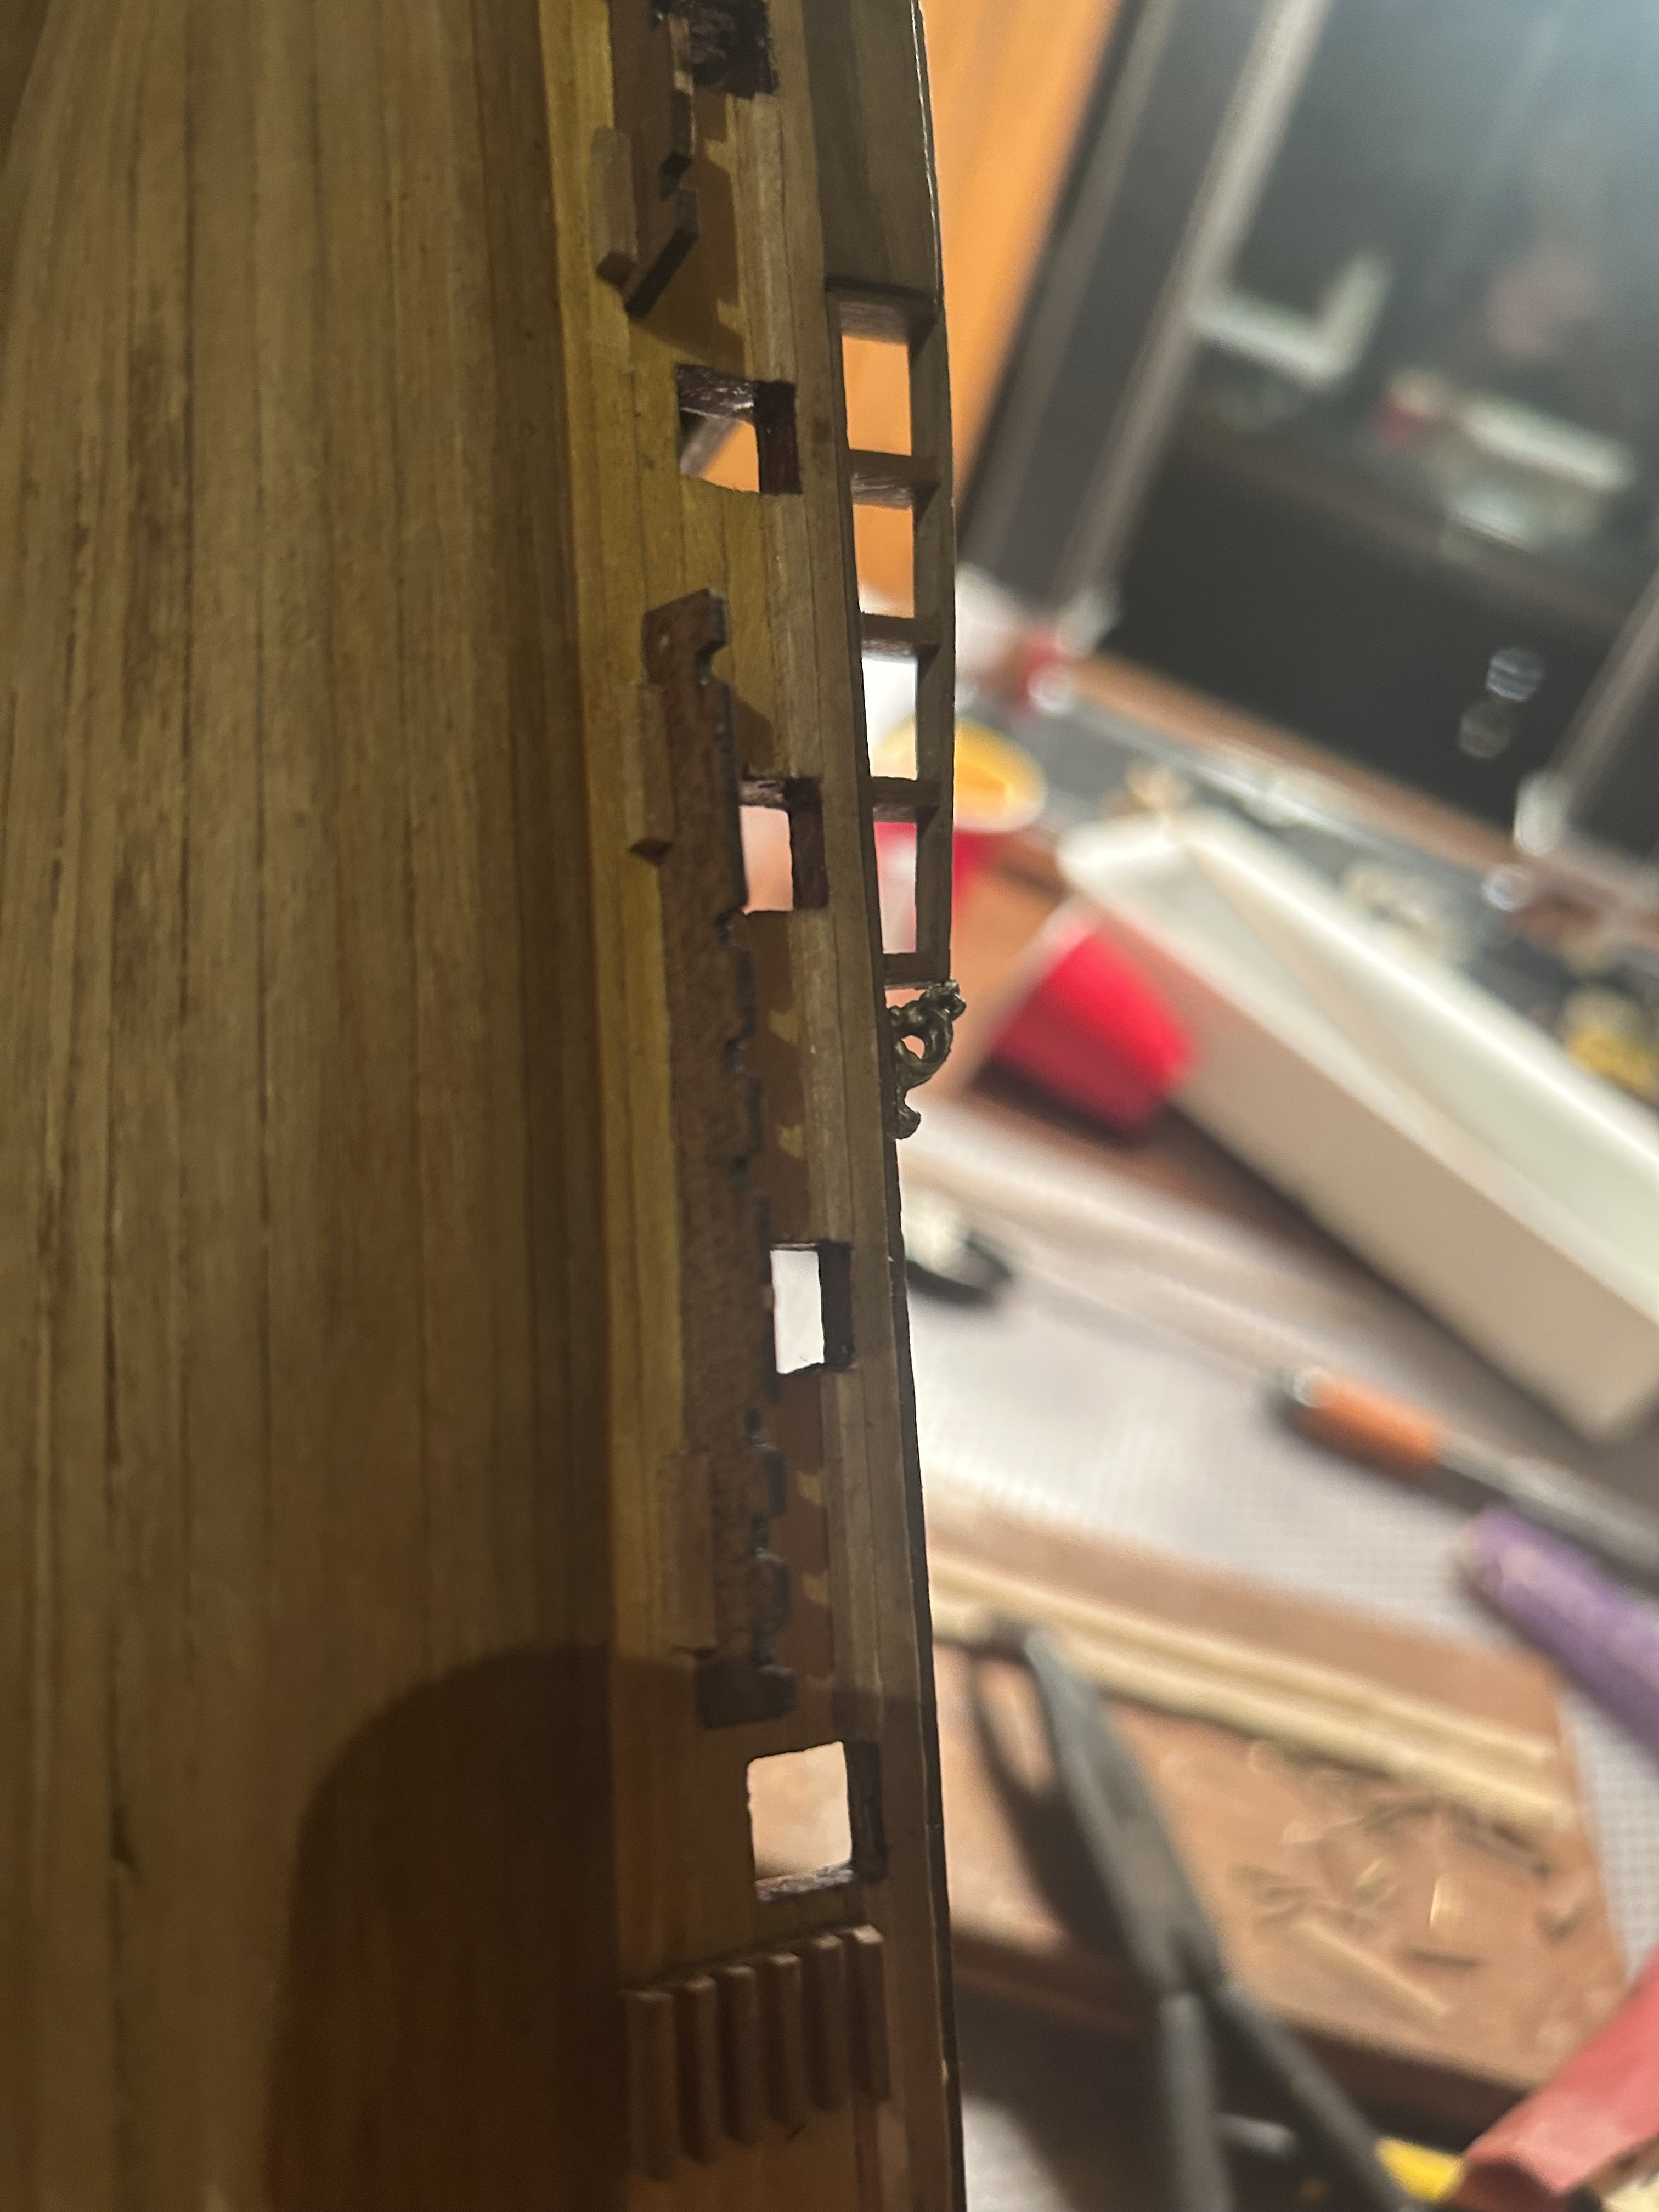
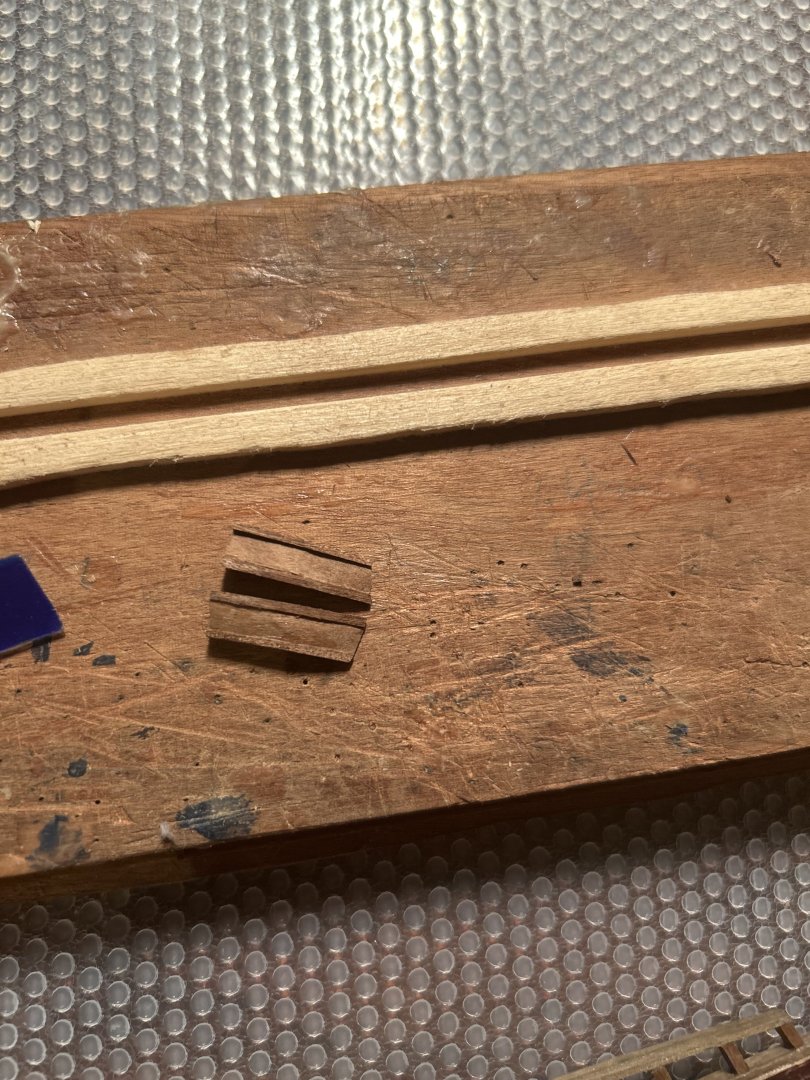
One tiny piece at a time, I advance. Four left. Cutting 20 miniscule window bars to shape has been stressful and somewhat tedious. But I think the results justify themselves.
-
The last few days have been productive. Before I put on the last two planks, I put the window pillars in place, aligned with the wood above the hull. Everything I've glued to the window was done using superglue. After the 2mm by 2mm pillars, I put on the 1mm by 1mm vertical window bars. I'm going to work on putting on the 20 horizonal bars over the next few days. After these steps, I put on the last two pieces of transom wood. Gluing them on was simple. I sanded them until they looked like a relatively smooth arch. I'll bend a cap piece over them after I finish the last few details.
-
Thanks @Srenner! That's a very kind offer, and I will definitely consider it if things don't go well. I'm not quite sure I understand what you mean about the small window timber. On mine, the back is fairly flat, so I plan to just glue it on the same way I did with the side windows.
-
Tonight I put everything onto the transom planking except the last two planks. The only difficult part was the plank directly above the transom window. I had to cut a divot in the middle so the window could fit smoothly. It all has gone very well though, apart from some remedial sanding where surfaces haven't been perfectly flat or straight. The last two planks will have to wait until I finish the transom window supports, as the pieces underneath them show where everything fits together. To my disappointment, I learned the lions I had my friend print are actually too big to fit on the transom. Not only was the metal badly cast, it was also somewhat too large. That said, I still like my planks more than Corel's metal transom piece. Also, I accidentally dropped the metal transom at the beginning of this step, and it broke. So I'm fully committed.

-
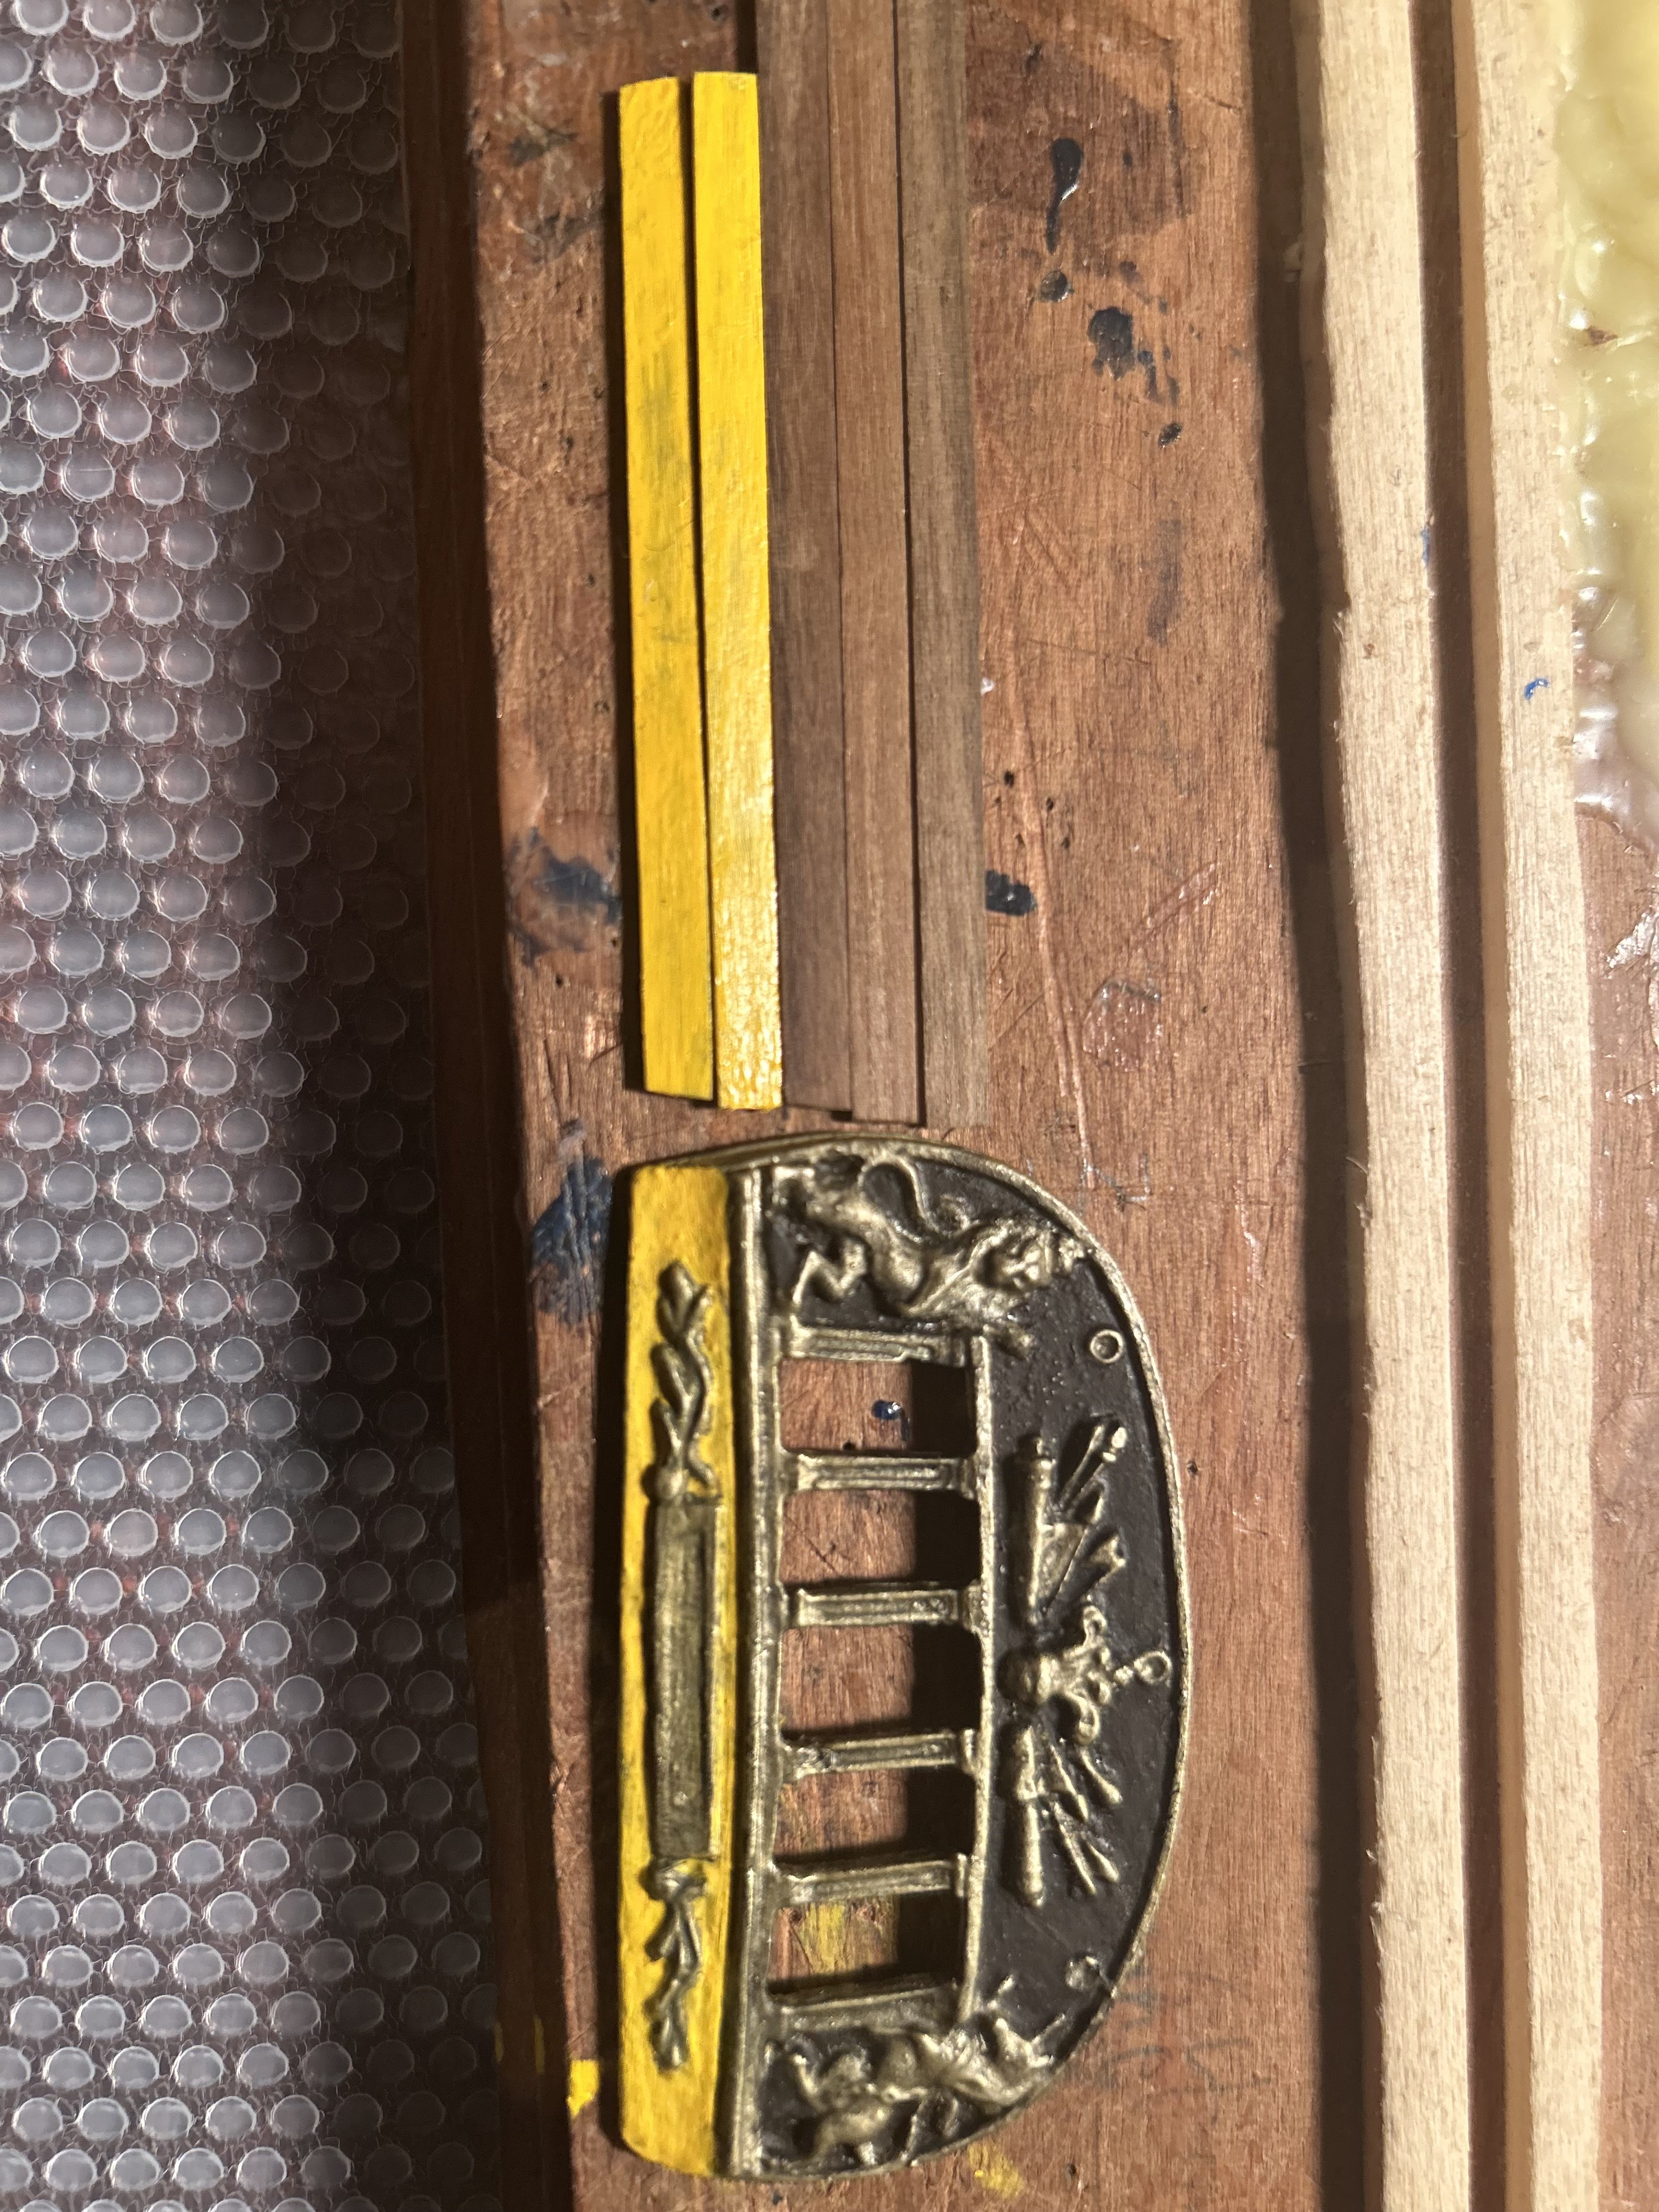
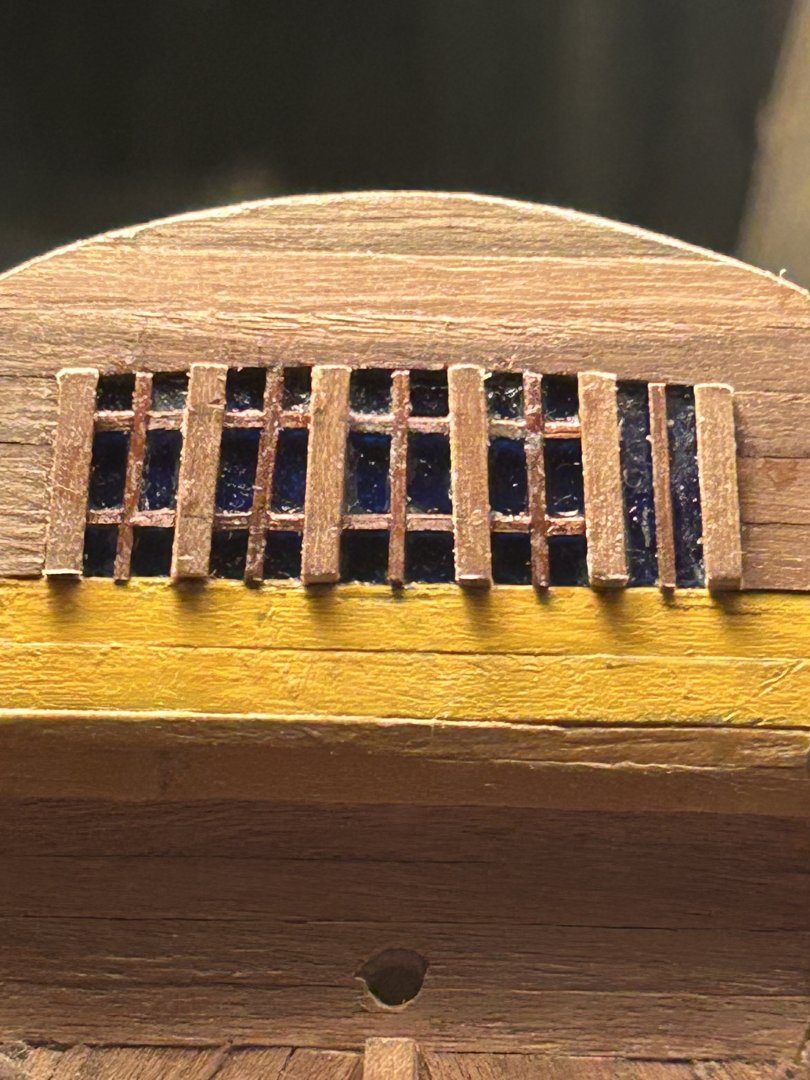
Here is as good a place as any to say a few words about the art of shipbuilding. In an idea world, building a model ship goes perfectly. Pieces glue in at the right angle, parts line up and everything looks great by the end. But that is not the world we live in. Instead, we live somewhere where after six tries, something looks like a solid seven out of ten, and you're sure the seventh try will bungle it worse. Sometimes that's the best you can do. That's where you should learn to cheat. In these situations, the best way forward is to find ways to build little optical illusions into your ship. By the time you're done, you and others who look at it won't notice, and it makes the model look far better. Here's an example or two from my Greyhound. The side gallery windows have tiny wooden window bars. In an ideal world, they would connect percectly with the pillars that frame the windows. But the back pillar is too low to connect perfectly against its bars. Rather than leave the bars bumping up, I sublty cut the bars into a wedge shape so it looks like they are flush with the pillar. On the stern, one piece of yellow-dyed wood is too short. To make it fit, I cut and glued two other pieces so they looked like a single solid piece. The result is hardly noticeable. There's another similar piece of woodworking on the bow where I did the same thing. These are far from the only things I've used to make the Greyhound look good despite setbacks. Little moves like these greatly improve the look of a model, even when you're not able to get things perfect. Sometimes attempting to make something perfect after a mistake only makes it worse.
-
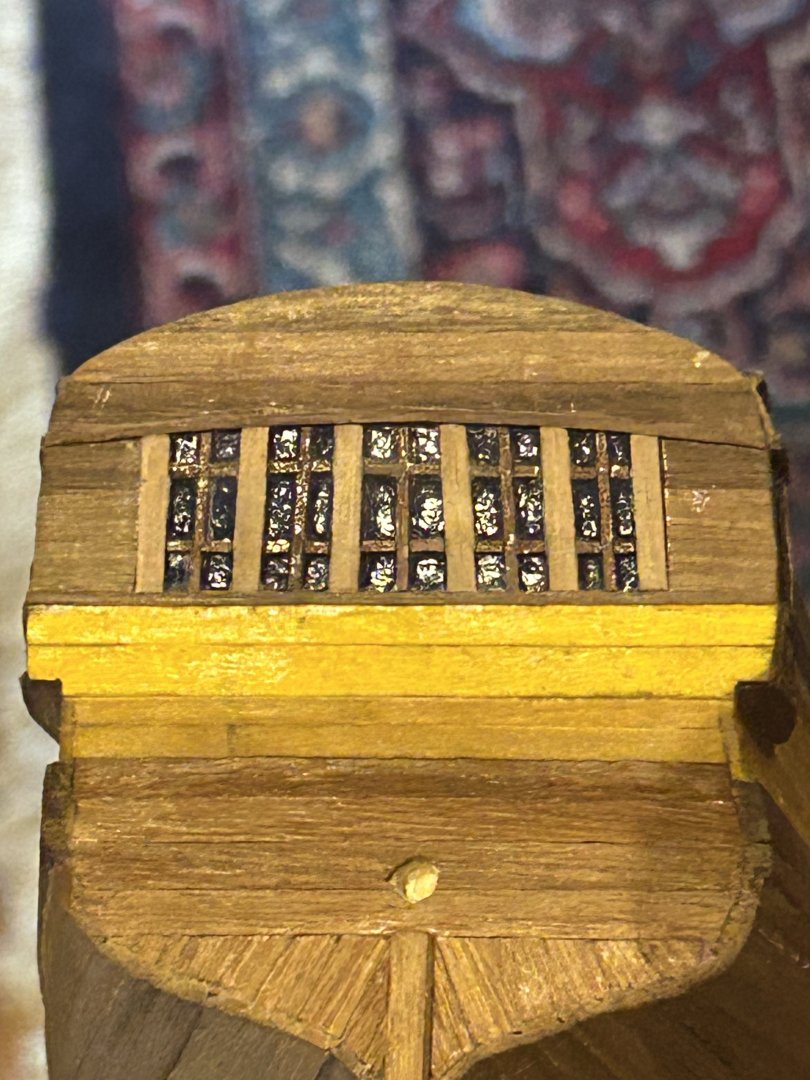
This next step took forever because it involved my nemesis: oil paint. And even worse, yellow oil paint. To get the next two planks to approximately the right shade, I had to blast them with several layers of thinned oil paint. Of course, each layer took a day to dry. Of course, after the painting, they went on fairly easily. And in the meantime, I realized that my glass for the transom window wasn't quite blue enough, so I've put on another layer of staining goo. Hopefully, the next step won't involve loads of drying for stuff under my control.


-
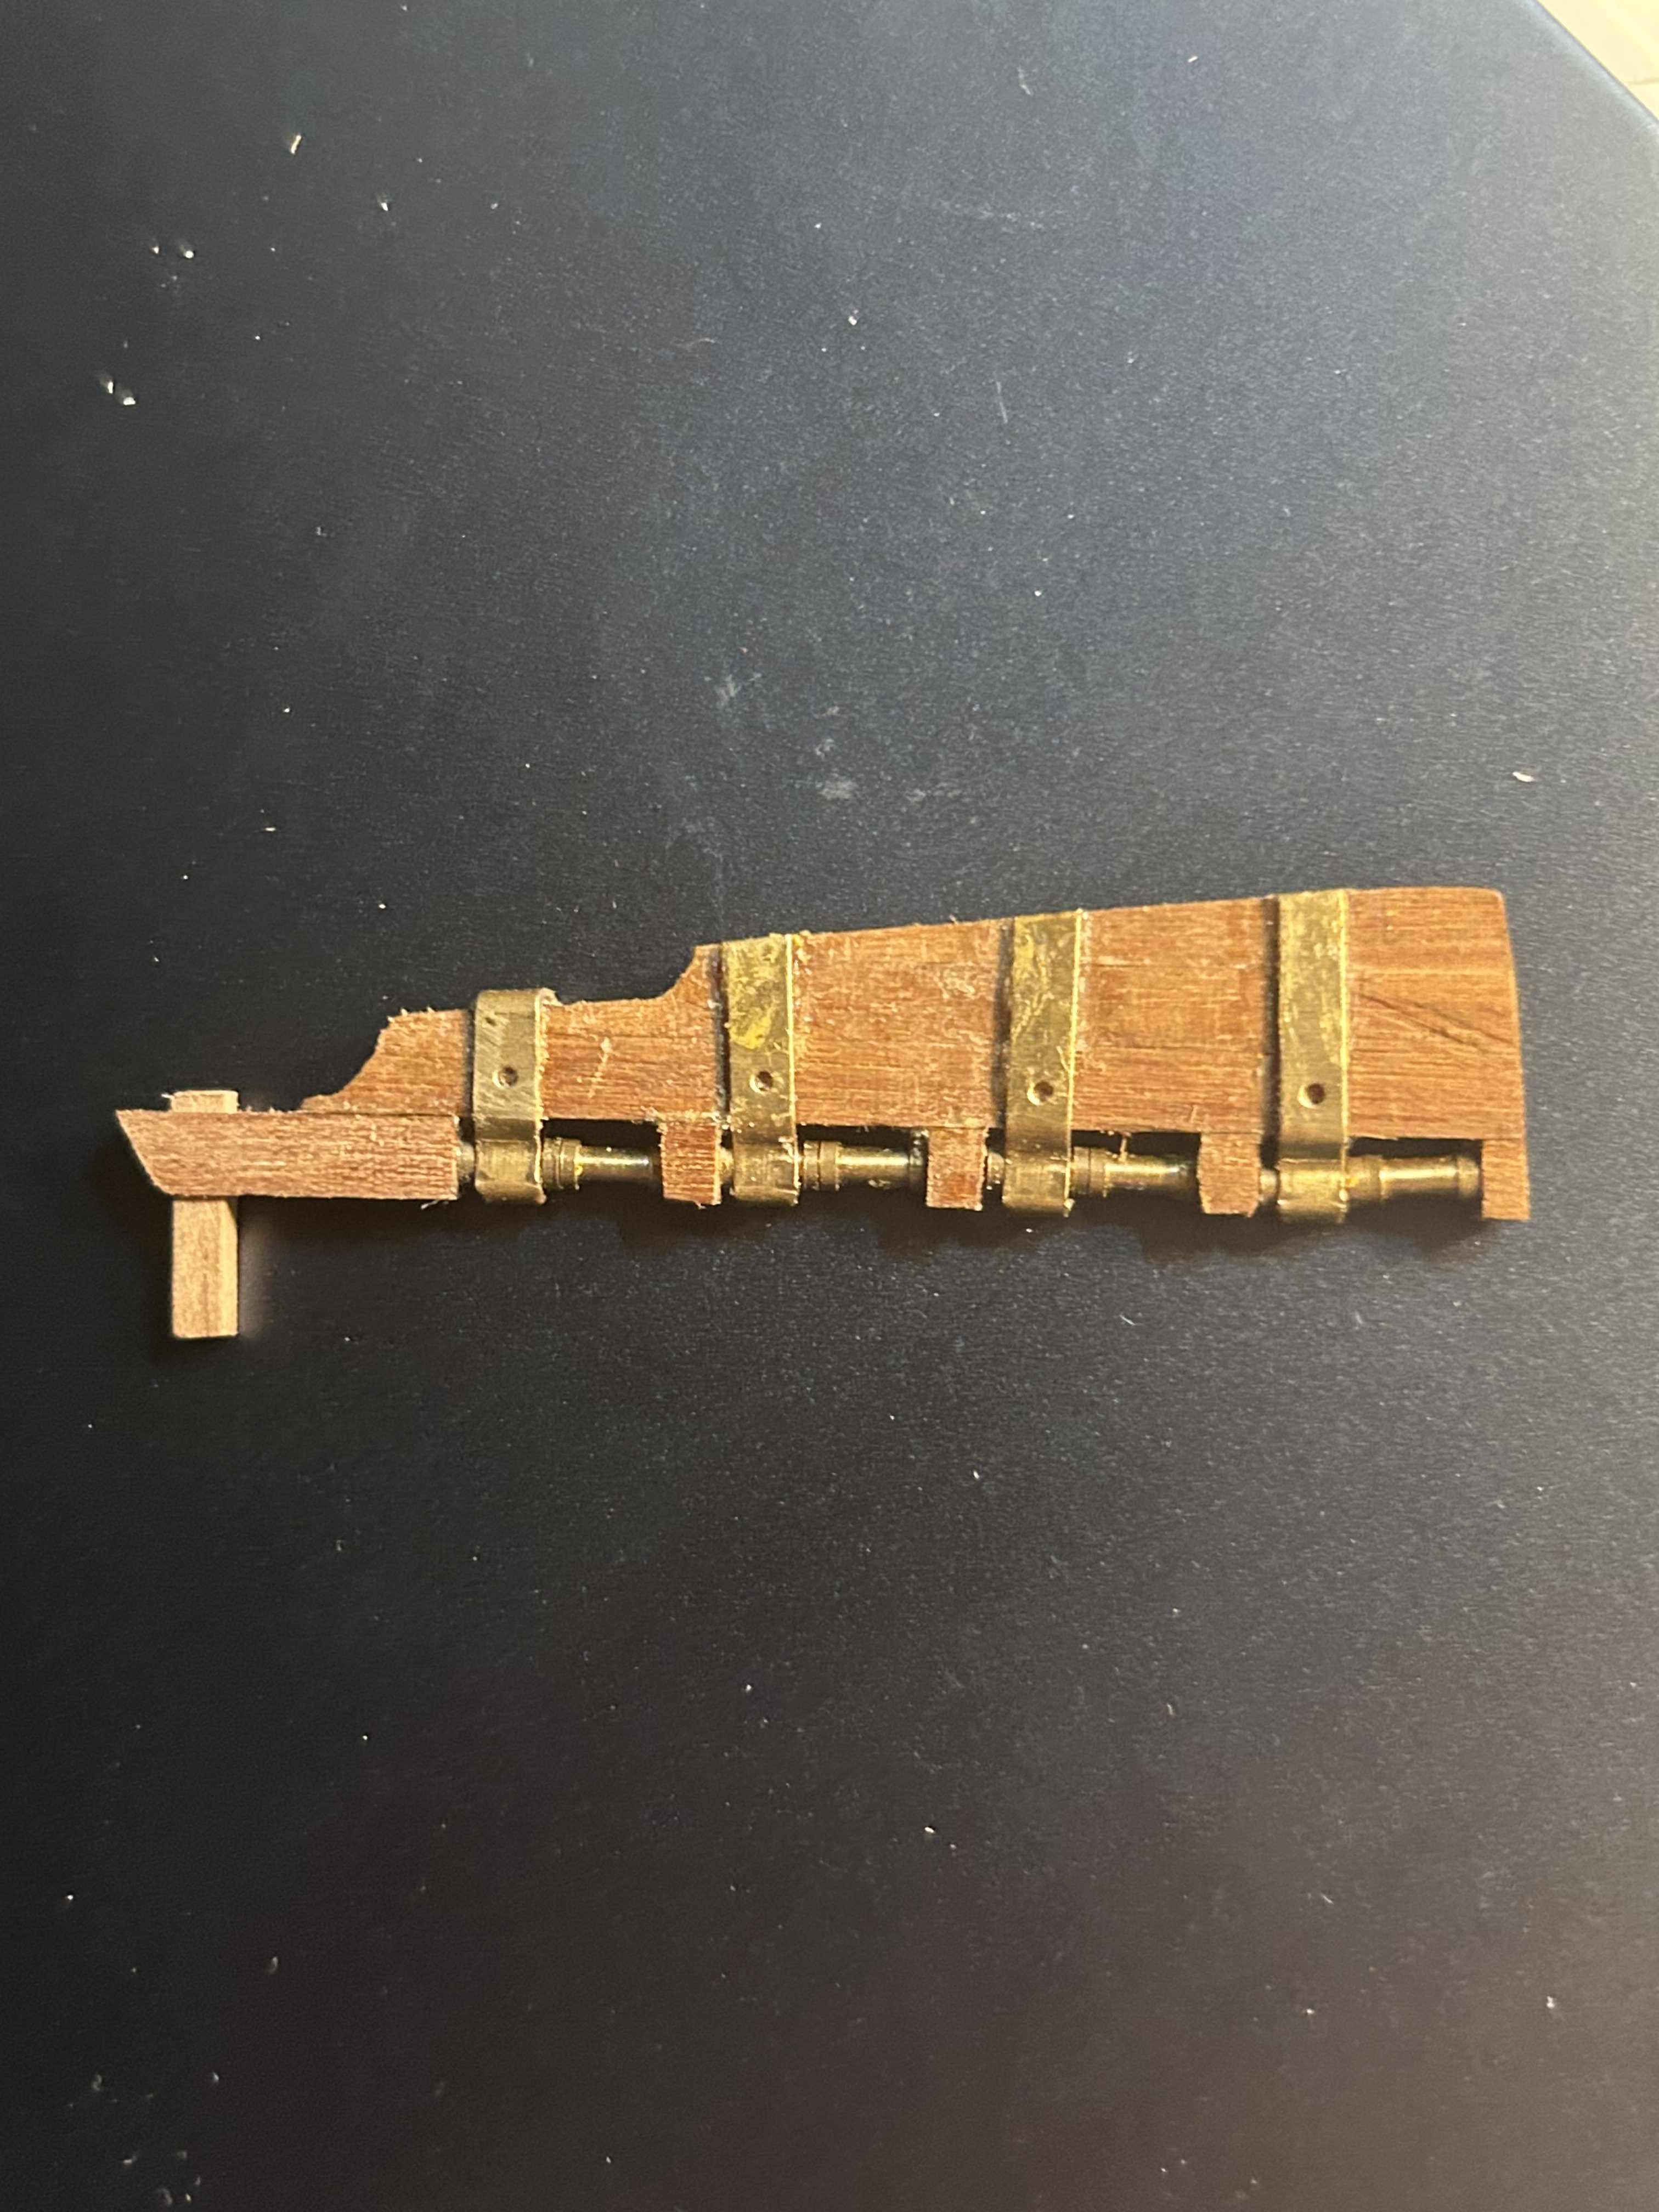
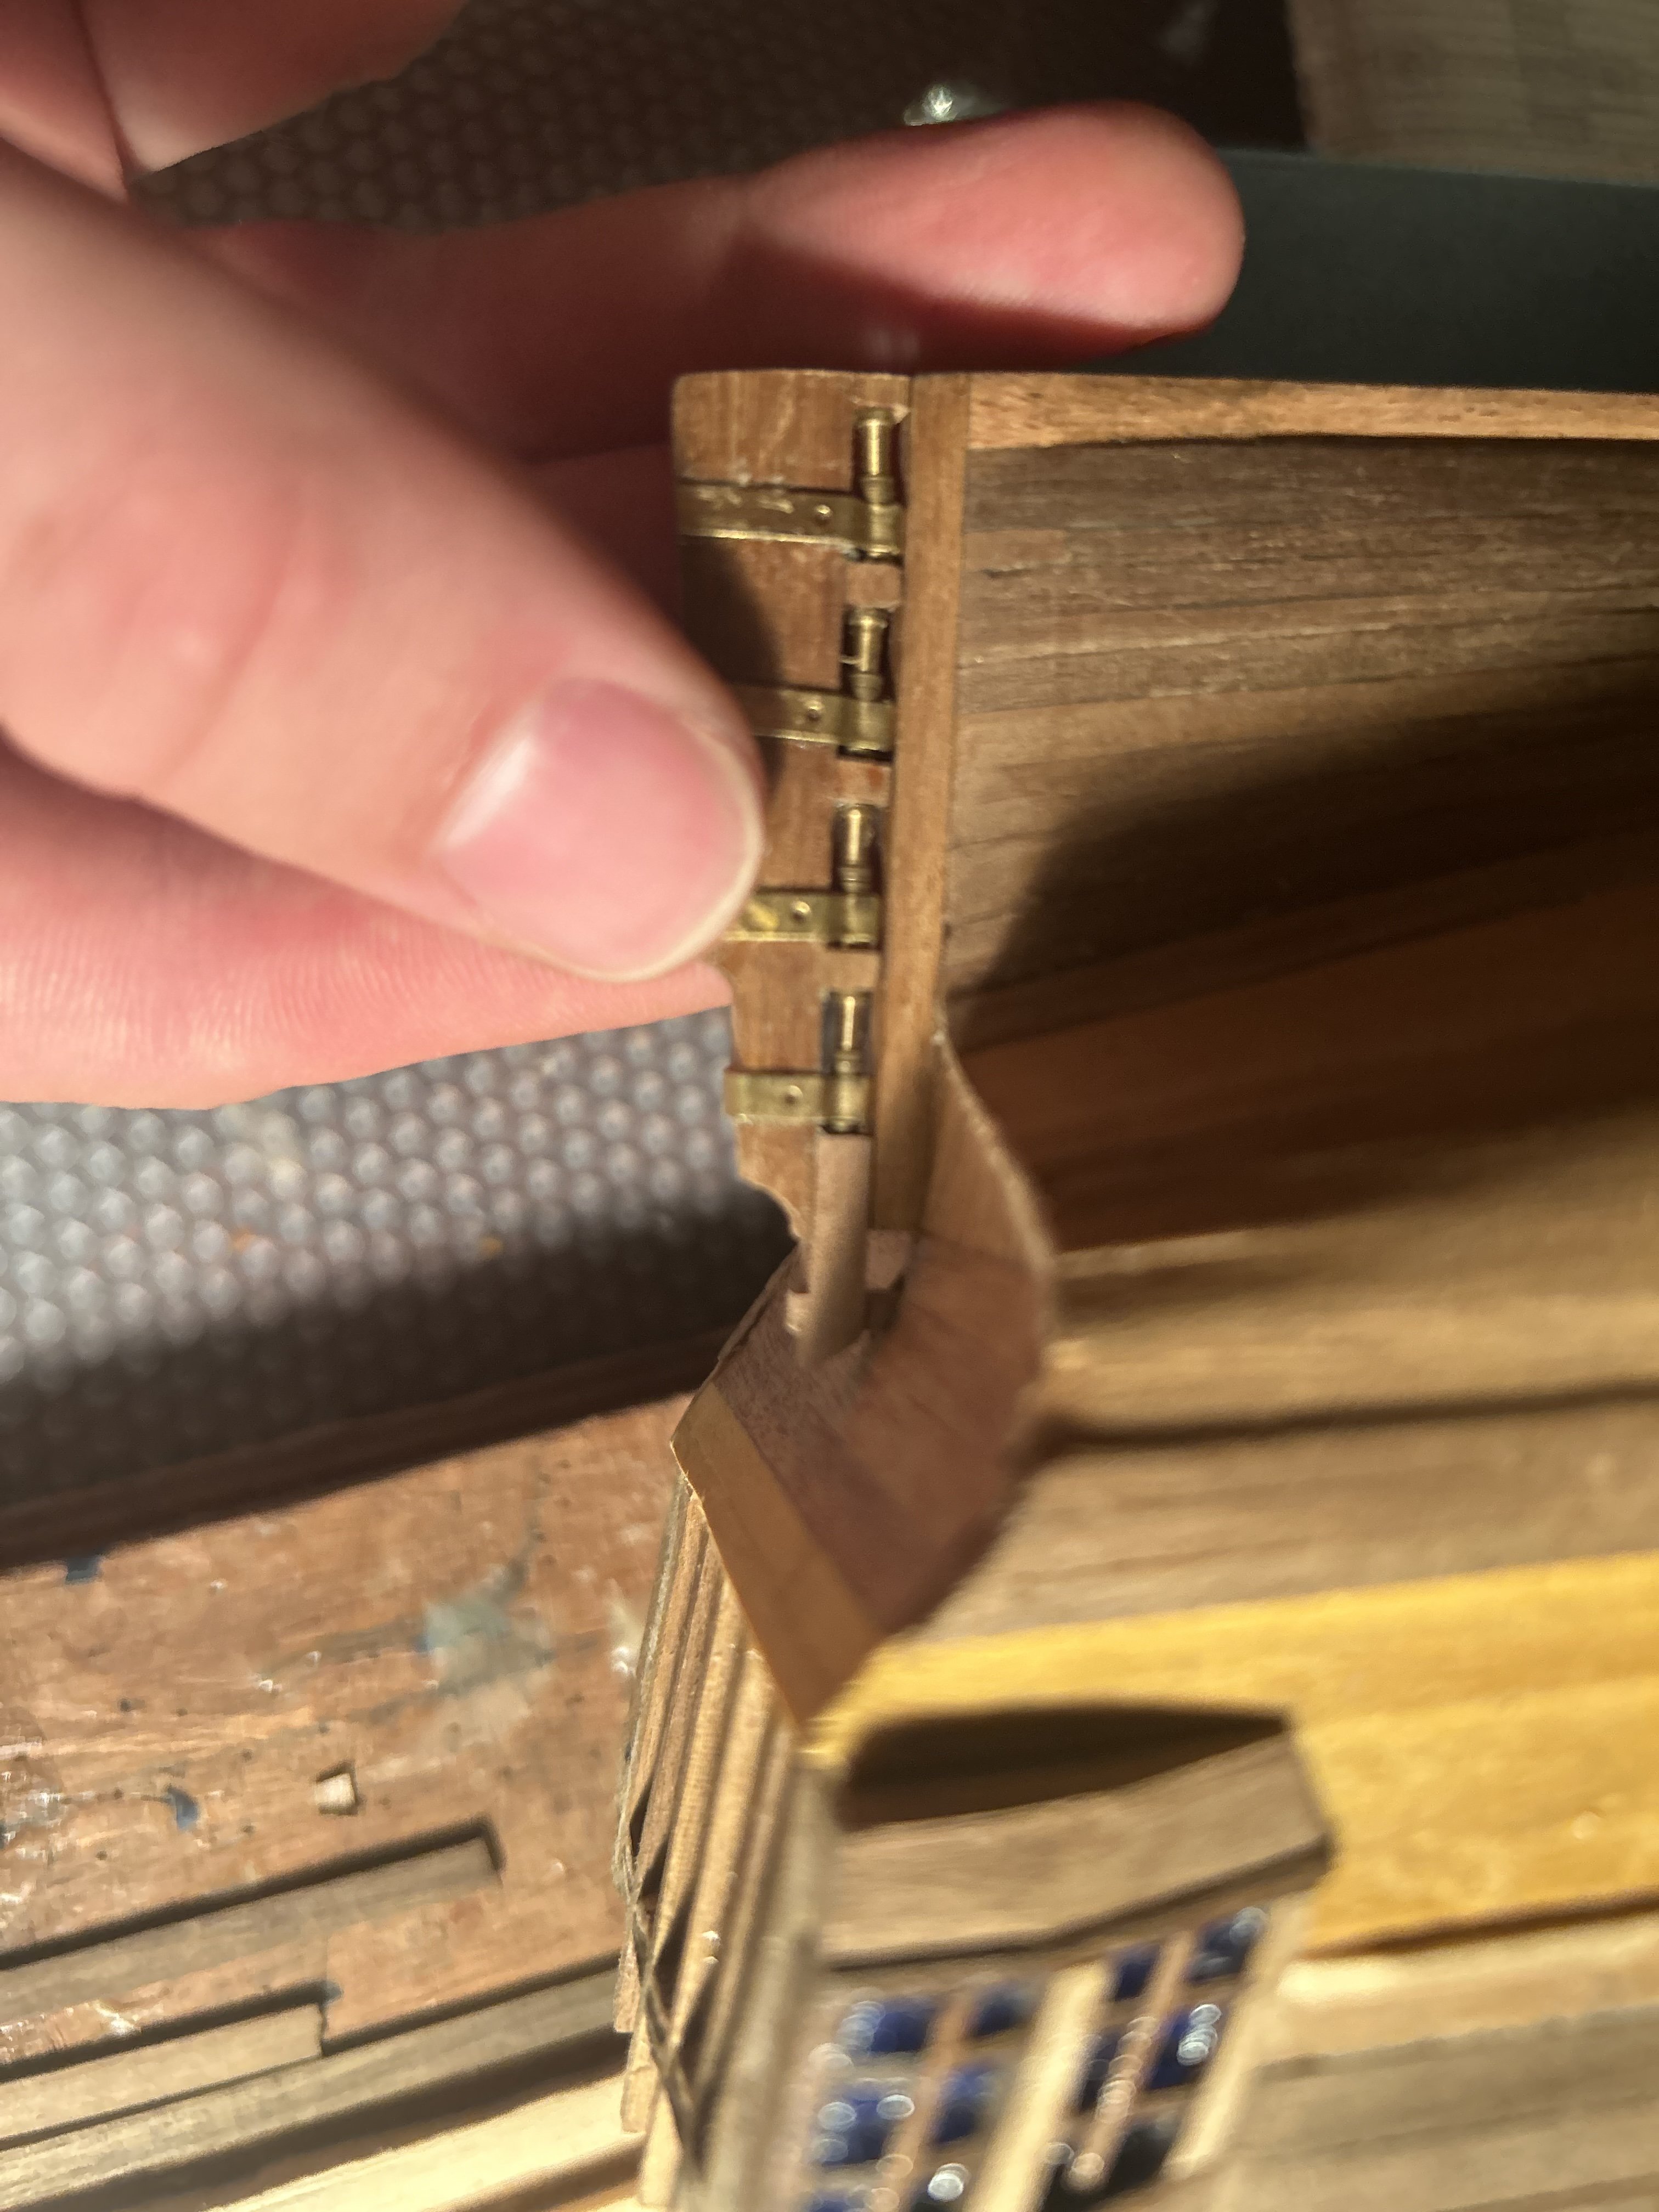
I have finished the rudder. It may be the best woodworking I have yet achieved on this ship. To get the last piece of the rudder required something special. I bored a hole in 4mm by 4mm, widened the hole to fit a 2mm by 2mm tiller, then shaved down the whole piece so it was 3mm by 3mm. Then I cut it to shape and glued it to the top of the rudder, so it can fit in a new hole I carved into the hull. It all fits perfectly! Unfortunately, I'm still working on the transom. The oil paint looked blobby, so I need to repaint it. I'm getting very tired of trying to repaint uncooperative yellow. Ah well...


-
Thanks! I mostly copied work from @hamilton and his Greyhound build for them, with a few modifications of my own.
-
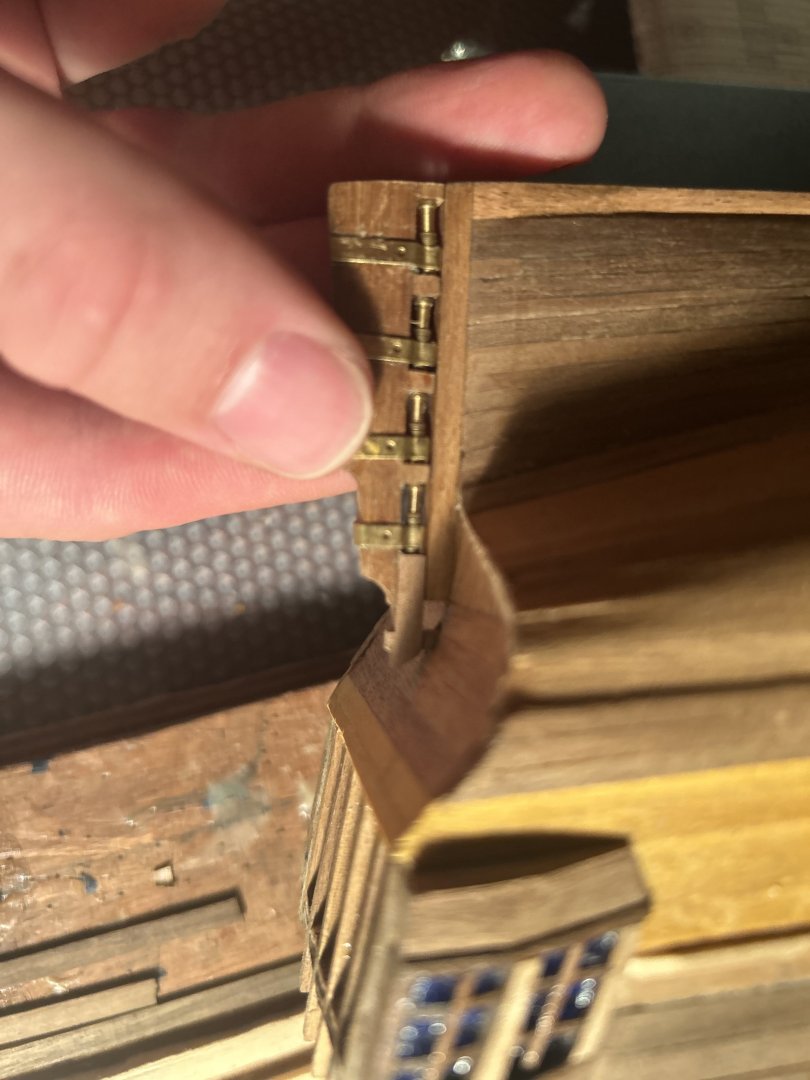
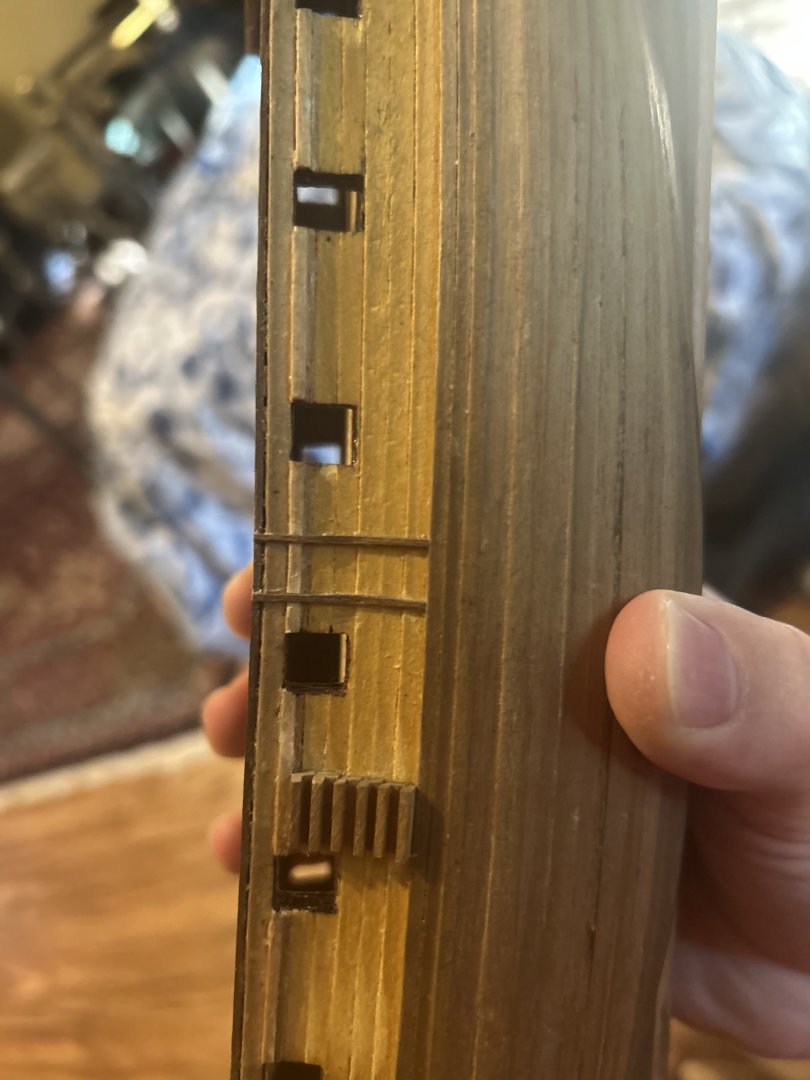
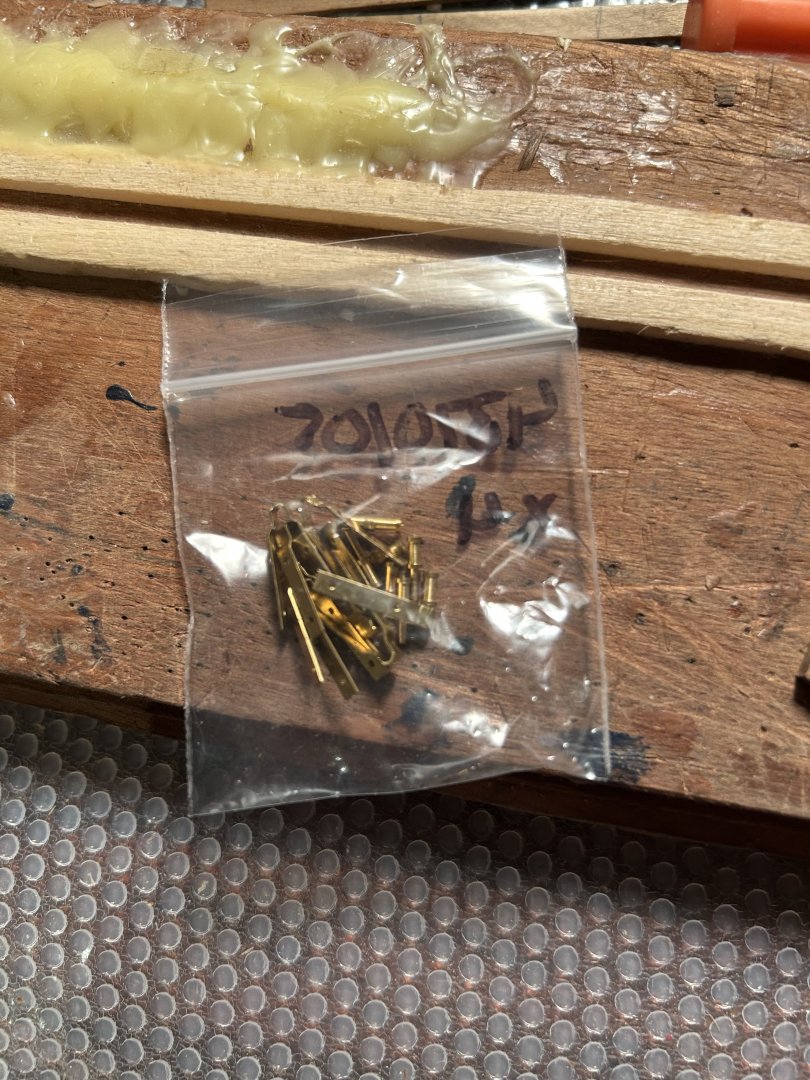
Things have been slow, because oil paints take a while to dry and yellow takes a lot of coats. I'm working on painting the transom planks, and I'm fairly sure I need just one more layer to make them look solid. In the meantime, I've started work on the rudder. My clippers don't really do well at cutting through brass, but enough perseverance and gentleness can go a long way. I have one hinge on and have three to go until the rudder is finished. My measurements suggest that each piece of wood between the hinges can be no more than 2mm in height. I have a feeling the rudder will take me a solid three or four days to finish if I'm lucky.

-
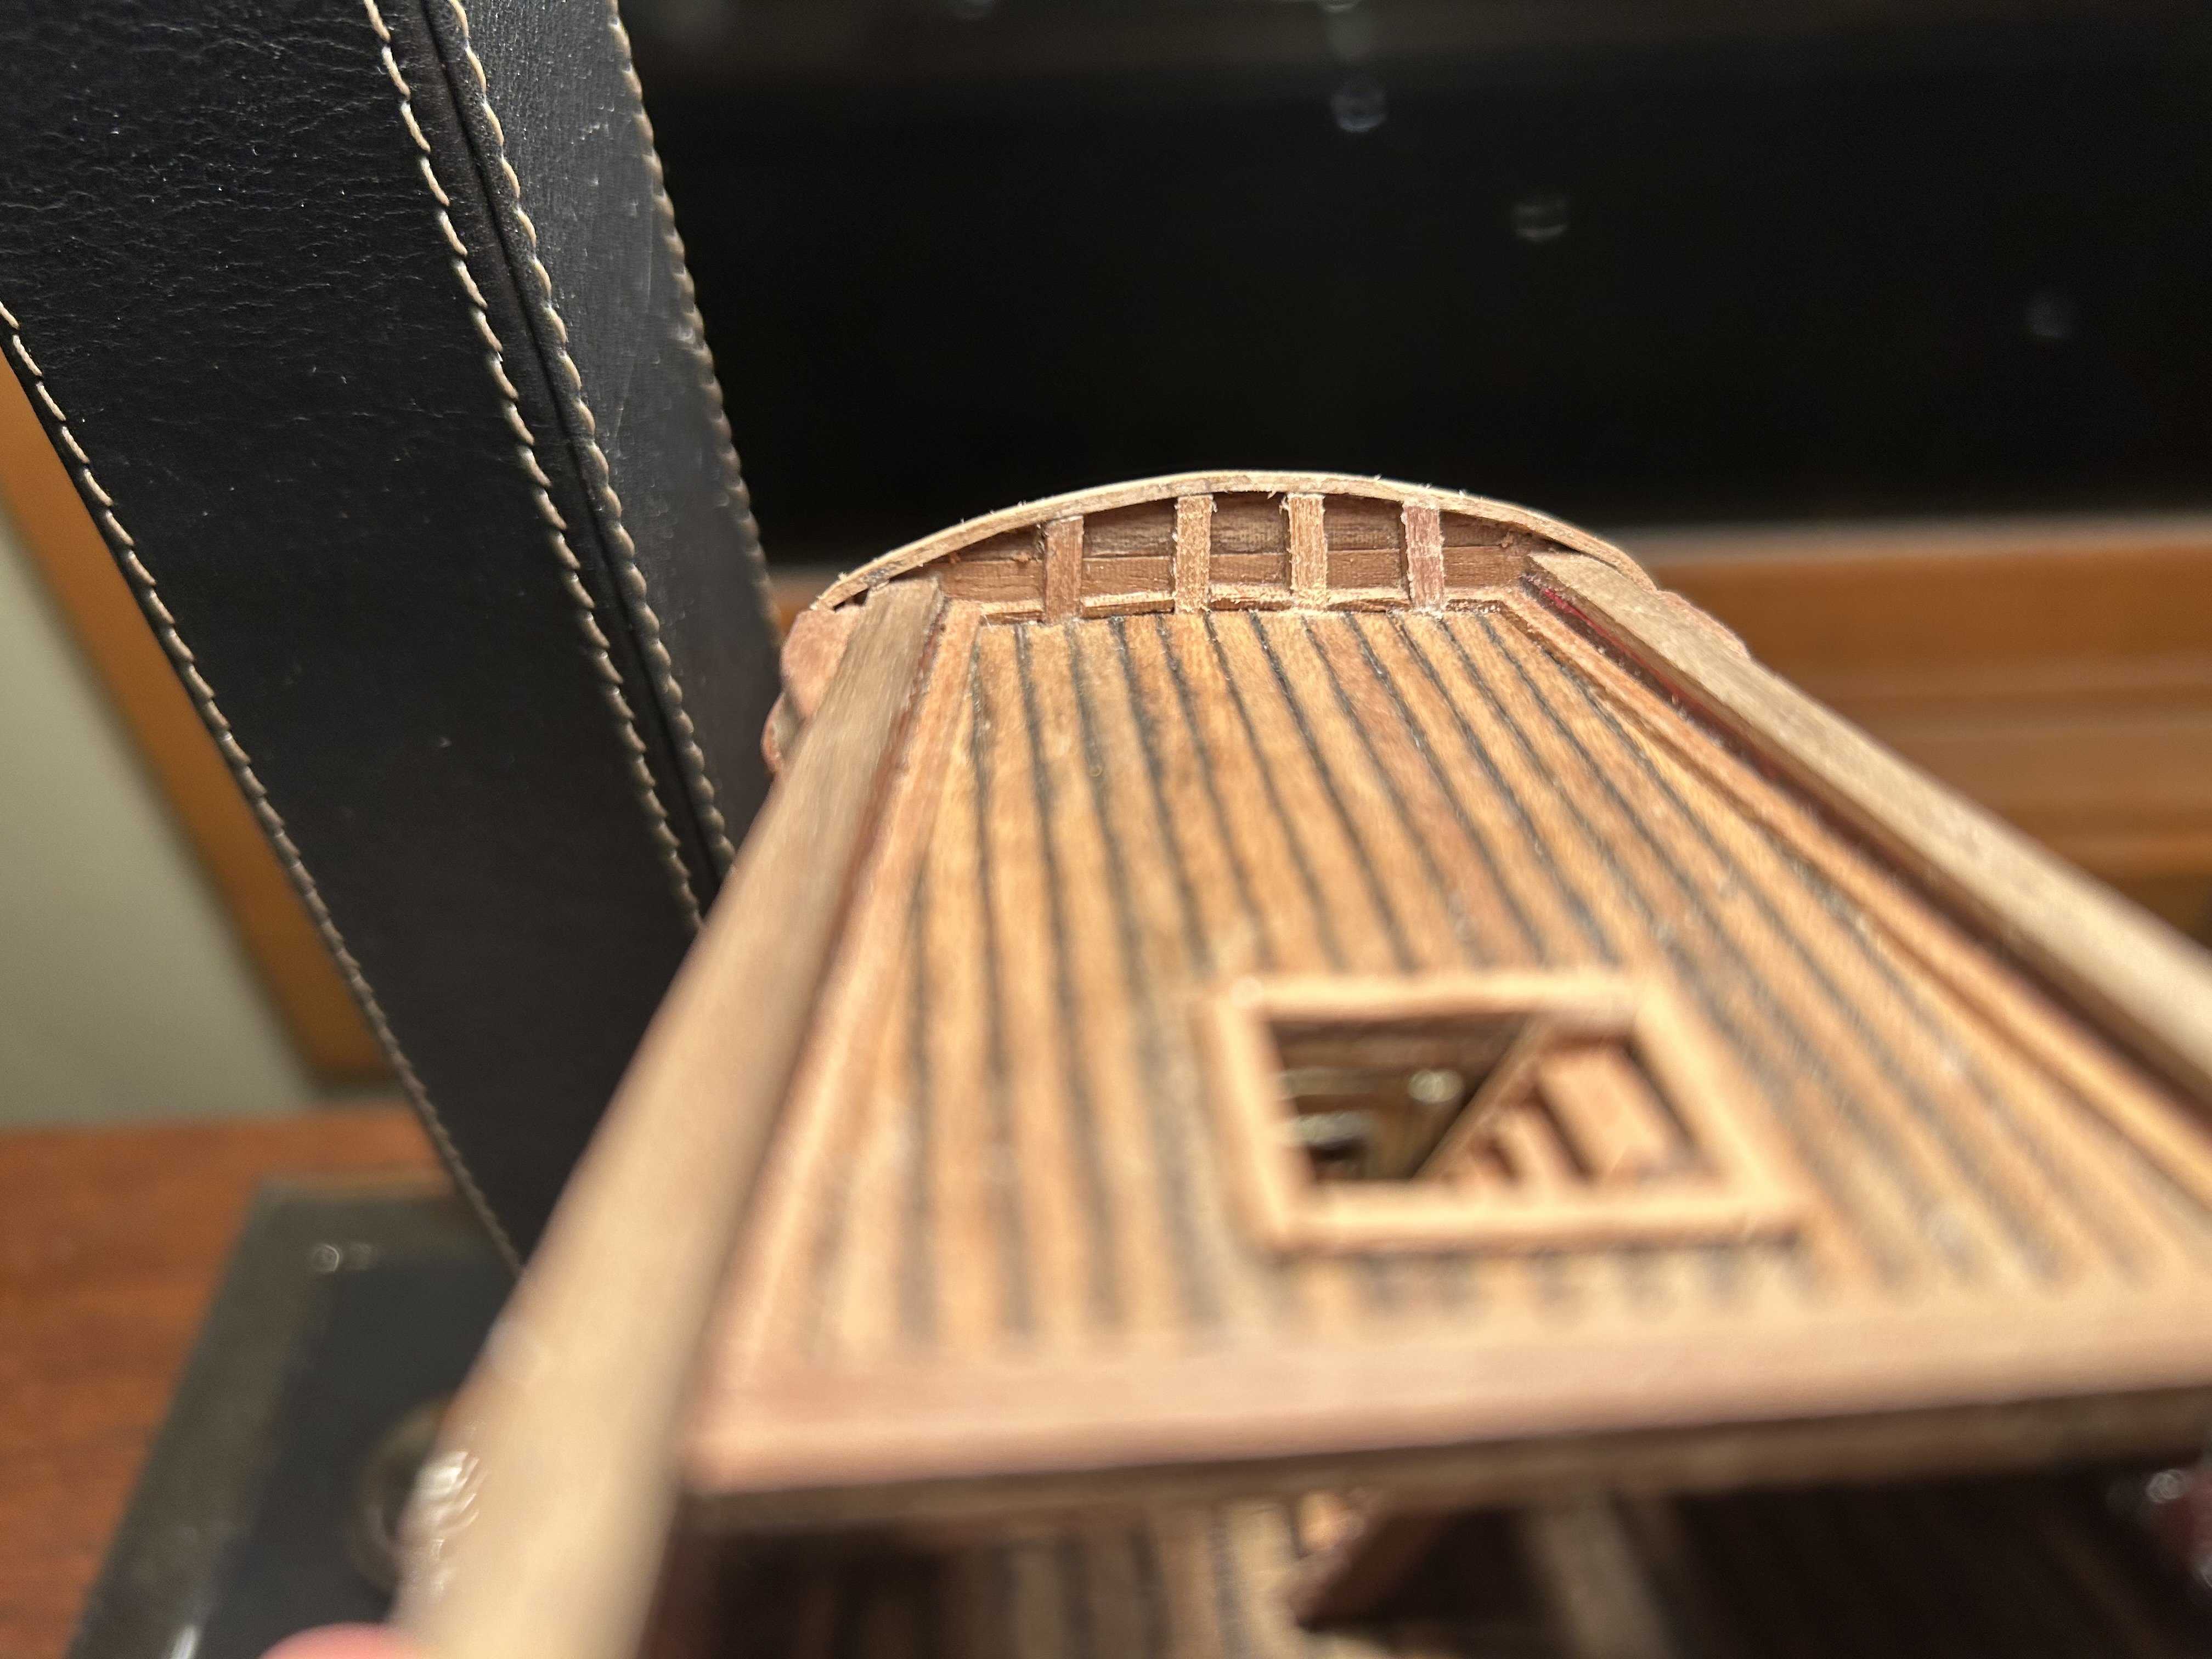
Today I finished the window bars on the side windows. It was pretty much exactly what it looks like. Super glue holding 1mm by 1mm in place. Cutting it to shape was a bother, but with careful measuring everything went fairly well. In the end, the superglue softened the look of the glass. I think I got what I was hoping for. I'm hoping the transom will prove easier.


-
I put the central window bars on today. My method was the same as with last time. Measure carefully, then superglue it into place. 16 tiny horizontal bars to go, and then I'll have these two things done.


-
Success! The starboard replacement window went on perfectly. It's all glued in place now, and I will start putting the little window bars on after this weekend. I'm not up to more tonight, and I have plans for this weekend. Doing it this way looks so much cleaner and more real than the kit parts.


-
It was annoying, it was exasperating, but now one side is done! I used superglue to attach the fake glass, and it binds fast to the blue stained glass stuff. On the starboard side, it got messy and I had to cut out another piece of fake glass for it. Staining the glass takes a solid 24 hours. So I will have to wait until tomorrow for the next step.
-
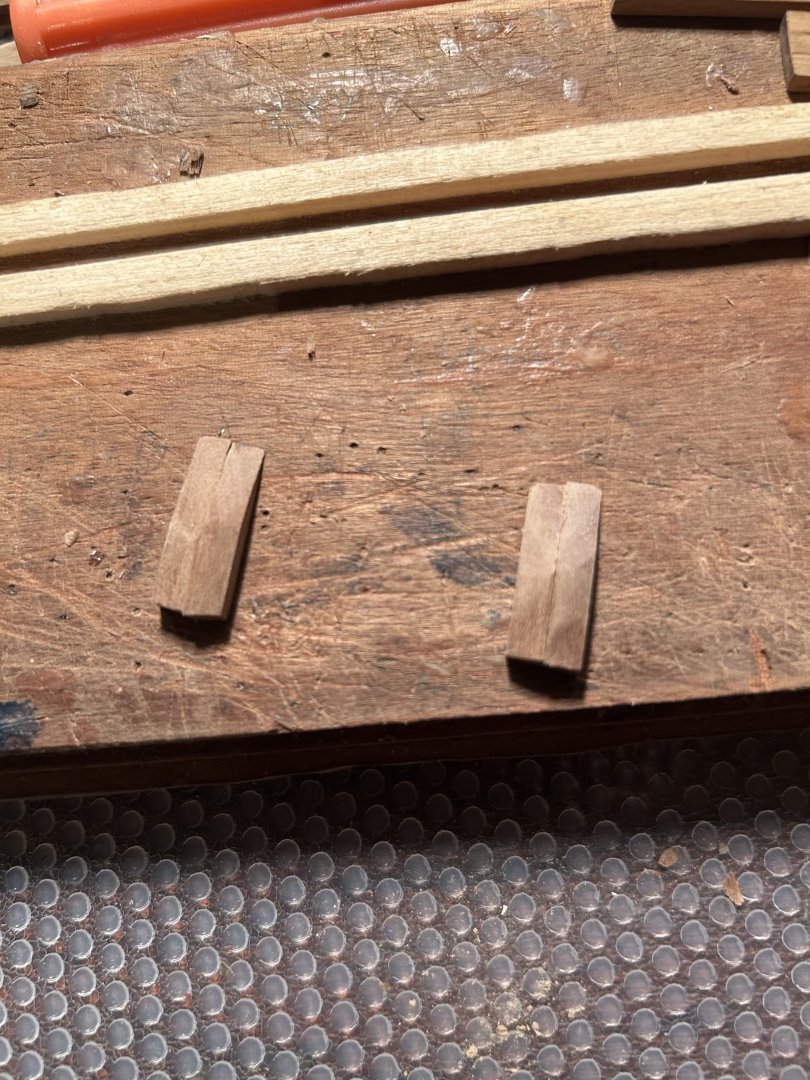
Life has been busy, so my next steps have been delayed. I've started building the side windows. The glass is cut already. And today I finished making the little side pieces. I basically chiseled a 4x4 to be 3mm at the bottom and 4mm at the top, then worked to shape the rest of the piece into something reasonable. I glued 1x4mm pieces on the top, and trimmed them to shape until they looked good.

-
I attached the little side protector pieces over the last couple days. They were fairly straightforward. I measured some distances, cut out a place for them on the parts of the hull that stuck out, then boiled and bent them to fit the hull's curve. So... maybe not that straightforward. The last two weeks have been very busy, so progress has been slow. However, the end is in sight.
-
Happy 4th of July! Last week was very busy. But not on ship related matters. The good news for us here is that my package of 1x1mm, 2x2mm, and brass hinges have finally arrived! I also finished the most time consuming part of the windows I'm building. I'm working on the rest of them too. They will be very similar to @hamilton's build. Thanks for a good example, pal.
-
Your woodwork looks pristine! Very well-fitted planks.
-
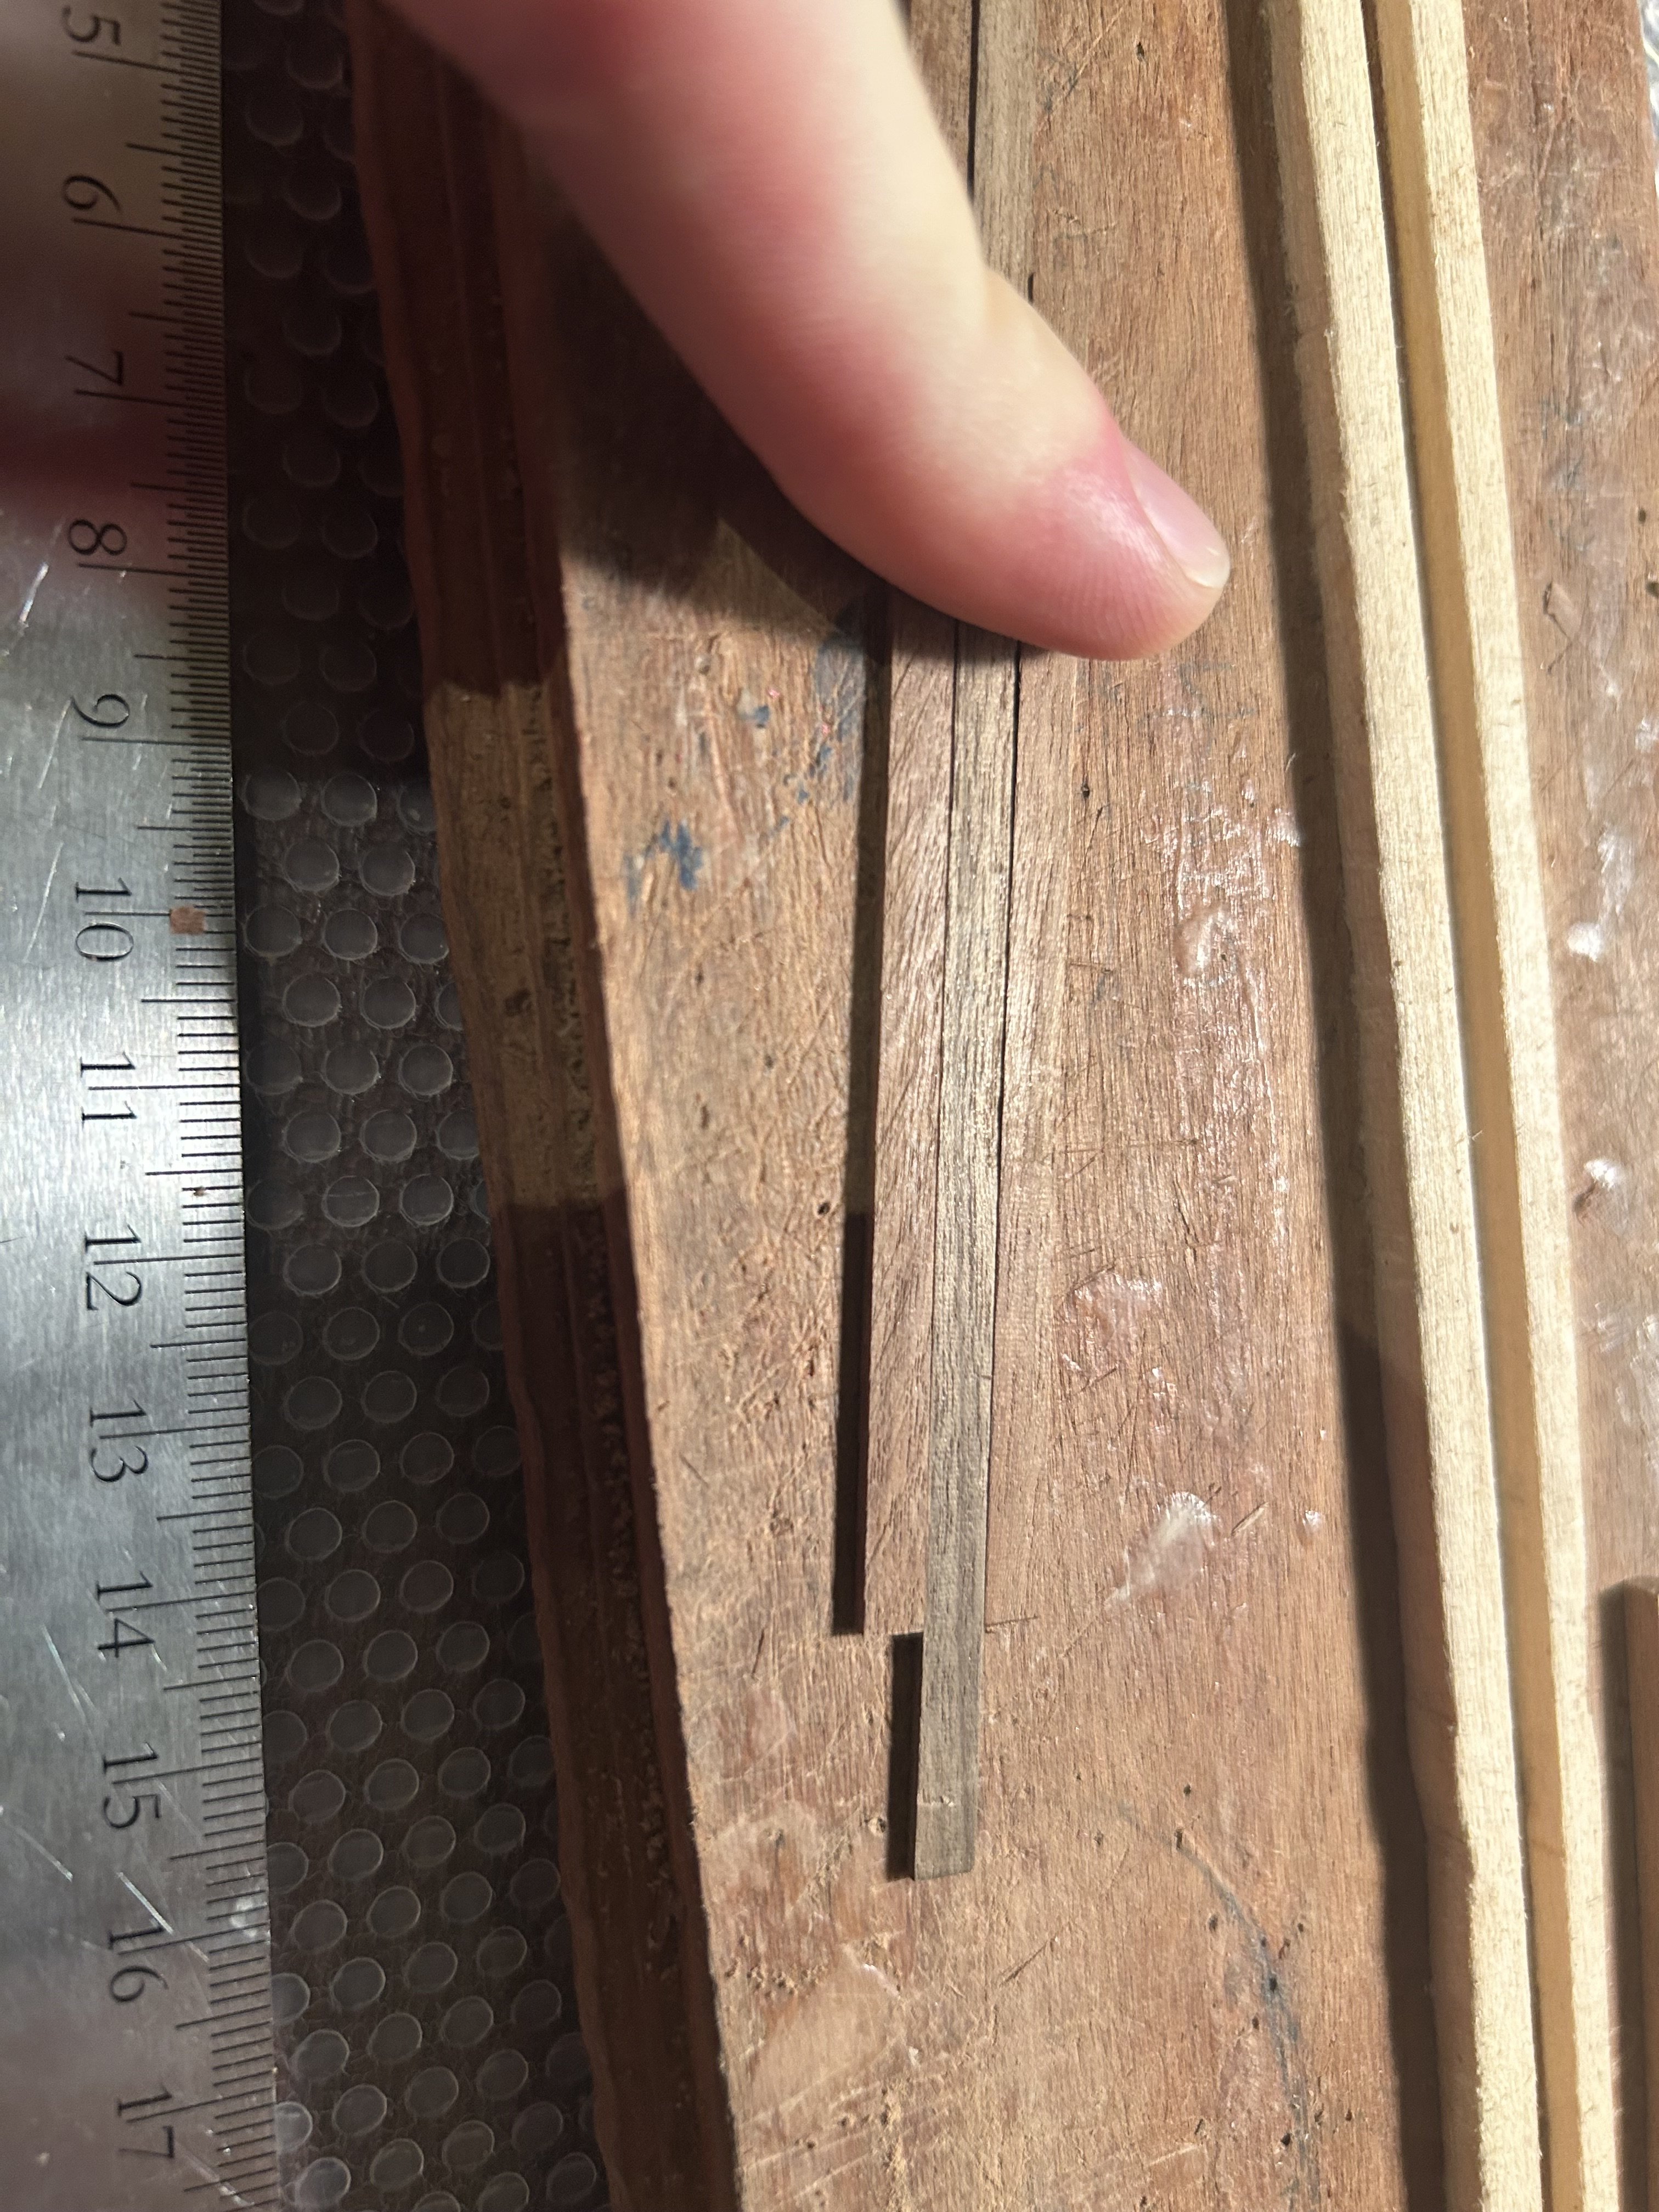
I know what some of you are wondering... Are those just planks? What kind of build log shows just plain walnut planks? Any build log that features the Greyhound, that's what kind. One of these humble 1mm by 4mm walnut planks began life as one of seven surplus 2mm by 4mm plank that Corel generously provided for reasons unknown, given that hardly any wood in the kit requires wood of these measurement. At the same time, I need 1 mm by 4 mm walnut to build my own transom, given that the metal one Corel provided is slightly off in terms of shape. Therefore, with the help of my patented X-Acto Knife and 400 grain sandpaper program, our patient lost half his body weight in under an hour! * It was exactly what the ship needed. Although steps like these aren't quite as thrilling as building something new or getting something into the perfect shape, they nevertheless remain an important part of ship building. *(I do not endorse this weight loss technique as a legtimate medical remedy for any condition.)