HOLIDAY DONATION DRIVE - SUPPORT MSW - DO YOUR PART TO KEEP THIS GREAT FORUM GOING! (Only 27 donations so far out of 49,000 members - C'mon guys!)
×


Chief Williams
-
Posts
38 -
Joined
-
Last visited
Content Type
Profiles
Forums
Gallery
Events
Everything posted by Chief Williams
-
 Hiya Harlequin, I've sorted out all my parts as I mentioned before on your messaging page, and I've made a start on the Bellona, a question though, (and if you don't mind, this will be the first of many), would you advise planking the decks before gluing them in place? On some models, I've done this, and then found it was better to leave the planking until later, and on others, I'd wished I'd planked the decks before I fitted them.
 -
Hi Harlequin, I'm here looking for some help on the Corel version of HMS Bellona. I bought it from Cornwall Models, a very good firm, but I appear to be missing some strip wood. I've asked Corel for a list of what should be in the box and got a flat no, which was surprising. (I live in New Zealand, which makes any re-supply time consuming). Your build log of this model is going to be invaluable, and I hope you don't mind if from time to time if I ask for your advice. Thanks in advance,
George (Chiefy Williams)
I spent most of my life in the RN, and I'm guessing from your avatar, you used to jump out of good aeroplanes.
-
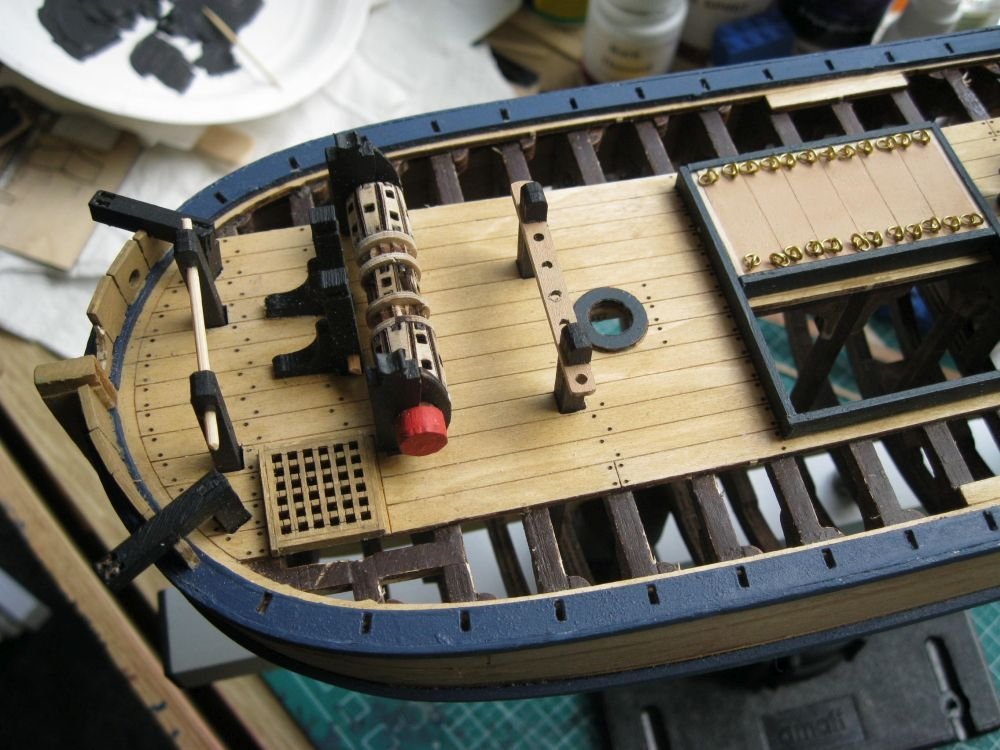
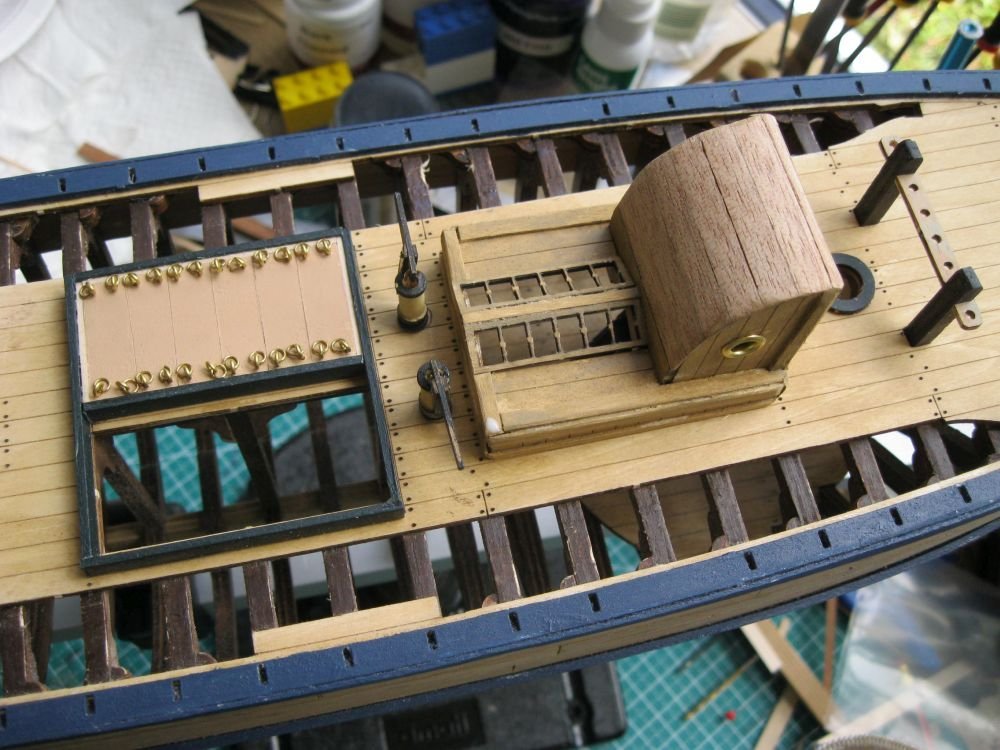
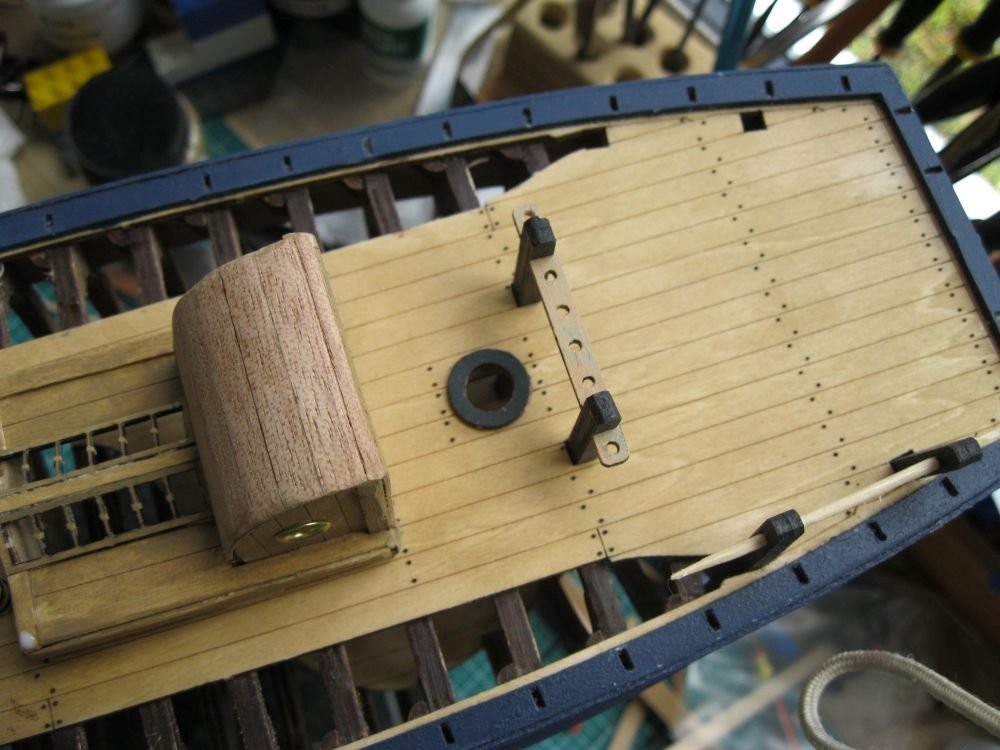
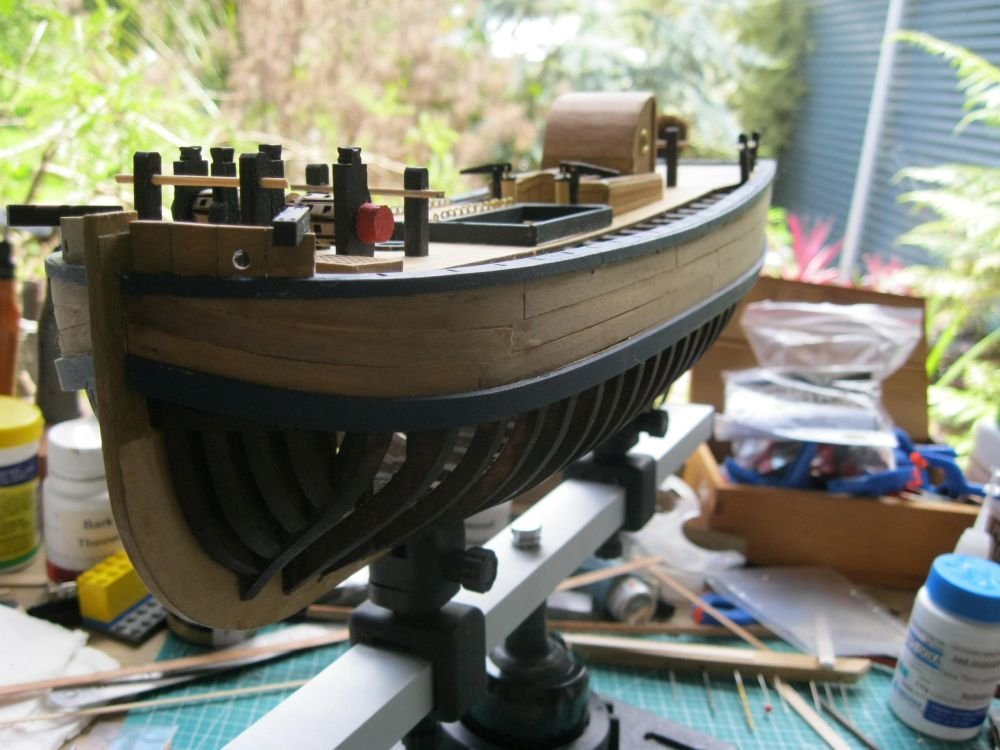
Sorry I haven't kept up with this as often as I should. I thought that retirement would mean lots of time to get on with my ship modelling, but my Lady Wife amongst others has had more important calls on my time. However, the build has gone on in the few odd minutes I got, as the photos below will show Here's the top of the bow showing the windlass, and all the other detail. I wish I'd spent more time on the windlass. And here's the midships detail. I've just noticed that blob of glue on the companionway frame, that'll have to go. and the stern detail. the cocktail stick between the port mizzen bitts is only so I can get the alignment right. and the view from the port bow. I decided to use some 0.5 x 5 walnut strips I had left from a previous project, and use the scale length of the planks, as supplied to the original builder, which would probably have been 22 feet long, giving a scale length of 140mm. (it's 1:48 scale). But It doesn't look too good as you can see, so they are coming off and I'll have a re-think. any suggestion will be gratefully received, but clean ones only please. I'm going to start on the rudder now, and then the cap rails. A month ago, I took delivery of my next kit, HMS Bellona from Corel, so I will be spending some time on that as well. Look at the state of my workbench as well....
- 3 replies
-
- 3
-

-
- mary byrne
- admiralty model
- (and 1 more)
-
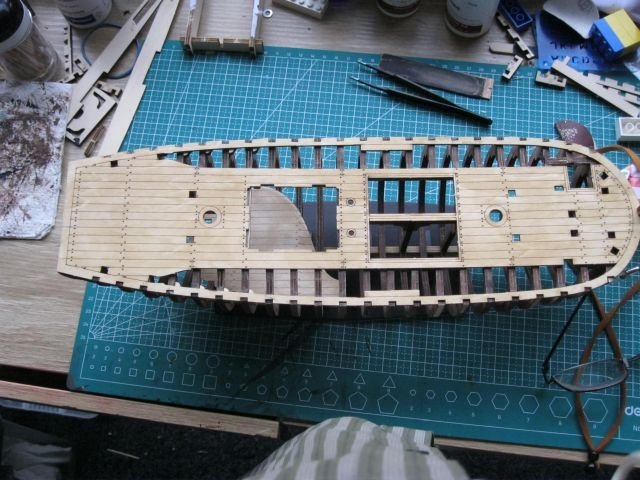
I've got the deck on, but as I've already told Rodger (he's building the same model as me, but doing a far better job of it), I wish I had a tenth of his skill. I appear to have fixed the slight warp in the frames, it was taken up by the deck as I thought it would be. I've also got the lodging knees in which proved to be easier than I thought. Next job is the planking. If you need to see how this kit is done properly, have a look at https://modelshipworld.com/topic/29444-mary-byrne-1826-by-rodgerdodger-modellers-shipyard-admiralty-model/ I've fitted the first row of planks, but this has shown me that I don't have any clamps small enough to go between the frames to hold the planks on while they are being glued. I'm going to put the project on hold until i can get hold of the right ones, but given the delay in post times due to the current lockdown, and the fact that I live at the end of the known world, i might have a bit of a wait. The photos do show that I have a very scruffy workbench though.
- 3 replies
-
- 3
-
-
- mary byrne
- admiralty model
- (and 1 more)
-
Fantastic job Rodger, I wish I had a tenth of your skill. One thing I am learning is that I don't have enough clamps of a small enough size to go between the frames, and trying to get hold of some, living as we do at the back end of the world is going to take some time. I'm going to put the model on hold until I get the right tools.
-
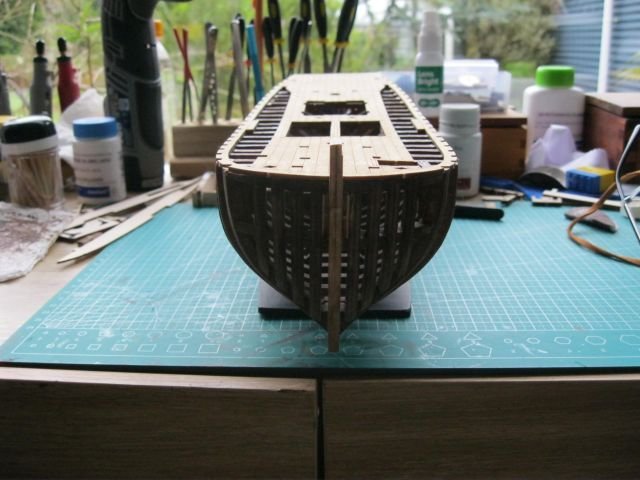
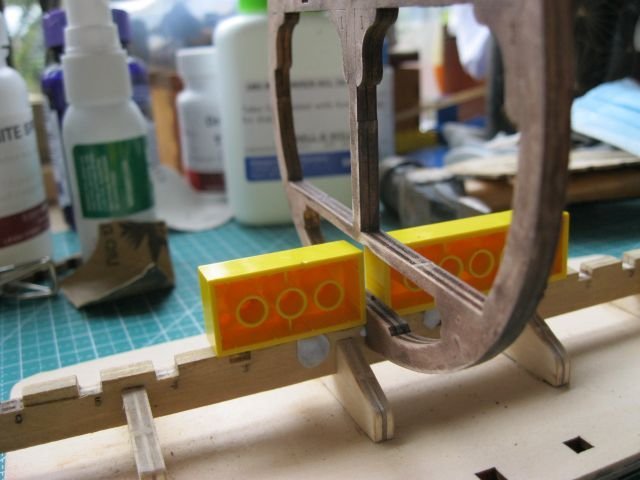
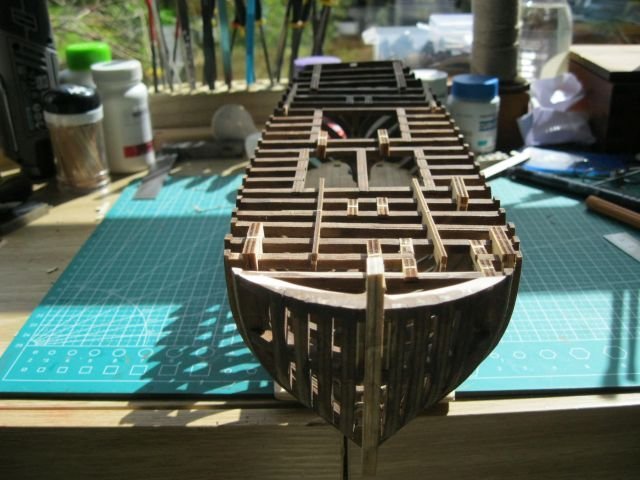
I'm well into the build of this model, and although I intended to do a full build log, I held back because Rodger Dodger's log is a hard act to follow. I thought I would just use this as an adjunct to his, showing some of my own ideas and techniques (If you don't mind Rodger?). I wasn't too impressed with the colour of the plywood supplied with the kit, it was a bland, blond and looked nothing like what I imagined a real admiralty model would look like, so I decided to stain the frames and the keel. I used Resene stains, 'Bark' for the frames, and 'Driftwood' for the keel and decks, both thinned 50/50 with water, and I intend to varnish the visible bits later with a satin polyurethane. I've already tried this on the lower deck, and I'm quietly pleased with the effect. I was very conscious of Rodger's advice on getting frame 1 square and plumb, so after giving it some thought, I decided to use a couple of techniques I'd picked up from other members here. I used a pair of lego blocks, blu-tacked to the keel to get the frame square, and by rigging a line from the stem to stern posts, and marking the centre of the frame, I was able to sight down on to the frame, and get it plumb. This took care of the pitch and yaw axes, but the roll axis I did by eye. I would be very grateful of any advice people could give me on how to do this in future. Unfortunately the photo I took of the centering line was too blurred to be on any use. (I never said I was a photographer!). I've used the spacing inserts extensively throughout the framing process, and it worked out quite well as you can see from the above photo, the stern frames appear to be skewed to starboard, but after having a few heart attacks about this, I've found it was caused by a slight warping of the keel. This will get fixed when the deck and whales are put on, at least that's what I'm telling myself. I'll be getting on with the deck now and I'll report back on that later. Oh, as a by the bye, I'm pleased with the kit so far, everything seems to fit, the instructions are superb, and it's been very enjoyable so far (my wife hasn't been subjected to any sailor's foul language, up to now anyway). The only niggle I've got is the 5mm plywood does tend to de-laminate at times, which would need to be fixed if it's visible on the model.
- 3 replies
-
- 4
-
-
- mary byrne
- admiralty model
- (and 1 more)
-
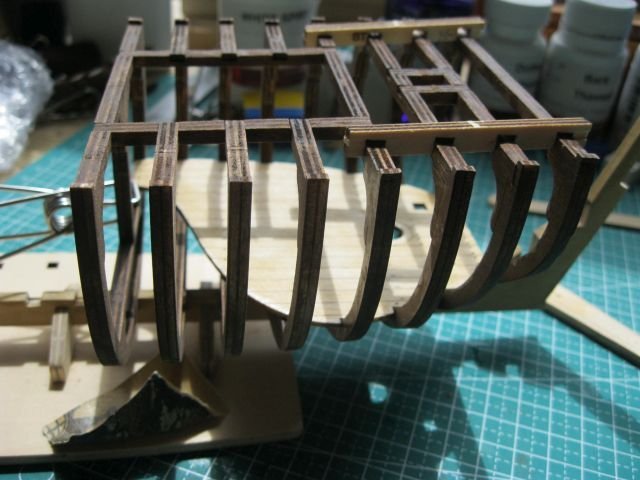
I'm sorry I haven't got as far as a build log yet, there always seems to be something more important to claim my time. However... I'vegot as far as cutting all the frames out, and the corresponding beams, and where the instruction book very glibly says "dry fit all the parts together", I'm finding I need about six pairs of hands to do this. When I fitted all the parts, I made sure they were a stiff push fit, but after a few times trying them, the push fit has increased to a sloppy fit. How are you holding your construction together so well? Any hints will be gratefully accepted. I've paid some attention to trying to hide the plywood, and I've researched a lot of different colours from the Resene range, but I haven't come up with anything as yet. My aim is to have it looking like the model I showed a couple of posts ago, and I'm trying to find a way of artificially aging the wood, but up to now, no real success. I'll keep you updated on how I'm getting on.
-
My kit arrived today, and I'll unbox it and check all the parts tomorrow. I'll start my build log of it then as well. I must congratulate you on the wealth of detail you're putting in your log Rodger, it's going to prove invaluable when I come to the actual build.
-
Reminds me of a story a friend of mine told me, he's from the USA, and he and his wife were holidaying (vacationing) in my home country, England, and had booked a table for dinner in an old hotel in Oxford. They'd heard that the hotel was really old and had specifically asked to be seated in the old part of the establishment. However, when they got there, the head waiter apologised to the and said that due to a booking error, all the tables in the old part of the hotel were taken, and they'd had to be seated in the New Room. My mate asked when the New room had been built, and the head waiter said, 'about 1240 sir"
-
We have got a lot of apples, and a lot of other fruit, but we don't see any of the wood. Even bog-standard pine here is ridiculously expensive I costed out a new workbench a couple of weeks ago, nothing fancy, just a workbench, and the timber alone was going to cost me nearly $700. I've managed to pick up some Rimu floorboards, (that's a bit like walnut), but I had to sell my first-born for that.
-
Thanks for the info Gregory, I've had a look at the veneer options available here at the a*** end of the world, and unless I want to buy huge sheets, there not much to go with. I tried to buy some boxwood a couple of years ago, and the guy in the shop laughed at me. "We haven't had any of that since before the war", and he meant the 39-45 one. I think I'm going to follow Rodgers idea and paint the frames, although I haven't ruled out using the kit frames as patterns and cutting my own out from what I can get my hands on here, probably Rimu. I had a look at your build log for the Resolution, and that is very good work.
-
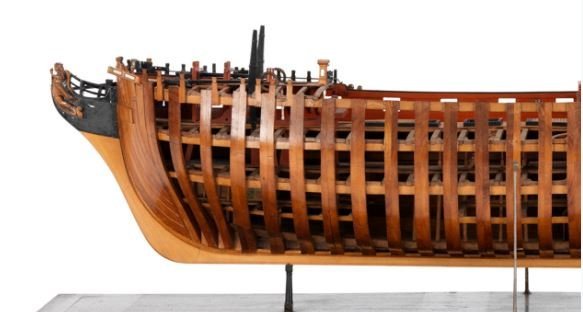
Thanks for the reply Rodger, it's been a long time since I was called Chief. Back when I had three buttons on each arm... I've been doing some trawling on the web, and I found this jpg, for the life of me I can't remember where though. However, I like the colour scheme and the contrast between the frames and the keel. I was going to take a trip down to the paint shop to try and find some similar colours, but the virus has put paid to that for a bit. I don't live in Auckland though, so things might ease up by weekend. Your idea of using flat red might work, although the picture you've attached makes it look a little startling, I'll hold fire on that until I see it all together. I do have to keep telling myself that an admiralty model is not meant to be a model of the real ship, but a representation of it, showing how it was built. searching the web, a lot of similar models appear to have been made out of a whitish wood, maybe pear or lime? Fat chance of getting hold of any of that here though.
-
My kit hasn't arrived yet, but I guess that post over the ditch is a bit few and far between. I've been thinking about the colour of the frames though, you are right in not leaving them as the original plywood, so I've been experimenting with the colour as well. Would the frames have been made of tarred oak or teak do you think? (sorry to intrude if you're still on a break)
-
Fantastic article. I've just ordered this kit and I'm looking forward to starting it. I was particularly interested in your take on disguising the plywood on the visible frames. That hadn't occurred to me until I read it, but it seems wrong to leave the plywood visible. Will you be carrying on with the build dairy?