MORE HANDBOOKS ARE ON THEIR WAY! We will let you know when they get here.
×


mandolinut
-
Posts
125 -
Joined
-
Last visited
Content Type
Profiles
Forums
Gallery
Events
Everything posted by mandolinut
-
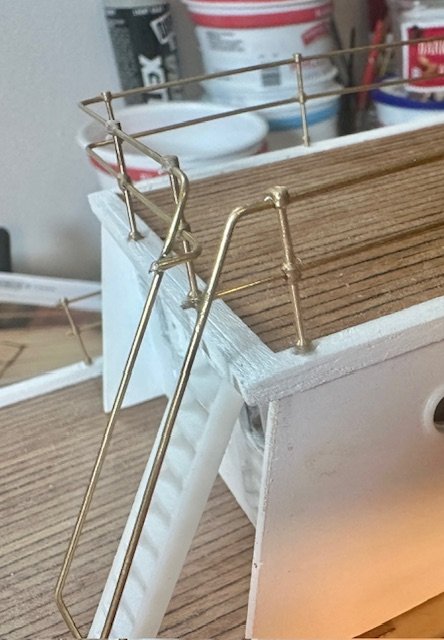
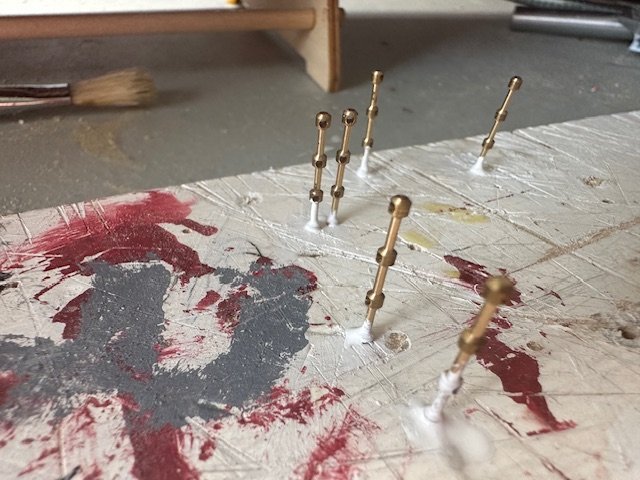
Back at it today. For whatever reason, I was not looking forward to the safety rail installation. I thought of it as threading a number of small needles but in this case, threading multiple thin wire strands through stanchions. It turned out to be tedious but not too bad. Patience required :0) I was careful to try and get the downward sloping rails at the same angle as the stairs so temporarily had the stairs in place. Now to add safety rails to the bow pulpit and to paint these safety rails.
-
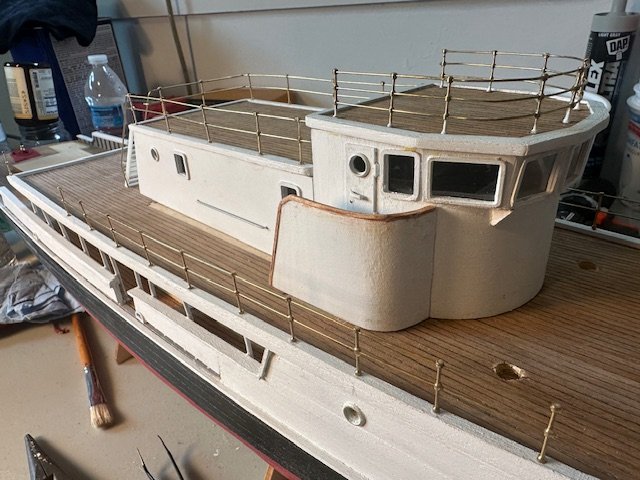
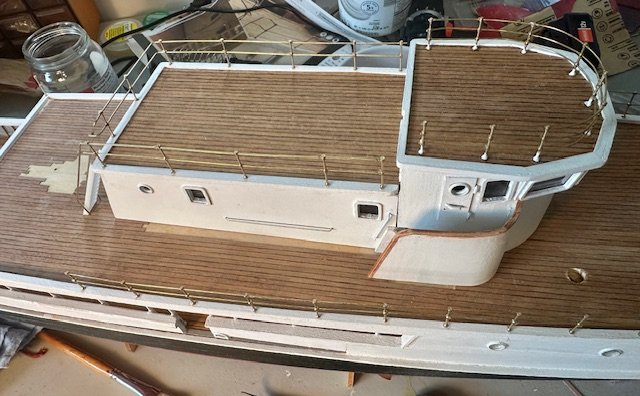
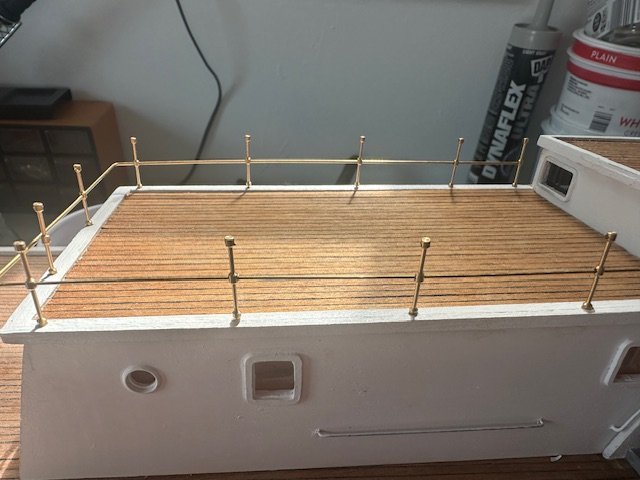
I came back this afternoon and started the wheelhouse safety rails and the upper deck safety rails. The rails above the wheelhouse are set in natural wood decking so I placed the stanchions in predrilled holes and painted the bases careful not to get paint in the holes. This will help when it comes time to paint the rails.
-
Installed the lower safety rails today. Began by dry fitting running the wire through the stanchions to line the stanchions up. Once dry fit, I began gluing the stanchion bases in place. Then added a small dab of thin super glue to all of the joints. Next, the safety rails over the pilot house and upper deck.
-
Removed all of the peripherals off of Calypso today in preparation to working on the upper and lower safety rails. Nothing is finished yet, but all is getting closer to being finished.
-
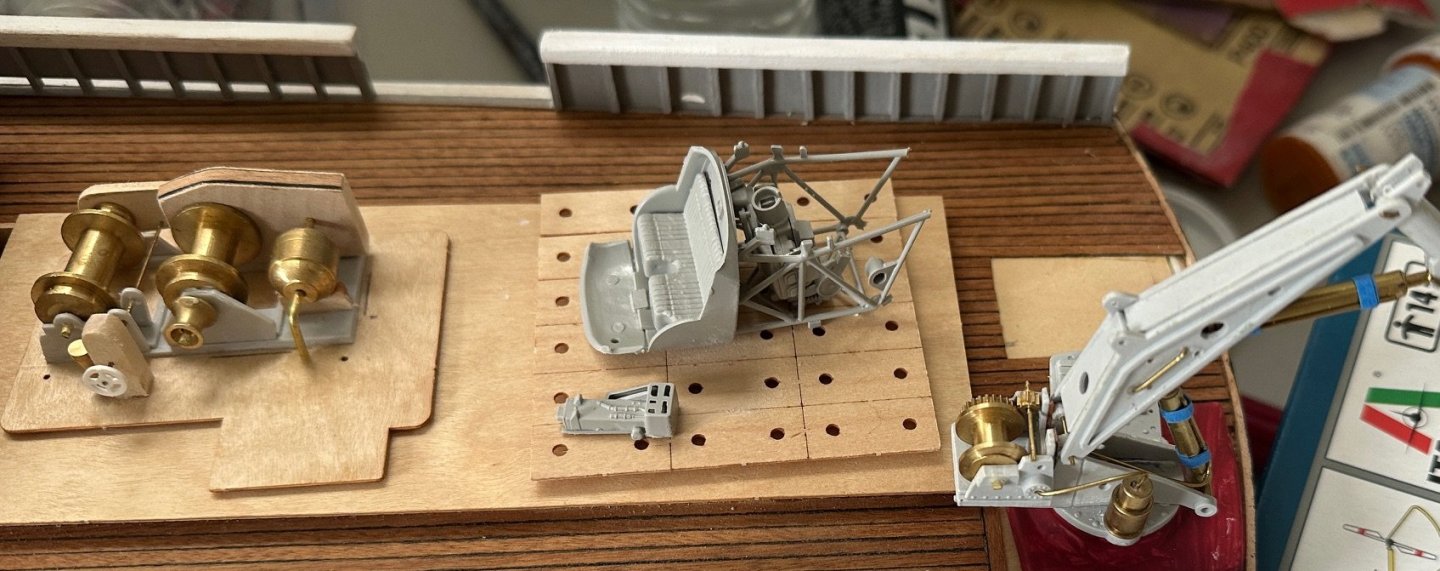
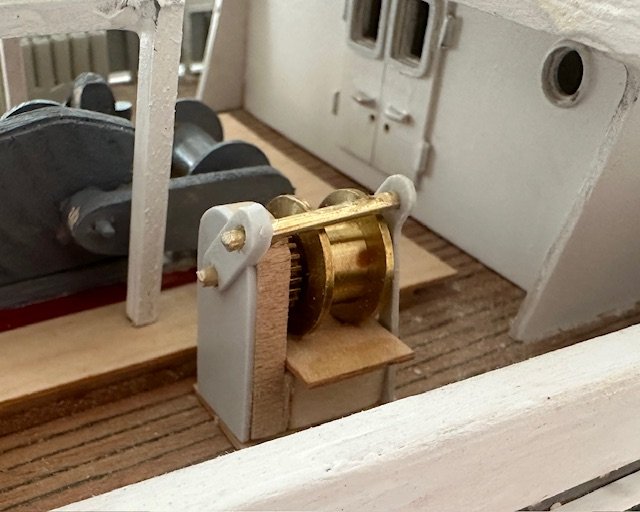
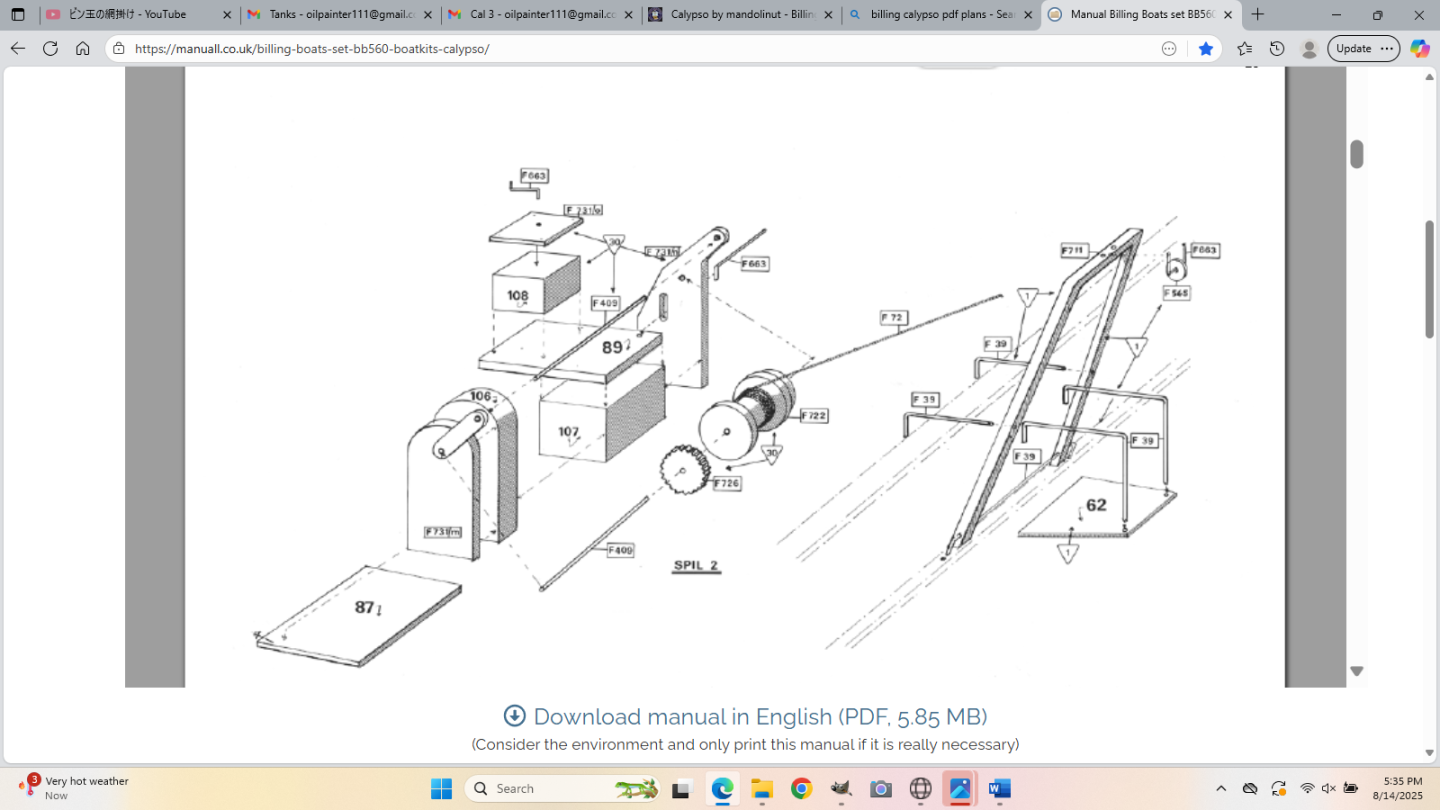
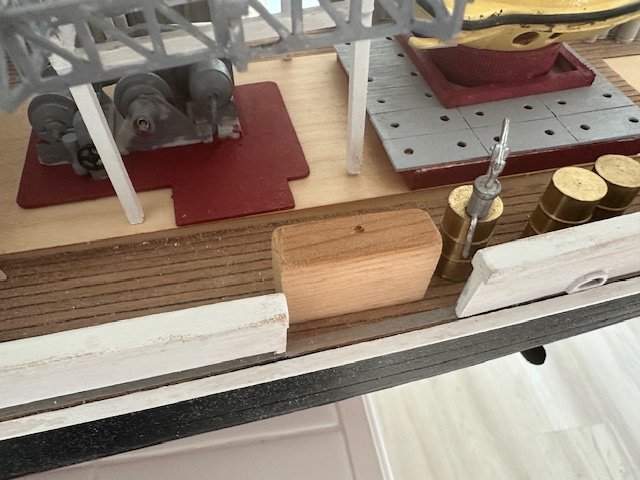
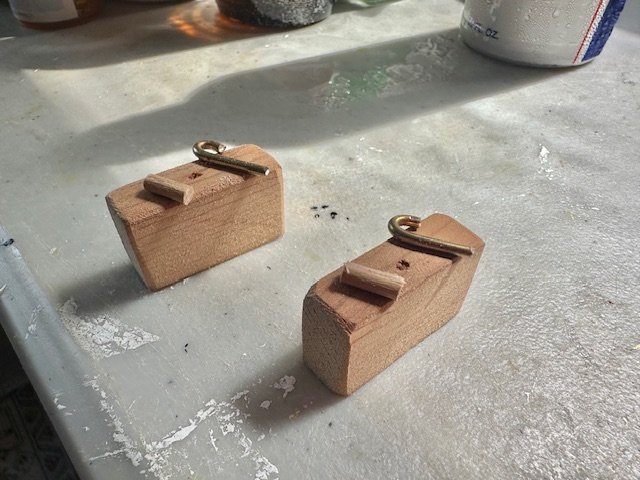
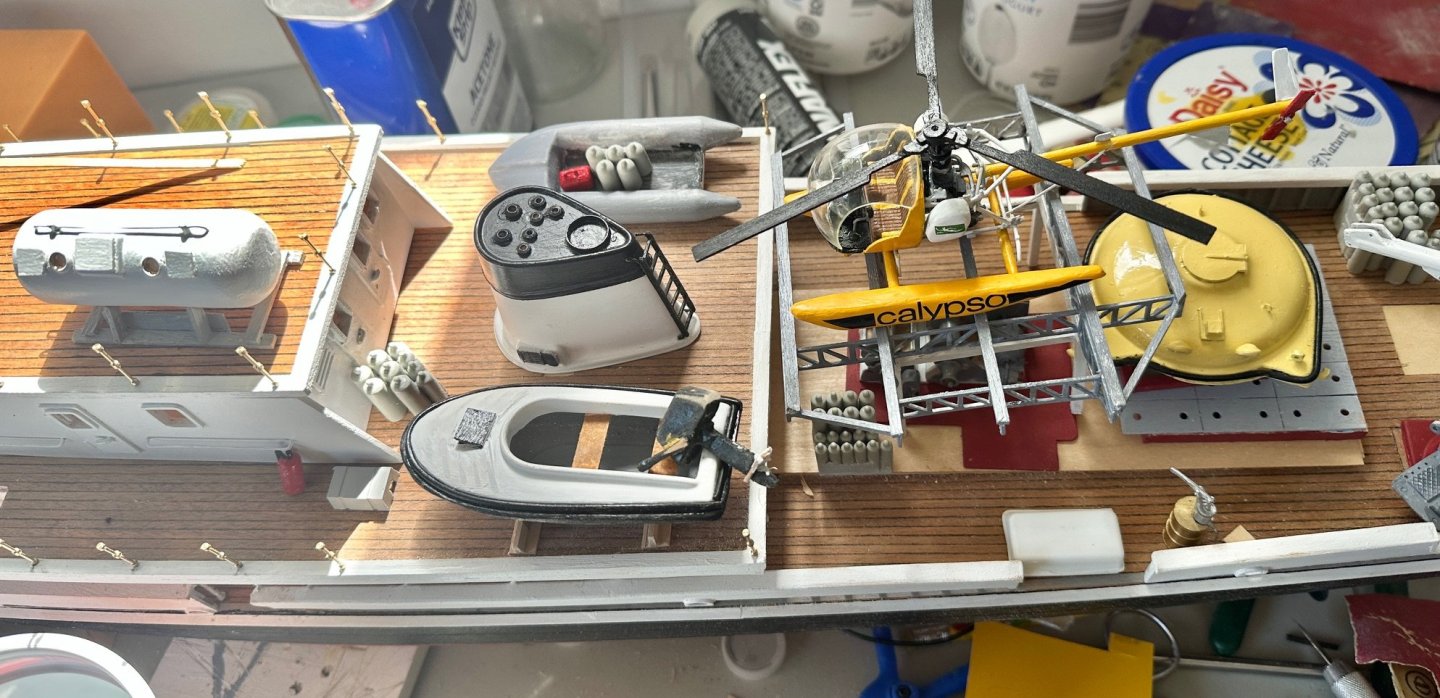
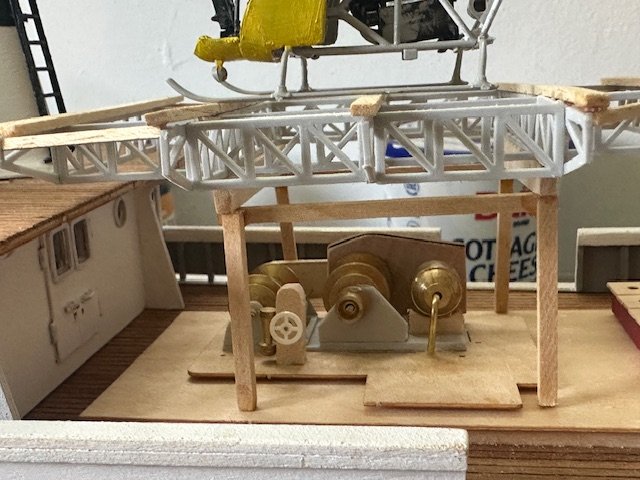
Had fun putting some primer on my water tanks and building "spill 2". Not sure what spill means in Denmark but all of the mechanical deck structures are Spill 1. Spill 2, Spill 3 etc. I + I still need to build the boom assembly that goes with this winch and hangs over the side.. From the plans: https://manuals.handleidingkwijt.com/html/55416/bg19.png
-
I have been working on the life raft cannisters and the tanks located port and starboard aft. I decided to replace the "plastic" water tanks supplied with wood because the plastic had a seam around the edges that was nor realistic and when removed caused the two halves to come apart. I could have filled the two halves with Bondo and then glued them together but the wood worked well. Added a filling spout and an air vent to the water tanks. Found a nice petroleum decal sheet online in various scales. I will use a few of these on my 50 gallon brass barrels and paint the barrels a matching color.. I need to clean up the water tanks and file a bit on the brass vent before painting :))


-
Looking forward to following your build. Patrick Mathews did a fantastic job on his Pilar which inspired me to also build a scratch Pilar. I was happy with the result but it was not at the level of Patrick's.
-
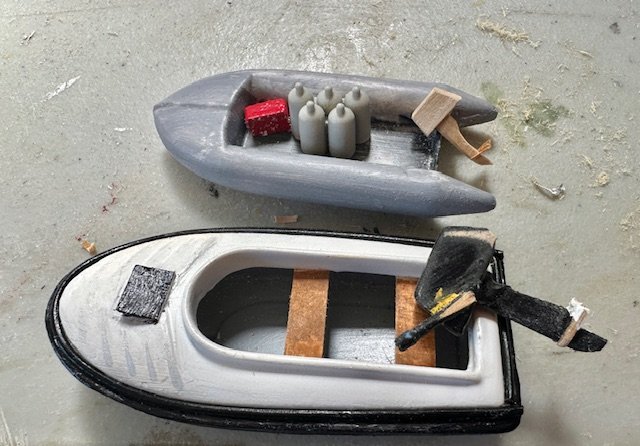
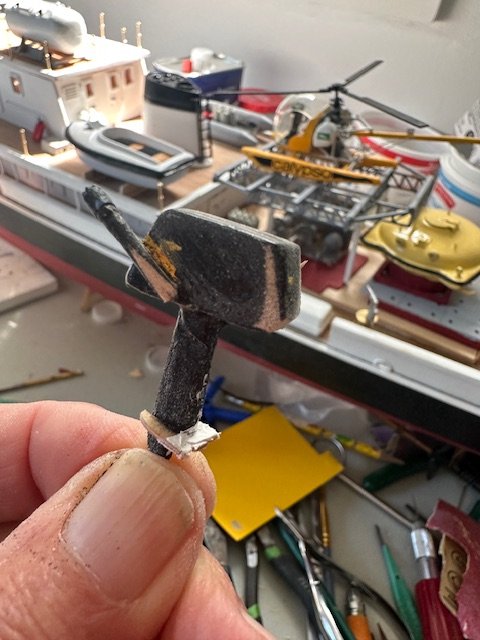
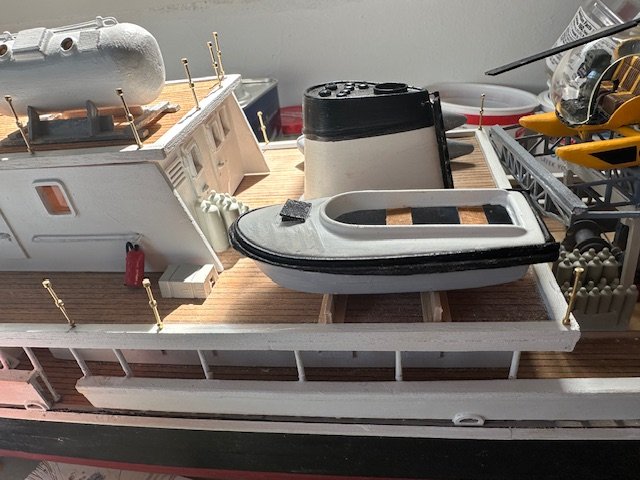
I made a second smaller scale outboard motor for the Avon today. I see from older photos that I have the seats wrong on the runabout and will change them. The forward seat should be all of the way forward and the hatch should be painted to match the deck of the boat. .

-
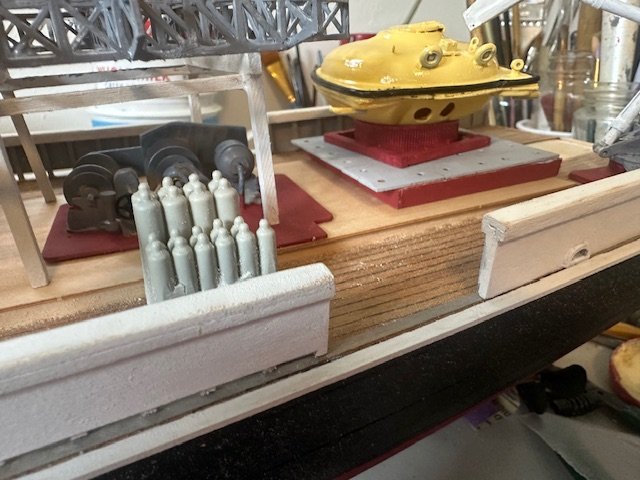
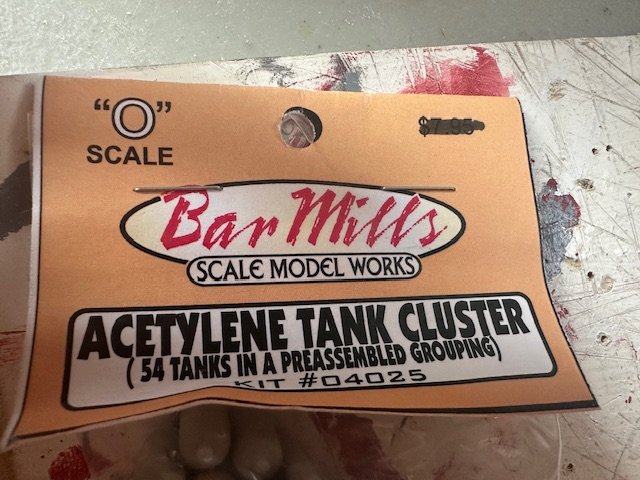
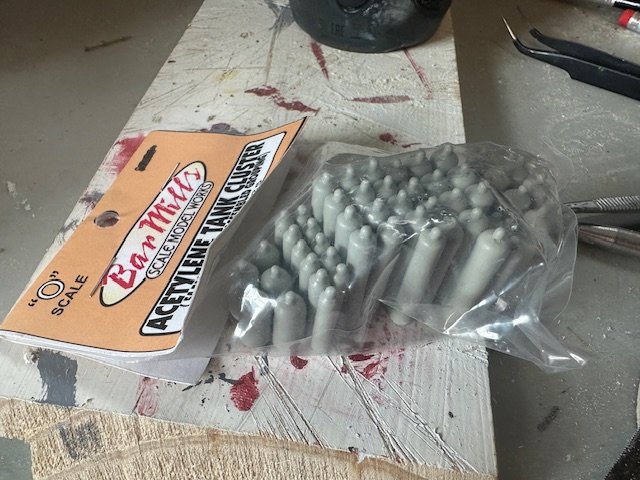
Thanks Paul. I had fun the last few days. Received a package from Ebay with 45 compressed air tanks of various sizes. Not having a 3D printer, this will be helpful for detail . I will use some of the various tank sizes for fire extinguishers, some for scuba tanks on the Avon, Some for compressed air tanks, Nitrogen tanks and oxygen tanks. The only hiccup is these came all molded into one piece. I carefully used my razor saw and separated these into small groups. A little sanding required to get the cylinders round again :0) Also did a little more work on the runabout. A friend tried to 3d print me a 1:45cscale outboard but it turned out to be too small for his printer. A then went to my lumberyard and pieced together an out-board motor for the runabout. Not finished but beginning to look like an outboard. . Fire extinguisher: Many extra tanks: O scale 1:48 which is close to the Calypso 1:45 scale from Ebay Outboard motor at this point: Runabout at this point with extra tanks in the background. Will look better with the outboard motor and gas tank. I filled in the grooves on the foredeck a bit with putty feeling they were to exaggerated. Nothing attached yet. Will have to figure out how many tanks to keep and where to place them. Also made a cradle for the runabout with wood from the lumberyard:
-
Taking a break from the safety lines and stanchions and decided to work on the small outboard runabout. The Billing runabout comes in two parts, upper and lower. The apparent flat floor surface is too near the top. I plan on adding two wooden seats and want to have leg room. Today I cut out the floor from the upper half and after sanding, glued the removed part to the bottom of the hull for a flat surface. I feel it looks more like a boat now and less like a jet ski. I have been looking for an "O" gauge outboard motor without much luck. That will make a nice touch and could be either stowed away in the boat or hung off the transom ready to go. I will probably have to fabricate one from wood. Makes me wish I had a laser printer.


-
Hello all. I have drilled and temporarily placed the rails in position and am at the point of running wire through the stanchion safety rails. I see this rail feature is common to a number of Billing ships. Question to those who have done this....are there any do's and don'ts? How do you deal with a joint if the supplied wire is not long enough for a run? Thanks in advance. Patrick
-
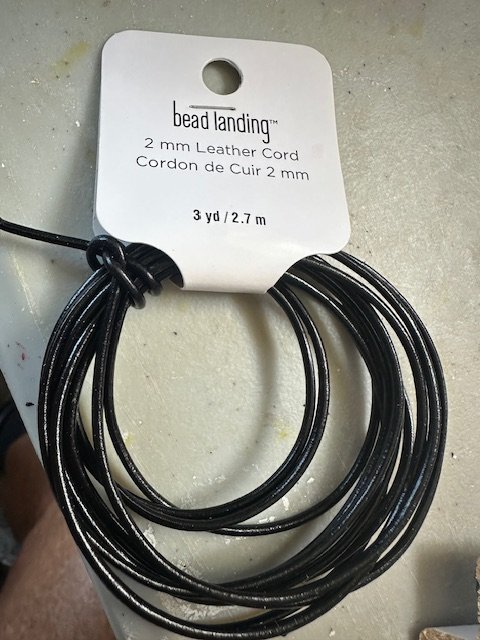
I drilled 34 more holes on the perimeter of the upper deck today for more safety rail stanchions. Added to the 21 holes drilled yesterday for upper safety rail stanchions, Calypso has more piercings than a rock star :0) I also wrapped the mini sub with bumper material I found at Michael's Hobby. It is a 2mm very flexible black rubber / wire found in the bead department. Seems to be a good scale. For some reason the packaging says leather. Go figure. I see I need to add some touch up glue to the front.
-
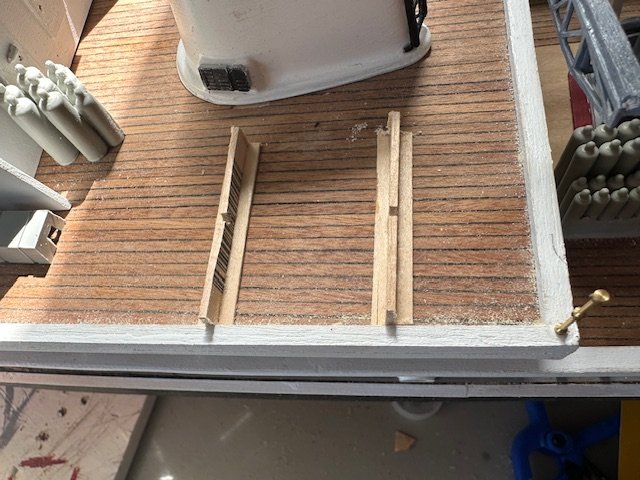
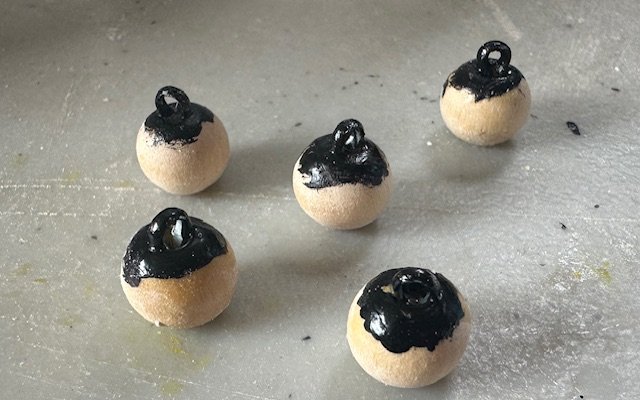
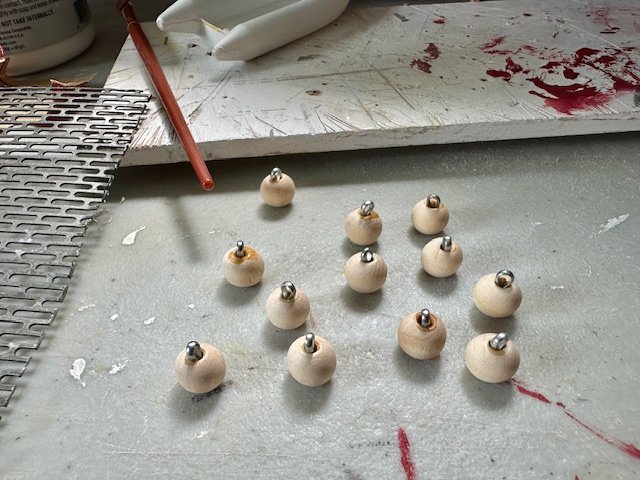
I had fun today working on what will become fenders for Calypso. I began by adding wood glue to the tops to fill in the gaps from the cotter pin. Then hand painted some black on top. The fun part was then dipping them in some white paint to create an even coating at the top. I will do the same thing to some of the other floats with orange paint for dive floats. Began drilling pilot holes using calipers and the life size plans for the safety rail stanchions on the upper deck and pilot house.
-
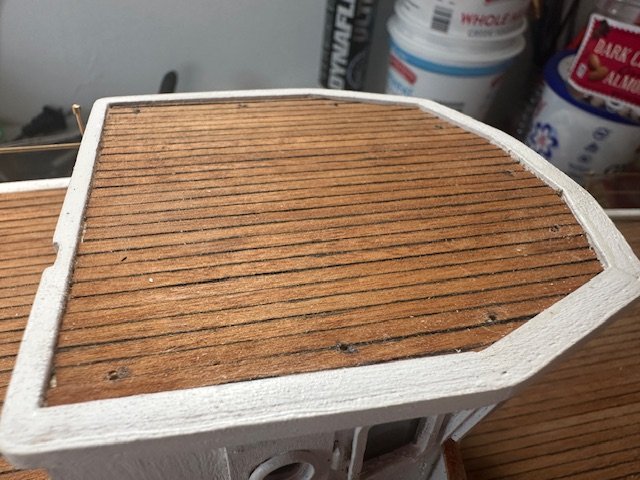
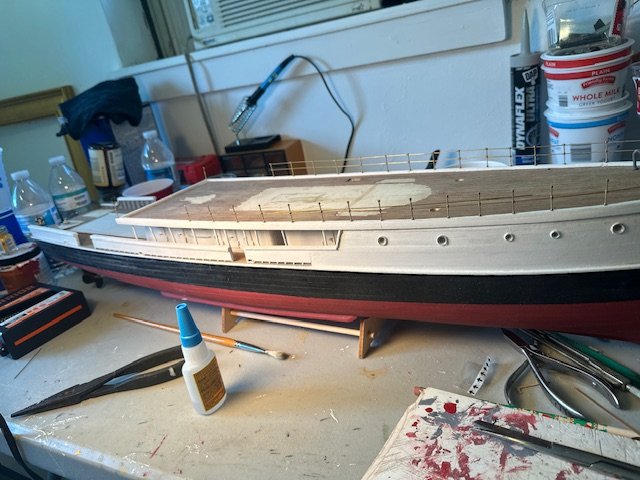
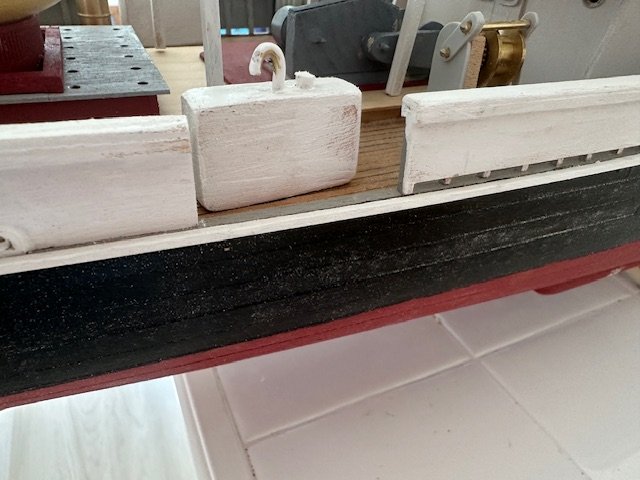
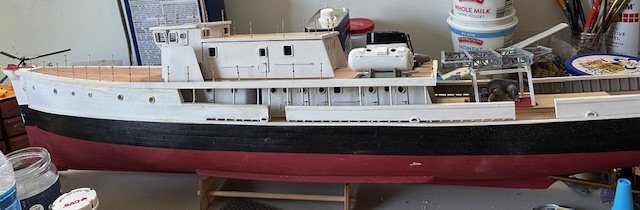
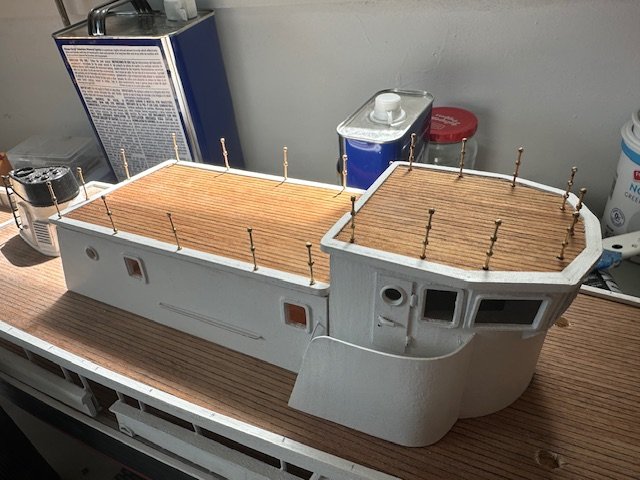
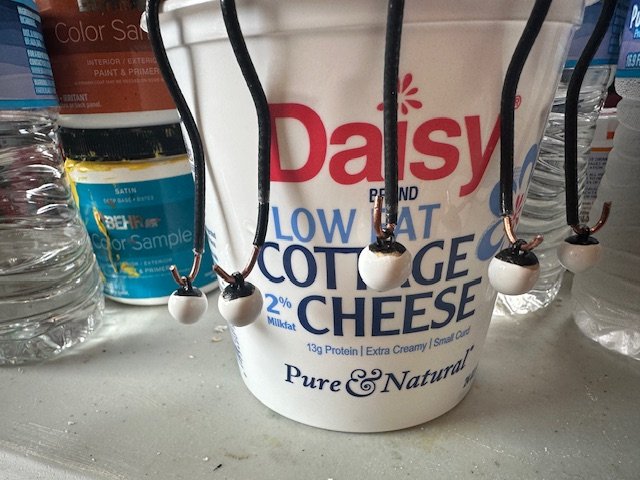
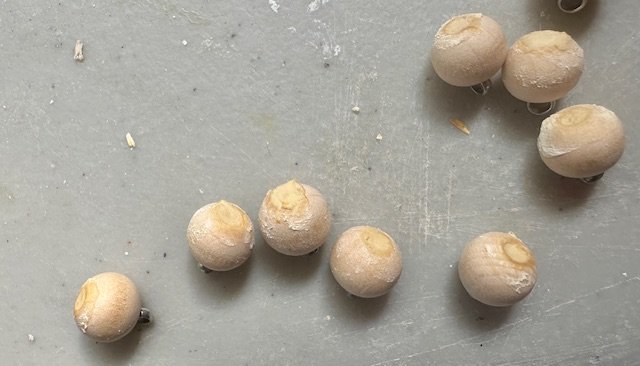
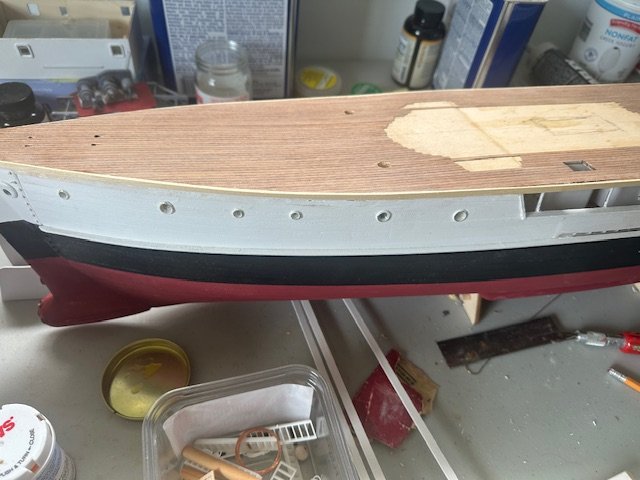
I added the upper deck trim above the edge trim previously done so the upper deck to hull joint is completely gone. Still needs more sanding and paint. I now have a surface to attach the safety rails. Once the safety rails are complete on the upper deck and around the pilot house roof, I can finally glue the components down. Meanwhile, I am enjoying dry fitting all of the parts at the end of the day just to look at everything together. I wanted more than the three fender / dive floats supplied with the model, so bought a necklace from Michael's Hobby and Craft store made of 10mm wood beads that match the three supplied with the kit. I added small cotter pins that I shortened through the top and wood putty on the bottom to remove the holes. Some will get painted white and hang down the side of the ship for fenders and others will be painted yellow and red for dive floats.
-
I am moving right along with Calypso. Another question please. For detail, I want to build scuba tanks and larger cylinders with compressed gases. Any advice on how you made yours would be helpful. Thankyou.
- 22 replies
-
- 1
-

-
- Calypso
- Billing Boats
- (and 1 more)
-
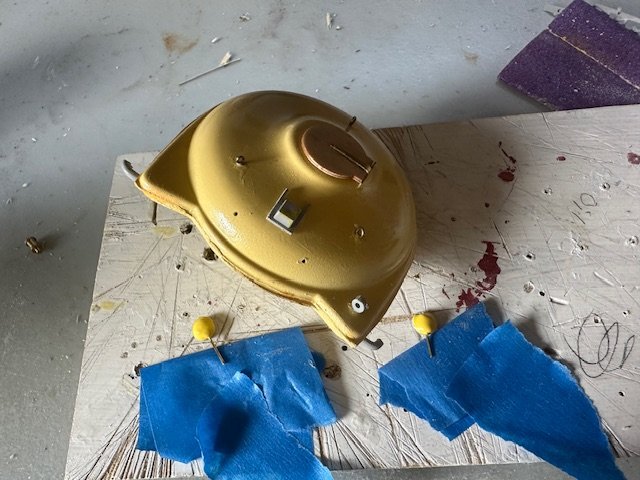
Making a little more progress today. Added the headlights to the minisub. They consist of the helicopter wheels from the aftermarket model I used for the cockpit. Bent a small copper wire 90 degrees and glued it into the axle hole and built up the back hemisphere with drops of paint. This little feature adds a lot to the overall look of the minisub. Now that the upper deck has been glued down and faired, I added the wood strips on the edge to hide the upper deck to hull joint. Next step will be to add the wood strips on top of the upper deck that rest on top of these edge strips.
-
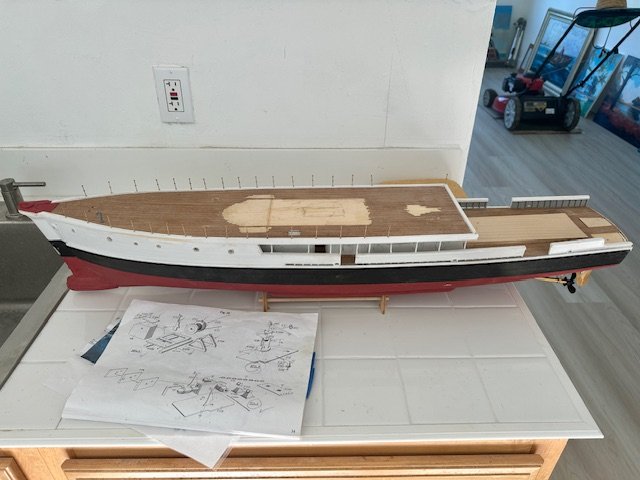
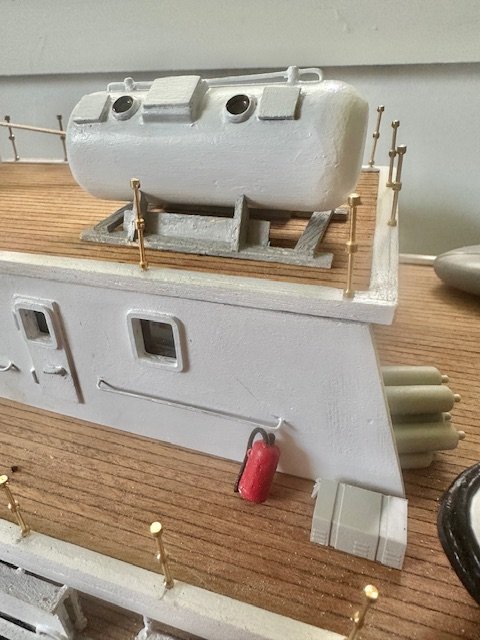
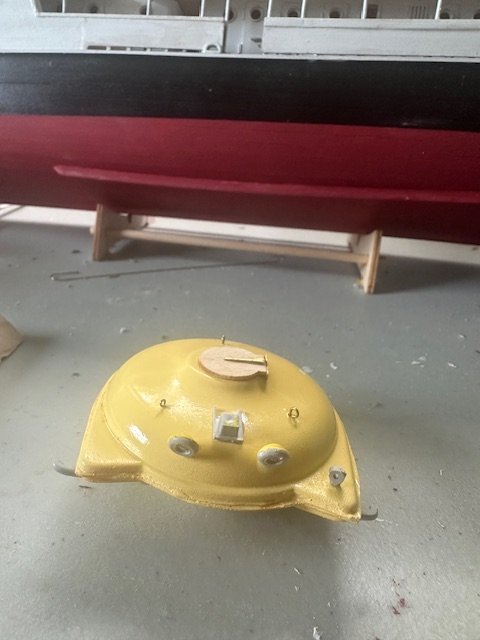
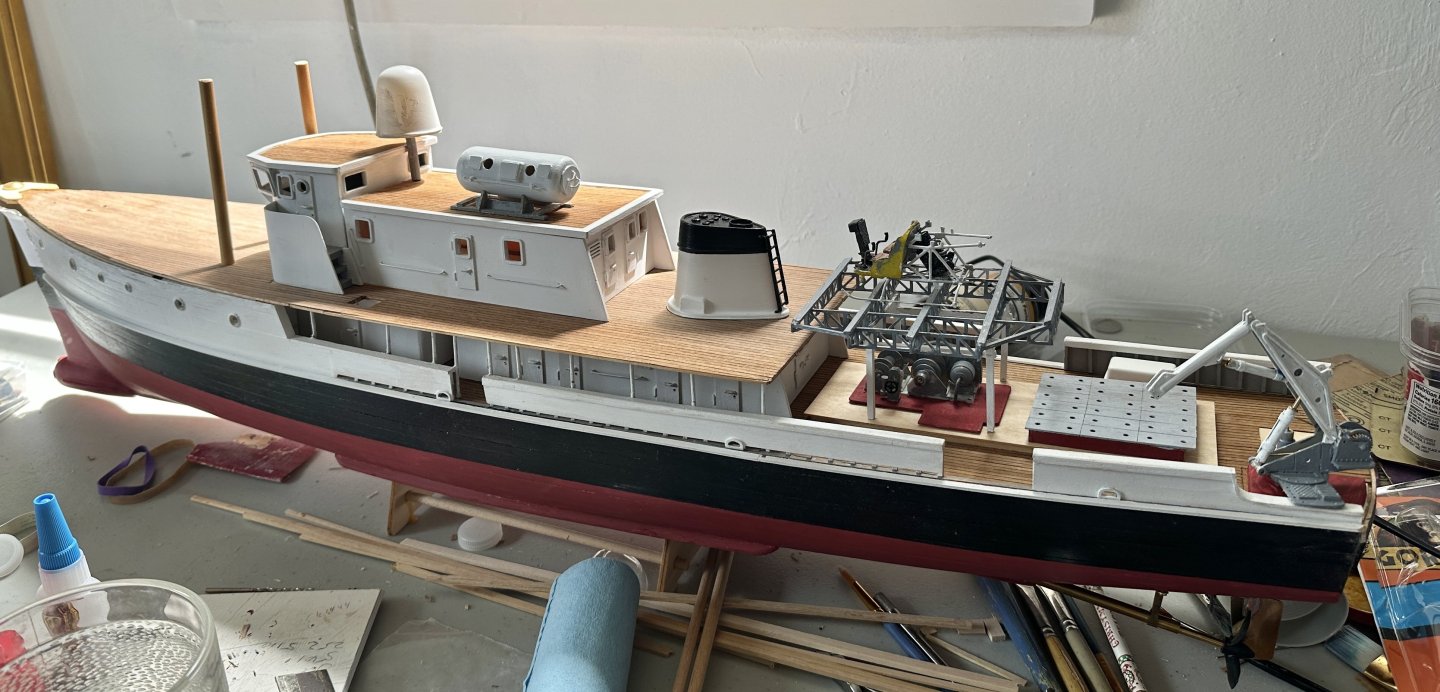
I finally made the decision not to go with interior led lighting. At the ripe young age of 76, this Calypso will most likely end up in my local yacht club and the lighting feature would never be used or seen. With that said, the upper deck was glued down to the hull today. A big moment for me. I can now fair the edges of the deck to match the hull lines (there is a slight overlap of the deck) and add the upper and outer trim pieces to hide the joint. Also beginning the mini sub. Creating some headlights to go above the port holes as seen in the photo. Also added some port and starboard thrusters as seen in Calypso photos along with a few other features. I'll eventually add a robotic arm. Planning to strip a section of black copper wire and split it down the center for the black bumper trim to go around the edges. Enjoying the journey.
-
Thankyou Alan and Don. Don, your helicopter was my inspiration! Thanks for sharing. Also, your idea of Krystal Klear for the port holes on the chamber, ship's bulb nose and mini sub. Patrick
-
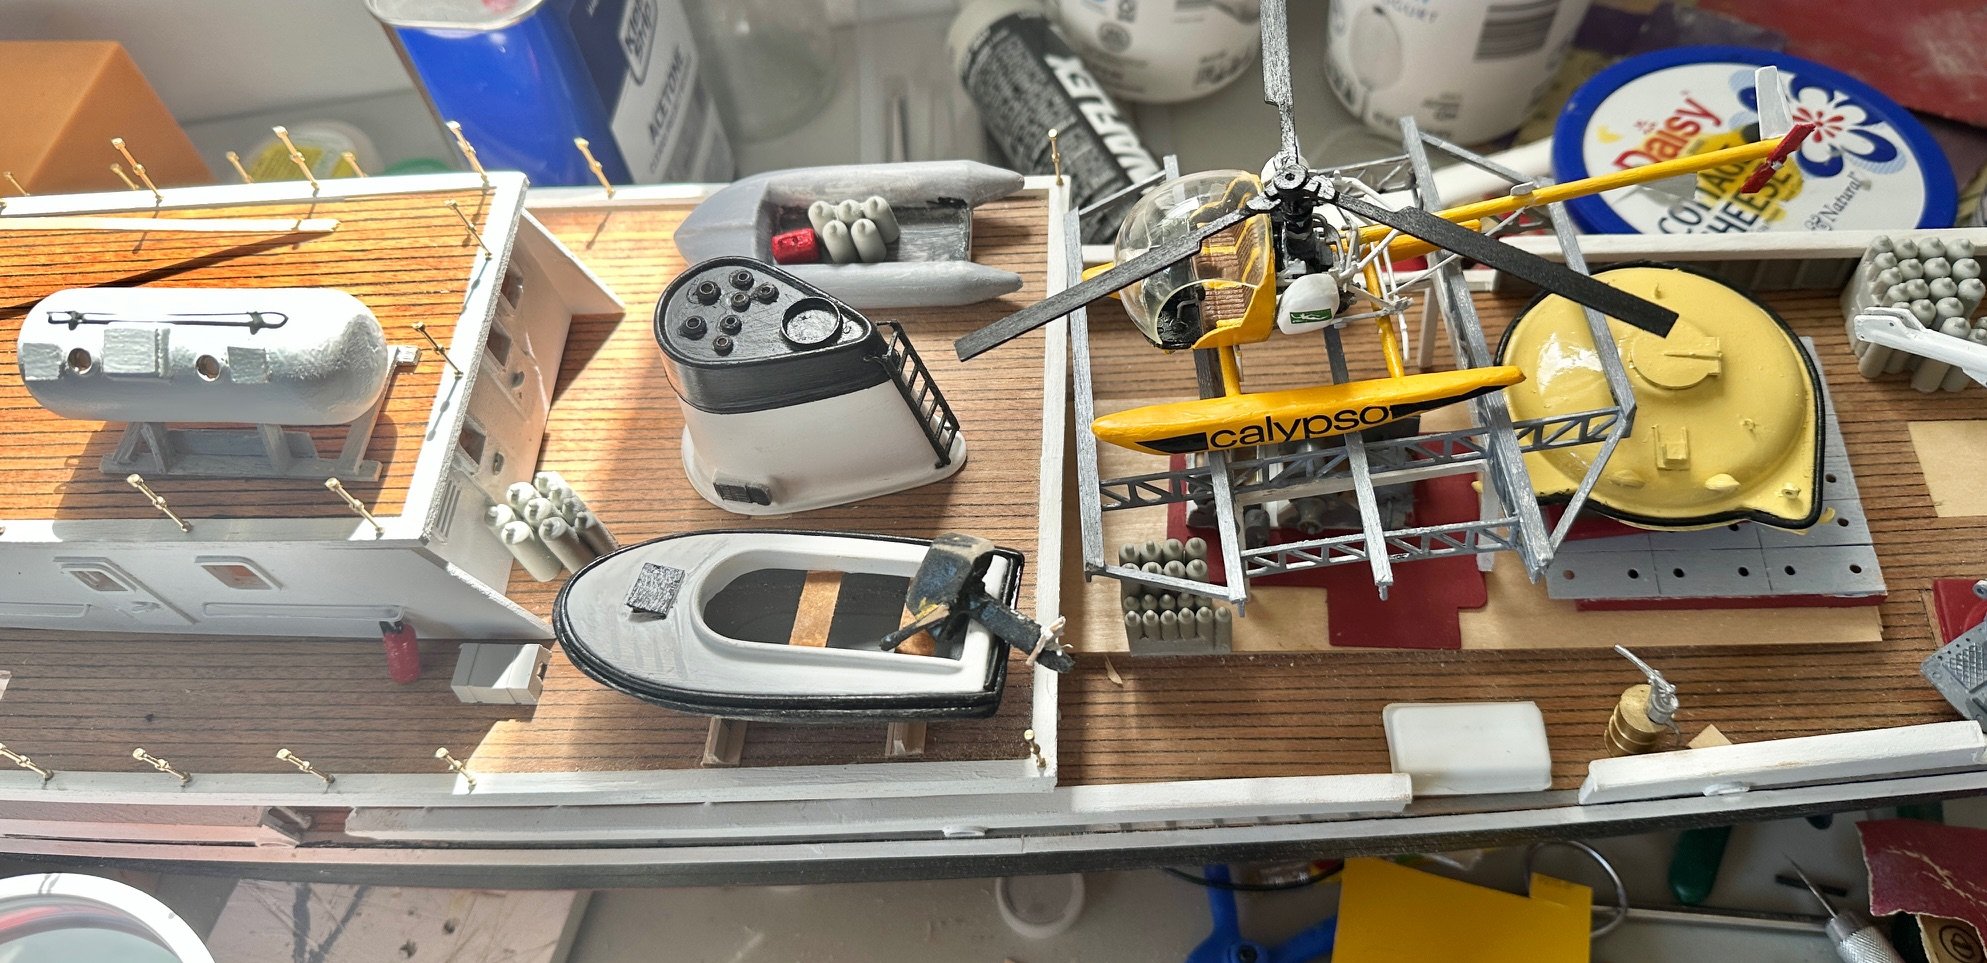
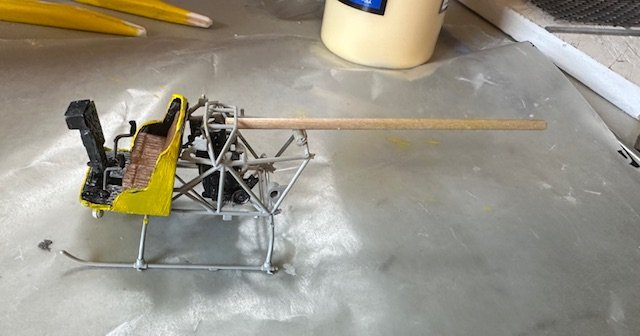
More work on the helicopter. The rear section and pontoons and rotor blades are all Billing. The highly detailed Cockpit and engine are from an OH-13 Sioux (same scale) by Italeri. Quite happy with the look so far. Will only get better with more paint and decals. So not 100% accurate but darn close :0)


-
I placed many already built parts together today for this photo, but at this point, nothing is glued down or attached, all dry fit. I painted some of the brass hardware which really hurt, because I really liked the look of the brass, but it did not work for "the Calypso look". I am sure my fellow Calypso builders felt the same when painting over their brass parts.. Still working on the helicopter. I have put off gluing the upper deck down trying to decide if I should add LED lighting. My wife has already determined that this size model will not end up or fit in our home, but end up in my other house, which is my art/painting studio. She said "what are you going to do? Go over to your studio at night to look at Calypso with the lights on?" We had a good laugh over that.
-
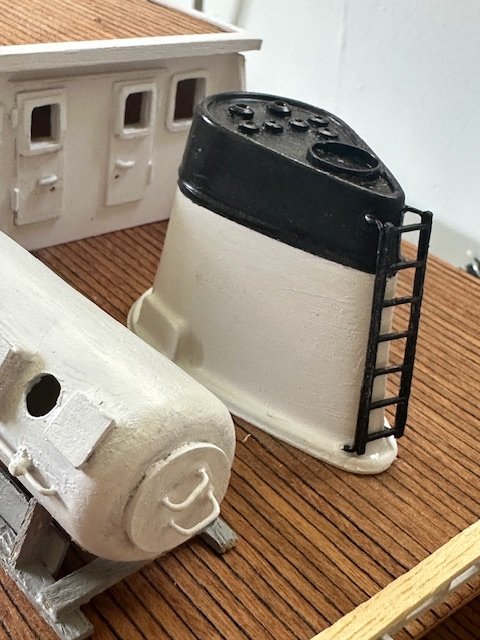
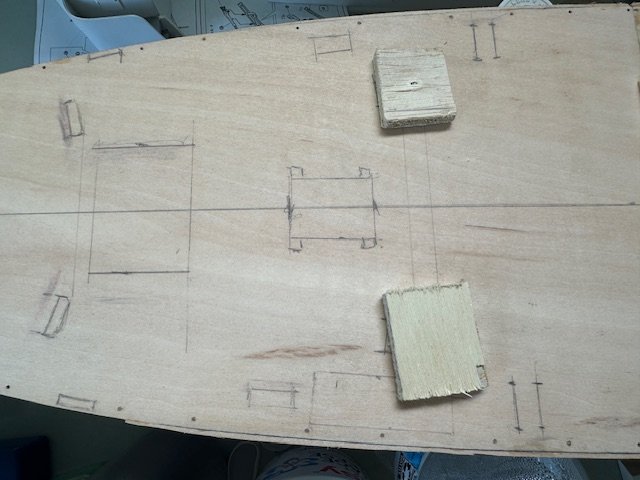
Nice to hear from you yvesidal and mtdoramike. I have looked at and learned from both of your Calypso builds. The Calypso holds many memories for me growing up watching the Undersea World of Jaques Cousteau. Today I was able to do a few fun mini projects. Built the ladder for the ship's chimney, constructed the satellite dome, built the legs for the helicopter landing platform, and drilled openings in the foredeck for the anchor chain and towers. I decided to back up the underdeck for the towers to create a stronger attachment point.

-
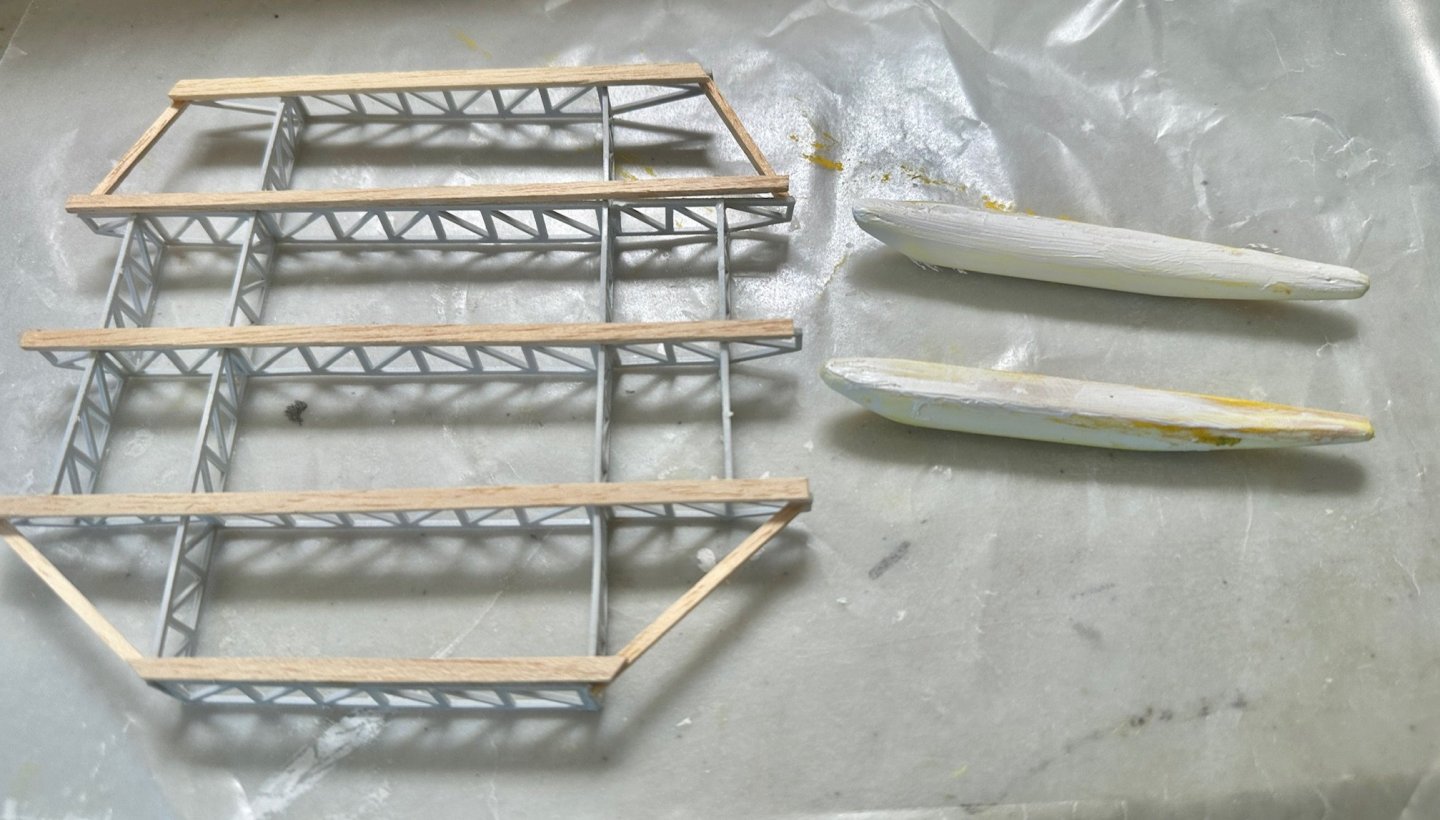
Adding plastic filler to the tops of helicopter pontoons to hide the seams and make them flat and flush. Also began the helicopter landing structure. Taking my time and enjoying the journey.
-
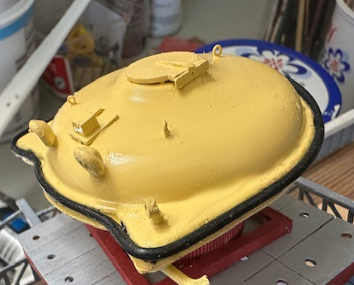
I did some initial painting of the helicopter today. When dry, the fuselage will need sanding before the next coat of yellow paint is applied. Dry fitted the basic tail section. More to come. The second photo is to show scale. The forward curves of the landing gear will be clipped, and the pontoons will be added to the bottom.
-
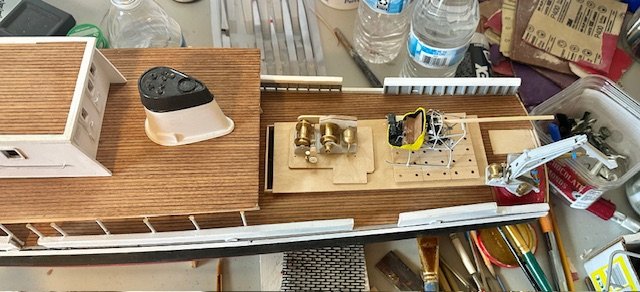
Here is a photo showing similar high detail of the helicopter with the crane and windlass. This will look like Calypso's helicopter when I am finished.