HOLIDAY DONATION DRIVE - SUPPORT MSW - DO YOUR PART TO KEEP THIS GREAT FORUM GOING! (Only 24 donations so far out of 49,000 members - C'mon guys!)
×


rshousha
-
Posts
431 -
Joined
-
Last visited
Content Type
Profiles
Forums
Gallery
Events
Everything posted by rshousha
-
 Gentlemen (and ladies, if there are any of you reading this). I'm very sorry that I haven't been on the site lately. I've been spending my evenings watching Downton Abbey on CD. We're anticipating the start of the new season and need to catch up on the details. What fun! Regards, Rick
 -
We are all crazy. Definitely get the little drill from Proxxon. I don't know how I ever worked without it. Make sure you get the adjustable collet as the little ones that come with the drill are too big for the majority of holes you will want to make. I think I have some of that alcohol somewhere. I will try it out on a piece of scrap as I don't want to end up with a bigger problem than I have now. I could redesign the whole thing, add a building jig right into the parts, and cut them on my laser cutter.... By then, I'd want to make it at 1/48 scale and do the photo-etch stuff, as well....and make the cannons on a 3D printer.... OK, stop. Regards, Rick
-
Your point about the top of the keel versus the bottom is also very interesting. I have a nice jig for the bottom of the keel and it is nice and straight. The curve is at the top only. Anyway, let's see what I can do about removing those patterns. Regards, Rick
-
You may be right (sigh). Reworking later won't happen. The time is now. That's yellow wood glue. Regards, Rick
-
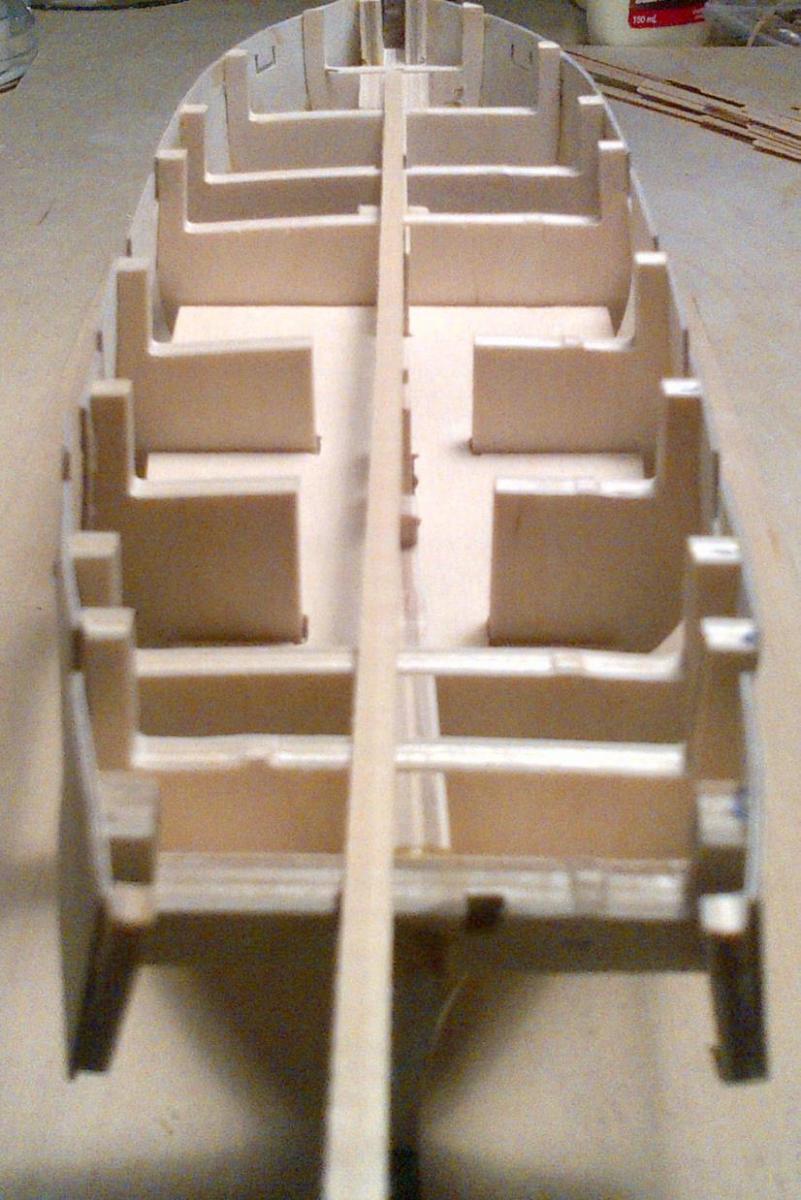
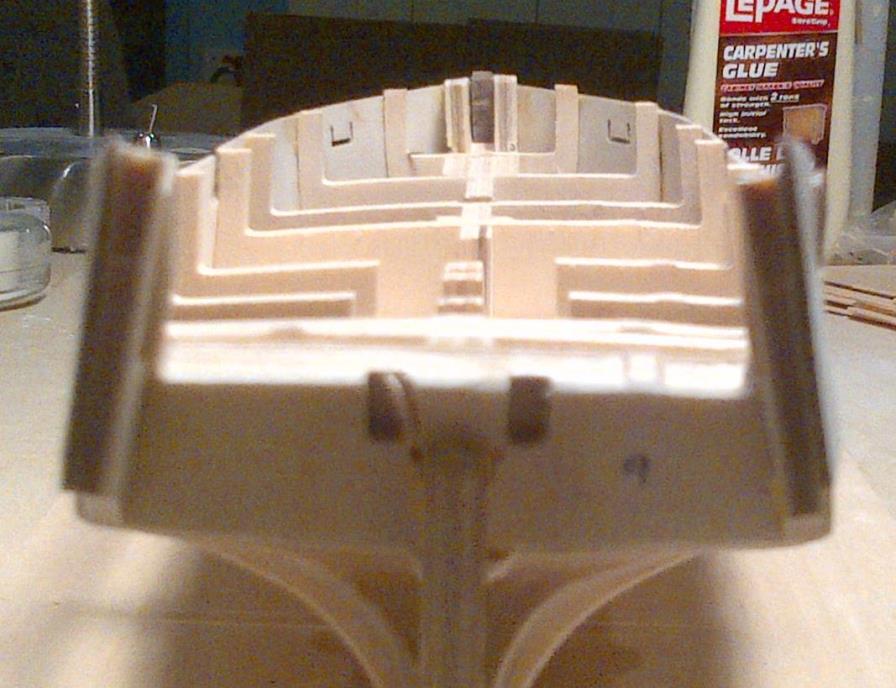
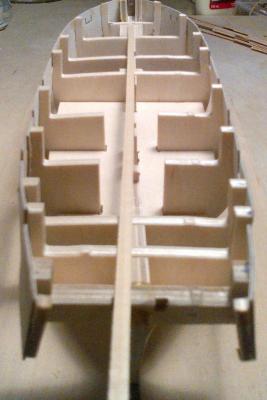
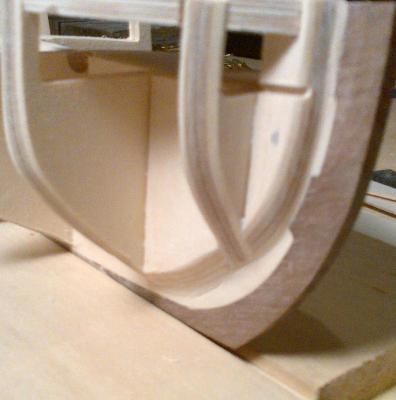
December 5th, 2014 I can't believe it's been almost a month since I started this model. I really should be putting in a few more hours each week. OK, so here we are with a couple of interesting issues. I was careful when I installed the bulkheads, making sure, to the best of my ability, that they were square to the keel. Well, it turns out I didn't plan far enough or add some components that would make the frame even stronger than I thought I needed. The problem happened when I installed the gun port template. I forgot to bevel a couple of the bulkheads and had to install one side at a time. It seems the template pulled the back of the boat out of alignment. In one picture, I've placed a straight strip along the keel. You can see where it deviates at the back of the boat. In the second picture, you can see the twisting. Hmmm, this is going to be interesting. Lessons learned: -add a significant amount of extra support inside the hull -check and recheck that the beveling is done. Use a colored pencil on all bulkheads -when designing the new replacement frames for these models, in a larger scale, ALWAYS add the T-rail. Here are a couple of pictures showing the misalignment. Any help with this, or just commiseration, is welcome. Indeed, why do we do this? Best Regards, Rick

-
Hello Again, In my humble opinion, there are now enough connections out there for people to make up their own kits, in whatever scale and whatever quality level they want to make. For instance, using advanced CAD software, I can develop frames for any ship in any scale, as long as there are line drawings. I can also supply single-shot photo-etch parts. Once you have frames in hand, there are several excellent manufacturers of strip wood out there. After that, there are people like Chuck Passaro, who makes absolutely lovely blocks and ropes. After that there are several websites where you can get 3D printed parts for some other bits. The only thing missing are the decorations and those will be available within two to four years, in my opinion. So, really, we should be thinking in terms of the "virtual factory" instead of trying to figure out which kit is best. I think the sky's the limit in terms of what people can do with modelling these days. Best Regards, Rick
-
OK, so I'll have to get that Proxxon saw and then a nice, little lathe. Eventually, i absolutely have to get a laser-cutter of my own, though. Regards, Rick
- 76 replies
-
- 1
-

-
- caldercraft
- finished
- (and 1 more)
-
Hi Matrin, Thanks for this. I've tried both the disc sander and the chisel, sandpaper, and fine sanding blocks. I'm not happy with the results. When I look at some of the excellent builds on this site, I have a hard time believing that the work is done by hand. It just seems too perfect. I don't know how anyone can make such sharp edges by hand. I was thinking of getting either a Proxxon saw or something from David Byrne, although I find he doesn't answer emails. What do you think? Best Regards, Rick
-
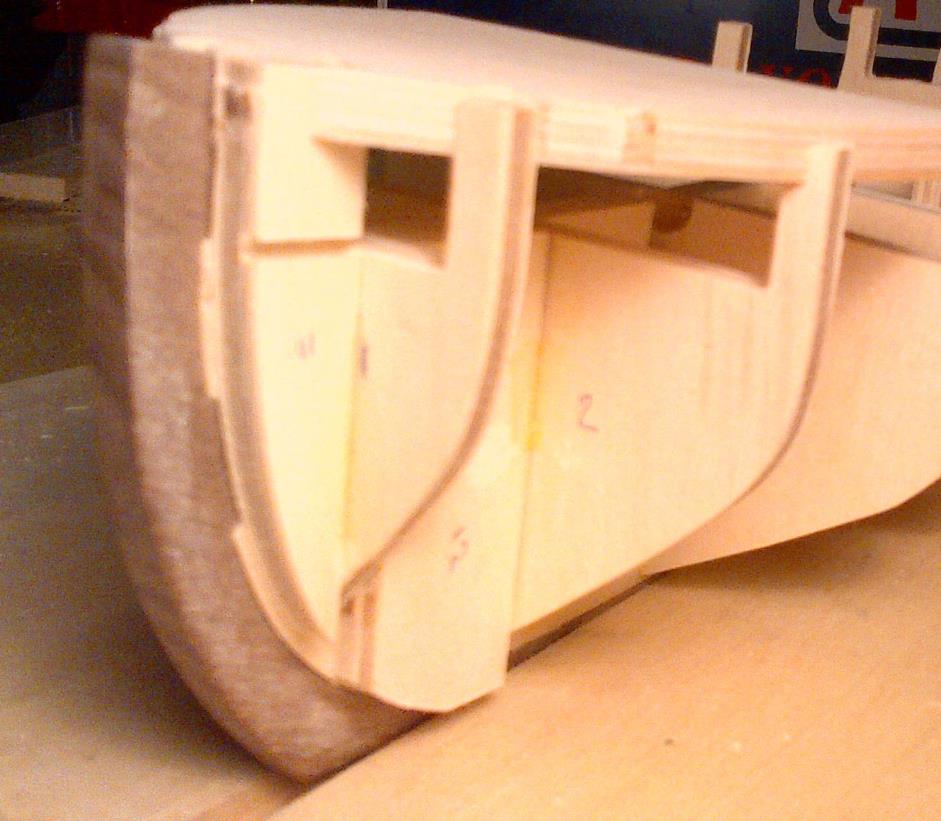
Greetings, I'm a bit concerned about the bow of my model. I am having trouble figuring out how much to bevel the bow bulkheads. If I want to make everything smooth, i get the feeling I've gone too far. Can someone comment? Best Regards, Rick

-
I just used Timbermate with one of my daughters on a school project. We used it on a small balsa paddle and it worked out just fine. i was afraid the balsa would sand off around the filler but it was just right. I'm always afraid to use filler that is harder than the surrounding area. It's really hard to even out surfaces when that happens. Actually, I really should put up a picture or two of the paddle. She put a Haida killer whale design on it stretching from one side to the other. it's pretty cool and makes me realize how much creativity we lose as we get older. Cheers, Rick
-
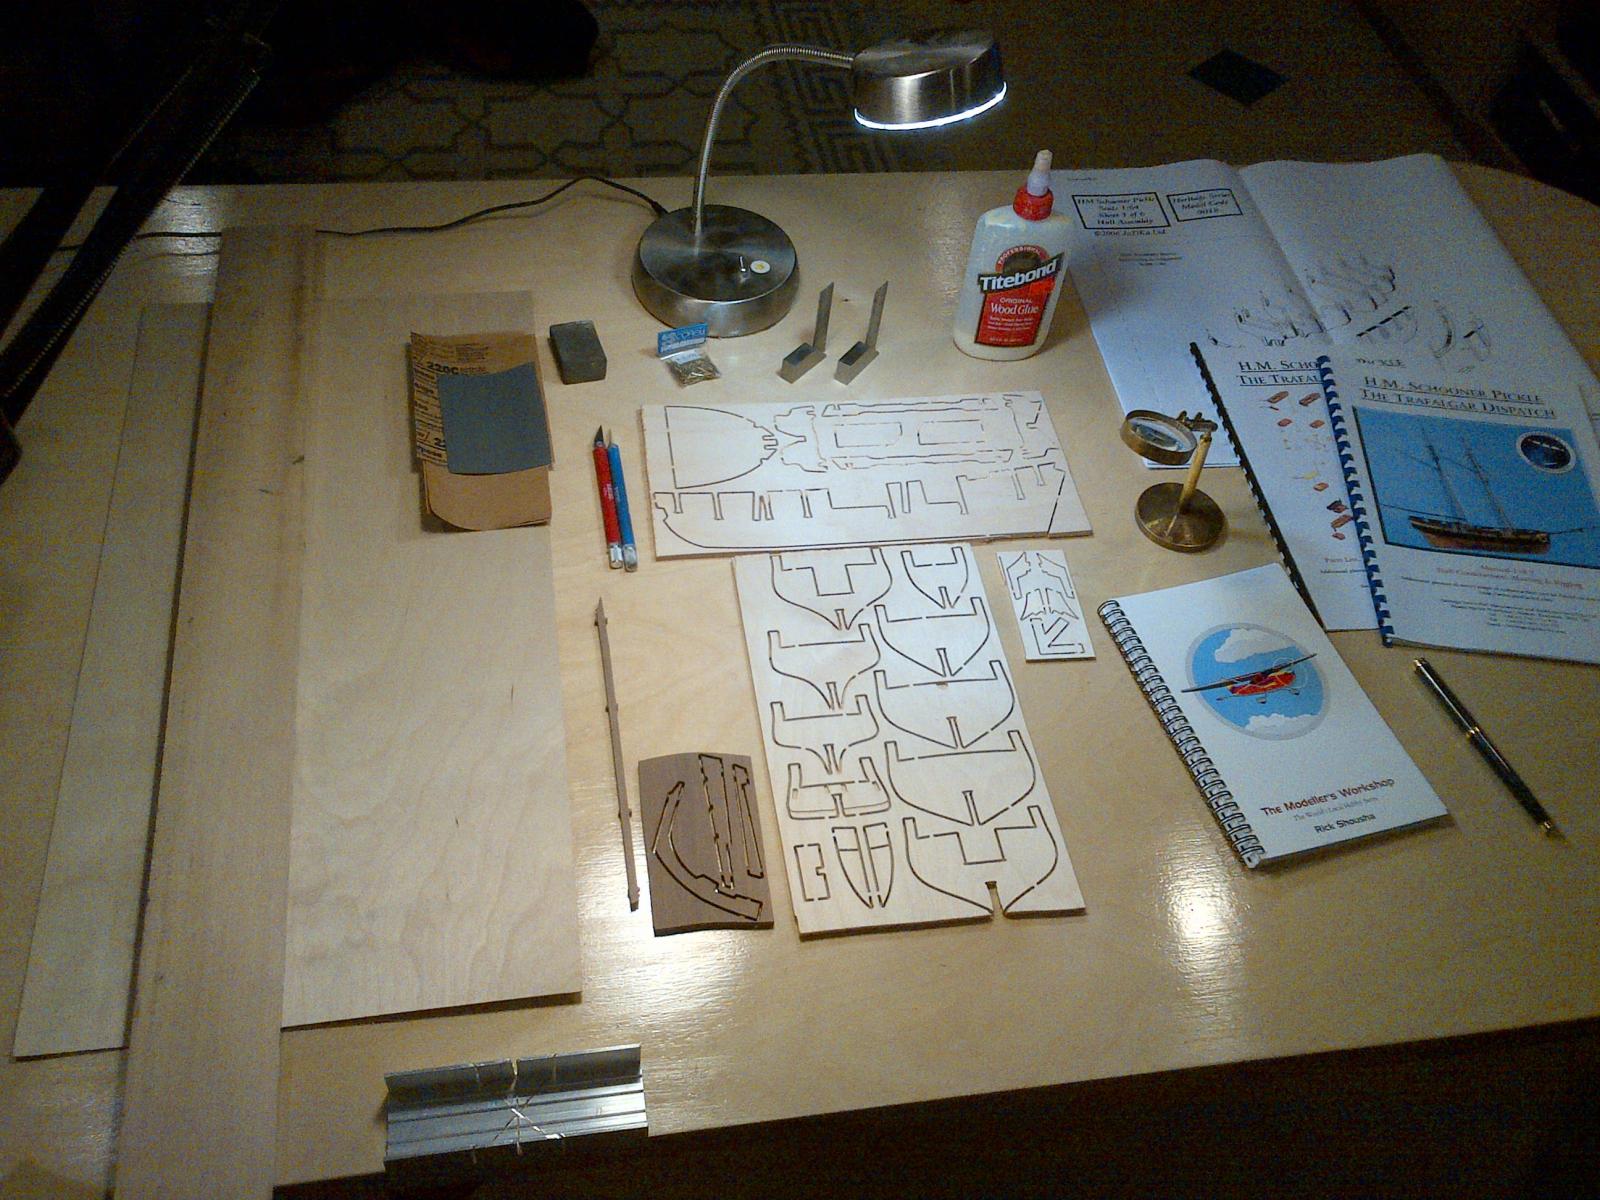
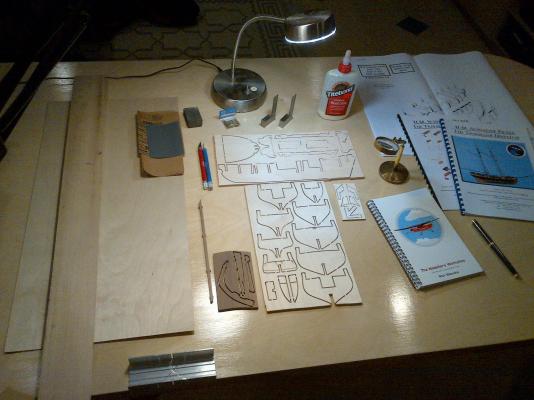
And, finally, here is what the little shipyard looks like at the end of the day. For those who are interested, that is Titebond in the back. I do not use CA glue as I am allergic to the stuff.To make things easy, I always have at least three glue bottles going at the same time. There is always one that is filled right up to the top. This is the one that is in use. By keeping it filled to the top, the glue comes out as soon as I turn it over. Best Regards, Rick
-
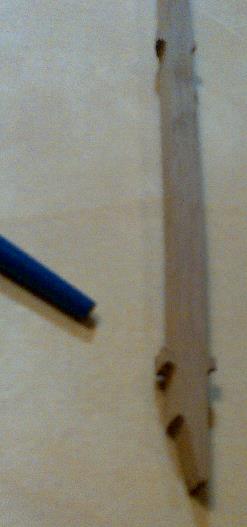
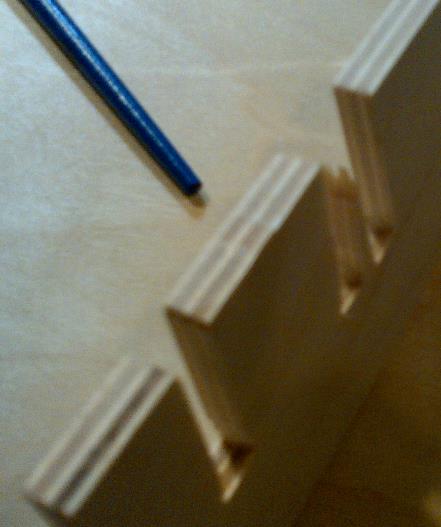
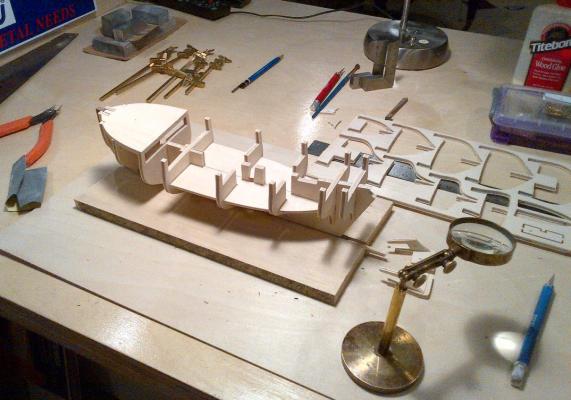
And now for the second picture and another question: How do you smooth out a piece of wood so it fits beautifully against another, with a nice, sharp, edge? In the picture, here, the keel piece has a bunch of protrusions that must be sanded off. I see great pictures of models all over this site where edges are perfectly aligned. This means this kind of protrusion has been carefully and perfectly sanded off. In the picture, the end of the paint brush is pointing to these bumps that need to be removed. I can use some help here. Best Regards,


-
November 22, 2014 It's time to add a couple of pictures and ask you fellows a couple of questions. First, here are the pertinent pictures: My first question is probably answered somewhere else on this board. How do you make a straight cut in a piece of wood? After years of making imperfect cuts, I'd really like to learn how to do this right.
-
Greetings, I`m partial to Timbermate. It comes in a variety of colours and can be thinned with a little water. Bondo is, of course, wonderful but, you`ll have red dust in your house for a month. Now, I have to get back to my own Pickle build. I will have questions of my own tomorrow. Best Regards. Rick
- 76 replies
-
- 1
-
-
- caldercraft
- finished
- (and 1 more)
-
Rob, Thanks for the note about Blue Ensign's build log. I'll definitely have a look. Now that the varnish is curing on my workbenches, I have to wait three days before starting. So, in that time, I'll be building up my Project Management on the Pickle. I know Pickle is not as involved as some of the Pocher models I've done but the only way to get to the end of a project is to line up the steps and prepare some to-do lists. Also, it's very important, in my opinion, to stick the plan. Otherwise, one tends to do the fun things first and leave the difficult things to the end. The best way to see a project to the end is work in order, cutting through the difficult steps as they appear. The next post will be on Thursday, when I can spread stuff out on my workbenches. I'll have the steps laid out by then. Regards, Rick
-
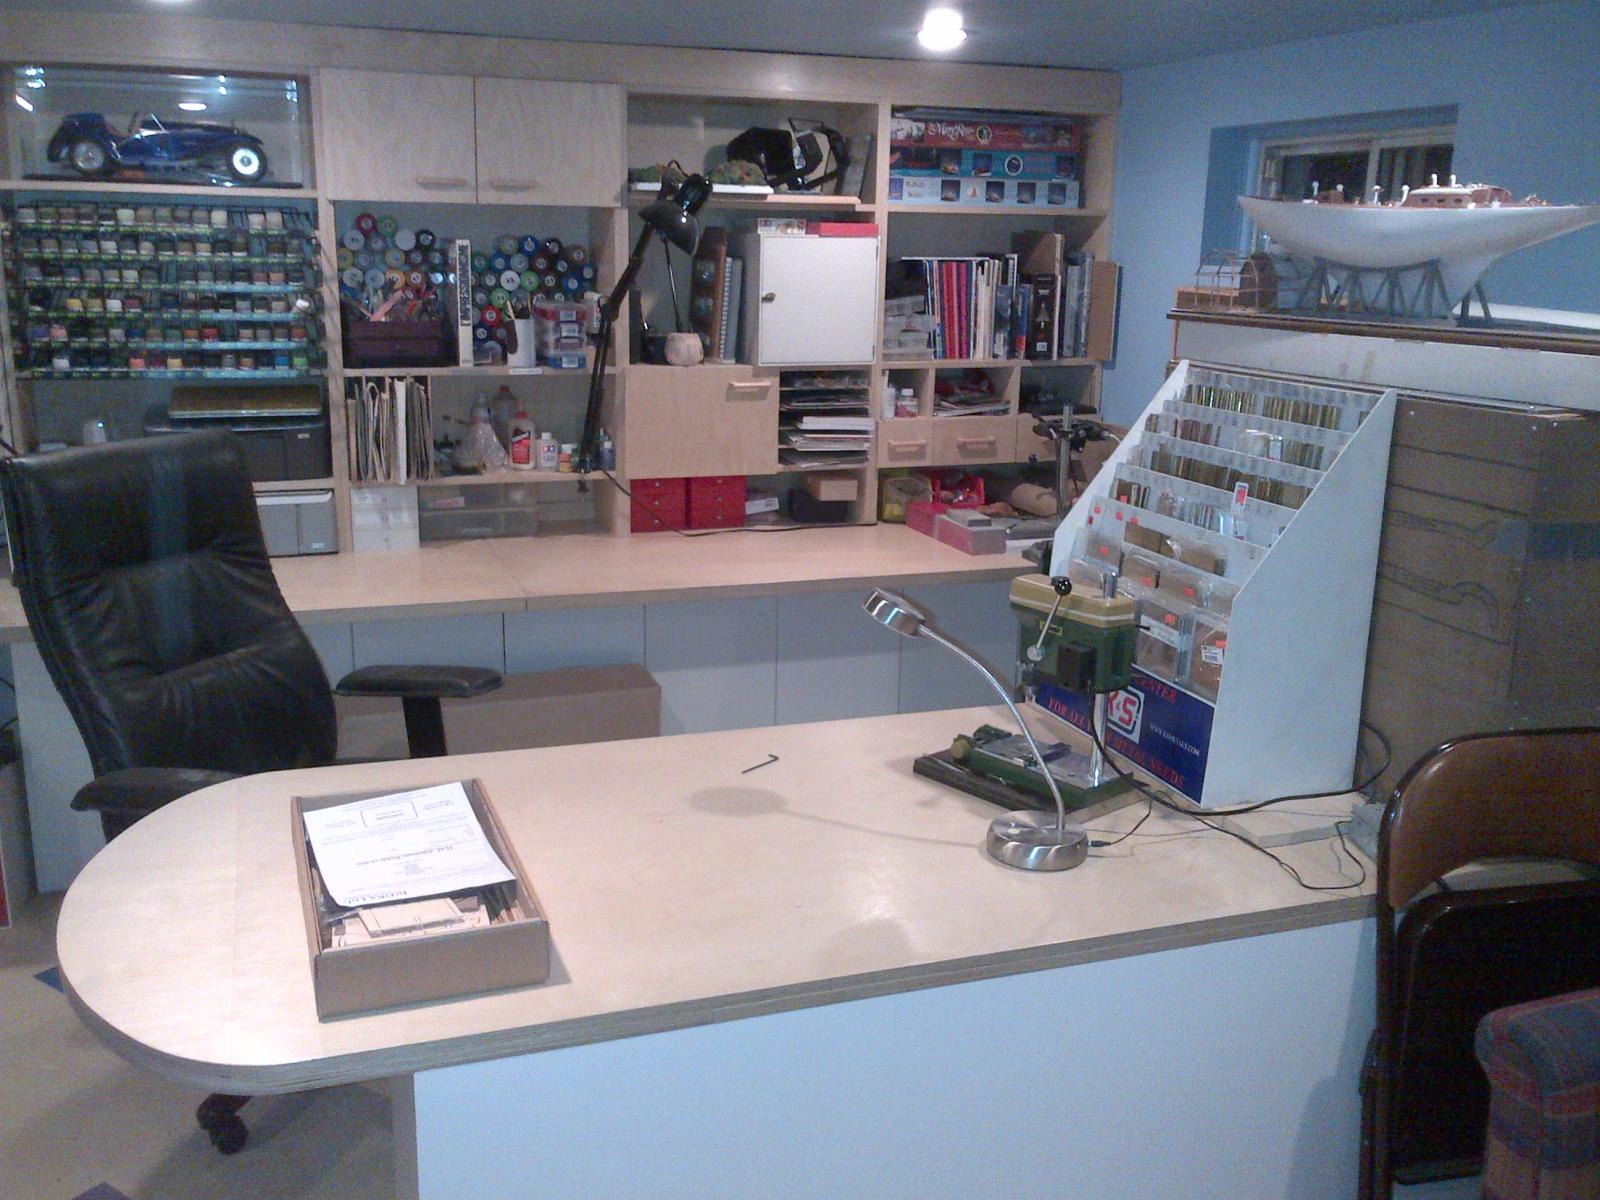
Thanks for the notes, fellows. Just to give you a tour, that box on the right is my spray booth. It has a clear acrylic top so you can look down onto the work while spraying. This way, you're removed from the fumes, even as they get vacuumed out the back. There's a clothes dryer hose attached to a vent that fits right in that window you see whenever I want to use it. Right now, there's a partially completed Corel Corsaro II sitting on top. On the left is the second Pocher model I ever built. Under the two tables are cupboards that are 27" wide, in order to fit my stash of Pocher kits. That stash is now down to only a handful as I am slowly moving towards building wood ships. After building twenty of those Pocher models, I felt it was time to move on. Also, I have to say the people on this website, and ship modellers in general, are a great bunch and truly inspirational. So, let's see what I can do as the model takes shape. Best Regards, Rick
-
First things, first. I sand off my workbenches and give them a fresh coat of varnish for each model. Now, if I can just figure out how to add pictures to this blog.... I'm not complaining; this is really an amazing website. I want to thank Chuck and the other moderators for making this possible. Well done! Rick

-
Greetings, There are some wonderful build logs of this vessel on this site so I will focus on the things a new builder encounters along the way and give you my personal take on building models in general. I hope people will find this interesting. I cracked open the box last night, November 16th, 2014. The first thing I did was make a list. Let's see what I can do this evening. I will post at least once a week. This is going be great fun! Best Regards from Montreal Rick Shousha
-
Hi Rob, Yet another Pickle! What fun. I'm just about to start this model and I see there is even another build by spyglass. Where did you get the little sailors? They look wonderful. Best Regards, Rick Shousha Montreal
-
Hi Joe, Thanks. I'm looking forward to it. Whenever you're ready, please let me know and we'll build something amazing for you. Best Regards, Rick
-
Interesting discussion and I'd like to put a different spin on it, if I may. When i started building car models for people, I specified that my models are "art quality" models and nothing do with either the real thing or anything that was "museum quality". The goal was to make something whimsical out of a cool kit. I was successful with that and had a great deal of fun with my clients. Yes, I did paint a 1933 Alfa Romeo in metallic paint. So, my question is; who is going to be the first person to make a five-masted HMS Victory? Best Regards, Rick
-
Christmas tool and equipment list
rshousha replied to schnu's topic in Modeling tools and Workshop Equipment
I want a couple of Starrett measuring tools and the lovely little toolbox. -
Joe, My company does this now. It's taken a while to get going but we're ready. We use Solidworks, Inventor, and Autocad and have two laser cutters and a CNC router for big stuff. Best Regards, Rick Shousha Montreal 514-973-7741
-
Rob, This is really impressive. I went through your whole build this morning, bit by bit. I got a real kick out of the pictures in the gun ports. That's a great piece of imagination. Well done! I will keep coming back to follow the rest of the build. Best Regards, Rick Shousha Montreal