


robdurant
-
Posts
831 -
Joined
-
Last visited
3 Followers


Recent Profile Visitors
4,713 profile views


-
 robdurant reacted to a post in a topic:
Soleil Royal by Hubac's Historian - Heller - An Extensive Modification and Partial Scratch-Build
robdurant reacted to a post in a topic:
Soleil Royal by Hubac's Historian - Heller - An Extensive Modification and Partial Scratch-Build
-
 A great start. You should be okay for vibration as the rpms should be farily low - it isn't a race boat - but if you want to be doubly cautious, making a part that sits inside bh6 that acts as a support for the prop tube could also damp any vibrations that might form?
 -
robdurant reacted to a post in a topic:
NORDKAP 476 by _SalD_ - Billing Boats - 1:50 - RADIO
-
 _SalD_ reacted to a post in a topic:
NORDKAP 476 by _SalD_ - Billing Boats - 1:50 - RADIO
_SalD_ reacted to a post in a topic:
NORDKAP 476 by _SalD_ - Billing Boats - 1:50 - RADIO
-
robdurant reacted to a post in a topic:
NORDKAP 476 by _SalD_ - Billing Boats - 1:50 - RADIO
-
robdurant reacted to a post in a topic:
NORDKAP 476 by _SalD_ - Billing Boats - 1:50 - RADIO
-
Great to see this log. All the best for your build nice hat, too. We live on top of a big hill, so in the middle of winter a hat like that can come in handy. I imagine on fishing grounds in the North Sea or Atlantic it would be essential wear.
- 5 replies
-
- 1
-
-
- Nordkap
- Billing Boats
- (and 1 more)
-
robdurant reacted to a post in a topic:
NORDKAP 476 by _SalD_ - Billing Boats - 1:50 - RADIO
-
robdurant reacted to a post in a topic:
Chris Watton and Vanguard Models news and updates Volume 2
-
François de Saint Nazaire reacted to a post in a topic:
HMS Bristol 1775 by robdurant - Scale 1:64 - Portland-class 50-gun ship - as built from NMM plans
-
robdurant reacted to a post in a topic:
Stefano running rigging
-
robdurant reacted to a post in a topic:
Stefano running rigging
-
Wow, what a handsome model. I fear you are ahead of me and I will therefore be little help to you at this stage, but I wish you every success in finishing the task.
-
 robdurant reacted to a post in a topic:
Stefano running rigging
robdurant reacted to a post in a topic:
Stefano running rigging
-
Hi Morten, That's my log Chris has linked to above... sadly I had to pause the build having suffered a brain injury that put the mental requirements somewhat beyond my current abilities, but I still have all the plans (albeit packed away in the loft), and the model sat on my desk next to me. If I can be any help, I will gladly try. Am I right in thinking that you are looking for runs of rigging (i.e. which side of spars / other lines things pass), belaying point details, positions of yards when not carrying sails, etc? To my recollection I never really quite reached that point... indeed it was that task that I found most daunting in this model. As you'll see in the pictures on the log above, I placed the sails but they have no rigging attached, and there is no other running rigging at present. Ultimately, (and apologies if I get this wrong) as a minimum, I guess you want halyards to hold the yard up from the centre, braces for horizontal planar direction from the ends of the yards, and lifts for the vertical alignment going to the ends of the yards? The difference between rigged and unrigged is then that the yard is in its lowered position. The final part of the puzzle would be where to belay all of those lines... some through a block on the deck and then up to the centre pin rails (halyards?), some onto the belaying pins down the sides of the deck. Which side do they belay to? Is it higher yards further forward or aft? All of those would begin to make a plan of sorts.... and for the rest, well.... it's a collier trying to make a profit, not a royal navy vessel trying to pass inspection 😉 Rob
-
GrandpaPhil reacted to a post in a topic:
HMS Mercury by robdurant - Shipyard - 1:96 - CARD
-
GrandpaPhil reacted to a post in a topic:
HMS Mercury by robdurant - Shipyard - 1:96 - CARD
-
GrandpaPhil reacted to a post in a topic:
HMS Mercury by robdurant - Shipyard - 1:96 - CARD
-
Mr Whippy reacted to a post in a topic:
Golden Hind (ex-Pelican) by Baker - FINISHED - scale 1/45 - Galleon late 16th century
-
DB789 reacted to a post in a topic:
Erycina by robdurant - FINISHED - Vanguard Models - 1:64 - Plymouth Ketch-Rigged Trawler
-
rcweir reacted to a post in a topic:
Erycina by robdurant - FINISHED - Vanguard Models - 1:64 - Plymouth Ketch-Rigged Trawler
-
AJohnson reacted to a post in a topic:
Erycina by robdurant - FINISHED - Vanguard Models - 1:64 - Plymouth Ketch-Rigged Trawler
-
AJohnson reacted to a post in a topic:
Erycina by robdurant - FINISHED - Vanguard Models - 1:64 - Plymouth Ketch-Rigged Trawler
-
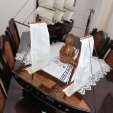
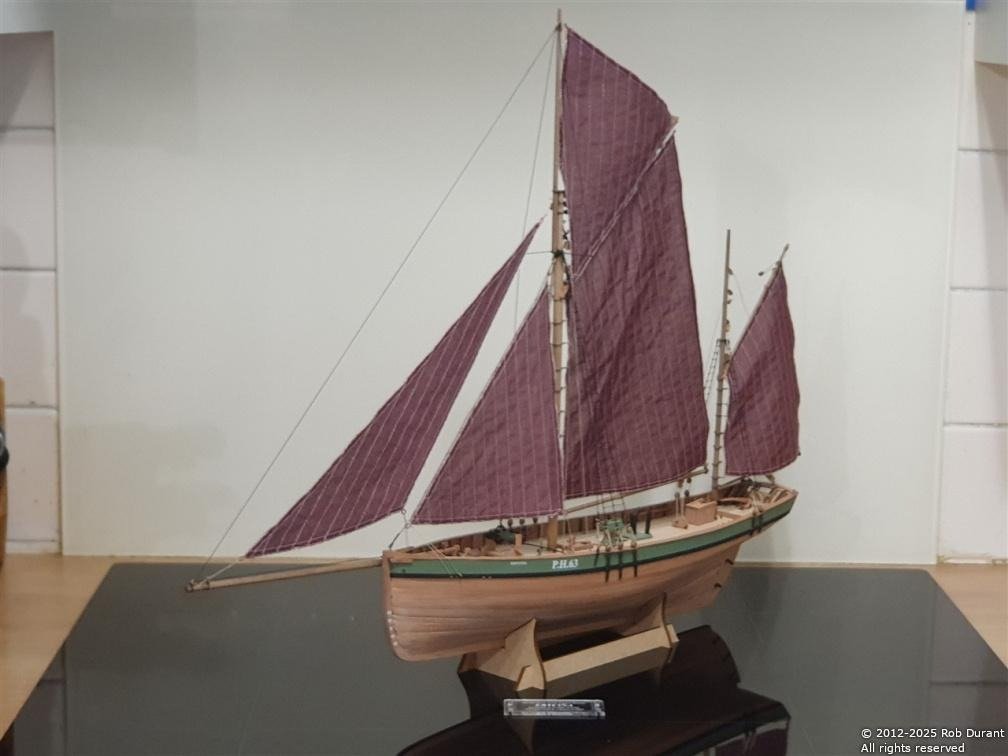
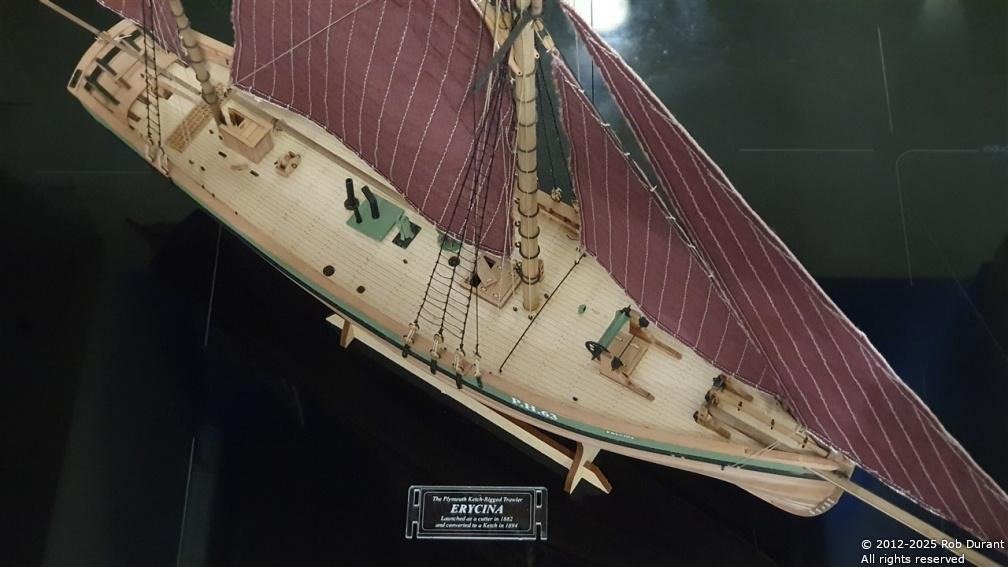
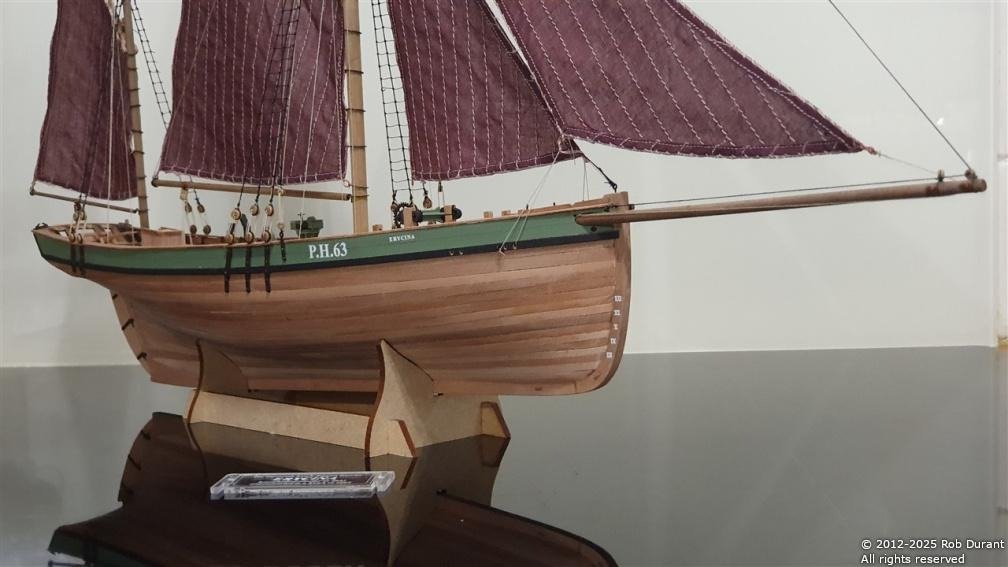
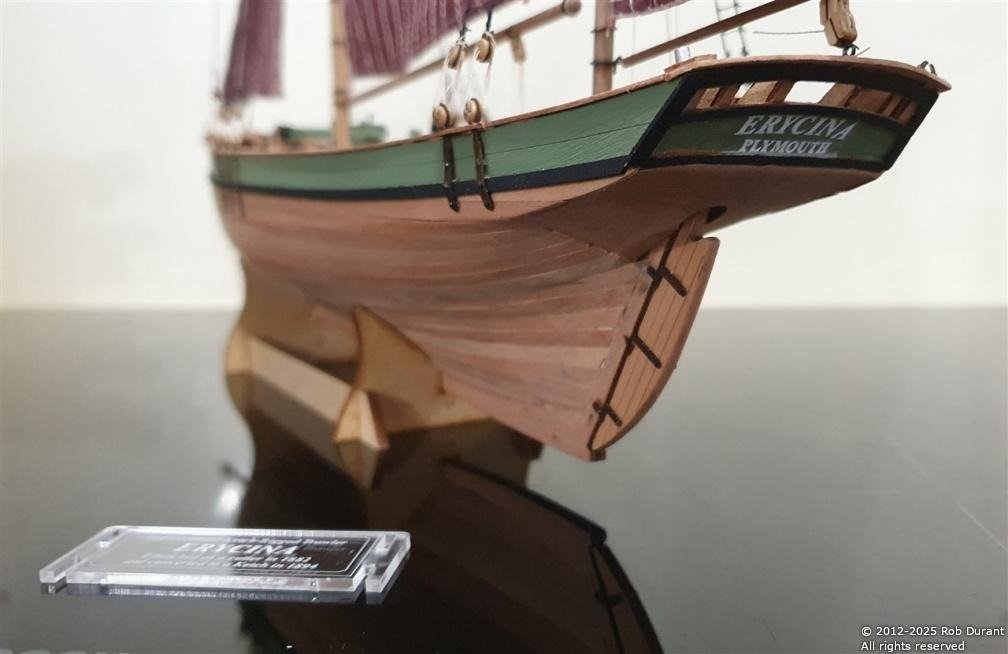
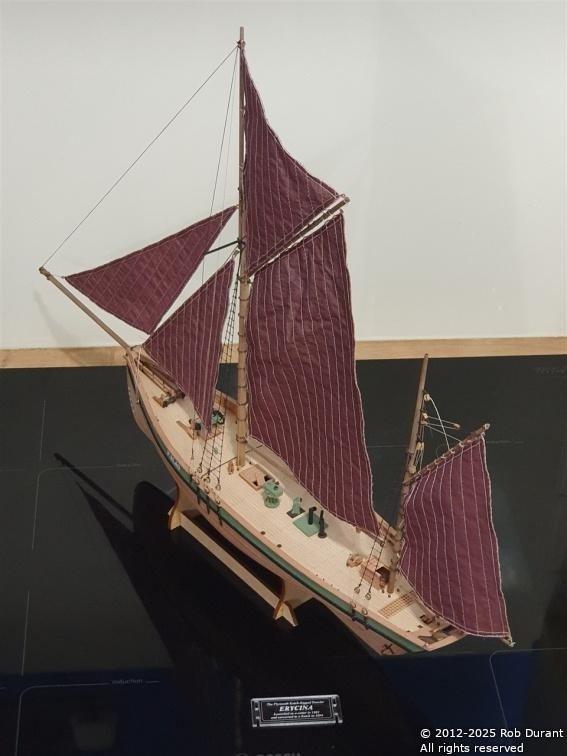
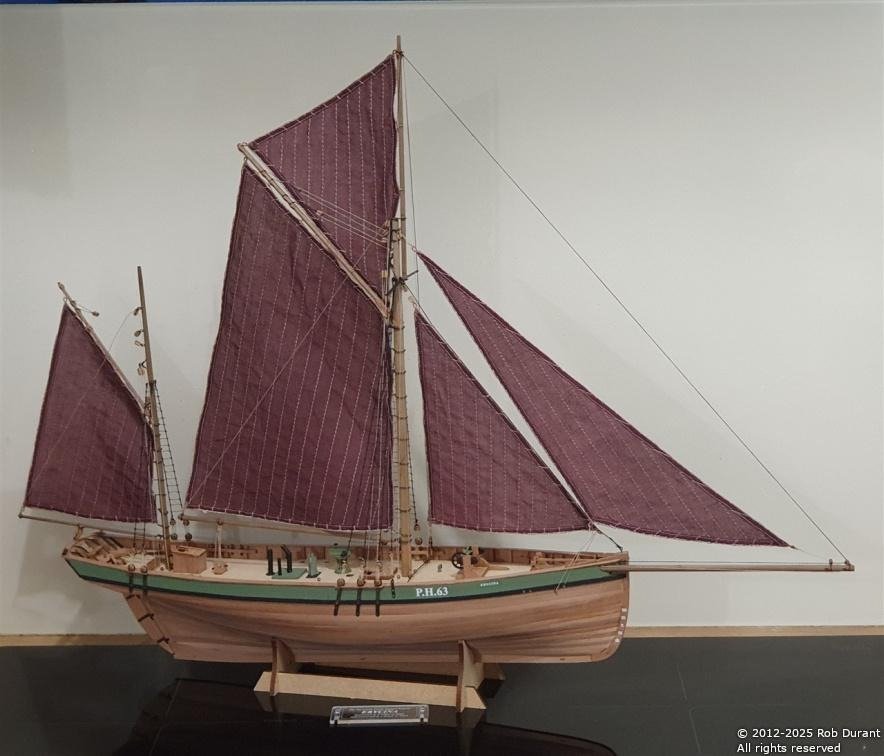
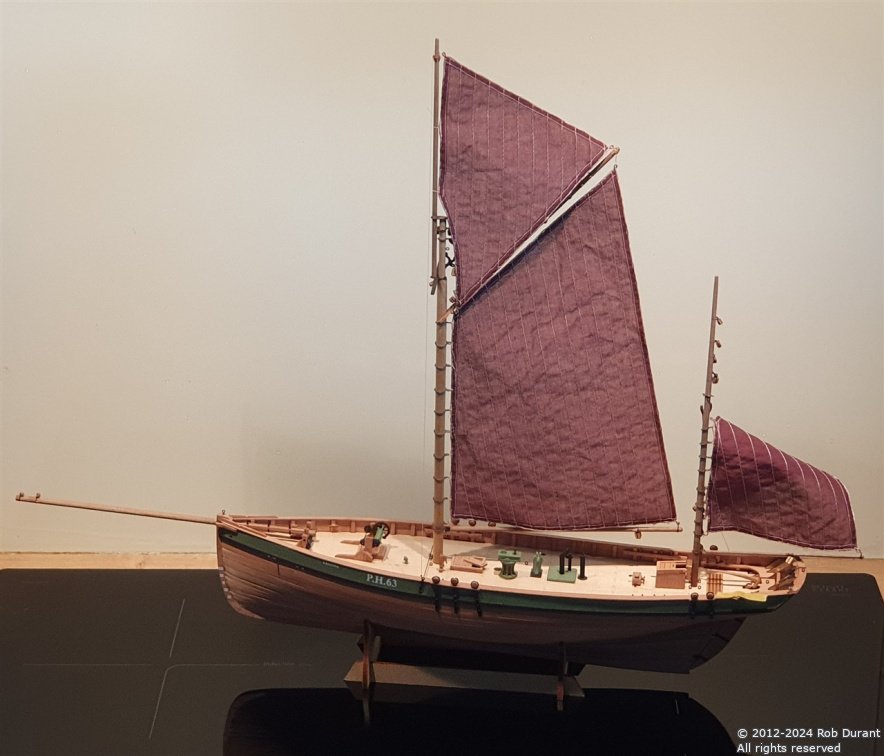
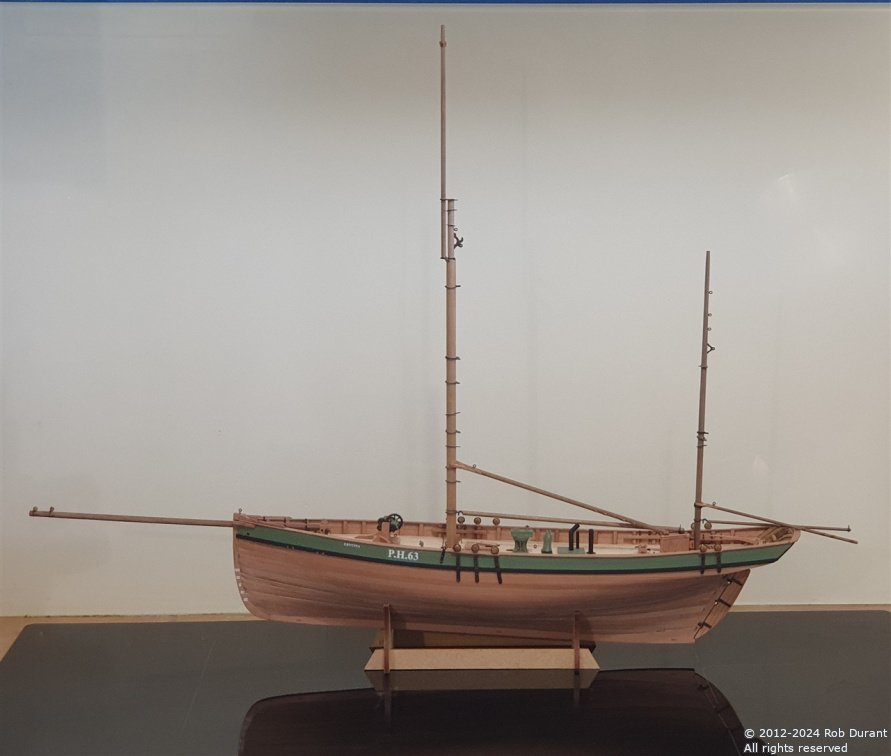
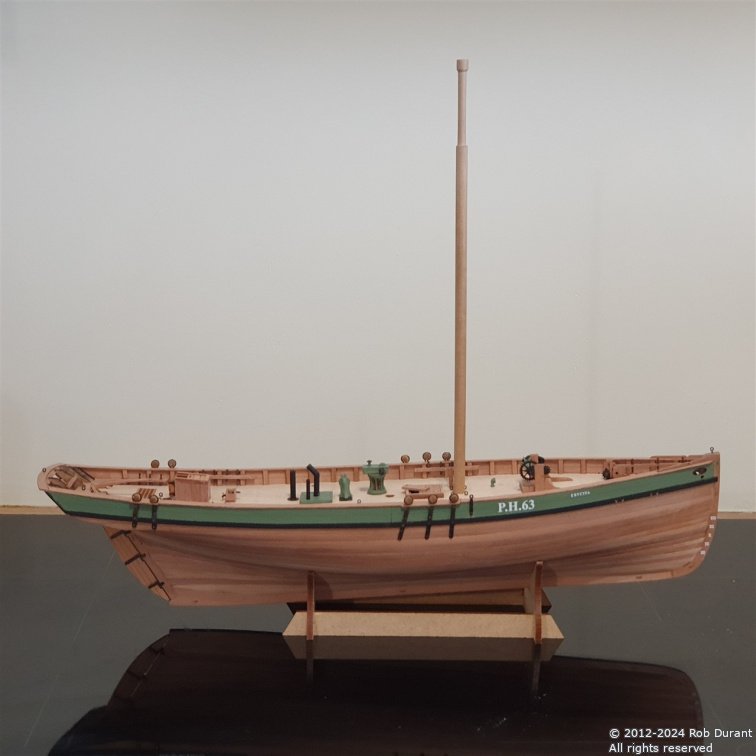
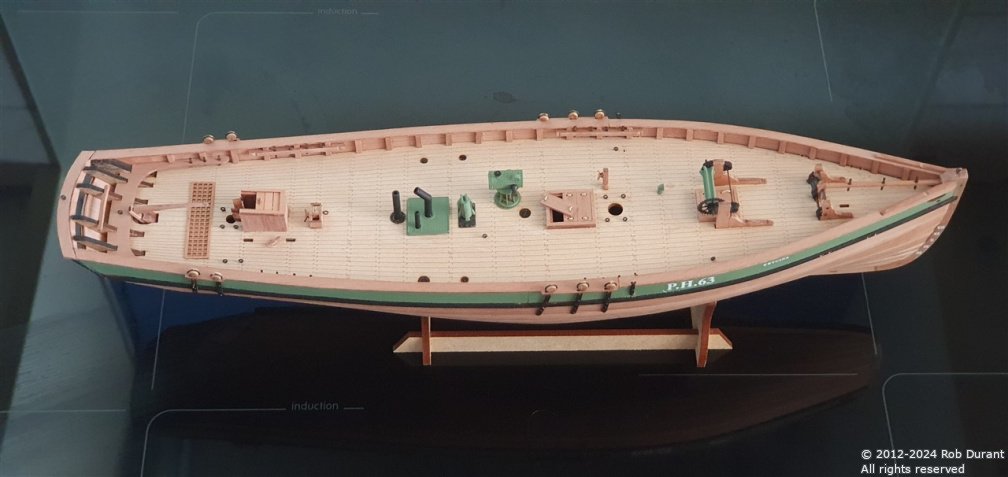
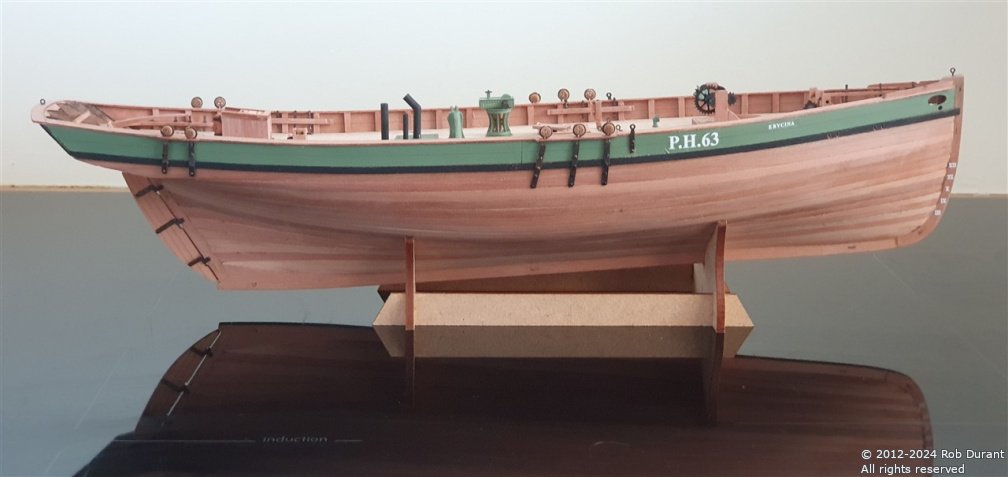
Well I haven't stopped to write down much about the rigging, but there are far more capable modellers on this forum who have written excellent guides. I have, however, completed this model, which is something of a triumph! Just eight days short of a year since my journey with encephalitis began, to have recovered to the point where I was able to finish this model is both a personal win, and a great testament to the model that Vanguard Models have made here. Anyway - enough talk. Here are some pictures. I'm deeply grateful to all those who have been an encouragement and who have spurred me on through this build. And I'm thrilled with the results. I'm marking this one done Rob
- 47 replies
-
- 11
-
-
-
- Erycina
- Vanguard Models
- (and 1 more)
-
Thanks Andrew, I managed to get the other shroud on the mainmast done today, so things are really chugging along now Onto the mizzen shrouds next. Rob
- 47 replies
-
- 5
-
-
-
- Erycina
- Vanguard Models
- (and 1 more)
-
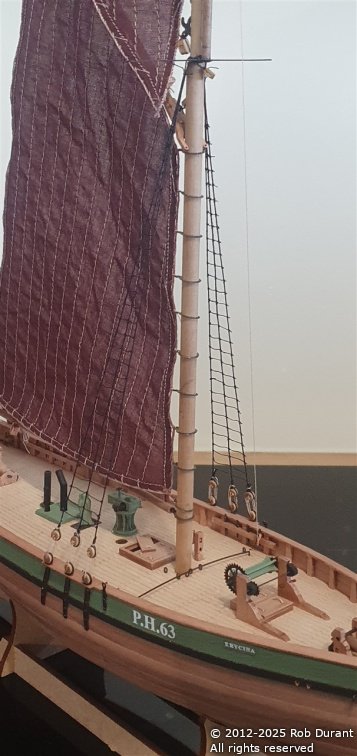
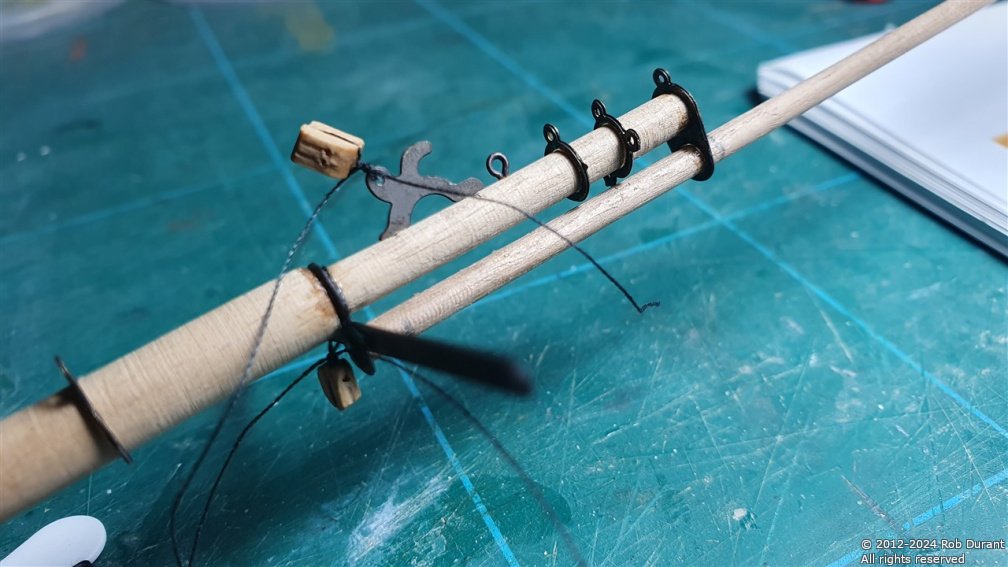
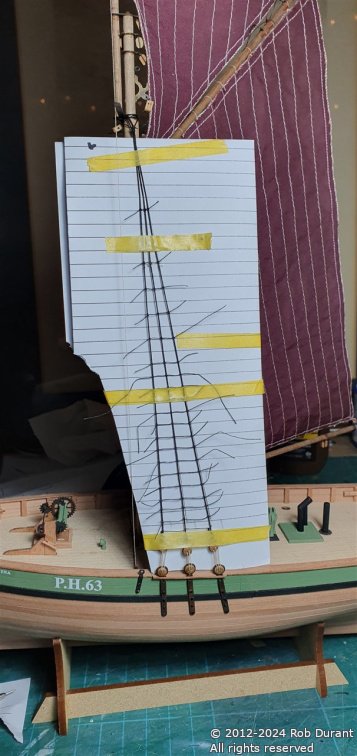
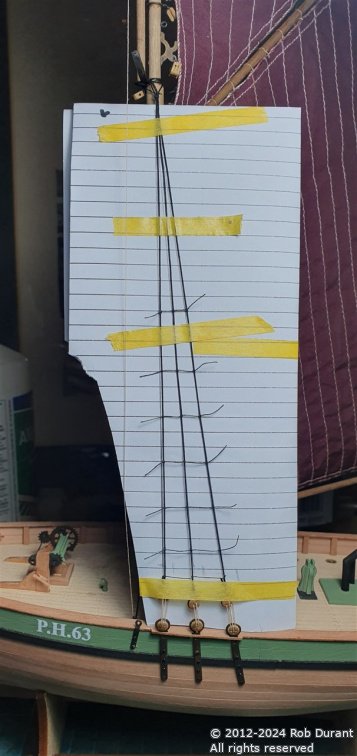
A belated happy Christmas and a very happy new year to you all! Some final details were added to the main mast. I put the mast hoops on and tied the sails to the yards before attaching them to the mast hoops in situ. Masking tape was used to ensure the mast hoops didn't move too far while they were attached. And a photo with the sails roughly in place... Progress has slowed significantly as I've retaught myself to do stays with rigging, dead-eyes, and lanyards, and attached the sails to the masts. I had to relearn how to tie ratlines (despite having tied in excess of three thousand of them previously!) - and I'm finally getting into the swing of things. I find that putting a lined sheet behind the ratlines (with the angle of the shrouds drawn onto it), helps in a number of ways. Firstly, it helps me to get the knots tied without the shrouds getting pulled gradually inwards by the knot tension (where they are, I can stretch it back out again as it goes). Secondly, when I thread the rope to make the knot, it gets pinched between the shroud and the paper, holding it in place while I move my fingers / tweezers to the other side. The only thing to watch out for is that you don't stick the ratlines to the paper when you glue them in place with watered down glue. Using only a little glue, and running a metal ruler between the shrouds and the paper shortly after gluing seem to keep this under control. Thanks as always for looking in. Progress may not be fast, but I'm happy enough with how it's going. And given how 2024 was, it's amazing I've achieved any of it, really. Every blessing for 2025! Rob
- 47 replies
-
- 8
-
-
- Erycina
- Vanguard Models
- (and 1 more)
-
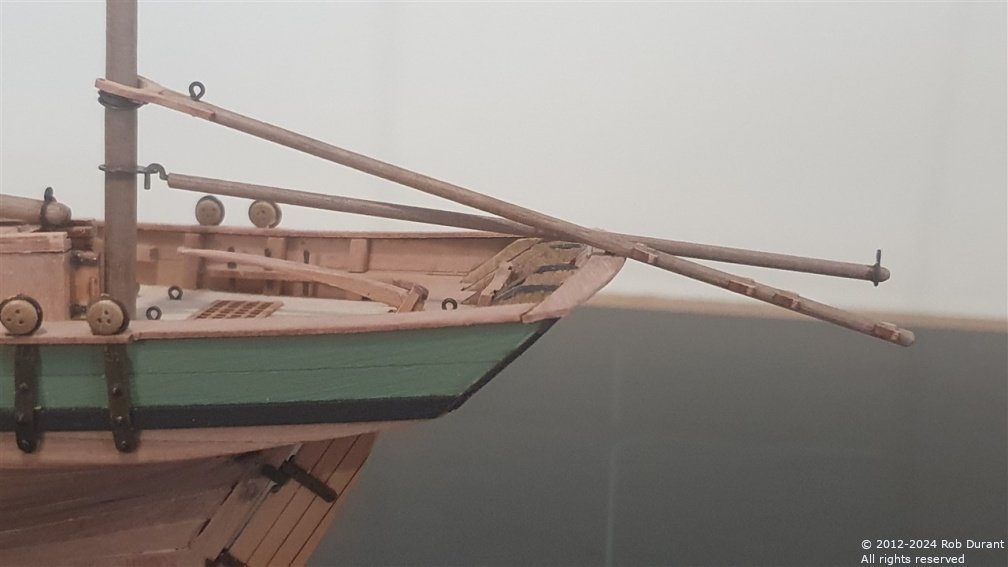
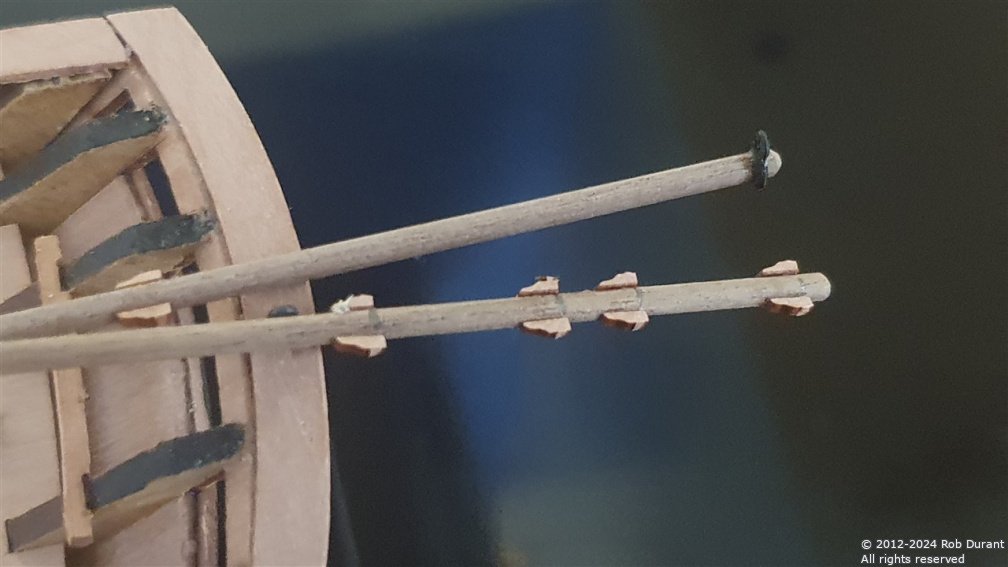
I've finished shaping the masts and spars, fitted the bowsprit, and added all of the hardware... Next up comes the rigging in earnest In retrospect, I wish I'd used a round file to sand the inner edges of these small parts on the spars so they fitted up against the spar better when glued in place, rather than being a flat surface gluing onto a round one. I'm sure I used to know that - it just got lost somewhere along the line! Otherwise, I'm pleased with progress. Thanks as always for the likes and encouragement. I'm really beginning to think I can bring this build home, now Slow and steady! Rob
- 47 replies
-
- 8
-
-
- Erycina
- Vanguard Models
- (and 1 more)
-
Looking very smart. One tip I've found helpful in the past is to mask up the lines and then paint on some clear matt varnish. If this bleeds it doesn't matter. You can then paint the black over it, and it's less.likely to bleed as the gaps are already filled by the varnish. I've used this trick a few times and not had any issue. With that said, your tidying up efforts look very neat. Rob
-
And... onto the masts. I haven't cut down the top of the mast yet, but couldn't resist seeing how it looked in situ.
- 47 replies
-
- 6
-
-
- Erycina
- Vanguard Models
- (and 1 more)
-
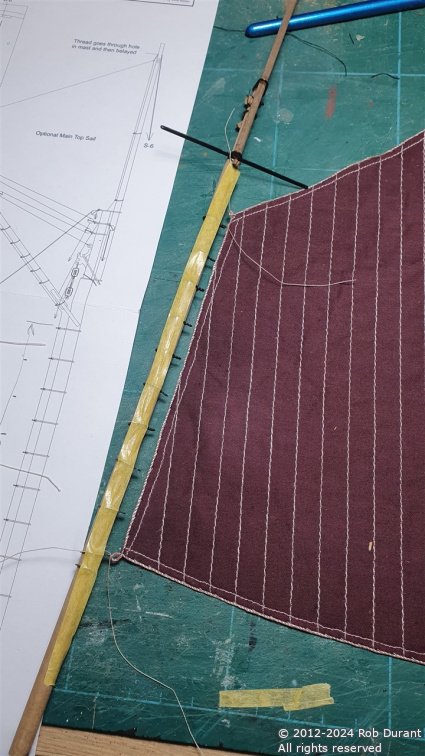
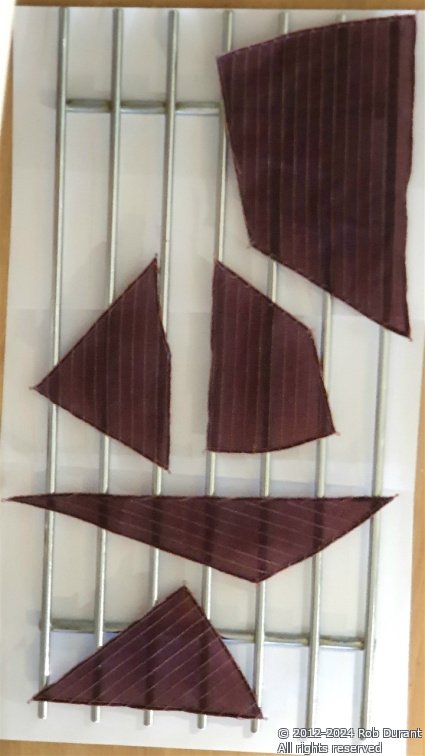
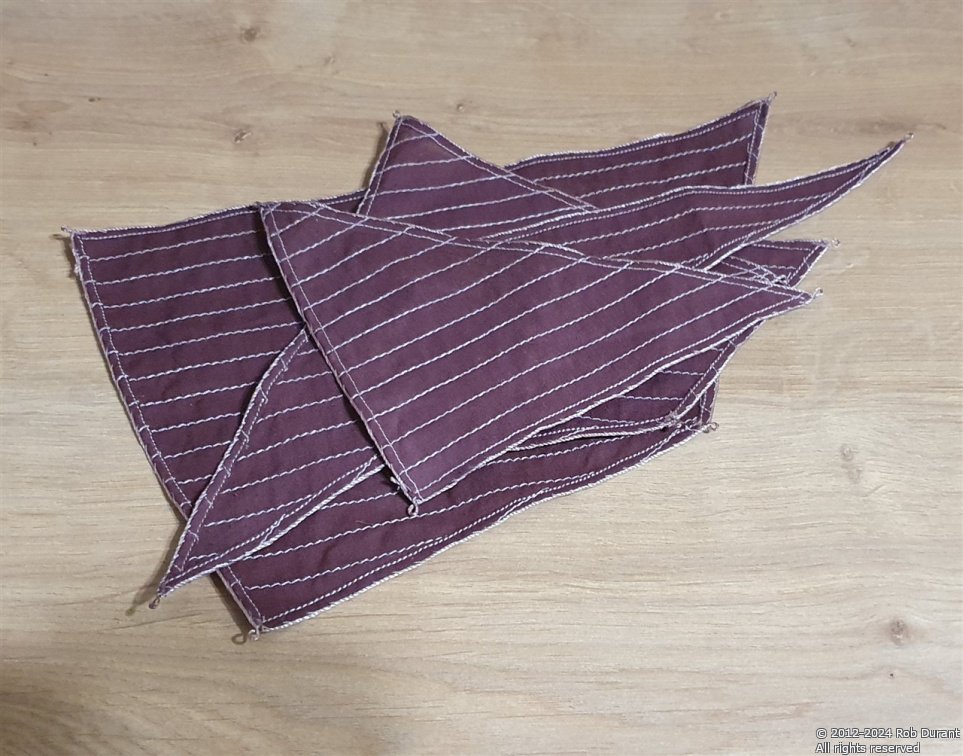
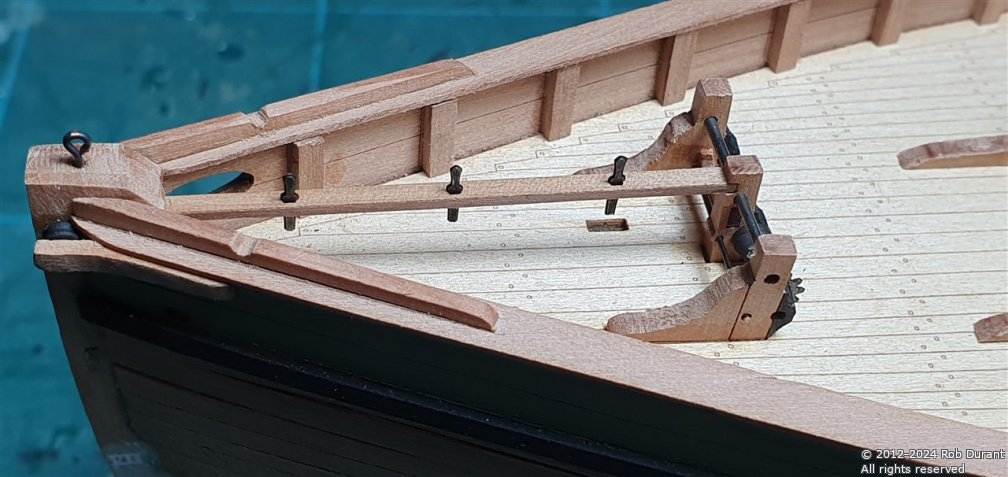
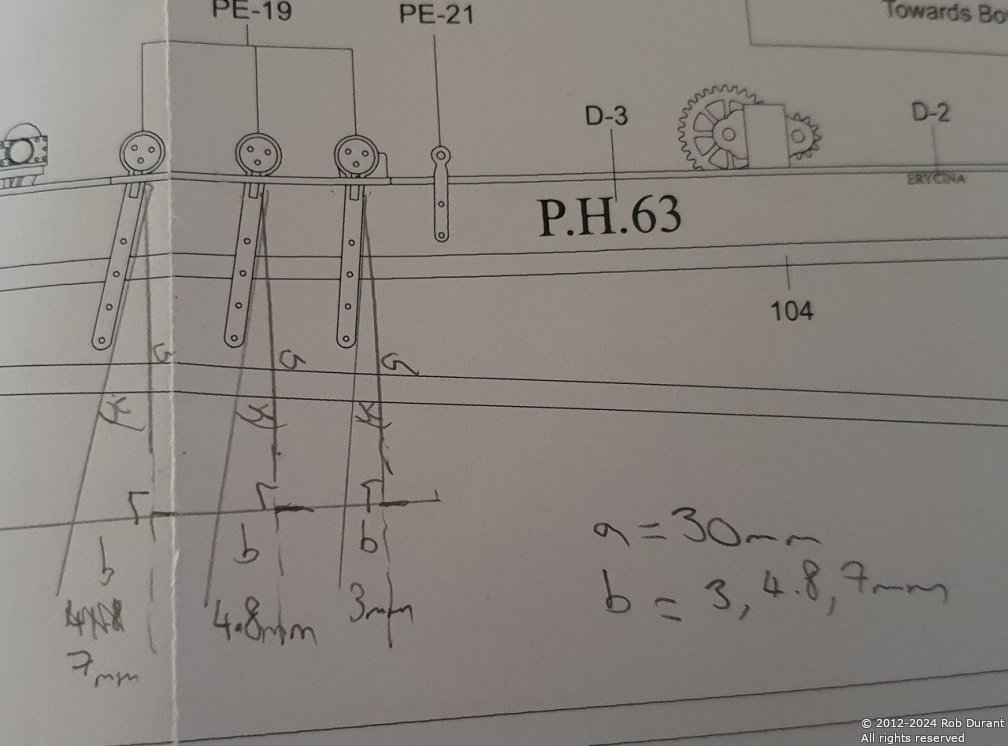
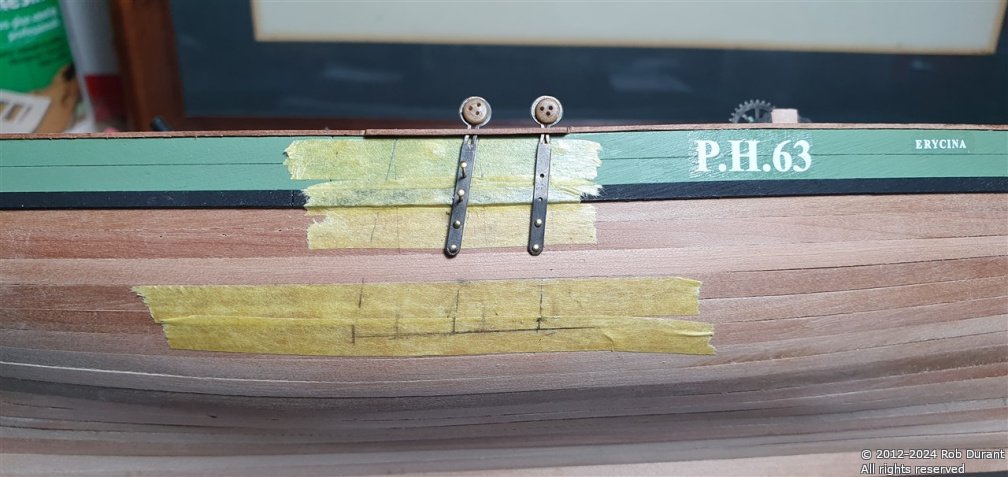
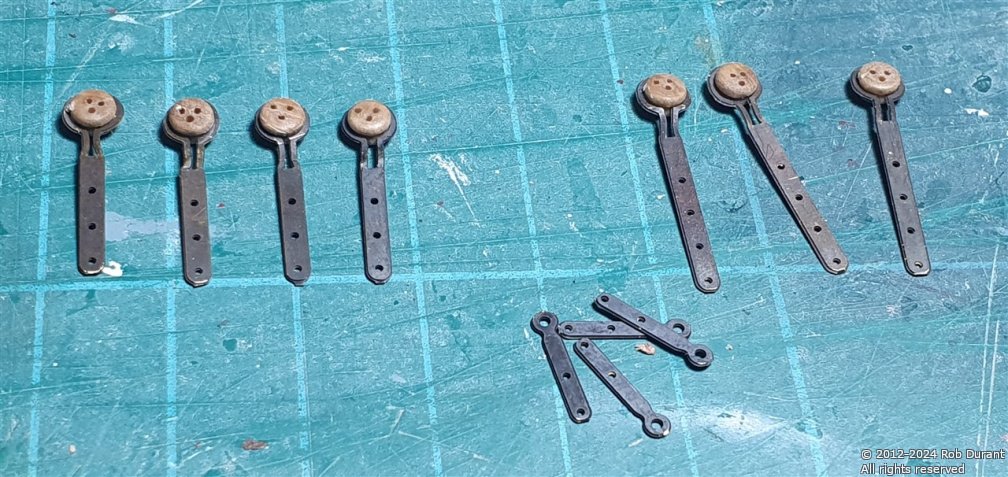
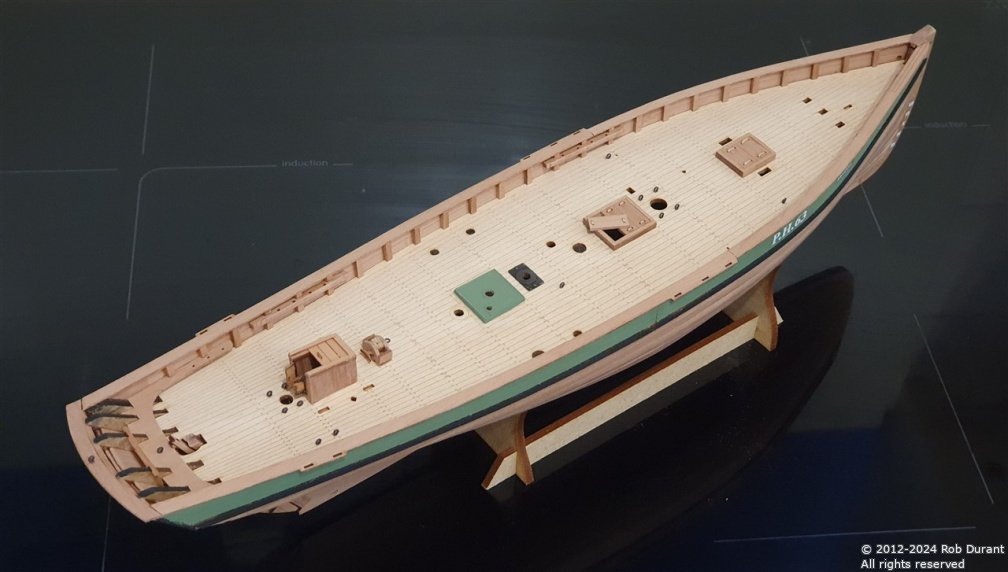
It's been a productive week. So here's an update. I've finished off all the deck furniture, and added the belaying pins (blackened photo-etch), and the chain plates... The chain plates were marked out from the plans using masking tape to protect the hull as I put pencil marks on to show where they should go. Once I was happy with the arrangement, I drilled a hole in each to locate the first pin, and then removed the masking tape. The remaining holes were drilled, and the provided pins were fixed in, having first blackened the heads. (It's worth noting that on the top holes of the forward and rear chainplates, the hole shouldn't end up sticking out on the far side of the bulwark. To avoid this, I shortened the pin before gluing it in place with a small dab of superglue. I've also dyed the sail set (these are the premium sails sold separately by Chris at Vanguard, and they really do add to the model). I used Rit dyes for this. About two pints of water were boiled in a big stainless steel pan, then having given it a few minutes to start cooling, I added two teaspoons of Rit Wine powder and Rit Dark Brown powder, half a teaspoon of salt, and a tiny dribble of washing up liquid. Having thoroughly stirred the mixture, the sails were added, ensuring they were completely submerged and wet through. About 30 seconds later, I took out the sails, and lay them out to remove the worst of the liquid. They were then placed on a cooling rack to dry off, turning occasionally. I was really pleased with how these turned out. When I build Lady Isabella (the Zulu from Vanguard's range), I felt the sails ended up a little light... this time, I've managed to get a deeper, richer colour. I'm almost onto the masts now, so soon I'll get the chance to see how they look on Erycina! Thanks for all the likes and encouragement Rob

- 47 replies
-
- 7
-
-
-
- Erycina
- Vanguard Models
- (and 1 more)
-
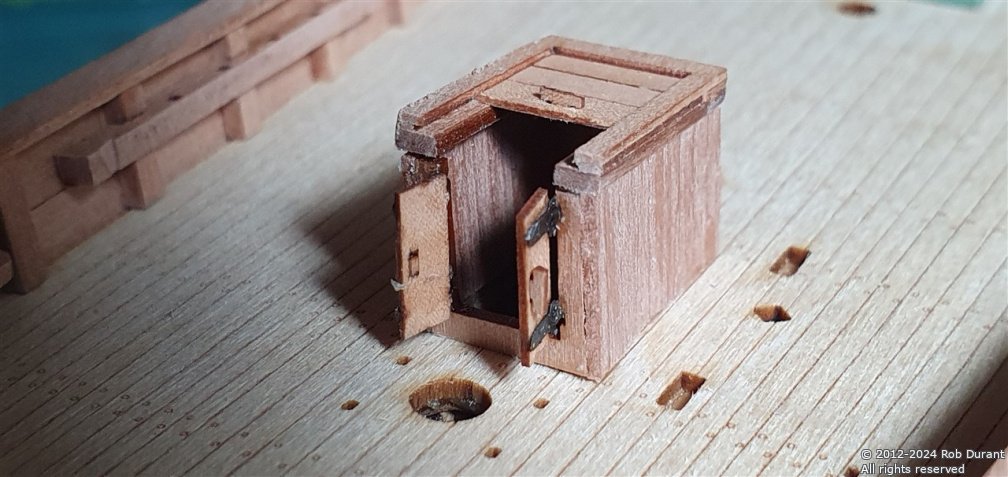
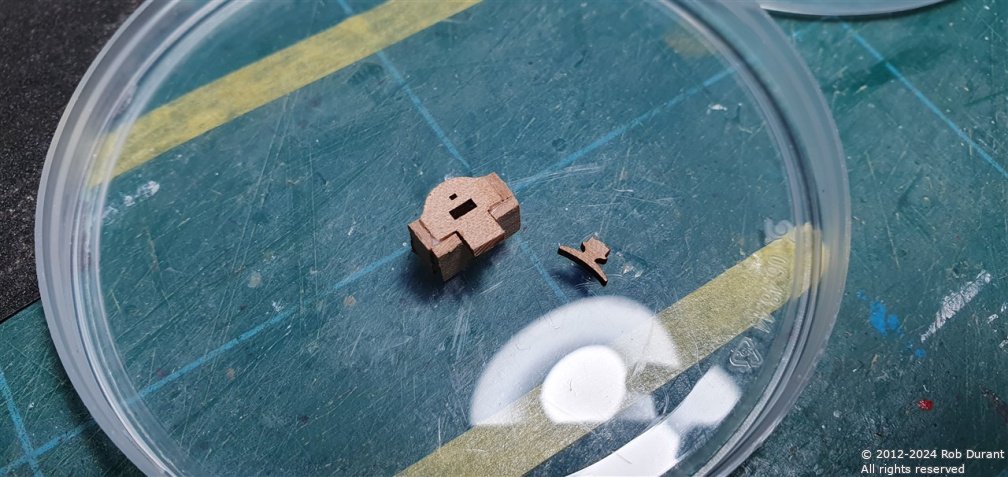
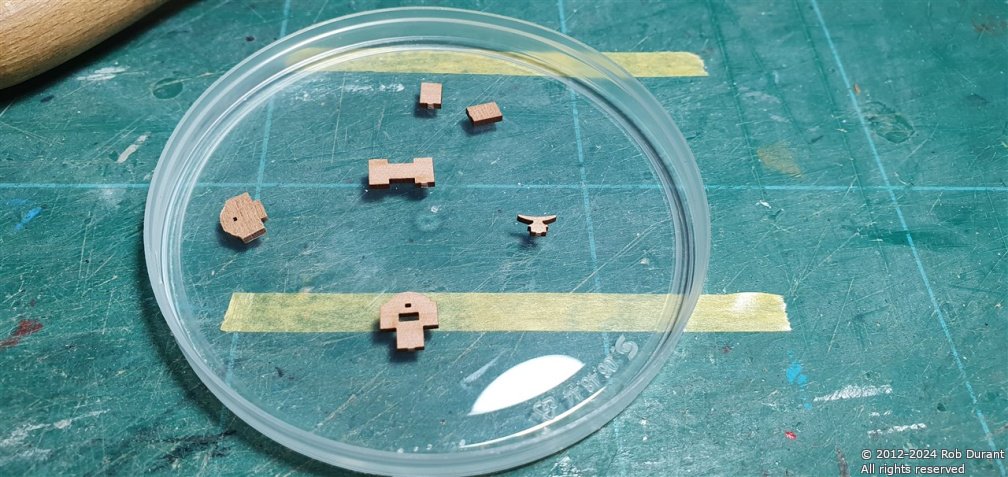
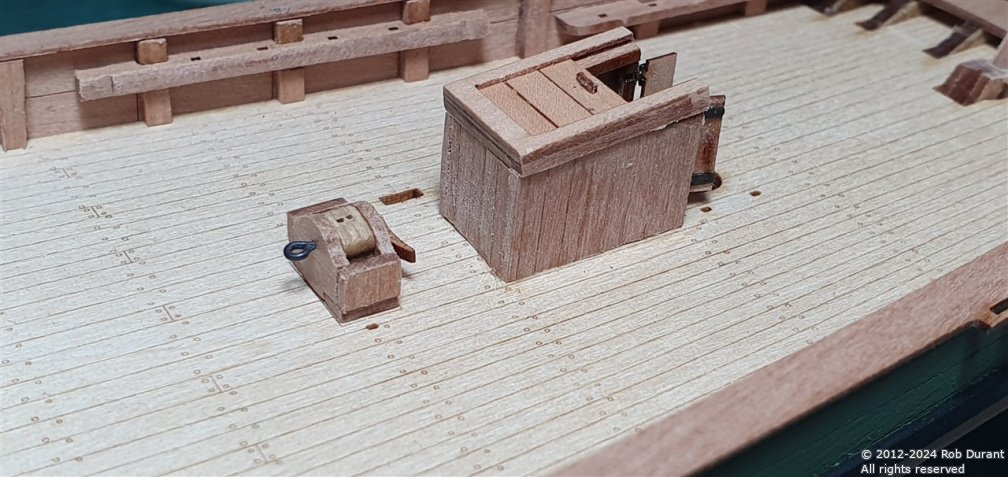
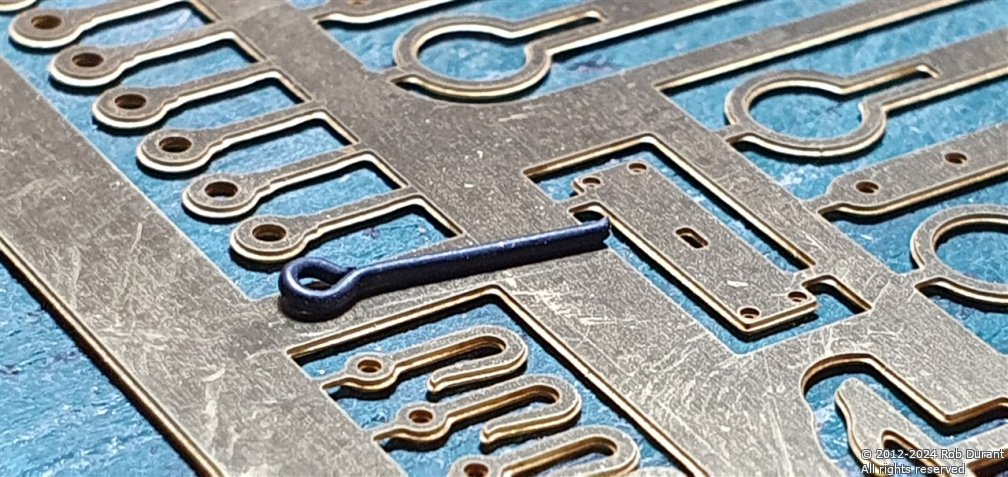
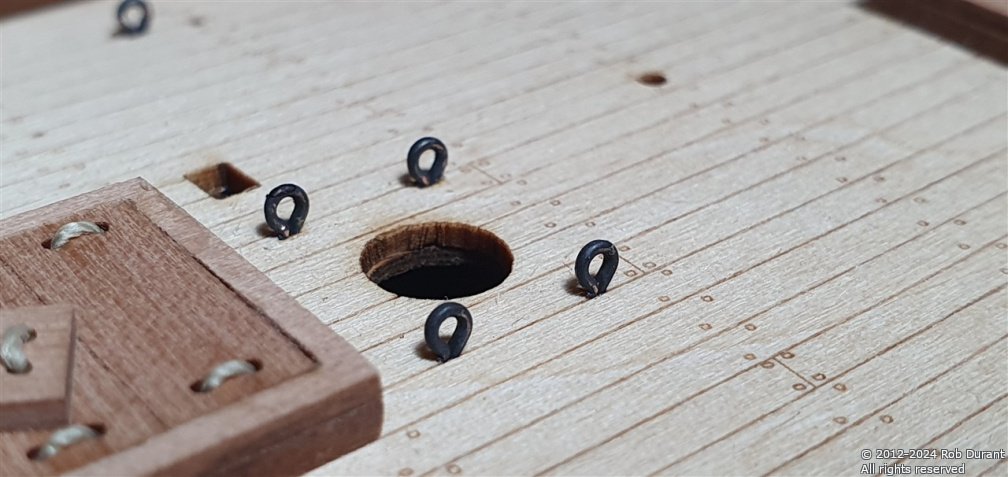
Hi, A little bit more progress. I've added the details to the companionway, and installed it in place. I've also constructed the main sheet housing assembly and the eyelets in the deck. I replaced the photo-etch for these with wire versions (which I had left over from previous builds), as they're more rounded, and I think I prefer the look overall. Whether you'd really ever notice the difference is another matter entirely, but I'll know A (very-zoomed-in) comparison of the wire and the photo-etch eyelets: And installed... I haven't currently glued the eyebolt holding the double-block in place as I wasn't sure how easy it would be to rig, and I wanted to keep the option open to get more access if I wanted it. It amazes me how much slower building is these days. When I built Lady Isabella, I was working six-day weeks and it took me four months. But progress is progress, and I'm enjoying building this model immensely! Thanks for looking in Rob
- 47 replies
-
- 7
-
-
- Erycina
- Vanguard Models
- (and 1 more)
-
An excellent rescue glad you're back on track. I haven't built this model, so I'm not much help I'm afraid. I guess a dry fit will tell you if it will all fit okay?