HOLIDAY DONATION DRIVE - SUPPORT MSW - DO YOUR PART TO KEEP THIS GREAT FORUM GOING! (Only 20 donations so far - C'mon guys!)
×


rshousha
-
Posts
431 -
Joined
-
Last visited
Content Type
Profiles
Forums
Gallery
Events
Everything posted by rshousha
-

MDF for laser-cutting new frames
rshousha replied to rshousha's topic in CAD and 3D Modelling/Drafting Plans with Software
The question of toxicity is interesting. Since it is made of wood product, why would it be more toxic than plywood? In both cases you are sanding wood and glue. Brian, do you have a couple of links I can have a look at? That's an important consideration. Regards, Rick -
MDF for laser-cutting new frames
rshousha replied to rshousha's topic in CAD and 3D Modelling/Drafting Plans with Software
I appreciate the feedback. More than likely, this would not be a good idea for the R/C people, unless they plan on using the frame to make a fiberglas mold. On the other hand, considering all the effort people go to in order to straighten out warped plywood, it seems to be an interesting solution. I am a huge fan of Amati. Their kits are a head and shoulders over anything else I carry and my clients swear by those kits once they tried them. I can't wait for their new kits to come out. It will be interesting to see if they use the MDF in the enormous Victory that is rumoured to be in the works. Regards, Rick -
Greetings. I'm about to ship out another wonderful kit from Amati; their Pegasus model. As with Lady Nelson, the the frame is constructed with MDF instead of plywood. I would like to get some opinions about how this material compares with good, old, plywood? Is there a limit to the size of model that can use this stuff? Has anyone broken such a frame during construction? In considering future laser-cutting, I am considering sourcing and using this material. What do you think? Best Regards, Rick Shousha Montreal www.modellers-workshop.com
-
When the laser was installed, the manufacturer specified the company had to build a concrete slab several feet down below where the ground can freeze under the building where the laser was installed. It was also specified that the concrete had to cure for at least two weeks before the machine was installed. Well, the fellows who owned the company thought they knew better. Since the machine was twenty feet from the edge of the building, they never thought the ground would freeze that far from the outside of the building so they decided they only had to go down three feet, instead of the six that were required. They also figured the concrete had cured after a week. So, the machine was installed. A couple of winters later, we had thirty-five below for a few days and a very long stretch around twenty-below. So much for global warming. The slab cracked and the machine moved. So, the mirrors went out of alignment and, well, there you have it; a $200,000 mistake. So, don't drop the laser.... Cheers, Rick
-
I don't think one should discount a company just because the products they sell aren't the top of the line. For instance, now that we all know that the MM laser knife is not good as an actual tool, it may still be very good as an educational device. if you are planning on spending $10k plus on a real laser, I don't think it's a stretch to spend another $2k with a learning tool. I would say it's much better to break a $2,000 tool, and learn something, than to spend the same amount of time learning on the real machine, with the fear and stress of breaking it in the first week. Sure, the more expensive machines come with good training, and are actually pretty easy to use but, hey, still, I think it could be fun to break a $2,000 laser. I remember how one could break a $1.5 million dollar laser..... Cheers,
-
On a completely different note, I am considering buying a 44" plotter to print plans. I have a lot of demand for plans to go along with my laser-cut frames and I was under the impression you were looking for someone who could print for you. If so, please let me know as this may encourage me to buy the printer. Regards, Rick
-
Chuck, That's an amazing price you got there. I don't think you can get a set-up like yours in Canada for under $12,000. So much for free trade. I'll have to look up the people you bought from. Cheers, Rick
-
I have some experience with lasers, from 50-watts to 3000-watts. This could be fun but expect what you pay for. $2,000 is 1/10th of the cost of a modest wood laser. Regards, Rick
-
Gentlemen, I'm surprised to see all the places where these models are available, and in stock. For some reason, my supplier is not carrying those items and I think they are excellent items all around. I'll have to find a way to get some on my website. Cheers, Rick www.modellers-workshop.com
- 43 replies
-
- 1
-

-
- indian girl canoe
- Midwest Products
- (and 1 more)
-
Gunther, What an excellent model. I built this a couple of years ago and painted the hull to look like red, stretched, canvas. I do agree that making those gunnels was a challenge. Do you know where I could find these canoe kits? They seem so hard to find, I am contemplating making some new kits myself. Cheers, Rick
- 43 replies
-
- 1
-
-
- indian girl canoe
- Midwest Products
- (and 1 more)
-
I'm curious to know why you avoided CA glue. Are you allergic? I have become allergic to the stuff and can't come within five feet of the stuff. Regards, Rick
-
Hi GuntherMT, I built this model a few years ago and it turned out really well. I was planning on putting in some water, made from acrylic sheet, but I never got around to it. Where did you find it? I am having trouble getting hold of this kit and would love to propose it to clients. On the other hand, I am now considering building my own kit for my website. I will keep an eye on this build and see if you come across the same difficulties I had. If I build a new kit, I was thinking of making the keel board quite a bit bigger and use it as part of the support structure instead of just an add-on at the end. It might make it easier for people to keep the model aligned. Best Regards, Rick www.modellers-workshop.com
-
Hi Keith, Will you be needing a sheet of my gun port hinges . The corrected version should be ready in April. Regards, Rick
-
That comes from playing hockey. Just score.
-
Yes, indeed, that's what I did. I had to figure out a way to straighten out the upper part of the keel with the least amount of effort. I do believe that laziness is the mother of invention. So, considering it was only the stern three or four bulkheads that needed to be adjusted, I thought of squeezing the deck into place to push the end of the frame to the side. This is why I did not put the planking on the hull. Putting on the planking would stiffen the hull completely. However, as I tried to install the deck without its planking, it just bent out of shape as the bulkheads were stiffer than the deck. Once I added the planks, the deck was now still enough to move those stern bulkheads into alignment. Cheers, Rick
-
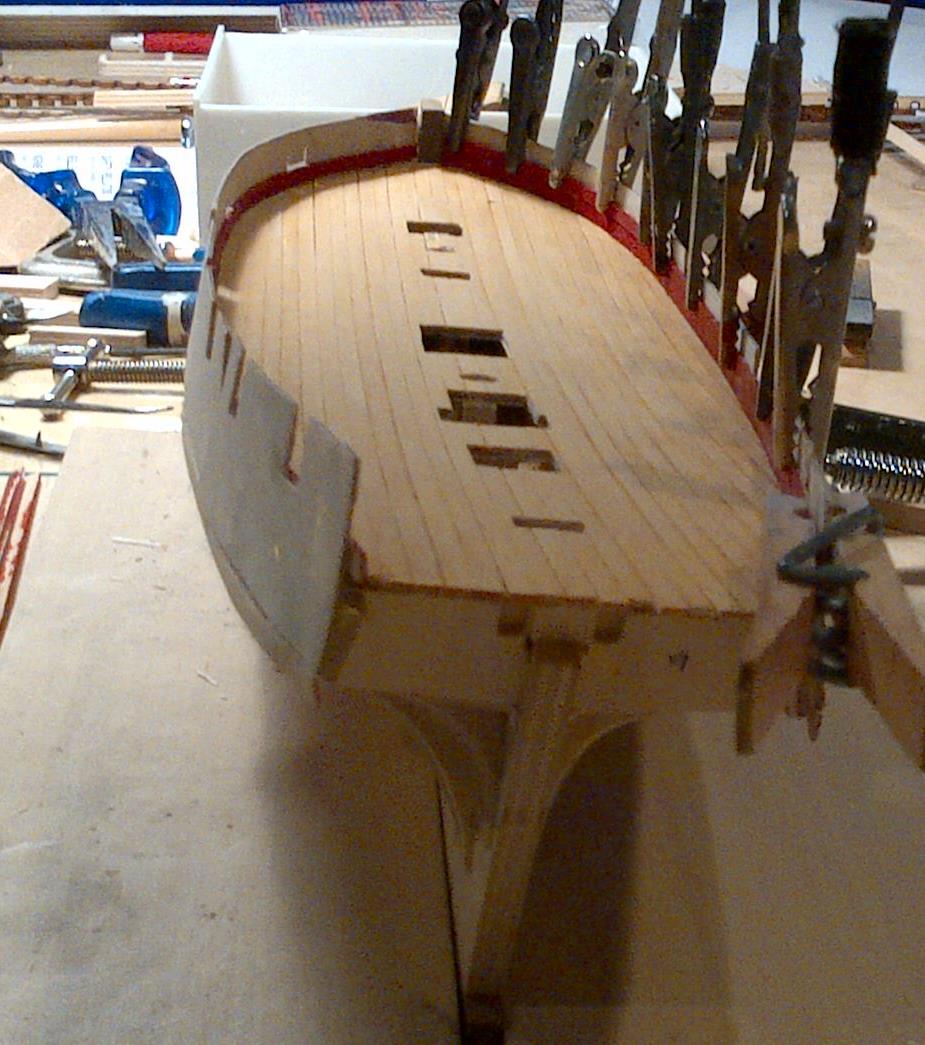
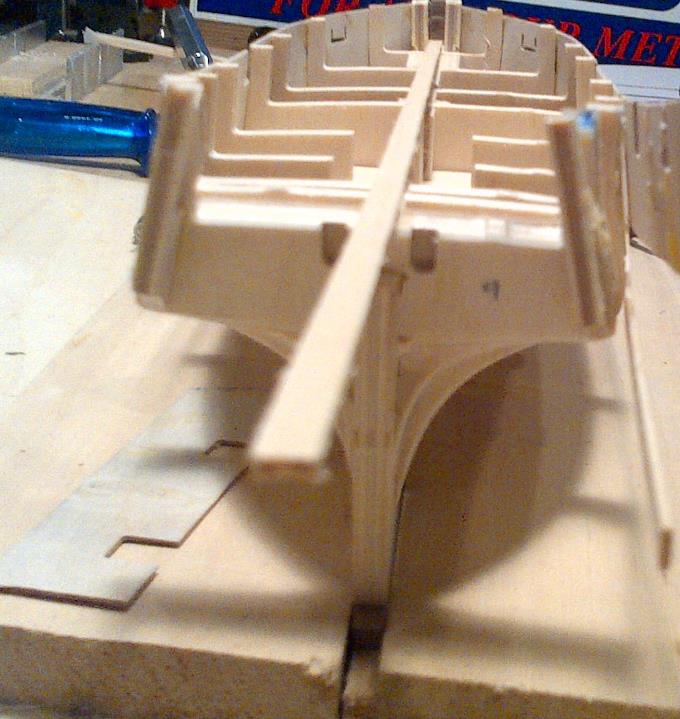
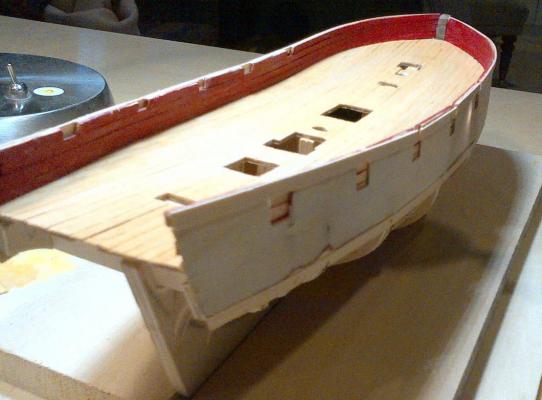
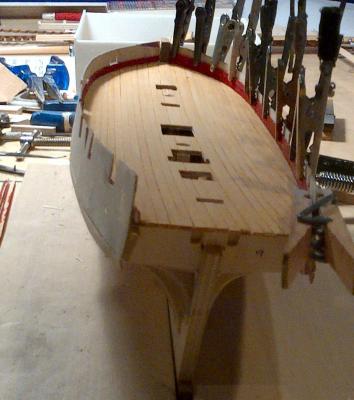
Greetings, Wow, it's amazing how one thing leads to another and another and another. Now I realize it may have been easier to start the job over at the beginning but, hey, I'm having fun. OK, so here's what's happened: The interesting work noted above brought on a new problem, which I managed to fix, sort of. Since I built up the deck off the boat, it was quite stiff. Also, it warped in the wrong direction as the glue dried. In other words it had reverse camber once it was ready to be installed. Note to self: check camber of decks before installing. This means I had to create some jigs in order to bend it back into the correct direction. However, the pressure I needed to use was quite high and I was afraid to blow the entire frame to smithereens as I put pressure to get the deck to follow the curvature of the bulkheads. This means the curvature was not perfect all the way along the deck and this meant the gun port openings were no longer perfectly aligned. It’s amazing how one thing just leads to another and another and another. Who knows what else this will bring later on? So, I basically created a new bulwark all the way around, at the correct height above the deck. I still kept the original gun port pattern but there's a tiny, tiny, adjustment in between the outer and inner top planking. This means I can now cut new gun ports at the right height off the deck, as well. Note that I switched to 3mm board instead of the 4mm that came with the kit. I just thought that was too big. Note that the starboard side you see there is not yet smoothed out to match the curve of the deck. I will fix that to look like the port side. Those are the in between pieces you see there. OK, now I have to take a few days off and do some paying work to pay for all this fun, Cheers, Rick
-
Happy New Year Everyone! Well, it looks like I was able to straighten out my keel without taking everything apart. Instead of installing the first planking, I installed the deck first. This meant the structure was still somewhat flexible and aligned itself to the deck as I squeezed it into place. The solution may be a little unconventional but, hey, it solved the problem and made the construction a little exciting. Now, I can get to the planking and get the assembly back on track. Cheers, Rick
-
A question about Lady Nelson by Amati
rshousha replied to CharlieZardoz's topic in Wood ship model kits
Greetings, I am also planning on building the Lady Nelson shortly and was encouraged by the news that Pegasus also is made with MDF. Do you know if the big Vanguard has an MDF keel? Also, I am most interested in getting your impressions of working with the MDF. Have you built Pegasus? Is the MDF solid enough for large parts? i am considering moving my laser-cut frames from plywood to either MDF or high-density foam, like Renshape. Your input would be appreciated. Best Regards, Rick -
Greetings, I was excited that the frame was straight after I removed the bulkheads but, in fact, it still has some twist at the top. I readjusted the gun port template and re-installed it only to find the problem was still there.
-
A question about Lady Nelson by Amati
rshousha replied to CharlieZardoz's topic in Wood ship model kits
Greetings, I just decided to have a go at the Lady Nelson kit after the Jotika Pickle that I am building. I have to say the quality of the kit looks wonderful. I'm really looking forward to building the model. Just as a first look, I noticed the frame is built of MDF, not plywood. This means everything is absolutely flat and will not warp any time soon. I think that's a huge improvement over plywood. Regards, Rick Montreal -
Greetings, This whole business of twisted keels and bulkheads got me thinking about the work I am doing forging myself a place in the industry. Why are we using wood in the first place for these parts? With the variety and availability of glue out there, wouldn't it make sense to start making the frames out of a material that is flat to start with? I was thinking of Renshape. It comes in a variety of dimensions and densities and is really easy to work with. What do you think? Regards, Rick
-
it seems fitting that rum works very well. I get a nice tint in the wood, as well. "I like cooking with wine. Sometimes I even put it in the food". - Julia Child.
-
LOL! I'm afraid of breaking them. Already the port side is in two pieces and I'm not sure how I'll sort that out. However, it turned out to be pretty easy to take them off with the rubbing alcohol, though. I'm thinking of resorting to ventilation, a mask, and some (gasp!), CA glue to put them back on. As I may have mentioned, I developed quite an allergy to the stuff and I haven't used it in years. Cheers, Rick
-
Wow, it worked! I never would have thought it. Thank you so much, all of you, for the encouragement. I have to say this is great fun. First, the rubbing alcohol at eight o'clock in the morning sure got my day off to an energetic start (that, and shoveling out the driveway) and now I have a little success in modeling. Here's picture, with the rear of the starboard bulkhead detached. I guess the bow had a nice curve but the stern was too straight. This is most interesting. Thanks! Rick

-
Rob, You are right, the pattern is a little high on the starboard side. The keel was nice and straight at the bottom, and still is. I have a little jig for that and it slides in with no effort. The twist is in the top of the keel. I'm not convinced the gunport pattern is pulling the keel over. I pre-bent them carefully for a couple of days and I even think they were more curved than needed. I saw an awesome "strong-back" on an HMS Victory build somewhere on the site. I think these boats should come with a disclaimer "no jig, no boat". It's fun to build the jigs, anyway. Now I know. Since I'm building this as a "my first Jotika kit" I'm just as happy to see these difficulties. Cheers, Rick