HOLIDAY DONATION DRIVE - SUPPORT MSW - DO YOUR PART TO KEEP THIS GREAT FORUM GOING!
×


Zack Soderquist
-
Posts
81 -
Joined
-
Last visited
Content Type
Profiles
Forums
Gallery
Events
Everything posted by Zack Soderquist
-
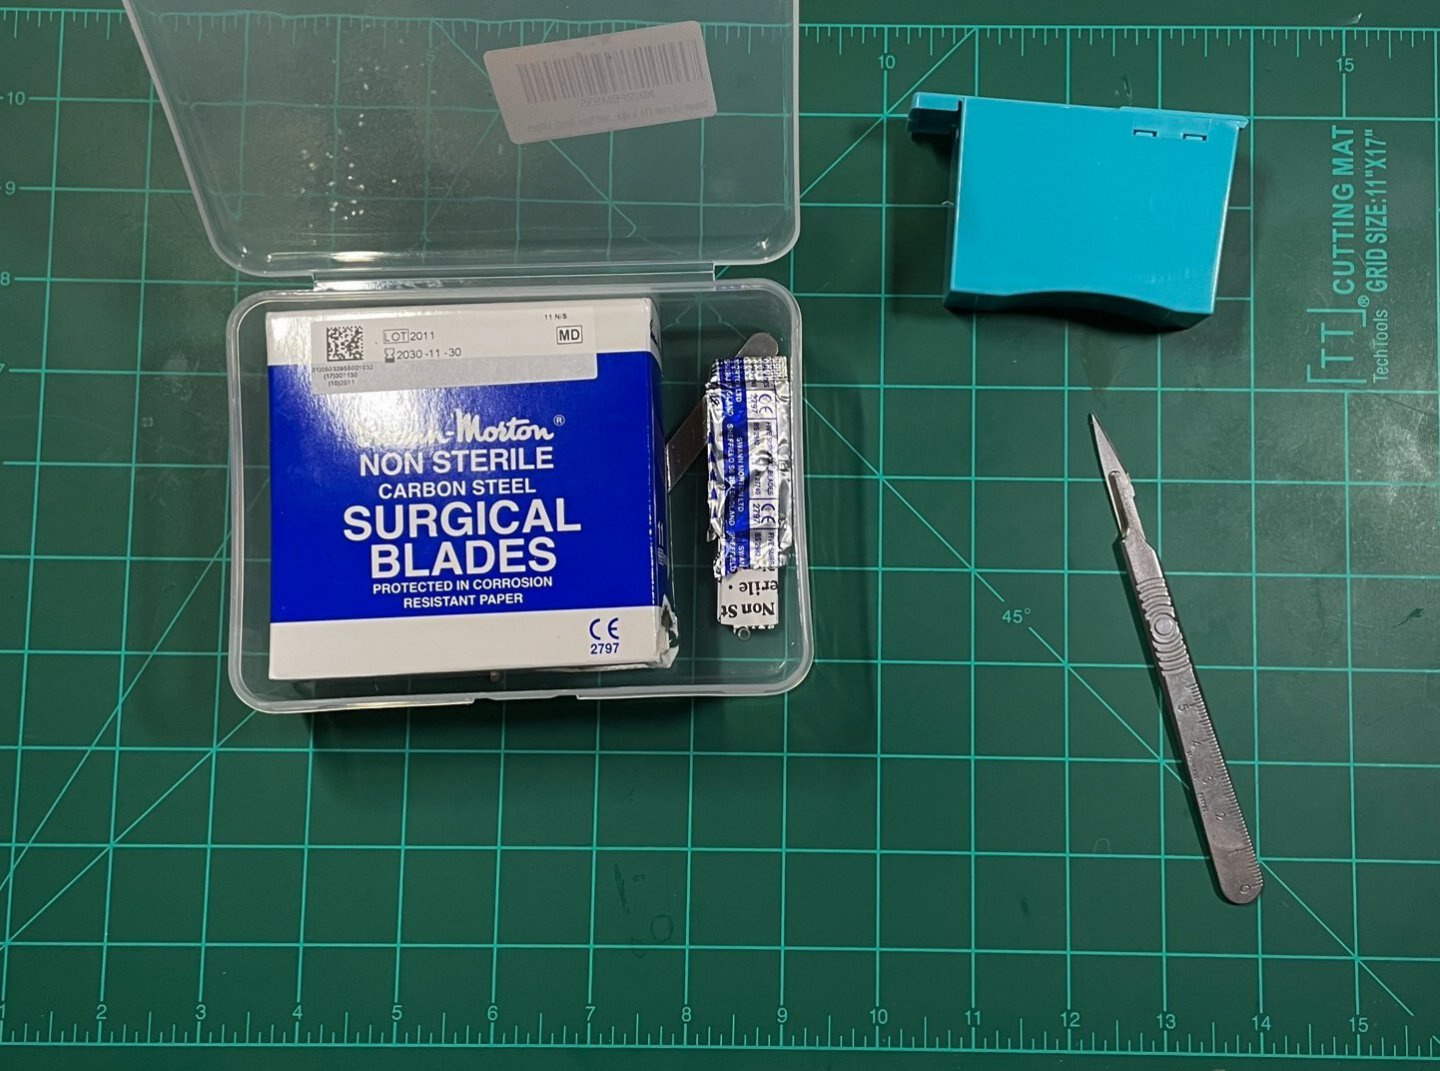
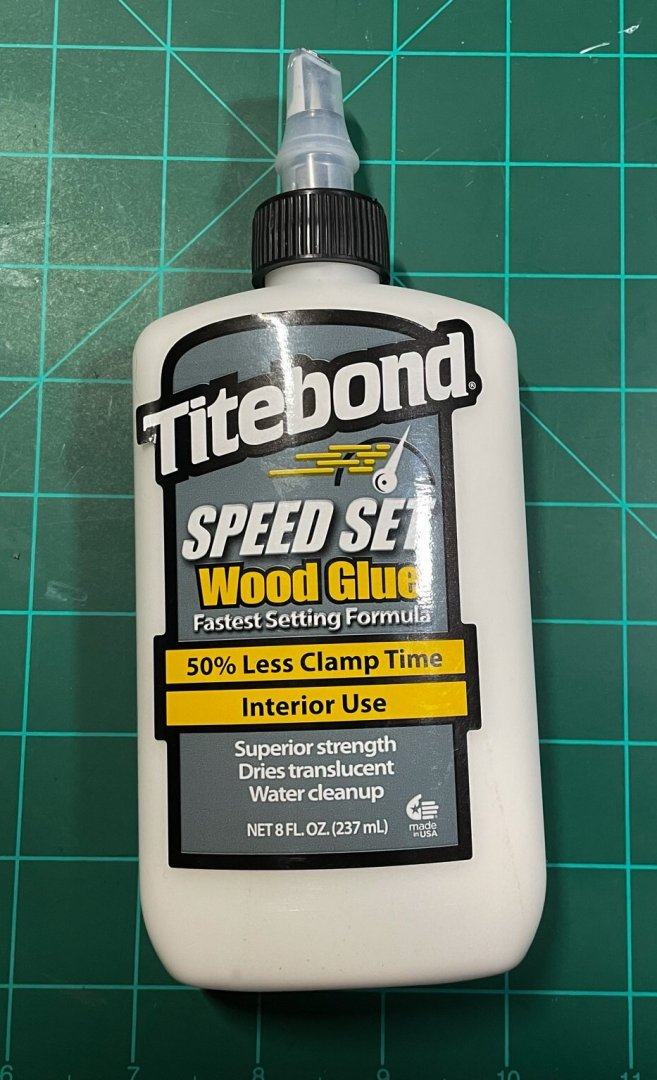
 Pram laser cut sheets. Based on other forum posts, I decided to upgrade my X-Acto to Swann Morton Scalpels 100 Blades: https://www.amazon.com/gp/product/B083BQLFB8/ref=ppx_yo_dt_b_search_asin_title?ie=UTF8&psc=1 Handle: https://www.amazon.com/gp/product/B0056ZX1R8/ref=ppx_yo_dt_b_search_asin_title?ie=UTF8&psc=1 Blade Remover (Safety First): https://www.amazon.com/gp/product/B0082CW90M/ref=ppx_yo_dt_b_search_asin_title?ie=UTF8&psc=1 I also decided to go with white glue per the recommendations in the instructions. I found at the hardware store that Titebond makes a white wood glue.
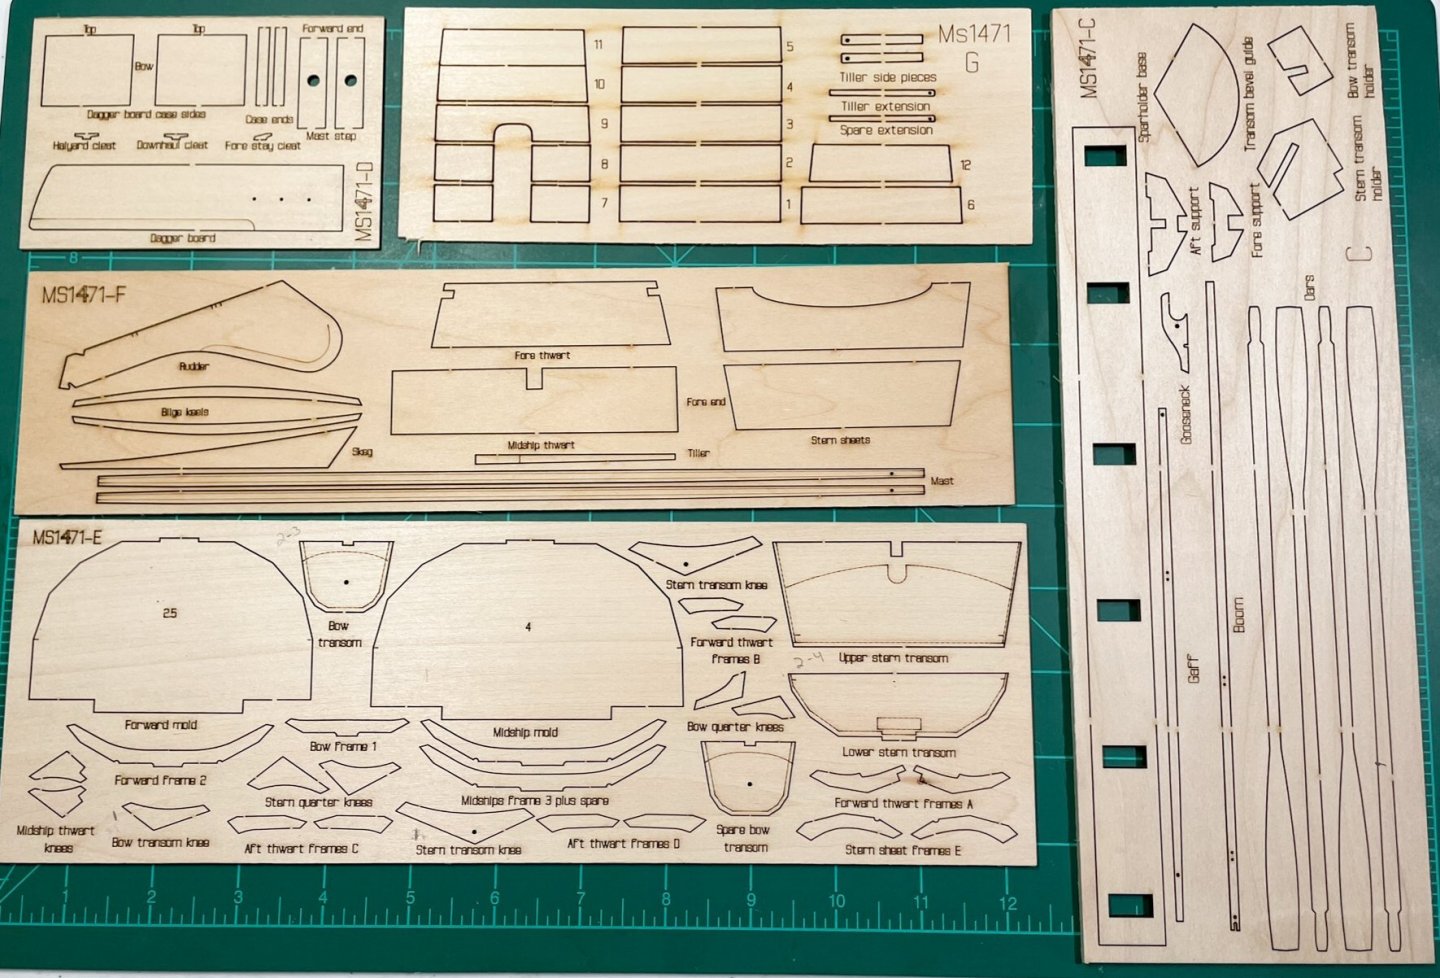

-
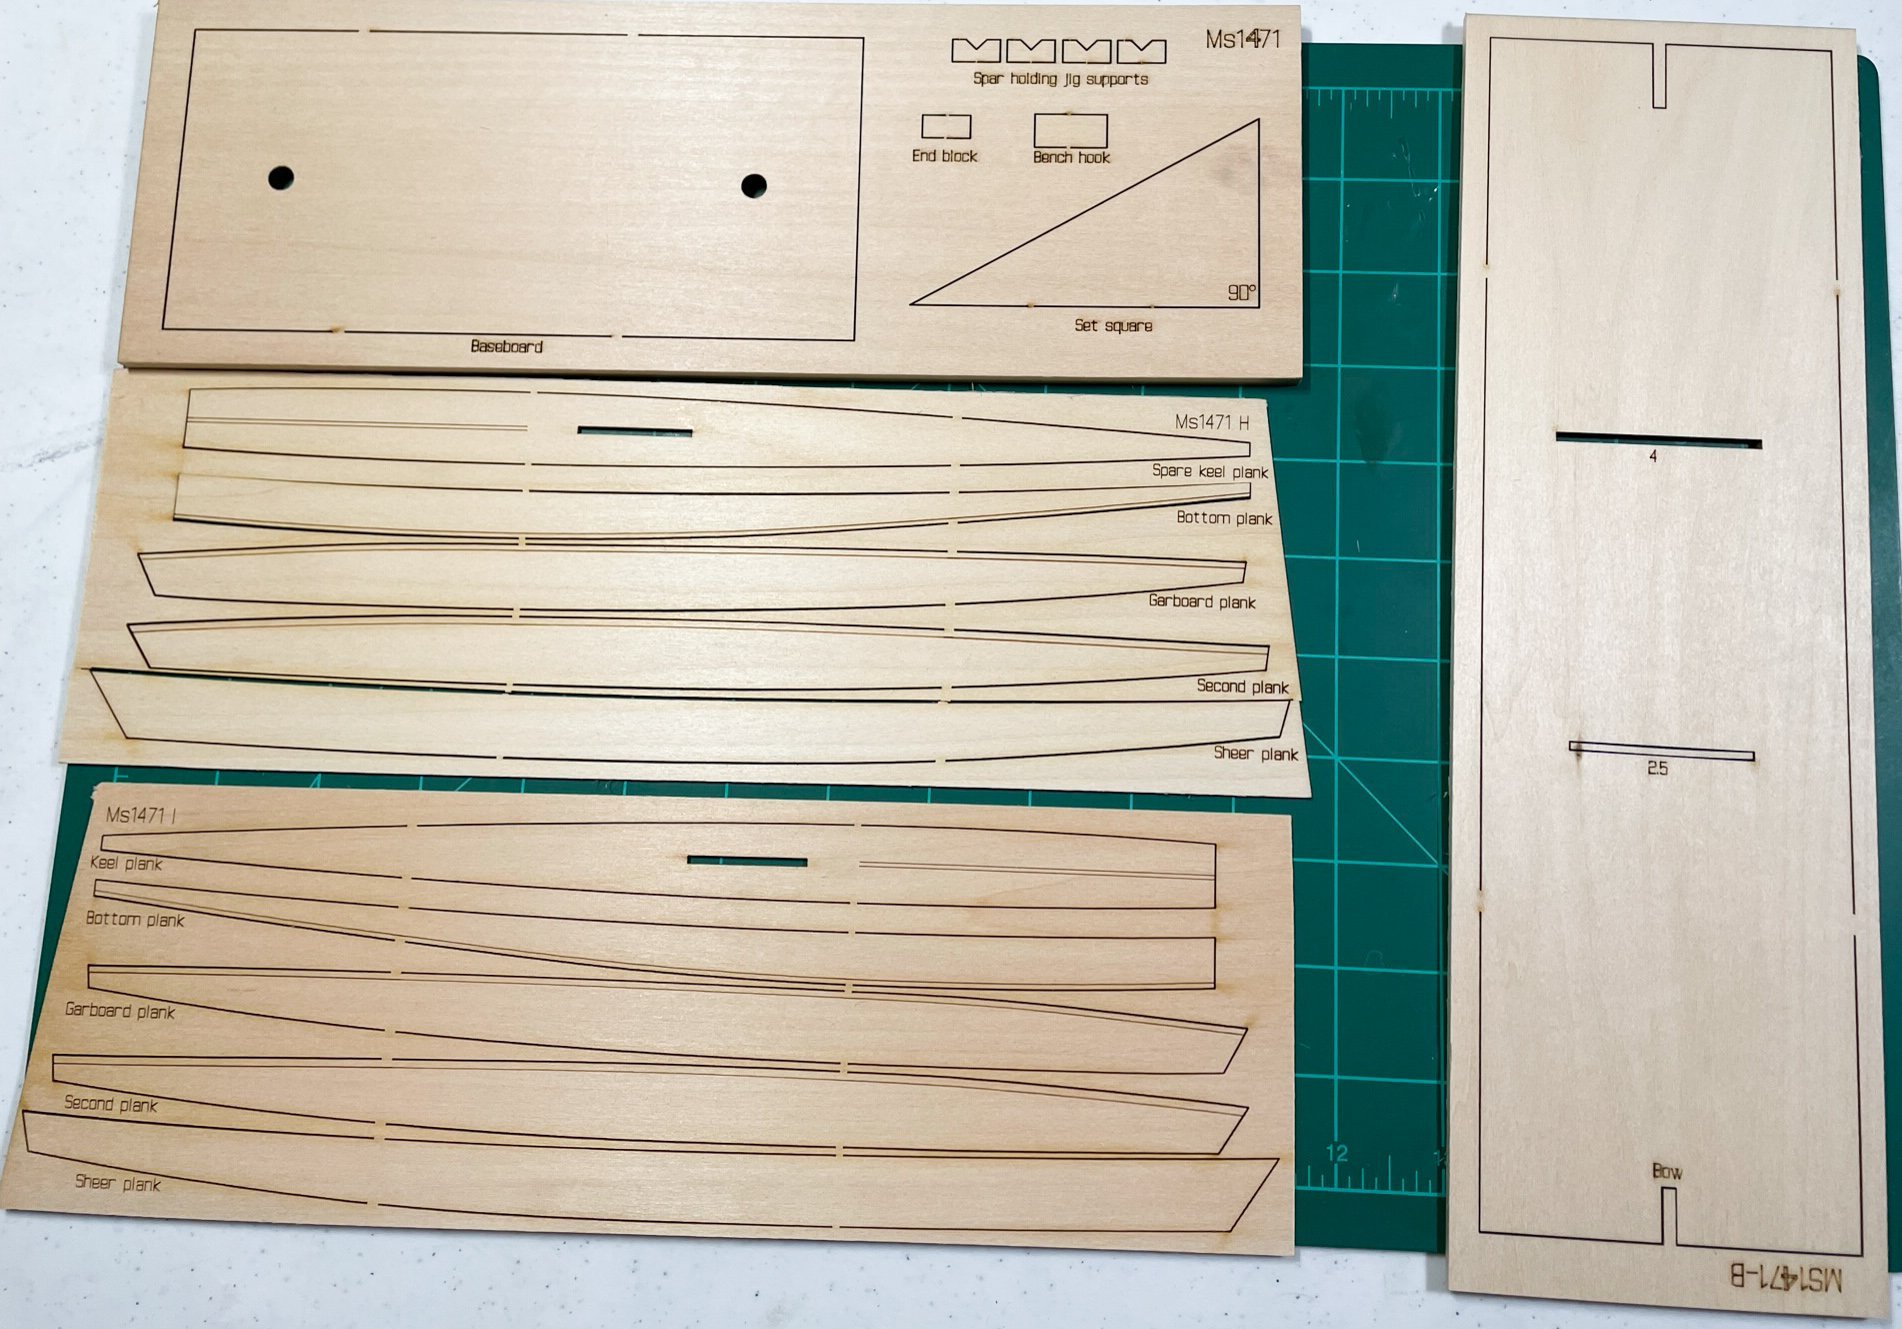
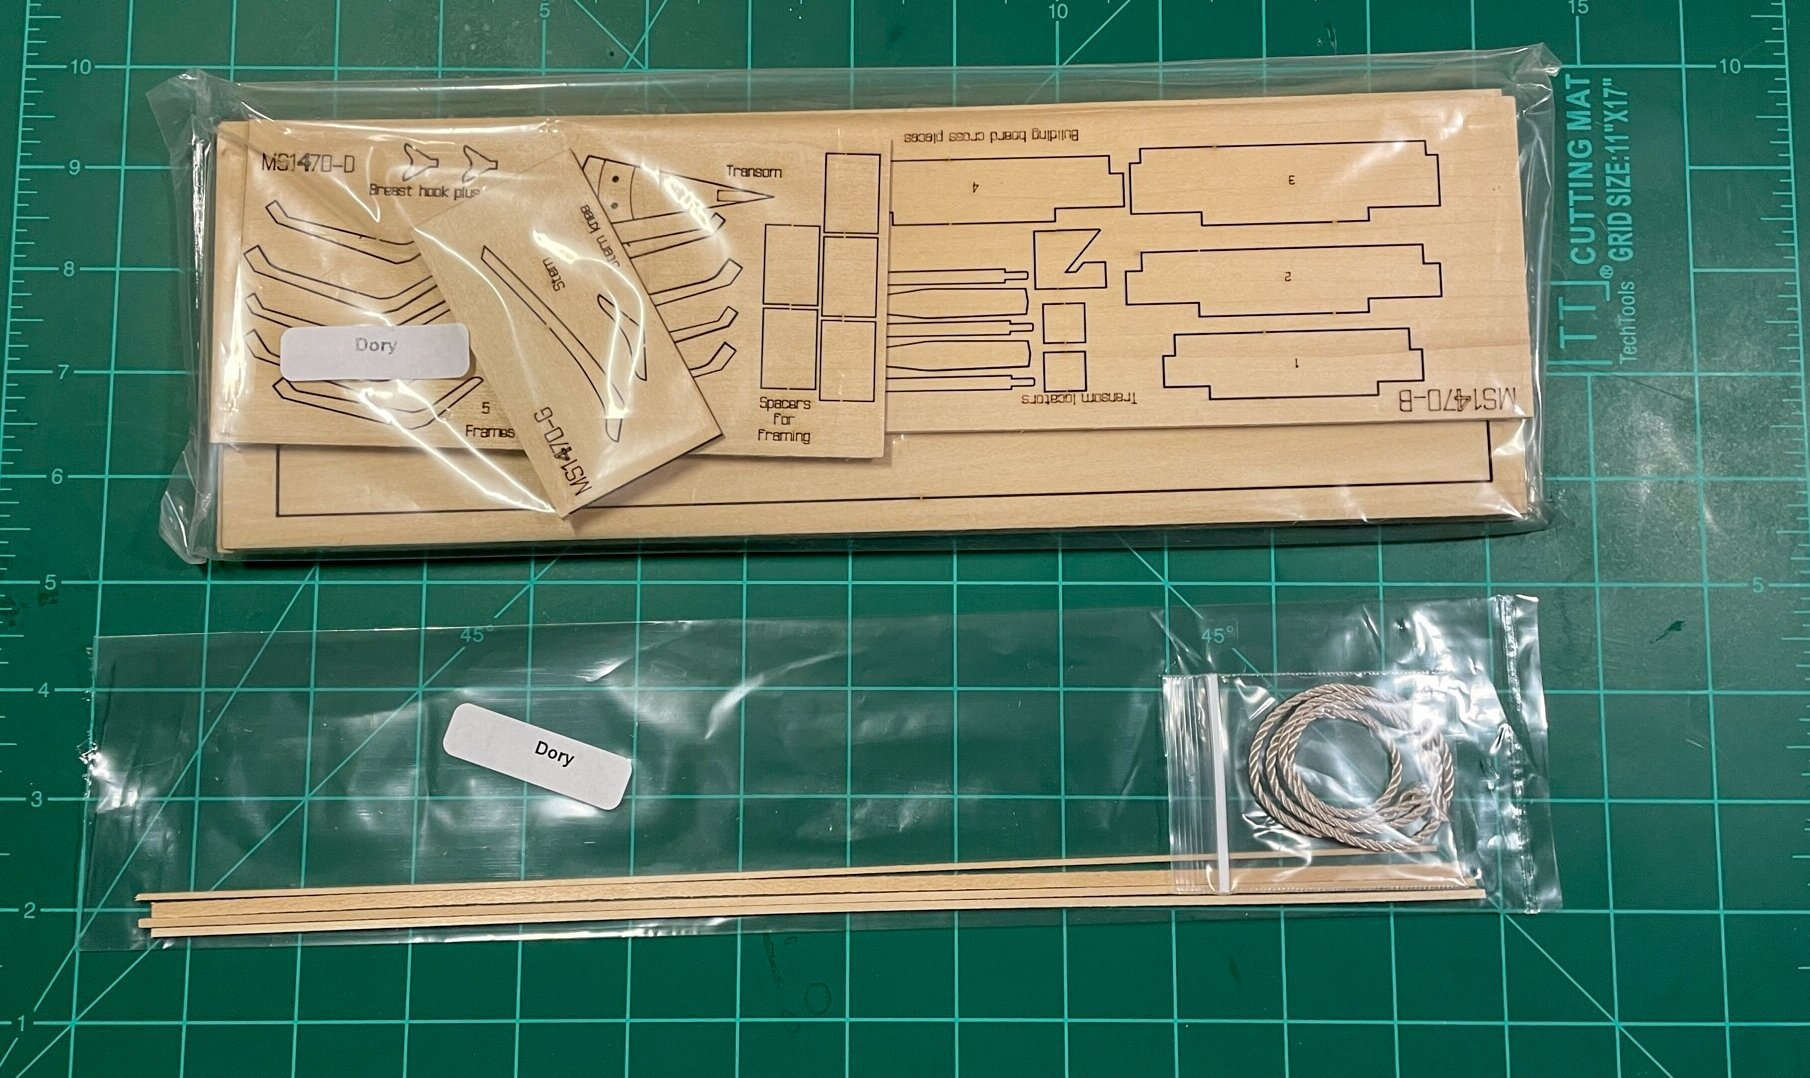
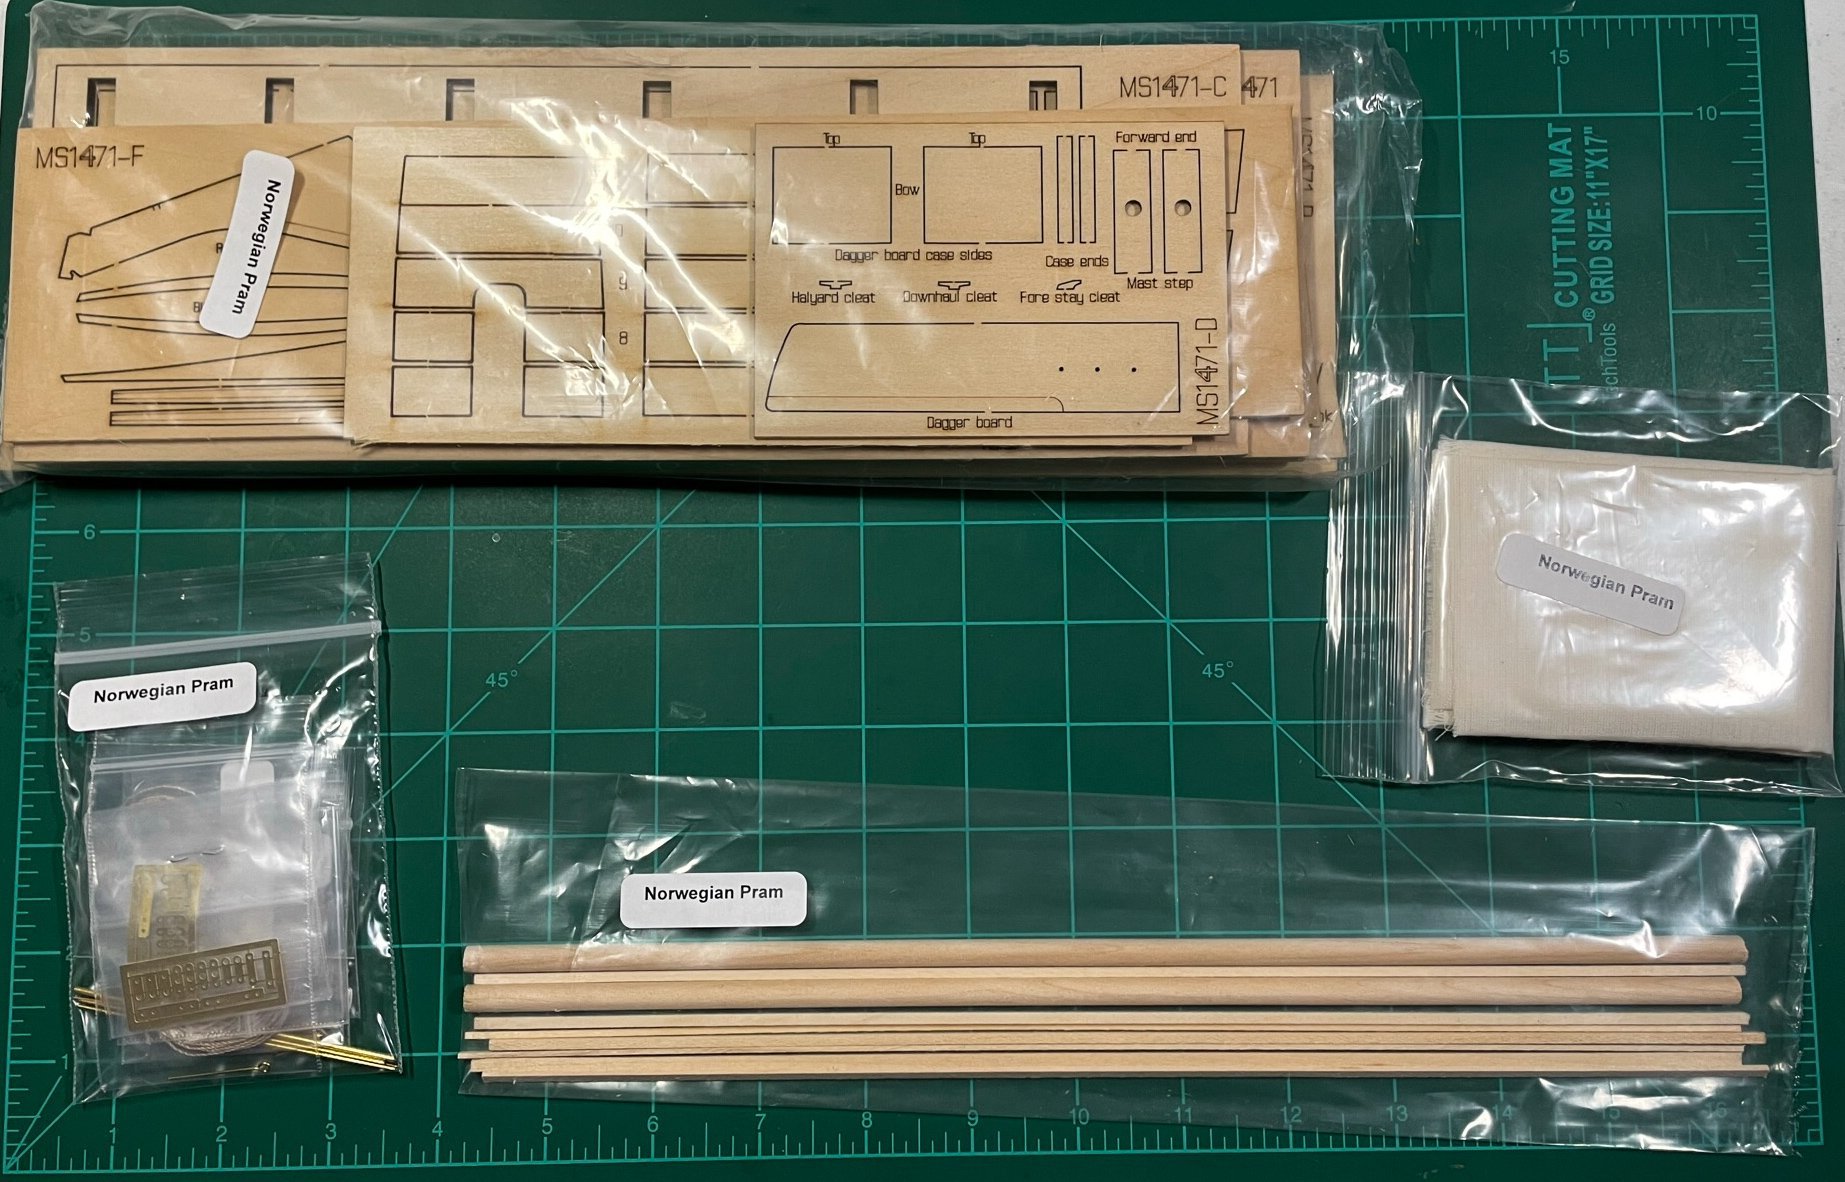
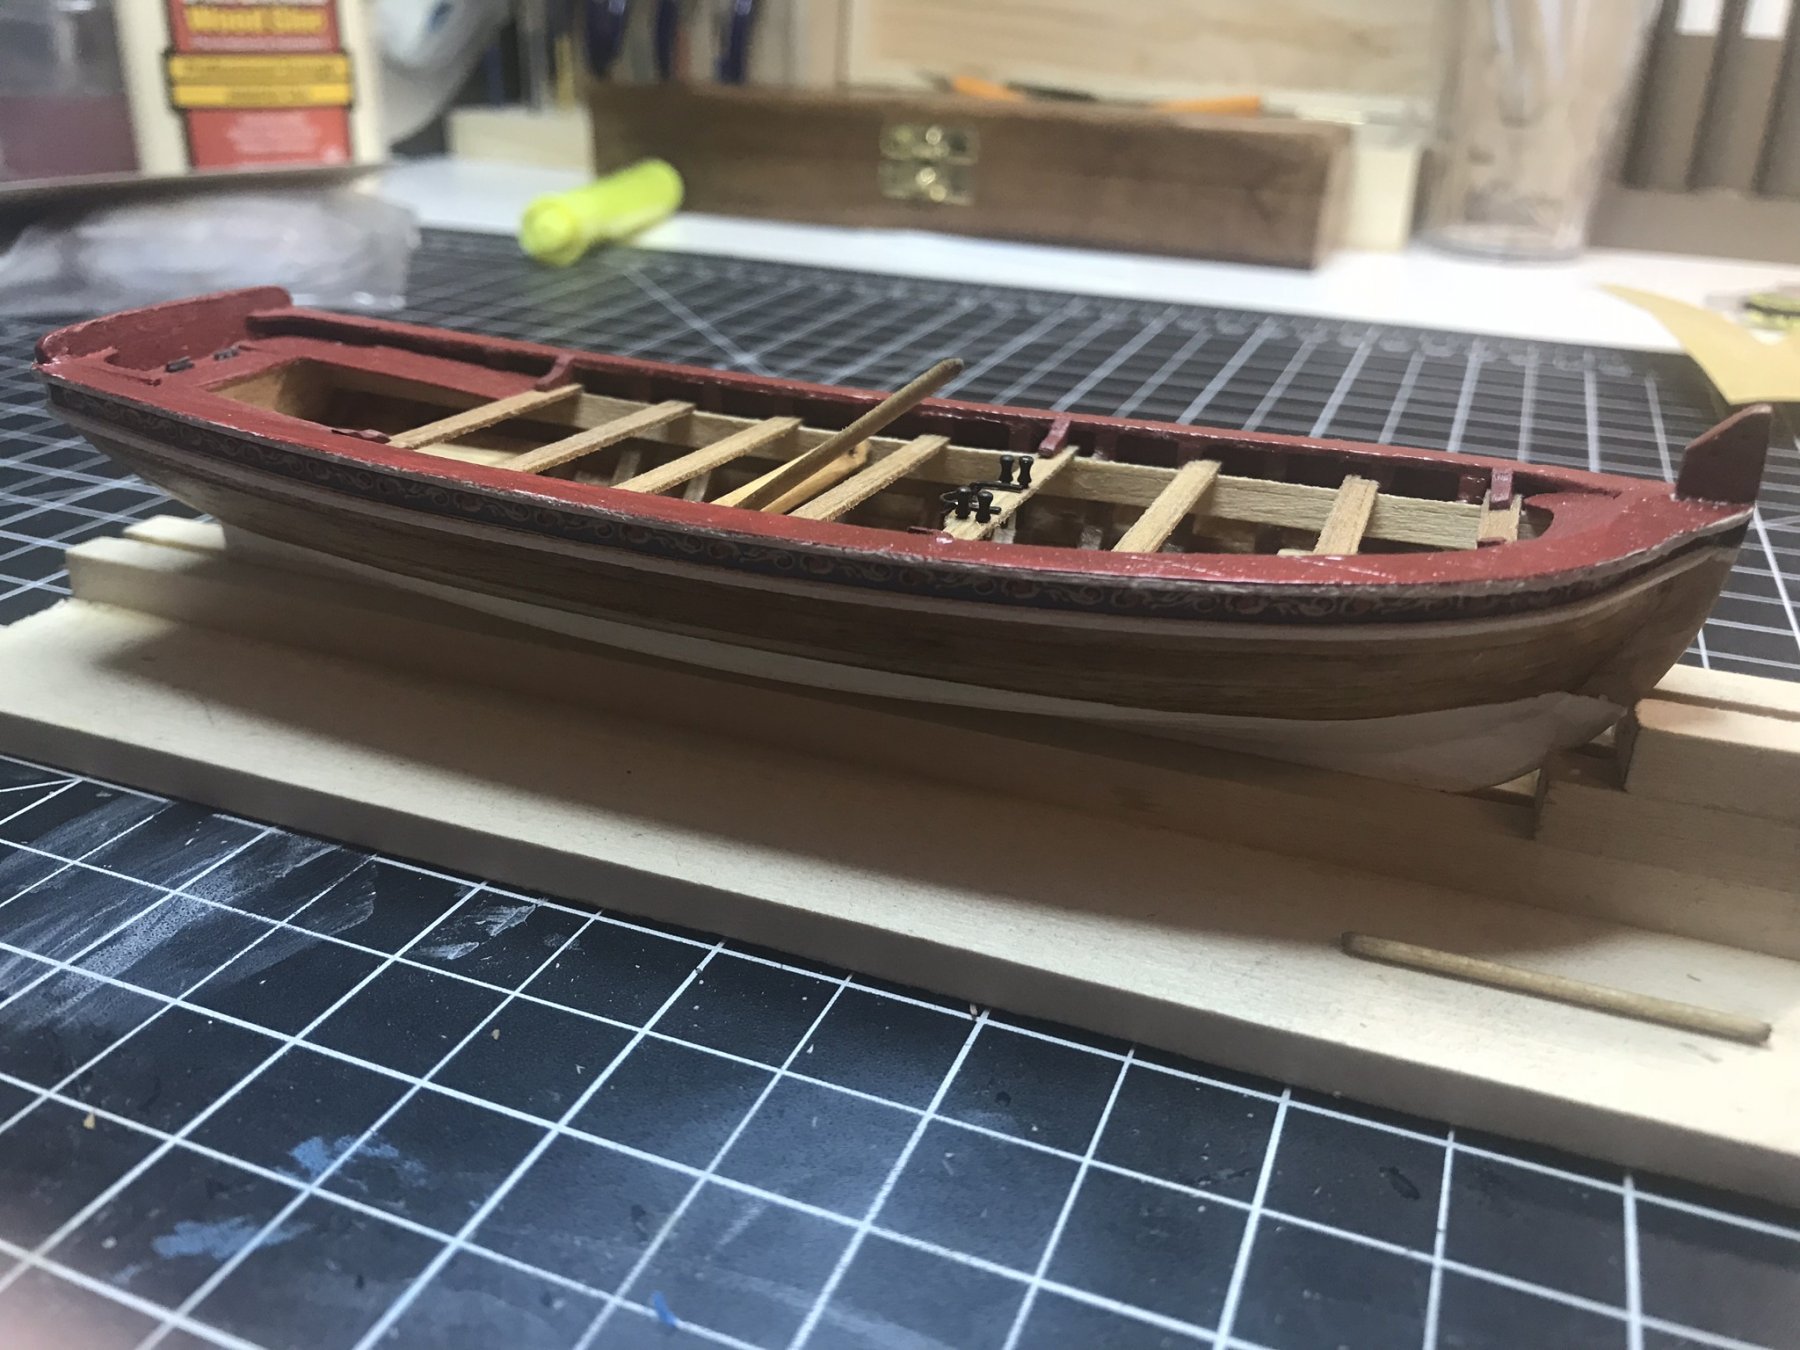
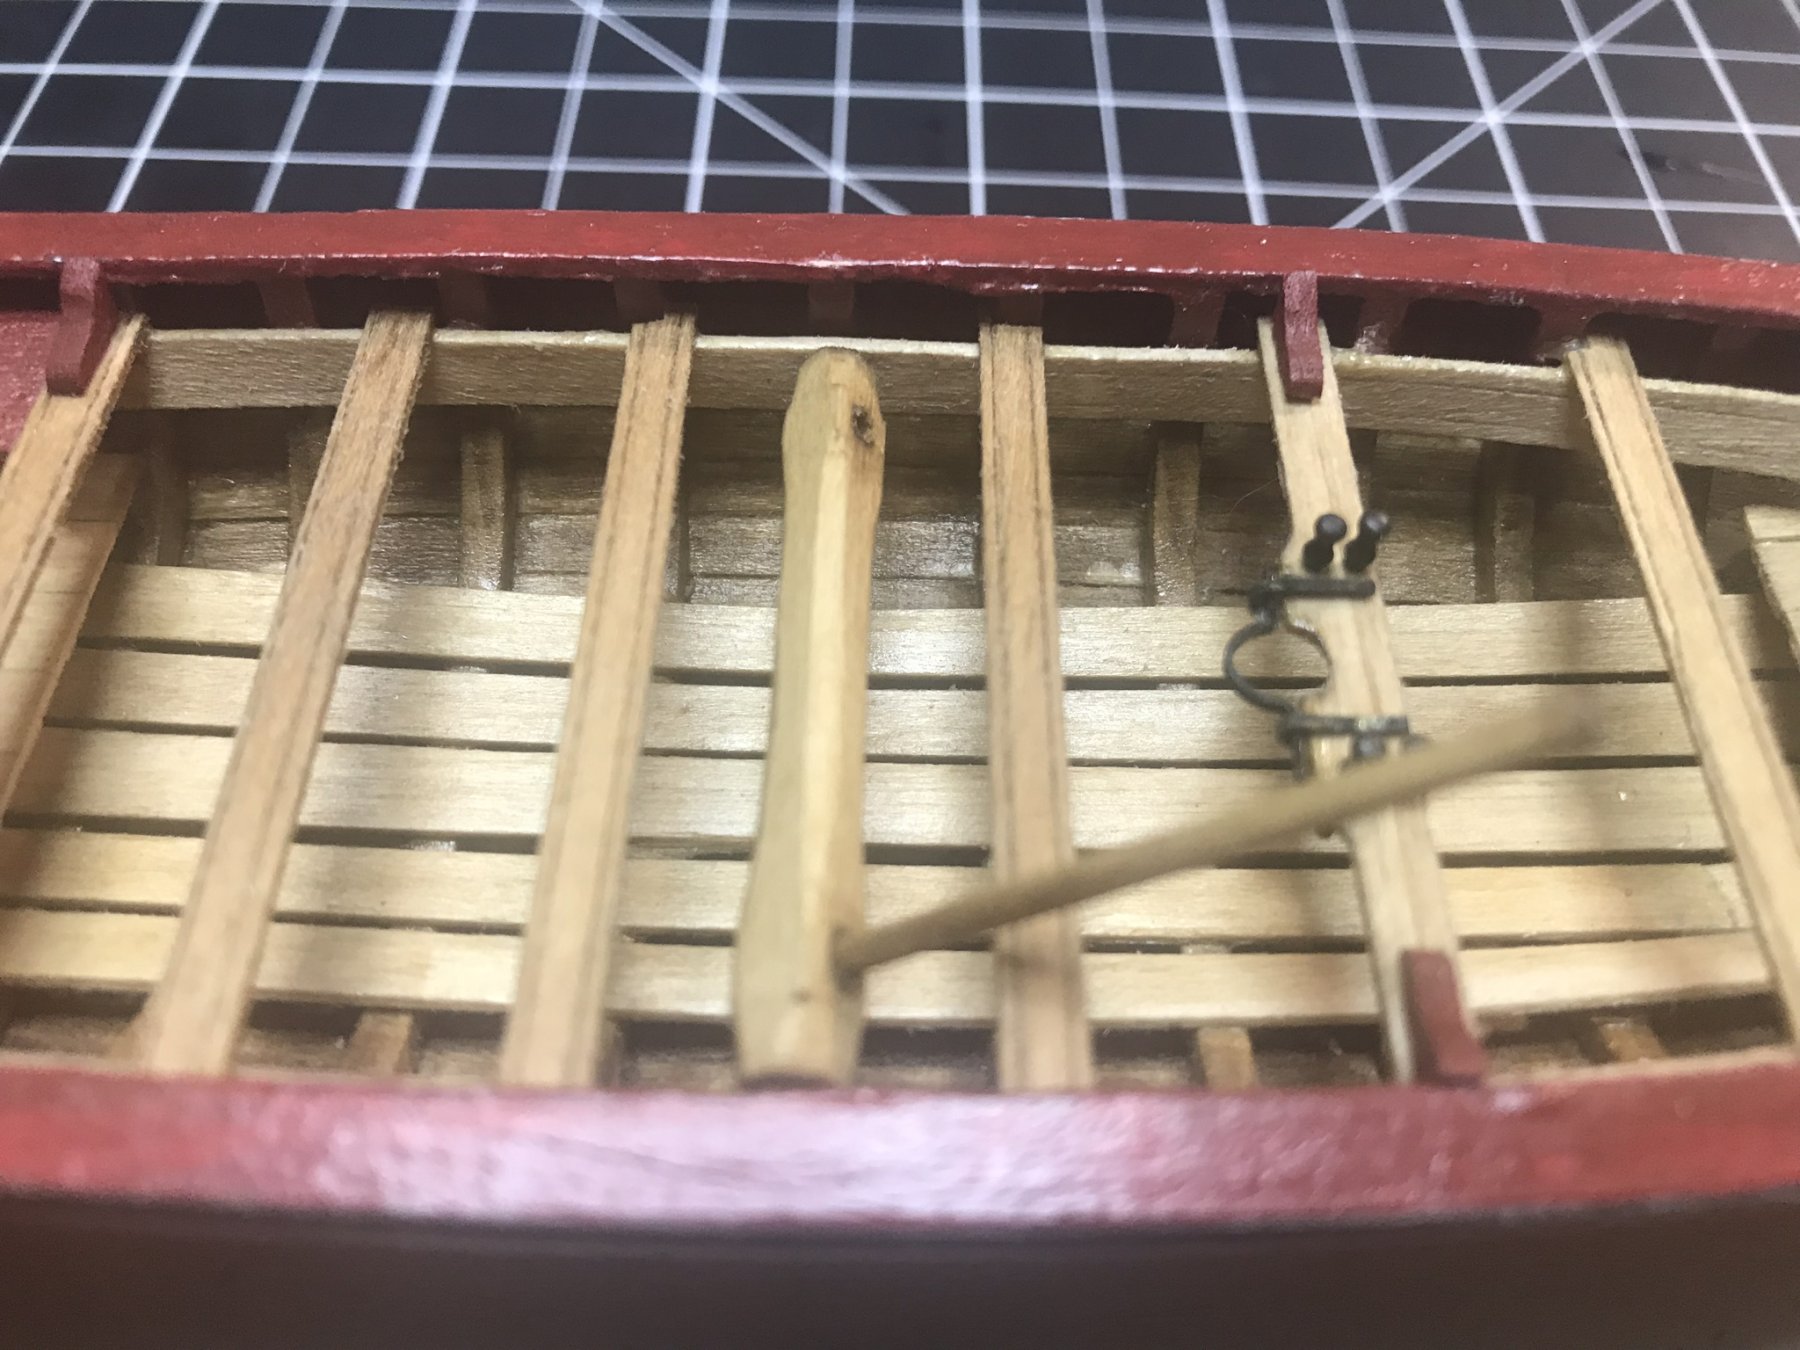
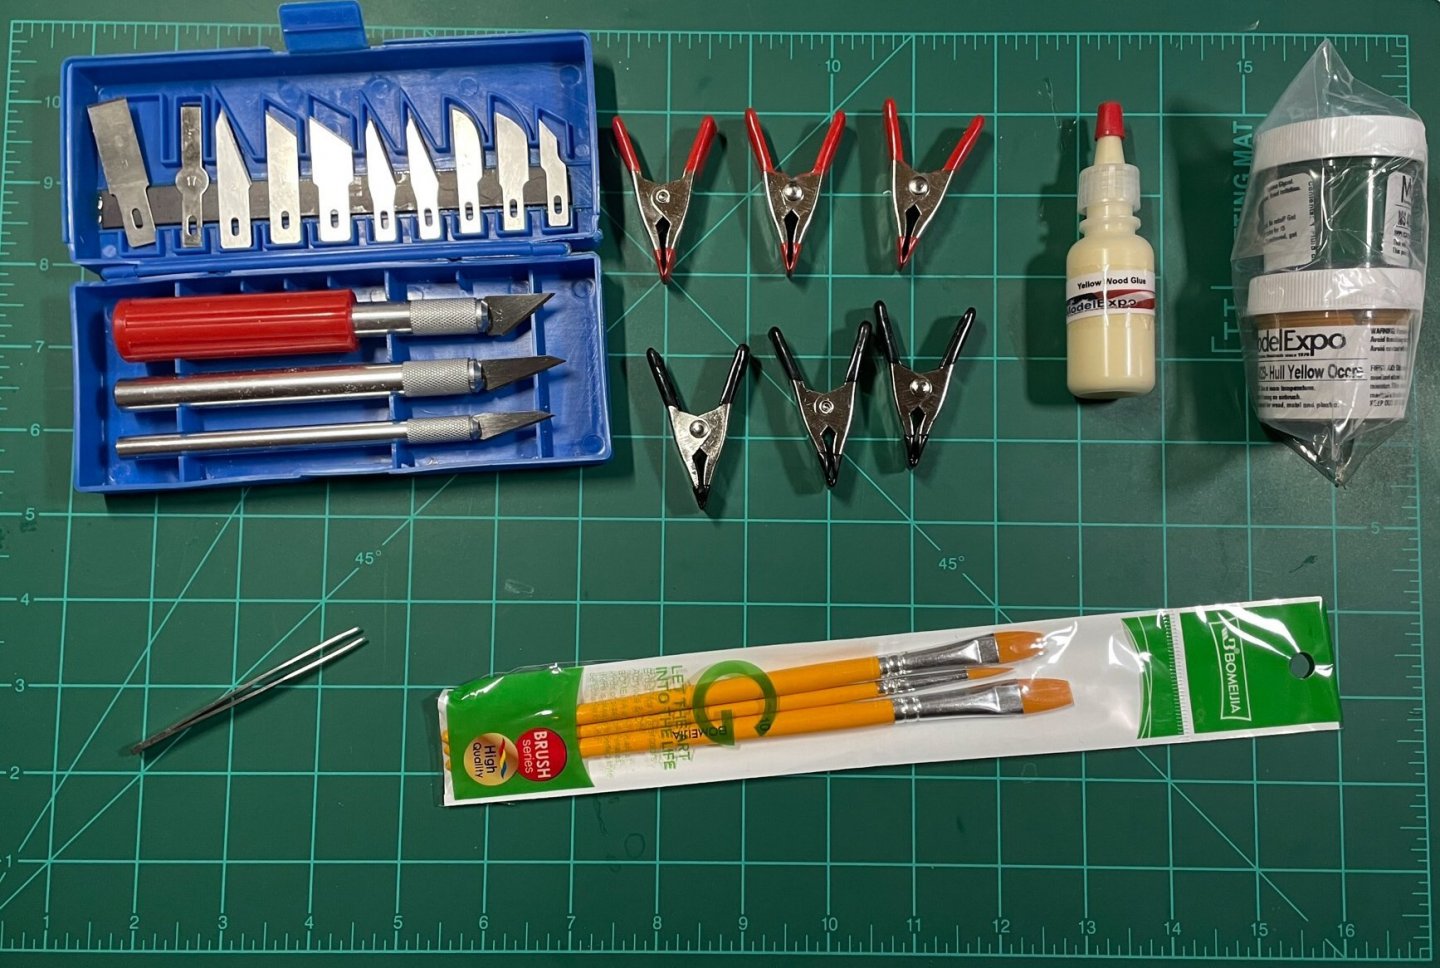
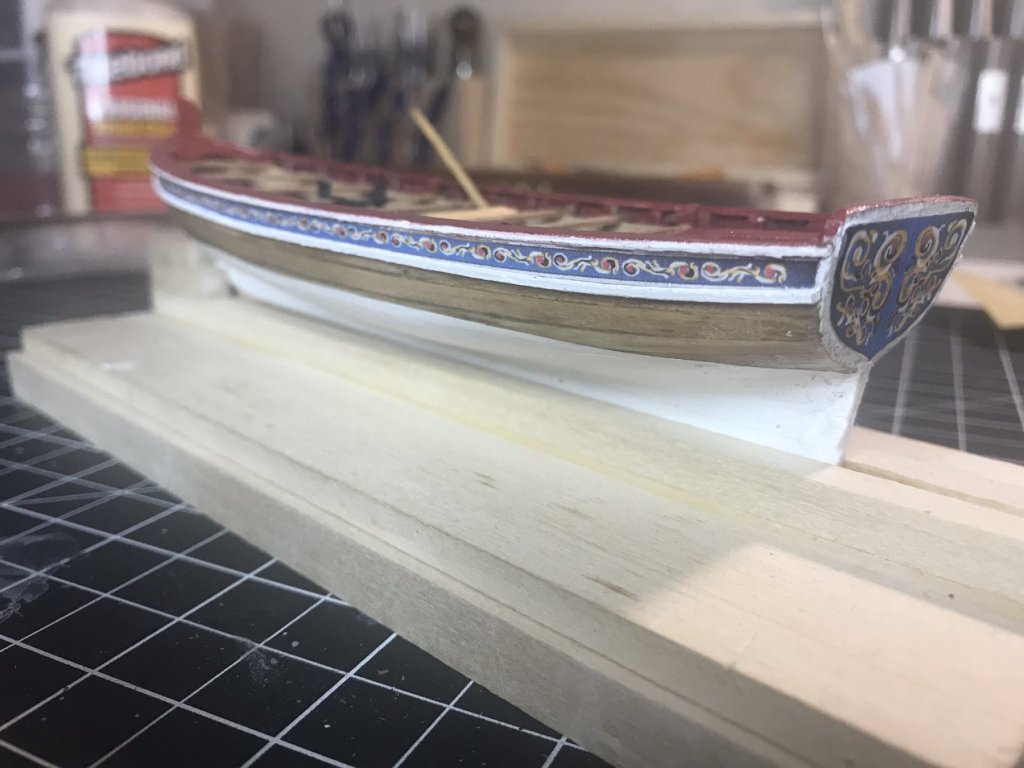
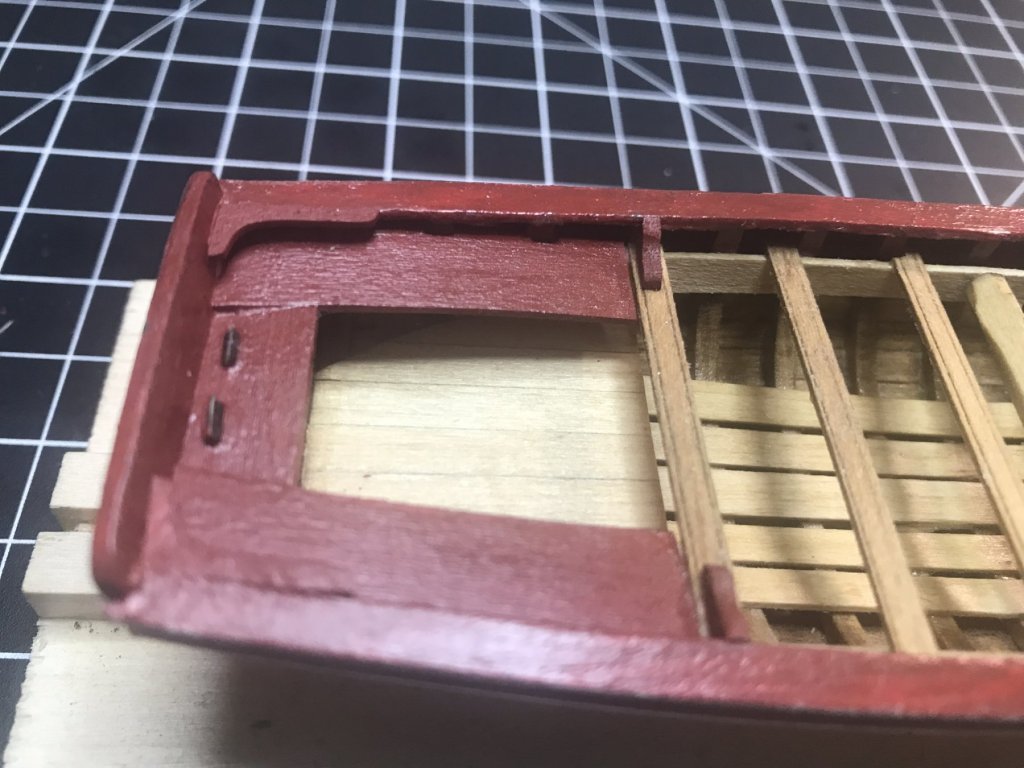
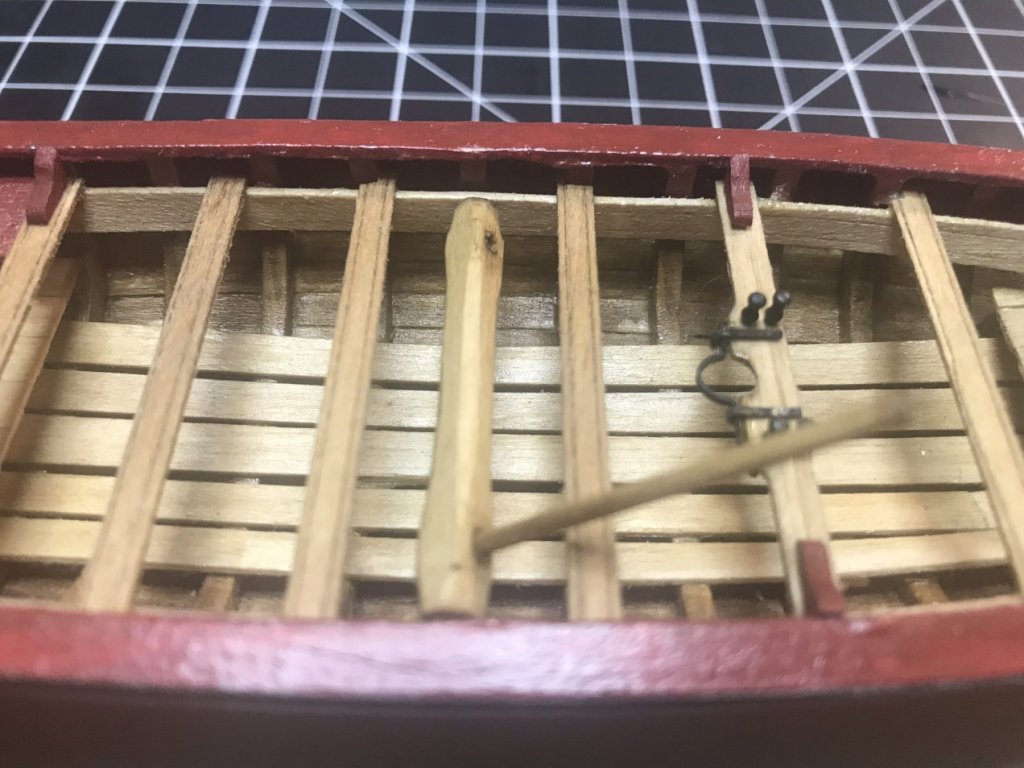
After opening the kit, here is what was received. Kit also included a sheet of 150 and 220 grit sandpaper (no photo).


-
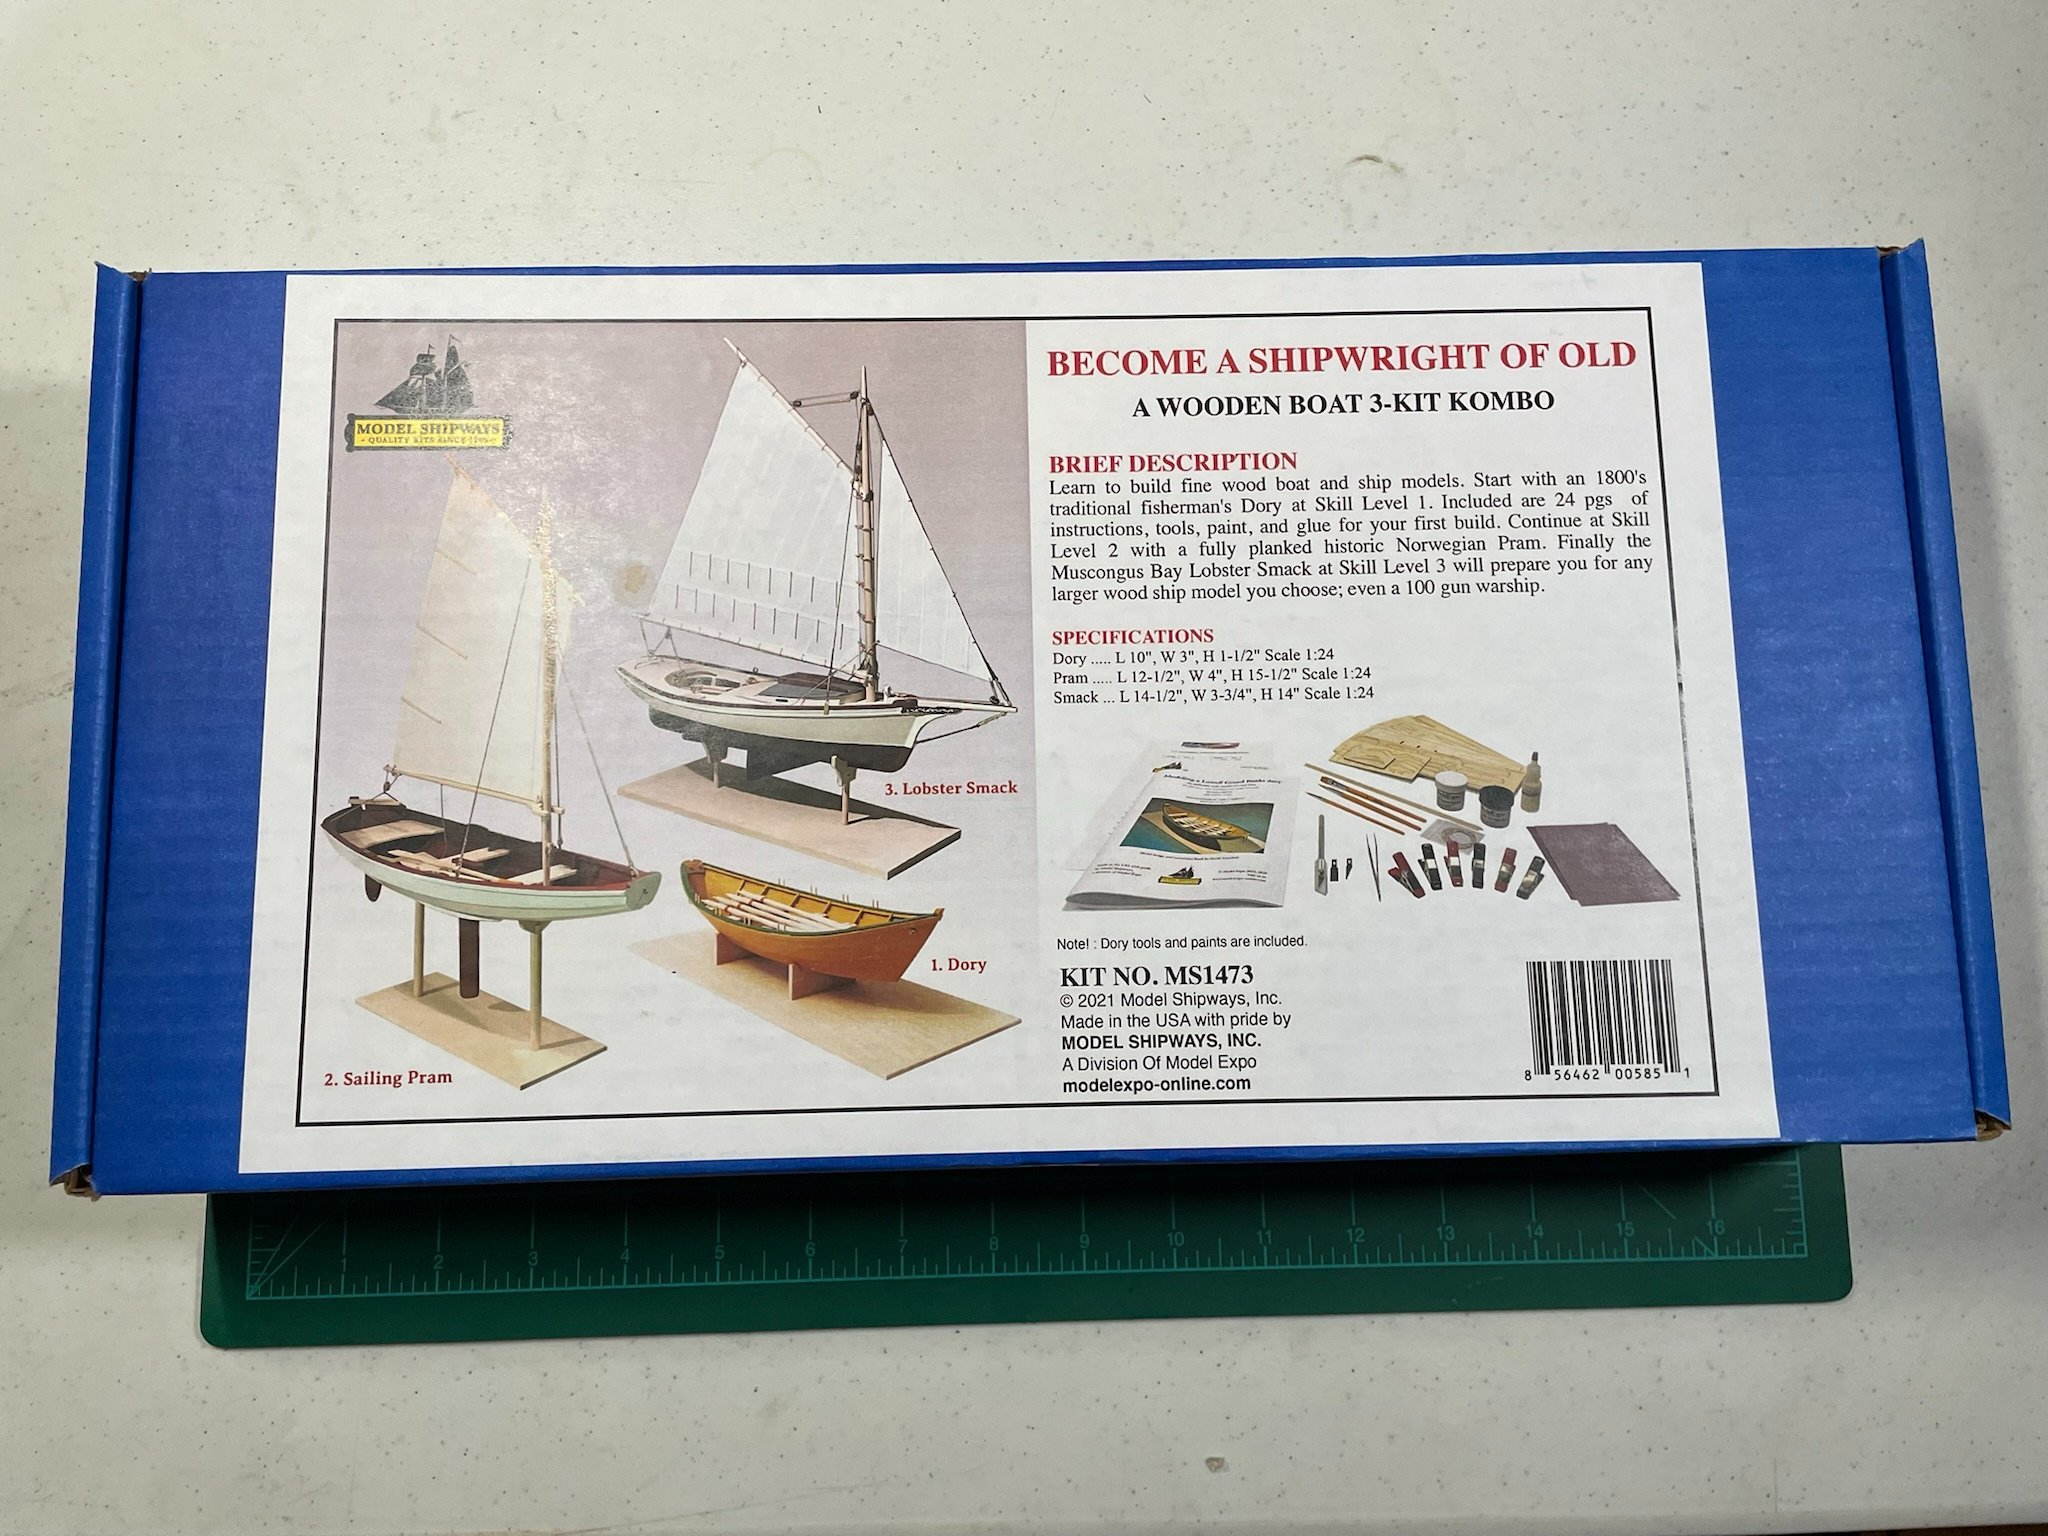
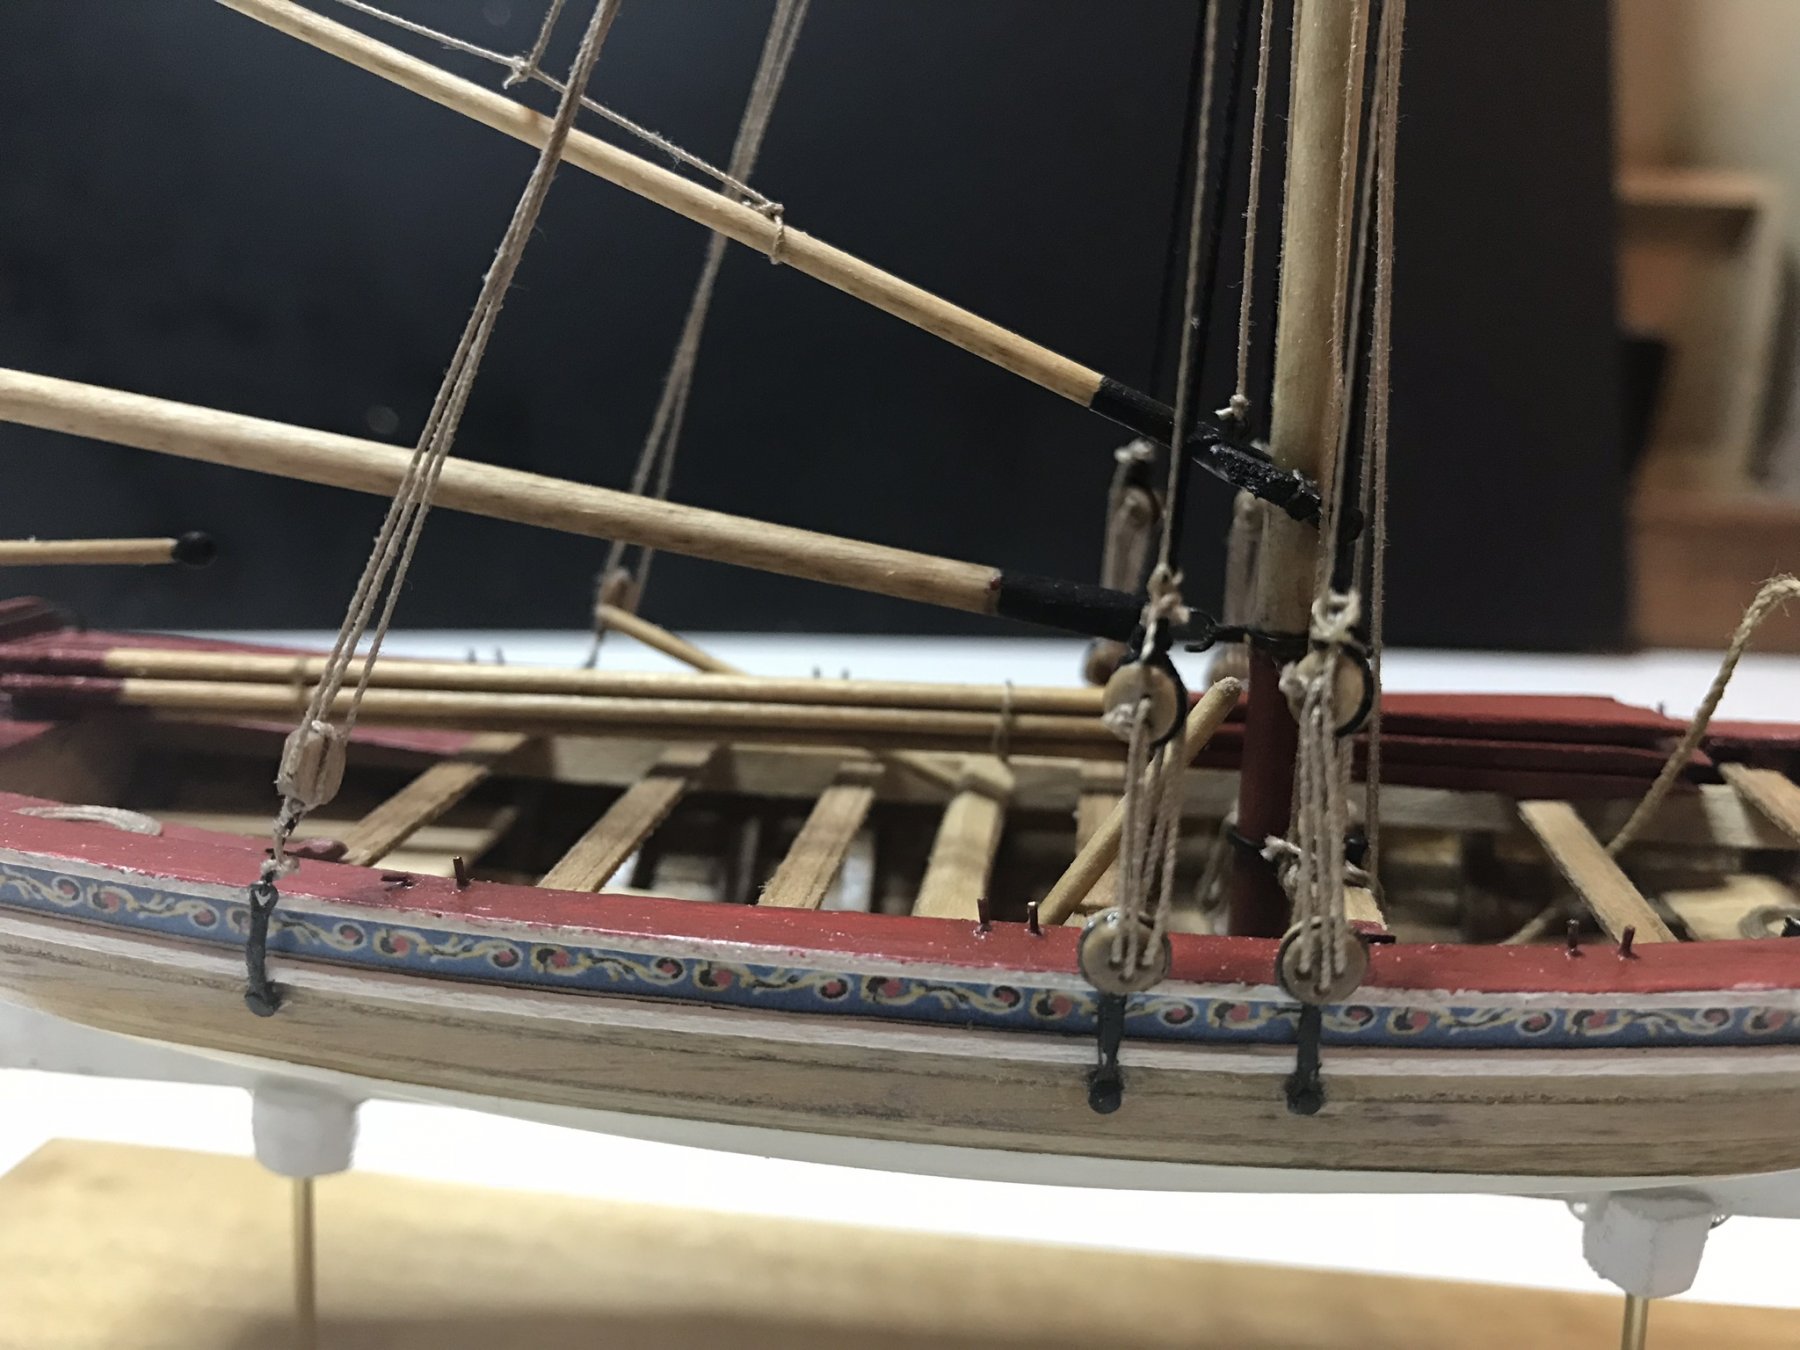
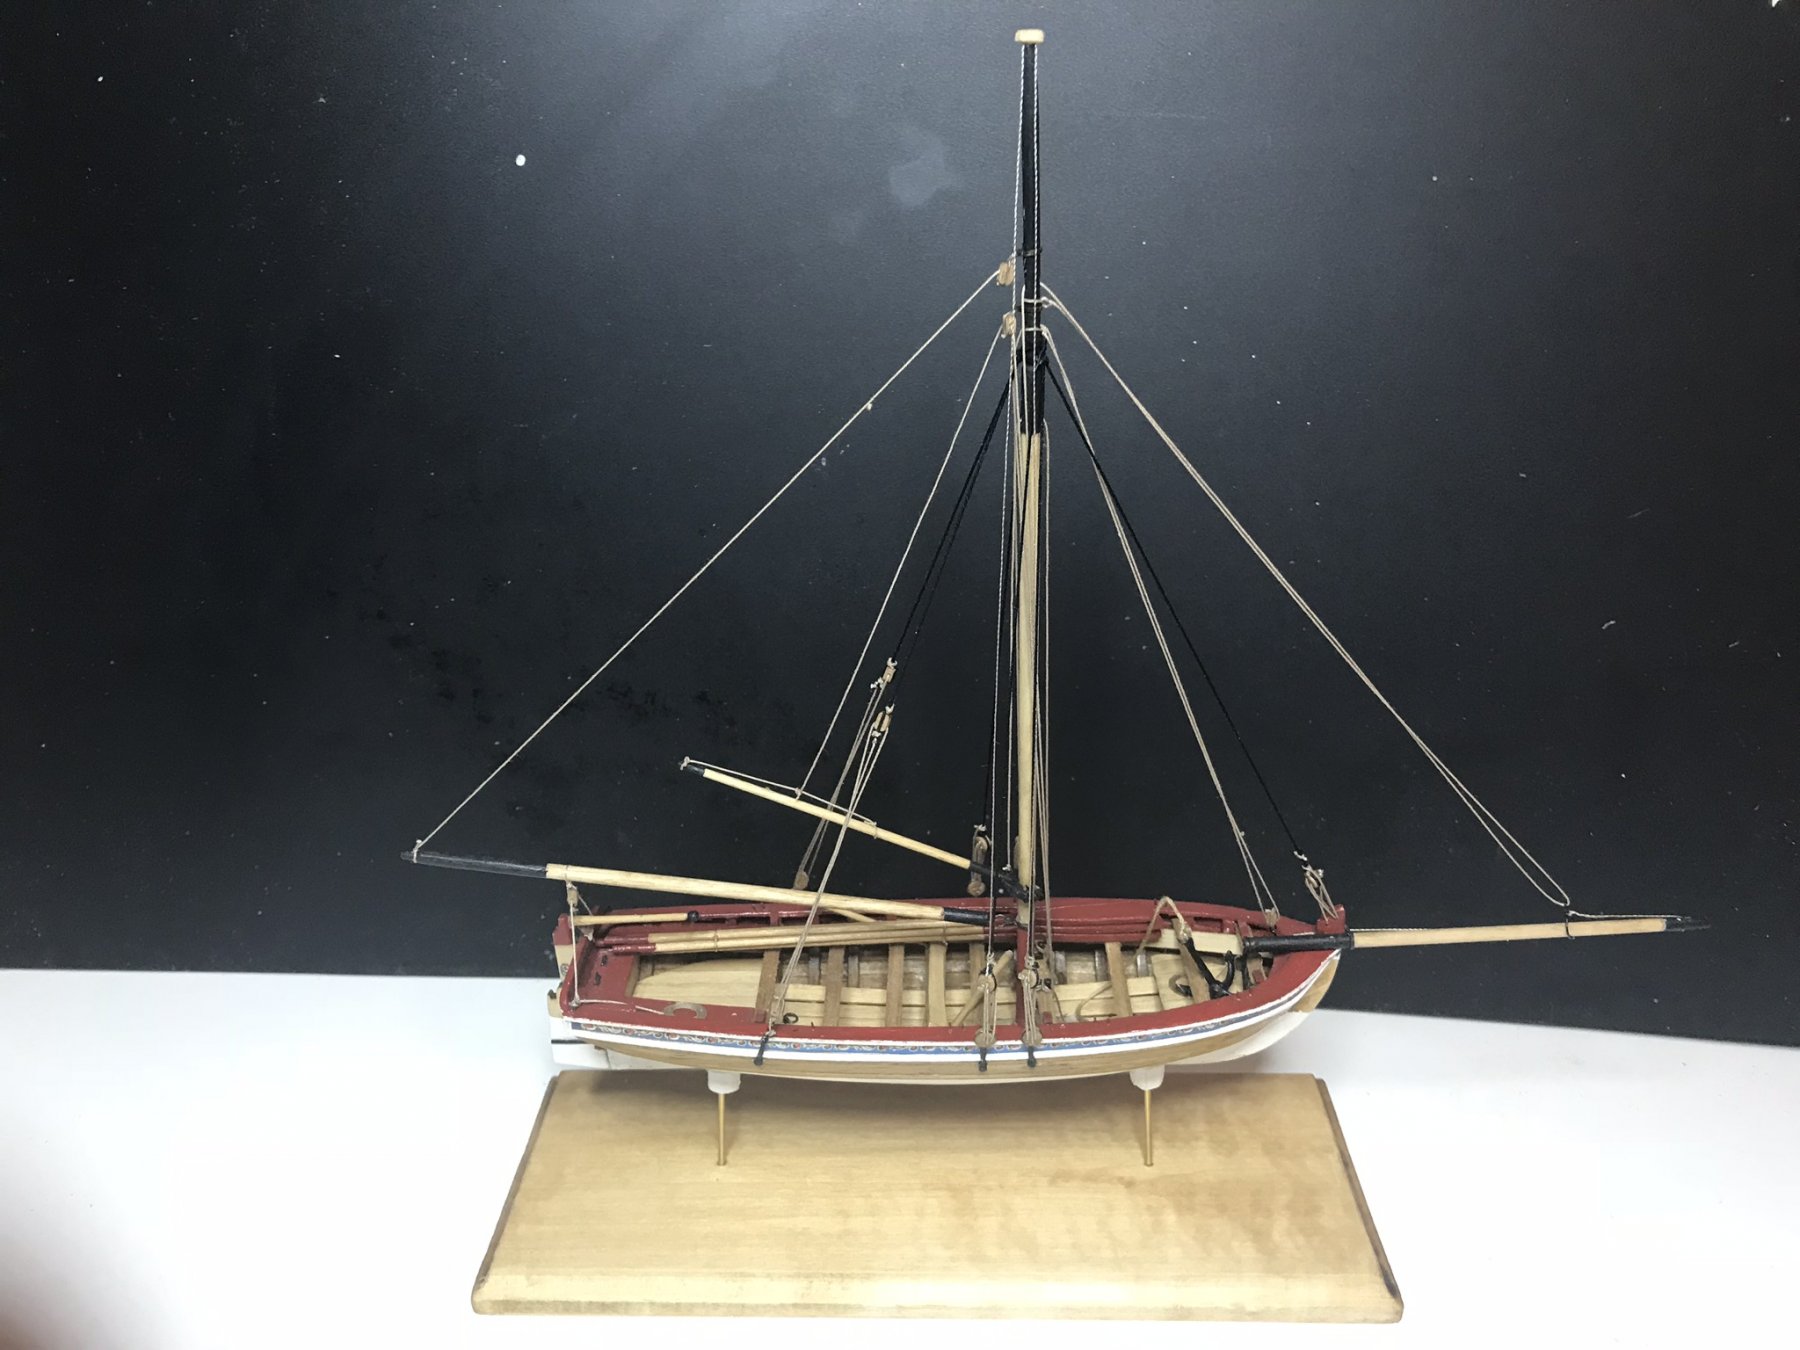
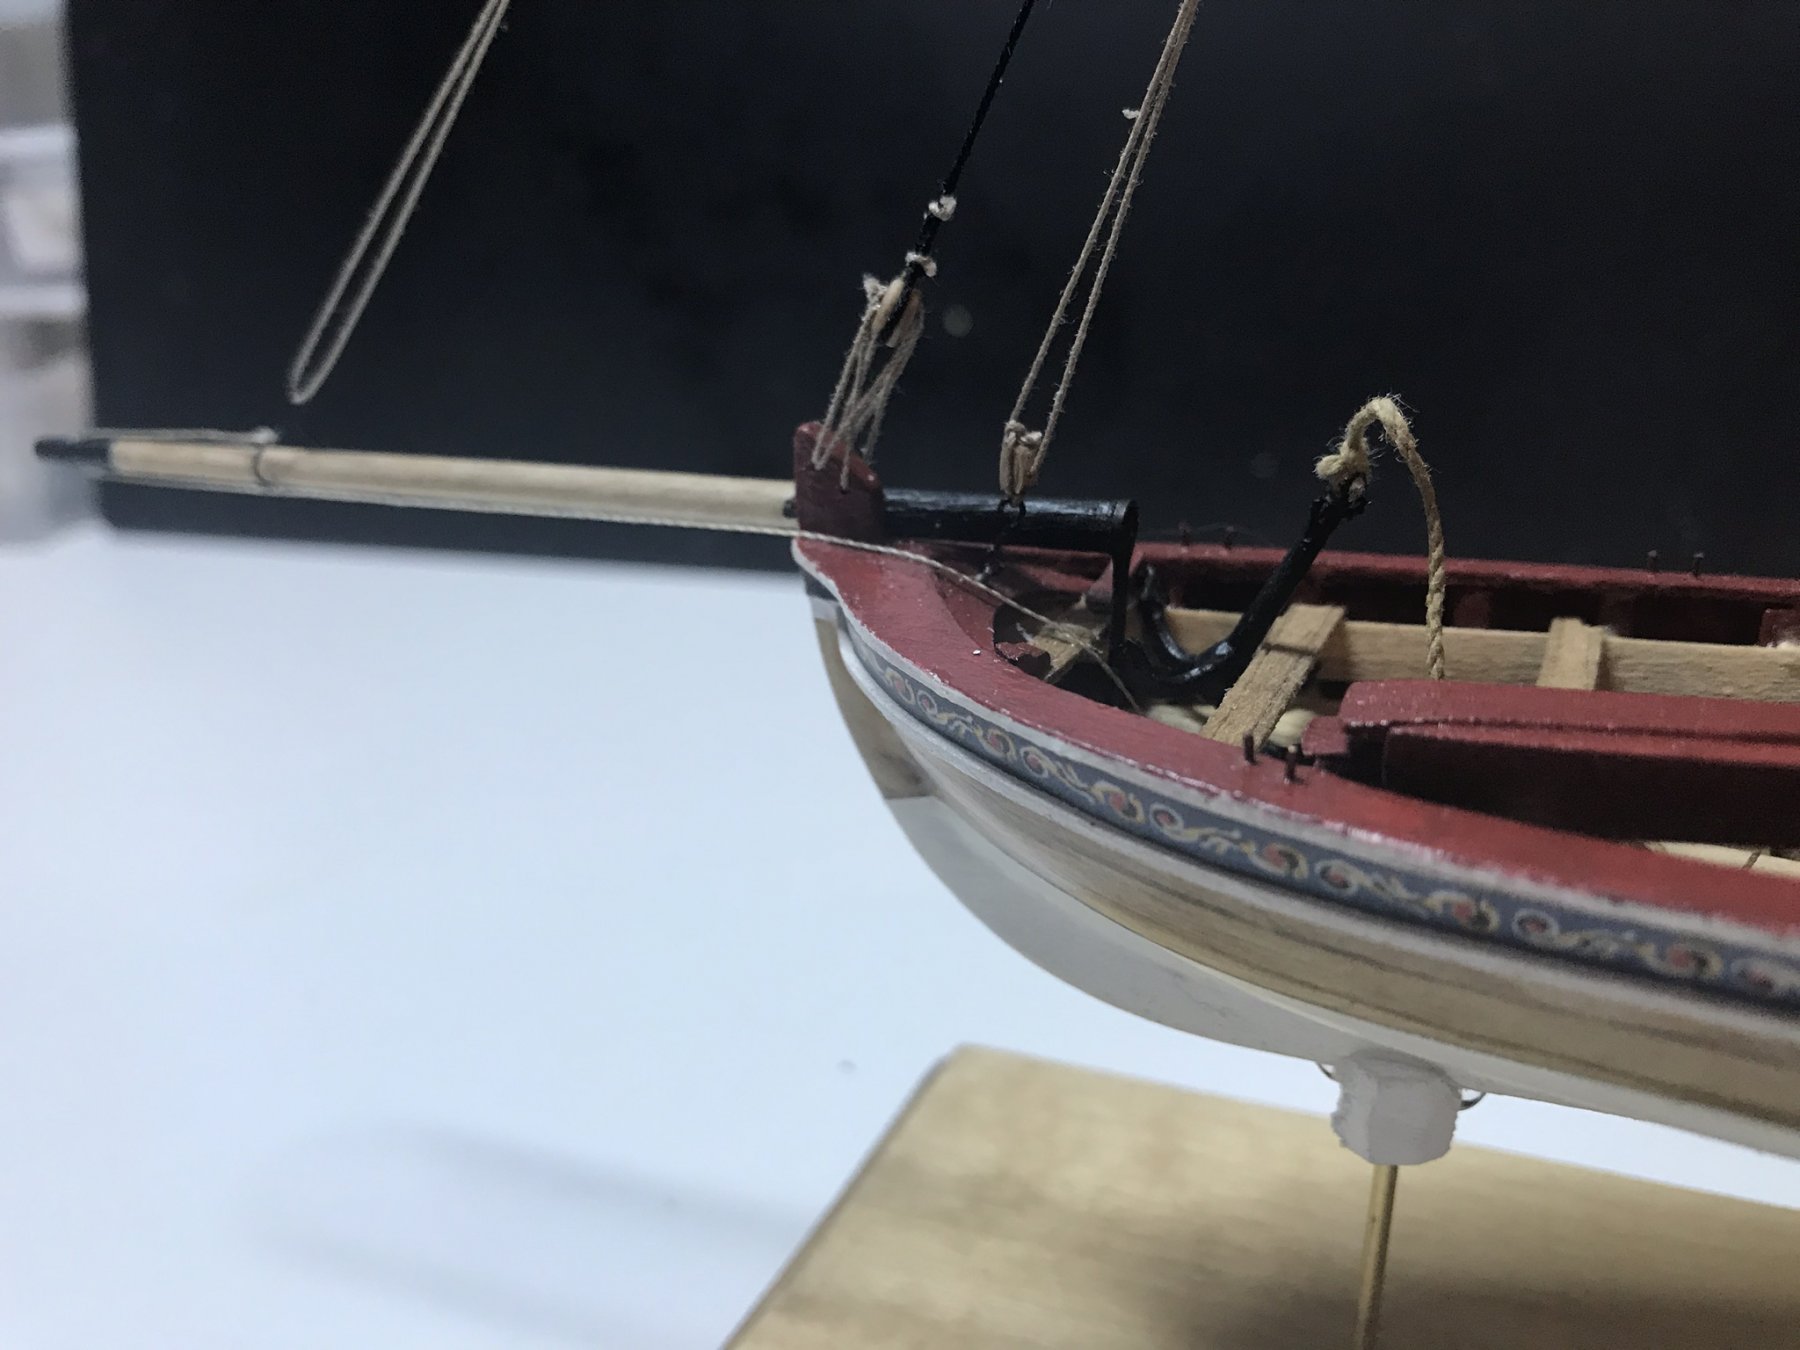
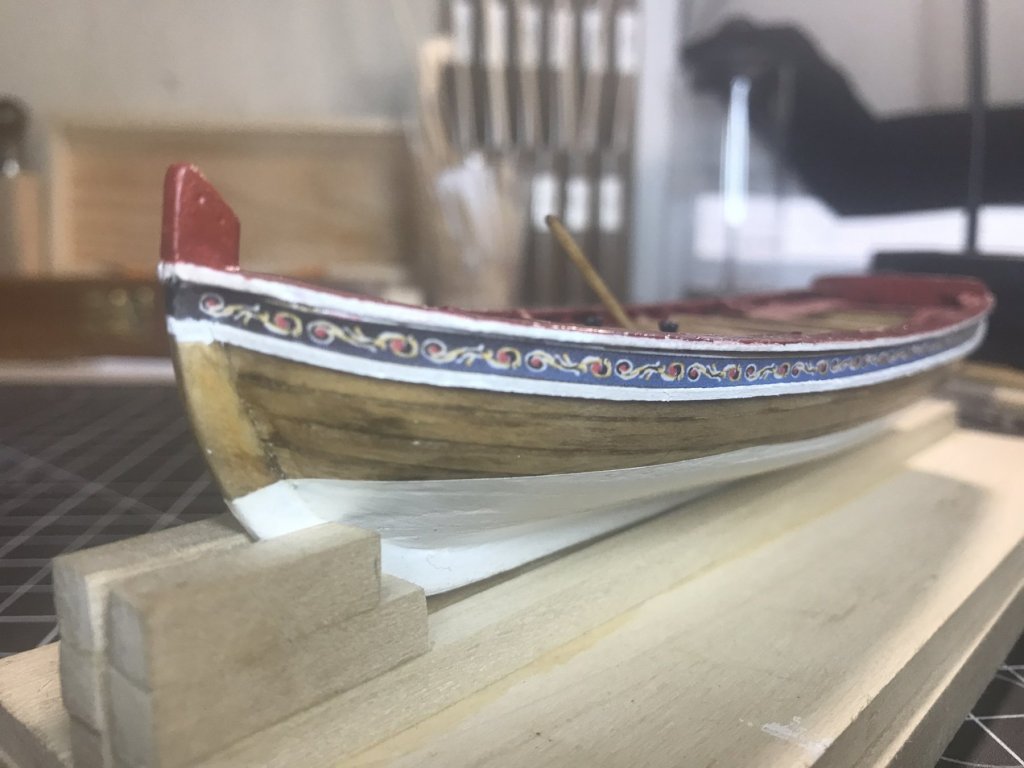
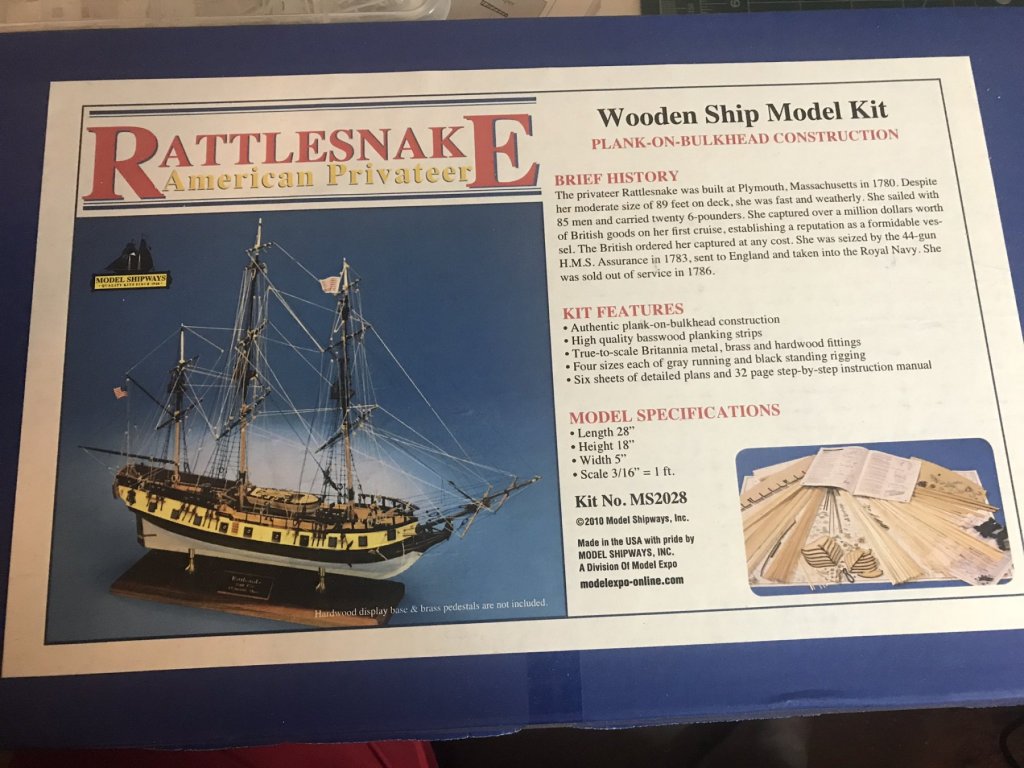
This will be my third build. My first build was the 18th Century Long Boat by Model Shipways (Finished). I then started the Rattlesnake by the same company and realized I was over my head. The manufacturer then came out with the Shipwright series and I thought it would be good to go through the series. My second build was the Lowell Grand Banks Dory (Finished), first in the Shipwright Series. For this second model in the Shipwright Series, I purchased the entire Shipwright Series Bundle from Model Shipways. I now have another Dory but might be fun to get back to the basics down the road. The sailing pram does not come with ship plans but the instructions reference Mr. Simon Watts website to acquire the plans. The plans are for the full-sized boat but the model was designed off of these plans so can't get much better than that right? Well, you are unable to purchase the plans from the provided link. I think I saw somewhere that Mr. Watts passed away and the family has not maintained the download. However, after a little more research, I was able to find a site I can purchase Mr. Watt's plans. I was able to acquire the plans here: https://www.woodenboatstore.com/products/norwegian-pram-plans-and-book-digital?variant=17247483723866

-
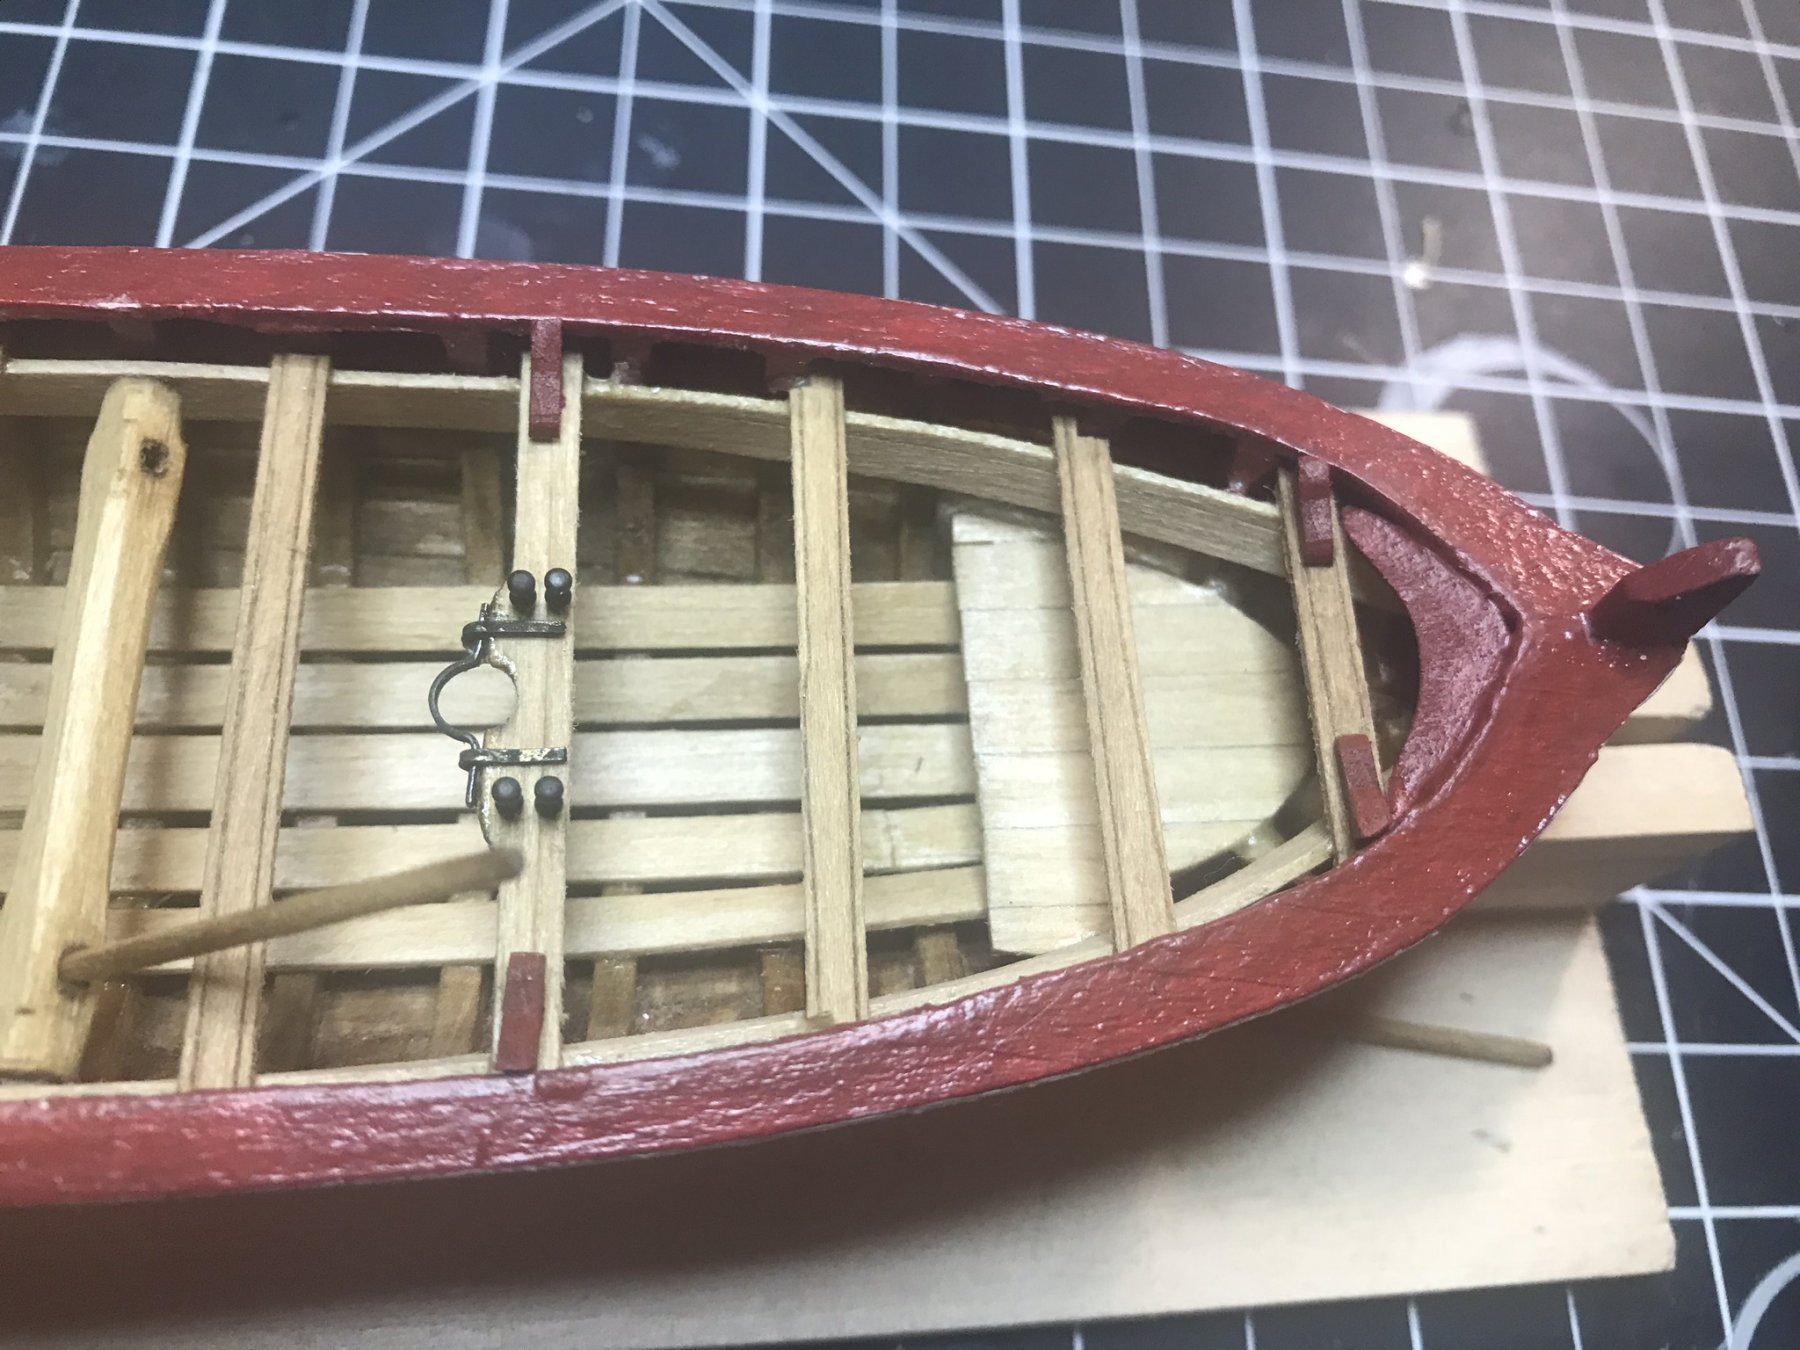
I have abandoned this project. To be honest, I got in way over my head. I may circle back to this one in the future but I will likely purchase a 2nd kit and start from scratch. I can use the 1st kit for spare parts I suppose. Since this project, Model Expo has release a shipwright series that I have purchased and will build to learn the fundamentals.
-
CA glue nozzles or tips
Zack Soderquist replied to Antonio Vasquez's topic in Modeling tools and Workshop Equipment
Acetone!!! Here's what I do to manage CA glue and glue tips. I always order extra caps/tips. I have several types of CA glue (thin, medium, thick, etc) I always order from the same manufacturer so the tips are all compatible. Personally I really like Starbond CA glues. I store the bottles with an uncut tip. I have cut tips that I put on when I'm going to use it. After using the CA glue, I put the uncut tip back on for storage and I have a small mason jar (canning jar) with acetone. I drop the tips in the acetone, close it up and let them sit in there for awhile (anywhere from a couple hours or till the next day). The acetone eats away the CA glue without any damage to the tips. I have used acetone to take completely dried tips and let them sit overnight and the next day, they are like new again. I also do the same thing with micro tip extenders. This allows me to purchase a small pack of the micro tips and reuse them indefinitely!- 2 replies
-
- 11
-

-

-
New to ship modelling? But what do you build first?
Zack Soderquist replied to MSW's topic in Wood ship model kits
Experience/Thoughts from a New Ship Builder: My very first ship build was the plastic Revell USS Constitution 1:196 Scale (completed). This was a challenging build even though it was a plastic kit. It was challenging because being from the Midwest, I knew absolutely nothing of ships. I think one of the most important skills I learned from this build was the concept of rigging. I probably spent as much time on the rigging as I did the rest of the boat. Either way this got me really interested in age of sail boats. Although I really enjoyed building the USS Constitution, there were not many options for age of sail ships in the plastic variety. I started the larger Revell USS Constitution 1:96 (abandoned) but quickly lost interest. I spent a lot of time painting parts and quickly realized that although painting is fun, it was not overly challenging nor a major area of interest. I enjoyed the "build" not the "paint". This led me to endeavor down the road of wooden ship models. I felt that with wooden ships it was much more about the "build" than the "paint". I also noticed immediately that there were many more options for ships in the wood category than in the plastic. My very first wood ship build was the Model Shipways 18th Century Longboat 1:48 Scale (MS1457) (completed). I purchased this kit because Model Expo offered a kit that included "everything you need" including the starter set of tools. I quote this because it was far from the truth in my opinion. I figured with it being small and having a starter kit, that it meant it was a starter boat. Many frustrations and learning experiences with this build. I later found out it was considered a more "advanced" or "expert" level kit because of it's size. I found this frustrating because if this was an advanced boat kit, wouldn't the builder already have the starter set of tools they sell with it?? Either way I did finish the build and was very happy with it. After travel for work gave me an opportunity to see the Cutty Sark and the USS Constitution in person, my interest in the hobby was supercharged and I decided that I wanted to build a gun ship. So I acquired Model Shipways Rattlesnake US Privateer 1:64 Scale (MS2028) (abandoned, for now). I assumed being a larger ship this would be easier to build than the longboat. I got discouraged in the build primarily due to the daunting size of it. Being much larger also meant much much more details and many many more parts. I got the framing built up and got close to the planking steps but I think I began to realize I was way over my head on this build. Even though I completed the longboat, my skills were not where they needed to be for a build like the Rattlesnake. So this project has sat collecting dust. After the attempt on the Rattlesnake, my enthusiasm for the hobby was crushed and I have spent the last couple years on other hobbies (wood turning). I am now in the process of moving and I will be moving back to an apartment and I will not have the space or location to continue with wood turning and my hobby space will be greatly limited. As such, I have decided to go back to wooden ship models but I decided to go back to the beginning to build up my skills. So I am returning to the hobby with an absolute beginners mindset, although I did acquire quite a few tools for the hobby so I am well set to resume/restart. As a fun small project prior to moving and getting settled into my new place in a week, I have been working on a ship in a bottle. Just a small basic USS constitution kit I found on Amazon. But I have already purchased my next ship kit. I noticed that Model Expo has begun a shipwright series geared towards brand new builders. As I understand it, the series is designed to walk you through the learning process where each ship in the series builds upon the skills acquired on the previous build. This to me sounds like a perfect path to skill building. There are only 2 ships released in the series so far but I hope that by the time I complete them, the 3rd one will be released. My next "first" build will be the Model Shipways Lowell Grand Banks Dory 1:24 Scale (MS1470). I only purchased the kit and the paint this time. However this kit does have a starter tools kit that can be purchased as a bundle. But since I already have the tools, I didn't see the need. If you're starting from scratch, this set makes sense to get the starter tool kit in the package as it is truly a starter kit. I have opened the box and that is about it. I want to get setup at my new place before beginning. The kit is very basic and I think it will be a very easy build. But I look forward to it as I believe it will provide a good foundation for the next build. This dory does not have a mast so it's just the hull, but seems like a good first step as I will relearn building the hull and basic planking. When this is done, I plan to move on to the 2nd ship in the shipwright series which I was just recently released. The Norwegian Sailing Pram 1:12 Scale (MS1471). This kit has a single mast and sail and will involve some basic rigging. It appears to be the next logical step in the learning process. I do intend to start and maintain build logs on each of these builds. I think keeping the logs will not only help me to share knowledge and learning lessons along the way, but I feel it will help reinforce my own knowledge. I do apologize for the length of this post, but I felt I should share it to this thread because the purpose of this thread is to help other new builders to avoid the exact issue(s) that were mentioned that I experienced myself. -
Thank you. That link is exactly what I was looking for!
-
I have seen some very impressive builds that have figures added. (Sailors, Captains, Etc) I have searched the Internet and have found many figures for railroad builds but I can not find a good source for ship figures. Do you know of any good sources for different scales and types or does everyone hand carve their own and if so, is there a good source for images for reference?
-
I'm sorry. I'm not really following what you're saying.
-
I am currently working on the Rattlesnake by Model Shipways. This is only my second wood ship model and the instructions nicely give me a break down of what color/stain to use on what area. The issue I have is it doesn't tell me WHEN to paint or stain things. Is it better to paint or stain things before they get attached to the boat or after? Should I paint after installation and stain before installation? I am getting to a point where I need to make a decision on this and would like to suggestions and advice. Also, if you wouldn't mind, provide your reasoning for doing it the way you do it so it can help me make a decision. Thank you.
-
This may end up being a question that is all about preference. But I would like to know people's opinions on whether airbrushing or brush painting a ship is best. I would like to know what you think the pros and cons of airbrush vs brush painting (hulls, fittings etc). I have both options available to me. I have a very nice paasche airbursh as well as high end Winsor and Newton brushes. Currently I am working on the Rattlesnake by Model Shipways. I am leaning towards brush painting but I am concerned about brush strokes, especially on the large hull. What is your opinion and why?
-
Ok thank you everyone for your feedback. The 3/32" thick batten does not bend well to the hull without soaking or bending. I think Ed might be correct and it probably meant the 1/32 x 3/32 stock. I will use that for fairing. Thank you again.!
-
I am currently building the Rattlesnake by MSW. The instructions recommends to use a 3/32" thick batten to check for fairness. Obviously this thickness is harder to bend than 1/16" thick. The standard plank thickness of the lower hull for this model is 1/16". Is there a reason to use a thick batten to check for fairness?
-
I have a LOT better understanding of planking than I did when I posted this. Thank you all. @vaddoc One question about spiling. Even with a strake split into multiple planks, it seems some of them will be wider than the plank stock provided in the kits. How do you deal with this? Do you order additional material in a wider width?
-
Thank you all for your feedback that helps me a lot!
-
CA glues
Zack Soderquist replied to Antonio Vasquez's topic in Modeling tools and Workshop Equipment
How I manage CA glue tips is acetone which you can pickup at walmart, home depot etc. They have it where the have mineral spirits, lacquer thinner, etc. First I use BSI (Bob Smith Industries) CA Glue. This is what is typically sold by Micro-Mark, Model Shipways etc with their name on it. I then ordered extra tips. https://www.amazon.com/gp/product/B001NI8MS0/ref=oh_aui_search_detailpage?ie=UTF8&psc=1 I have uncut tips which is what I use on the bottles while not using the glues. When I need to use them, I put on a cut tip and use it. When I'm done, I drop the tip in a jar with acetone and put the uncut tip back on the bottle. If I'm using thin CA, I also add a fine tip. https://www.amazon.com/gp/product/B002N4S8S2/ref=oh_aui_search_detailpage?ie=UTF8&psc=1. Again when I'm done, this fine tip goes in the acetone too. After the tips soak in acetone for a day or two, I remove them and let them air dry. They dry pretty quick. Now they are ready to go. -
Show pictures of your work area
Zack Soderquist replied to a topic in Modeling tools and Workshop Equipment
I'm very new to this hobby but here's what I have setup so far.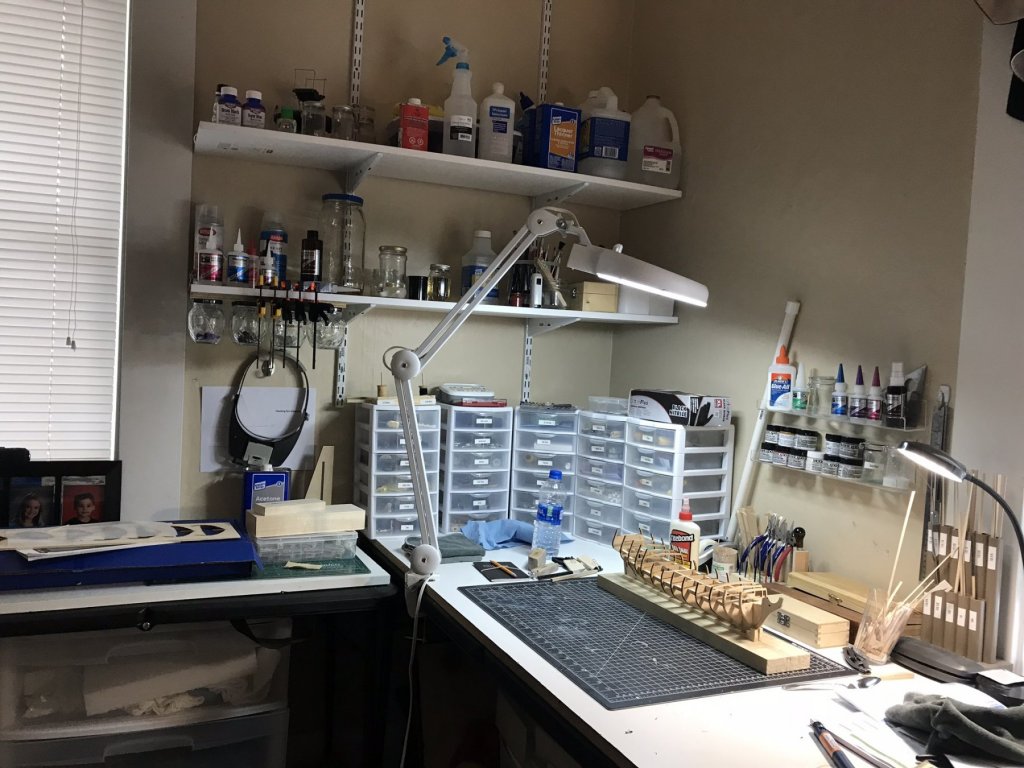
-
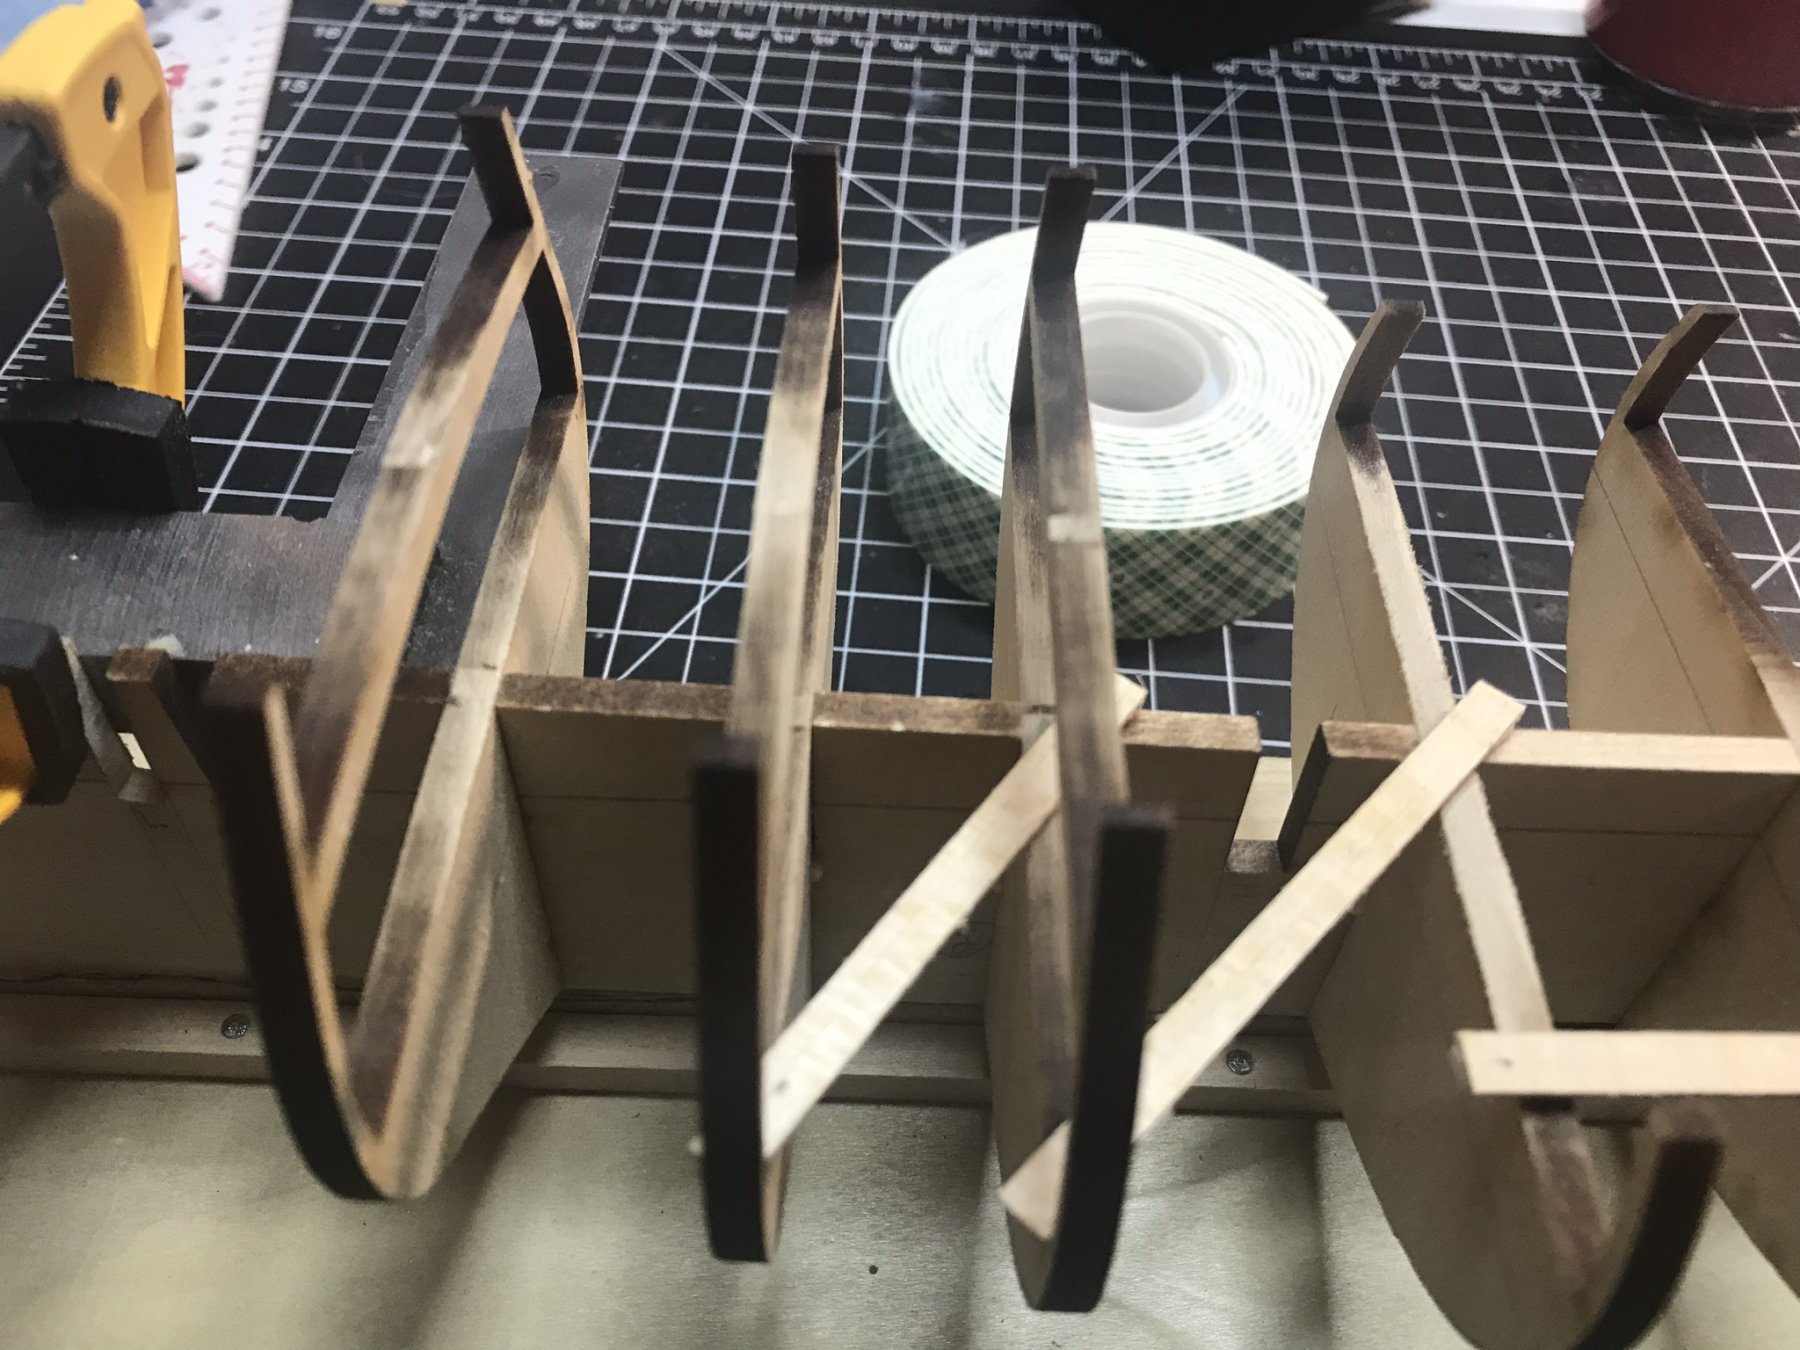
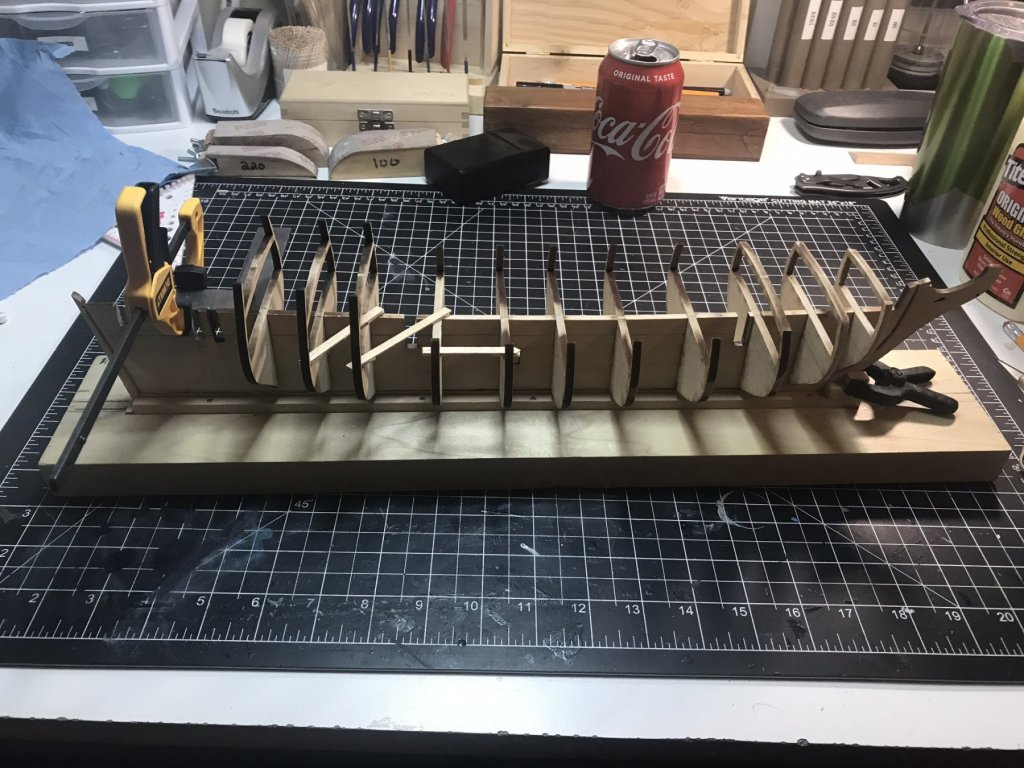
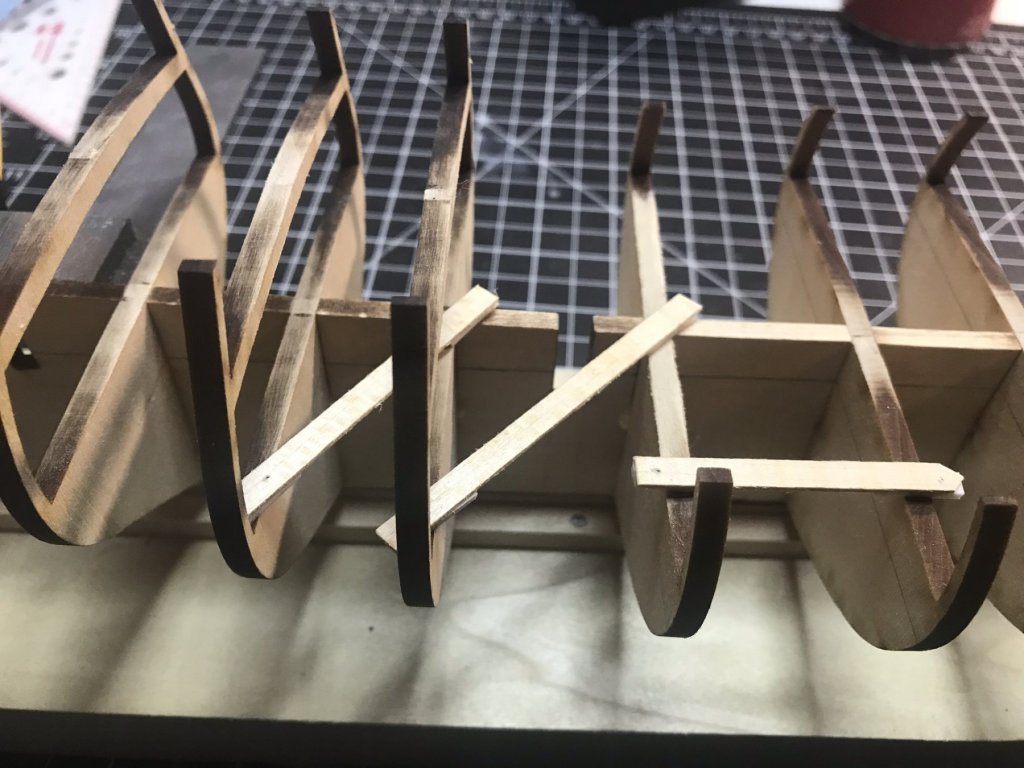
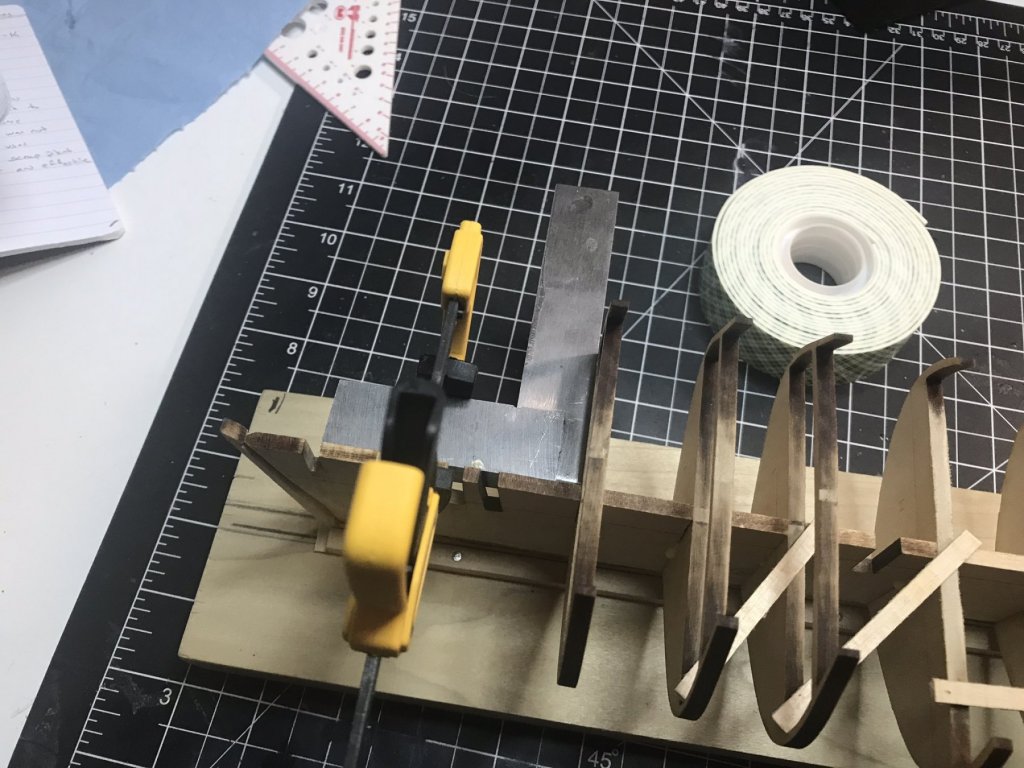
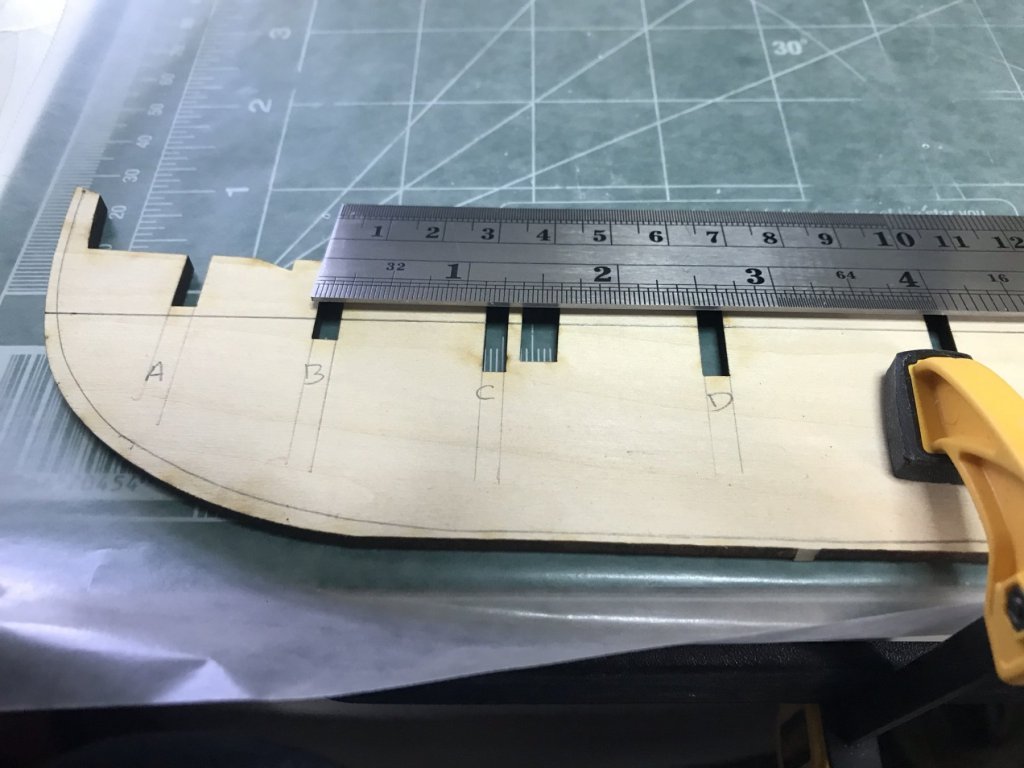
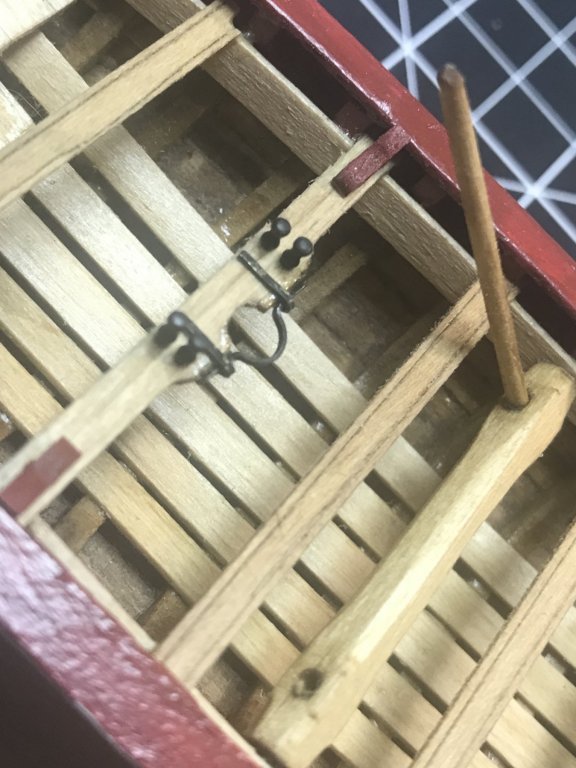
After attaching the the keel, stem and sternpost, I chiseled the bearding and rabbets. Then I sanded the slots on the bulkheads and center keel to fit. I also marked the waterline on each bulkhead to aide in installing the bulkheads properly. To square the bulkheads, I used a small square and clamp. The instructions say to nail a piece of scrap plank to hold the bulkheads square while the clue dries. After trying this, I found it very cumbersome. I then took some double sided tape and attached it to the scrap planks and used that instead of the nails and it worked very well and was much easier. I beveled the two fore bulkheads prior to installing. The rest, I will bevel after they are installed by using a sanding block. Not yet sure how I will bevel the inside of the bulkhead for the ceiling planks. After all bulkheads are installed, I will add a strip of wood on each side to strengthen the bulkheads for beveling as well as making sure each bulkhead is perfectly aligned before planking. In hindsight I wish I would have installed the bulkheads starting from the back to the front as there is not a lot of room to use the square on the aft of the boat.

-
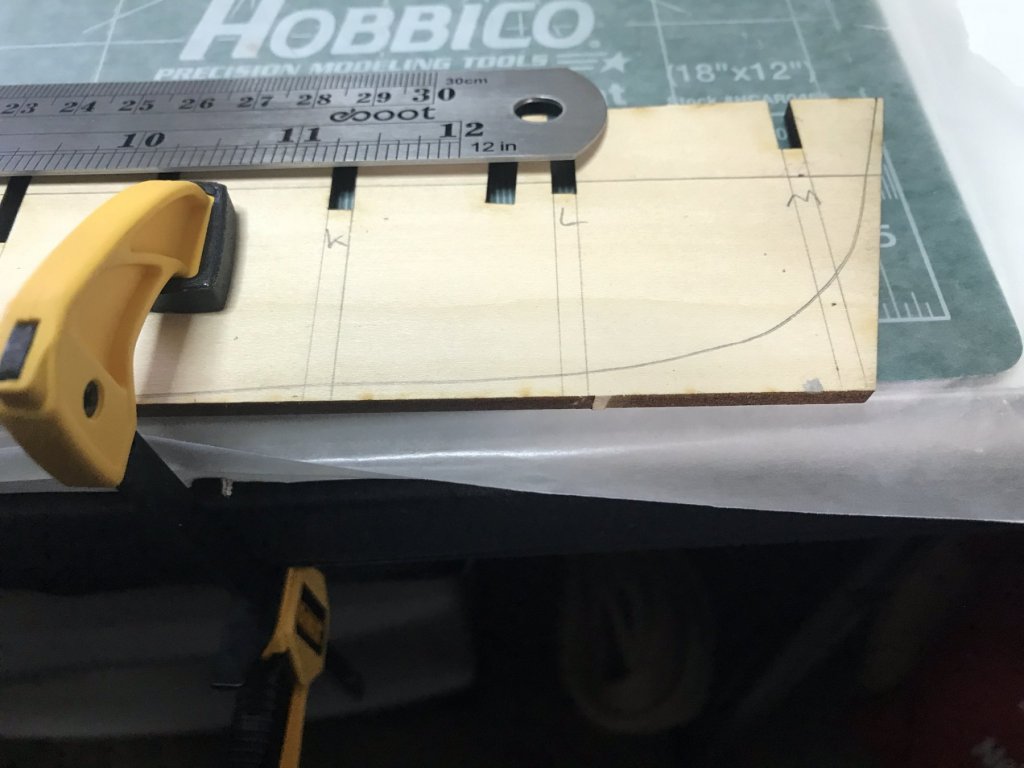
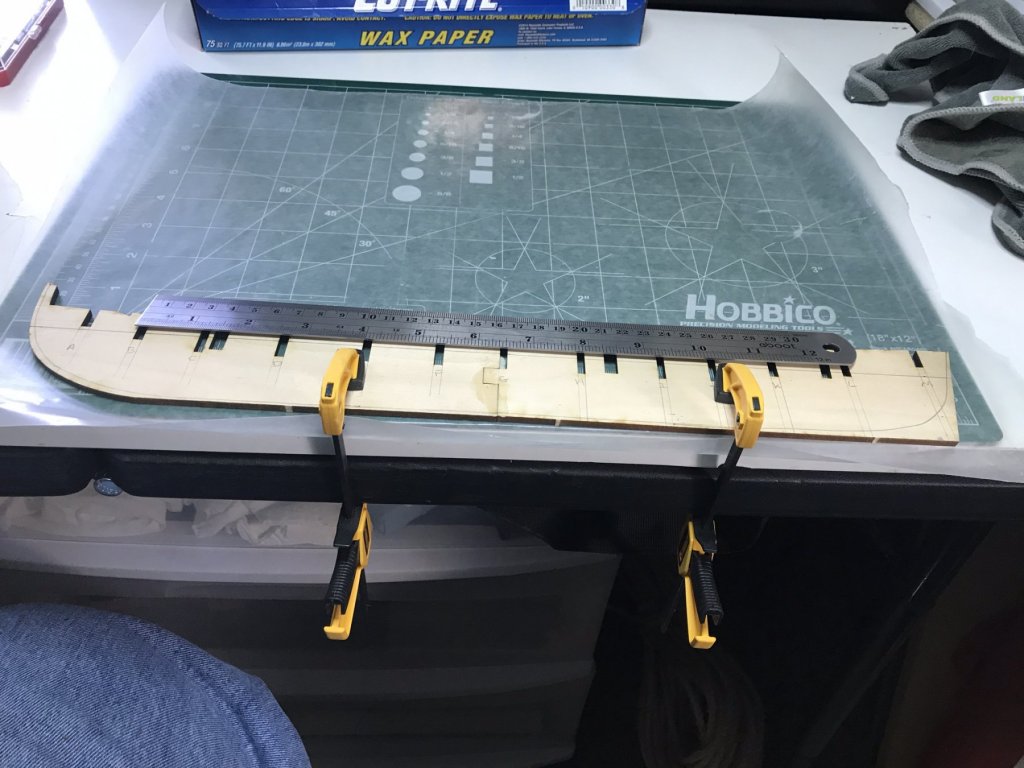
My first step was to draw the water line, bearding lines and bulkhead markings on the center keel, then glued the two center keel pieces together.
-
I decided to build a display case from scratch. I didn't purchase enough oak corner molding so the photo shows missing molding on the back which has since been completed. Some lessons learned in the process but compared to the model, it was actually quite simple. I plan to have a plaque created and will add inside the display case.
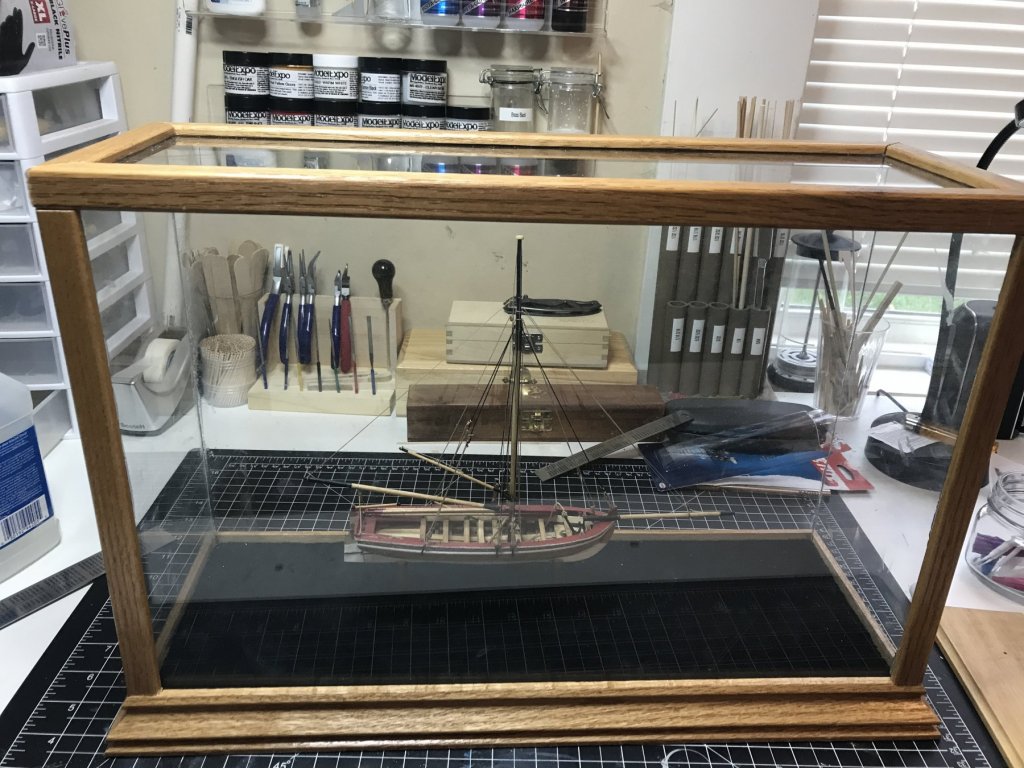
- 3 replies
-
- 8
-
-
- 18th century longboat
- model shipways
- (and 1 more)
-
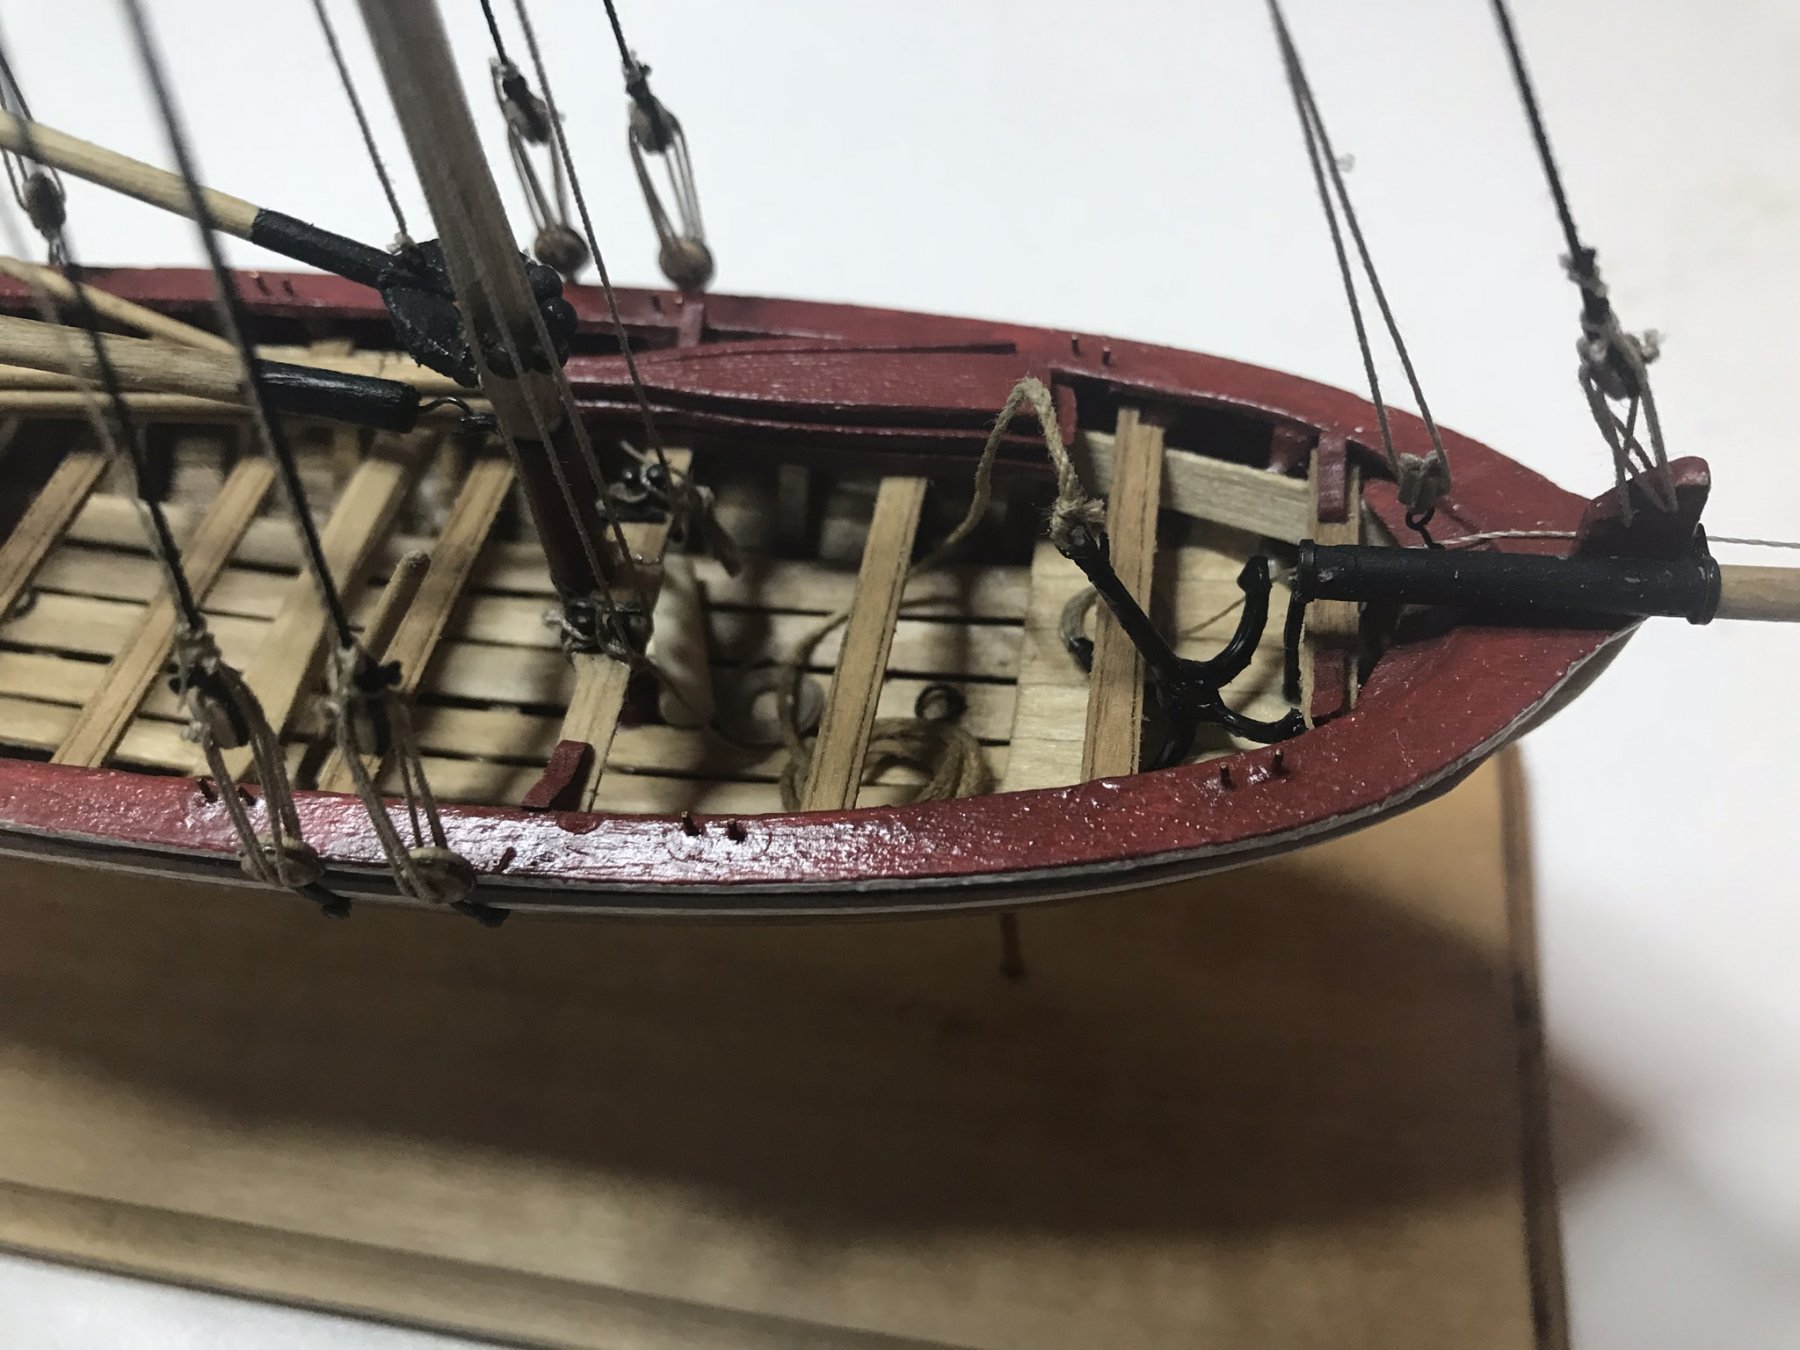
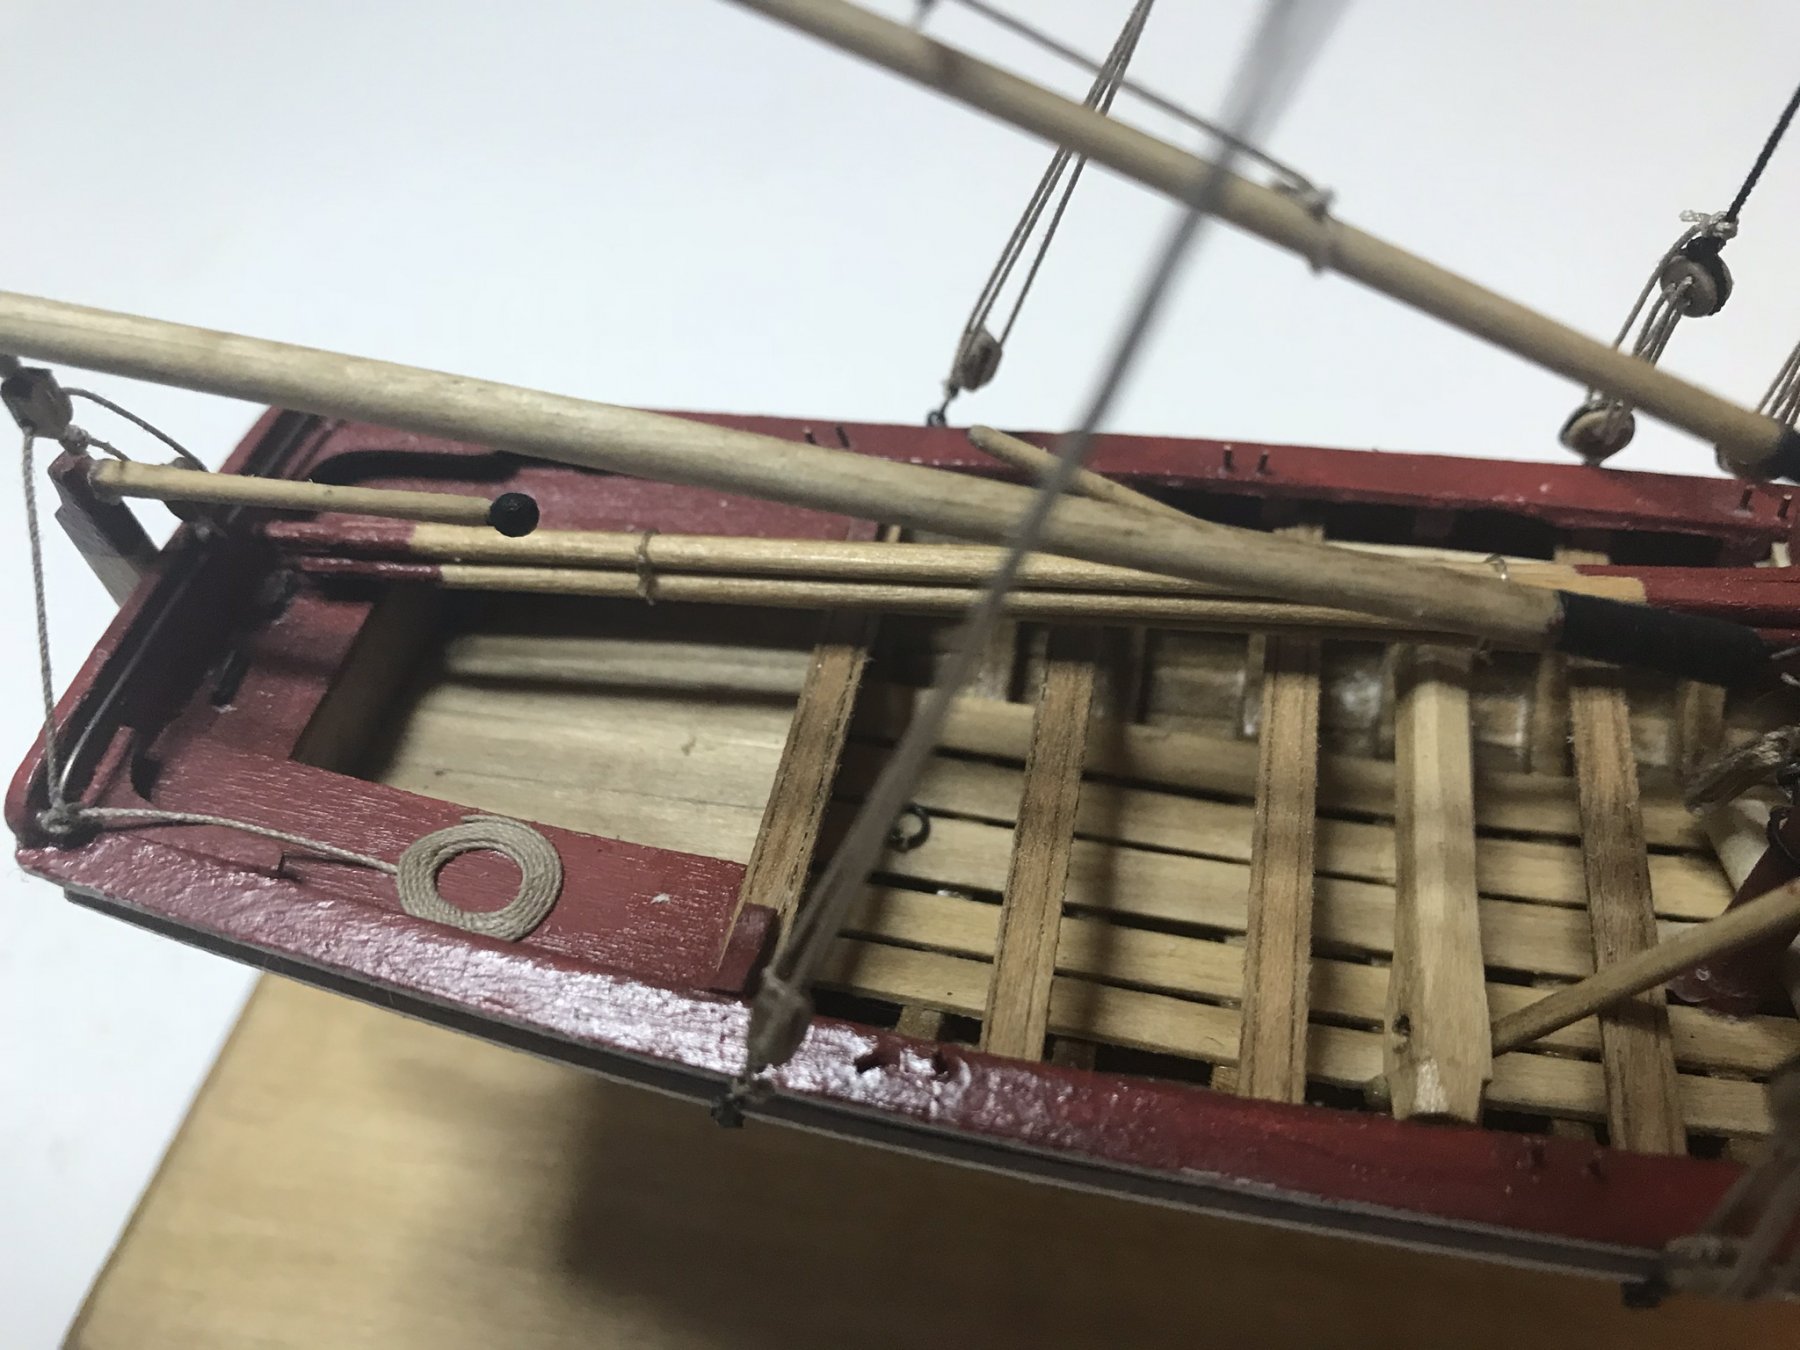
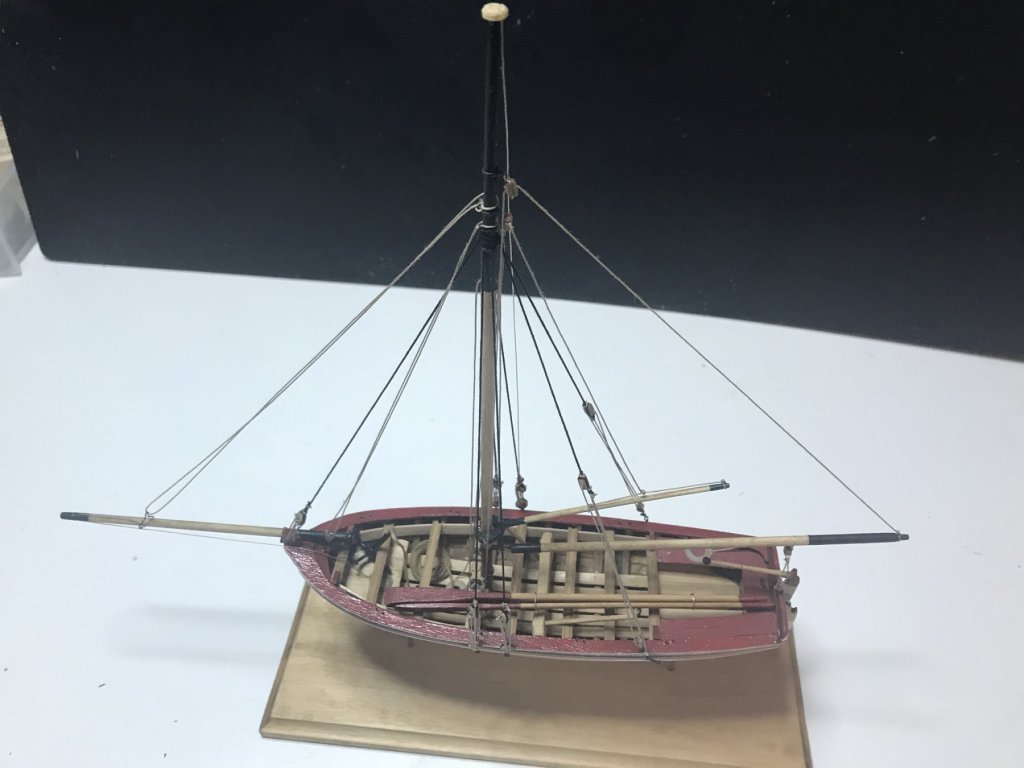
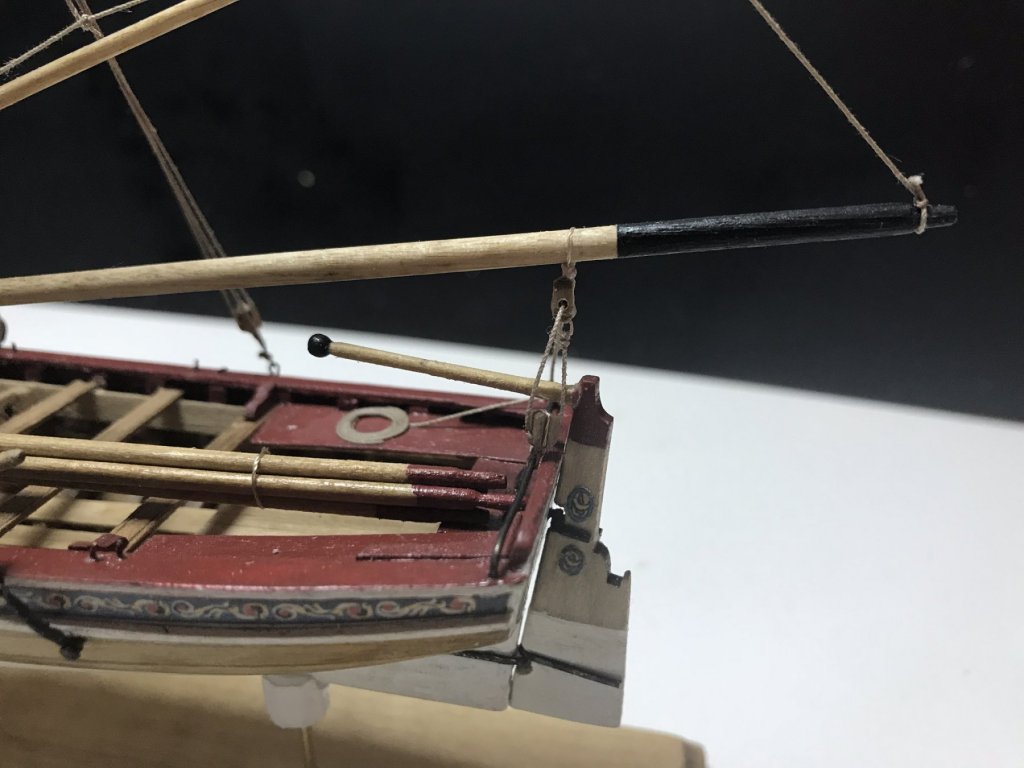
Here are pictures of the ship after I finished the masting and rigging. I didn't like the rigging line provided in the kit so ordered rigging line from Syren Ship Model Company https://www.syrenshipmodelcompany.com/. The quality of this line was quite apparent. I was very happy I upgraded the rigging, it made it much easier to work with.


- 3 replies
-
- 1
-
-
- 18th century longboat
- model shipways
- (and 1 more)
-
This was my first wood ship build. I didn't take many pictures during the build process. Didn't think to do so. Prior to this, I built a USS Constitution by Revell 1/196 scale, plastic. That is the extent of my model building experience. Comparing the process of building a plastic kit and a wood kit, I am totally hooked on wood ships. Also of note, I am a software developer by trade and have never worked with wood or did any painting so I am very very new to every part of building models and it is apparent in the quality. I am happy with the final results but I can only get better from here. I did modify the color of the red paint that came with the kit. The kit came with Bright Red and Hull Copper Red. I mixed a little of the Hull Copper Red in with the Bright Red till it came out with the color I liked. Here are some photos before I started on the masts and rigging.


- 3 replies
-
- 3
-
-
- 18th century longboat
- model shipways
- (and 1 more)
-
Beginning a build of the Rattlesnake US Privateer by Model Shipways. This is only my third model, second wood ship. Previously I have built the USS Constitution by Revell - Scale 1/196 - Plastic 18th Century Longboat by Model Shipways - Scale 1/48 - Wood After building a plastic ship model and a wood ship model, I am totally hooked on the wood ships. My first wood ship build was purchased as a combo kit from Model Shipways which included the kit, paint and tool kit. I falsely assumed that if it came with a beginners toolkit that it was a beginner ship model. After receiving it and seeing how small it was, I researched further and found it was for advanced builders. Although a bit dismayed, I gave it a go and did complete it slowly. I learned a lot during the process. I probably learned more about what not to do. For this build, I used the MSW Model Ship Kit Database to pick my next model. http://mswshipkits.ampitcher.com/ This is a much larger ship and rated at an intermediate level. I hope the larger size will make it a little easier in some ways. After reading the instructions for the kit, it provides a lot more "beginner" details on how build a wood ship. It is much more detailed than the longboat instructions.
-
You lost me on the last sentence. What does 9-7-6-5 mean, what is a fan gauge and how would you use it to find the points to use the spilling batten on? Also, I understand the concept that the width of the plank is going to be different at the stern and bow, and that you taper the plank only on the top. So is that spilling? I thought it was cutting the plank so it is curved on the edge and not straight.
-
Jim, I've read the articles from there on planking. I saw some ways to do this on the outside of the hull, although it is still not completely clear, once I do it on another model it will make more sense. Where I am still lost is how to do this on the inside of the hull, also the hull is only 7" long so it's pretty small to work with.