
HOLIDAY DONATION DRIVE - SUPPORT MSW - DO YOUR PART TO KEEP THIS GREAT FORUM GOING! (Only 13 donations so far - C'mon guys!)
×


JamesBhm
-
Posts
142 -
Joined
-
Last visited
Content Type
Profiles
Forums
Gallery
Events
Everything posted by JamesBhm
-
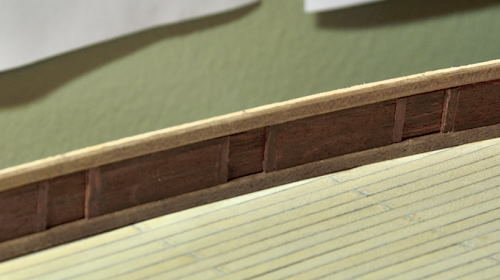
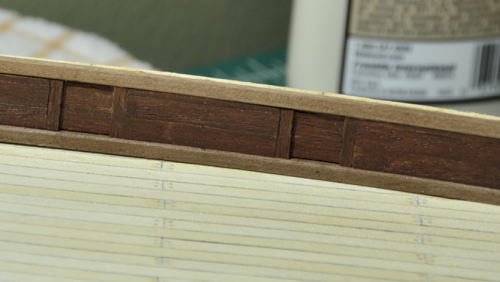
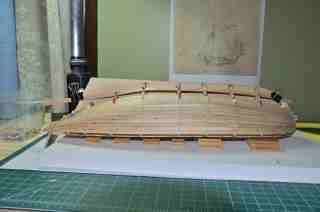
 Started on the new and improved inner bulwark...slightly thickened, recessed closed gun port lids, and bull nose on the walnut trim at the top and bottom. The gun ports are tedious and fiddly.
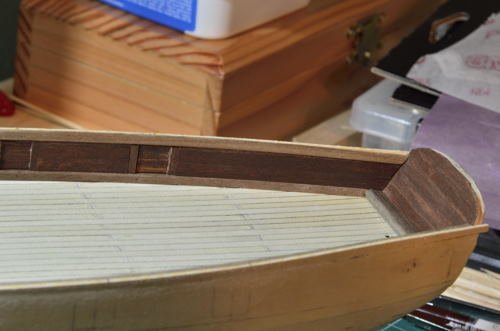

- 241 replies
-
- 1
-

-
- mermaid
- modellers shipyard
- (and 1 more)
-
Yes! That's the next step of going rogue, probably with less risk of unintended consequences (provided I don't mess up any belaying points in the process). I wish he had done more sketches like that cross section.
-
I’m at a point where I’m going to go a little bit rogue (but hopefully not off the rails). I agree with Rick that the inner bulwarks look better (and may be more accurate) planked rather than with exposed false frames. I’m thickening the bulwarks up just a bit as if the frames had been planked over. I put the strip of 2mm x 3mm walnut along the base of the bulwark, but I put a little bit of a bullnose on it. I did the same along the top of the bulwark with walnut stock I’m not using for all those exposed frame pieces. I’m going to lay down a little 1/32 sheet stock between them to thicken up the bulwark a bit and then plank over that. I’ve also decided to interpret the “gun port-like paint job” as actual disused gun ports. I’ve scoured the historical documents I can find and there is really nothing to clarify whether they are real gun ports or painted on. I think painted on is perfectly reasonable, but I doubt King would have been the one to do it. There was no war on, and he was sailing into literally uncharted waters where there were no “king’s enemies” who understood what gun ports looked like. The boat was purchased for King by the colonial government from a “local house” (presumably merchant?) and it’s possible they painted false gun ports. Again, there was no active war at the time, but I’m not sure where it served and what the dangers were (I know there was some pirate activity in the south China sea back then). In King’s cross section drawing, the boat is clearly blocking gun ports (as I think Rick pointed out), but the Mermaid had two whaleboats and a jolly boat for the surveying assignment, so I don’t think that would have been an “original” boat. My theory (mostly conjecture) is that the boat was built in British India but designed as a typical armed cutter at the tail end of the Napoleonic Wars. After the end of the wars, the British Navy was downsizing and I think it may have been either sold out of the service or never bought into it as intended when it launched. The lack of solid historical details is the beauty and the curse of this particular boat. It’s hard to know what’s historically accurate, but it also gives you some interpretive leeway because there are few hard benchmarks on what is correct. That being said, if anyone found anything in historical records or has a different interpretation, let me know! As for modeling the disused gun ports, I’m not actually punching through the bulwark or installing pre-fab gun port fittings. The port lids will be slightly recessed planking on the inner bulwark and defined by breaks in planking with some attached hinges on the outside (assuming I can pull it off).
- 241 replies
-
- 3
-
-
- mermaid
- modellers shipyard
- (and 1 more)
-
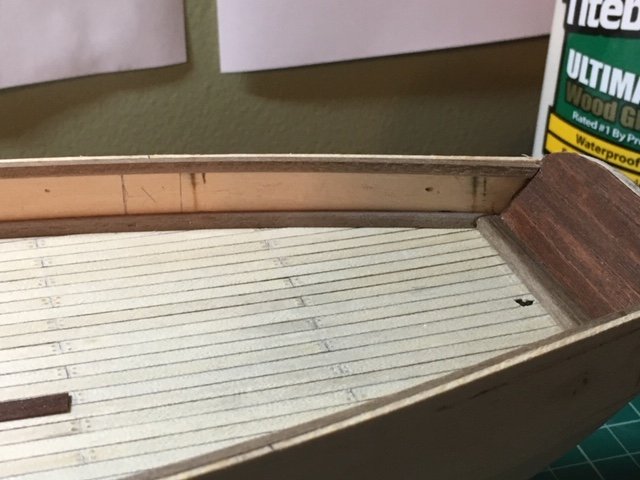
Just a note for future builders: I figured out that the 2mm x 3mm bulwark extension (walnut piece) is basically to even out the height of the bulwark to follow the shear of the deck, which could be critical if you are putting in a bunch of the pre-cut walnut false frames, which are all the same height. I think the bulwark pieces are shorter toward the bow to make them easier to bend. I saved the walnut piece for other purposes and just built a bulwark extension from a 2mm thick basswood plank. I just measured height from the deck at various spots and trimmed it down just like a hull plank.
- 241 replies
-
- 2
-
-
- mermaid
- modellers shipyard
- (and 1 more)
-
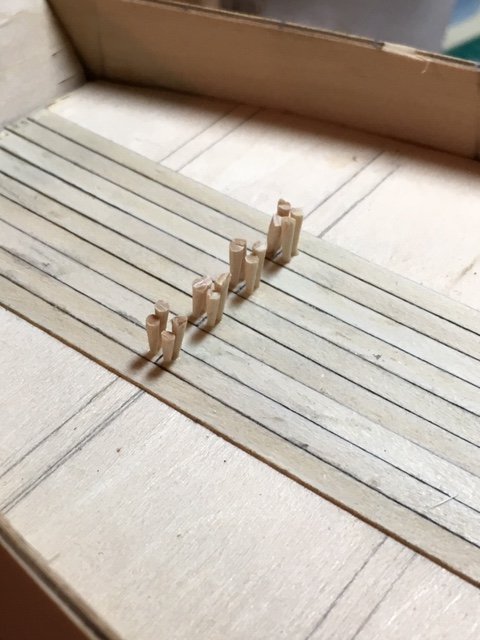
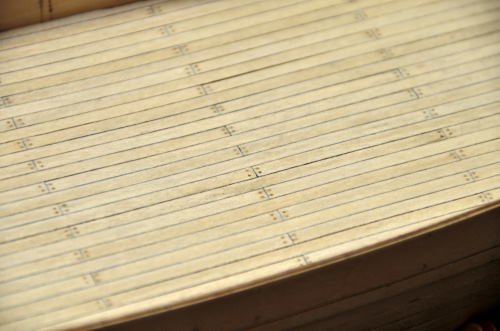
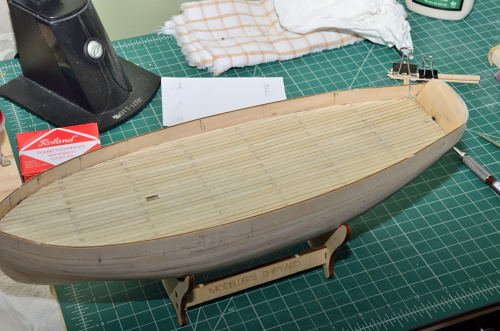
I got exactly what I wanted for Christmas: some uninterrupted build time over the last few days. I started on the decking. My original plan was not to worry too much about treenails. I tried hinting at them by making a little divot/dot with a colored pencil near to the color of the deck and hated it. I experimented a bit and ended up going down the rabbit hole of toothpick tips. After 340 individually drilled holes with snipped, glued, and trimmed toothpick tips, every tendon in my right arm is killing me. Just finished sanding and finishing the deck. I like the look of the treenails ok, although precision of placement could have been a bit better. Another good skill building exercise.

- 241 replies
-
- 3
-
-
- mermaid
- modellers shipyard
- (and 1 more)
-
Thanks Rick and Fernando...very helpful. I was worried there was something obvious that I just wasn't getting. I'll mull it over more when I get to that part in a bit. Rick: elimination of the "frames" is interesting. I haven't done much research but after you mentioned it I looked at several other models online and solid planked inner bulwarks seem to be common. I might go that route.
-
Question for fellow Mermaid builders: I'm a little bit baffled by the 2mm x 4mm strips of walnut that are glued "edge on" to the top of the bulwarks. The instruction book and the DVD don't offer the same instructions. I'm not sure what the purpose of it is other than to raise the height of the bulwarks. In the DVD, he shaves it down with a hand plane without much rationale. What exactly is it being shaved down to? Is the strip covered by planking inside and outside of the bulwark? if so, why is it made of a nicer wood? Is any part of it supposed to be visible?
-
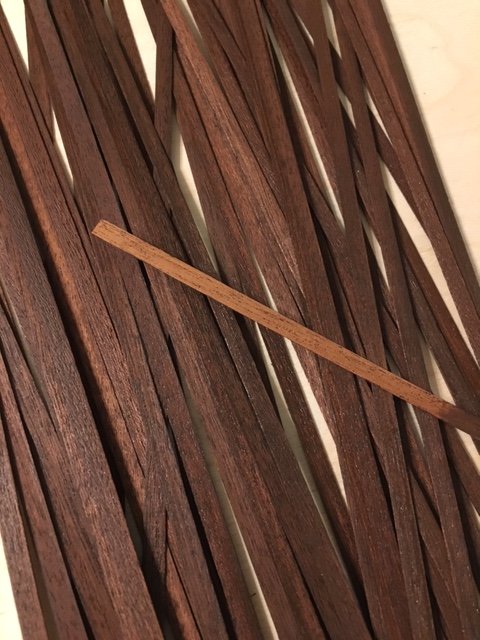
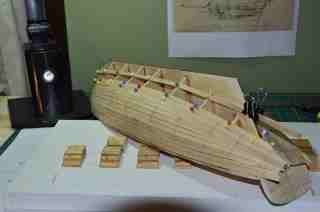
Been a bit bogged down lately with work and holidays, but I've managed to get in a little build time. I shaped and fitted the bulwarks...and "fitted" is the key word. It took some fairing, sanding, and trimming to make sure they were flush with the first layer of planking below. I've dry fitted the keel and stem, and will need to plank them before gluing them in place (Rick, I agree that plywood is overused in this kit, but I'm not sure I'm up for making a new keel). To gear up for that I spent some time preparing the wood stock for my outer layer of planking. I want some darker wood tones in the model and I don't like the orange-ish tinge of the wood so I opted to stain. I gave each plank a very light pass with #400 sandpaper, then applied some water based wood conditioner and finally a water based stain. I managed to darken up the planks without losing the wood grain. I think the color is closer to King's paintings of the boat (although I realize that was probably paint and not true wood color).
- 241 replies
-
- 7
-
-
- mermaid
- modellers shipyard
- (and 1 more)
-
Thanks Rick and Fernando. Dumb question: did you plank over the false keel before attaching and then do the second layer of planking on the hull? Seems like the long run of the keel underneath could almost go either way but at the bow it would need to be planked first (if that makes sense).
-
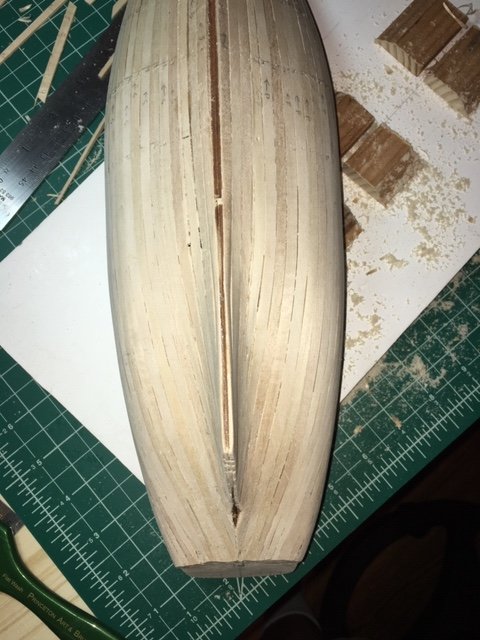
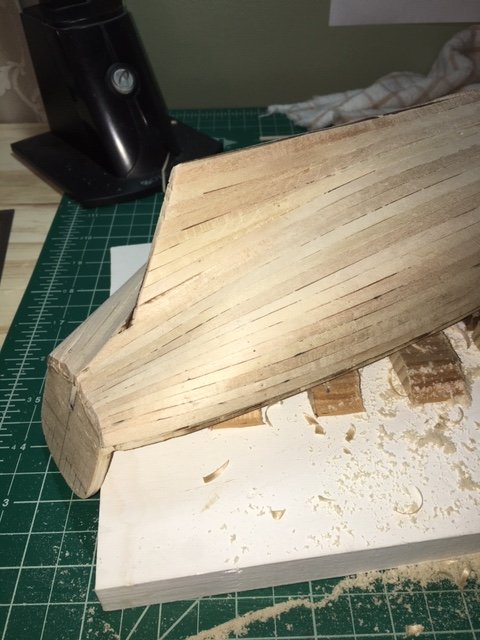
Spent a good bit of time this week filing, filling gaps with wood putty, and sanding. I managed to fill and re-shape a slight “depressed fracture” of one plank between bulkheads at the bow (I squeezed a bit too hard pinning something and the plank gave a bit. I’ve got a pretty smooth hull at this point. Before I get to the second planking layer I’ll have to decide whether I’ll fit the false keel last (like the instructions and DVD) or fit it before the second layer.
- 241 replies
-
- 6
-
-
- mermaid
- modellers shipyard
- (and 1 more)
-
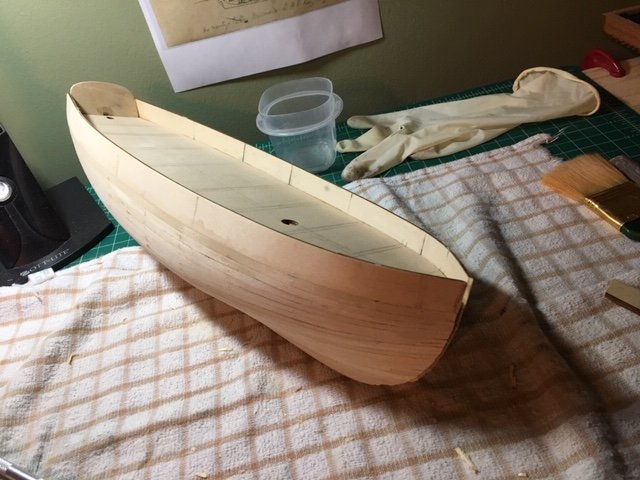
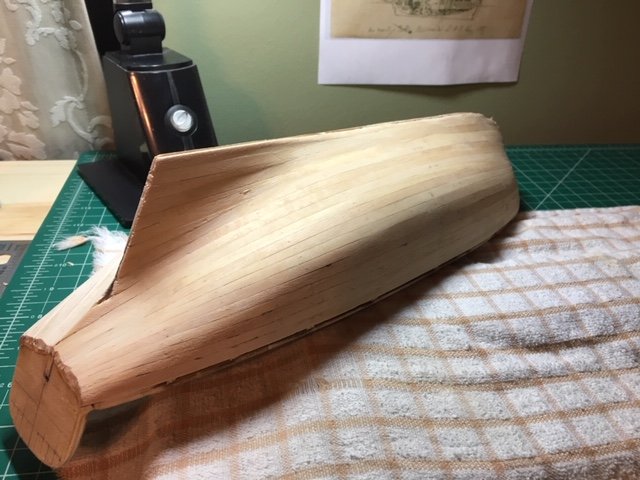
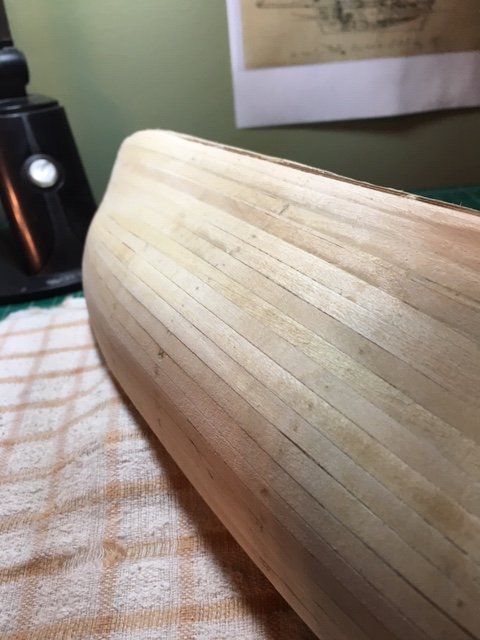
Got in a little sanding tonight, starting at the stern. Looking much better than it did in "rough" form. Sanded pretty smooth. Once I cover the whole hull I'll go back and hit a few of the gaps with some filler and final sanding.
- 241 replies
-
- 4
-
-
- mermaid
- modellers shipyard
- (and 1 more)
-
A quick look at the carpentry I've done around my house will tell you that sanding and filling are my forte!
- 241 replies
-
- 1
-
-
- mermaid
- modellers shipyard
- (and 1 more)
-
Thanks for the tip, B.E. I was mostly using a crimp plank bender (as used in the DVDs), but it obviously has some limitations. I think it was good to get a feel for it and learn its uses and limitations, but in hindsight I wish I had played with some other bending techniques for the trickier spots. I've got some scrap limewood left over and might practice some heat/water bending.
-
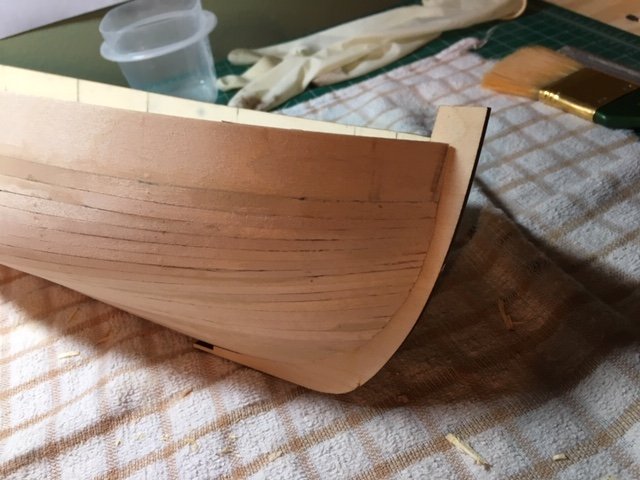
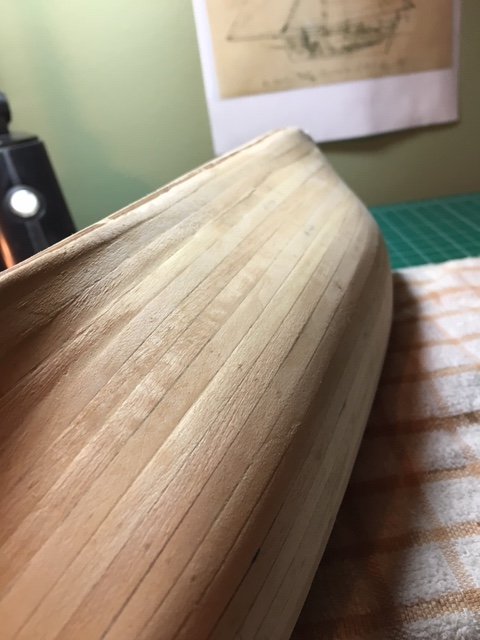
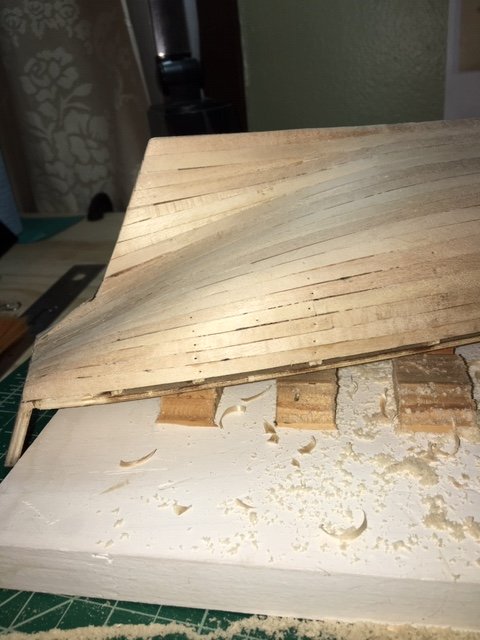
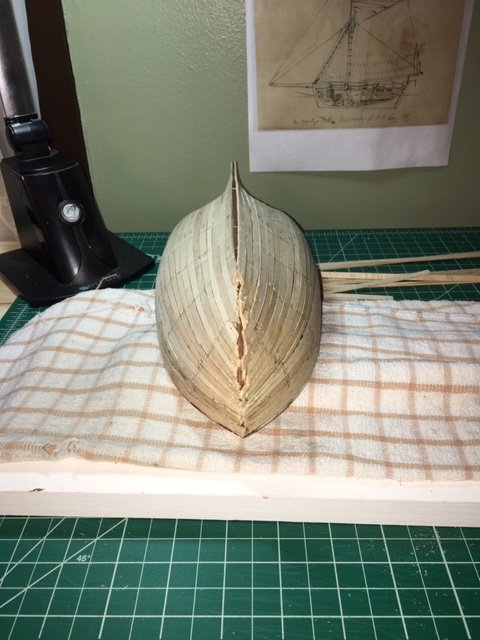
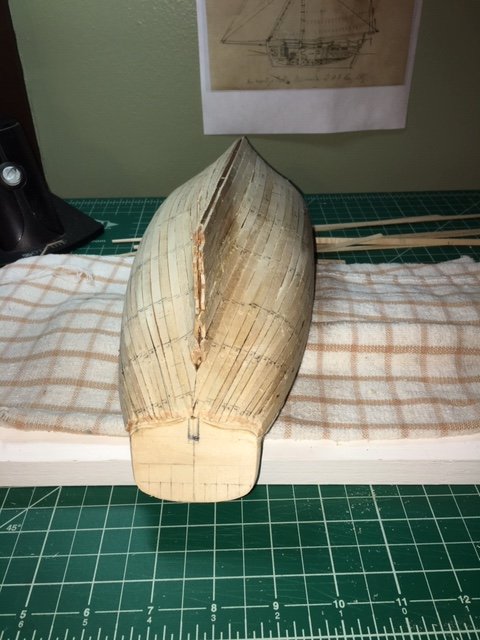
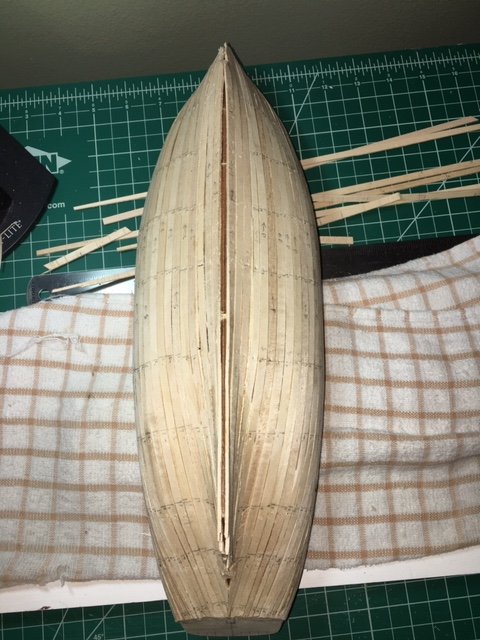
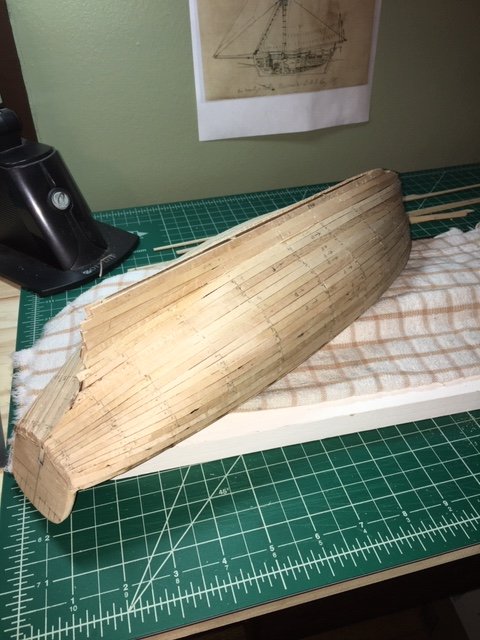
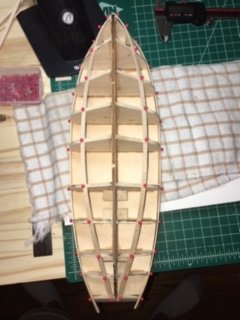
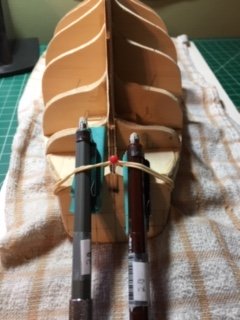
I’ve been a little sidetracked and busy lately but have managed to finish the first layer of planking. I won’t lie, I struggled a bit with the curves in the stern, especially where the planks twist to the deadwood area. I have some unsightly small gaps and uneven spots that should be filllable and sandable. On the positive side, I’m pretty pleased with the symmetry (even my gaps and uneven spots are about the same on each side!) and smooth gradation of plank widths (no jumps from super narrow to wide planks). Doesn’t matter for the first layer, but it’s dress rehearsal for the final planking.
- 241 replies
-
- 2
-
-
- mermaid
- modellers shipyard
- (and 1 more)
-
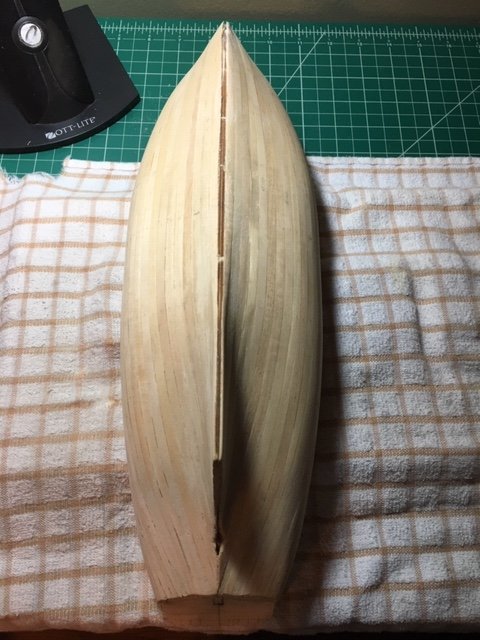
Planking continues at a casual pace. I’m lucky to fit and attach one pair each evening, but this weekend I’ve hit breakneck production and done two pairs per night. I’m trying to measure and fit each plank carefully for the practice, even though it’s just the first layer. I’ve got some small gaps and mild clinkering (some of which is just varying thickness of planks). Nothing that can’t dealt with through sanding, etc. My technique still needs practice but I’m pleased with the symmetry and flow of the lines I’ve got. I had originally intended to just plank according to the DVD instructions, but after a while I got much more comfortable and I’ve been freestyling more in line with the planking tutorial from this site.


- 241 replies
-
- 4
-
-
- mermaid
- modellers shipyard
- (and 1 more)
-
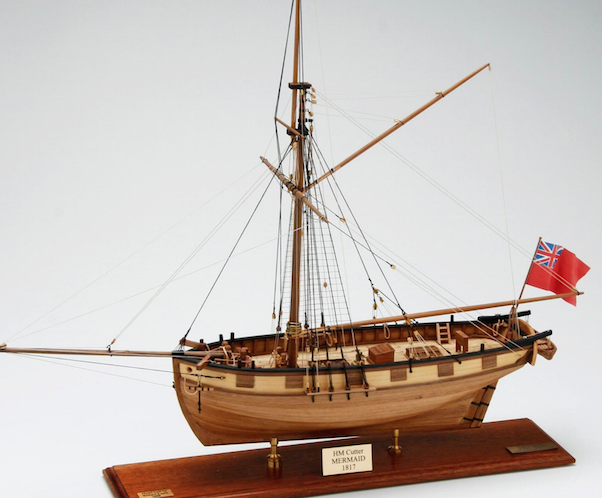
Rick, I'm on the fence between that explanation and the idea that they were just plain ol' disused gunports that weren't needed when the ship was re-purposed for merchant work then survey work. I can't find any reference one way or the other in the documents I have (other than confirming two carronades). The ship was finished just after the end of the Napoleonic wars. I wonder if it was planned for service as an armed cutter but then sold out of the service by the time it was done. The model in the Australian National Maritime Museum (below) has some darker planking -- but not even the two guns we know it had. I'm not sure if that's supposed to suggest gunports, covered gunports, or what. Still haven't decided how to approach that (but I'm not there yet!). Thanks for the link...I didn't have that image.
-
Rick - thanks for the tips. I'll definitely keep a close eye on those parts. With regard to the gunports, what are your thoughts on the fact that King's drawings seem to show six gunports down the side of the boat? I know he only carried two carronades, but I've wondered if those are disused gunports. The history of the boat doesn't clarify things. It was bought for King's use out of merchant service, not clear if it was originally built for the service or to be an armed cutter, or what. It wasn't very old at the time the colonial government bought it and it's origins in a Indian shipyard are murky. Thanks also for the maritime museum link. Fernando - Glad to hear I'm not the only one with that experience. I immediately switched to the hobby knife and steel ruler and am happy with it. I'm trying (trying!) to be fairly precise with the first layer of planking just to build planking skills, but it's definitely a relief to know I've got a good margin of error. If I post pics I might just land an endorsement deal from sandpaper and wood putty companies!
- 241 replies
-
- 1
-
-
- mermaid
- modellers shipyard
- (and 1 more)
-
Planking started in earnest this week. I’ve gotten into a rhythm each night after work where I bend, bevel, adjust, and attach a pair of planks cut the previous night - then measure and trim down a new pair for the next night. A few thoughts: 1. Trimming the plank width using a vise and small hand plane (like the DVDs) just did NOT work for me. I don’t think I have a well-suited vise and probably didn’t have the depth of the blade quite right. The planks looked like I gnawed them with my teeth. I ended up just marking the planks and then trimming them with a straight edge and hobby knife. Really not that time consuming. Any consensus on the “best” way to trim planks or do people just do what works for them? 2. Mixed feelings on the crimp style plank bender. I’ve gotten much better with it but not convinced I’ve mastered it. 3. Each successive plank is fitting tighter so I know the learning curve is kicking in. 4. The transom area is still giving me some headaches (although I suspsect it’s just a tricky area on lots of kits). I’ve got some clinkering going on around the curve of the transom, possibly because the limewood planks are so thick, but I’m also getting a better appreciation of how the planks need to behave as they curve (and how to make them behave!). Pretty sure I can sand/fill to smooth things out, but would have liked for it to be a little tighter in the first place. 5. The limewood planks in the kit are of varying quality. Some are darker and harder to bend, some are lighter and very easy to inadvertently chop or kink. Not sure if this is normal variation or just the quality of the kit. It helps to pair up similar looking planks for each side. 6. Still feeling very good about this as a beginner’s kit. I’m feeling challenged and having to learn along the way, but not feeling overwhelmed or discouraged at all so far.
- 241 replies
-
- 2
-
-
- mermaid
- modellers shipyard
- (and 1 more)
-
Rick, I'm open to hearing about any issues you ran across but don't go out of your way. I'm kindof looking forward to learning more about the rigging (whether I'll enjoy DOING it remains to be seen, but I think I will). I got the Lennarth Petersson rigging book for fore and aft rigs and it has a pretty good configuration for a typical cutter, which will hopefully help sort out any snags I run into. My knowledge of rigging is basically all of the odds and ends I've picked up through immersion in reading all of Patrick O'Brien's novels.
-
Rick...yes...very glad to have seen the bulwark issue and will have to double-check if there has been any change in the instructions. That never would have occurred to me. I'll proceed very cautiously with that part. Also...the DVD specifically tells you to do the weird run of the anchor cables. I did a double take and just assumed I must not know much about these things but the physics of that didn't seem right! Your Mermaid build looks great. I hope to do as well.
-
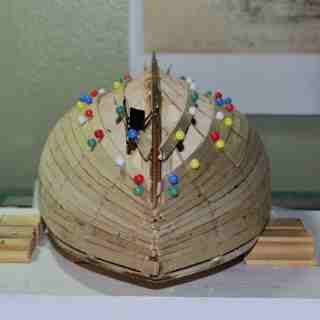
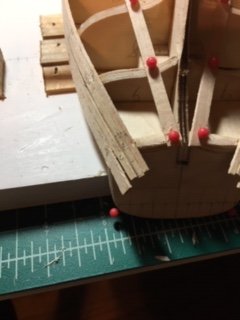
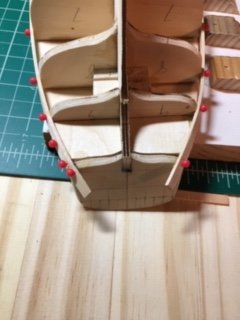
Back to planking once the transom was sorted out. Got the first plank and the guide plank in place on each side. This time instead of putting one guide plank on entirely then putting on the other one, I went bulkhead by bulkhead, pinning and comparing each side. No more “something’s not quite right” feeling. The planks also attached to the new transom with MUCH less groaning and straining.
- 241 replies
-
- 2
-
-
- mermaid
- modellers shipyard
- (and 1 more)
-
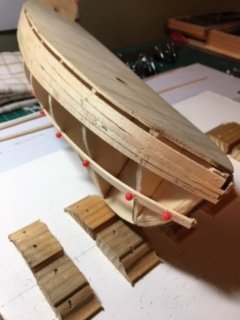
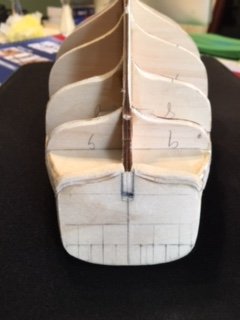
Yesterday’s time-out was worthwhile. My bulkheads checked out ok, but my measurements for the first two planks were a little off. The bottom of the transom definitely needed to be built up a bit. I put down two strips of 1/32 sheet stock and then trimmed and faired down and gave it a bit more shoulder. to match the other bulkheads.

- 241 replies
-
- 1
-
-
- mermaid
- modellers shipyard
- (and 1 more)
-
Hi Chook and Fernando...thanks for the encouragement. Good to hear from other members of "Club Mermaid." I've been pleased with the kit so far and I think it was a good choice for a beginner. I'm learning lots of new things, but not feeling overwhelmed. The parts where the instructions are vague have made for some challenges, but it seems like that's par for the course in lots of kits. The DVDs have helped a lot. When I was a young modeler I tended to get "go fever" but now that I'm getting old and mellow, I don't mind taking my time, slowing down, and figuring out a problem (my favorite line from the DVD: "Take your time. It's a hobby, not a job"). Chook, that's interesting about the wreck. I just recently found the online blog of the team working the site. I love it when history makes a model come to life! I'm off to do some reconstructive surgery on the base of the transom. I'll post updates.
- 241 replies
-
- 1
-
-
- mermaid
- modellers shipyard
- (and 1 more)
-
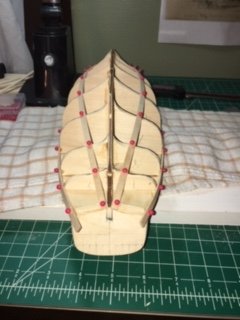
Well, I ended up carefully removing that first plank also and spending time checking my bulkheads. I literally traced and cut out index cards for each bulkhead to check symmetry. They were actually in pretty good shape, with maybe a couple of minor spots to sand. I can see better where my measurements for the planks were off a bit. I'm glad I backed up and took stock. It'll give me a chance to build up the underside of the transom just a bit to give it some shoulder, and now I have a better idea how to get those first two planks right. I was eager to get into the planking this weekend, but sometimes you have to listen to your gut when it says something's not quite right.
-
Mixture of progress and setbacks today, but nothing unmanageable. I got the first plank on. First few attempts with the plank bender I felt a little like Frankenstein's monster meeting the little girl by the pond. After obliterating some scrap stock, I found a gentler touch and think I’ve got it. My transom sits a little high (it has a lot of play when you’re attaching it to the keel and the instructions don’t give much guidance as to just how it should sit). The result is a pretty sharp twist in the first plank, and the next plank or two will be tricky. I suspect it will need some sanding and filler in that area. I pinned on the lower guide plank on each side and adjusted one side several times. No matter how I placed it, something just didn’t look right. When measurements in one dimension worked, something was a bit off in another dimension. I decided that I must have lost some symmetry when fairing my bulkheads. As excited as I was about planking, I finally declared a “time out” and removed the guide planks. I think I can take some measurements and do a bit more fairing to make some adjustments to symmetry without having to remove the first plank.
- 241 replies
-
- 2
-
-
- mermaid
- modellers shipyard
- (and 1 more)