DONATION DRIVE - SUPPORT MSW - DO YOUR PART TO KEEP THIS GREAT FORUM GOING!
×


KurtH
-
Posts
449 -
Joined
-
Last visited
Content Type
Profiles
Forums
Gallery
Events
Everything posted by KurtH
-
Absolutely immaculate as always!
-
Thanks Mort! I appreciate your constant support throughout this project starting from before I joined MSW.
- 112 replies
-
- 1
-

-
- Bluejacket Shipcrafters
- Constitution
- (and 2 more)
-
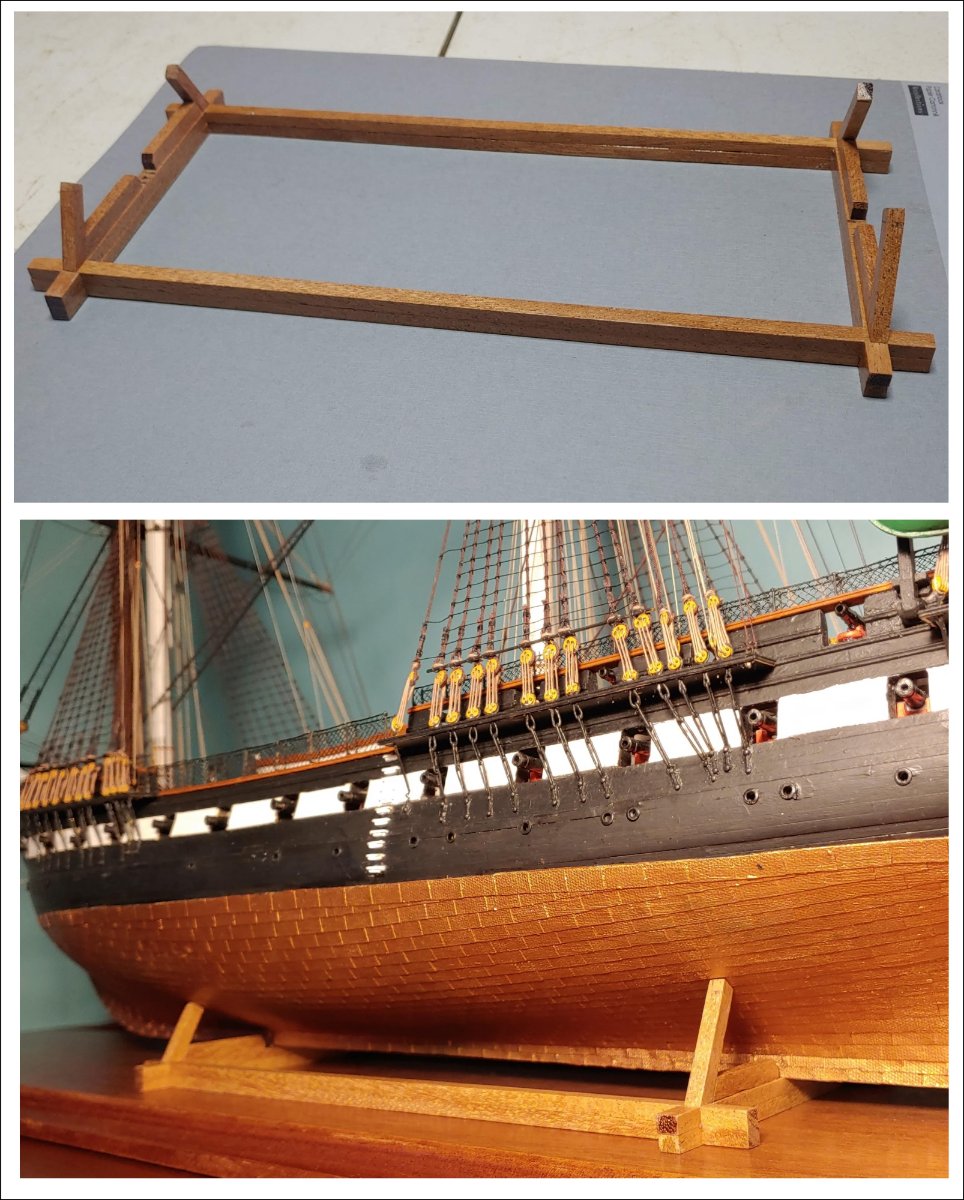
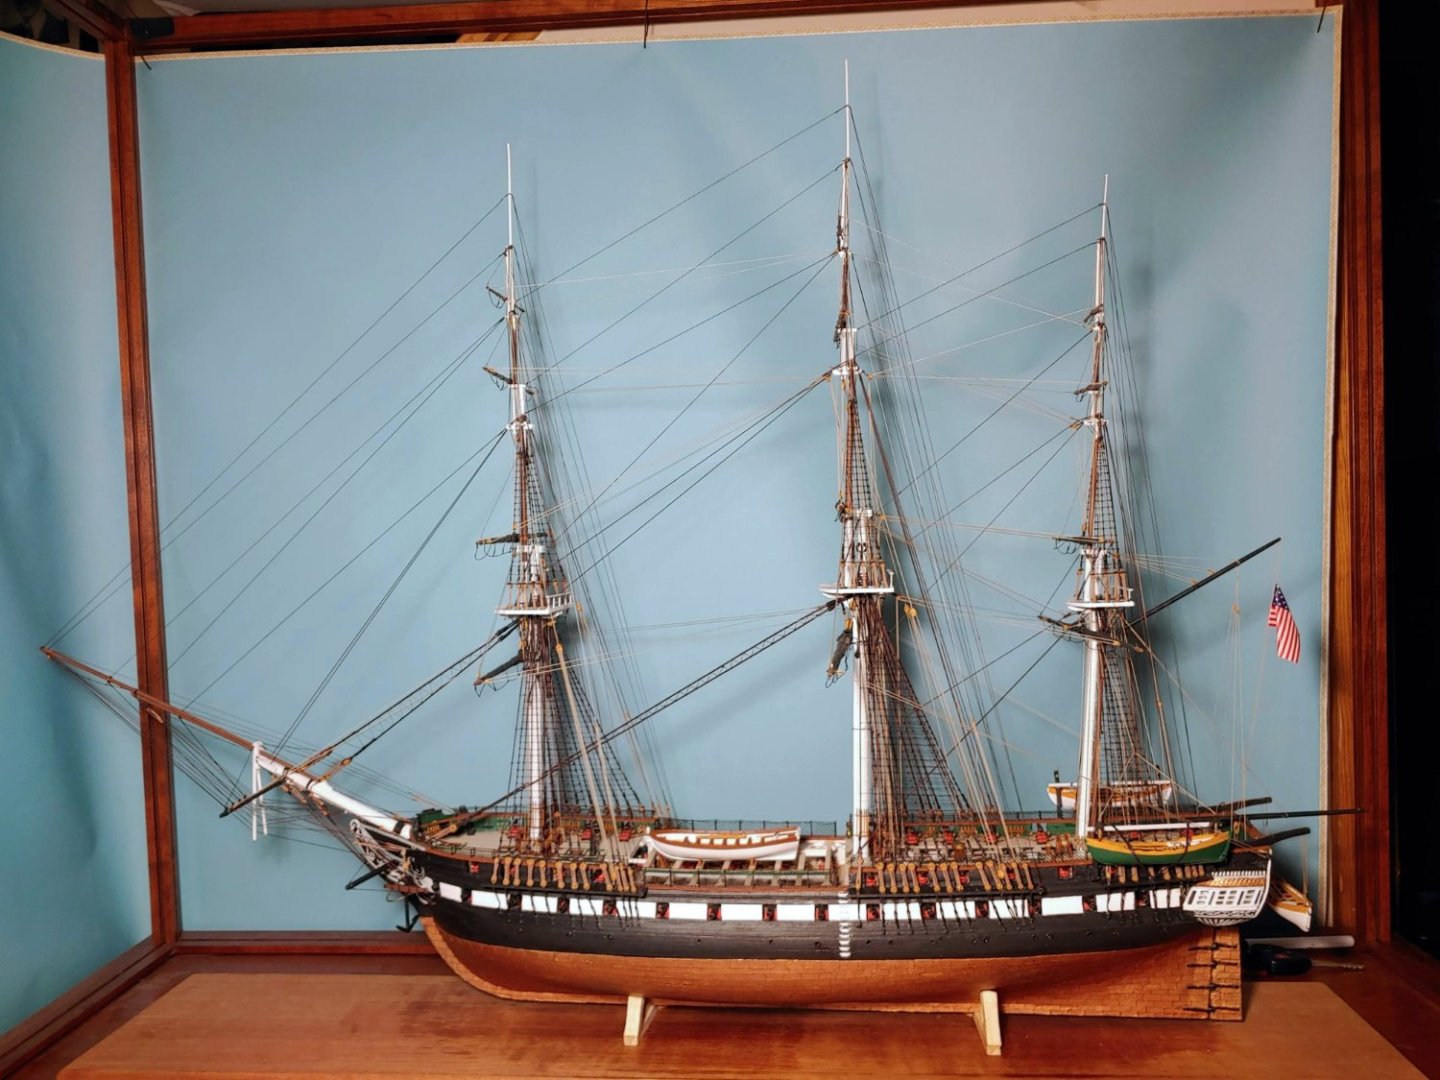
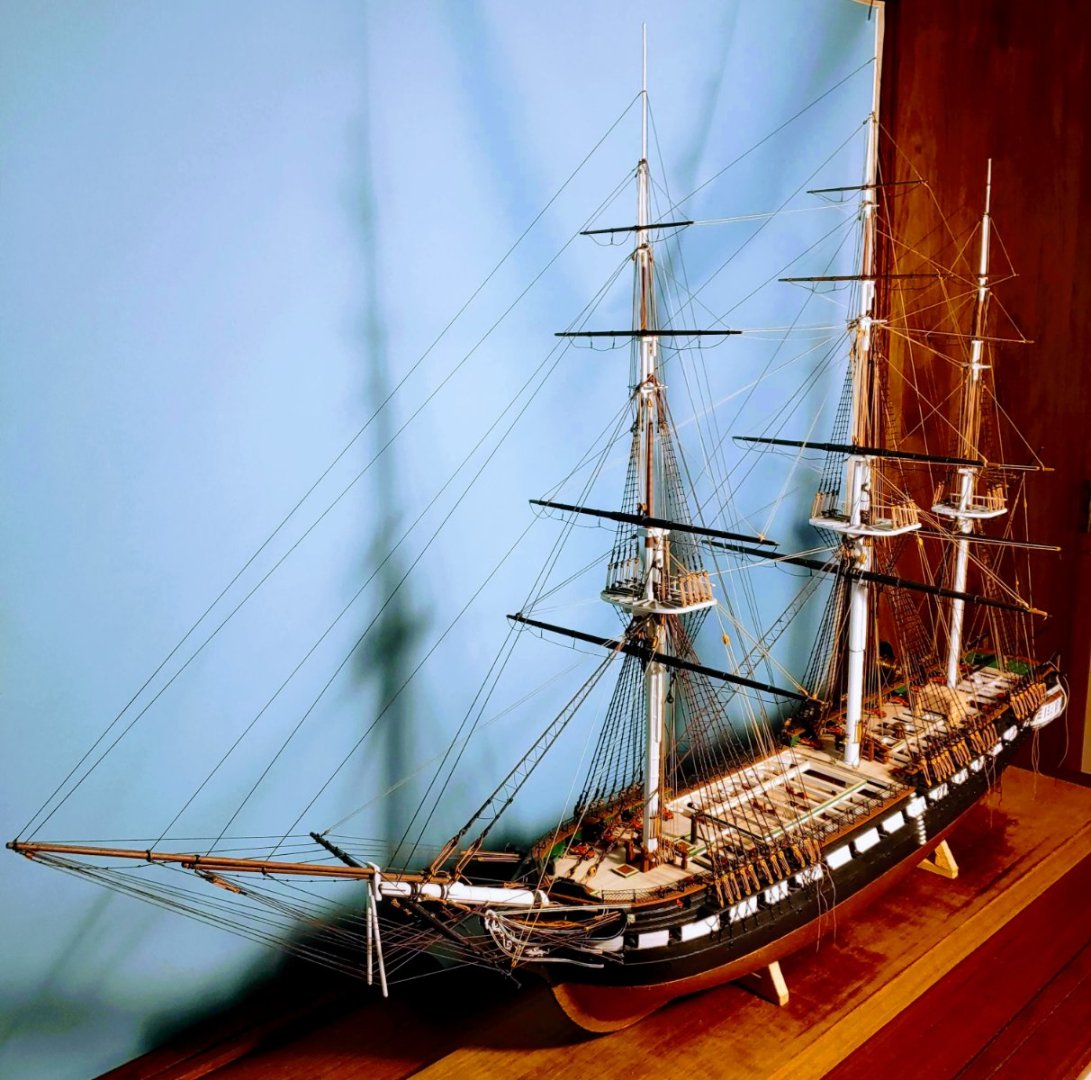
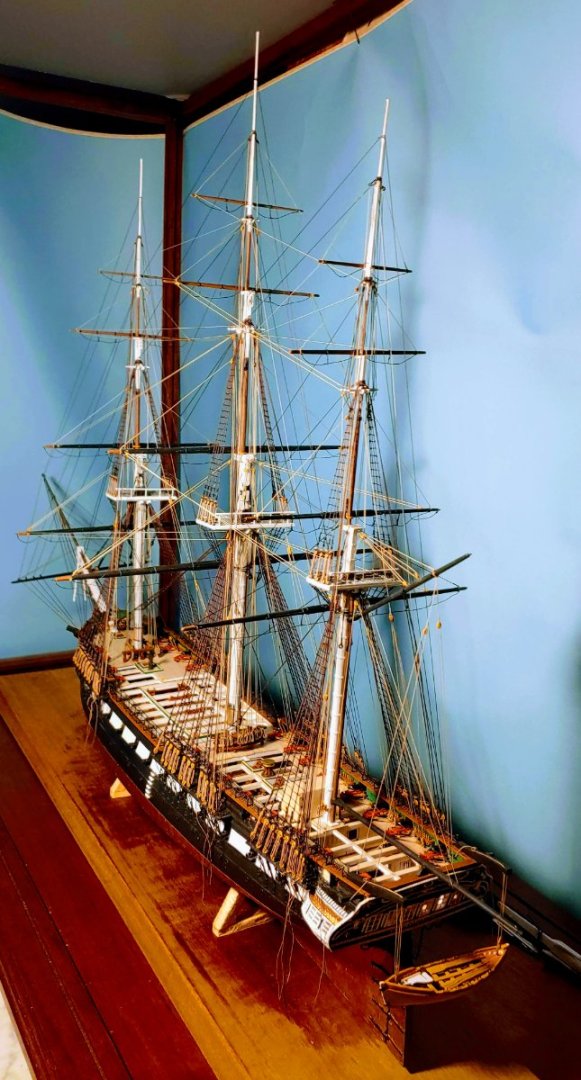
I have completed and varnished the display cradle, and have finished and varnished the base board. I modeled it after some cradles I saw in Keith Julier's books on modeling techiques. This will be my last build log post. I understand that all shots of the completed model belong in the gallery which I will begin work on shortly. I began this build in 2007, 16 years ago! There are two reasons it took this long. One reason is that this is a very challenging build, and I had never tried the majority of tasks required. It was therefore a matter of learning skills as I went rather than applying skills already mastered. The other reason was that I needed to take months at a time off during the year to pursue my audio-video jobs. In view of the fact that this is a challenging build, and that I was a novice in most respects when I began, it is not surprising that the errors and flaws in my model are legion. Nonetheless, I am happy with the overall appearance of the model. Actually, I think I deserve an "A" for persistence if nothing else, and I am patting myself on the back just for having finished it. I would like to express my great appreciation for the encouragement in the form of comments and "likes" and advice I have received from other MSW members. MSW is truly a mutually supportive and collegial group of model enthusiasts. I would also like to thank Nic and the folks at Bluejacket who have been a delight to work with, and prompt in sending me all those little items I bought one at a time because I could not always forsee my needs. I also benefitted greatly from the availability of fine rope from Chuck at Syren.

- 112 replies
-
- 17
-
-

-
- Bluejacket Shipcrafters
- Constitution
- (and 2 more)
-
Thank you so much Nic!
-
Thanks so much gentlemen! Your kind words mean a great deal to me! Once the cradle is done, I will wrap up the build log and start work on my gallery photos.
- 112 replies
-
- 1
-
-
- Bluejacket Shipcrafters
- Constitution
- (and 2 more)
-
Thank you so much Tim!
-
Thanks so much!
-
I am almost finished with my Constitution model, and I will soon want to post Photos in the gallery. I looked at the above instructions the images of which bear little resemblance to the pages I encounter beginning of the absence of a shadow person avatar. When I go to the editing of my profile, there is no prompt for gallery. Can someone set me straight? Thanks.
-
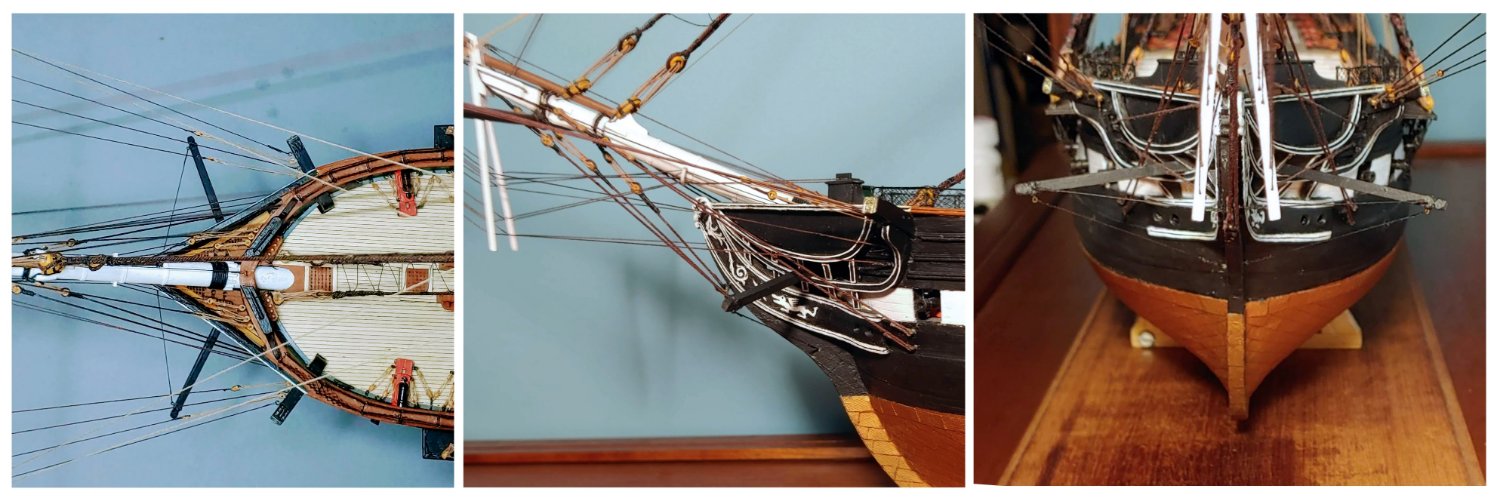
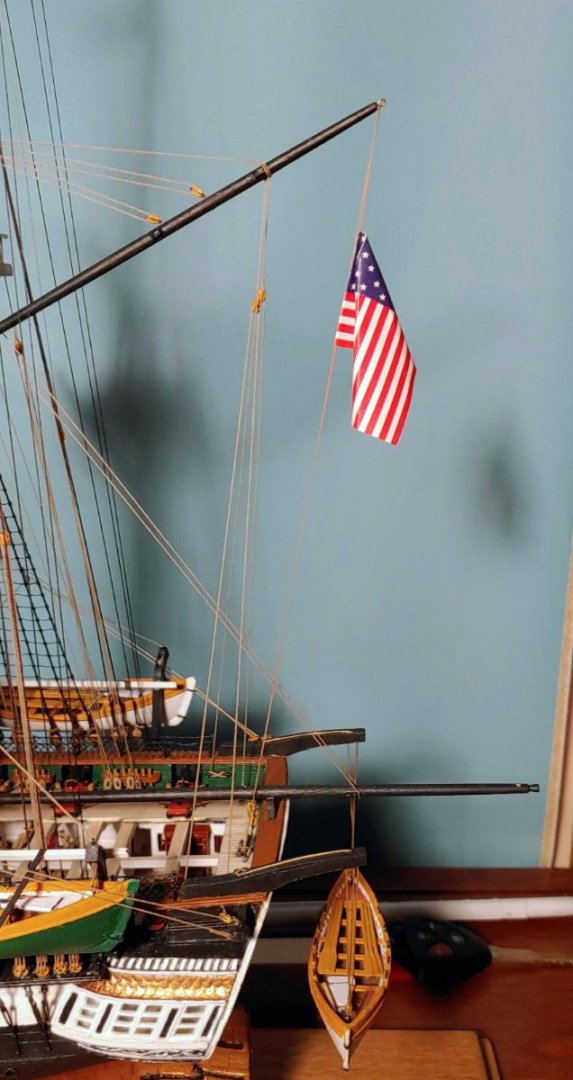
Flag installed. This completes the model (!!!!!!). Now my attention turns to finalizing the display starting with the cradle. I would like to do this in mahogany to match the base board. Let's see how it comes out. Worst case scenario- I am unable to improve on what I have, in which case, I will paint the current cradle black. We shall see. More posts to come.
- 112 replies
-
- 21
-
-

-
- Bluejacket Shipcrafters
- Constitution
- (and 2 more)
-
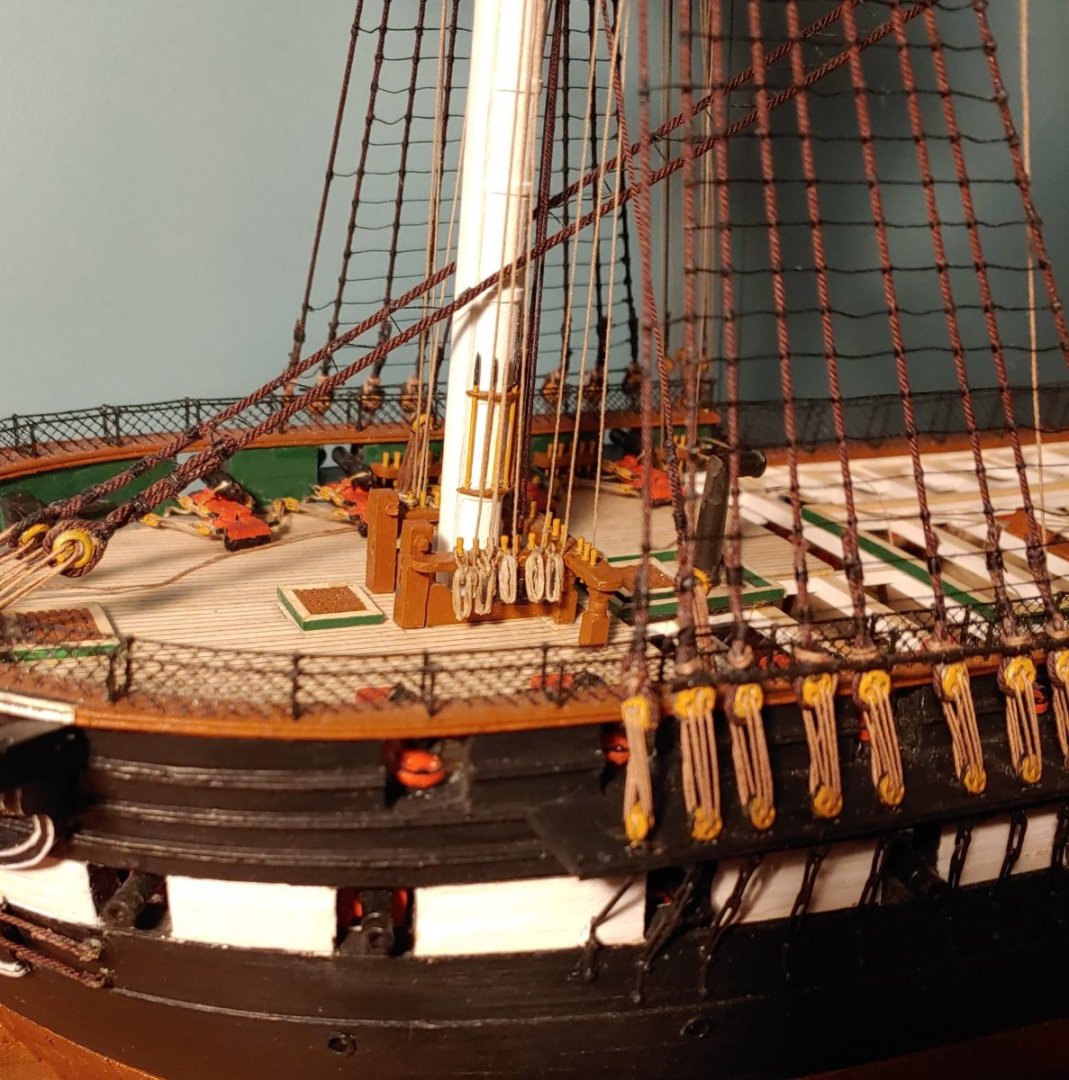
Main braces rigged. Now to see if I can hang the flag in a realistic manner rather than just stick it on.
- 112 replies
-
- 6
-
-
-
- Bluejacket Shipcrafters
- Constitution
- (and 2 more)
-
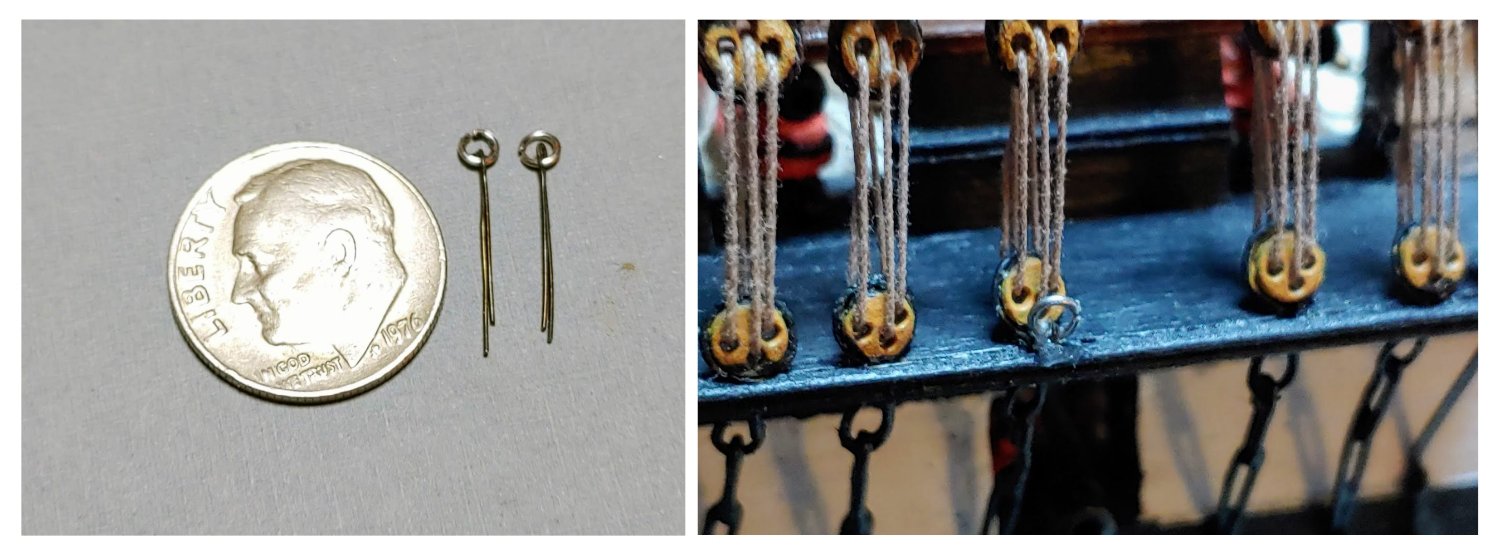
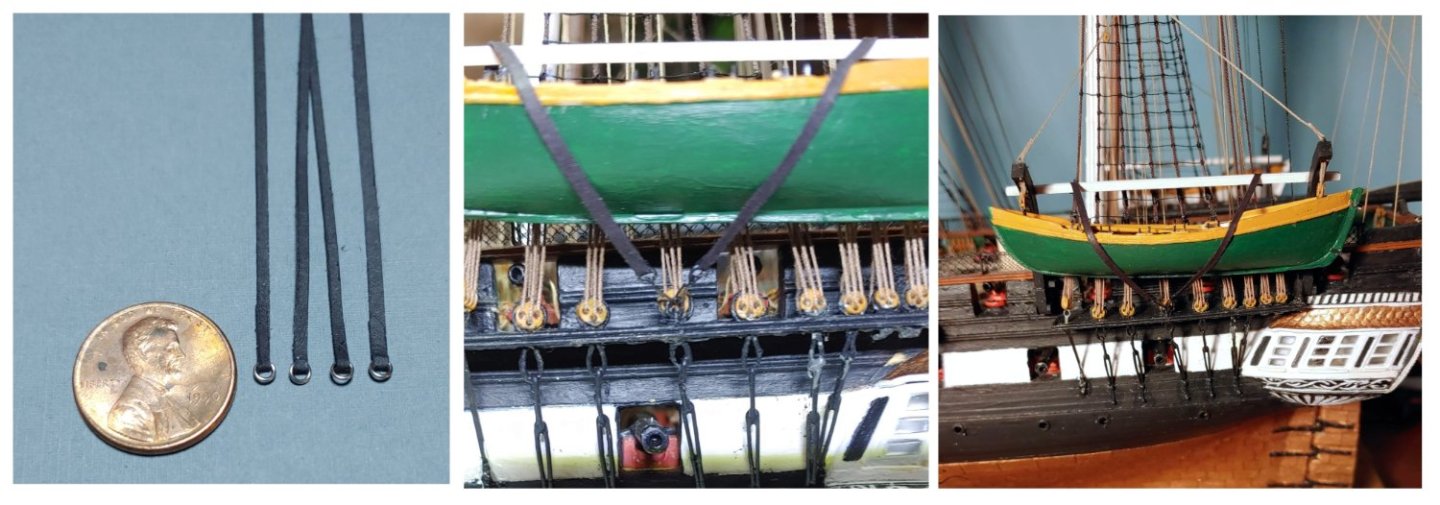
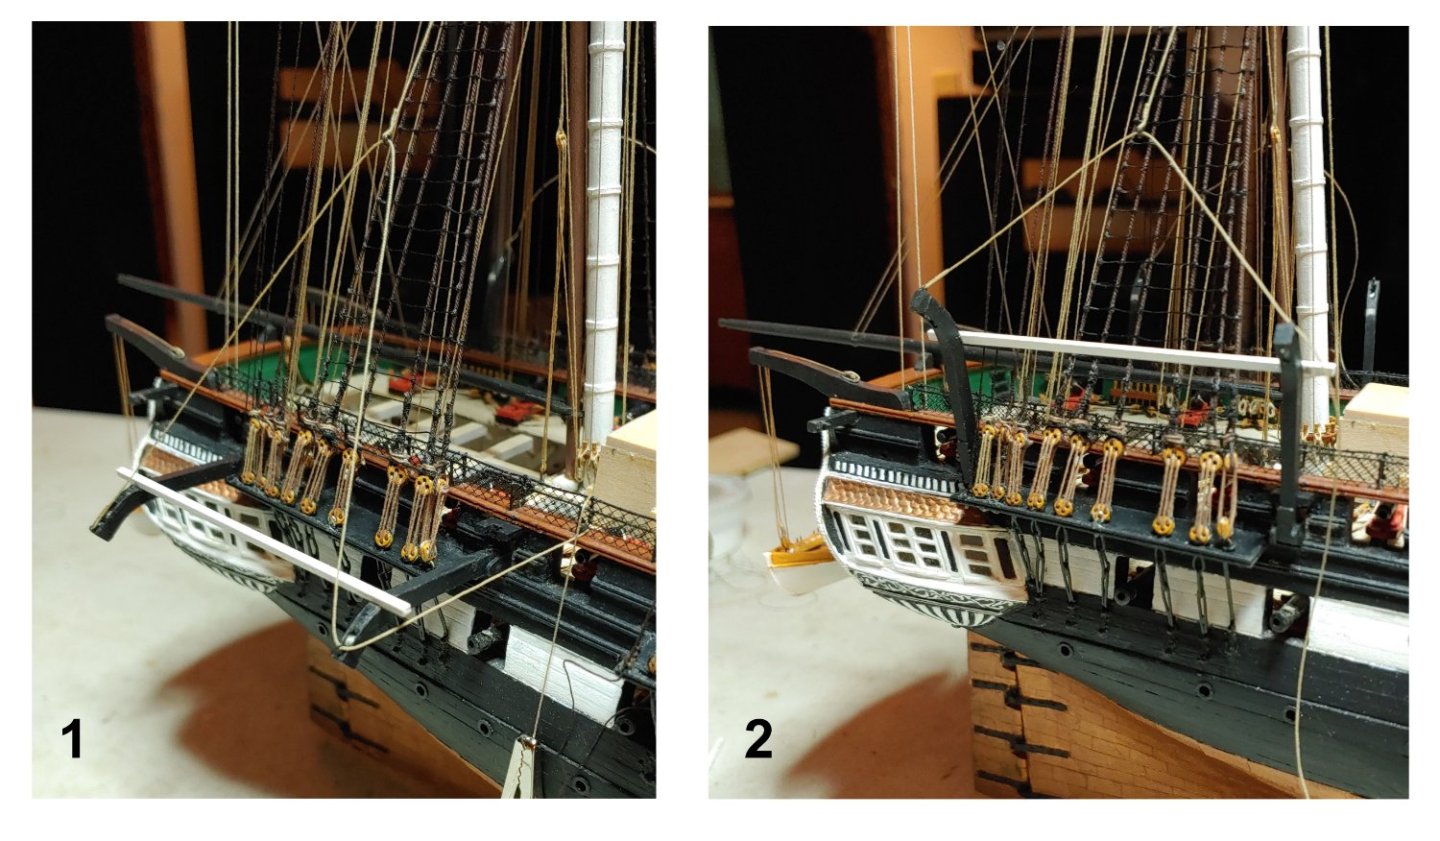
Gripes installed. The straps are made from black construction paper. I did not use the rings from Model Expo because they were too small and the next size up was too big. These are the same rings I used as breeching rings on the 24 pounder guns on the gun deck. I have lost track of where I got them. Now to rig the main braces. I will also attempt to hang the flag which will add a dash of color. Whether or not I use it will depend on being able to make it hang in a realistic fashion.
- 112 replies
-
- 7
-
-
- Bluejacket Shipcrafters
- Constitution
- (and 2 more)
-
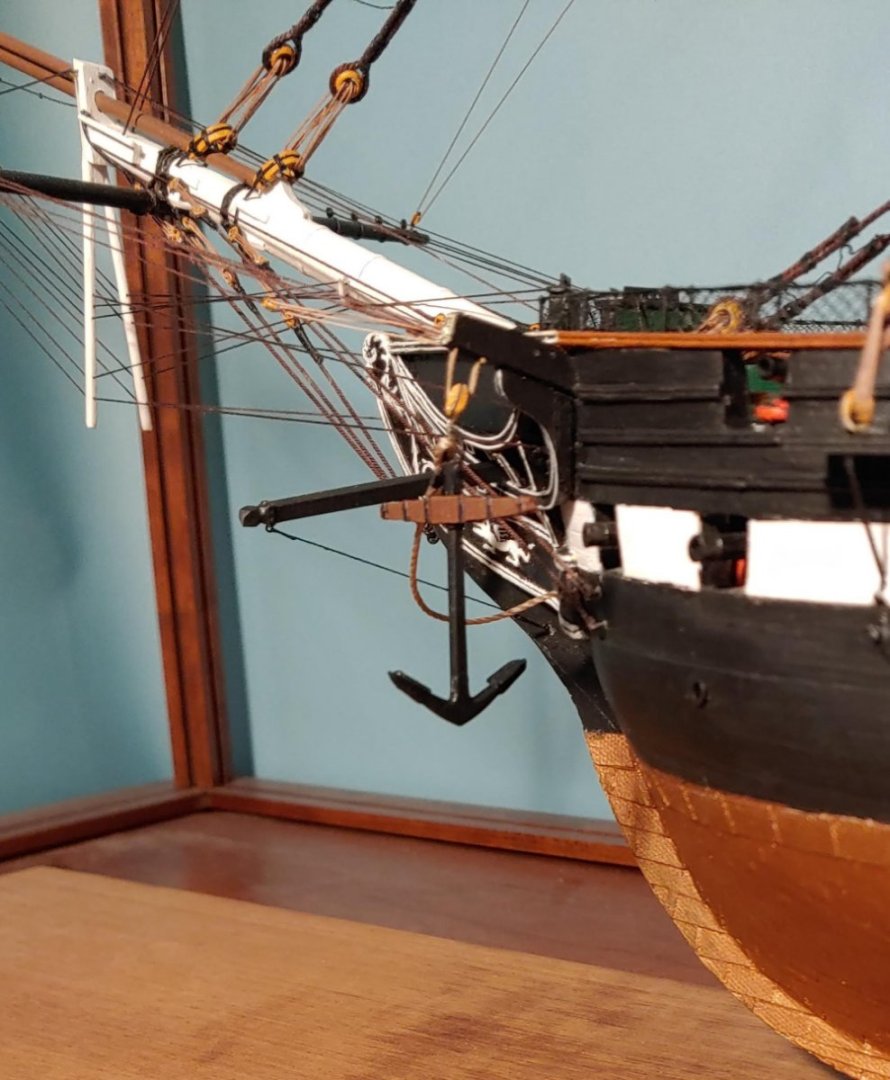
Port anchor in place. I used the anchors from the Revell model because they look more like the ones illustrated in the Marquardt AOS. Yeah I know that it should be made fast to the channel, but as the cathead and channel are so far apart, and there are no exposed timber heads to which to tie it, I decided to hang it instead. On the other hand, I have seen some very fine models on MSW in which that option was used. I'll do the starboard anchor tomorrow.
- 112 replies
-
- 7
-
-
- Bluejacket Shipcrafters
- Constitution
- (and 2 more)
-
While waiting for the split rings that I ordered from Model Expo to arrive, I finalized the bowhead. Seats of ease and "canvas" (card stock) covering were permanently glued in. Fore tack boomkins were installed and rigged. Once the quarter boats have been finalized, all that will remain will be the anchors, the main braces, and, if I an pull it off, a new mahogany cradle to match the base board.

- 112 replies
-
- 7
-
-
- Bluejacket Shipcrafters
- Constitution
- (and 2 more)
-
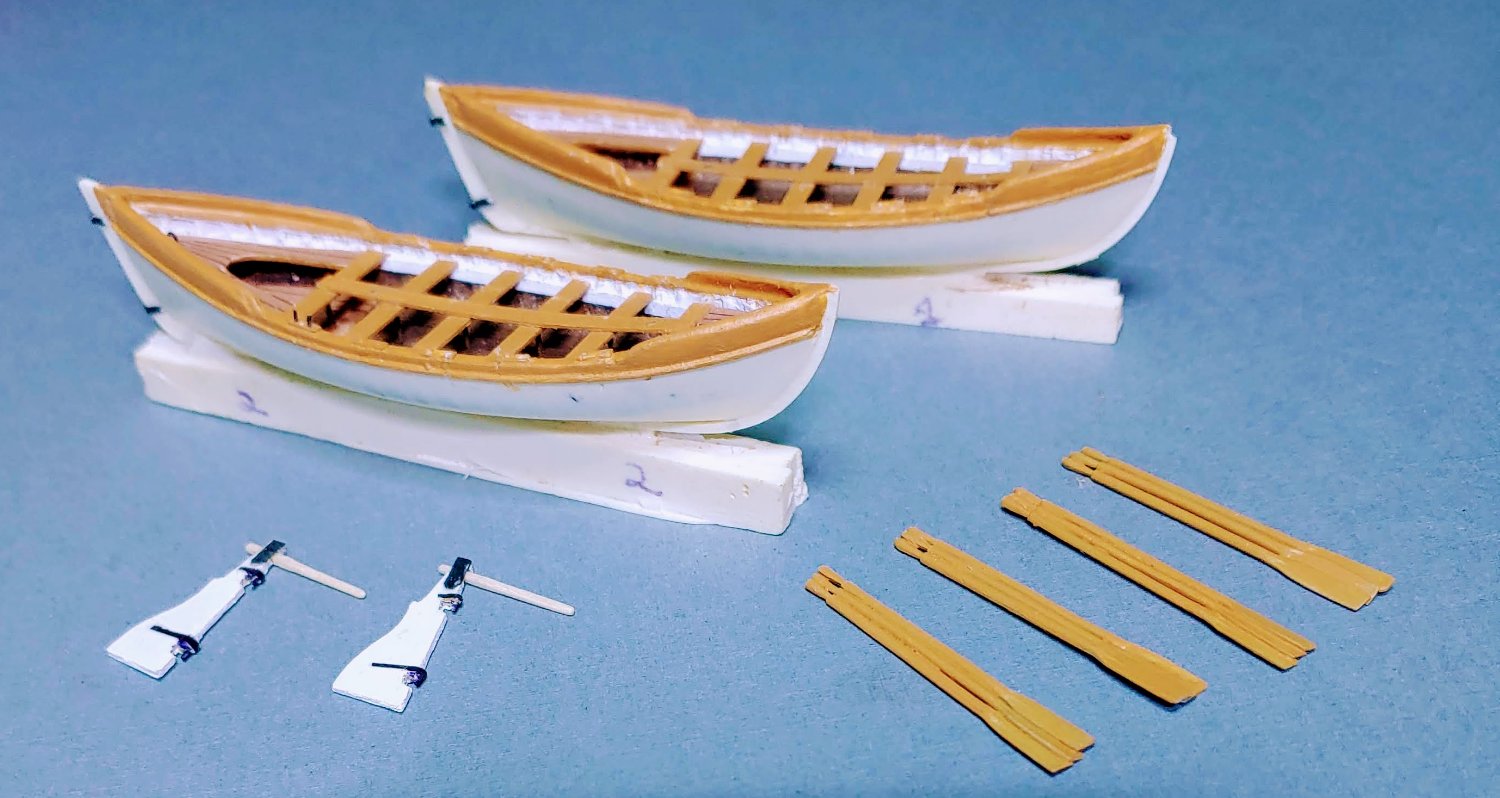
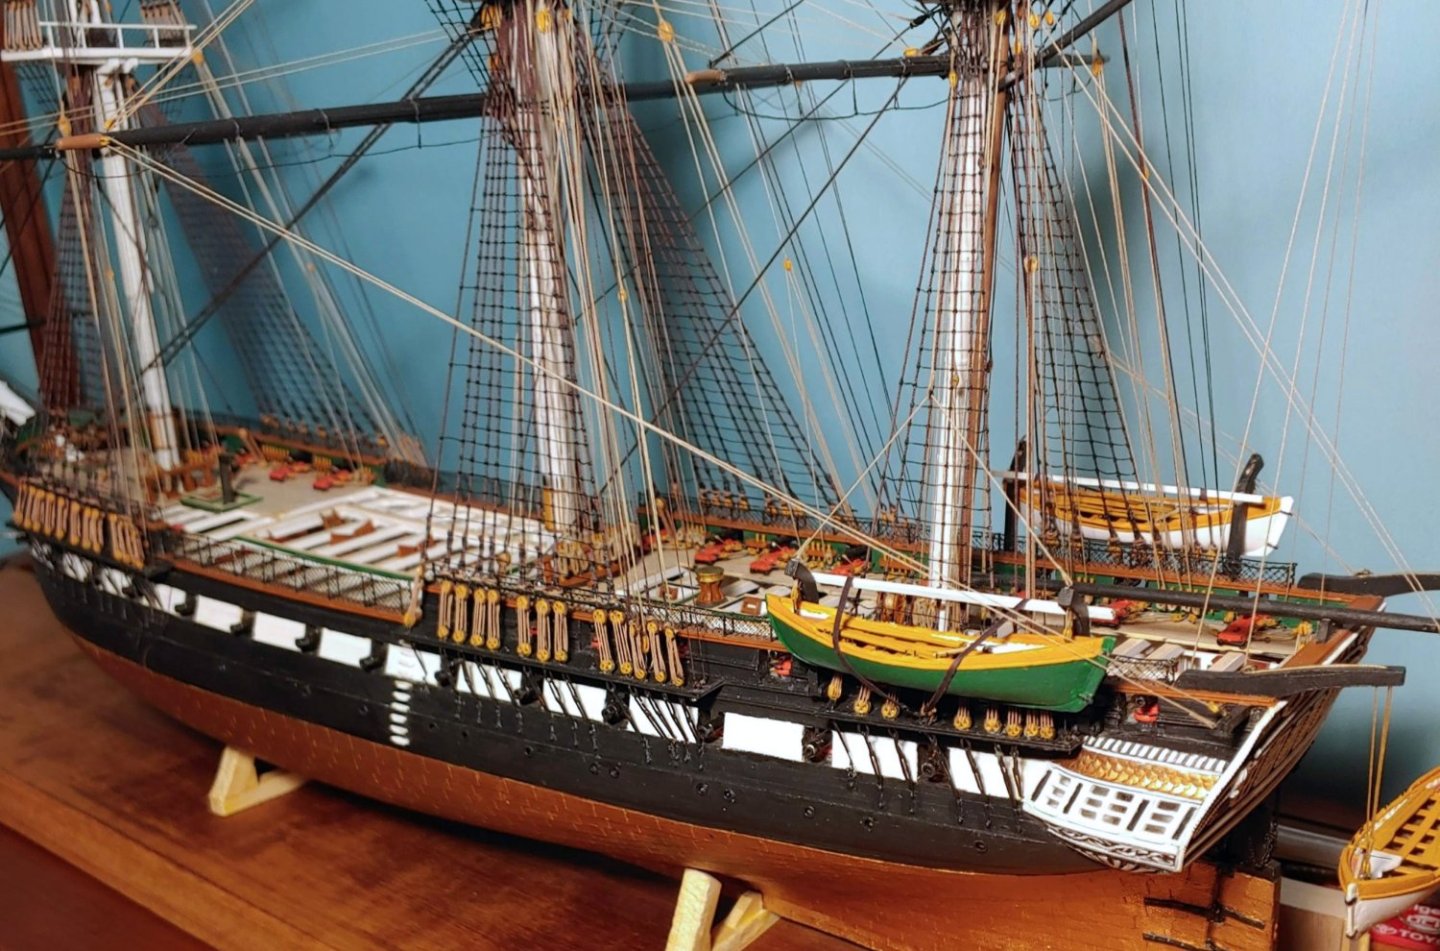
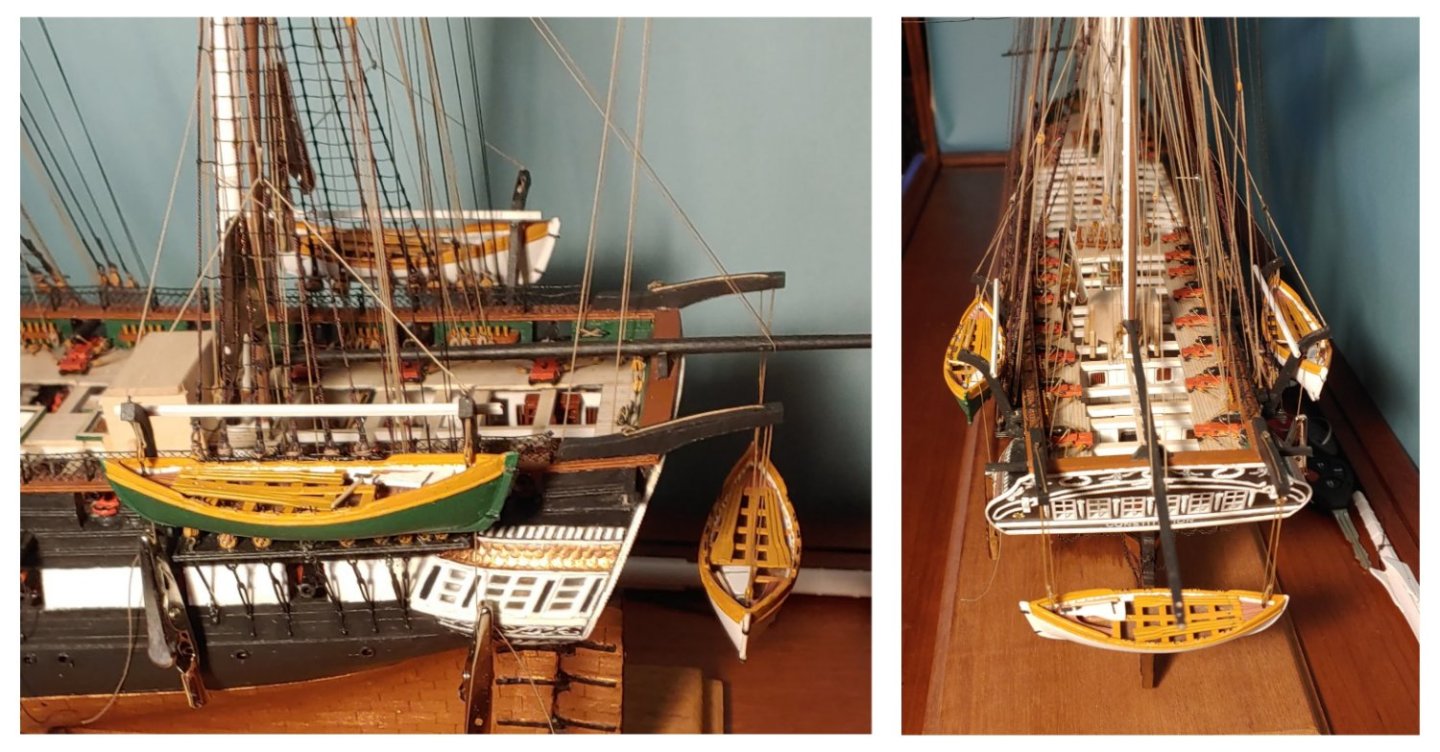
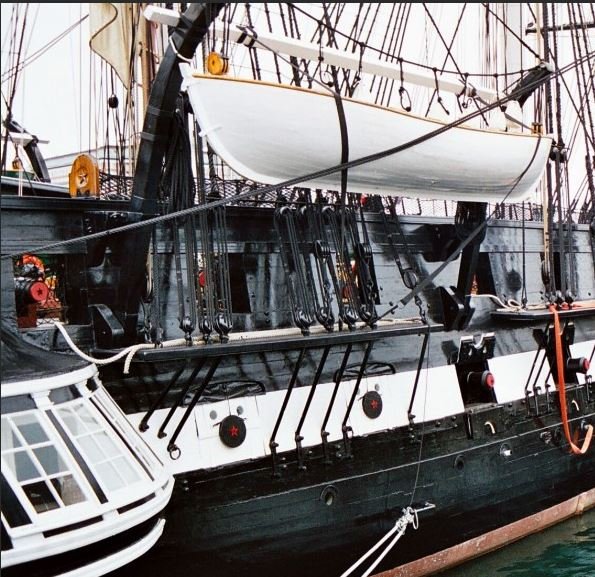
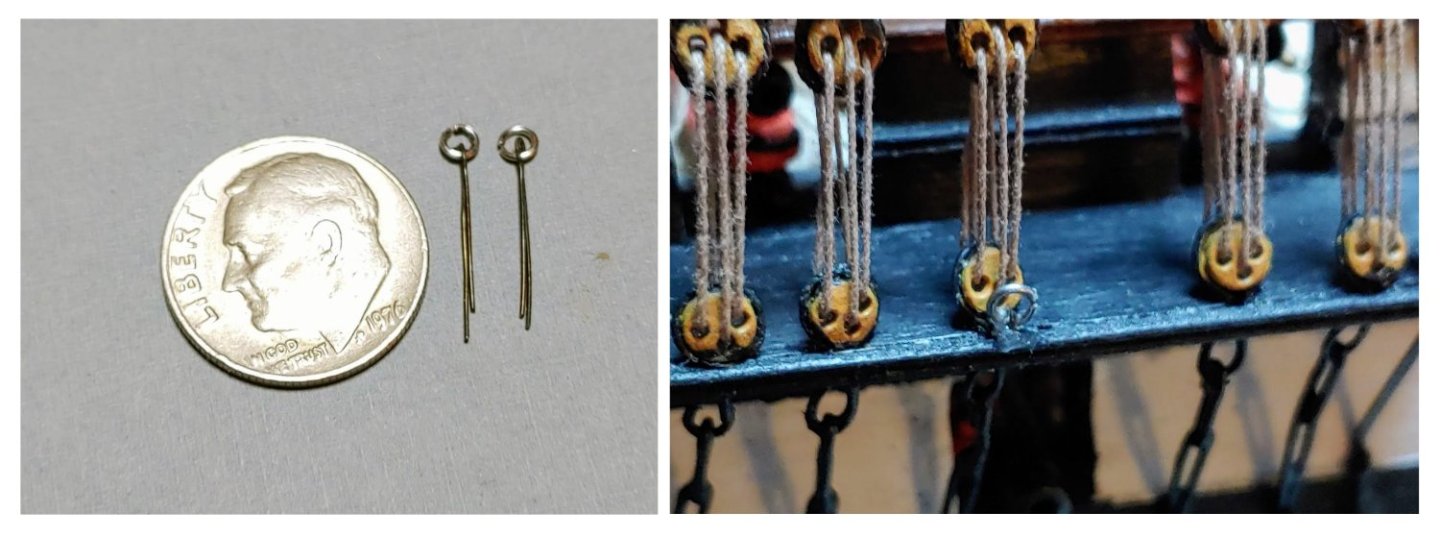
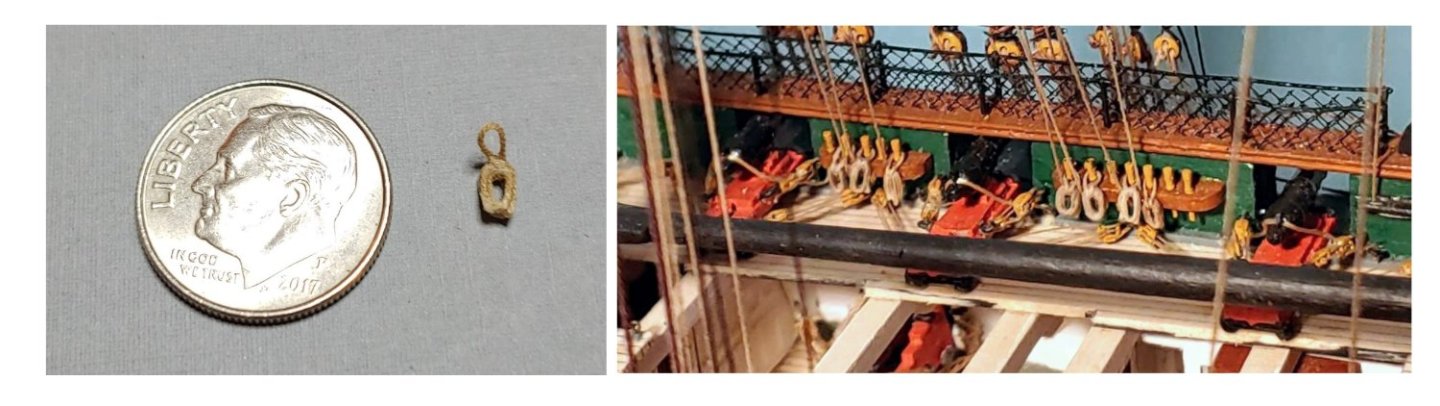
Quarter boats in place. They are not glued in yet, because I may want to adjust their height, or perhaps remove them altogether when I attempt to attach the gripes to the channel. Being inexperienced at the sort of thing, I am grappling with issues such as the material to use for the gripes, and the size of rings to employ at their ends. If I am successful at making these, I will want to keep the boats as is, which is how they are currently on the real ship. The main brace will then pass outboard of the boats contacting them as in this photo: If I am not successful at making the gripes to scale and making them look good, I will omit them. When I checked the BJ builds of the model in their catalog and on their website (each different from the other), and the photo of Larry Arnot's build on the cover of the instruction manual, I saw that the gripes are absent. Therefore, I see this omission as a viable option. The boats are suspended lower in these examples, and the main brace passes over them. In another build, I saw the main brace passing inboard of the boats, but I do not see that as an option on my model. I have ordered brass split rings (2mm) and some black construction paper with which to make the gripes. In the meantime, I will see about installing the foretack boomkins. I have made them up, but I am not sure whether or not they will integrate well with the bowsprit rigging, or whether I can make the angles at which they stick out match. The port and starboard bowheads are close to being a match but not exact. If the boomkins look ridiculous, I will omit them as well. This is also a viable option, as they are not mentioned in the instructions, and do not appear in the BJ builds.
- 112 replies
-
- 8
-
-
- Bluejacket Shipcrafters
- Constitution
- (and 2 more)
-
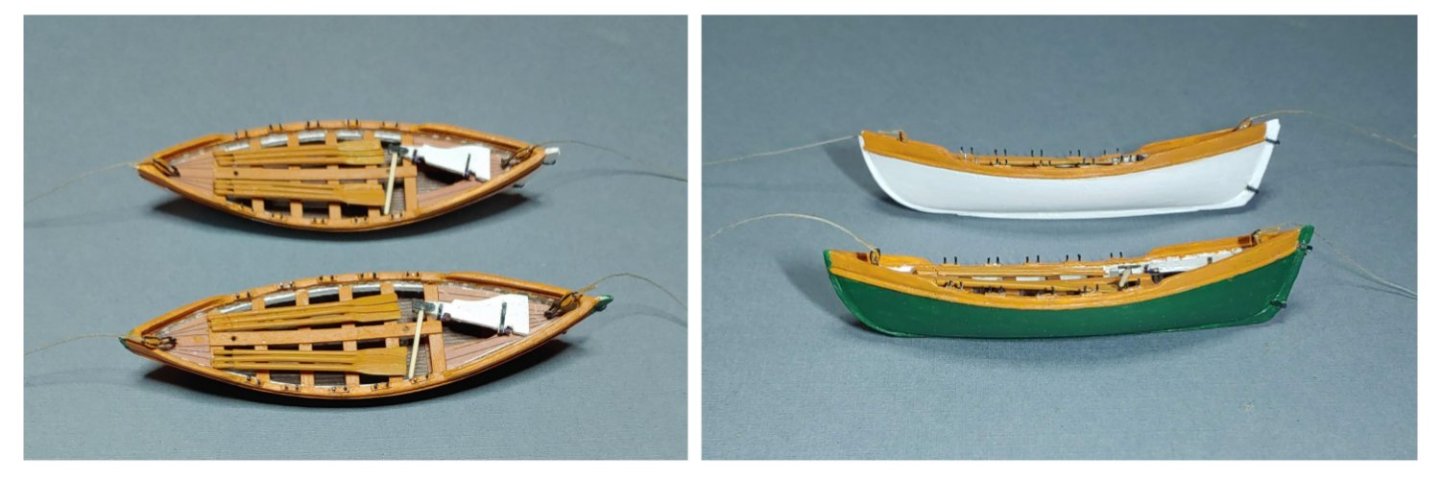
Quarter boats ready to be hung on their davits: White areas on the stem and sternpost of the green boat are blown out highlights, not places I missed.
- 112 replies
-
- 5
-
-
- Bluejacket Shipcrafters
- Constitution
- (and 2 more)
-
Just a suggestion - If you follow the coppering pattern illustrated in the Marquardt AOS, the job becomes a lot simper. There is no goring at the bow. Just lay the plates in rows then trim them when you reach the stem and then the water line. You will still need a few stealers aft, but I do not remember these being very difficult. The same pattern is followed in the Revell model. I used one dressing strake at the water line, but you could have two.
-
Permanent installation of the starboard quarter davits: 1. Gluing the gripe spar to the davits. 2. Davits with gripe spar in place. Topping lift to be finalized when the boats are hung and the angle of the davits is set. Davits installed perpendicular to the water line. Gripe spar installed parallel to the water line. This was an accident, but now that I think about it, it makes sense. In any case it is too late to change it now. Quarter boats' current state of play: Boats to be hung parallel to the water line. I notice in photos of the ship from 1991, 1997, and since the last refit that the starboard boat is white and the port boat is green. I will do the same.

- 112 replies
-
- 5
-
-
- Bluejacket Shipcrafters
- Constitution
- (and 2 more)
-
Working on the installation of the quarter boats and their davits. The gripe straps attach to the channel. The manner in which this is done is not given in the instructions, nor was I able to find a photo of the ship that shows that detail. Once again, I went to Xken's Connie build and found exactly what I was looking for. My first step was to make up and install a ring on the channel: Next will be the installation of the davits.
- 112 replies
-
- 6
-
-
- Bluejacket Shipcrafters
- Constitution
- (and 2 more)
-
Remaining coils installed on the spider ring. Quarter davit topping lift tackles rigged.

- 112 replies
-
- 6
-
-
- Bluejacket Shipcrafters
- Constitution
- (and 2 more)
-
Thank you so much!
-
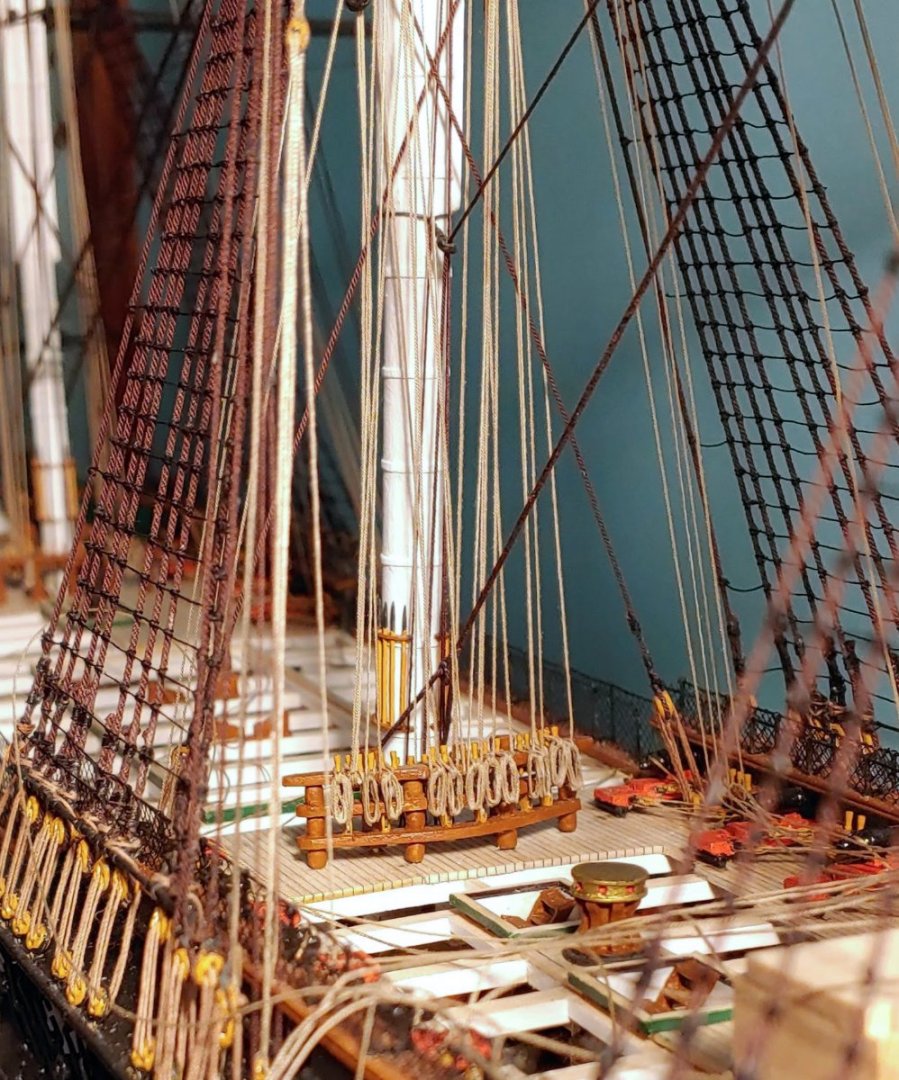
I have made up and installed the afore mentioned itsy-bitsy rope coils on the bulwark pinrails.
- 112 replies
-
- 8
-
-
-
- Bluejacket Shipcrafters
- Constitution
- (and 2 more)
-
I used Weldbond which was recommended in the instructions. I do not recommend it. I found that it oozed out around the edges. At first it looked fine. The excess glue was invisible until I applied poly, which was also recommended in the instructions. This turned the excess glue black, making a heck of a mess! I ultimately solved the situation by applying copper liquid leaf over the entire coppered area. This has made a very durable unchanging finish which I like. I know this is only a negative recommendation, but since it is in the instructions, I thought I had better alert you to the pitfalls therein just in case you were considering it. Incidentally, copper liquid leaf is no longer available. I'll say this for the Weldbond though - it has held up well to a lot of handling as I have worked on my model. No plates have come loose. Your planking looks right to me. It look like a little neatening up of the gun ports with a file and a bit of filler here and there will do the trick. Do you plan to install linings? I did not, but perhaps I should have. According to the booklet, there was a time when the gun port lids were fastened in place with sliding bolts when the guns were stowed, then taken in and stored when the guns were run out. I would say you have a choice as to whether to have them on hinges with lanyards, or just omit them. Nice work on a very challenging kit!!
-
Current state of play as of now. Time to put it aside while I work on video post, and pursue Xmas activities. Running rigging is finalized except for the main braces, and the vangs, which will be finalized when the quarter boats are installed and their topping lifts rigged. Also more rope hanks to do yet. I expect to resume work early in January. Heading into the home stretch!
- 112 replies
-
- 4
-
-
- Bluejacket Shipcrafters
- Constitution
- (and 2 more)
-
More rope hanks: Now to do the itsy-bitsy teeny-weeny coils on the bulwark pin rails.
- 112 replies
-
- 6
-
-
- Bluejacket Shipcrafters
- Constitution
- (and 2 more)
-
My first attempts at rope hanks. It will not set MSW on fire, but since I have never done this before, I could not resist posting it. Many more to do, but now at least I have some idea how I can do it. Hanks on the bulwark pin rails will need to be about half this size for reasons shown in my last post.
- 112 replies
-
- 6
-
-
- Bluejacket Shipcrafters
- Constitution
- (and 2 more)