Supplies of the Ship Modeler's Handbook are running out. Get your copy NOW before they are gone! Click on photo to order.
×

DarkAngel
-
Posts
243 -
Joined
-
Last visited
Content Type
Profiles
Forums
Gallery
Events
Everything posted by DarkAngel
-
 Thanks for your kind thoughts as always Mark I like to work on several things at the same time, glue this... wait to cure, plan something else. It helps break the monotony on a big project by doing little bits at a time... like making prototypes for belaying pins etc... Having a look at the plan for the Quarterdeck, I found myself wanting more than the Corel had provided. Not accurate to my liking. So I've been studying more real photo's of the HMS Victory and coming up with another scale plan I can use which I'll be happy to share with everyone. So stay tuned for another of my genius plans ! I've worked out by using coffee stirrers, I should have excess walnut 1x5 mm planking, plus I have heaps of vintage Kauri pine I can cut up... plus there's the Beech display board in the kit that can be cut up into suitable bits. Remodelling plans Quarterdeck section 4x Stairs down to Upper Gun Deck need to be narrower and may try and fit more steps (original has 9 steps !) with brass fittings to hold stantions. grates bigger, funnel fatter and more tapered Main stairs to be a bit wider, and redo wooden ballistrades instead of brass posts currently. Add heaps of eyebolts and rings where required, like behind the Quarterdeck cannons and on the Carronades (with pulleys) Redo Bell housing section with wood instead of card inserts, design change also to look more like original... using Kauri wood or Beech maybe
 -
Working on the Quarterdeck
-
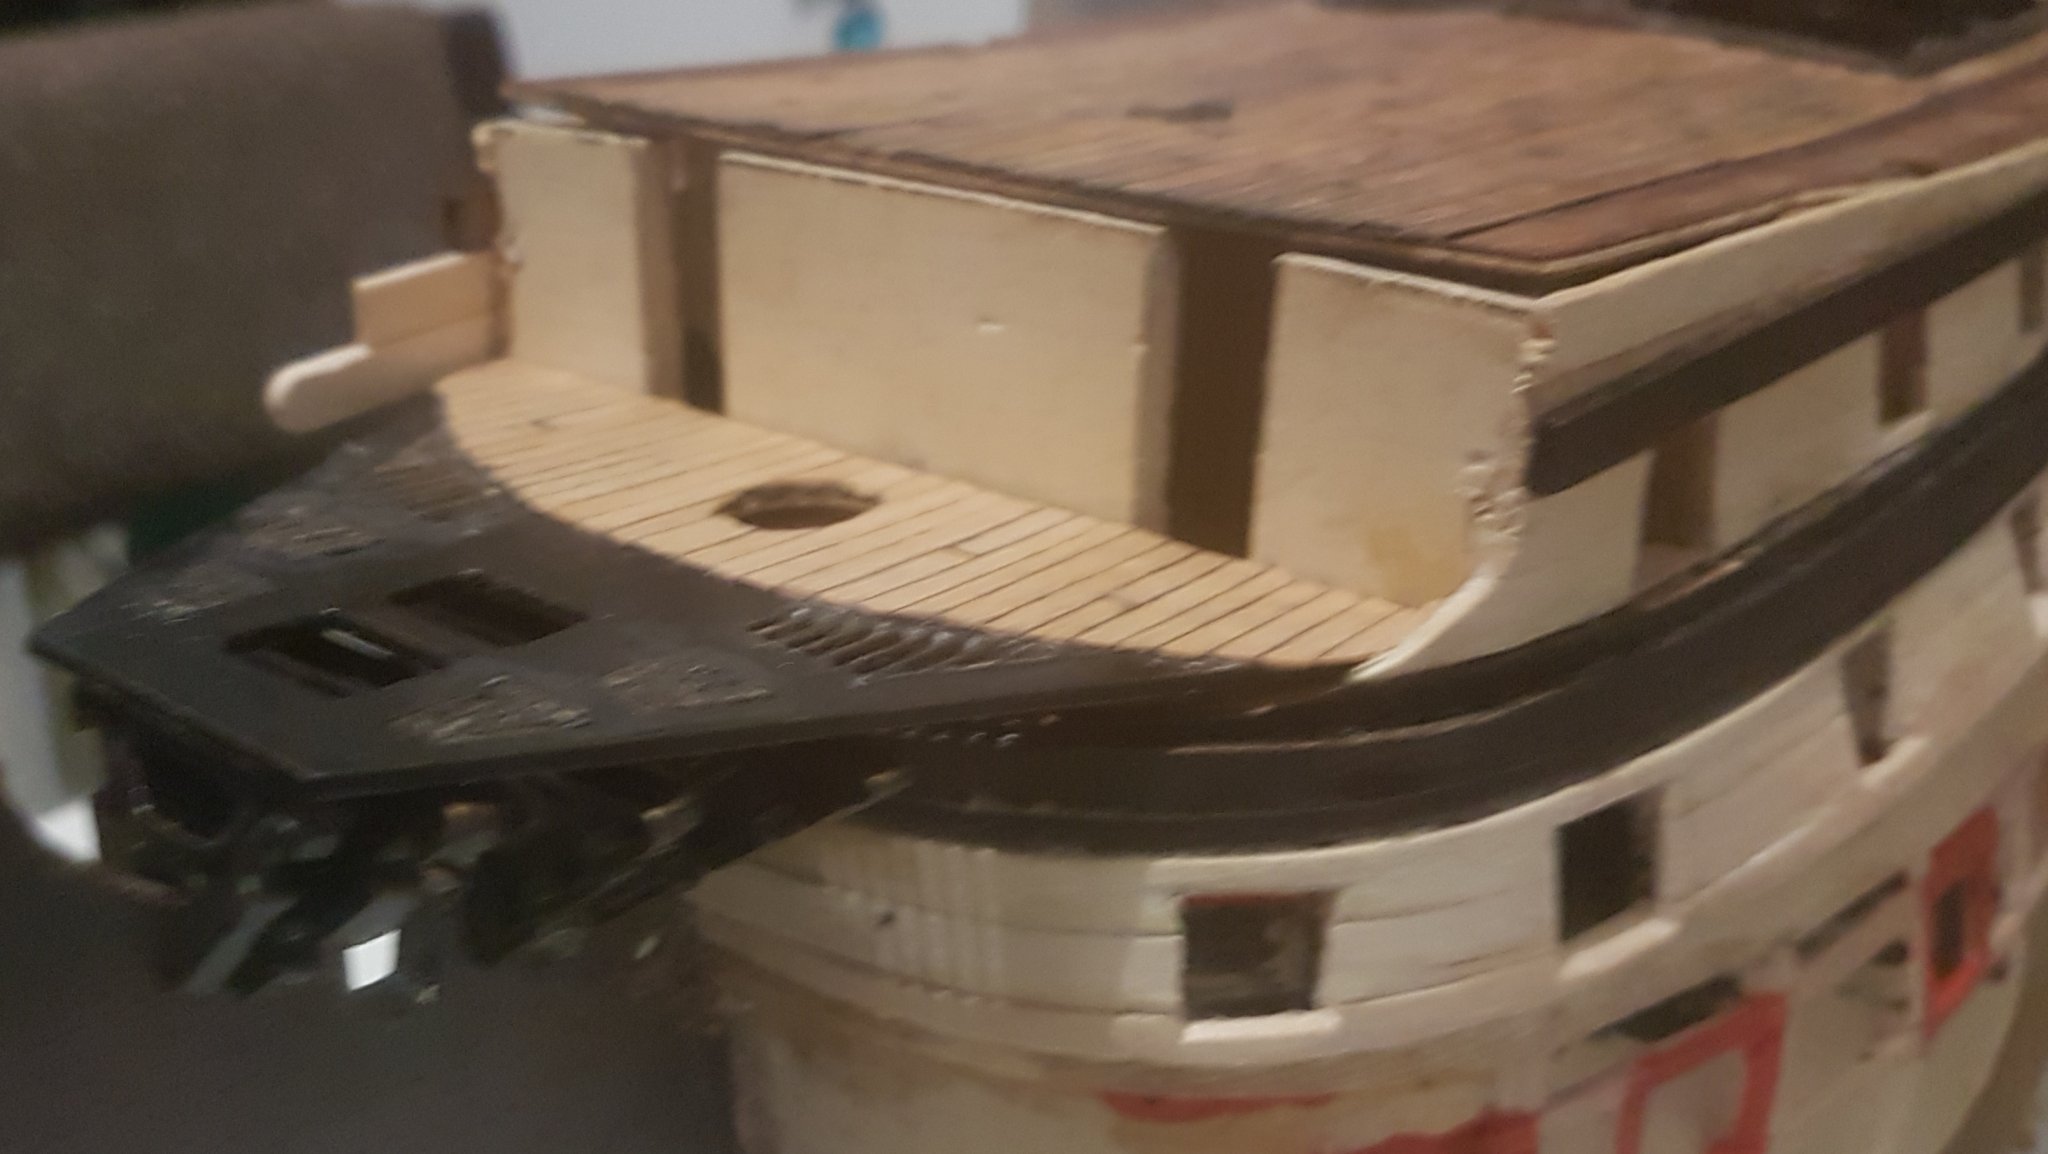
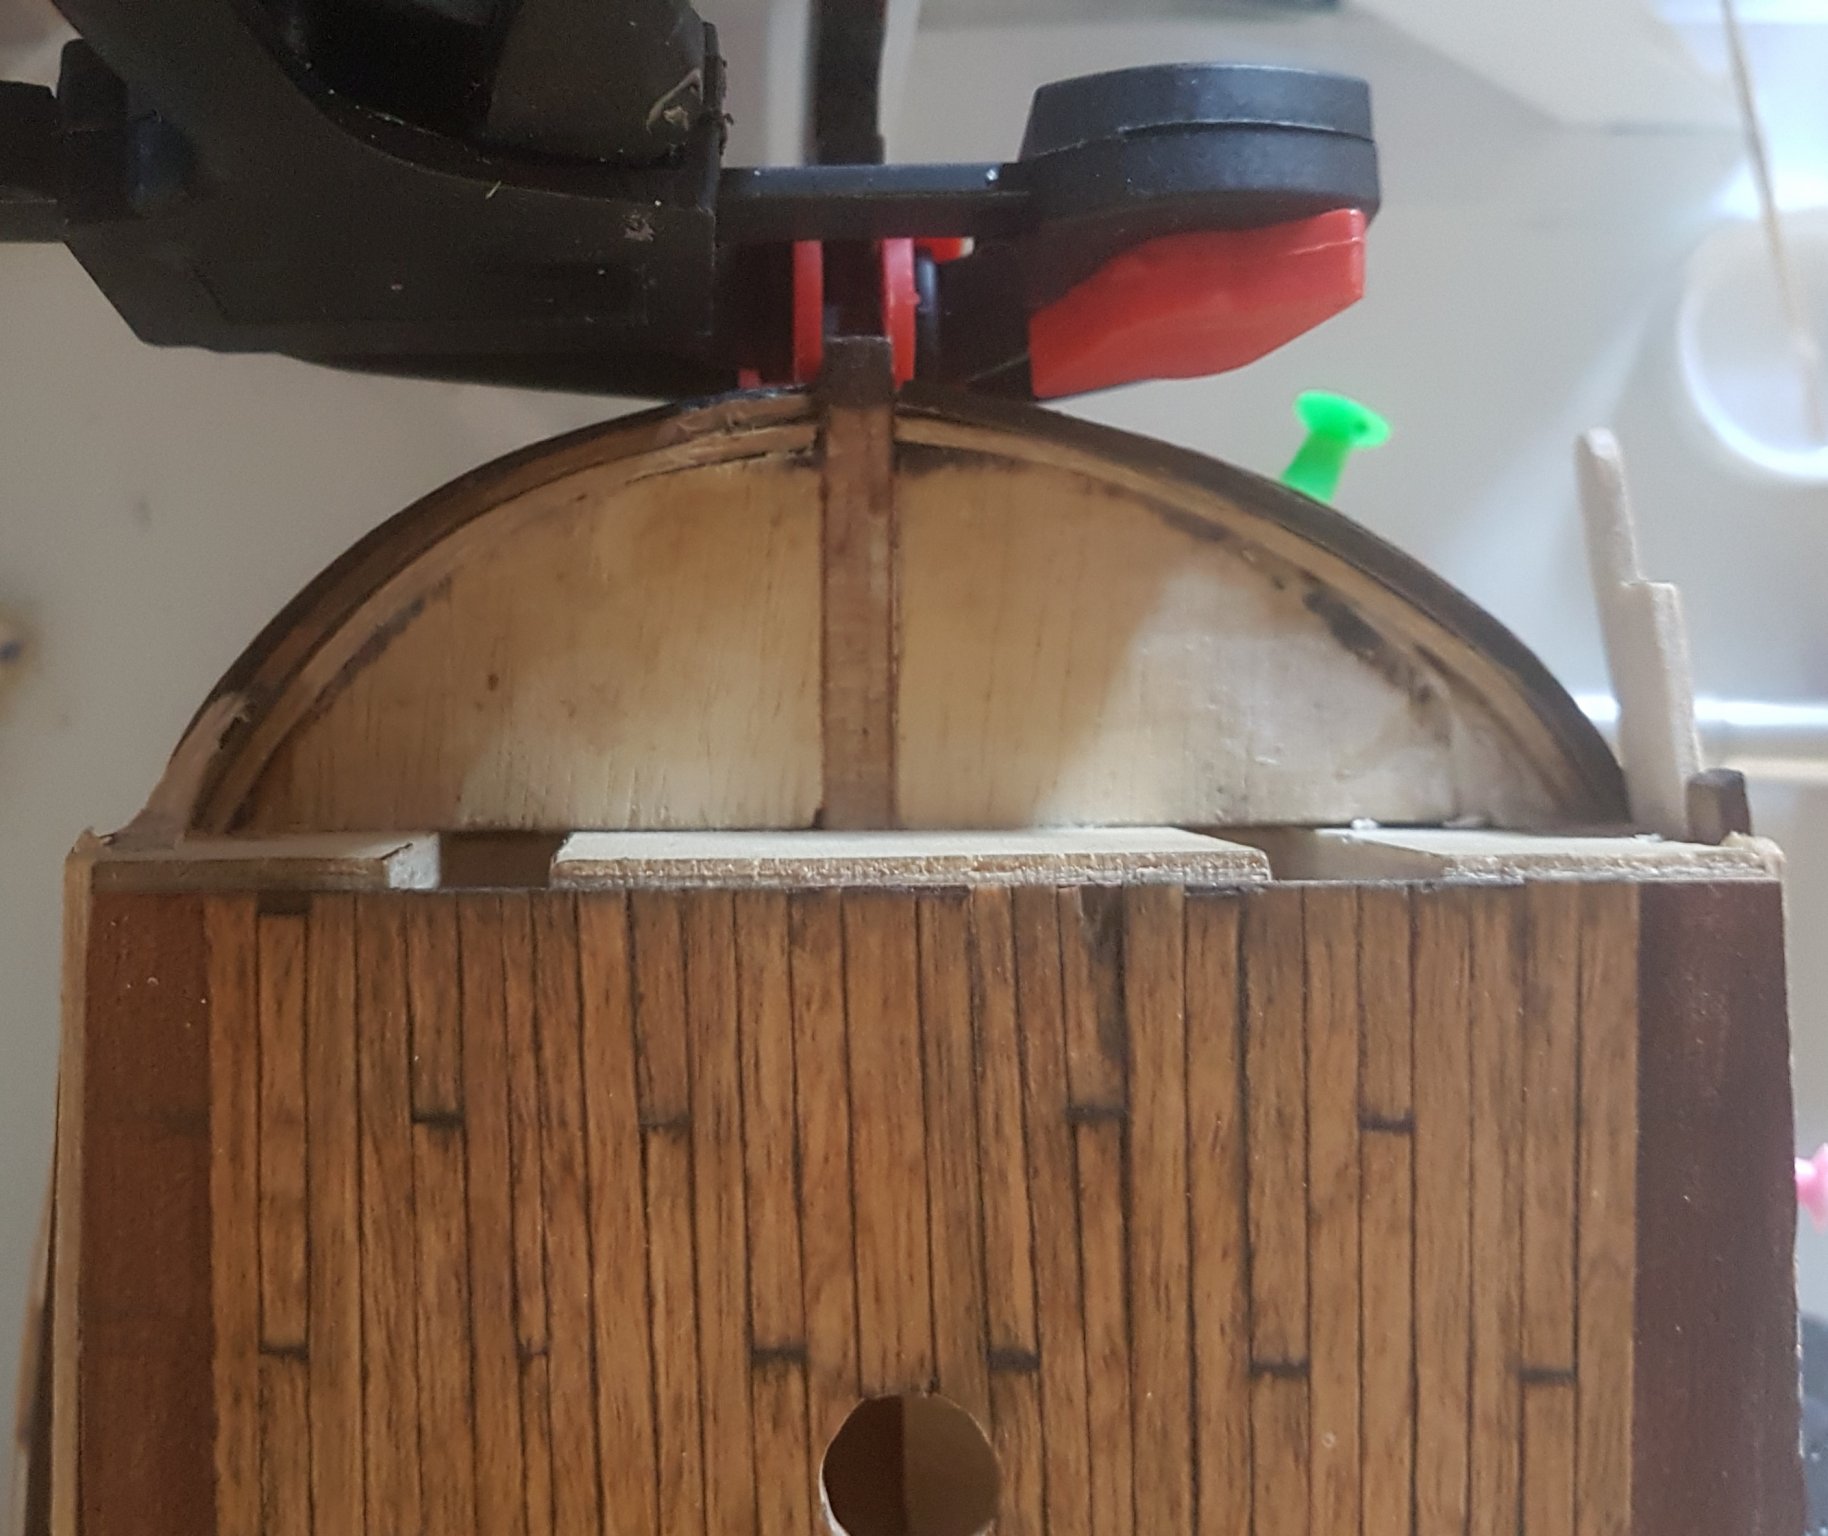
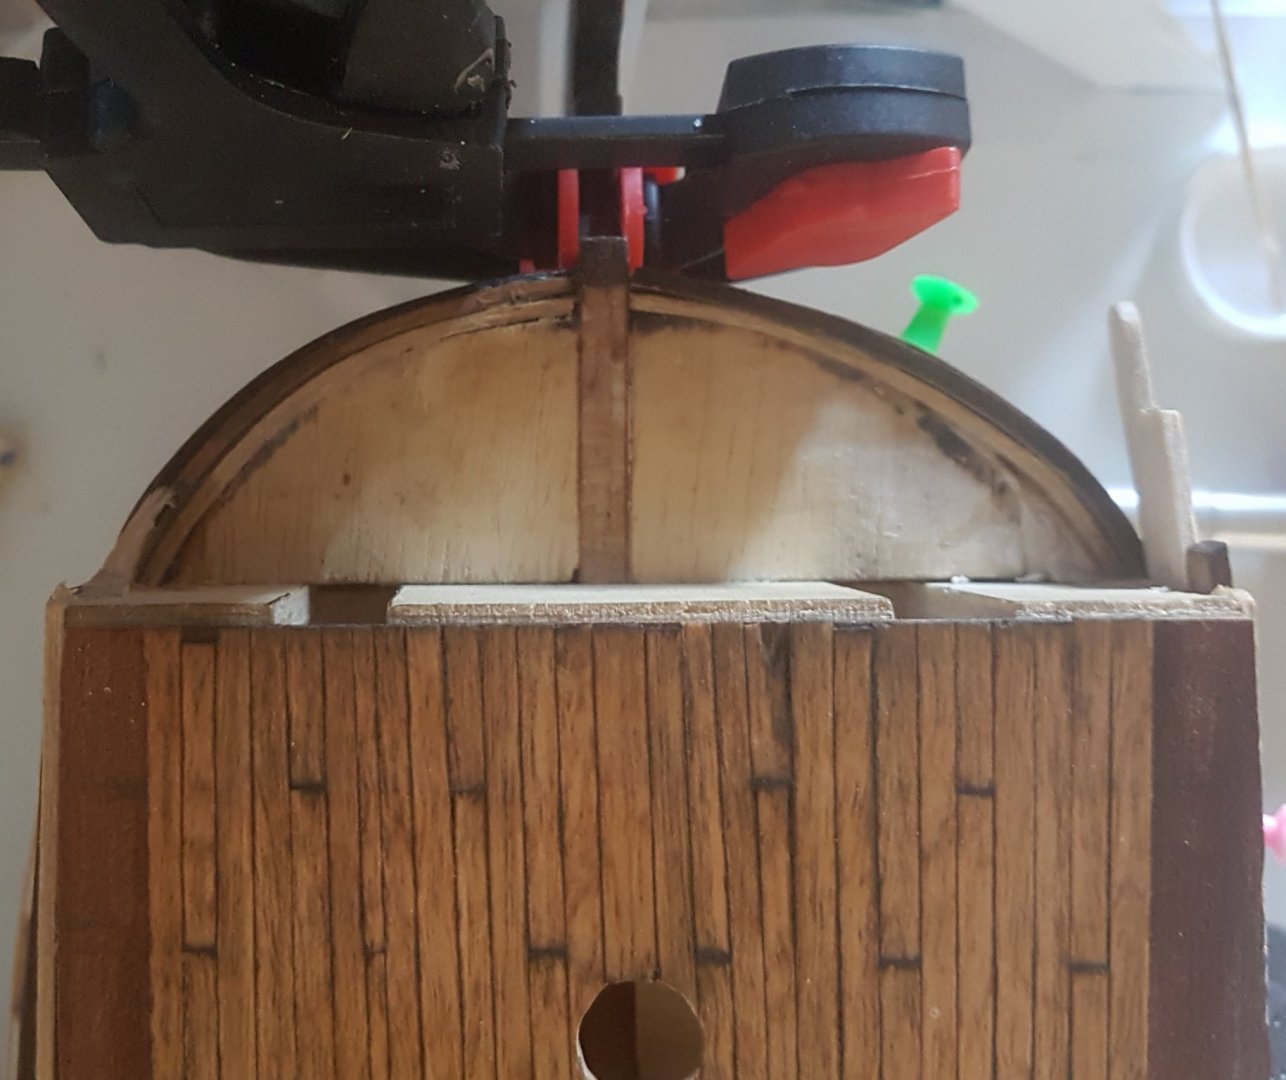
Putting it all together... I have planked the Bow section and thought I'd take a pic before aging the wood. Looking at this pic I don't think anyone will notice the slight difference in girth between the two sides of the front bow hull.

-
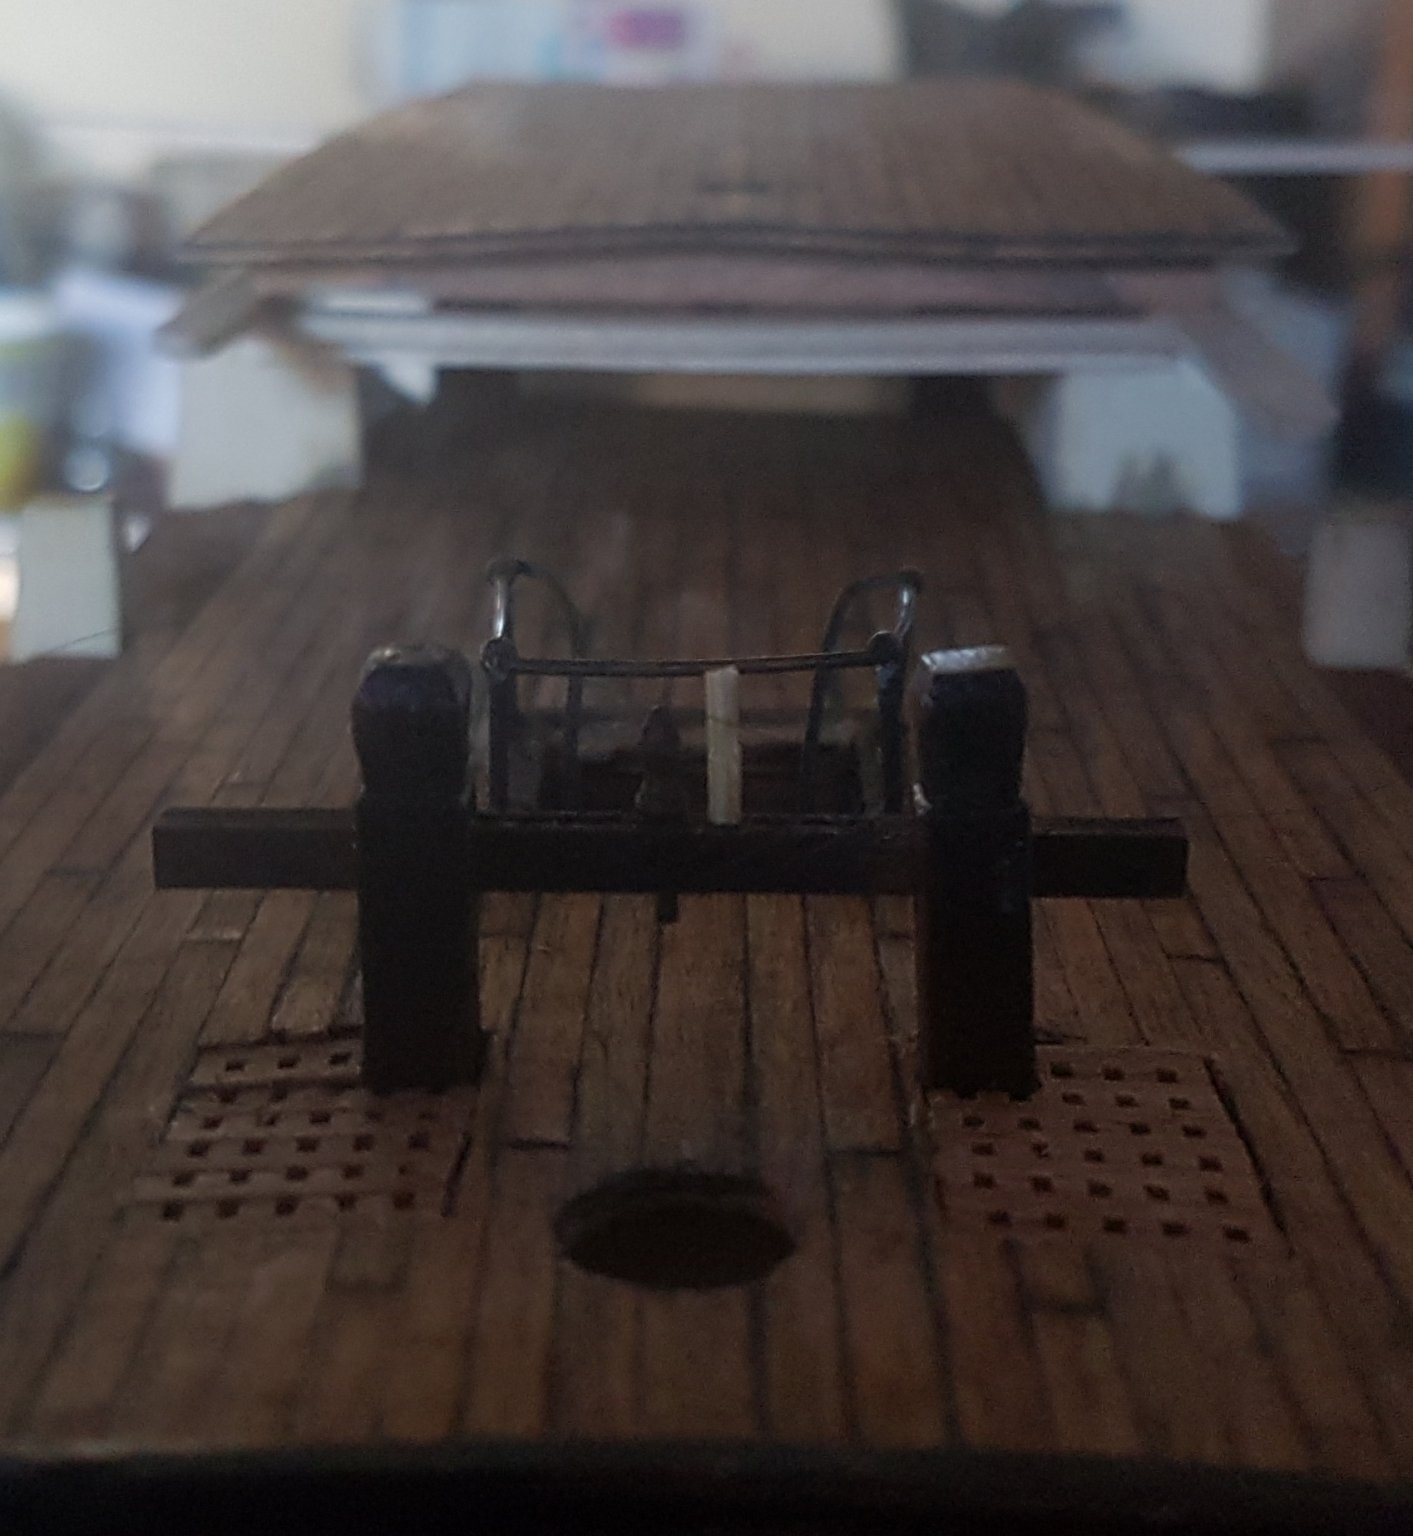
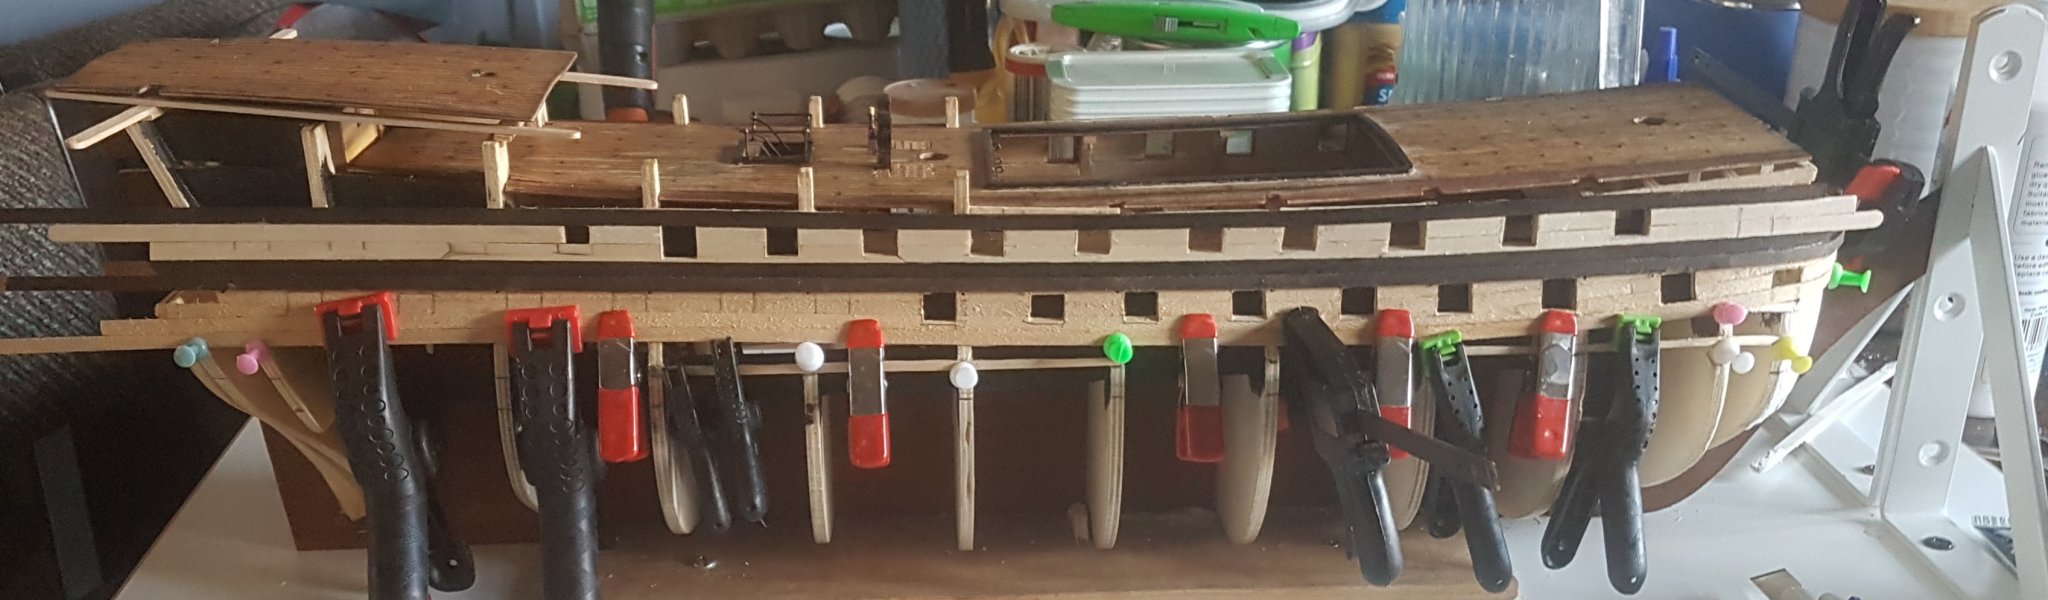
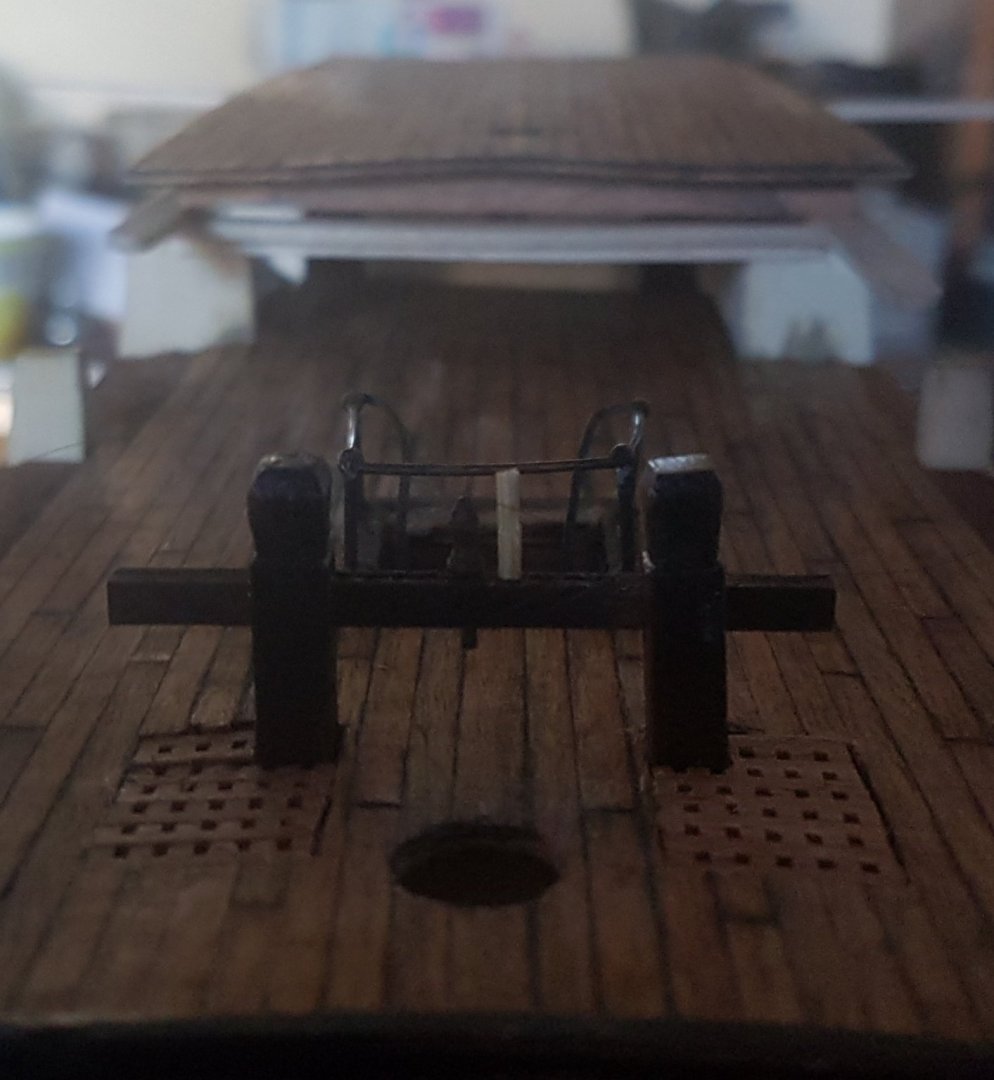
Hull Update Planking continues I have also added some pic's of the bow to see how the 2 sides match... a bit off so I'll put in some wood filler to round off the side I'm working on so they are about the same girth. Raising the Poop Deck I have raised the Poop deck by 6 mm blocks to take a look at the new height. The room underneath the beam is about 23 mm and that's ok for figures and ships wheel (which goes either side of the roof beam). Check out the two different belaying pins on the rack and let me know which one you guys prefer... the lighter one needs pushing down a bit further as the bottom isn't visible for some reason. edit: Another option is to reduce the last floor beam on the Quarterdeck under the Poop Deck, as there is a bit of a slope there which allows for a bit of extra depth as seen in pic above.

-
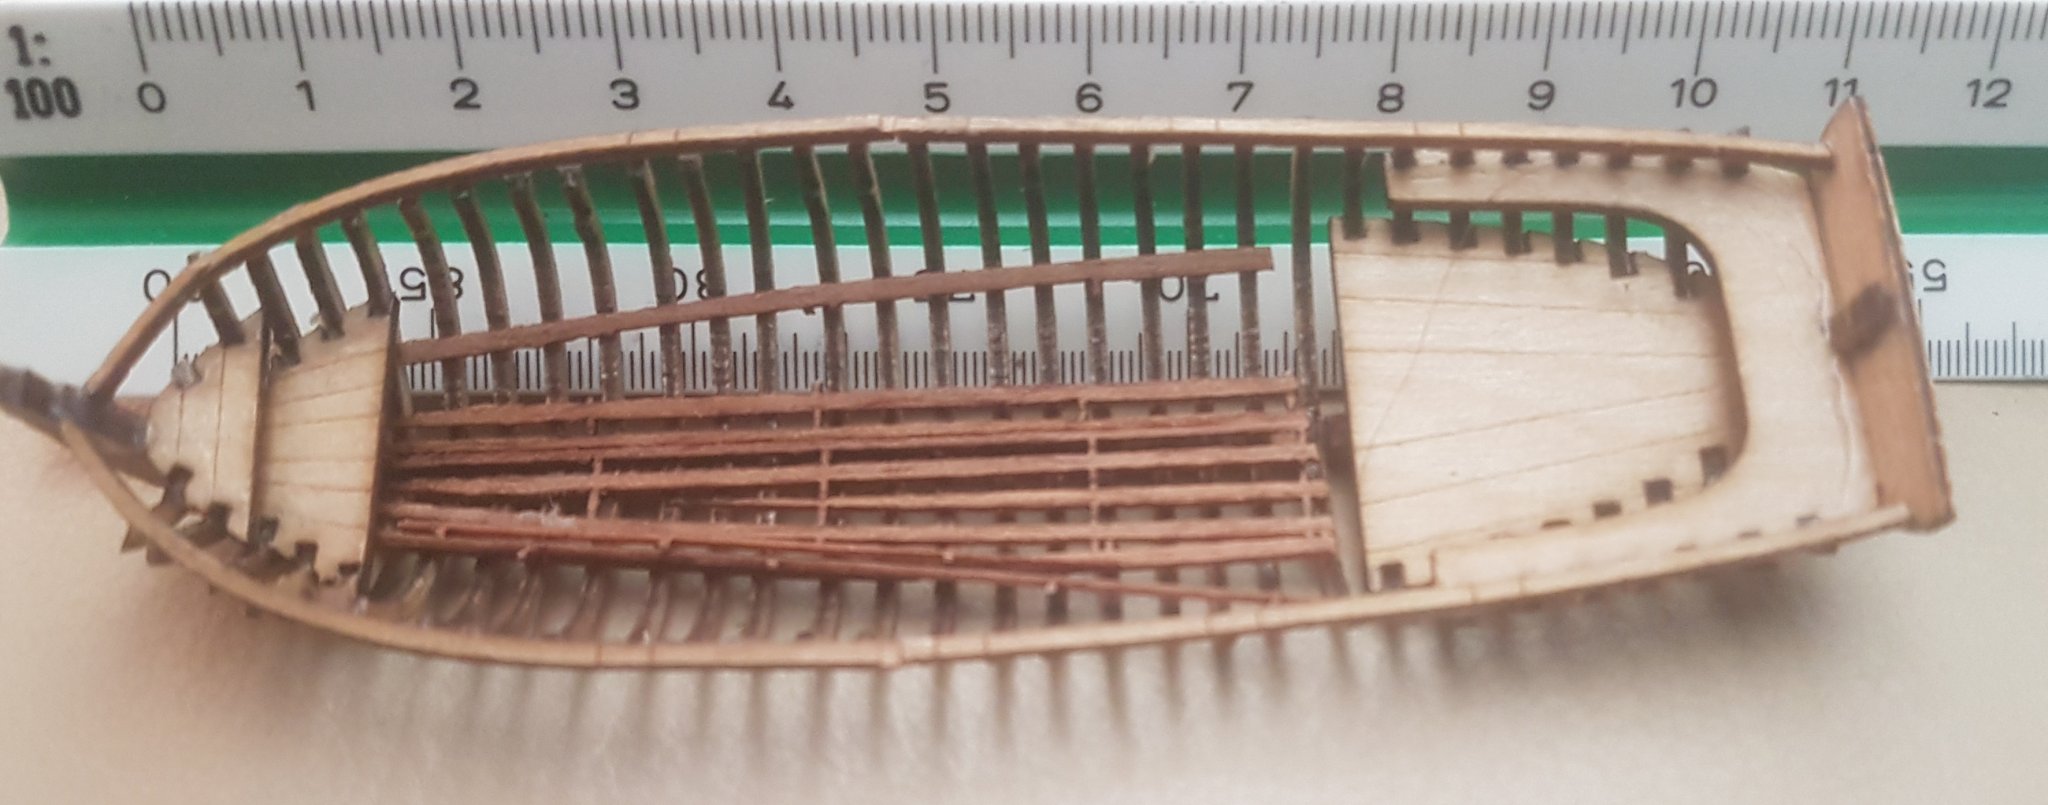
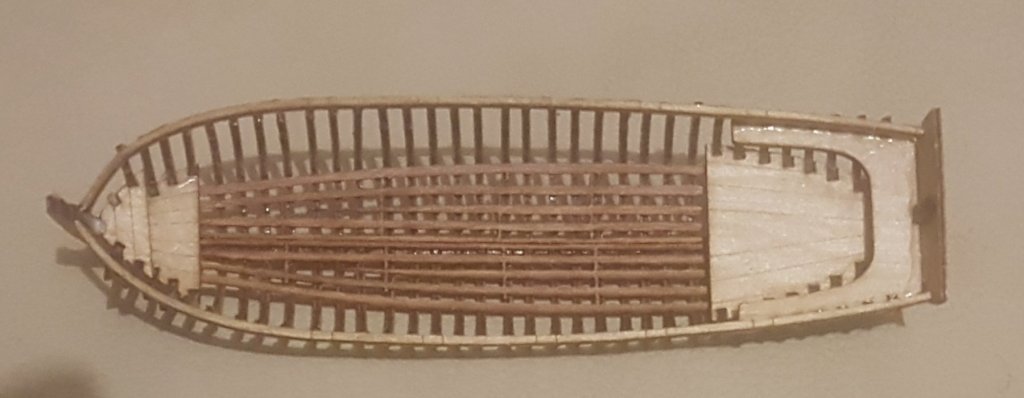
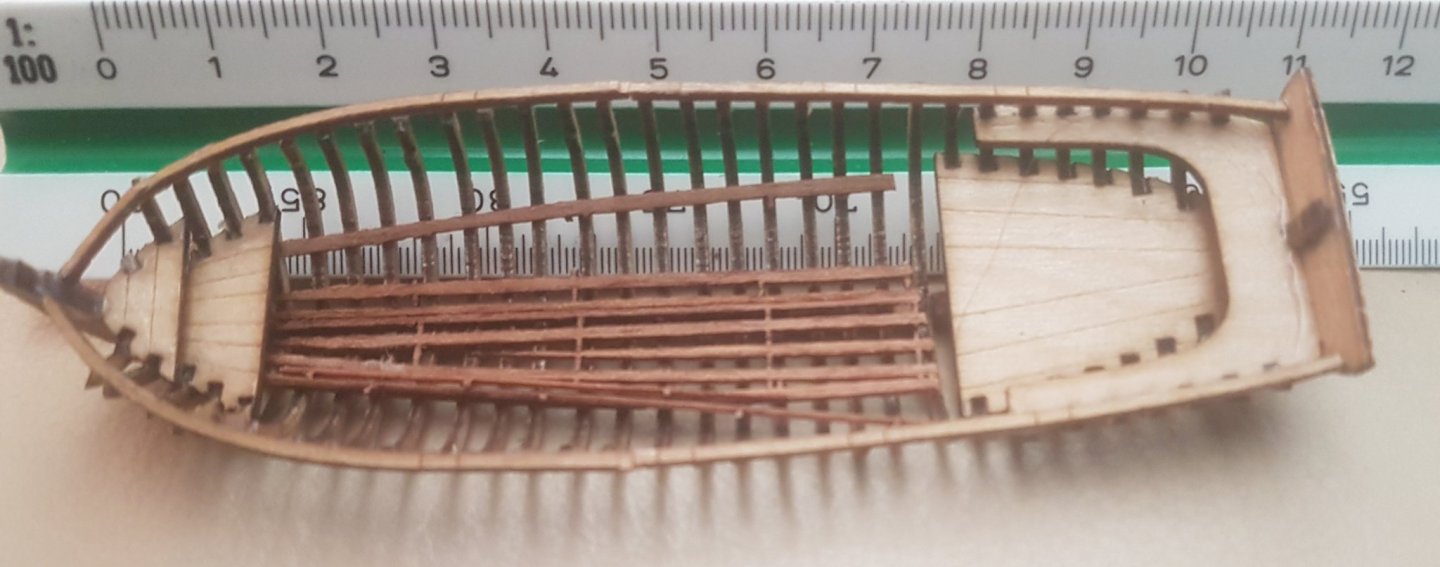
HMS Suprise Launch modified The kit size was 125 mm long, which was about 20 mm more than I needed, so with advice from my boatbuilding friend, I cut three ribs out of the middle of the boat. Then reglued the frame together with superglue. It lined up perfectly Here's a pic of the cut down version HMS Victory Launch now 105 mm at 1:98 scale of the 34' original
-
Hello mugje and welcome to the build, yes it is a bit tricky working with things so tiny. and I have lost many bits that sometimes *spring* out of my tweezers or get dropped by my huge fingers. Sometimes I spend more time on my hands and knee's searching for stuff on the floor than I do actually assembling the part Dremel drill press and lathe I had an opportunity to use my Dremel drill press work station today. I wanted a nice neat row of 1.5 mm holes on a 3mm x 3mm cross beam to hold my custom made 1.5 mm belaying pins. They are being glued at the moment so I'll update a pic tommorrow. Also using the drill press at 90 deg angle is good to use as a lathe by putting a 2 mm bamboo round toothpick into the dremel drill chuck (takes 0.3 mm - 3.5 mm drill bits) Crafting Belaying Pins So I'm making belaying pins out of toothpicks, the one's in the kit don't look accurate, being too short.
-
Update Gallery Upper Deck refitted and glued in, and a look at the hull progression.

-
Raising the Poop deck aka 'The Slaughter House' The scale figures and the ships wheel doesn't fit under the 20 mm high roof of the Poop deck from the Quarterdeck, and I remember reading in a blog here someone raised it by 5 mm or so by blocking up the roof deck supports. I'm going to consider this an option instead of trimming down the ships wheel to fit underneath and directly in front of the mast located there... (as the original HMS Victory) I don't think there are any issues with raising the Poop deck by 5mm or so... what do you guys think ? I'm doing a complete rebuild of the rear cabins and stern section so that part won't be an issue
-
Lol... it's not stealing if it is freely given. Think of it as a 'Blessing'...
-
Update Gallery Including first look at new Upper Gun Deck.


-
Aha ! I shall investigate. Although I am quite cluey in regard to electric's. (my last project was an electric bike upgrade with a lithium battery cells I put together myself, and a solar charging system)
-
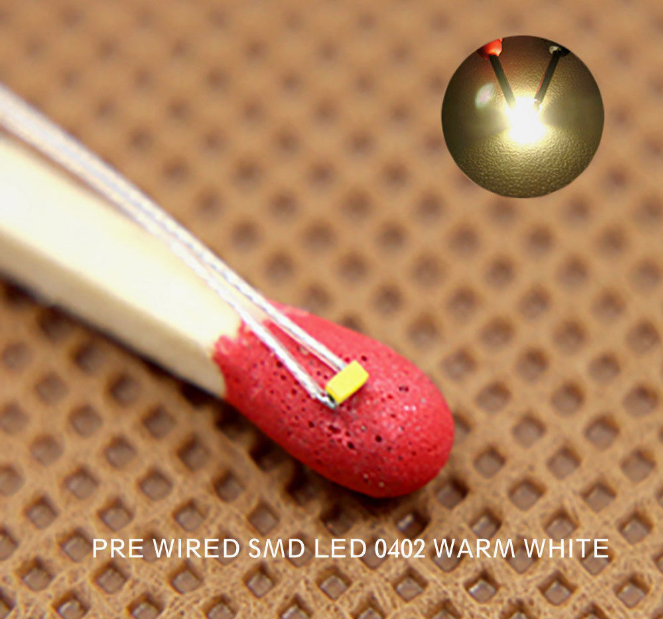
Kauri pine I have sourced some old weathered kauri pine floorboard sections that are probably 100 years old. These may be a bit cracked but I'm sure to find some sections ok for milling into cannon carriages... or other fittings. Lanterns Also going to start building lanterns to house the new micro SMD lights I'm getting... probably 4 mm high to hang off the roof beams.
-
Cool, thanks Mark that's just what I was looking for.
-
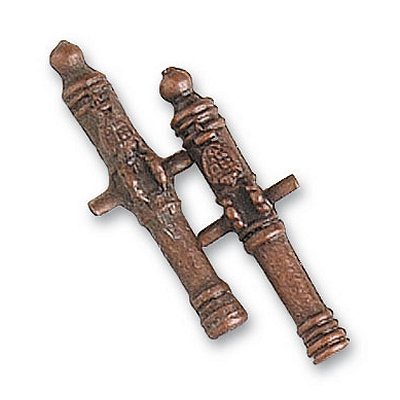
The issue with making an exact scale reproduction for parts is that the whole ship needs to be in the right proportions, like the width of the decks etc. So I have found I need to go by 'eye' too, like when I made the plan for the Upper Gun Deck. I couldn't fit two grates in each section as the original HMS Victory had, neither could I have the right number of grids in each grate... but making it more accurate than the stock model is satisfying. Like having bigger cannon balls that look like they actually fit in the cannons. Conversion table below ( I work in metric ) and we'll see how the cannons fit the 30mm ones I purchased. Cannon sizes 12 Pounder Long: Barrel length (A 9' or 2.74m) 1:98 scale 27.95 mm Medium: Barrel length (A 8'6" or 2.62m) 1:98 scale 26.73 mm Short: Barrel length (A 7'6" or 2.13m) 1:98 scale 21.73 mm Results Quarterdeck can use stock cannons with carriages for 12 x Short 12 pounders need 2 x medium 12 pounders using 30 mm cannons trimmed to about 27 mm Upper Gun Deck need 14 x long 12 pounders using 30 mm cannons trimmed to about 28 mm Purchased 12 x 30 mm cannons, need another 4 pack... maybe I'll get more for the short 12 lb'ers and cut them down... that way all the barrel's will be the same diameter
-
HMS Victory Cannons 1805 Does anyone have the breakdown of the various cannons onboard the HMS Victory, like sizes of carriages and cannons ?
-
Lantern lights Specifications: Brand:evemodel. Size: It's SMD Led 0402(1.00x0.50mm), The wire is about 20cm(L). Forward voltage:2.8V~3.4V, AC or DC Compatible. Forward current (typ/max): 15mA/20mA. Emitting color: Bright Warm White. Viewing angle:120 Package included: 20 Pre-soldered with micro litz wired leads Bright White SMD Led 0402. 20 resistors (not pre-soldered) for 9~18V operation.
-
Update Gallery


-
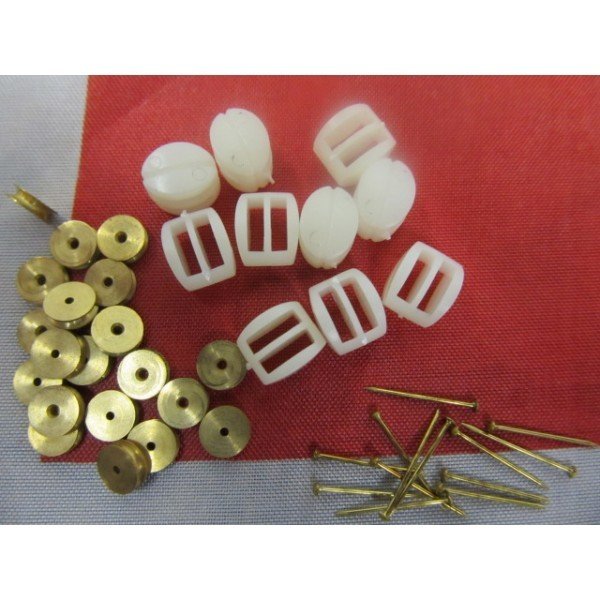
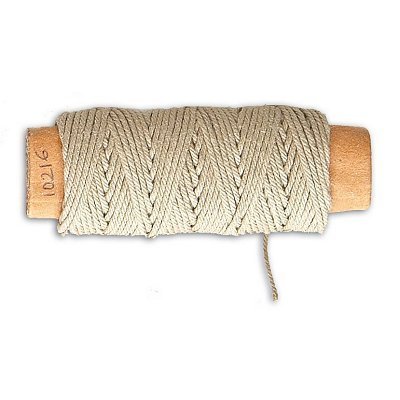
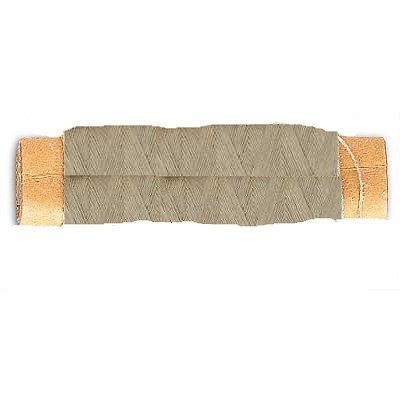
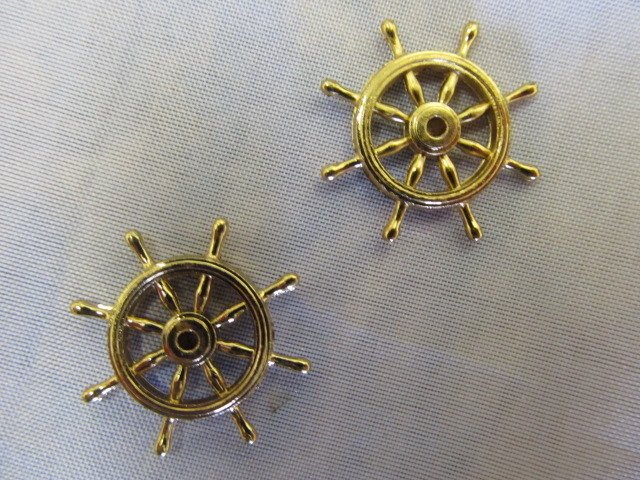
Extra supplies ordered Good news, a new batch of goodies has been sourced and ordered as follows Artesania Latina Victory Cannon 12 x 30 mm cannons (for the upper gun deck, the stock cannons look a bit small) Billing Boats - Double Block 10mm (10) (incl 20 brass pulley wheels for rope which I'm going to mount inside various wooden posts, not using plastic surrounds) Artesania Latina Thread Beige 0.75mm (15m) Artesania Latina Thread Beige 0.15mm (40m) Artesania Latina Wooden Barrel 8mm x4 Billing Boats Wheel 25mm Brass (2x)

-
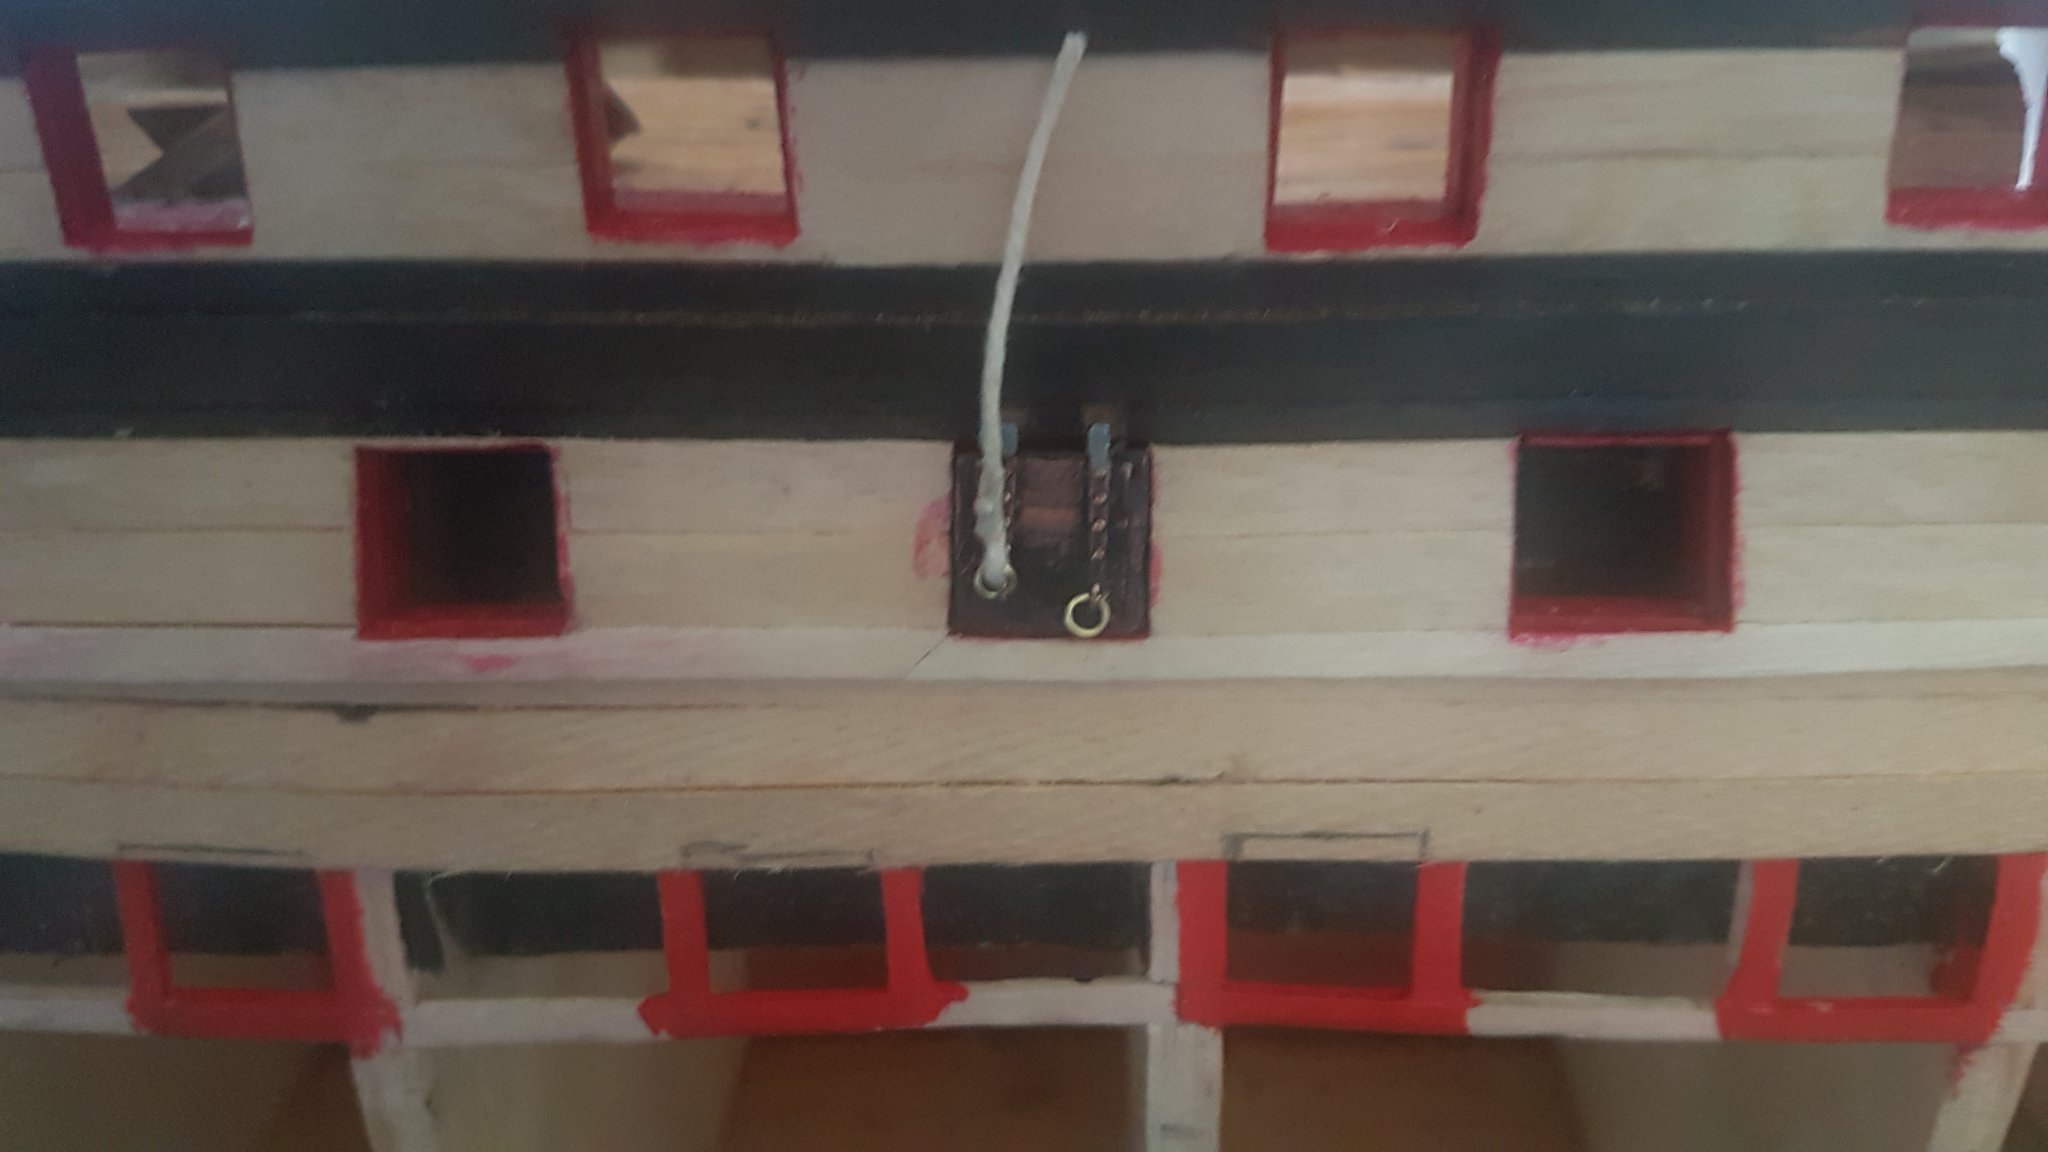
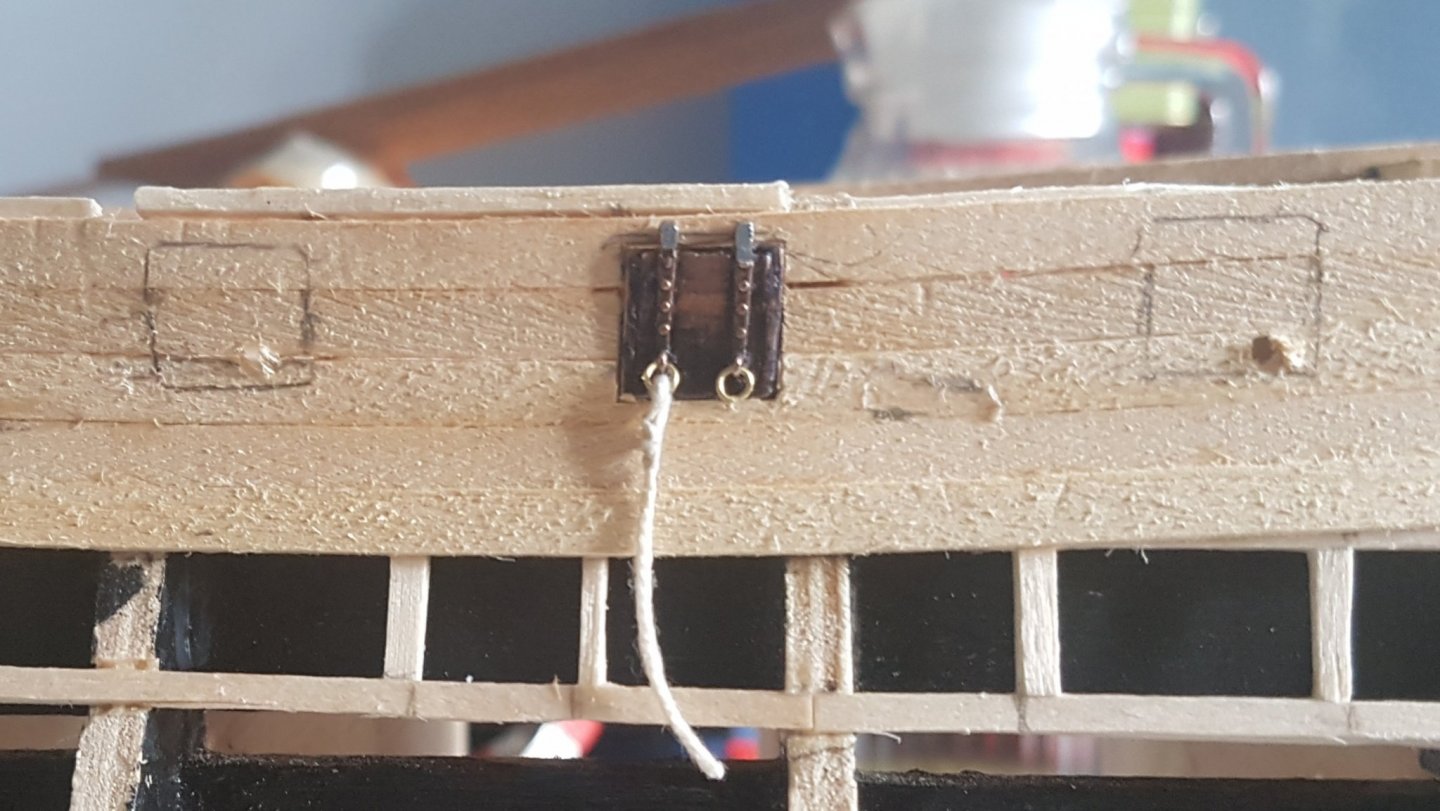
Adding Brass brackets Here's a look under the Quarterdeck at some extra modifications I have been taking inspired by real pics of the HMS Victory. 🚩 WARNING !!! This is very time consuming, took me about 1 hour to hand drill 1 x hole in brass using a hand drill and a 0.9 mm bit. May be better with chuck attachment for 0.9 mm drill bit in dremel ! For the Brass brackets Extra equip needed: 0.8 mm 3mm brass pins with round head small vice 3 oz hammer Precise hand drill and 0.9 mm drill bit Strong long nose pliers (I used my leatherman surge) with coffee stirrer (to avoid pliers damaging ship) Superglue bent nose tweezers method for crafting L brackets I hammered one brass cannon wheel rod flat about 5mm on one side drilled 2 x 0.9 mm holes in the flat surface bent it into an "L" shape in my vice with the 3 oz hammer. snipped off the rod allowing another 5 mm on the non flat side put back in the vice and flattened the other side before drilling 2 more 0.9 mm holes method for attaching position bracket in place (I used a small clip to firmly attach) mark holes in post and roof beam remove bracket drill holes at about 3 mm deep using 0.9 mm drill bit (I just did one in each side of the L bracket) test depth with brass round head pins and remove dab a little superglue on holes and where bracket will go attach bracket over superglue and add brass round 0.8 mm x 3 mm pins one at a time into holes use needle nose pliers with coffee stirrer on reverse side to protect ship and apply pressure to sink brass pin firmly into hole Repeat for other brass pin drill more holes through the post through the pre drilled holes in the bracket add brass round 0.8 mm x 3 mm pin into hole, push in with needle nose pliers as above done... now for the other 3 brackets and 12 more pins ! blacken brass by painting on 'Liver of Sulphur' solution and allow to bracket and pins to dry and blacken after attached. pic shows 2 blackets in with 4 brass 0.8 mm x 3 mm pins each. (Need to do other side with 2 more brackets)

-
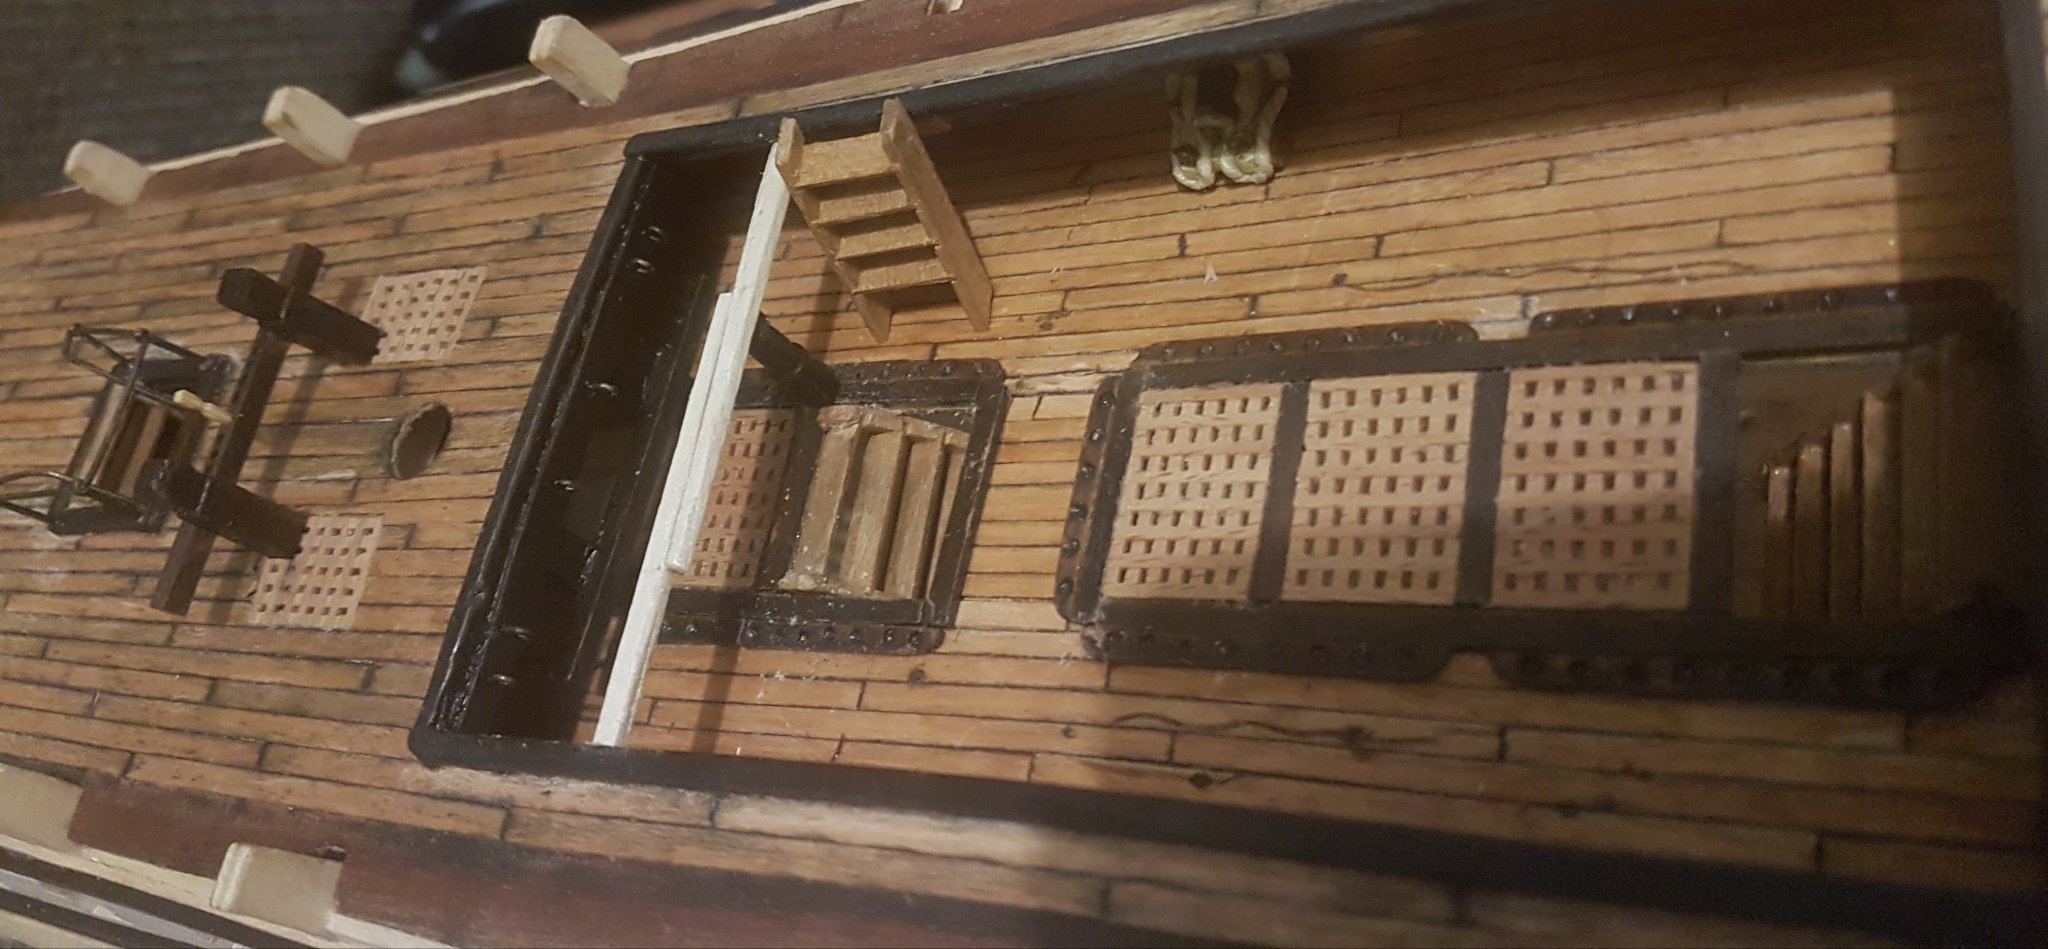
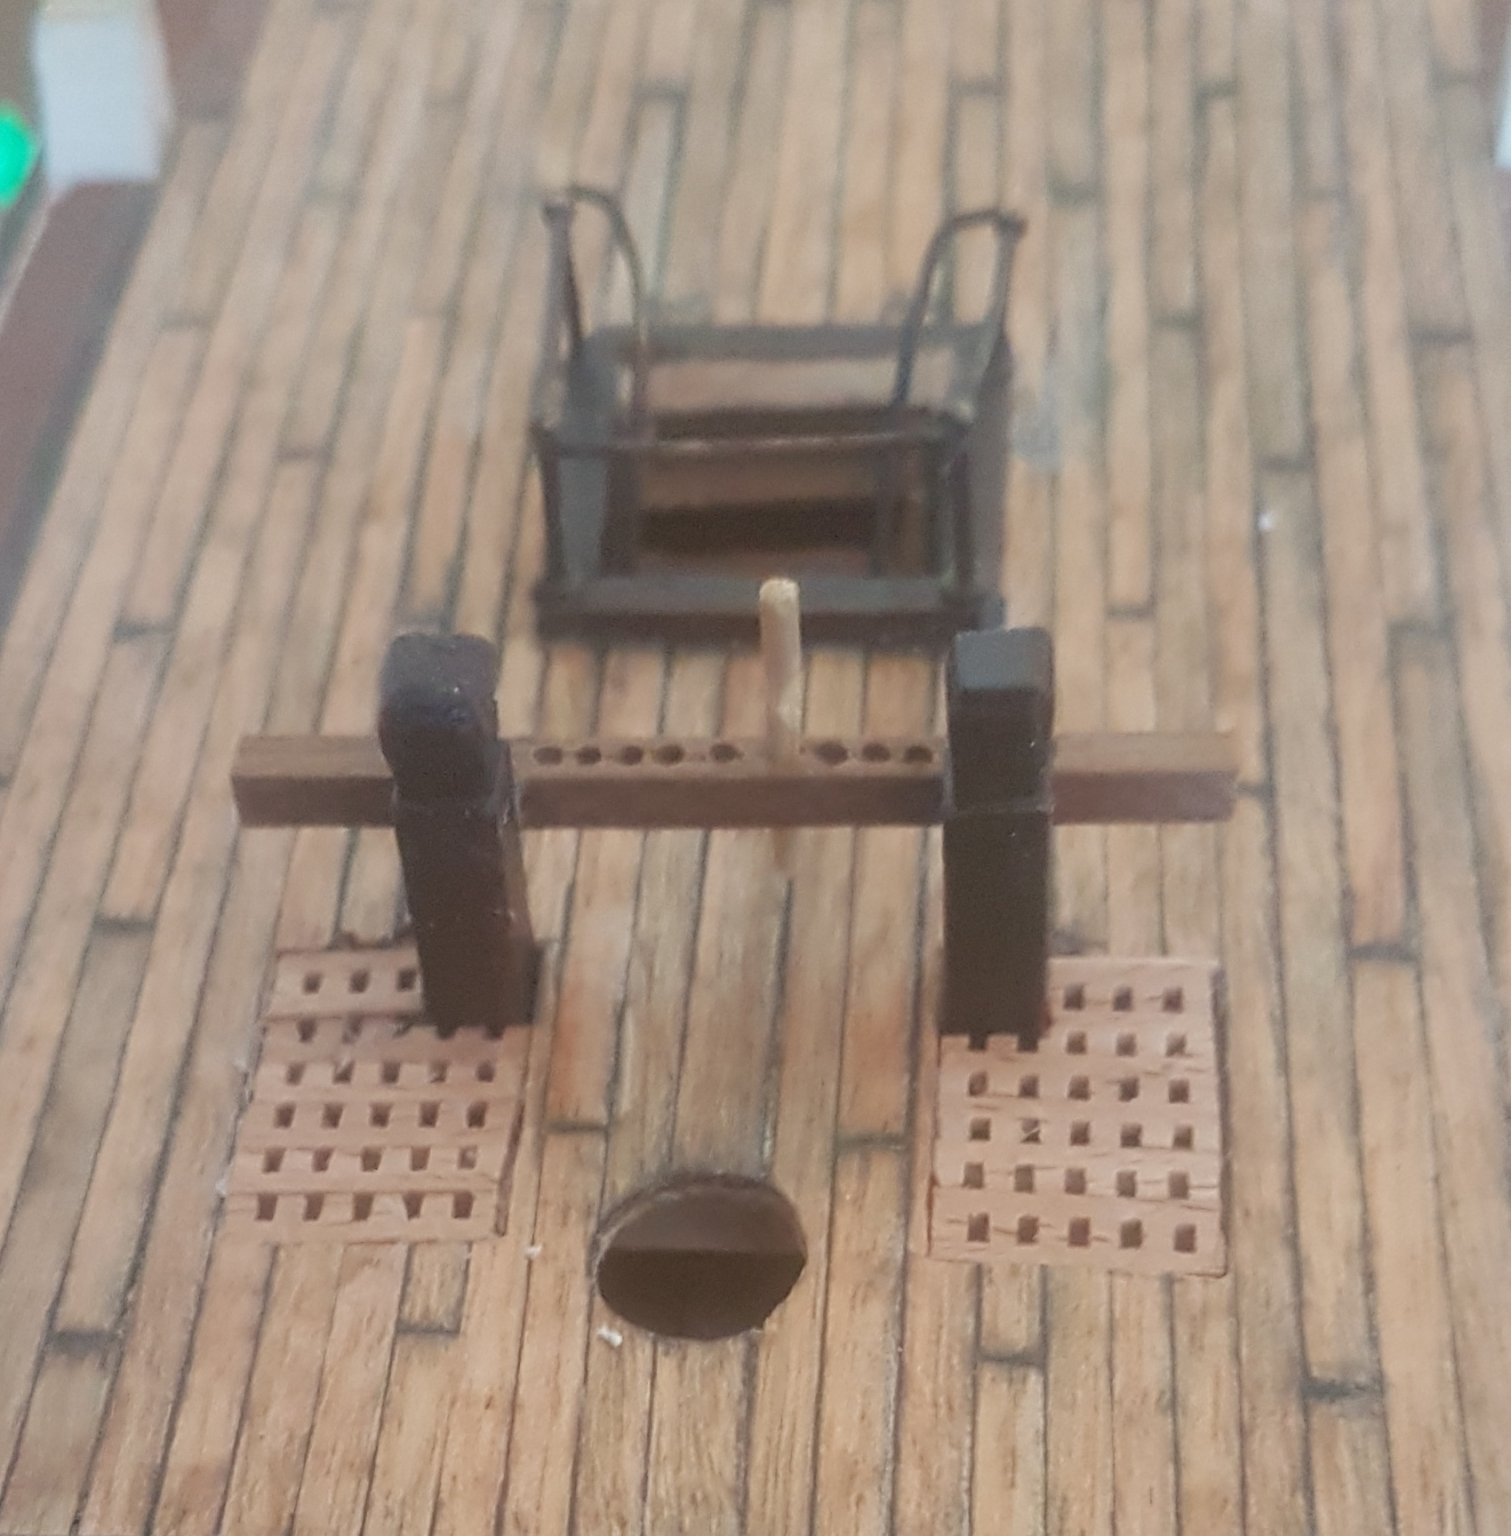
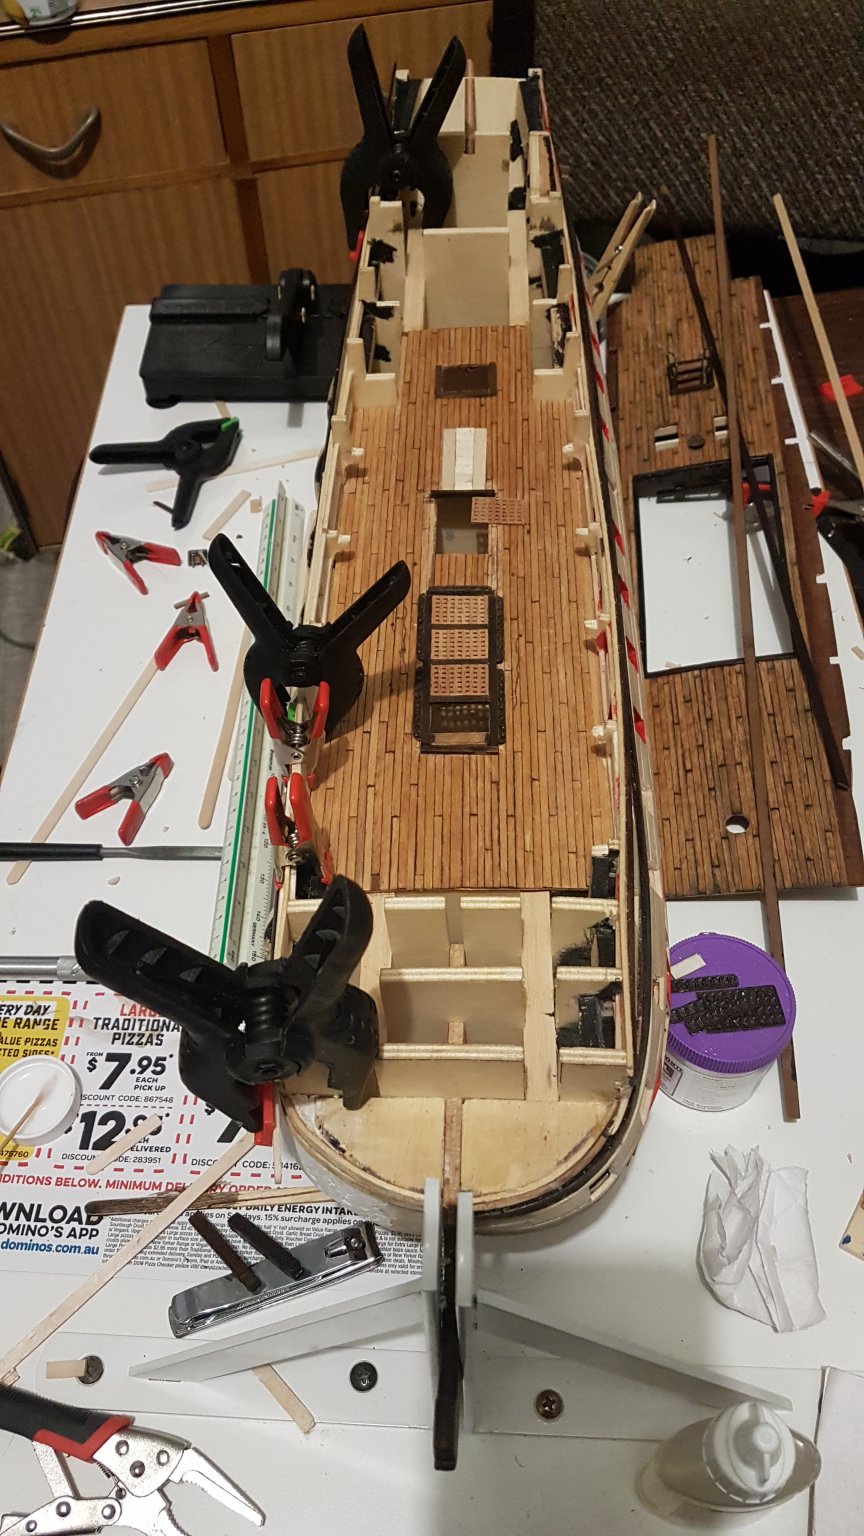
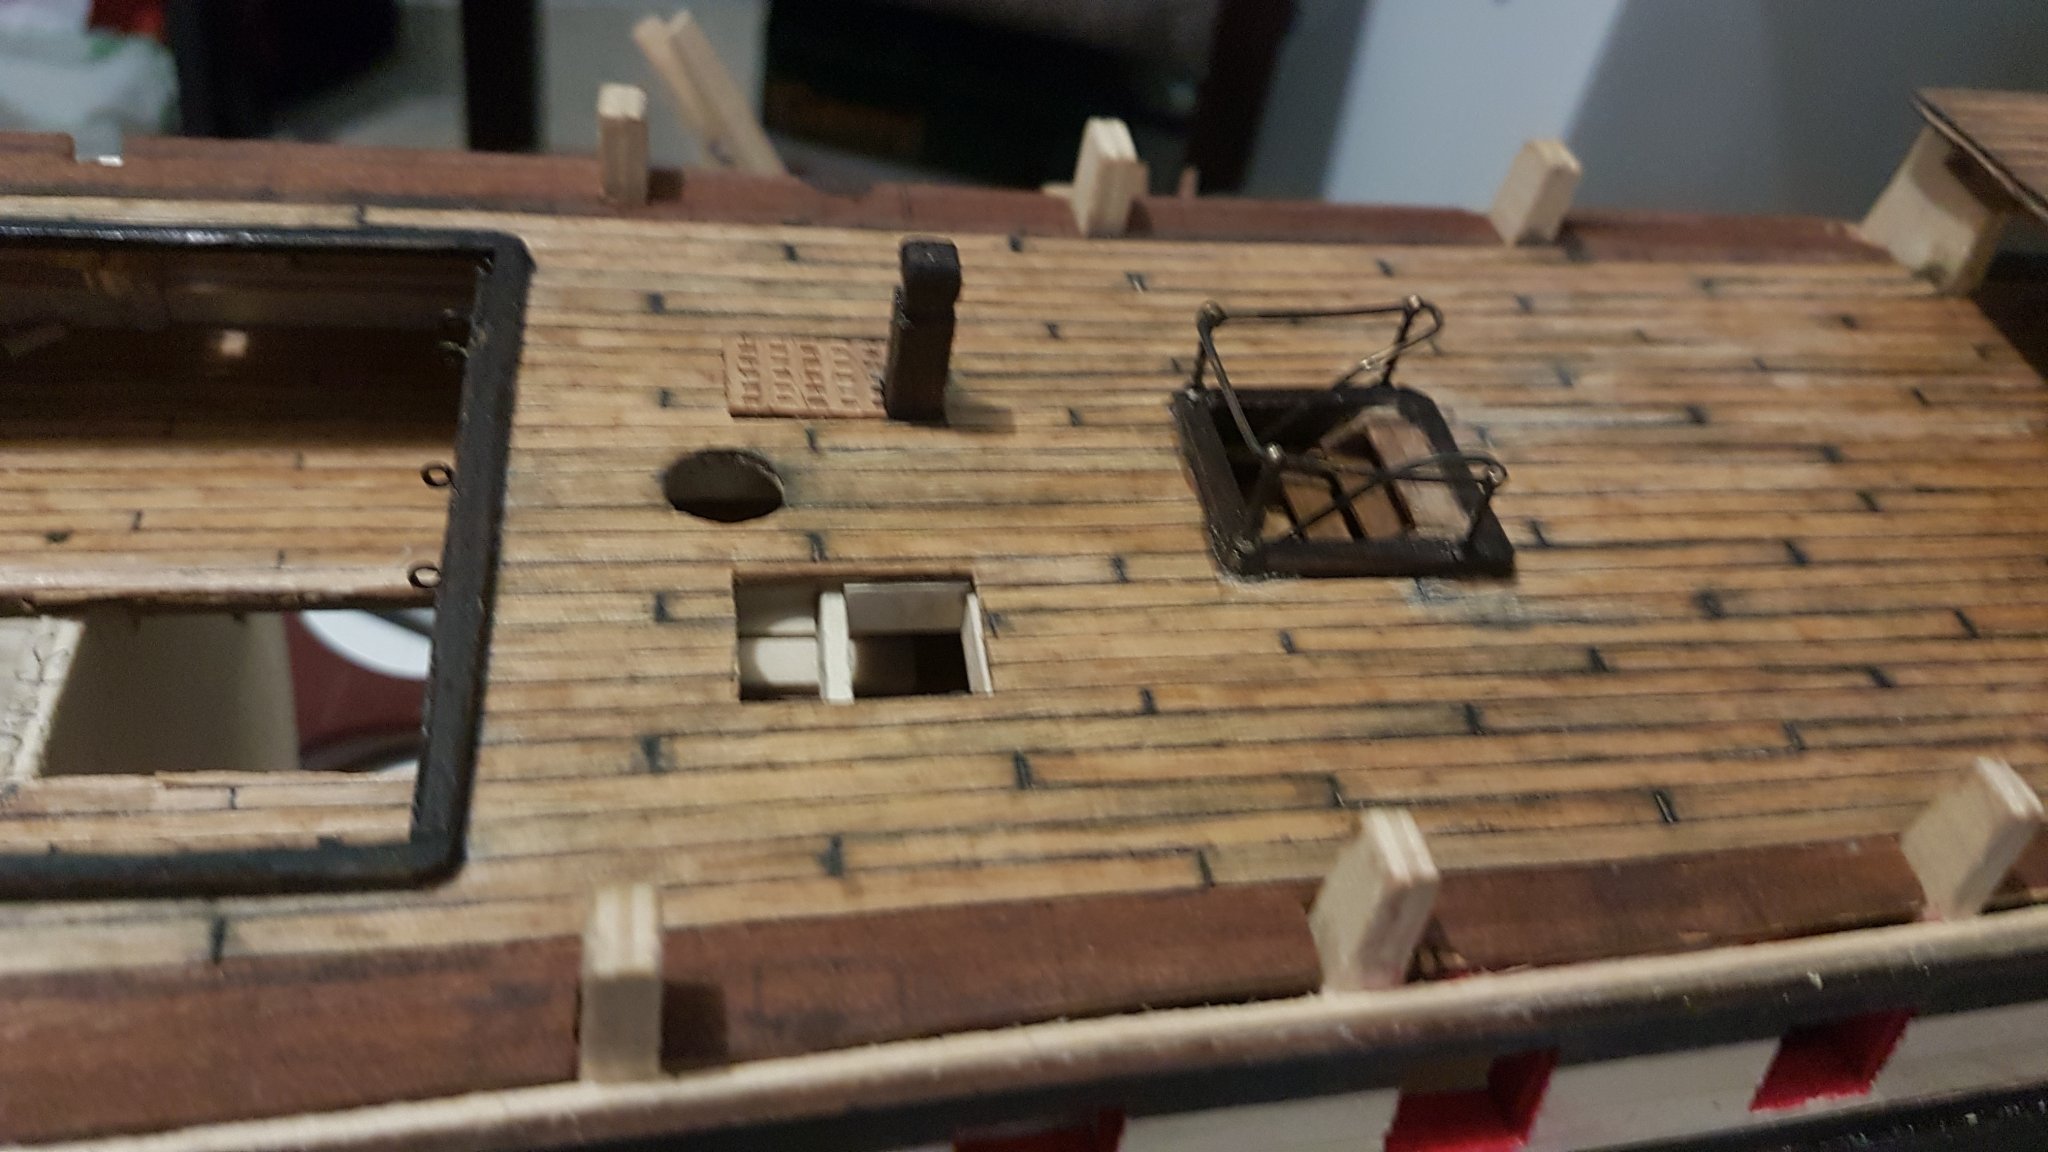
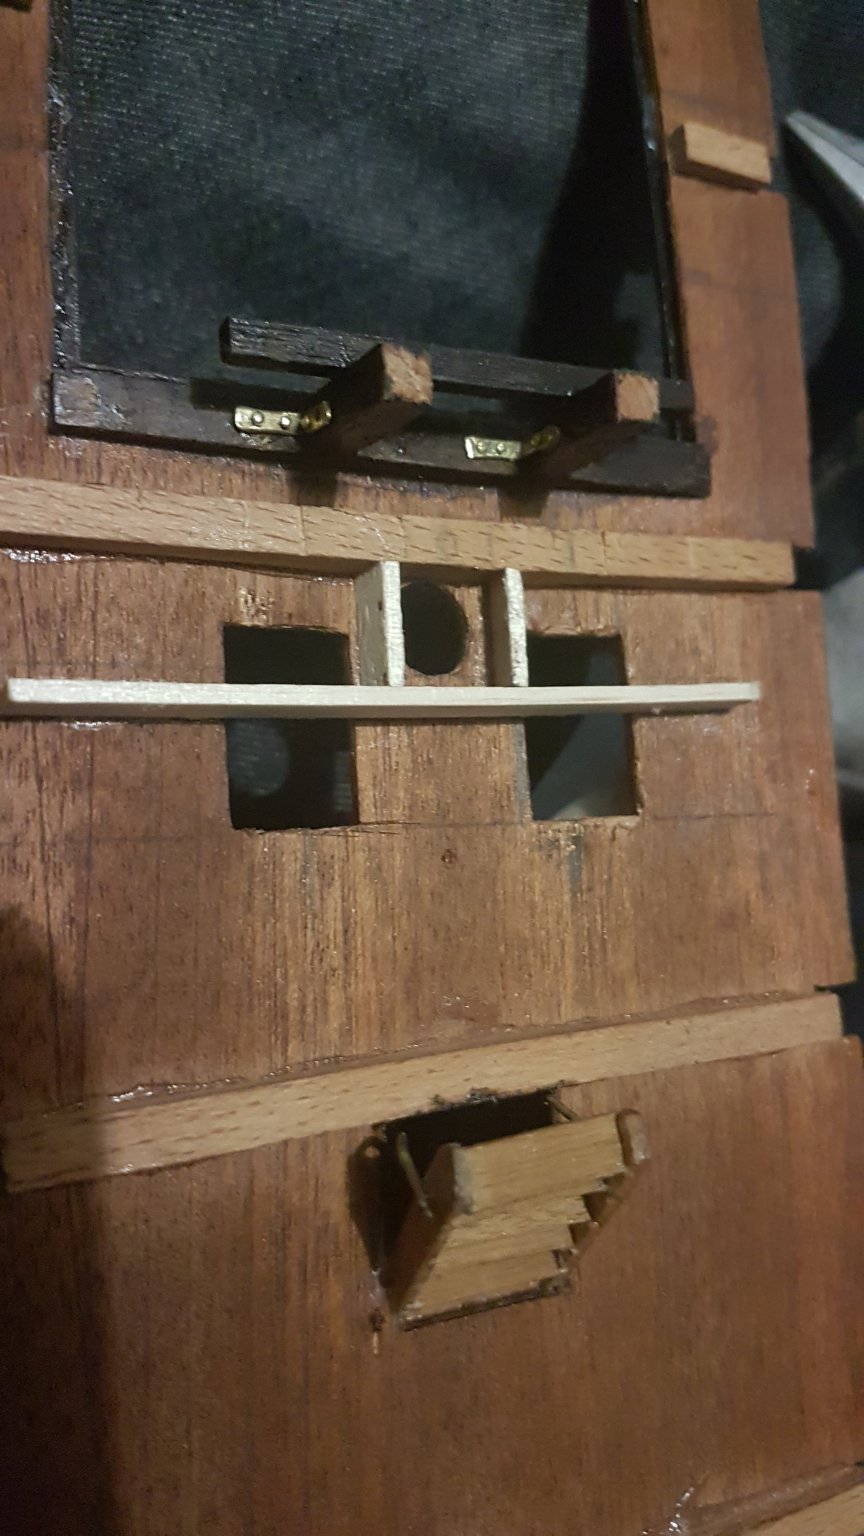
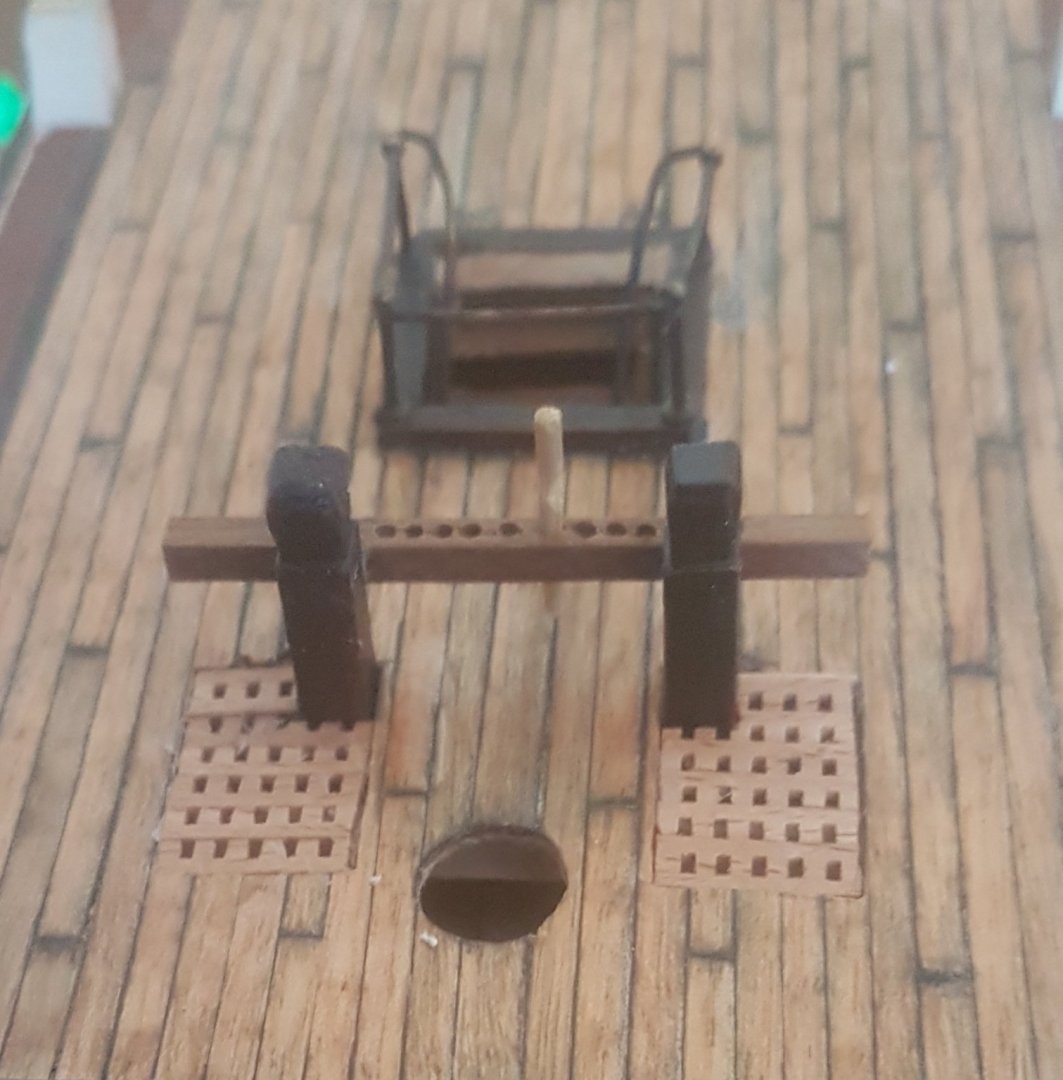
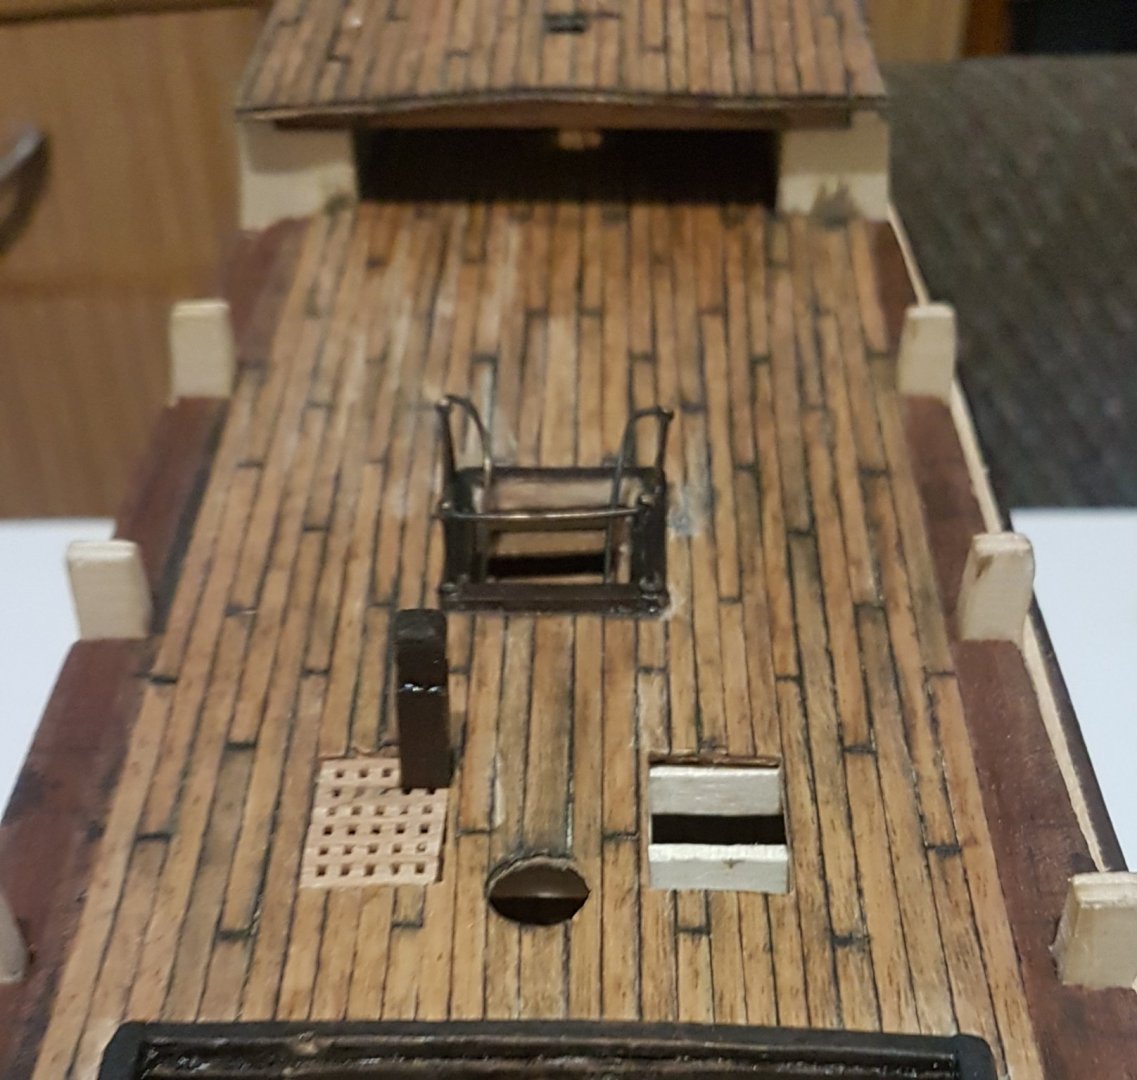
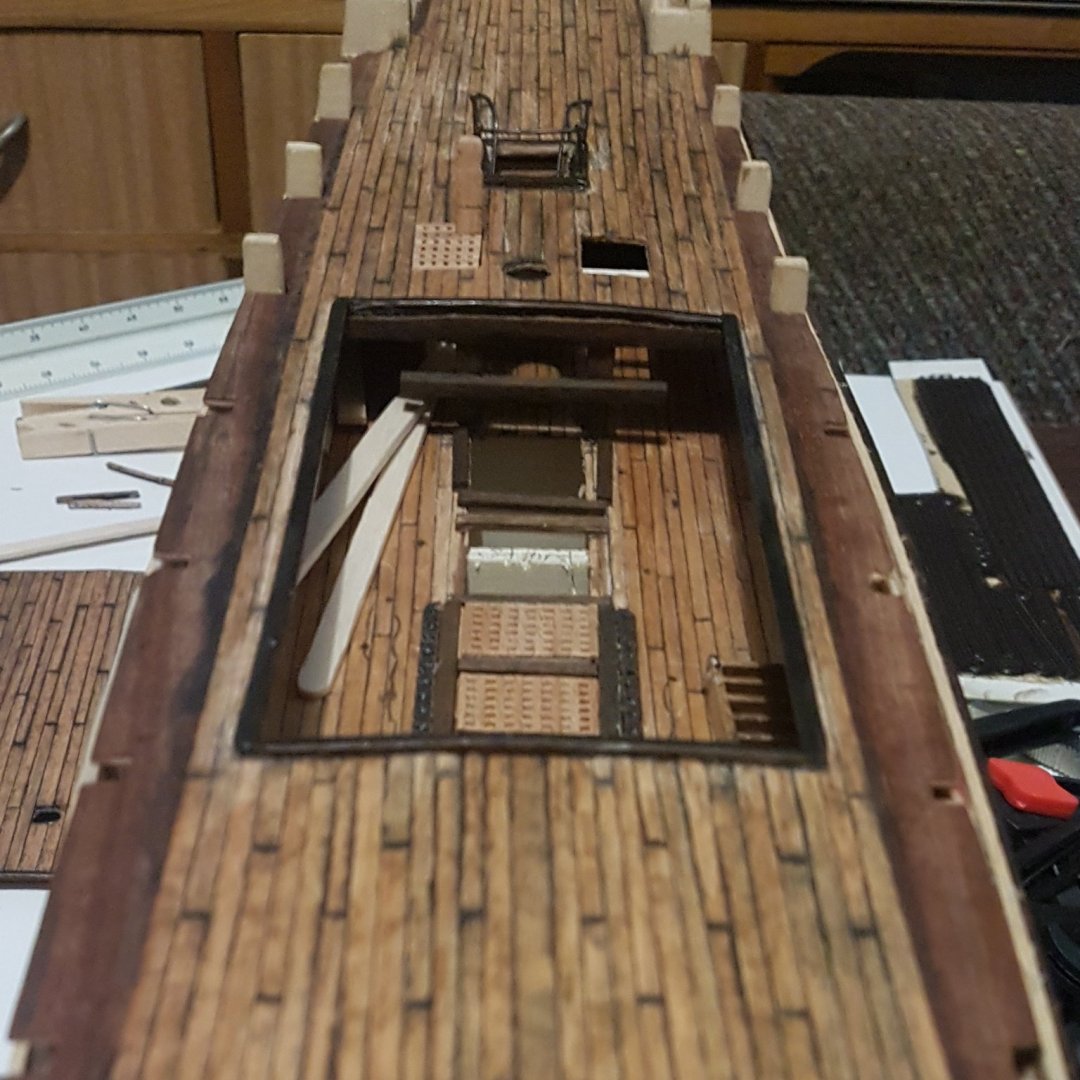
September update Here's some pics of my progress and where I am up to currently. one : Planning and placement of new deck items on both decks. two : working out a prototype for the stock hatches with modifications, drilled 0.5mm holes in latch on hatch to attach 2mm brass rings and rope.

-
Shipwrights Journal Build Plan Calendar September Complete hull planking on both sides Stain outer layers on hull complete redo of lower deck, including redesign as per the plan I posted complete cannons and rigging for lower deck. considering adding another staircase leading to 3rd deck behind stairs near middle mast.
-
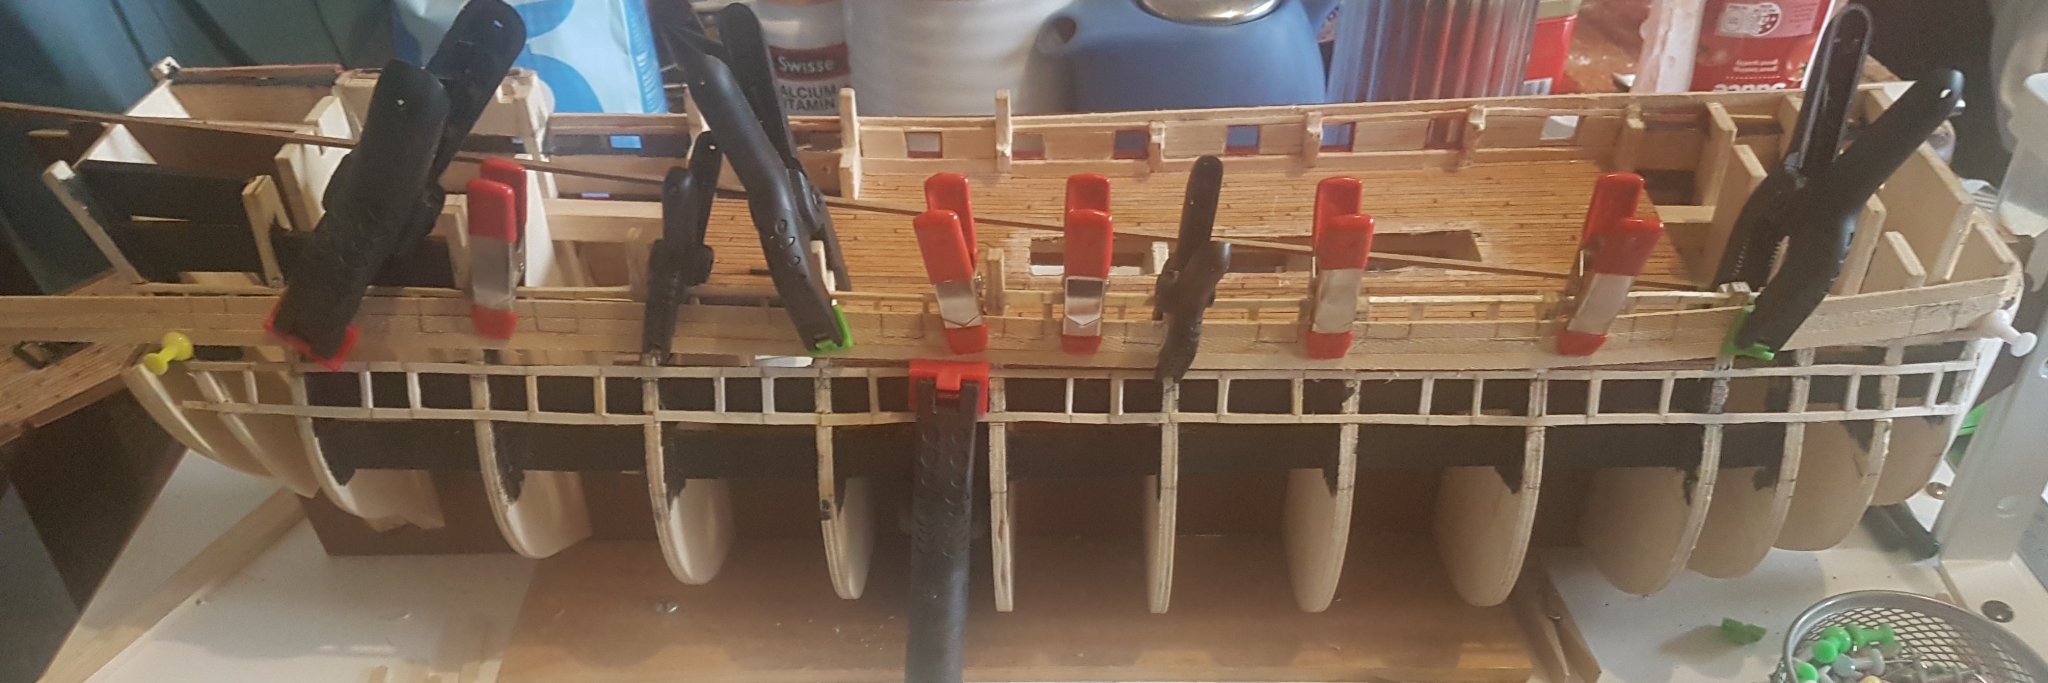
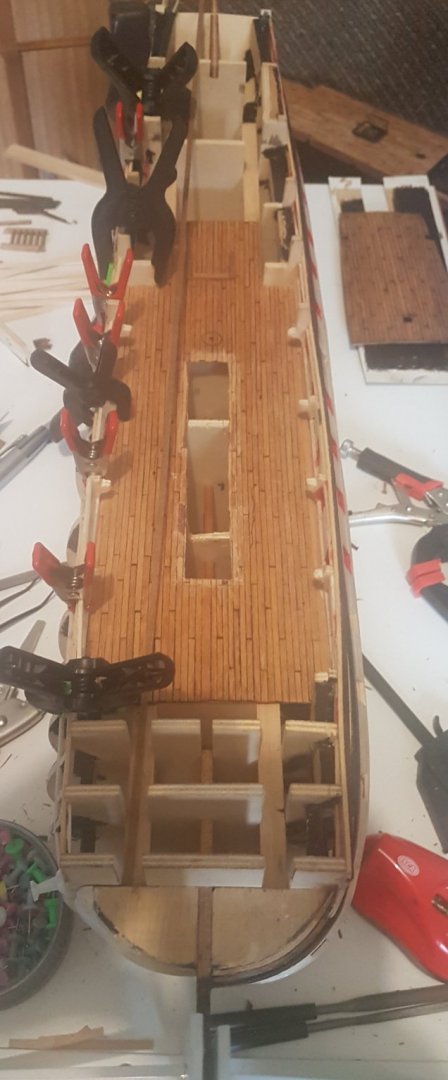
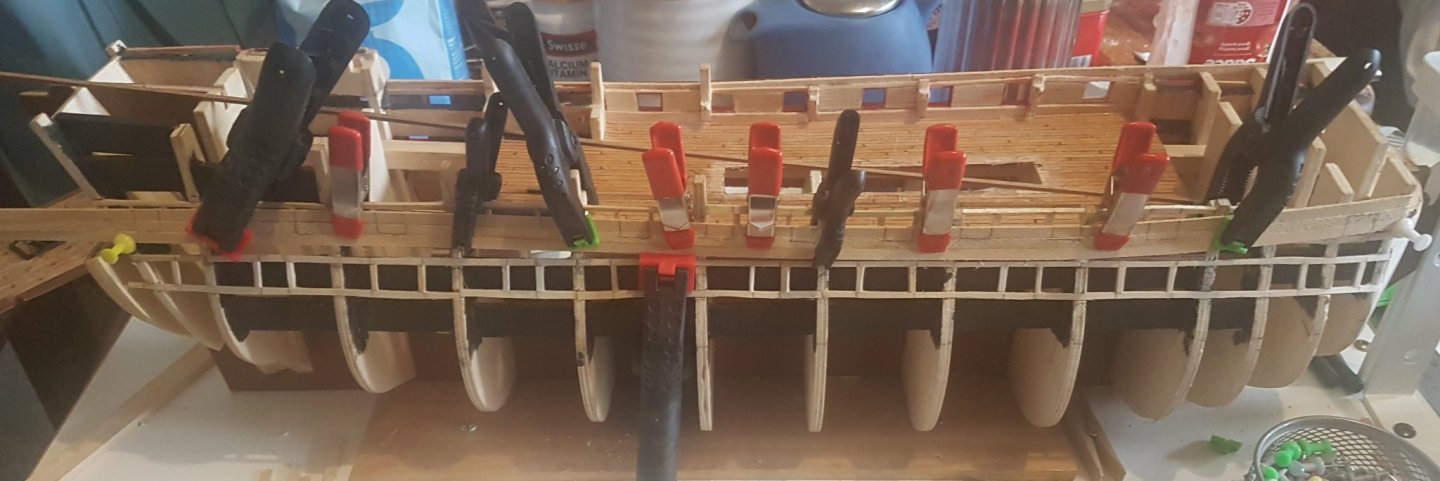
Upper Deck rebuild Tear down complete, now a blank canvas to put my plan into action Also the hull planking is coming on nicely.
-
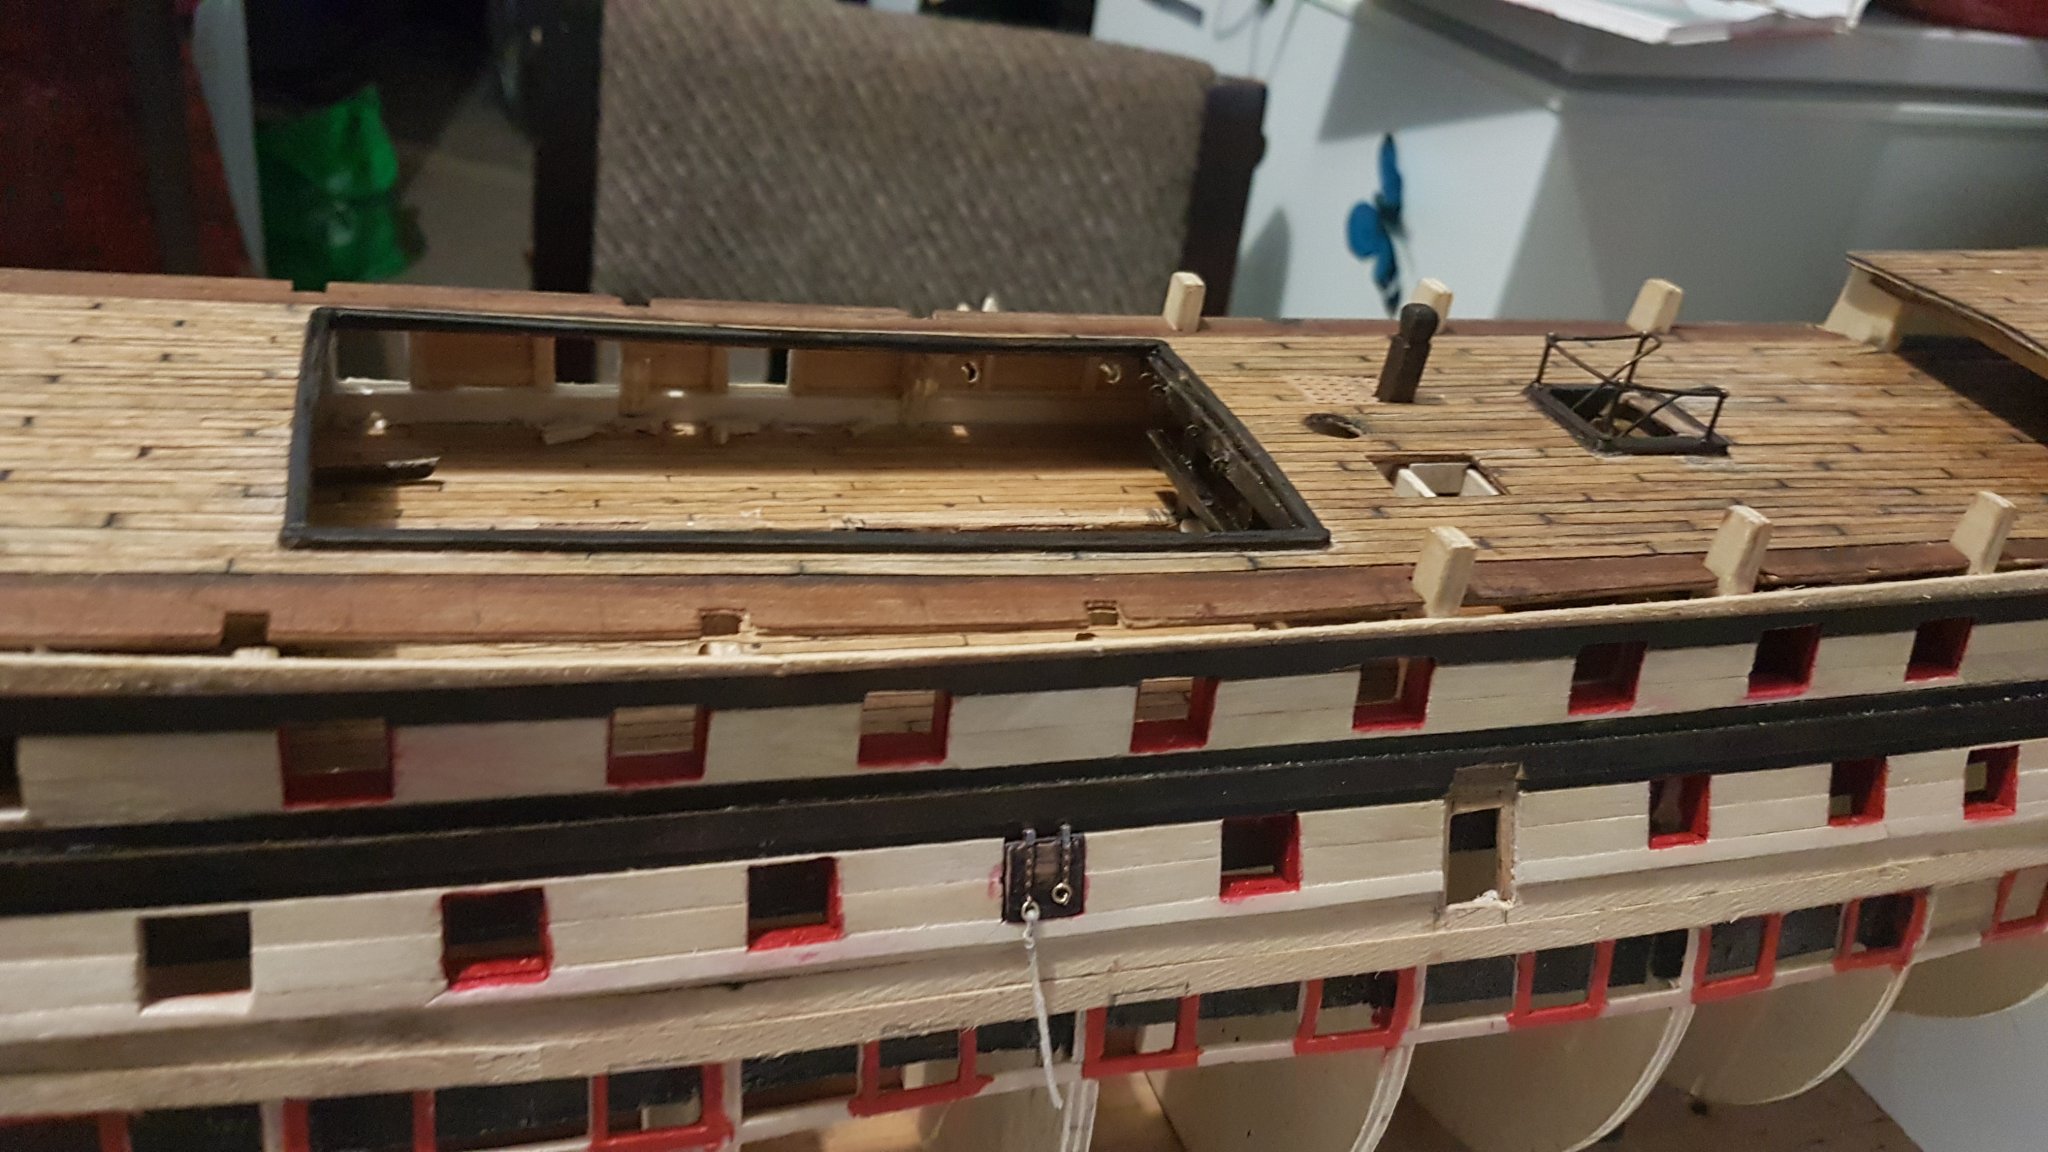
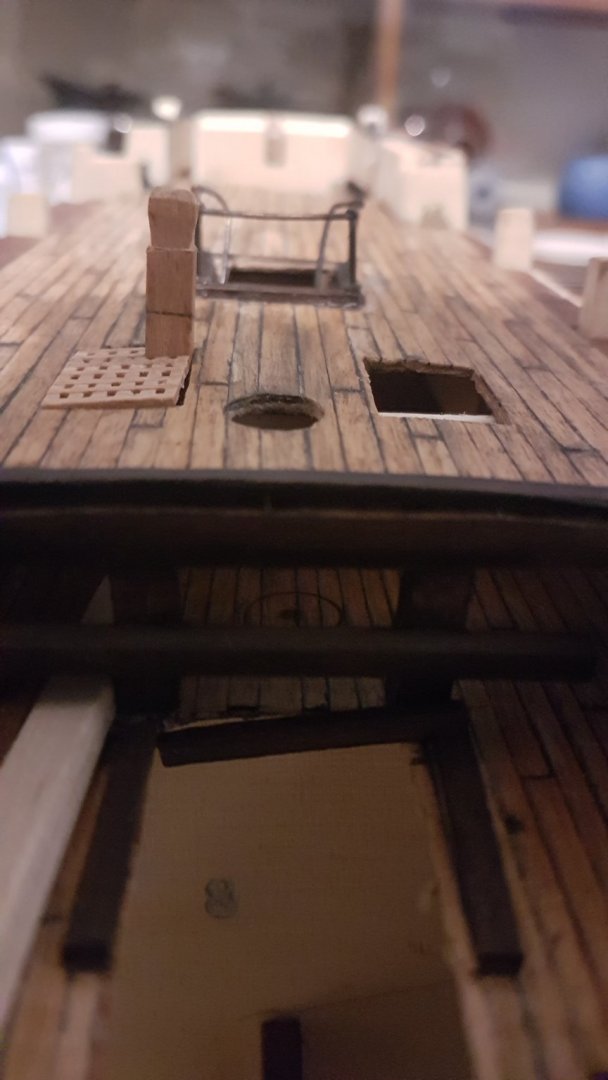
Did a teardown of the upper gun deck stairs and hatches... going with my plan above. Will post a pic when the deck doesn't look like a demolition site Also started planking the hull again, to match the other side of the hull. Doing about 2 planks per day at the moment, may increase to 4 later.
-
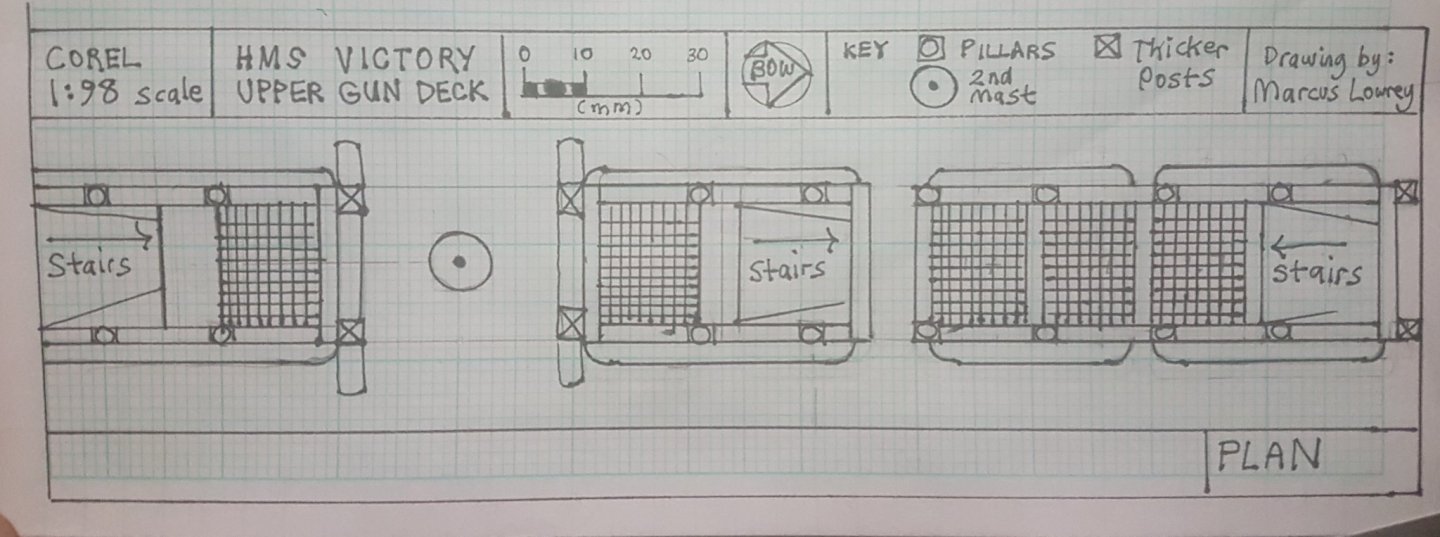
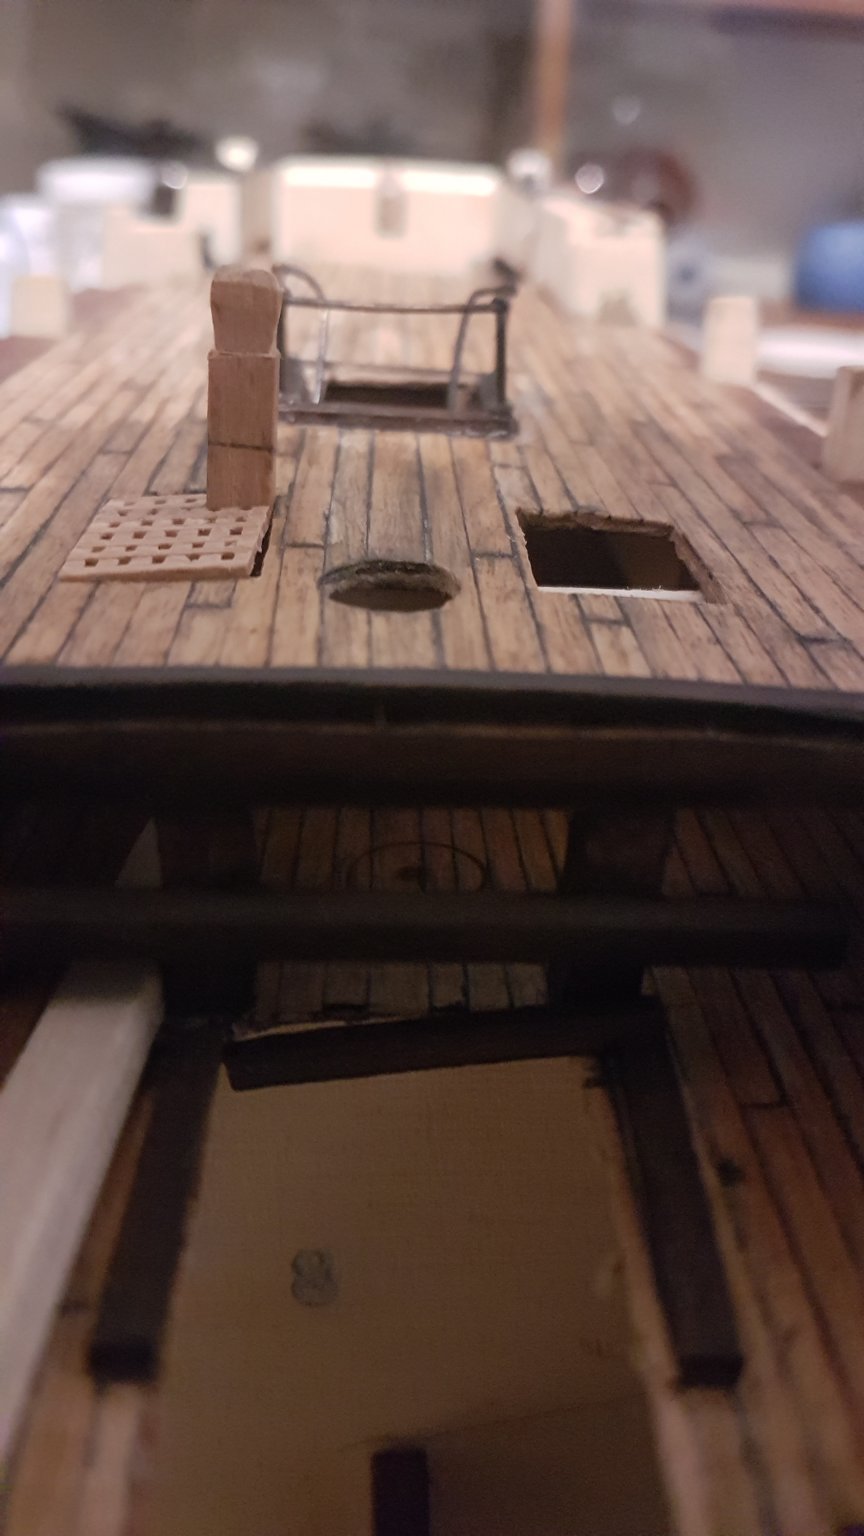
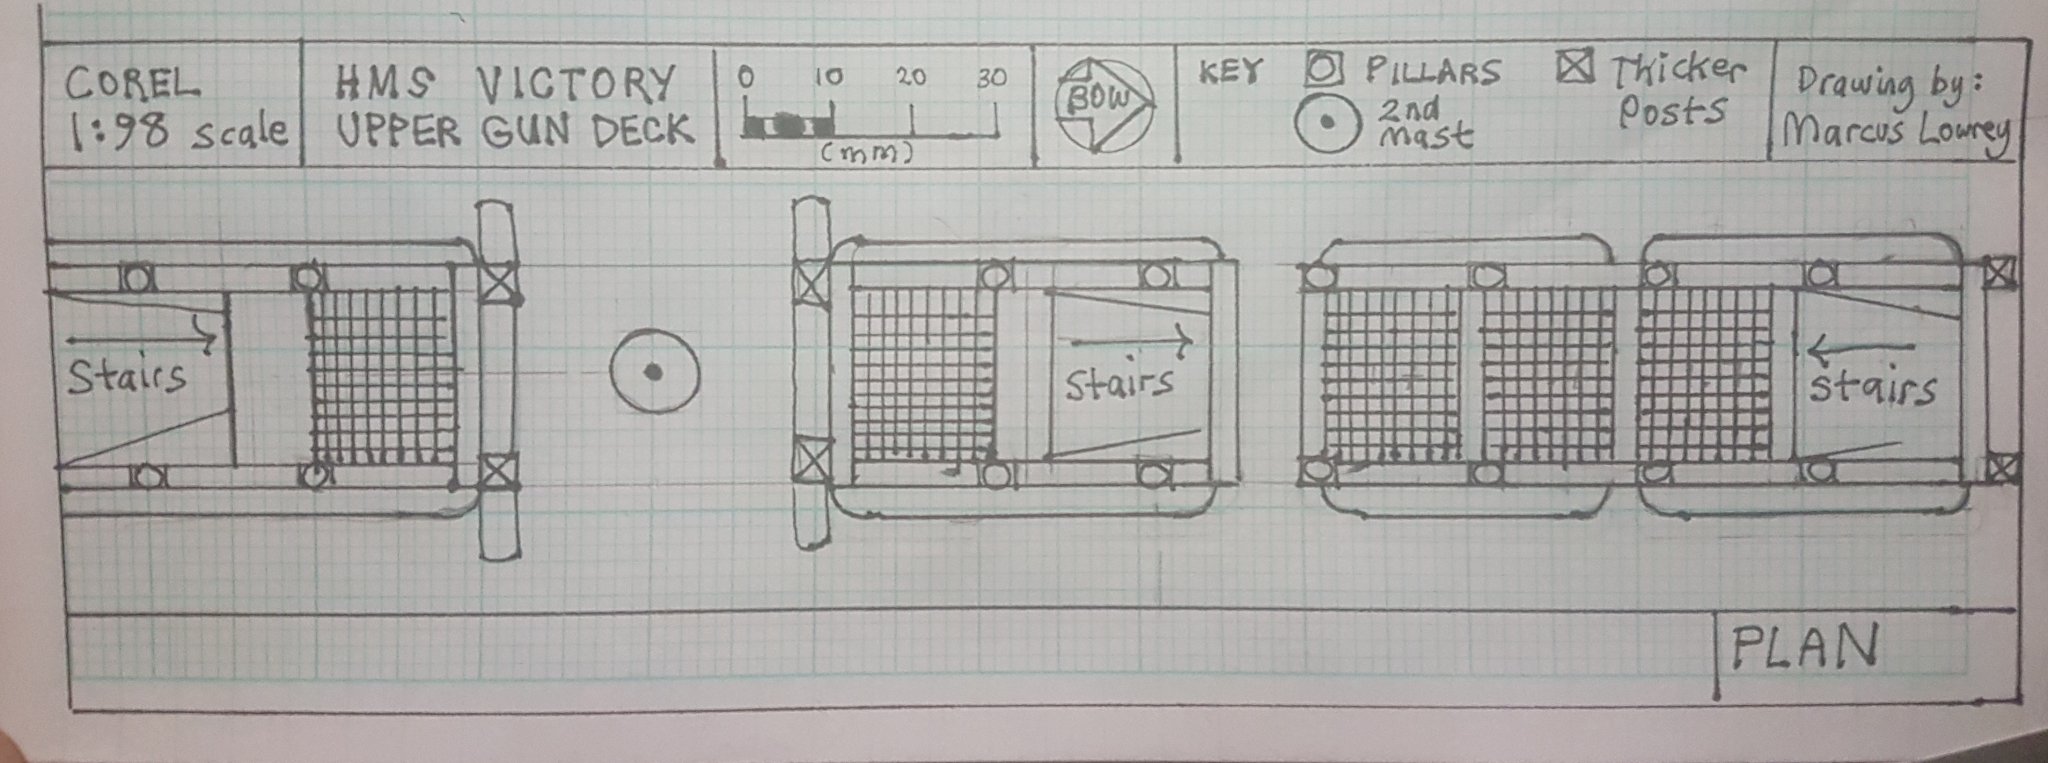
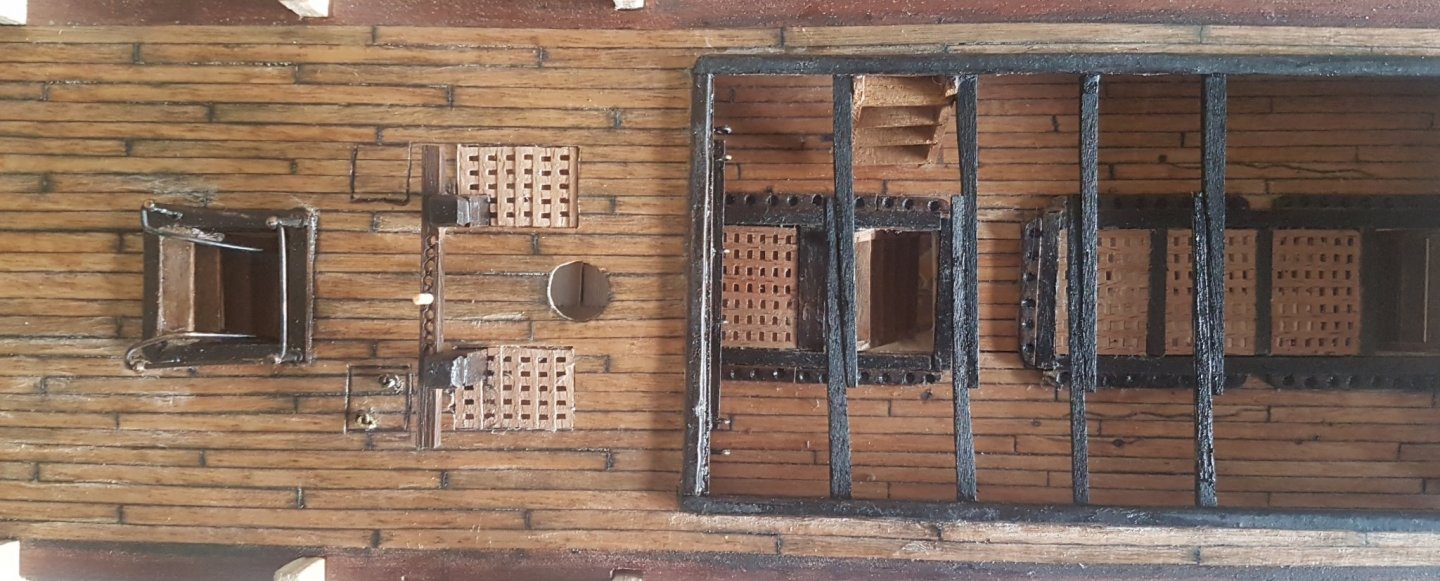
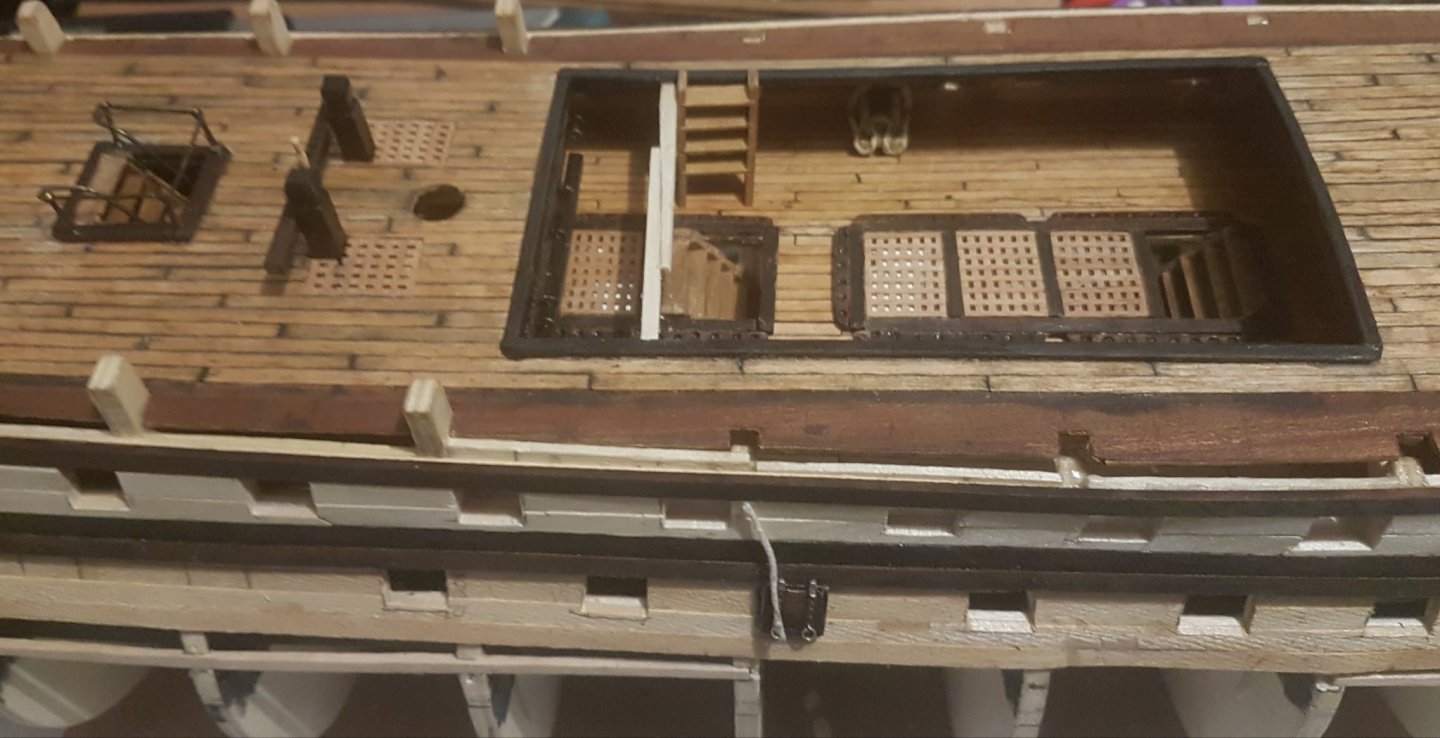
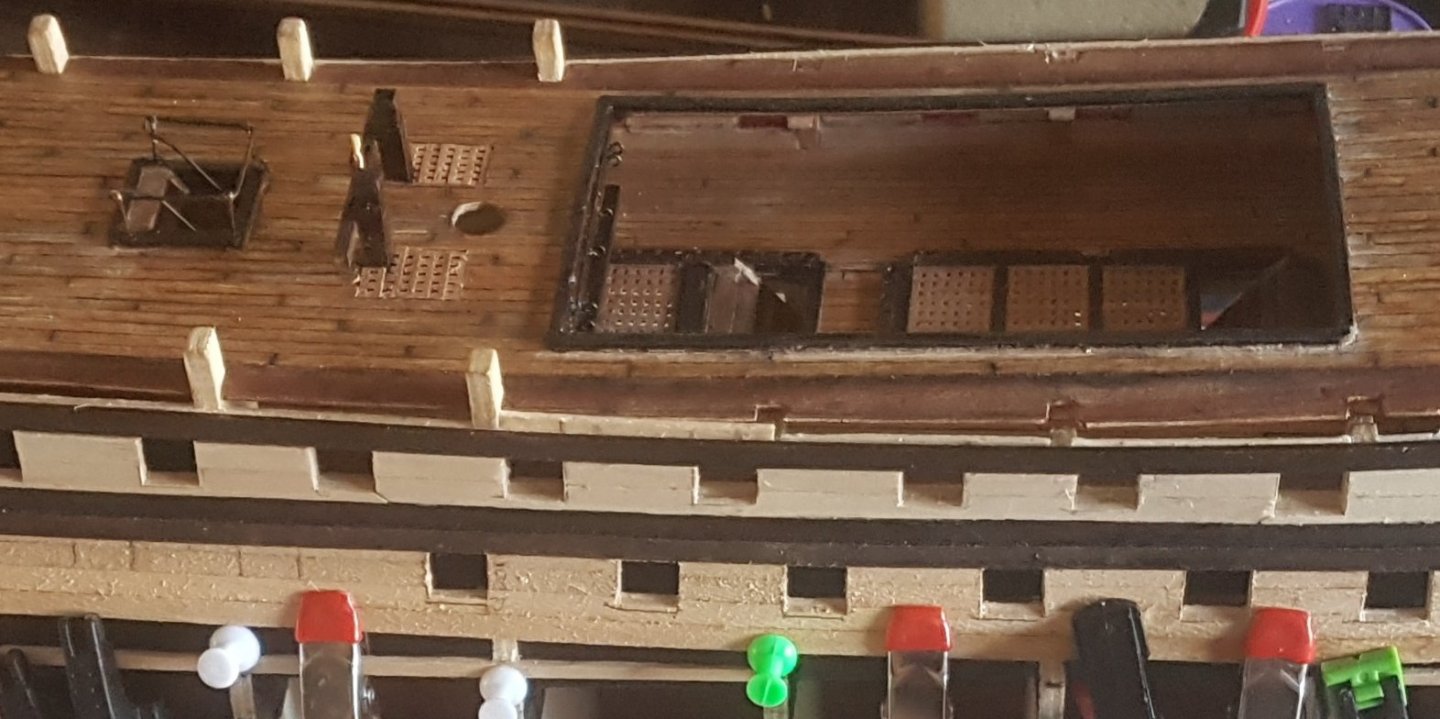
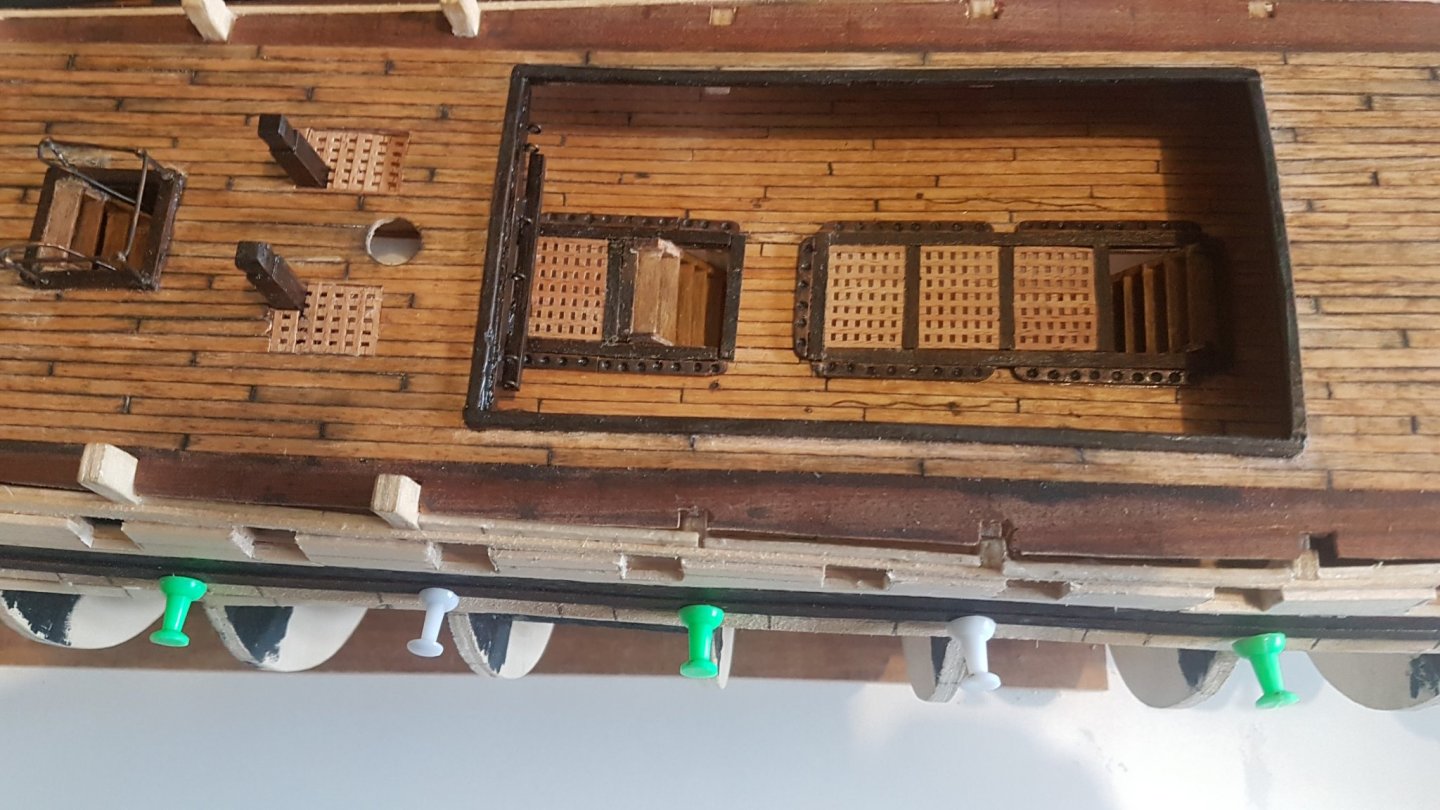
Thats a great comparison, my plan is a scale drawing for the Corel 1:98 HMS Victory... so you can take measurements off the plan and apply to the stock Corel kit I'm not sure if those double gratings are correct, as I've seen double gratings on the vertical axis not the horizontal one. If you look carefully at the second pic above you can see a seam on the grating on the vertical.
-
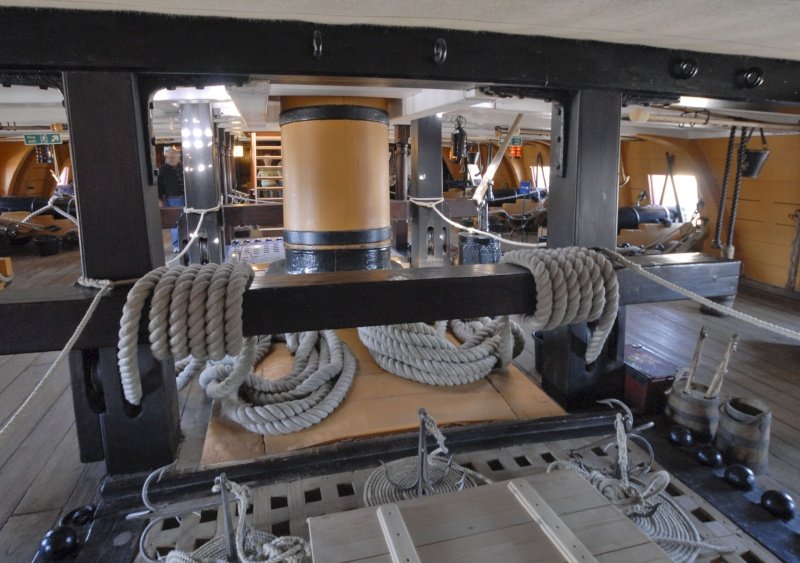
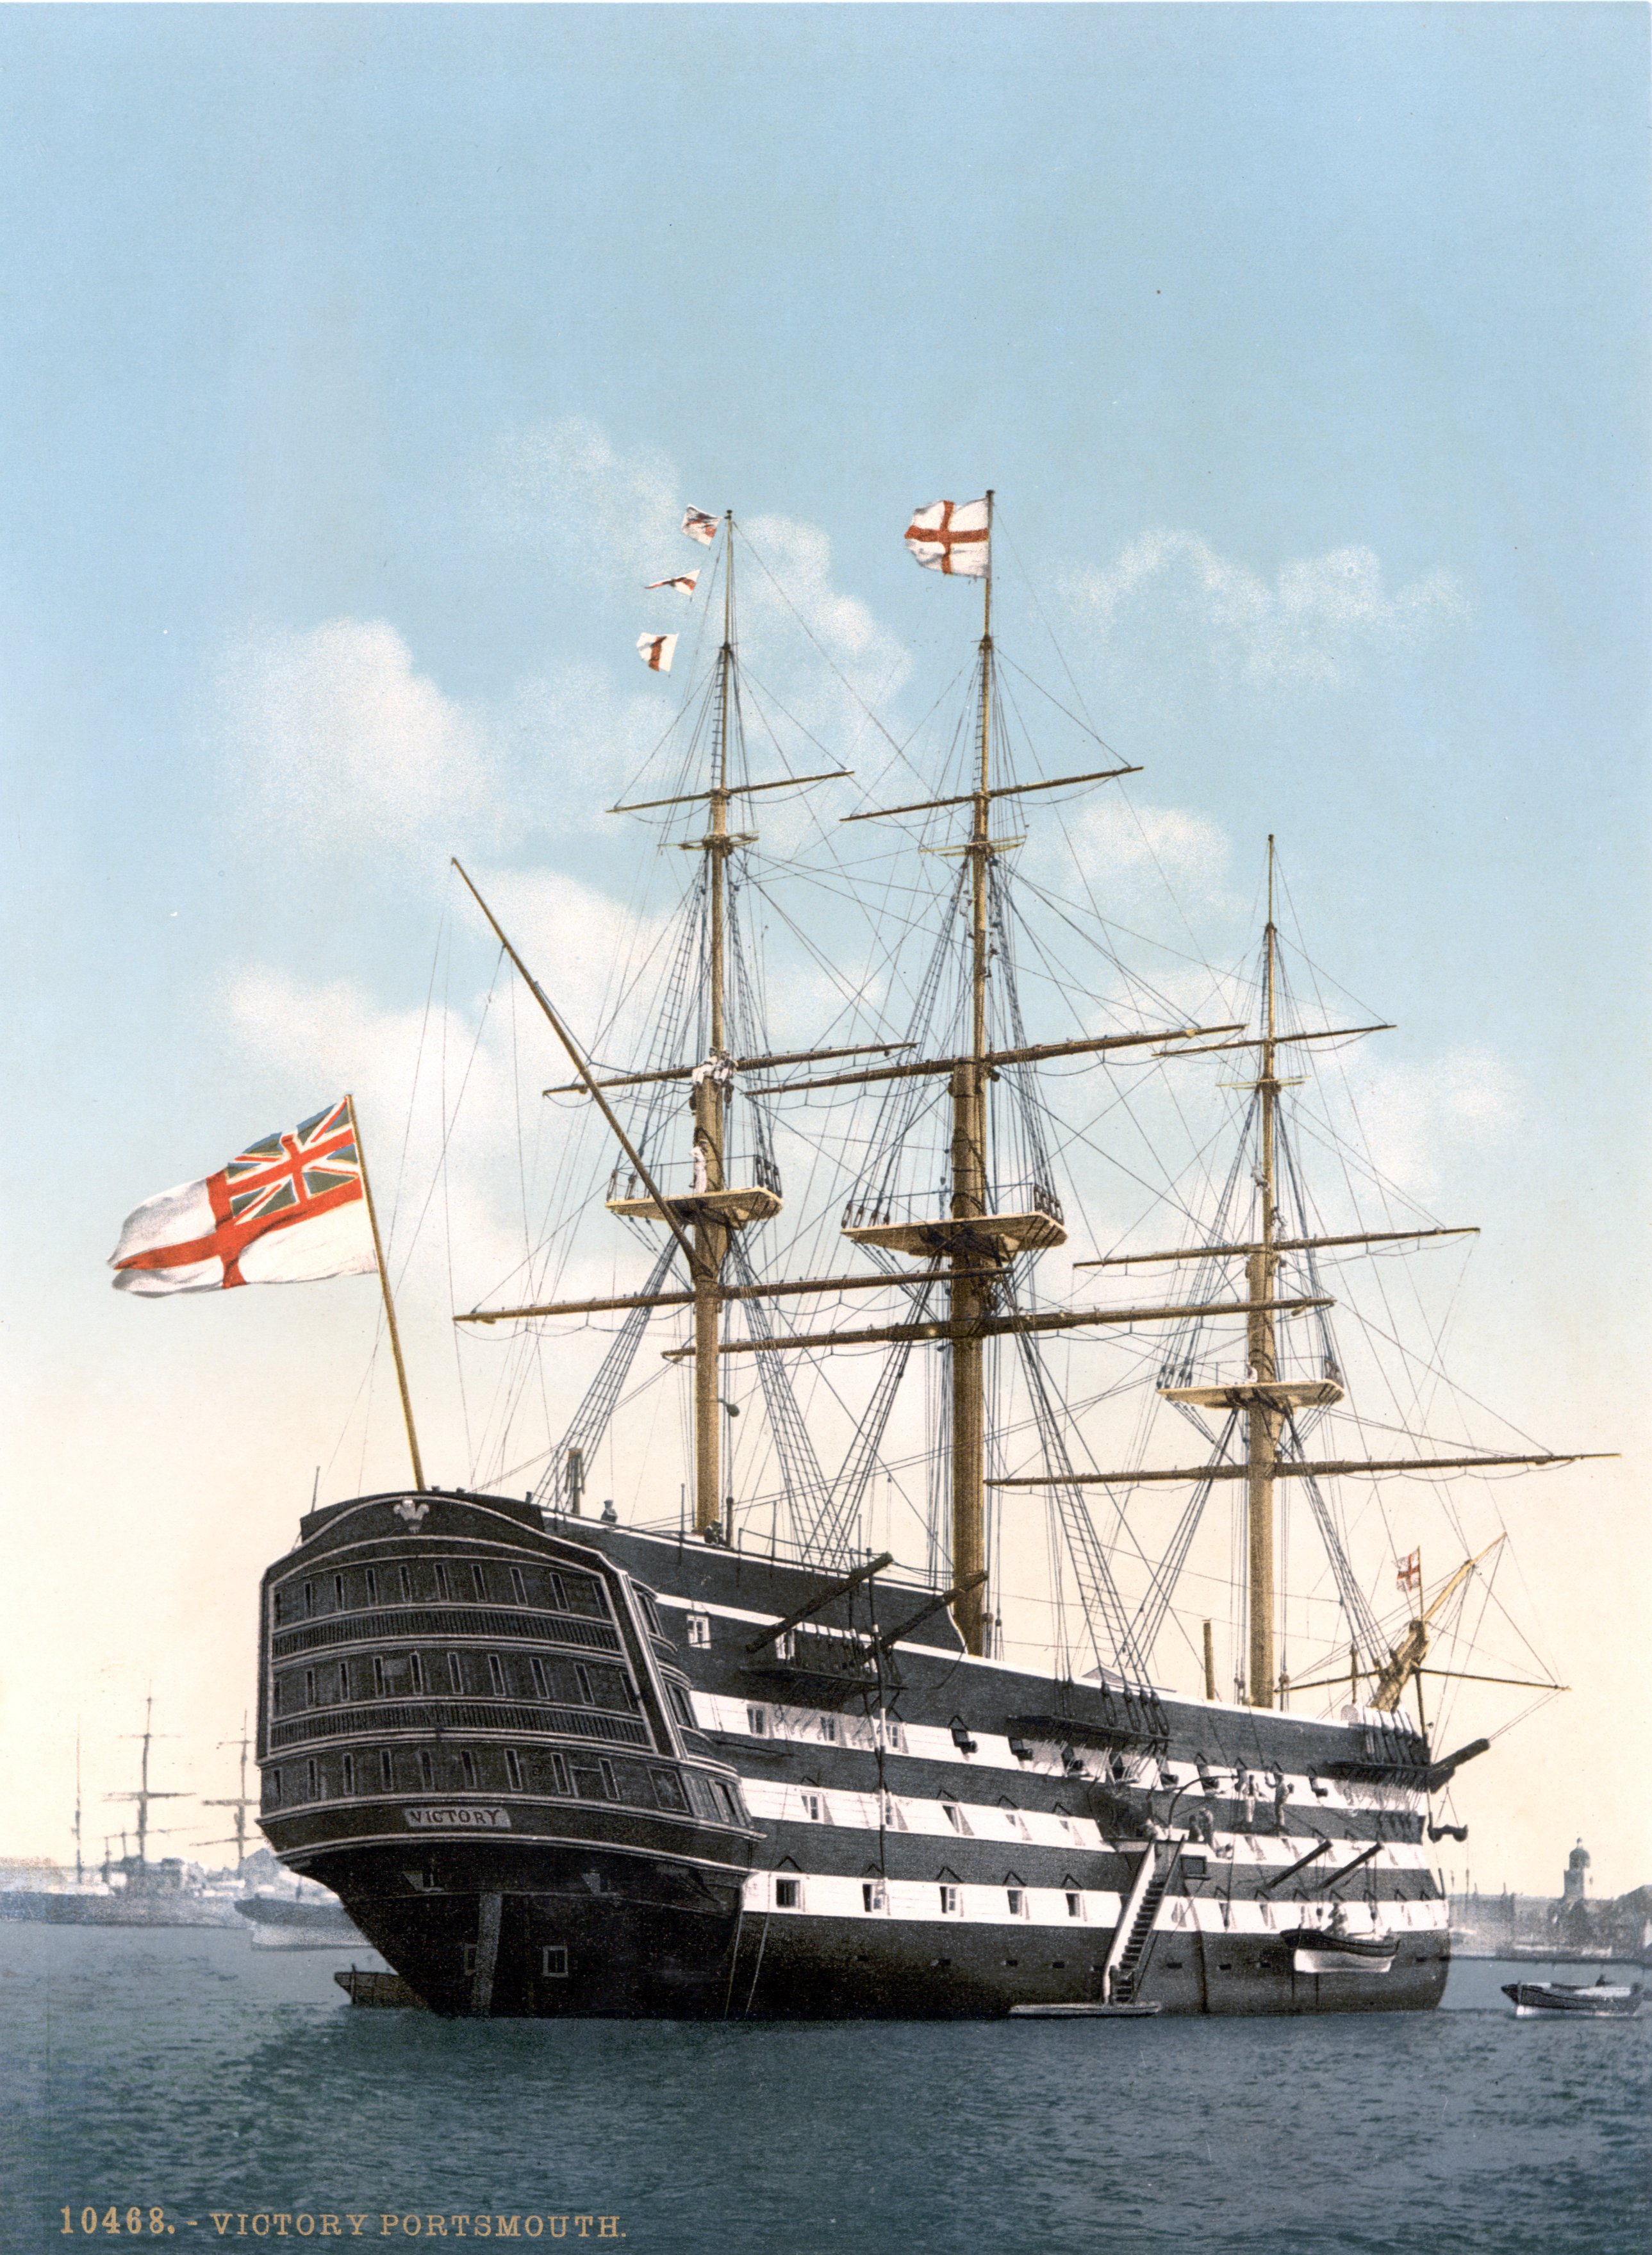
I have been studying countless photo's of the HMS Victory in Portsmouth, and cross referencing with other scale models Here's a plan I devised that should work with the Corel 1:98 HMS Victory dimensions. I'd be interested in any comments, feedback, comparisons etc... This Pic below I found on the internet is the next level below, which is identical except for the wood that is mounted on the floor under the mast. The Upper Gun Deck doesn't have the wooden platform under the mast I think... I may be wrong however and this pic may actually be of the Upper Gun Deck.