MORE HANDBOOKS ARE ON THEIR WAY! We will let you know when they get here.
×

The Bitter End
-
Posts
257 -
Joined
-
Last visited
Content Type
Profiles
Forums
Gallery
Events
Everything posted by The Bitter End
-
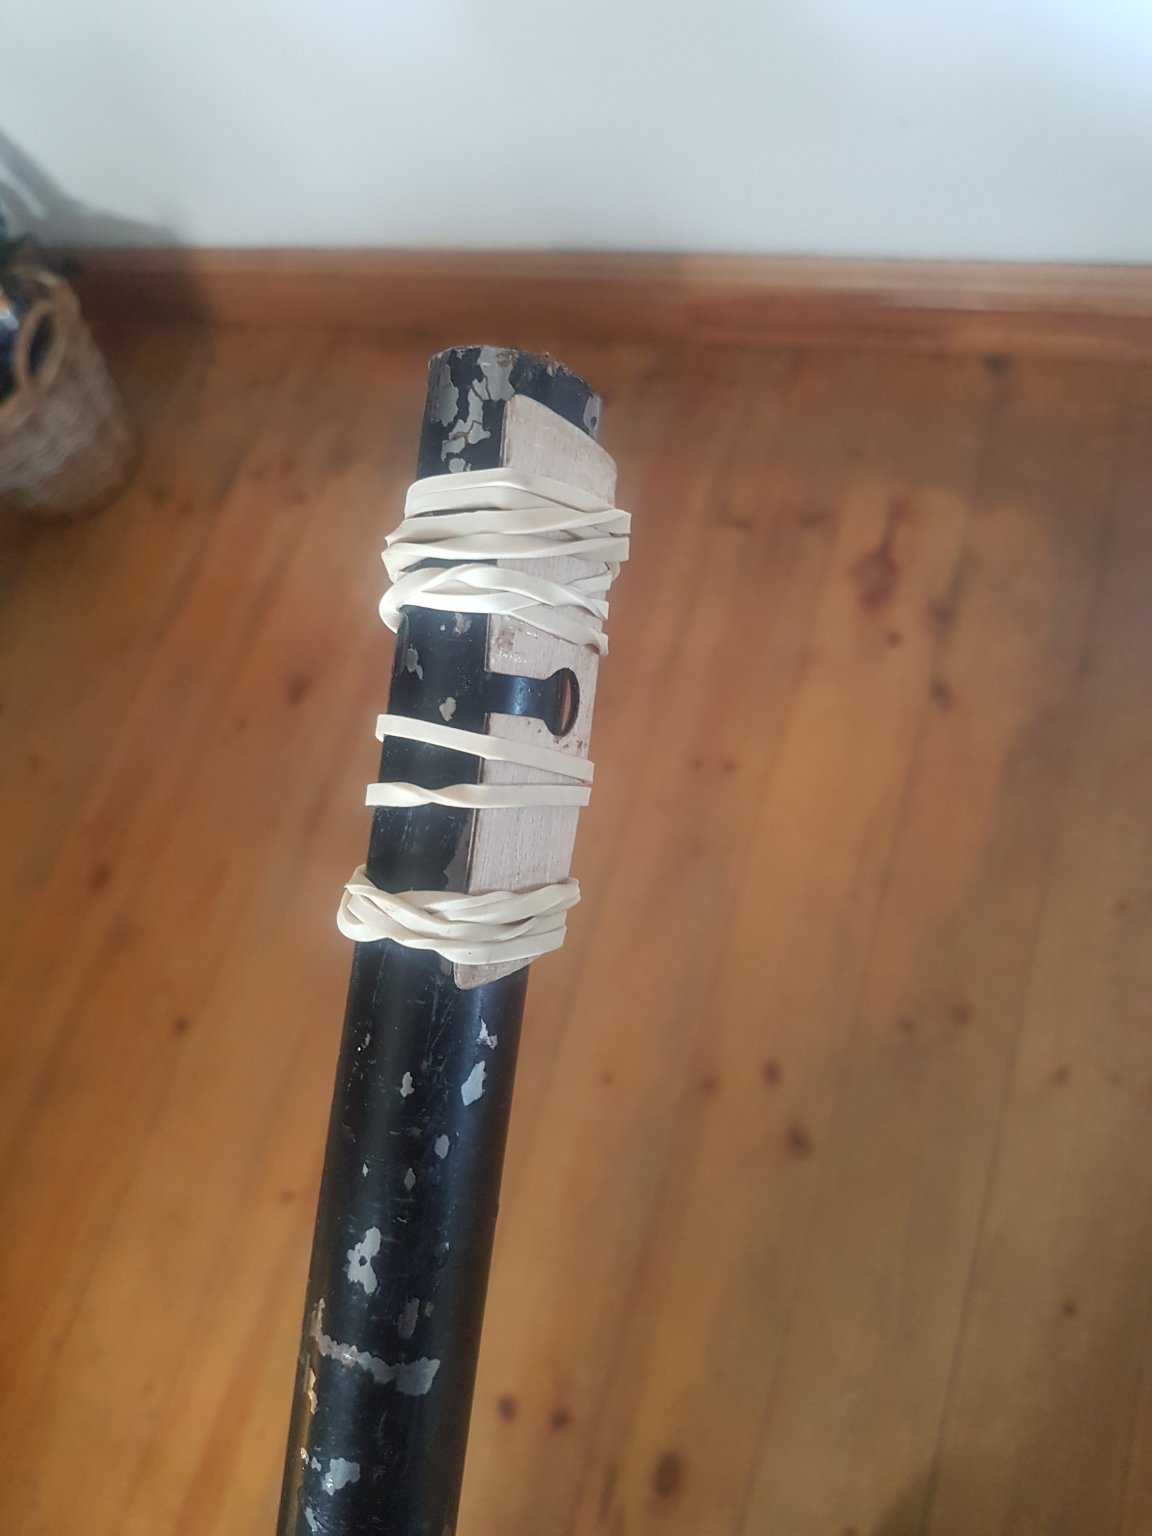
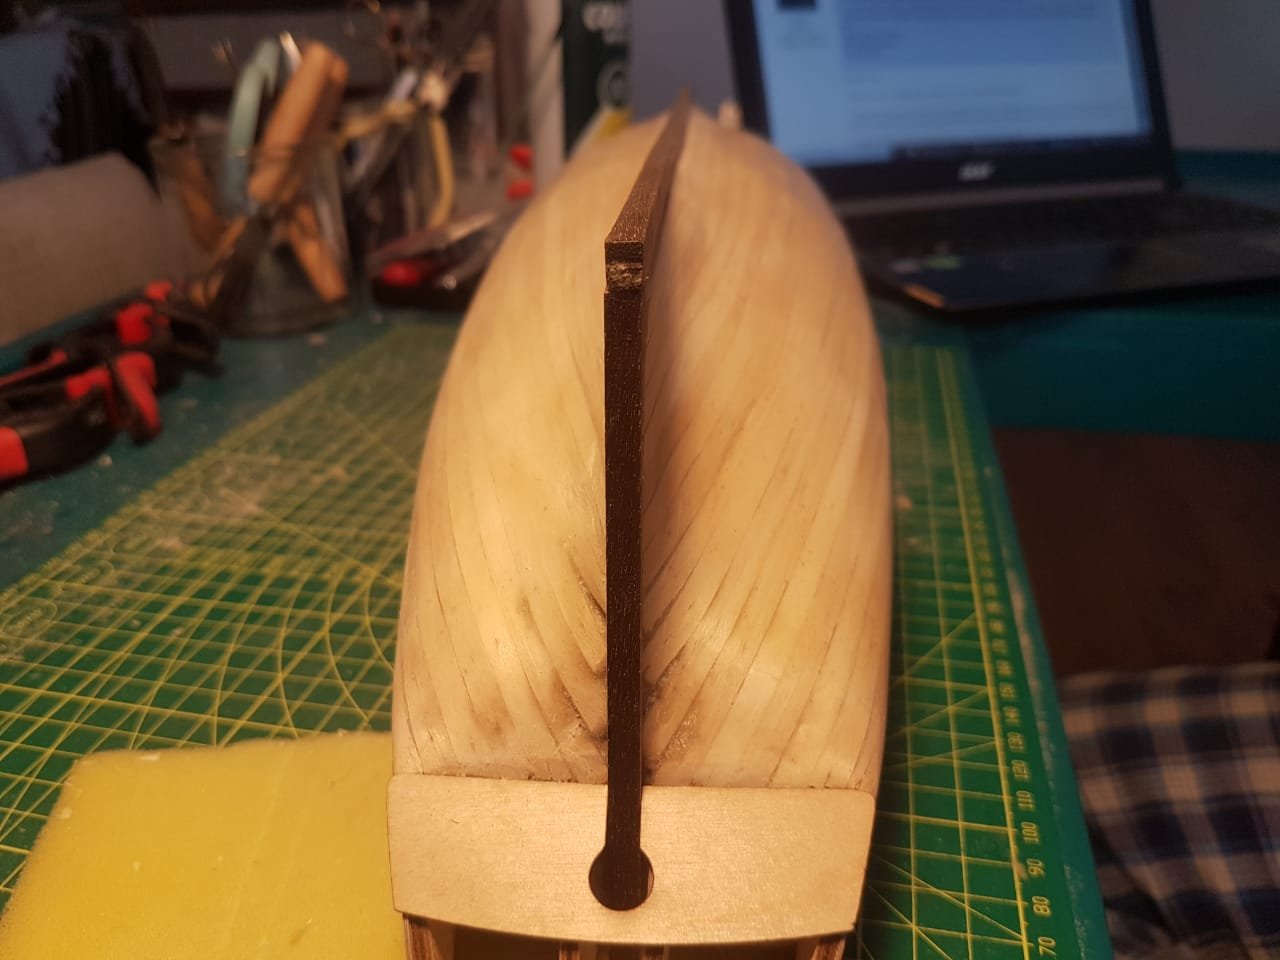
 @SpyGlass Hi Spy! I made great use of your advice as always and curved the stern counter as you suggested. I steamed it well and then secured it to a pipe with elastic bands. I should probably have curved it slightly more but that ship has sailed. I also followed that advice of yours and steered completely clear of CA and stuck to PVA glue. I have completed the planking of the hull and trimmed the stern counter but i have not planked the counter yet. How much of a problem is this? The Bitter End
-
Hello All! To those of you who I have not sent personal messages to I would like to apologise for my long absence and sudden disappearance. I did not spend my time in idleness, I did manage to get my second planking done. I would like to reply to all the messages that I did not attend to when I should have and then get on to what should be quite a lengthy post about my progress(brace yourselves). Thank you all for your input, support and feedback. I really hope you will all stick around for the rest of the show. Cheers! Haiko
-
Hi everyone. I would just like to apologise for my absence and general lack of enthusiasm. I am going through the end of a 6 year relationship and it has really made me struggle to be excited about my build. BUT! I will be back in full force as soon as I am ready. I hope you are all having great success in whatever you are currently pursuing The bitter end!
-
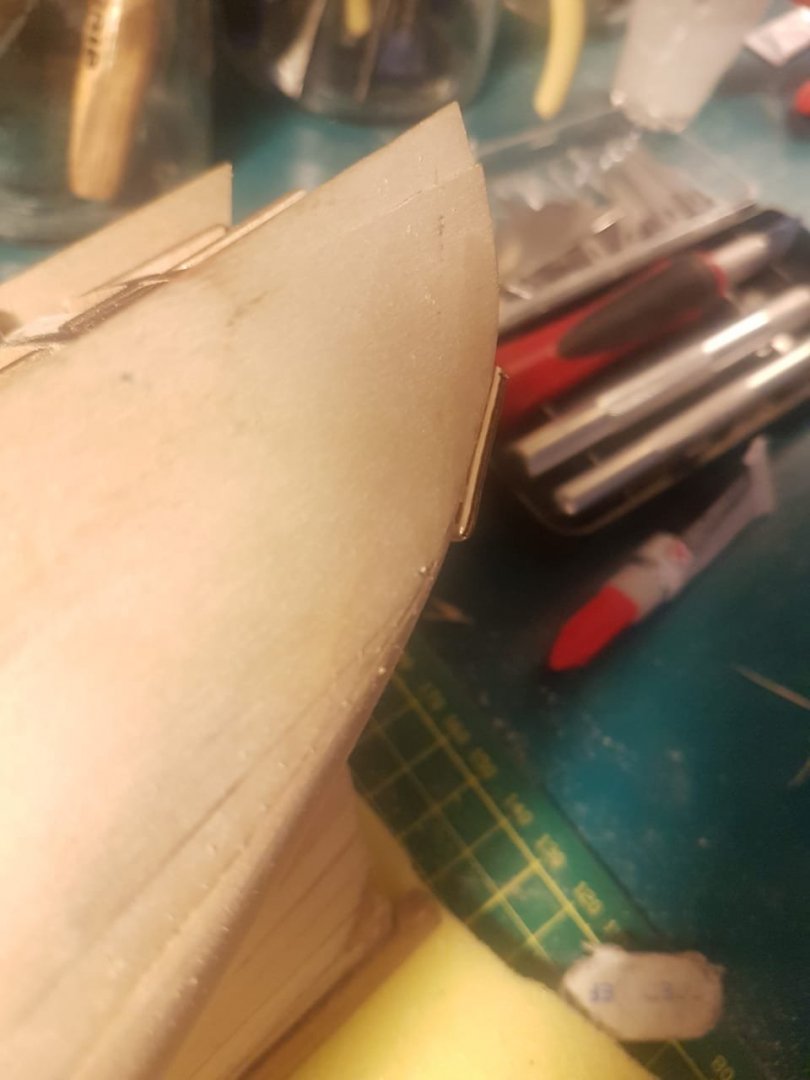
Rookie question number 982 Th e stern counter piece sticks out slightly beyond the edge of the bulwarks. I cant quite figure out if this was a mistake on my part or the models part or if it is meant to be that way. Should I be trimming this back so that the bulwark planking can cover the edge of the stern counter?
-
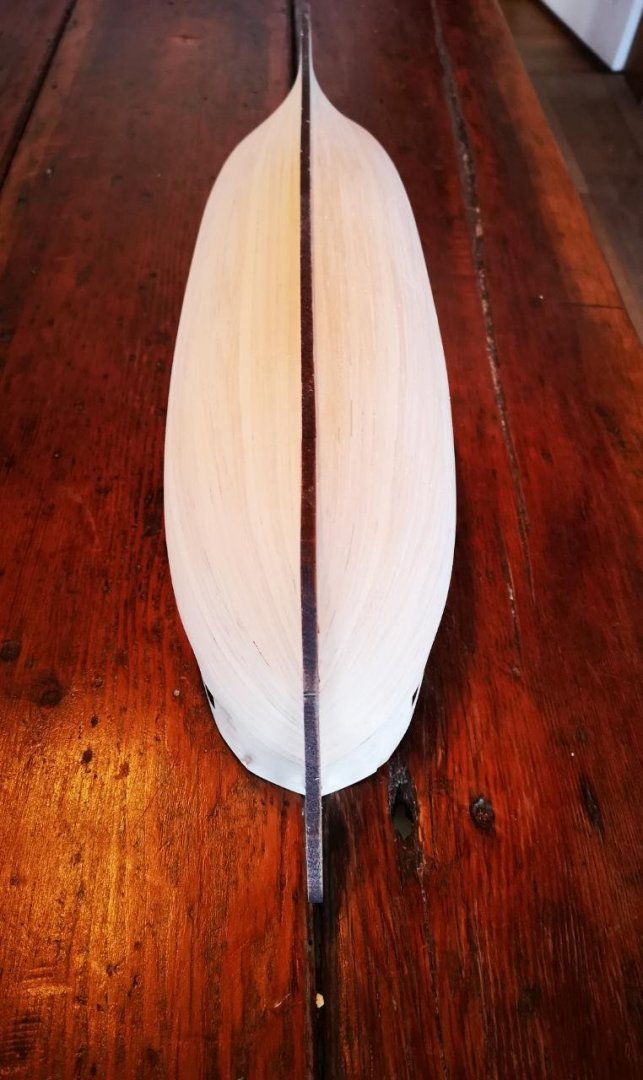
@SpyGlass Hello Spy! old faithful at it again. I agree entirely that that wale line was infact far too high. I have an analog vernier that I used to measure the wale off the drawing again and I am far more happy with the results. I did then go a step further and I used a compass, set the compass to the distance between the gunport and the wale indicated on the drawing and then went over to the model. the advantage of this is that it has the pencil built into the one side so there is less fiddling. Thanks for this great representation of just how extreme that curve in the stern counter actually is. I had no idea. I think I may nave to somehow exaggerate this curve using the planking of the hull and the counter itself. I cant get a curve into the ply piece that accurately matches your drawing. Thank you for that link to the drawings. they really are beautiful. I will order a set tonight! I hope you are having a great day. cheers "bitter"
-
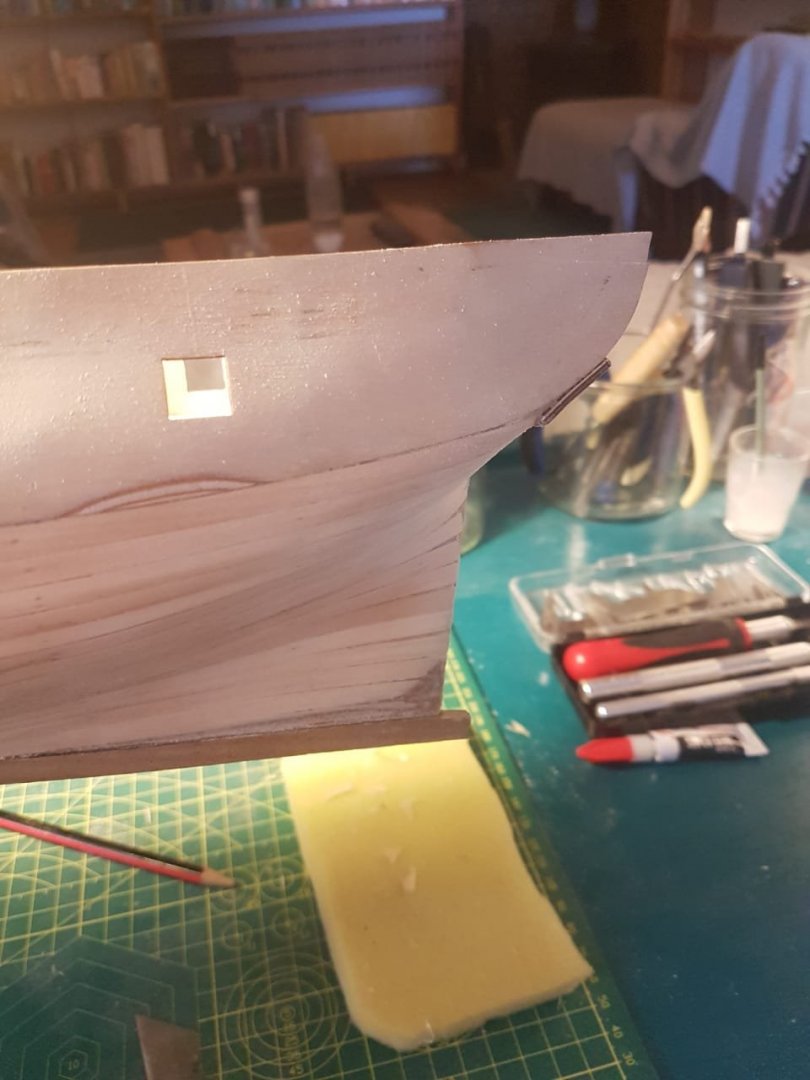
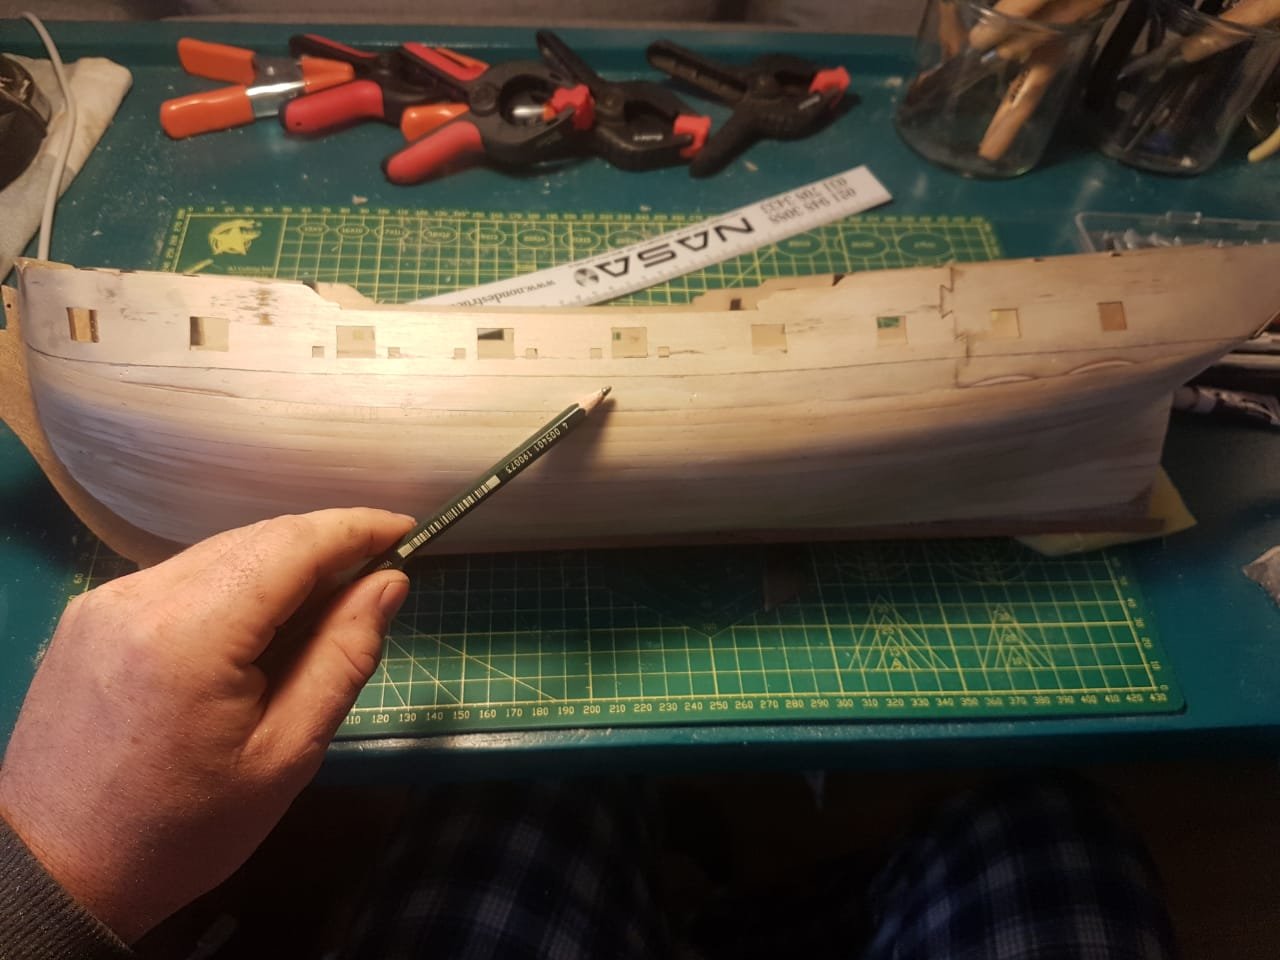
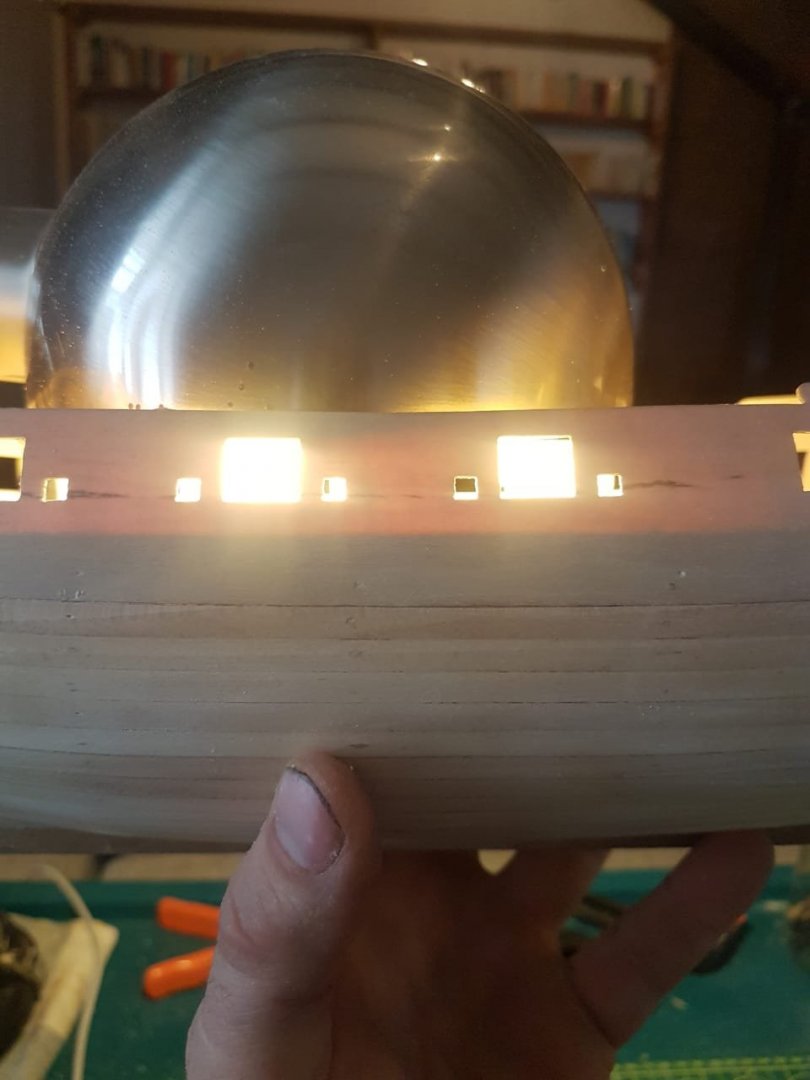
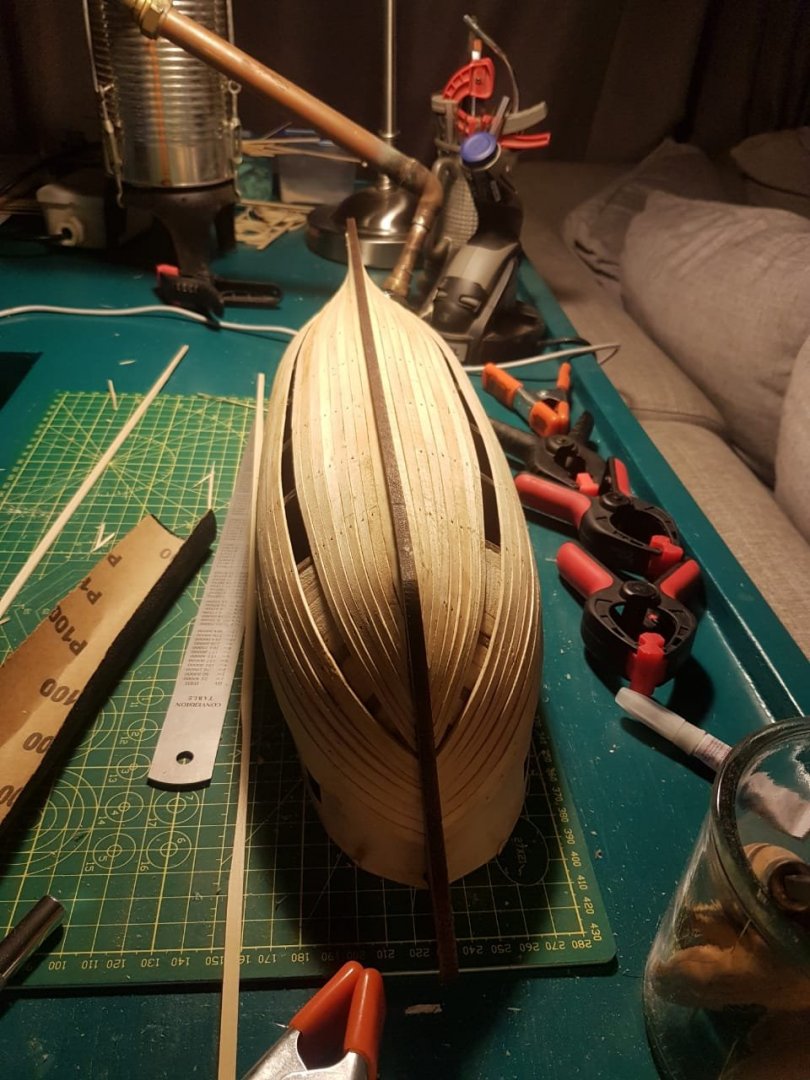
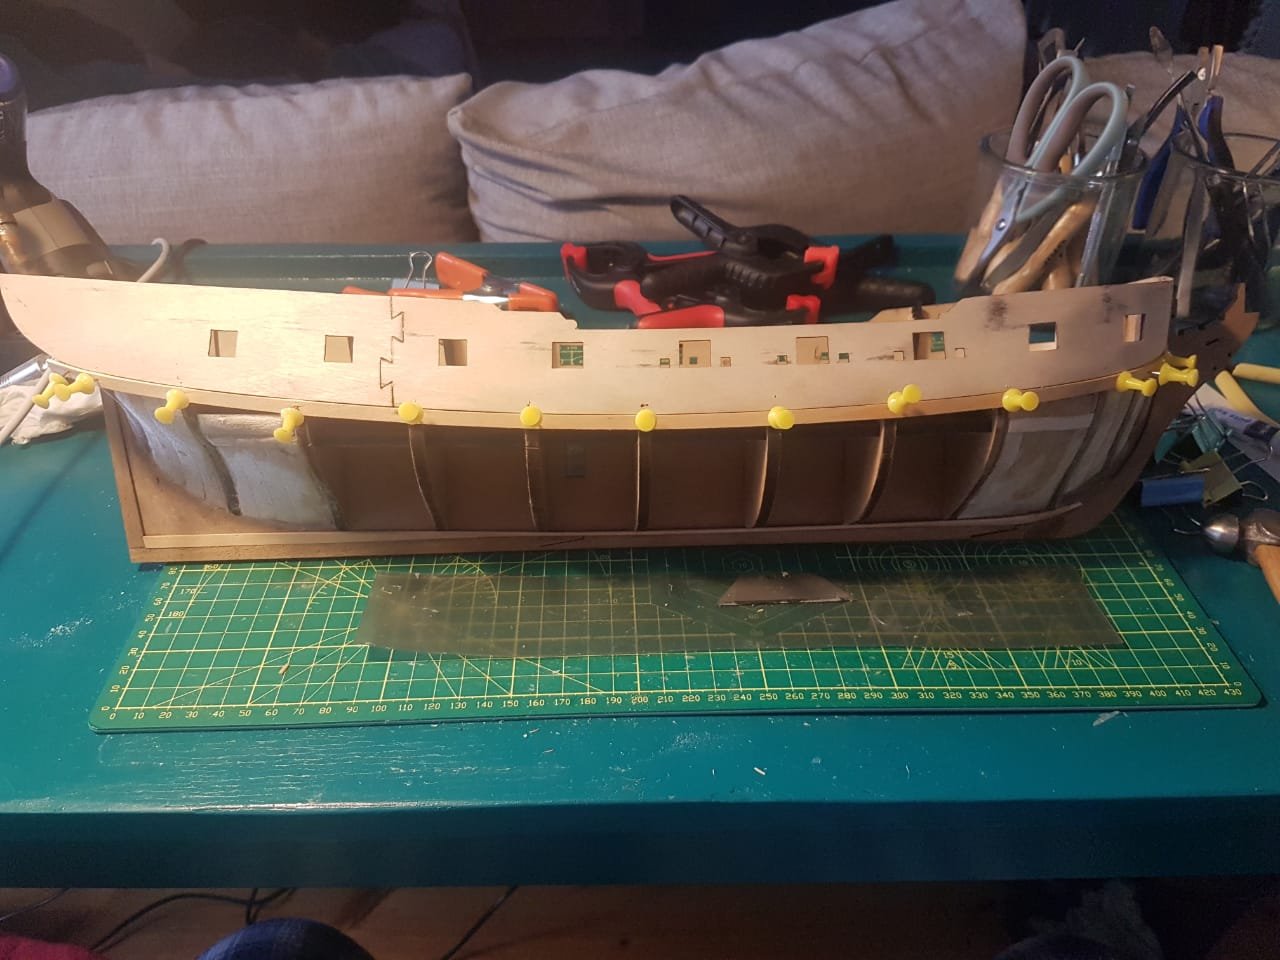
Day 38 After some great advice from fellow members I sanded back the hump that was pointed out and attempted to put a bit more of a curve into the stern counter. Please let me know if this is correct if you fine people have the time.. I then applied myself to the wale line. I measured on the drawings on sheet 4 and realised that the distance from the bottom of the gunports to the top of the wale is the same as the distance from the bottom of the gunports to the gun deck. This happy coincidence combined with the fact that the ply is pretty thin meant that I would shine a light through the ply to mark this level in pencil on the outside. My plan is to then use the 2 darkest strips of planking I can find in the bundle to mark the top of the wale and then plank down from there with lighter wood to make sure I dont get confused about whats what. Again it would be appreciated if you could take a look at the pencil line I drew to mark the top of the wale and give me feedback on its location. Please excuse my dirty nails. I am a farmer and I spend a large portion of my day either doing things that makes tour hands too dirty to ever truly get them clean
-
@SpyGlass Spy! Top of the morning to you I hope you will be pleased to see that I have moved over to tagging instead of copying the entire message you said(how fast im growing up) This is all starting to make way more sense. I did look at cutting another rabbet and I think there is a very real chance I will just do damage I cant repair so Im going to log this under experience for my next build. In retrospect it does make alot more sense to do it your way(thats what I get for trying to be clever). I understand what you mean now about the hump at the stern. Thank you for taking the time to clarify that. I will get on fixing this immediately I think the Wale situation confused me because it seemed like a big step in the whole second planking thing. when in reality its really just a fancy way of saying "make sure that you mark where you want the wale to run when you finish your planking."
-
@vulcanbomber Good morning Vulcan! This now all makes perfect sense. I did use the same 4 butt pattern when planking my deck but this explanation really simplifies the process. I am still not sure if I am going to make use of this system or not yet. It does seem like a huge amount of work for something that is going to be coppered over but the point of this build was always to build the skills I need for future builds. Between you and spys explanation of the hump i have at the stern I now know exactly what you mean. Back to the sanding block. I did also notice on Spys photo that the stern counter was curved so I took mine off, soaked it in a cup of hot water and reapplied it wit pressure to create the curve(in the process I also learned that one shouldnt put hot water in a mug that looks like it might have tea in it. i had 3 large sips out of it, thought that I should really write a letter to the Delaware Local Observer about the fact that the quality of tea in this country is going down the toilet, and then realised I was actually just drinking a cup of plywood water.) How did you adhere your planks to the hull? did you use cyno(superglue is what we members of the peasantry would call it) Have a magical day/night cheers Haiko P.S. Despite my run in with the "tea" and my somewhat rookie questions I promise I am usually a fairly competent person 😂
-
Hi Spy! your positive feedback makes me quite proud. Thank you. I dont mean to be annoying but i dont really understand your suggestion. I think the issue is my poor understanding of the terminology. Could you please help me out While im asking questions, I no longer have a rabbet. I filled it with my first planking. Should I cut a new one? Also they refer to marking a main wale? i Cant quite figure out what exactly that means(I assume it means that I should apply a single strip of planking at a specific level below the Gunports to make a sort of upper guideline. If that is correct then how do i determine what level to put this at? to answer your questions..I did not chamfer my planks. I just steamed the heck out of them and pressed them hard against each other both when shaping and gluing. I did also cover the whole hull in woodglue and sawdust and then sand it down which might be giving it an deceivingly tight effect. As for coppering...I am on the fence. I was considering coppering one half and not the other? do you have any thoughts on this? I cant decide. Thanks again for all your detail and effort. It really helps
-
You make me blush. I really hope I can keep this up. I feel like I keep getting lucky here.
-
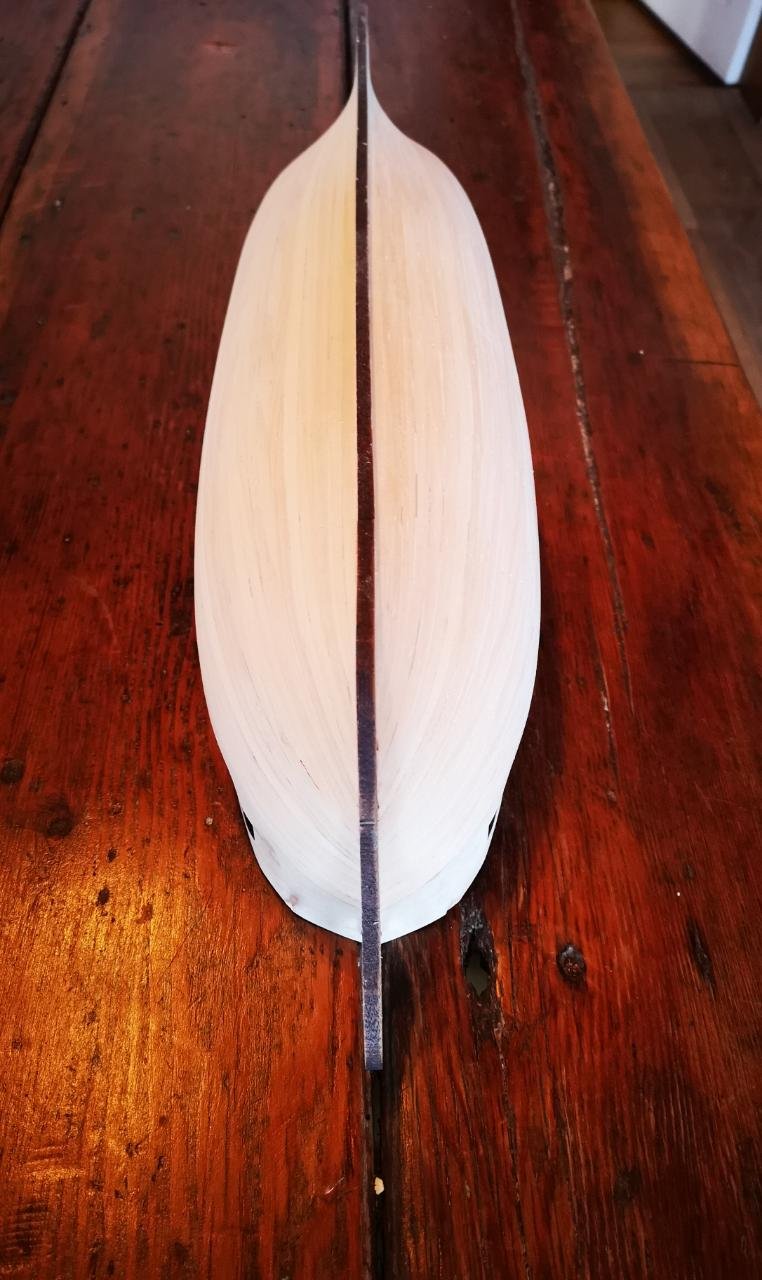
day 35 to 37 I sanded, alot. After completing the basic first planking I decided with my infinite wisdom(and handsome looks) to cover the whole hull in a layer of PVA and sawdust to fill all the minor holes in the planking and then sand it back. DO NOT DO THIS! it took me basically 3 days to sand it back to wood again. the results are reasonable but not worth the effort. During this sanding process I also sanded the stern back to allow the second layer of planking to lie just a fraction proud of the keel as suggested by SpyGlass.. I then also went and glued the stern keel piece down for some entirely inexplicable reason. Im putting it down to fatigue. I see many different methods of planking and I have a number of questions. However my first is...where do I start the planking. there seem to be at least 4 options.
-
Good Morning Vulcan This post and your build log are going to be my primary sources for planking, you have a great approach. I was wondering how you determined the plank lengths for the hull planking. I am struggling to find information on layouts etc. I would like to do what you did and plank to scale but I dont know how. Also im an absolute ruddy chop and i went and glued the stern keel piece in place for some weird reason. Now i have to remove it AGAIN!! Thanks so much for your help and patience. Its brilliant.
-
Hi Spy Thank you for this really useful post as always. It really helped. Now that I think about it I recall having seen (and even discussed) how you approached first planking. I somehow forgot about this. I have however now followed yor advice as far as possible and sanded back to where things should be. ' Please take a look and let me know your thoughts if you do have a moment. thanks again!
-
Hey there Lazy Thank you for the compliment its really nice to hear, especially for a rookie. I followed your first piece of advice and sanded back and then decided that I was going to be a perfectionist and cover the whole first planking in a layer of sawdust and PVA(a decision that I deeply regret as it took about 3 days to sand off. I hope you stick around and continue to give me advice where you see fit. cheerio! TBE
-
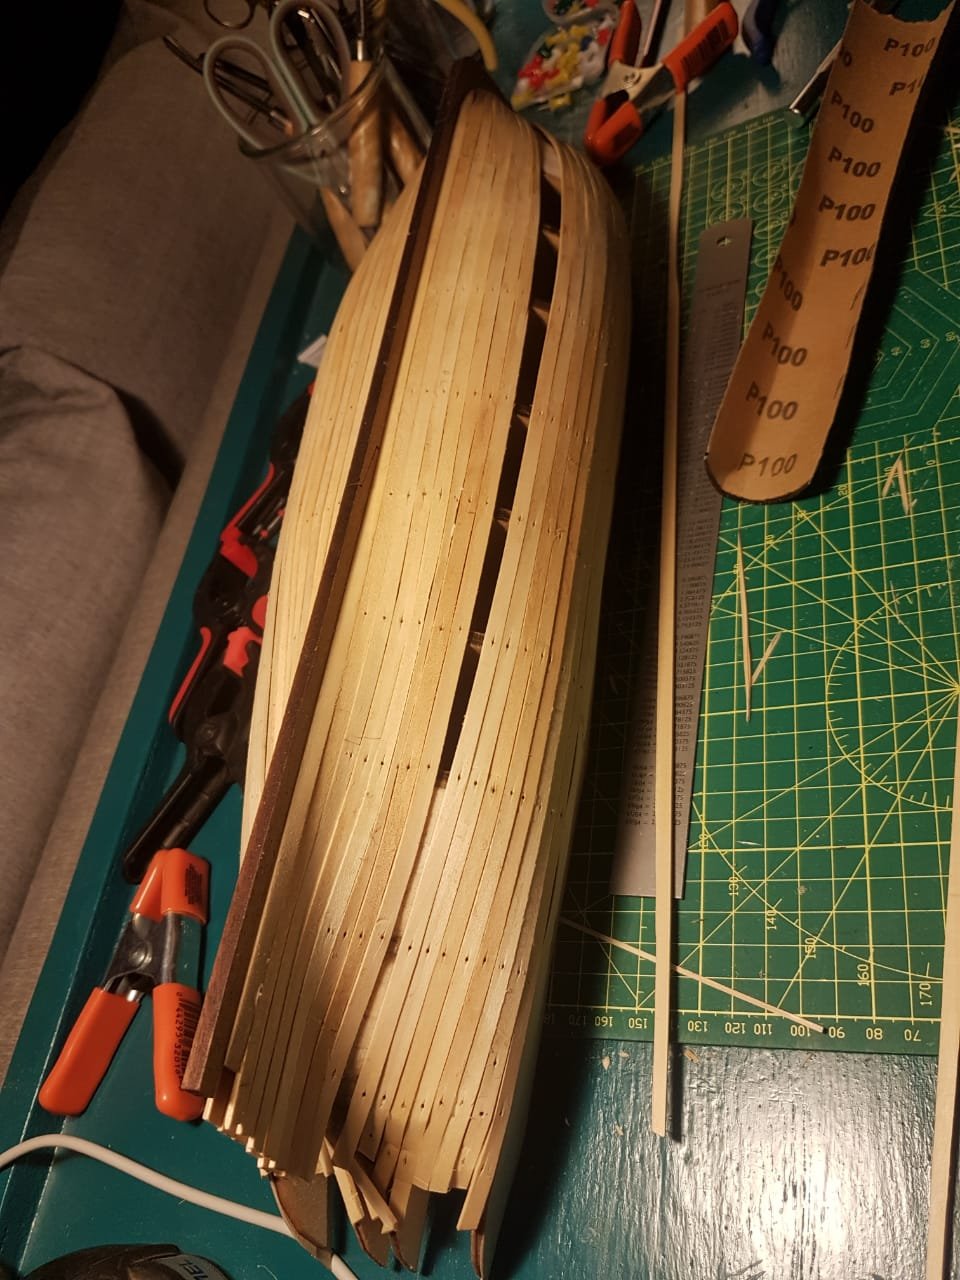
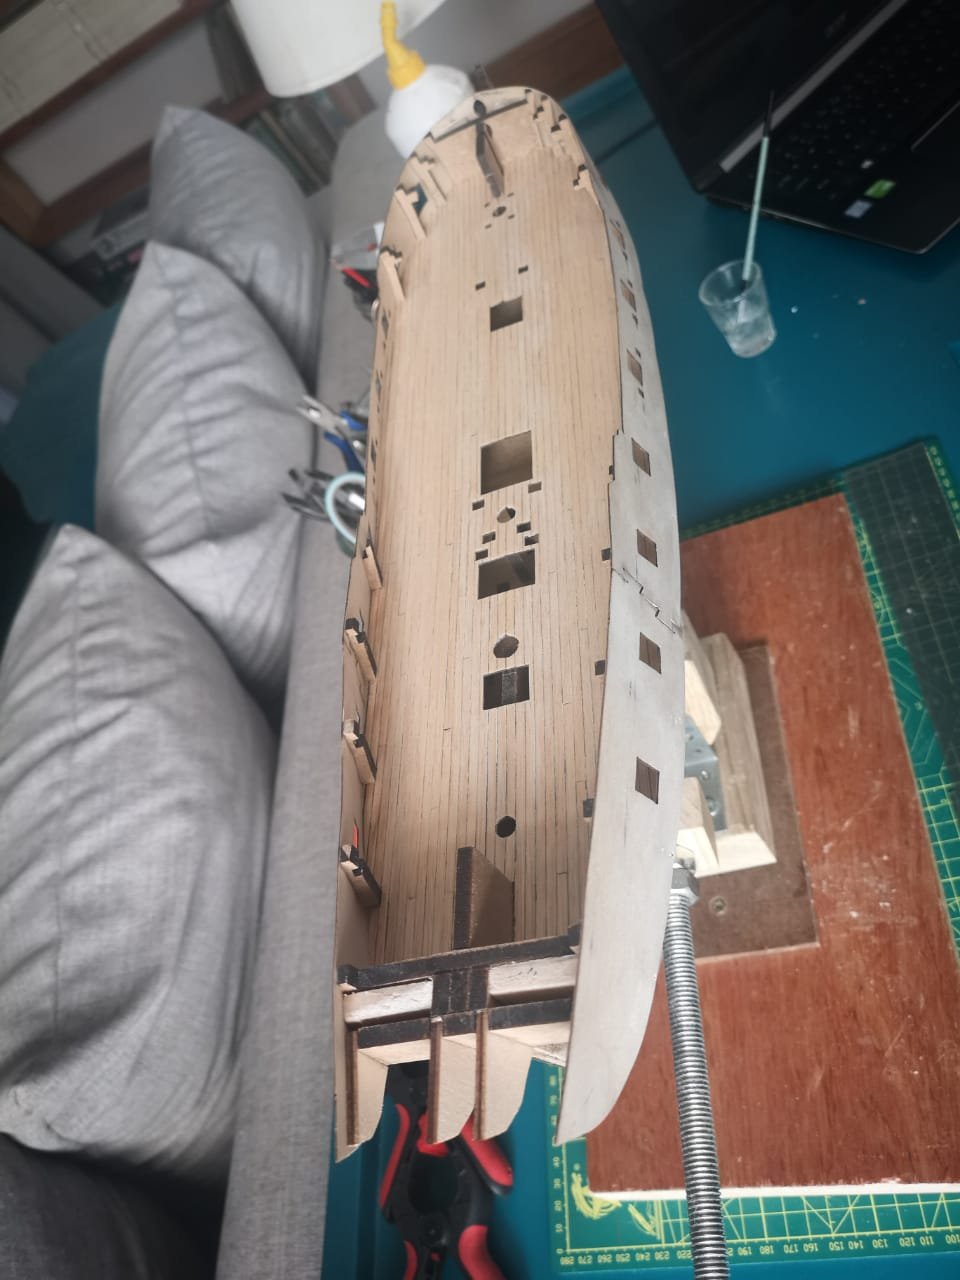
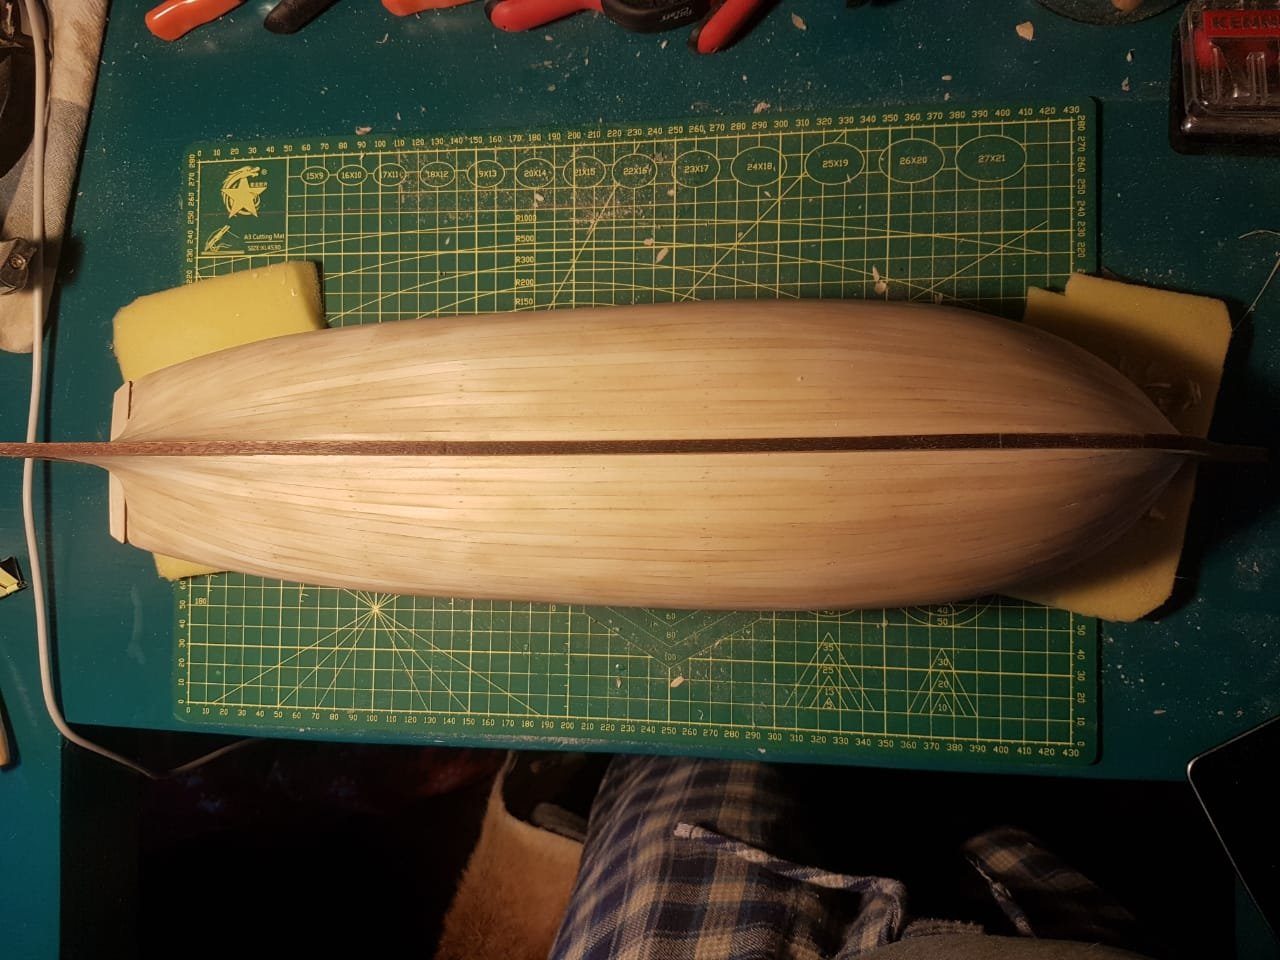
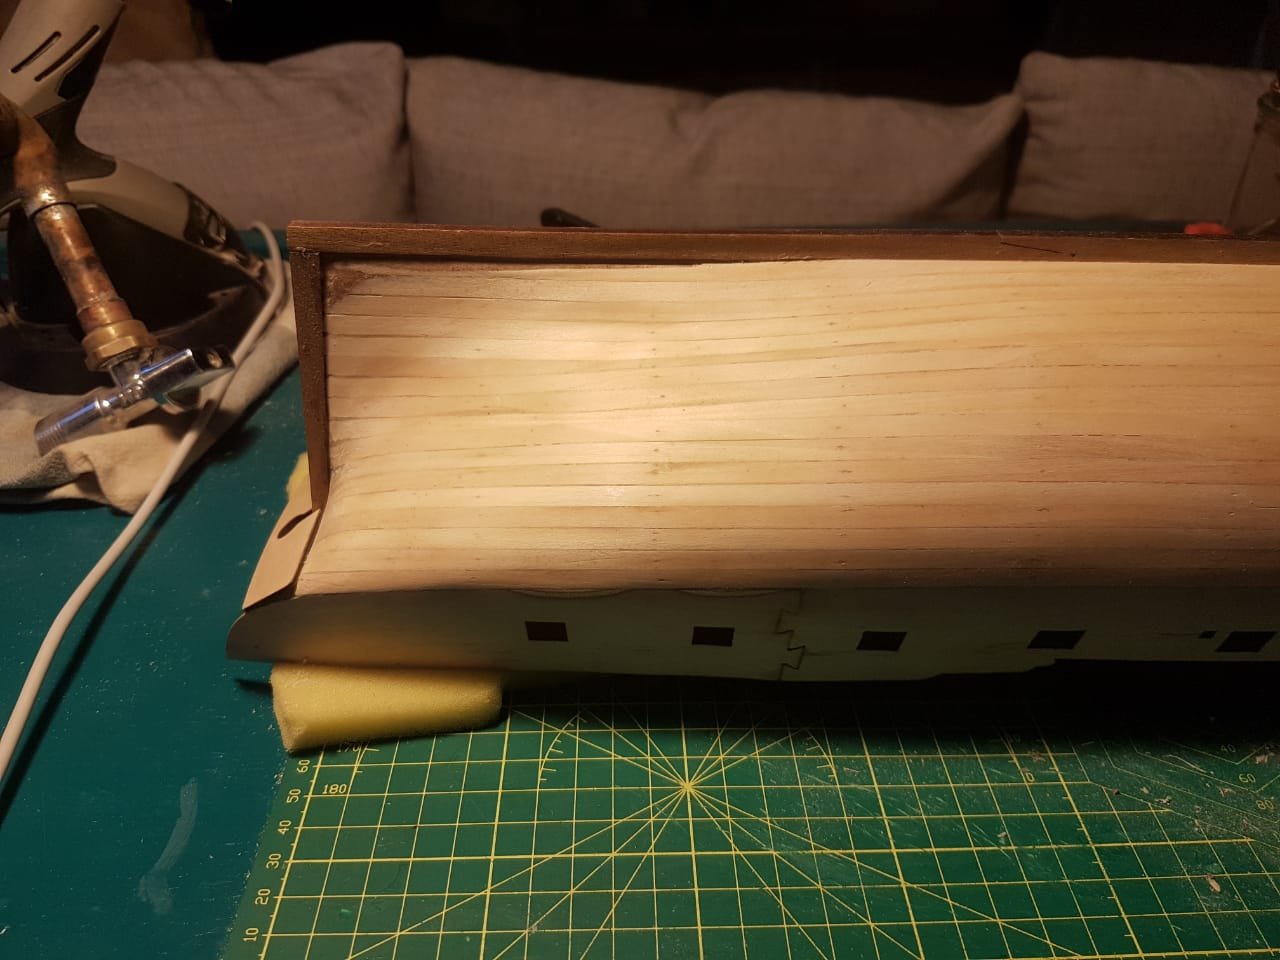
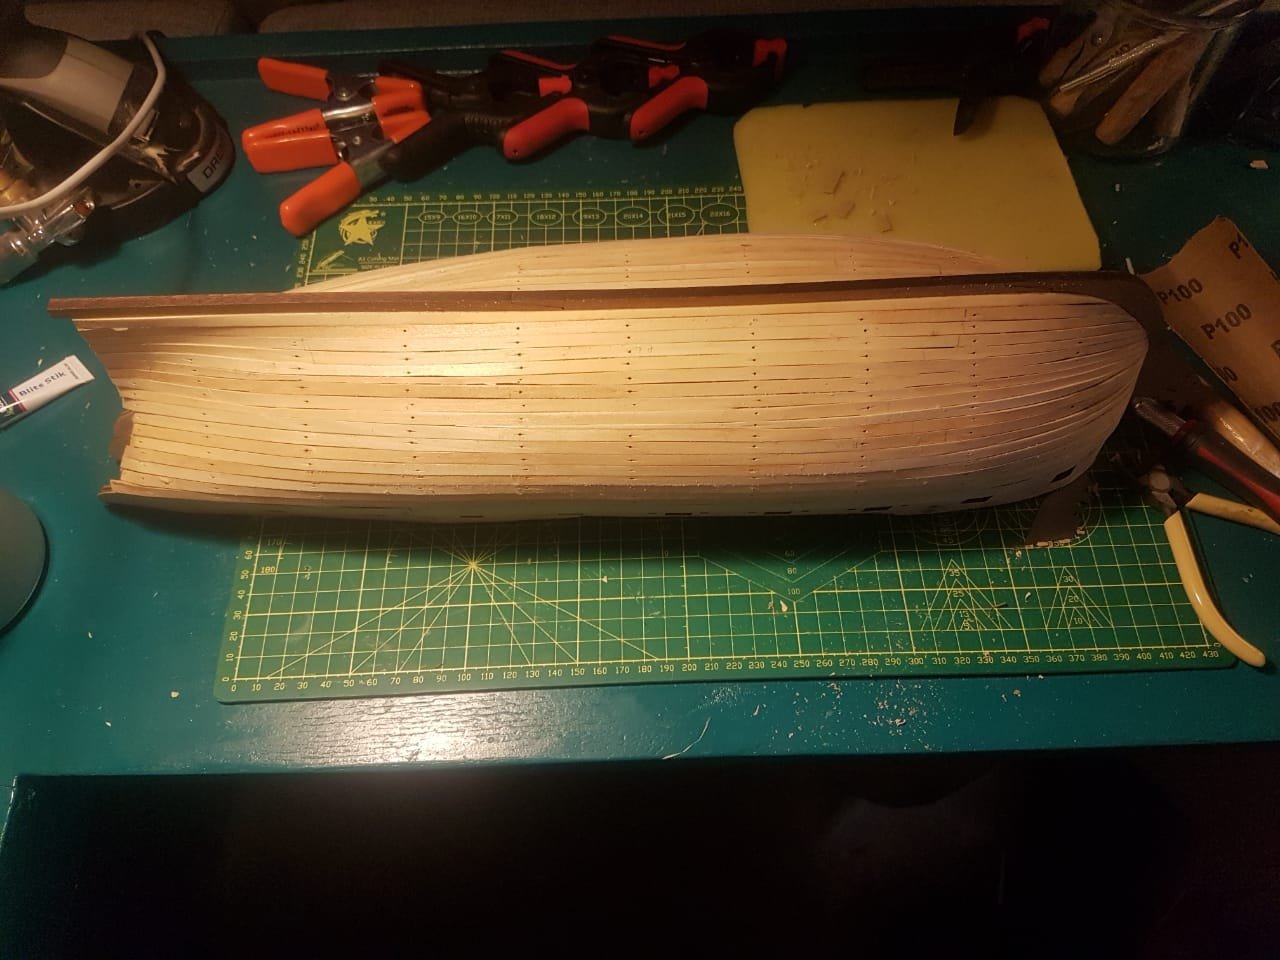
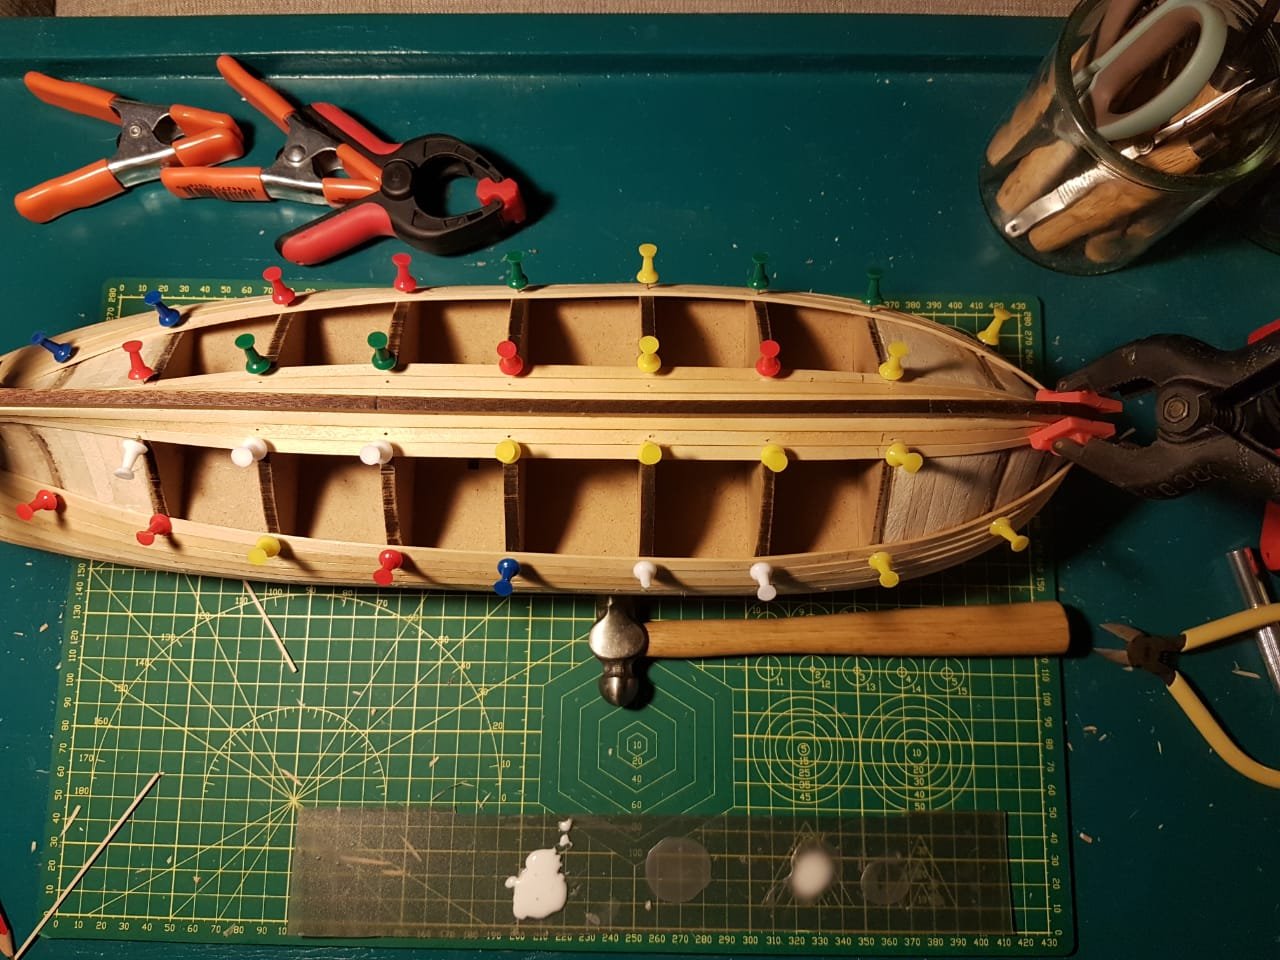
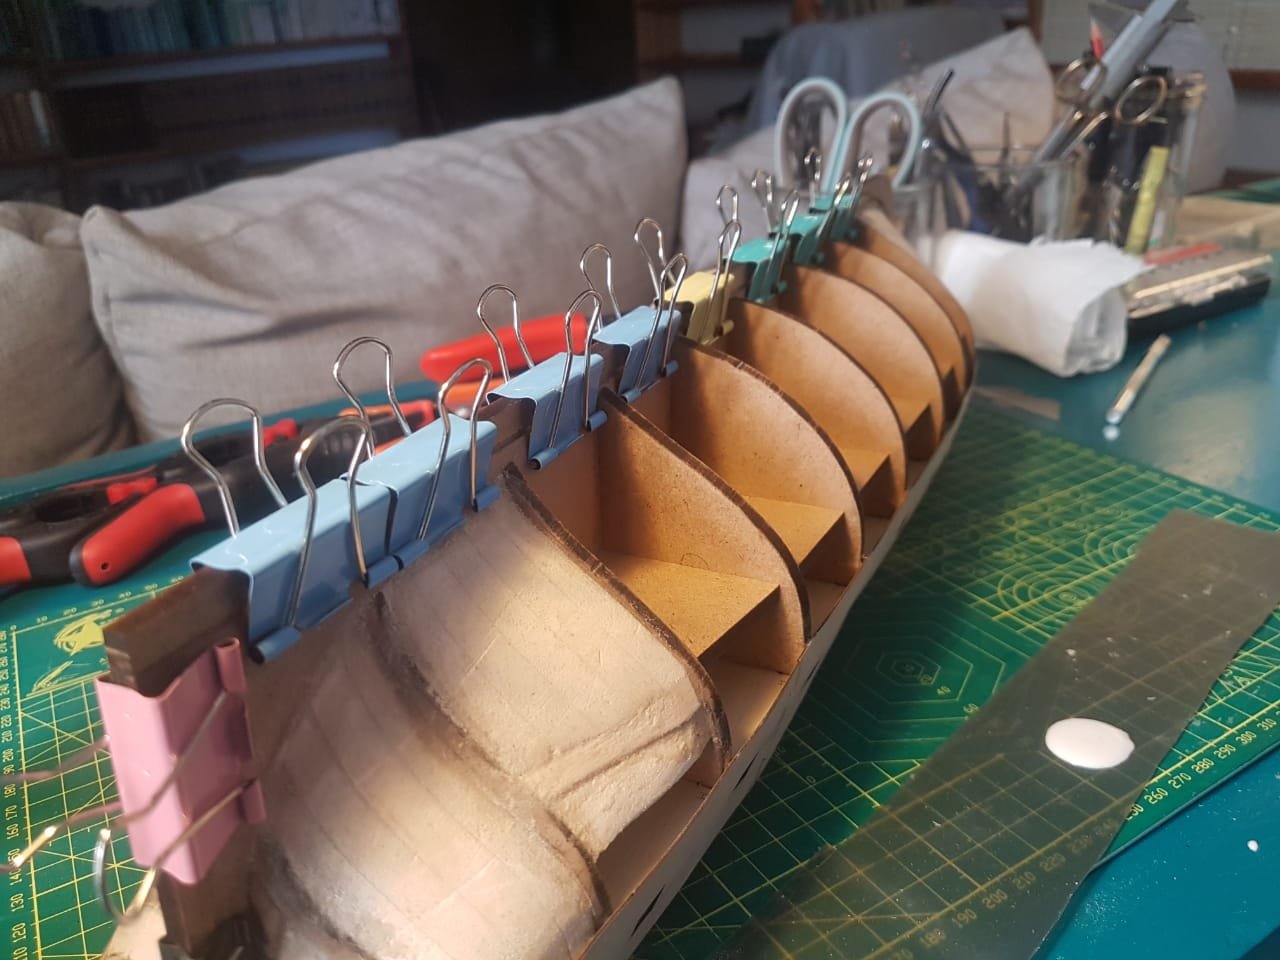
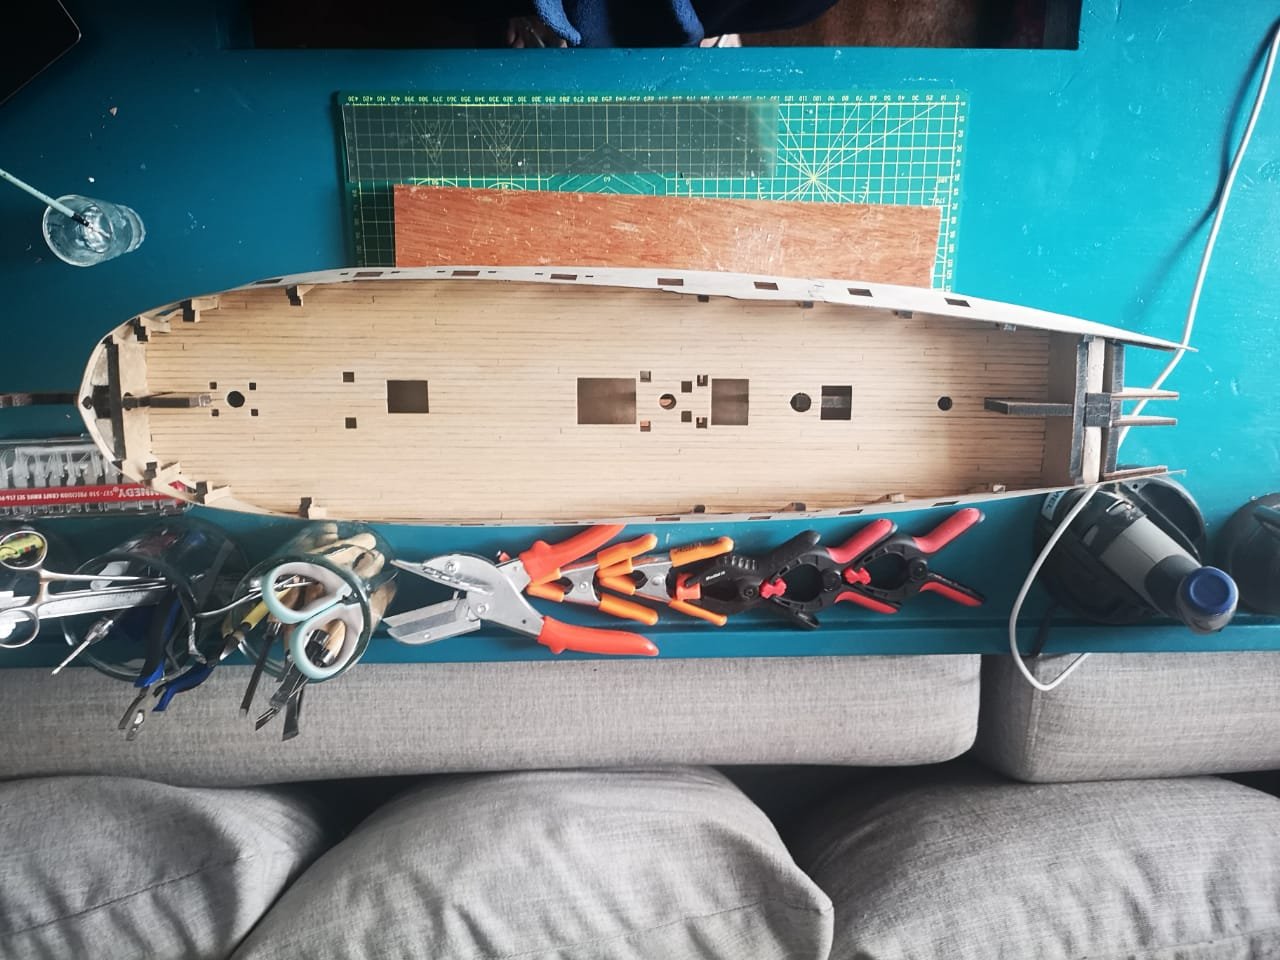
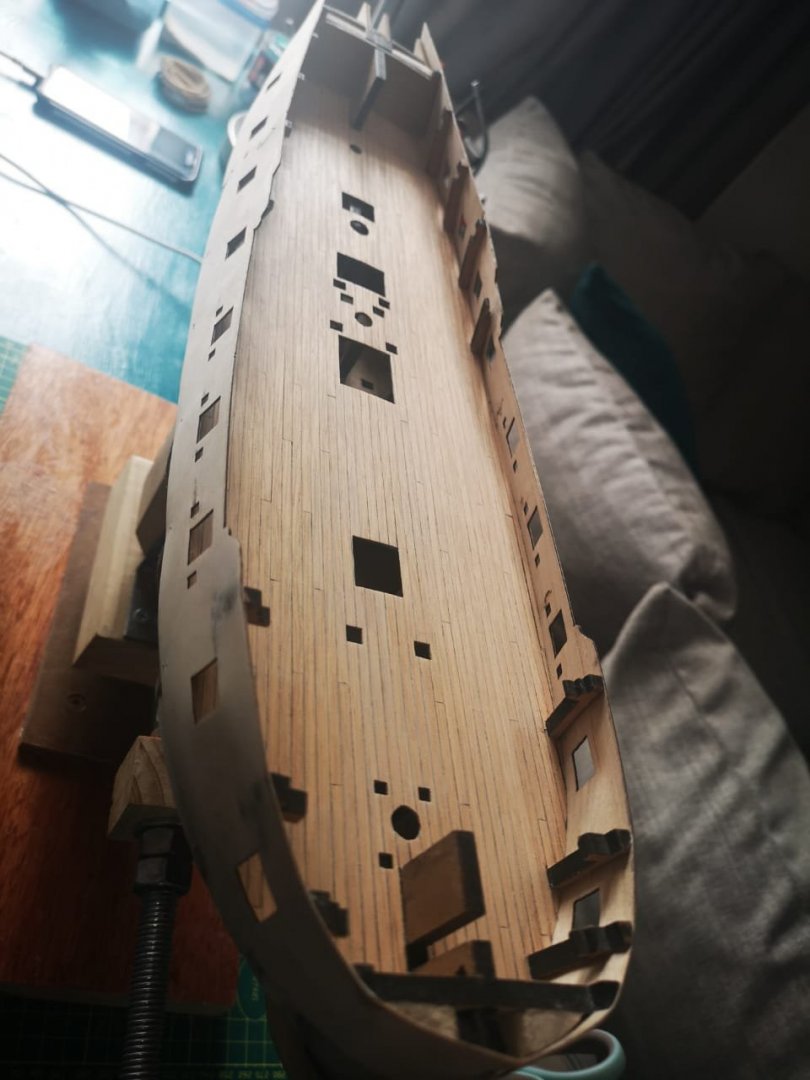
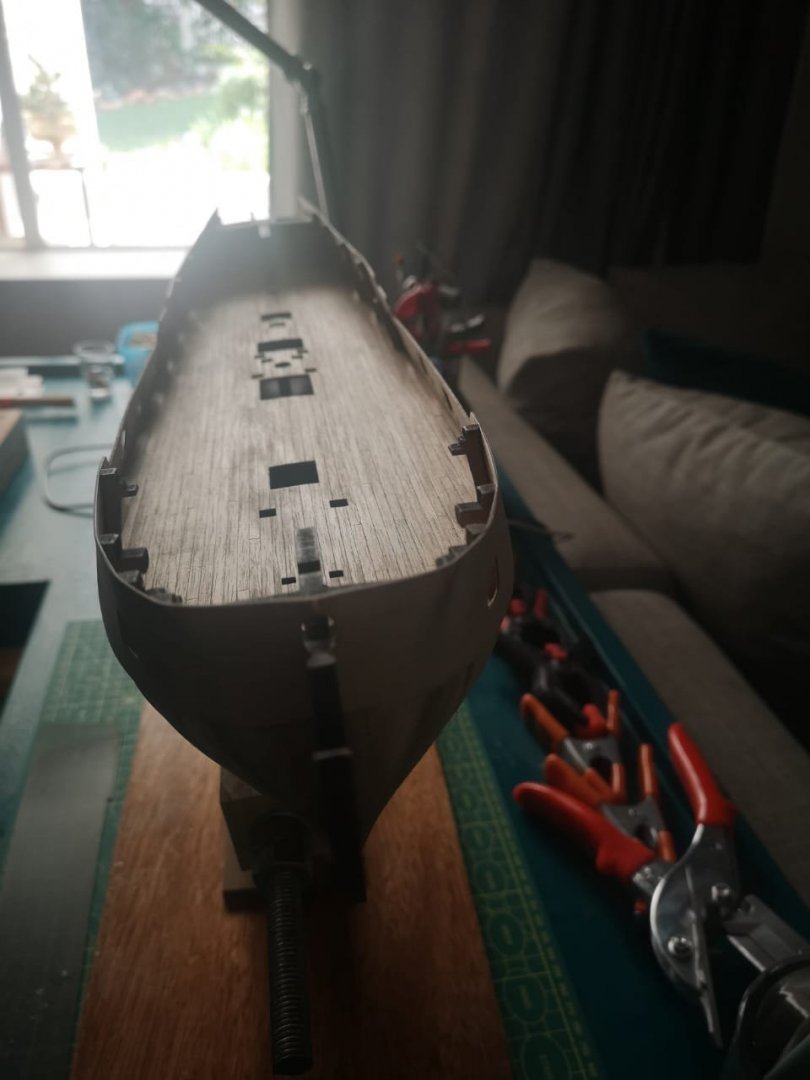
Day 27 to 34 - First planking This post covers the first few stages of the first planking. After some careful reading of the posts of the helpful folks on here I began first planking. The method I went with at the end of the day was a combination of different bits of advice. It is far from perfect but it was a great learning experience that I thoroughly enjoyed and I am very glad that I had this first layer of planking to teach me before approaching the second layer. Here are some things that I learned during this process. 1. That rabbet that is not mentioned in the original build plans is an absolute lifesaver for a rookie. It captures the planks neatly and helps a huge amount. 2. Sand the bearding like quite a bit before you start planking. It is far easier to sand MDF than it is to sand this lime wood. 3. Do as little of the rest of the build as possible before beginning planking. It requires a fair amount of rough handling and the less there is to break while doing this the better. 4. Those balsa wood fillers are a huge help. If the planks dont have something solid to be glues onto they had a tendency to be slightly springy. making it almost impossible to get them sanded completely flush. 5. The best method I could come up with for smoothing the planks was to use a carpet knife blade and scrape the worst of the unevenness out of the hull and then move over to 100 grit sandpaper and then up to 600 grit. I dont think it makes sense to make the surface TOO smooth as it will just reduce the ability of the glue to adhere for the next layer of planking. My method for fitting the planks changed after the first few went down but I will describe what I did as if it was the method I used from the beginning to the end. I started by placing the upper and lower strakes(I know there is a correct technical name for this but i forget what they are). I then measured the distance between these two planks at the widest distance and used this to calculate how many planks would fit in this space by dividing the distance by 5.2mm as the planks are actually slightly wider than 5mm and there will always be additional space when laying the plank(the answer was 16 for me). I then measured the narrowest gap at the bow and divided this number by 16...giving me what width plank I would need to be able to fit 16 planks in that space. I then tapered the planks from this measurement back to the point where they returned to original thickness and then installed them buy steaming, pinning, drying and then gluing the shaped planks in place with PVA glue. I repeated this process (measurements included) every time I had laid a plank to eliminate any errors at each stage and not create compound errors. This worked swimmingly until I got about 2 planks from the end. This left me in a position where I had one plank that had to have a curve cut out of it near the stern (i did this by steaming and pinning the plank and then marking on the hull. there is a photo below where you can see this curve between the planks already laid) and one plank that got cut into a long pointy shape, which i realise is really not the right thing to do. Despite all this I am fairly happy with the results and what I learned. This brings me to questions. 1. Must the first planking at the stern lie flush with the walnut keel or should I sand it back further to accommodate the final planking. 2. How should I fill the spaces between planks and pin holes where they appear? Should I use pva glue and the sawdust that I so lovingly gathered together while sanding? Is there another step that I need to take before proceeding with planking, and have i missed anything major or made any mistakes. Here are some photos


-
Vulcan! My humblest apologies. Please change all my sirs to ma'am's. I hope that I havent misinterpreted your photos but you will see my attempts at duplicating them below.
-
Hi again ASAT Thank you for the correction 😂this is exactly what I need. I will be formulating my apology accordingly. It really is great to have so much support on here and thank you for the compliment. Hopefully by the time you read this my next post will be up and running with all the usual rookie questions. Have an outstanding day! cheers Haiko
-
Vulcan you are a scholar and a gentleman! This post really helped me. And actually anticipated a number of questions I had, like which side of the plank to taper. I did employ a slightly strange method in the end but I couldnt have done it without you.
-
Hi there ASAT Thank you for your contribution. That makes perfect sense and I can see how serious that problem would be. This, being my first build has been quite a steep learning curve and its great when someone can forewarn you of mistakes before they happen . If you ever have the time please keep stopping in to correct me where I am going wrong. I anticipate this may happen alot Cheers! Haiko
-
Good morning my friend I am so glad that you told me this. my first layer of planking currently looks like the north end of a chicken flying south. But Im hoping that with some judicious sanding and filling things should be ok
-
Good Day folks I have spent the last 24 hours scratching my head about how to do the first planking on this hull. Alot of what I have read says that planks must be tapered? I dont fully understand why there is the need for this. Why not just use full sized planks and then use a stealer for the spaces that are left when complete? Is there a definitive correct method? How should I be approaching this issue?
-
Day 27 morning. just a quick entry. at this point I decided to attach the walnut keep pieces to complete the rabbet that would capture the first strake of planking. I chose to not sand or shape it at all at this stage so that I didnt do any damage to the final shaped product.
-
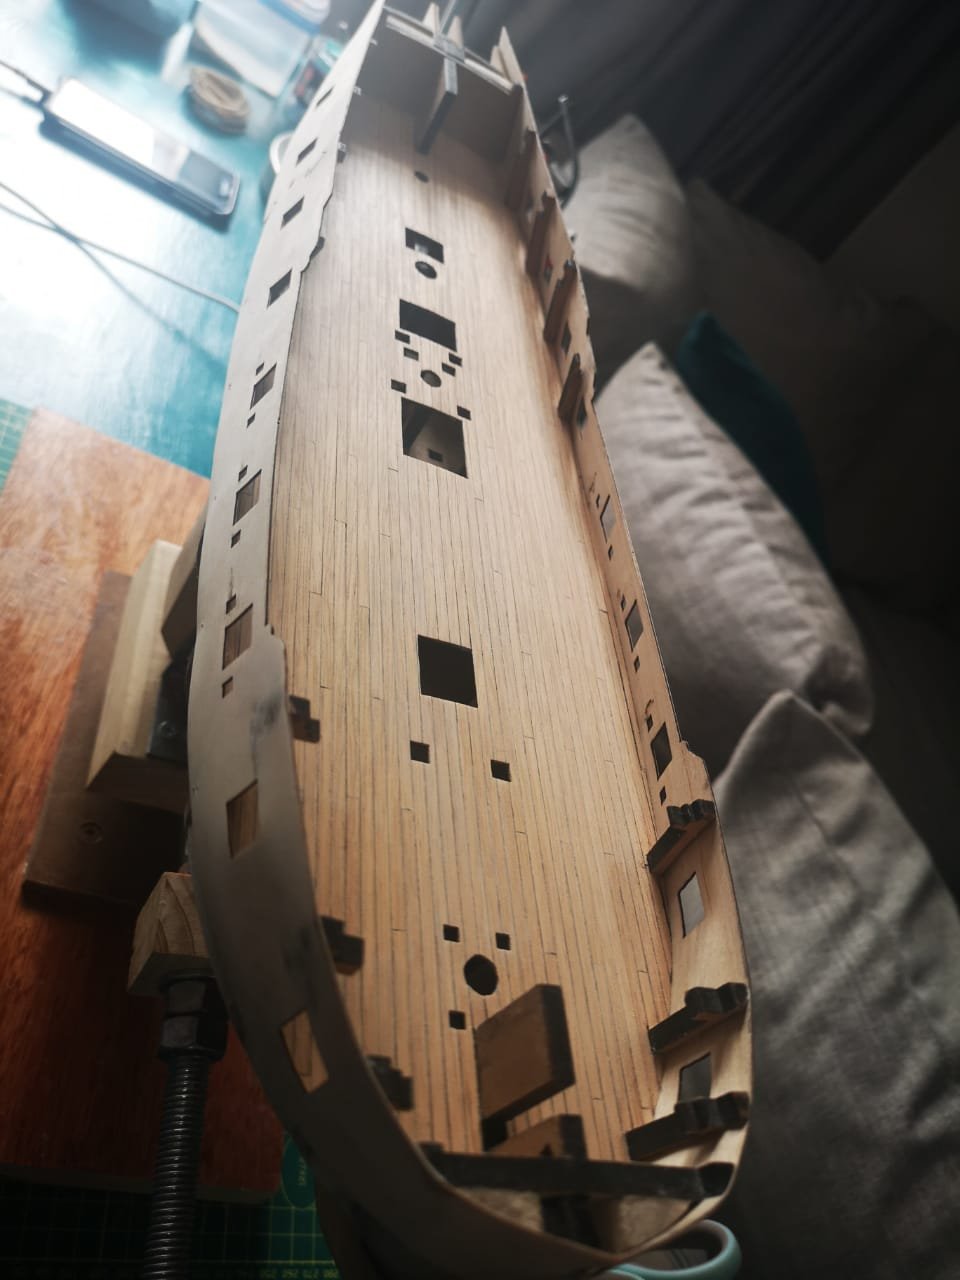
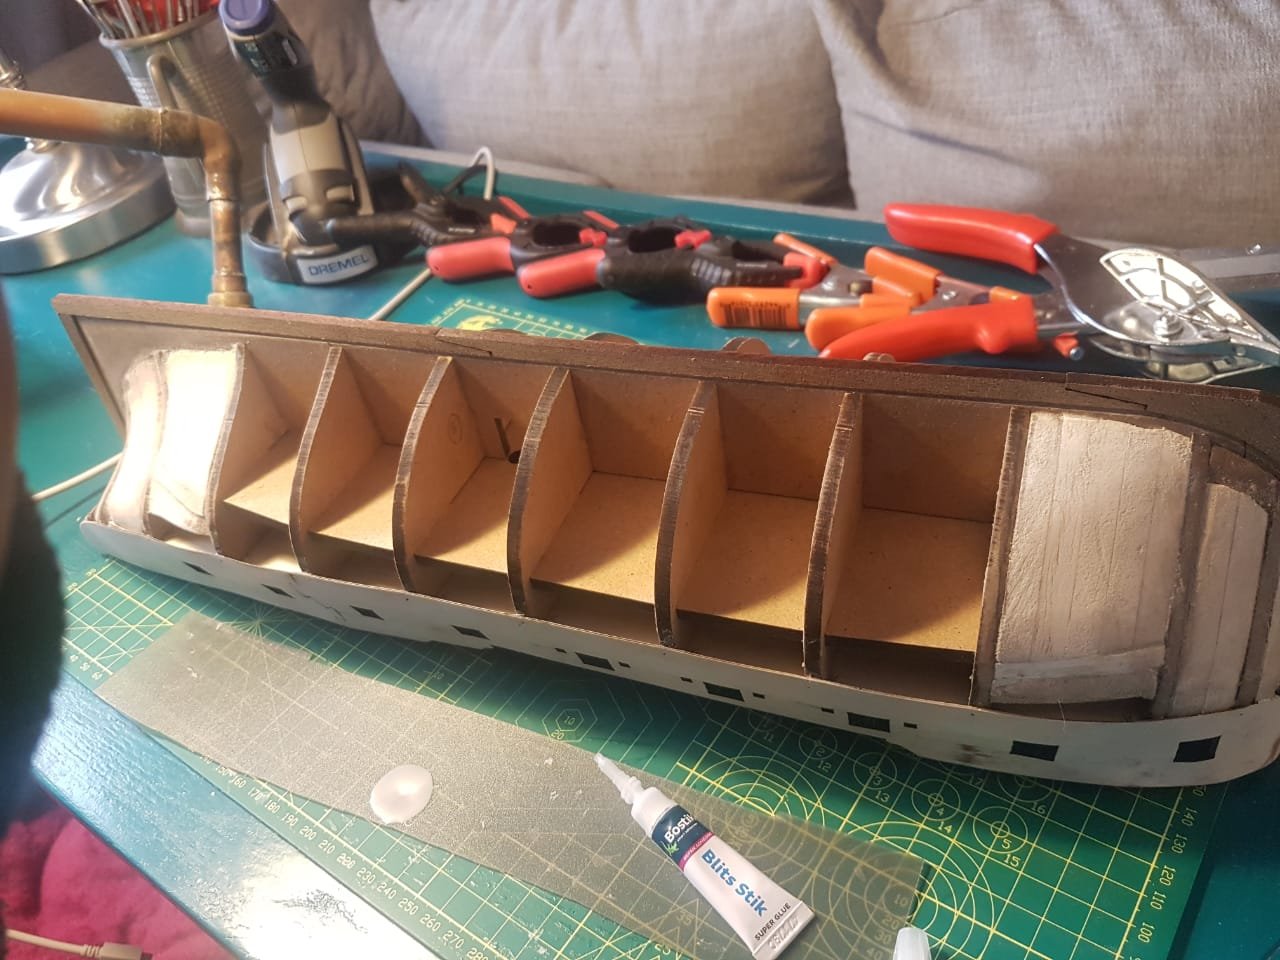
Day 23 to 26 I removed the uprights from BH 5,6 and 7 to complete the deck planking. This ended up involving some very fiddly shapes but I really enjoyed the process. I gave the deck a light scraping with a carpet knife blade and left it at that for now. I will finish the first and second hull planking(hopefully) and then go back to the deck. Please, as usual, any criticism is most welcome.

-
Perfect,thanks