MORE HANDBOOKS ARE ON THEIR WAY! We will let you know when they get here.
×

The Bitter End
-
Posts
257 -
Joined
-
Last visited
Content Type
Profiles
Forums
Gallery
Events
Everything posted by The Bitter End
-
 Hi Stuglo I will put something together with drawings etc and send it through to you. I have had a rather busy week but it will happen soon. Cheers Mate!
 -
That makes lots of sense. What are your views on varnishing the deck before planing the hull? vulcanbomber expressed concern about getting glue on it and JolleyRoger said he was concerned about glue not sticking to varnished surfaces.
-
Hi Stuglo I couldnt agree more. This community has genuinely given me faith in humanity. Every single person on here has been kind, polite and helpful without exception. Despite my remarkably rookie questions. Thank you for your input. I didnt even consider using a wipe on system but im liking the idea. If you would like some guidance on how i built this clamp please let me know. The swivel locking system is essential and in my case its a bit of a weird system. Now im off to look for your build logs! have a great day
-
Hi Vulcan! I think I will do what you did with your first build and get as far as possible building skills before attempting the hull planking. Park of this skill building can be planking those areas that are hard to see. Will there be enough planking material to do this supplied with the kit?
-
Great advice as always. I will be following that advice and finish the deck planking first. I will also leave the varnishing until a later stage. I actually think this may improve the lines of the vessel as there is some indentation between the BH's. I a a little confused by what you mean about thinning the keel? are you talking about the rabbet? I look forward to showing you my progress.
-
Thanks for the tip. I will bear that in mind. This does complicate things somewhat but im glad you warned me
-
Home made tools
The Bitter End replied to The Bitter End's topic in Modeling tools and Workshop Equipment
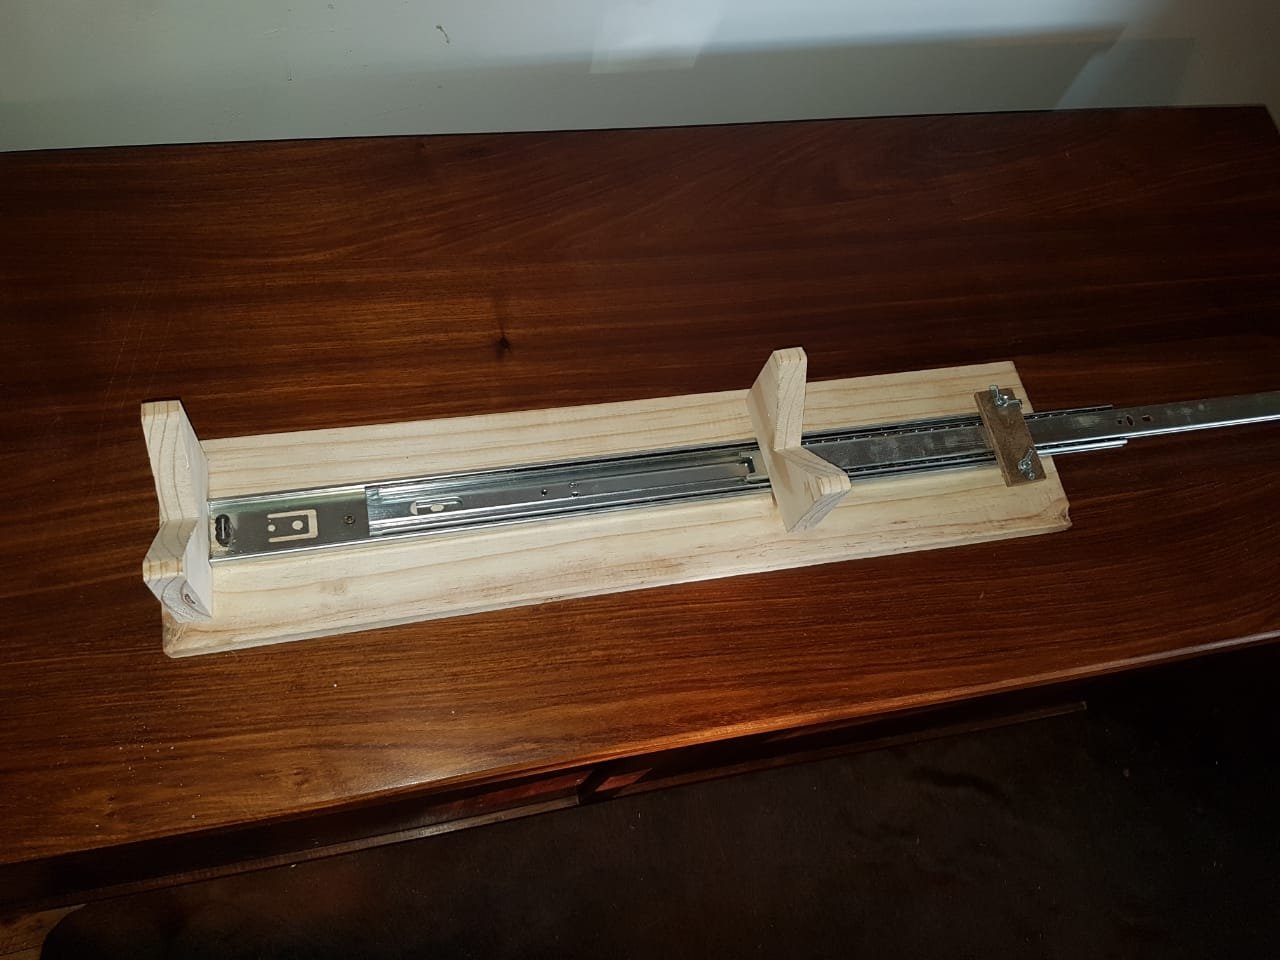
Hi Bruce My apologies for the delayed response, it has been a really busy week for me. That device is essentially a plank with one Vee shaped hull rest secured to the plank and another secured to a drawer slide. I I then drilled 2 holes on either side of the rail and used to bolts with wing nuts and and a small piece of mdf to clamp down the slide to prevent it moving once it is in position. Pros and cons. Pros... Can be used for any sized hull Can have minor adjustment so that the hull rests dont obscure the same part of the hull all the time. You can also cut out a specific hull profile shape and secure it to the hull rests based on what you are working on and where on the hull you are working. Cons. The drawer rail is rather long and sticks out fairly far which can be a bit annoying. I hope this helps. Please let me know if you have more questions. CHeers Haiko -
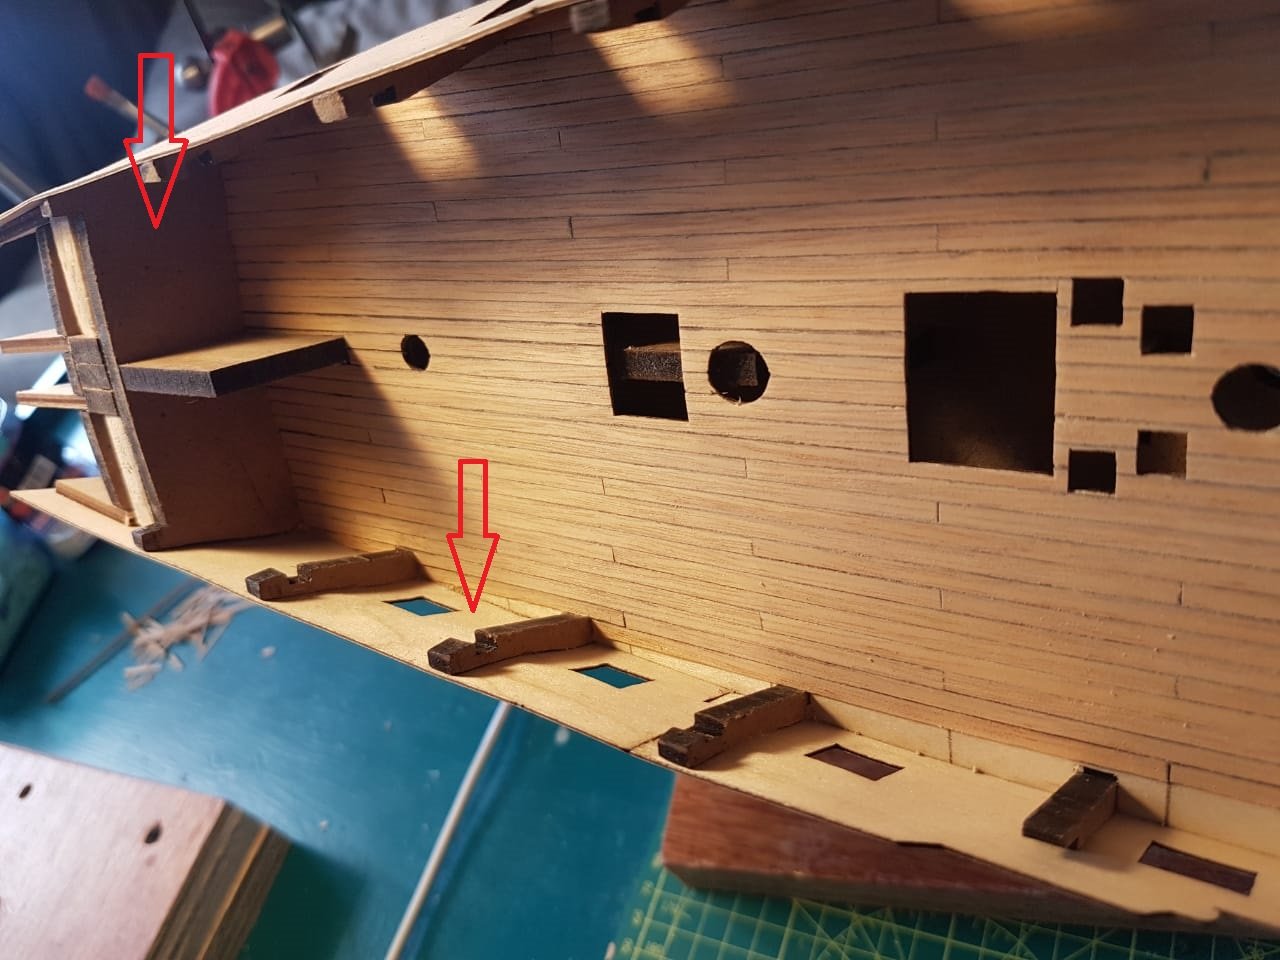
A quick side question. Do the vertical components of the area around the aft and forward portions of the gun deck get planked? it seems strange to leave them as ply and MDF? I know the areas around bulkheads 5,6 and 7 get planked but what about the rest?
-
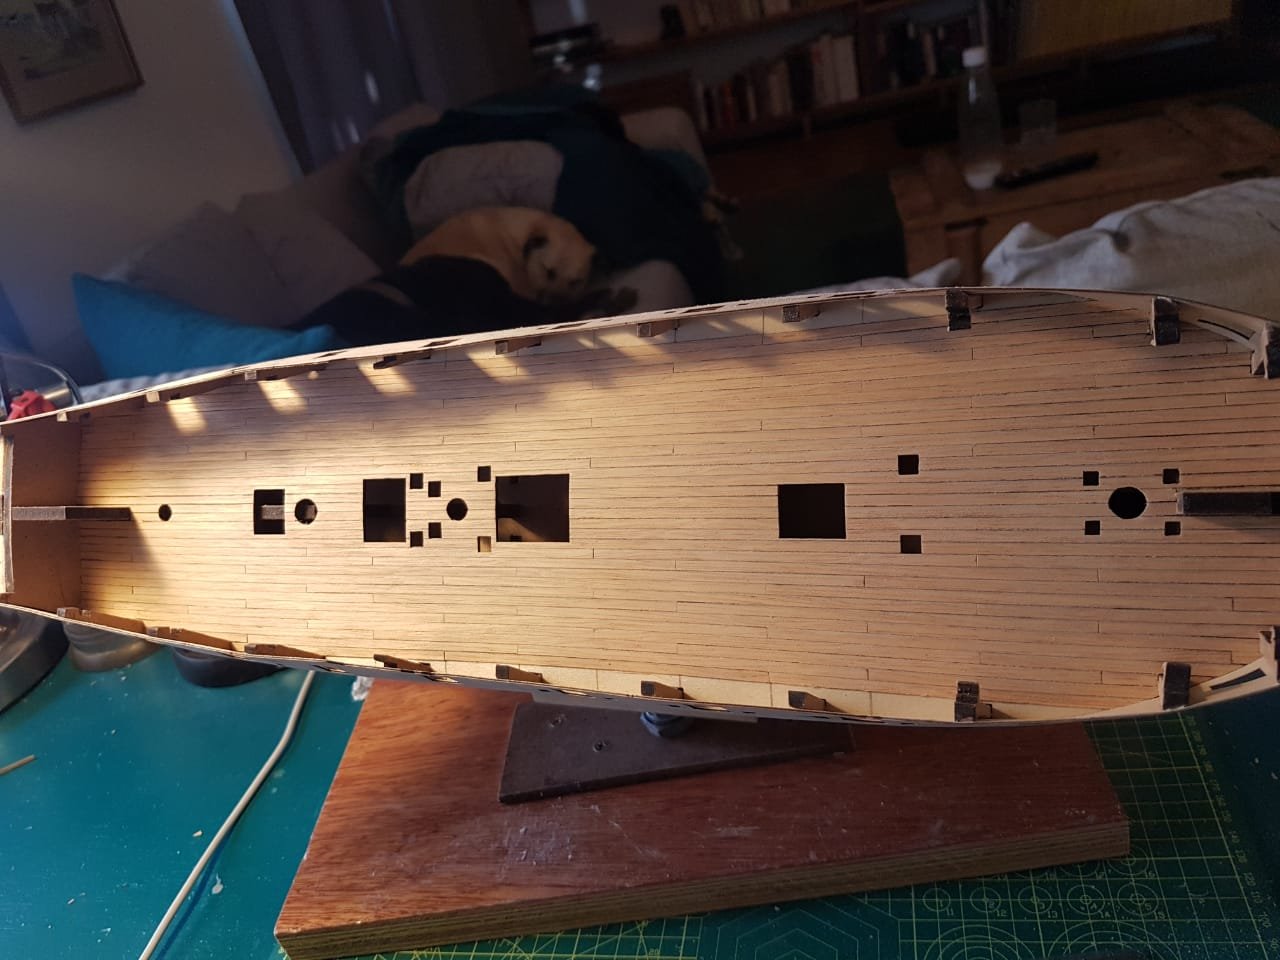
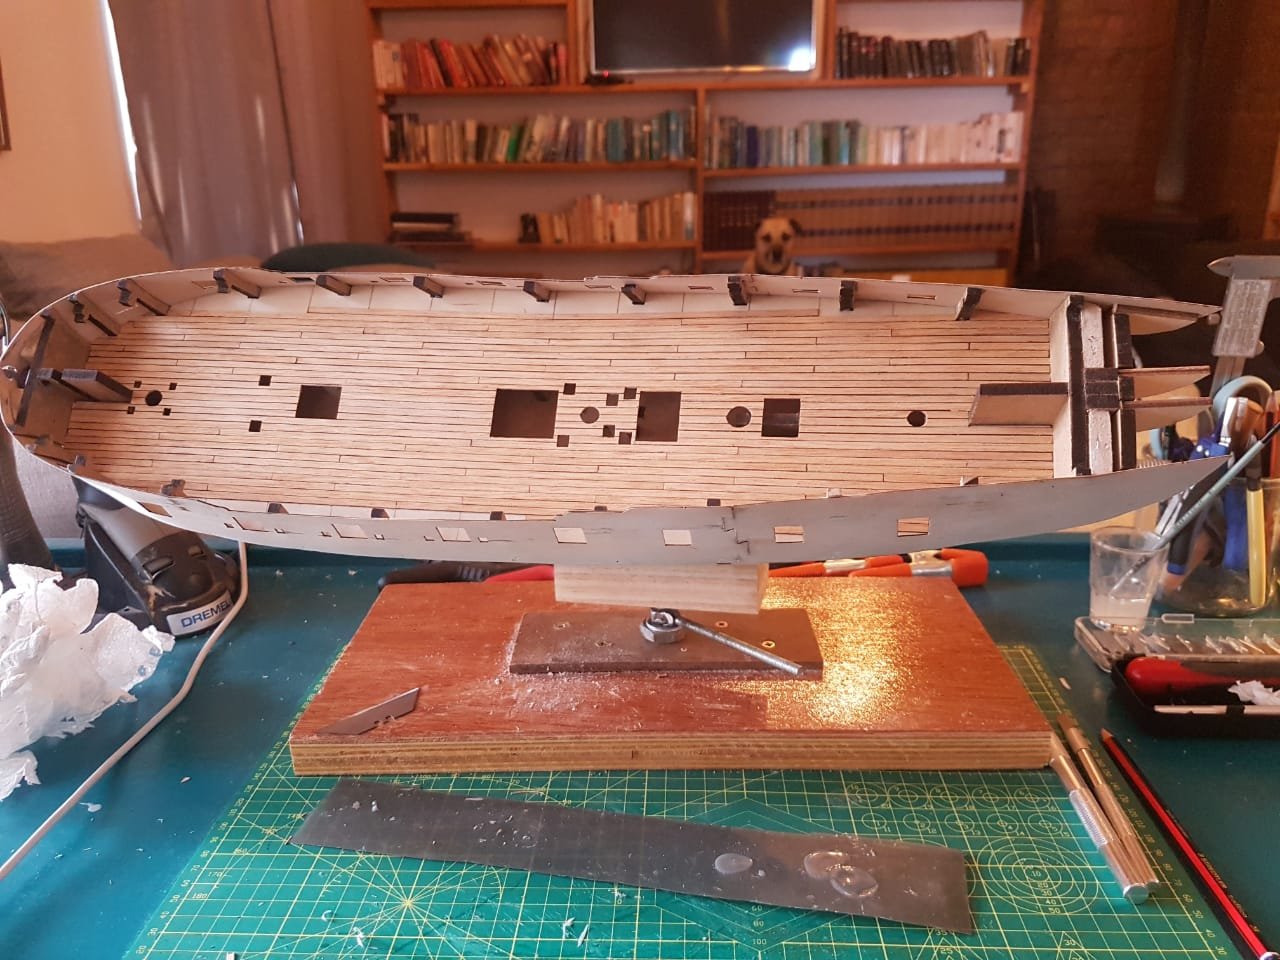
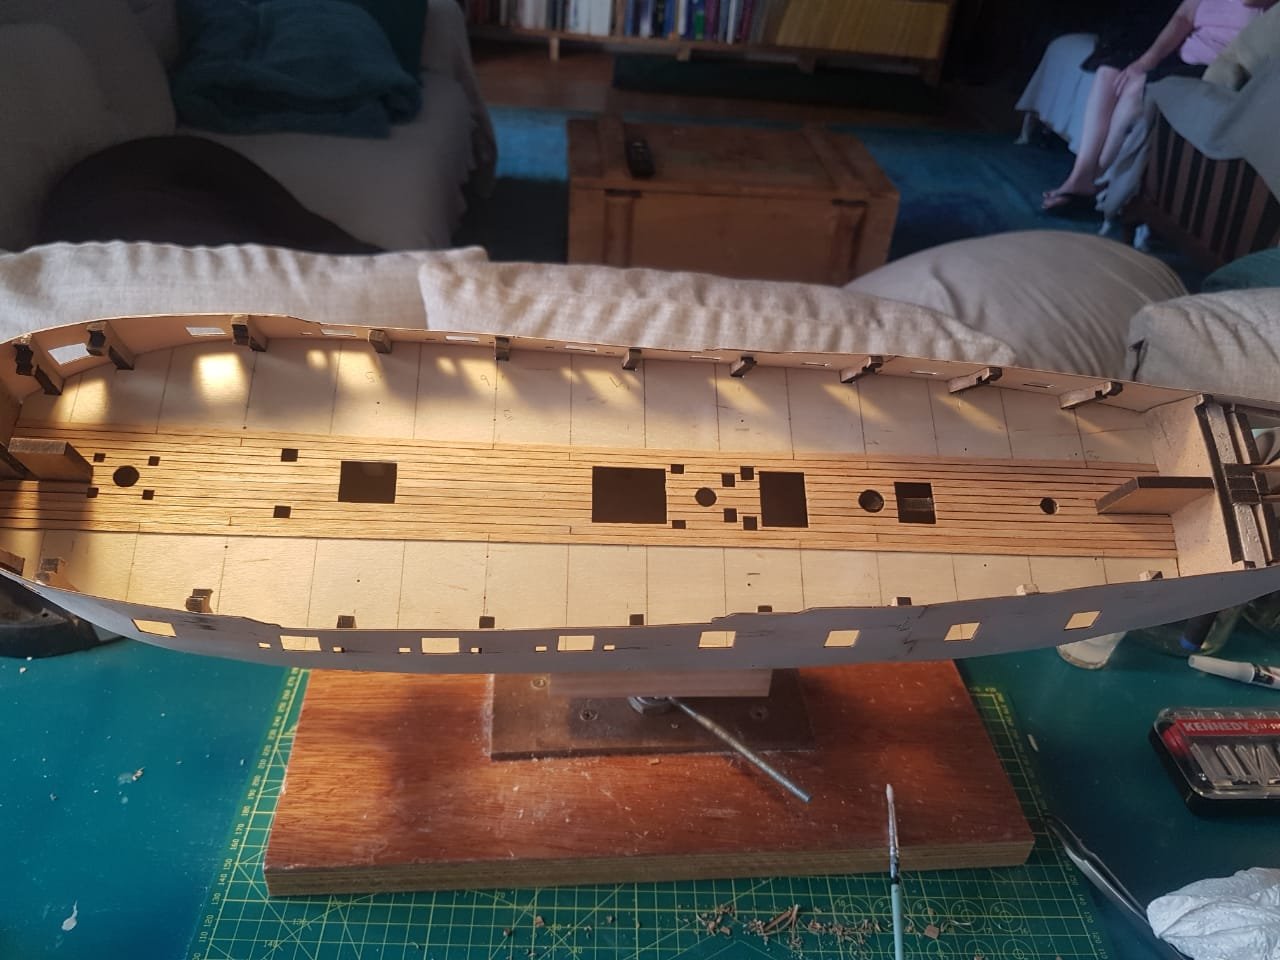
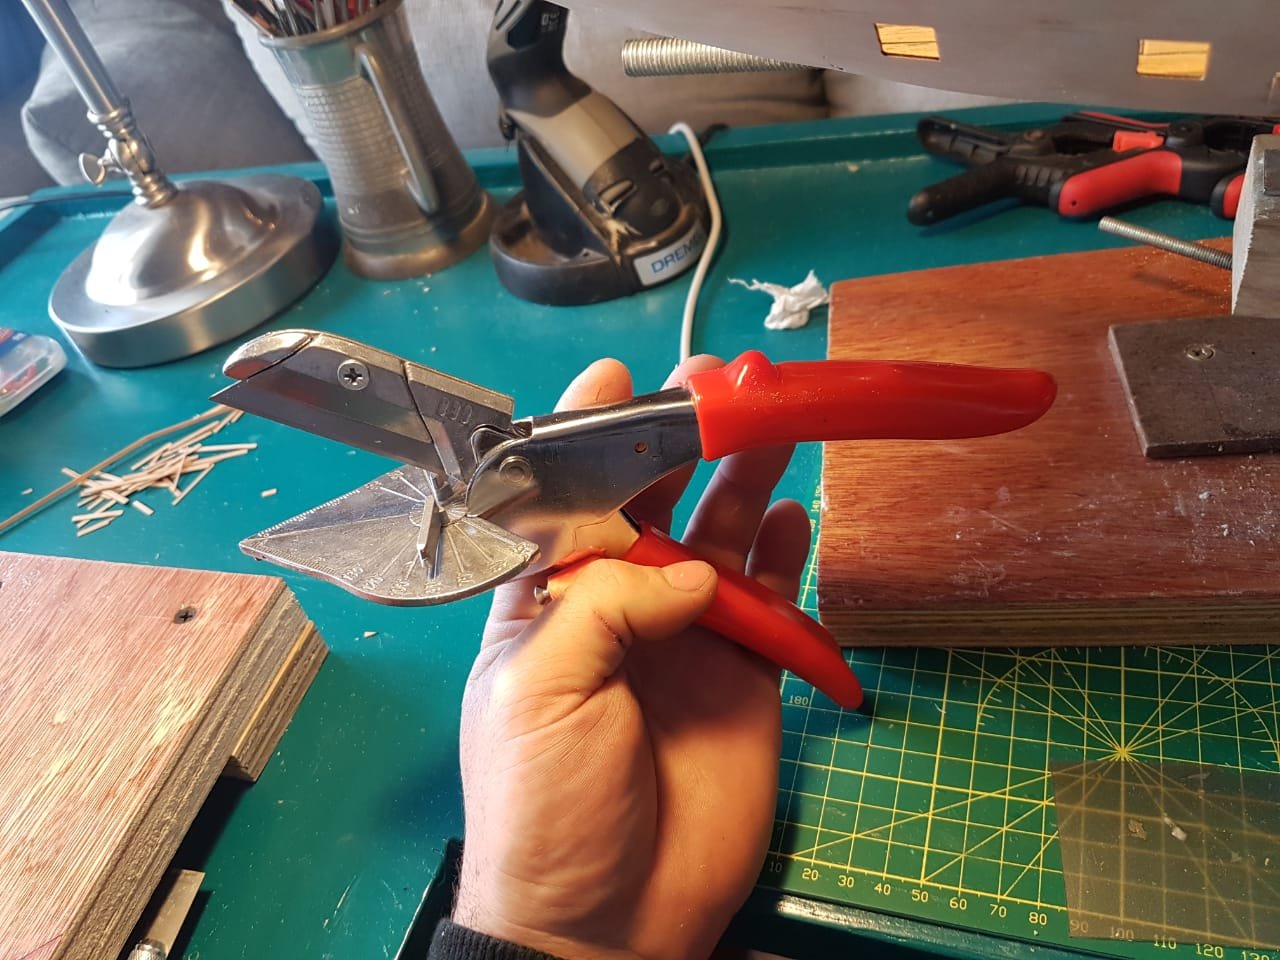
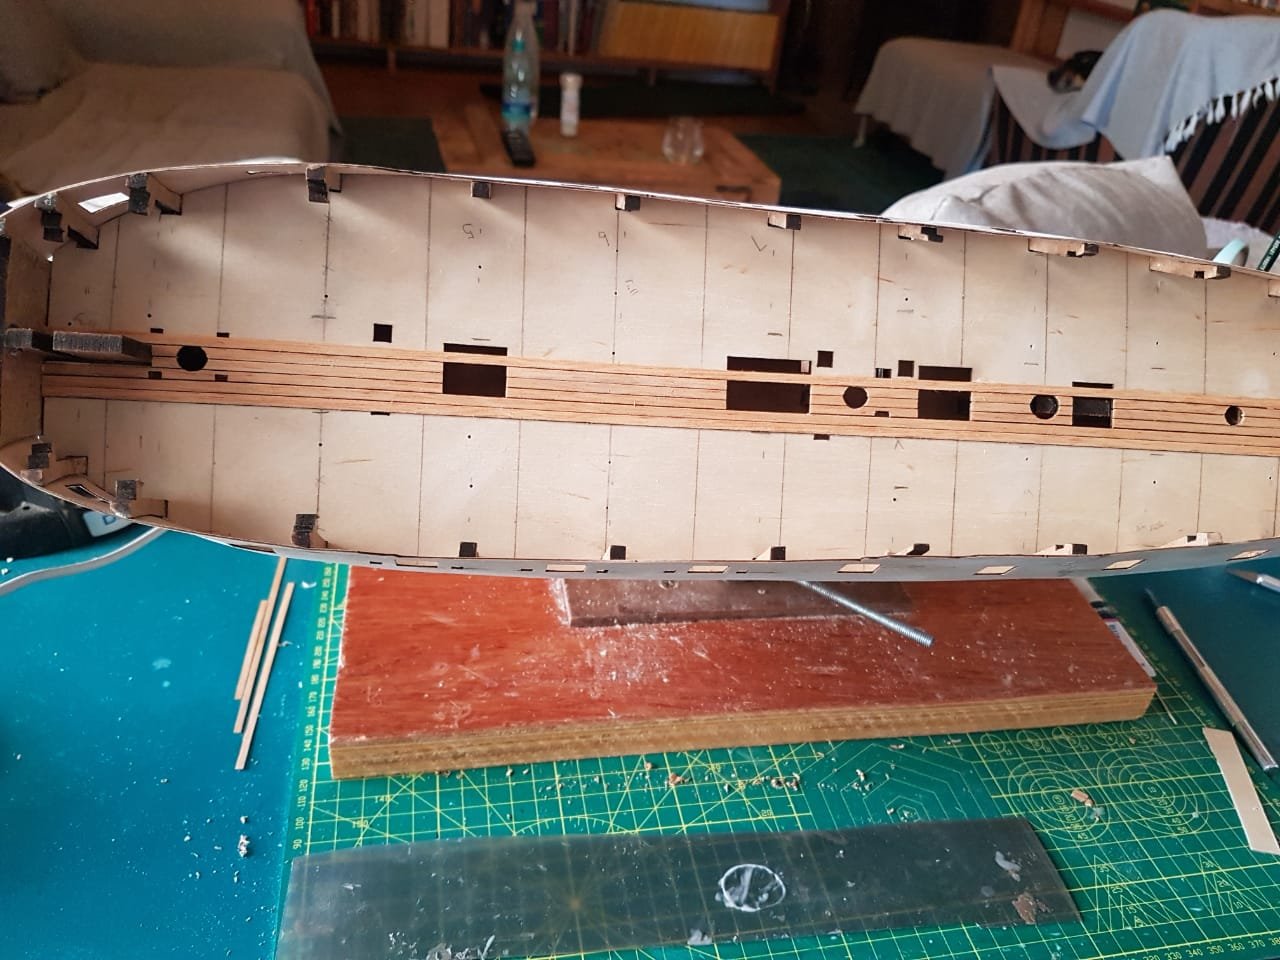
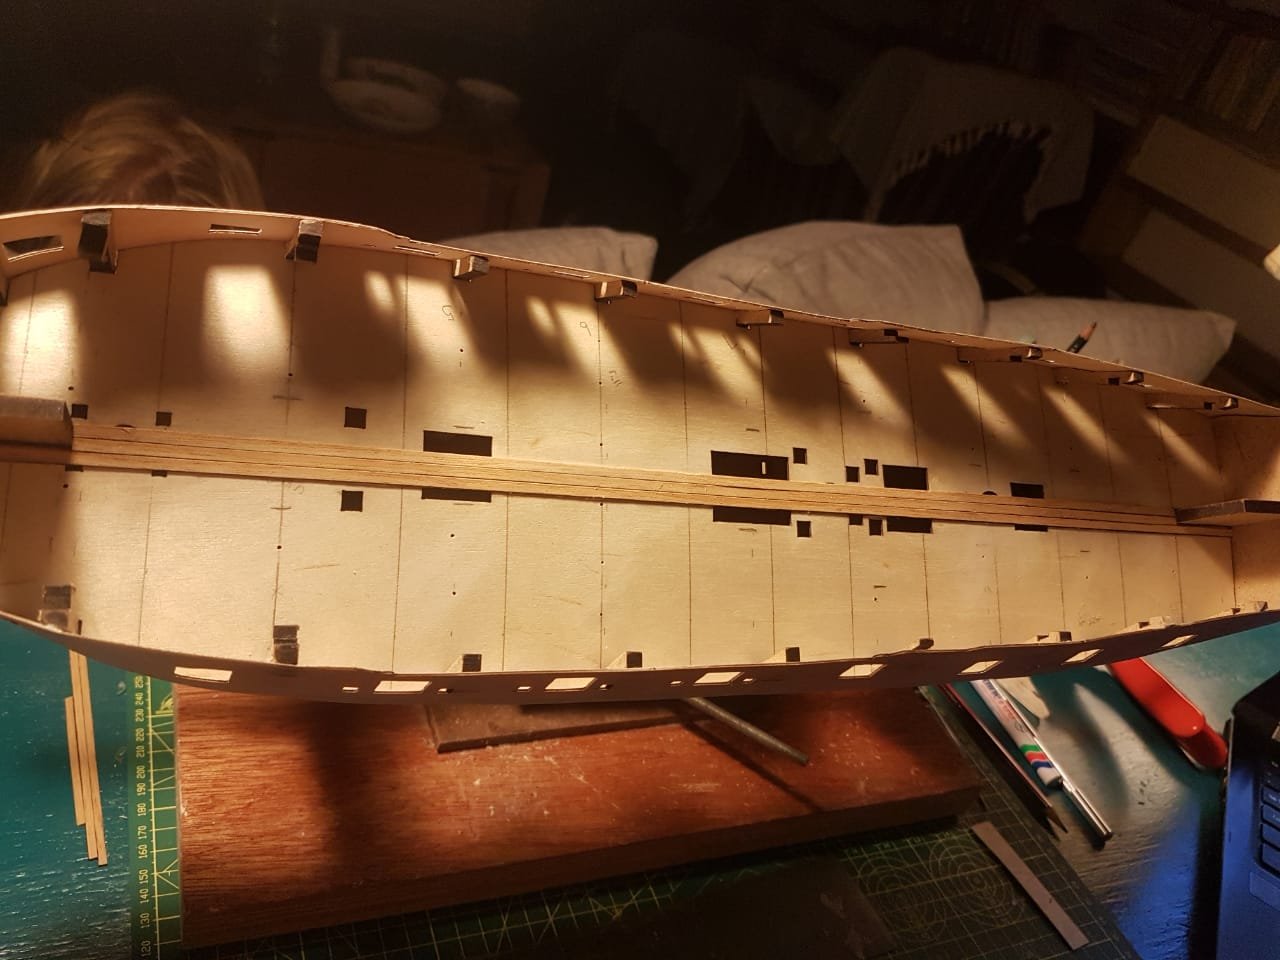
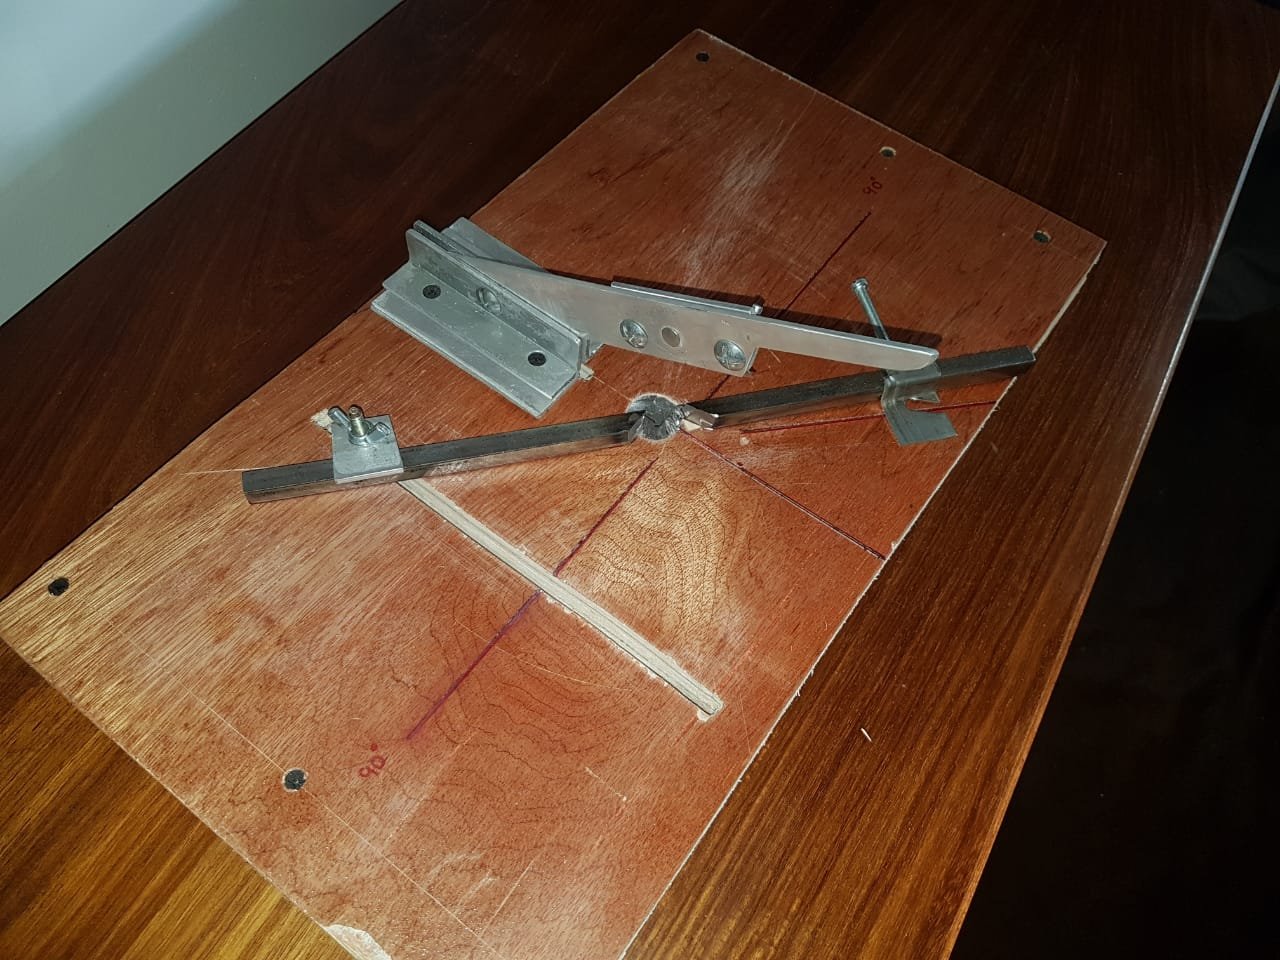
Day 16 to 22 A week dedicated to planking! I continued to plank the deck using the 4 butt pattern and glueing the planks down with normal PVA and then wiping them clean. I chose to not use tree nails as this is my first build and I felt the risk was too high. I cant decide if I regret having used permanent marker for caulking. It gave a slightly uneven finish to the caulking but it doesnt really feel unrealistic so I am reasonably happy with it. Planks were cut with my home made guillotine and this weird angle cutting set of shears I found online. I dont know what they are actually meant for but they do a decent job. I planked as far as possible without interfering with Bulkheads 5,6 and 7 as they need to be removed at a later stage of the build. I then scraped the deck with a carpet knife as per SpyGlass' suggestion and it worked a treat. I followed this up with a light sandng with 600 and 1200 grit paper. Now come the usual questions.. WHAT NEXT!? do I varnish what I have done so far to protect it? do I plank out the rest of the deck? do I start first hull planking? am I missing some other step? Please help!!!!


-
Spy! Good day fellow! It has been too long. I have had an extremely busy week both agriculturally and with guests so I have not had the time to get back to you. I just finished using your scraping method on my decks. It really works a treat! Do you water down your varnish with turpentine and if so how much? Please take a look at my next post and let me know what you think I should be doing next!
-
Hi Vulcan and thank you! Its great to get positive feedback from someone with your experience. I will be sure to use oil based suede varnish and test off the model before going ahead. Do you have any pointers on how to apply?
-
Hi Jolley! Please excuse my very slow response, I had a wedding on the farm last weekend and I am building an onion seed drying facility that is taking up alot of my evenings. Thanks for the info! Do you mix your varnish with tupentine before applying? is there a special process? I was too impatient to wait for the suggested archival pen to arrive but I will get hold of one for the upper decks. As you will see in my next post there was a certain amount of bleedout. Cheers, Haiko
-
Thanks Spy! the encouragement really helps, I often feel like this cant be right so hearing that it is is huge. I will be be super careful with all the walnut parts for sure!
-
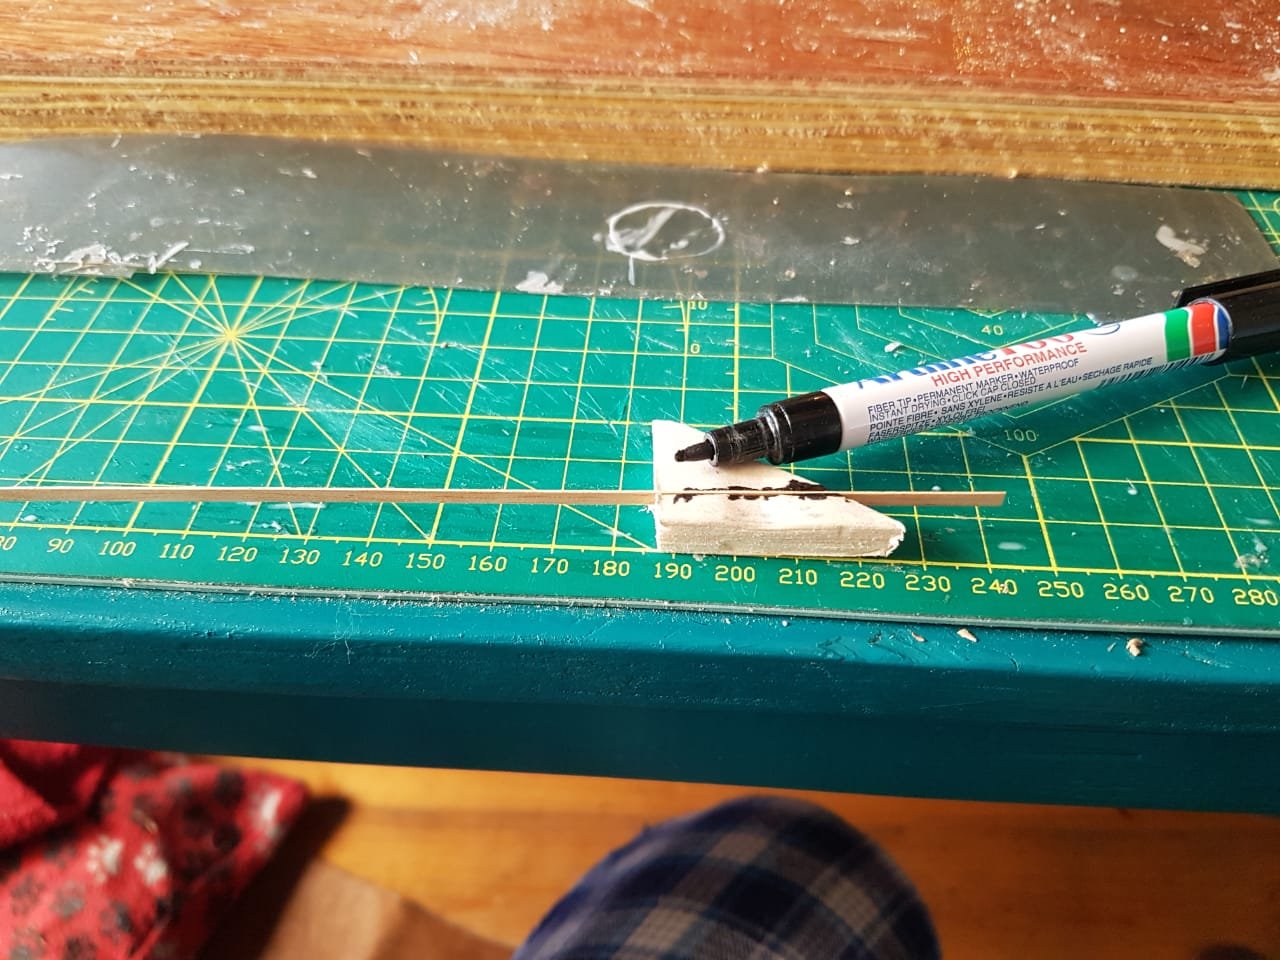
Day 15 I opted to start with the deck planking to gain some experience in cuting planks etc before proceeding with the hull planking. I will only be going up to the point where I would need to remove the upper portions of bulkheads 5,6 and 7 and will then move onto first hull planking. I dont want to weaken the gun ports by removing these before I do all the hull planking handling. I opted to go for a 4 butt system with a maximum plank length of 118mm. I also chose to go with 2 planks running down the center of the deck so that these planks could run perfectly parallel to the center line of the false deck. instead of trying to line up a single king plank perfectly. This means that with all the cavities in the false deck for the hatches etc the first 8 planks(4 to port and starboard of the center line will have no butt system as there is no single length of plank longer than 118 mm. I then did a couple of tests with marking caulking on the deck planks and opted to go with a artline permanent marker. THere appears to be significantly more bleedout on the one side of the plank than the other so I just placed the planks with the side with less bleedout facing up. This gave me a caulking line that felt acceptable. lets see how it goes once the deck is sanded down. In order to apply this permanent marker I took a small block of balsa wood, cut a slot into it the exact width and depth of the deck plank and then pushed a depression into this block of balsa across the slot. This meant that I could place the plank in the slot, place the tip of the marker on the edge of the plank and then simply drag the plank through the block, leaving a neat marked plank edge. I also found that 2 passes at a fairly high speed worked best to prevent bleedout while still having a decent dark line. When laying the center 8 planks I have started by laying the full length of the plank over the deck and then cutting out the holes for hatches etc. In order to make this process I never laid planks in such a way that I entirely covered a hole that needed to be cut out. this meant that there was always a good starting point available for the cut. Once these openings were rough cut and then fine cut(dont attempt to cut them perfectly on the first pass) then I laid down the next set of planks. I will now wait for those to dry before cutting their portion of the holes out before adding the next set. I hope this makes sense, I am writing it in quite a rush. Any advice on the best deck varnish would be a life saver!!
-
I should have listened better!!!! 😭😭
-
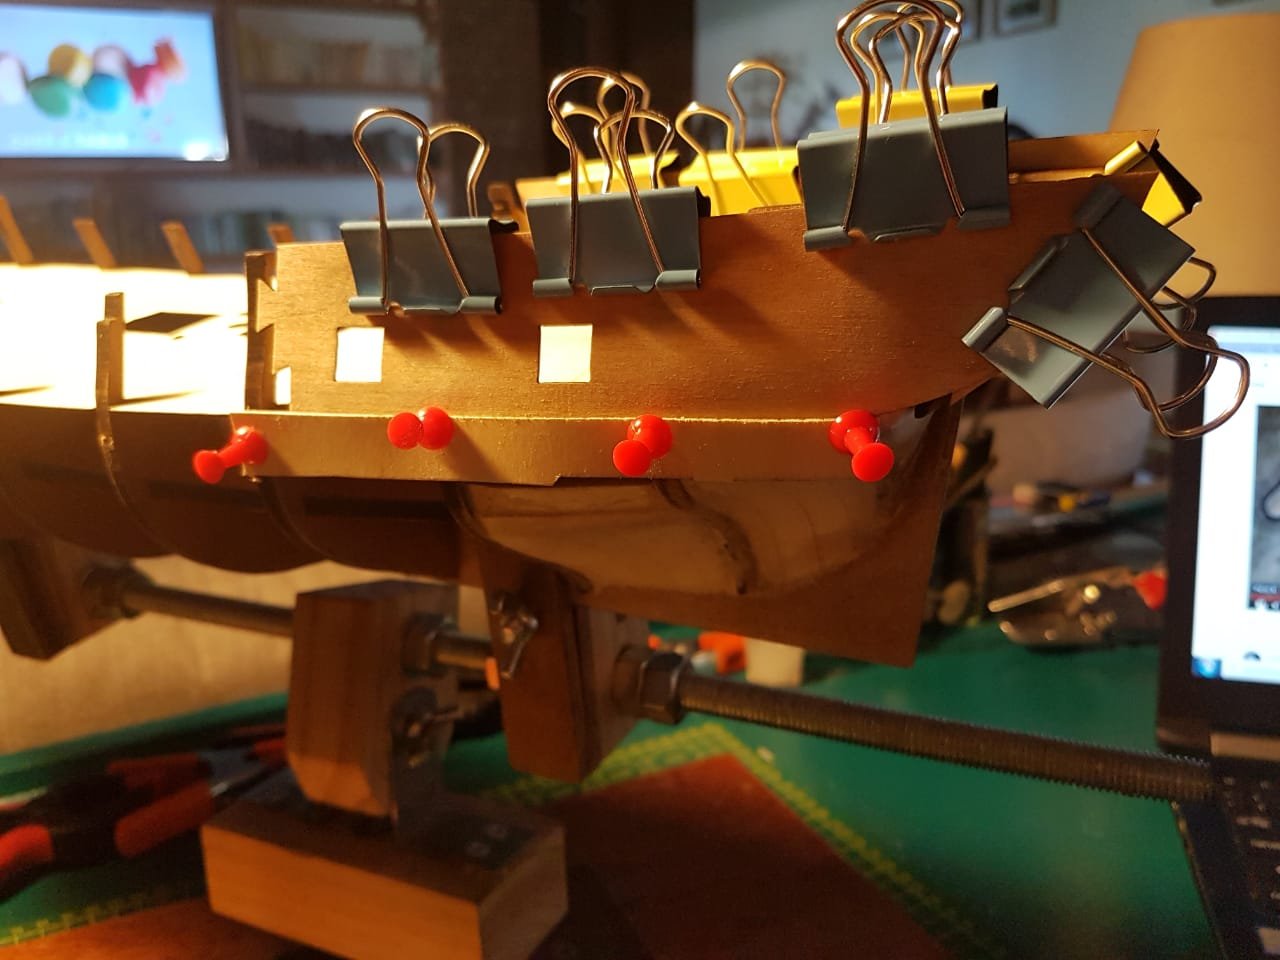
Day 13/14 Another somewhat slow couple of days, I have been putting in a staircase which has turned out to be a bit of a nightmare. I manage to complete final shaping and gluing of the gun ports. I have a couple of points on this process I would like to share. 1. I cannot stress enough how important it is to shape these ports correctly and be patient in this process. Soak and bend, soak and bend. This is also a time where you need to accept that some additional fairing needs to be done. I didnt take SpyGlass nearly as seriously as I should have and this resulted in gun ports with a curve that I am not entirely happy with but I will accept due to lack of alternative options. 2. The puzzle joint has a mighty sloppy fit and doesn't land on a bulkhead. Most people suggest that you put a filler block behind the puzzle joint to support it. I cant really agrue with this approach but I opted to just superglue and clamp the joint. This has left some daylight coming though but I think it will be fine once it is all planked. 3. I originally intended to leave the walnut keel stem off until final hull planking but I realised that the gun ports sort of hook in behind the rabbet cut into the keel. This means that it wont be able to be taken in and out once the gun ports are secured. I therefore Opted to glue the stem in. 4. The ply gun ports do get cladded with planking on all faces so I chose to sand down some of the high points of the wavy areas. I am reasonably happy with the final result(bearing in mind that alot more will happen to these strips before the build is done. What is the recommended next step? I see many people plank the Gun deck and other opt to do first hull planking and some do half the gun deck, then plank the hull and then return to the gun deck. I am unsure. Any and all advice on where to progress from here or if I missed anything at this stage would be great!


-
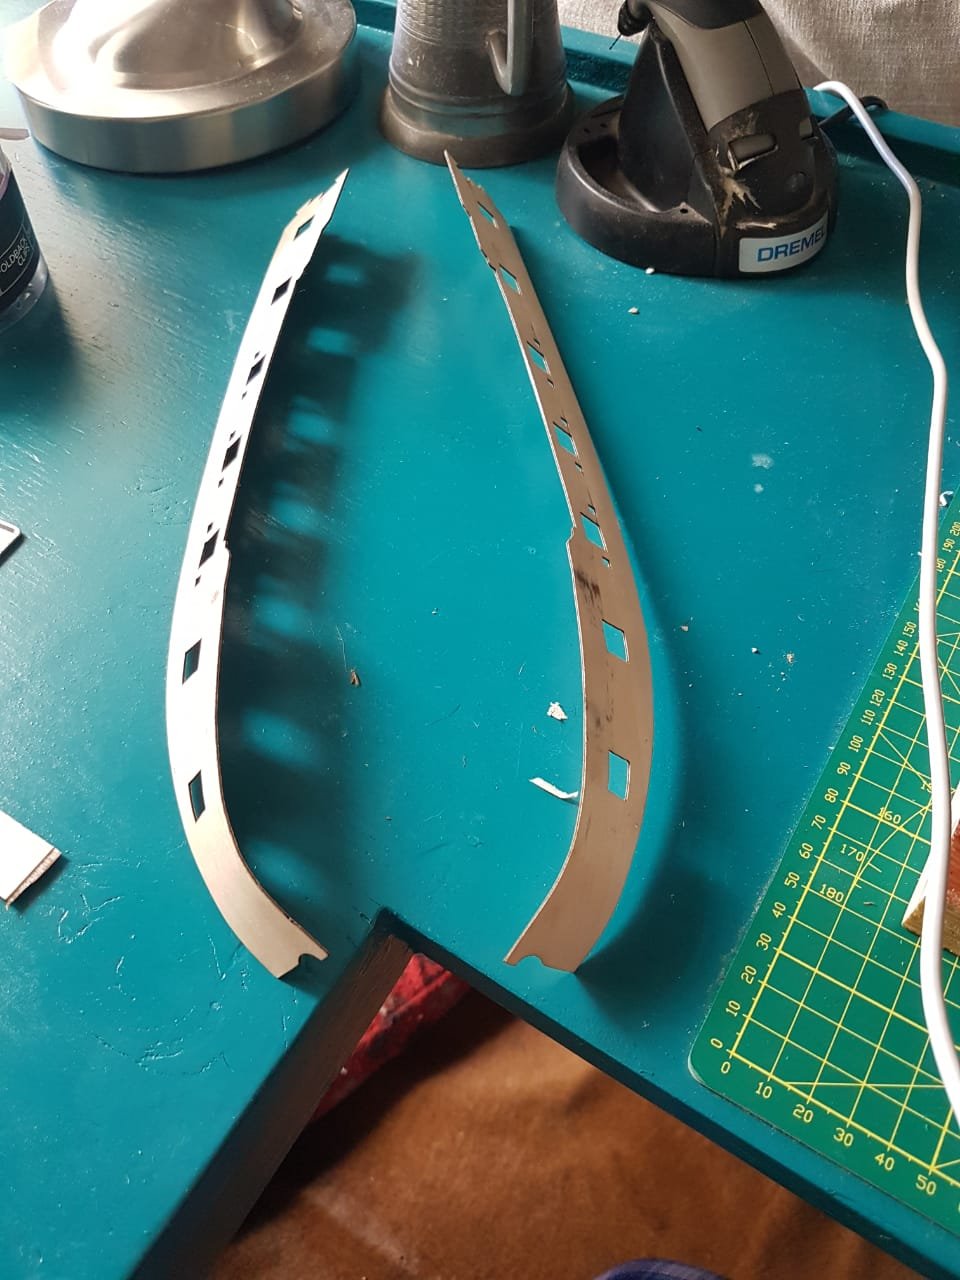
Hi Spy! Thanks for the feedback. You are totally correct, this angle does seem to be a bit of a problem, infact it was way worse before and I managed to coax most of it out but I see now looking at the strips and that photo that its back again. Its actually a relly important point because my feeling is that this build is ALL about the lines and flow. to lose that would be a travesty. I will be sure to apply a bit more time into making sure this is all perfect. As for the overlap I have almost none at all, however I didnt bring the point to an absolutely smooth curve, it comes to a very oblique point. I somehow felt this would make more sense and it fits nicely into the rabbet I will show you what I mean in tonights post(hopefully)
-
Thanks Vulcan!
-
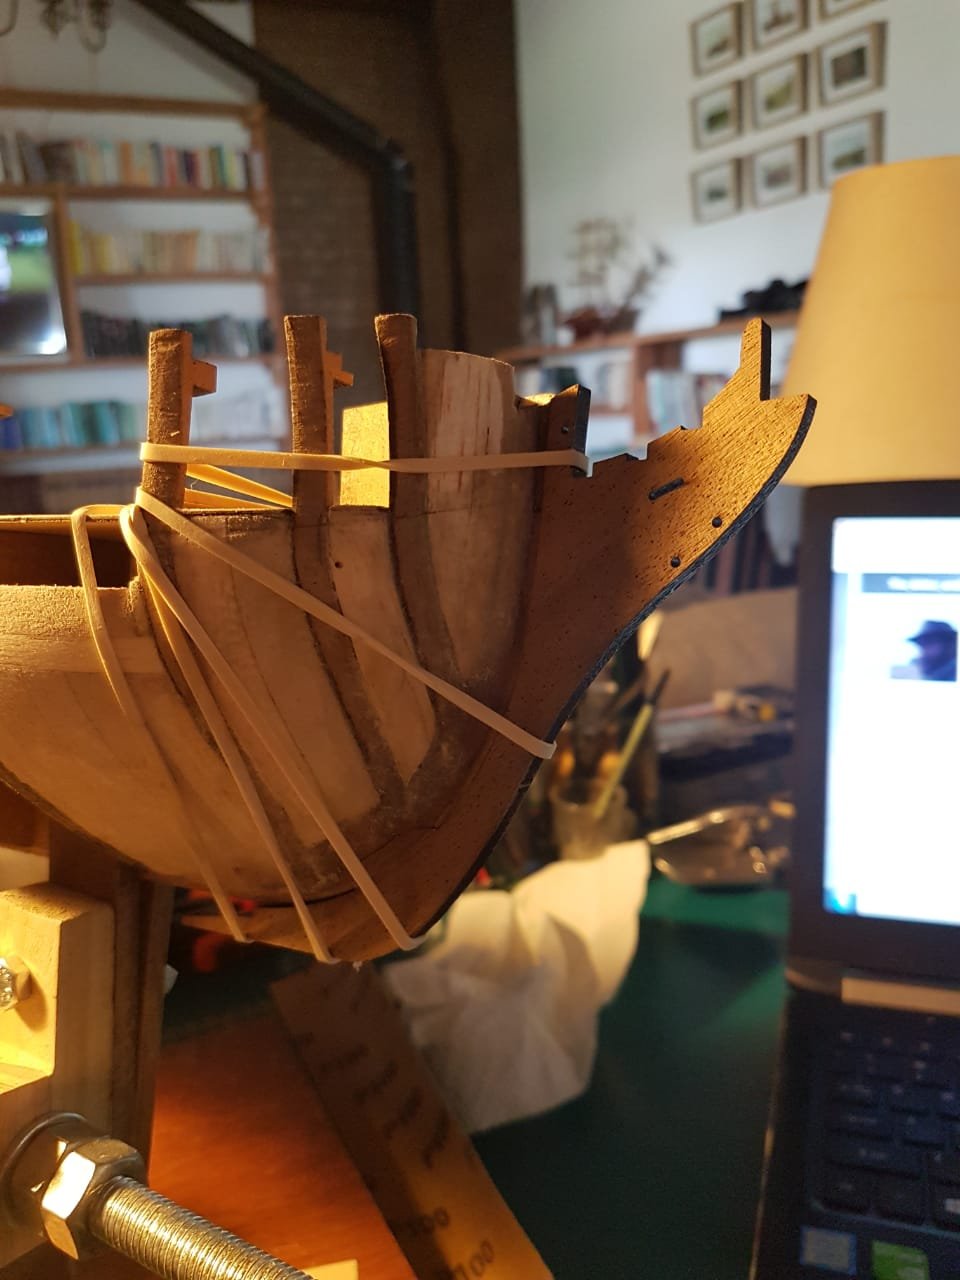
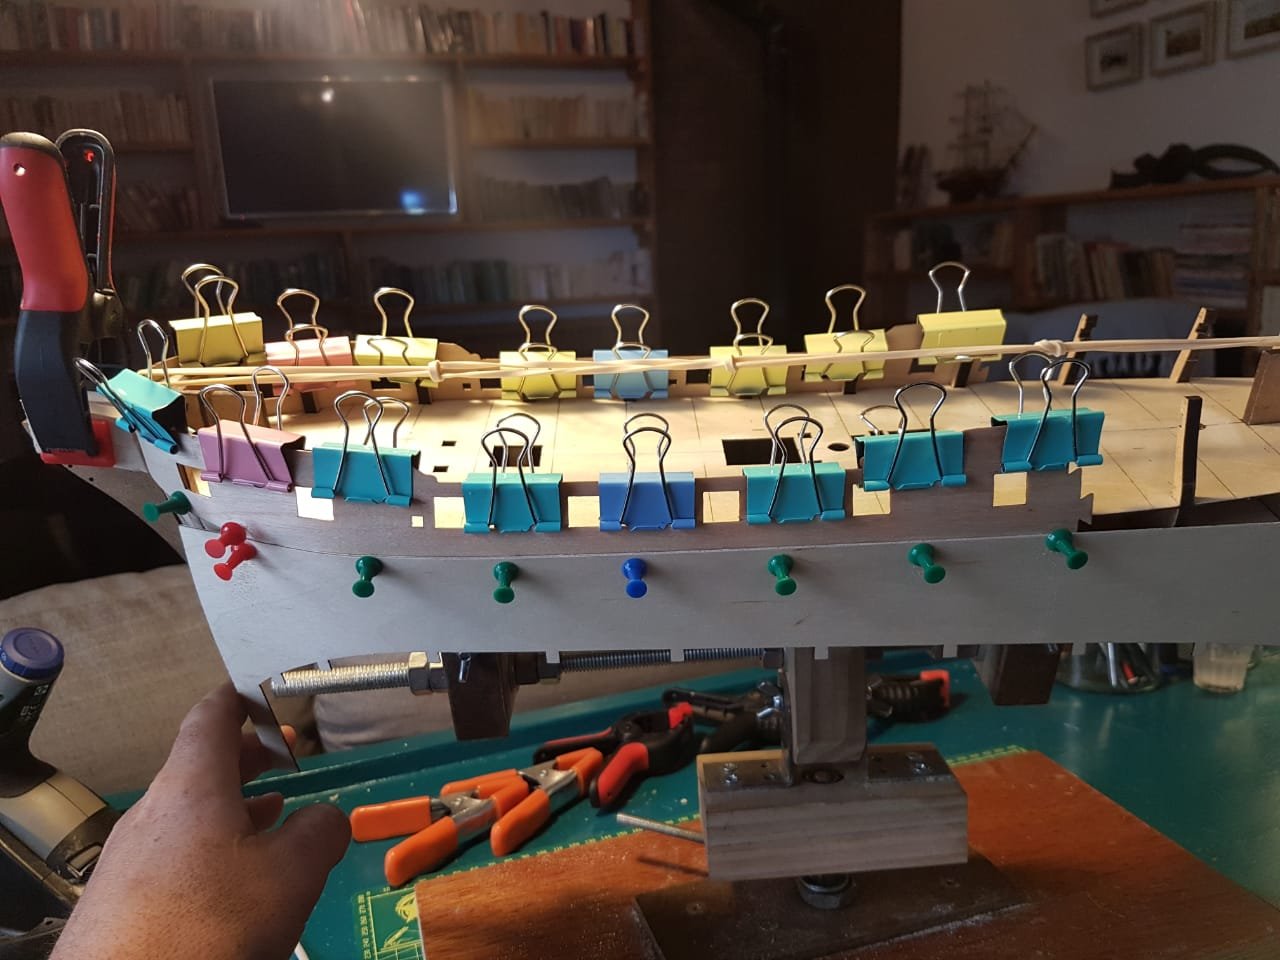
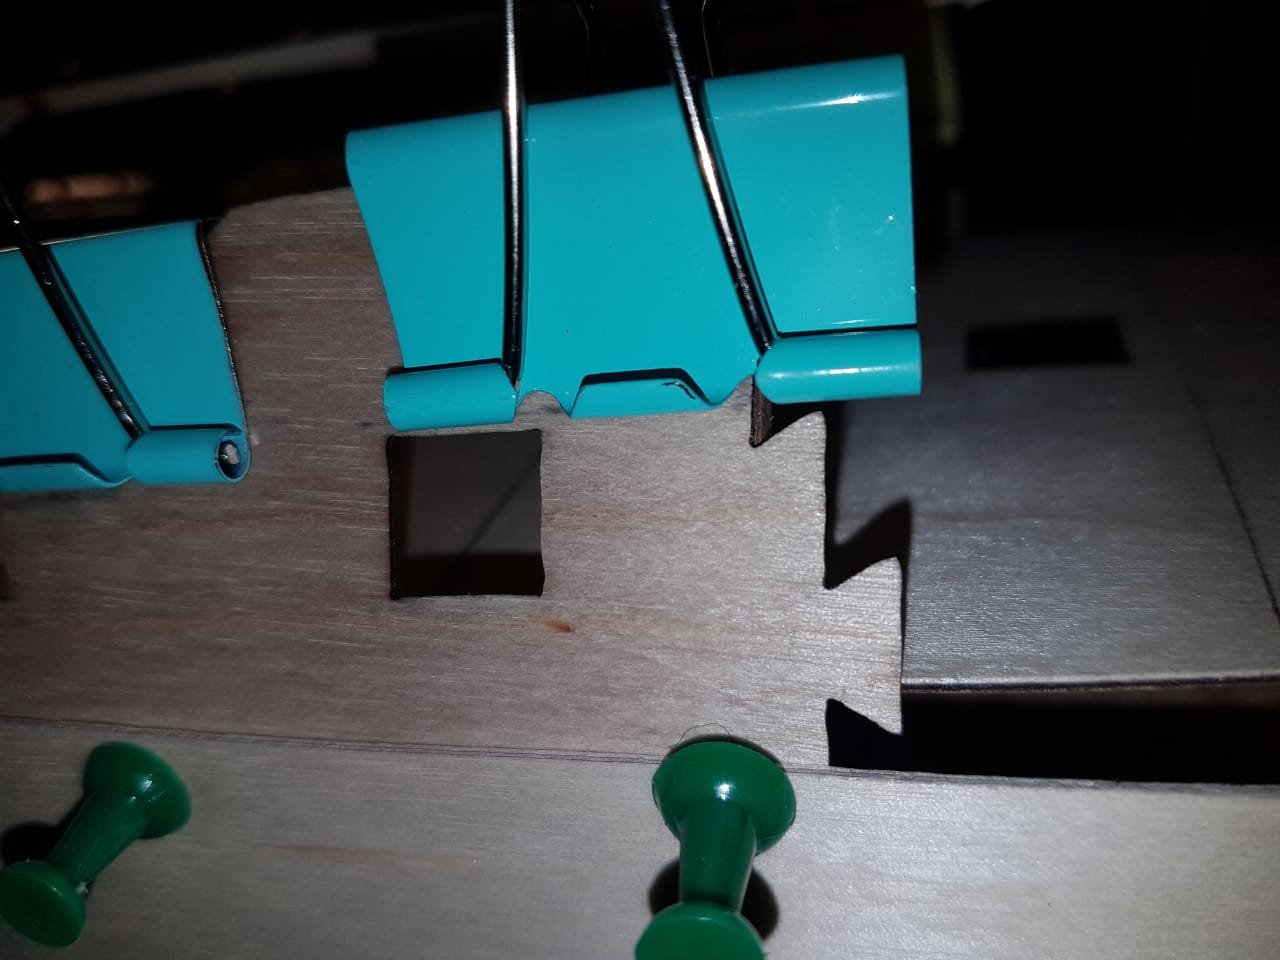
Day 11/12 This turned out to be a pretty unproductive weekend due to a charity event that I was part of hosting on the farm. Infact my whole weekend sort of fell to pieces. Never-the-less here is what happened on day 11. I did the second shaping of the gun ports, this time using an additional strip of wood to hold down the lower edge of the gun ports and eliminate warping. This did work well along the bottom edge but the forward port of the top edge did warp a bit. I eliminated this by slowly working out the warp by hand. I have also included a photo of the alignment that I got with BH No 9. You can just see a tiny amount of the bulkhead sticking out behind the female portion of the puzzle joint. This seems correct to me but please let me know if I am making a mistake here. After this second shaping and slight manipulation I was fairly happy with the results. I also managed to get a nice vertical "S" shape into the rear of the gun port just using strategically placed paper clamps. Another advantage of using these clamps is that you can push them all the way down so that they rest on the top of the bulkhead and use this for alignment of the gun port flush with the top of the bulkhead.

-
Your appreciation is appreciated Please just dont abandon me, I still have so many more questions!
-
Good Morning kids! I just wanted to post a couple of photos of some of the items that I have made to assist with my first build. They really are nothing fancy, their focus is on cheap and cheerful. I thought this might help for those of you looking for ideas on how to save some money with this already expensive project. If you have any suggestions, questions or comments please let me know and I will do my best to respond. The photos below are the following. A steam tube, guillotine for cutting specific angles and lengths, an adjustable keel rest and a lockable, adjustable keel clamp(which I absolutely love). I have also included a photo of the desk I made specifically to build this vessel. please excuse the strange colour. I entered into a rather weird negotiation with my girlfriend and somehow ended up agreeing to paint this desk "teal" in exchange for the permission to build it.

-
A quick break from the build to show you folk the steamer I made from a coffee can, the element from a kettle, some copper pipe and other bits and bobs I had in my workshop. I find it works pretty well. For those of you that want to make one please do not attempt to create a temperature regulator using a light dimmer switch. It works extremely well until the switch starts to smoke. If anyone wants instruction of how to make this little guy feel free to give me a shout, its quite easy
-
Good morning Spy, do you ever sleep? I dont know what time zone you are in but it seems like your replies come in 24 hours a day, this is great for me as I keep somewhat strange hours myself. I did seriously consider steaming the joints but I was worried that the steam would play silly buggers with the MDF and make it expand? I will actually do a little test on a scrap piece and report the results. I am going to do my best to follow these detailed instructions. My gun ports are soaking as we speak for their second fitting
-
Another great bit of advice. At the moment I have the false keel out so that I dont damage the walnut and so that I can used the curve of the vessel to shape planks etc without having the keel in the way. It has a very snug fit so I can take it in and out as needed. I will be sure to check the elevation of the main mast hole against the keel piece. I am not totall sure about the orientation of the gun ports to the tops of the BH's are they meant to be lying flush?