
The Bitter End
-
Posts
257 -
Joined
-
Last visited
Content Type
Profiles
Forums
Gallery
Events
Everything posted by The Bitter End
-
 Thanks for the reply! You are probably right, the most logical thing to do would be to look at templates. Sadly as a result of my very elementary skill level and the fact that the kit has some significant alignment issues, just relying on how the mast fits into decks etc is certainly not going to fly.
 -
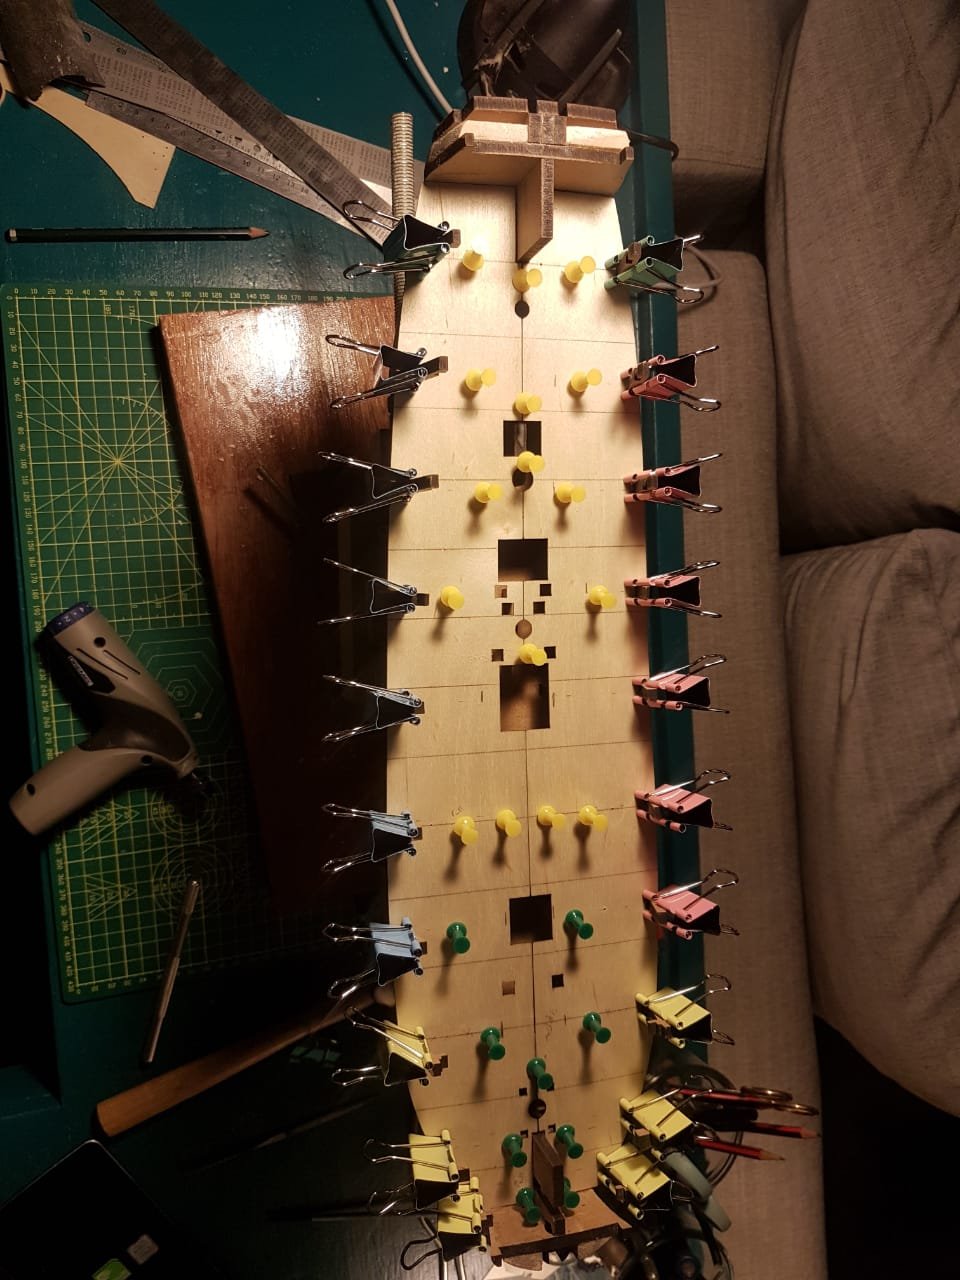
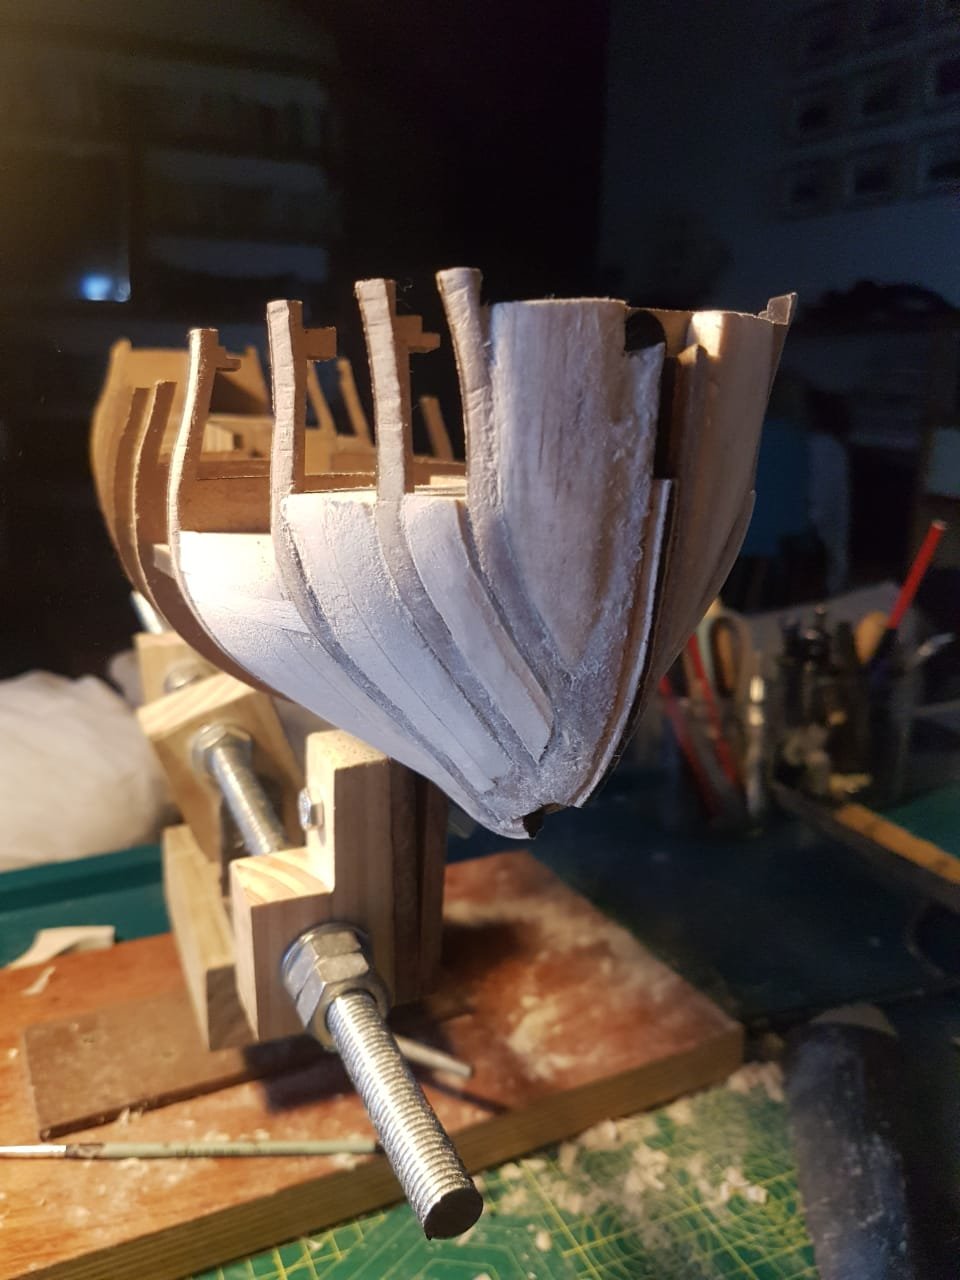
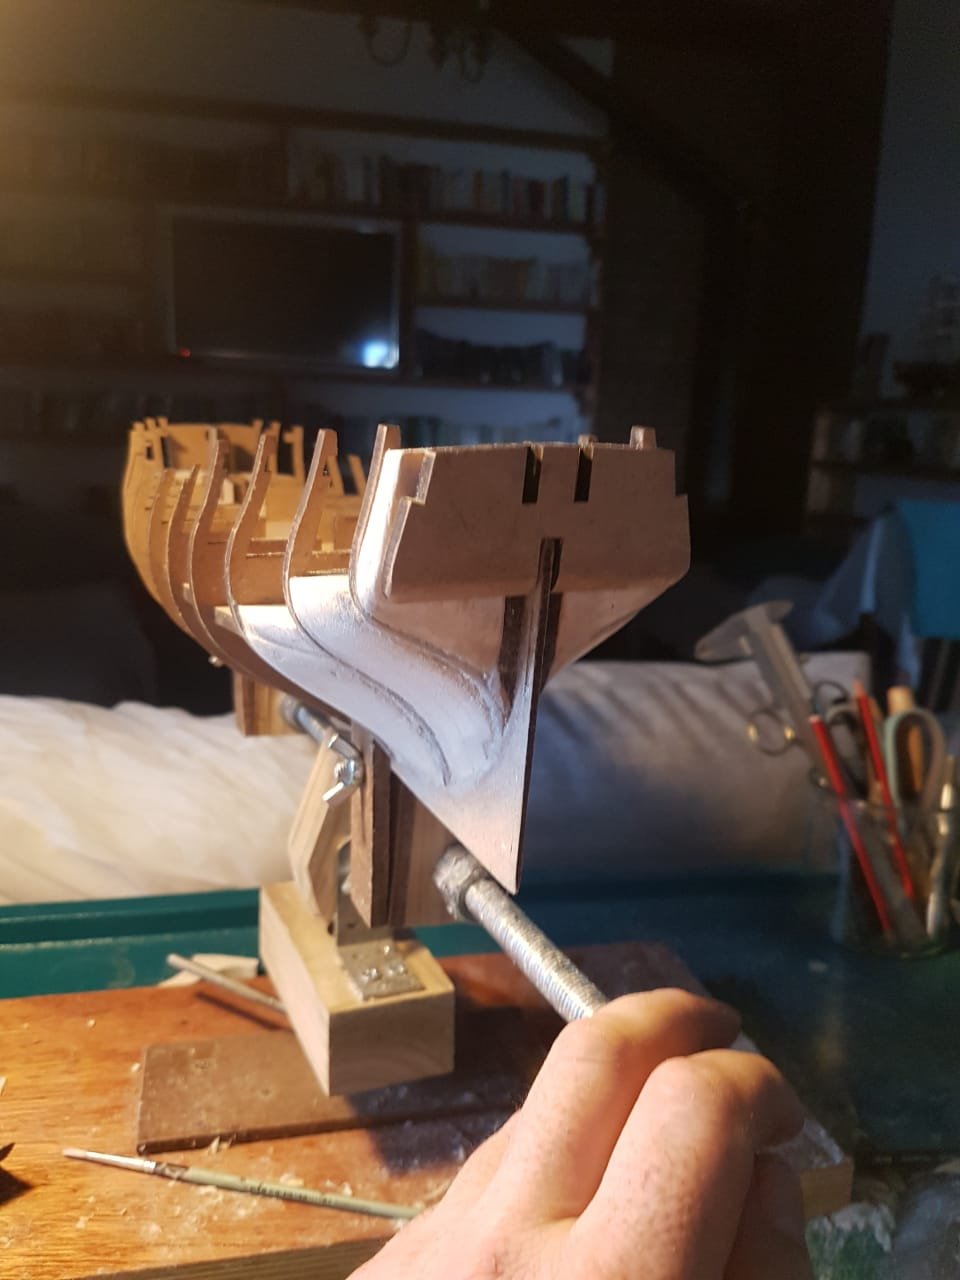
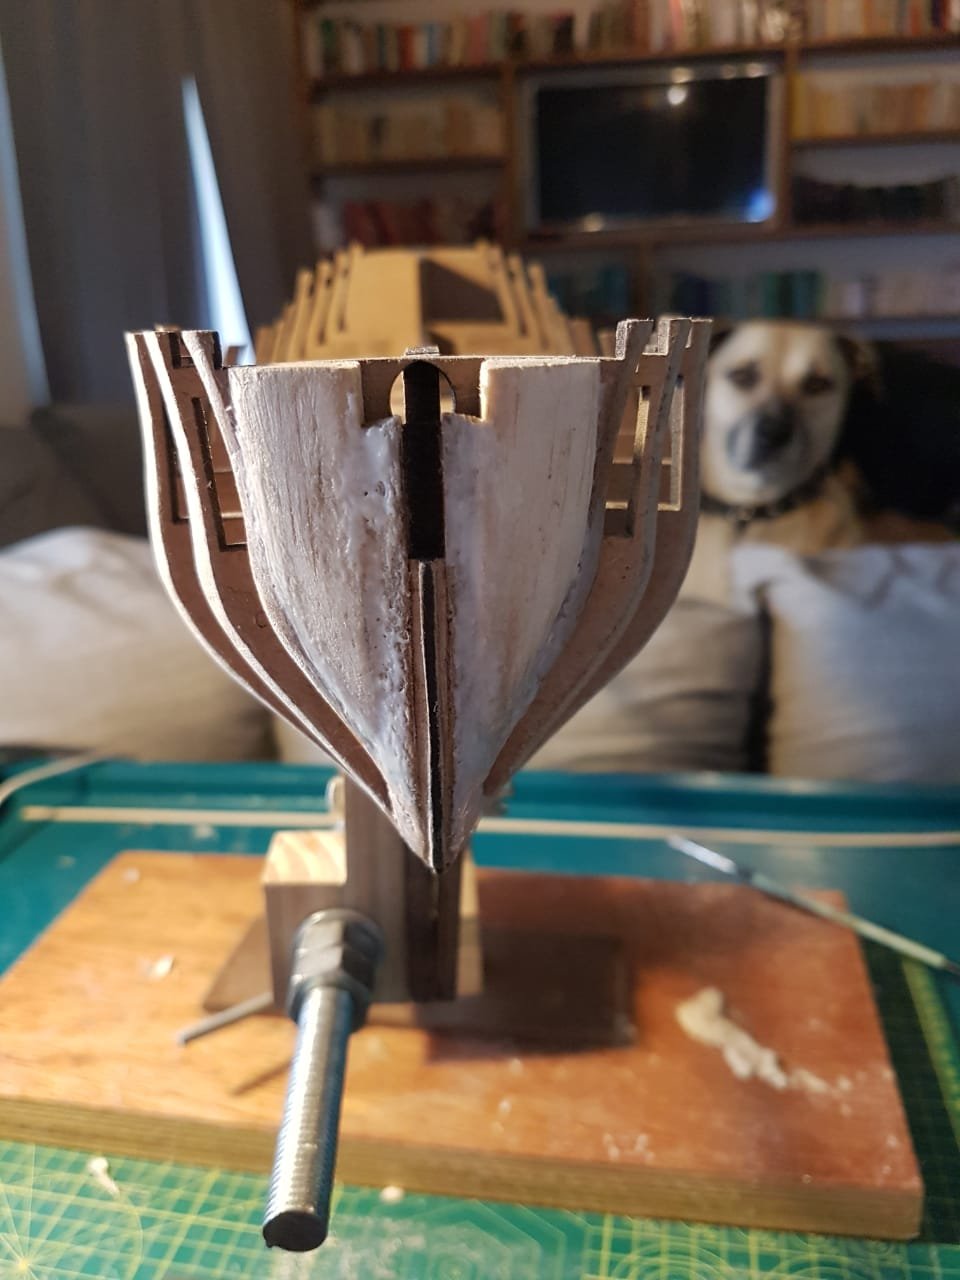
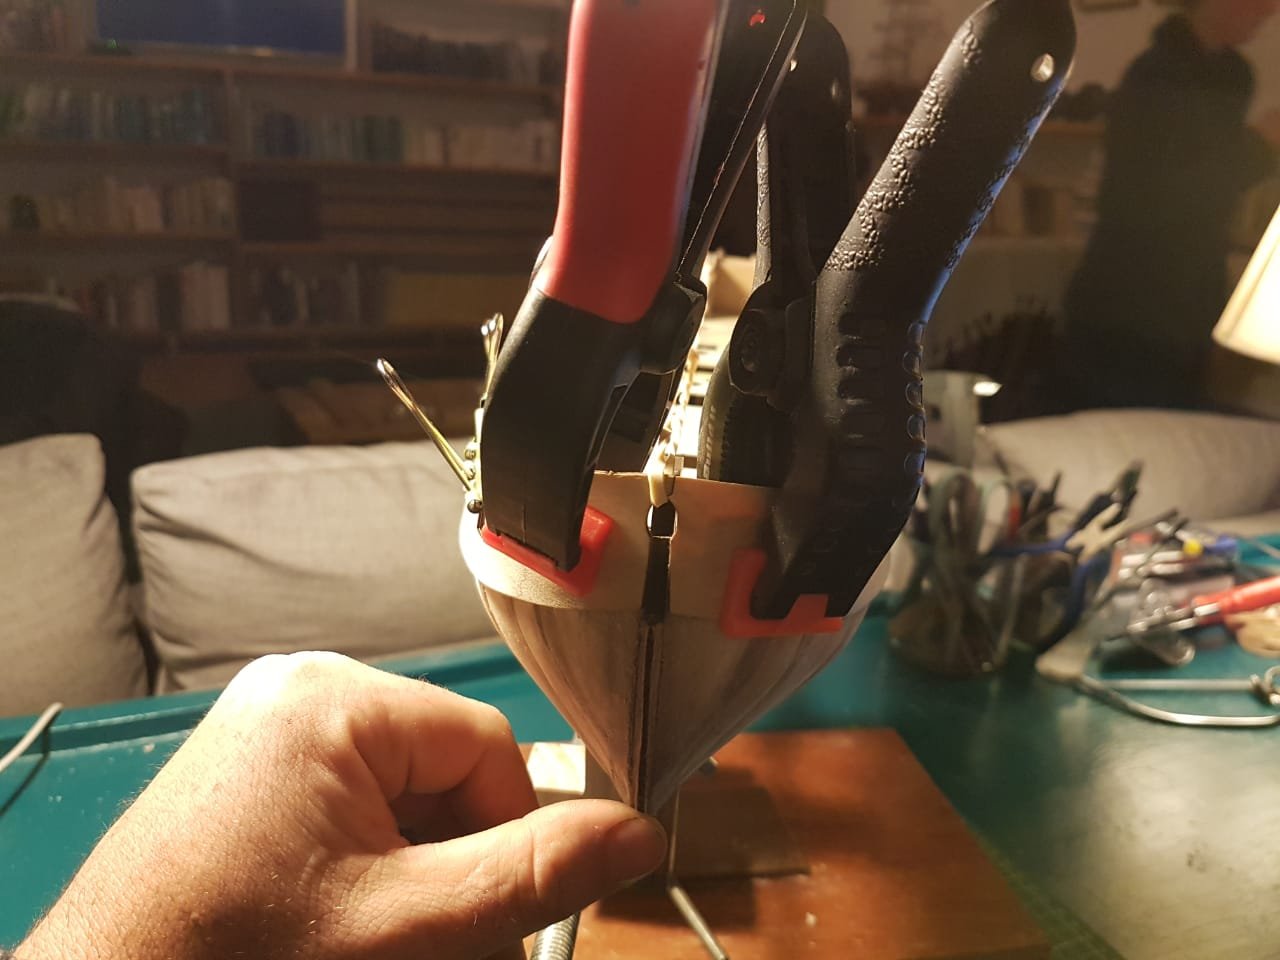
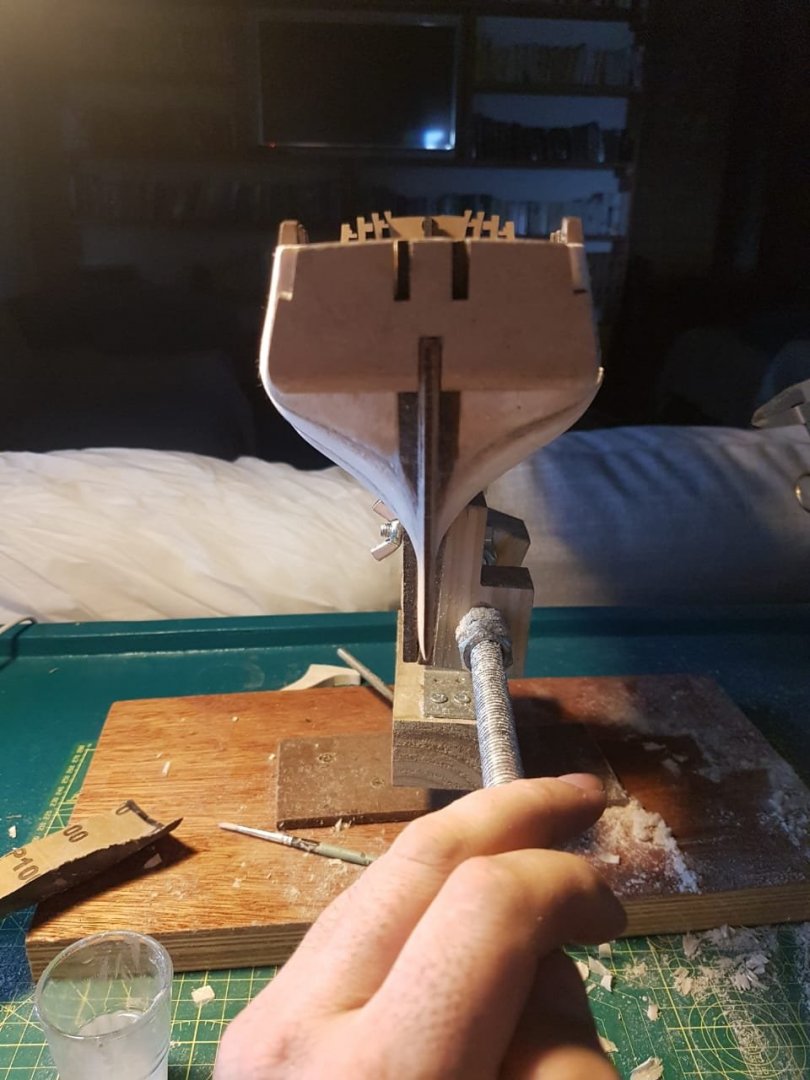
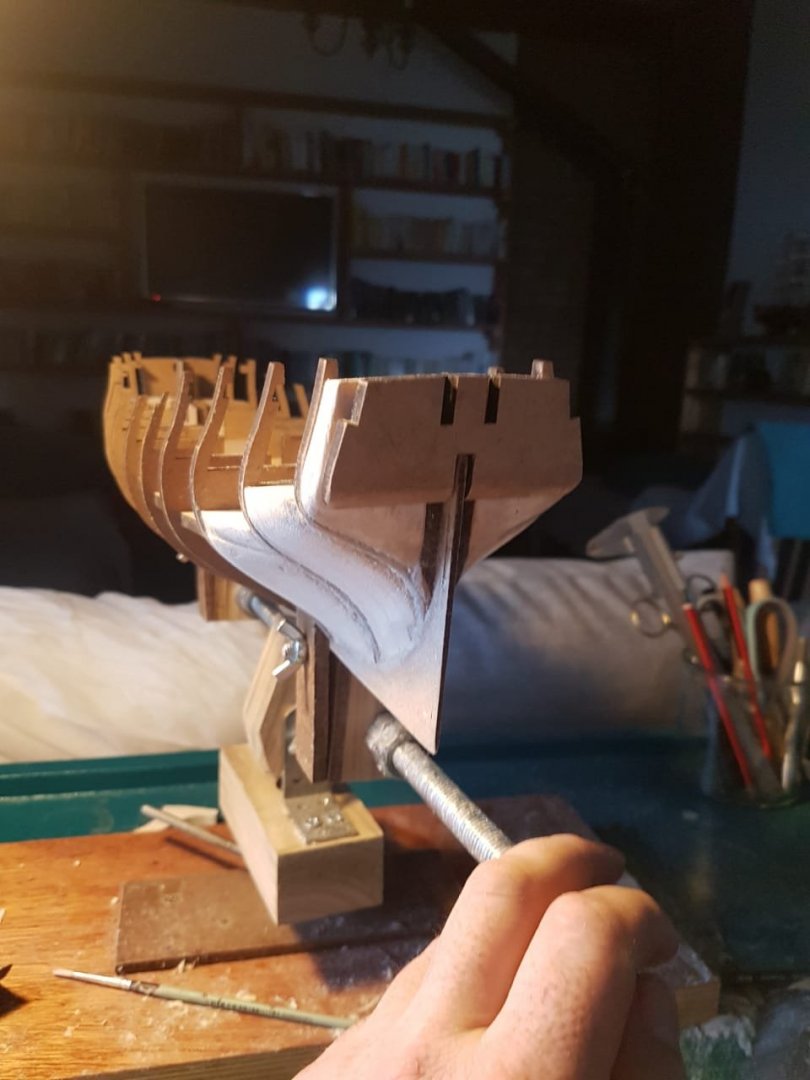
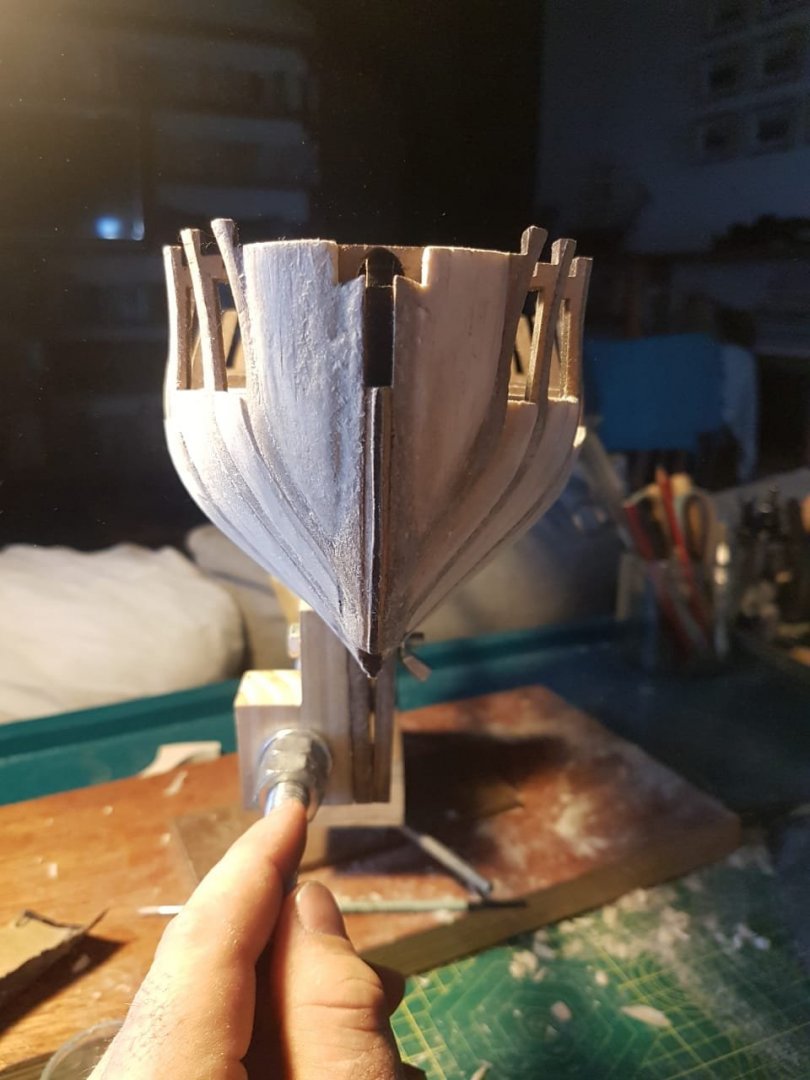
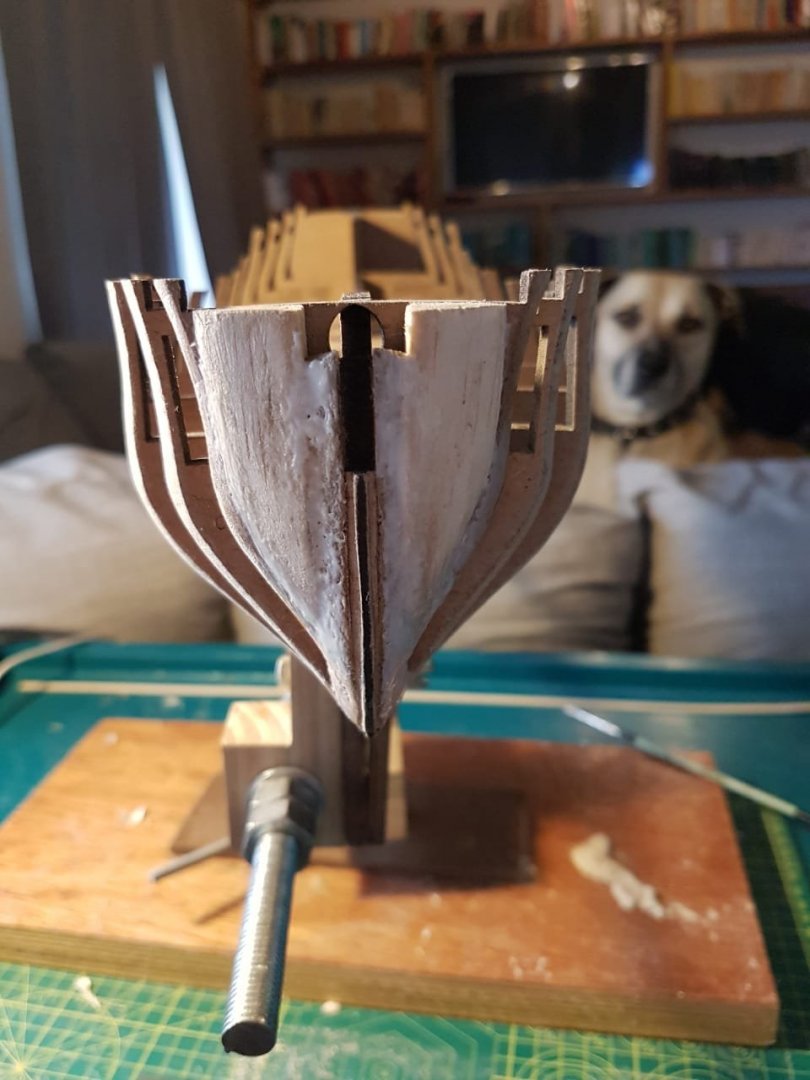
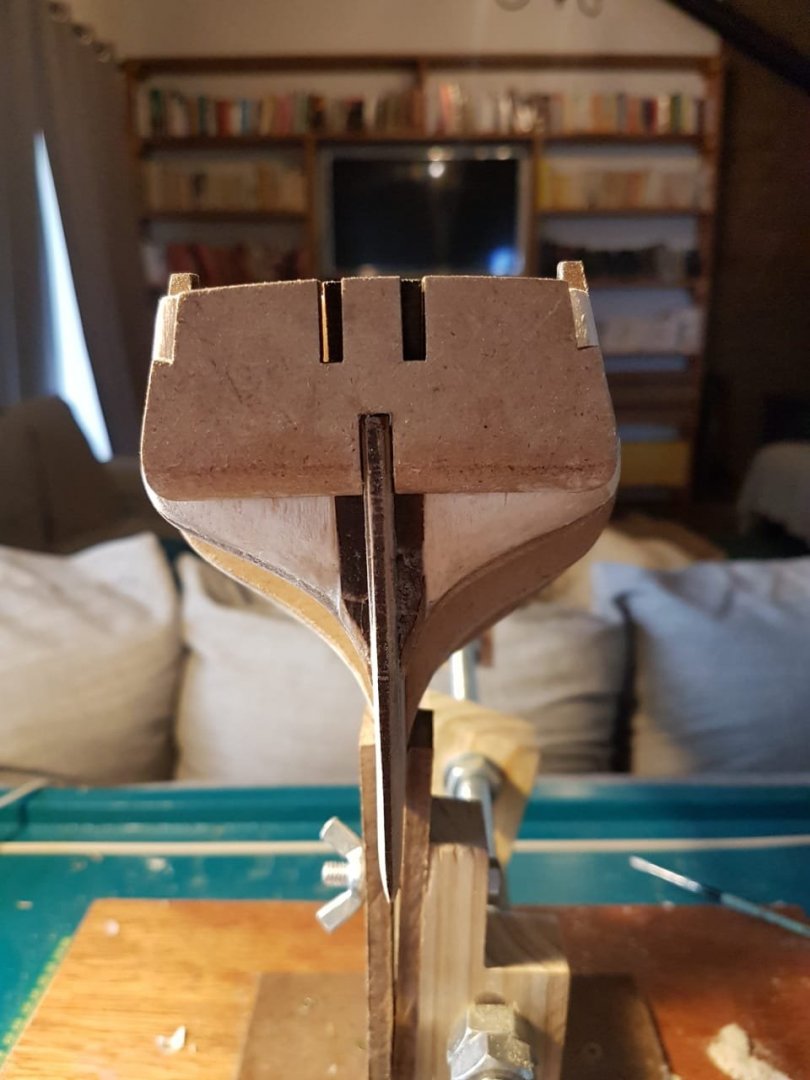
Day 10 Today started off with a disappointing display of muppetry, I somehow misread 2 separate build logs to the point where i chose to glue the bulkhead beams in prior to installing gun deck planking. After some head scratching and more reading I realised that this was a ridiculous decision. I did however ultimately manage to remove these beams without incident. I also installed the "two sets of stern counter patterns". A small heads up for new builders, be aware that the outer two pieces should be installed at an angle that allows them to run parallel to the edges of the stern upper deck, this requires checking against the deck itself as the default position they "want" to sit in is incorrect. The orientation in the photo below is correct for my model. PLEASE NOTE! In that photo I still have the bulkhead beams in place, this is NOT correct, they have been removed and will be reinstalled once the deck planking is done Finally I soaked the gun port patterns for about an hour in hot water and then clamped it to the bulkheads for my first shaping session. I found that using the paper clamps applied pressure nicely into the dip of the bulkheads, I am hoping that this will aid in getting the correct profile from the beginning. I also used a bit of a silly elastic band system to pull the bow points of the gun strips in as can be seen on the photo. I am still a bit concerned that I may have seated the gun port strips too far forward. If anyone has any comment on this orientation please let me know. this is only the preliminary bending.
-
Spy, my good friend, I seem to have temporarily taken leave of my senses and done something entirely illogical. When I read your log I somehow managed to convince myself that you installed the bridges across the bulkheads and then cut them off again. It turns out that you were actually talking about cutting off the excess portion of the BH's(I think 5, 6 and 7) that get removed once the gun ports are in place. I did manage, with great difficulty, to remove the bridges that I glued in without causing any damage....so crisis averted. I did notice that the wood for your bulkheads, keel and bridges are laminated, mine are MDF with the exception of one walnut bridge strip. I will be sure to exercise extreme caution when working with the beam in question. Regarding the matter of rake, do you perhaps know the correct angle for rake on this vessel?
-
Hi there Eamonn Thanks for your comment, compliment and advice. I am enjoying the challenge and loving the help Im getting here. It is really enhancing this process. I took at look at your buildd, it really is a beautiful piece of work. I just realised that I have actually seen the rake you are referring to in the past. Do you have any idea if there is a specific angle of rake for masts of the era on this kind of vessel? Cheers, Haiko
-
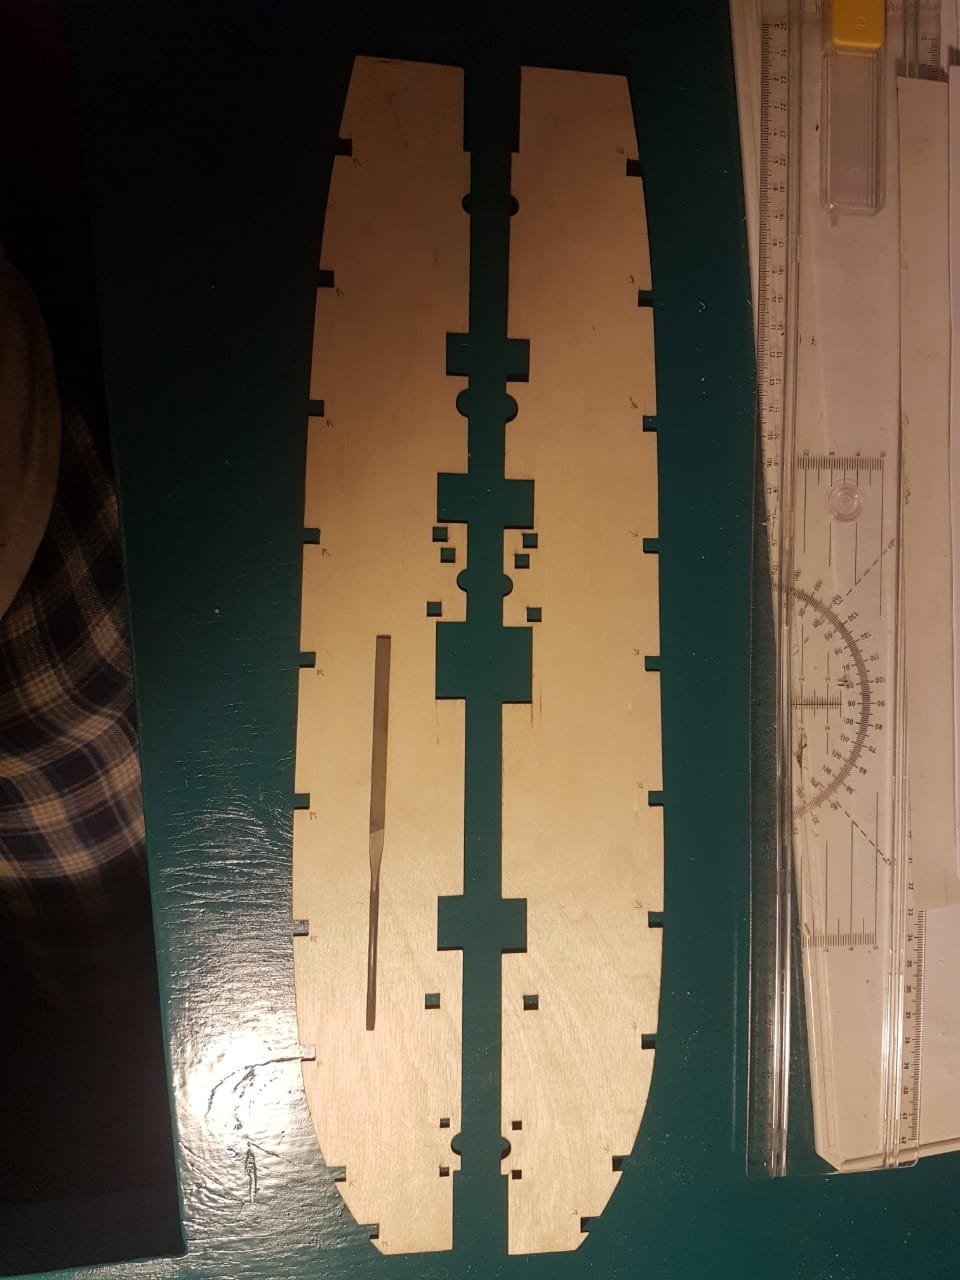
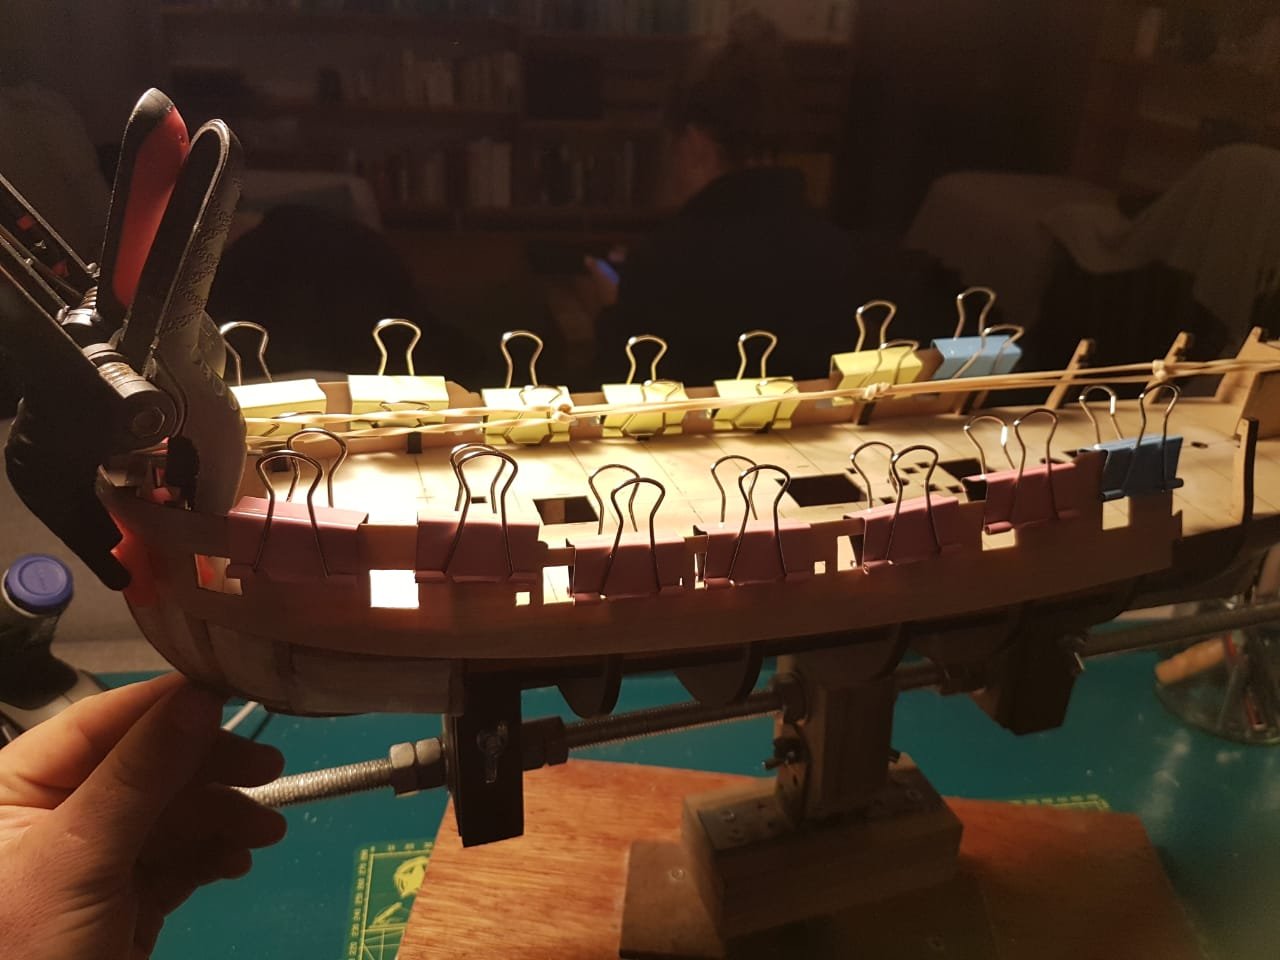
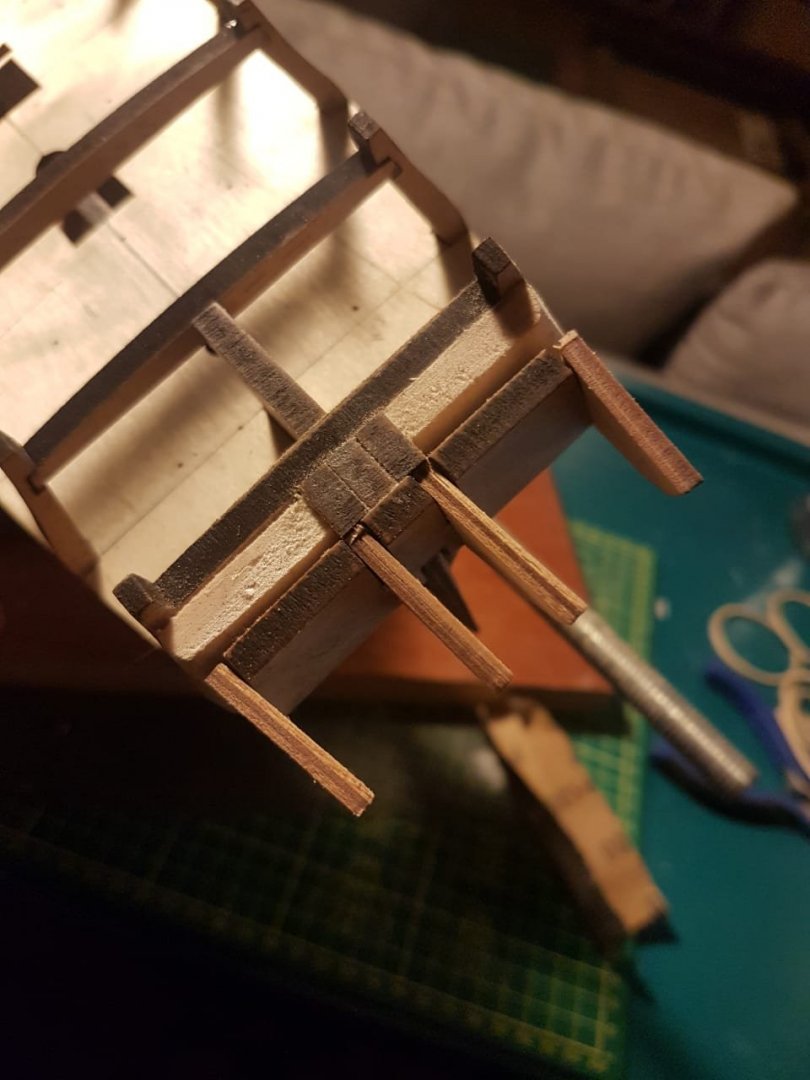
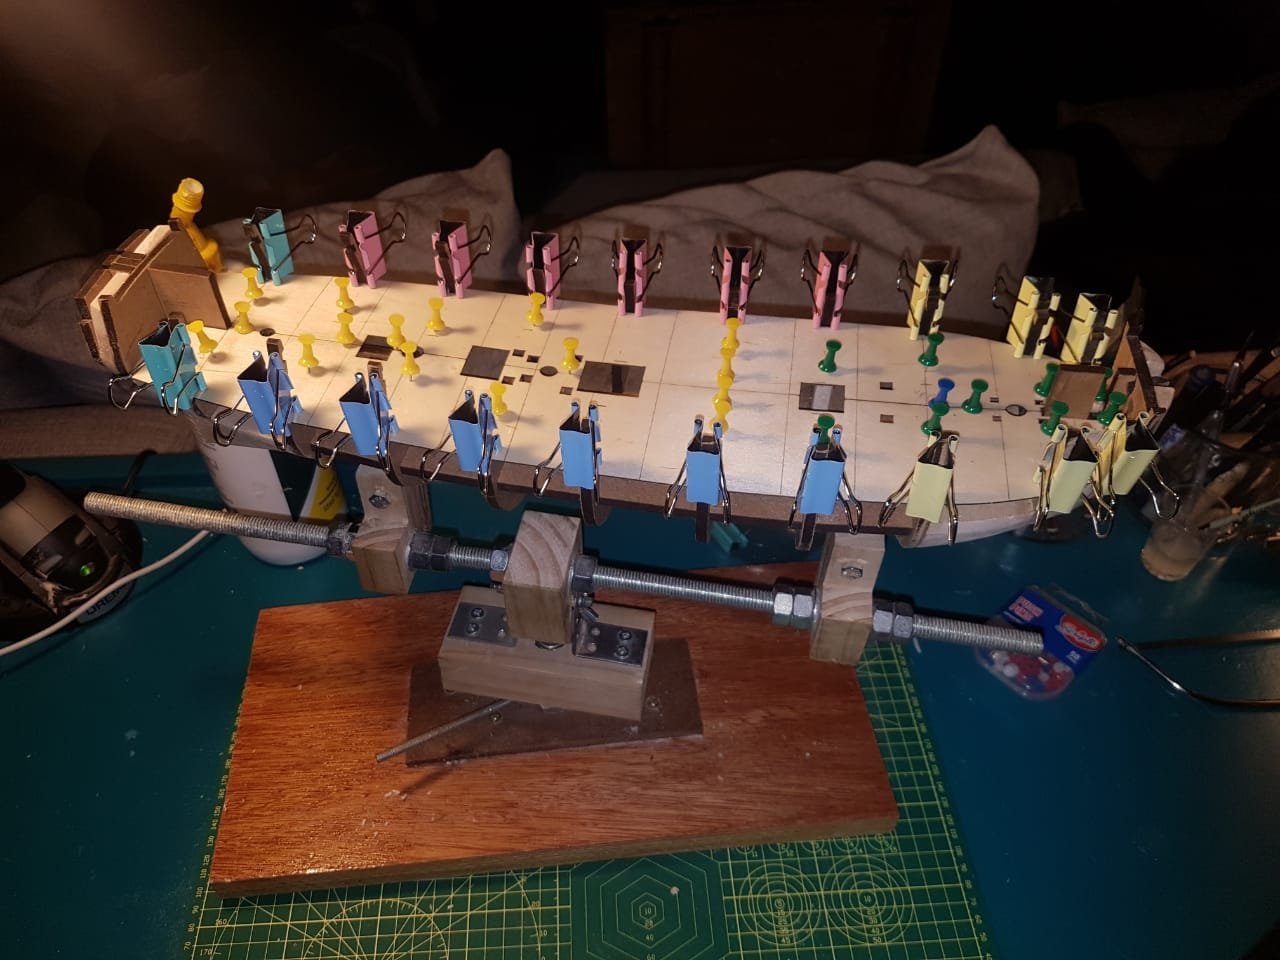
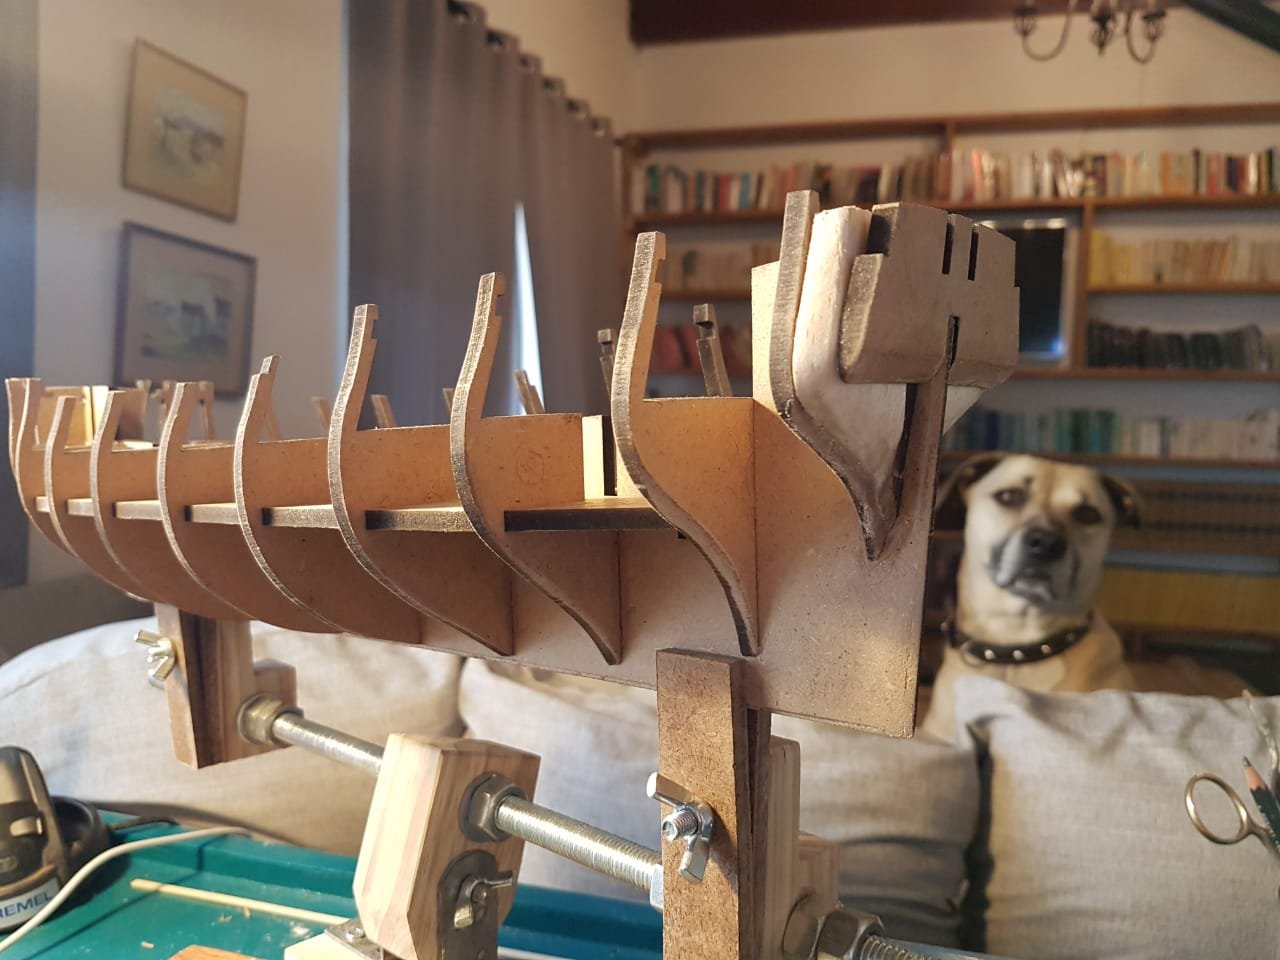
Day 9 Once my false gun deck had been dry fitted i taped it back together and marked out the lines for the 4 butt system deck planking I plan to put in . I decided(somewhat at random) to go with planks or 118mm long meaning that the spacing between pencil lines for the butts are spaced at 29.5mm. I also marked out the location of the bulkheads below for pinning so that the pins I installed to hold the deck down(after drilling holes for these pins) always went into something solid below the deck. Once the deck had been completely dry fitted and pinned I removed everything, applied PVA glue and pinned and clamped the whole deck down. It is worth mentioning that If you are going to use balsa filler blocks these can obstruct the path for the masts so make sure that you take this into consideration before gluing anything in. I also had to shape the MDF keel to take the mast and keep it vertical which has proven to be a bit of a nightmare with the balsa in the way. The false deck is now in place. and ready for the next stage. At this point do I glue the MDF bulkhead bridges in, then install the gun ports and then remove the bridges and then plank the deck? I am a bit confused about the order of things and this removal of bridges. The first Image shows where the balsa filler interferes with the access to adjust the MDF pocket for the mast as well as simply being in the way of the mast itself.


-
Hi again Spy Thanks for these photos. That really does put it into perspective. I might just do some really light treenails but lets see how it goes. I am a little confused about your build, I have been going over it and am i correct in saying that you first install the false gun deck, then you install the bridges across the bulkheads, then install the gun ports and then you remove the bridges between the bulkheads again? Thanks for the warning about steaming the gun ports, I was about to do this.
-
Day 8 Sadly today was spent on nothing for my build but research, which turned out to be pretty useful. I also started making a steaming tube so we will have to see how that goes. I wanted to do decking but I had to babysit a neighboring farmers child and dog. Hopefully day 9 will be better!
-
Your deck planking link has been added to my long list of tabs, I will go through it very carefully before I pick up a plank. Tree nails are a whole other kettle of fish. I can make a decision about this after i finish the planking right? If you dont mind me asking, how come you find yourself doing multiple pegasus/fly models? do you do this professionally?
-
Howdy Vulcan I am super torn about this issue. I heard that the thread can "fray" if you sand over this but it can be avoided by using linen thread? I am worried about opening up a can of worms that I will struggle to close. I will head back to your build logs to scrutinize this again and try and make a decision. I will keep you up to date on how this plays out.
-
Magical advice as always. I will do just as you suggested. I know what you are saying about the center line, I was JUST about to start taking down the center line and I realised that it would indeed cause major issues, changing the hatches, mast holes and centerline itself. I dont think planking would save this. Im sort of jumping the gun here(I assume my next step after installing the false deck will be to install gun ports) but I saw some stuff about a curves margin plank(basically a plank that runs in a curve around the perimeter of the deck), would this be more historically accurate than just running straight planks? I will be sure to only start using glue once my deck has been soaked and pinned and all that...then I think it will be time for those gun ports. Strange question but did your gun ports fit into the spout of the kettle you described? I am busy making a steaming pipe with an old coffee can, parts from an old kettle and copper piping. the problem is that the steaming tube is only 32mm so it wont be able to accomodate the gun ports. Can I just hold them in the path of the steam for the suggested 20 seconds and take it from there?
-
Thanks Jolley! Unless you can shape with a chainsaw Im going to try and rummage around for more balsa for now. even that gave me grey hairs. Ive been meaning to drop you a message but keep getting distracted. I will push that to the top of the list.
-
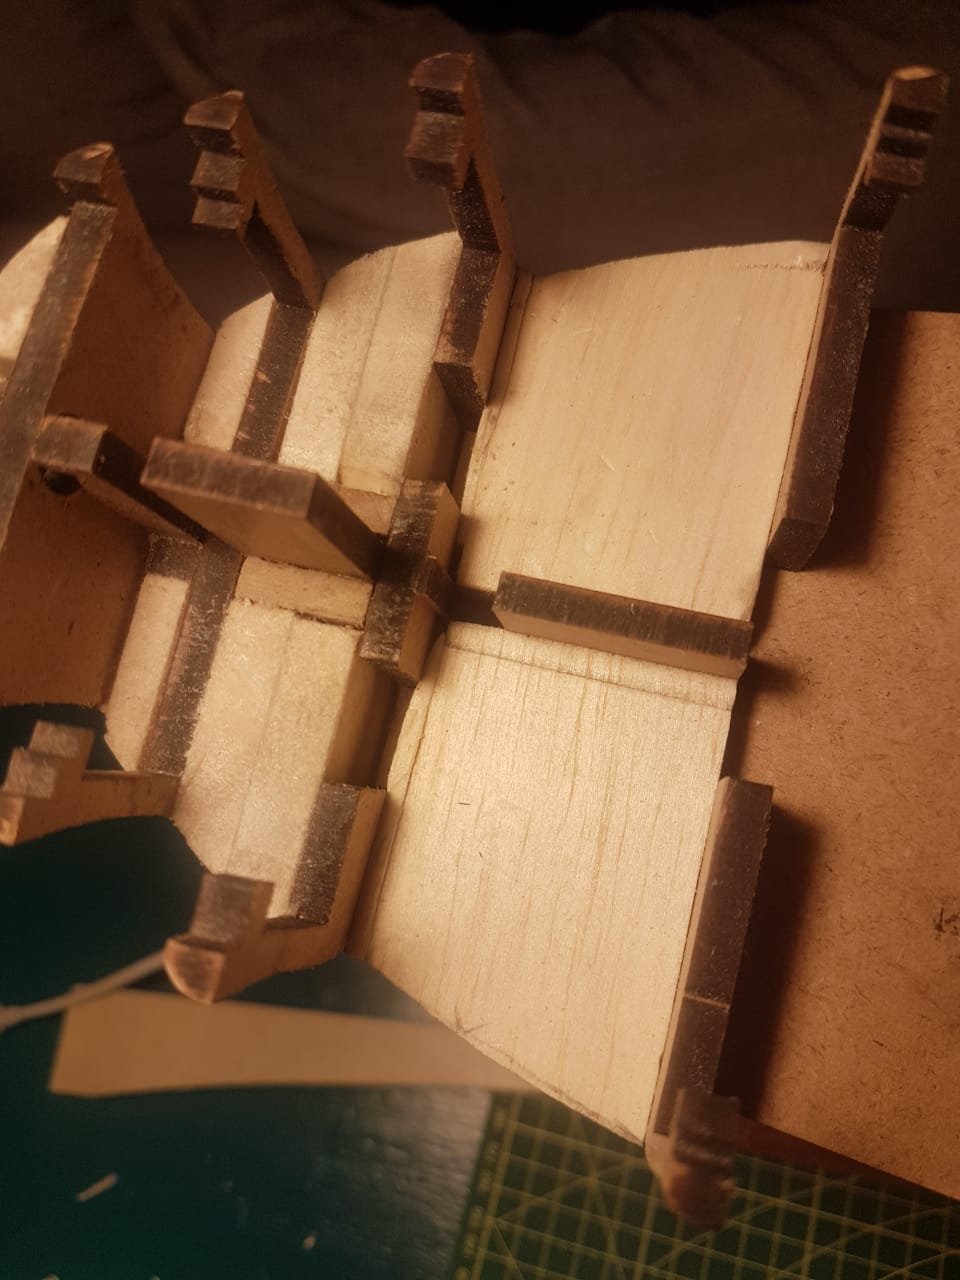
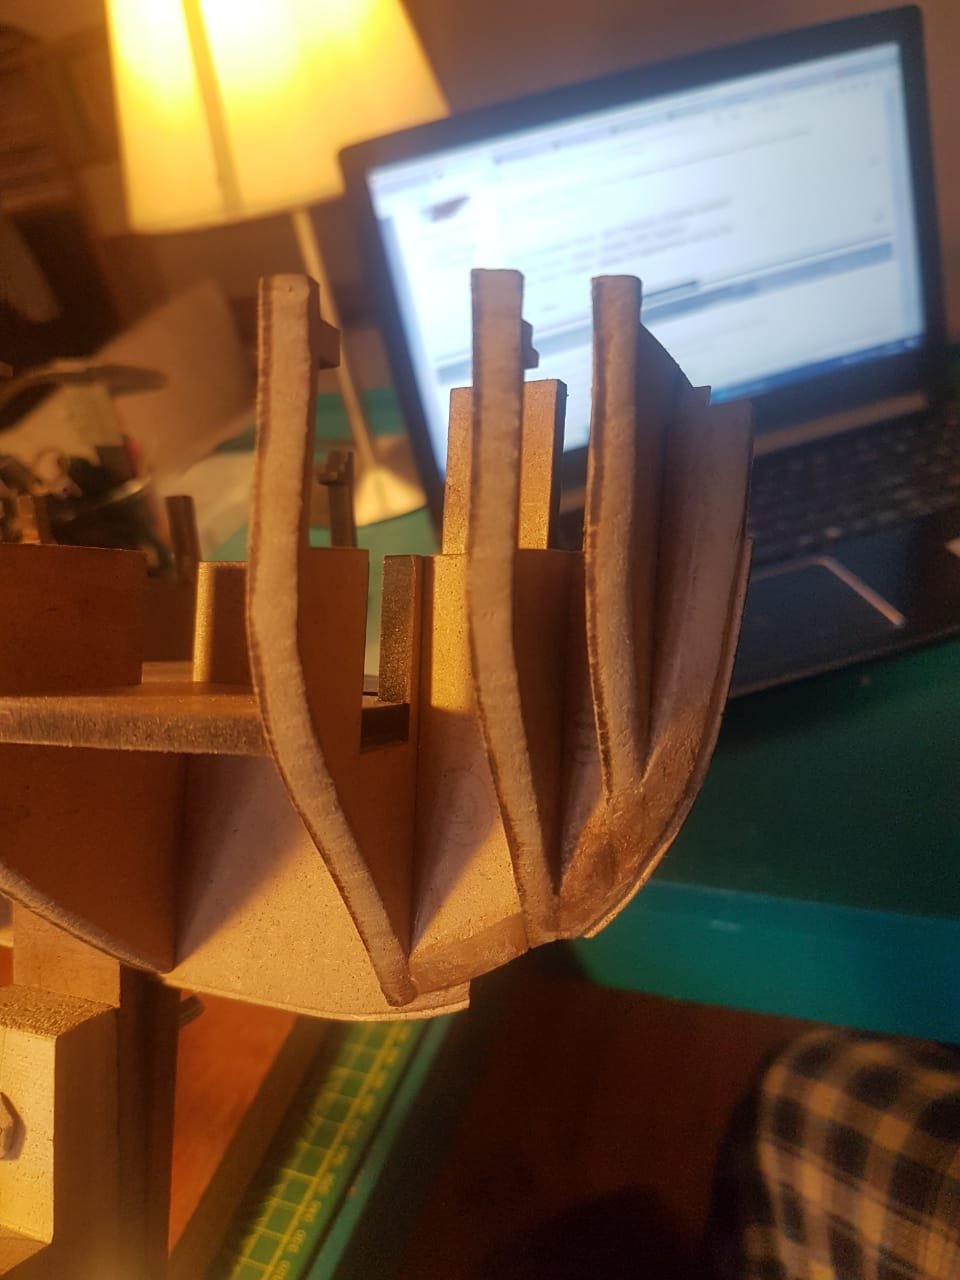
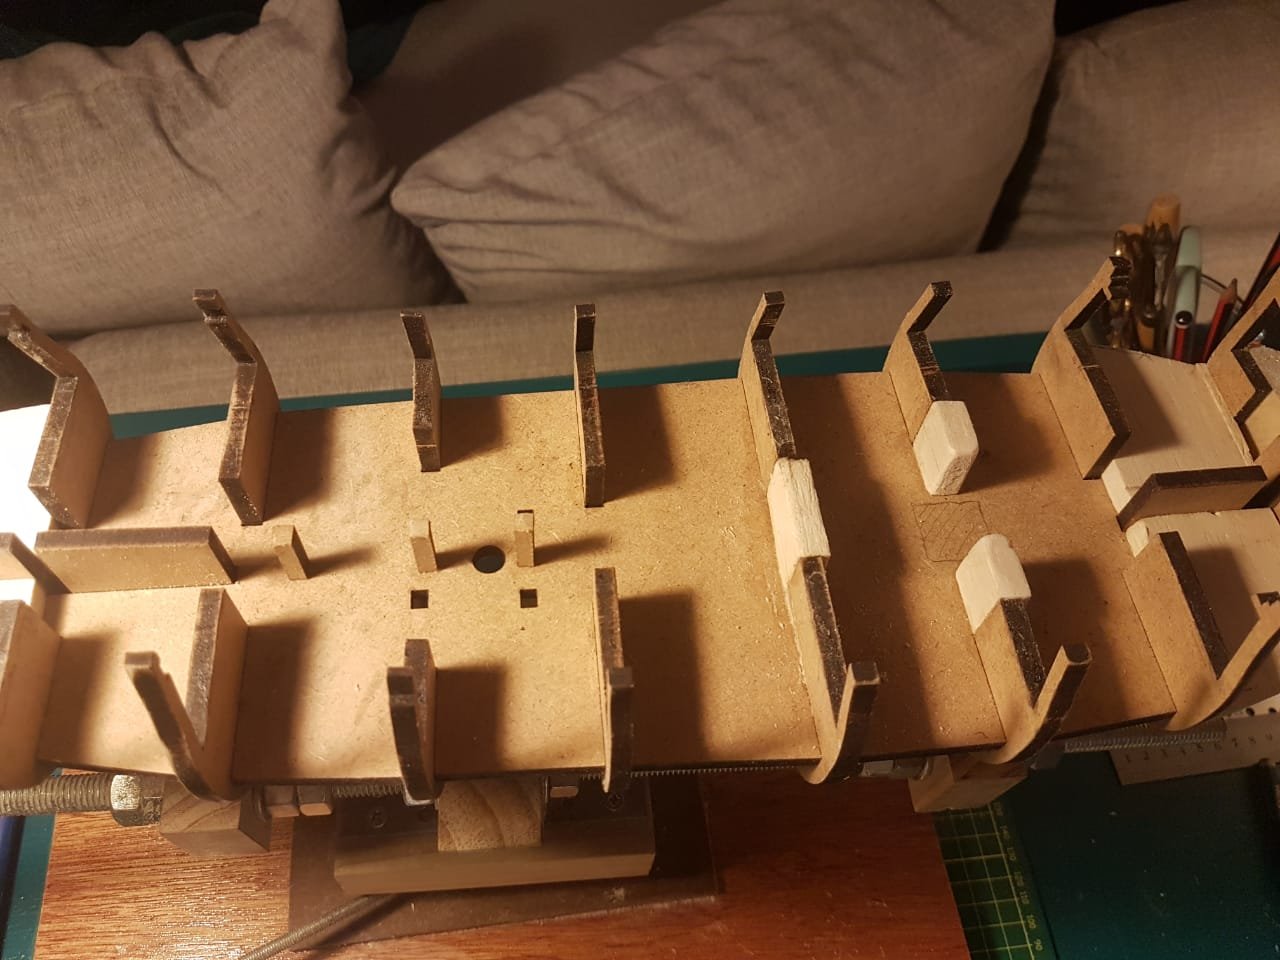
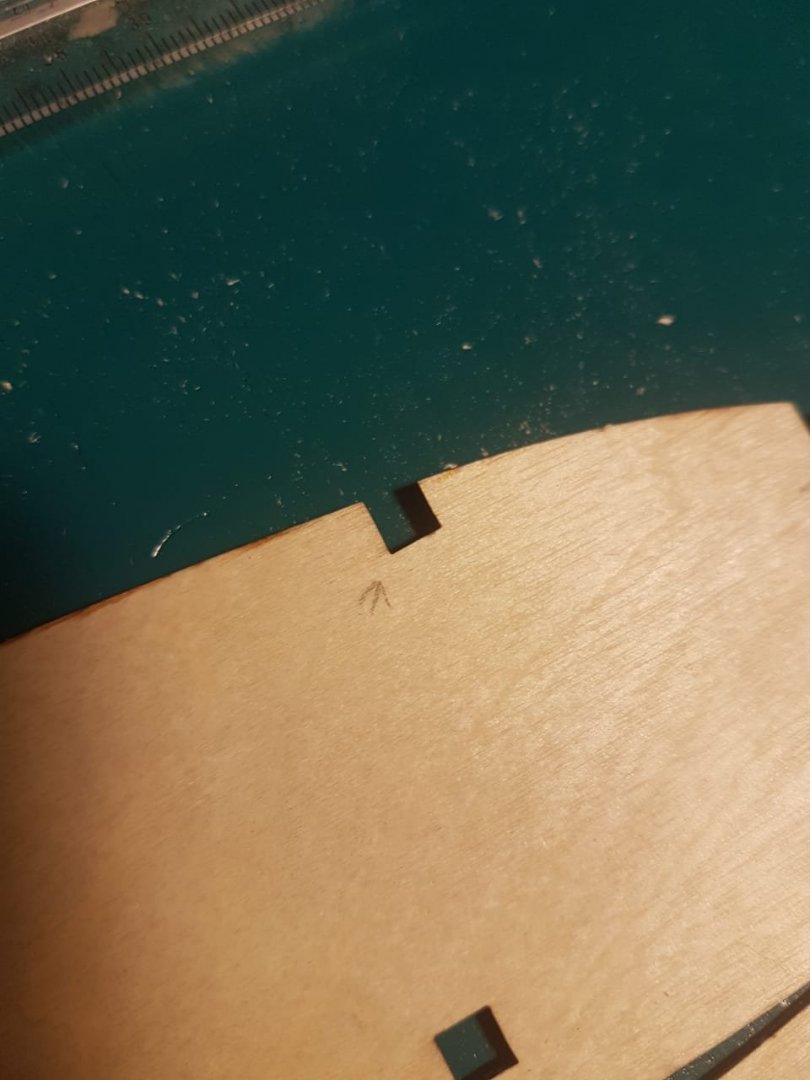
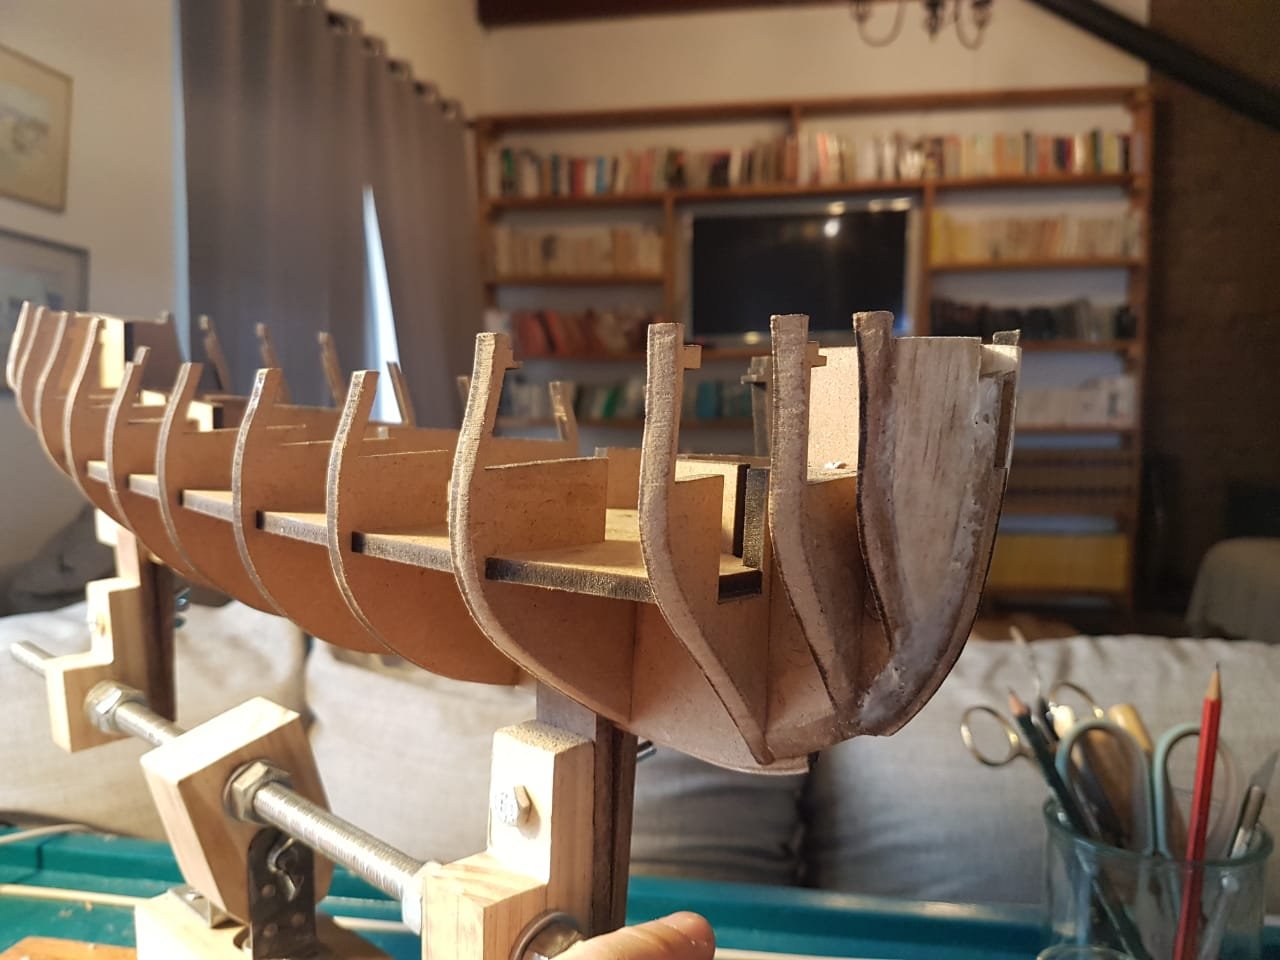
Day 7 First a question... should I be "quoting" messages when I reply to them in this thread? This was not a hugely productive day, I am busy building a second floor in my workshop and the undertaking is wearing me out a bit and not leaving me a huge amount of time in the evenings to get work done but this is where I am. I dry fitted the false gun deck. This required quite a bit of cursing to fit correctly. The cutouts for the gun deck need to be slightly modified to allow the deck halves to fit flush(I drew pencil arrows to in to indicate what im talking about). A note on this would be to do one cutout at a time with a small file and then re test the fit. i did this probably 20 times and suddenly it popped right in with no effort at all. I did however notice that this deck is somewhat flimsy. I recalled that some people were installing additional supports below the gun deck to add stability. I stole shamelessly and have done the same thing, putting balsa supports in at bulkheads 5 and 6 as well as MDF offcuts between bulkheads 7,8 and 9. I will also be reinforcing the edges of the hatches as seen on the build done by BlueEnsign. 3

-
Good morning again Spy I agree with you. I did some test with CA and I think there are a few very limited places where it is a great help(almost like a pin) but generally it does more harm than good in the hands of someone like myself. Im off to check your log on the matter of the angle of the stern strips right now. You presume correctly, although I would return my matchsticks to the manufacturer if they were that thin. It took a large amount of buggering around to get the deck to dry fit without breaking something in the process. I was thinking about what you said about the order of the work and it is quite logical to do it in the following order as you said.(this is just me thinking out loud here) 1. install and fair bulkheads(essential so that you have the basic shape that the deck will lie over. 2. install gun deck(i dont think you could even get it in with the gun ports in place) 3. install gun ports, attempting to do this after planking would result in some major adjustment of planks or a messy junction between the gun port panel and the planking. 4. at this point you could either install the hull planking or the deck planking. My inclination is to do the first hull planking(it doesnt matter if that gets a bit grubby, then the deck planking and then the second planking. I feel this order would keep the visible parts of the build as clean as possible. I asked Vulcan this question too but what is your opinion on the best way to do plank caulking for the decks.
-
Great tips! I am itching to do it but I dont think I will be planking the centre of the lower deck. I am anticipating making alot of mistakes and I dont want to run out of planking for the upper decks. It does bother me that it wont be happening but I have told myself that the tiny amount you can see through the hatch grating wont be worth risking running out of planking material for. I have read so many build logs and different opinions on this subject so Im a little confused but what is your opinion on the best way to show caulking on deck planks? I was leaning toward just marking the edges with soft pencil.
-
Day 6 Finally completed, the balsa fillers. This did present some challenges, firstly I only had one 8mm sheet of balsa so I had to stack, glue and cut up to 5 layers at a time. The glue I used made this stack of wood very hard to cut and shape but I am happy with the result. I also had a fraction too little wood to complete the filling I wanted to do. you will see that the area above the lower deck between BHS 10/11 and 3/4 are not completely filled. I had to make do with what I had and my remote location make getting more very very difficult. For some reason the photos make this work look slightly asymmetrical but i cannot for the life of me see this in reality. Again, this is my first build and I would appreciate any criticism. specially the kind that I would want to hear before planking over this. A big thank you to you guys who have helped me so much up to this point.


-
Hi Spy! I started replying to you and then got an urge to check out your link again which navigated me away from this page and my reply so Im starting again.. Thank you so much for your attention to detail and help. your work is great to see and you are potentially saving this kit from my ignorance. You preempted almost all of my questions. I do have 2 rookie questions for now, Im sure I had more but for now they are gone. 1. What kind of glue do you use for the hull planking and gun ports. 2. Is there enough excess wood in the kit to plank portions of the lower deck? i would love to as you suggested but I am worried about having insufficient timber and getting caught. This is South Africa so getting new planking will be a nightmare. I am about to start leveling bulkhead No. 9 as per your warning. That will be my sole task for the night, its been a long day. Adios! Haiko
-
Hi Vulcan This is great input. I might just make a custom steaming tube. Just because I enjoy crafting this kind of thing. The keel clamp in my photos is one of those things. I like these minor challenges. Regardless I will be sure to work with completely dry planks and exercise all the patience I have. Cheers Haiko
-
Day 5 I opted to begin with Balsa wood fillers for this build. I mostly did this because it is my first build and I felt it would be a good learning exercise. I have limited beginners advice at this point other than to work as slowly as possible. I probably wont be getting a Nobel prize for physics for pointing this out but its obviously much harder to build back up a piece of wood that has been cut back too much than it is to just shave a hair more off to make things fit. I also filled some of the gaps with a wood glue and balsa dust mix. I found that the balsa dust doesnt actually work nearly as well as the MDF dust for this application. It is also worth repeating the fact that some of the BHs are not entirely level where the deck will be installed. SpyGlass was kind enough to point this out to me and I found that BH No. 9 was slightly raised for this. I would suggest that and sort of variation in alignment be corrected before beginning with fillers or you will end up doing double work. This is my progress so far. for the record it really bothers me that the work looks so sloppy on the photos but in reality it isnt THAT bad and the shape seems decent. I think this will provide a solid base for planking and the somewhat messy appearance will not affect the final product at all. (for those that are interested the handsome fellow supervising progress is one of my 5 dogs, Cobra)
-
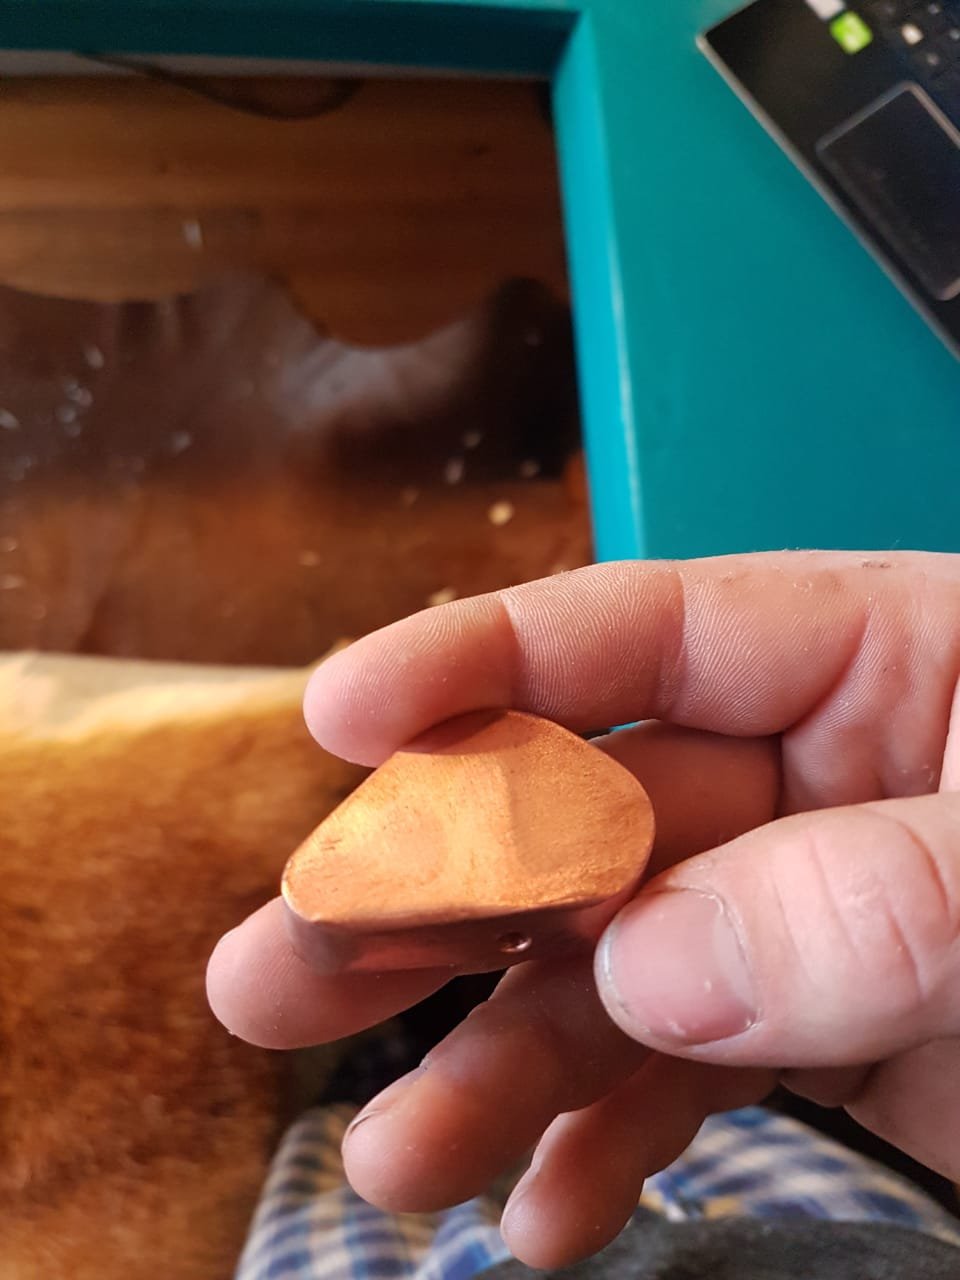
Vulcan! Good morning sir Thank you for this advice and the link. I have already started using it for the creating on filler blocks. I will be referencing it plenty in the future. I forged a copper head to go onto an adjustable soldering Iron for plank bending. Do you know anything about this method? is steaming superior and if so what is the best method to steam a plank. I will be sure to test the "no stupid questions theory to its limits!

-
Top of the morning to you Spy! Thanks again for helping me through this build. Your advice has saved me several times already. I will definitely not fit the walnut stem until all the planking is done. I love the Idea of bending around the bow(excuse my sloppy use of nautical terms, I got them from working on oil rigs which isn't quite nautical college.) I ended up deciding to start with the balsa infills. Not so much because i feel they are needed but rather because i feel like they are a good skill building exercise. I would like to one day(in the distant and theoretical future) do scratch build and this seems like a perfect baby step to start teaching me about shaping etc. Dont worry I wont attempt to craft a double plank rabbet, I can only imagine the complications that could create. Your first planking looks beautiful. It almost seems a shame to cover it. On a vaguely related note, when I get to the gun ports, is the optimal order of installation as follows: Deck, deck planking, gun ports and THEN first hull planking? also you said in your build log that the gun ports dont fit. I unfortunately didnt fully understand the correct fix for this? must I shorten the ports and then recut the puzzle joint. I will do my utmost to follow your planking/rabbet guid but you may have to tolerate alot more questions when I get there. It seems prudent to ask your views on wood filler at this point. do you stick to a glue/sawdust mix or do you use actual fillers on your work. Its good to know that I am making decent progress, I am very lucky to be in a situation where my time is my own between 1730 and 0800 every night. Please tell me if the quality of my work is not where it should be and I will be sure to take a step back and slow down. I hope you have an outstanding day.
-
Day 4 Progress has been slow but enjoyable and I am learning, mostly by error, all the time. At this stage I increased the fairing on the bulkheads as suggested although I probably still need to increase the fairing on the stern BHS. I have also shaped and fitted the blocks. My next step is to install the balsa fillers, I am hoping these will give me a better idea of how the lines will run and assist with further fairing. I do have some concerns about the bap between the rabbet and BH 2/3 as pointed out with my grubby singer in the photo below. Is this going to be a problem when planking? I was also wondering what your views are on using standard hardware store woodfiller to fill small gaps around the balsa wood etc when Im done(all stuff that will ultimately be planked over.

-
Hi again Spy As much as I like the look of the mounts you did I think for a first build it is best that I don't complicate things too much and I just go with the cradle option, this is mostly because Im a complete newbie and Ive already glued the bulkhead pieces in place. . I will definitely do this for my next build. I will however take your advice on pre-pinning the keel portions in place once I have sorted this balsa issue out.
-
Hi Vulcan! Thanks for the encouragement. Funnily enough my first question for the day was going to be about the balsa between bulkheads. You have answered my question for me. I will begin with that this morning after my post. I think it will also give me a better idea if my fairing is correct. cheers Haiko
-
Hi Jaager This is actually a very valid point. I do a fair amount of carpentry and the moment you cut anything other than a dead straight plank the wastage is remarkable. I can only imagine what that must be like when you a cutting hundreds of curves that must all be perfect.(Im guessing a fair amount of the wood winds up in the bin too when mistakes are made). Luckily for old Jolly I hope to farm here for a long time and there is a almost limitless amount of wood here for him whenever he would like it.
- 14 replies
-
- 3
-

-
- south africa
- wood
- (and 1 more)
-
Good evening sir! Thank you so much for your kind offer. I would love to give the drill press a good home. If you would like to come out to the farm and choose your trees and wood you are most welcome to. This is a guest farm so there is plenty of room if you would like to stay the night. Alternately I can just pick and choose a load of good stuff and meet up with you next time I'm in Cape Town, which should be fairly soon. I am still working my way through your build log. A really great experience so far. I am highly impressed by your work.
- 14 replies
-
- 3
-
-
- south africa
- wood
- (and 1 more)