
The_bitter_end
-
Posts
116 -
Joined
-
Last visited
Content Type
Profiles
Forums
Gallery
Events
Everything posted by The_bitter_end
-
 Good Morning Vulcan This post and your build log are going to be my primary sources for planking, you have a great approach. I was wondering how you determined the plank lengths for the hull planking. I am struggling to find information on layouts etc. I would like to do what you did and plank to scale but I dont know how. Also im an absolute ruddy chop and i went and glued the stern keel piece in place for some weird reason. Now i have to remove it AGAIN!! Thanks so much for your help and patience. Its brilliant.
 -
Hi Spy Thank you for this really useful post as always. It really helped. Now that I think about it I recall having seen (and even discussed) how you approached first planking. I somehow forgot about this. I have however now followed yor advice as far as possible and sanded back to where things should be. ' Please take a look and let me know your thoughts if you do have a moment. thanks again!
-
Hey there Lazy Thank you for the compliment its really nice to hear, especially for a rookie. I followed your first piece of advice and sanded back and then decided that I was going to be a perfectionist and cover the whole first planking in a layer of sawdust and PVA(a decision that I deeply regret as it took about 3 days to sand off. I hope you stick around and continue to give me advice where you see fit. cheerio! TBE
-
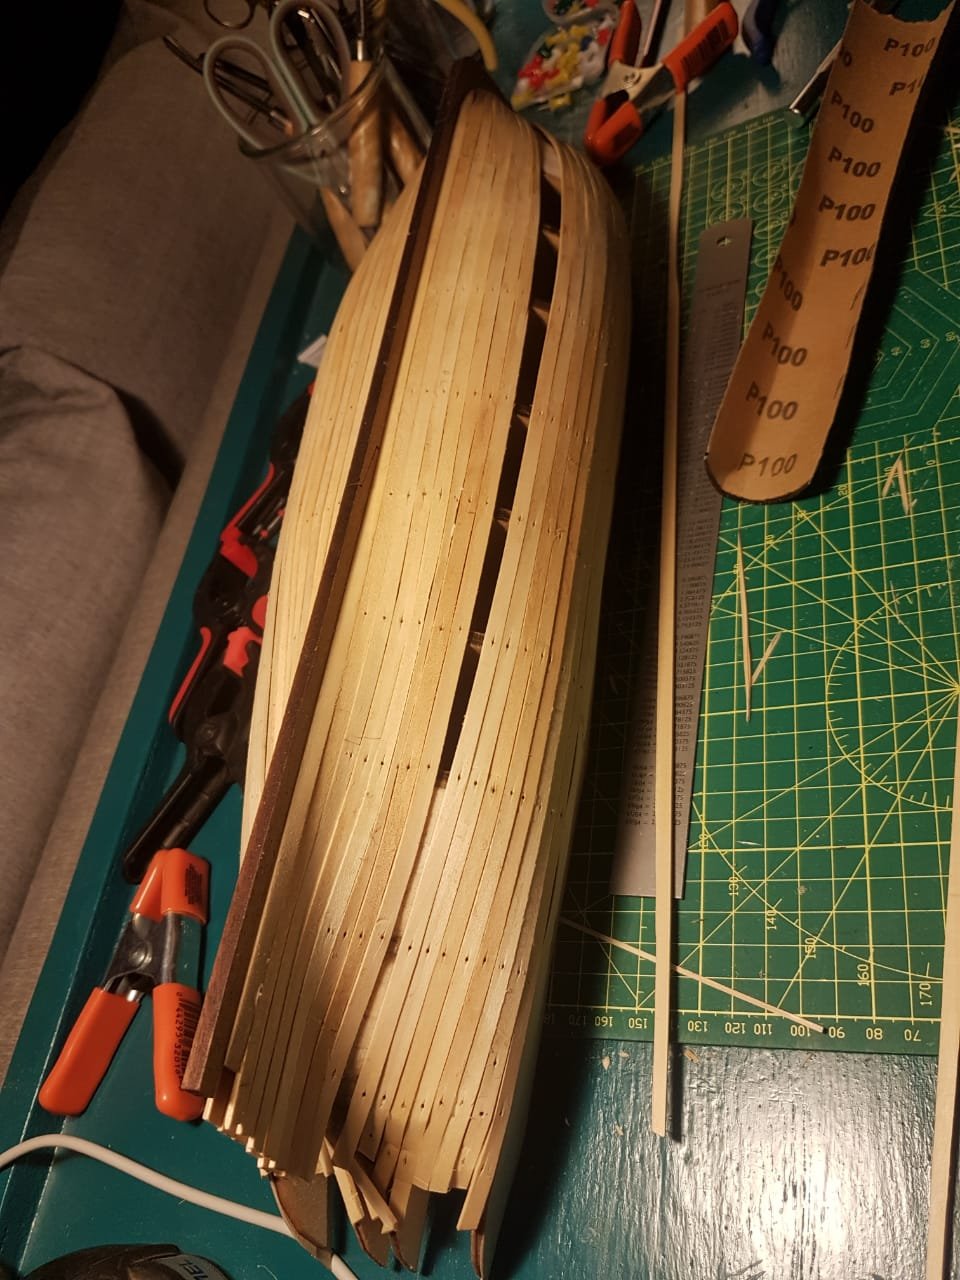
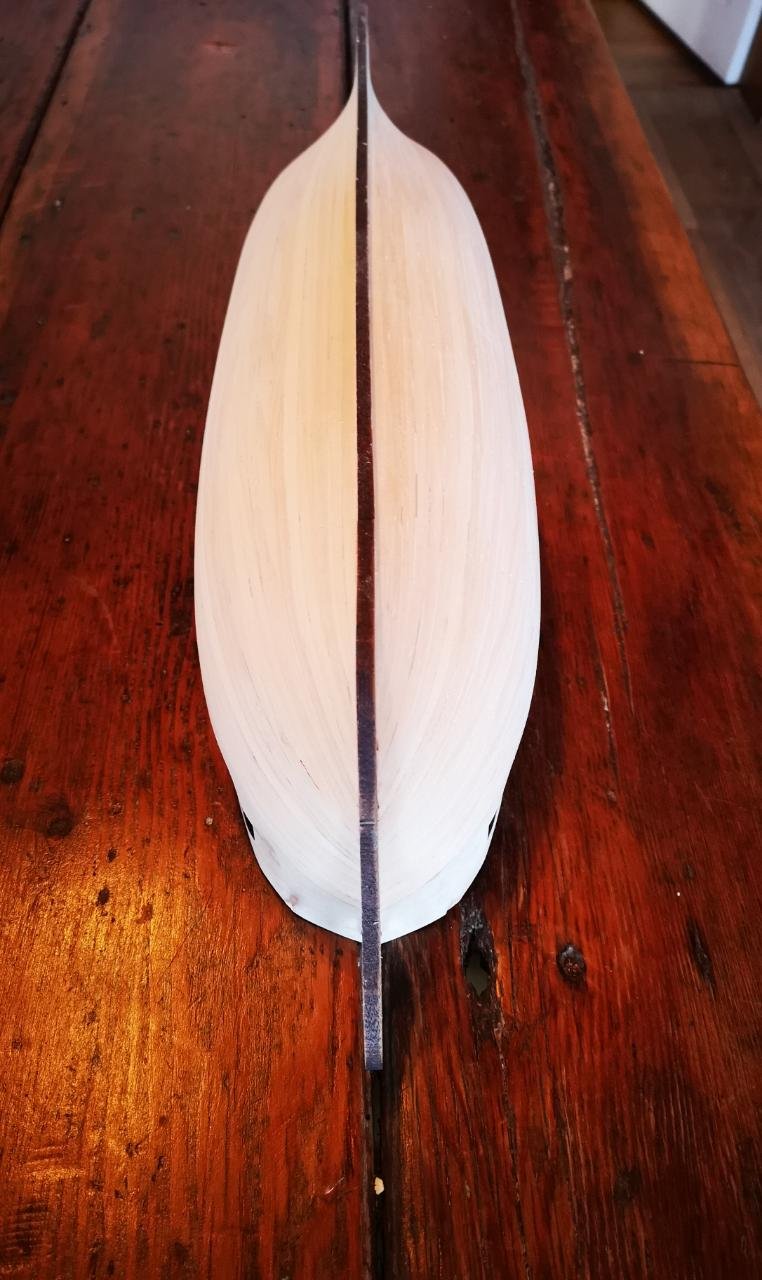
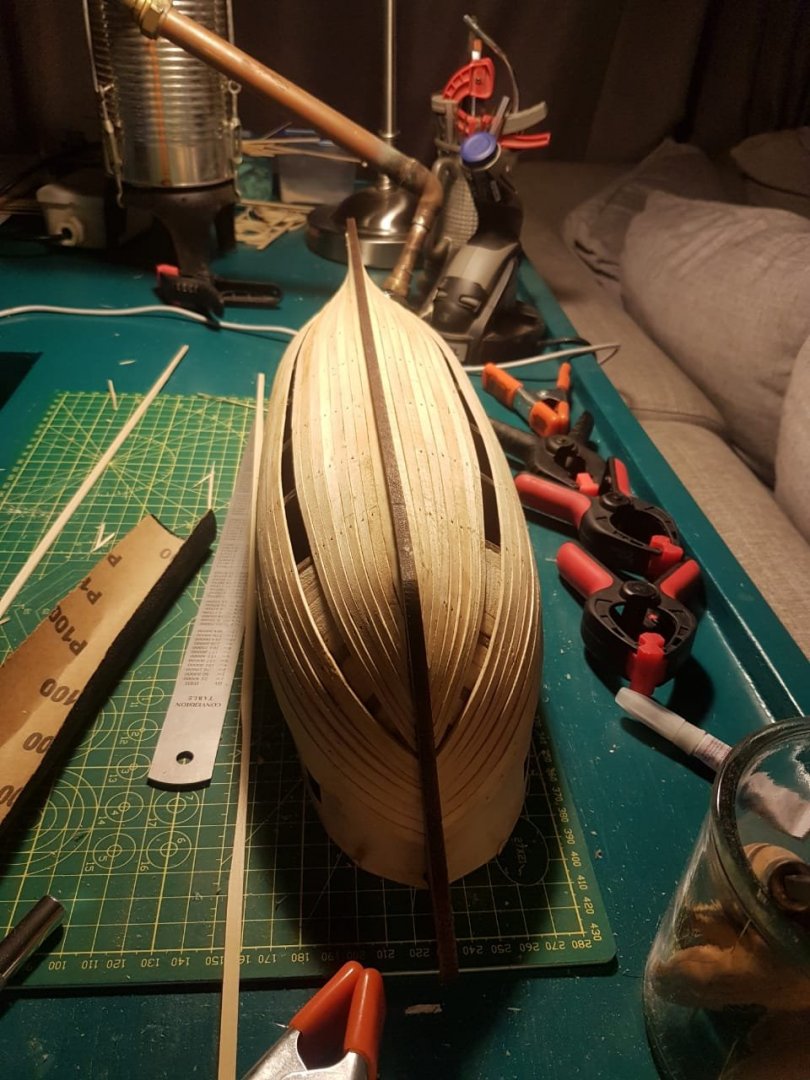
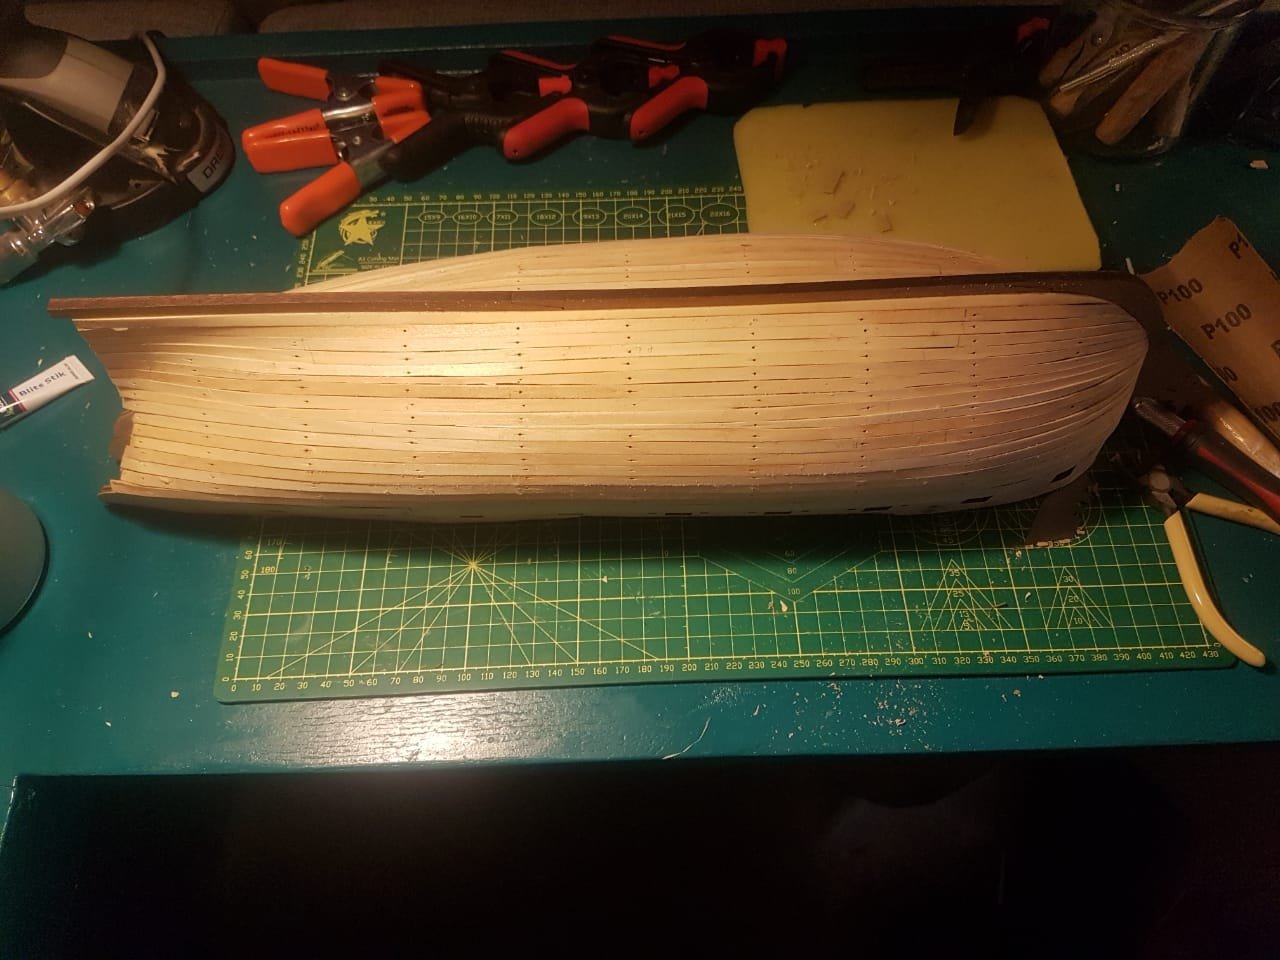
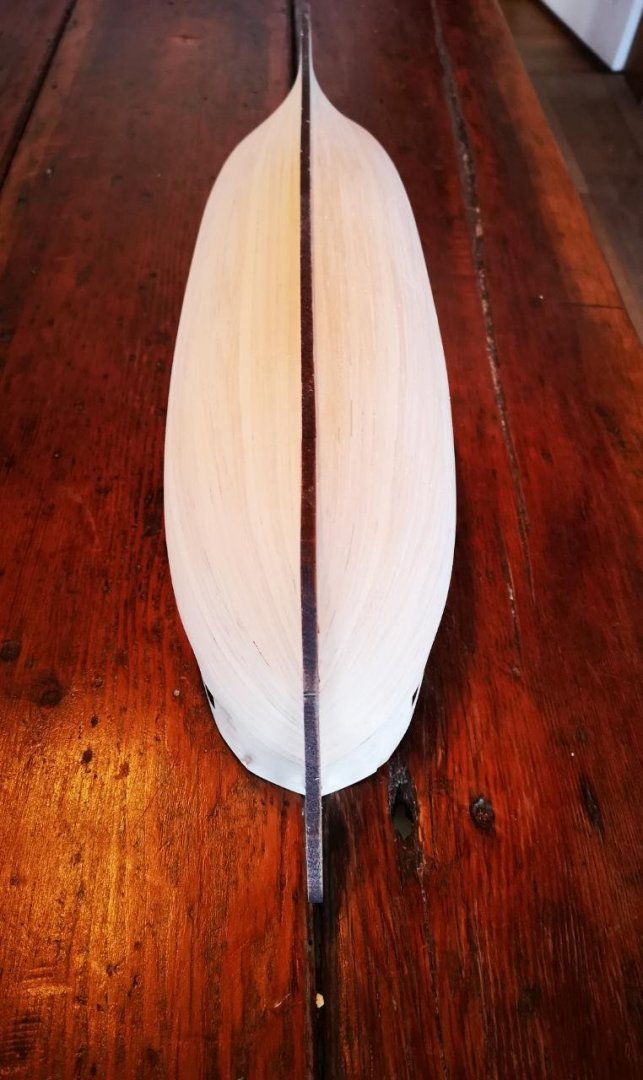
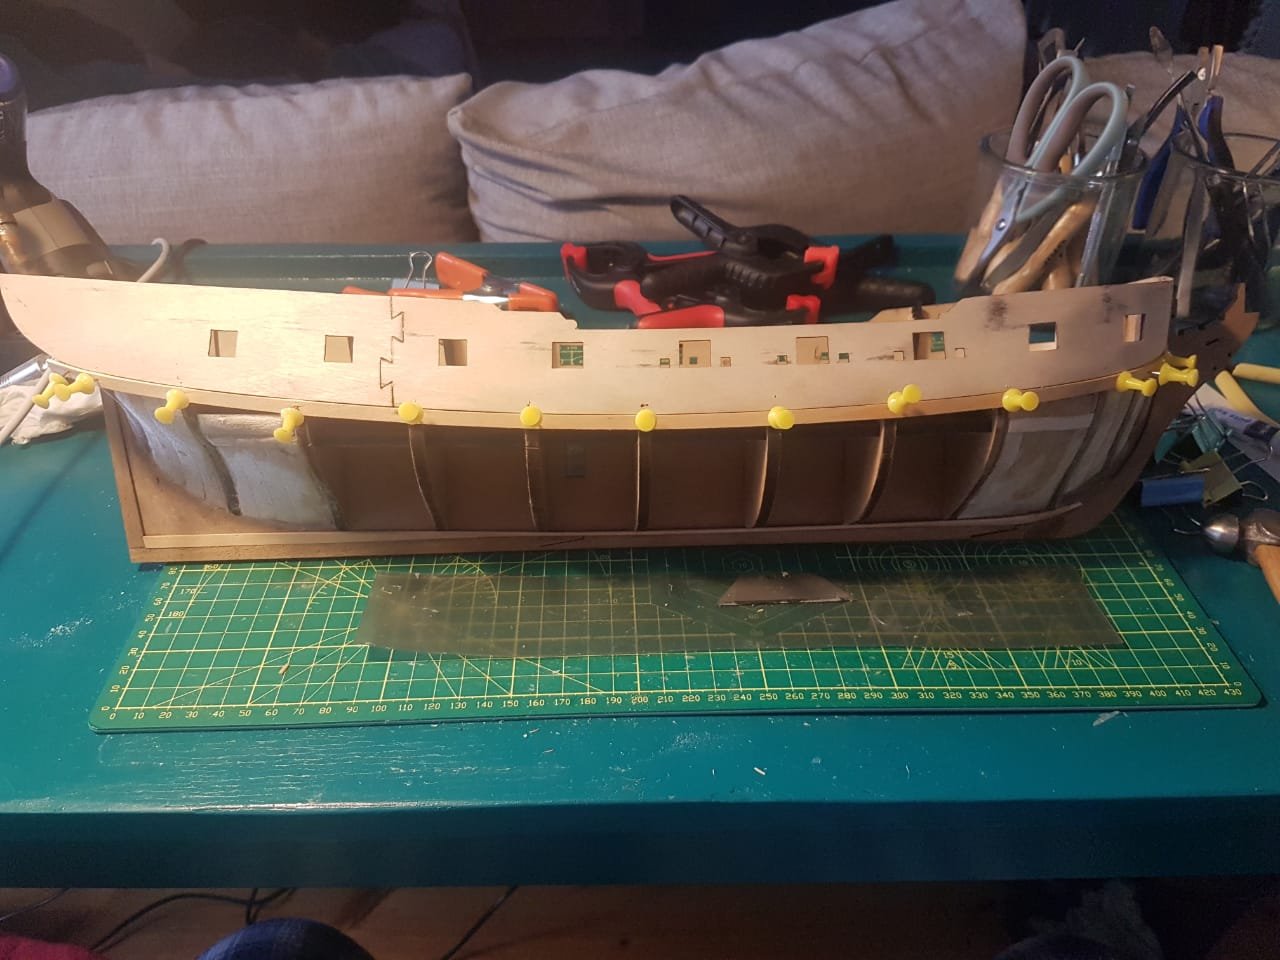
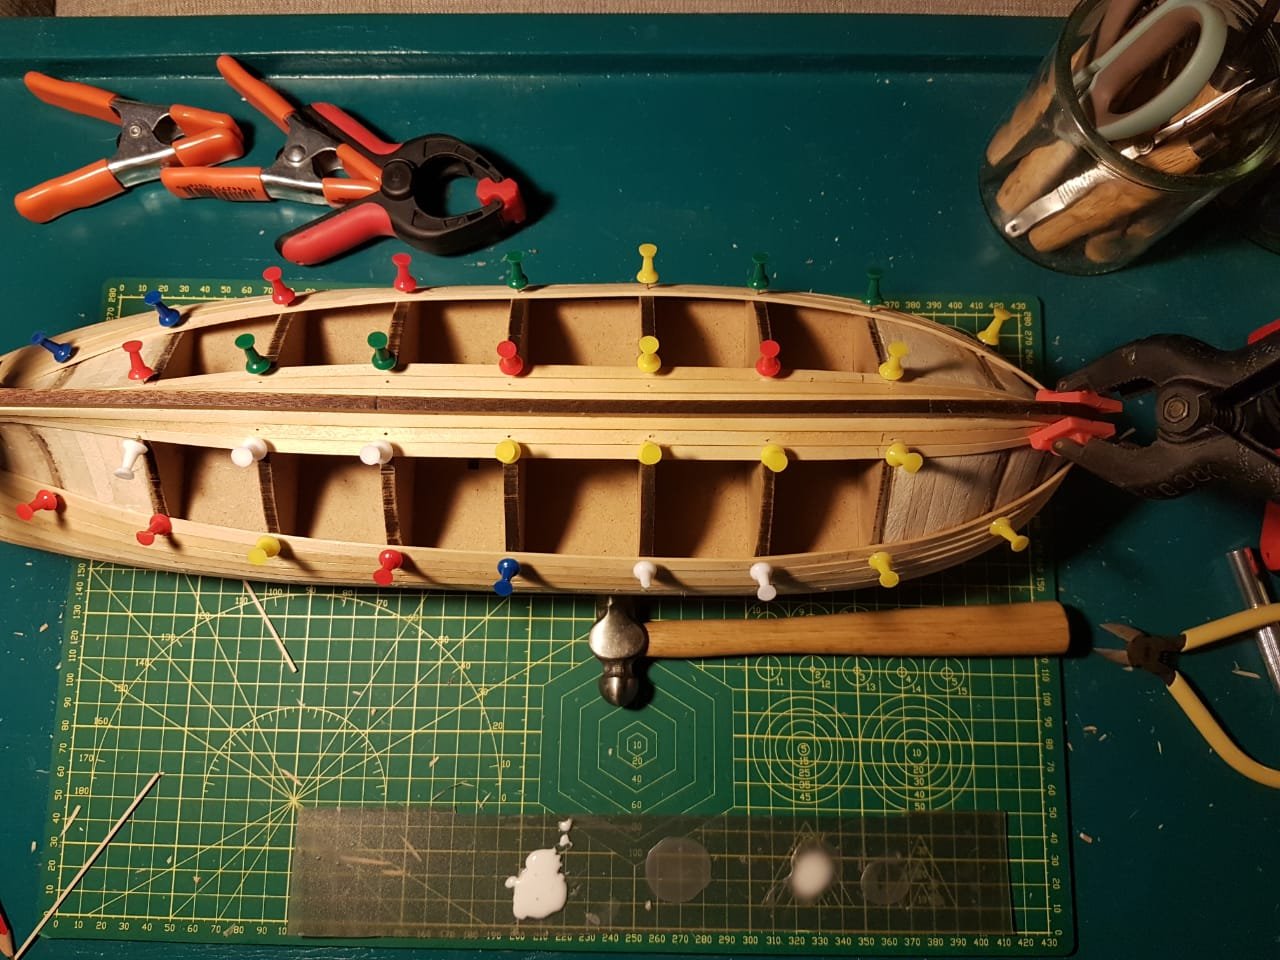
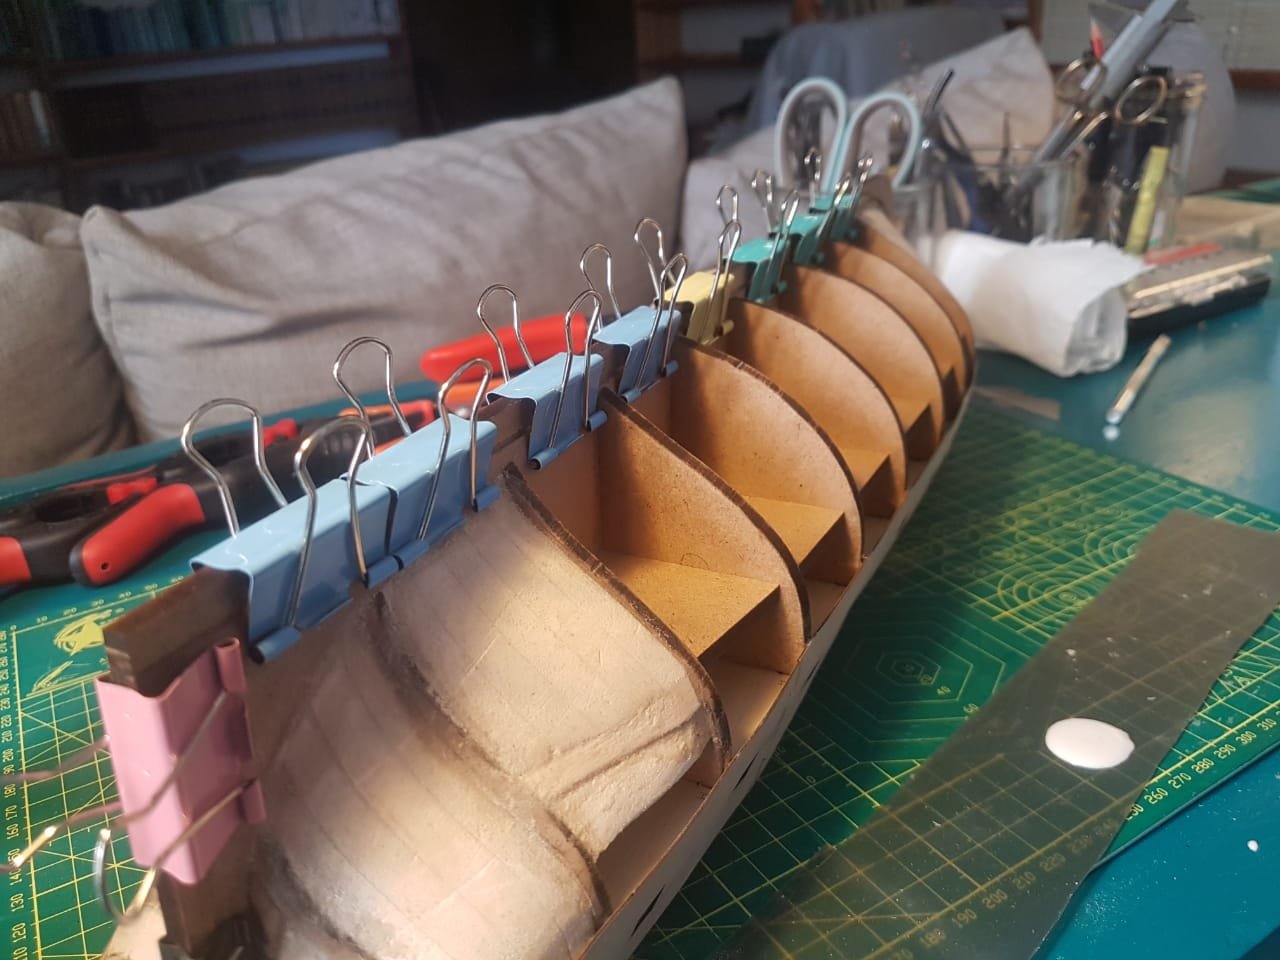
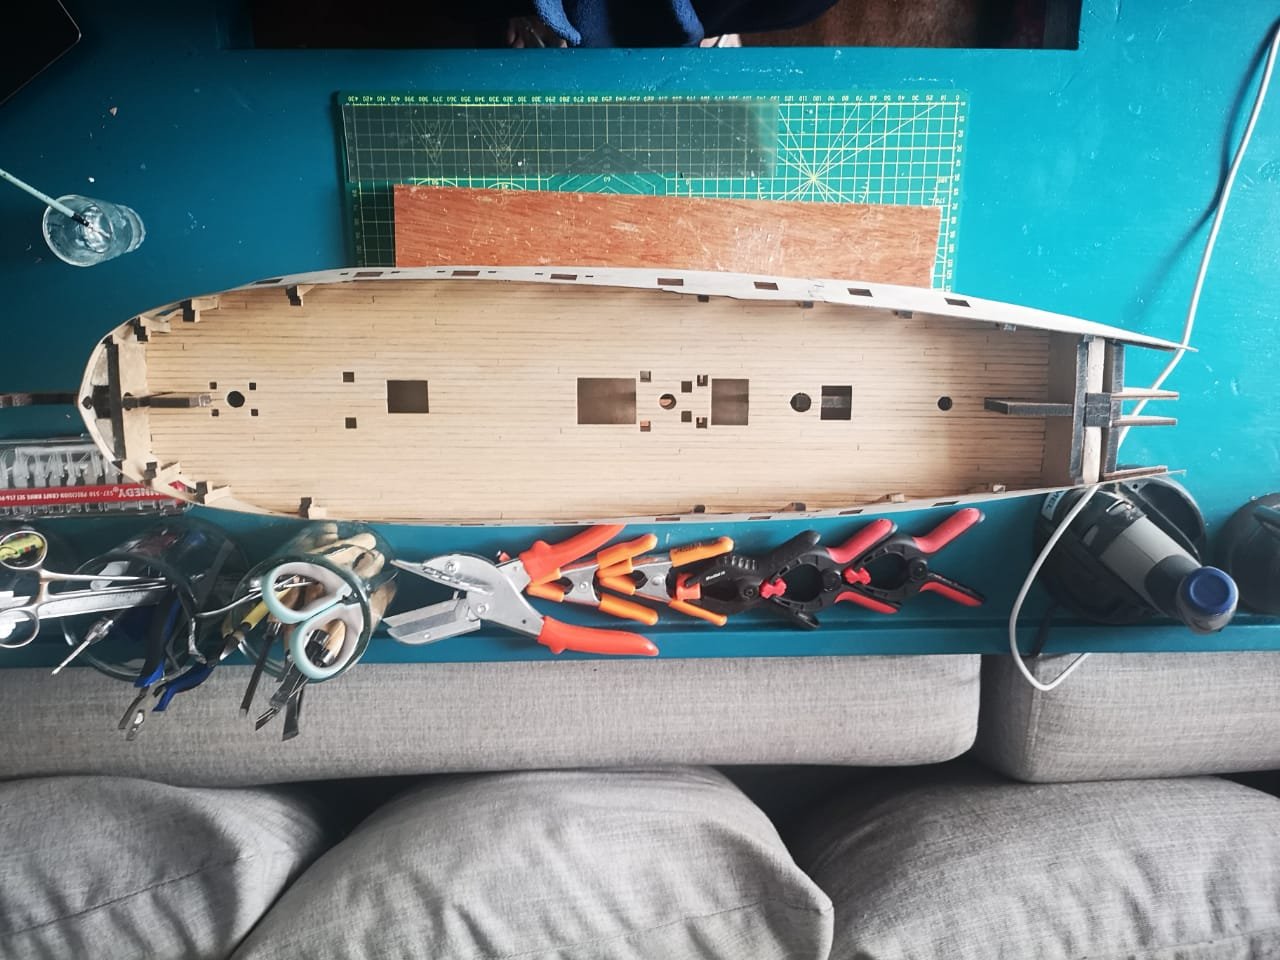
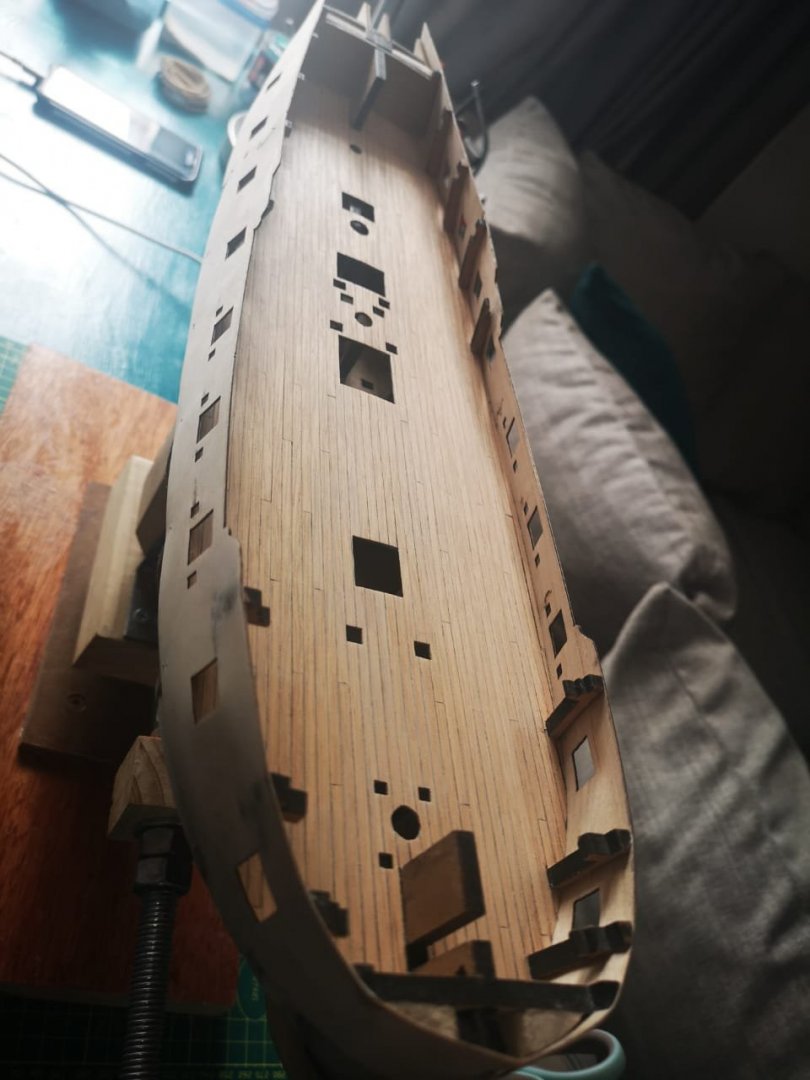
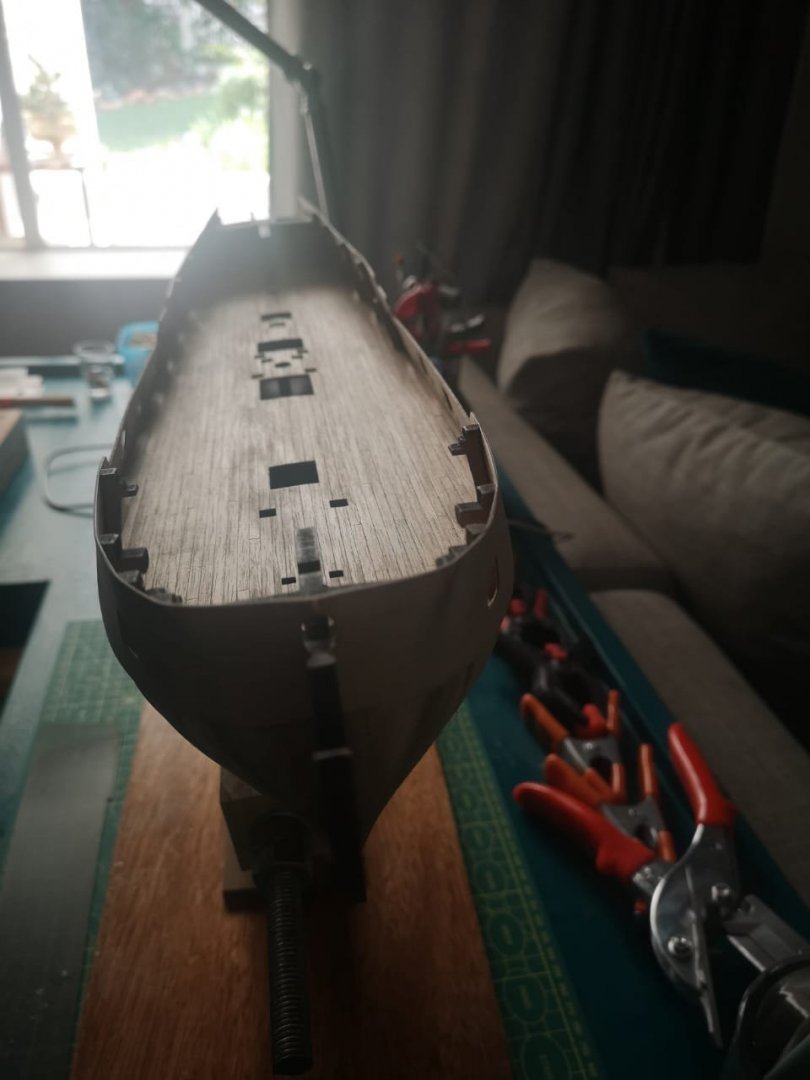
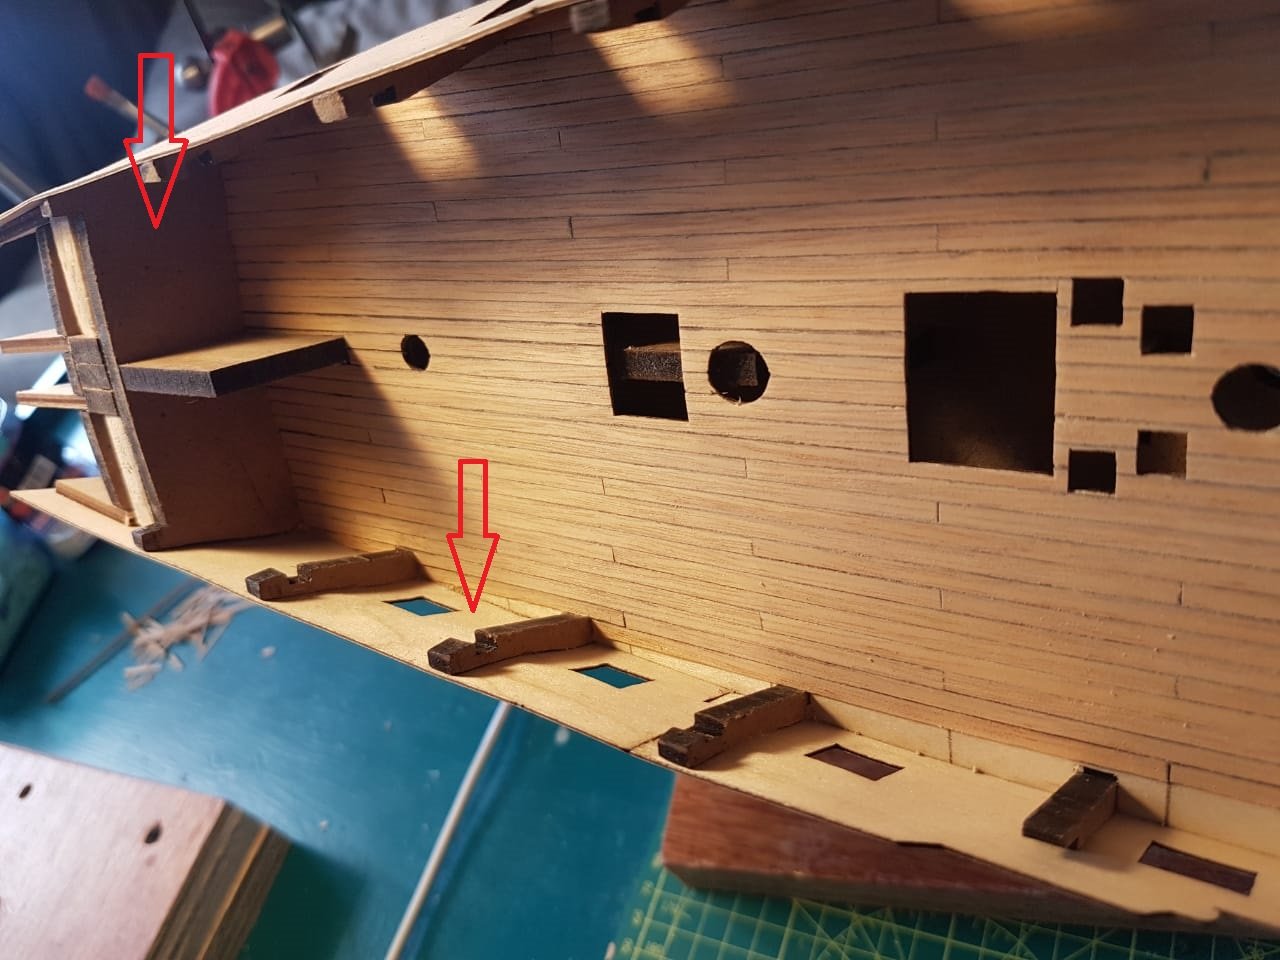
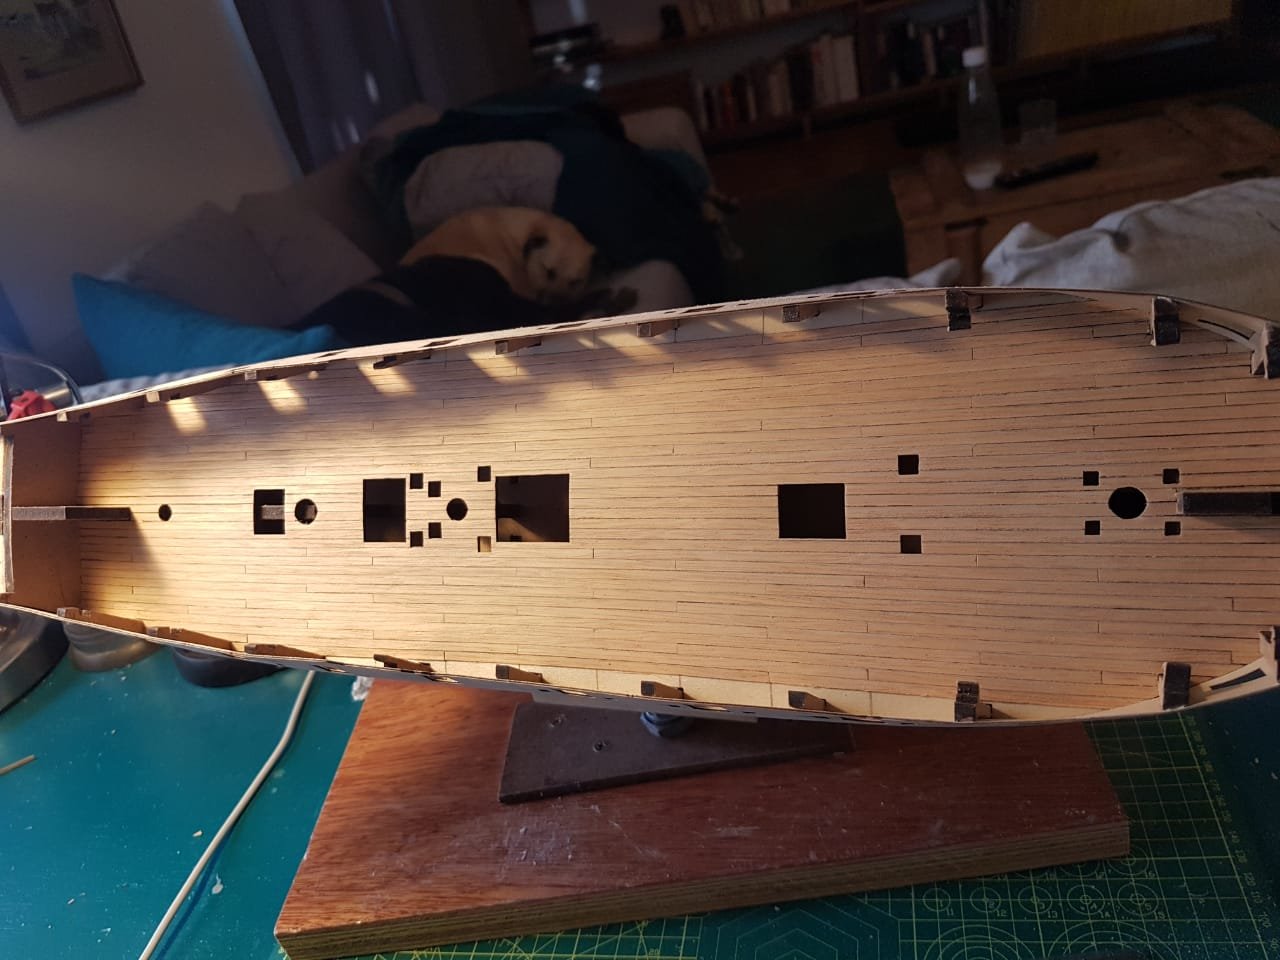
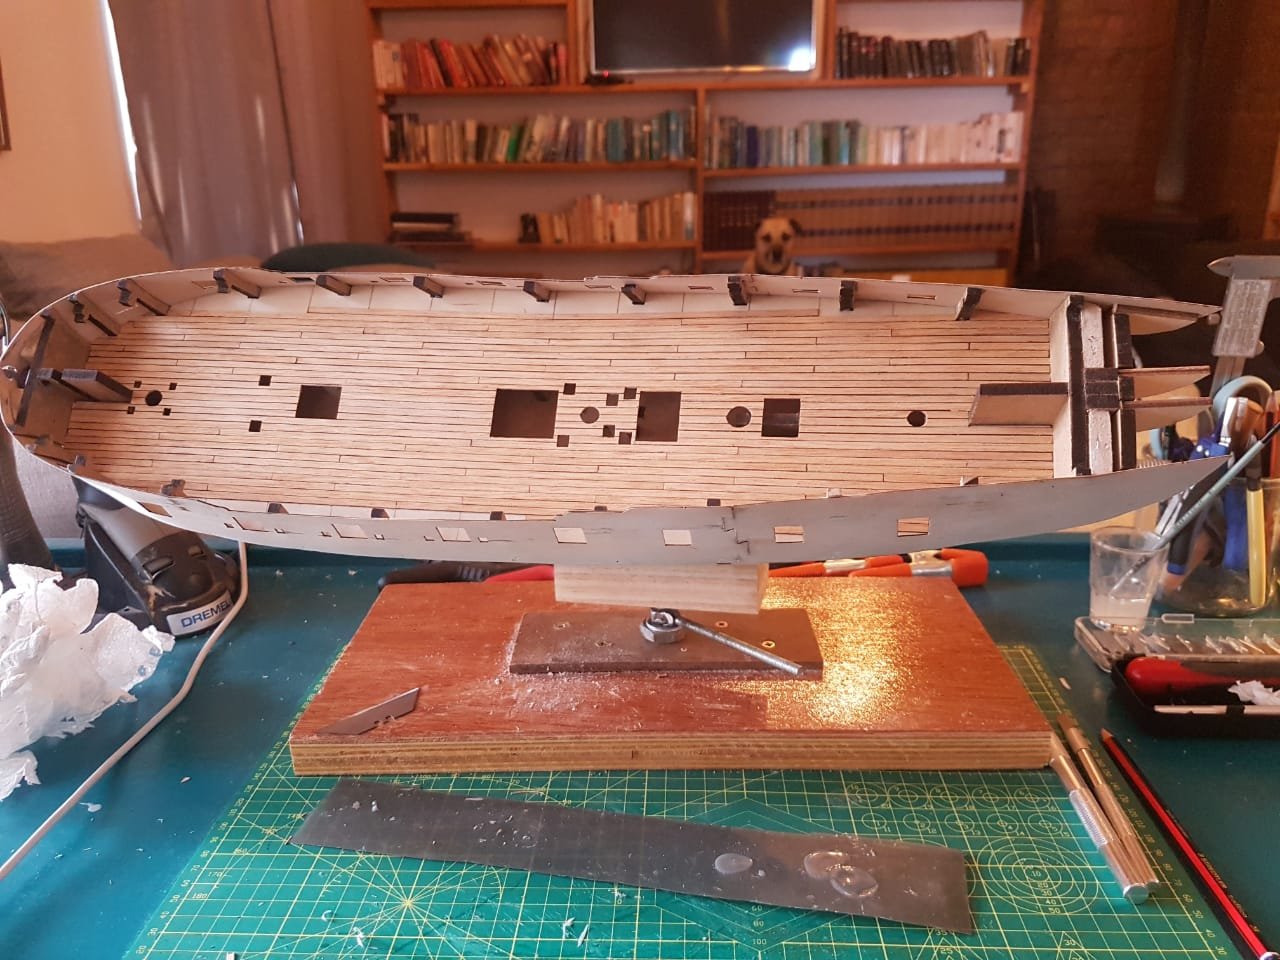
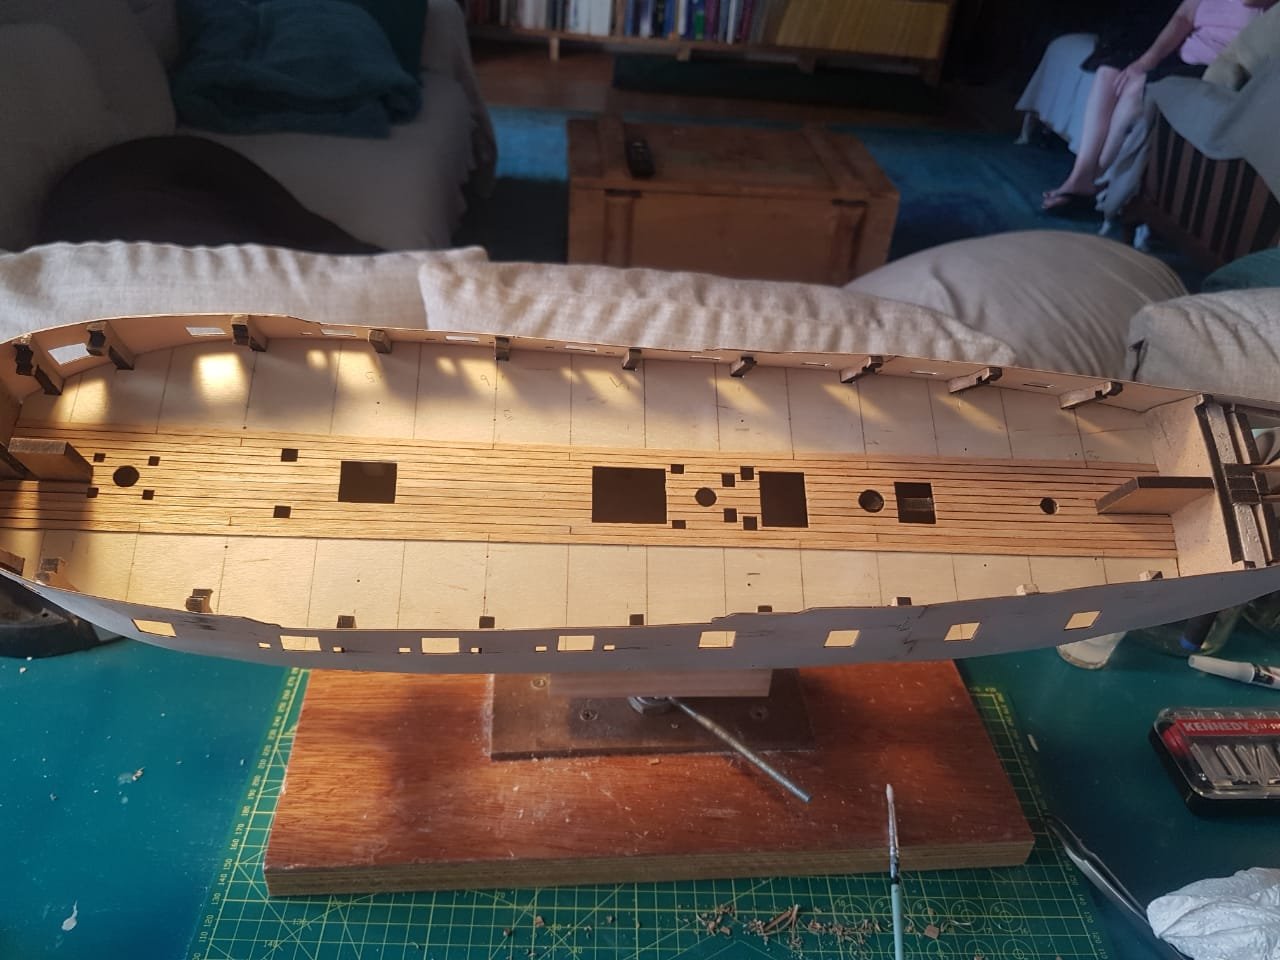
Day 27 to 34 - First planking This post covers the first few stages of the first planking. After some careful reading of the posts of the helpful folks on here I began first planking. The method I went with at the end of the day was a combination of different bits of advice. It is far from perfect but it was a great learning experience that I thoroughly enjoyed and I am very glad that I had this first layer of planking to teach me before approaching the second layer. Here are some things that I learned during this process. 1. That rabbet that is not mentioned in the original build plans is an absolute lifesaver for a rookie. It captures the planks neatly and helps a huge amount. 2. Sand the bearding like quite a bit before you start planking. It is far easier to sand MDF than it is to sand this lime wood. 3. Do as little of the rest of the build as possible before beginning planking. It requires a fair amount of rough handling and the less there is to break while doing this the better. 4. Those balsa wood fillers are a huge help. If the planks dont have something solid to be glues onto they had a tendency to be slightly springy. making it almost impossible to get them sanded completely flush. 5. The best method I could come up with for smoothing the planks was to use a carpet knife blade and scrape the worst of the unevenness out of the hull and then move over to 100 grit sandpaper and then up to 600 grit. I dont think it makes sense to make the surface TOO smooth as it will just reduce the ability of the glue to adhere for the next layer of planking. My method for fitting the planks changed after the first few went down but I will describe what I did as if it was the method I used from the beginning to the end. I started by placing the upper and lower strakes(I know there is a correct technical name for this but i forget what they are). I then measured the distance between these two planks at the widest distance and used this to calculate how many planks would fit in this space by dividing the distance by 5.2mm as the planks are actually slightly wider than 5mm and there will always be additional space when laying the plank(the answer was 16 for me). I then measured the narrowest gap at the bow and divided this number by 16...giving me what width plank I would need to be able to fit 16 planks in that space. I then tapered the planks from this measurement back to the point where they returned to original thickness and then installed them buy steaming, pinning, drying and then gluing the shaped planks in place with PVA glue. I repeated this process (measurements included) every time I had laid a plank to eliminate any errors at each stage and not create compound errors. This worked swimmingly until I got about 2 planks from the end. This left me in a position where I had one plank that had to have a curve cut out of it near the stern (i did this by steaming and pinning the plank and then marking on the hull. there is a photo below where you can see this curve between the planks already laid) and one plank that got cut into a long pointy shape, which i realise is really not the right thing to do. Despite all this I am fairly happy with the results and what I learned. This brings me to questions. 1. Must the first planking at the stern lie flush with the walnut keel or should I sand it back further to accommodate the final planking. 2. How should I fill the spaces between planks and pin holes where they appear? Should I use pva glue and the sawdust that I so lovingly gathered together while sanding? Is there another step that I need to take before proceeding with planking, and have i missed anything major or made any mistakes. Here are some photos


-
Vulcan! My humblest apologies. Please change all my sirs to ma'am's. I hope that I havent misinterpreted your photos but you will see my attempts at duplicating them below.
-
Hi again ASAT Thank you for the correction 😂this is exactly what I need. I will be formulating my apology accordingly. It really is great to have so much support on here and thank you for the compliment. Hopefully by the time you read this my next post will be up and running with all the usual rookie questions. Have an outstanding day! cheers Haiko
-
Vulcan you are a scholar and a gentleman! This post really helped me. And actually anticipated a number of questions I had, like which side of the plank to taper. I did employ a slightly strange method in the end but I couldnt have done it without you.
-
Hi there ASAT Thank you for your contribution. That makes perfect sense and I can see how serious that problem would be. This, being my first build has been quite a steep learning curve and its great when someone can forewarn you of mistakes before they happen . If you ever have the time please keep stopping in to correct me where I am going wrong. I anticipate this may happen alot Cheers! Haiko
-
Good morning my friend I am so glad that you told me this. my first layer of planking currently looks like the north end of a chicken flying south. But Im hoping that with some judicious sanding and filling things should be ok
-
Good Day folks I have spent the last 24 hours scratching my head about how to do the first planking on this hull. Alot of what I have read says that planks must be tapered? I dont fully understand why there is the need for this. Why not just use full sized planks and then use a stealer for the spaces that are left when complete? Is there a definitive correct method? How should I be approaching this issue?
-
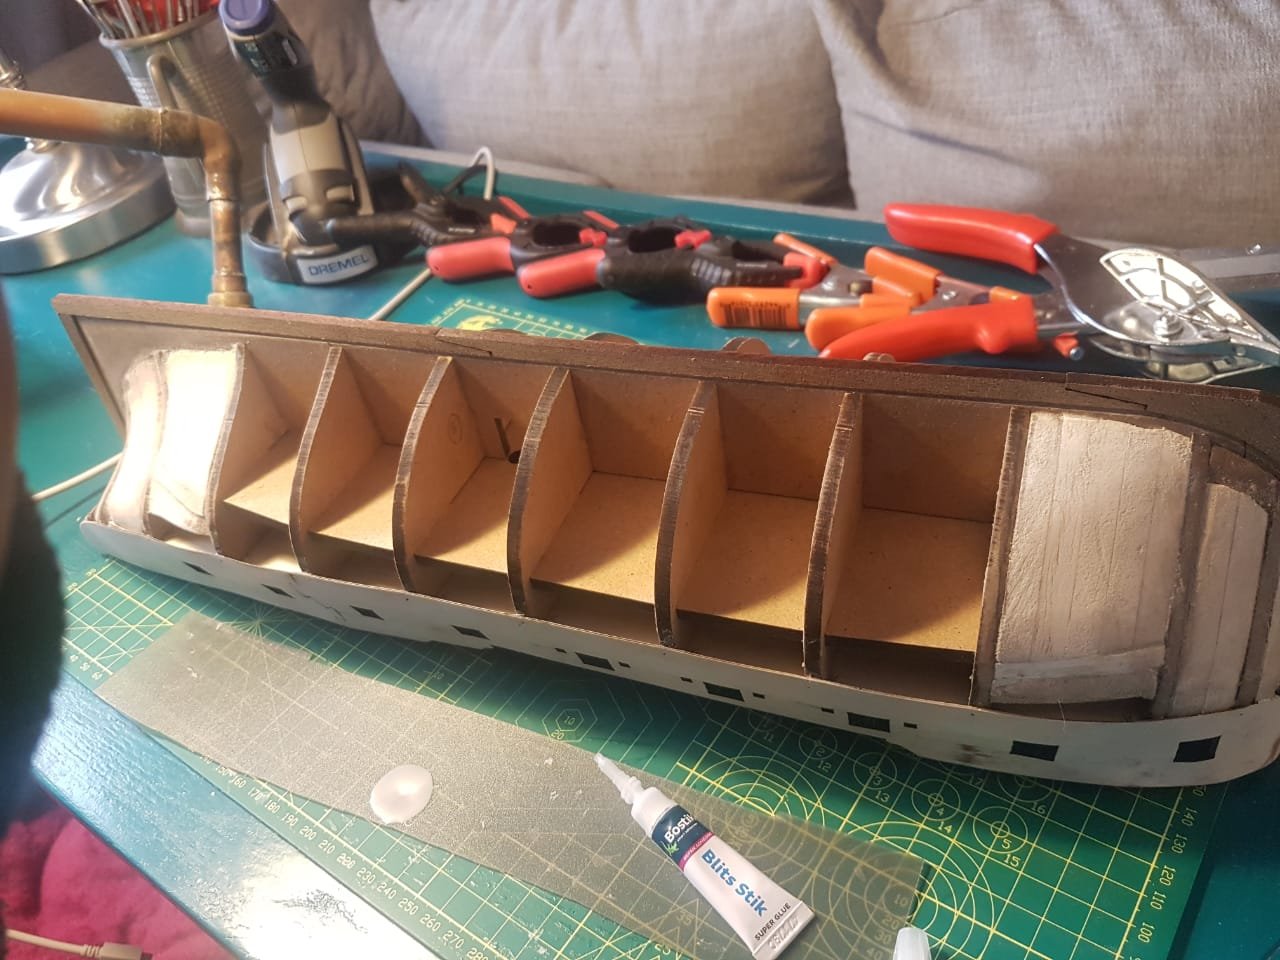
Day 27 morning. just a quick entry. at this point I decided to attach the walnut keep pieces to complete the rabbet that would capture the first strake of planking. I chose to not sand or shape it at all at this stage so that I didnt do any damage to the final shaped product.
-
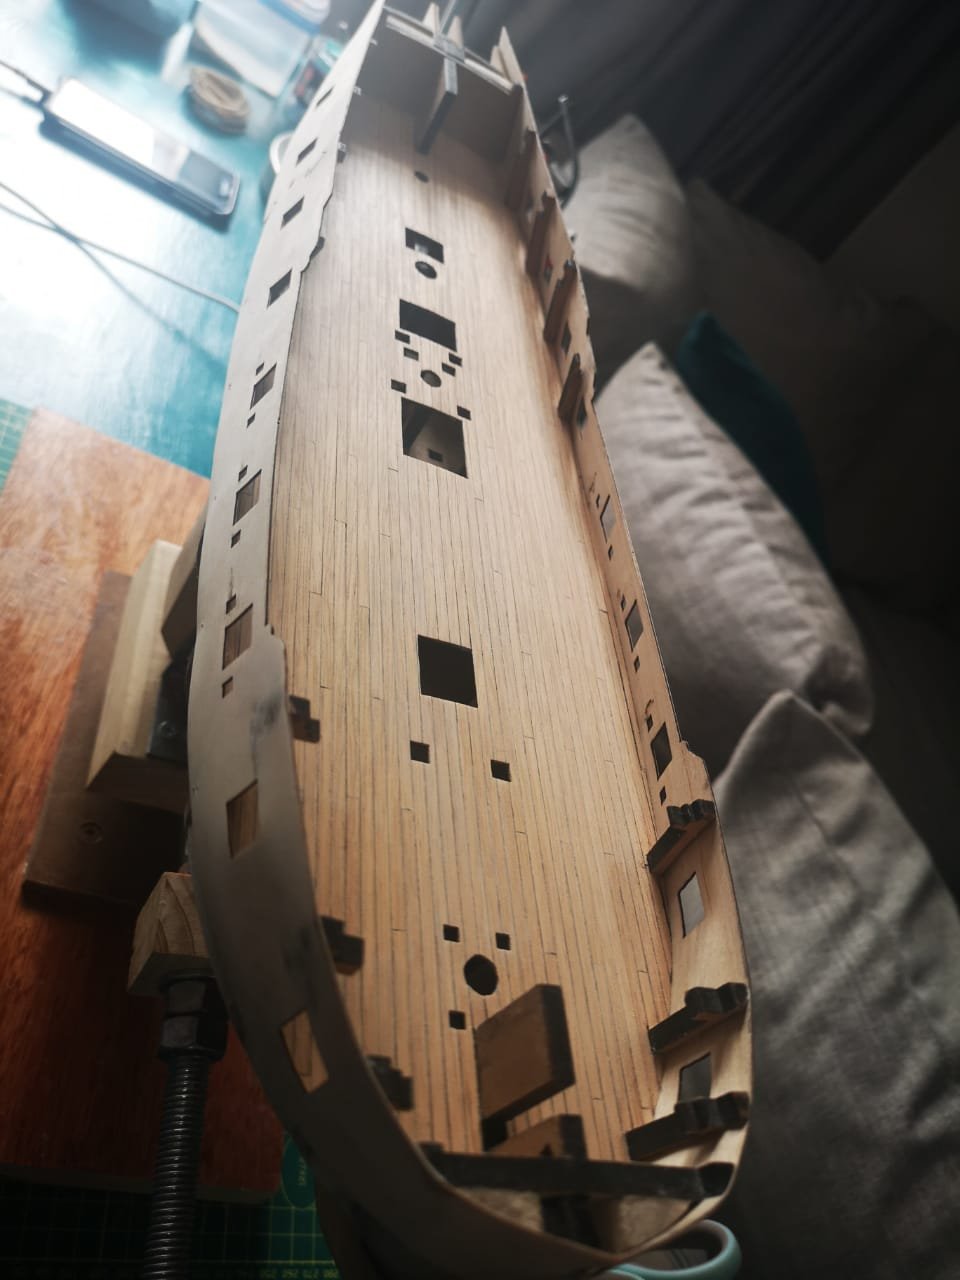
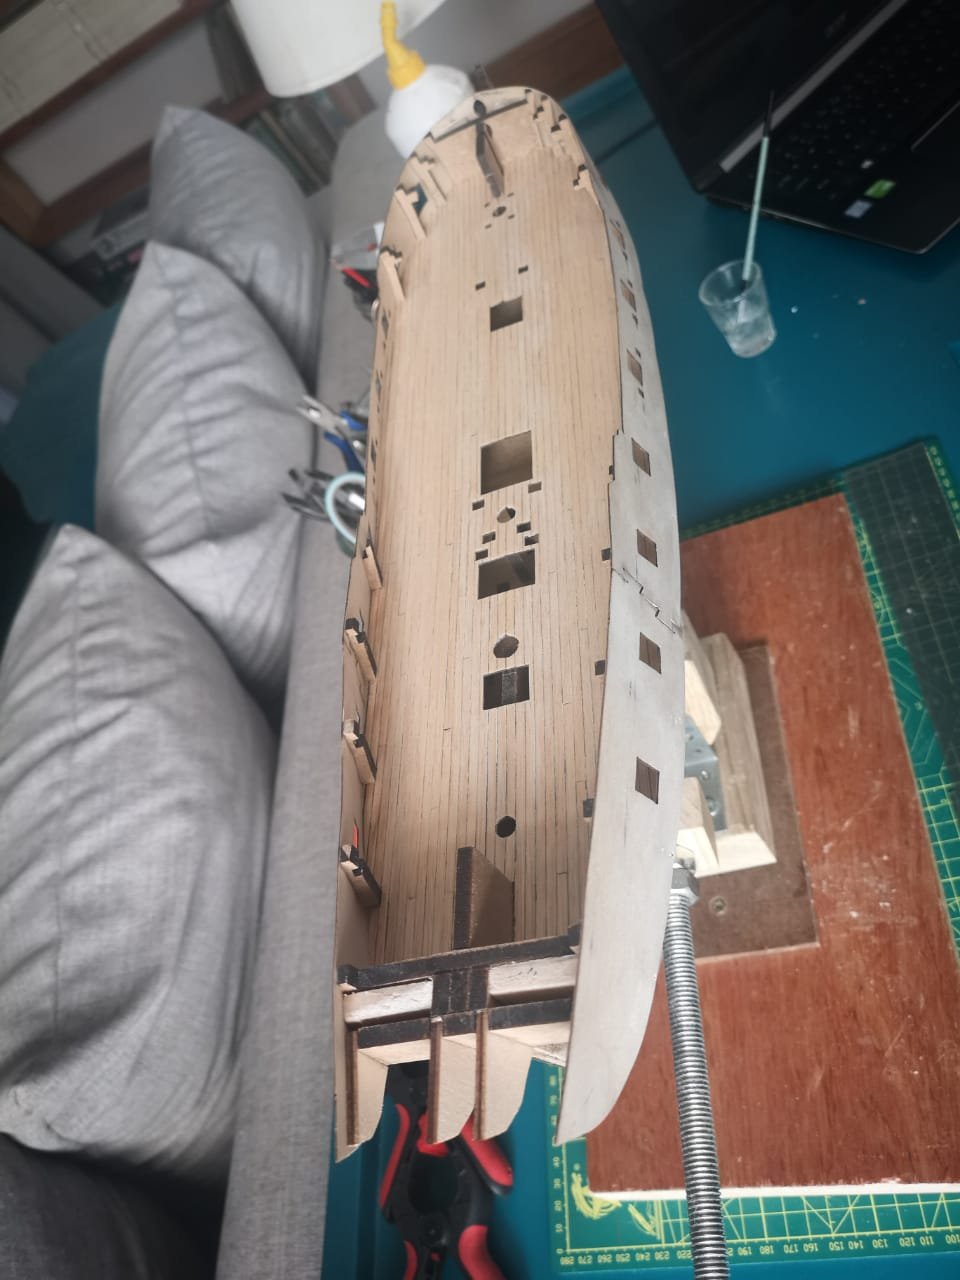
Day 23 to 26 I removed the uprights from BH 5,6 and 7 to complete the deck planking. This ended up involving some very fiddly shapes but I really enjoyed the process. I gave the deck a light scraping with a carpet knife blade and left it at that for now. I will finish the first and second hull planking(hopefully) and then go back to the deck. Please, as usual, any criticism is most welcome.

-
Perfect,thanks
-
Hi Stuglo I will put something together with drawings etc and send it through to you. I have had a rather busy week but it will happen soon. Cheers Mate!
-
That makes lots of sense. What are your views on varnishing the deck before planing the hull? vulcanbomber expressed concern about getting glue on it and JolleyRoger said he was concerned about glue not sticking to varnished surfaces.
-
Hi Stuglo I couldnt agree more. This community has genuinely given me faith in humanity. Every single person on here has been kind, polite and helpful without exception. Despite my remarkably rookie questions. Thank you for your input. I didnt even consider using a wipe on system but im liking the idea. If you would like some guidance on how i built this clamp please let me know. The swivel locking system is essential and in my case its a bit of a weird system. Now im off to look for your build logs! have a great day
-
Hi Vulcan! I think I will do what you did with your first build and get as far as possible building skills before attempting the hull planking. Park of this skill building can be planking those areas that are hard to see. Will there be enough planking material to do this supplied with the kit?
-
Great advice as always. I will be following that advice and finish the deck planking first. I will also leave the varnishing until a later stage. I actually think this may improve the lines of the vessel as there is some indentation between the BH's. I a a little confused by what you mean about thinning the keel? are you talking about the rabbet? I look forward to showing you my progress.
-
Thanks for the tip. I will bear that in mind. This does complicate things somewhat but im glad you warned me
-
Home made tools
The_bitter_end replied to The_bitter_end's topic in Modeling tools and Workshop Equipment
Hi Bruce My apologies for the delayed response, it has been a really busy week for me. That device is essentially a plank with one Vee shaped hull rest secured to the plank and another secured to a drawer slide. I I then drilled 2 holes on either side of the rail and used to bolts with wing nuts and and a small piece of mdf to clamp down the slide to prevent it moving once it is in position. Pros and cons. Pros... Can be used for any sized hull Can have minor adjustment so that the hull rests dont obscure the same part of the hull all the time. You can also cut out a specific hull profile shape and secure it to the hull rests based on what you are working on and where on the hull you are working. Cons. The drawer rail is rather long and sticks out fairly far which can be a bit annoying. I hope this helps. Please let me know if you have more questions. CHeers Haiko -
A quick side question. Do the vertical components of the area around the aft and forward portions of the gun deck get planked? it seems strange to leave them as ply and MDF? I know the areas around bulkheads 5,6 and 7 get planked but what about the rest?
-
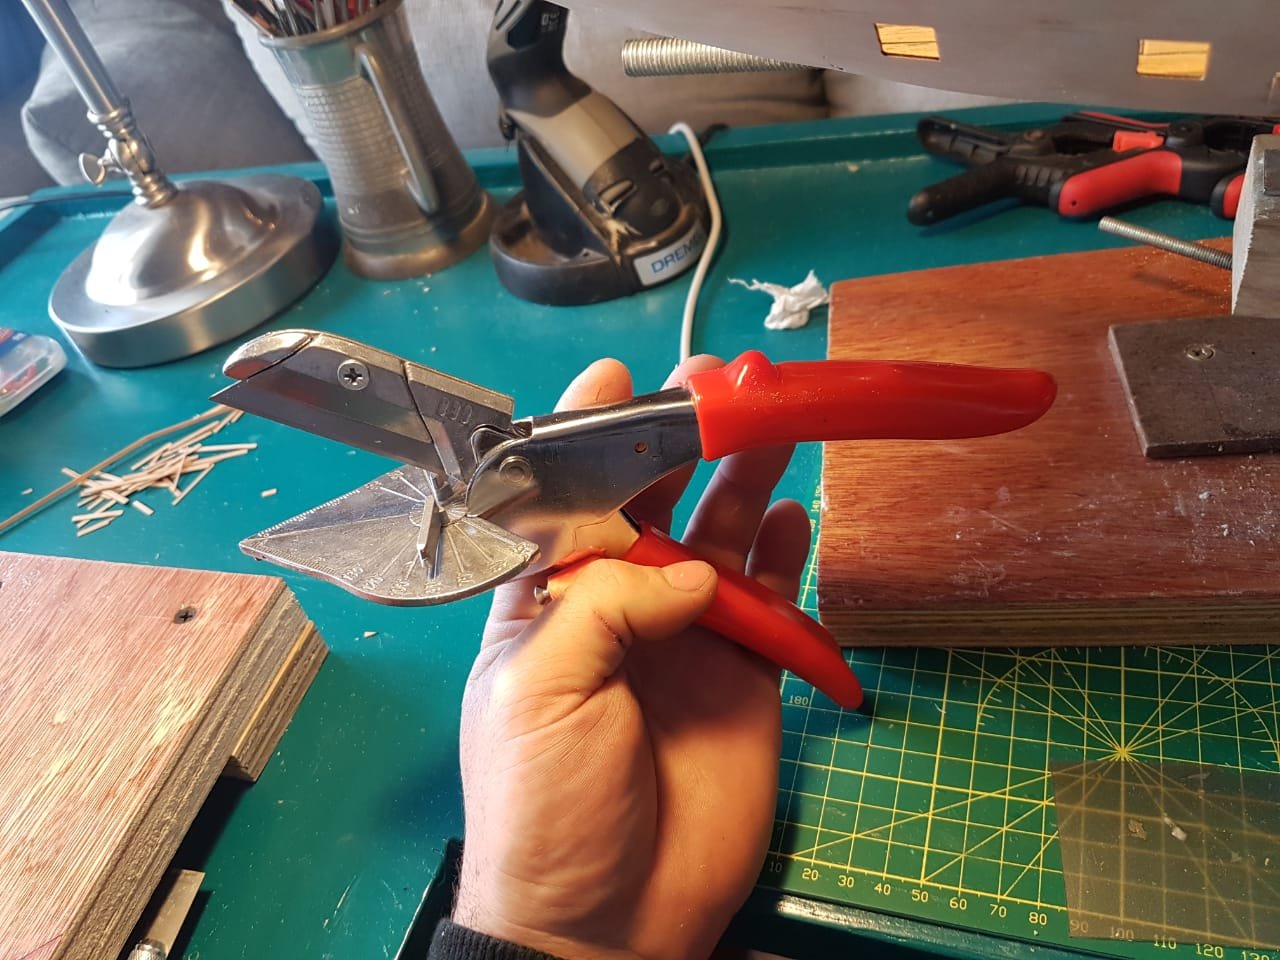
Day 16 to 22 A week dedicated to planking! I continued to plank the deck using the 4 butt pattern and glueing the planks down with normal PVA and then wiping them clean. I chose to not use tree nails as this is my first build and I felt the risk was too high. I cant decide if I regret having used permanent marker for caulking. It gave a slightly uneven finish to the caulking but it doesnt really feel unrealistic so I am reasonably happy with it. Planks were cut with my home made guillotine and this weird angle cutting set of shears I found online. I dont know what they are actually meant for but they do a decent job. I planked as far as possible without interfering with Bulkheads 5,6 and 7 as they need to be removed at a later stage of the build. I then scraped the deck with a carpet knife as per SpyGlass' suggestion and it worked a treat. I followed this up with a light sandng with 600 and 1200 grit paper. Now come the usual questions.. WHAT NEXT!? do I varnish what I have done so far to protect it? do I plank out the rest of the deck? do I start first hull planking? am I missing some other step? Please help!!!!


-
Spy! Good day fellow! It has been too long. I have had an extremely busy week both agriculturally and with guests so I have not had the time to get back to you. I just finished using your scraping method on my decks. It really works a treat! Do you water down your varnish with turpentine and if so how much? Please take a look at my next post and let me know what you think I should be doing next!
-
Hi Vulcan and thank you! Its great to get positive feedback from someone with your experience. I will be sure to use oil based suede varnish and test off the model before going ahead. Do you have any pointers on how to apply?