-
Posts
116 -
Joined
-
Last visited
Content Type
Profiles
Forums
Gallery
Events
Everything posted by The_bitter_end
-
Hi Jolley! Please excuse my very slow response, I had a wedding on the farm last weekend and I am building an onion seed drying facility that is taking up alot of my evenings. Thanks for the info! Do you mix your varnish with tupentine before applying? is there a special process? I was too impatient to wait for the suggested archival pen to arrive but I will get hold of one for the upper decks. As you will see in my next post there was a certain amount of bleedout. Cheers, Haiko
- 151 replies
-
Thanks Spy! the encouragement really helps, I often feel like this cant be right so hearing that it is is huge. I will be be super careful with all the walnut parts for sure!
- 151 replies
-
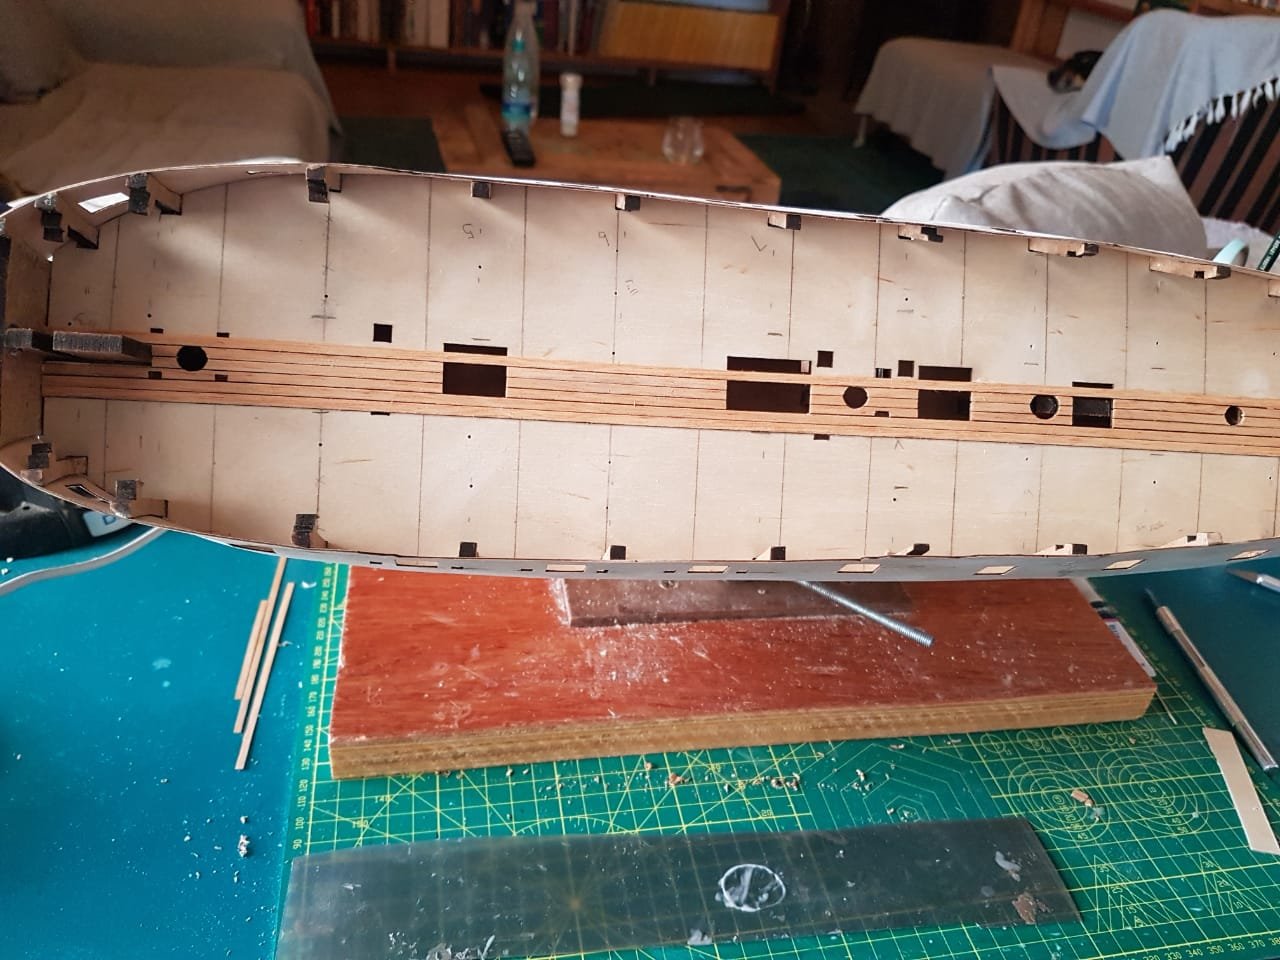
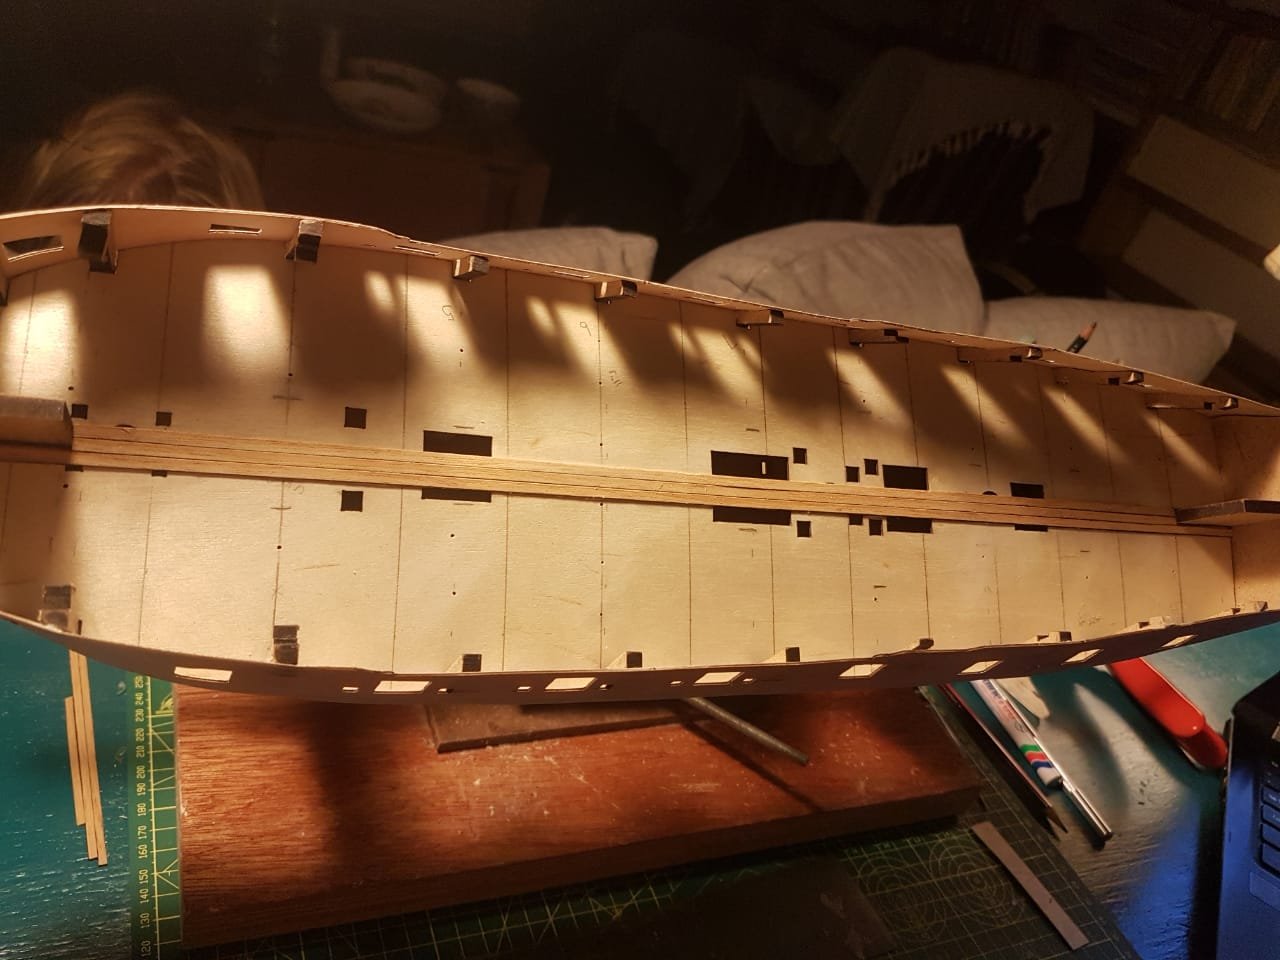
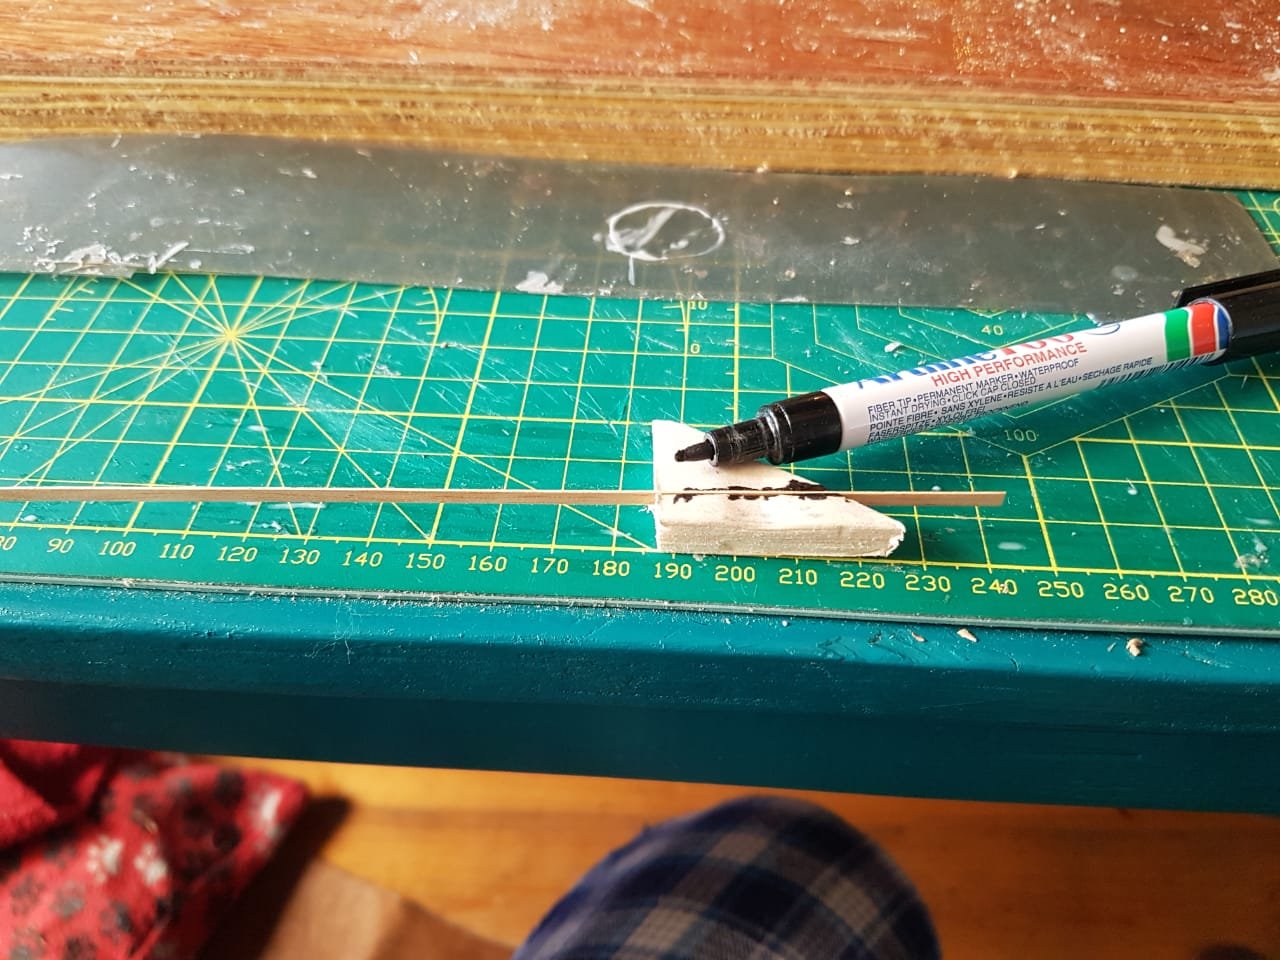
Day 15 I opted to start with the deck planking to gain some experience in cuting planks etc before proceeding with the hull planking. I will only be going up to the point where I would need to remove the upper portions of bulkheads 5,6 and 7 and will then move onto first hull planking. I dont want to weaken the gun ports by removing these before I do all the hull planking handling. I opted to go for a 4 butt system with a maximum plank length of 118mm. I also chose to go with 2 planks running down the center of the deck so that these planks could run perfectly parallel to the center line of the false deck. instead of trying to line up a single king plank perfectly. This means that with all the cavities in the false deck for the hatches etc the first 8 planks(4 to port and starboard of the center line will have no butt system as there is no single length of plank longer than 118 mm. I then did a couple of tests with marking caulking on the deck planks and opted to go with a artline permanent marker. THere appears to be significantly more bleedout on the one side of the plank than the other so I just placed the planks with the side with less bleedout facing up. This gave me a caulking line that felt acceptable. lets see how it goes once the deck is sanded down. In order to apply this permanent marker I took a small block of balsa wood, cut a slot into it the exact width and depth of the deck plank and then pushed a depression into this block of balsa across the slot. This meant that I could place the plank in the slot, place the tip of the marker on the edge of the plank and then simply drag the plank through the block, leaving a neat marked plank edge. I also found that 2 passes at a fairly high speed worked best to prevent bleedout while still having a decent dark line. When laying the center 8 planks I have started by laying the full length of the plank over the deck and then cutting out the holes for hatches etc. In order to make this process I never laid planks in such a way that I entirely covered a hole that needed to be cut out. this meant that there was always a good starting point available for the cut. Once these openings were rough cut and then fine cut(dont attempt to cut them perfectly on the first pass) then I laid down the next set of planks. I will now wait for those to dry before cutting their portion of the holes out before adding the next set. I hope this makes sense, I am writing it in quite a rush. Any advice on the best deck varnish would be a life saver!!
- 151 replies
-
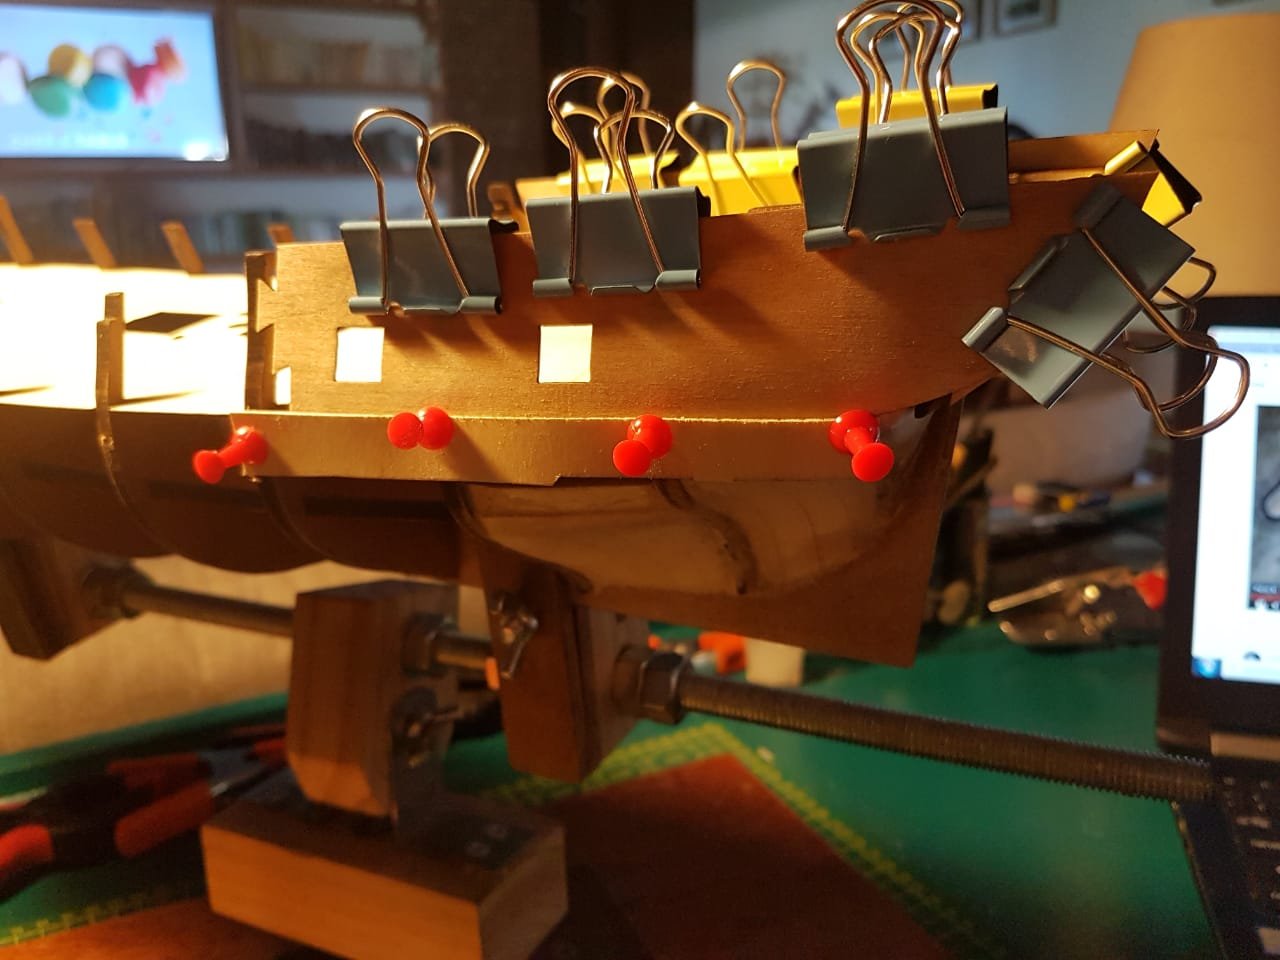
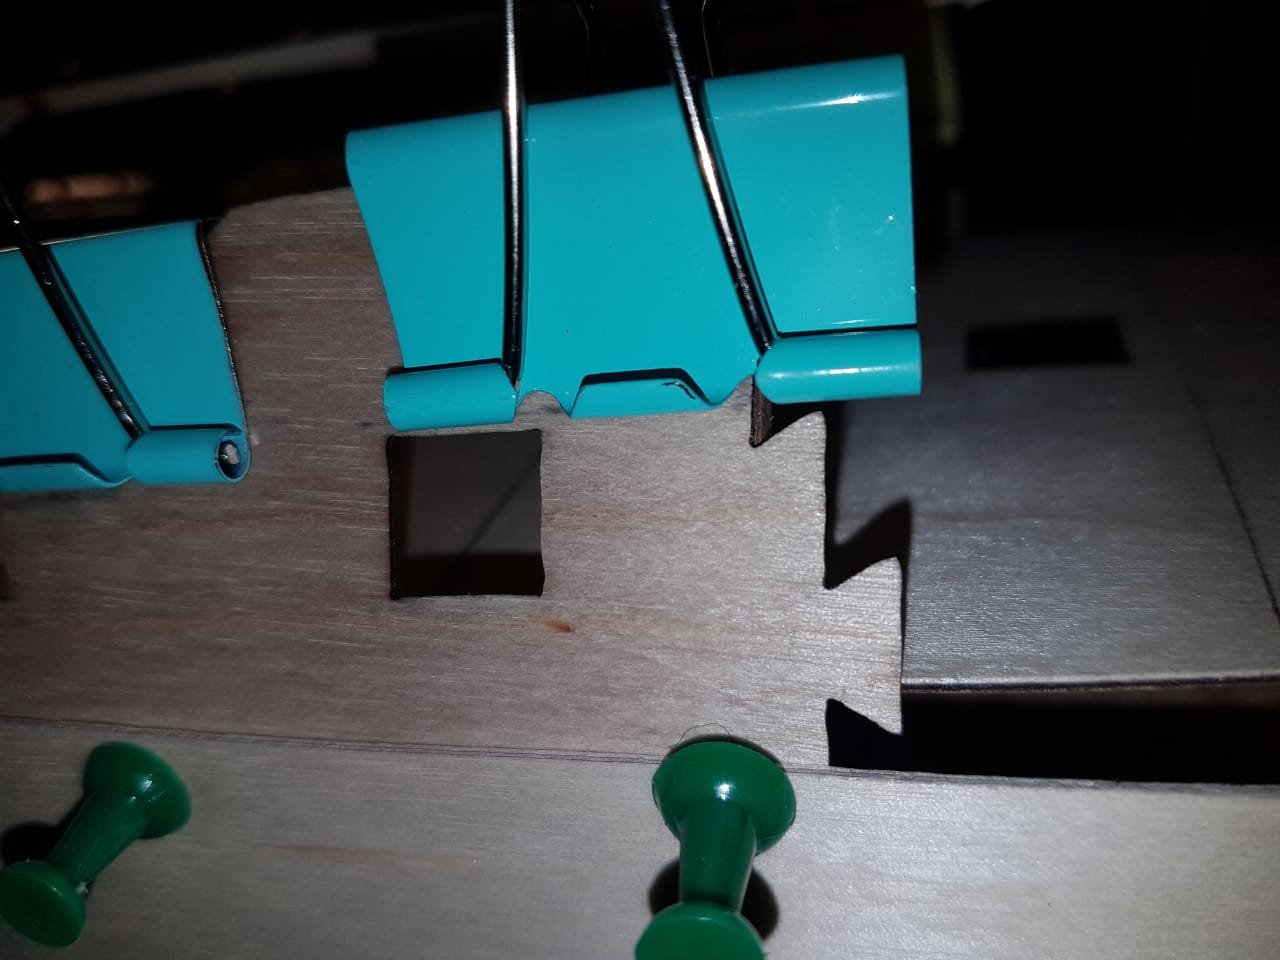
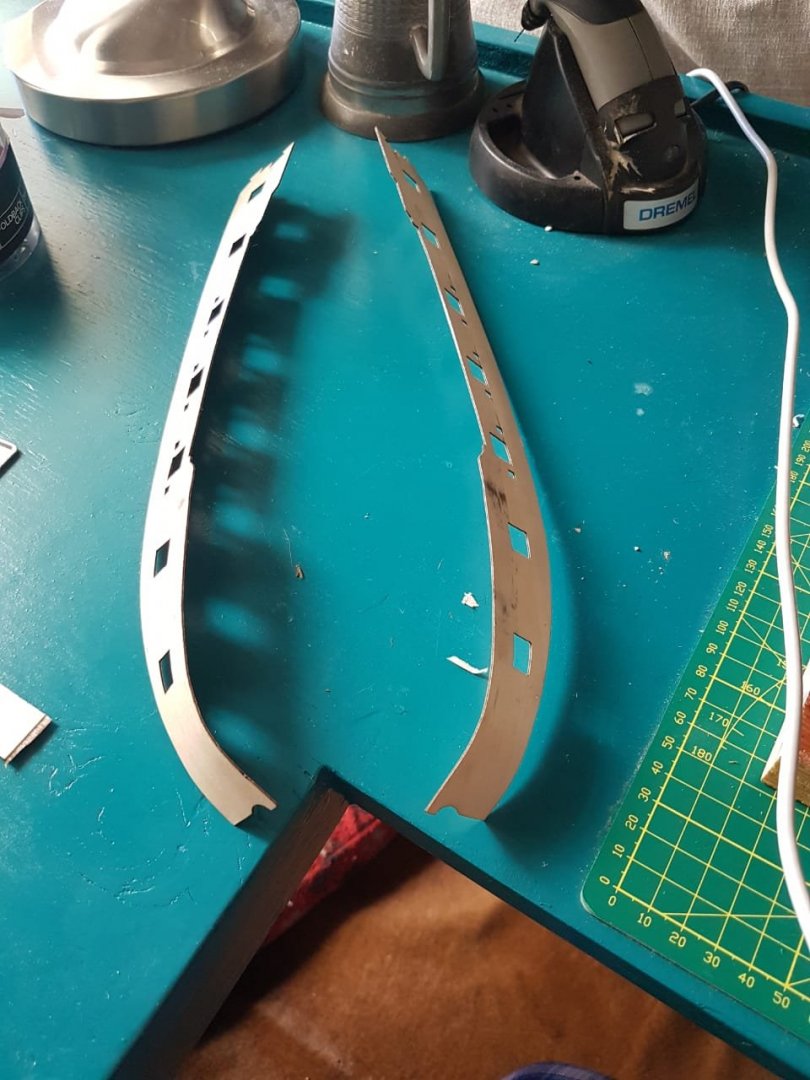
Day 13/14 Another somewhat slow couple of days, I have been putting in a staircase which has turned out to be a bit of a nightmare. I manage to complete final shaping and gluing of the gun ports. I have a couple of points on this process I would like to share. 1. I cannot stress enough how important it is to shape these ports correctly and be patient in this process. Soak and bend, soak and bend. This is also a time where you need to accept that some additional fairing needs to be done. I didnt take SpyGlass nearly as seriously as I should have and this resulted in gun ports with a curve that I am not entirely happy with but I will accept due to lack of alternative options. 2. The puzzle joint has a mighty sloppy fit and doesn't land on a bulkhead. Most people suggest that you put a filler block behind the puzzle joint to support it. I cant really agrue with this approach but I opted to just superglue and clamp the joint. This has left some daylight coming though but I think it will be fine once it is all planked. 3. I originally intended to leave the walnut keel stem off until final hull planking but I realised that the gun ports sort of hook in behind the rabbet cut into the keel. This means that it wont be able to be taken in and out once the gun ports are secured. I therefore Opted to glue the stem in. 4. The ply gun ports do get cladded with planking on all faces so I chose to sand down some of the high points of the wavy areas. I am reasonably happy with the final result(bearing in mind that alot more will happen to these strips before the build is done. What is the recommended next step? I see many people plank the Gun deck and other opt to do first hull planking and some do half the gun deck, then plank the hull and then return to the gun deck. I am unsure. Any and all advice on where to progress from here or if I missed anything at this stage would be great!
- 151 replies
-
Hi Spy! Thanks for the feedback. You are totally correct, this angle does seem to be a bit of a problem, infact it was way worse before and I managed to coax most of it out but I see now looking at the strips and that photo that its back again. Its actually a relly important point because my feeling is that this build is ALL about the lines and flow. to lose that would be a travesty. I will be sure to apply a bit more time into making sure this is all perfect. As for the overlap I have almost none at all, however I didnt bring the point to an absolutely smooth curve, it comes to a very oblique point. I somehow felt this would make more sense and it fits nicely into the rabbet I will show you what I mean in tonights post(hopefully)
- 151 replies
-
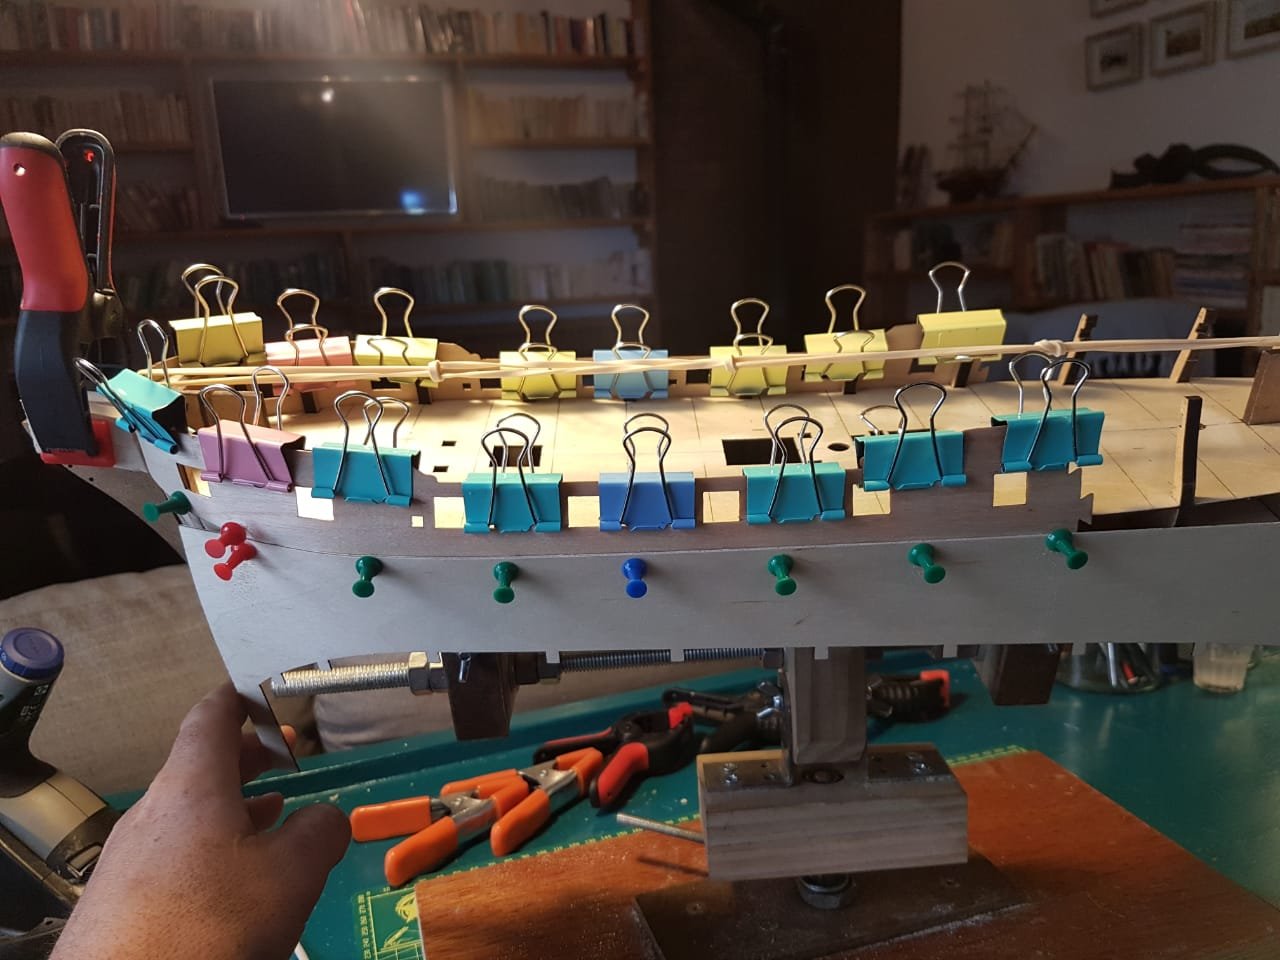
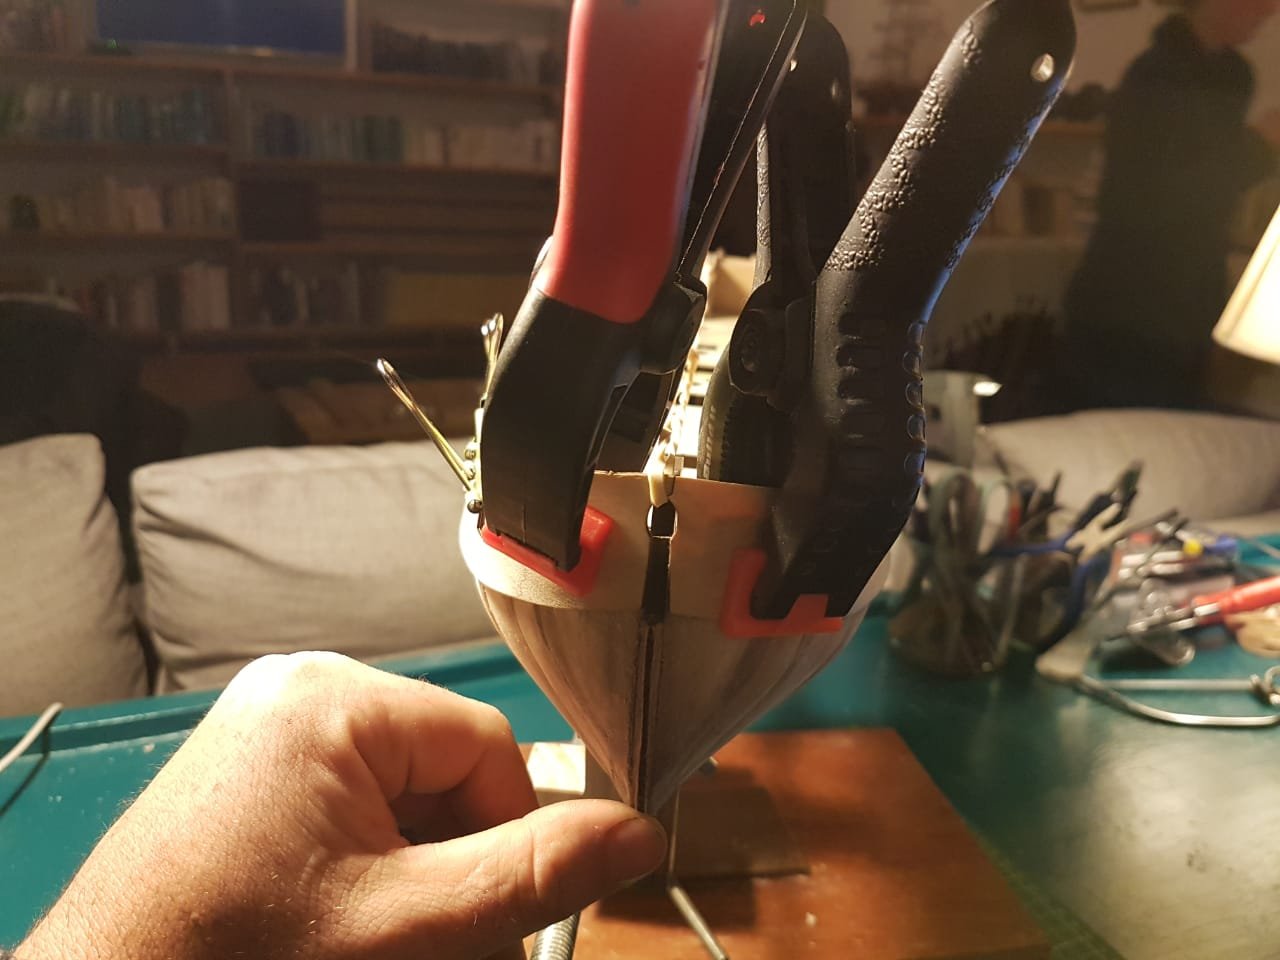
Day 11/12 This turned out to be a pretty unproductive weekend due to a charity event that I was part of hosting on the farm. Infact my whole weekend sort of fell to pieces. Never-the-less here is what happened on day 11. I did the second shaping of the gun ports, this time using an additional strip of wood to hold down the lower edge of the gun ports and eliminate warping. This did work well along the bottom edge but the forward port of the top edge did warp a bit. I eliminated this by slowly working out the warp by hand. I have also included a photo of the alignment that I got with BH No 9. You can just see a tiny amount of the bulkhead sticking out behind the female portion of the puzzle joint. This seems correct to me but please let me know if I am making a mistake here. After this second shaping and slight manipulation I was fairly happy with the results. I also managed to get a nice vertical "S" shape into the rear of the gun port just using strategically placed paper clamps. Another advantage of using these clamps is that you can push them all the way down so that they rest on the top of the bulkhead and use this for alignment of the gun port flush with the top of the bulkhead.
- 151 replies
-
Your appreciation is appreciated Please just dont abandon me, I still have so many more questions!
- 151 replies
-
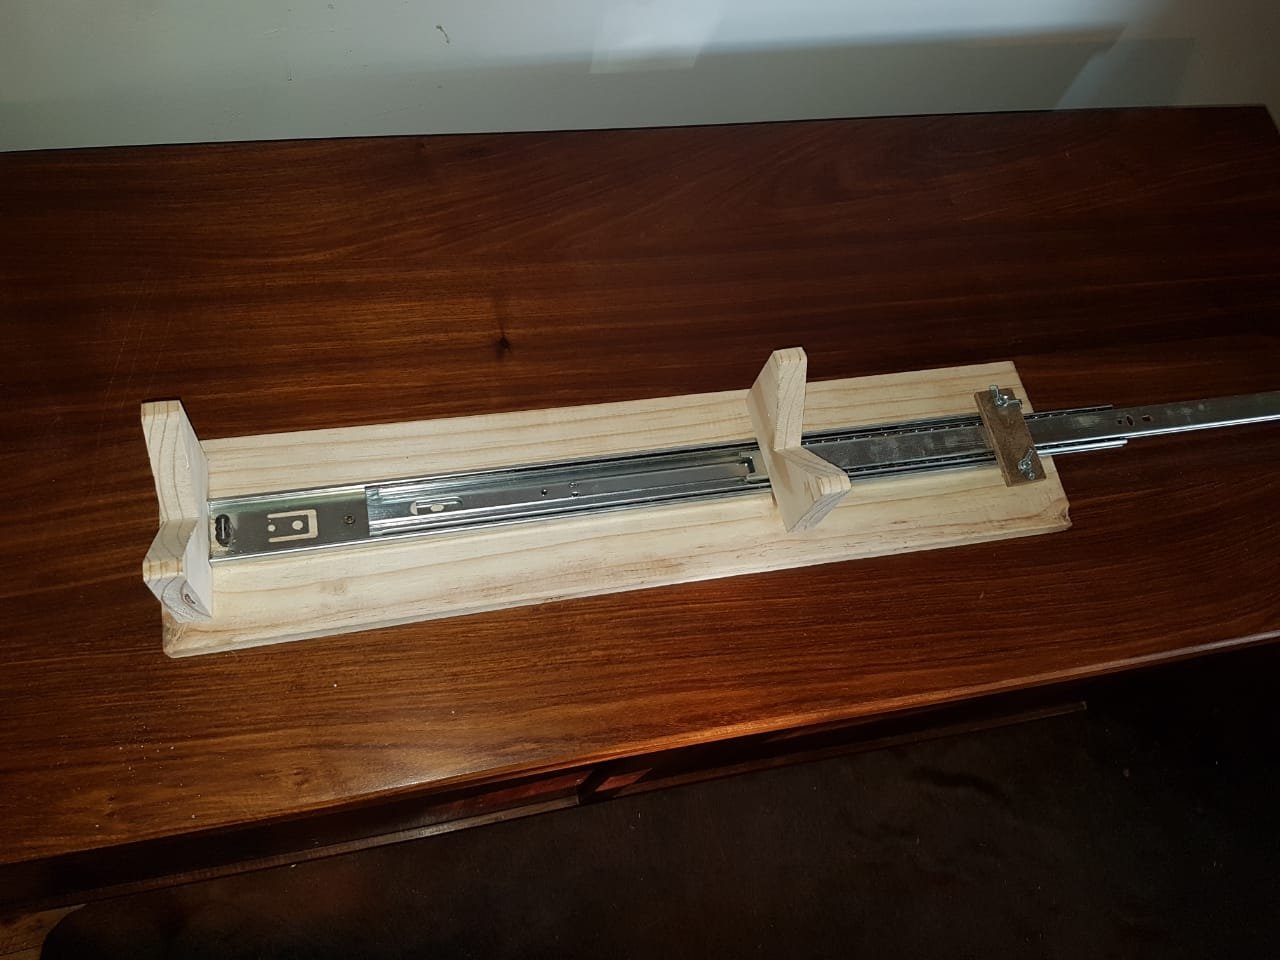
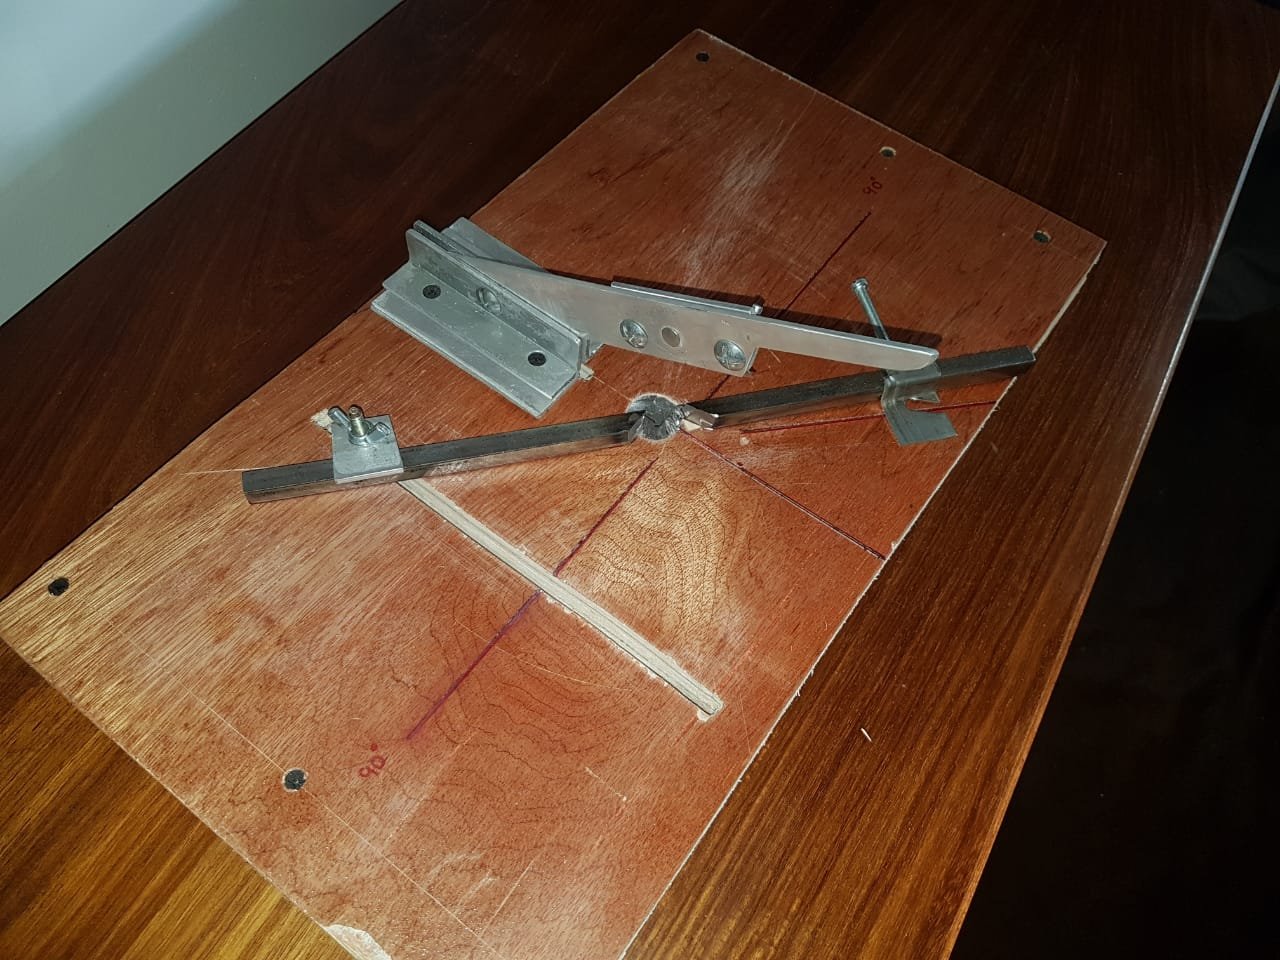
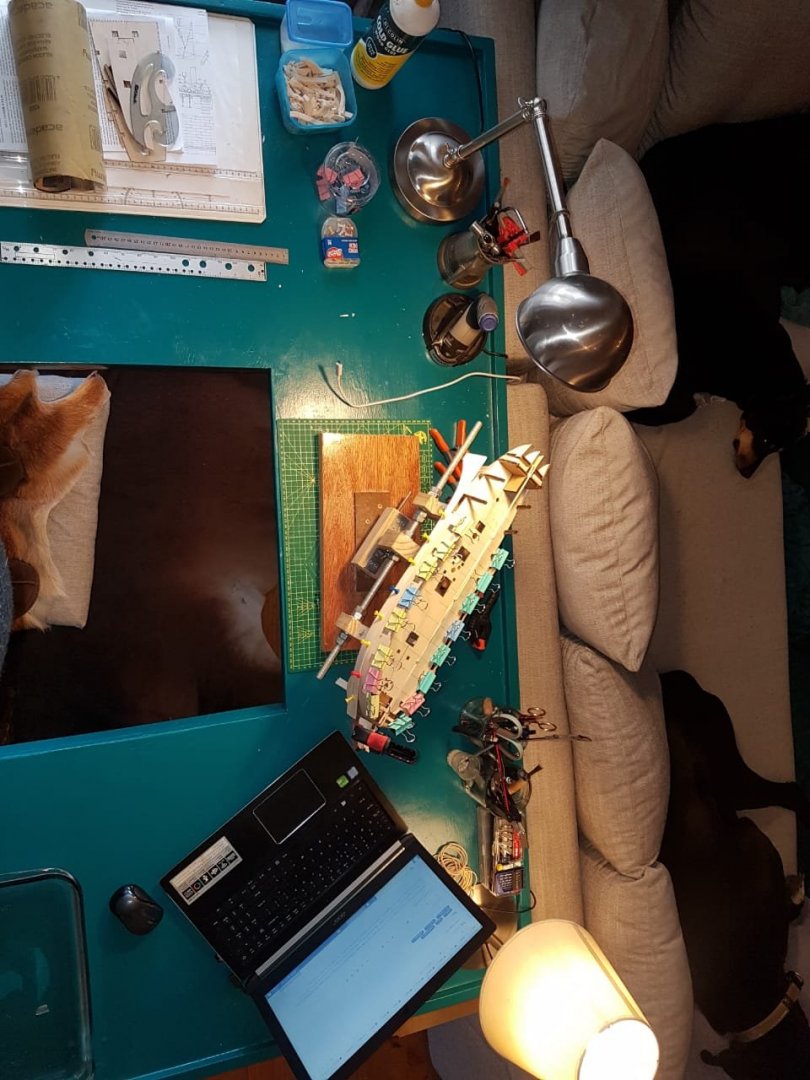
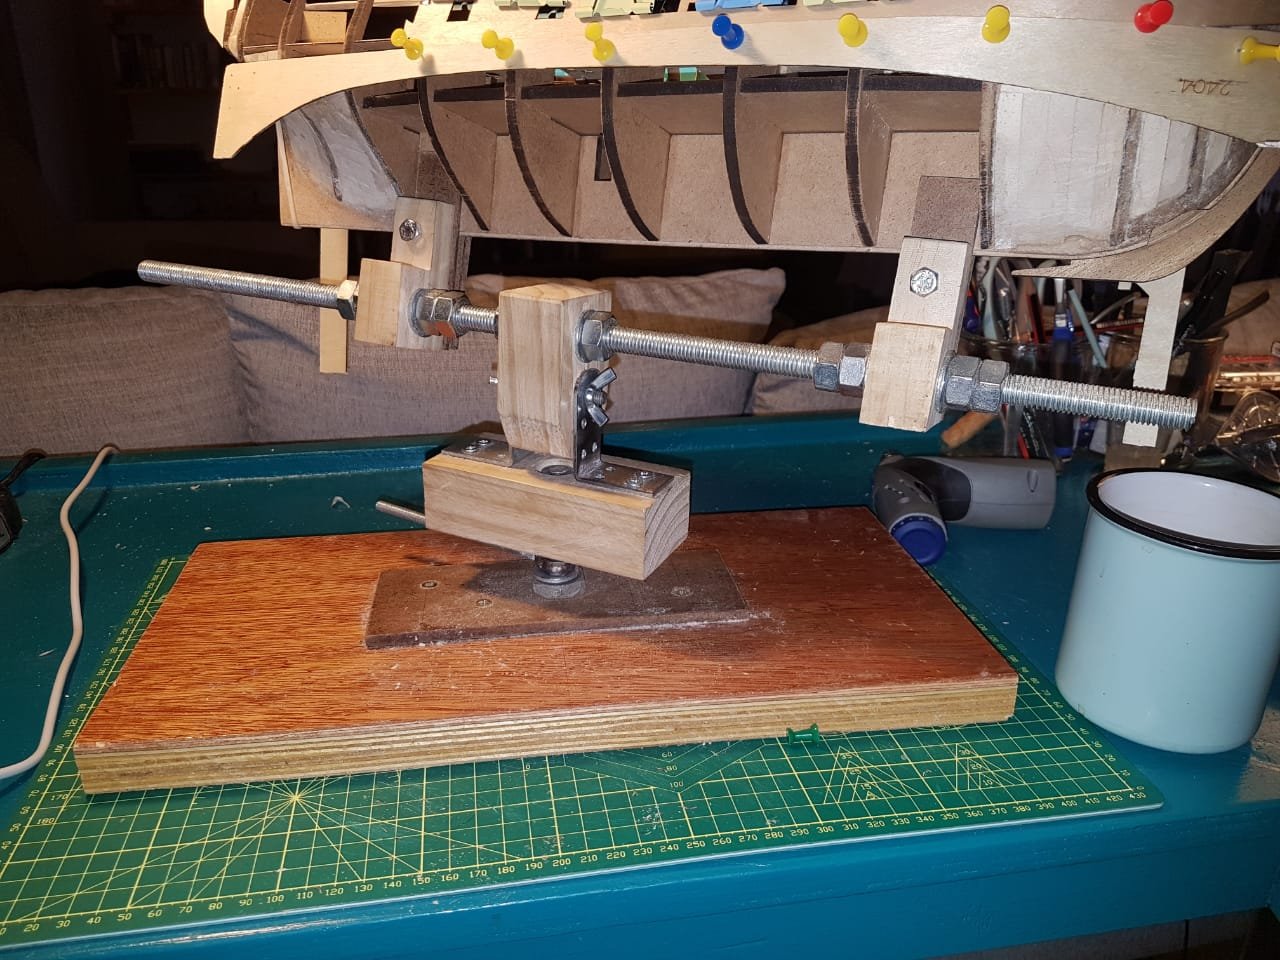
Good Morning kids! I just wanted to post a couple of photos of some of the items that I have made to assist with my first build. They really are nothing fancy, their focus is on cheap and cheerful. I thought this might help for those of you looking for ideas on how to save some money with this already expensive project. If you have any suggestions, questions or comments please let me know and I will do my best to respond. The photos below are the following. A steam tube, guillotine for cutting specific angles and lengths, an adjustable keel rest and a lockable, adjustable keel clamp(which I absolutely love). I have also included a photo of the desk I made specifically to build this vessel. please excuse the strange colour. I entered into a rather weird negotiation with my girlfriend and somehow ended up agreeing to paint this desk "teal" in exchange for the permission to build it.
-
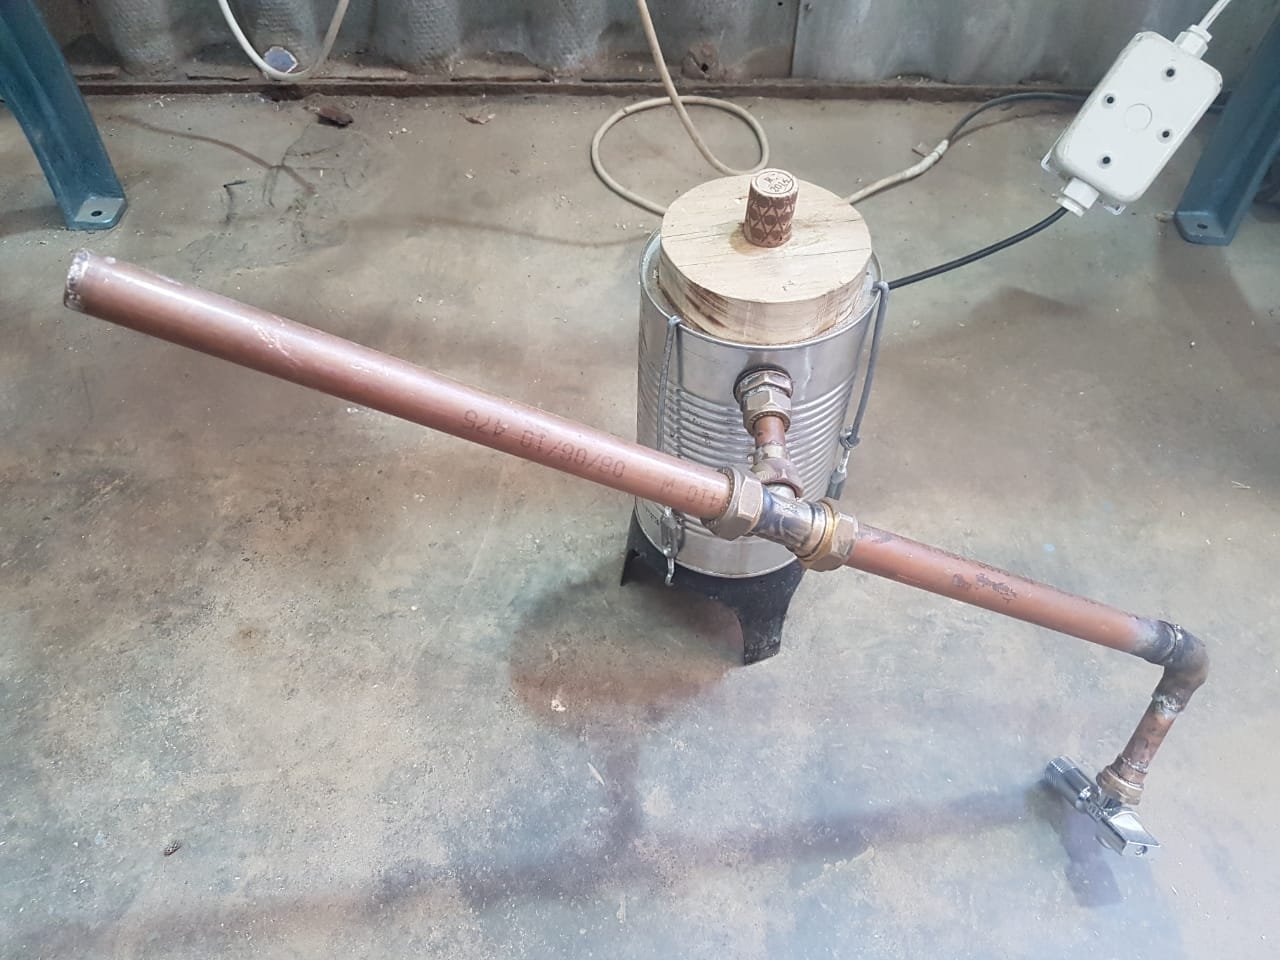
A quick break from the build to show you folk the steamer I made from a coffee can, the element from a kettle, some copper pipe and other bits and bobs I had in my workshop. I find it works pretty well. For those of you that want to make one please do not attempt to create a temperature regulator using a light dimmer switch. It works extremely well until the switch starts to smoke. If anyone wants instruction of how to make this little guy feel free to give me a shout, its quite easy
- 151 replies
-
Good morning Spy, do you ever sleep? I dont know what time zone you are in but it seems like your replies come in 24 hours a day, this is great for me as I keep somewhat strange hours myself. I did seriously consider steaming the joints but I was worried that the steam would play silly buggers with the MDF and make it expand? I will actually do a little test on a scrap piece and report the results. I am going to do my best to follow these detailed instructions. My gun ports are soaking as we speak for their second fitting
- 151 replies
-
Another great bit of advice. At the moment I have the false keel out so that I dont damage the walnut and so that I can used the curve of the vessel to shape planks etc without having the keel in the way. It has a very snug fit so I can take it in and out as needed. I will be sure to check the elevation of the main mast hole against the keel piece. I am not totall sure about the orientation of the gun ports to the tops of the BH's are they meant to be lying flush?
- 151 replies
-
Thanks for the reply! You are probably right, the most logical thing to do would be to look at templates. Sadly as a result of my very elementary skill level and the fact that the kit has some significant alignment issues, just relying on how the mast fits into decks etc is certainly not going to fly.
- 151 replies
-
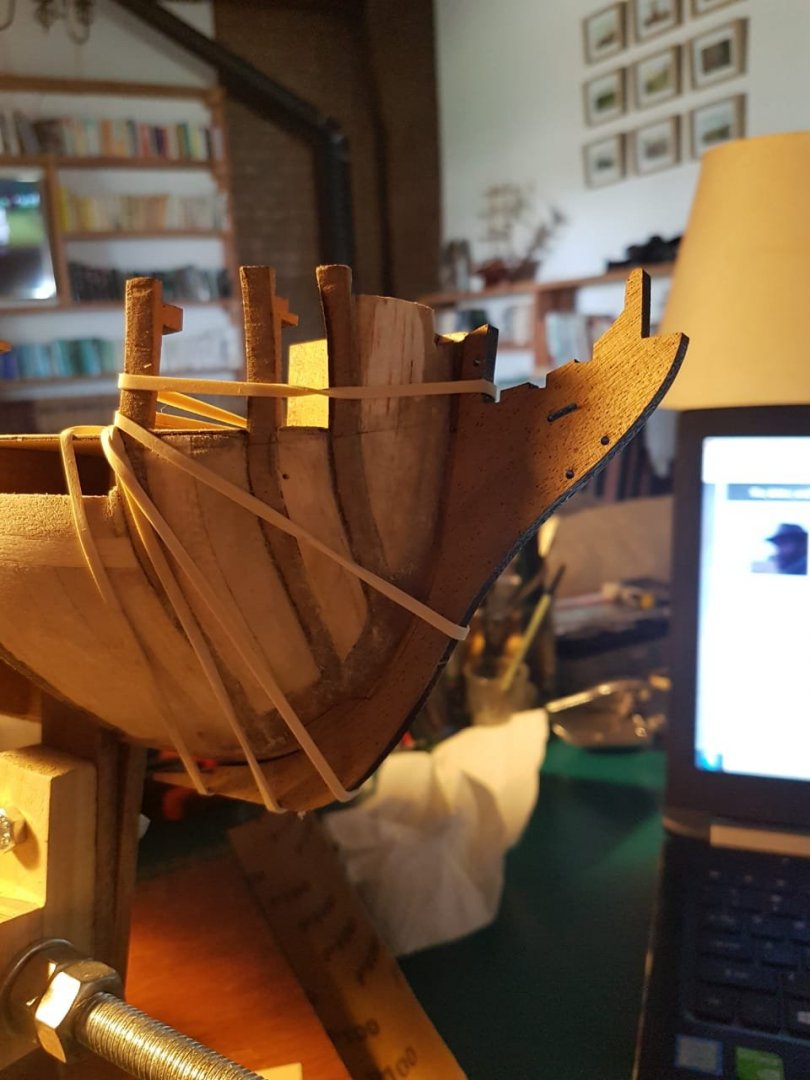
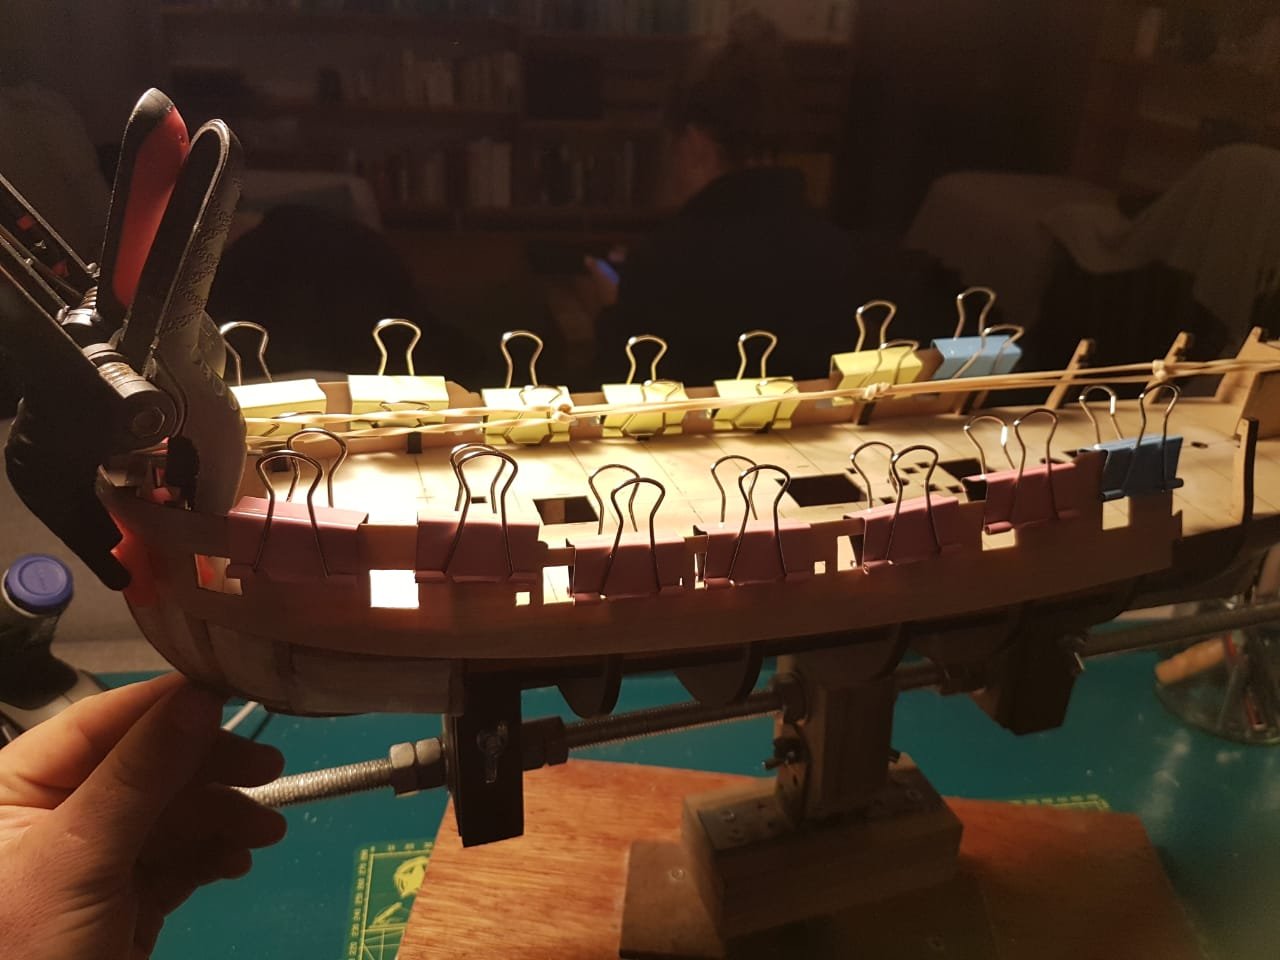
Day 10 Today started off with a disappointing display of muppetry, I somehow misread 2 separate build logs to the point where i chose to glue the bulkhead beams in prior to installing gun deck planking. After some head scratching and more reading I realised that this was a ridiculous decision. I did however ultimately manage to remove these beams without incident. I also installed the "two sets of stern counter patterns". A small heads up for new builders, be aware that the outer two pieces should be installed at an angle that allows them to run parallel to the edges of the stern upper deck, this requires checking against the deck itself as the default position they "want" to sit in is incorrect. The orientation in the photo below is correct for my model. PLEASE NOTE! In that photo I still have the bulkhead beams in place, this is NOT correct, they have been removed and will be reinstalled once the deck planking is done Finally I soaked the gun port patterns for about an hour in hot water and then clamped it to the bulkheads for my first shaping session. I found that using the paper clamps applied pressure nicely into the dip of the bulkheads, I am hoping that this will aid in getting the correct profile from the beginning. I also used a bit of a silly elastic band system to pull the bow points of the gun strips in as can be seen on the photo. I am still a bit concerned that I may have seated the gun port strips too far forward. If anyone has any comment on this orientation please let me know. this is only the preliminary bending.
- 151 replies
-
Spy, my good friend, I seem to have temporarily taken leave of my senses and done something entirely illogical. When I read your log I somehow managed to convince myself that you installed the bridges across the bulkheads and then cut them off again. It turns out that you were actually talking about cutting off the excess portion of the BH's(I think 5, 6 and 7) that get removed once the gun ports are in place. I did manage, with great difficulty, to remove the bridges that I glued in without causing any damage....so crisis averted. I did notice that the wood for your bulkheads, keel and bridges are laminated, mine are MDF with the exception of one walnut bridge strip. I will be sure to exercise extreme caution when working with the beam in question. Regarding the matter of rake, do you perhaps know the correct angle for rake on this vessel?
- 151 replies
-
Hi there Eamonn Thanks for your comment, compliment and advice. I am enjoying the challenge and loving the help Im getting here. It is really enhancing this process. I took at look at your buildd, it really is a beautiful piece of work. I just realised that I have actually seen the rake you are referring to in the past. Do you have any idea if there is a specific angle of rake for masts of the era on this kind of vessel? Cheers, Haiko
- 151 replies
-
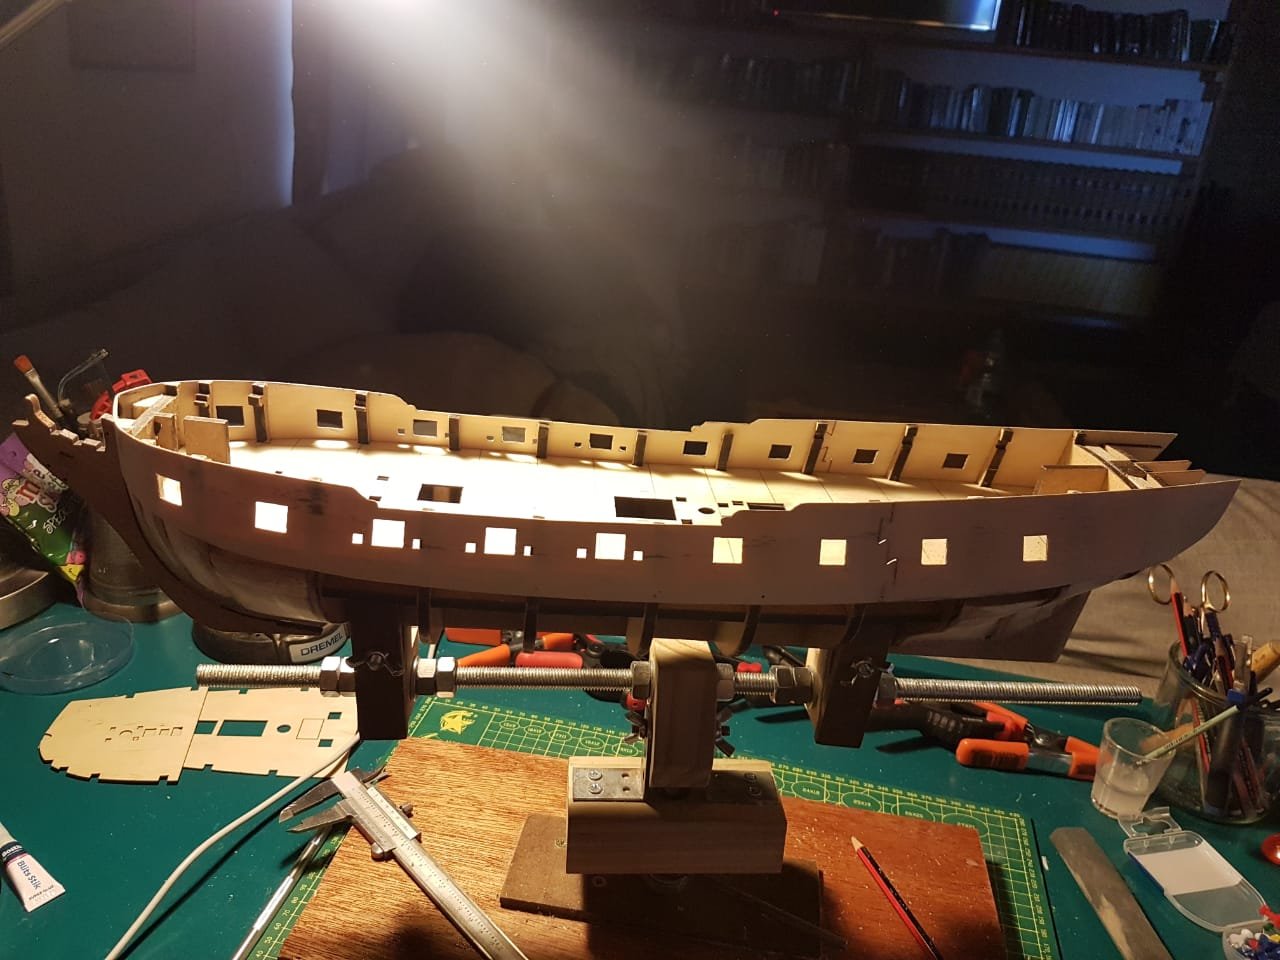
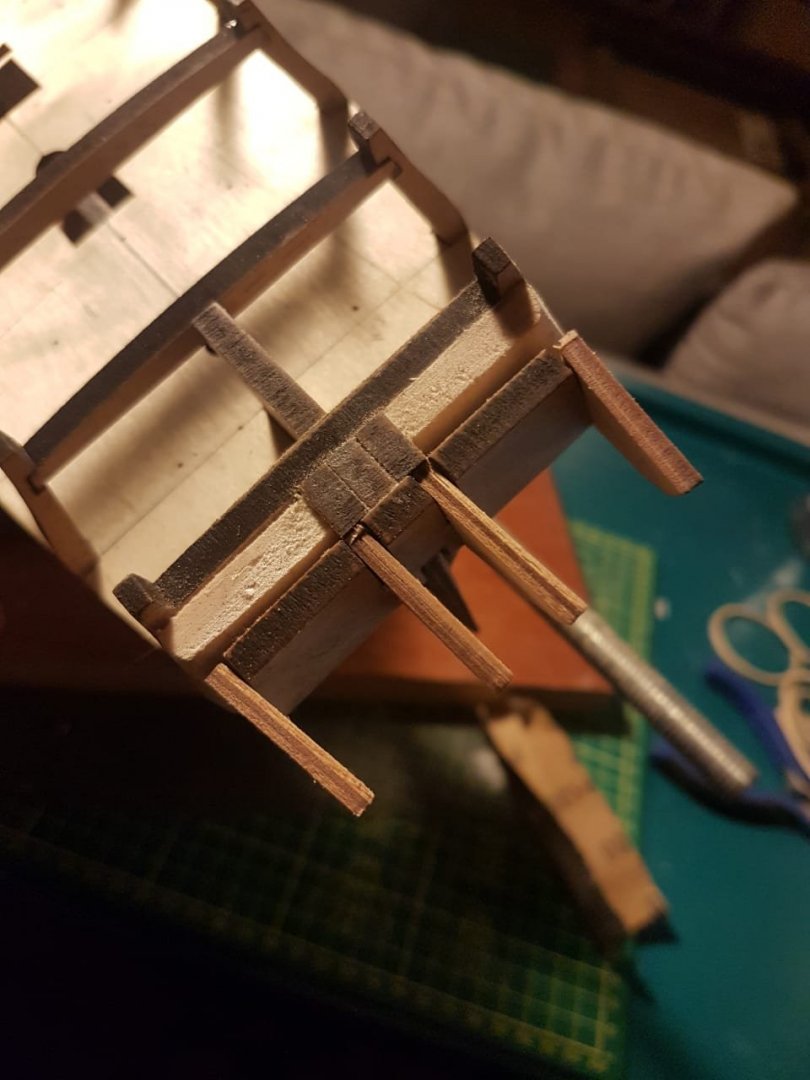
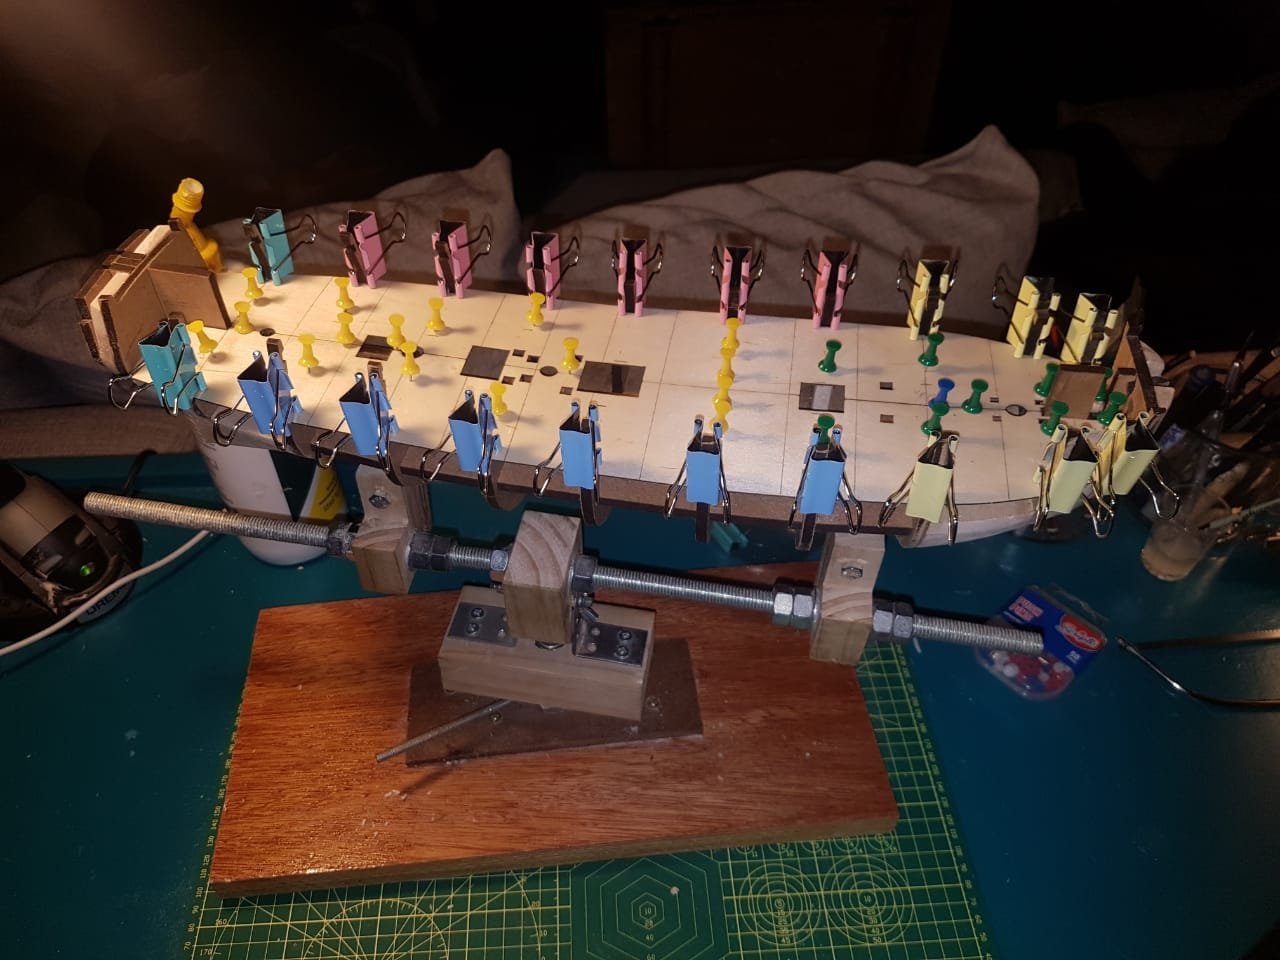
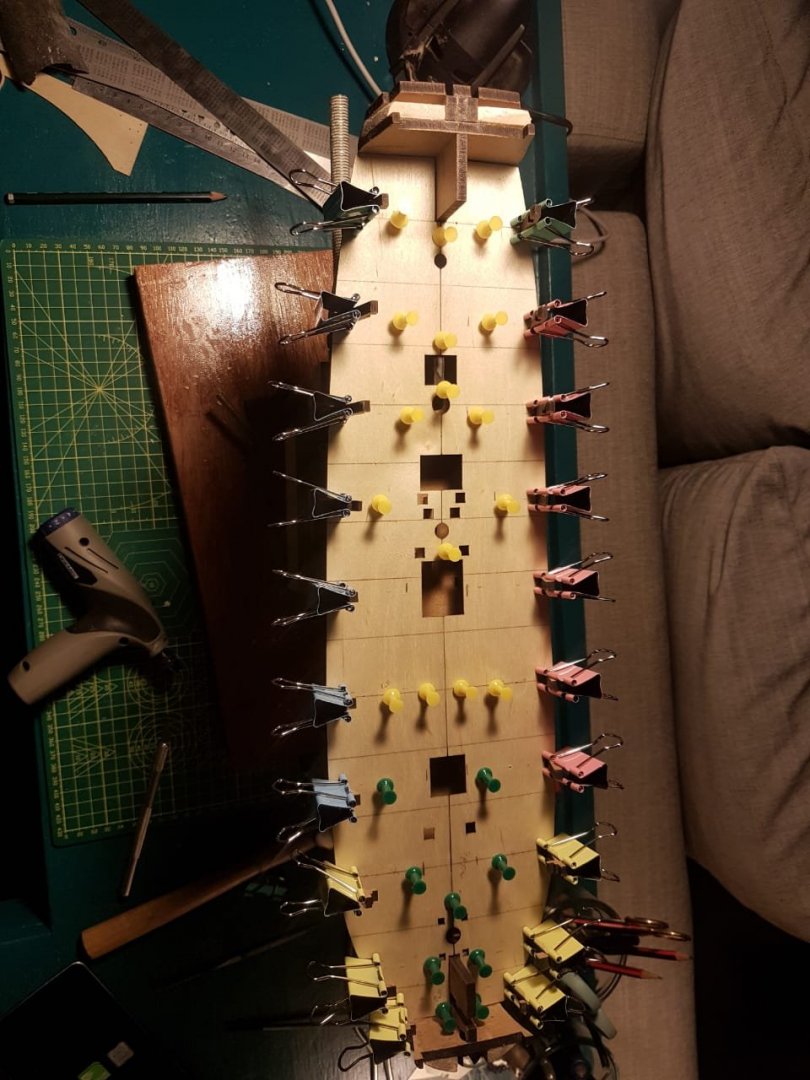
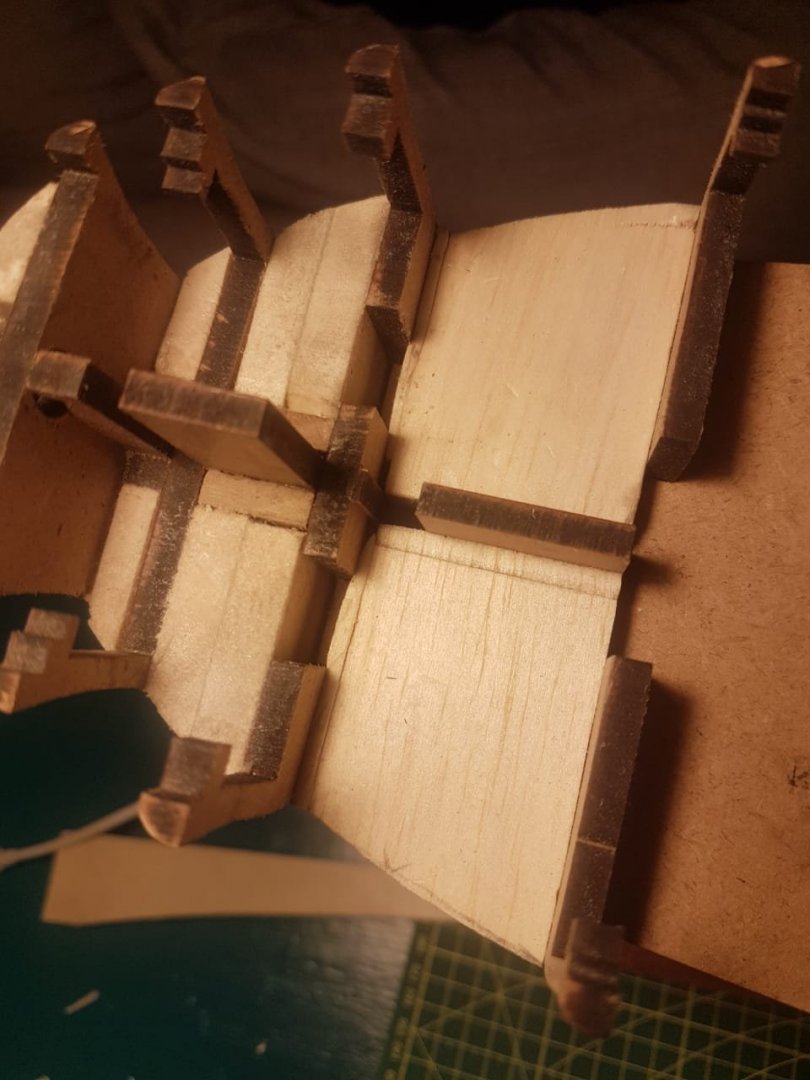
Day 9 Once my false gun deck had been dry fitted i taped it back together and marked out the lines for the 4 butt system deck planking I plan to put in . I decided(somewhat at random) to go with planks or 118mm long meaning that the spacing between pencil lines for the butts are spaced at 29.5mm. I also marked out the location of the bulkheads below for pinning so that the pins I installed to hold the deck down(after drilling holes for these pins) always went into something solid below the deck. Once the deck had been completely dry fitted and pinned I removed everything, applied PVA glue and pinned and clamped the whole deck down. It is worth mentioning that If you are going to use balsa filler blocks these can obstruct the path for the masts so make sure that you take this into consideration before gluing anything in. I also had to shape the MDF keel to take the mast and keep it vertical which has proven to be a bit of a nightmare with the balsa in the way. The false deck is now in place. and ready for the next stage. At this point do I glue the MDF bulkhead bridges in, then install the gun ports and then remove the bridges and then plank the deck? I am a bit confused about the order of things and this removal of bridges. The first Image shows where the balsa filler interferes with the access to adjust the MDF pocket for the mast as well as simply being in the way of the mast itself.
- 151 replies
-
Hi again Spy Thanks for these photos. That really does put it into perspective. I might just do some really light treenails but lets see how it goes. I am a little confused about your build, I have been going over it and am i correct in saying that you first install the false gun deck, then you install the bridges across the bulkheads, then install the gun ports and then you remove the bridges between the bulkheads again? Thanks for the warning about steaming the gun ports, I was about to do this.
- 151 replies
-
Day 8 Sadly today was spent on nothing for my build but research, which turned out to be pretty useful. I also started making a steaming tube so we will have to see how that goes. I wanted to do decking but I had to babysit a neighboring farmers child and dog. Hopefully day 9 will be better!
- 151 replies
-
Your deck planking link has been added to my long list of tabs, I will go through it very carefully before I pick up a plank. Tree nails are a whole other kettle of fish. I can make a decision about this after i finish the planking right? If you dont mind me asking, how come you find yourself doing multiple pegasus/fly models? do you do this professionally?
- 151 replies
-
Howdy Vulcan I am super torn about this issue. I heard that the thread can "fray" if you sand over this but it can be avoided by using linen thread? I am worried about opening up a can of worms that I will struggle to close. I will head back to your build logs to scrutinize this again and try and make a decision. I will keep you up to date on how this plays out.
- 151 replies
-
Magical advice as always. I will do just as you suggested. I know what you are saying about the center line, I was JUST about to start taking down the center line and I realised that it would indeed cause major issues, changing the hatches, mast holes and centerline itself. I dont think planking would save this. Im sort of jumping the gun here(I assume my next step after installing the false deck will be to install gun ports) but I saw some stuff about a curves margin plank(basically a plank that runs in a curve around the perimeter of the deck), would this be more historically accurate than just running straight planks? I will be sure to only start using glue once my deck has been soaked and pinned and all that...then I think it will be time for those gun ports. Strange question but did your gun ports fit into the spout of the kettle you described? I am busy making a steaming pipe with an old coffee can, parts from an old kettle and copper piping. the problem is that the steaming tube is only 32mm so it wont be able to accomodate the gun ports. Can I just hold them in the path of the steam for the suggested 20 seconds and take it from there?
- 151 replies
-
Thanks Jolley! Unless you can shape with a chainsaw Im going to try and rummage around for more balsa for now. even that gave me grey hairs. Ive been meaning to drop you a message but keep getting distracted. I will push that to the top of the list.
- 151 replies
-
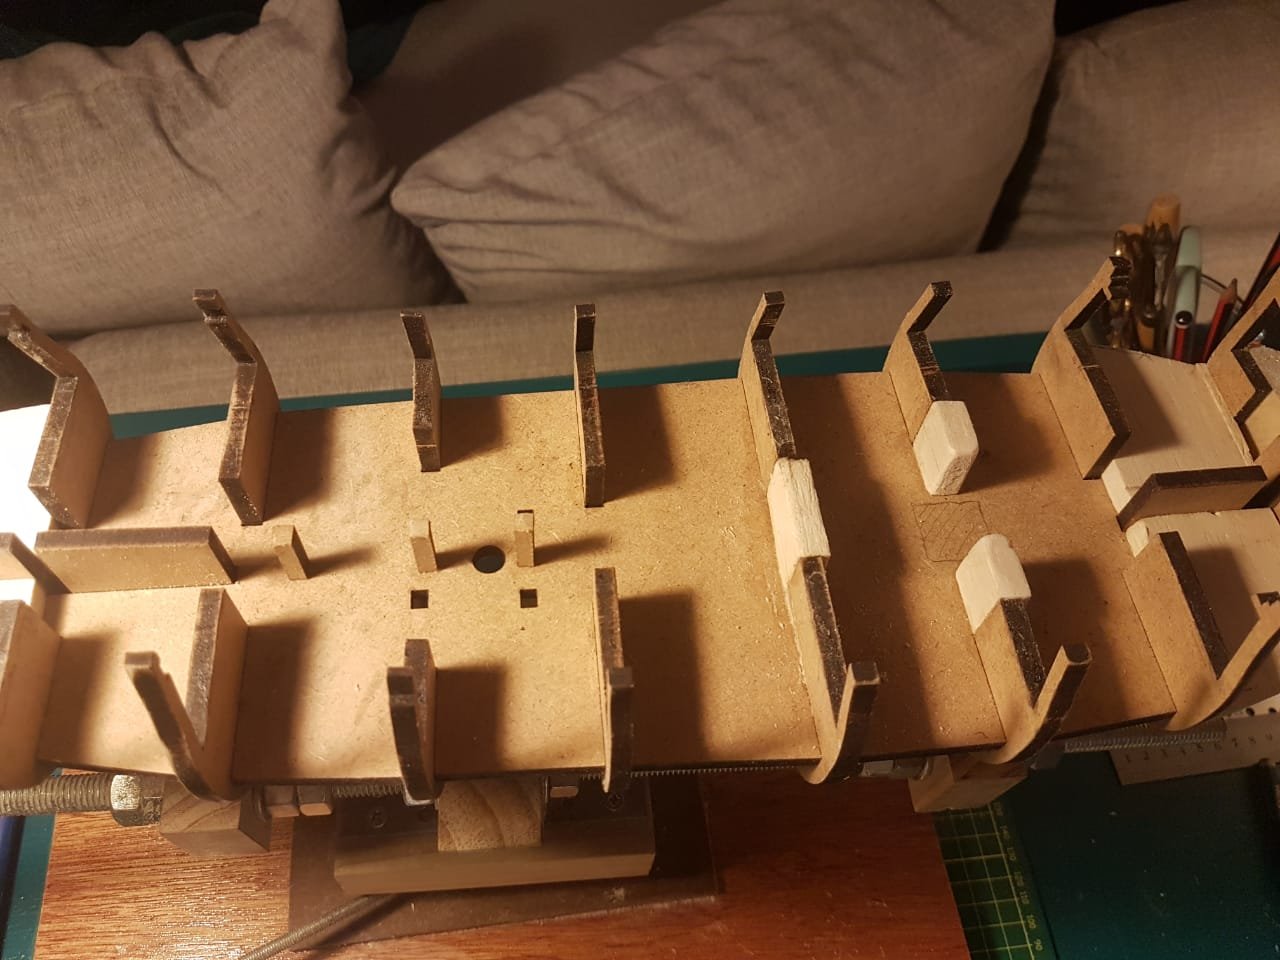
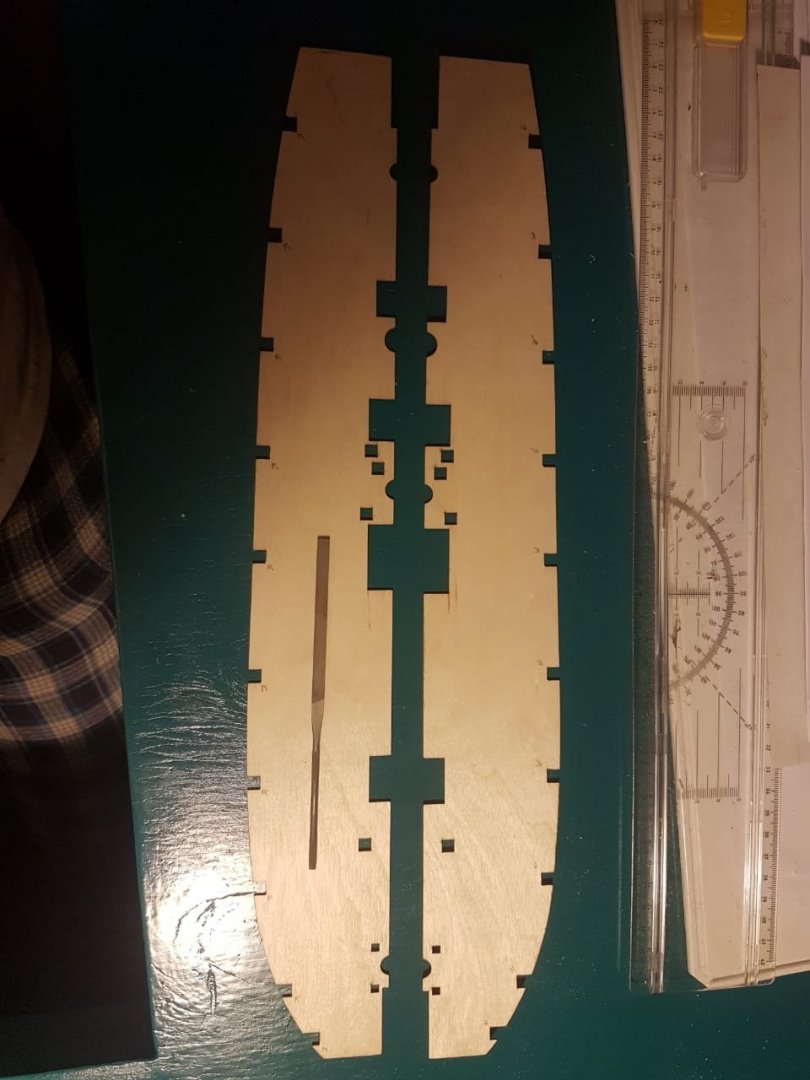
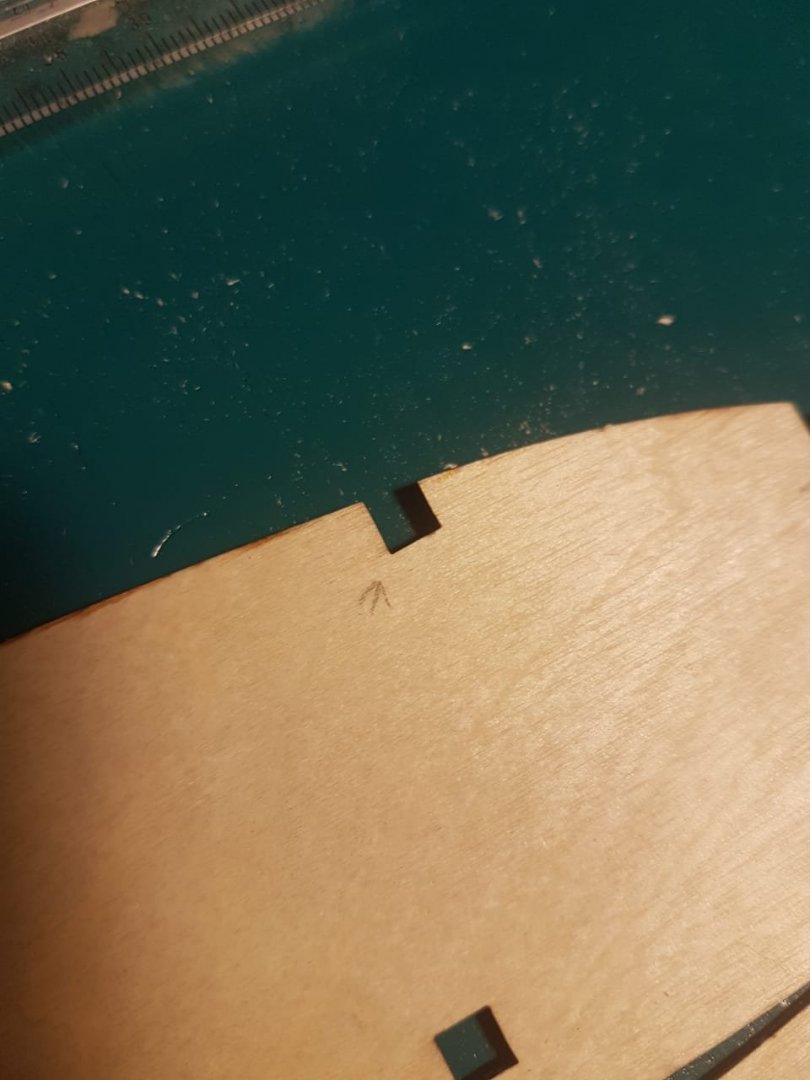
Day 7 First a question... should I be "quoting" messages when I reply to them in this thread? This was not a hugely productive day, I am busy building a second floor in my workshop and the undertaking is wearing me out a bit and not leaving me a huge amount of time in the evenings to get work done but this is where I am. I dry fitted the false gun deck. This required quite a bit of cursing to fit correctly. The cutouts for the gun deck need to be slightly modified to allow the deck halves to fit flush(I drew pencil arrows to in to indicate what im talking about). A note on this would be to do one cutout at a time with a small file and then re test the fit. i did this probably 20 times and suddenly it popped right in with no effort at all. I did however notice that this deck is somewhat flimsy. I recalled that some people were installing additional supports below the gun deck to add stability. I stole shamelessly and have done the same thing, putting balsa supports in at bulkheads 5 and 6 as well as MDF offcuts between bulkheads 7,8 and 9. I will also be reinforcing the edges of the hatches as seen on the build done by BlueEnsign. 3
- 151 replies
About us
Modelshipworld - Advancing Ship Modeling through Research
SSL Secured
Your security is important for us so this Website is SSL-Secured
NRG Mailing Address
Nautical Research Guild
237 South Lincoln Street
Westmont IL, 60559-1917
Model Ship World ® and the MSW logo are Registered Trademarks, and belong to the Nautical Research Guild (United States Patent and Trademark Office: No. 6,929,264 & No. 6,929,274, registered Dec. 20, 2022)
Helpful Links
About the NRG
If you enjoy building ship models that are historically accurate as well as beautiful, then The Nautical Research Guild (NRG) is just right for you.
The Guild is a non-profit educational organization whose mission is to “Advance Ship Modeling Through Research”. We provide support to our members in their efforts to raise the quality of their model ships.
The Nautical Research Guild has published our world-renowned quarterly magazine, The Nautical Research Journal, since 1955. The pages of the Journal are full of articles by accomplished ship modelers who show you how they create those exquisite details on their models, and by maritime historians who show you the correct details to build. The Journal is available in both print and digital editions. Go to the NRG web site (www.thenrg.org) to download a complimentary digital copy of the Journal. The NRG also publishes plan sets, books and compilations of back issues of the Journal and the former Ships in Scale and Model Ship Builder magazines.

