
JDDouglass
-
Posts
32 -
Joined
-
Last visited
Content Type
Profiles
Forums
Gallery
Events
Everything posted by JDDouglass
-
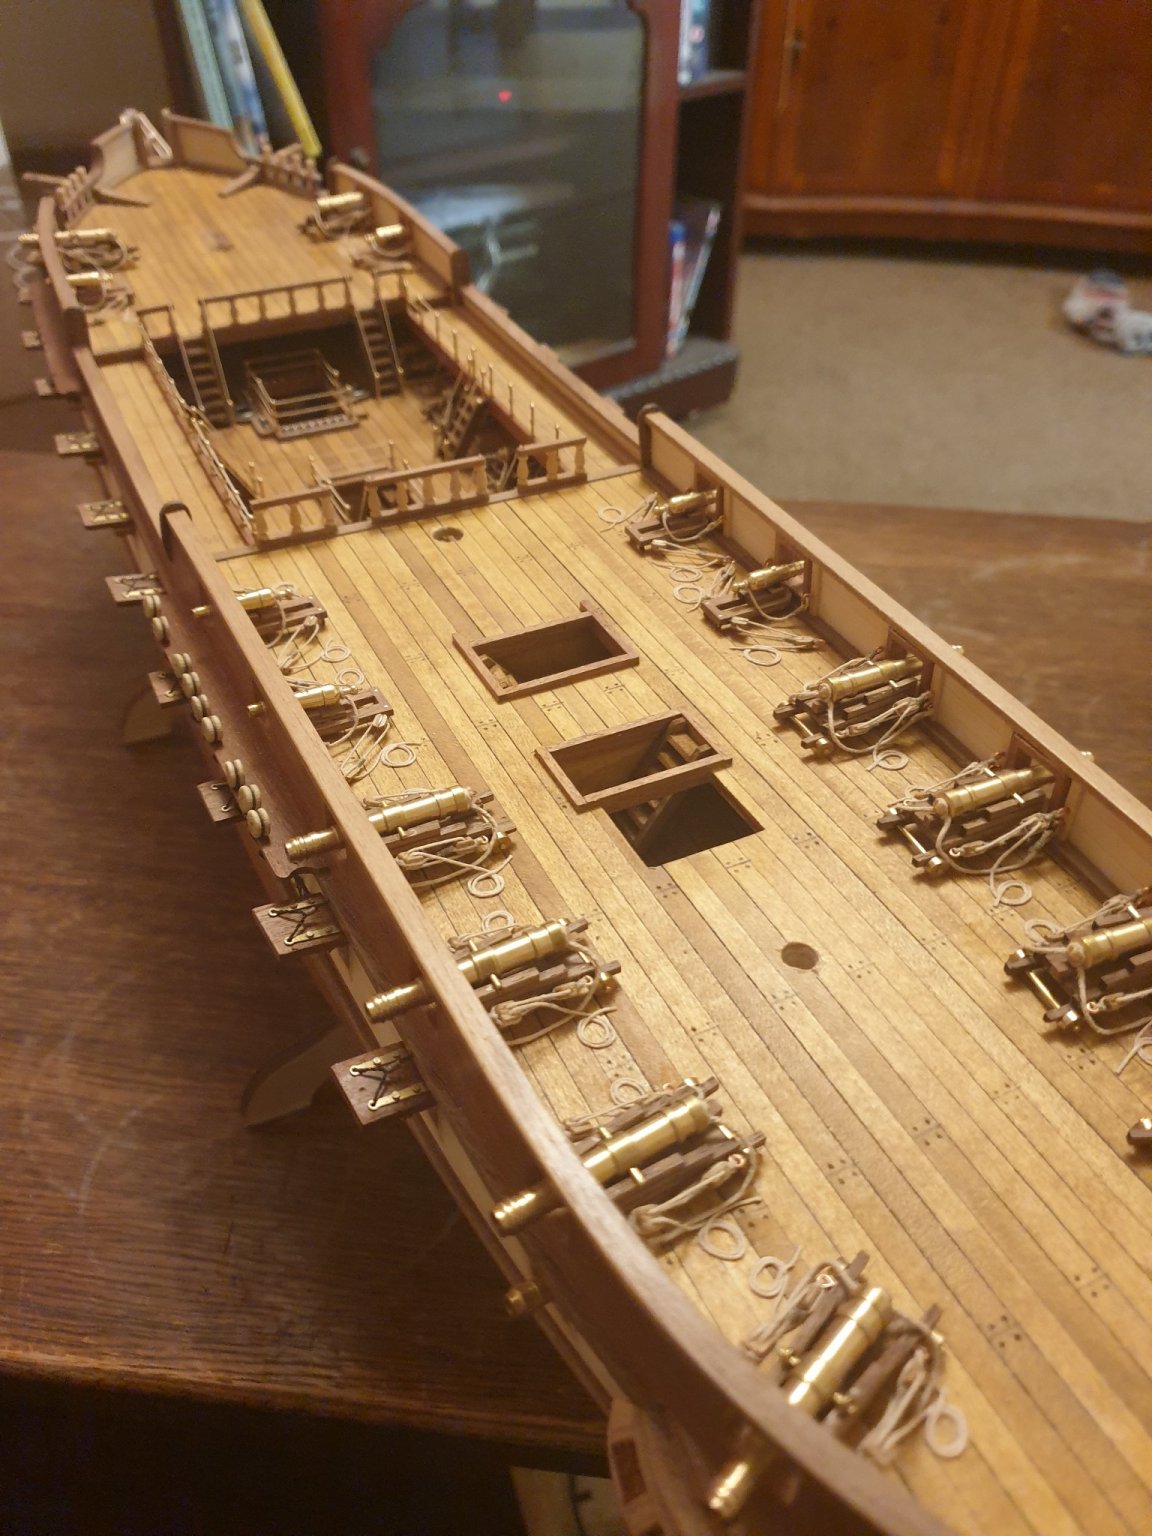
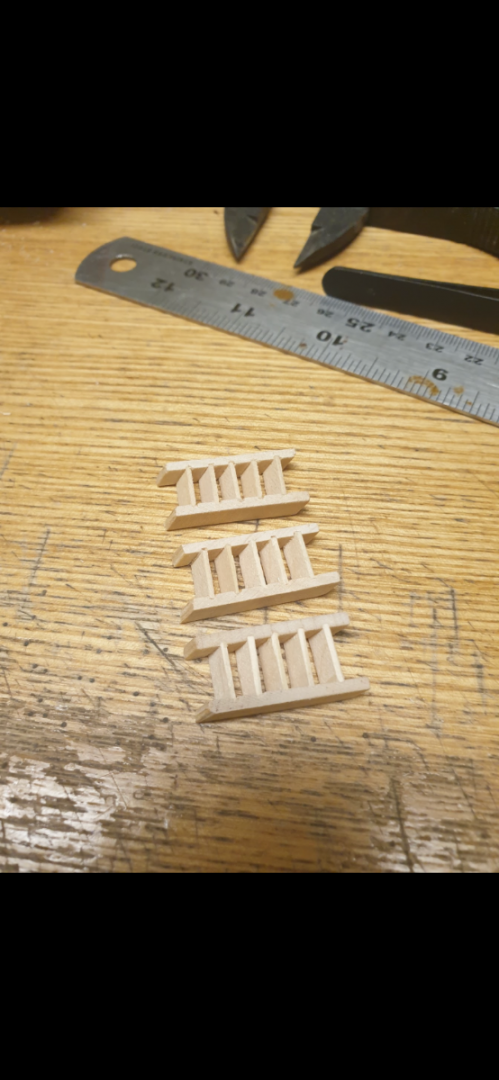
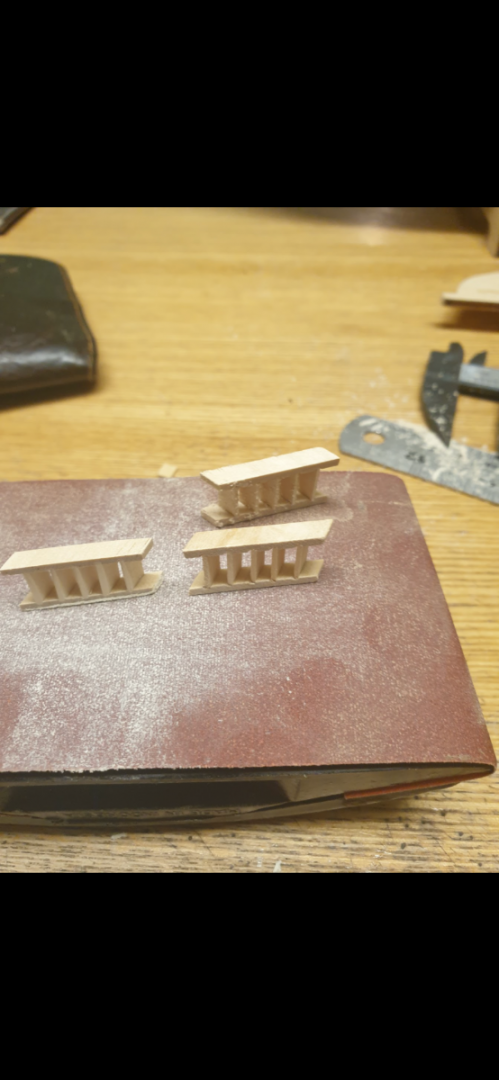
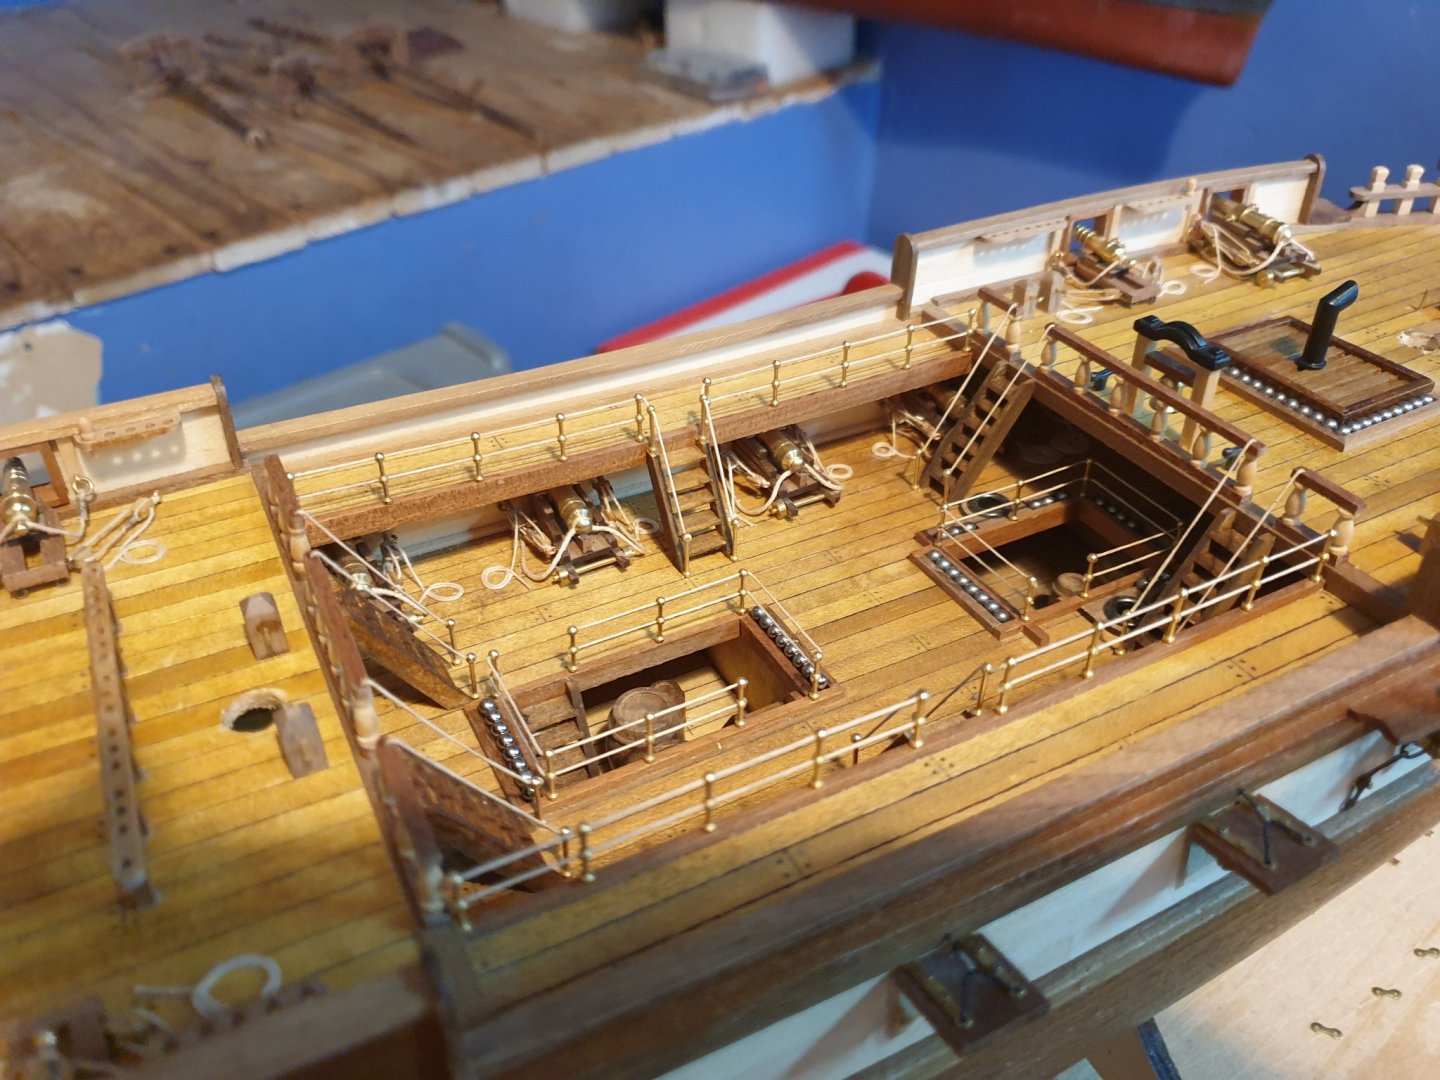
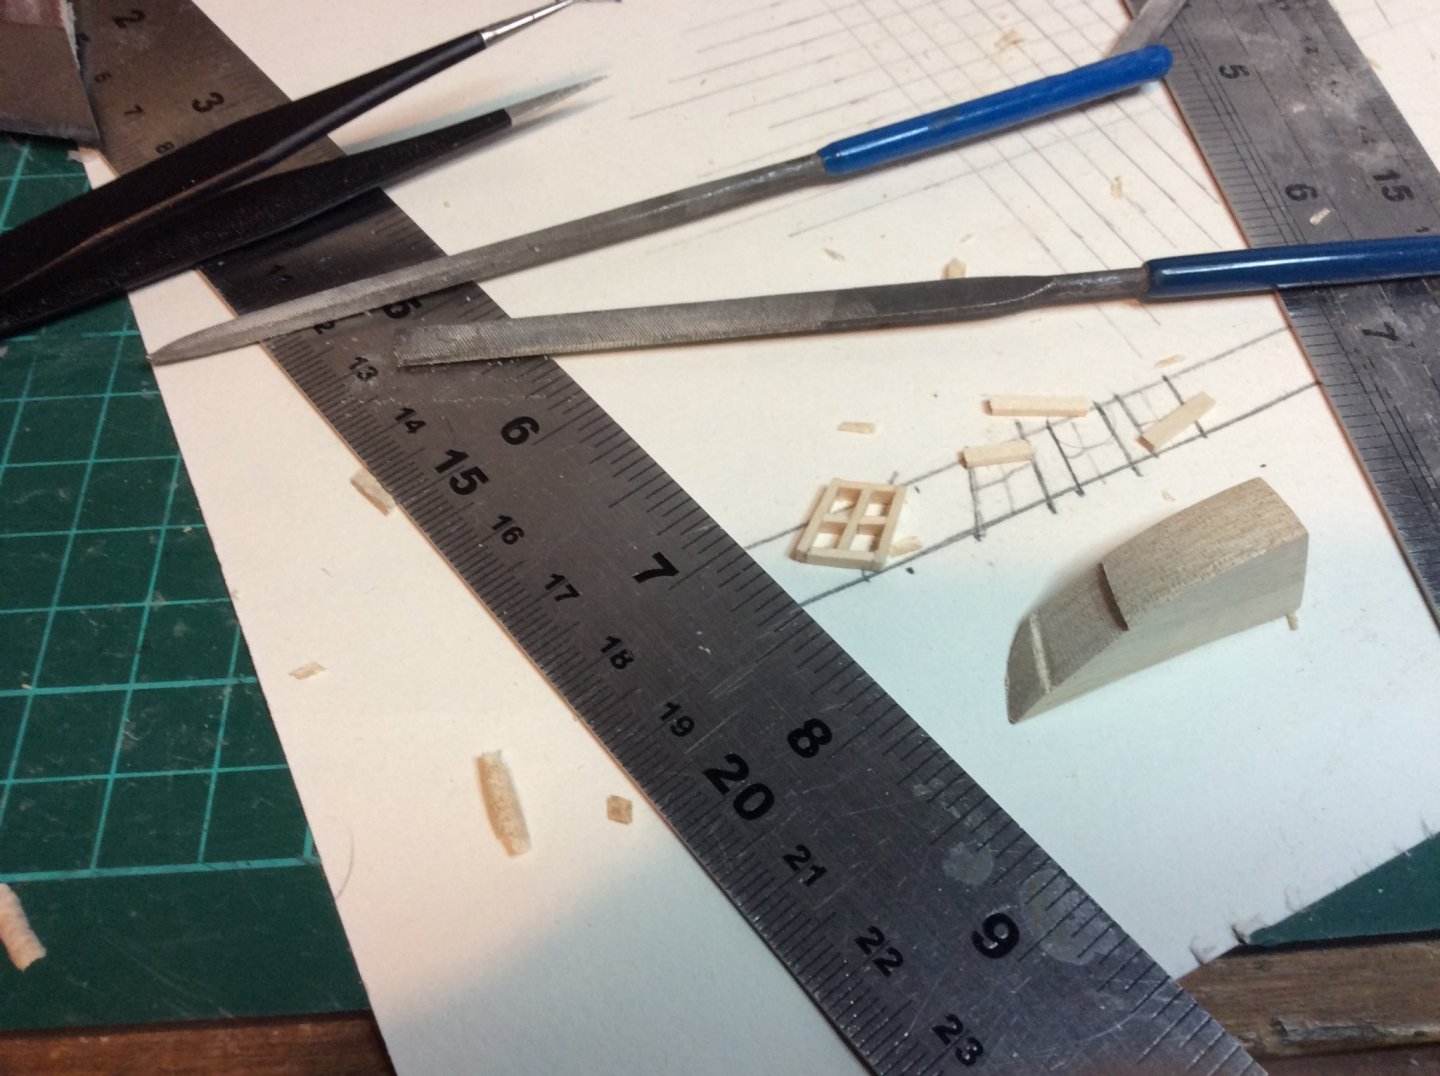
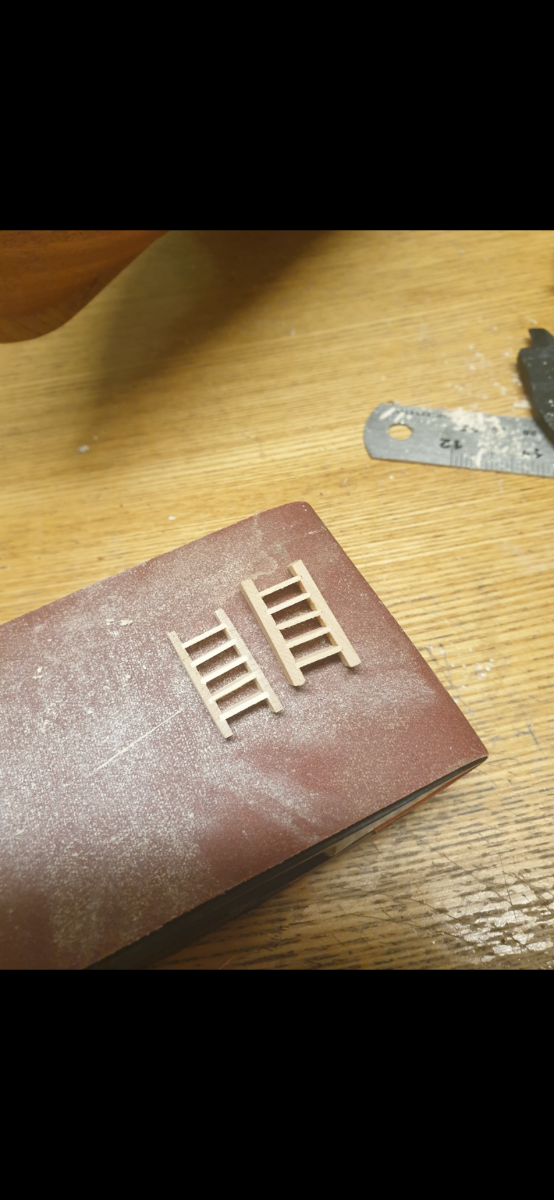
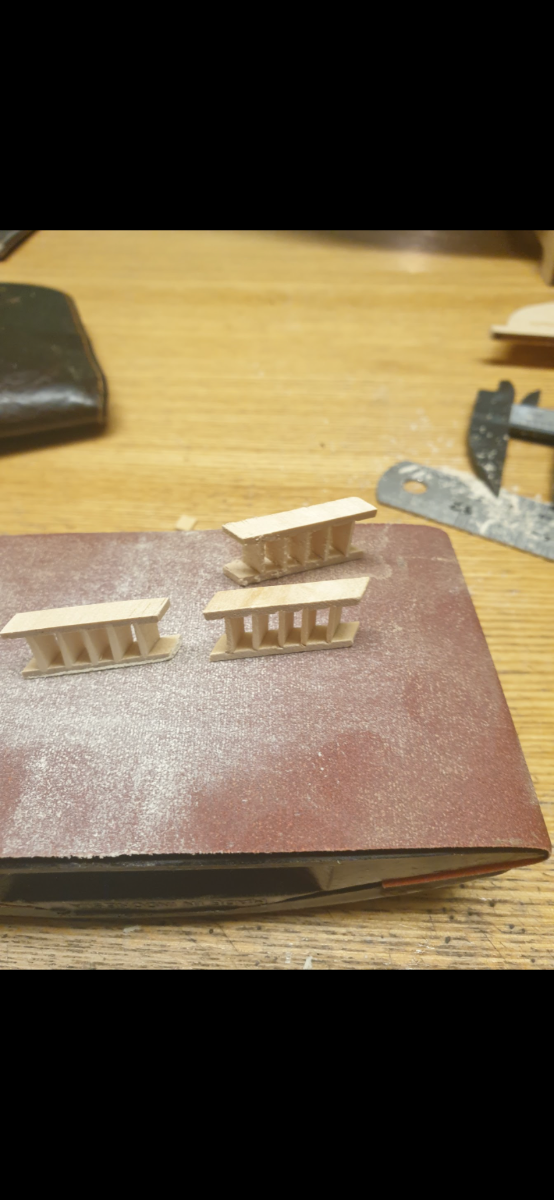
Oh, By the way just remember that the ladders that come from the main decks I made the treads smaller 7mm or 8mm. This was because or the openings on the gun deck which made it easier to fit them between the openings and cannons. Again using my fingers a sanding I reduce the width of those as well.

-
Hi Jack I think I made them 9mm long as the instructions said. Once I’d made the ladders though I used a sanding block to reduce the width of the sides and treads to make the whole ladder narrower. Being careful not to damage them in the process. I hope these photos will help.
-
Hi MSW, I’ve not been on here for a while. I was involved in a car accident in September where I sustained neck and shoulder injuries. I’m hoping to pick this model up again very soon to finish it. I’m not fully recovered as yet, it’s been a long road. I’m at the stage where able enough to do work on the model although it still extremely painful to work high in the rigging. I’ve missed doing this model so much that I purchased Victory Models HMS Fly. This is so I can start low down so to speak where I don’t need to reach high. So look for a new build log In the near future. Anyway I’ll sign out now and I’ll wish those who are starting the Constellation the best of luck with your builds. I’m hope my log will be useful to you to help you make great models. Until next time JD
-
Hi yes they are Caldercraft 10mm 2 ball stanchions. I perched these on EBay at £7.99 for 10 if I remember.
-
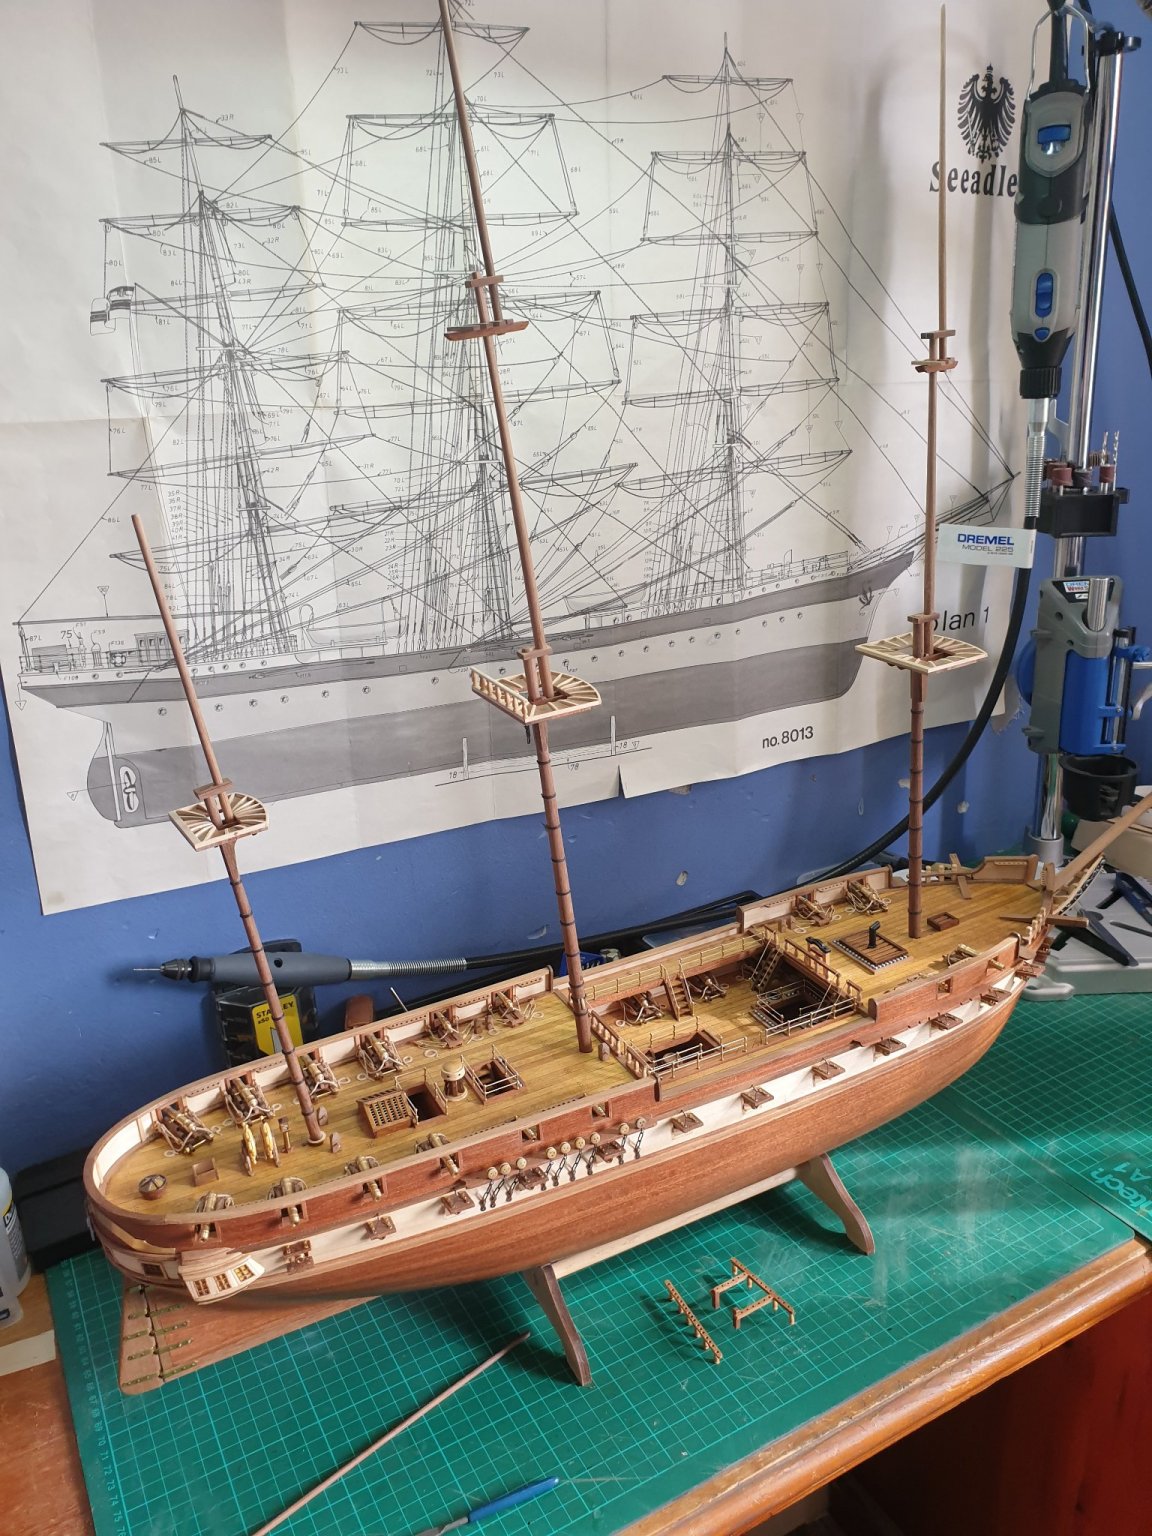
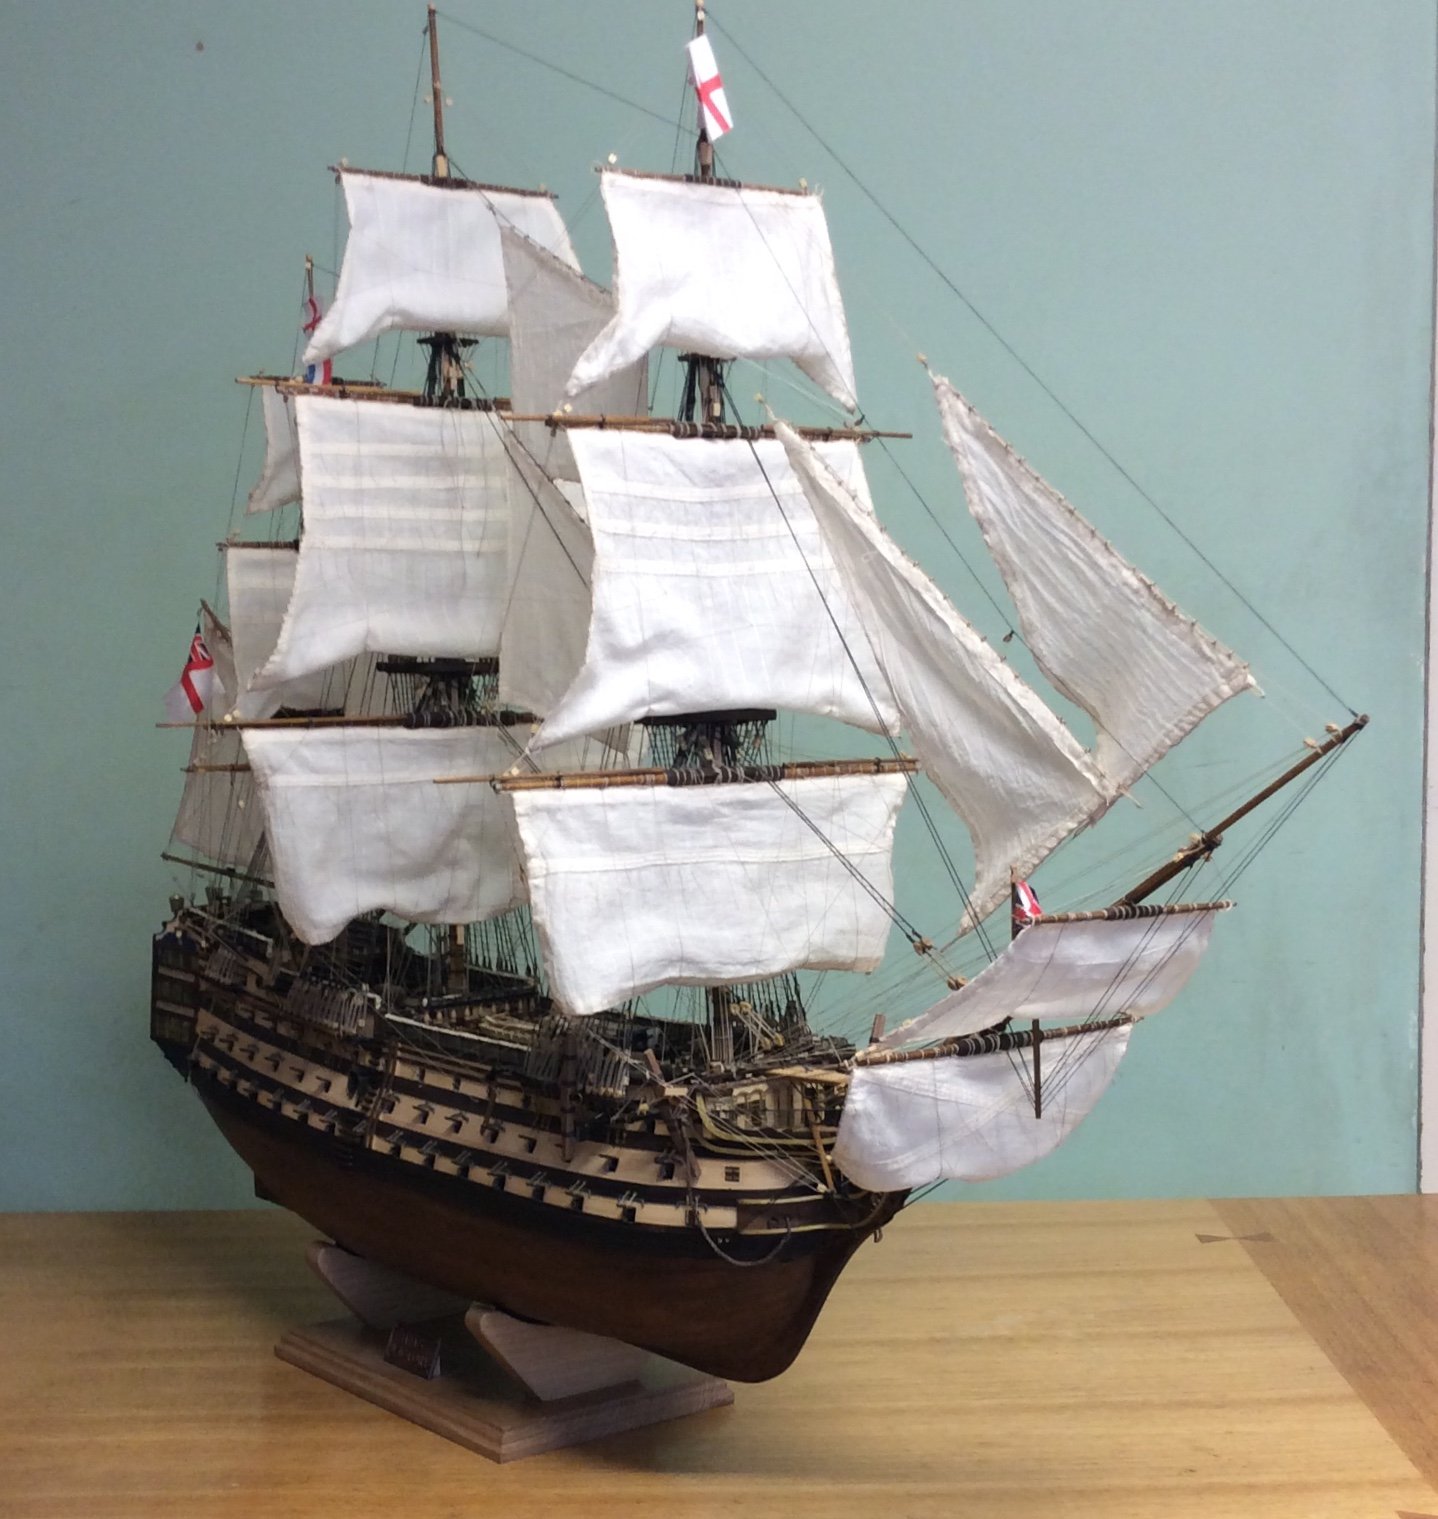
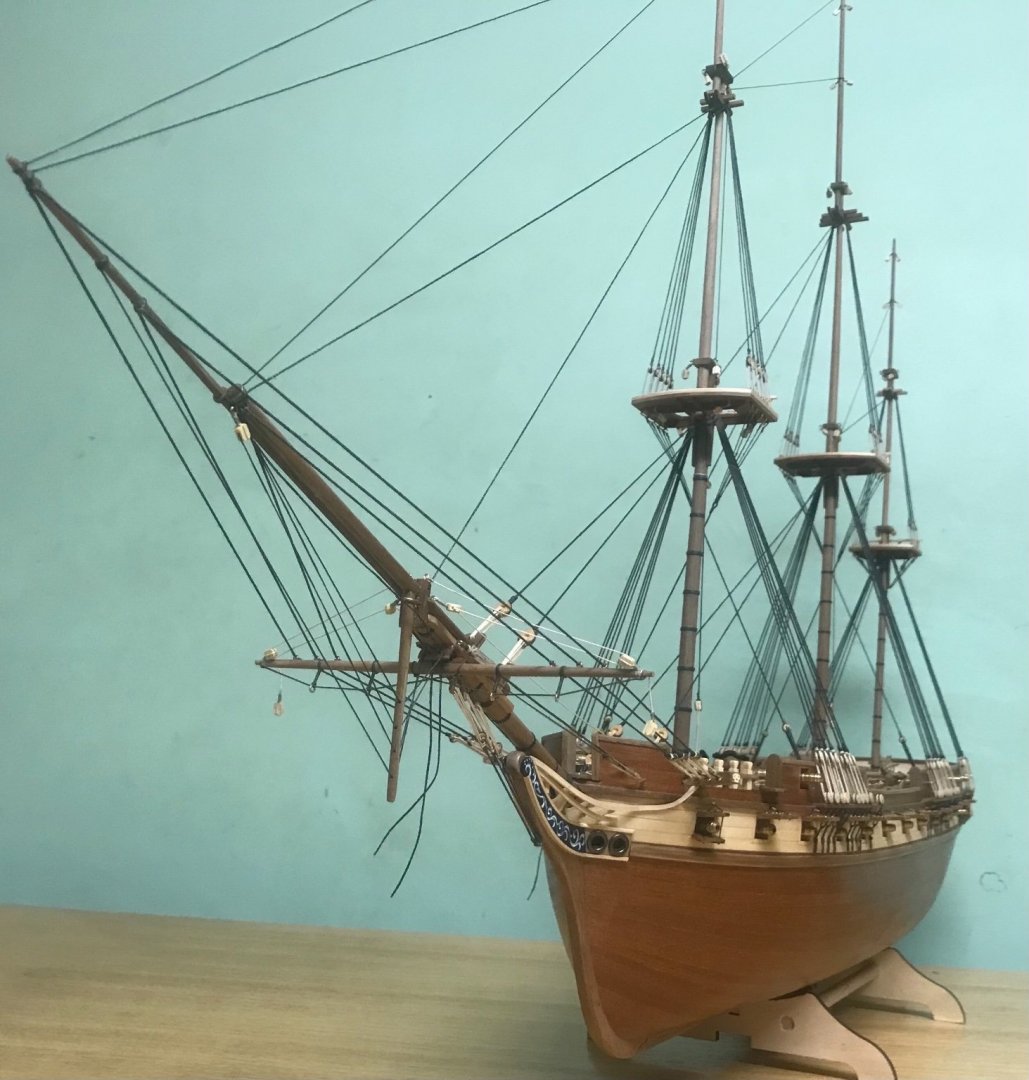
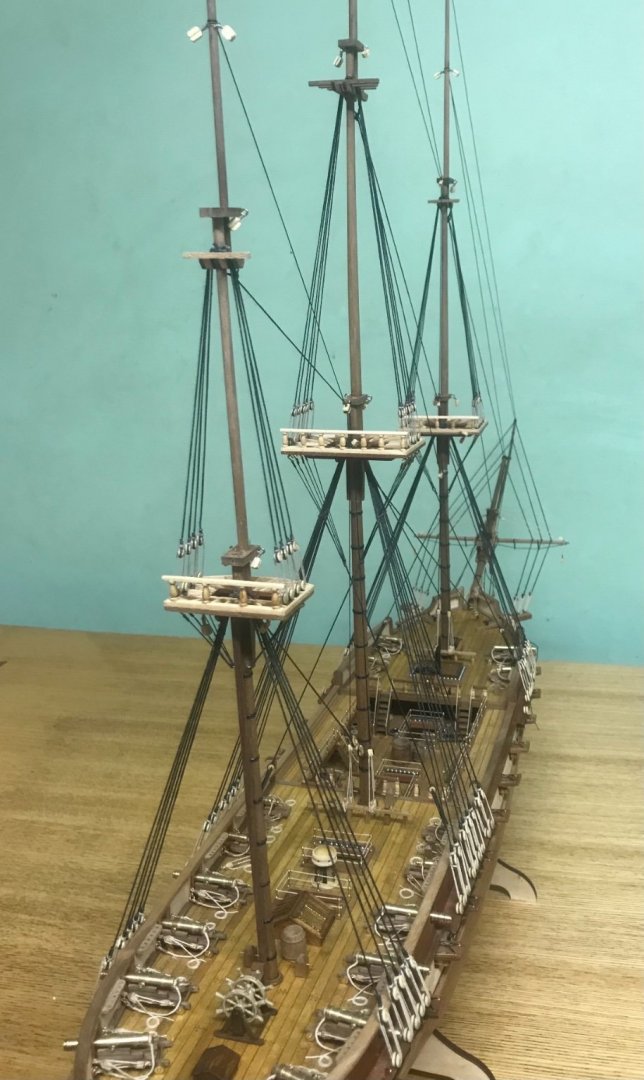
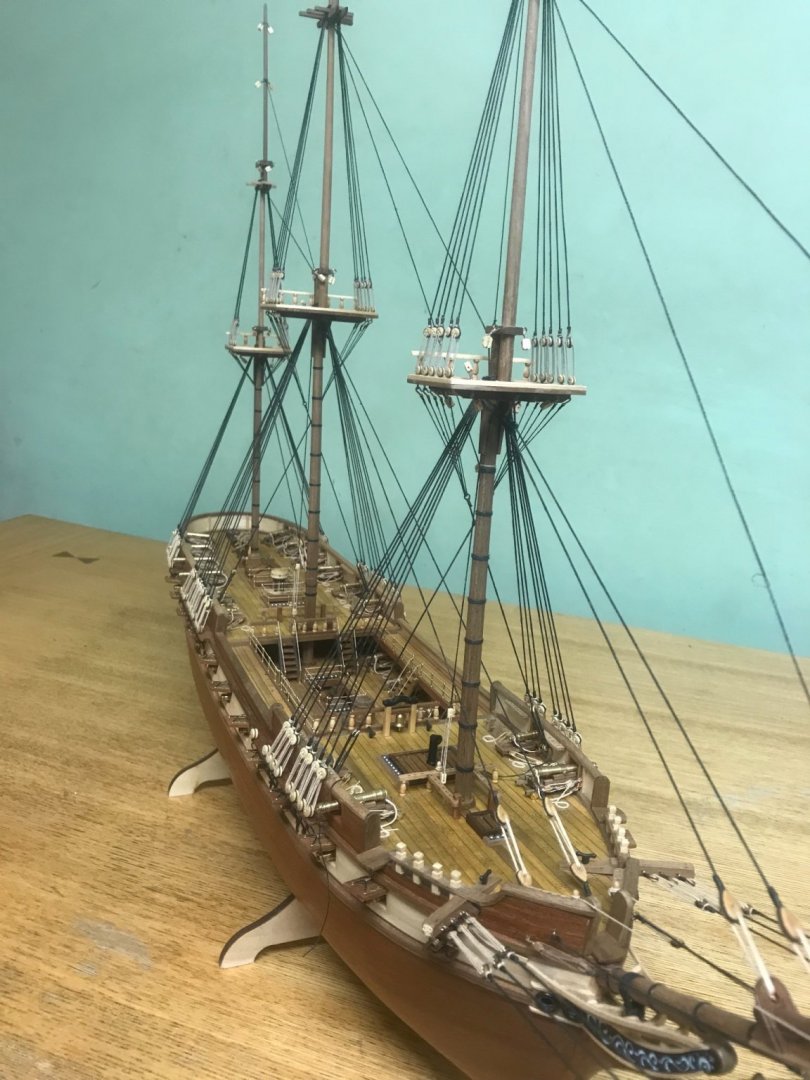
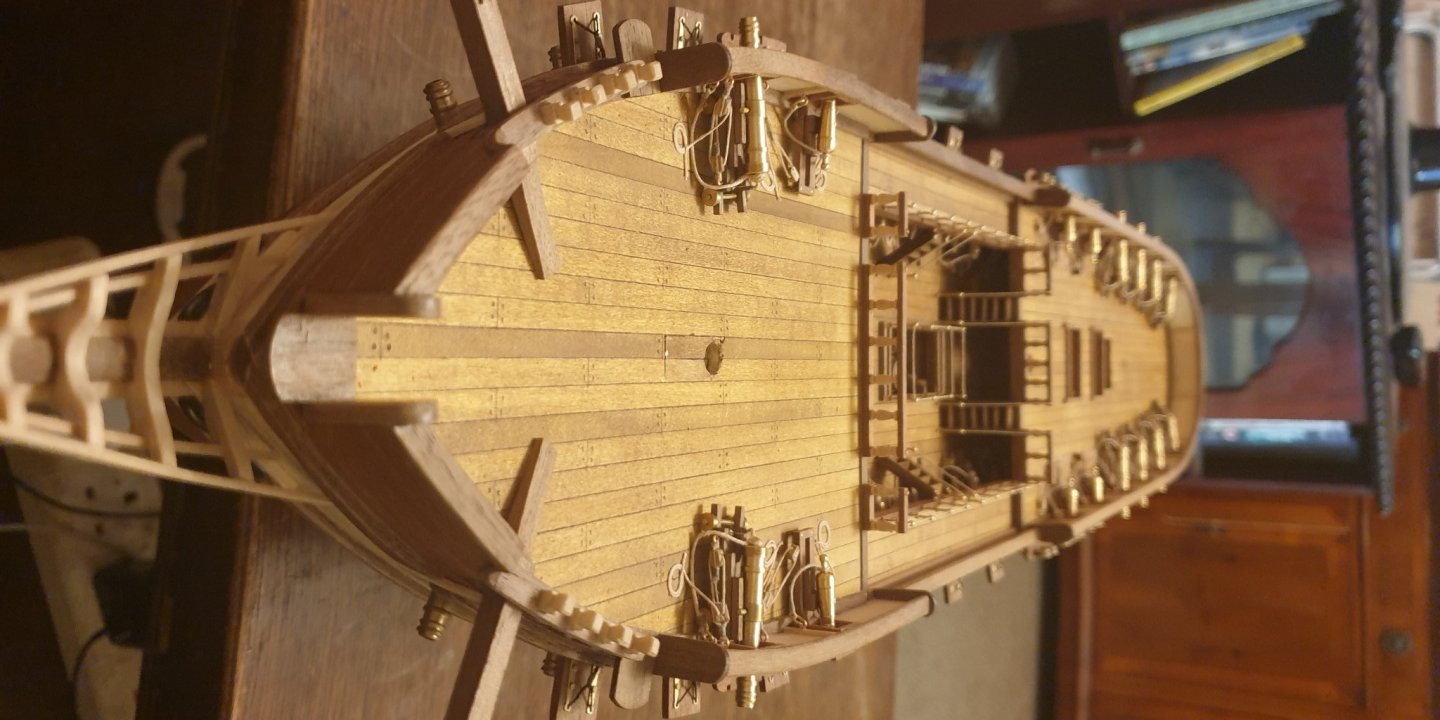
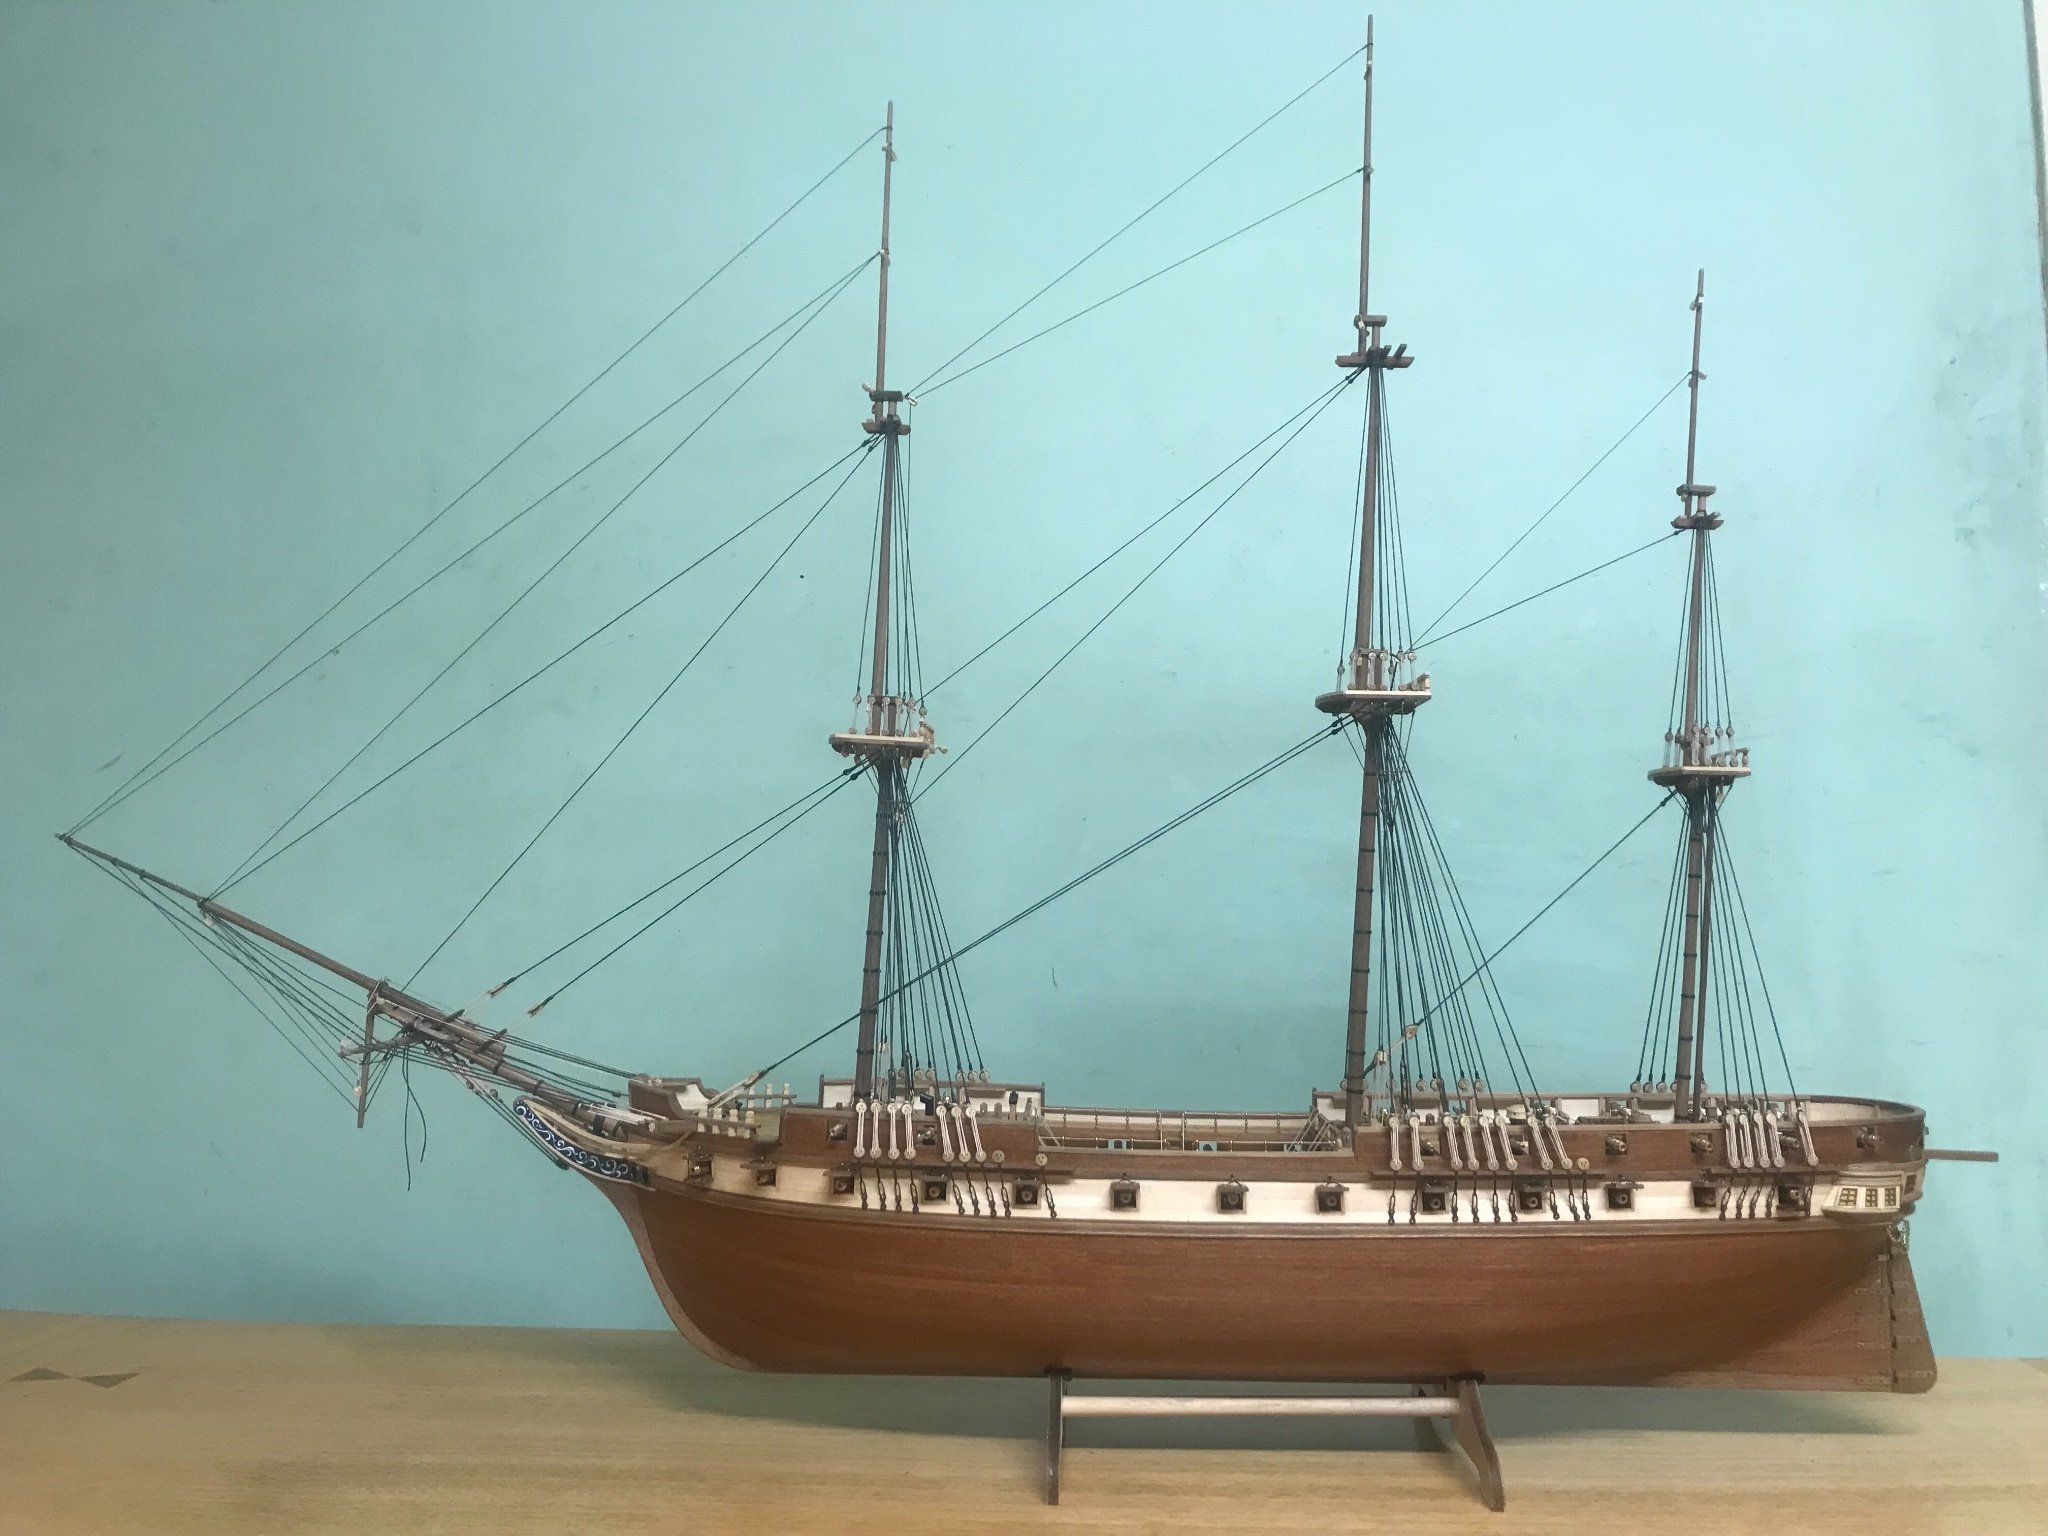
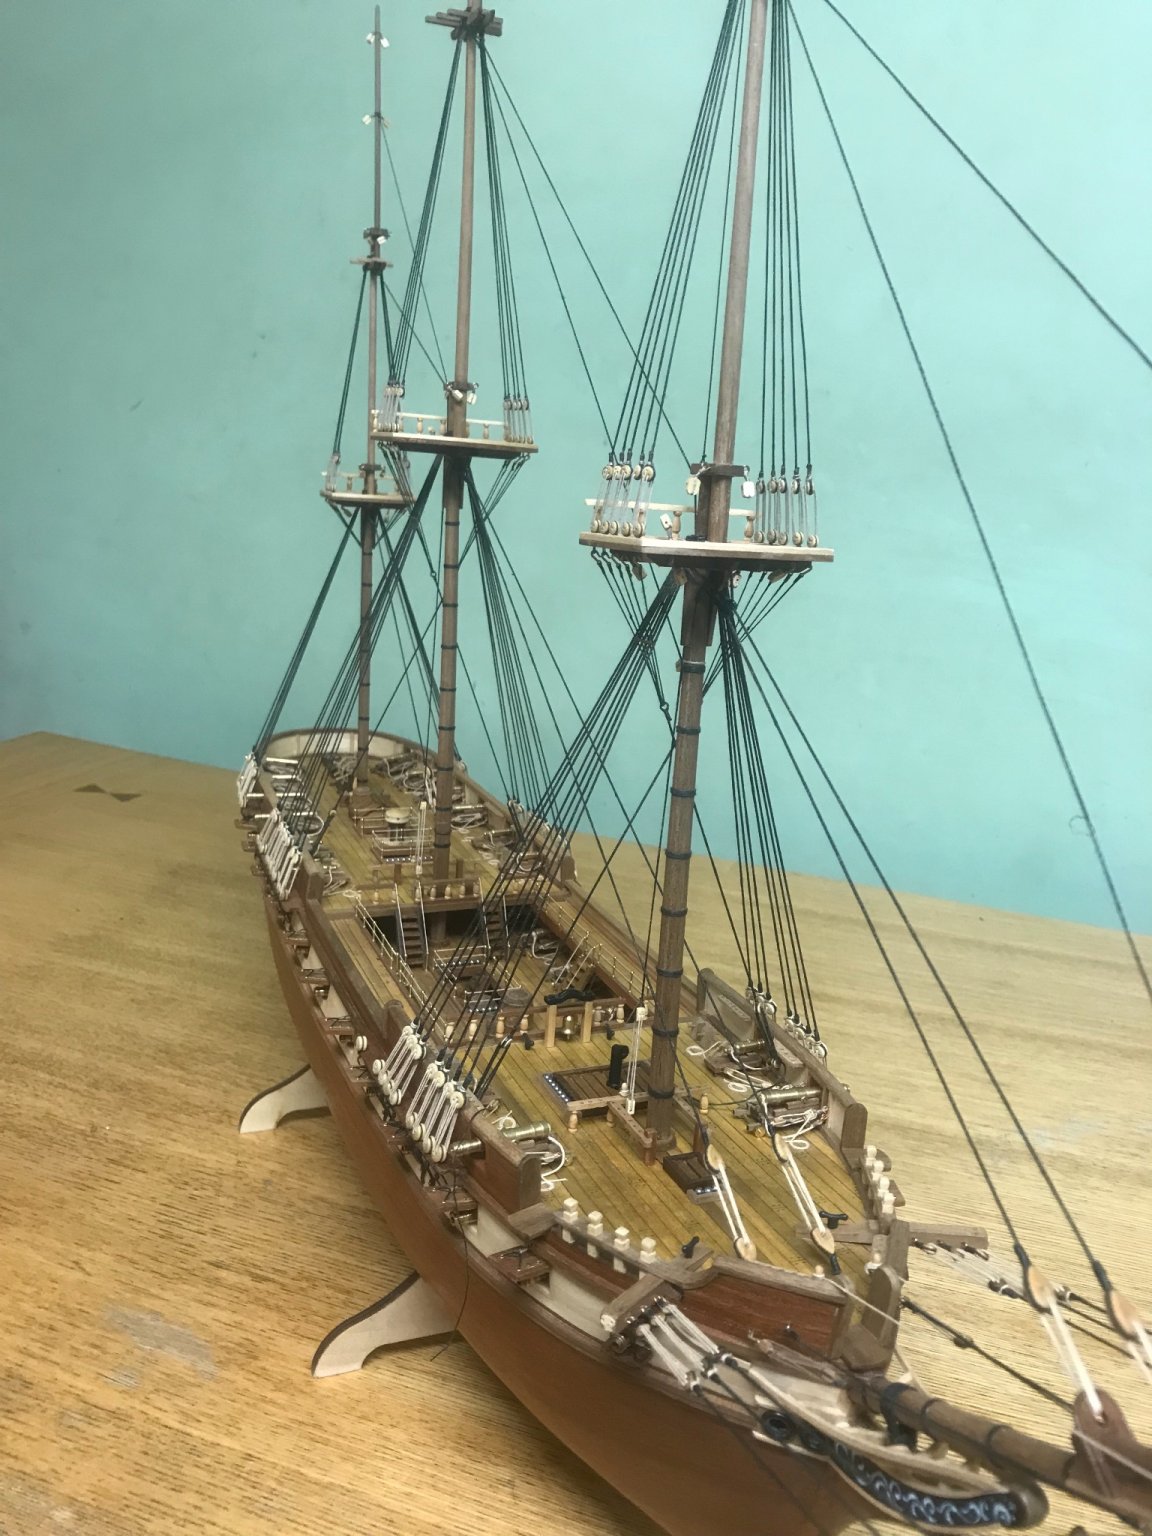
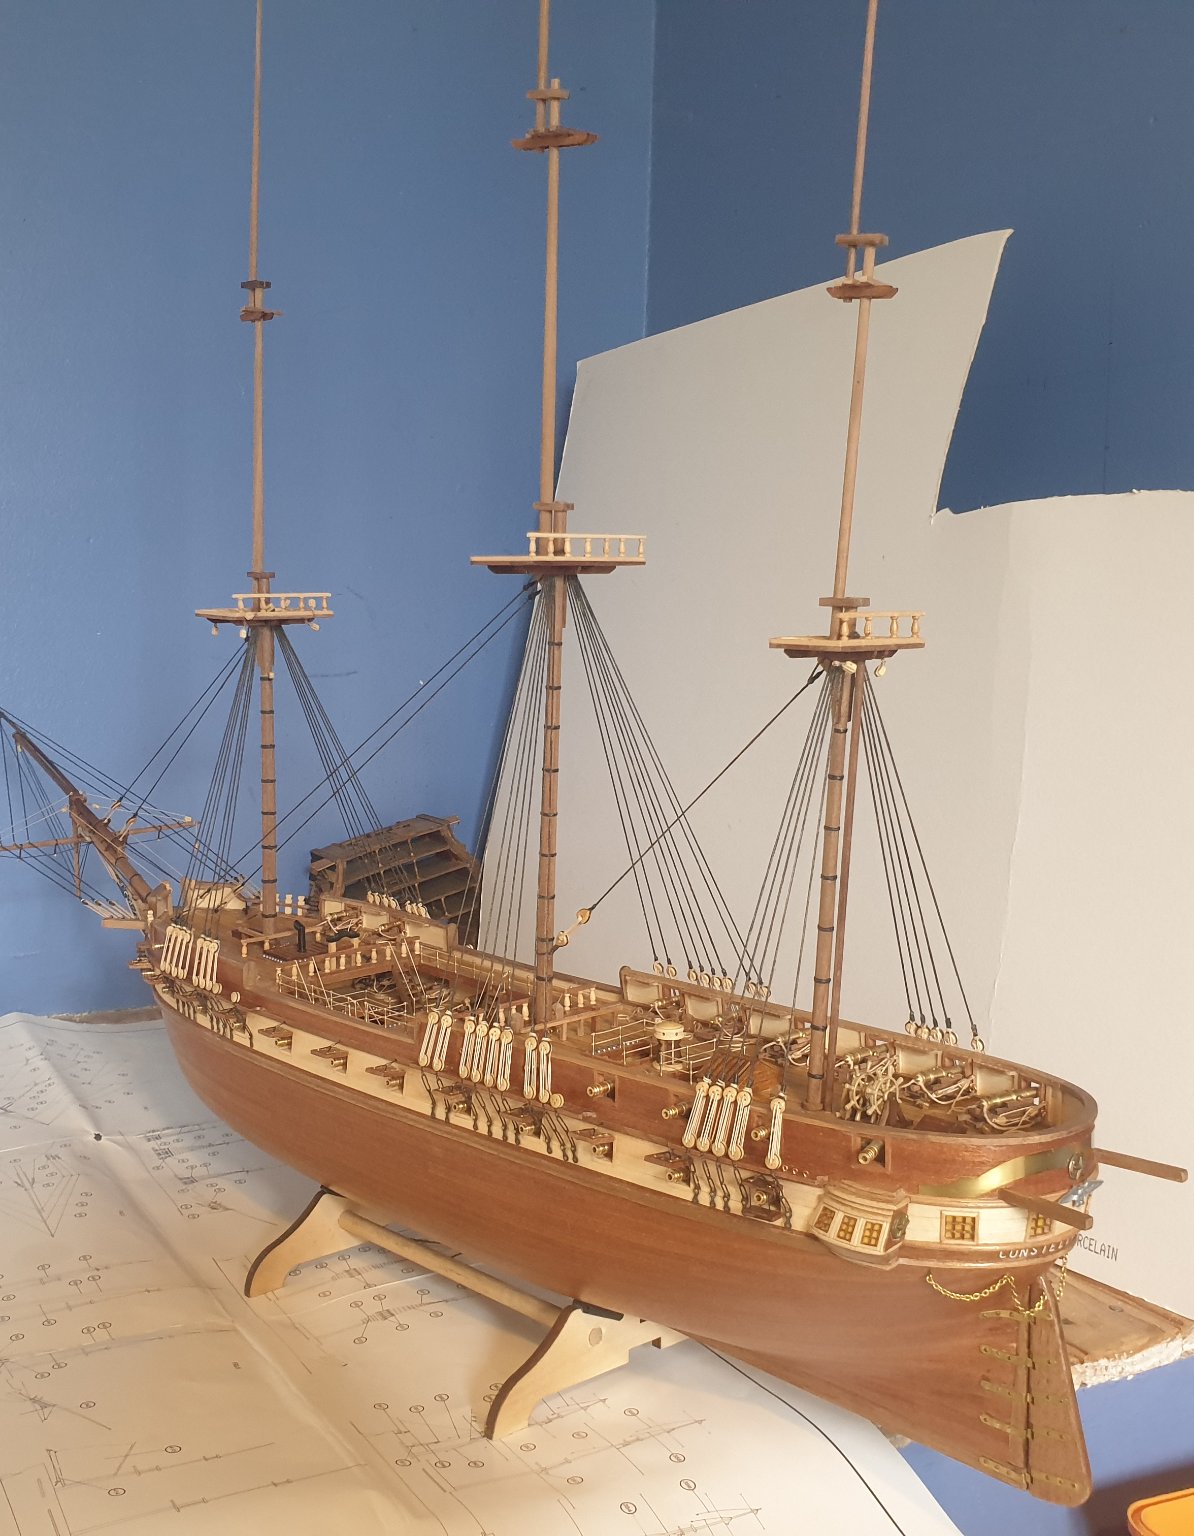
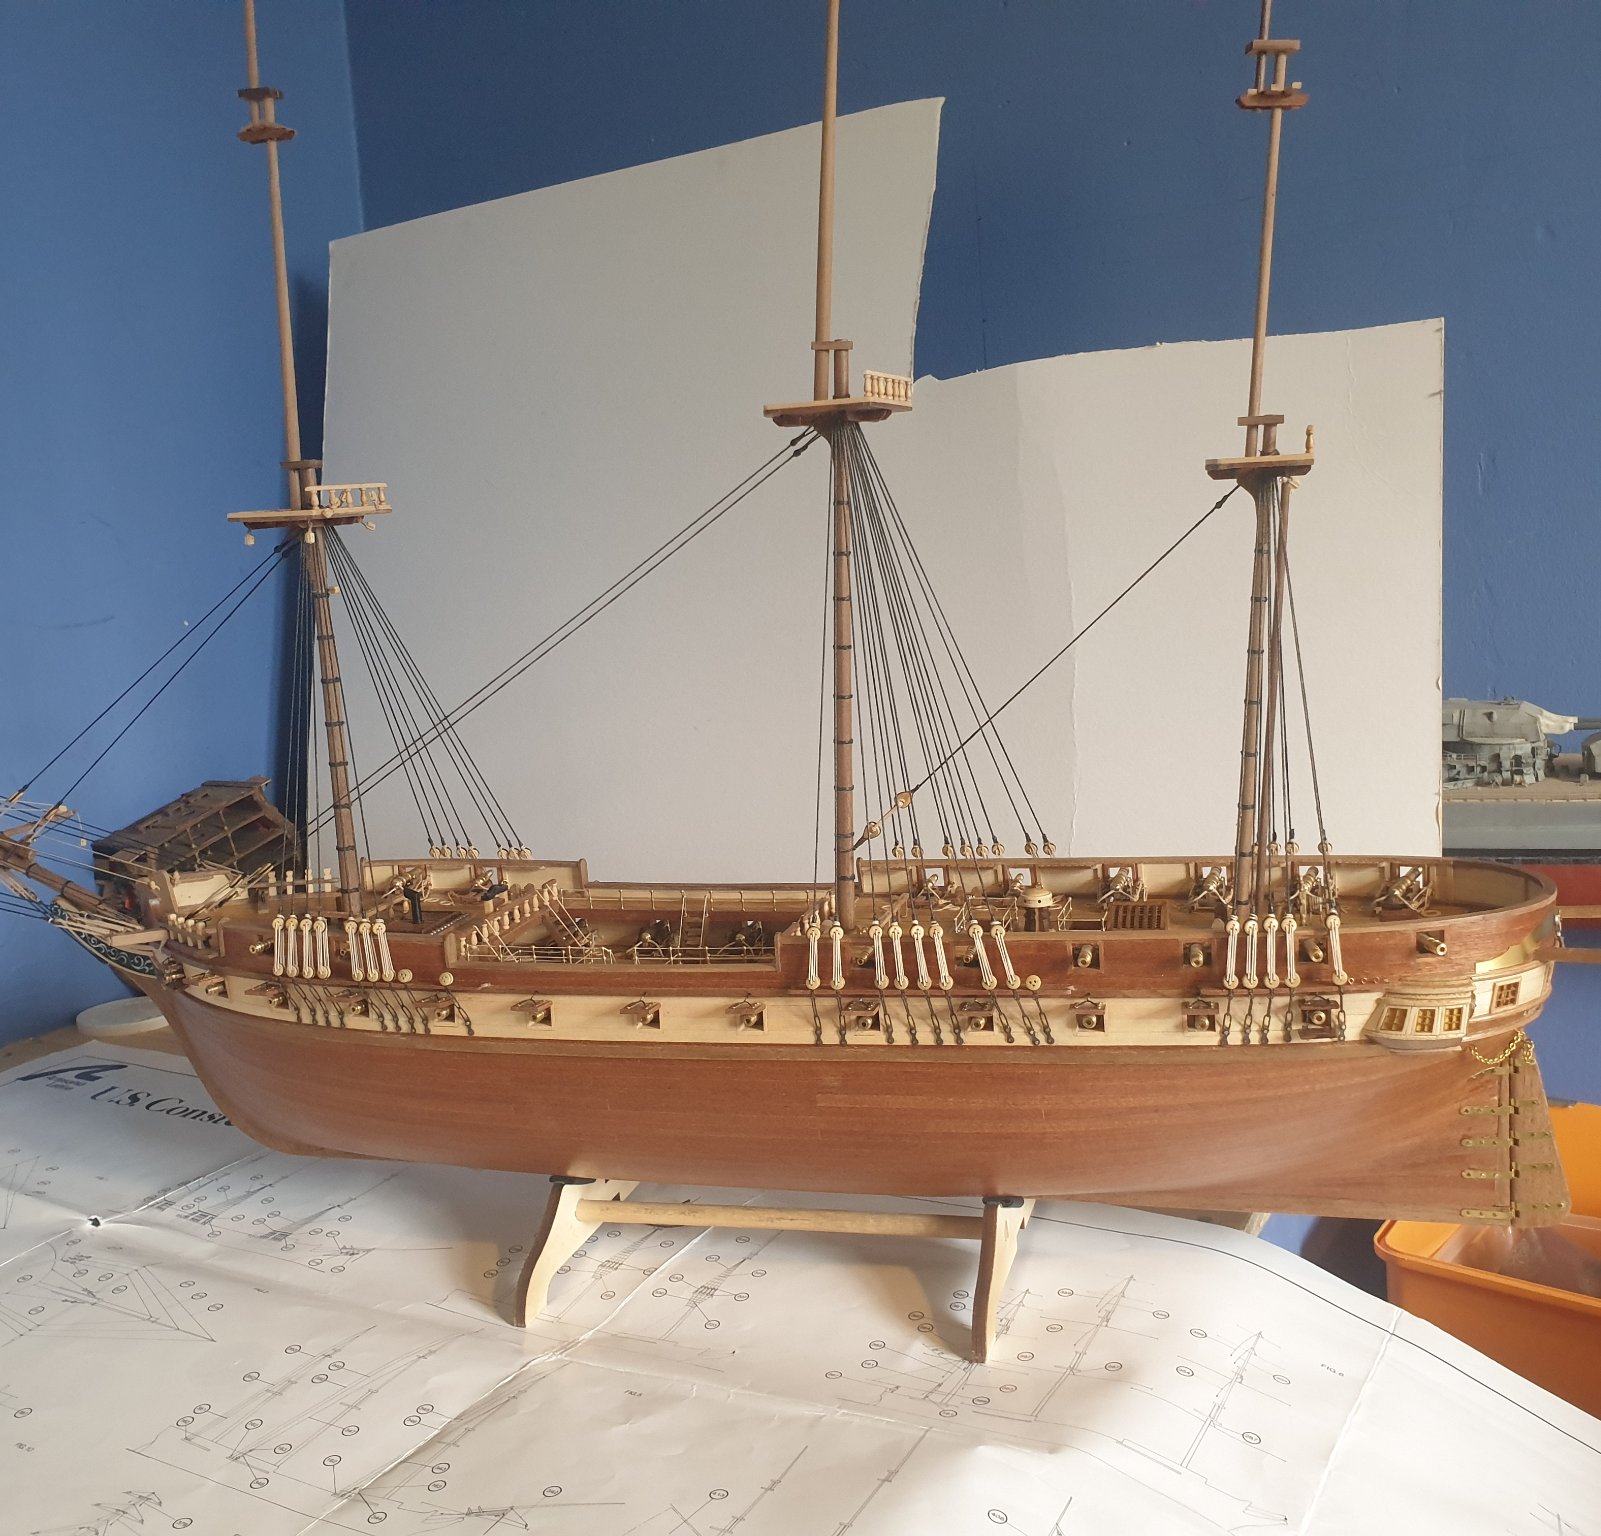
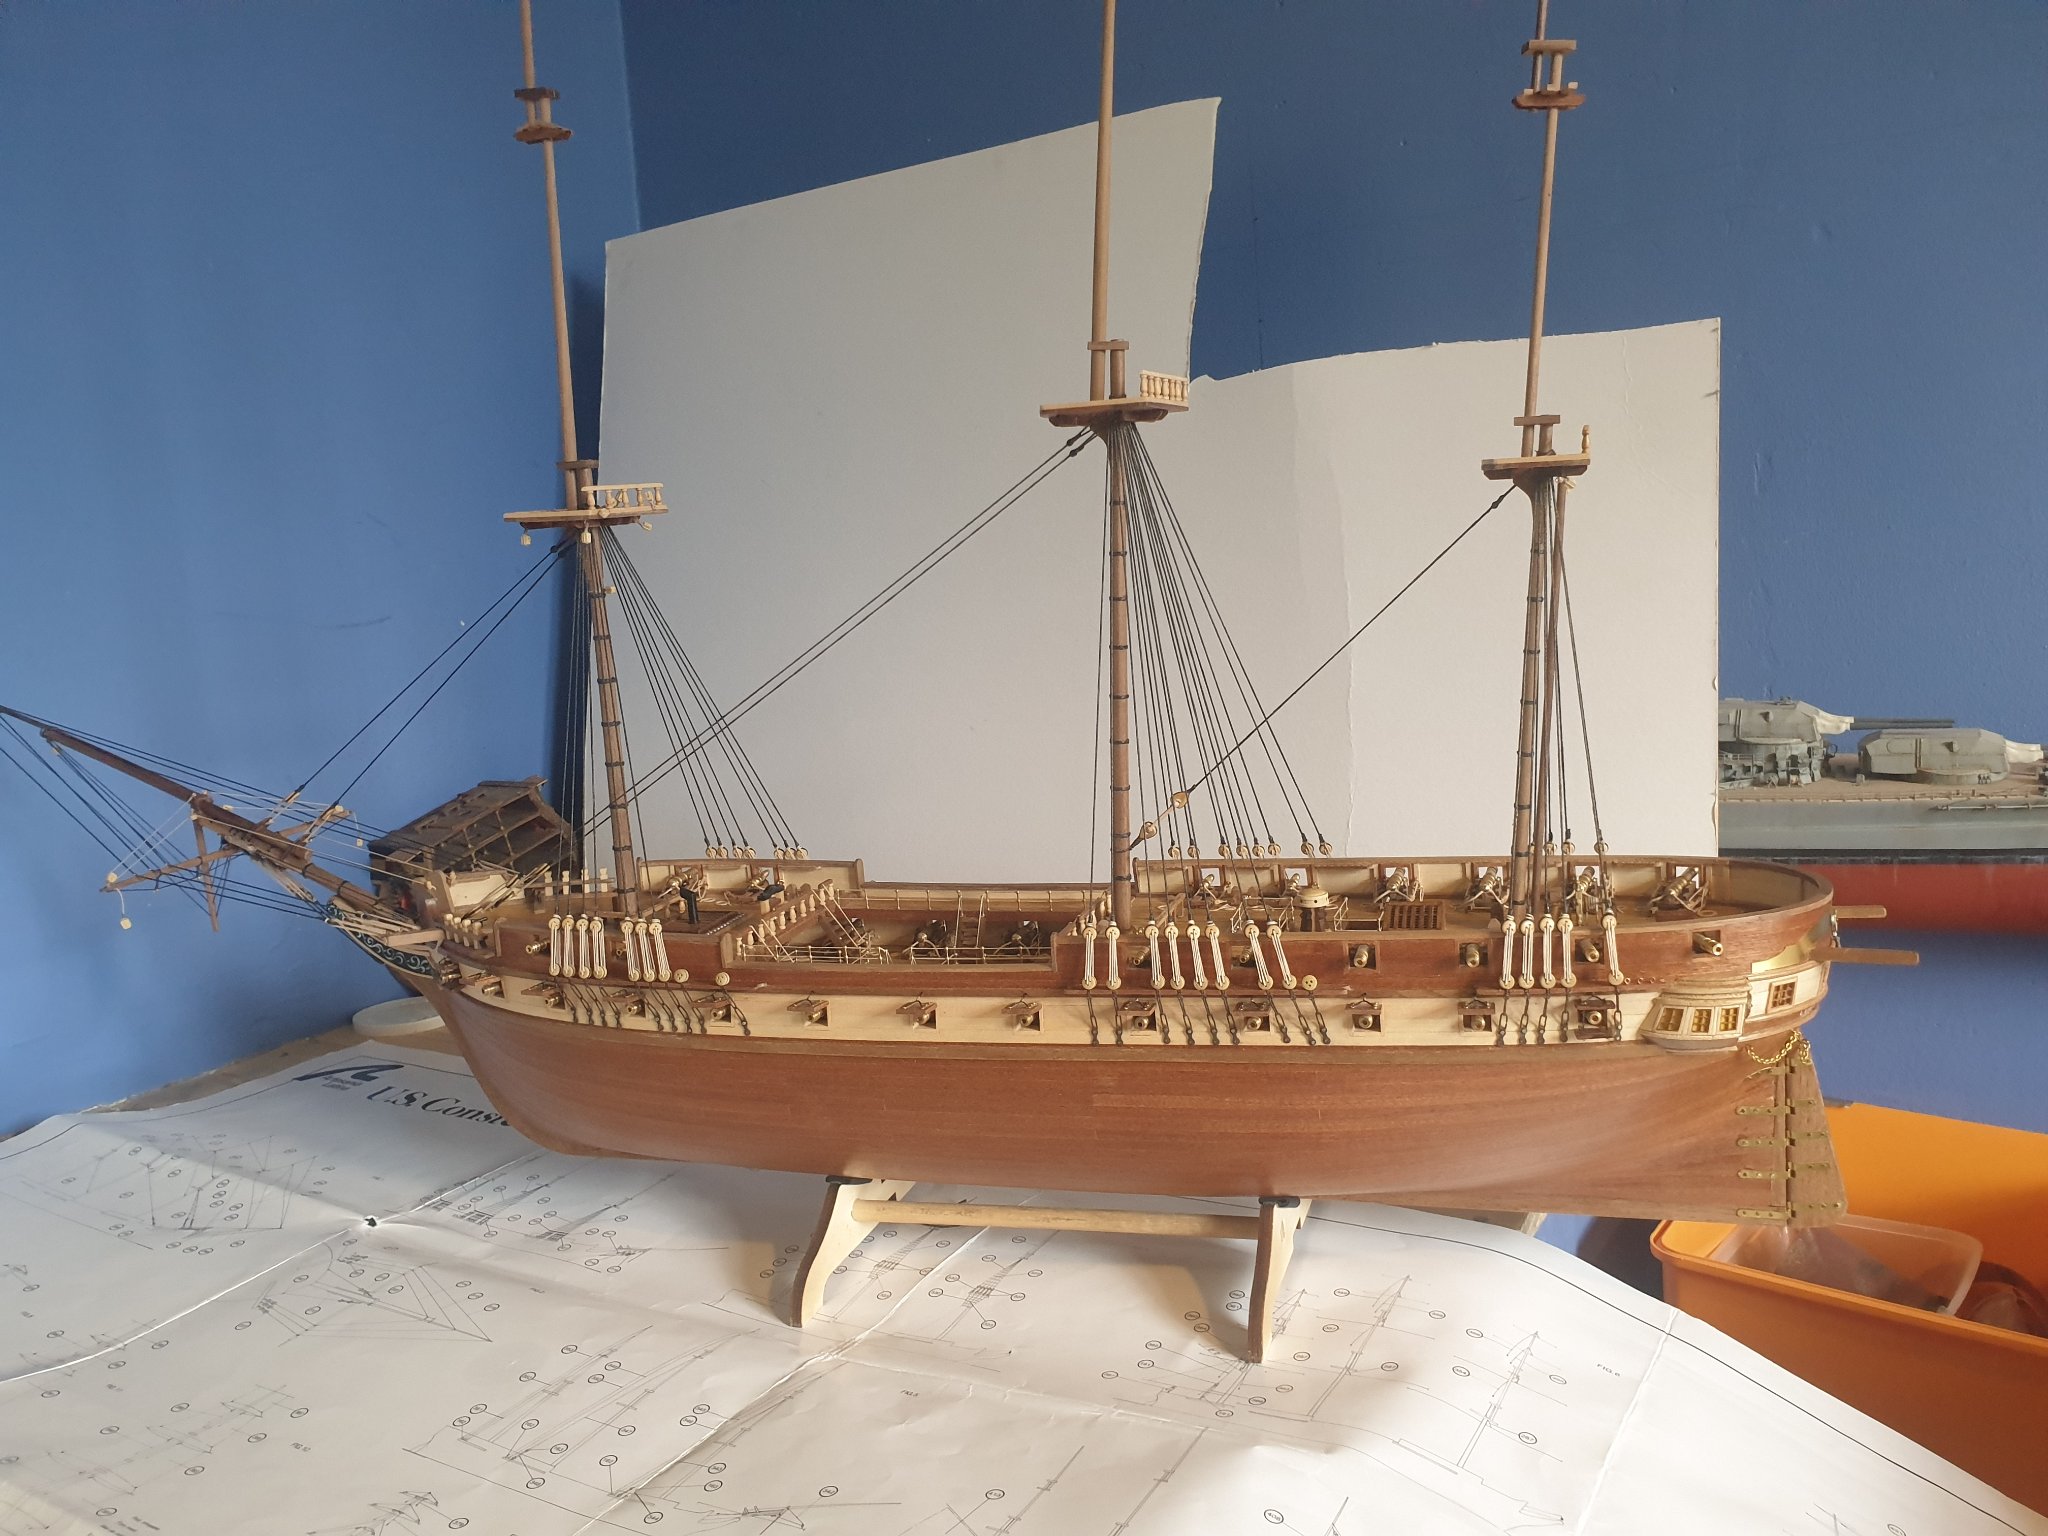
Hi MSW, a few up to date photos of the Constellation I took last night. Solved my rigging problem by using a couple of photos of the Constitution’s shrouds. Was going to upload some photos on how I made them but changed my phone. Not worked out how to transfer photos from my google album. Ratlines are next so will be doing those for at least the next week. Still not made any yard or booms for the masts either, still plenty to do but getting an idea of what the ship will look like finished now. Until next time. 😁

-
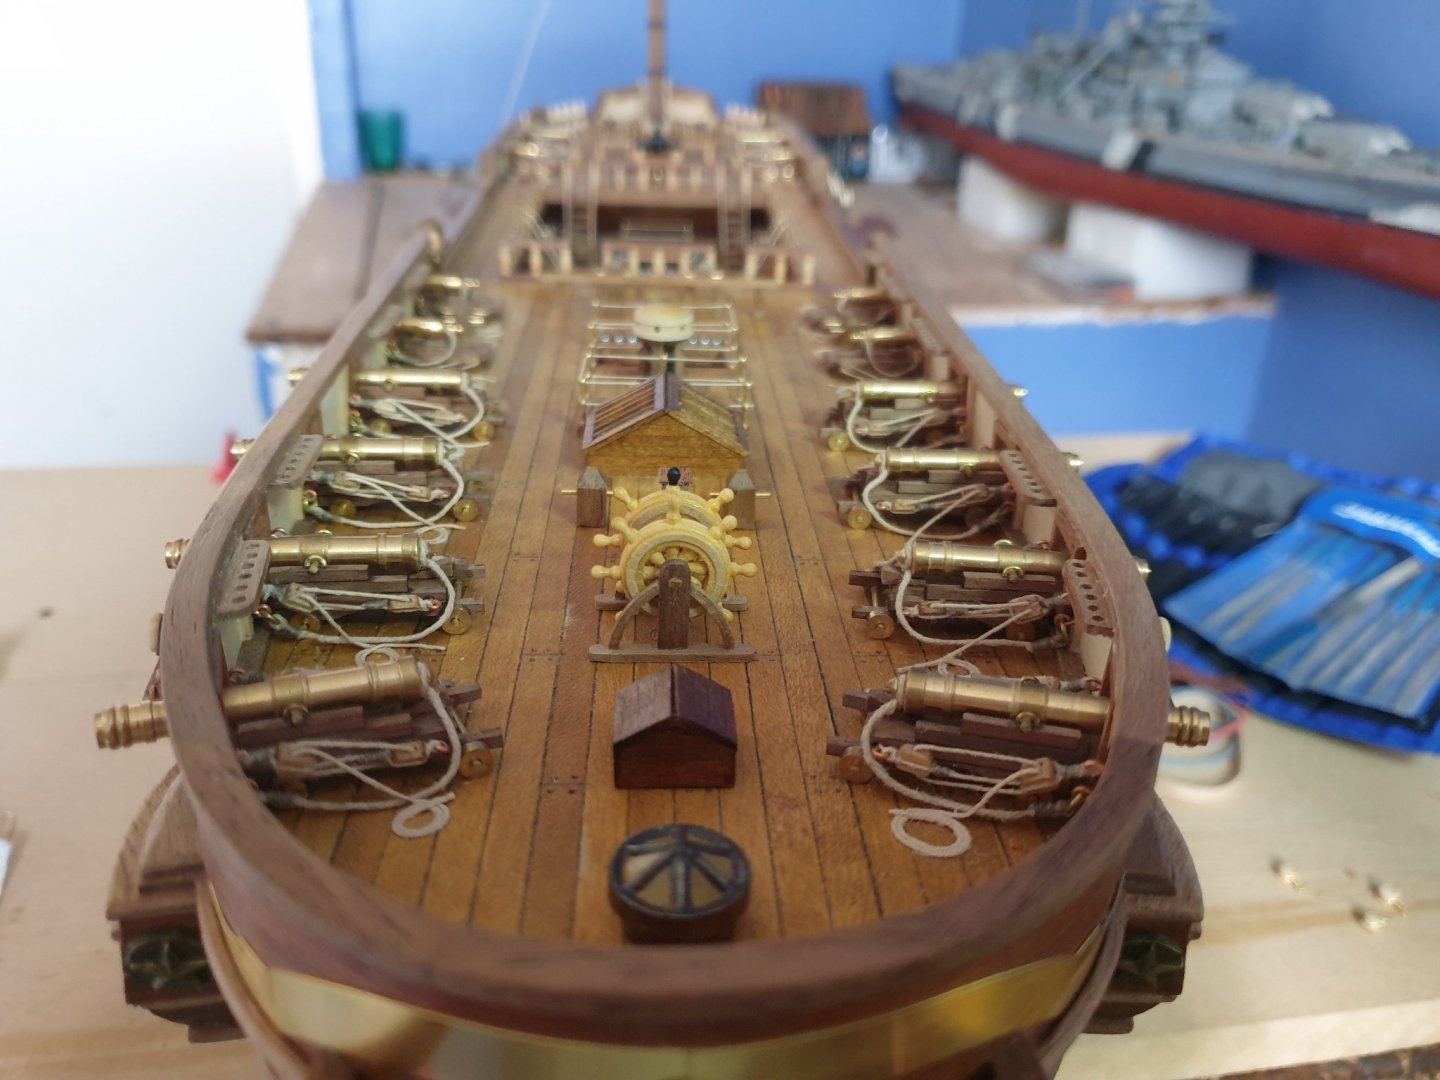
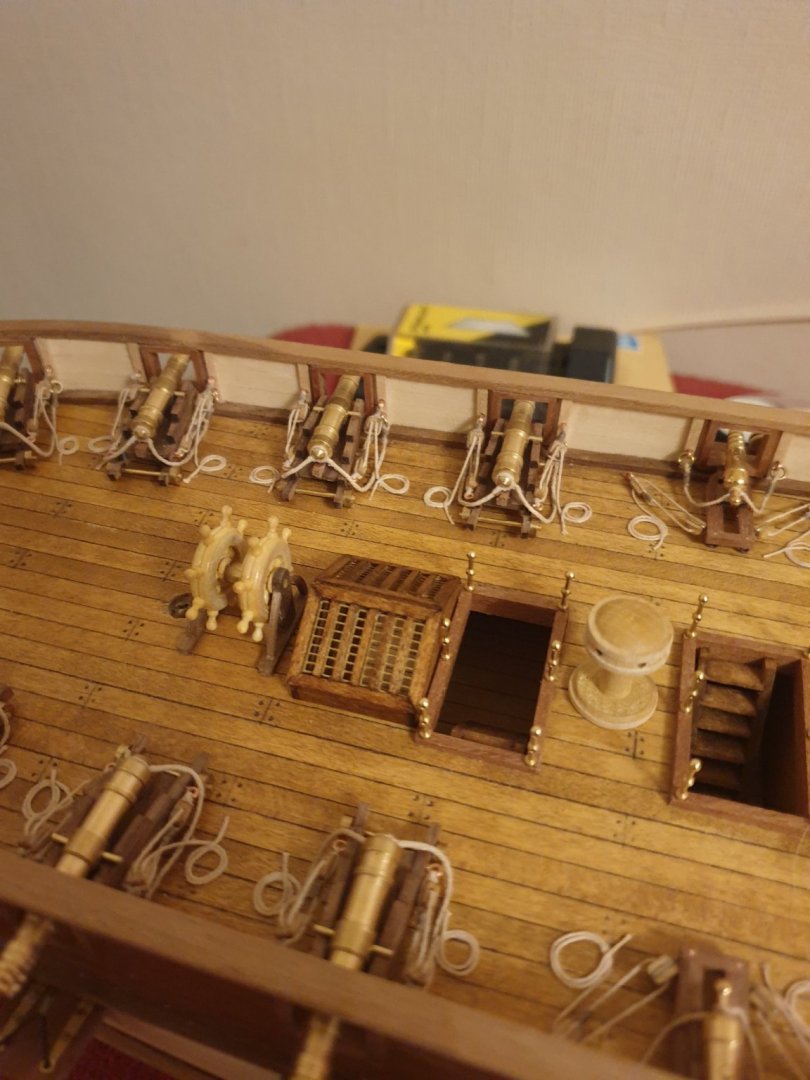
Hi MSW or should say mtaylor as you seem to be the only one watching. Update on the constellation, I'm finally into the rigging and she is coming along nicely. I changed a few more things along the way like the ships wheel. Looks a lot better with some constructo 23mm wheels i got off ebay. I have a problem to solve next before doing the upper mast shrouds as I want to add hooks to the futtock shrouds and also brace them down to the deck level as it is on the real ship. Trouble is I can't find photos of how or where they attached the ropes to the deck. Also limited photos of the shrouds them selves. I little bit of guess work ingenuity needed i think, I already have a few ideas running around my head. Anyway enjoy the latest photos taken today and until next time..


.thumb.jpg.33413949722fea3d19af135f43318a4a.jpg)

-
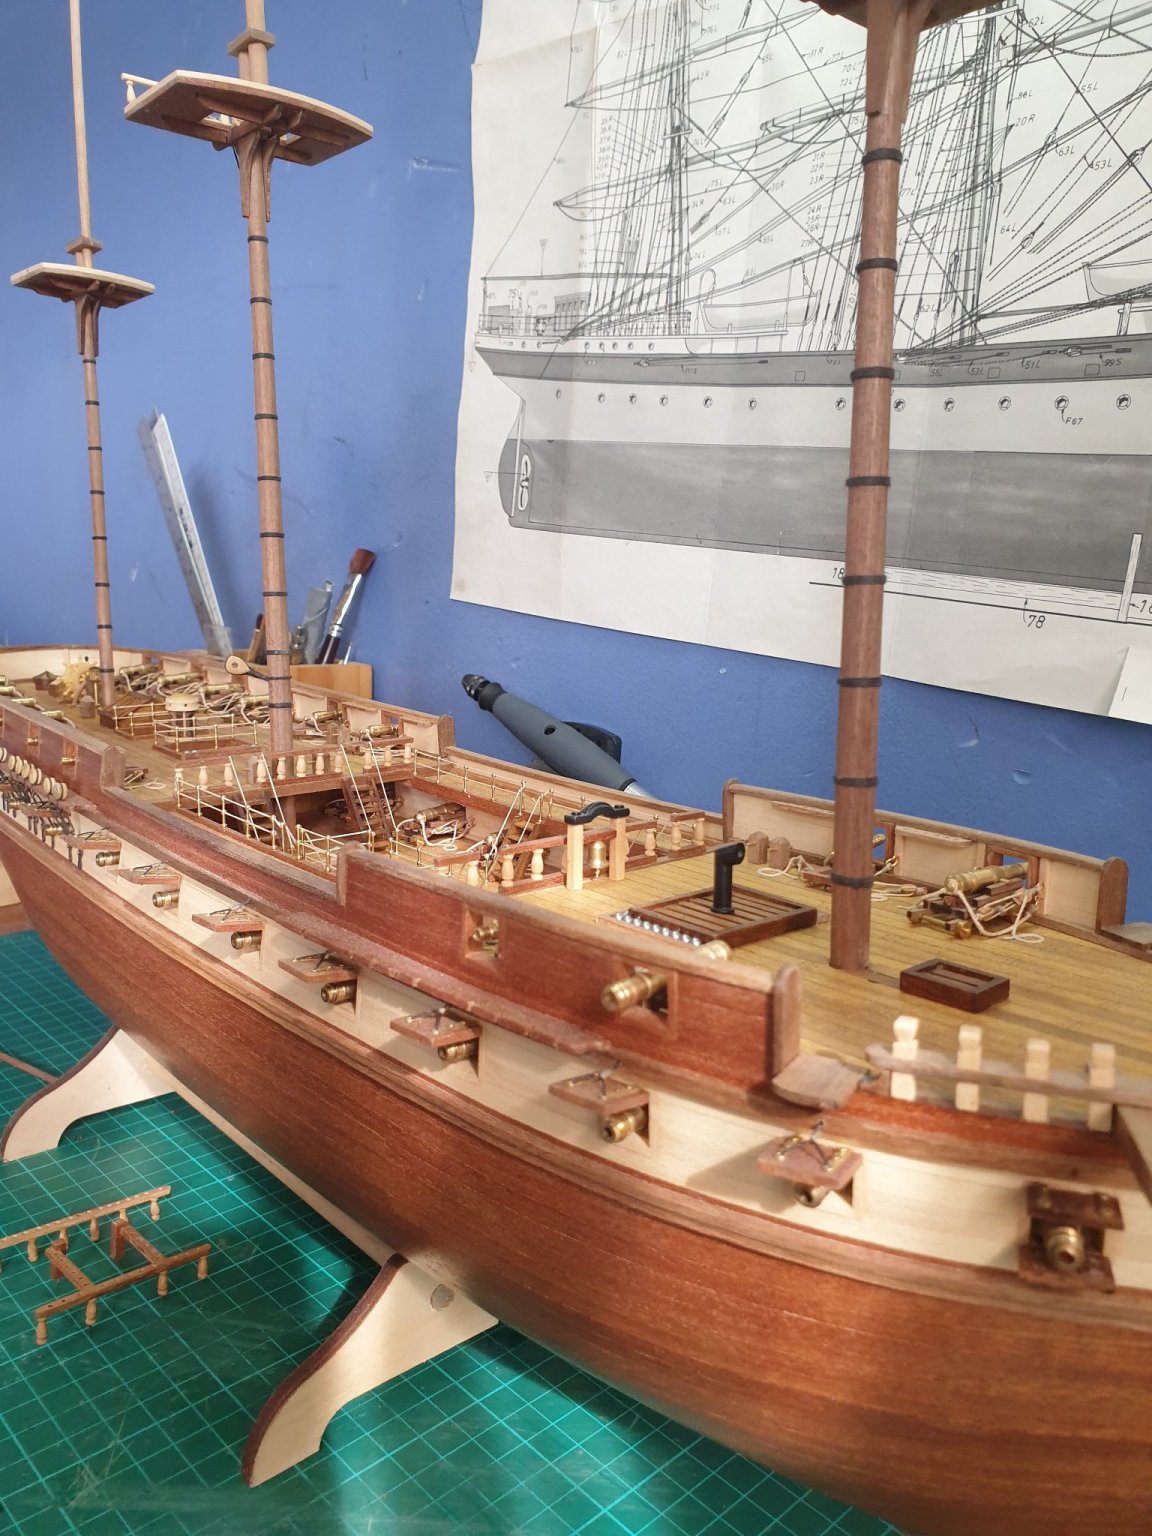
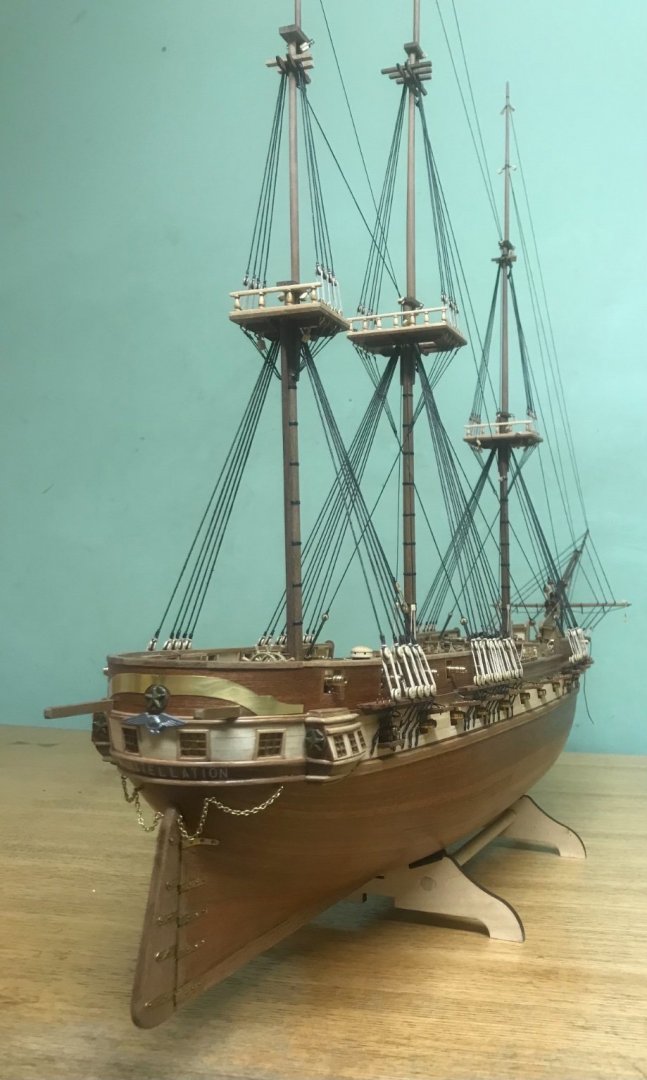
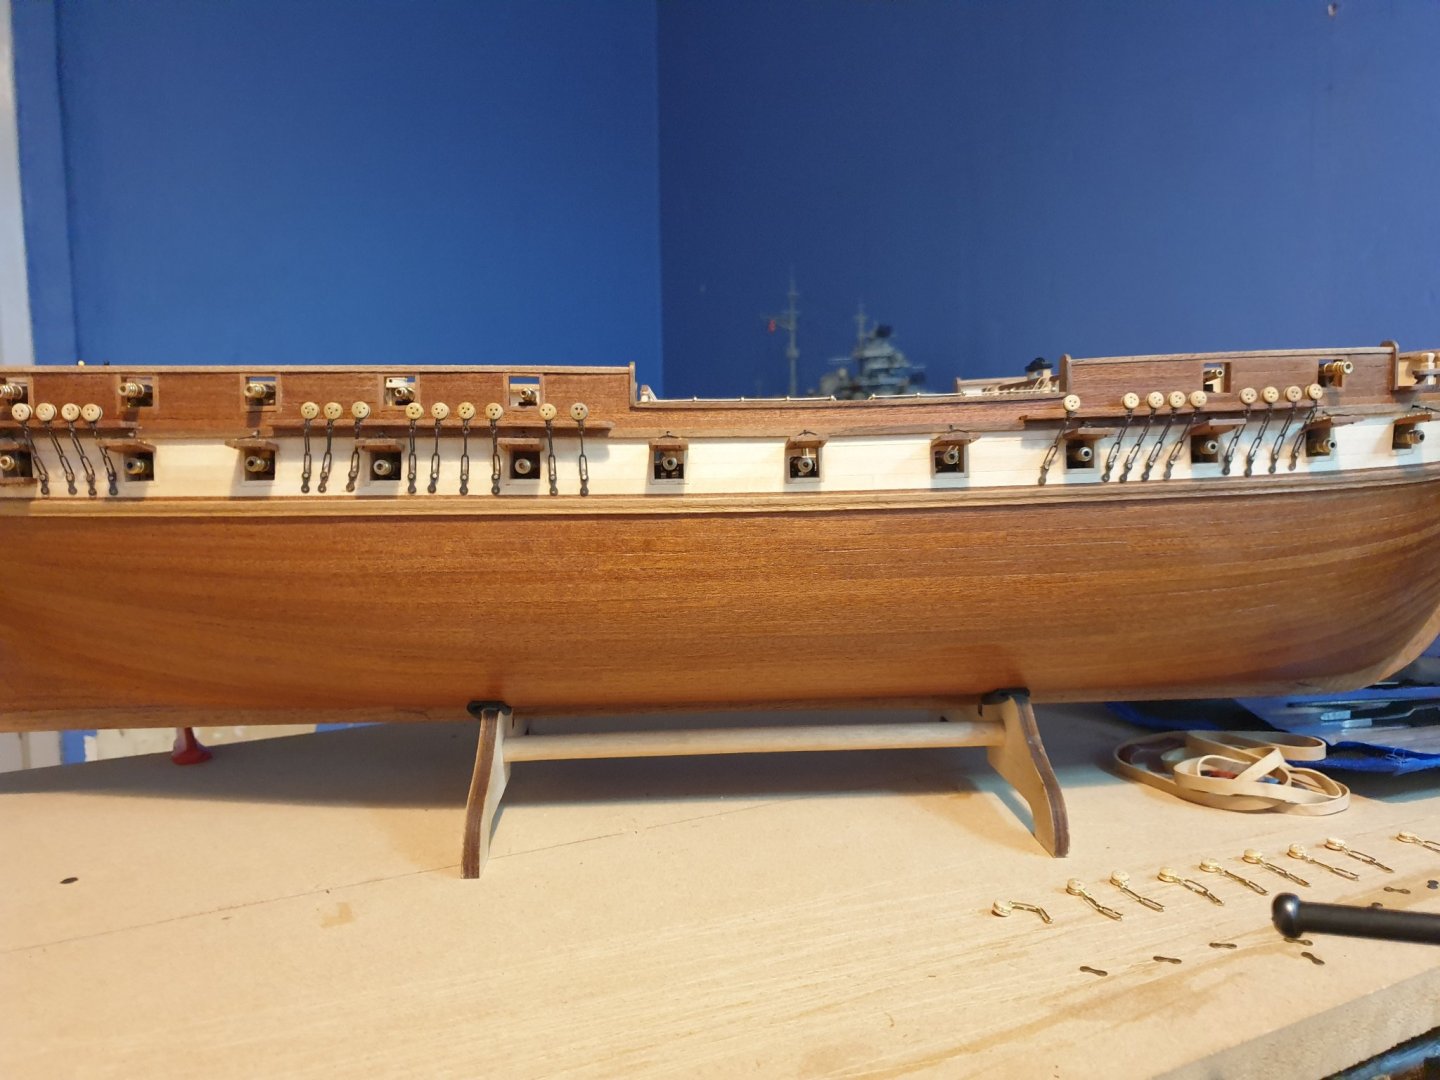
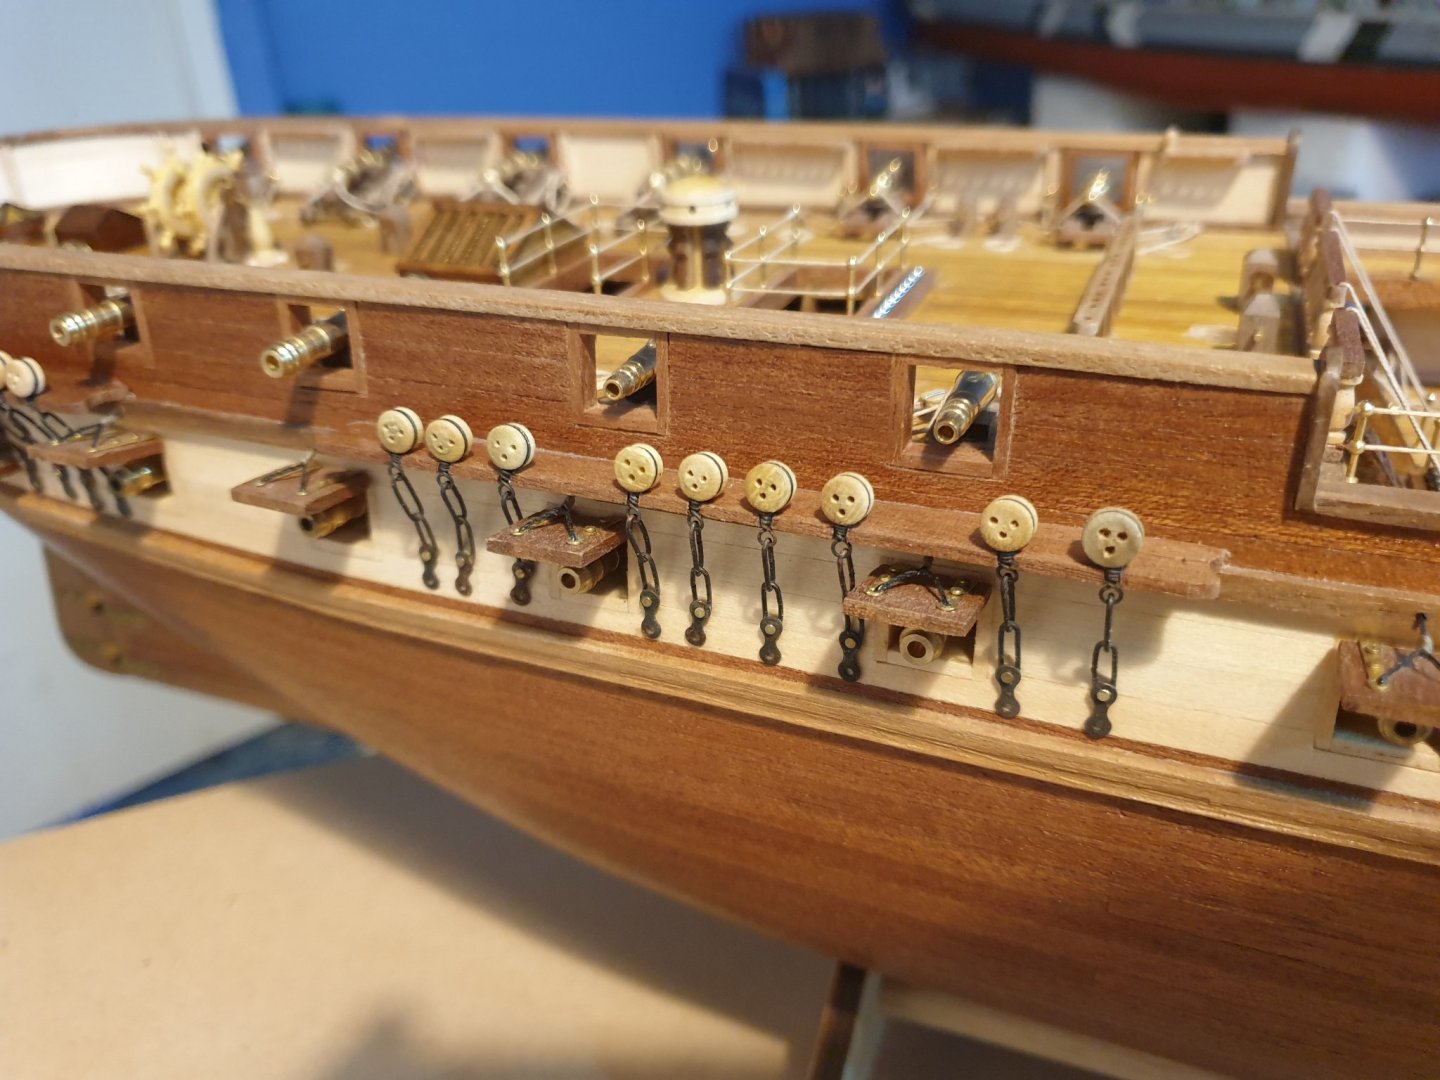
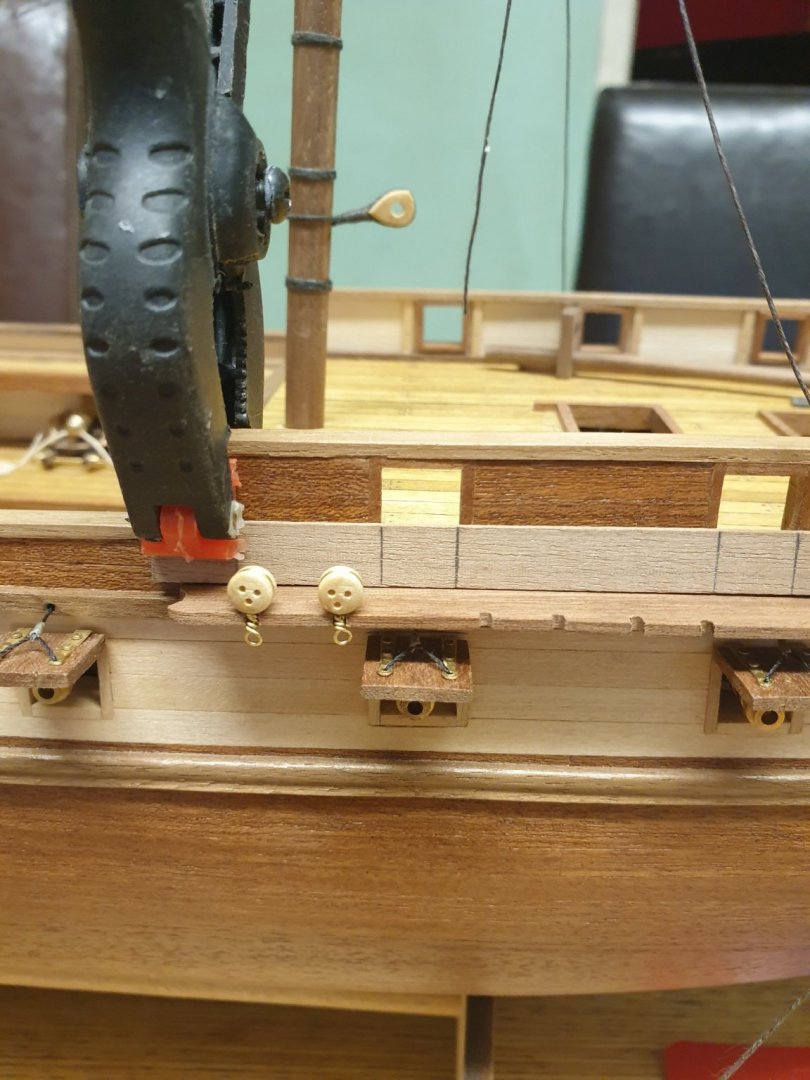
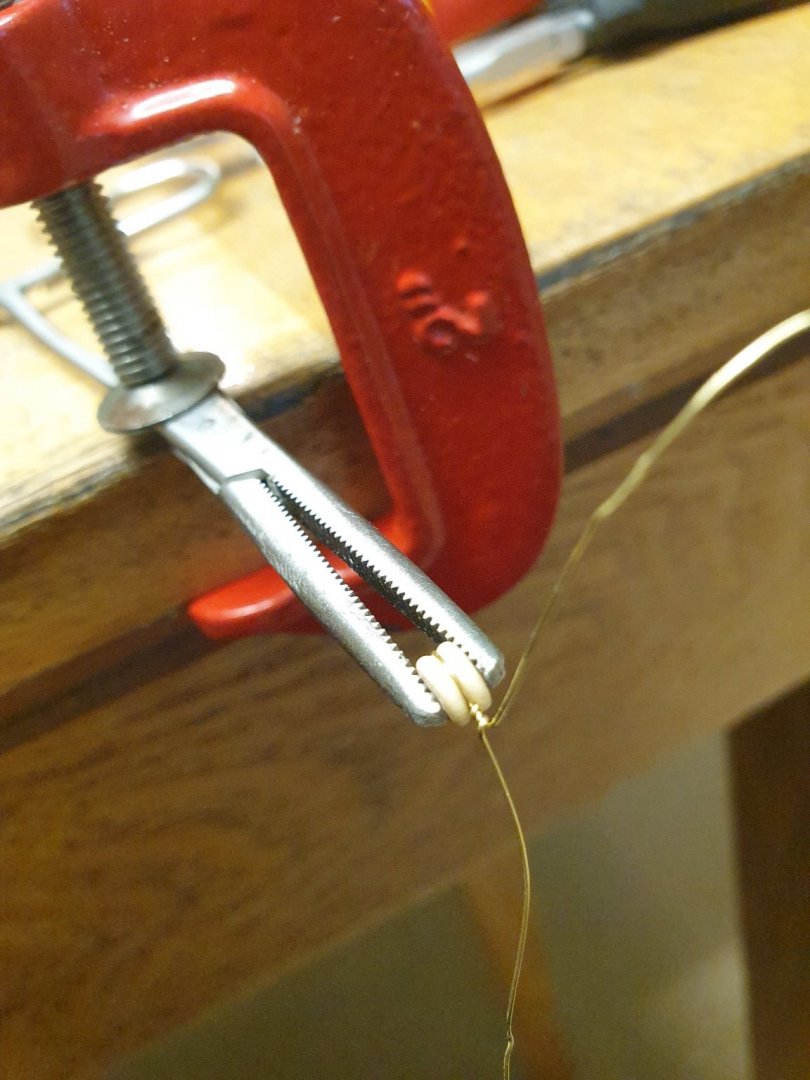
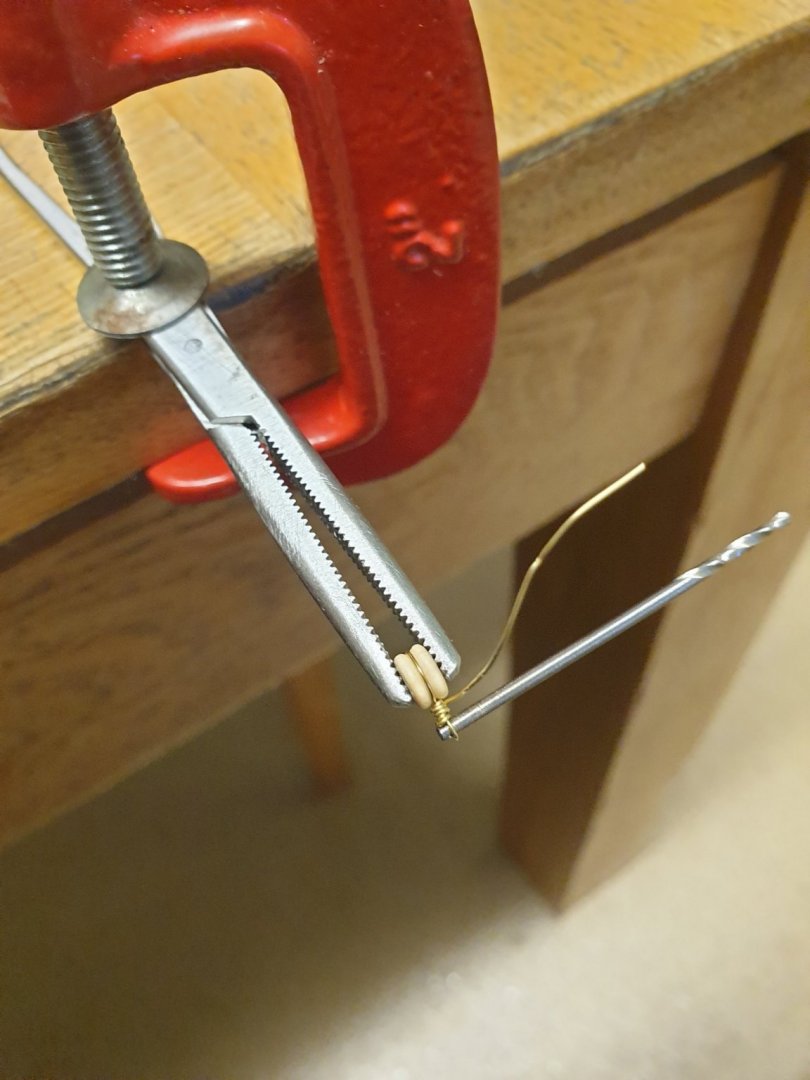
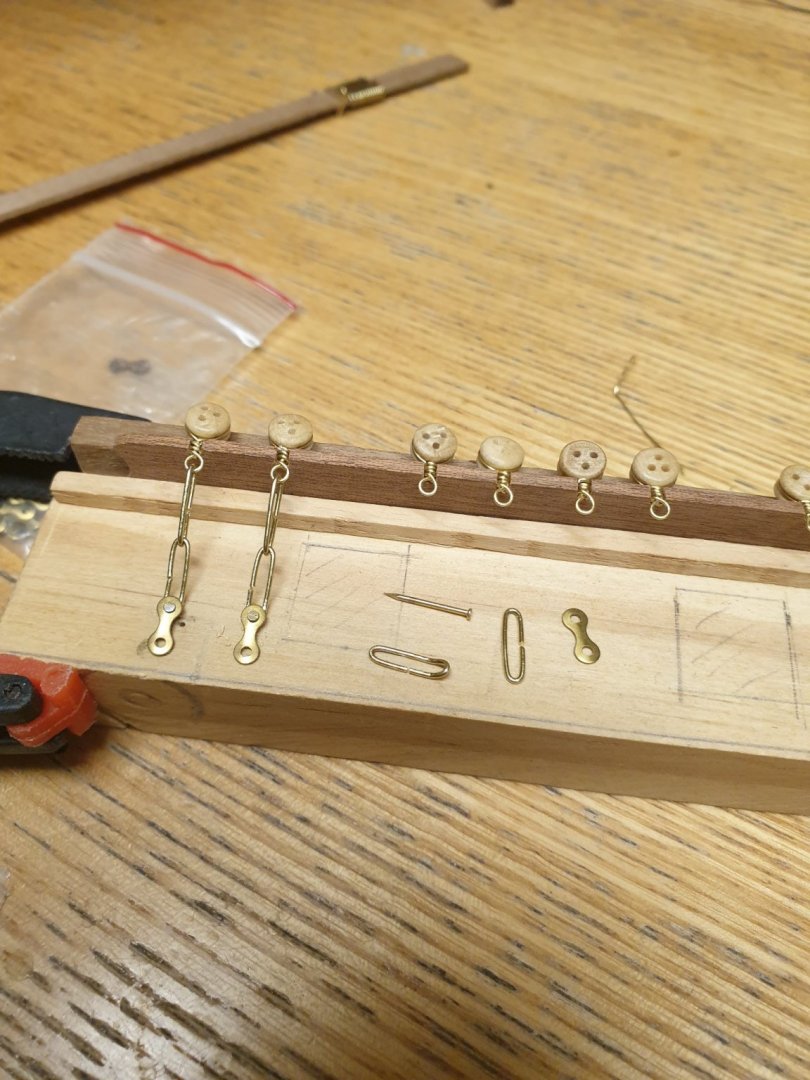
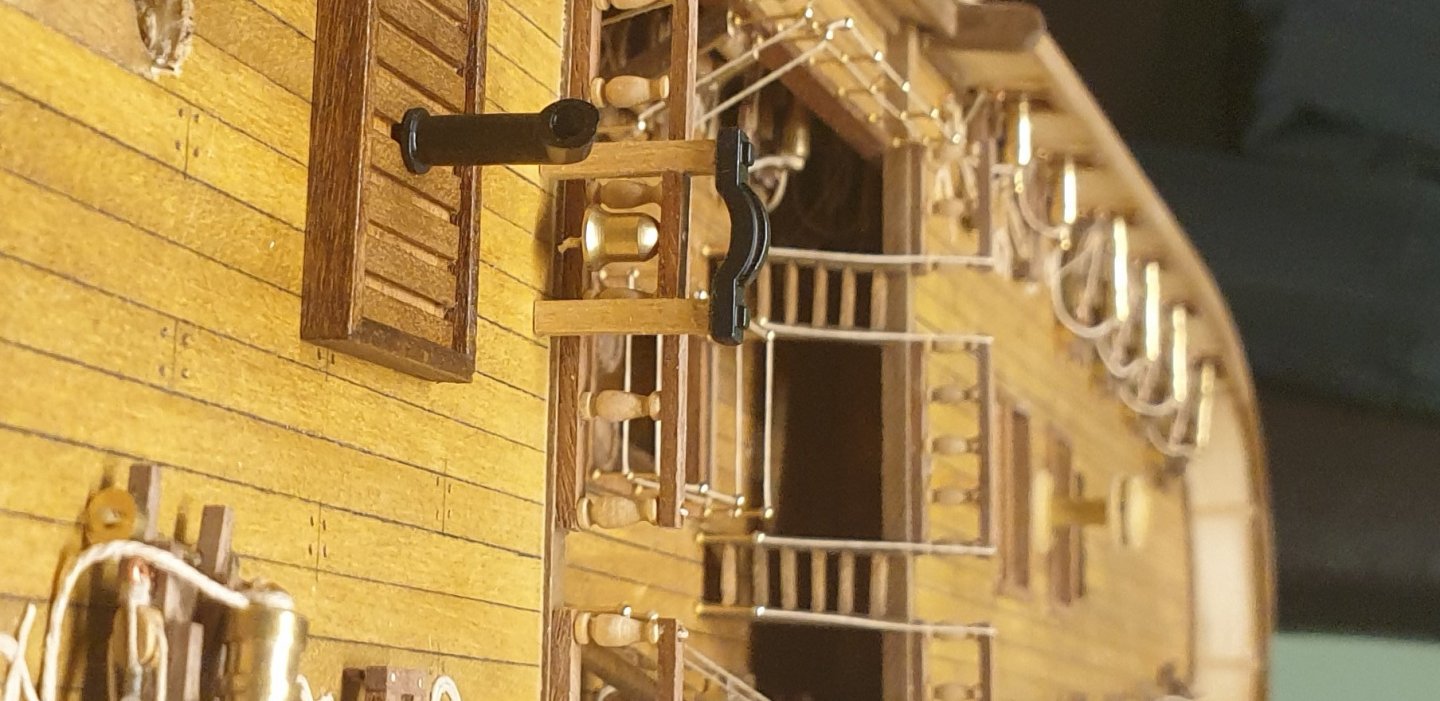
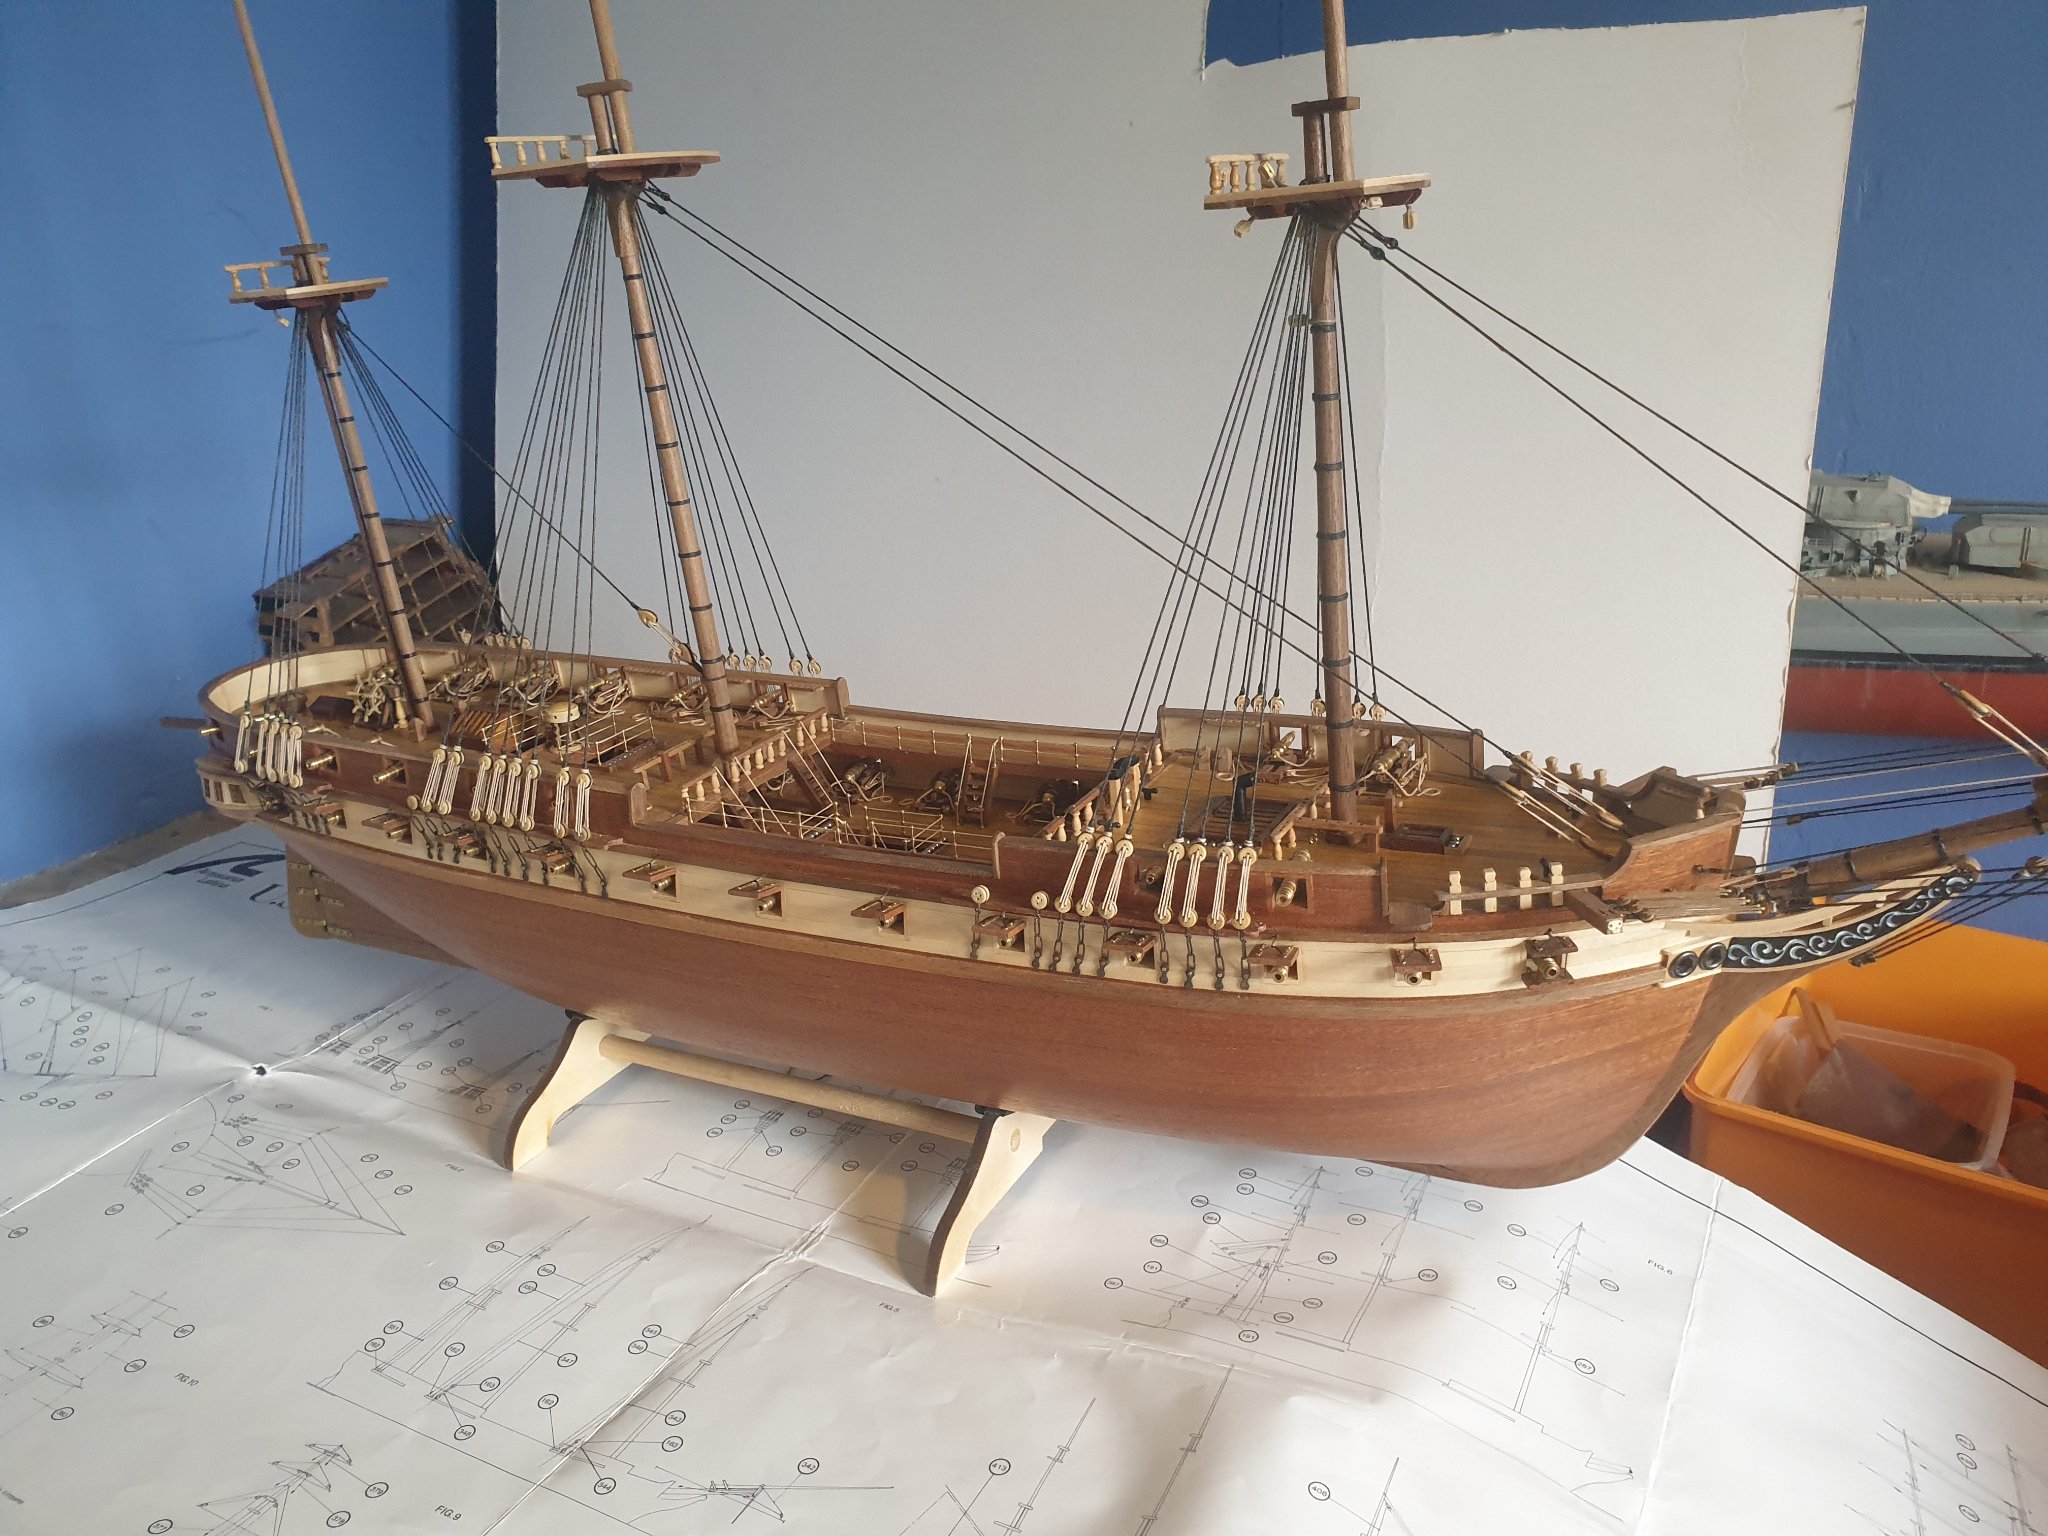
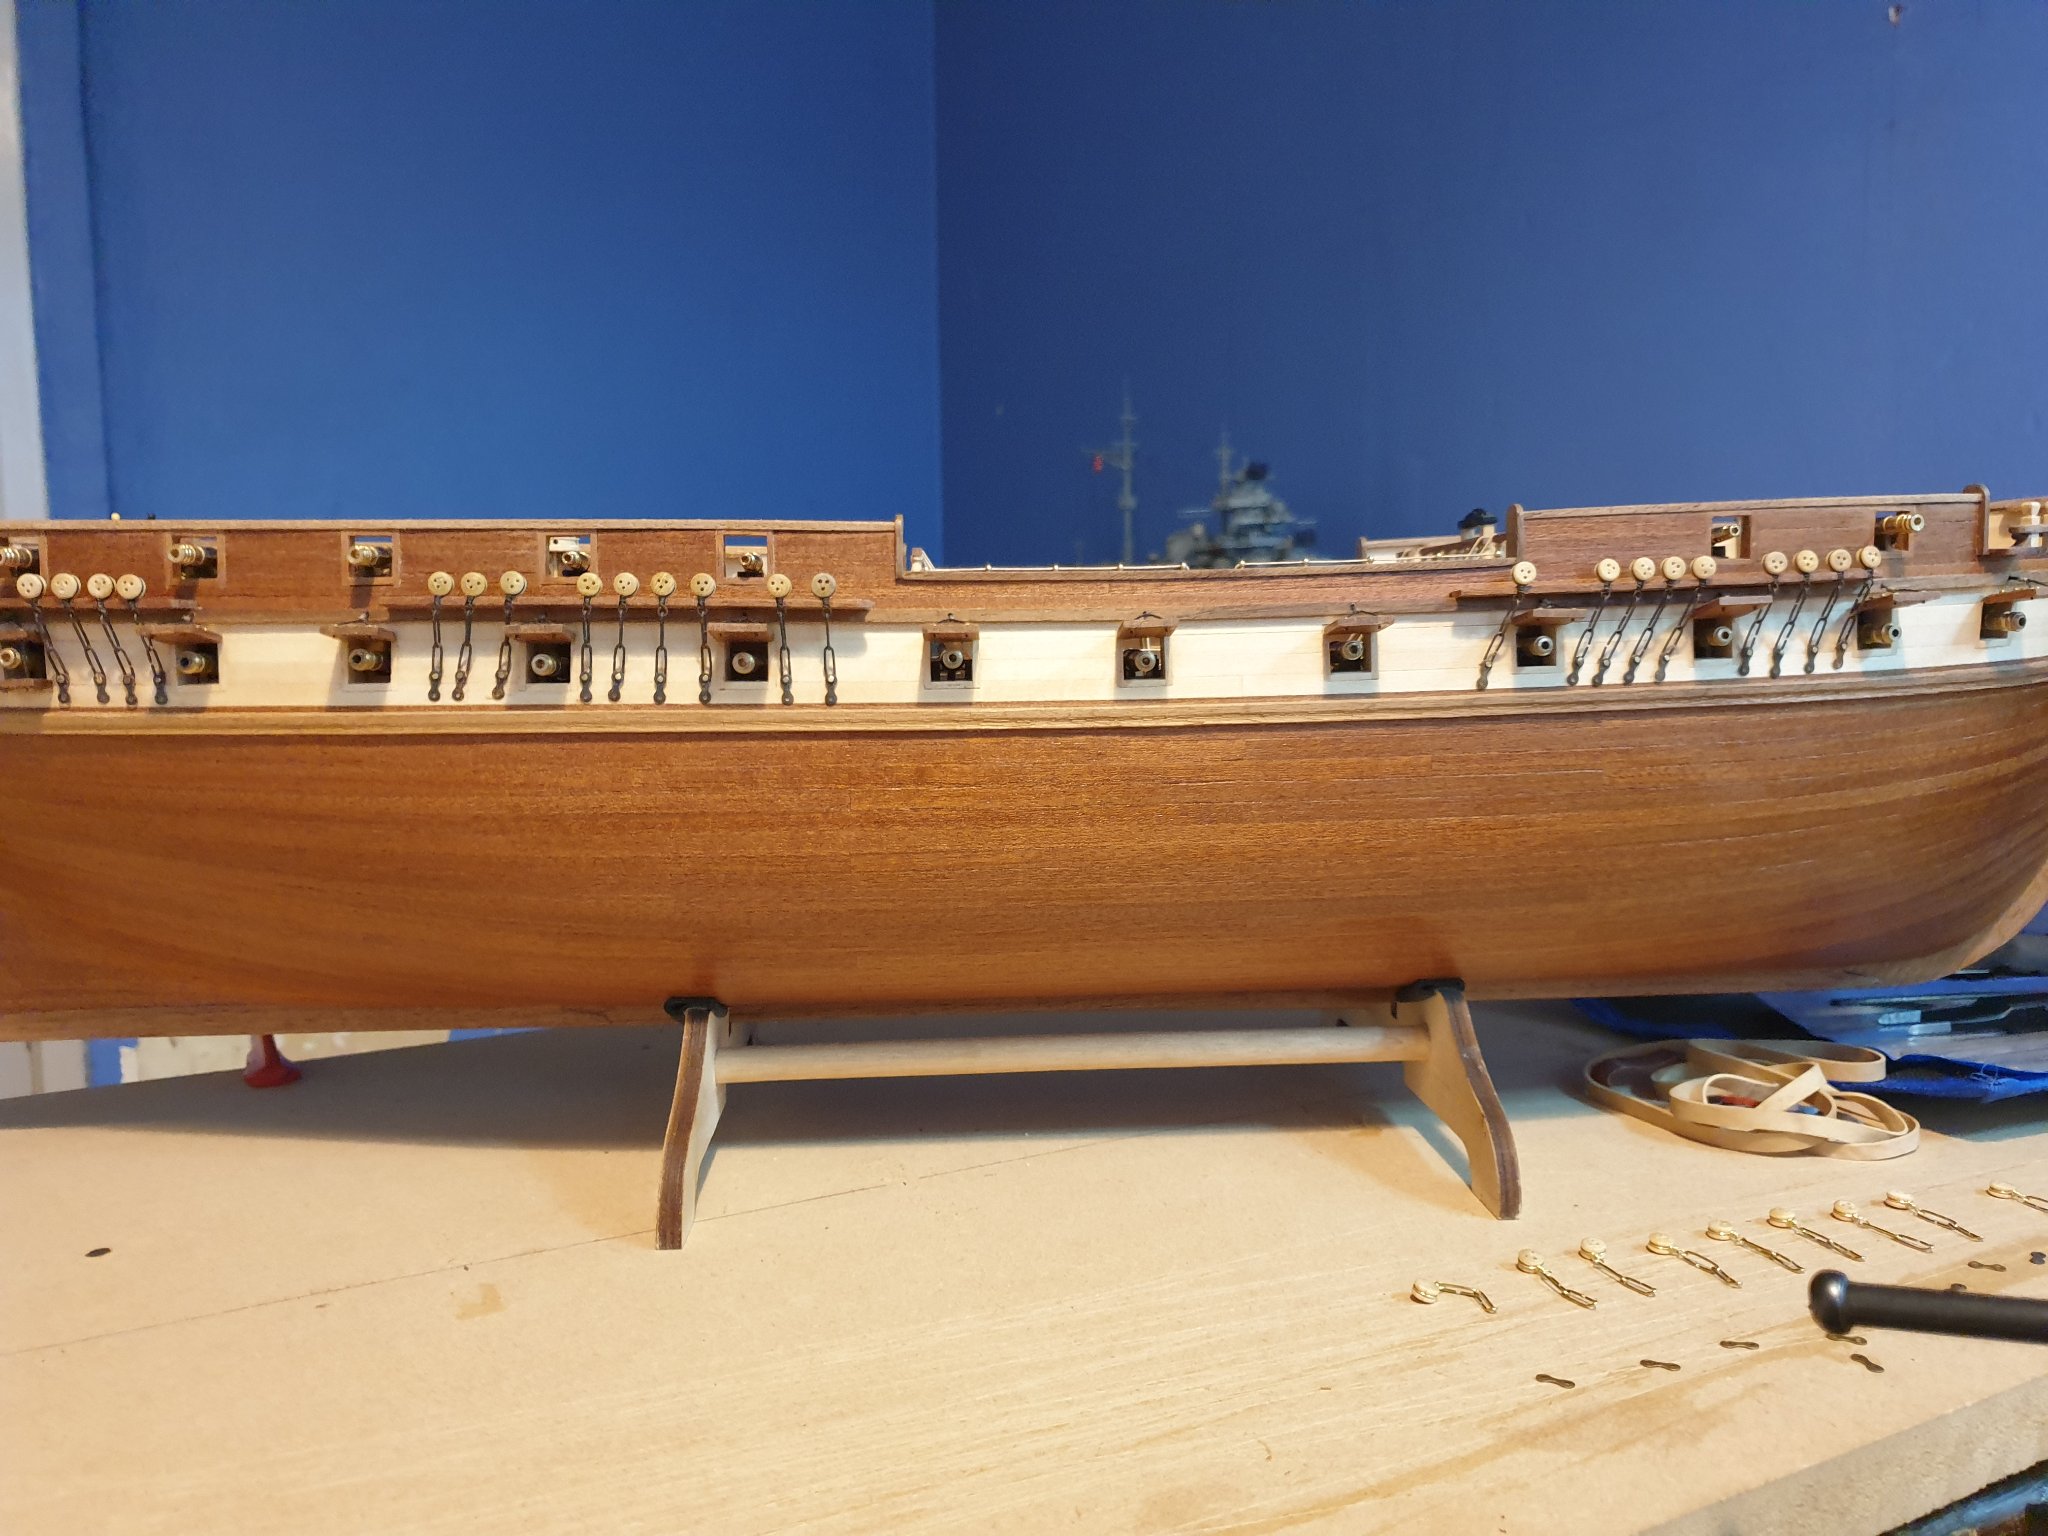
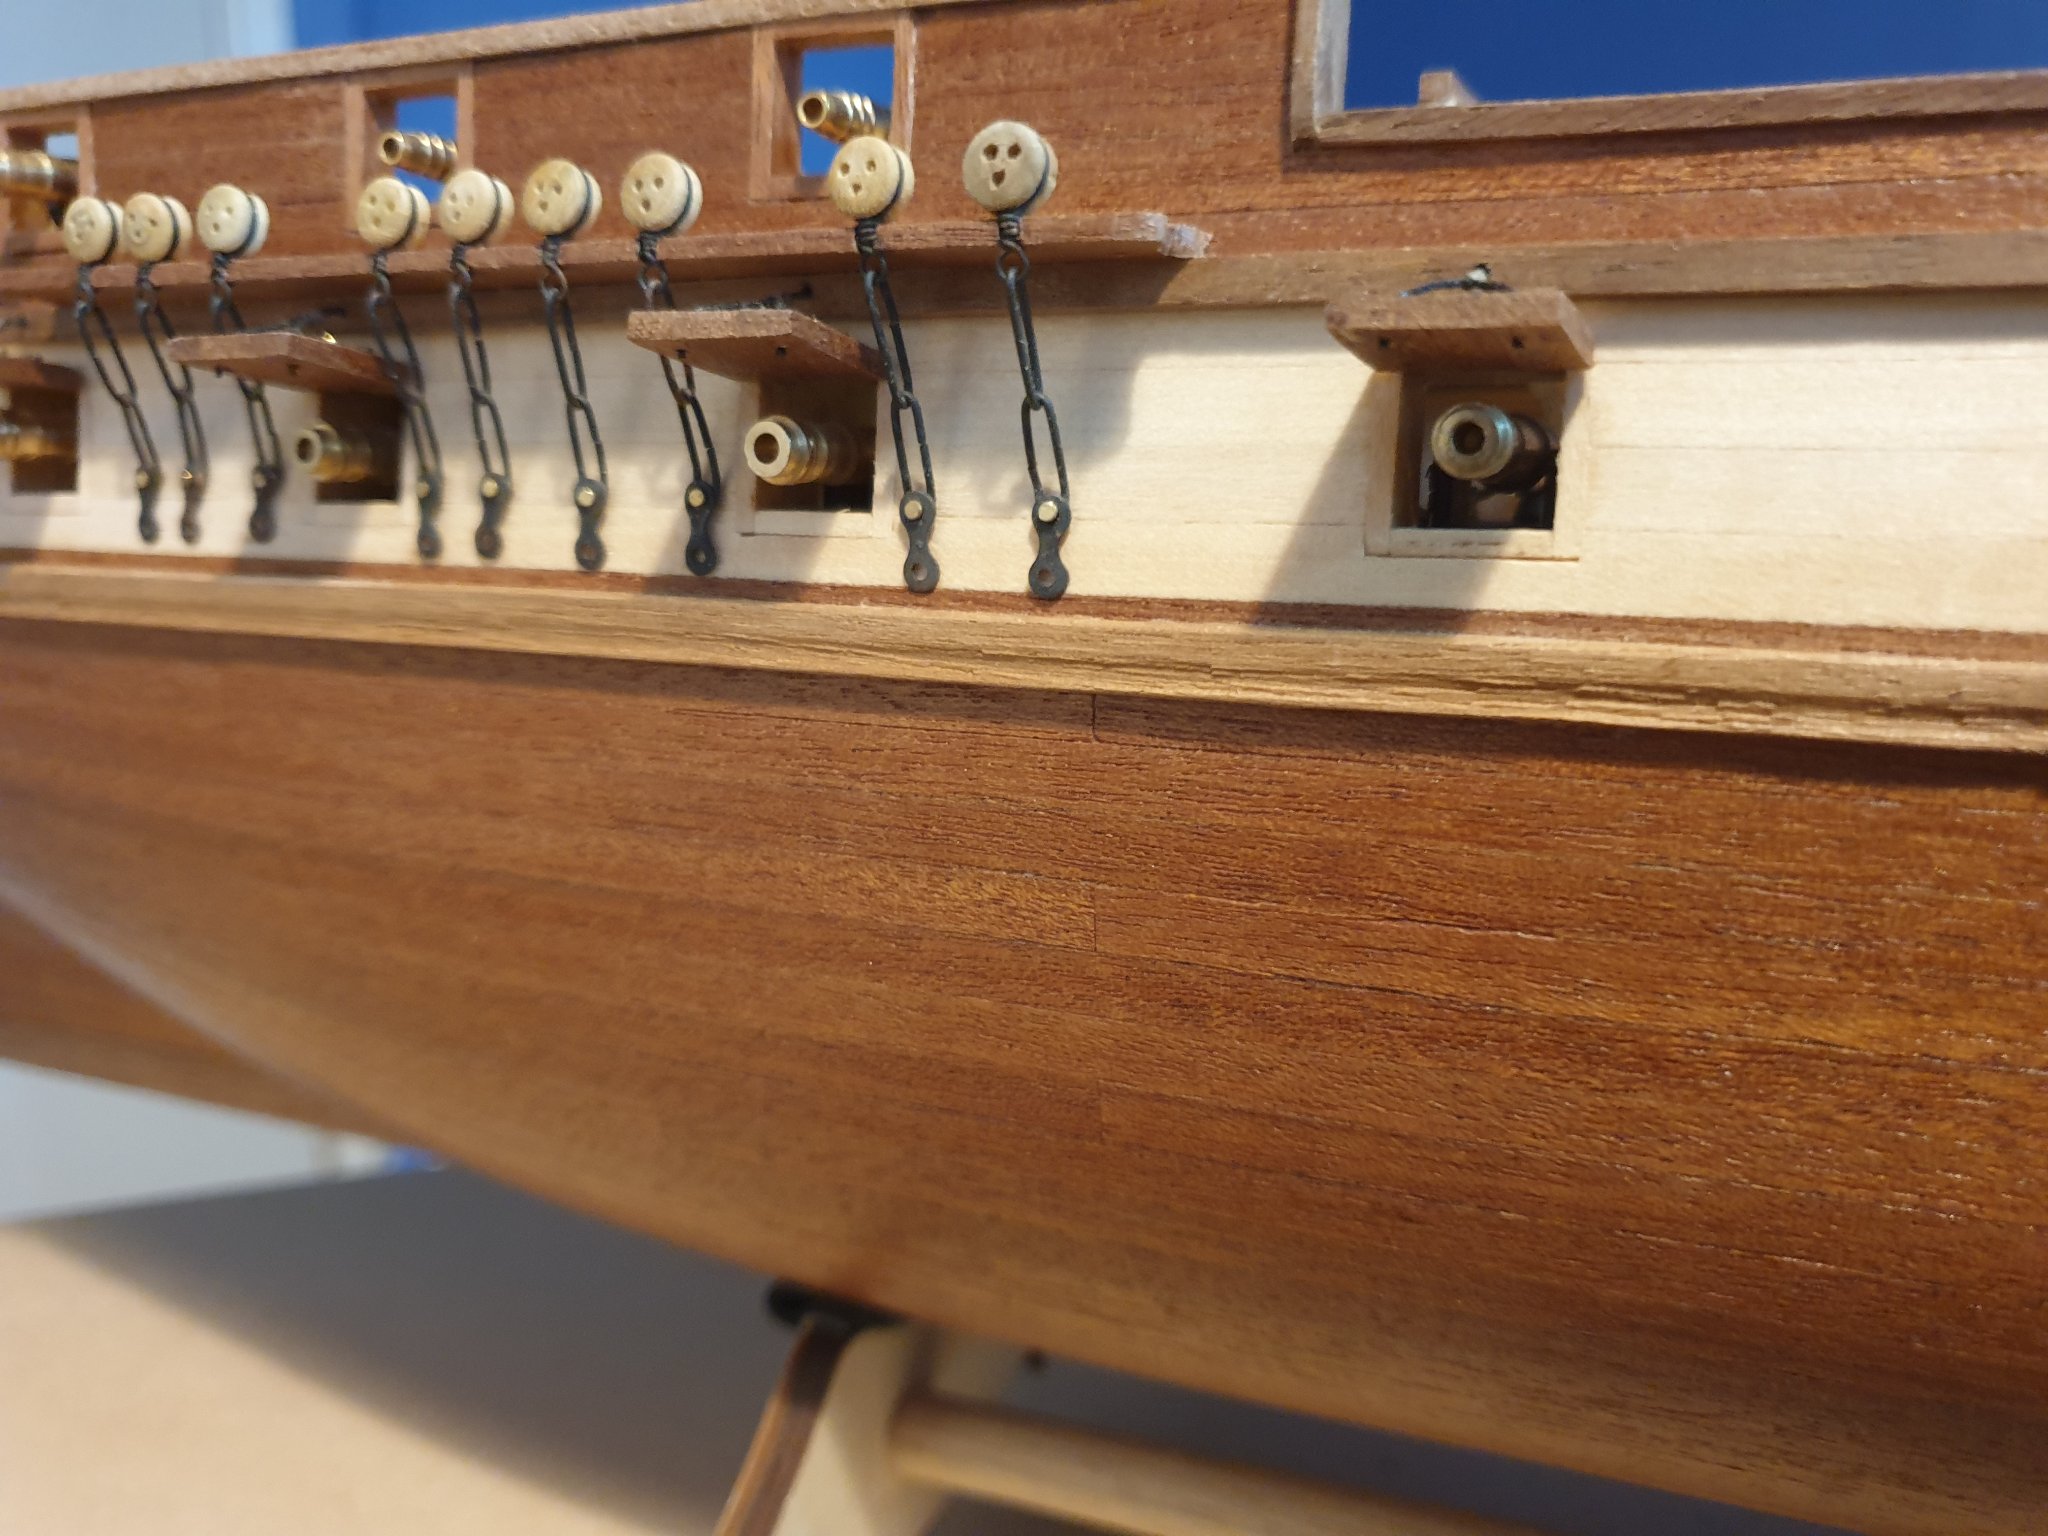
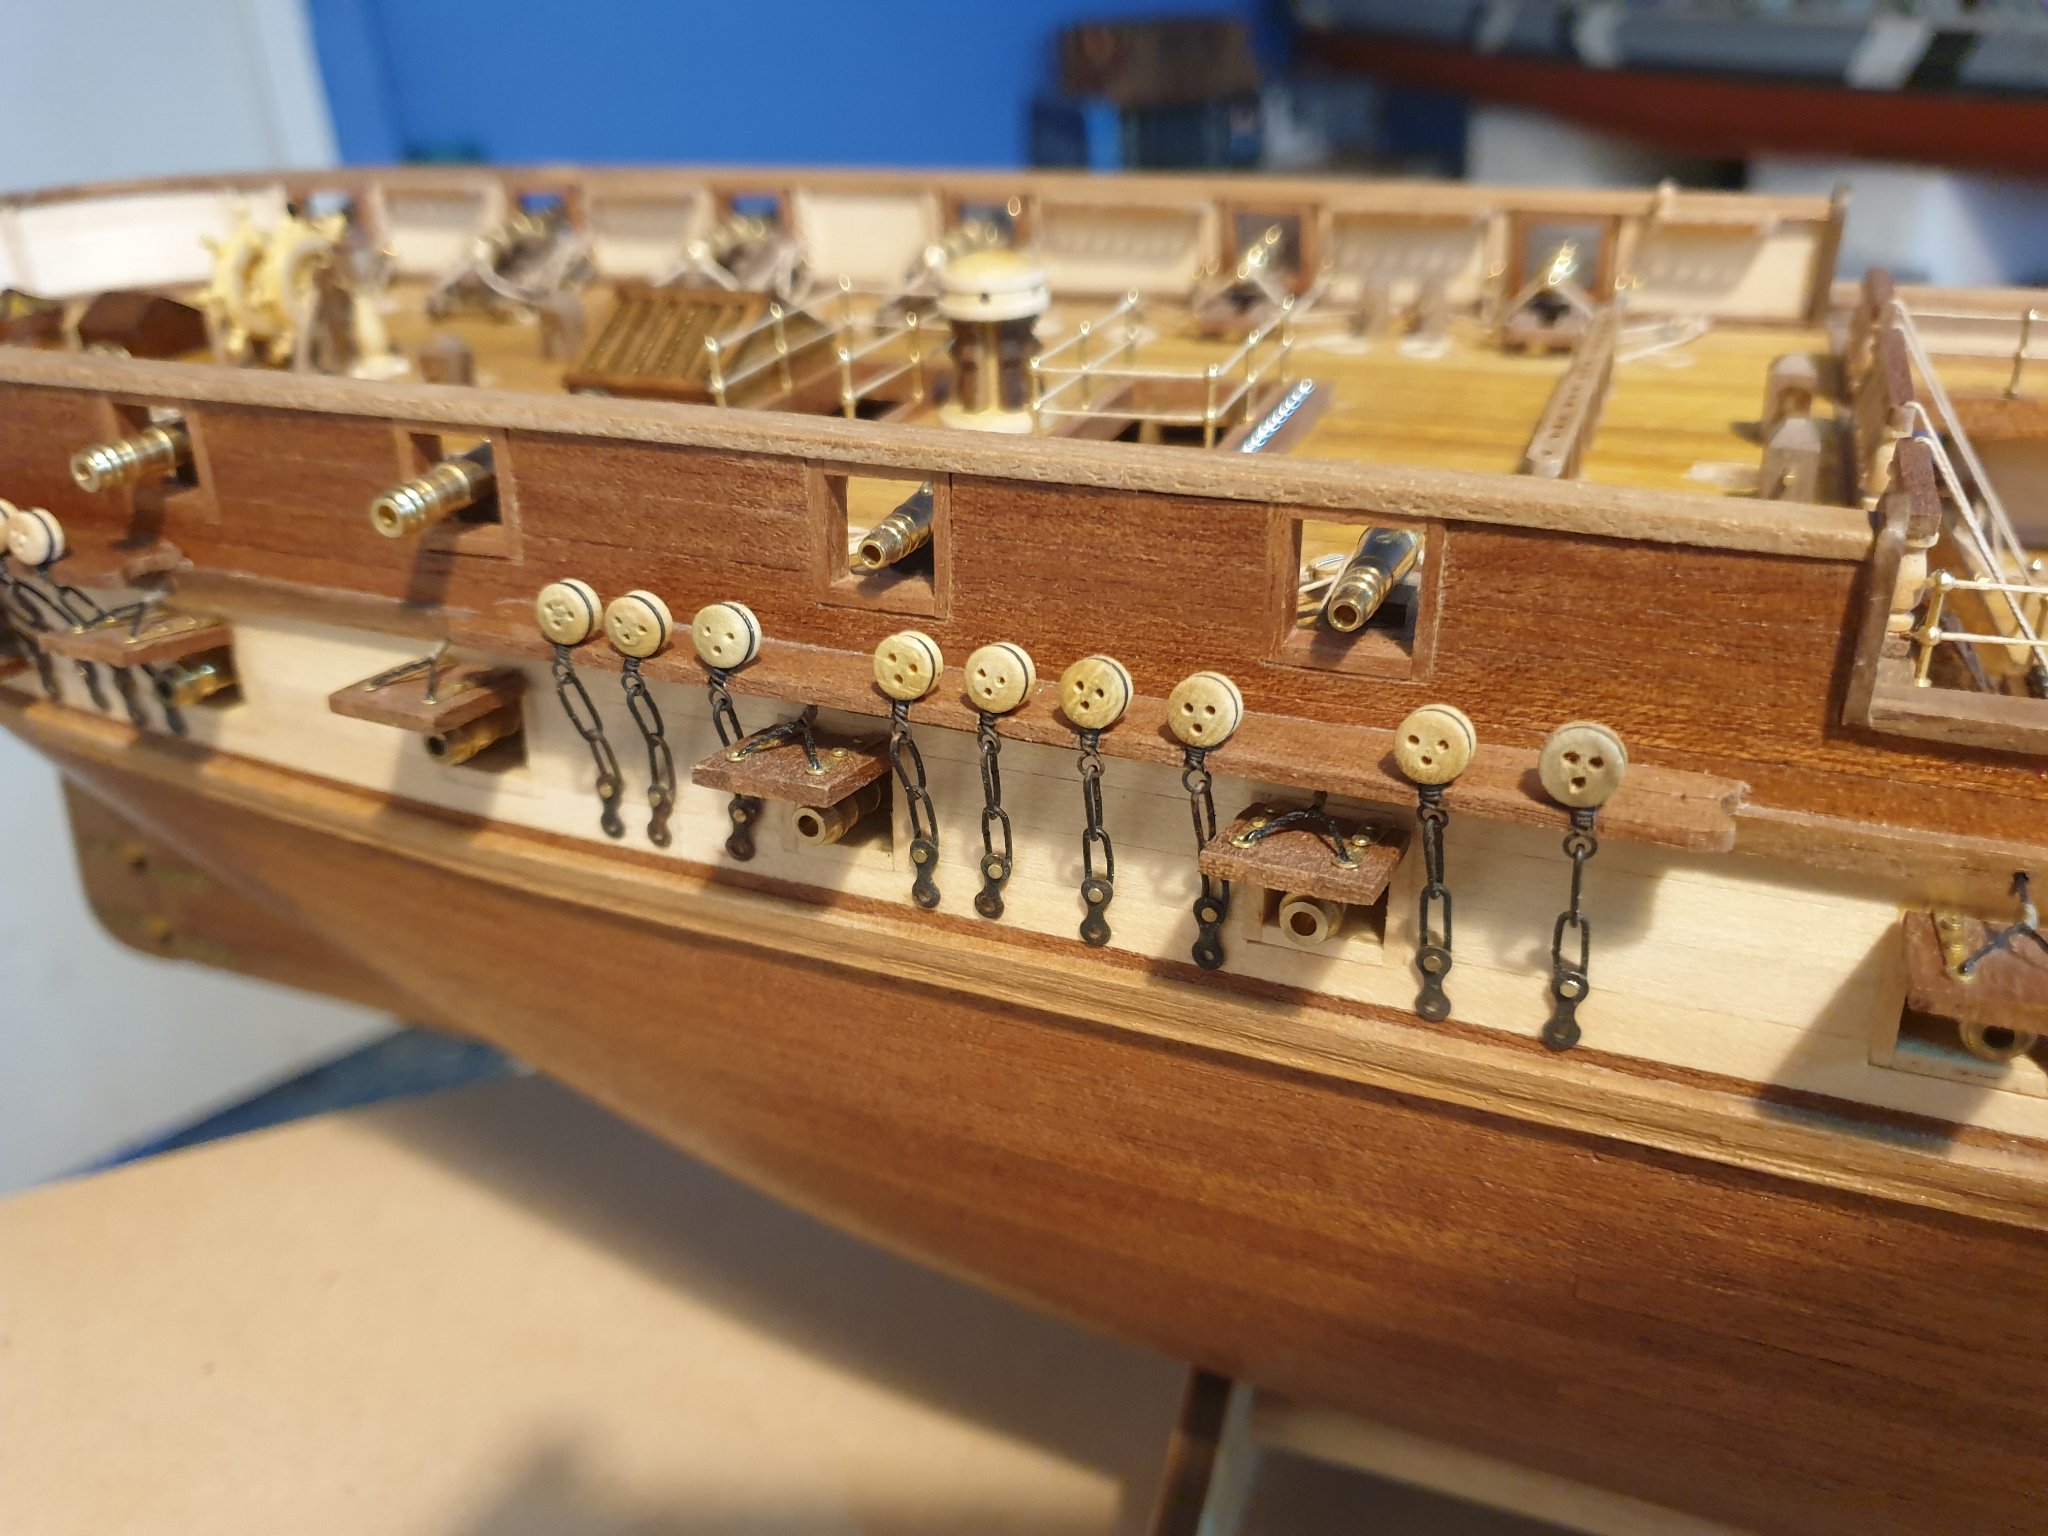
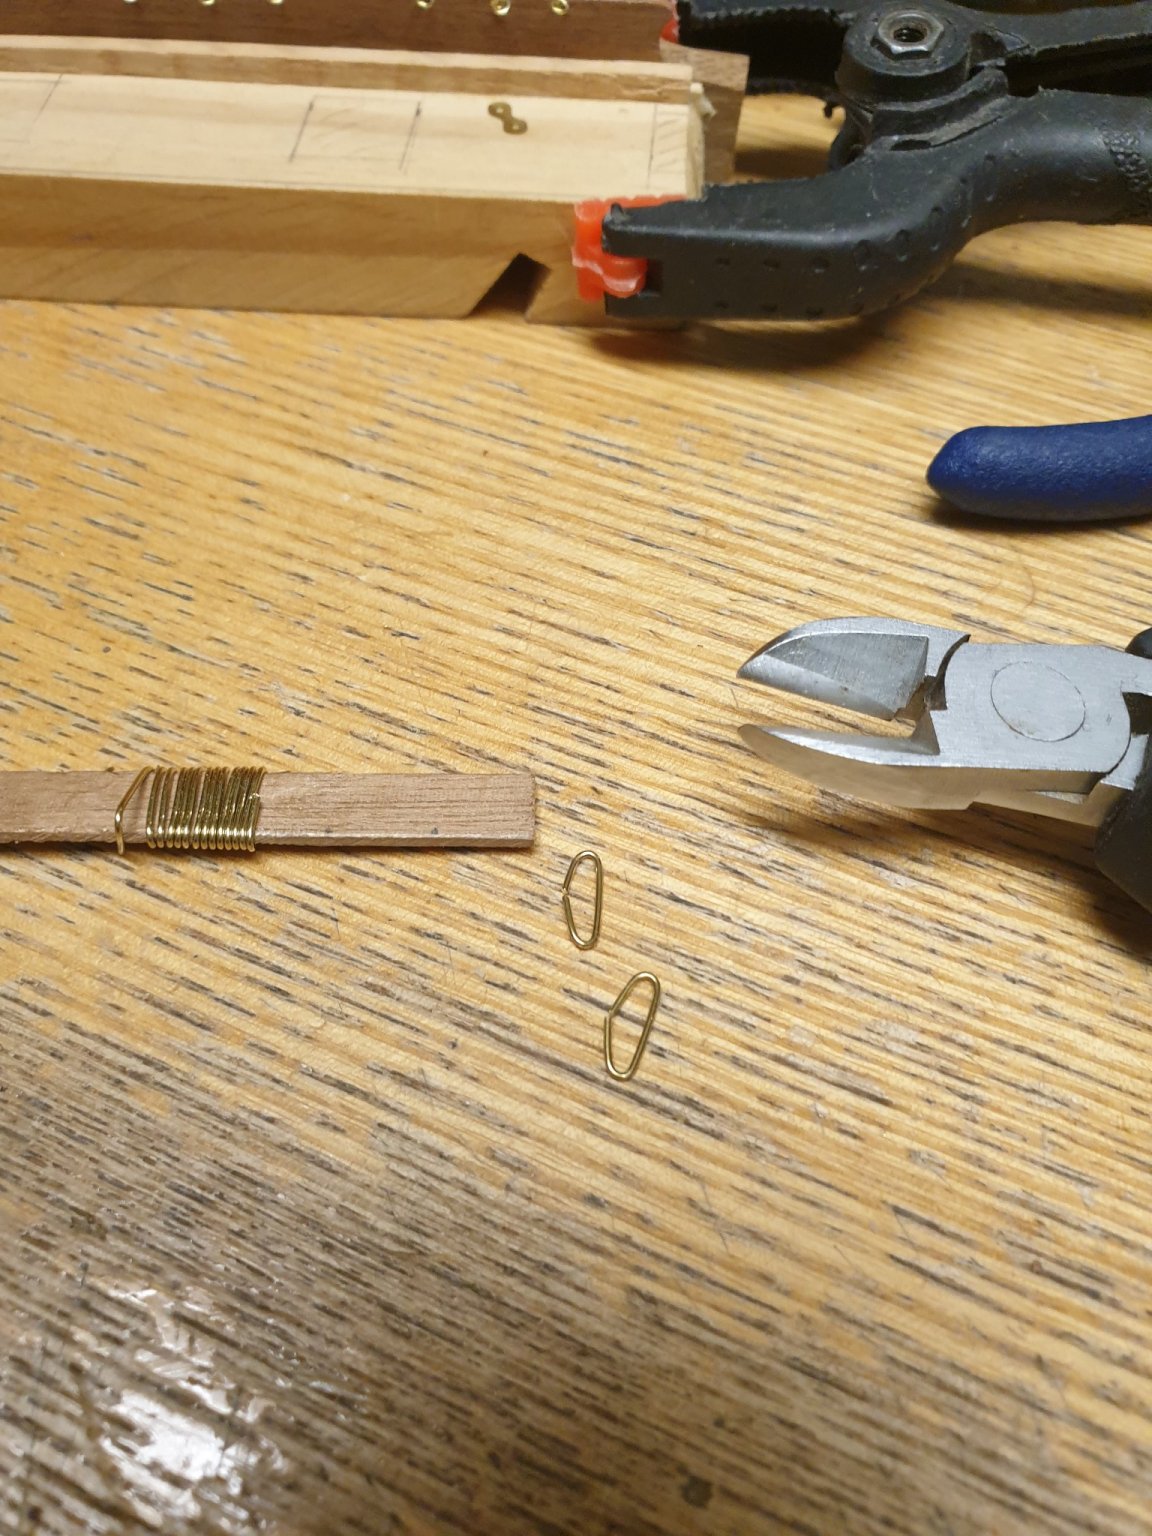
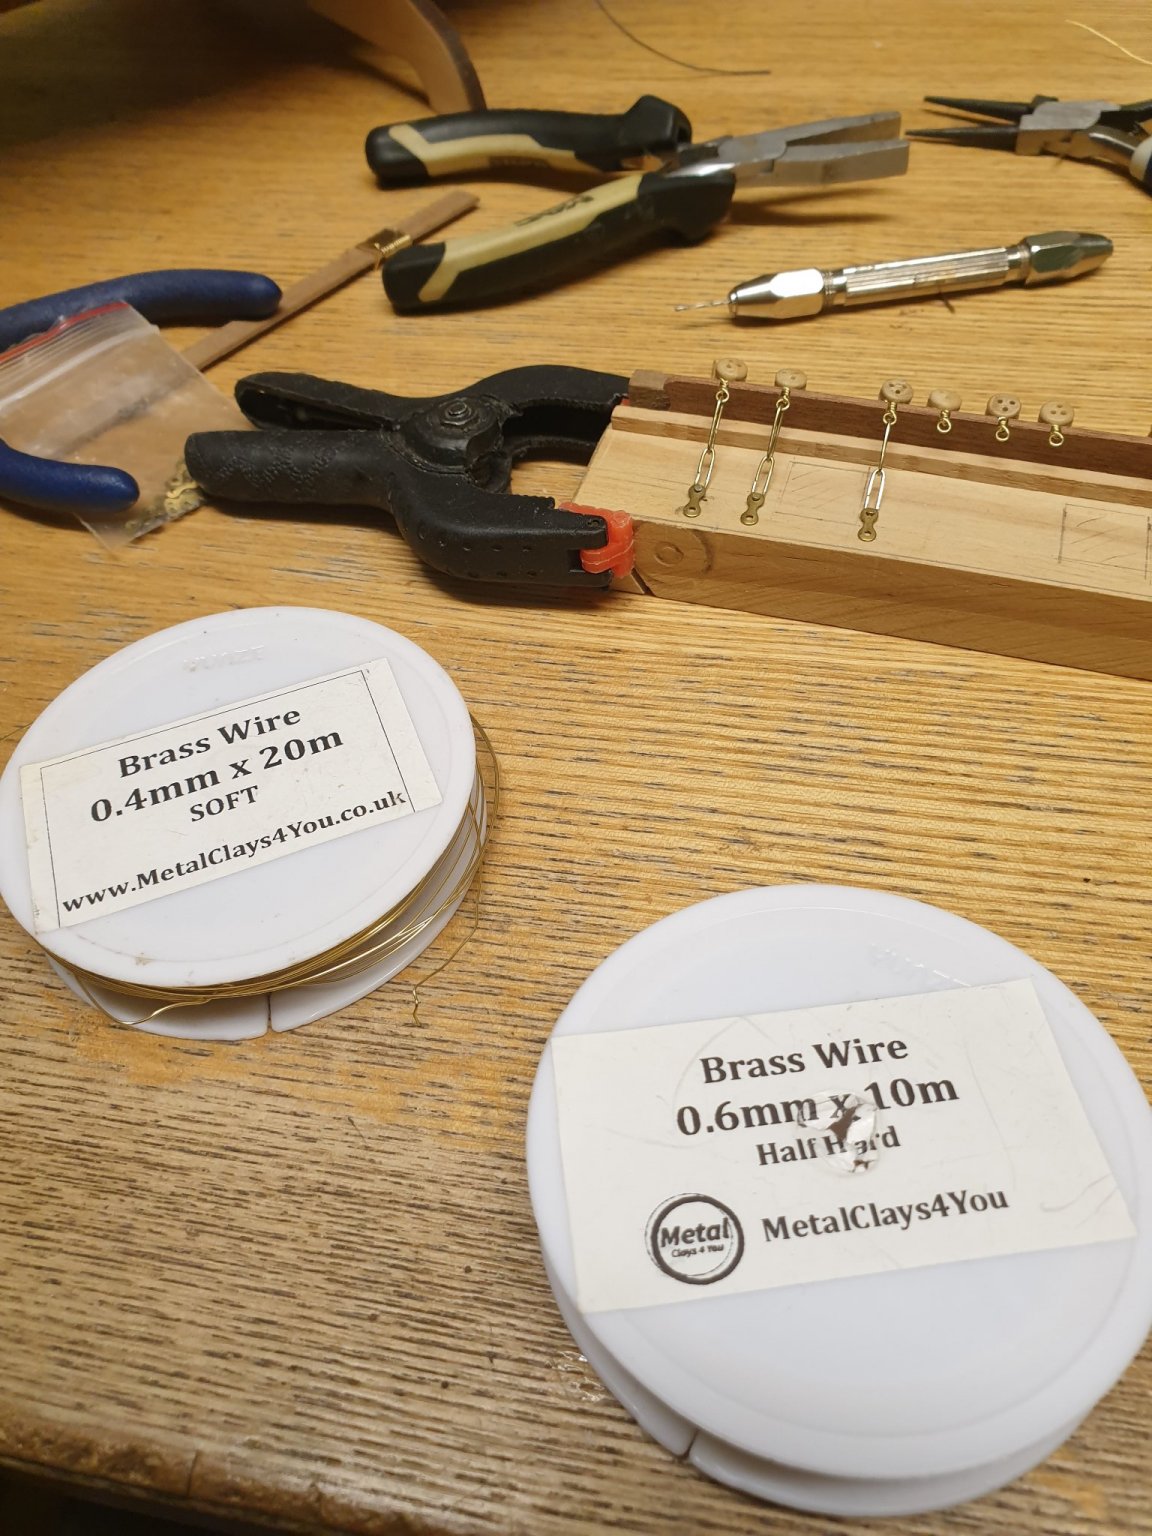
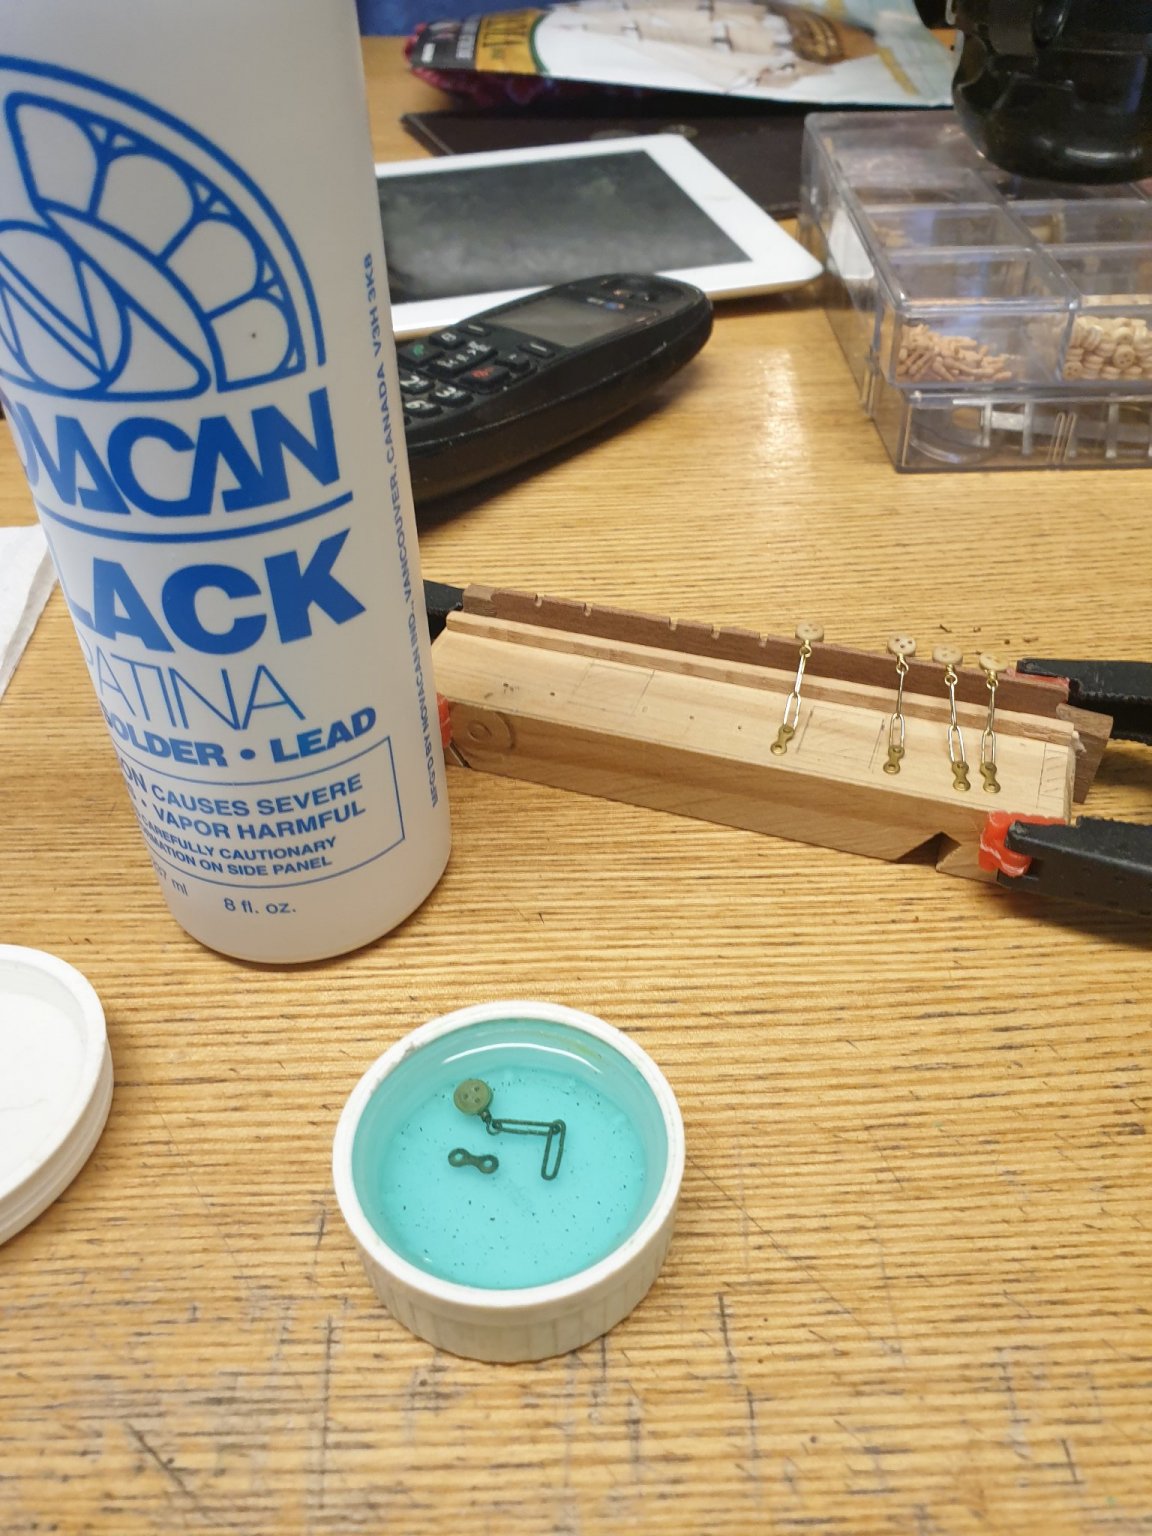
Afternoon MSW, Update on the Constellation. Finally got the chainwhales finished, I've added photos on how I made them. Again I didn't like what kit provided, Looks much better with proper chains rather then the brass flat and rings. Just a few finishing touches left and its all rigging. I'm not putting sails on I'm just going with standard rigging with a few improvements over the kit. Enjoy these latest photos, they are all the right way up lol. Until next time....


.thumb.jpg.f75d7ab010a586c50c2cca407e681412.jpg)
-
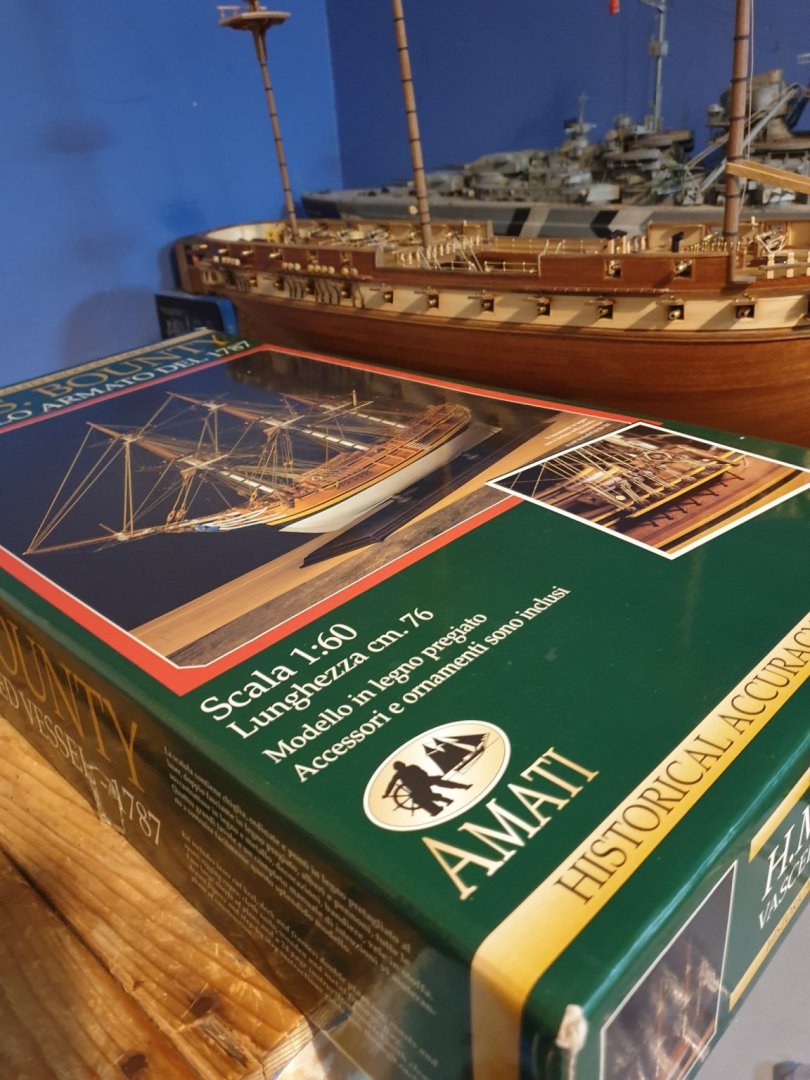
I chose the same manufacturer Amati, Looked at some of the other kits but I really liked this one. Bounty is a must for everyone's collection in my opinion, it's one of those iconic ships that most people know. I've always like to do my homework as you might say and do a lot of research before starting. I've seen the YouTube videos already myself, yes I find them useful to a certain extent. As you say through you can get a lot more information here on MSW. I enjoy reading the history of the ships I build as well as picking up tips on the the build itself. I'm still very much a novice this kit will be my 5th period ship so any help is always appreciated. I'm impressed that this only your first build, you have made a good job so far. Enjoy your build Dave 🙂 Regards JD
-
Greetings Dave, Impressive model beautifully made the box art really stands out. I got this model in the post today, opened the box pretty much the second it arrived. Looks a lovely model even though it has a few issues. Very much looking forward to starting but currently I'm building the US Constellation which I'll probably finish first. I'm just about to start rigging her so hopefully in a month or two I'll be able to start. I wish you luck with the rest of your rigging and finishing touches I'll be following.
-
Here are some more detailed photos of the ship but In no particular order.

-
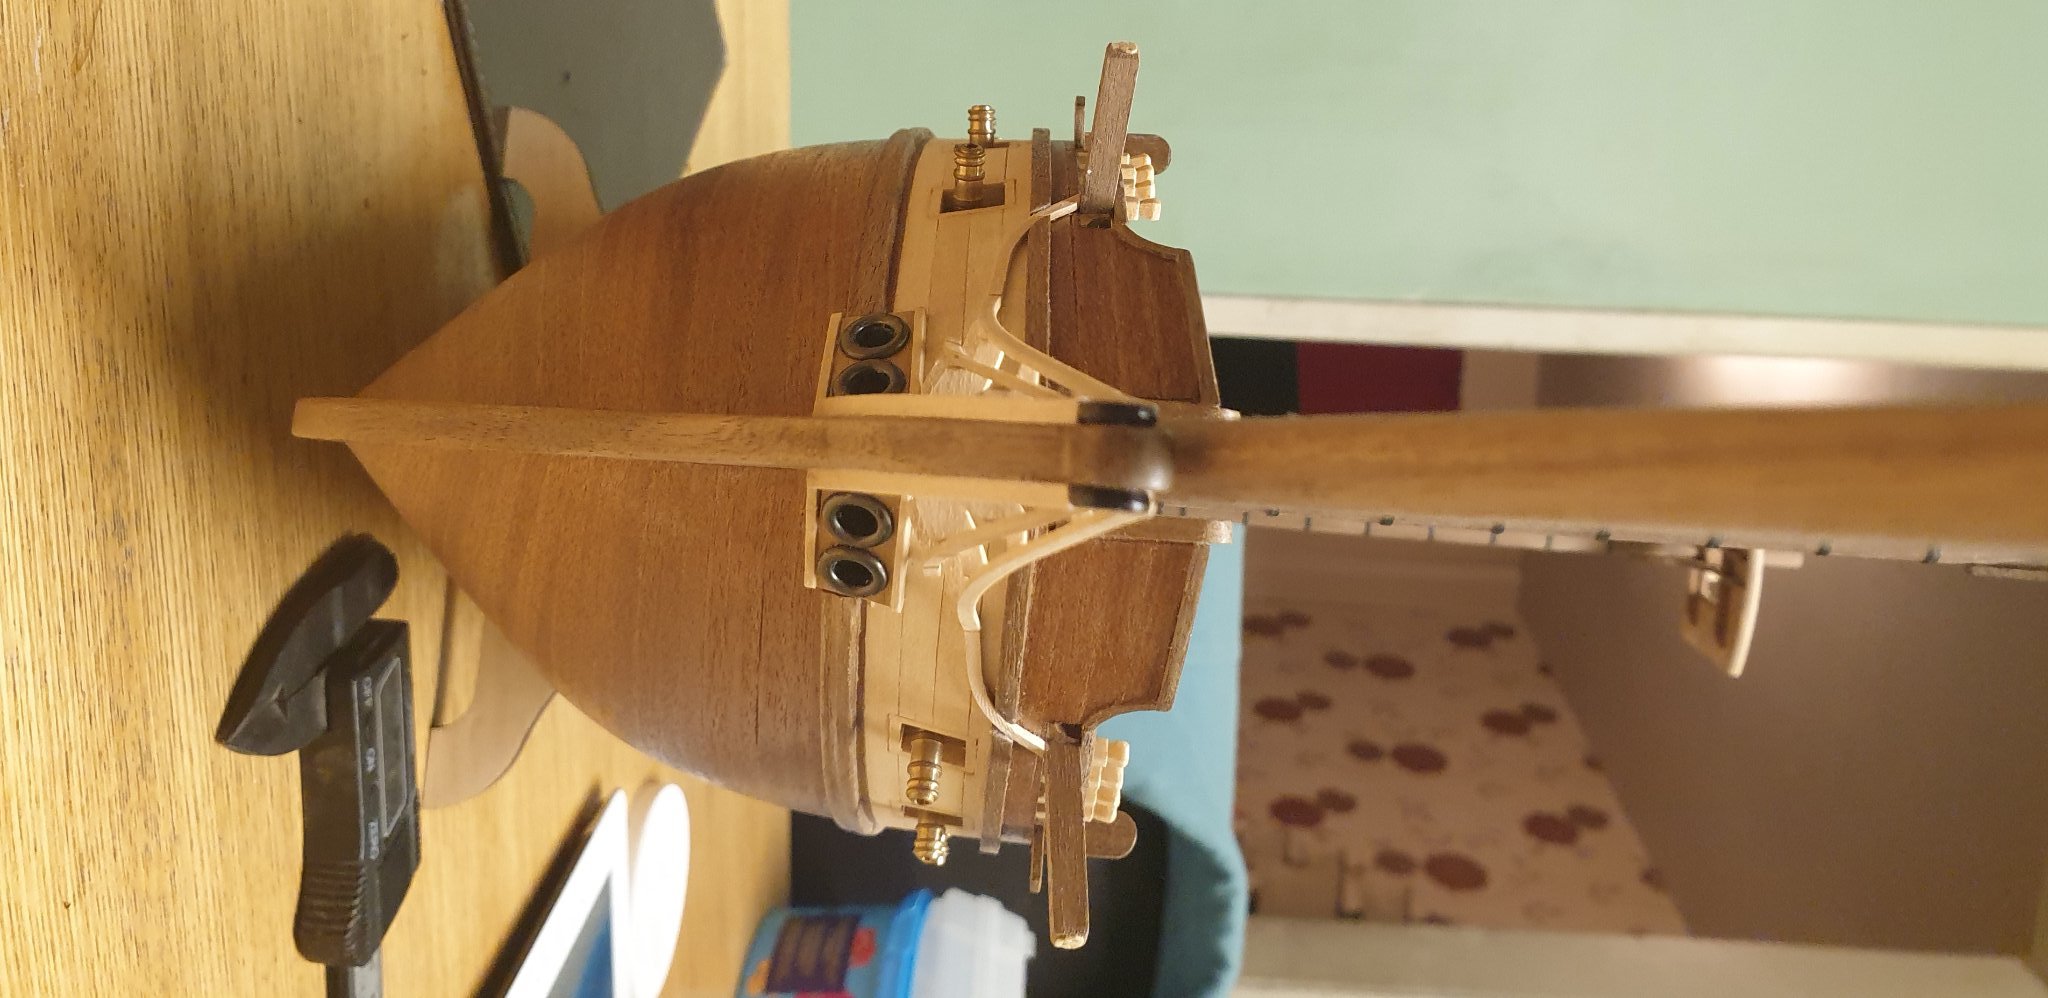
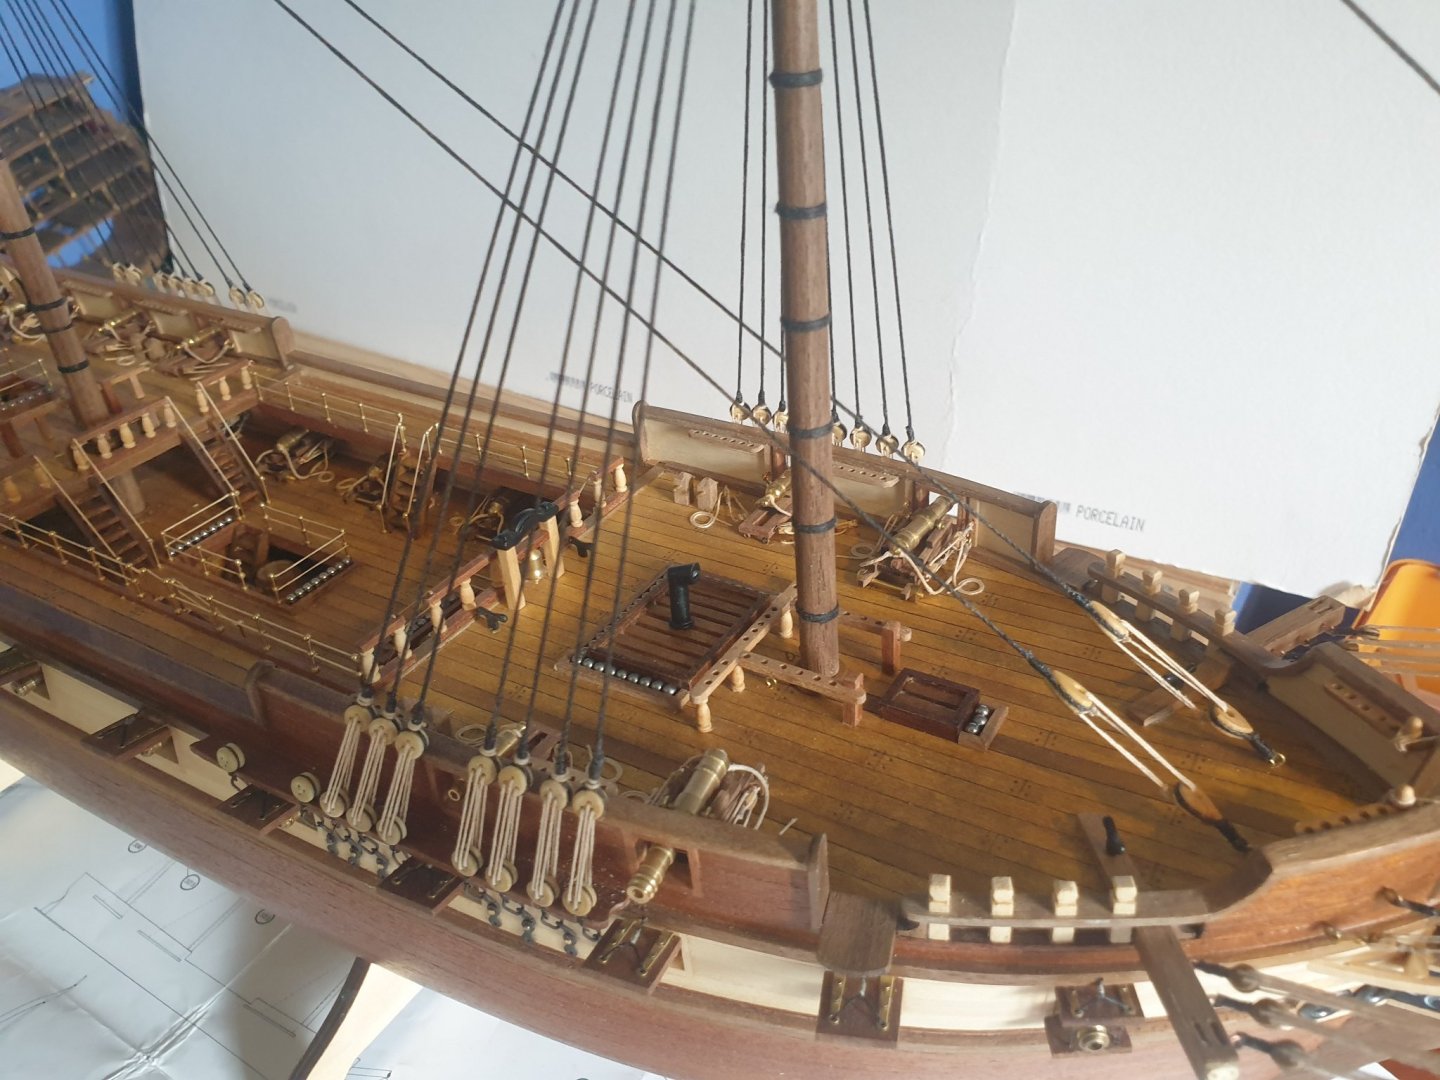
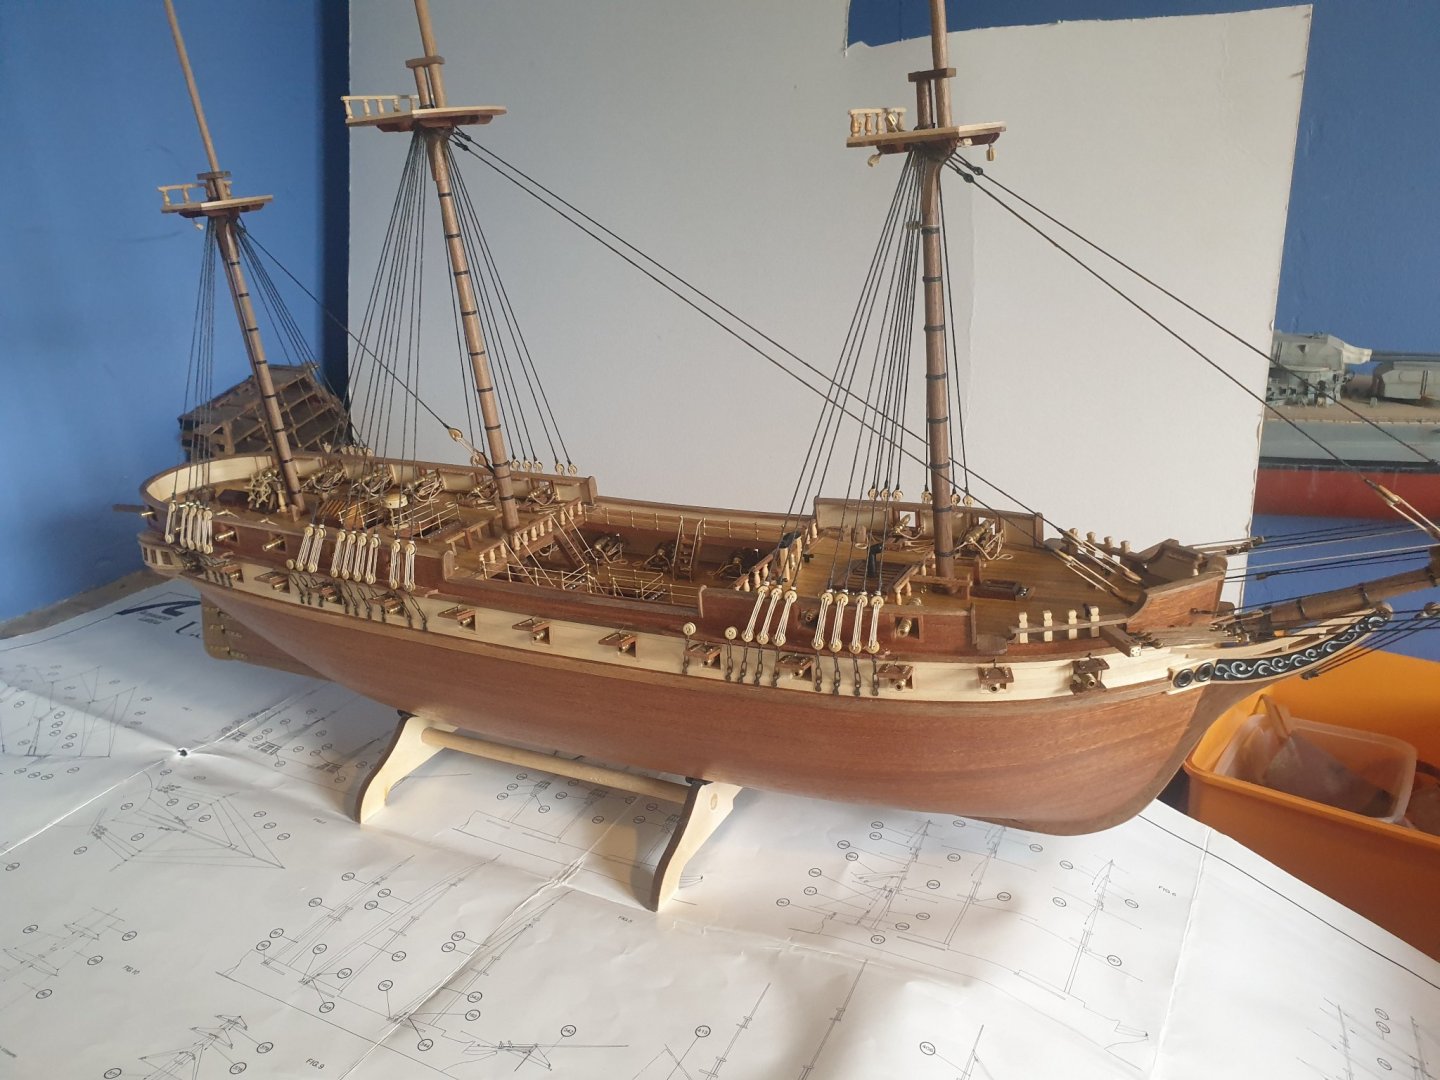
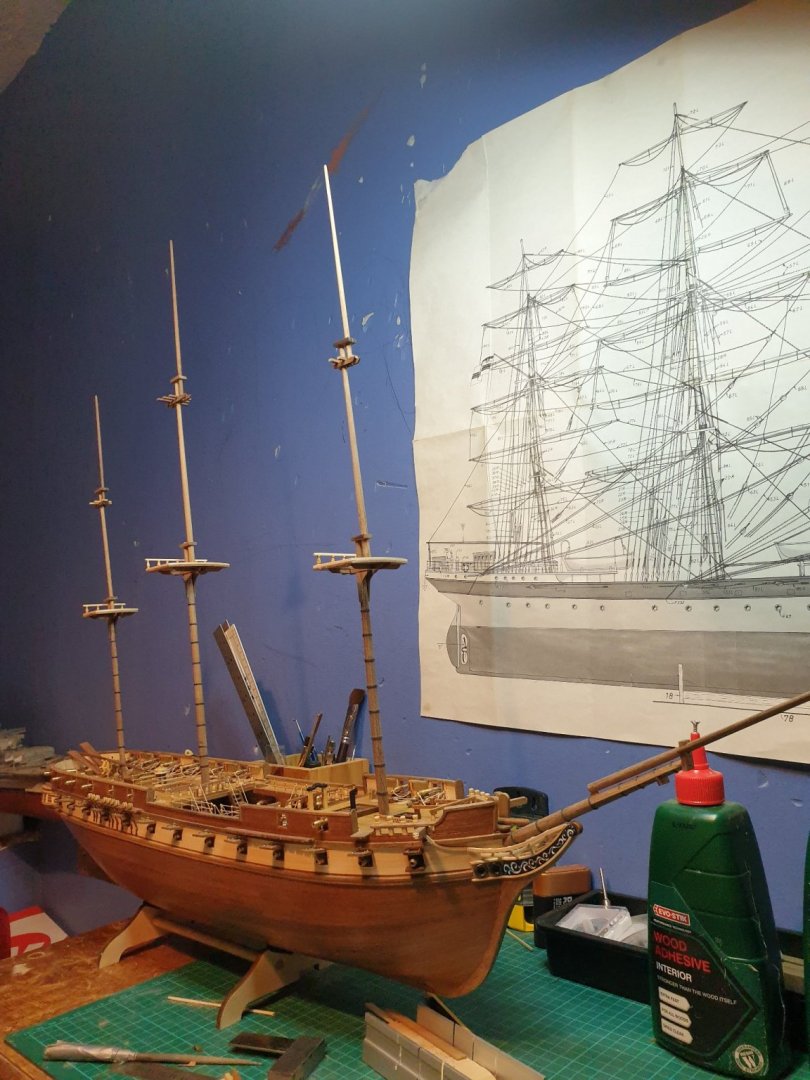
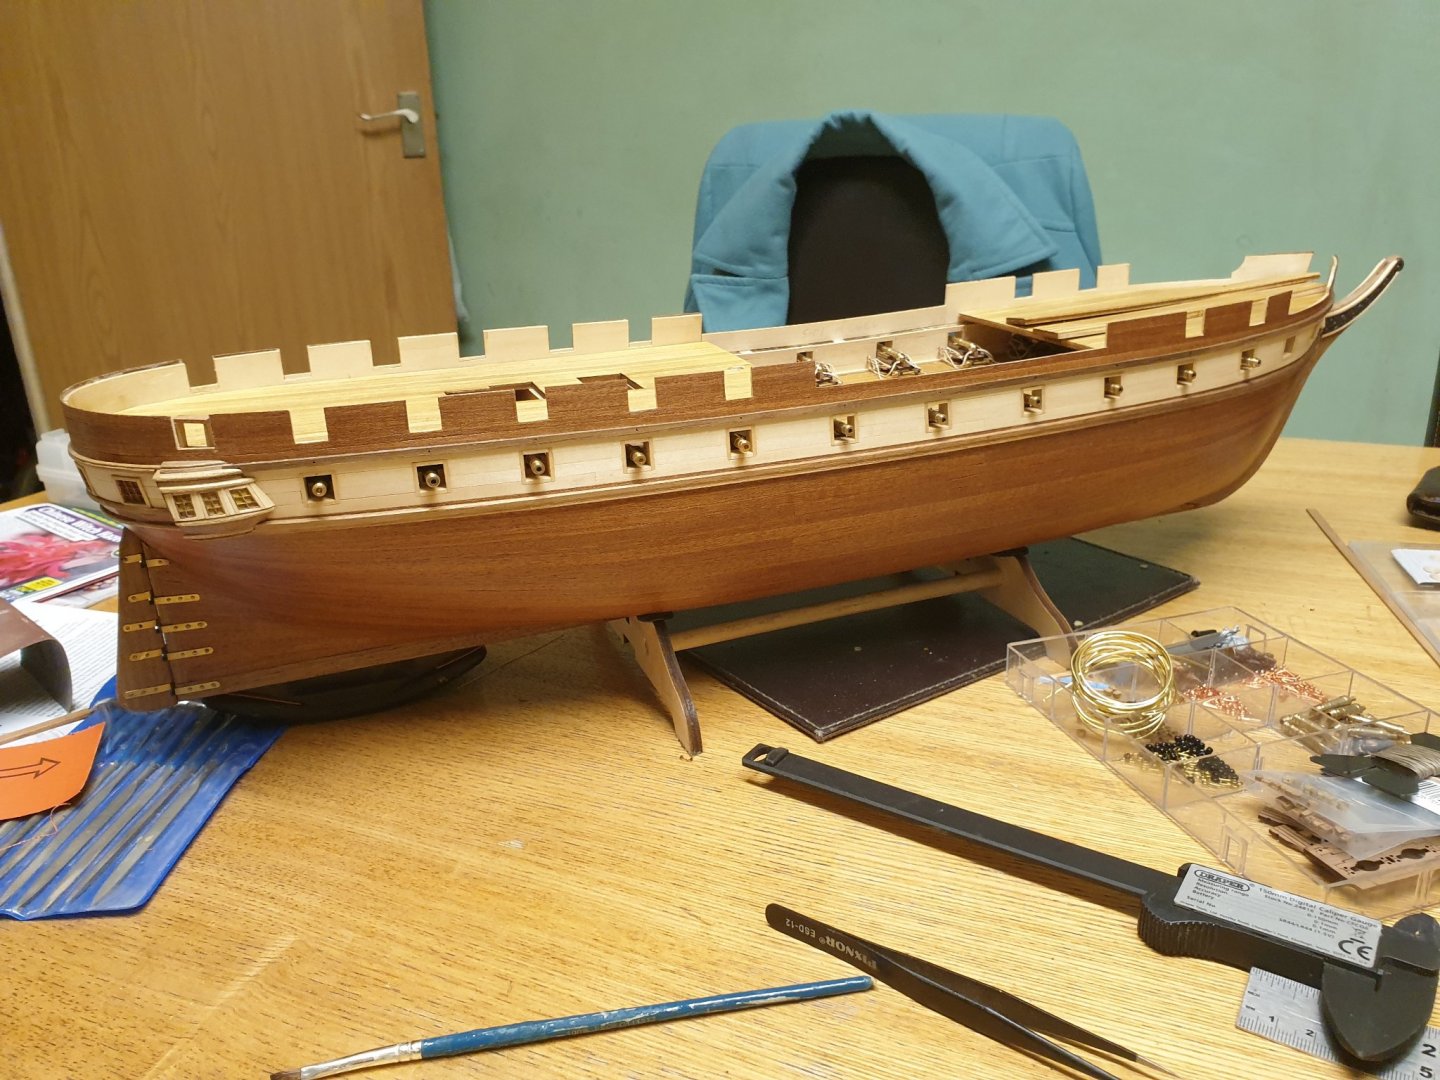
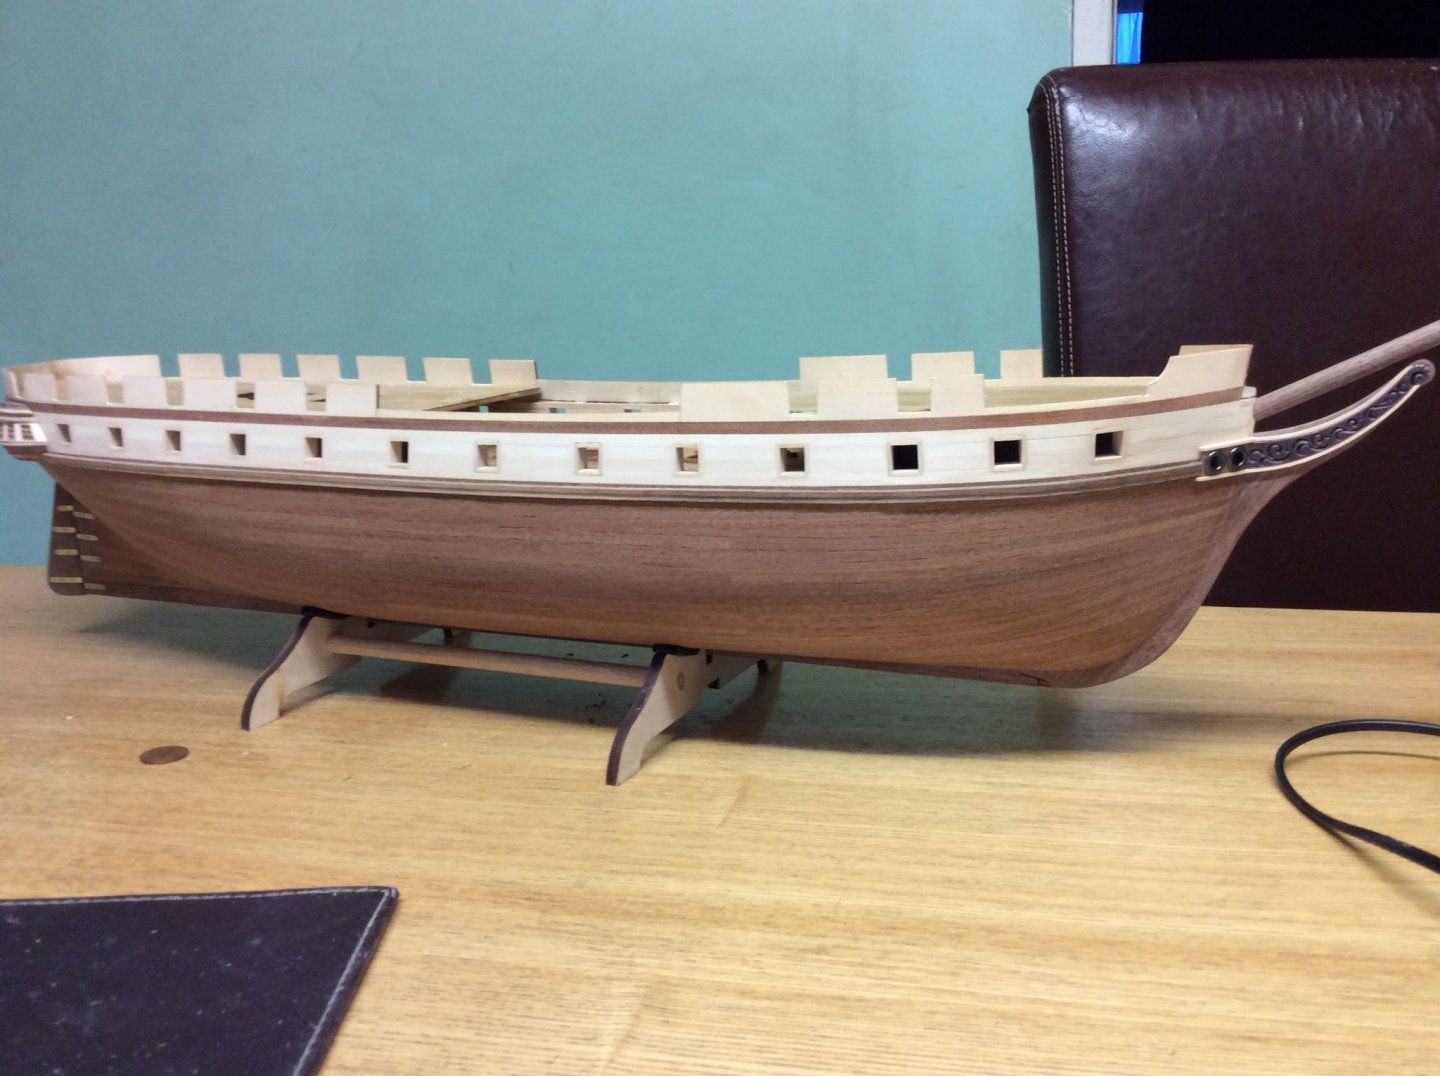
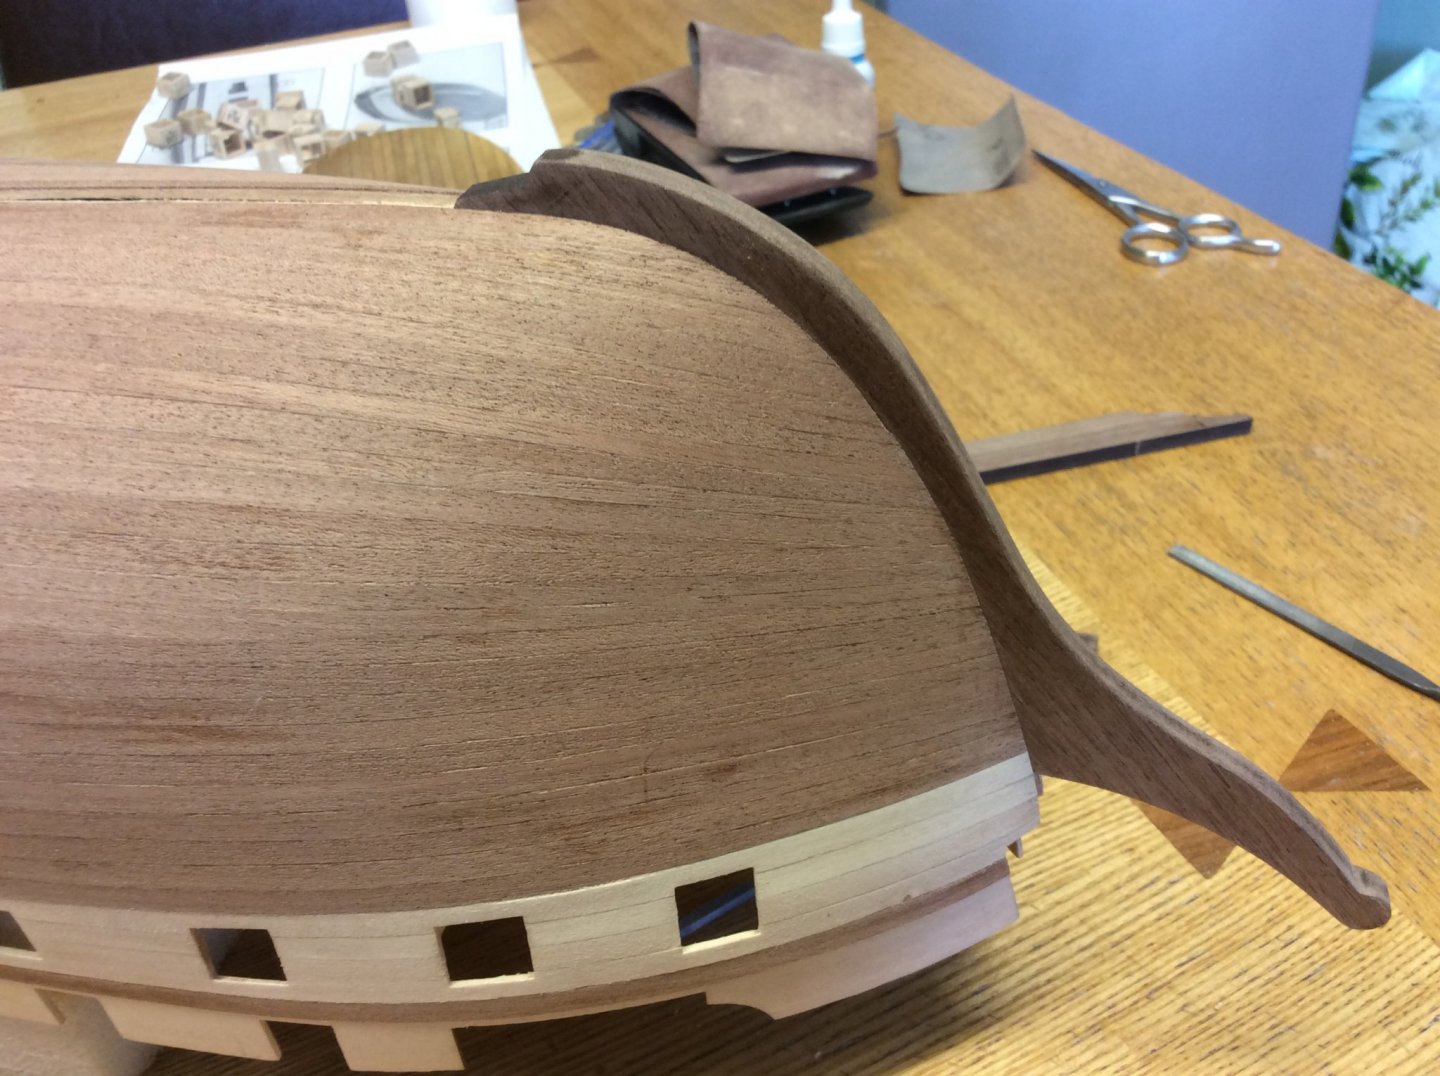
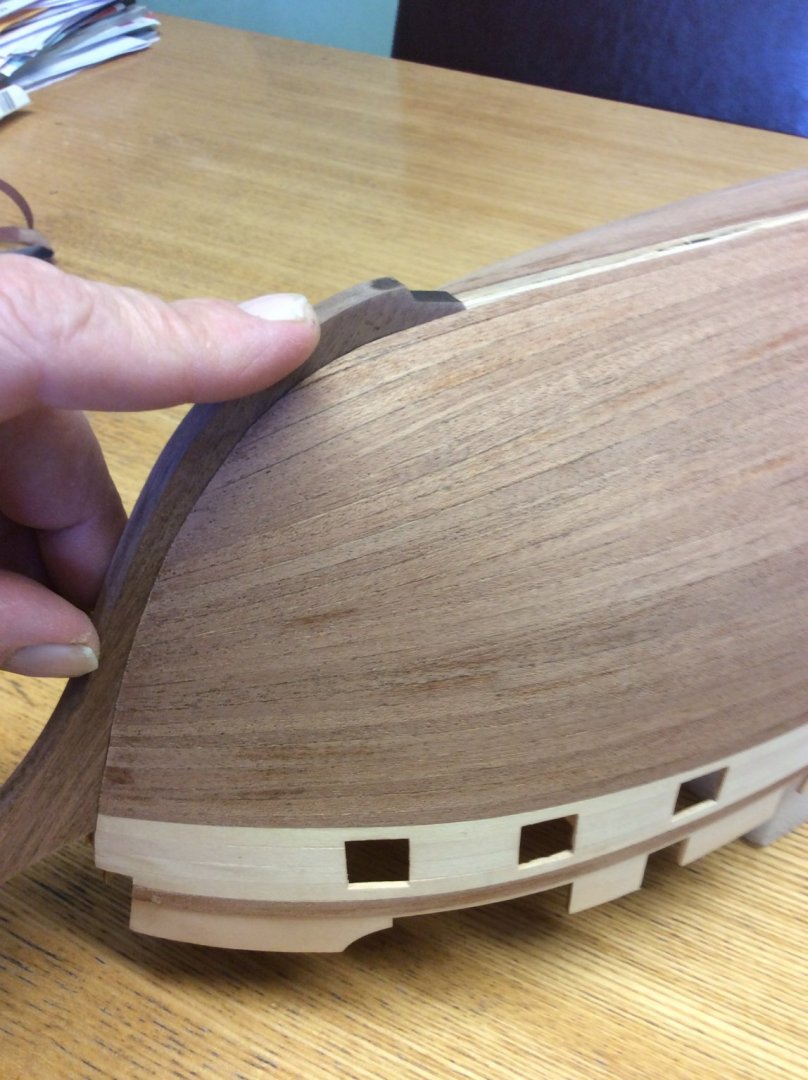
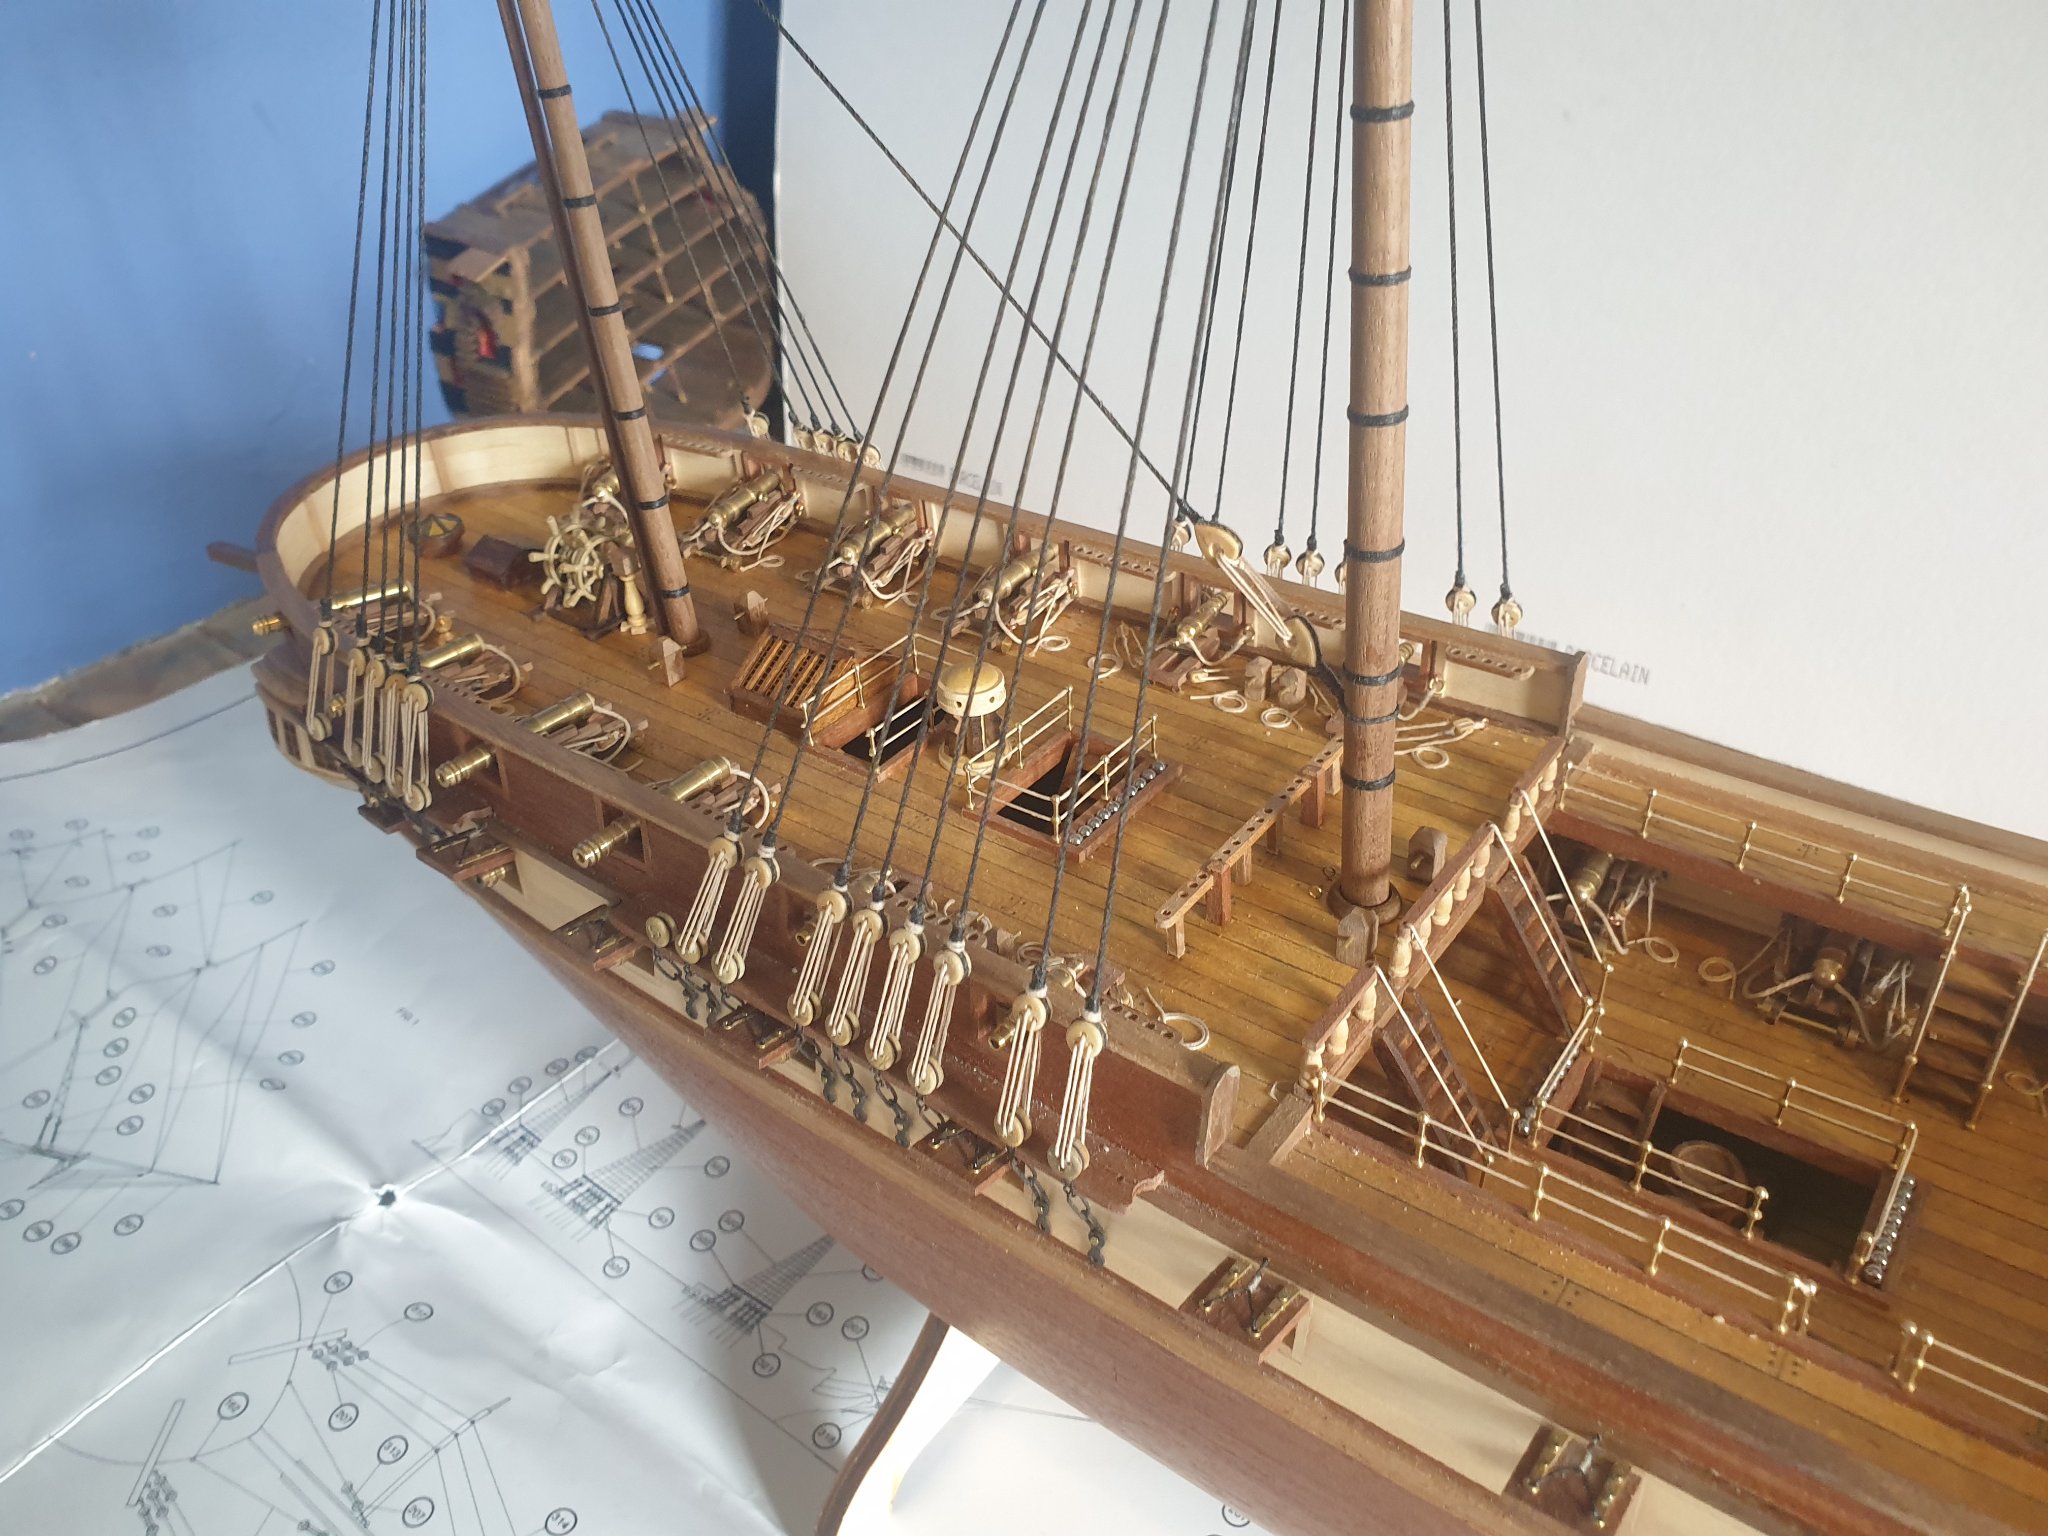
Hi everyone, it's been a while since I updated the build here are some of the latest photos. I'm almost up to the rigging stage just a few things to finish off. You will notice I scratch built the bow frame I didn't like the one provided In the kit. Also changed the chain plate, repIaced it with brass wire. Still need to finish For and mizzen mast channels. I still don't get the time I would like on the model that's probably why I've not updated for a while. Well enjoying these photos until next time.


-
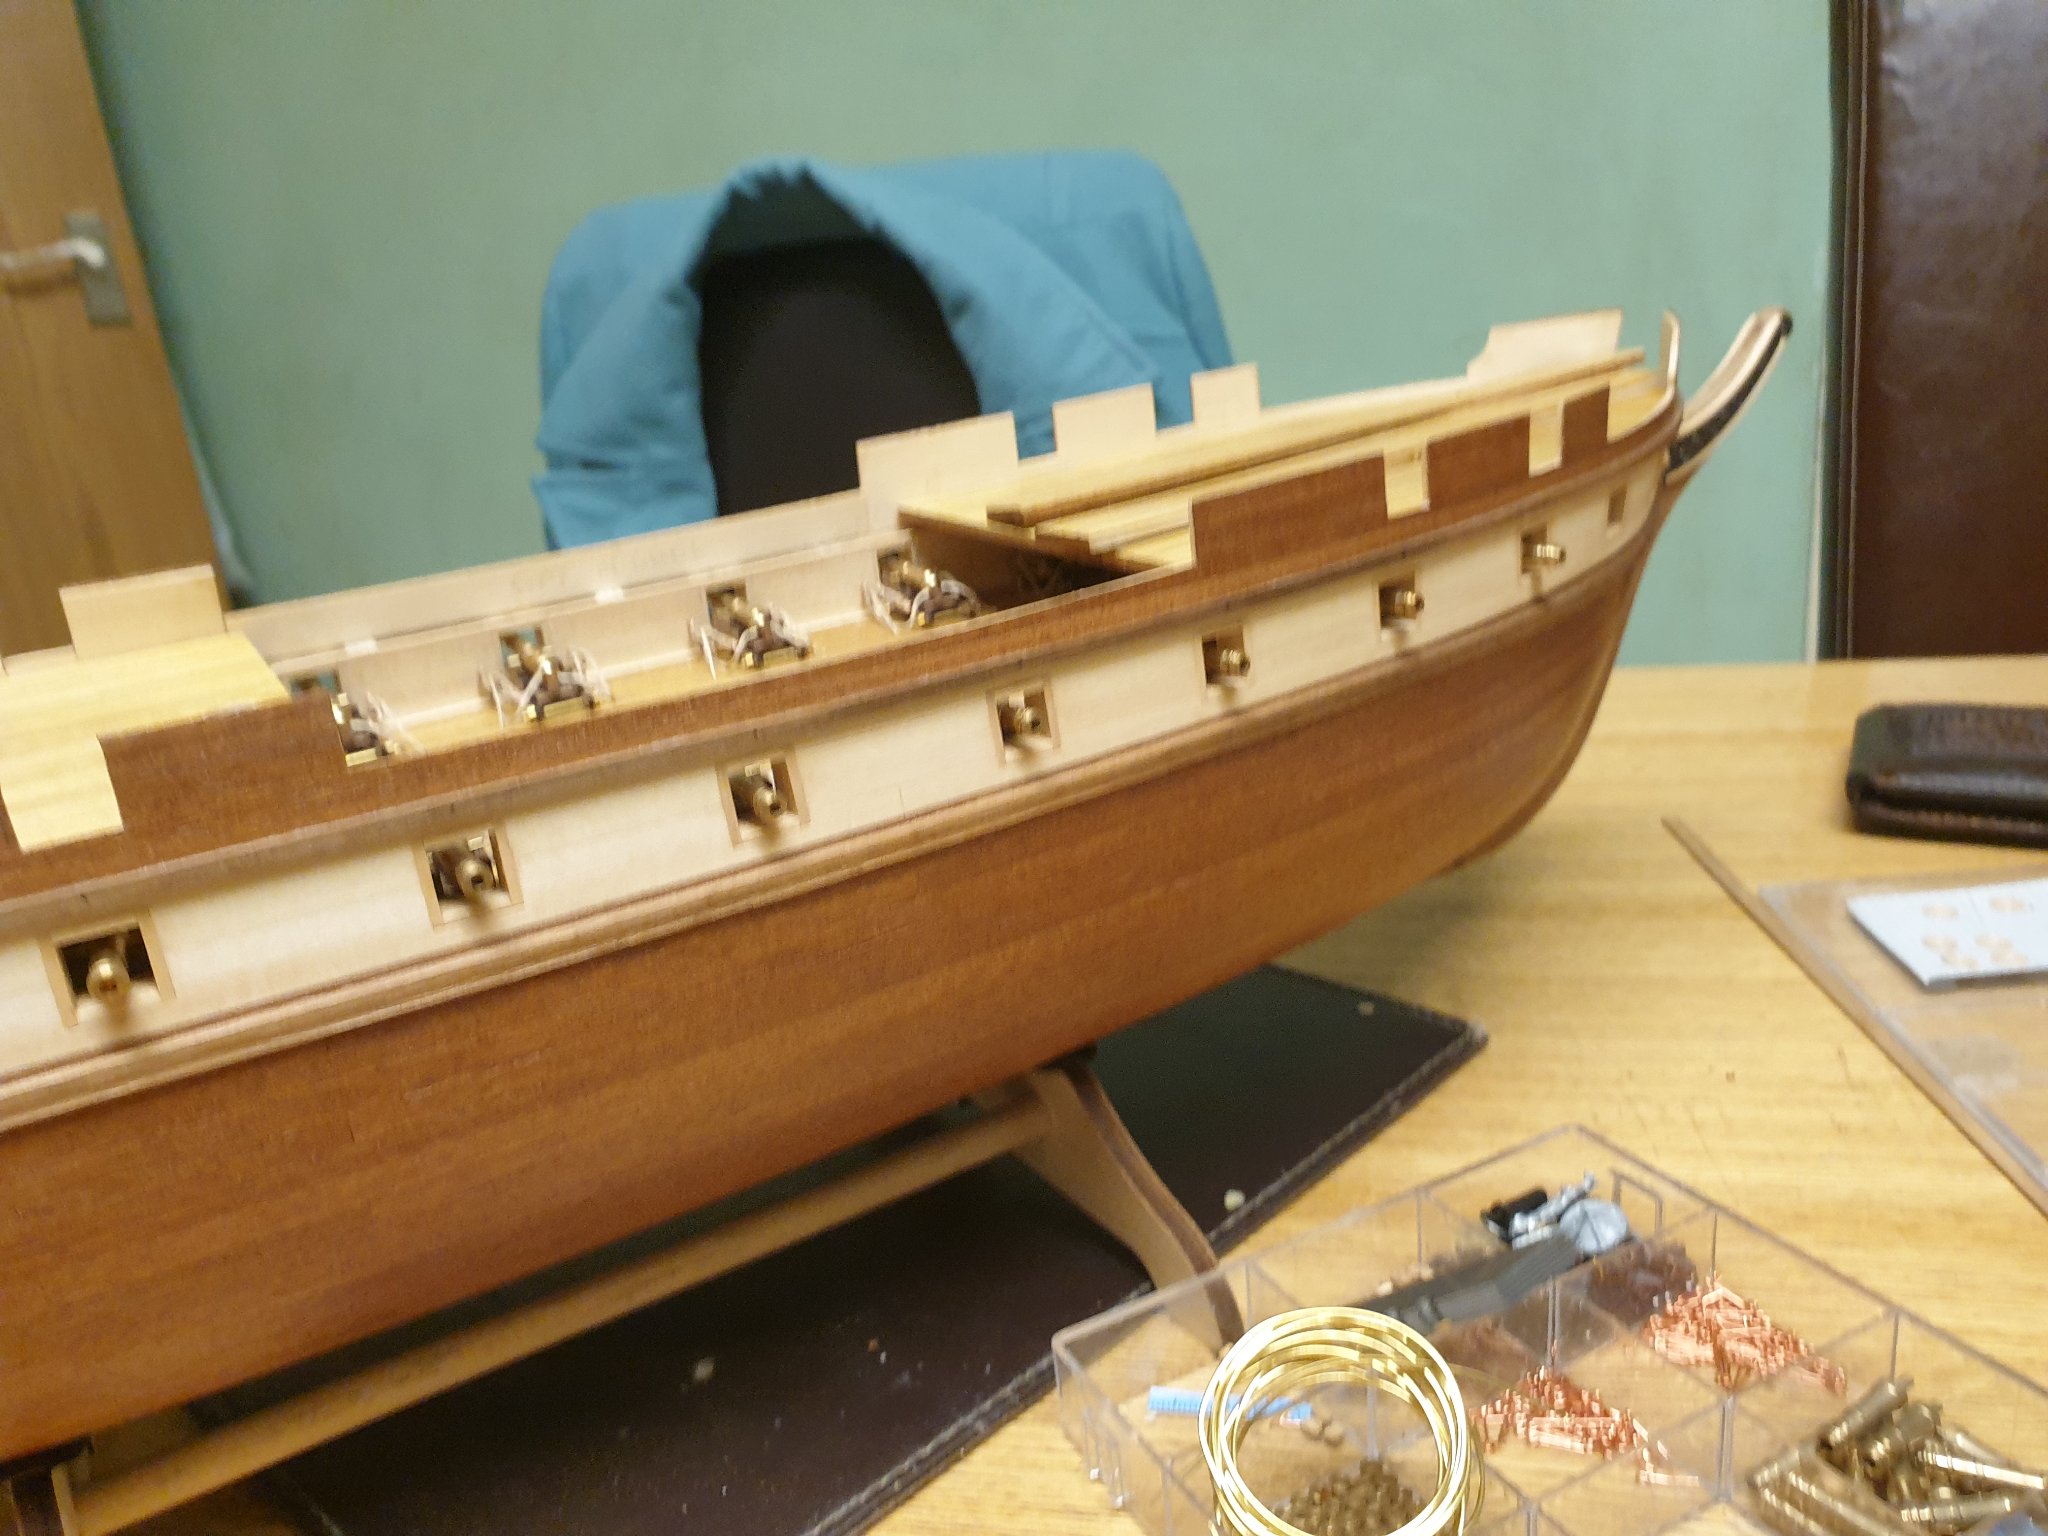
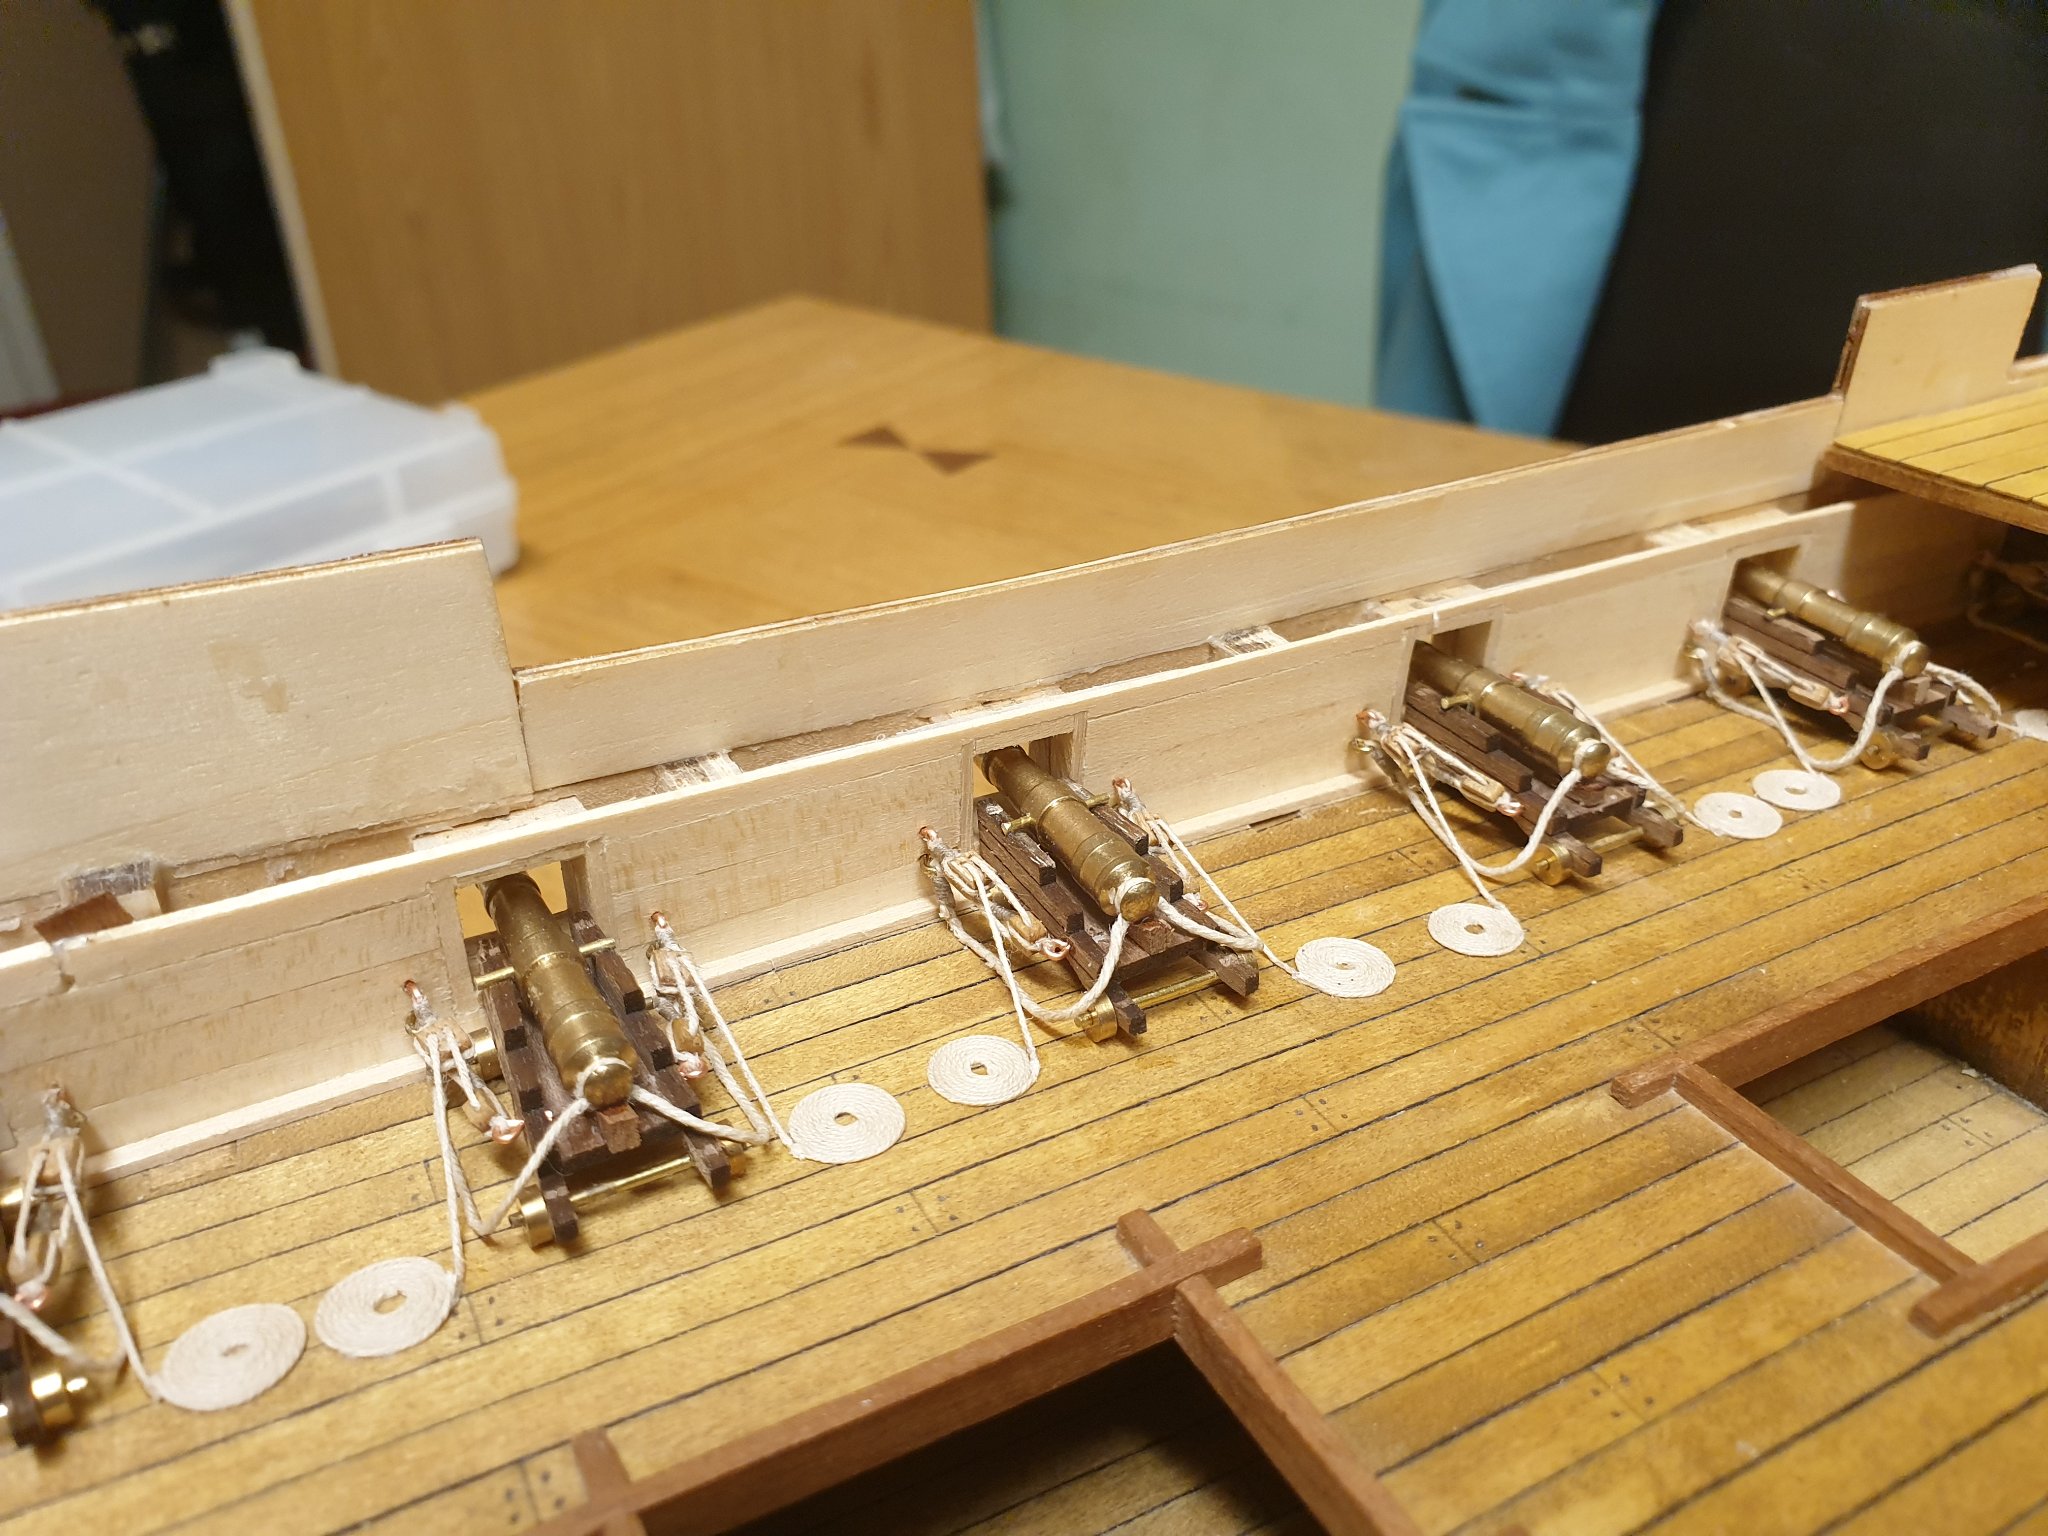
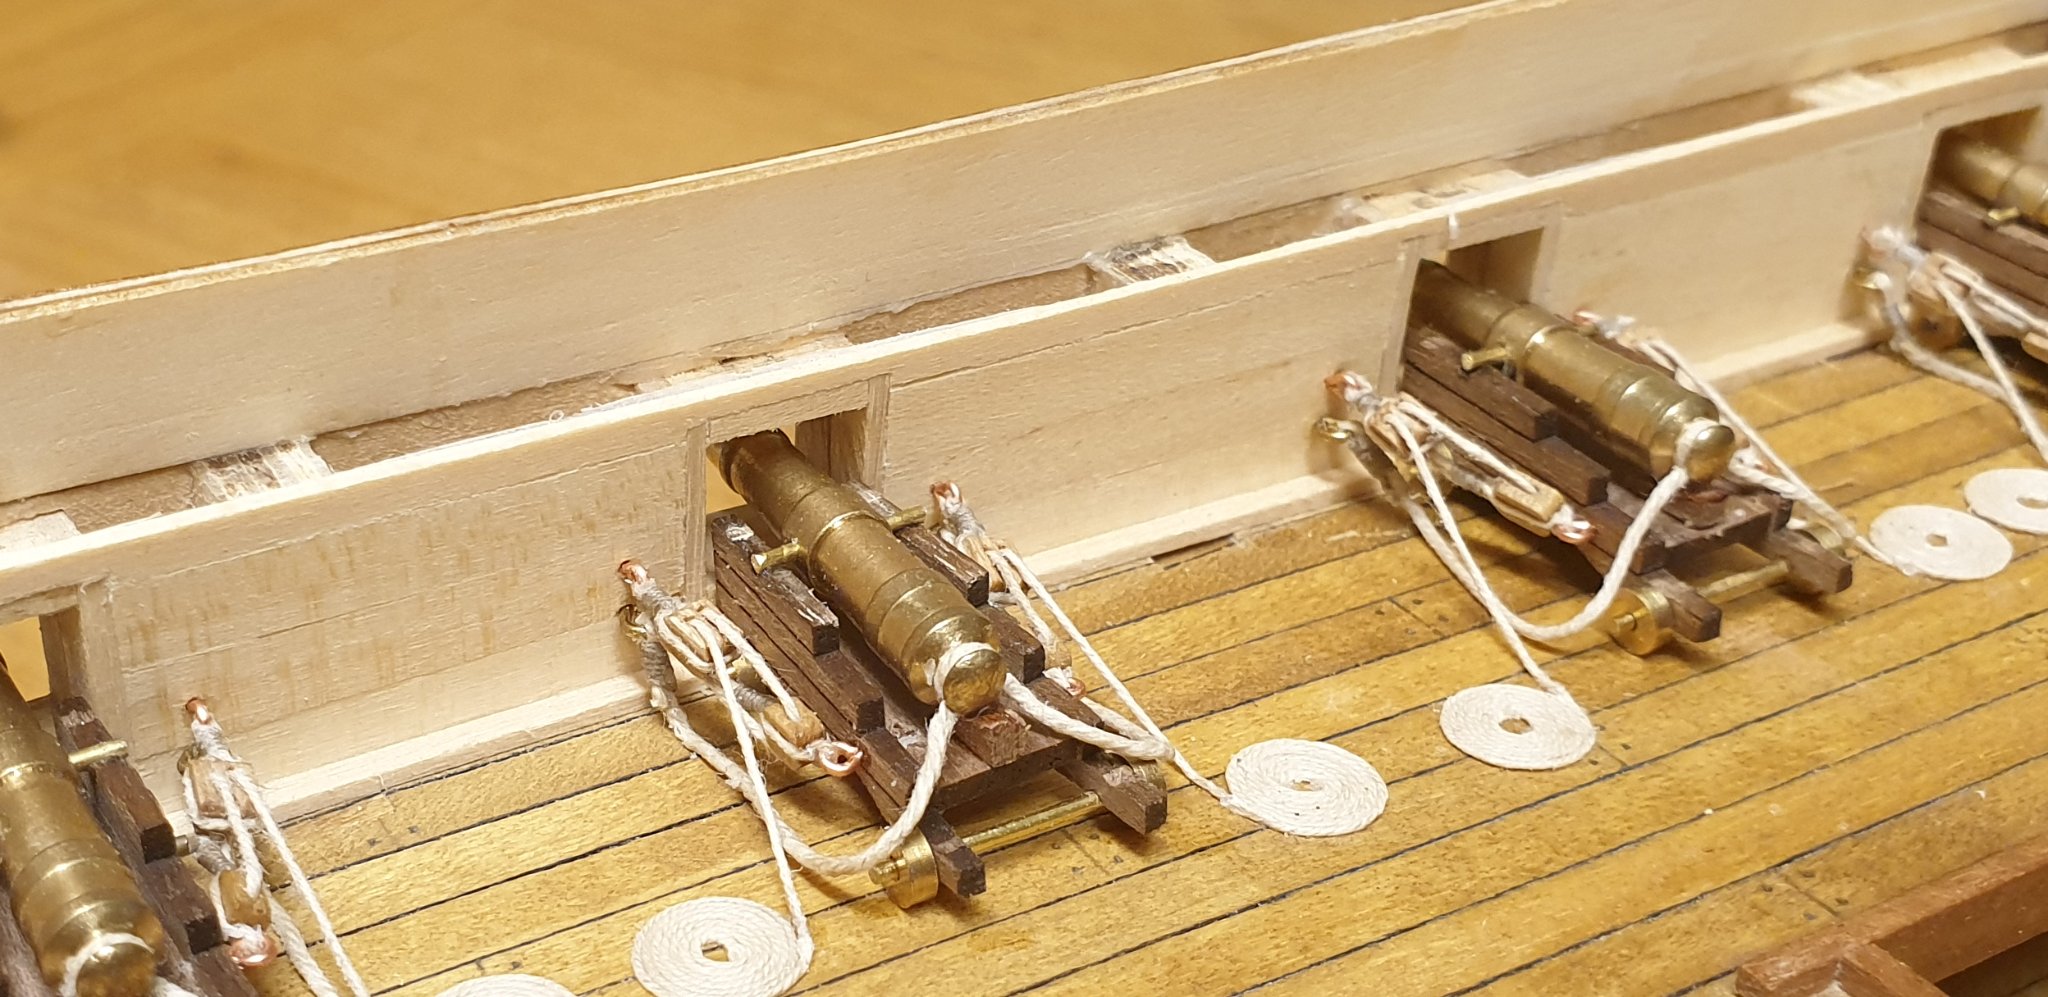
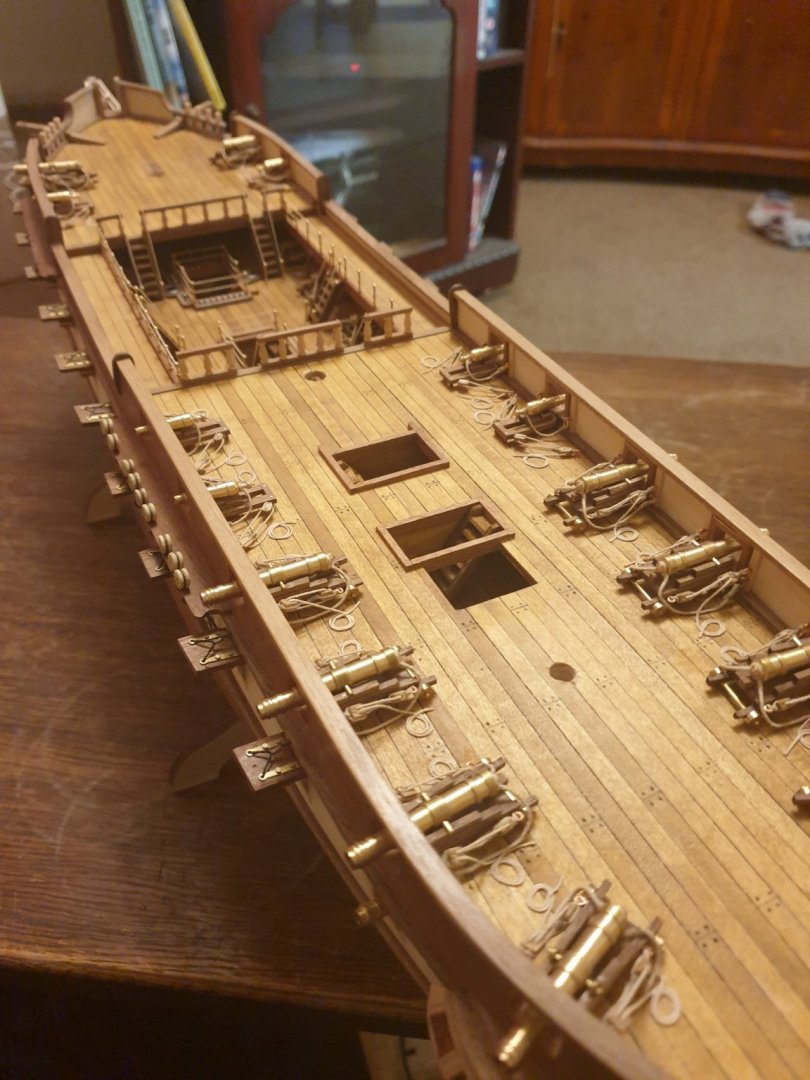
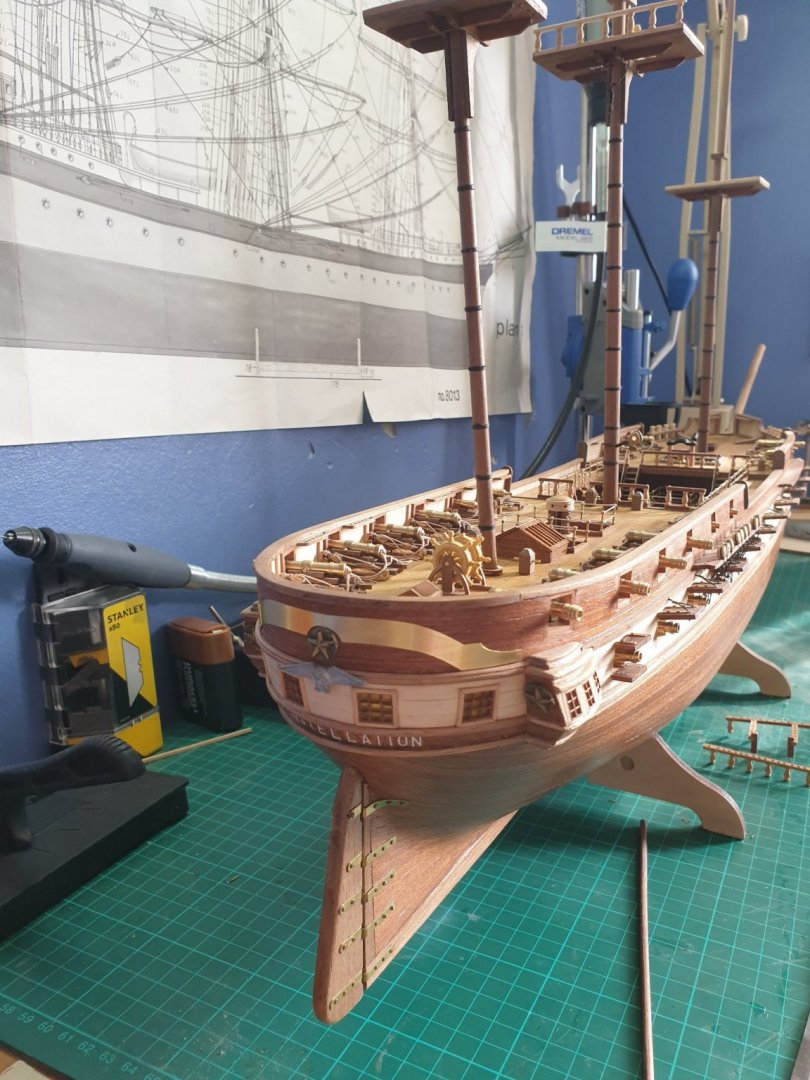
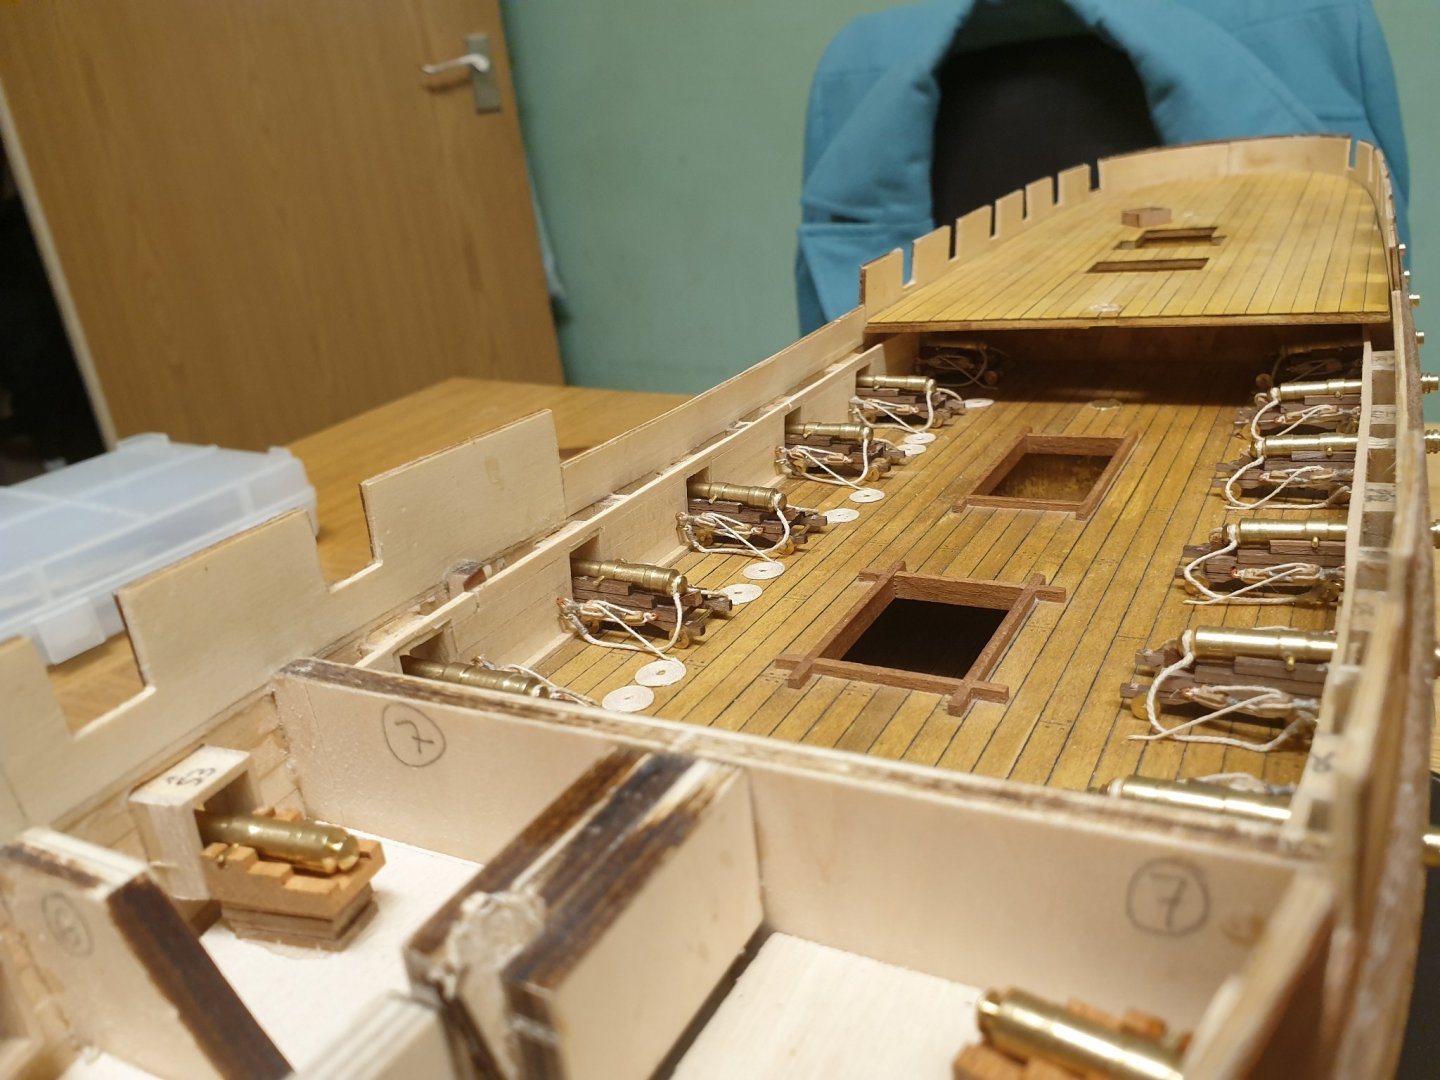
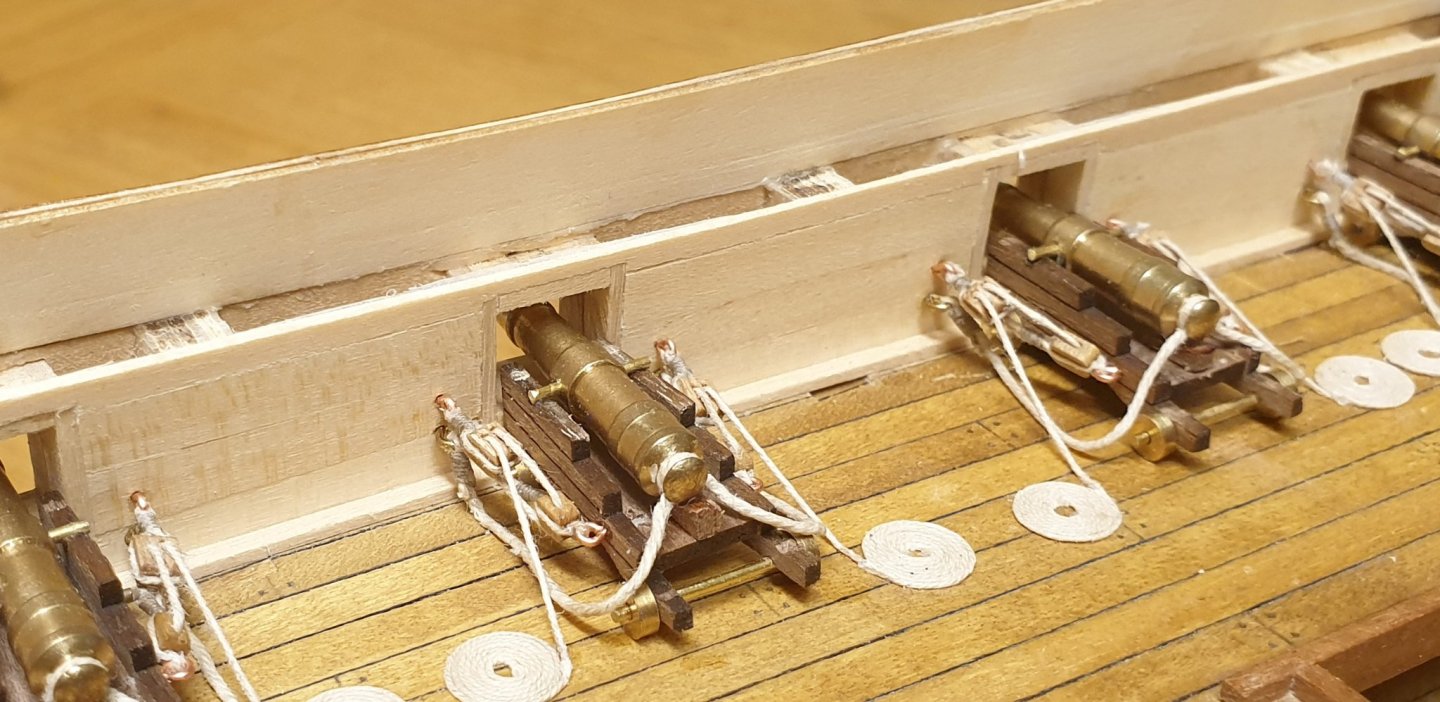
Not posted for a while been really busy lately. The model is looking great she has had a coat of varnish and I've fitted it's first guns. I'll let the photos do the talking as it's nearly 3 am when writing this message and I need some sleep. Up early for work in the morning so enjoy the photos.


-
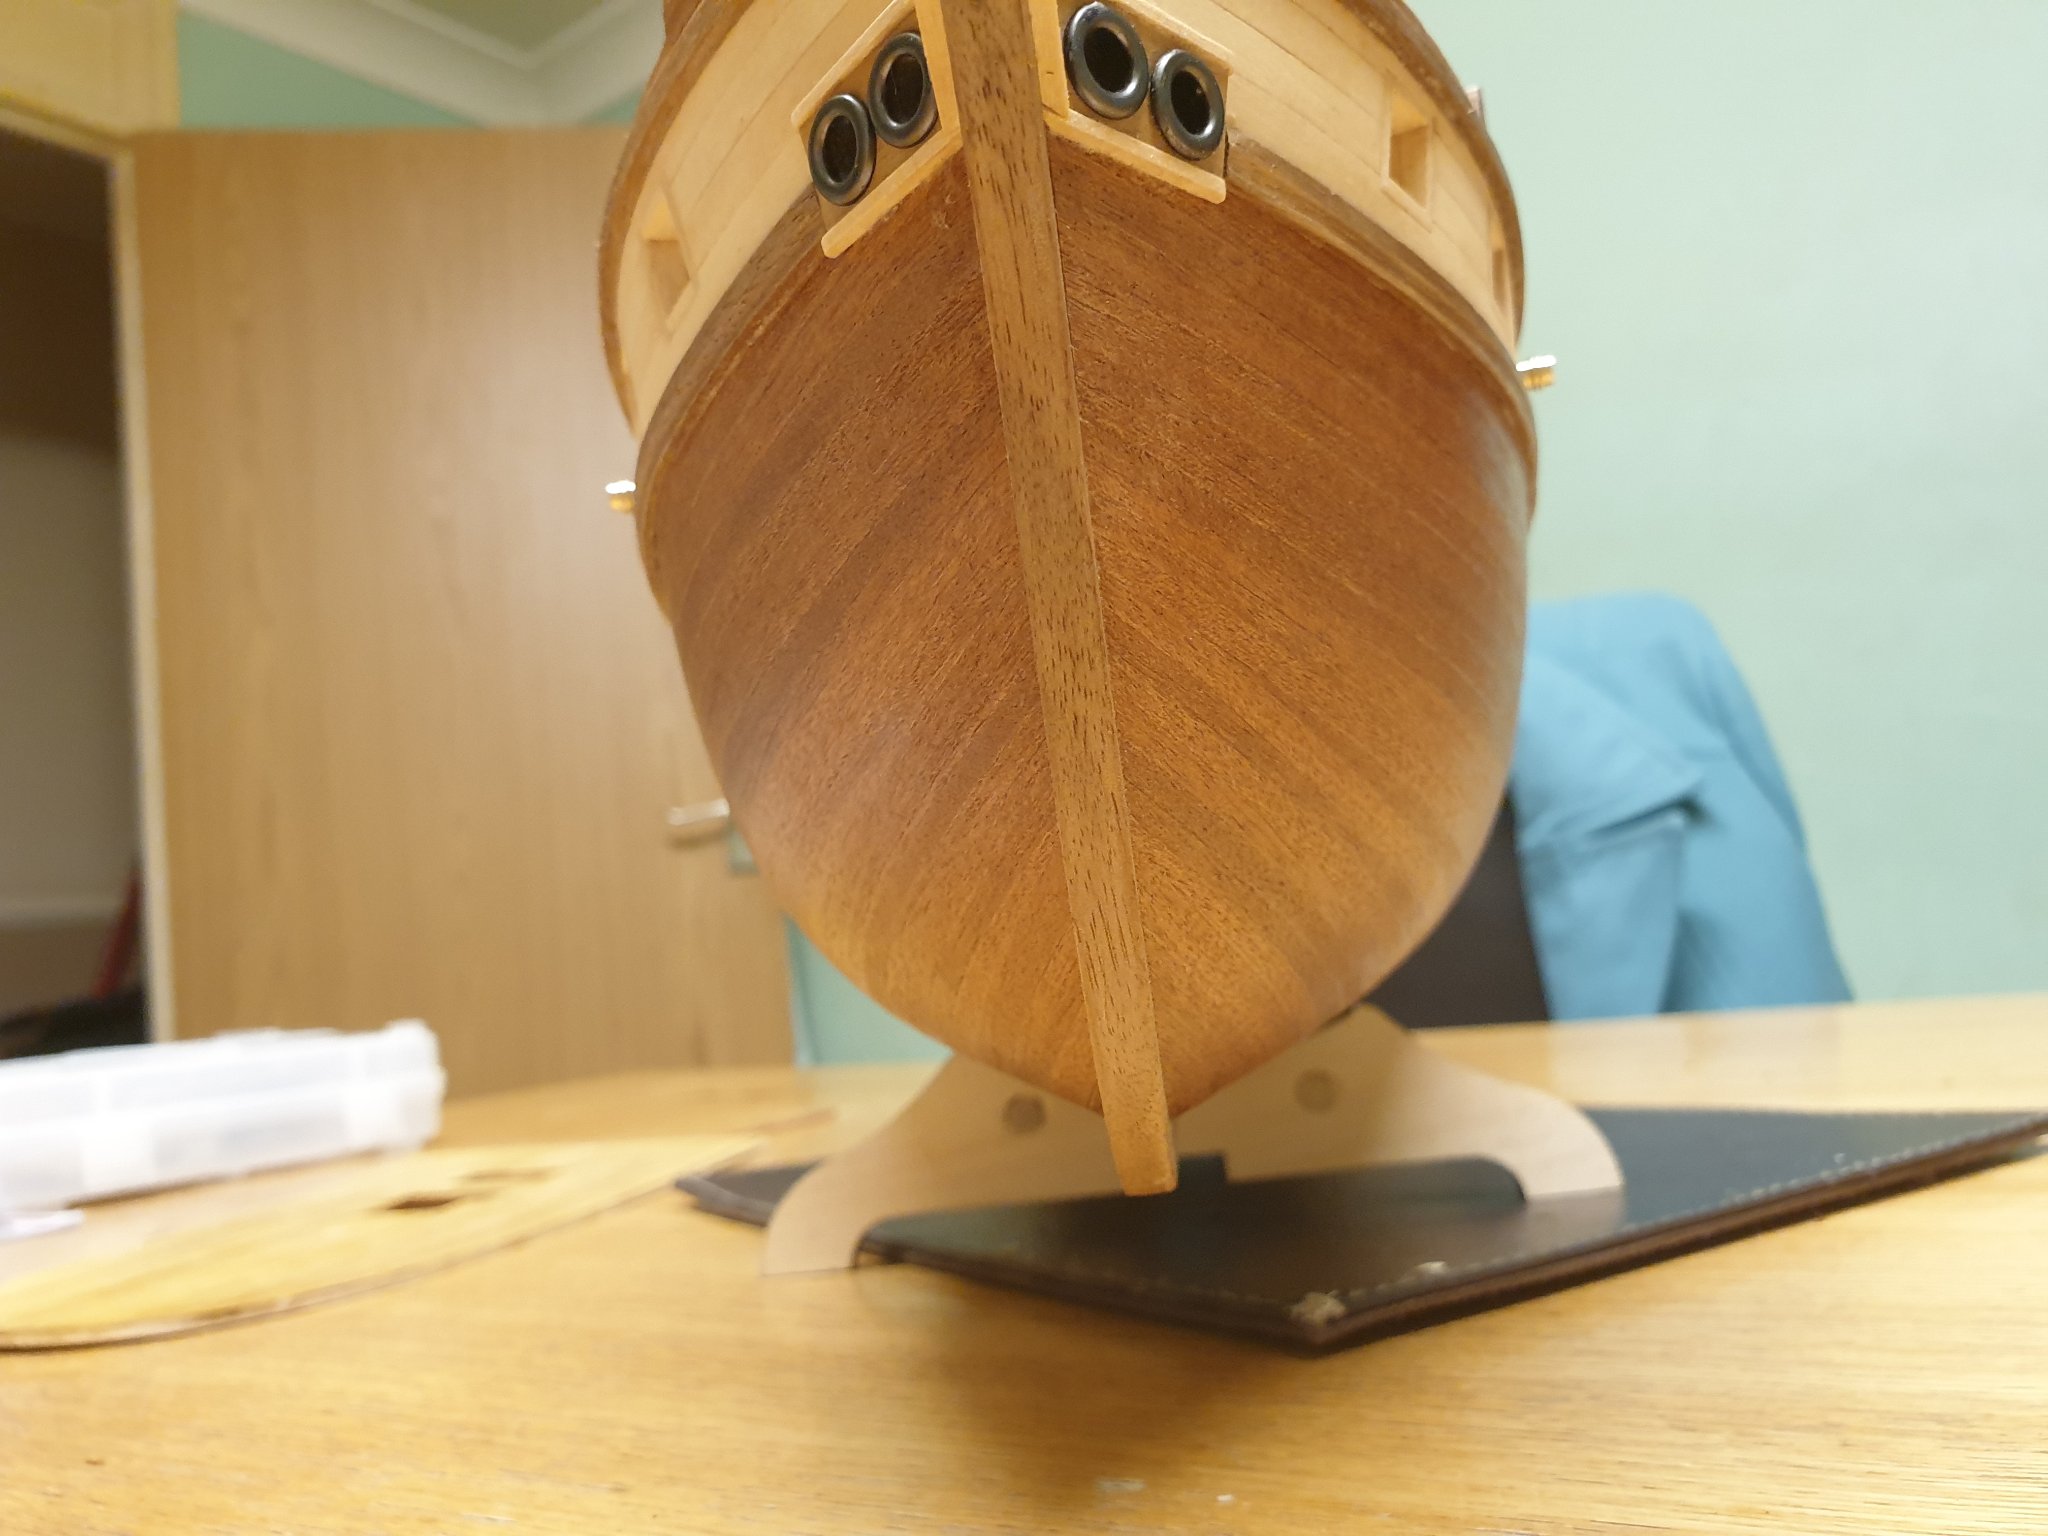
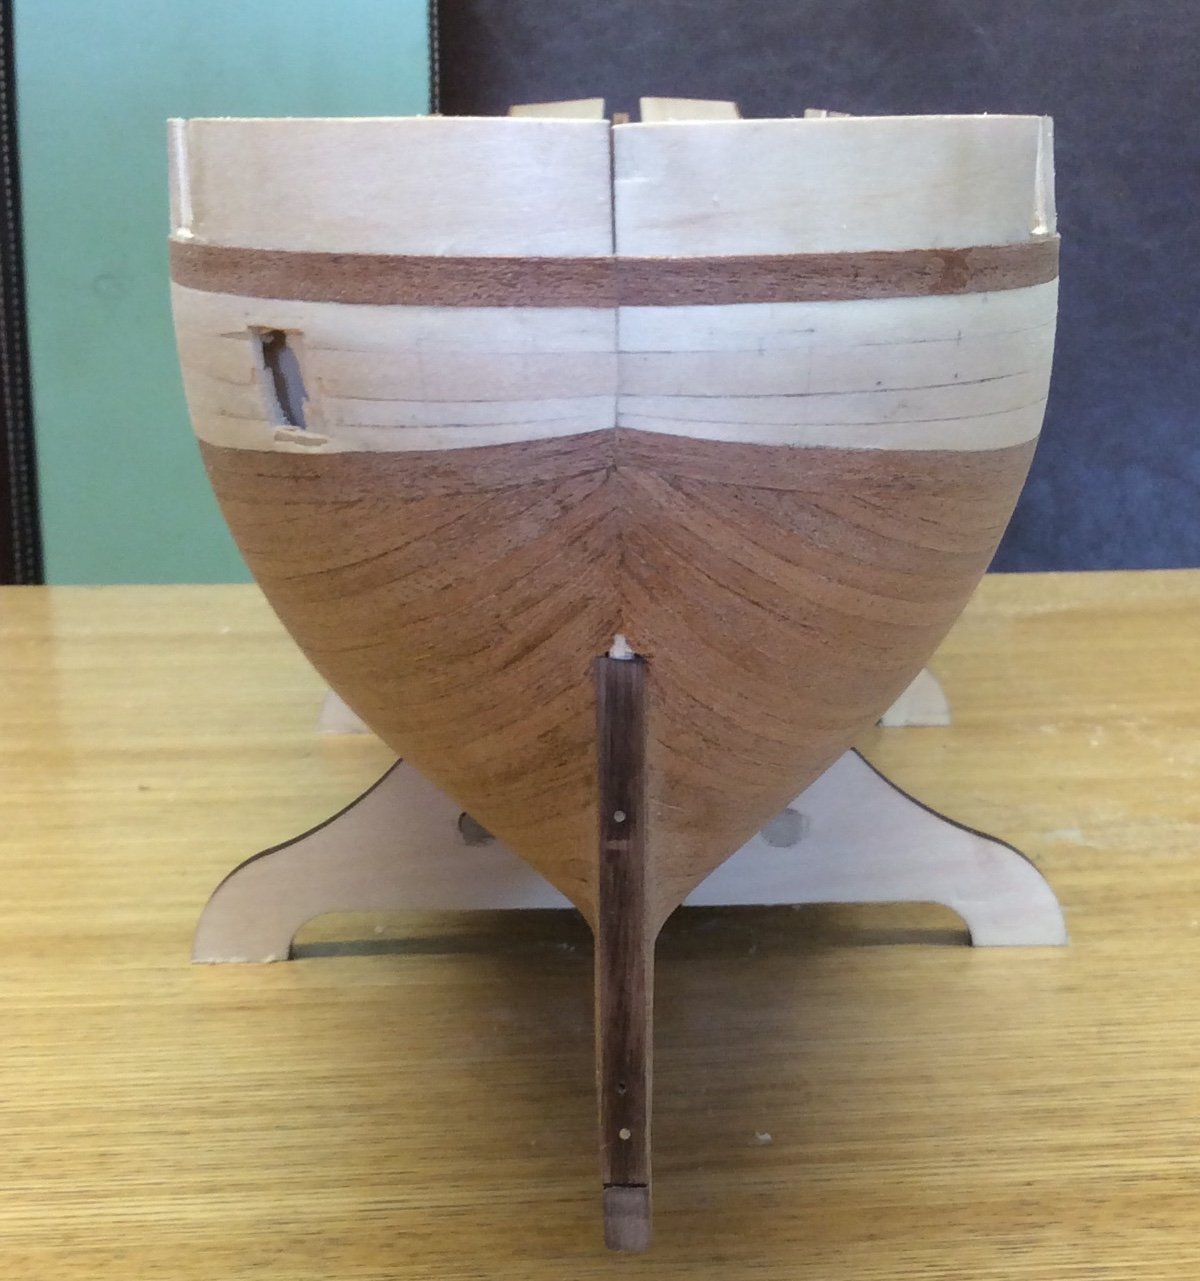
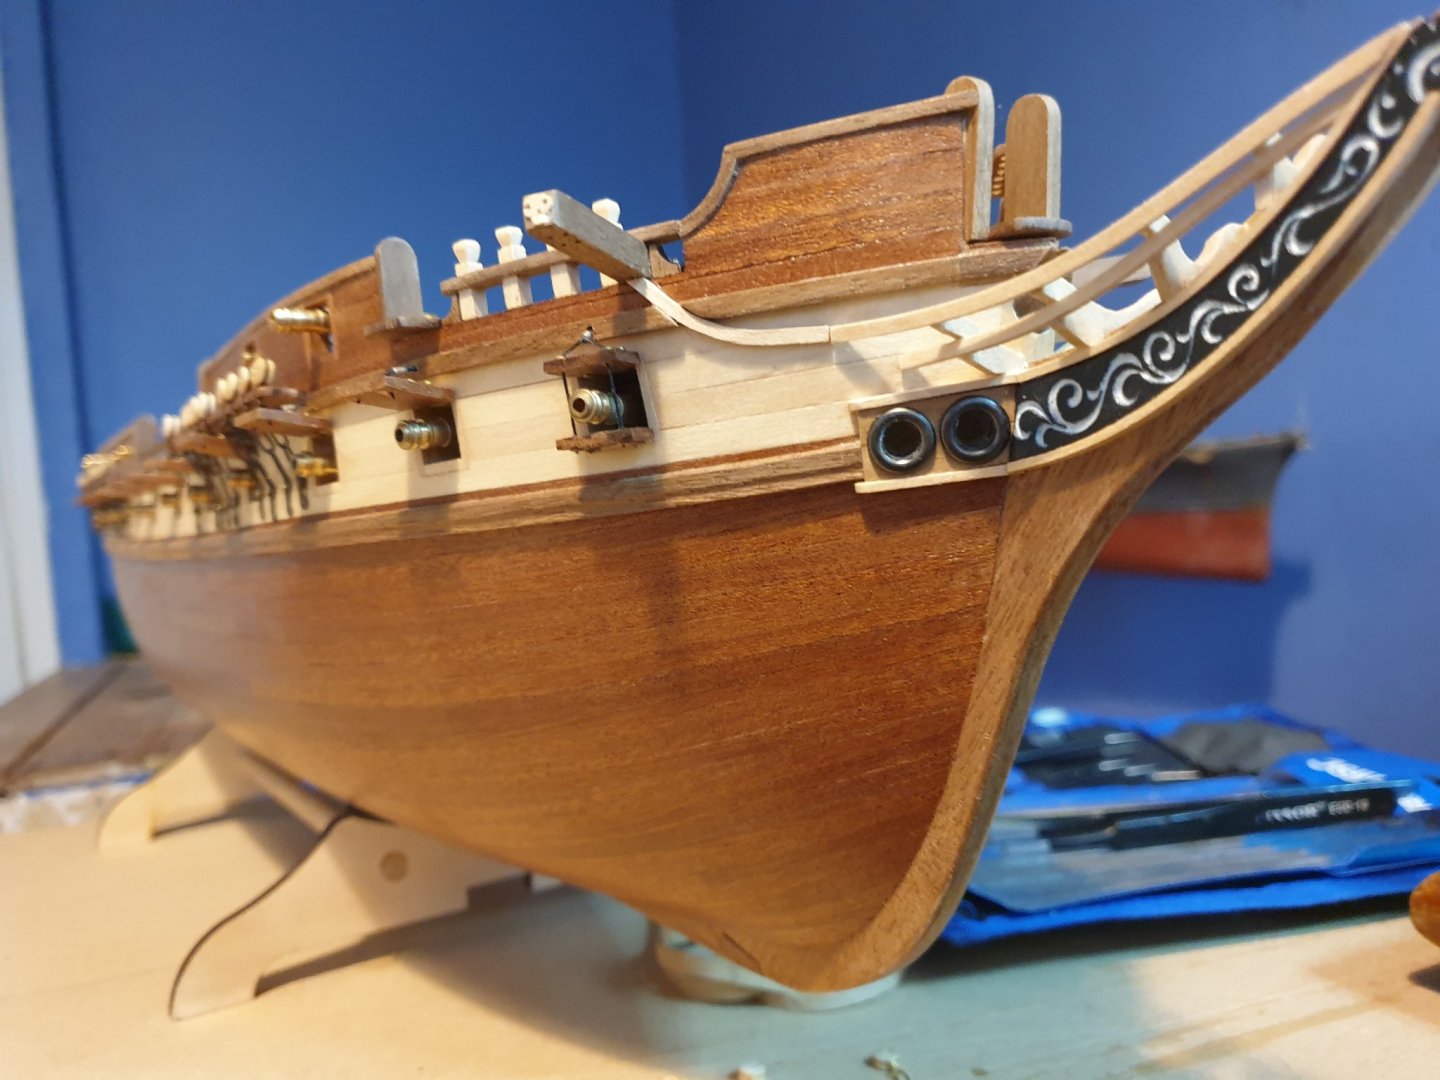
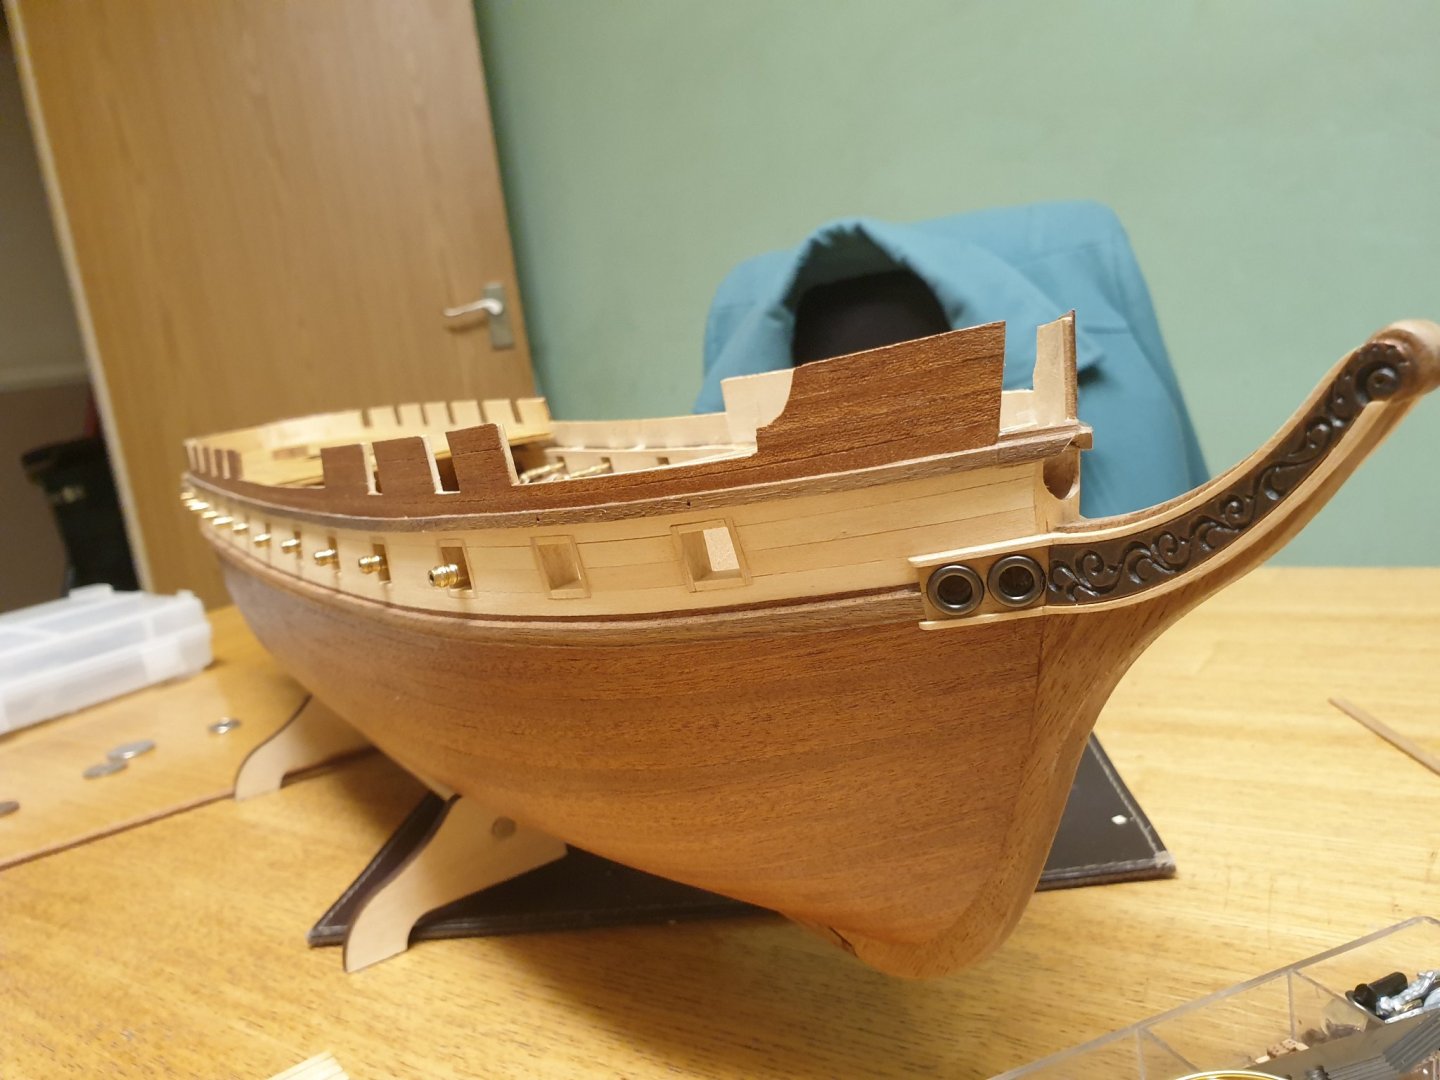
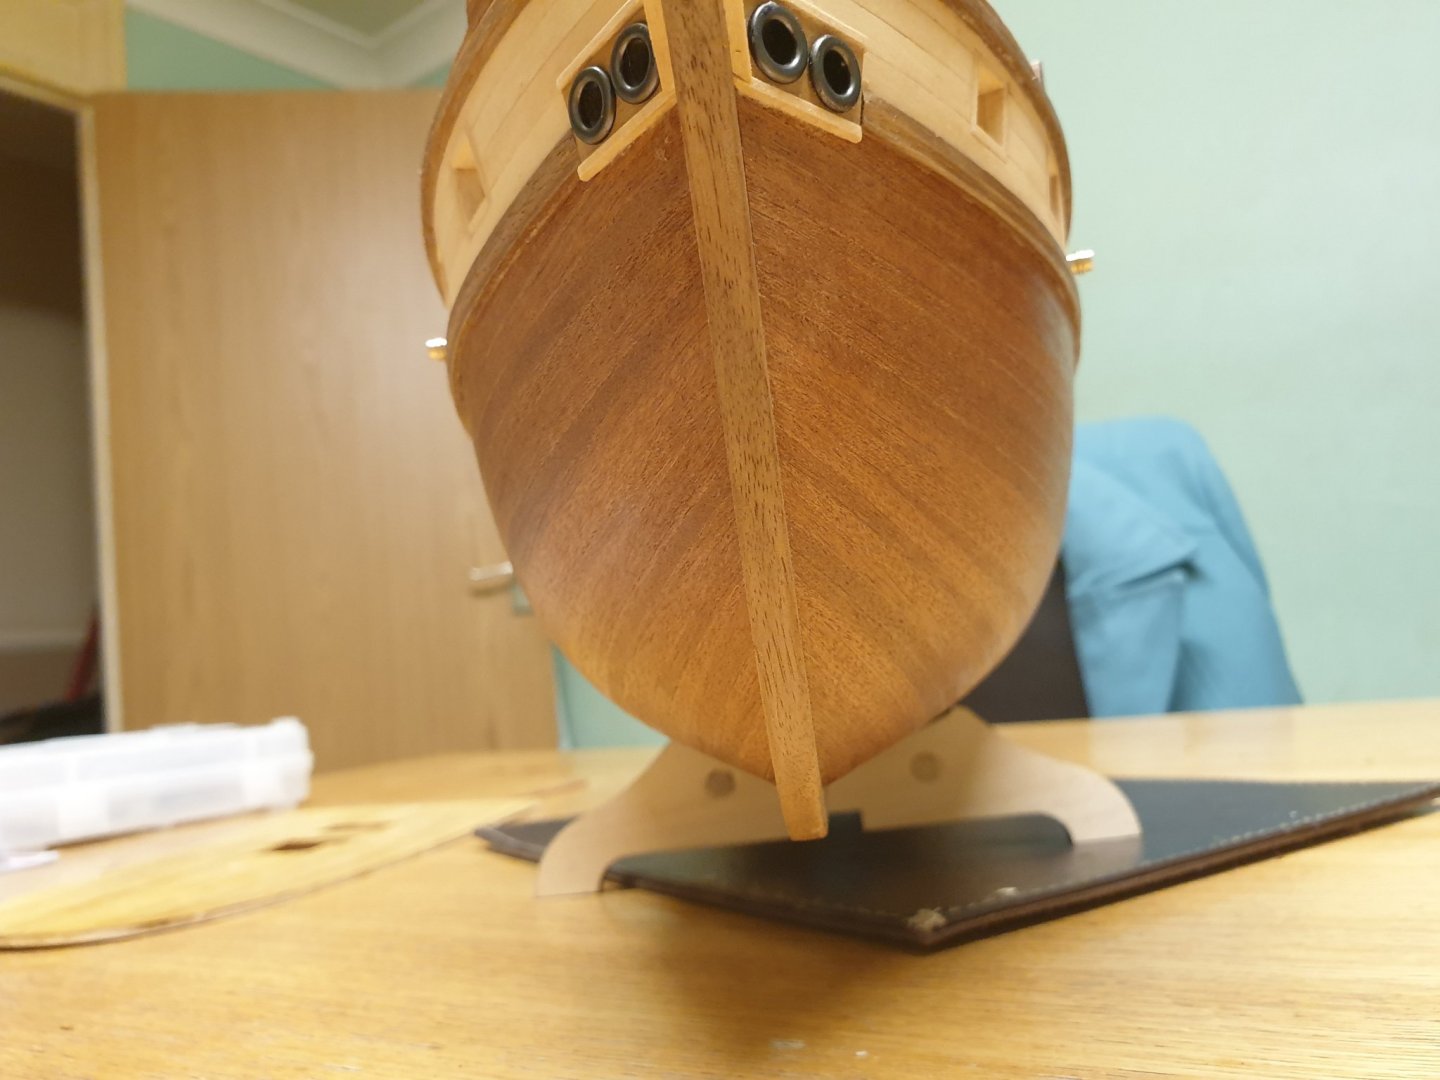
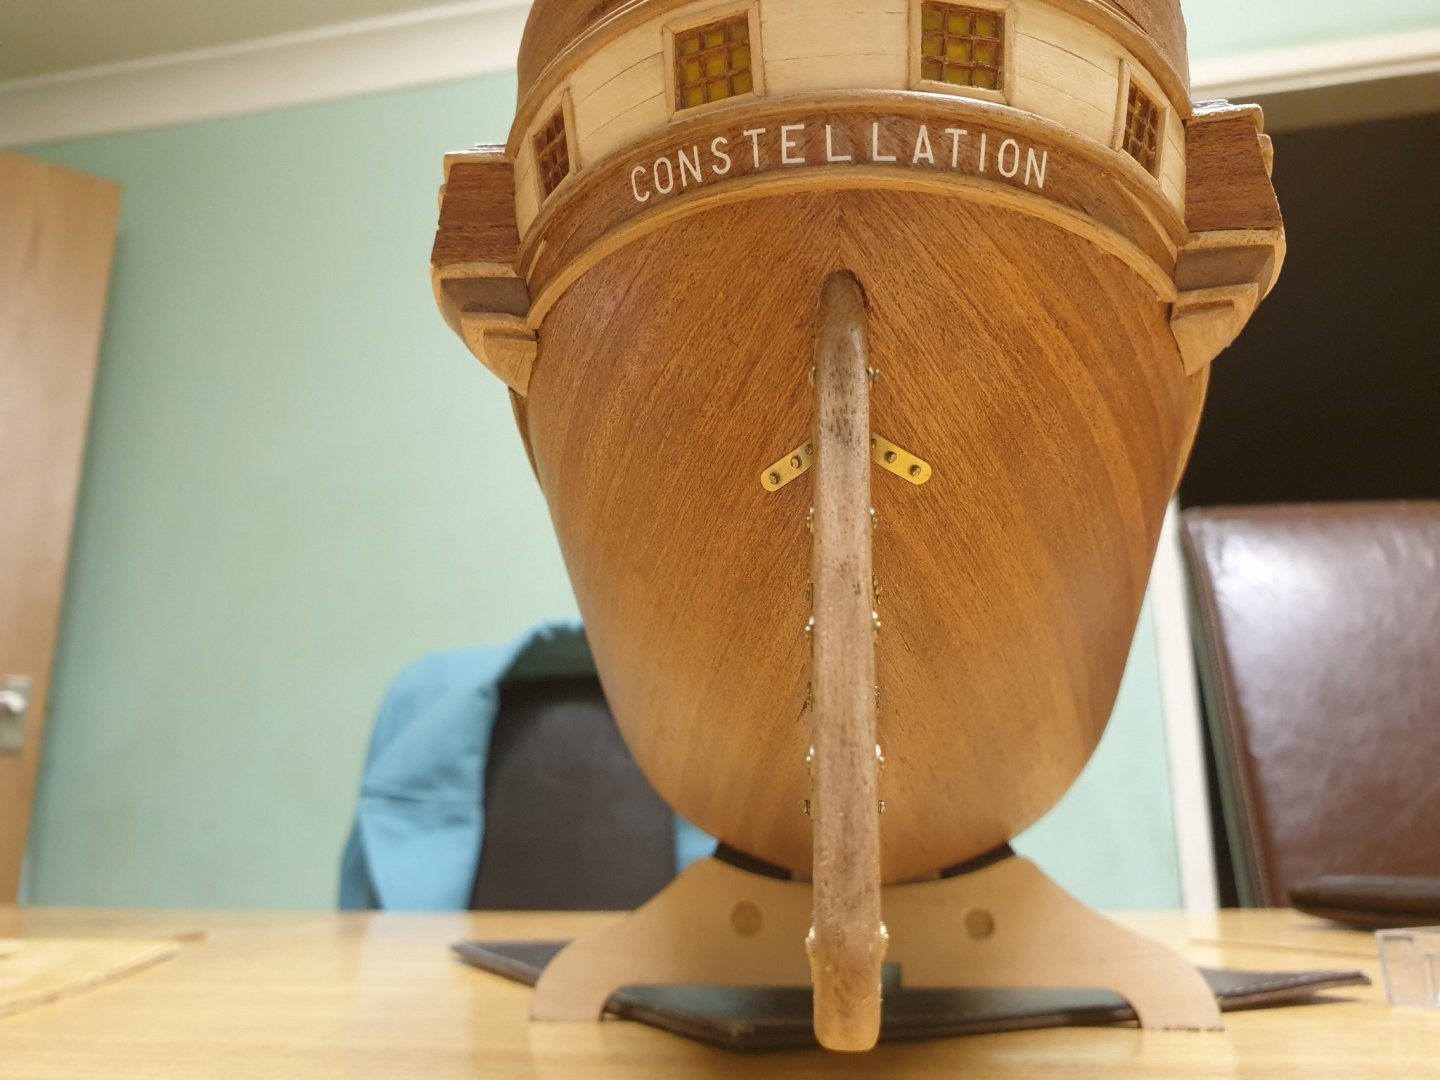
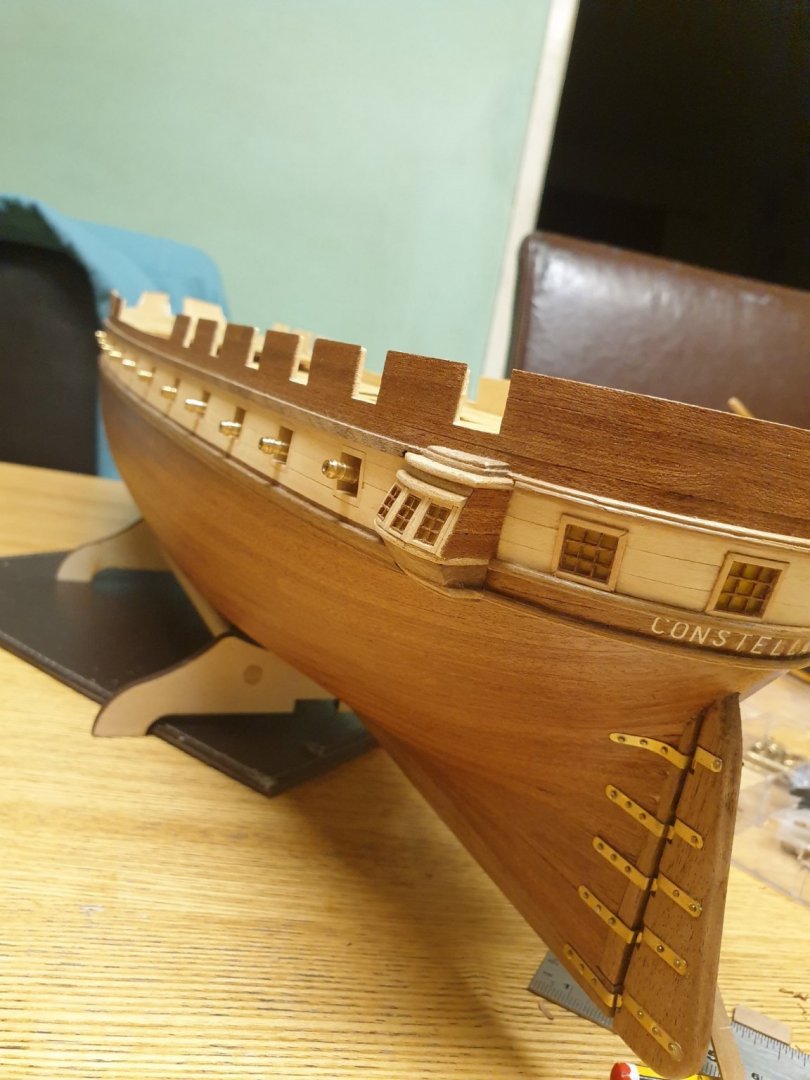
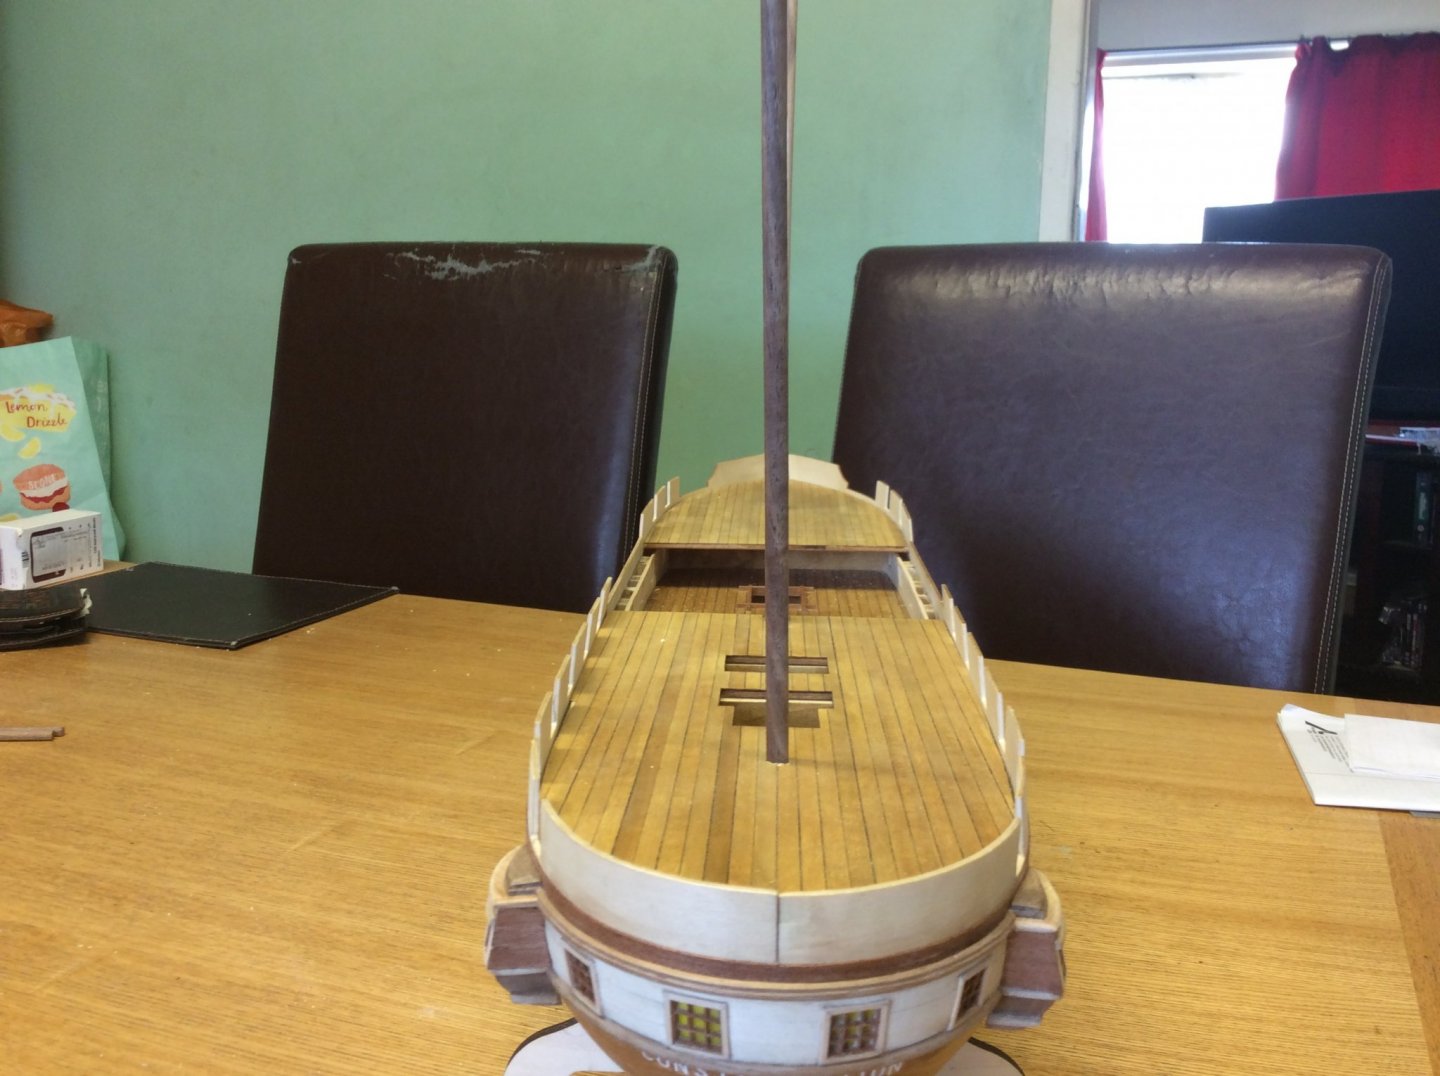
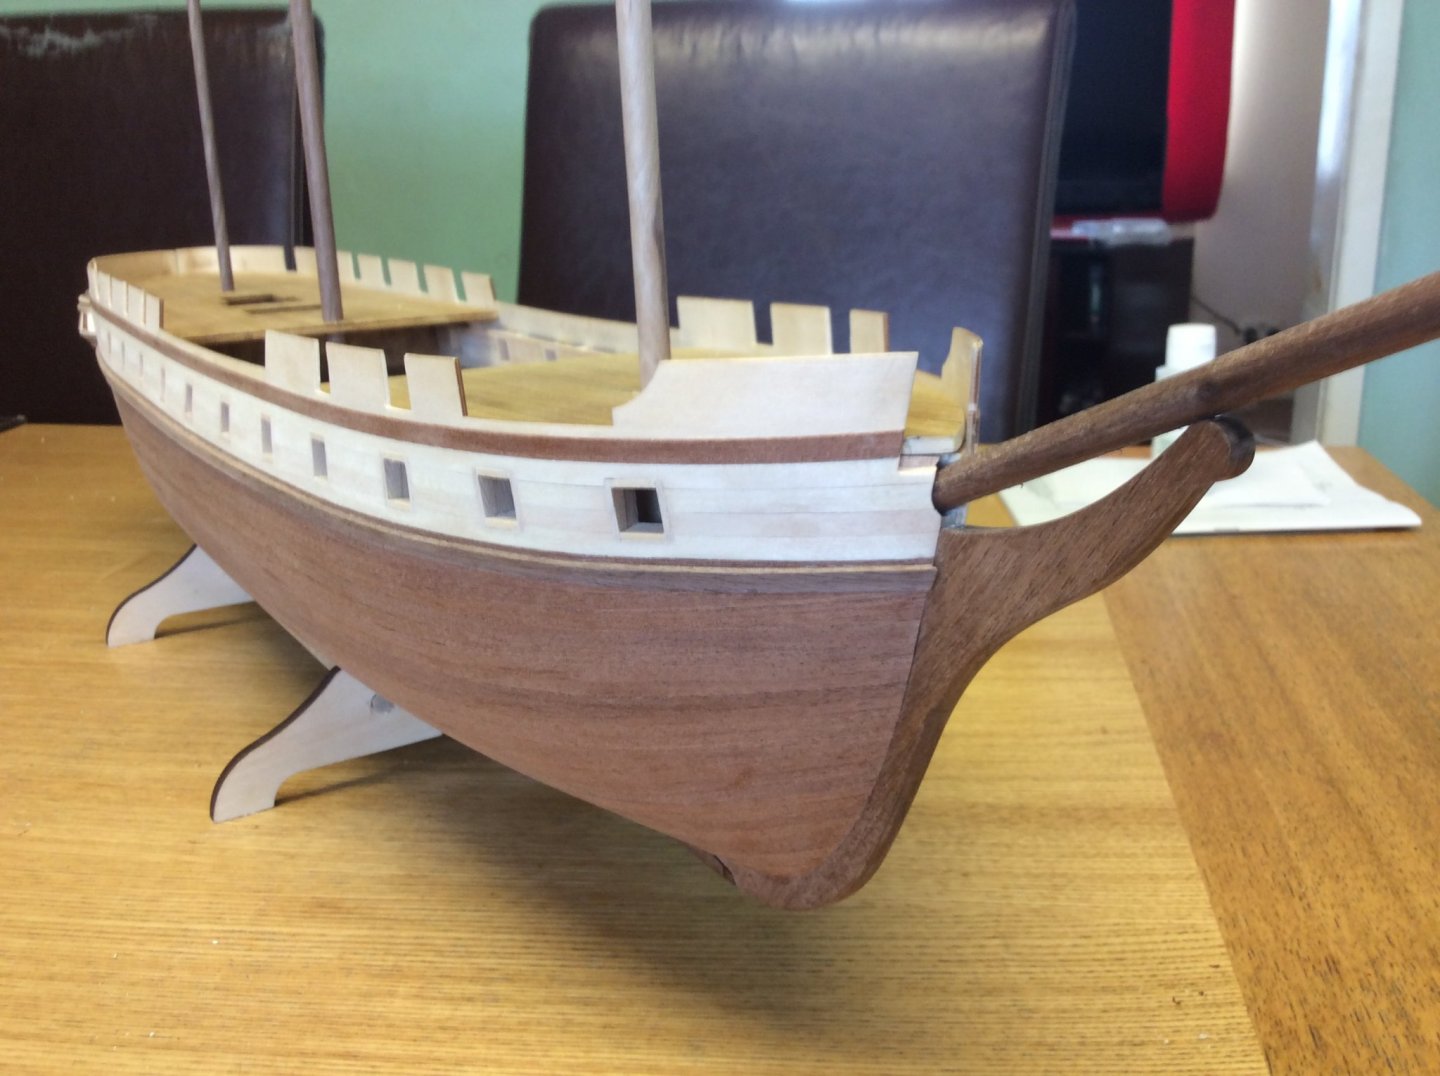
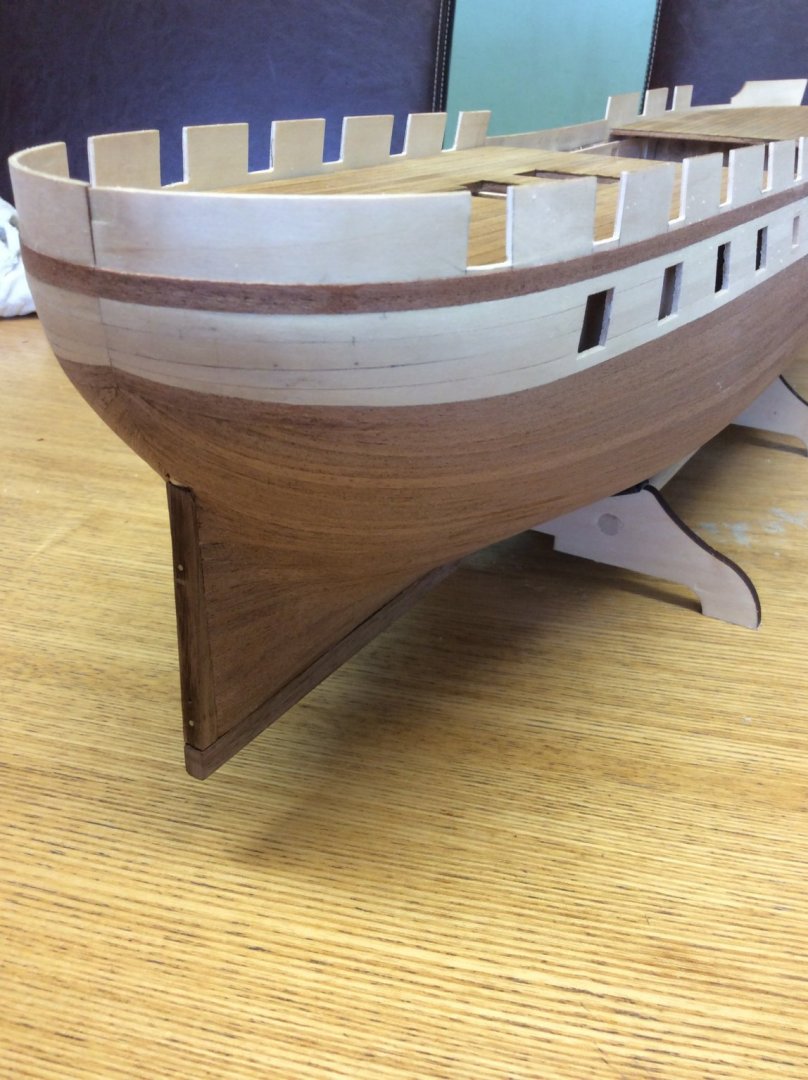
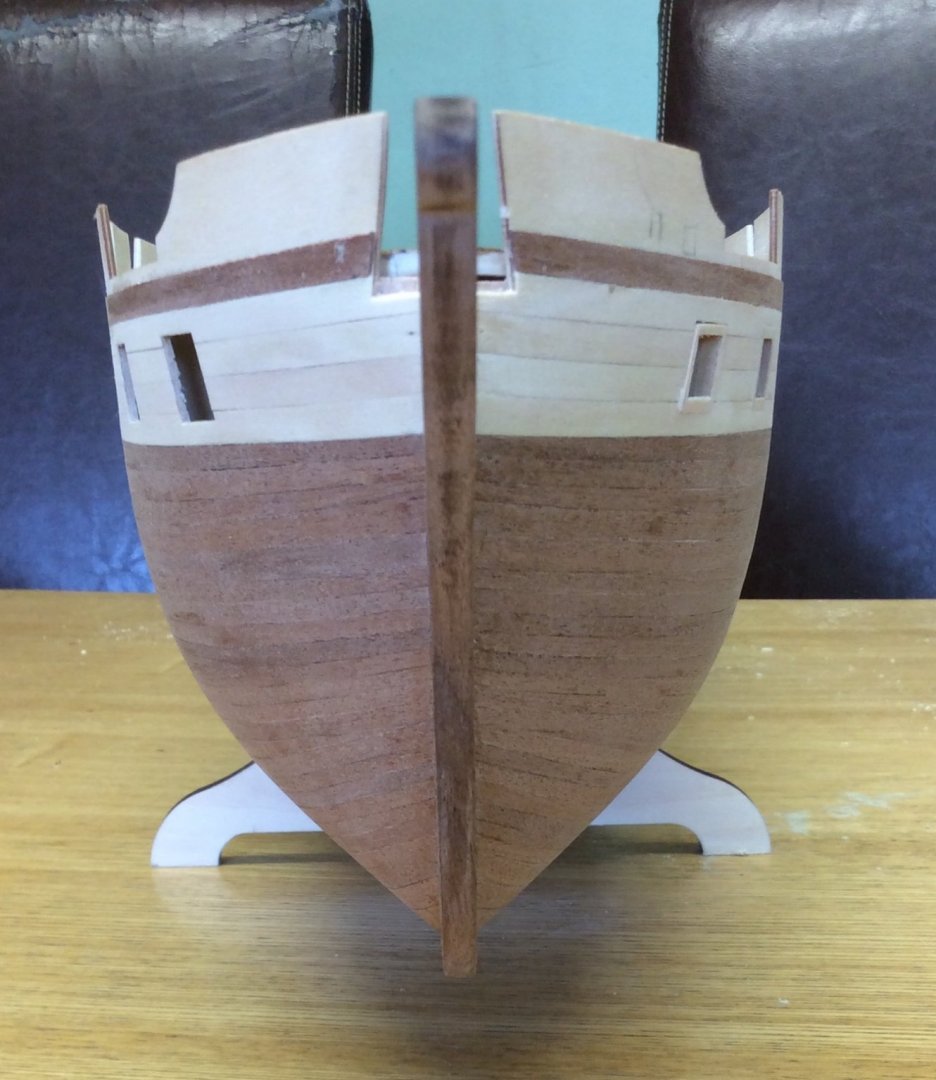
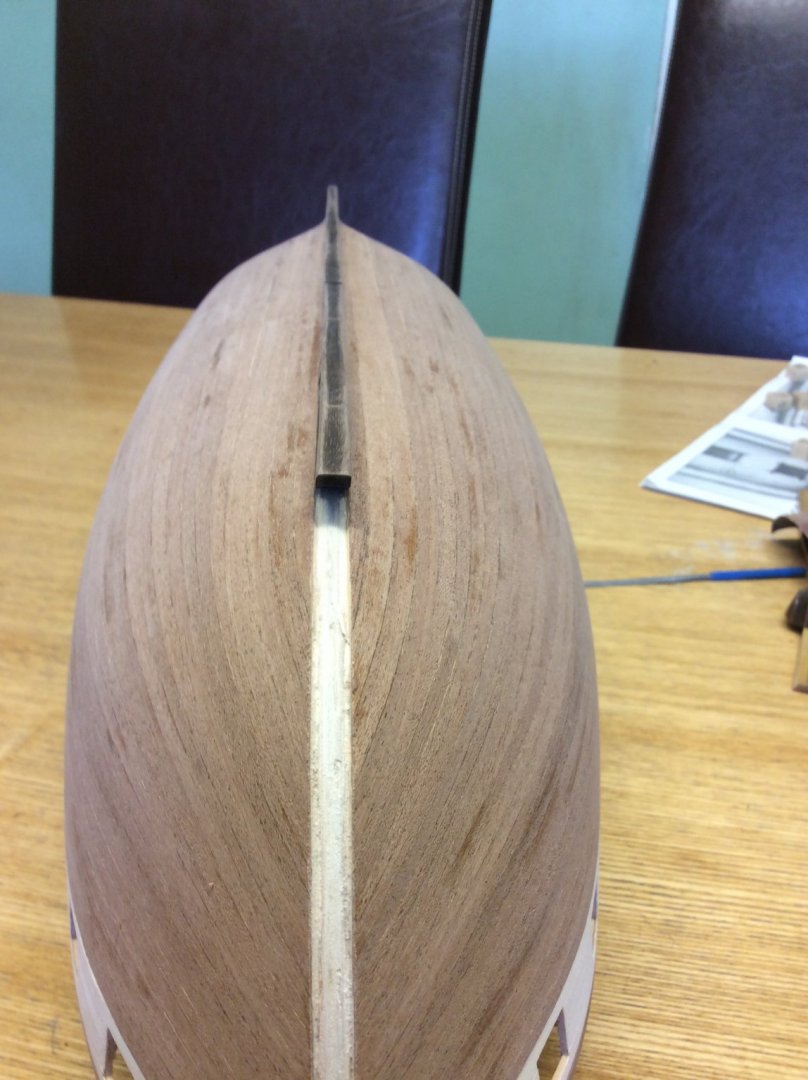
Hi Guys, not been able to work on the ship as much as I would of liked this week but managed to do a bit. Originally i was going to paint this model the black and white to be different but has time as gone on i’ve got to like the colours of the wood. It made me think about the stem decoration and how to fit so it was back to haze gray photos for a little help. Also armed with the information about the ships history i thought i would have a read of what i could find on the internet. Found it interesting but It’s made me think i’m making a fake though. Anyway I decided to add wood to either side of the decoration which actually i’m pleased with. Drilling the holes for the anchor chains were a nightmare the ended up being slots but you will never know looking at them as it’s covered by wood. Also drilled the holes for the masts and bowsprit, so glad thats done. Lastly i fitted the rudder and a strip of wood along each side. Next i’ll be working on getting the rest of the planking on the side done i’m also thinking about increasing the hight by a millimetre or 2 to help centralise the upper deck guns. Until next time...


-
Thanks for the photos Jonathan, i’ve seen these photos but at the time i passed them over as being the wrong ship. I’ve been looking at the Haze Gray & underway photos. I see what you mean there is a lot of different between the ships. Guess i’m building the sloop of war then as unfortunately to late to change things now. Thanks guys for the information i enjoy the history of these old ships as well as building them.
-
Greetings Bill, Thanks for your comments. I think i read somewhere that the original plans for the early ship had gone missing or were lost which is a shame. I like to research what i’m building but it’s been difficult to find reference to this ship. I’m mainly using the photos of the sloop of war as some reference but i do understand that it’s not the right ship. I do find many ships are changed over their years of service, finding photo reference is aways fun. I have an old billings kit of the SMS Seeadler with it’s fittings I picked it up cheap at a boot fair. All the wood needs replacing and i need to scratch build the hull but thats another ship that has a long history with many changes. Anyway i’m glad you like the build even though it’s not exactly correct.
-
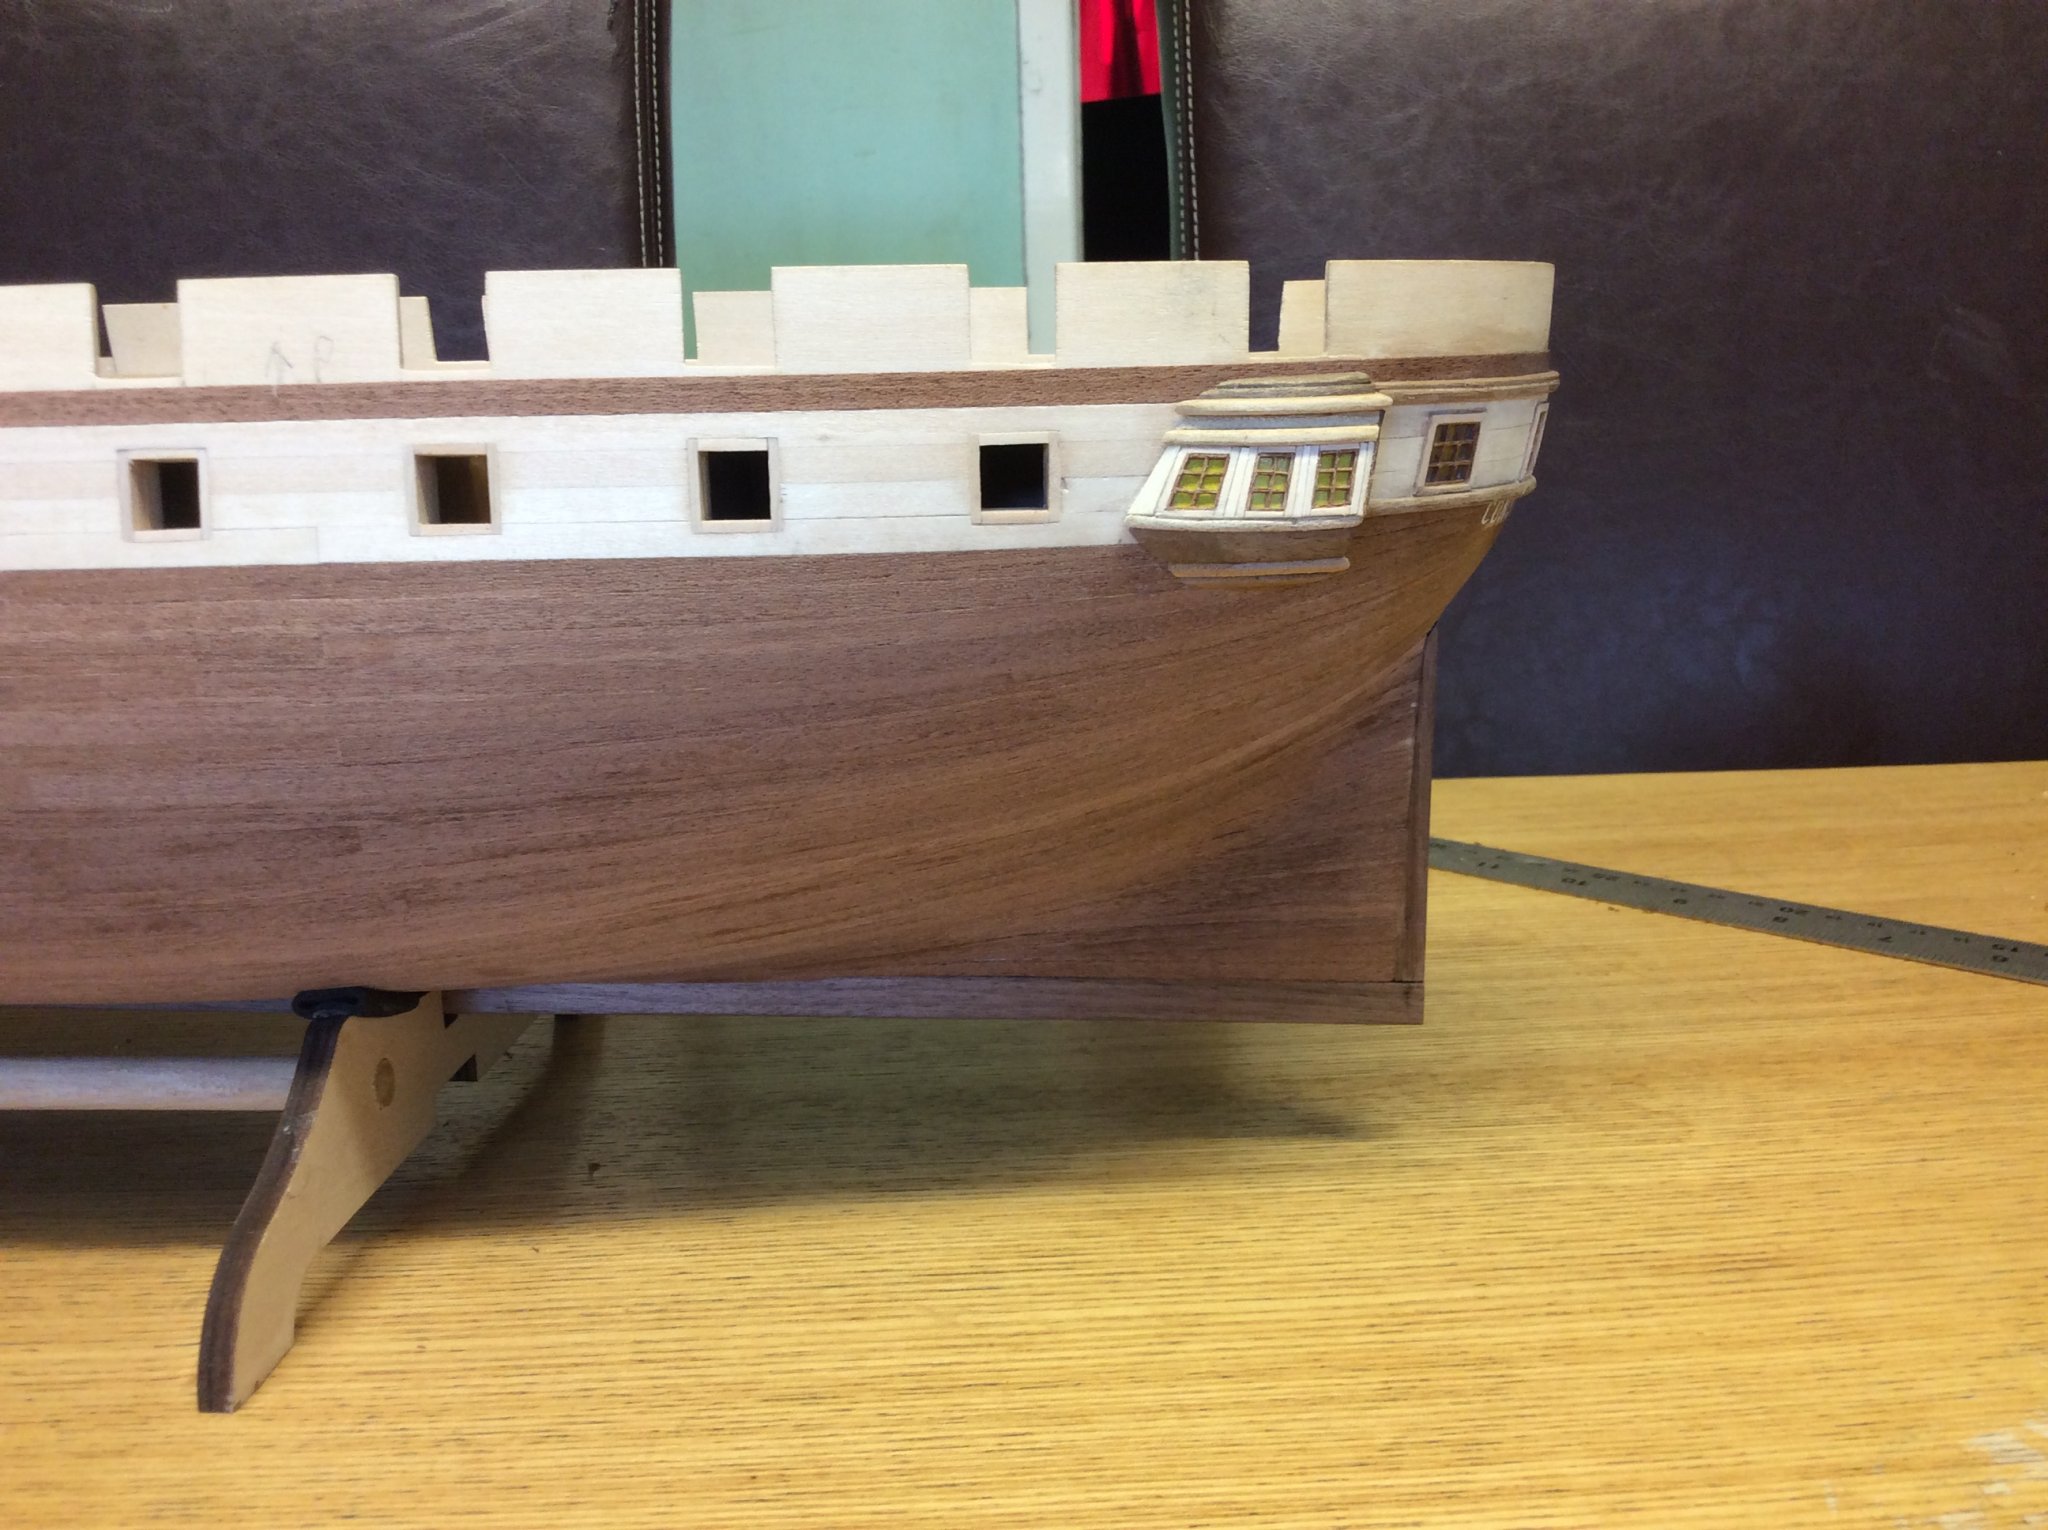
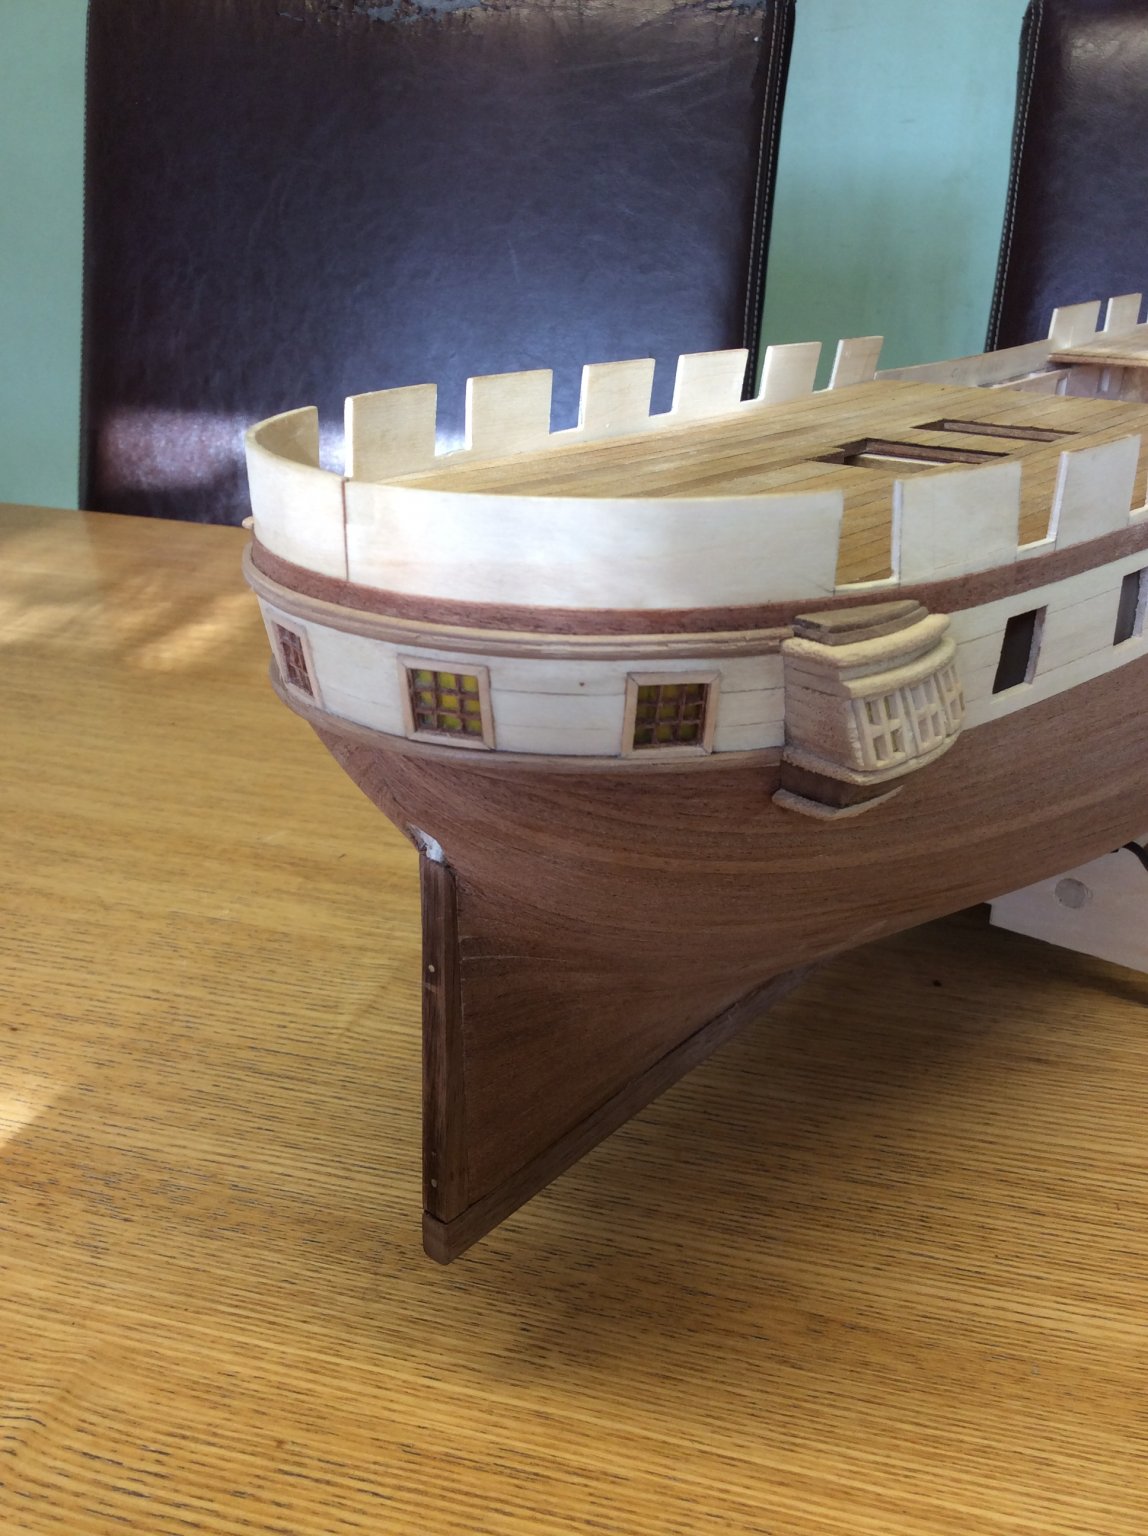
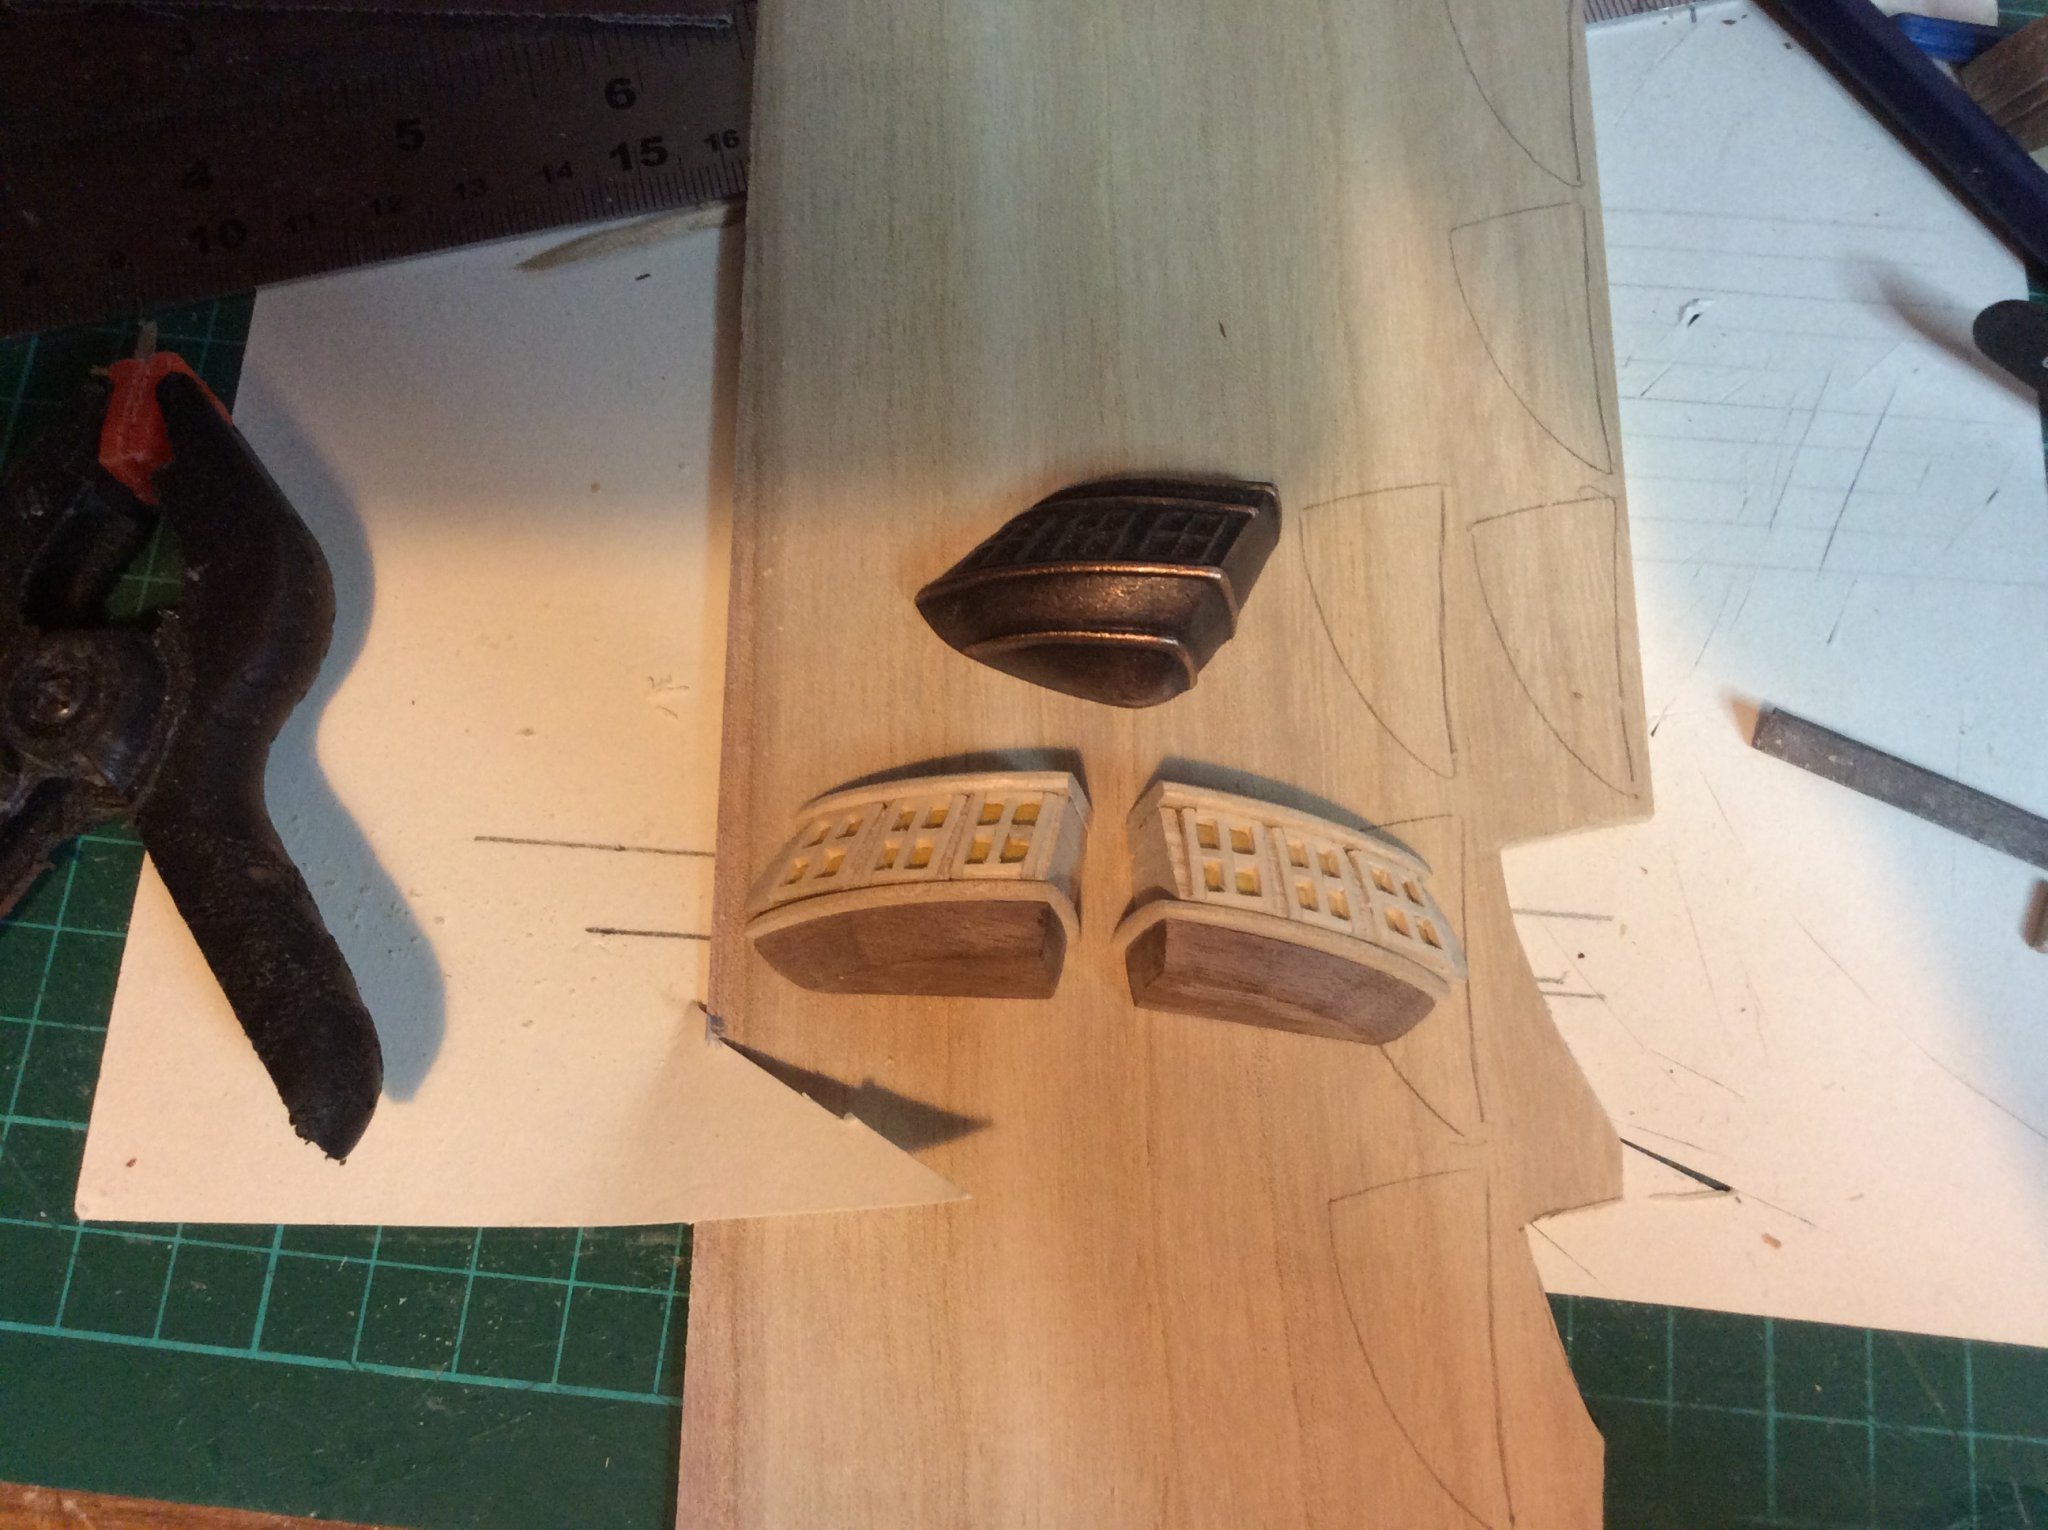
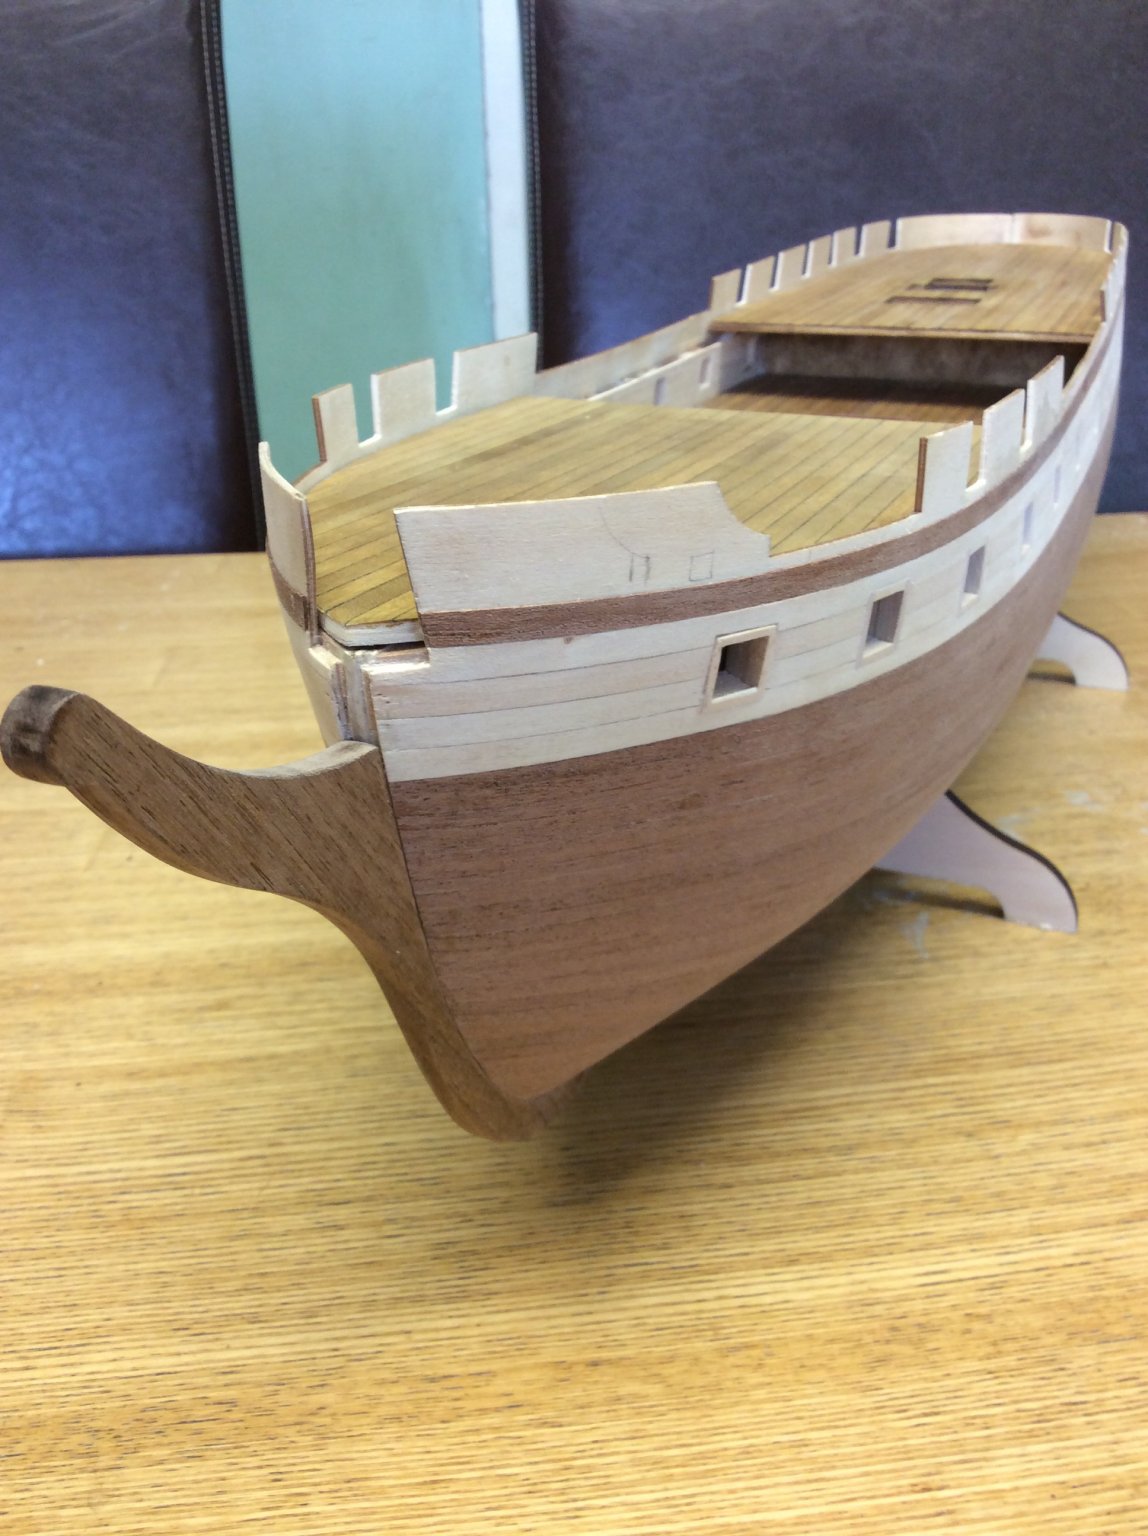
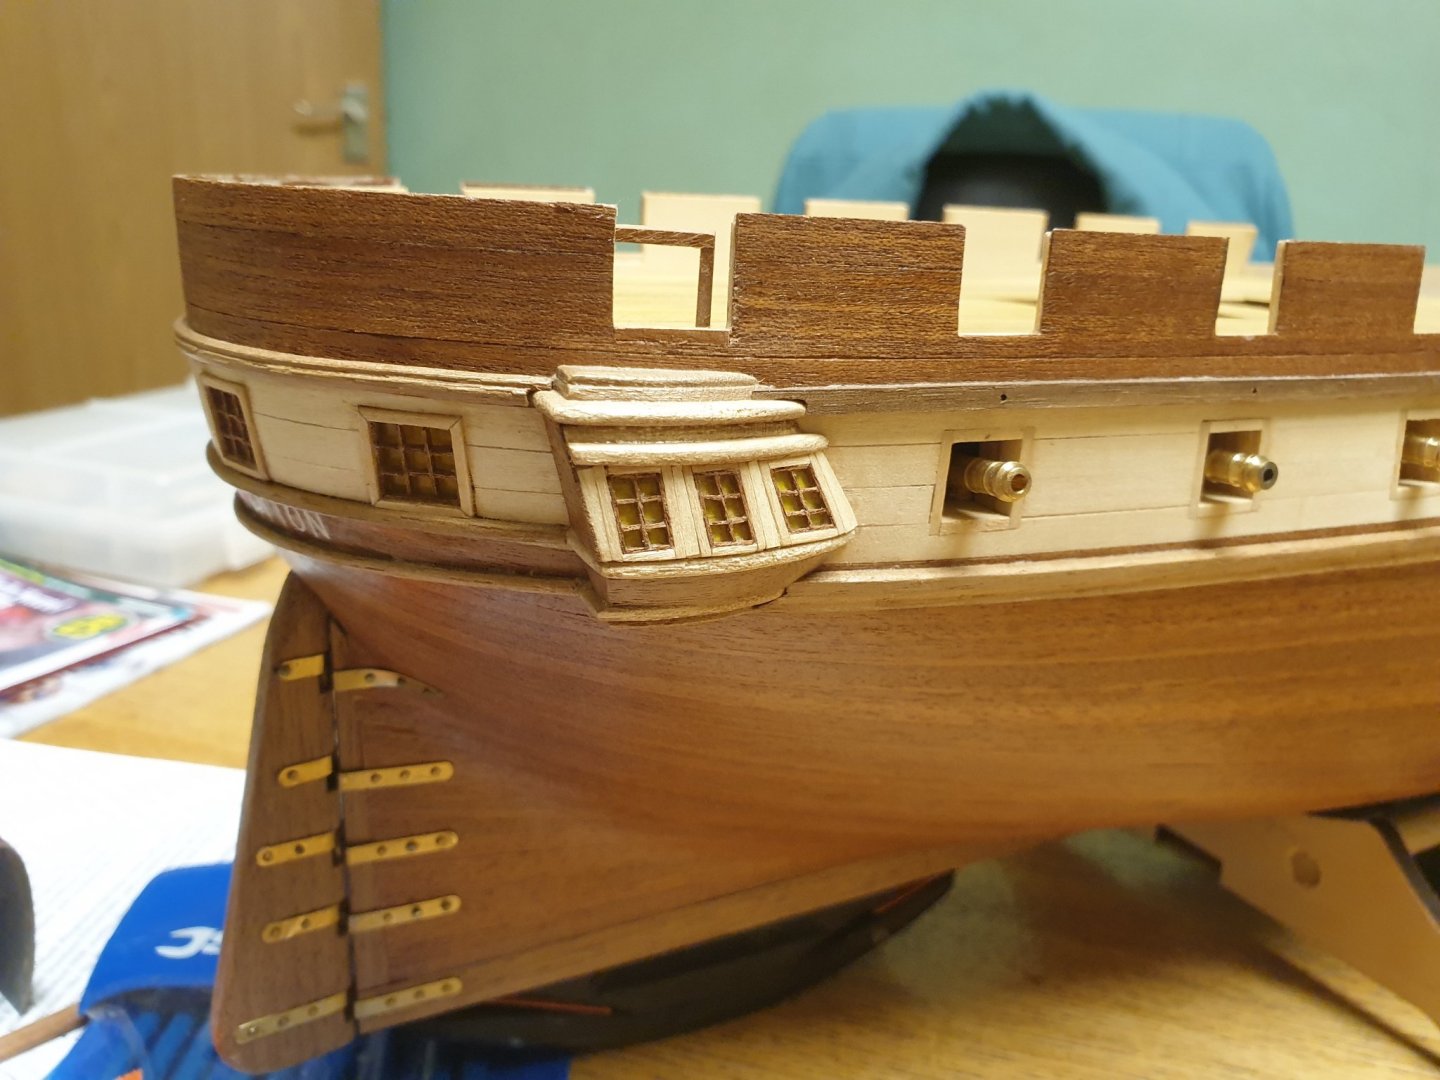
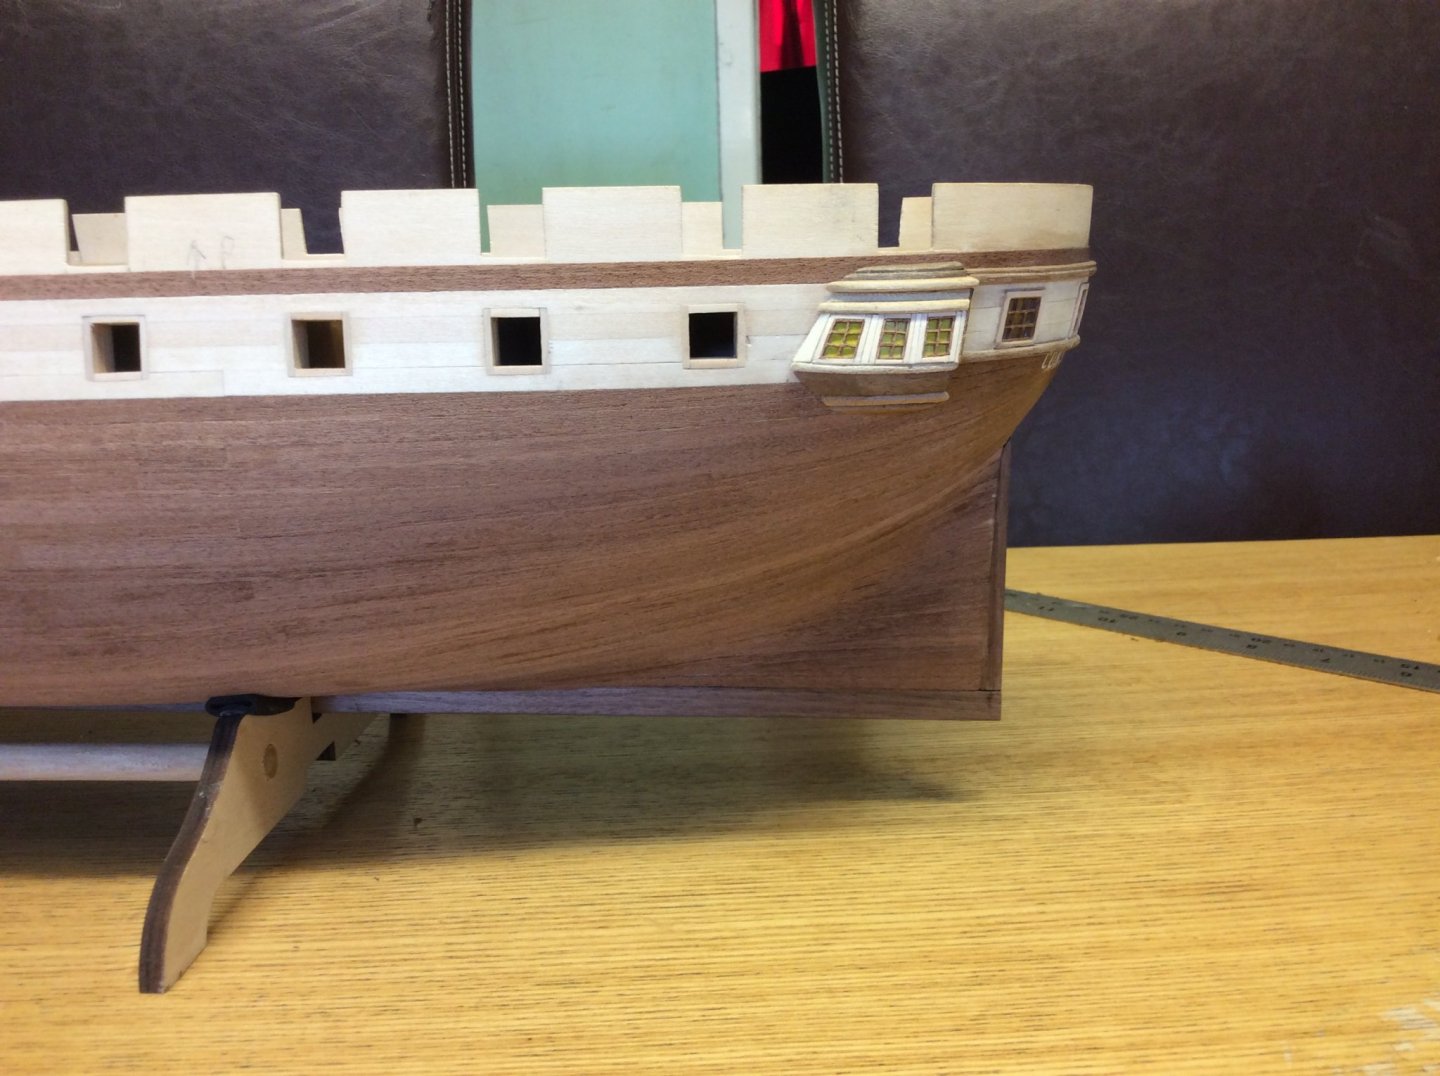
Just a couple of update photos Guys. I decided I wasn’t happy with the stern castles or quarter gallery’s so i’ve changed them. Much happier with the results they look a lot better and now match with the rest of the stern. Getting close to adding her first guns just a couple hours work got some nice Caldercraft 3mm blocks on order should be here tomorrow or Tuesday. She is shaping up nicely and looks great until next time...


-
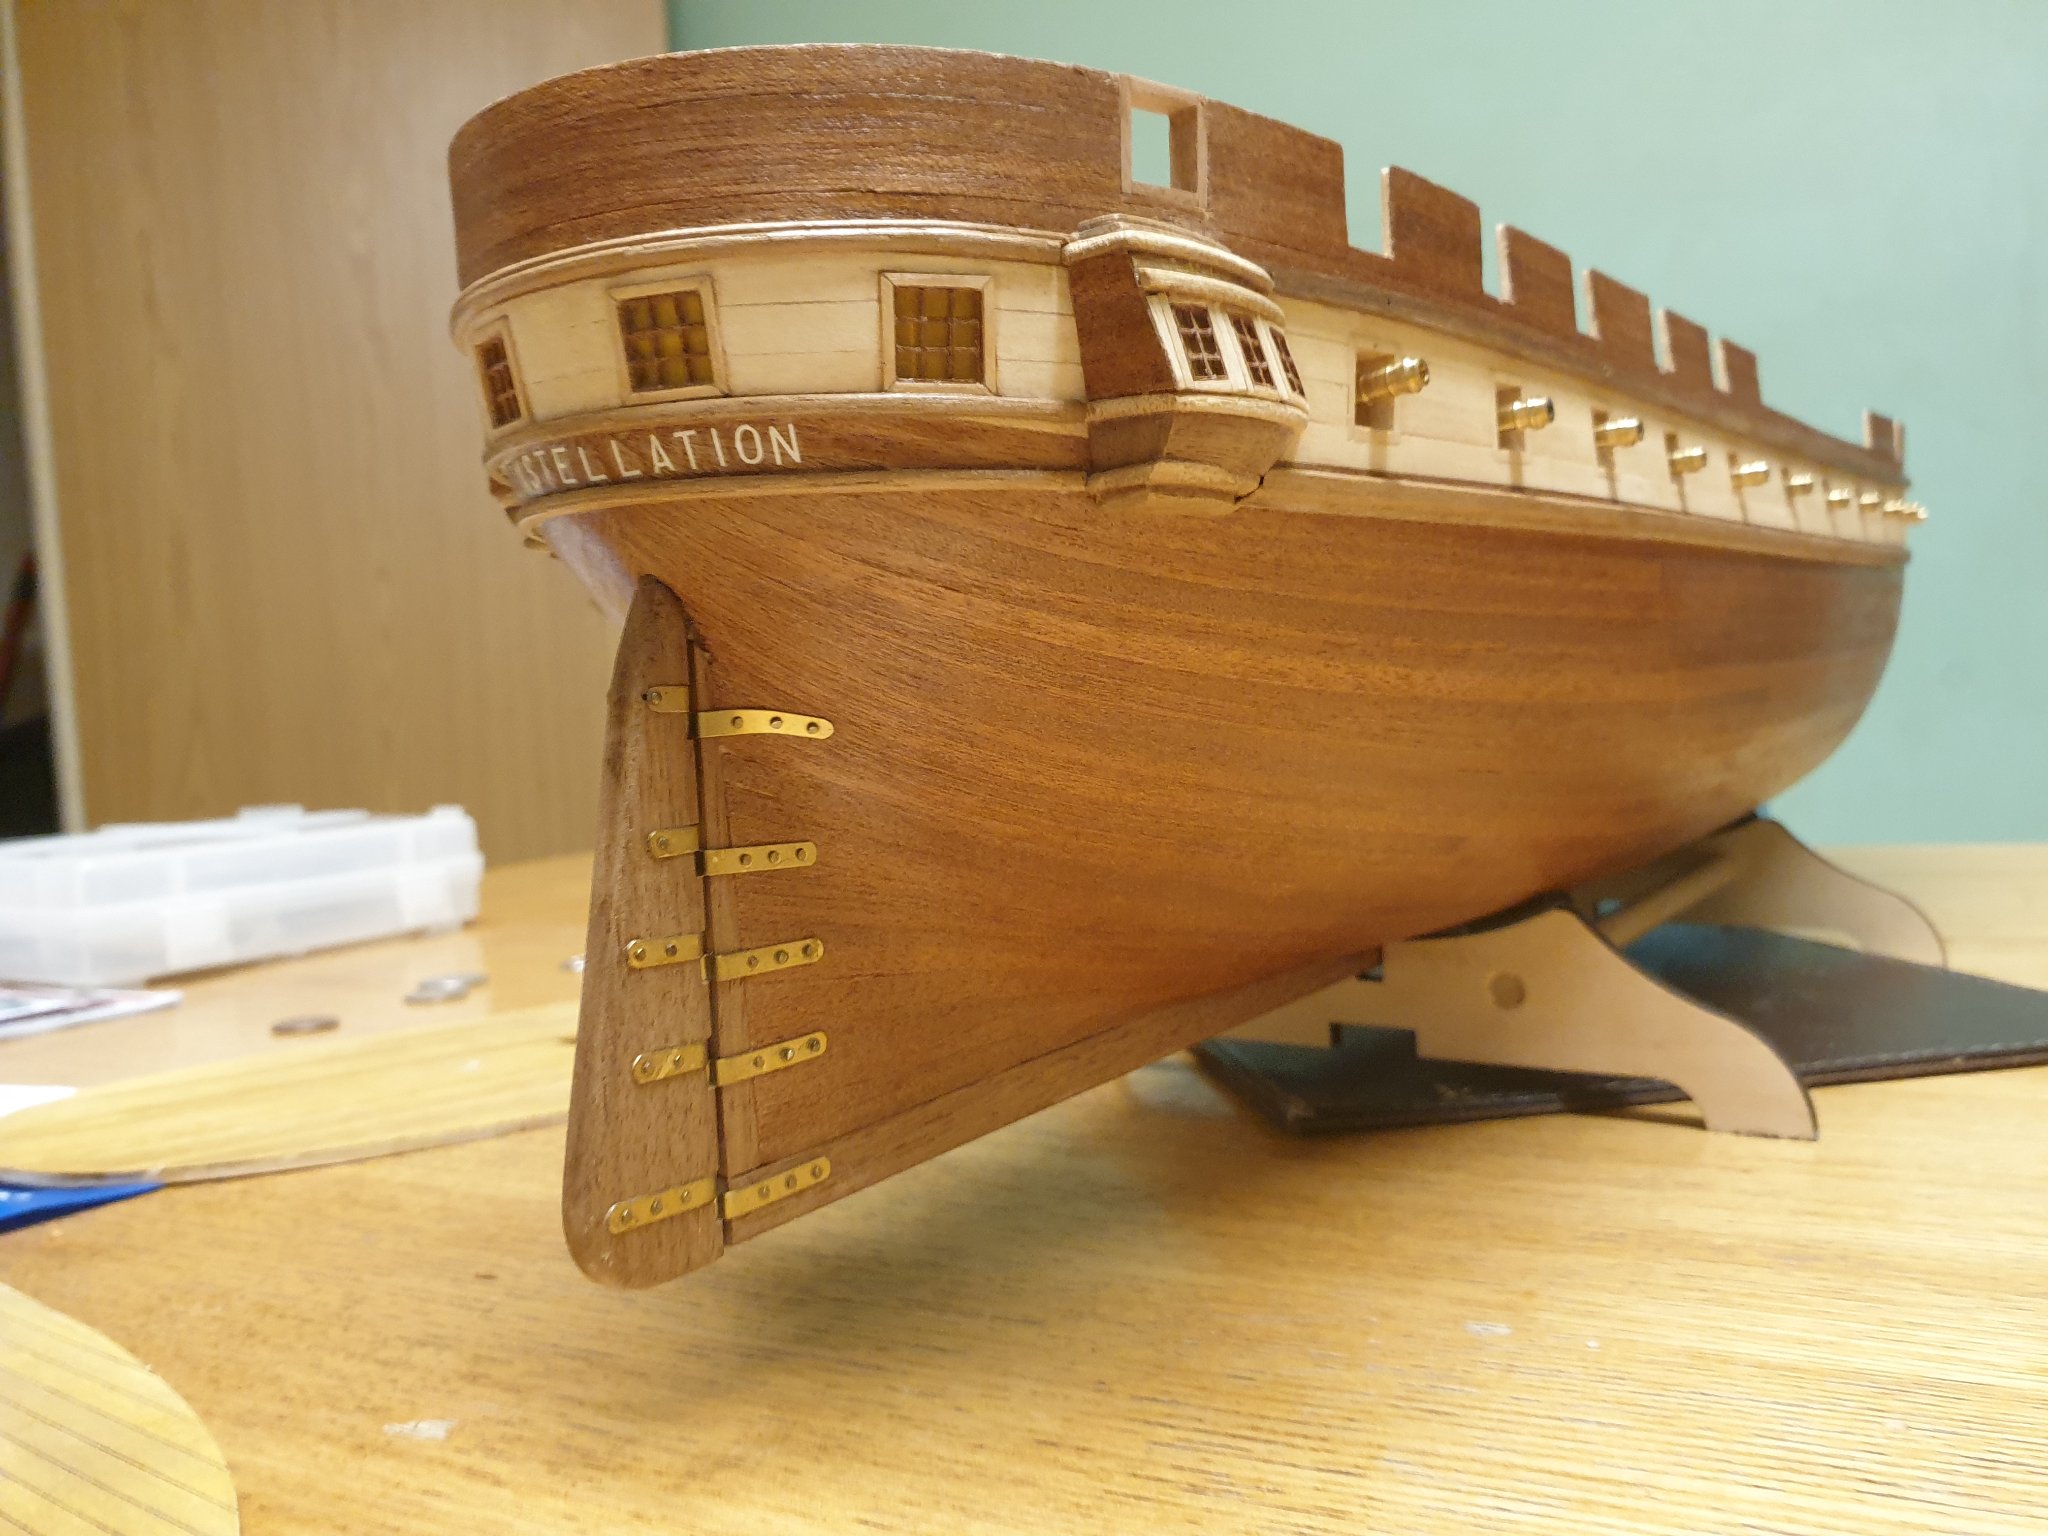
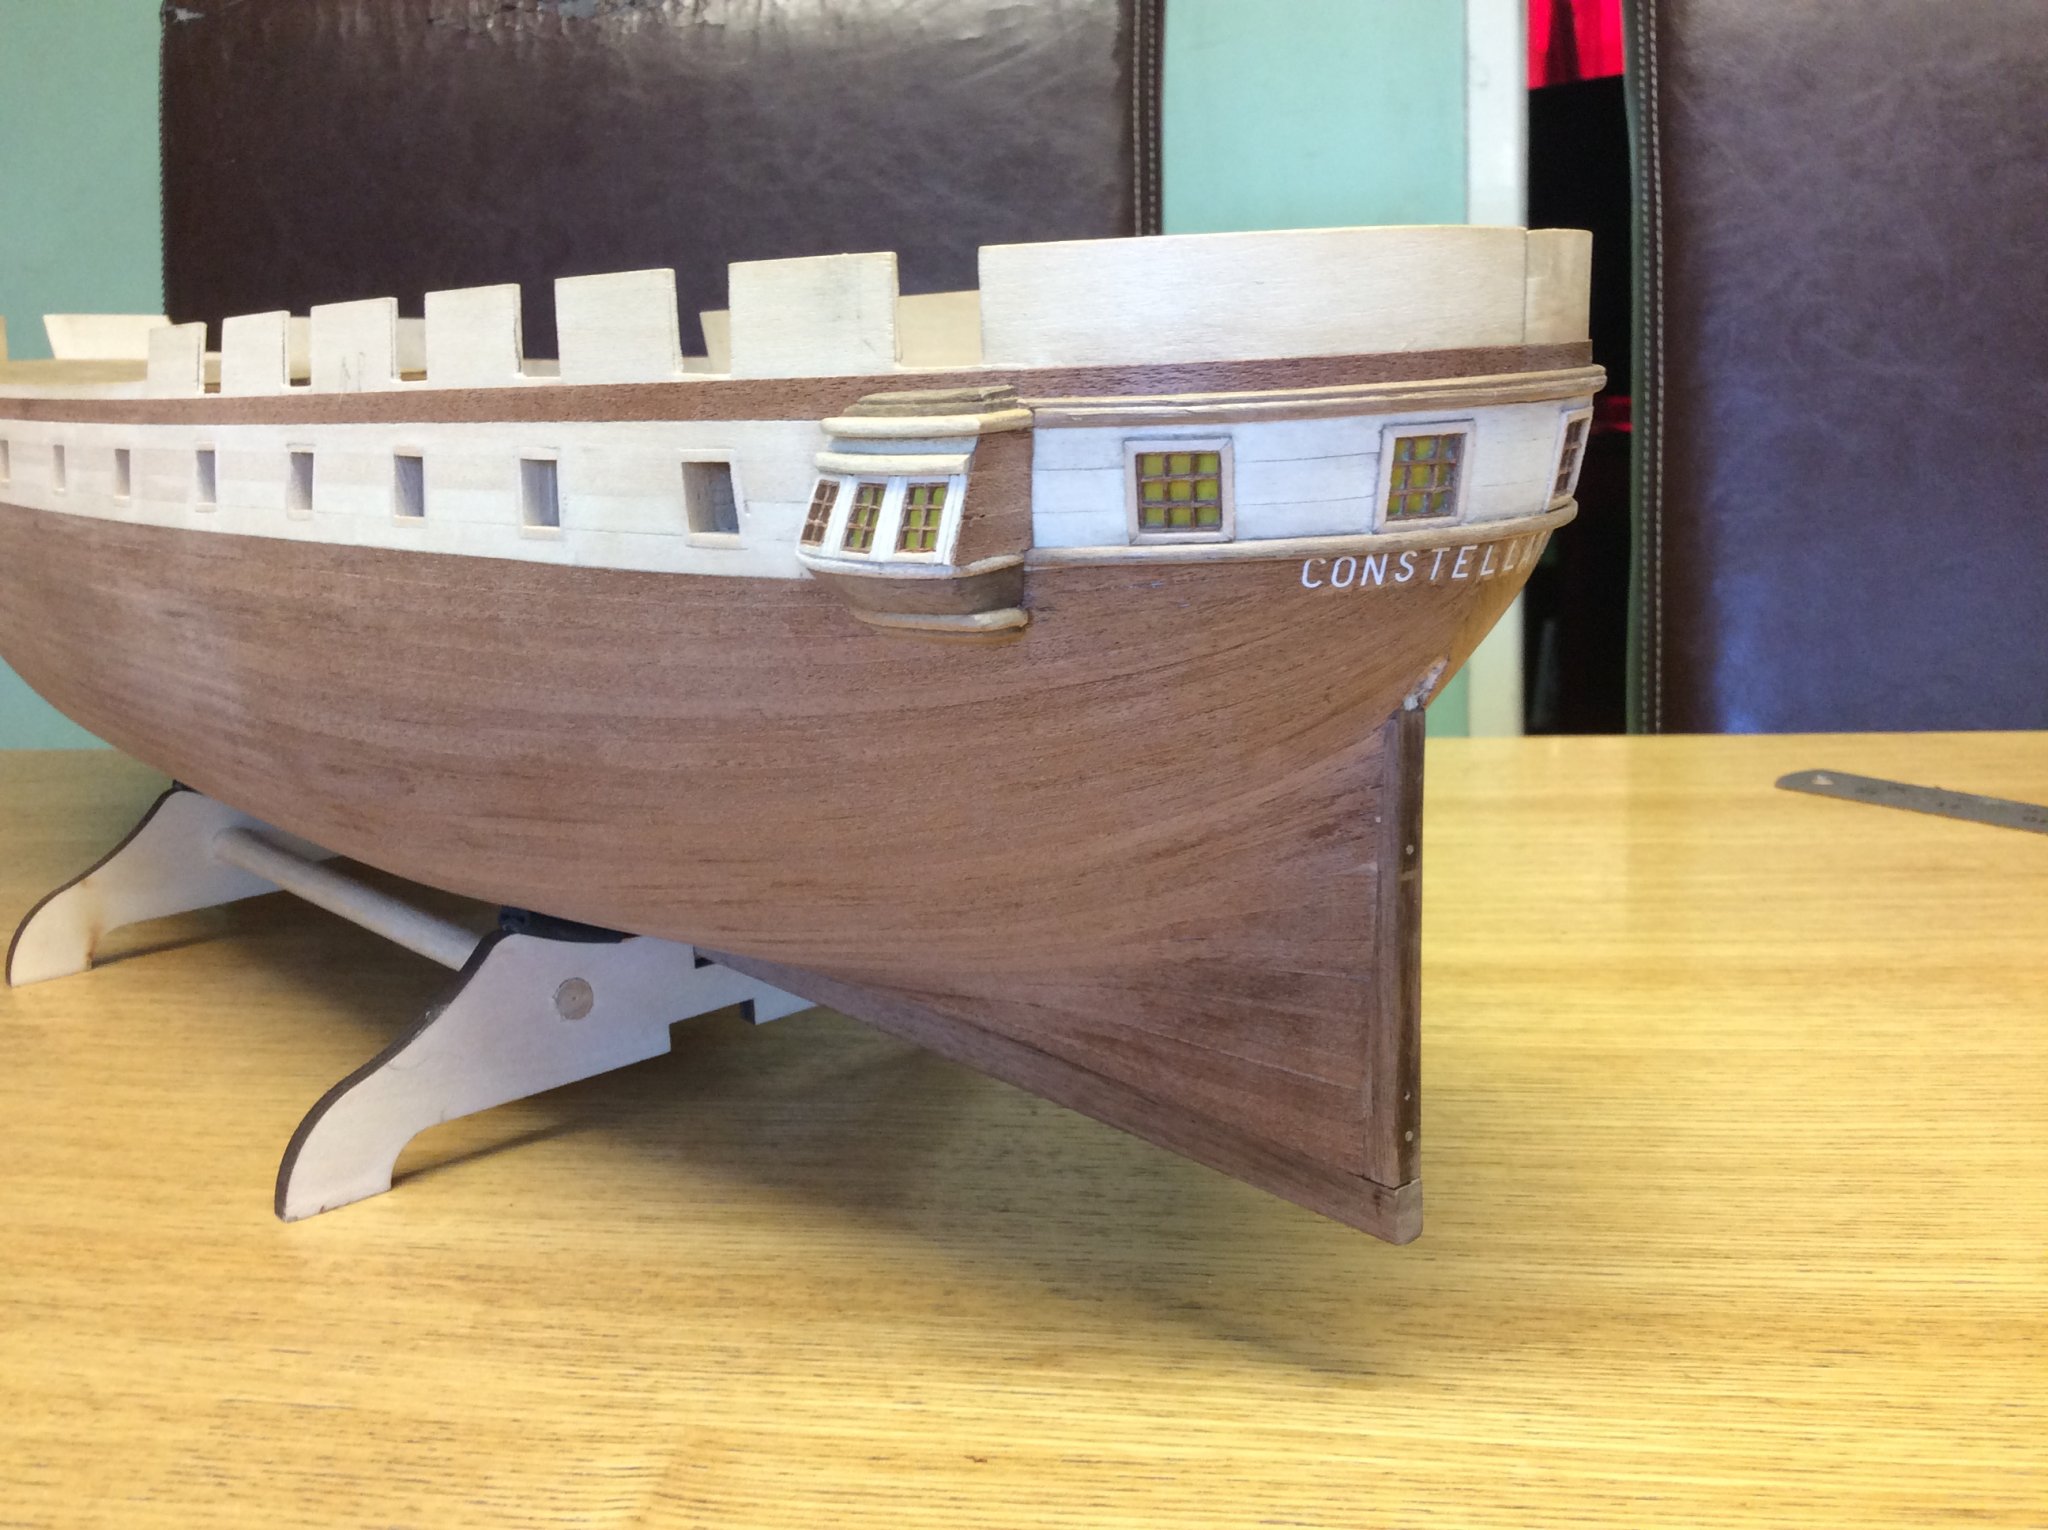
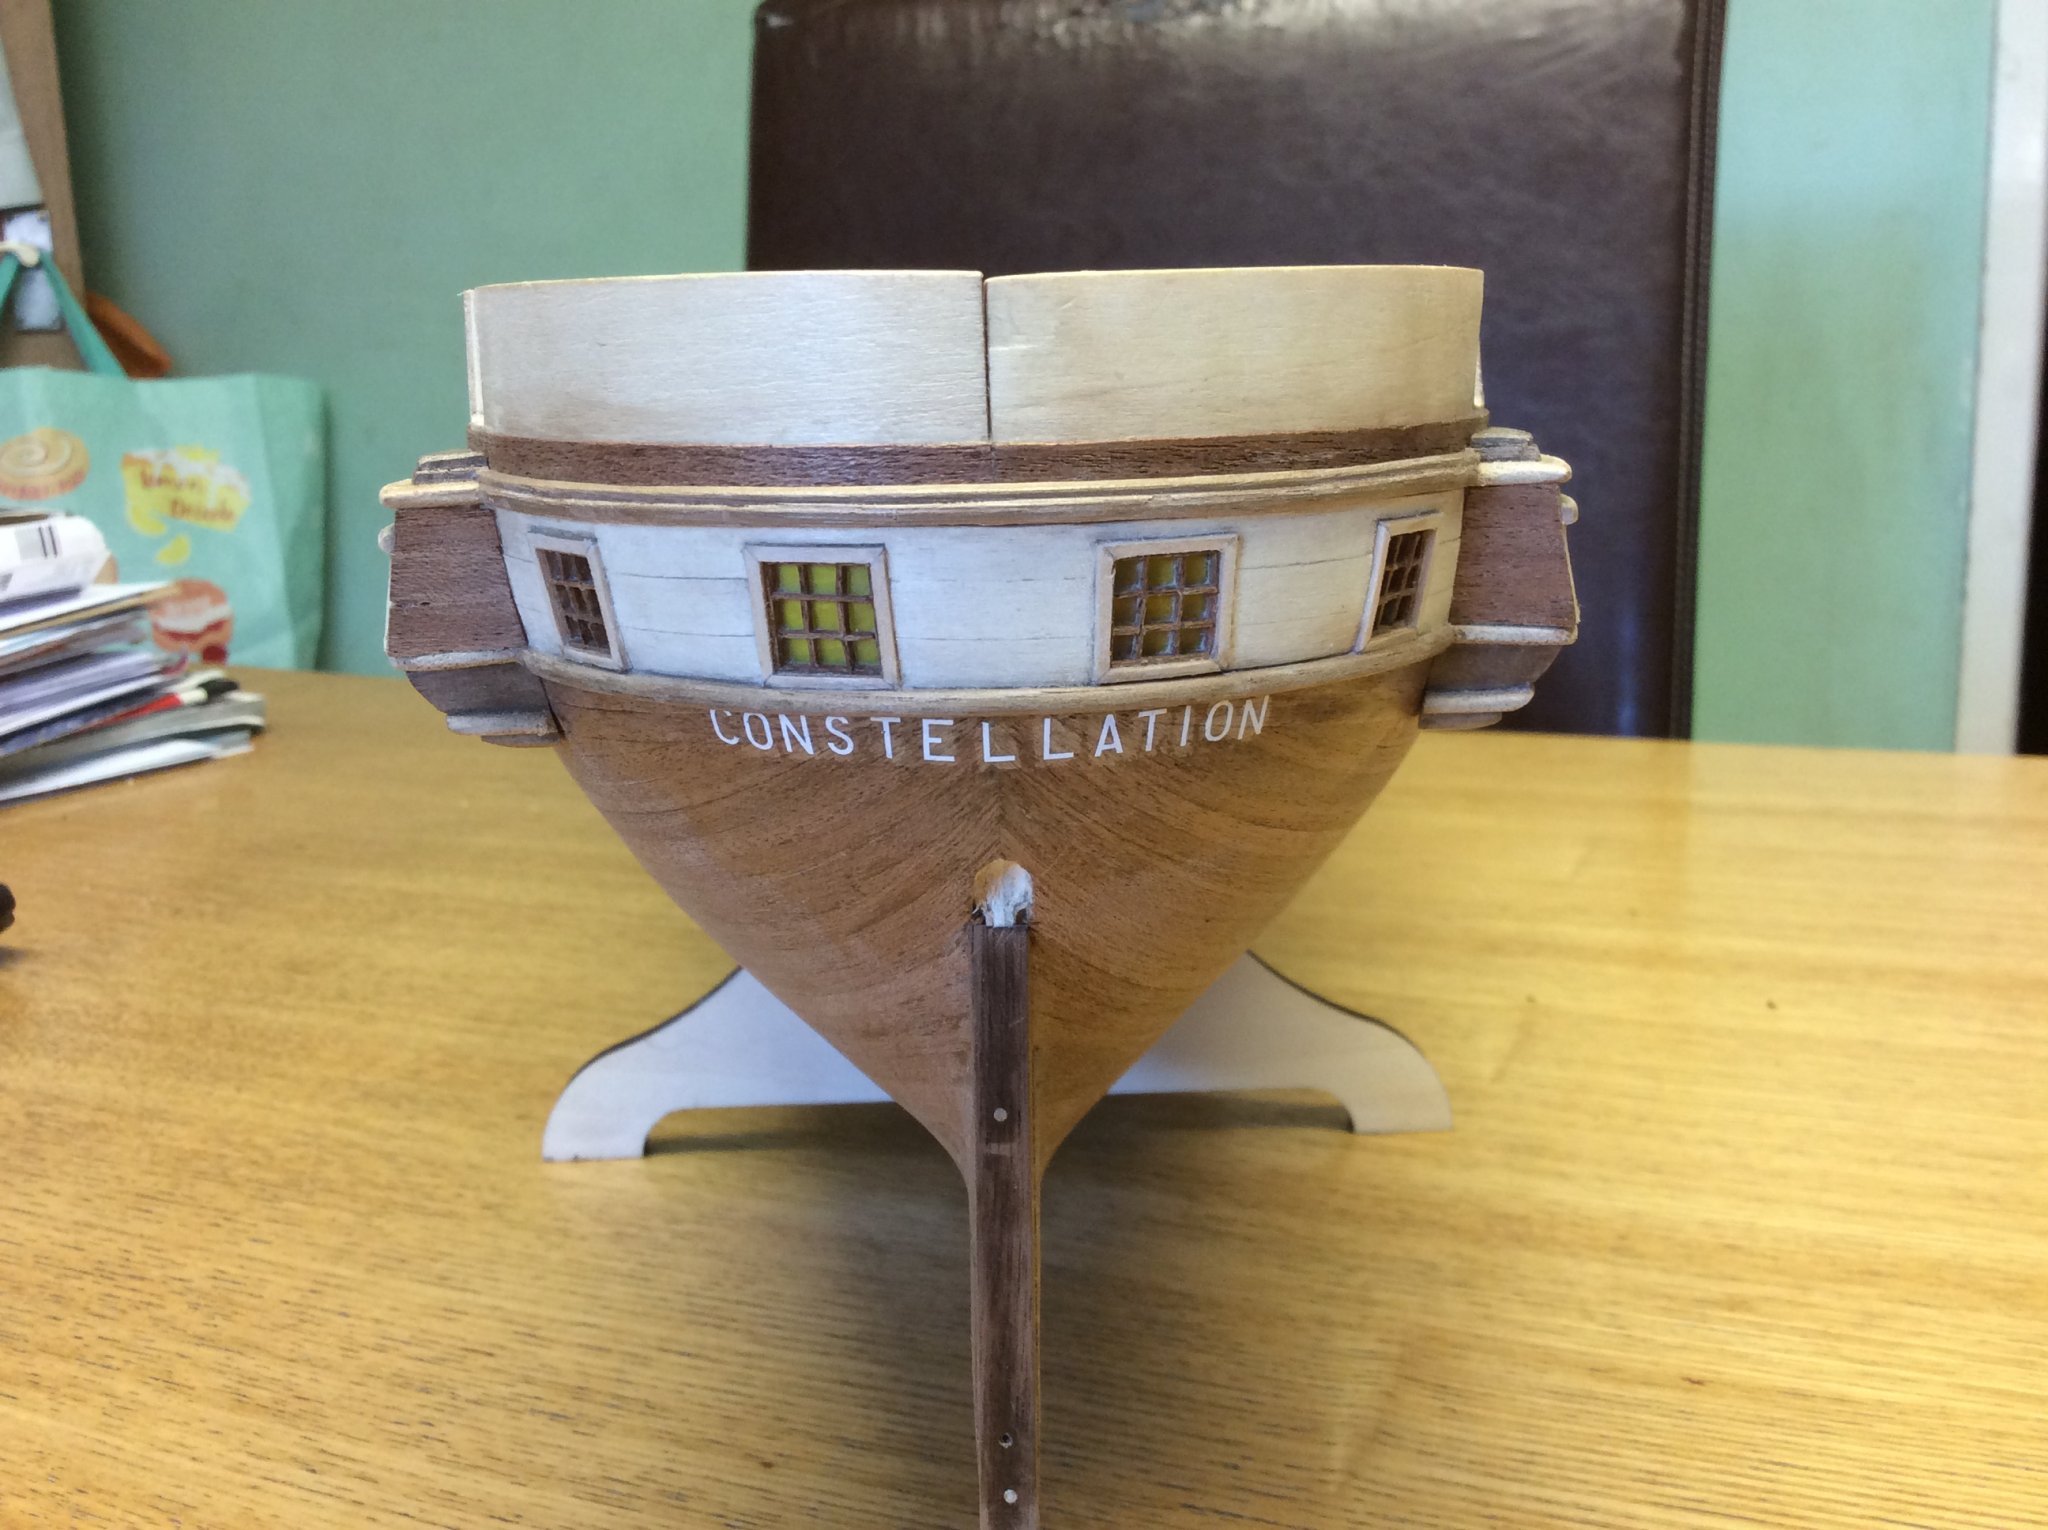
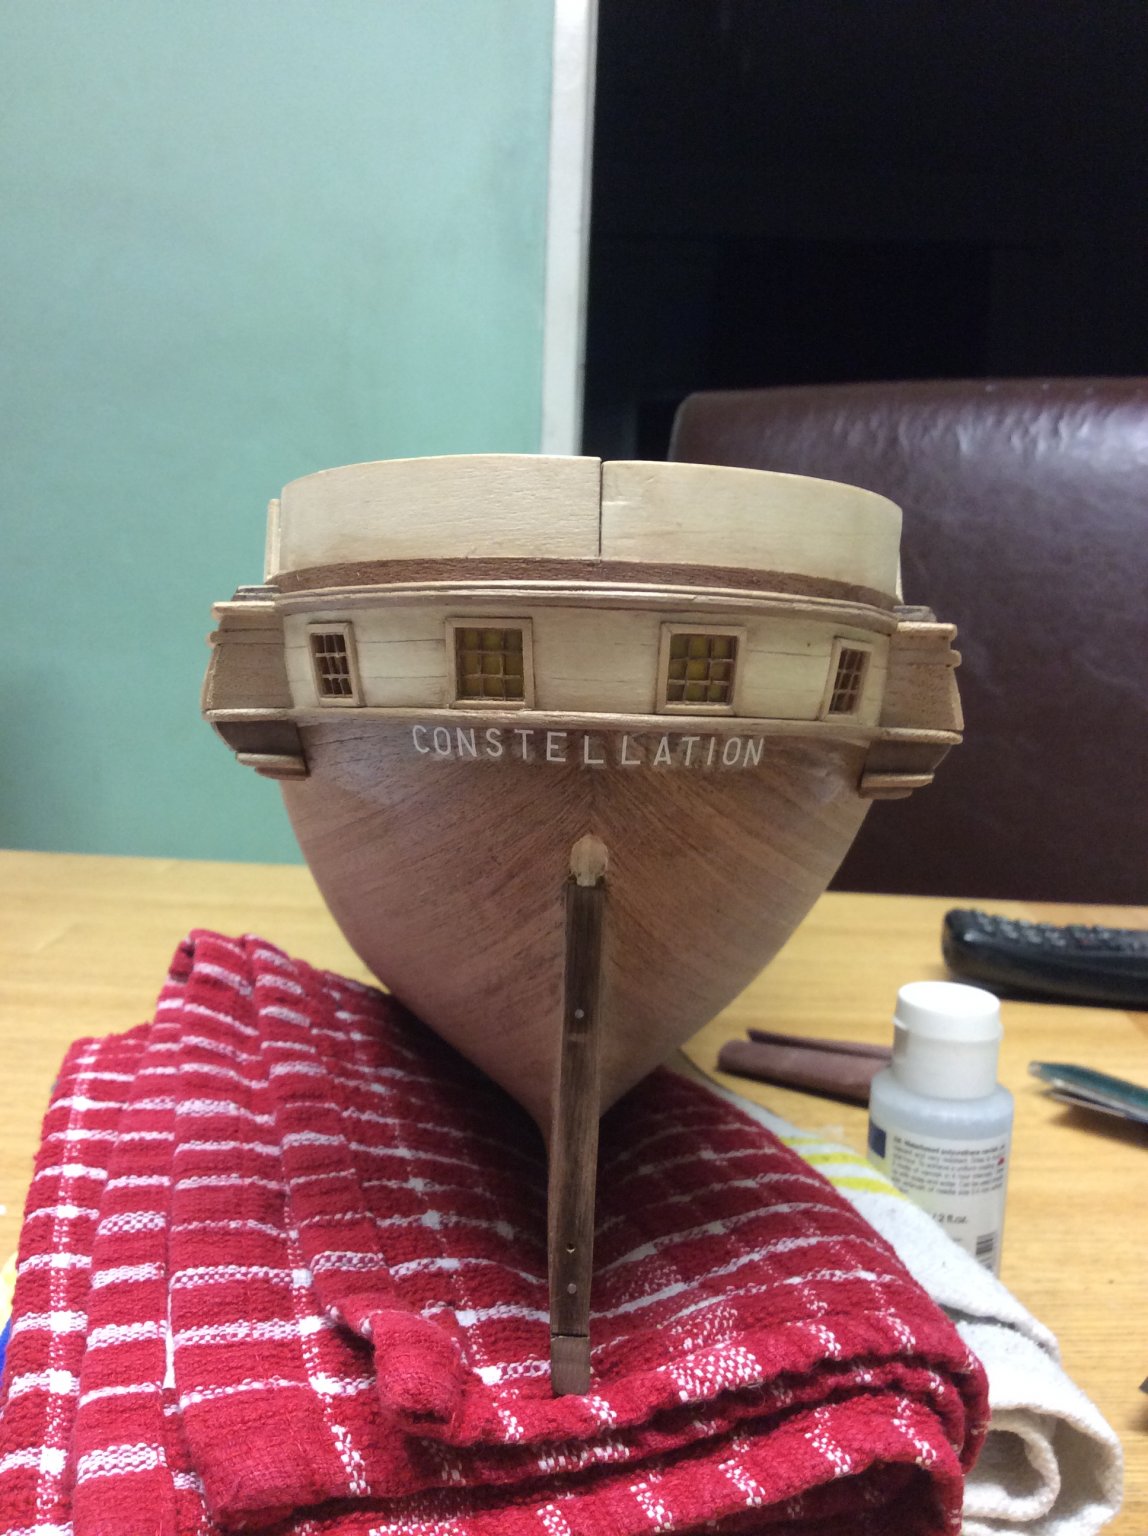
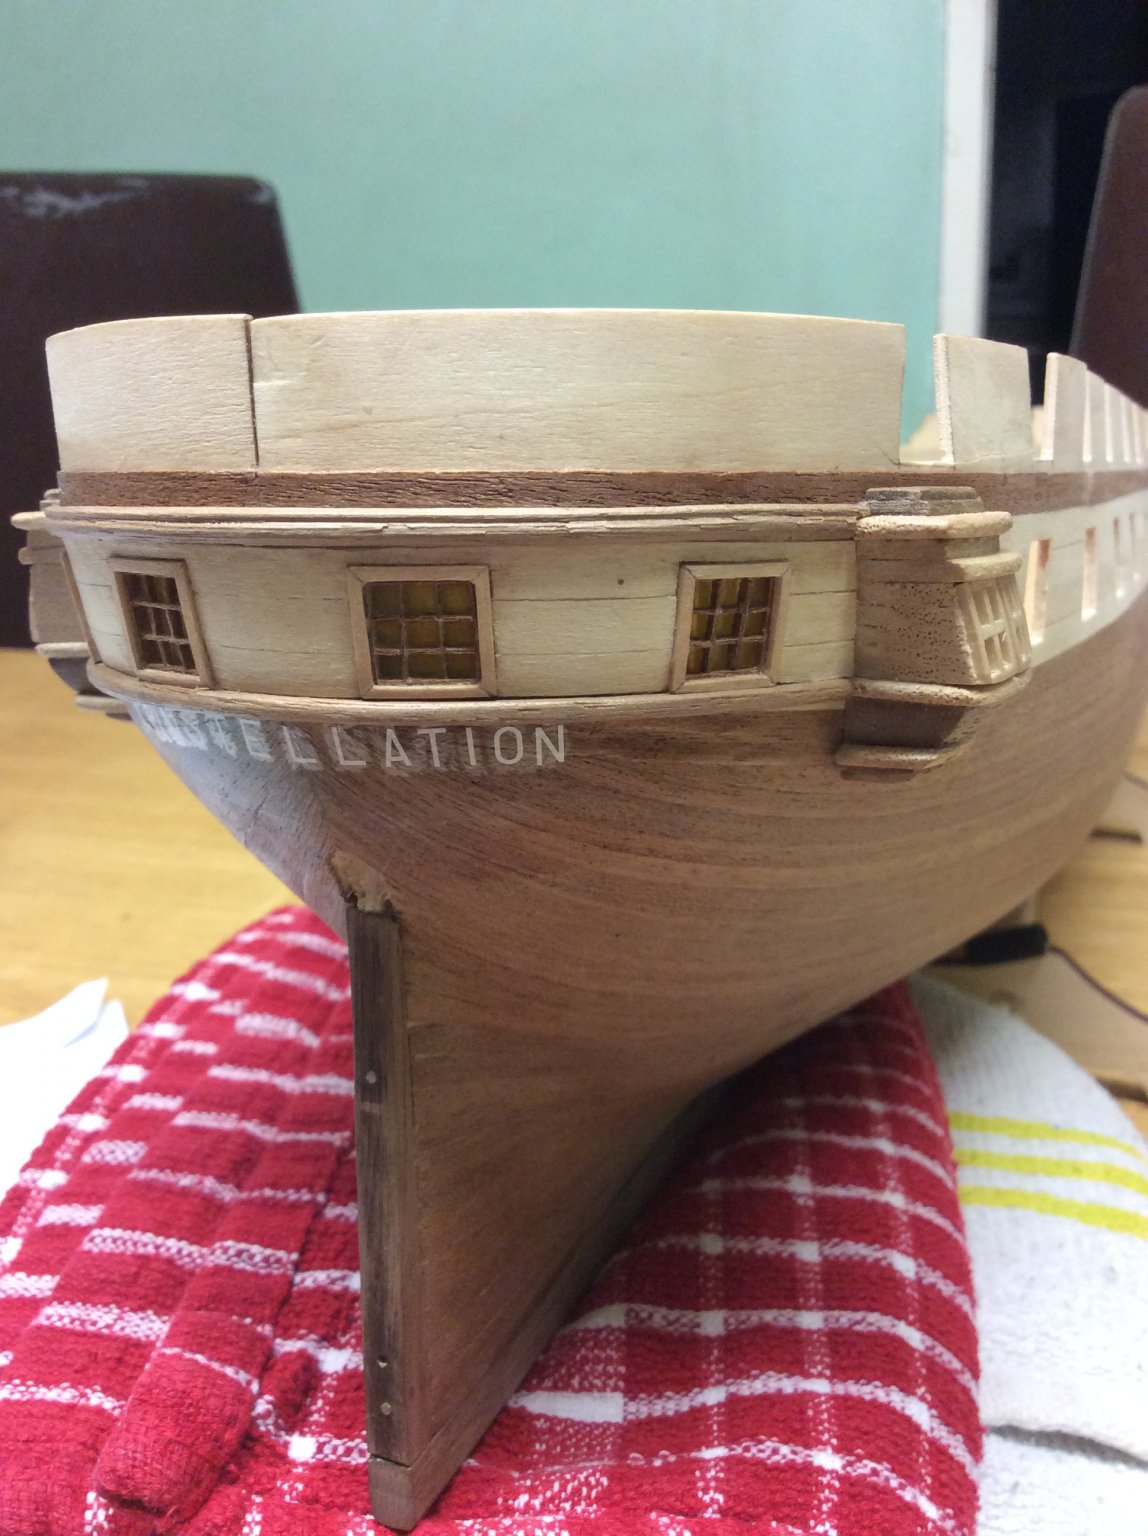
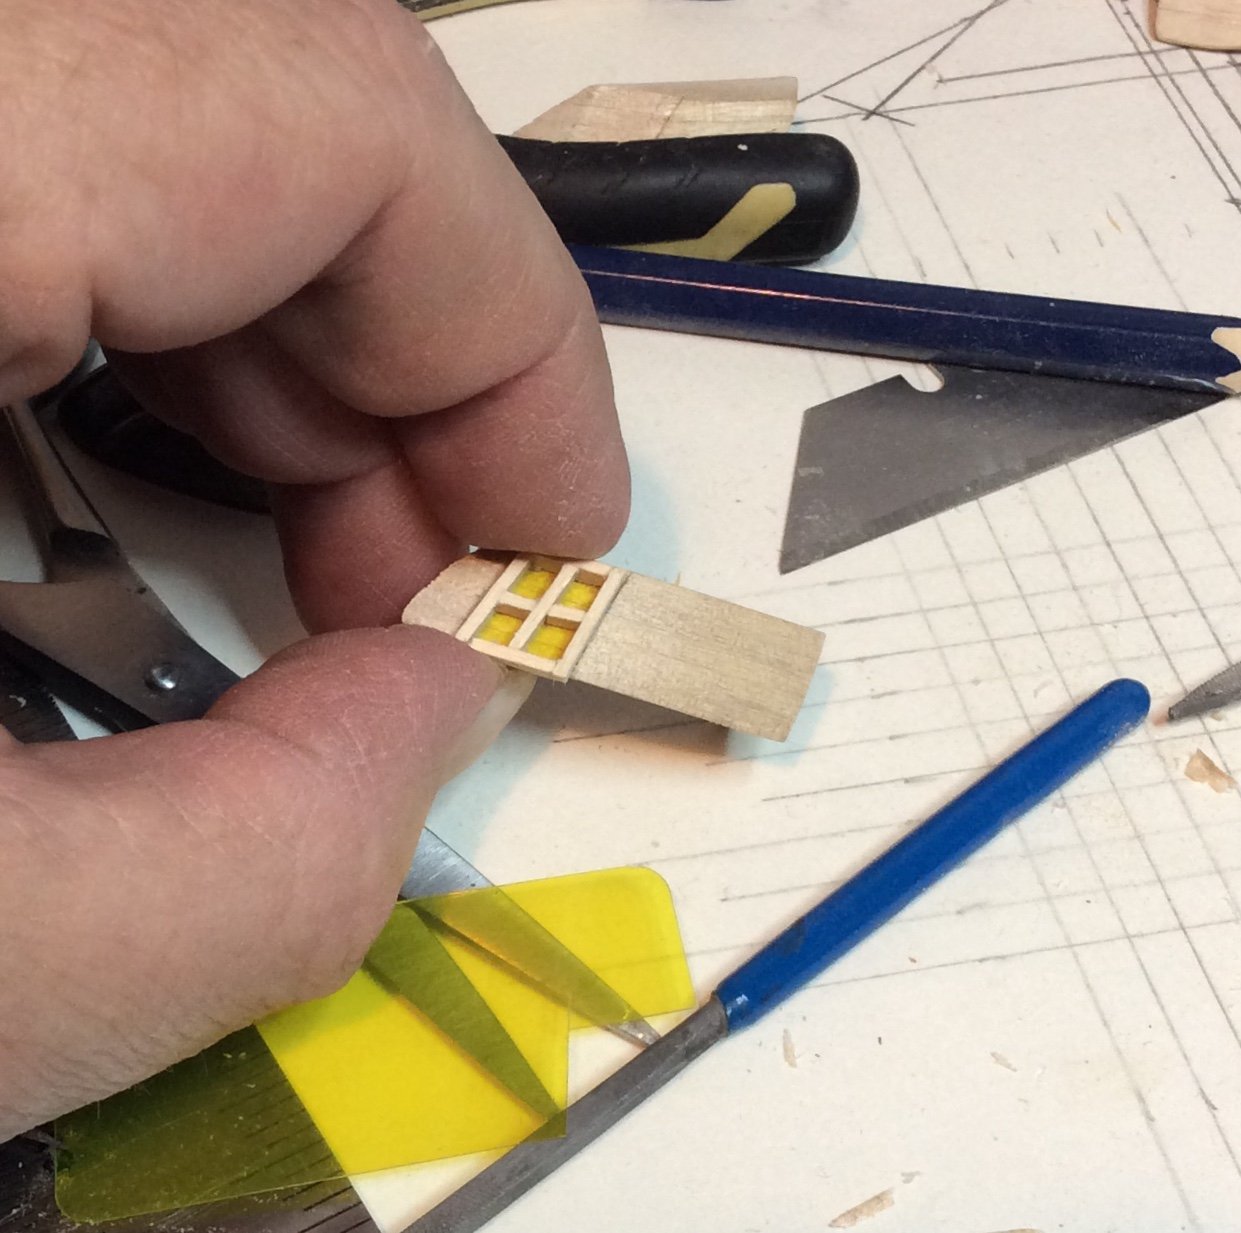
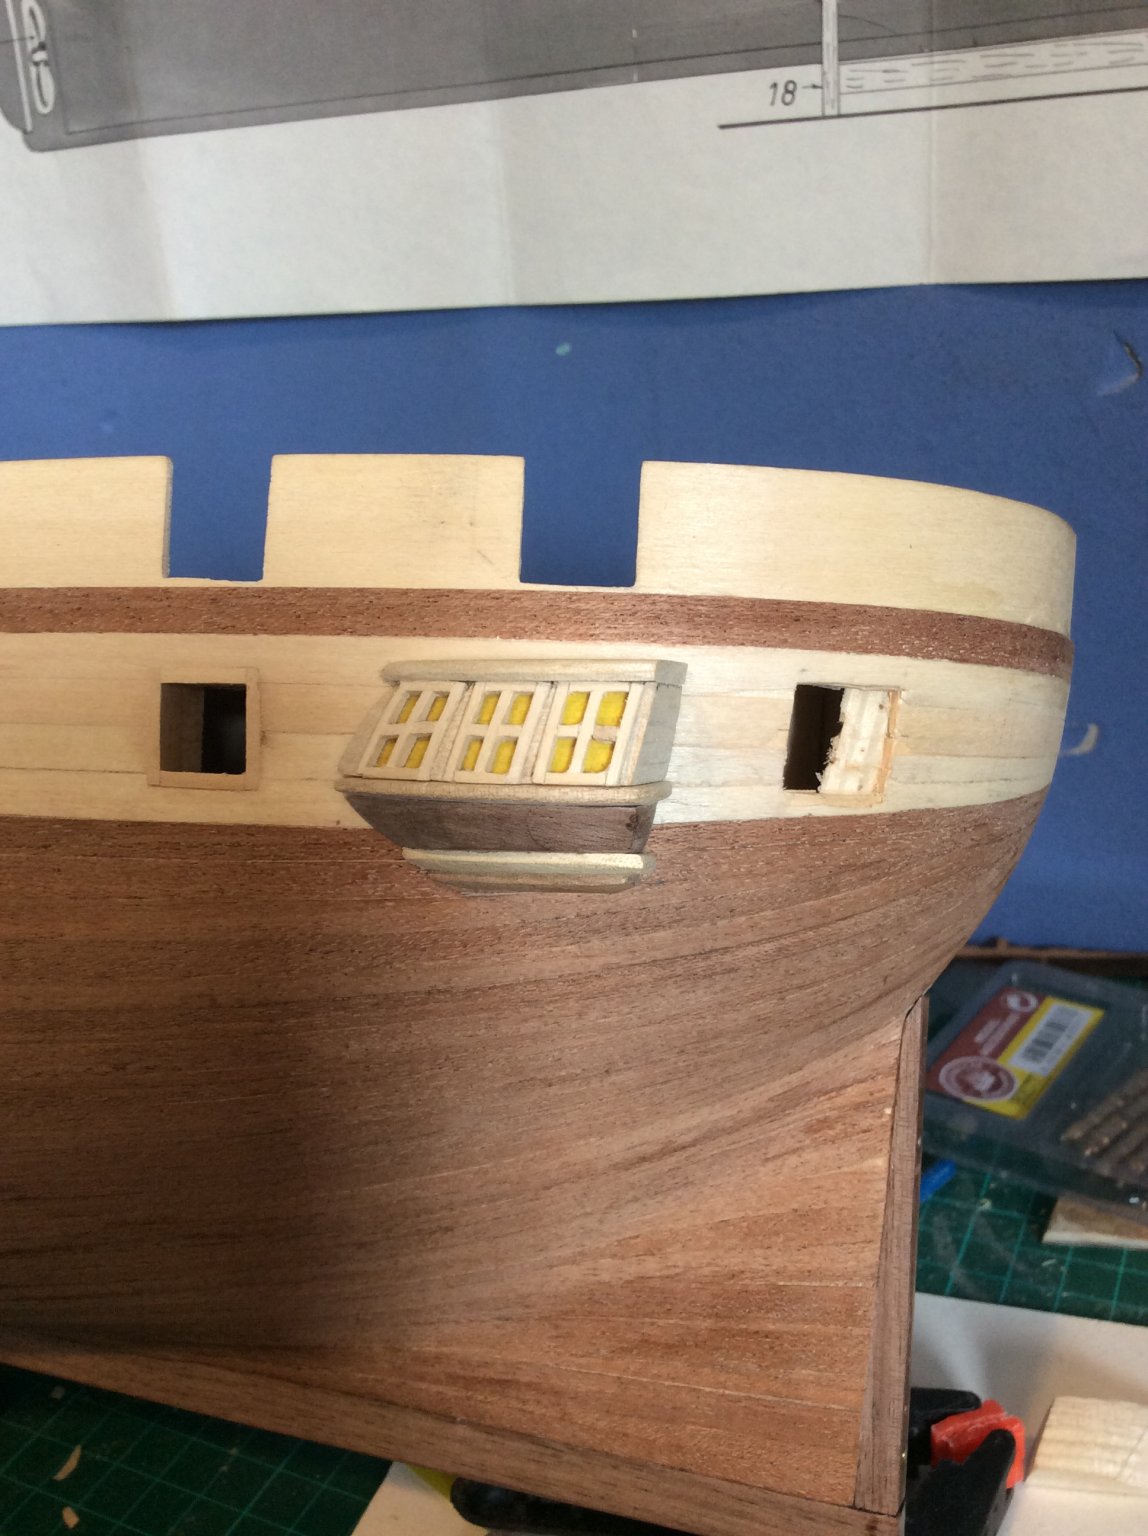
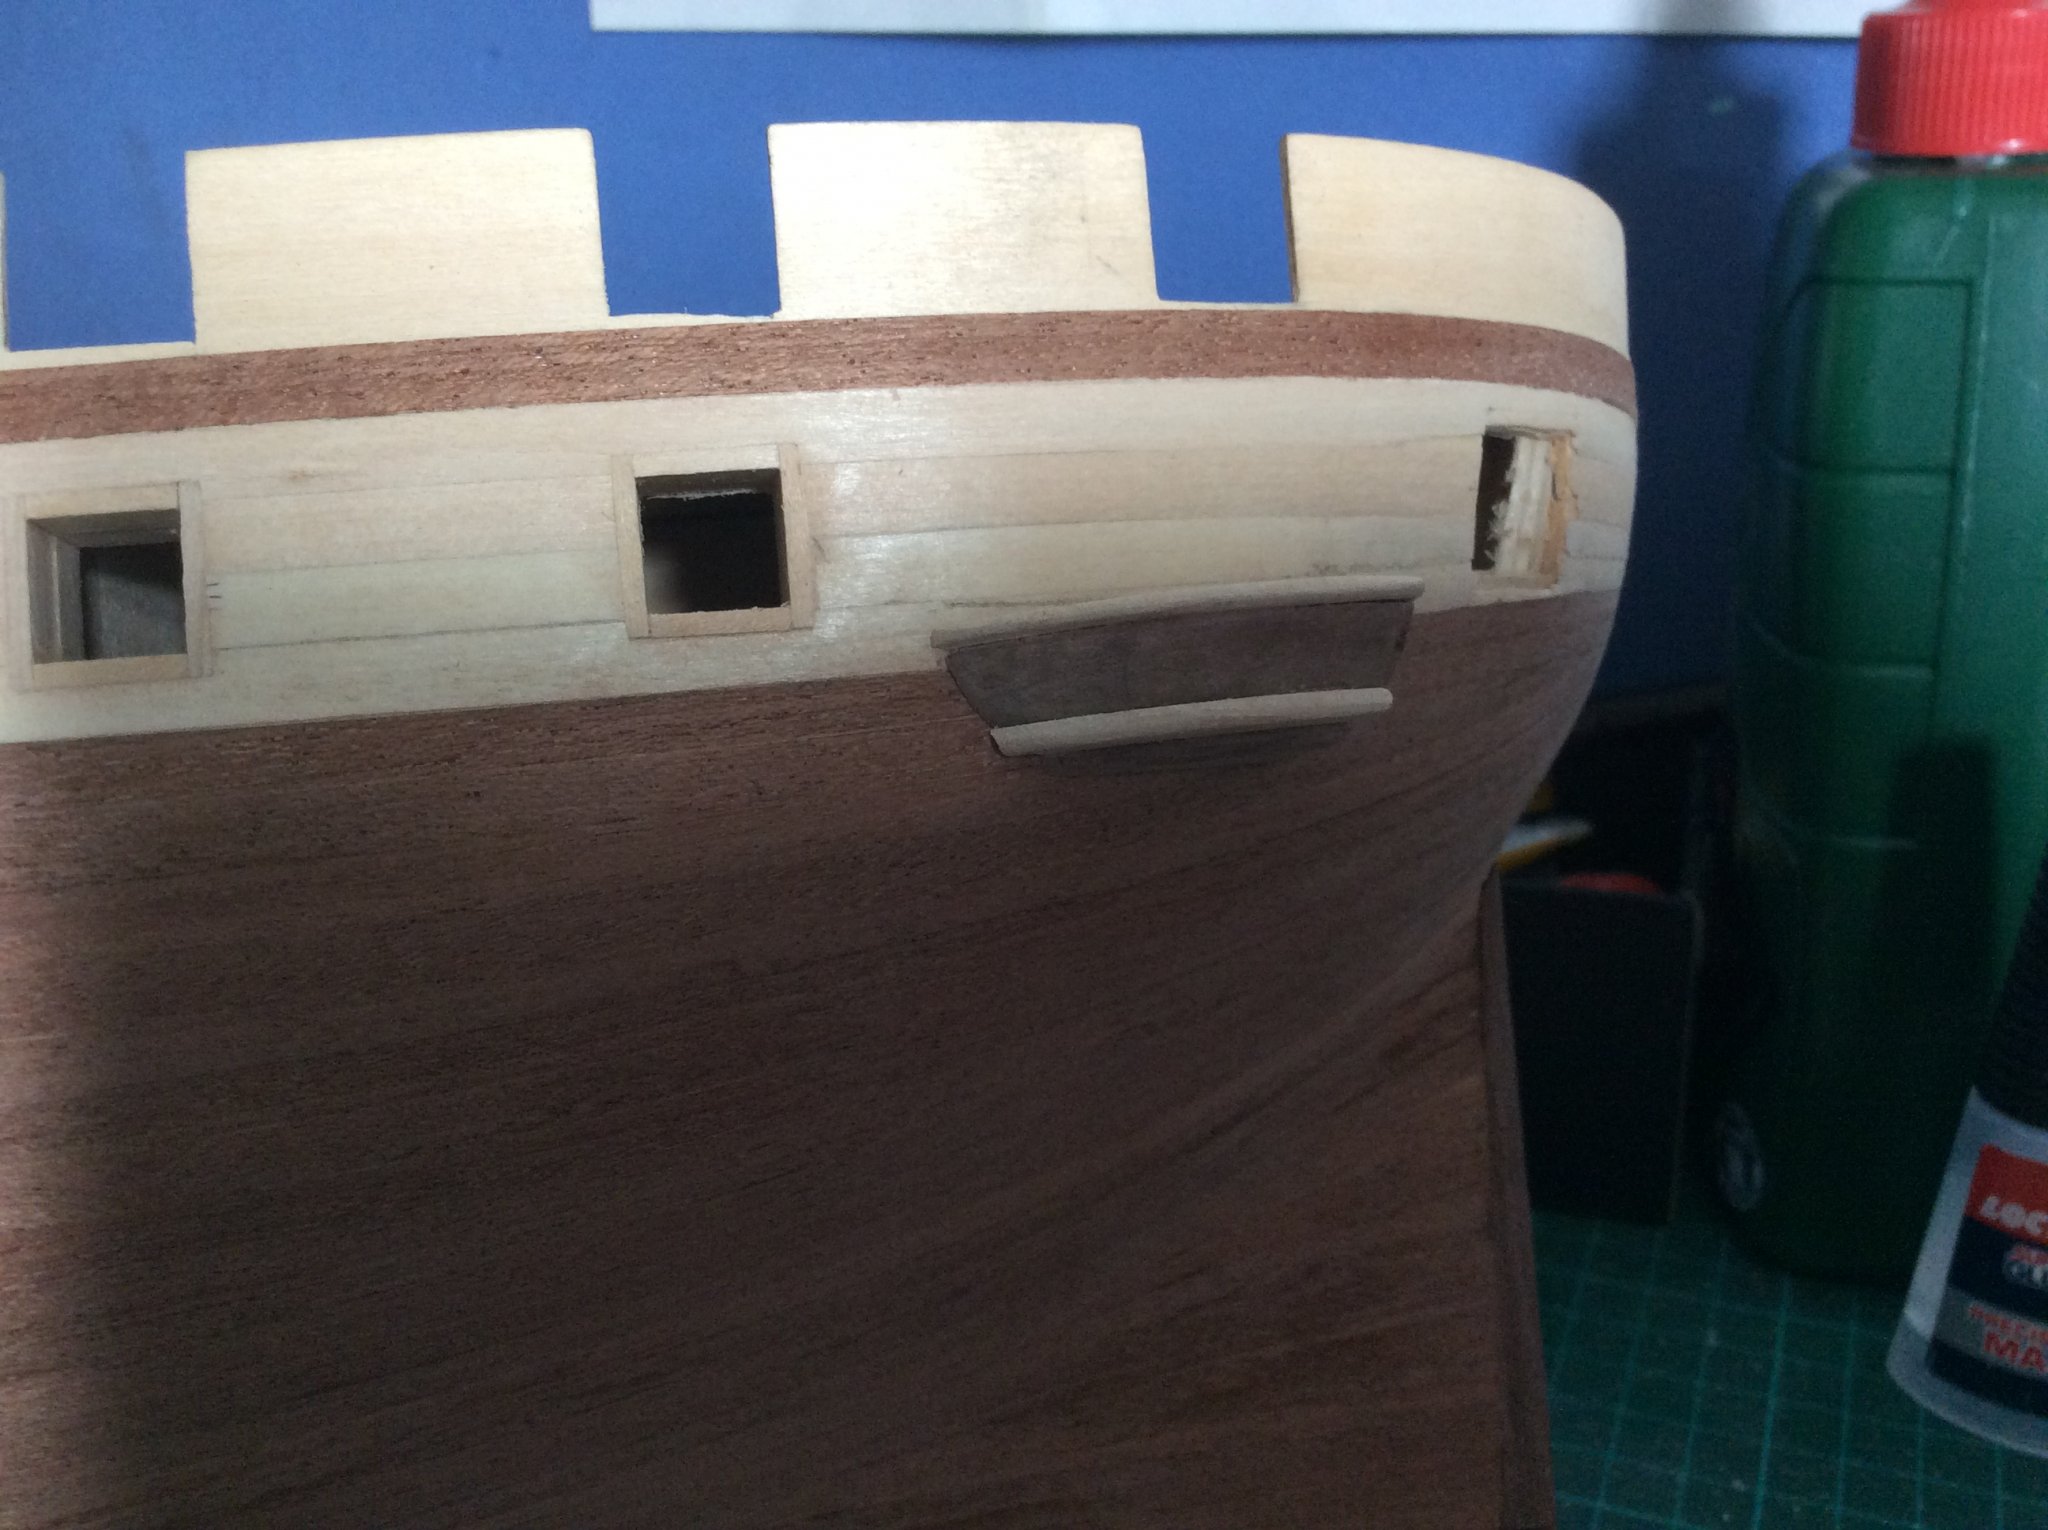
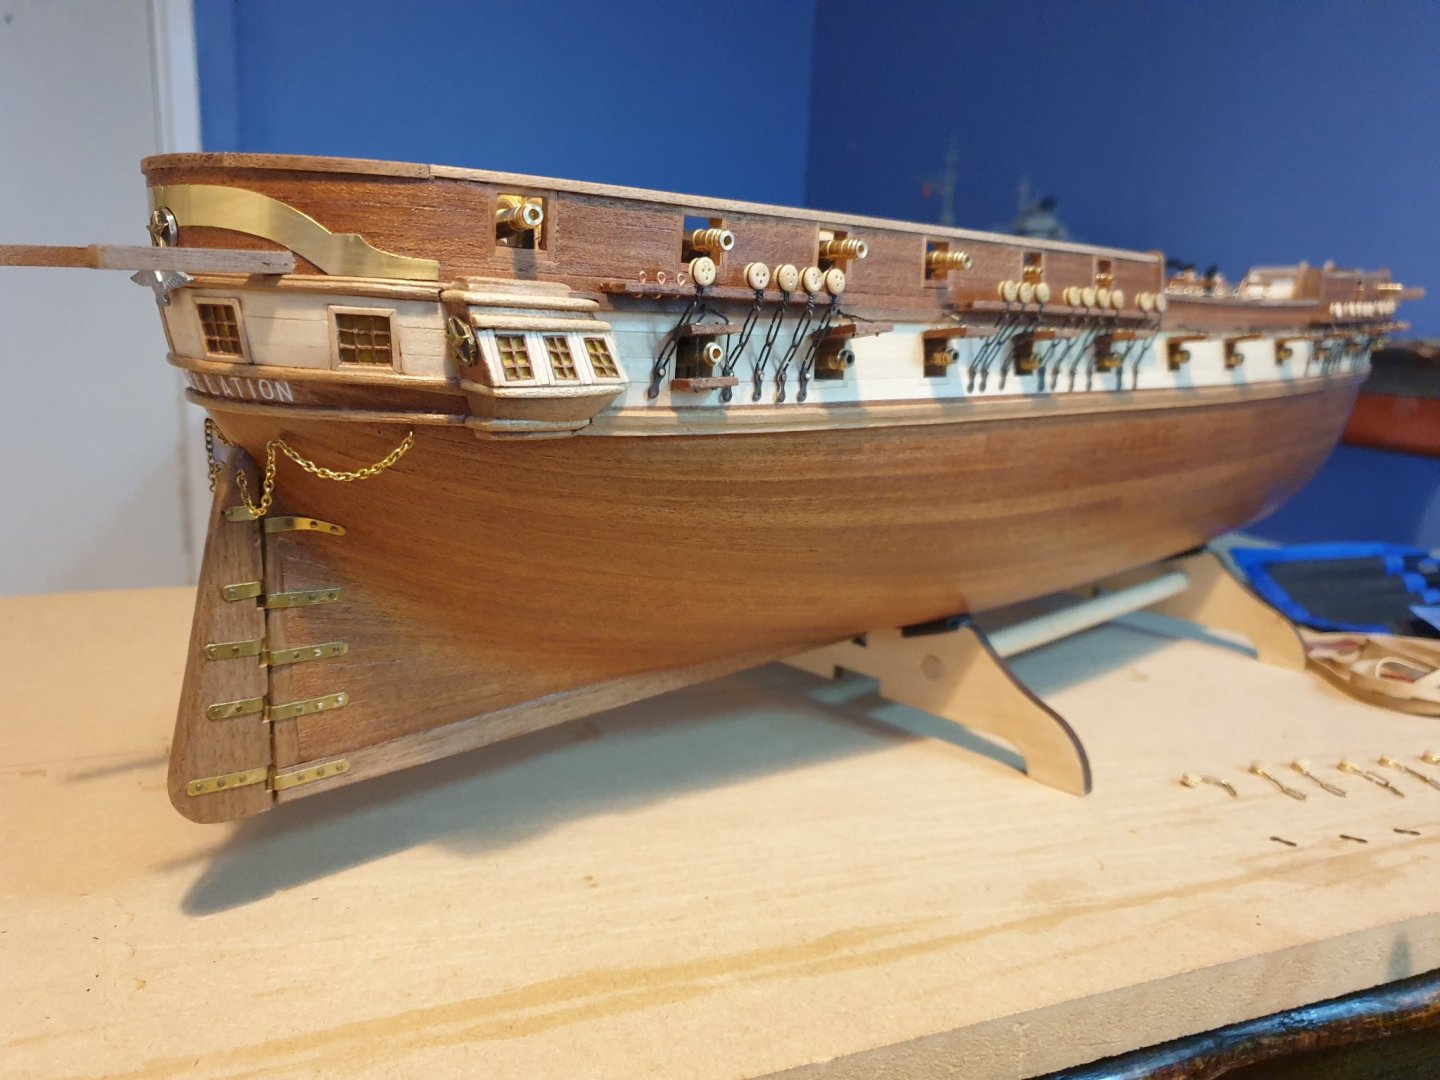
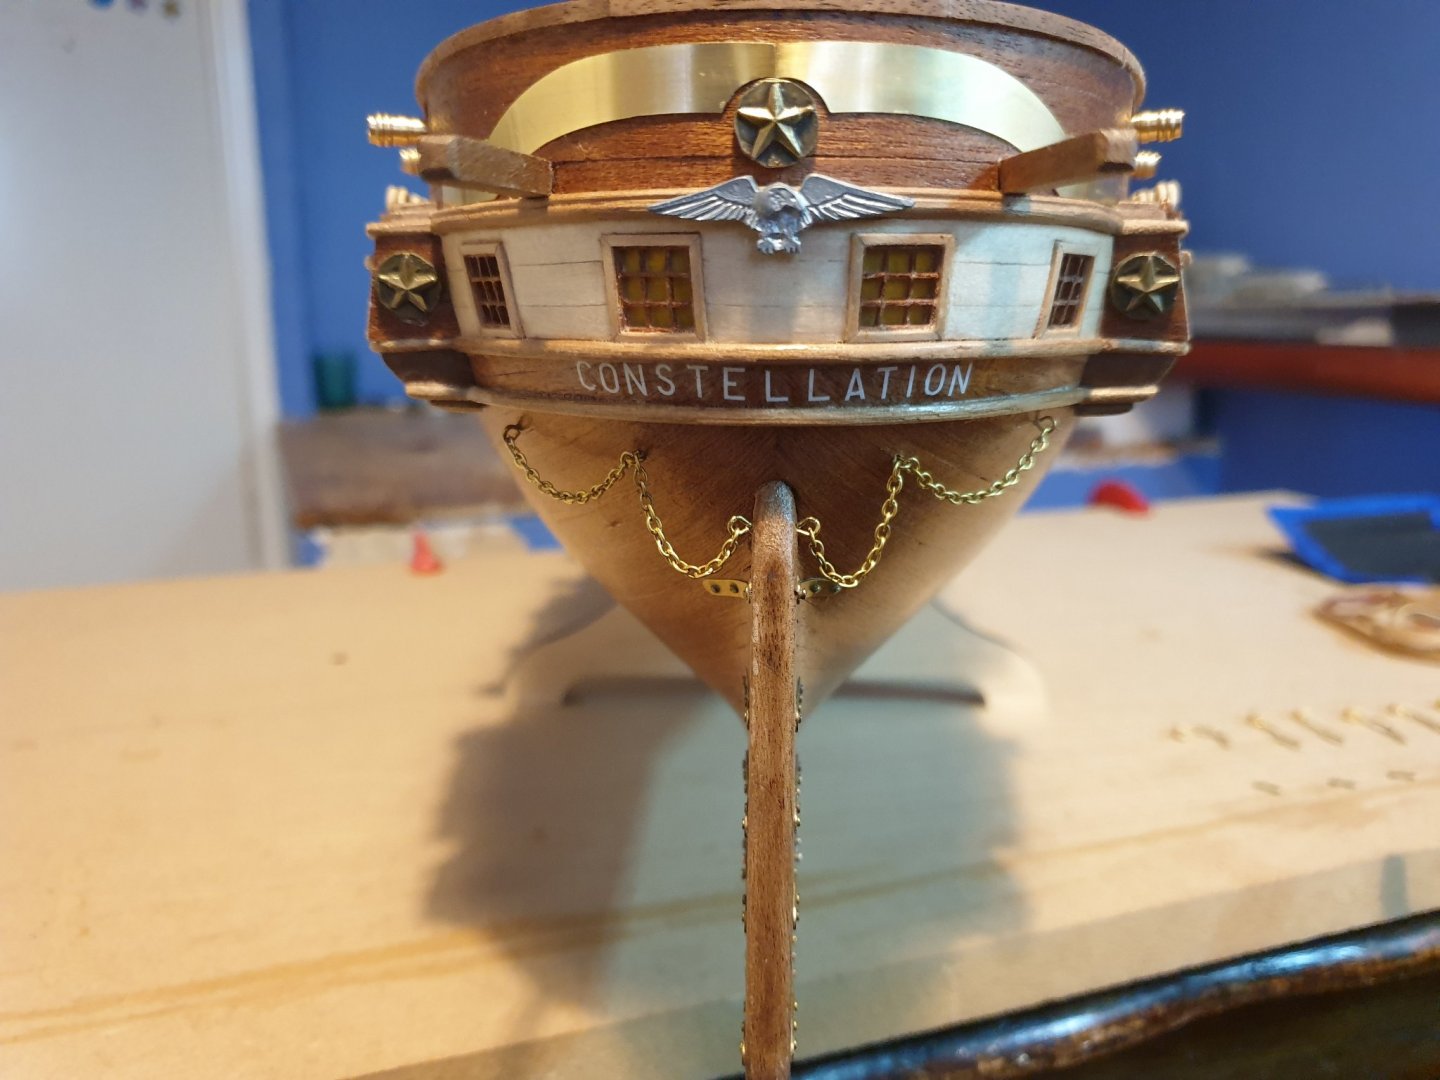
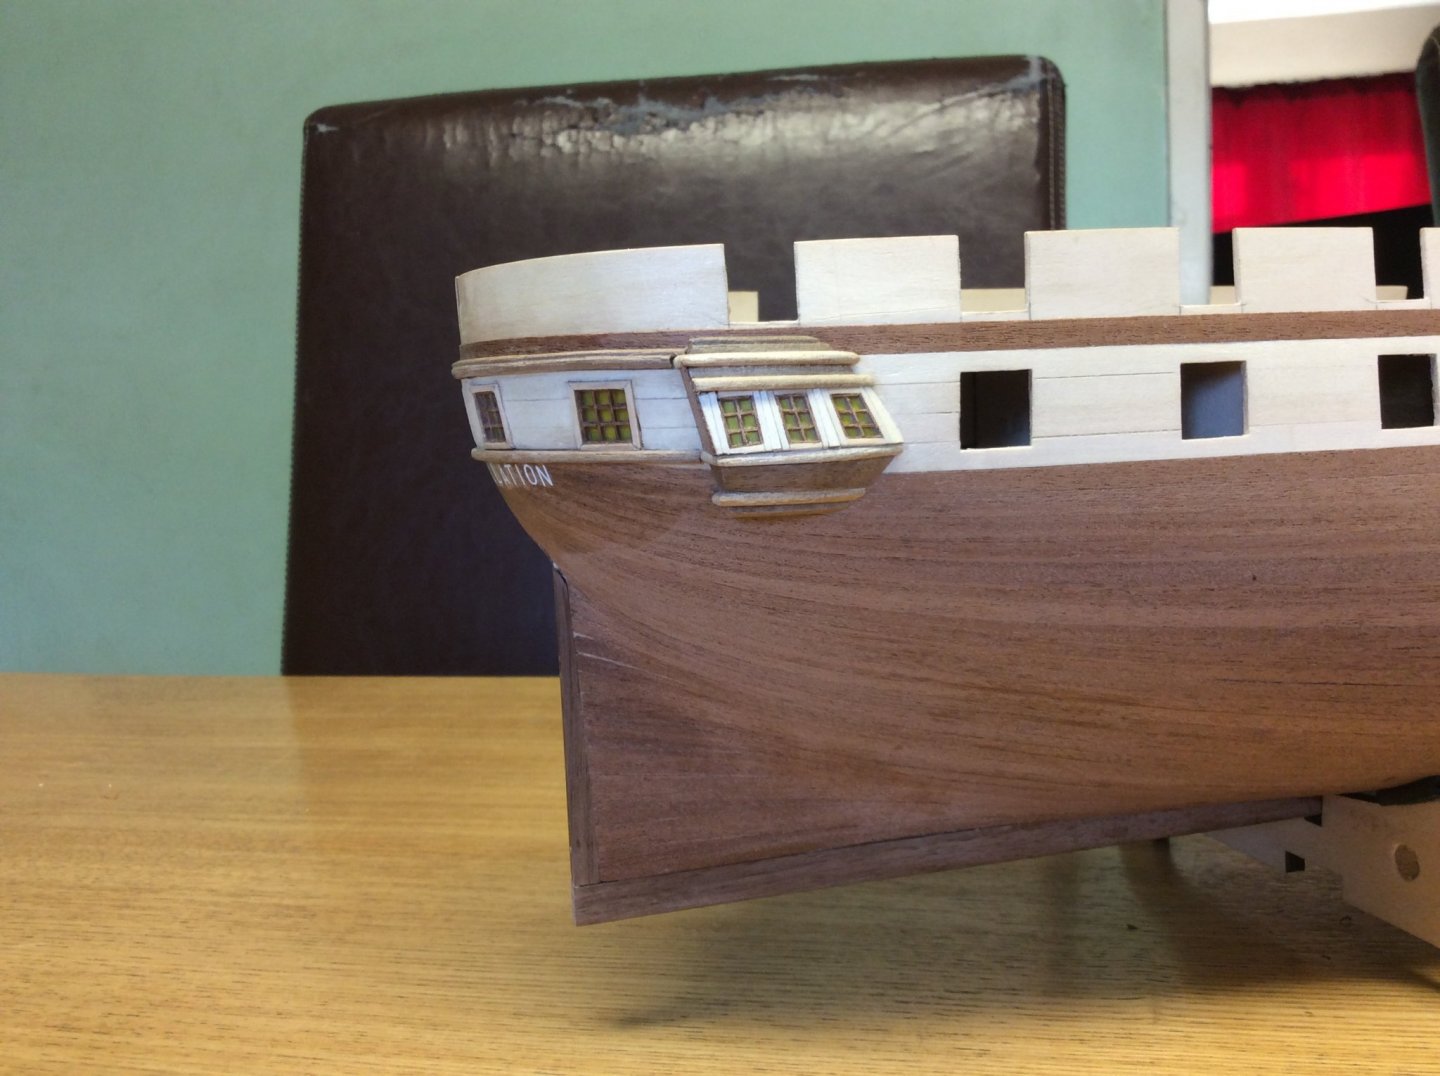
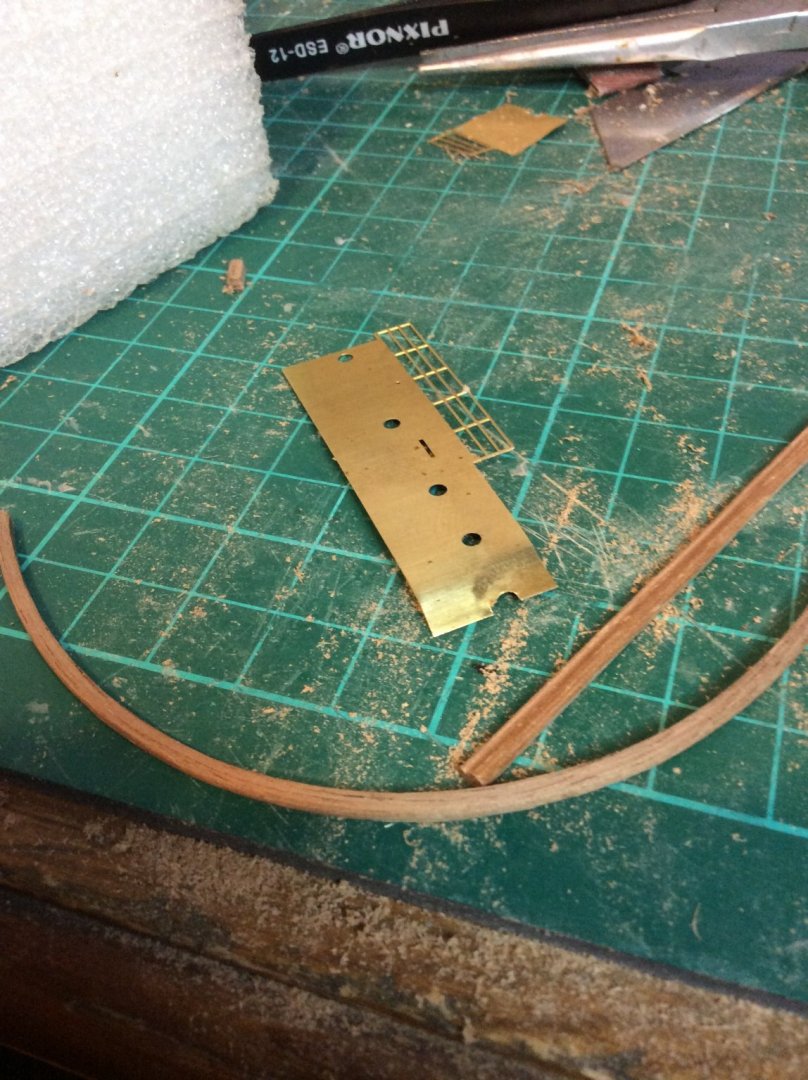
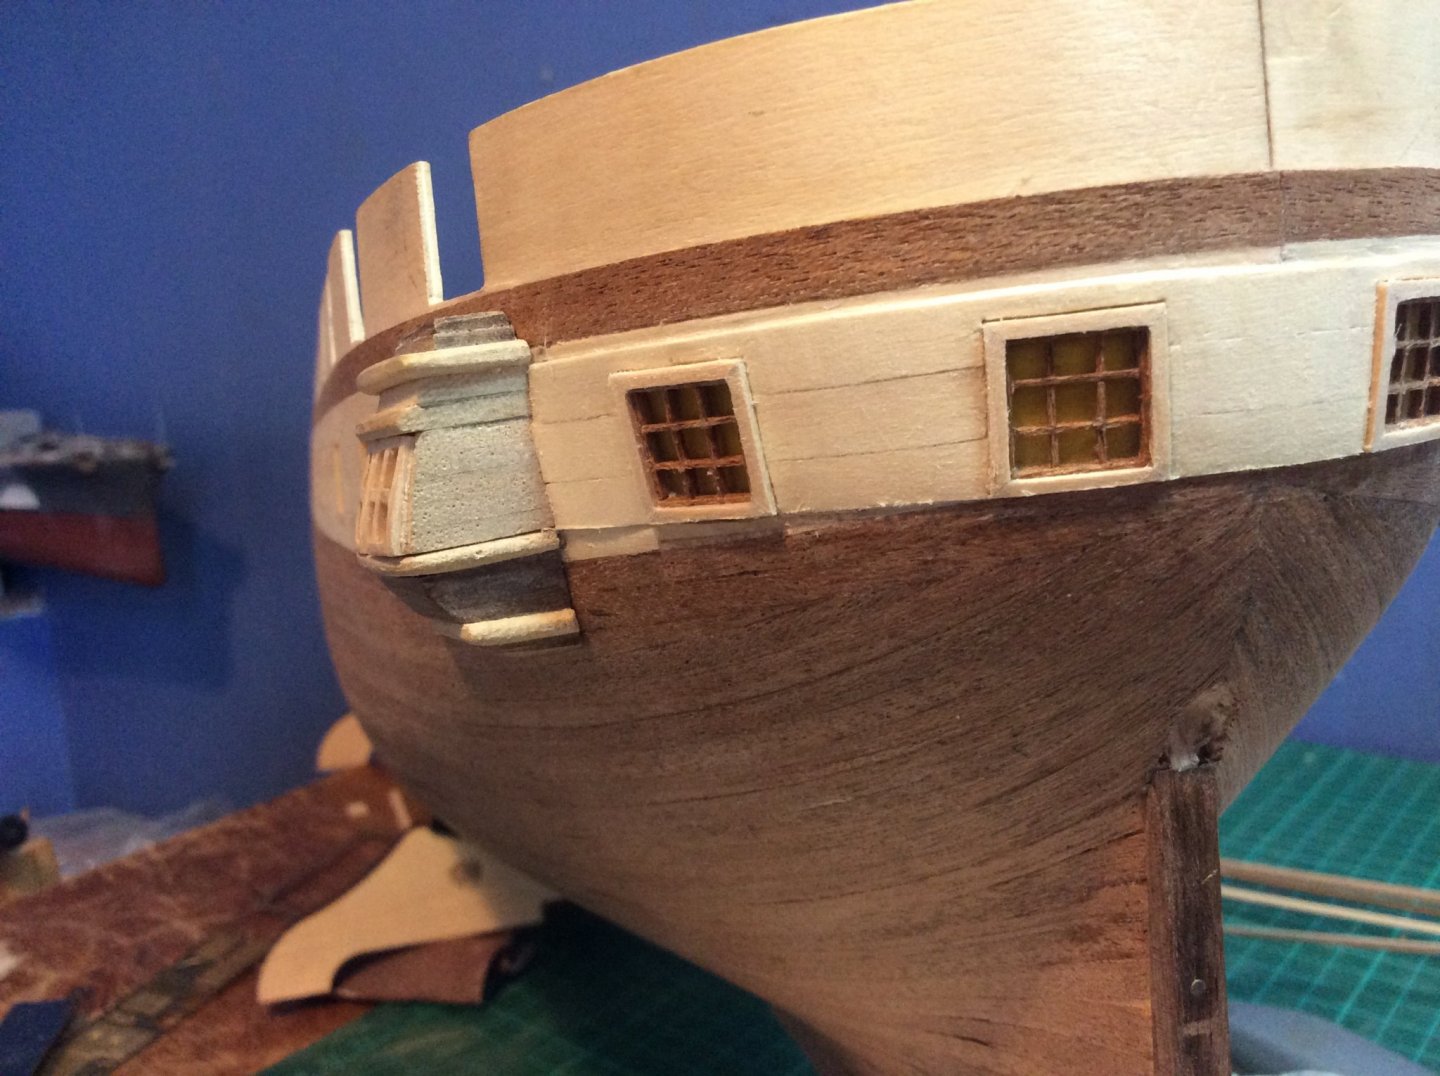
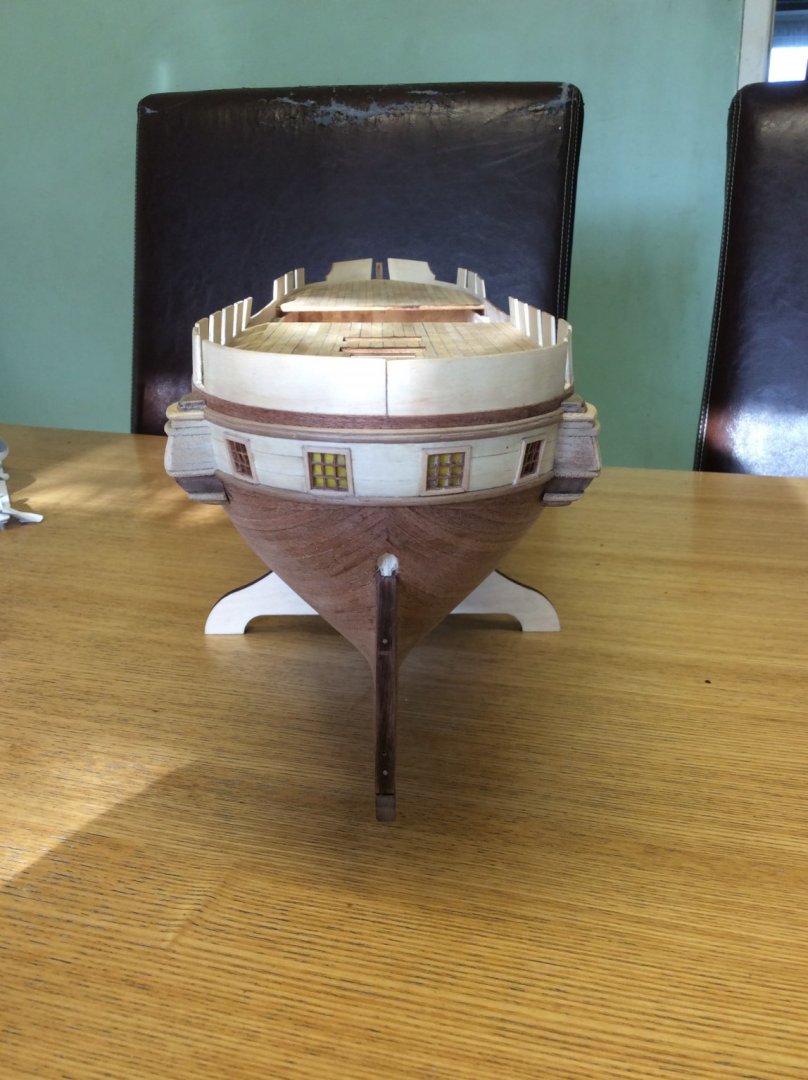
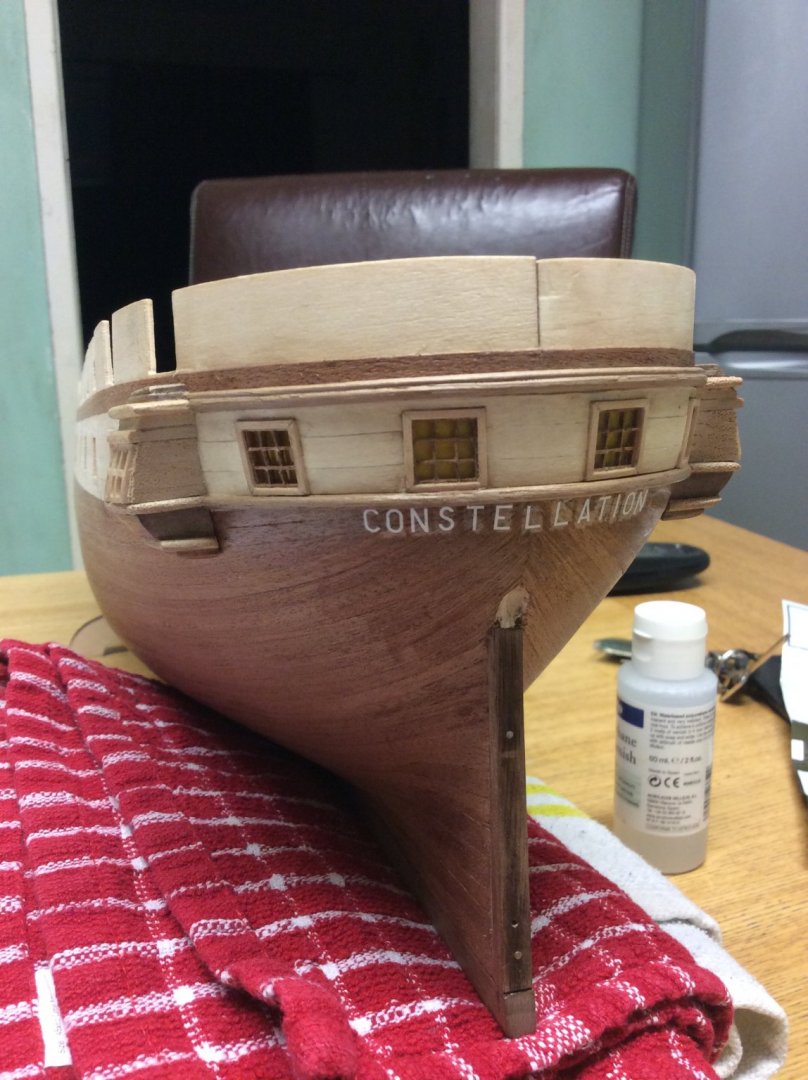
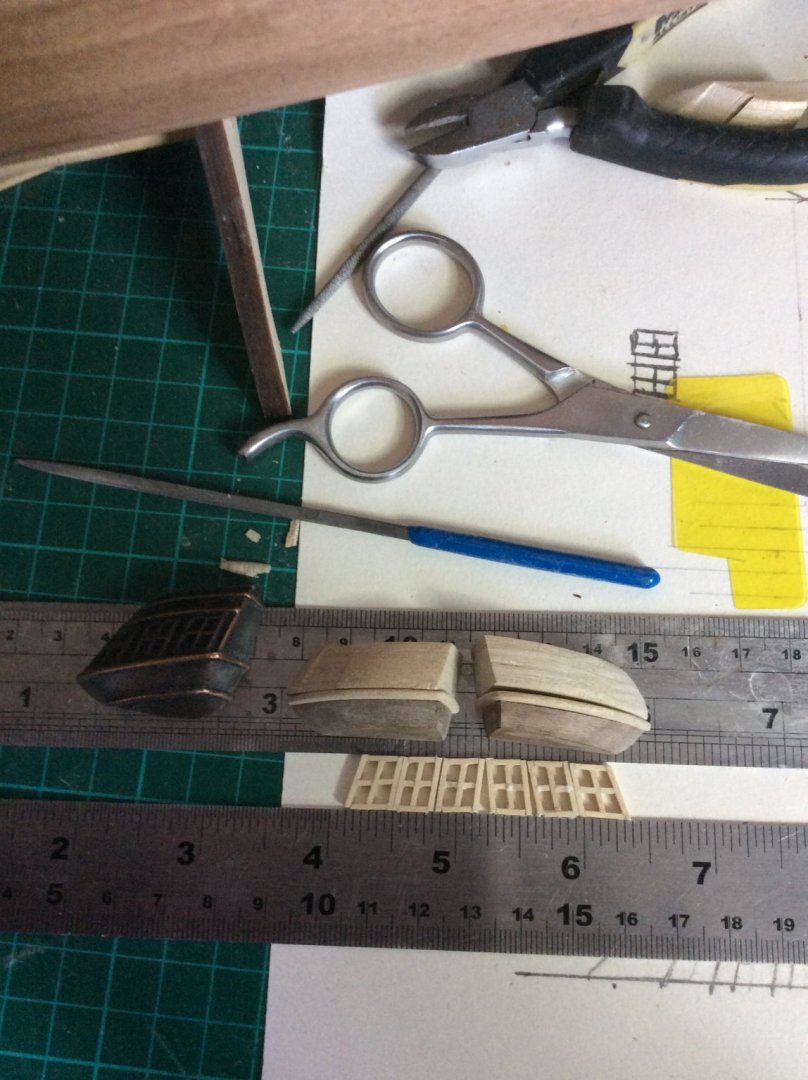
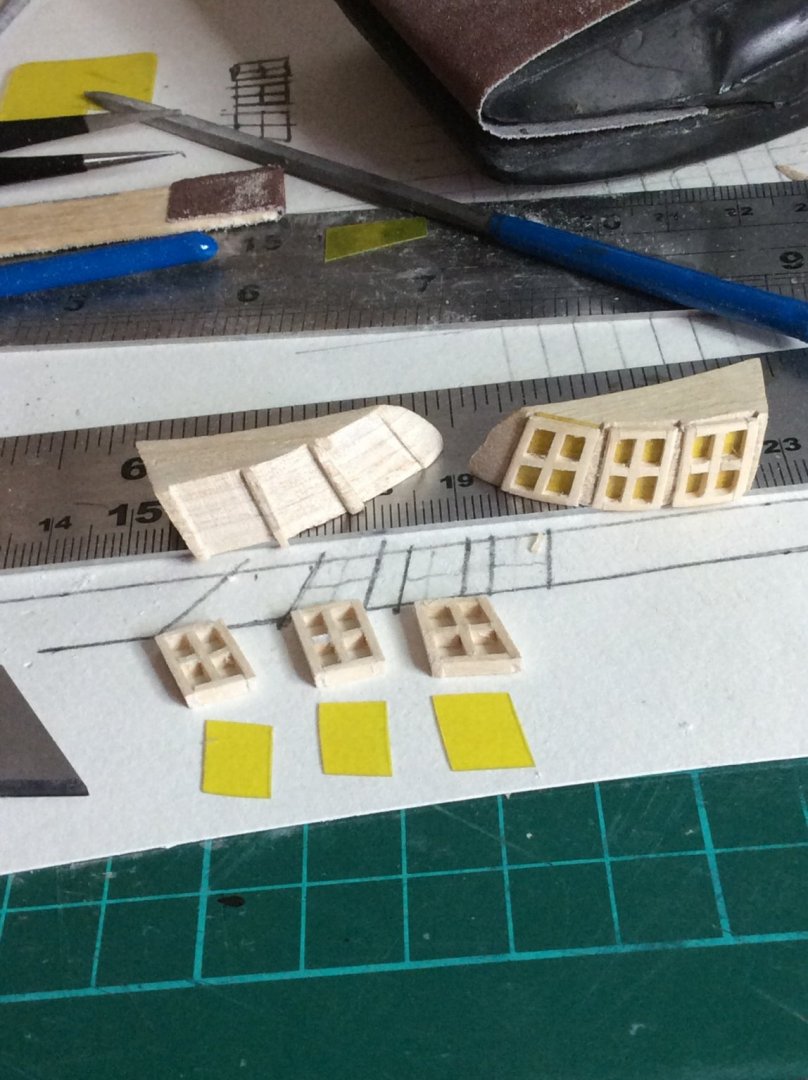
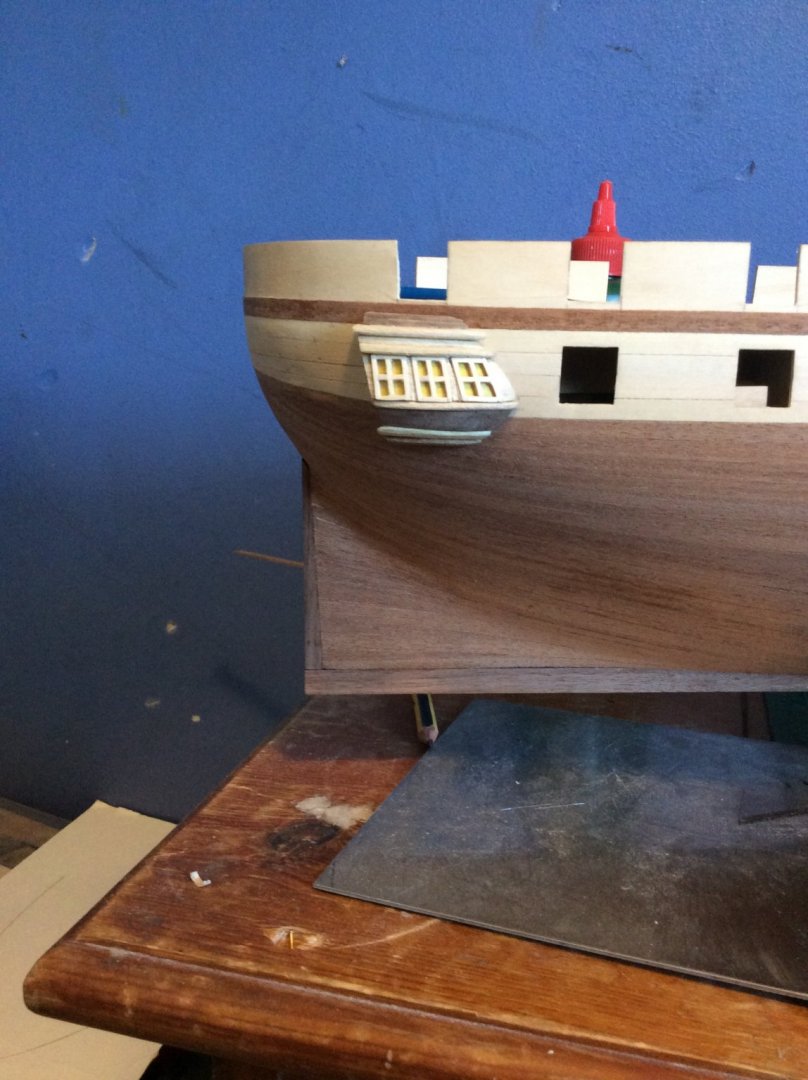
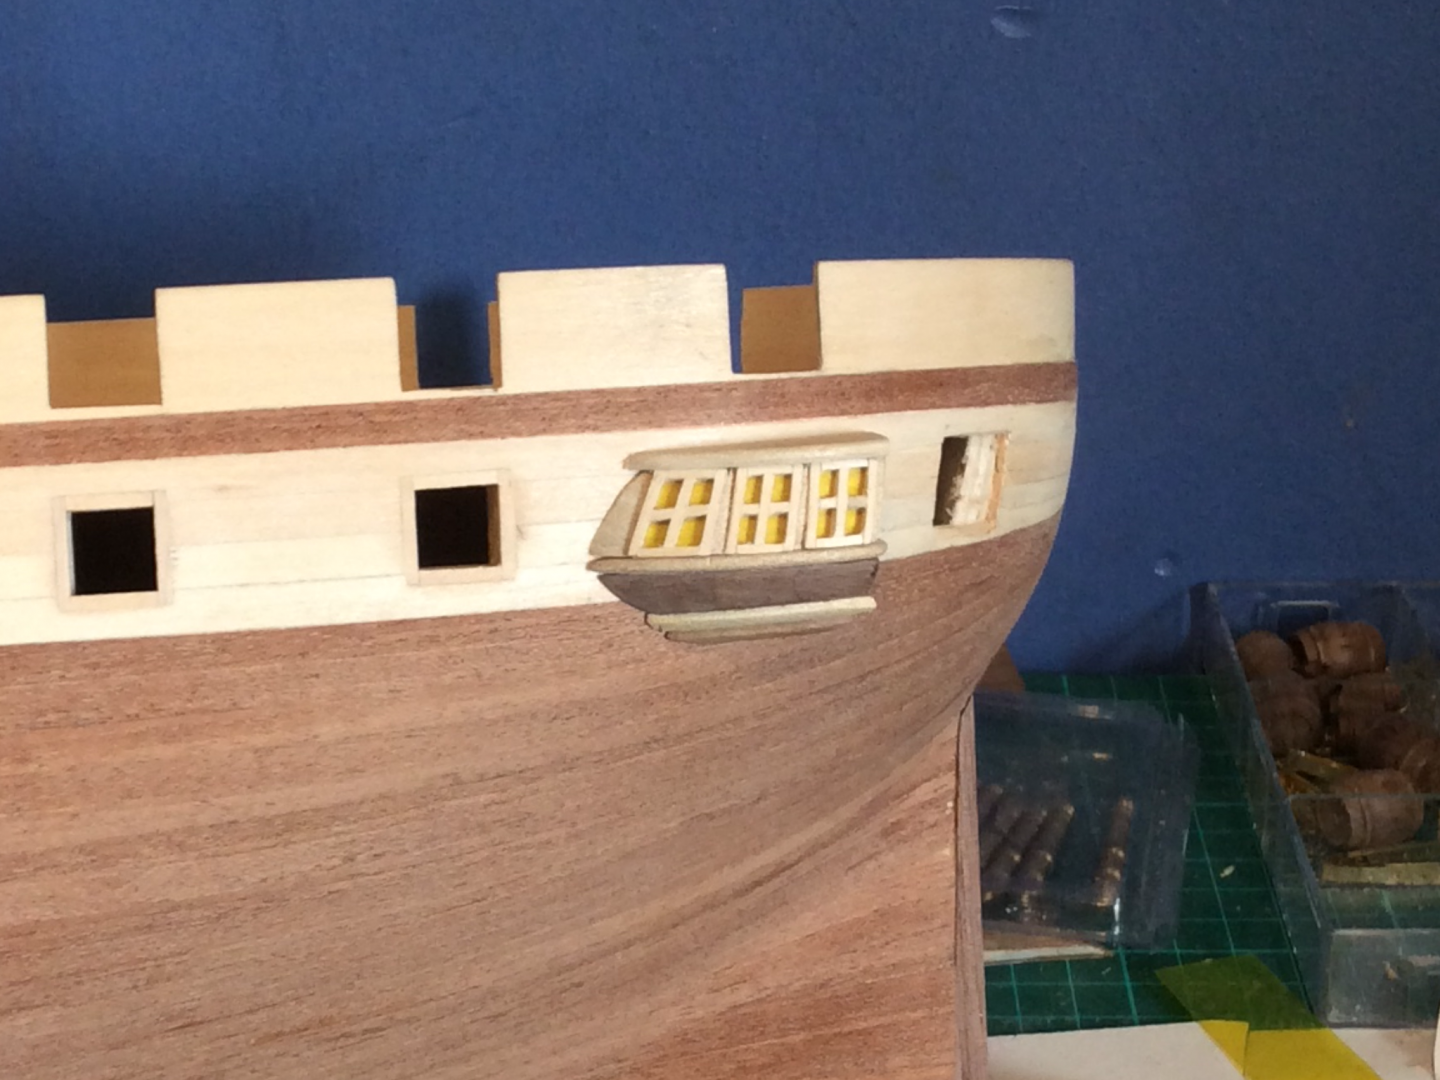
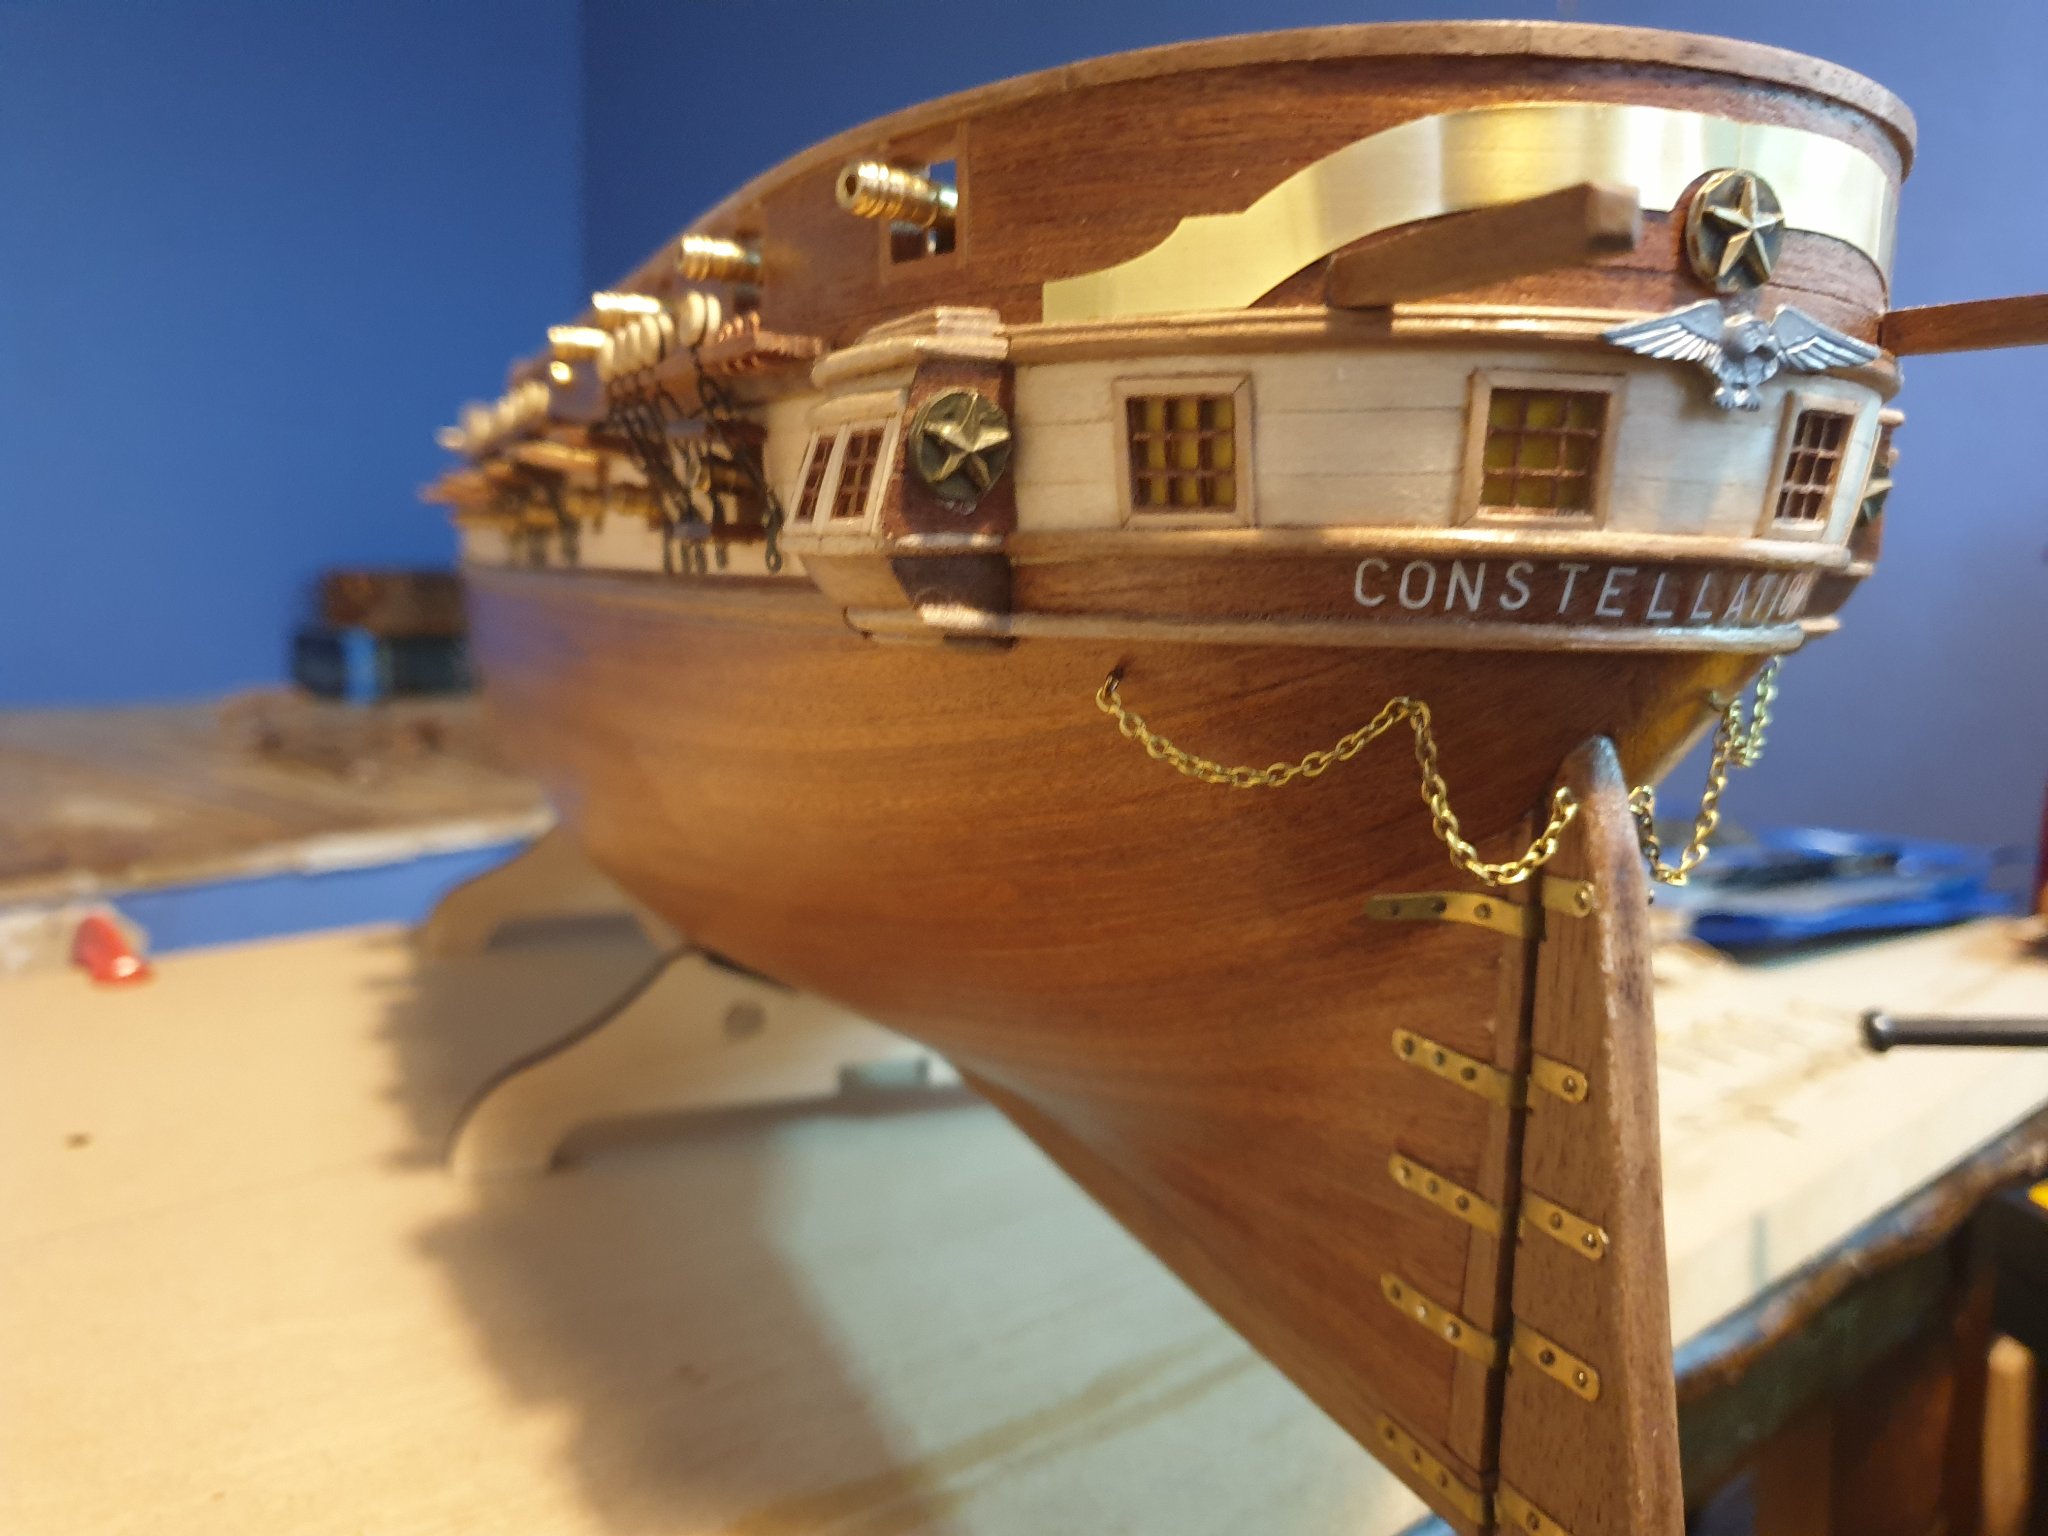
Hi Guys, thanks for the kind words about my work they certainly help me along. Been working on the stern and fixing the over sanding. Firstly i tried a couple of different ways of making the windows, I found a nice way of making them which i’ll certainly us on other builds. Also tried shaping the wood for the mouldings or rudder strikers i think they call them using some old brass. I have been looking for some micro shapers for a while now but everywhere seems to sell out quickly. Using the brass was ok but really didn’t get the finish I wanted. Anyway i’m happy with the way it looks but i know it could of been better. I also run some matt varnish over the work so I could add the word CONSTELLATION under the gallery with some old decals i had. This is where I struggle a little sometimes picking the right varnish or materials to use. The varnish i used discoloured the lighter wood slightly, Mind you it could of been the brush had a trace of wood stain which also could of caused it to discolour. I don’t actually mind it though because it’s given a weathered look to the stern. I could do with a few tips on what materials are best to use. Anyway again enjoy the latest photos next i’ll be working to the bow with the strips of wood down the side then hopefully varnish the hull and get that same look throughout. Until next time....


-
https://modelshipworld.com/forum/14-building-framing-planking-and-plating-a-ships-hull-and-deck/ This is the link that helped me hope it helps.
-
Looking at your photos I would plank the hull first but it doesn’t really matter. Your need to protect the deck if you plank that first. Did notice that you need to fair your ribs more before you start planking. Fairing the ribs is the most important thing about planking they must run in a smooth curve from bow to stern. I have a link somewhere i’ll post to you on the subject of planking. She looks a long ship so it shouldn’t need much fairing at midships but certainly bow and stern will need fairing better. Anyway i’ll go find that link and post it to you will explain planking better then i can.
-
Hello ubjs, I pretty new to this site and like you a little bit of a novice building wooden ships. Many different ways of bending planks my way is to use a electric plank bender. I soak them for about 20 mins or so this makes the planks bend easy with the plank bender. For really tight bends i’ll soak them a second time. Good luck with your build and i’m sure your get all the advice your need on here to complete your build. Anyway i shall follow you and offer what advice i can. I’m currently building the USS Constellation i have a build log on here you may like to take a look because i’ve now finishes most of the planking with a few photos that may also help.
-
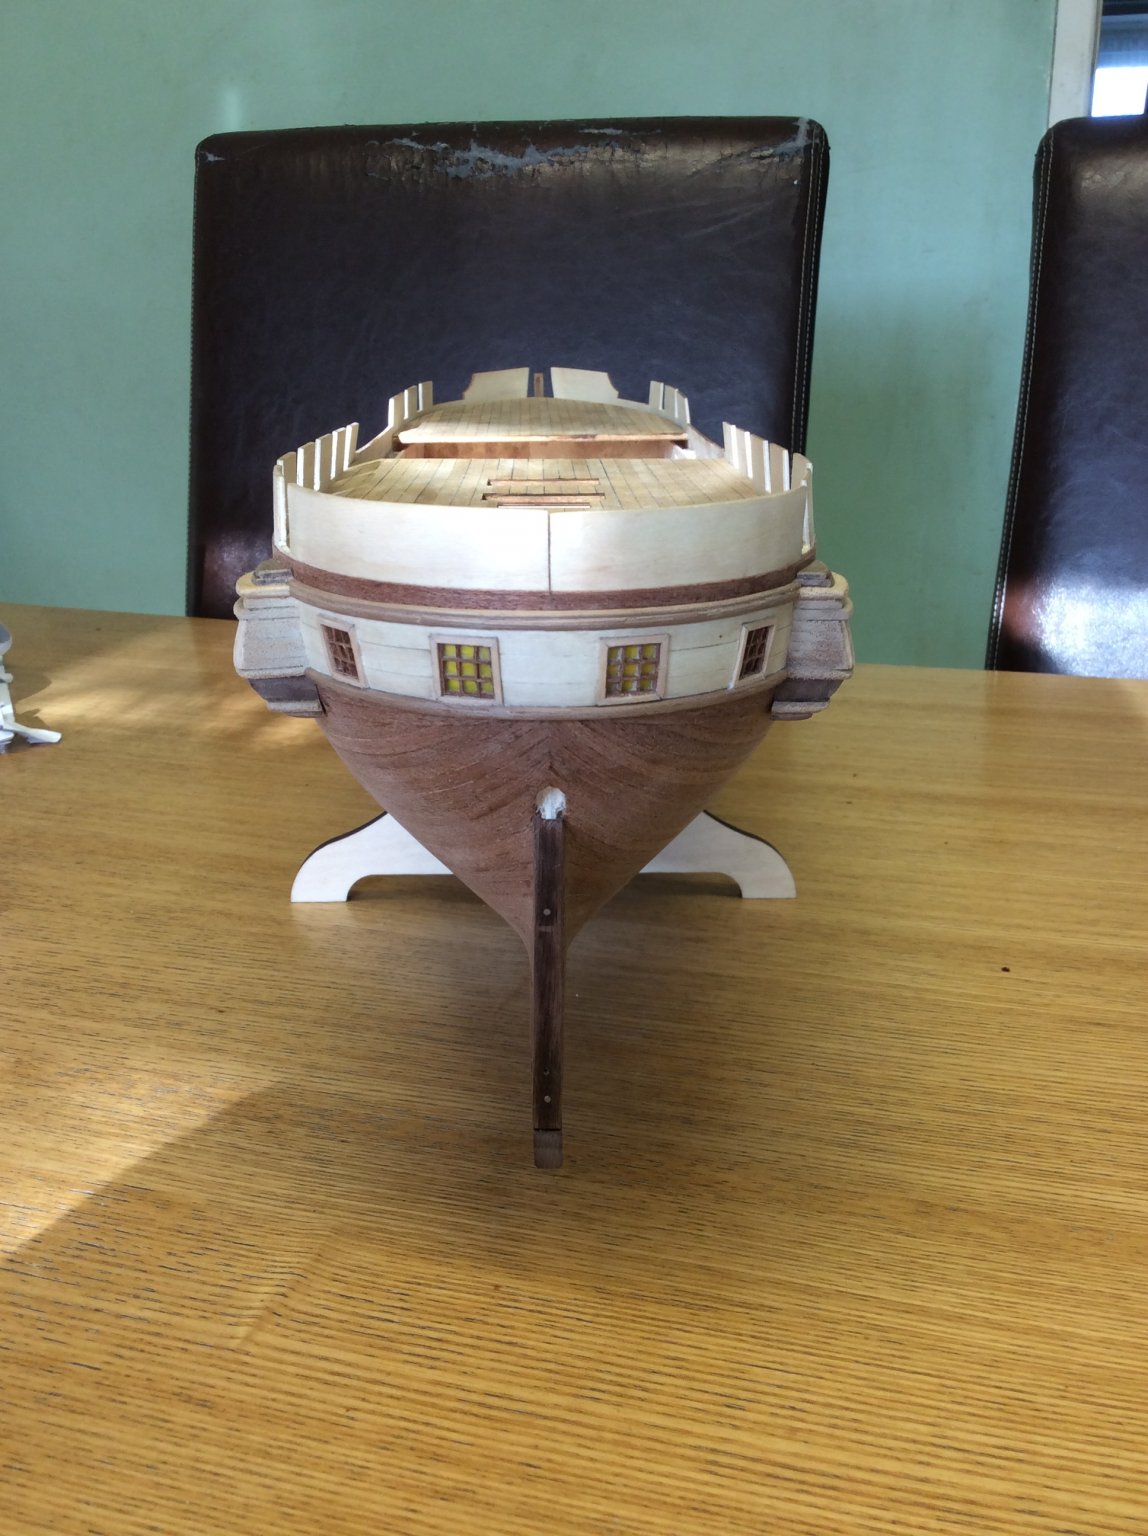
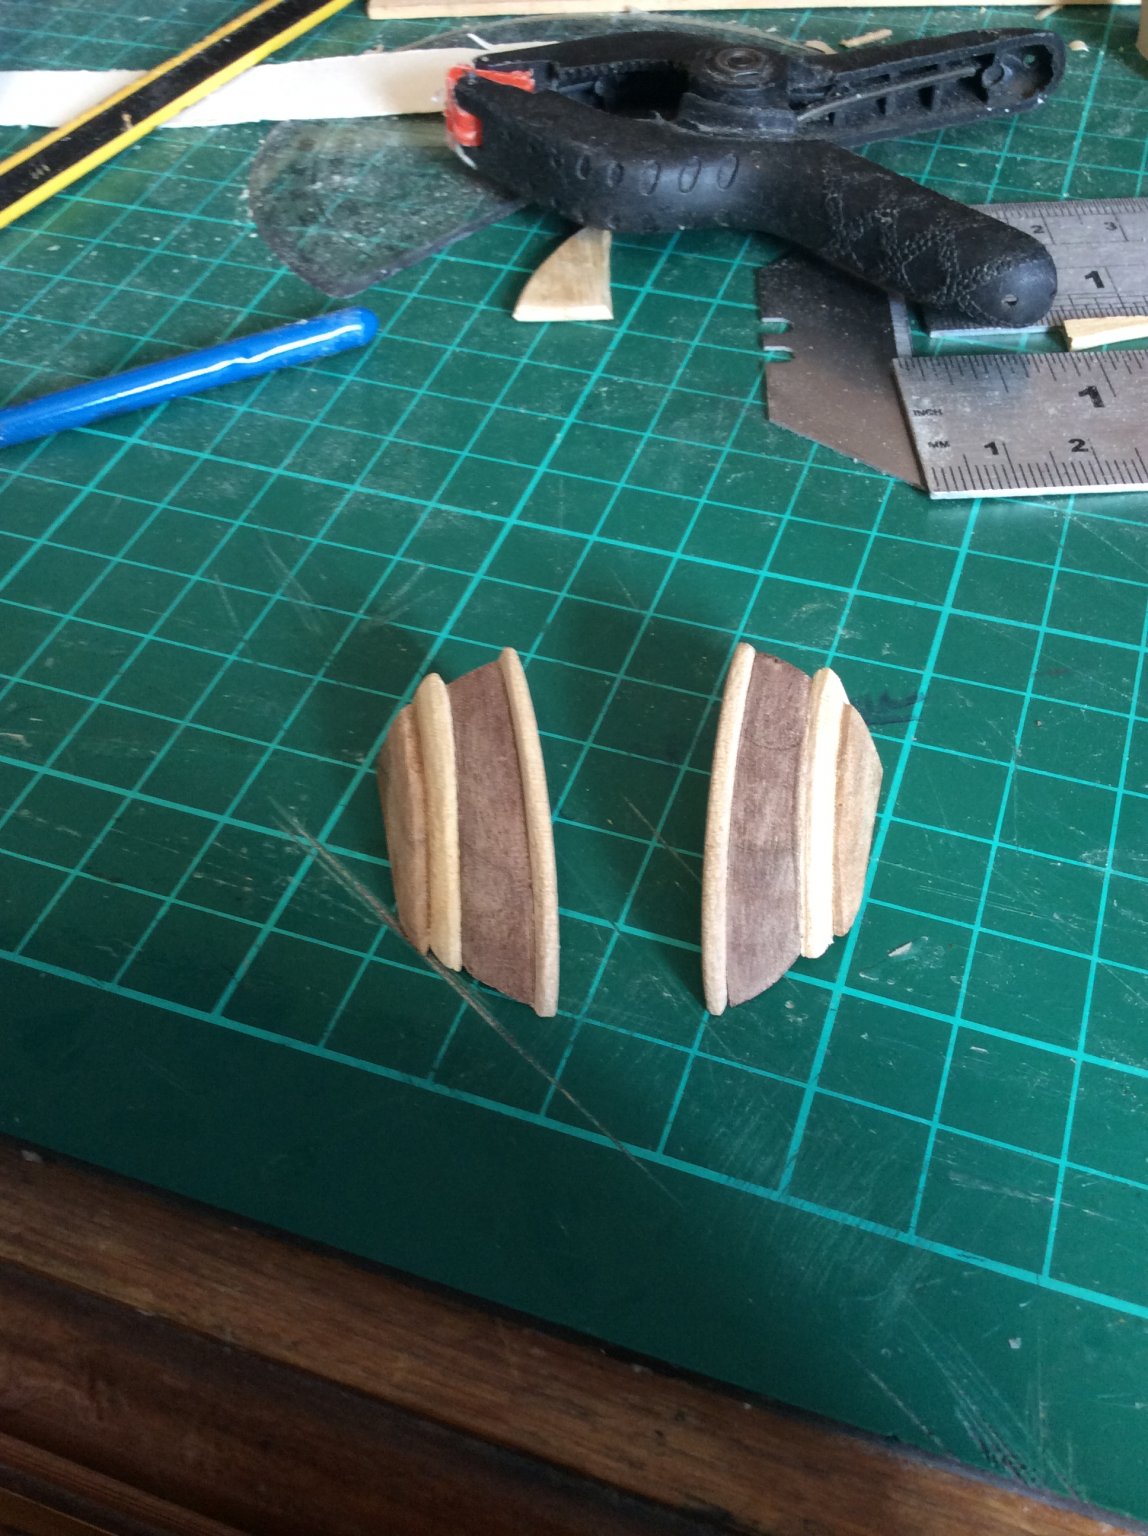
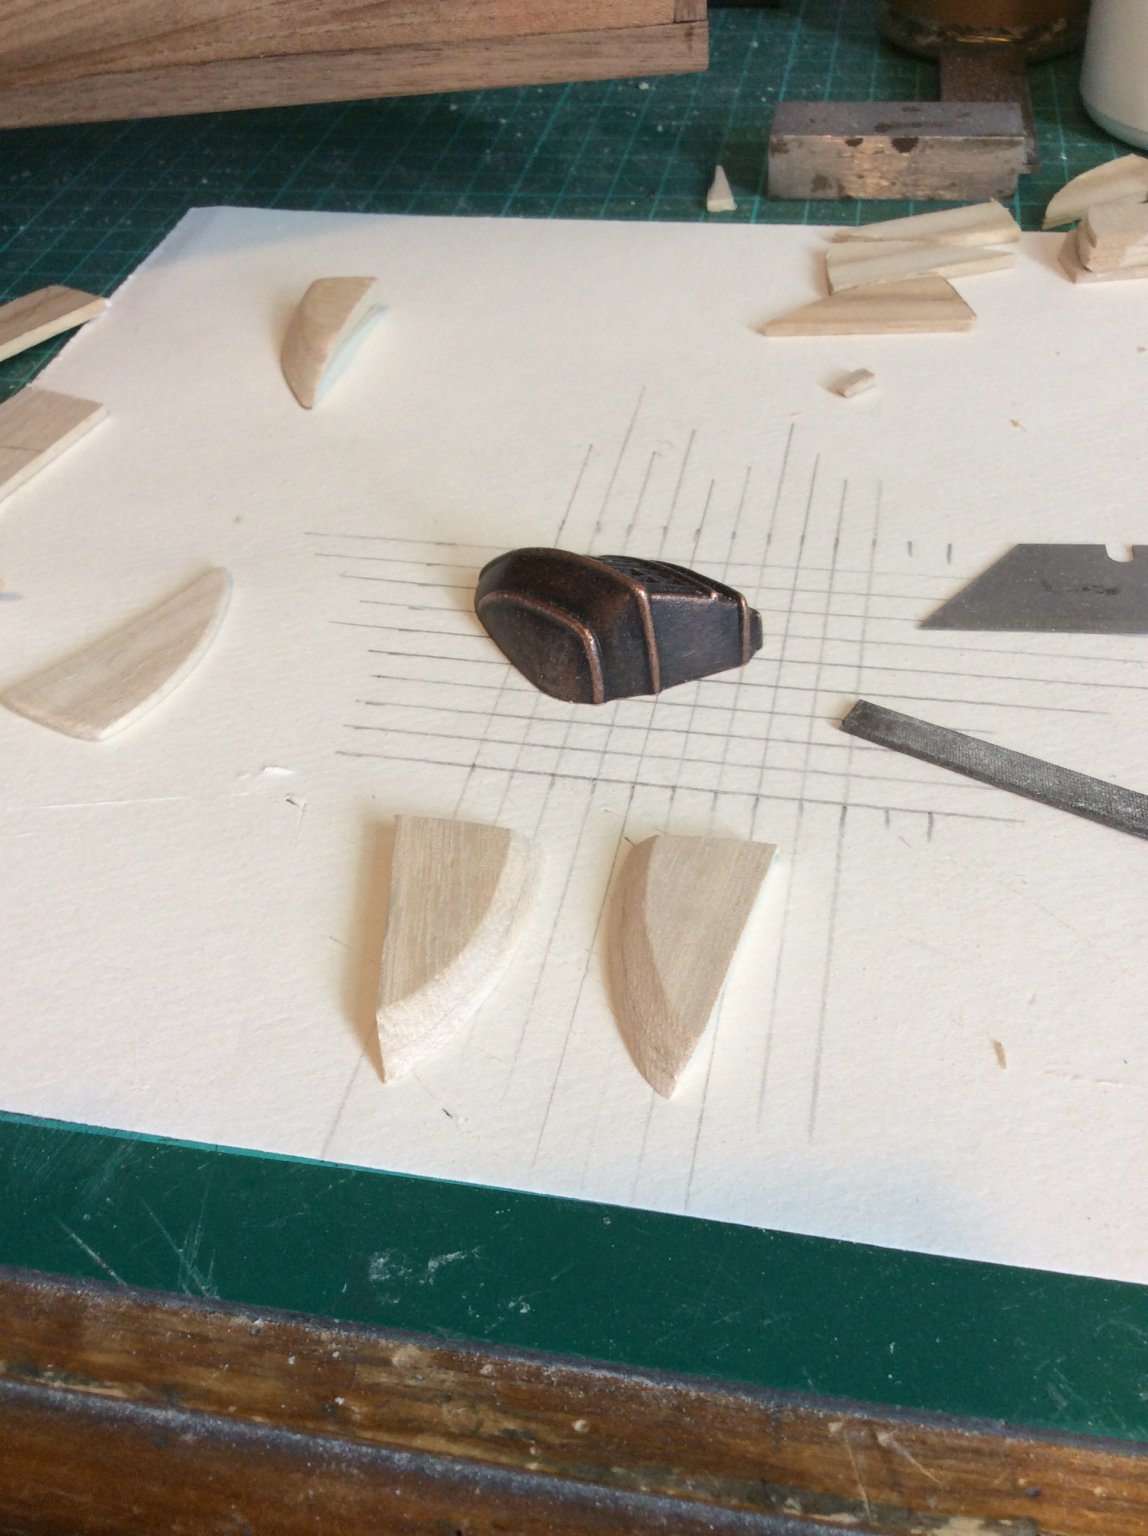
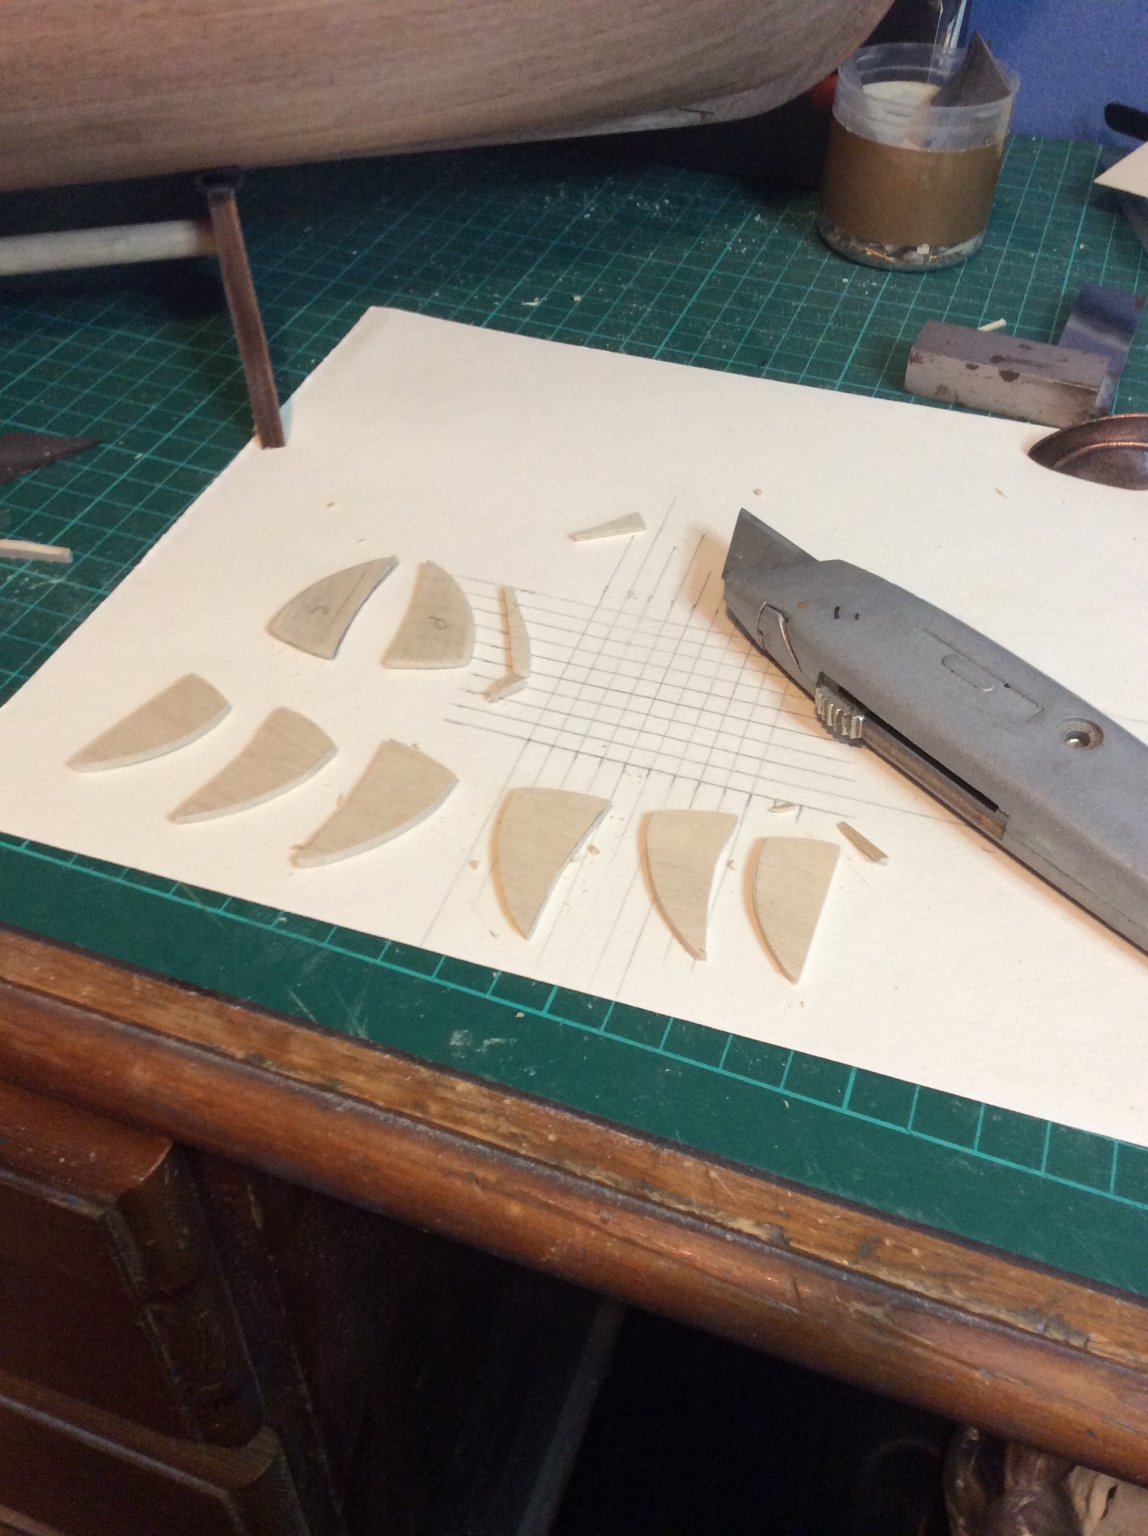
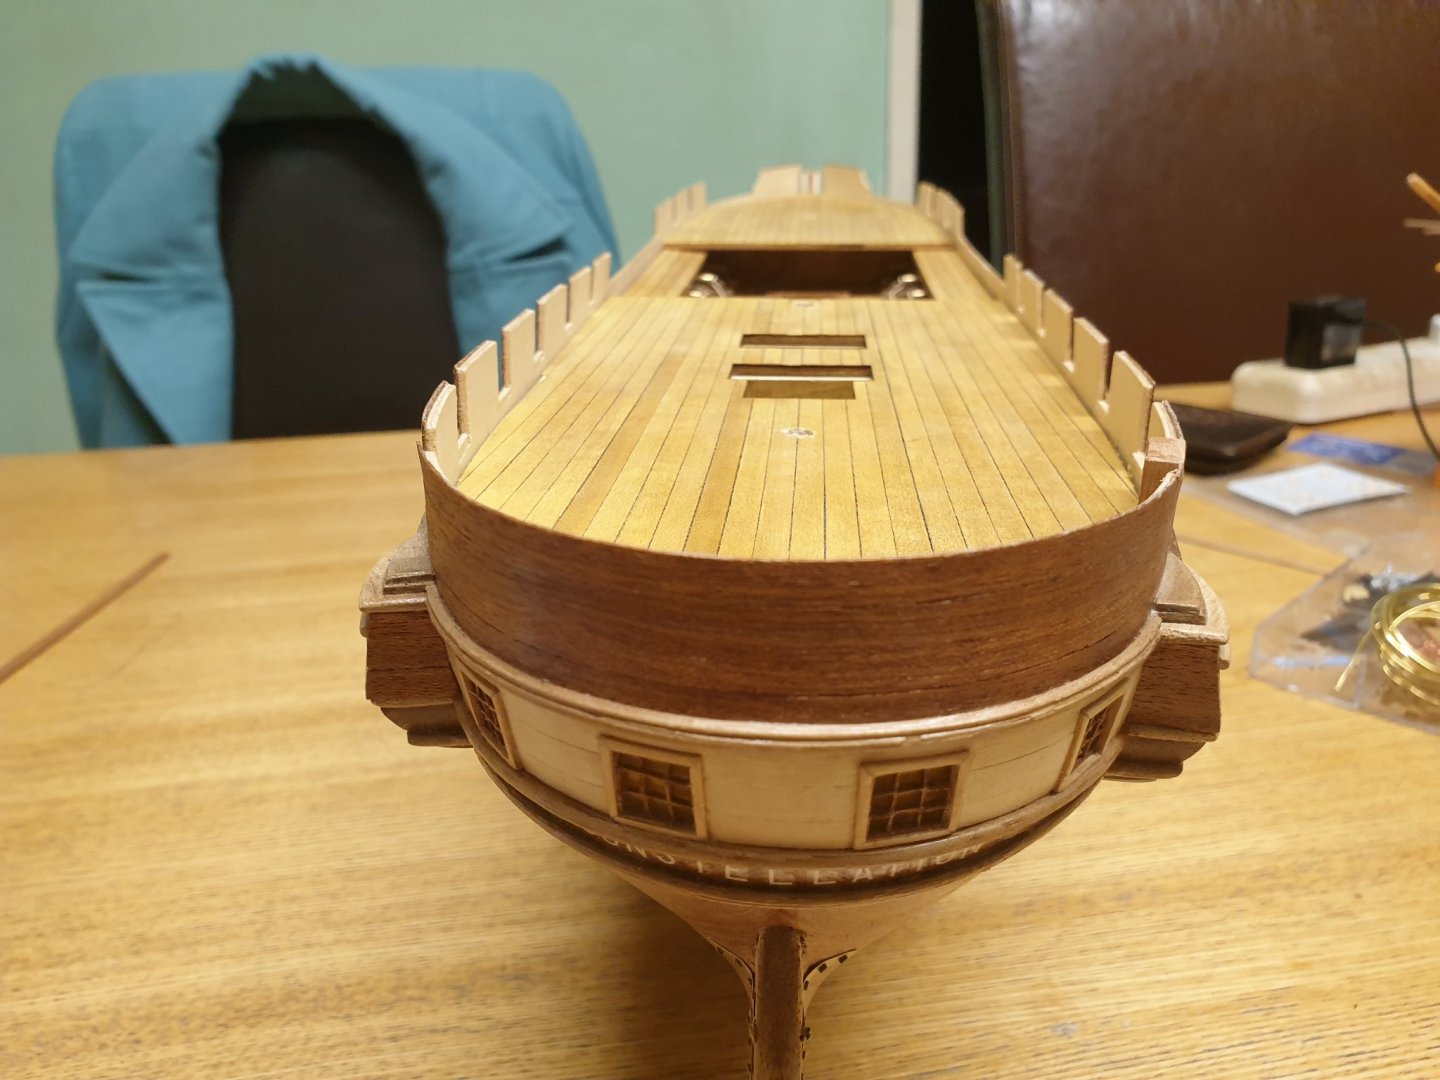
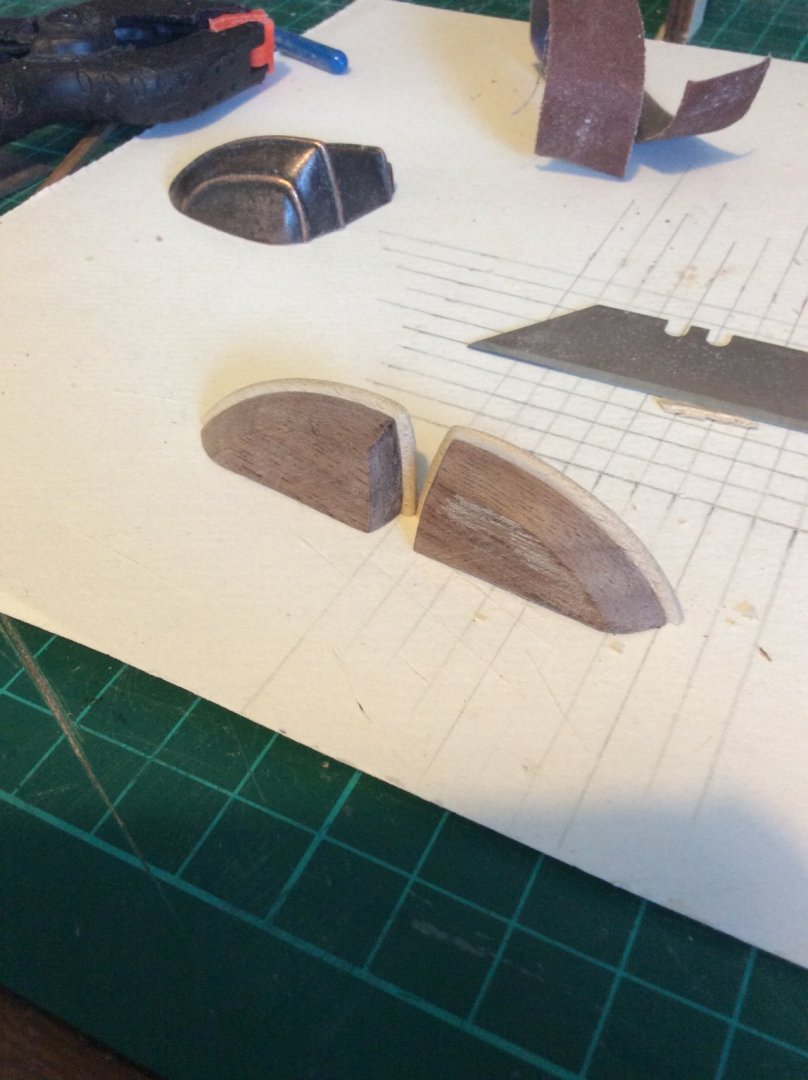
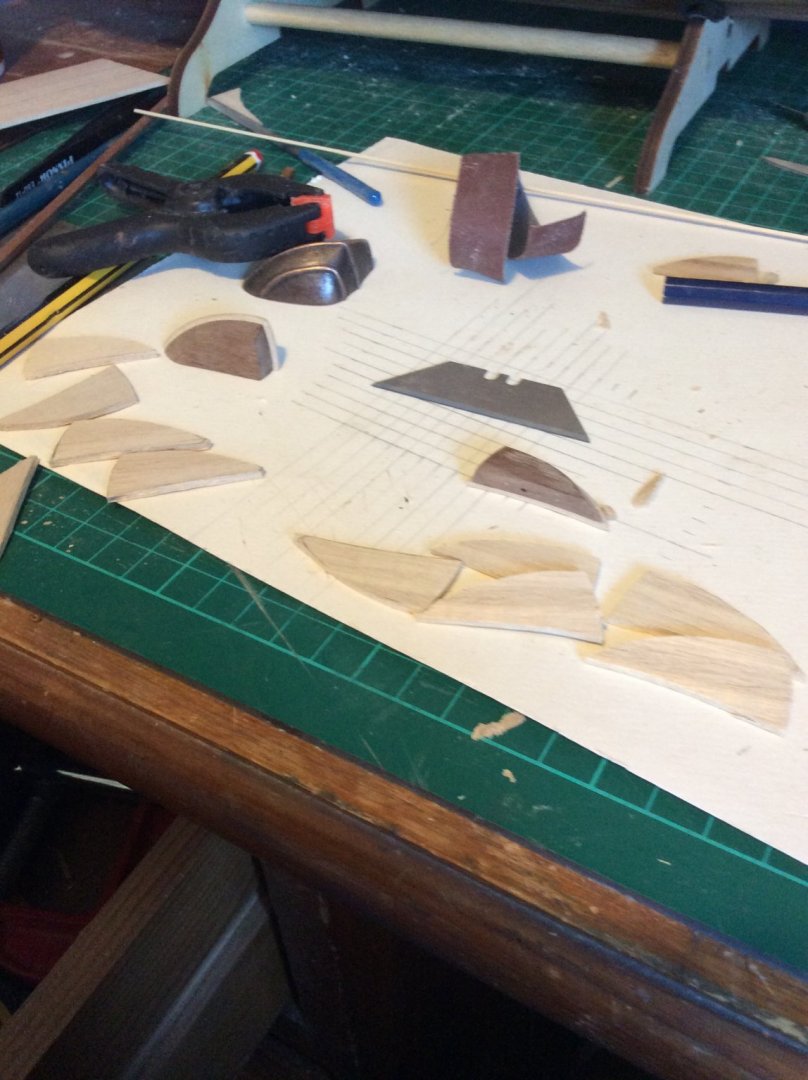
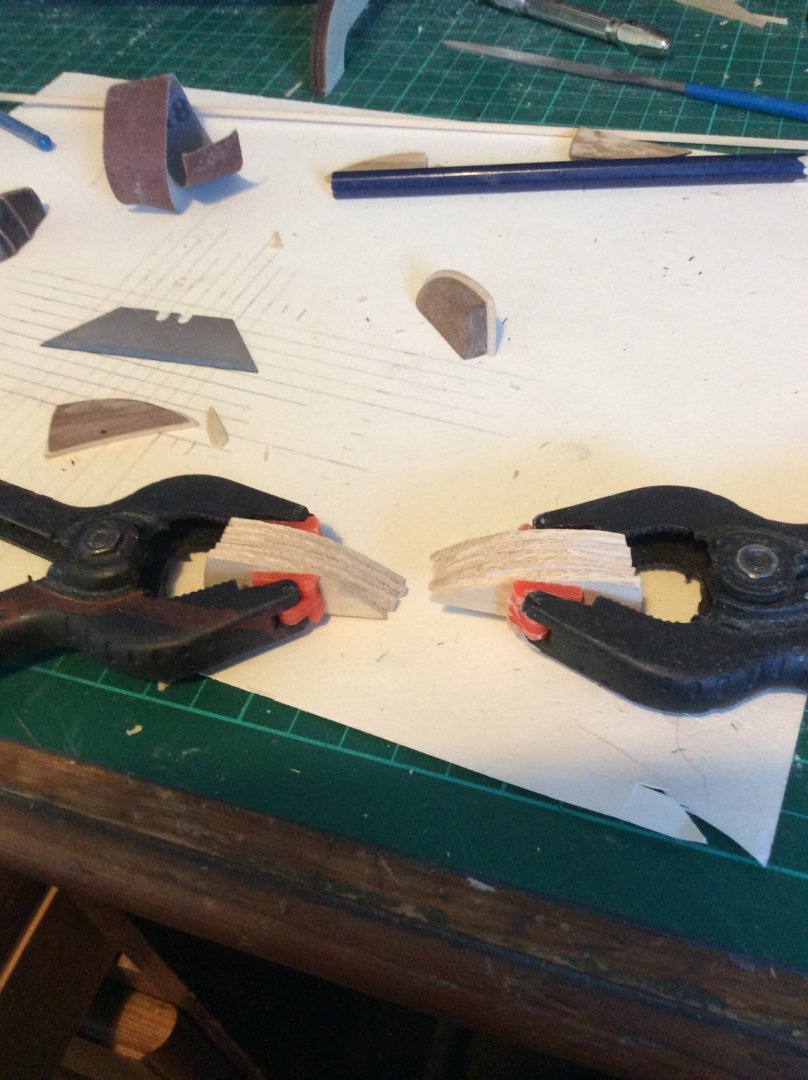
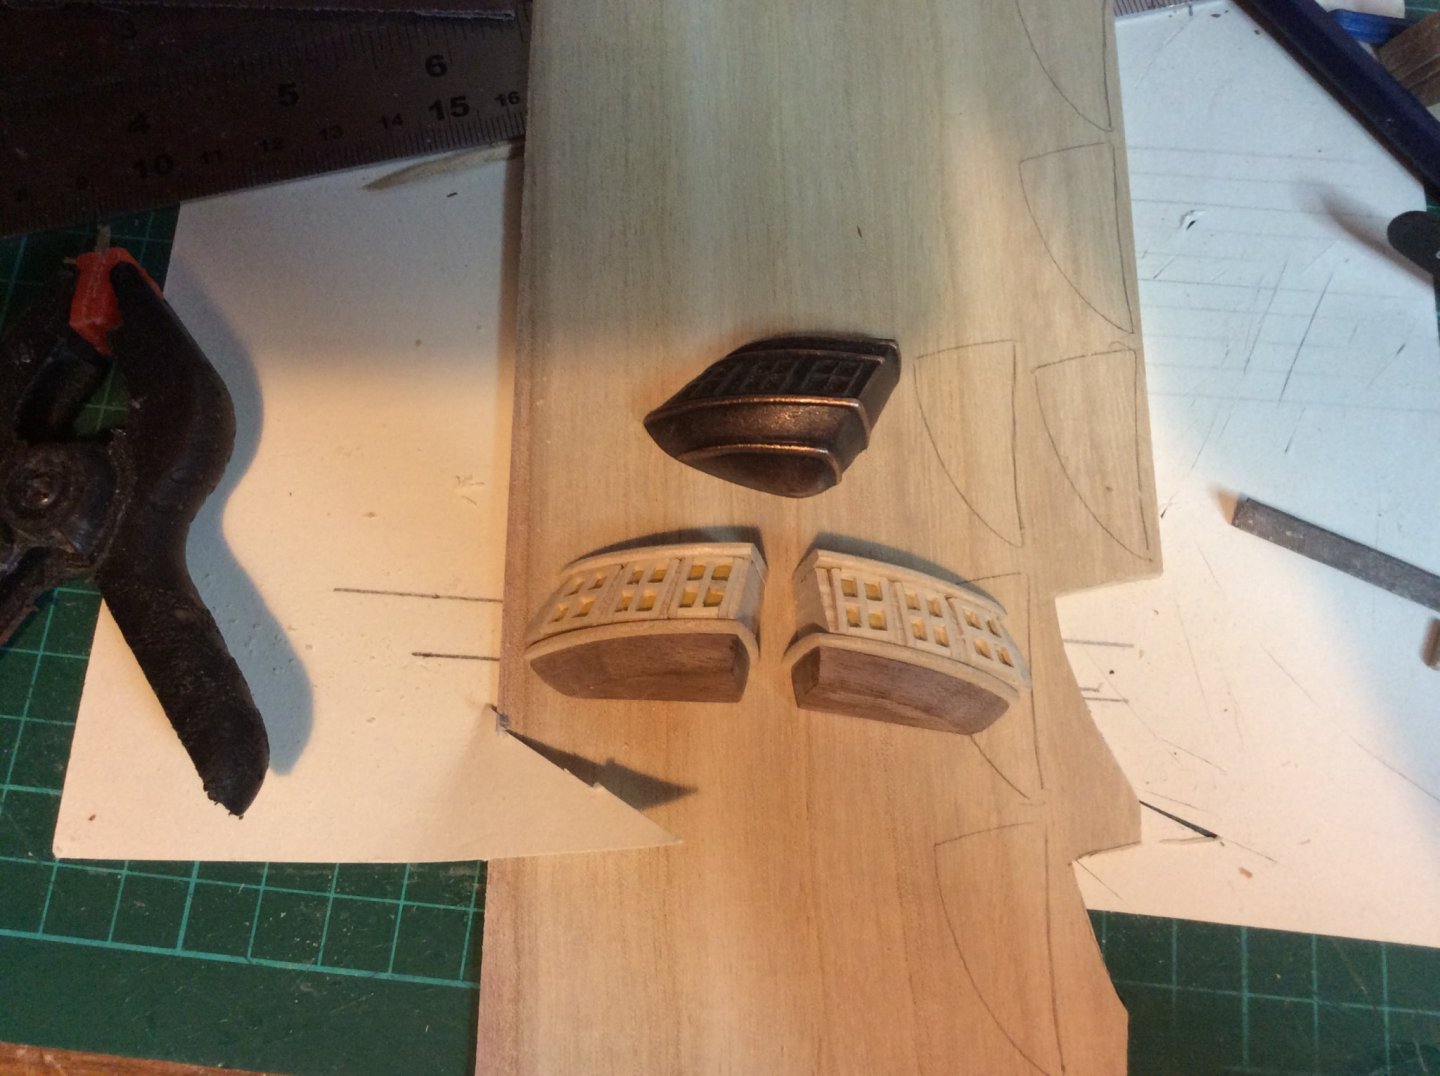
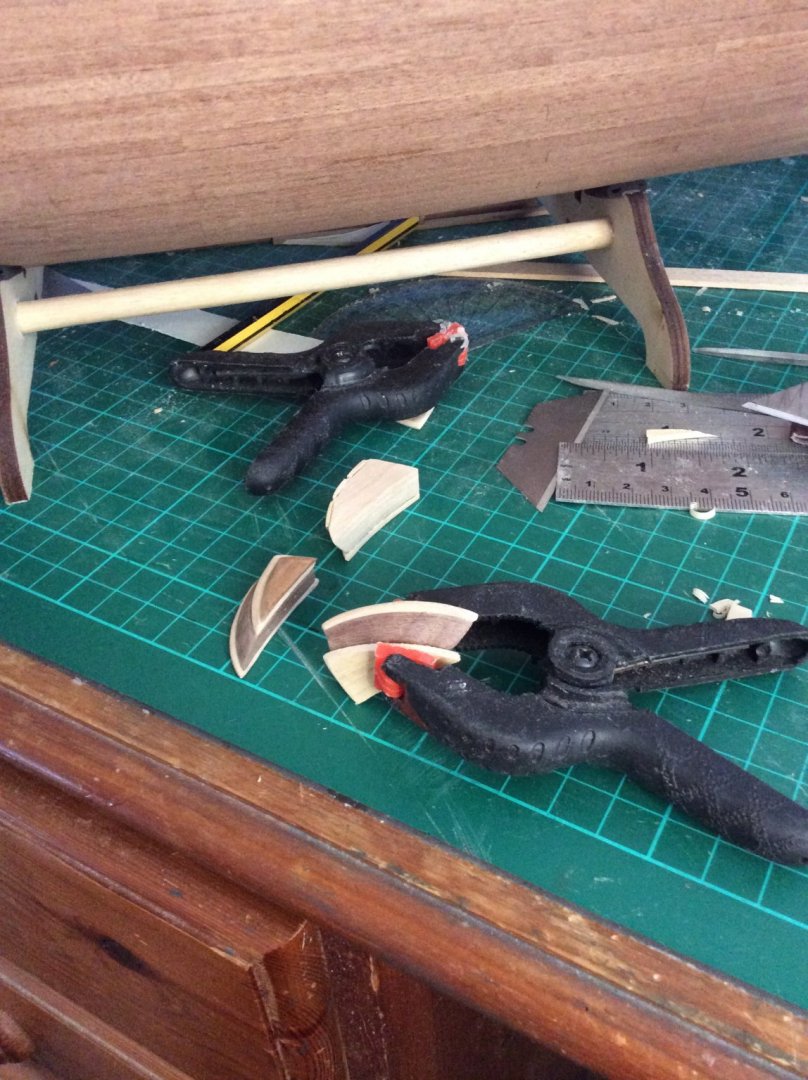
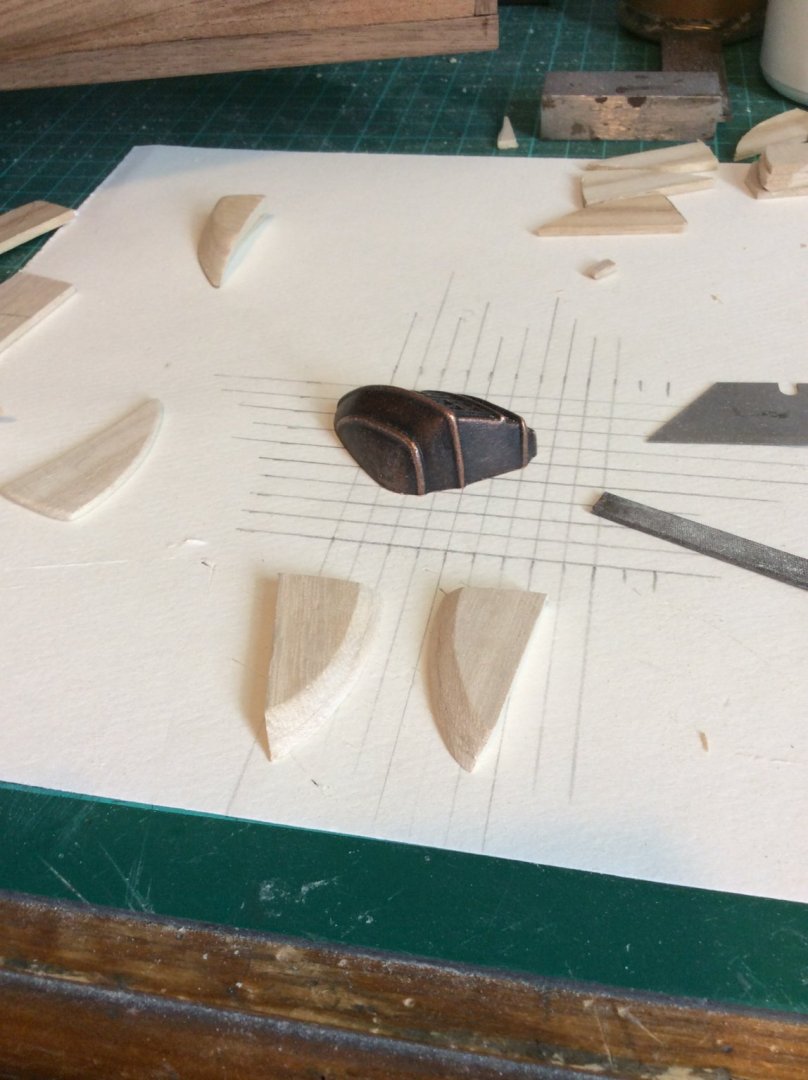
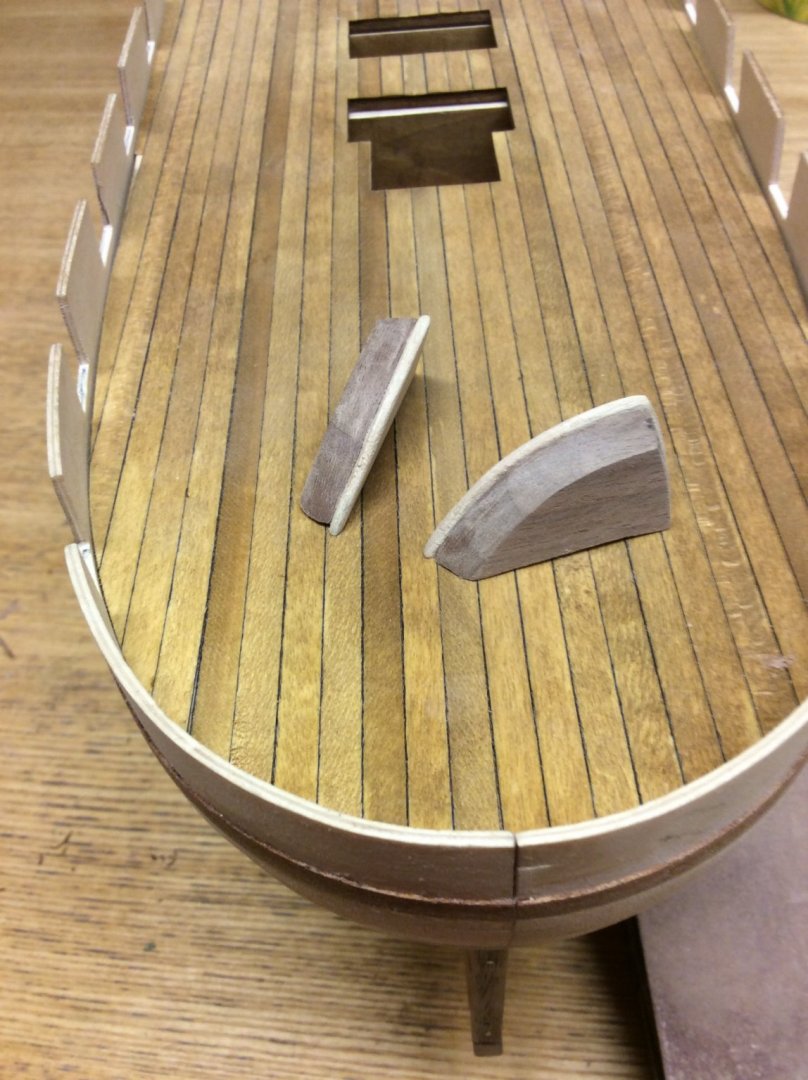
Hi MSW, update to my build, Stern Castles. As Jparsley said they are not exactly perfect crud was the word used. I started by making a template of the widest part of the metal kit part. Using the template i cut layers of wood and put them together like a cake. Not a man of many word but the picture will explain how i made them only problem i had was the materials I used. Unfortunately the wood I used splintered very easily and found problems keeping a sharp edge. Probably could of made them a little better but I don’t think i did a bad job anyway. They haven’t been glued and they are still in 2 half's so i’ll a bit of a fin sanding before gluing hopefully getting them snug against the hull. My next job will to be fixing the over sanding and putting in 4 windows in the stern. Anyway enjoy the photos until next time.


-
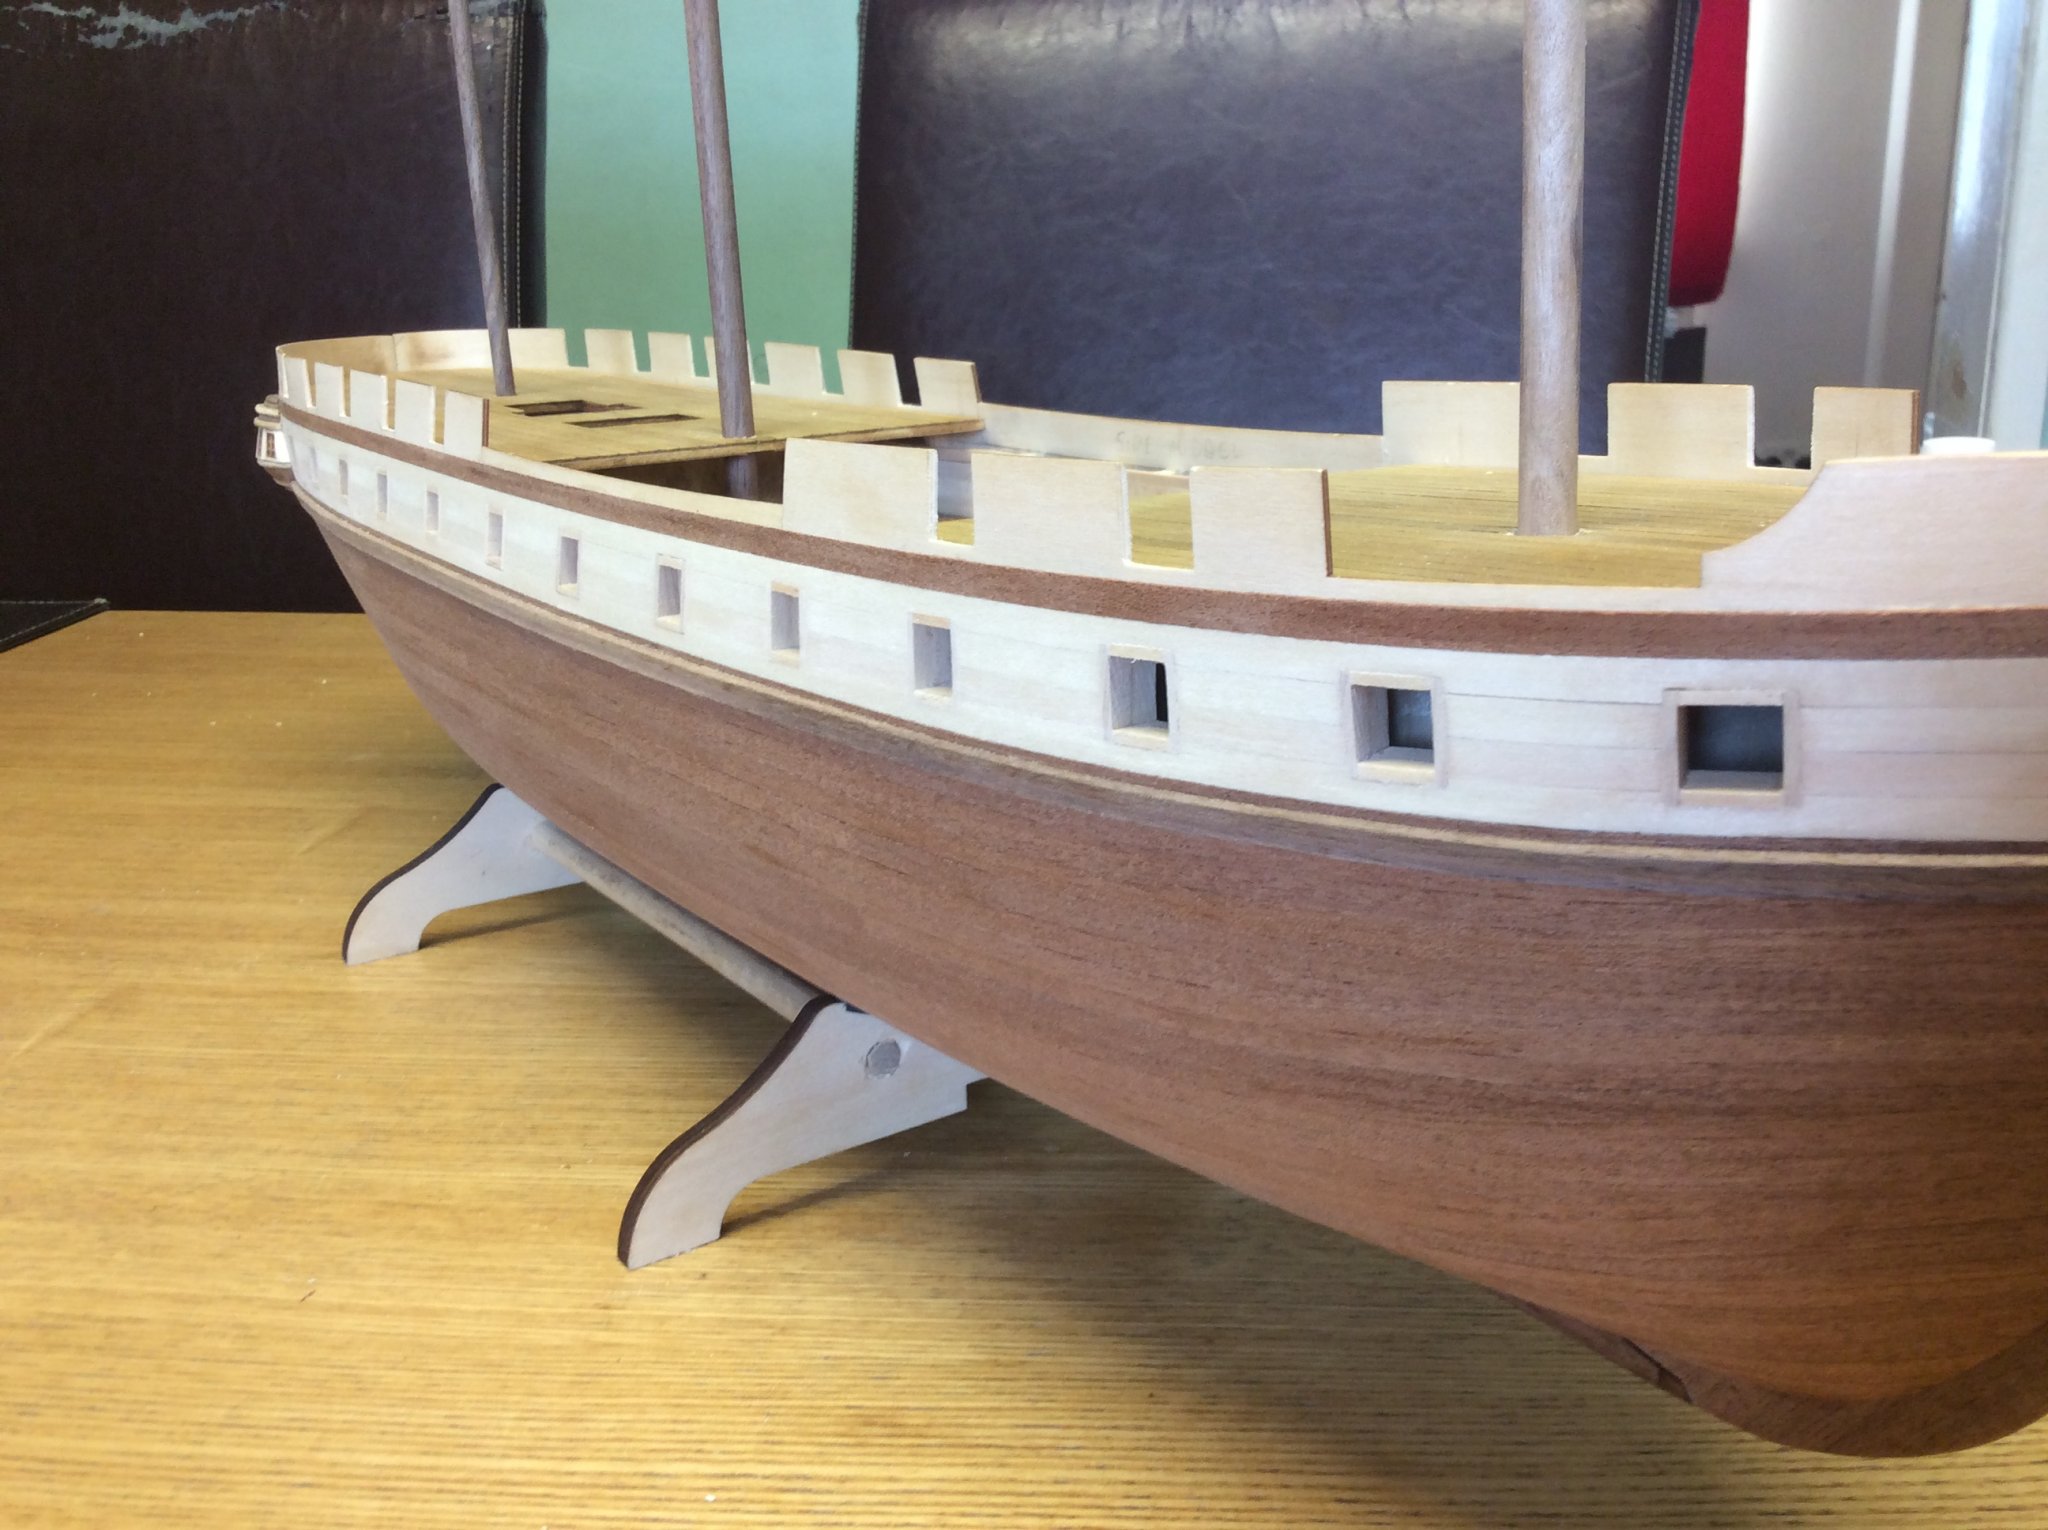
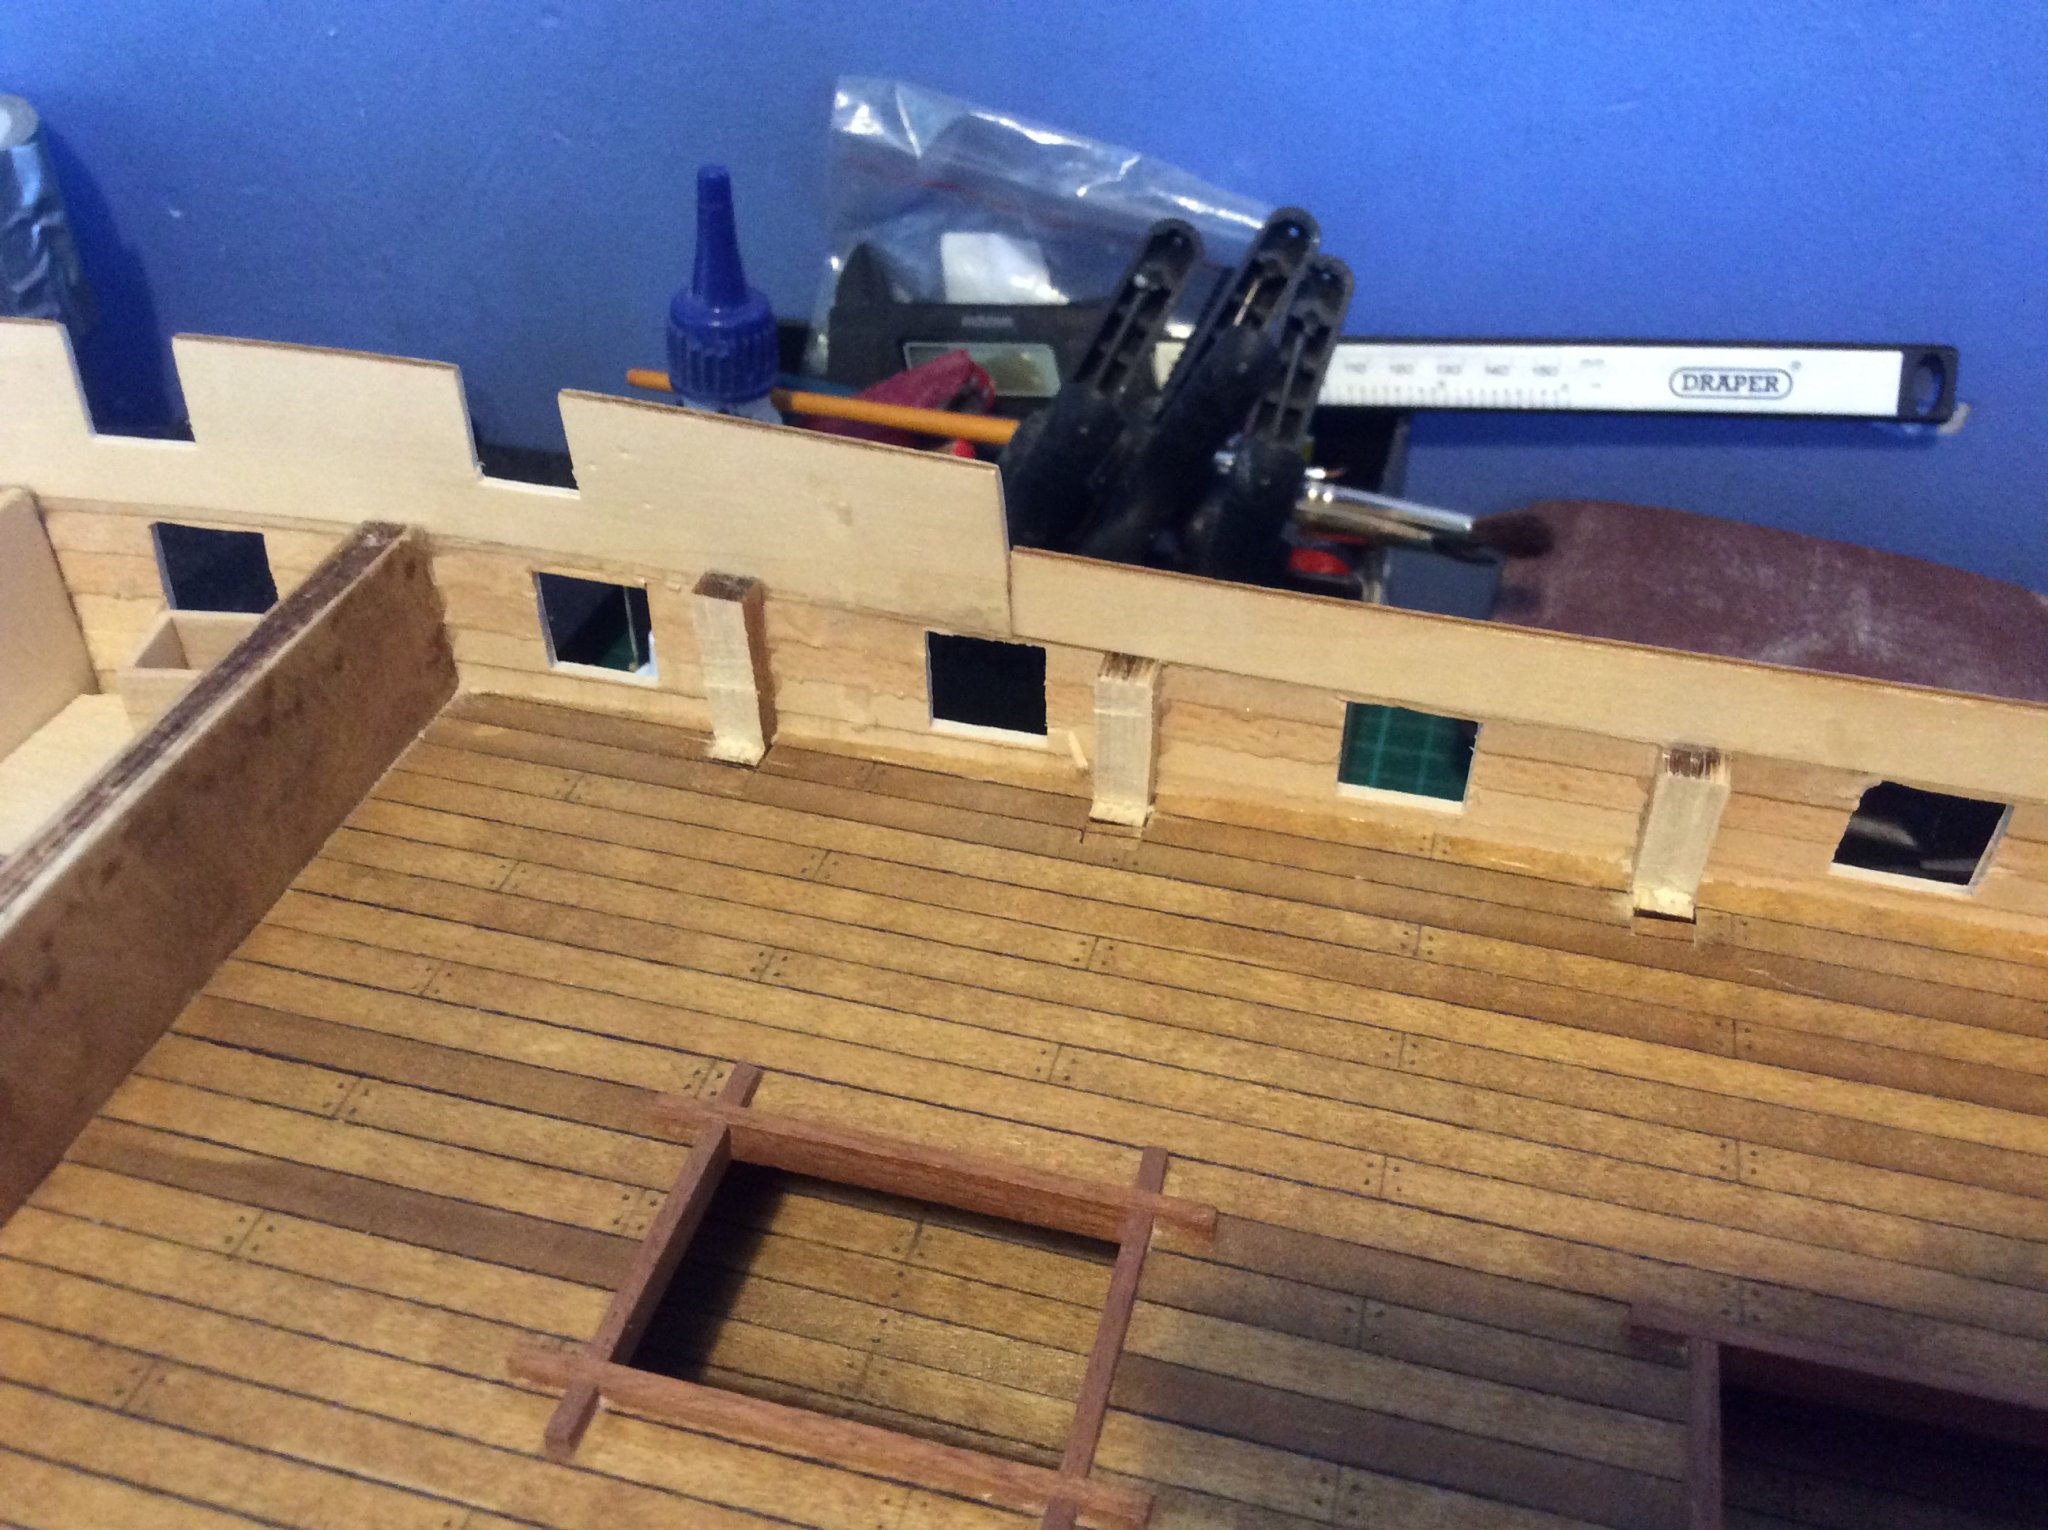
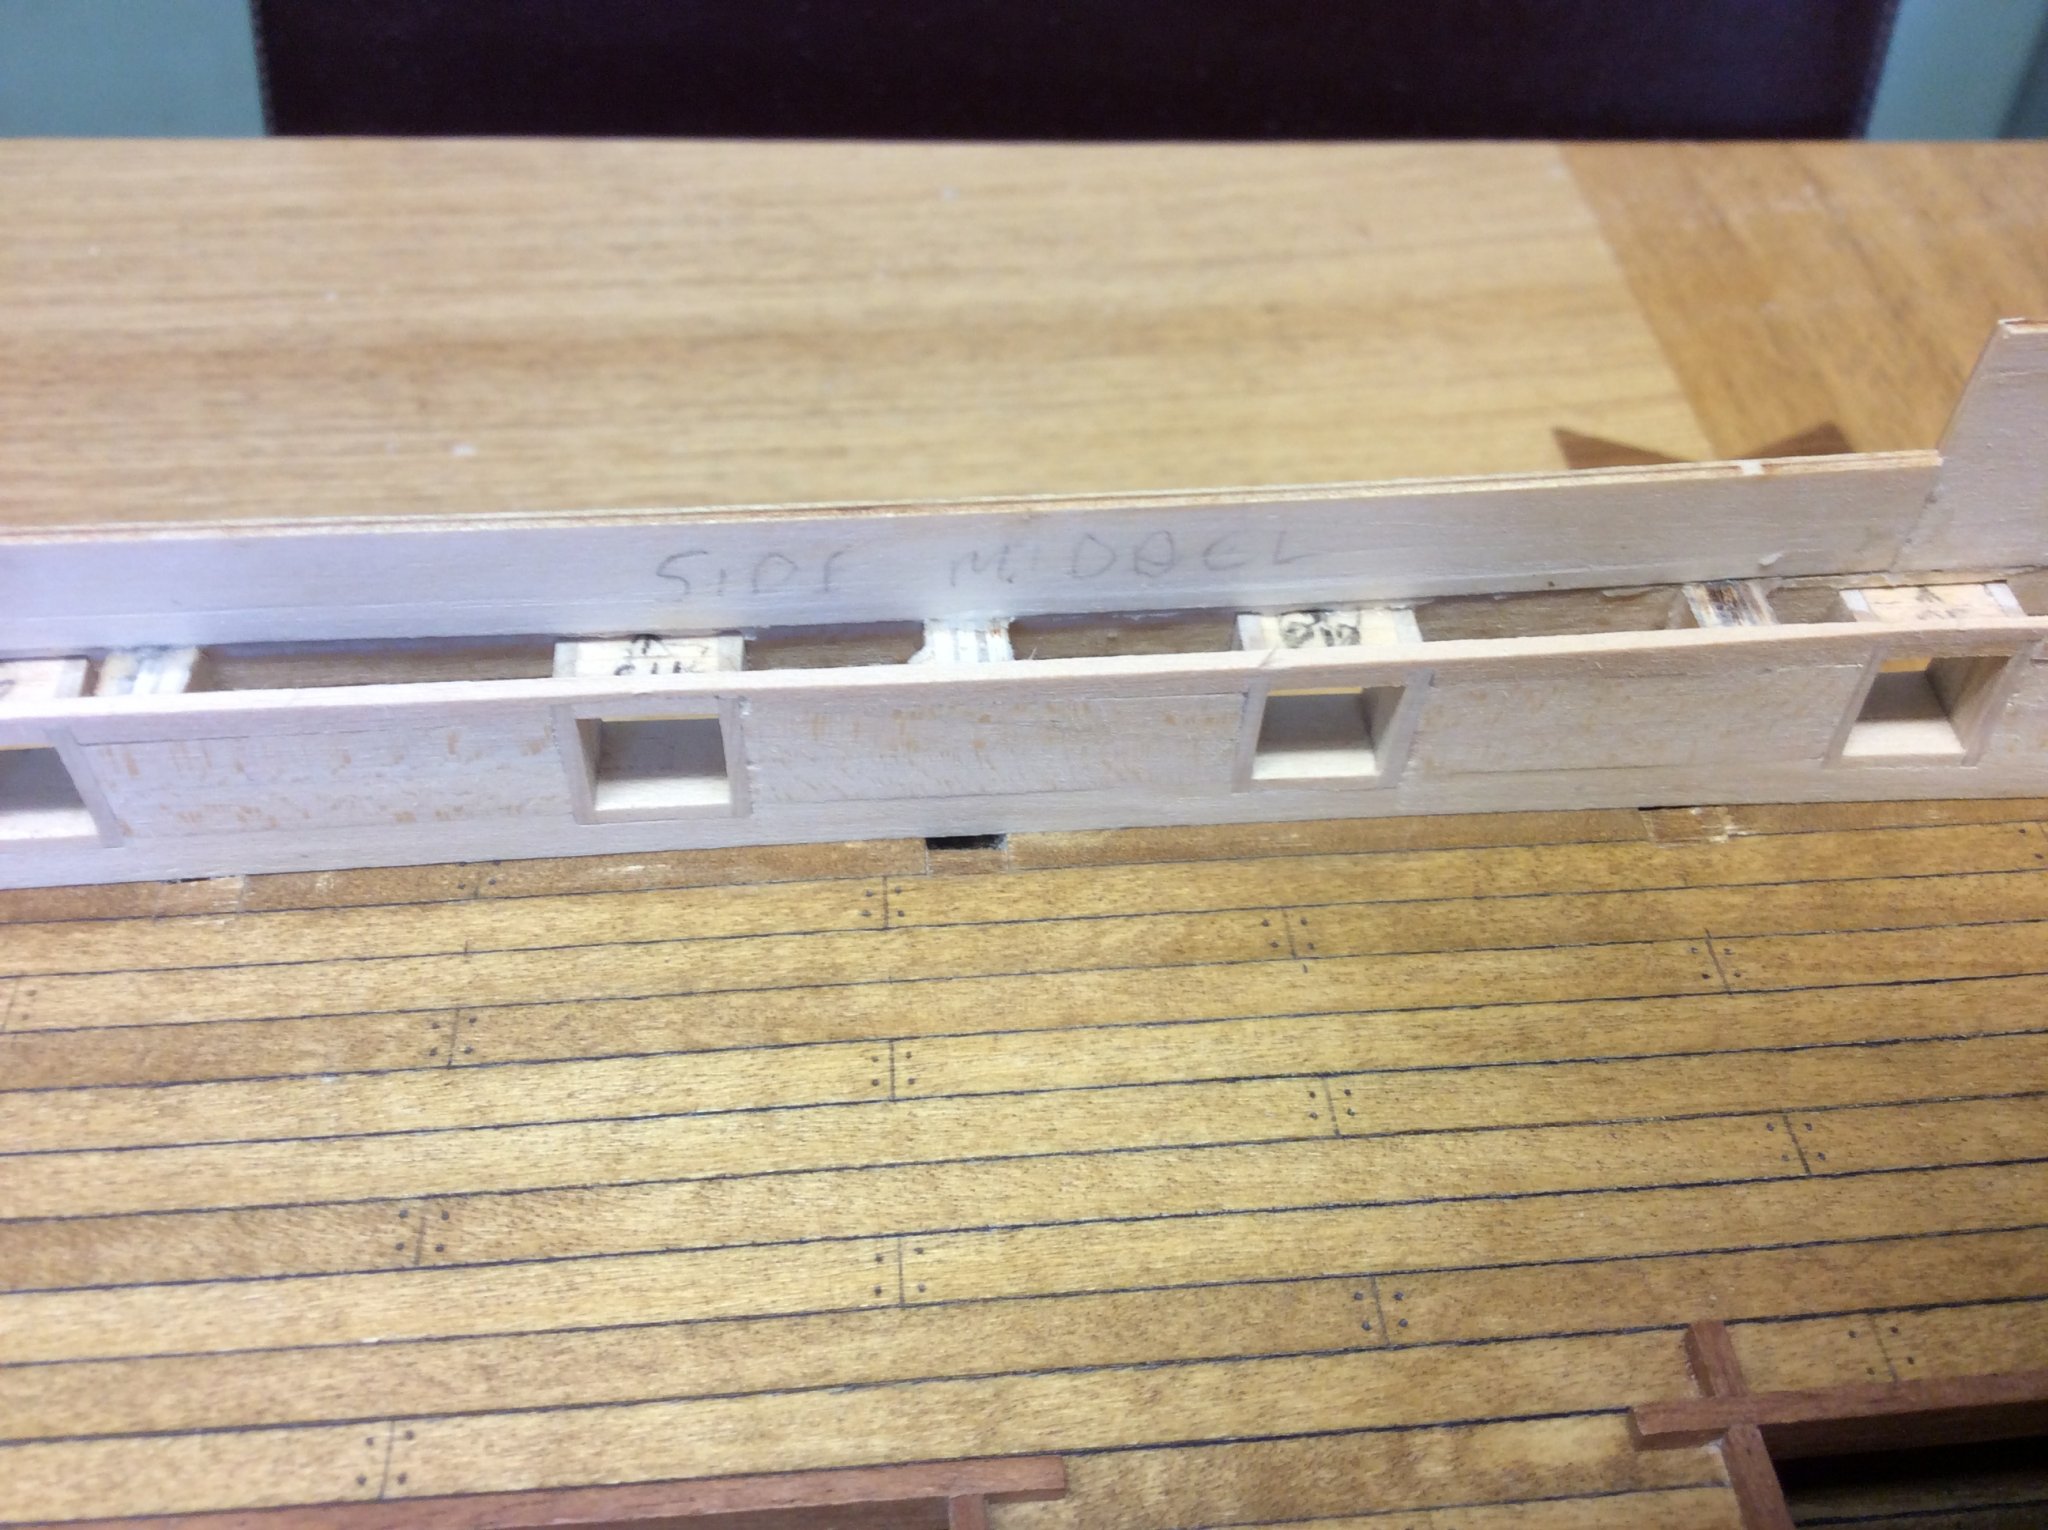
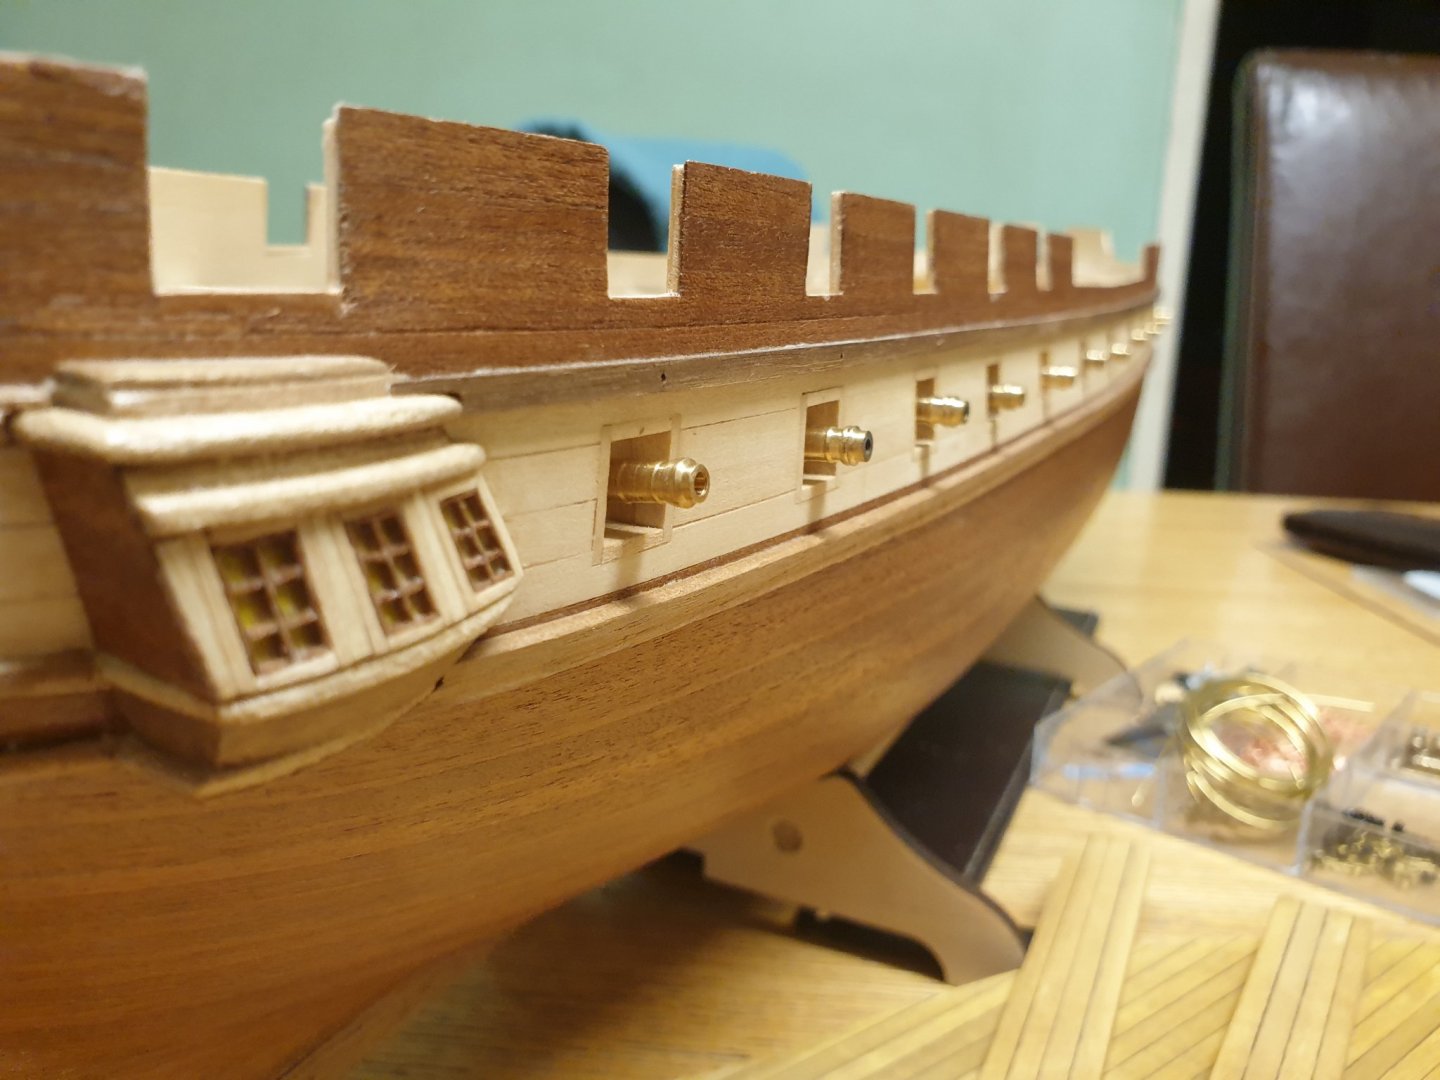
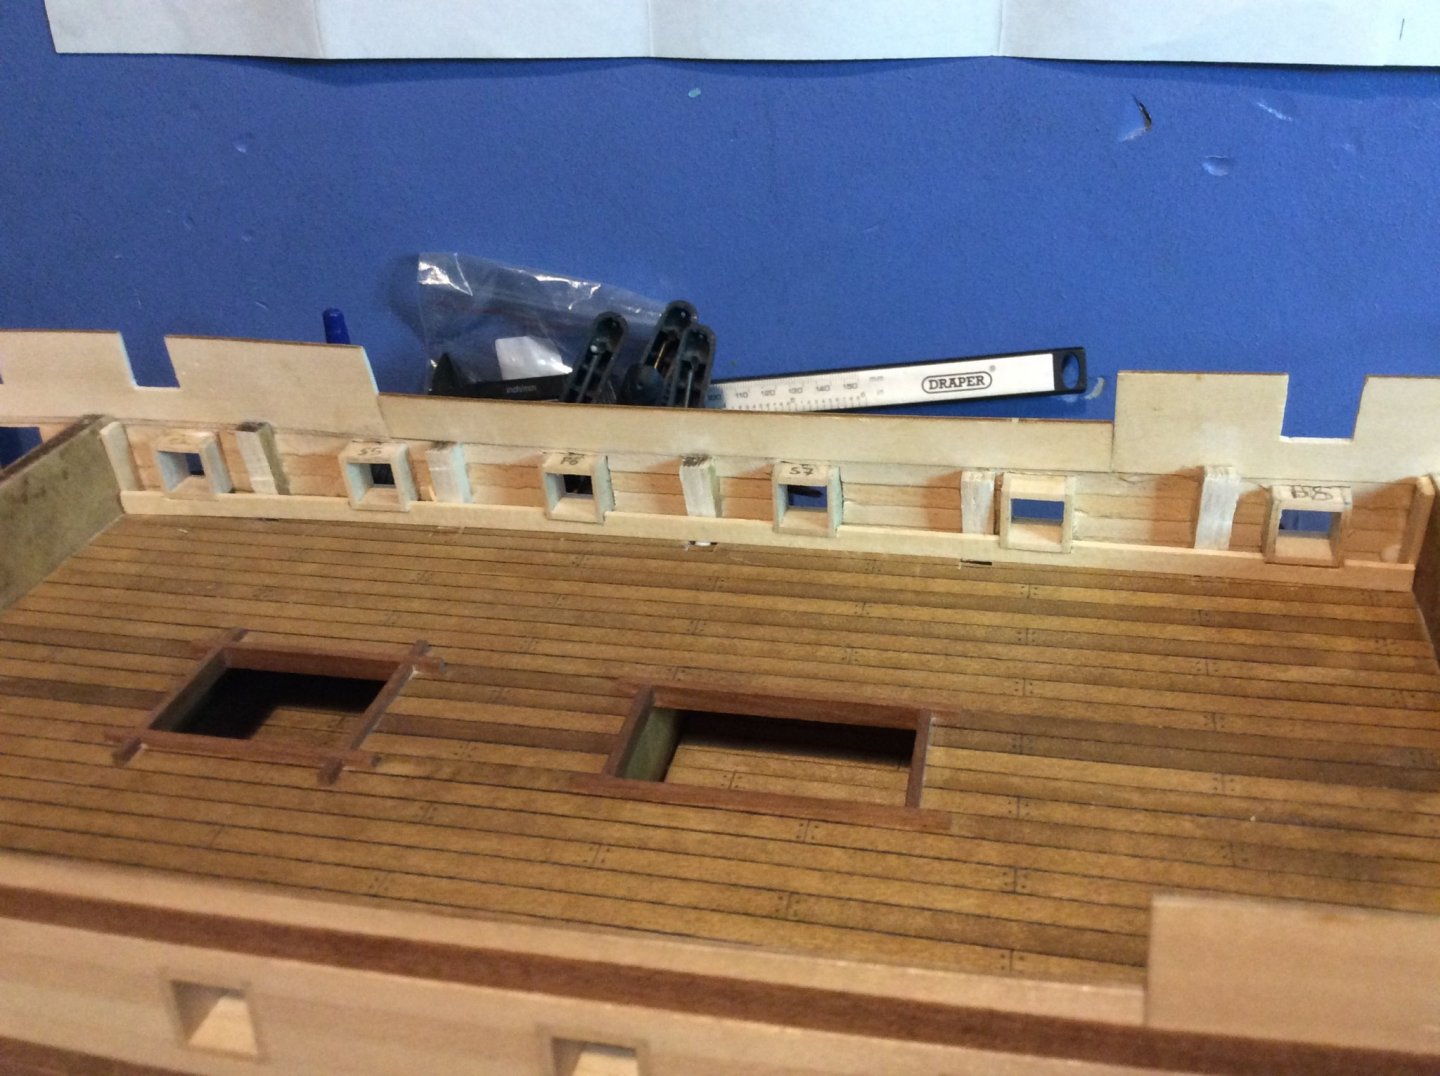
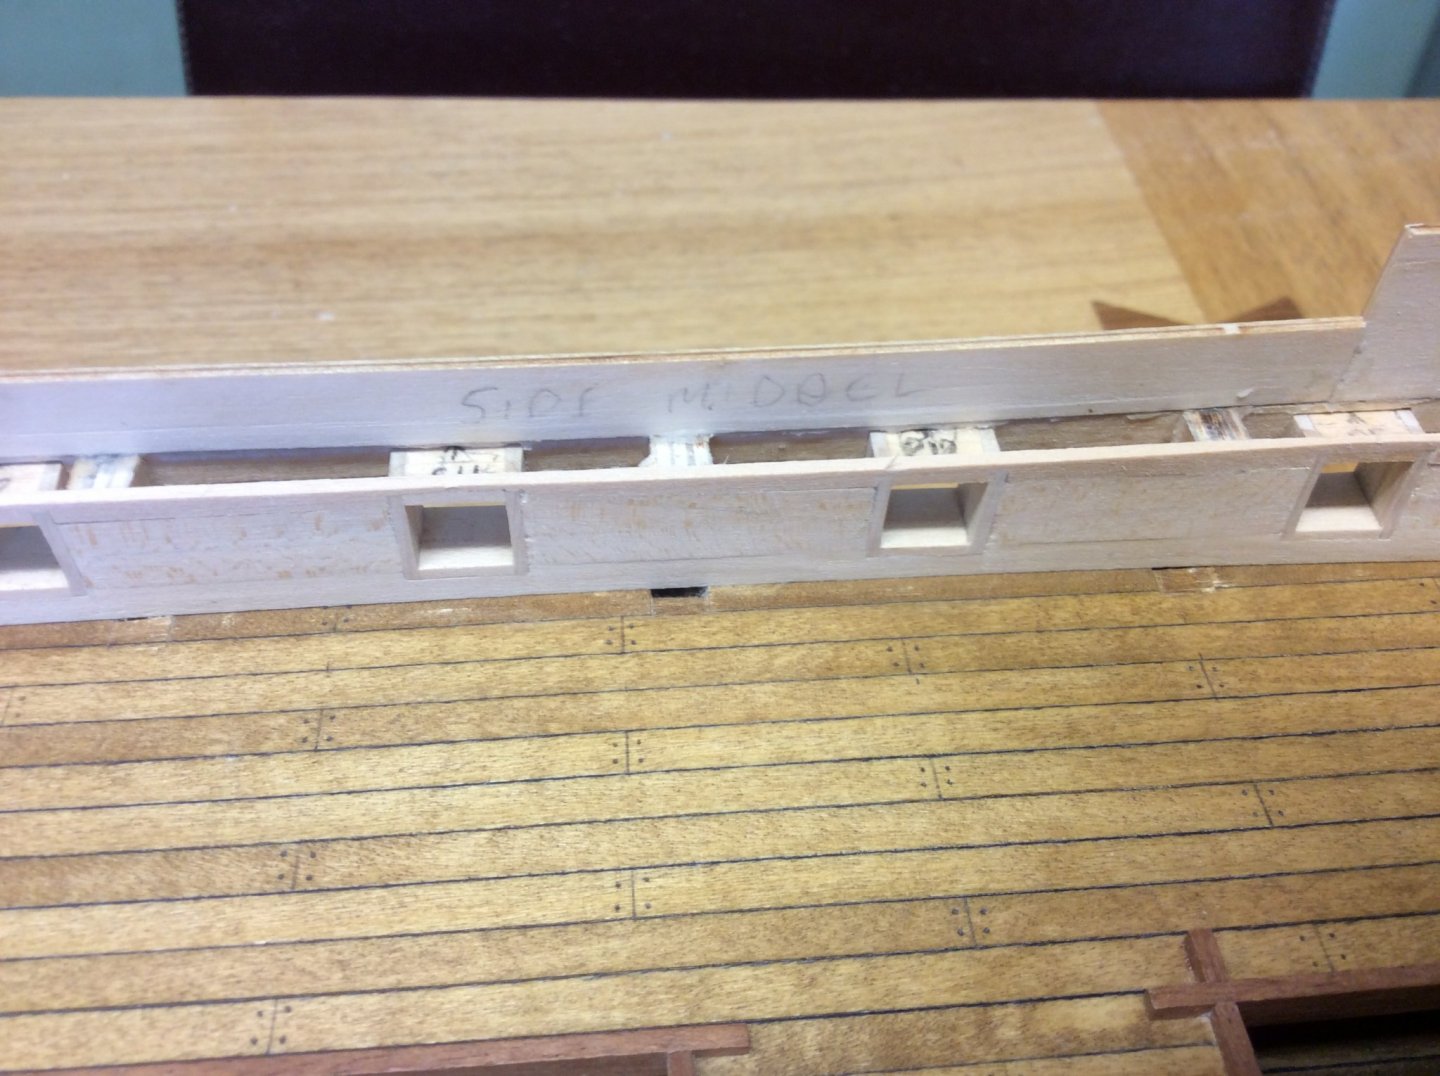
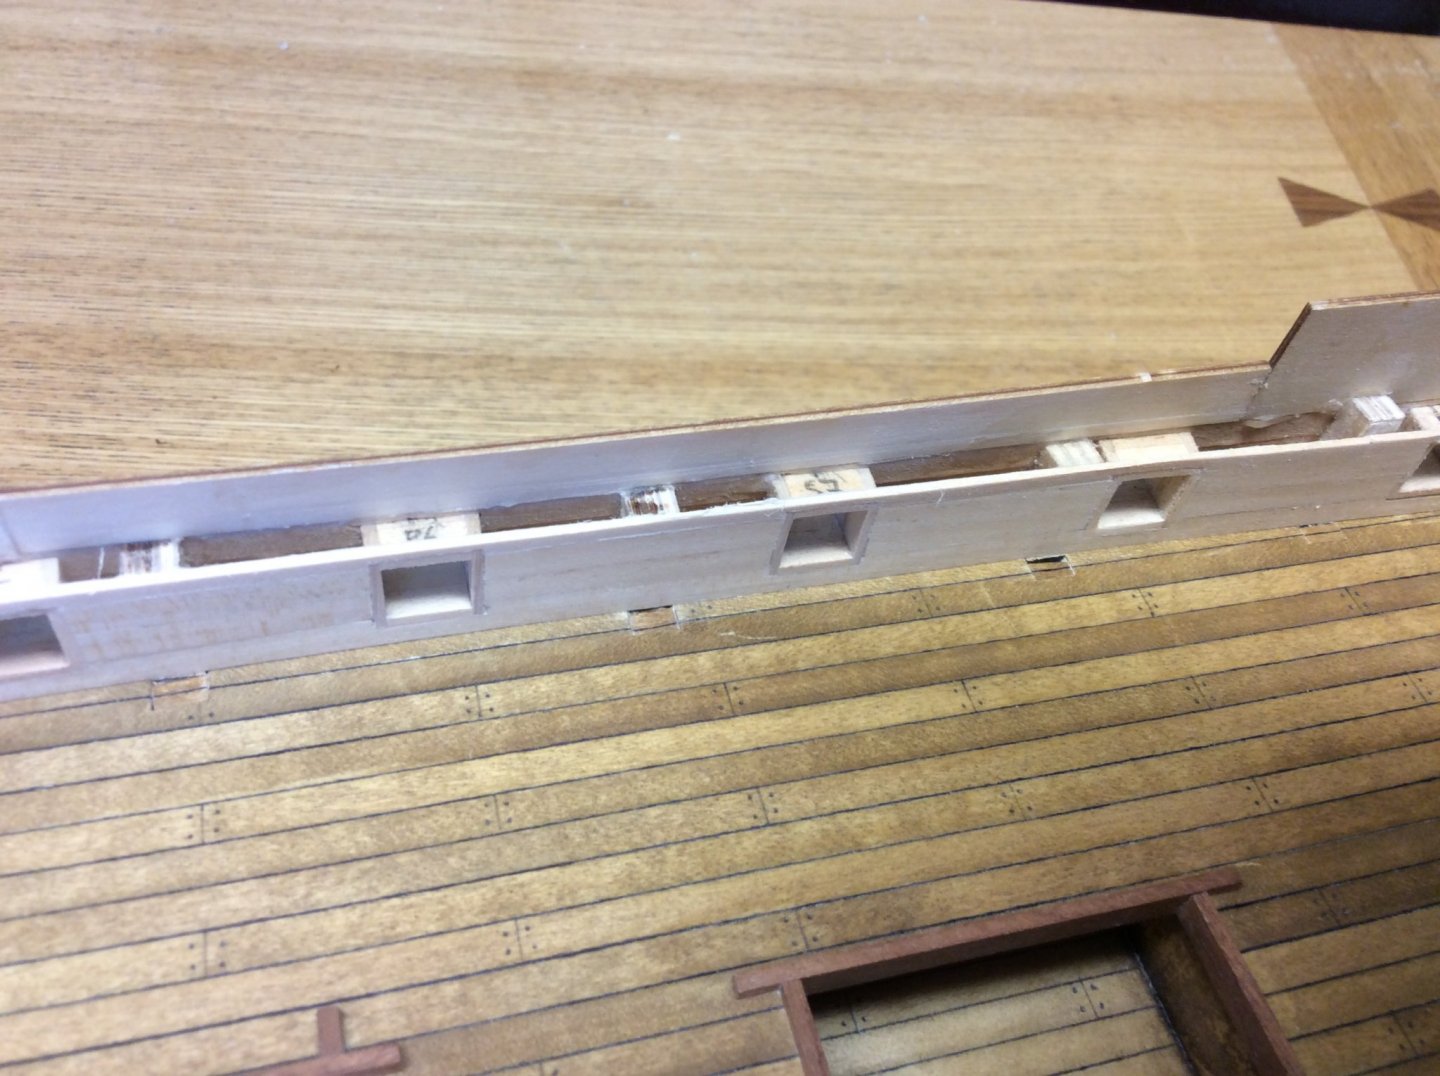
Few extra photos of the gun ports that are now pretty much finished.


-
Nice work. Been working on scratch building them stern castles myself think they look so much better in wood. My efforts so far.


-
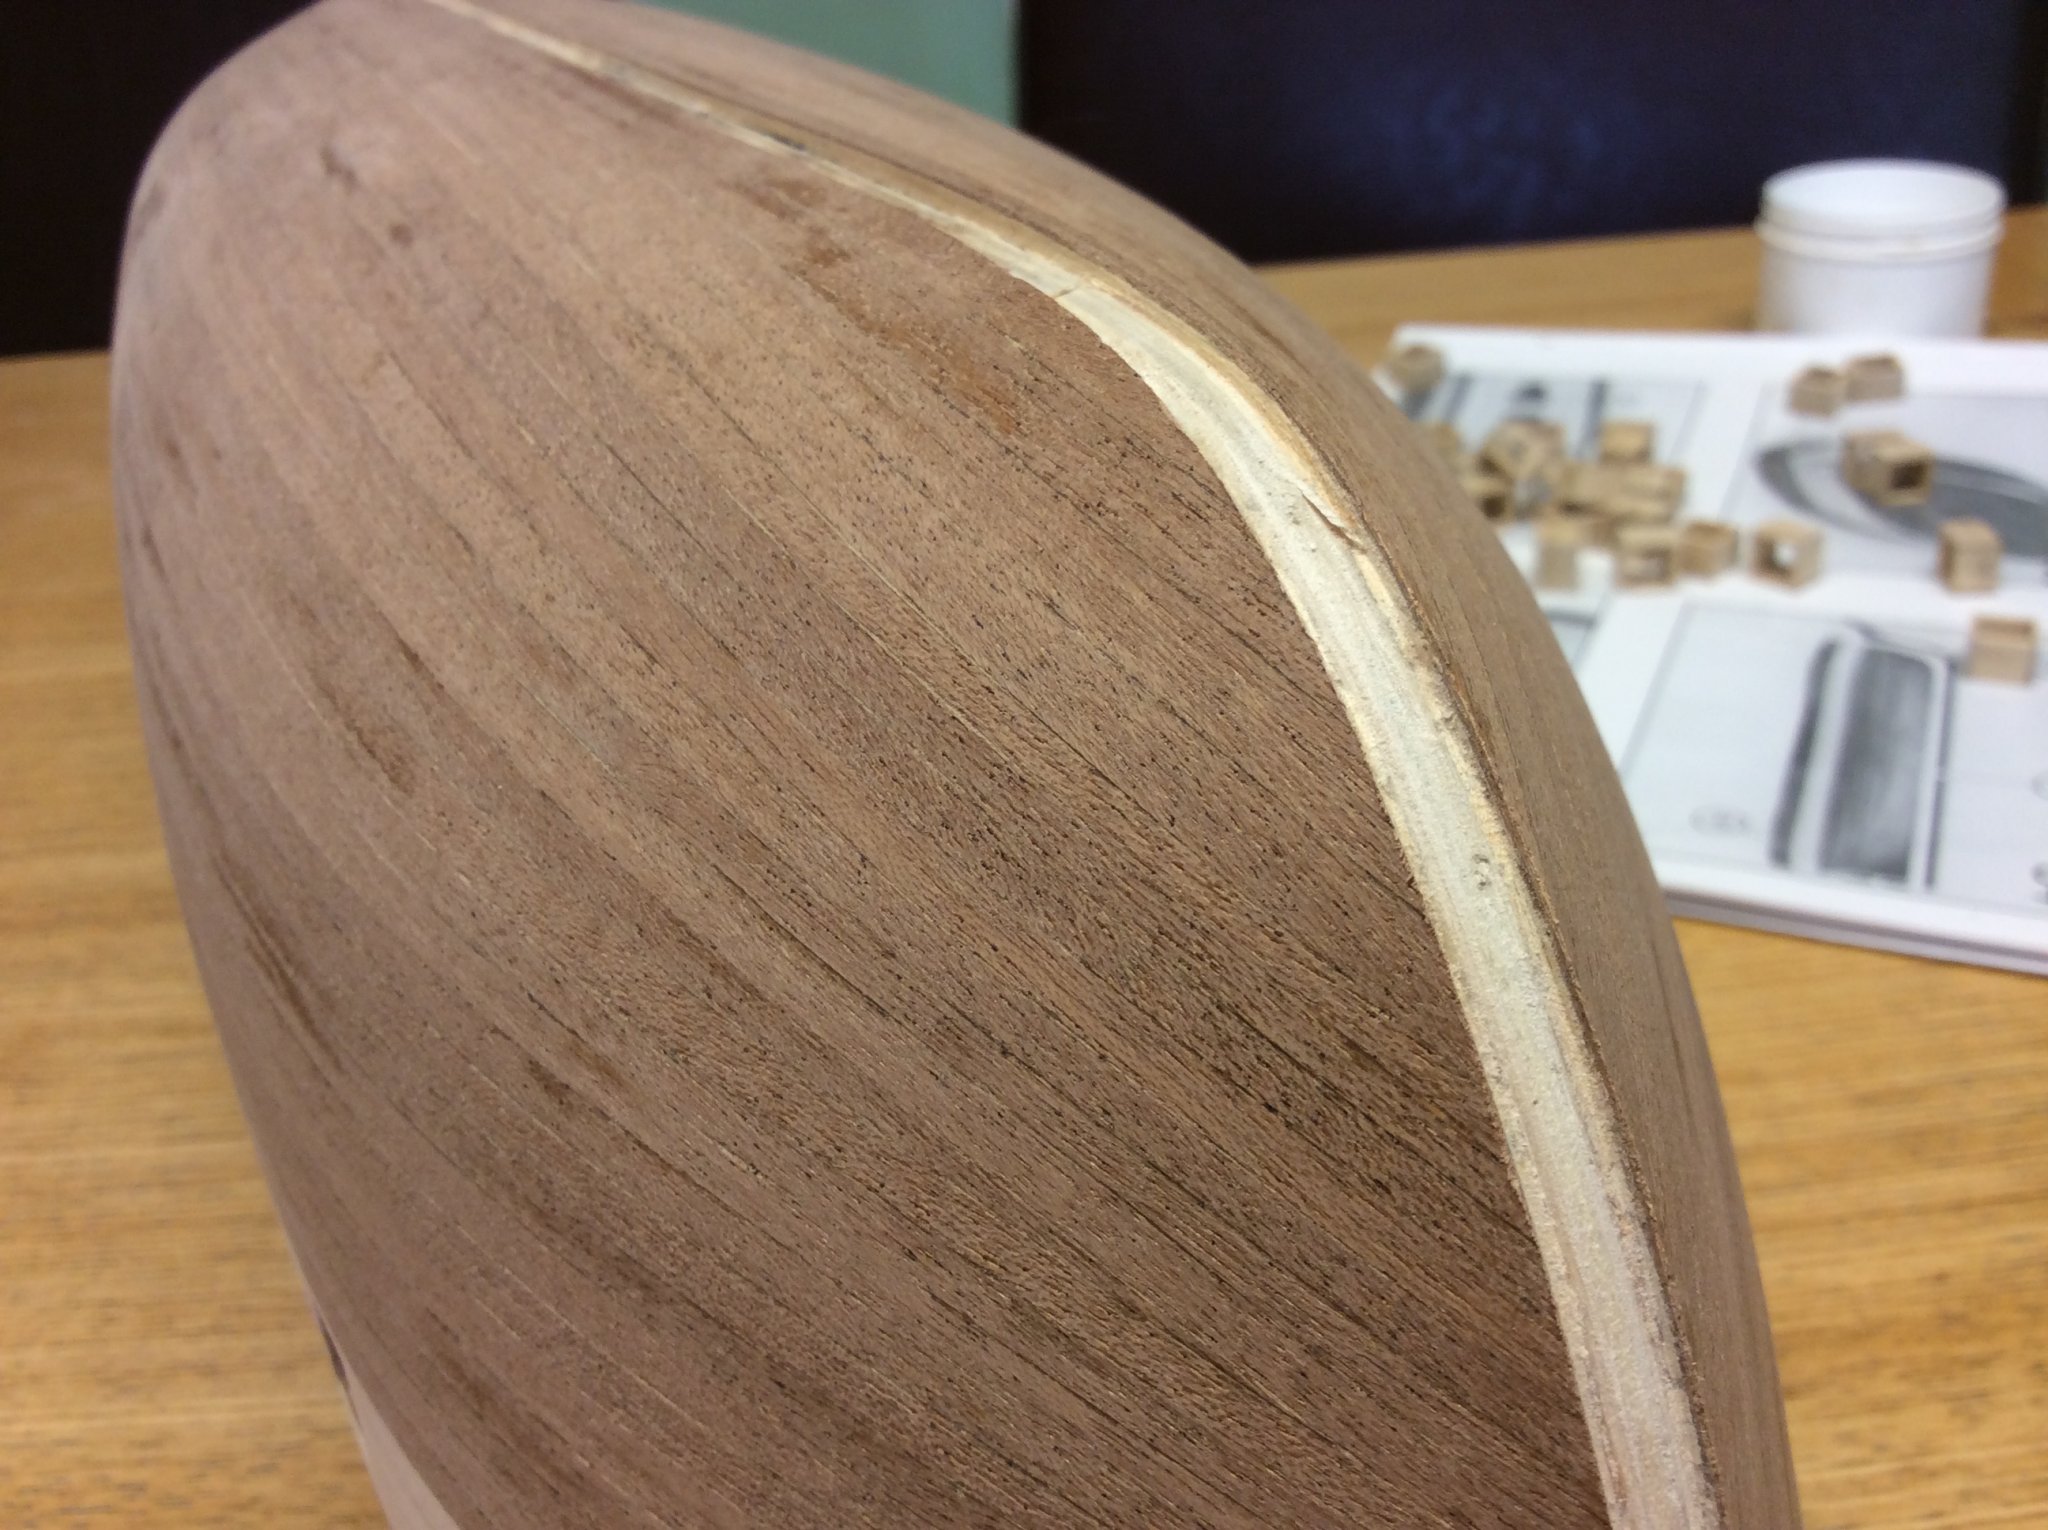
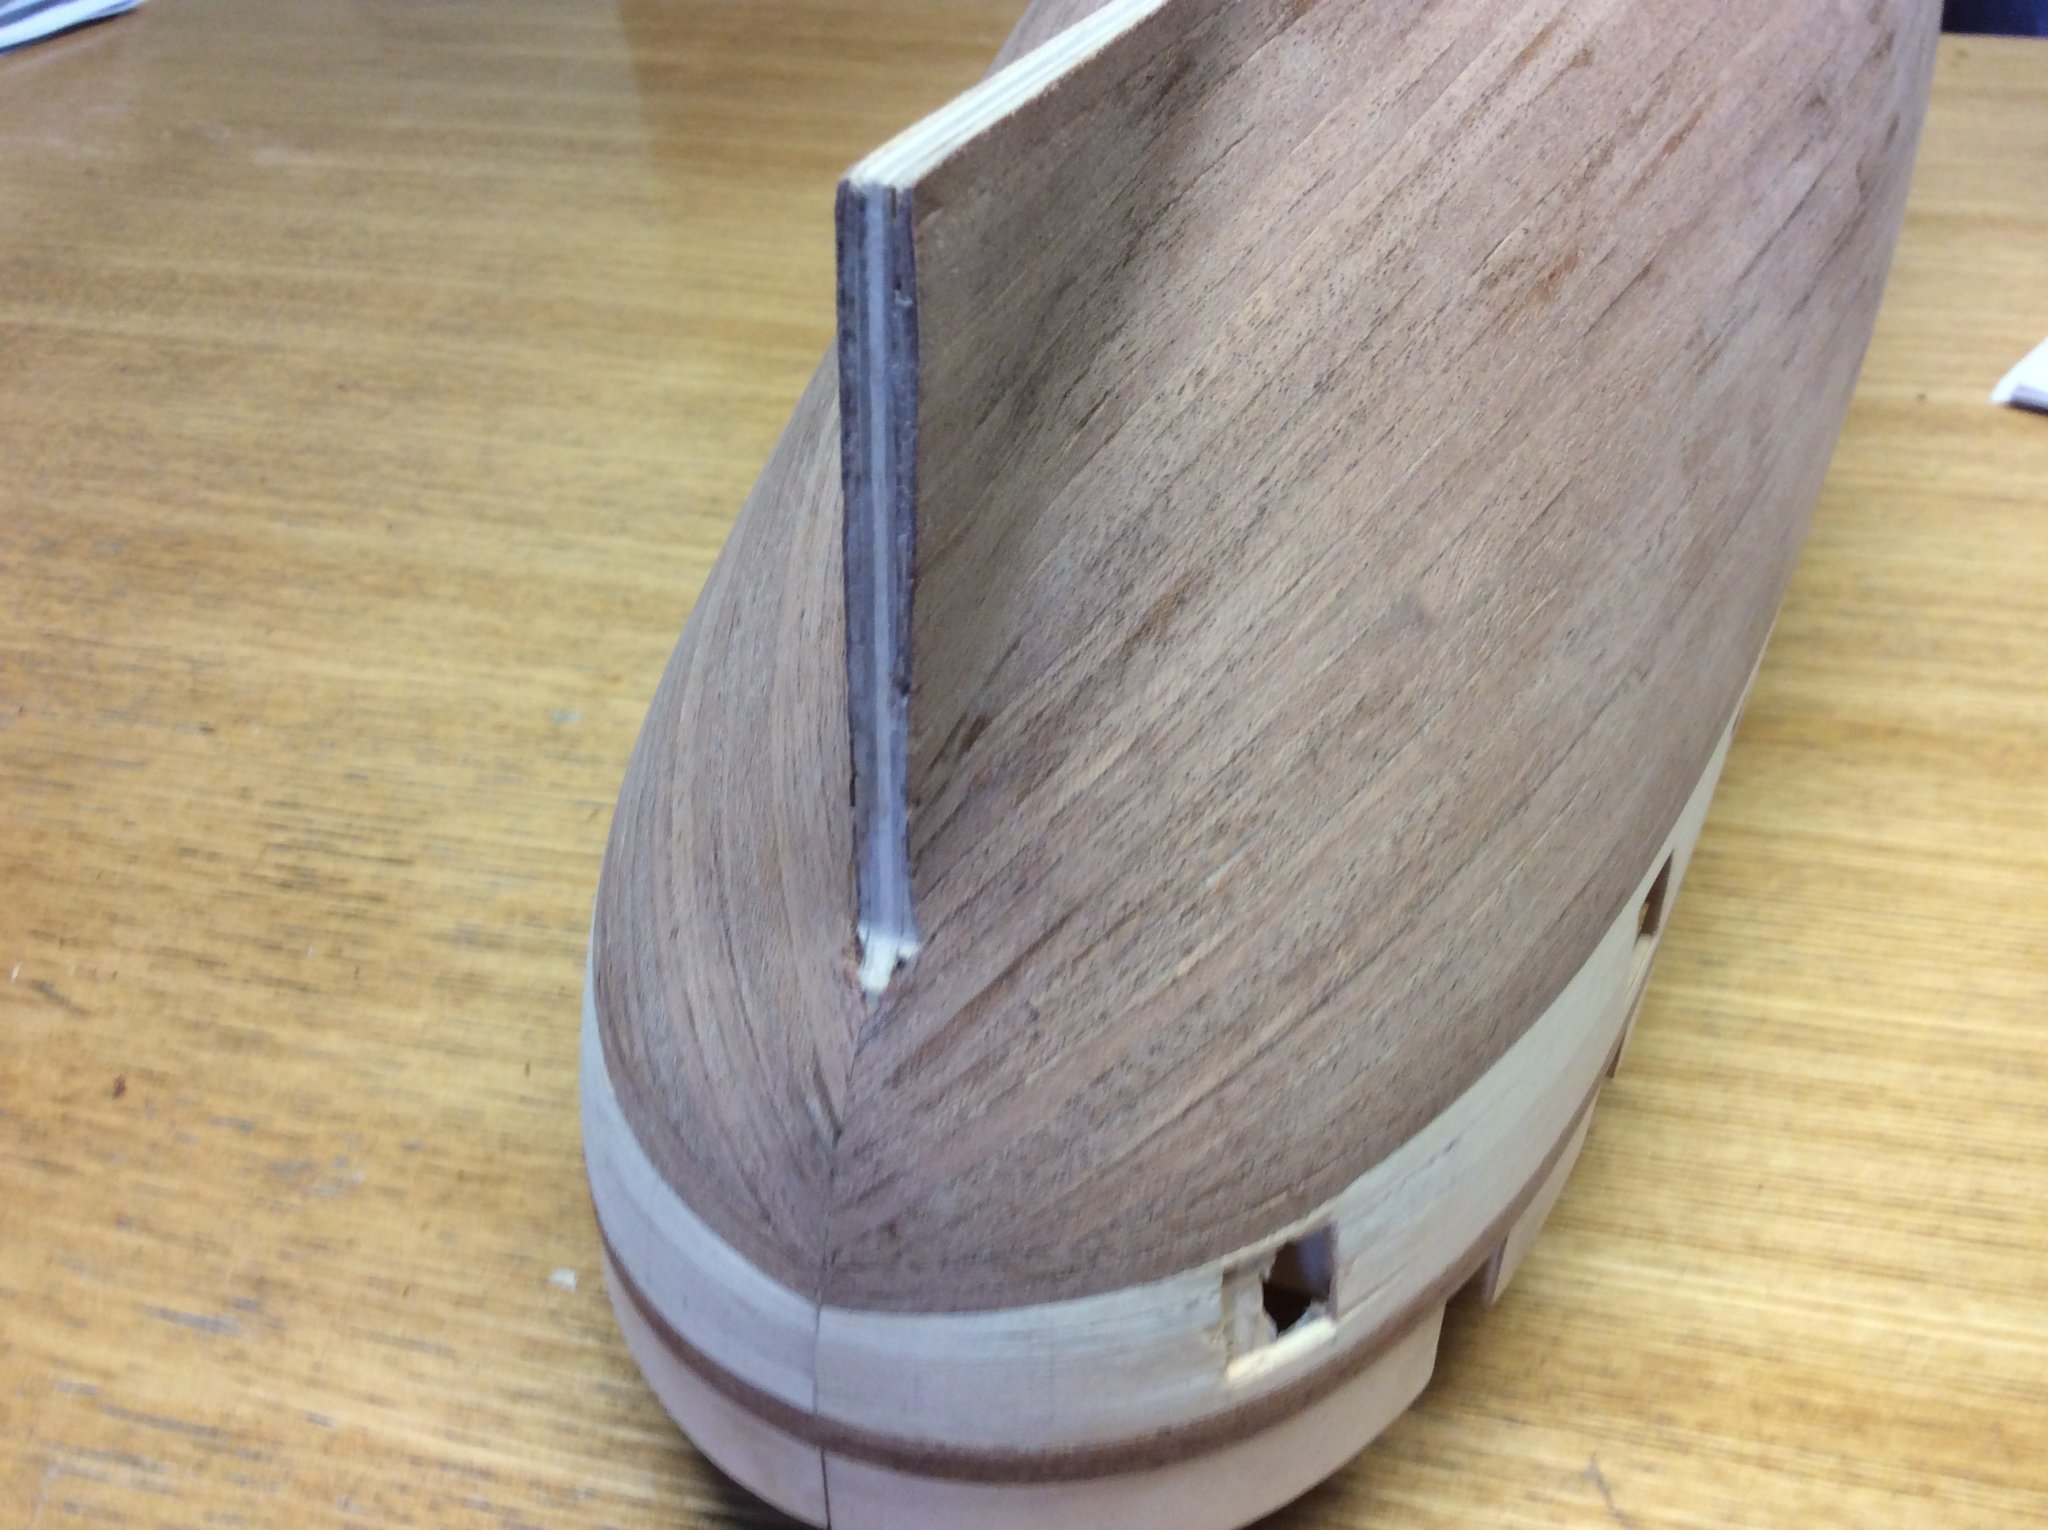
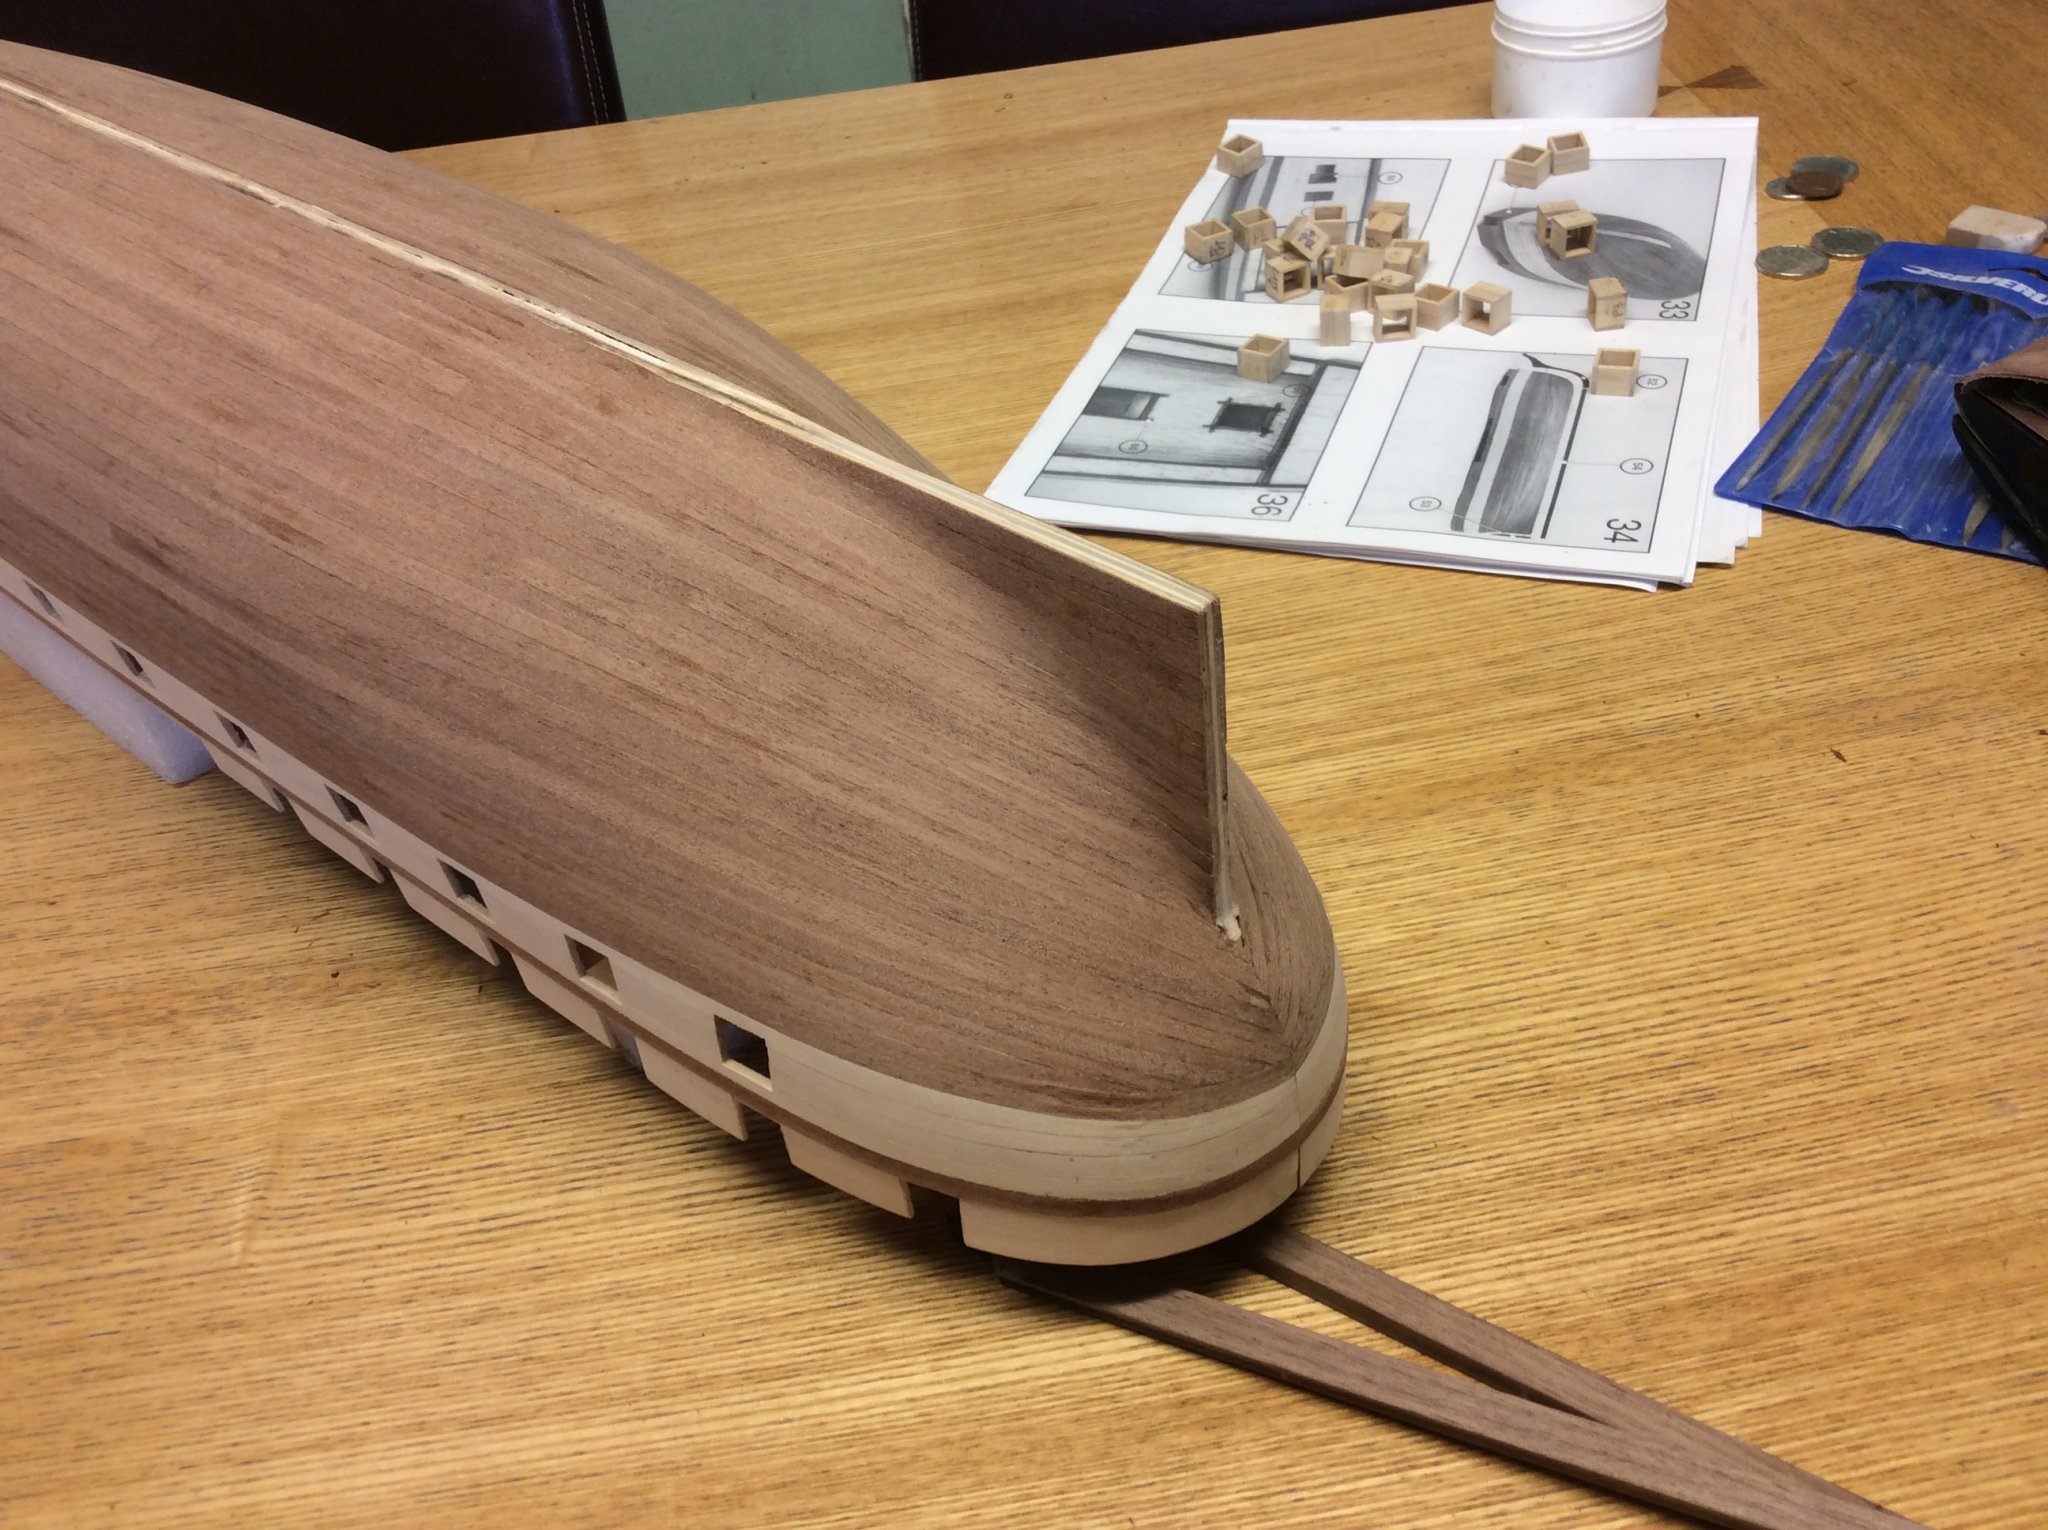
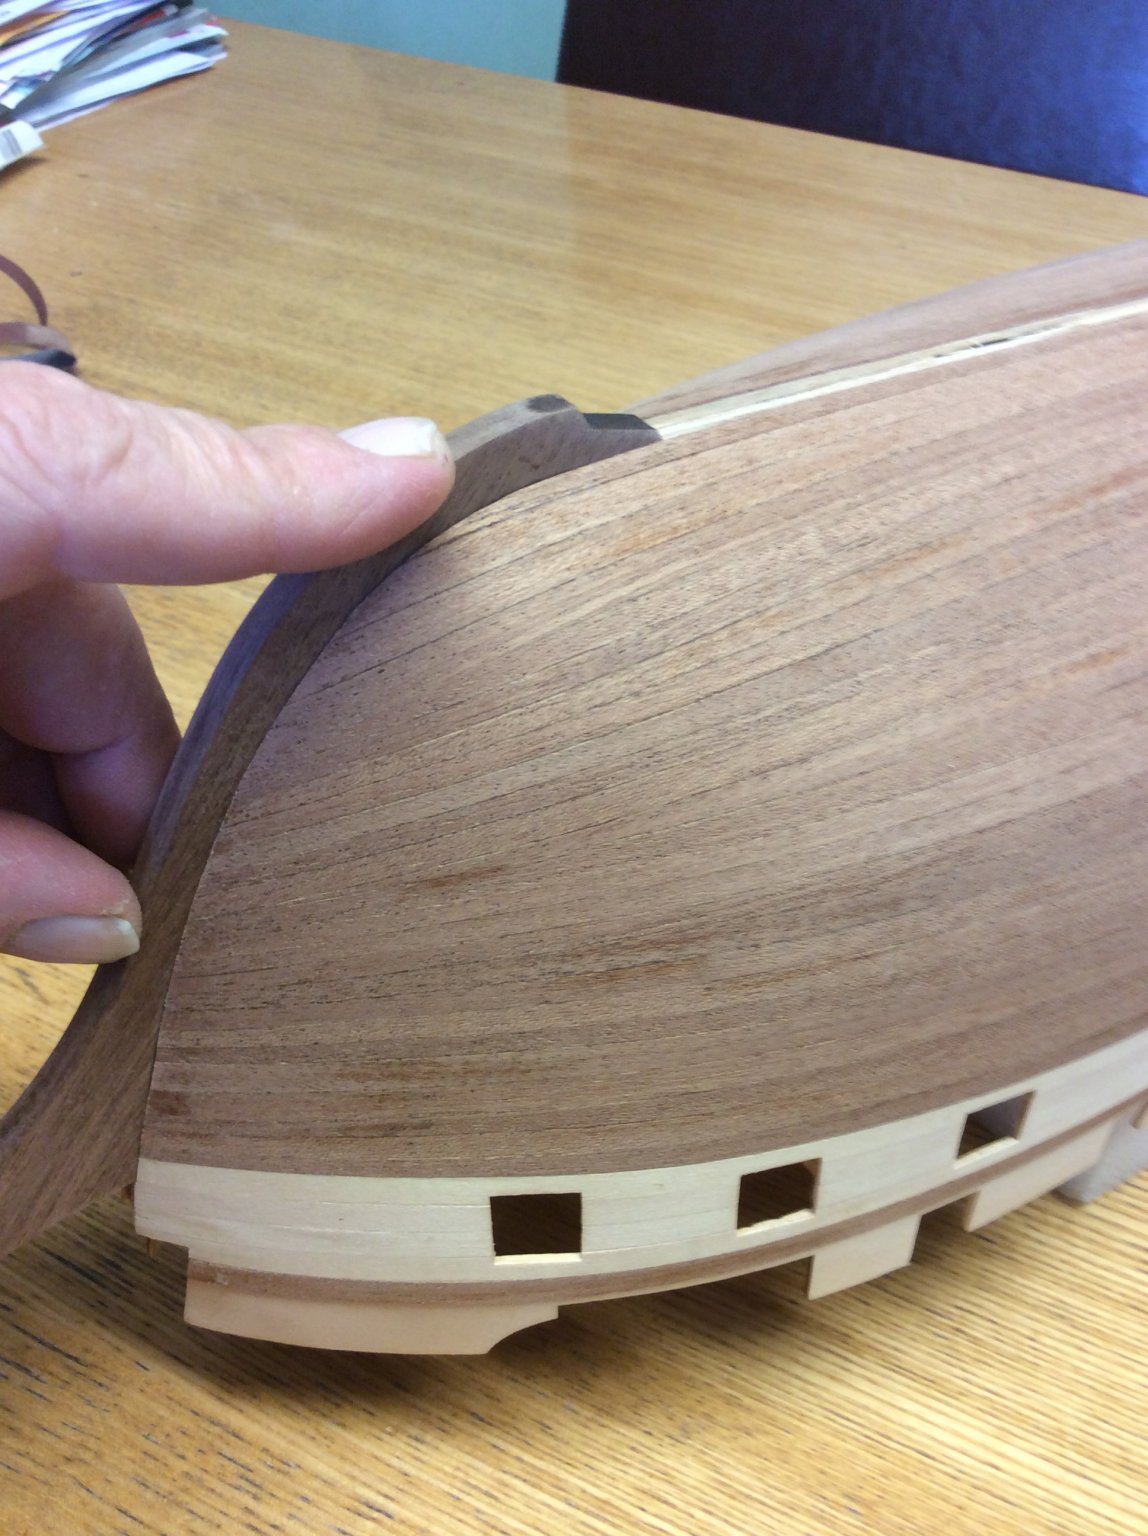
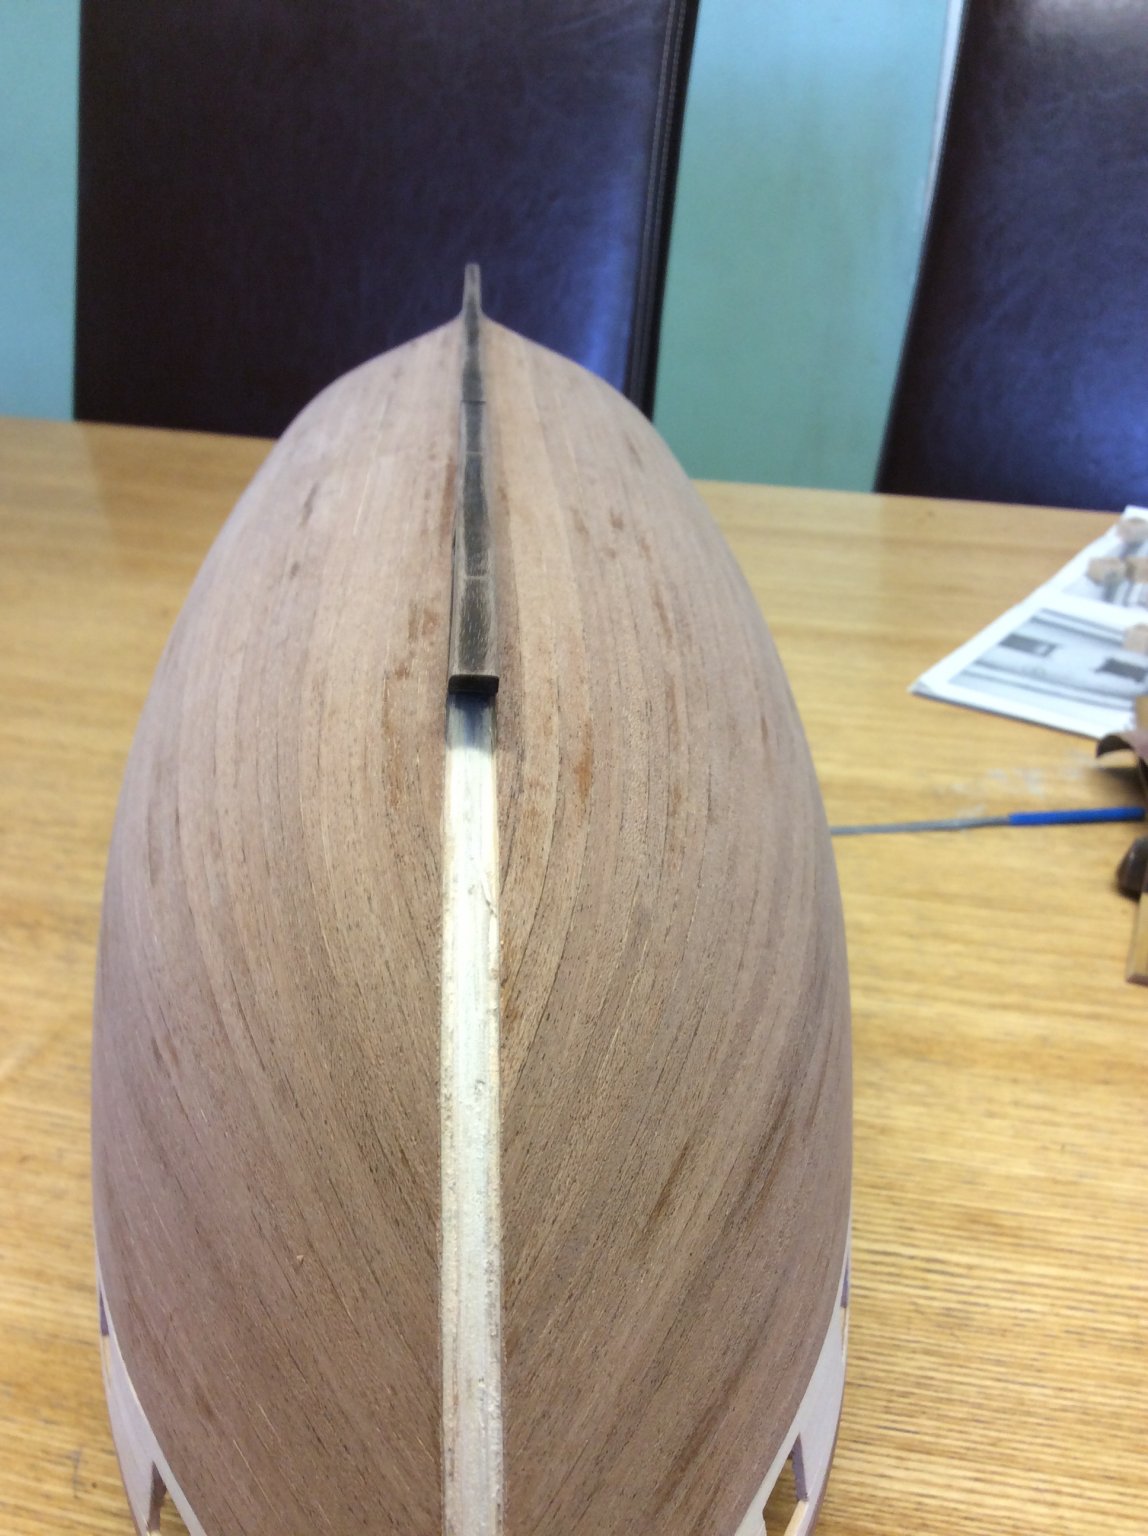
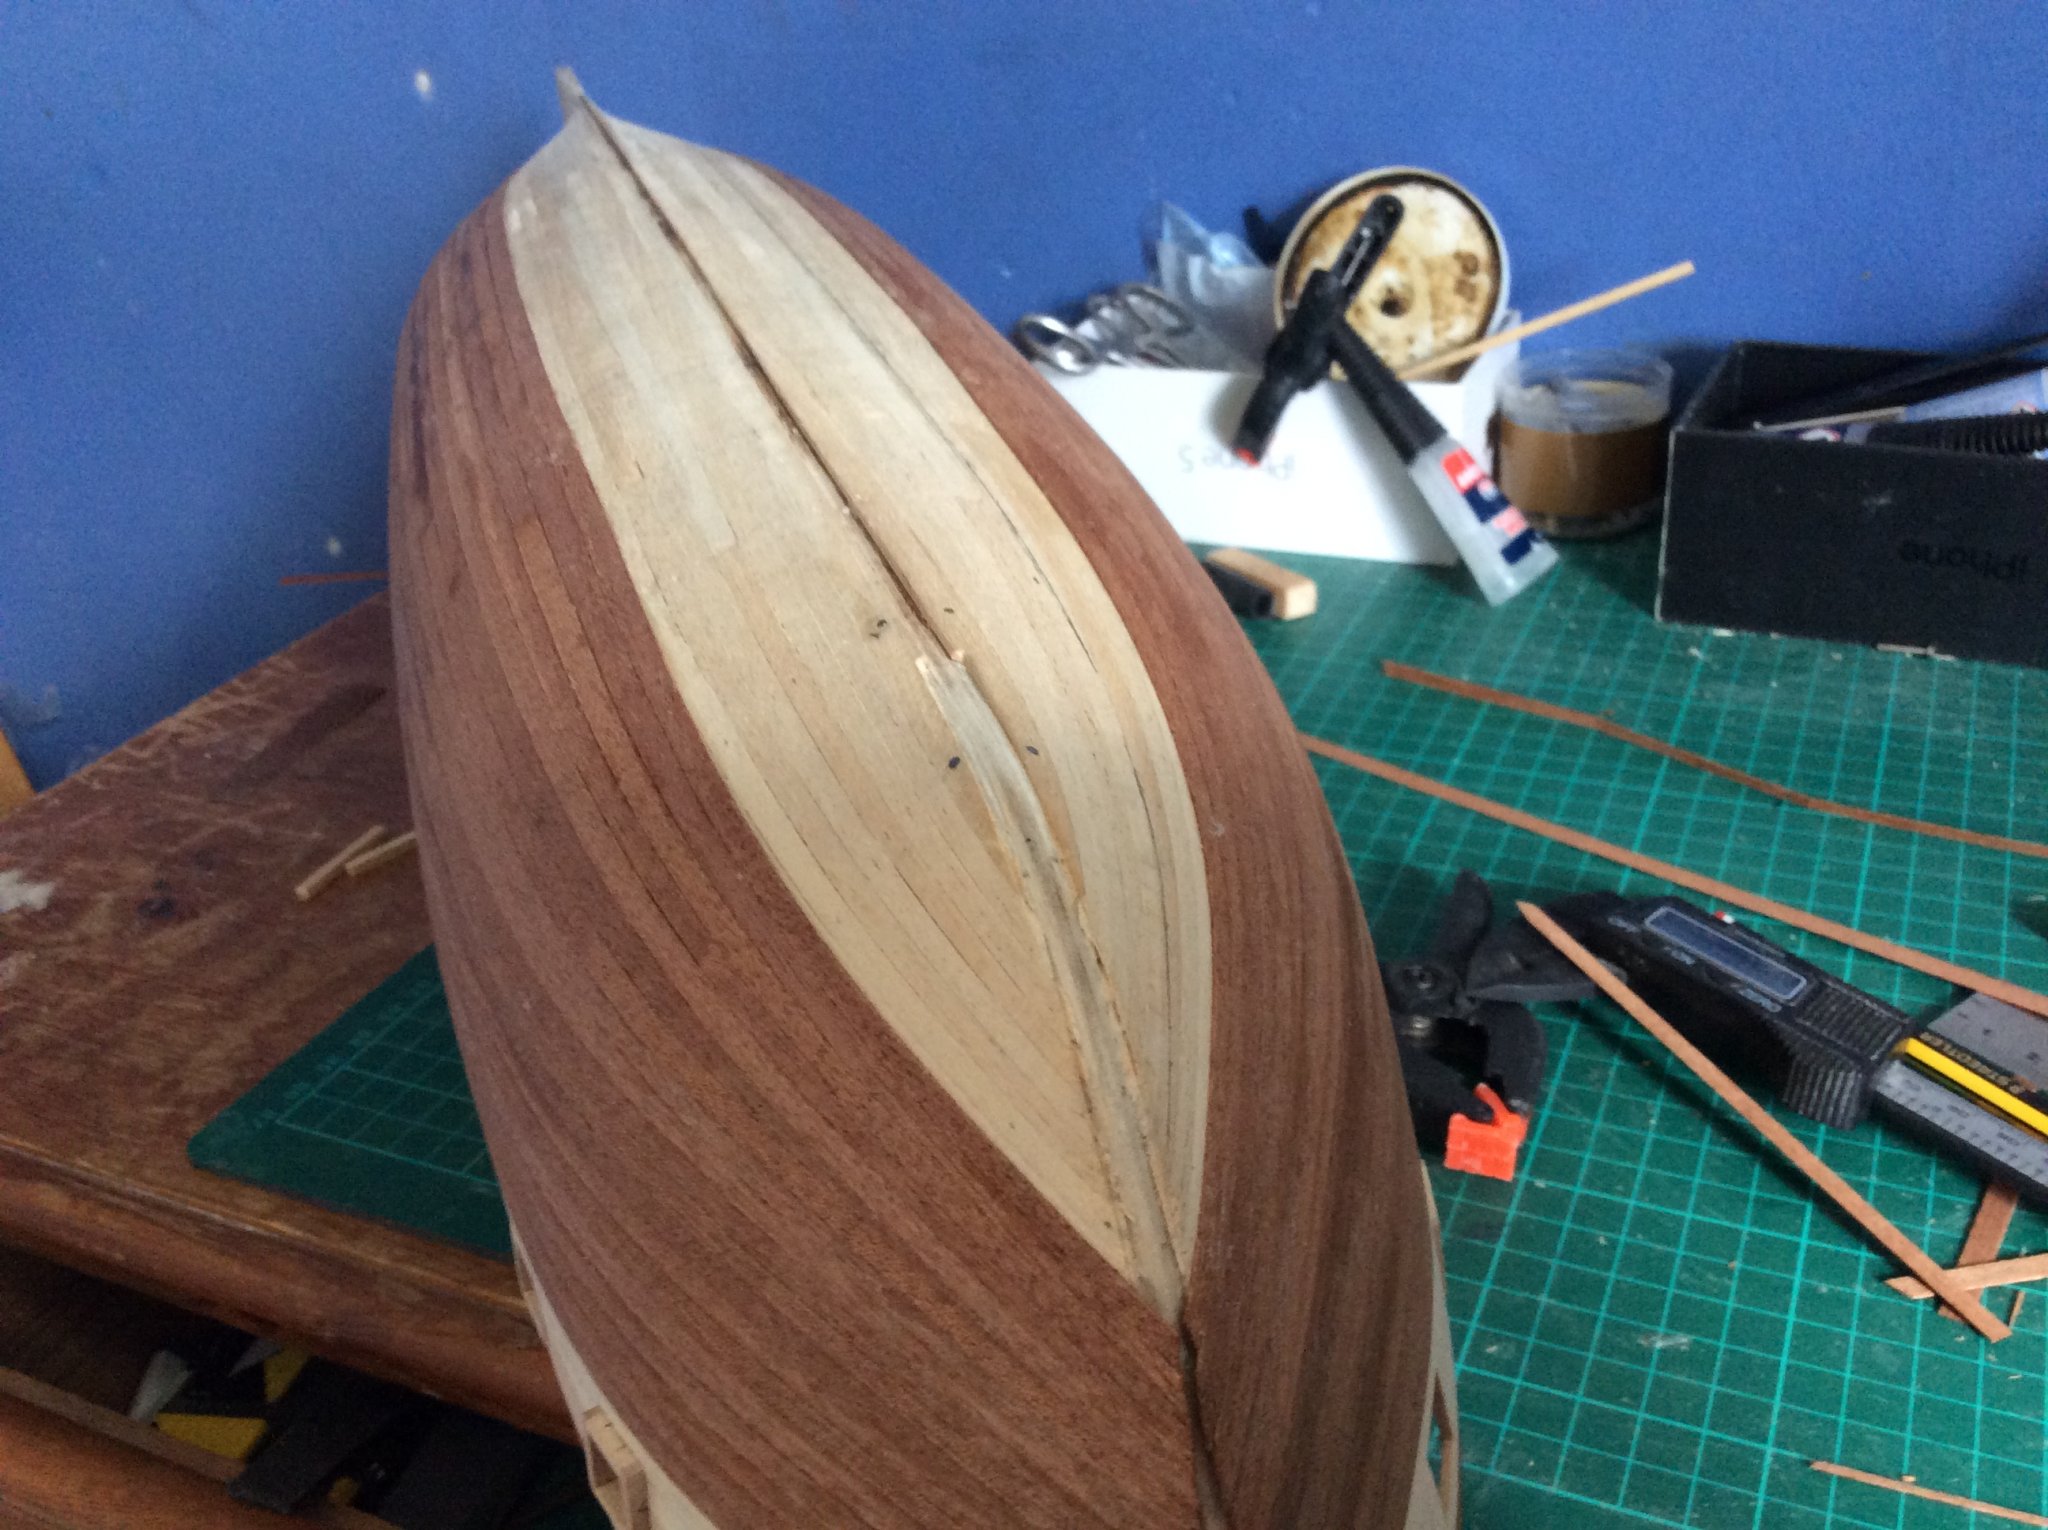
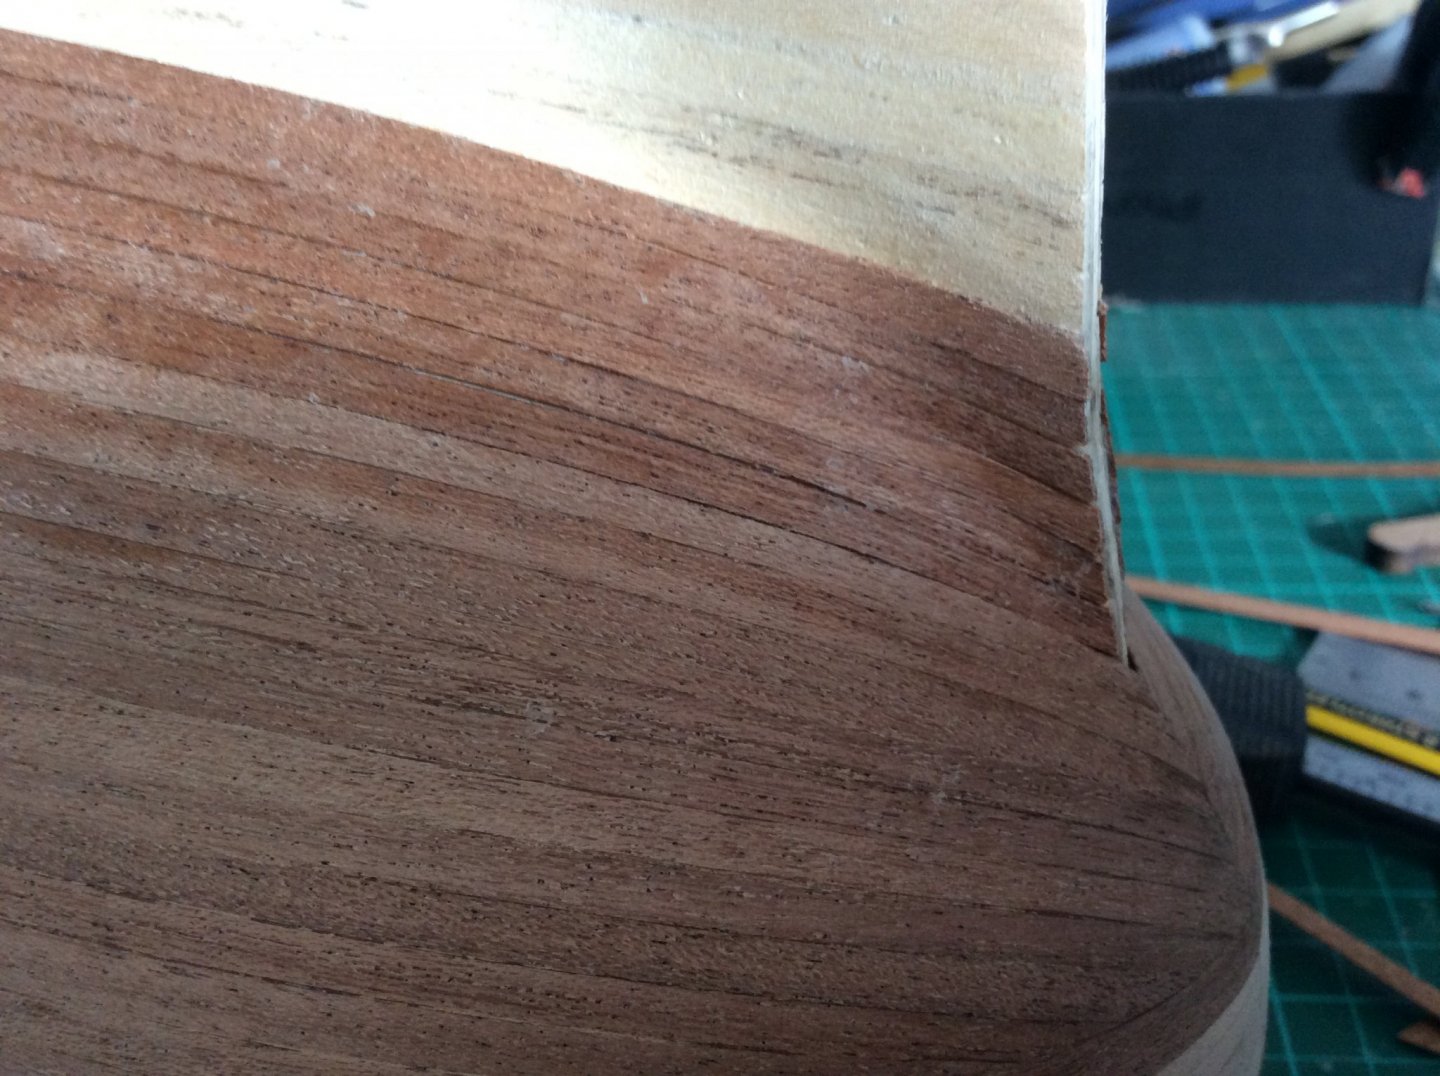
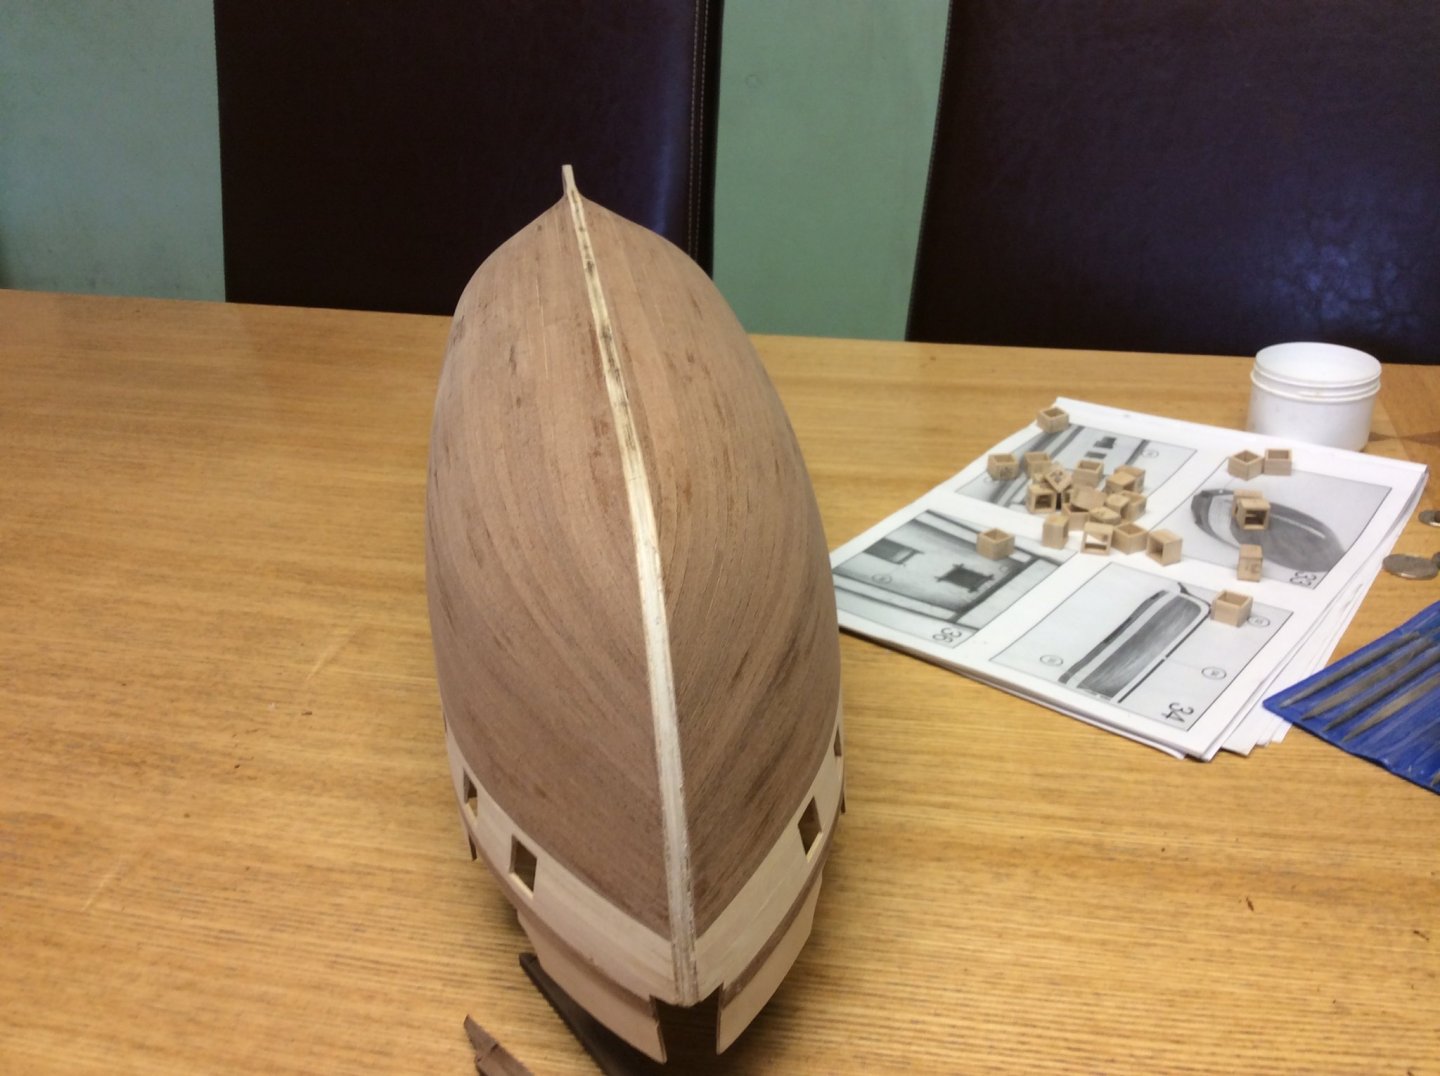
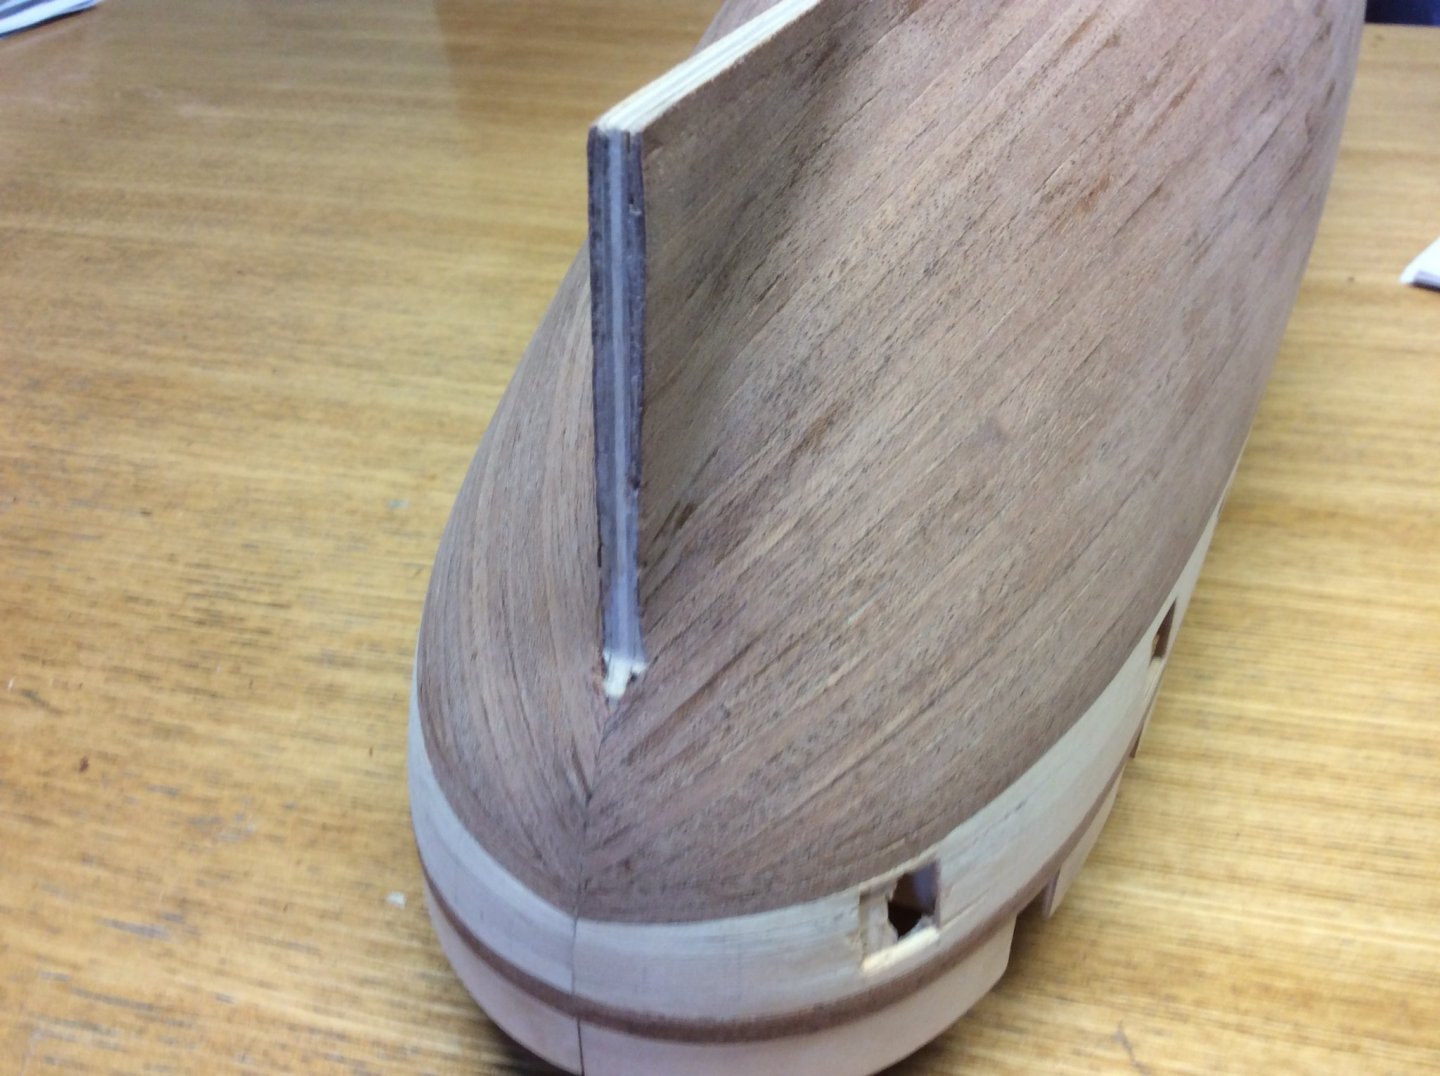
Hi Guys, update to my build. Firstly how do i add pages rather then going down the same thread. I’m ex construction engineer and lorry driver. Not computer minded lol. Also would like to make things more interesting by adding decryption below my photos. Anyway to the build, i’m happy with how the second planking went learning as i go really. Tried at first to follow the first layer pattern, but i do know from some experience that the second layer really needs to lay flat against the first. So just tried to keep everything flat to the hull. It worked beautifully the last 6 planks i came up from the keel. Started sanding the hull this is when i’ve made my first error simply explanation over sanding. fortunately it’s an easy fix because of where it is. I’m cutting 4 windows in the stern as I don’t like the cast ones. So i’ll run 4 planks from gallery side to gallery side between the mouldings. It made me think about sanding the rest. I’ve also glued the keel into place and it’s nicely square although I haven’t taken pictures of that yet. The model is looking good a few headaches to come like finishing the gun ports also the holes for the masts. That should be my next job. Enjoy the photos until next time.


.jpg.27731814c4dc44d72739d3f64ffde4b1.jpg)


.jpg.ddc6ff58a975f8d54d14348deb9fab21.jpg)