Fuji
-
Posts
56 -
Joined
-
Last visited
Content Type
Profiles
Forums
Gallery
Events
Everything posted by Fuji
-
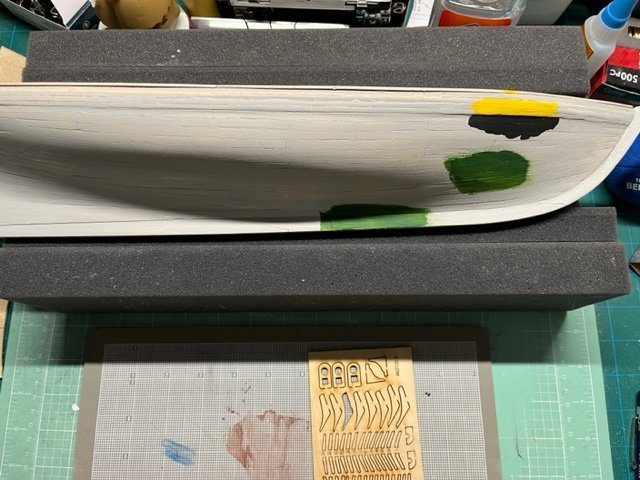
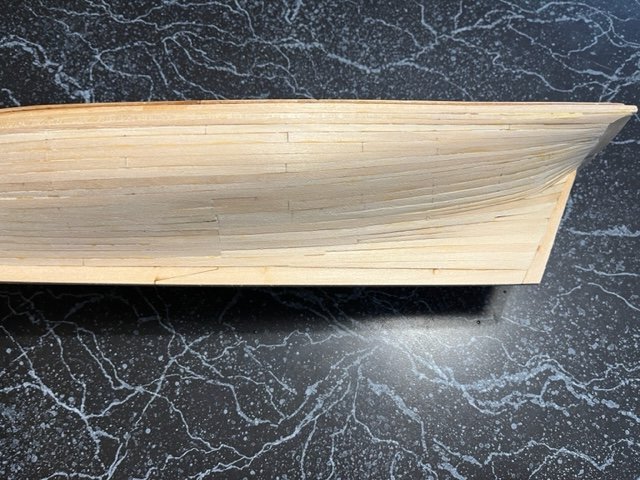
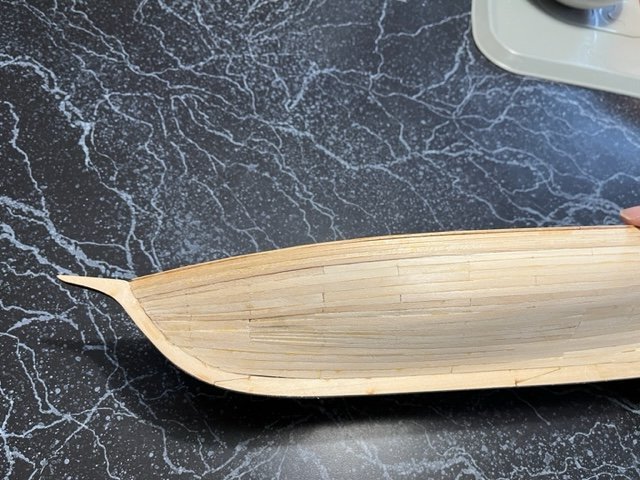
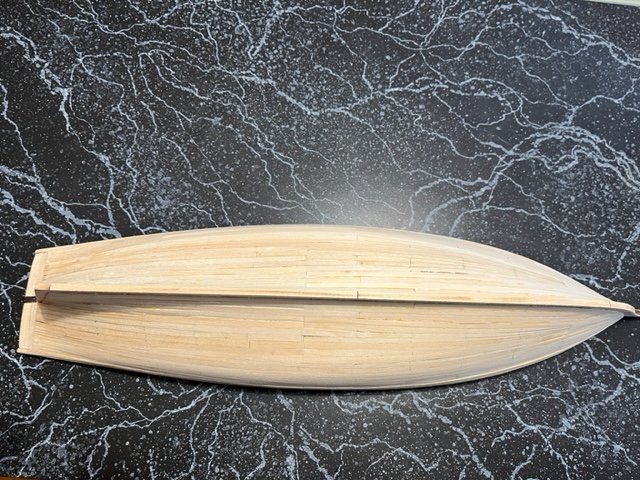
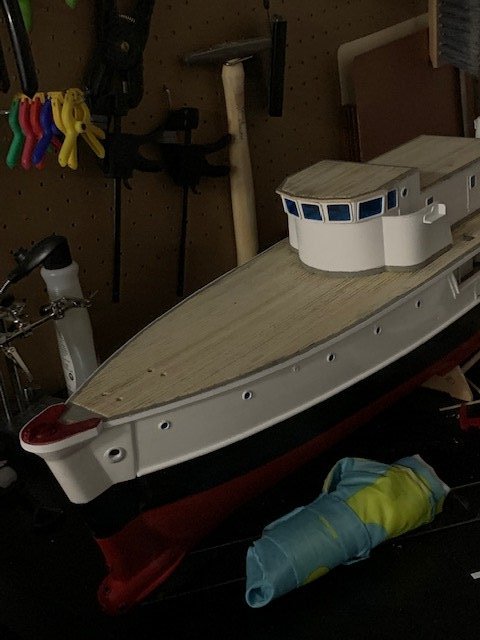
Hello! Although I haven't posted much on my build, I have been progressing albeit slowly for the past few months! I struggled with the hull planking for a bit until I read about using dividers to more accurately divide up the spaces between the battens. Brilliant!! I took my time to make sure the planks on both the starboard and port sides matched up relatively close at the bow and stern. I even tore out a row or two when the difference between the starboard and port side was too visual! Side note: Boy is balsa wood hard to find nowadays! I even used stealers for the first time. Talk about a game changer! My only "Hmmm..." moment came when I was trying to lay the hull planks at the very top near the transom. I sanded and fiddled with those last two planks but eventually ended up with something I was happy with. After a bit I thought... well... that was a lot of work for something nobody would be able to see once it's completed! I need to use some wood filler on some of the planks to close the gaps and to help smoothen out some "dips" in the hull where the plank when placed sagged due to not having the plank long enough to properly bend to match the hull curvature. Next on the bench after that is to add the bulwark stanchion and battens! Wish me luck! Fuji
-
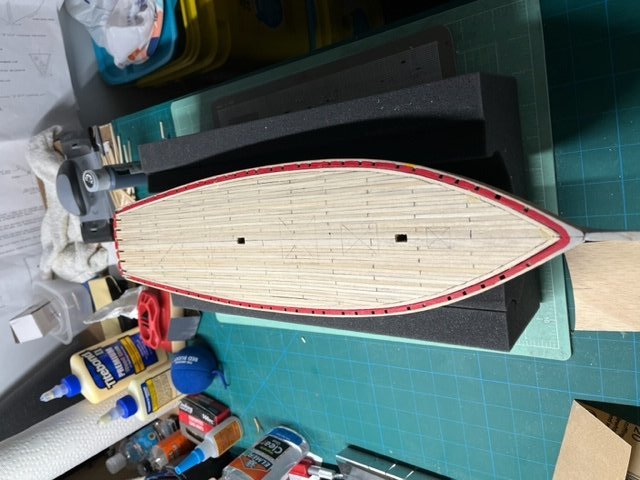
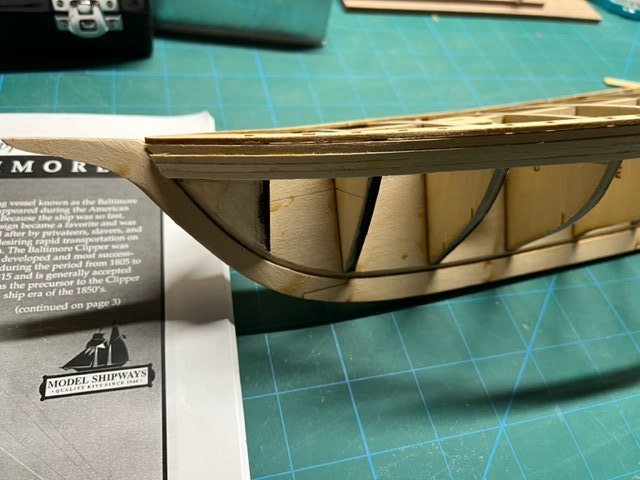
I was able to get some bench time, so I added the planksheer to the top of the bulkheads. I've read where some builders had the planksheer come up short, but for some reason my planksheer is long enough. Maybe Model Shipways fixed the tooling problem? After attaching the planksheer to the bulkheads I built up the wale planks. these were pretty easy to install although after I glued everything together I noticed some gaps between the wale planks. Nothing a little wood putty won't take care of! I will be planking the hull next, but I will need to hold off until my balsa cutter arrives since I need to trim down all the 3/16" wide planks down to 1/8". Yes, I could have trimmed all the planks down 1/16" the entire length, but between my eyesight and having mild arthritis in my hands I'd rather use a tool than trying to free-wheel something like this! More to come! Fuji

-
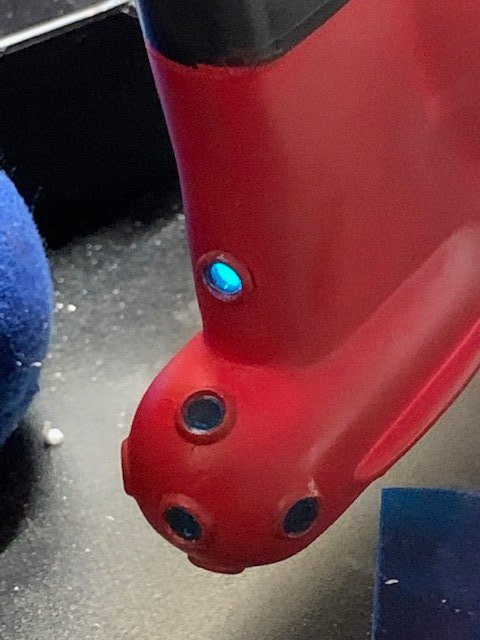
I have my cordless Dremel Tool to thank for that!
-
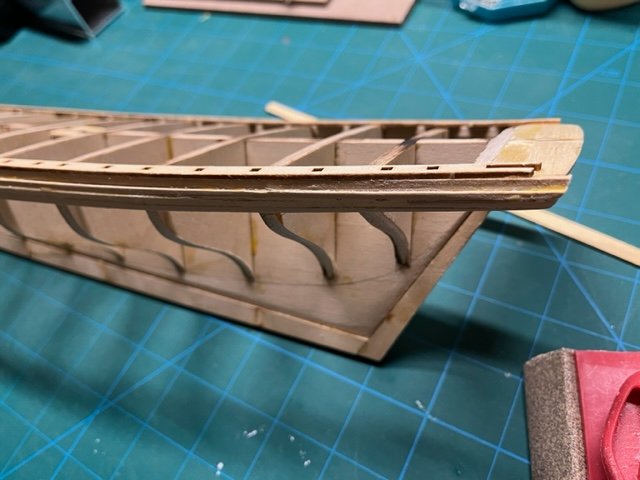
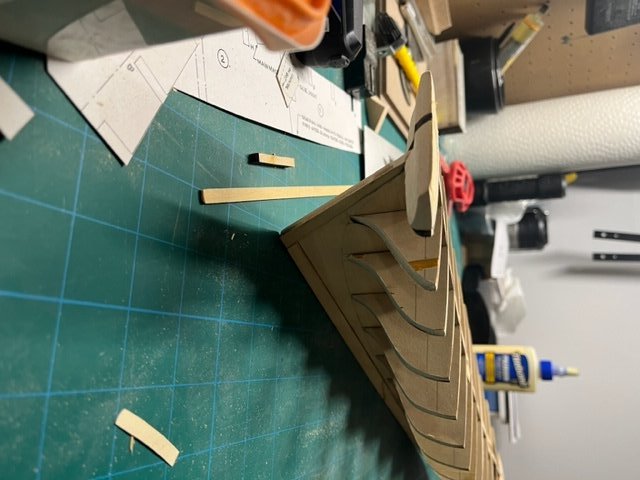
Had more time to work on the POB II since the weather turned cold and snowy. Cut and carved out the filler block at the stern and once I was done with that, I had enough stock left over to make filler blocks at the bow. After quite a bit of sanding I was happy with the curvature of the filler blocks. Did I tell you that I love my cordless Dremel tool? Next, I added scrap wood to cover the mast mortises on the center keel as per the instructions. Finally, I laid down a plank in preparation of adding the planksheer. This will have to wait until later as I need to figure out how to modify the planksheer to more accurately follow the curvature of the hull. More to follow! Fuji
-
Thank you Bob!
-
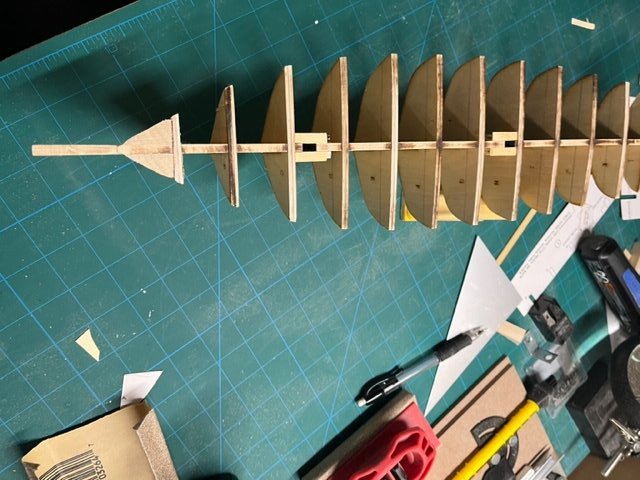
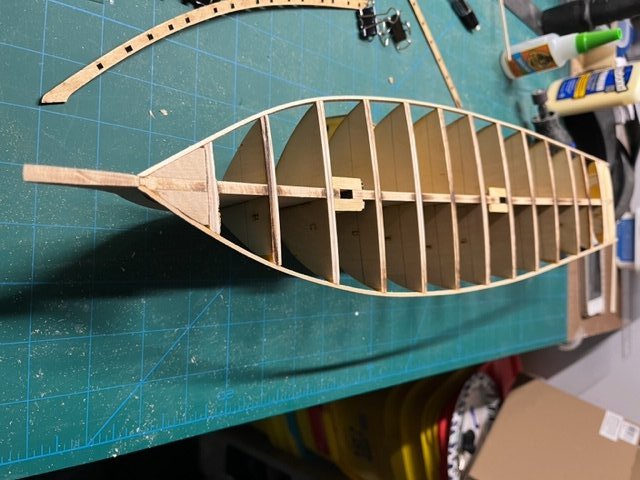
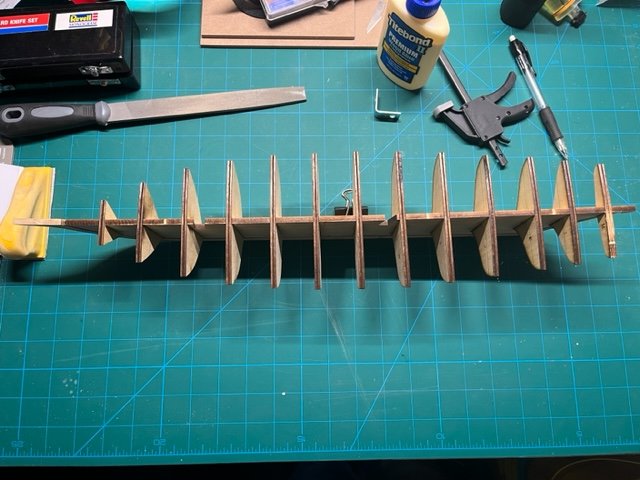
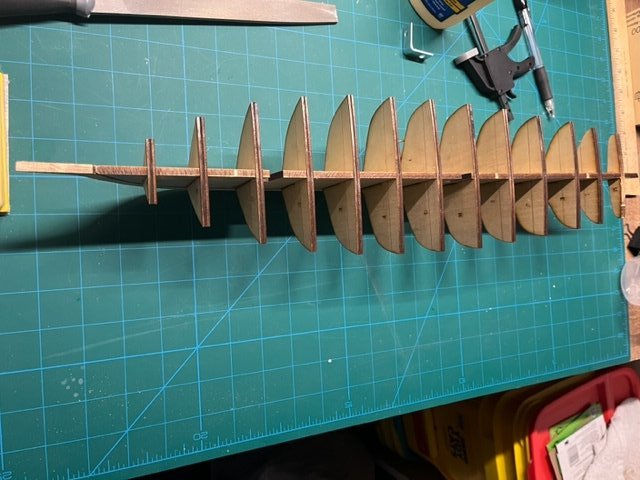
Got some bench time in this evening! I was able to place the bulkheads to the center keel. Quite honestly the hardest part was gently filing the bulkheads so they were perfectly perpendicular to center keel. Takes a lot of patience and a good machinist's square. Overall, I am happy with the results. Only one bulkhead isn't perfectly perpendicular to the center keel, but it is quite odd why that is. On the starboard side the bulkhead is perfectly perpendicular to the center keel, but on the port side it is out about 1/16". Both the center keel and the bulkhead appear to be flat and true, so I really don't know what happened... but I figure that 1/16" difference once the bulkhead is shaped to match the hull contour won't make a much of difference! Next, I'm going carve the stern filler block. Doesn't look too complex, but then again, nothing seems to complex until you get into the task at hand! More to come! Fuji
-
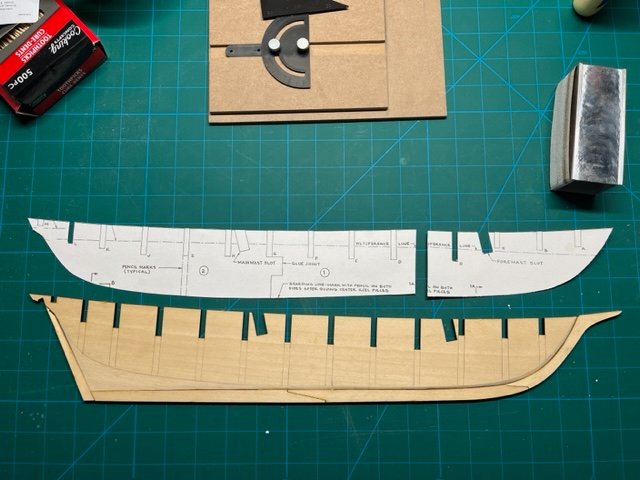
Made some progress this weekend. I have a sick cat at the moment that requires my attention throughout the day, but I was able to grab some bench time in-between medicating and feedings. I completed carving the rabbet joint on both sides of the center keel, then cut out and installed the sternpost, false keel pieces and the stem pieces being careful not to get glue where the rabbet joint meets the pieces. I also used the same photocopy template that I created to define the bearding to define where the WL (wale line?) is. Going to start cutting out the bulkheads next and will dry fit the bulkheads to the center keel once I give the wood glue time to cure. More to come! Fuji
-
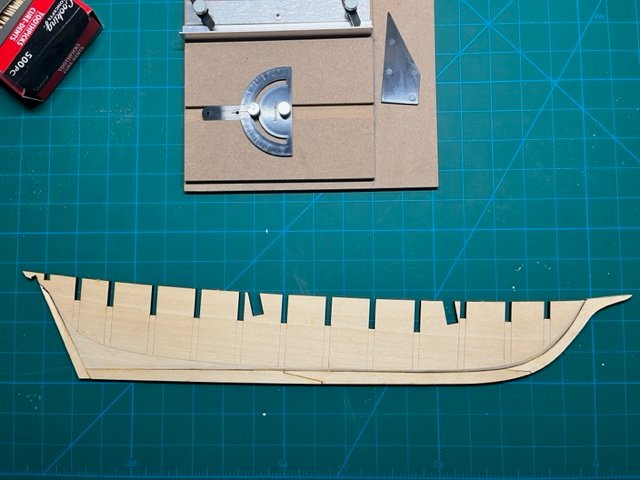
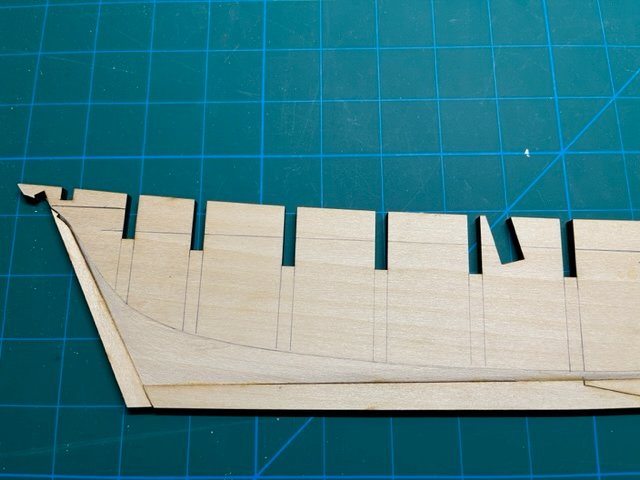
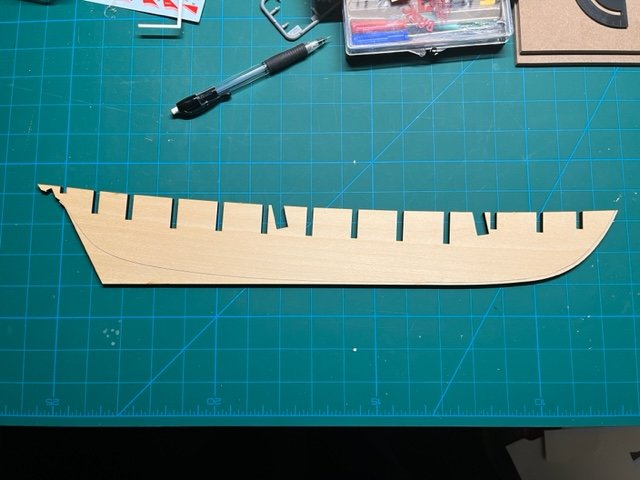
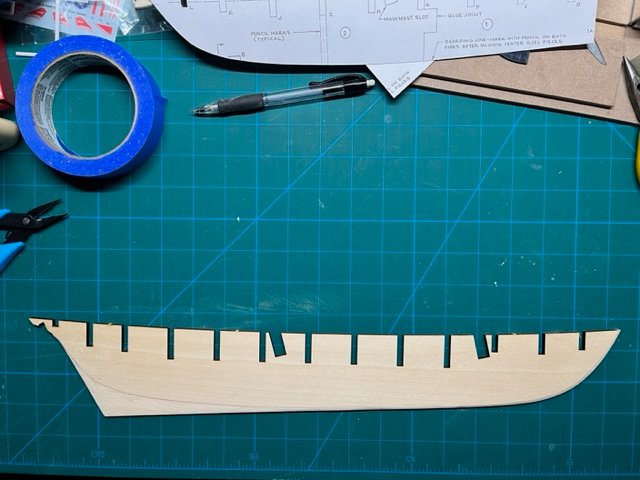
Now the Holidays are over it is time to hit the bench again! Separated the center keel and sanded the edges where the false keel will be attached. Transferred the bearding line onto both sides of the center keel and chiseled/sanded 1/16" below the face of the center keel towards the bottom of the center keel on one side. This wasn't too easy for me as I've didn't chisel the bearding line on my last build. I chiseled/whittled small sections at a time and sanded the larger area towards the aft. Maybe I made it harder for myself, but I didn't trust that I would be able to whittle the surface down 1/16" over such a large area in a controlled manner. So here are the results... a before and after photo if you will! Now on to the other side of the center keel... More to come! Fuji
-
Hi Halit - I'll check it out!
-
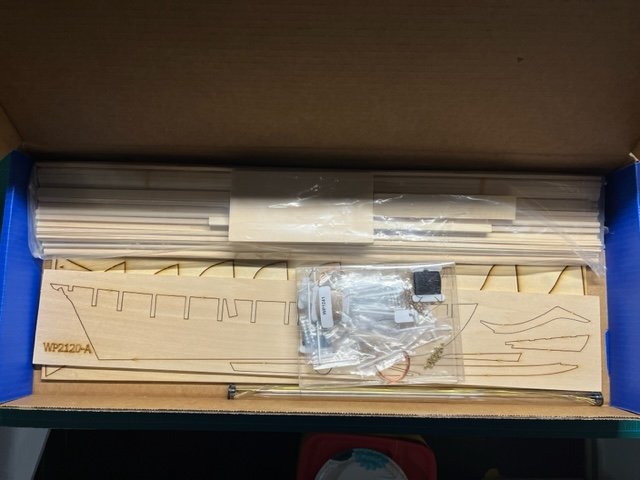
After taking a few weeks off after building the Calypso I'm off on a new build! I'm going to tackle building the plank on bulkhead model of the Pride of Baltimore (POB) II by Model Shipways, inc. In preparation of this build, I read the book Pride of the Sea by Tom Waldron. This book gave me insight into how the original Pride of Baltimore was conceived and built by the city of Baltimore, and the tragic sinking during a sudden squall on May 14, 1986. More to follow! Fuji

-
Thank you!
-
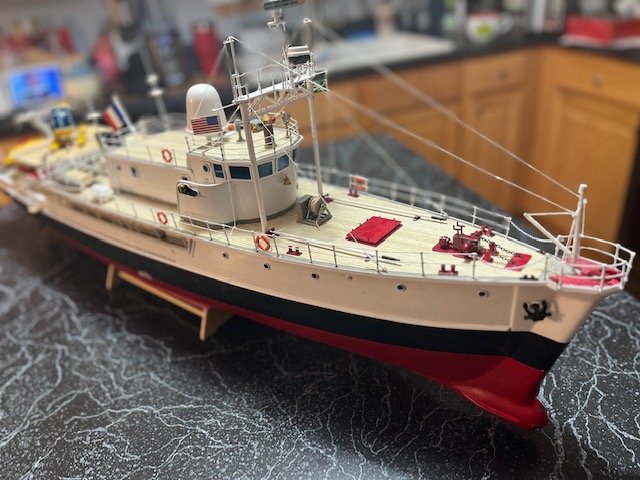
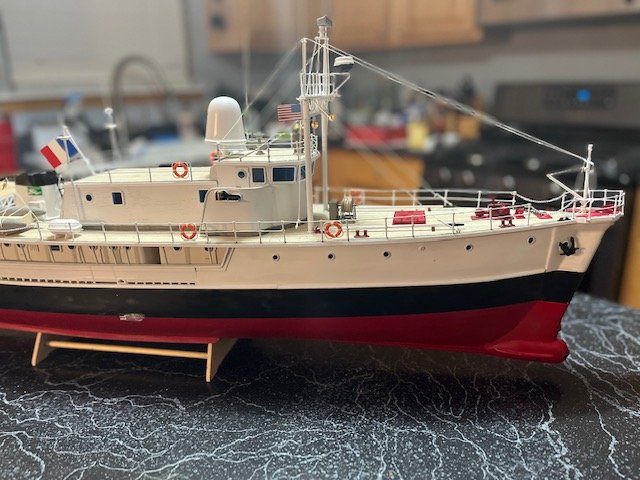
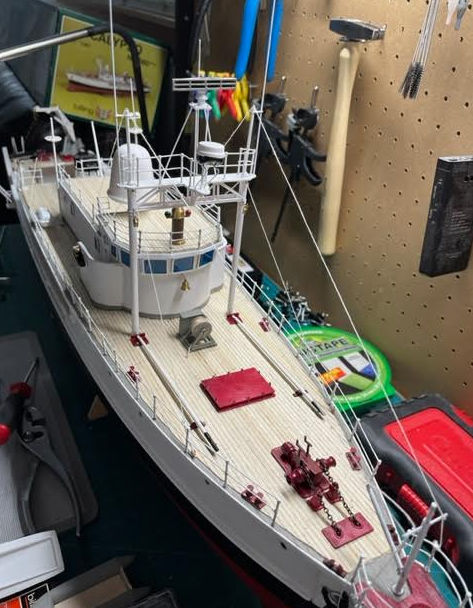
Well 844 days later the Calypso build is completed! I skipped installing the 55-gallon drums on deck (for a marine research vessel I could not see the reasoning of having 55-gallon drums of oil or fuel being lashed on the deck) and am still contemplating adding the "widgets" and wooden boxes for which they are kept in. As of right now I just look at them as clutter. Now to figure out how to get her off the workbench onto something large enough to hold her so I can start my next build... The Pride of Baltimore II!
- 68 replies
-
- 11
-

-

-
- calypso
- billing boats
- (and 1 more)
-
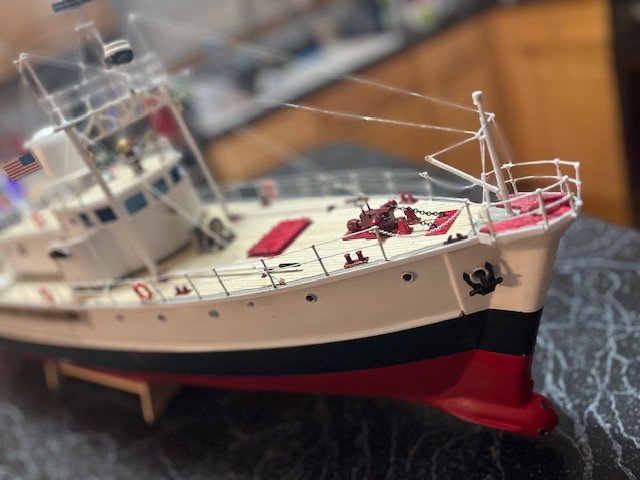
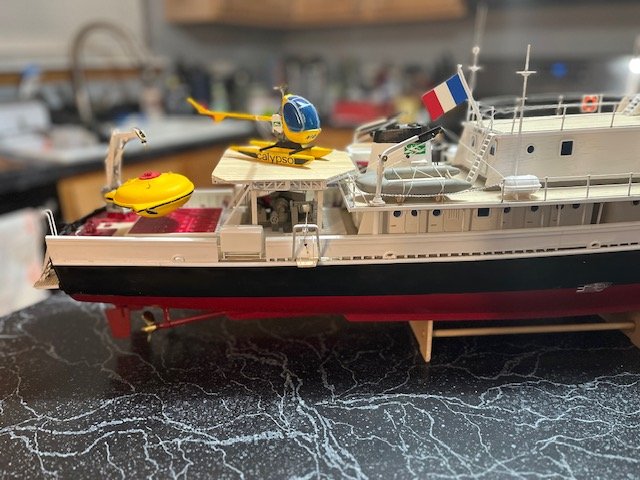
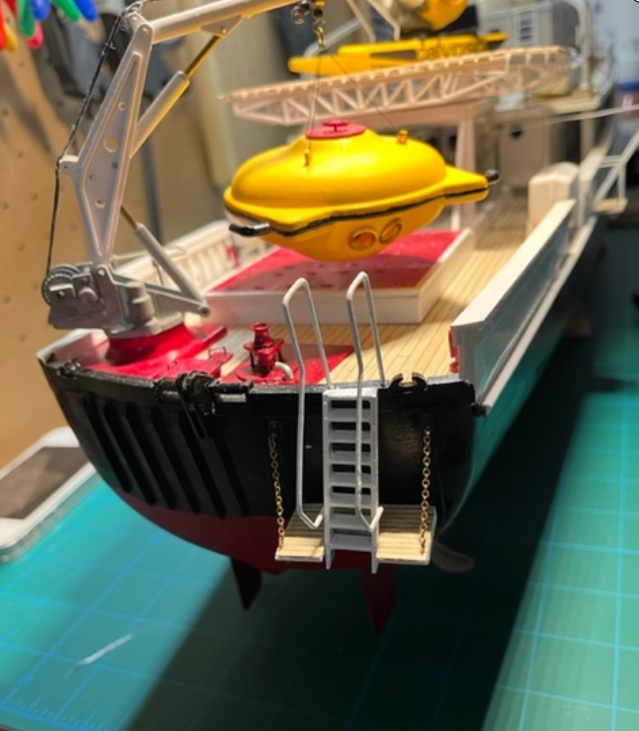
Made some progress today! I finally added the Calypso's brass props! I think they look way better than the plastic props that came with the kit! Next, I worked on adding the crane booms which attach to the ship's superstructure and adding the rigging... Next will be the small skiff and the zodiac inflatable boats. More to come! Fuji

- 68 replies
-
- 4
-
-
- calypso
- billing boats
- (and 1 more)
-
Thank you, Yves! I can now see the light at the end of the tunnel.... hopefully not a train coming the other way!
-
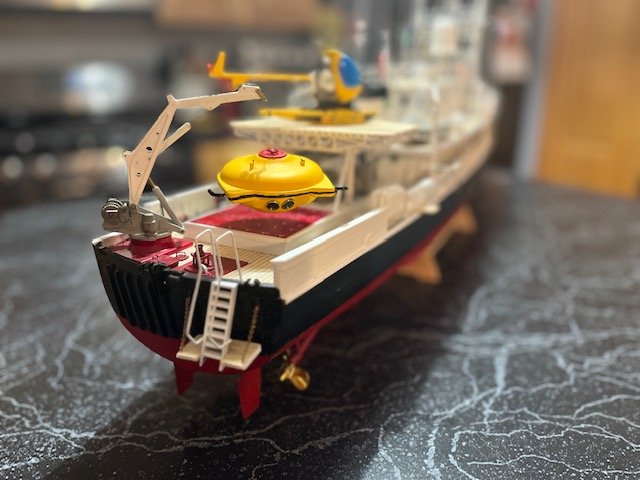
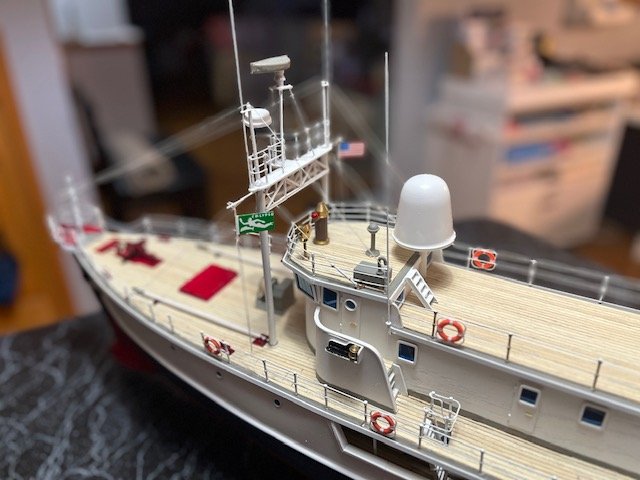
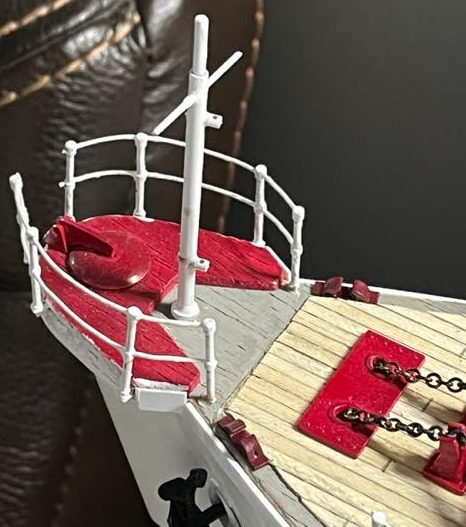
Hello! Had a few hours this week to work on the Calypso with this being a Holiday week in the states. Built the small crane at the bow. Drilling the holes for the brackets was pretty tough as the tubing is a very small diameter. Broke a couple of drill bits but eventually go the holes drilled. Built the 3 long aerials that are installed around the main deck. Hopefully they'll survive me continually snagging my sweater on these as I work around the model!! I also built the two cranes towards the aft of the cabins. These were a bit of a challenge to build especially since I was missing the block and tackle for them. I stole a couple of blocks from my Virginia model, and they look okay. Next is to complete the crane at the bow and build and install the crane booms which can be used on the ship's superstructure. Happy Thanksgiving to those living stateside! More to come! Fuji
- 68 replies
-
- 6
-
-
- calypso
- billing boats
- (and 1 more)
-
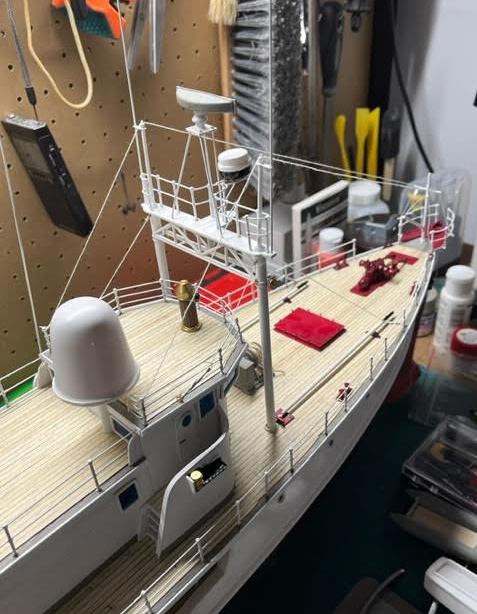
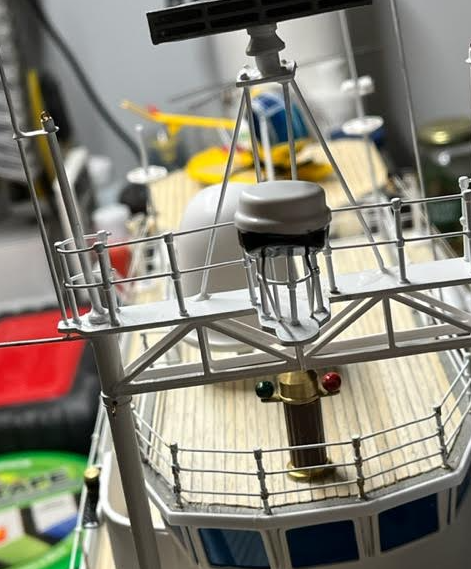
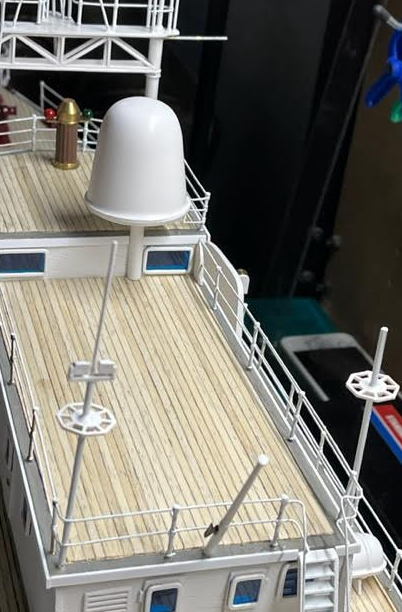
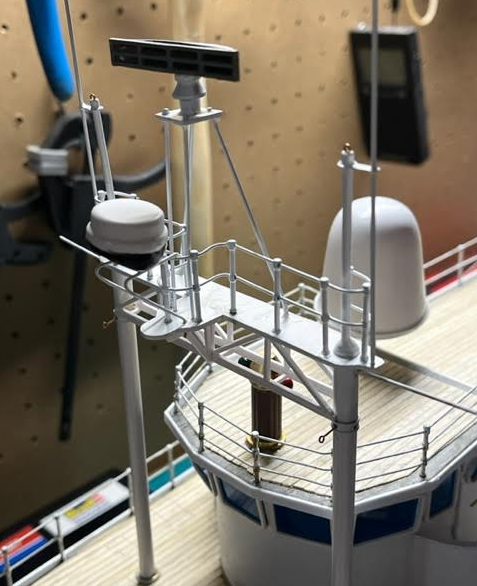
Hello! Apologies! It's been a while since I've posted any progress pictures!! I'm still working on the Calypso but not as fast as before. Got a little bored with the build so I built a "fast build" (QE2) on the side, but now I'm back on the Calypso build! So, this is the current state of the Calypso build... I've slowly built up the handrailing and placed some plastic strips along the deck and hull/cabins to hide the unfinished edge of the decks. I've also built the superstructure which holds the antennas and radars. Still need to add the GPS housing and miscellaneous booms and braces I have also been doing some work on the stern. Built the diving platform and temporarily threaded on the props which came with the kit. I bought some brass props from Dumas which will be the ones which I'll use when the build is complete. Planning to work on adding miscellaneous ladders and stairs and building the boom and mast at the bow next. Stay tuned for more progress! Fuji

- 68 replies
-
- 7
-
-
- calypso
- billing boats
- (and 1 more)
-
Hello Hugo! Yes, I've slowly been working on the Calypso. Work got crazy busy so not working on her as much as I'd like to. Stay tuned for photo updates! Fuji
-
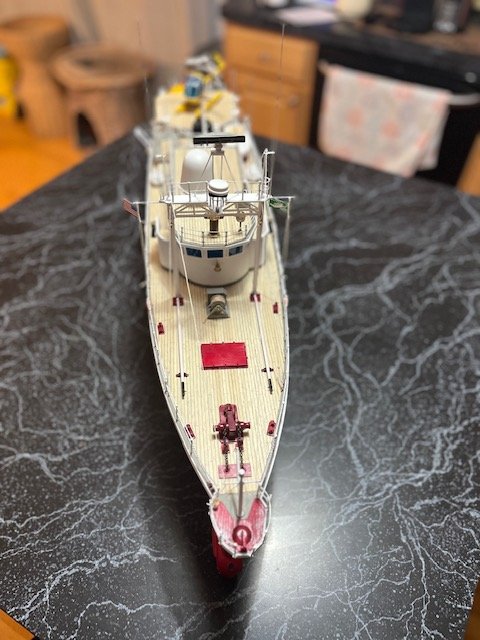
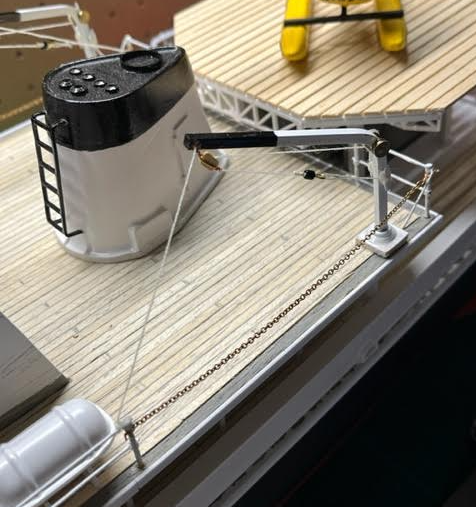
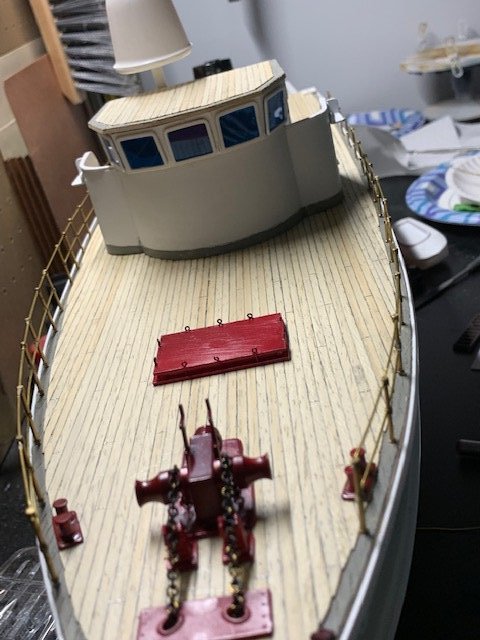
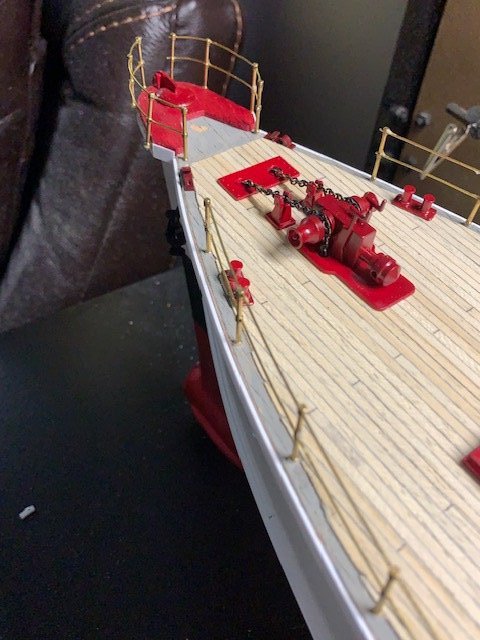
Made some progress on the Calypso the past few days. Not a whole lot but still some forward progression! Started adding the furniture to the decks! Got the anchors and anchor chains to the winch and believe it or not the anchors are attached to the chain and the chain is looped from one anchor to the other! Thank goodness for thin wires and patience! I also started adding the handrail posts and handrails! The handrails aren't as hard to add as I thought they would be. I learned to super glue the railings to the first and last post before trying to bend the railings. The think wire is super easy to bend when glued to the post... the glued handrail almost acts like an anchor so I can bend the handrails just using my fingers. The hardest handrails to bend was at the bow and atop the wheelhouse. Sometime over the weekend I'm going to try and tackle the stairway and stairway railings. I think I have a plan but we all know how that goes! More to come! Happy Fourth of July y'all! Fuji

- 68 replies
-
- 5
-
-
- calypso
- billing boats
- (and 1 more)
-
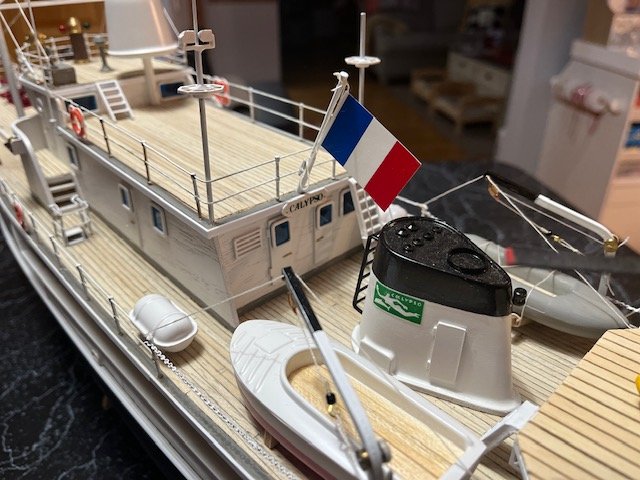
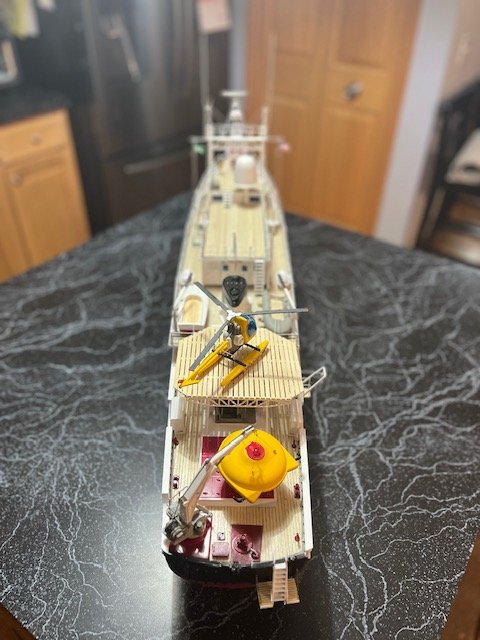
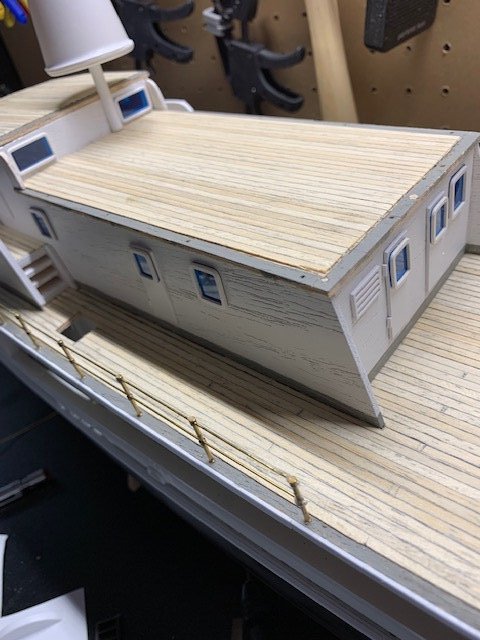
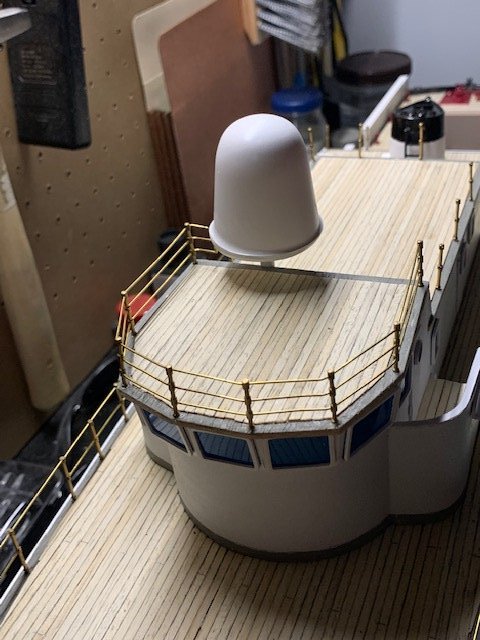
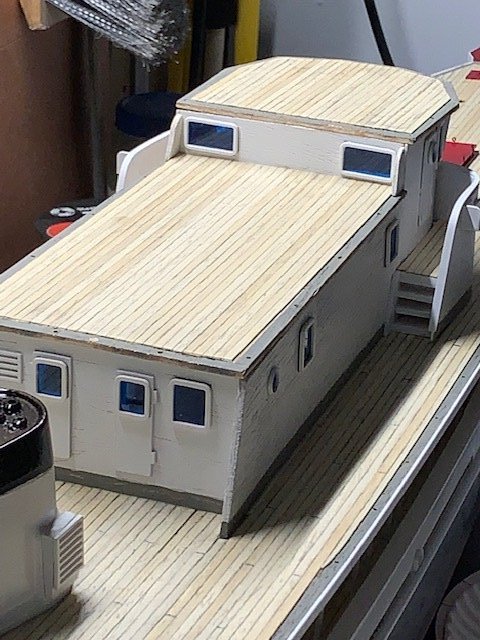
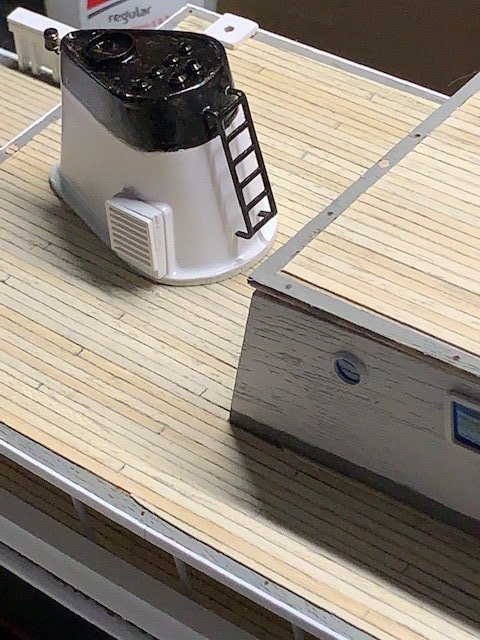
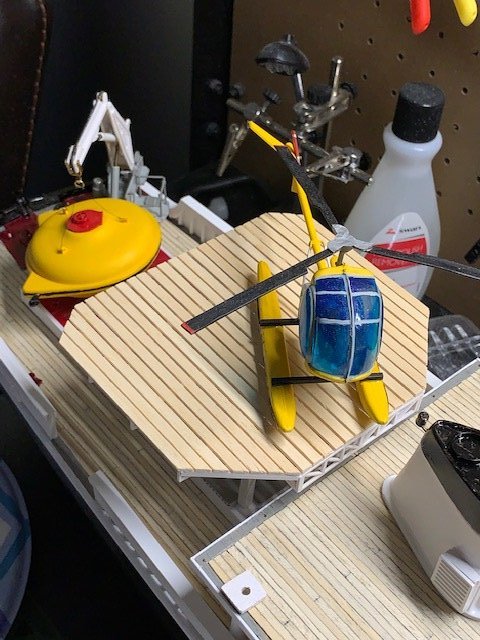
Made more progress on the Calypso the past few weeks! I've added the windows and portholes and also painted the upper cabins and the bridge. Didn't come out too bad I think! I've also planked the upper deck, upper cabin roof and the bridge's roof. That was a challenge but also very fun! Built and painted the funnel and the helipad is now glued to the helipad supports! I am also pretty happy as to how the stairs to the bridge came out! I scratch built the stairs as the model instructions would have had me build a "slide" consisting of a angled piece of wood stock. NOPE! That would have looked tacky even though you would never see it behind the stairway "wall". On the side I've built and painted the radar dome and support and have started building the Zodiac inflatable and skiff. Did I mention I don't like the vacuform parts of this kit?? OH! A co-worker asked my why am I hand painting most parts without using paint masking tape? Well besides the hull I want to hand paint as much as possible as what I am building will become a family heirloom of sorts. I think anybody can use masking tape, but to paint those line with aging shaky hands.. well that says this model is custom made by me! Since the weather is somewhat nice progress will slow on this build, but I will post progress photos ASAP! Cheers! Fuji


- 68 replies
-
- 5
-
-
- calypso
- billing boats
- (and 1 more)
-
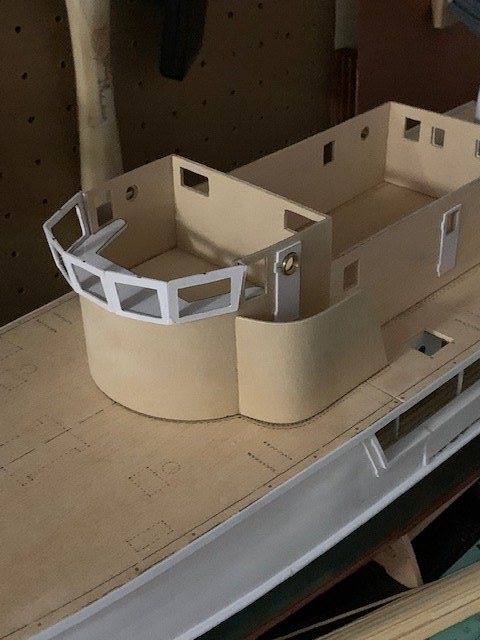
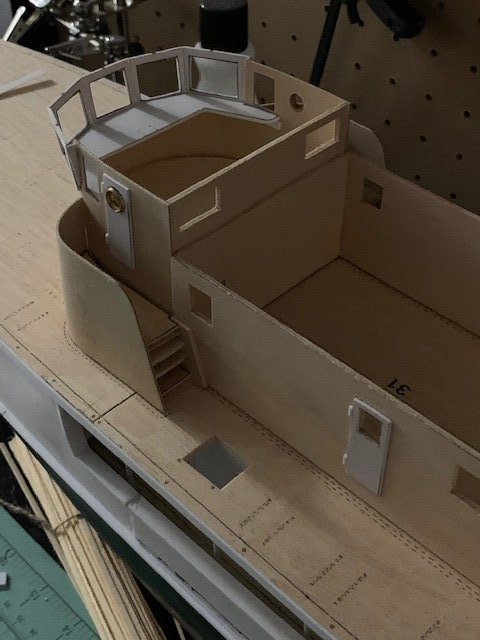
Making some good progress on the Calypso lately! I started building the bridge and the upper cabins. Let me start by saying the stairs up to the bridge according to the kit instructions was supposed to be just a single piece of wood glued from the bottom of the stairs up to the landing. Boooo! I took that piece of wood and created two stair treads following the angle formed by the upper and lower formers. Wasn't too hard to make but I can tell I'll need to paint these black or a dark color to distract from the fact the stair tread is a tad too thick! The forming of the stairway wall wasn't as hard as I thought it would be! What I did was steam the piece and bent it around a Tamiya paint bottle. Took about 3 steaming sessions before it created a good curve but patience is a virtue so they say! I next super glued the part of the stairway wall where it attaches to the bridge and added more super glue on the formers. Clamped that portion down then added super glue to the remainder of the former and clamped the stairway wall from one side to the other. I think it came out great! Now about the multi-faceted bridge windows... I loosely tapped the edges where the panels line up to each other using paint masking tape. Then with the bridge assembly upside down I slowly tacked each piece to the styrene former making sure the top (now on the bottom) of each window frame was on the cutting matt and the edges lined up with the adjacent window frame. It took about 20 minutes to get the shape and look that I wanted... along with a few choice words thrown in there for effect! I'll paint the upper structure tonight and pray that it comes out looking right. More to come! Fuji
- 68 replies
-
- 4
-
-
- calypso
- billing boats
- (and 1 more)
-
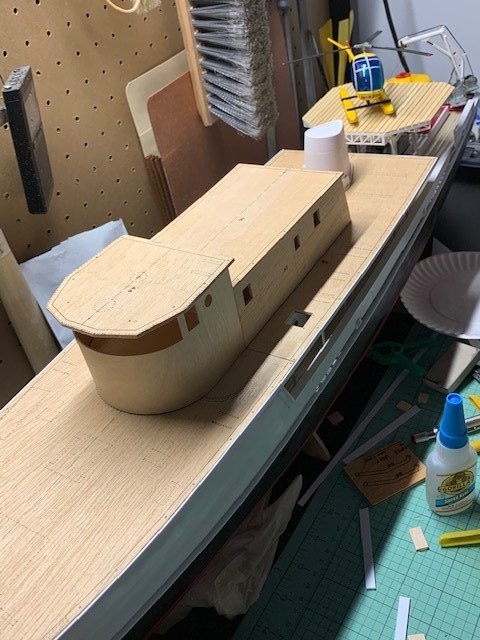
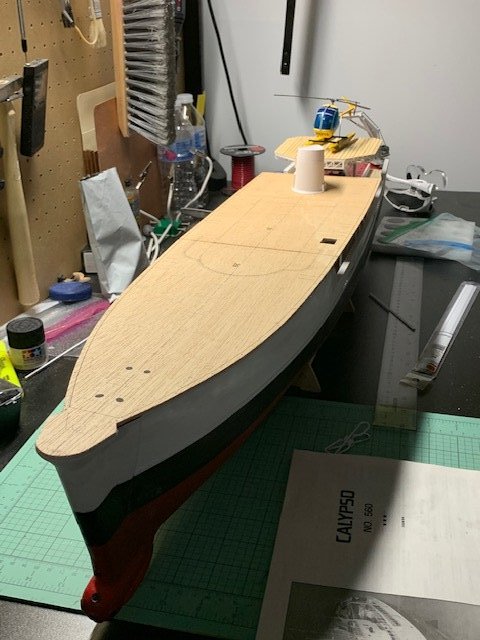
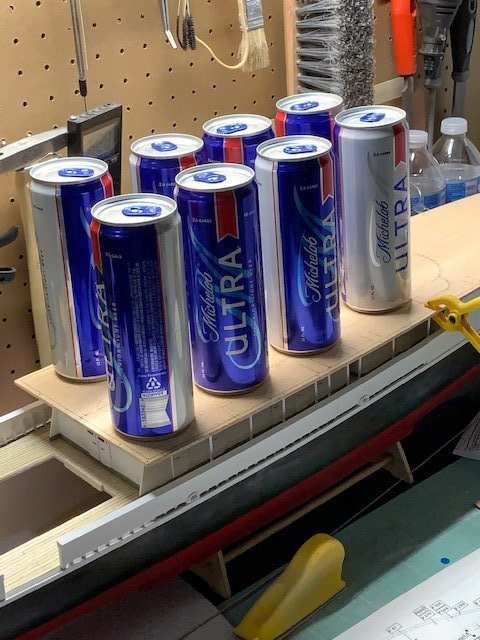
Worked a little on the Calypso over the week. Glued down the upper deck! I was pretty nervous about doing this as the initial dry fit didn't seems as if it would go smoothly as I could never seem to get the centerline of the deck to line up with the centerline of the cabins on the main deck. Used a 15 minute epoxy and ta dah! It didn't come out as bad as I thought it would. Still off center but by only about 1/16" so I'm a happy builder! The upper deck and the cabins on the upper deck are supposed to be removable if the ship is made as a RC model, but since this will be a static display I glued the upper deck down. It took eight cans of beer to glue down the upper deck! No not to drink... but to weigh down the upper deck to the tops of the main deck cabins! I purposely left off the last two posts towards the stern of the main cabins as there is supposed to be a large diameter post right below the starboard and port davits on the upper deck. I'll probably install 1/8" or 3/16" diameter dowels to represent the posts after I mount the davits on the upper deck. Next I'm going to glue 1/8" wide strips of styrene along the edge of the upper deck to mask any mismatches between the hull and the upper deck and all along the rear portion of the upper deck. It'll look much cleaner than just having the exposed plywood over the main deck. More to come! Fuji

- 68 replies
-
- 7
-
-
- calypso
- billing boats
- (and 1 more)
-
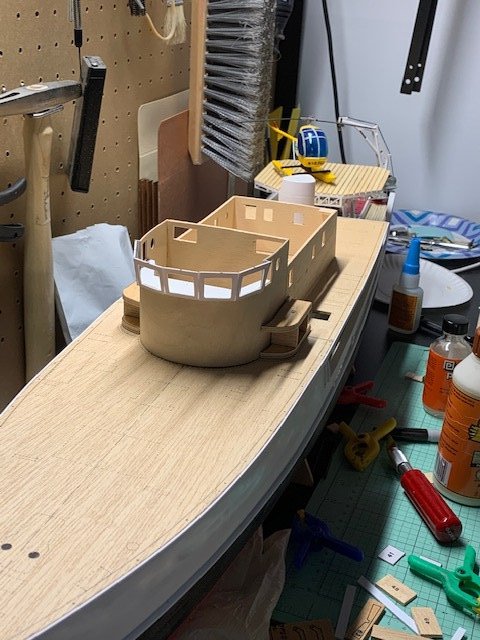
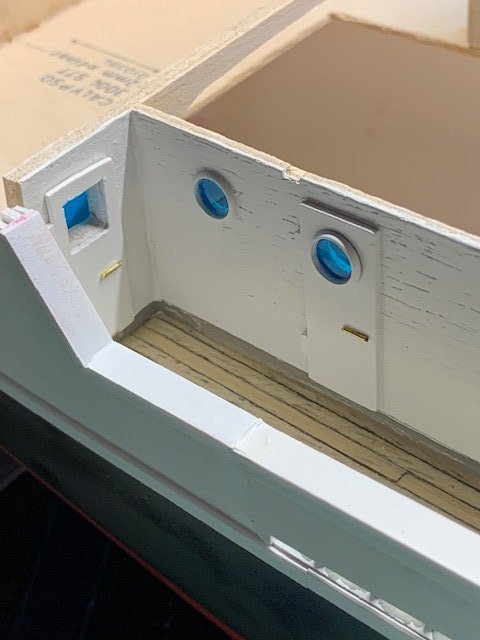
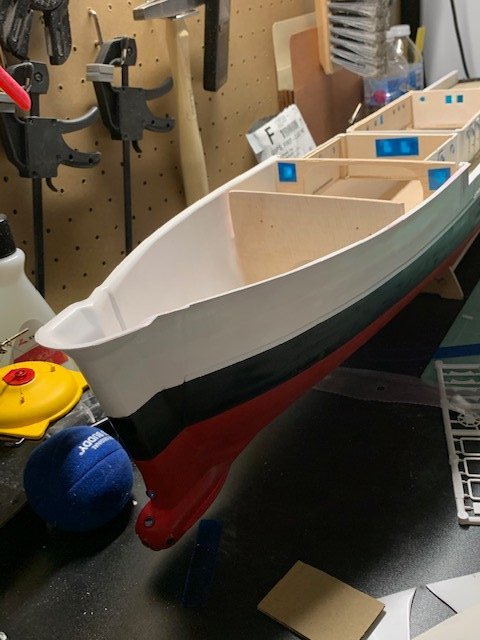
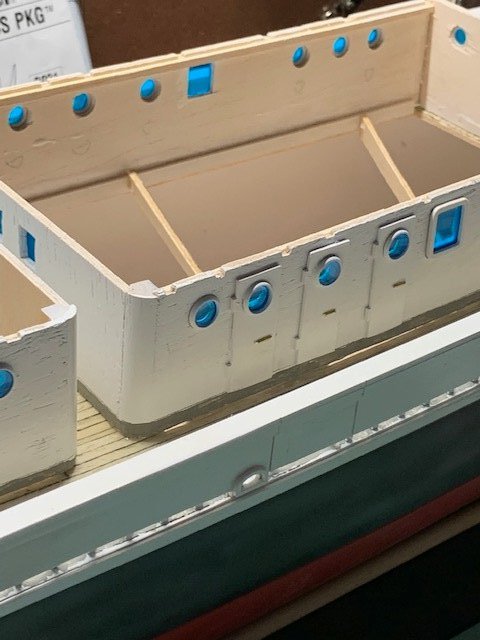
Despite the weather turning nice and the draw to do more outside being very strong I got some work done on the Calypso the last two weekends! I managed to paint the hull (had a LOT of issues with over-spraying so there is literally 3 coats of paint on the hull!) but still need to go back and hit the areas where the painter's tape wasn't quite aligned. I also cut the acetate for the circular portholes using the Thinnerline Circle Cutter I bought from Shadow Hobby. For those of you who are looking for an accurate way to cut circles in variable diameters on acetate sheets this is it! I used a blue tinted acetate sheet for all the windows as I wanted to mask the fact that the cabins have no interior detail. Overall I'm pretty happy how the windows all came out. If you look at the last photo you'll see the passageway that I created with windows representing 2 sets of double doors on each cabin. In that same photo you'll also see the "door handles" that I created using thin piano wire. I had to do this as what's a door complete with hinges without some kind of door handle? I glued the 2 cabins to the main deck in preparation of adding the support columns and the lower half of the upper deck cranes before gluing the upper deck to the top of the main deck cabins. Not really looking forward to installing the upper deck as I can see there will be a lot of alignment issues since both halves of the deck appear to be longer than what is physically possible. Could mean a LOT of trimming and retrimming in order to get the deck the correct length and in the correct position. I'll probably get to those in a couple of weeks as the wife will be having surgery soon so my free time to work on the Calypso will be slim to none. More to follow!
- 68 replies
-
- 5
-
-
- calypso
- billing boats
- (and 1 more)