
travis
-
Posts
176 -
Joined
-
Last visited
-

Sail feedback request, Mondfeld method
travis replied to travis's topic in Masting, rigging and sails
Anyone have a recommended US vendor (besides SIG if their product is possibly not durable enough)? -
Sail feedback request, Mondfeld method
travis replied to travis's topic in Masting, rigging and sails
@Y.T. I was wondering about the durability. I wonder if it can be layered/laminated for strength? That batiste fabric sounds interesting though too. Going to look that up. -
Sail feedback request, Mondfeld method
travis replied to travis's topic in Masting, rigging and sails
Thank all, I keep reading about silkspan but hadn't gotten the initiative to give it a try yet, in part becuase it's not a available at the local hobby shop and there seems to be a lot of "fake named" products online? Just trying to find a good supplier thats in the US (darn tarrifs!) thats not overcharging or excesive shipping. I did try an interesting aproach on my first build (a schooner). On that one i used a light fabric and carefully "pulled" a single thread out where each seam would be. Still of course out of scale but a pretty cool look for a larger scale build (1:40 I think?). Can't get it to work on a tighter weave fabric though. I think i will make a try for sourcing the silkspan/modelspan first and if that doesn't work out I'll go for the penciled fabric. -
Sail feedback request, Mondfeld method
travis replied to travis's topic in Masting, rigging and sails
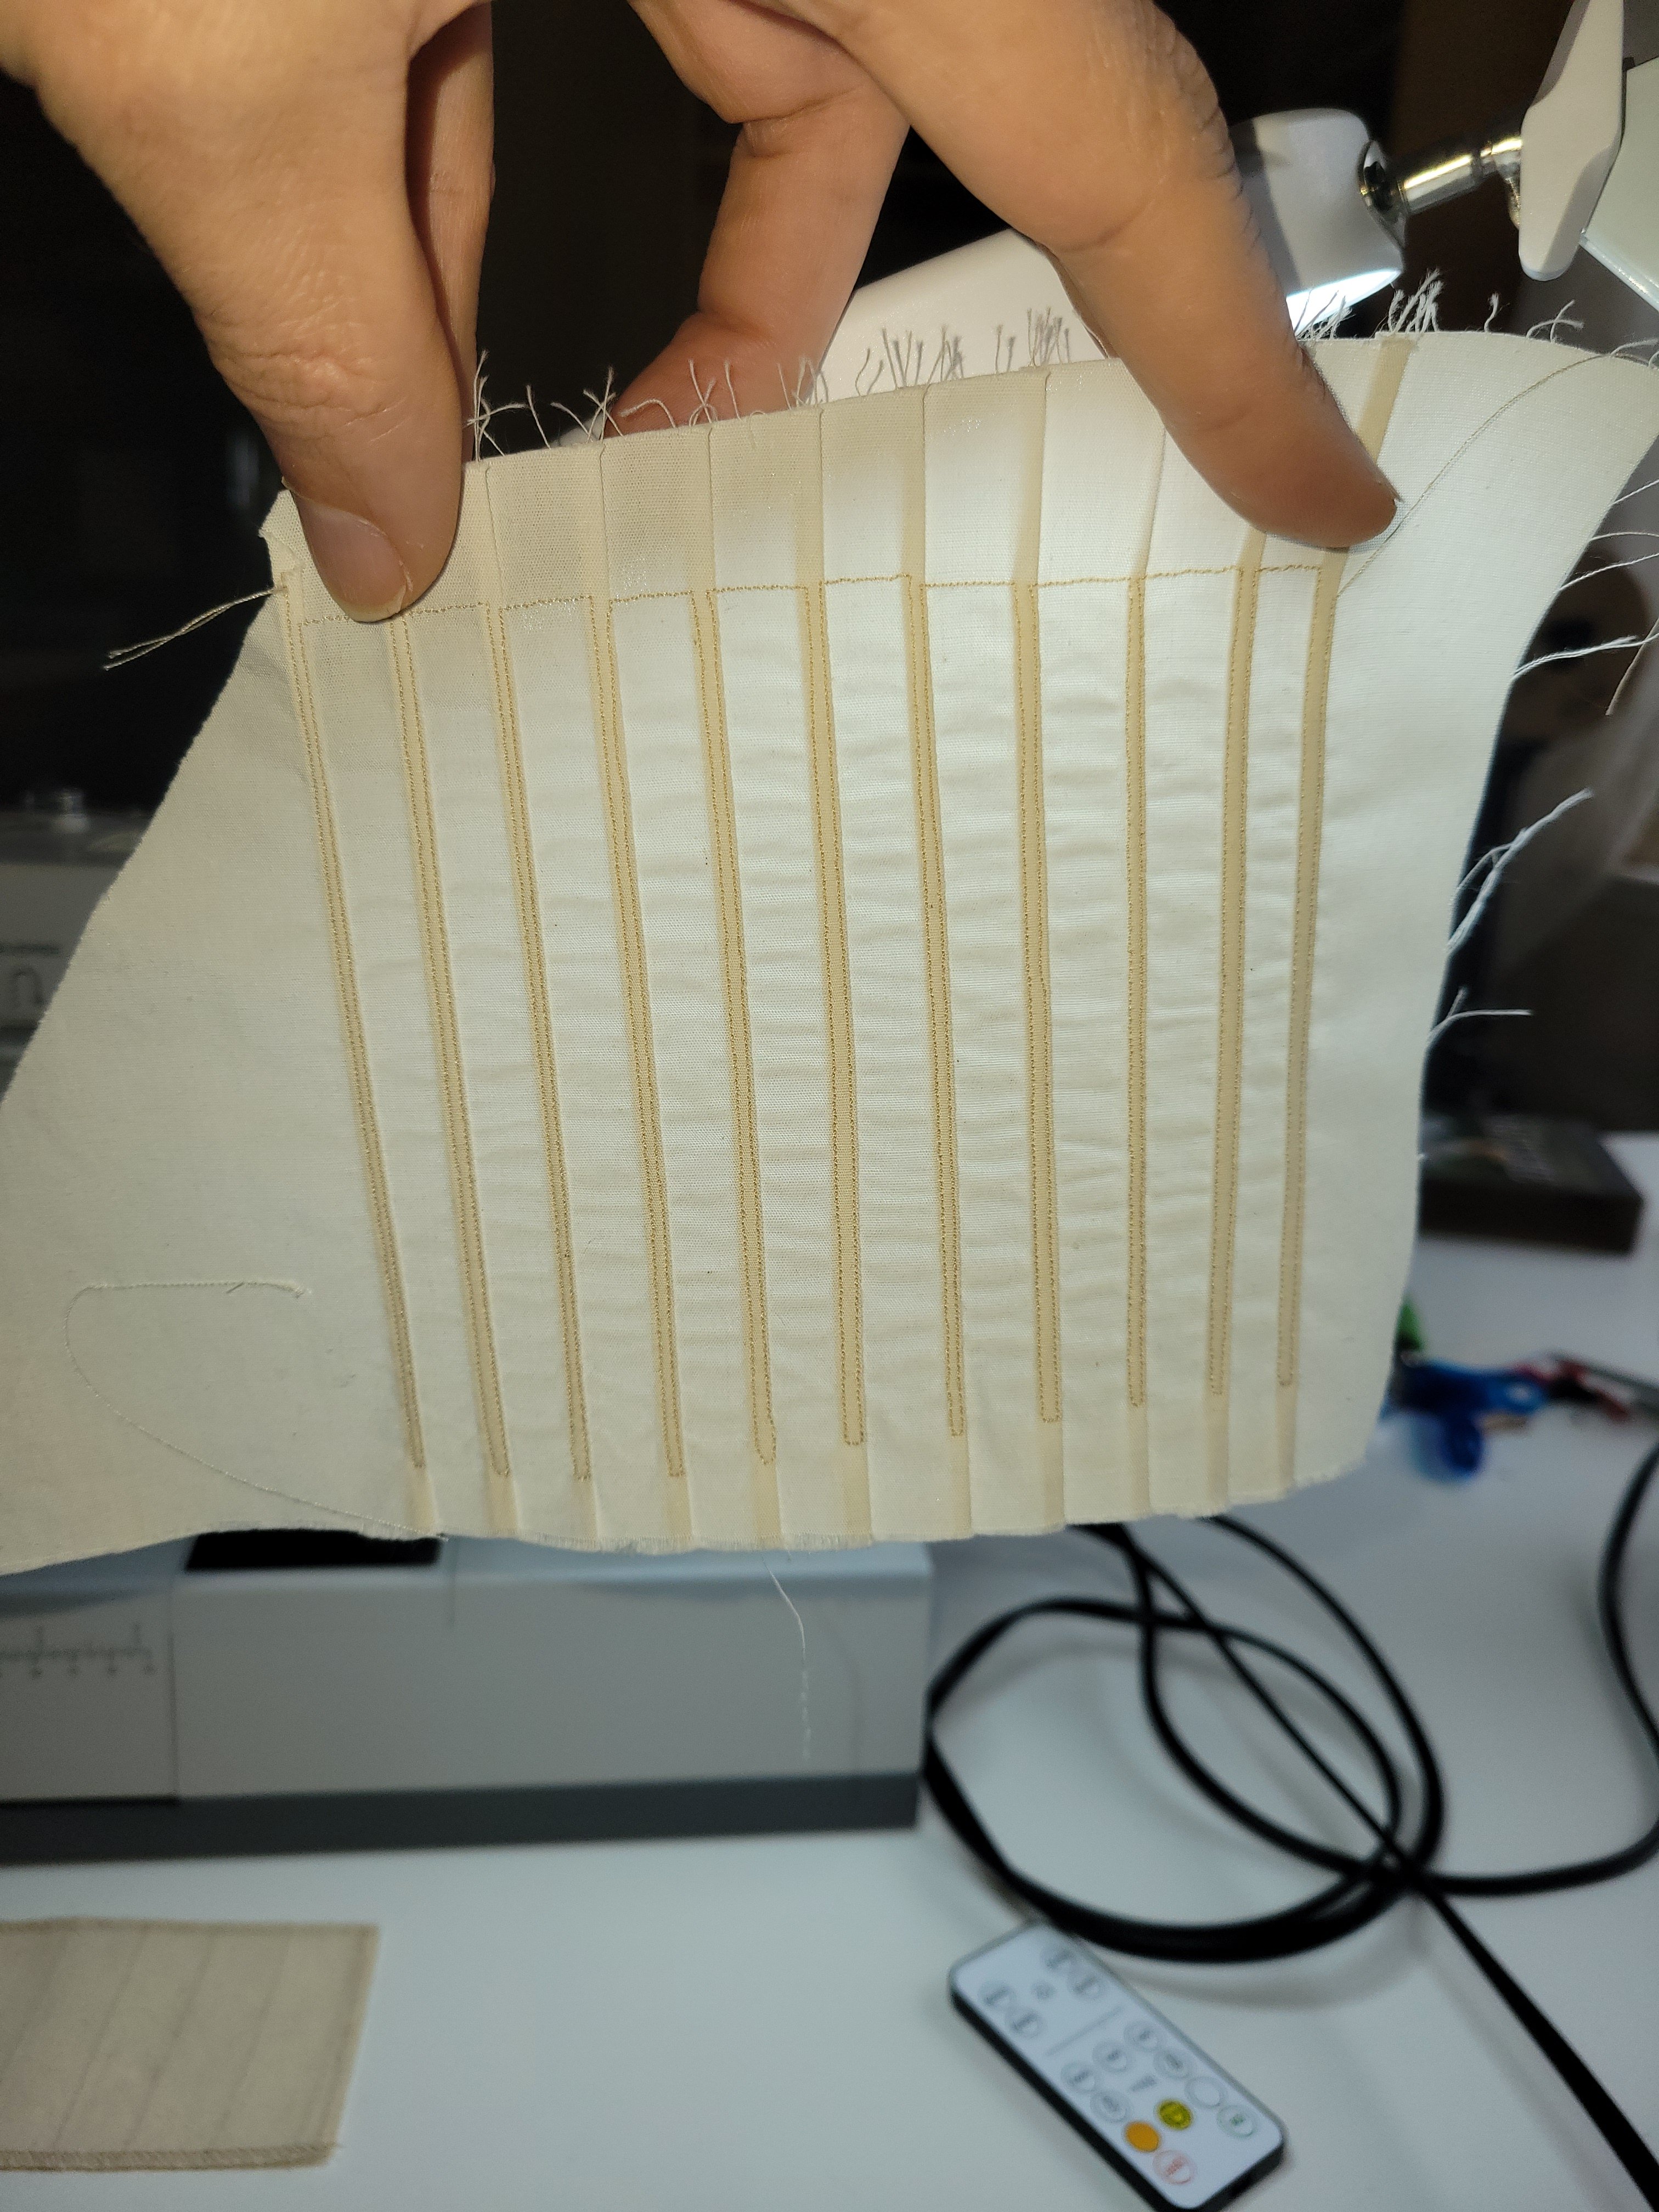
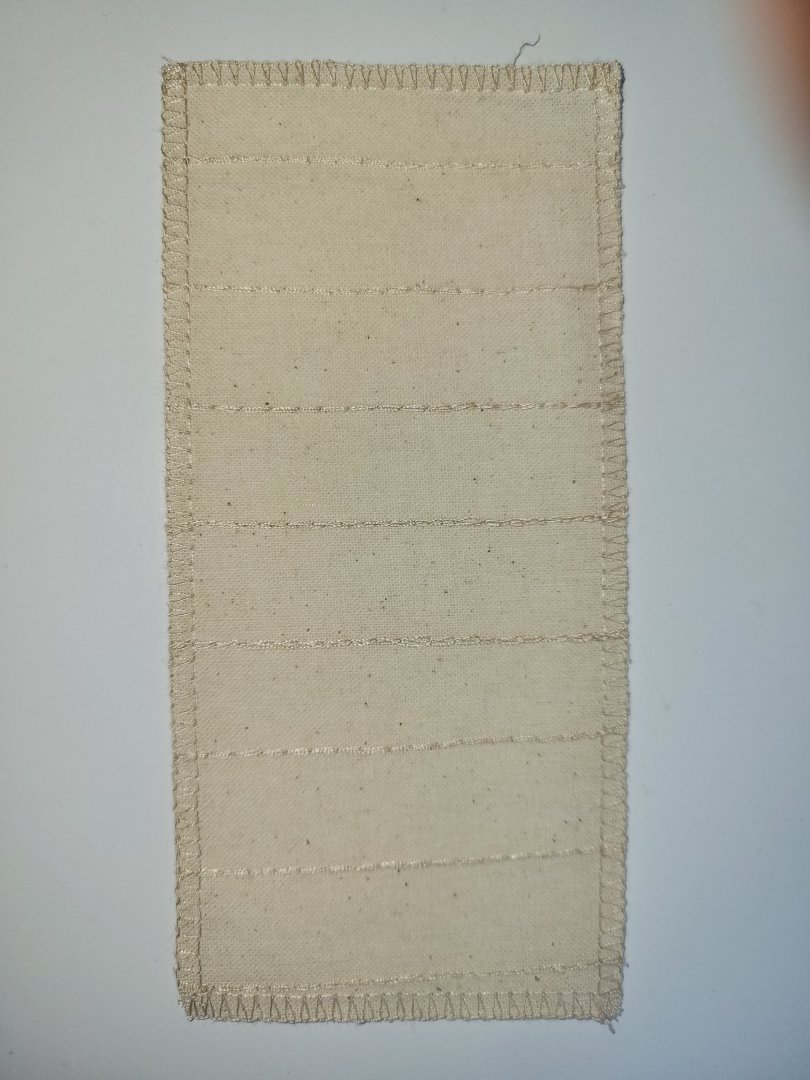
Here's holding to the light to see the overlapping hem better.
-
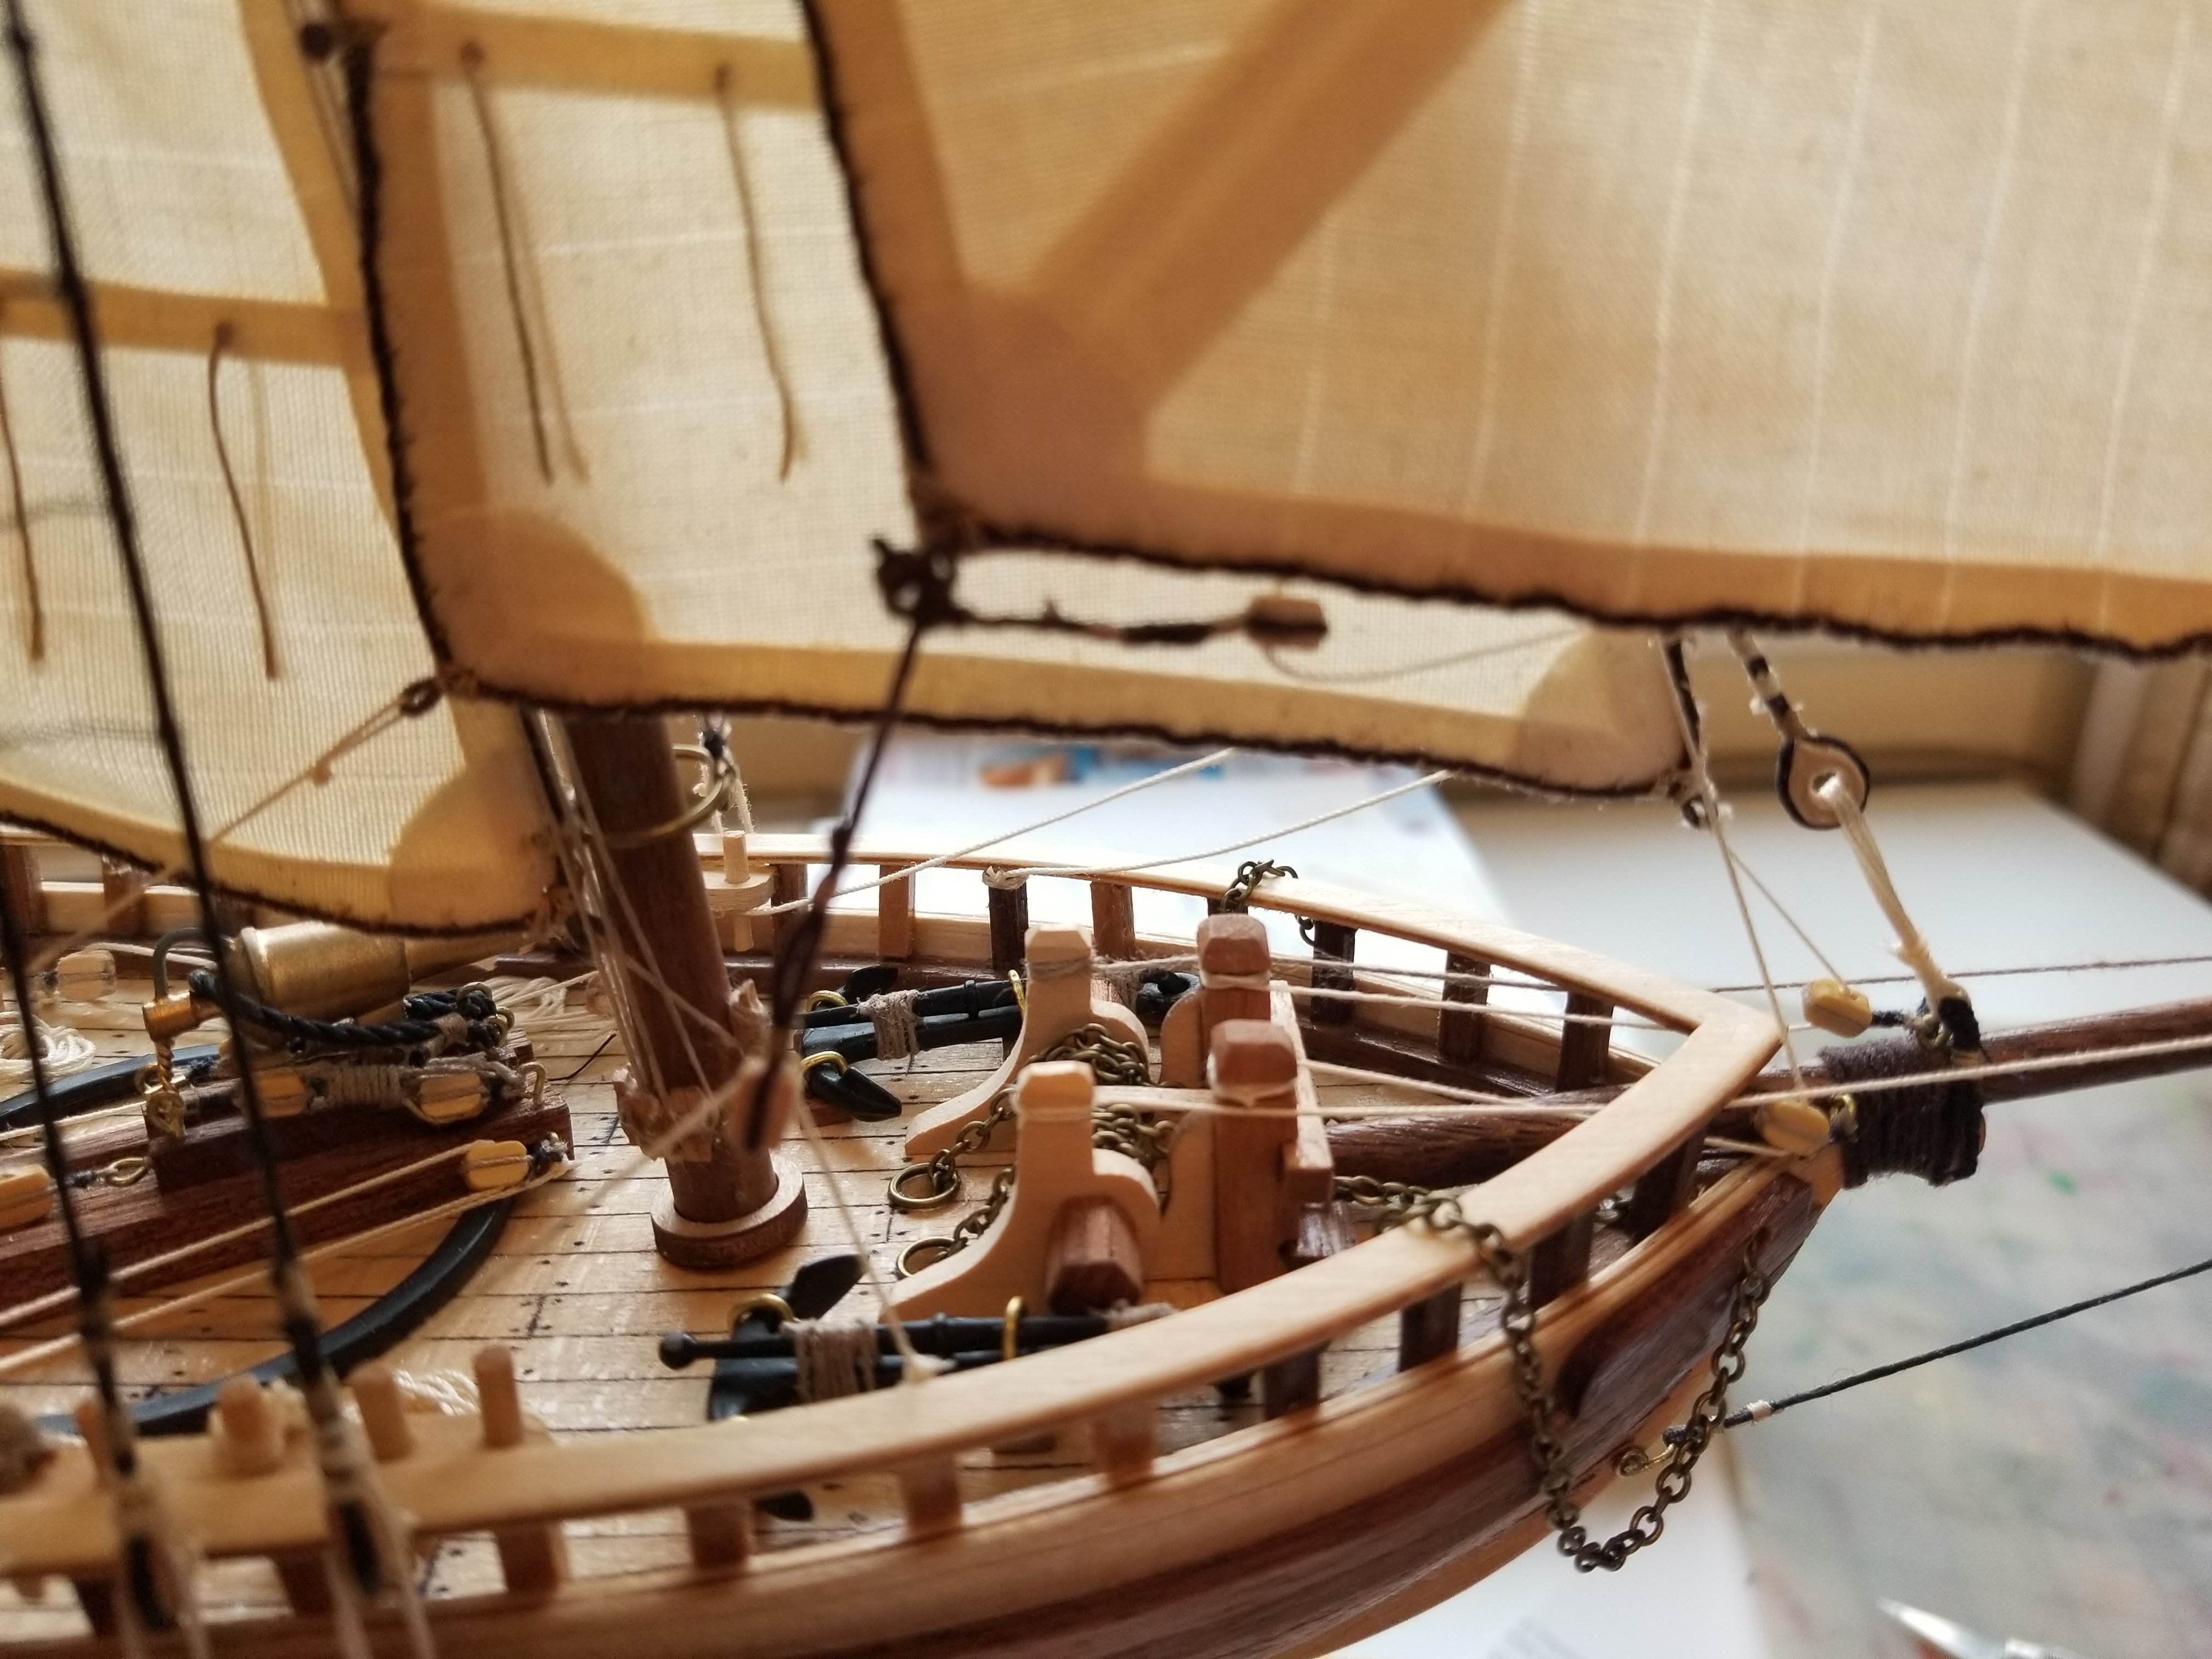
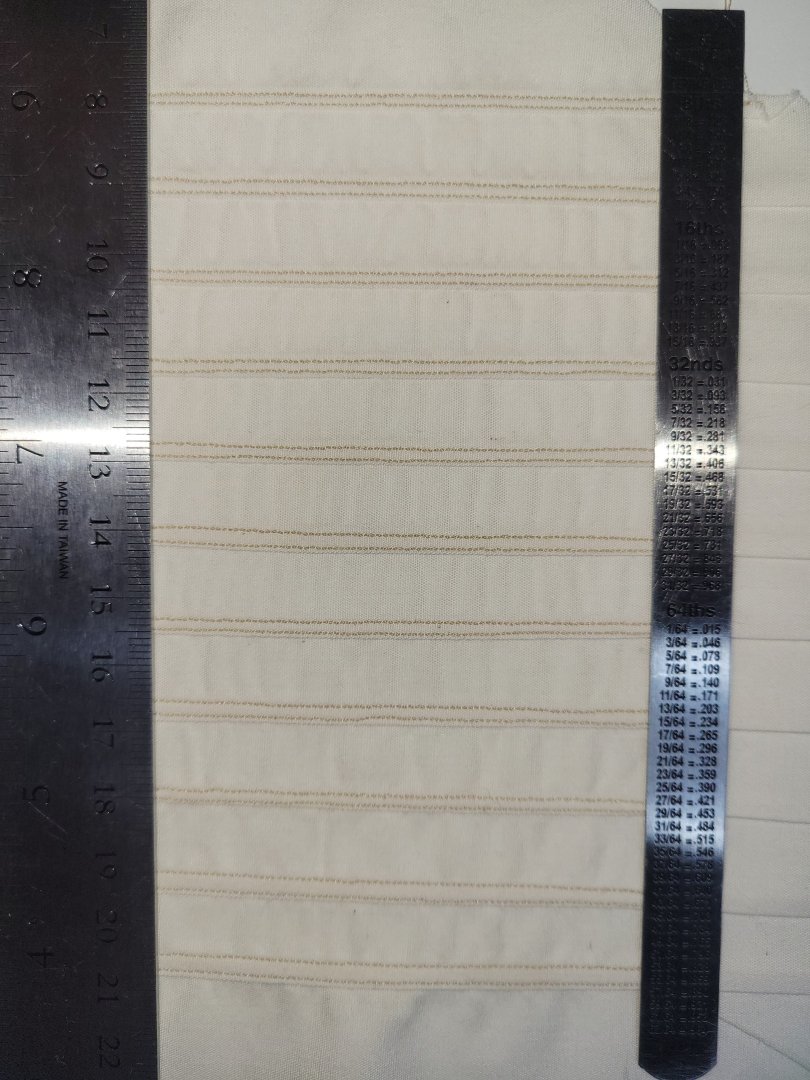
Looking for some community feedback. I'm starting sails for my third build, Occre Apostle Felipe. So approx 17th century spanish galleon from the silver fleet (mexico). Each build I've tried a different sail strategy. This time, I've used a lot of reference on this build from Wolfram Mondfeld's book, historic ship models. I noticed he has a unique sail making approach that i don't think I've seen on any posts here. His approach is press/steam a seam for each panel of the sail and then straight stich those seams. So a bit more than just using the stitch to create the panels but an actual hem. It's a lot of work. Also quite hard to steam the small seams at a consistent width and sew the seams. In my attempt, I have a 3mm overlap of fabric which results in about 12mm panels (model scale is 1:60). Interested in everyone's feedback before I commit to all the sails. This one is a spritsail. First image is the sample before hemming the edges. Second image is the sail supplied by occre which is of course to heavy a fabric. Constructive criticism acceptable!
-
 LoydB reacted to a post in a topic:
Apostol Felipe by travis - OcCre - 1/60
LoydB reacted to a post in a topic:
Apostol Felipe by travis - OcCre - 1/60
-
Lind Mihály reacted to a post in a topic:
Apostol Felipe by travis - OcCre - 1/60
-
kgstakes reacted to a post in a topic:
Apostol Felipe by travis - OcCre - 1/60
-
kgstakes reacted to a post in a topic:
Apostol Felipe by travis - OcCre - 1/60
-
 kgstakes reacted to a post in a topic:
Apostol Felipe by travis - OcCre - 1/60
kgstakes reacted to a post in a topic:
Apostol Felipe by travis - OcCre - 1/60
-
kgstakes reacted to a post in a topic:
Apostol Felipe by travis - OcCre - 1/60
-
GrandpaPhil reacted to a post in a topic:
Apostol Felipe by travis - OcCre - 1/60
-
DavidG reacted to a post in a topic:
Apostol Felipe by travis - OcCre - 1/60
-
vvvjames reacted to a post in a topic:
Apostol Felipe by travis - OcCre - 1/60
-
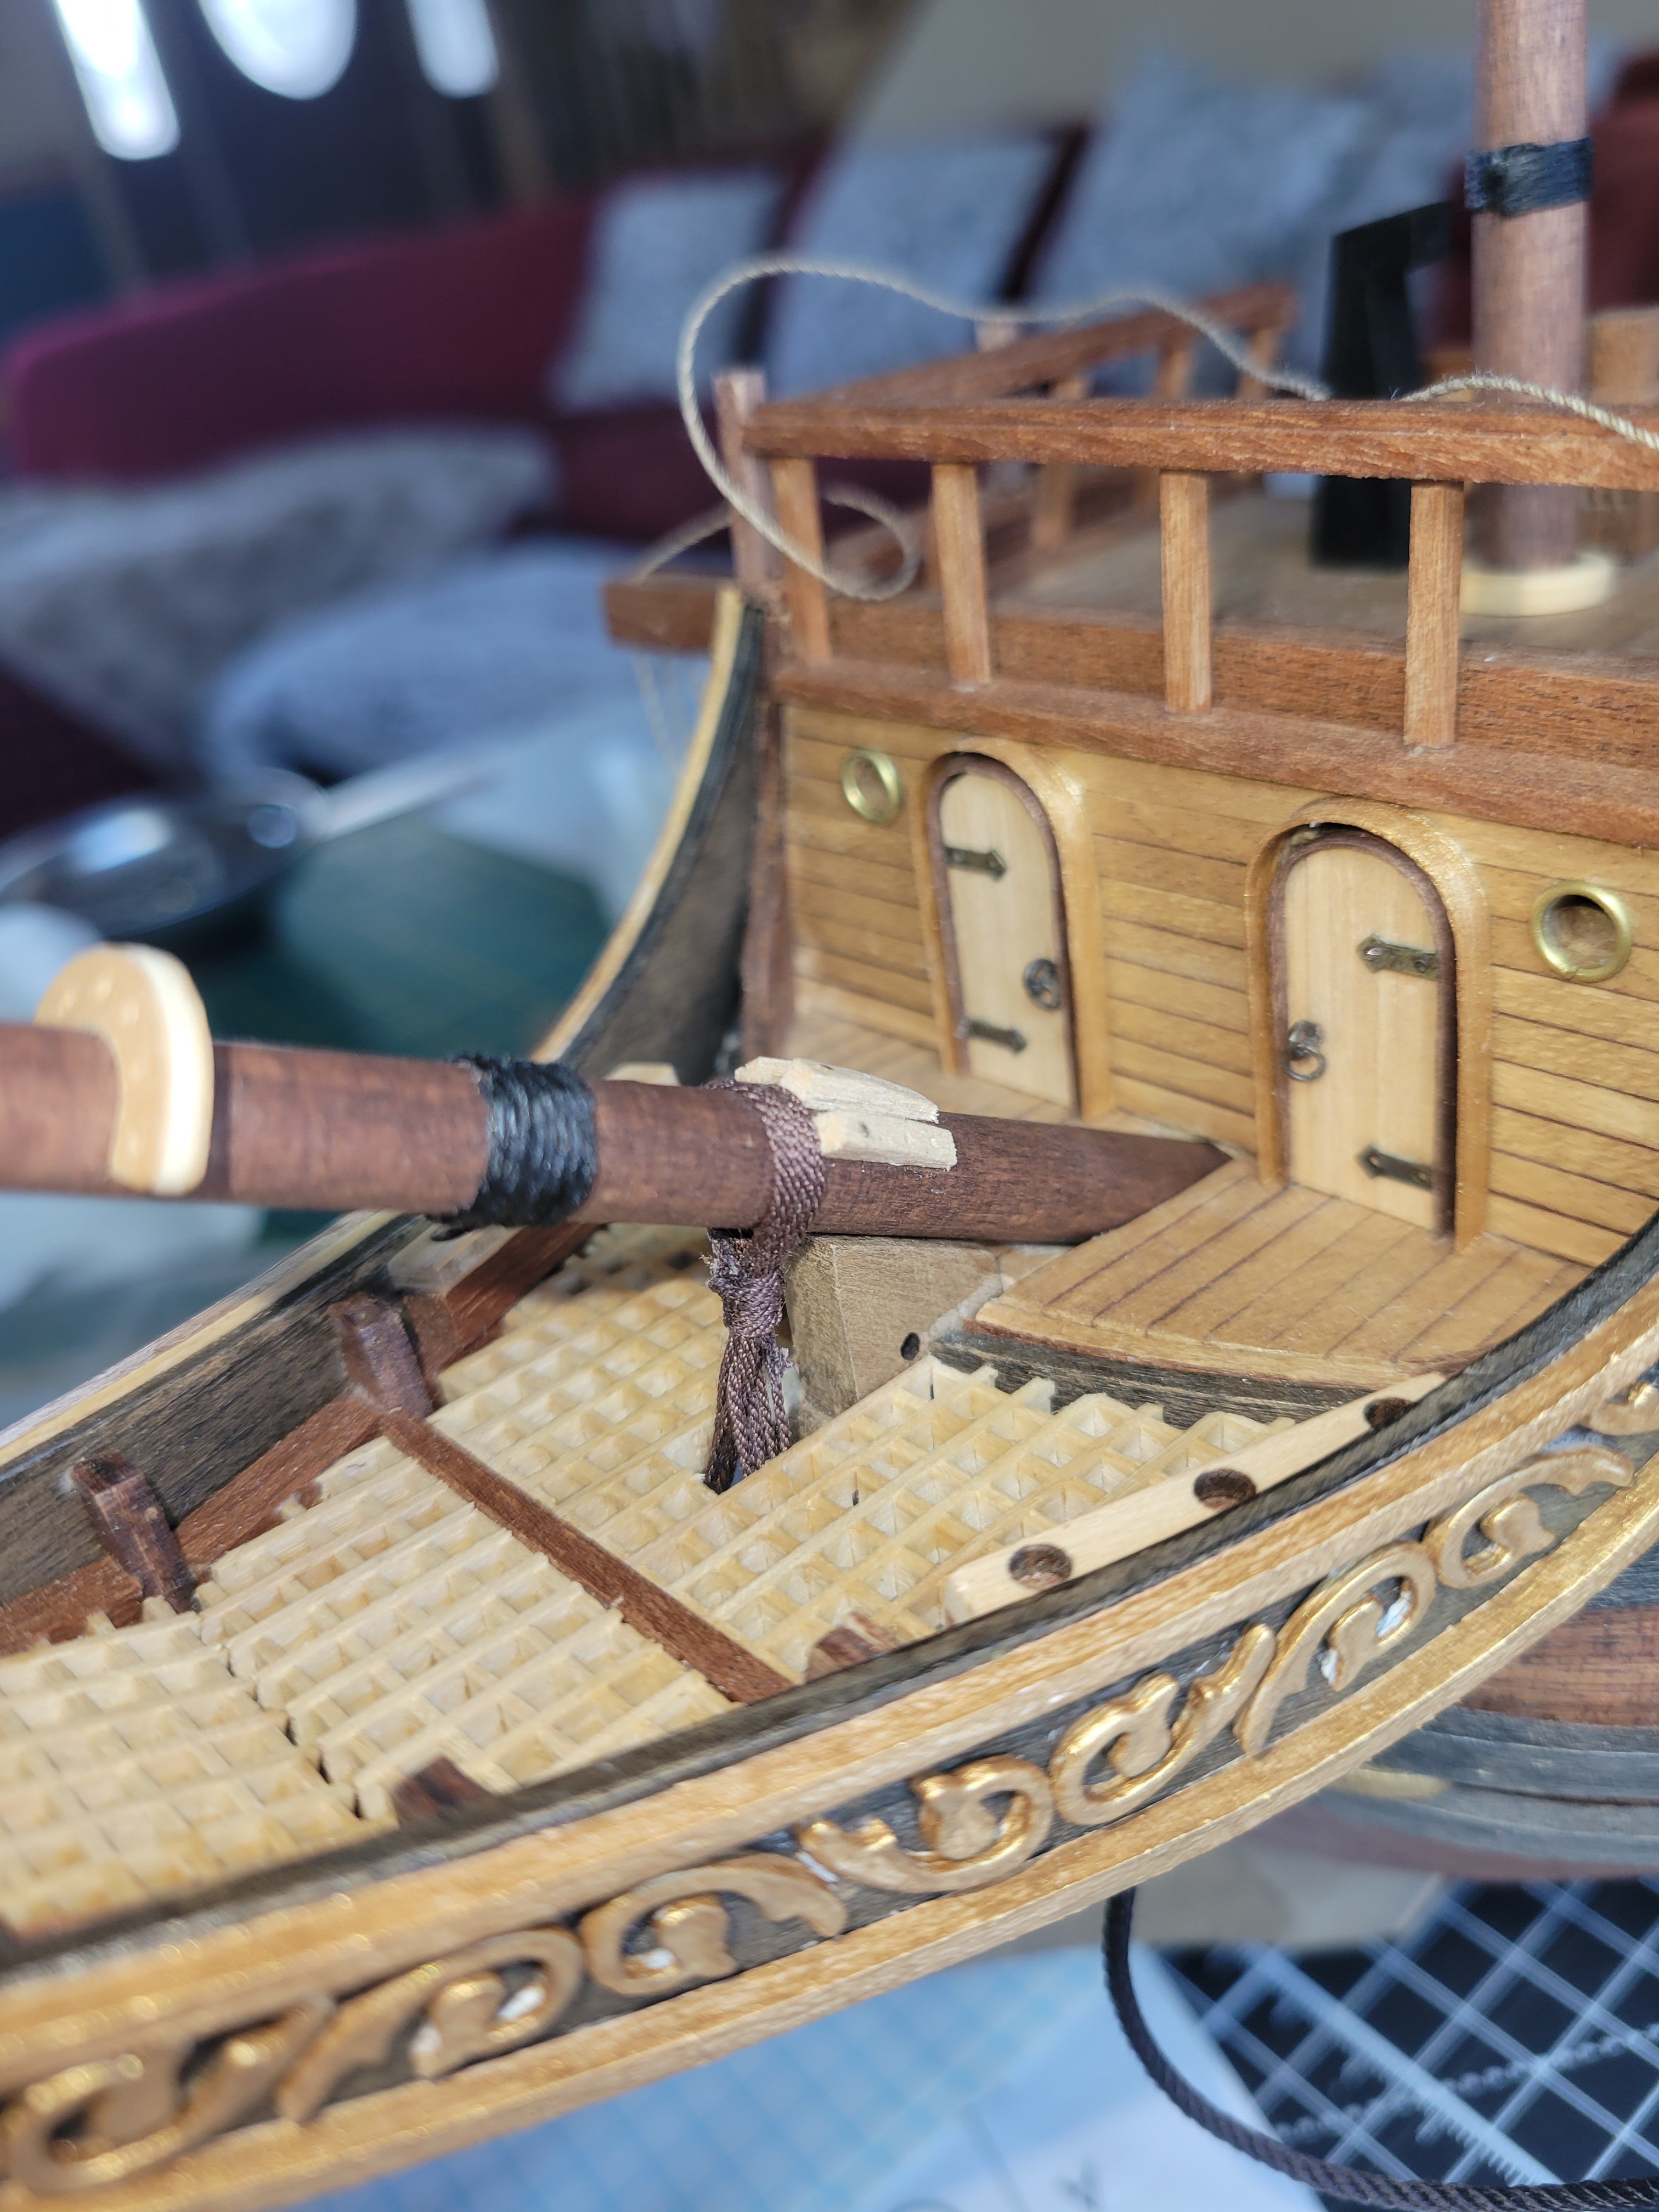
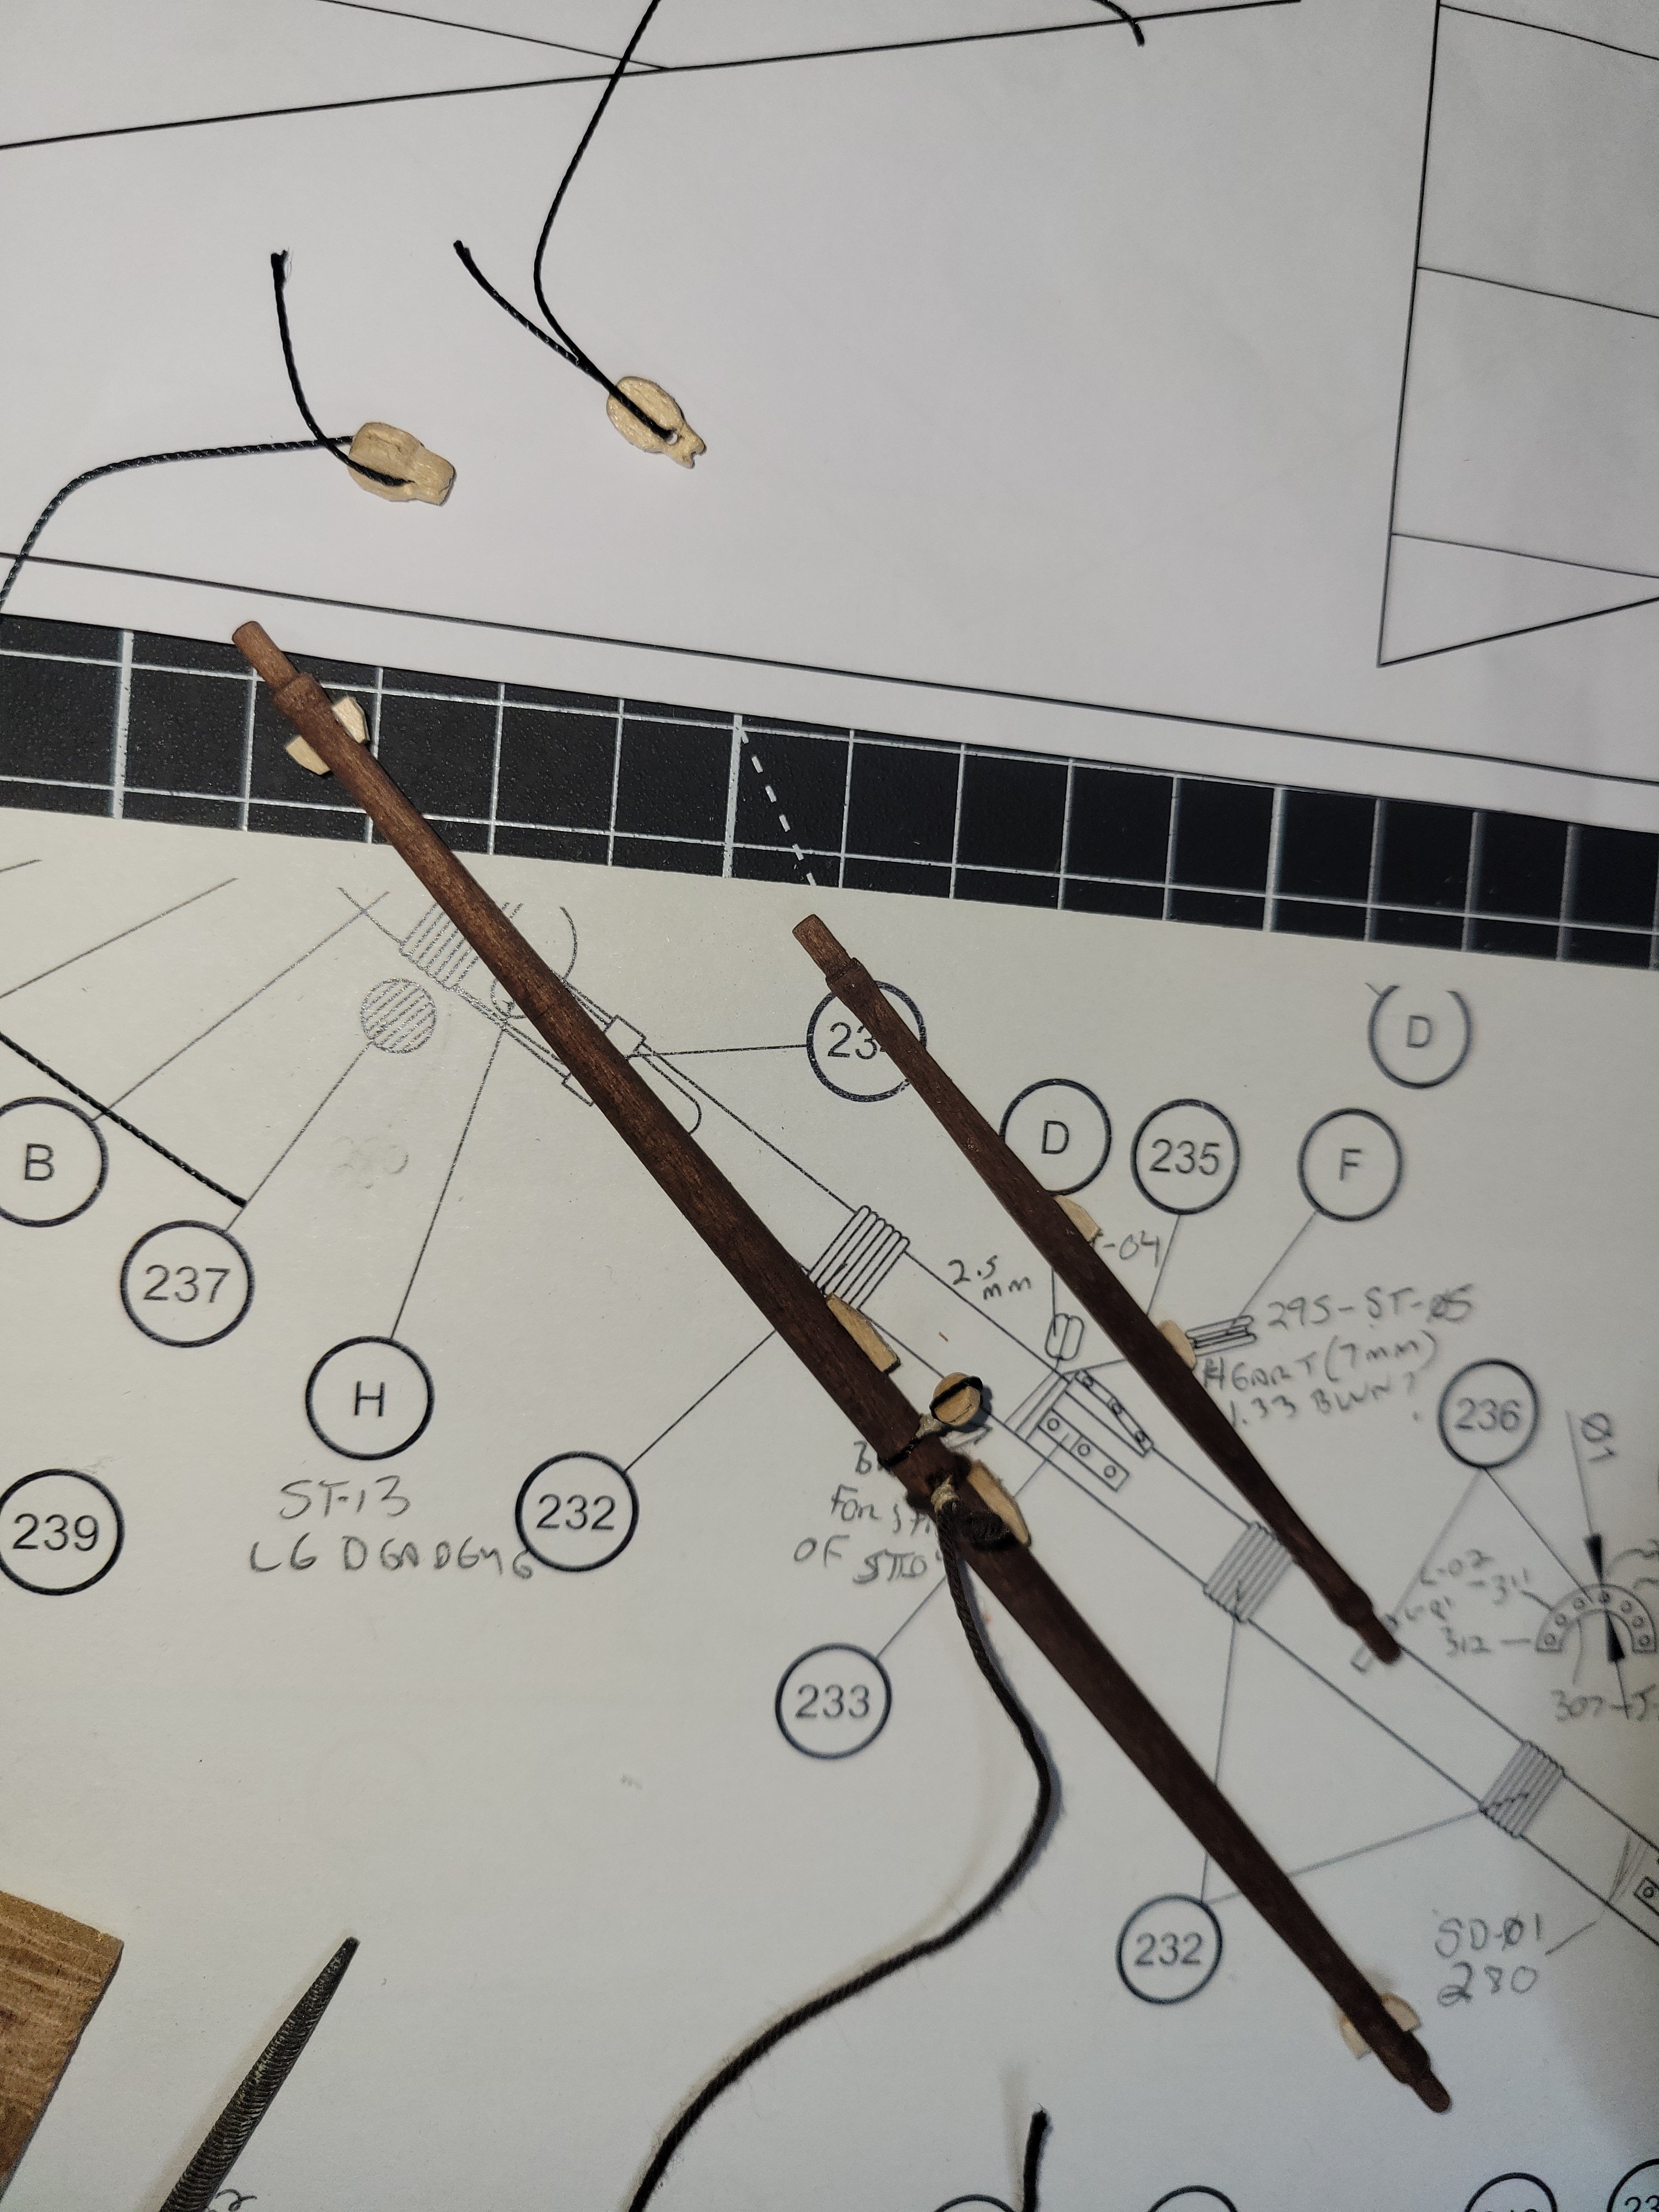
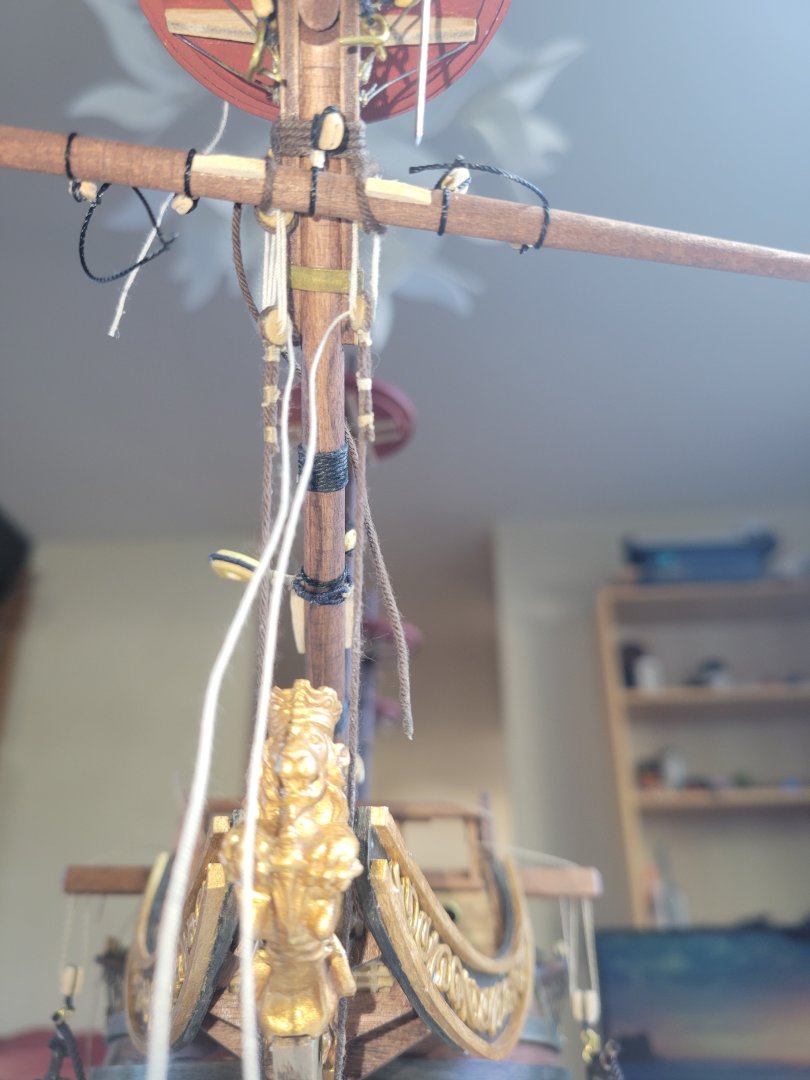
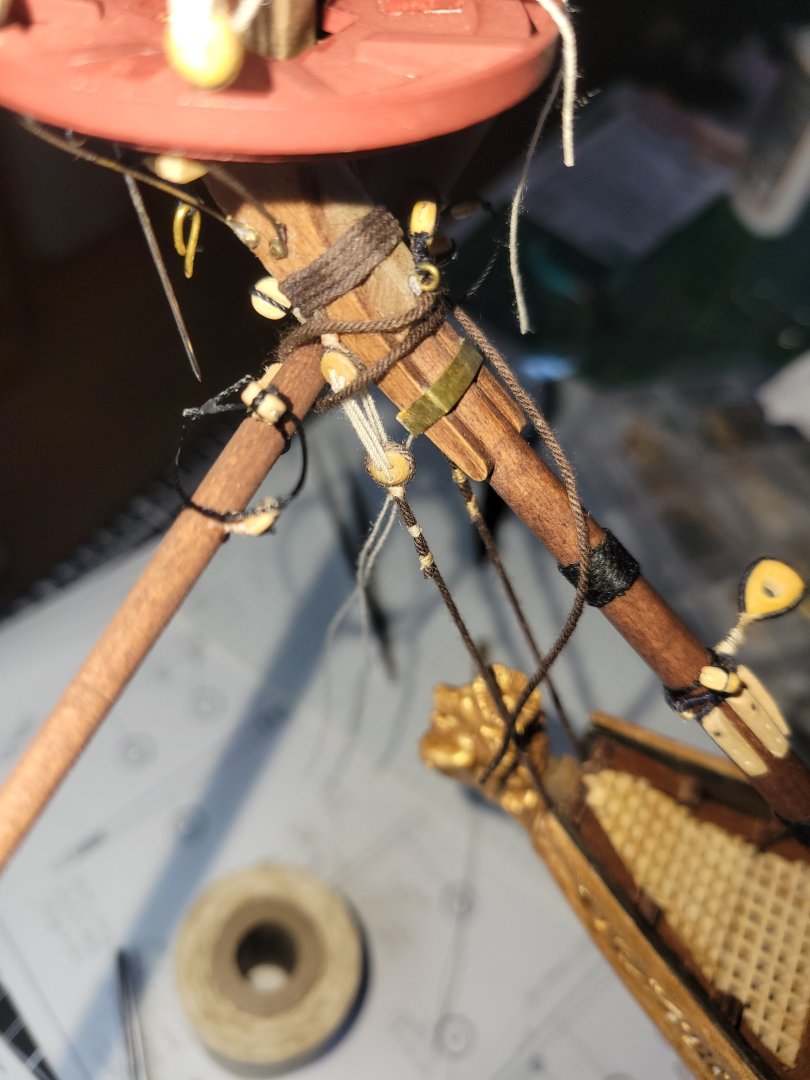
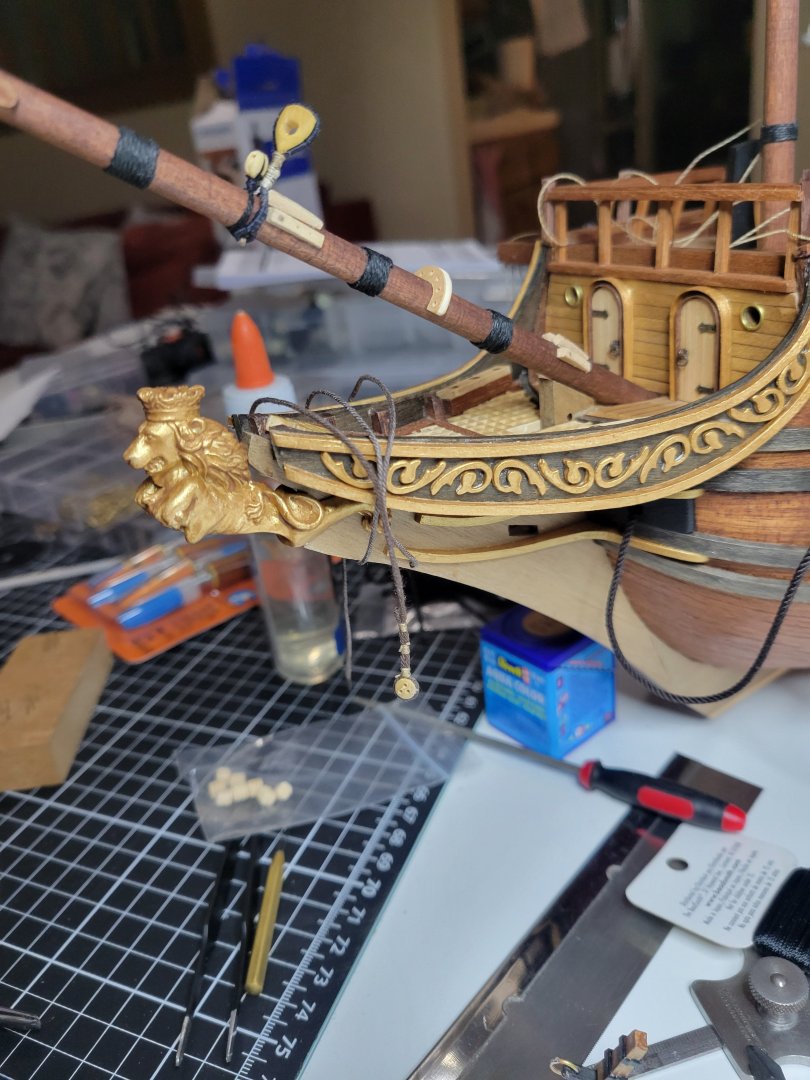
Time to finally set the bousprit with gammoning and bobstays. Also checking spritsail yard positioning.

-
Lind Mihály reacted to a post in a topic:
Apostol Felipe by travis - OcCre - 1/60
-
Continuing progress. Sprit sail yard ready to bend sail. Spirit top mast rigging and yard in progress. Rigging the shrouds. Probably going to set the bowsprit next with the gammoning and bobsays when the shrouds and ratlines are done.

-
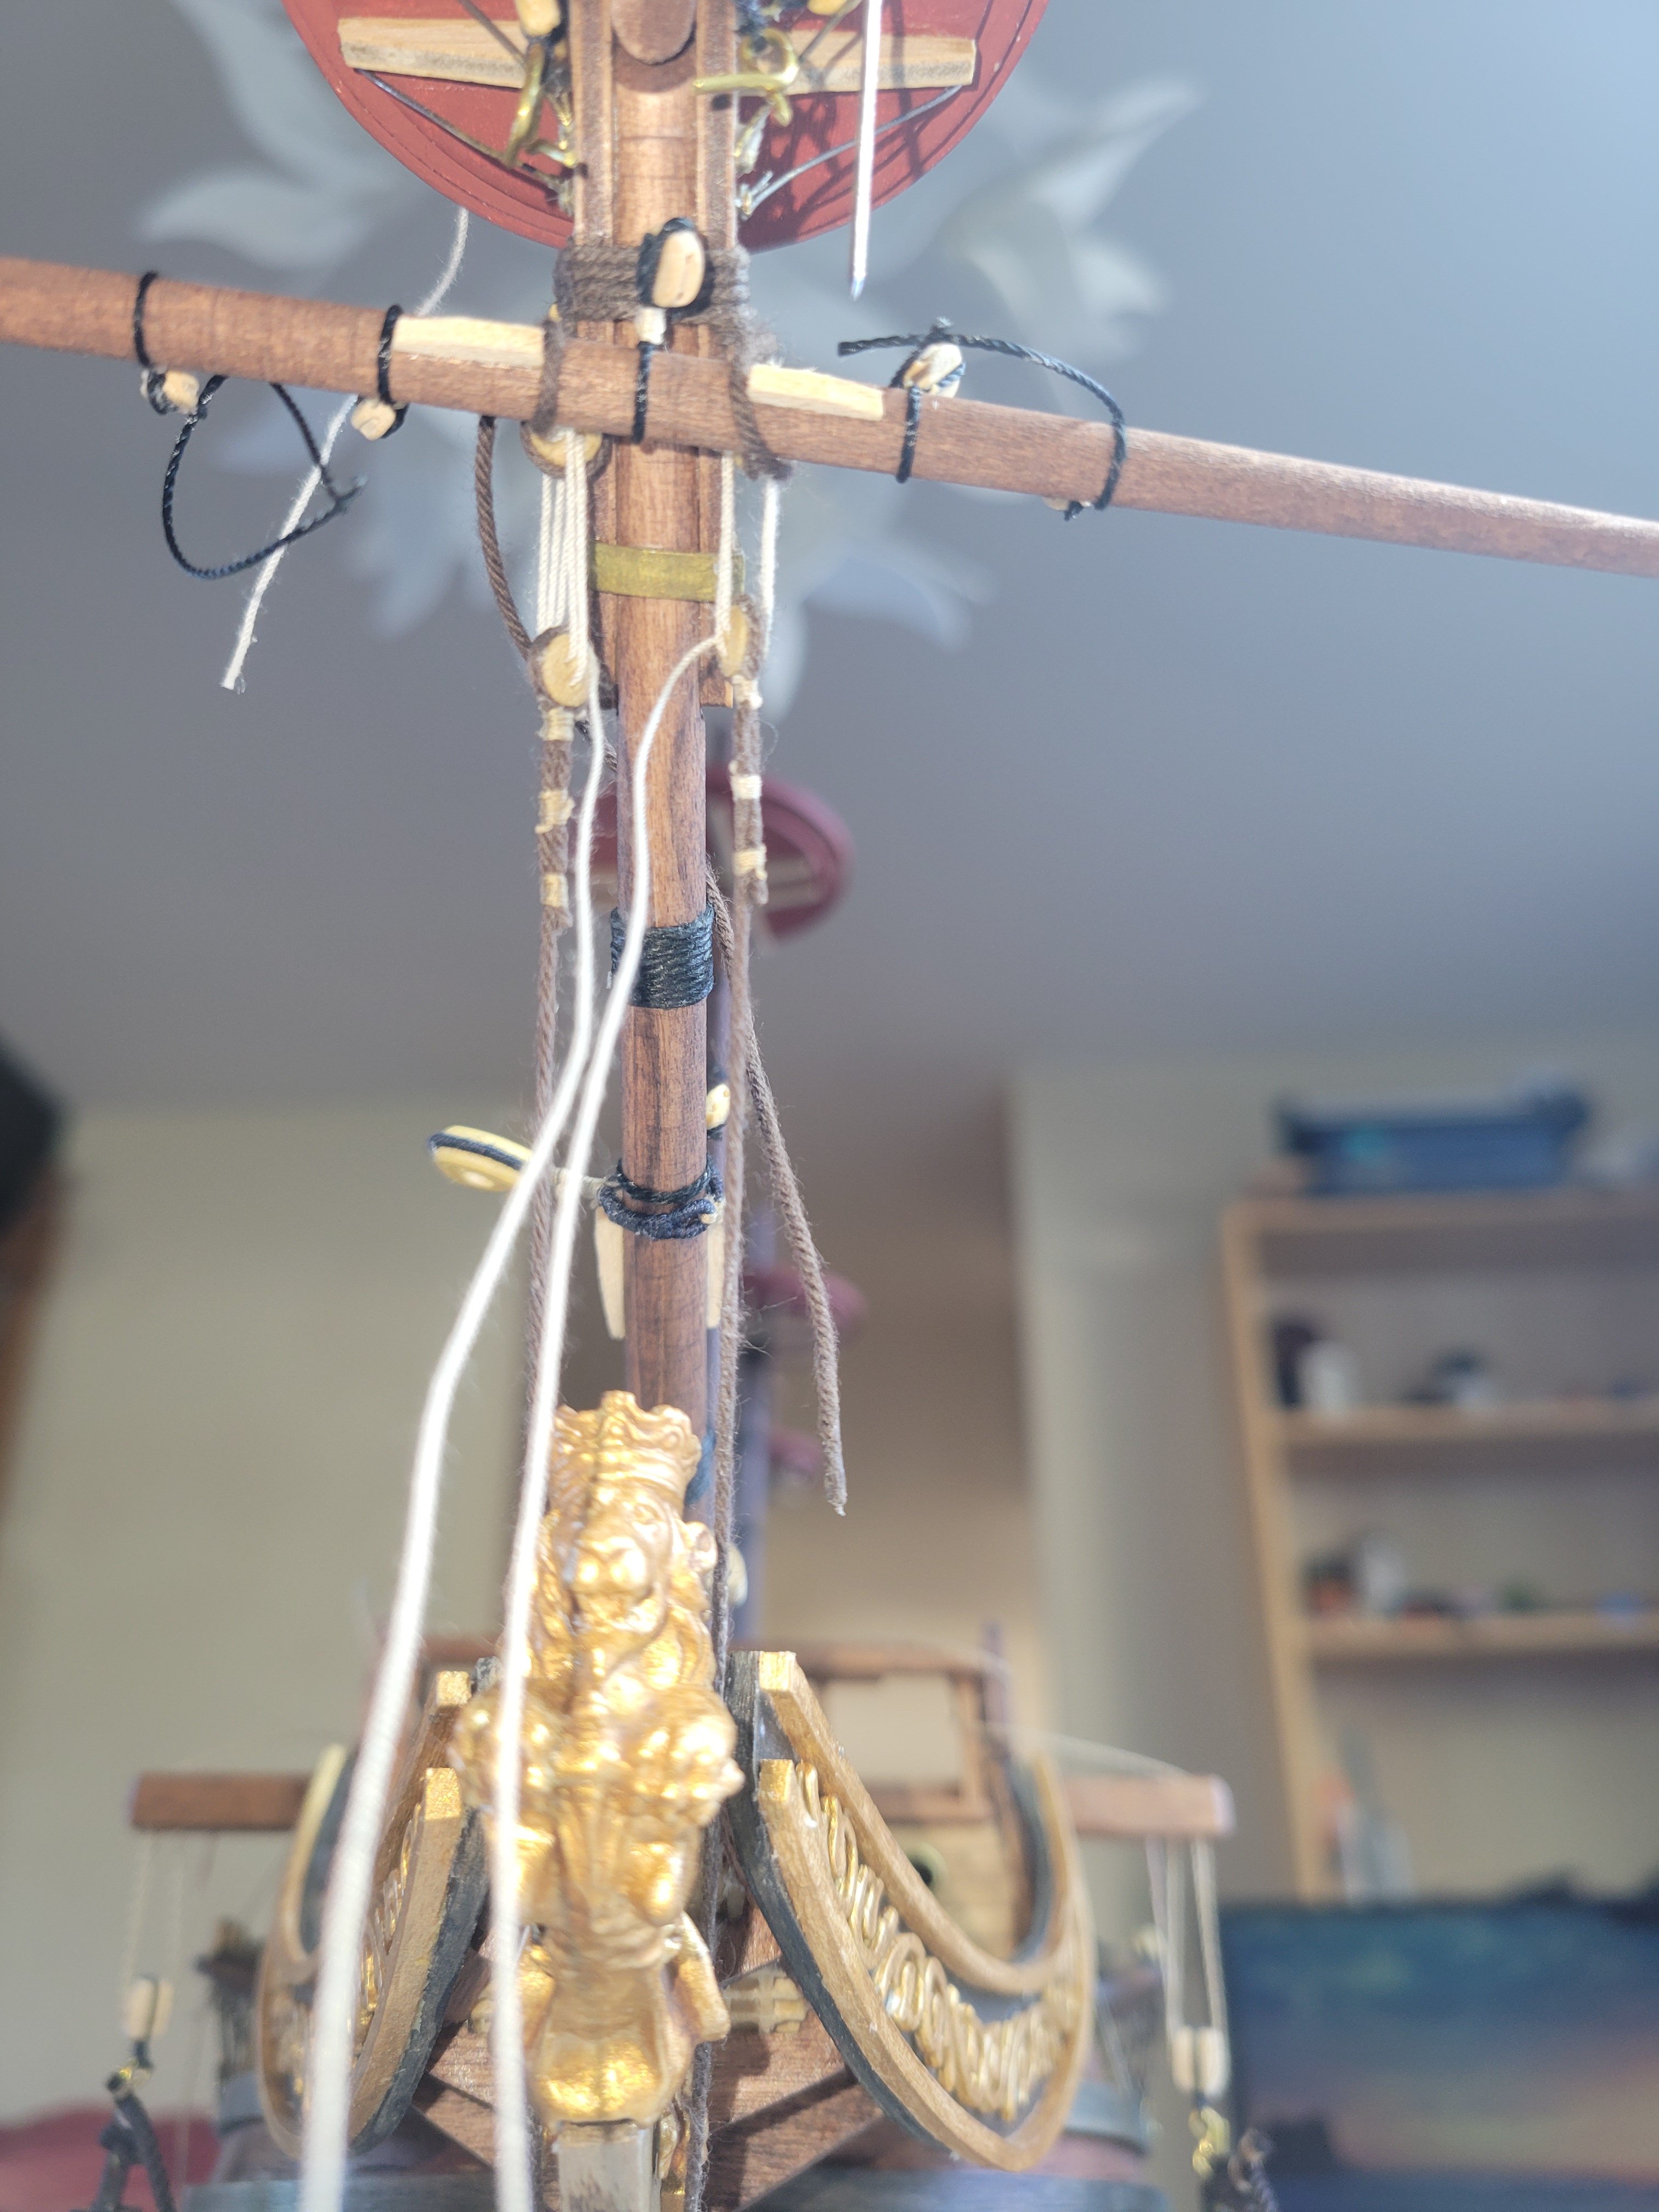
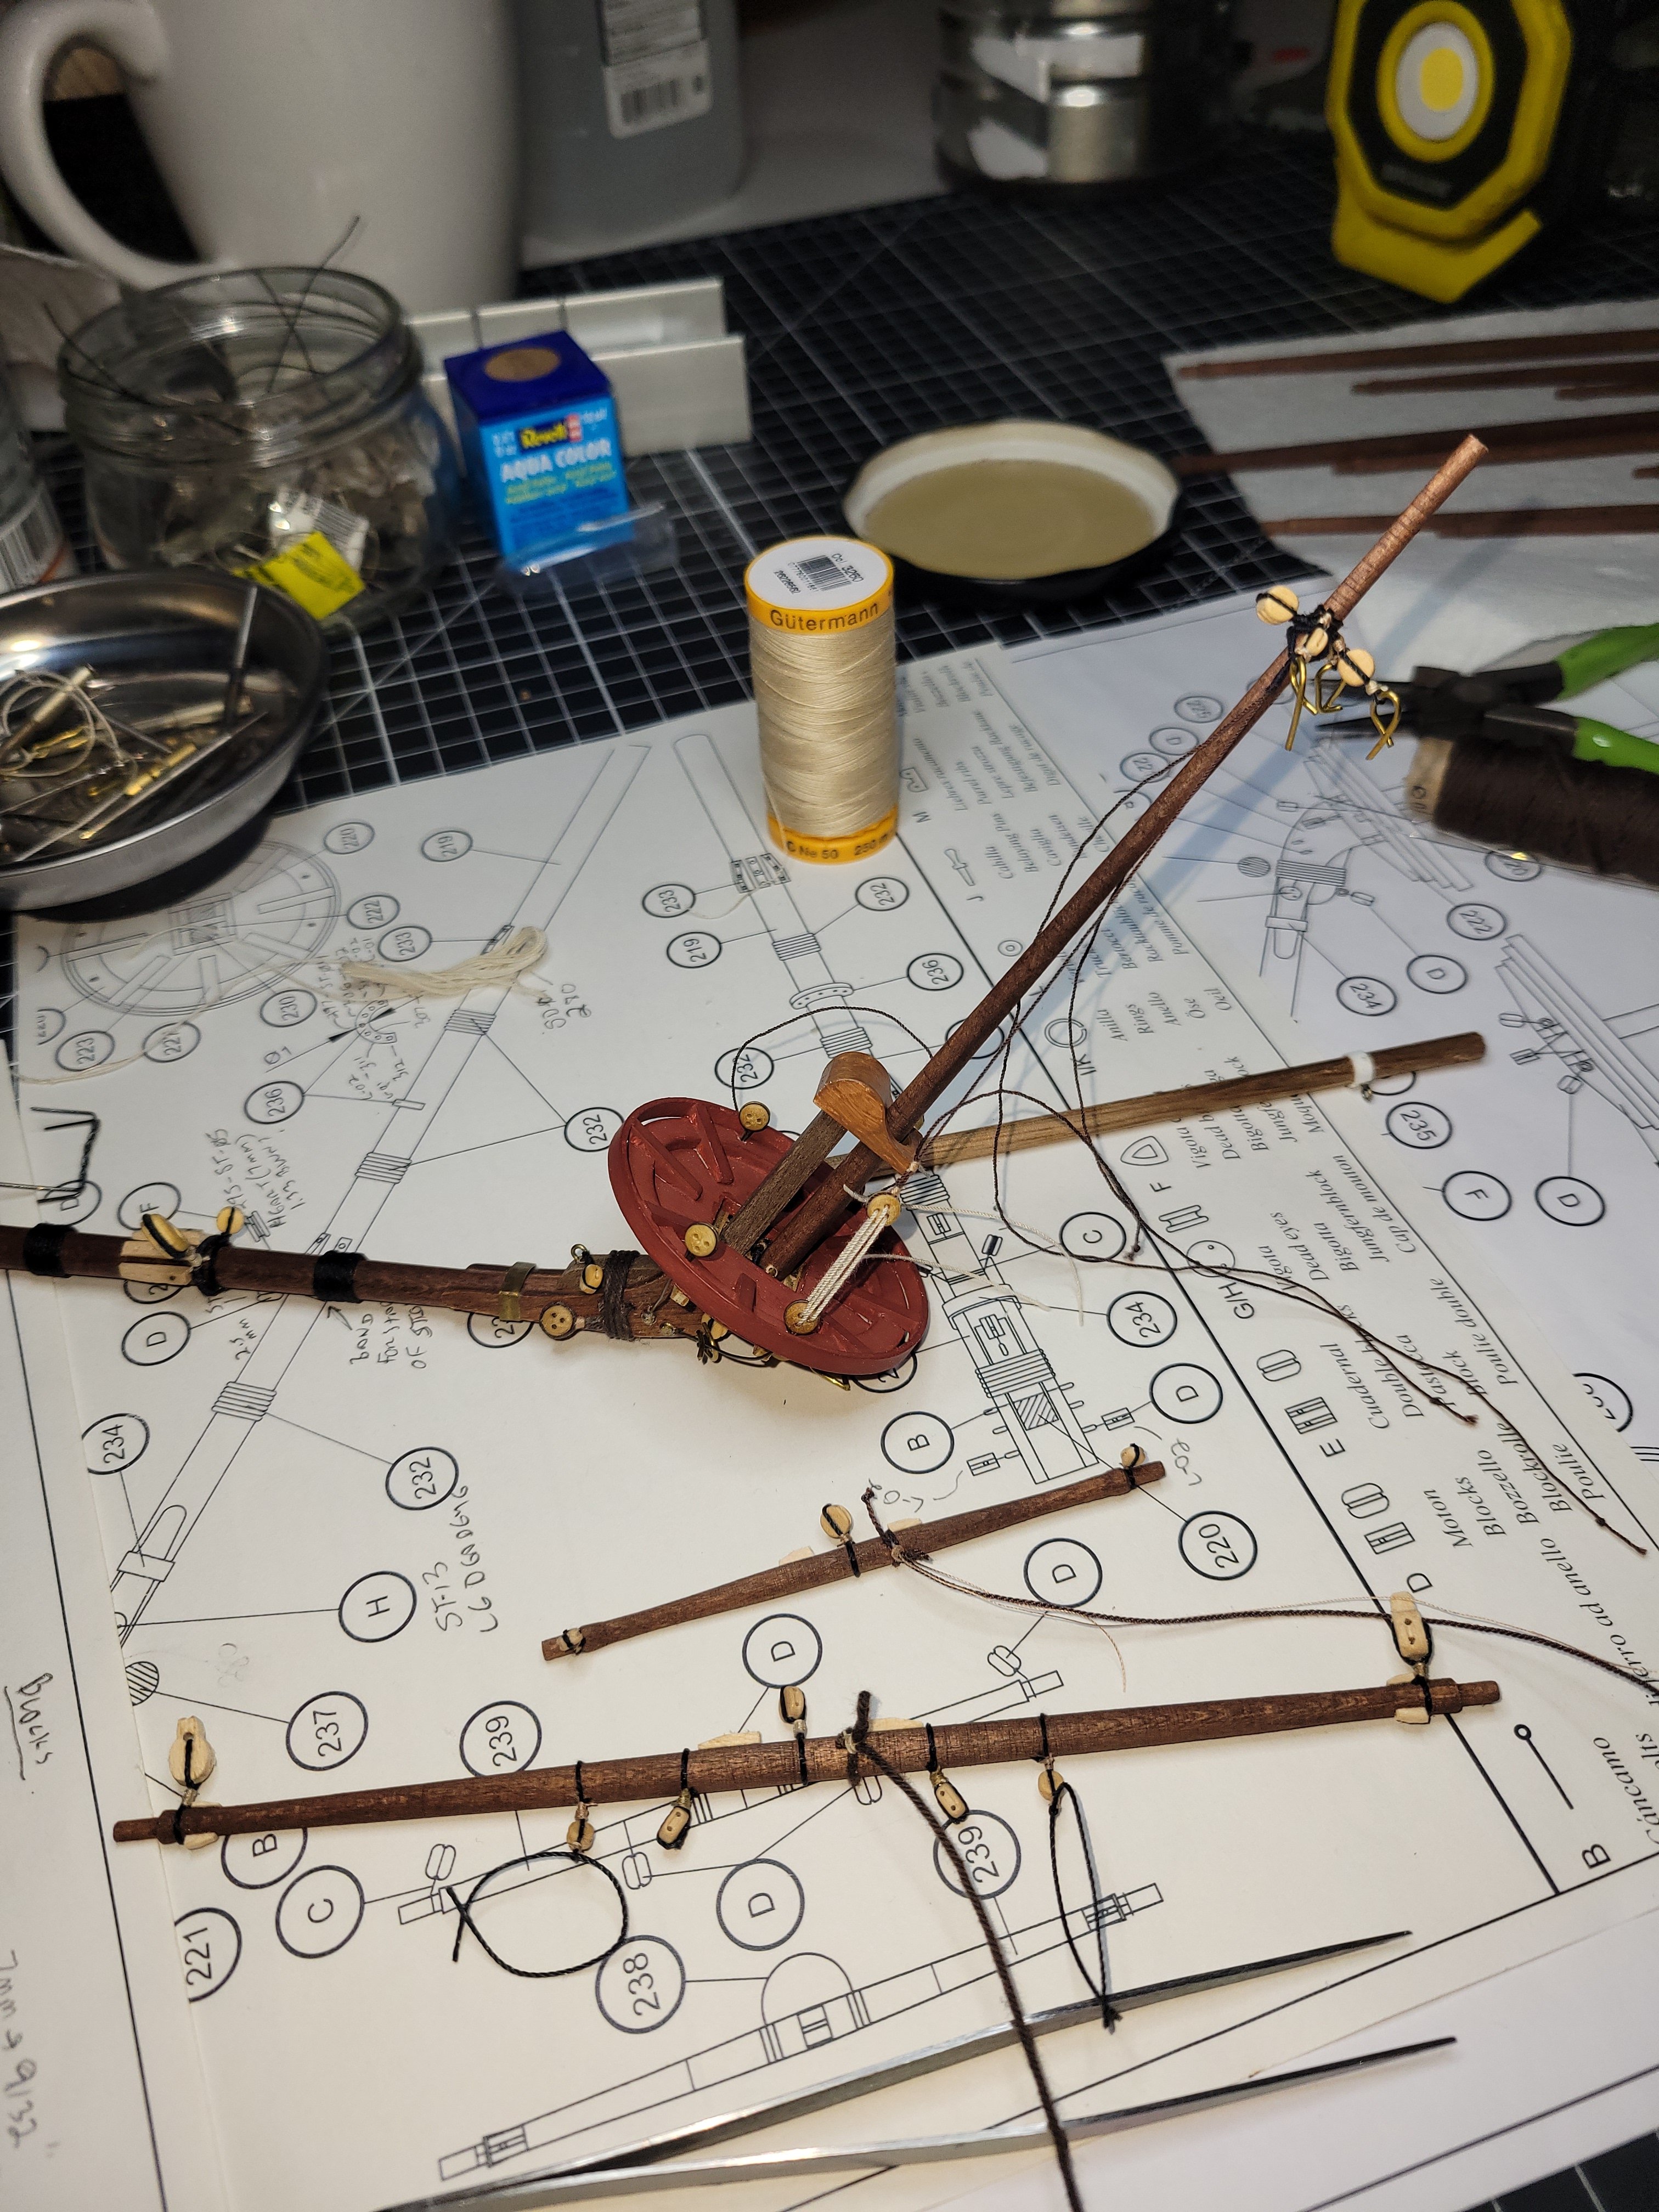
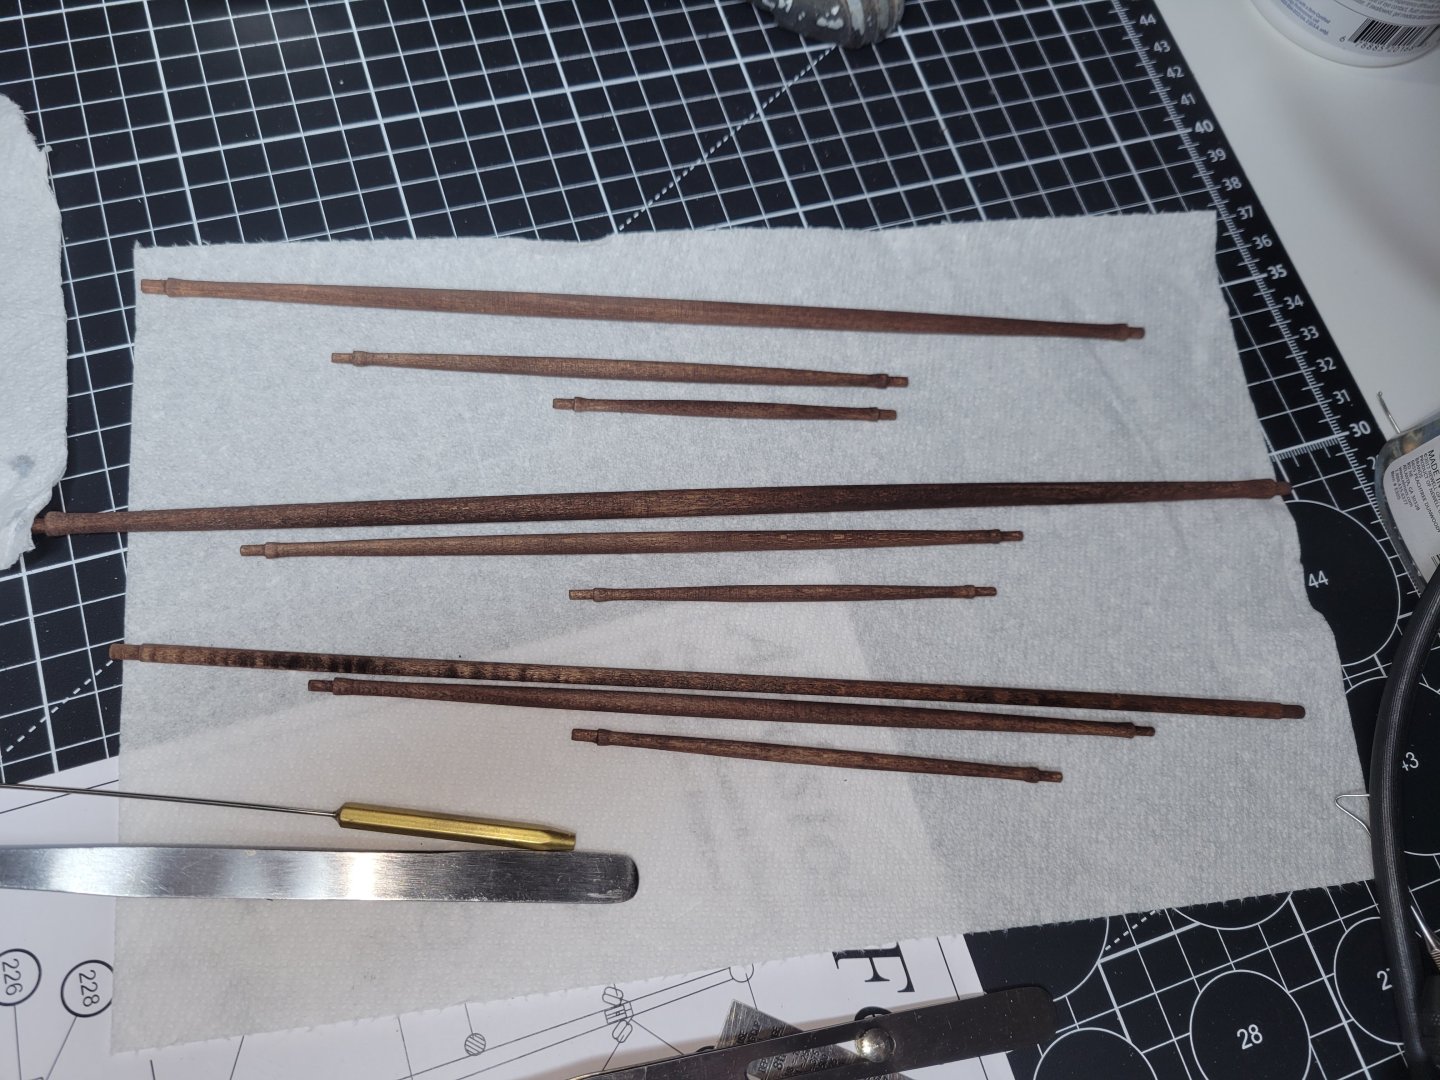
Making progress now shapping yards and associated blocks. Starting with sprit mast.

-
These are a great find! Well produced and fairly well detailed. Especially great resource for anyone new to the craft/
-
Port side set and coiled
-
Would love to work on a modern warship of that scale one day! That about doing one of the my first duty station, a frigate. Would look really cool to handmade those nets but thats probably more painstaking than even ratlines! Good luck with the braided line.
-
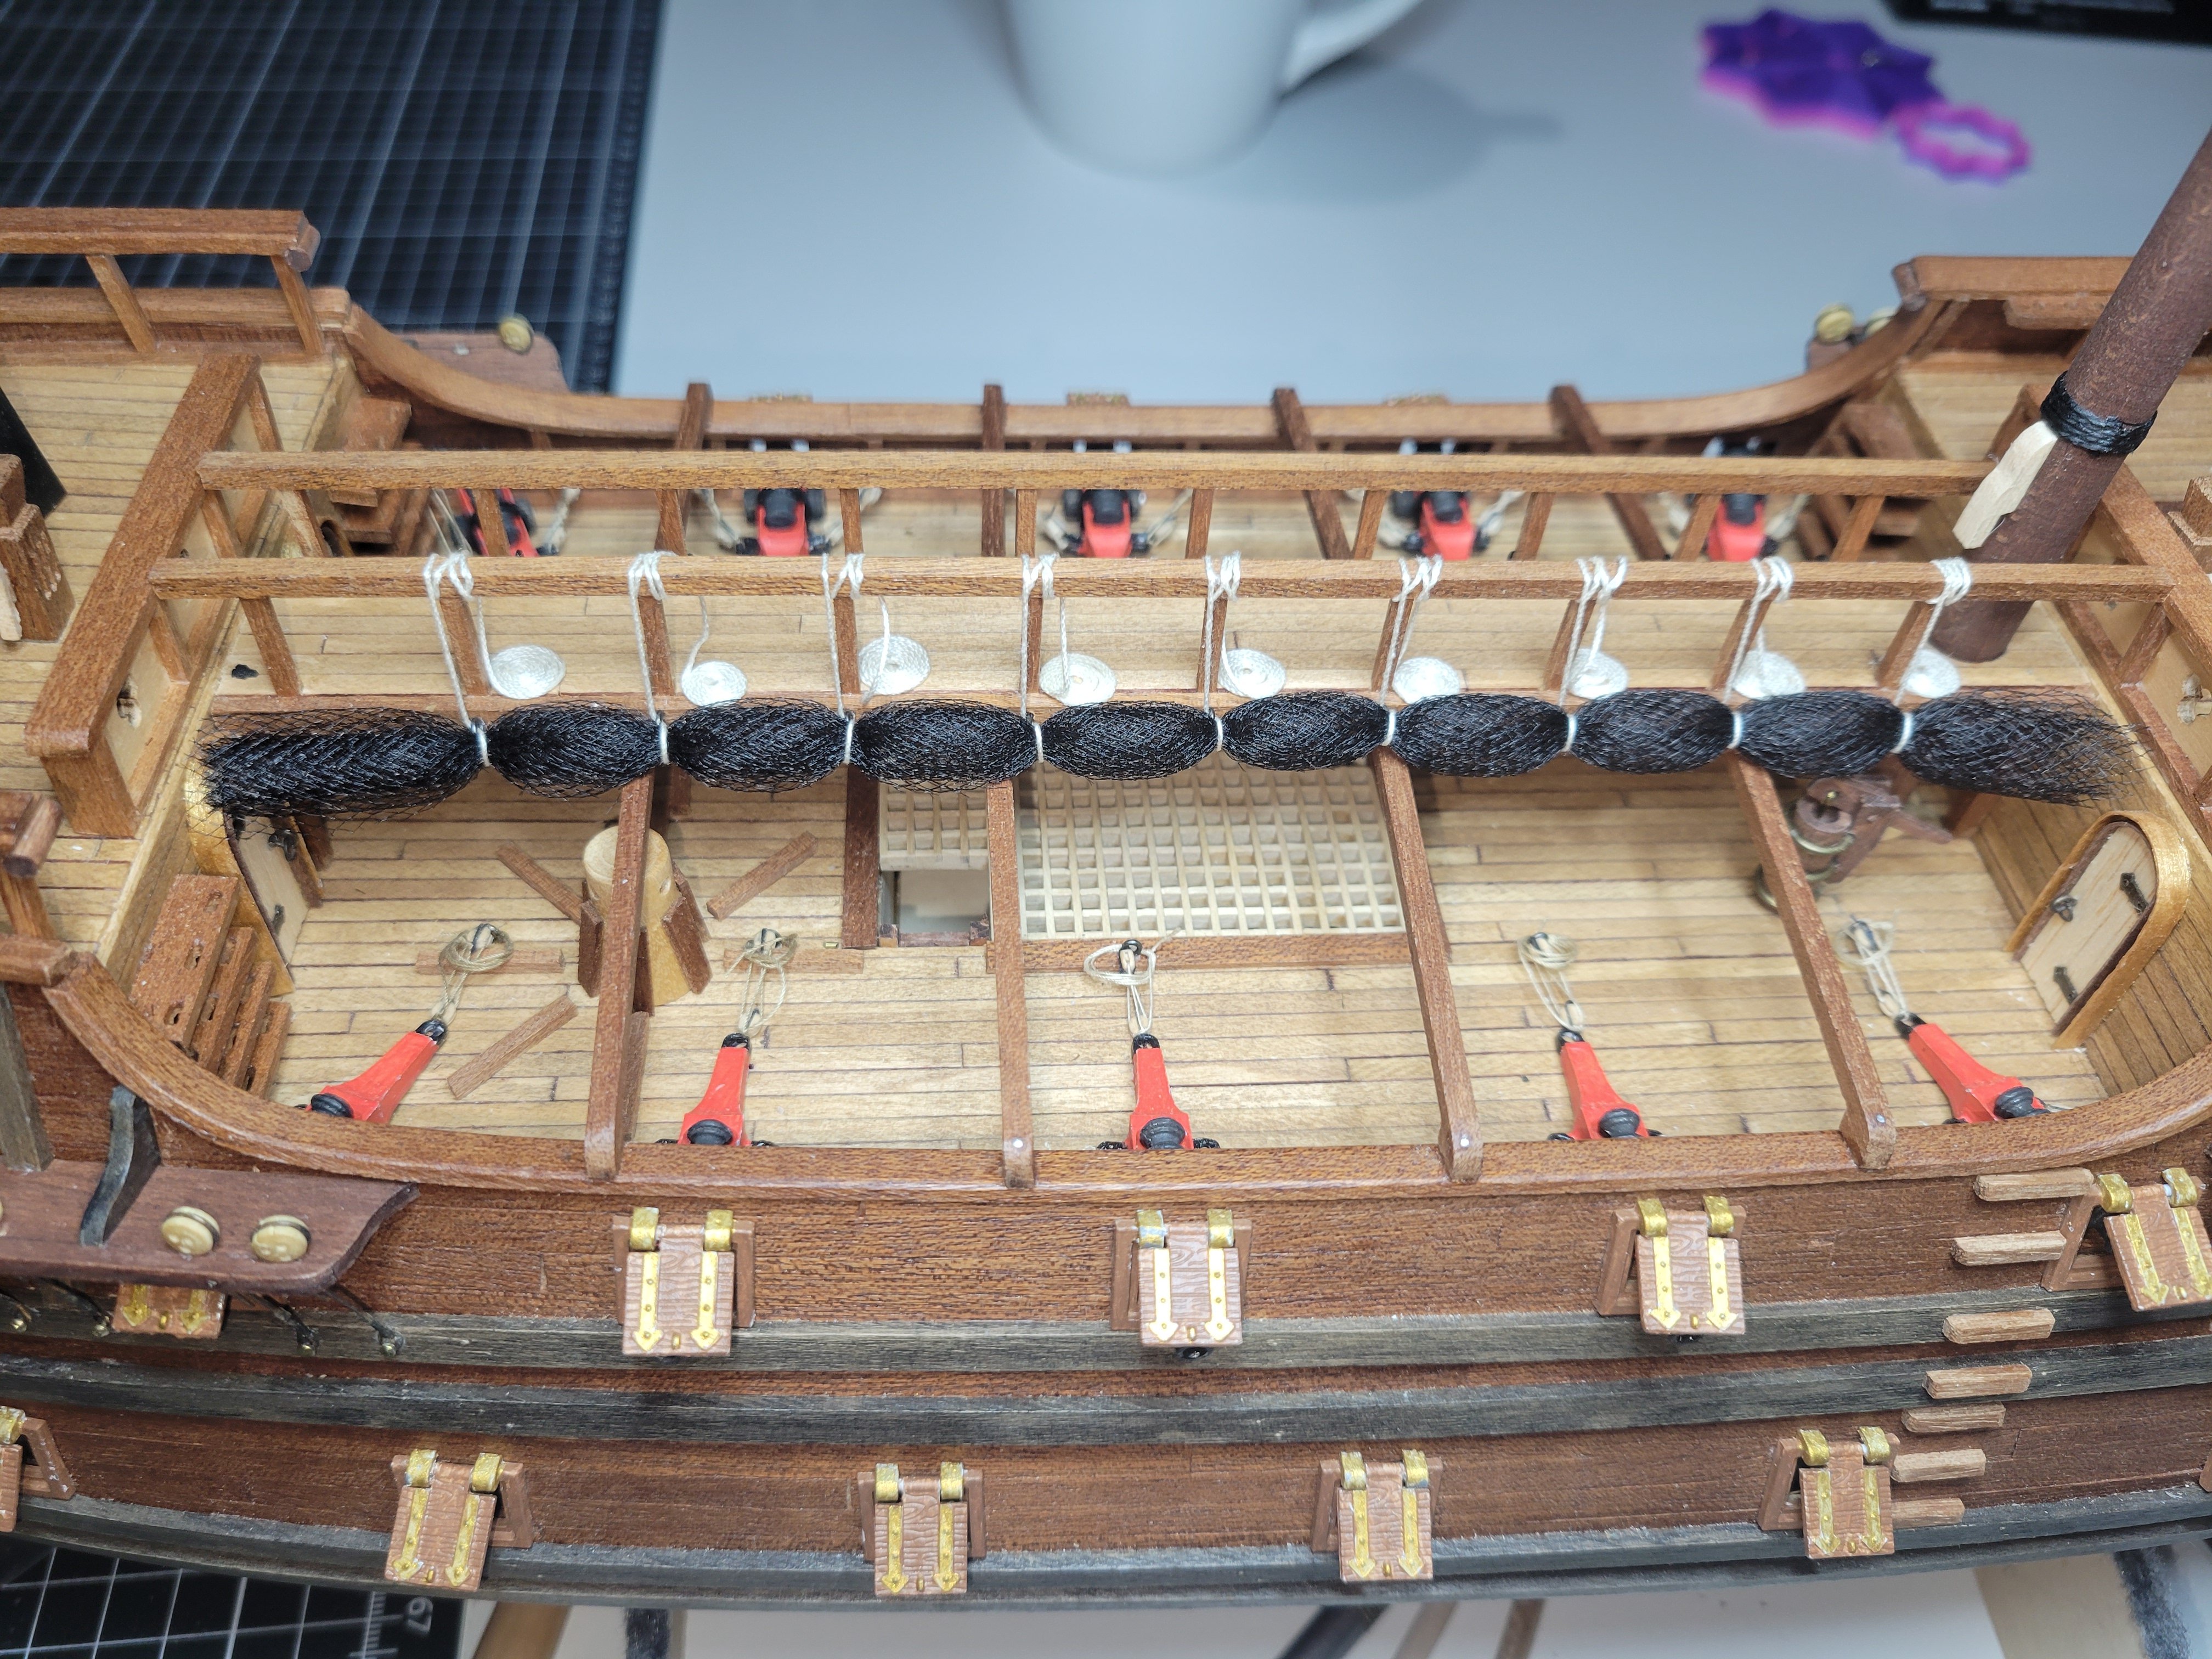
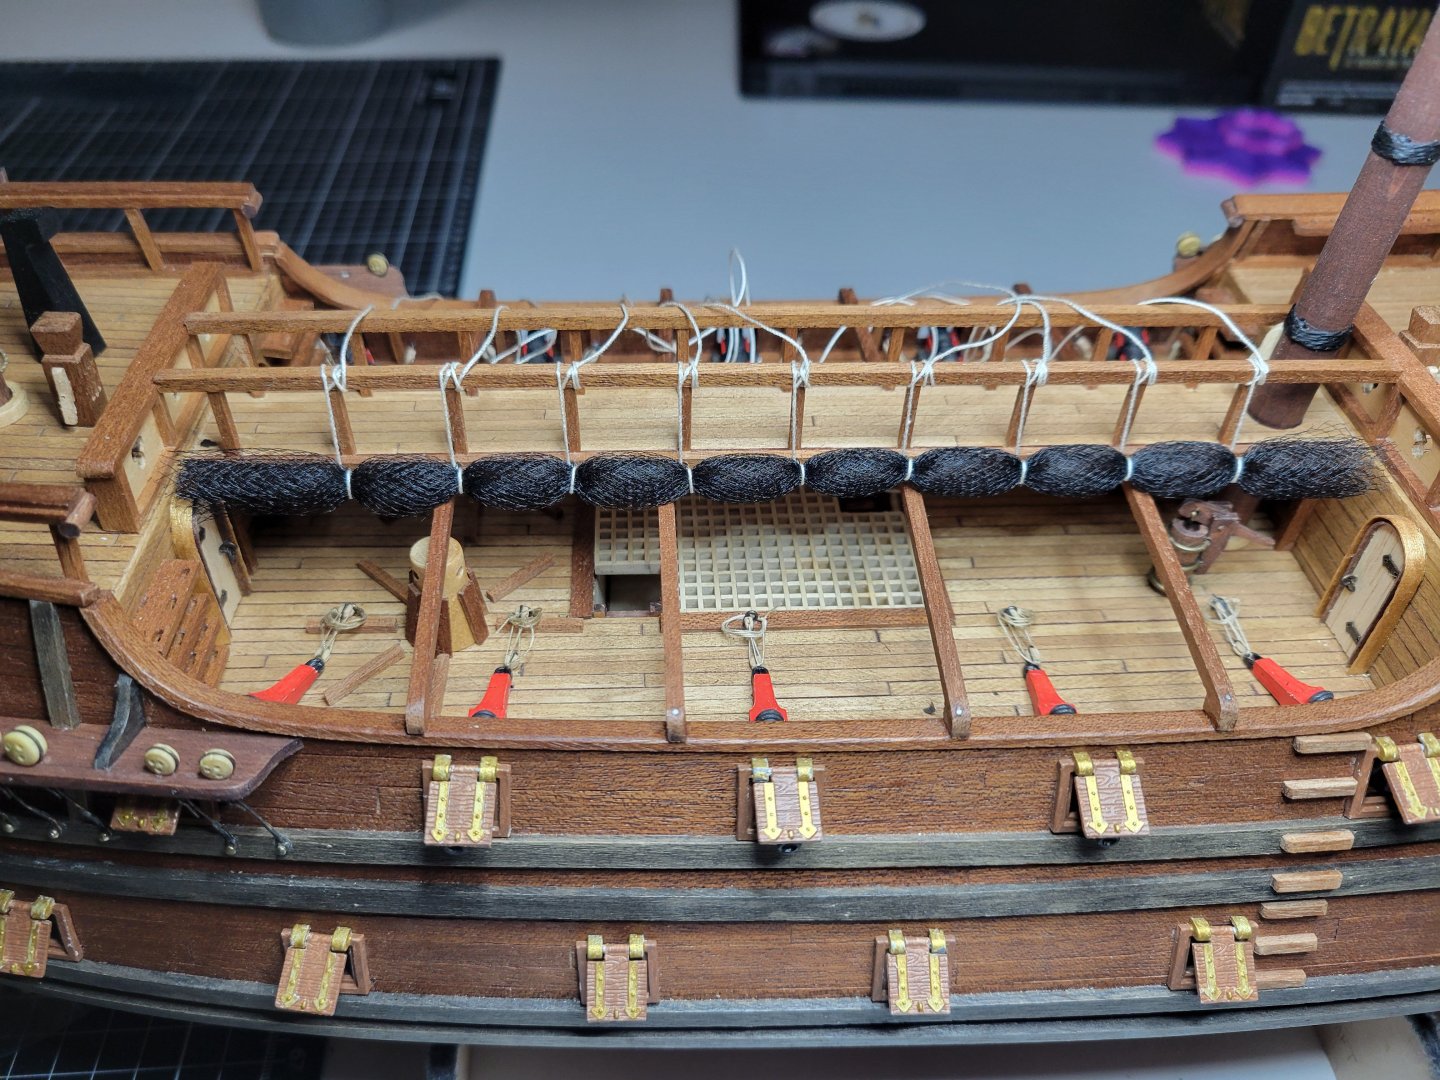
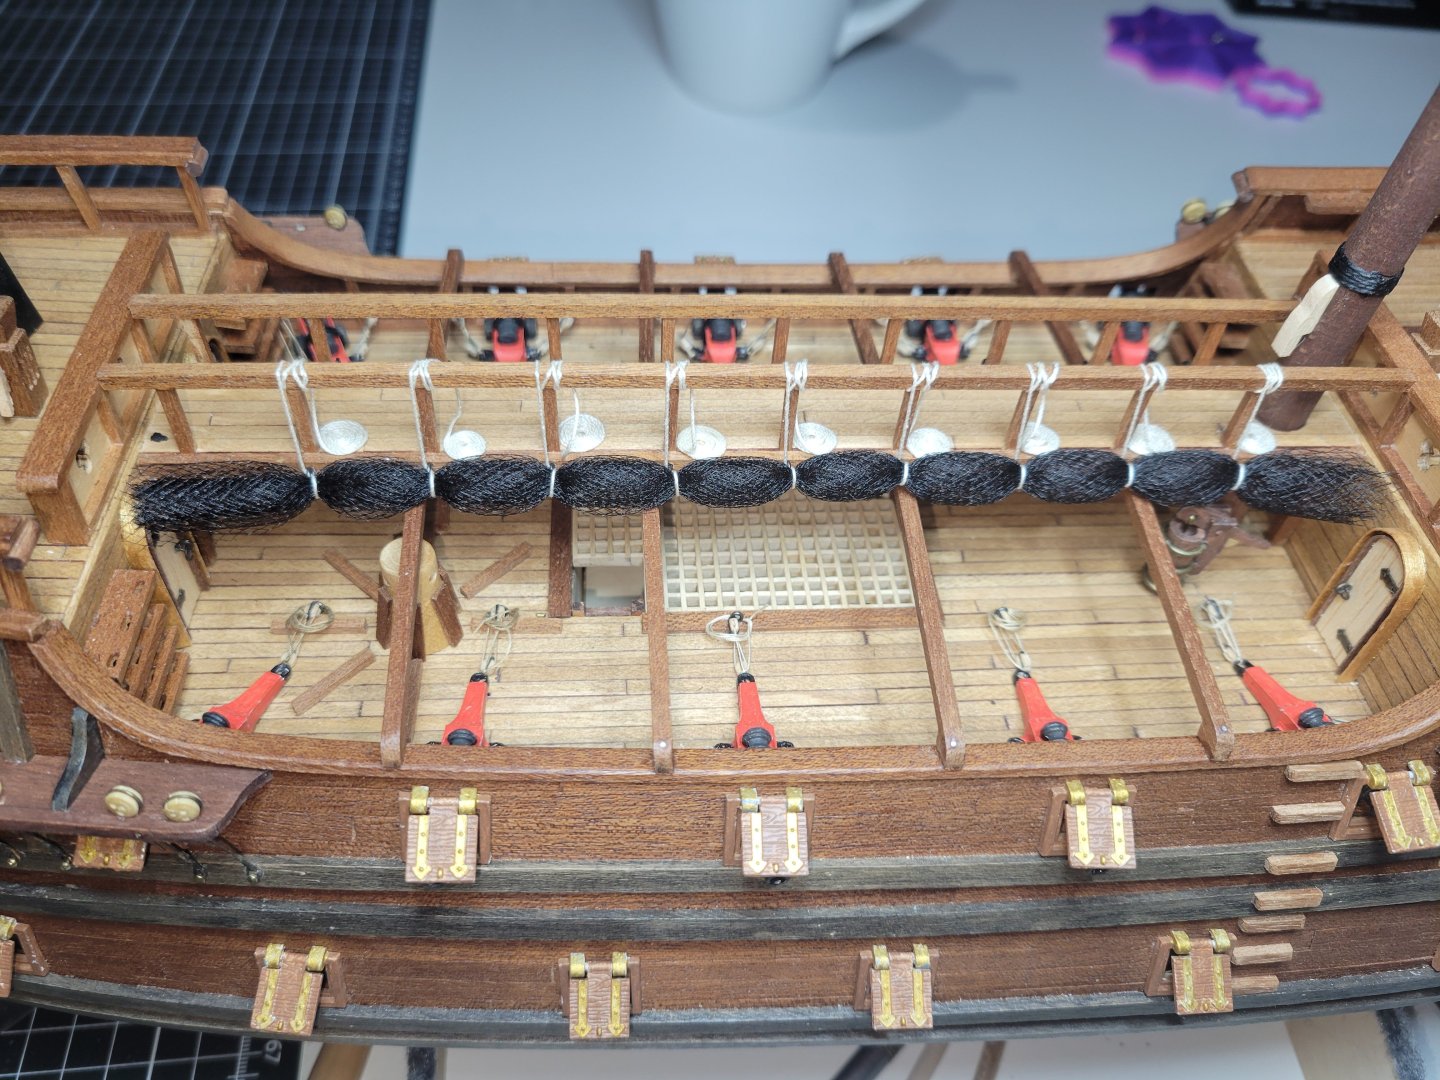
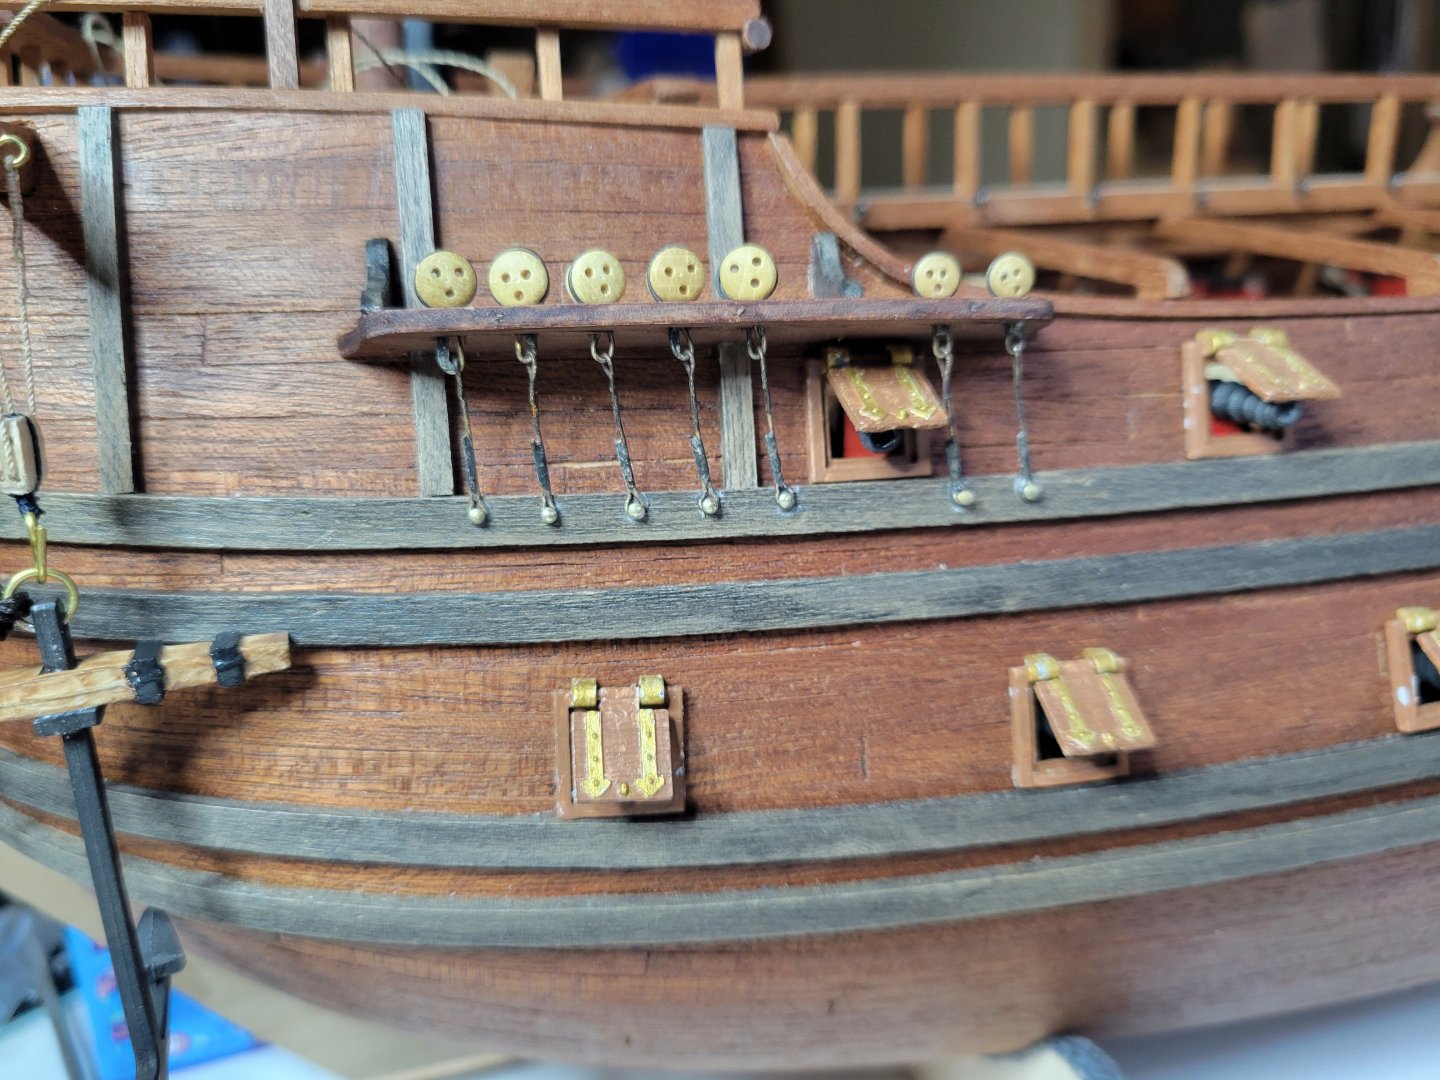
Ot much available on these nettings/grattings over the gun deck so I'm just going with what makes sense from my own time handling the lines in the navy (granted a modern destroyer is a bit different than a 17th century spanish galleon!). I figured there would be people "rolling/gathering" the netting from the gun deck and a second team on the walkway above hauling in on the lines. Once in place they would probably just lash those lines right to the rail with a good ole clove hitch and then coiled on/near the rail. The mesh netting from Occre was not properly sized (not long enough) and a bit rigid so I replaced with tule fabric which has a smaller grid which fits the scale better and just looks more natural.
-
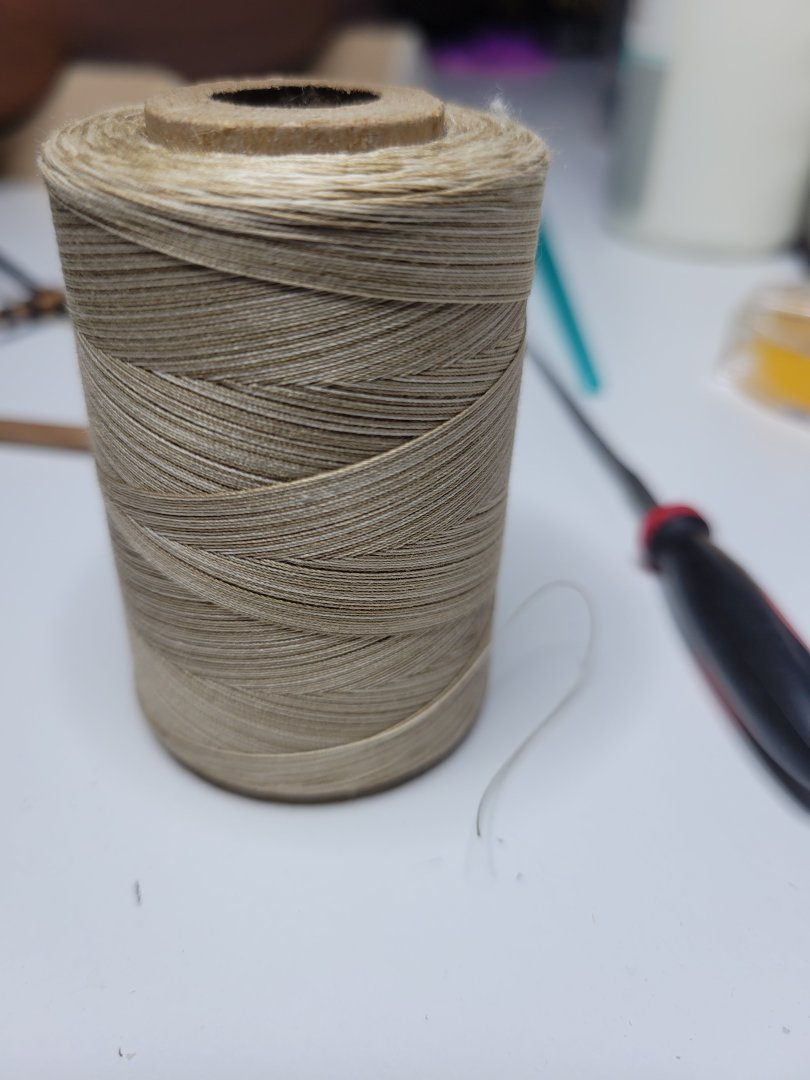
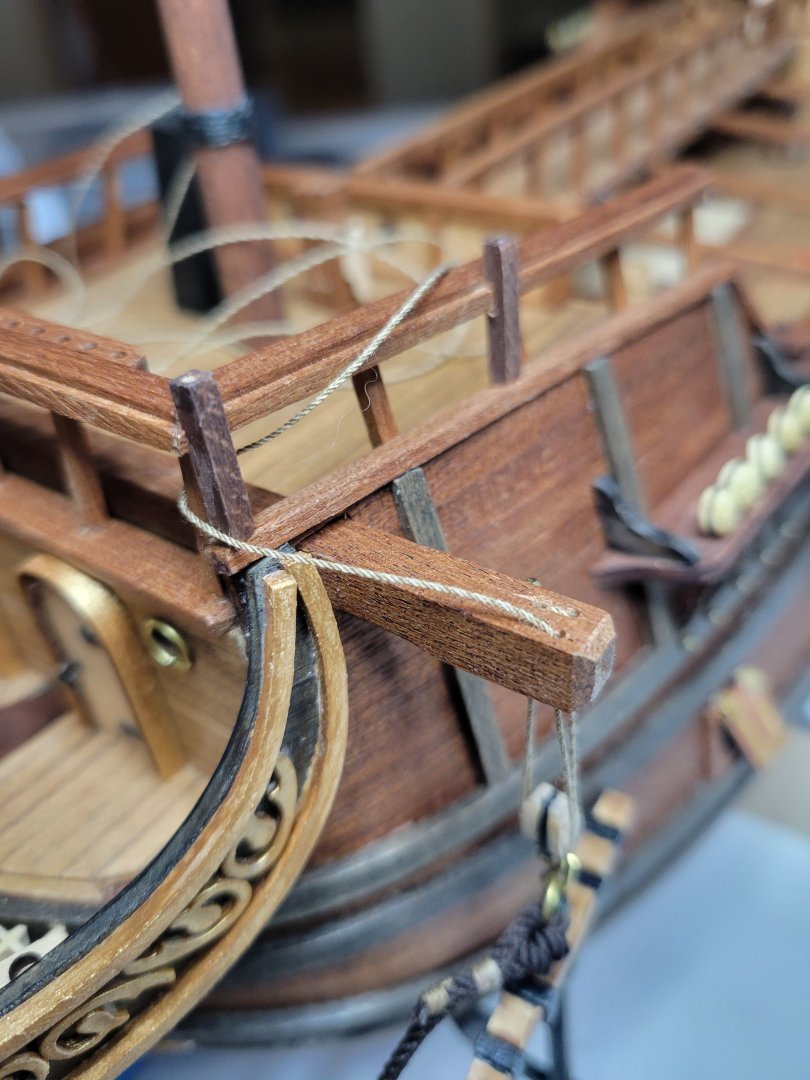
Just a note on ropemaking. I have a thread with some variation in its color. Made a small rope from it and at first figured i couldn't use it because of the variation. Realizes that this would actually perfect for any rigging lines that I want to "accentuate artistically" so that they stand out from others on purpose. For example, using it on the cathead/anchor tackle. I know thats not "accurate" but I like the look anyways so now I just need to think through anywhere else I want that done intentionally!
-
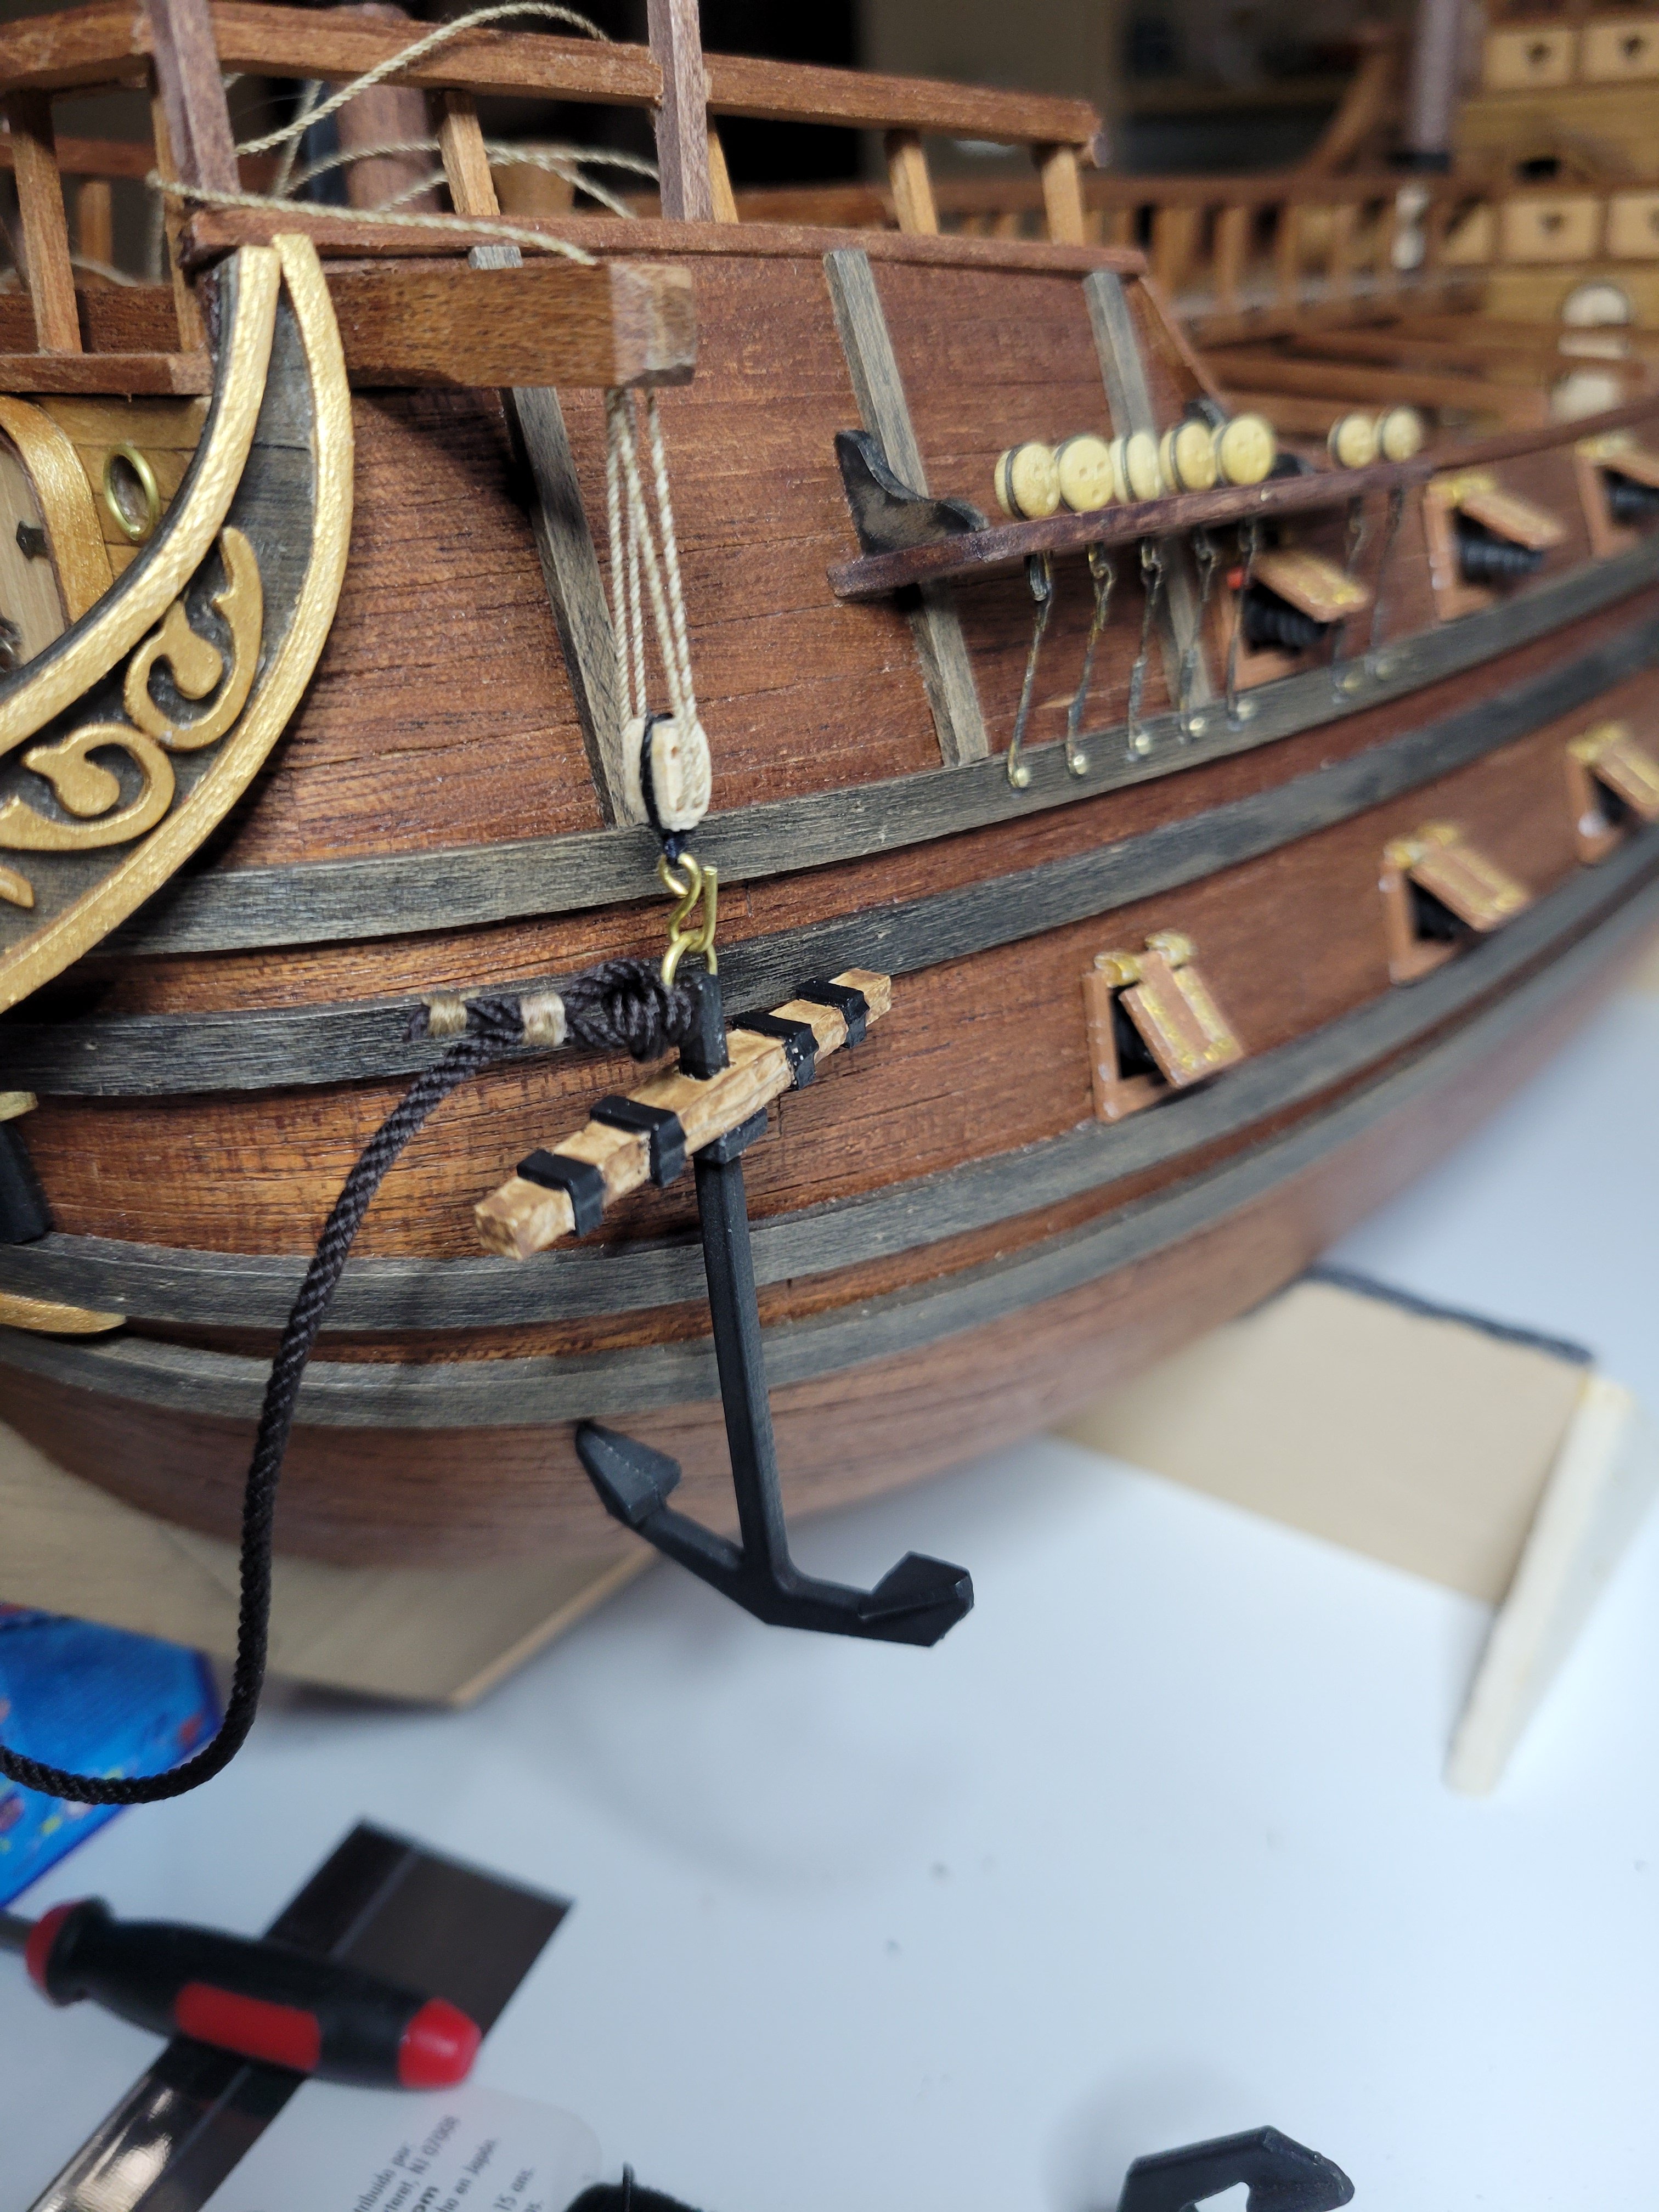
More progress during the holiday. - figure head in place and starting the bobstay. - Chainplates finally set. - Anchors rigged on catheads.

-
Thanks. I was worried about creating "perfect rope" but quickly realized, my simple lego machine paired with a couple practice runs and my so-so inexperienced rope is already so much better than kit rope. Certainly not at the quality and consistency of chuck's syren rope or ropes of scale (shout out to both for not only fantastic rope products bit lots of content to help the rest of us make our own!) but definately good enough for me. When I lay up the next rope I'll take more pics if anyone wants to see it in action to build their own. Next trip to a hobby shop I'll probably pick up gears and other parts to make a more permanent version.