Pchem530
-
Posts
13 -
Joined
-
Last visited
-
 Mr Whippy reacted to a post in a topic:
Lynx by Pchem530 - FINISHED - Panart - 1:62
Mr Whippy reacted to a post in a topic:
Lynx by Pchem530 - FINISHED - Panart - 1:62
-
Mr Whippy reacted to a post in a topic:
Lynx by Pchem530 - FINISHED - Panart - 1:62
-
Mr Whippy reacted to a post in a topic:
Lynx by Pchem530 - FINISHED - Panart - 1:62
-
Mr Whippy reacted to a post in a topic:
Lynx by Pchem530 - FINISHED - Panart - 1:62
-
Mr Whippy reacted to a post in a topic:
Lynx by Pchem530 - FINISHED - Panart - 1:62
-
Thukydides reacted to a post in a topic:
Lynx by Pchem530 - FINISHED - Panart - 1:62
-
Peter Joyce reacted to a post in a topic:
Lynx by Pchem530 - FINISHED - Panart - 1:62
-
chris watton reacted to a post in a topic:
Lynx by Pchem530 - FINISHED - Panart - 1:62
-
 ccoyle reacted to a post in a topic:
Lynx by Pchem530 - FINISHED - Panart - 1:62
ccoyle reacted to a post in a topic:
Lynx by Pchem530 - FINISHED - Panart - 1:62
-
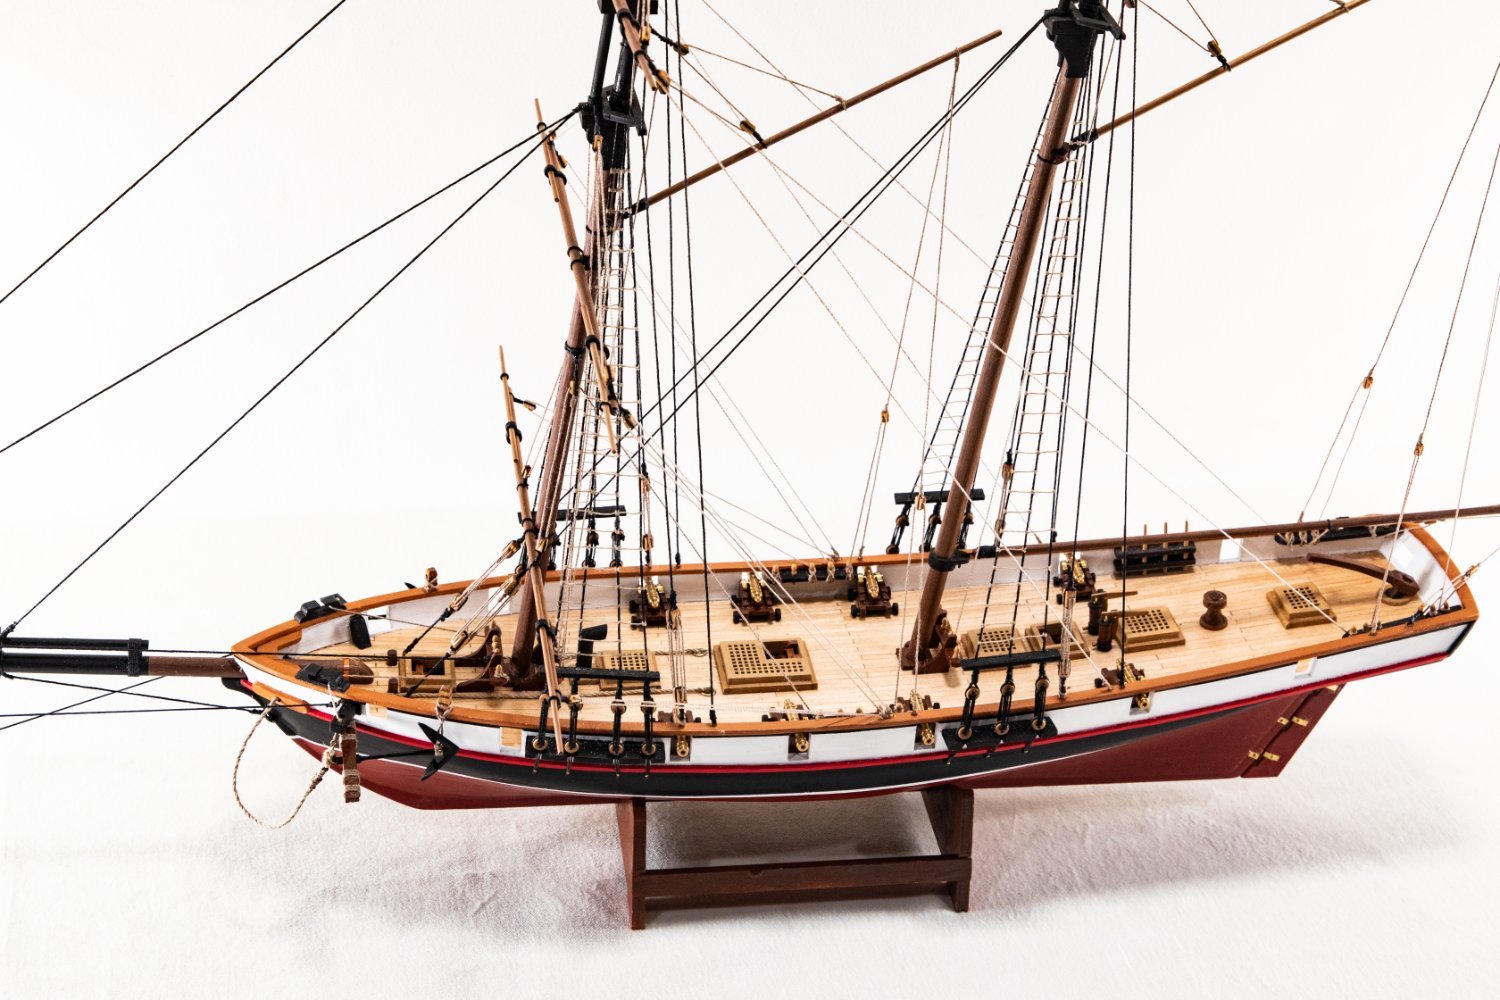
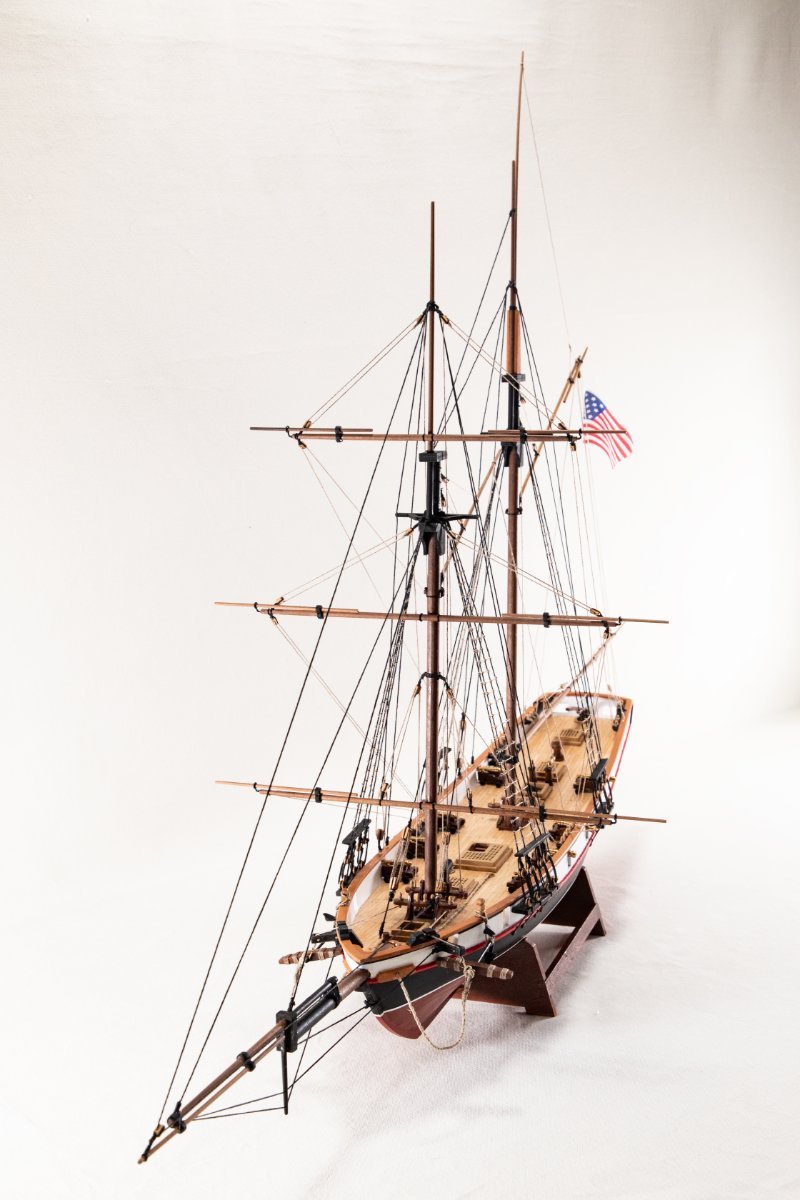
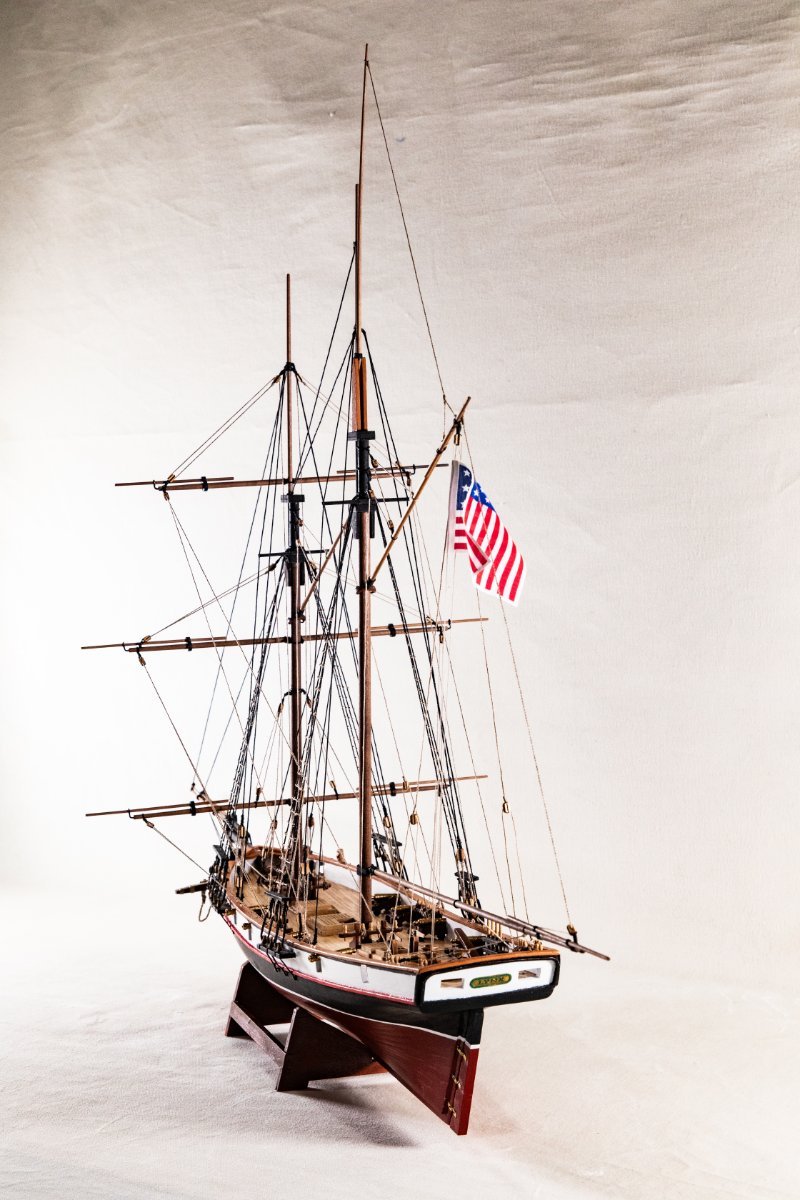
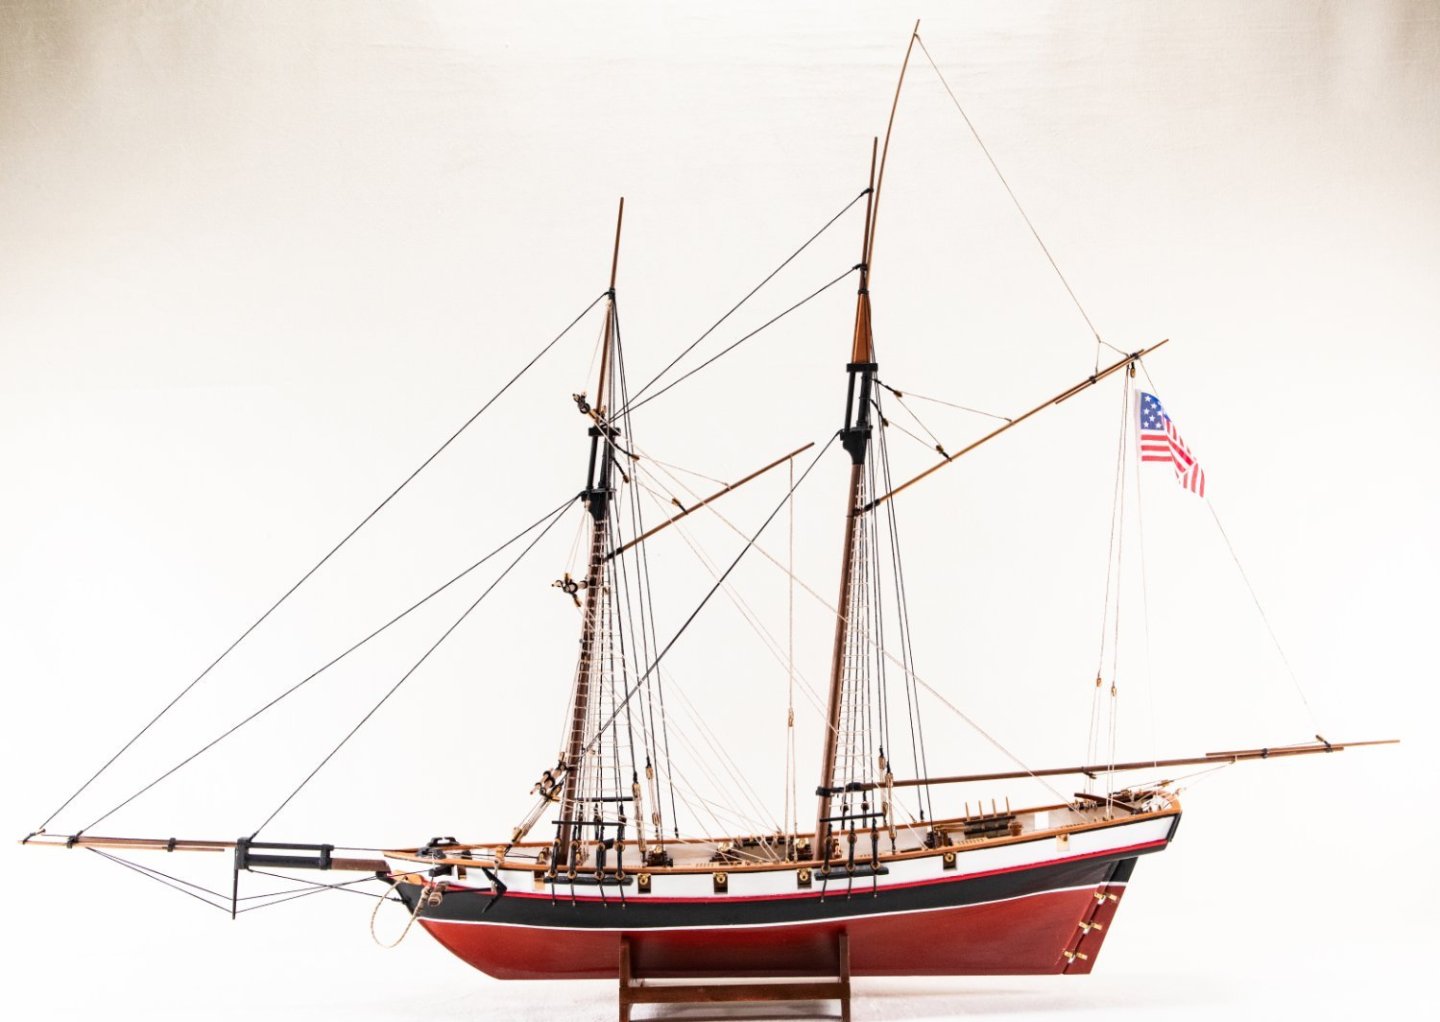
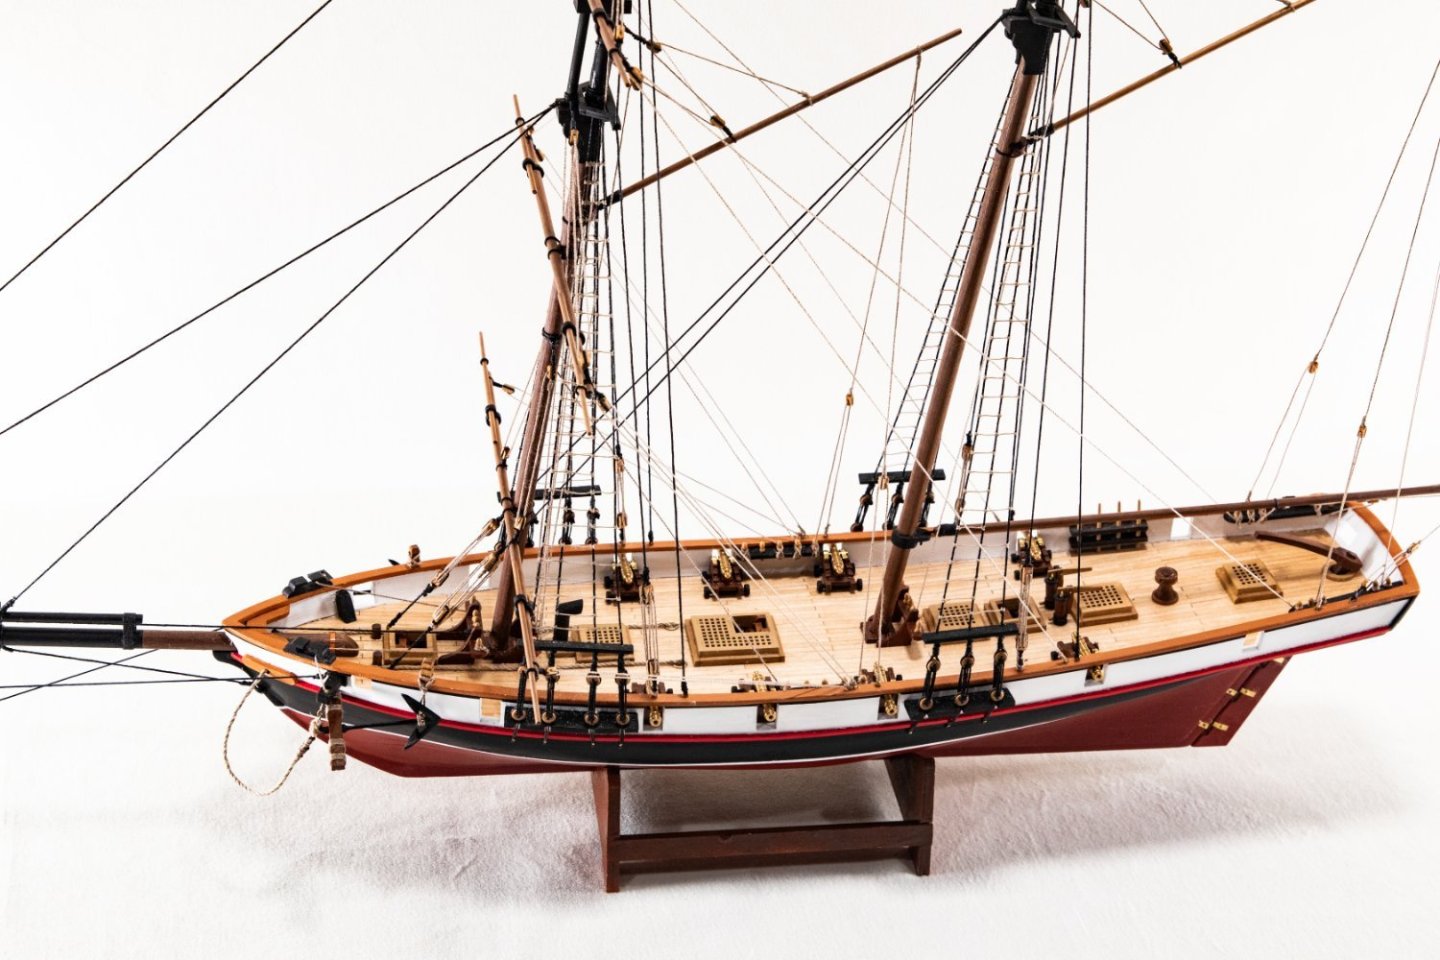
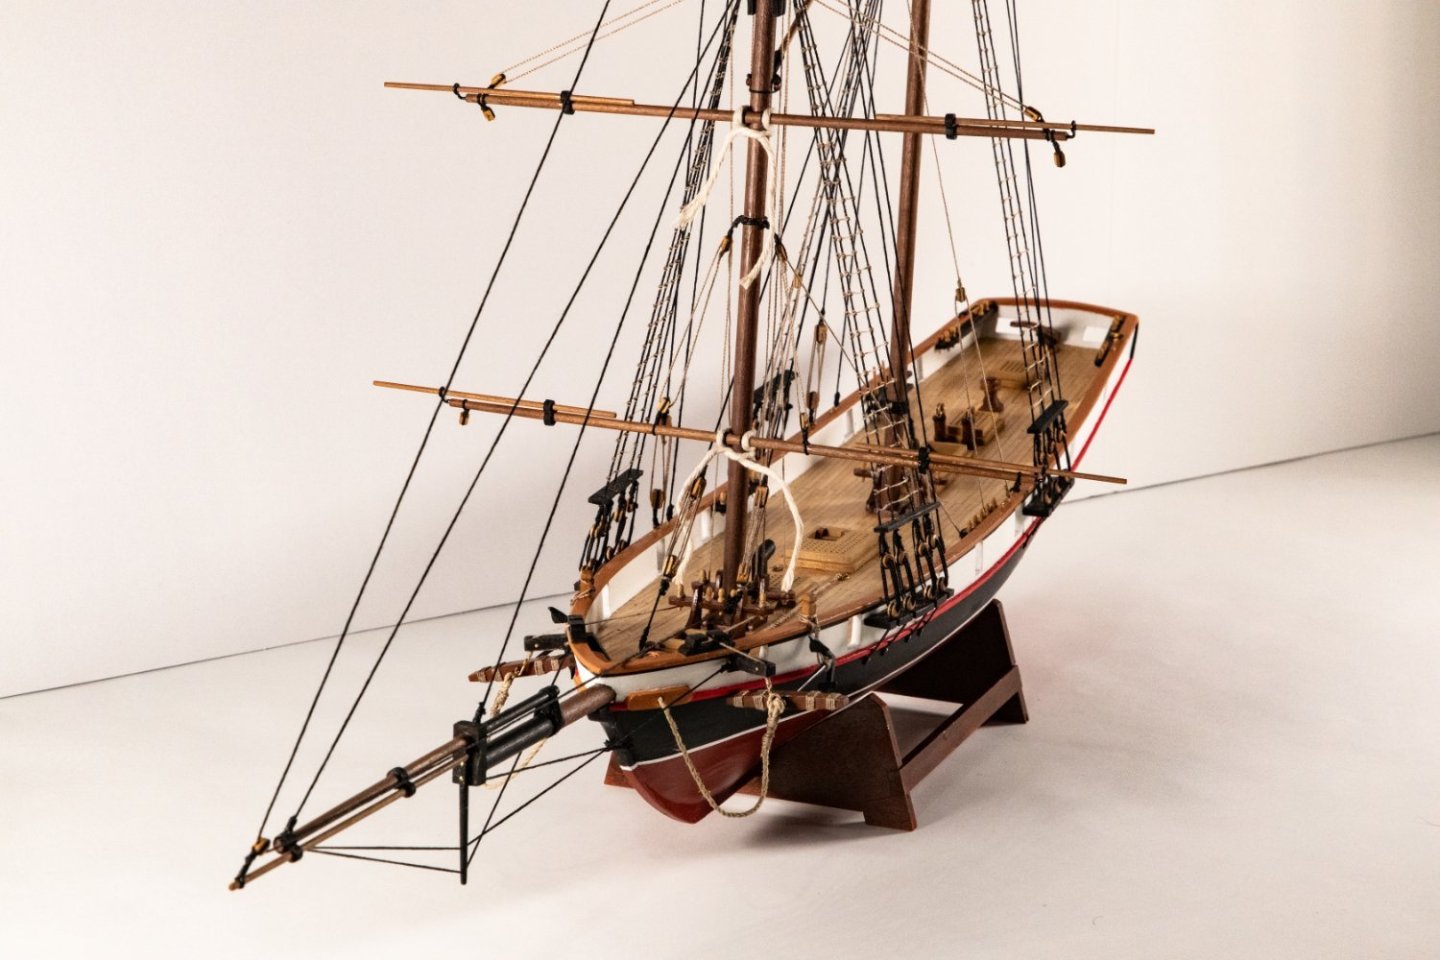
At this point things went pretty much according to plan with the following observations. It is extremely useful to use any extra line to hold yards and booms in place until you can secure them with the running rigging. Once everything looks good, add a drop of 50:50 glue to all the knots etc. I also experimented with seizing lines as well as using the method described by Mastini (overhand knot, several turns and a drop of glue). I think seizing gives a better result, but it is not always practical. If you do use seizing, Do Not trim any excess ends until the everything is secure, and you have added the final drop of glue. Several times I pulled the block free while tightening the lines (usually at the end of a yard or somewhere else equally inconvenient) and had to reattach using Mastini's method. Finally, dampening the flag and using the wife's curling iron works really well to get a nice droop in the flag (so long as she isn't around). Building the model also reinforced a lesson I learned in the past. If kit instructions say to attach Part A to Part B using Part : 1. The person who made Part A never met or talked to the person who made Part B, 2. Part C will be missing, 3. The person who wrote the instructions never assembled the kit or talked to anyone involved in making any parts, and 4. Once you have jury rigged or bought a replacement for Part C, that part will be found in the corner of the box or on the floor under the table. Hopefully my next log will be better. Here is the finished result. Until next time.


-
Peter Joyce reacted to a post in a topic:
Lynx by Pchem530 - FINISHED - Panart - 1:62
-
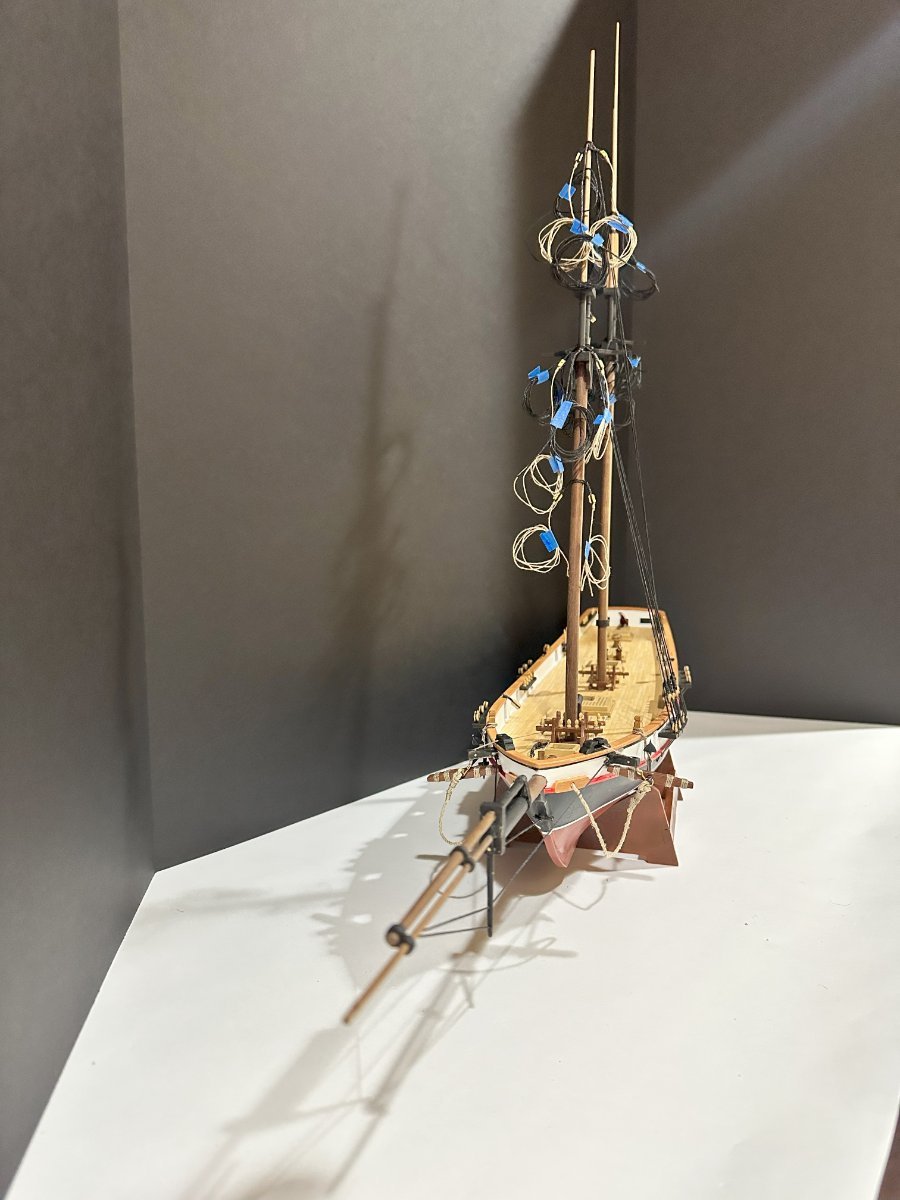
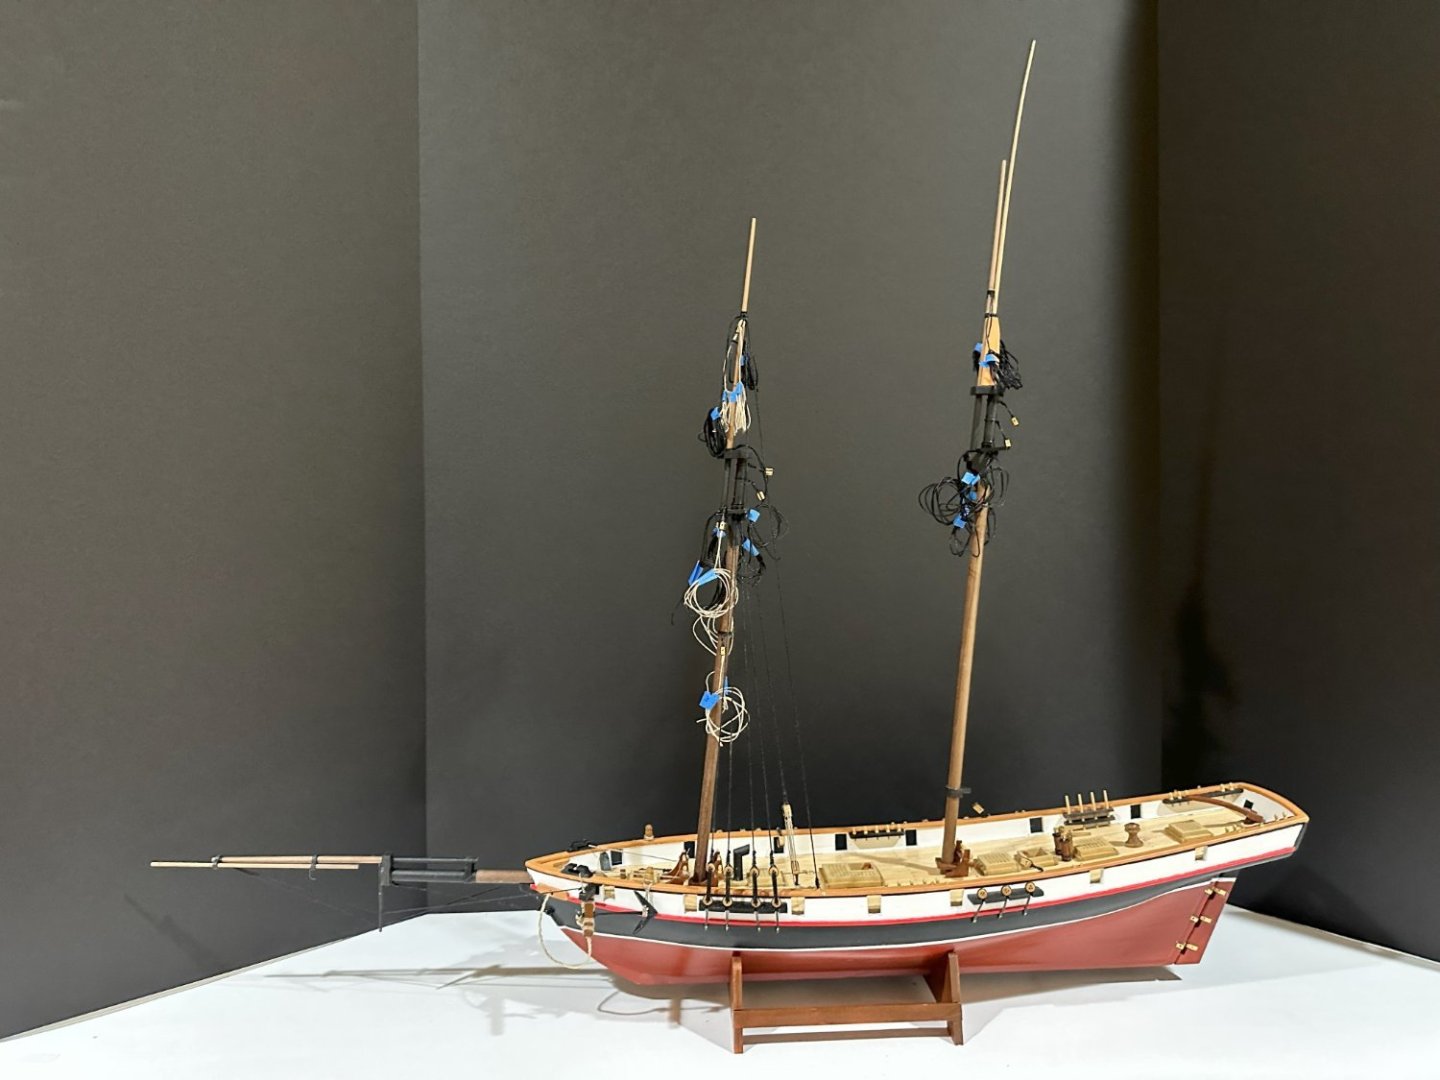
At this point I took a recommendation from Frank Mastini's "Ship Modeling Simplified" and attached rigging (backstays etc.) to the masts before stepping them permanently with the following results. While this seems doable for a schooner, I question how practical it is for a full rigged ship like a clipper (next project). After finishing the standing rigging, I worked on the ratlines. I ordered some thinner line as recommended by Mastini (and ordered extra line for the rest of the rigging since I was using more than the kit supplied). I tied each ratline to the stay using clove hitches since I found after experimenting that it was easier to adjust the tension/spacing between the stays. As I moved along, I put a drop of 50:50 wood glue on the knots to hold them in place. When it came time to install the yardarms, I was uncertain the best way to hold them in place while rigging them. Some blogs recommended using a pin or nail to hold them, others recommended gluing them. I ended up using butcher's/kitchen twine as a temporary measure. The advantage was that the twine is fairly soft and wouldn't scar up the mast or yards, but "bit" itself to hold things steady. Once I finished the running rigging and was satisfied with the position/angle of the yardarm, I put a drop of CA glue to hold it in place and removed the twine.


-
Hi Peter. Looking good, and keep in mind like I read in another post, you will see every imperfection while everyone else will see how great it looks (and if they don't, cut off their bar tab). A word of caution when installing the grates and ladders - I found out that the ladders in general were too long! My solution was to hold the grate over the hole in the deck and slide the ladder down at the proper angle until it touched bottom. I then cut the ladder to length and flipped the ladder so that the cut end was down below deck for installation. Hope this helps.
-
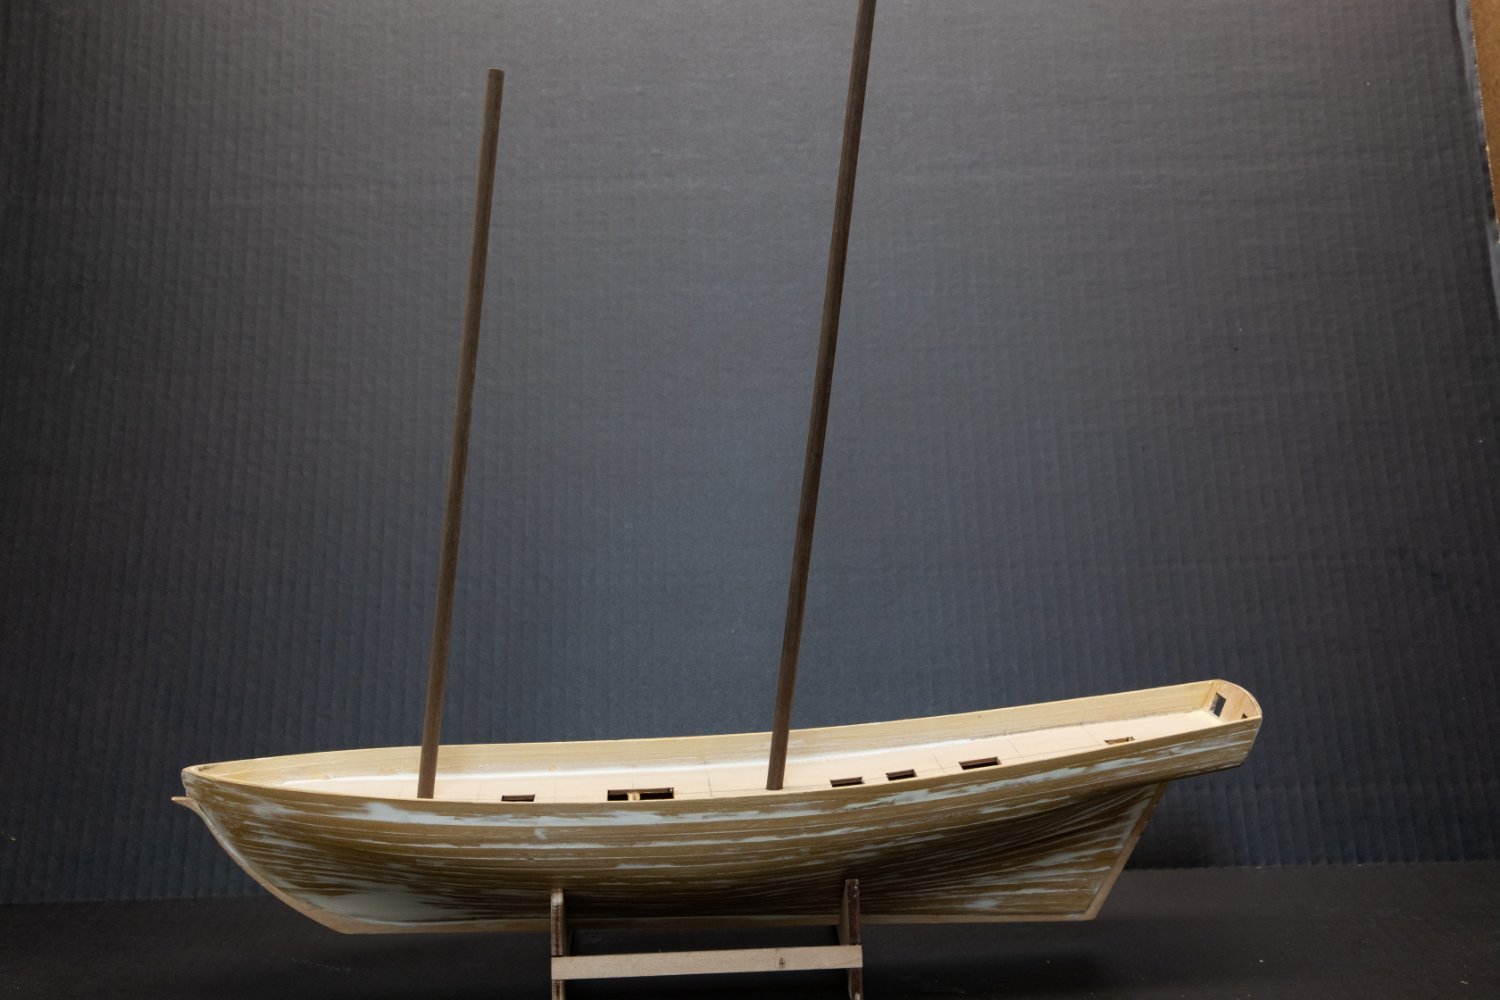
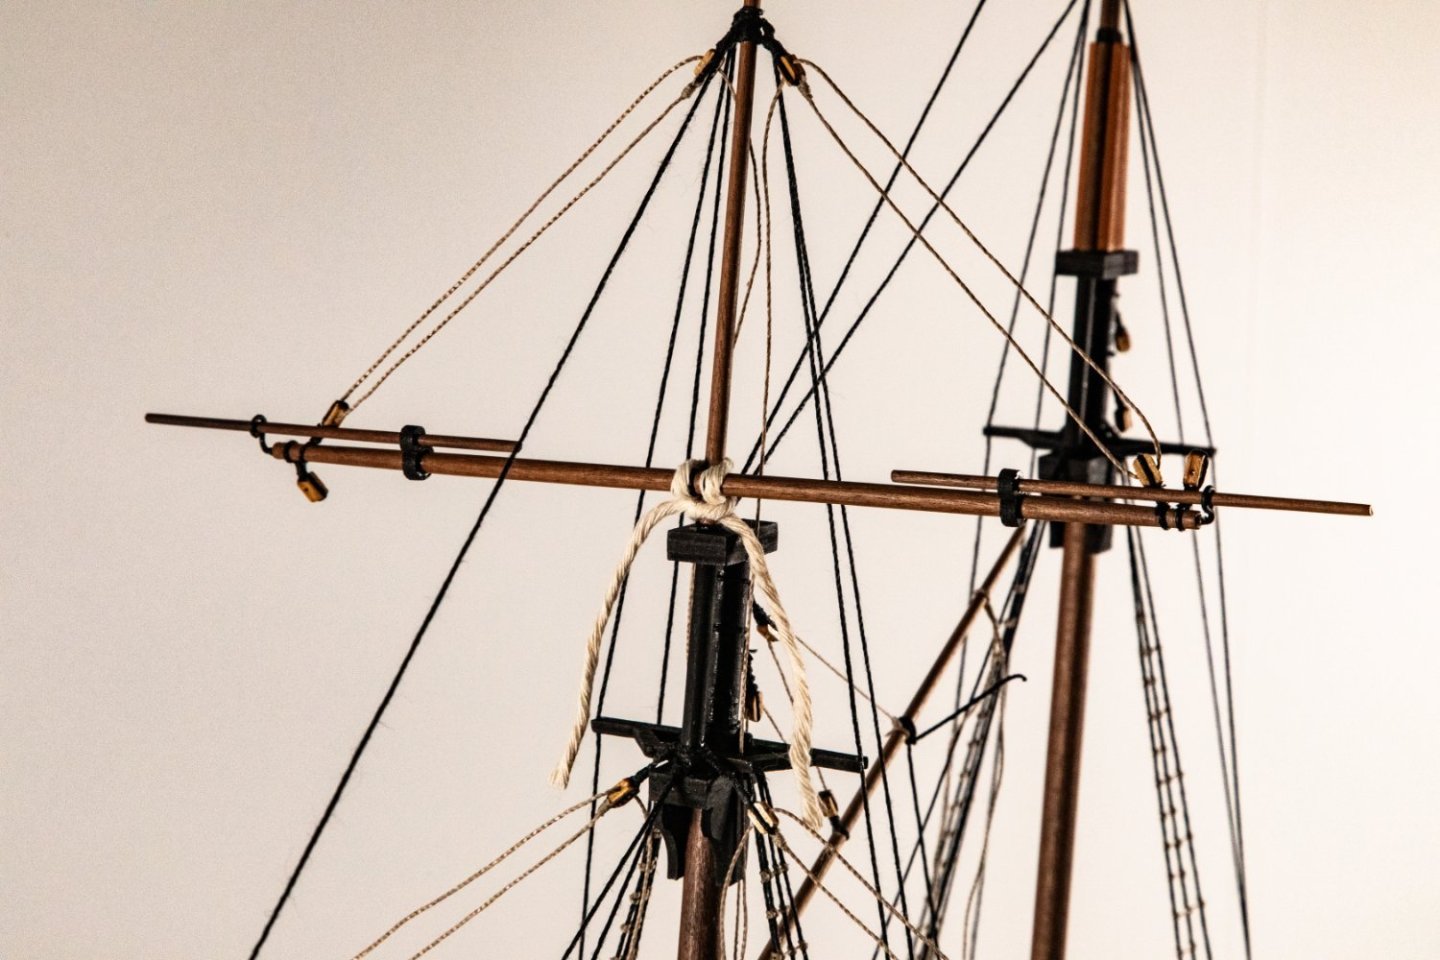
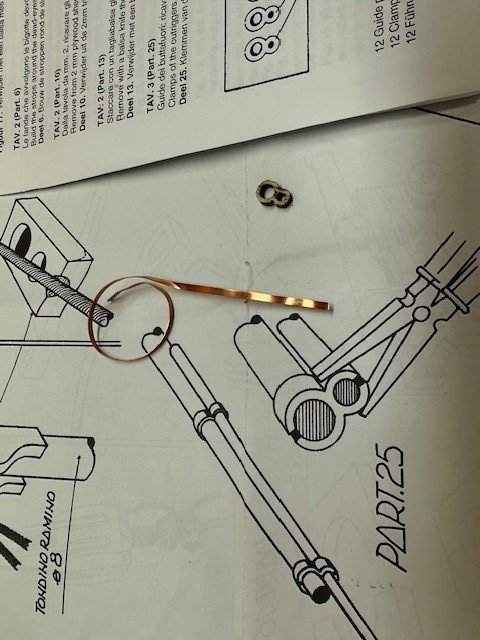
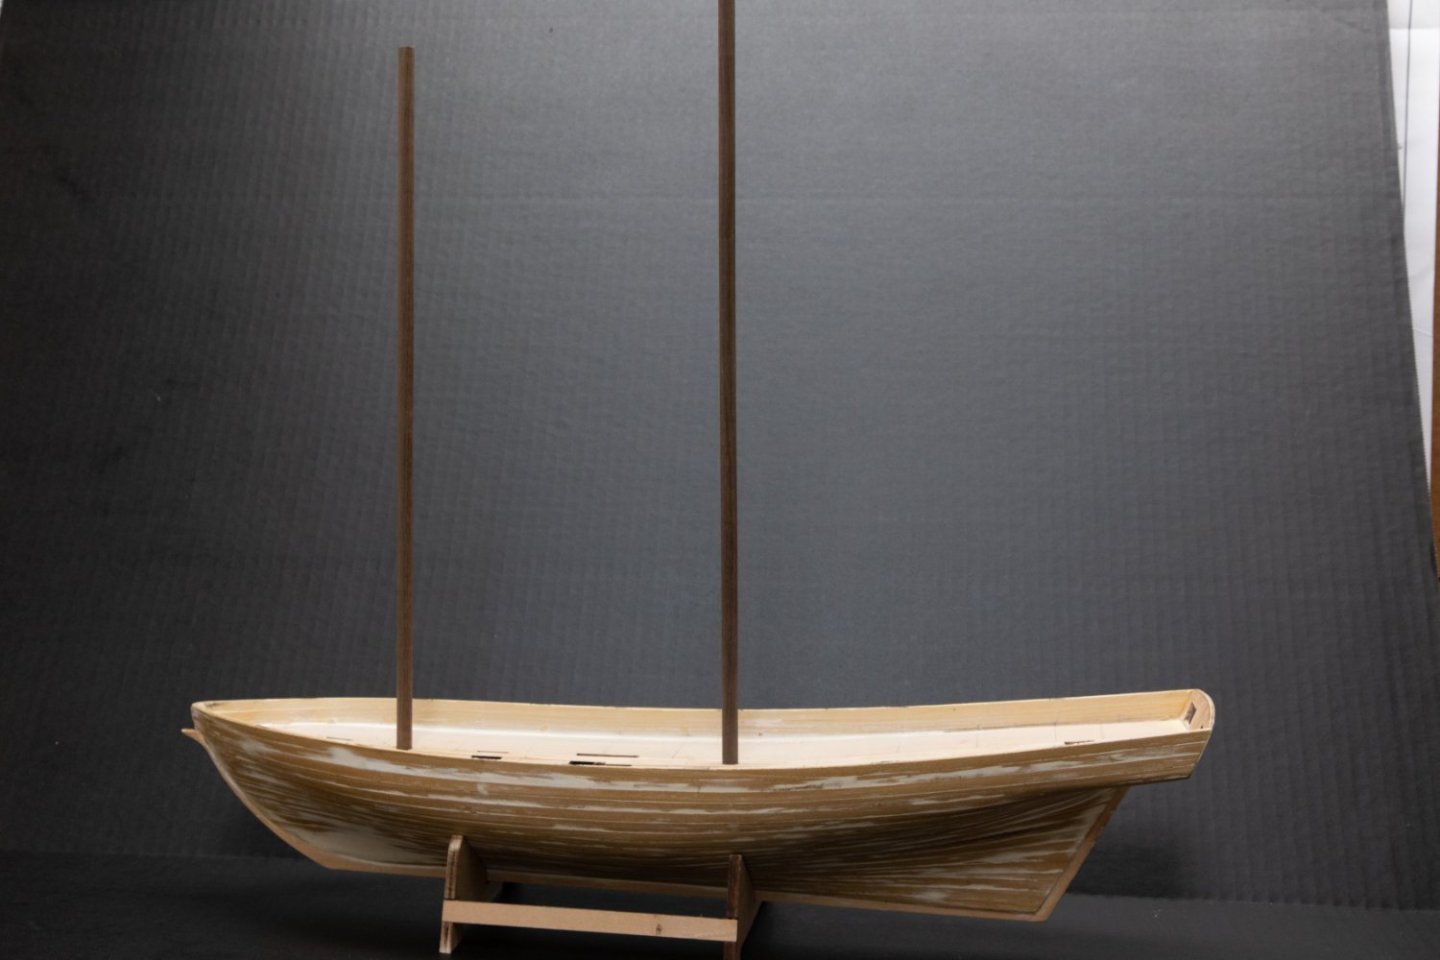
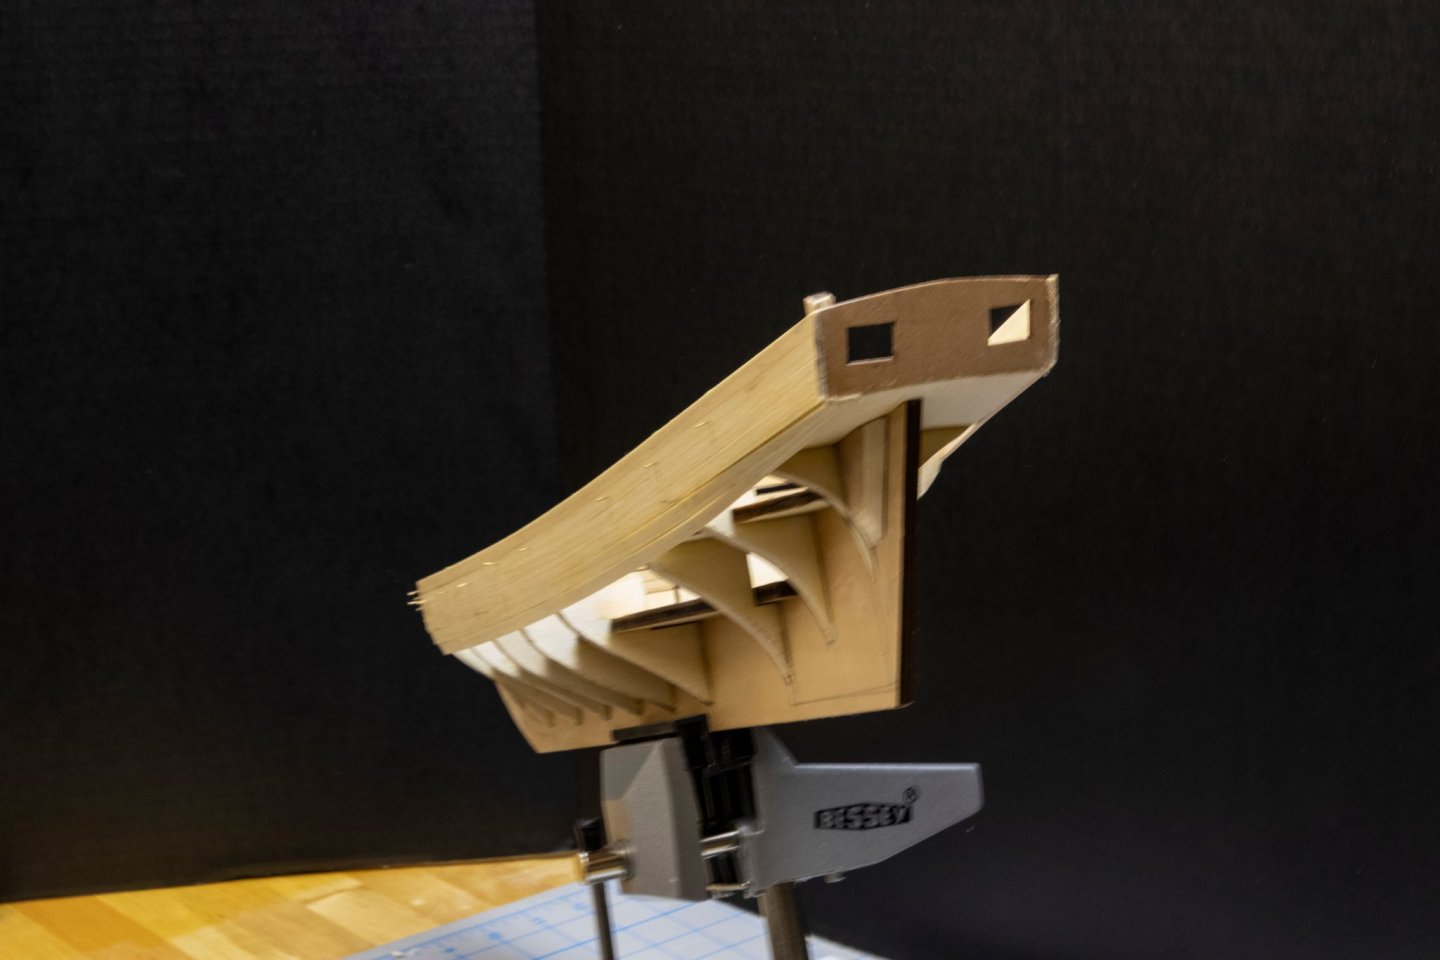
Masts and Yards: The first issue I encountered was that the lower masts were made of 8 mm dowls, but the top blocks were drilled out for 7 mm. Rather than make the top blocks too thin, I sanded the masts down to 7mm, but only down to where the cheeks/crosstrees began, leaving the lower portion at 8 mm. This gave a better fit through the deck. The second issue was with the chainplates. After playing around with the brass strips, wire, and deadeyes, I decided to purchase the chainplates (27 mm) online. I found some that I think actually look better than what was proposed in the kit. Another issue was that the outrigger clamps shown in the plans had nothing to do with what was supplied or described. The plans showed metal clamps to be squeezed on the yardarms, but an addendum showed plywood clamps and indicated that the clamps should be made with brass strips. Not only that, but there were also insufficient plywood parts for all the yards and booms. I decided to use the plywood parts (sanded and painted black) for the larger yardarms and use the brass strip (painted black) for the smaller booms. The yardarms ended up looking like this. At this point, I tested how the masts would fit,


-
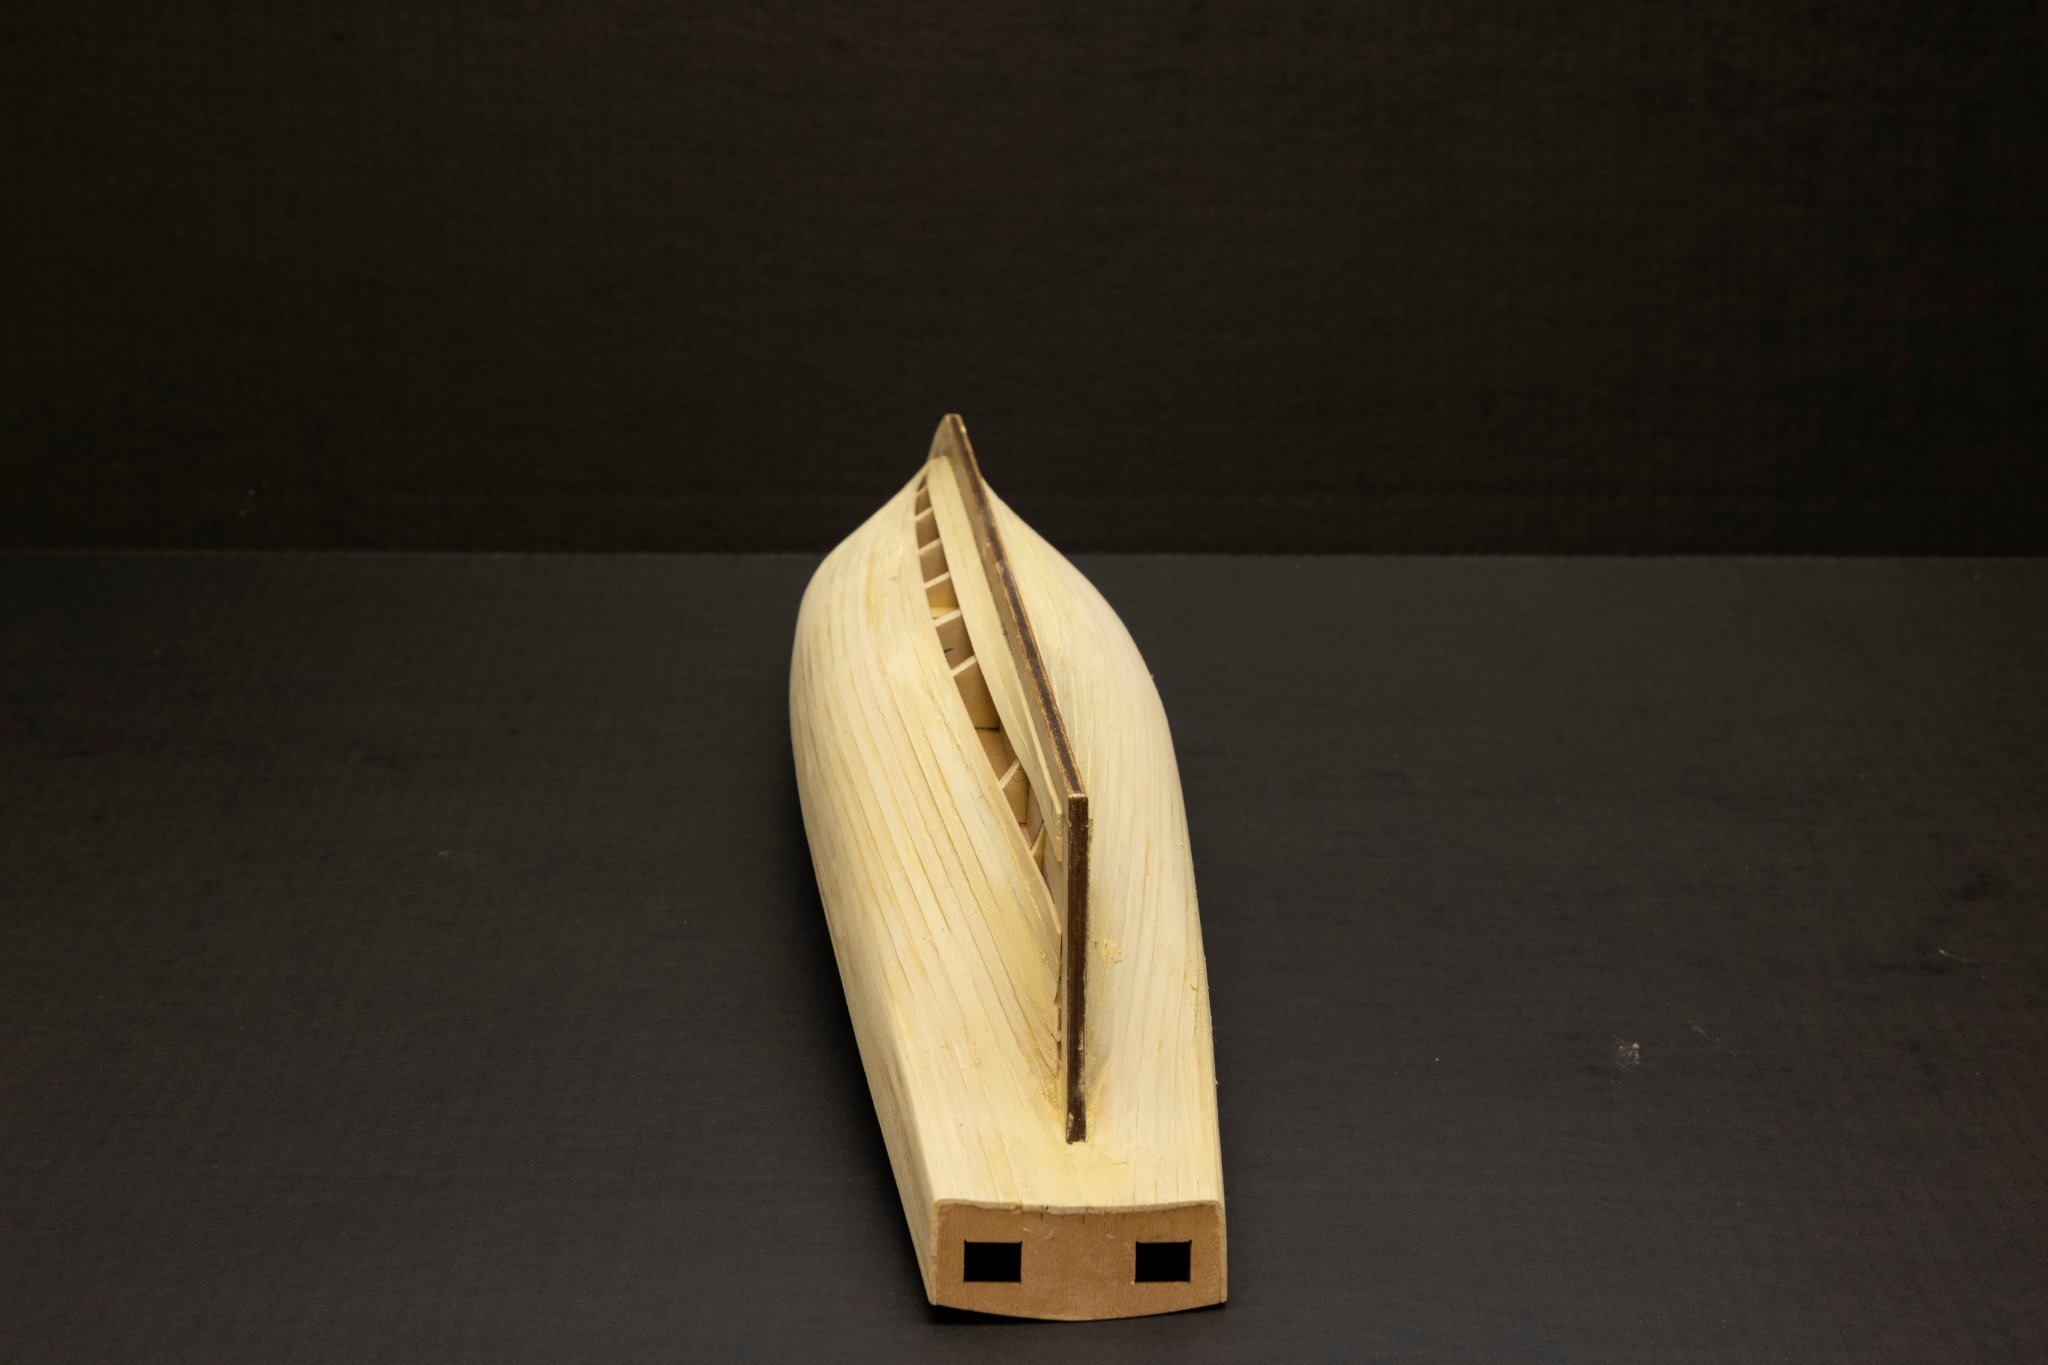
Note: Somehow I managed to end up inserting the picture showing the holes cut for the chain wales at the end of the post, instead of higher up where it should have been. Appologies.
-
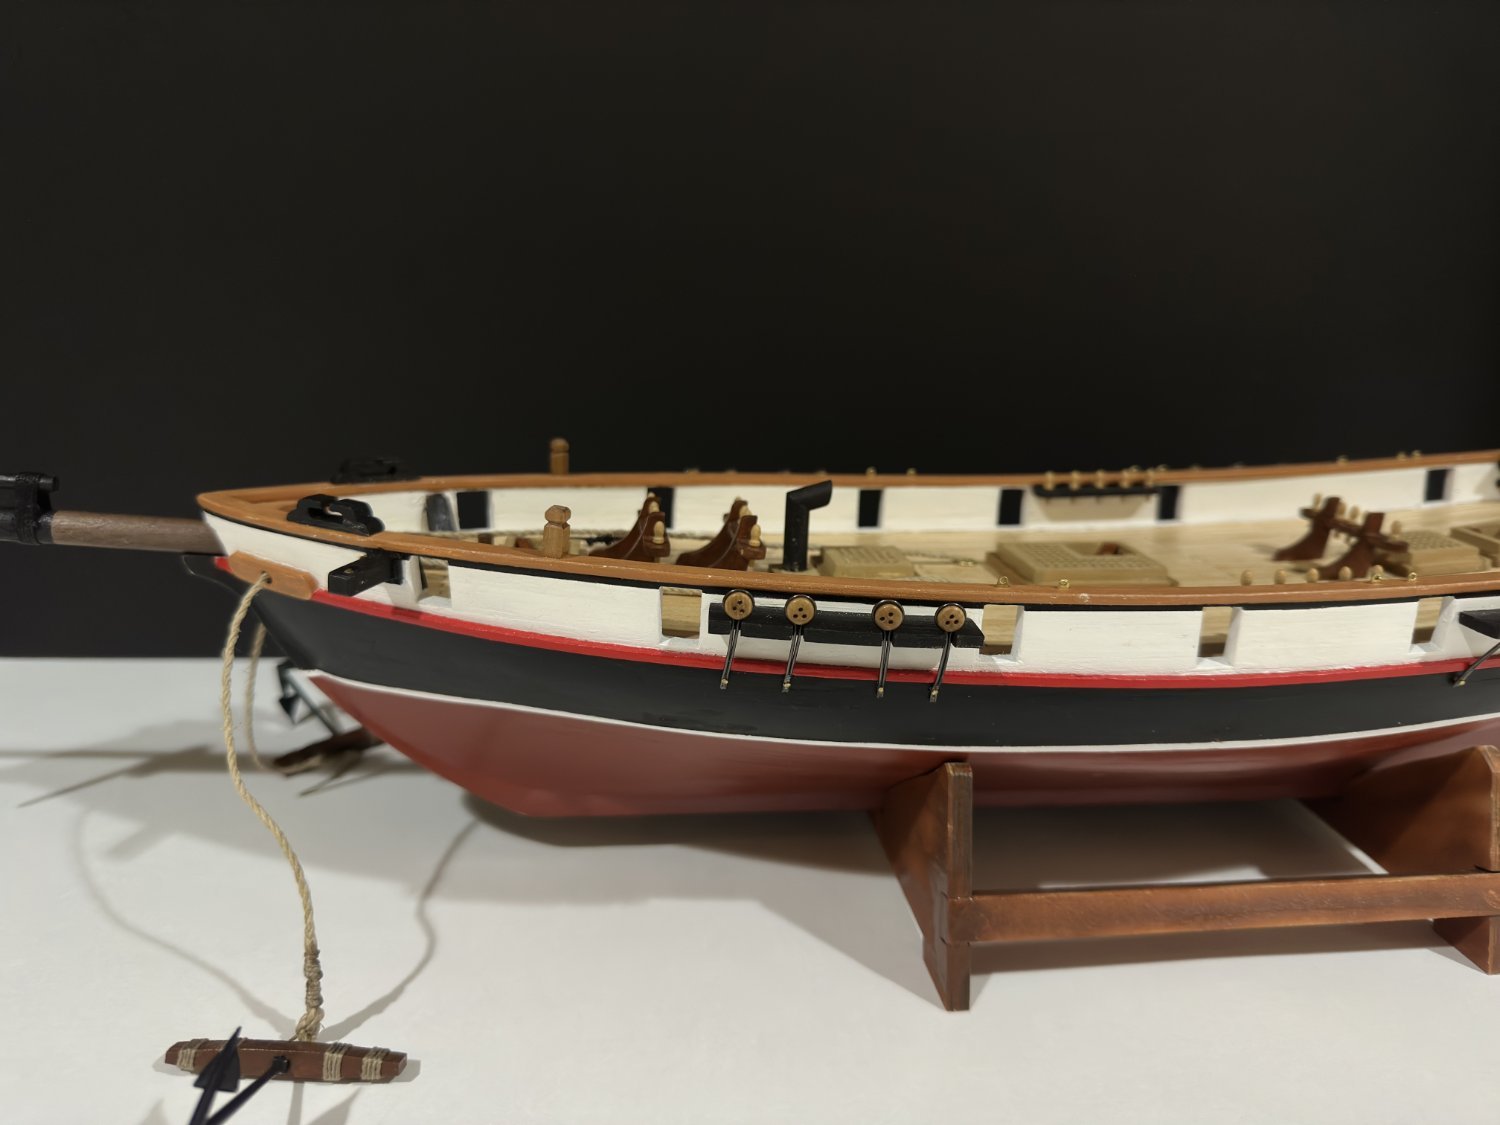
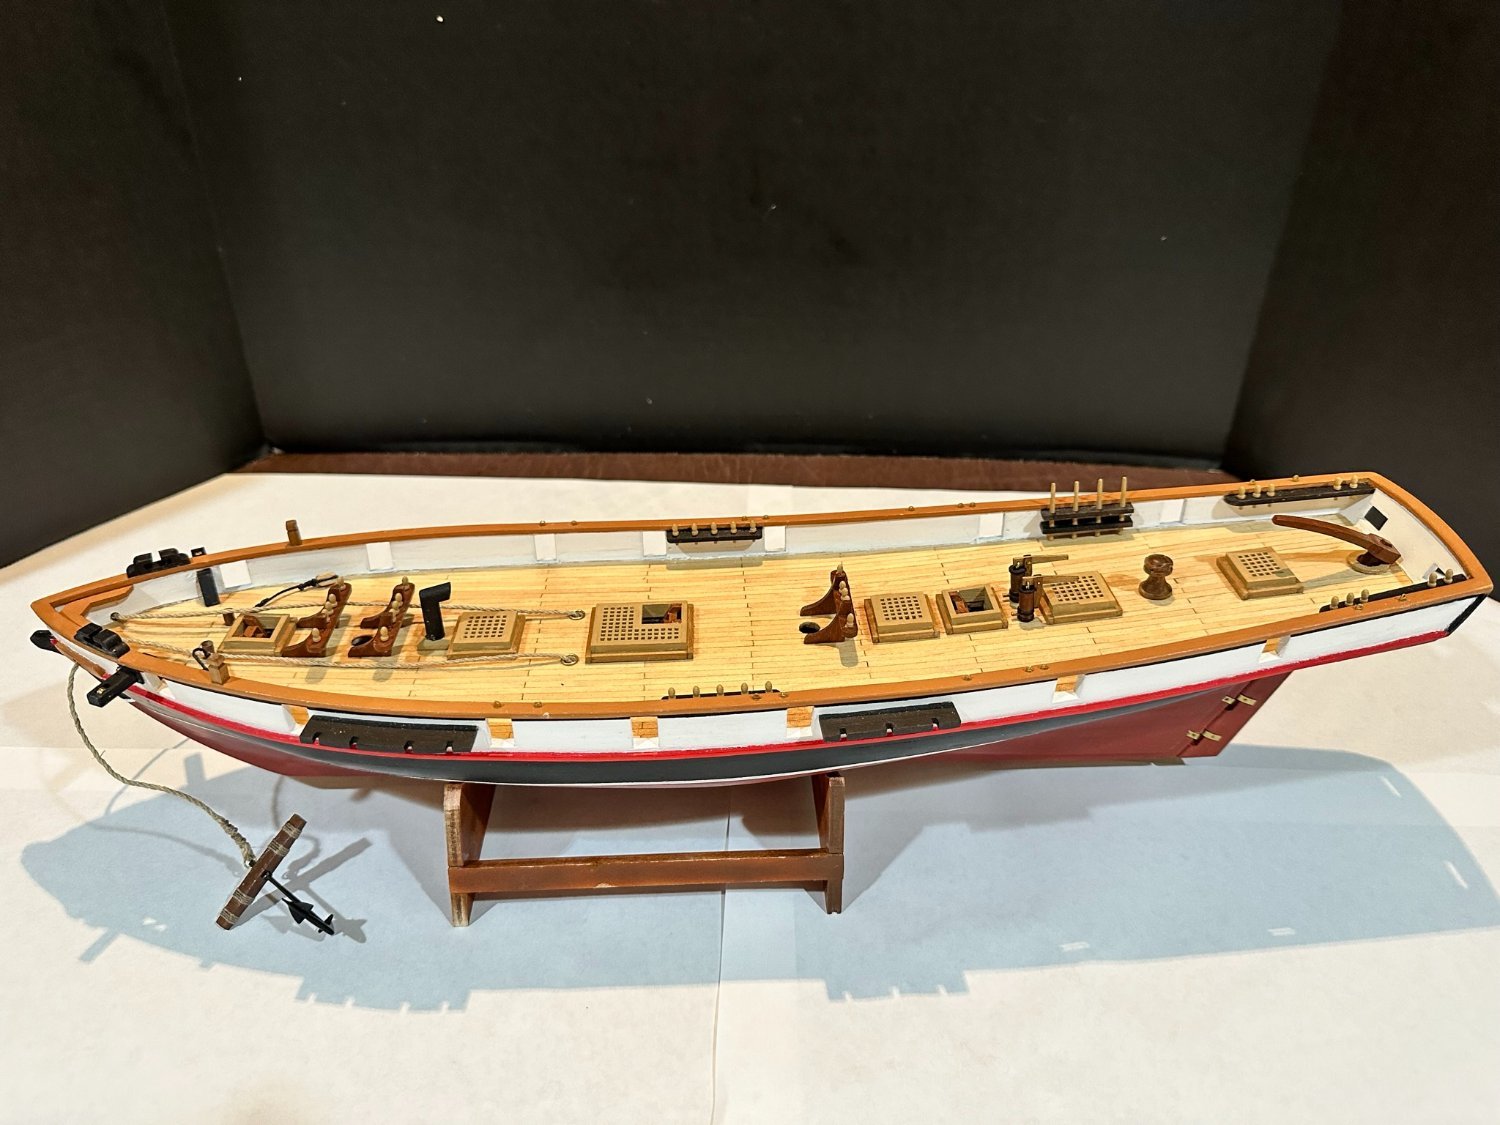
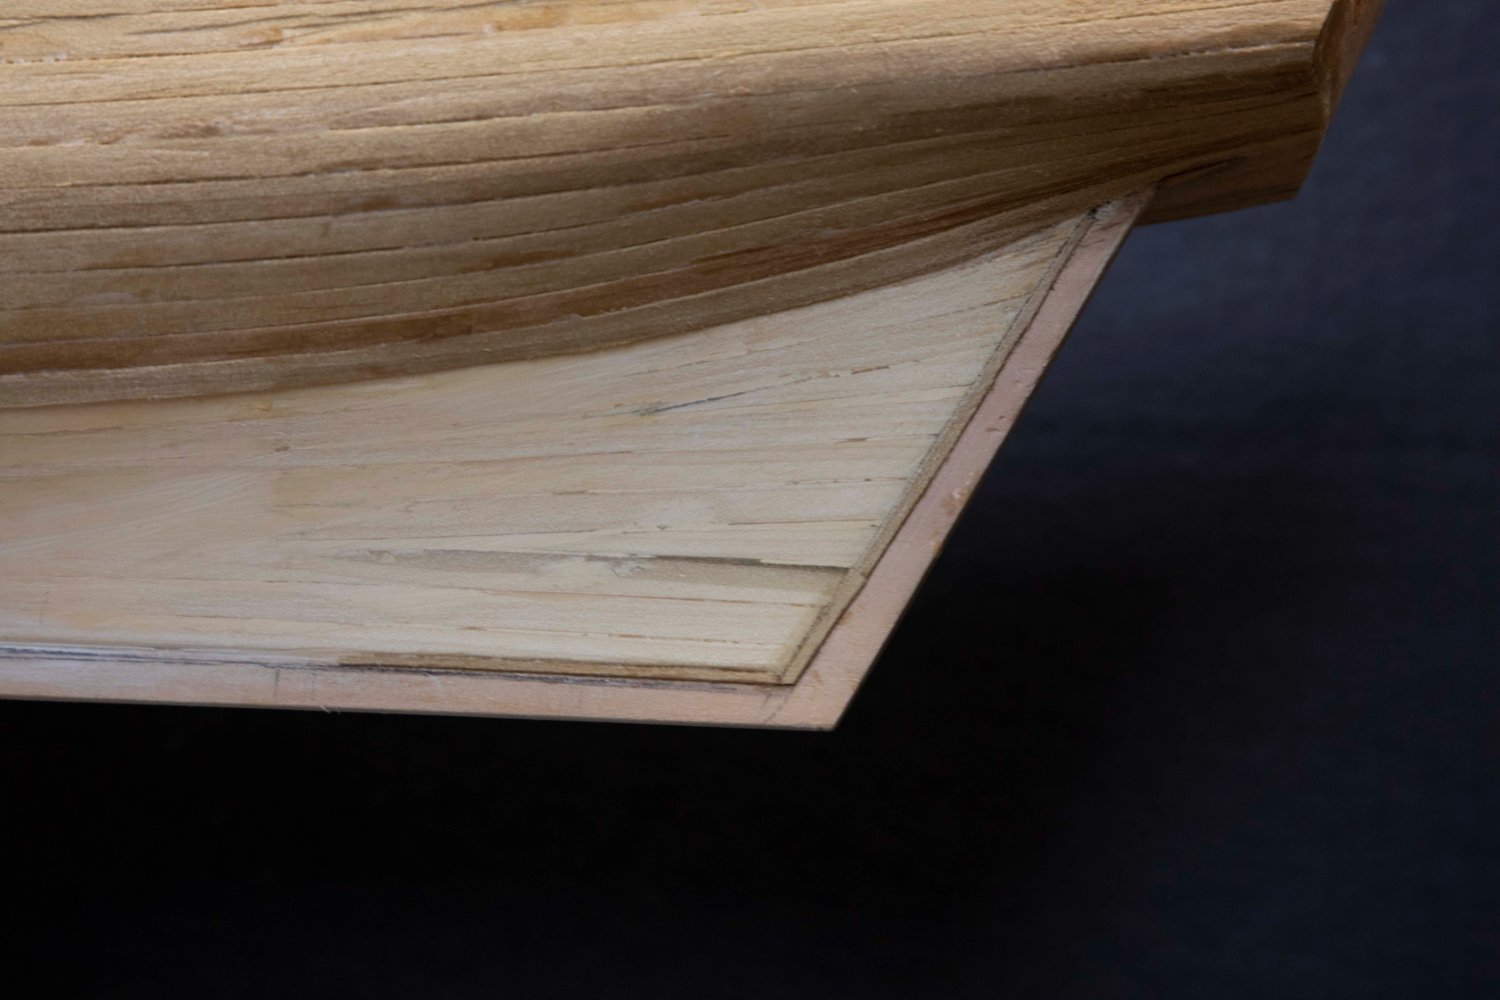
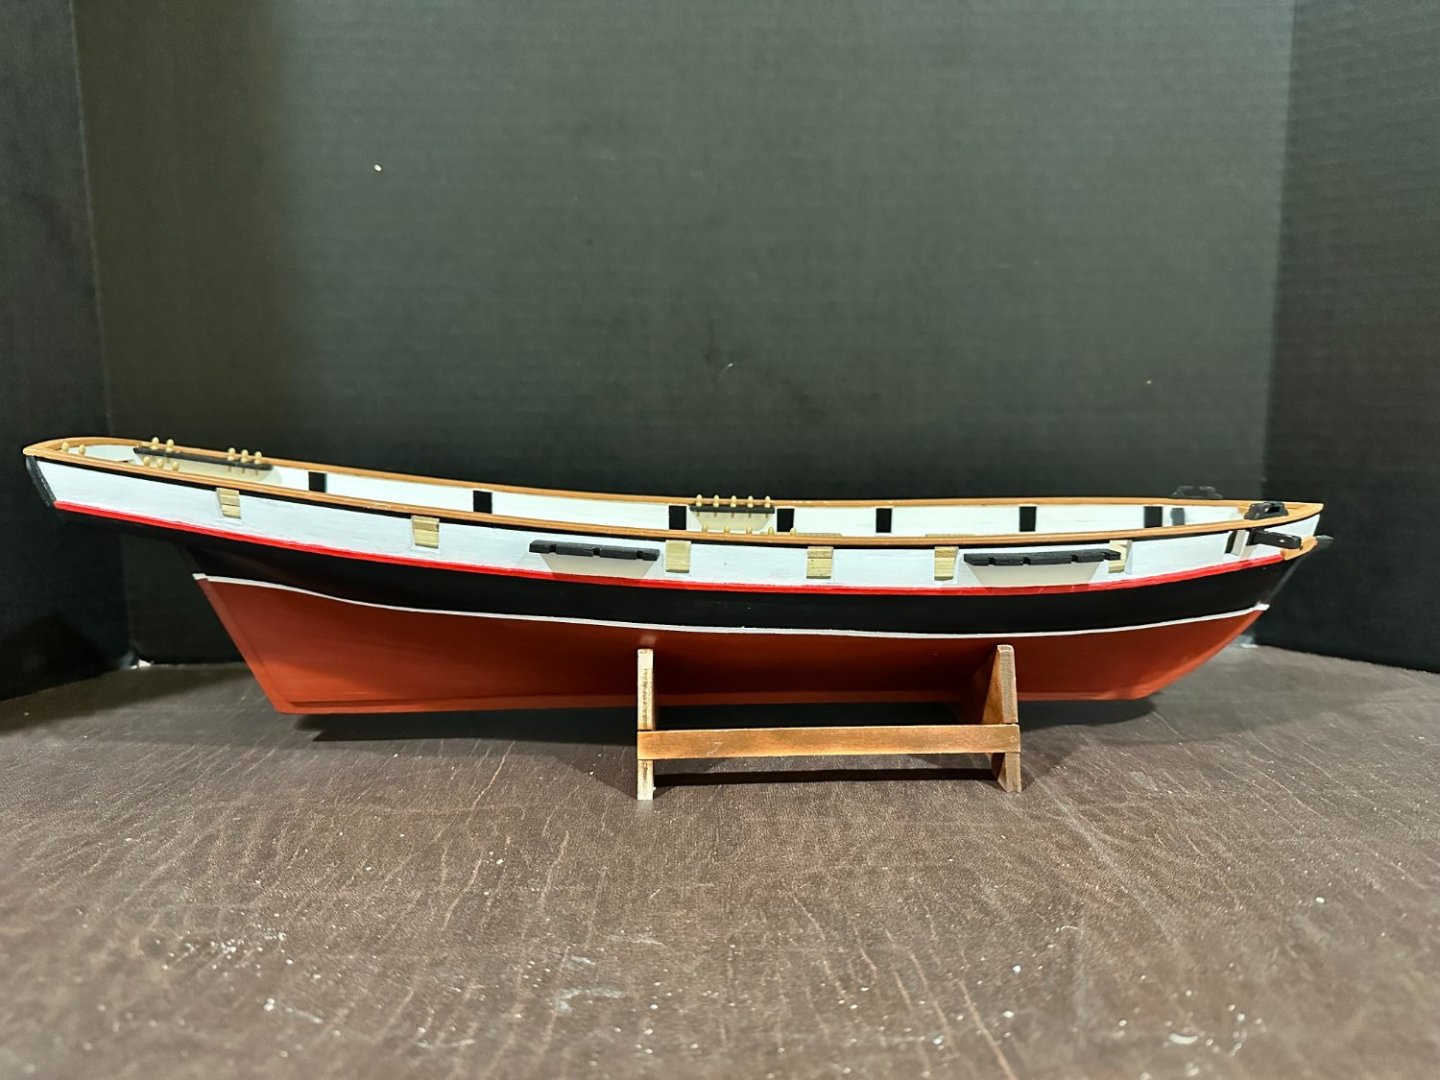
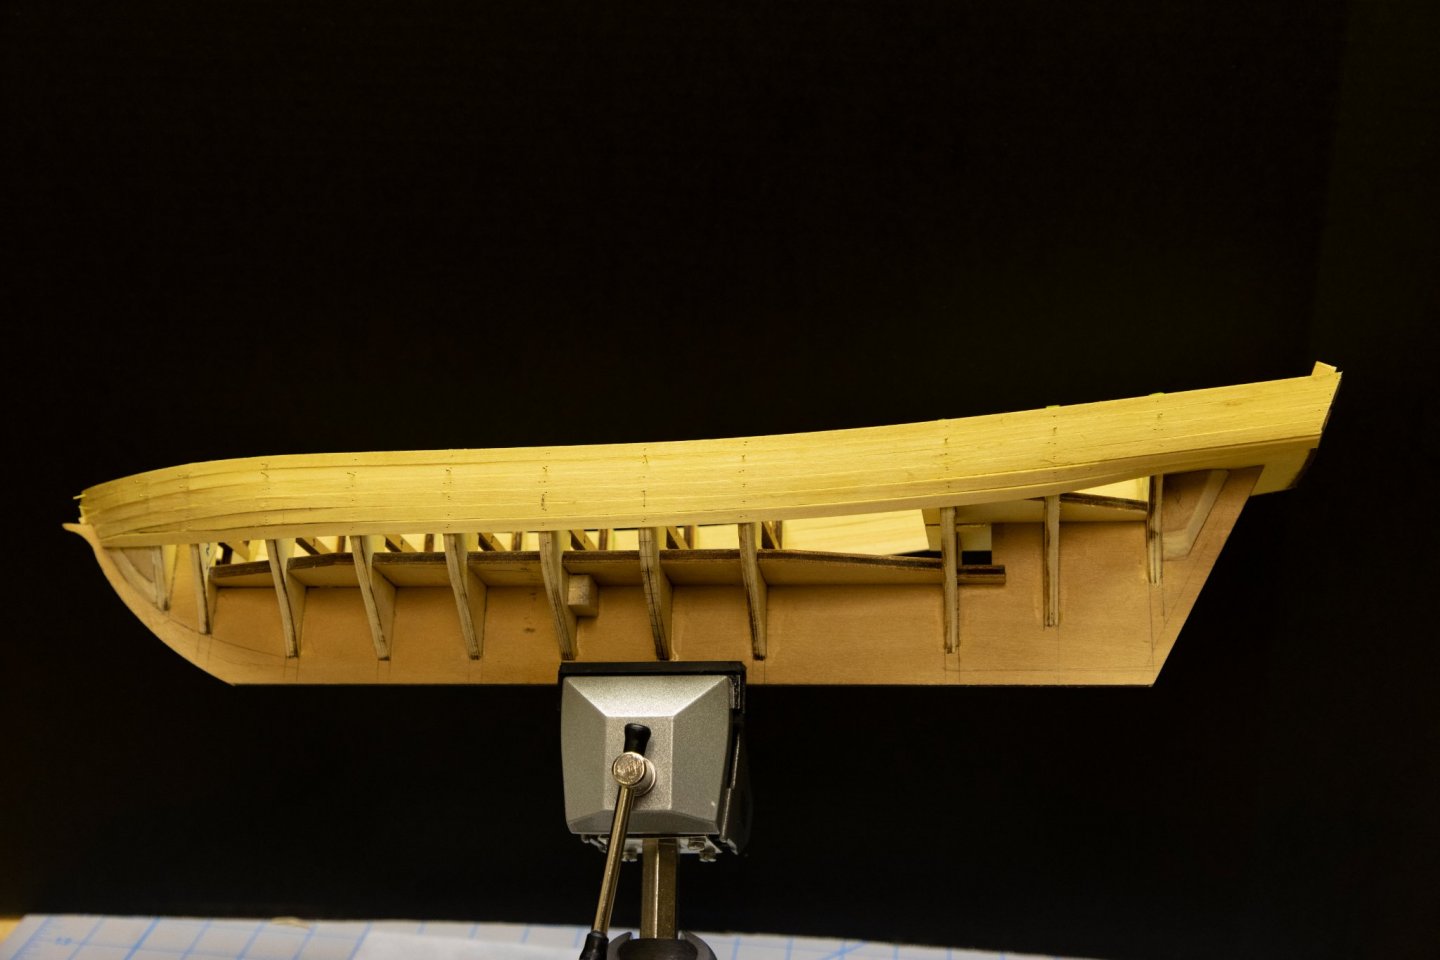
Moving on, the next step was to bend the subdeck to conform to the hull. After reading various sites warning against delaminating the plywood, I used a more conservative approach. I dampened each side of the plywood, then placed it in the hull and placed weights (a brass block and removable weights left over from physical rehab) on top. Each night I repeated the process and after a week, the plywood conformed nicely to the hull without delamination. Things then proceeded nicely according to the plans (minor sanding here and there), until it was time to add the chain wales. The parts supplied had extensions which would either have to be cut off or extend the wales away from the hull which did not appear to be correct. My solution was to carve square holes that aligned with the extensions thinking that this would also strengthen the joints. I cut the holes and installed the chain wales prior to planking the bulkheads so that the holes would be hidden by the planking. After painting the hull (and adding pin rails etc.), the results were as shown - I installed the planking on the chain wales after attaching them to the hull to cover any gaps where the extension went into the hull. At this point, thing progressed pretty much as the plans indicated, although it seemed as if there were not enough parts to complete the deck gratings. I lucked out since I saved trimmed ends and was able to splice parts together. Next up, masts and rigging.


-
Hi Peter. When I placed the deck on top of the plans, I noticed that if I lined up the edges of the deck with the plan, the cutouts in the deck (mast and hatches) did not line up (should have taken a picture - sorry). When I lined up the cutouts to the plan, the edges of the deck did not line up (stern extended ~4 - 5 mm past the plan line. In order to get the rake, I trimmed the stern edge of the deck by ~4 mm so that the stern and cutouts lined up with the plan (had to fill in the bow with scrap/filler so that the deck planks have support). Hope this helps and keep it up - this is a good model to learn with.
-
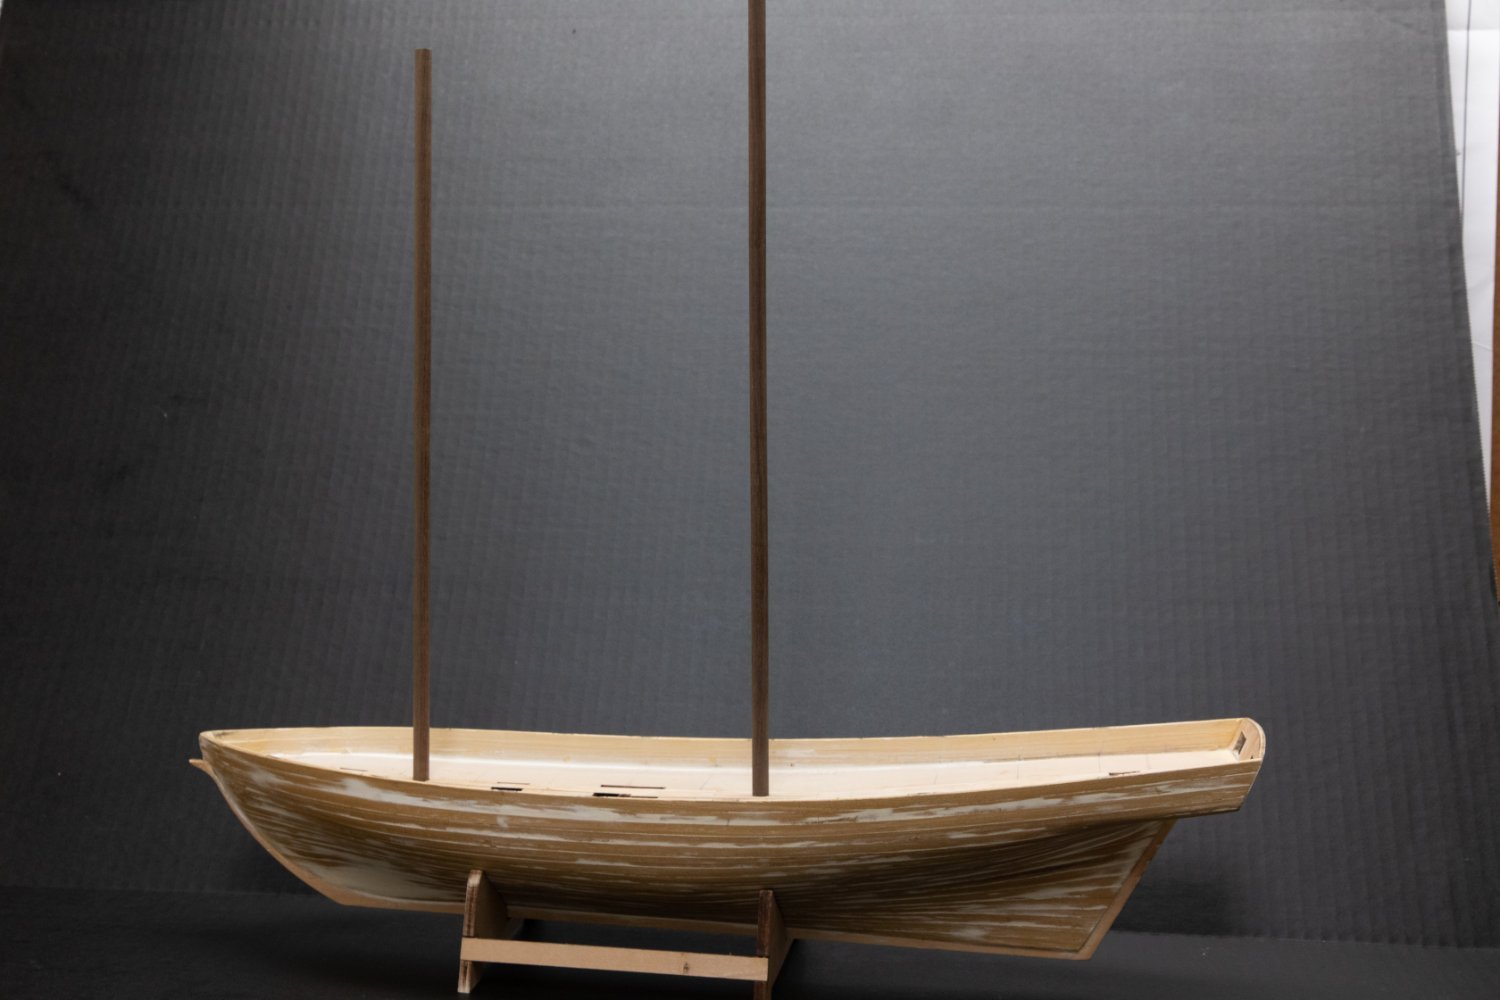
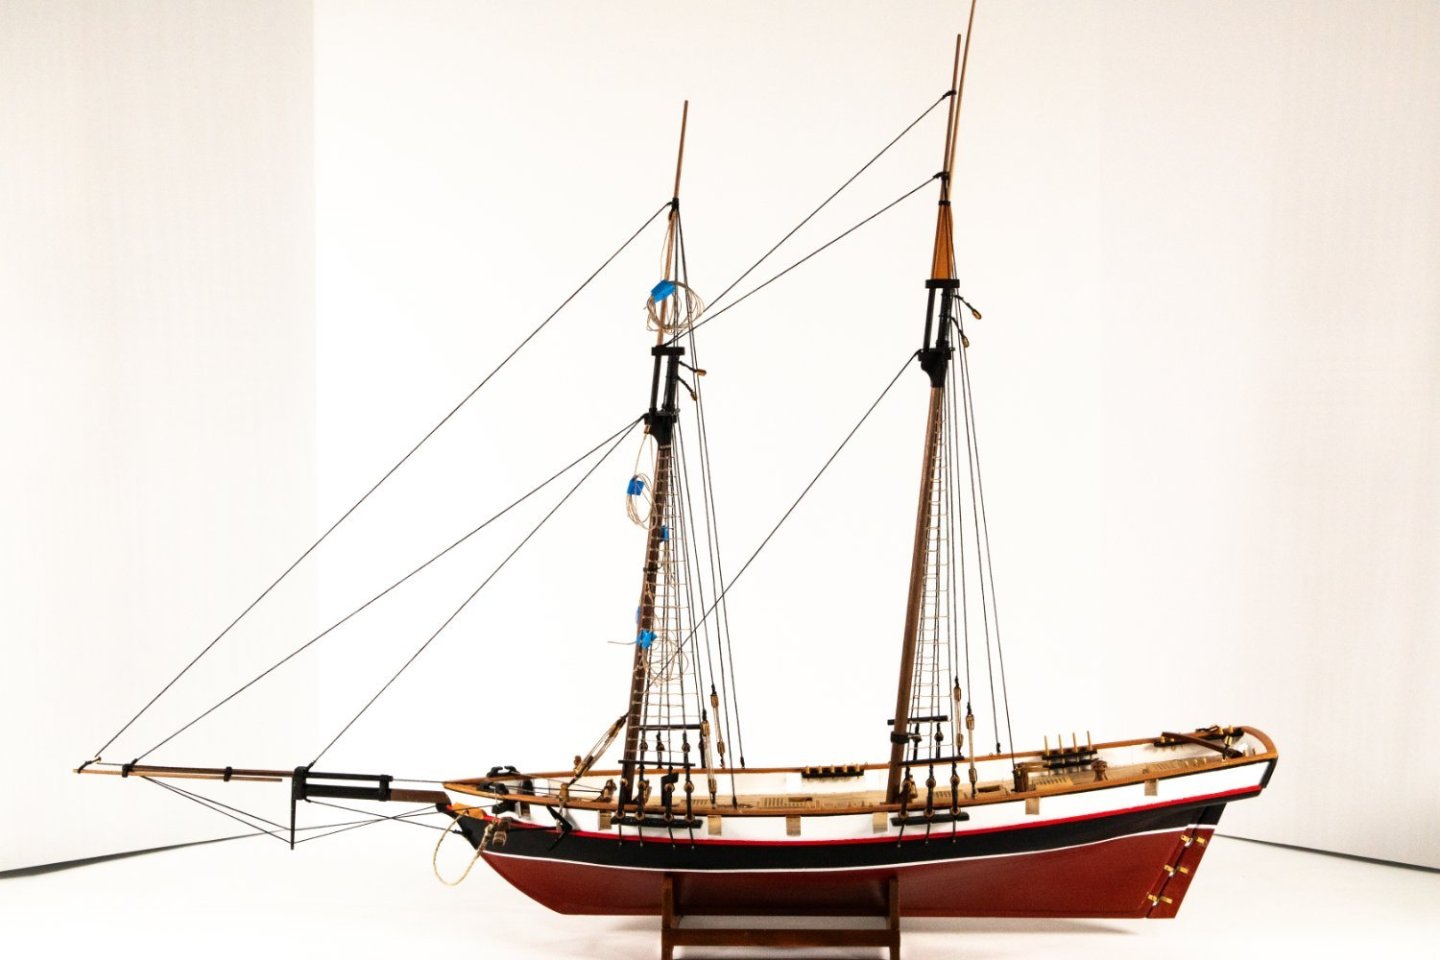
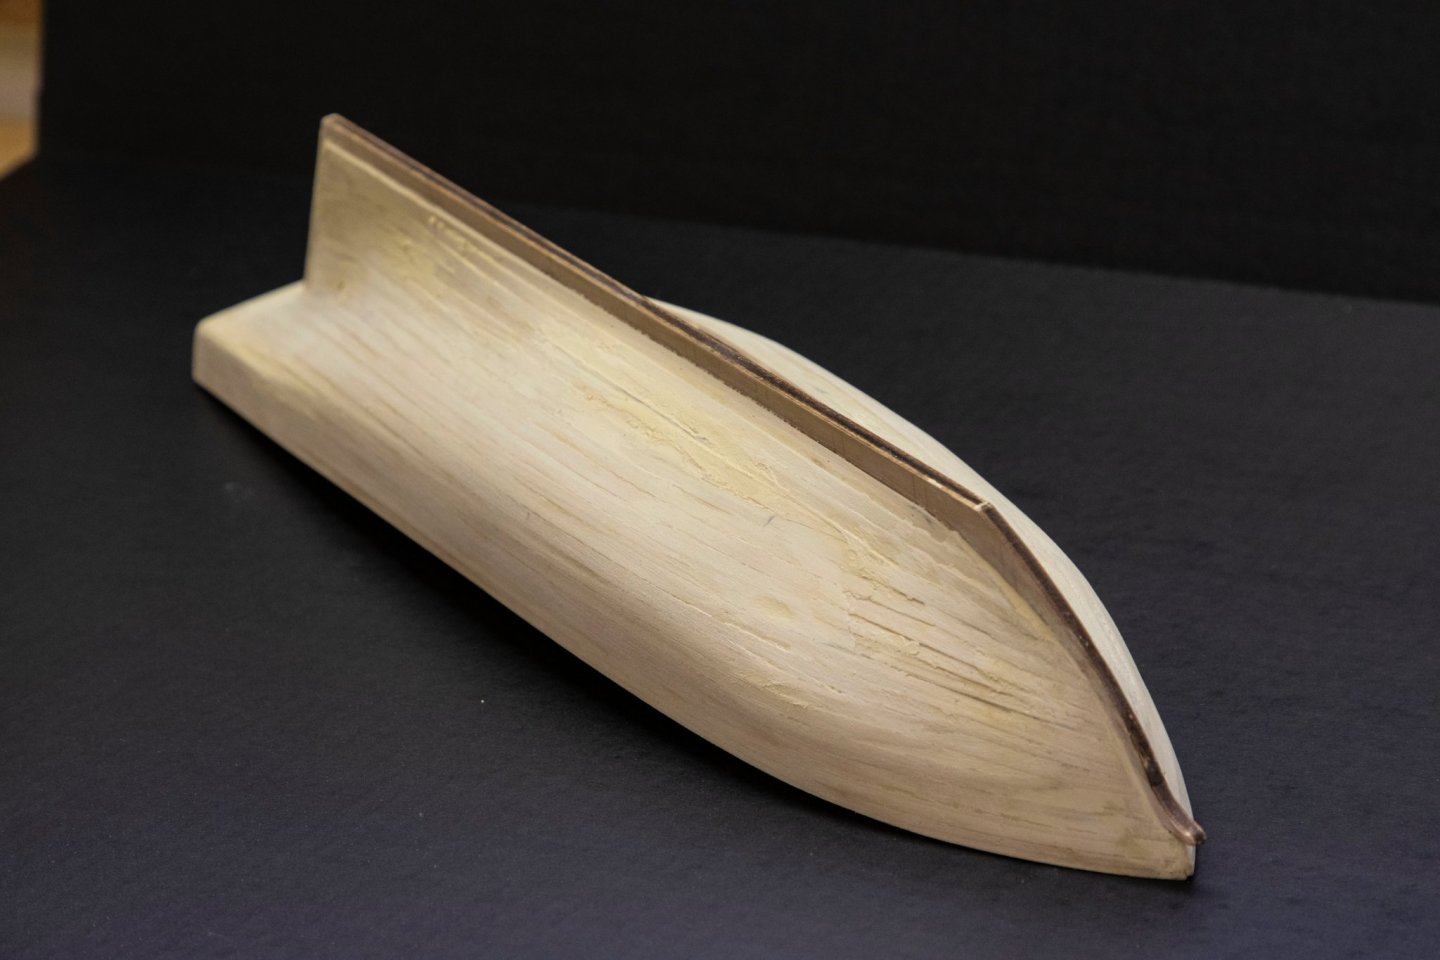
It has been three years since I started this log, but building got sidetracked until about a year ago. Since then, I have finished the model, but would like to post steps where I made progress/encountered problems, and would like to acknowledge any of the multiple logs on various sites for their ideas. The second planking went rather smoothly, but I did notice that if you are too aggressive using a hot plank bender, you can compress sections of the plank which would not spring back. However, since I planned to paint the hull, this was not an issue for this model, but lesson learned for future projects. After completing the second planking, I placed the deck into the hull to see how the masts would fit. I immediately noted that the masts were perpendicular rather than raked as they should have been. Comparison of the deck to the plans showed that in order for the mast holes to line up, it was necessary to trim about 4 - 5 mm from the stern. This allowed for approximately a 15 degree rake consistent with the plans, but also required that filler be put in the bow to provide for a base for the deck planking. Lesson - the plans and the parts of a kit may not be exact, and care should be taken to get the desired results.


-
By the way, after the first pictures, my wife (aka the "Boss") recommenced the black background to prevent distraction from the model. This requires a certain level of photoshop to correct for contrast, but what the heck - she was right (again!!).
-
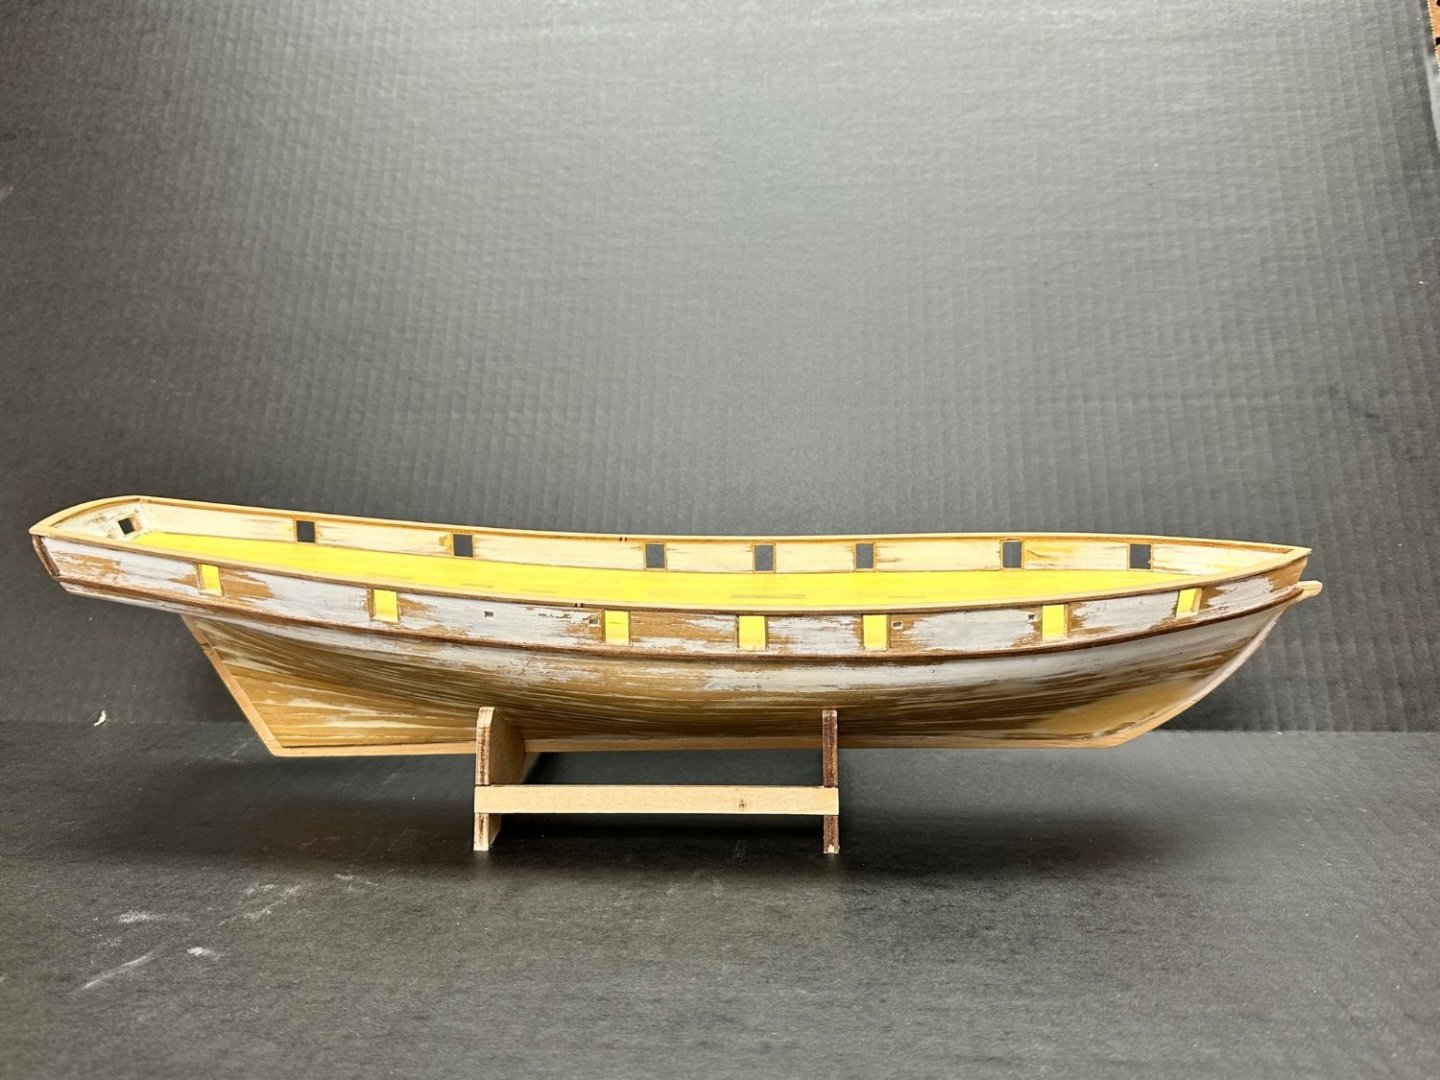
I have since finished the first planking and am ready to sand/fill/sand the hull. At this point I would like to make the observation that to rely on one's "good eye" can be a mistake - the eye isn't as good as one's ego would admit. Also, your first attempt will not be perfect (perfect is the enemy of good), but forge ahead - filler and sandpaper can correct for a multitude of imperfections. Now, to my questions. I have noticed a discussion on using traditional wood filler versus drywall patch (the pink wet, white dry material). My experience with drywall patch (wall installation/repair - don't ask) is that it is easily gouged/scratched and may not make a good base. Therefore I plan to use standard fill/sanding for the initial shaping, followed by using the drywall patch for minor blemishes. Comments? Also, should I wipe the finished first layer with urethane to harden prior to the second planking? I intend to post periodically as I progress, with observations and questions as appropriate. Again, thanks Chris (the site is too easy to use for an old federal employee).
-
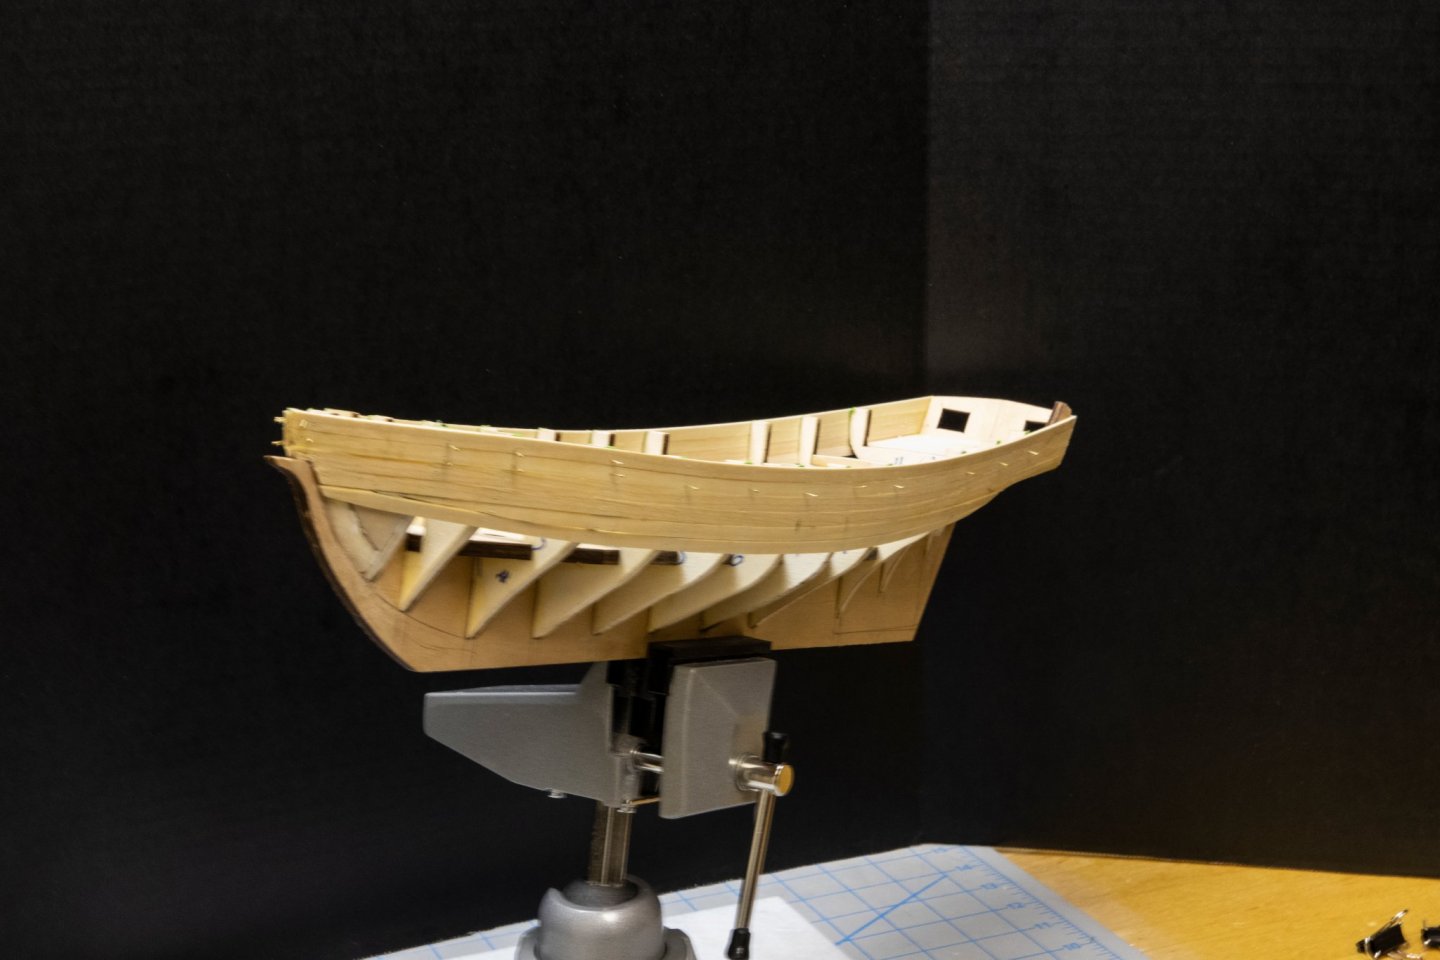
First, my apologies - I am new to the log and am still fighting years of conformance to federal computer systems. Second, my thanks to Chris for correcting my title, again see the first comment (I set it up as per my old job's requirements). Finally, I had to unexpectedly close out the log and initially had trouble figuring out how to edit/amend the log (your system is much too user friendly and would never be accepted for federal government use - too straightforward). That being said, after fits and starts, I continued with the first planking. After playing with the plank bender (very useful for the transom), I decided to go with the "soak, pin, then glue" approach. Initially I was using standard pins (look like thumbtacks) but switched to 0.020" nails (look closely and you might be able to see them in the later photos). The advantage is that with the proper pliers, it was easier to push through the soaked planks, and reduced splitting them. The disadvantage is that the brass is relatively soft and after several uses, they tended to bend or break. By mid summer I had half the hull planked, but projects around the house diverted me. When I returned in the winter I hesitated not knowing how to continue, being afraid to make a mistake. However, after perusing this site, I decided to resume, starting from the keel up and started to make progress. At the beginning of the month, I was about to complete the first planking (not as bad as I thought):

-
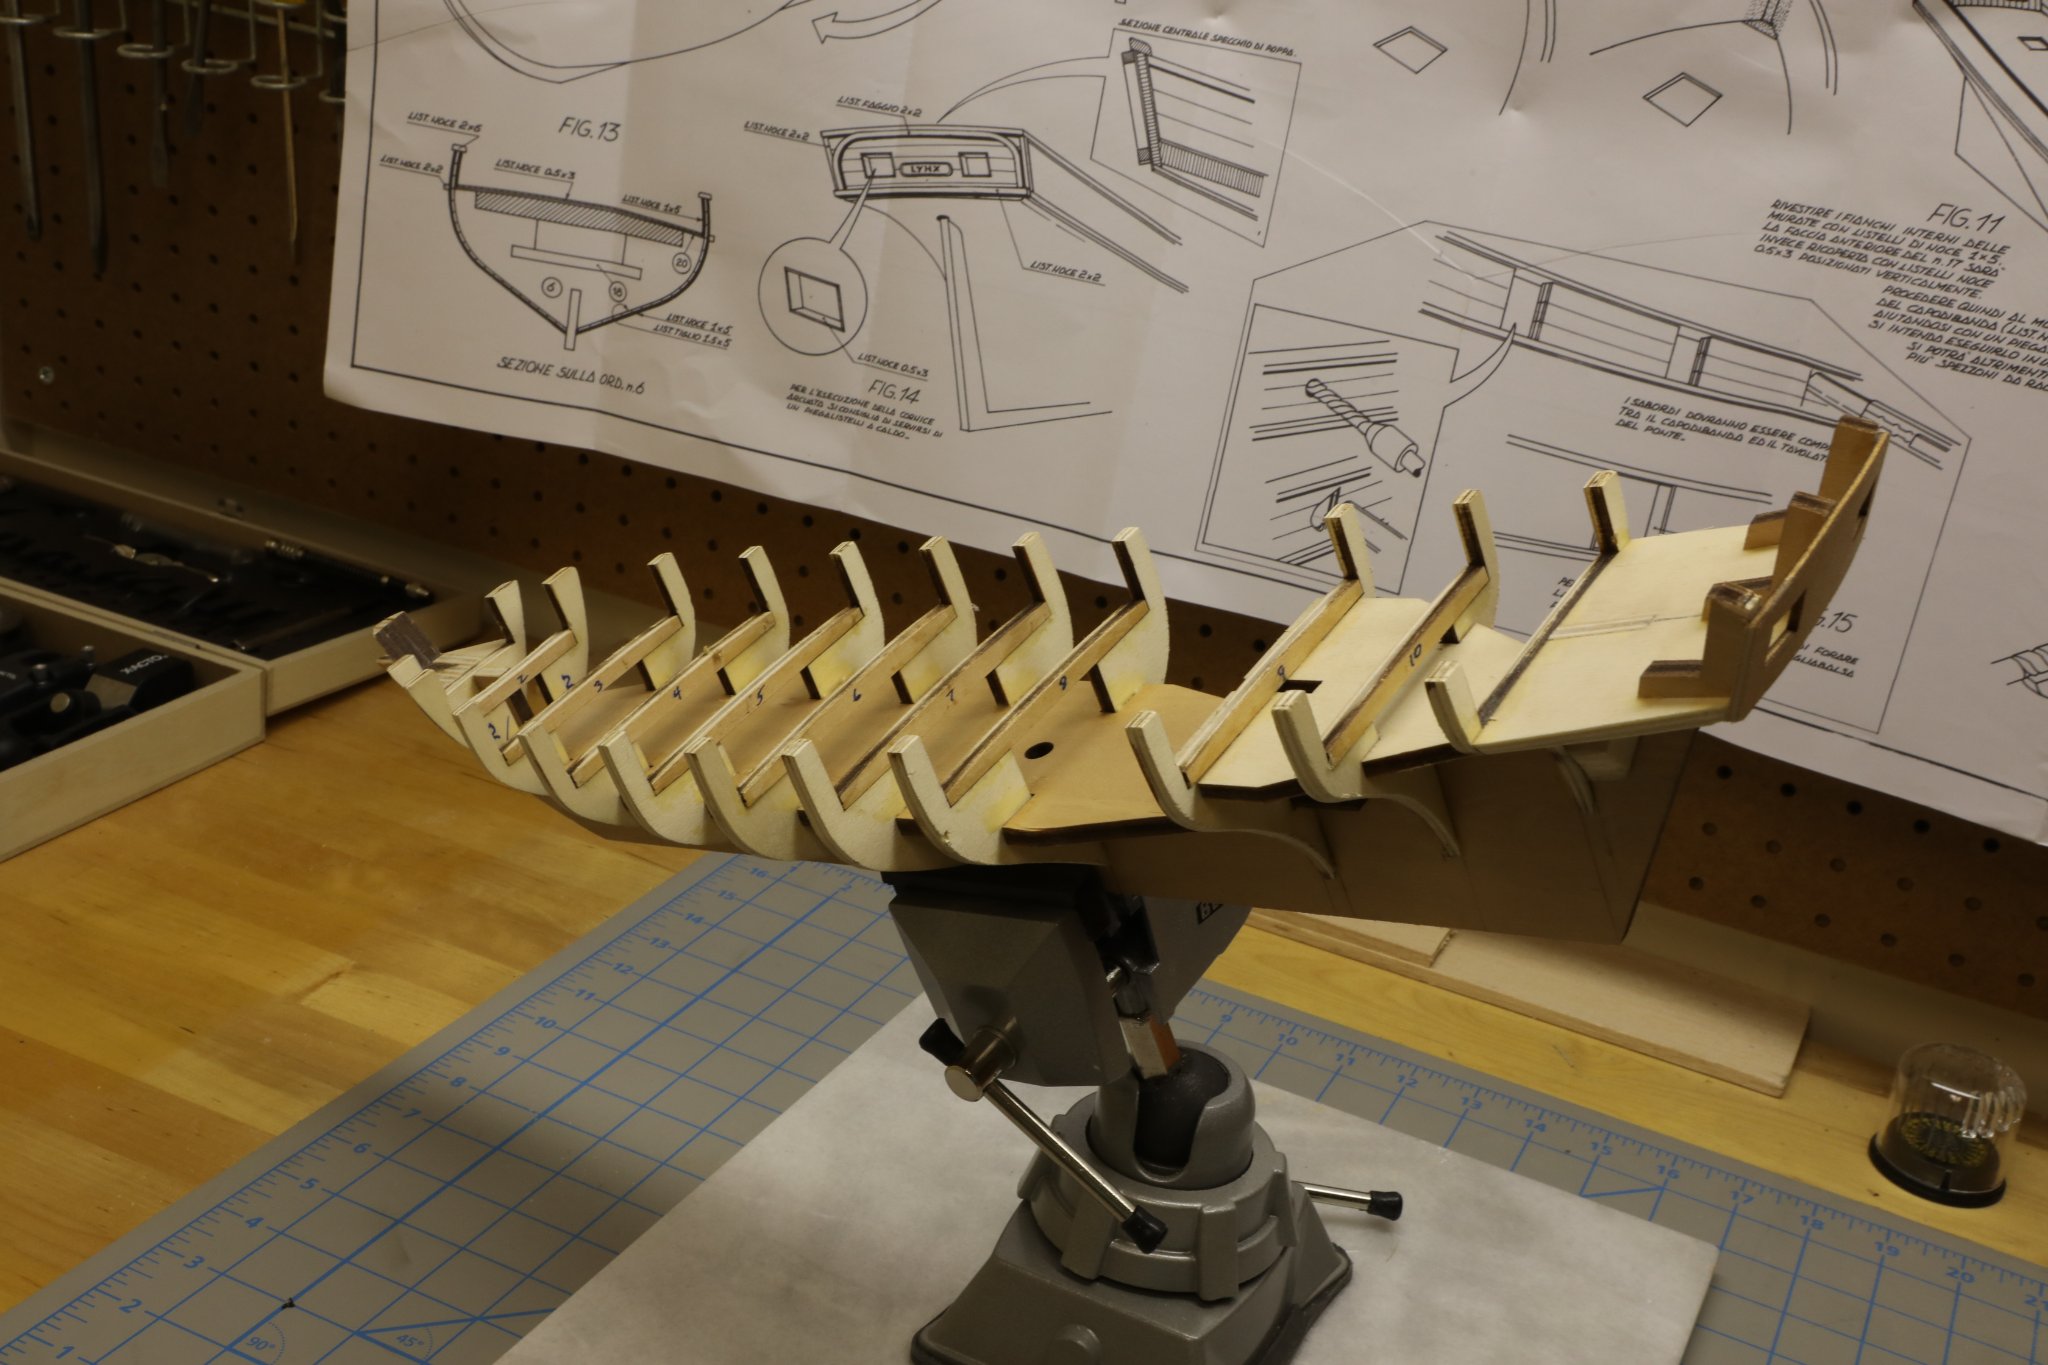
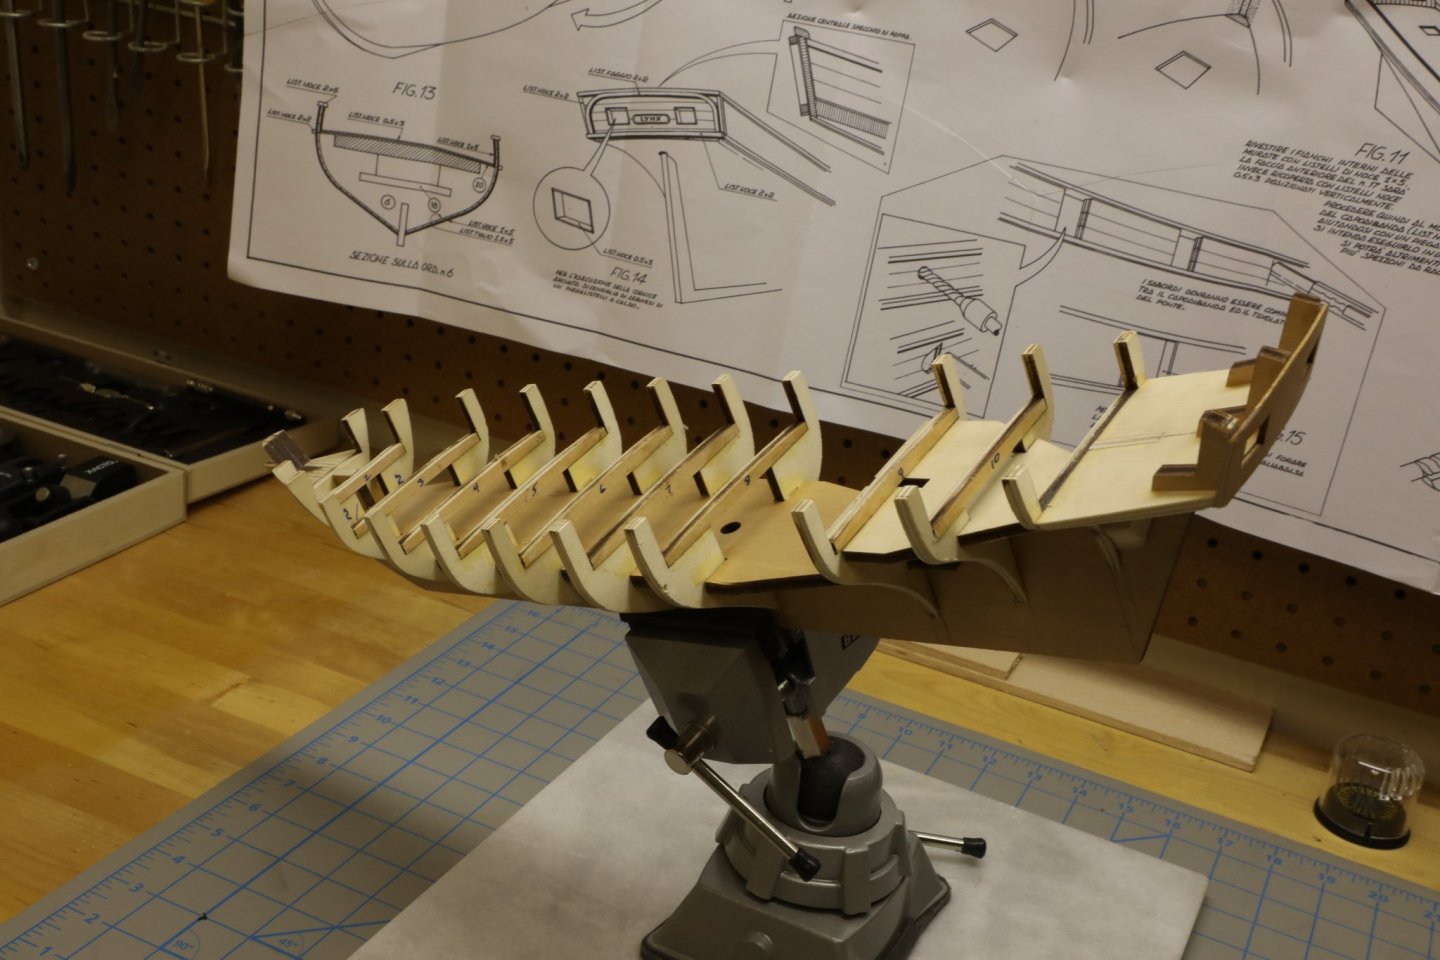
Greetings All, Where to begin...? I had intended to start posting my progress, but life got in the way. However I first must acknowledge all other building blogs for the Lynx - they did help steer me in the right direction. Shortly after I started, I had the bulkheads aligned with the keel; and had begun planking:
-
Hello. I registered back at the end of July, but life got in the way of introductions. I began model building several decades ago, including balsa wood airplanes and most notably, the Revell Cutty Sark clipper model. Retired, I am again starting to build models, and will open a blog on building the Lynx soon (I grew up on the Chesapeake Bay, so it seemed appropriate before jumping to a full Clipper Ship). I have read several of the blogs and found them informative, so I hope mine will point out what went wrong as well as what went right (with a little humor injected). Pchem530