Brinkman
-
Posts
154 -
Joined
-
Last visited
-
 Benjamin Raule reacted to a post in a topic:
One more small cog c. 1410 by Brinkman - scale 1:13
Benjamin Raule reacted to a post in a topic:
One more small cog c. 1410 by Brinkman - scale 1:13
-
CiscoH reacted to a post in a topic:
One more small cog c. 1410 by Brinkman - scale 1:13
-
CiscoH reacted to a post in a topic:
One more small cog c. 1410 by Brinkman - scale 1:13
-
Ferrus Manus reacted to a post in a topic:
One more small cog c. 1410 by Brinkman - scale 1:13
-
wefalck reacted to a post in a topic:
One more small cog c. 1410 by Brinkman - scale 1:13
-
 ccoyle reacted to a post in a topic:
One more small cog c. 1410 by Brinkman - scale 1:13
ccoyle reacted to a post in a topic:
One more small cog c. 1410 by Brinkman - scale 1:13
-
Mike Y reacted to a post in a topic:
One more small cog c. 1410 by Brinkman - scale 1:13
-
Mike Y reacted to a post in a topic:
One more small cog c. 1410 by Brinkman - scale 1:13
-
Mike Y reacted to a post in a topic:
One more small cog c. 1410 by Brinkman - scale 1:13
-
Mike Y reacted to a post in a topic:
One more small cog c. 1410 by Brinkman - scale 1:13
-
Brinkman reacted to a post in a topic:
Roter Löwe 1597 by Ondras71
-
Brinkman reacted to a post in a topic:
Roter Löwe 1597 by Ondras71
-
Brinkman reacted to a post in a topic:
HMS Tiger 1747 by Siggi52 - 1:48 - 60 gun ship from NMM plans
-
Brinkman reacted to a post in a topic:
HMS Tiger 1747 by Siggi52 - 1:48 - 60 gun ship from NMM plans
-
Brinkman reacted to a post in a topic:
The San Marco mosaic ship c. 1150 by Louie da fly - FINISHED - 1:75
-
Brinkman reacted to a post in a topic:
French 64 Gun Ship 1729 by Jeronimo - FINISHED
-
Brinkman reacted to a post in a topic:
The San Marco mosaic ship c. 1150 by Louie da fly - FINISHED - 1:75
-
Brinkman reacted to a post in a topic:
The San Marco mosaic ship c. 1150 by Louie da fly - FINISHED - 1:75
-
Brinkman reacted to a post in a topic:
One more small cog c. 1410 by Brinkman - scale 1:13
-
 Brinkman reacted to a post in a topic:
One more small cog c. 1410 by Brinkman - scale 1:13
Brinkman reacted to a post in a topic:
One more small cog c. 1410 by Brinkman - scale 1:13
-
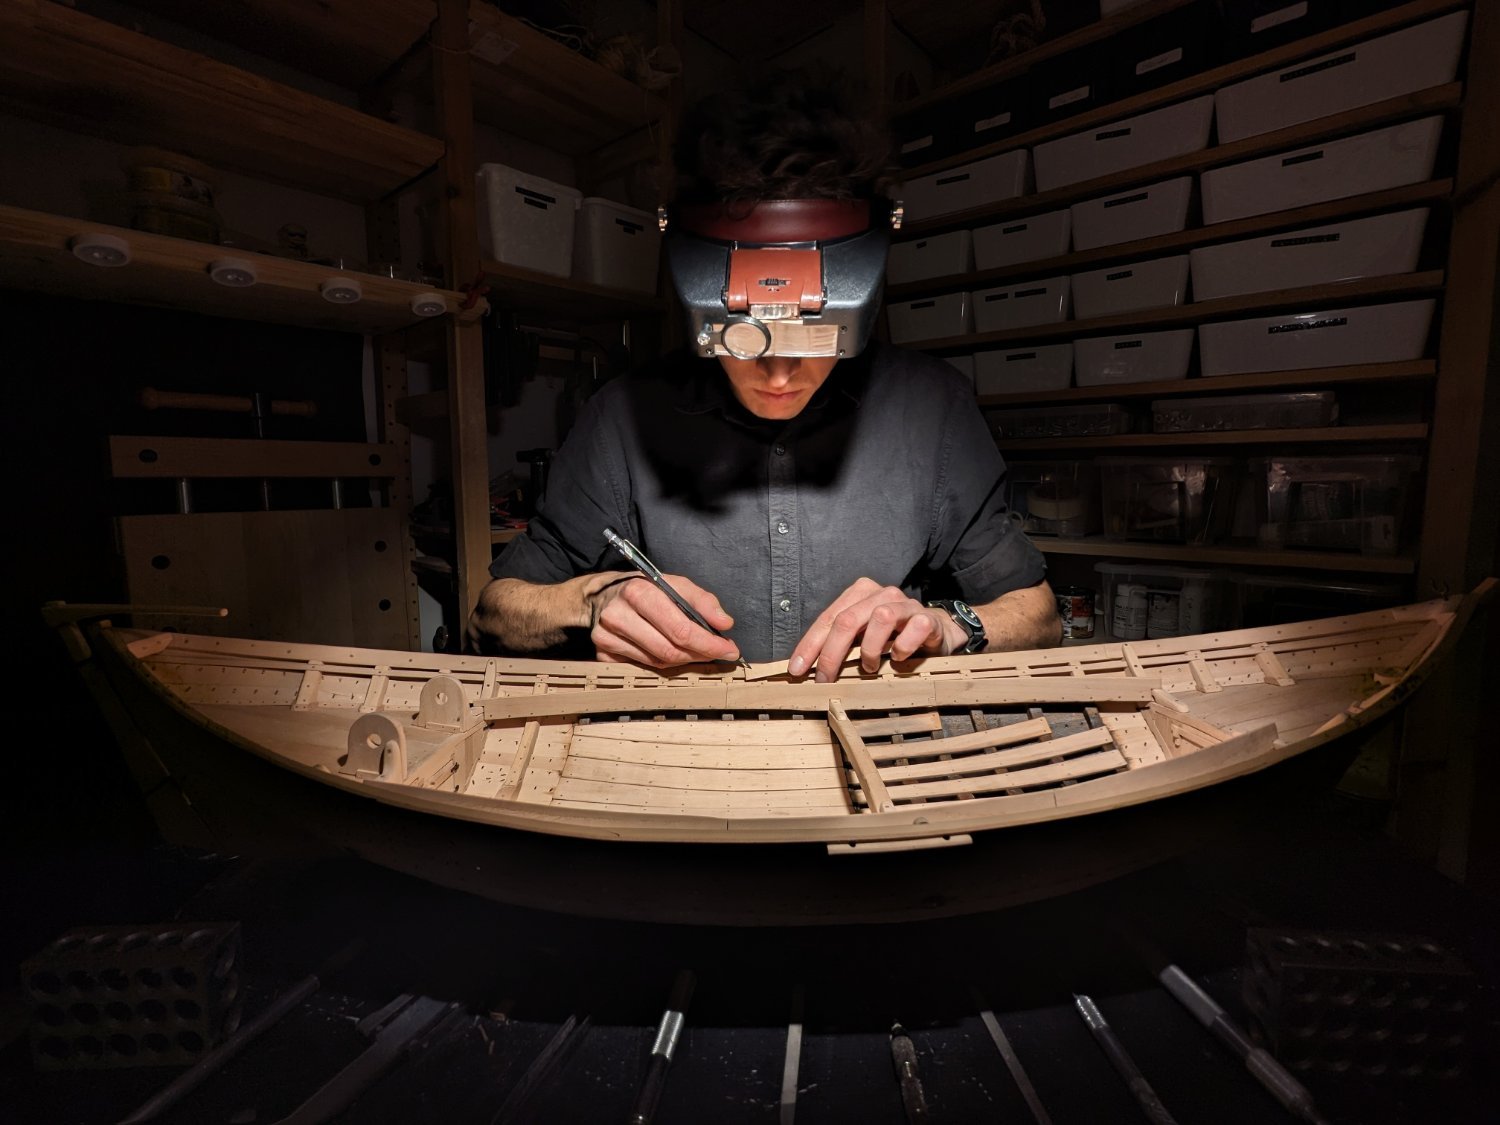
 Thank you for the kind reactions on my photo. Many years ago I was into photographing and it was fun to think about composition again. Joachim & Håkan: Thank you, but the photo exaggerates the size a bit as I used a fisheye effect to get the lines in te background as I wanted. But yes, just under 1m is still quite large. Mark: I like the magnifier a lot and it actually has two drop down lenses that can be used in any combination.
 -
Thank you for the likes! Mark: Thank you, and it will be very interesting when doing the crew and cargo and see how that effects the sense of scale. My work place has a photo competition and my contribution is of me working on this ship. I work in a design department and many are into photographing and photoshopping, so only unedited mobile phone images was allowed to level the playing field. I really dislike photos where people obviously are fake working, but I did it anyway here...

- 87 replies
-
- 16
-
-
-
Brinkman changed their profile photo
-
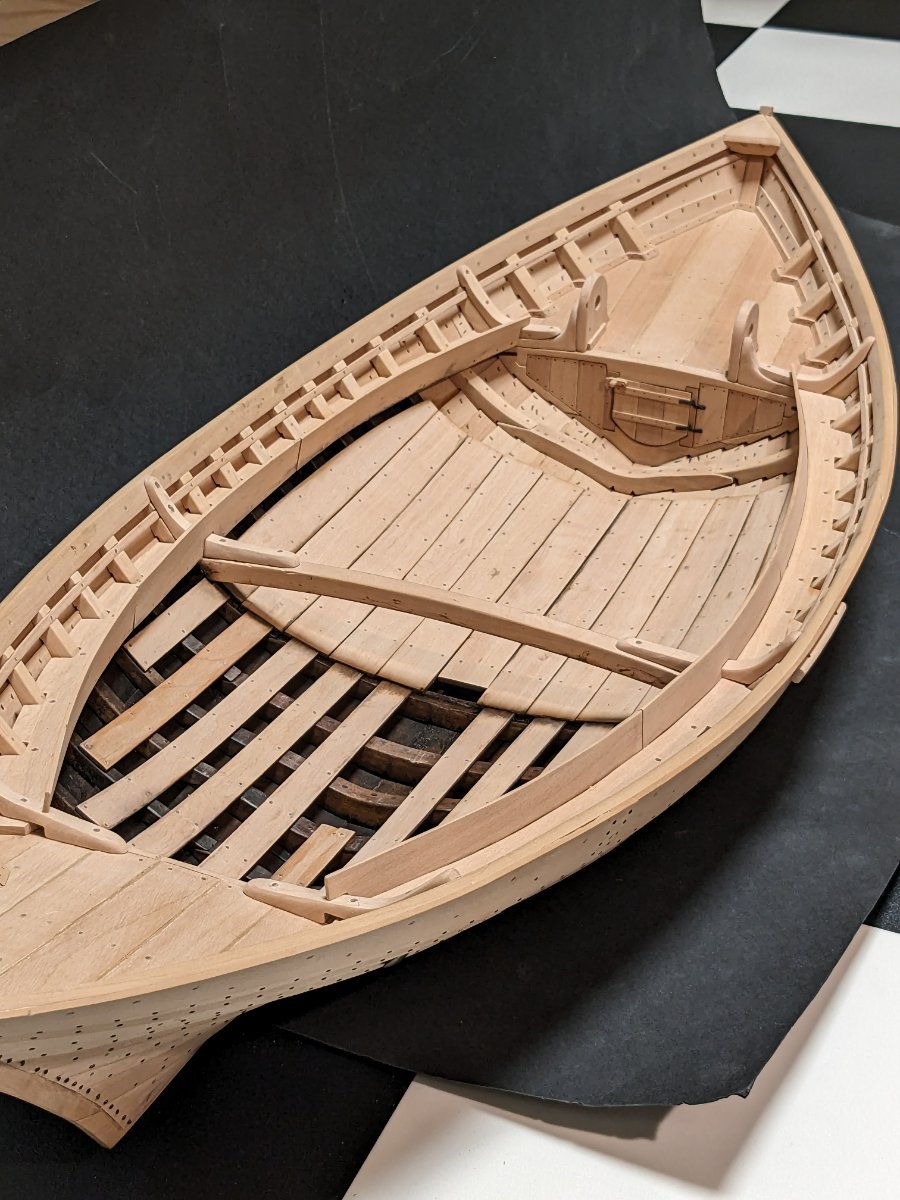
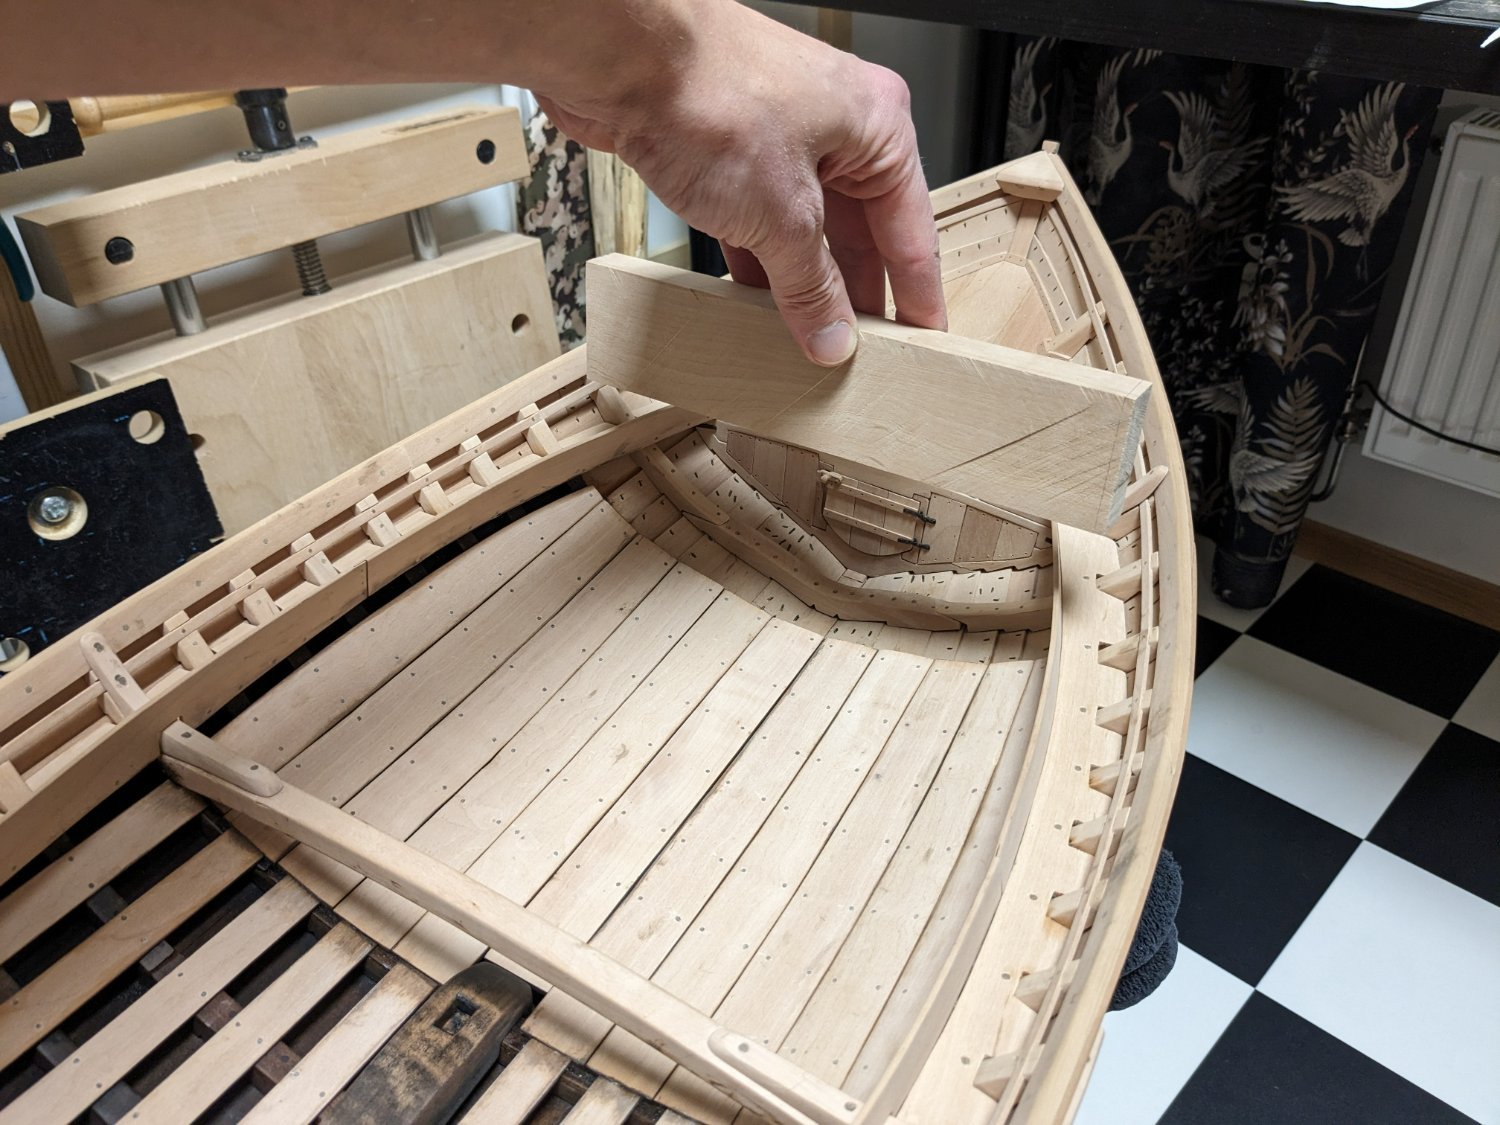
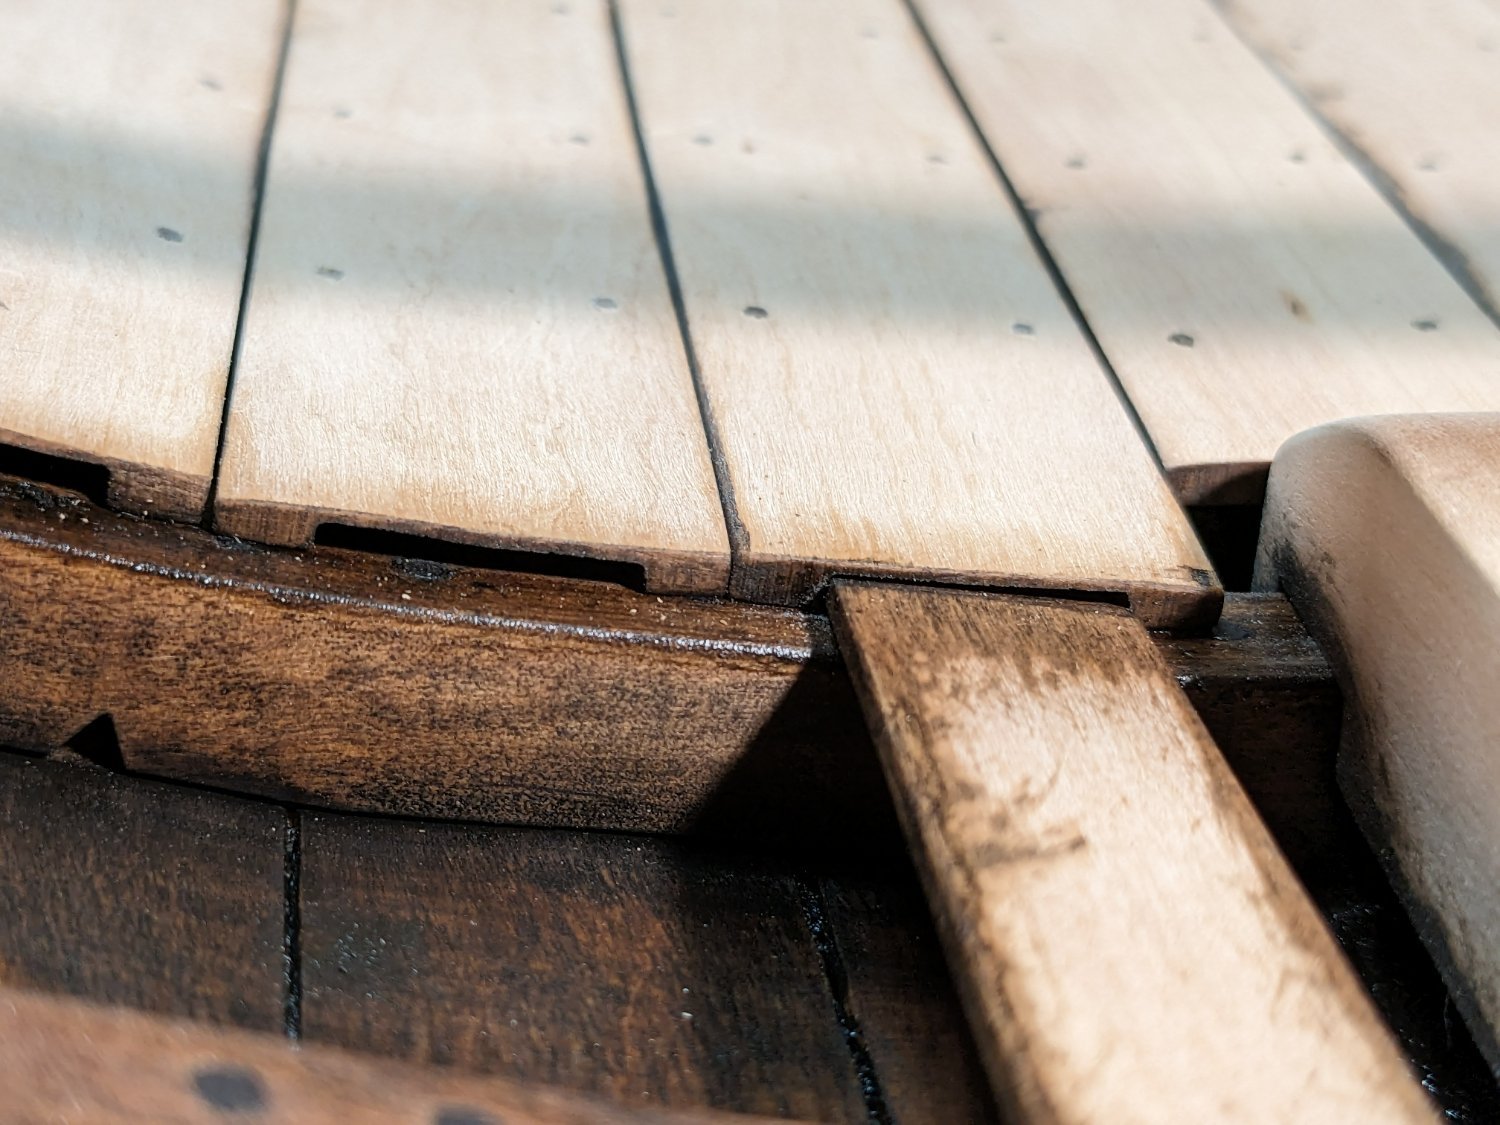
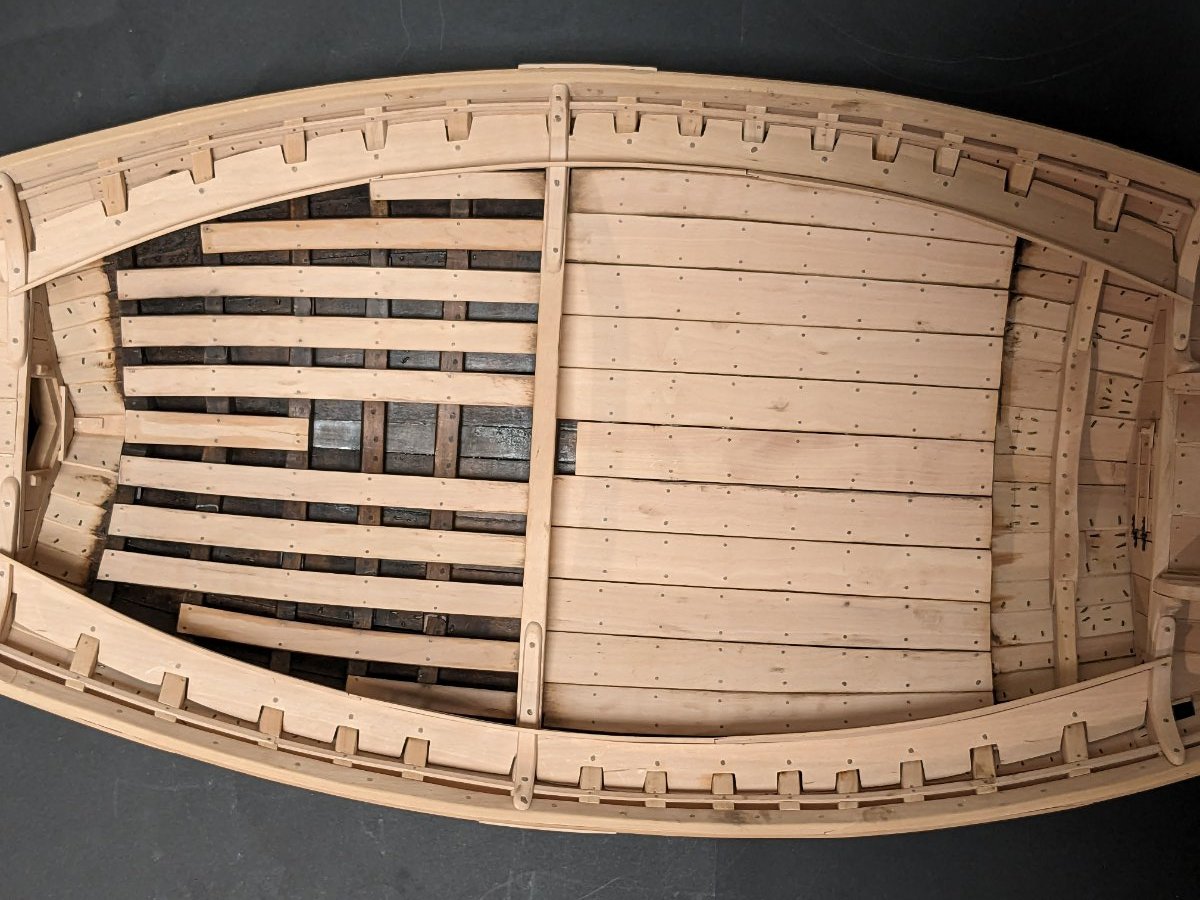
Thank you for the likes! Steven: Thank you very much! The secondary hold got it's ceiling. I wanted this area to be separated in style but still connected to the main hold. The separate areas are connected by lining up the planks, but differ by the ceiling being open or closed and how the edges adapts to the round hull - while the last planks in the main area are shaped, the last planks in the secondary area are simply cut off. The connection between the planks is a hidden scarf joint that surely is not historical, but it looks good and helped lining up the planks. I mentioned that the wood supply is running low. Some time ago I laid aside two pieces reserving them for the bulkheads, but now I see that I need larger pieces. Let us see if the remaining piece of timber is long enough: Yup, it's long enough. Sometimes you really need to be lucky when you don't plan your work in advance.


- 87 replies
-
- 13
-
-
Thank you for all the replies! And for the nice words about my model. Yes. I should have painted this before attaching the stringer. I really wanted to see how it looked and couldn't wait to let the paint dry... At least I didn't repeat the same mistake with later parts. Chuck, excellent tip with the crooked tips! Druxey and Bob, at least everything will be painted in the same tar coloured wash. But it's good to know how to protect the surfaces otherwise. Glen, ship in a bottle builders sure has to come up with some ingenious tool adaptations! I think I will try using cut offs from make up sponges held with by tweezers and use a generous amount of my wash and linseed mix and let capillary action transport it where I can not reach.
-
Hello all, I'm nearing completion on the hull I'm building and have tried to wait with painting for as long as I could to minimise wood dust on painted surfaces. I have painted some areas before mounting parts that will partly cover them. But I didn't do it everywhere. Do you have any tricks and tips for painting hard to reach areas? I'm using oil based paints.
-
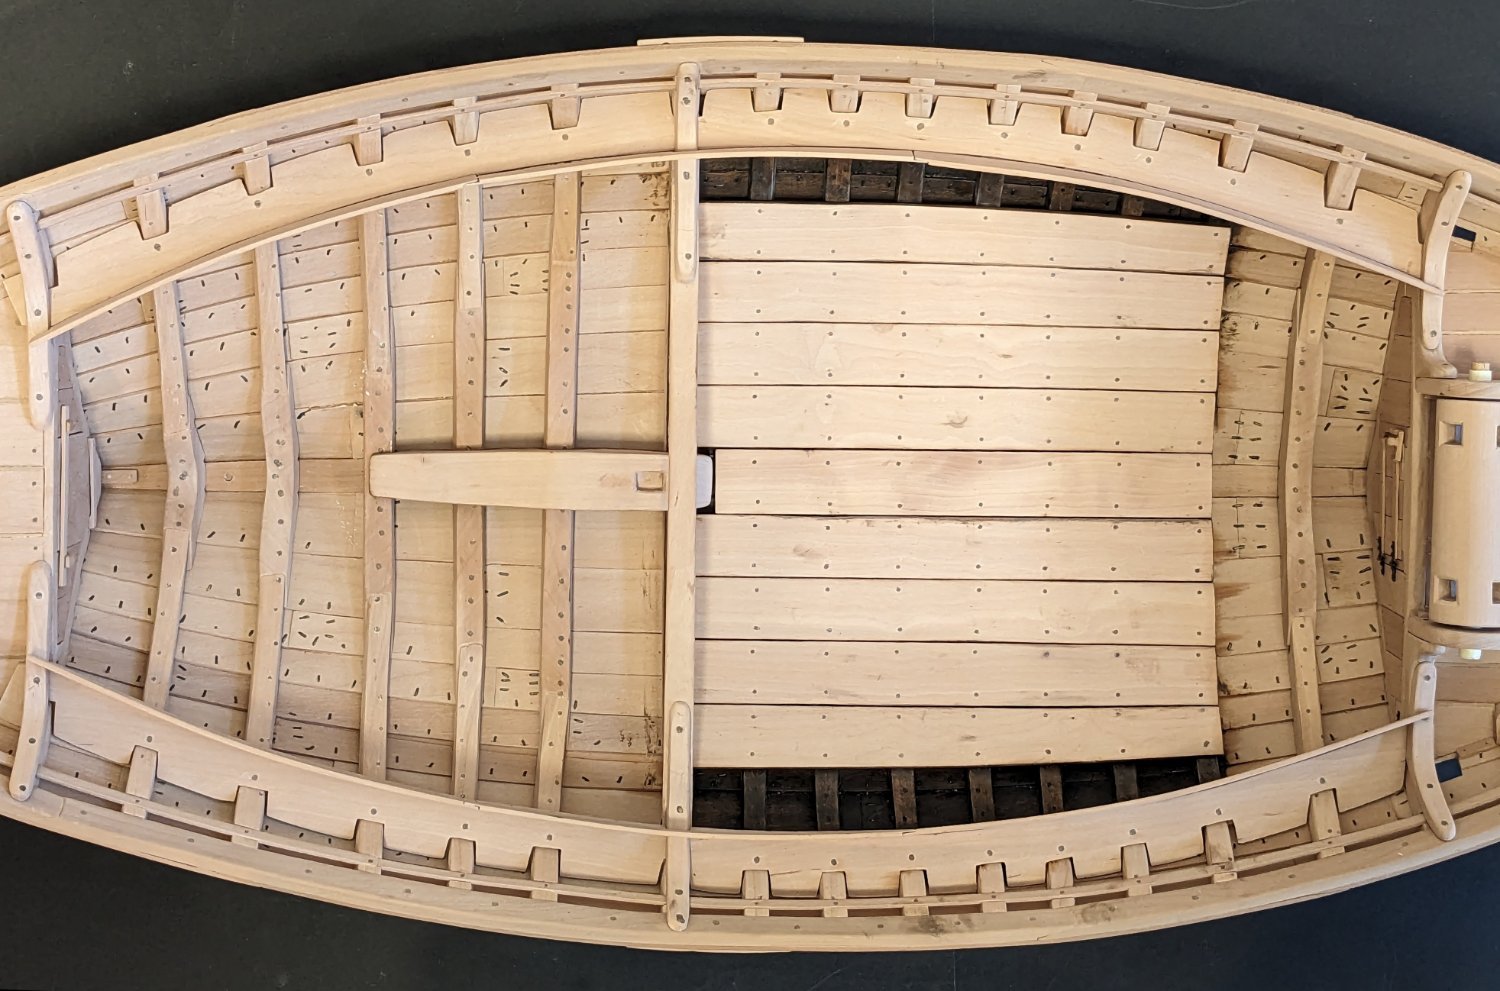
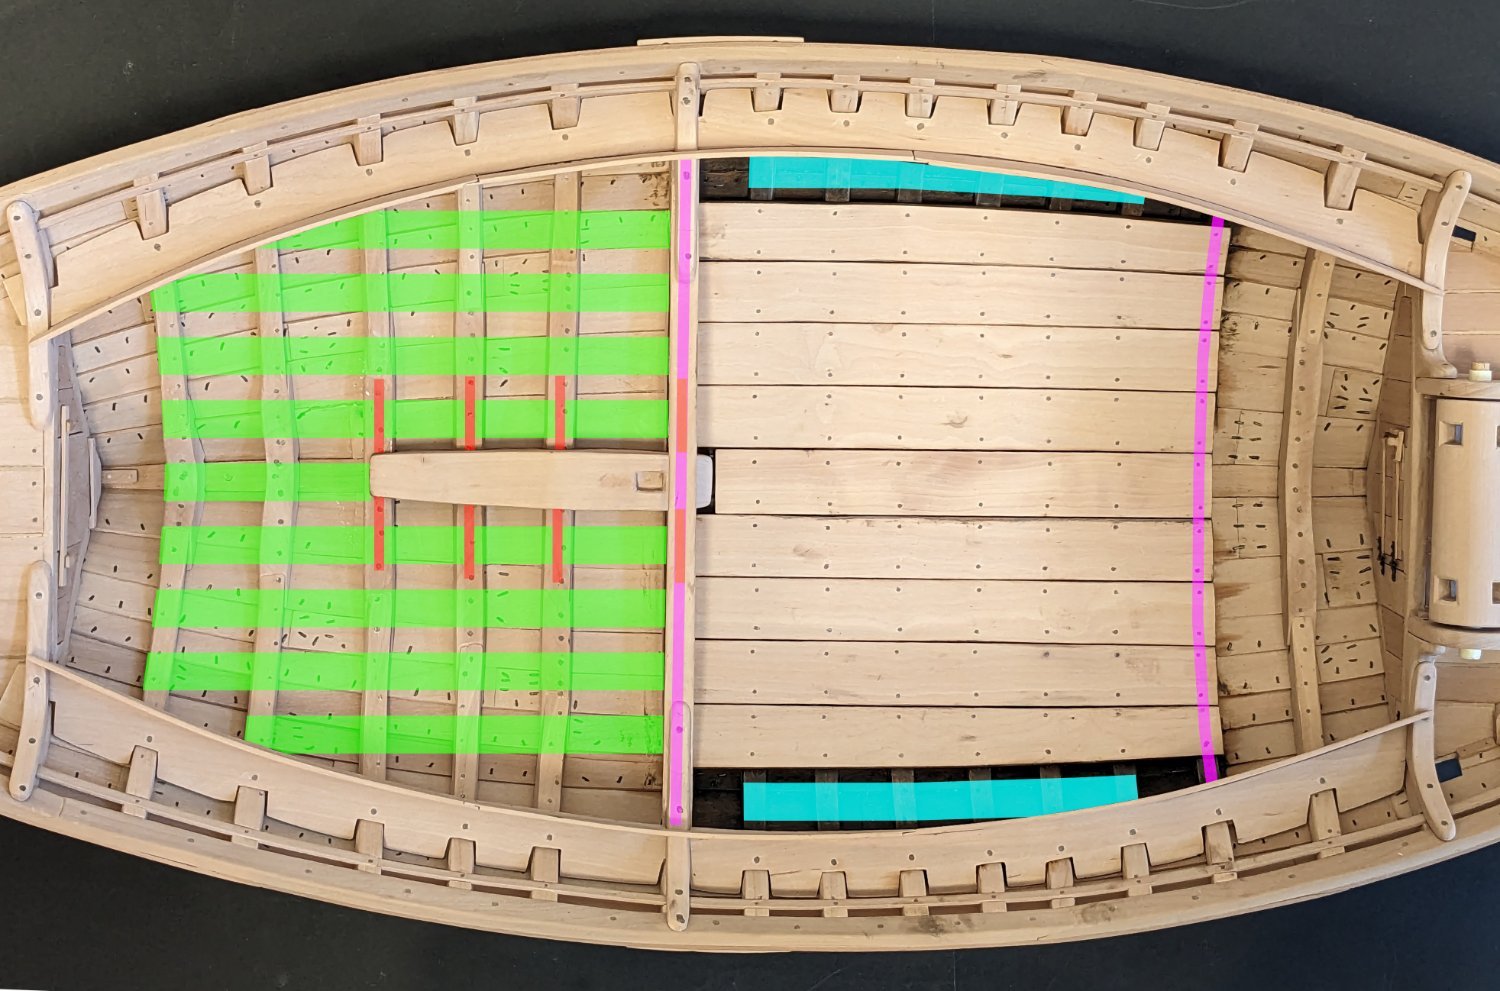
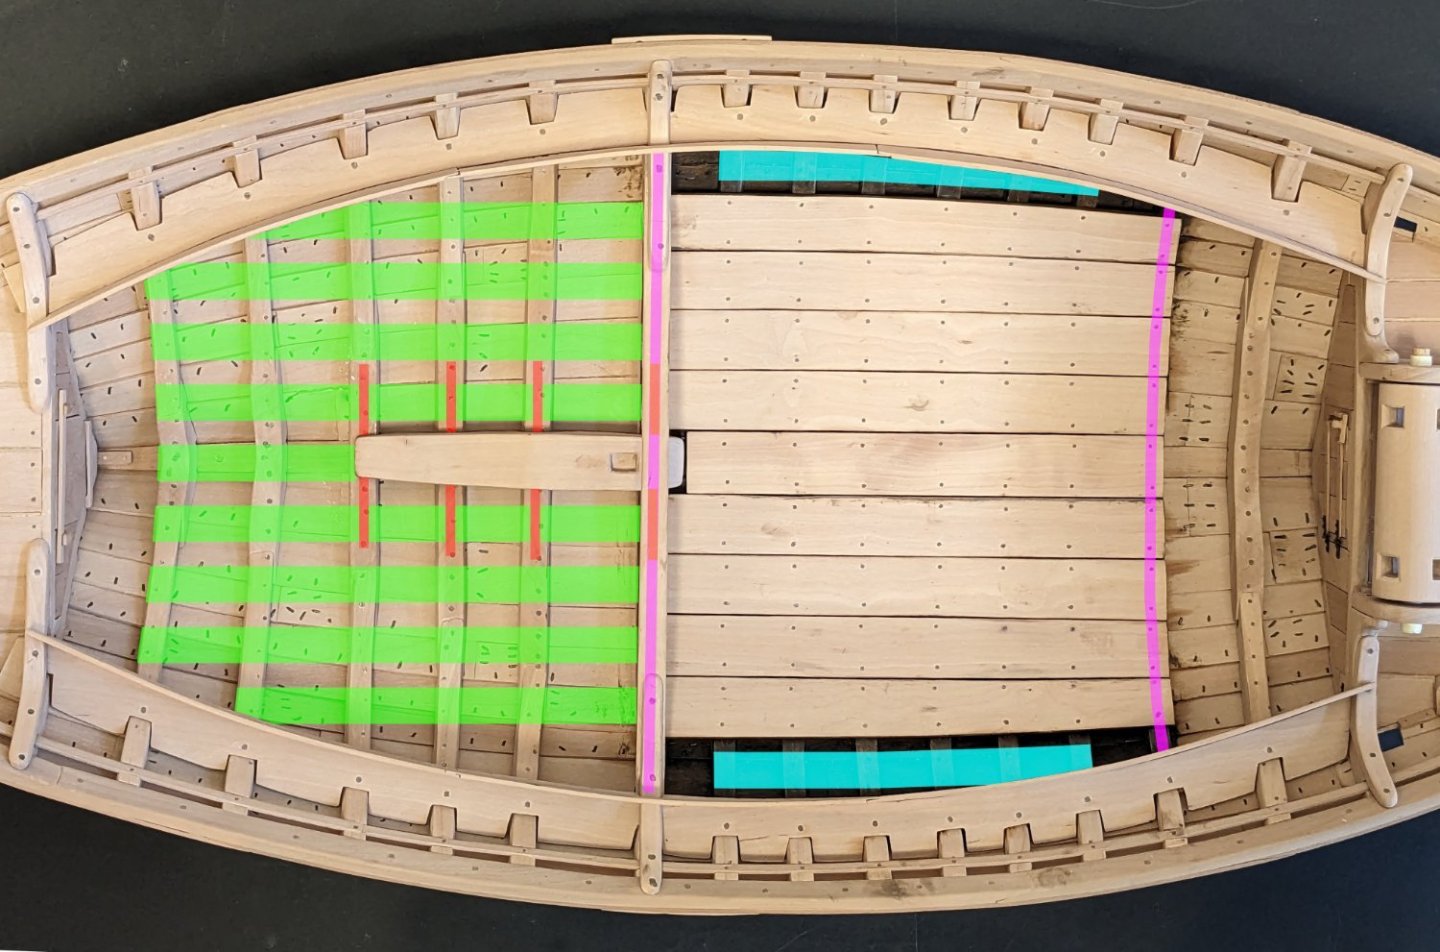
I felt a bit frustrated a week ago when I was disappointed with the ceiling after having spent time and resources on it. But it was quick to remove the planks make the new ones. Part of the frustration stems from a dwindling supply of my pear wood. I didn't know how much I should buy when I started on the project so I thought I would order just enough to start so I had to order more when it would be easier to estimate how much I needed. But it seems like I ordered pretty much the exact amount so each time I have to discard something I worryingly look at what I have left. But I'm much happier with the new ceiling. I left a sub millimeter gap between the planks for a hint of the floors and futtocks. I thought I would just use straight planks, but as the the ceiling climbs further up on the sides the curvature increases and I had to spile to keep the gaps constant. Other times I bent planks I used hot water but I couldn't do it here so I instead used a heat gun to make them more pliable. 'Ceiling' is a good and rational word, but in Swedish we use the word 'garnityr' that comes from the same root word as 'garniture' and in everyday Swedish it means cake decorations making it quite funny when it is used here. The planks look a bit dirty as I painted the edges before mounting. I mentioned earlier that I interpret this area to be the main hold and I will add low bulkheads at both ends. On the sides of the ceiling we have a small area left and I'll later see how to fill it. Fore of the ceiling we have the secondary hold area. Here I think I will have a more simple ceiling with more narrow and thinner planks with wide gaps. These gaps can later be covered with loose planks where needed . And then knees will help keep the mast step in place.

- 87 replies
-
- 10
-
-
Mark, I also thought about loose panels at least in the middle to clear the bilge from debris. But I don't see any evidence for it. Reading through the sources again I see both ceilings with gaps and without, so I wasn't really as wrong about that as I thought earlier this evening. But I think it will look better with minimum gaps. Most ceilings were fixed with treenails, probably for longitudinal strength of the hull. Ripping the new planks went much faster then I first thought it would.
-
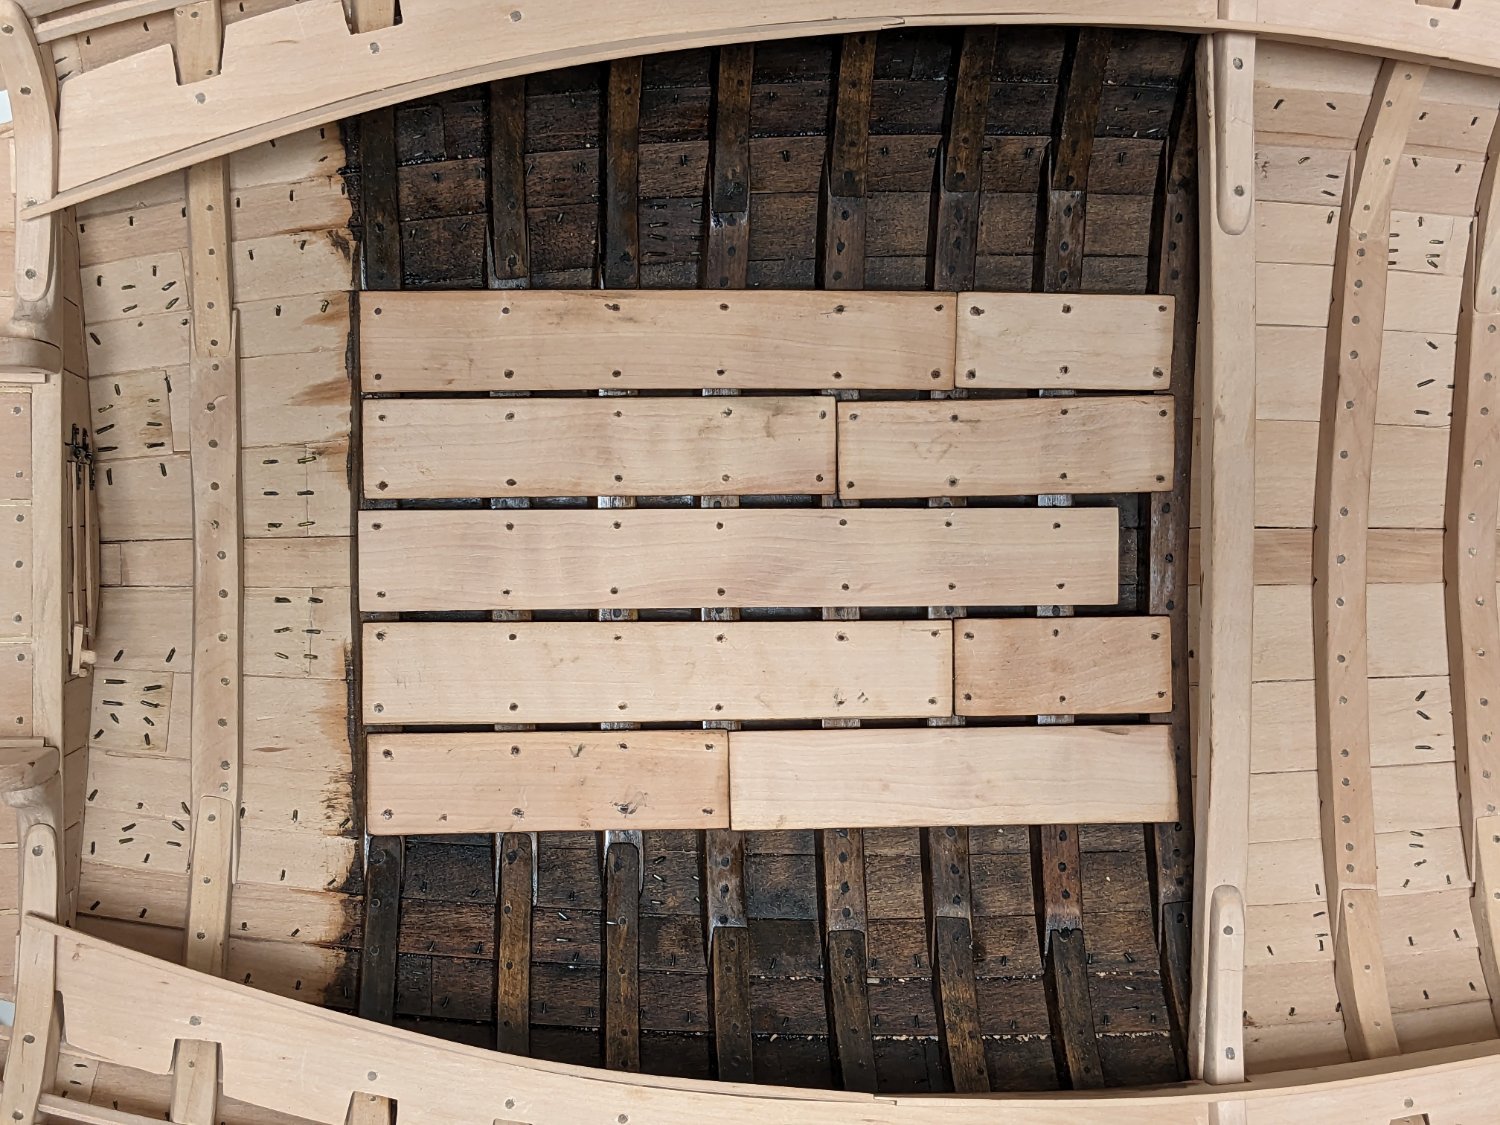
Two steps forward, and one back. I have started on the ceiling by first painting the area that will be covered and then laying planks. But I'm not feeling it. I do not understand why I put in the spacing between them and why I used short planks. Looking at Almere Wijk 13 the planks were put tight together and were even longer then mine would be. I will remove them even if that will be hard because of the treenails. The paint I'm using is a 50-50 mix of oil based wash and linseed oil. The edges of the planks are also painted why it looks a bit dirty. Edit: After giving it some thought I think removing them will be pretty easy. I will just drill away the treenails and only one of them were glued to the floors so it will be easy. Resawing all the planks by hand on the other hand will not be so easy.

-
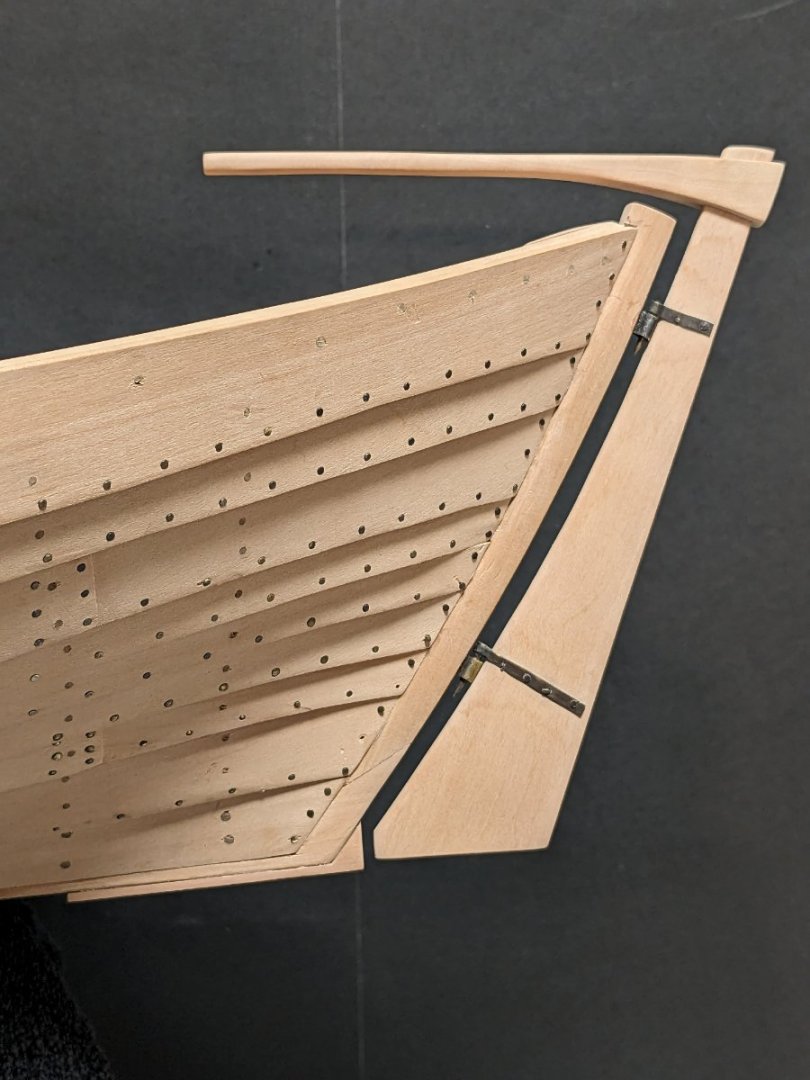
Thank you @Mark Pearse! It is indeed made from brass. I ground a piece of brass pointy in both ends and then curved it making sure to anneal it frequently to keep it malleable. And then solded it to another piece and blackening it after tidying up the solder. The only use of the proto bowsprit was to hold the bowlines. On larger ships of war it could also be used for grappling hooks.
-
I don't browse these modern boards very often and had totally missed your current build Håkan! It's very fascinating to see all the engineering that goes into building a ship like this and is a must follow. Your jig that you clamp your hull to when planking looks really efficient with great access to the inside.
-
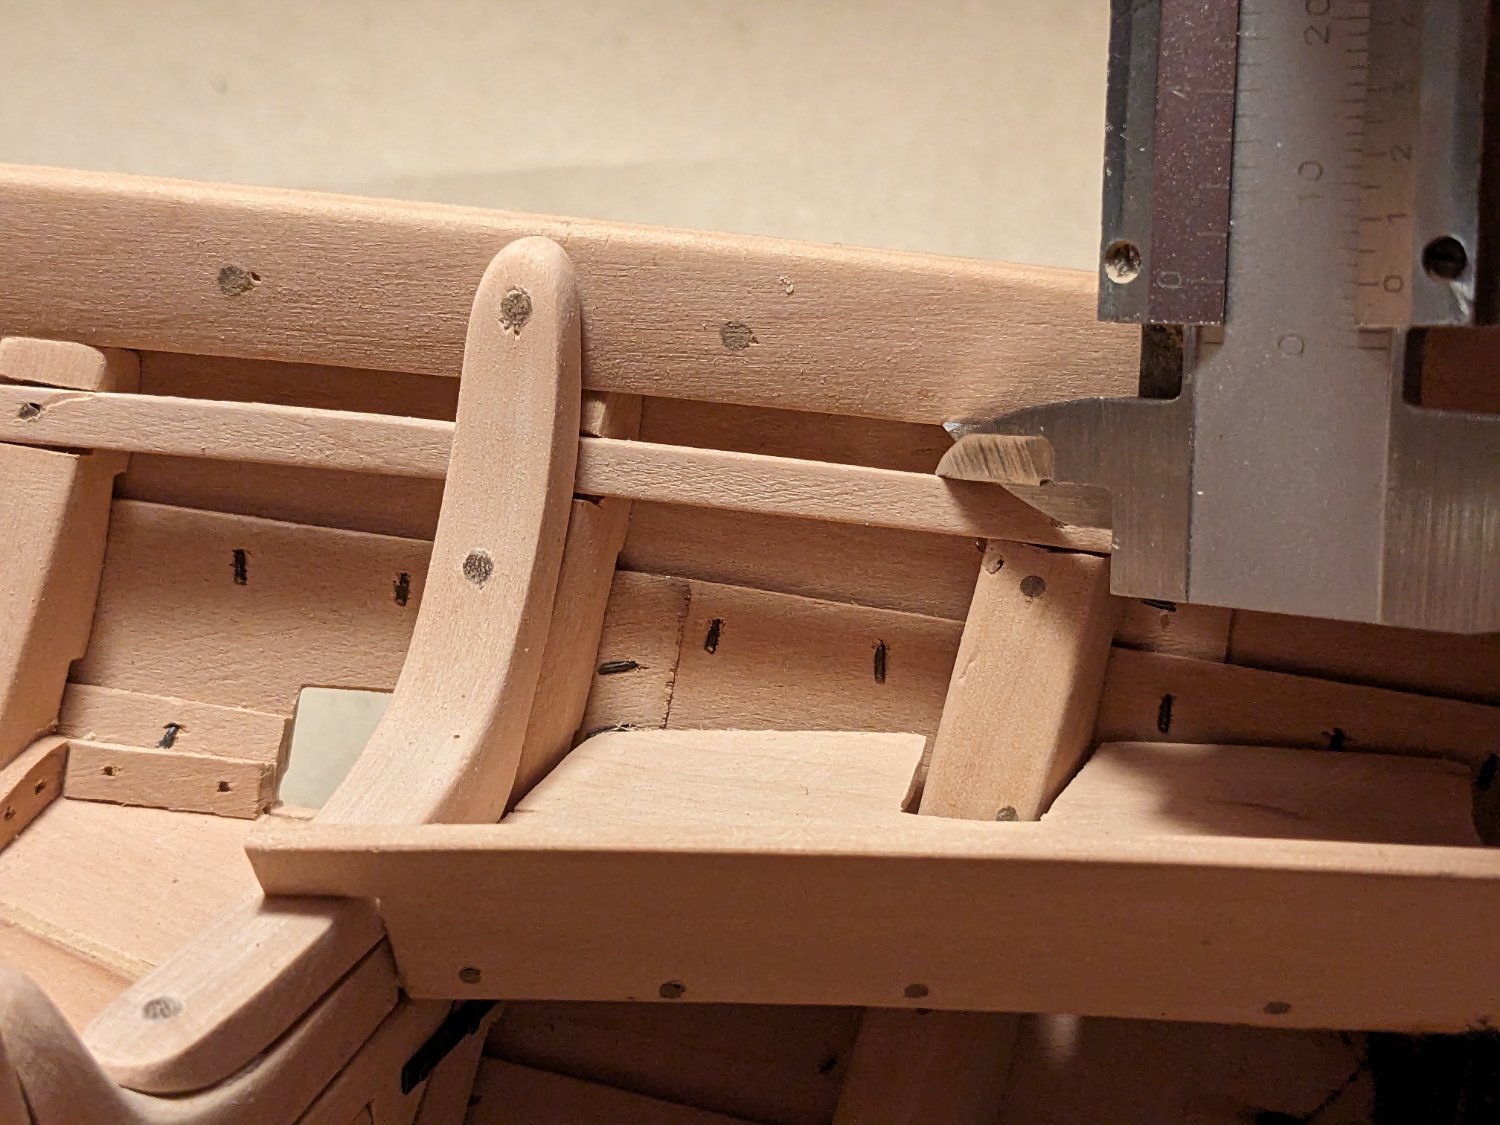
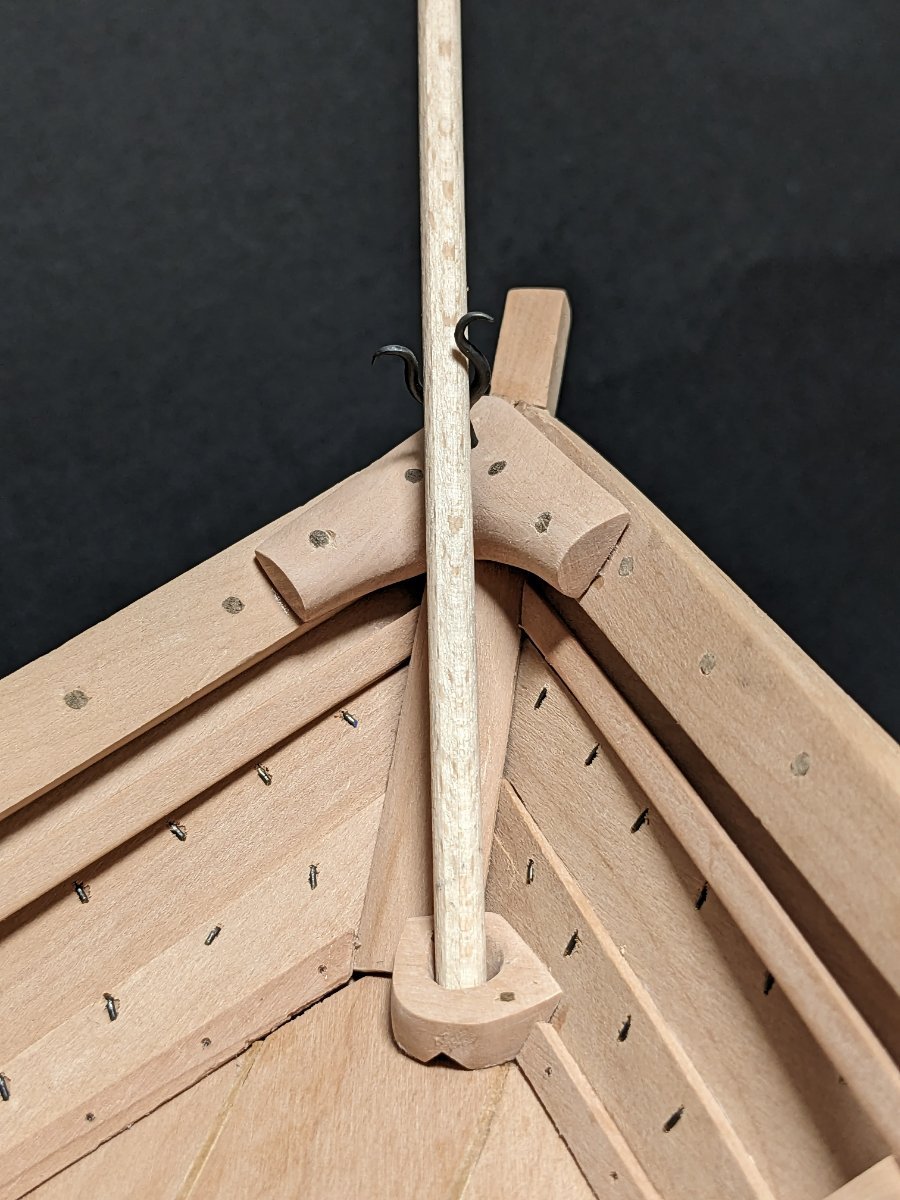
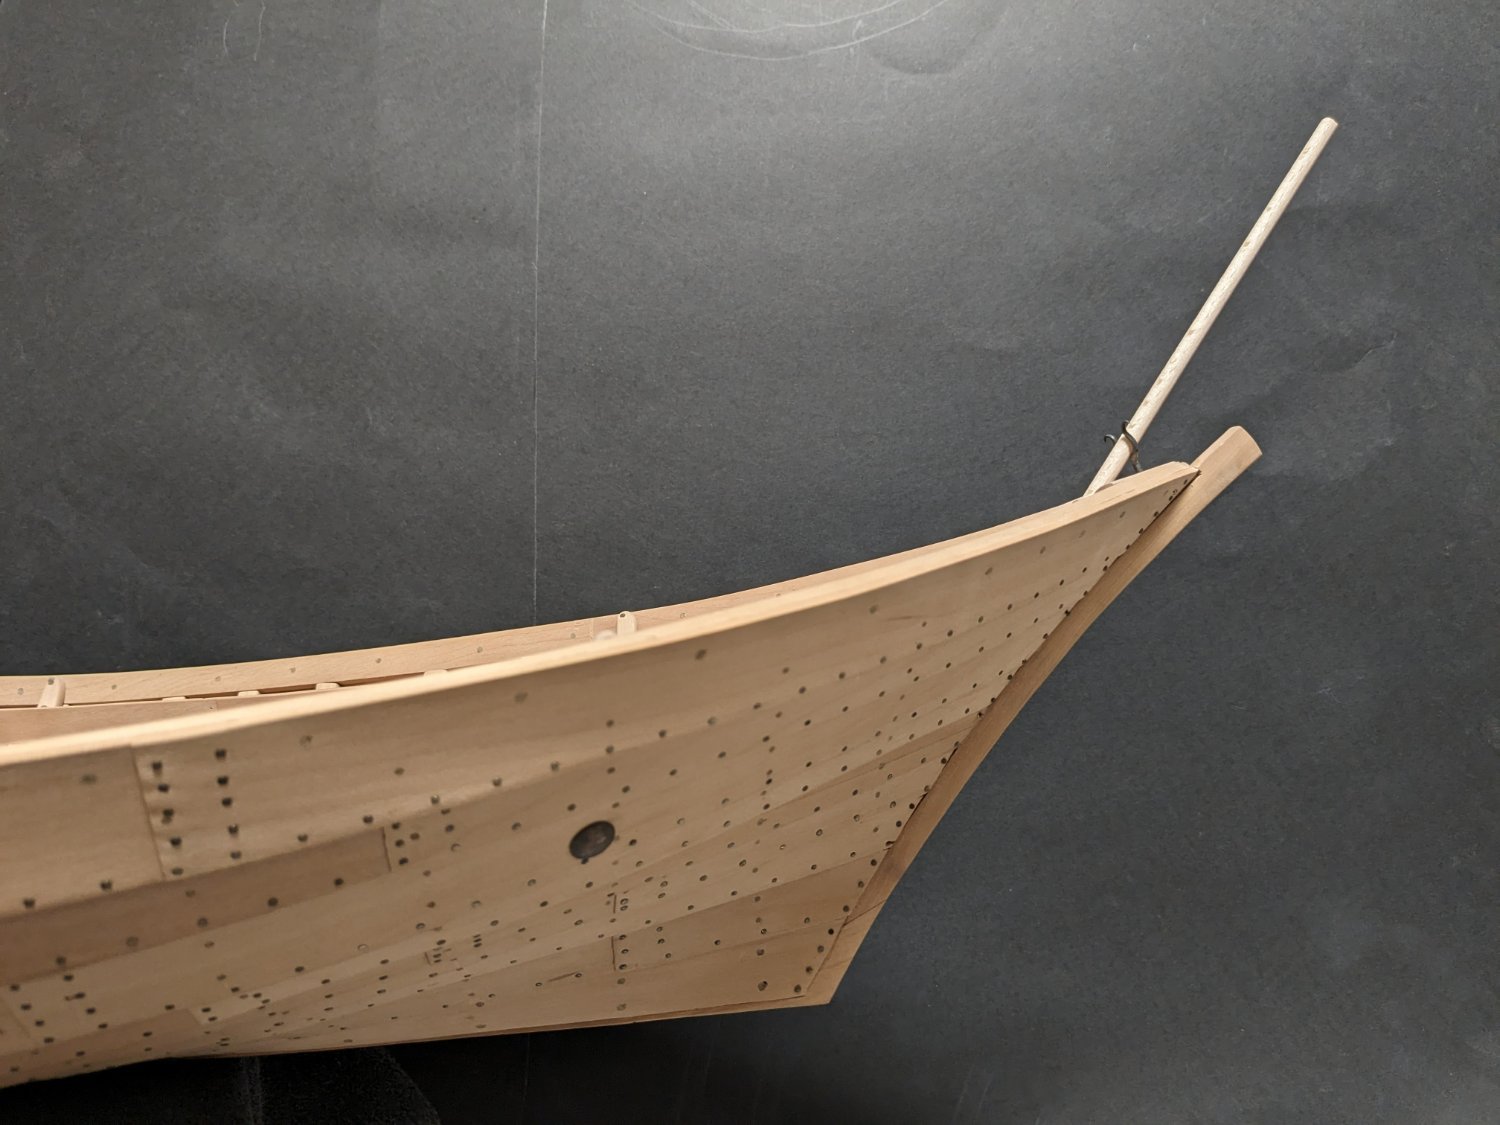
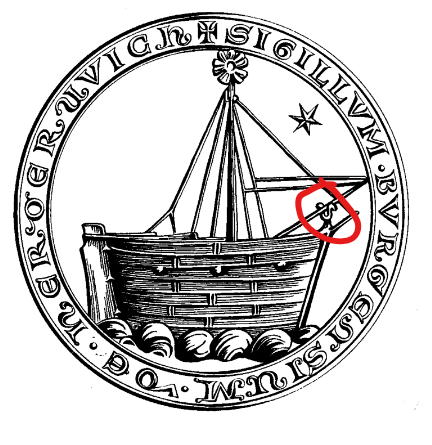
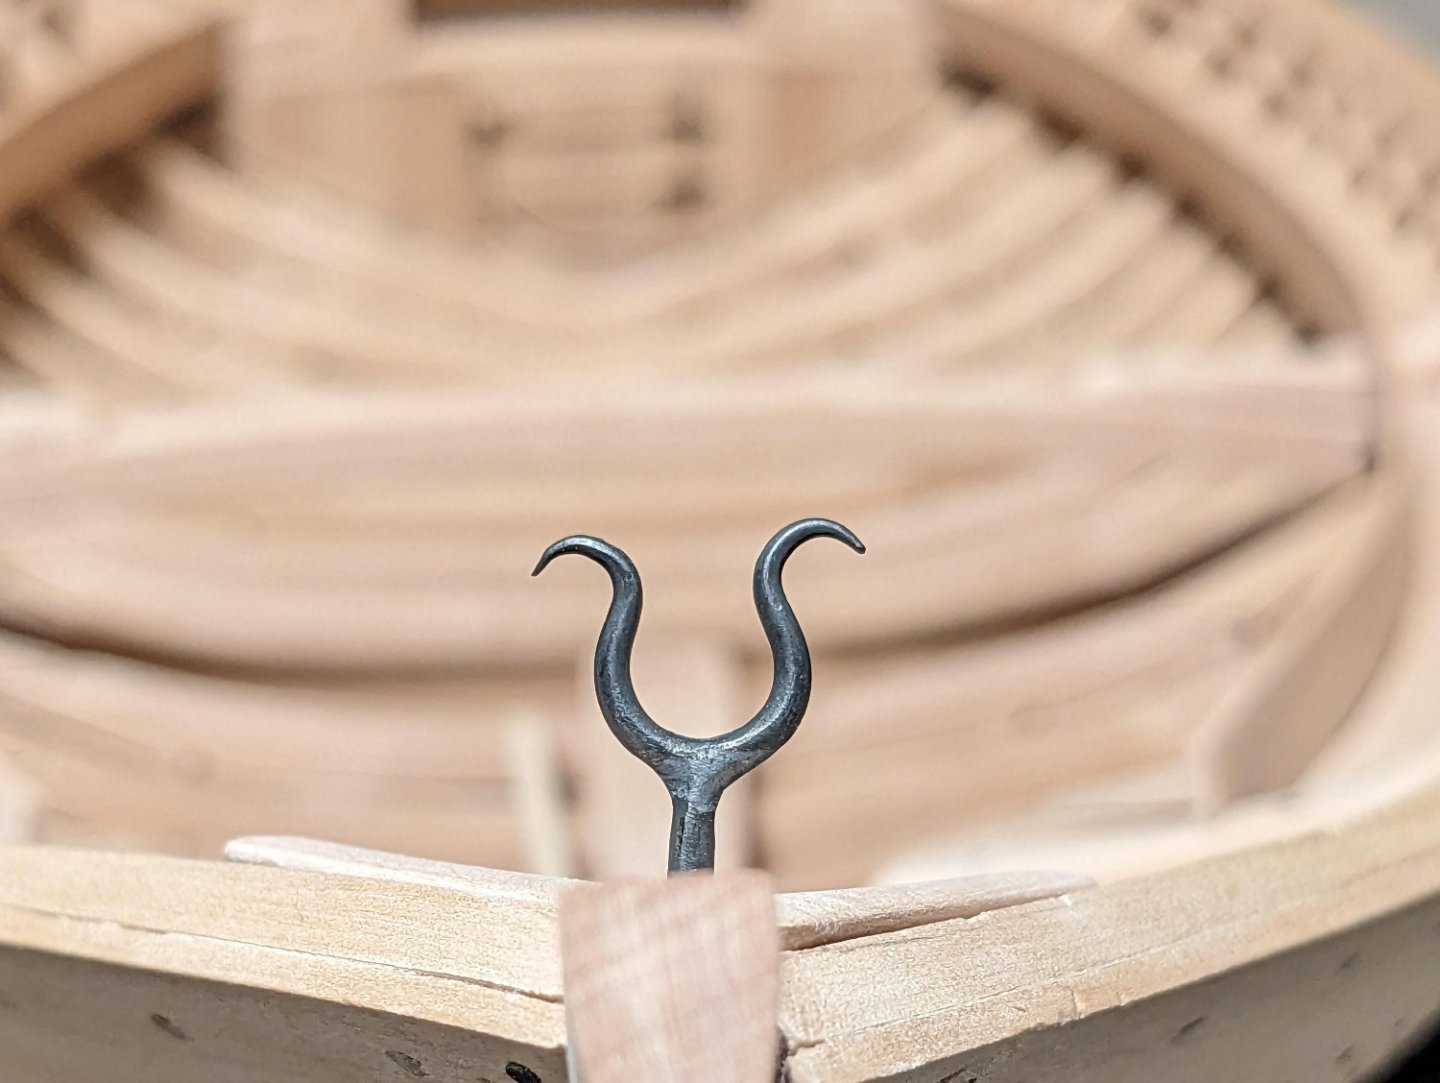
But back to the bowsprit before doing the ceiling. Or rather, back to the proto bowsprit. So, two weeks ago I was almost ready to bet money on me removing the bowsprit from scope. I had tried for a month to come up with a way to mount it that I felt was suitable and just couldn't find any. Then I read on this forum someone calling this kind of bowsprit 'proto bowsprit'. I really liked this as the function of it is something totally different from what we normally call a bowsprit and using a different name for it helped me move away from the conventional ways to fasten a bowsprit. And a week ago I started to look into the Gedesby find for inspiration for rope and I saw that there had been a full scale reproduction made of that ship, Agnete, and it had this kind of proto bowsprit! But I couldn't find any good picture of how the lower part was fastened. There was a book written of Agnete and I had to loan it from a library abroad which could take time. Then this Friday I got a message that I could collect the book. That made my cogs spin a bit faster and while at work I finally came up with the simplest way to fasten it - with a step. The end of the proto bowsprit should of course just rest in a mortise in a wooden block. At the end of the day I got the book, but there was no picture showing this area, but that didn't matter now. The spar itself is not the one I will use, but I think it will be something like this in size. The step is placed off center to clear the proto bowsprit from the fore stay. I'm really glad that I could use a similar crutch to what in this seal. First I planned on using a branch but I think a forged crutch just looks so much better. A simple lashing will hold the spar to the crutch.


- 87 replies
-
- 11
-
-
-
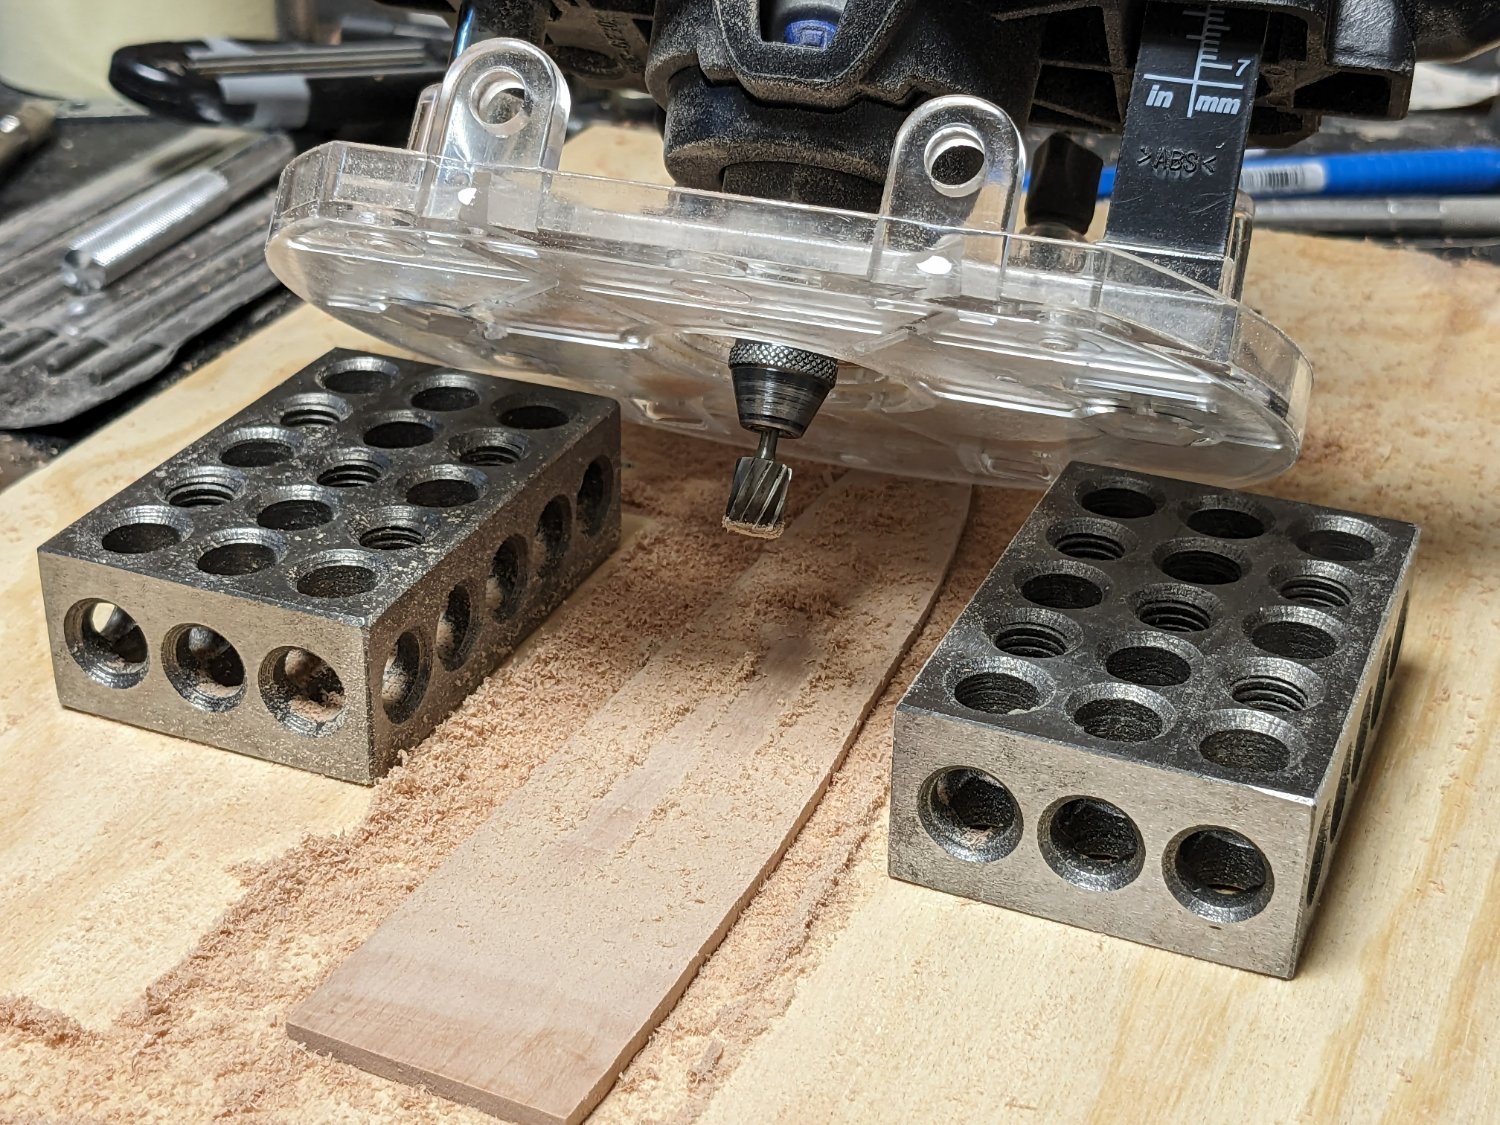
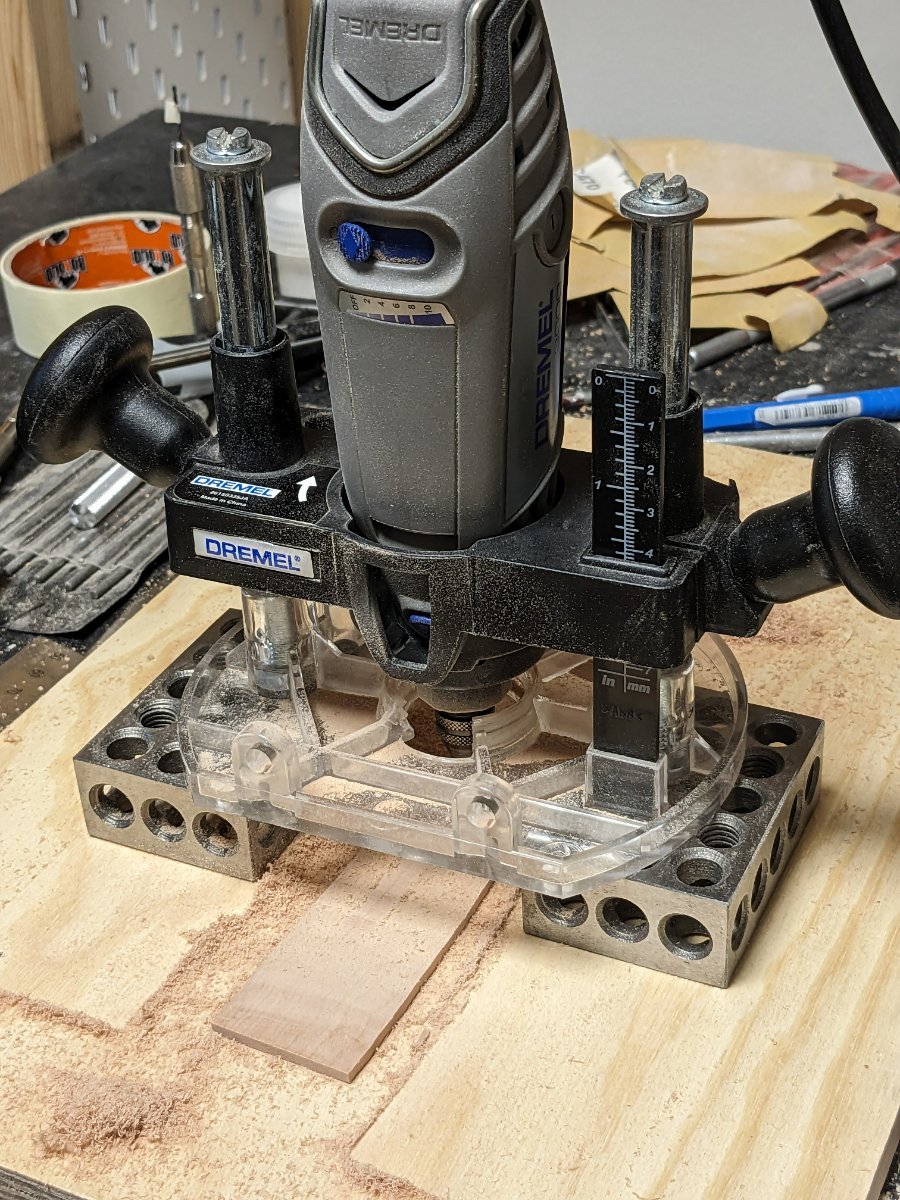
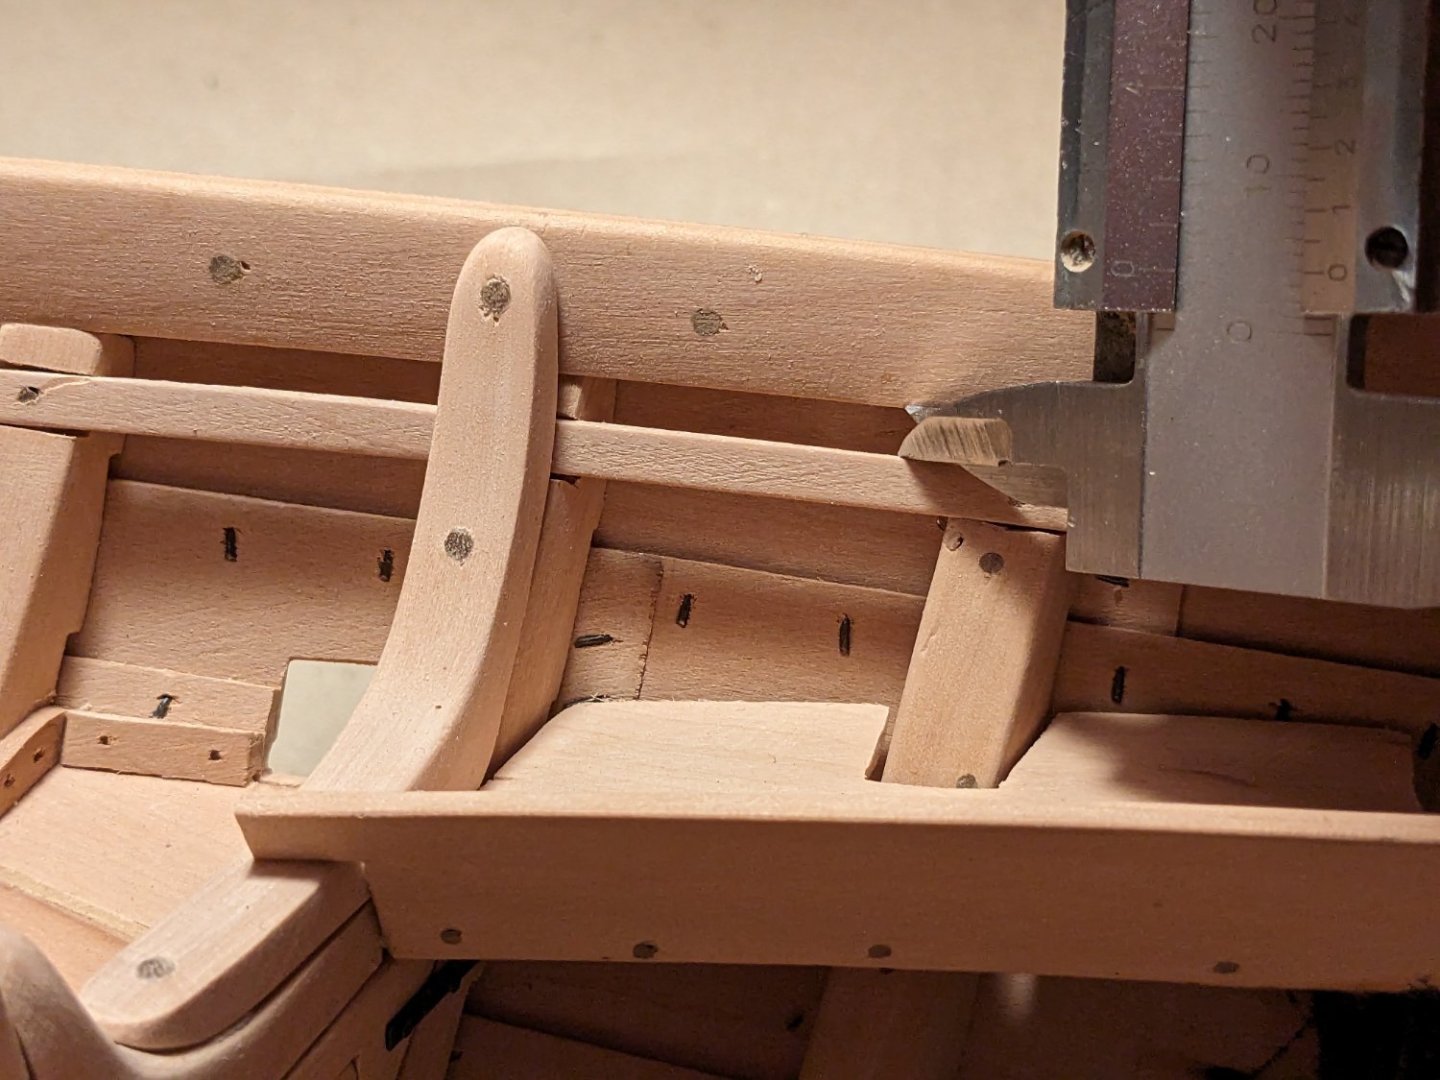
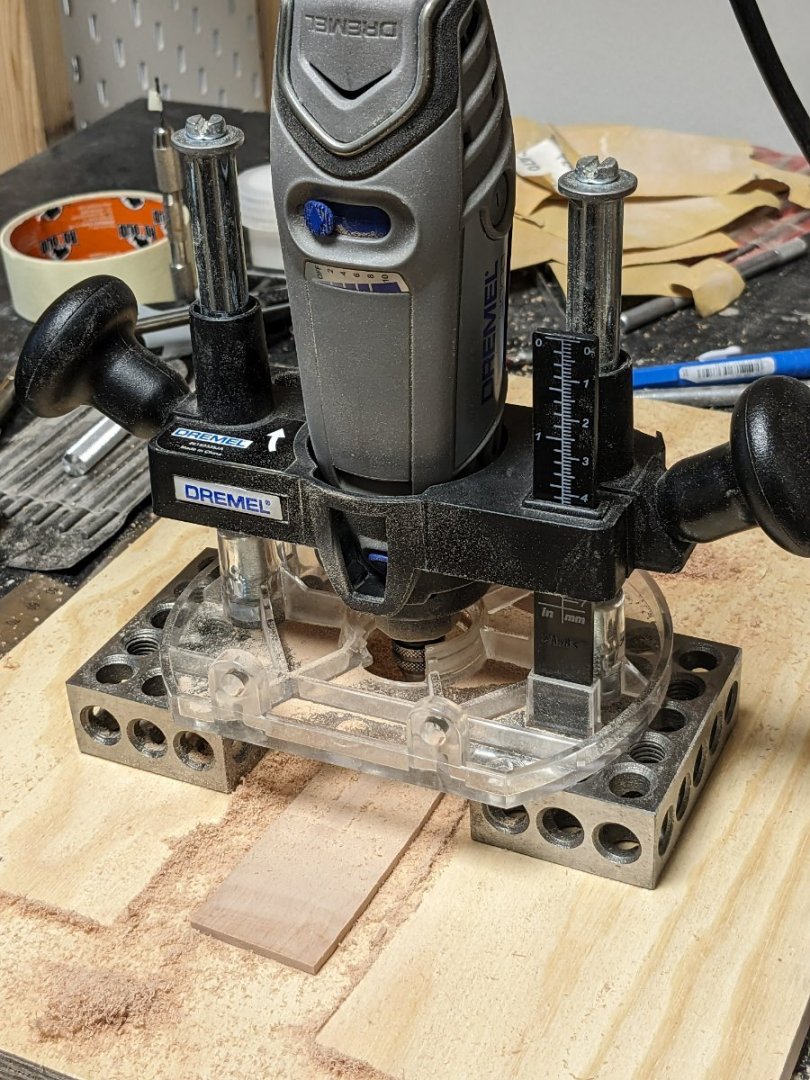
Thank you for your input Håkan! You are right and in order to better protect the rudder I added a sacrificial heel. I have started to look into the ceiling of the hold. The hold itself will be divided in two parts - fore and aft of the mast beam, where the later one will be the primary compartment. The ceiling in this part will have thicker boards. And to get an even thickness on my hand sewn planks I used the dremel: I've seen woodworkers on Youtube use this technique with full size tools to plane large boards so I thought I could try it too. The surface quality actually turned out quite ok. The planks were just hot glued to the plywood.

- 87 replies
-
- 11
-
-
-
Thank you for the quick answers! Then I will proceed with test samples of different mixes.
-
So, I have started to do some test painting for my current build of a 15th century cog. It is in pear wood and I would like a Stockholm tar look. I have a tar coloured oil based wash but it is too dark for my liking. I tried mixing it with turpentine and did not like the consistency at all. But when mixing it 50/50 with linseed oil I got something that I really liked. But I was told by some hardware store staff not to do it. Is there some reason by I should not mix these two oil based products?
-
Thank you all for the likes! Here is the rudder. I really liked the elegant flow of it and it felt wrong to keep the rudder boxy in cross section so I gave it a simple hydrodynamic shape.

- 87 replies
-
- 16
-
-