HOLIDAY DONATION DRIVE - SUPPORT MSW - DO YOUR PART TO KEEP THIS GREAT FORUM GOING! (83 donations so far out of 49,000 members - C'mon guys!)
×


broden
-
Posts
33 -
Joined
-
Last visited
Content Type
Profiles
Forums
Gallery
Events
Everything posted by broden
-
HMS Terror by Broden - OcCre - 1:75
broden replied to broden's topic in - Kit build logs for subjects built from 1801 - 1850
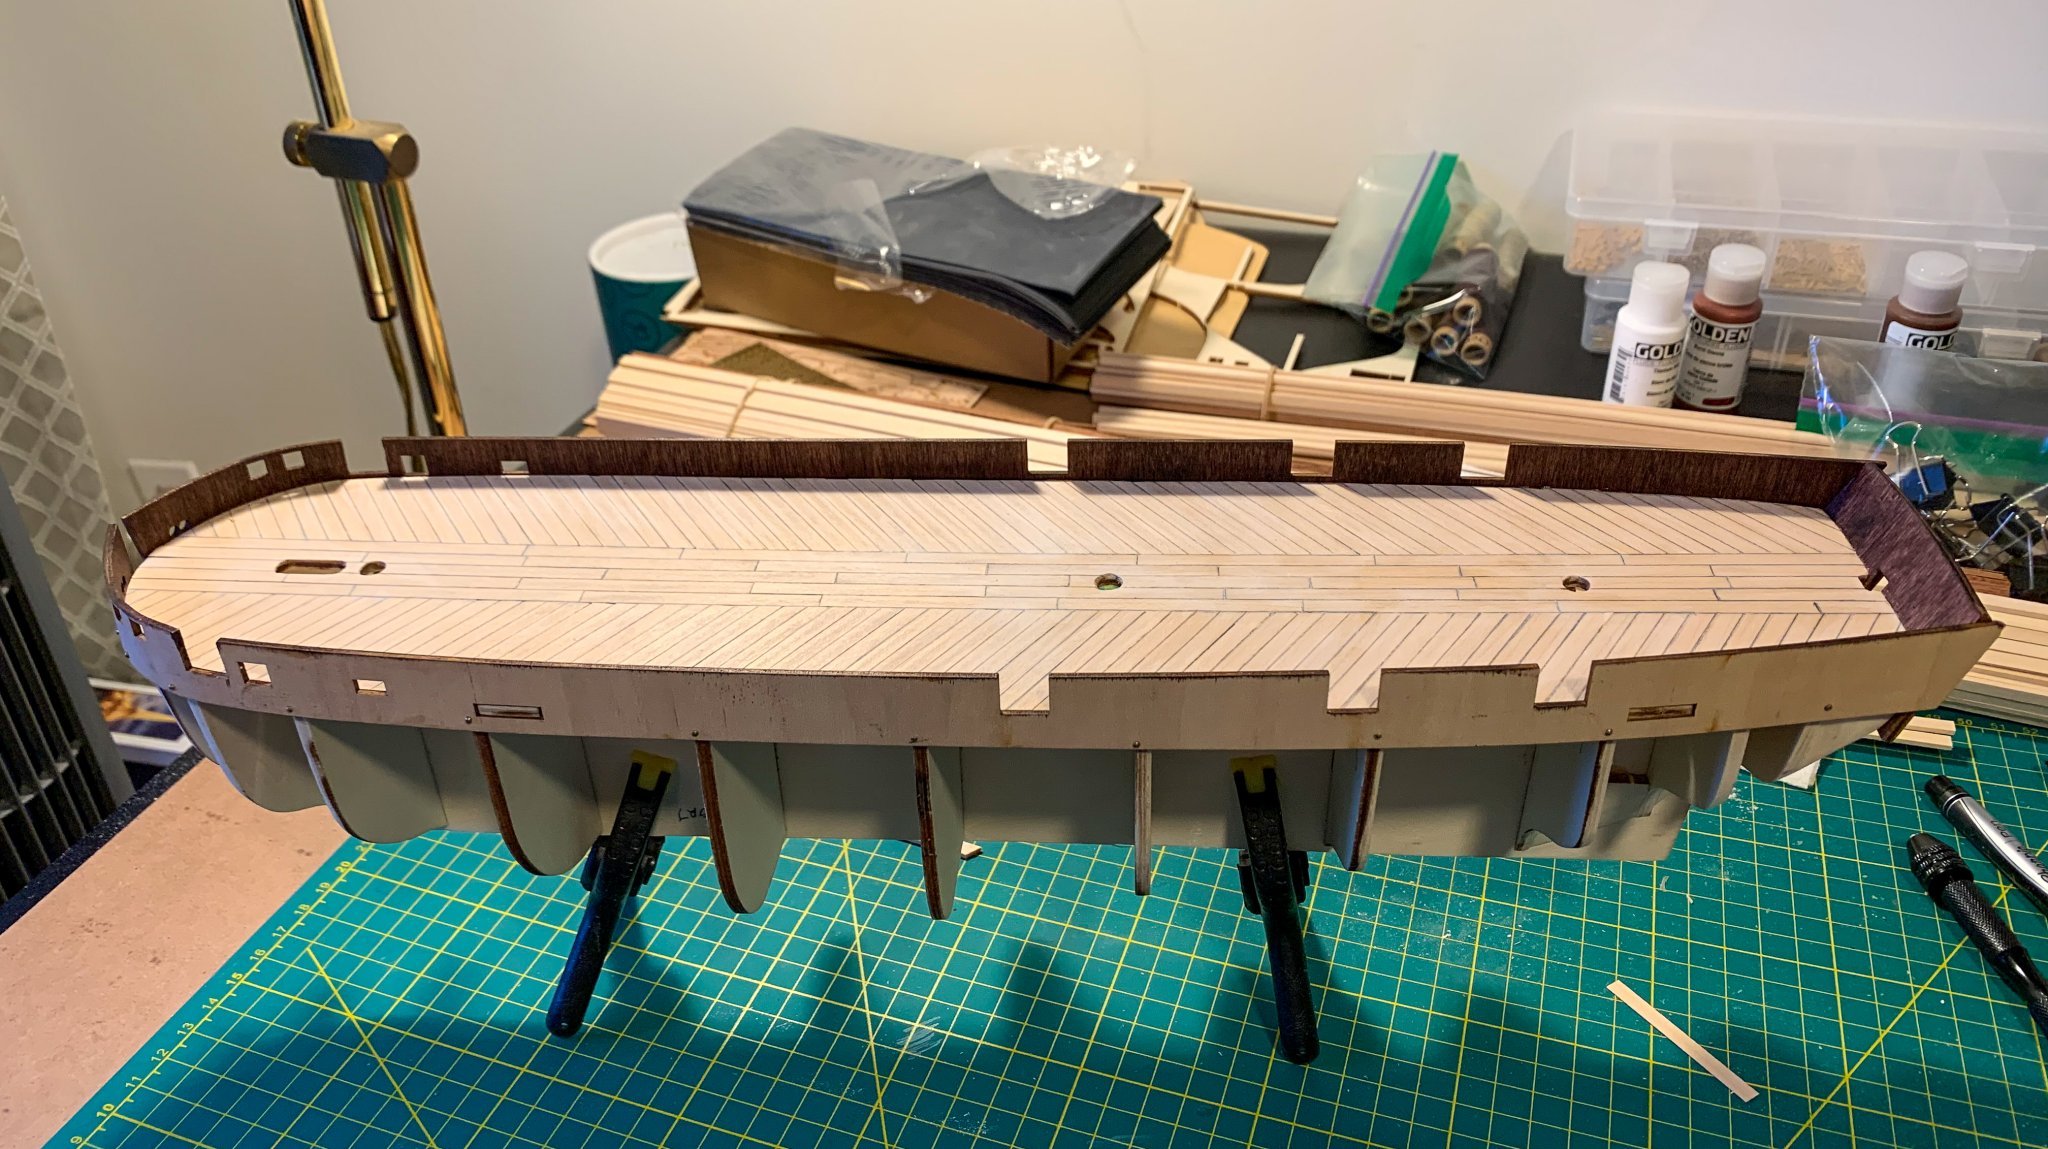
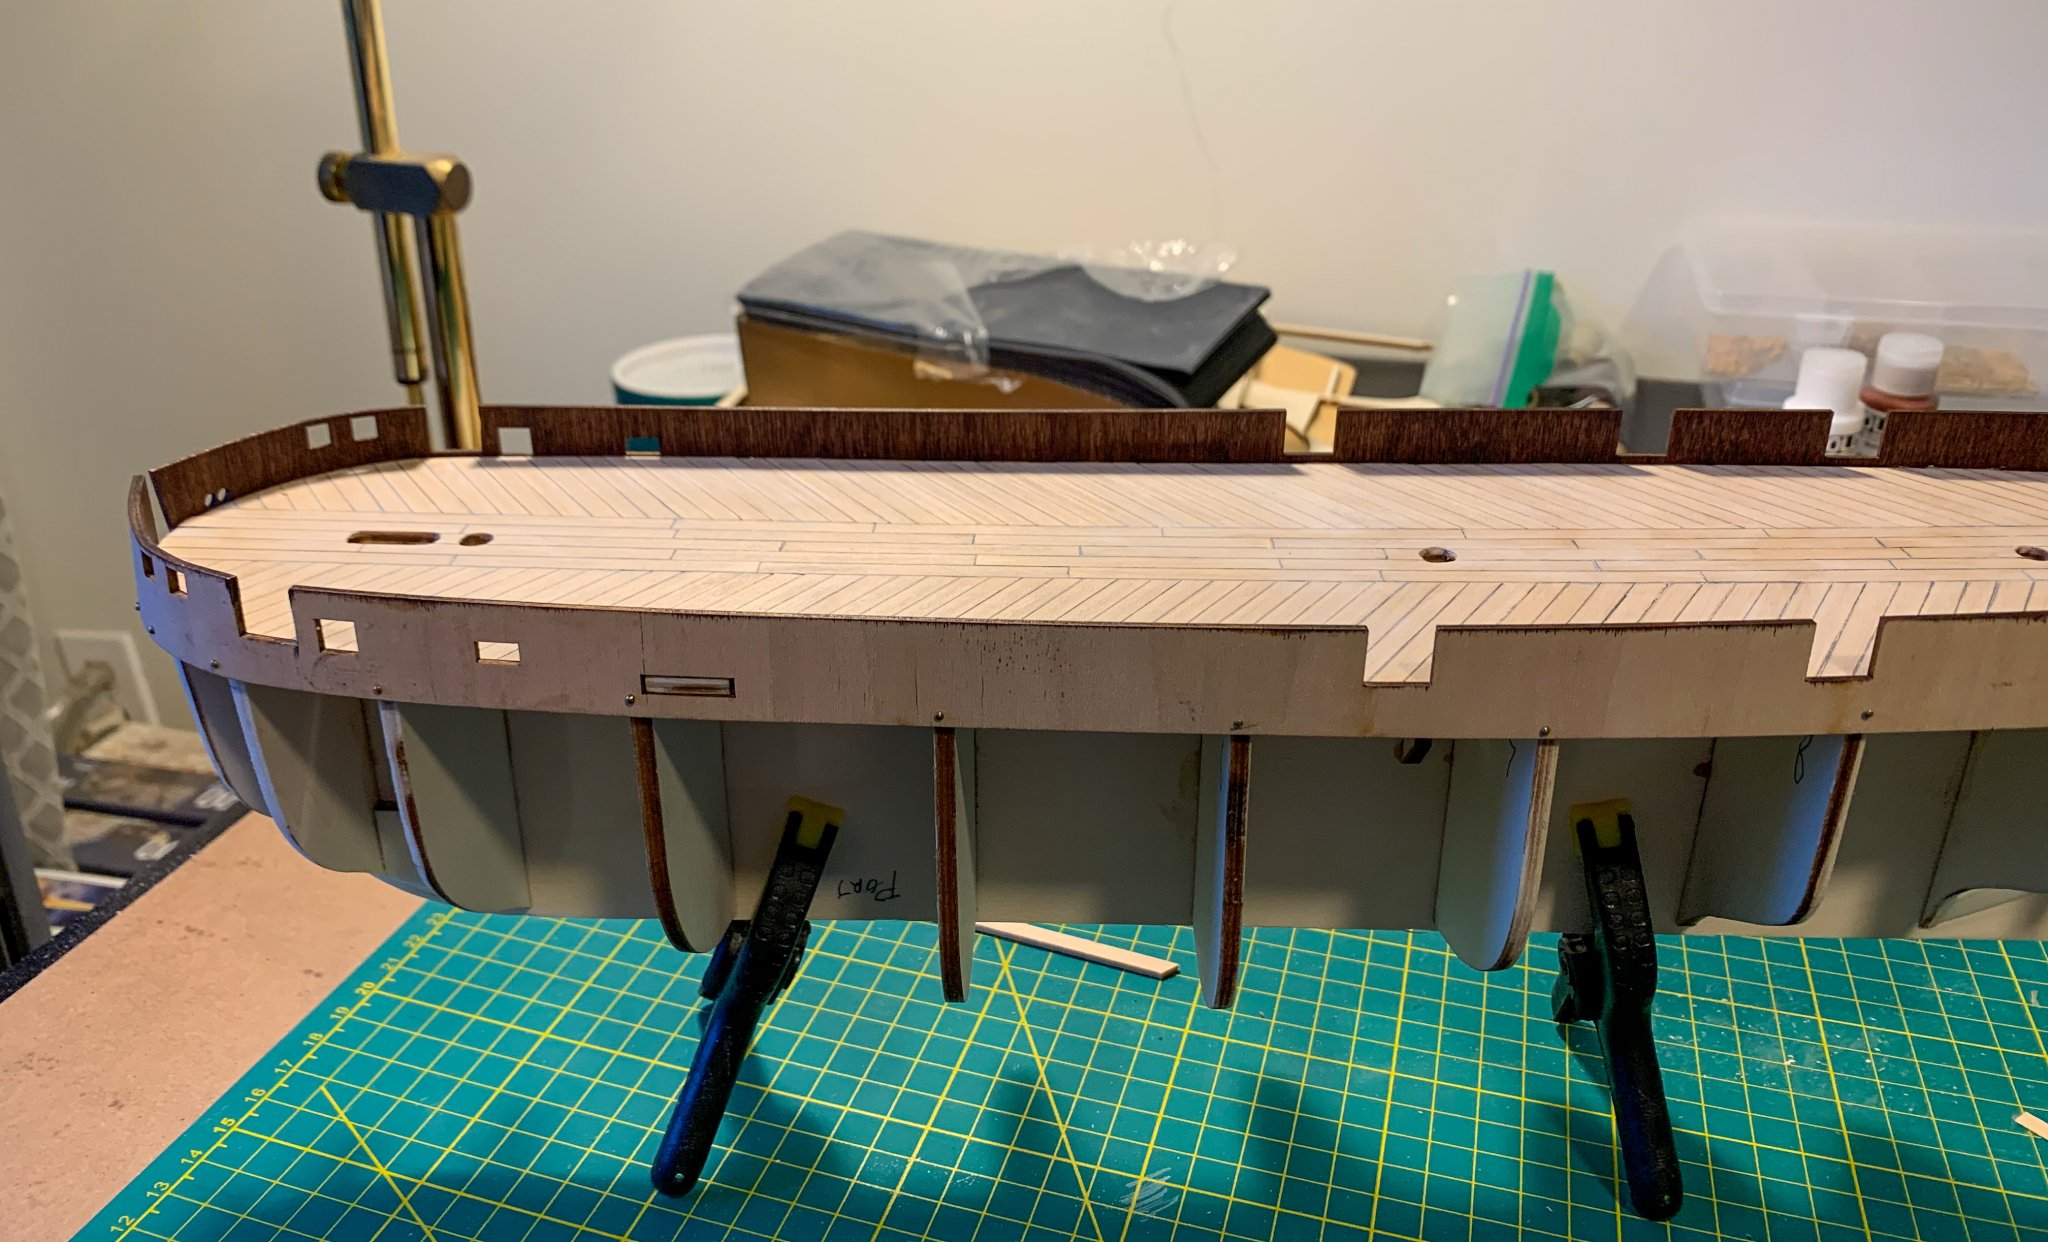
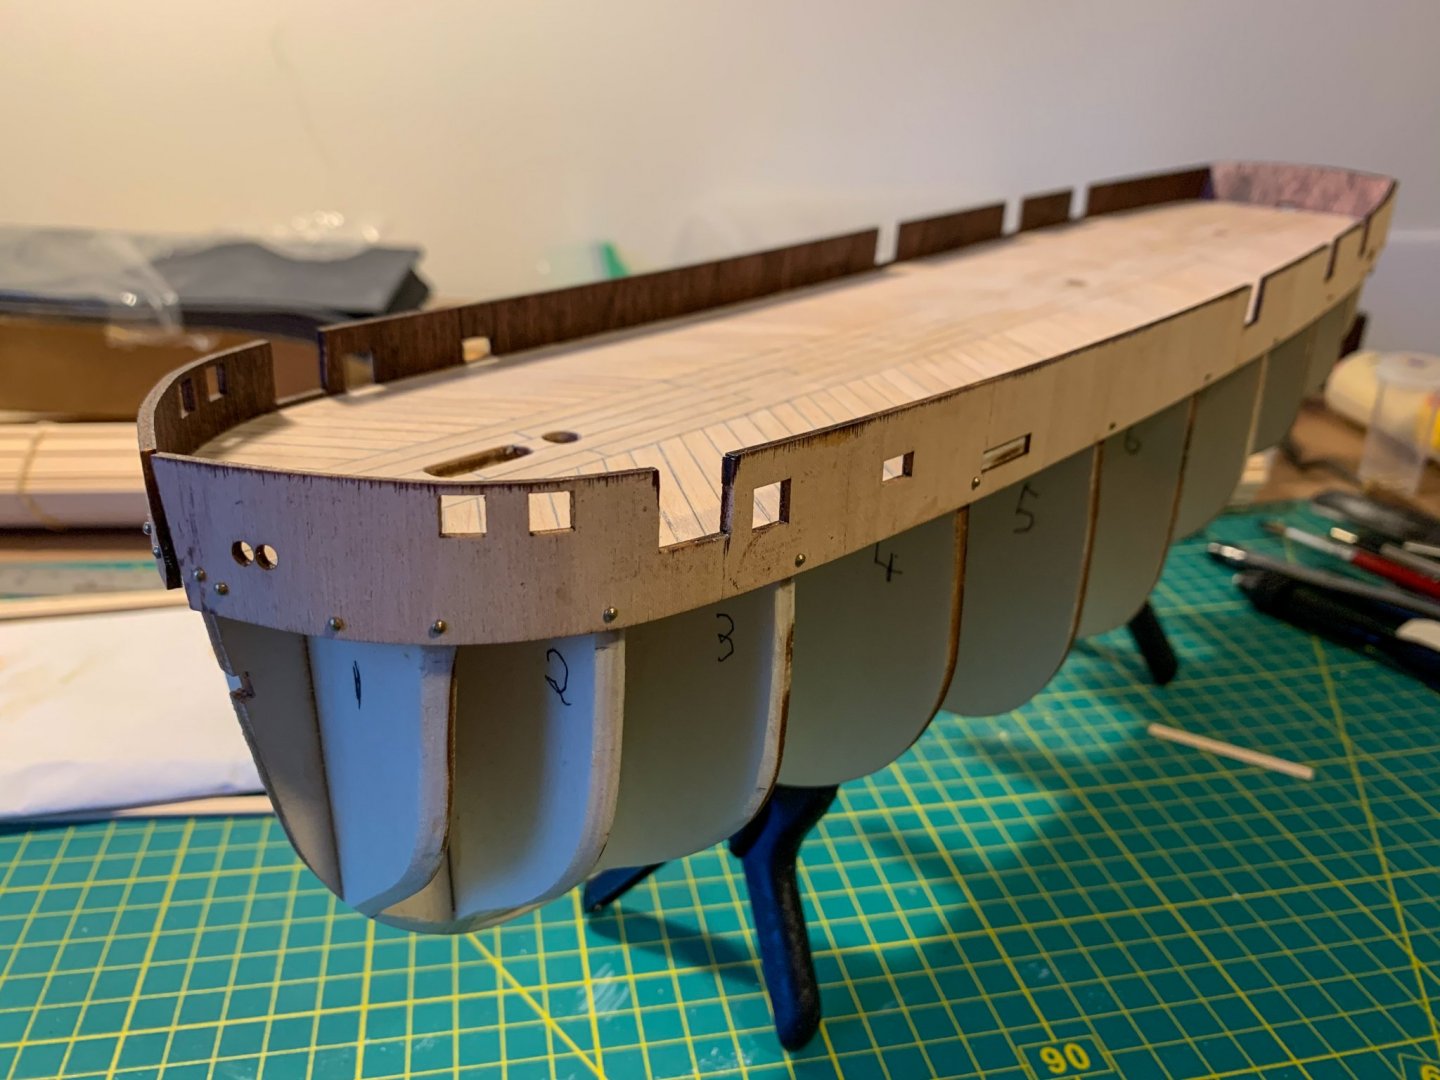
Thanks for the help. I suspect the kit has changed. The first and second layer of planks supplied are much longer than the model. I will just lay them full length tapering and filling as necessary. I got the deck finished with the deck boards defined a quick coat of shellac then a light wash of very diluted acrylic white to tone done the colour. I then installed the deck along with the transome and bulwarks. I picked up a mahogany stain at the big box store and am using that for all the deck furniture as I go along. It seems to look pretty good on the bits I have done so far. The bulwarks were my first attempt at bending ply wood it worked out OK, but I had to use pins to keep it in place. It is on and I did not bust it. I think I've finished both sides of the first sheet of instructions. Cheers DB

-
HMS Terror by Broden - OcCre - 1:75
broden replied to broden's topic in - Kit build logs for subjects built from 1801 - 1850
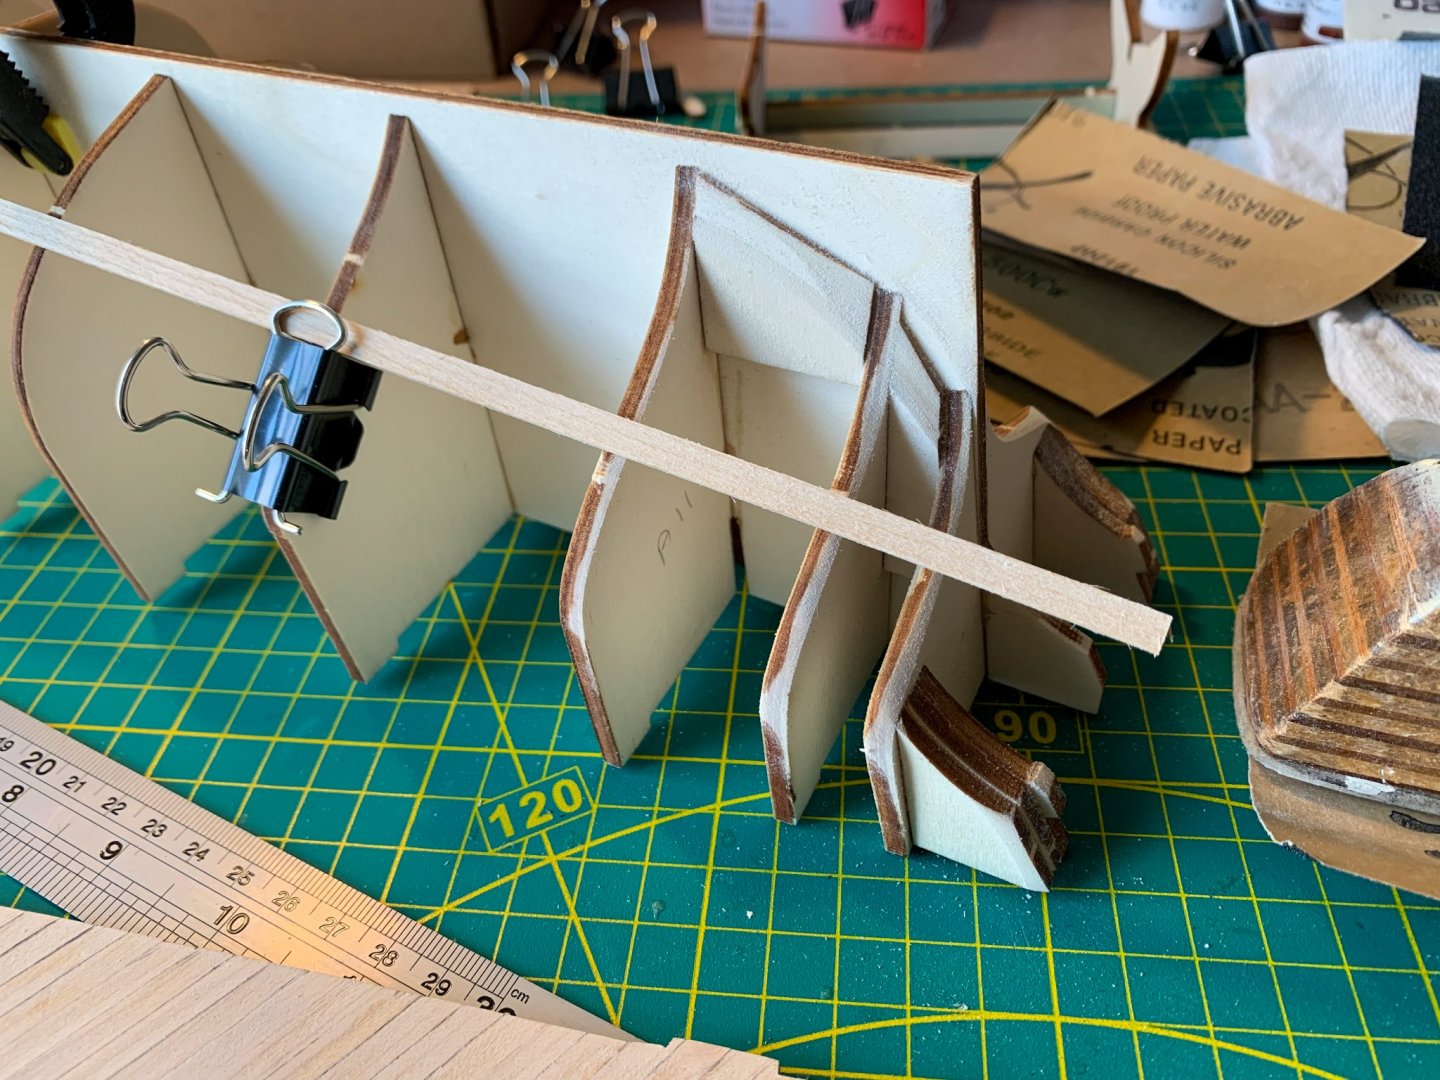
I have the deck almost where I want it. A bit more sanding and outlining of the planks then finishing. I am waiting on delivery of some "B" lead for mechanical pencil to do the lining of the deck planks. I took a look at the kit instruction for planking then did the usual searches on google and YouTube for planking methods. The OcCre kit's method of planking the first layer up to frame A2and ending there is not typical. It looks reasonable in the plans, but I am curious, is it a good idea or will not running the planks right to the bow cause problems later on? Anyway, I started fairing the frames, which seems to be a rather long bit of sanding. I am using a planking board to sight the fairing lines and hope I'm doing it right. It seems that matching the sides maybe my issue. I'll get there.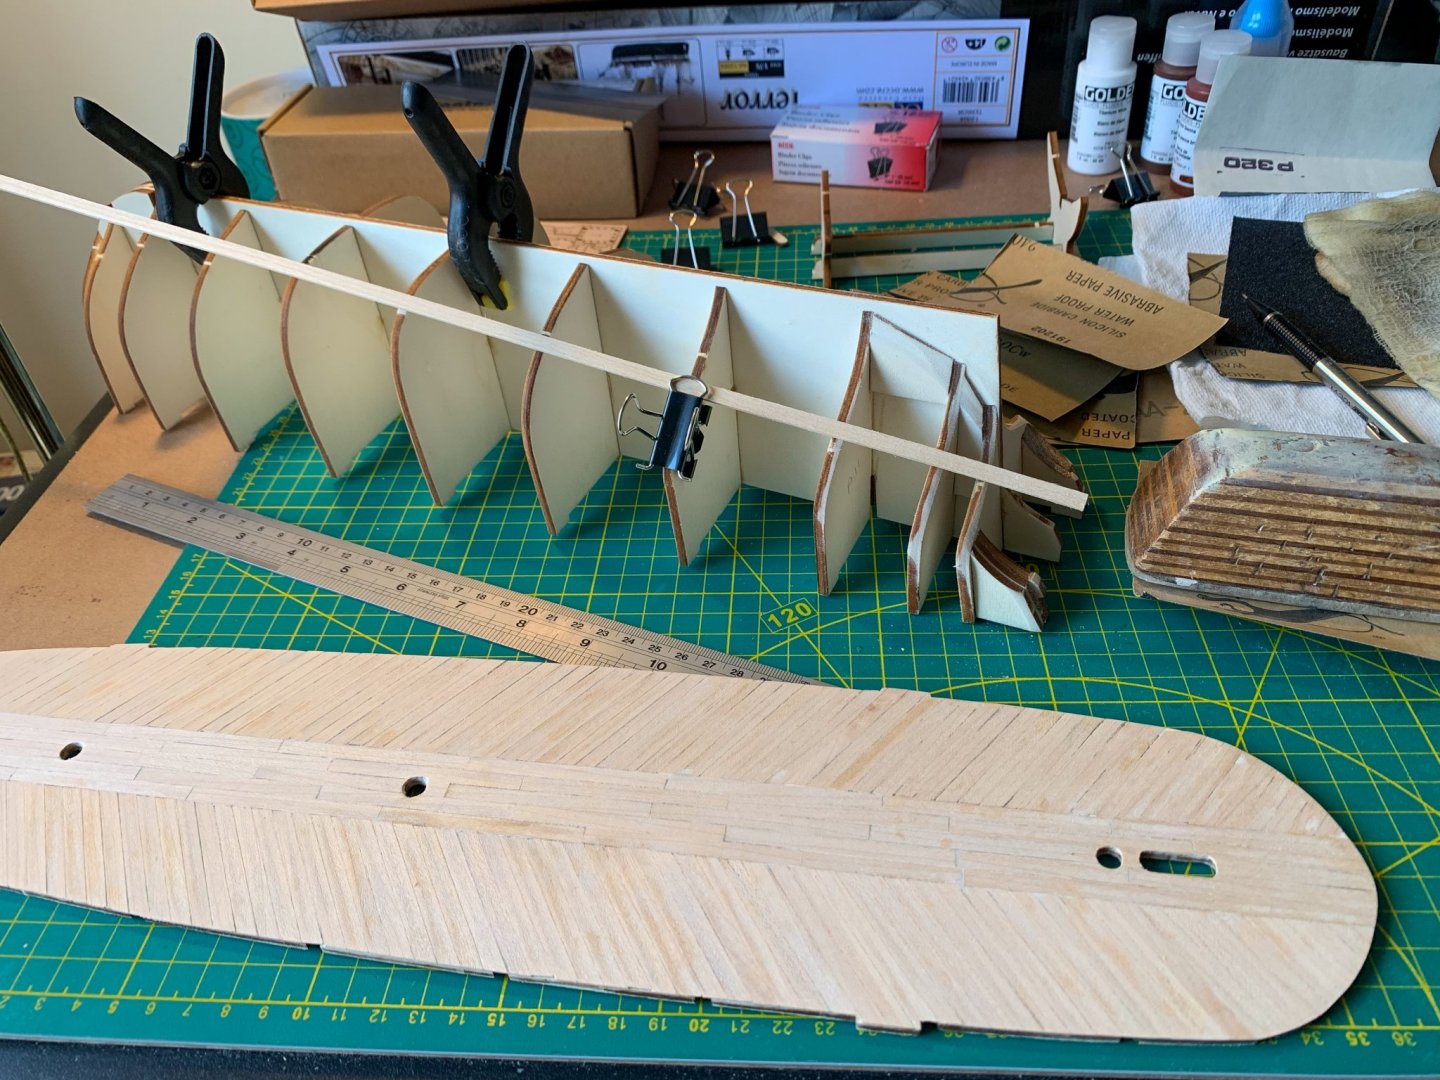
-
HMS Terror by Broden - OcCre - 1:75
broden replied to broden's topic in - Kit build logs for subjects built from 1801 - 1850
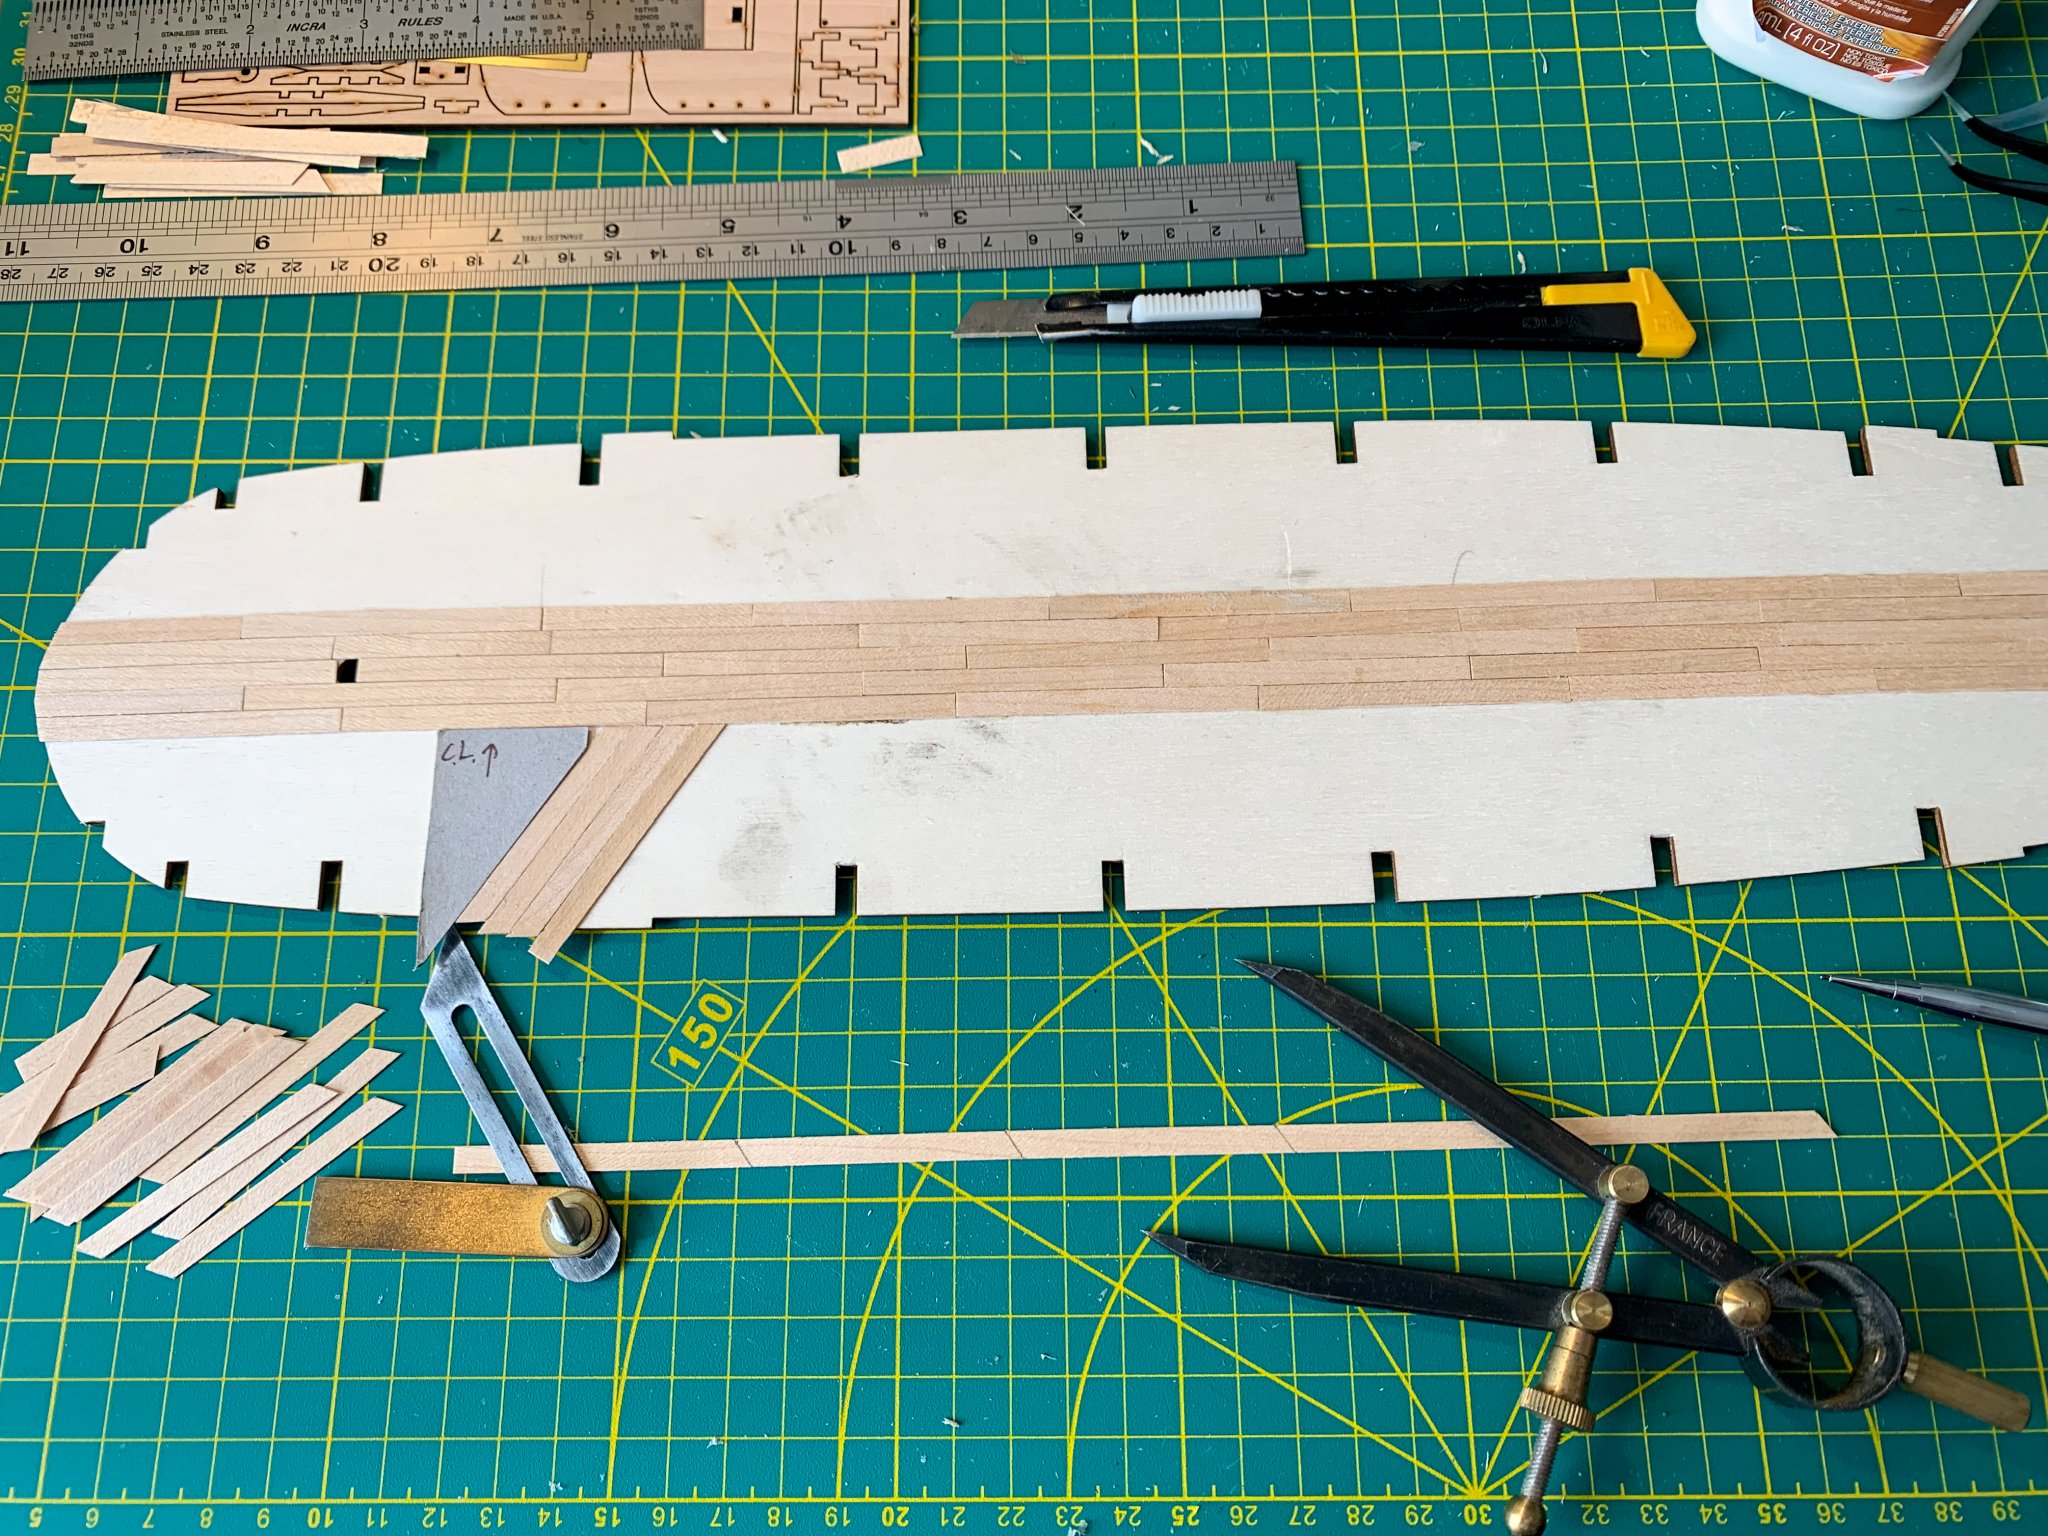
Thanks for the tip on mast diameters. I do not think I have MM drill bits, but I have the fractional equivalents. Worst case I have a lathe so trimming the dowels and shaping them will not be a problem. I figured out how I screwed up the deck planking. A close review of the instructions revealed that the center planks should be part A-21 described as 0,6x5x400, Qty 10, herringbone planking as A-22 described as 0,6x5x47, qty 75. In my kit I have many strips of 0.5x5x600 and maybe 5 strips of 0.5x6x600. So my deck has 5 center runs of 0.5x5x60 planking and herring bone layout of the same width and thickness. By the way it looks fine to my eye. I'm sure these variants were included to confuse old north American woodworkers, who are sure that if God wanted us to use the metric system there would have been 10 disciples. DB -
HMS Terror by Broden - OcCre - 1:75
broden replied to broden's topic in - Kit build logs for subjects built from 1801 - 1850
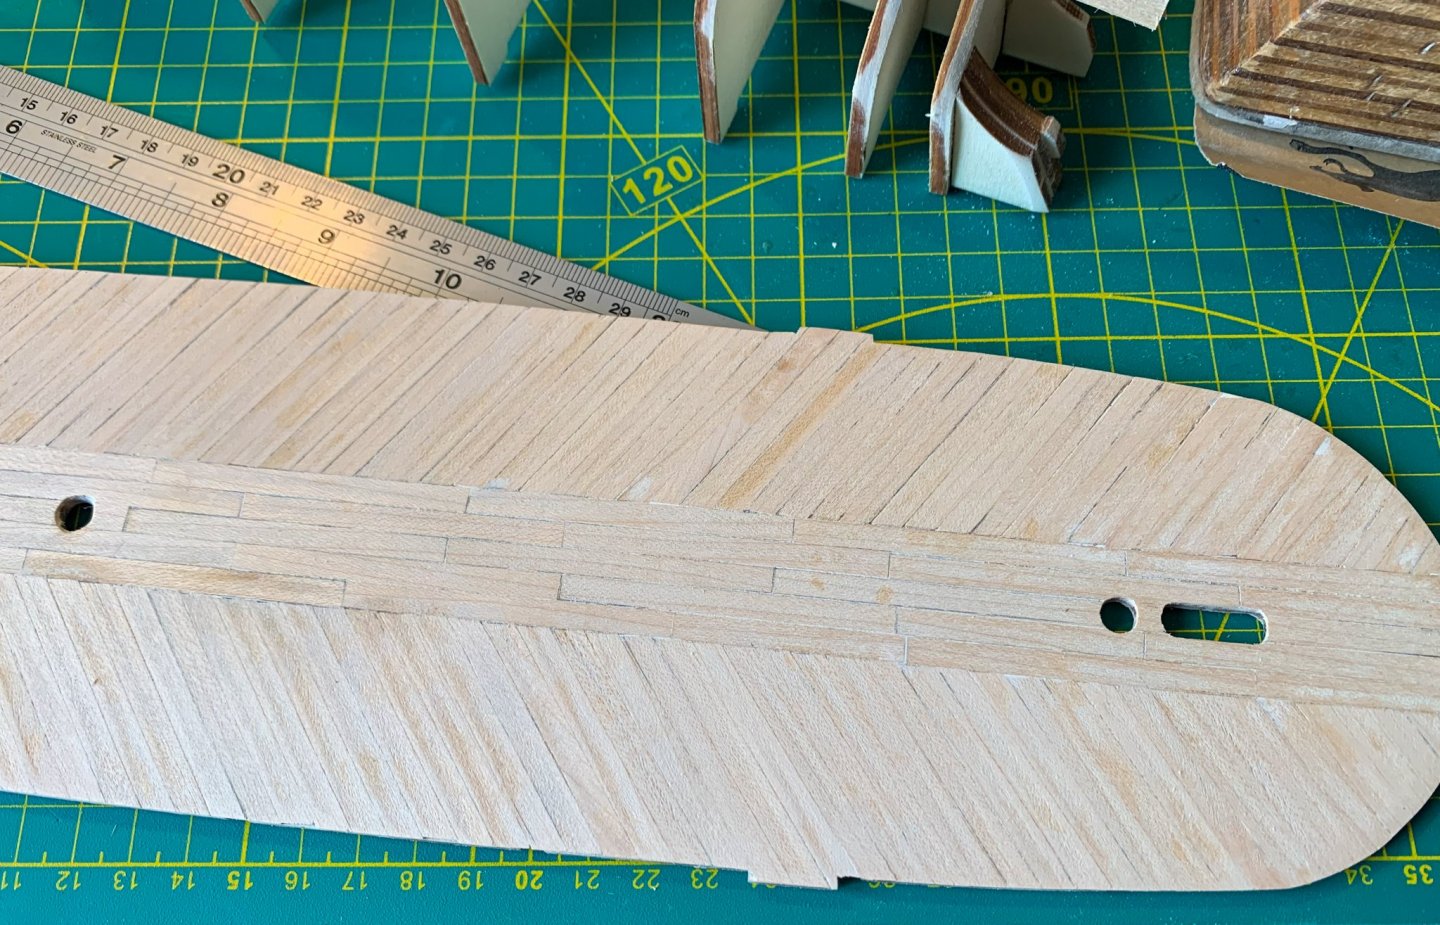
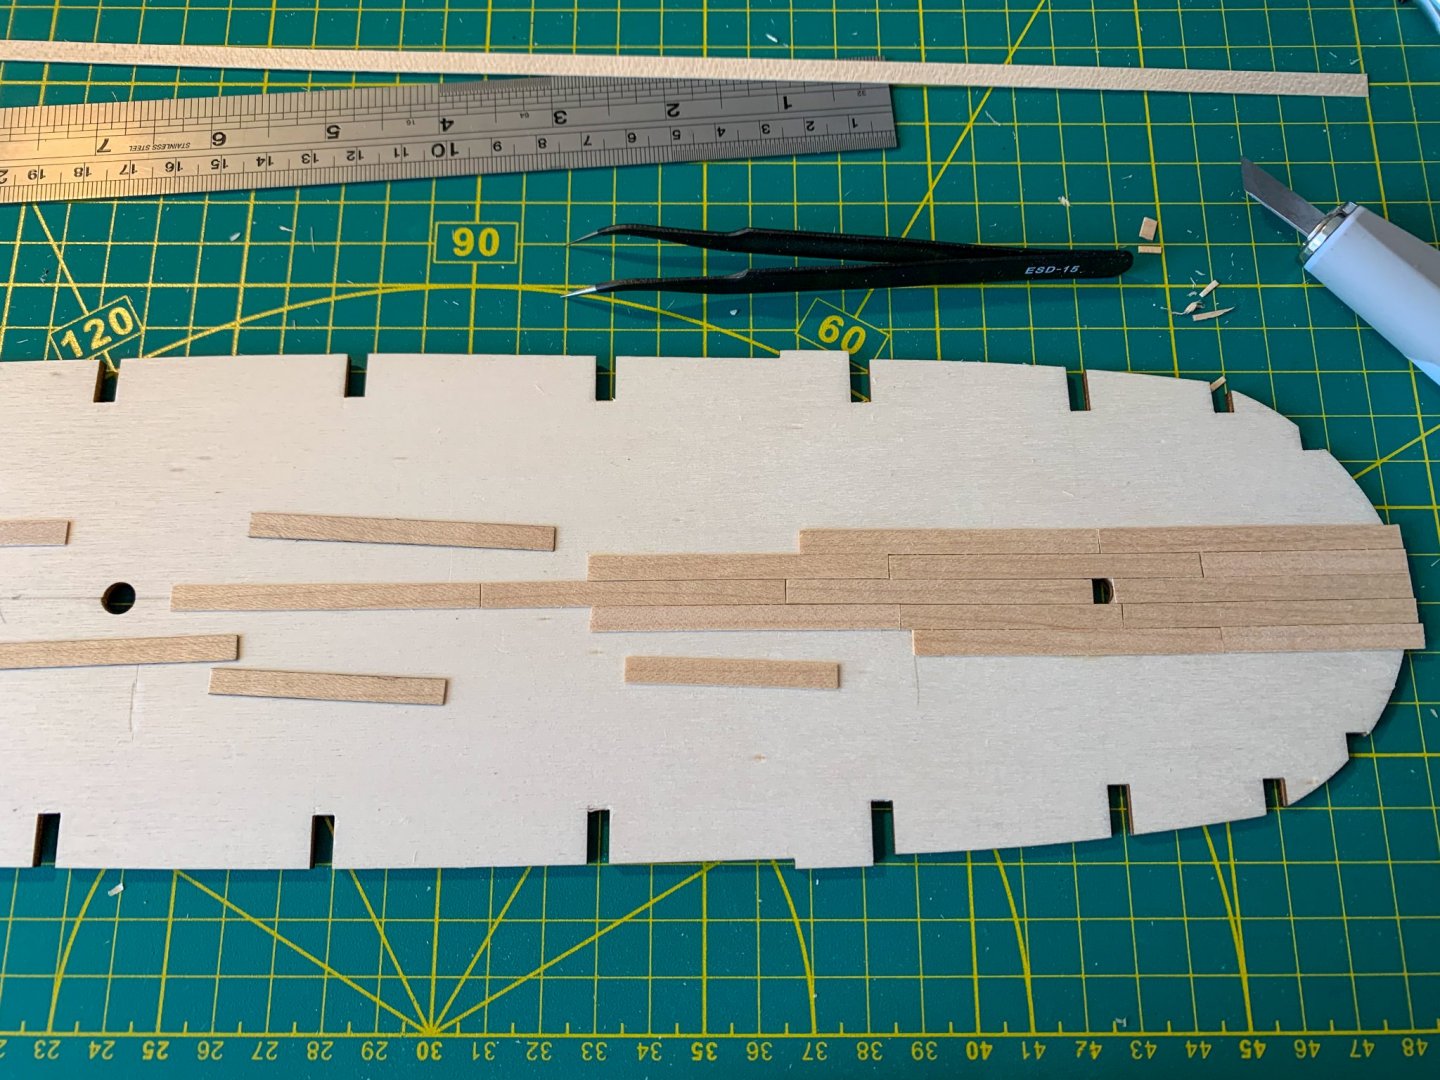
Thanks for the insight. I will probably do a light wash of mostly white with a touch of gray to tone down the wood a bit. Even modern ships with teak or oak decks very quickly get a weathered look. So I started the herring bone decking and figured how to produce the approximately 190 boards to cover the rest of the deck. Basically I used dividers to set the length, mark the angle with a small angle set then cut the whole strip at once. I got fooled with a couple of strips that were just a little wider 6 mm instead of 5 mm. I do not know if I screwed up some thing else by cutting that strip up. I guess I'll find out.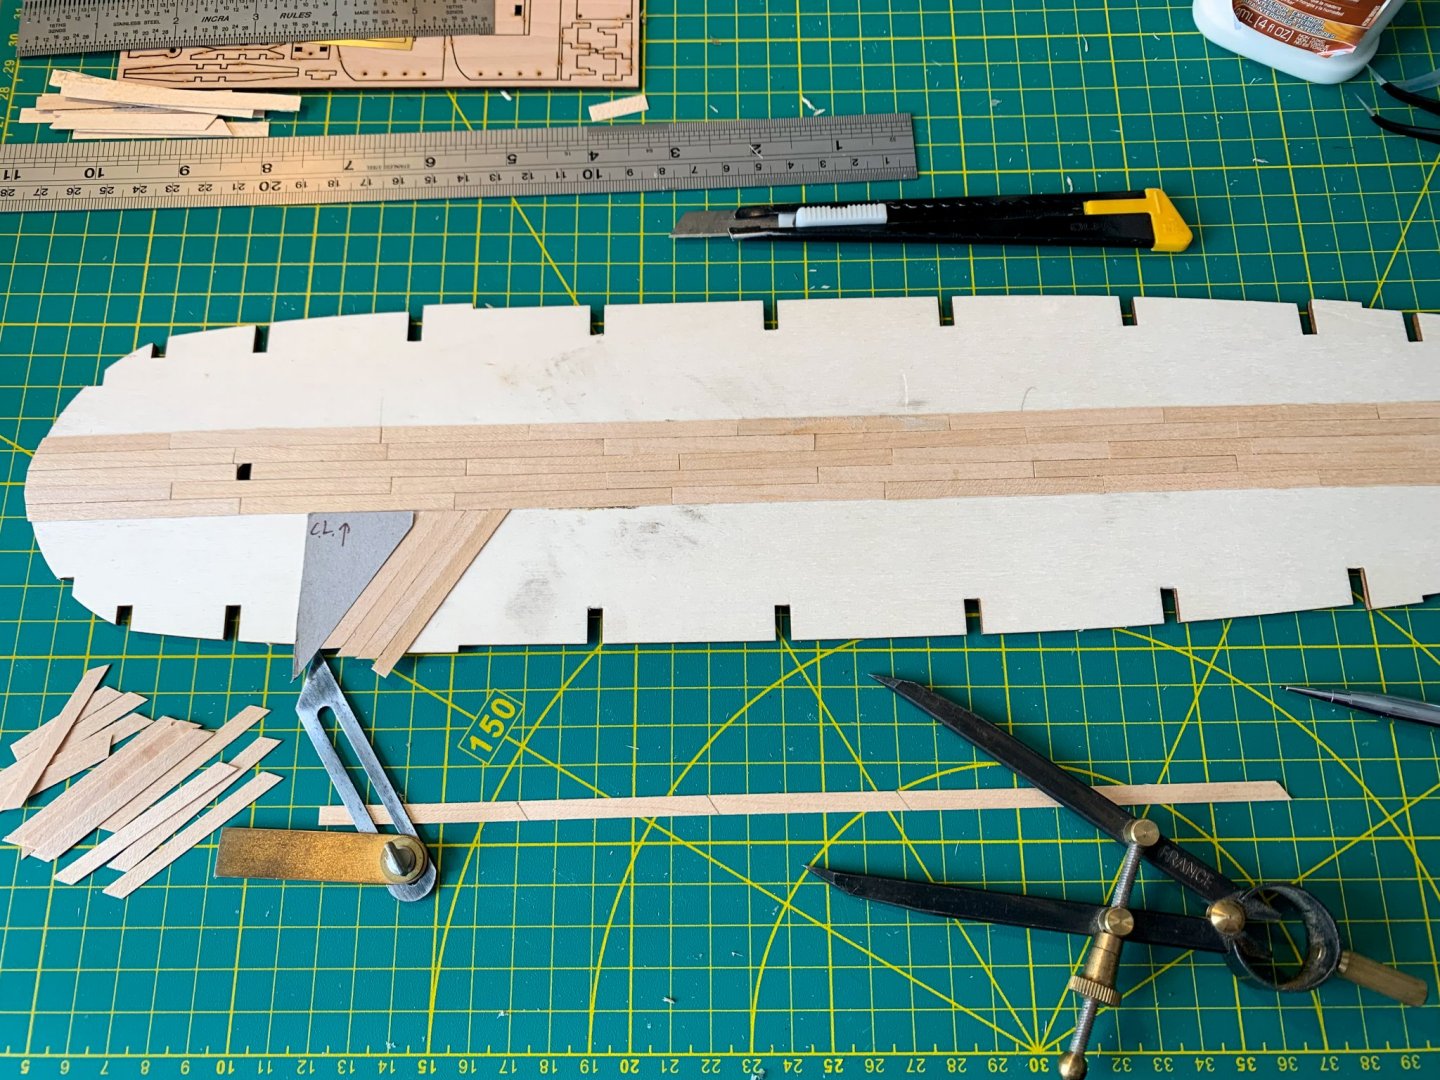
-
HMS Terror by Broden - OcCre - 1:75
broden replied to broden's topic in - Kit build logs for subjects built from 1801 - 1850
Things seem to be moving quickly on the build. All the frames are mounted on the false keel. A couple had noticeable bows in the frames but not enough to prevent the under deck from fitting properly. The fitting of the under deck went much better when it was turned over. It did not look any different but it certainly was. Being a bit contrary, I did not like the instructions on planking the deck with the long strips down the center. I'm sure it would be faster, but I'm not doing this built for fast, so I'm cutting individual boards for the center strip and will high light them with a "B" pencil when finished. I will do the herring board design for the remainder of the deck. Any suggestions for colour of the decking. One of the British Navy's standard make work projects was to almost daily holly stone the decks. I suspect the new wood appearance went away very quickly. All suggestion accepted and looked forward to. DB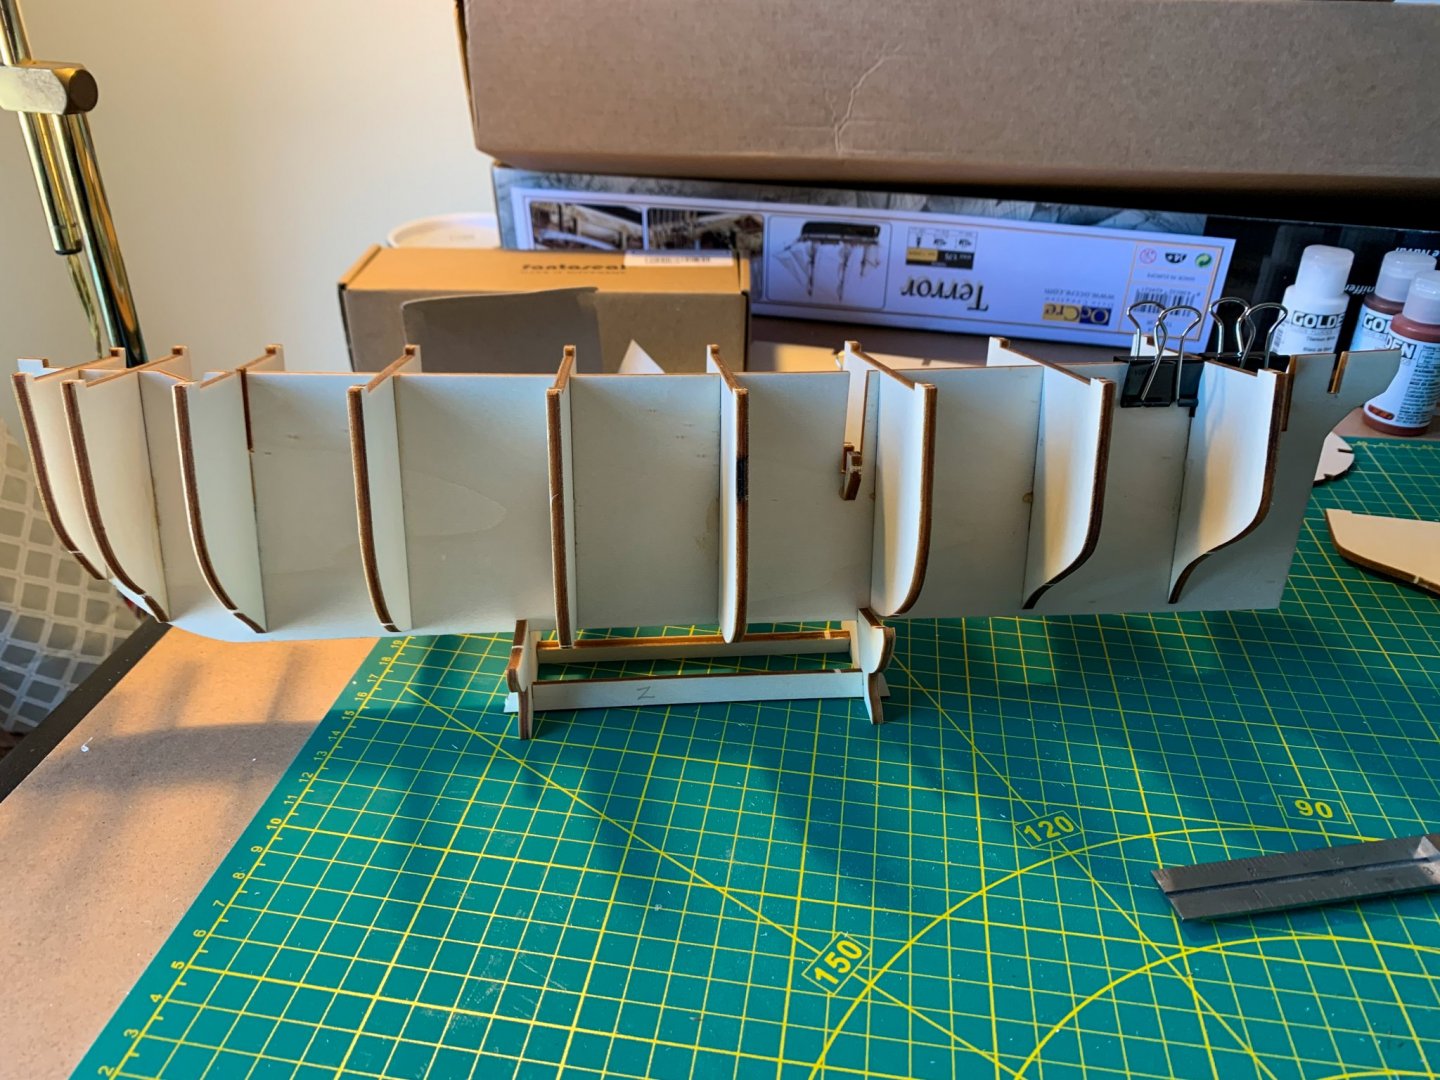
-
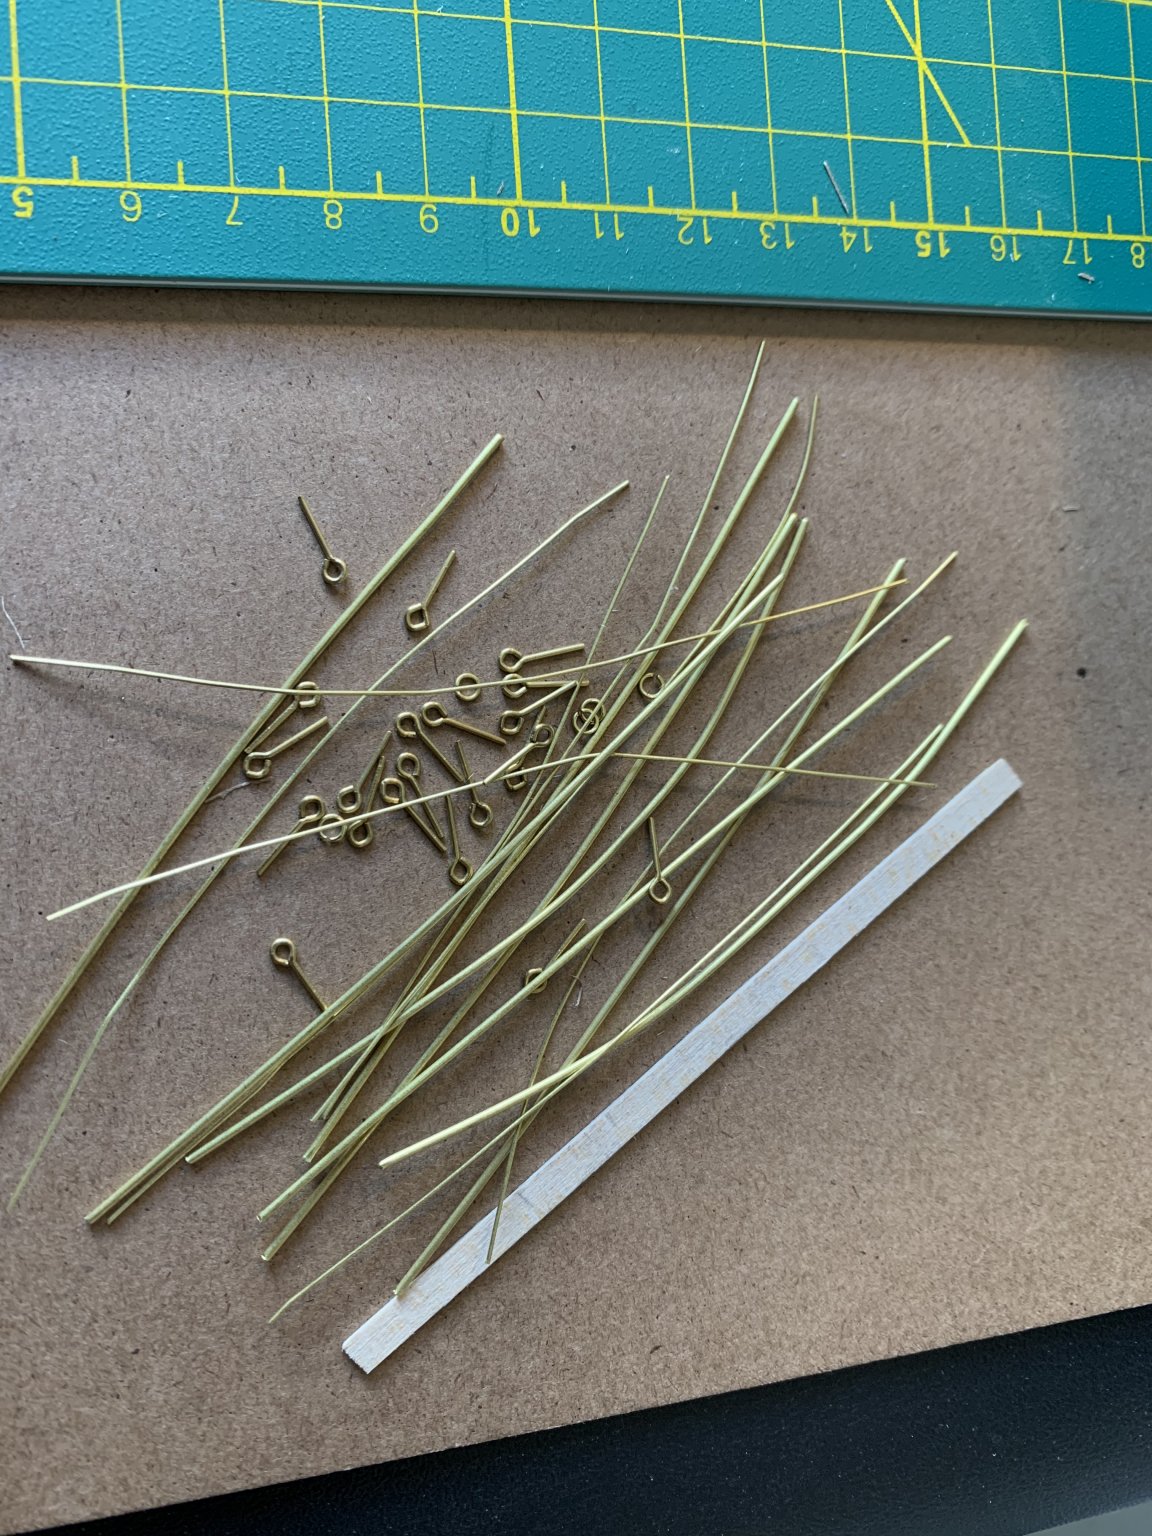
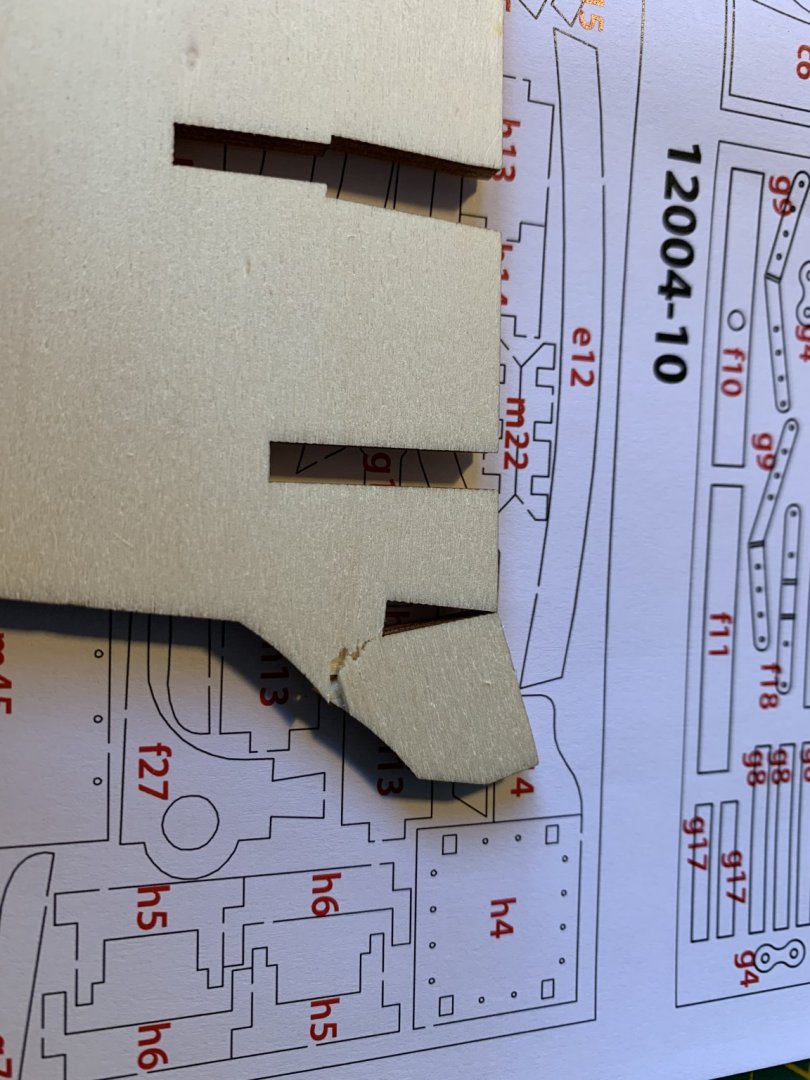
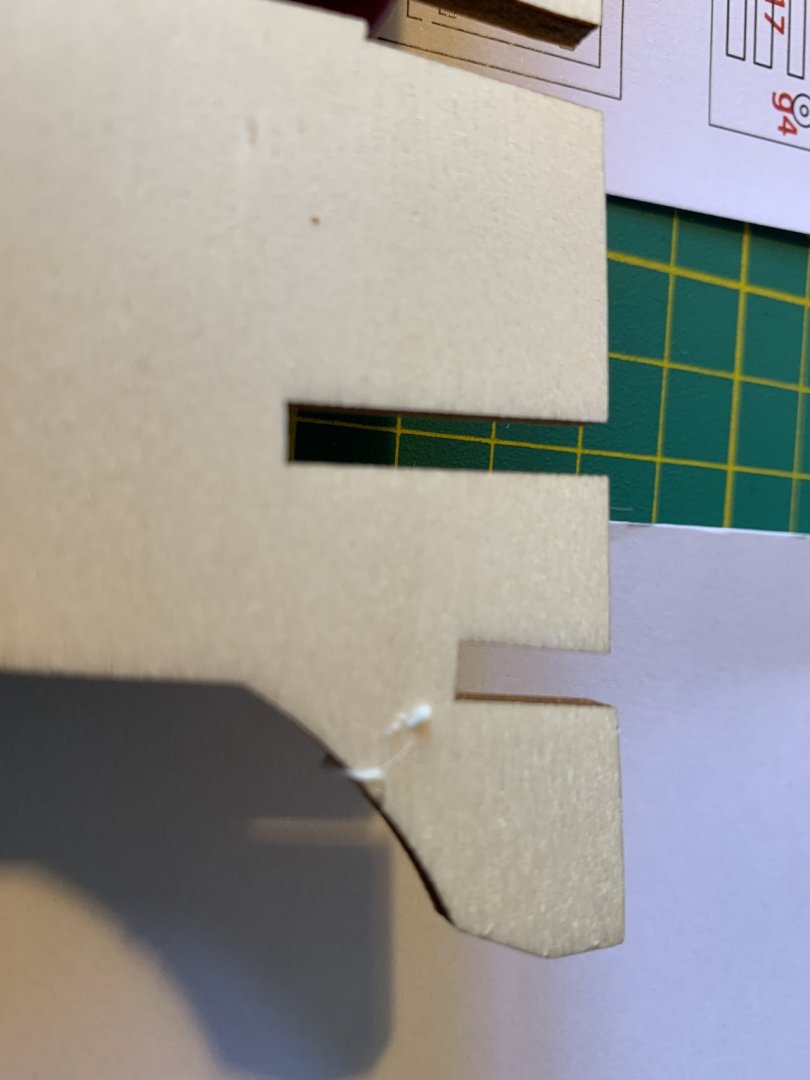
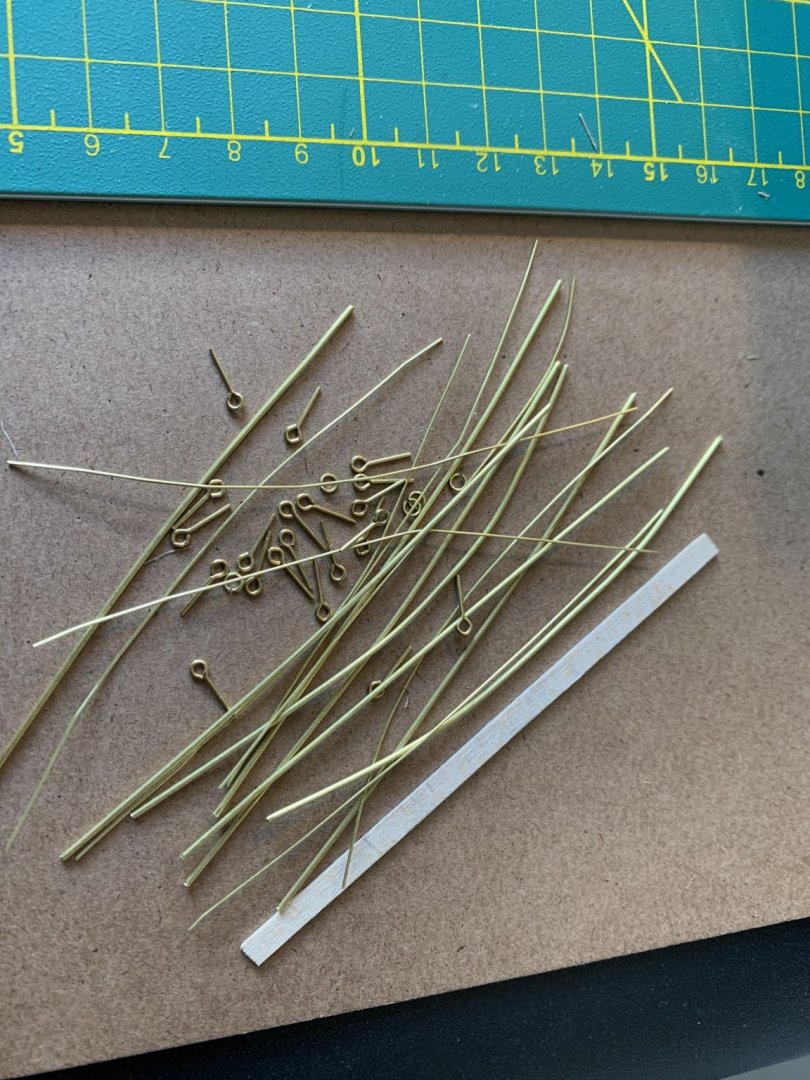
The shipyard is open. The kit arrived today. In my new member post I suggested that Canada Post might be slow. They were fine, USPS took 13 days from L.A. to the border. There was some damage in shipping. The false keel was crunched at the stern. Pictures and fix below and the parts box let all the little eyelets and rings circulate through the box and the shrink wrap. Just about every length of brass bar was bent or crimped. I am ready to go and I'm sure I'll have lots of questions. Broden
-
Very impressive. What a comparison. Castings can be good but that one certainly was not. I am enjoying your build log and will start mine as soon as the kit gets here.
-
Hello from Canada. Quick bio, I am retired, have been woodturning for about 35 years as a hobby. I have built lots of kit models mostly planes and HO rail items. The only ship was the USS Constitution, which languished at the rigging stage about 30 years ago. The Covid shut down led to a lot of YouTube videos mostly of folks building real sail boats “ Acorn to Arrabella” and “Restoring the Tally Ho” to mention two and some kit models ship videos. Then I stumbled on the kit for HMS Terror. Now if you are Canadian with ancestors who were Royal Navy and you loved the C.S Forester books you will understand the interest in a storied ship such as HMS Terror. What other ship of this age is sitting about 80 feet down in freezing water with all her hull and artifacts intact. So the kit has been purchased and it is right now winging its way through the U.S. Postal system to be handed over to the somewhat delay prone Canada Post. Hopefully arriving in Montreal in the next week or two. I will start a build log and begin asking questions. I have a bunch already and I am hoping to learn a lot of details about building this model from the other builders on this site. Thank you, Broden.