HOLIDAY DONATION DRIVE - SUPPORT MSW - DO YOUR PART TO KEEP THIS GREAT FORUM GOING! (Only 44 donations so far out of 49,000 members - C'mon guys!)
×


Dale Hallier
-
Posts
43 -
Joined
-
Last visited
Content Type
Profiles
Forums
Gallery
Events
Everything posted by Dale Hallier
-
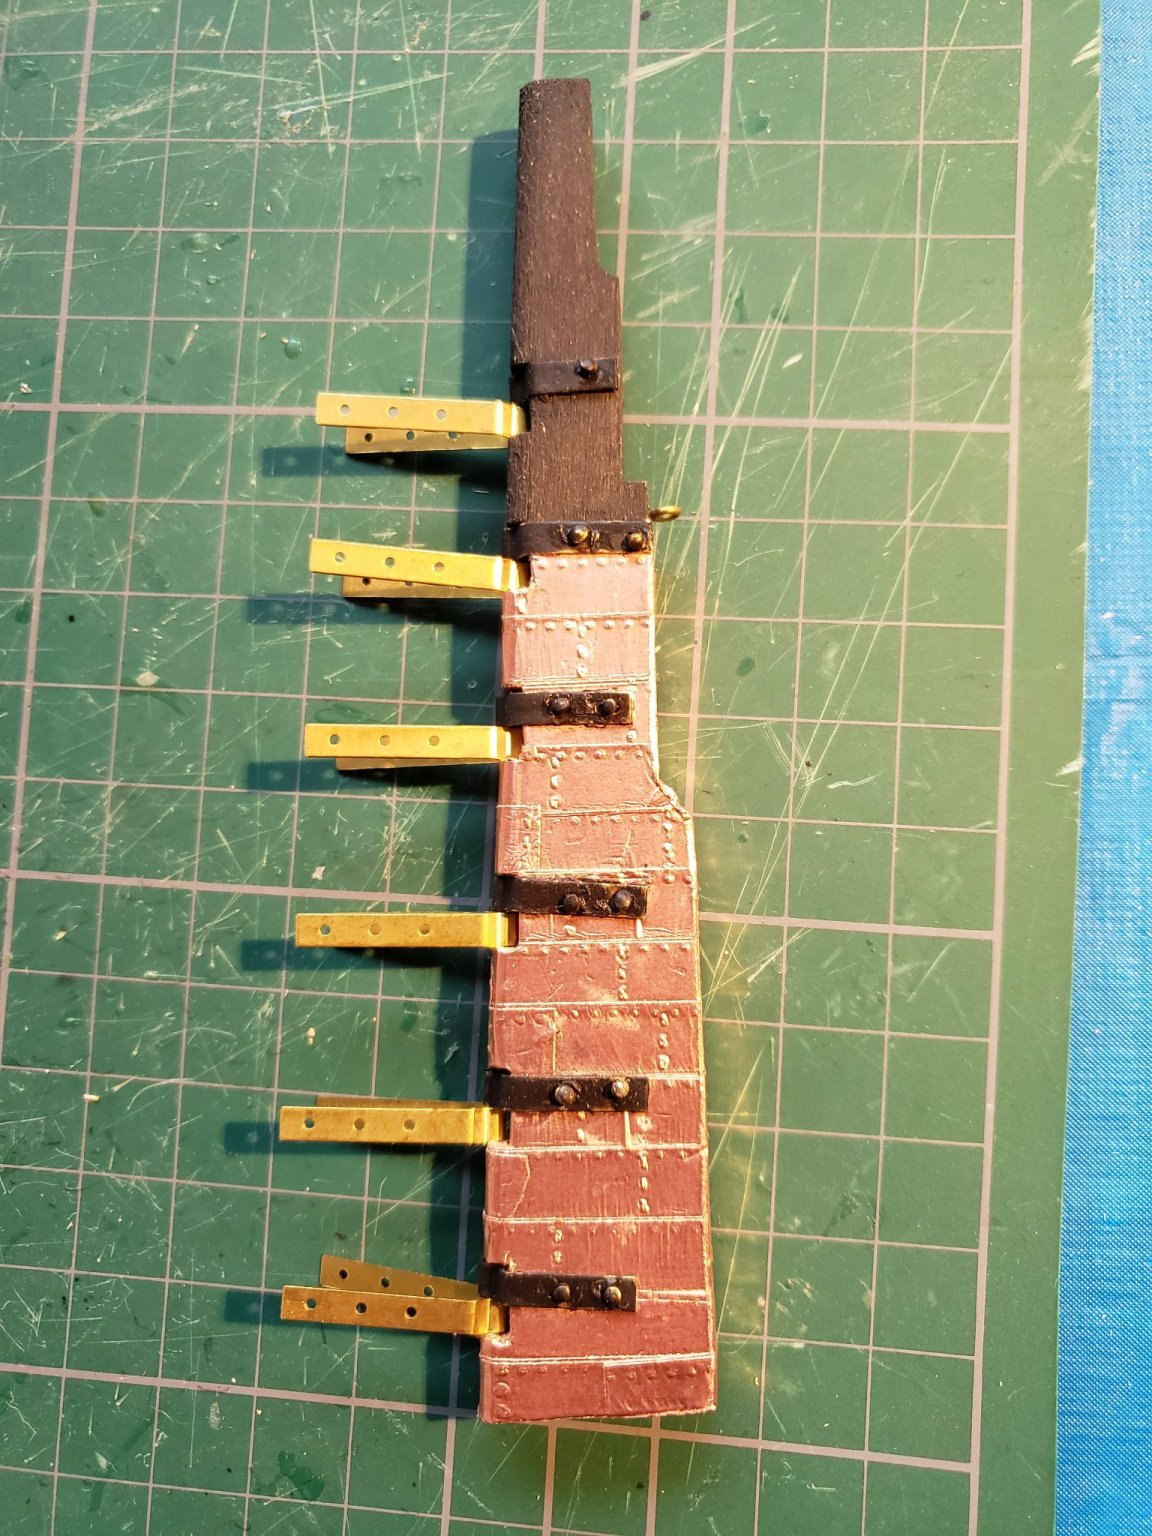
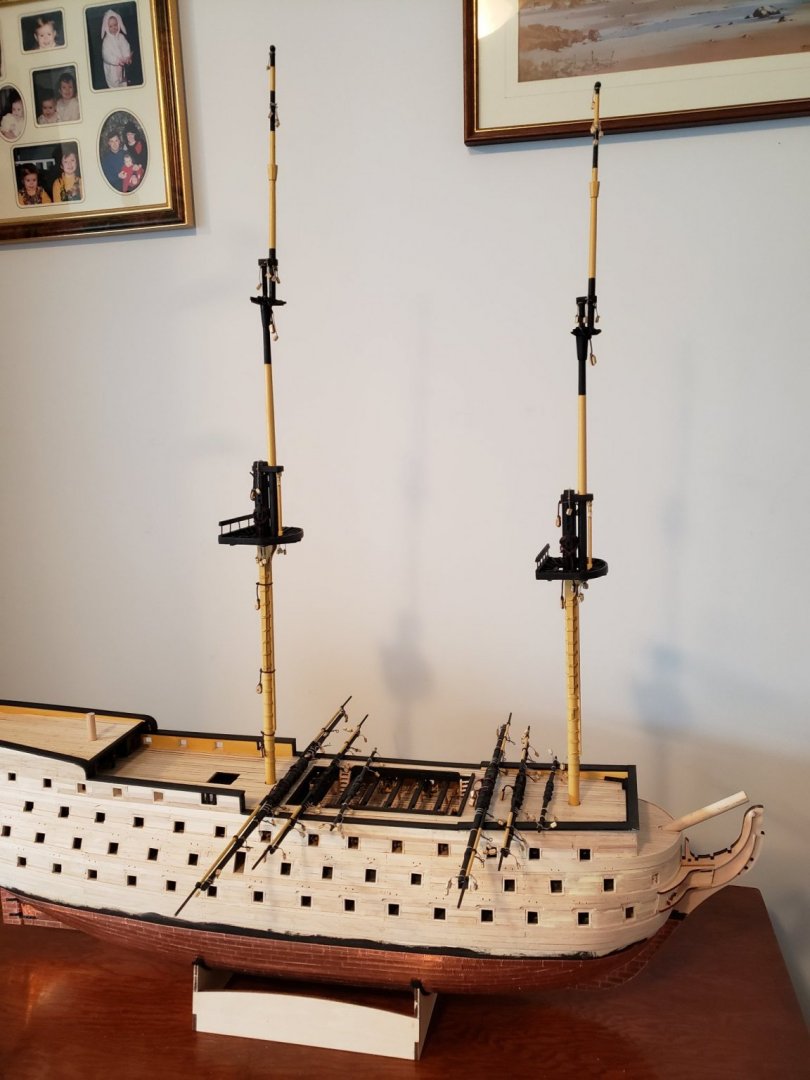
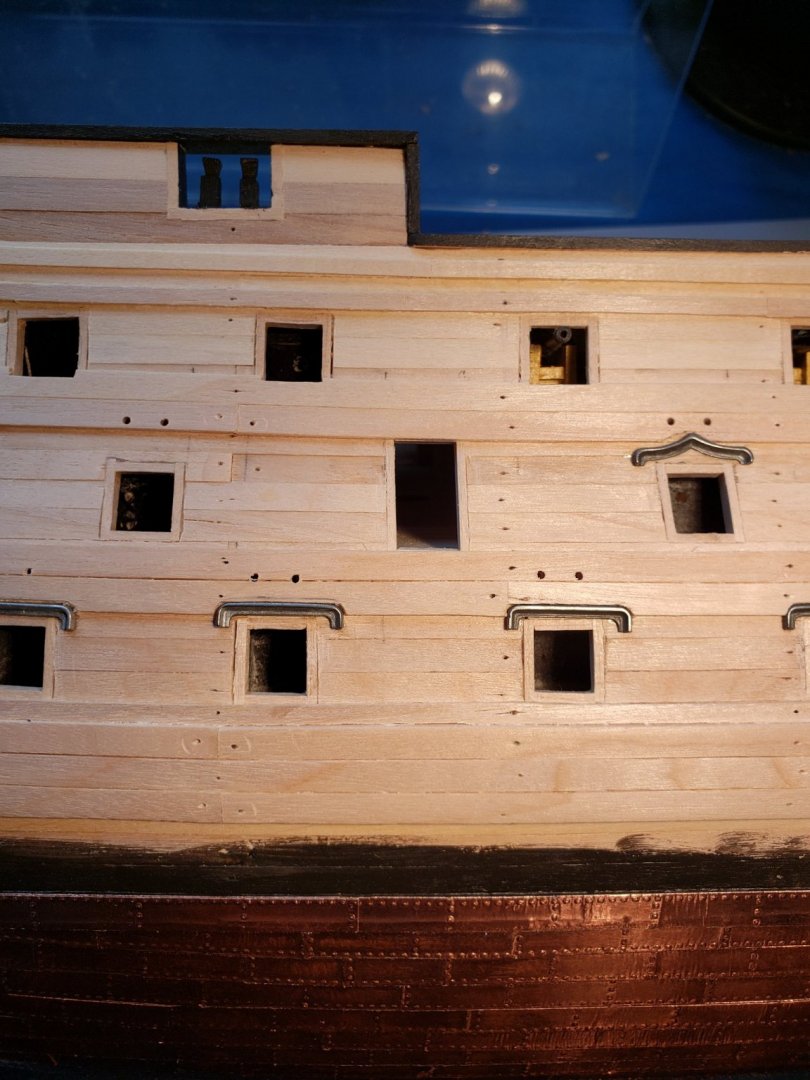
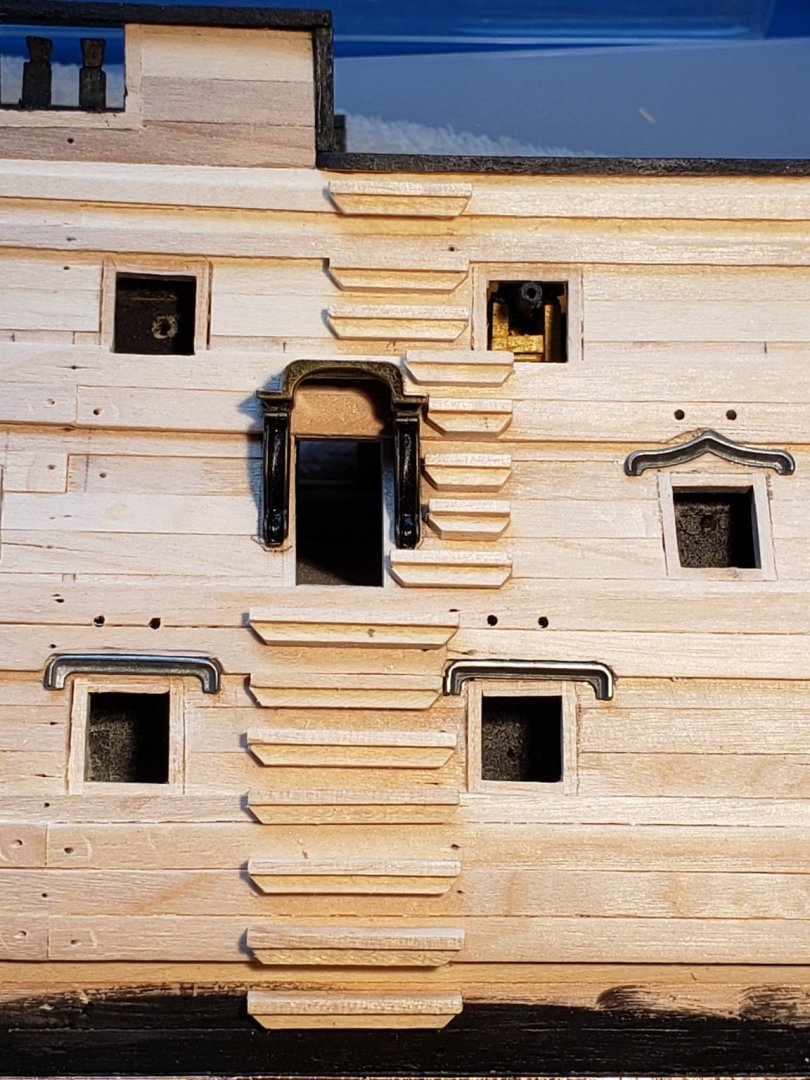
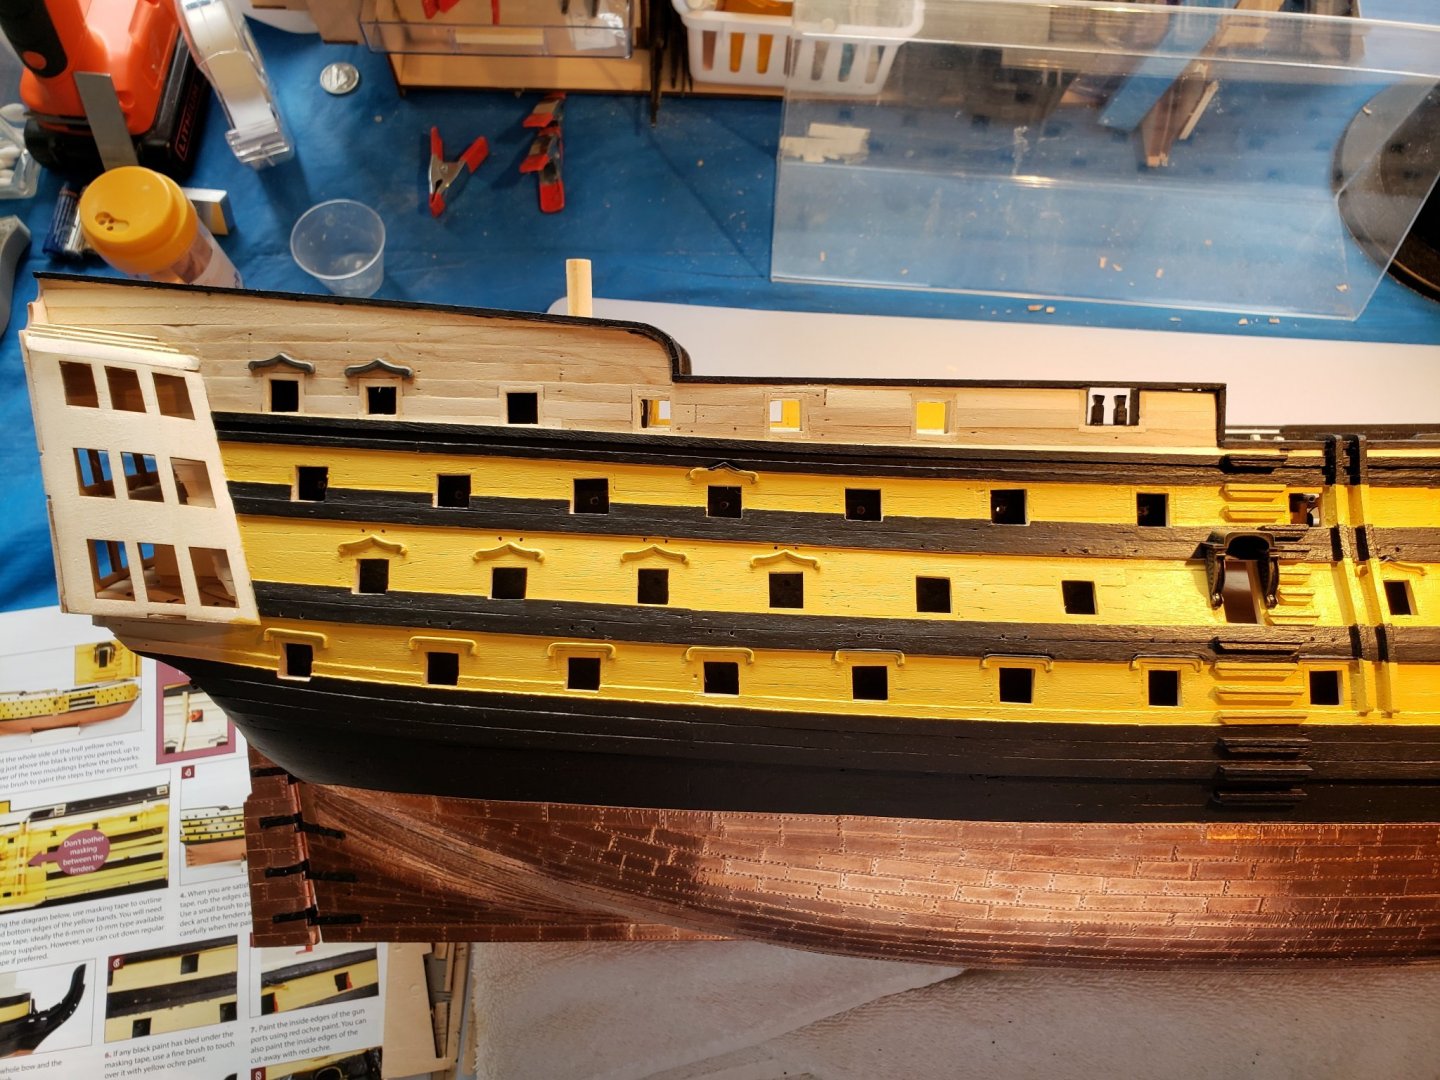
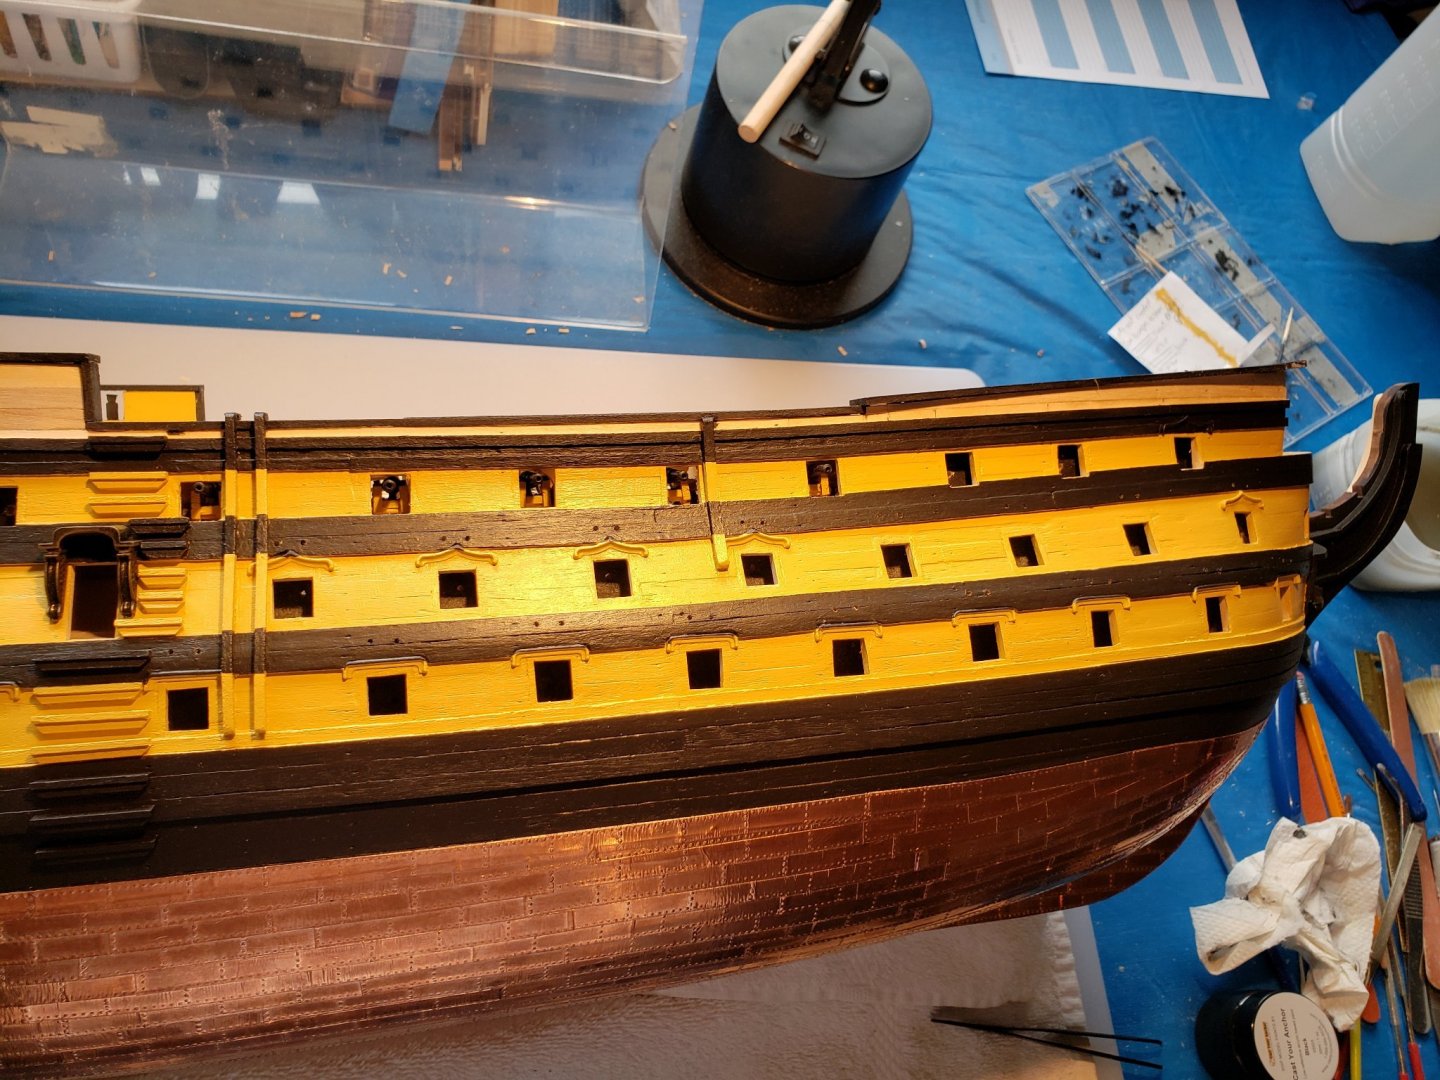
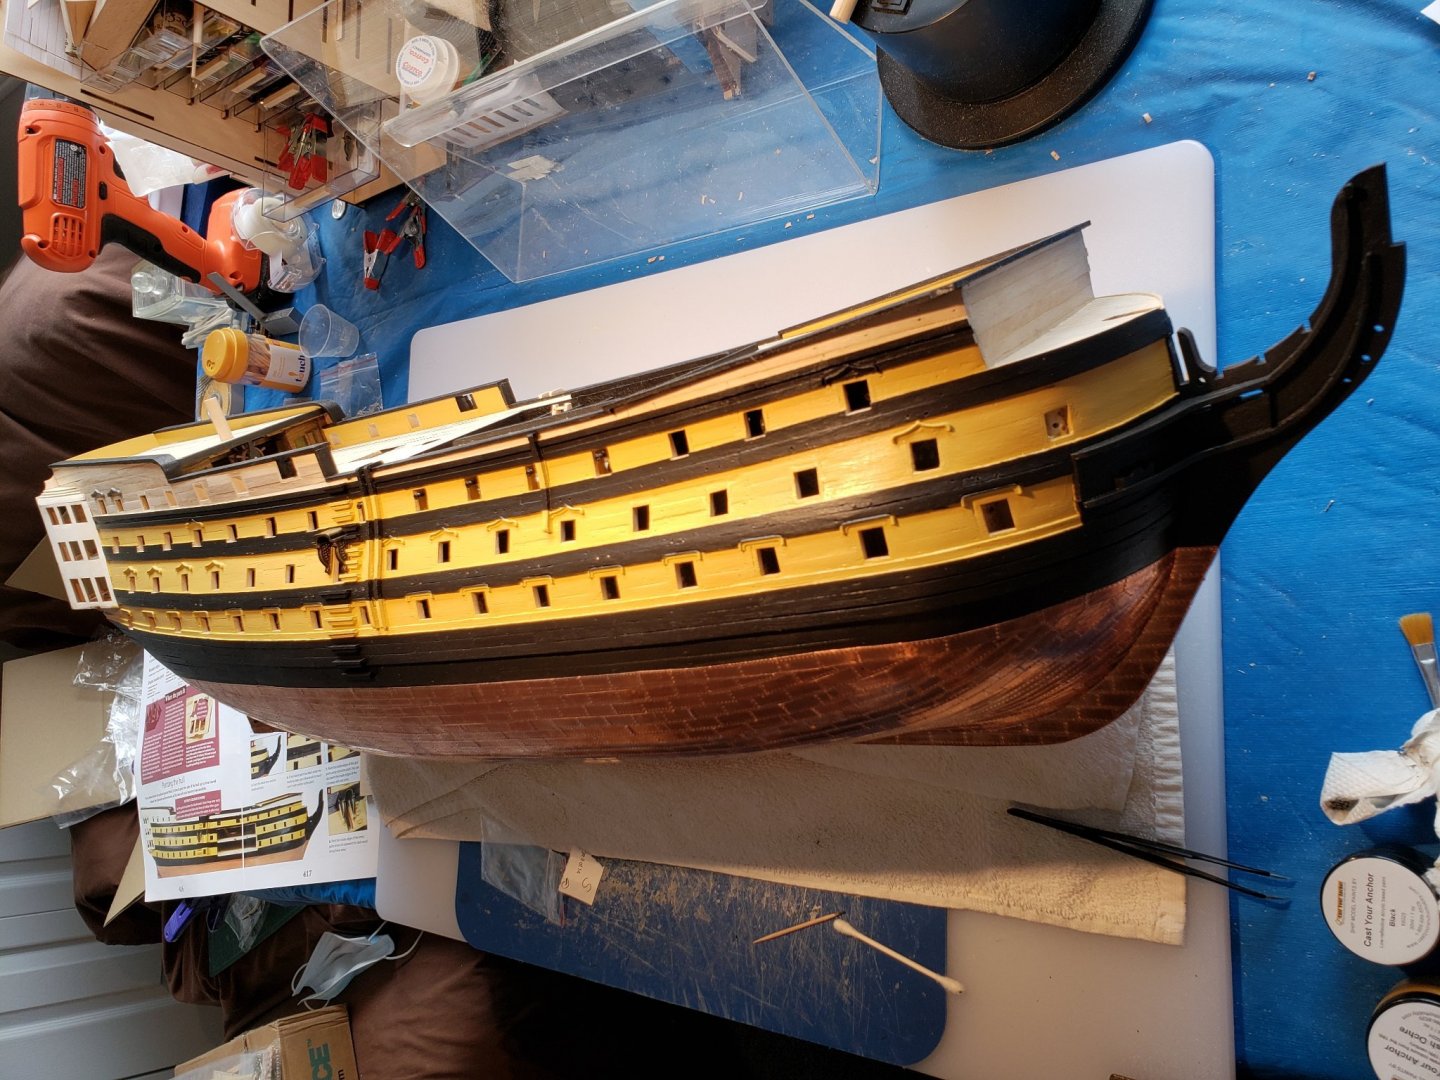
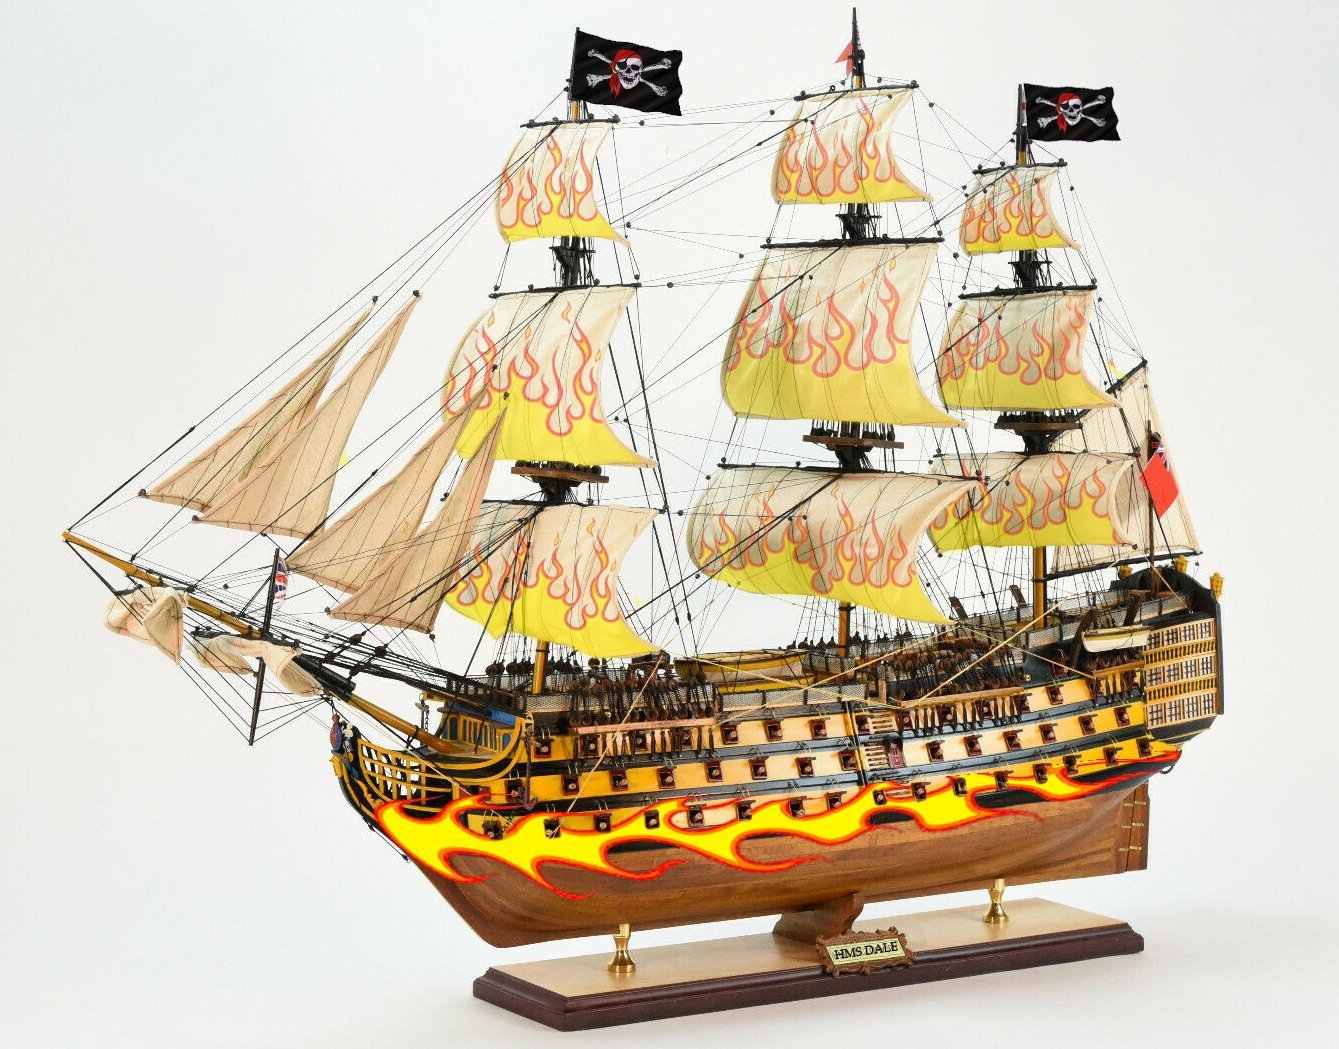
March 2021 While a lot of work happened this month, most of it doesn't reflect well in pictures. Most of the month was spent building the main mast and fore mast and all the spars for each mast. Even just rigging the masts takes a lot of time. A welcome break was fitting the entry port canopies, which were supplied as fairly well detailed metal castings. After filing them to match the angle of my ship's hull they were painted and attached to the side of the ship. Next came the side ladders and fenders. Finally it was time to paint most of the hull, and I went with the traditional, not new choice of Yellow Ochre and Black. The side galleries are incomplete, so the painting is not finished yet. It looks good against the coper tiles I think. An artistic friend suggested the following "improvement" to the paint scheme, but I decided to stay closer to the original! Next month I worked on the stern details, some of the chainwales and the mizzen mast and yards. I'll post more soon.

- 59 replies
-
- 6
-

-
- DeAgostini
- Victory
- (and 1 more)
-
I liked plank bending at first... but after two months I was really ready to move on! That would be one advantage of building a smaller ship, much less hull to cover. I like "our little wood world" - it does draw you in!
- 59 replies
-
- 1
-
-
- DeAgostini
- Victory
- (and 1 more)
-
I appreciate the praise,but it was easier to be patient during Covid where there was little else to do! I do find it therapeutic to work for a few hours on the model, and you are right, not rushing the pace is a good concept. I am sure the planking will go well!
- 59 replies
-
- 1
-
-
- DeAgostini
- Victory
- (and 1 more)
-
Thanks so much! I am pleased with much of the build, but as I post I keep seeing things that I want to go back and improve... but then I might never finish this ship! I'm not sure I realized what I was getting in to when I started - no wonder not all builds get completed. How is your Lady Nelson build going?
- 59 replies
-
- 1
-
-
- DeAgostini
- Victory
- (and 1 more)
-
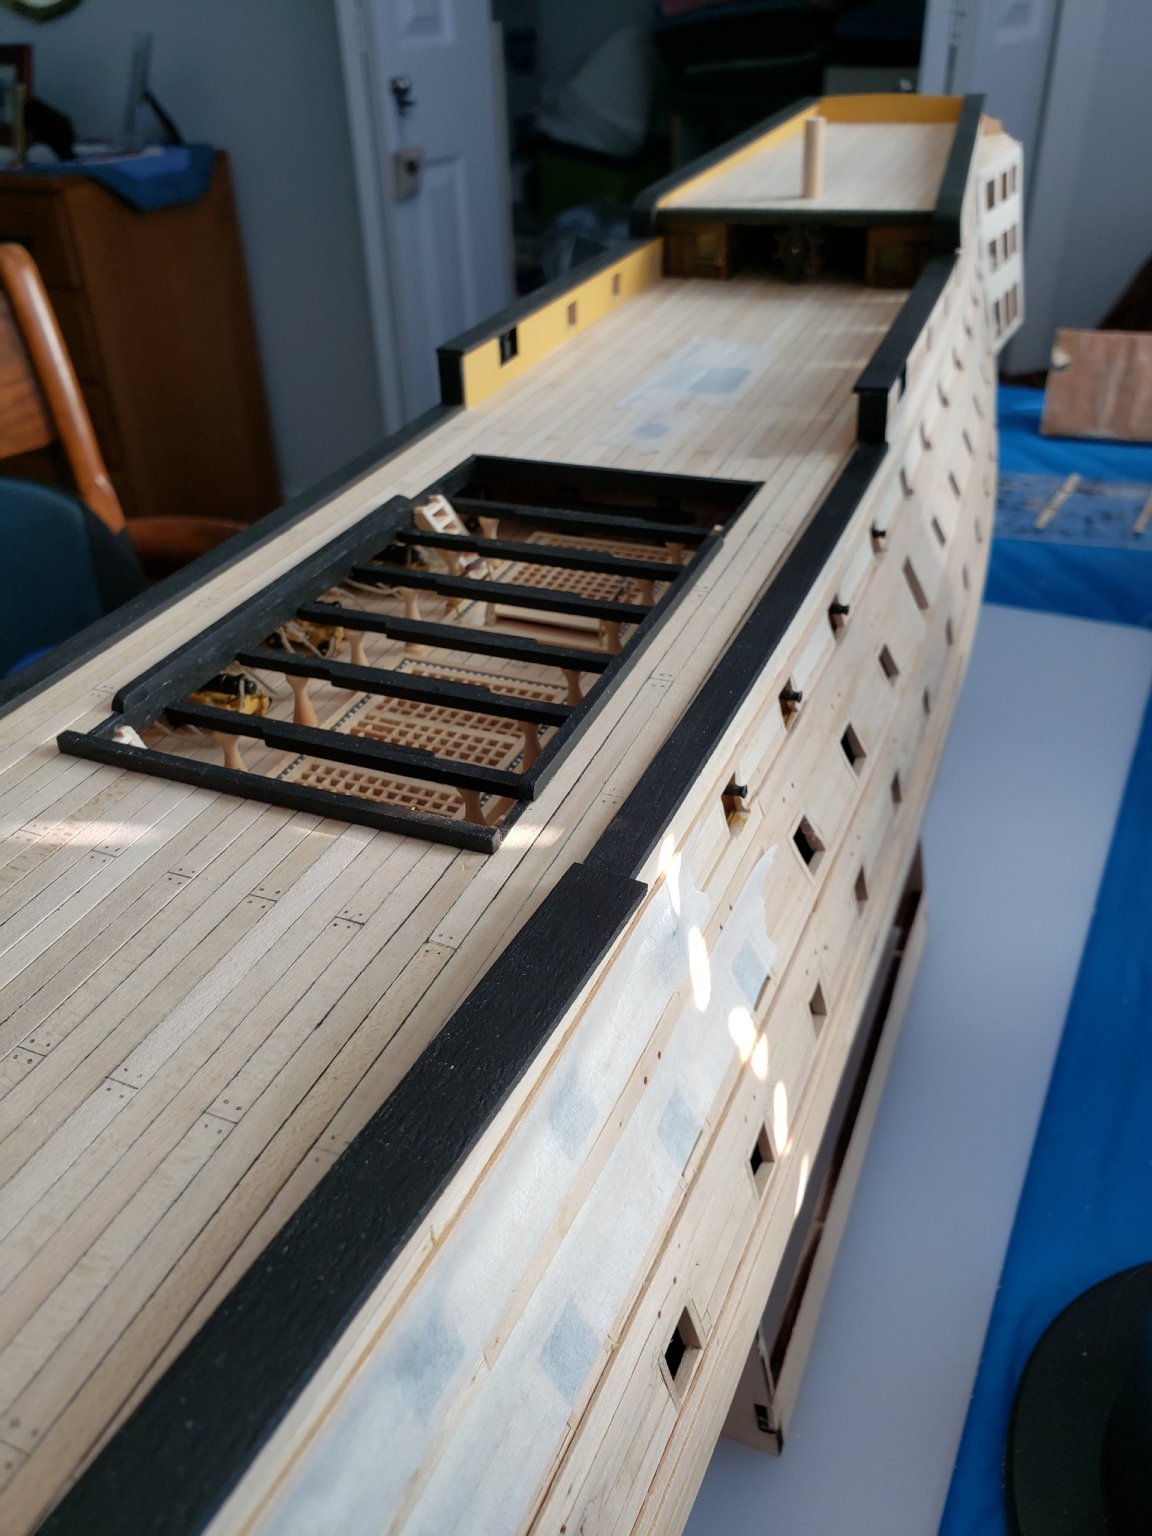
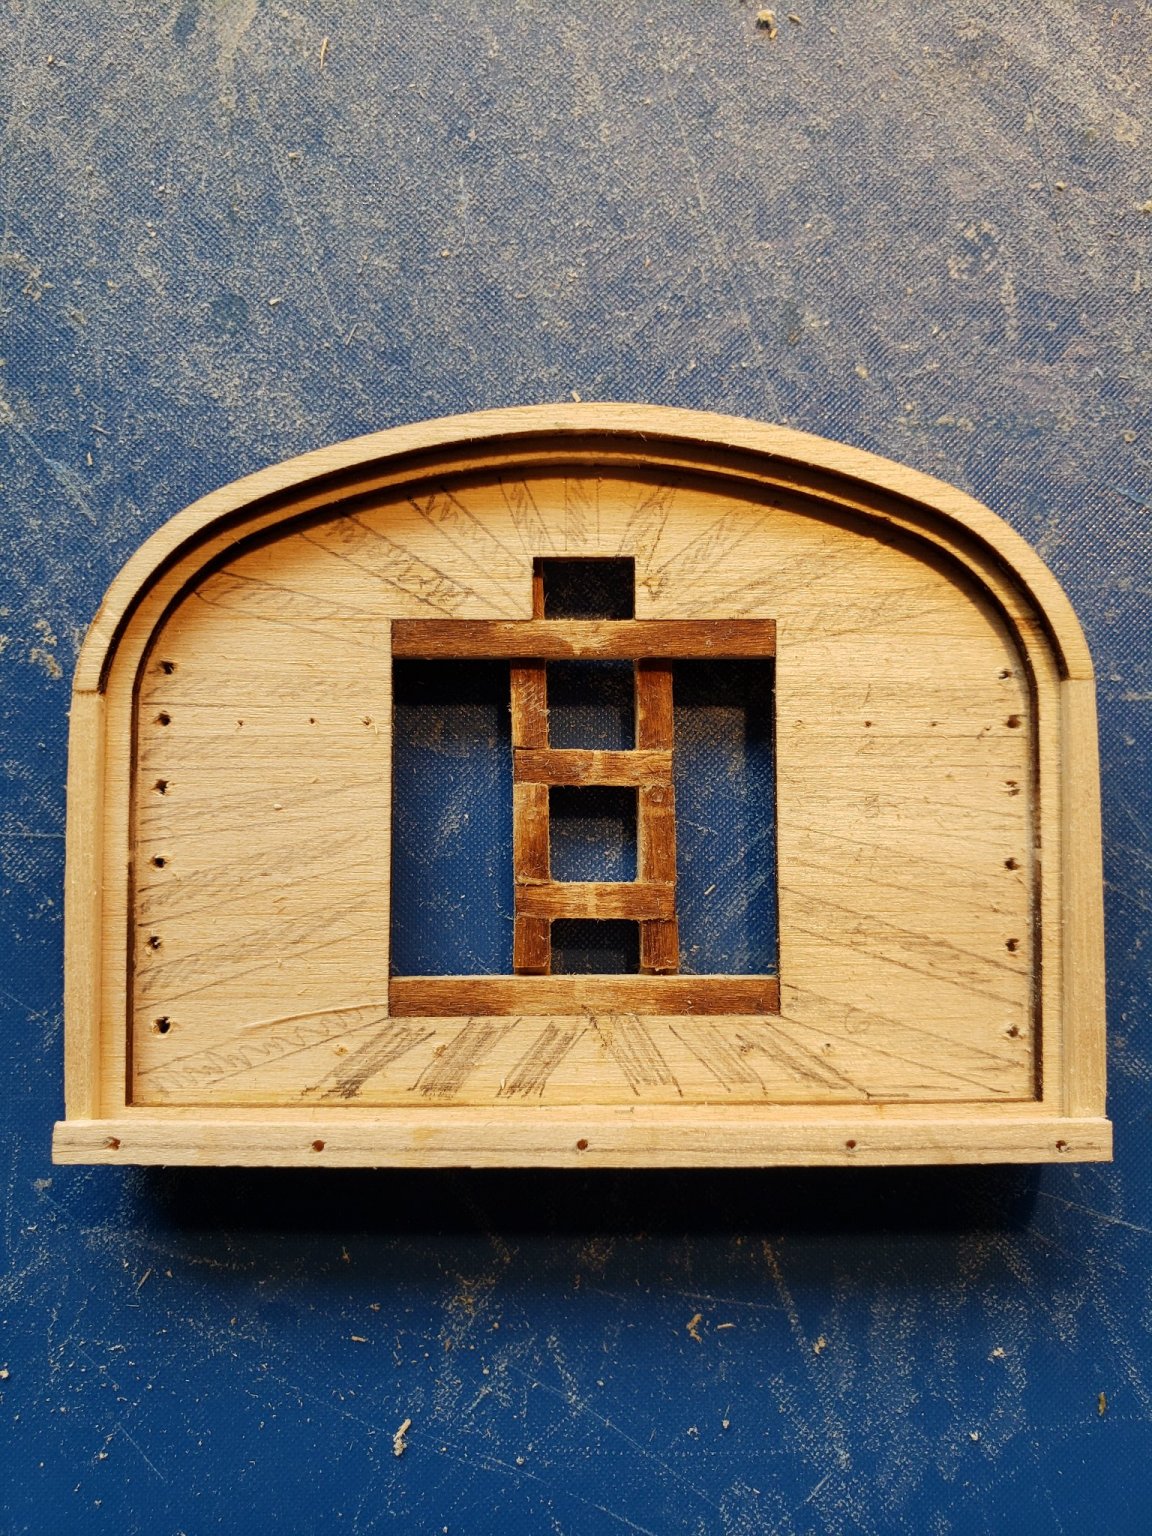
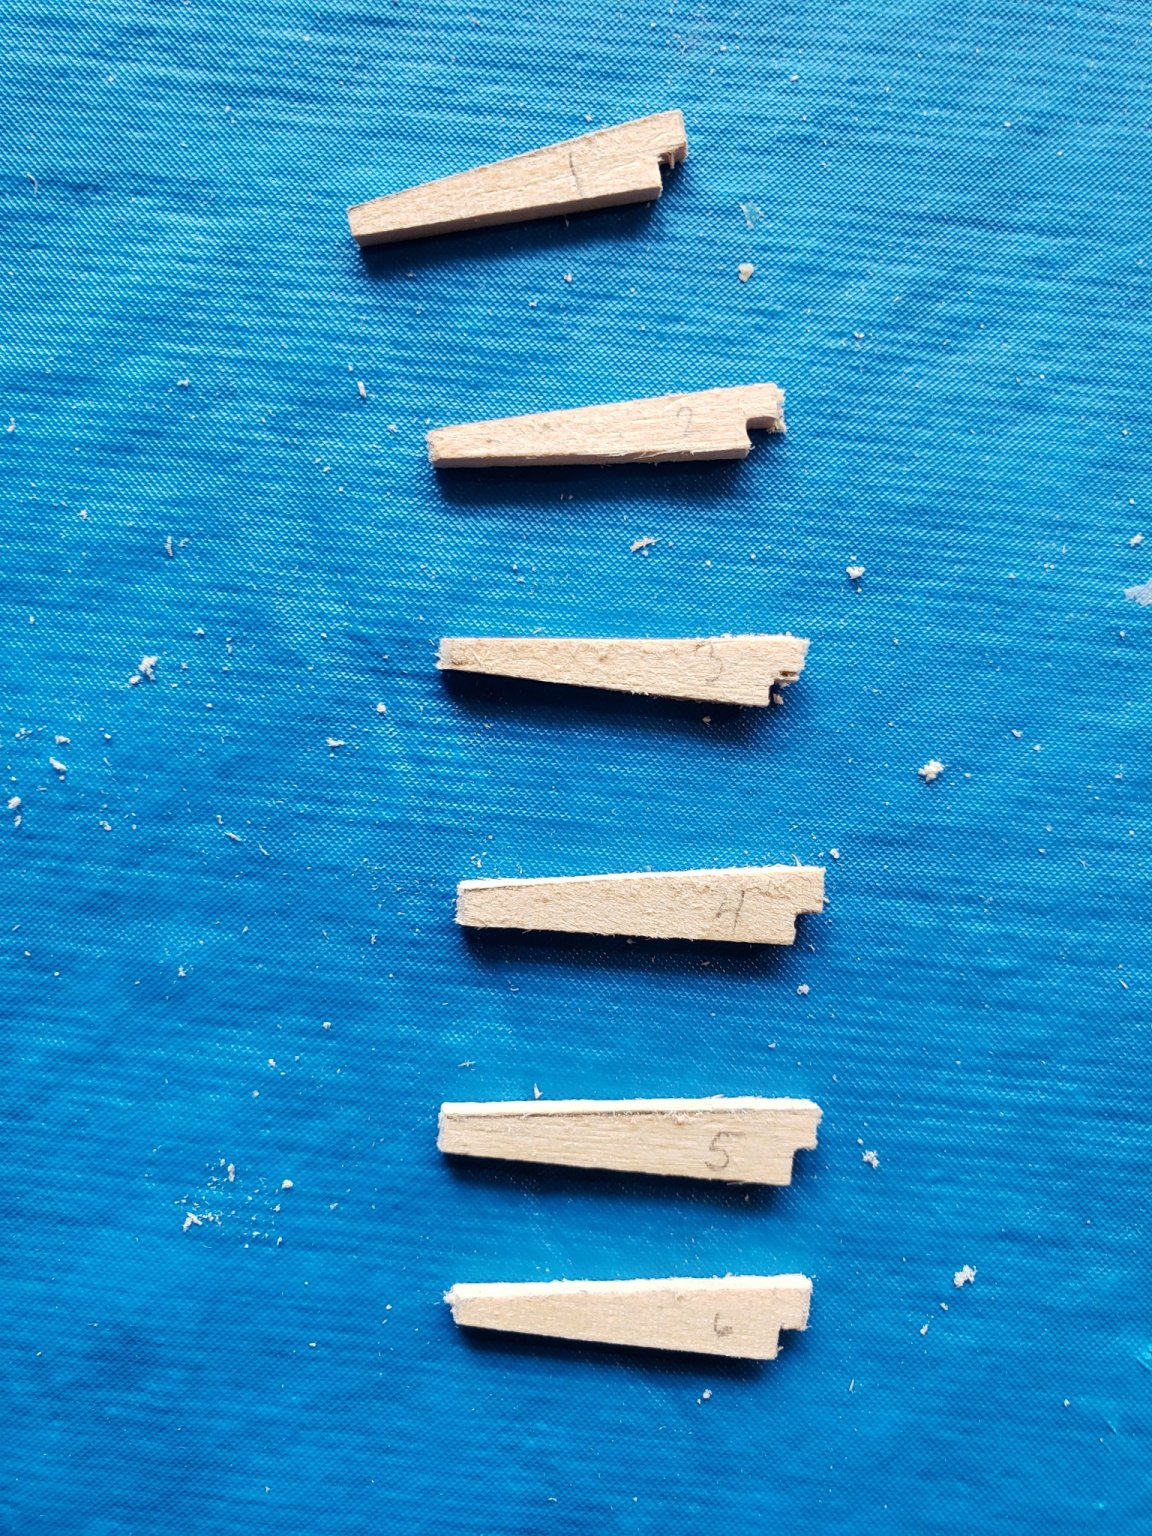
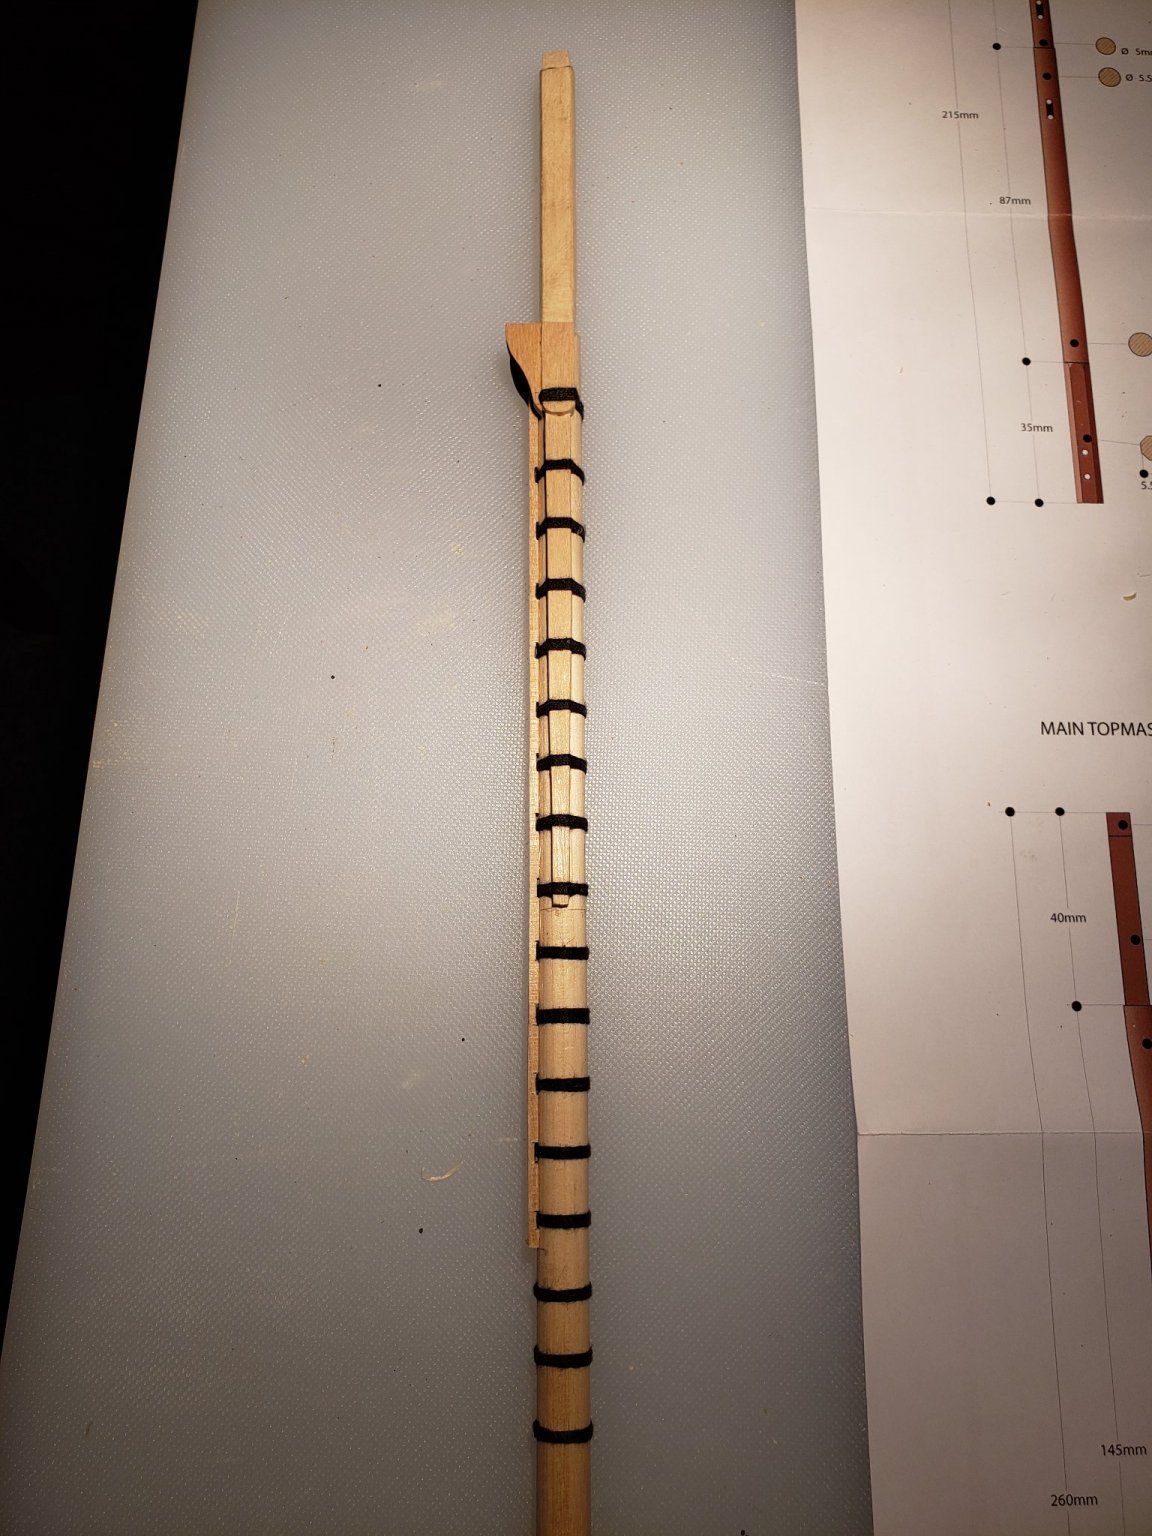
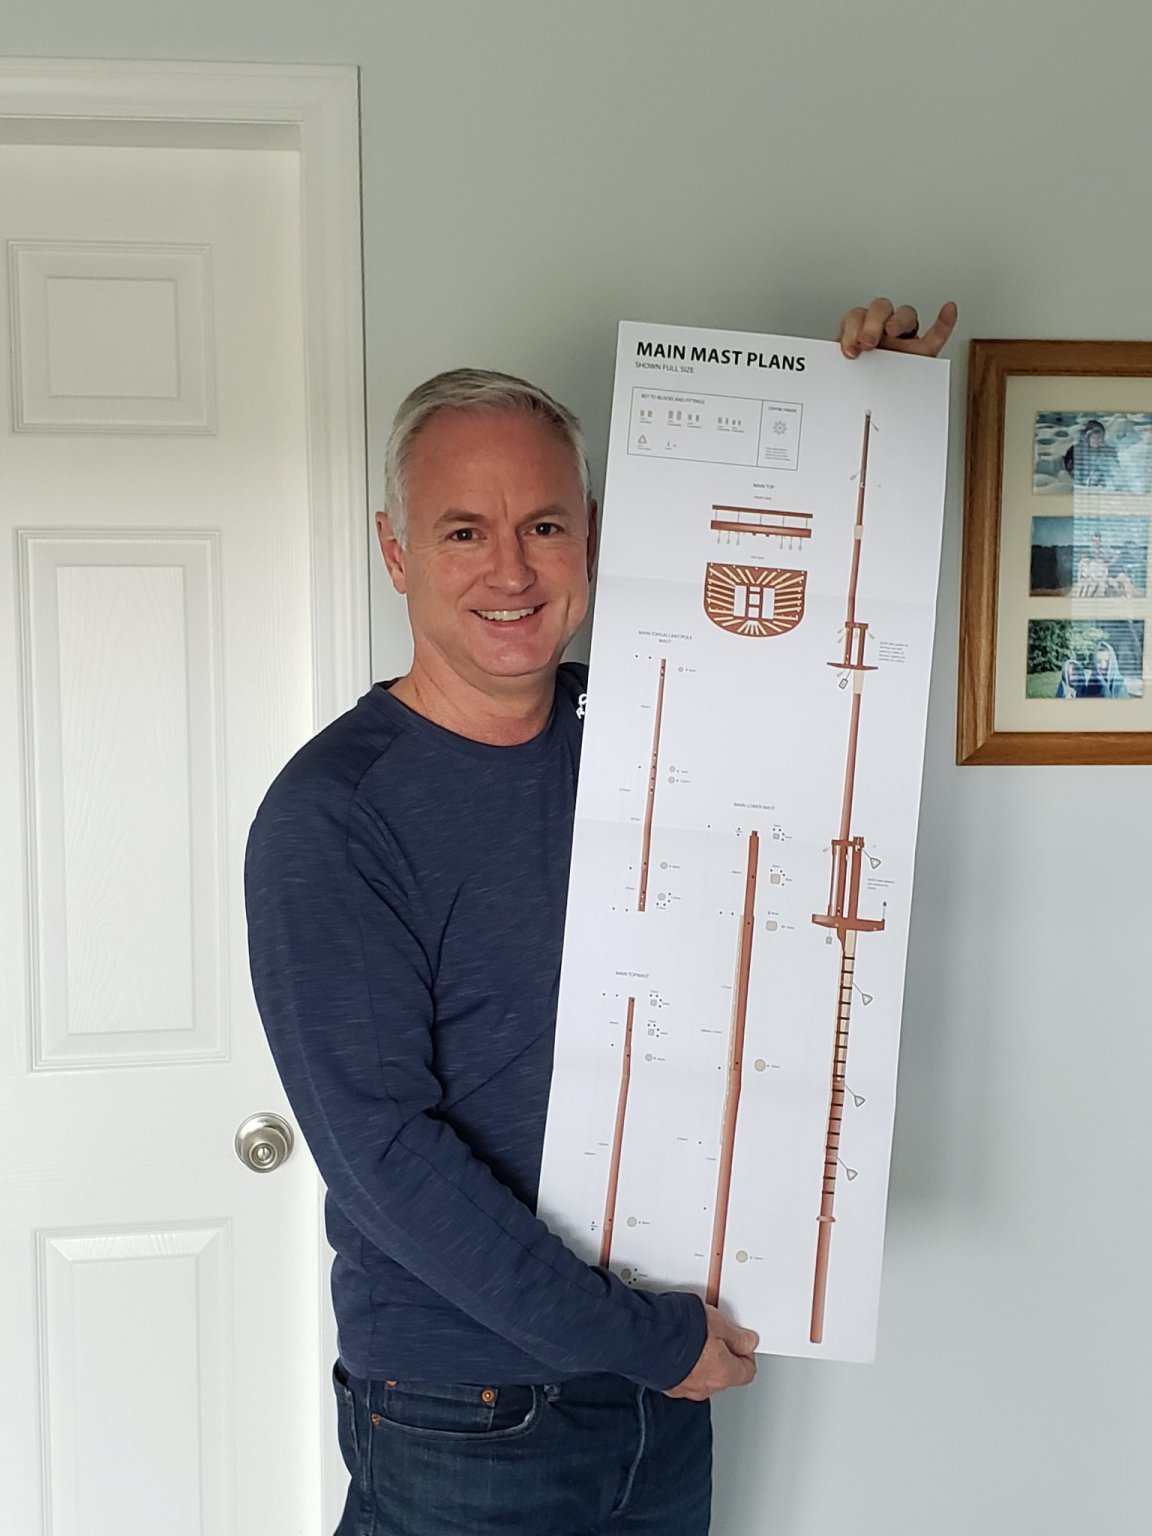
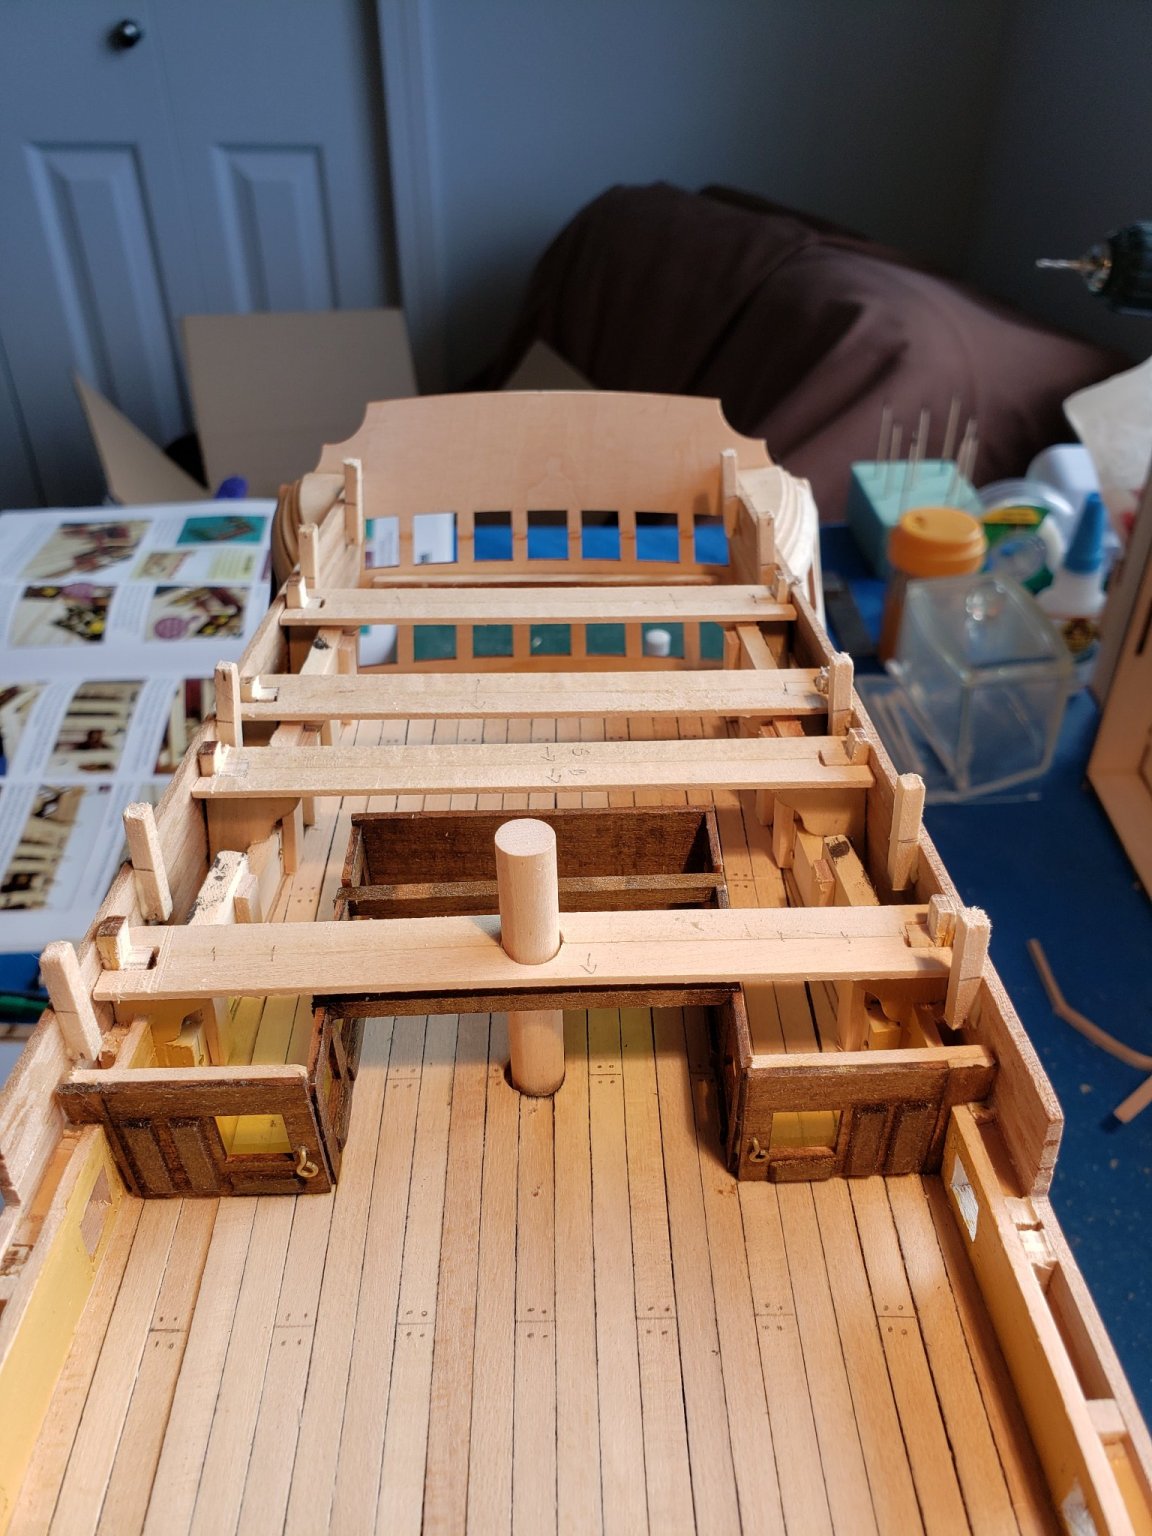
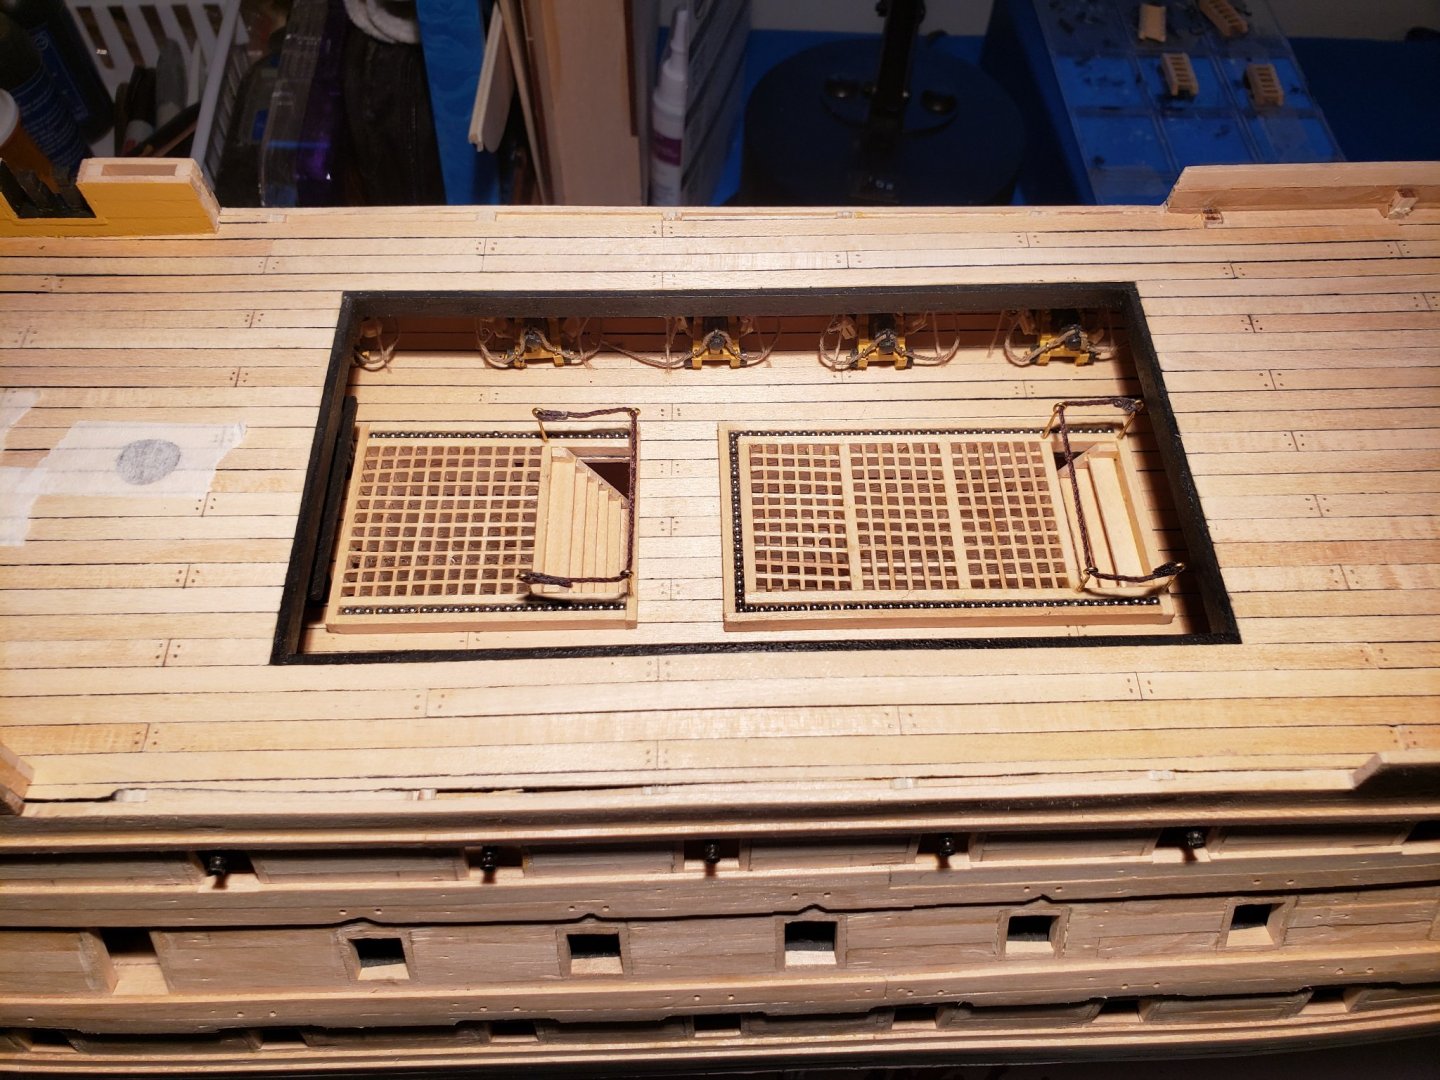
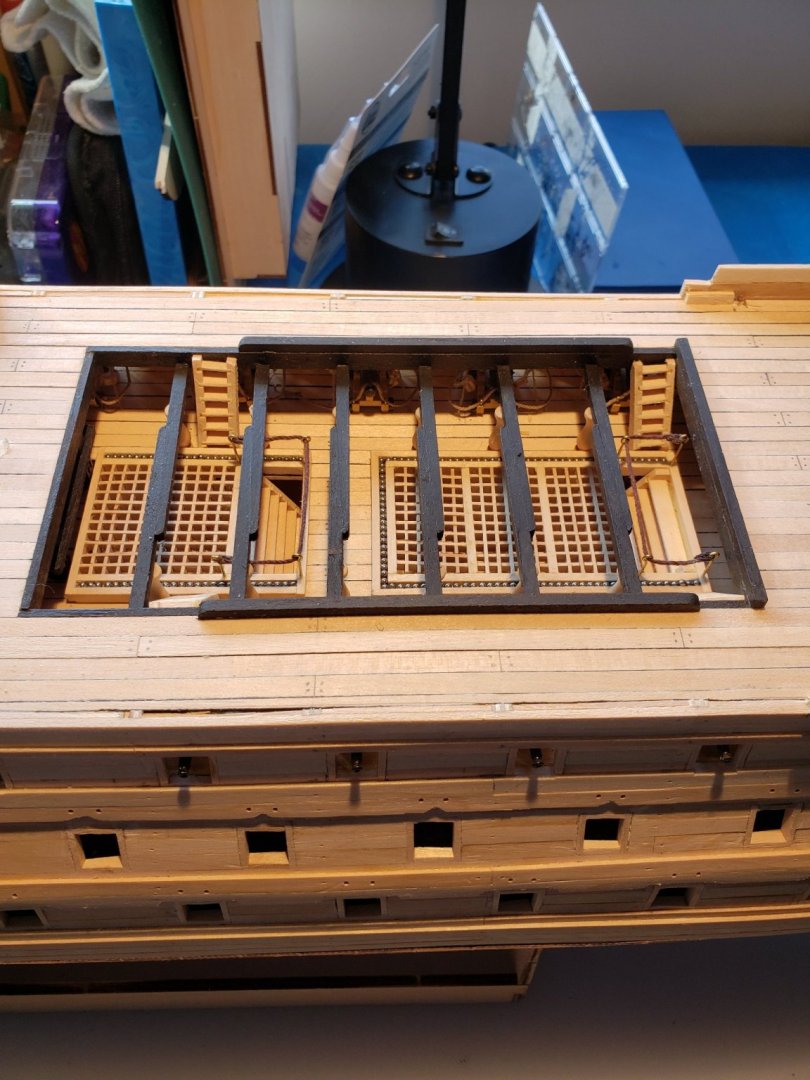
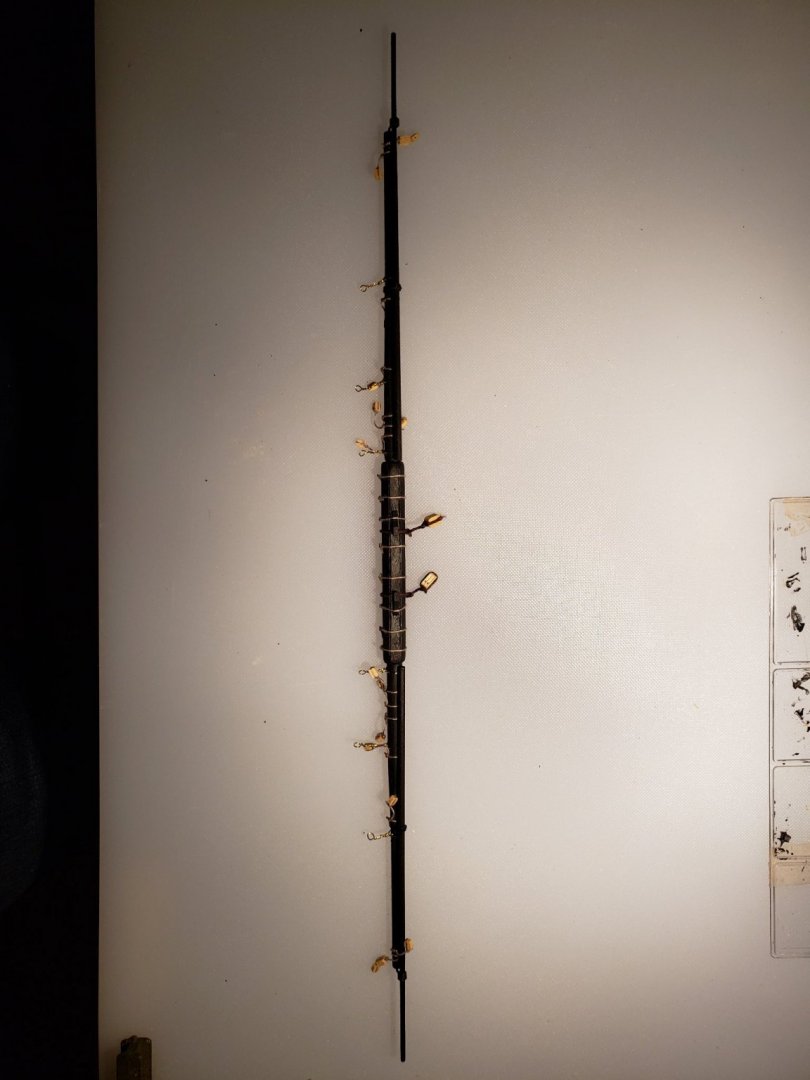
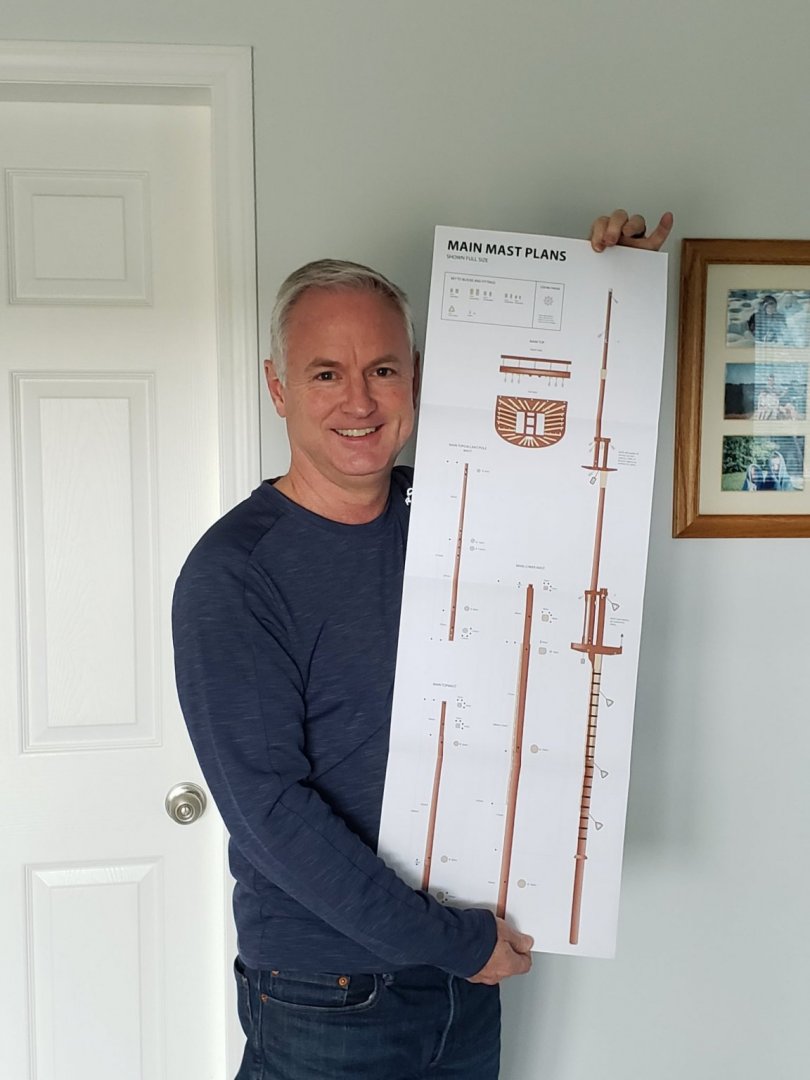
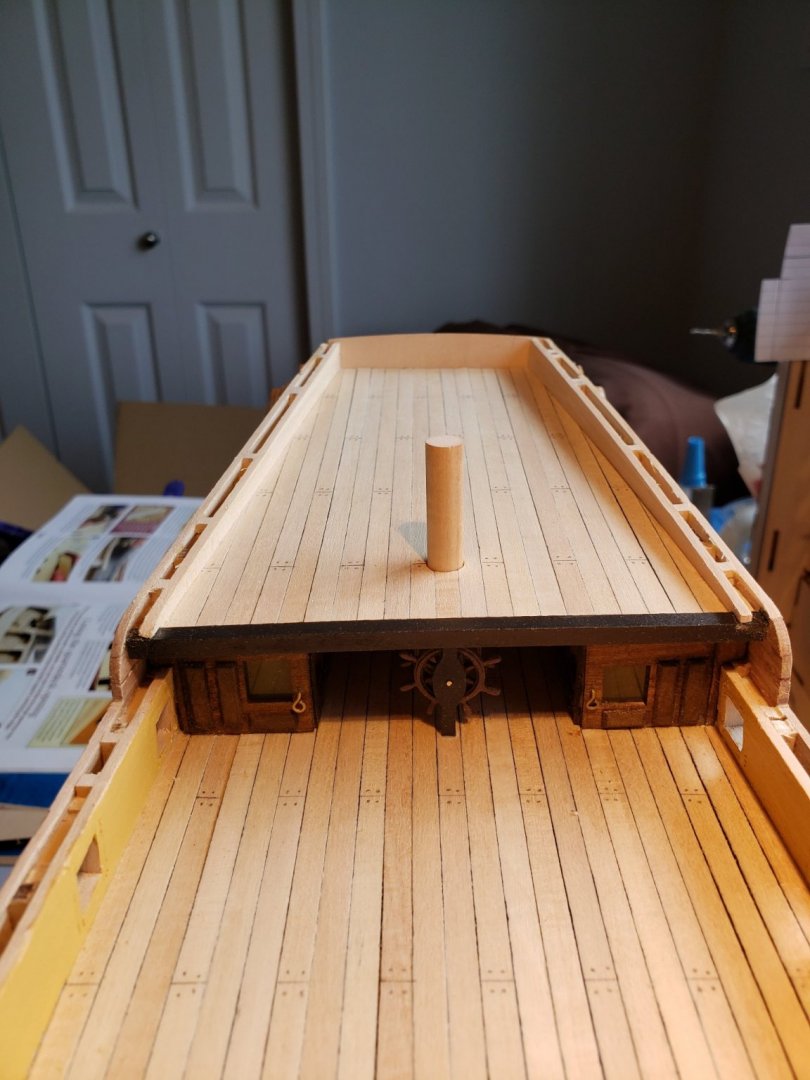
February 2021 Attention turned next to the large quarterdeck opening. After lining the opening, pillars were placed to support the skid beams which will hold the ship's boats later. Ladders were added, but I am not happy with how they turned out. Even though the slots are precut, they still don't line up well. Capping pieces were added to finish the bulwarks and were painted black, and that paused the mostly hull construction as the build moved on to the masts and spars. I couldn't believe the height of the masts as I opened the 1:1 plans provided! No wonder they called them Tall Ships! I don't have a lathe, so I used my power drill and a digital caliper to make and measure the taper on the masts and spars. This worked fairly well when tapering one end , as in a mast, but when tapering both ends of a spar it was hard to taper the second end without damaging the first tapered end in the drill chuck. Luckily most dowels were provided over length so you could just cut off ends that were damaged in the drill. The amount of work shaping the masts and spars really surprised me, but it was a nice change after so much hull work for months. The mast tops are a perfect example of the work required in modeling that no one would understand who isn't a modeler. After assembling the base cutting and shaping the 27 ribs individually was not fun.. Looks good when done, though with the railing added. Spars for the main were made with the use of copper wire for the foot supports challenging. The wire was fragile and broke several times, and I couldn't get all of them exactly the same size. I changed the mast and spar painting from what was suggested in the plans to match the original. The plans call for all black above the main top which is not accurate, and easily changed. The studdingsail booms are ochre in the real ship, not black as in the plans. One mast down, two to go!


- 59 replies
-
- 3
-
-
- DeAgostini
- Victory
- (and 1 more)
-
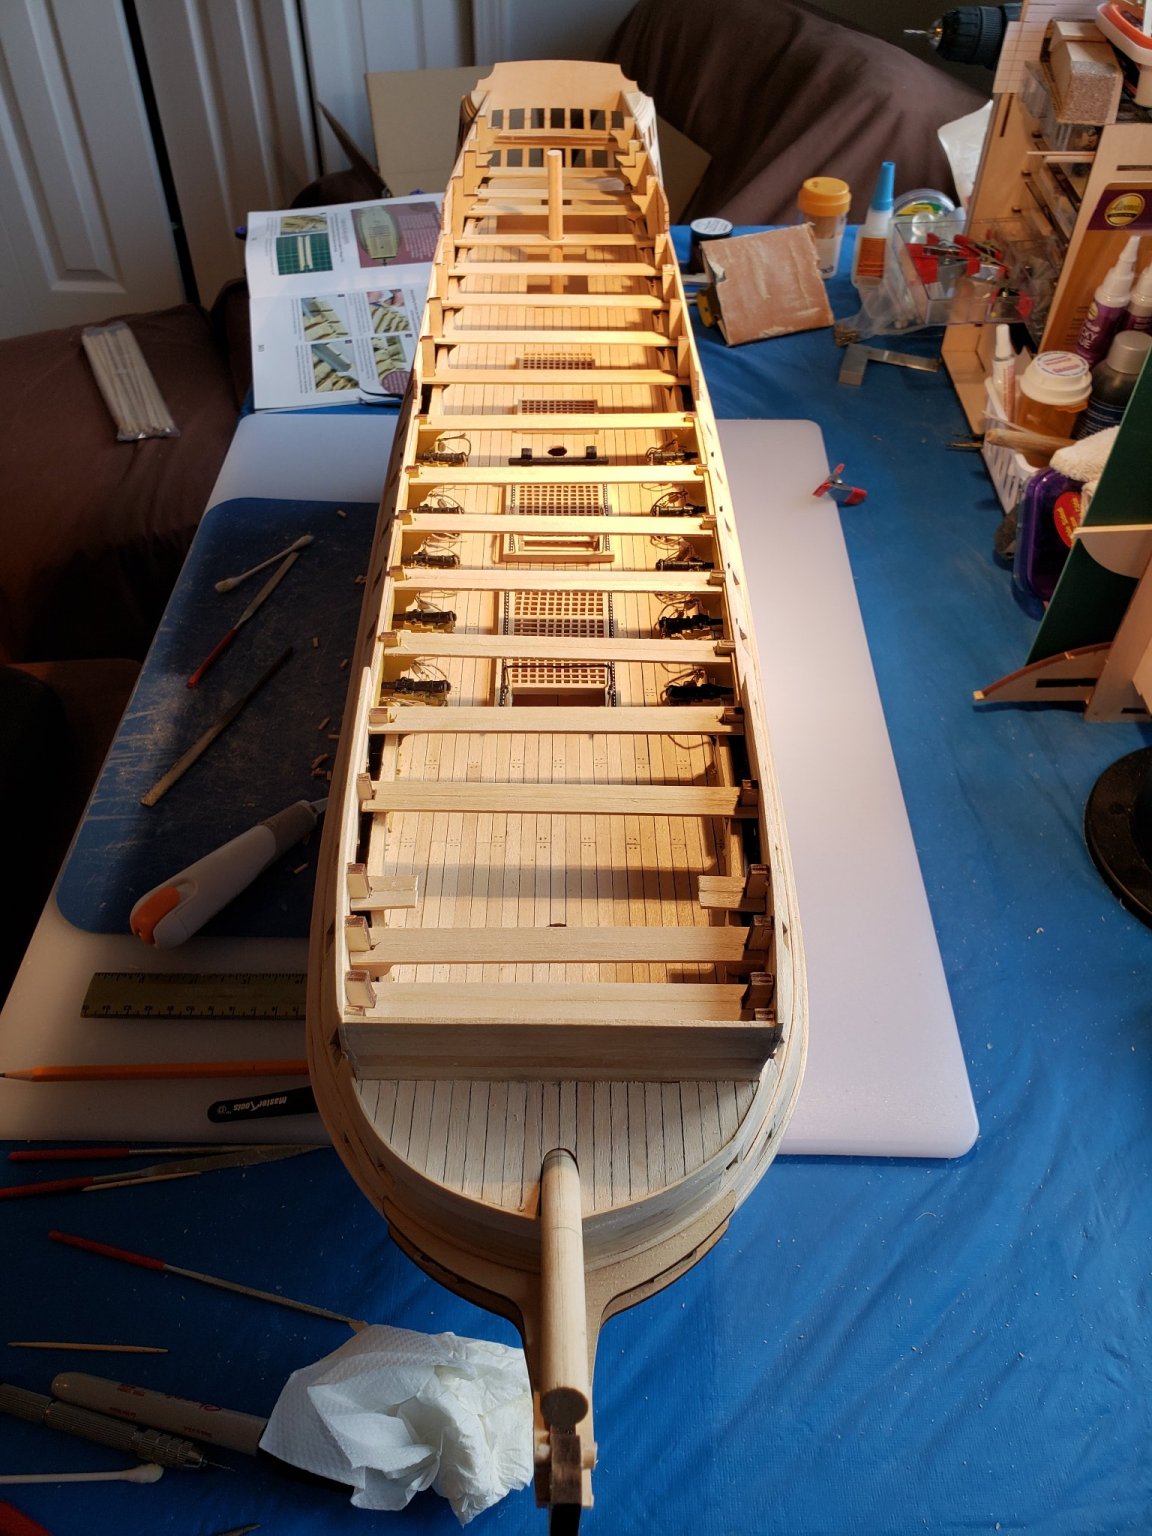
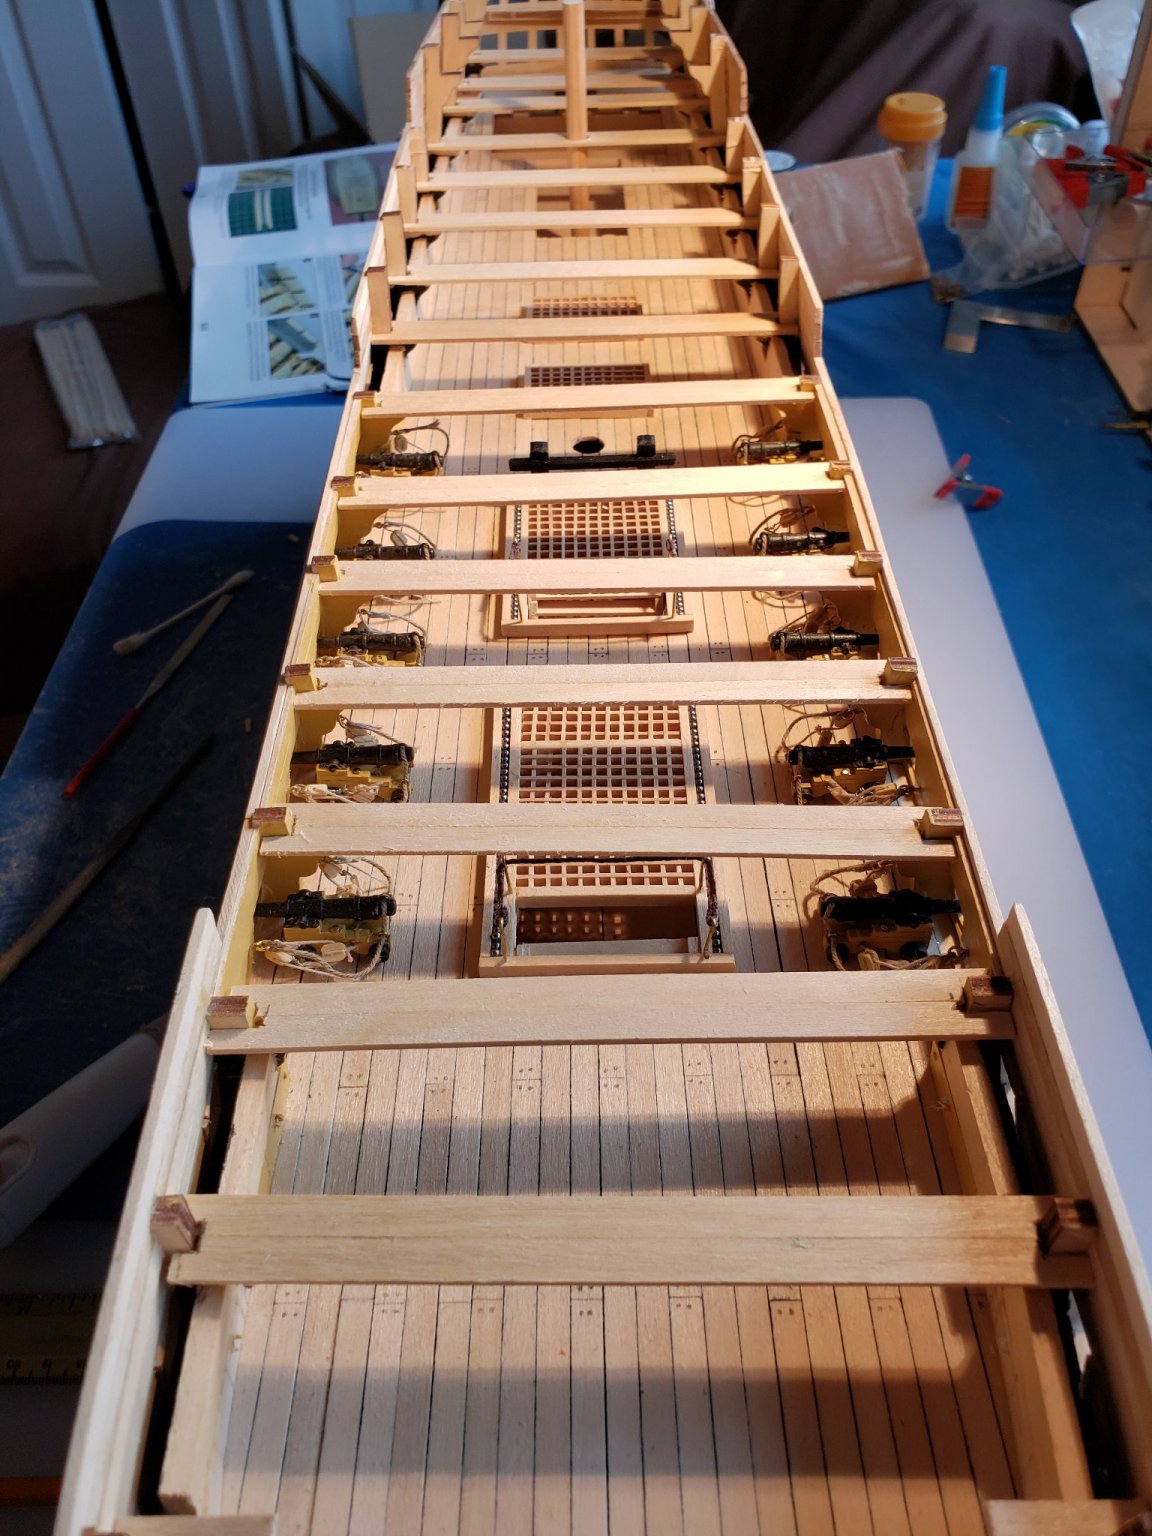
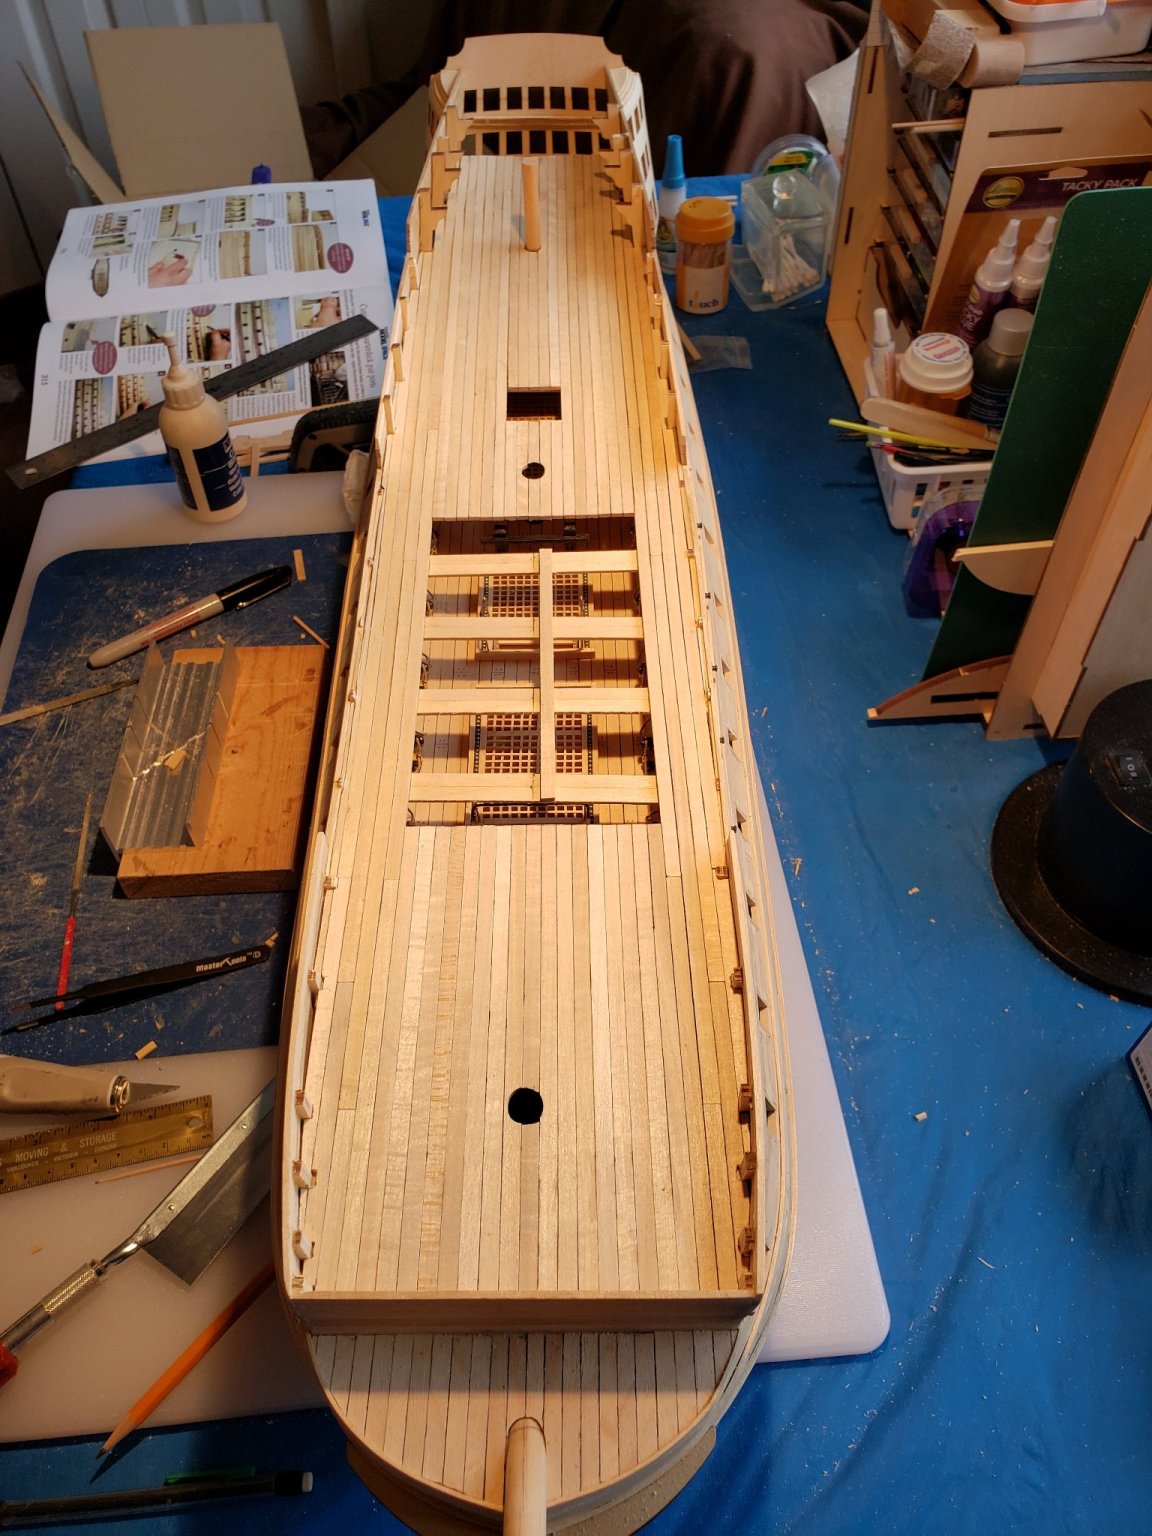
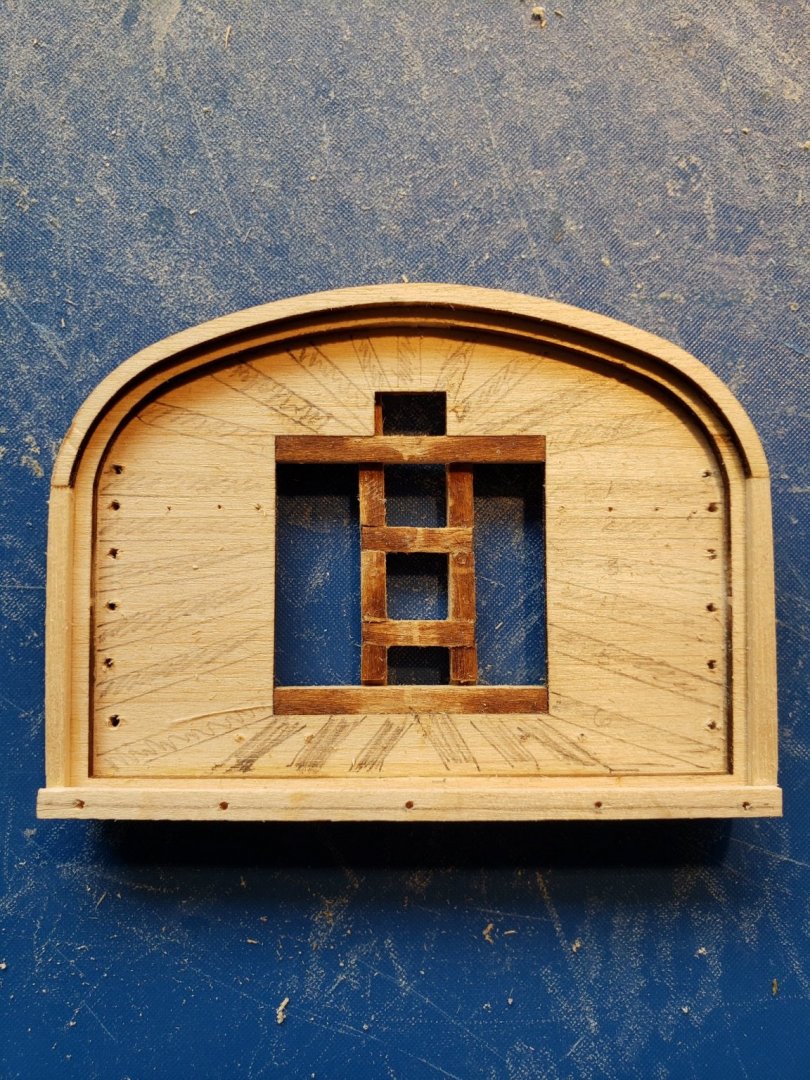
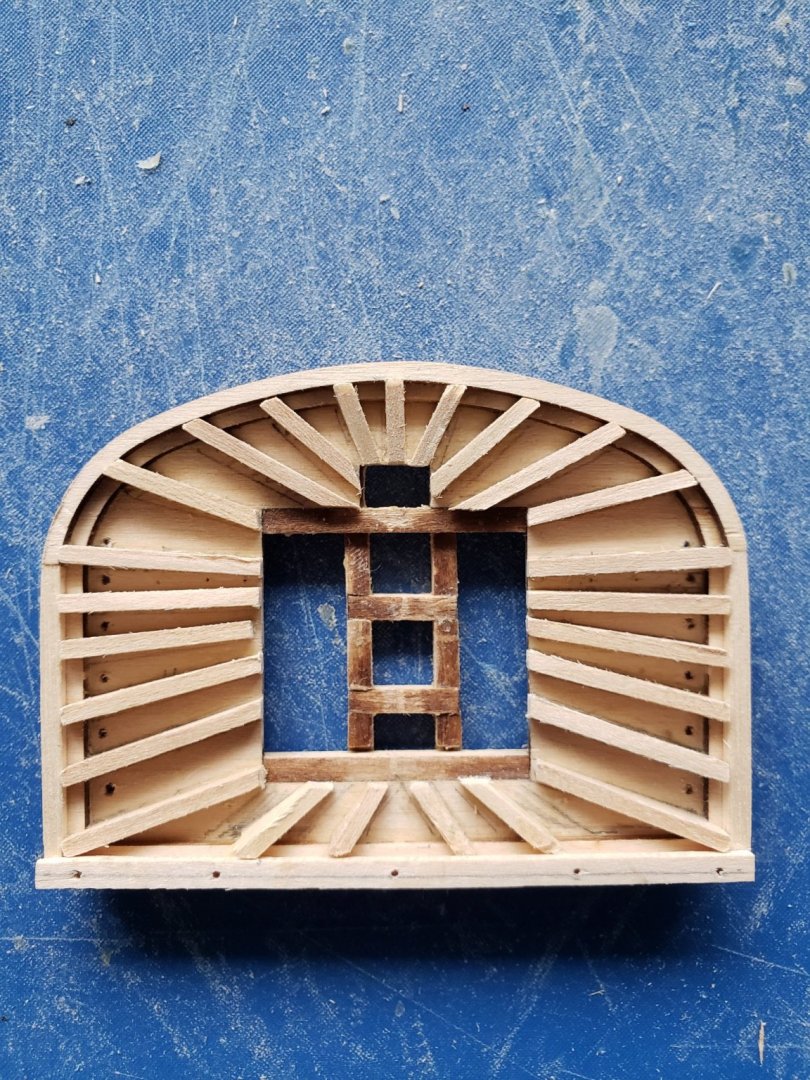
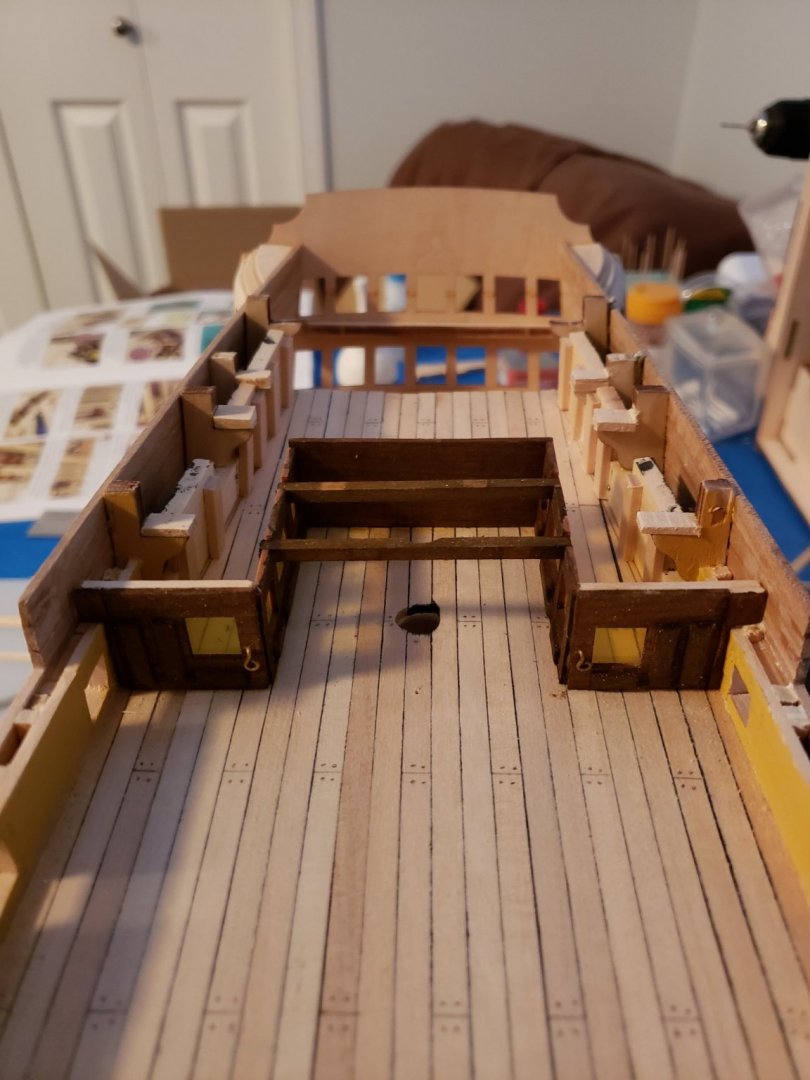
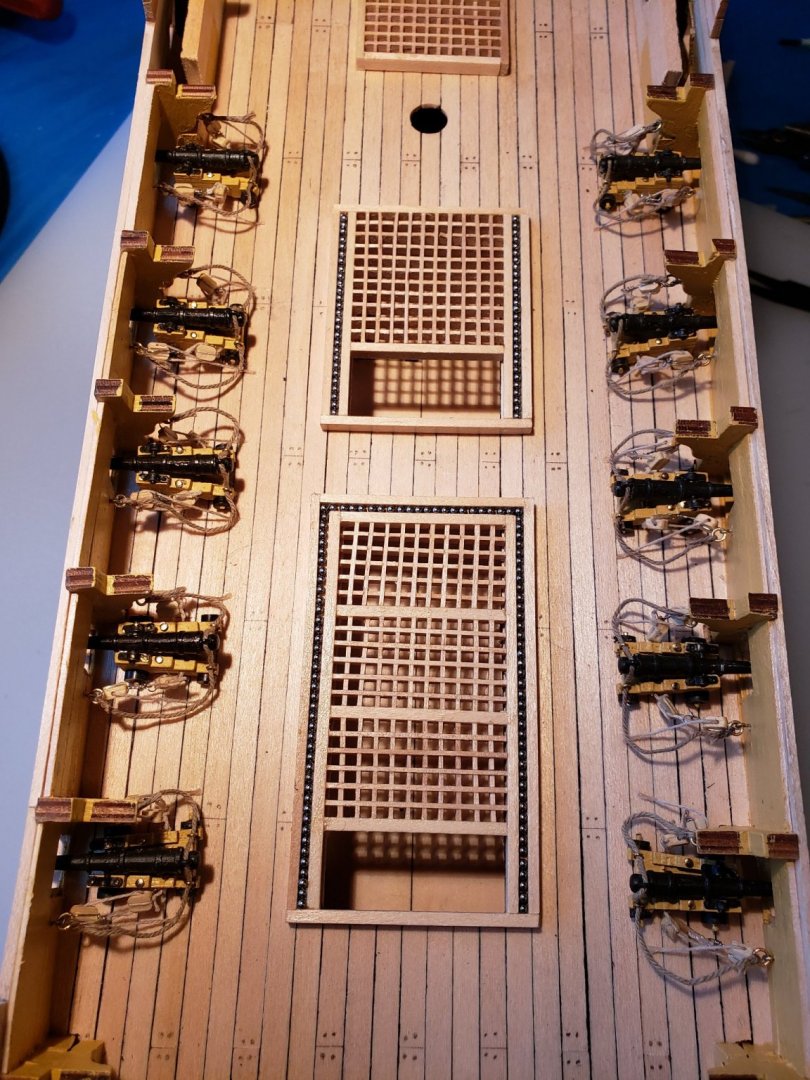
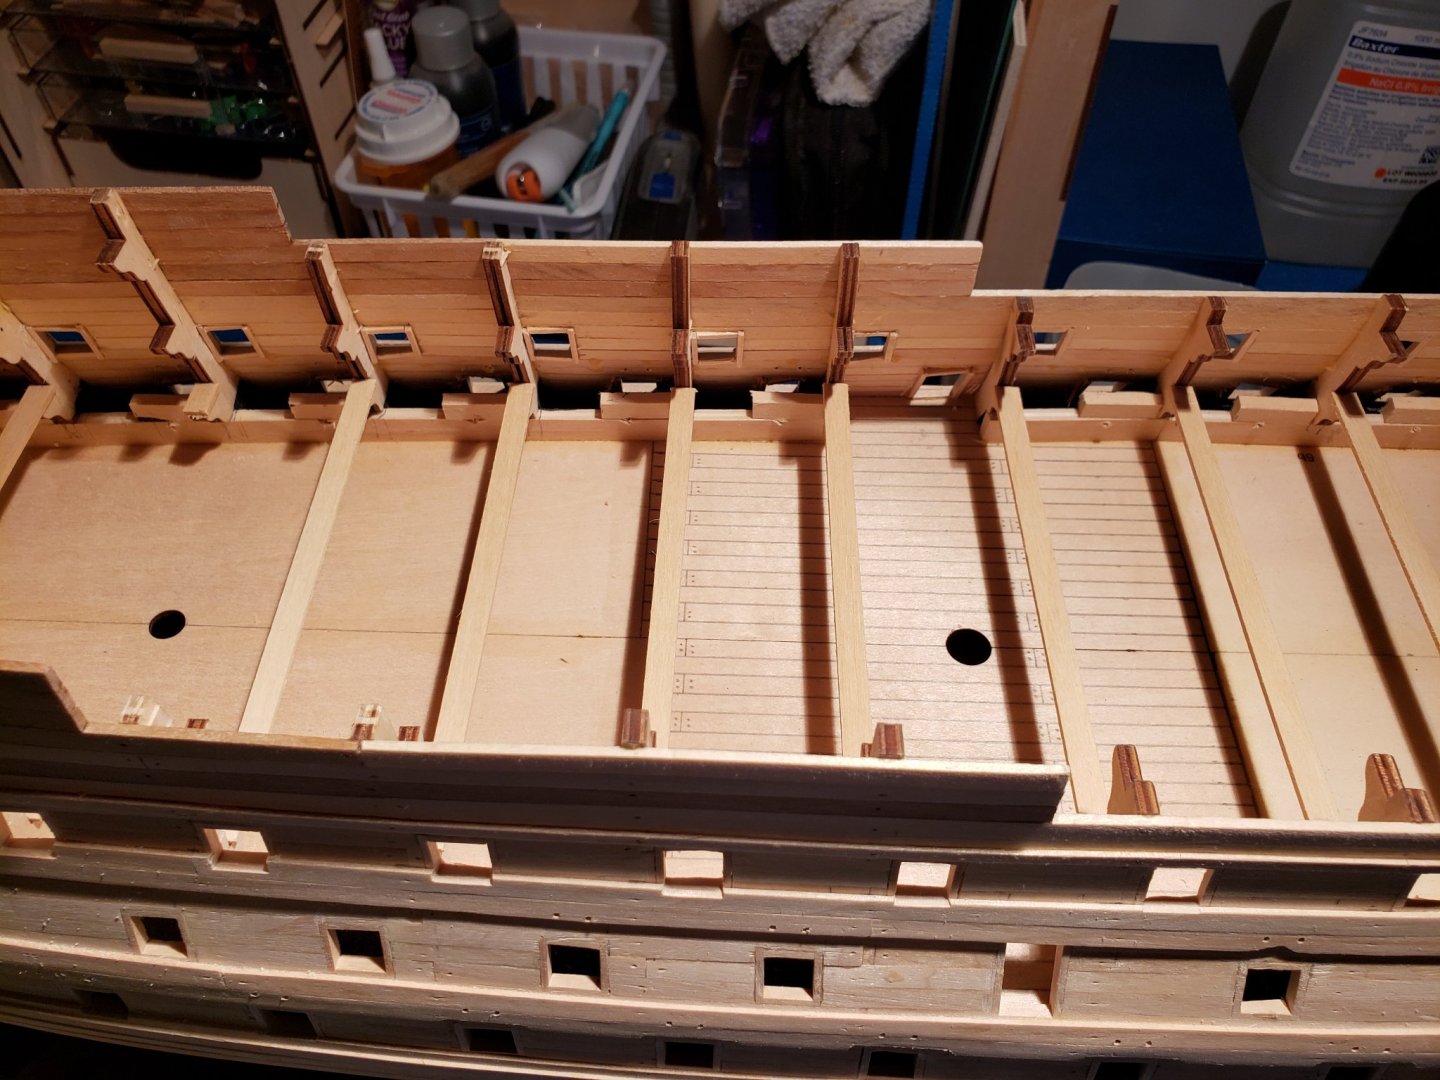
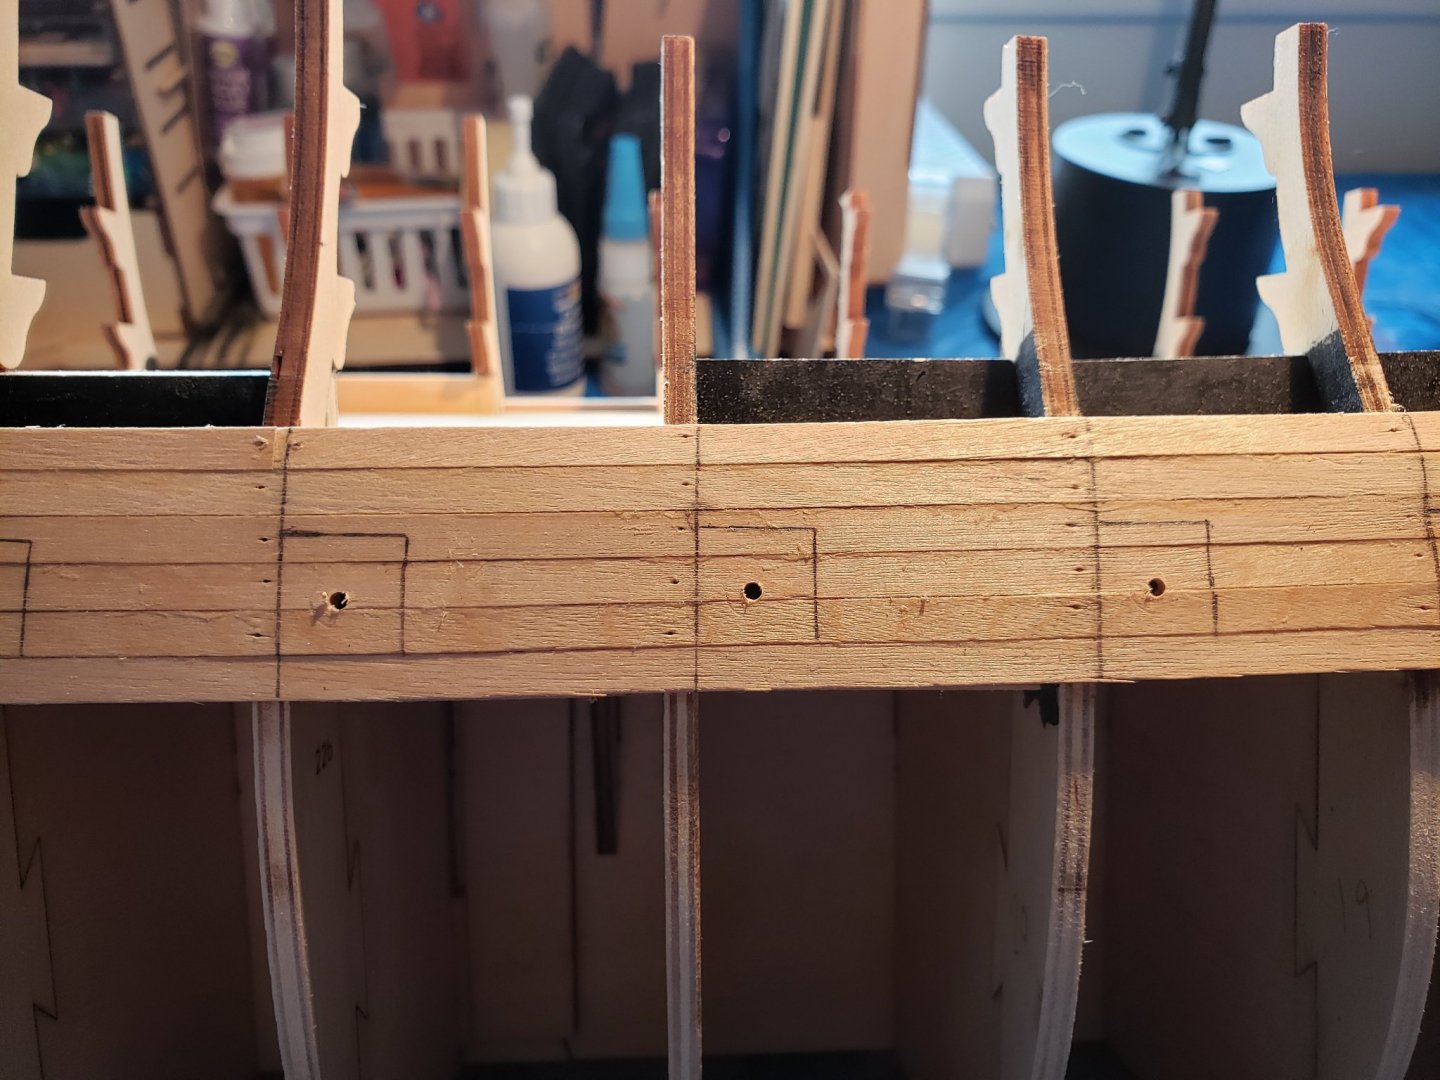
January 2021 The next steps were placing the deck beams to support the quarterdeck. I used dividers again to measure the interior dimensions and then transferred that to the deck beams. I was sad when I realized how much of the guns I had just rigged on the deck below would be covered up! Planking the quarterdeck went easily, just with some measurement for the quarterdeck openings. Once the planking was complete, I cut away the temporary deck supports . After the wales were placed on the outside of the hull, cuts were made to allow placement of the wriggles above some of the gunports. I then drilled holes for the gunport lid ropes using a template. Gunports on the quarterdeck were cut out and framed. Bulwarks were lined covering up all the fussy attempts I made to plank right to the edge of the hull - could have saved time not worrying about that! Moved on to making the cabin partitions for the officers' cabins at the rear of the quarterdeck. Detail here was not great, but they are barely visible once the poop deck is framed above them. Deck beams were constructed for the poop deck planks, and then after planking was complete the bulwarks were lined for this deck. The mizzen mast is just a temporary dowel to ensure the fit of the deck planking so far. That completed this month's progress on the ship.


- 59 replies
-
- 1
-
-
- DeAgostini
- Victory
- (and 1 more)
-
Thanks Penfold. The tiles aren't perfect, but were really reasonable (about $20) compared to actual copper tiles and were so much easier to put on. I felt it was a good compromise and am happy with how they turned out. I'll update progress soon.
- 59 replies
-
- 1
-
-
- DeAgostini
- Victory
- (and 1 more)
-
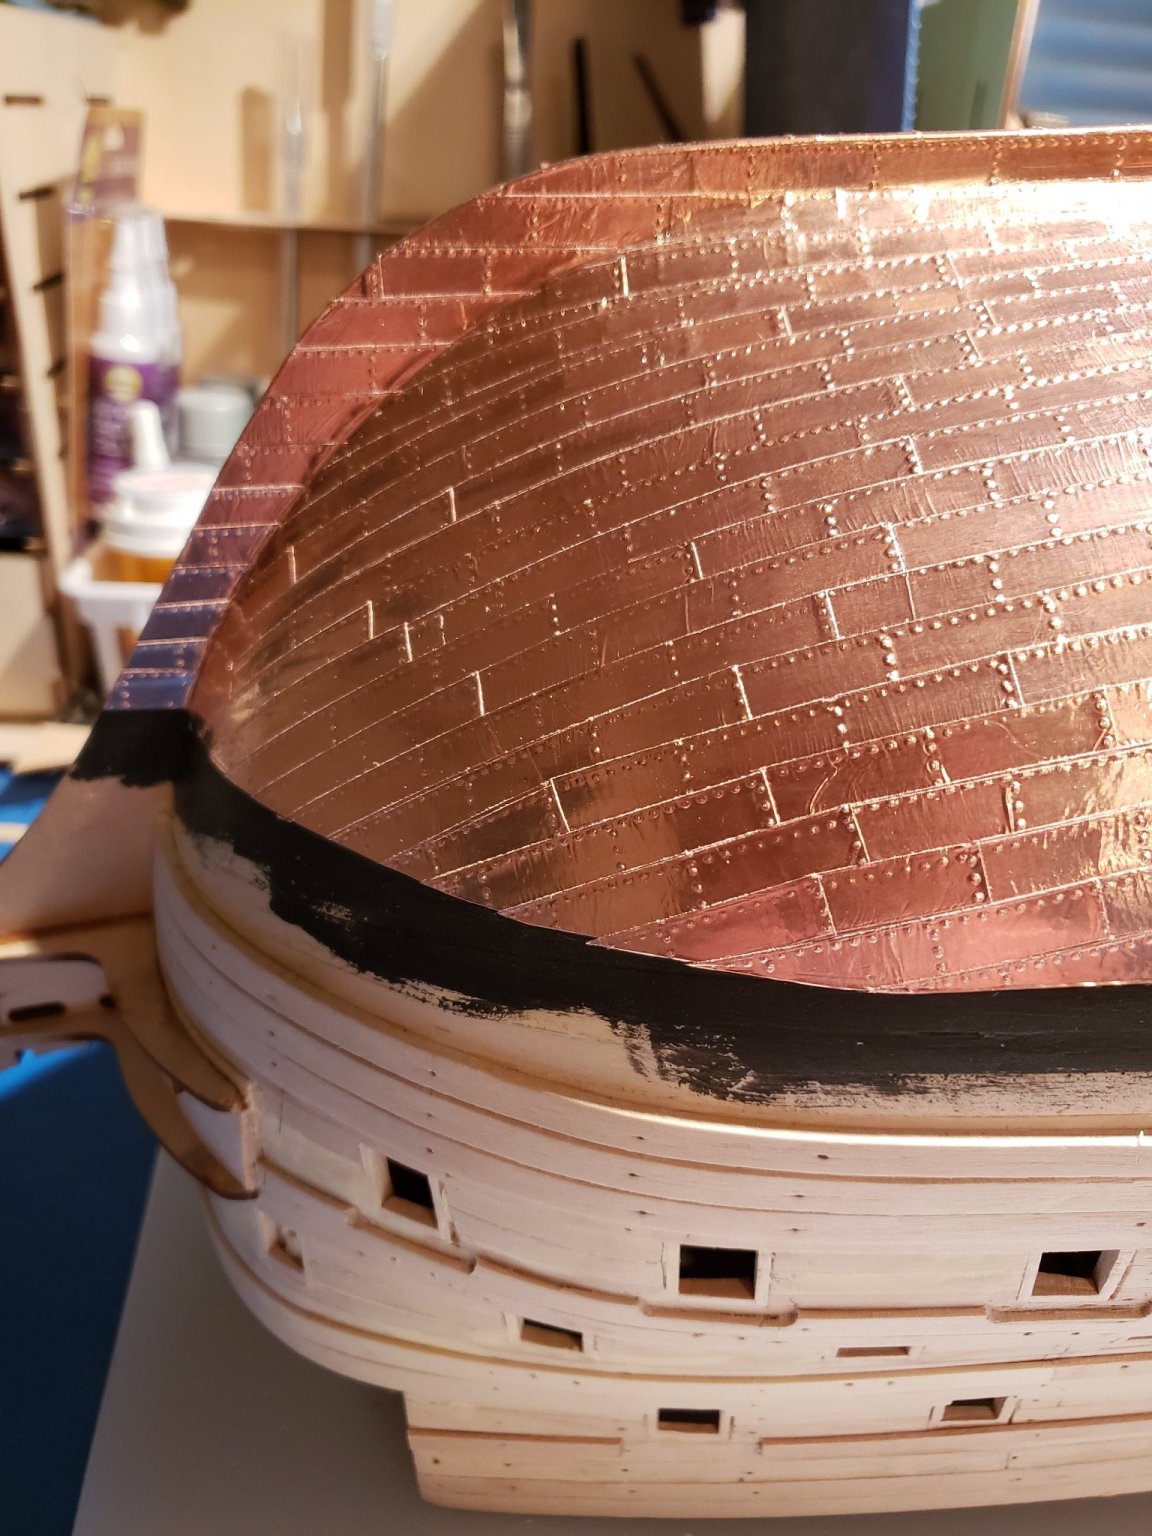
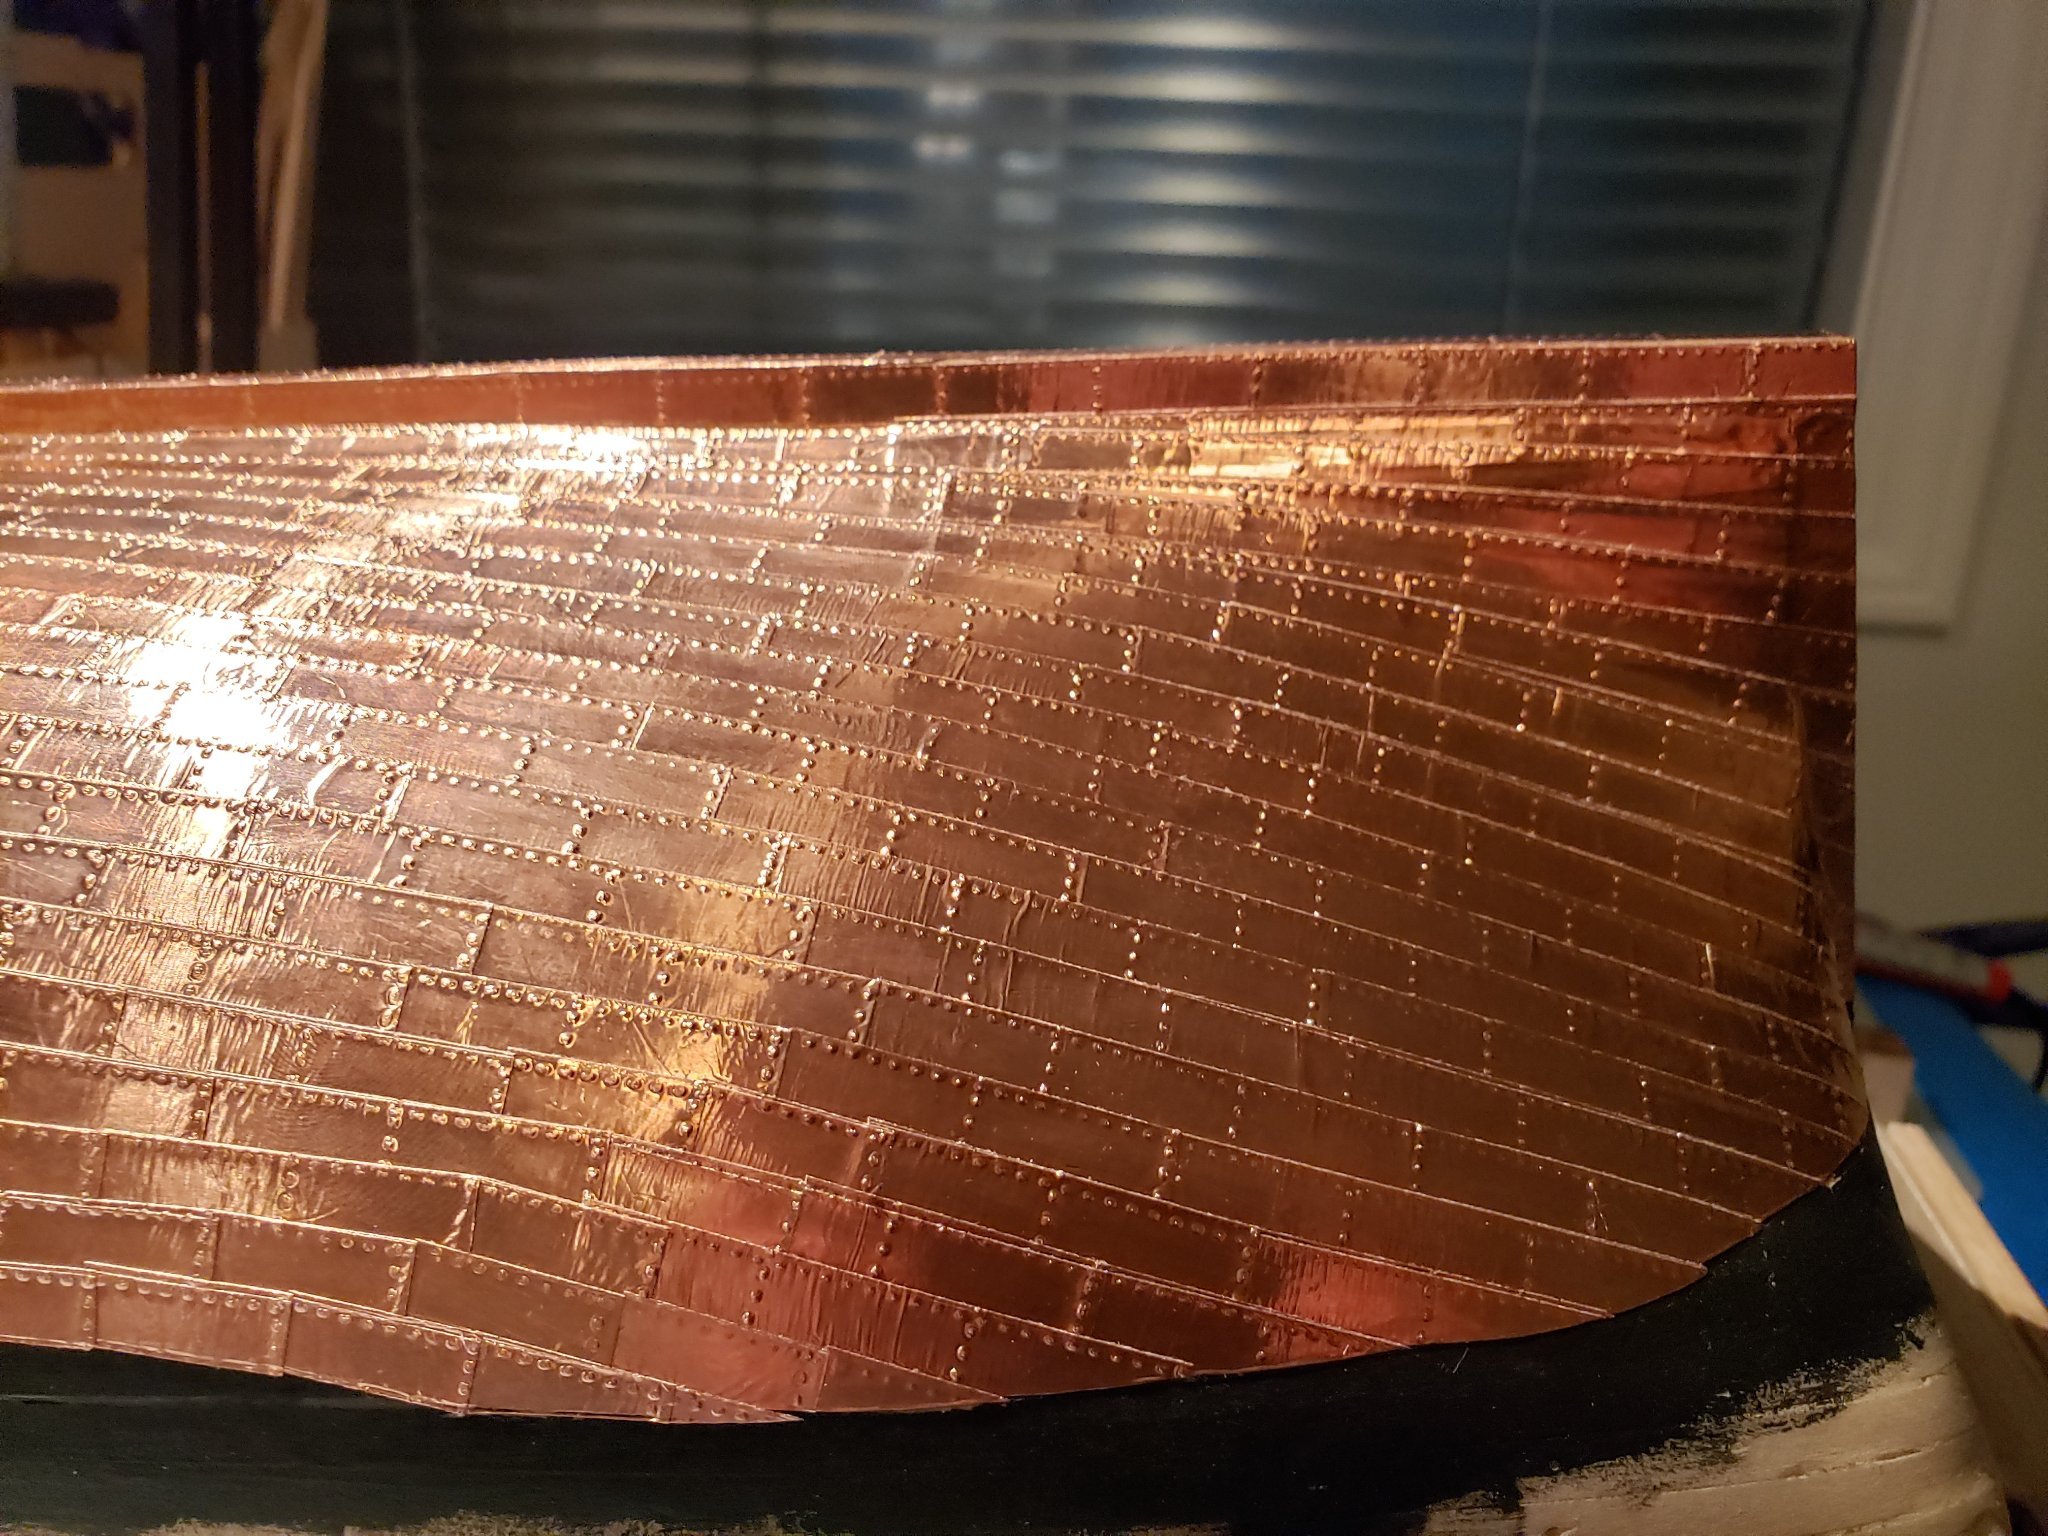
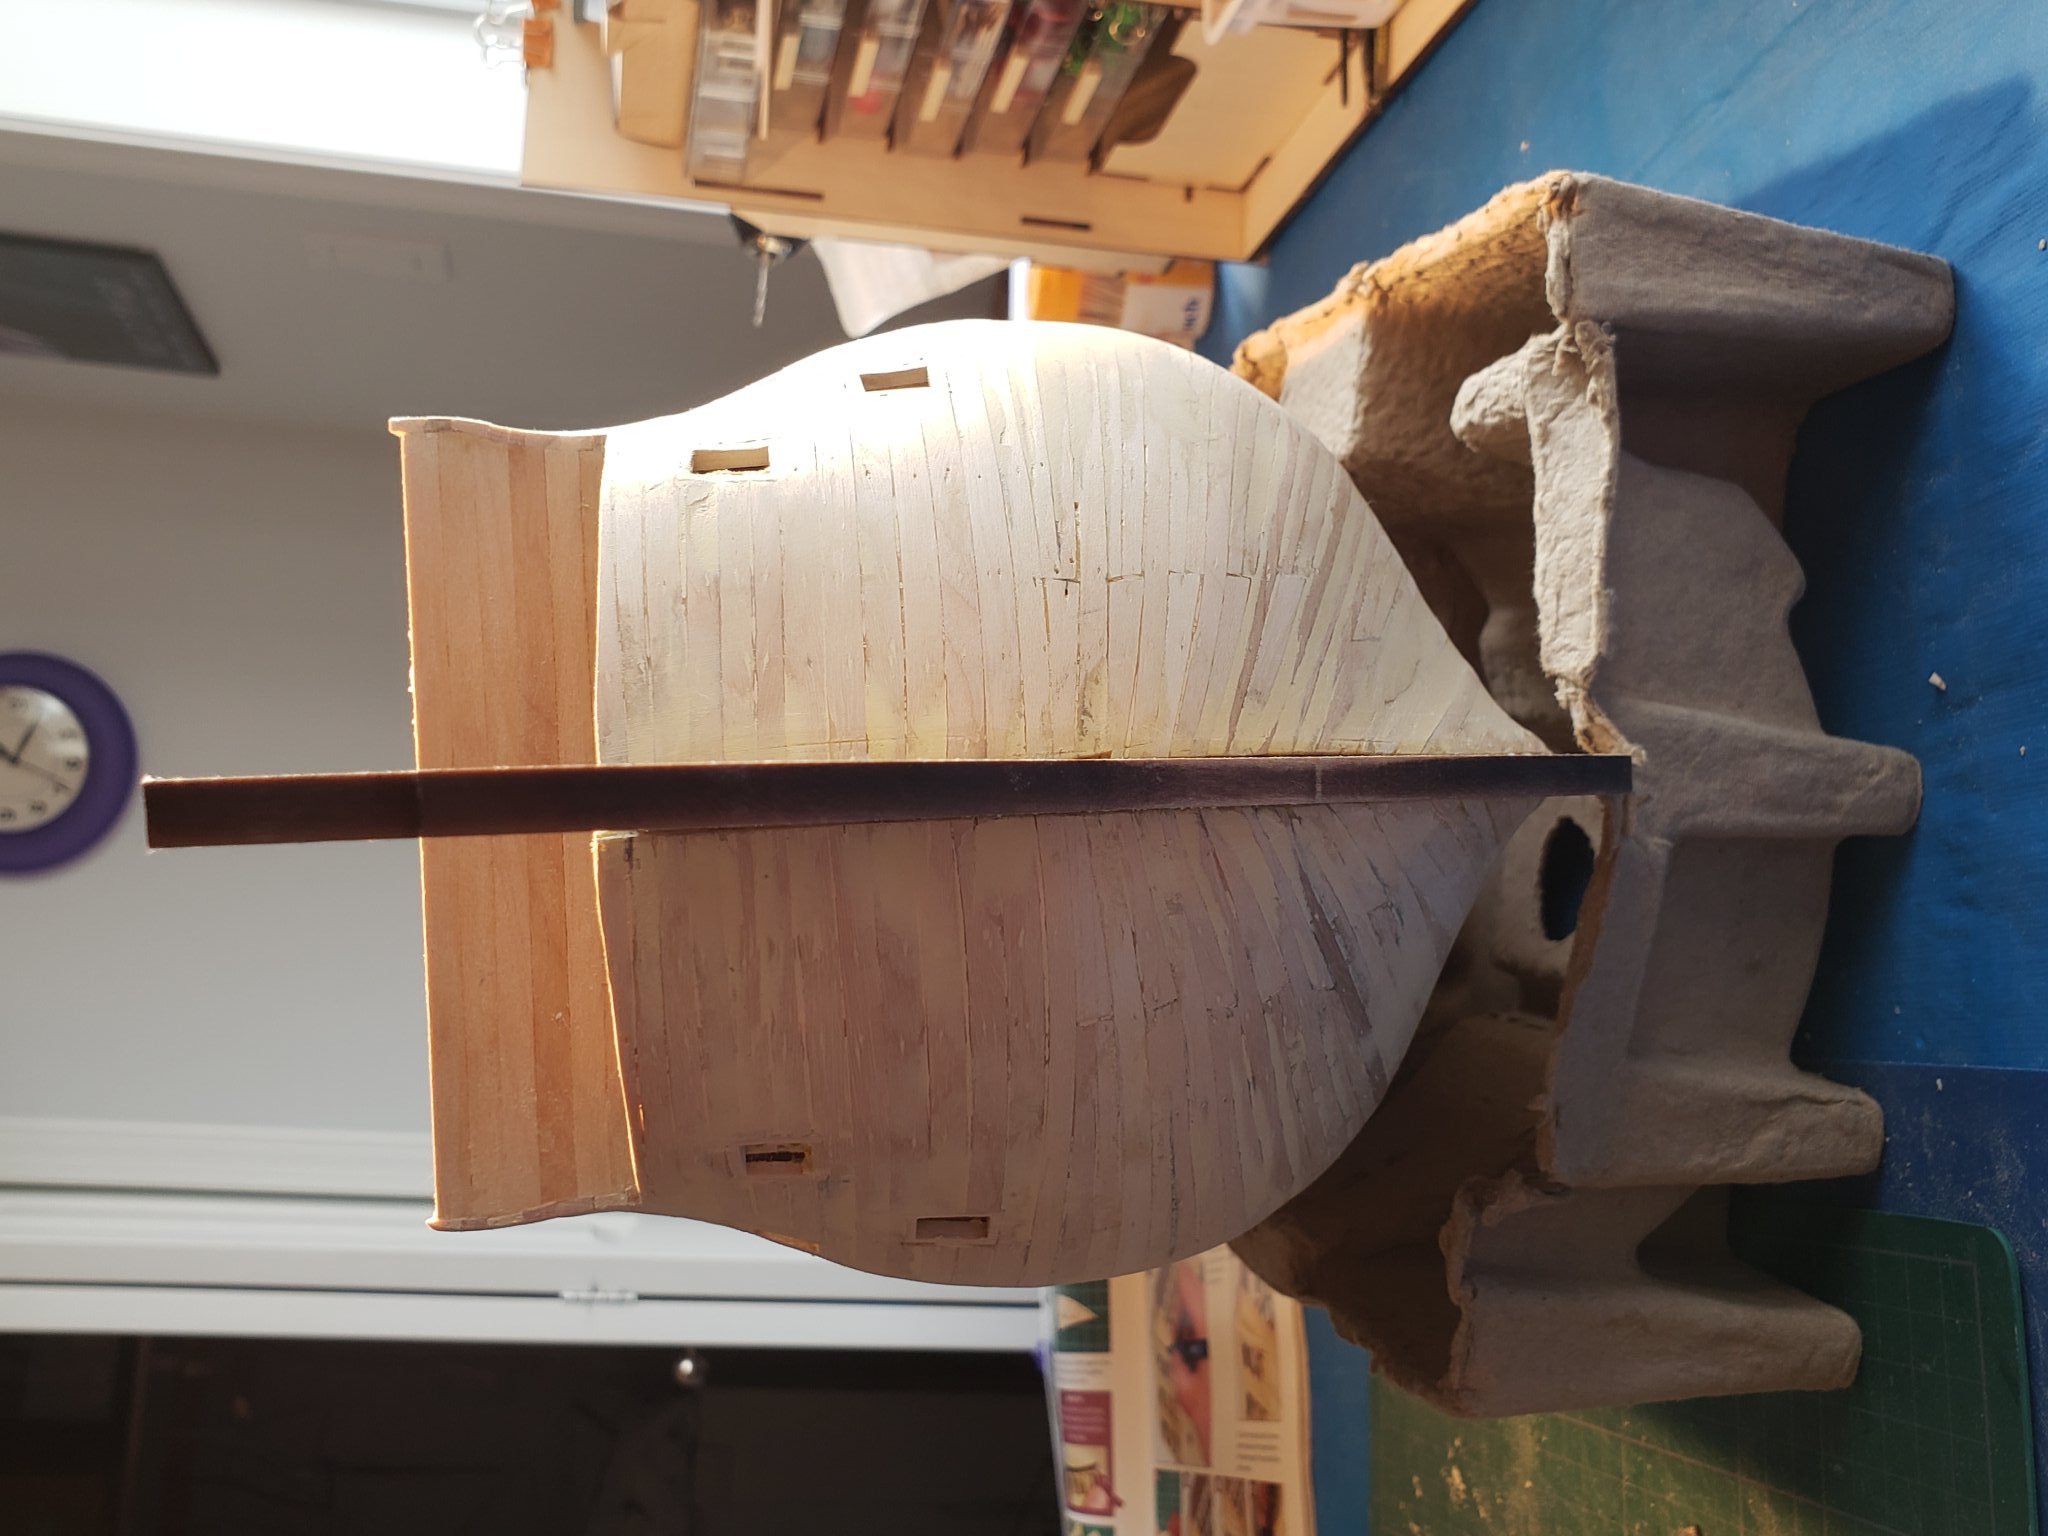
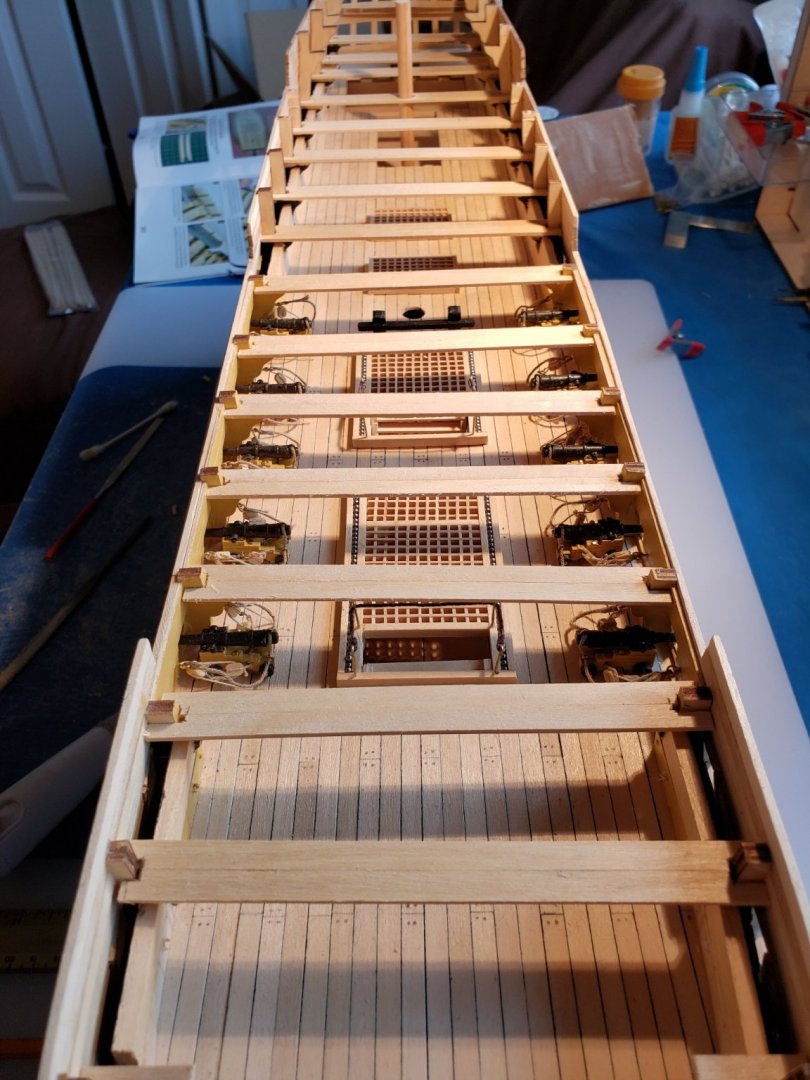
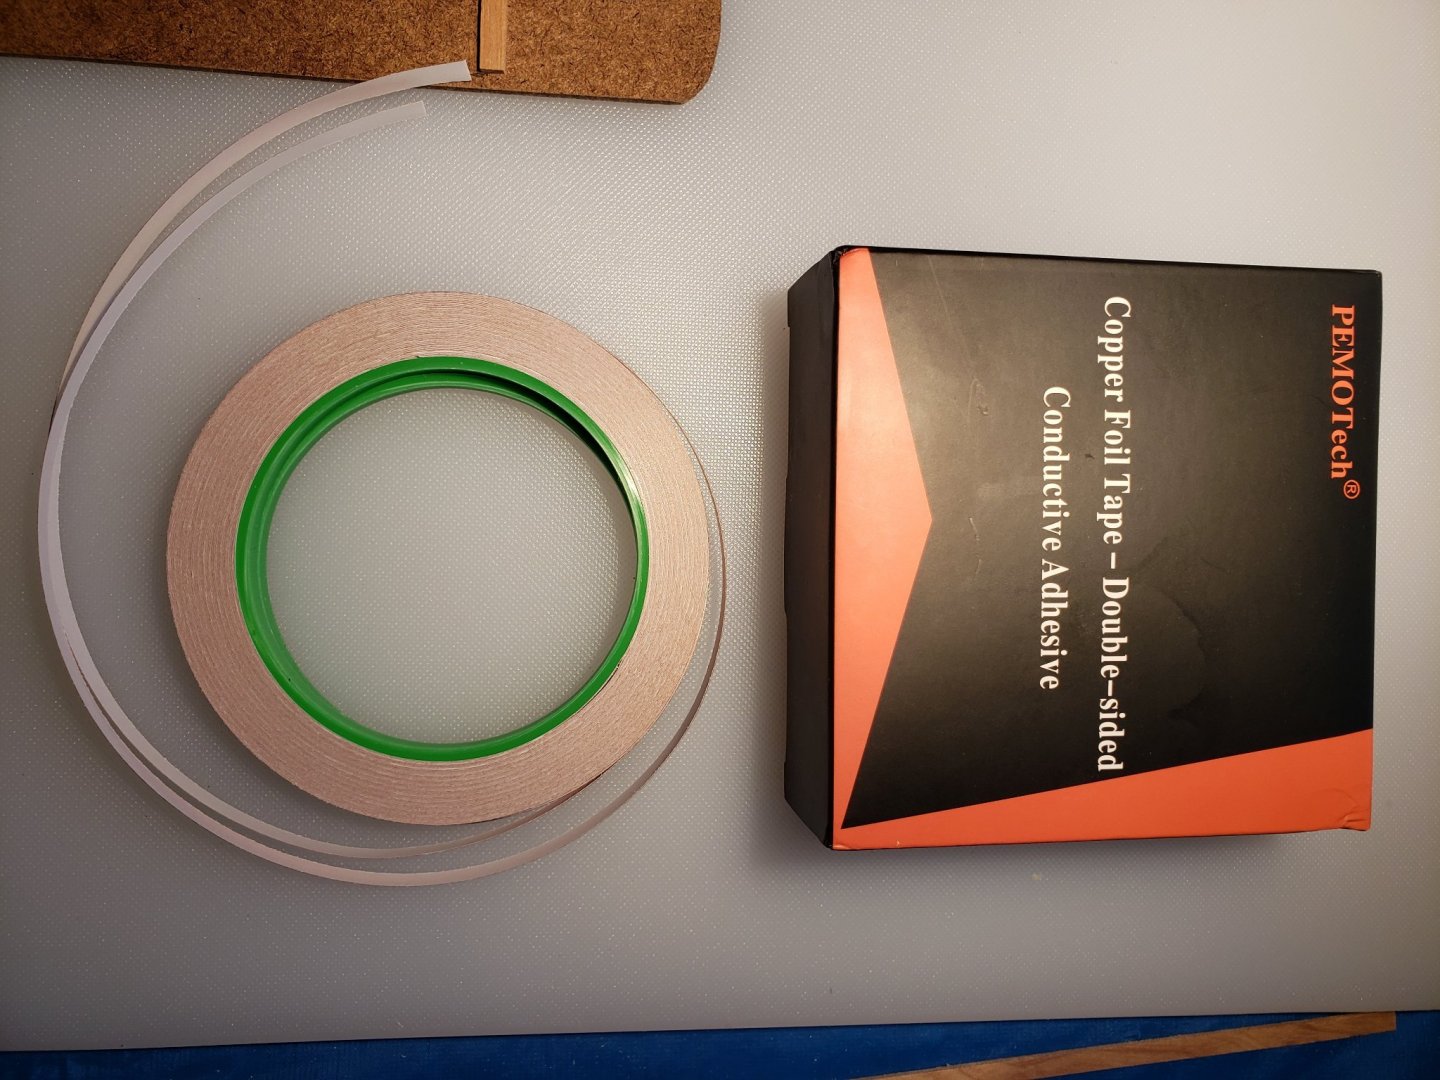
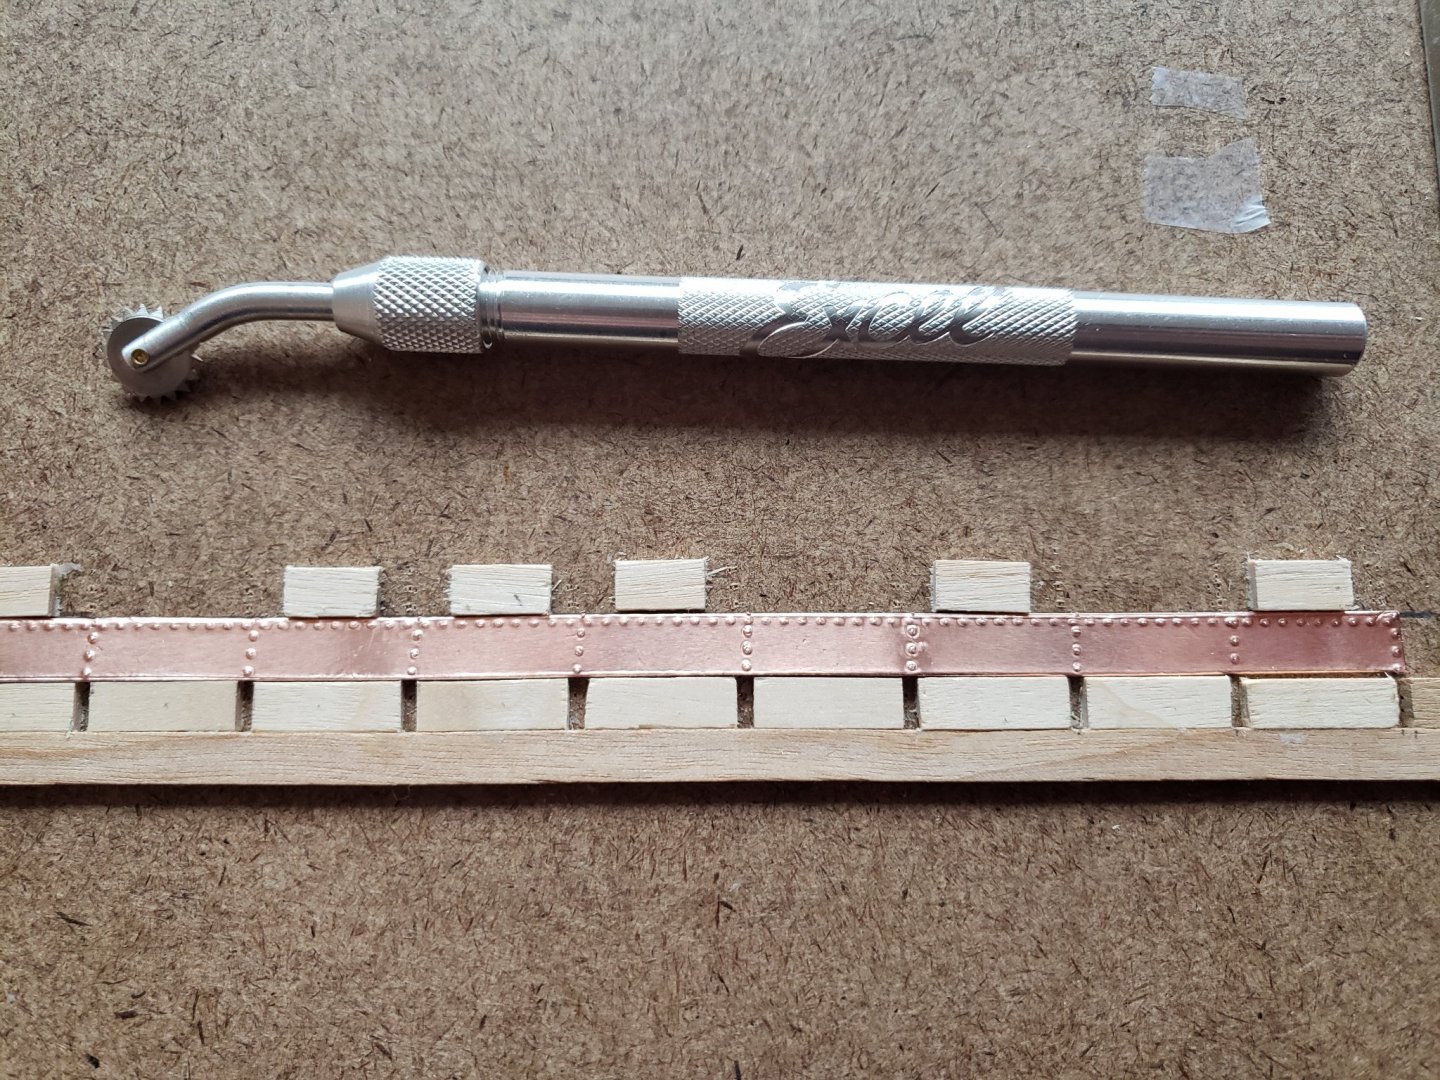
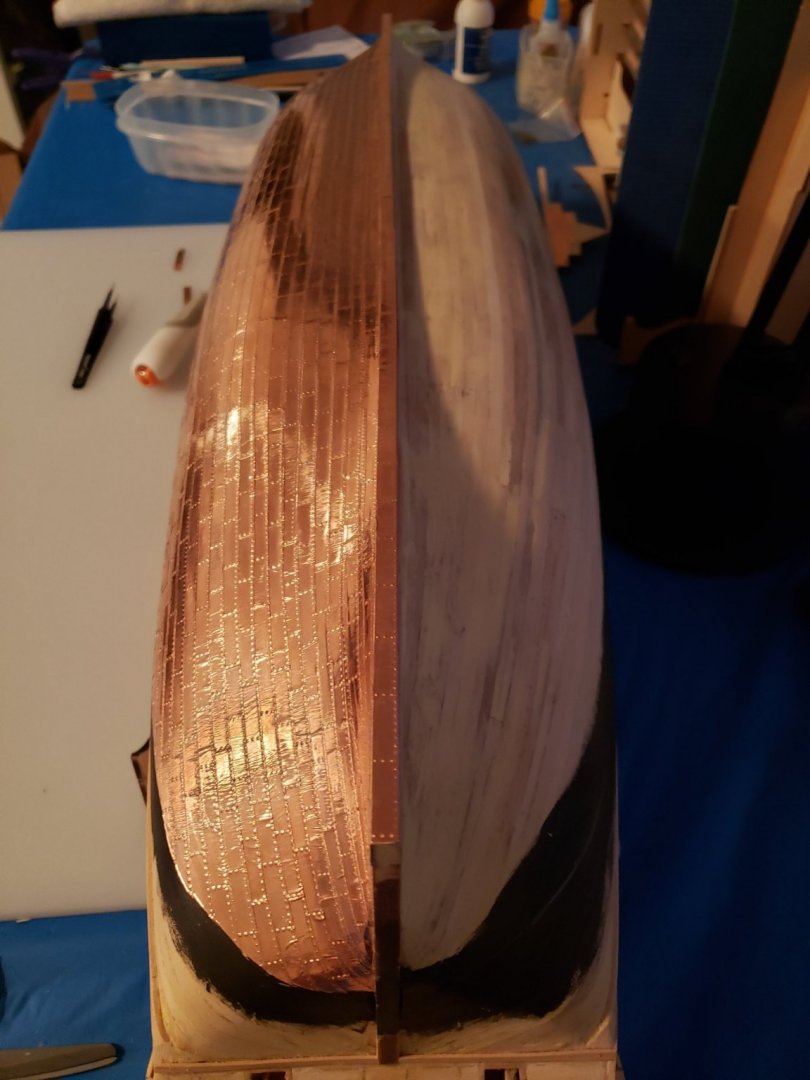
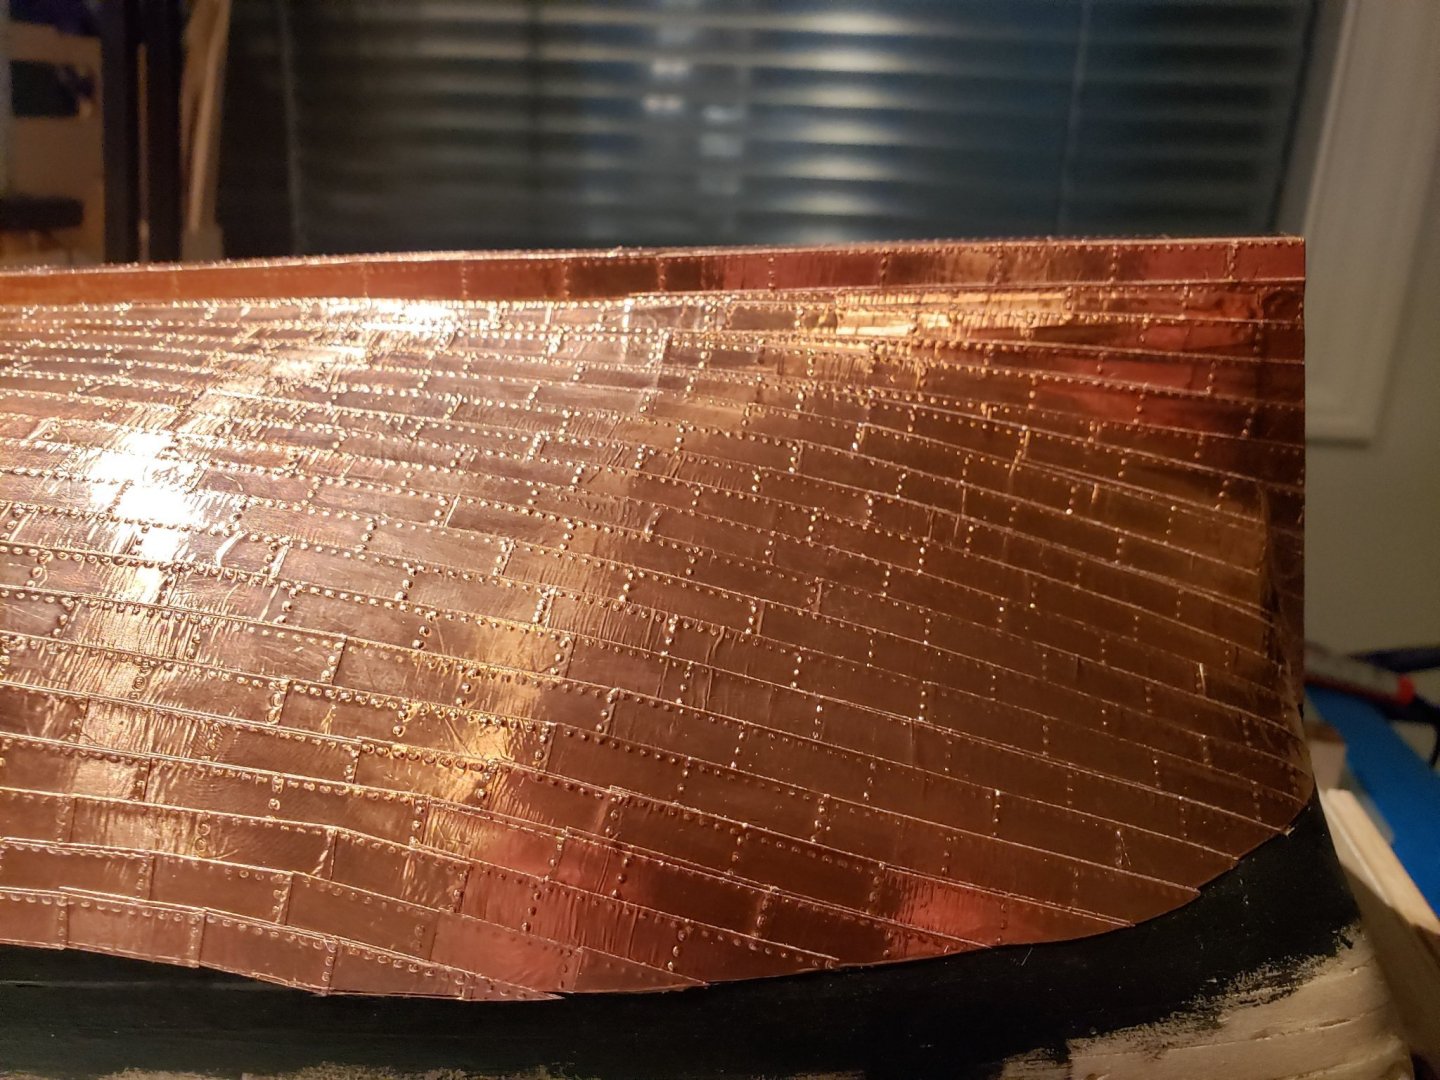
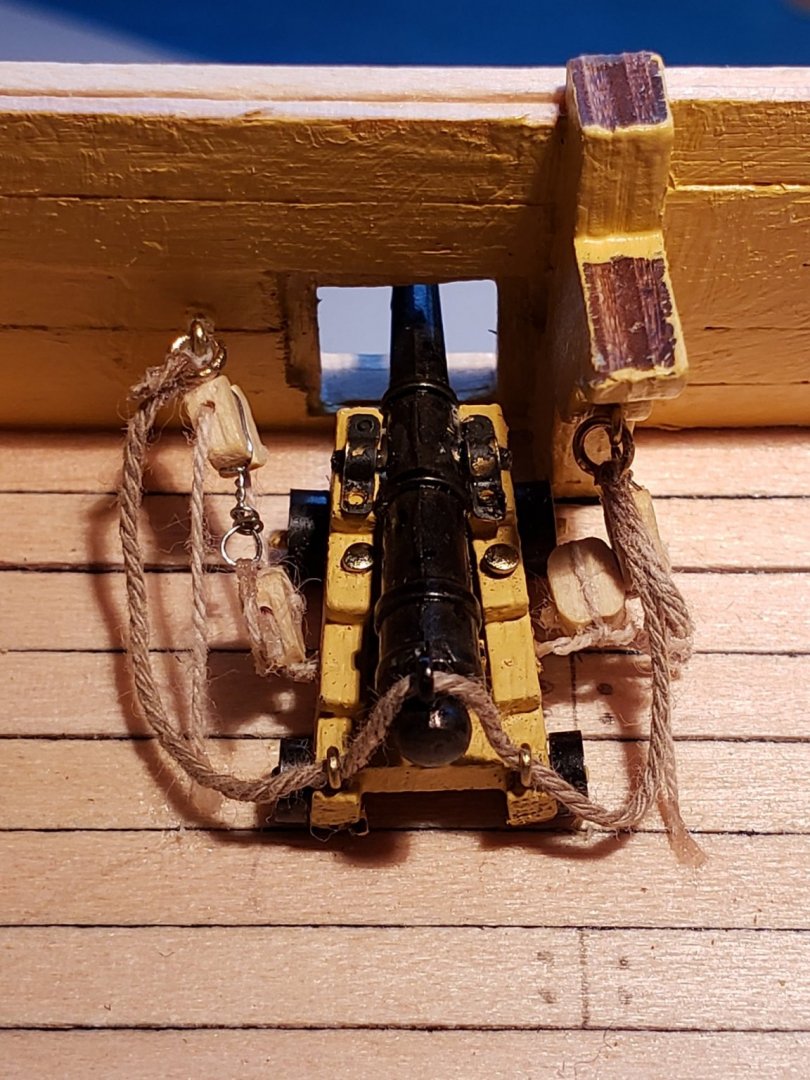
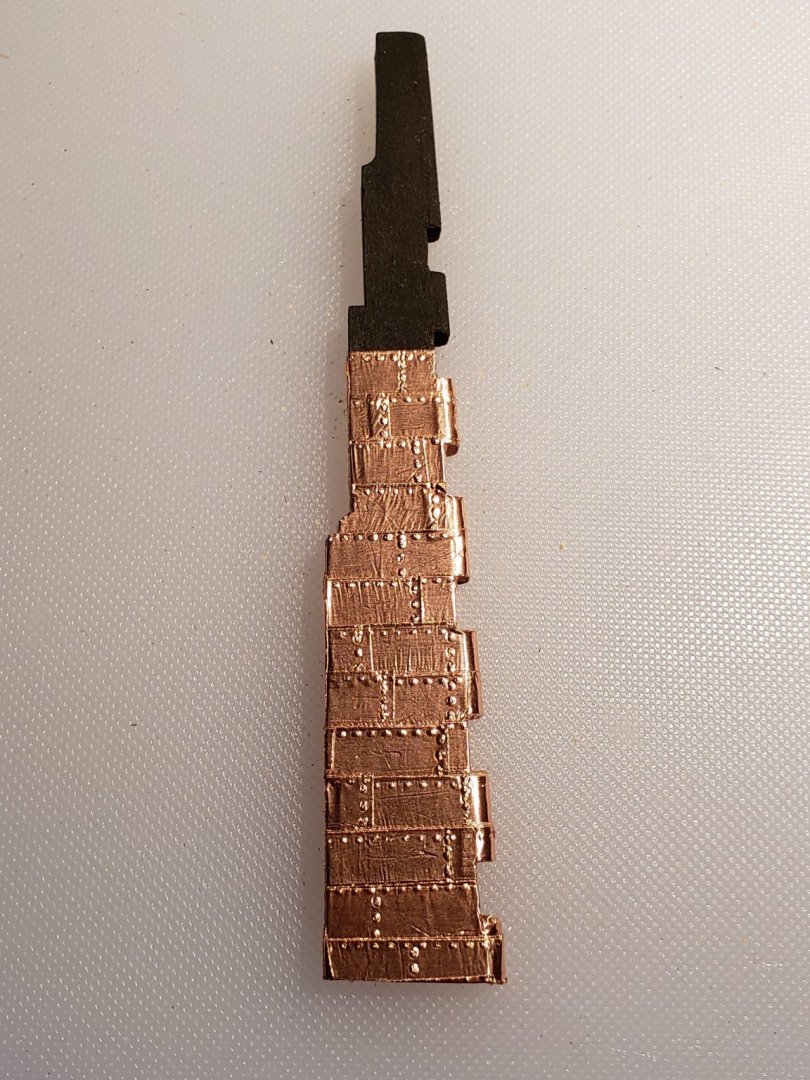
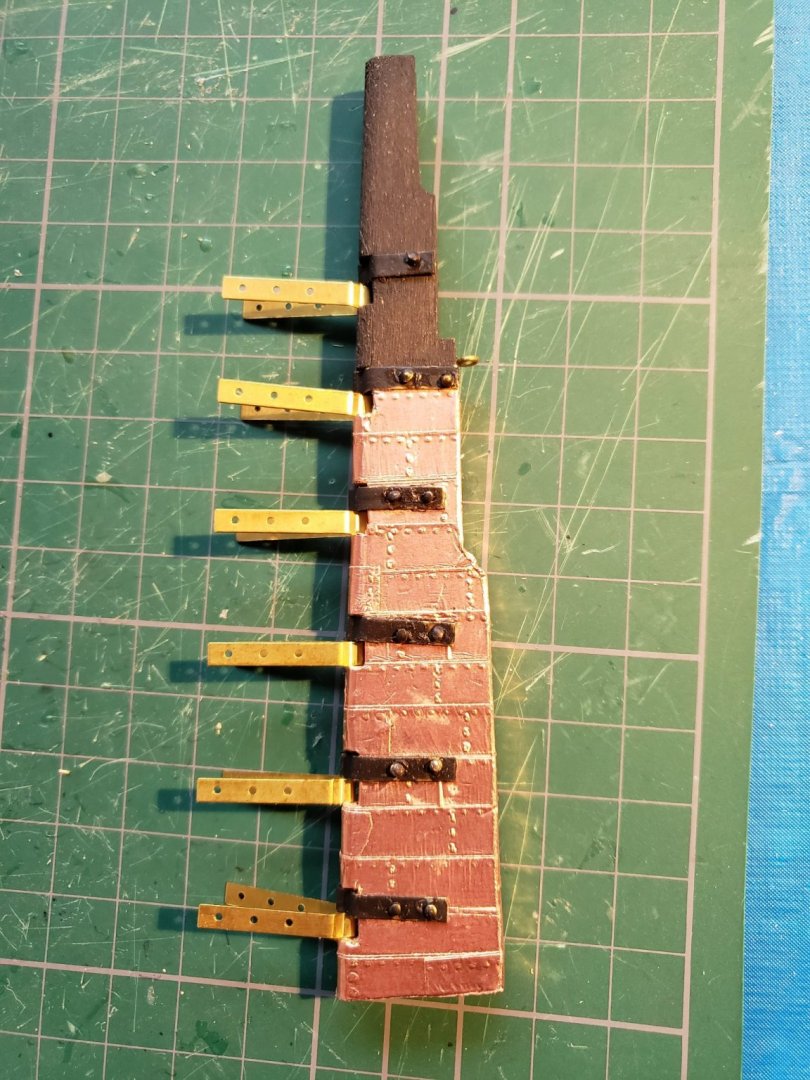
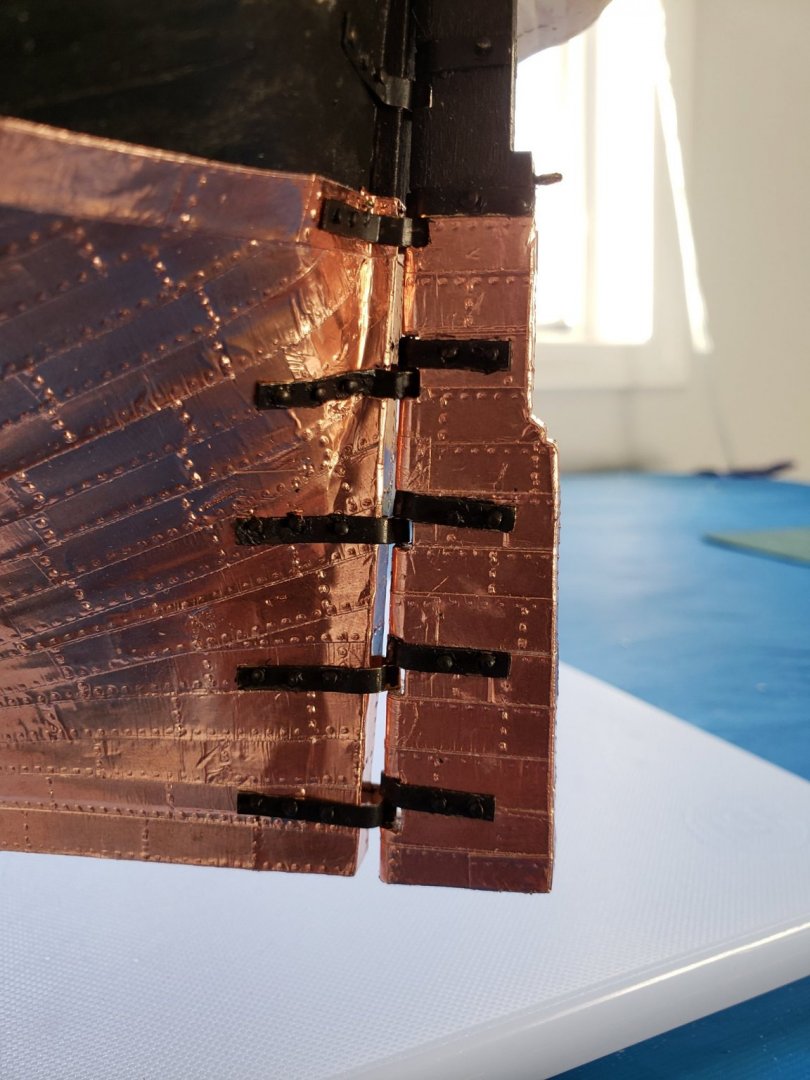
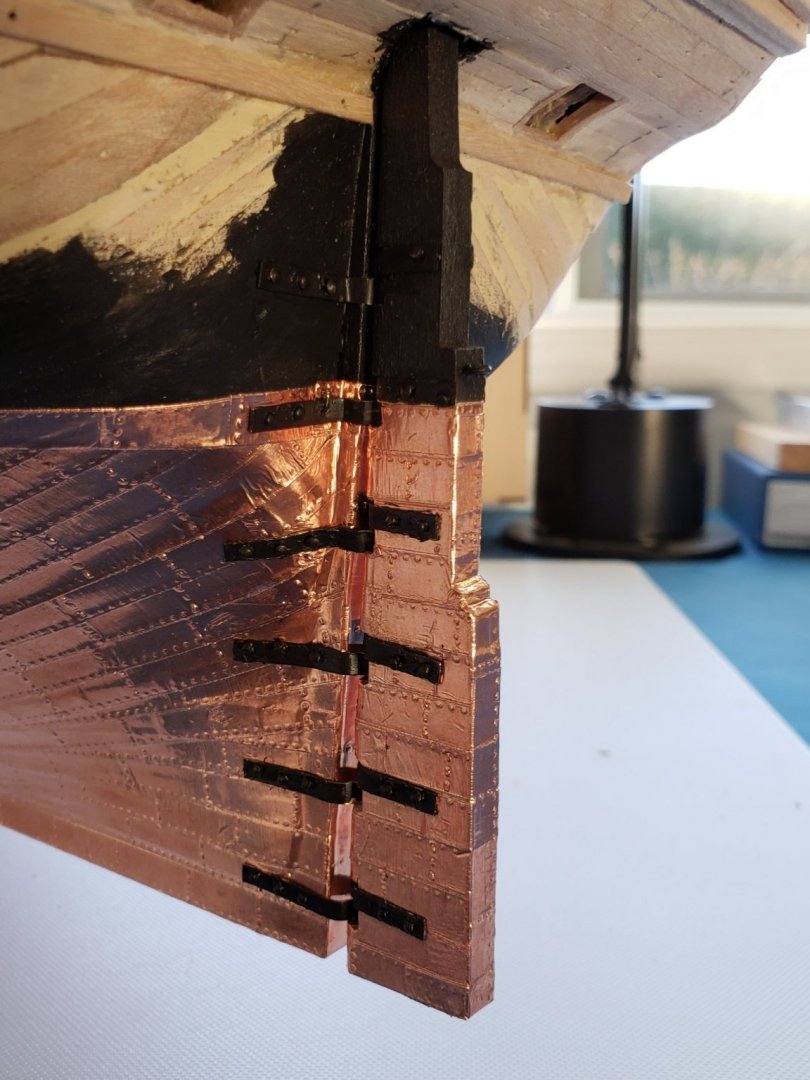
Thanks for the comments. As a beginning modeler, there will be lots of mistakes you will see... but at least you will get a sense of what this kit build will look like done just as per the instructions right out of the box. I f you have questions along the way JJolley, I can't offer expert model advice, but can at least share our similar experiences with the build! December , 2020 At this point I decided to copper the bottom before I added guns and other deck fittings, which is ahead of what the kit recommends. The kit is split into 12 "packs", each consisting of 10 stages, so 120 stages to complete the entire build. The kit coppers the bottom at stage 66, and I did mine at stage 51. At this point I can see that either way works, but I would still do mine earlier than the kit suggests to avoid any damage to fragile deck items. I spent a lot of time looking at other builds and listening to the ongoing debates about how and what to do to copper the ship bottom. I should preface my decision by saying that as a new modeler, I am just trying to follow the kit as it is already complex enough, even when at times I know that there are inaccuracies compared to the real Victory. Deagostini sells copper tiles with very clear instructions for a reasonable price of $90 US. However, these tiles have been out of stock since June 2020, so as I got close to needing them I had to move on. Other copper tiles are available, but quite expensive, as you need about 3,000 to copper the hull. I was so fortunate to find another great resource for this build on YouTube "John Builds Iconic Military Models" which consists of 75 amazing videos. Parts 60-63 show a great technique using adhesive copper tiles (used for electronics applications generally I guess). Some people online hated this idea, but while making the tiles was very time consuming, actually putting them on the hull was quick and really satisfying. Is that what you would choose? You can see the results and judge for yourself. They are slowly darkening as the copper oxidizes, although I actually like the bright copper ( I know, it would never look like this for long on an actual ship hull!). Watch the videos by John to get a better sense, but briefly here are the steps I used: I made a jig using extra 2 X 5 mm wood and first glued a long strip to a clipboard ,then cut pieces 15mm long and glued them to the first long strip with a 1mm gap between them. A few more pieces of wood were placed 6mm away from these pieces just to hold the copper tape steady. As the tape is only 1 mm thick, I stuck two pieces together to make them 2mm thick, as John suggested - a pain, but definitely worth the time as it was easier to work with a more robust tape. Then I used a pounce wheel to trace "rivet lines" (with the tape placed upside down on the board, not copper side up as in the pictures). I made the tape in groups of 10 tiles and then cut them generally into lines of 5 tiles or less when I needed to make sharper turns. Then just put on the 3000 or so tiles and I was done! Took about three days to make the tiles, but only two days to copper the entire hull. See what you think. It was hard to cover up the planking after all the work smoothing! I painted some of the hull black first just around the waterline so the copper could go over that without having to touch up the paint. I wasn't sure exactly where the waterline should be, so I estimated as best I could - I think it is a bit low, but was just my best guess. After the hull I moved on to the rudder. Fussy to put the tiles on the rudder, although actual copper tiles would have been even harder I guess. Nailing the rudder to the hull was also hard to do as the copper tiles are quite fragile. Next I worked rigging the 10 upper deck guns that are semi-visible... if you are very determined after the quarter deck is placed above them! All of this post took the entire month, but made a huge difference in the look of Victory.


- 59 replies
-
- 6
-
-
- DeAgostini
- Victory
- (and 1 more)
-
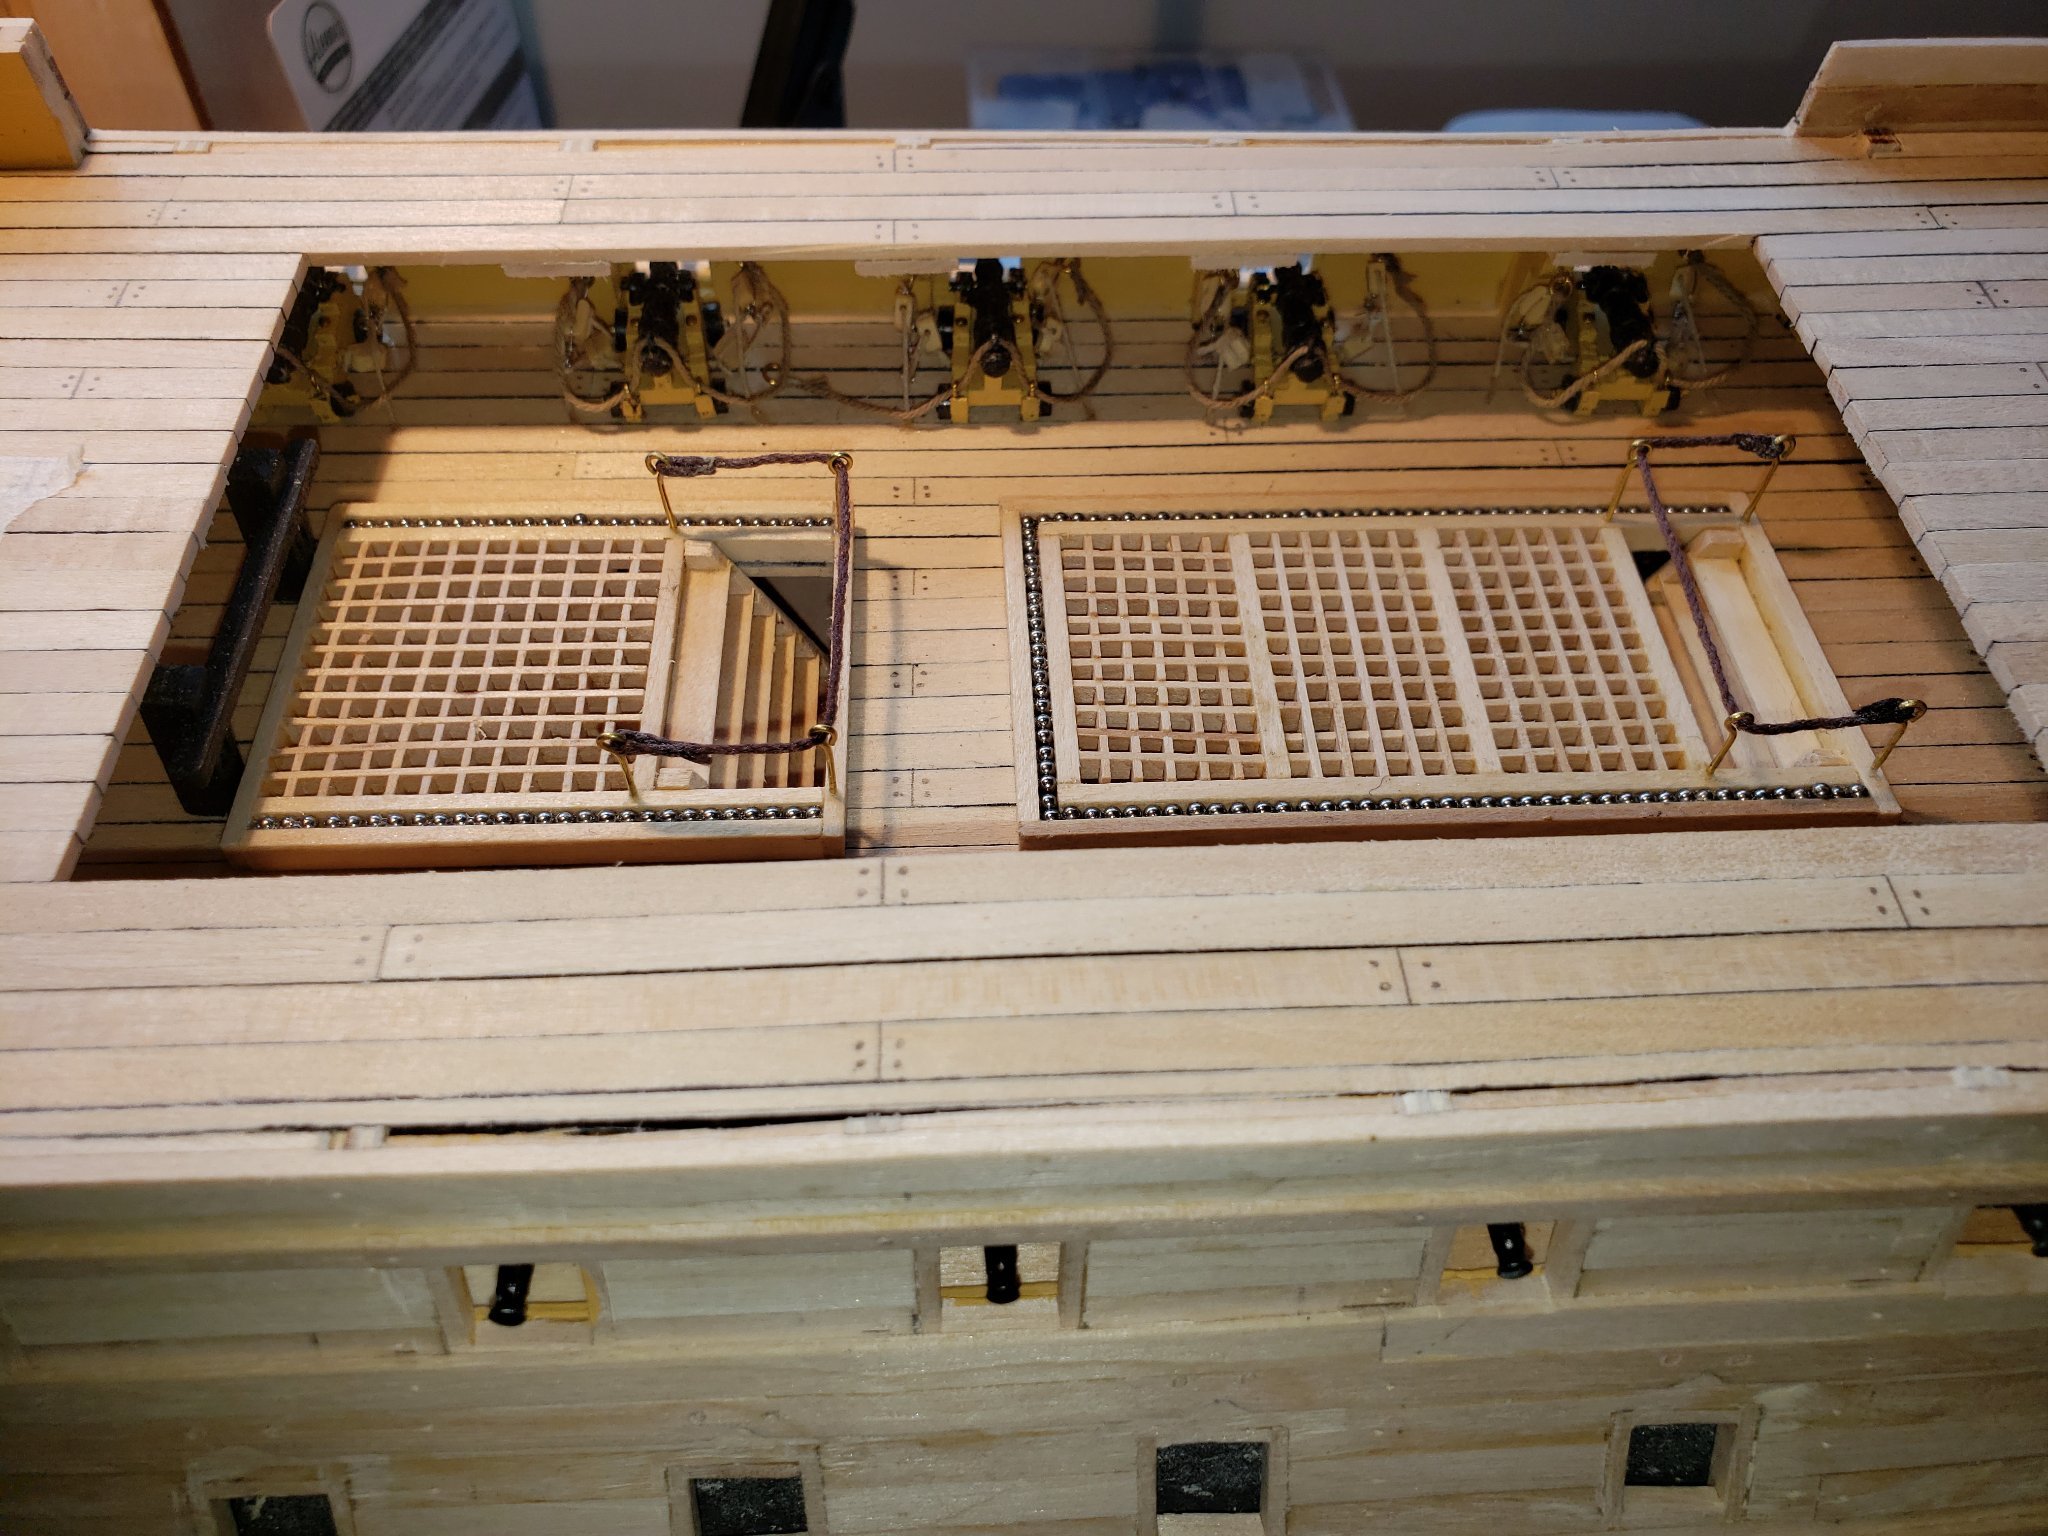
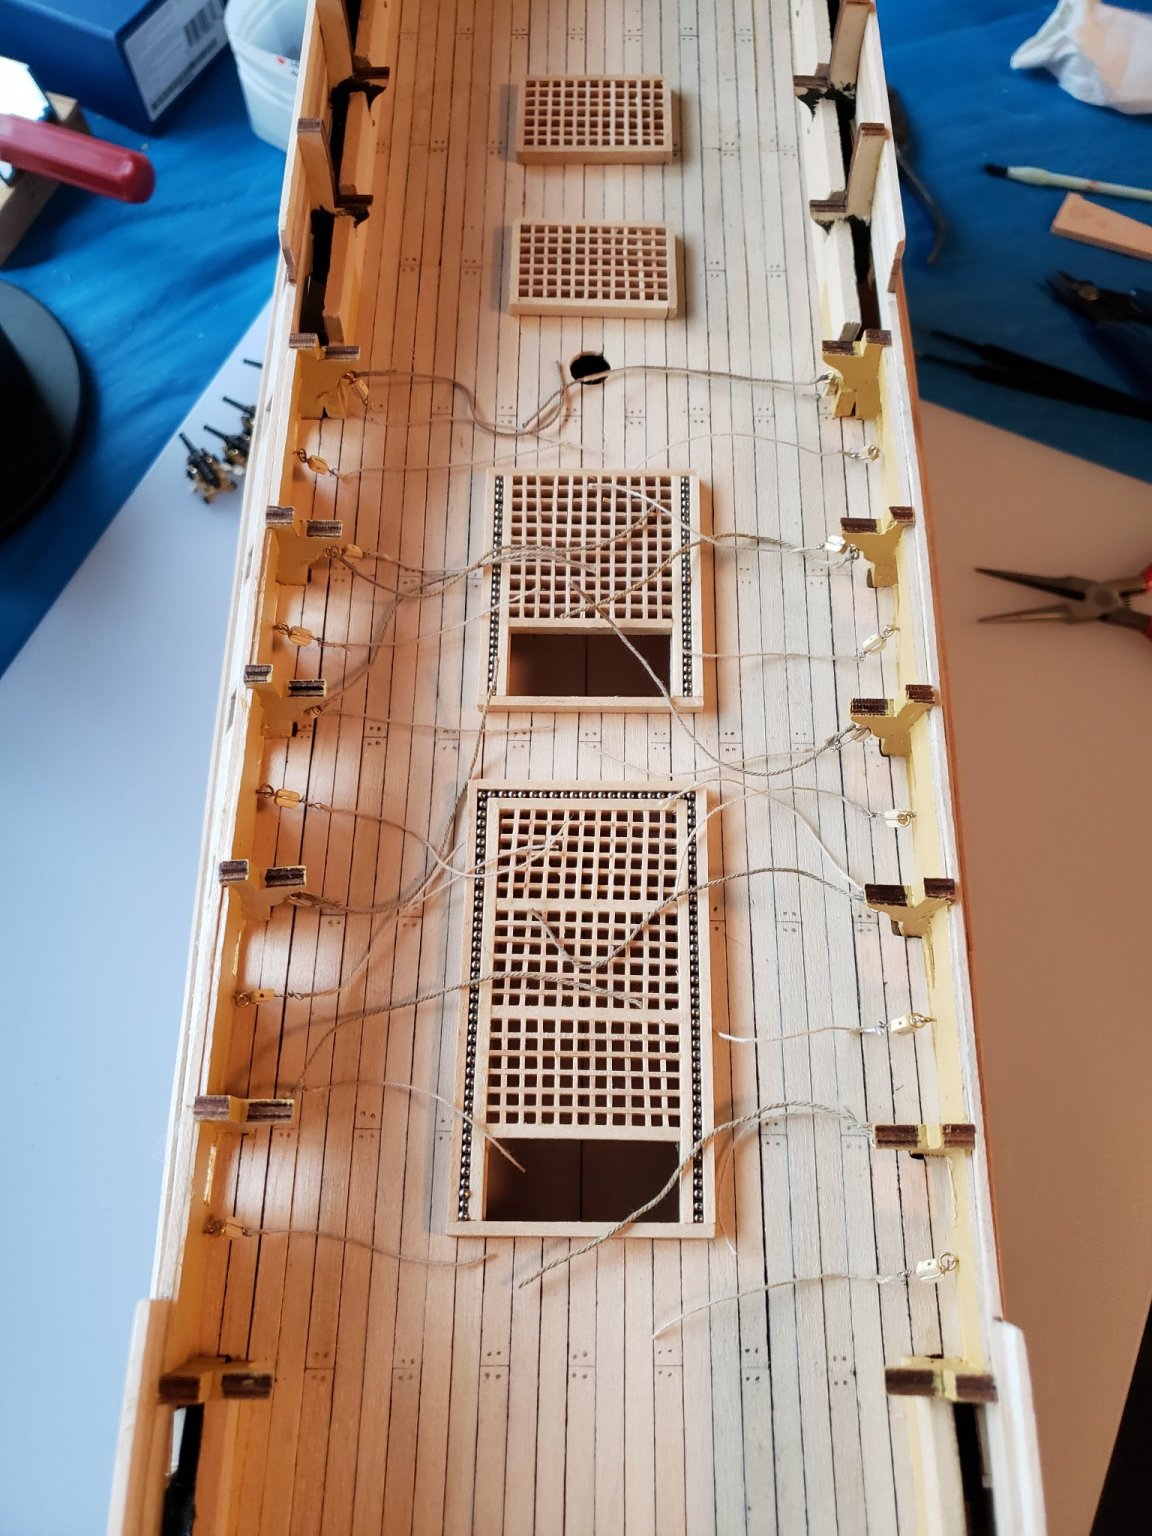
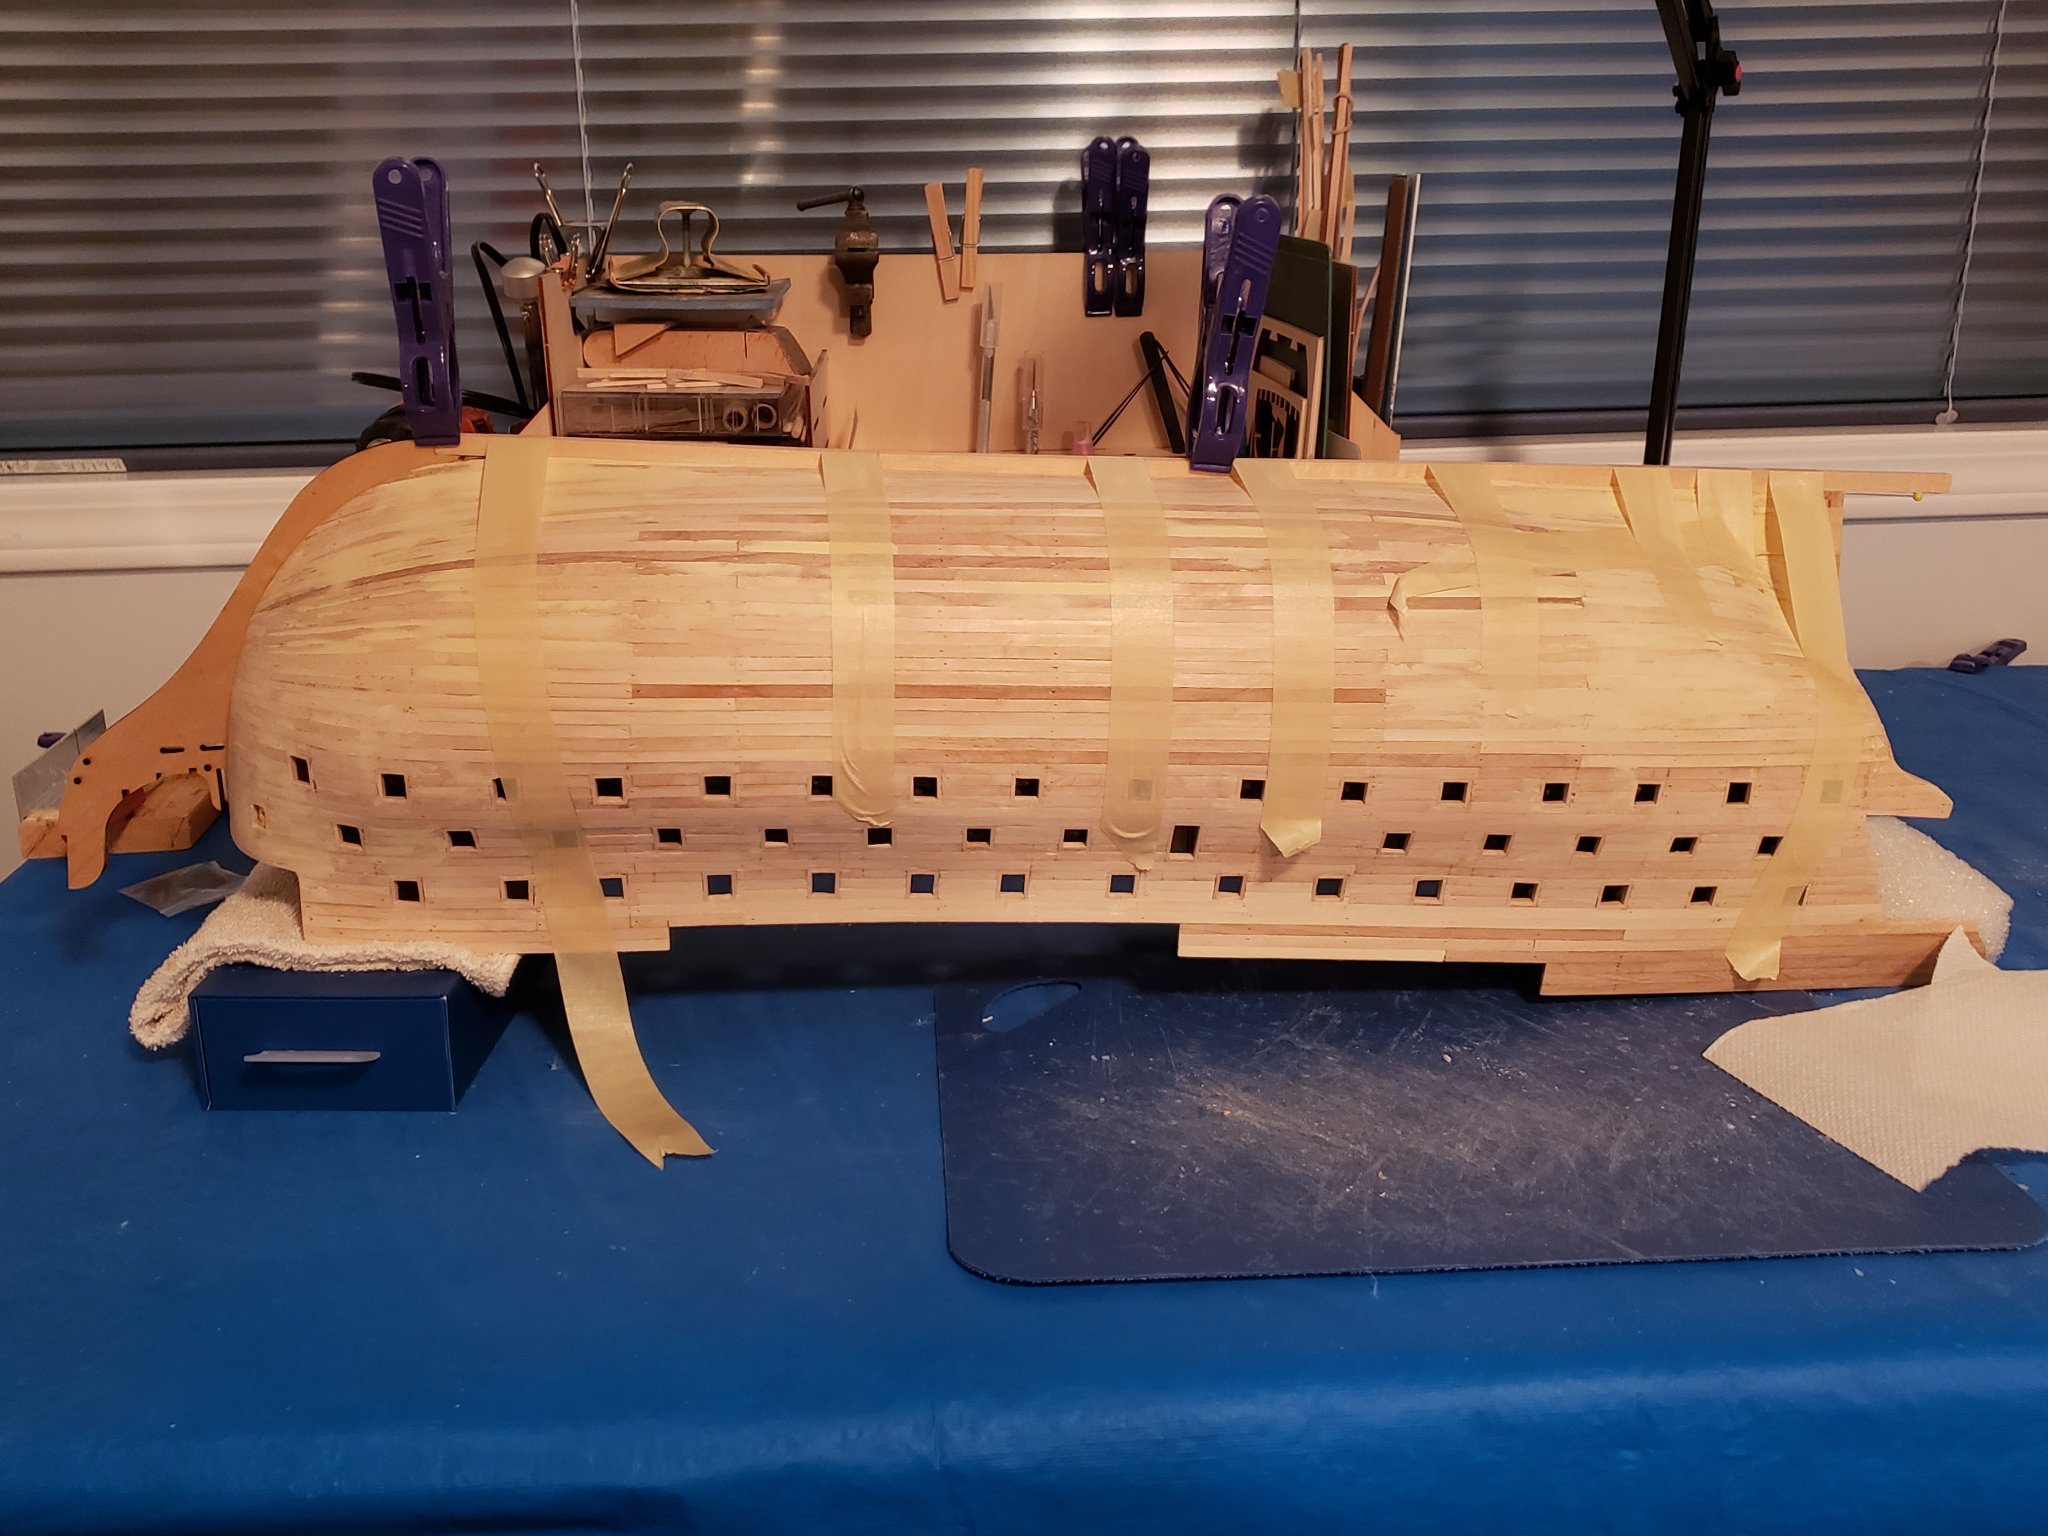
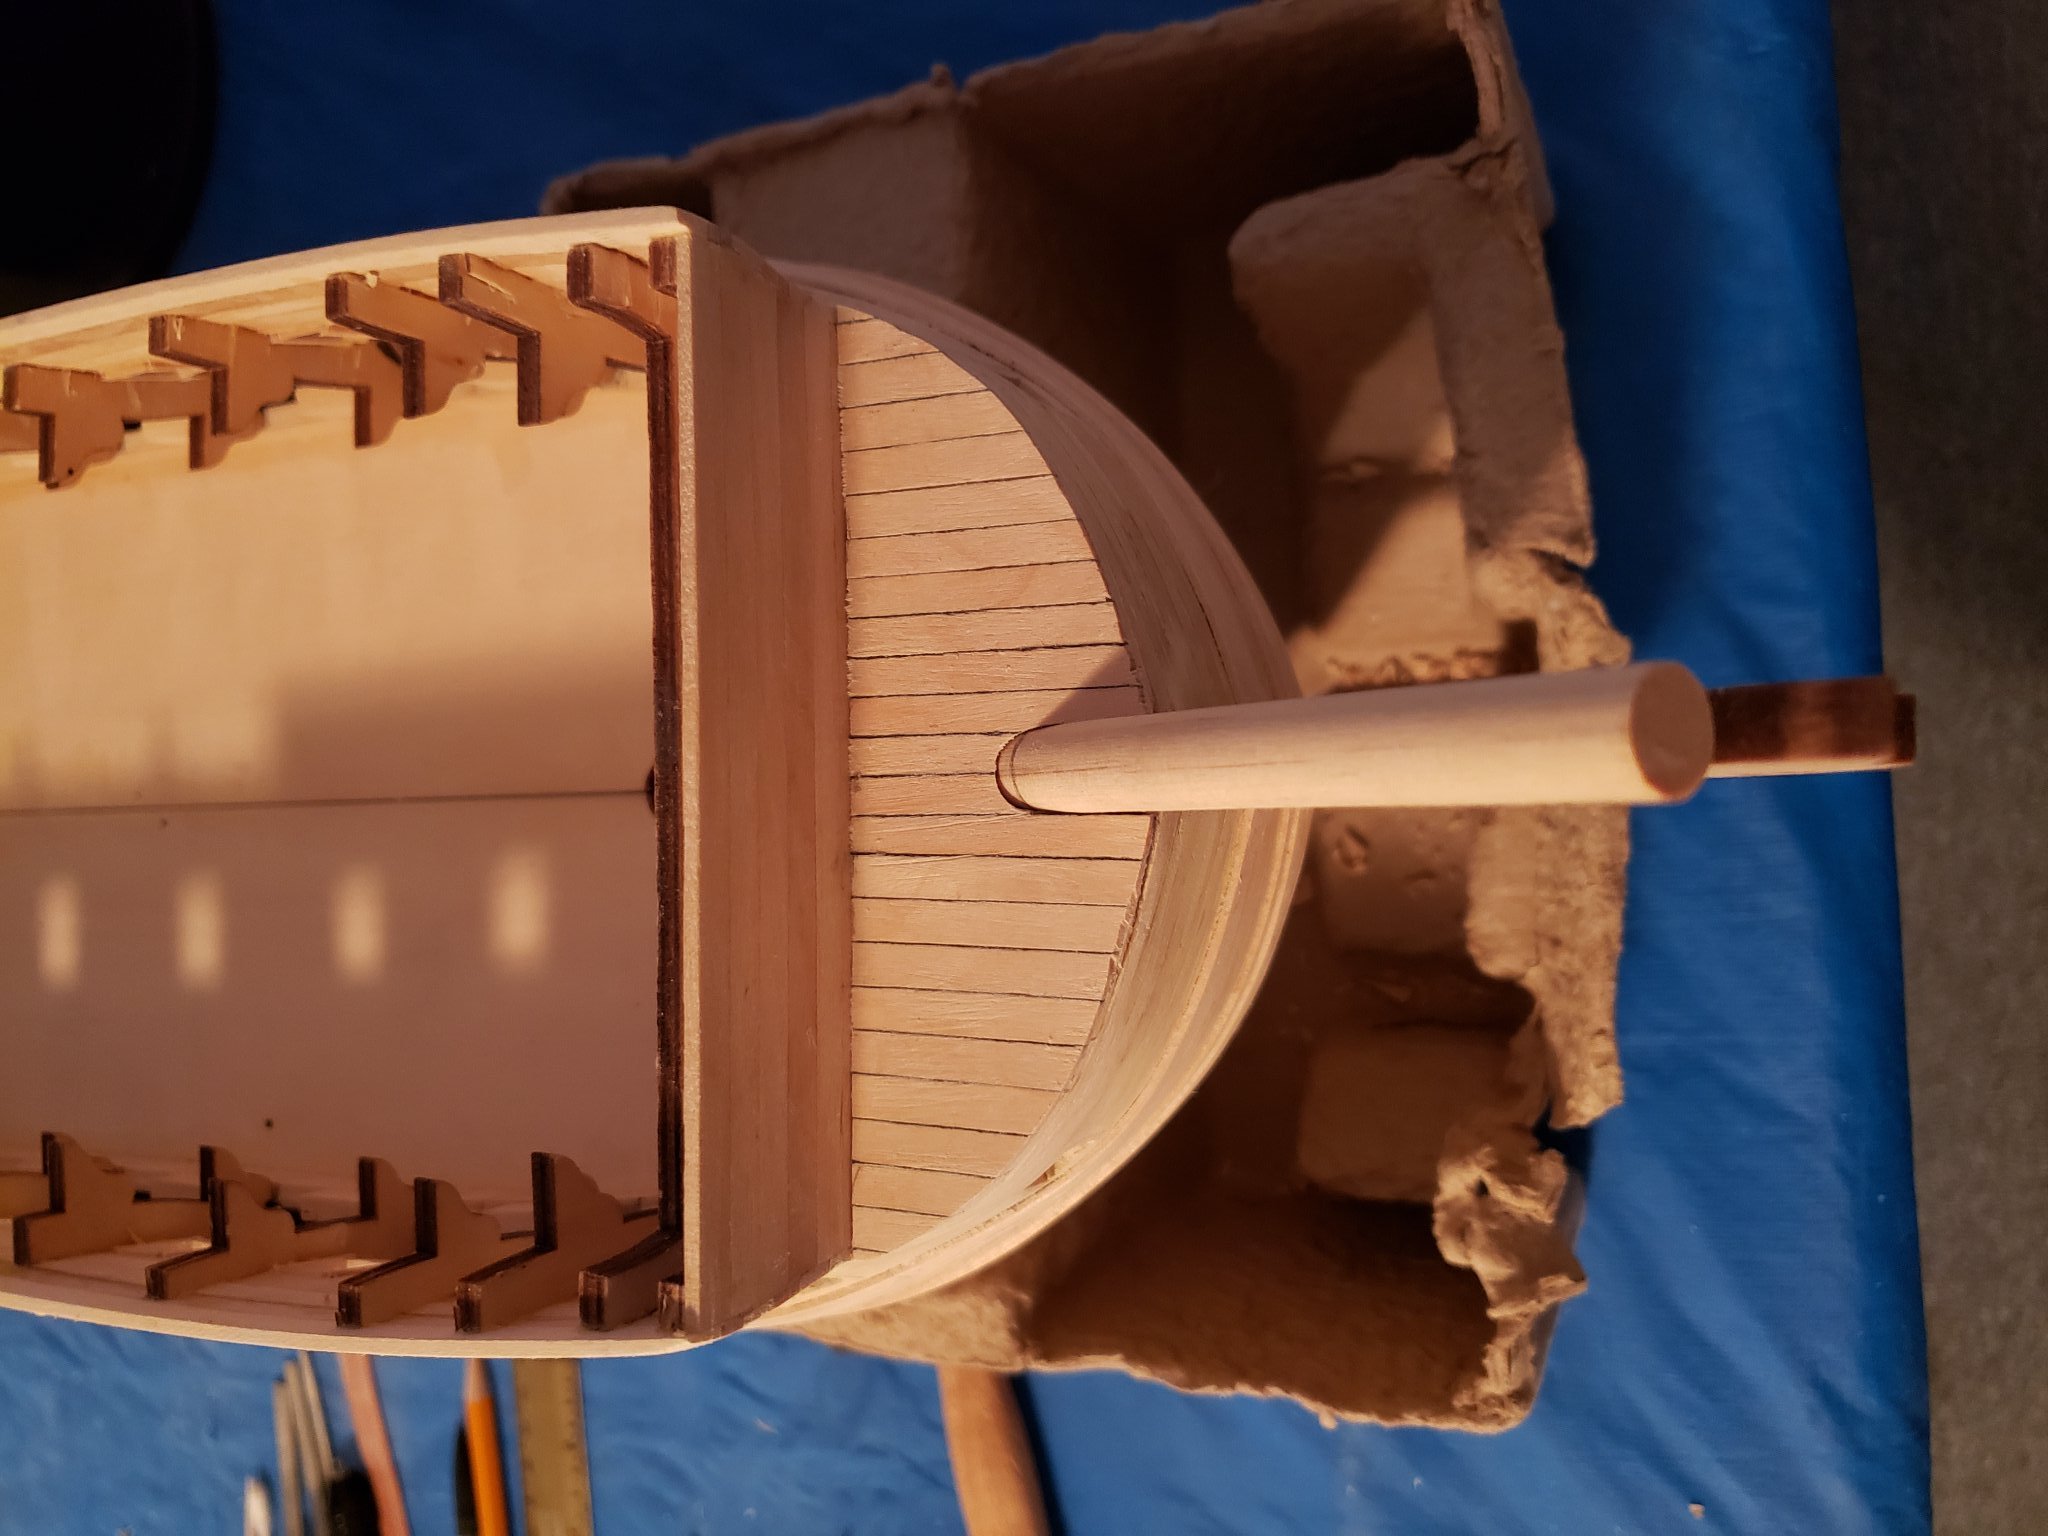
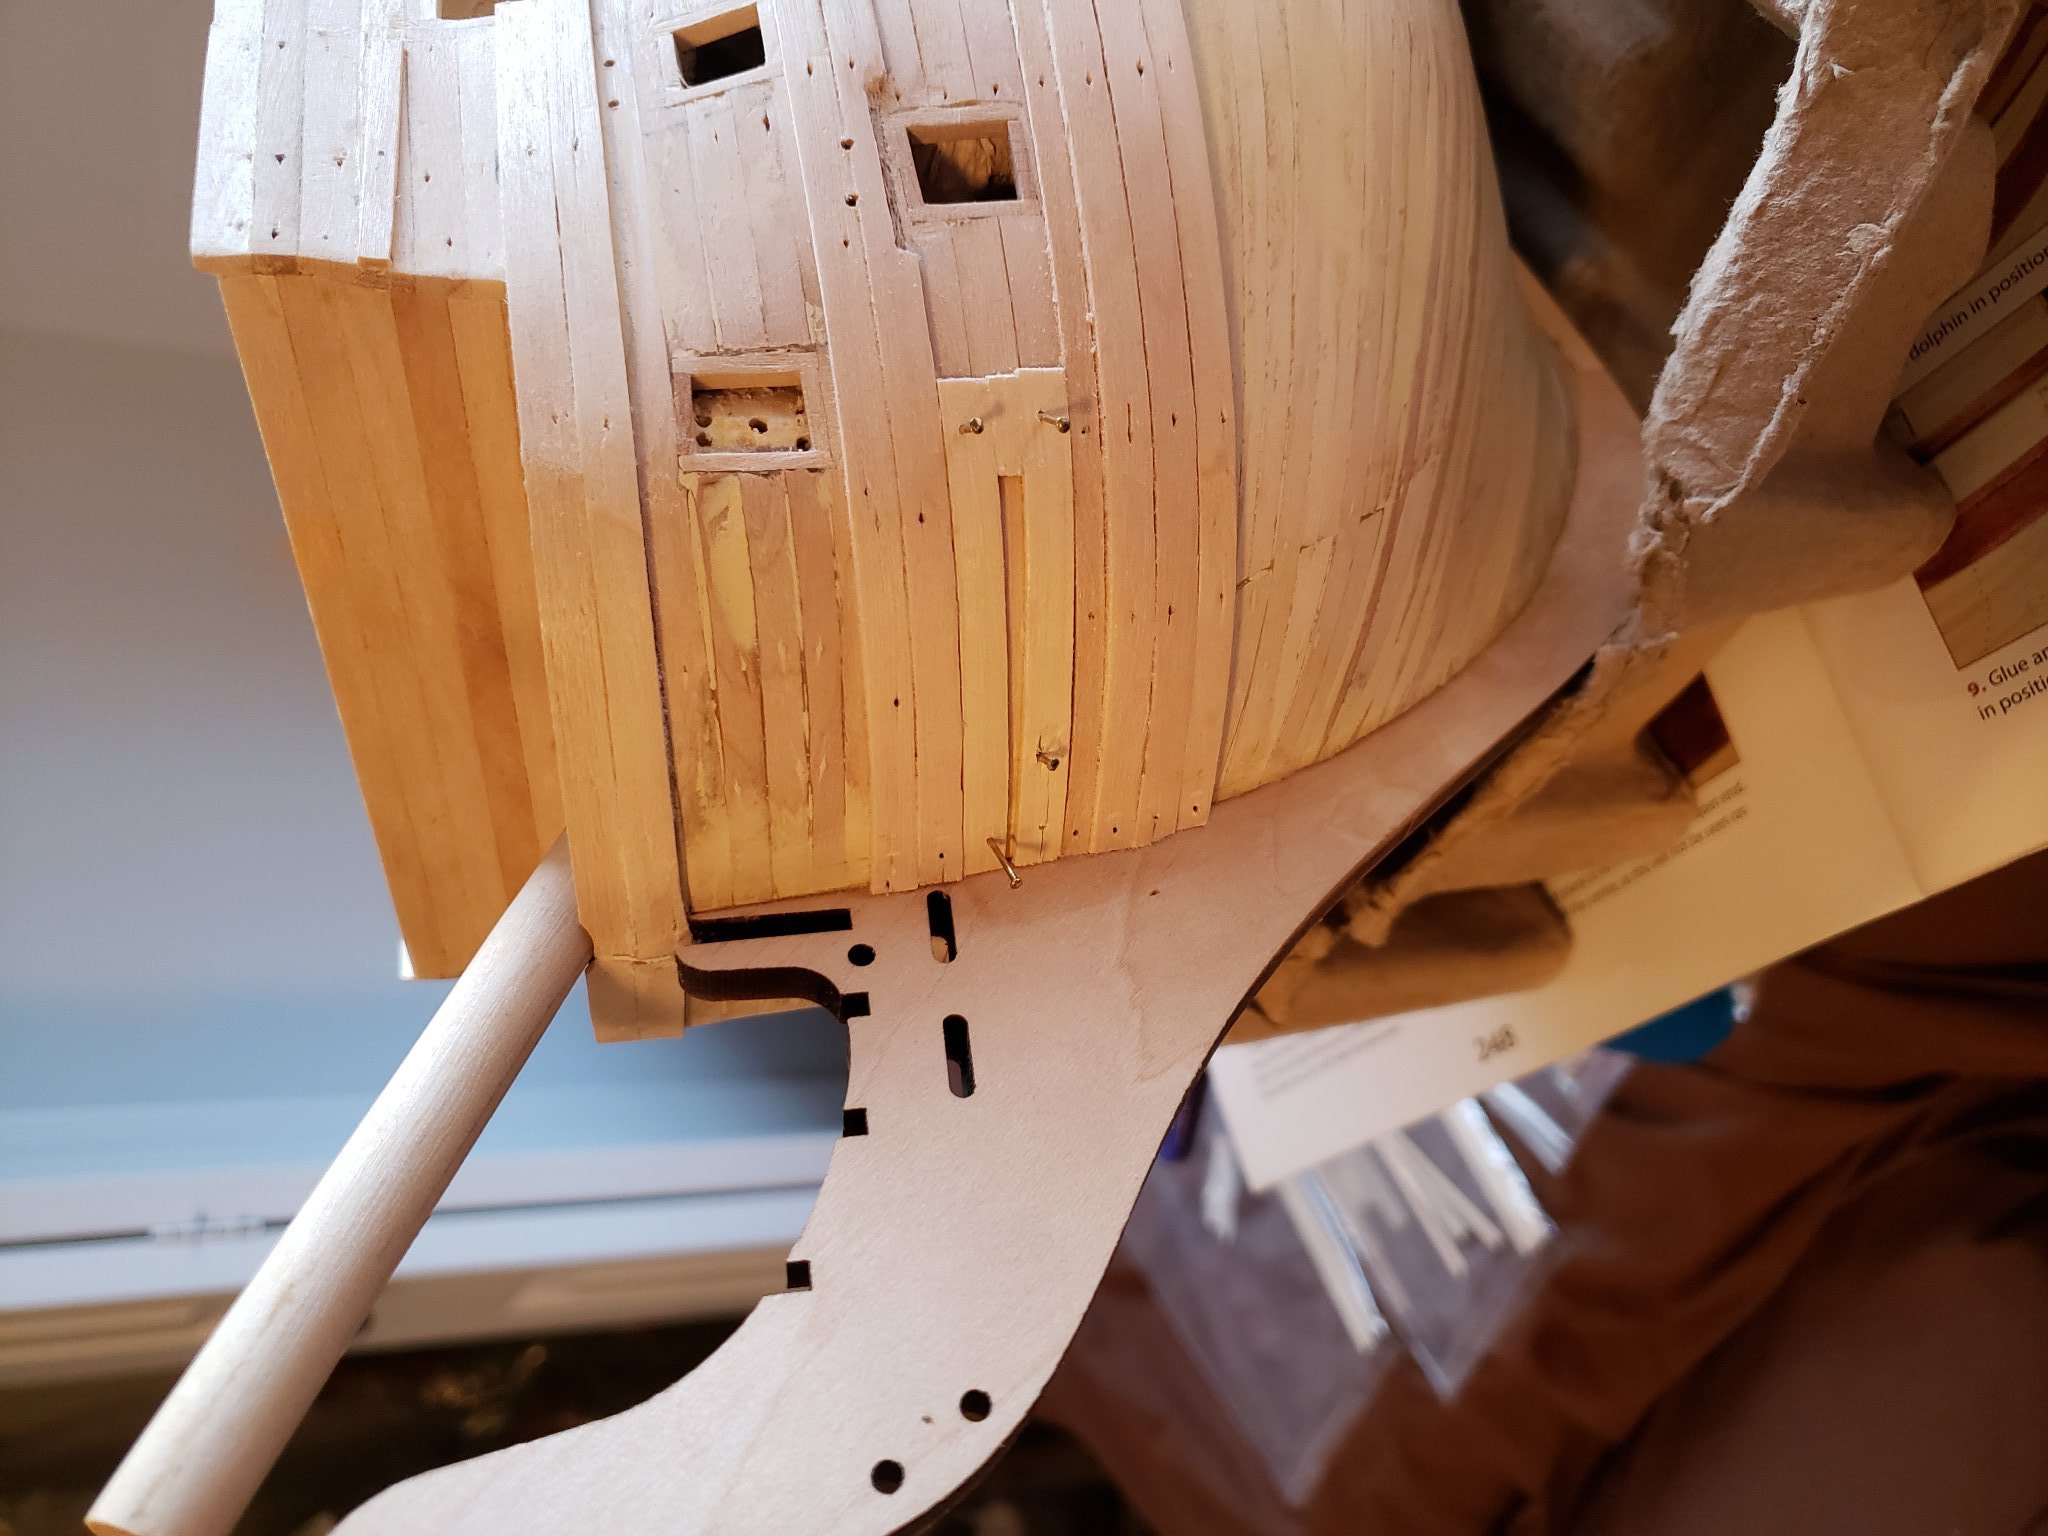
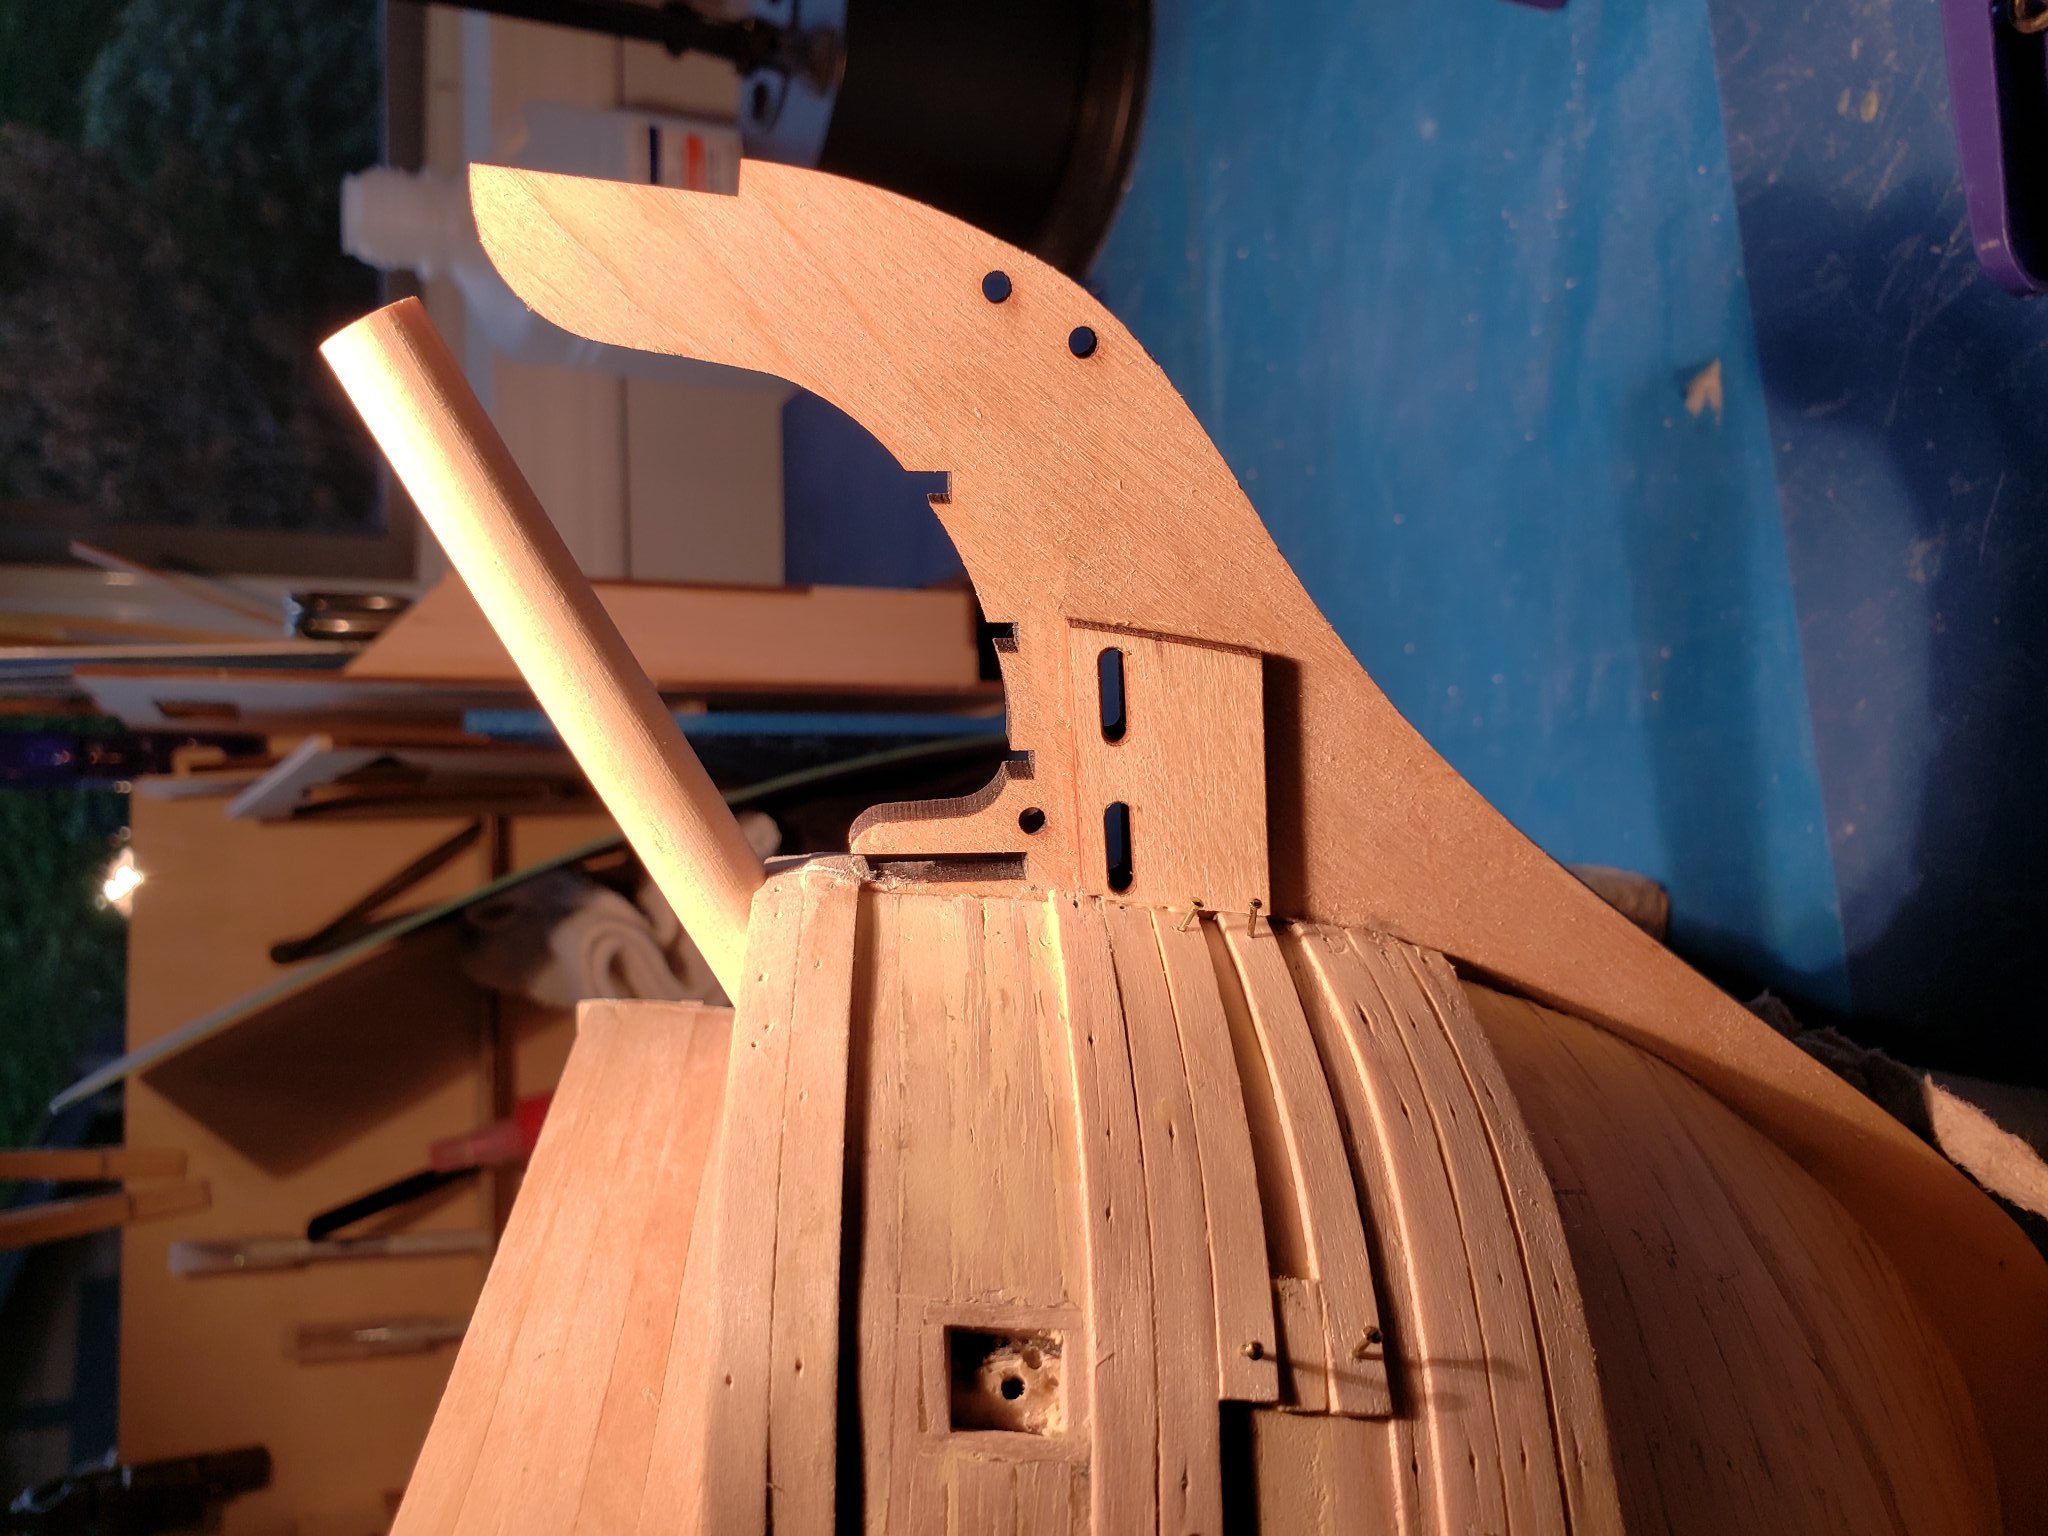
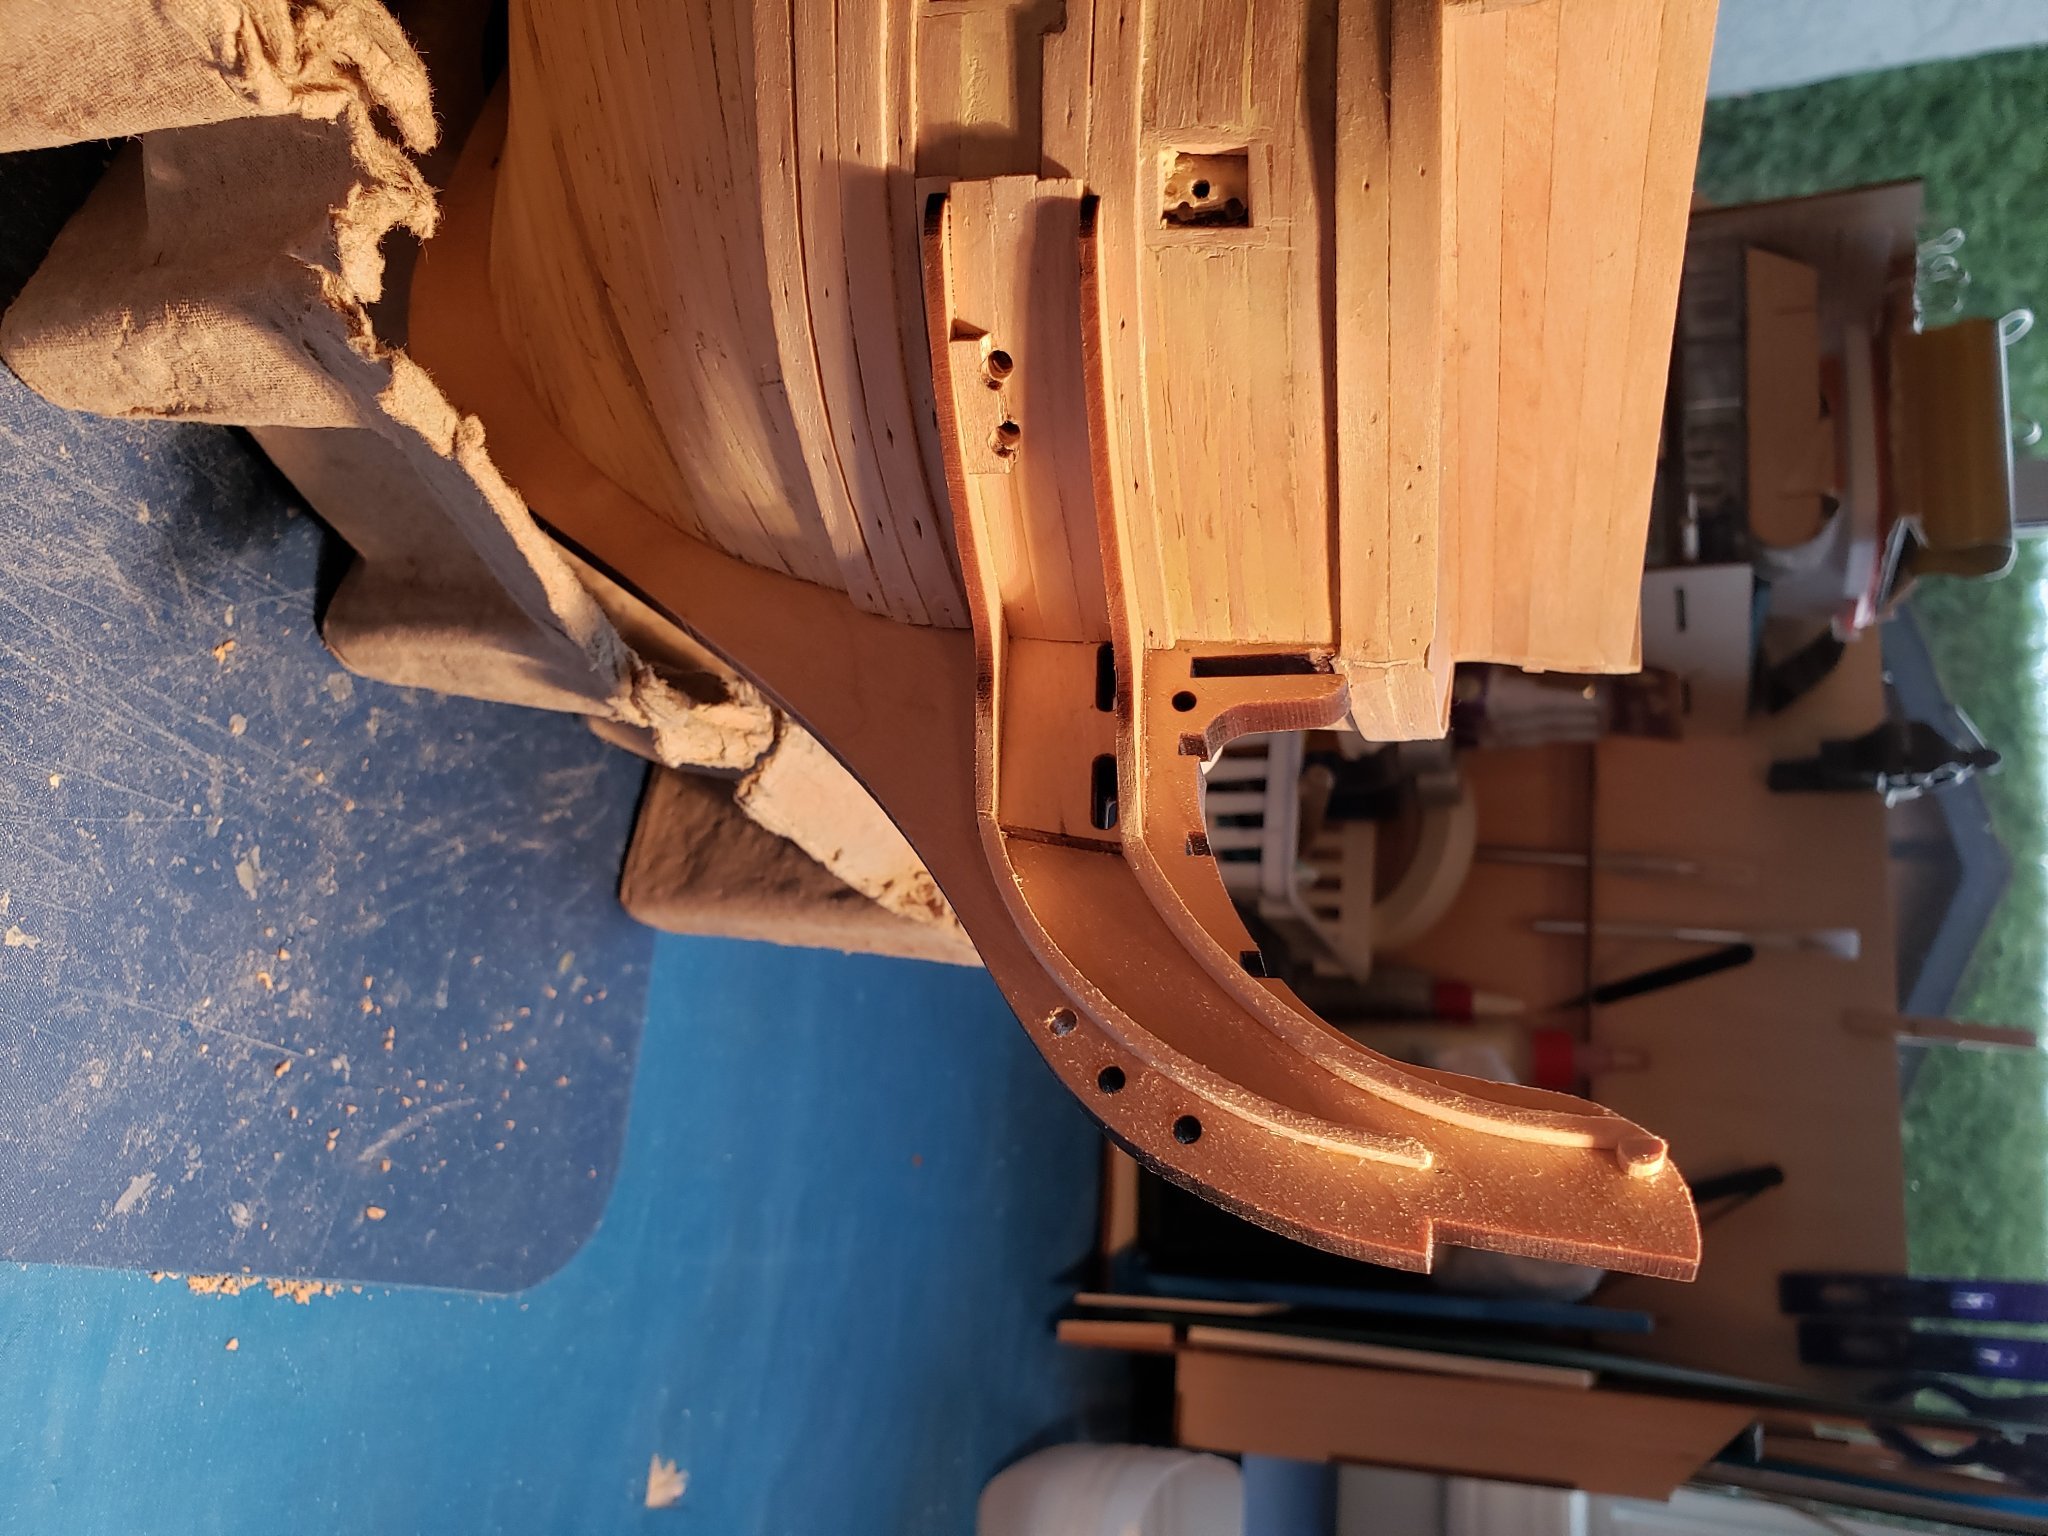
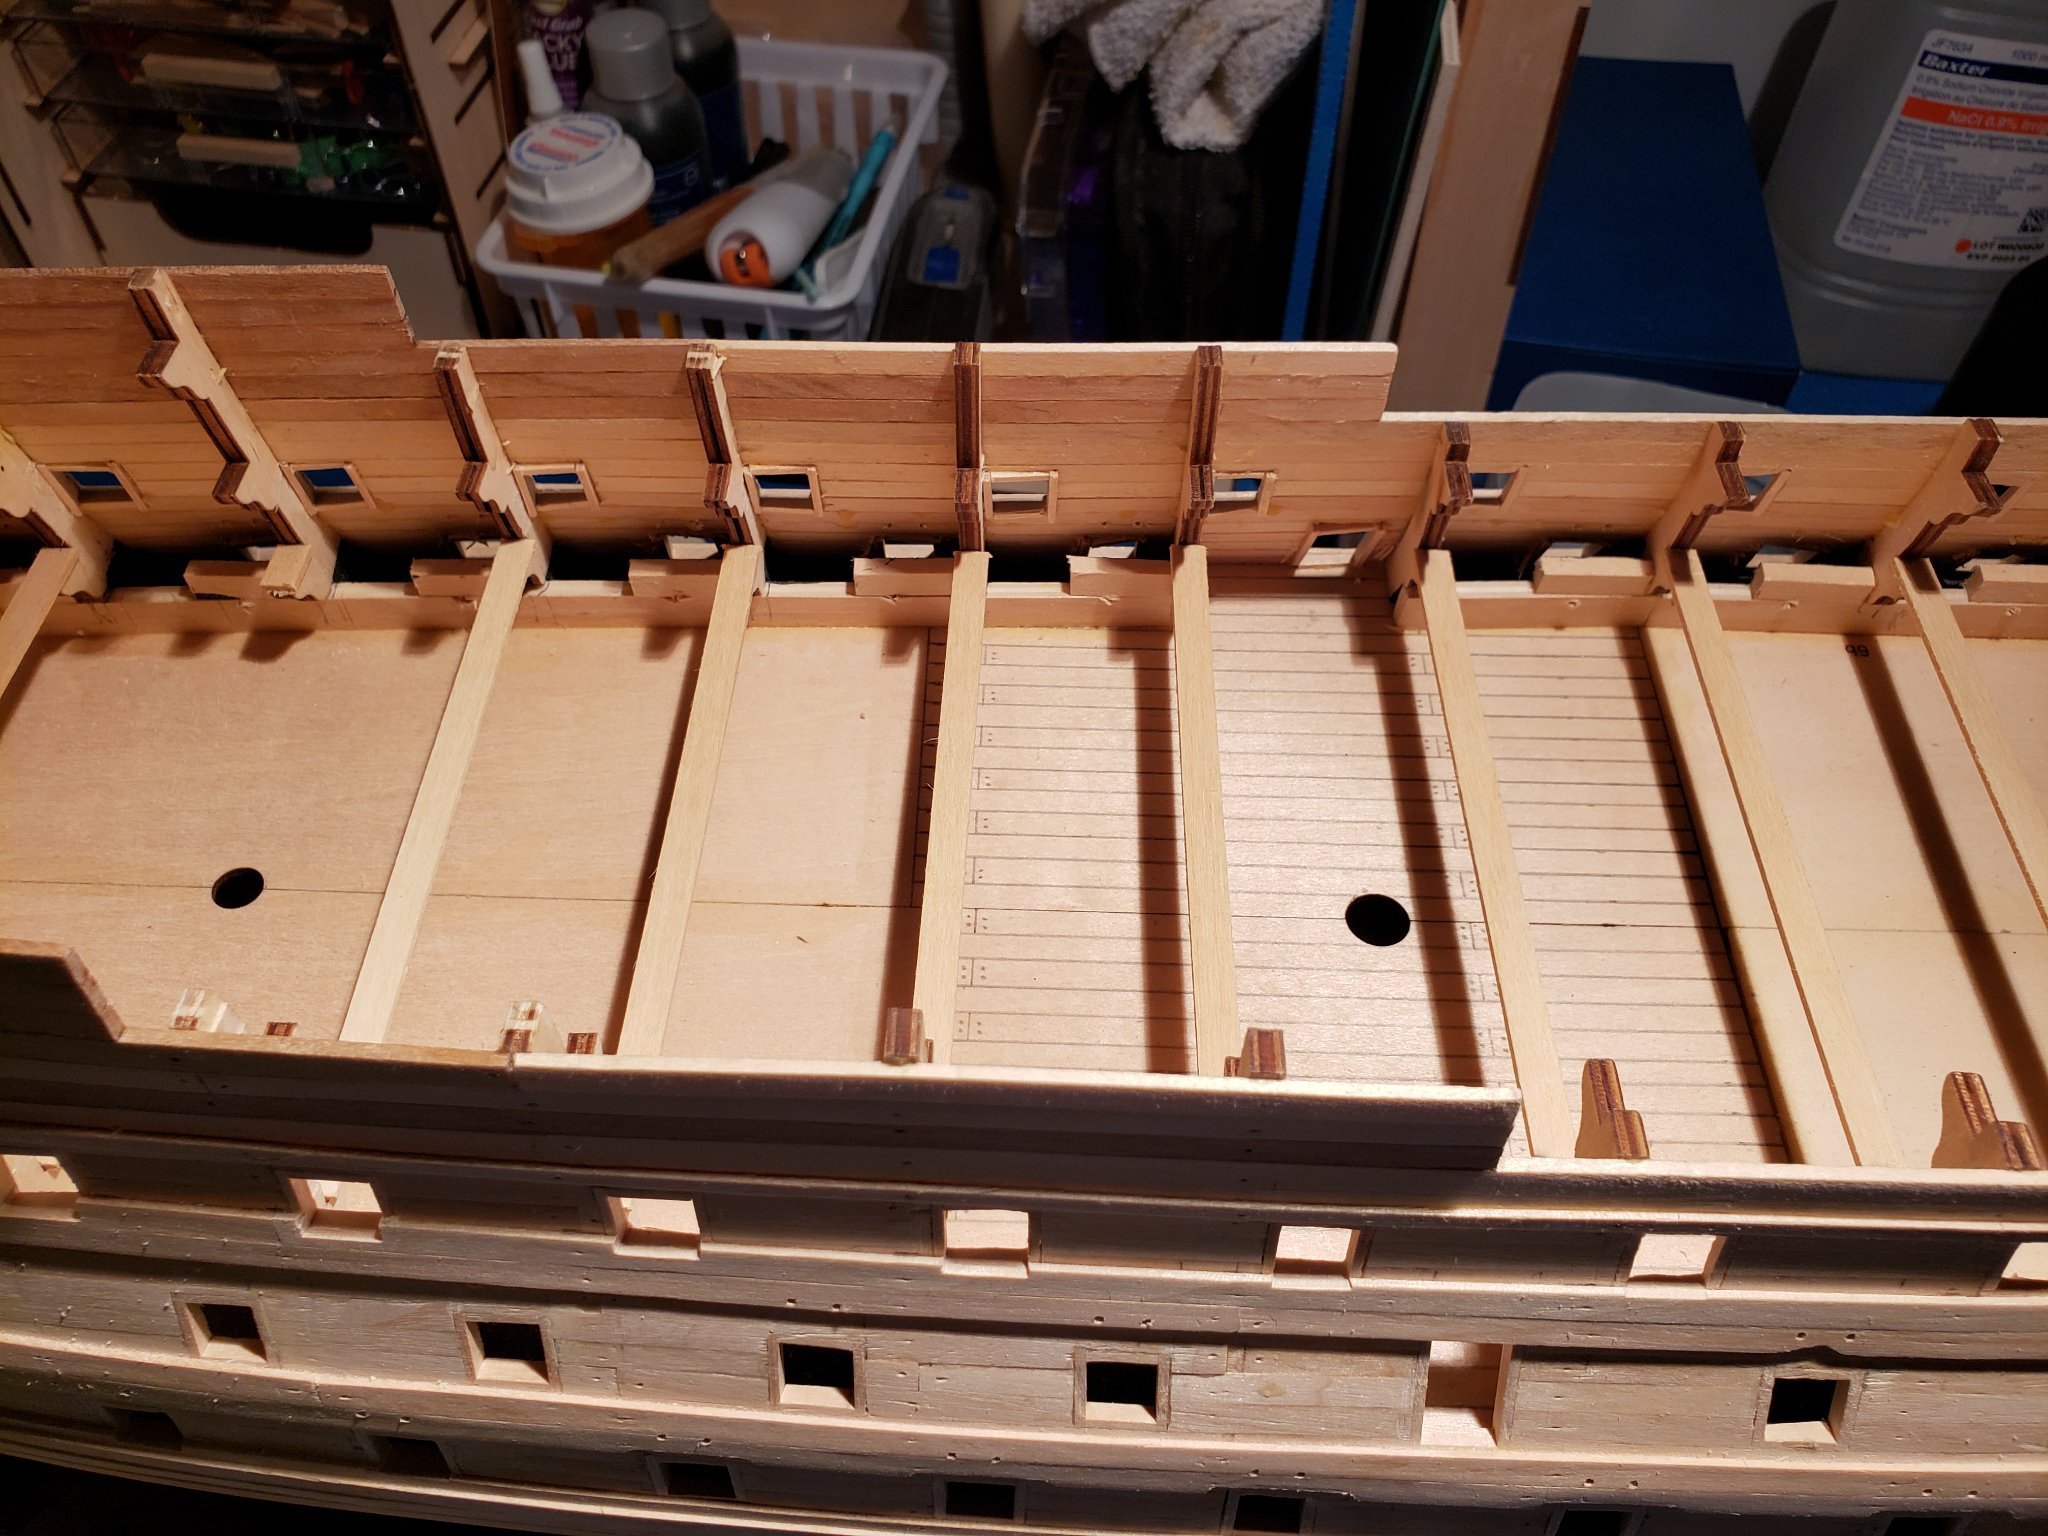
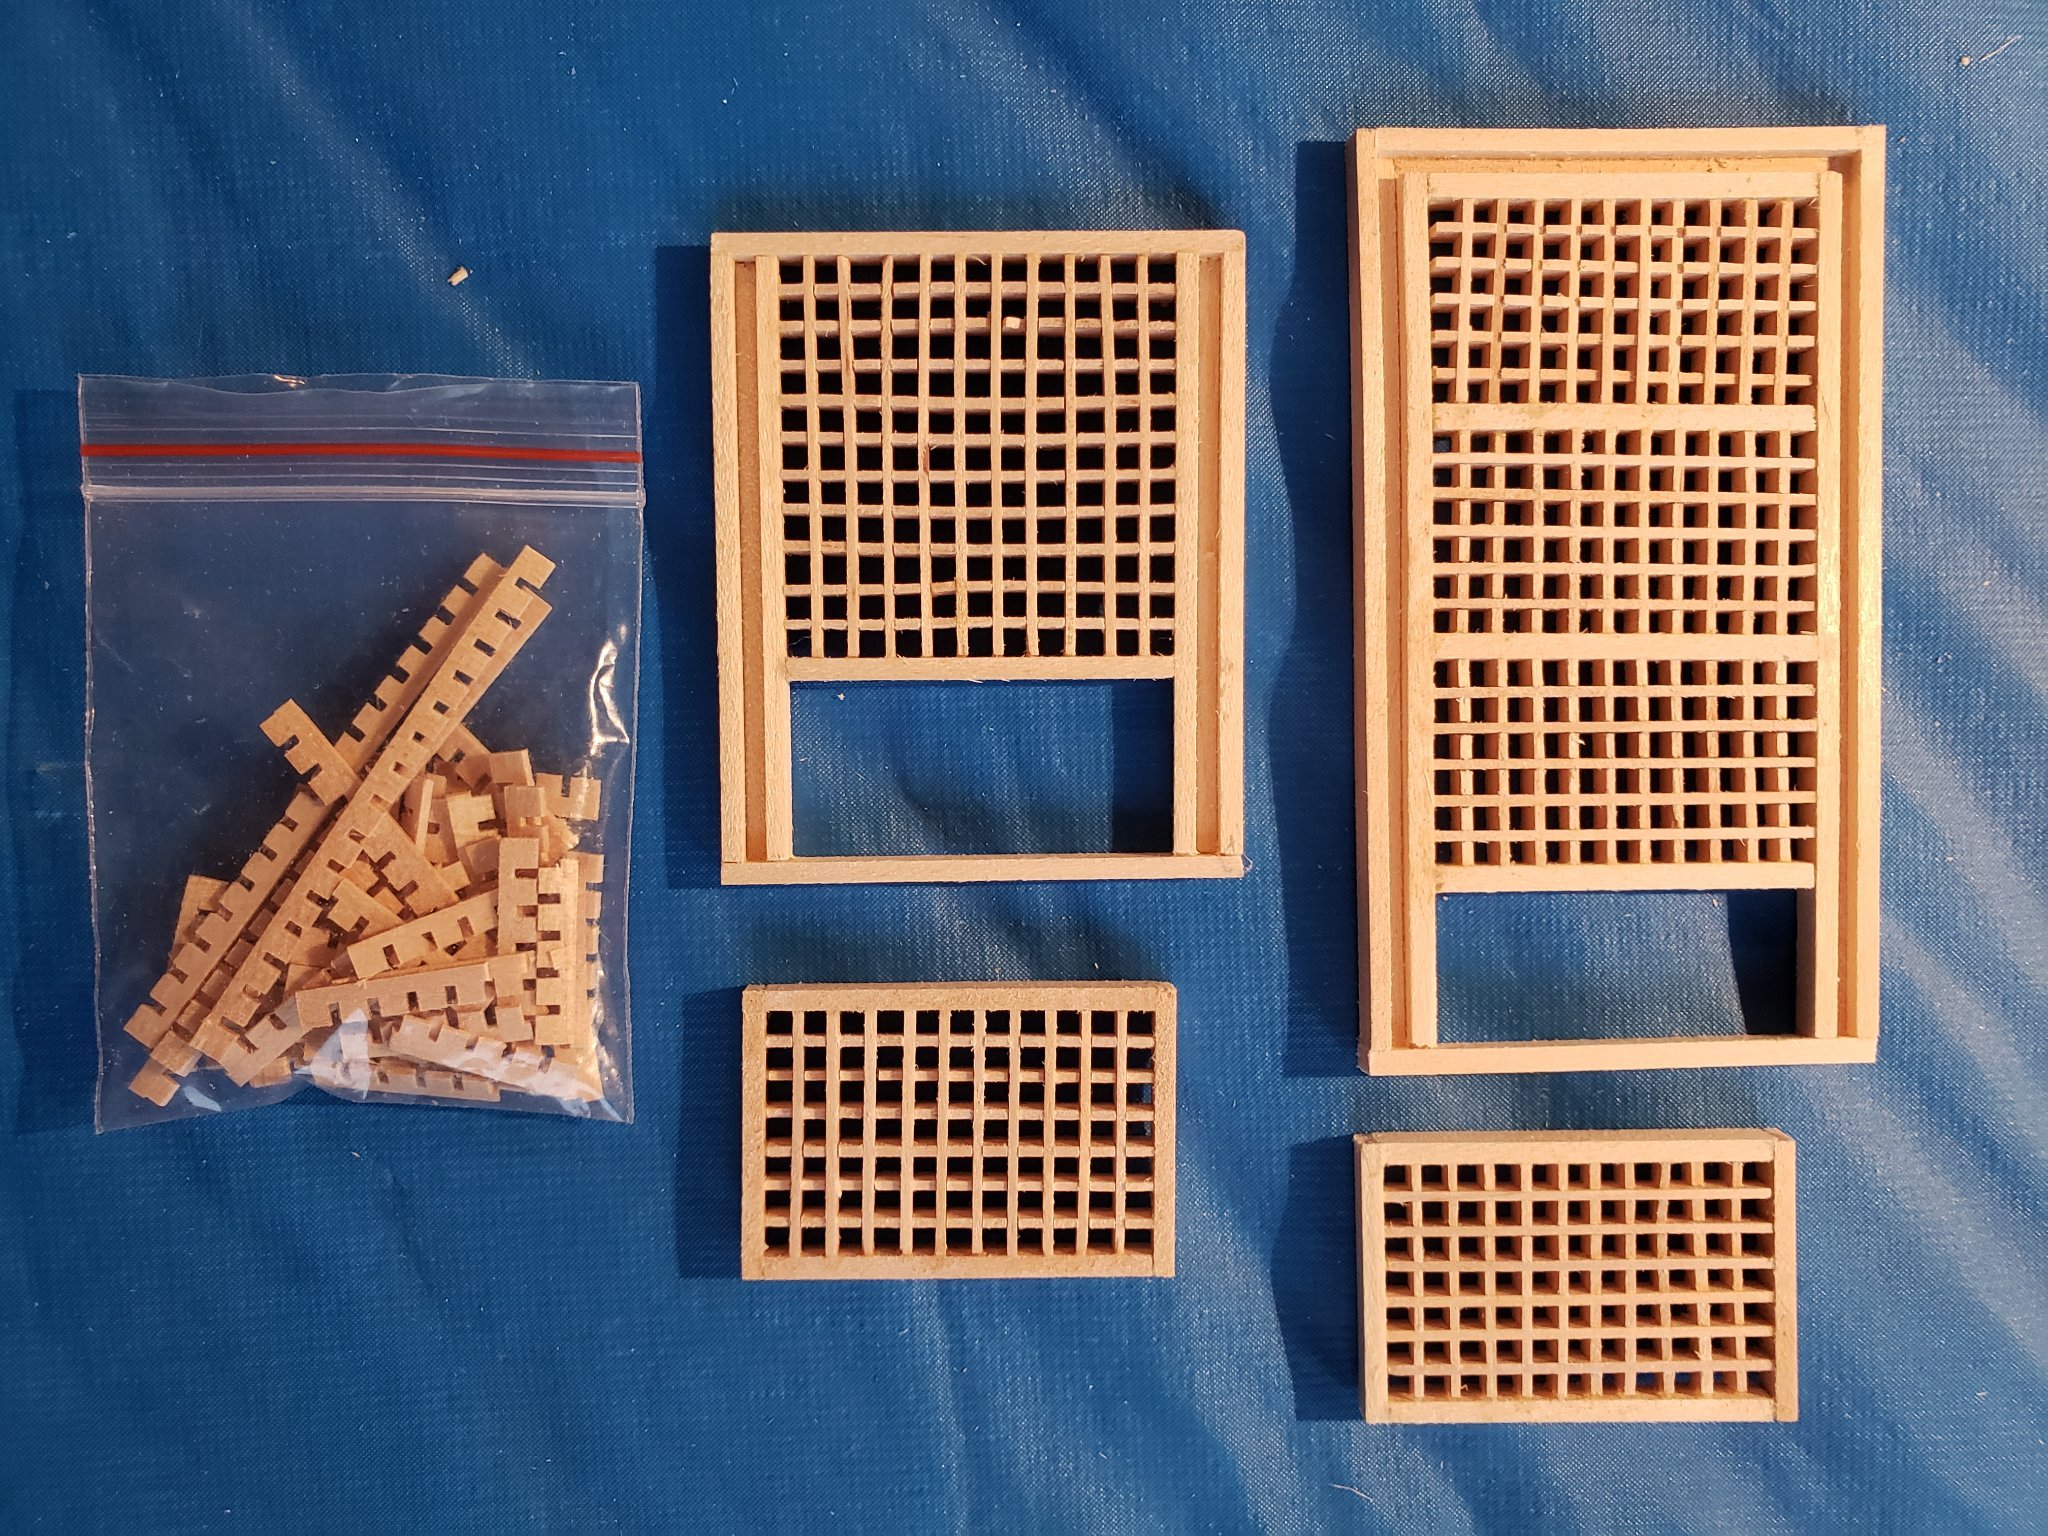
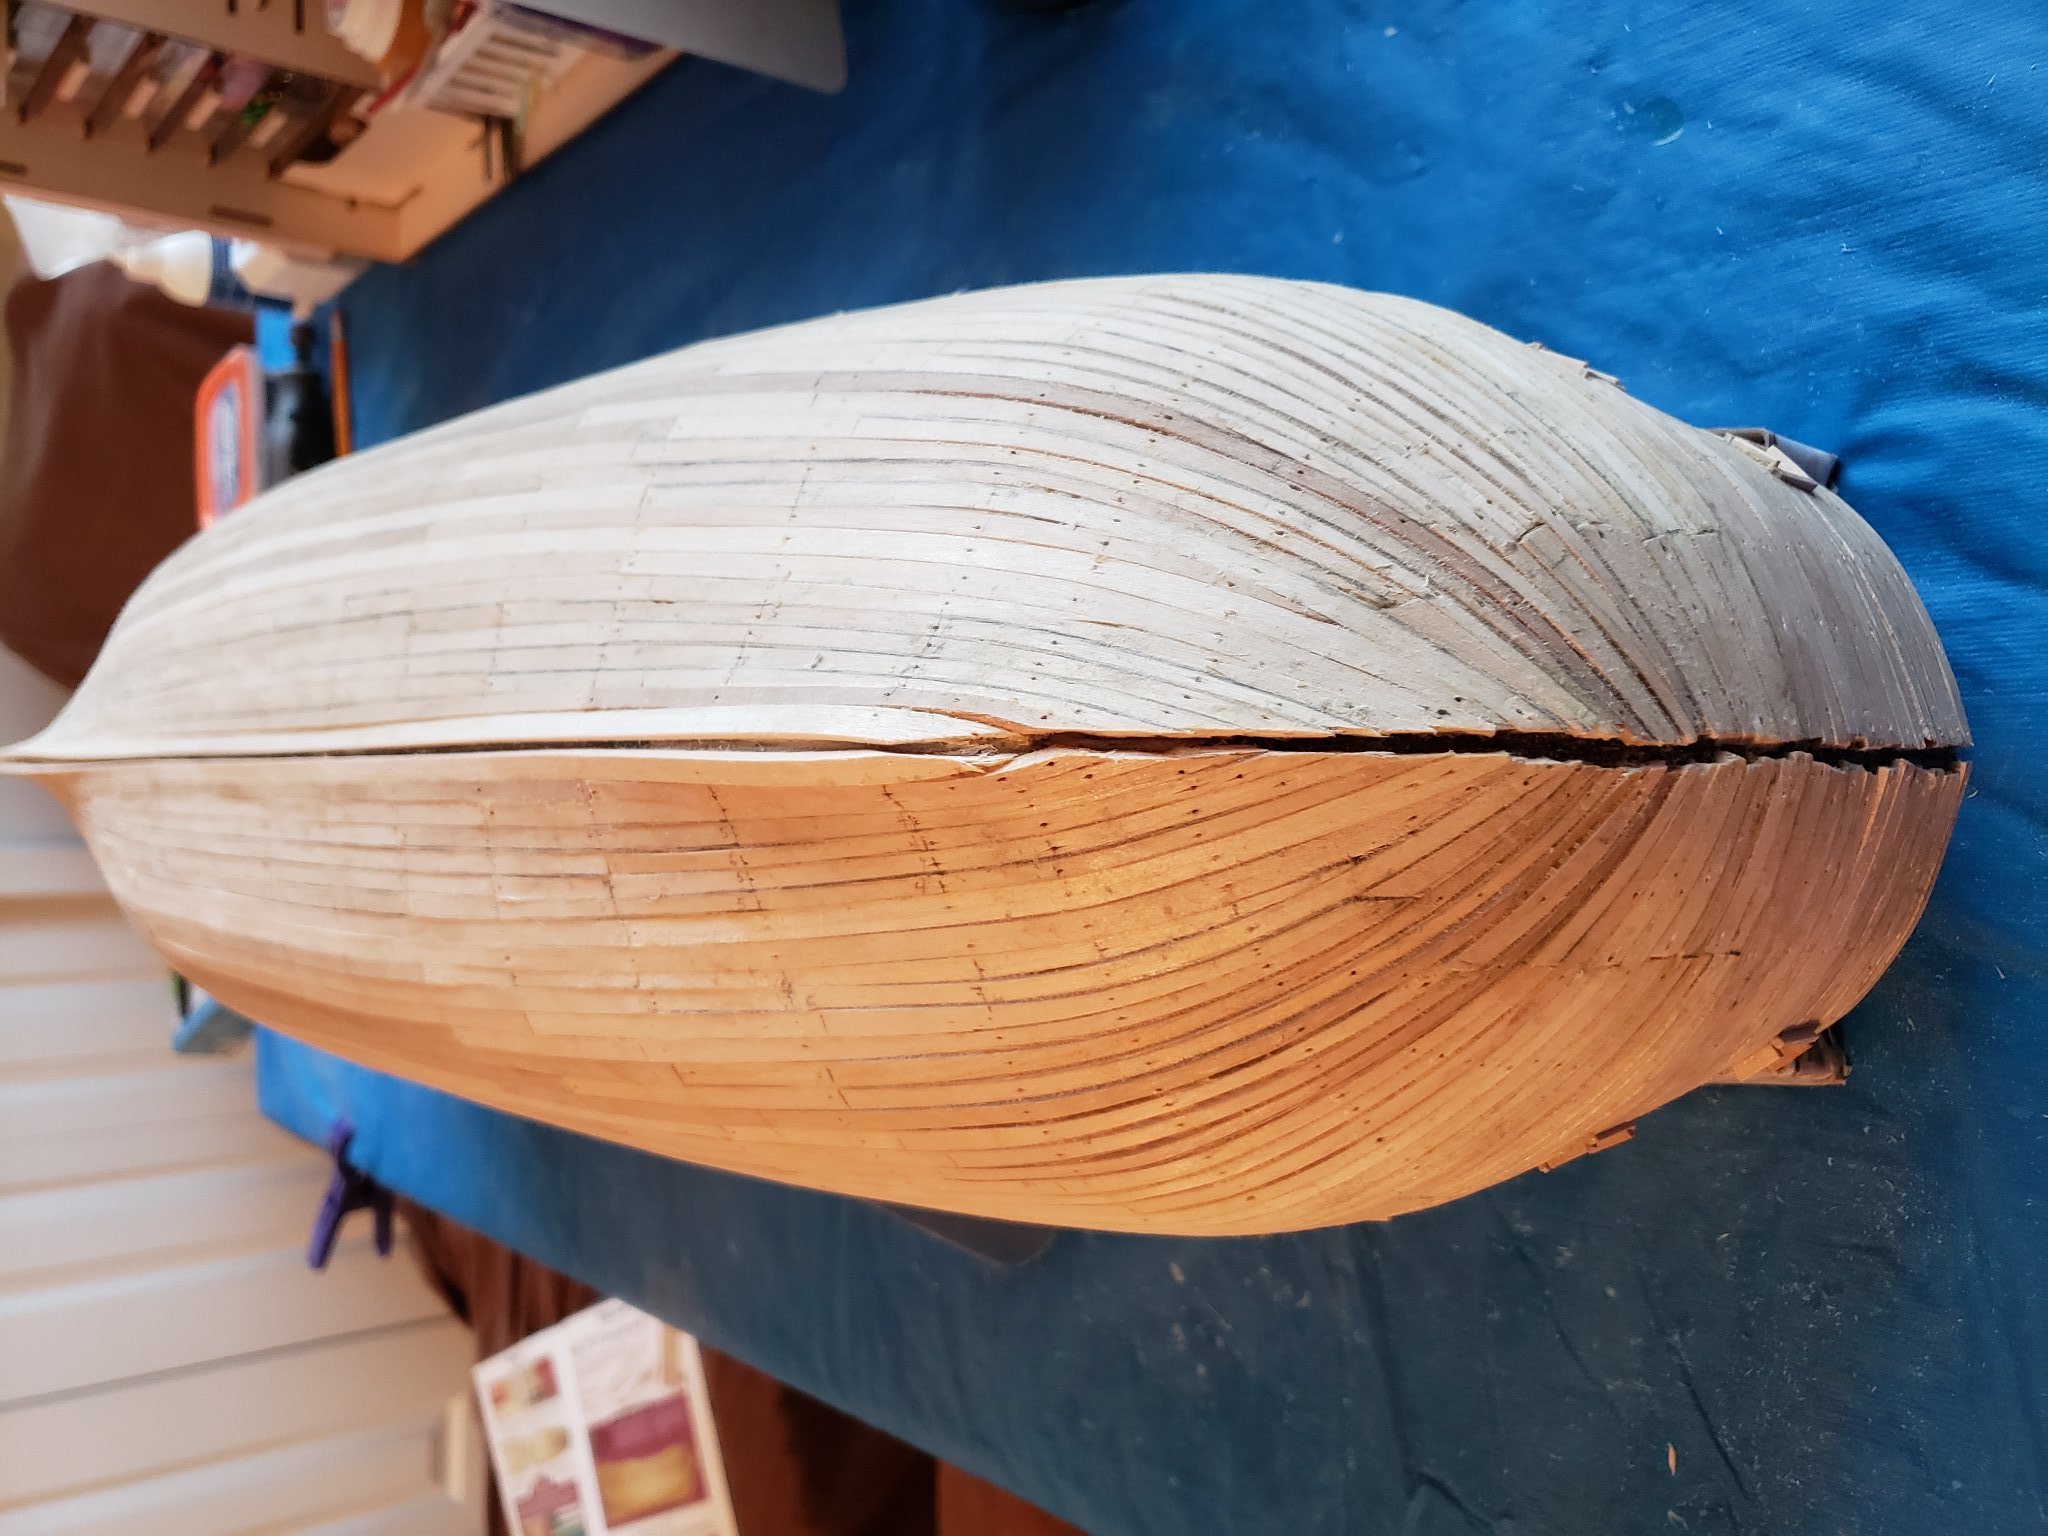
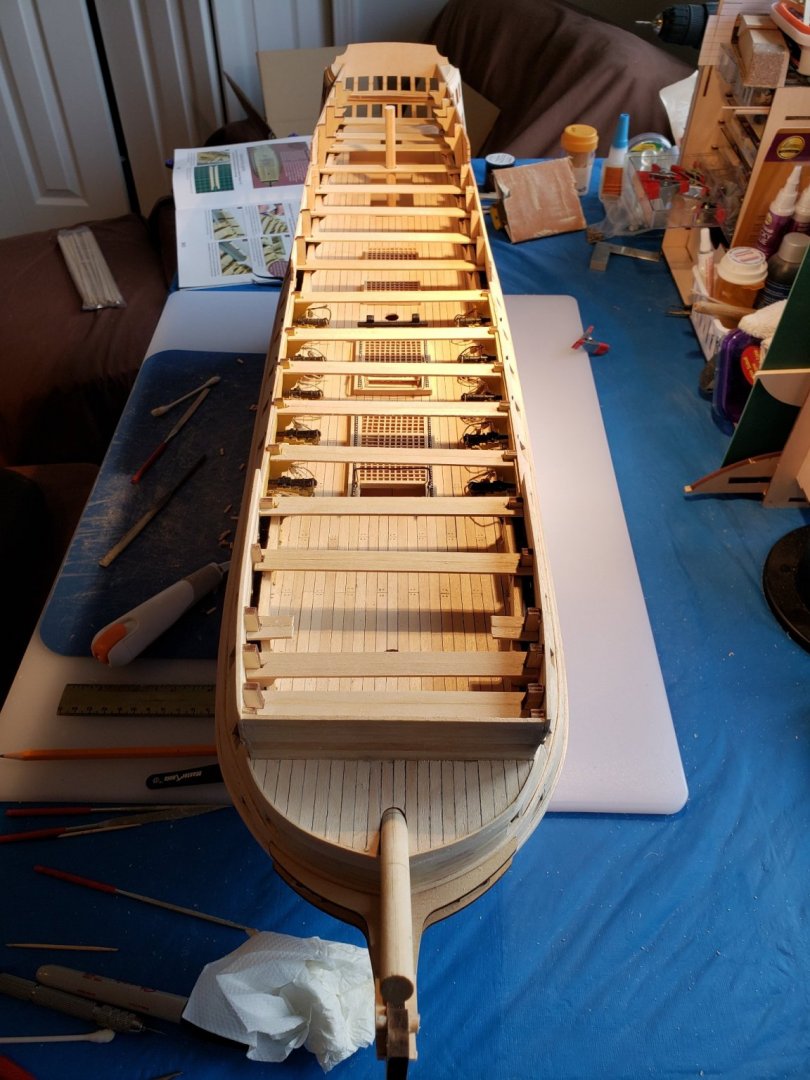
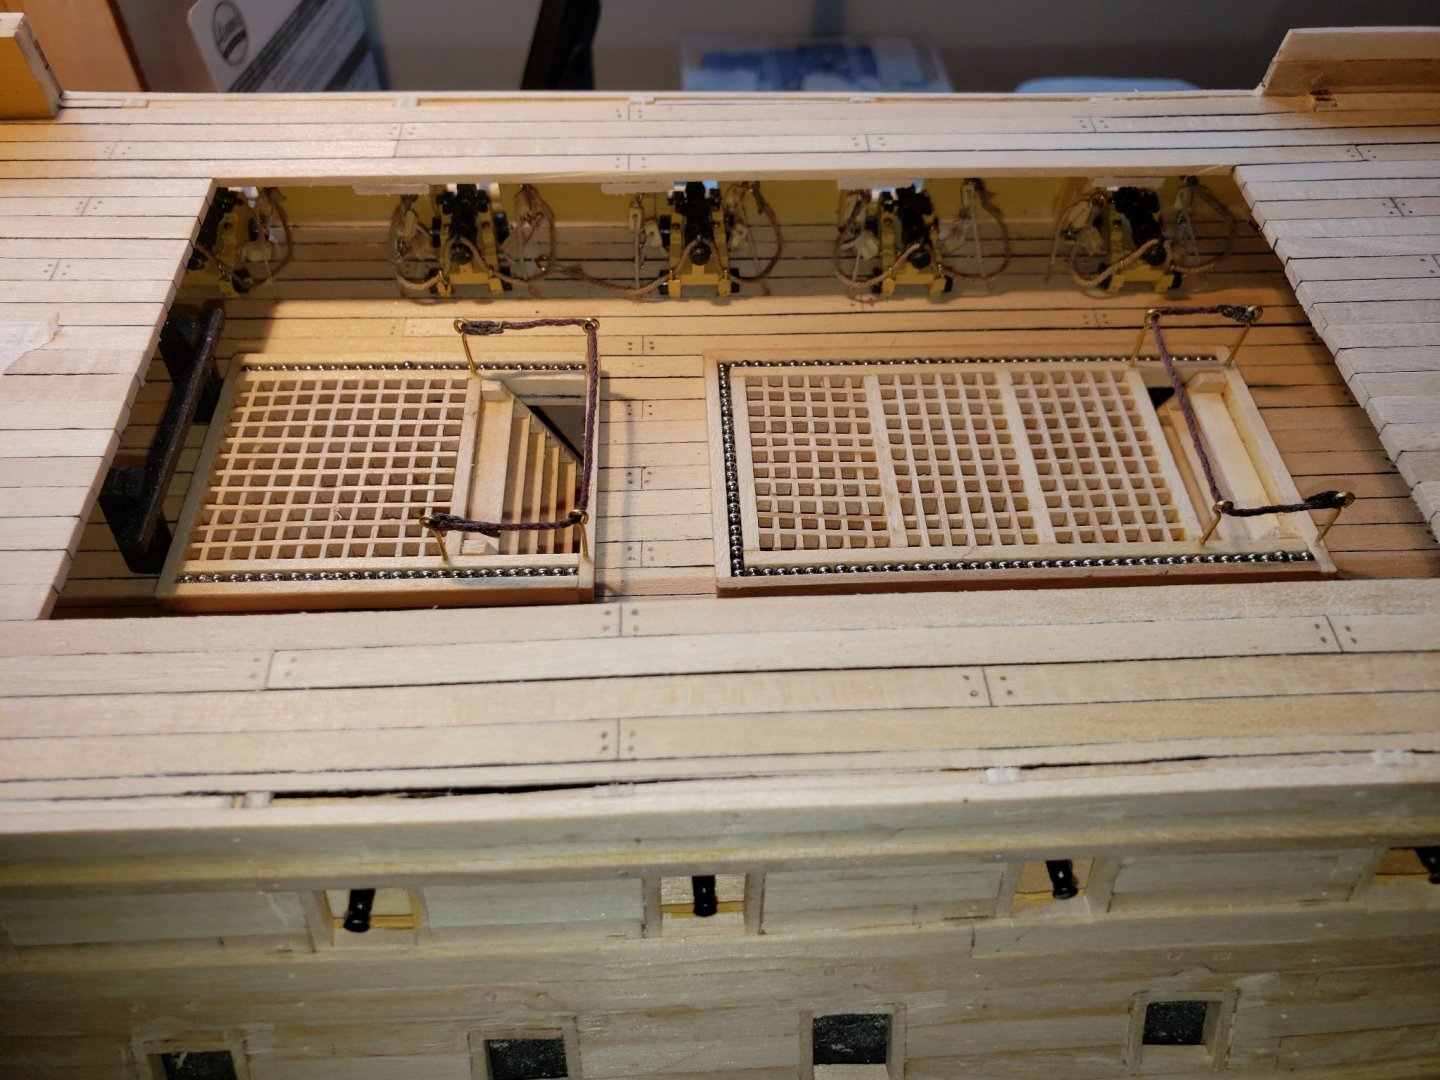
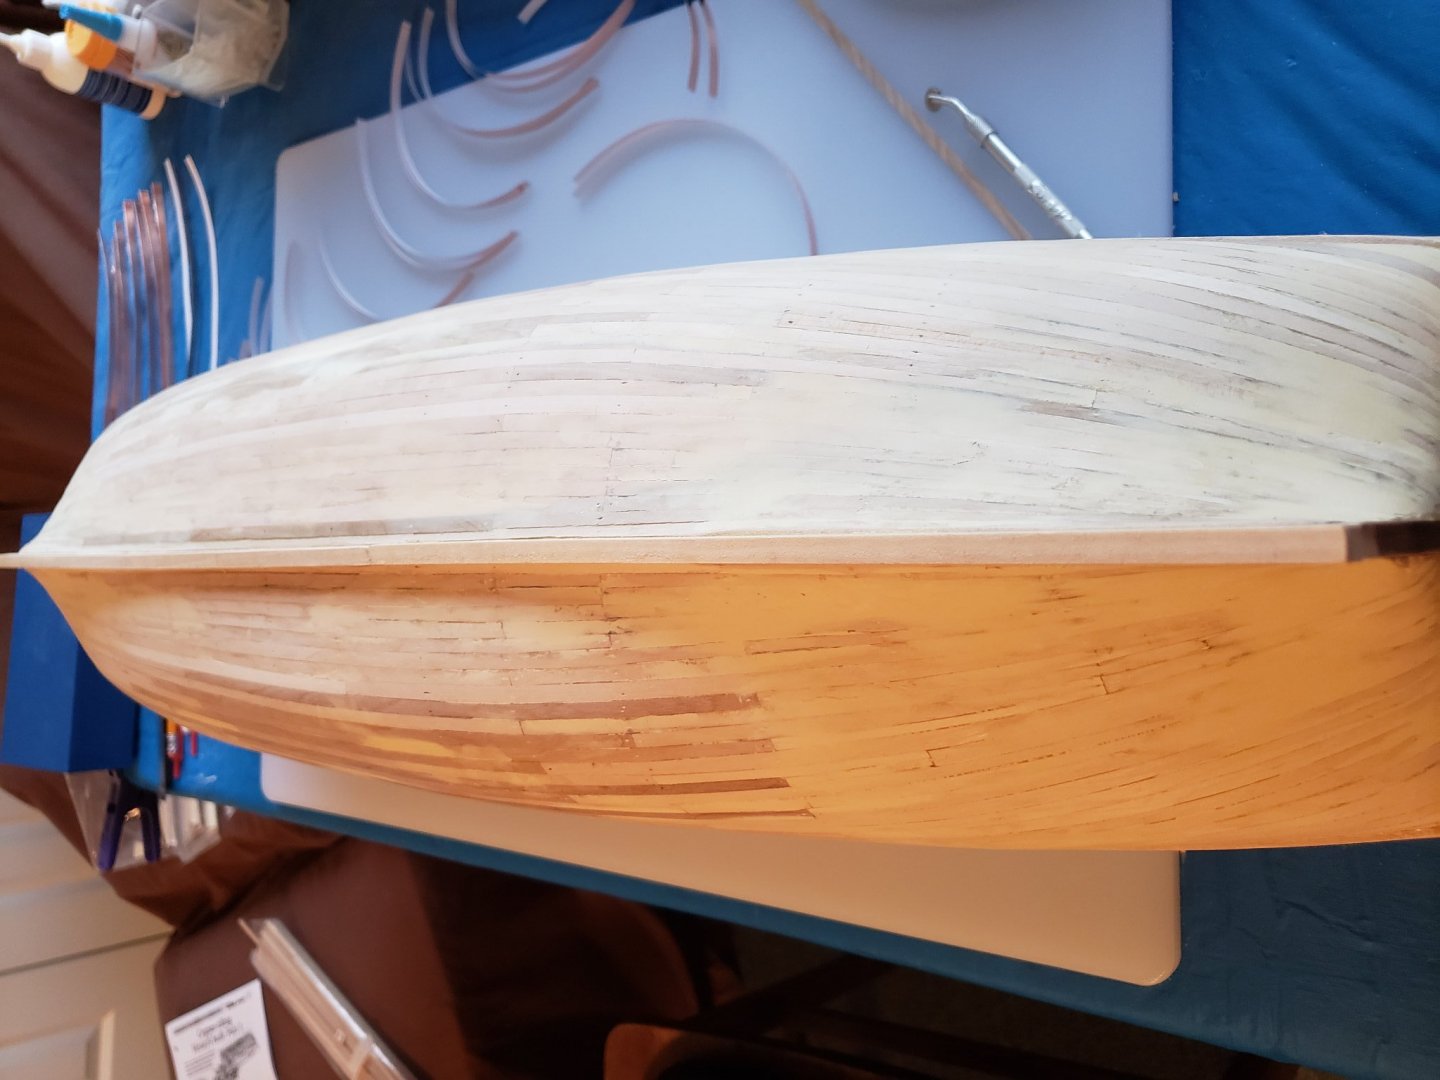
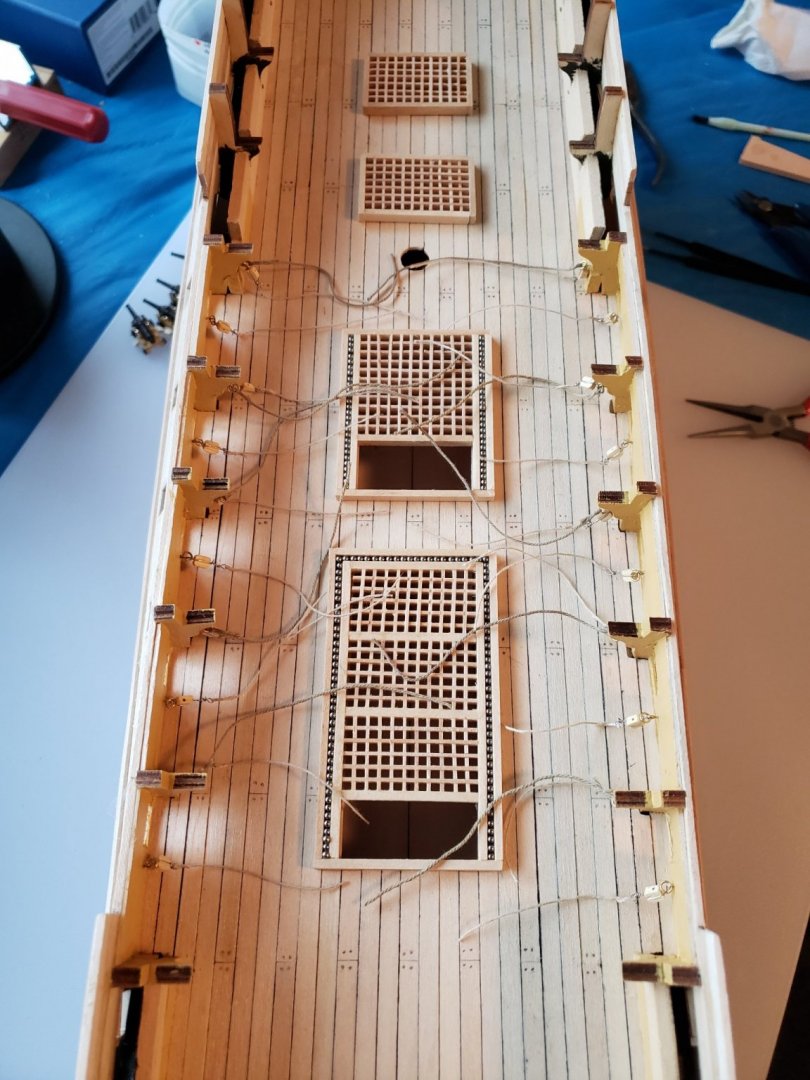
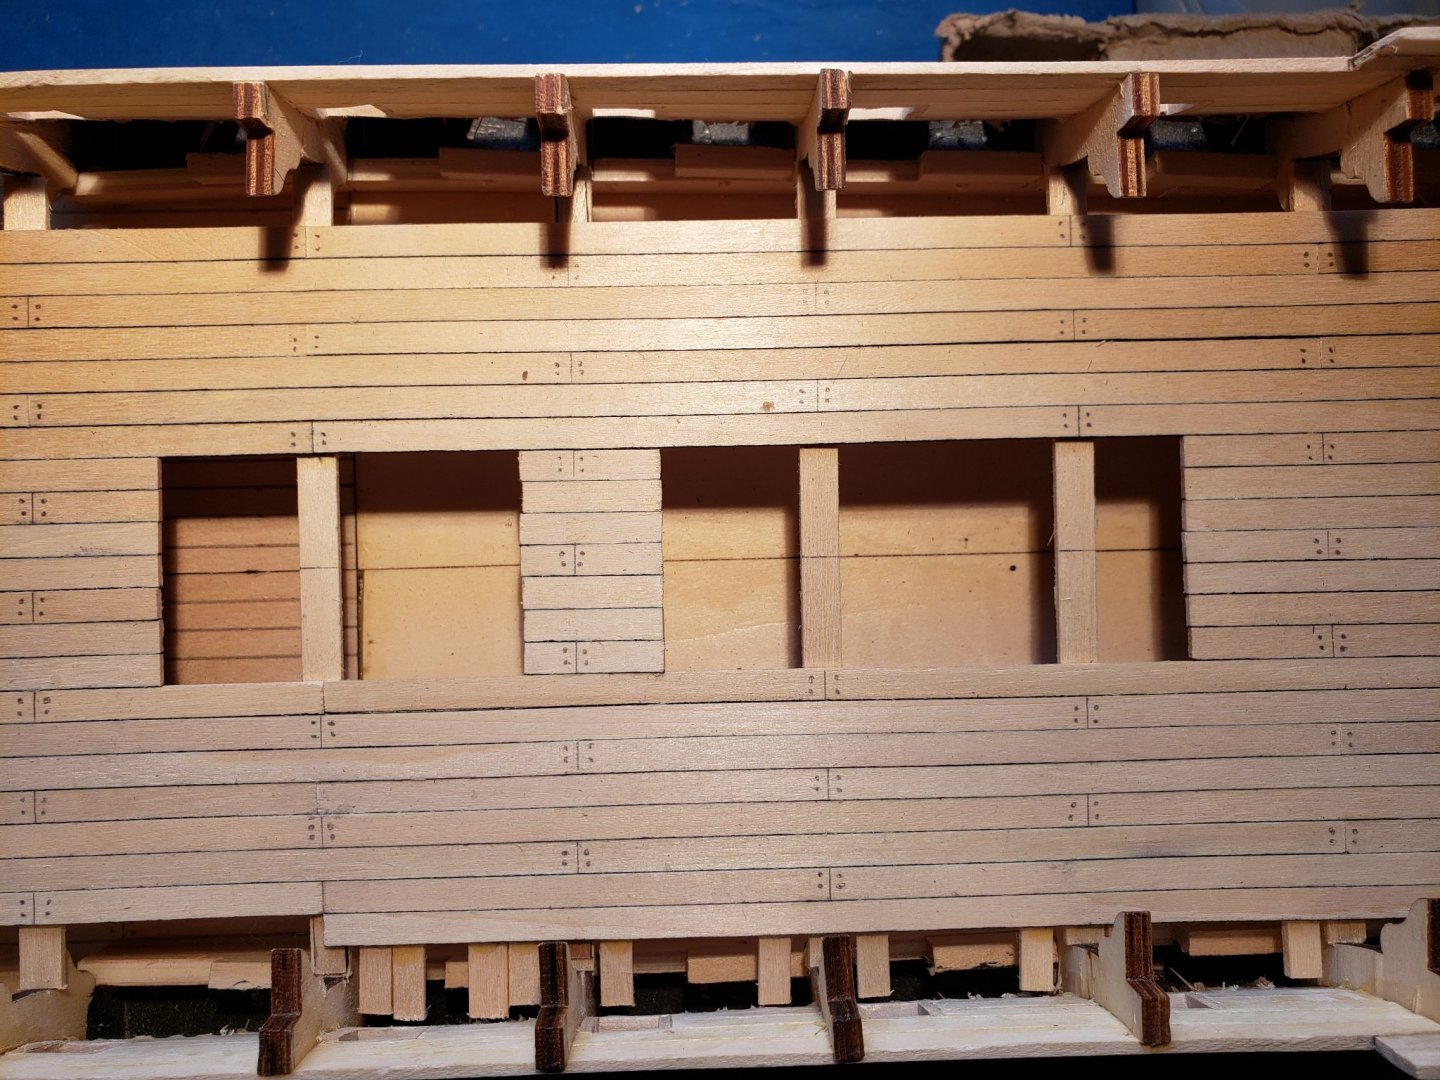
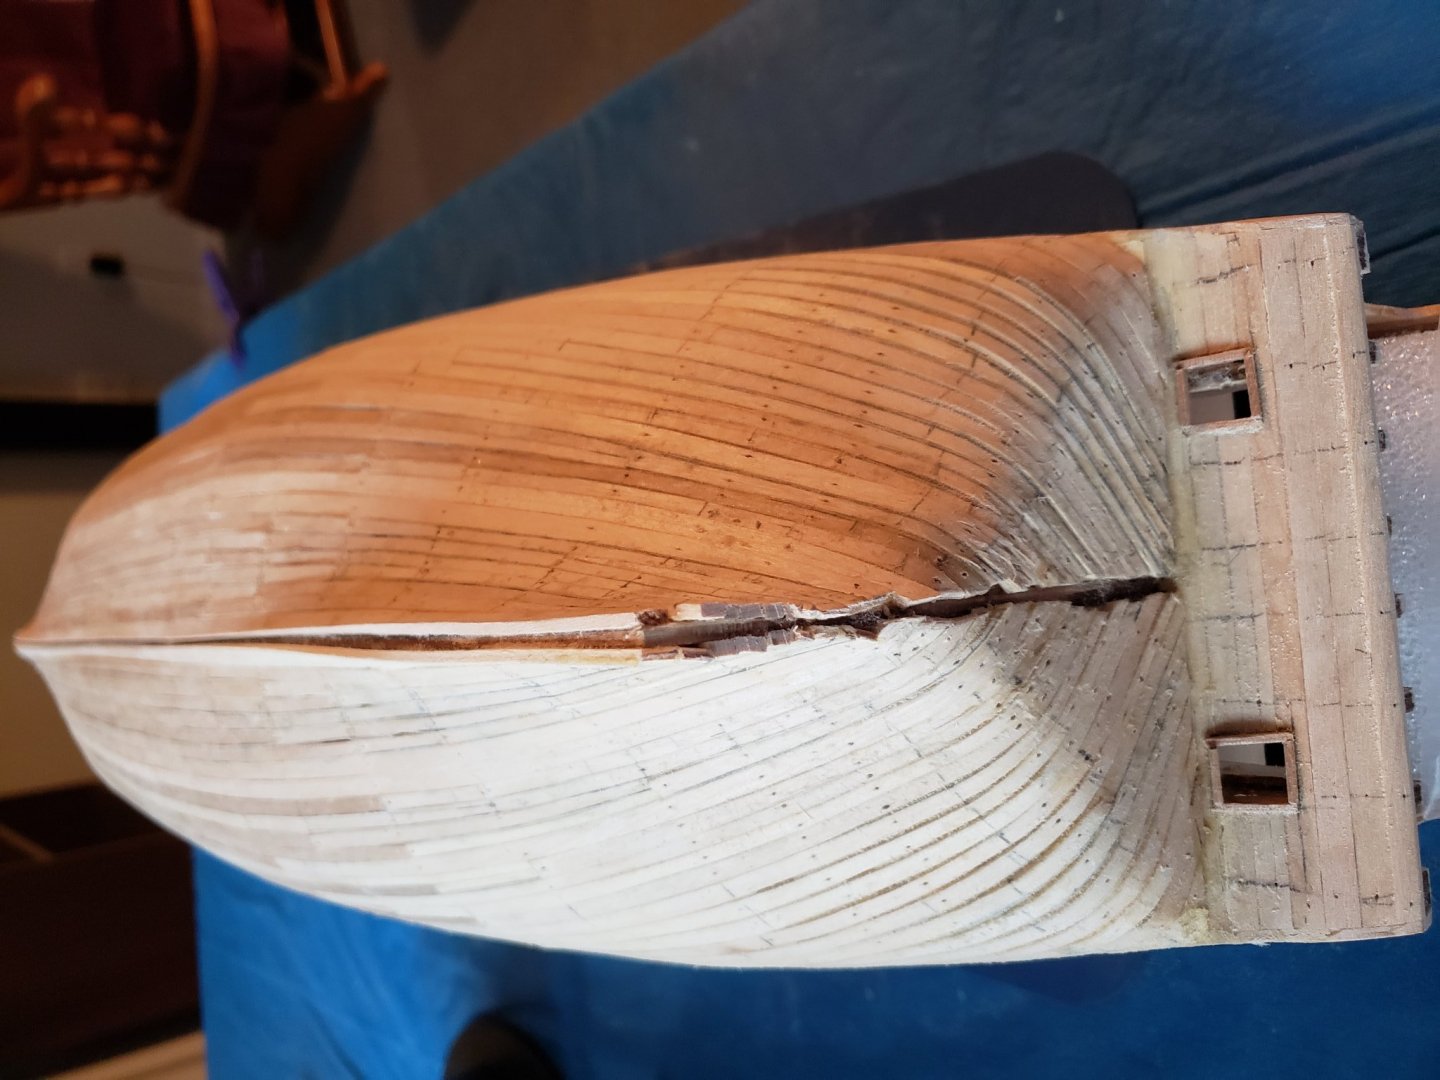
November, 2020 After two months of planking, I was ready to move on to sanding and filling of the hull. This made quite a mess in the room which my wife really appreciated! Other than the stern, I didn't have to use too much filler and for my first major ship, I felt this was an okay job of planking - a long way to go to be good at this however! I used a razor saw to clean up the gap for the keel to fit at the bow and stern and placed the stem and stern post with no fit issues. Next I moved on to positioning the stern gallery side and real panels. These fit fairly well, but I did soak and bend the side panels to fit the curved pieces provided. Planking the bow deck was enjoyable, as it was such a small job. You are given a test dowel to be sure that the bowsprit will fit in the space easily, which is very helpful. The stem reinforcements needed some filing to match the curve of my bow, but with a little work turned out fairly well. To begin planking the upper gun deck, gun deck support beams had to fitted individually which was a bit of a chore to measure. I used a pair of dividers to get the inside measurements which I then transferred to the support beams. For the decking itself, I used a felt to simulate the caulking (I found pencil smudged too easily for me) and used pencil to simulate the deck nails. I spent way too much time filling the deck boards right up to the sides only to see that once the bulwarks were lined much of that painstaking detail was covered up. Oh well - like many aspects of ship building I guess! "I know it was there" is what I tell myself often. A break from planking to make some gratings for the upper gun deck, and that was it for November.


- 59 replies
-
- 4
-
-
- DeAgostini
- Victory
- (and 1 more)
-
That must have been so hard to leave behind! I will have to stay in this house forever... the hull is large enough, but when you add the masts and bowsprit, it really takes up a lot of room!
- 59 replies
-
- 1
-
-
- DeAgostini
- Victory
- (and 1 more)
-
Thanks Gregory. In hindsight, I saw that if I had turned at a sharper angle, the planks would have sat flatter as they made the turn instead of the slight step for each one, but I was committed by the time I noticed! It sanded out and looked fairly good (with some help from filler as well!)
- 59 replies
-
- 3
-
-
- DeAgostini
- Victory
- (and 1 more)
-
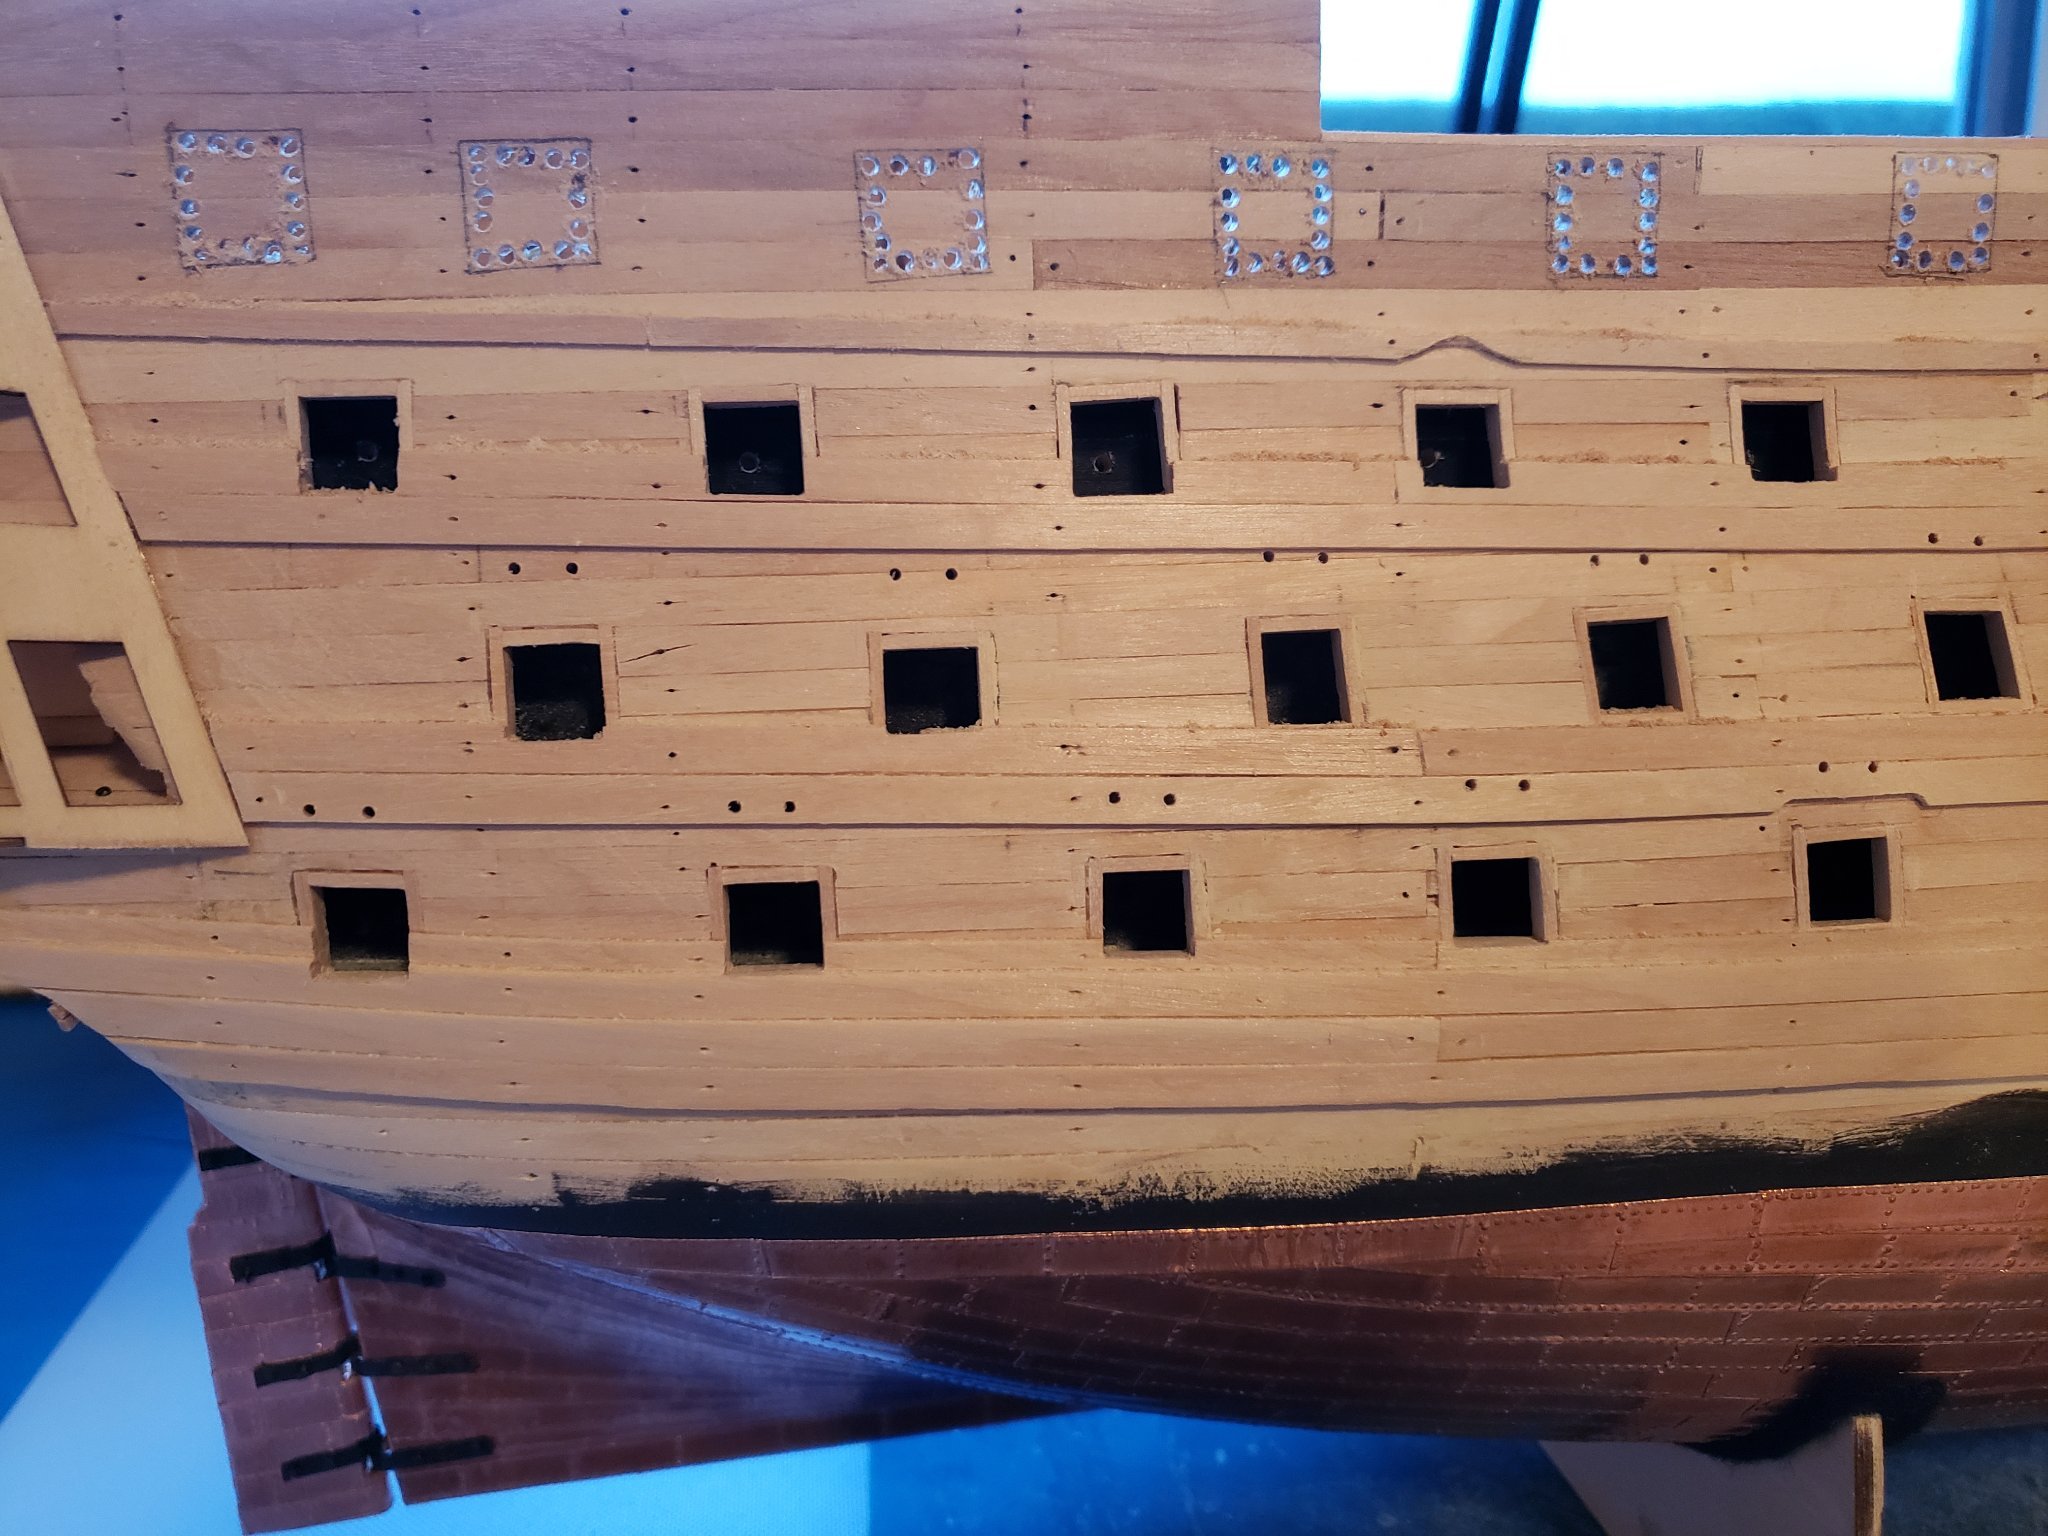
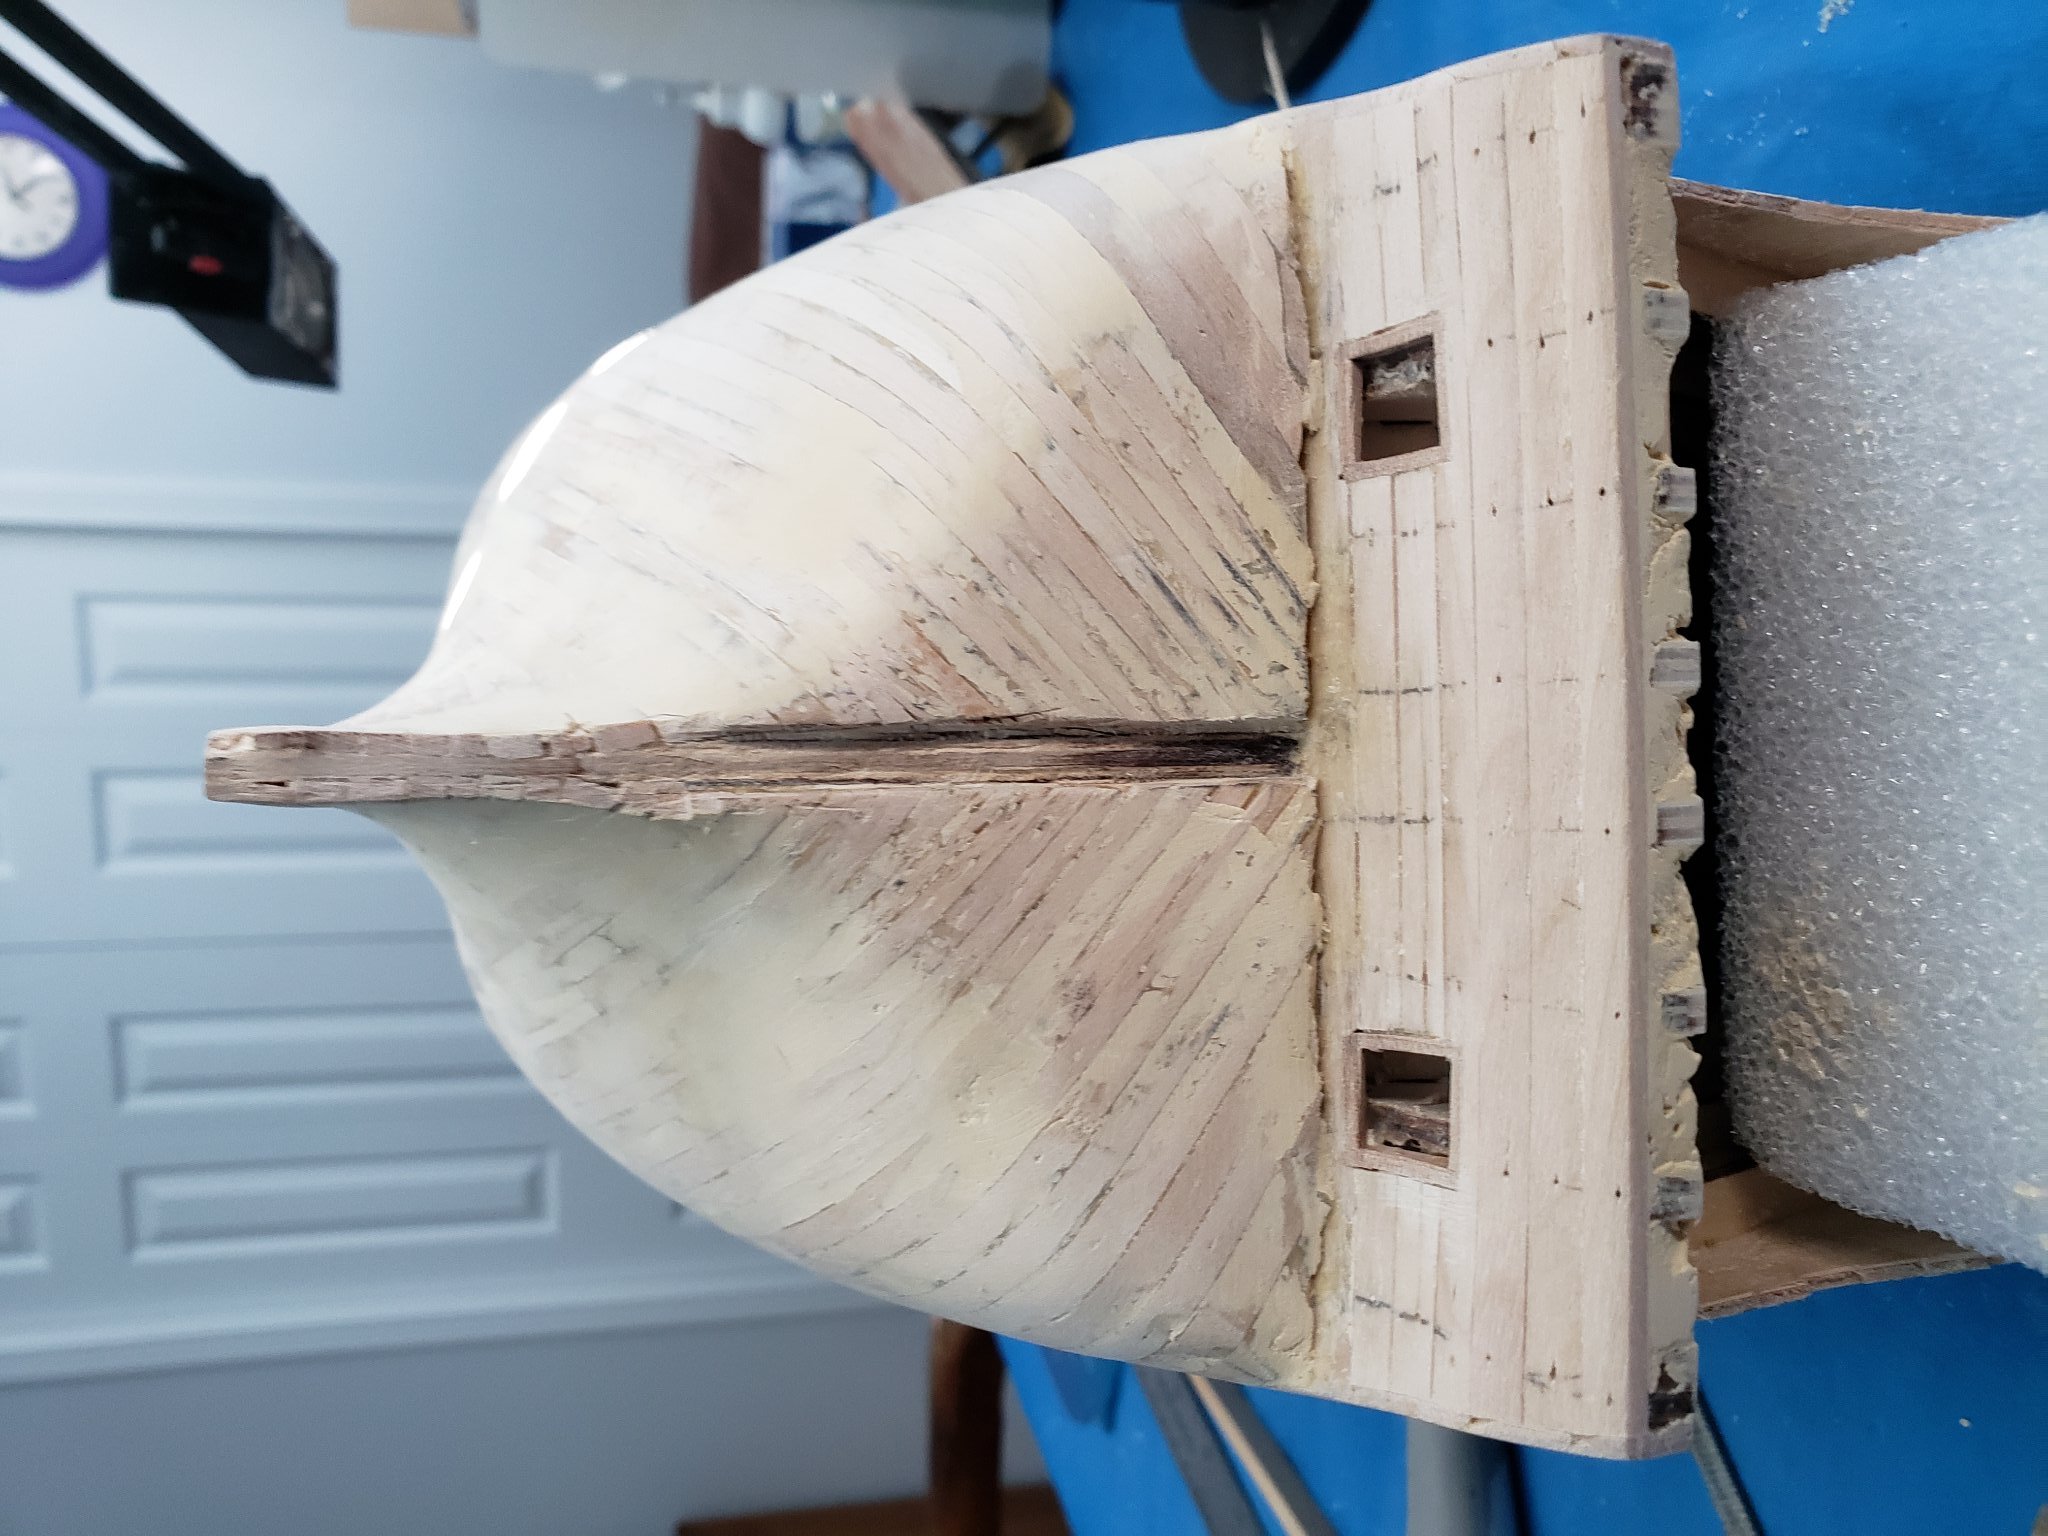
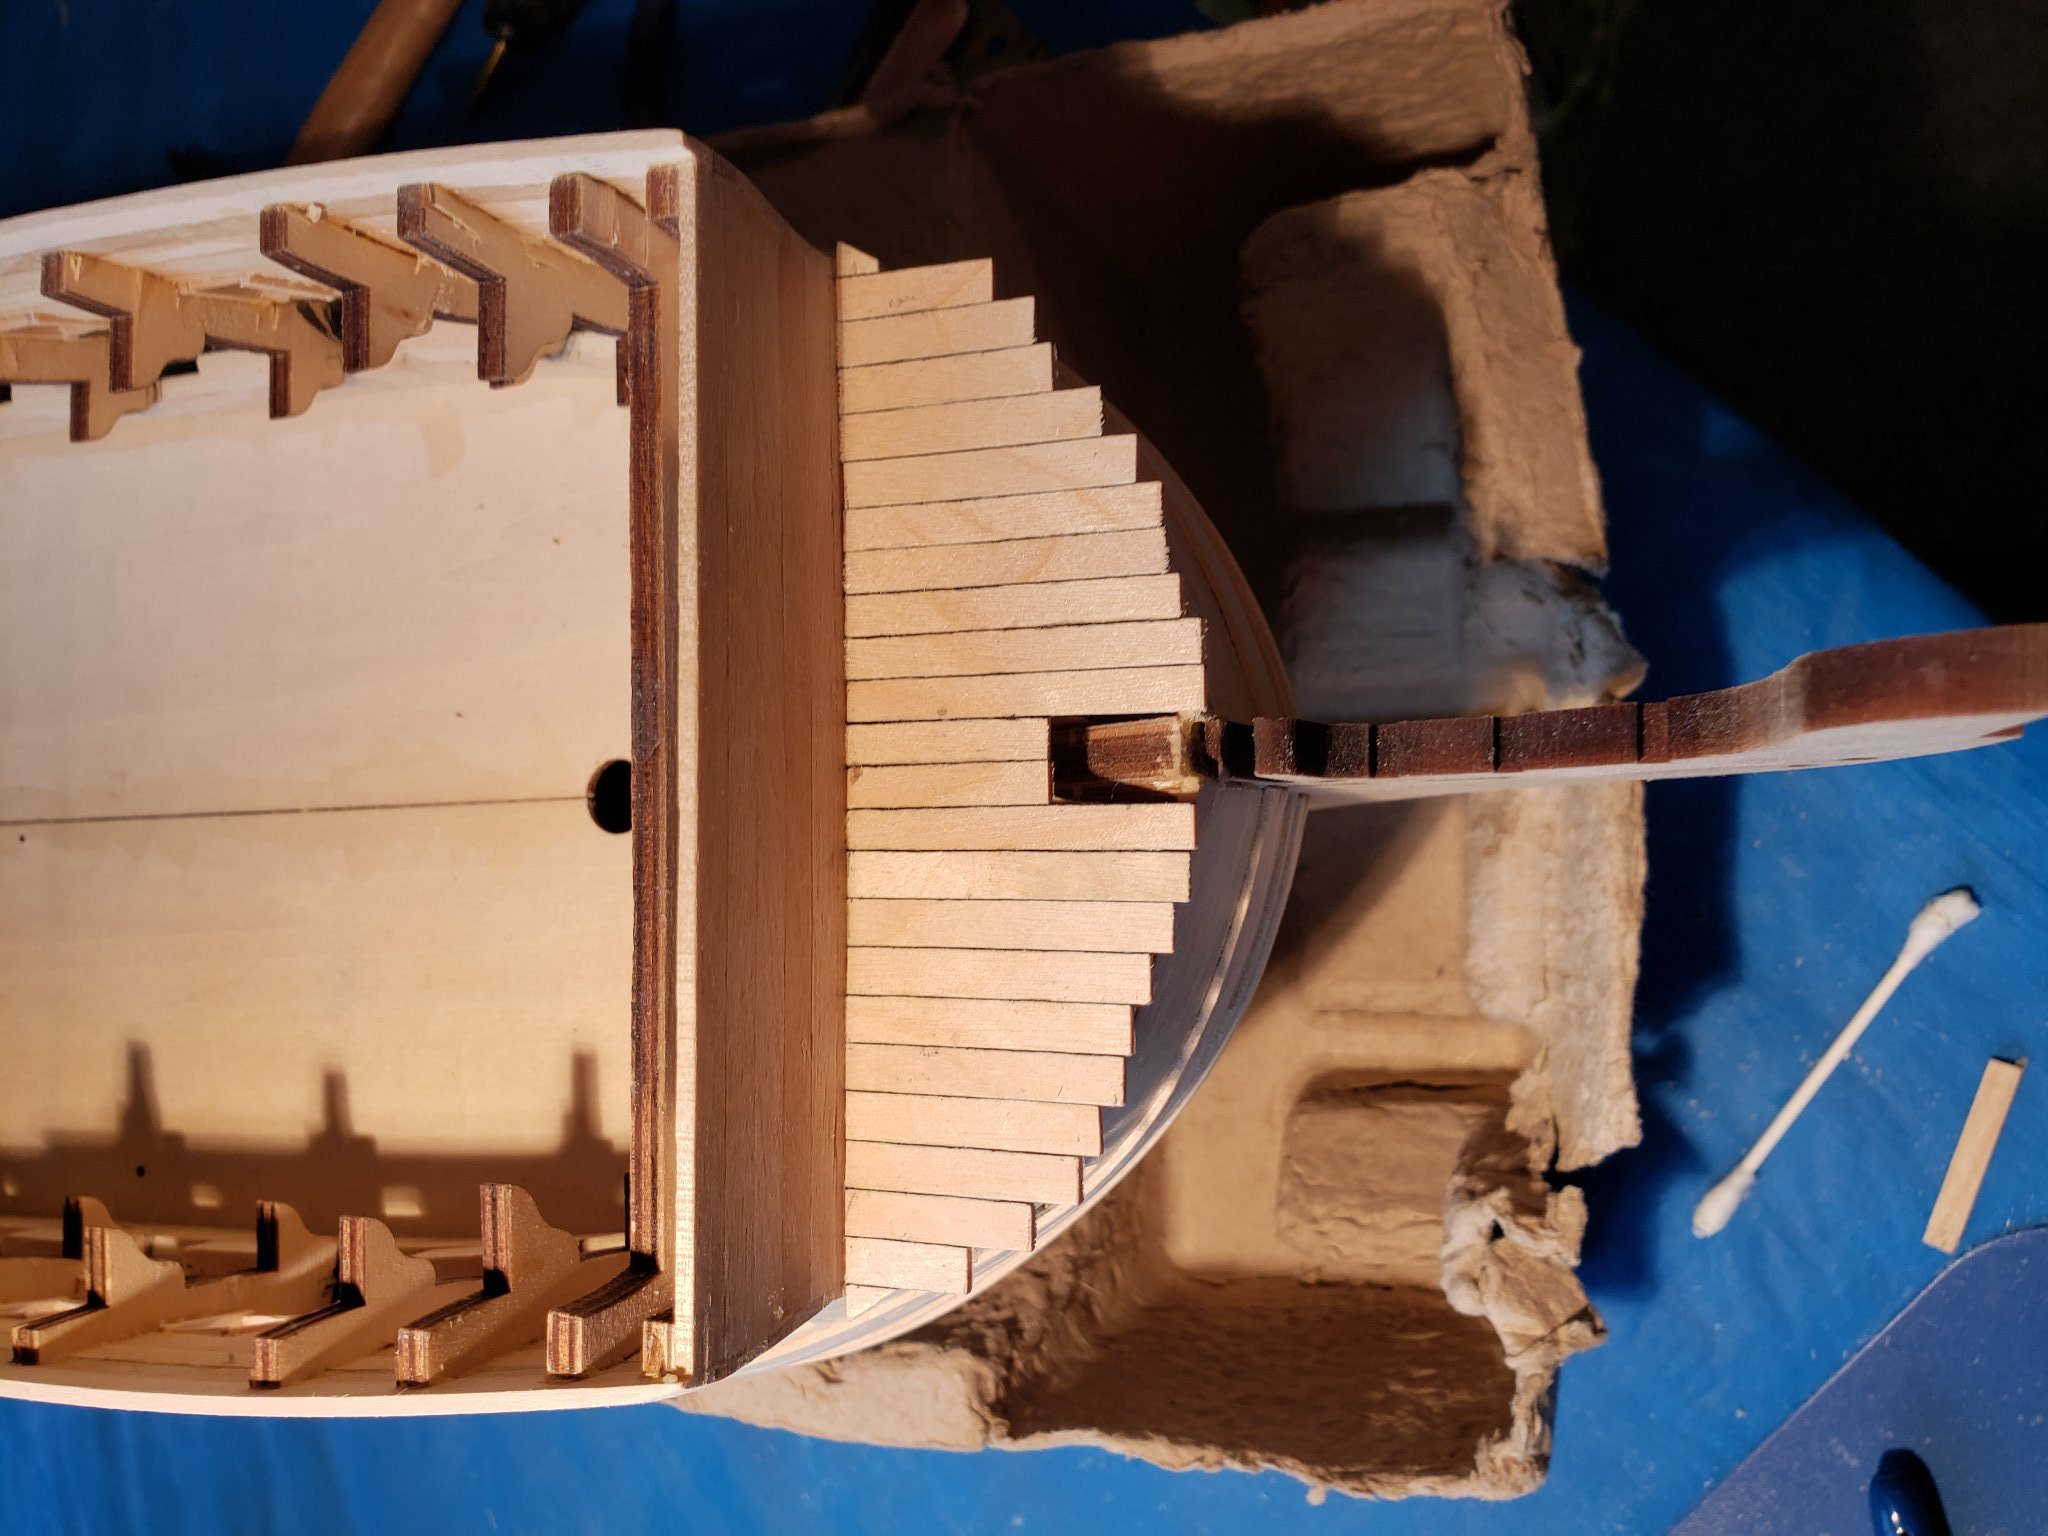
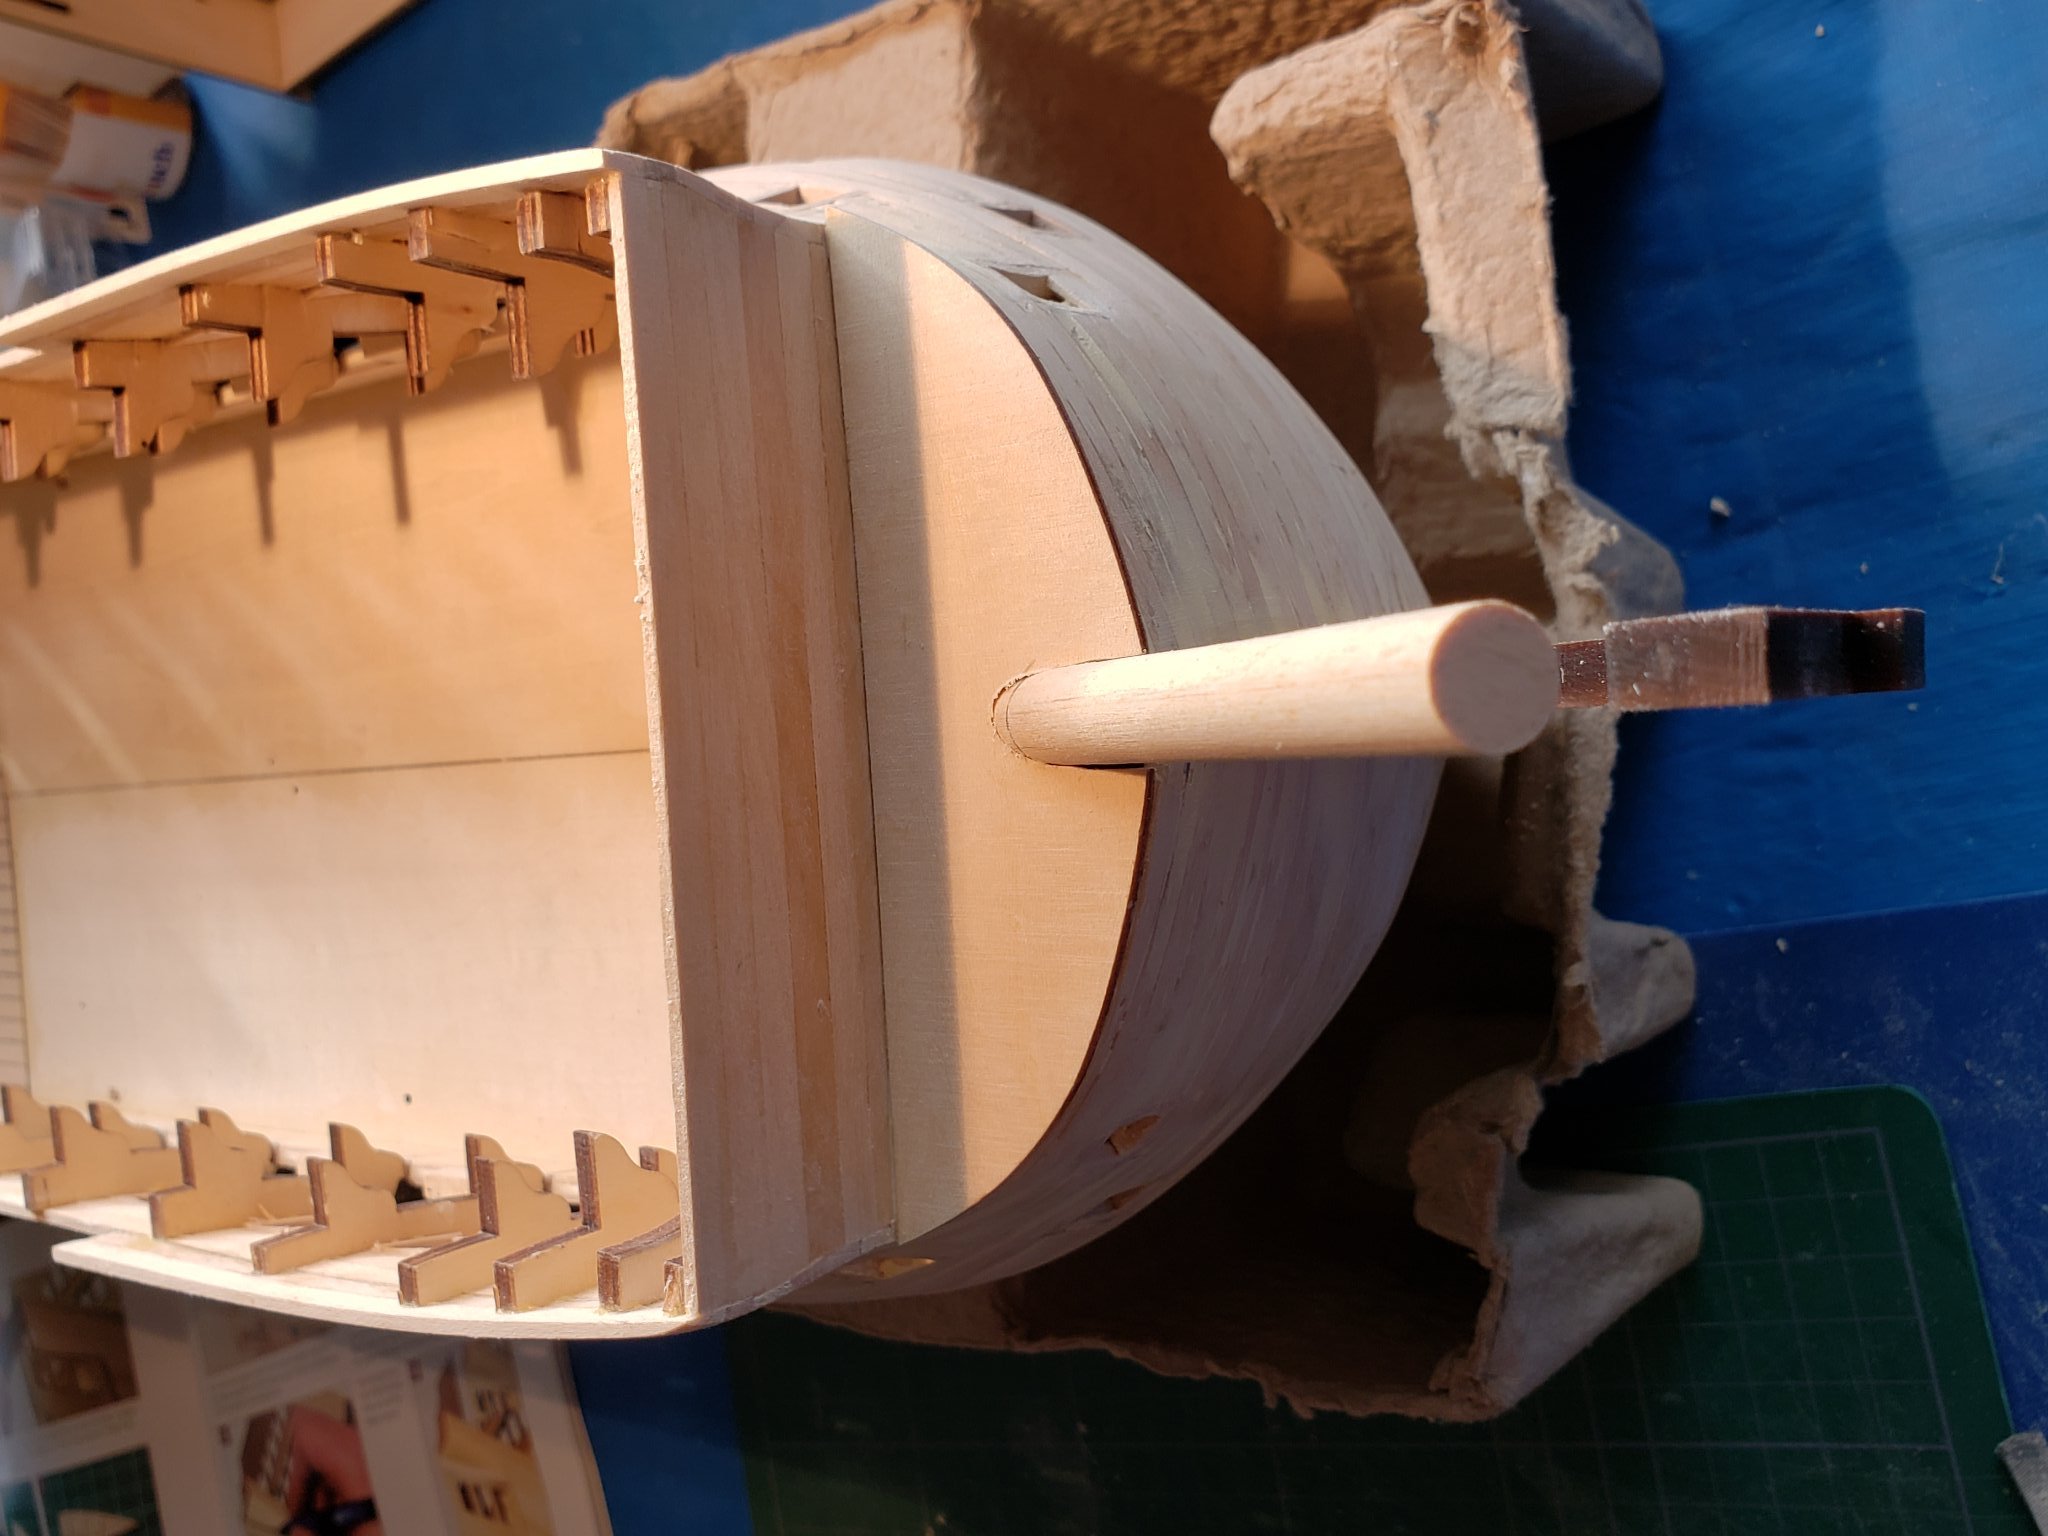
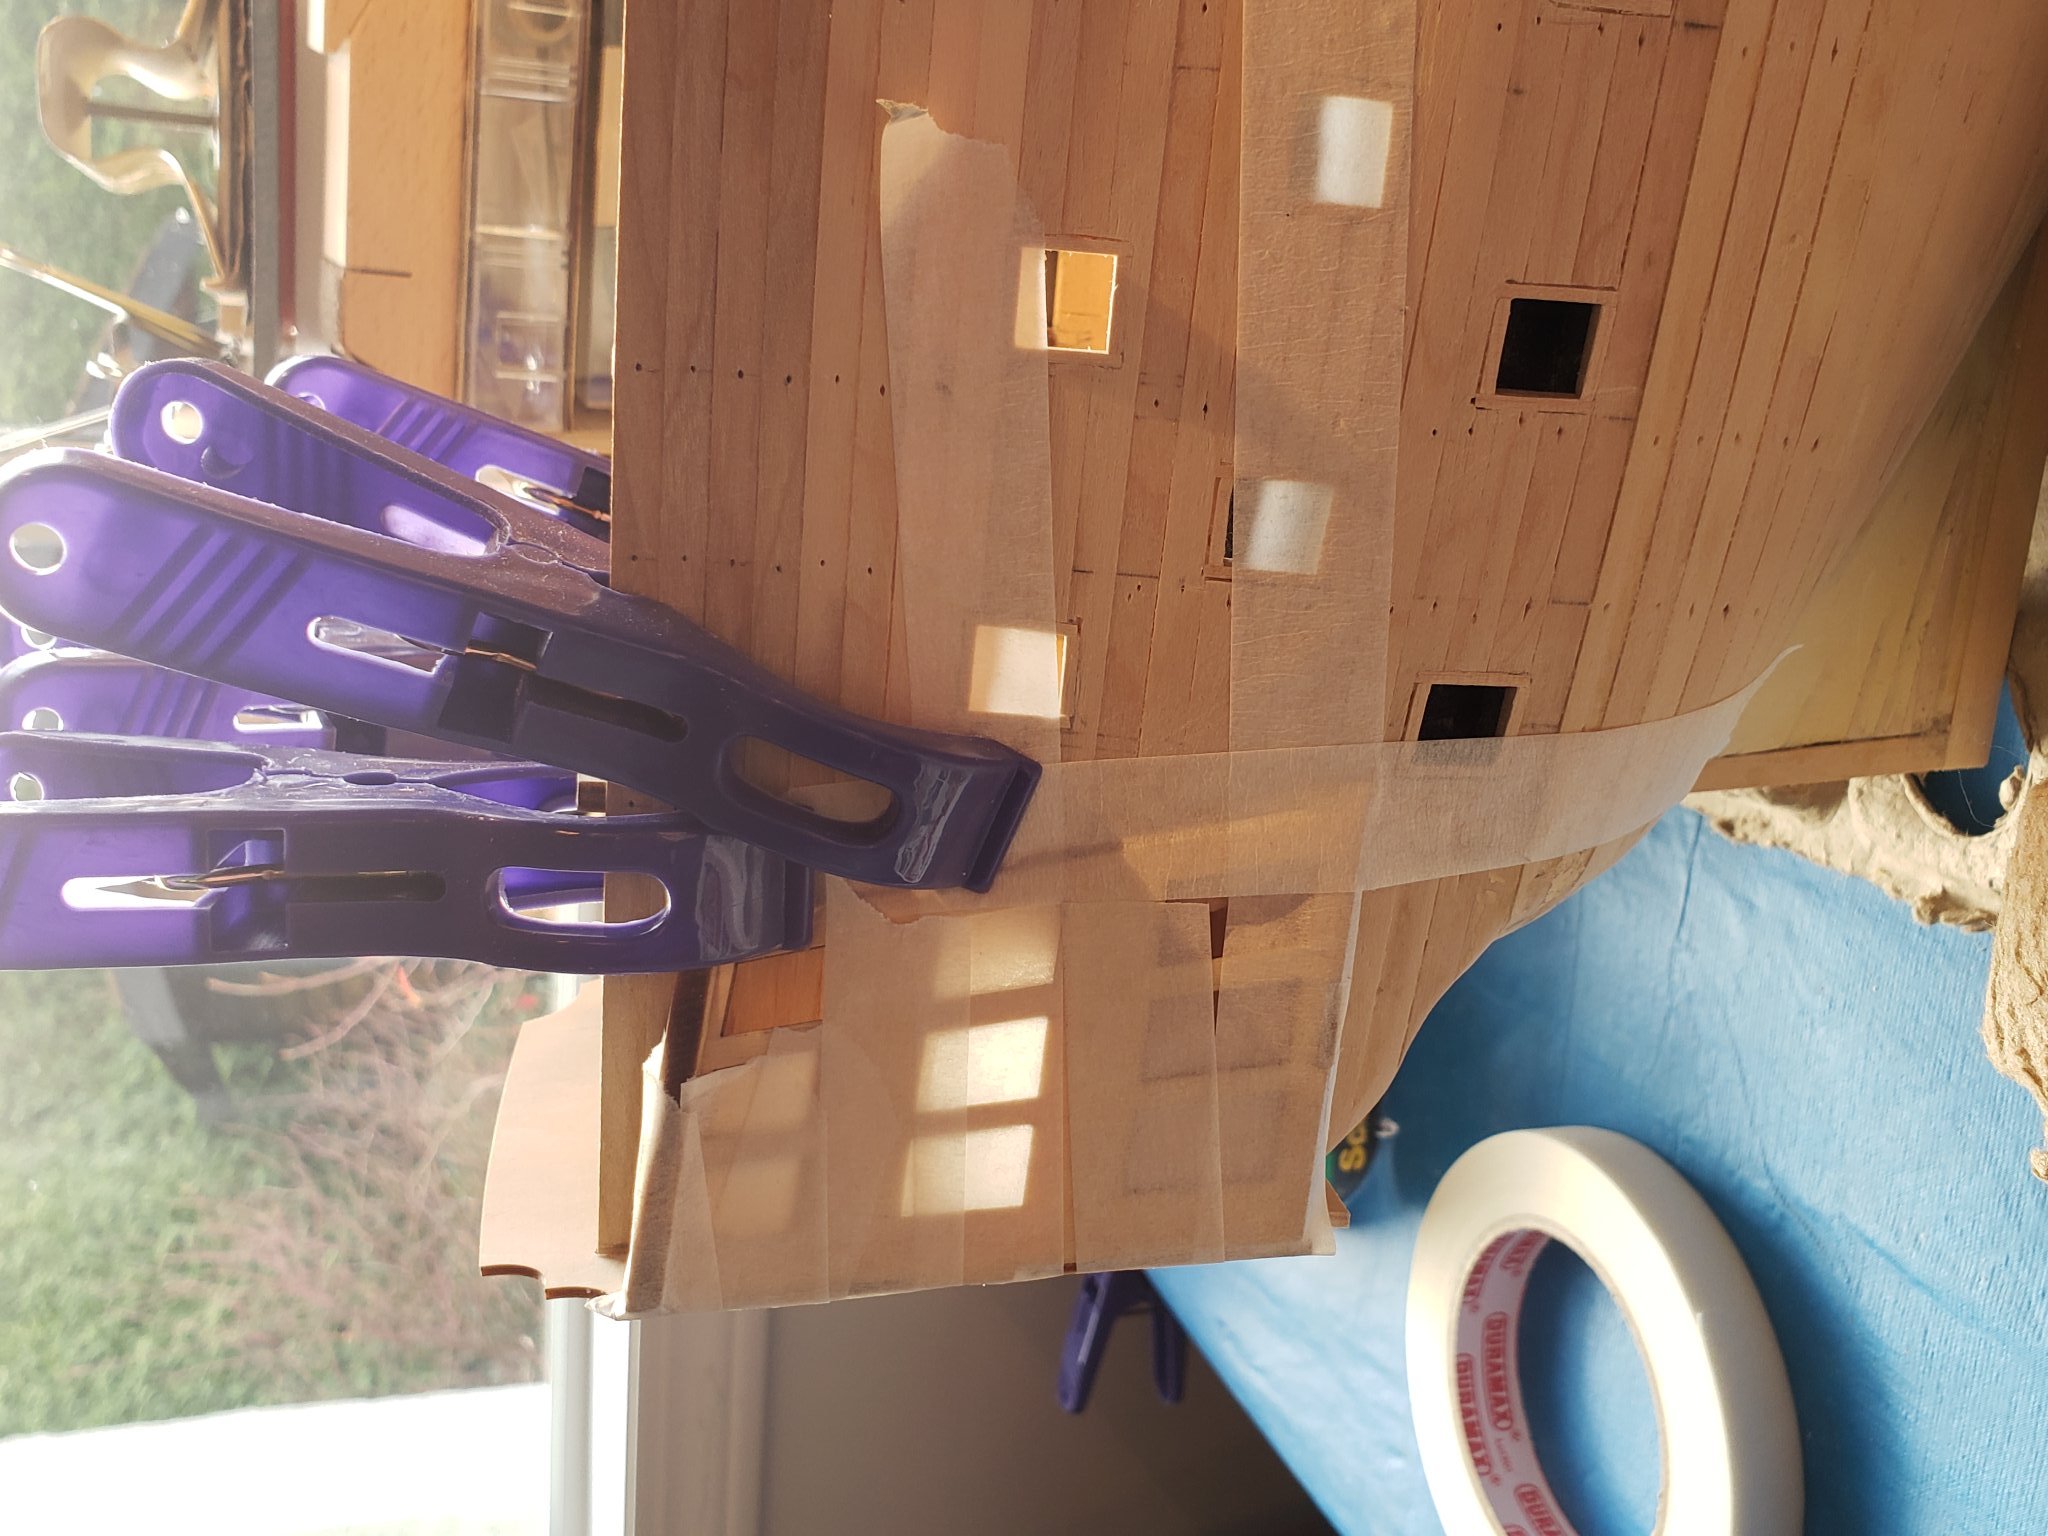
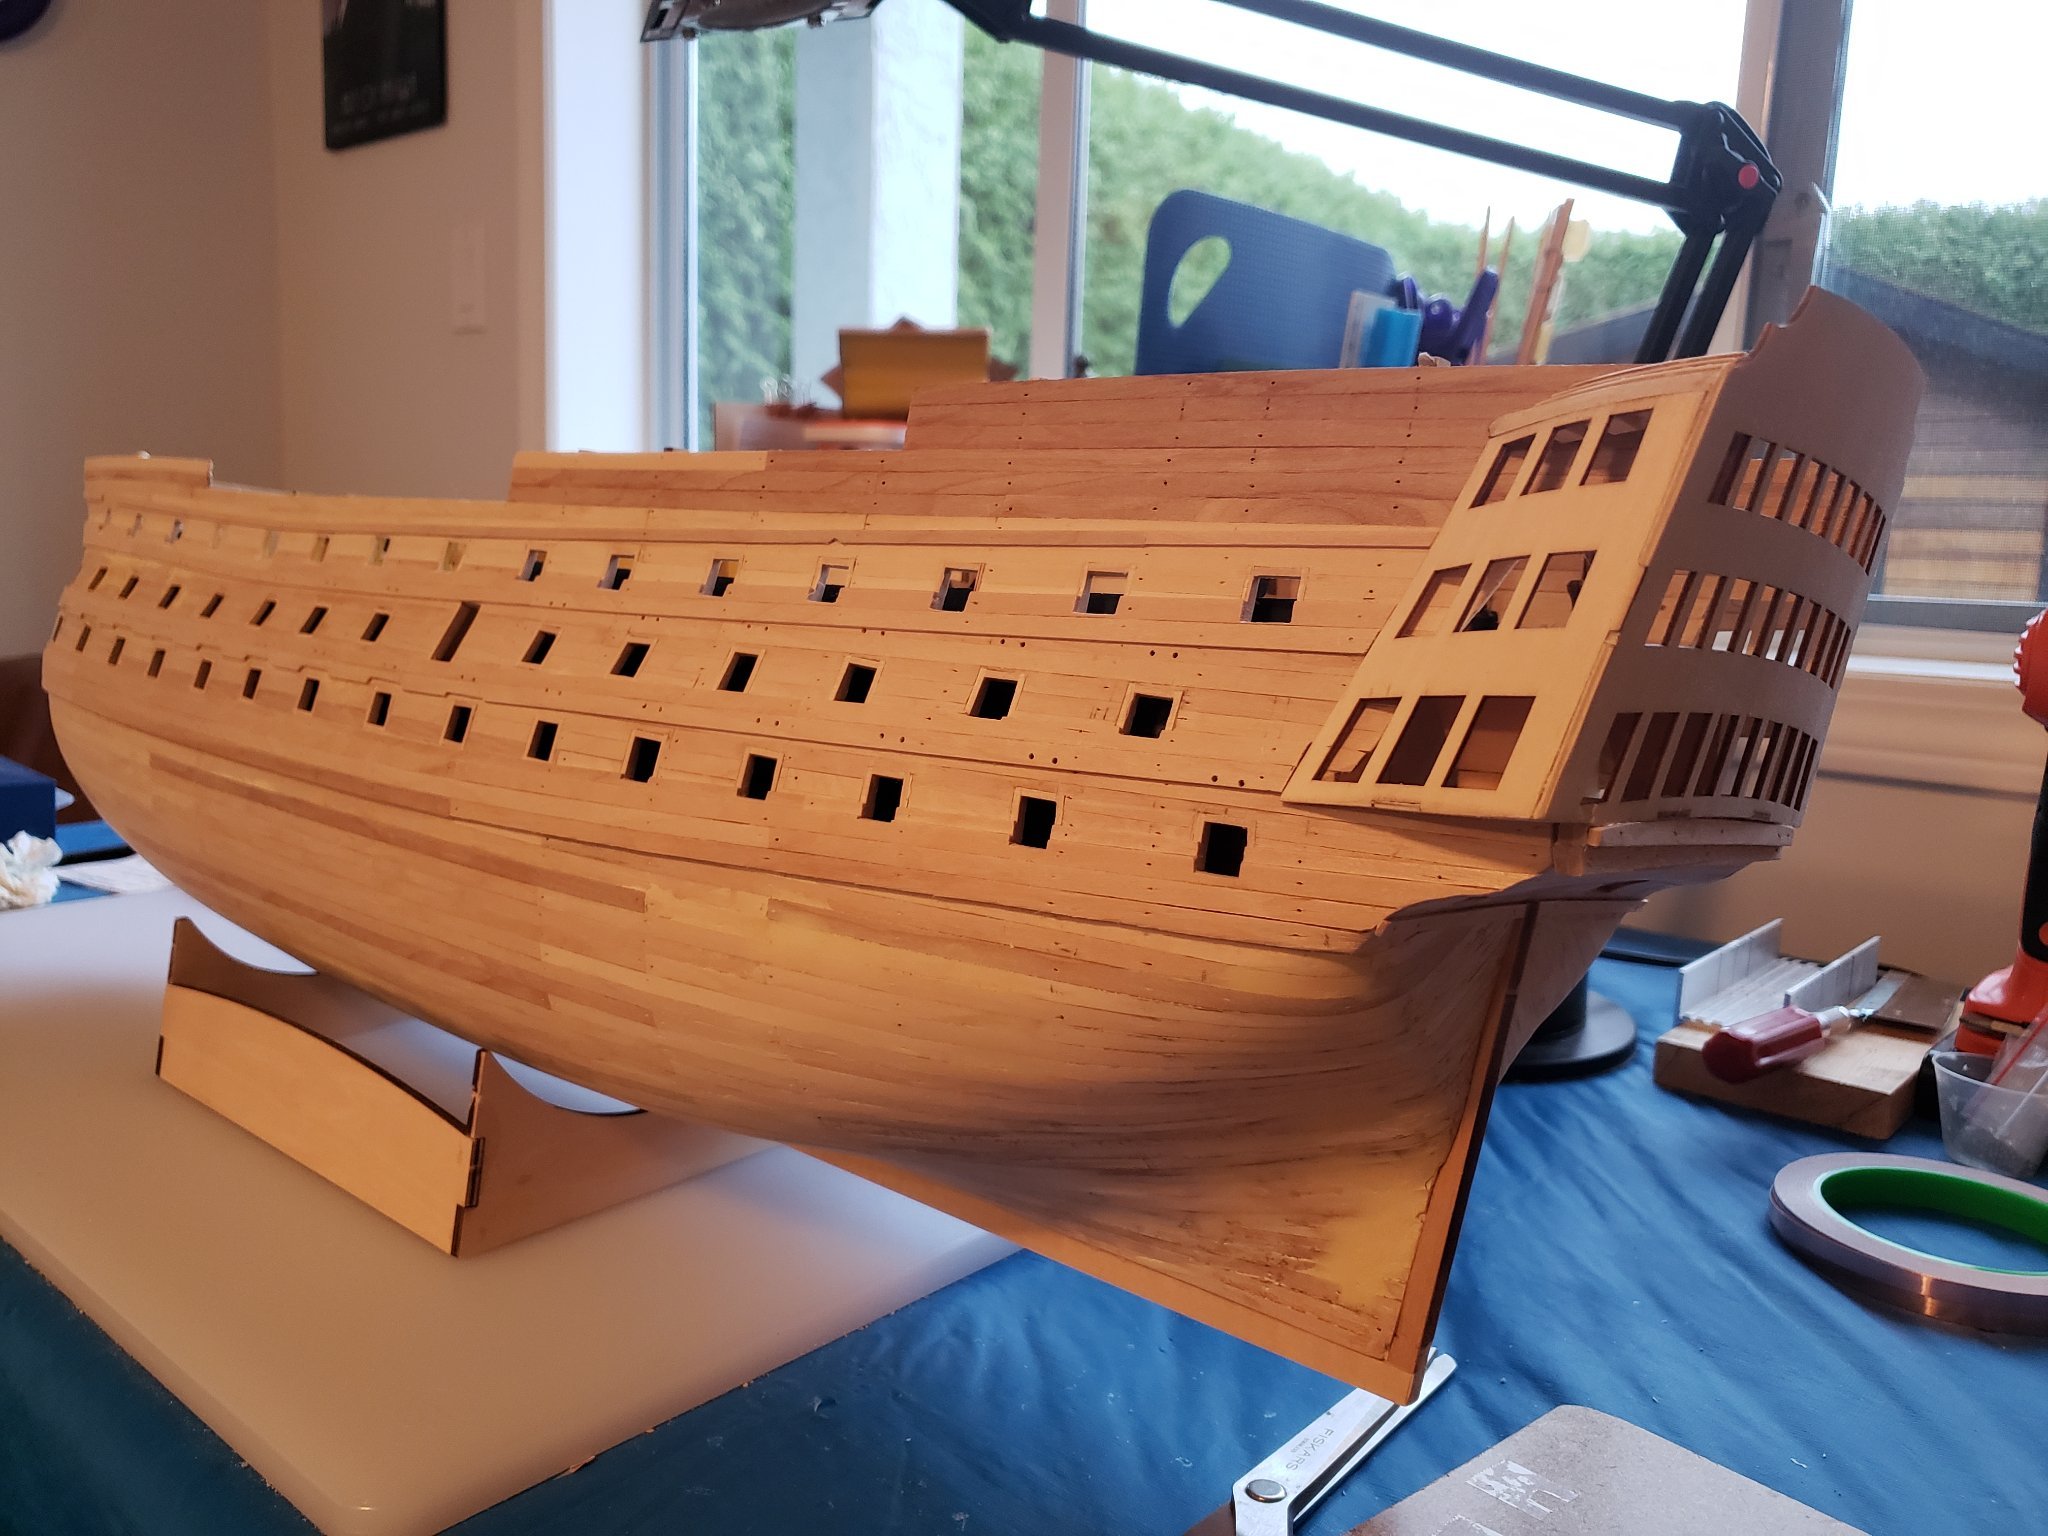
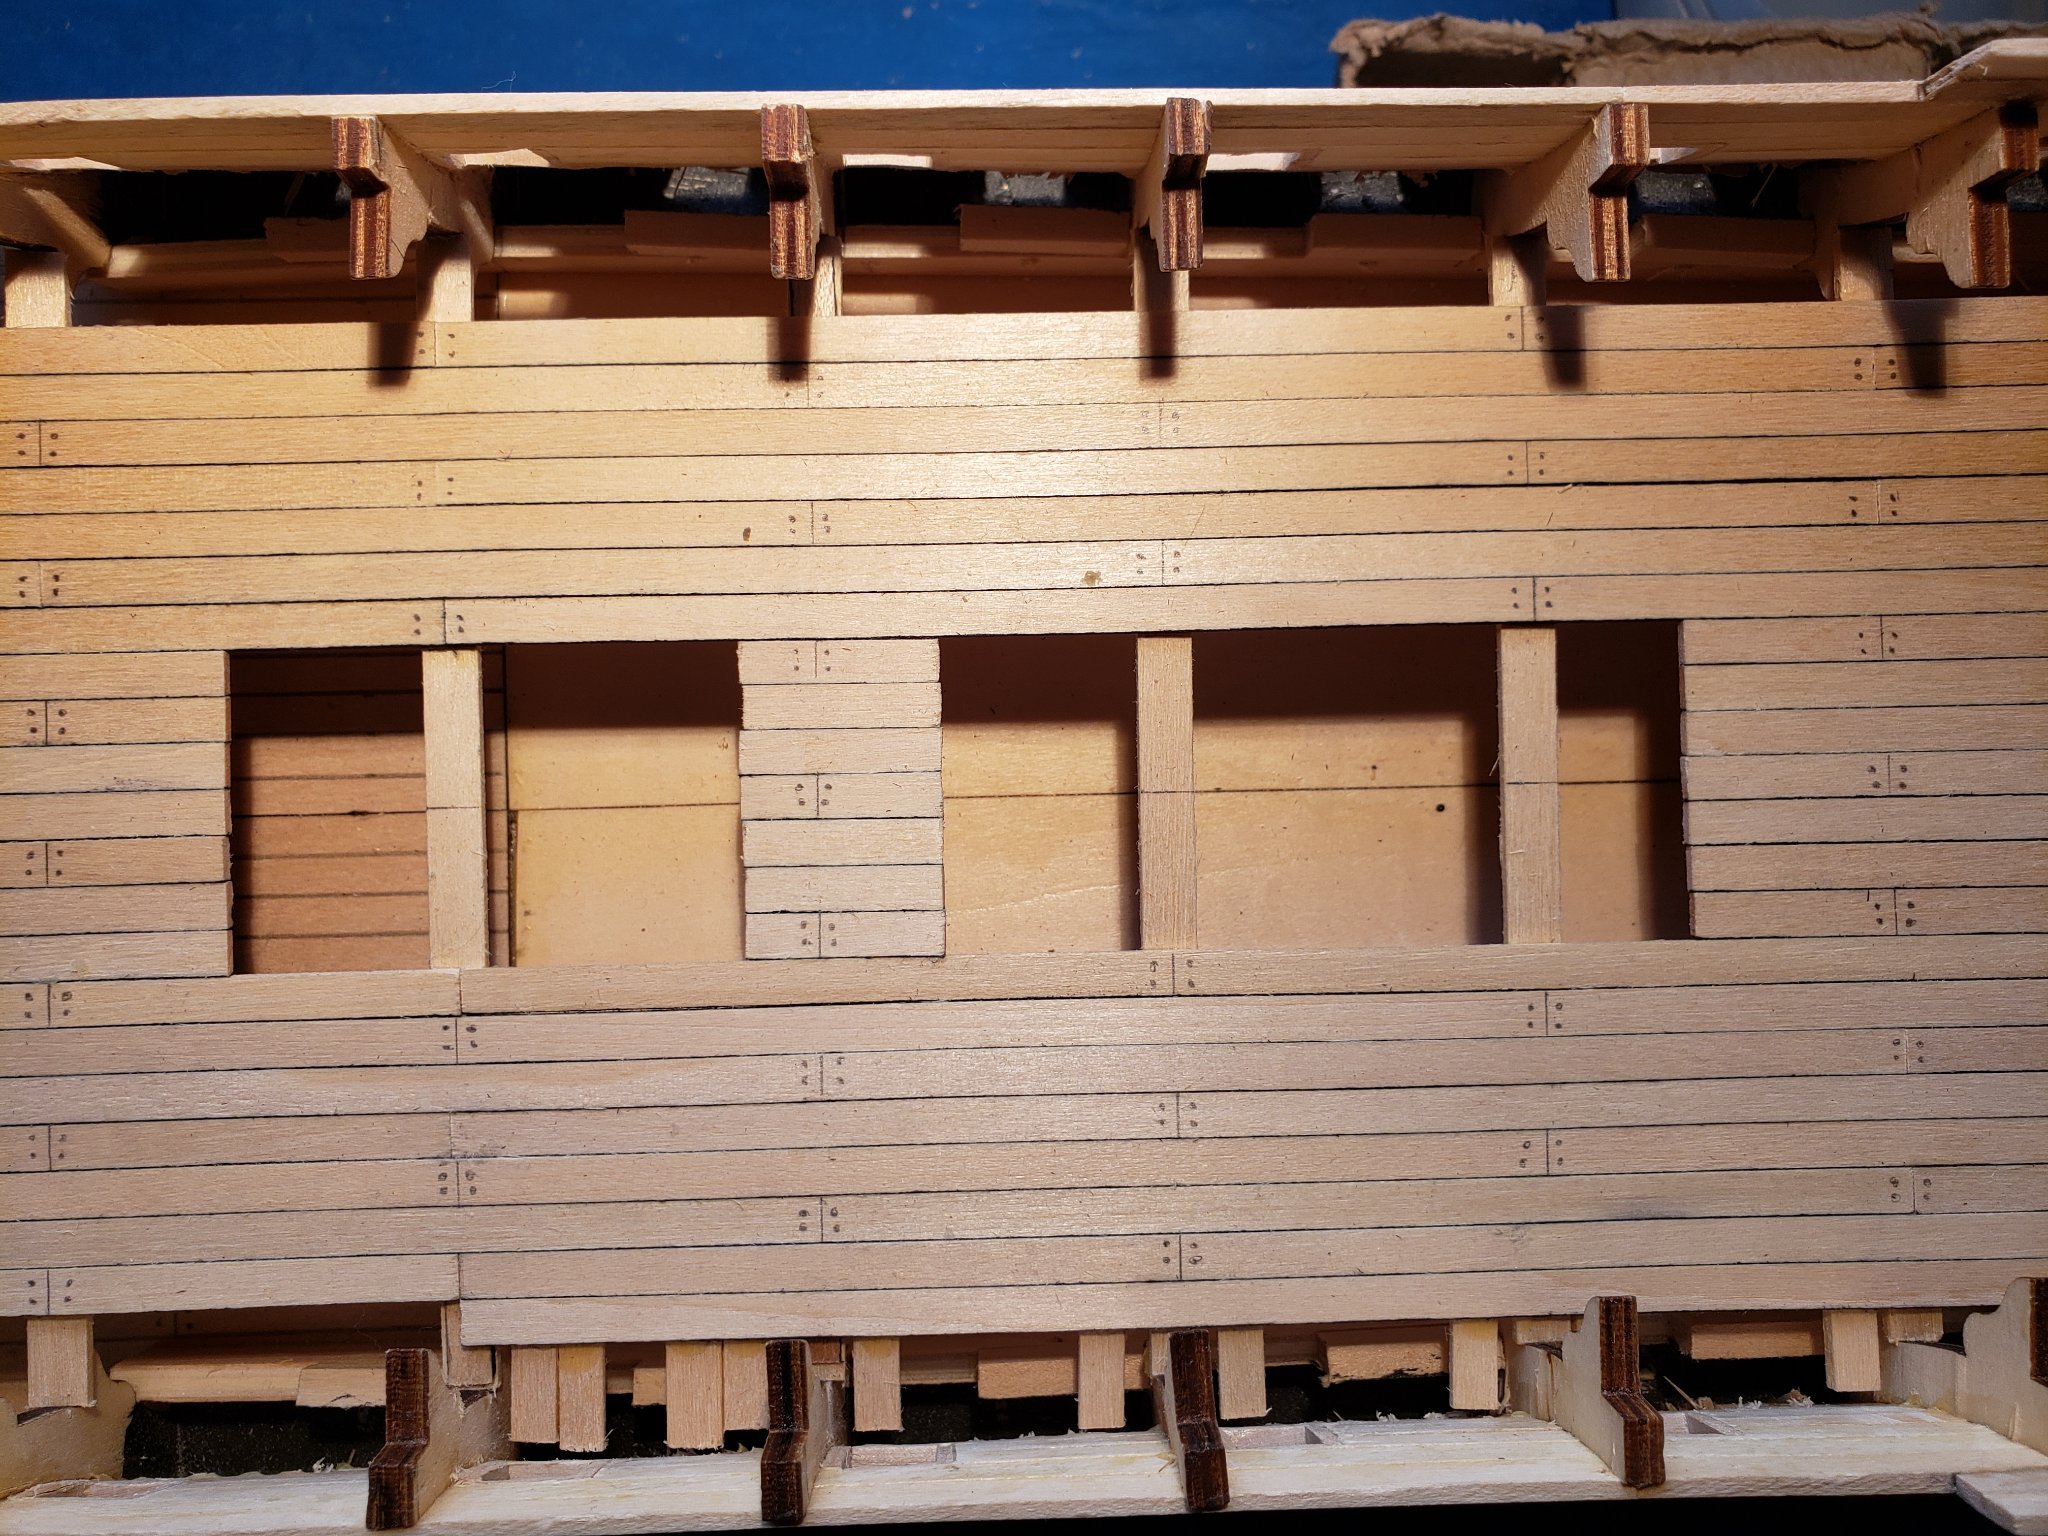
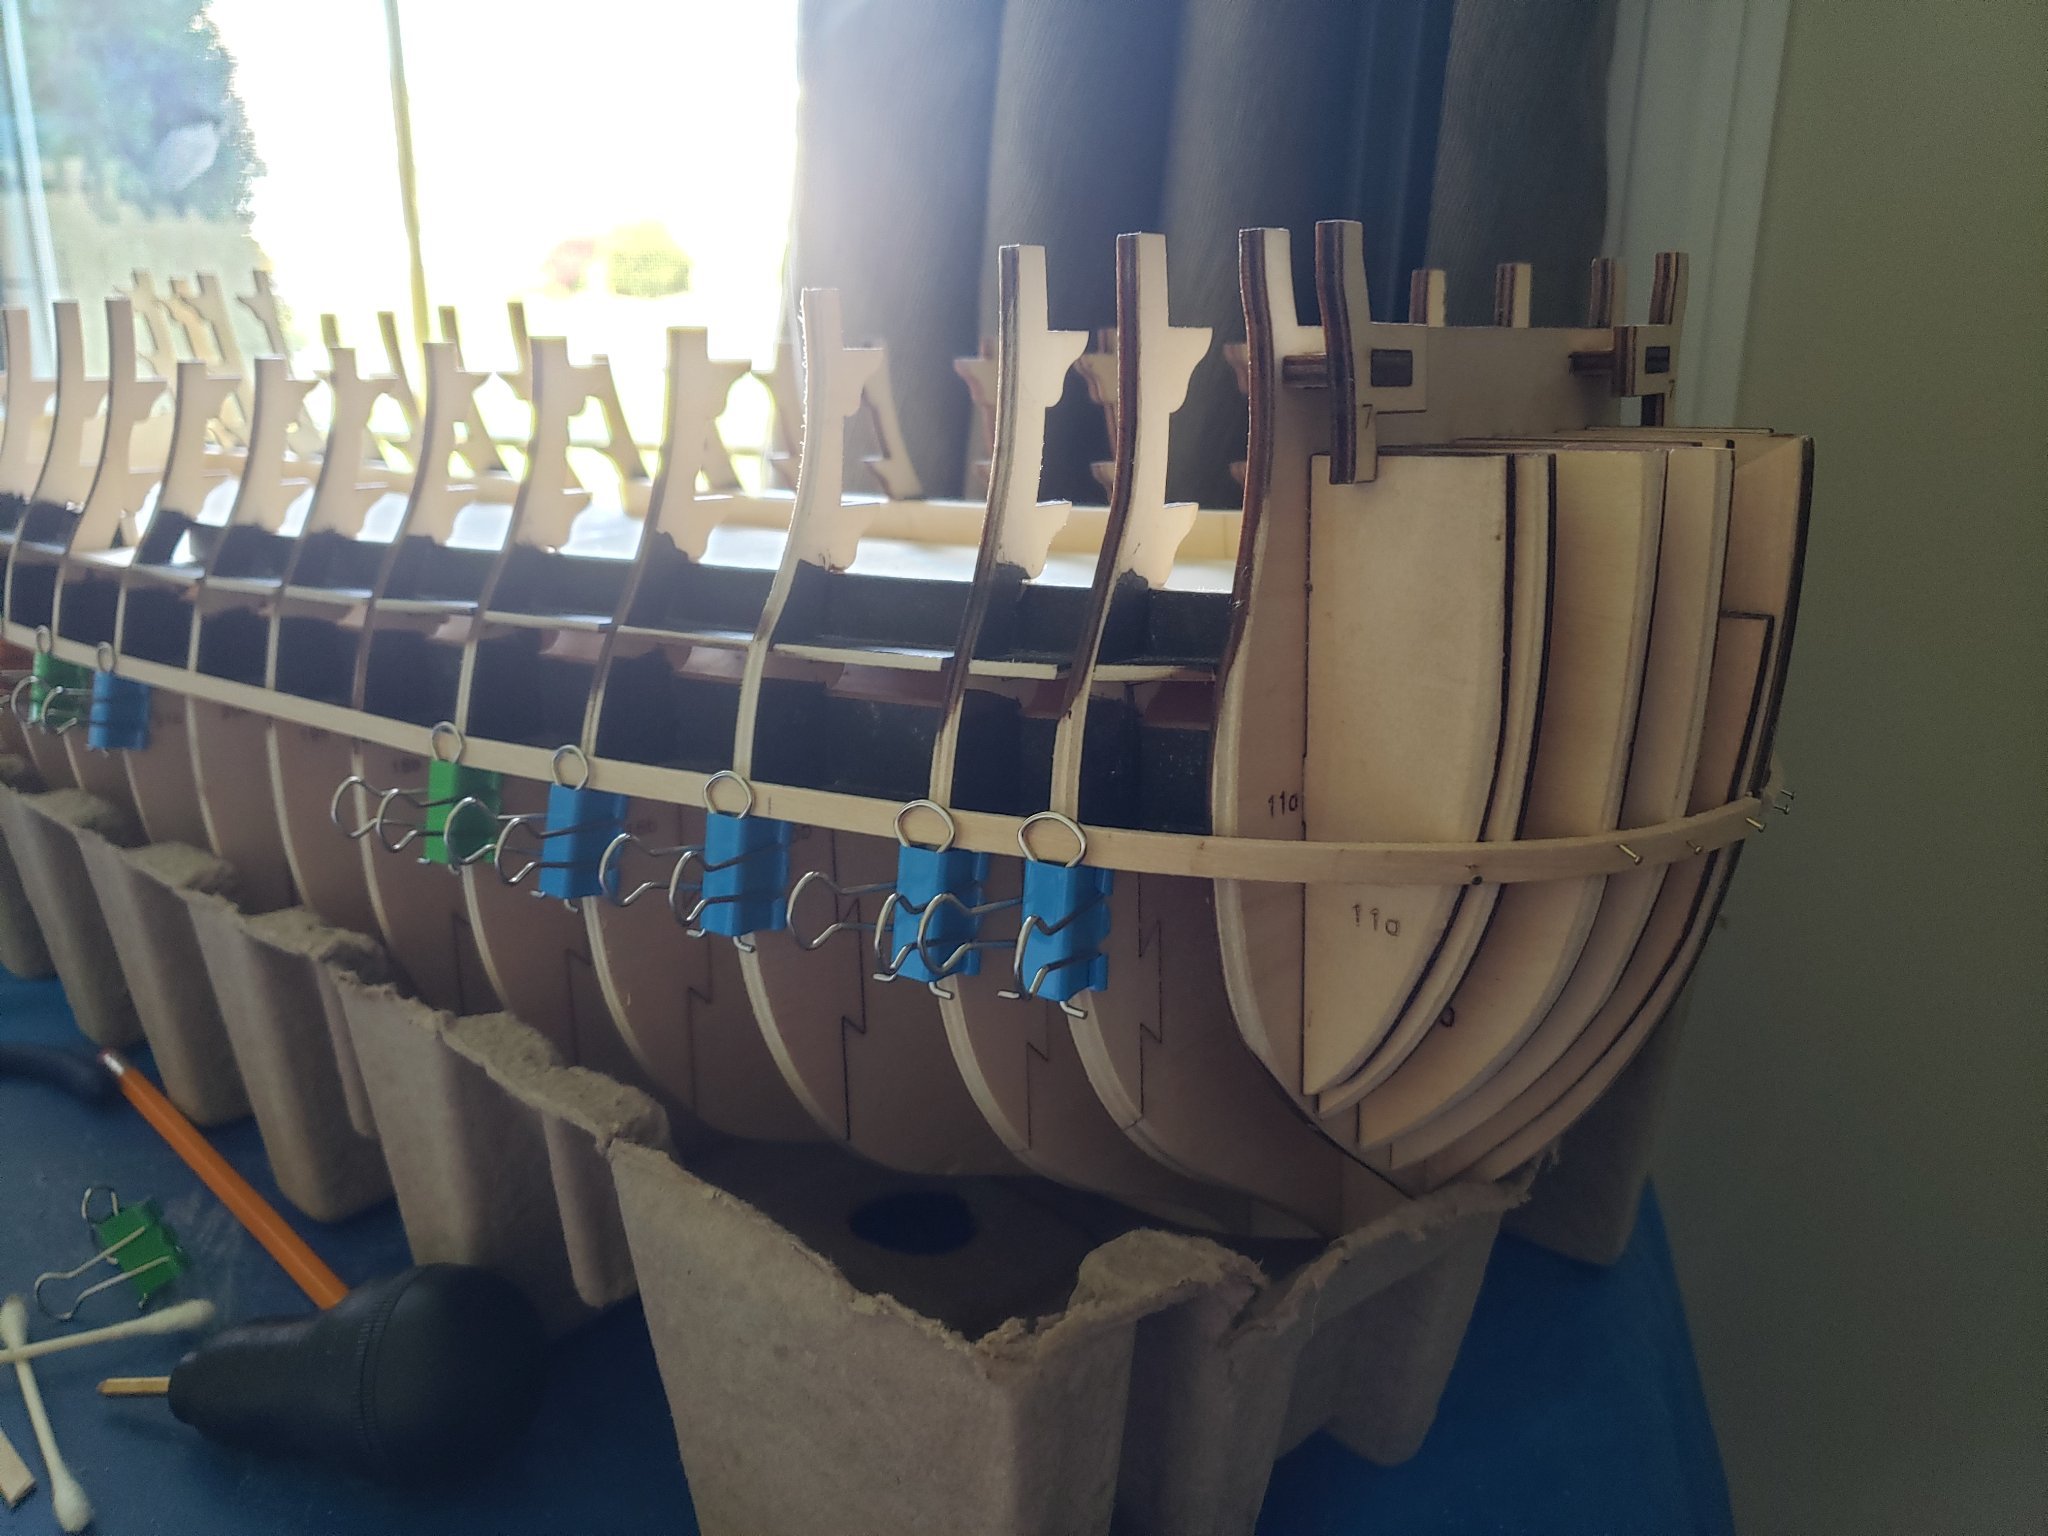
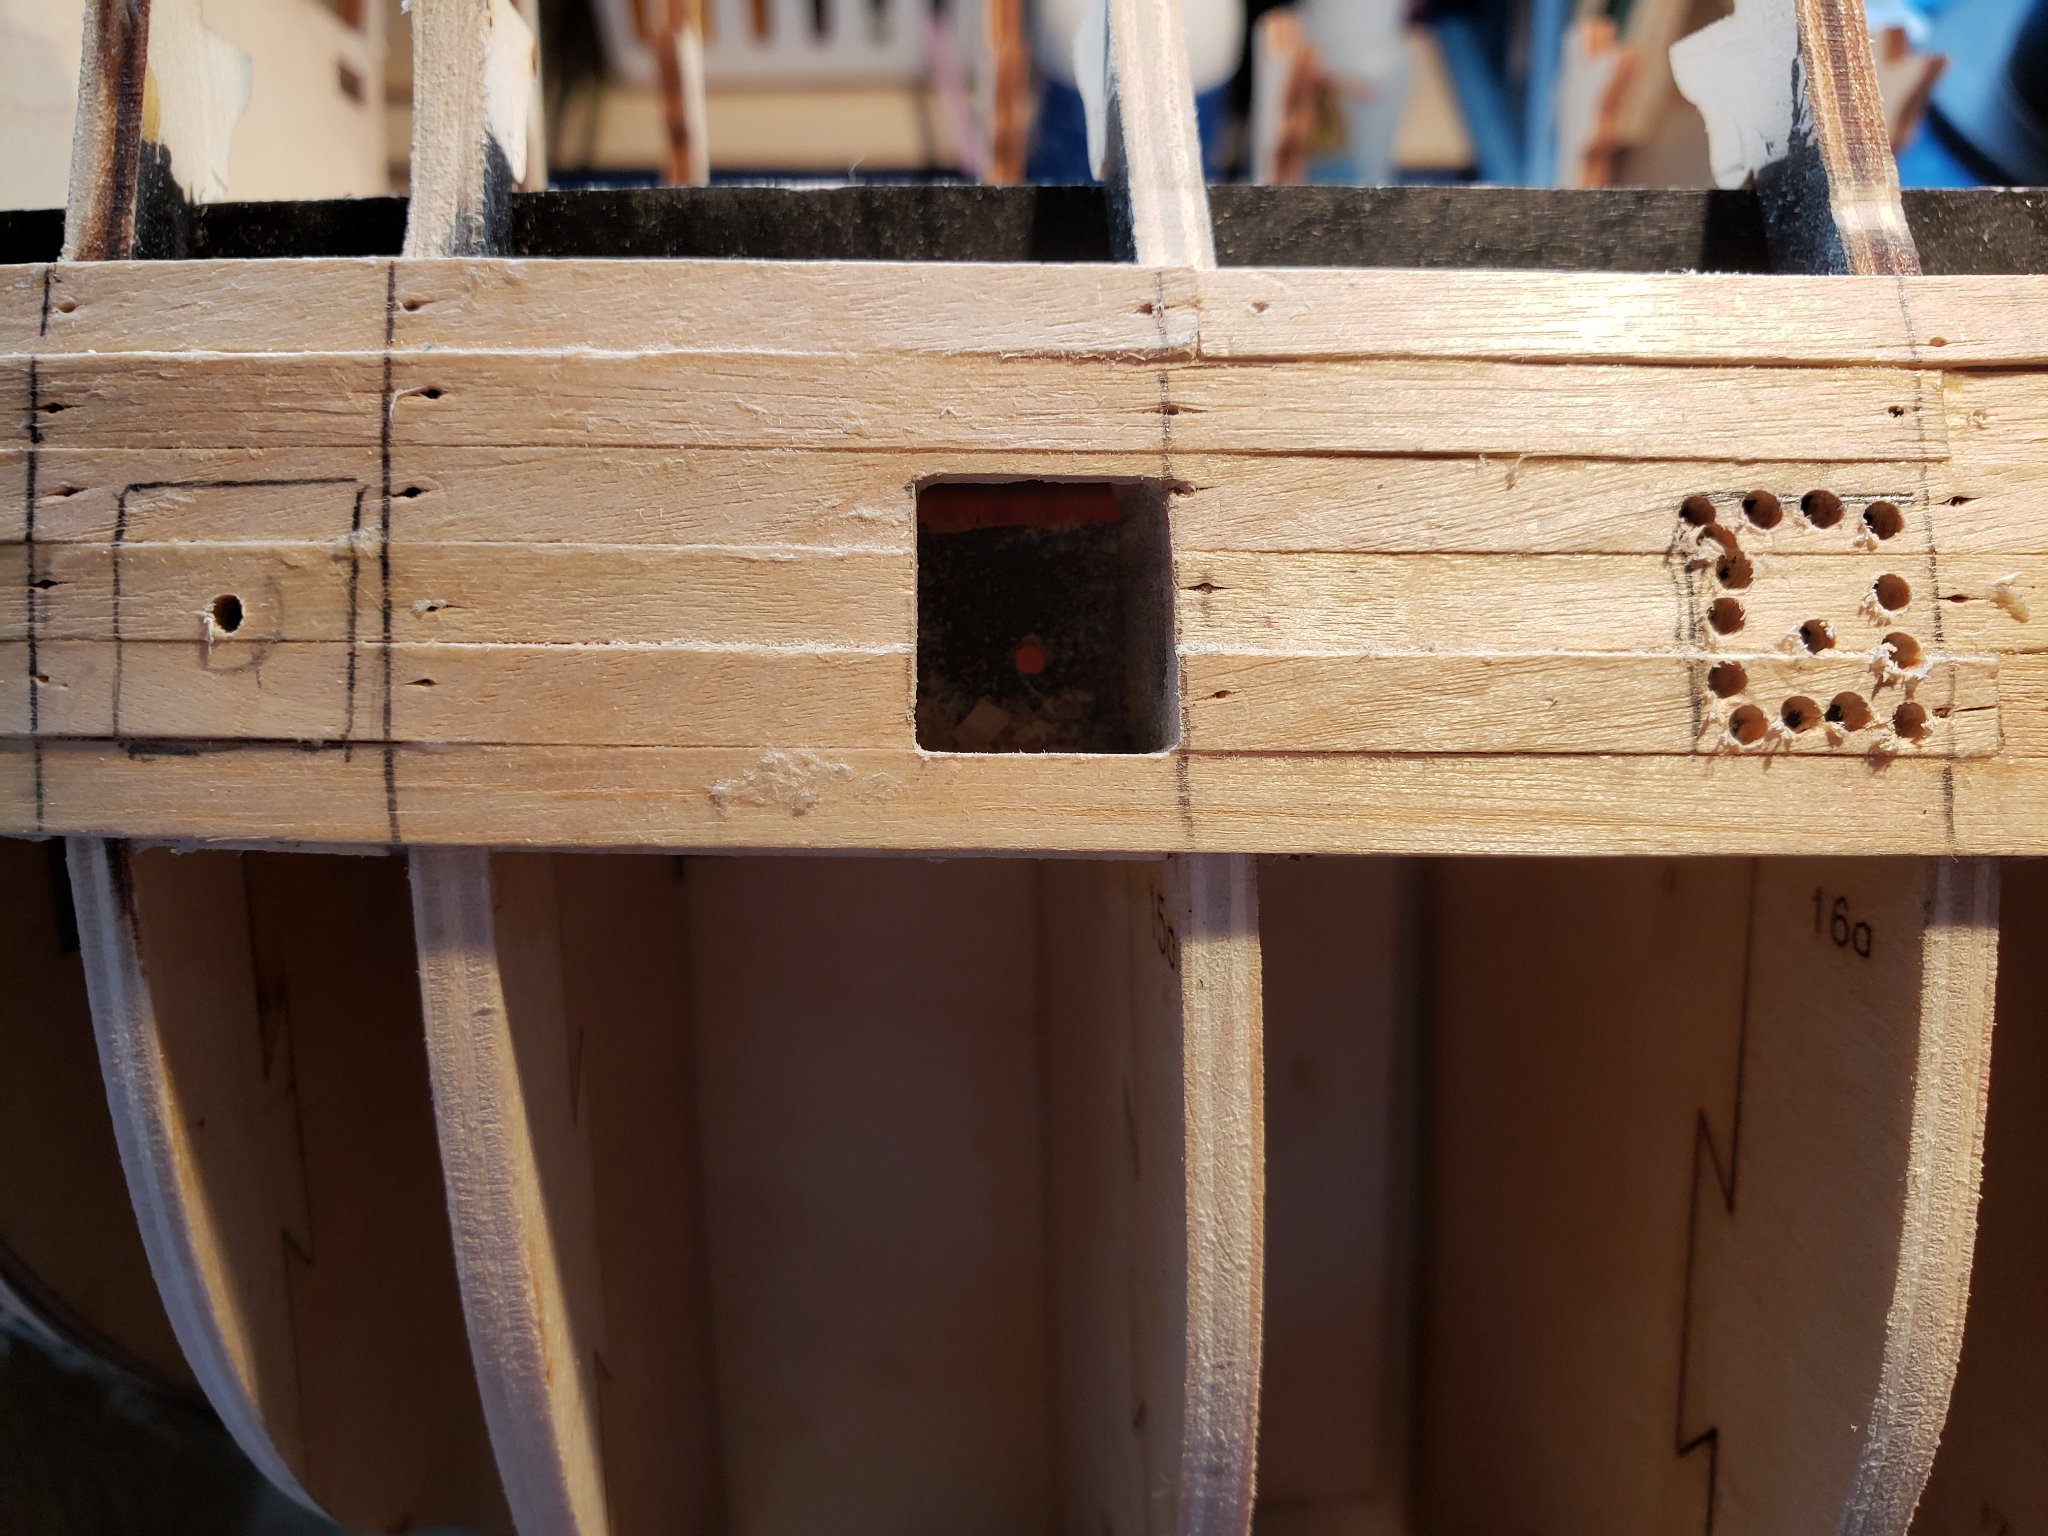
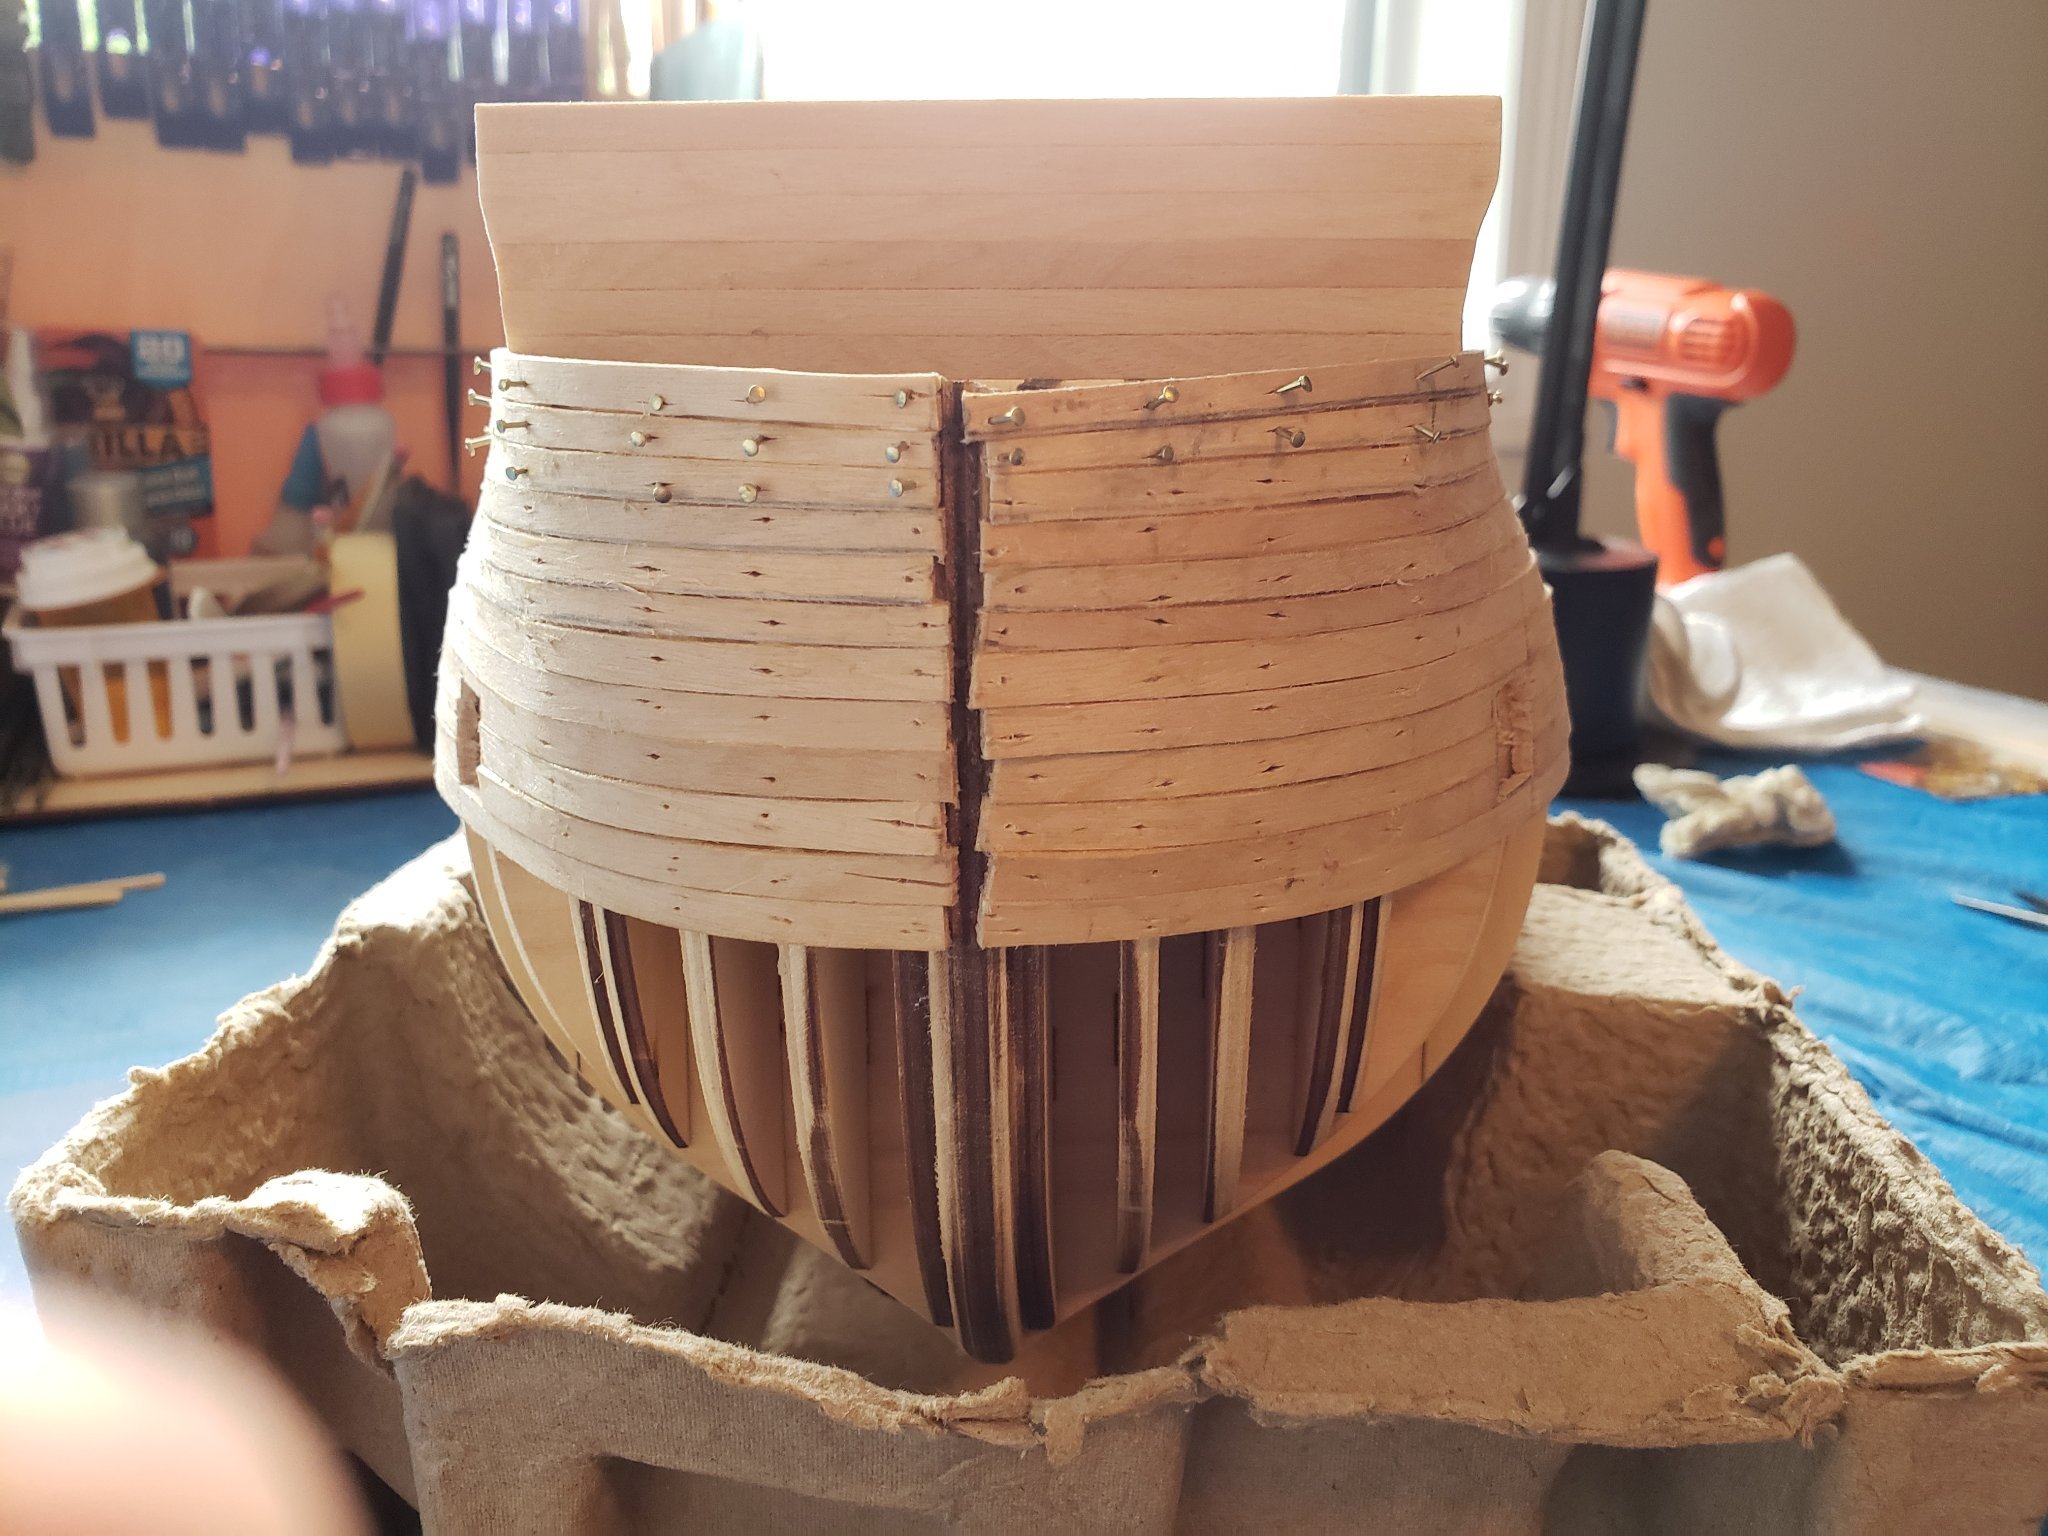
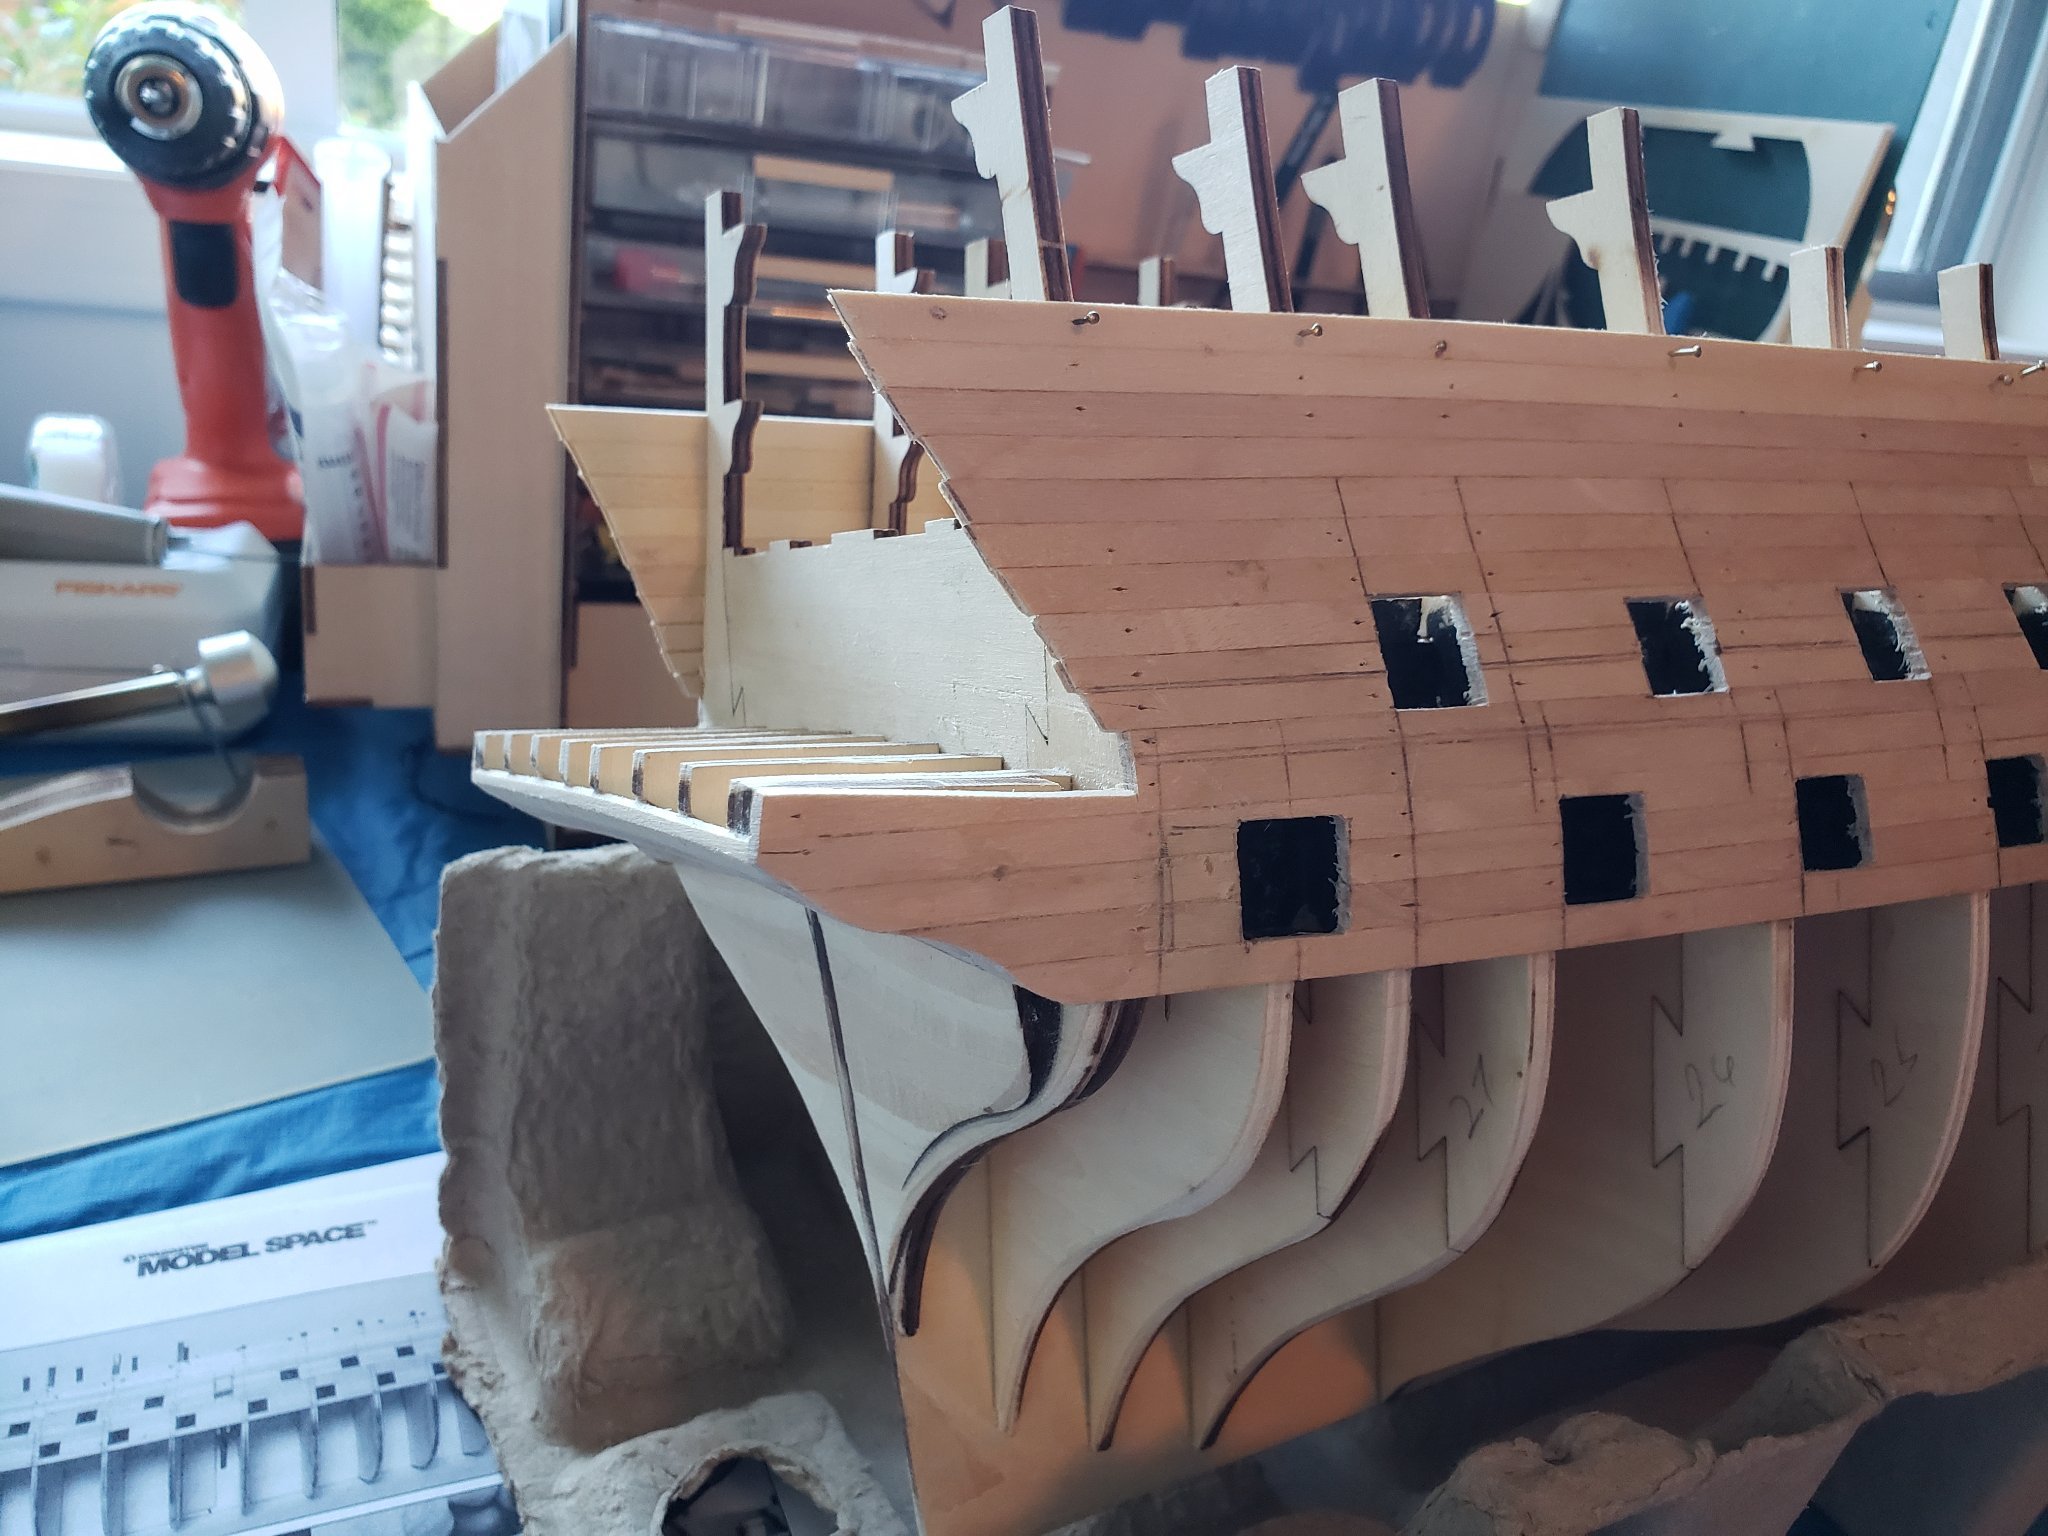
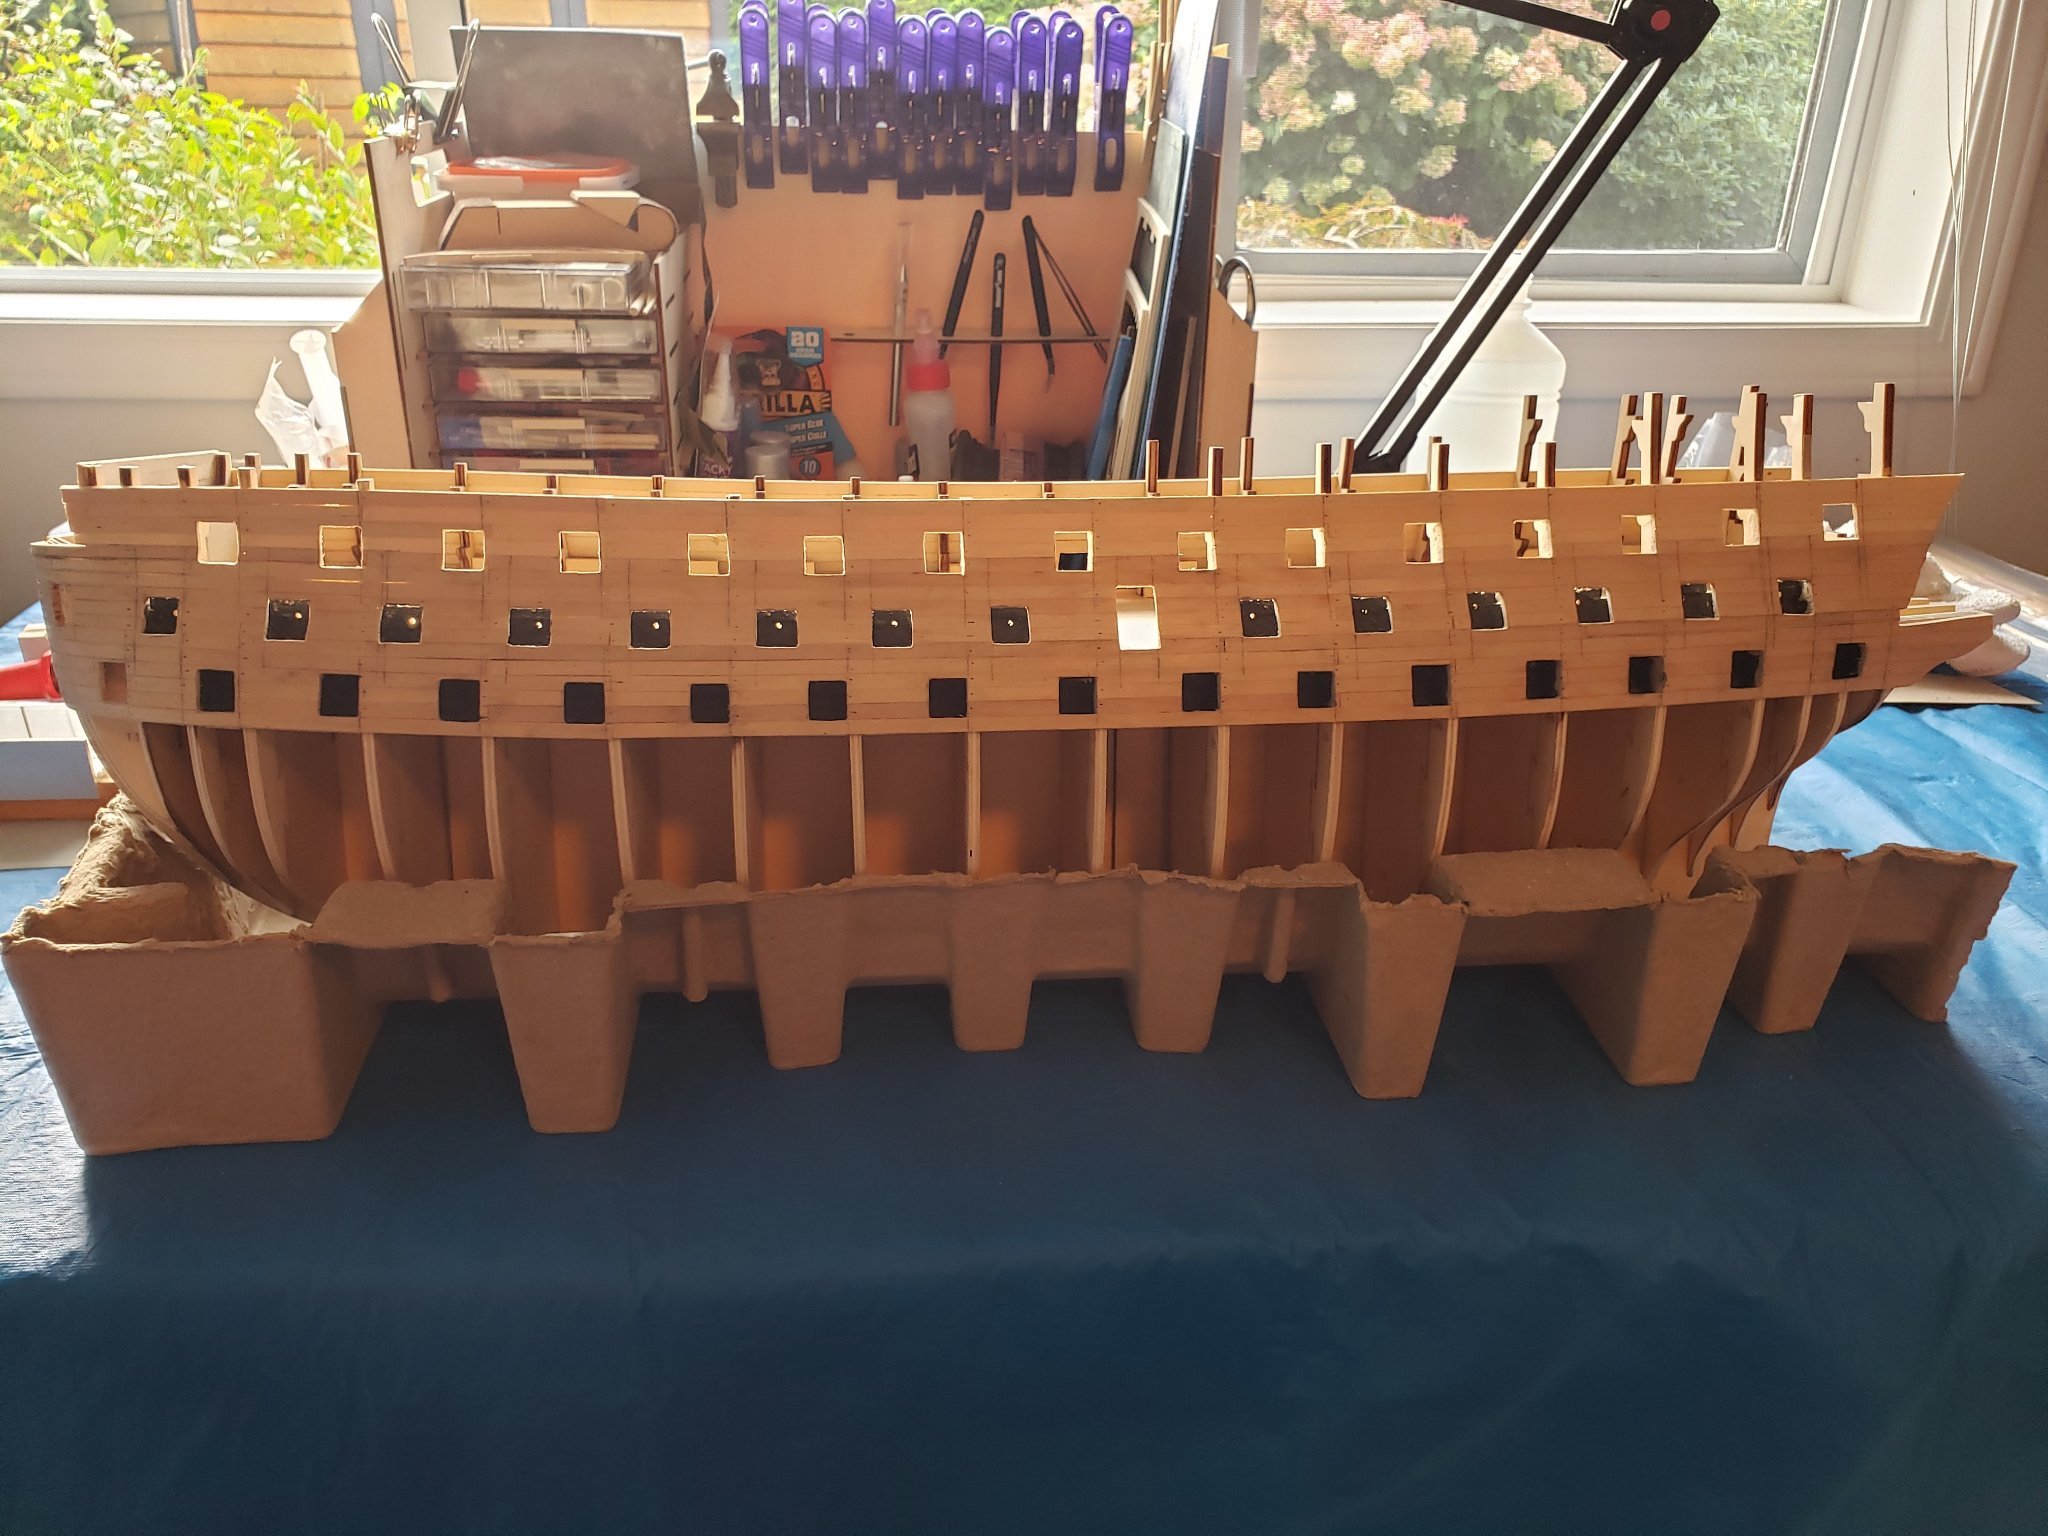
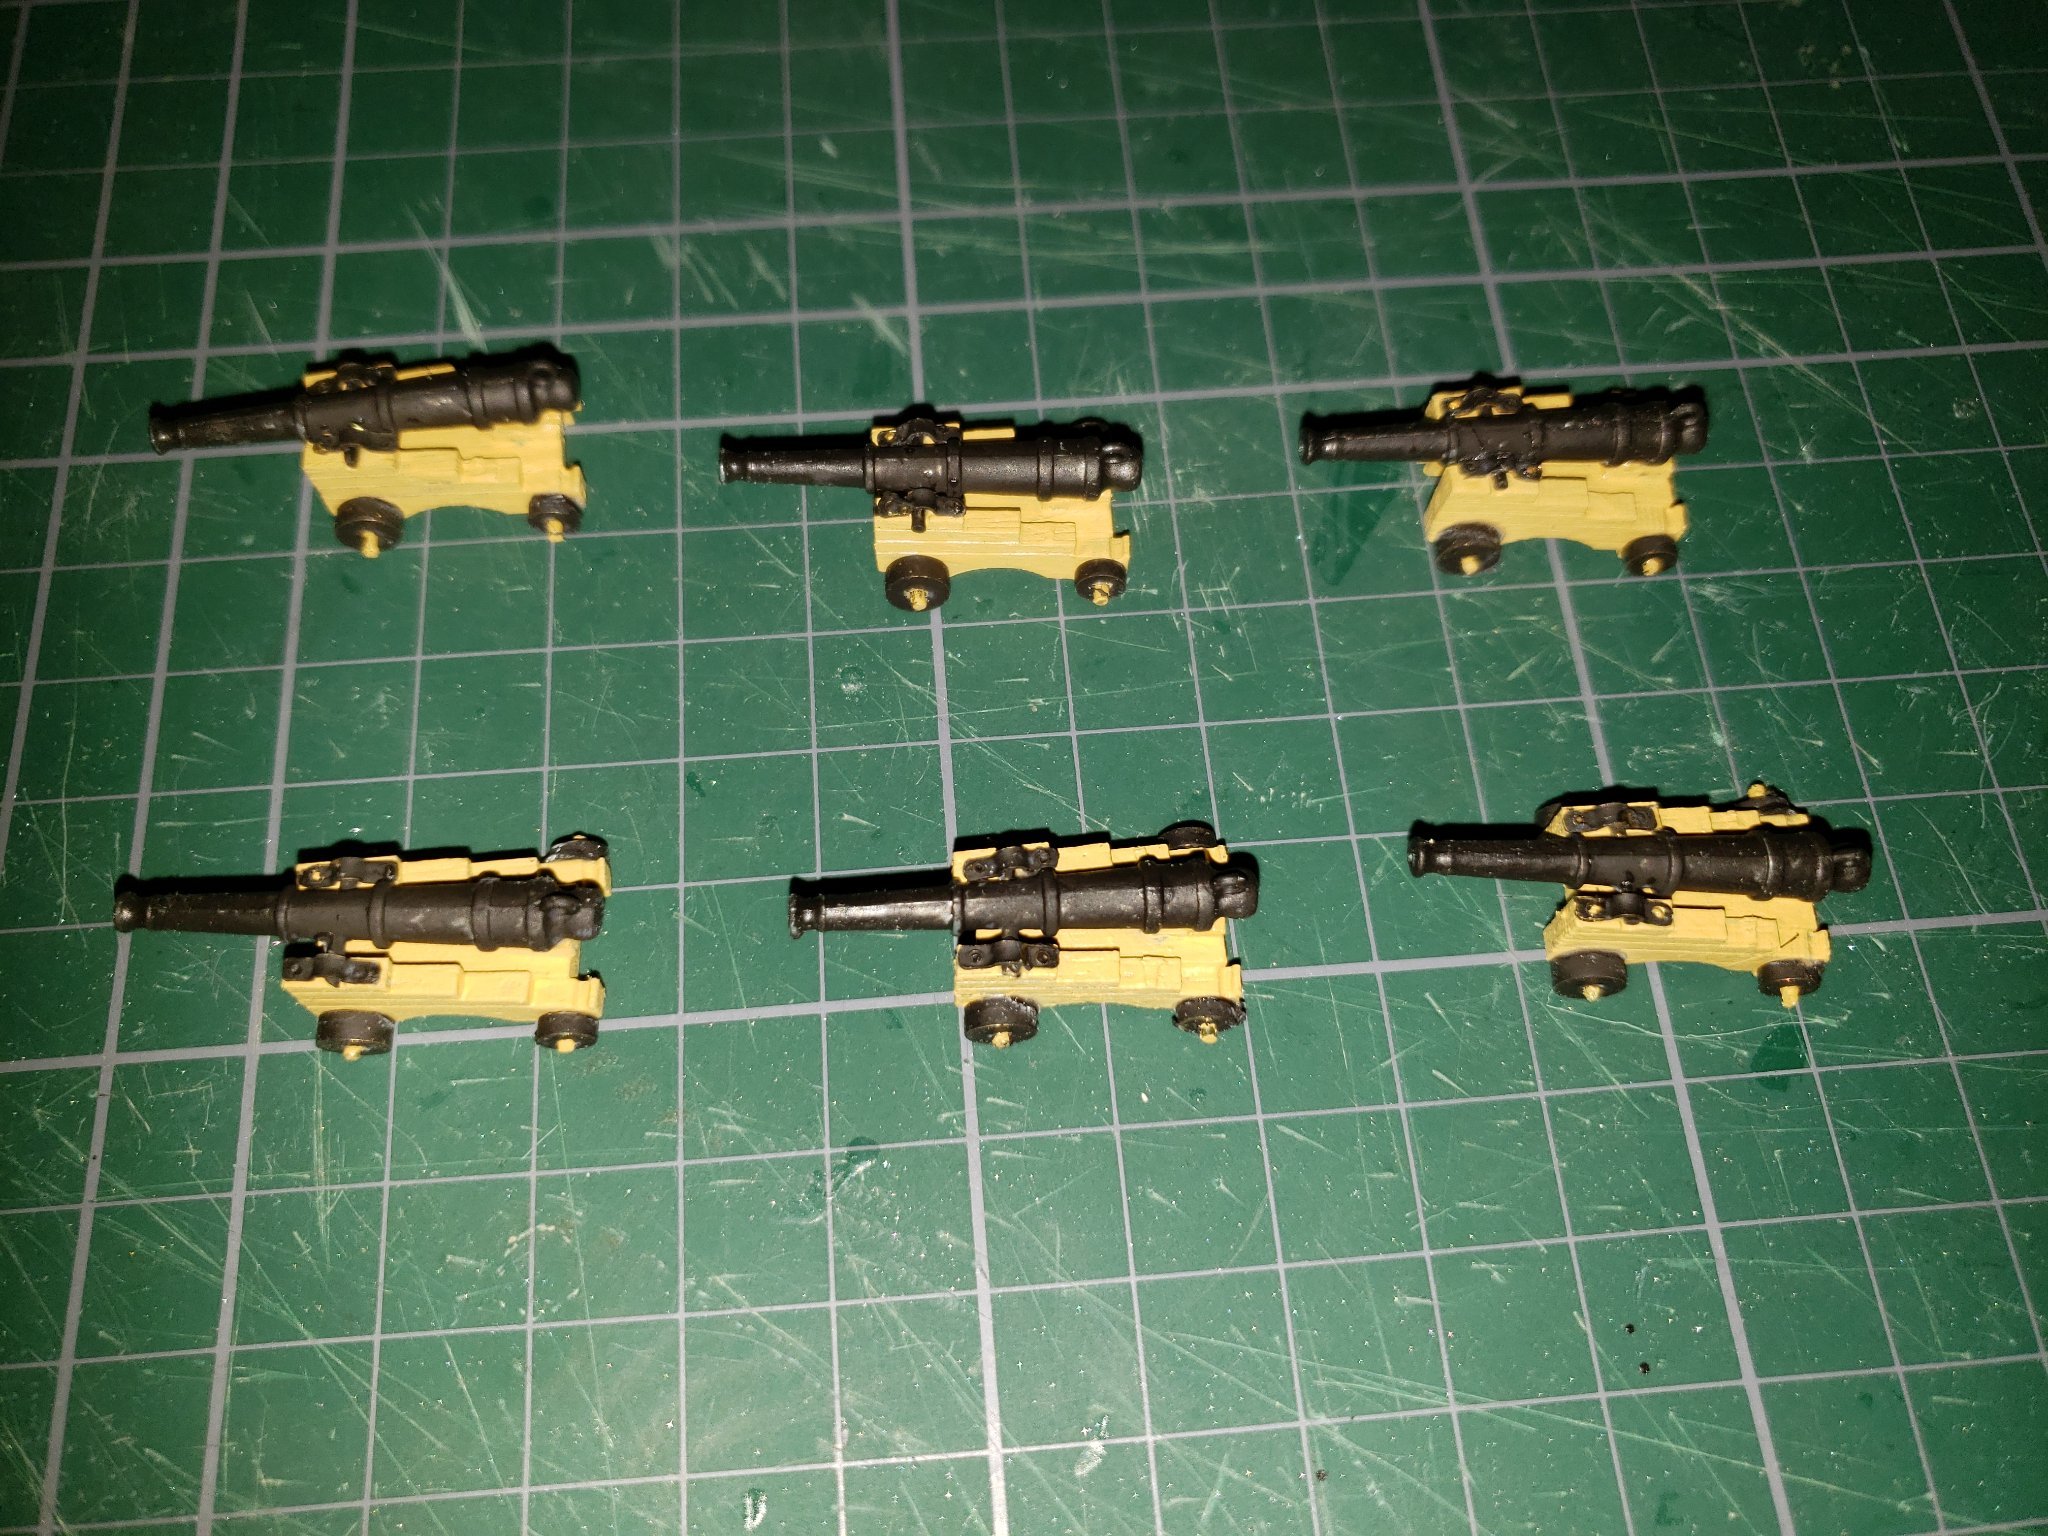
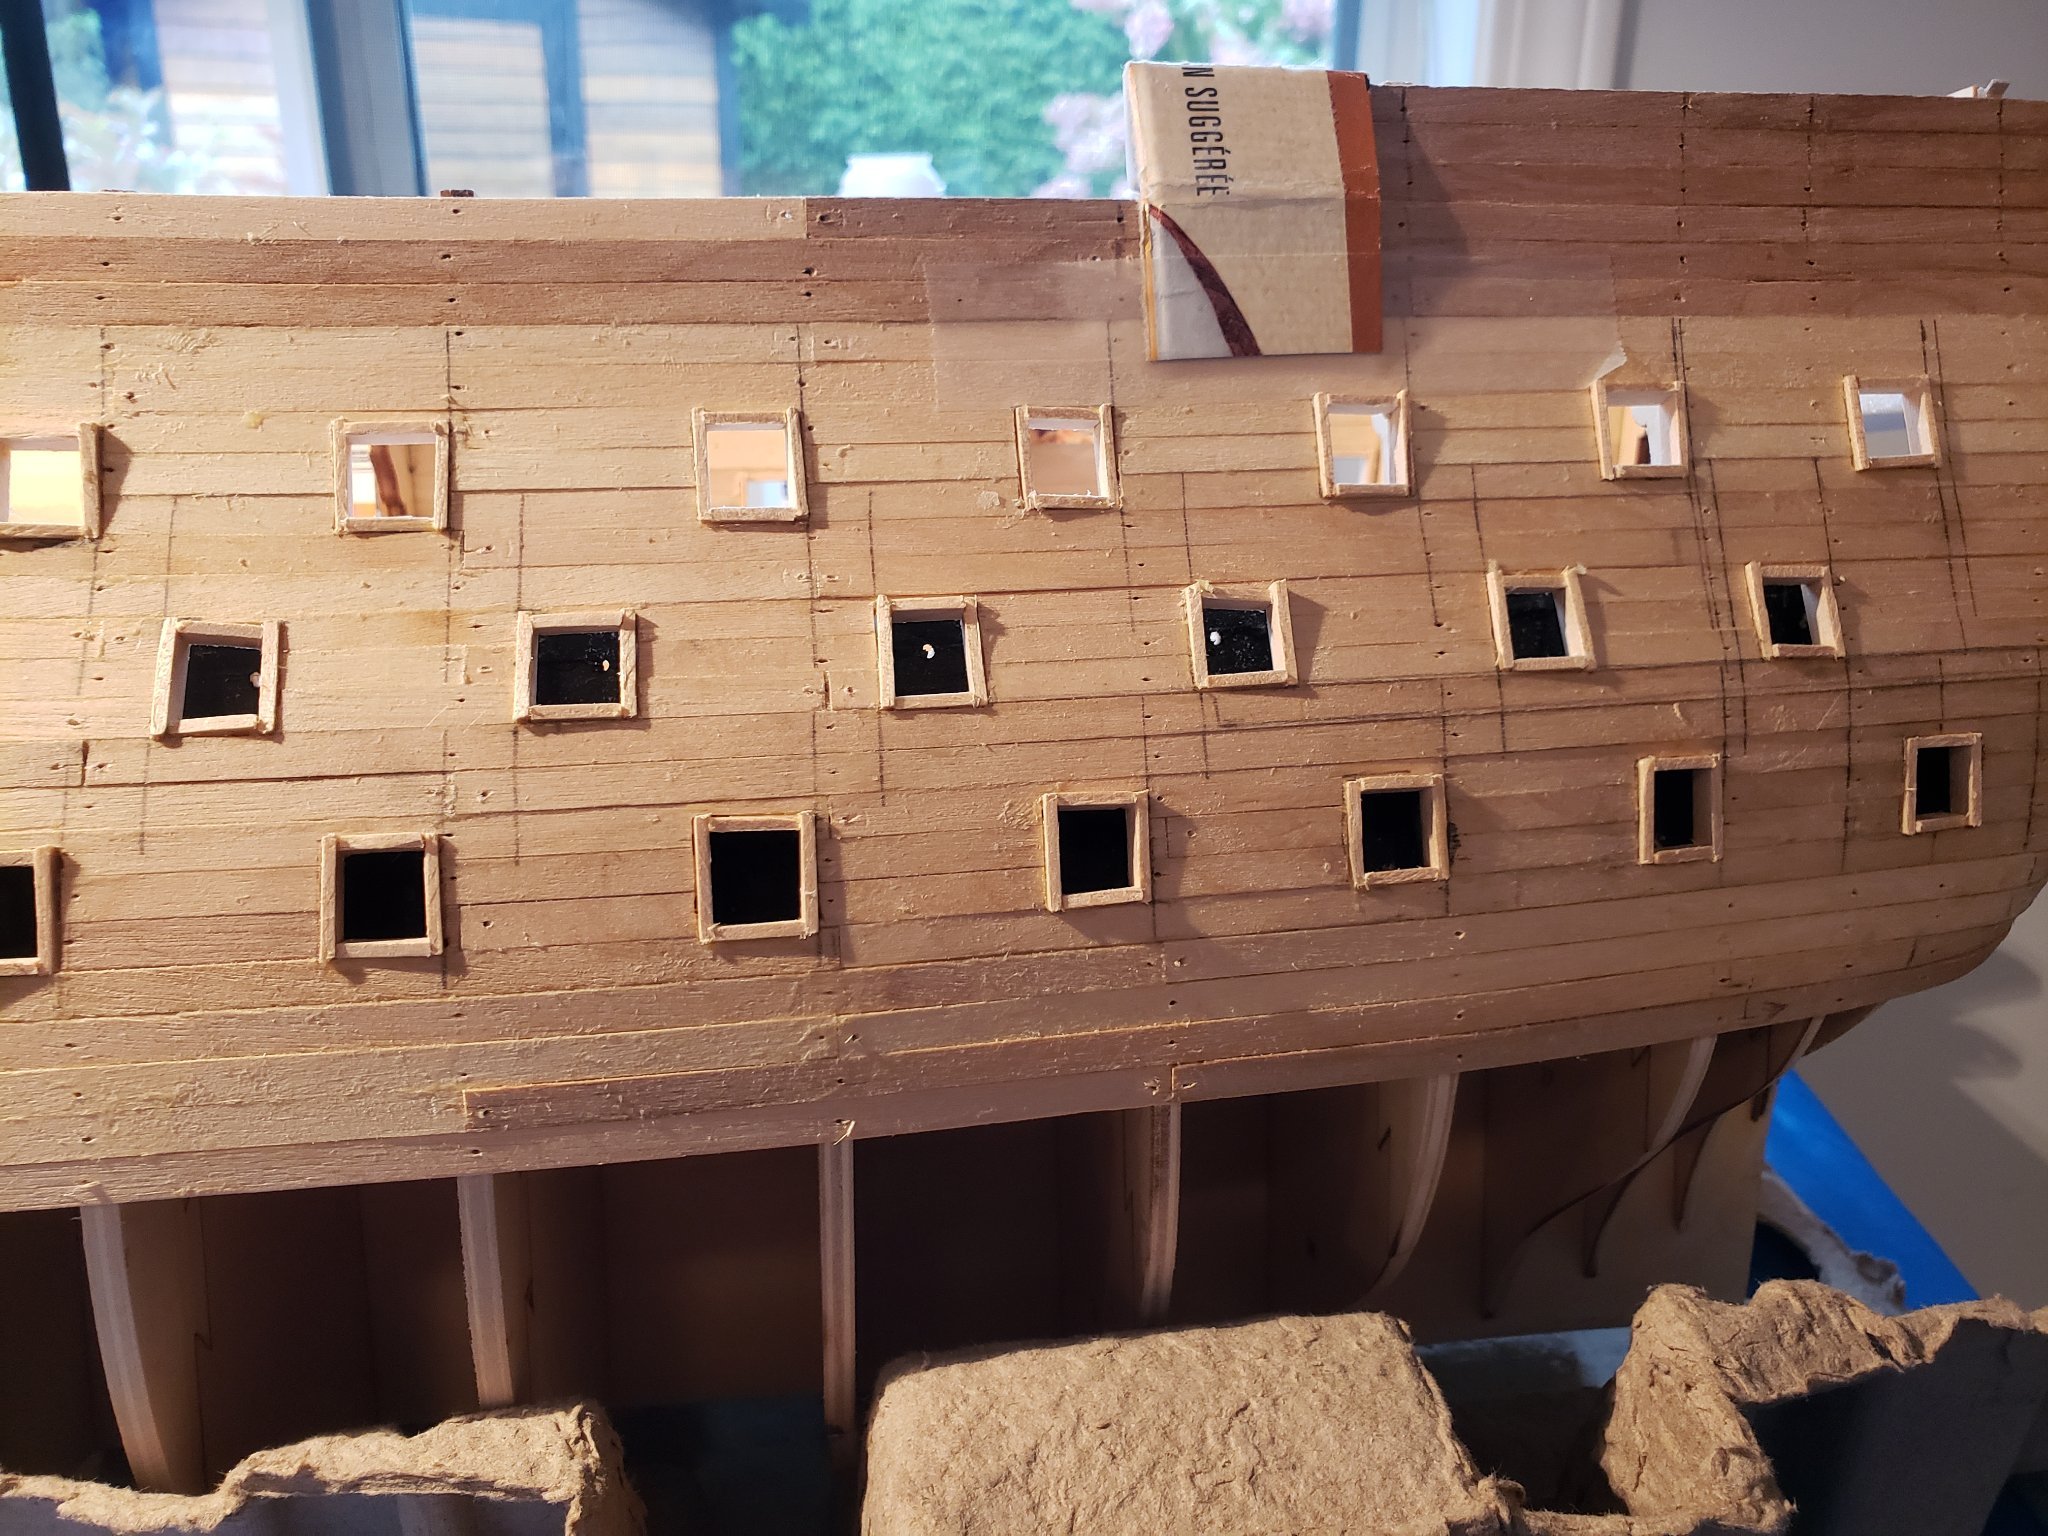
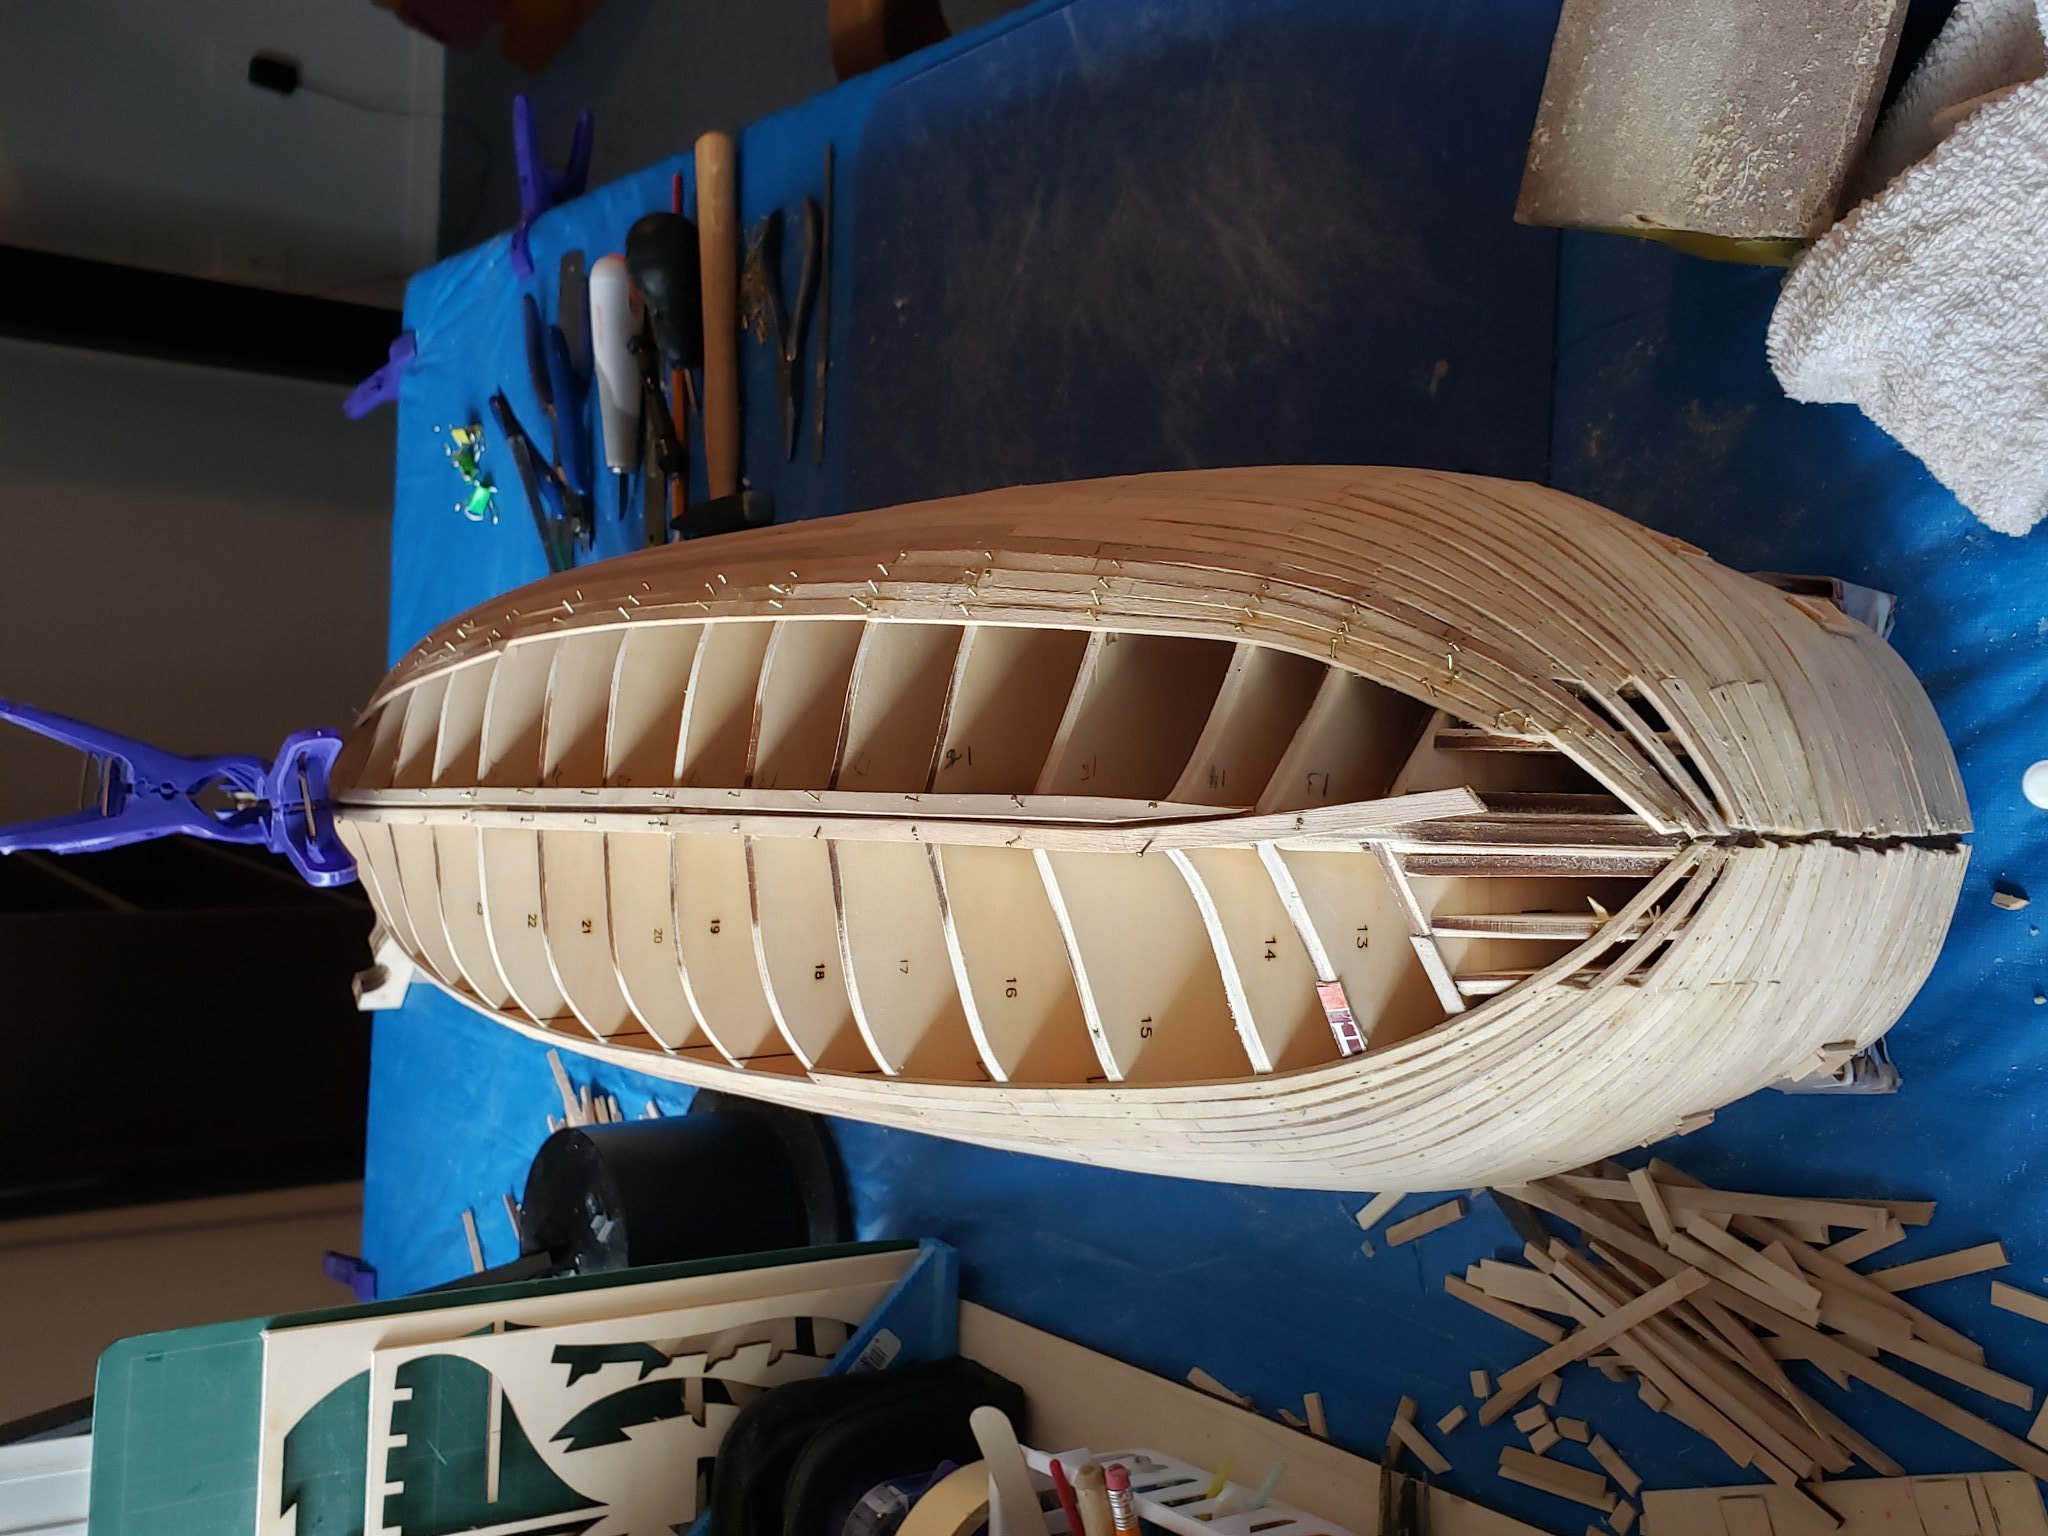
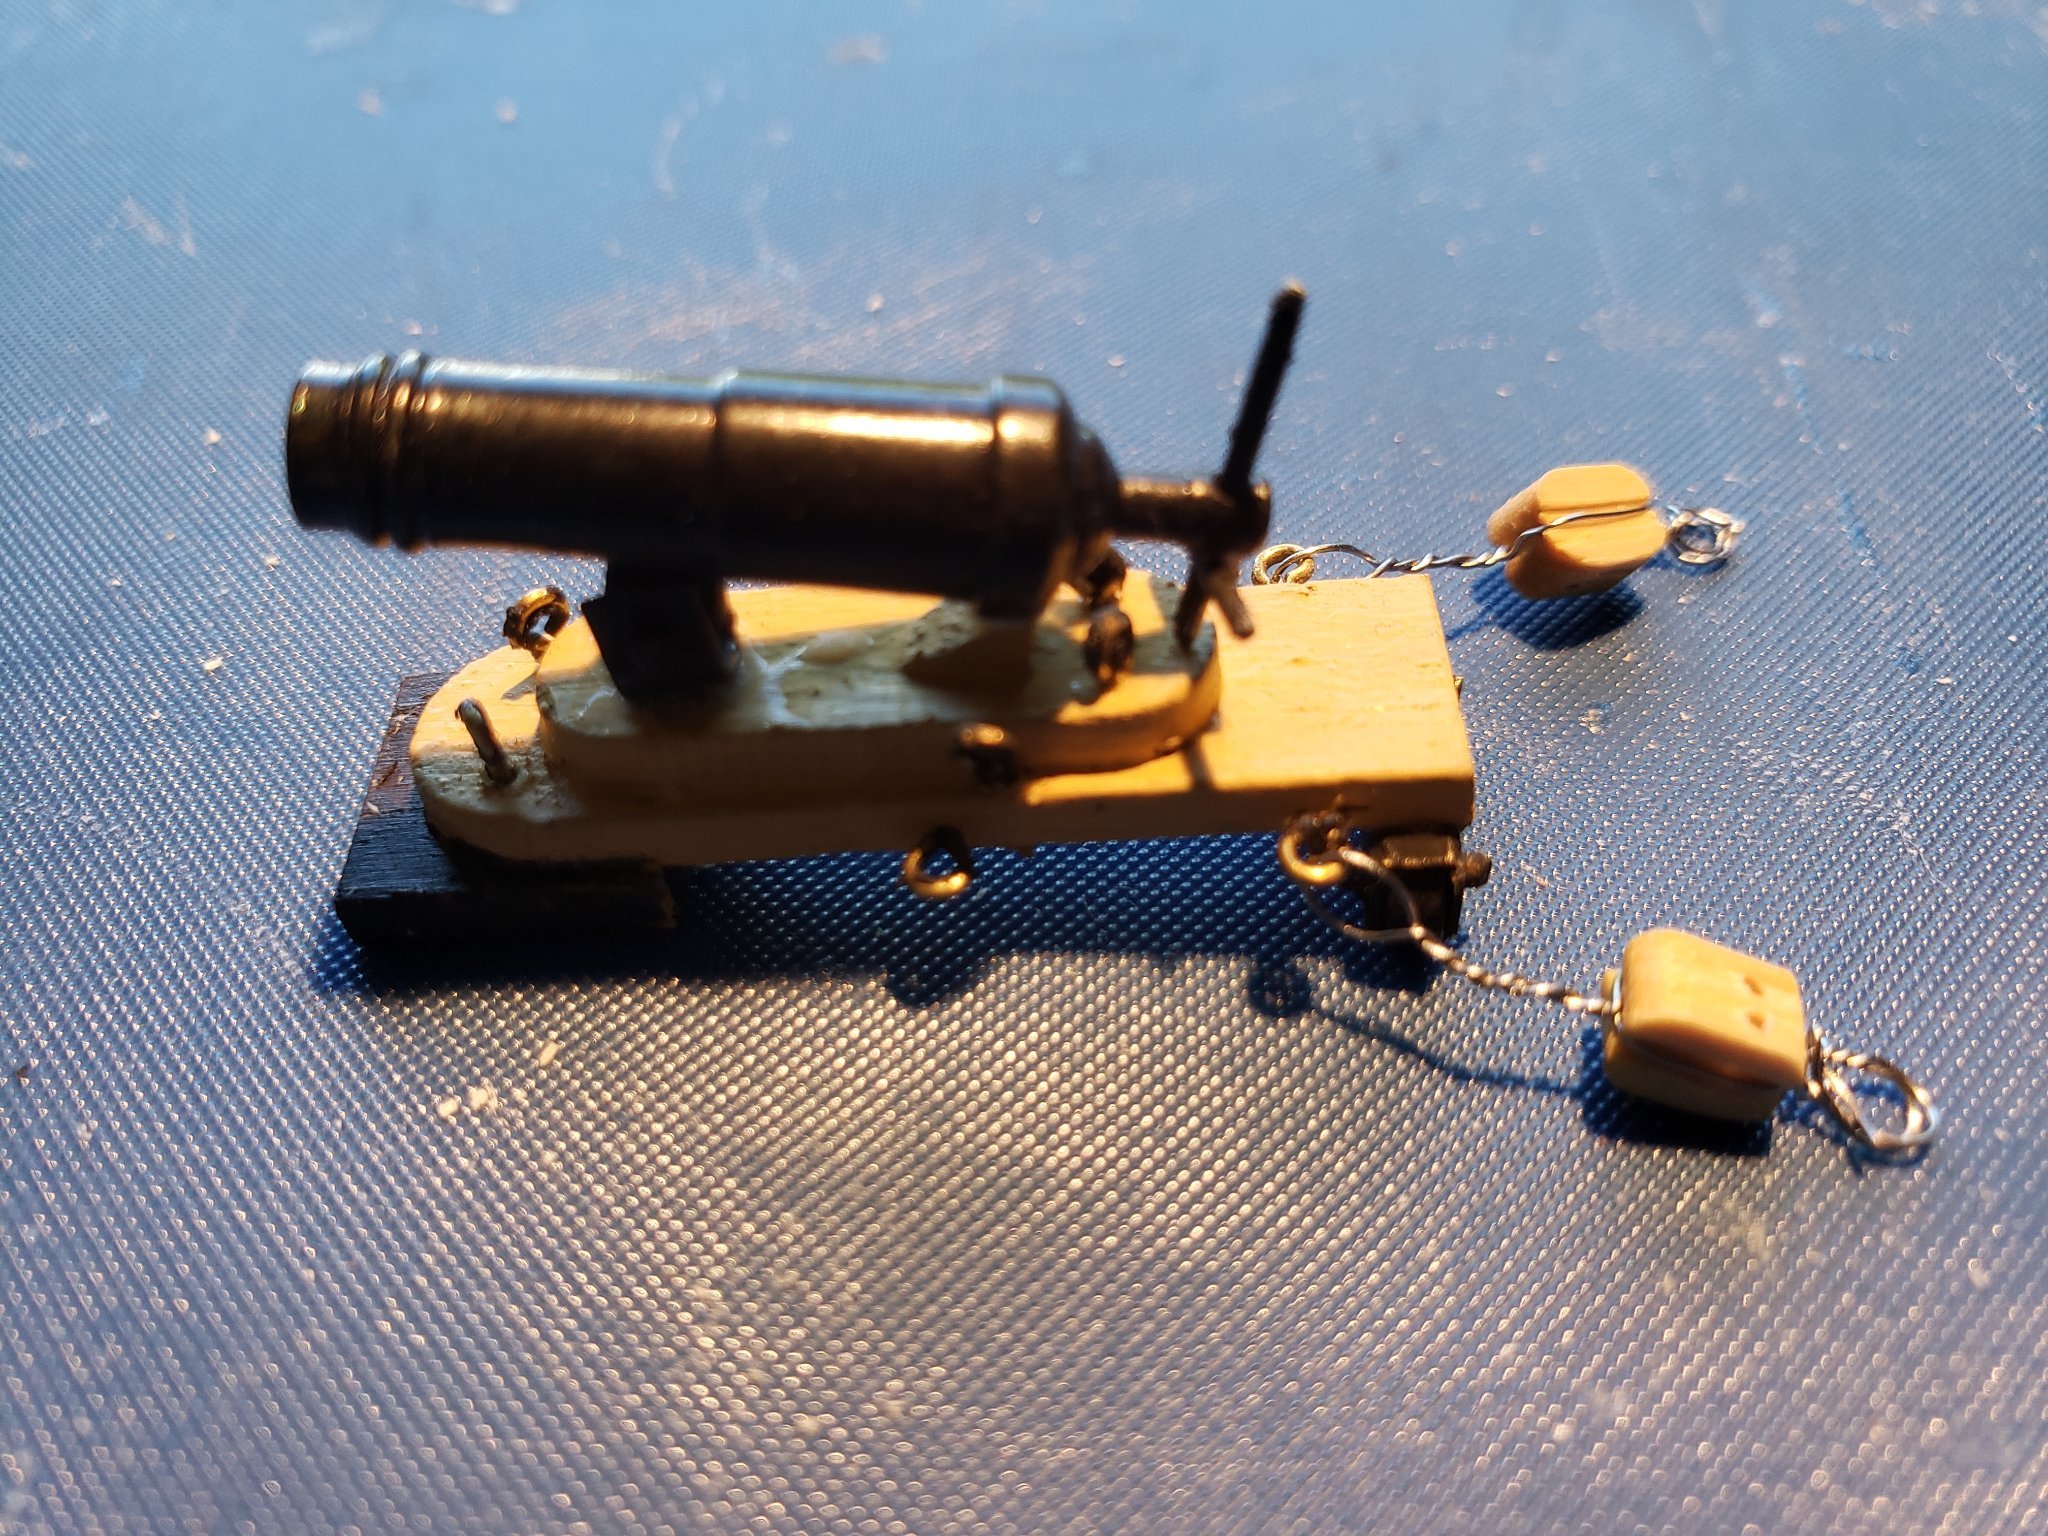
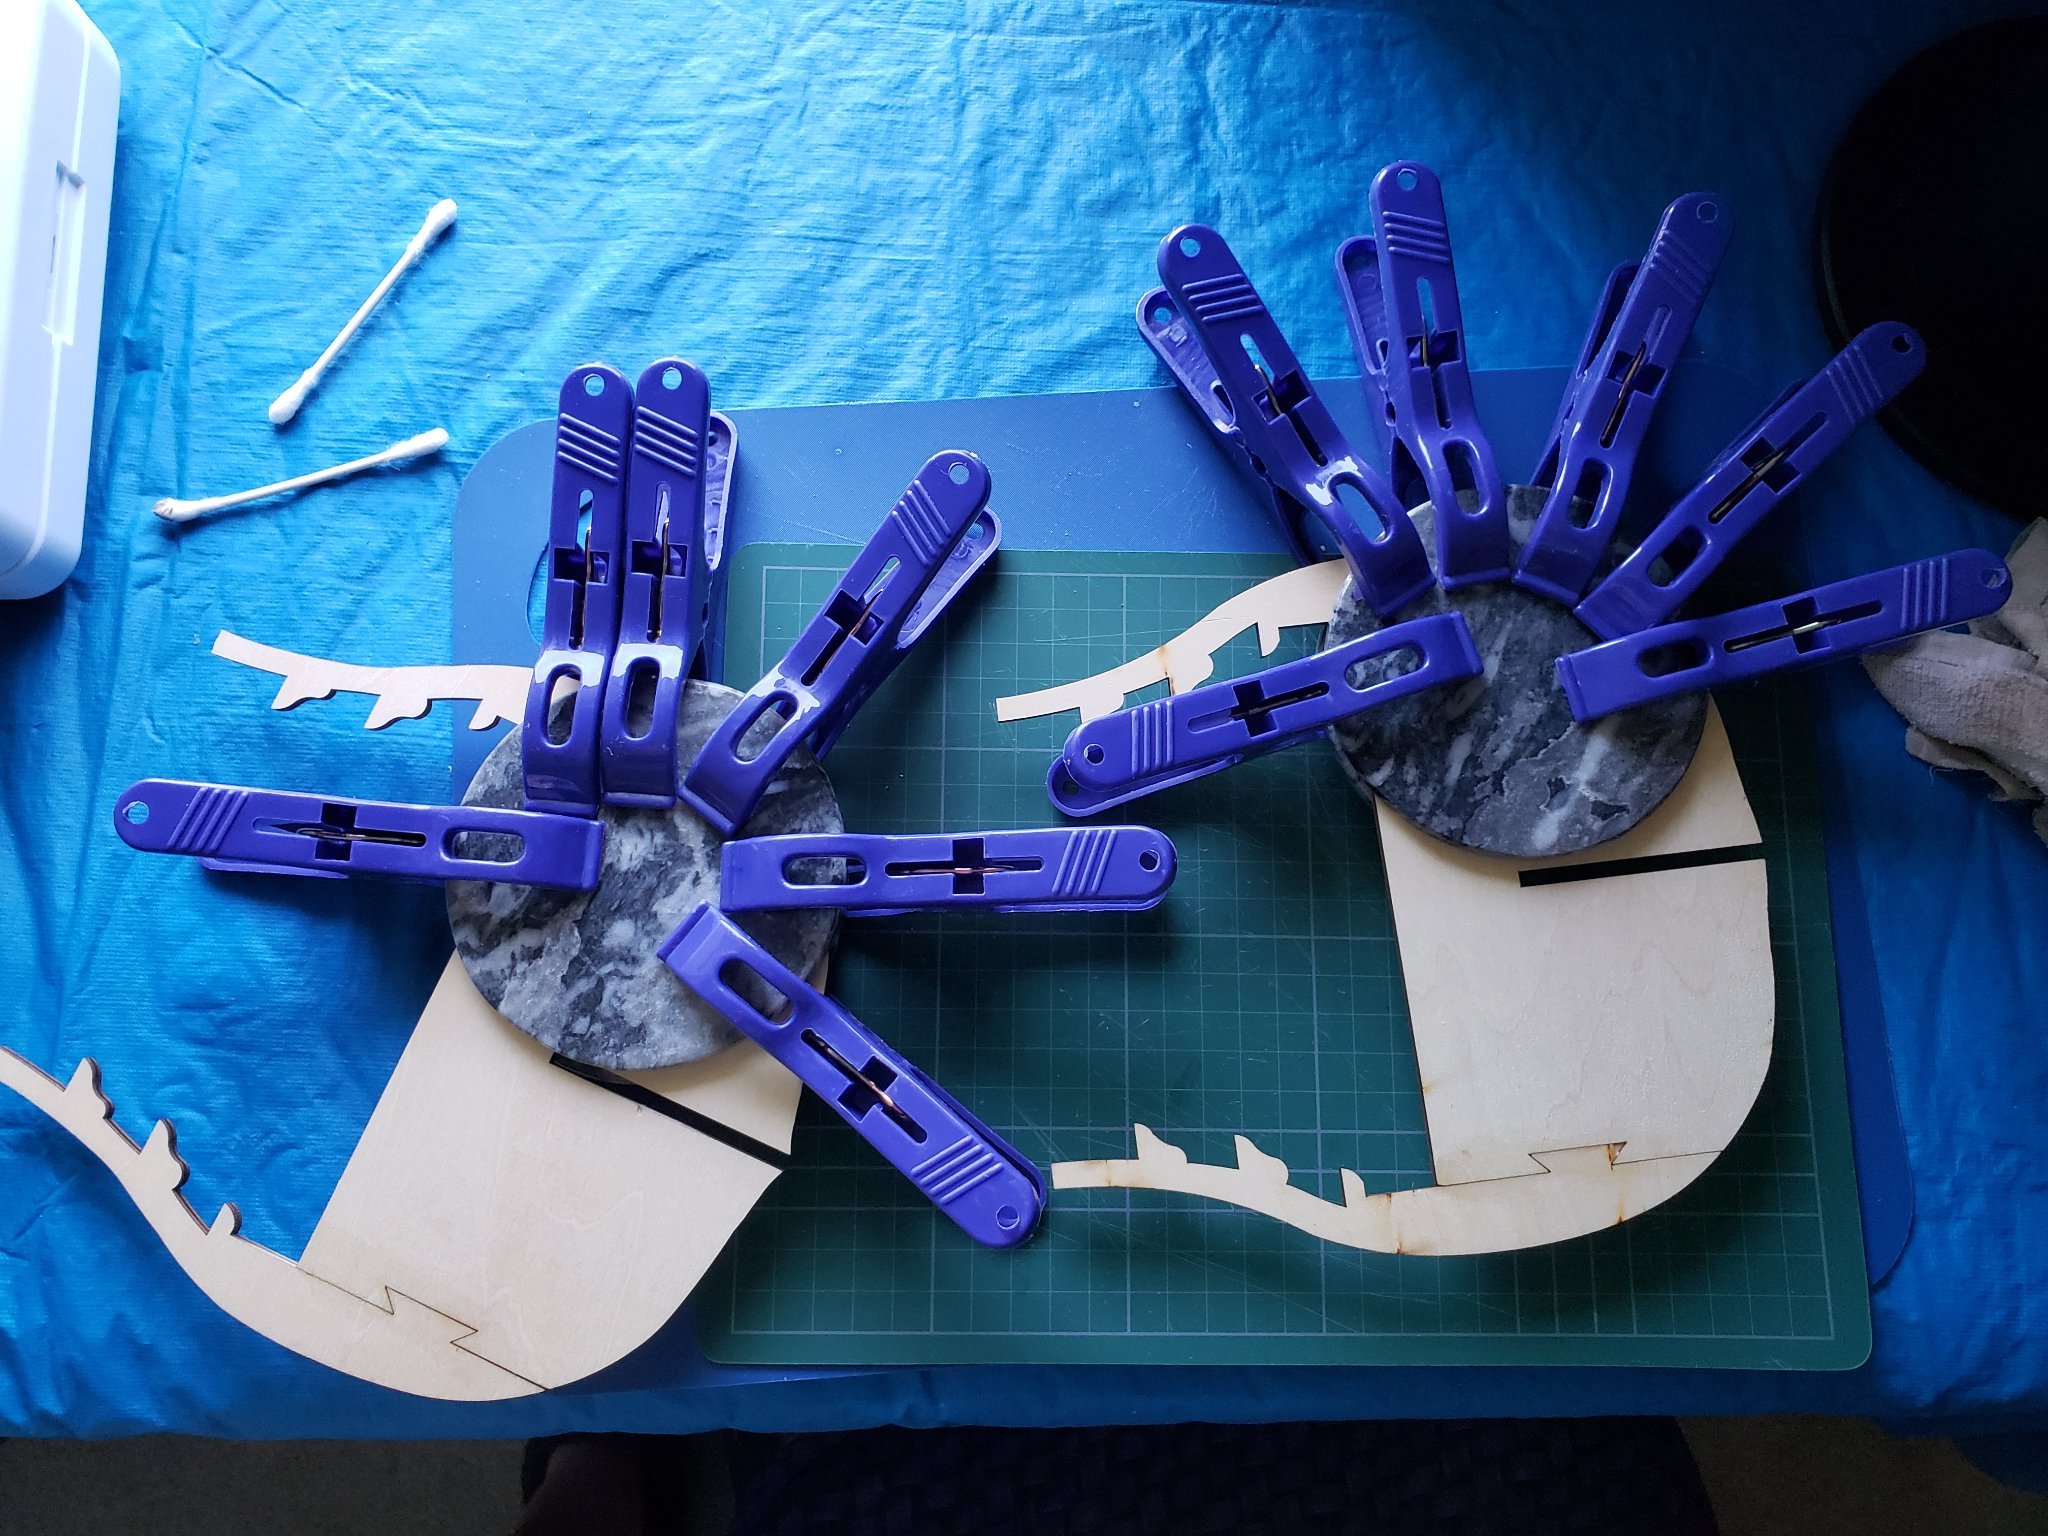
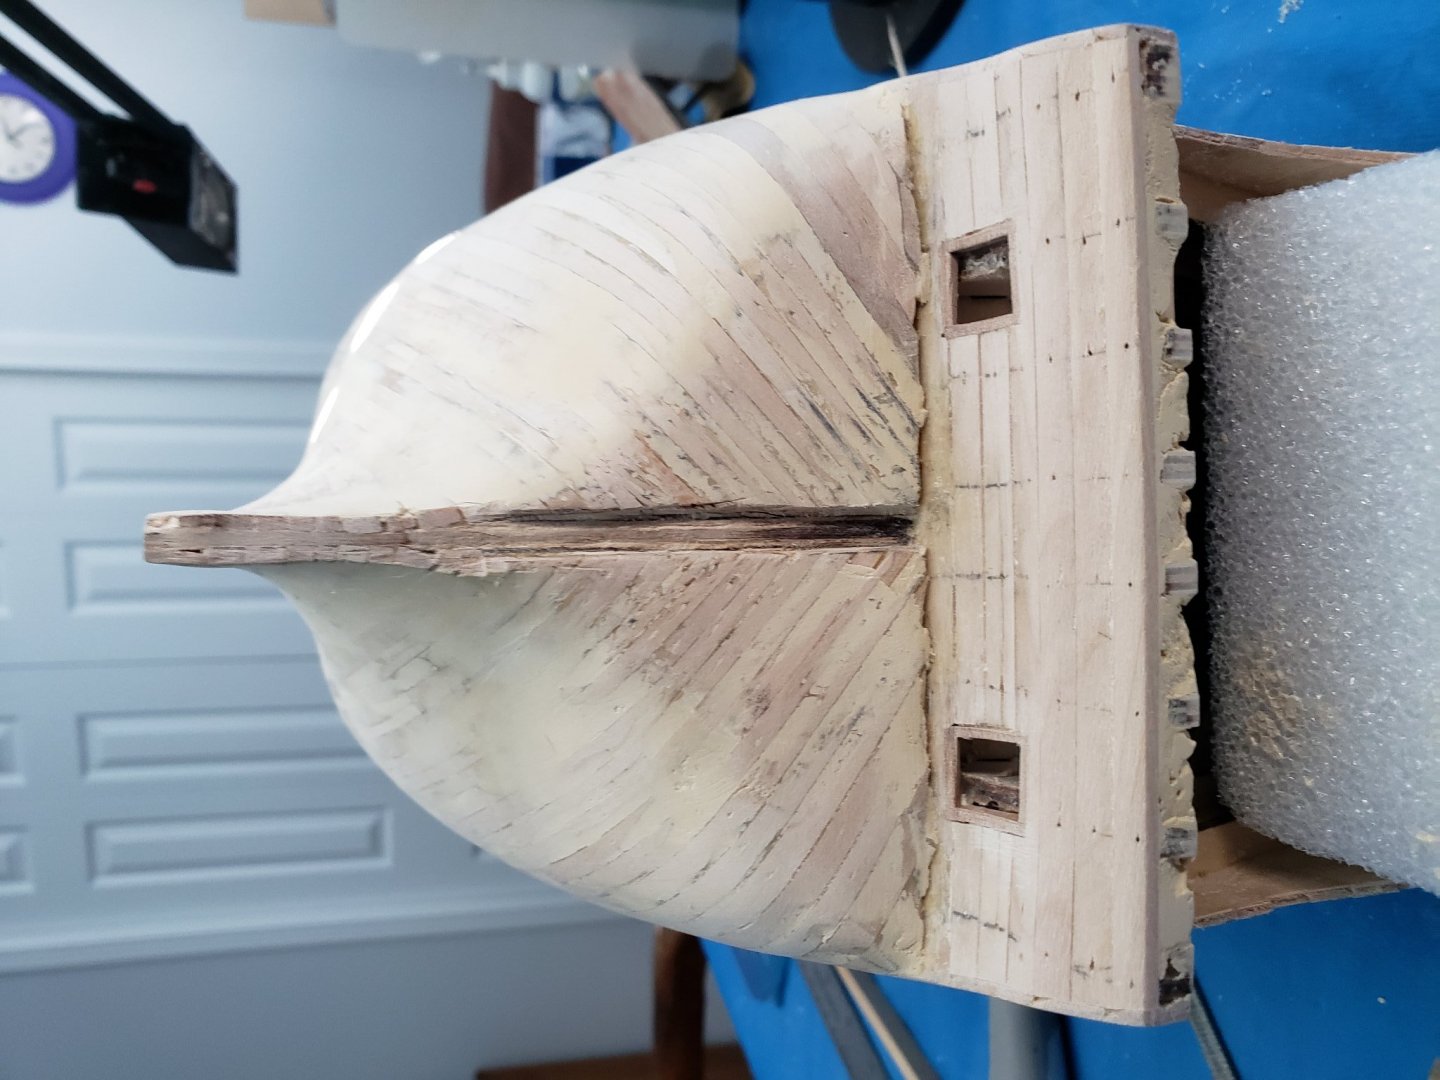
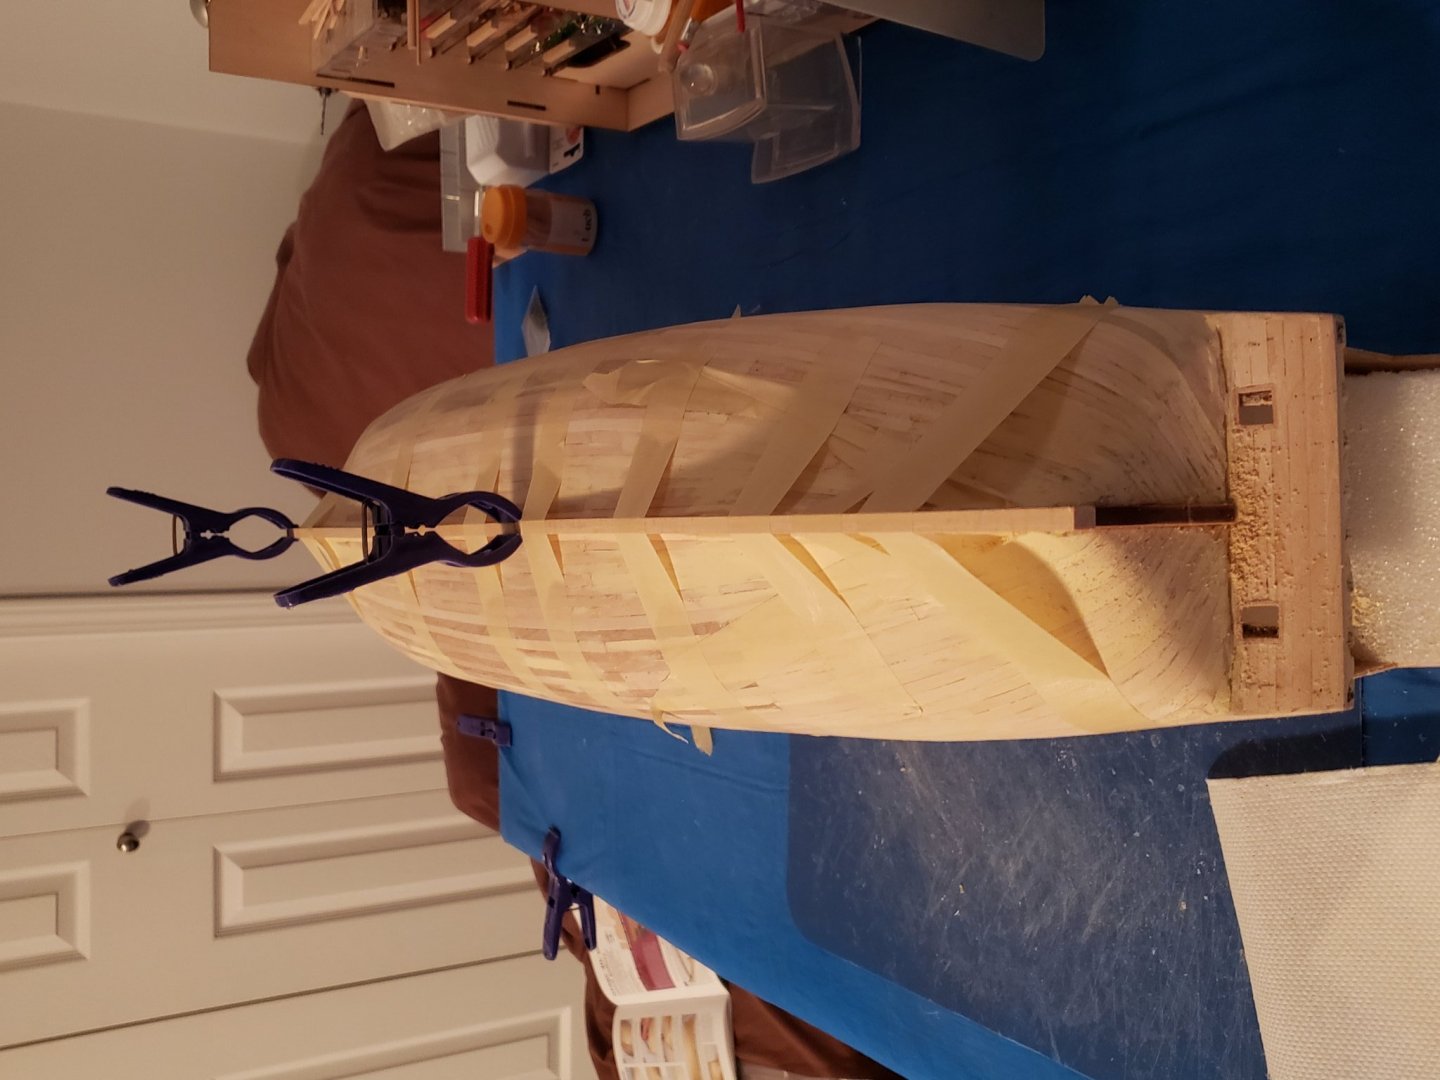
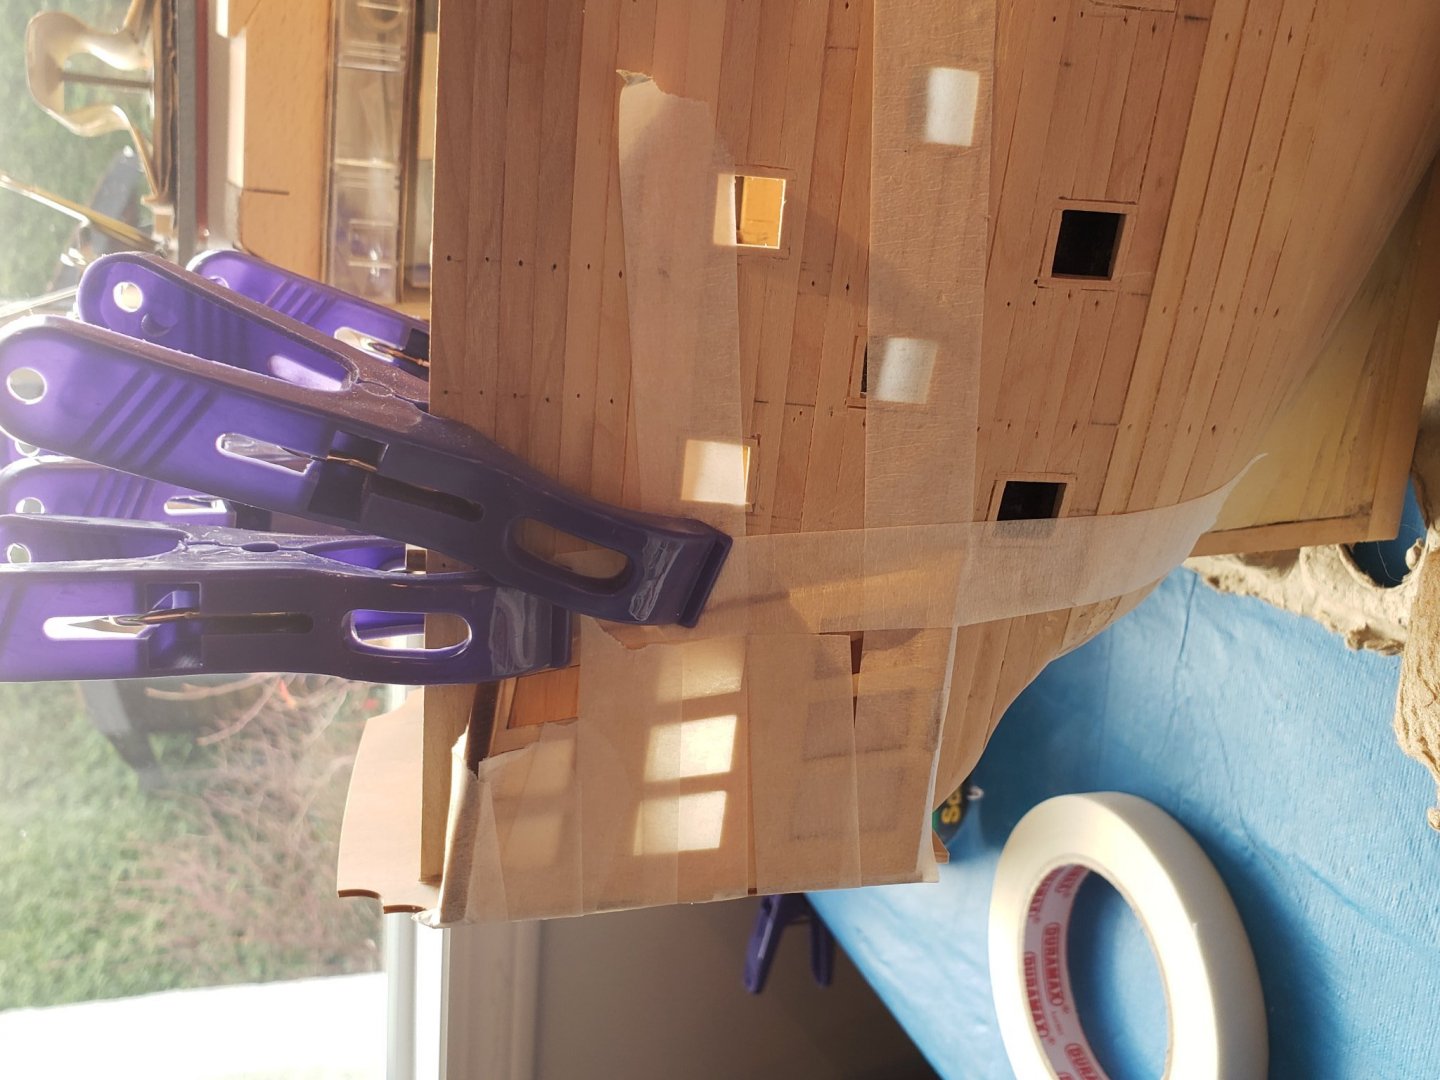
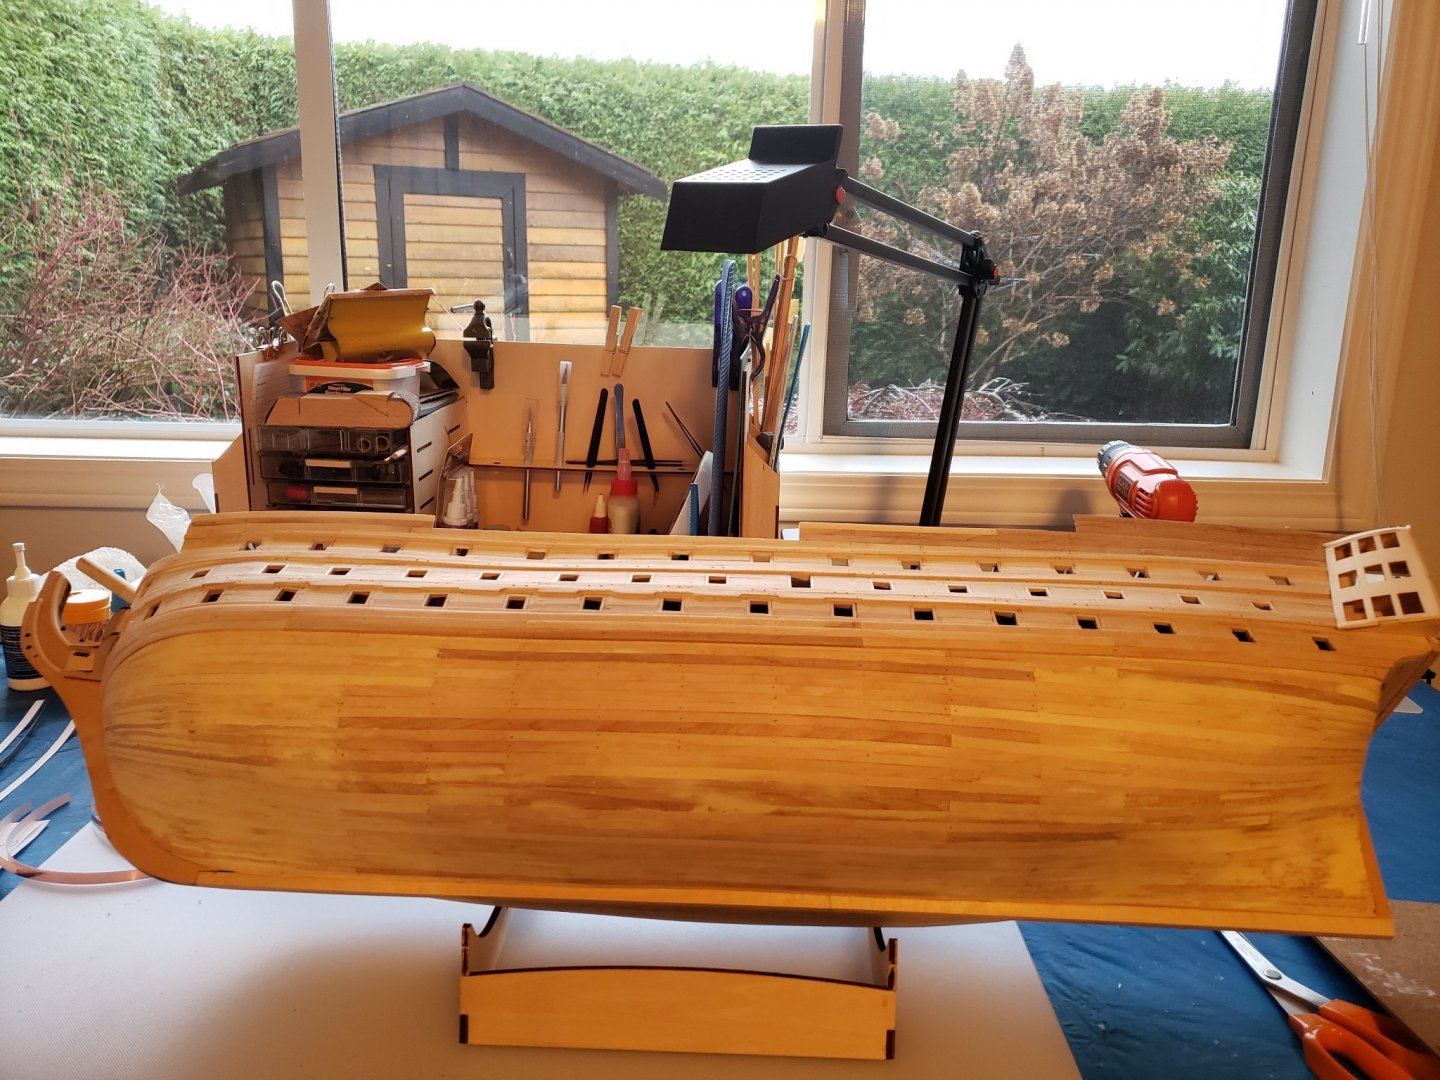
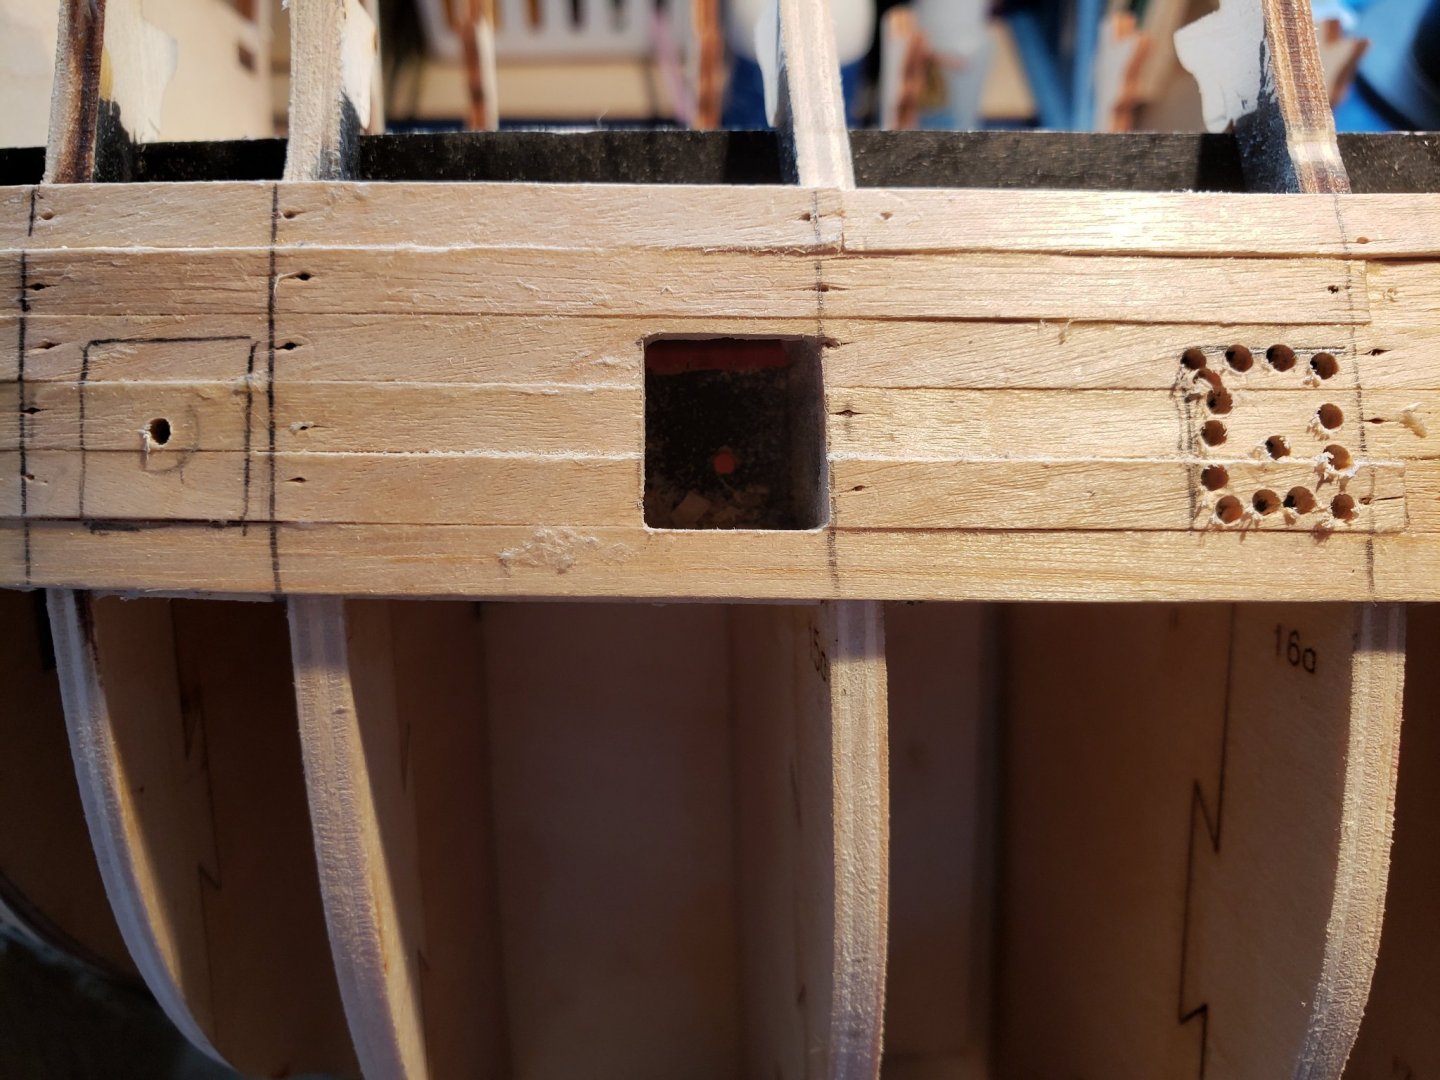
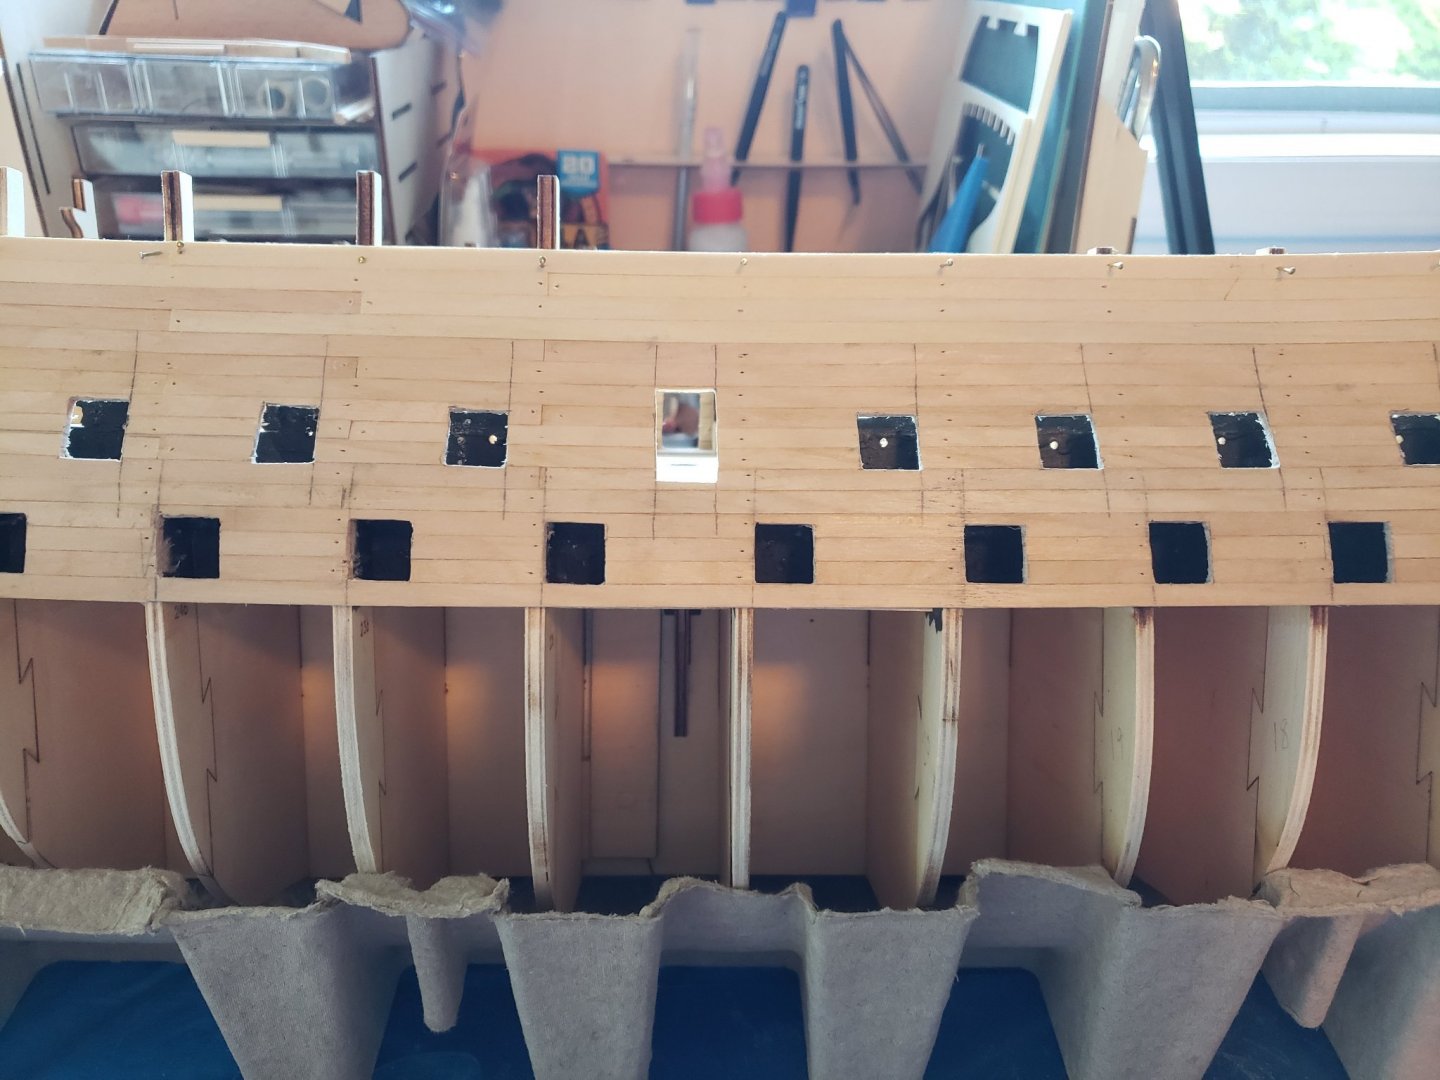
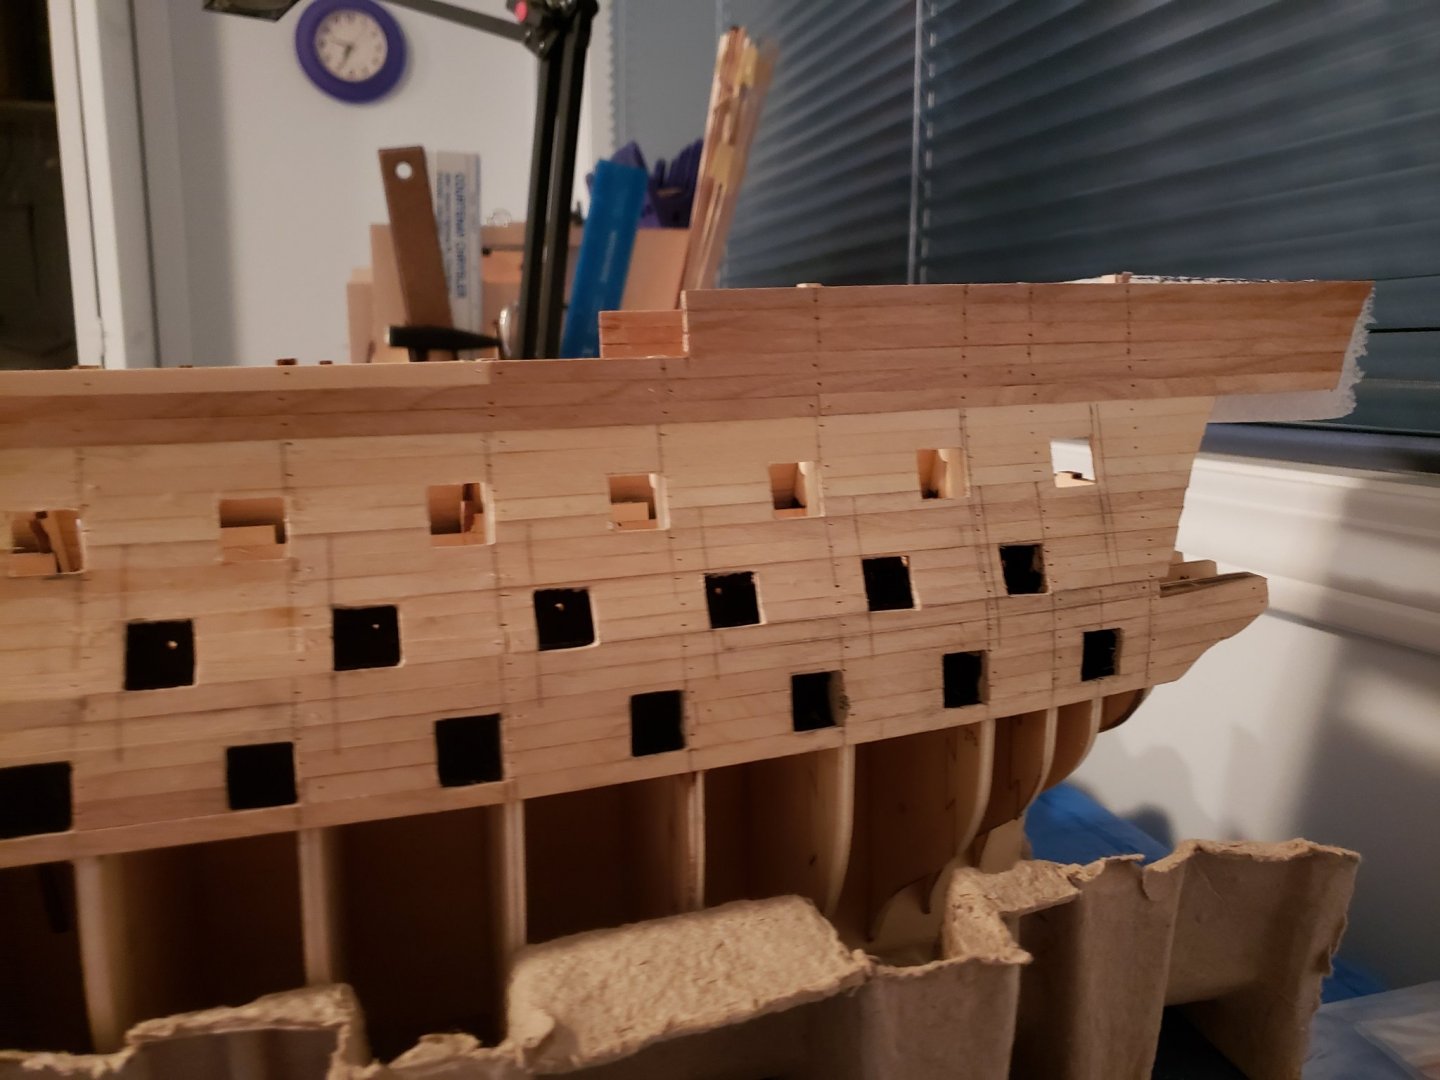
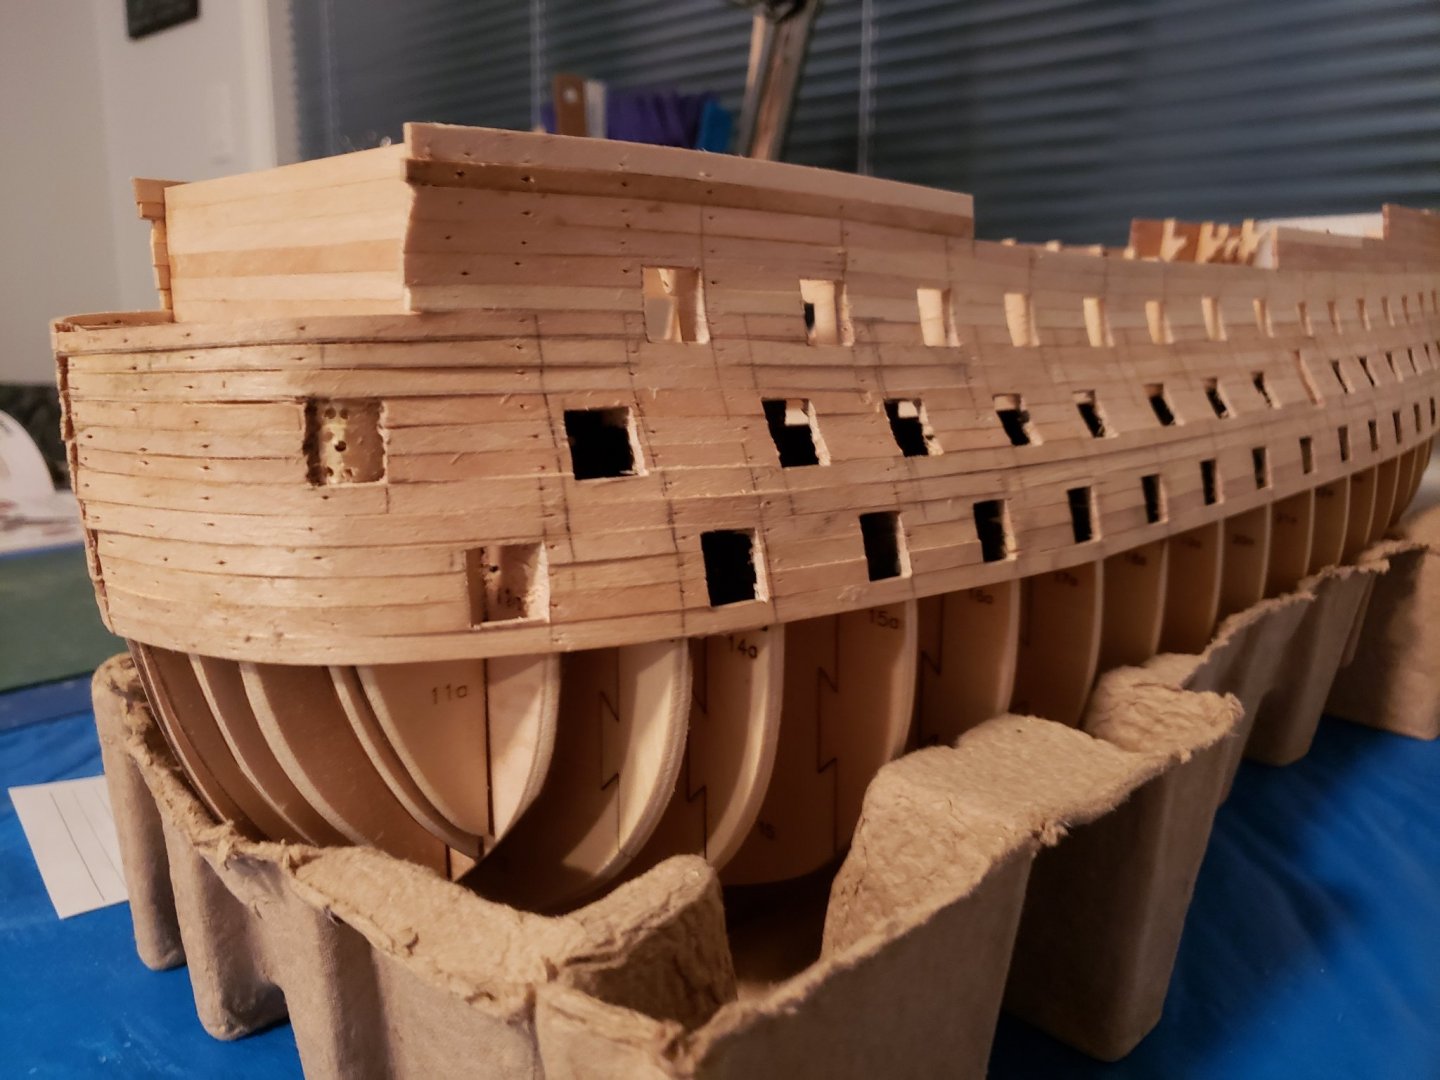
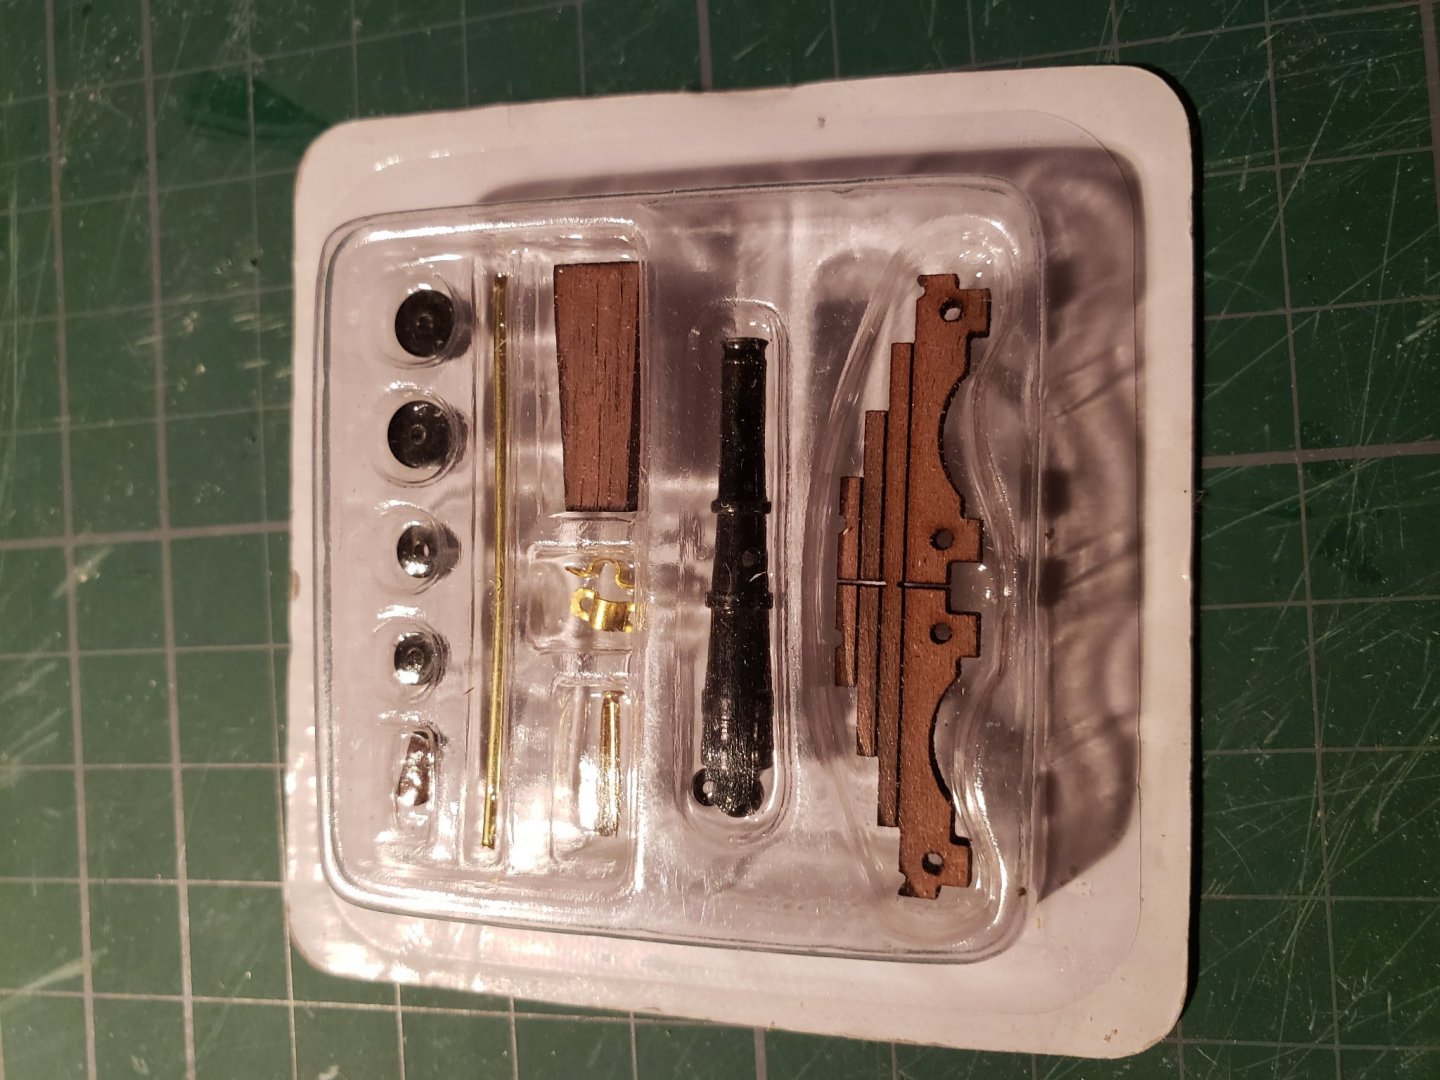
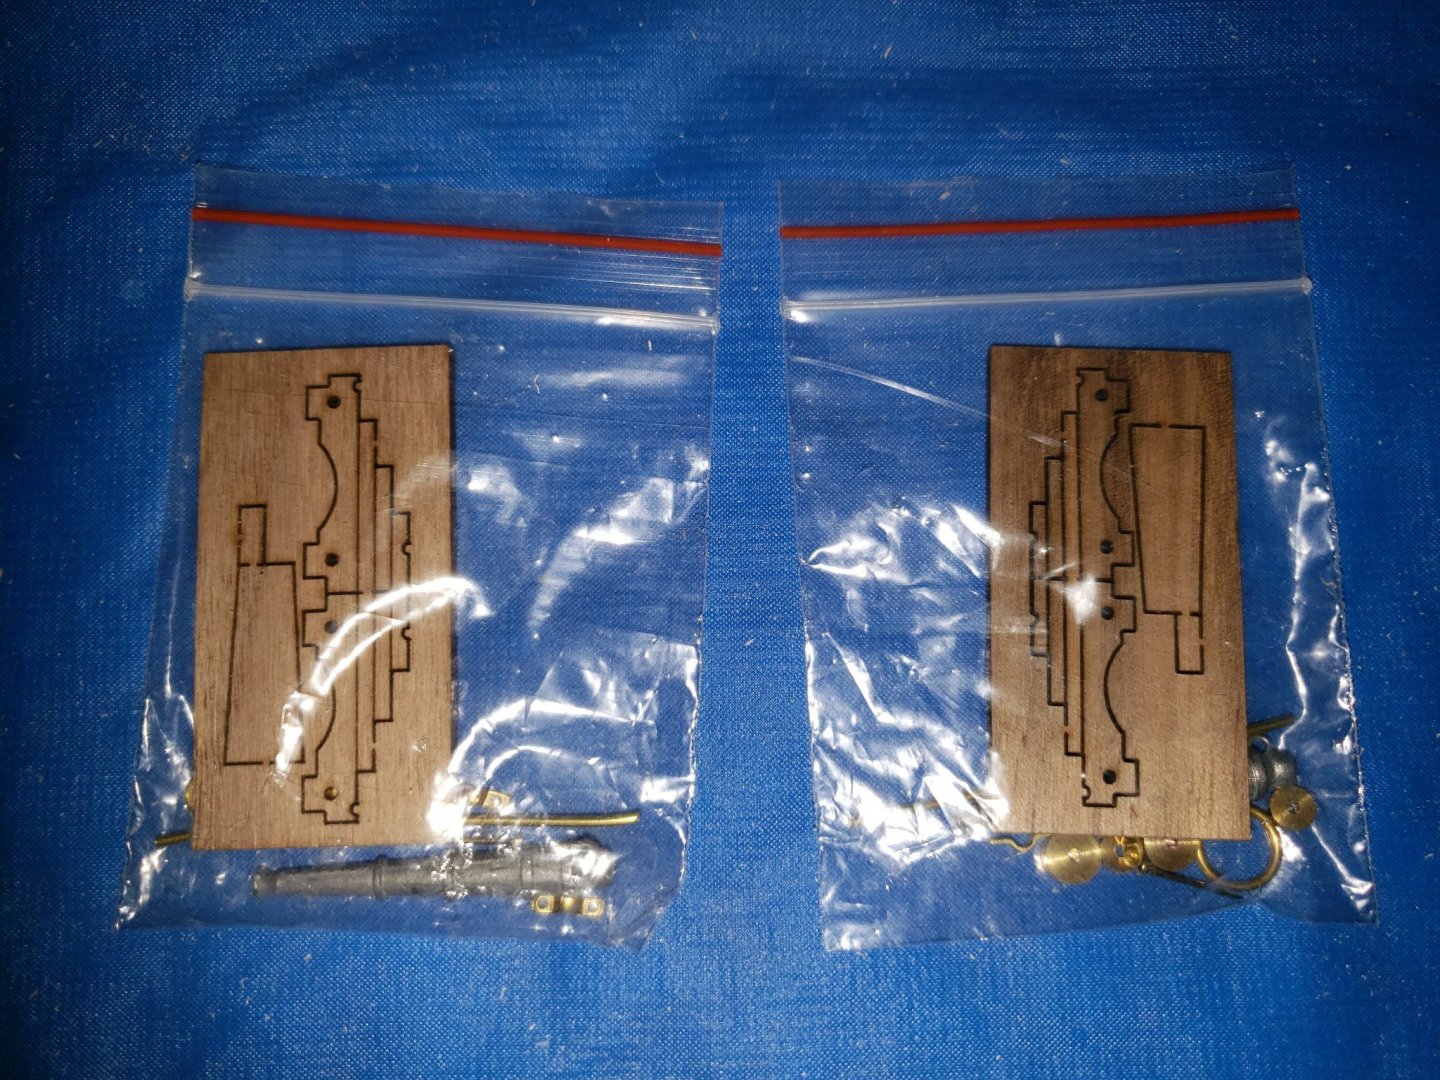
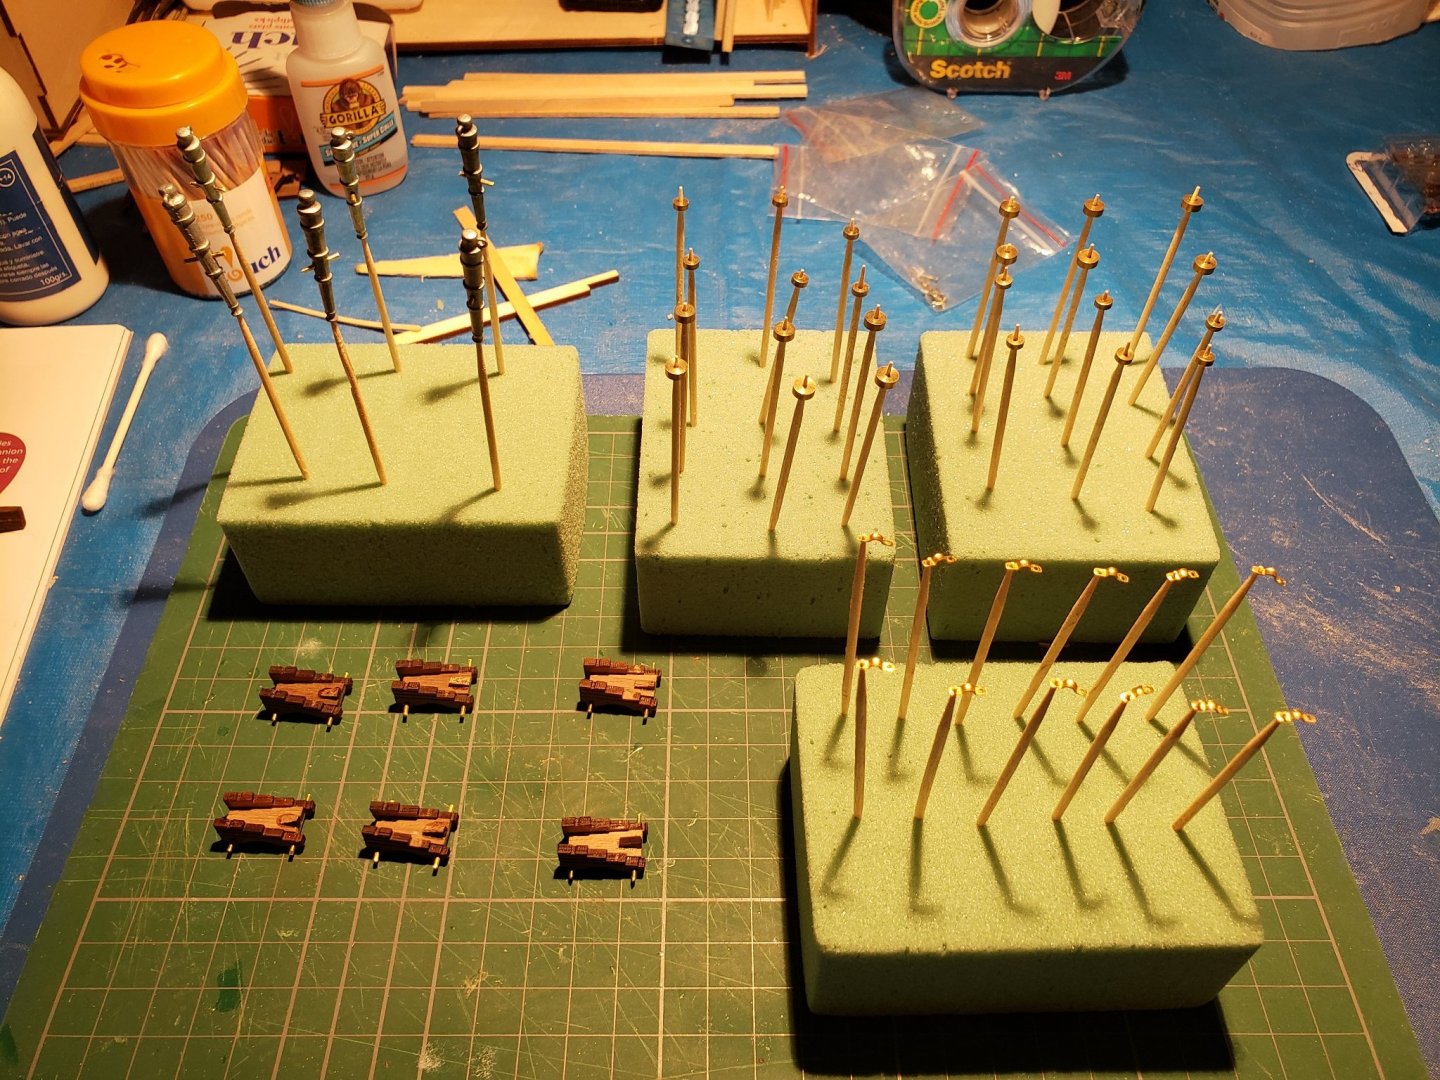
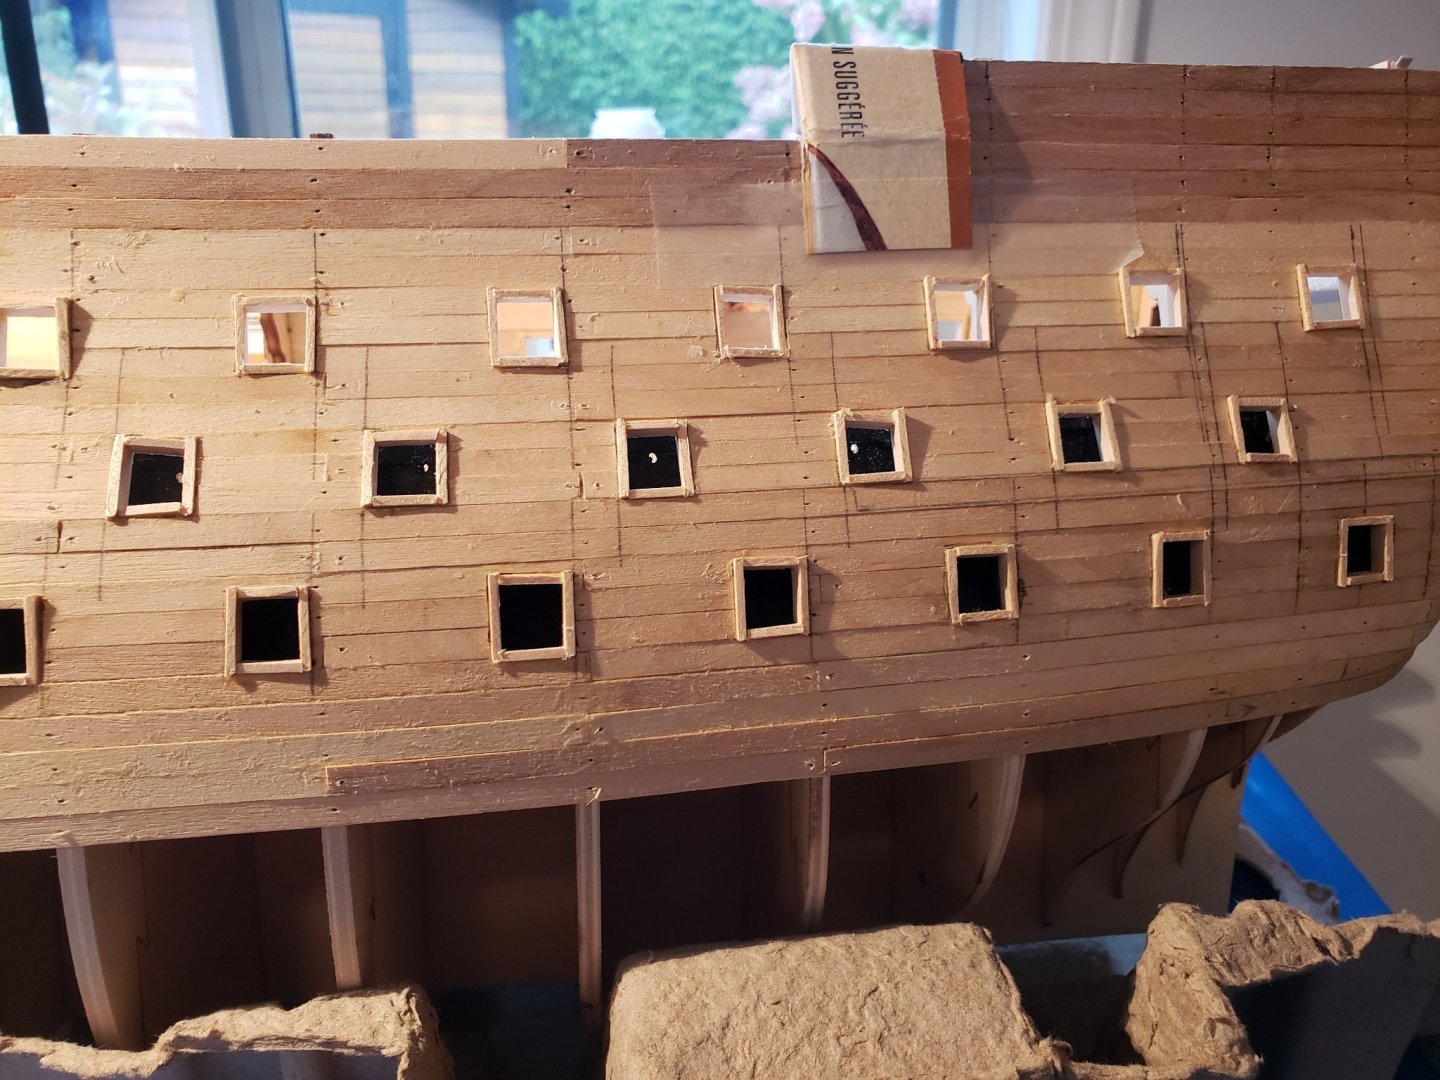
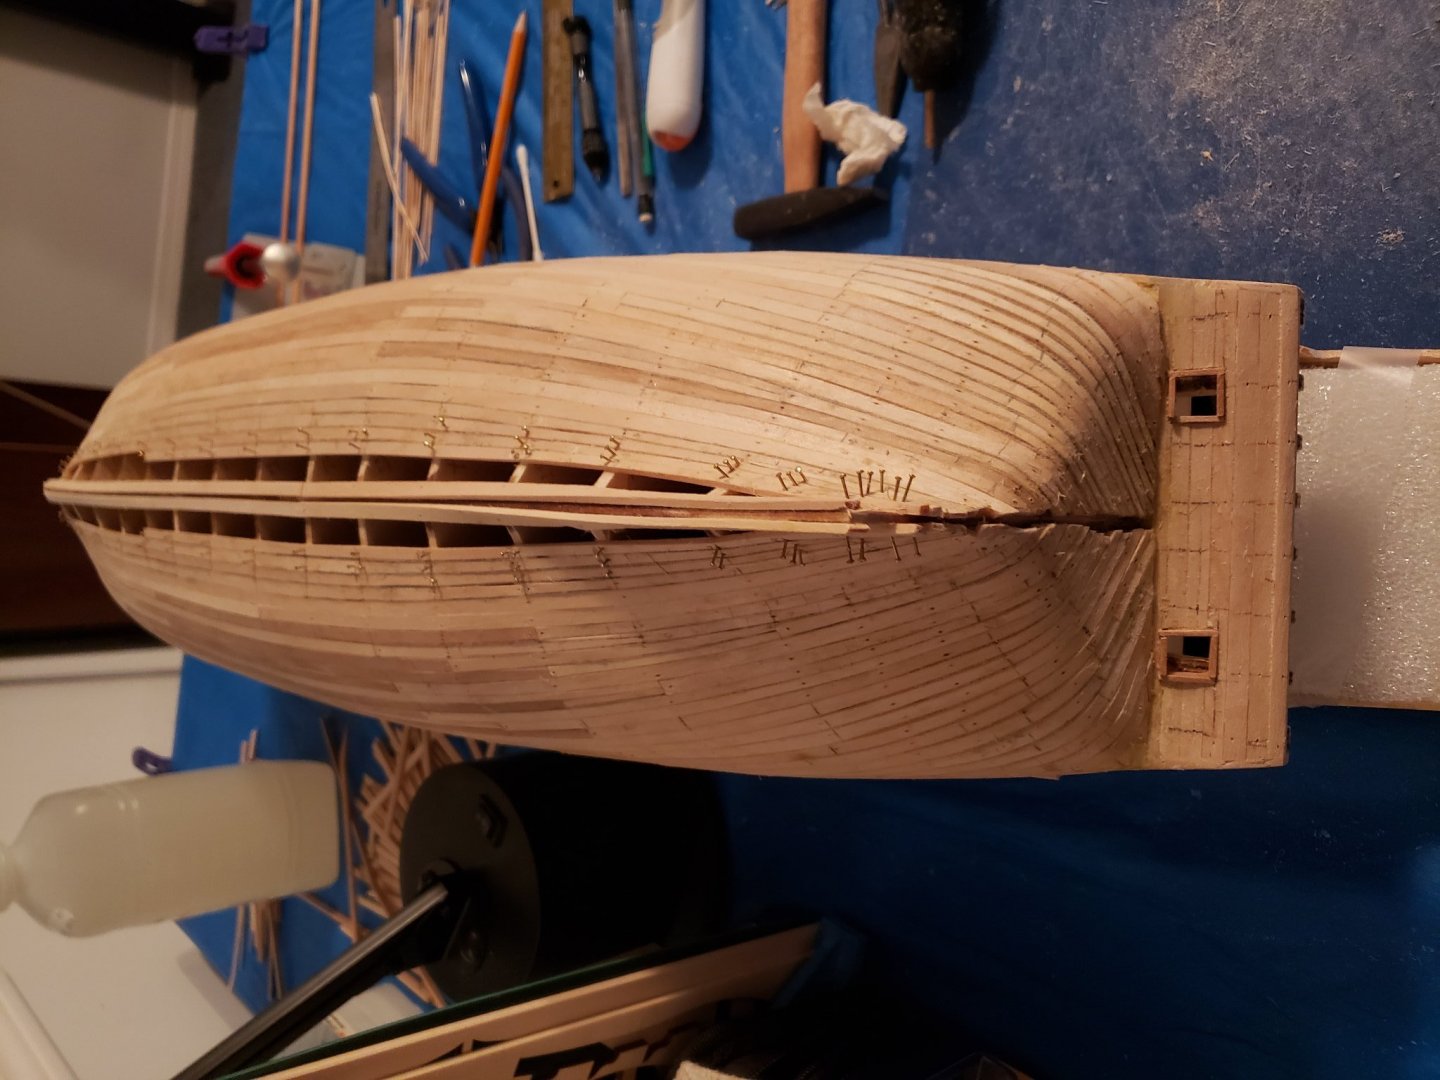
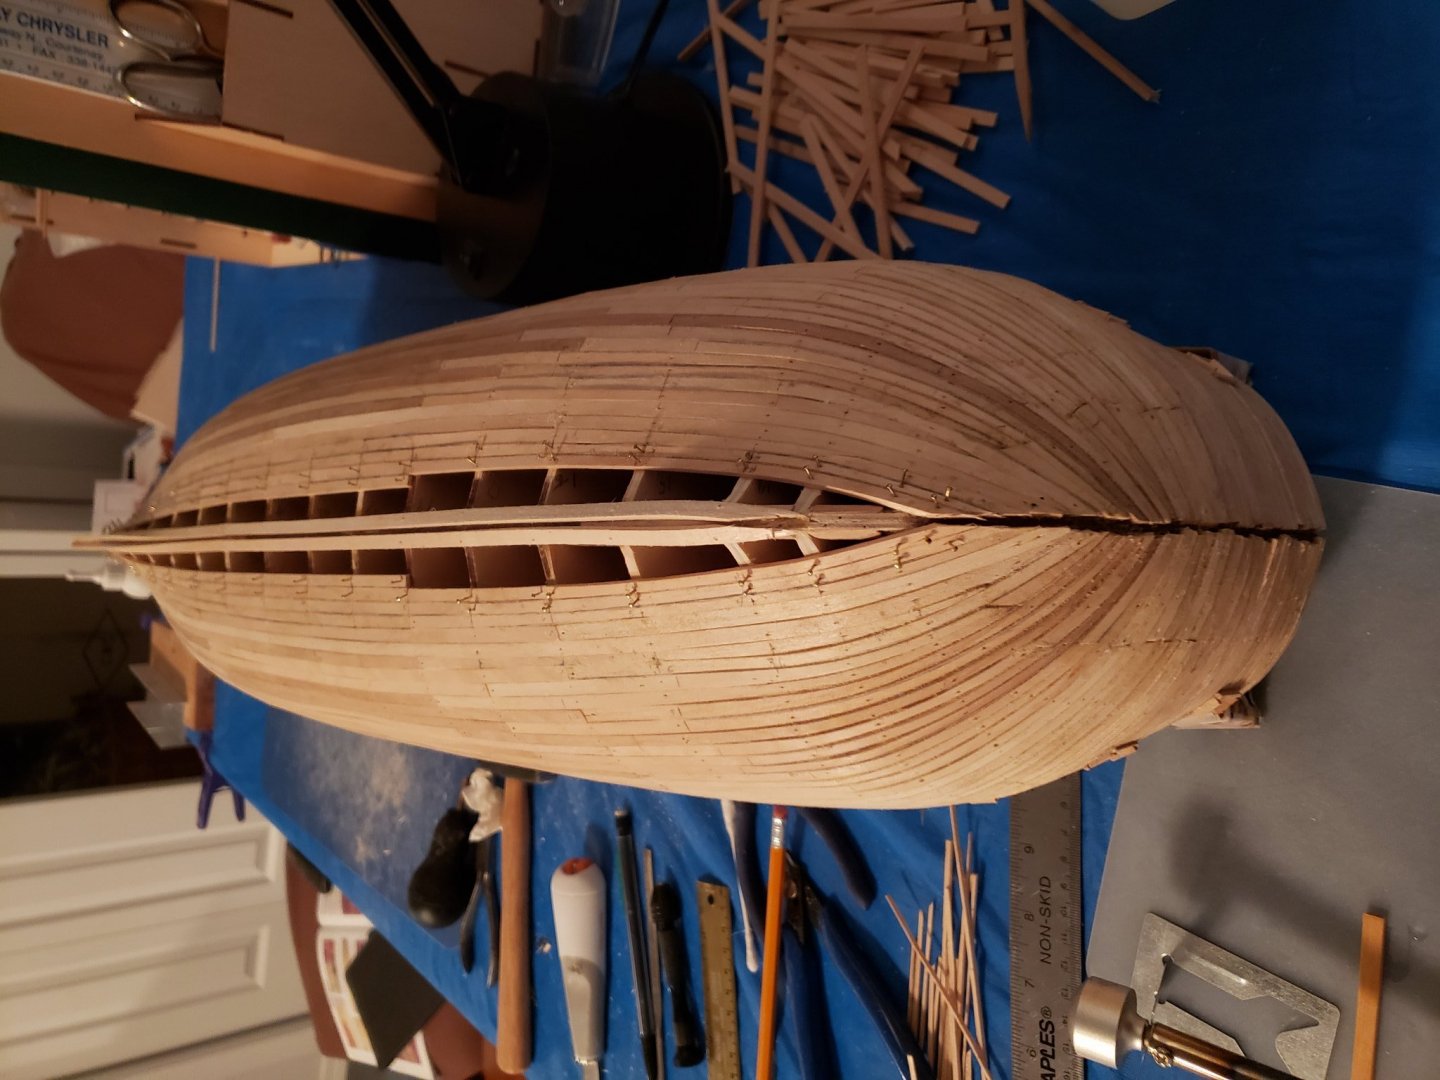
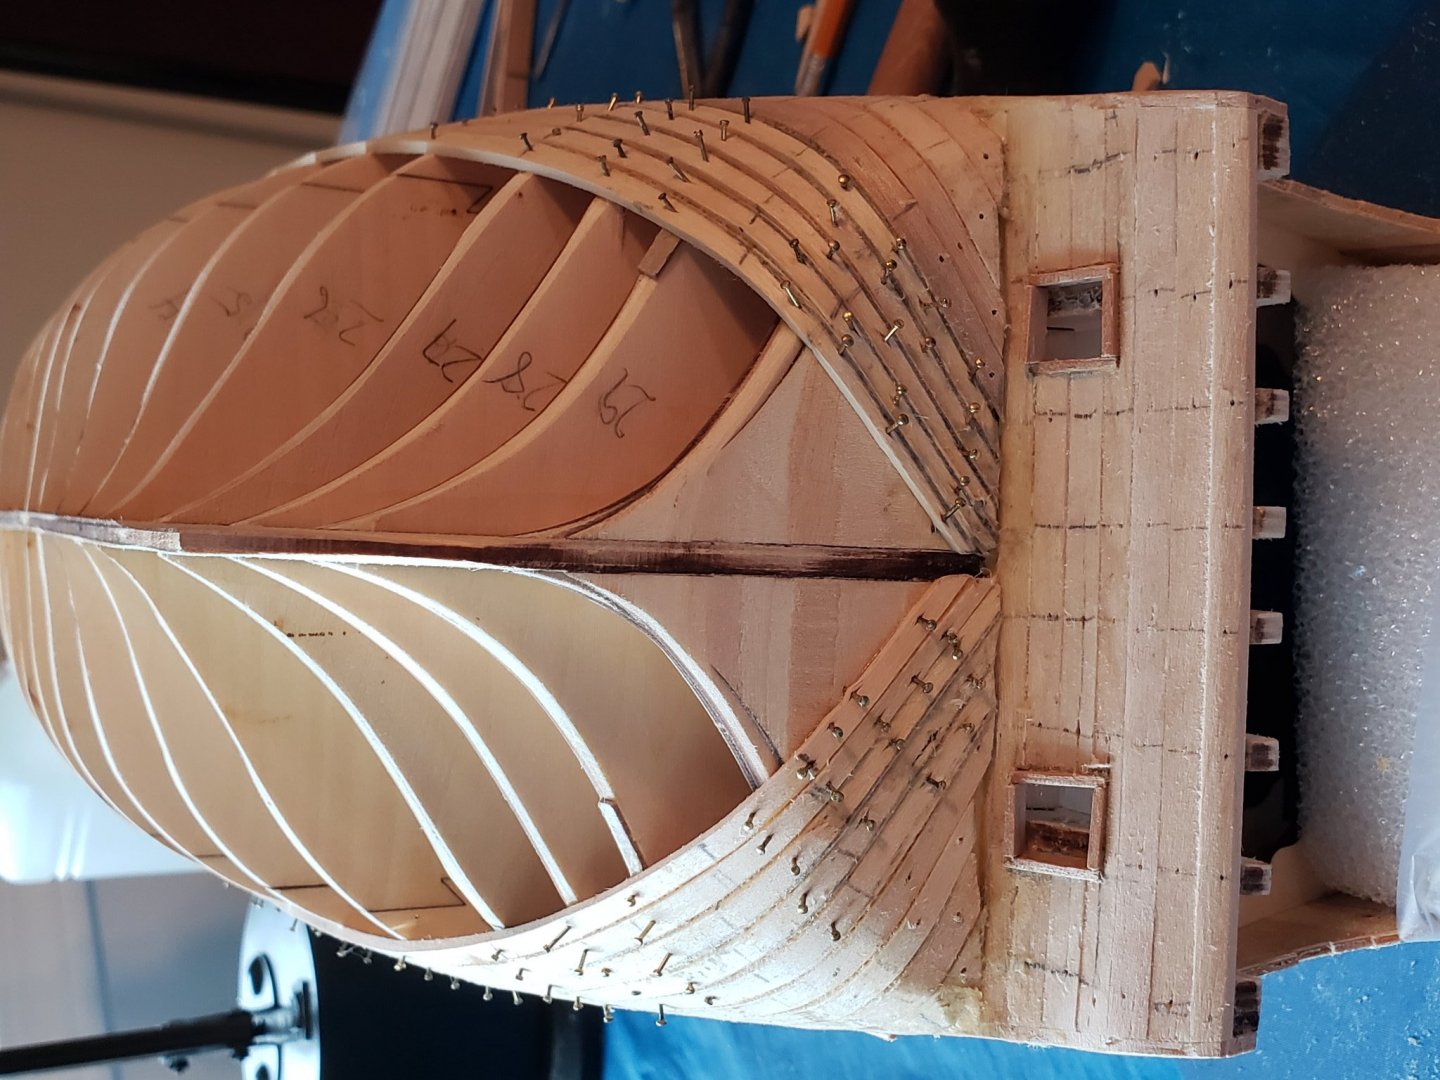
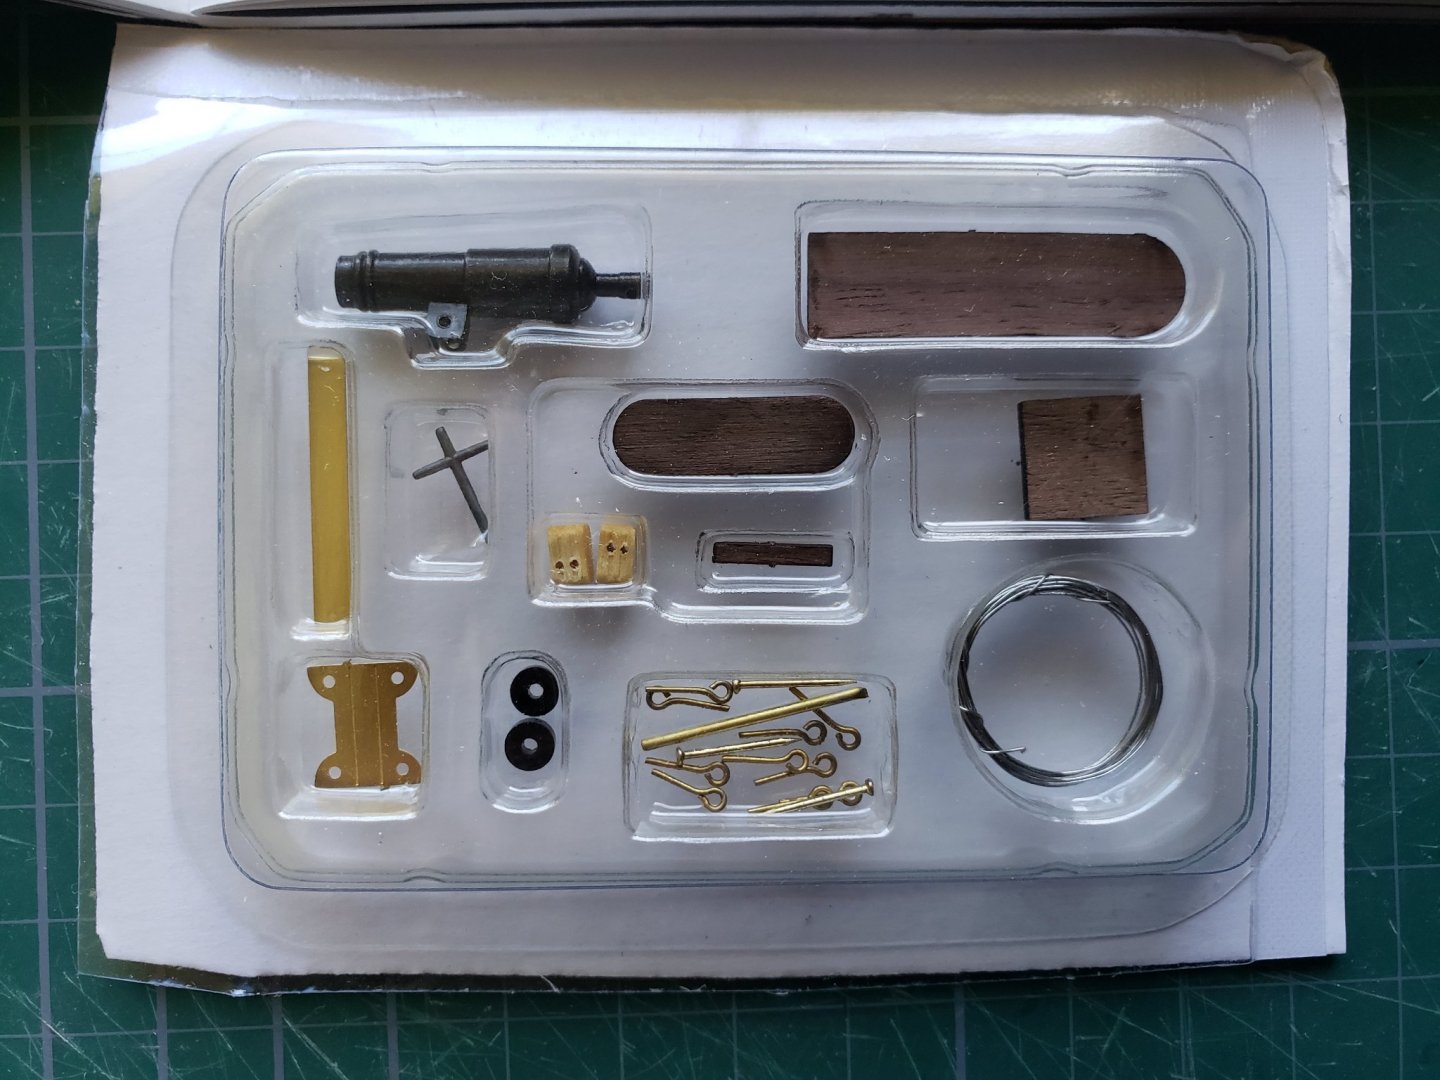
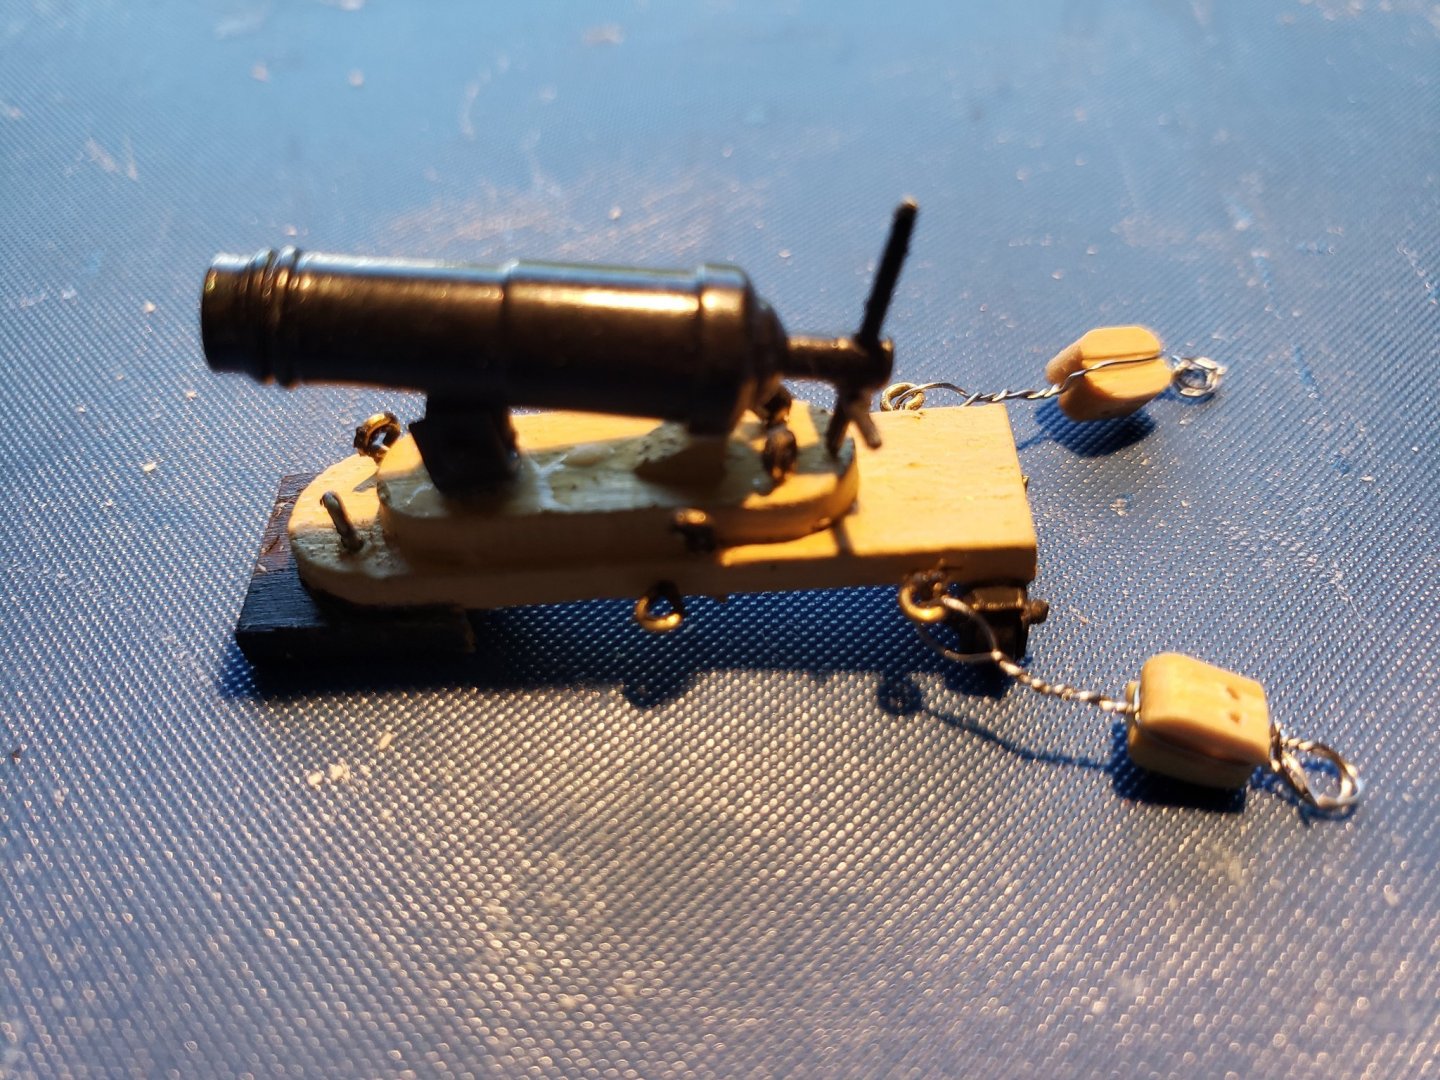
September and October, 2020 The build moved on to a phase that really took me by surprise, as the fairing of the frames and planking of the hull (and cutting out gunports) took 2 months to complete. By the end I was getting comfortable, but the time to shape, cut and chamfer each plank ( with roughly 6 planks to do one row on both sides) really added up - even with working a few hours each day. I tried using binding clips, but didn't always get the results I wanted, and eventually moved to pins to attach planks which I eventually removed as the glue dried. Planking started at the bottom of the lower gun deck and worked up, based on the instructions. I know that there are many ways to plank, but this system was at least very clear, and easy to follow. Using a plank bender made the job of planking the bluff bow relatively easy. I cut the gunports using a template and drilling out the perimeter, and then using a small saw and knife to finish the edges. Planking moved upwards and so the middle gundeck ports and entry way were cut out. Upper gundeck ports and stern planking were done as well as the fore castle area. Another break from planking ( much needed) was when I set up an assembly line to make some of the cannon that would be visible on Victory's gundecks. Some cannon were packed very nicely in blister packs, while others were just in plastic bags. I used toothpicks to hold the cannon parts while I painted them in black and yellow ochre. Next I cut wood to form the "picture frames" of each gunport - not a hard task, but again time consuming due to the large number of ports on the ship. No I was not drinking - these were just to hold in place until I glued them in! I sanded down the frames until they were flush with the sides of the ship later. The ship turned upside down now as planking moved from midships to the keel - a process that took about 3 weeks in all. Bending planks to fit on the stern was a bit of a challenge due to the steep angle. Finally approached the end of planking with relief. Again, the instructions were very clear with this whole process, including using stealer and dropper planks with some success. This is the final result before any sanding or filling.


- 59 replies
-
- 6
-
-
- DeAgostini
- Victory
- (and 1 more)
-
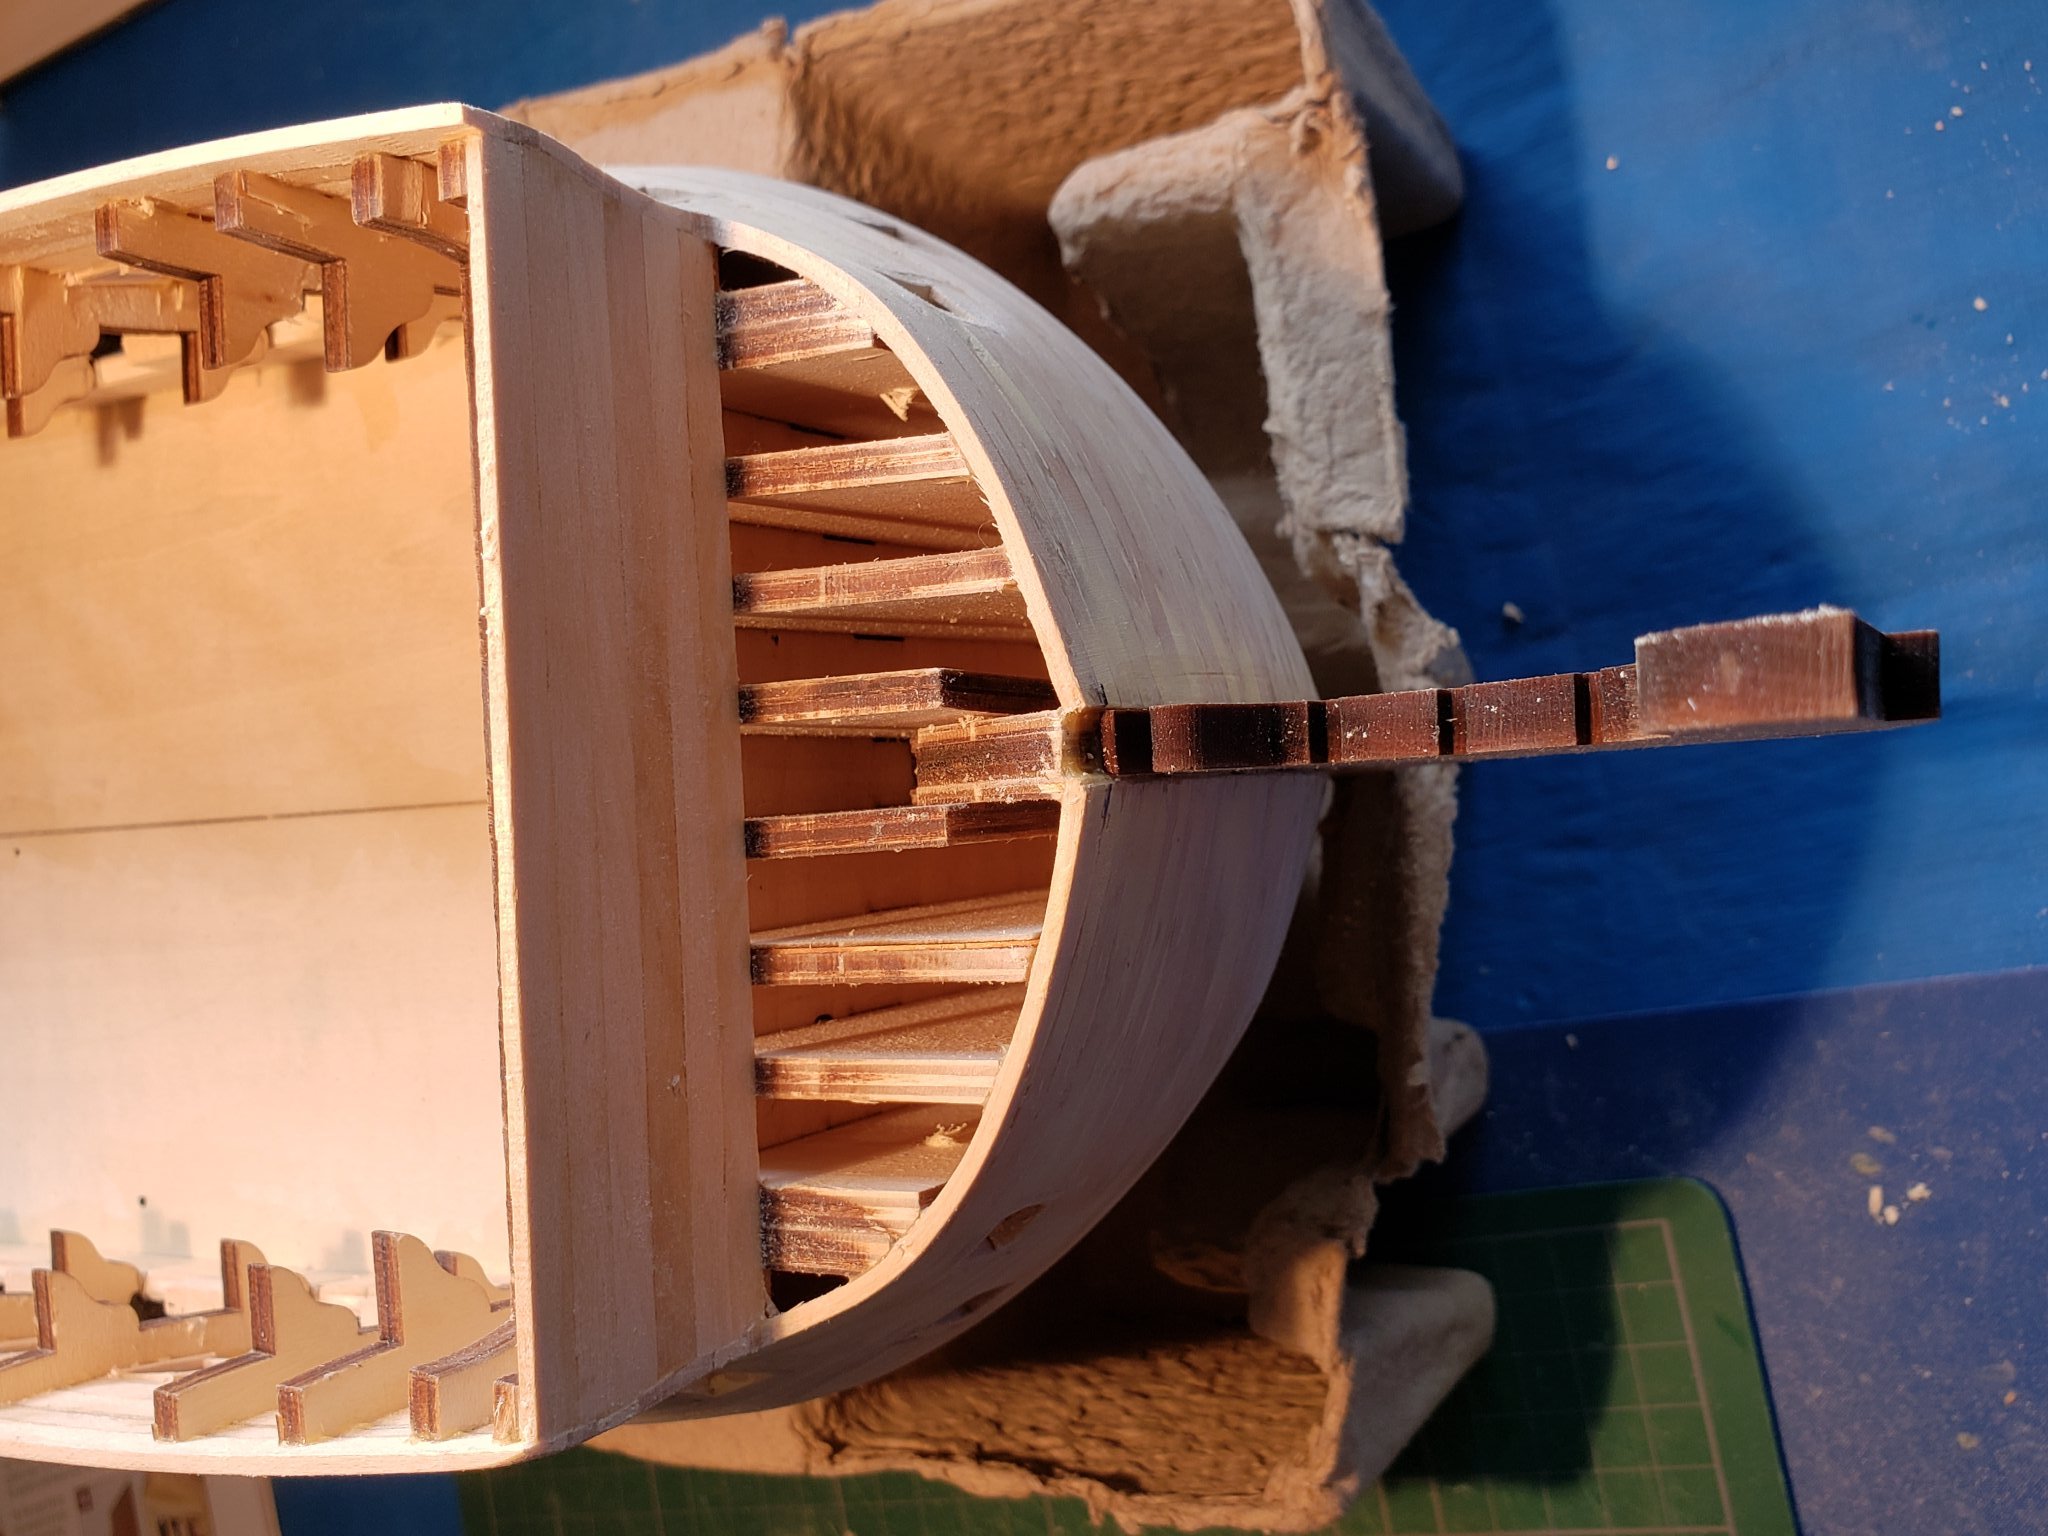
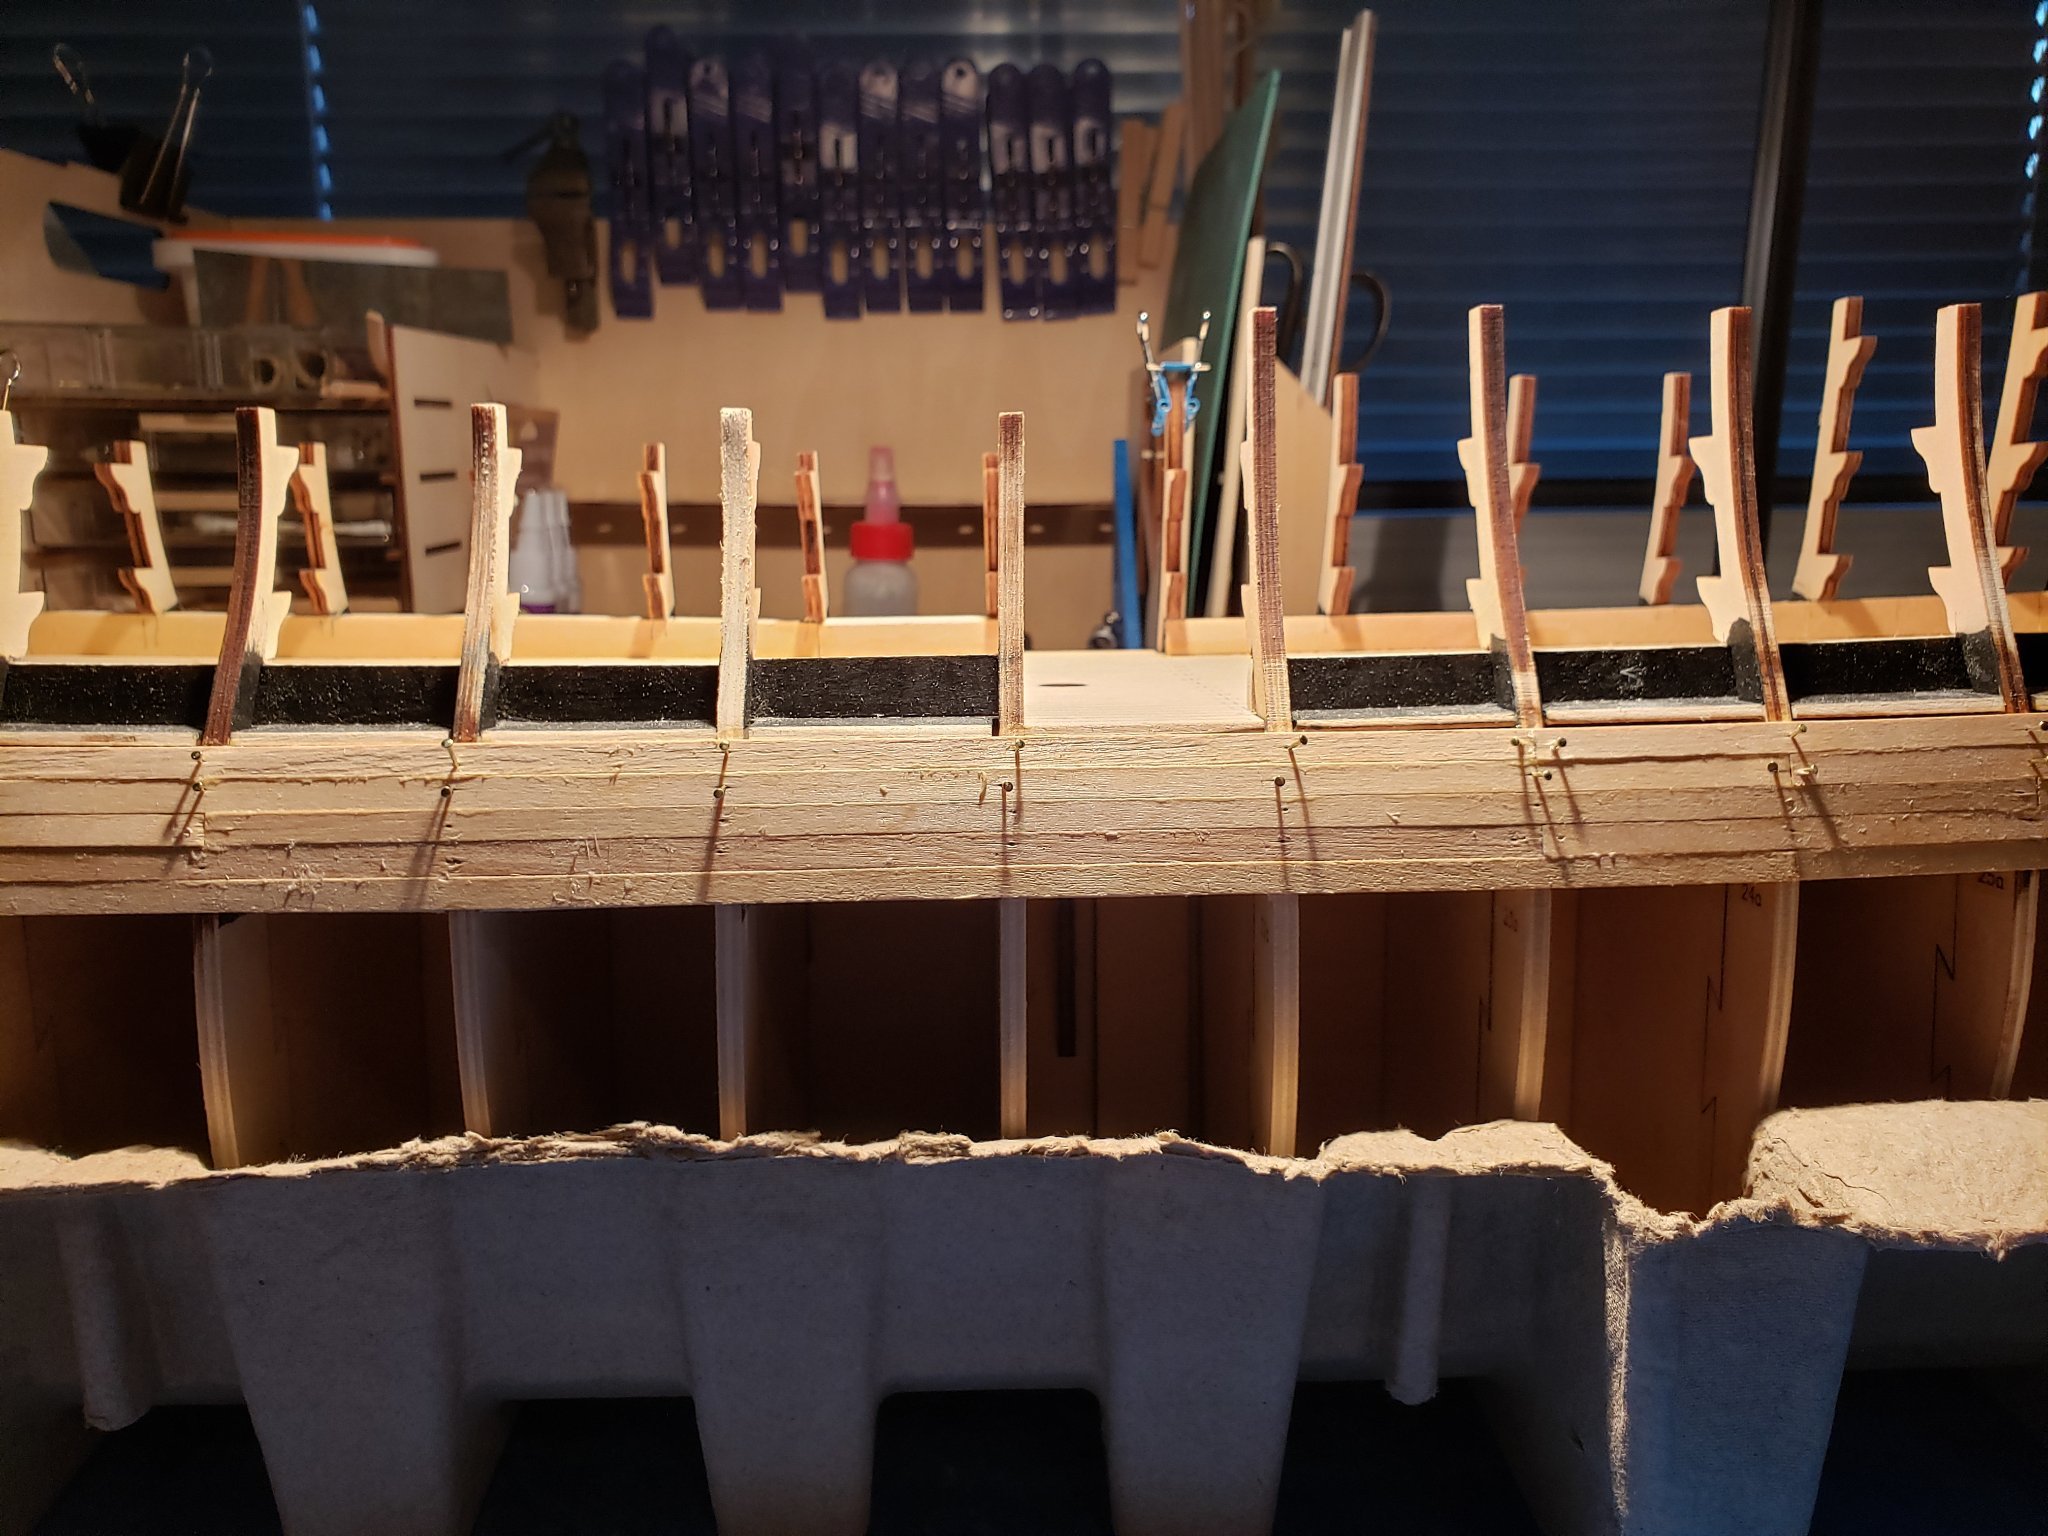
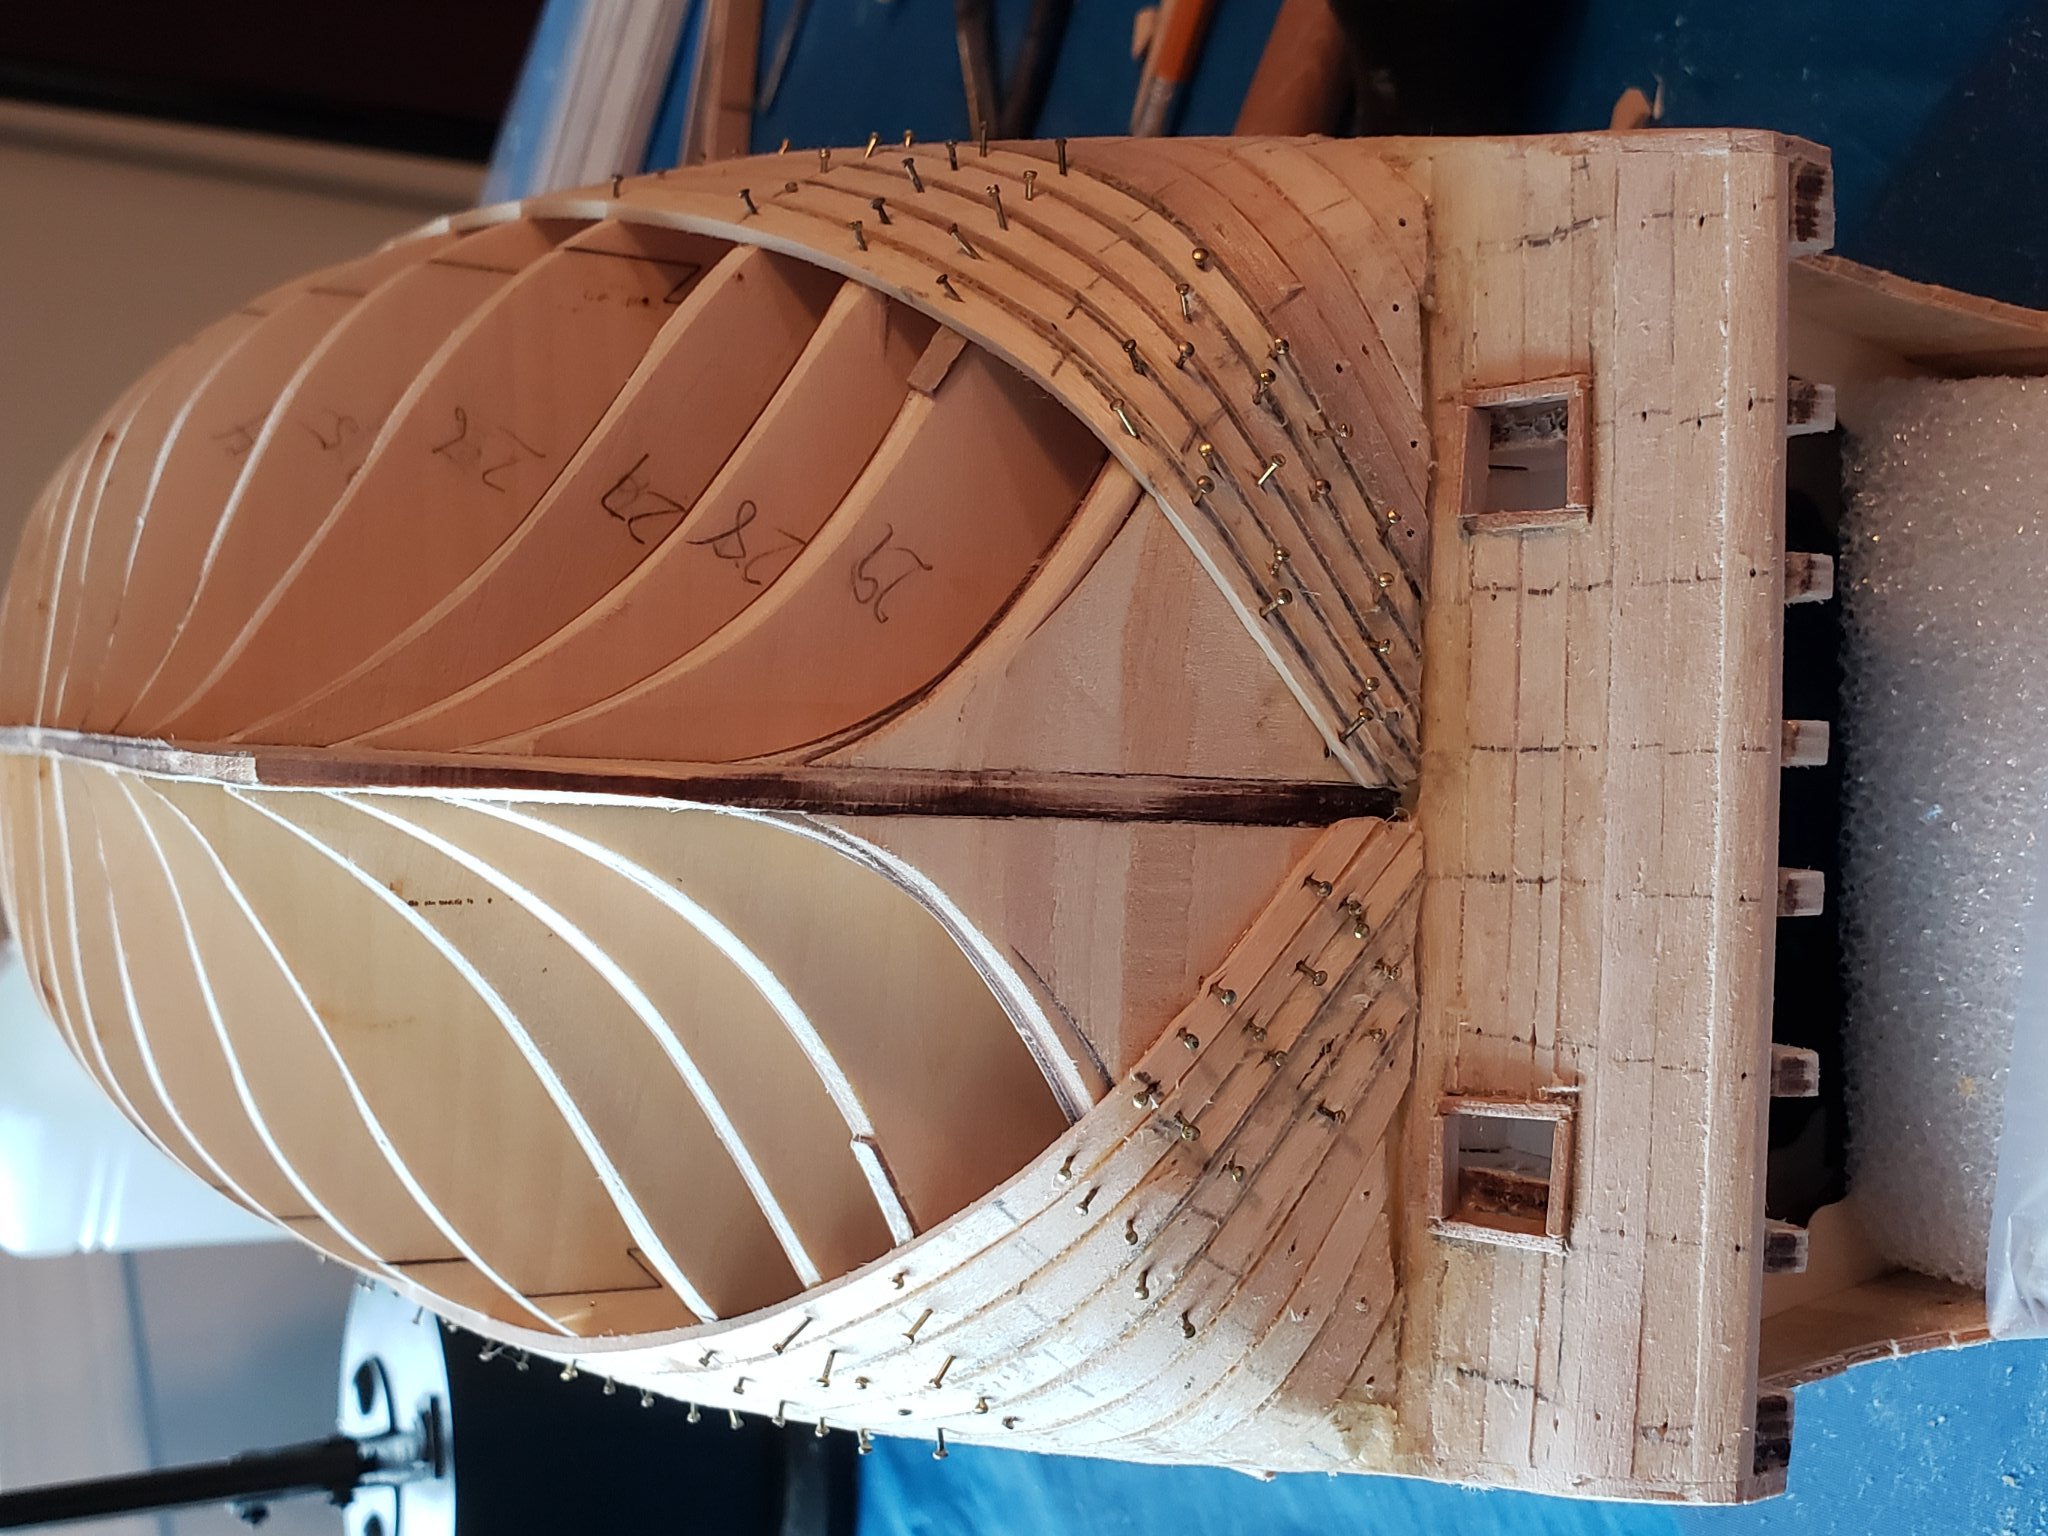
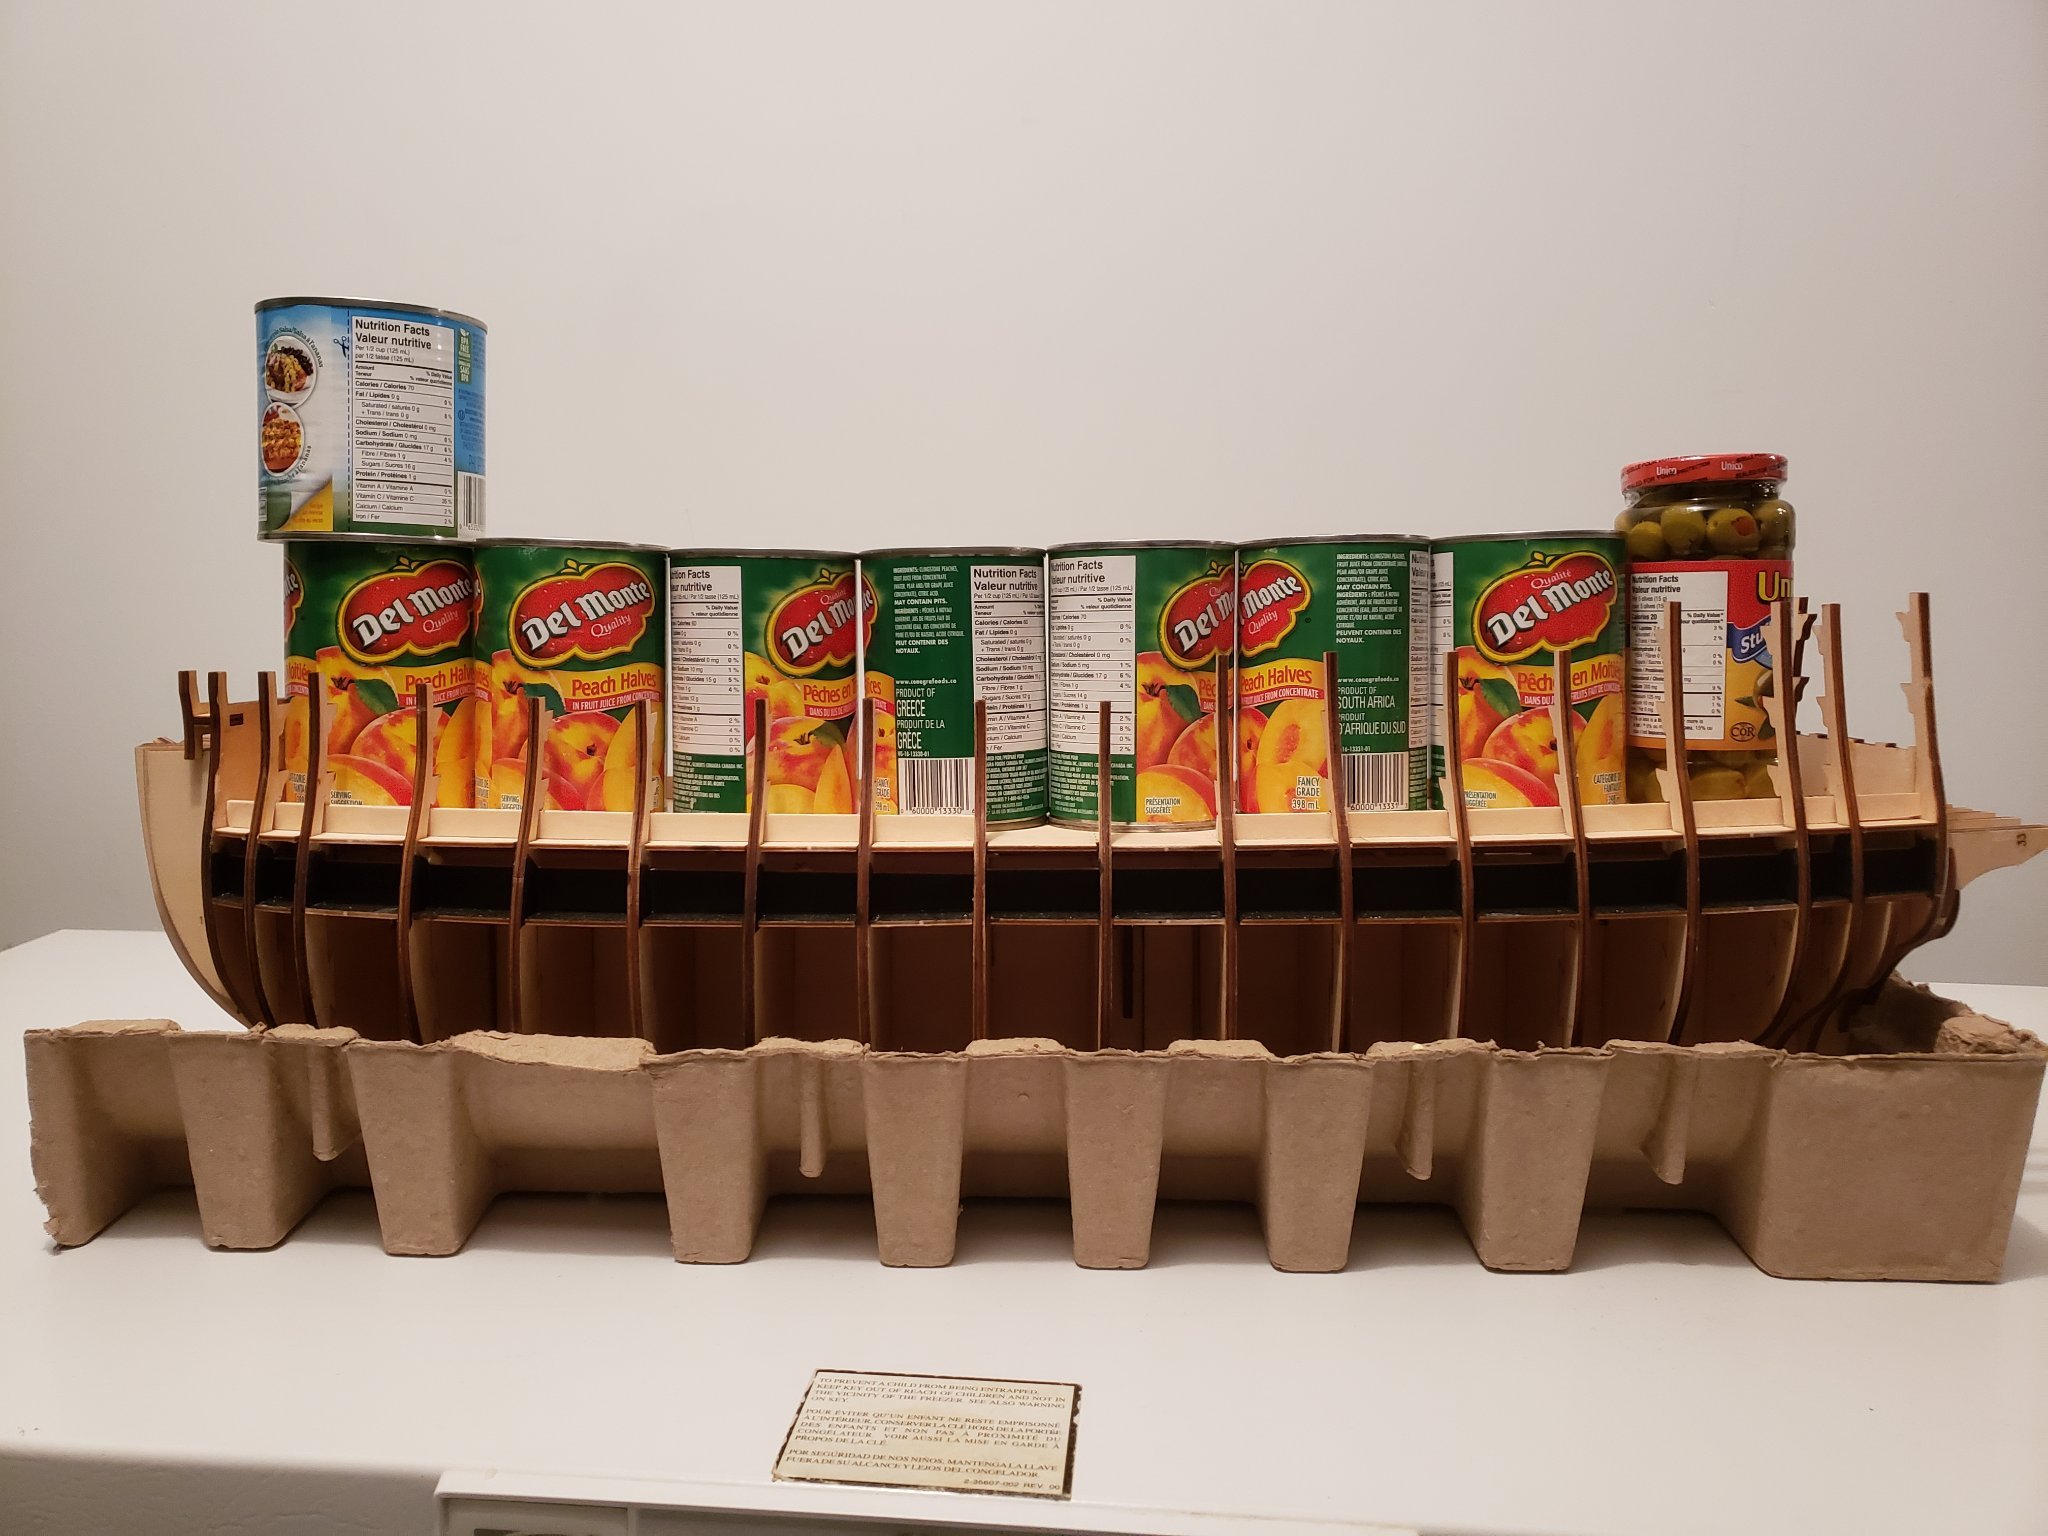
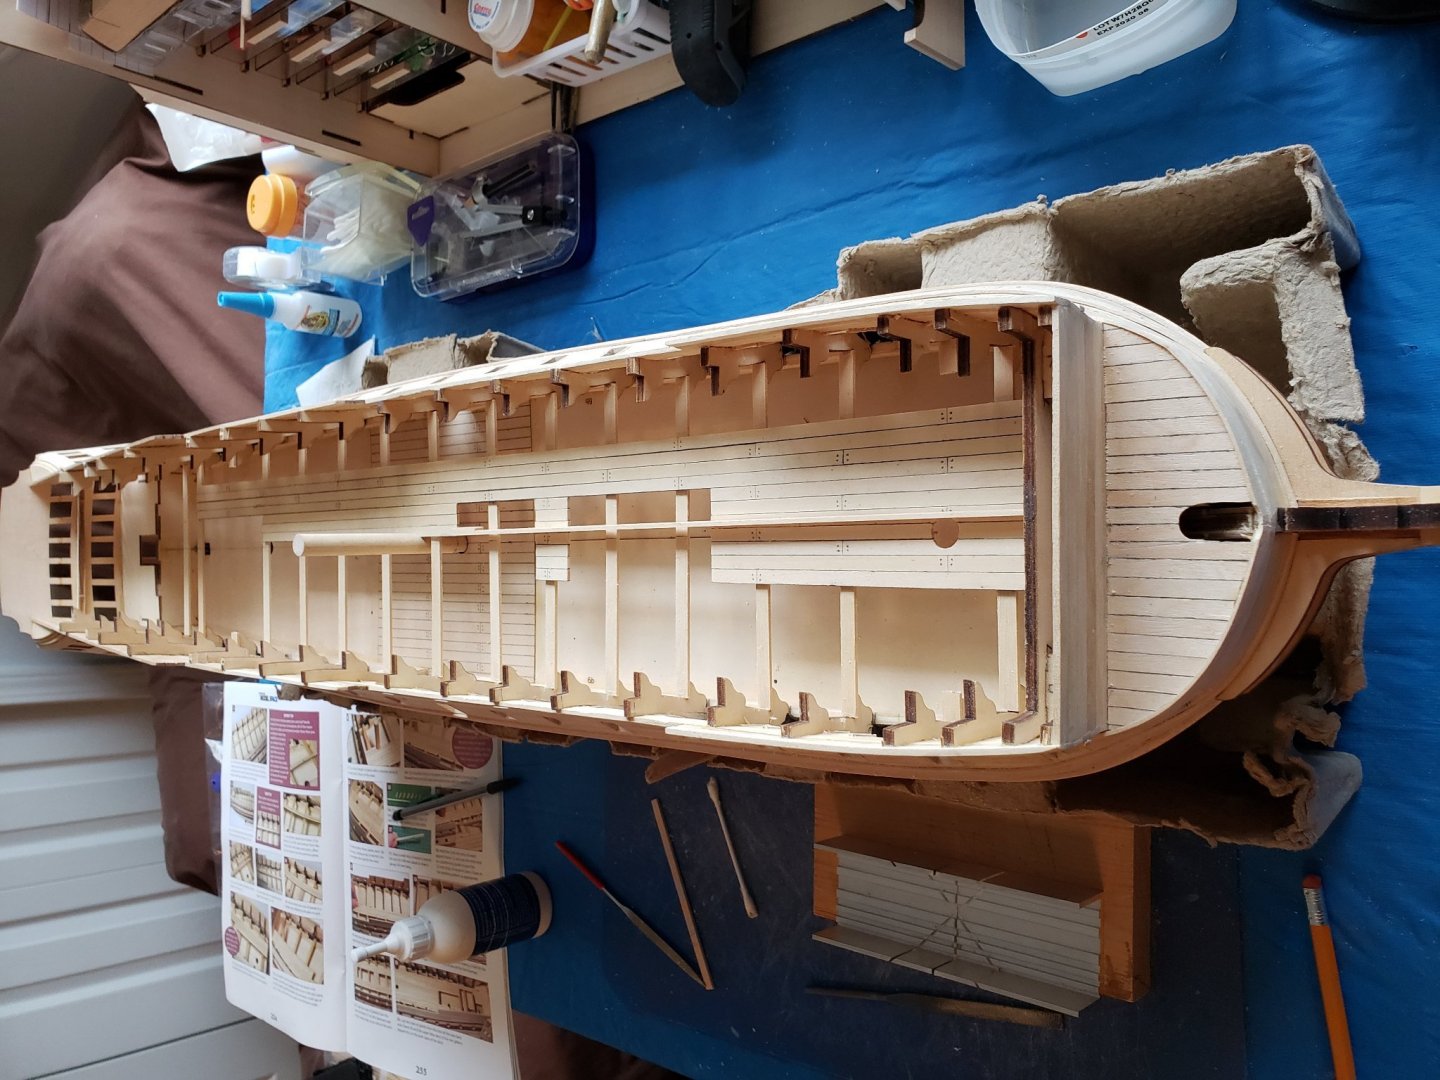
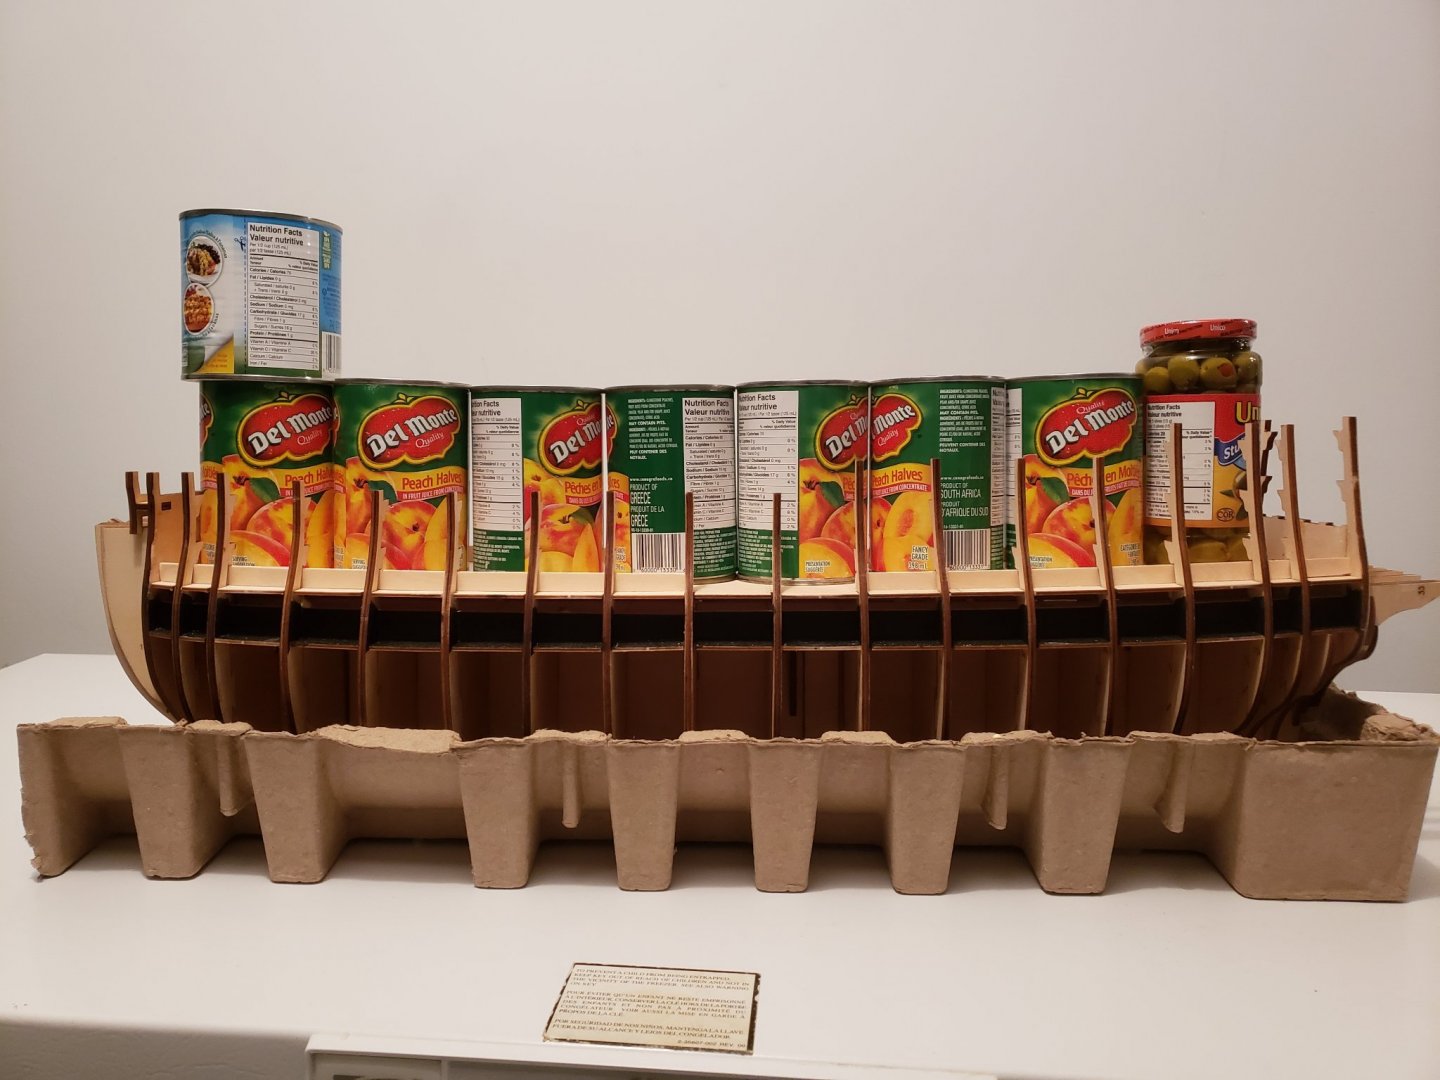
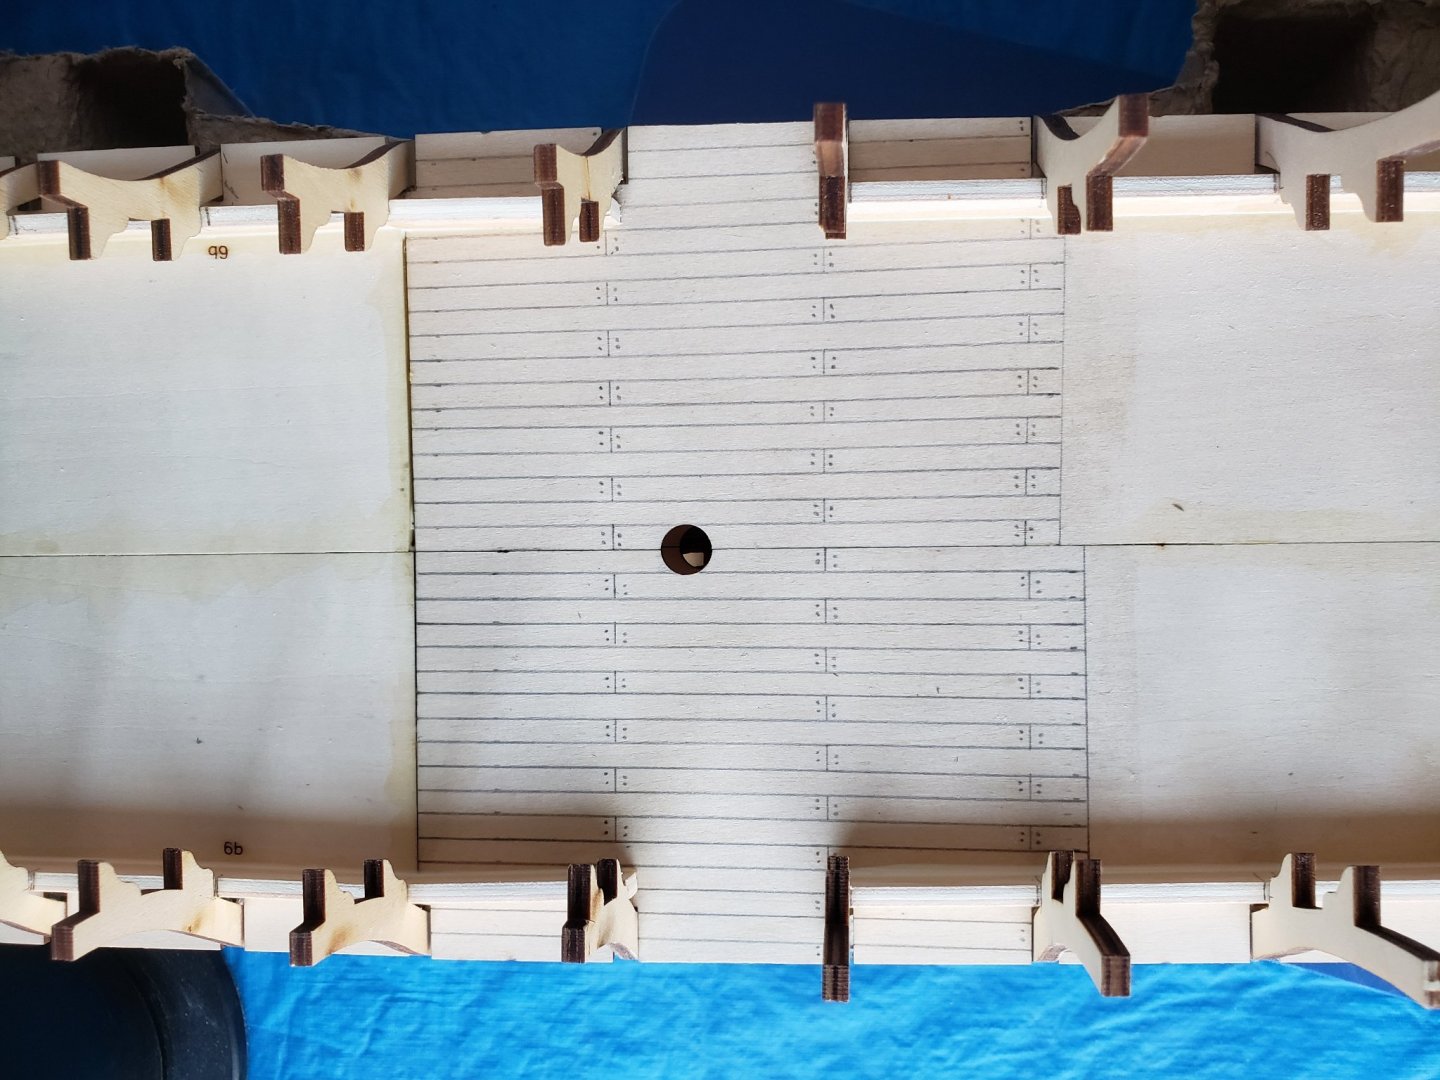
Continuing on with the build... as I began to place the lower gun deck, I had my second issue with warped wood. I tried to same steam and pressure system that worked well before, but had less success even after several applications. I finally used glue and pins to attach the deck after most of the warping was eliminated and it seemed to be okay. Moved on to placing the middle gun deck with no issues. Painted the gun beam supports black after ordering pins for the beams as none were provided for in the kit. Along the way took a break and worked on deck barrels and on of the carronades. Added the middle gun deck glued down with the help of improvised weights (the HMS Canned Goods set sail for one day only). I drew in decking details with a pencil in case someone with a very tiny scope ever peers through the entry ports to observe the decking! Added the middle gun deck support beams - these will have dummy cannon barrels attached much later in the build. Continued gallery framing and planking at the stern. That took the first month of my build.


- 59 replies
-
- 5
-
-
- DeAgostini
- Victory
- (and 1 more)
-
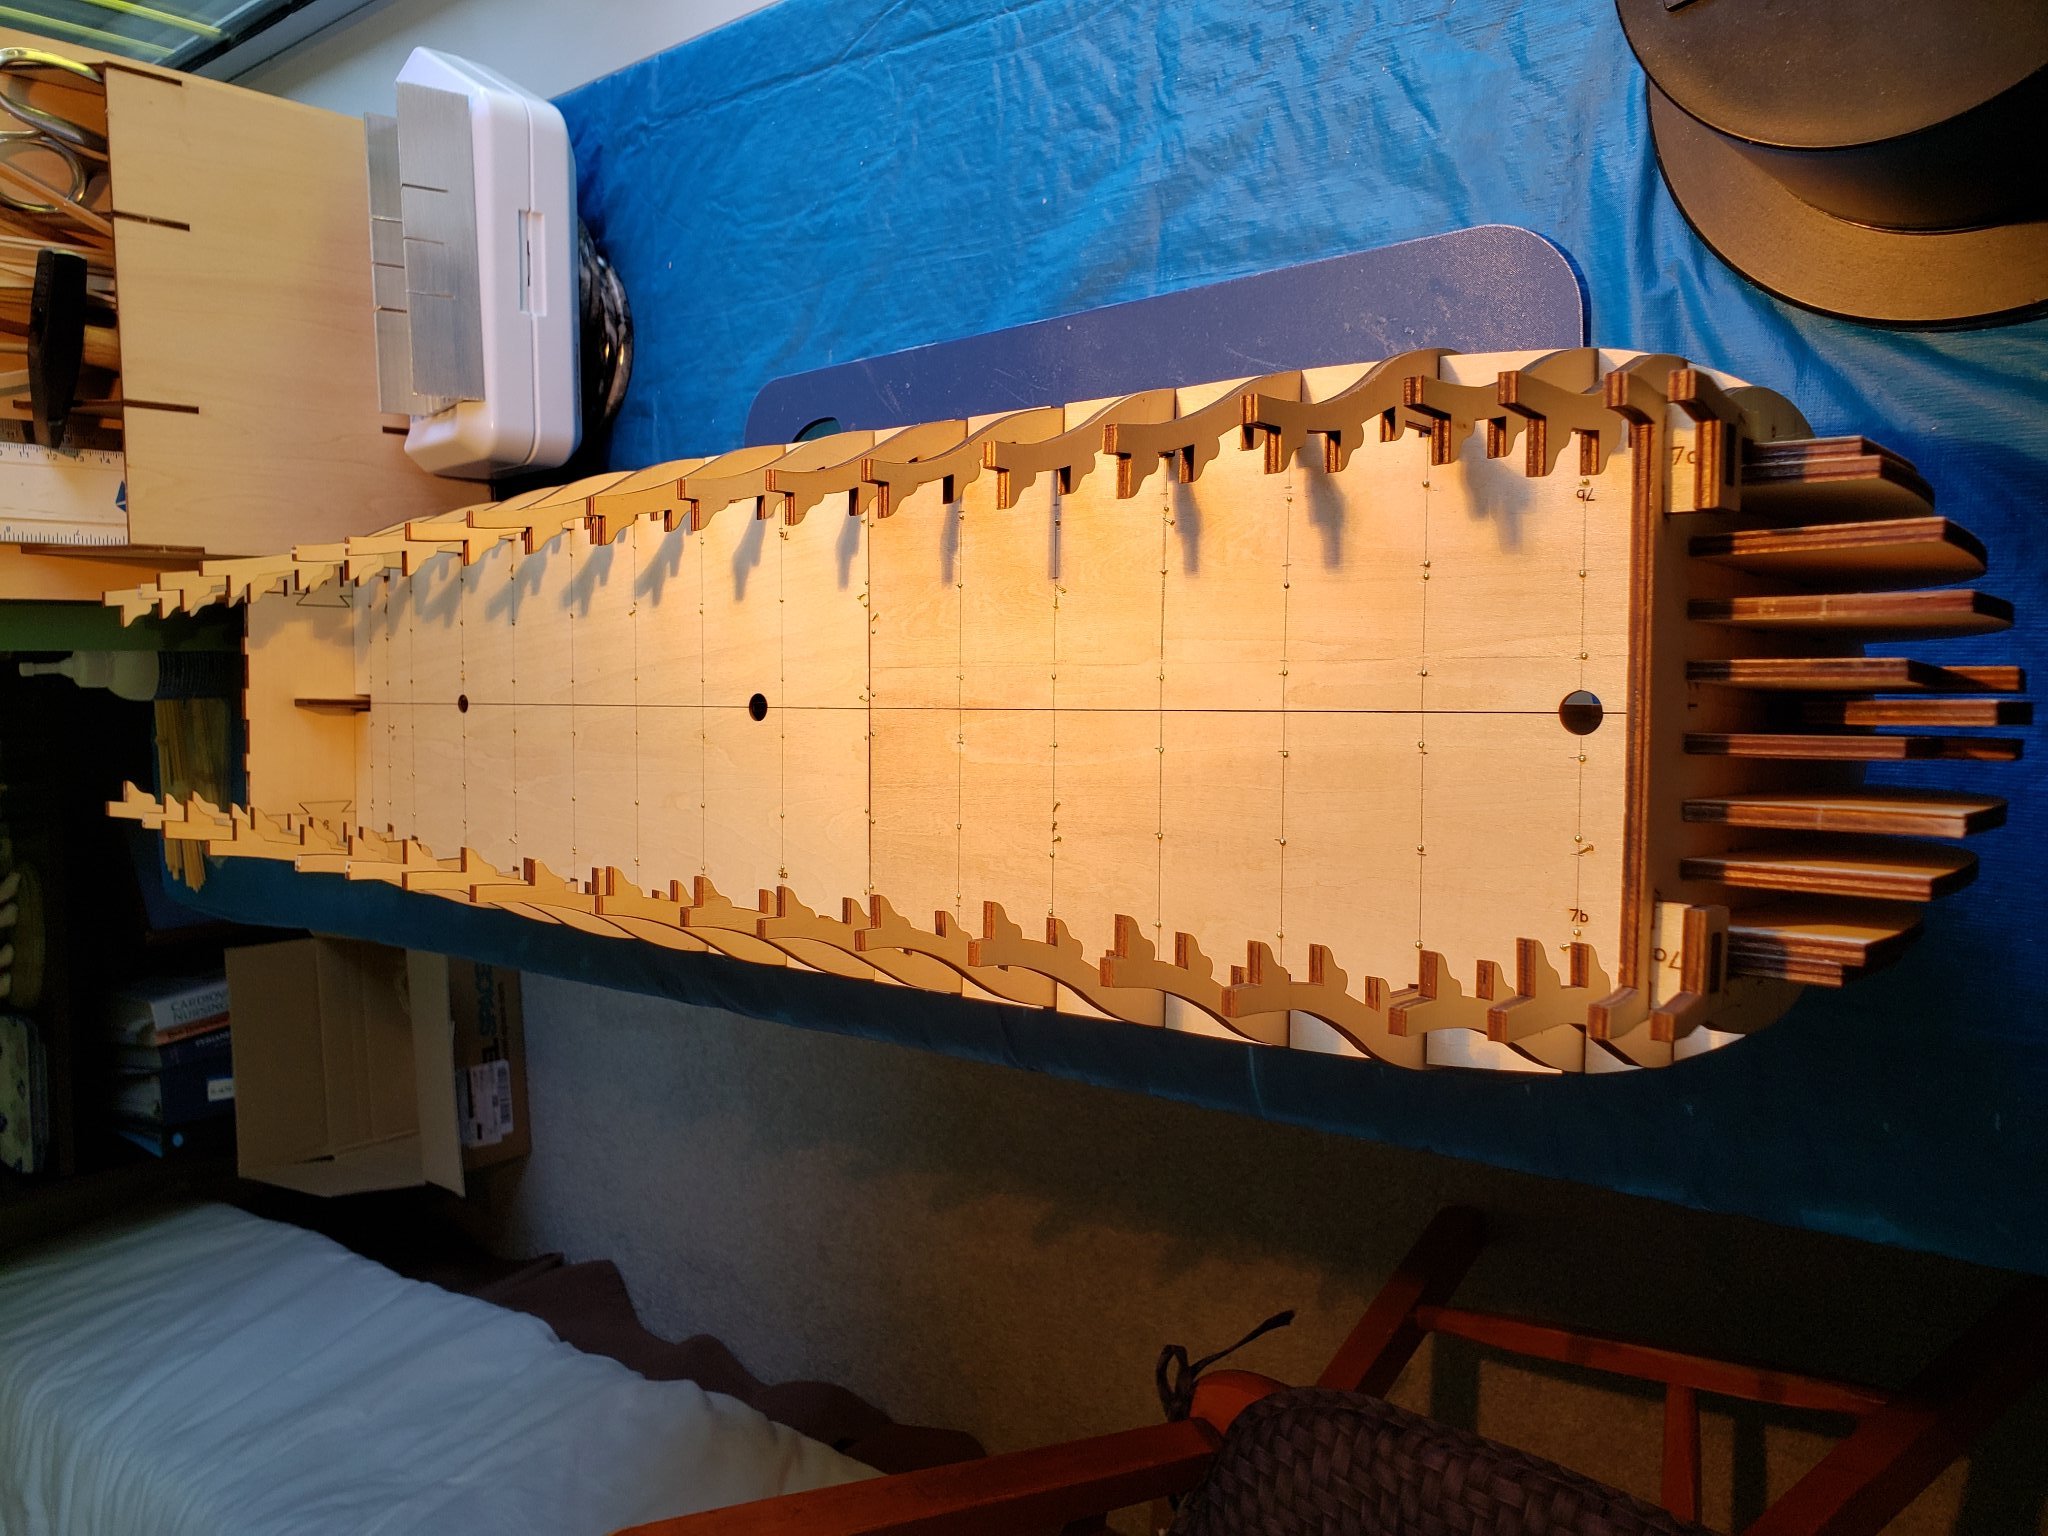
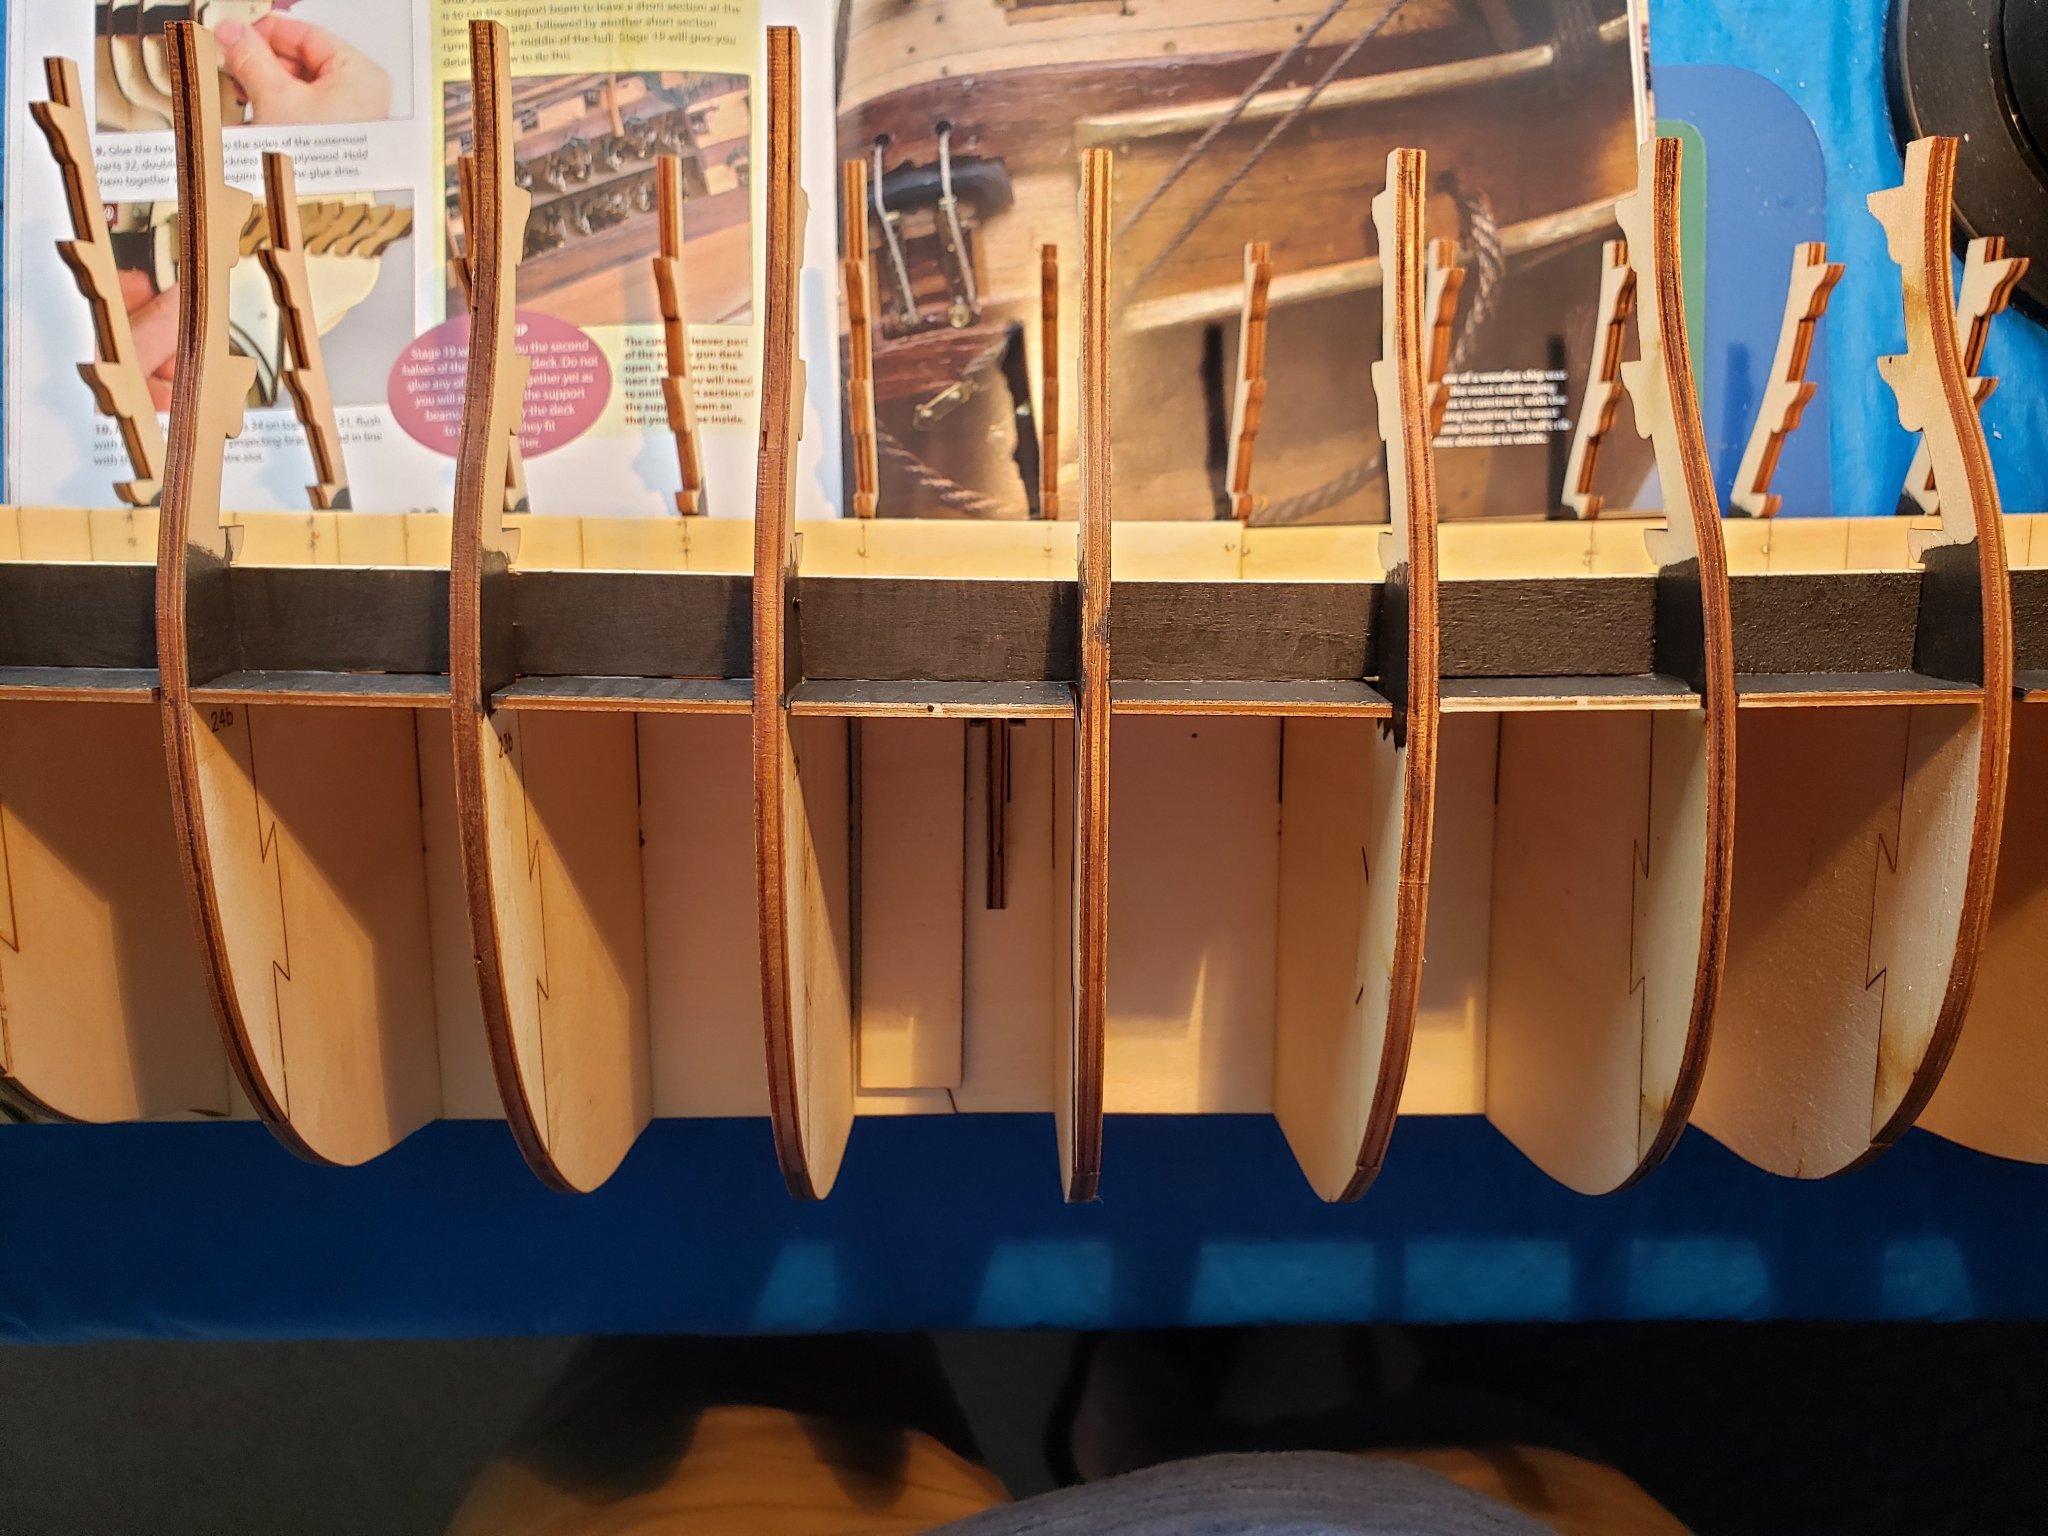
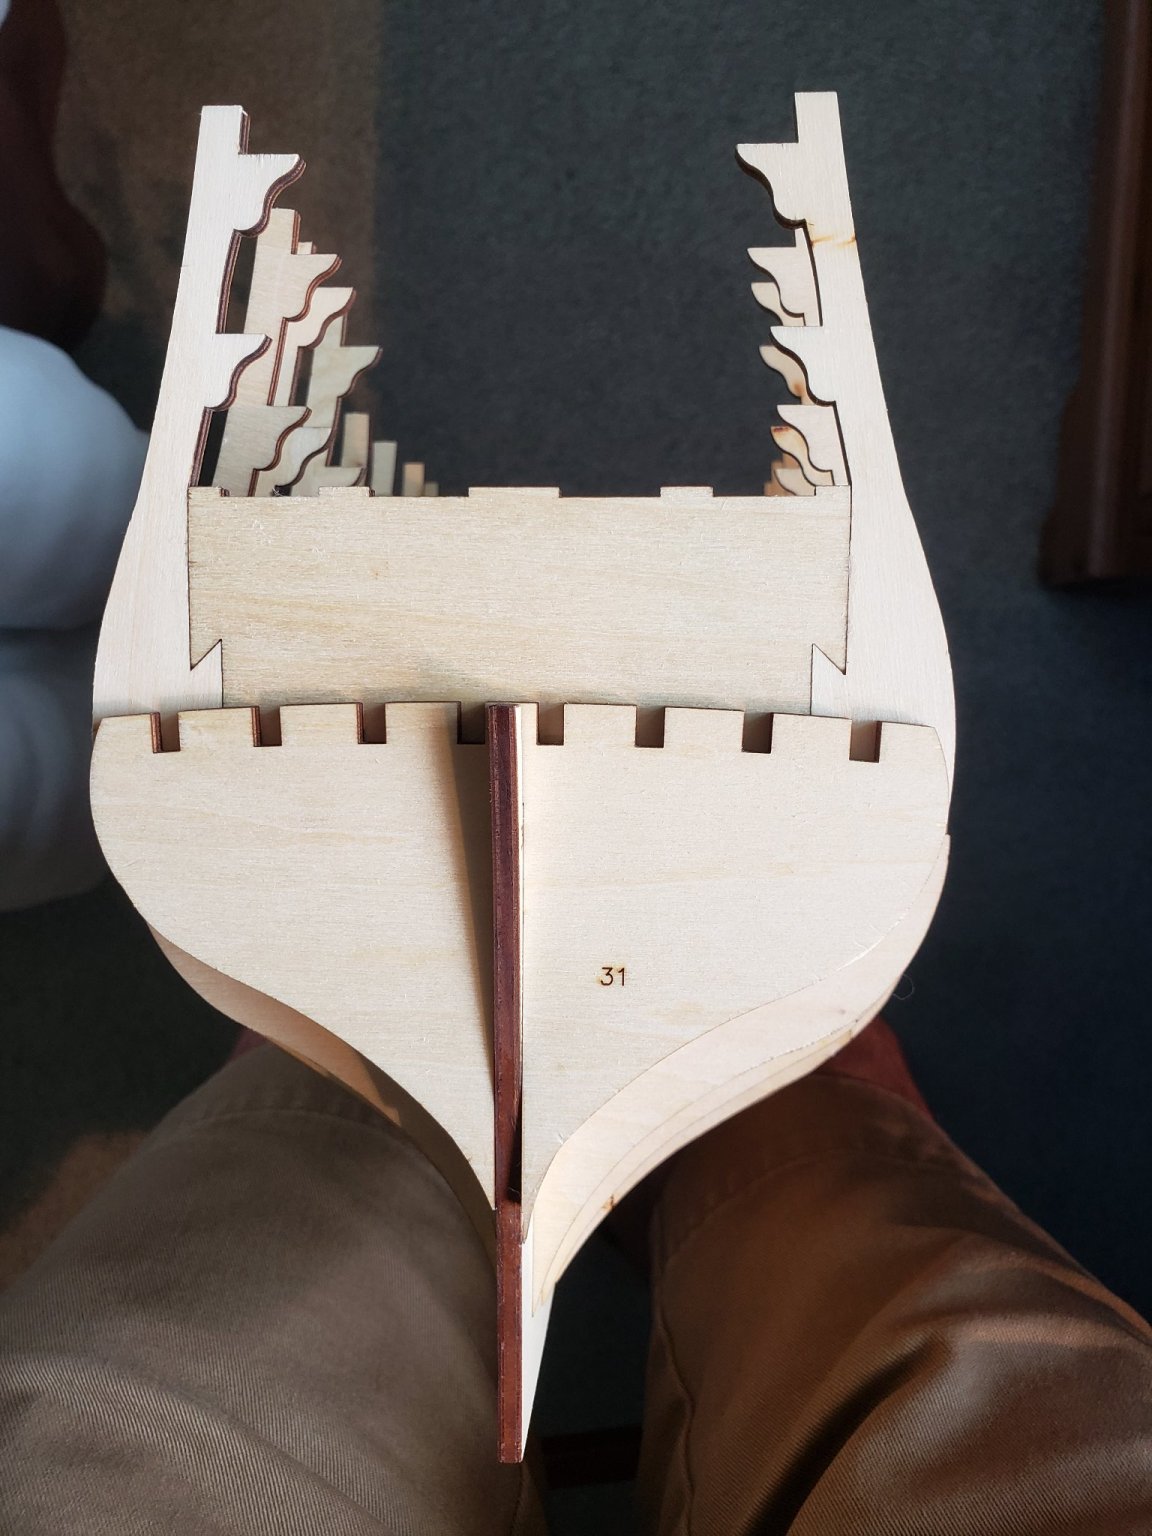
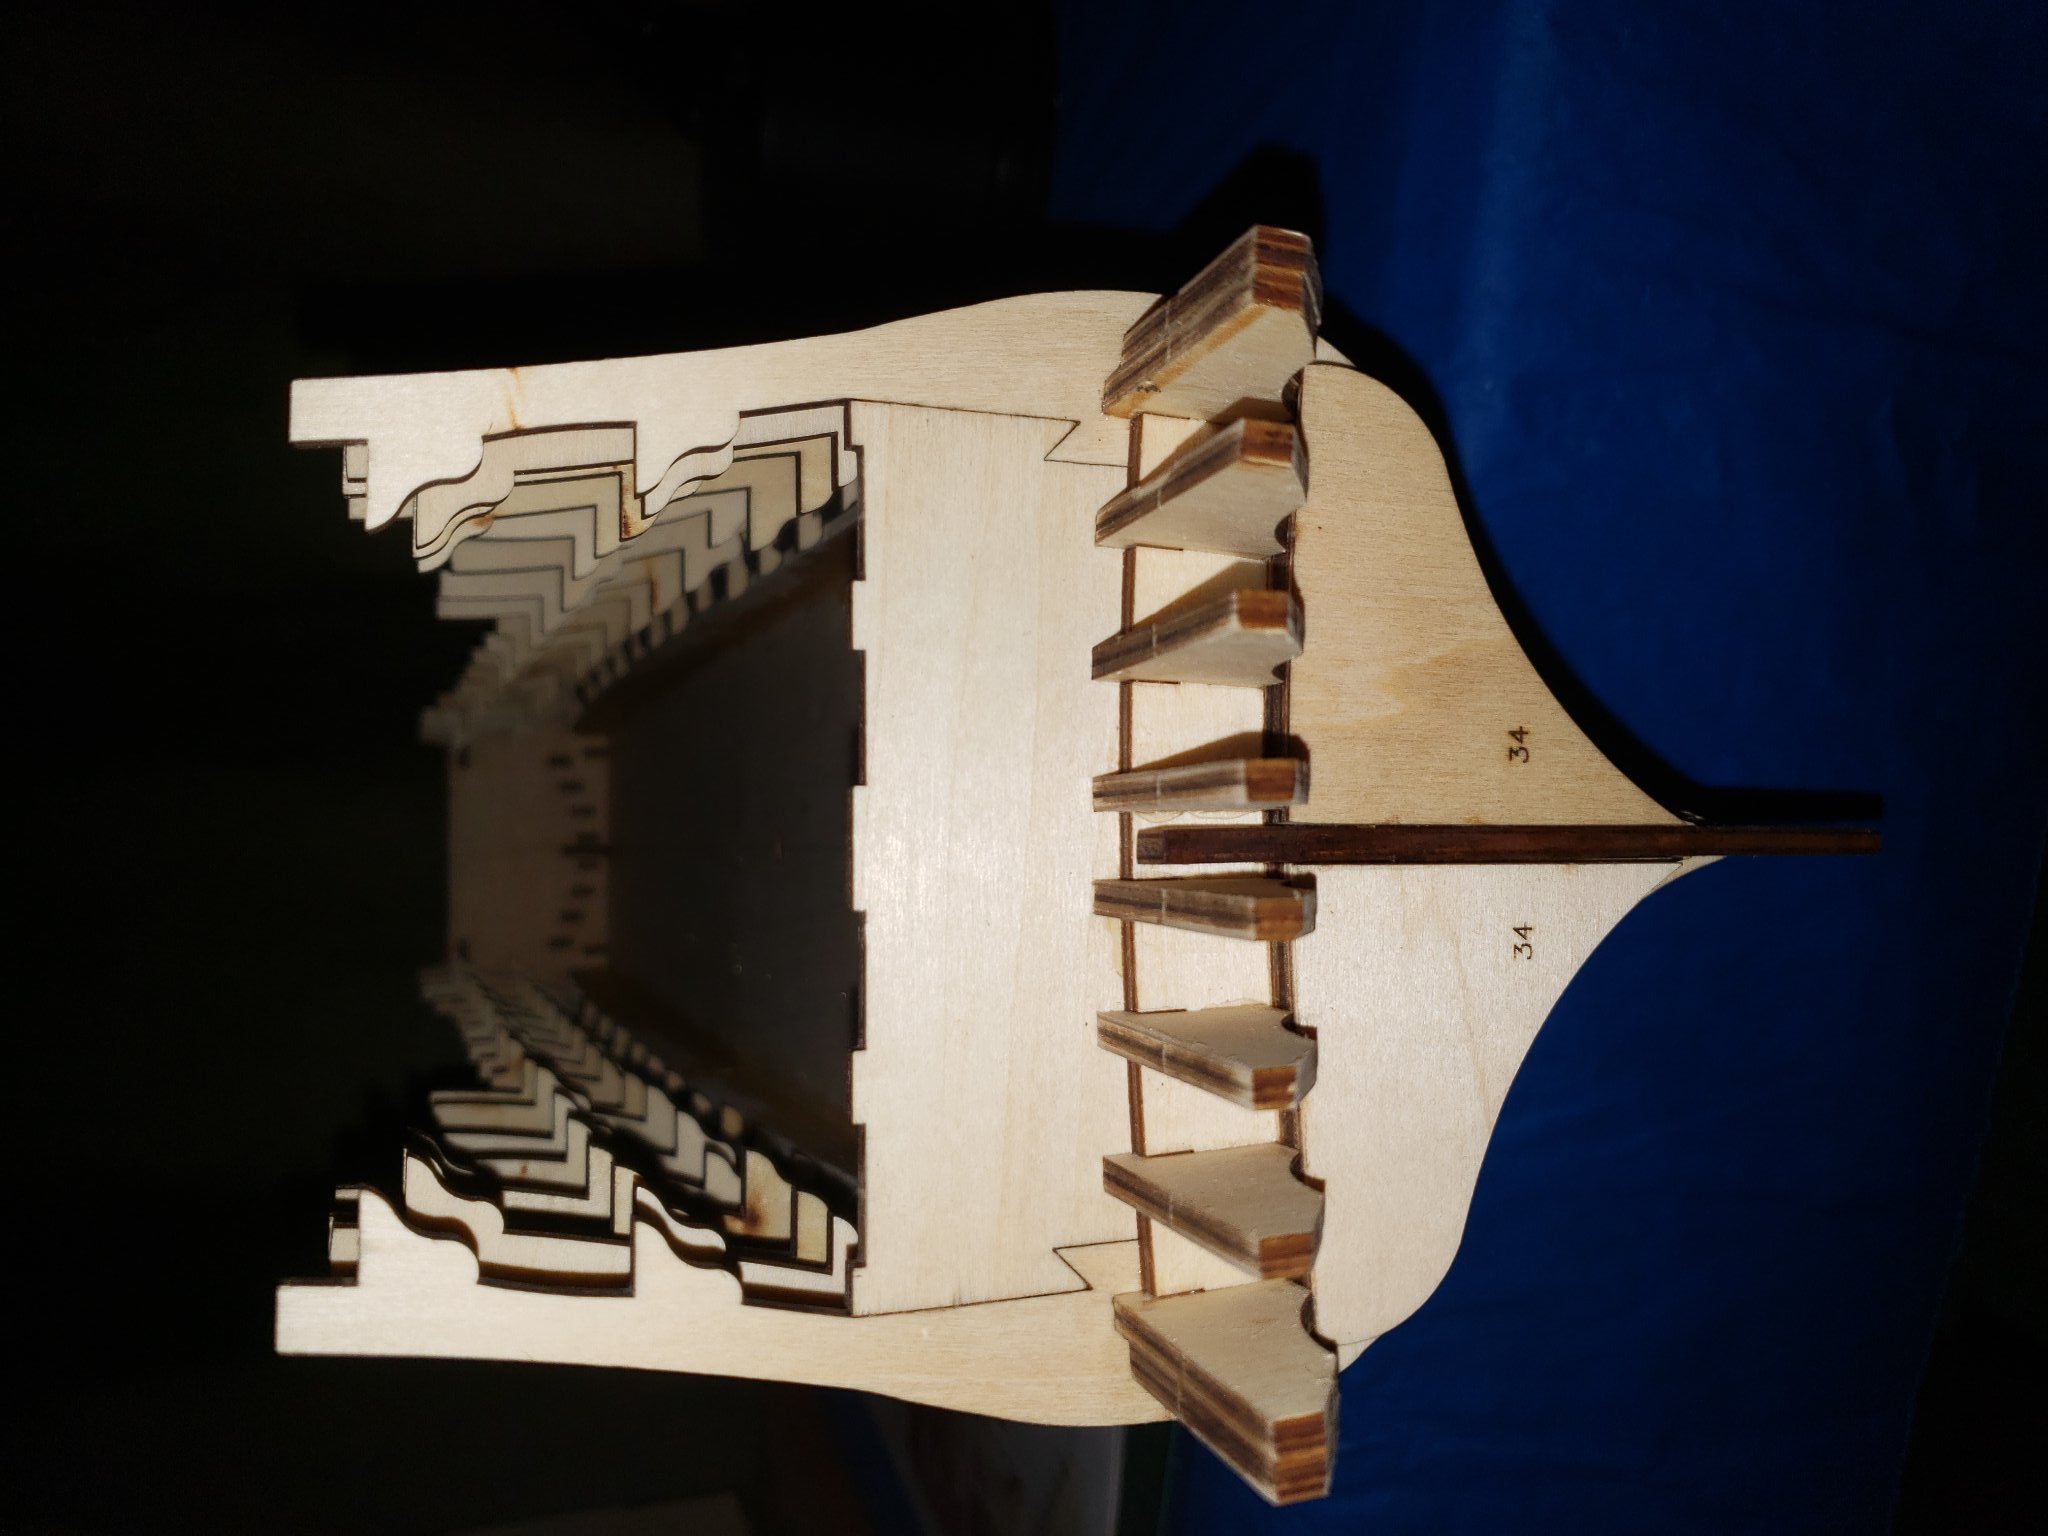
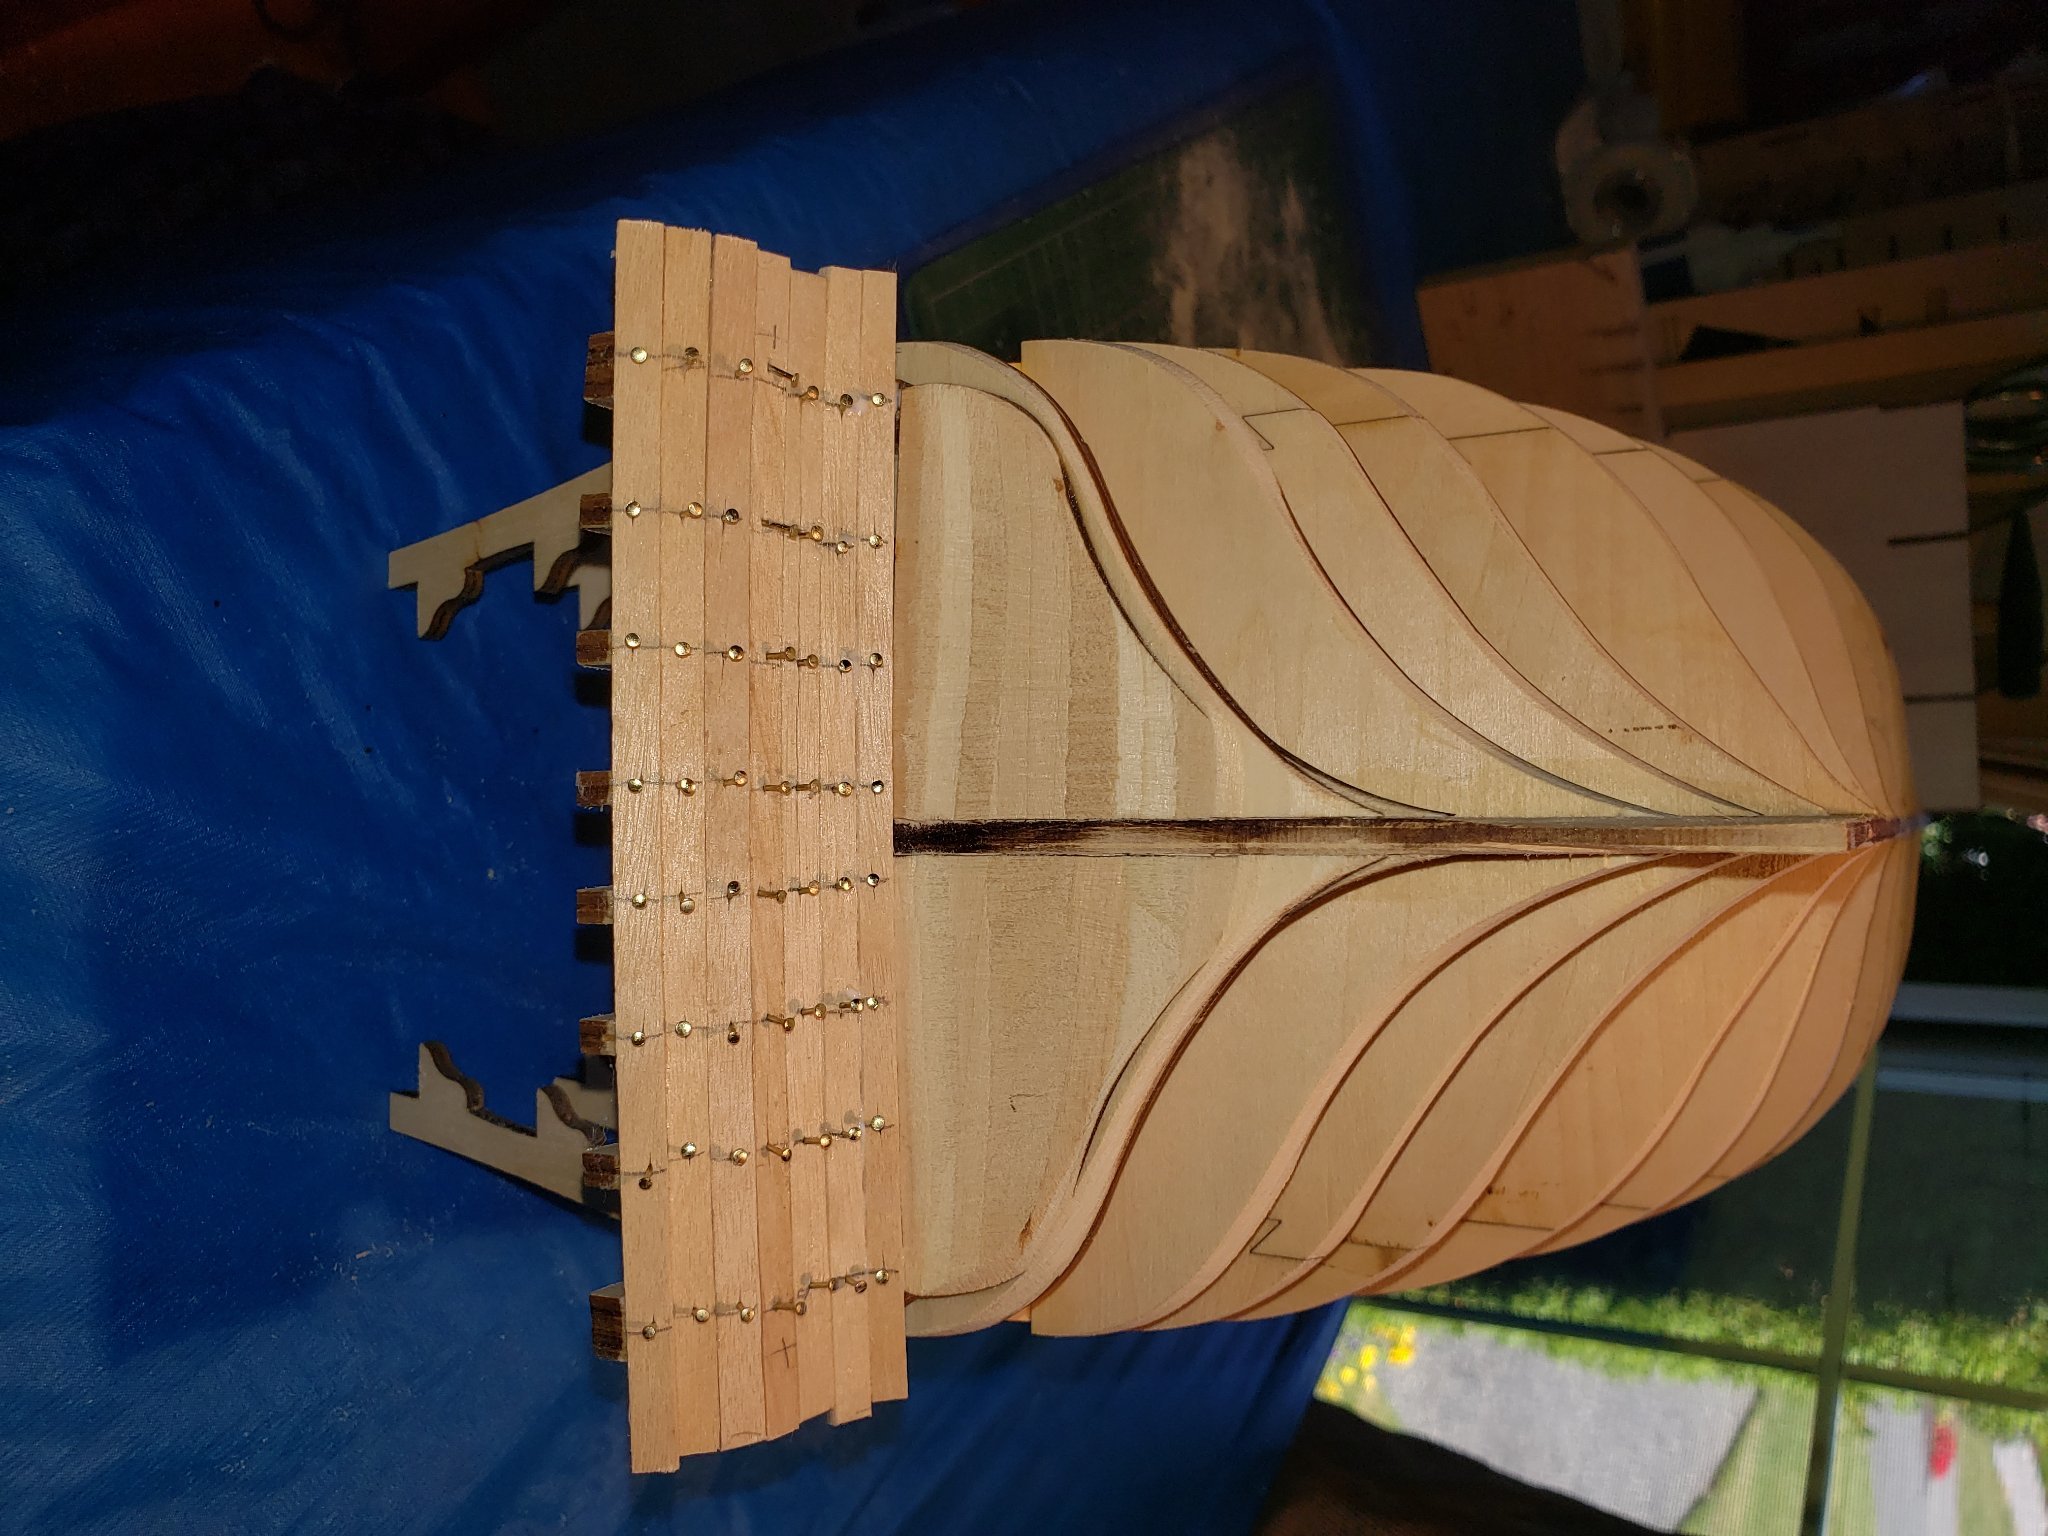
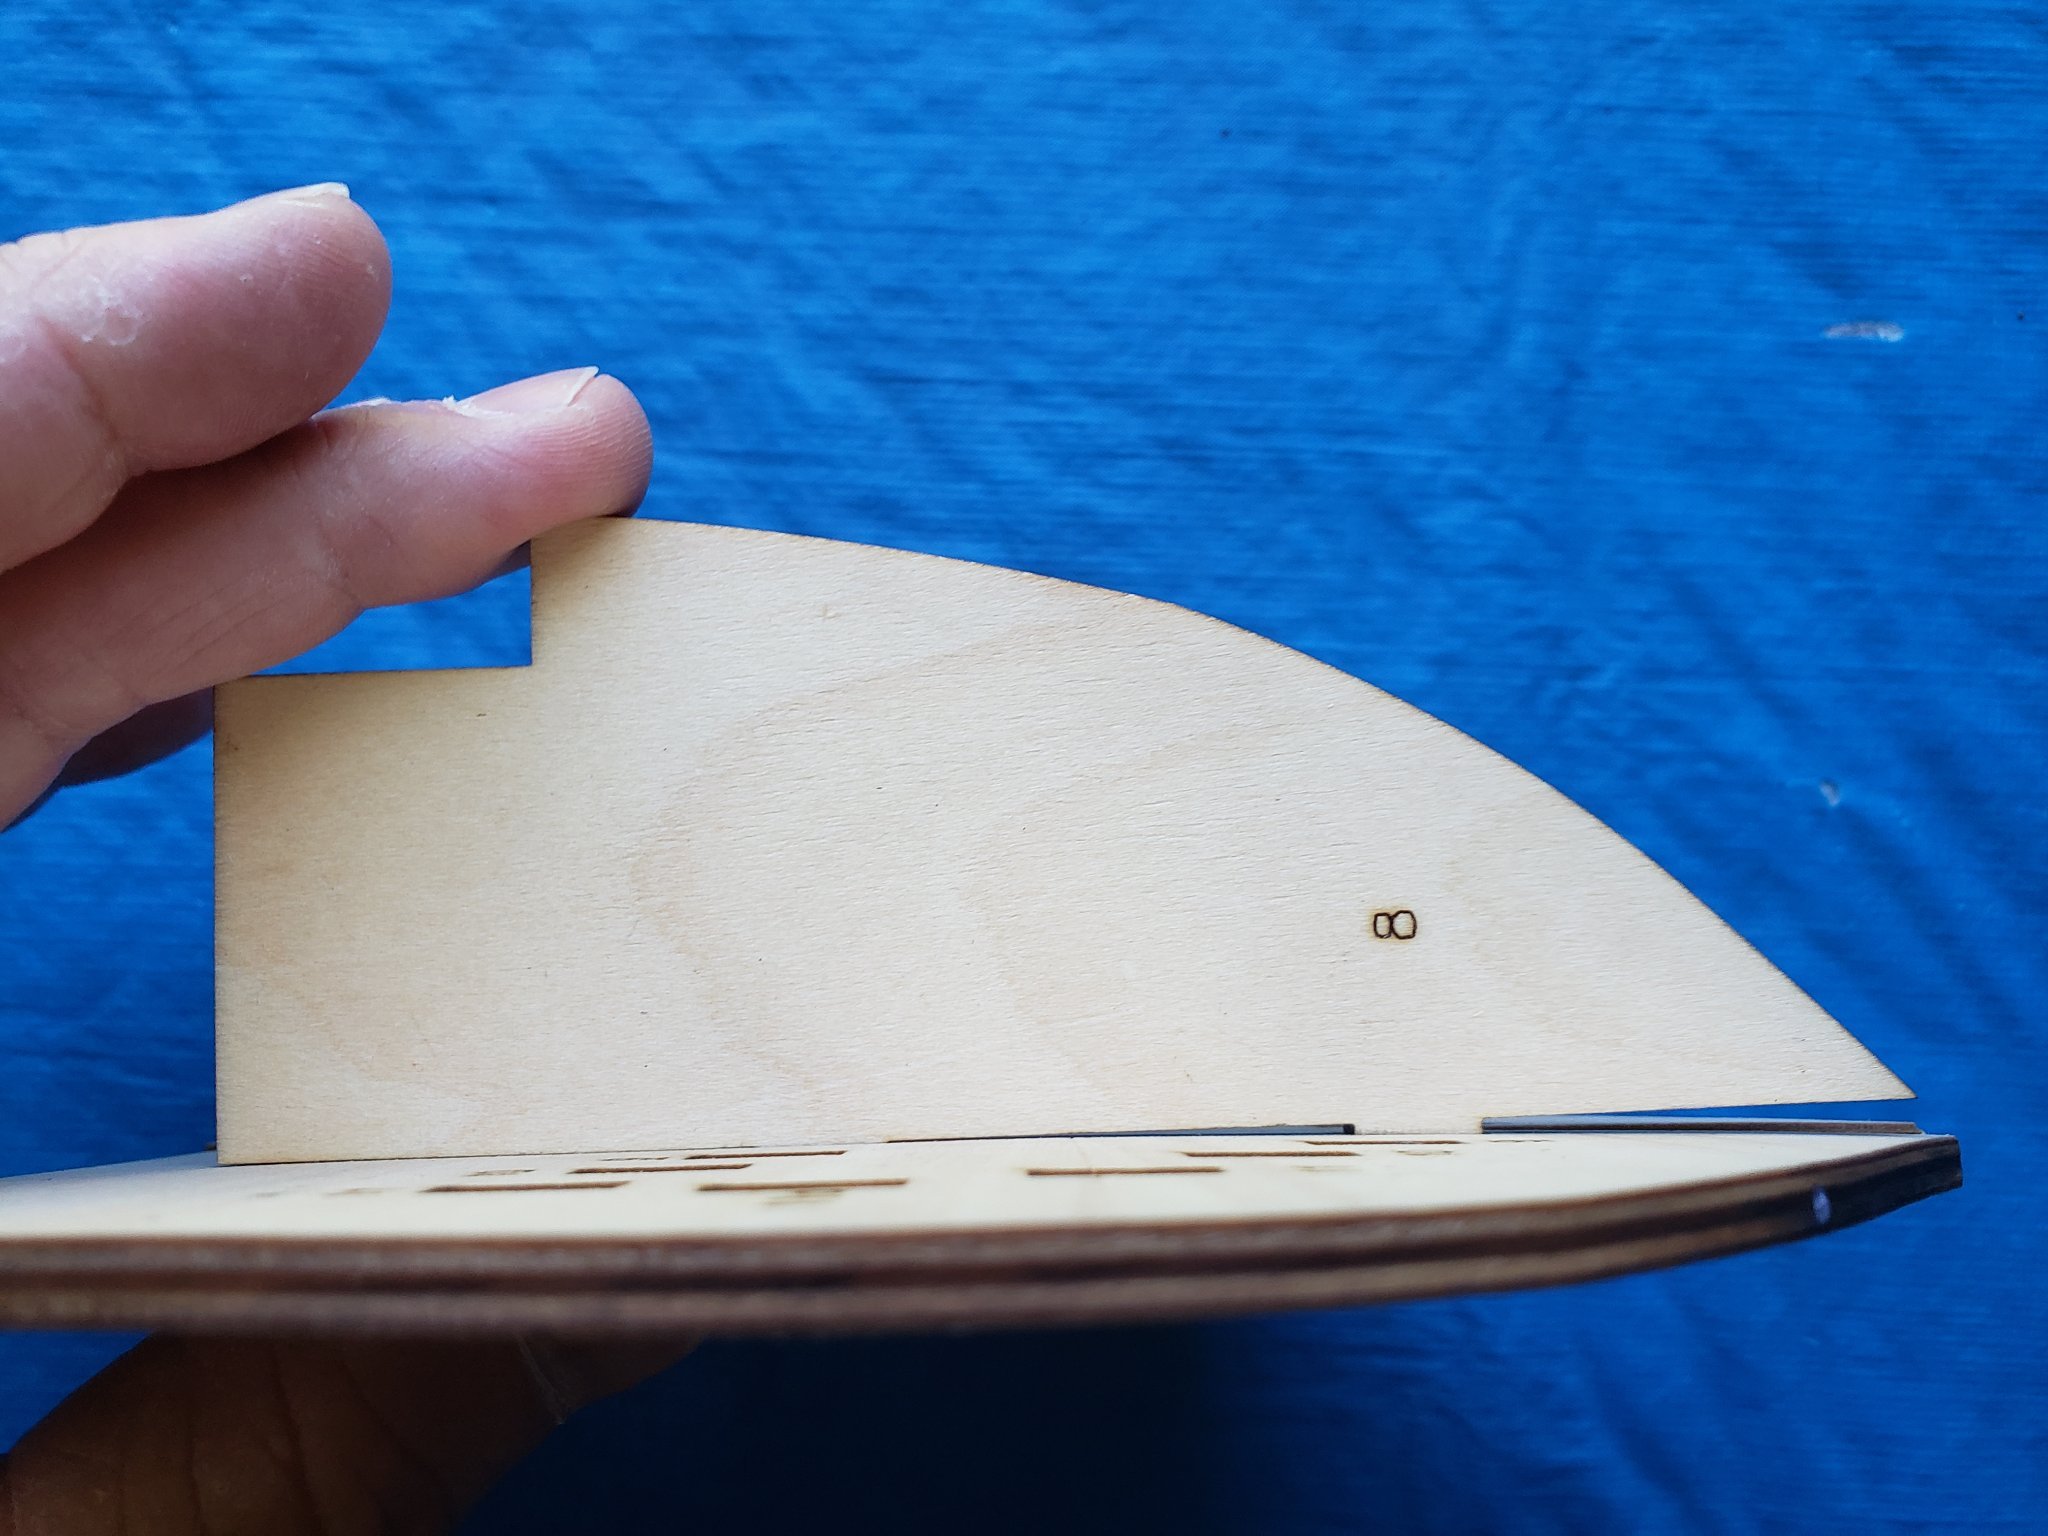
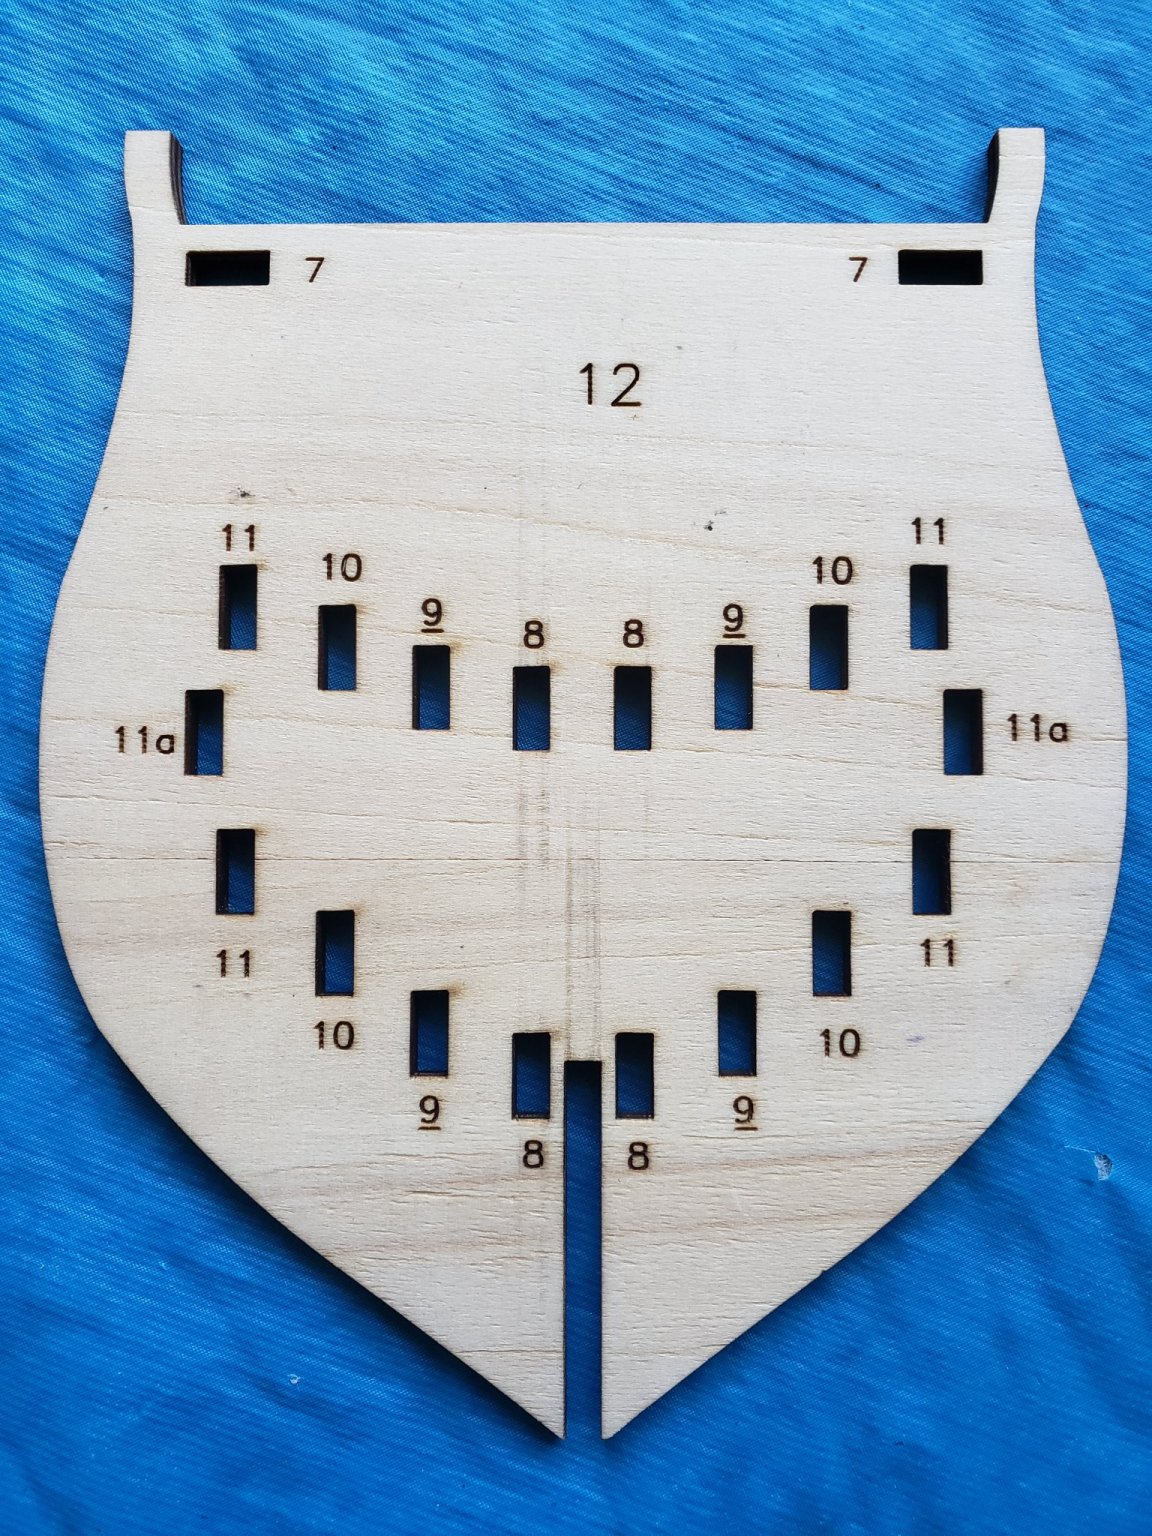
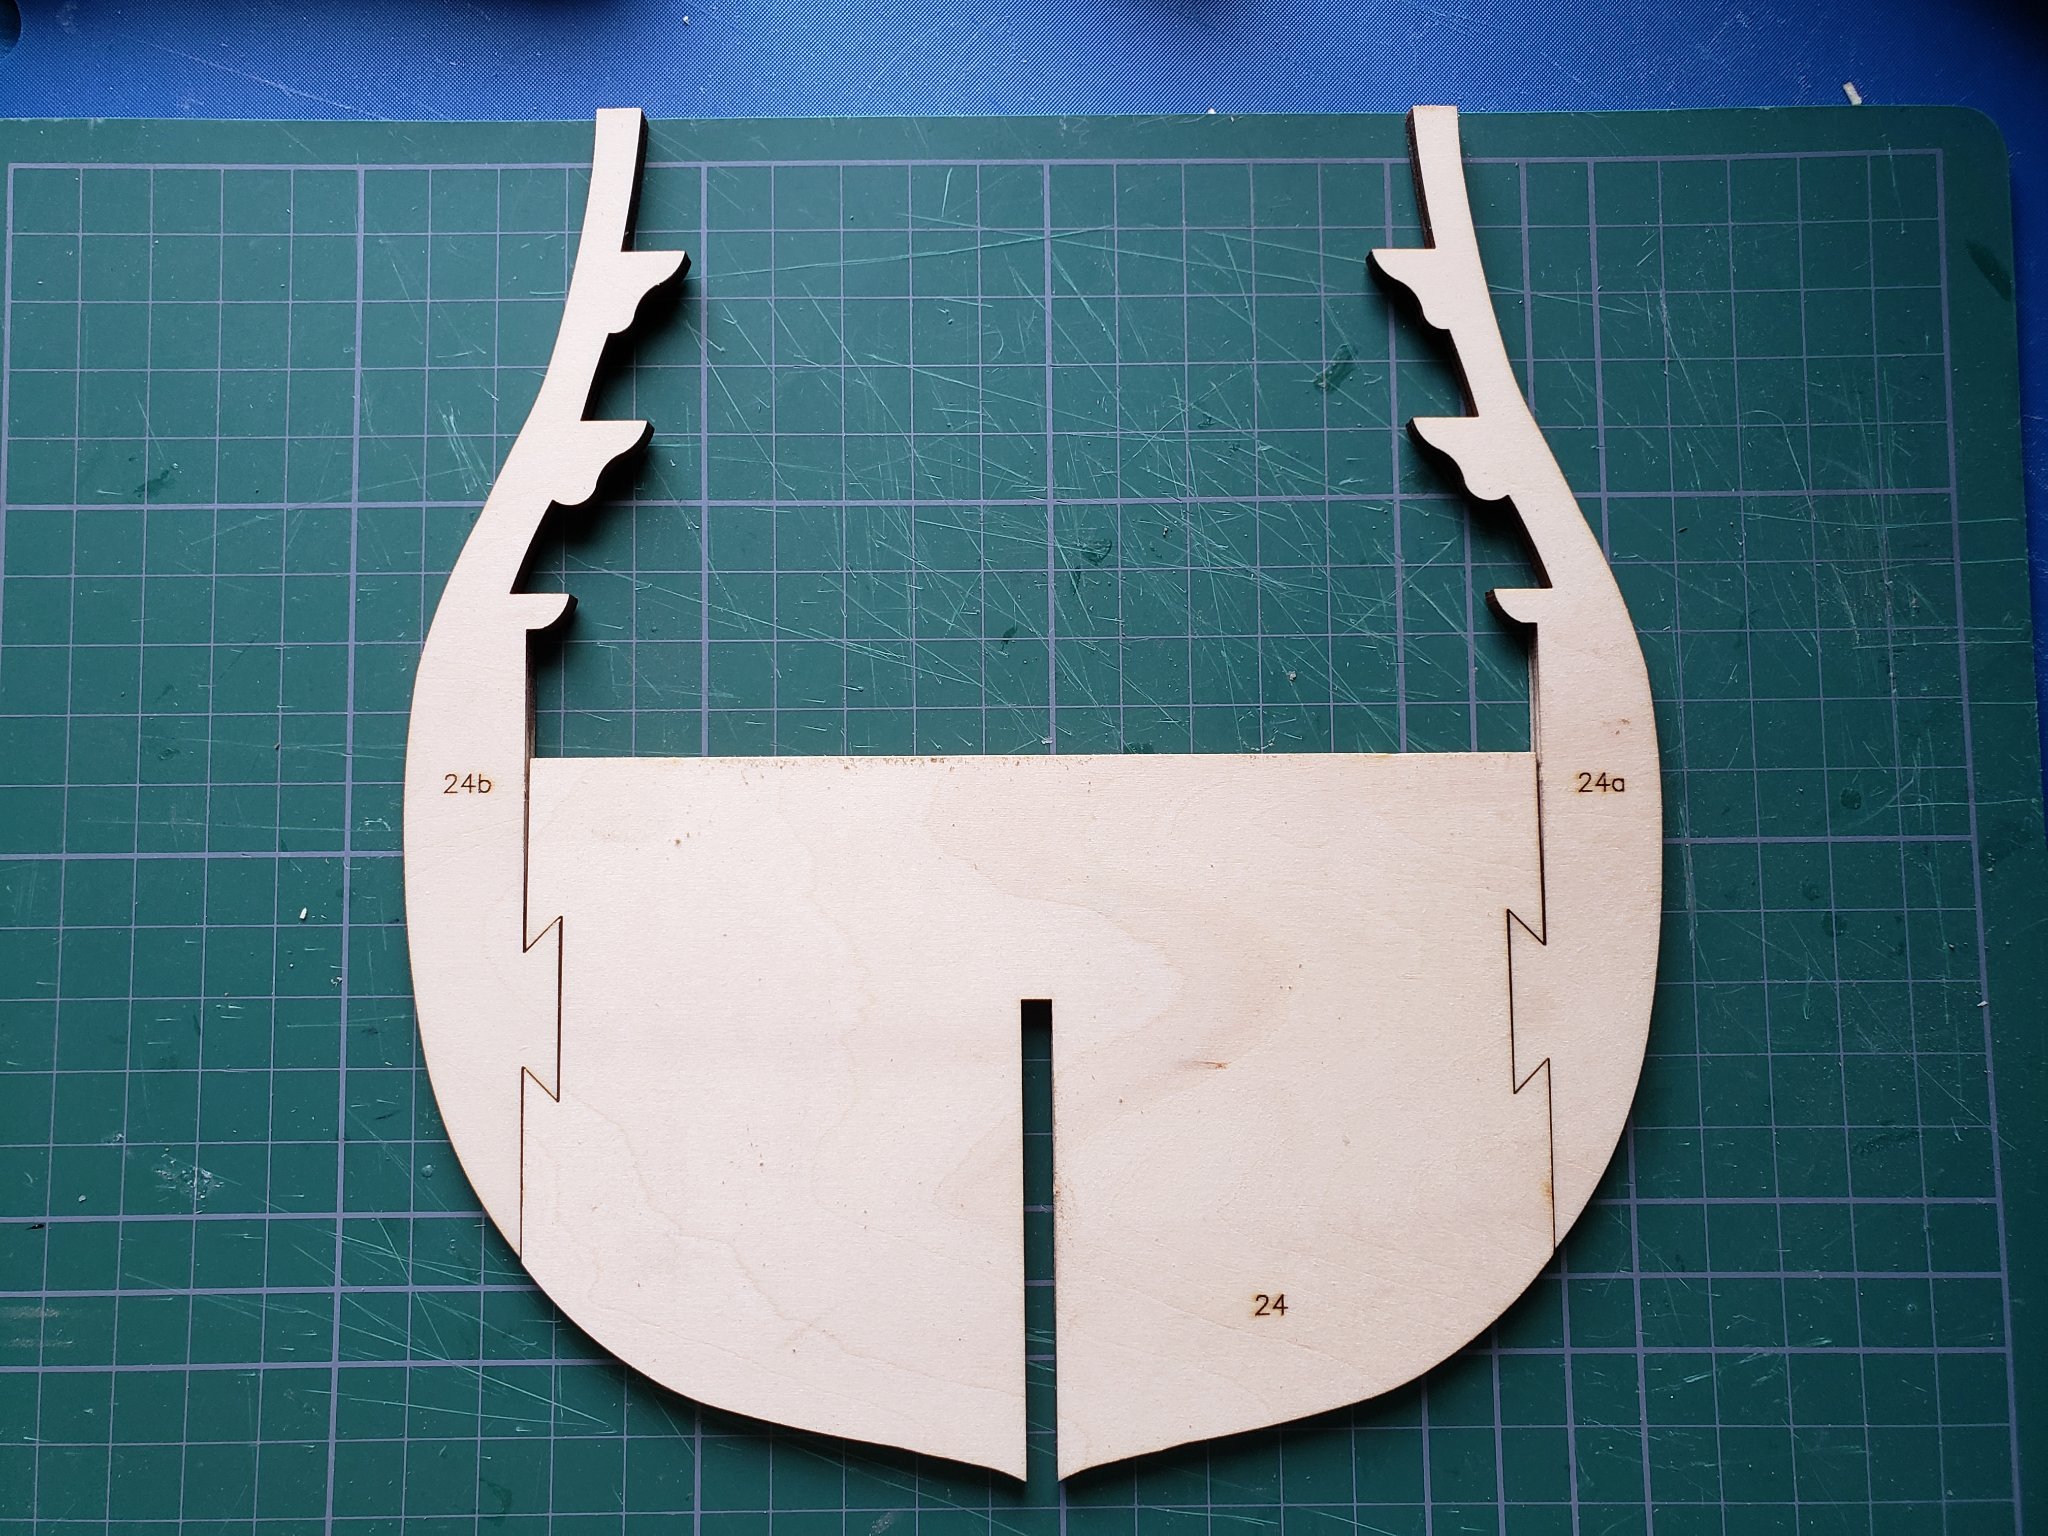
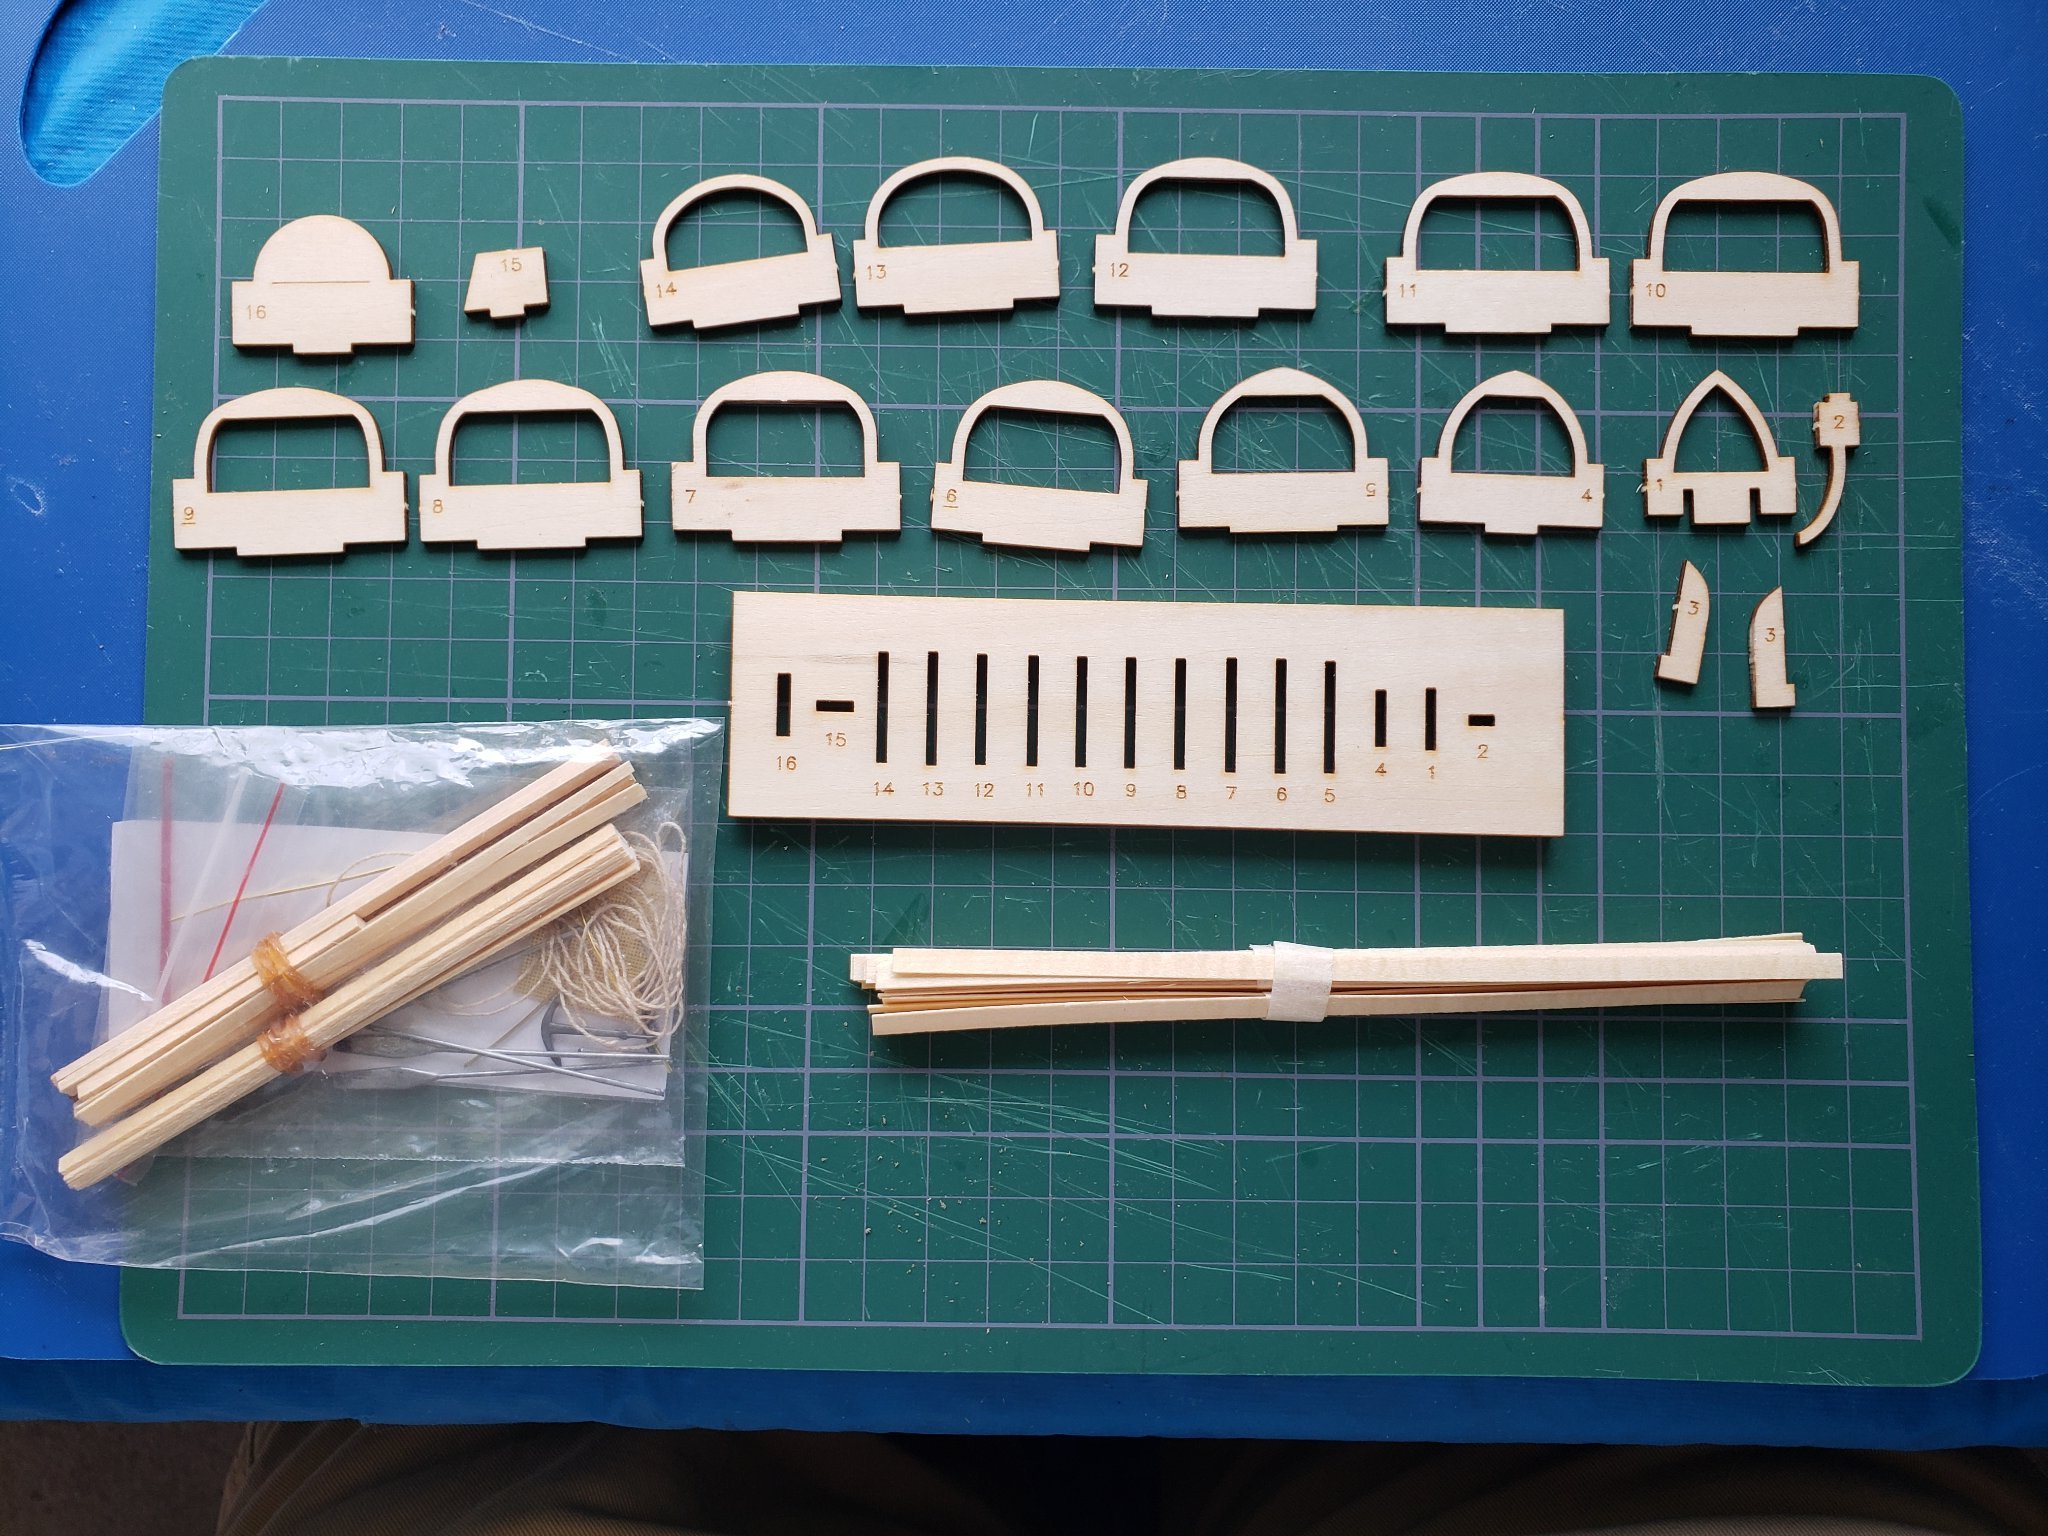
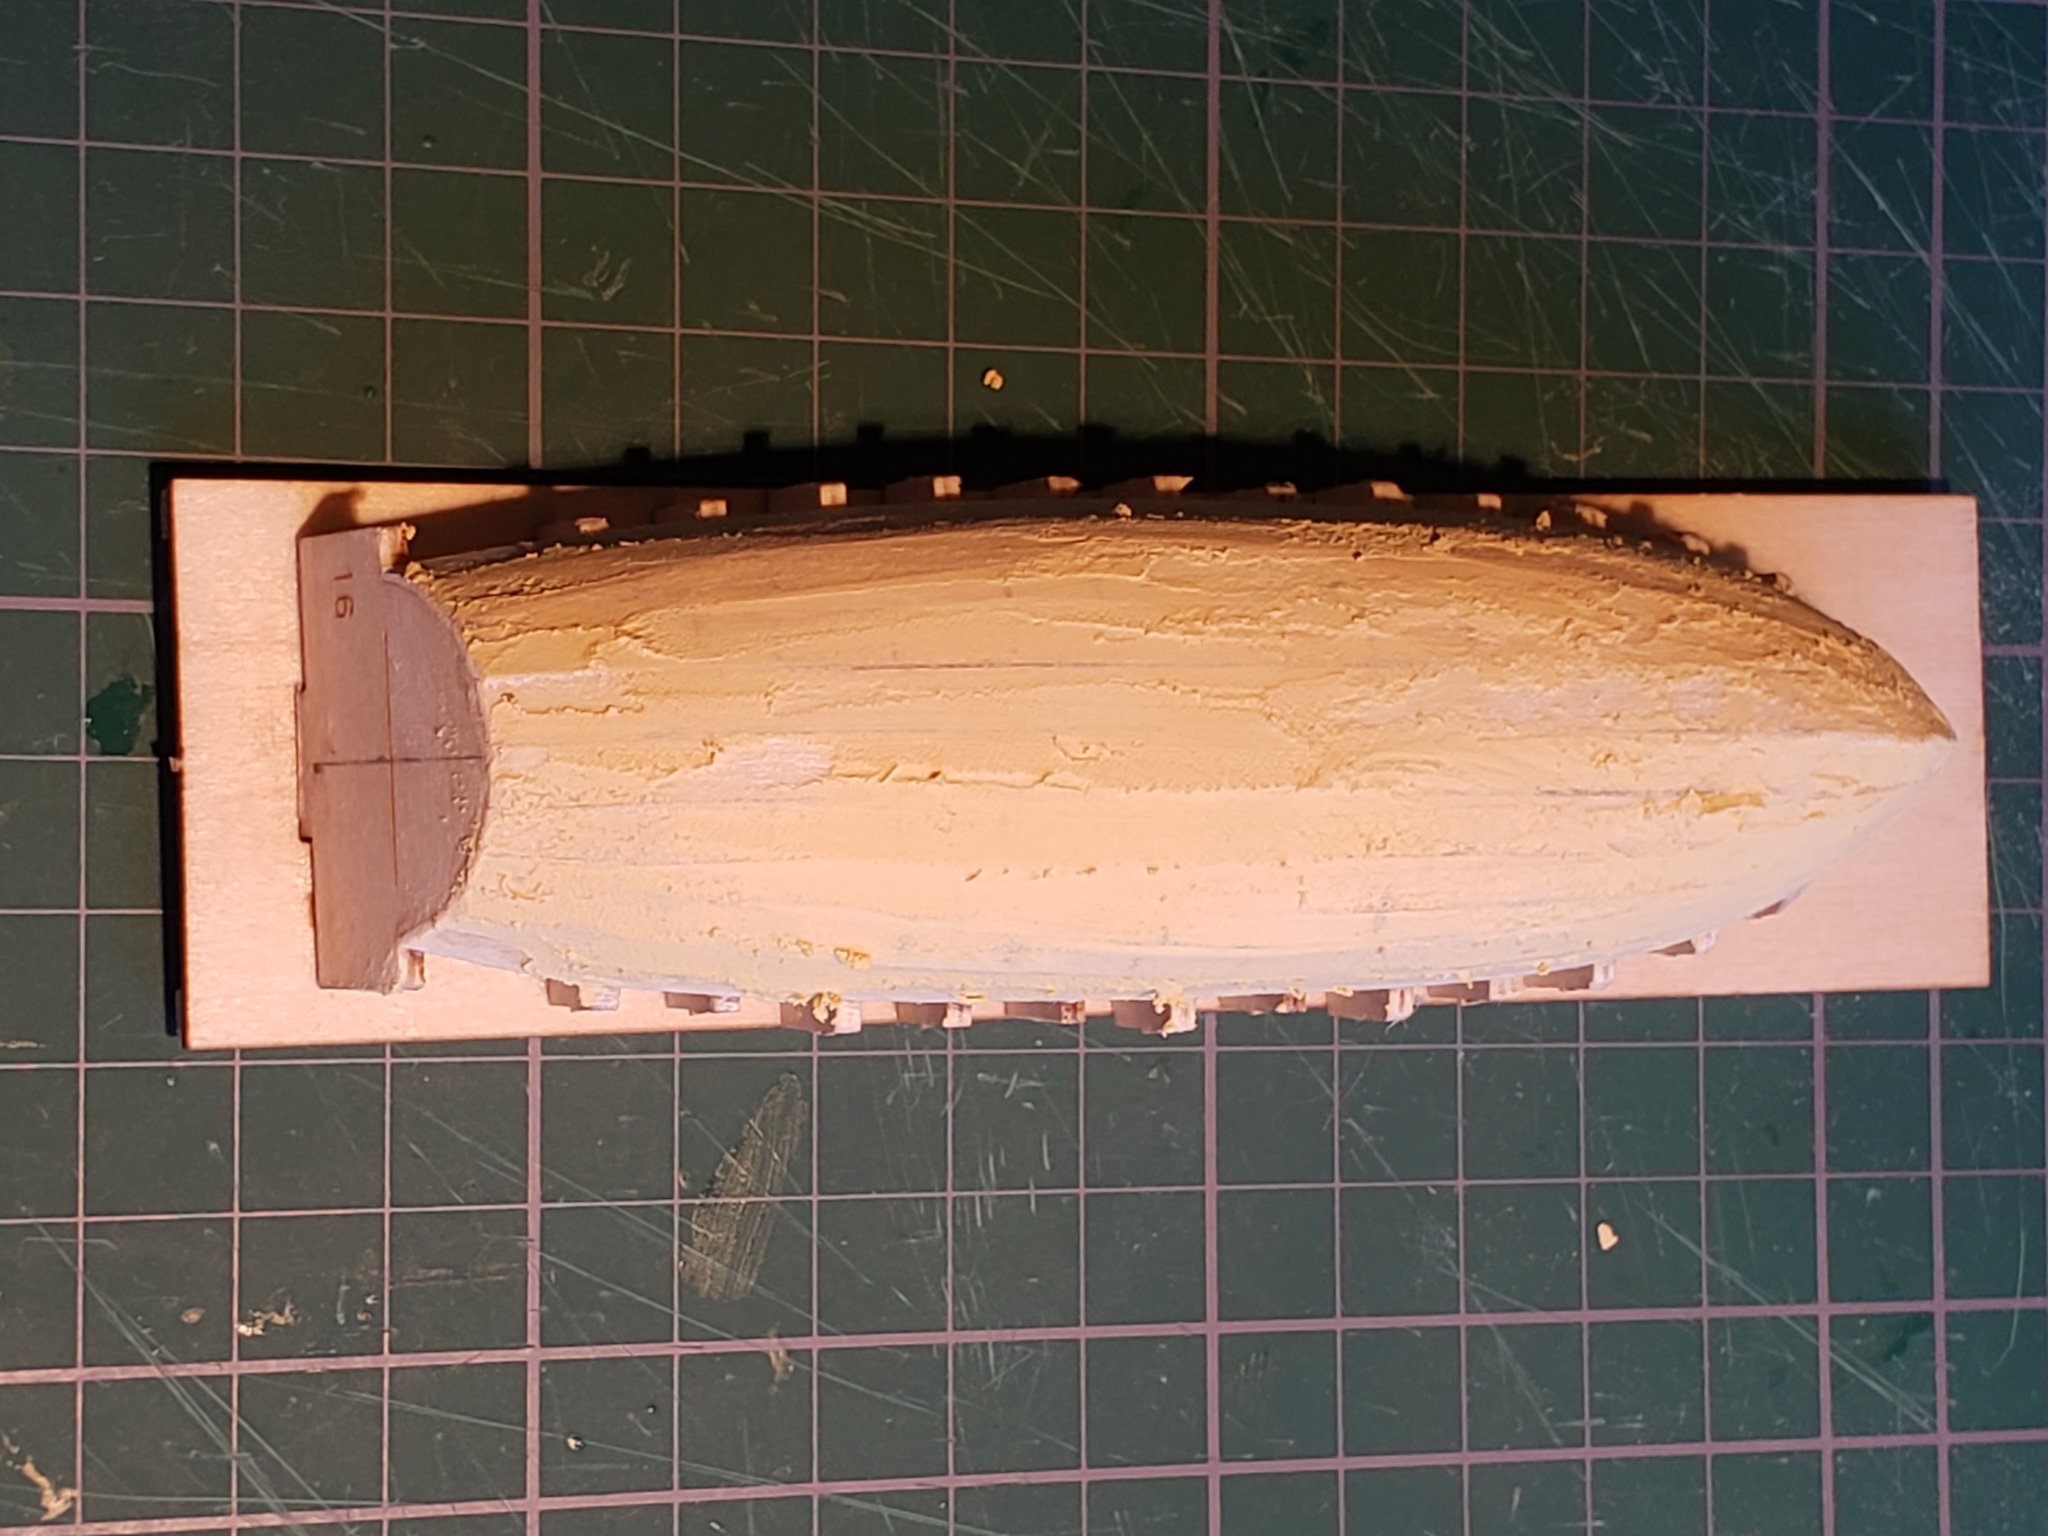
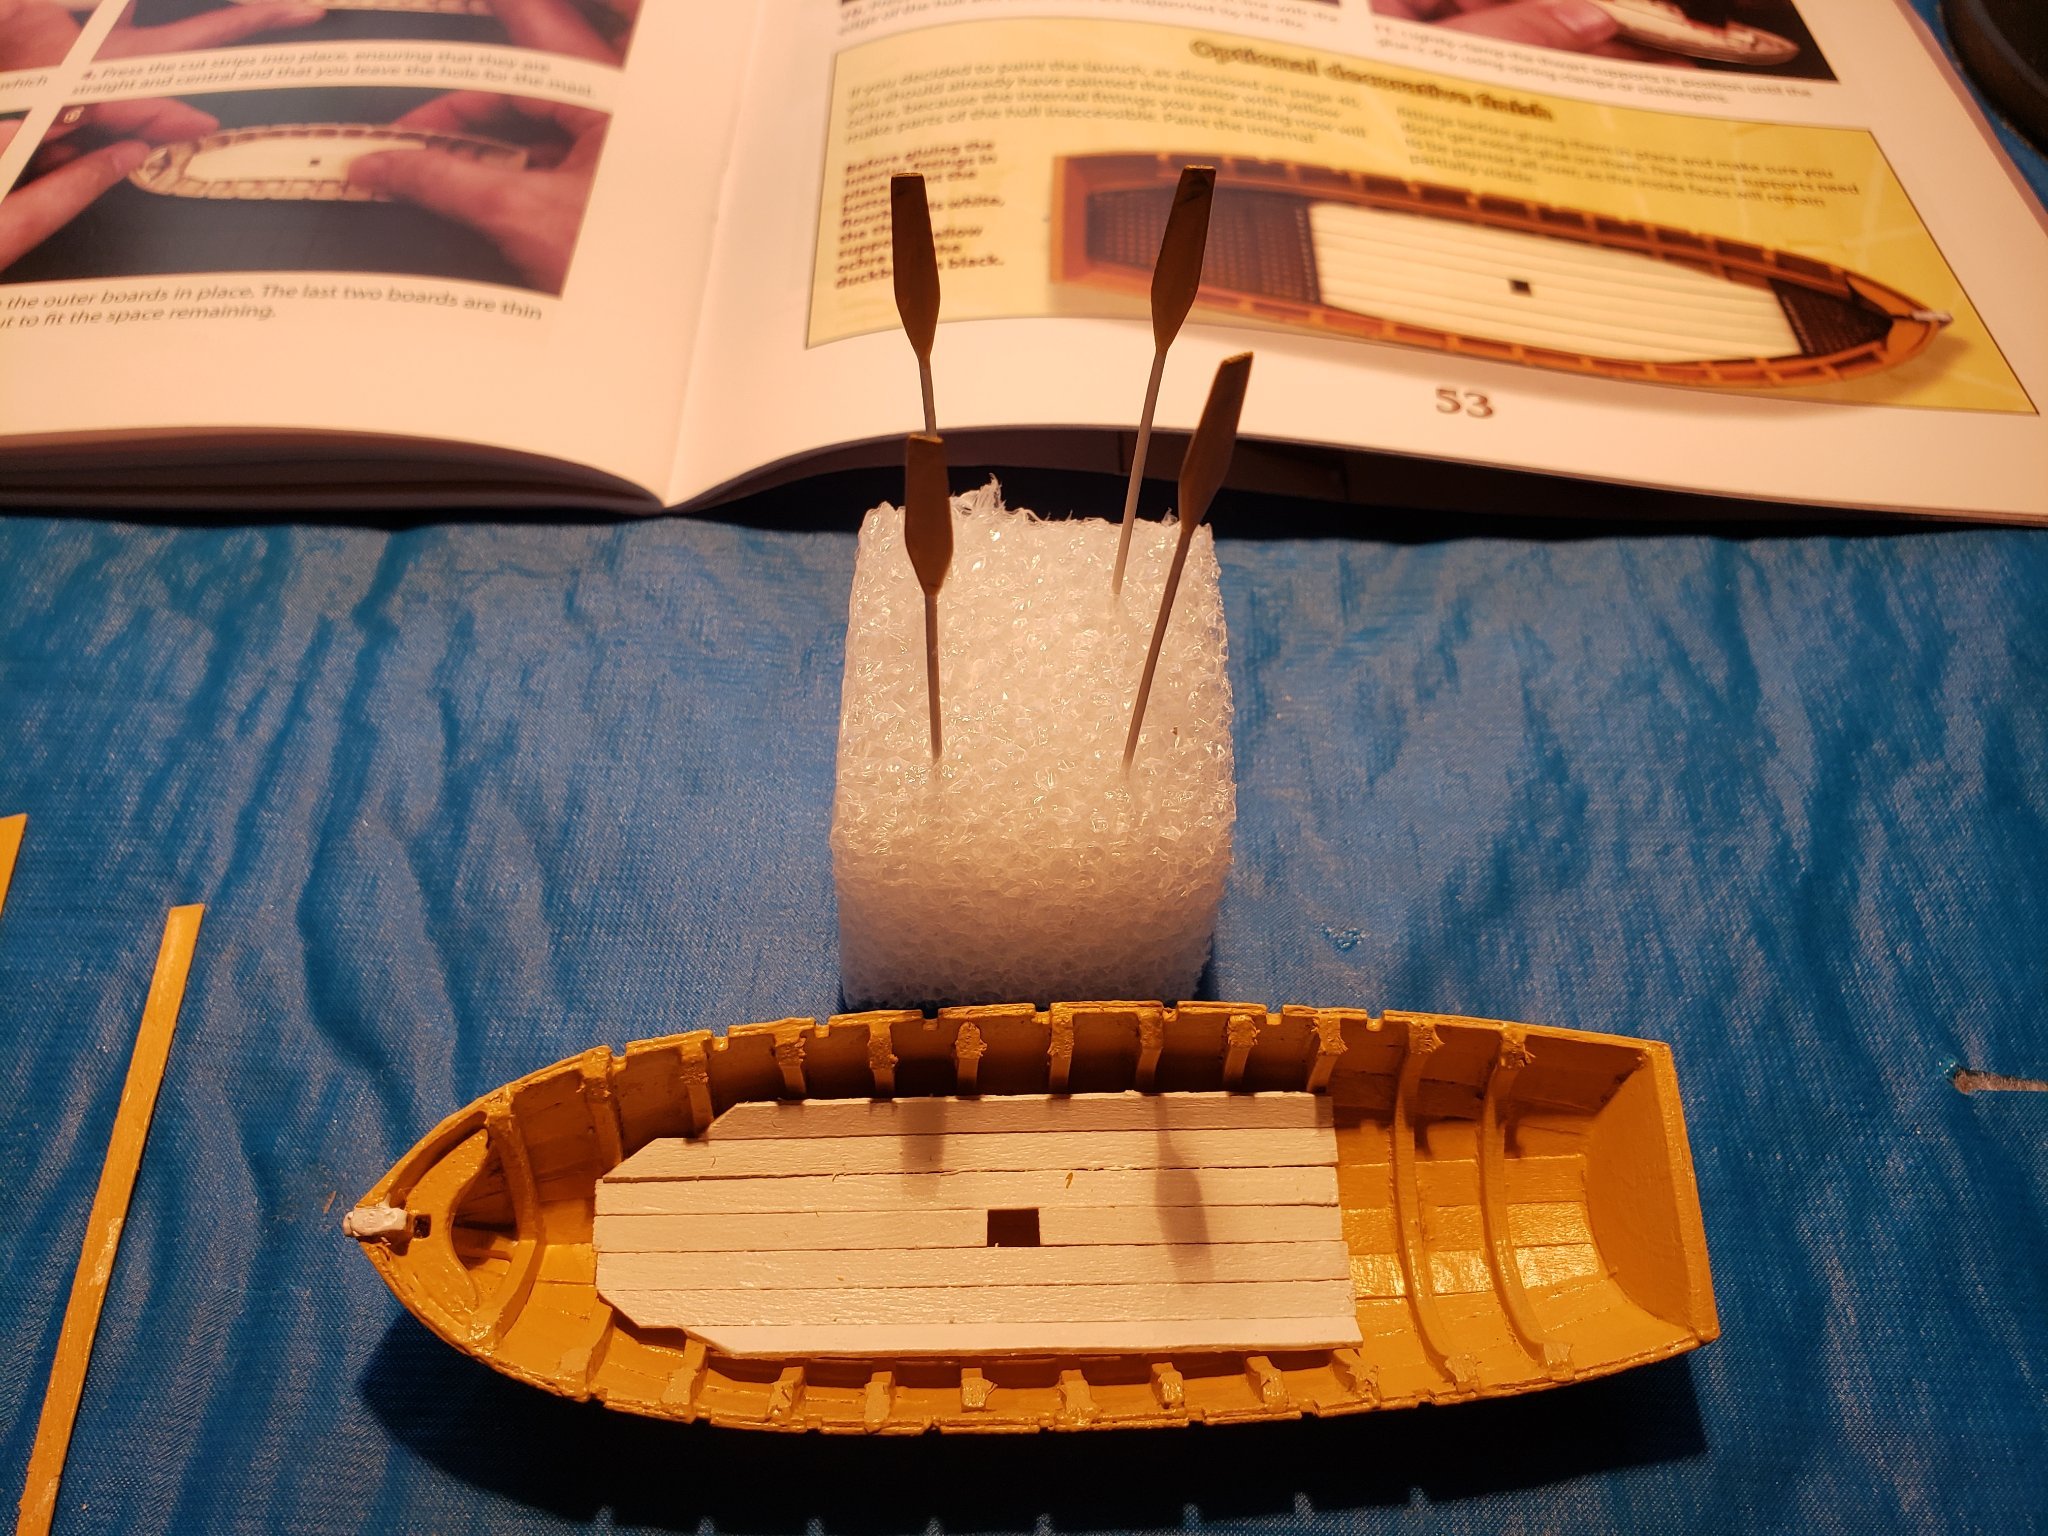
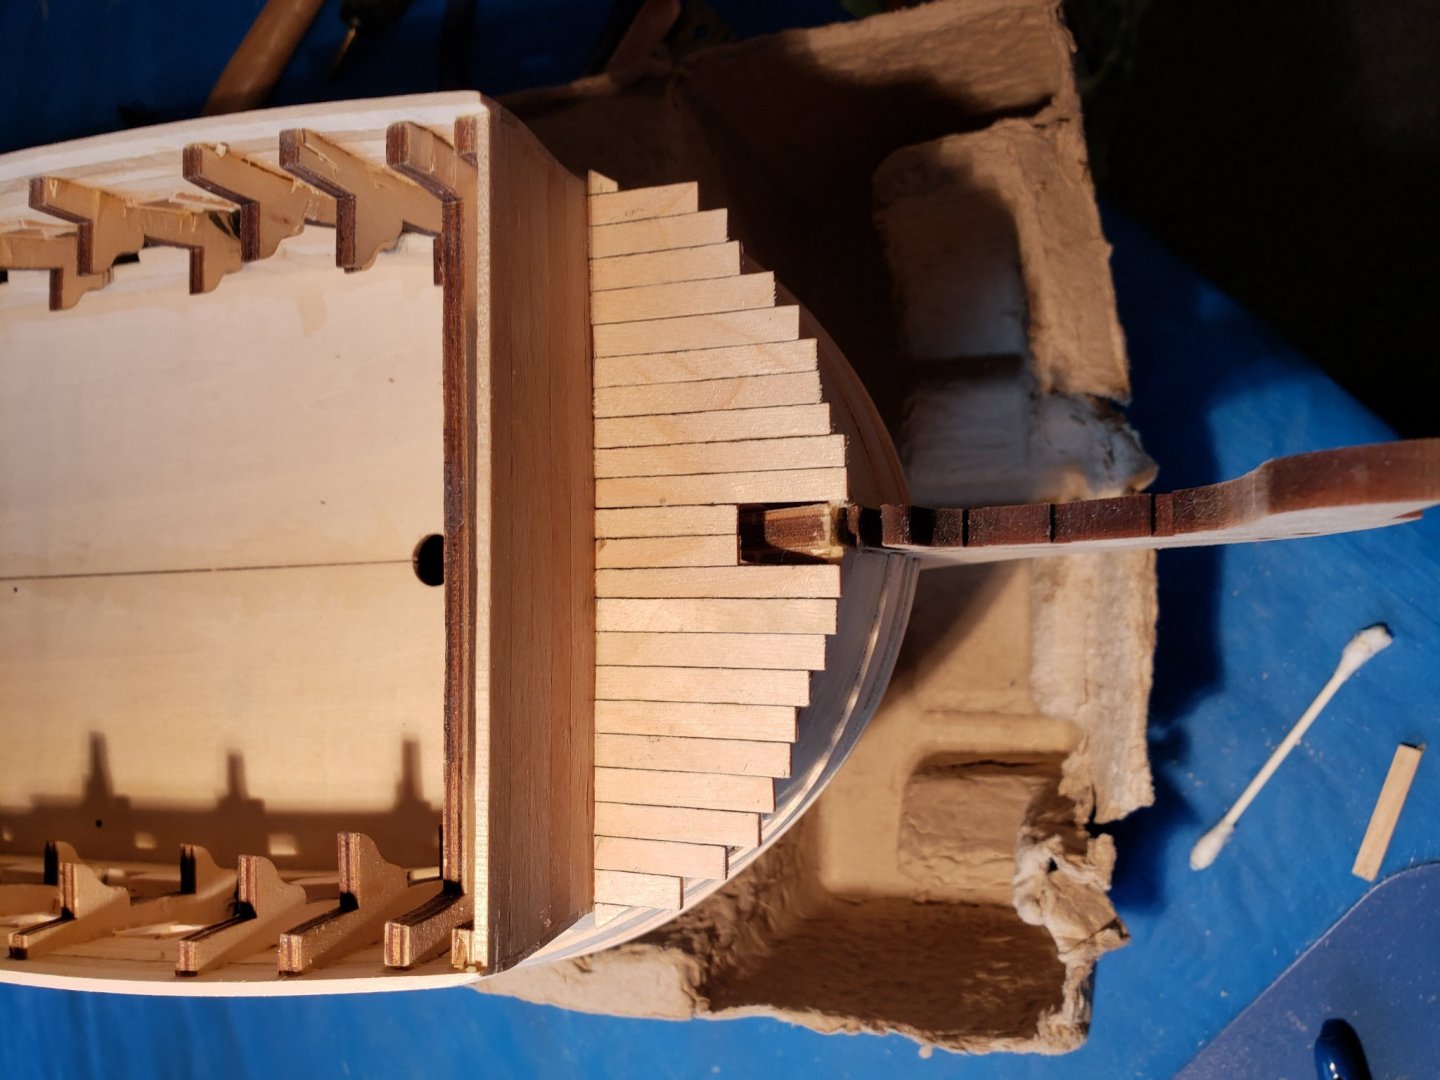
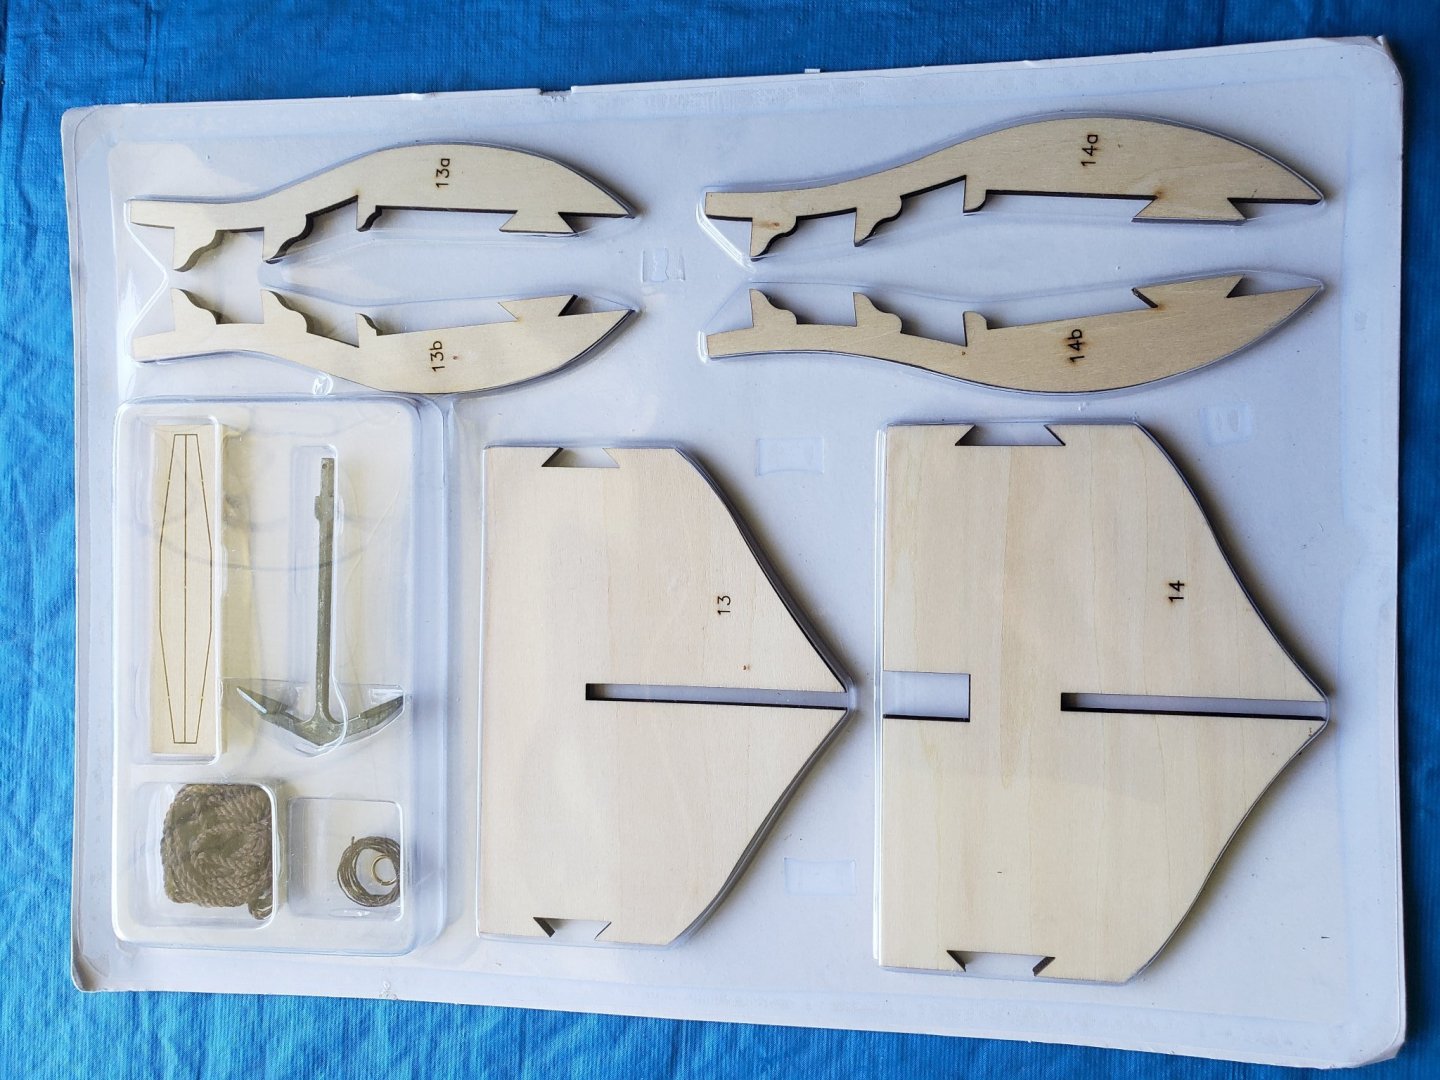
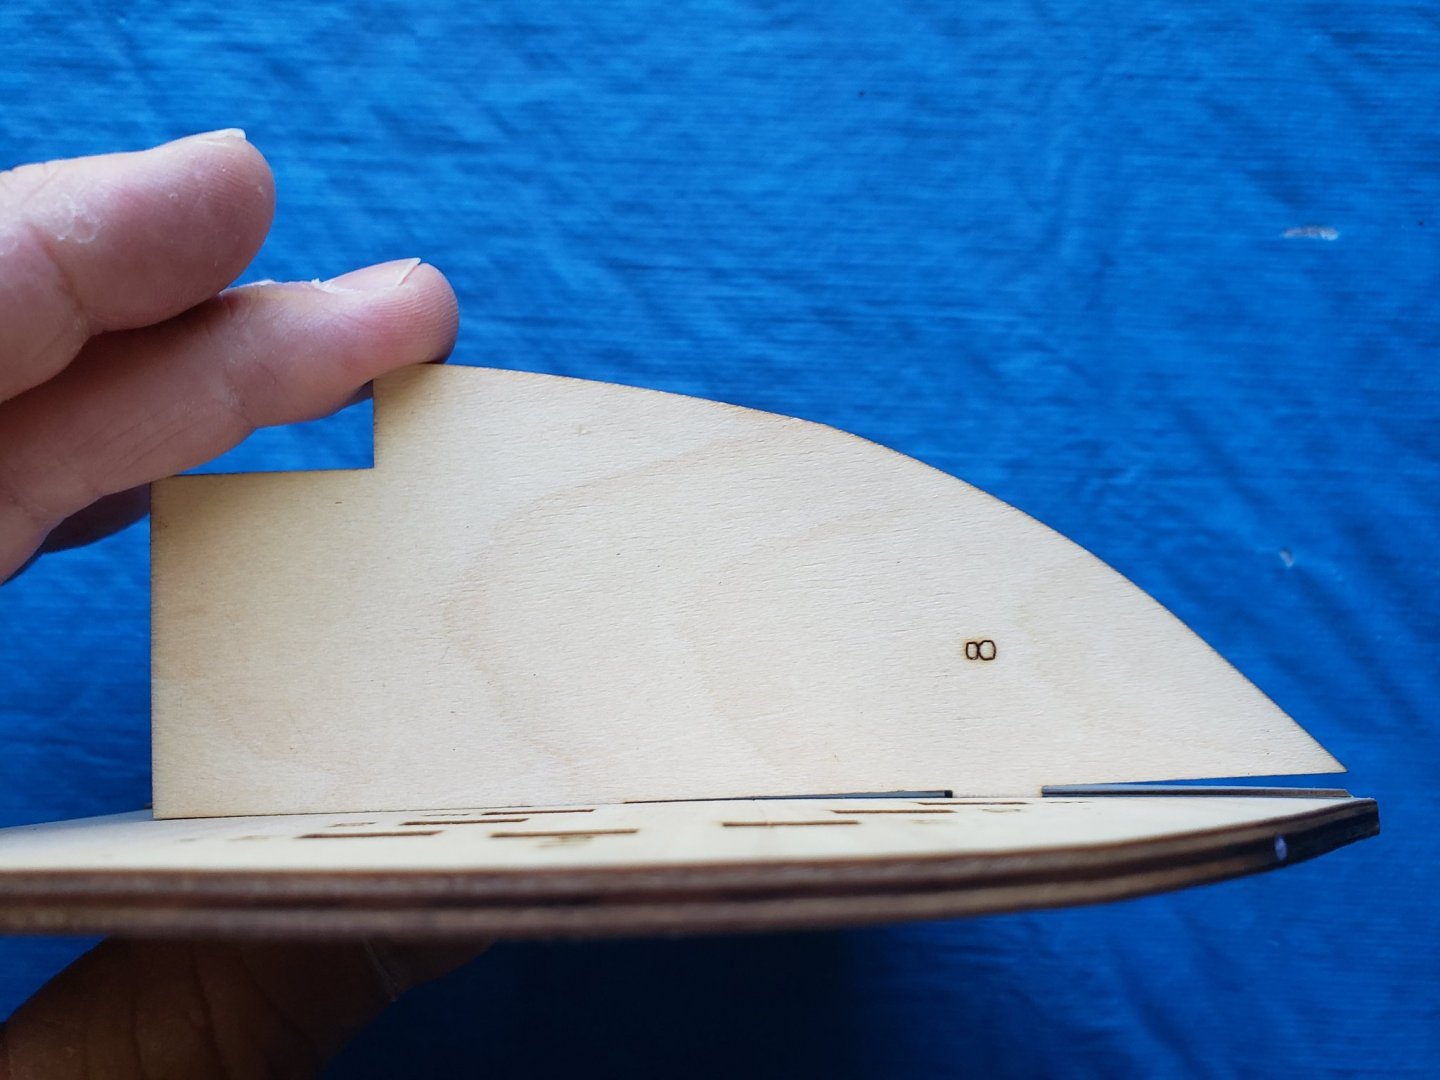
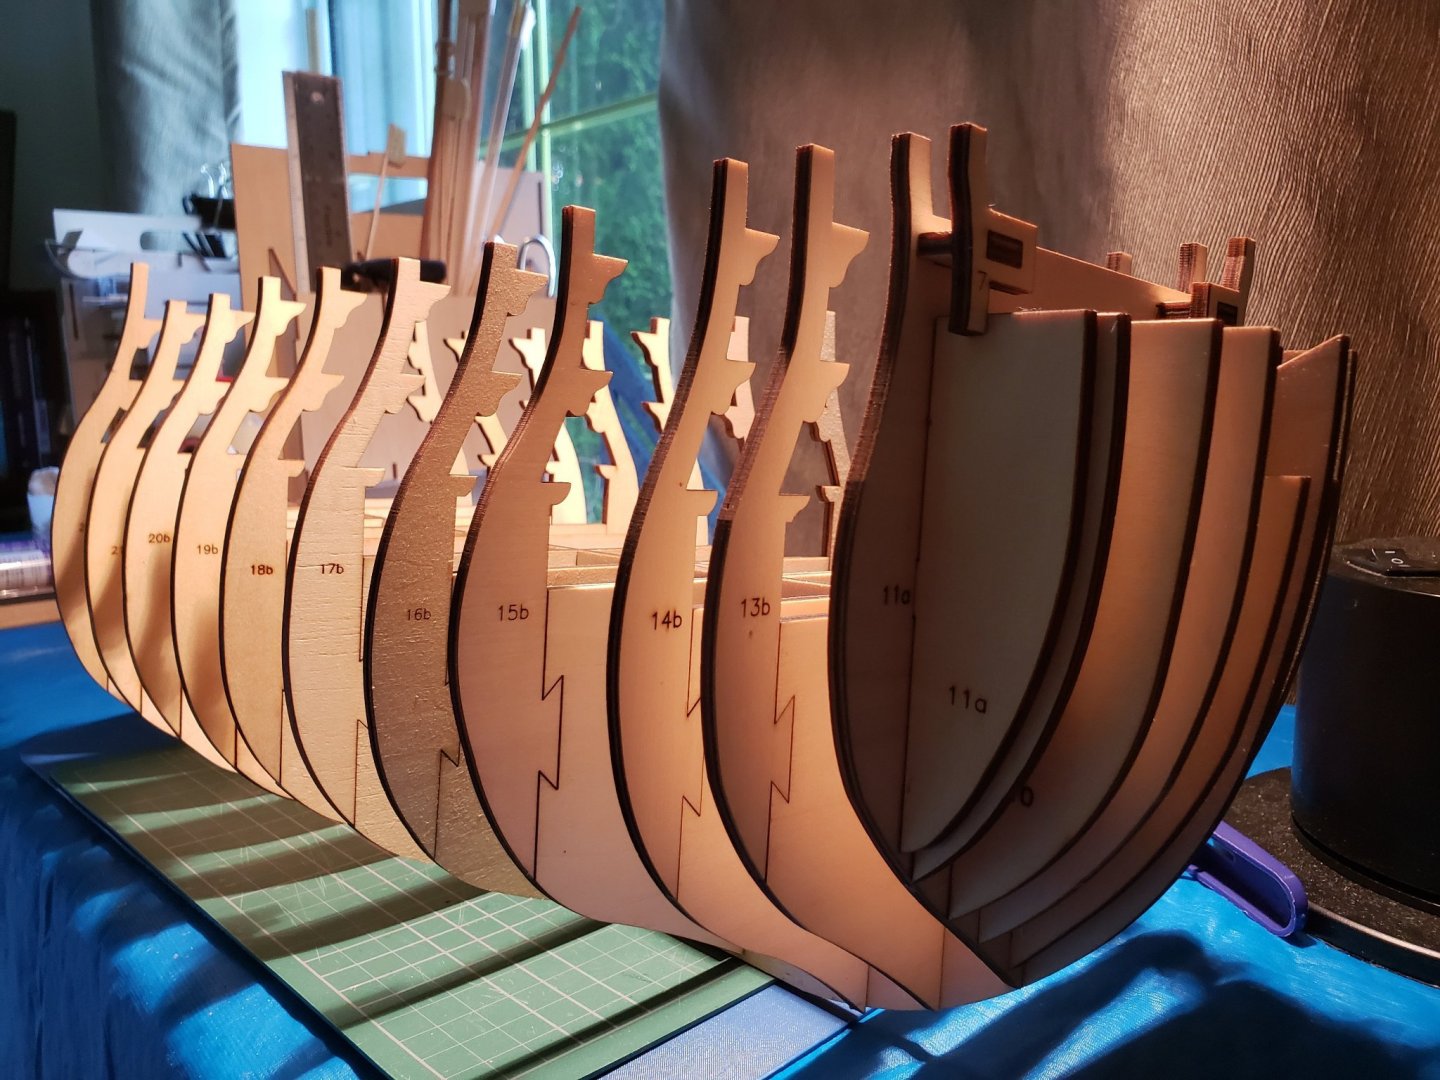
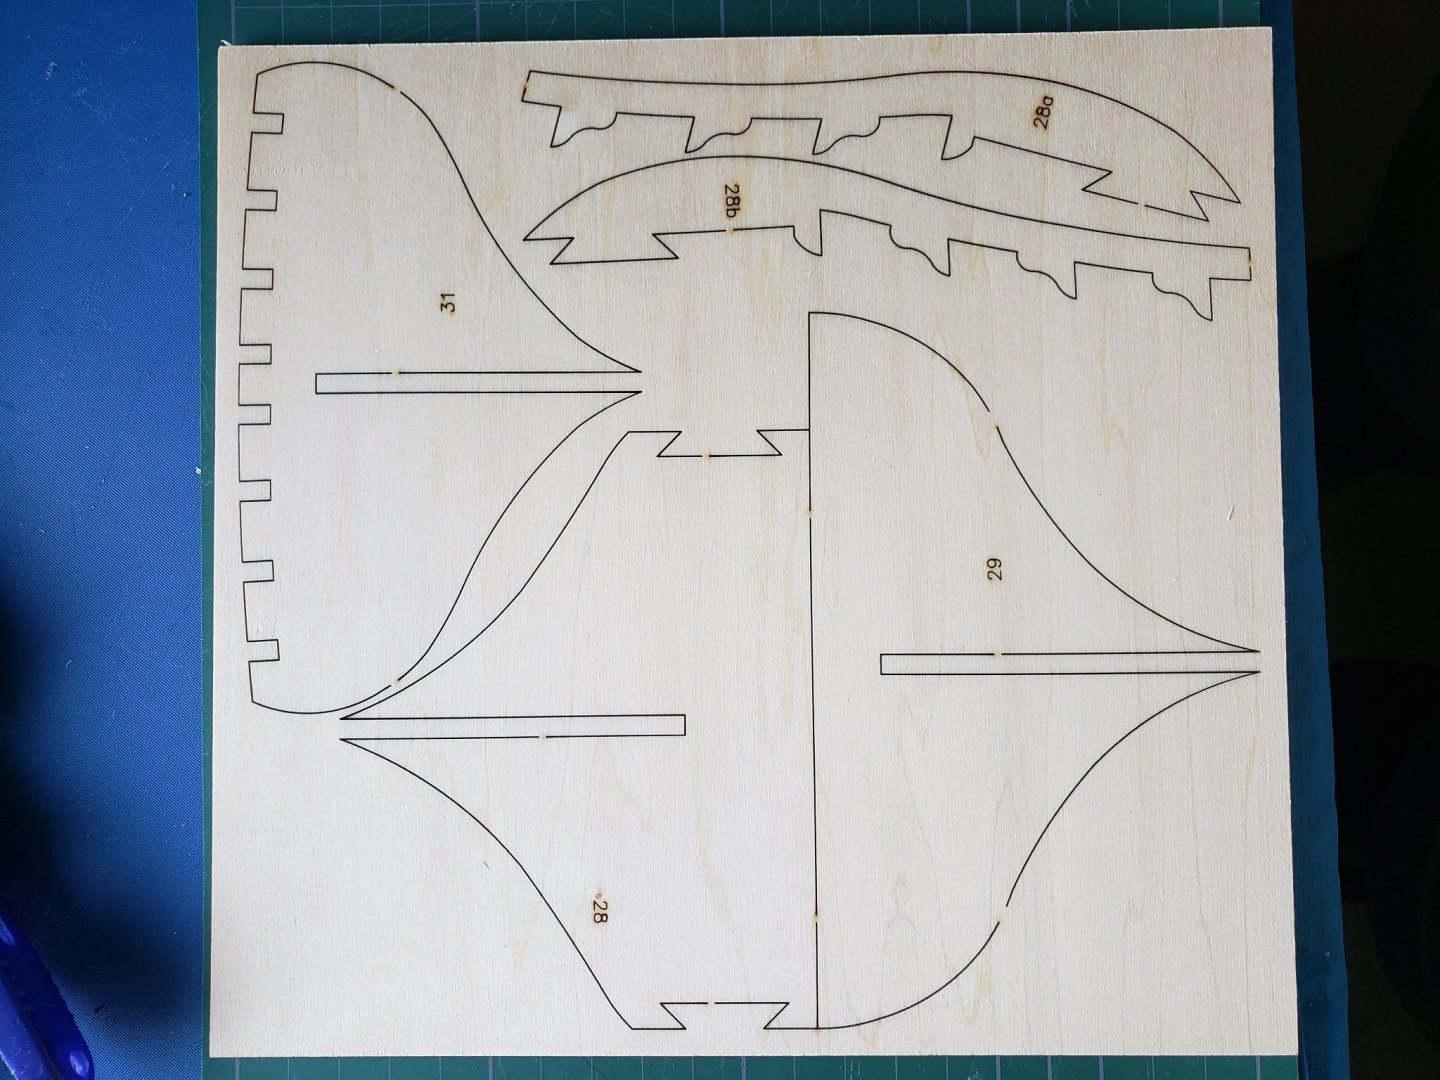
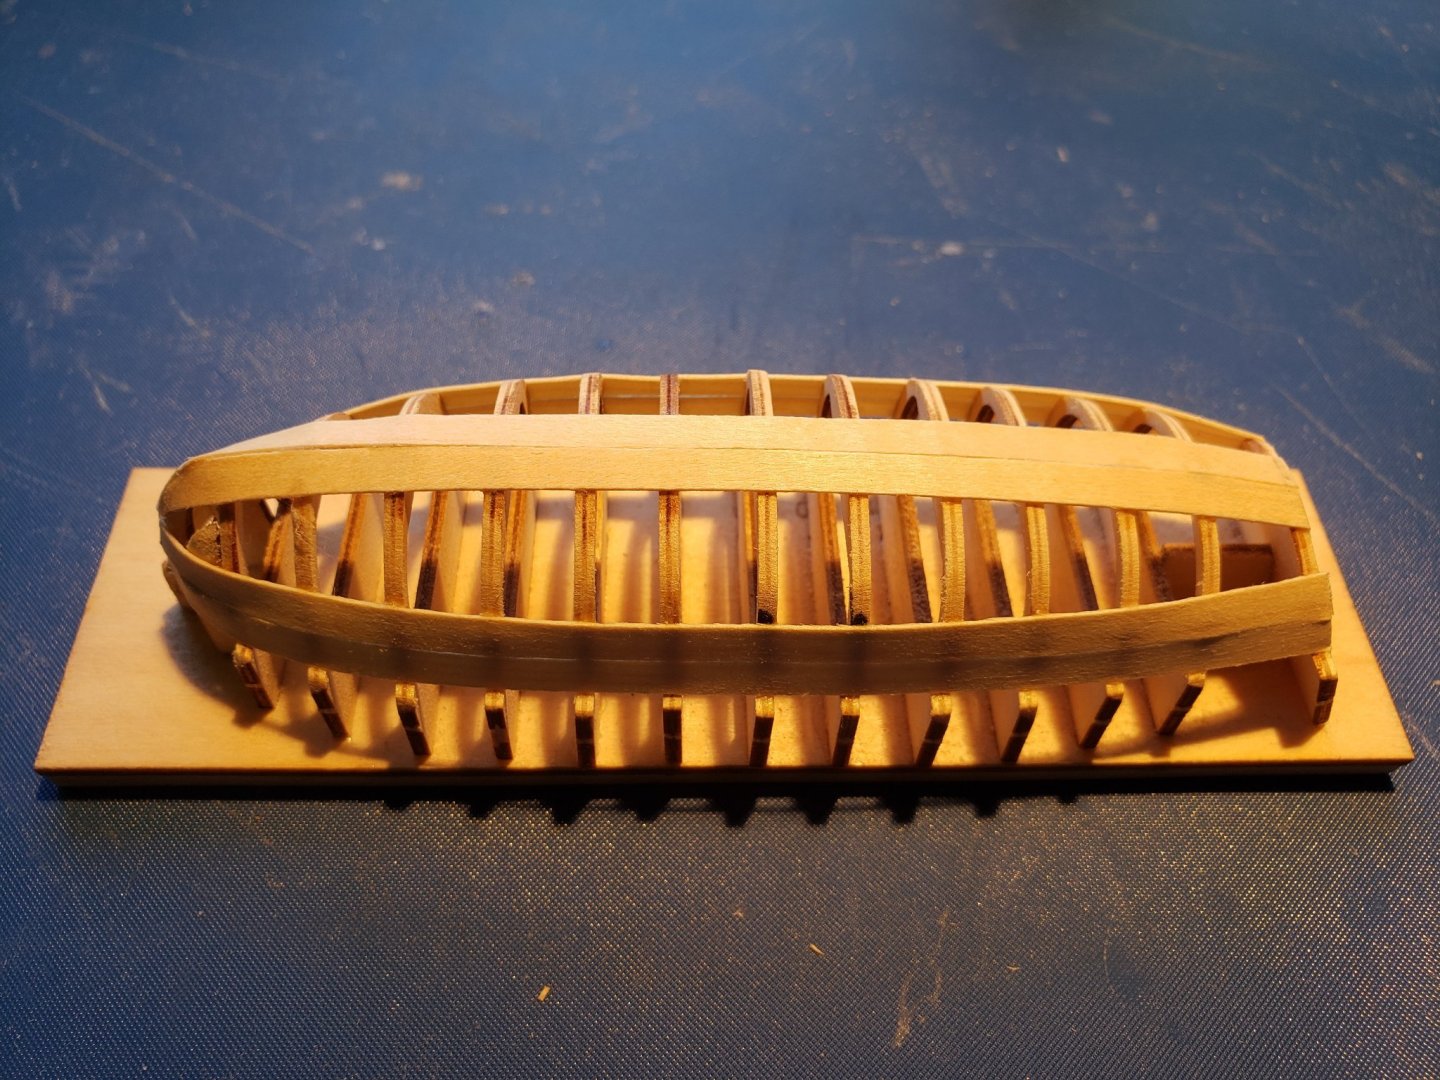
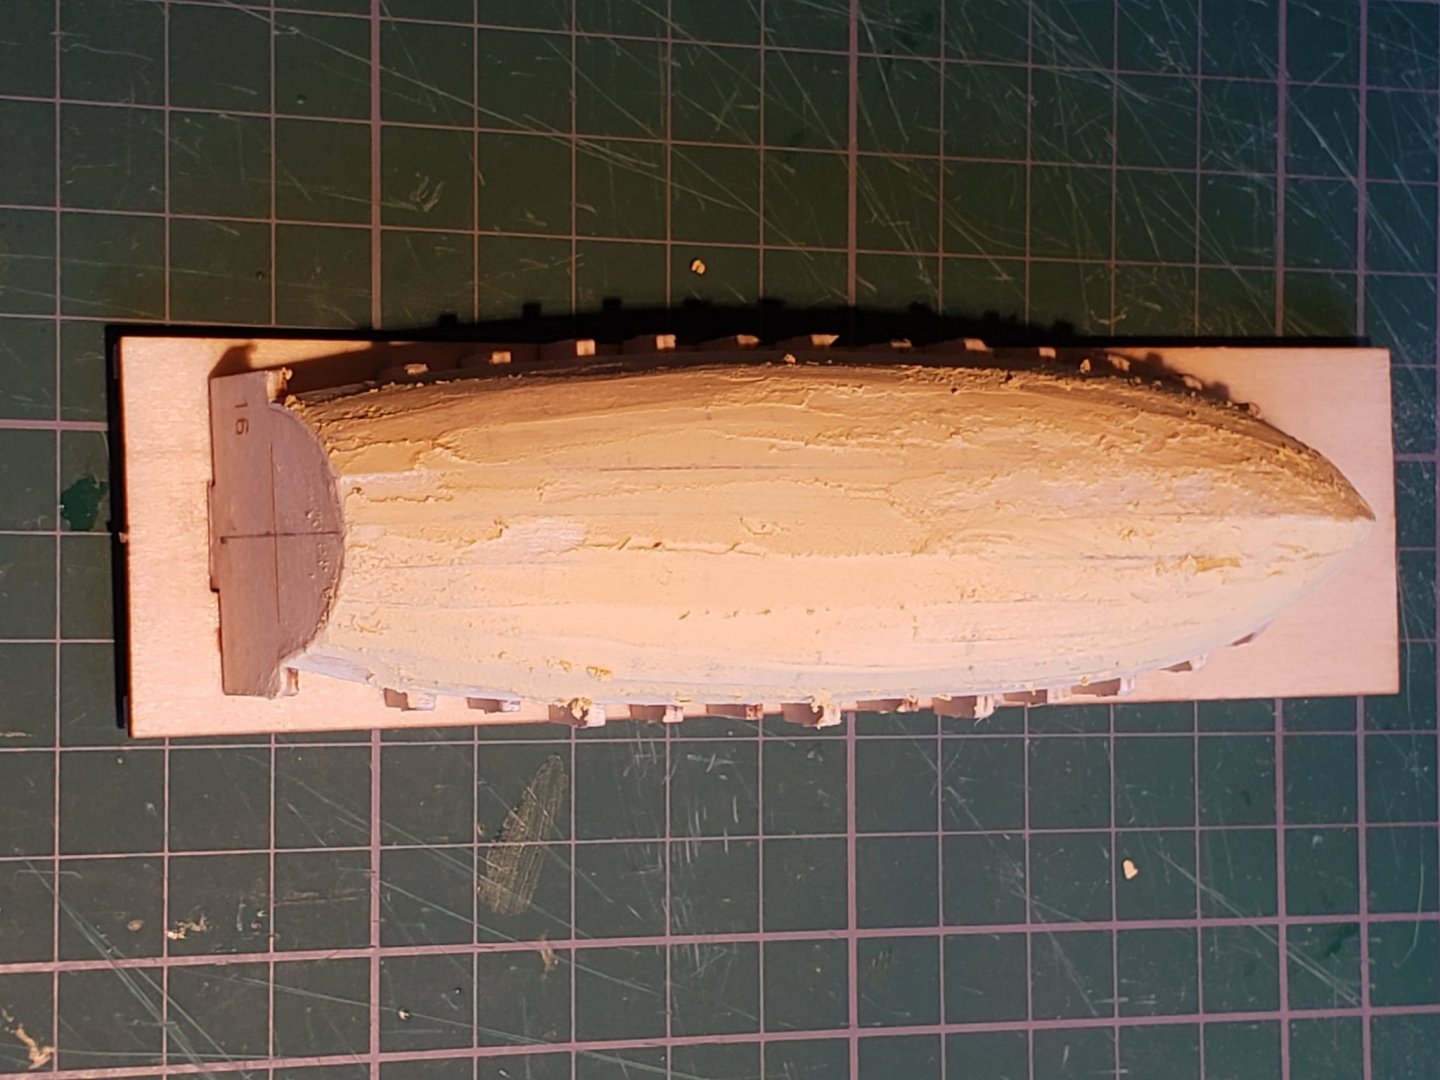
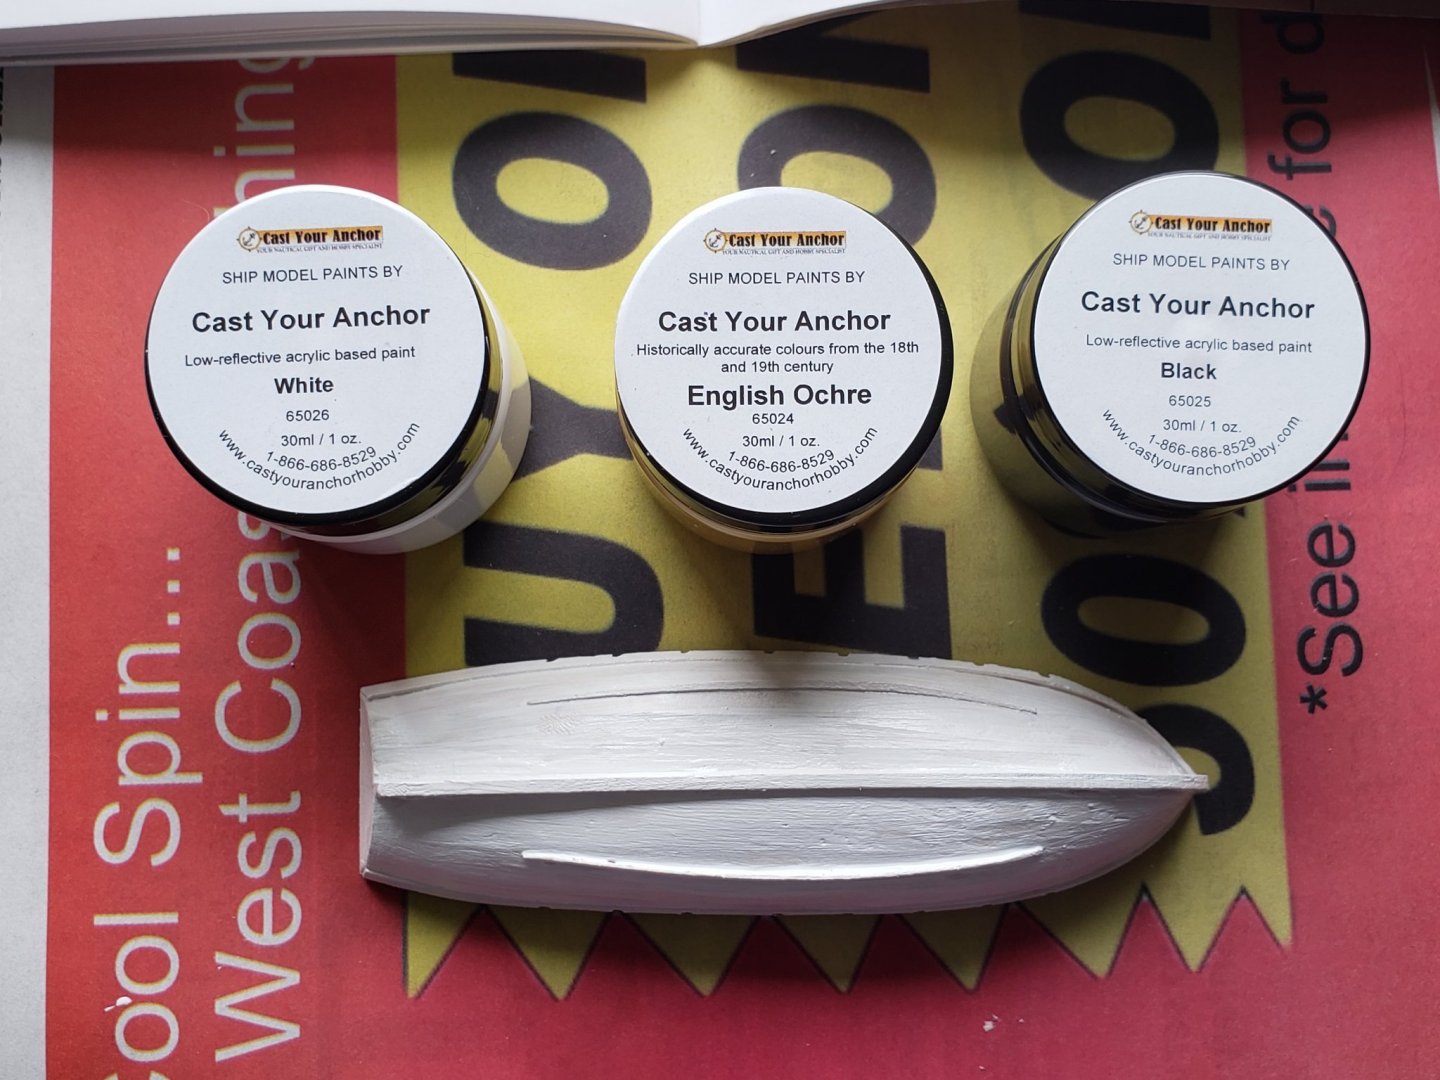
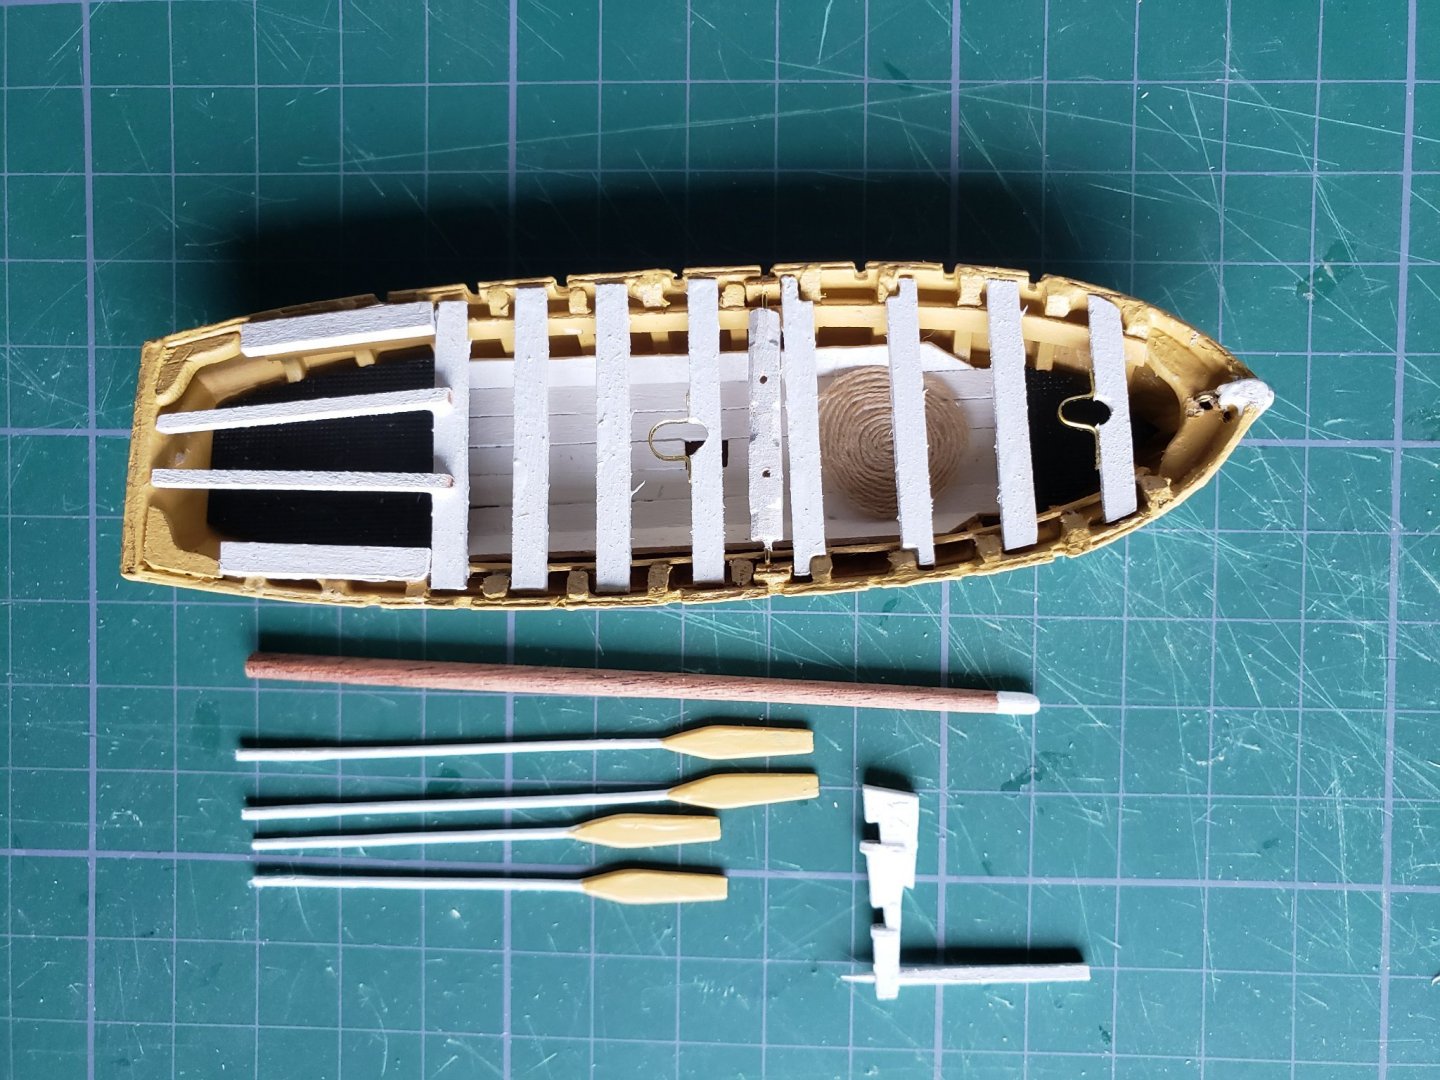
This is my first build log. I was hesitant to post as this is only my second build, and I am not experienced as a wooden ship modeler, but I thought that I could add some information about the DeAgostini version of this popular model. First some general pros and cons: The best thing is the extent and quality of the instructions - 575 pages of very detailed text and photos, backed up with 63 build videos on YouTube. Even as a novice builder (I have only done the Occre Polaris before this), I have found all the work manageable based on the depth of instructions. I can't comment of the historical accuracy of this kit or relate it to other Victory models. I chose to order the kit in 12 installments, and it is worth your while to check each package thoroughly for parts - 7 of the 10 kits were missing parts. To be fair, they do have a 1-800 number where the reported missing parts were always replaced no charge, but as parts were sent from the UK to their North America office where I purchased the kit from, a delay of 3-4 weeks was common. I have spent the past 10 months working on the kit, so I will post with dates as I progressed until where I am today. On to the build itself. August 2020 Initial parts were nicely packaged, but they soon lost interest in that and sent parts in plastic bags. Most plywood parts were fine, but one bow structure was warped. I used a steam iron on high with some damp towels to flatten the part and pressed it with weights for several days which solved the problem. Later I read about plywood delamination issues - luckily I didn't know about that possibility before I started the process! Parts were cleanly cut with minimal charring, and the early stages were certainly the most satisfying, as assembling the keel and ribs went very quickly. The next steps (perhaps intended to break up the stages of the build) was a mini build in itself constructing one of Victory's launches, which was challenging on its own. A jig was provided to attach the frames to, and then after fairing the frames, a single layer of thin planking was done. After that the usual filling and gentle sanding and then the boat is cut out of the jig and painting started. Duckboards, oars, a windlass, rudder, seats and mast were then prepared and the launch is done to be put aside until the end of the build. I'll continue to post more of the build next time. Thanks for reading - I know that there are lots of mistakes in the build as I am learning as I go!


- 59 replies
-
- 5
-
-
- DeAgostini
- Victory
- (and 1 more)