HOLIDAY DONATION DRIVE - SUPPORT MSW - DO YOUR PART TO KEEP THIS GREAT FORUM GOING!
×


Cpt_Haddock
-
Posts
85 -
Joined
-
Last visited
Content Type
Profiles
Forums
Gallery
Events
Everything posted by Cpt_Haddock
-
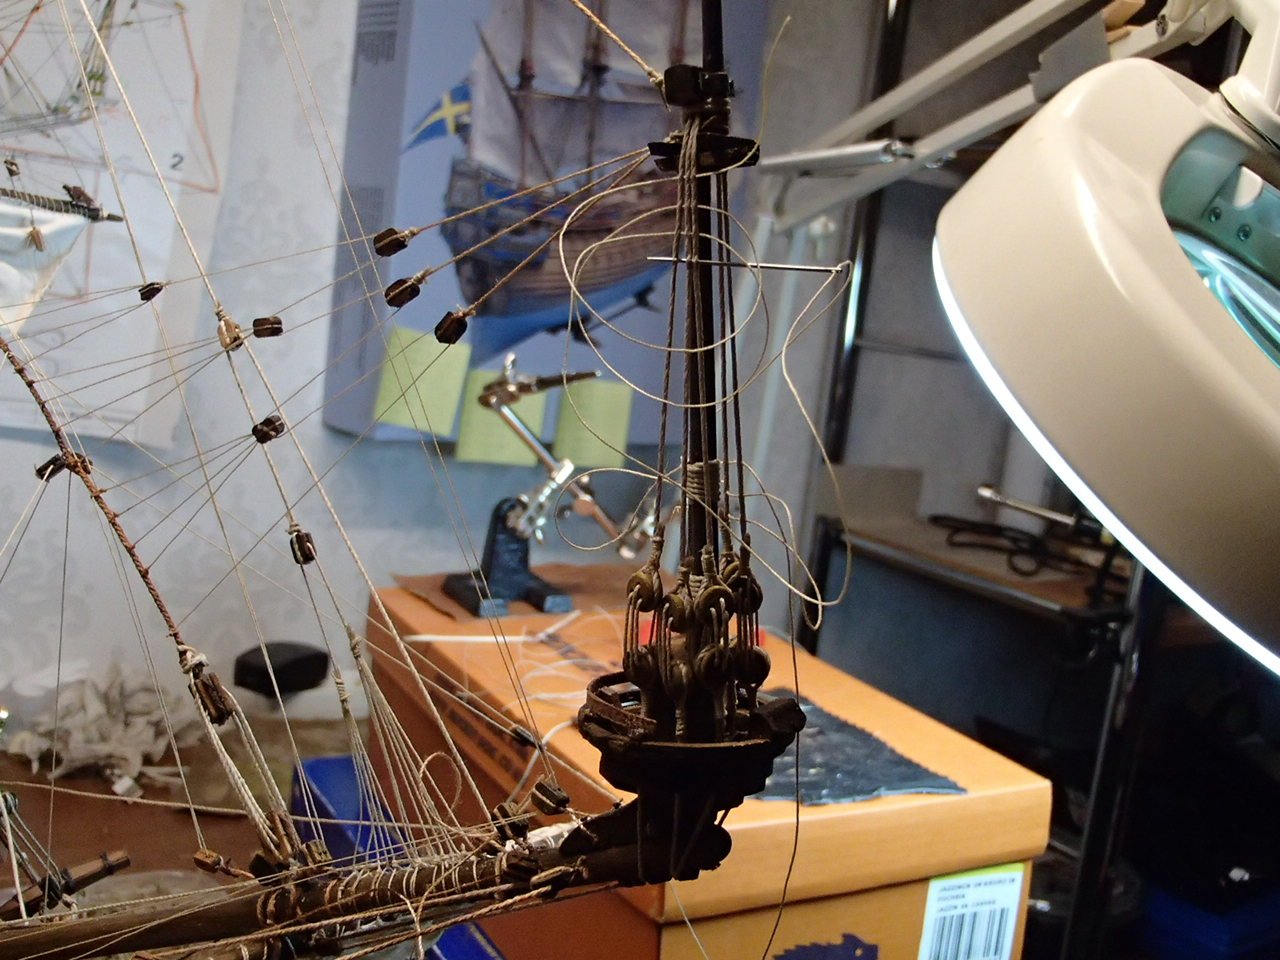
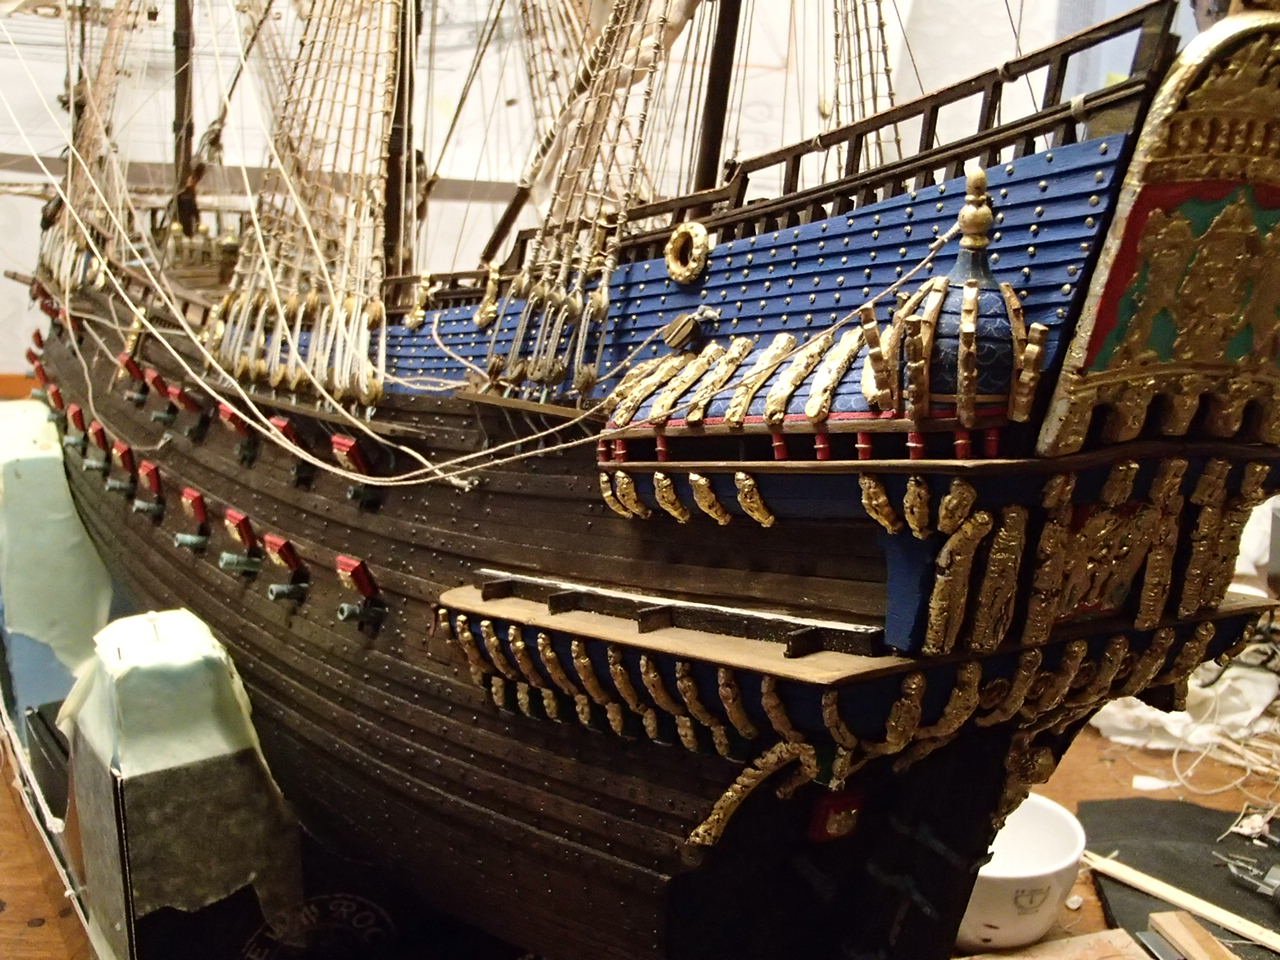
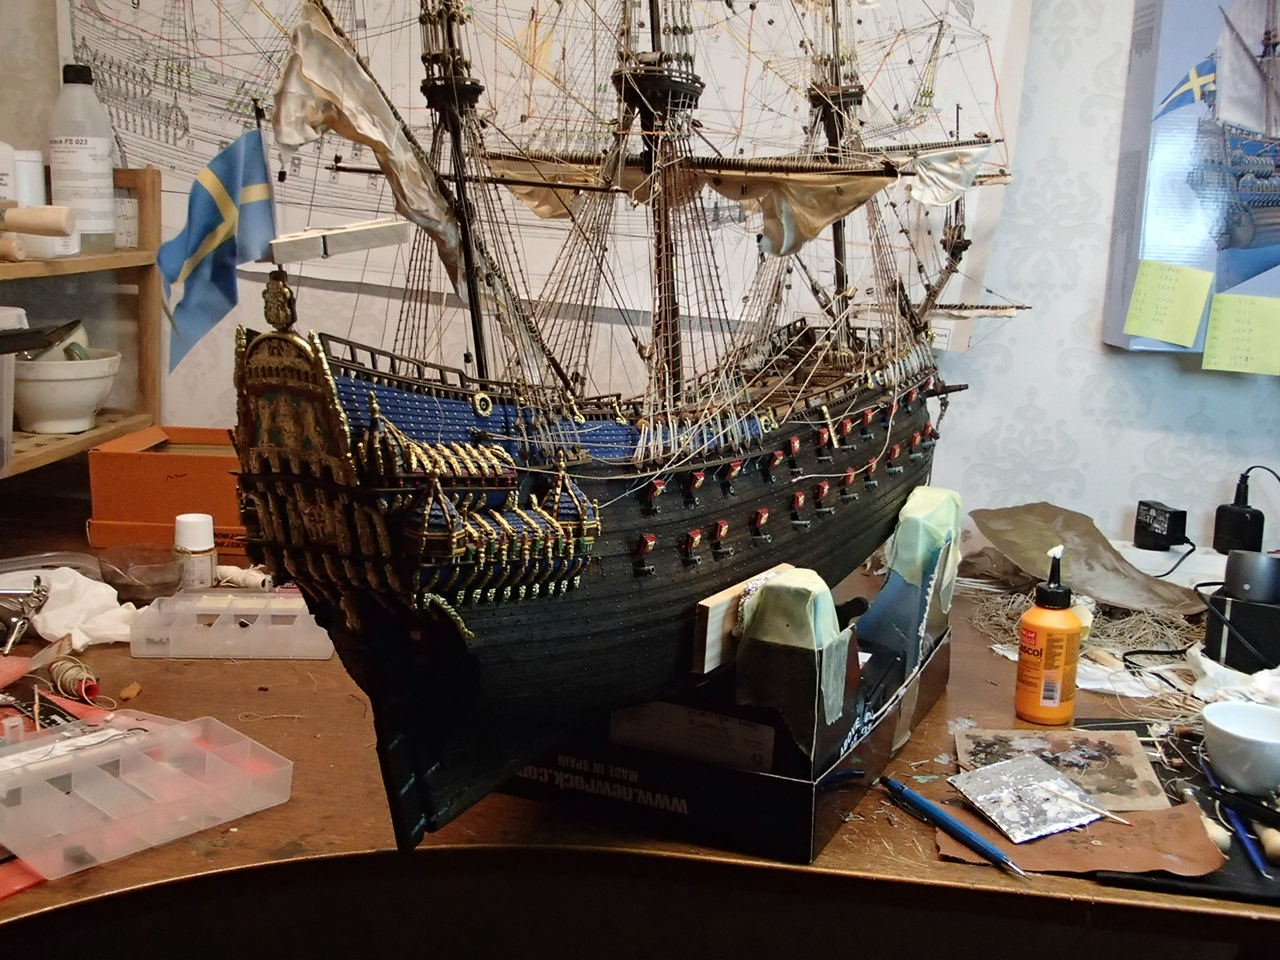
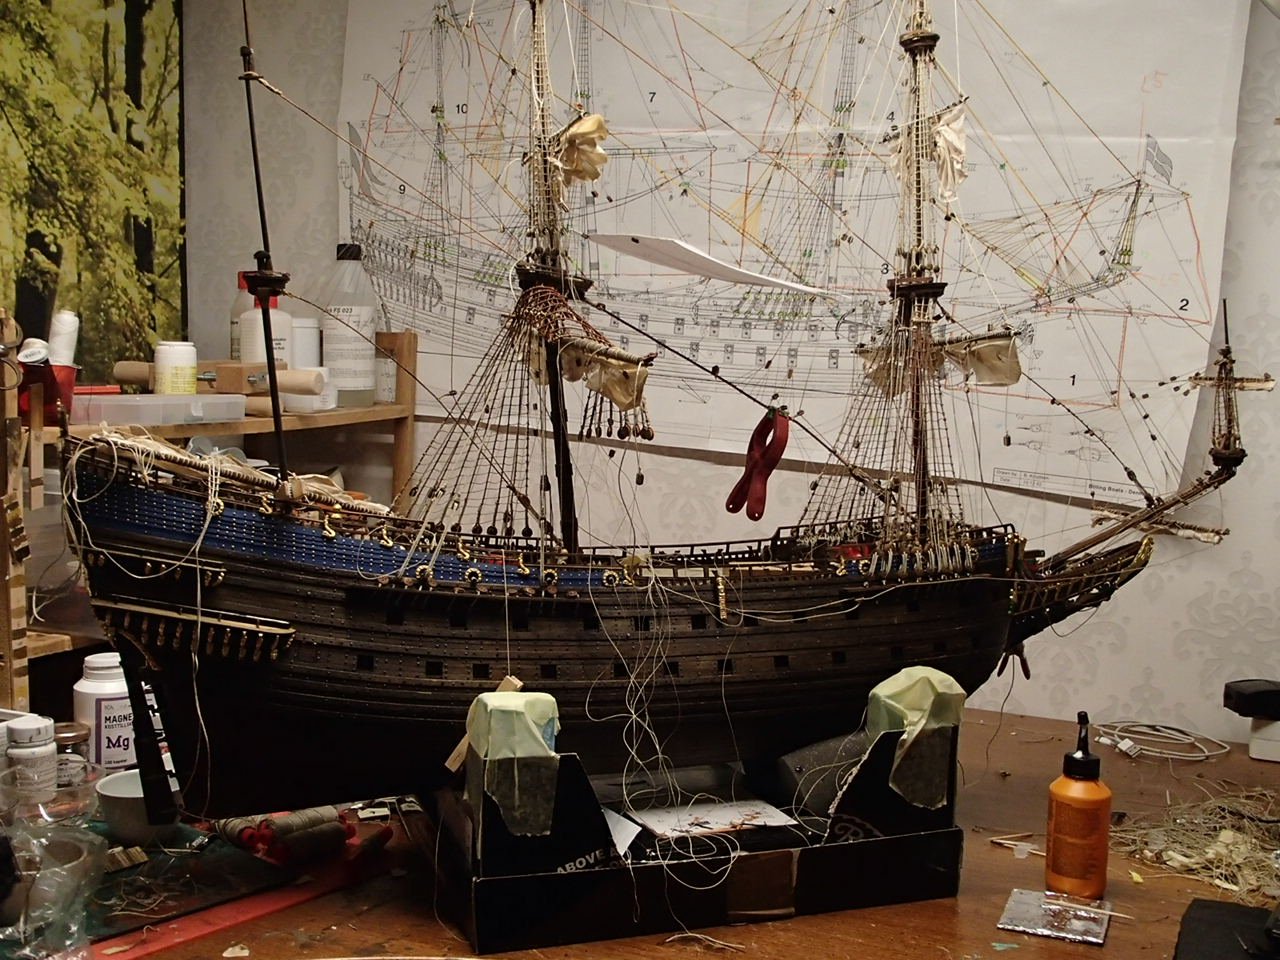
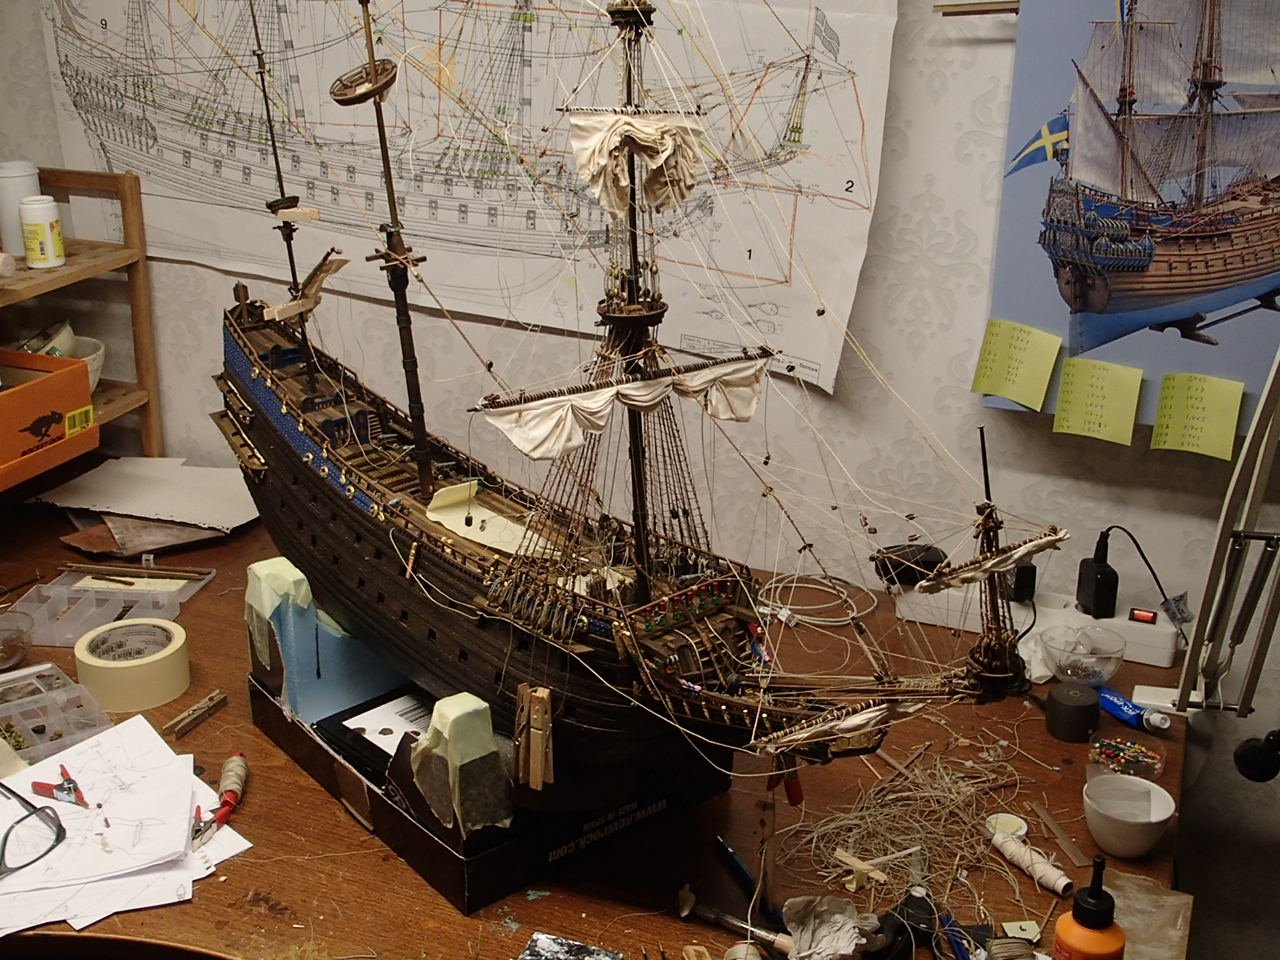
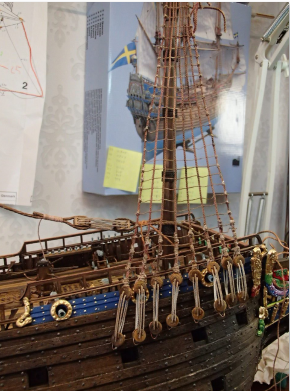
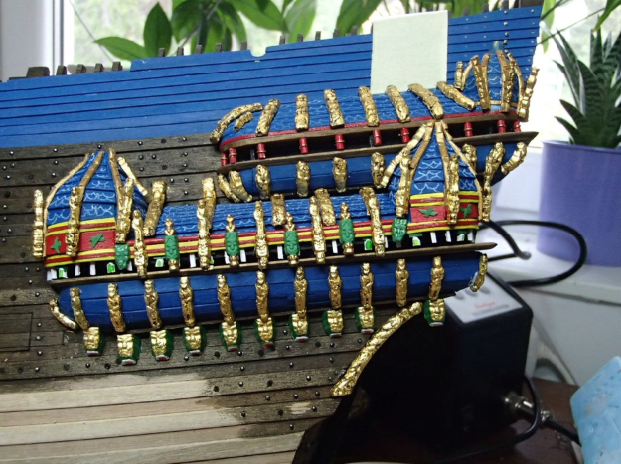
Some final pictures of the build - only acrylic showcase left to build - seem every other facility bought plexiglas for Covid-19 protection nowadays.
-
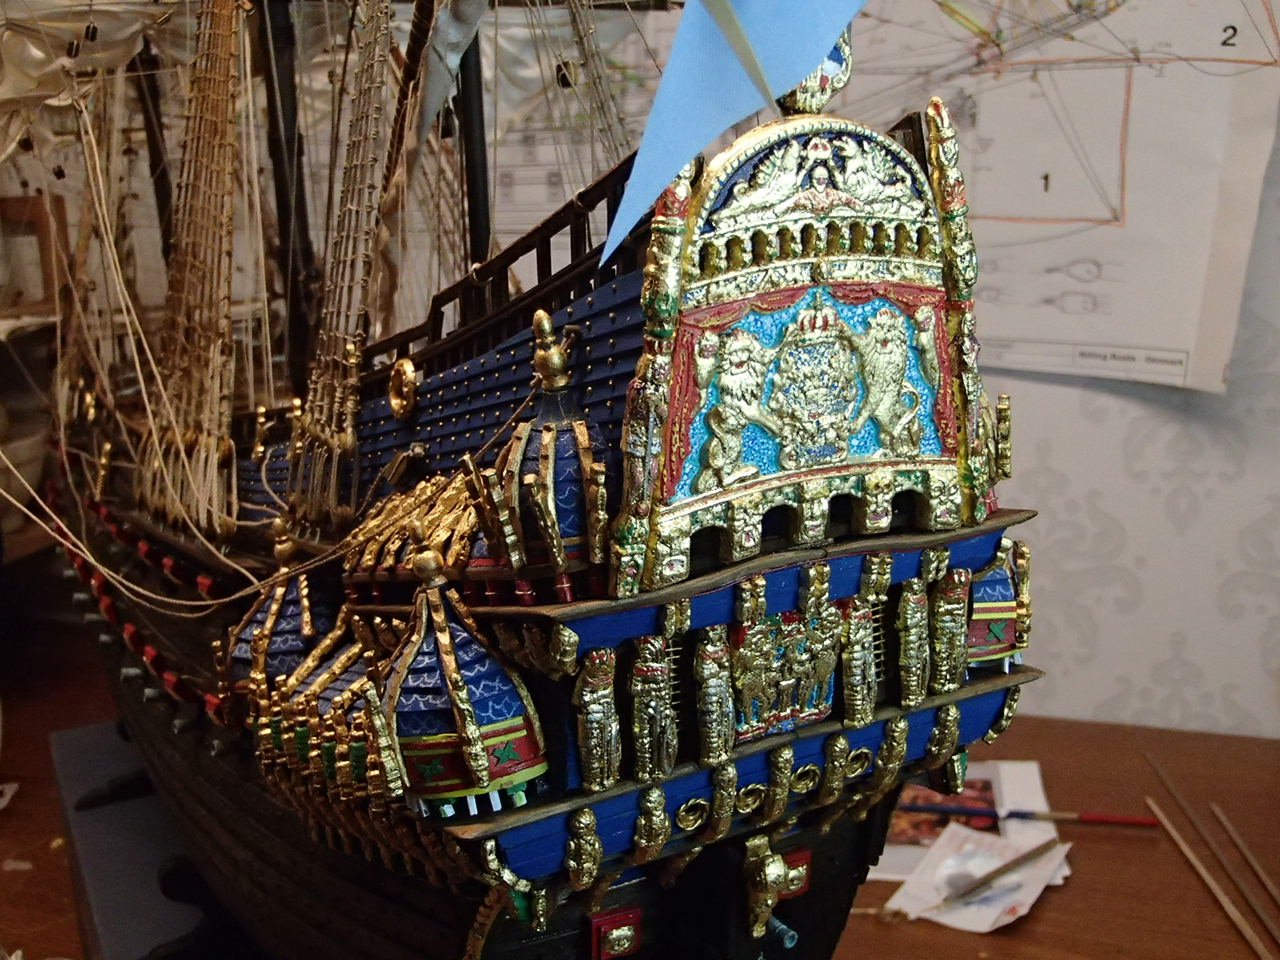
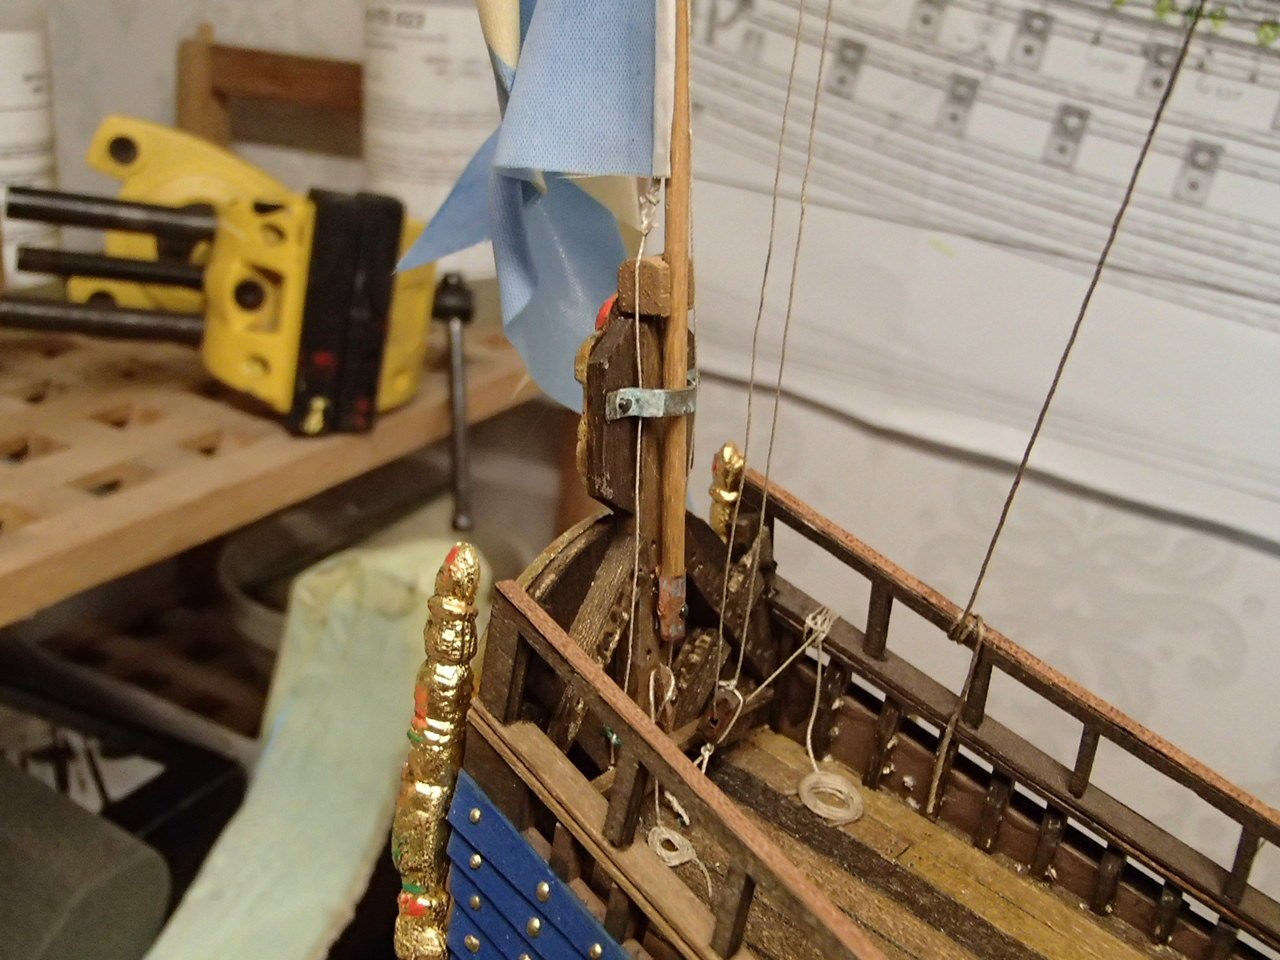
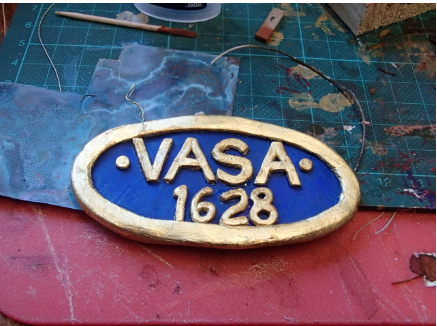
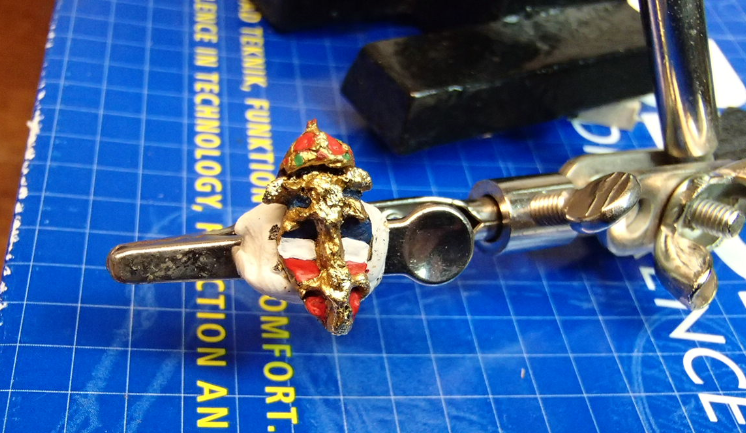
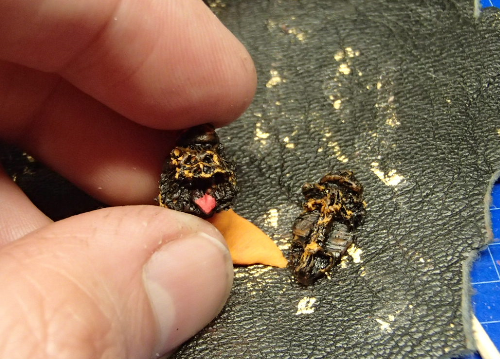
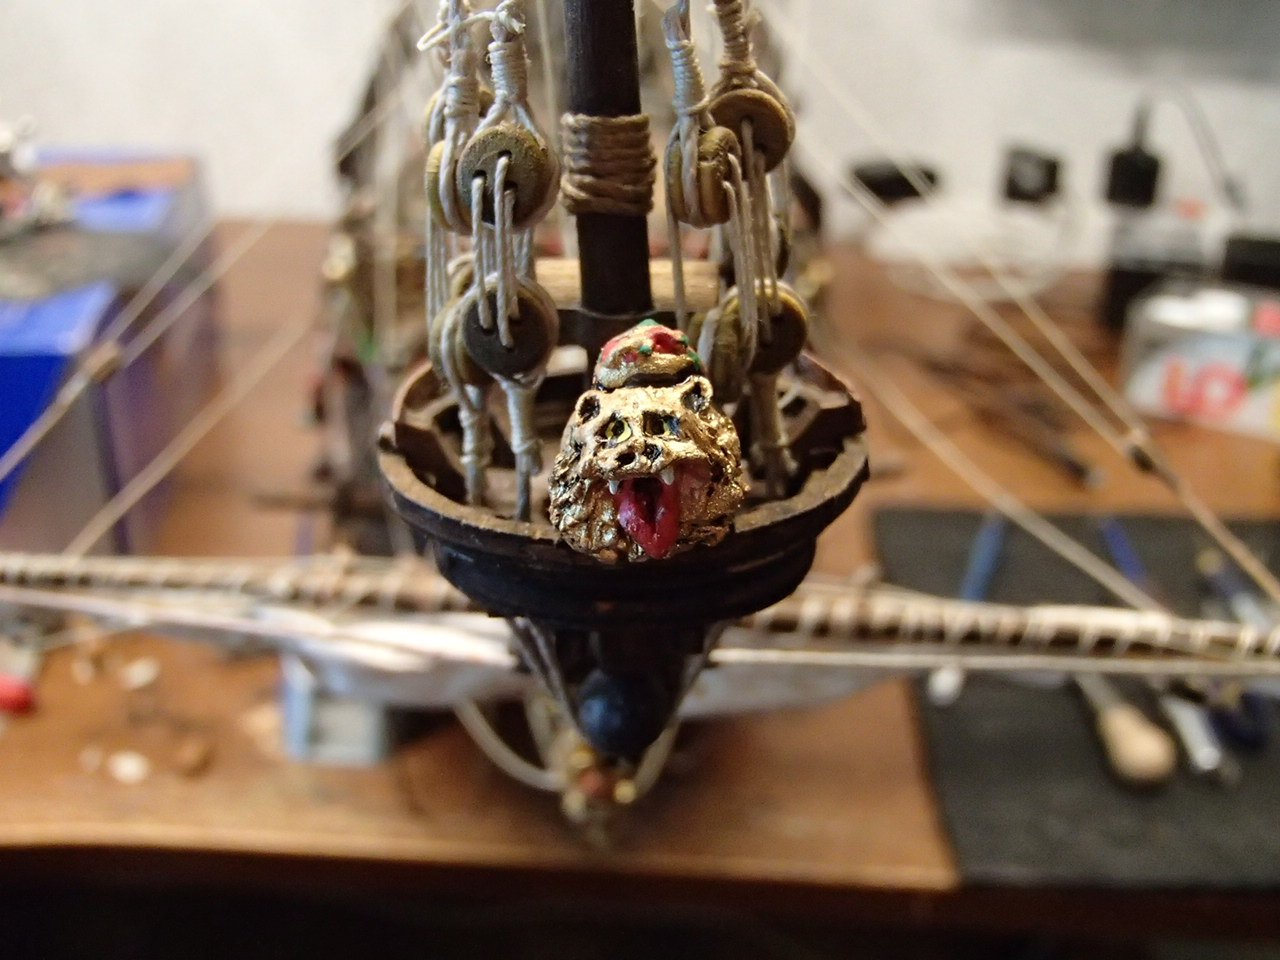
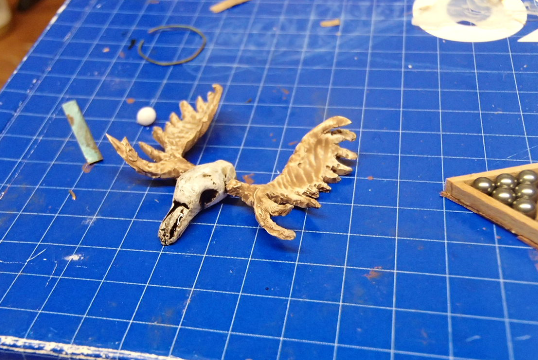
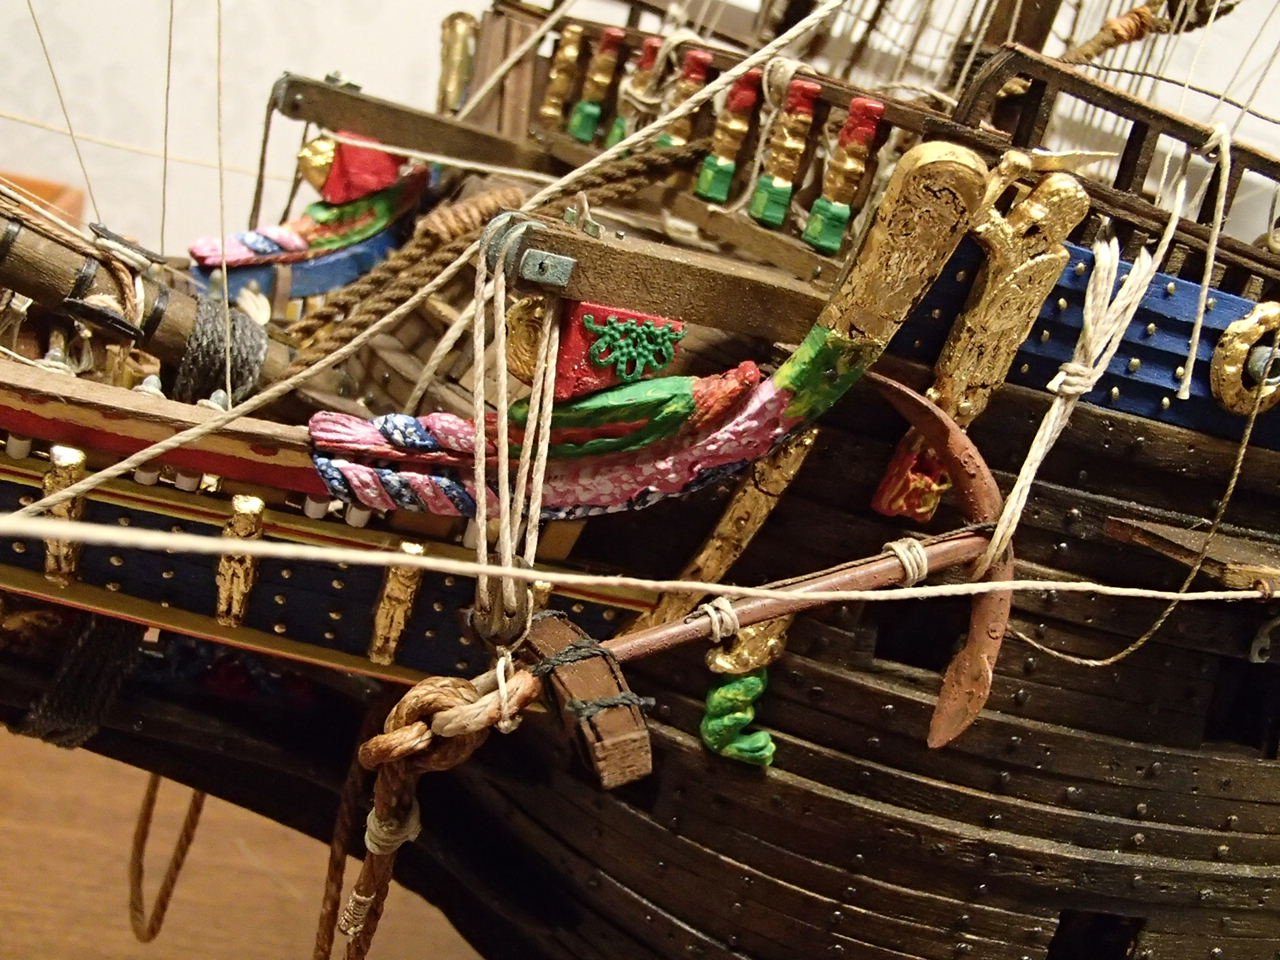
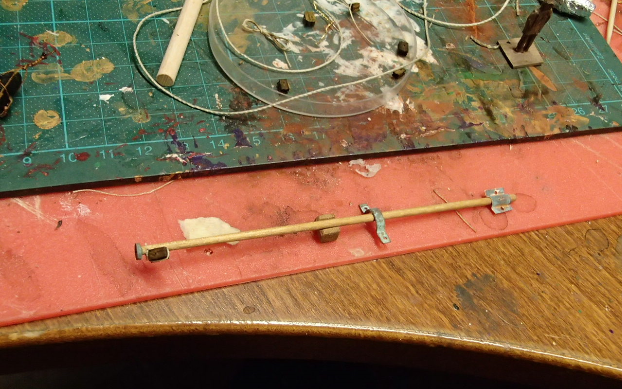
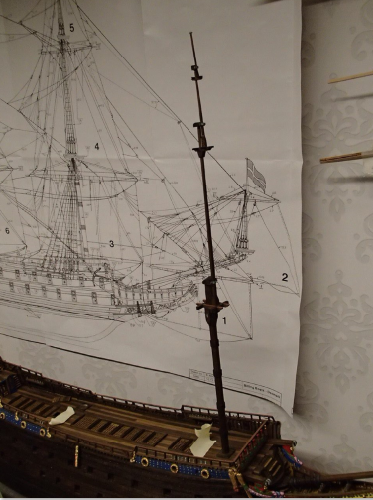
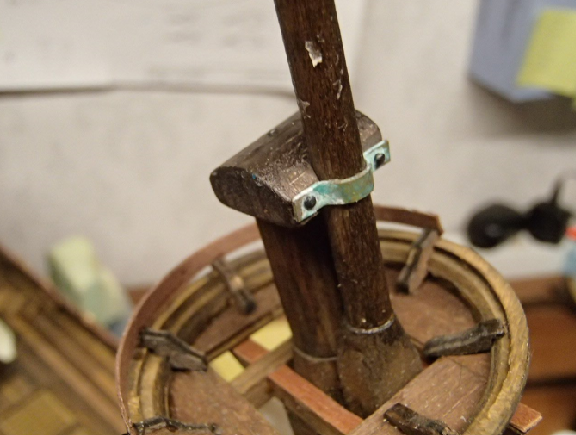
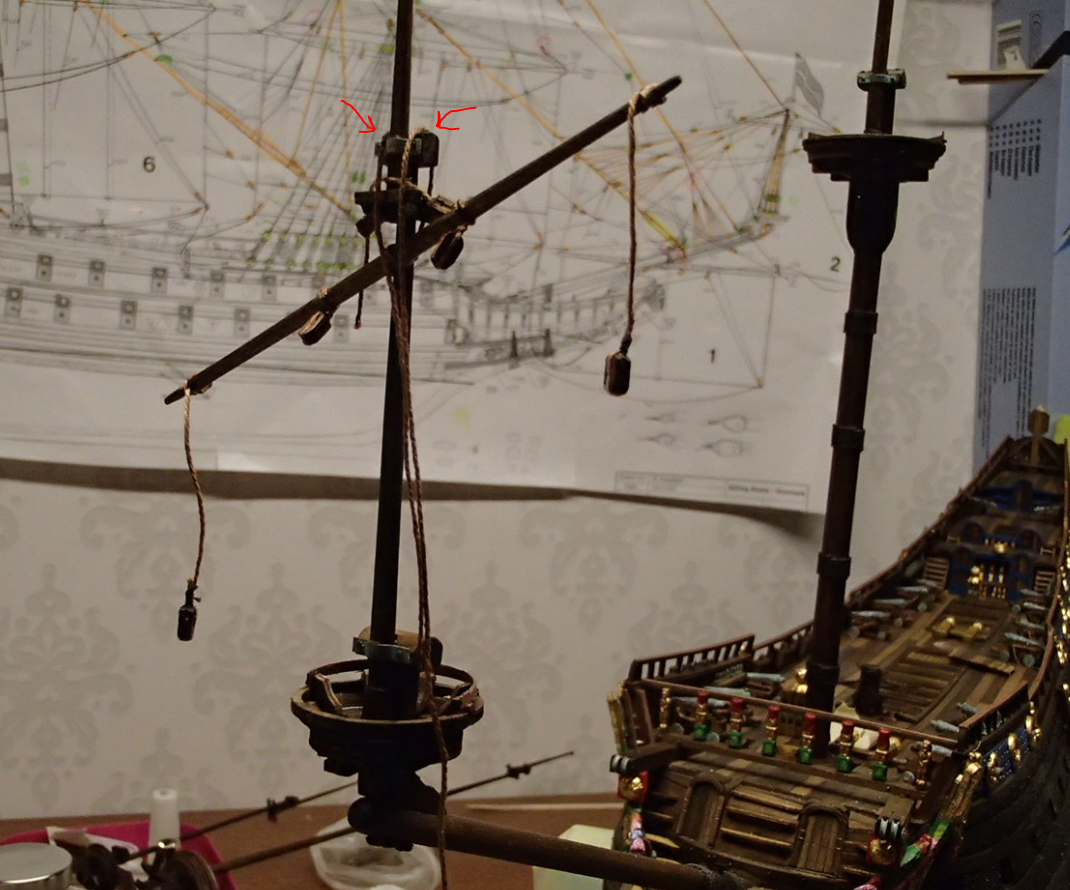
With the experience from doing all the mast I removed the old bowsprit mast and created a new with a small brass wire to stiffen up the mast to correlate the force pulling it backwards. New nicer hemp yarn - Amati rigging thread (bought all from Cornwall model boats) instead of Billing boat kits cotton. Made the plaque out of modelling clay. As well as the weapon shield held by the lion figure head together with an extra lion at the very front of the bowsprit. Could not resist making a moose horn to make the main mast more ornate.
-
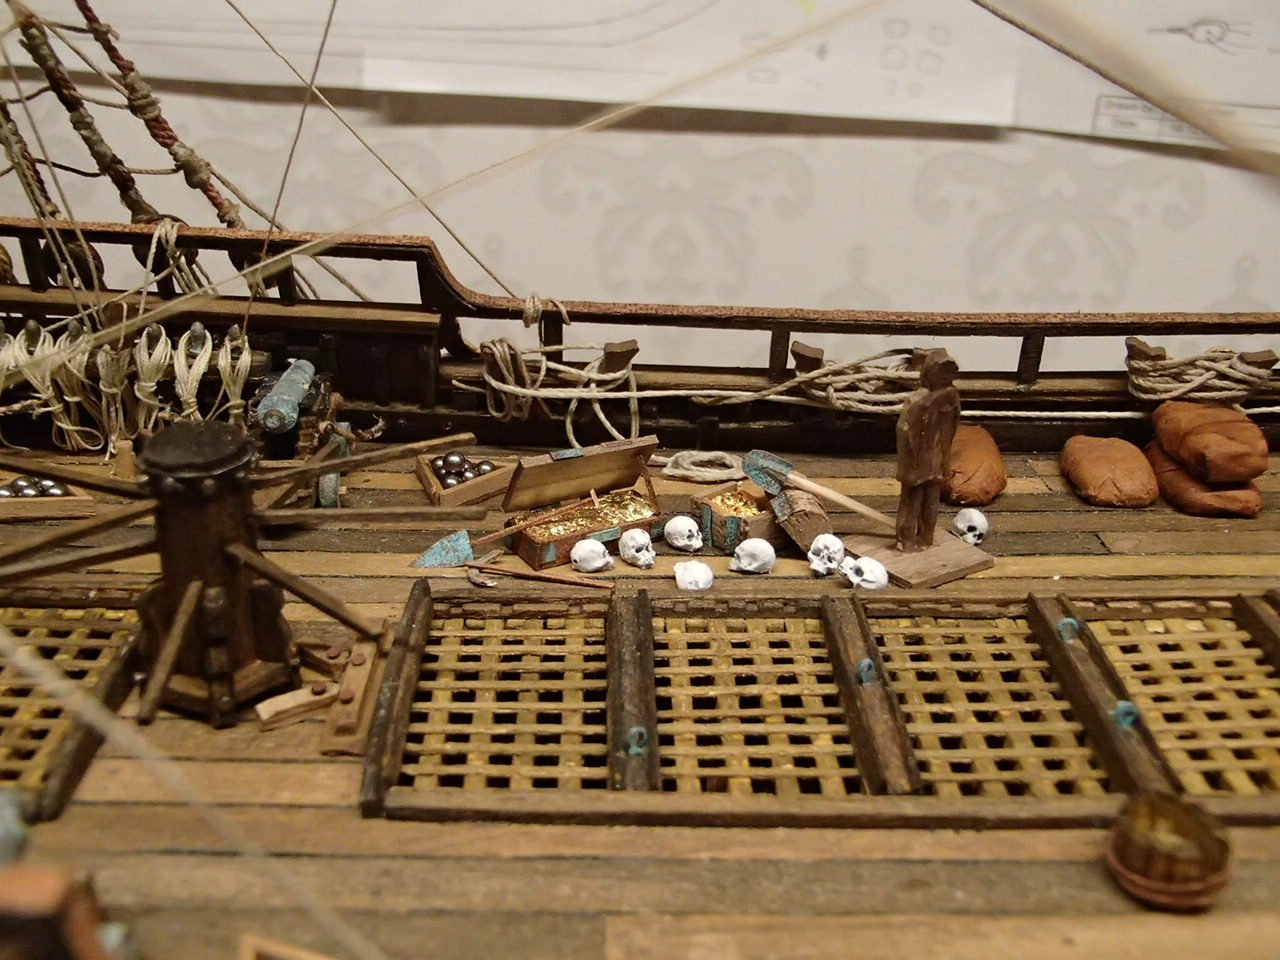
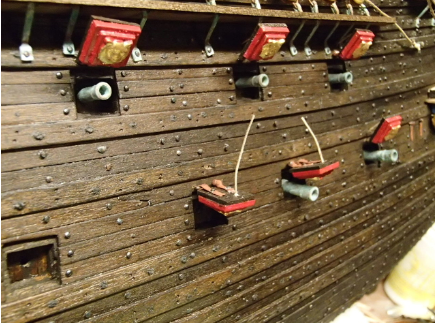
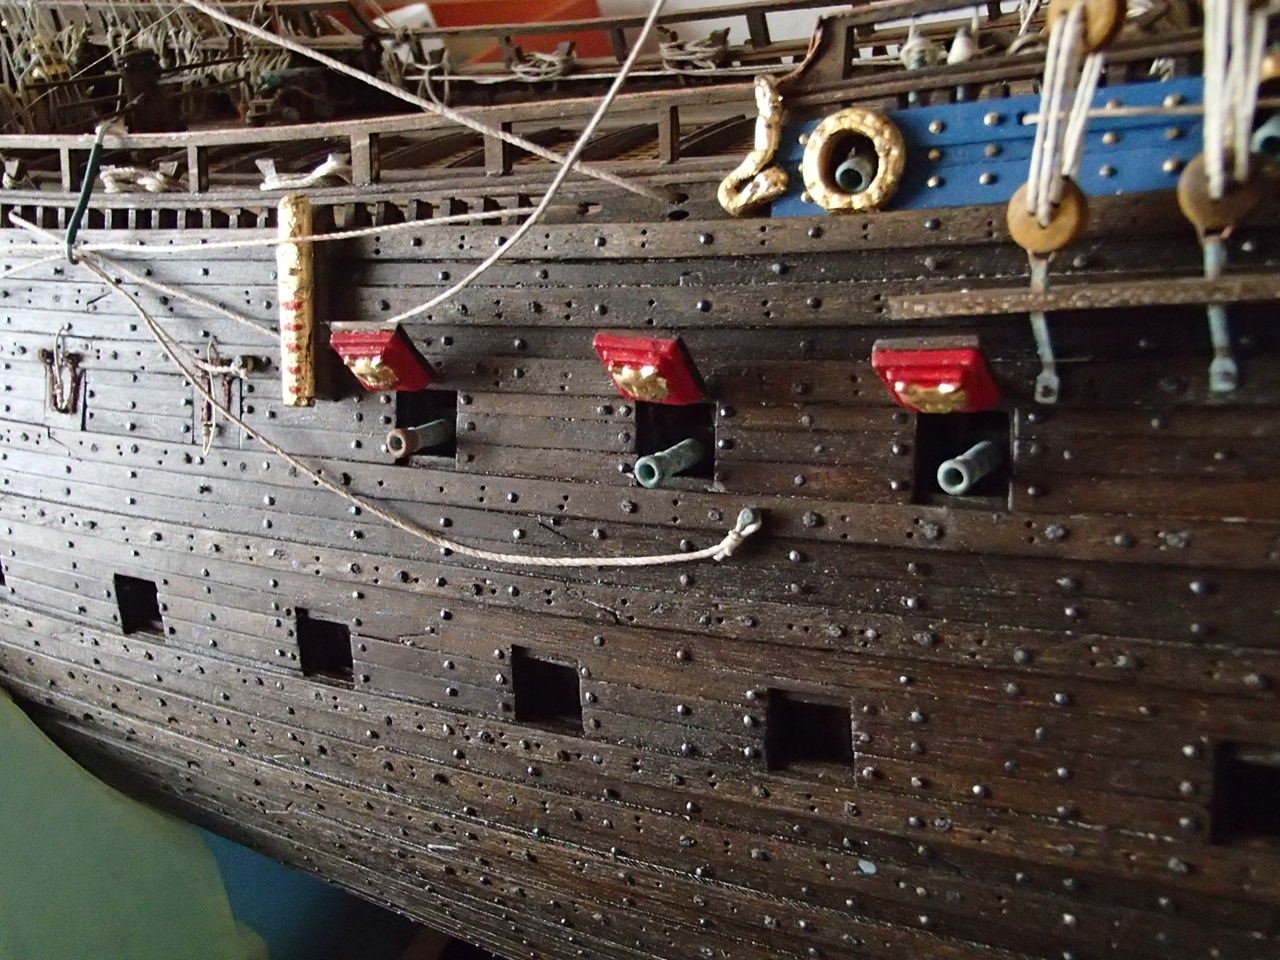
Added only the upper rope and skipped the sometime used lower rope (for closing the port). Maybe I should have reduced the thickness (plastic part of the lids). The rope and hinges - to bad they are only seen when the port is closed. Finally all ports done. Time to glue the balcony platforms. All flags mounted and only some small things left - add some deck fillers - barrels, bags and cannon balls - redo the whole bowsprit (the mast is leaning backwards) - add a "Vasa 1628" plate to the stand
-
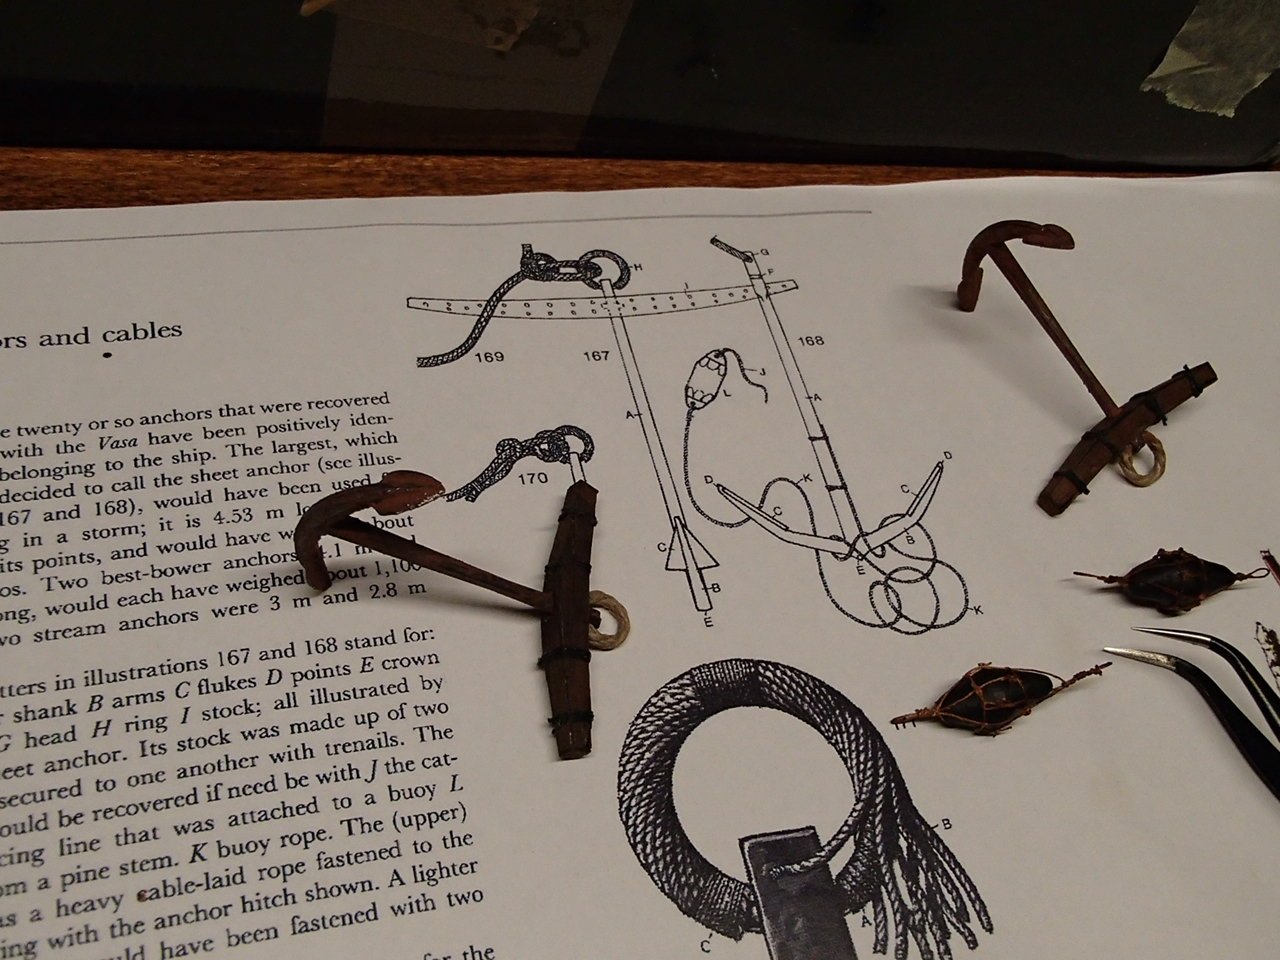
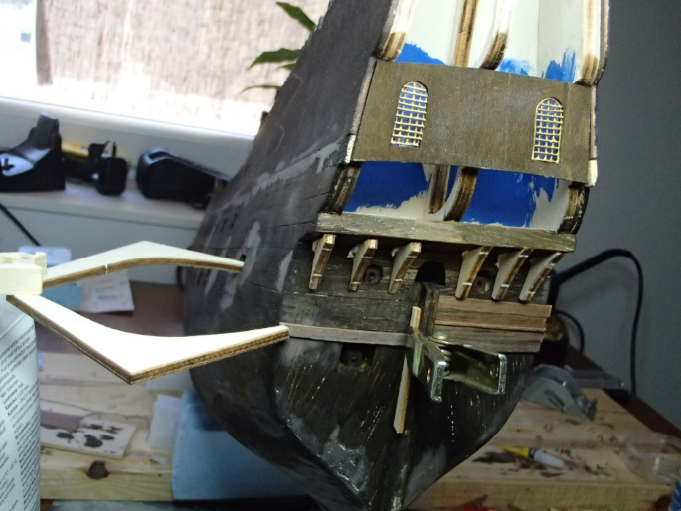
Mounting the anchor and preparing all the cannon ports in aluminum.
-
Decided to skip the lantern at the rear and only have a flagpole (with the big flag): The mizzen mast with multiple ropes. A bit clay for the anchor float ball
-
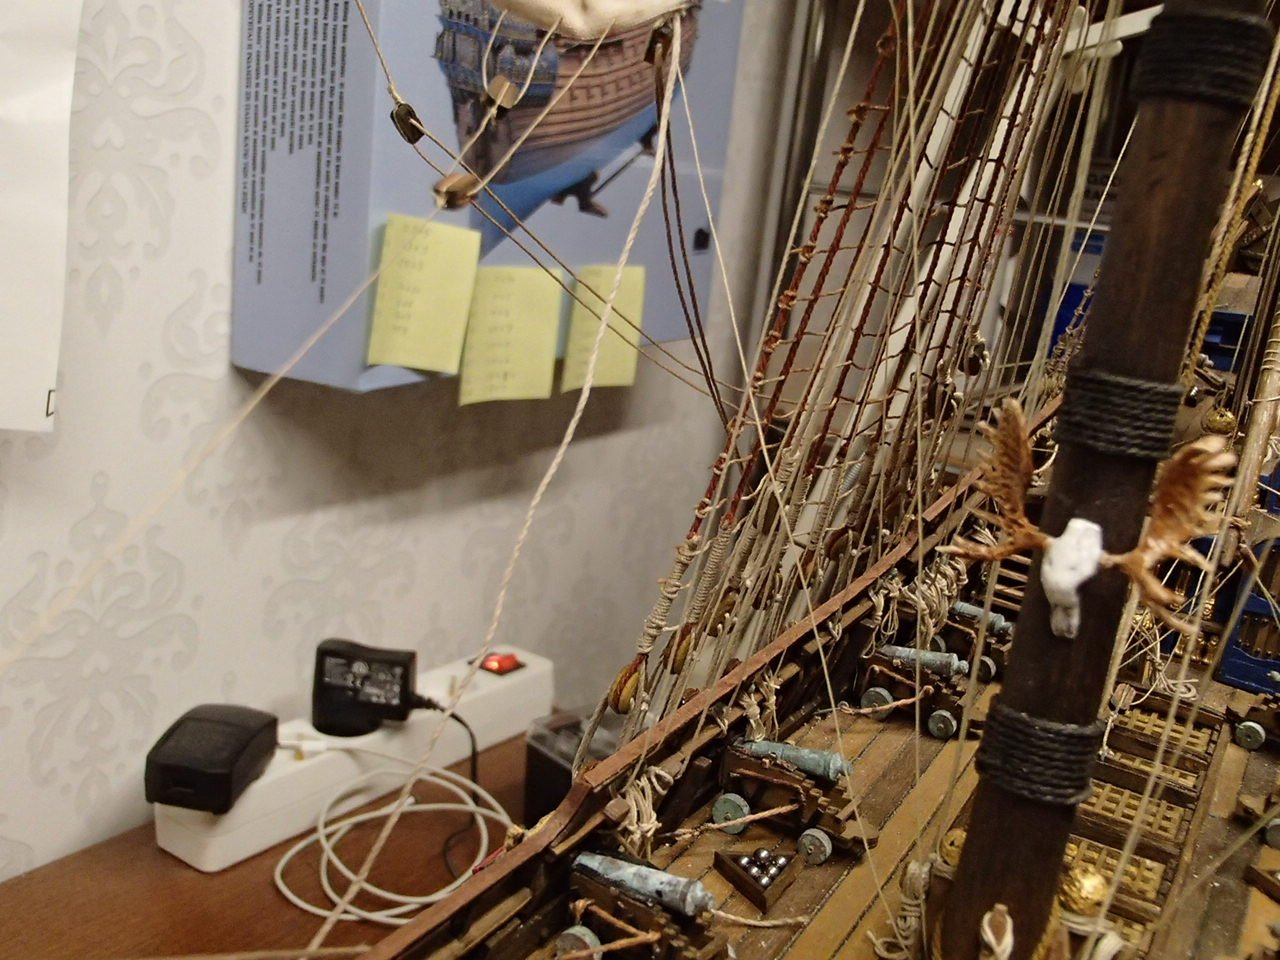
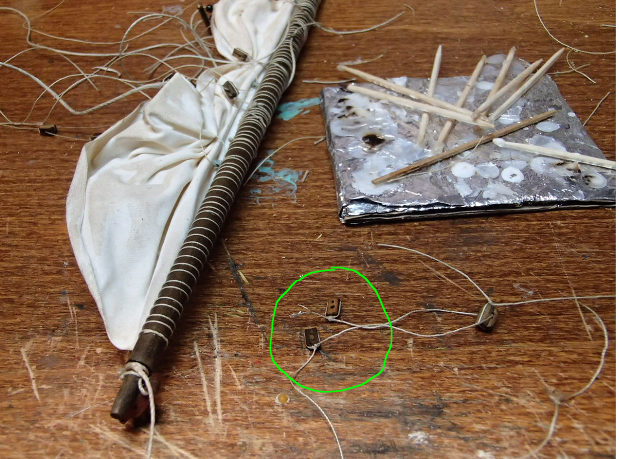
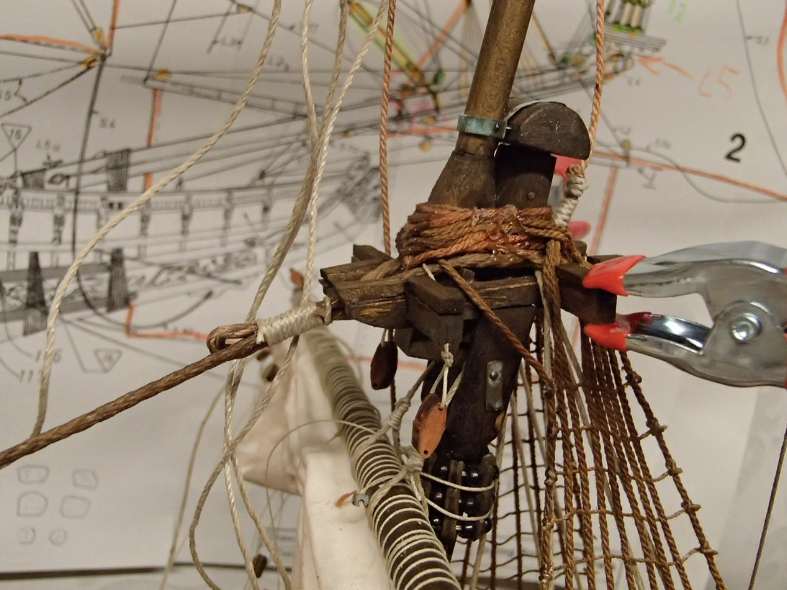
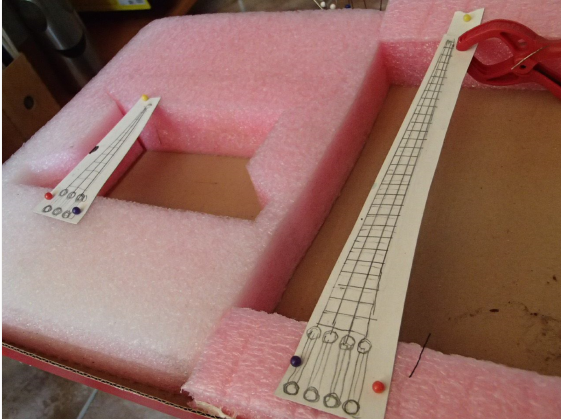
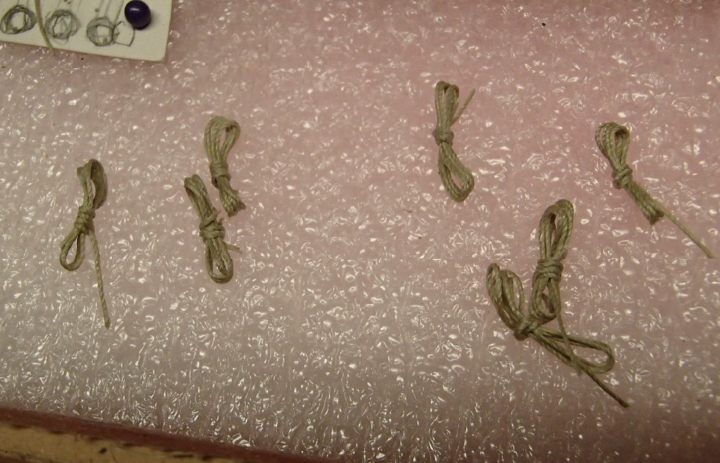
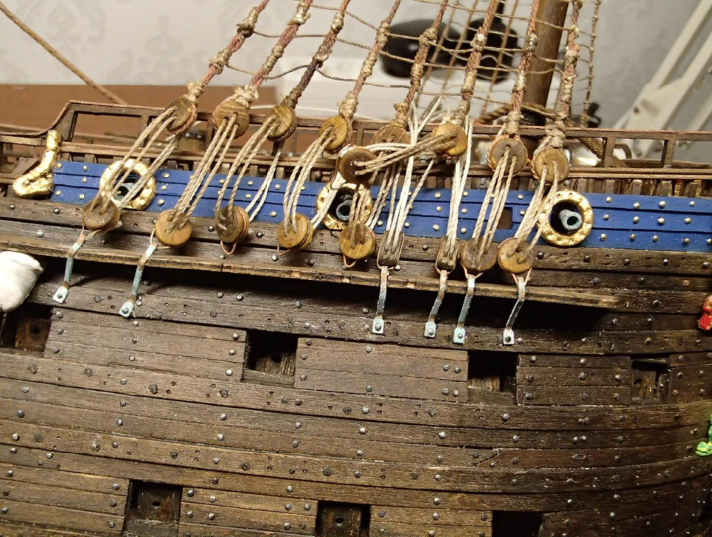
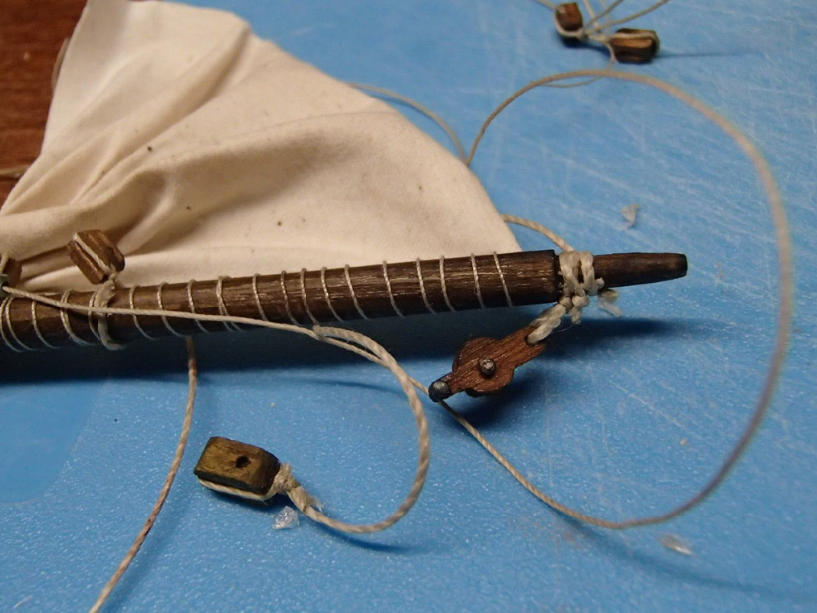
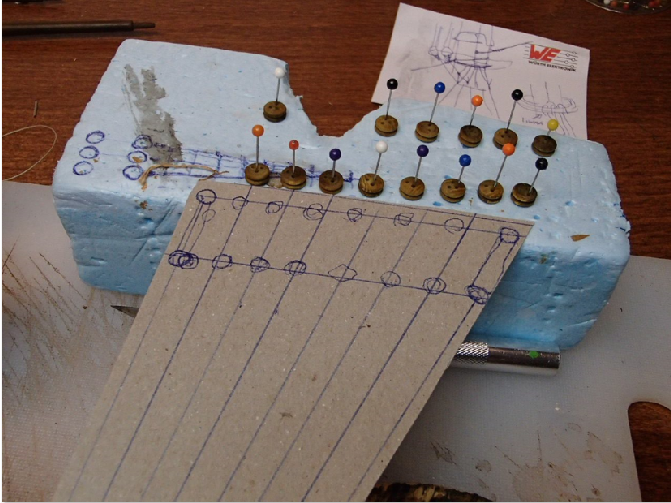
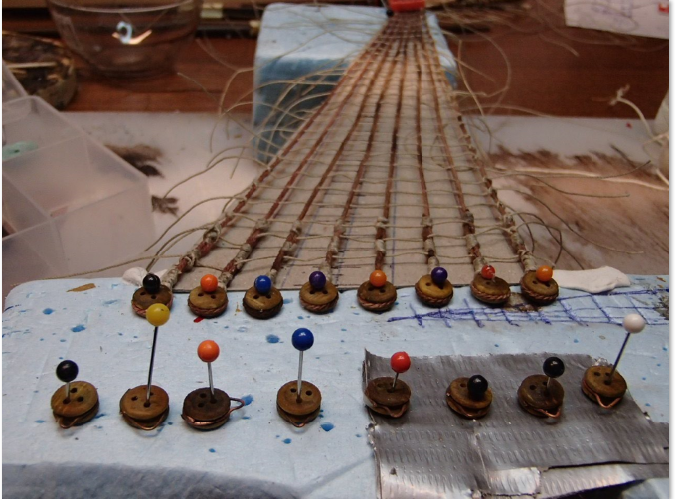
I made some mini-blocks that was not included in the kit: It was tricky to get tension on all wires even using a template and lots of wall paper glue: I hid all remaining wires under the crow´s nest. The mistake I made on the front mast keeping the shrouds connected to the blocks below getting it hard to work on the deck - this was avoided on the main mast and the whole shroud could be loosened to get access on working on the deck details.
-
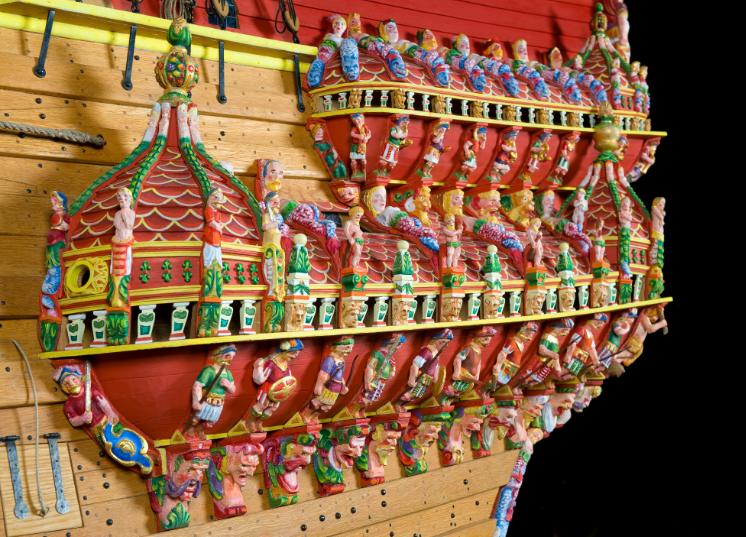
Thank you Kirill - I wish I could paint like you on the Galleon ship of yours. Like a icon painting in 3D.
-
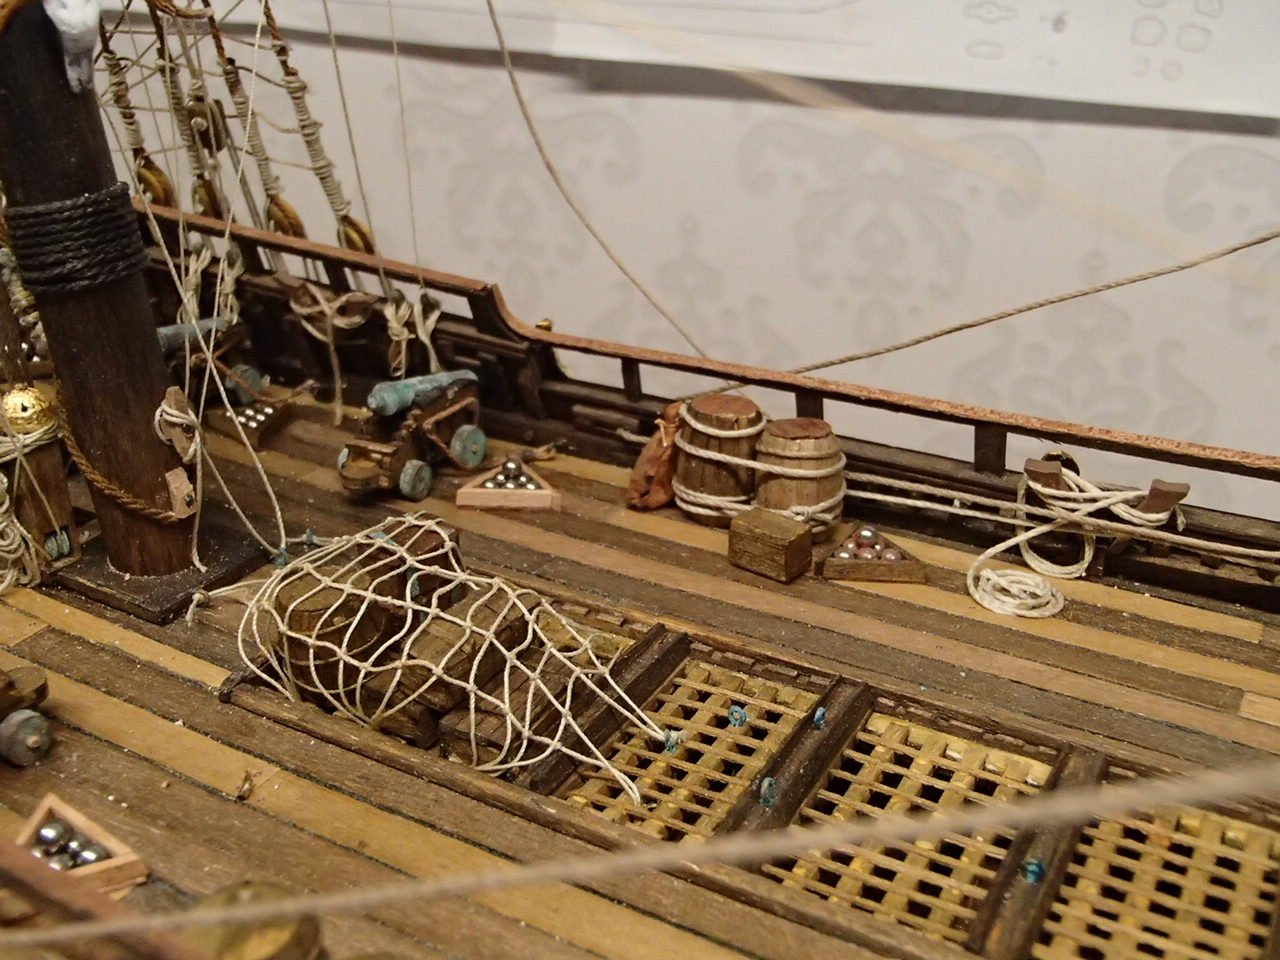
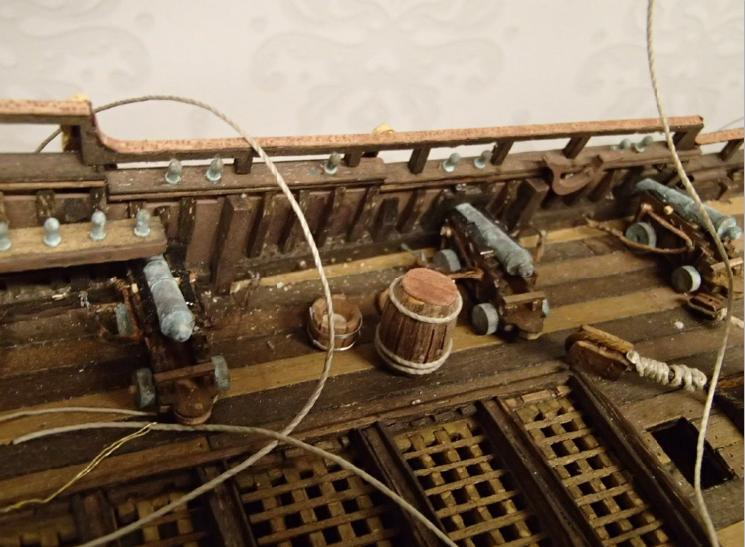
I missed working with wood, I noticed that the age (poor vision on close objects) was getting more and more annoying when working with the rig. I added some barrels and boxes for the deck. Used metal wire between the blocks instead of wire on the main mast.
-
Almost the front mast completed. Just two more mast, and then put on all the cannons with gates. Almost there:

-
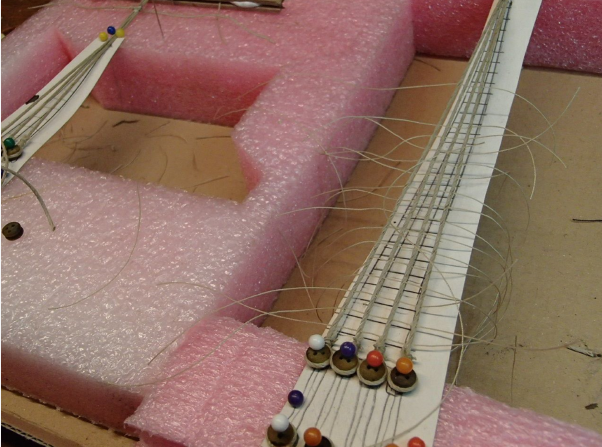
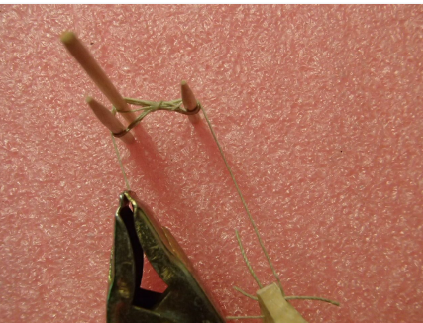
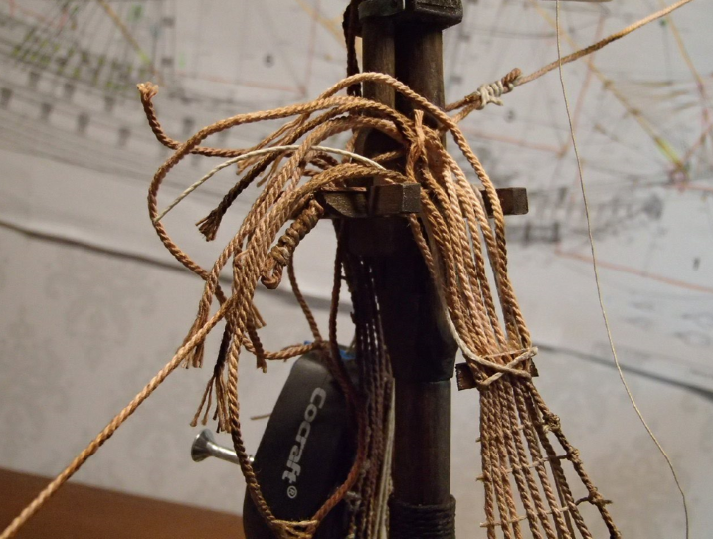
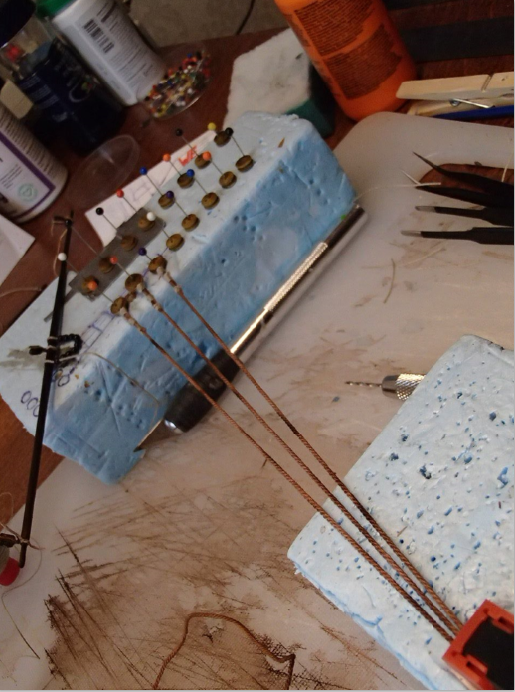
Making more templates for the other mast shrouds. And small loops with rope from a tip here on msw.
-
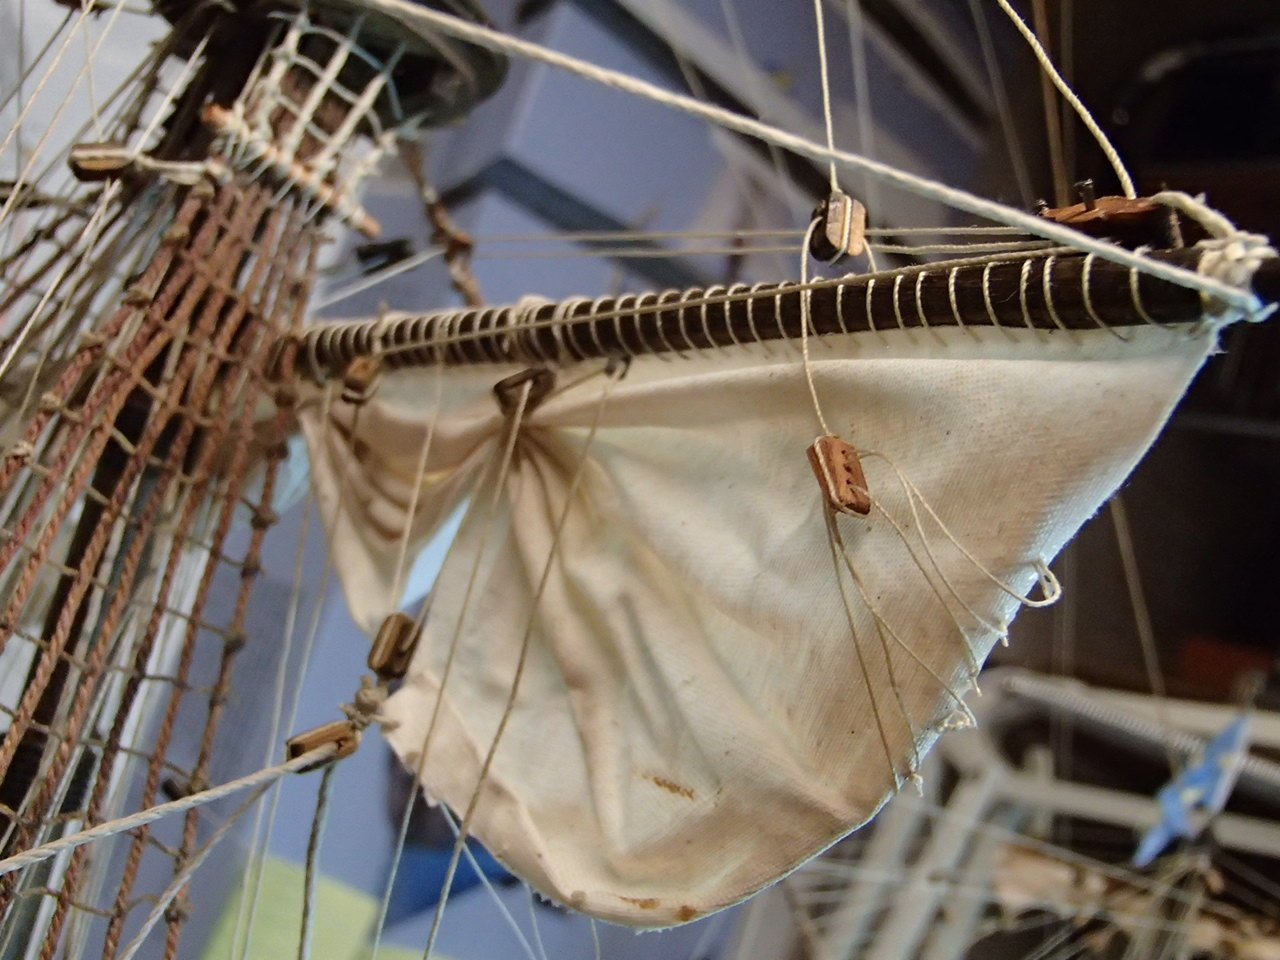
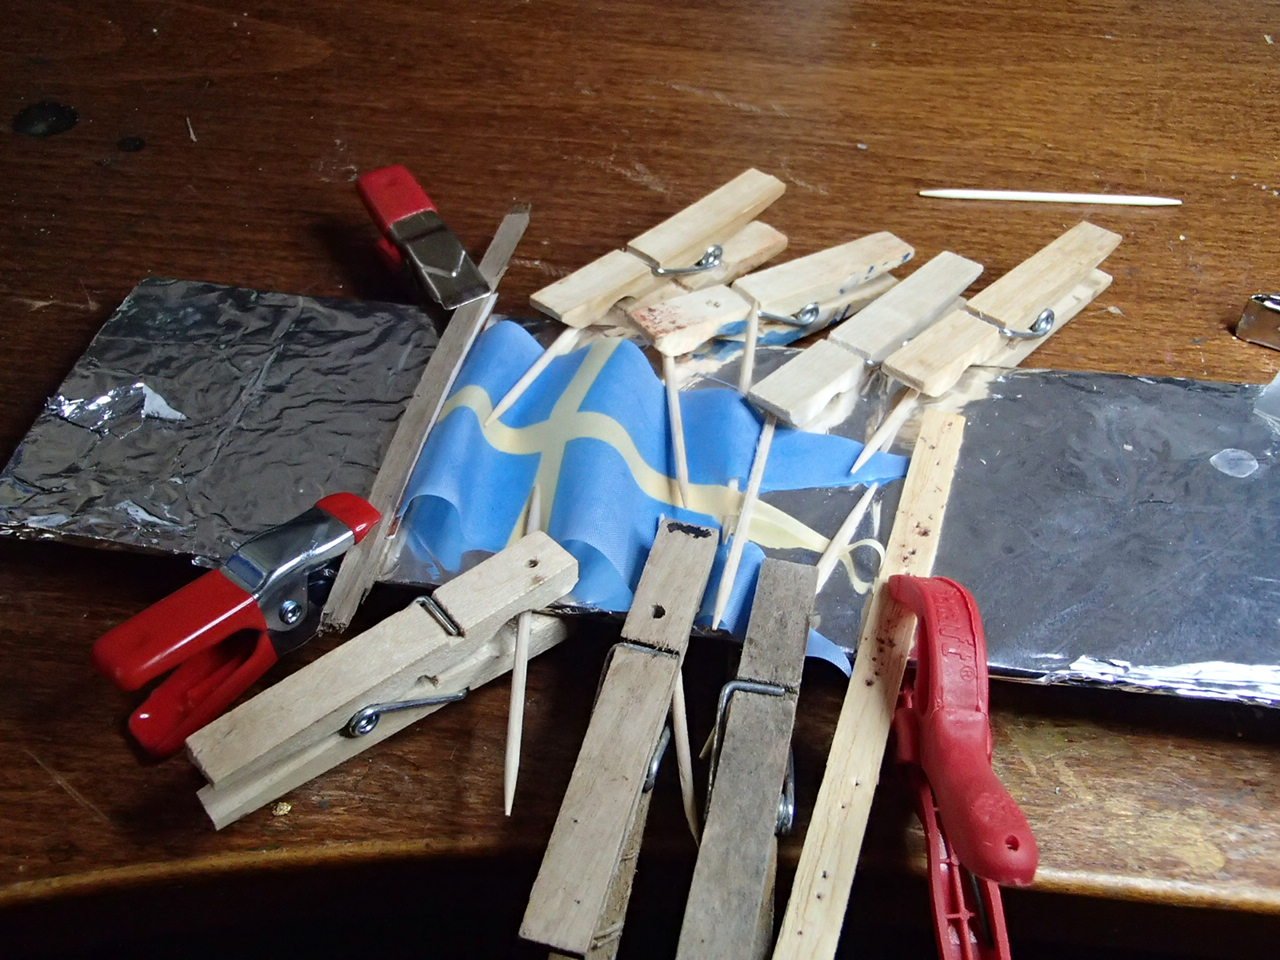
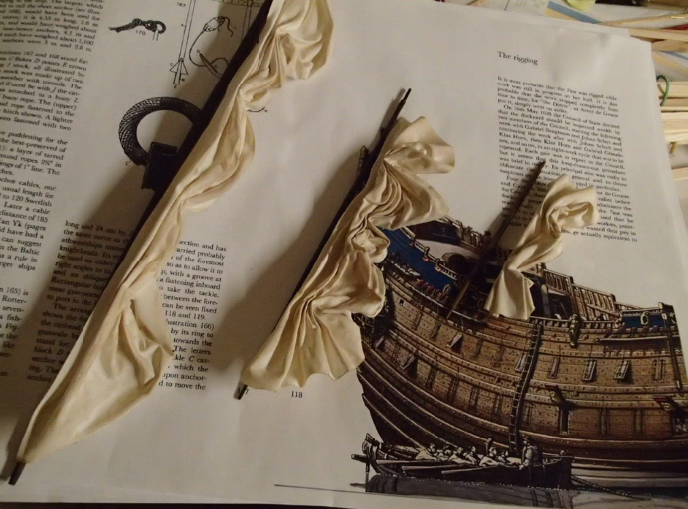
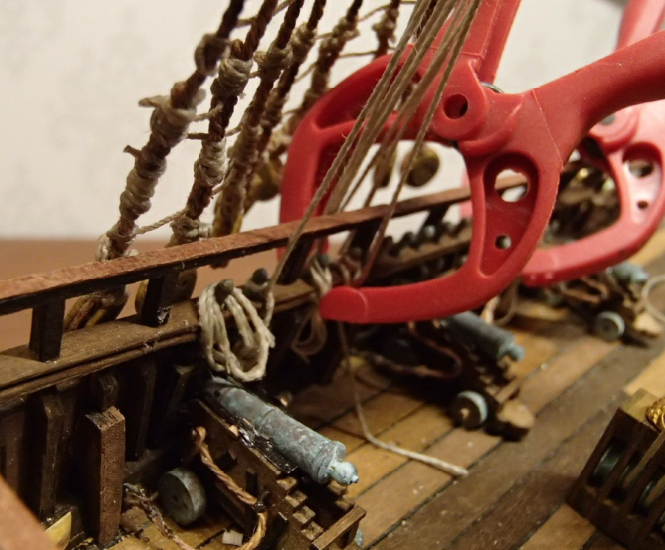
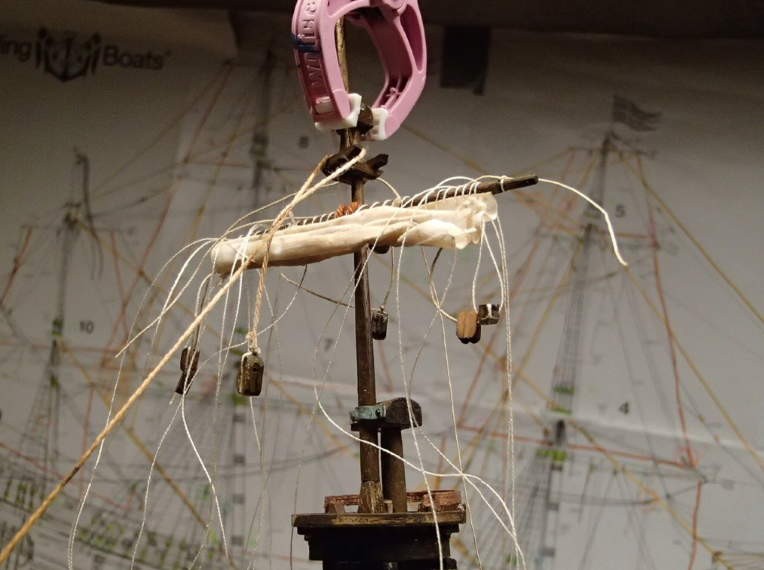
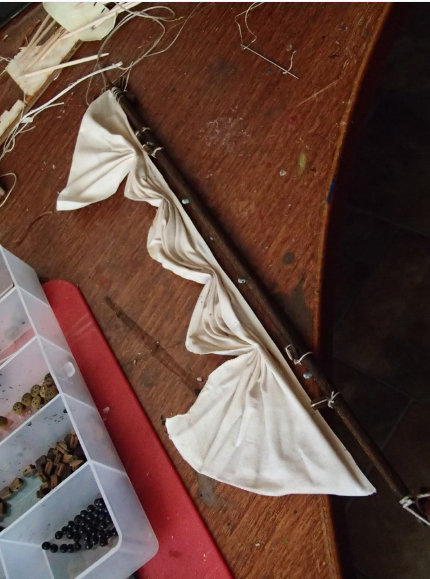
The fixation of the front mast shrouds: And placing the sail from the top and downwards. Here is fabric drained in wallpaper glue:
-
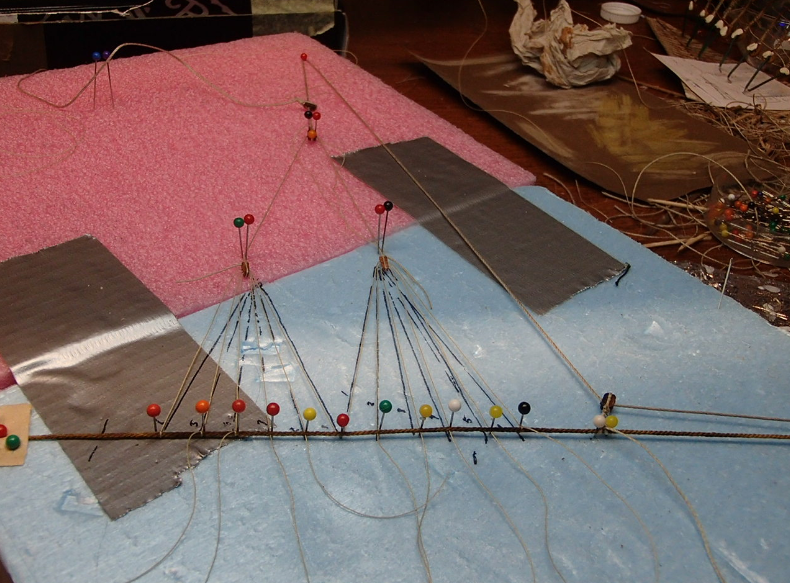
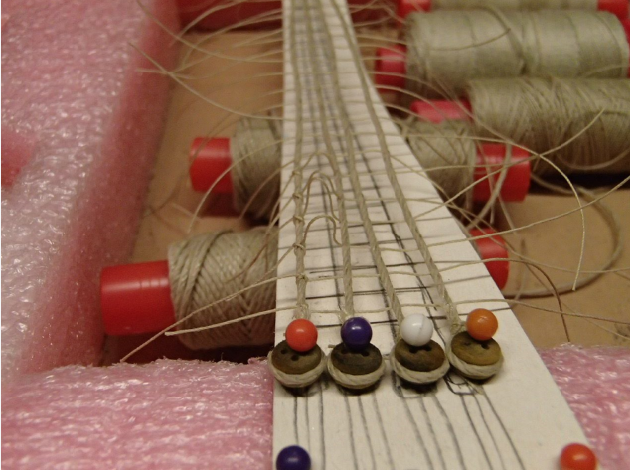
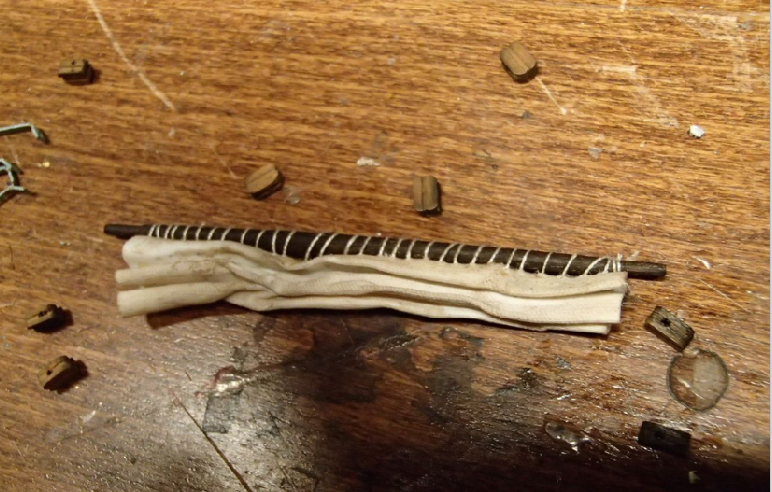
This is how I made the front mast shrouds:
-
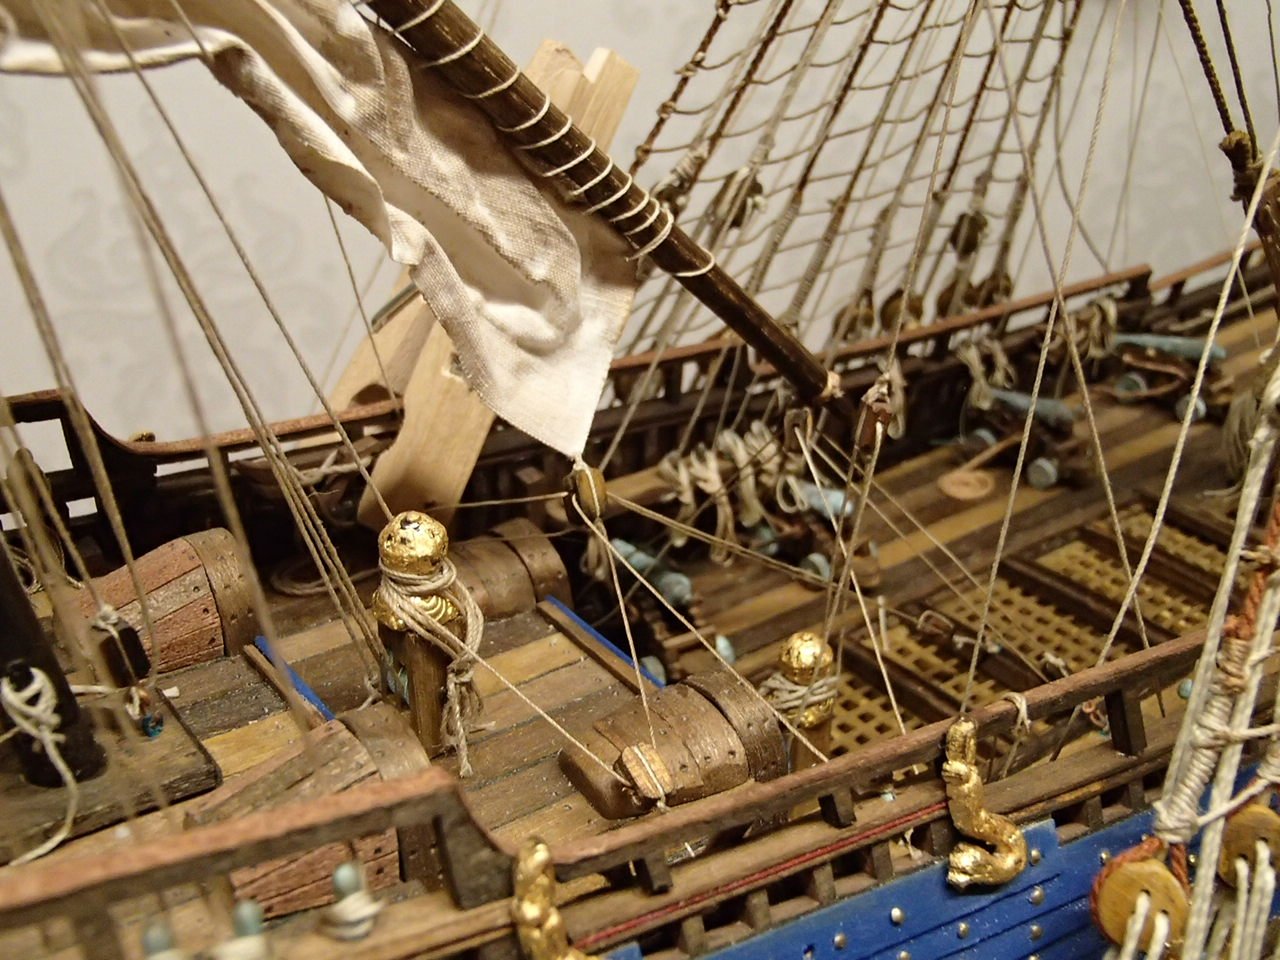
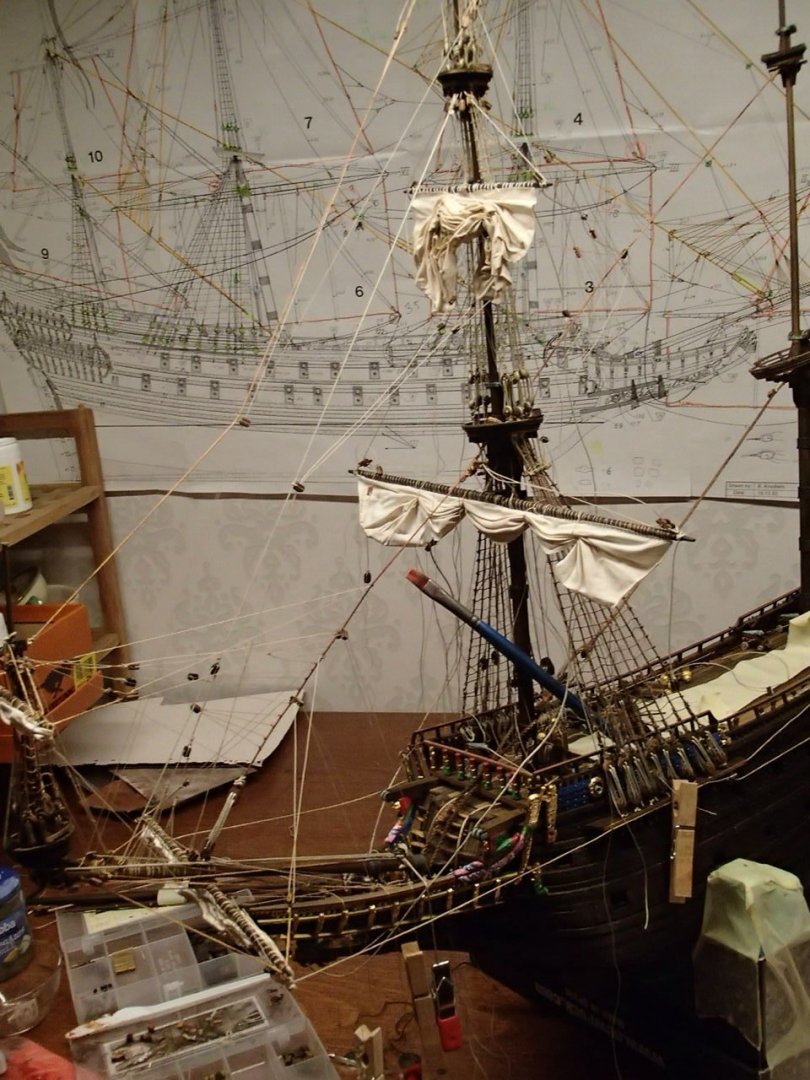
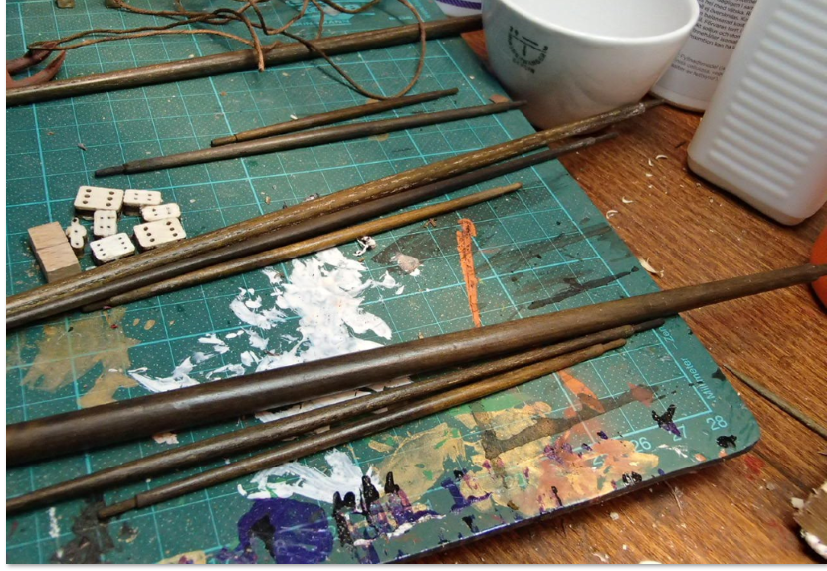
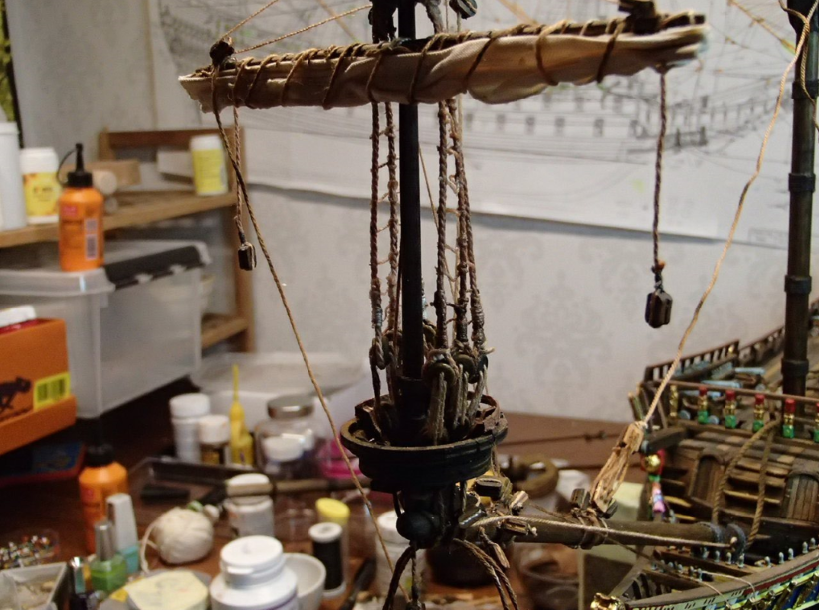
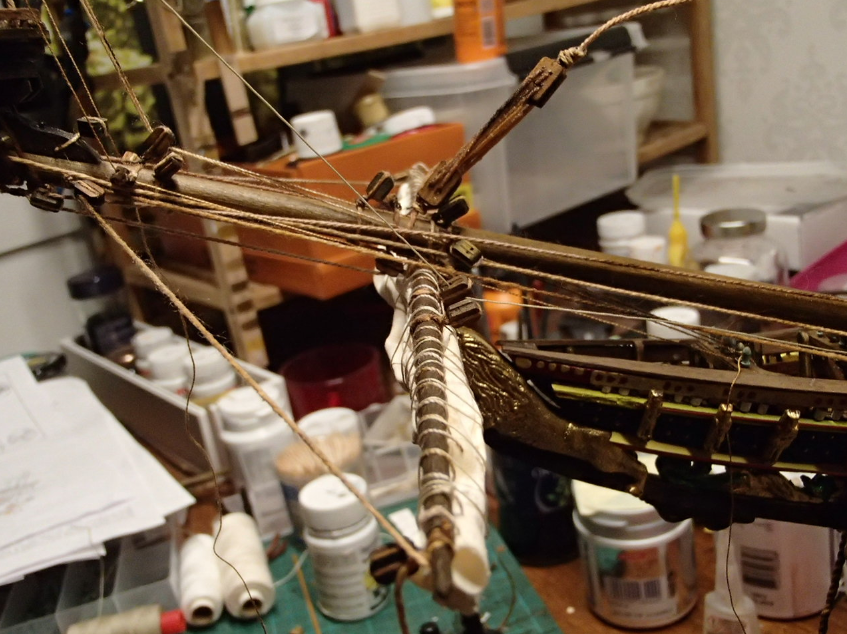
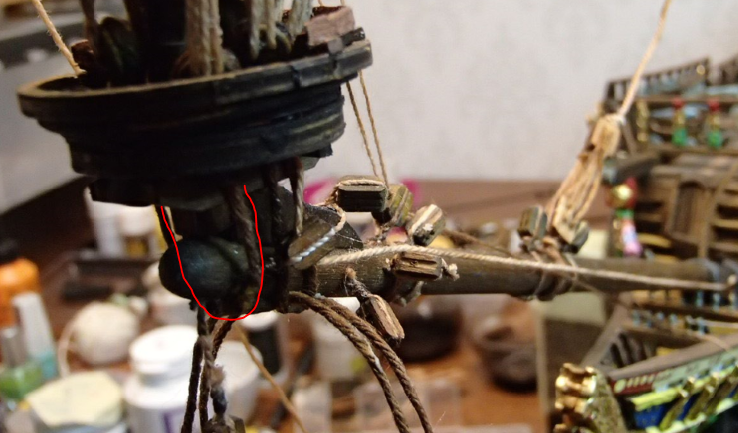
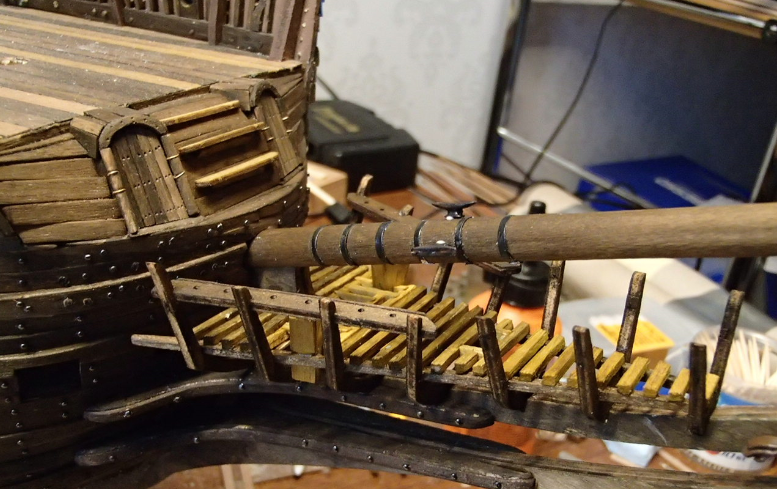
Did look forward to start with the rigging but at the same time not. It turned out to be more tricky than expected. I though more and more about people building those small ships in bottles. I started with the masts and the capstan. I also fixed the cannons. I prepared all the mast and boom parts and decided to start the rigging from the front of the ship. I wanted to rig with sails but "folded". I used wallpaper glue for fixing the fabric so to simulate gravity. I also used wallpaper glue on the wires for gravity-effect. First I used glue then sugar/water but that did not work. At the start I used the wiring from the Billing boat kit but soon bought some better wires that didn't "fuzz" that much. I had three major issues with the bow: 1) the rope connecting the lower blocks - to the other side without a joint - I made a joint at the underside of the bowsprit: 2) The next problem was that the whole mast at the bow bent backwards when attaching all the wires to the front mast. I remade the whole bowsprit due to this later. 3) Finally I did not want to drill in the mast (afraid it would brake) but fixed the bow yard using two wires "on the outside" one on each side -


-
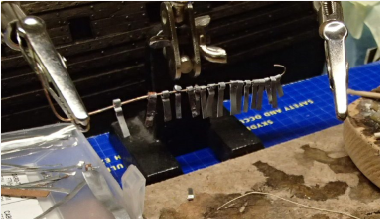
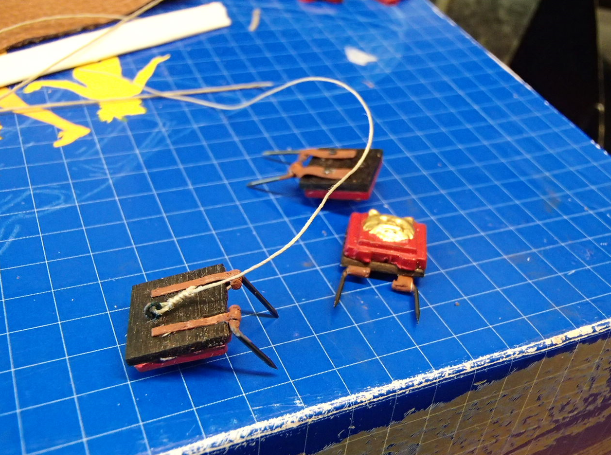
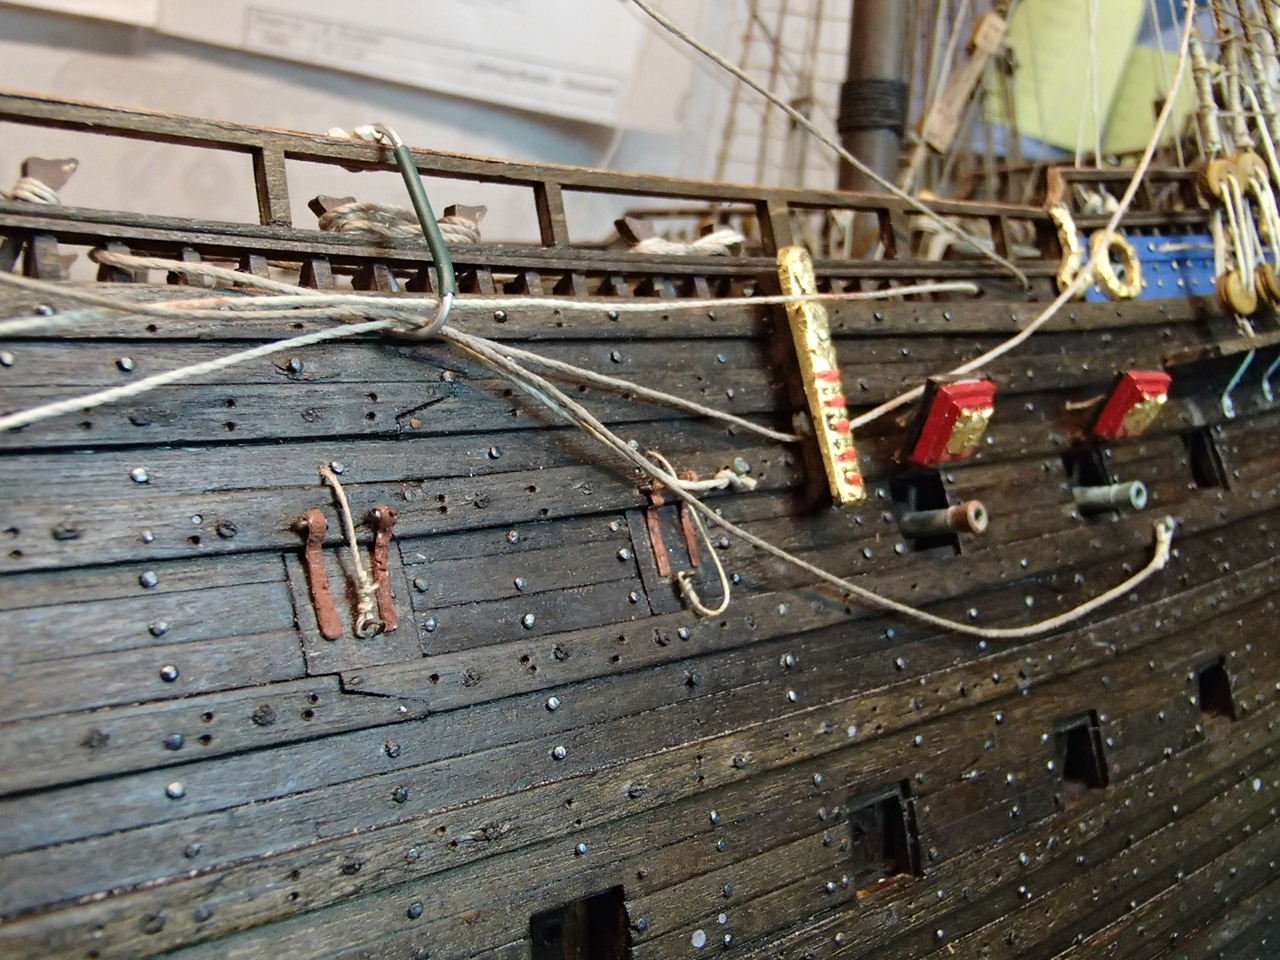
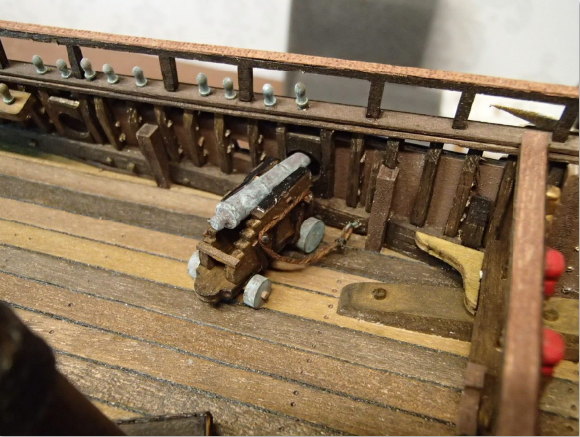
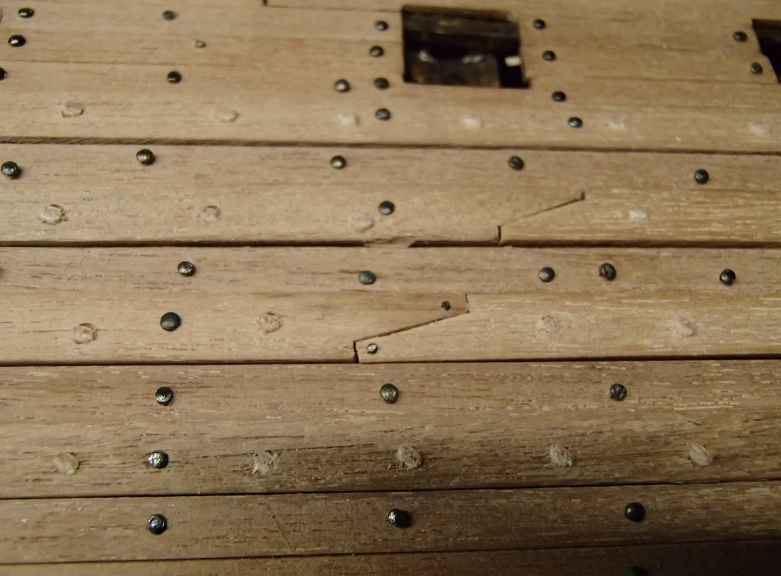
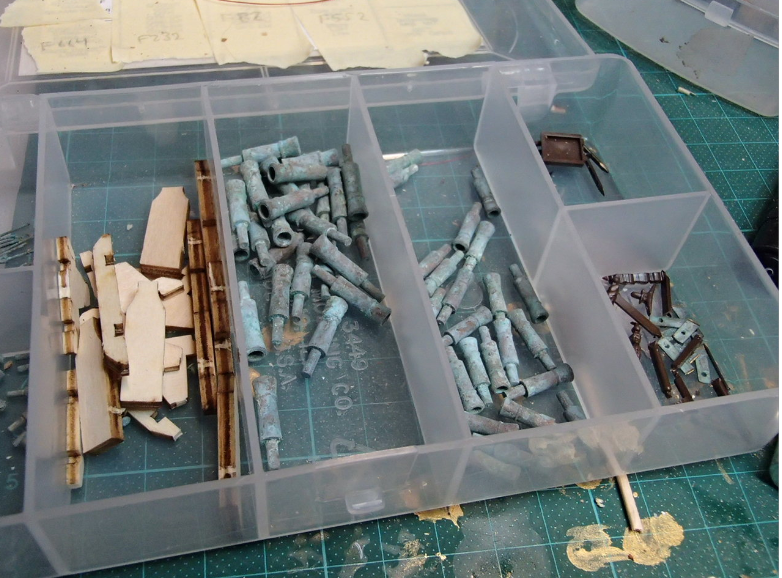
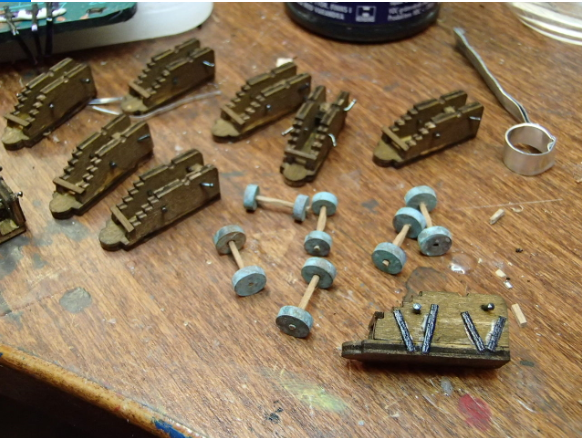
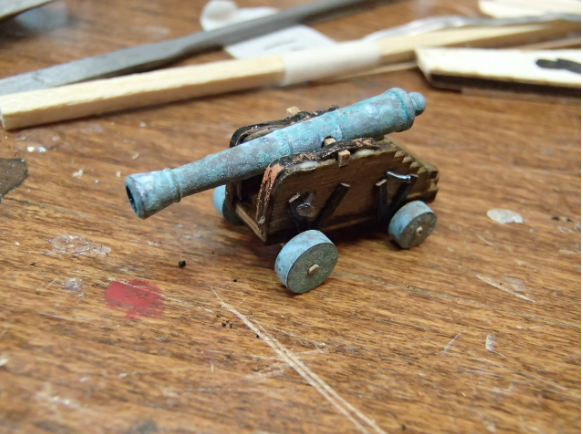
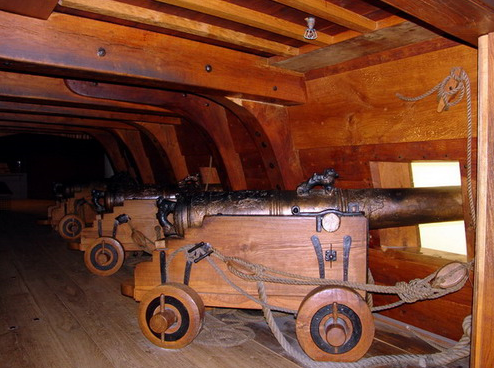
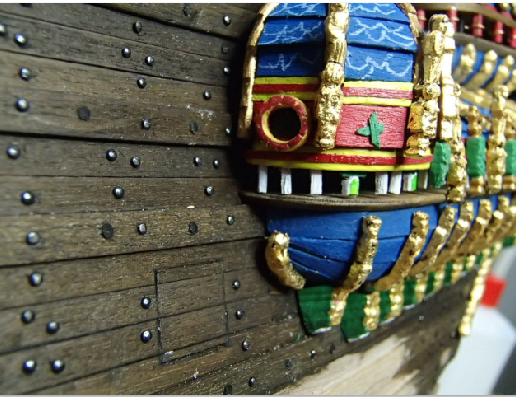
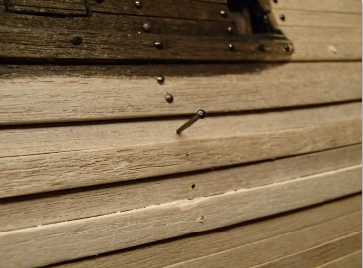
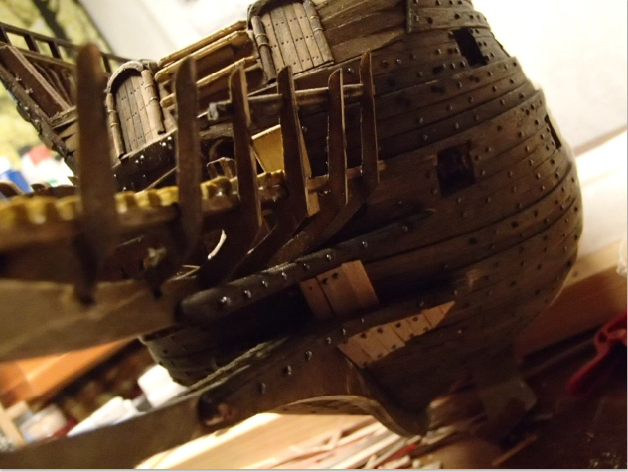
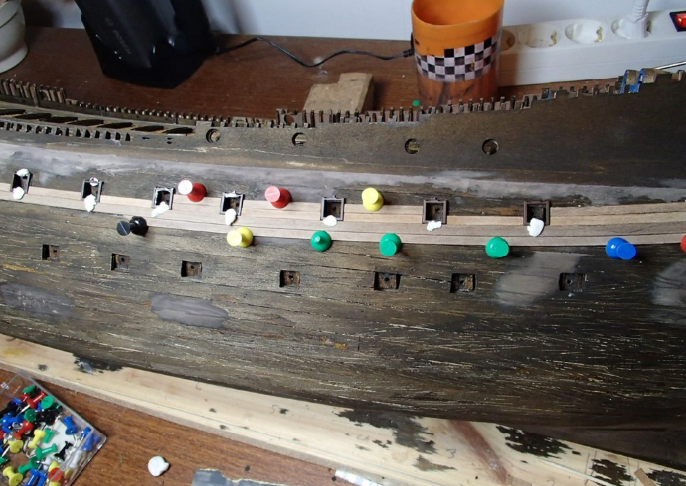
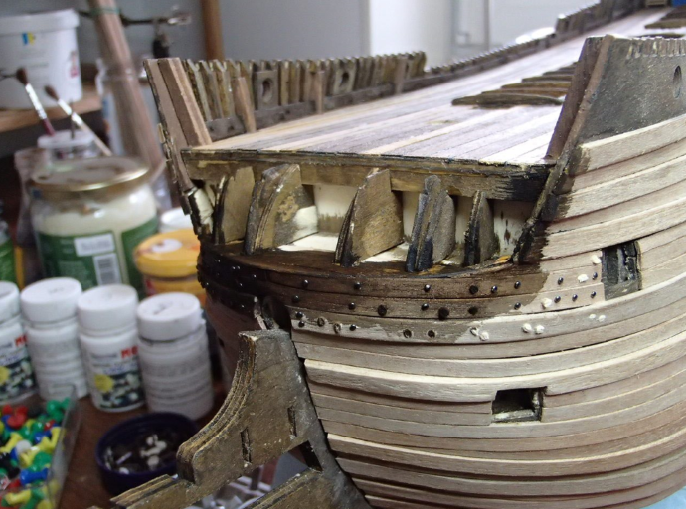
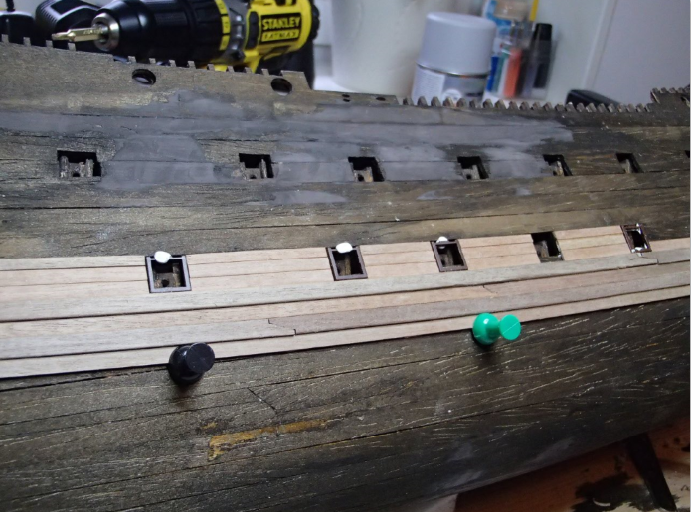
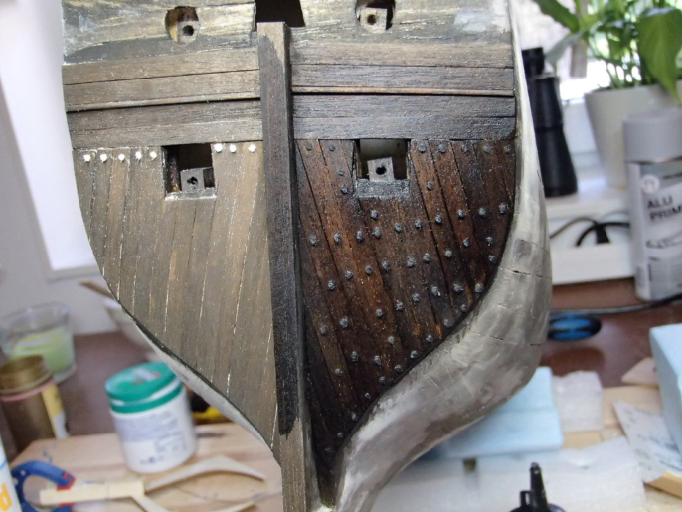
Closeup on the nails and wooden plugs, some nails came without the head - so I used them for the joints: The work on the hull done. Time to move on to work on the cannons. This is how the cannon barrels looks like after oxidation. All These also have to be darker to match the hull. Quite monotonous work building all these cannons. These museum cannons have wooden wheels though:

-
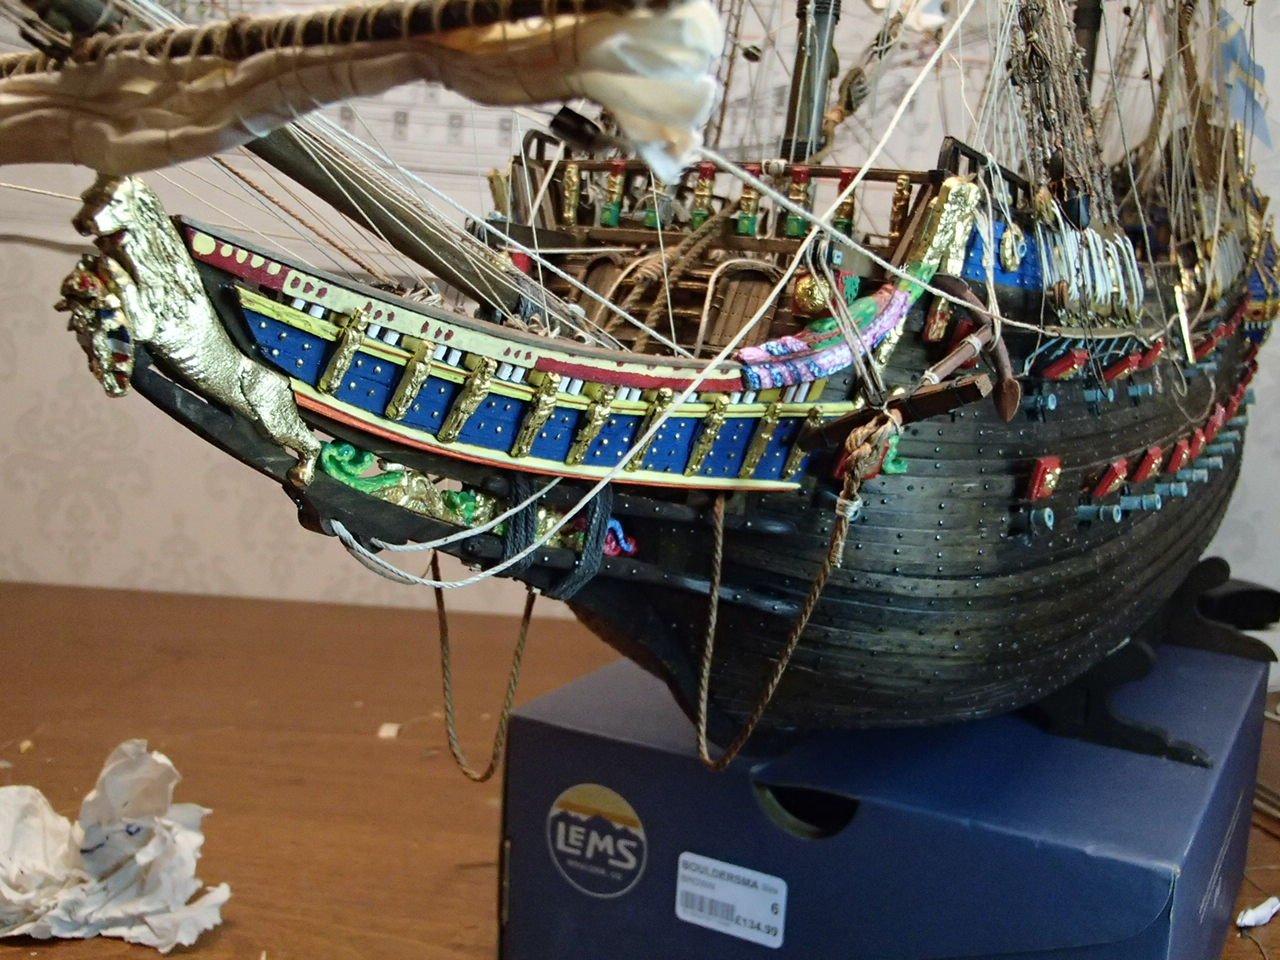
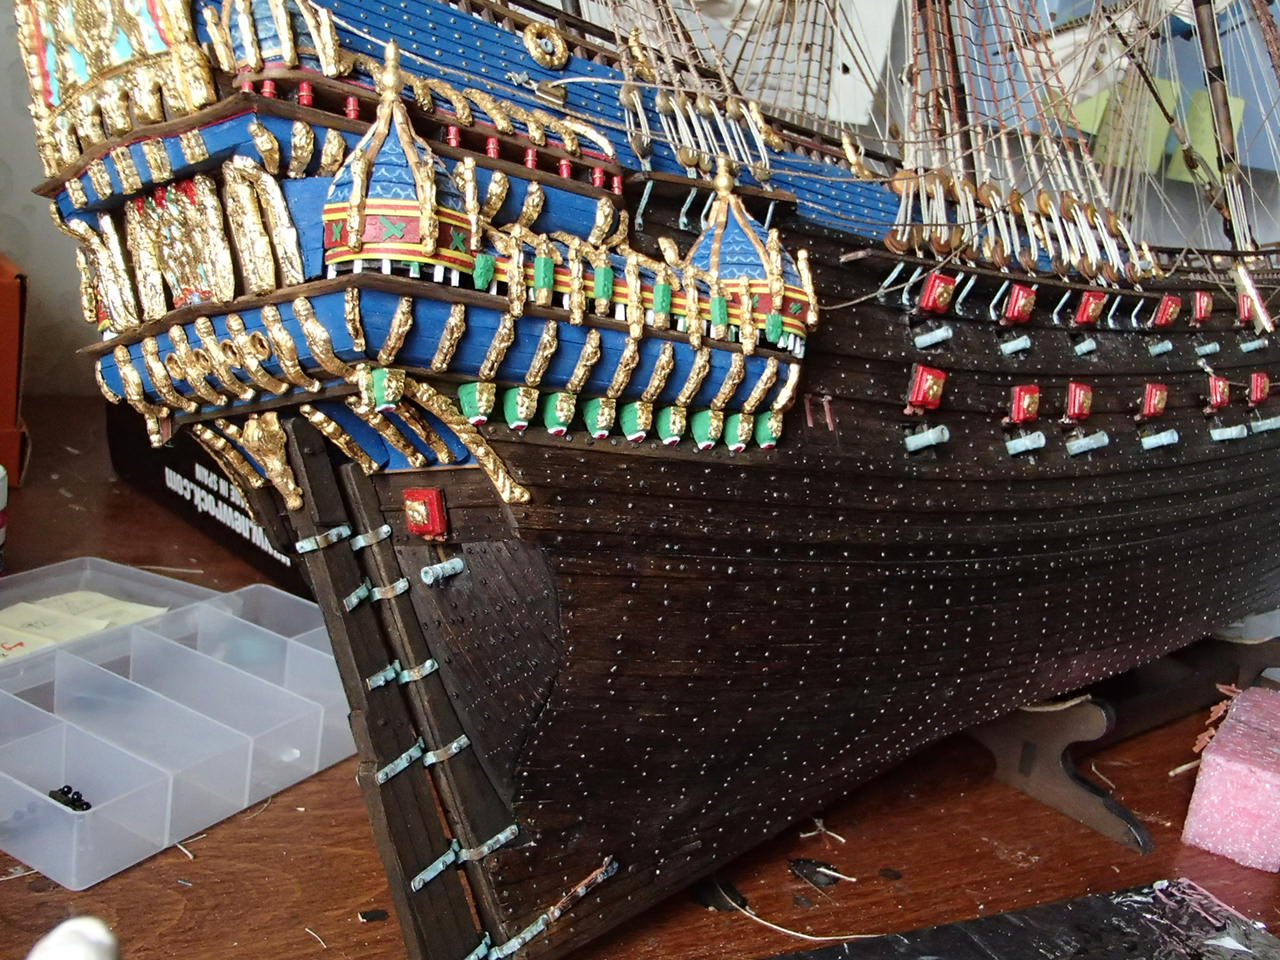
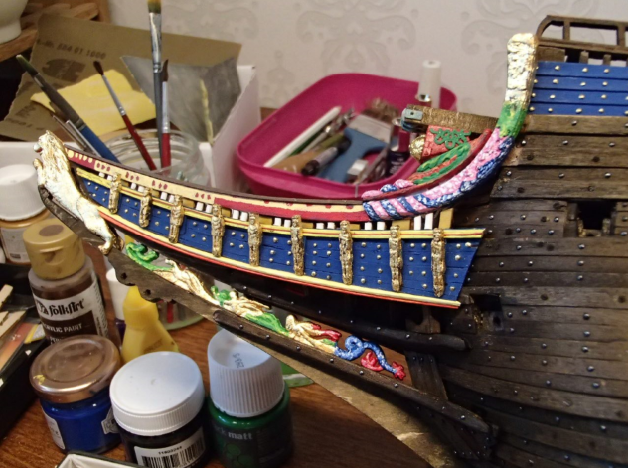
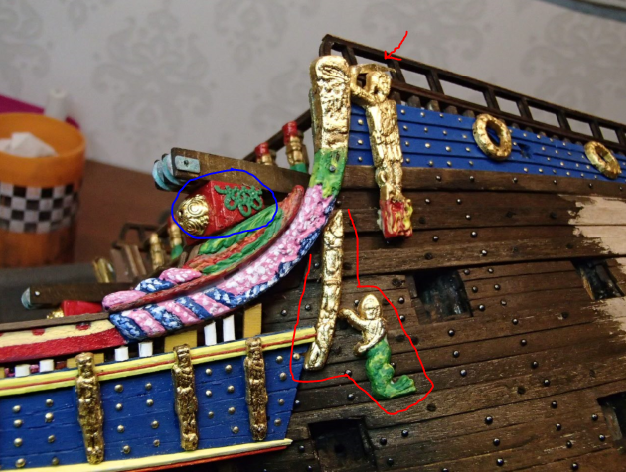
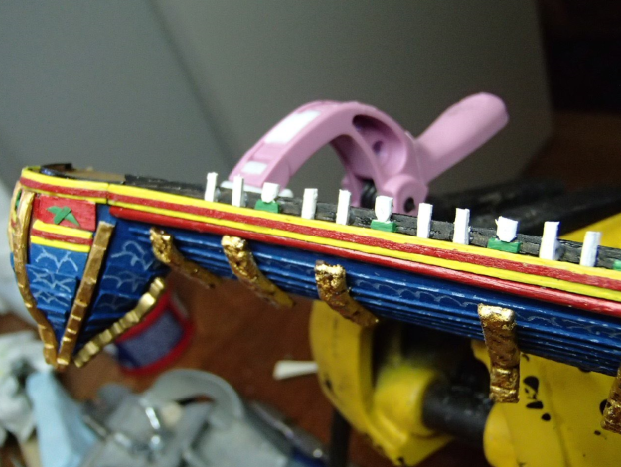
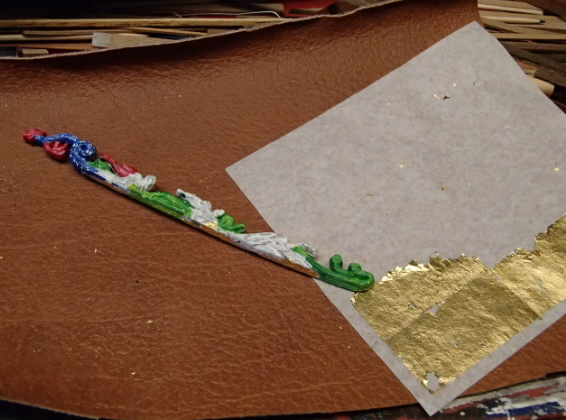
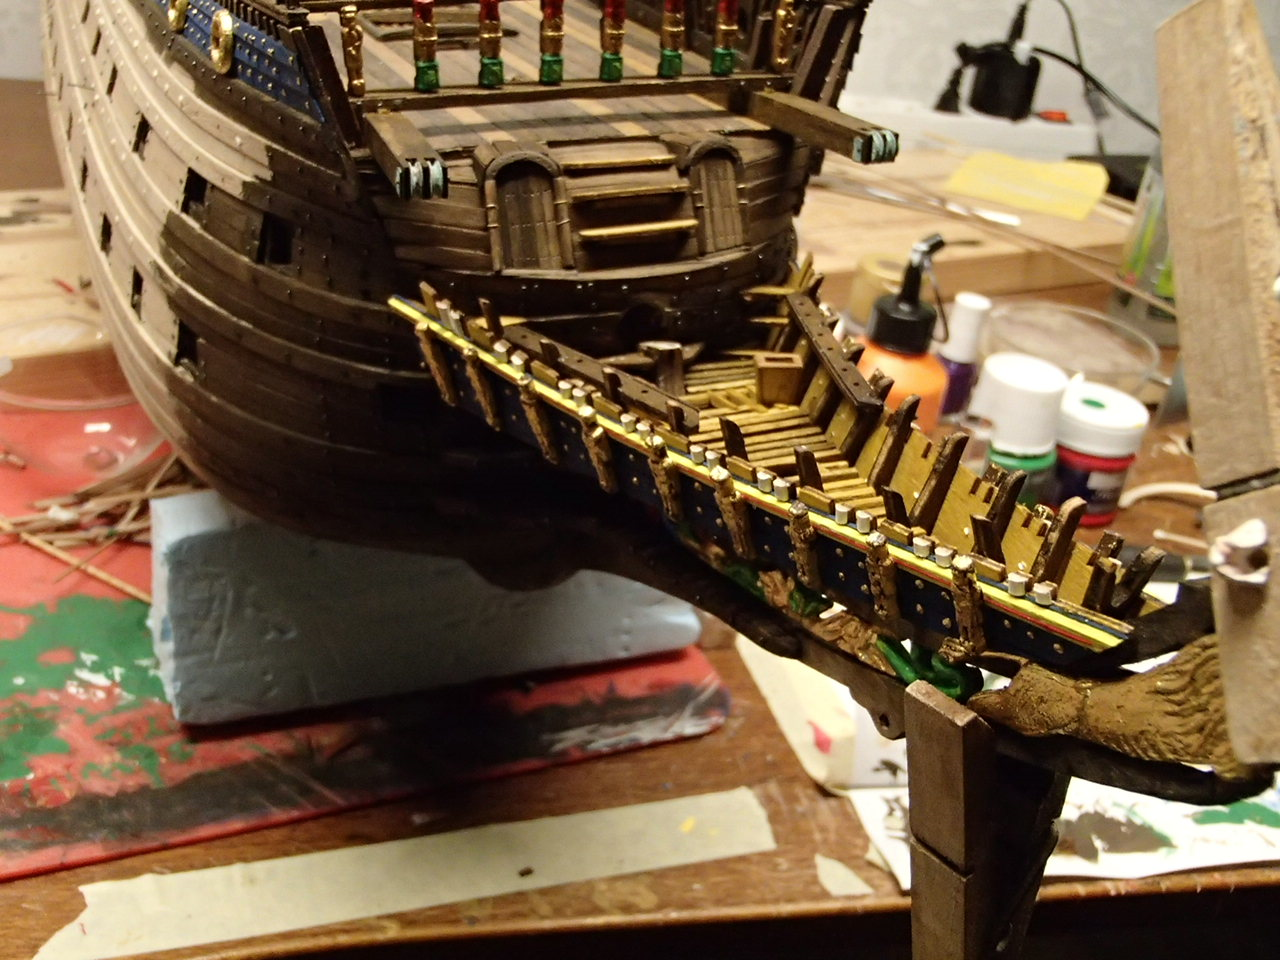
Bow paintings and gold: It is supposed to be a Polish man (when I was in Poland a few years back - they told me a history of some country men foolish the Swedish army in the forests back in the days) on his knees i the blue area. I simplified that part. Instead added a sword to the upper figure and put some left-over parts in the are (in red). One side of the boat finished with wax mixture. Mounting the rudder and stern. I used plastic spares (brown) as rivets melted in each end using a soldering iron for the mountings of the rudder. I had at this point in the build spend a little more than half of the total building time (calendar time). Starting in Mars 2015 and at this state of the build in February of 2018.

-
Thanks, interesting, I have seen that ship in Stockholm. I think they use it at hostel nowadays. Haven been on board though. _ Cumbria seem a nice place to live
-
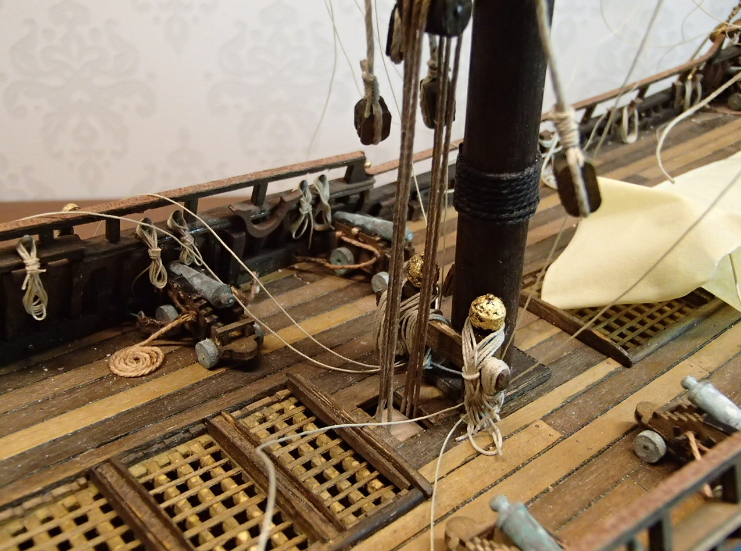
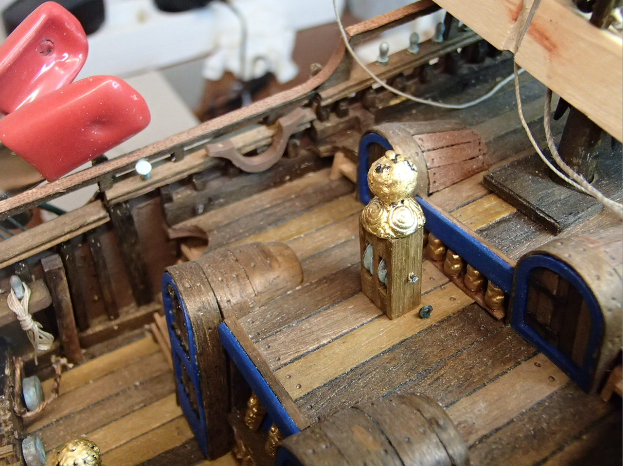
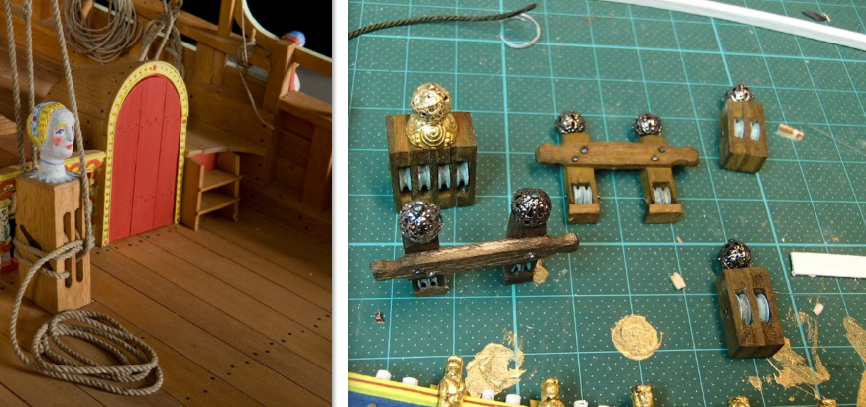
This picture is taken a little more than two years after I started the oxidation of the brass parts. As can be seen the green is more strong. I experimented some with boiled egg white and heating (heating and spraying with vinegar and then put metal in a plastic bag with wet paper and egg white). The oxidation took some time (and I even tried electrolysis but after using the opposite process to clean my car brake caliper from rust - the whole basement smelled a mixture of burned transformer and vinegar.. ) It was during the drilling around the cannon port that a couple turrets fell inwards. The wood was to hard to drill through. I did not see that I could do the carving on the top of the deck pulleys, so I put a round metal ball on top instead:

-
Thanks md, I have also the Sergal Sovereign as my next-next project. Do you know why there seem to be different stern versions for the Sovereign? I have seen at least three different. Sergal has two animals around a weapon shield, then there is one with a woman between two riders and also one with an angel between riders.
-
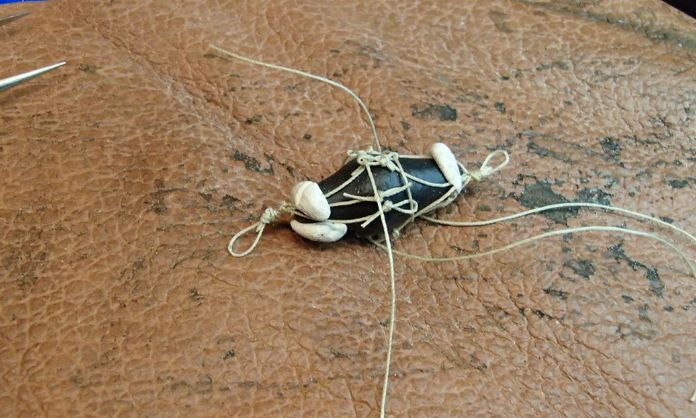
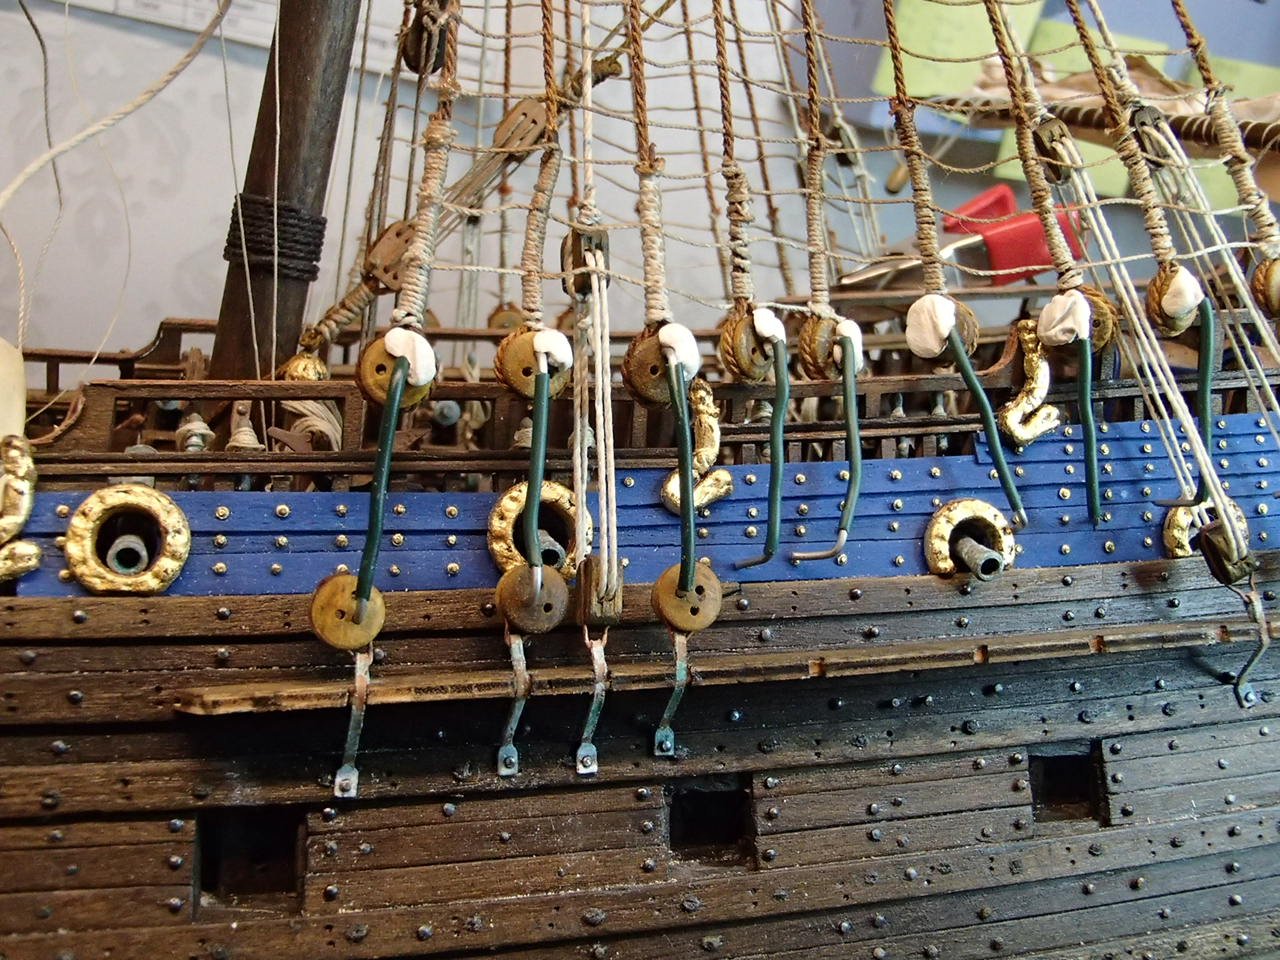
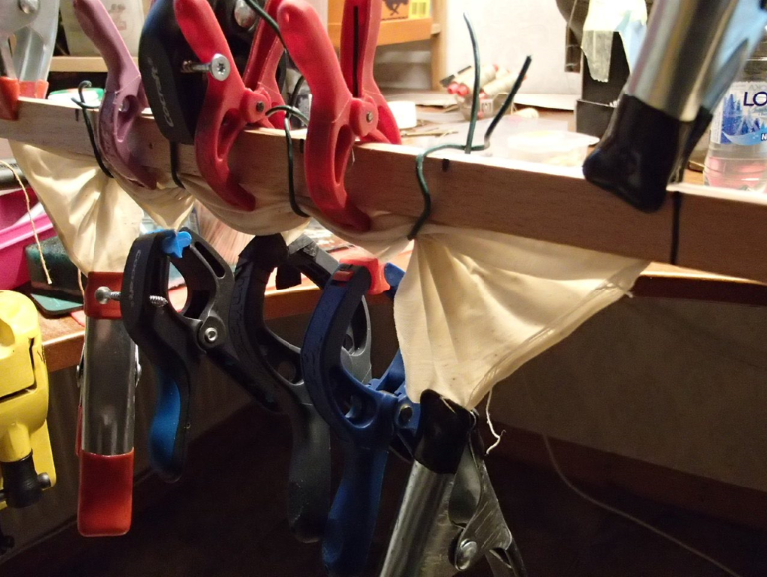
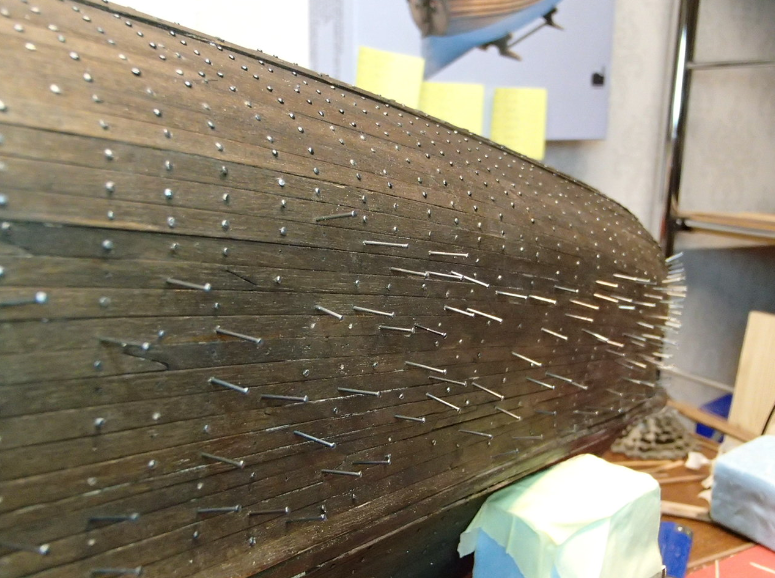
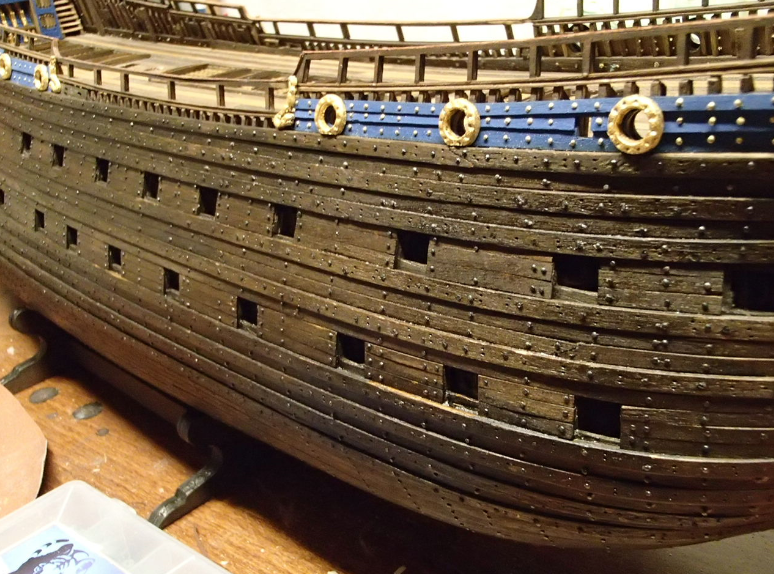
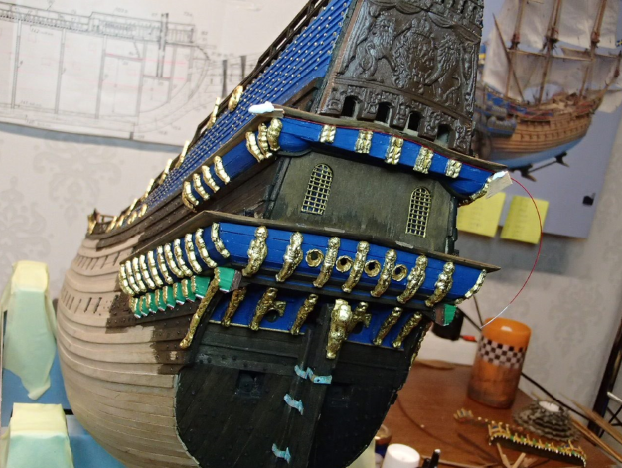
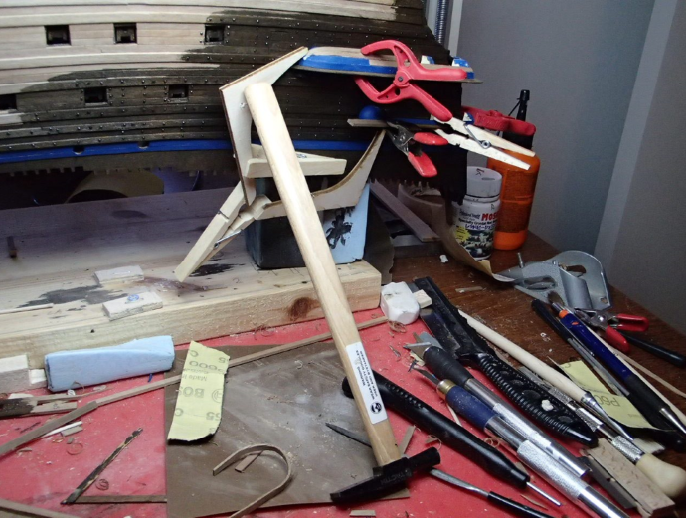
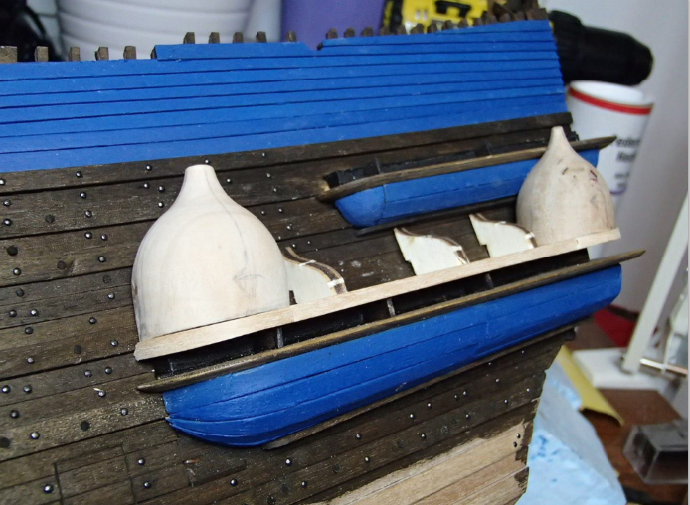
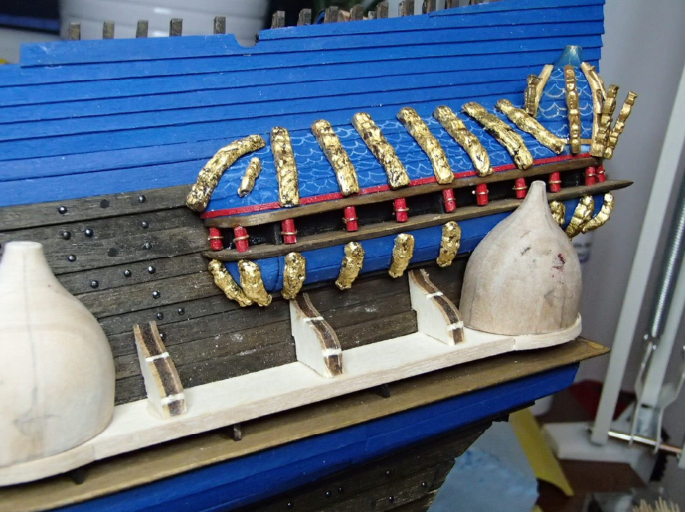
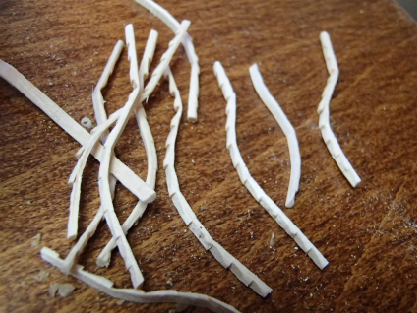
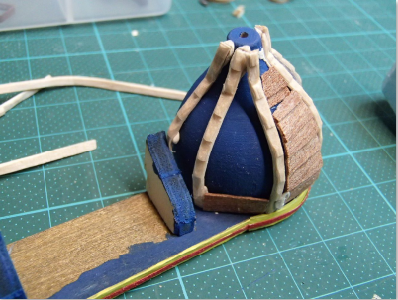
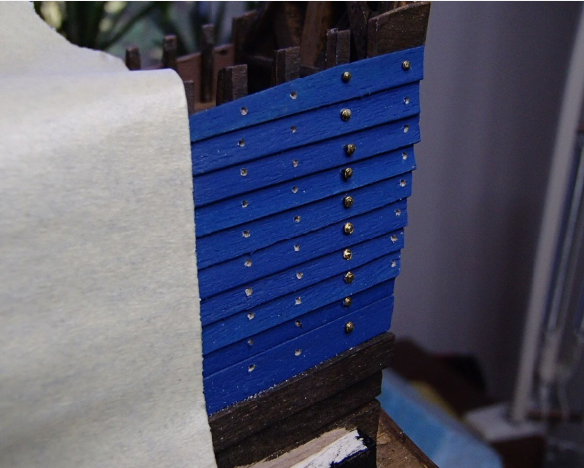
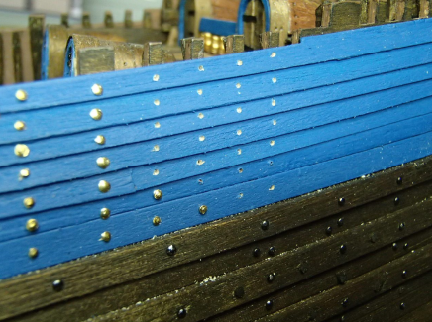
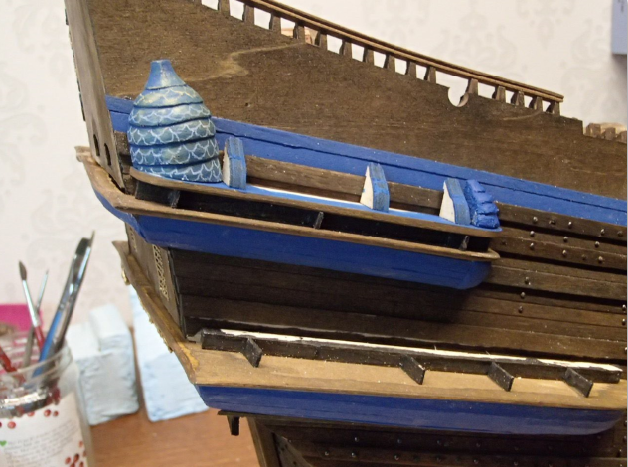
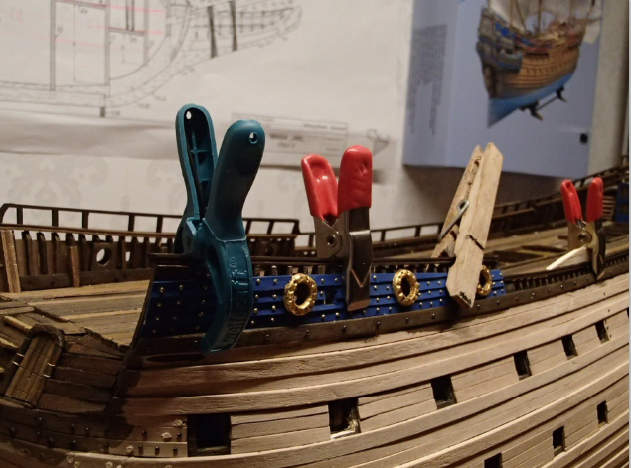
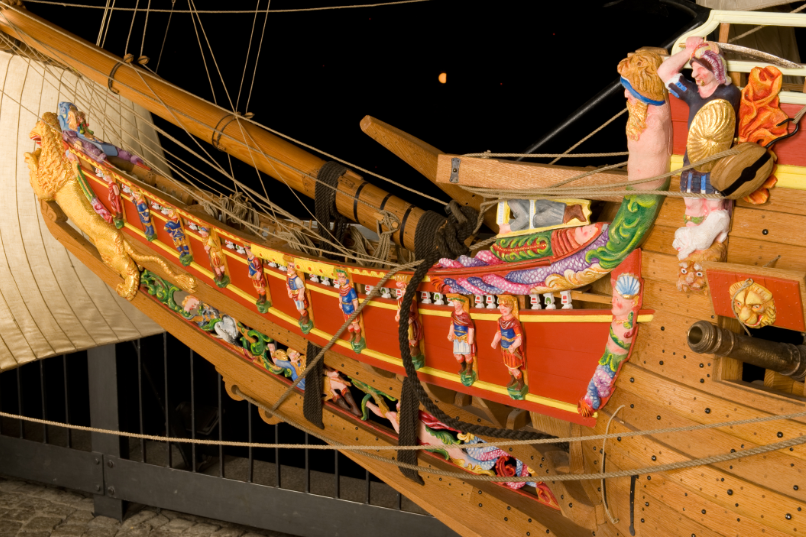
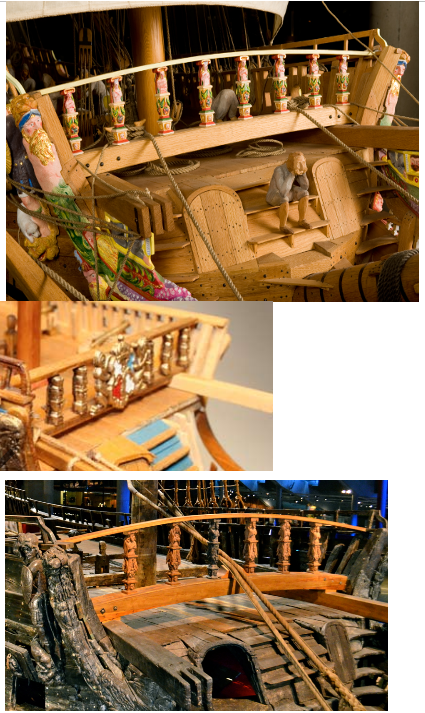
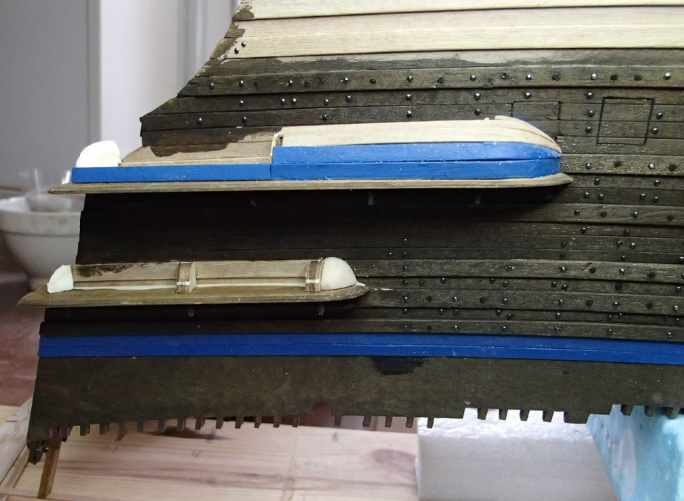
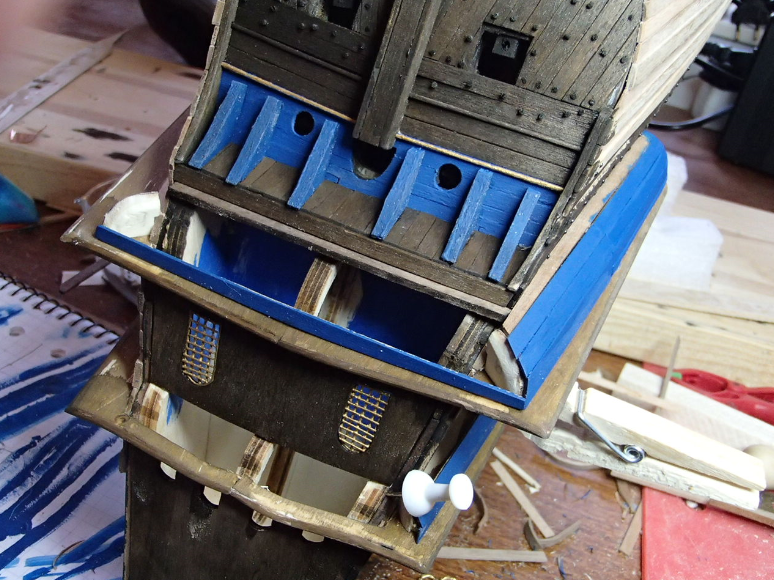
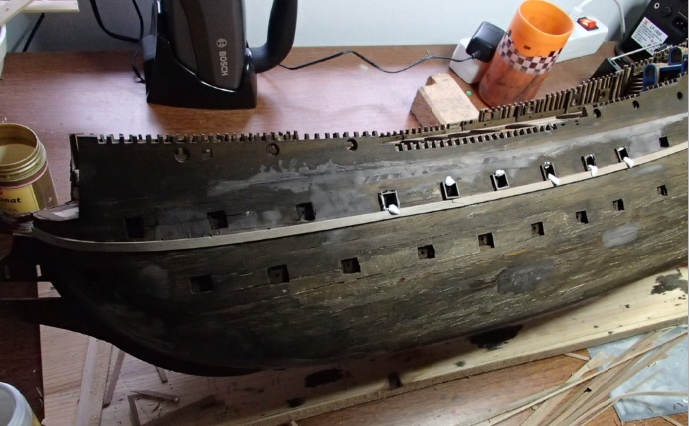
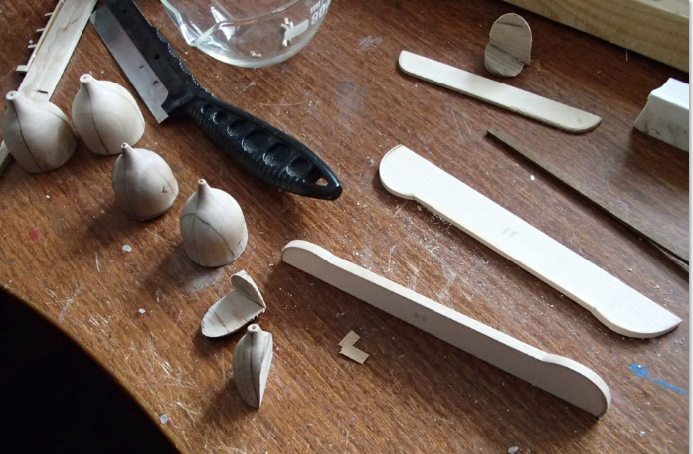
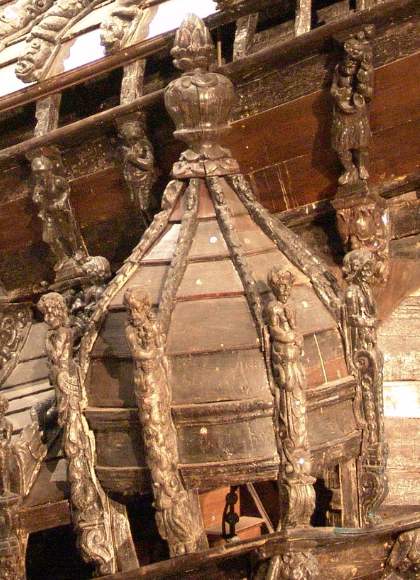
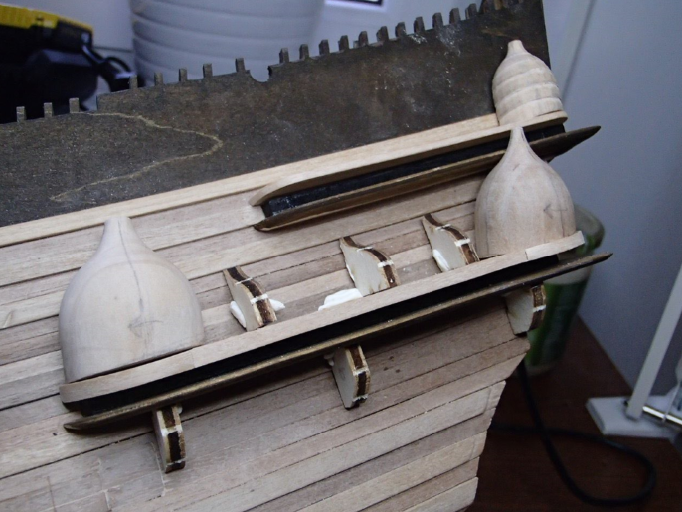
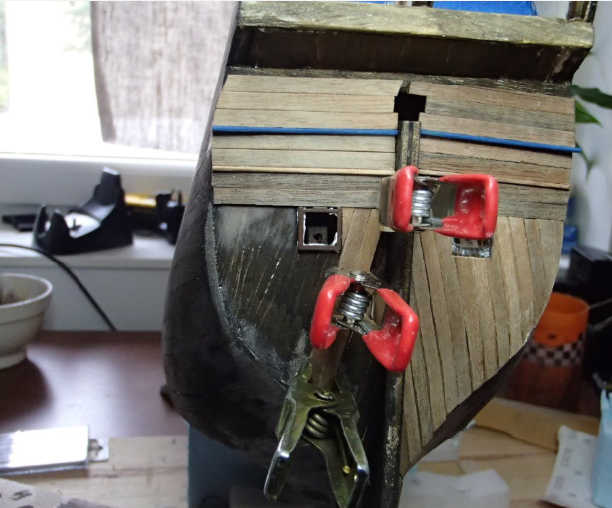
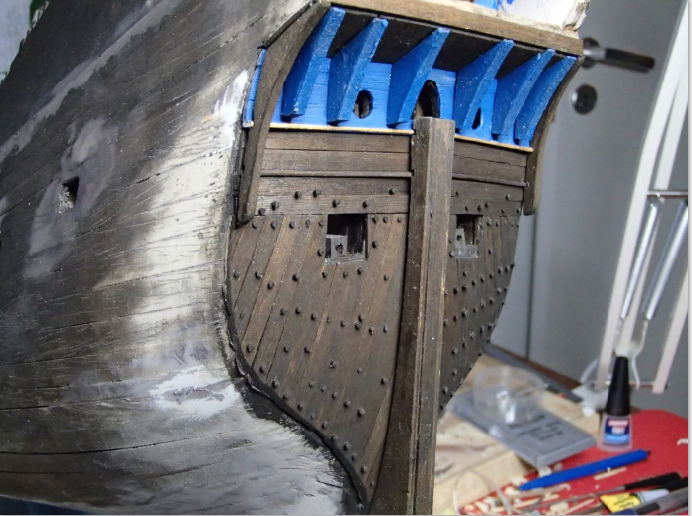
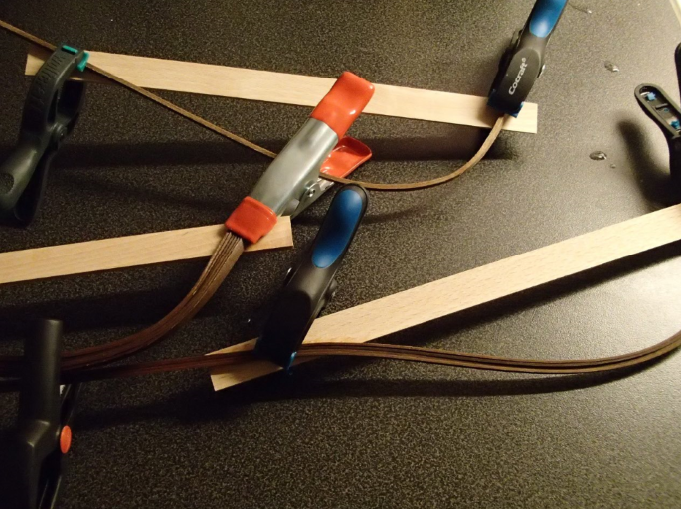
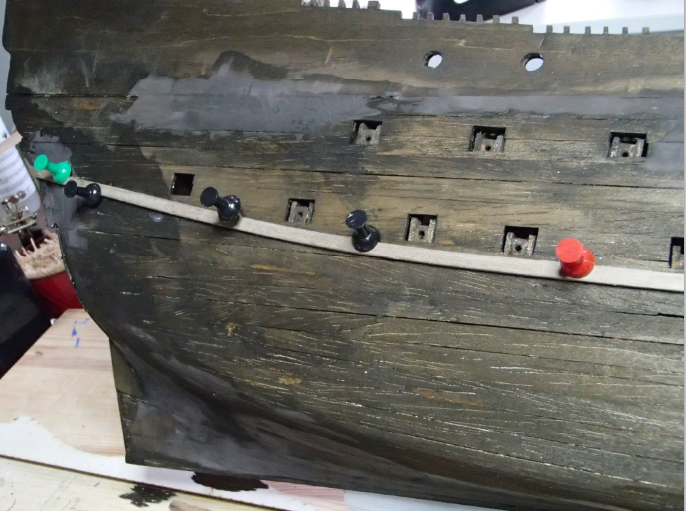
It is good to have lots of clamps. Deep blue on the boards under the bulwarks. Here is the beginning of the balcony that will be removable. First the upper balcony. On the lower domes I will use split tooth picks instead of the kits plastic pieces. The big problem I run into was that the split pieces had to be removed to paint the gold apart from the blue. Here the result after painting. Added some bling to the lower balcony. Brass nails of the blue boards. The complete side: With the round window: Adding more nails, I noticed a bit late that the nails "bulged out" on the inside along the deck. And then the same on the other side. I planned to do the cannon ports last but tried out the hinges on the fake port. I then spend a few days drilling and fixing nails before starting with the bow. The bow was fun. Here is a picture from the museum: I did not want to cover this piece in gold. I had to try that the bow sprit fit. One thing made me confused when comparing Wasa/museum model and BB490: The heavy rope from the bow sprit to the fore mast. I skipped the weapon shield and decided to have a rope trough as in the wreck picture.

-
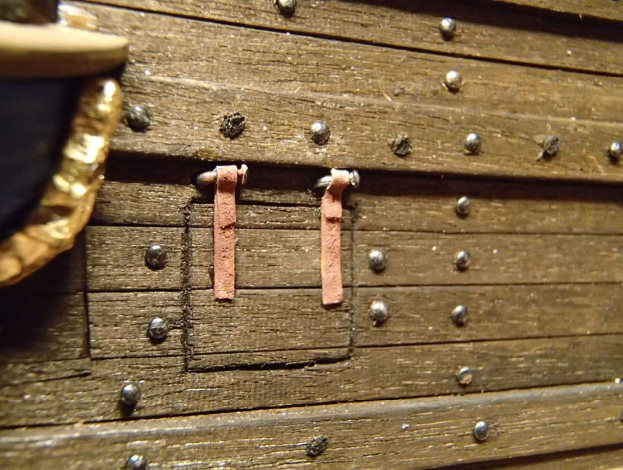
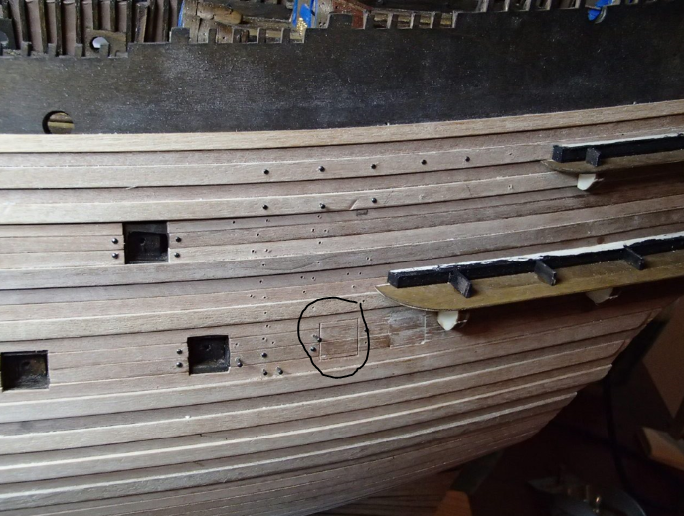
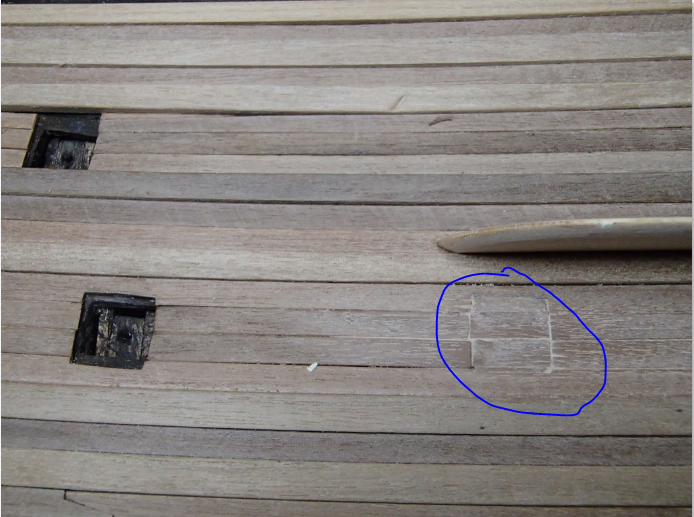
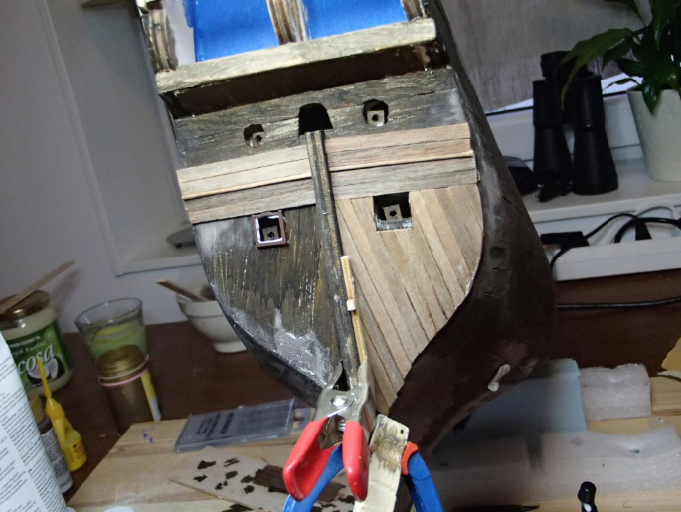
I "moved" the cannon port. This will be a fake port with the lid closed. I enjoyed drilling and putting in the nails. This has to be done before painting the balcony. Here is a picture from the museum model:

-
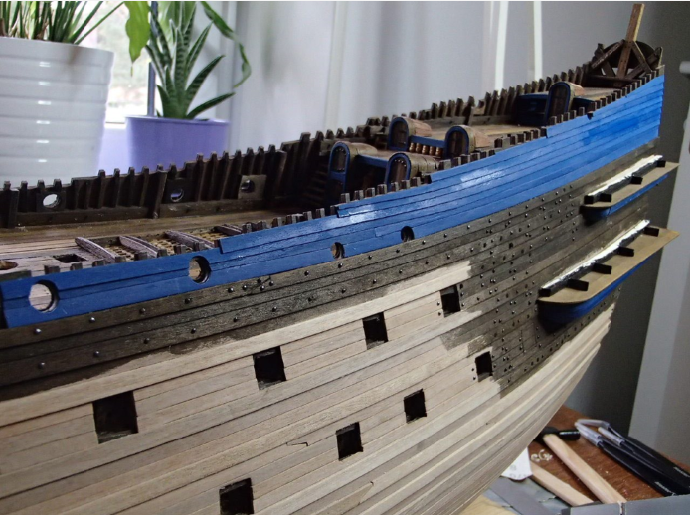
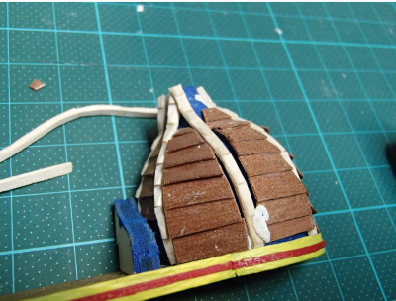
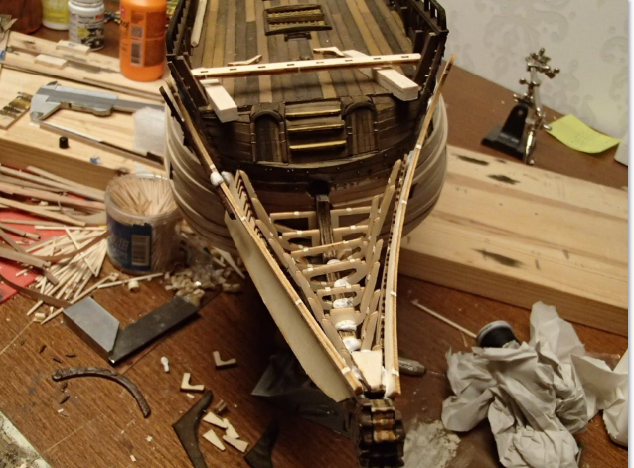
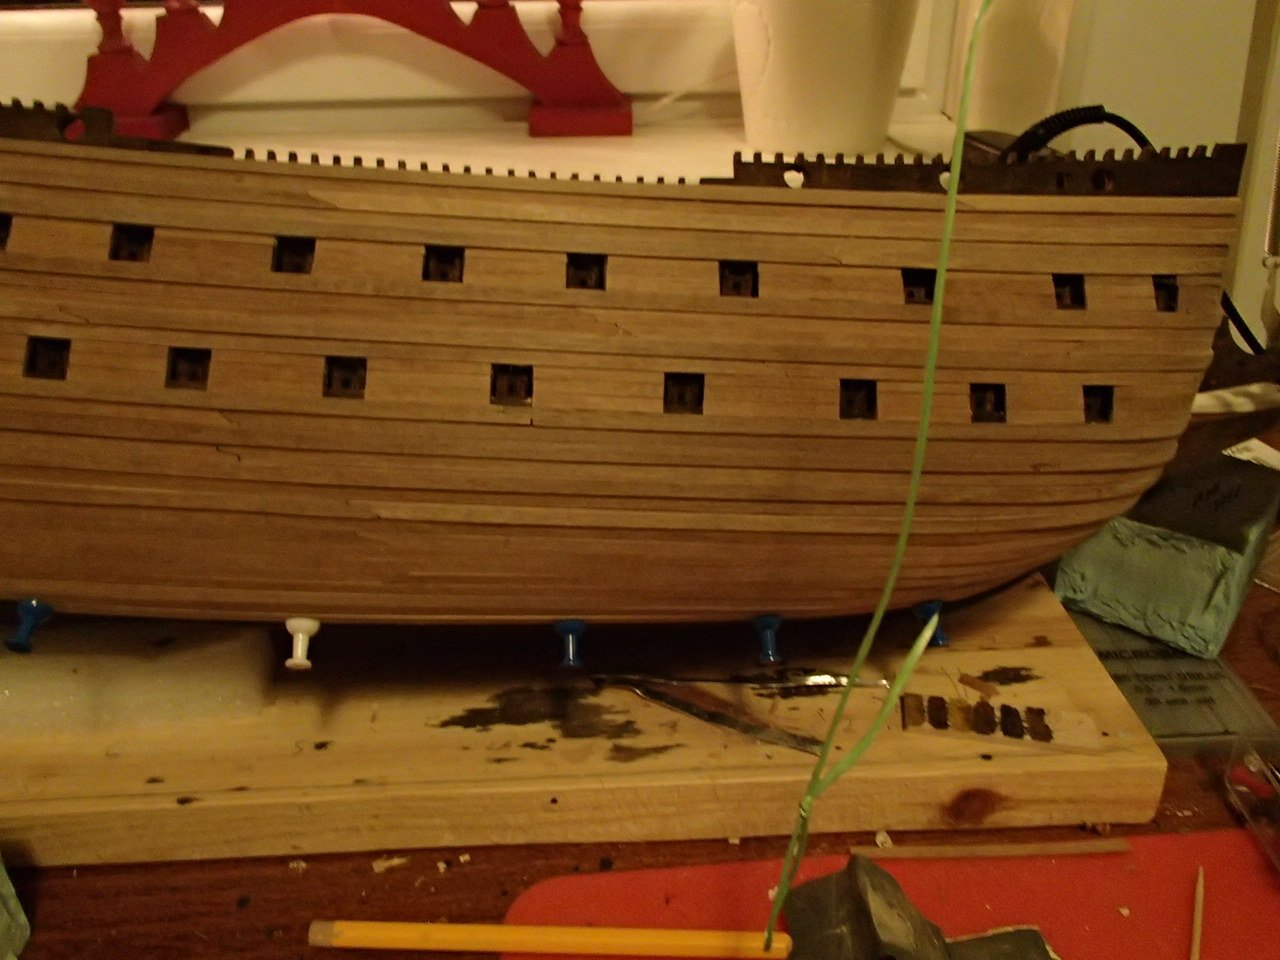
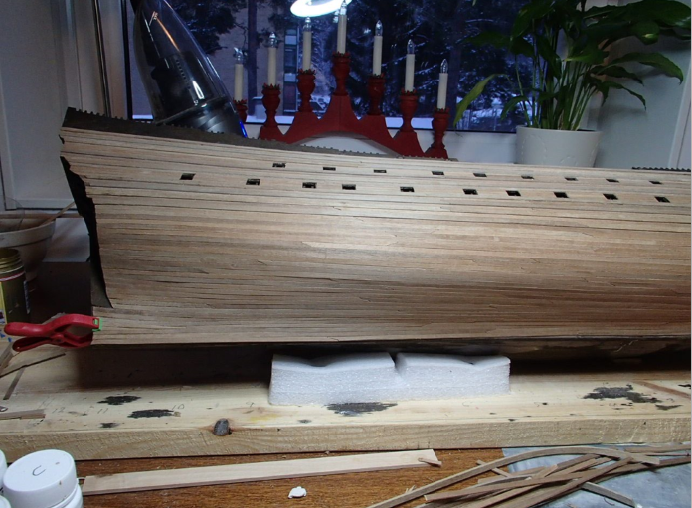
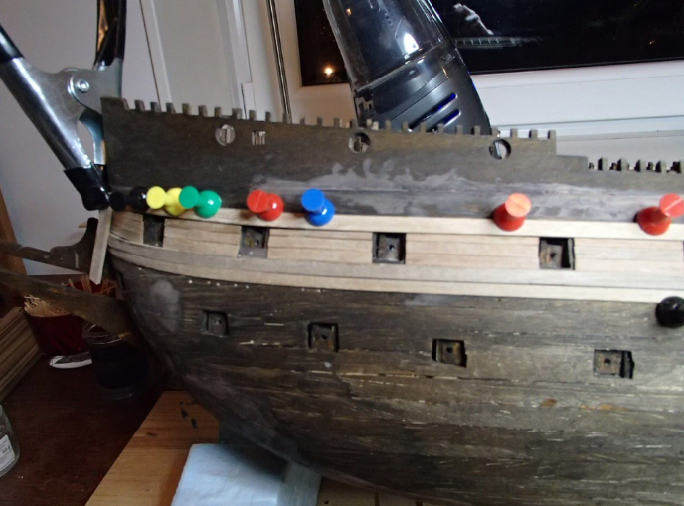
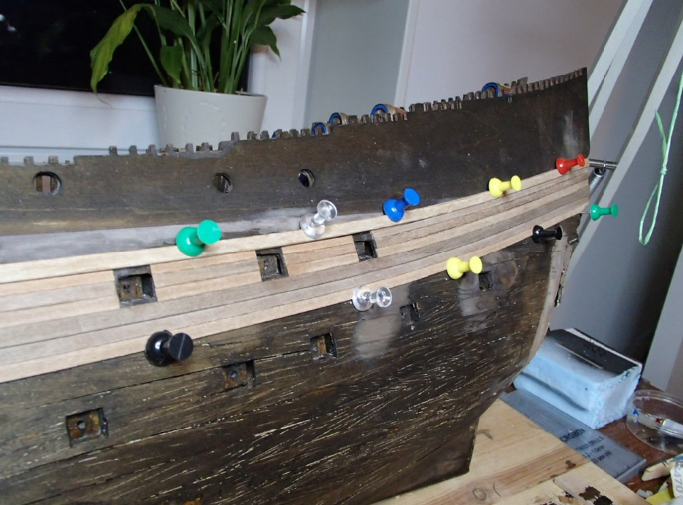
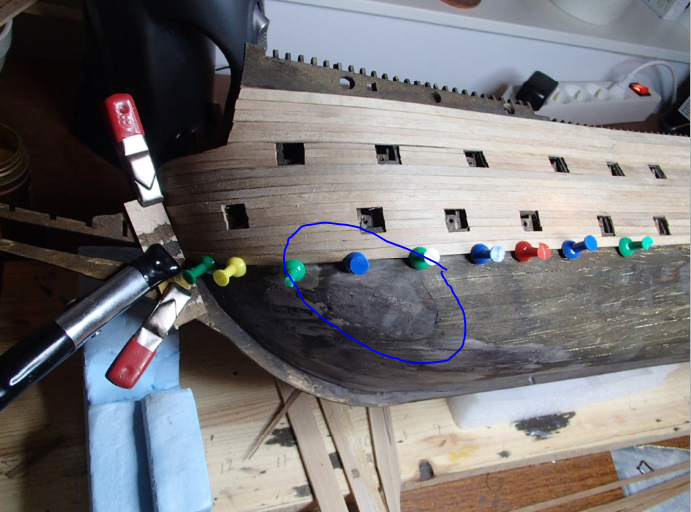
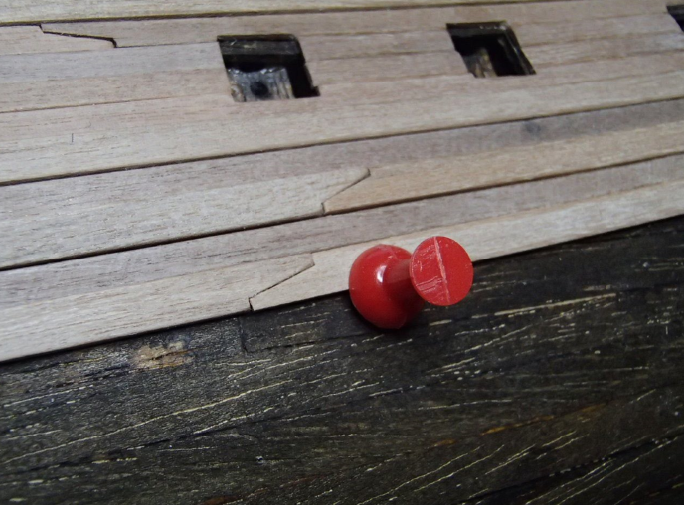
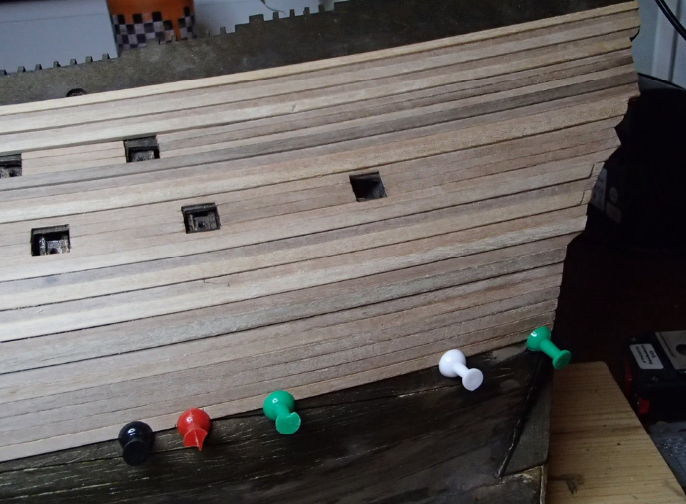
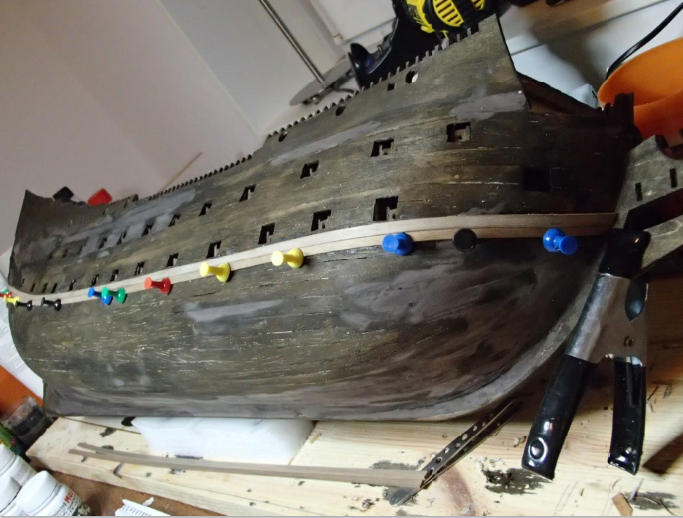
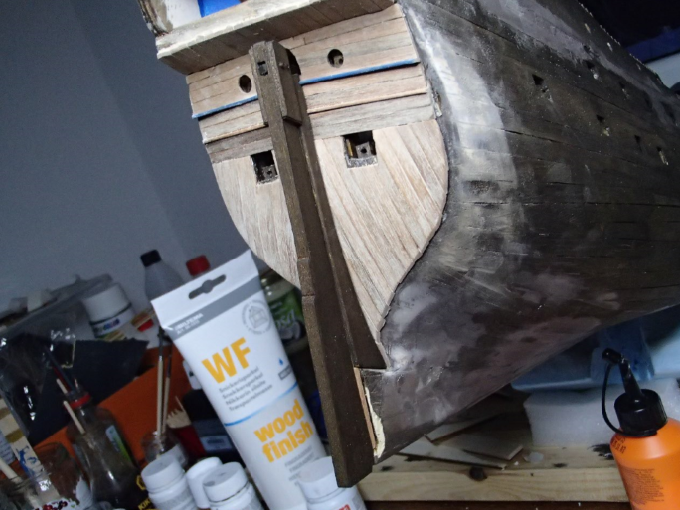
Planking second layer, last picture was from July. This picture is from Christmas time ( candle stick in the window) The stern part or rear end was ok but the front/bow was not easy. I had to fix wood in opposite direction. Not nice but the curvature was to much in two axles at the same time. And then do the same once more. For a moment I had forgotten about the other side.😬 I followed the same procedure using the plastic "fake" ports as templates for the wood. It was tricky to get the right length but then I did not have to fix the openings afterwards. I started one level up with the first stripe. Just under the ports of the upper cannon deck. So much better finish using walnut than the pine in the first layer. In the following picture I mark the area with most grinding. This area was very thin. I saw this from the book way to joint the ends. Do not know what it is called. I had to do the same fix at the bow as on the other side. Not nice but maybe I should have started from the keel and upward. I was also a bit confused how to and the planking towards the keel. It had to match the base/pedestal. Finally planking done (may to mars) - I decide to fix the front. With a mix of both tooth picks and nails. Coming up - the balcony 1, 2, 3 and 4. I did not look forward to this part. I know it would not be easy to hide mistakes. I noticed that I had one cannon port were it was not supposed to be one. Here a picture from the Wasa vreck: I decided to to each balcony detachable (and to fixed them later). In this way I could remove them when working on other parts avoiding breaking any details. I even thought about making a secret opening to hide stuff in but skipped that thought.


-
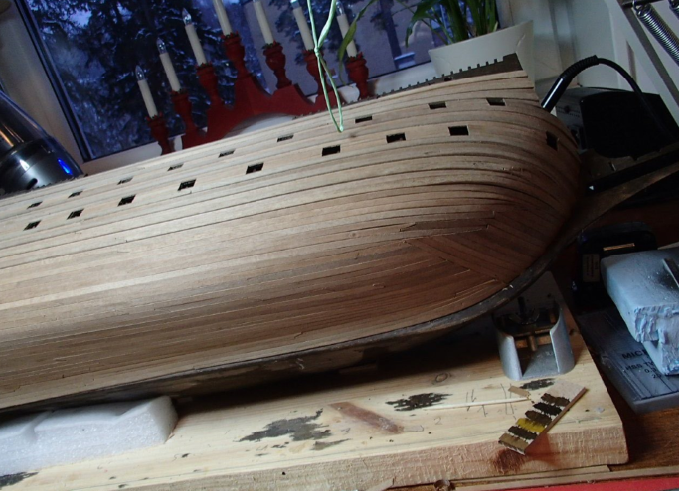
Some more pictures from the second layer of planking: Here is were it was getting tricky: Progress:
-
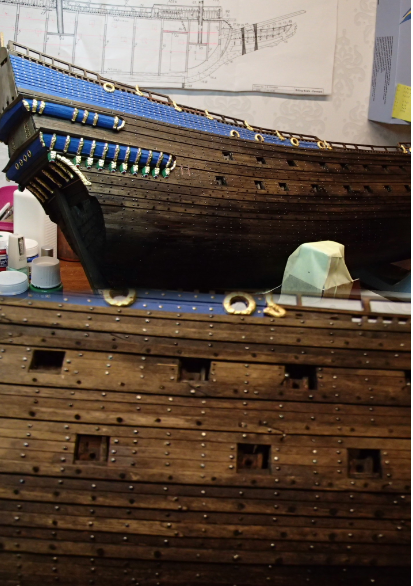
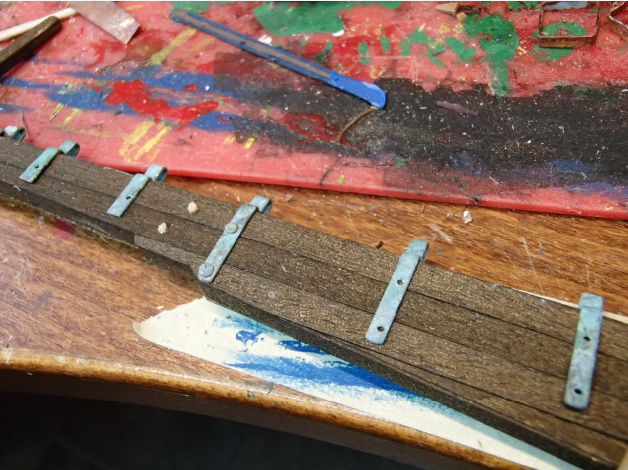
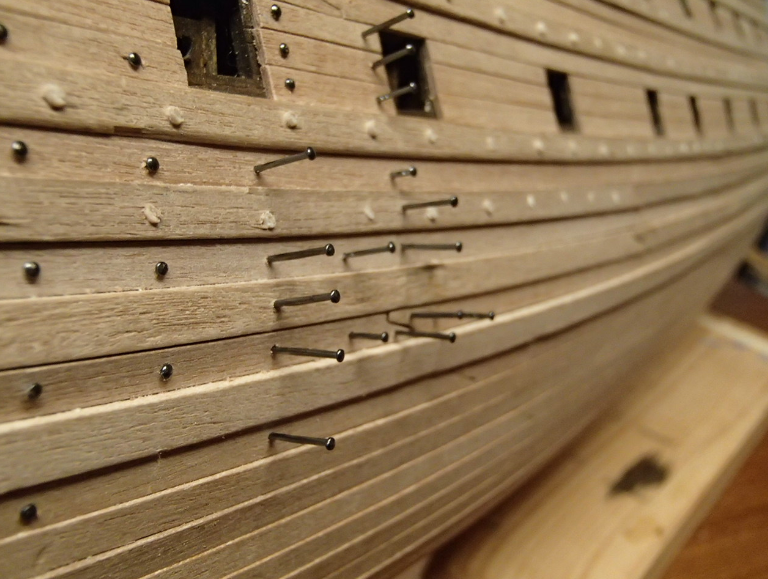
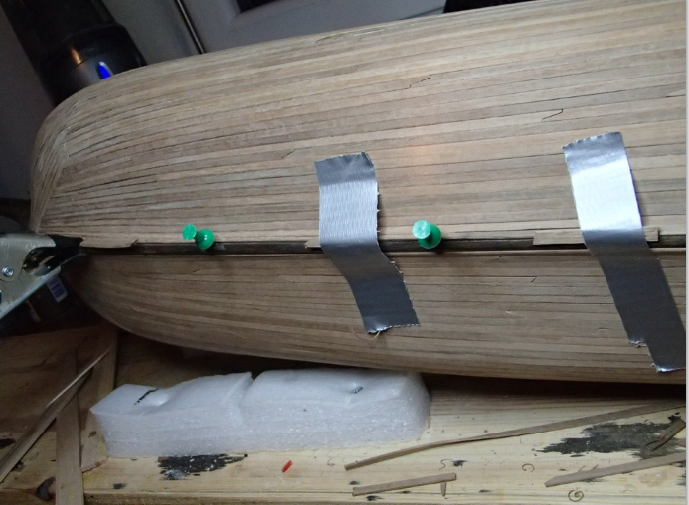
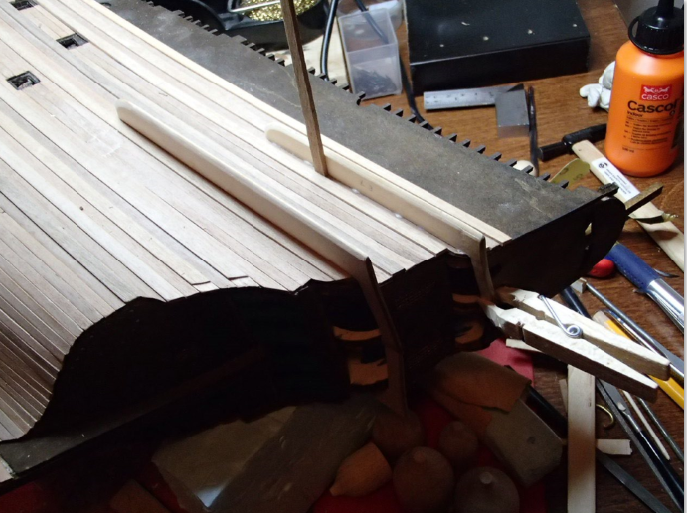
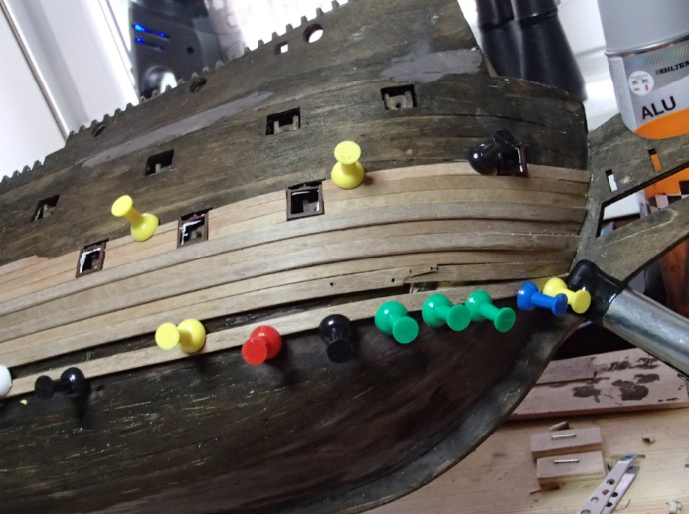
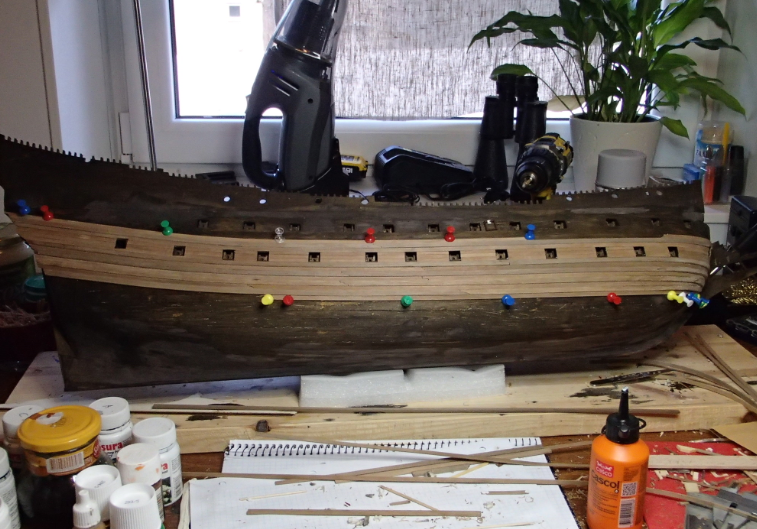
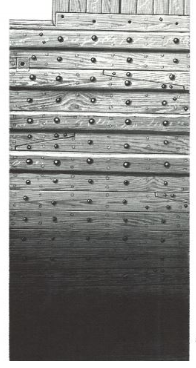
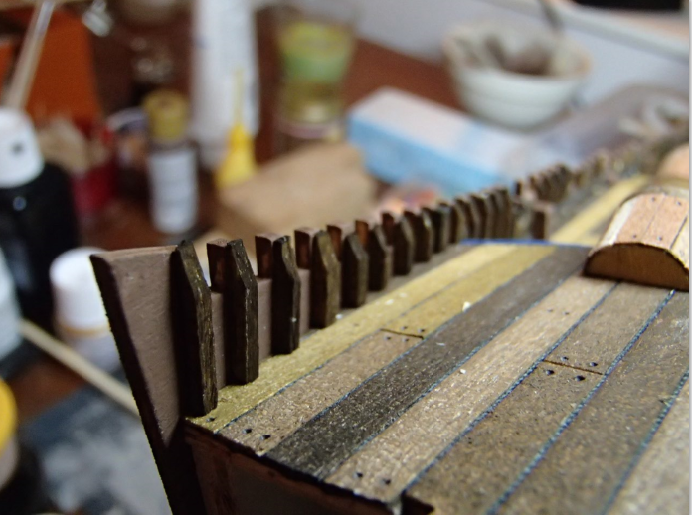
Planking the final layer with Walnut wood. Starting at the stern. Picture from the book I mentioned before: I bought (lots) black nails from Amati to the most hull area. At the stern wood, tooth picks. I also decided to go with the dark oak stain. To finish the hull I used a own mix of wax, bee wax, turpentine, soap and water. As can be seen in the picture above - the blue and above is still not fixed. Same as for the rudder. Applying the wax-turpentine mixture. Smelling like nothing else. That the "easy" part with only straight pieces of wood. I did not use heat for bending ( I will try heat on my next project) but soaking in water and bending while drying: I thought long and hard on were to start with the first stripe of wood.

-
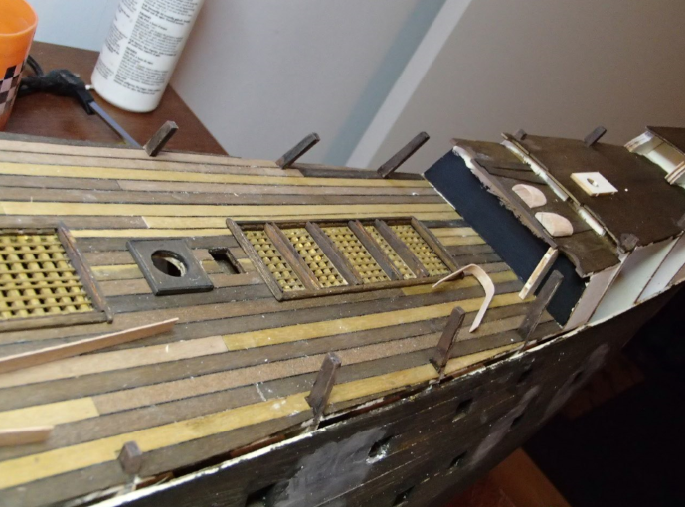
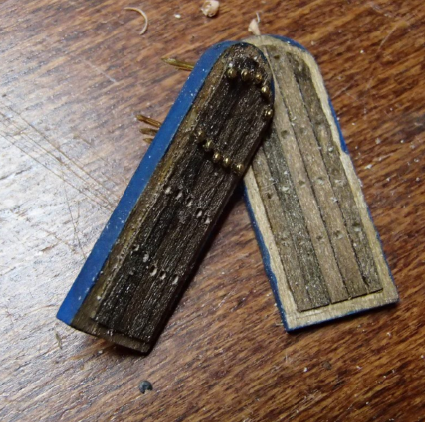
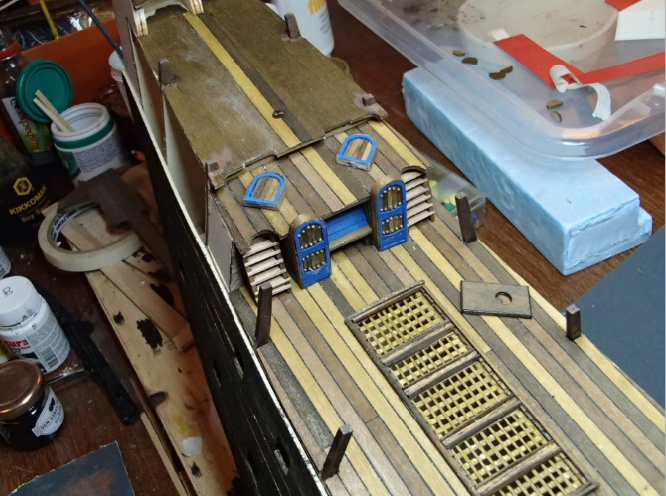
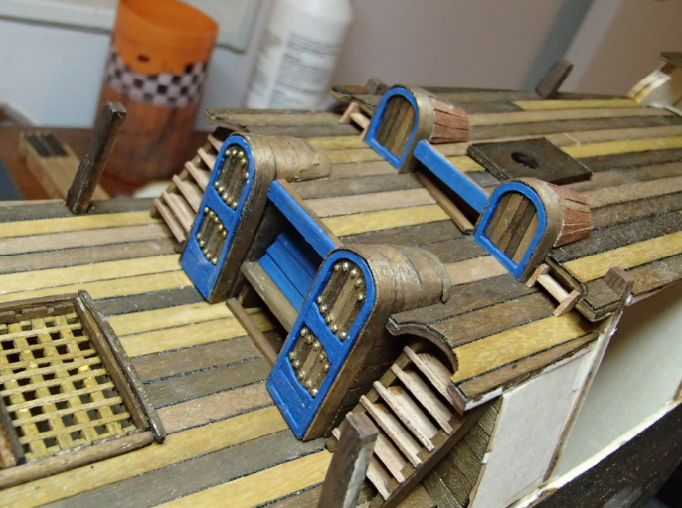
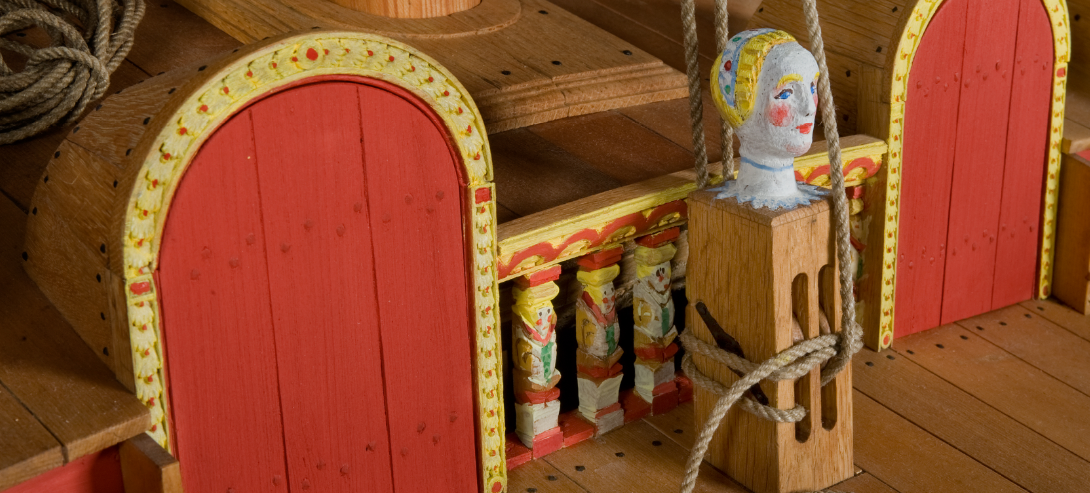
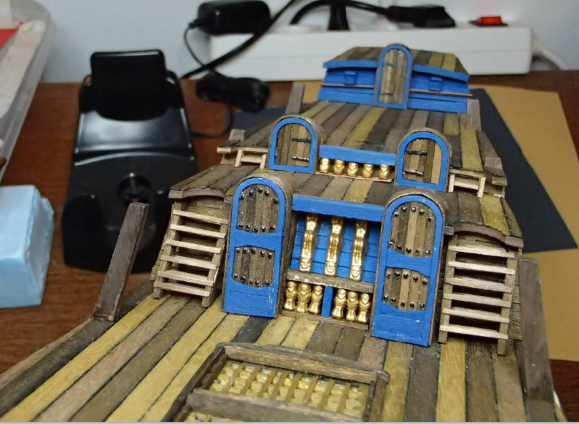
Moving on with the doors. I kept the "blue" theme. I had to improvise around the "roof" part of the doors. Compared to the Museum model: Complete deck: And ornaments in gold: I then fixed the long upper rails, fixed small pieces on the inside with tooth picks: As can be seen, I have used an soldering iron on the deck to make "nail" markings.
-
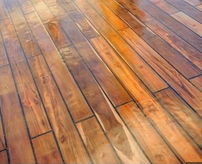
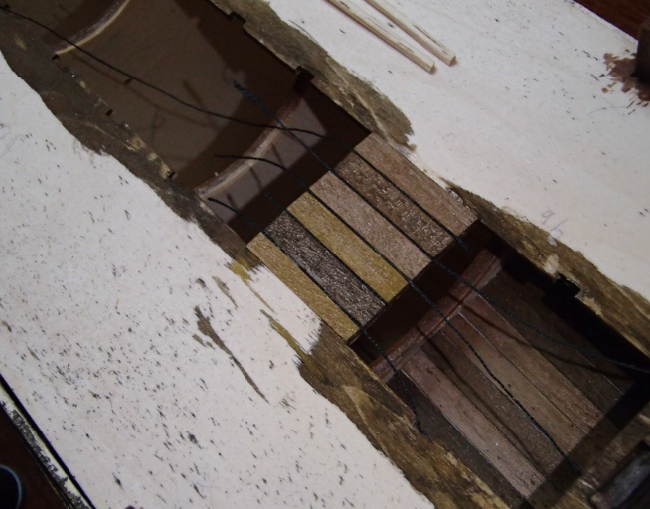
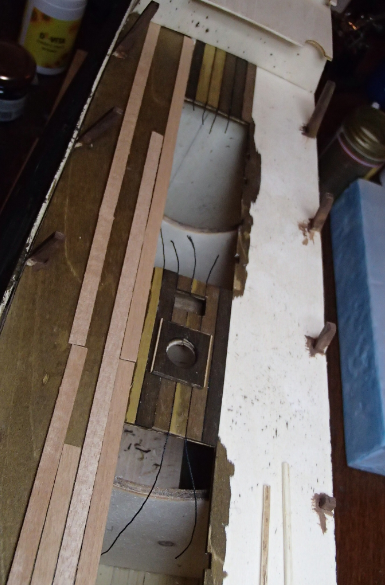
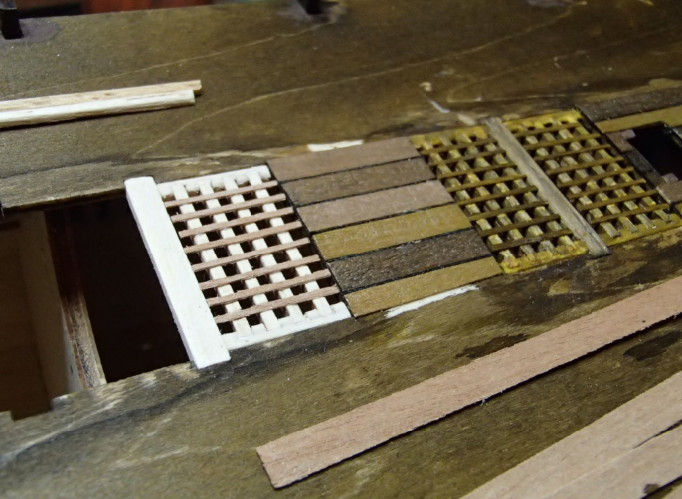
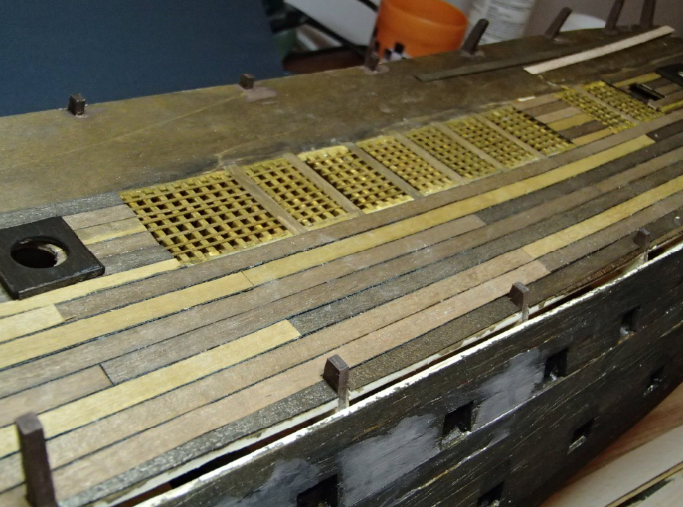
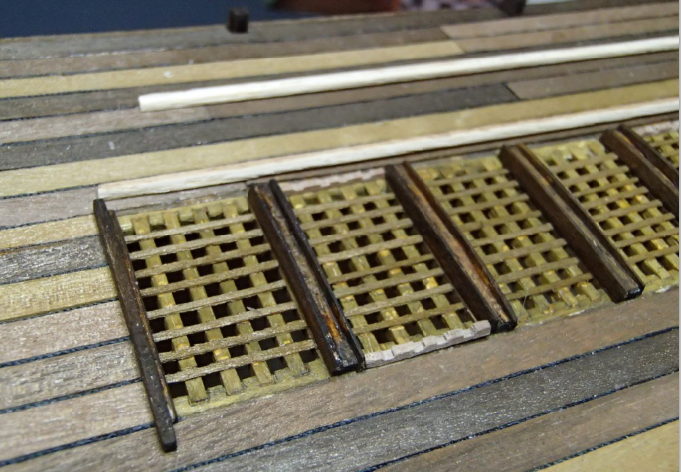
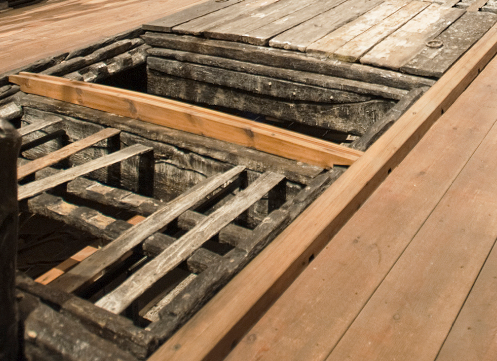
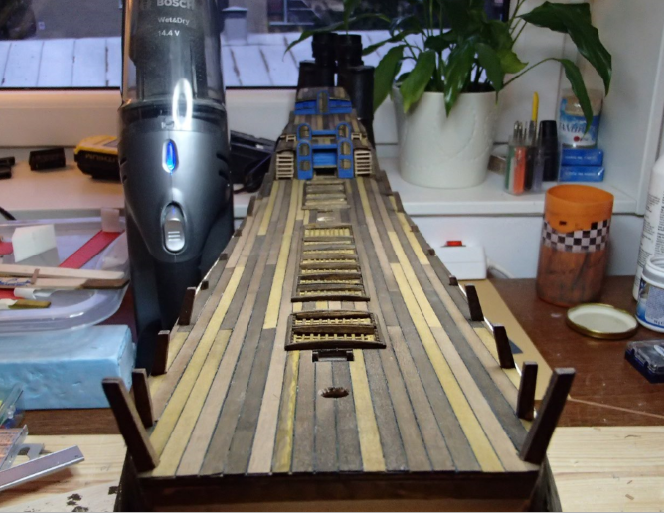
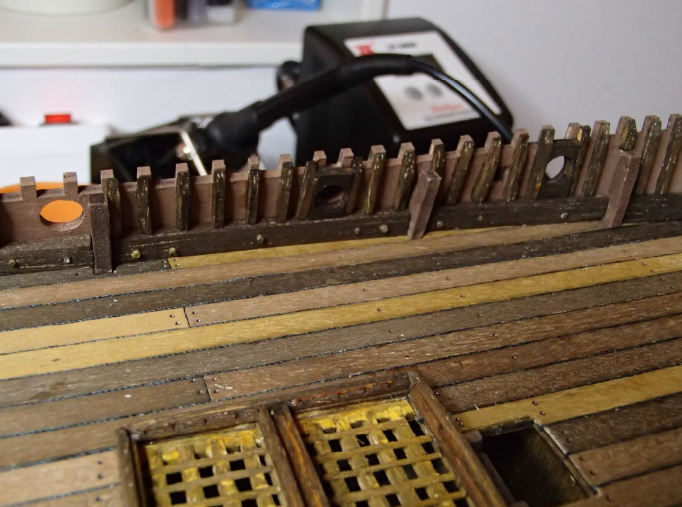
I had to use some filler and then dark stain. All "cannons" were mounted and making sure the holes for the cannons were pointing correctly. Then I had an idea of a deck with different nuances/gradations of oak stain on the wood. I put black threads between. The openings needed some more details: I was thinking about having lids as seen here on the Wasa wreck. But it would cover the work..