MORE HANDBOOKS ARE ON THEIR WAY! We will let you know when they get here.
×


Steve20
-
Posts
168 -
Joined
-
Last visited
Content Type
Profiles
Forums
Gallery
Events
Everything posted by Steve20
-
Many thanks for your reply, Jagger. Your process of using the bandsaw for the initial slicing of planks then finishing them with the table saw is one that I will follow. At the moment I am still looking for the optimum blade for the Proxxon FET Table saw I have, so in the meantime I'm getting more familiar with the bandsaw. I hope you can bear with me on this. I've not used a bandsaw before and started this thread to learn how best to cut stock with it. I'm am now succesfully doing this; thanks too all who have given their advice to me on here. I am now keen to take things a step further and see how much can actually be done with the bandsaw. Steve
-
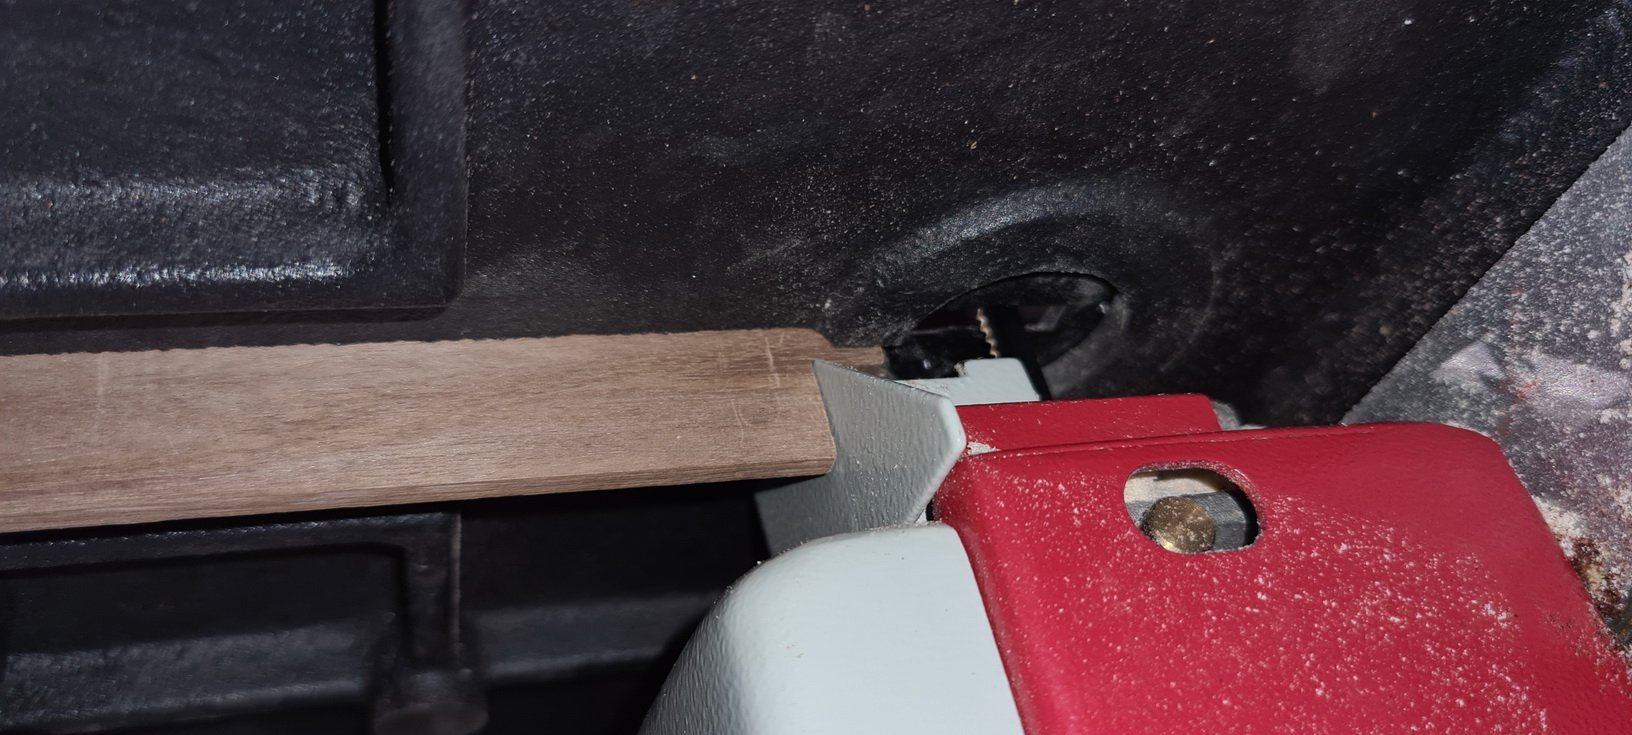
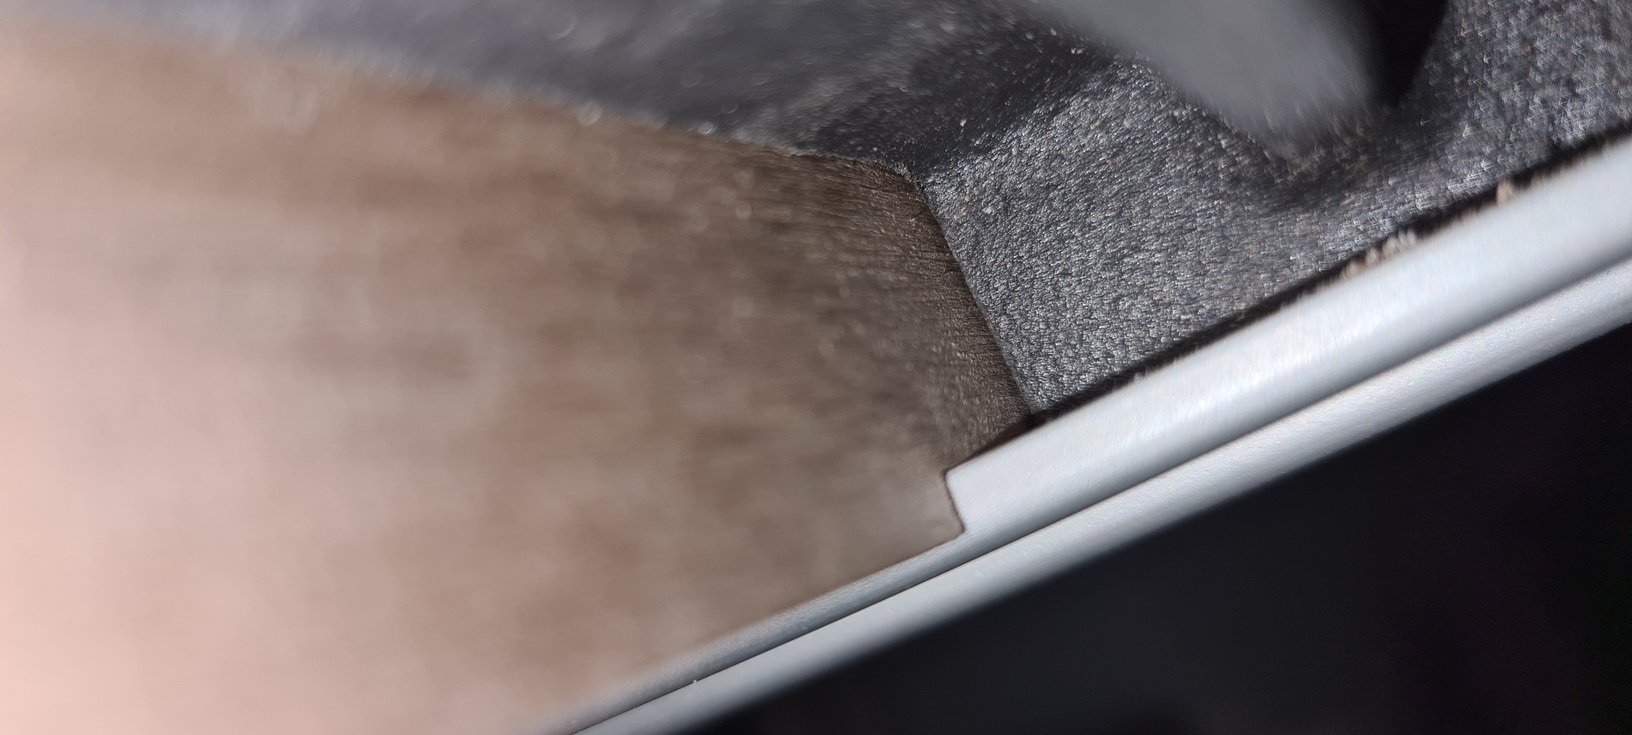
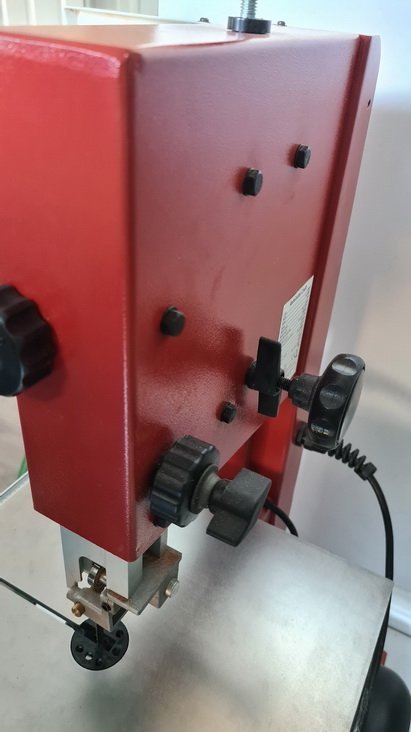
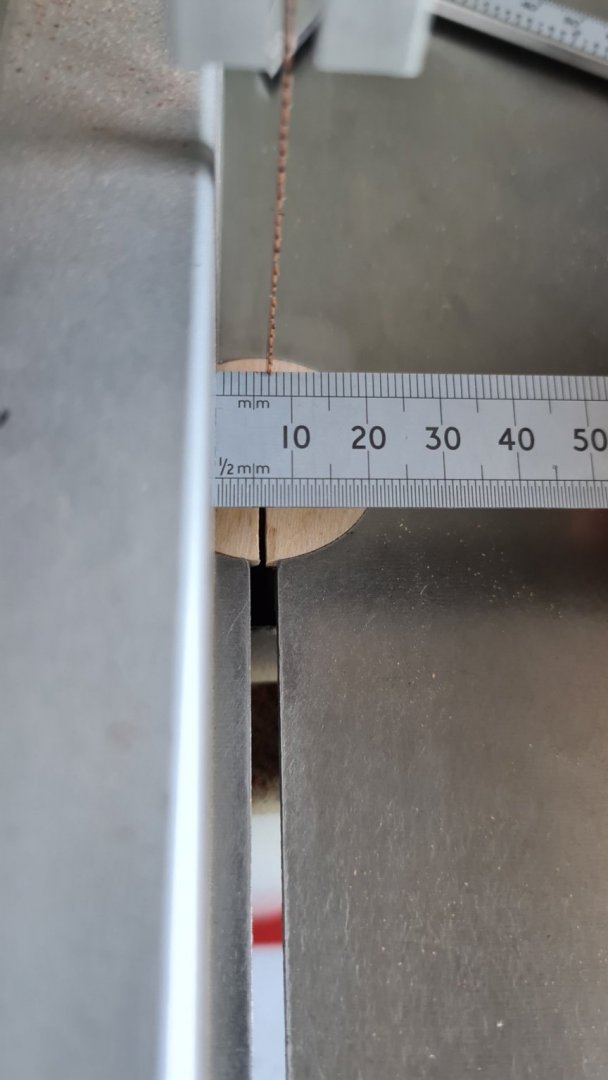
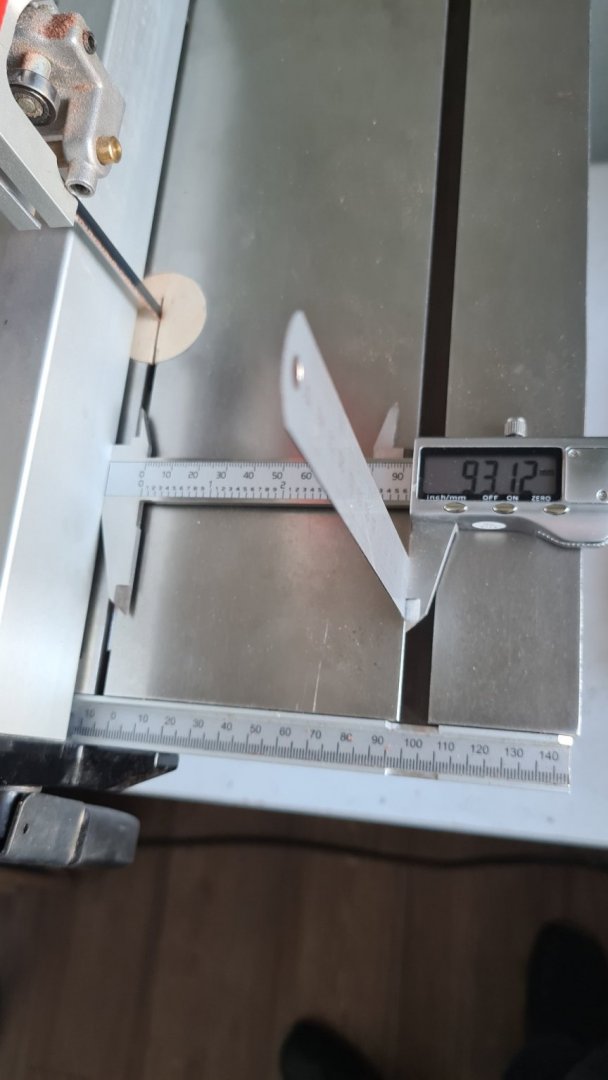
When I came to cutting the last strips off a billet, I found it was falling into the slot in the centre of the table, so I decided to make an infill for this. First, though, I checked that there was a way that would prevent the infill from slipping forward into the saw blade. Without this, I wouldn’t make it. Fortunately, there is a steel plate sitting 23mm in front of the blade and 10mm below the table surface. Also, at the front of the table itself there is a ledge on the underside that I could sit the other end of the infill on. By making both ends of the infill a close fit, it sits firmly in position and is impossible to remove unless both ends are lifted together vertically upwards. I will also make the new zero tolerance throat plate out of the same Walnut but I’ve got other things I want to get on with so I'll do this later. As I’m new to bandsaws, I would appreciate you letting me know if the infill is not an advisable thing to do.

-
Very good idea, Mark, I didn't think to stiffen it. I'll will glue cross braces on the underside when I make the next one and I'll look into applying epoxy. That should really do the trick. Thanks Steve
-
Thanks again No Idea, I'd really appreciate if you could give me details of the UK wood supplier. Some of what I've previoulsy bought is not that good.
-
Jaager I did misunderstand what you said in your earlier post about tracking, but I I get what you mean now. I've just sawn a length off 1 1/4” thick Cedar (same piece as in the pic at the start of this topic) and the cut was straight and uniform, so it looks like I don't have a problem with tracking. You are right in assuming I'm pushing the saw to its limits because I've been asking advice on ripping thicker pieces. However, the ripping I will actually be doing is really very limited. The Cedar I've just cut will now be sectioned into smaller planking. This will be enought to last for a year because I only need about 65 linear feet of it for the Winchelsea deck planking. It's a similar story for the 1" thick Pear. I plan to make a few 3" slices on short pieces just like in the trial I did, above. I took this slow and the machine handled it quite well. For most part I will be lopping off 1" thick lengths for cutting into 1/4” planking or other smaller items. Again, the Winchelsea only needs a limited amount of this so I won't be overworking the machine. Certainly, if I need a bigger bandsaw I will buy it. Steve
-
No Idea, Thanks very much for the link to Tuffsaws: They have a good range of products and their website is really informative. I see they recommend SuperTuff Premium and Hobby/Thin Gauge Blades for the bandsaw I have. For sure I'm going to buy a range of Supertuff Premium and I'm thinking to buy the 1/4" Hobby with 24 TPI because it's only .014” (.35mm) thick and I'm hoping this will have reduced kerf on the thinner strips. Steve
-
Unfortunately, Mark, neither Byrnes nor Martindale are readily available for us in the UK. If they were I would bought Byrnes for sure. Steve
-
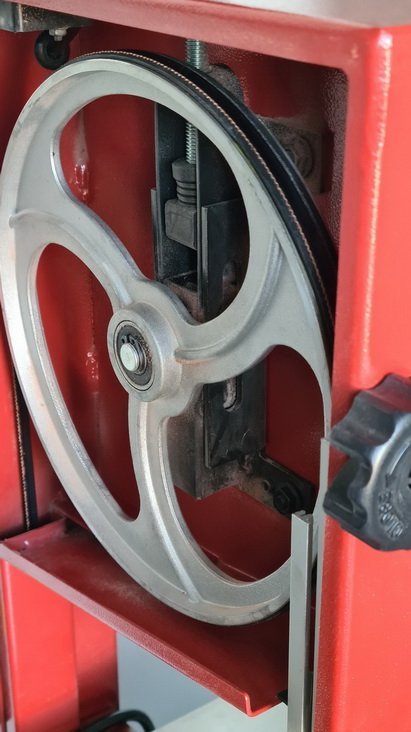
Jaager, I'll only use the insert when making thin or critical cuts because of the debris problem. This is not just because of zero tolerancing; the insert provides a smoother transition through the saw blade than the stock throat plate as it is completely flush with the bandsaw table surface. You are right in that there isn't a lot of choice in blades for a bandsaw this size (1400mm). Axminster offer 11 (steel) own brand blades including an 1/2” 6 TPI blade, which I am trying out on the next pieces I rip. The only 4 TPI blade they offer is 3/8". As I currently have only 2 1/2” cu ft to RIP and my maximum depth of cut will be 3", I'm hoping the 1/2” blade will suffice. I going to buy a spare 1/4” 14 TPI blade as I've been happy with the performance of this. If the 1/2” blade is OK I'll buy a spare also, otherwise I'll try the 3/8” 4 TPI. Axminster is always prompt in their delivery so there is never much of a wait time. Axminster advise that the blade should be centered on the rubber band that sits in the top wheel gullet. Before I ripped the Pear I did this and adjusted the tracking (easy to do using the tacking control knob (below, centre rear). I've just checked now and the tracking hasn't shifted by even a small amount. I held off buying a jigsaw and waited to see if the bandsaw alone would suffice and so far it has. Of course, if I get serious about ripping I'll get something bigger and put it in the garage, but for my purpose right now this bandsaw is perfect and I'm very pleased with it. Steve
-
You're right, Mark, the throat plate is only 3.5mm thick ply and will not take very much in the way of drilled holes. I will give it a try, though, but I'll progress the jig and feather board first. I have a good vac (Festool CTL Midi) sitting close to the bandsaw and I plug it straight in when I'm sawing. It sucks in almost all of the dust/debris away and there hardly any left on the bandsaw table when I'm use the stock throat plate. Maybe a (drilled) throat plate made from hard wood would be the answer. Steve
-
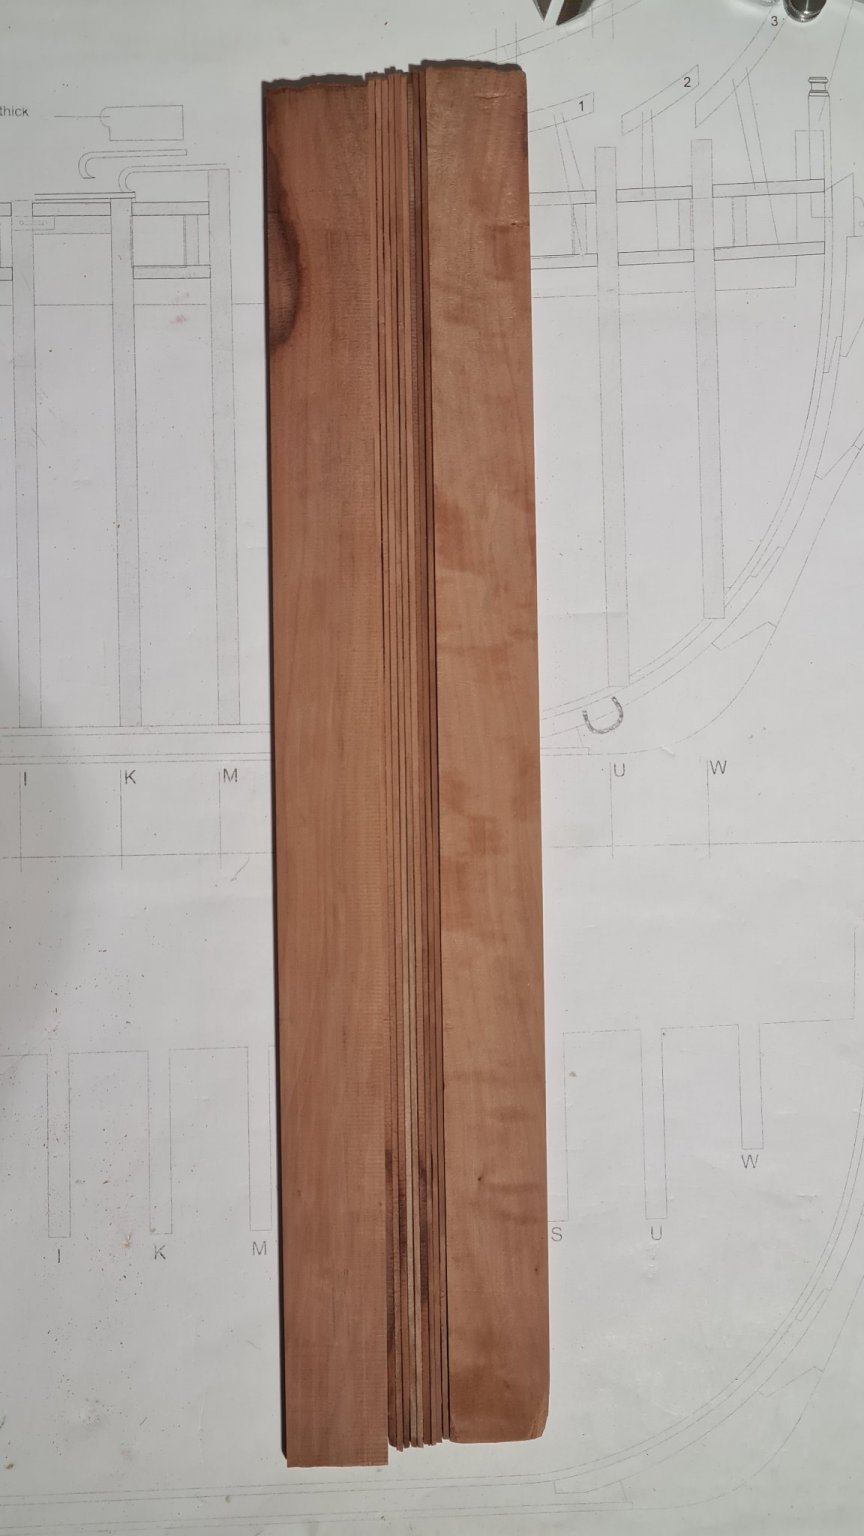
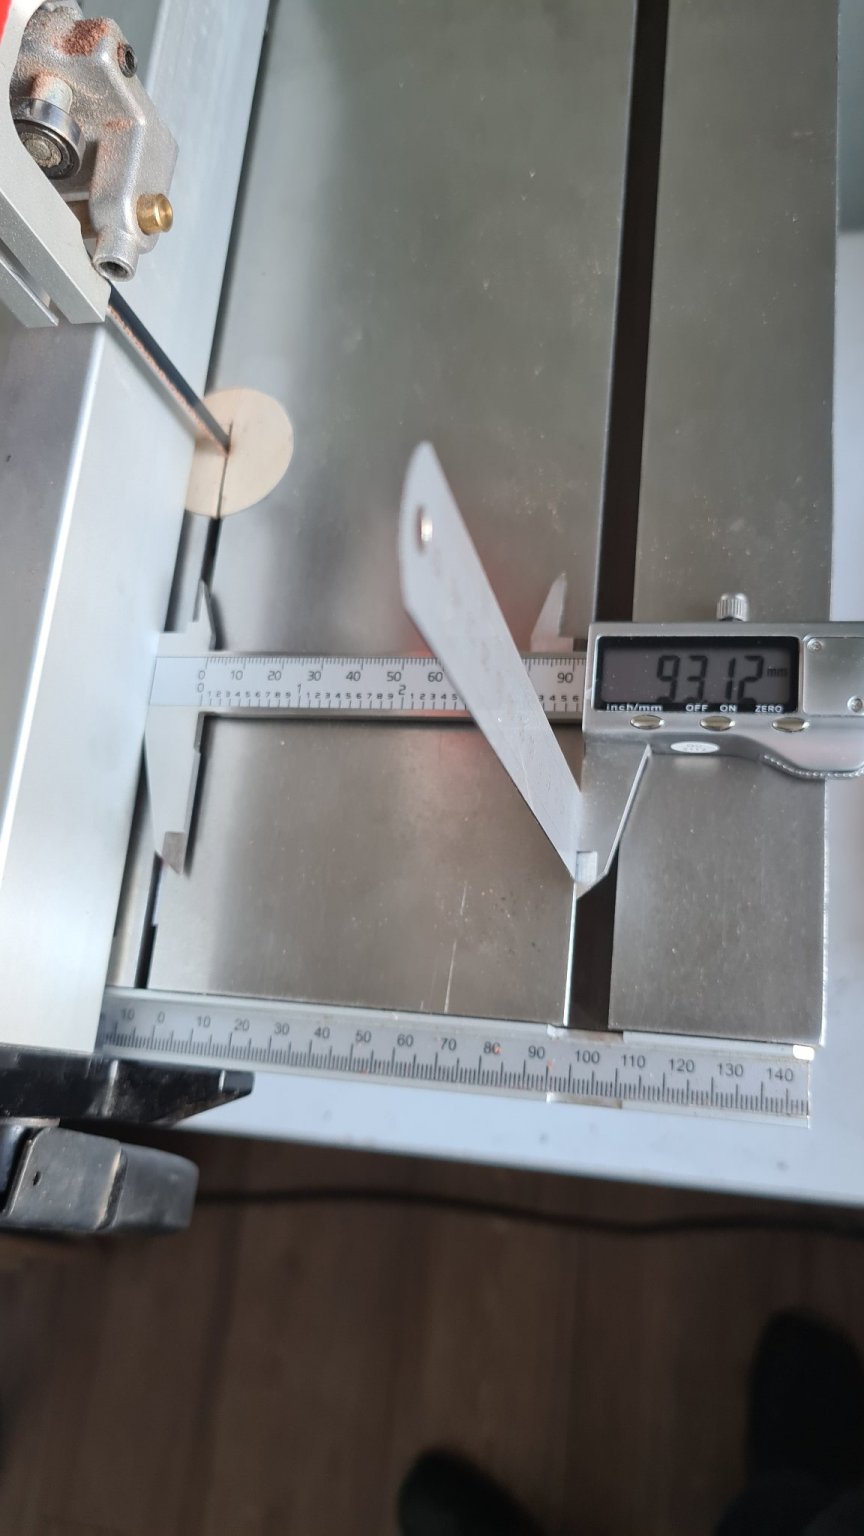
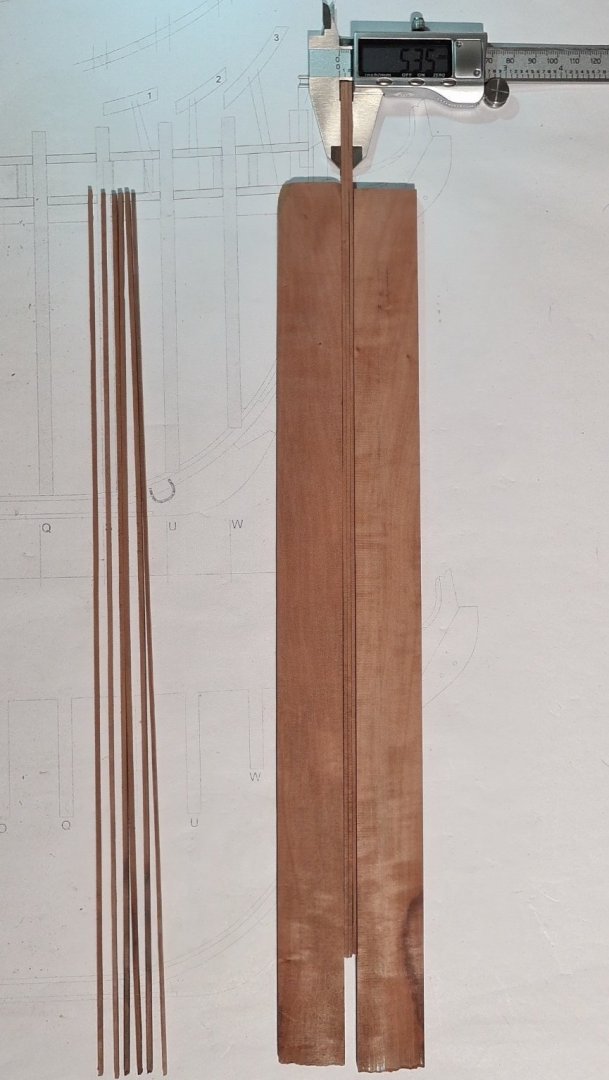
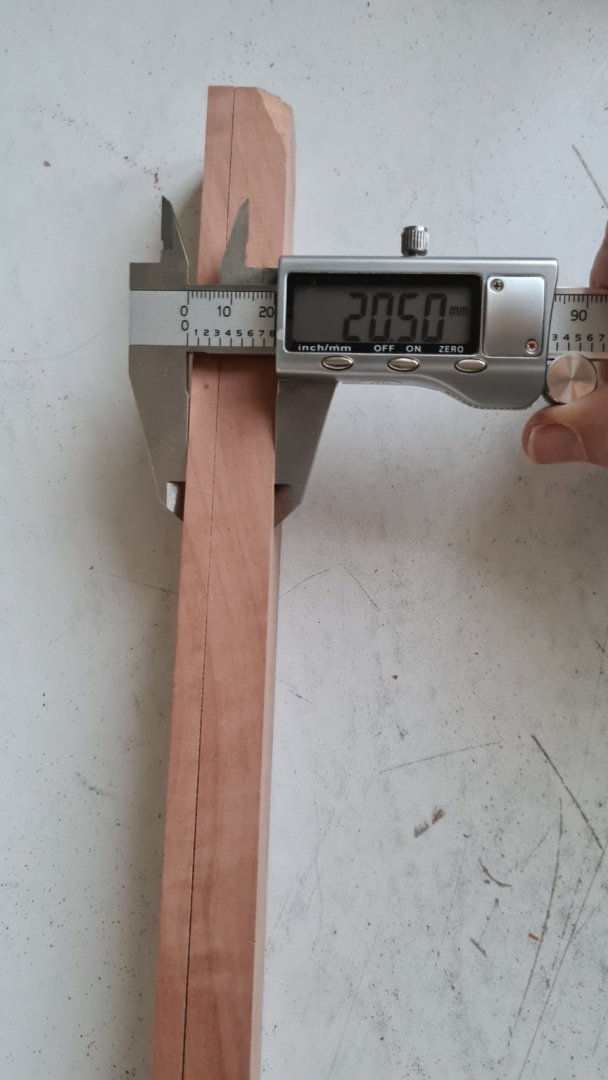
The strips are not quite a good as I would like but are better than I expected this far in. With a proper set-up on the bandsaw I know I can produce better. I found during sawing that any variation in horizontal pressure on these thin strips did vary the cut thickness and you can see this sometimes in the pics, particularly, on my first cuts. I will make the feather board that Bob has recommended as well as a suitable fence and jig to help prevent this. I used the 11 cut strips to measure kerf so I can calculate wastage. Together these measure 1 ¾” (20.18mm) wide in total. The original 5/32” (4mm) billet was 1 9/64” (28.83mm). The difference is 11/32” (8.65mm) and dividing this by 10 cuts give an average kerf of 1/32” (0.86mm). The average strip width cut was 9/128” (1.83mm). As a straight calculation (not considering depth of cut and volume), when cutting strips this thick the wastage due to kerf is 30%. The thickness of the blade I used is 1/64” (0.5mm) and the teeth measure 3/128” (0.6mm), so maybe I can reduce the kerf with a proper set-up.

-
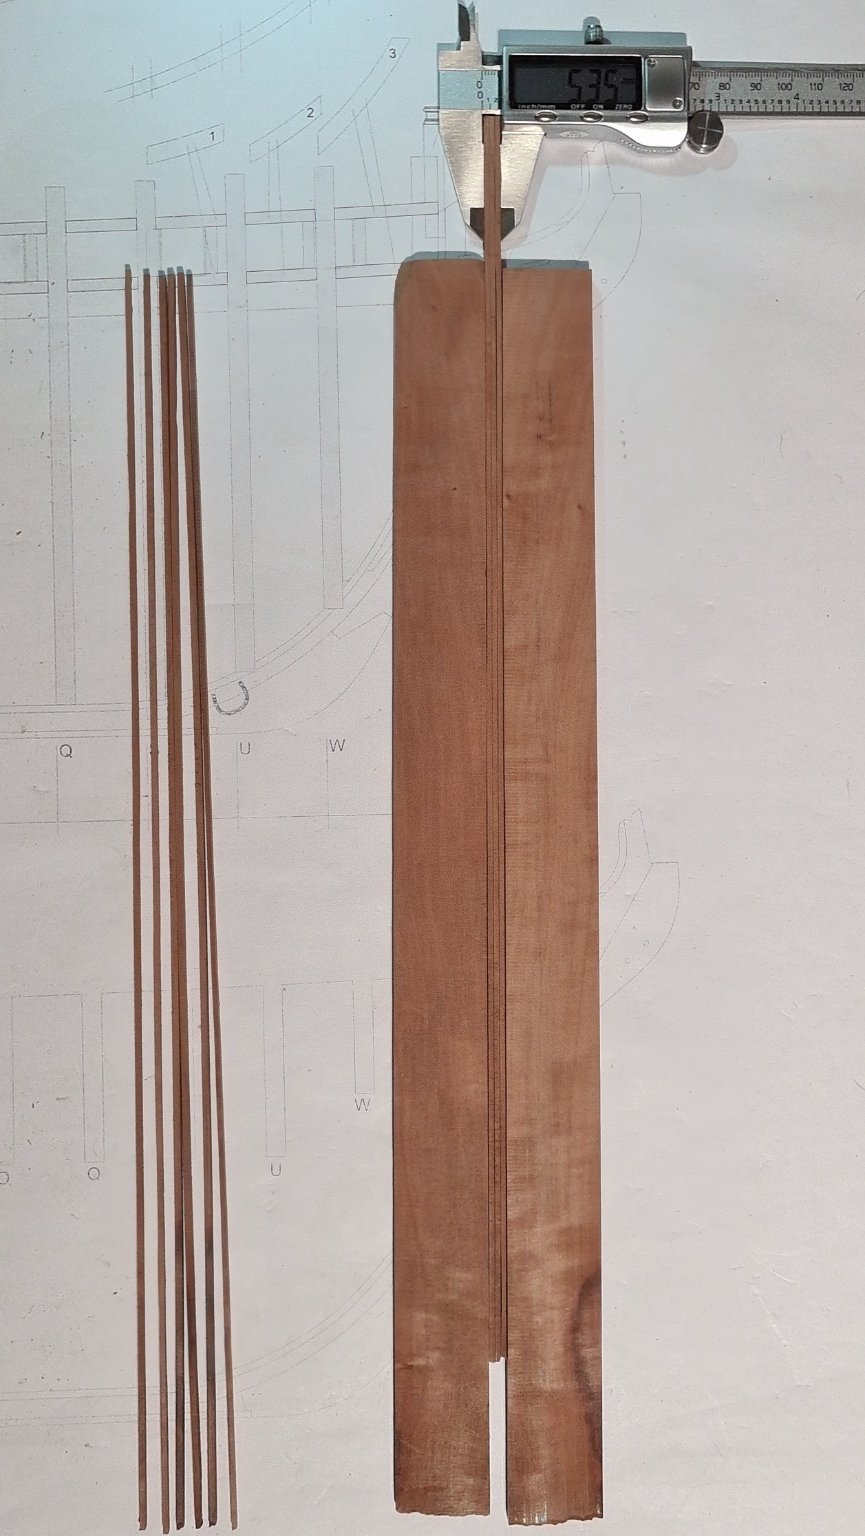
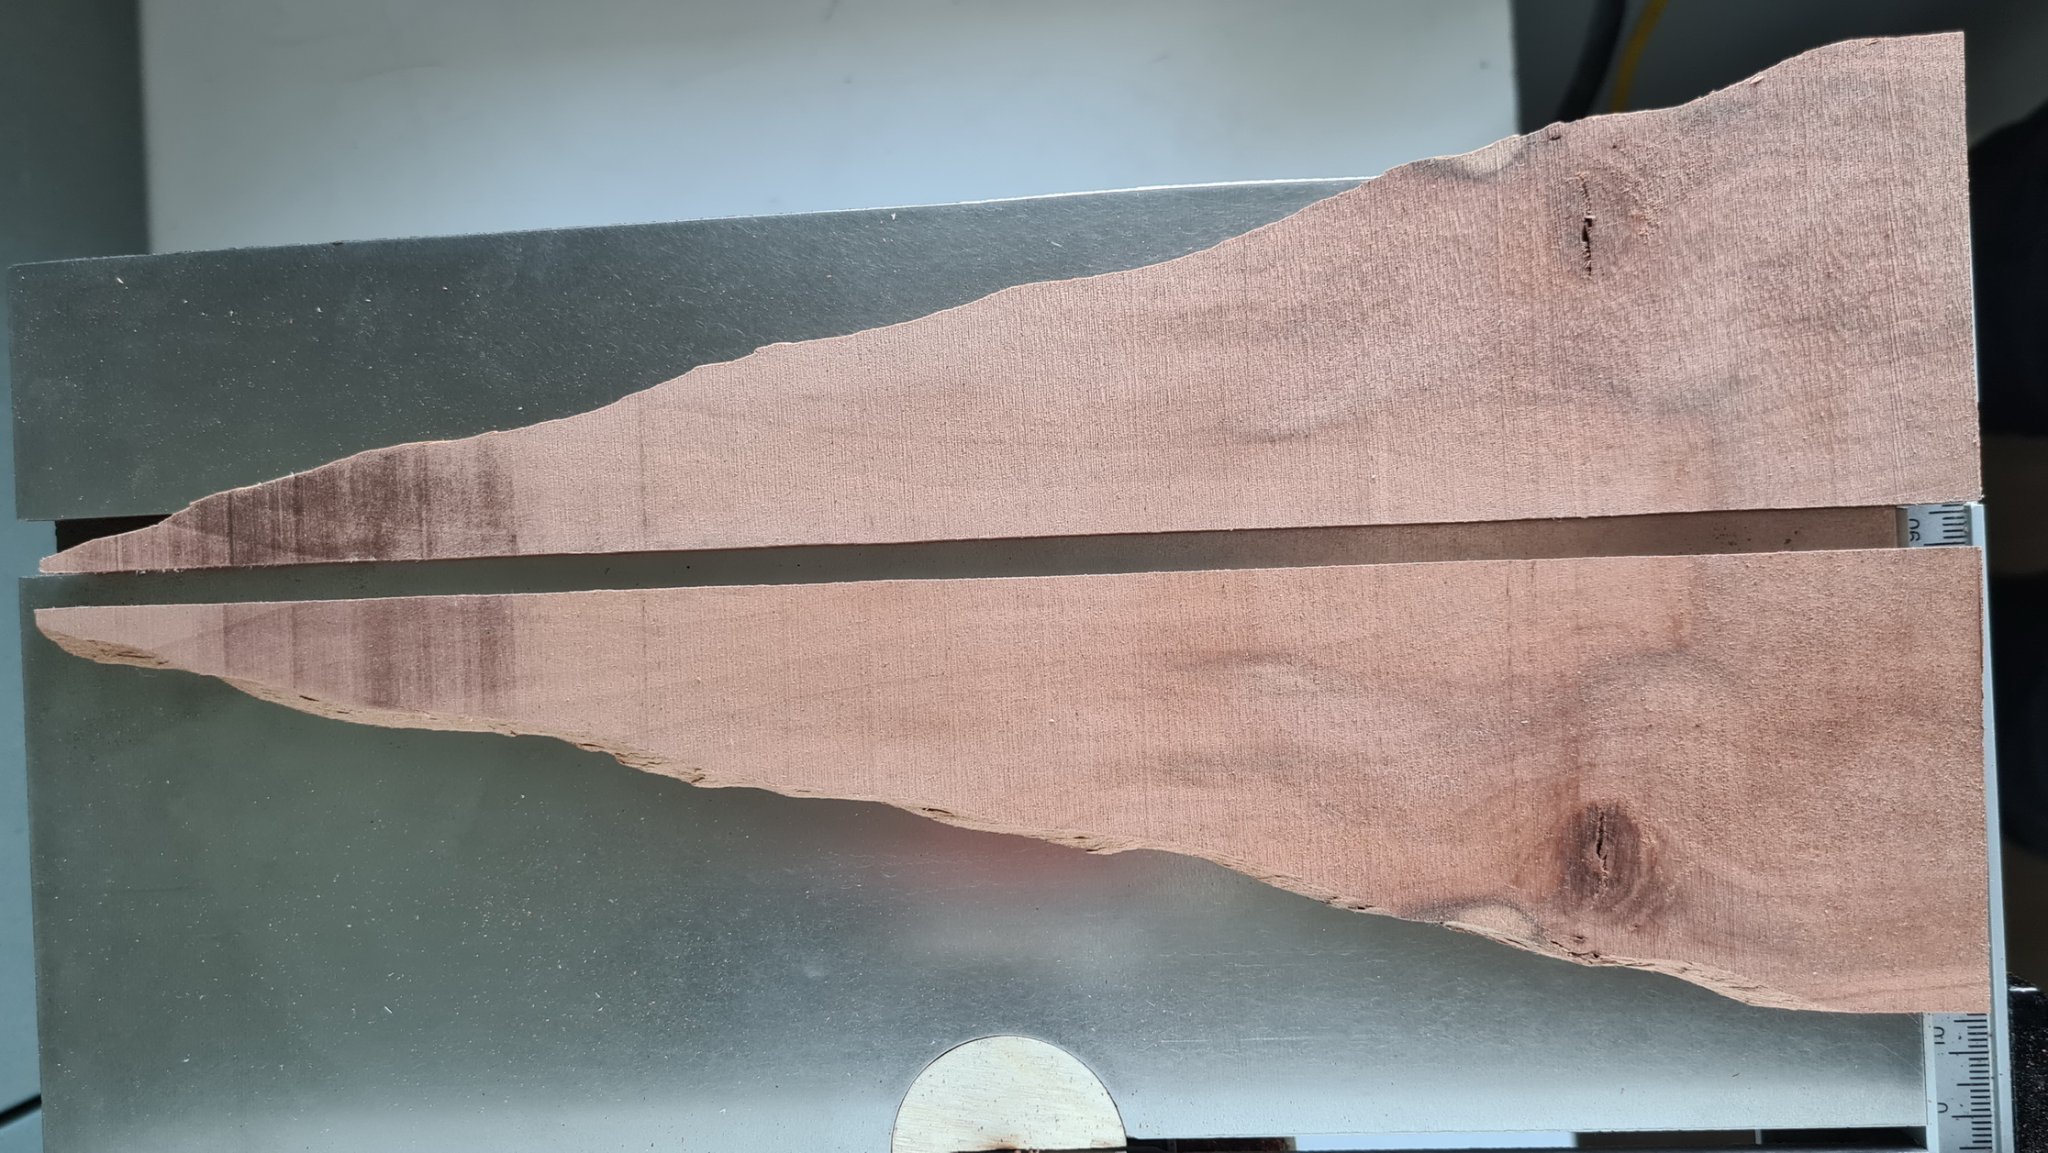
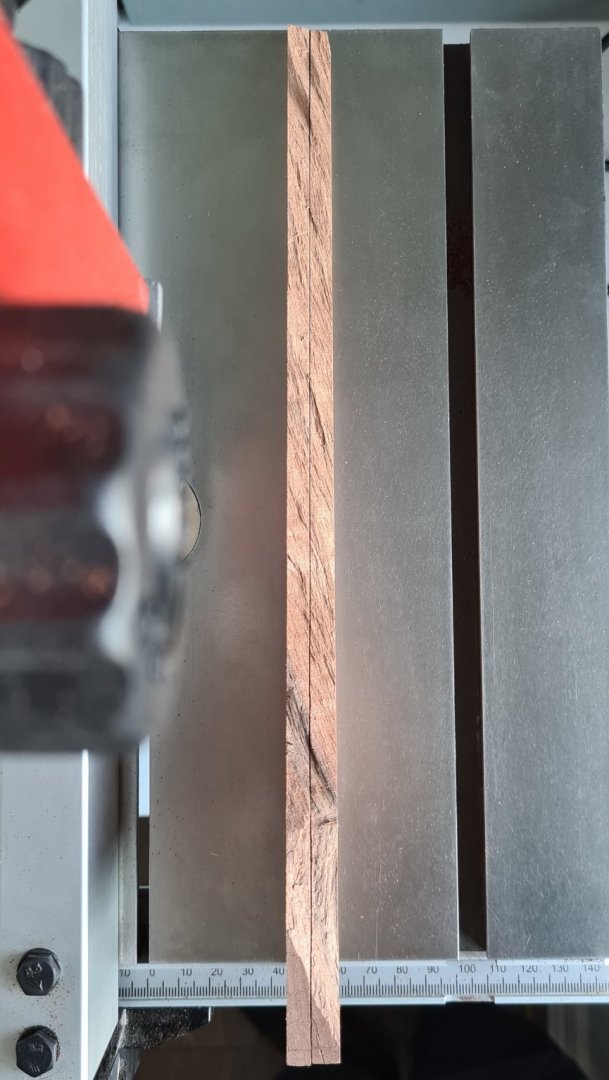
To make any pieces thinner than the above without a decent fence and feather board was not really pracical or sensible. But I was keen to try a few cuts out. I took the 5/32” (4mm) piece to cut the 1/16” (1.6mm) strips. The first ones came out a little over-thick (about 5/64” [2mm) because I overlooked the poor squareness and table contact at the lower edge of the fence. Also, I realised that I needed to clean each newly cut face before I mated it to the fence for the next cut, because even small irregularities or debris affect thickness on these thin cuts. After some more trial cuts I reduced the thickness and got a strip just under 1/16” (1.5mm). I increased the thickness slightly and finally got 1.6mm strips oversize at 1.75mm). The pics, below, are as cut with no cleaning or sanding.

-
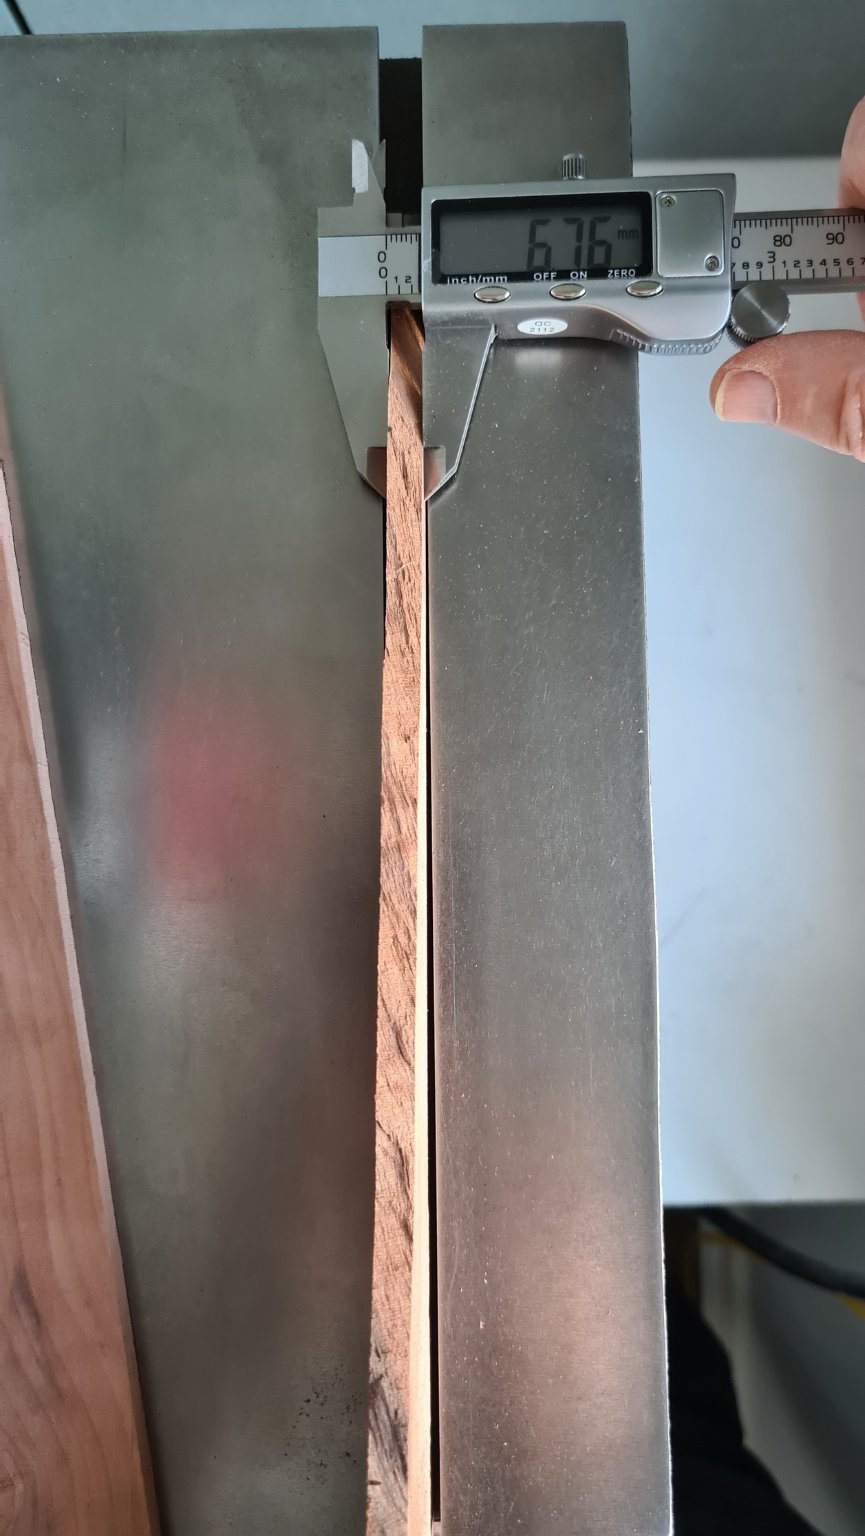
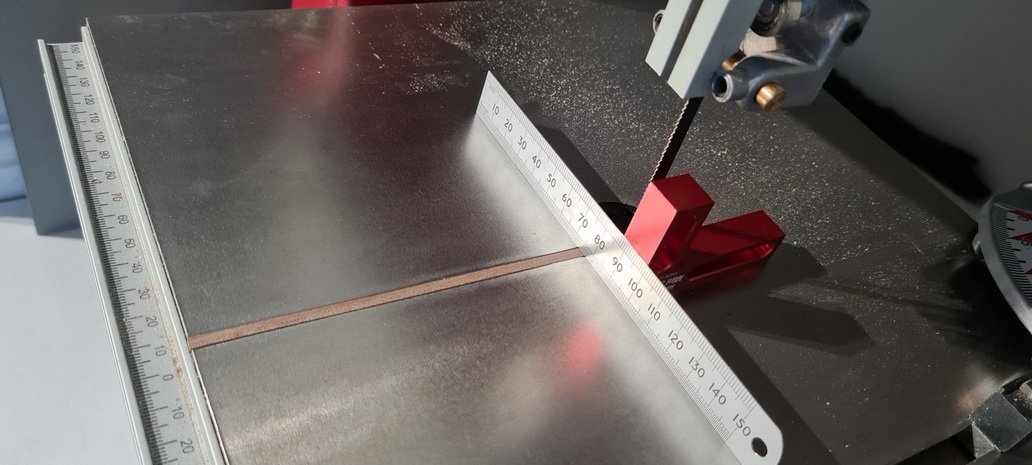
Using the ¼” (6.3mm) 14TPI blade I took a 16” (400mm) x 27/32” (21.4mm) x 1 9/64” (28.8mm) billet and sliced 2 (over sized) pieces with the aim of producing ¼” (6.3mm) planking. These came out a consistent around 6.7mm. I then decided to thickness one down to 5/32” (4mm) to cut 1/16” (1.6mm) rabbet strips for the model of Chucks Winchelsea I’m building. Once more, I made these slightly over thick.
-
I made a temporary carrier and cut the piece into sections. The pear had a curvature in it and I lost quite a lot of material flattening this in the thicknesser. This was the first time that I had used a thicknesser (I’ve only just bought a Proxxon DH40) and I knew I had to insert wood with the grain in a direction that will not engender lifting. However, sometimes the Pear grain runs in opposite directions on the same piece, so I’ll have to consider this problem in the future. Also, I found it necessary to note grain direction when thicknessing will be required on wood after it has been cut into thin sections because grain direction cannot easily be discerned on these. As to this topic title. ‘Edge cut or face cut’, with the Pear that I have got it really makes no difference. The grain sometimes runs through the wood and sometimes across it, therefore, as Jaager said; I should decide the cut and use on a case-by-case basis. I next selected a less aesthetically pleasing piece to try out 3” (76mm) cuts and I sliced two ¼” (6.4mm) pieces. I made them slightly oversize (see Jaager, again) to allow for sanding.


-
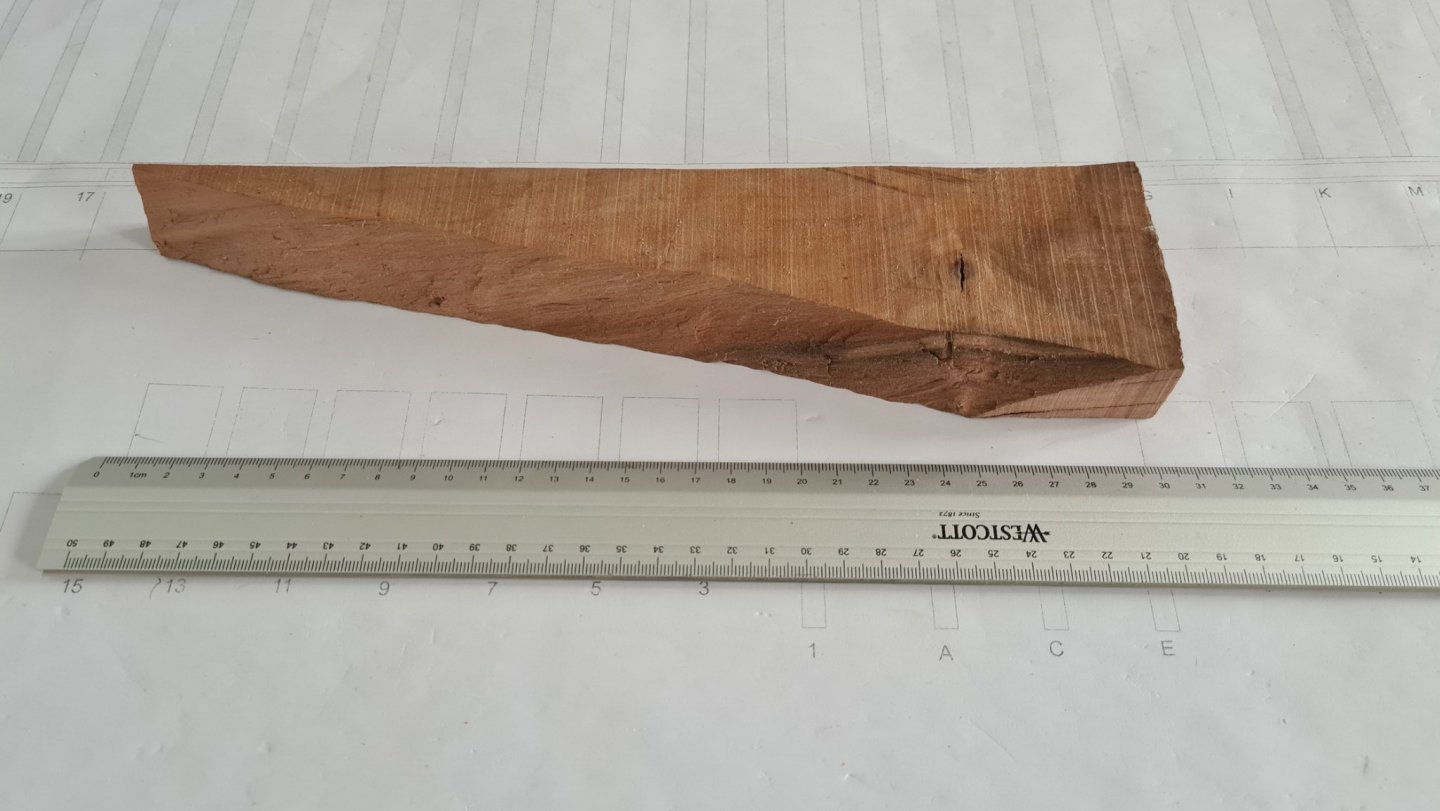
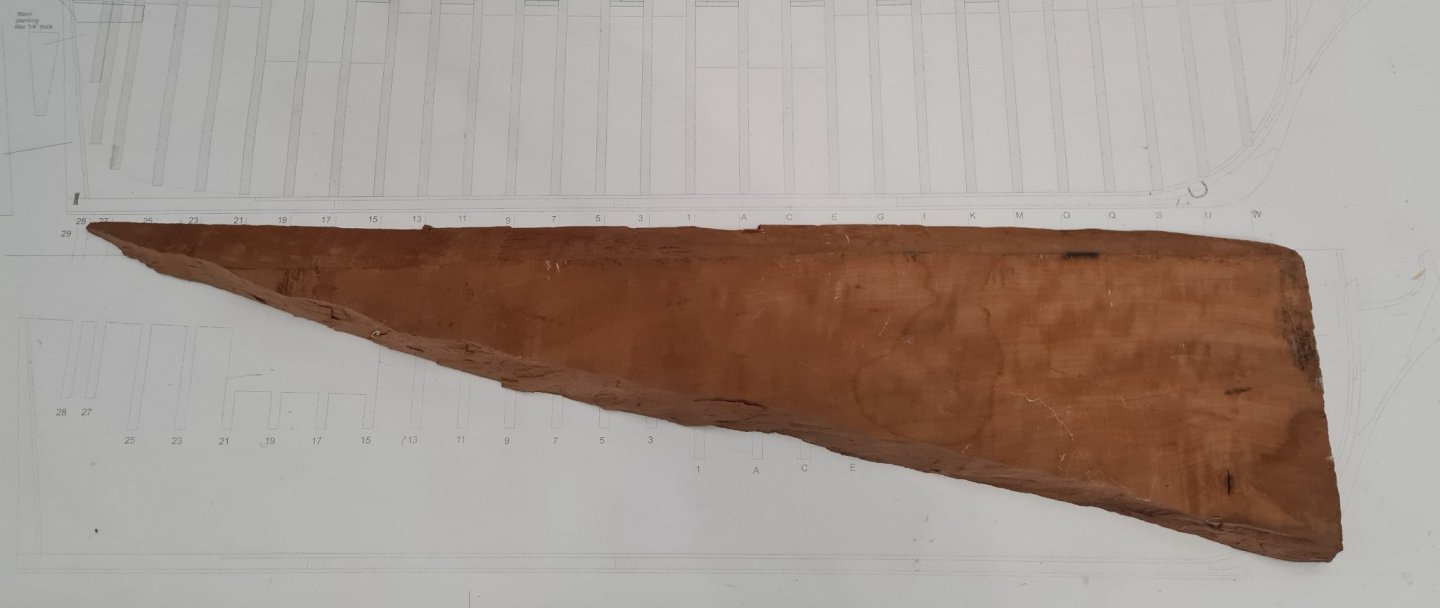
I had selected the smallest piece of Pear I had (30” [76cm] x 8” [20cm]); the triangular shape giving it limited area and volume.
-
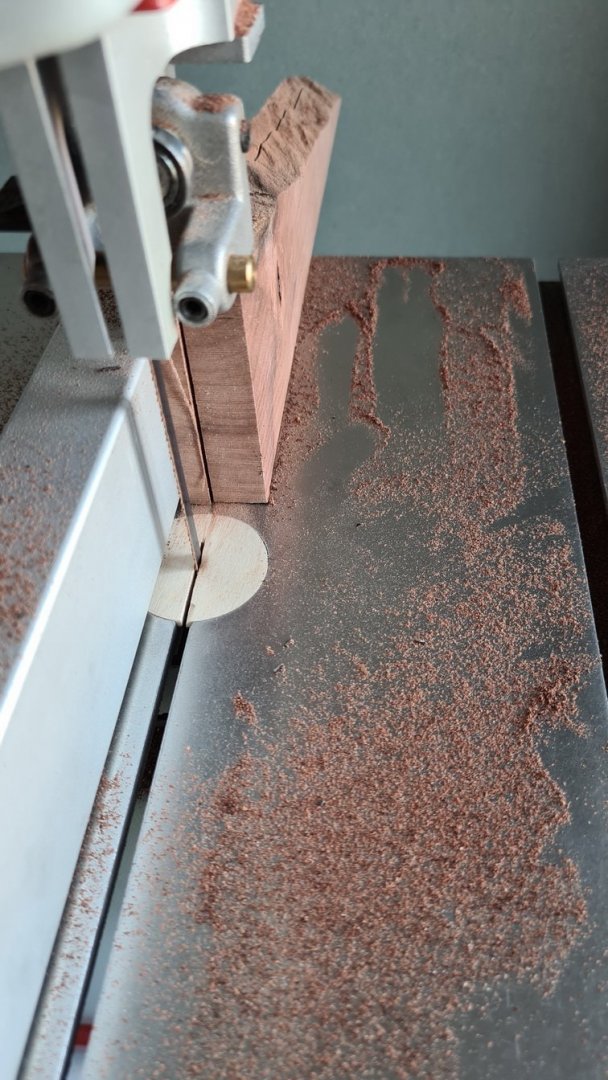
When cutting I found the blade now very steady, even when I lifted the upper plate guard from my usual 38mm to 75mm. However, it does prevent waste material from being carried away and this collects on the table surface. I might test drill a few (cautious) holes near the outer perimeter in the future.
-
I only recently bought this machine as well as 3 blades to go with it understanding their use would be as follows: 1/4" (6.3mm) 6 TPI – standard blade - general purpose. 1/4" (6.3mm) 14 TPI – for cutting thinner sections up to 25mm T. 1/2" (12.7mm) 6 TPI - for cross cutting and ripping larger sections, the ½” width giving less flex and a straighter cut. I made a zero-tolerance throat plate as recommend by Bob, but I deferred adding adjustment screws as the plate is quite small, and I might not need them. However, I rounded the underside outer perimeter corner and cleaned the plate ledge to ensure it would be properly seated. I then gradually sanded down the thickness until it sat flush with the table surface.
-
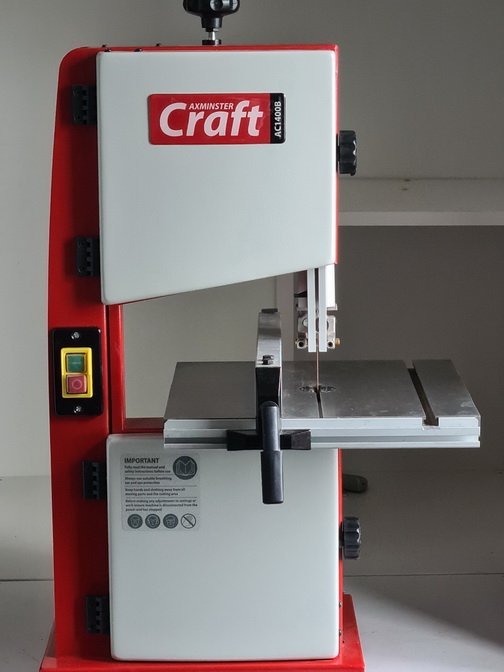
I’ve decided to move forward on this and chose the bandsaw as this can cut greater thicknesses. I have an Axminster (UK) AC1400B which has a maximum cut of 8” (200mm) width and 3” (80mm) thickness. I opted for a small machine as the majority of what I will saw will be of smaller sizes and I wanted to set-up a workshop in a spare room rather than the garage. The machine weighs only 44lbs (20kg) so it’s easily ported.
-
That's incredible work, Mike and a beautiful model. Steve
- 607 replies
-
- 2
-

-
- winchelsea
- Syren Ship Model Company
- (and 1 more)
-
I've been catching up on your build log, Frank; it's impressive what you've done. Everything finished clean and square, and the stern is looking very good.
-
That's a good solution Bob and one I will make use of.
-
Thanks, mtaylor, very good information. I looked for the Thurston blades but see they are not manufacturing now. Trouble is that Proxxon don't offer a good selection of blades and the Proxxon FET has a 10mm bore which limits the alternatives. One option may be the saw blade adapter from MicroMark which reduces 1/2" (12.7mm) bore down to 10mm for their MicroLux Mini Tilt Table Saw. This will likely fit the Proxxon. https://www.micromark.com/Saw-Blade-Adapter I see MicroMark also offer 1/2" bore slitting saw blades some of which are similar in kerf and TPI to those listed for Thurston. These blades are 3" diameter which is just a little less than the 80mm blades supplied by Proxxon. https://www.micromark.com/mini-powertool/power-tools-accessories/saw-blades-cut-off-wheels/table-chop-saw-blades I'll check some more because there must be plenty of people milling planks with the Proxxon and they've no doubt come up with the best solution.
-
Bridgman Bob, I thought for a long time about buying a thicknesser and finally purchased a Proxxon DH40 which was delivered last week. I thicknessed my first four pieces with it a couple of days ago and I'm really pleased with the results and how easy it is to use. Thanks for the advice on grain evaluation; I will now thickness trial planks before milling any quantities of planking, especially the Pear. Thanks again. Steve
-
Jaager, As you can see from my reply to Bob that I am limited in what I do by the saws I've got. I'll start with the bandsaw then probably move onto the Proxxon FET table saw when I have sufficiently reduced billets. I have a Proxxon 36 tooth 80 x 1.6 TCT blade that came with the machine and a Proxxon 80 tooth 85mm x 0.5mm blade which I believe will be good for the plank milling. I'll set-up the machine as Bob advises and hopefully will get good results from it. Fortunately, the Sycamore I have is English Acer pseudoplatanus and I'll now be careful never to buy Platanus occidentalis - amazingly useful information I'm getting from here! Without me asking you've solved my next problem: how to cut the Pear without a straight edge. I'll make the 1/2" carrier board you describe and that should get me over another hurdle. Thanks for your help and information. Steve
-
Bob, you've provided a lot of very useful information and from this I understand that I cut the Castello and Sycamore plank faces from the stock edges. Your comments on the Pear are particularly valuable as I didn't think about the colour variations. I now know to separate these into different groups. I have 1/2 cu ft of Pear so should be able to get enough matching wood to make good use of it. Similarly, I note what you say about the grain and will cut and use planks with this in mind. I'll definitly cut some test strips. For setting-up the saws, I'll be following your instructions in detail. I have a proxxon table saw with a maximum cut of 22mm (I'm in the UK and the Byrnes is not available here) and a small band saw that cuts up to 80mm. Therefore, I'll use the bandsaw to cut the wood into smaller billets then cut strips to what thickness I can get the bandsaw to take these down to. If needs be I will then use the table saw. I had no idea about a modified stock plate but can now see it to be essential and I will make this and the accessories. I have three high carbon blades: a general purpose 1/4" 6TPI blade, a 1/2" 6TPI blade, and a 1/4" 14TPI blade. The manufacturer gives a general guide on blade selection and from this I understand that I would use the 1/2" 6TPI blade to cut billets up to 2" thickness and the 1/4" 14TPI blade to cut thin strips in sub 1" thickness. Any idea if these are the right blades to use? Also, would you know if I should use the 1/4" or the 1/2" blade if I use the 6TPI for the billets? Thanks a lot for all the information, Bob. Steve