

Harvey Golden
-
Posts
490 -
Joined
-
Last visited
2 Followers

About Harvey Golden

Recent Profile Visitors
4,227 profile views


-
 Harvey Golden reacted to a post in a topic:
J H Crawford by LJP (Lawrence Paplham) - Scale 1:64 - an 1894 to 1898 Wisconsin sternwheeler
Harvey Golden reacted to a post in a topic:
J H Crawford by LJP (Lawrence Paplham) - Scale 1:64 - an 1894 to 1898 Wisconsin sternwheeler
-
Harvey Golden reacted to a post in a topic:
Tartana Genovese by maurino
-
Harvey Golden reacted to a post in a topic:
Let me introduce myself
-
Paul Le Wol reacted to a post in a topic:
Gjøa 1872 by Harvey Golden - Roald Amundsen's Cutter built at Rosedahl, Norway
-
 wefalck reacted to a post in a topic:
Gjøa 1872 by Harvey Golden - Roald Amundsen's Cutter built at Rosedahl, Norway
wefalck reacted to a post in a topic:
Gjøa 1872 by Harvey Golden - Roald Amundsen's Cutter built at Rosedahl, Norway
-
Siggi52 reacted to a post in a topic:
Gjøa 1872 by Harvey Golden - Roald Amundsen's Cutter built at Rosedahl, Norway
-
Keith Black reacted to a post in a topic:
Gjøa 1872 by Harvey Golden - Roald Amundsen's Cutter built at Rosedahl, Norway
-
Keith Black reacted to a post in a topic:
Gjøa 1872 by Harvey Golden - Roald Amundsen's Cutter built at Rosedahl, Norway
-
sheepsail reacted to a post in a topic:
Gjøa 1872 by Harvey Golden - Roald Amundsen's Cutter built at Rosedahl, Norway
-
Dr PR reacted to a post in a topic:
Gjøa 1872 by Harvey Golden - Roald Amundsen's Cutter built at Rosedahl, Norway
-
Scott Crouse reacted to a post in a topic:
Gjøa 1872 by Harvey Golden - Roald Amundsen's Cutter built at Rosedahl, Norway
-
 Thank you Paul!
 -
Harvey Golden reacted to a post in a topic:
Gjøa 1872 by Harvey Golden - Roald Amundsen's Cutter built at Rosedahl, Norway
-
Paul Le Wol reacted to a post in a topic:
Gjøa 1872 by Harvey Golden - Roald Amundsen's Cutter built at Rosedahl, Norway
-
 Paul Le Wol reacted to a post in a topic:
Gjøa 1872 by Harvey Golden - Roald Amundsen's Cutter built at Rosedahl, Norway
Paul Le Wol reacted to a post in a topic:
Gjøa 1872 by Harvey Golden - Roald Amundsen's Cutter built at Rosedahl, Norway
-
Harvey Golden reacted to a post in a topic:
In which offense is taken (or, "hey! I resemble that remark")
-
Harvey Golden reacted to a post in a topic:
Cutter Luisito by GioMun - 1/48 - A small cutter built to survive a shipwreck in southern seas
-
Harvey Golden reacted to a post in a topic:
Cutter Luisito by GioMun - 1/48 - A small cutter built to survive a shipwreck in southern seas
-
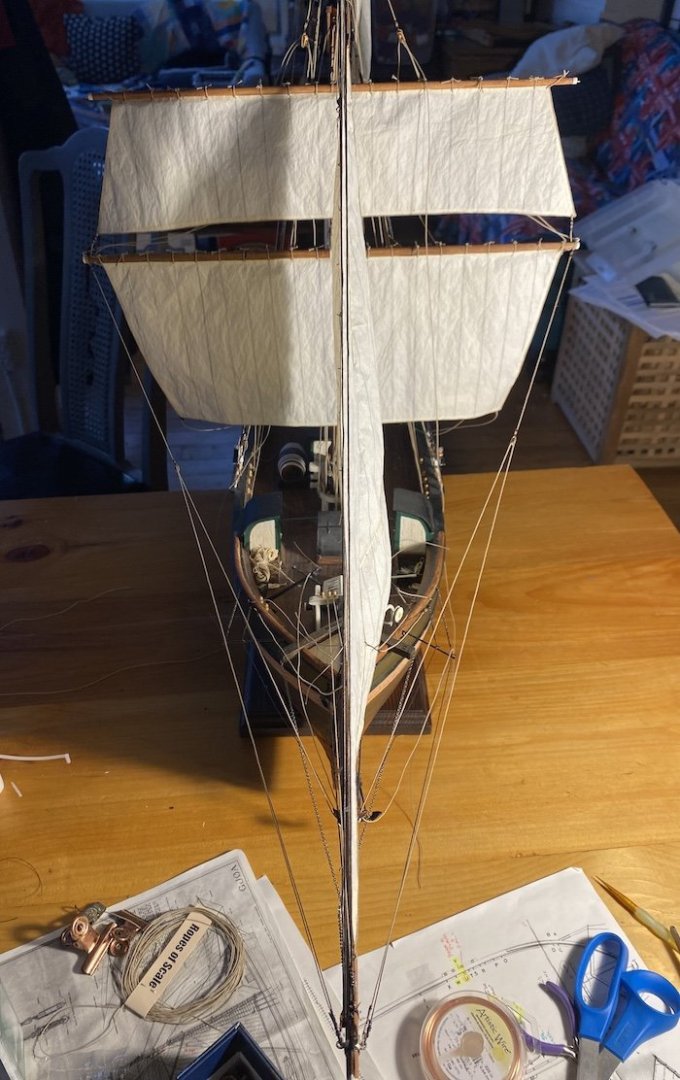
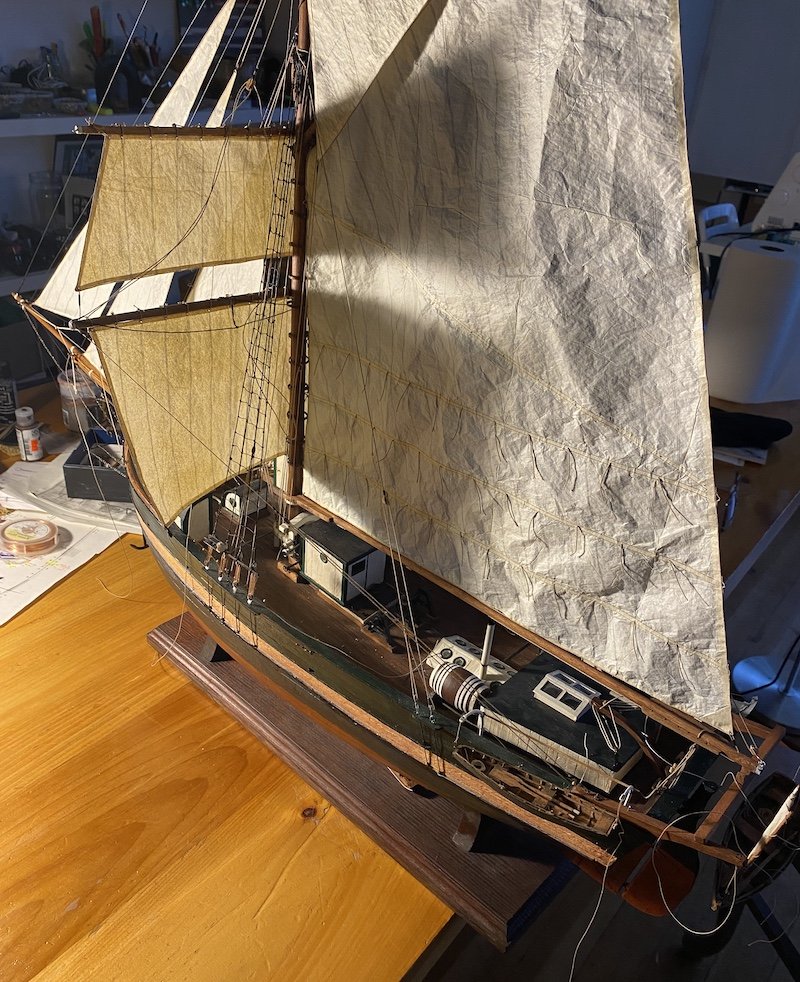
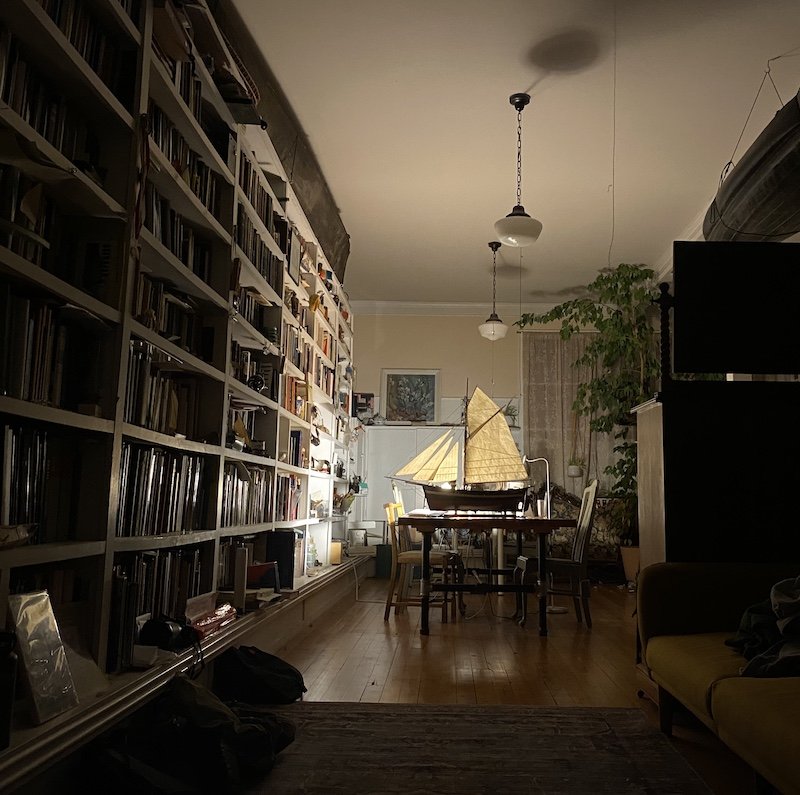
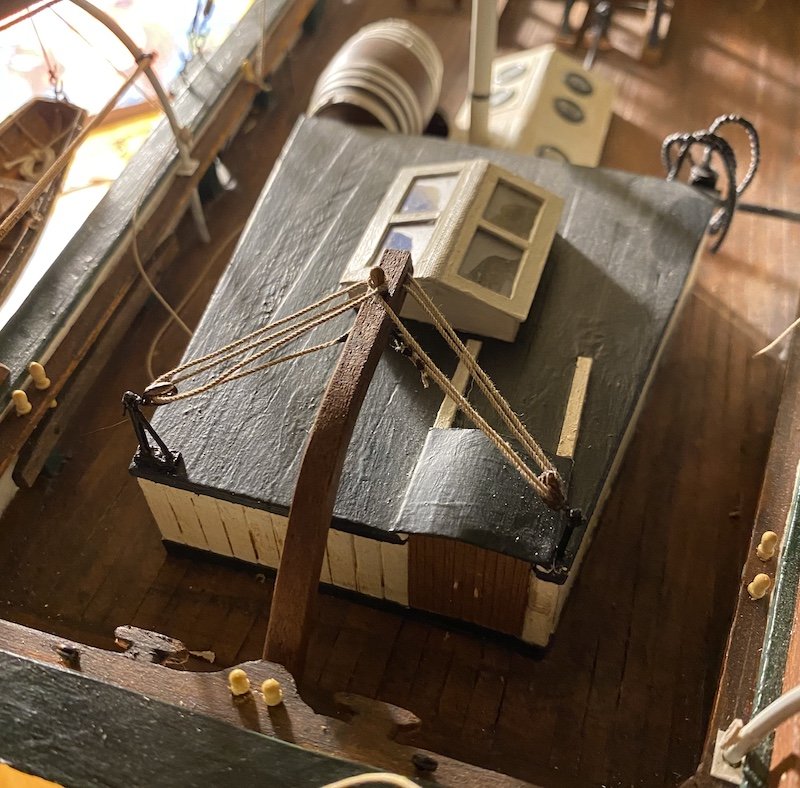
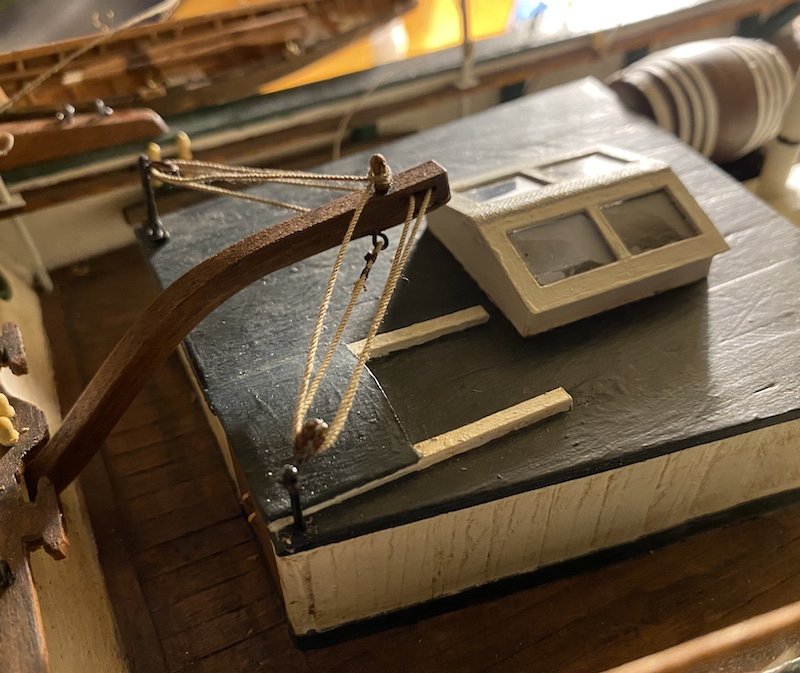
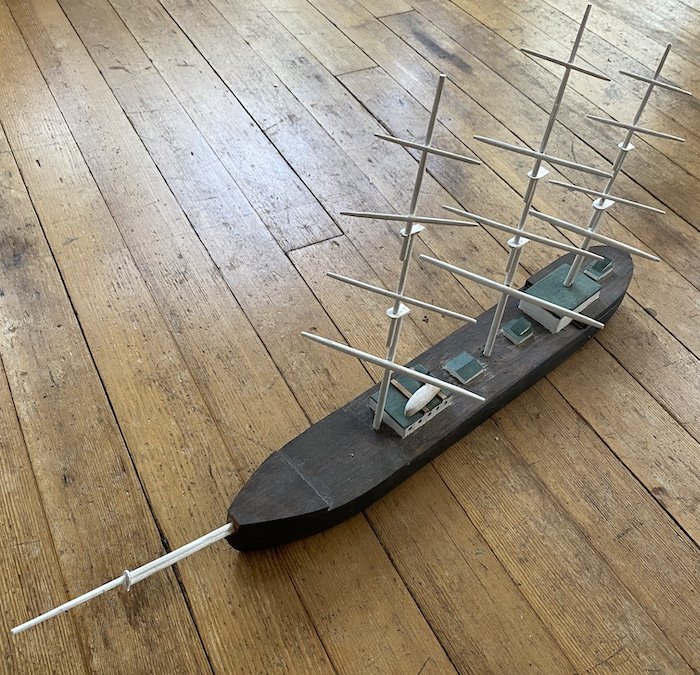
Finally got the braces on-- fore and aft, as well as the square-sail sheets. Other minor progress in tightening this and that and tying off ends. I changed the 'white stripe' side to what I'm hoping will eventually look like aged natural wood-- this has involved several washes of several colors-- not sure it's there yet. First two pics show the braces, etc; additional are some detail shots on deck, etc. H-

-
Harvey Golden reacted to a post in a topic:
Bateau de Lanvéoc by JacquesCousteau - Scale 1:32 - From Ancre Plans
-
Harvey Golden reacted to a post in a topic:
Tartana Genovese by maurino
-
Harvey Golden reacted to a post in a topic:
Muscongus Bay Lobster Smack by JacquesCousteau - Model Shipways - 1:32 - Rescaled and Modified
-
Novice builder and question re: Amati felucca
Harvey Golden replied to jrbm's topic in New member Introductions
Welcome! The text on the box refers to them (Feluccas) being used on San Francisco Bay, which is true I suppose. But the type used there didn't look anything like the model on the box. The profile looks like a Greek Sacoleva, though these are round hulled (the model looks flat bottomed and slab sided). The blunt bow is very odd. H- -
Tartana Genovese by maurino
Harvey Golden replied to maurino's topic in - Build logs for subjects built 1851 - 1900
Looks very nice! I'd love to see a picture of the entire hull-- I don't have a sense of its overall form yet. Best, Harvey -
I wonder if any of the other parts of a ship are named after the sound they make hitting your head?
-
No idea, but here's the man himself: Roald Amundsen at the helm of Gjøa in San Francisco (retrieved from https://amundsen.mia.no/resource/1903-1906-gjoa-ekspedisjonen-gjoa/) ... he's probably just be clowning around though 😉 --H

-
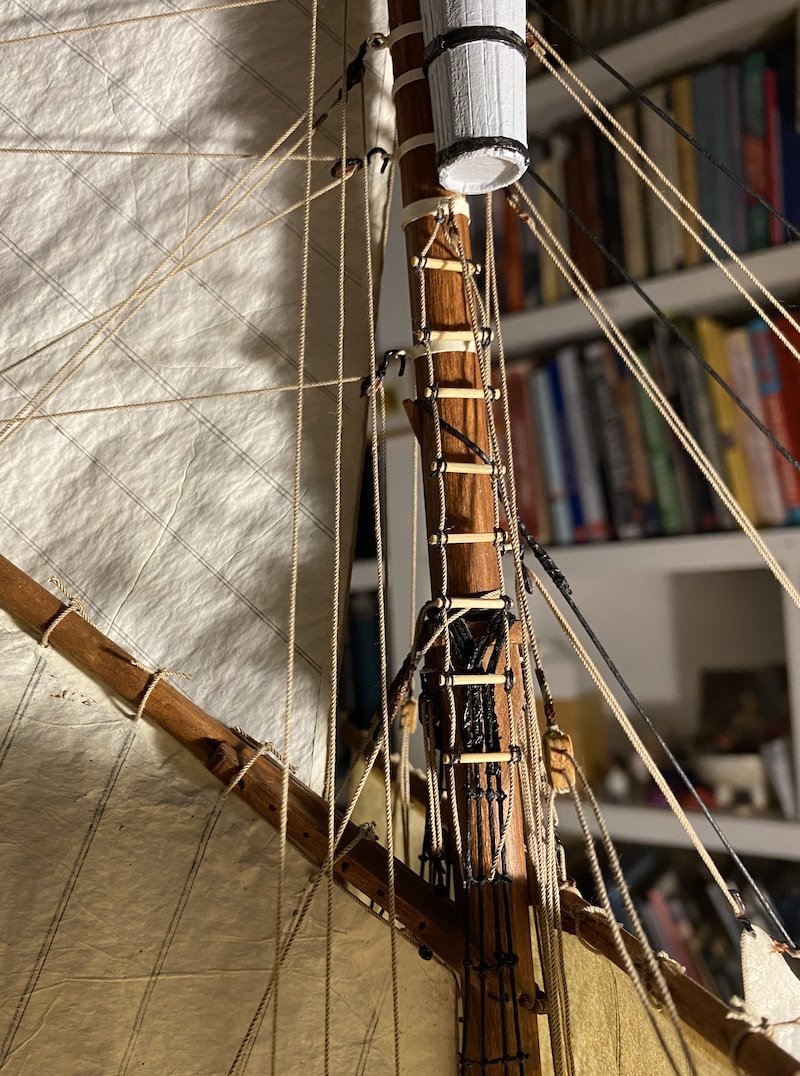
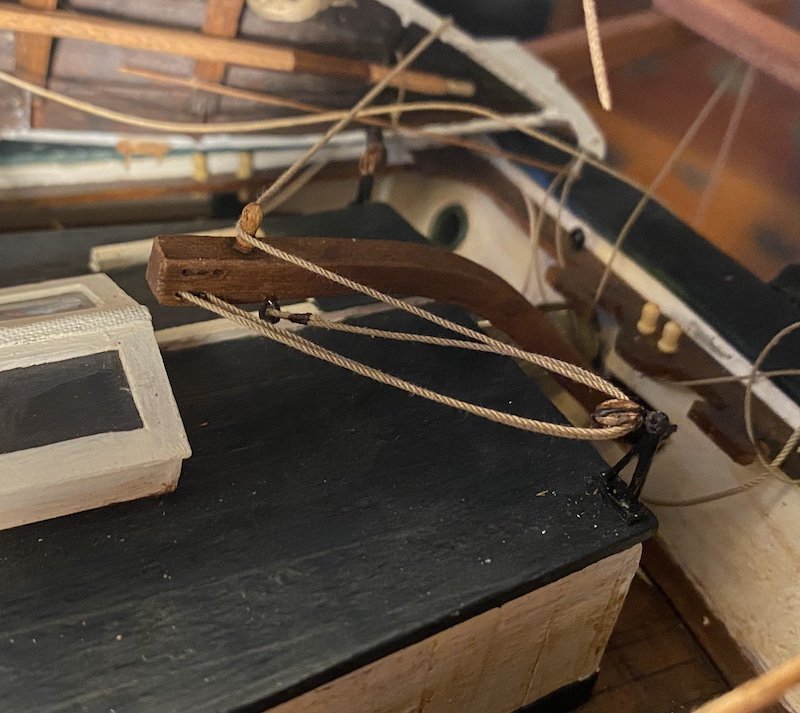
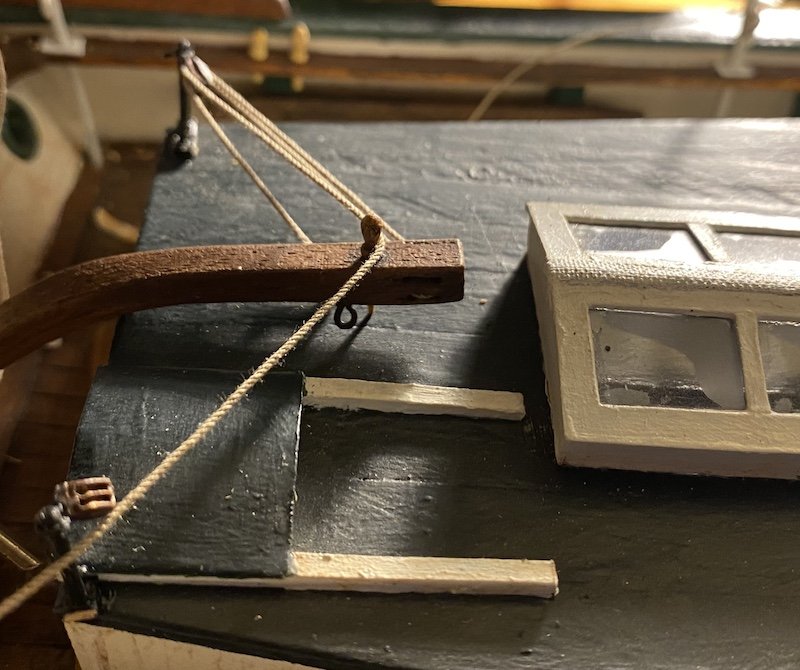
The tiller tackle has been tackled! I hope it resembles reality. Wasn't easy seizing the eye at the end (to the ringbolt on the tiller-- not a proper seizing, but glued and then painted seizings). Two pics: And the rope ladder to the crow's nest/ice barrel has been hung, though it still needs attaching at its lower end:
-
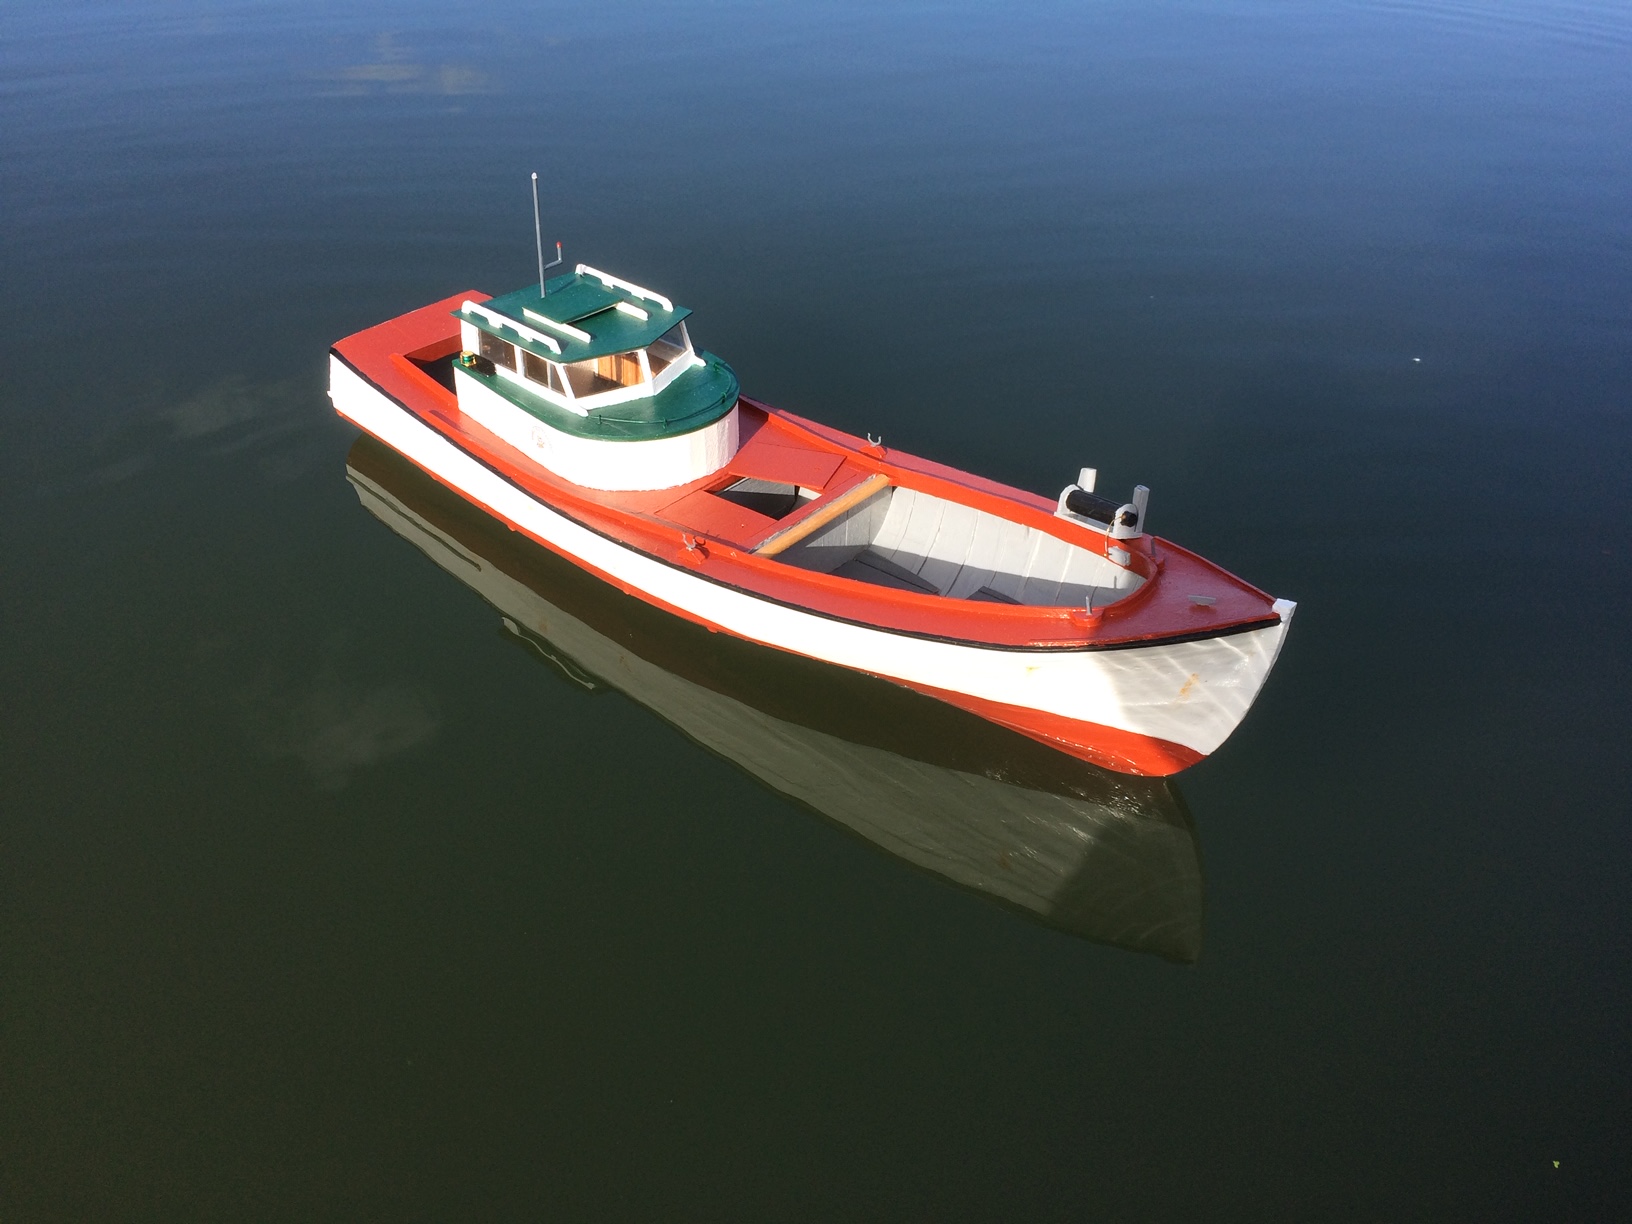
I'm reminded of that saying: "Things worth doing are worth doing well." ... But I'm also reminded of the words a Professor told my class in college-- words that haunt me to this day: "Things worth doing are worth doing poorly." I think both are correct, and the latter perhaps more correct, at least for many things one might casually do (not recommended for relationships, flying airliners, surgery, or driving a car, though nobody else on the road seems to agree). To build is human, and assembling a model is pretty darned human in my book. But beware: you may find yourself improving naturally, even subconsciously. Someday you'll look back at your earlier work and cringe. . . Here's an early model of mine: Done poorly, carelessly, and it was every bit as fun and worthwhile to build as the ships I build now. Welcome Aboard! -Harvey
-
It's looking very good Jon! Your skills are beyond mine, what with soldering and using turbocad. All of my scaling of yards, masts, etc. are based on relative proportions, penciled out, etc. As for coloration, I'm still figuring things out; the broad white strake is going to natural wood on mine-- no easy fix as it's painted, but I'll 'simulate' natural wood. Your pumps and winches look good! H-
- 61 replies
-
- 1
-
-
- Northwest passage
- Norway.
- (and 2 more)
-
Beautifully done!
-
Thank you Wefalck! This is very helpful and I think I have a grasp on this now, and shall rig it accordingly. Sometimes I just need to understand the 'why' before I 'do.' All the best, Harvey
-
Thank you Phil! The method on the Lady Washington makes a lot of sense-- the 'clamp' to hold the line is a much neater method of securing the tiller. Also interesting to hear about the 'shock absorber' property of this-- it explains a lot about why there is so much tackle on the rudder in the first place. All the best, Harvey
-
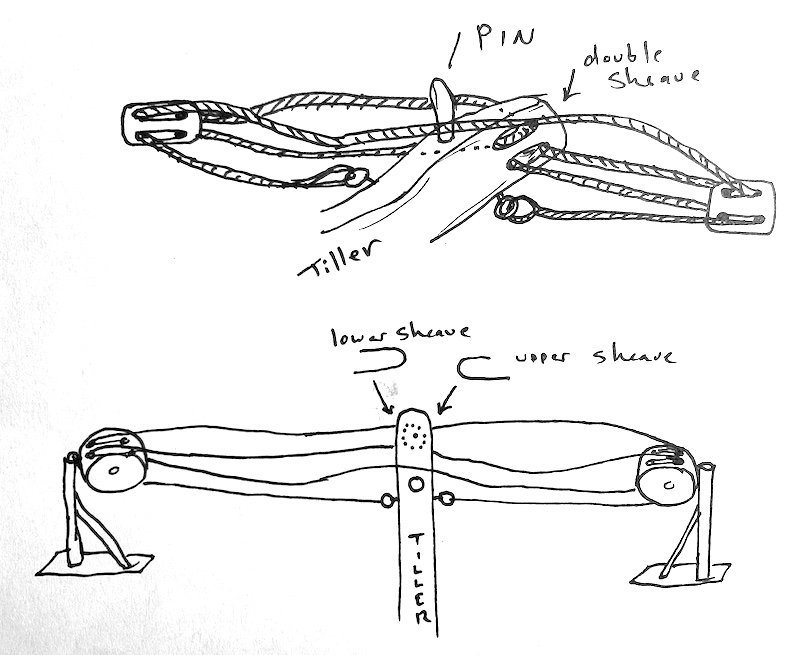
Well, I'm a bit stumped on how the Gjøa's tiller tackle was rigged. I have pics of how it is set up at the museum, but a few things don't make sense to me, or at least aren't clear. First, here is my impression of how it was/is rigged-- EXCEPT, where the line crosses the tiller near the belaying pin, it is wrapped clumsily four or five times, and the pin does not seem to extend below the tiller. I can't tell if this is how it was hitched, or . . . well, anything. Not even sure if this is one continuous rope or two lengths ending in the ring bolts attached to the tiller. If my drawings are confusing, here is some more confusion: The same set-up half run on the model. Any thoughts on this? I've searched up "Tiller Tackle" here, but haven't found anything quite like this. The pdf on the Hardanger "Jakt 'Jelse'" shows an entirely different manner, with no double sheave or pin in the tiller. My latest thinking is the line crossing the tiller may have been rather slack, and to snug it down, one would gather and loop it over the pin a few times?
-
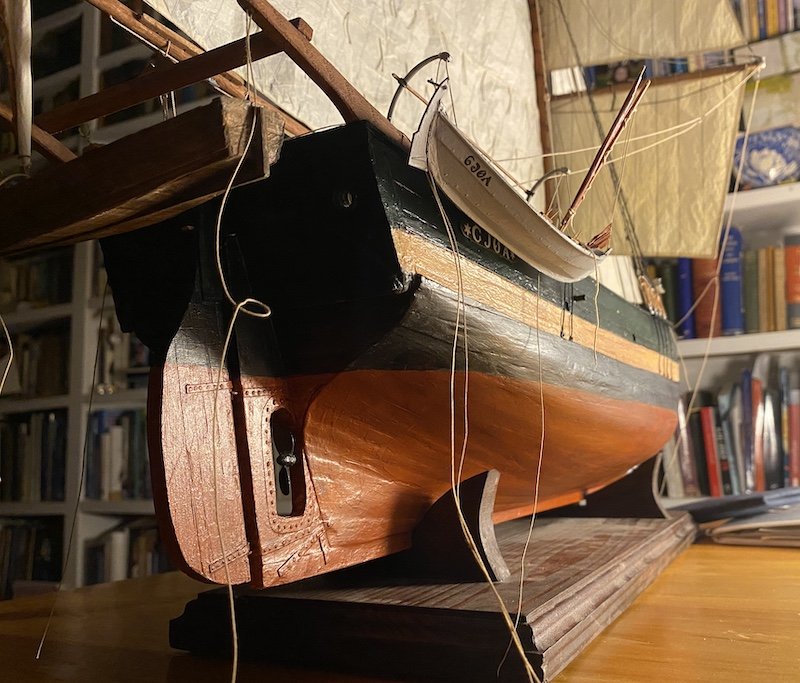
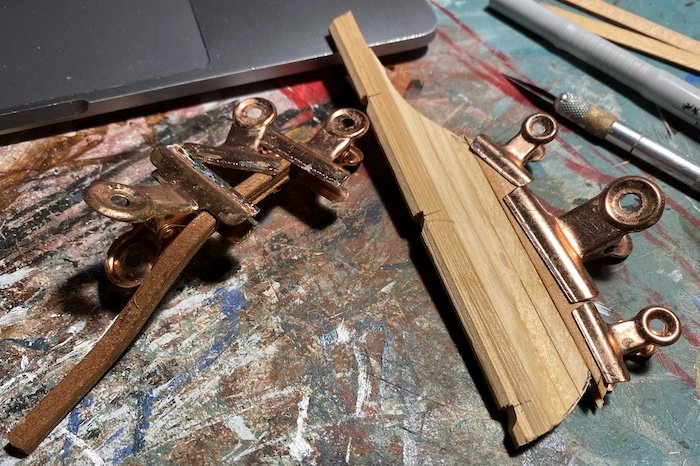
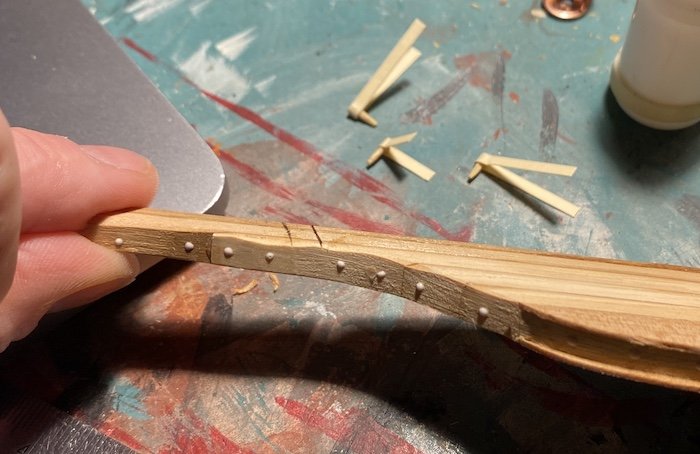
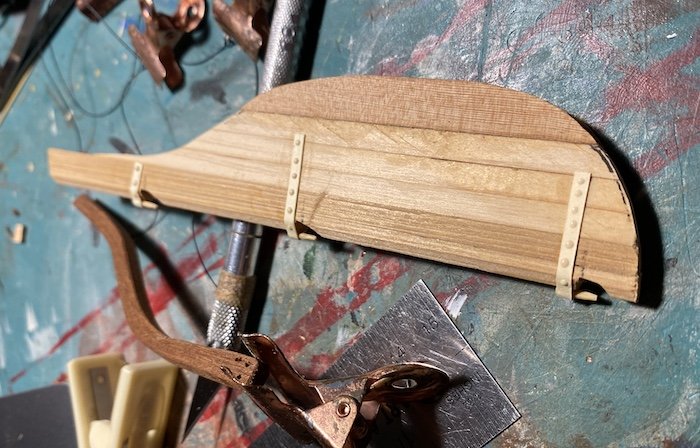
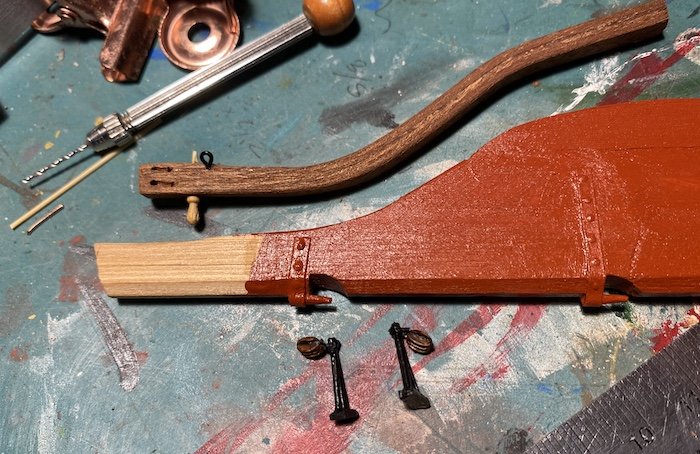
Getting the rudder together, finally. A glue-up of some cedar (Western and Port Orford) scraps will do nicely. The sinuous tiller is a 5-ply lamination of some sapelé strips from a salvaged kit. I use dots of glue to mimic drift ends and other fasteners; they diminish a bit while drying, but if they are nice round drops they approximate hammered rivets or drifts nicely. In the back ground are the pintles, formed of bamboo and paper. Below, the rudder has its pintles in place. Mostly completed rudder and tiller below, former with first coat of paint, and latter with integral sheaves, belaying pin, and ring bolts. Stanchions for the steering ropes are also shown. I hope to hang it and rig it by this time tomorrow, then more rigging aloft.
-
Misery loves company-- thank you for your sacrifice. 😉

