

Harvey Golden
-
Posts
485 -
Joined
-
Last visited
Content Type
Profiles
Forums
Gallery
Events
Everything posted by Harvey Golden
-

Tartana Genovese by maurino
Harvey Golden replied to maurino's topic in - Build logs for subjects built 1851 - 1900
Looks very nice! I'd love to see a picture of the entire hull-- I don't have a sense of its overall form yet. Best, Harvey -
I wonder if any of the other parts of a ship are named after the sound they make hitting your head?
-
No idea, but here's the man himself: Roald Amundsen at the helm of Gjøa in San Francisco (retrieved from https://amundsen.mia.no/resource/1903-1906-gjoa-ekspedisjonen-gjoa/) ... he's probably just be clowning around though 😉 --H

-
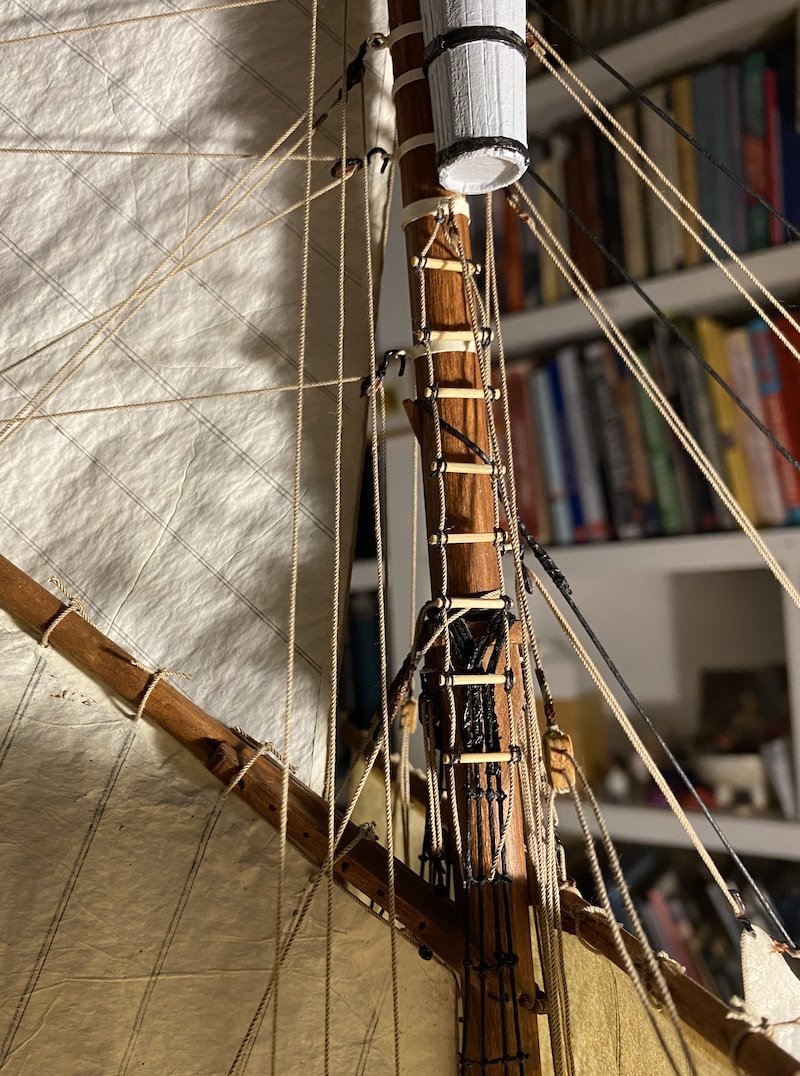
The tiller tackle has been tackled! I hope it resembles reality. Wasn't easy seizing the eye at the end (to the ringbolt on the tiller-- not a proper seizing, but glued and then painted seizings). Two pics: And the rope ladder to the crow's nest/ice barrel has been hung, though it still needs attaching at its lower end:
-
I'm reminded of that saying: "Things worth doing are worth doing well." ... But I'm also reminded of the words a Professor told my class in college-- words that haunt me to this day: "Things worth doing are worth doing poorly." I think both are correct, and the latter perhaps more correct, at least for many things one might casually do (not recommended for relationships, flying airliners, surgery, or driving a car, though nobody else on the road seems to agree). To build is human, and assembling a model is pretty darned human in my book. But beware: you may find yourself improving naturally, even subconsciously. Someday you'll look back at your earlier work and cringe. . . Here's an early model of mine: Done poorly, carelessly, and it was every bit as fun and worthwhile to build as the ships I build now. Welcome Aboard! -Harvey
-
It's looking very good Jon! Your skills are beyond mine, what with soldering and using turbocad. All of my scaling of yards, masts, etc. are based on relative proportions, penciled out, etc. As for coloration, I'm still figuring things out; the broad white strake is going to natural wood on mine-- no easy fix as it's painted, but I'll 'simulate' natural wood. Your pumps and winches look good! H-
- 54 replies
-
- 1
-

-
- Northwest passage
- Norway.
- (and 2 more)
-
Beautifully done!
-
Thank you Wefalck! This is very helpful and I think I have a grasp on this now, and shall rig it accordingly. Sometimes I just need to understand the 'why' before I 'do.' All the best, Harvey
-
Thank you Phil! The method on the Lady Washington makes a lot of sense-- the 'clamp' to hold the line is a much neater method of securing the tiller. Also interesting to hear about the 'shock absorber' property of this-- it explains a lot about why there is so much tackle on the rudder in the first place. All the best, Harvey
-
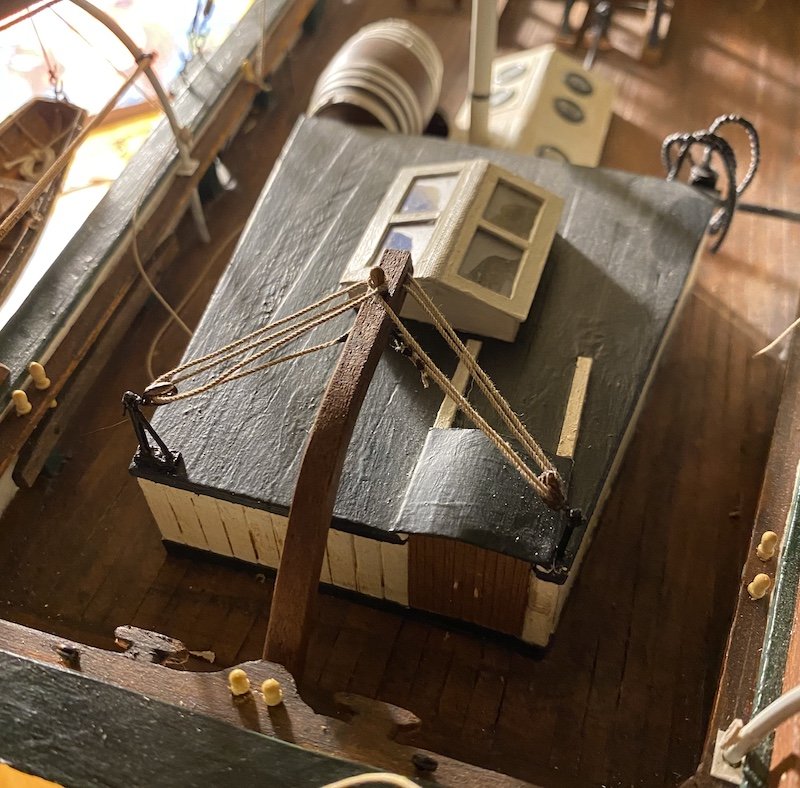
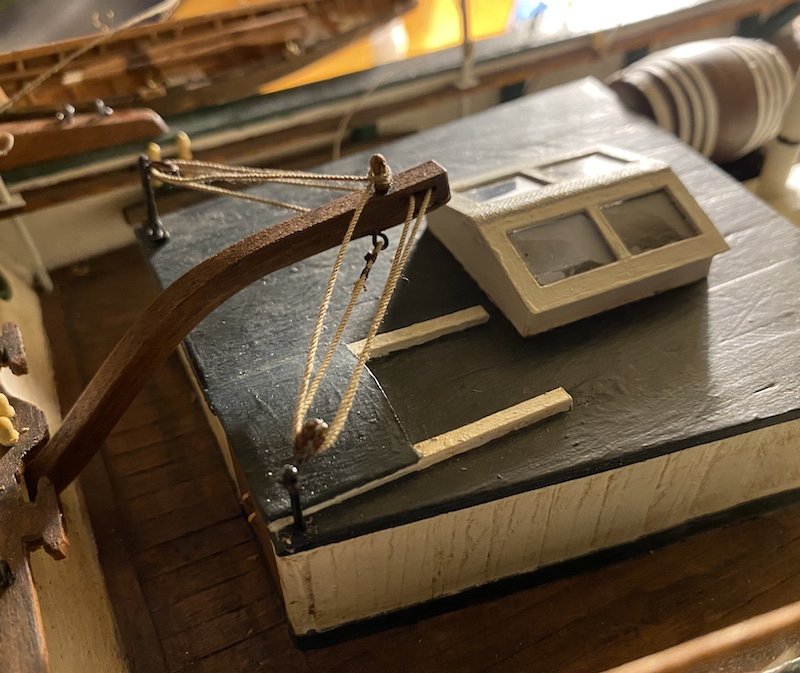
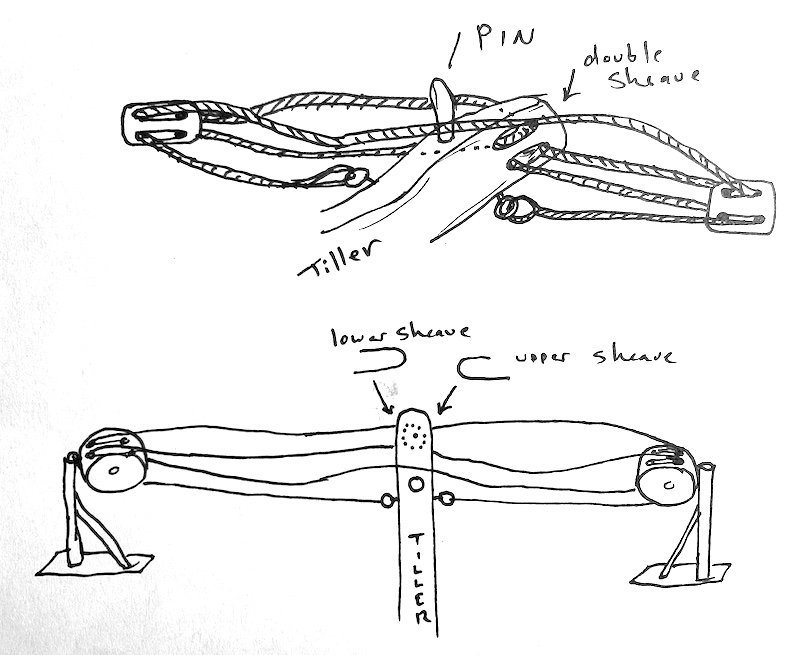
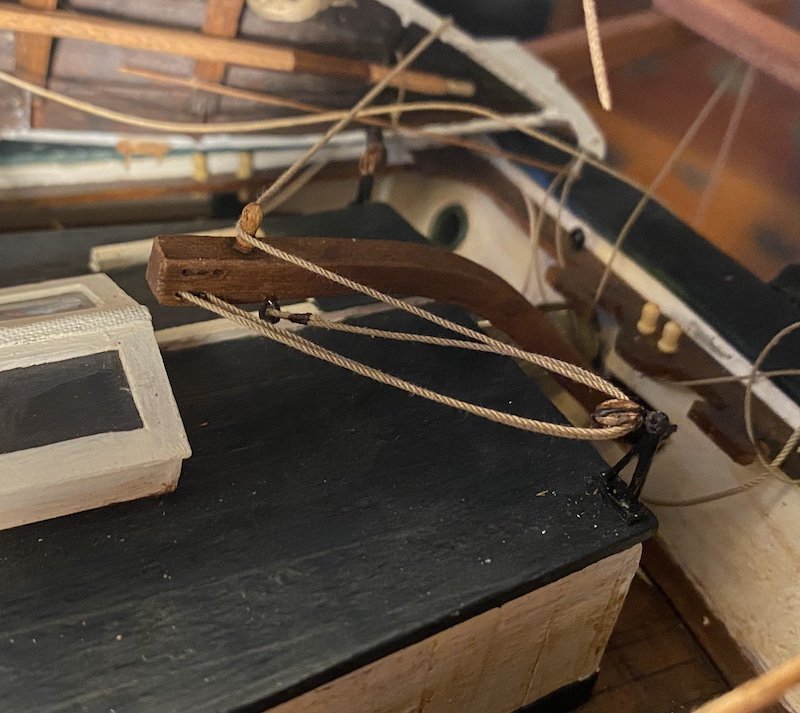
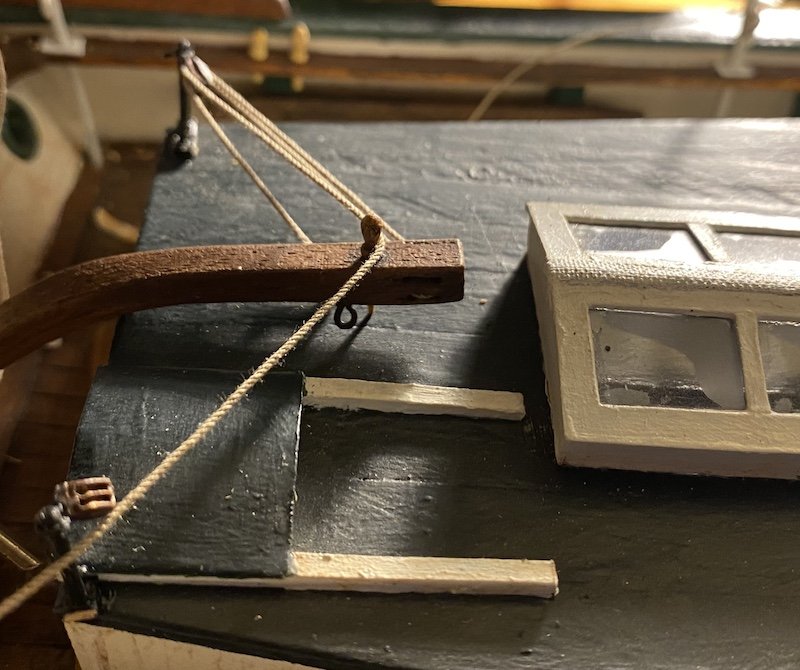
Well, I'm a bit stumped on how the Gjøa's tiller tackle was rigged. I have pics of how it is set up at the museum, but a few things don't make sense to me, or at least aren't clear. First, here is my impression of how it was/is rigged-- EXCEPT, where the line crosses the tiller near the belaying pin, it is wrapped clumsily four or five times, and the pin does not seem to extend below the tiller. I can't tell if this is how it was hitched, or . . . well, anything. Not even sure if this is one continuous rope or two lengths ending in the ring bolts attached to the tiller. If my drawings are confusing, here is some more confusion: The same set-up half run on the model. Any thoughts on this? I've searched up "Tiller Tackle" here, but haven't found anything quite like this. The pdf on the Hardanger "Jakt 'Jelse'" shows an entirely different manner, with no double sheave or pin in the tiller. My latest thinking is the line crossing the tiller may have been rather slack, and to snug it down, one would gather and loop it over the pin a few times?
-
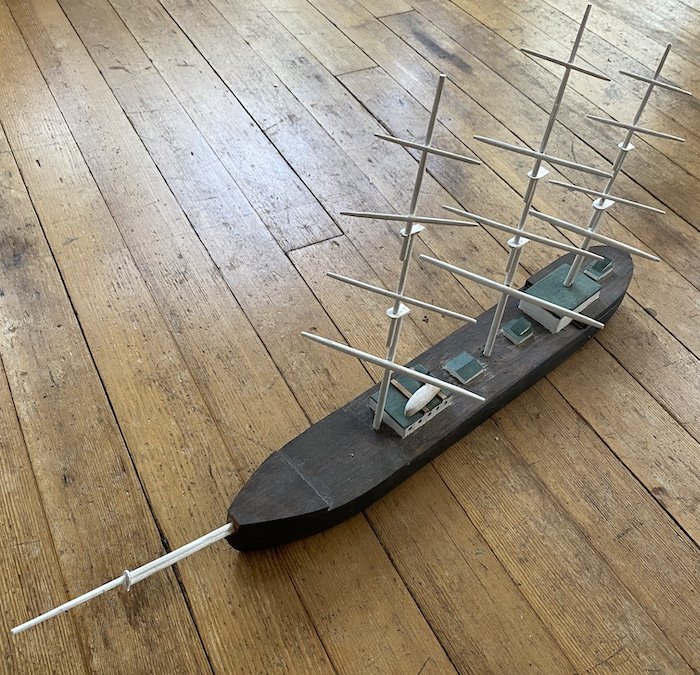
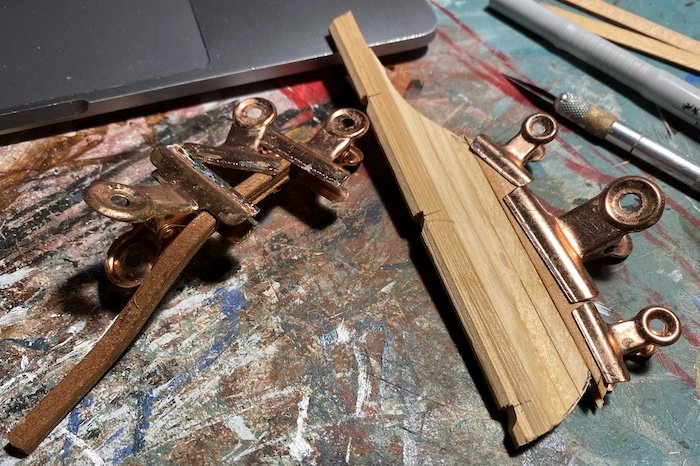
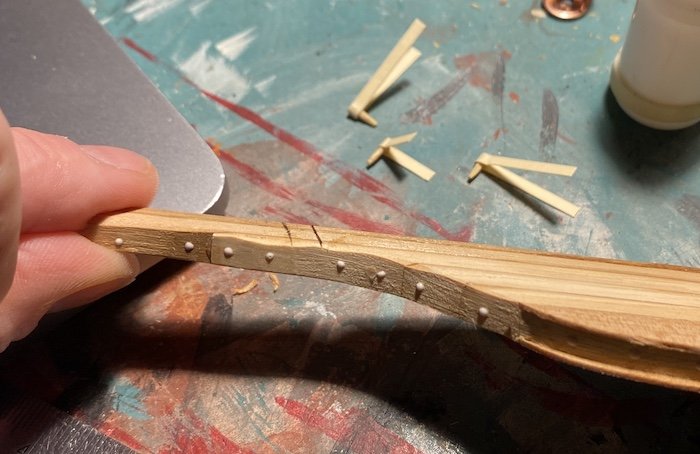
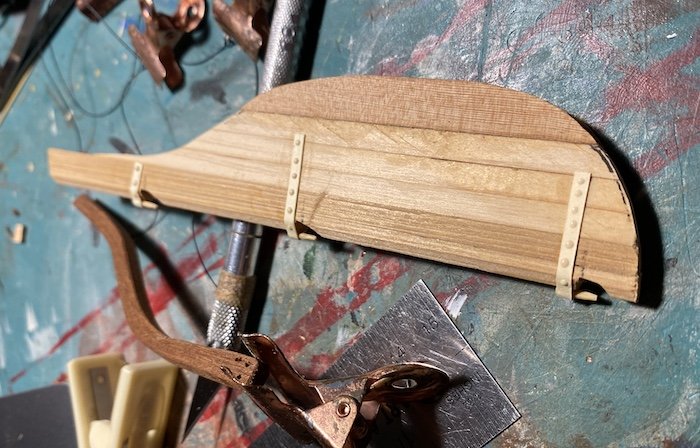
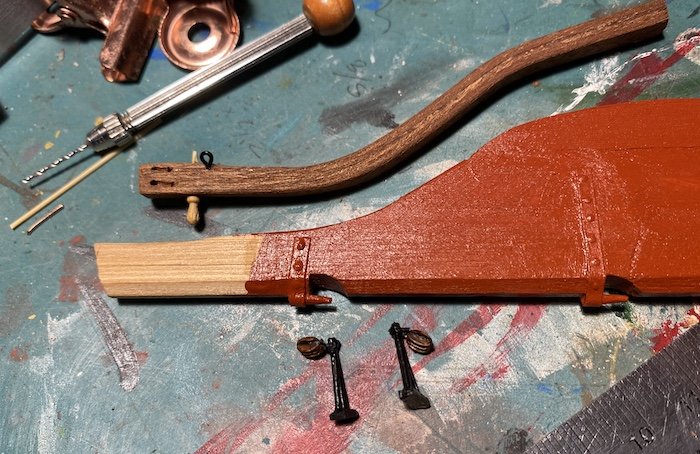
Getting the rudder together, finally. A glue-up of some cedar (Western and Port Orford) scraps will do nicely. The sinuous tiller is a 5-ply lamination of some sapelé strips from a salvaged kit. I use dots of glue to mimic drift ends and other fasteners; they diminish a bit while drying, but if they are nice round drops they approximate hammered rivets or drifts nicely. In the back ground are the pintles, formed of bamboo and paper. Below, the rudder has its pintles in place. Mostly completed rudder and tiller below, former with first coat of paint, and latter with integral sheaves, belaying pin, and ring bolts. Stanchions for the steering ropes are also shown. I hope to hang it and rig it by this time tomorrow, then more rigging aloft.
-
Misery loves company-- thank you for your sacrifice. 😉
-
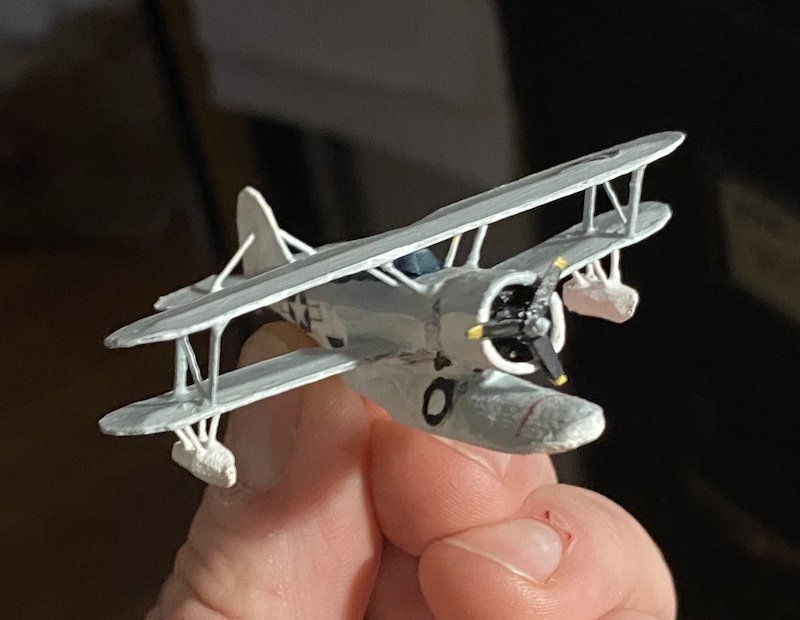
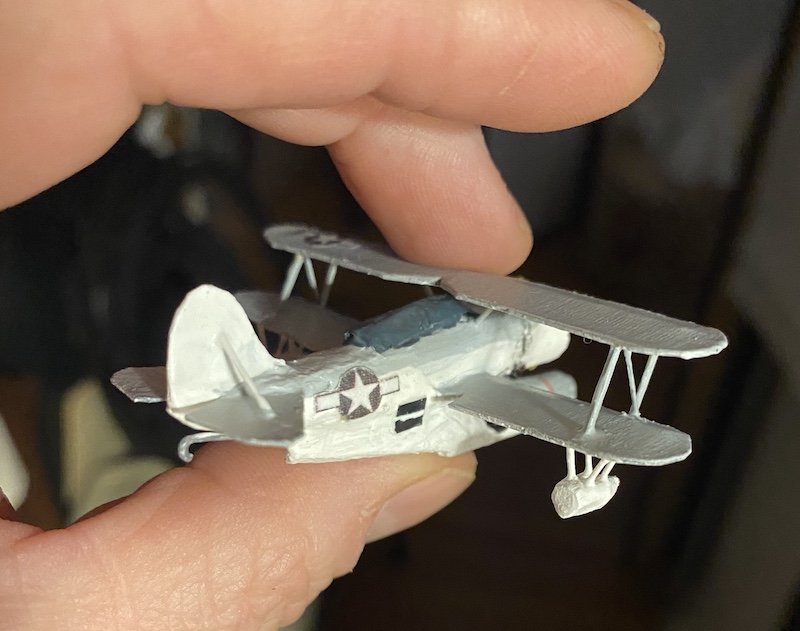
I've decided to build a model of the USCGC Storis in Greenland Patrol colors (ca. 1944). I'll be using plans from the Historic American Engineering Record, as sourced from the Library of Congress' web-page: https://www.loc.gov/pictures/item/ak0534/ The HAER pages have 13 sheets of drawings showing original layout and more recent adjustments. Here's a slightly outdated history: https://www.defensemedianetwork.com/stories/save-the-storis/ ... outdated in that she was eventually scrapped. I haven't begun the ship yet, but the J2F is pretty much finished (needs rudder and tail wheel) -- just a carved cedar fuselage/central float, with paper wings, cowling and propellor. Canopy is tarped. H-
-
Thank you Jon! The scale has sort of forced my hand in terms of detail work; it's been a lot of trial and error and repair. Probably the biggest (ahem!) mistake I've made is building it in such a large scale. It's been a learning experience, and the fact I had to look up what a cringle was again speaks to my poor retention. All the sail work has been gleaned from Tom Lauria's videos (on Youtube), though I've simplified his methods a tad-- I brushed the paint on instead of rolled, and I used whatever pencil I had laying around instead of the lead grade he recommended. One glaring mistake that will bother me for ever shows up in one of the earlier sail pics above, where the penciled seam laps don't align from back-to-front-- I now use a light-box to ensure proper overlap. Your Gjøa is looking great! Best, H-
-
Hi Jond! I wondered the same about the crow's nest-- I'd never heard the term "ice bucket" before, but I like it! It appears (on the old Model Shipways Plans?) that it had a 'Jacob's Ladder' (rope, with wooden rungs). I still haven't found out whether or not there was a hatch in the floor of the ice bucket, or if one went over the top to get in-- the rope ladder seems to just go up to the bottom of the bucket, so probably it had a hatch floor? Hope this helps, and hope someone who knows will chime in. Best, Harvey
-
Hi Keith-- there should be four or five in the first two columns; here's a link to one: https://www.traditionalkayaks.com/Kayakreplicas/398278.html Best, Harvey
-
Yes, the Federal Prison would have been much more pleasant than the result of such an inquiry. (Blush). It's true. Not many "Harvey Goldens" out there, and if you google the name, you'll come across a lot of Golden Retrievers named Harvey. 😉
-
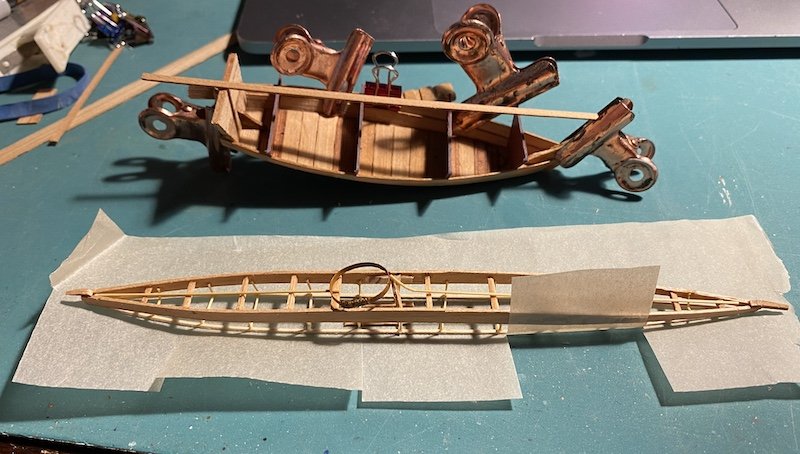
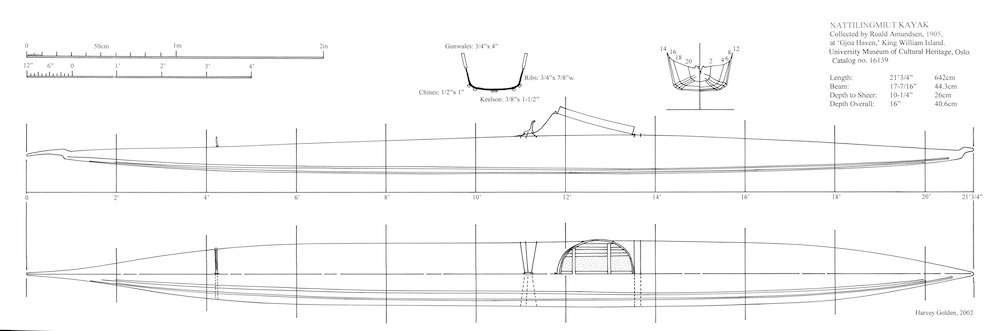
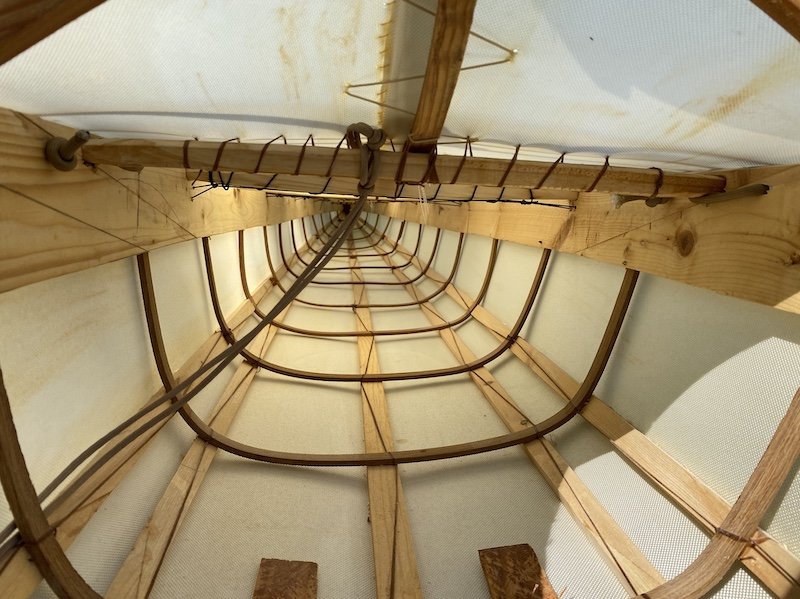
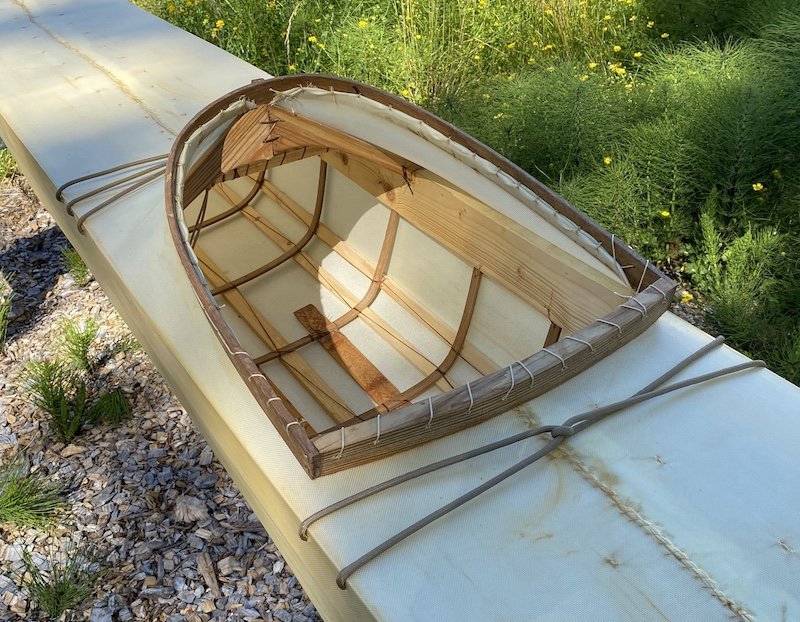
Thank you Wefalck! I probably didn't describe them; easier to do so again than check. They're just fine pieces of cedar and thin strips of bamboo glued together; the bent ribs are bamboo 'cracked' at the bilges, as Nattilingmiut kayaks have very flat bottoms and slab sides. The 'skin' covering is just tissue, stained, with painted seams. My interest in this ship, and in Amundsen comes from the three Nattilingmiut kayaks he collected on King William Island in 1905-06. I study kayaks in museums, and the two intact kayaks Amundsen collected will be in my next book (I see my previous two books have made it to your list! That is a superb and thorough list, BTW). Here is a scale drawing of one of them: Part of my studies with Inuit (and other) northern kayaks involves full-size reconstruction; here is a full-size functional replica of the other intact Nattilingmiut kayak Amundsen collected: The joinery, scantlings, and lashing patterns are the same as on the originals; the primary material substitution is nylon for the 'skin' as using seal skin would land me in federal prison. I've built a few others as well: https://www.traditionalkayaks.com/Kayakreplicas/KayakReplicas.html All the best and happy new year! -Harvey

- 153 replies
-
- 13
-

-
-
That is quite an eclectic book-- it covers a lot of ground beyond models. It seems on first glance only the first 3 pages cover models? Chapman lists a supplier of model fittings, and it's the same one advertised in Hasluck, 1905 (attached below)-- must've been a good supplier to have been in business that long; I wonder when they opened. H-

-
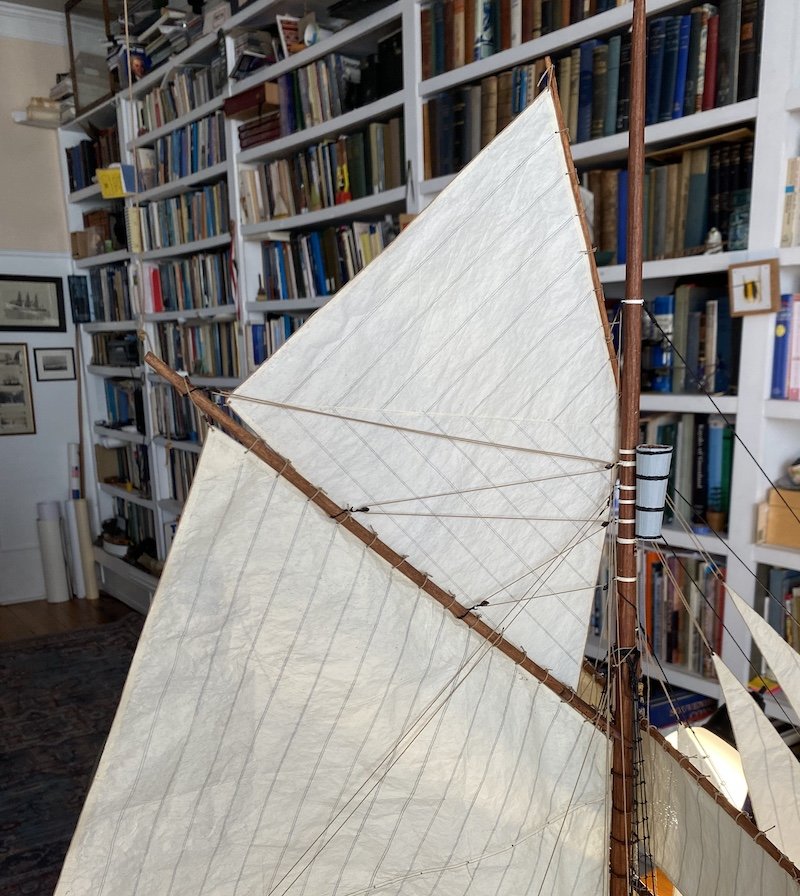
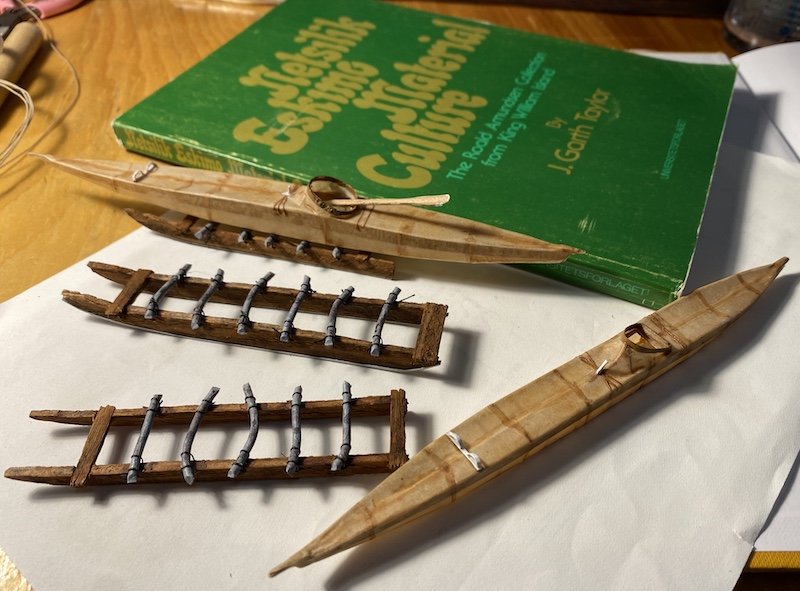
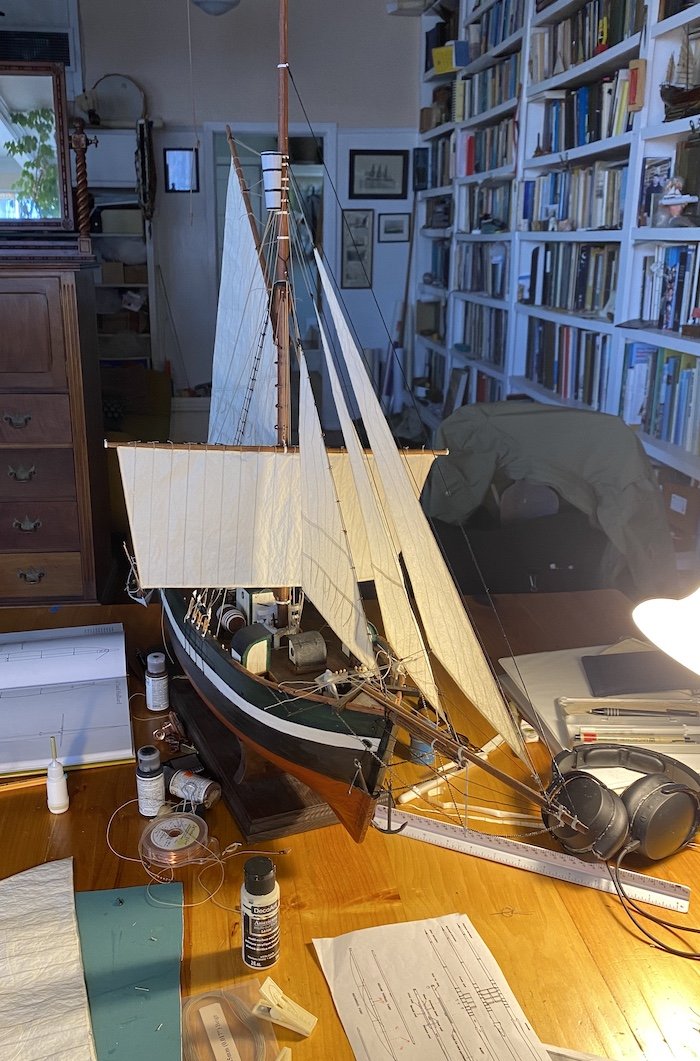
The Gaff Topsail is hoisted! Next up are the yards' lifts, braces and sheets. As I've built the two intact Nattilingmiut kayaks that Amundsen collected on King William Island, I thought I'd also make the three wood and caribou antler sleds-- the specs for these come from J. Garth Taylor's 1974 "Netsilik Eskimo Material Culture: The Roald Amundsen Collection from King William Island." The model sleds are made from cedar, paper, and copper wire, lashed with button thread.

- 153 replies
-
- 13
-
-
-
This evening I fixed the mast's pin-rail situation-- my model had half the number of belaying pins she should have had (as per the old Model Shipways plans); the Gjøa in the museum as she is today seems to have been short five, having just five (This is just on the horse-shoe shaped rail around the mast). Sounds easy enough, however ... The handle-ends of the pins I ordered didn't match the five I had in these positions, so I had to swap out others here and there to get ten matching pins. I had to re-space several of the extant pins so they would accommodate the doubling and look properly spaced. Also, the pins are not long enough to project through the bottom of the rail, so each 'lower-end' is a dummy of bamboo, inserted from below and glued. Old unused holes were plugged and painted. All of this done while she is nearly fully rigged, which is of course when I realized more belaying pins are needed-- made for some tight work, though nothing was damaged. Anyhow, an in-process shot, and a completed shot, with the foresail halyard replaced. Now I can finally begin to hitch off all the loose ends and tighten things up! Best, H-


-
What exquisite luxury to have the full-size functioning vessel close at hand, and permission to board her! Your model is looking very good, as does the full-size! Harvey
-
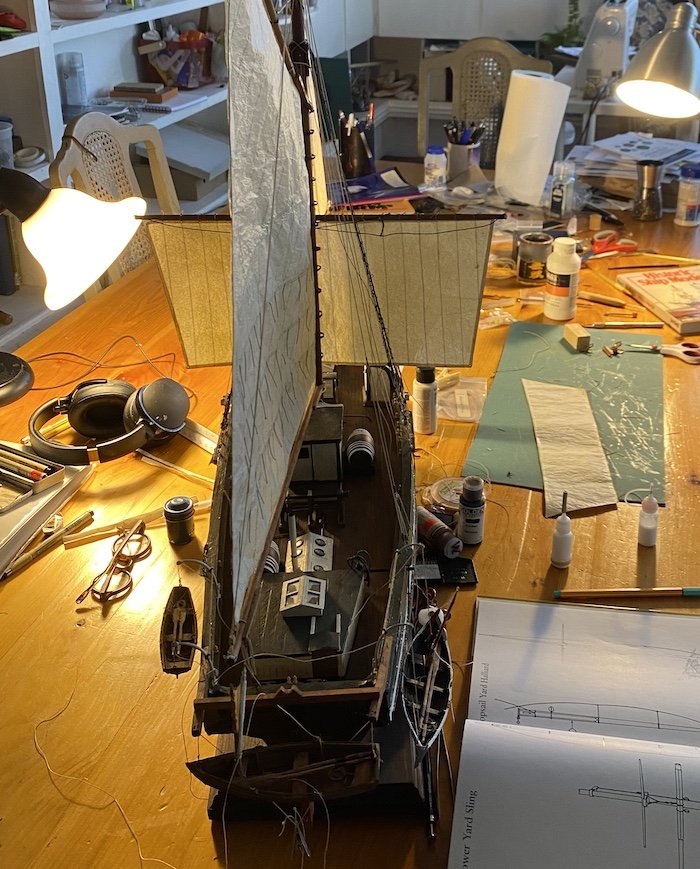
Almost time to relinquish the dining room table-- I got a lot done though! I'm so pleased with how the sails turned out that I decided to go all out with the rig, so the square, square topsail, and the sprit topsail will be set; Gjøa will be in full bloom by spring! One little hitch discovered this morning. . . I set up the mast's pinrail like how she is in the museum today, but there are apparently a number of pins missing. The old Model Shipways plans shows many more (and their functions), AND I ran out of pins (ordered, though). So, back to the shelf for a while. H-
- 153 replies
-
- 10
-
-
All credit to Steggen-- I'd never heard of the book or museum before, but it was a major help! Best, H-

