histprof1066
-
Posts
69 -
Joined
-
Last visited
Content Type
Profiles
Forums
Gallery
Events
Everything posted by histprof1066
-
Ferrus, thank you for your comments on my completed model. Yes, the 1066 is in reference to the Norman Invasion of England in 1066. I appreciate your comments on my advancement in the modeling hobby. I have just recently started the Artesania Latina Vasa build, and am currently 'fairing' the hull. I know I ought to start a build log on it for sure from what I currently see online with a good number of people interested in seeing it completed. Now that I have all new tools and other helpful items, I am sure that this next one will be even better.
- 88 replies
-
- 1
-

-
- Constitution
- billing boats
- (and 1 more)
-
I think the bad comments comes from a combination of the lack of detail in some kits to the supplied thread being only one colour and easily frayed. I had not thought about the kits that were sold separately. Thinking about it now, I wonder if people can really hold a grudge that long. As for the case, I have a basic understanding of how to make a case and some wood working skills, though my tools are limited. Do I have a miter saw? No. Do I have a power sander? No. Do I have a lathe? No. These are all things I would like to have in the future but just do not have the room. Right now I am wondering if it would be better to order a case and get the glass (I have cut glass and plexi before for a living). I am going to start asking around and see what materials I can get a hold of first. I will keep you posted. Thank you all for the wonderful words and support.
- 88 replies
-
- 2
-

-
- Constitution
- billing boats
- (and 1 more)
-
Thanks John, I was certain that they might do a display case, though I was figuring it might be better and cheaper if I do it. Do you mind if I ask how much you spent on yours? I wasn't thinking that two years and 4 months was especially long, though towards the end I was wondering if I was going to finish lol. Billings does get a bad wrap in many other groups I have seen. The thing is that the talk is all about the instructions and in some cases, their materials. They are working to correct the materials issue in some kits they are relaunching. The instructions though, they are moving to more of what you would see from Artesania Latina. Only time will tell what they will do to ships like the Constitution. I definitely have some feedback they should use for a relaunch lol.
-
Thanks John! I am looking into building a display case. I see one forum post that interests me on this site. However, due to the cost of about 200 dollars, that might have to wait until I get my bonus check at the end of August. Hopefully I will have it made and done soon thereafter. I for now have it displayed on a table. Do you make your own cases? If not, do you have a good retailer that I might look at instead of making mine? Thanks for your assistance and input.
-
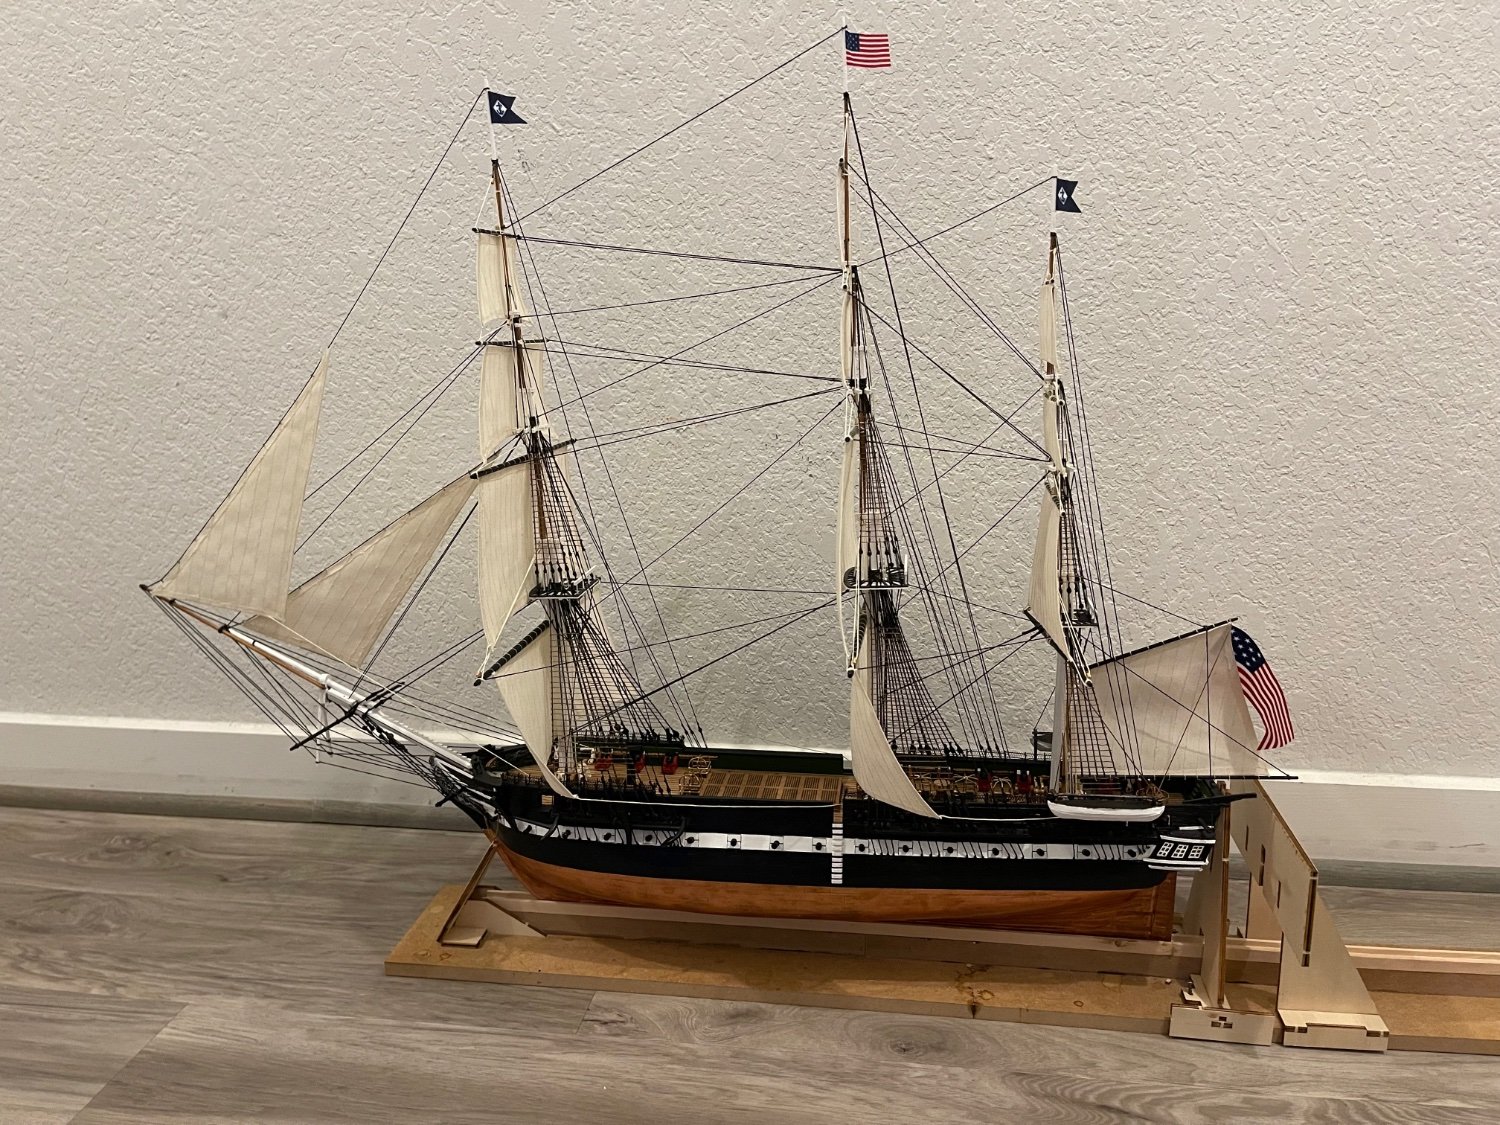
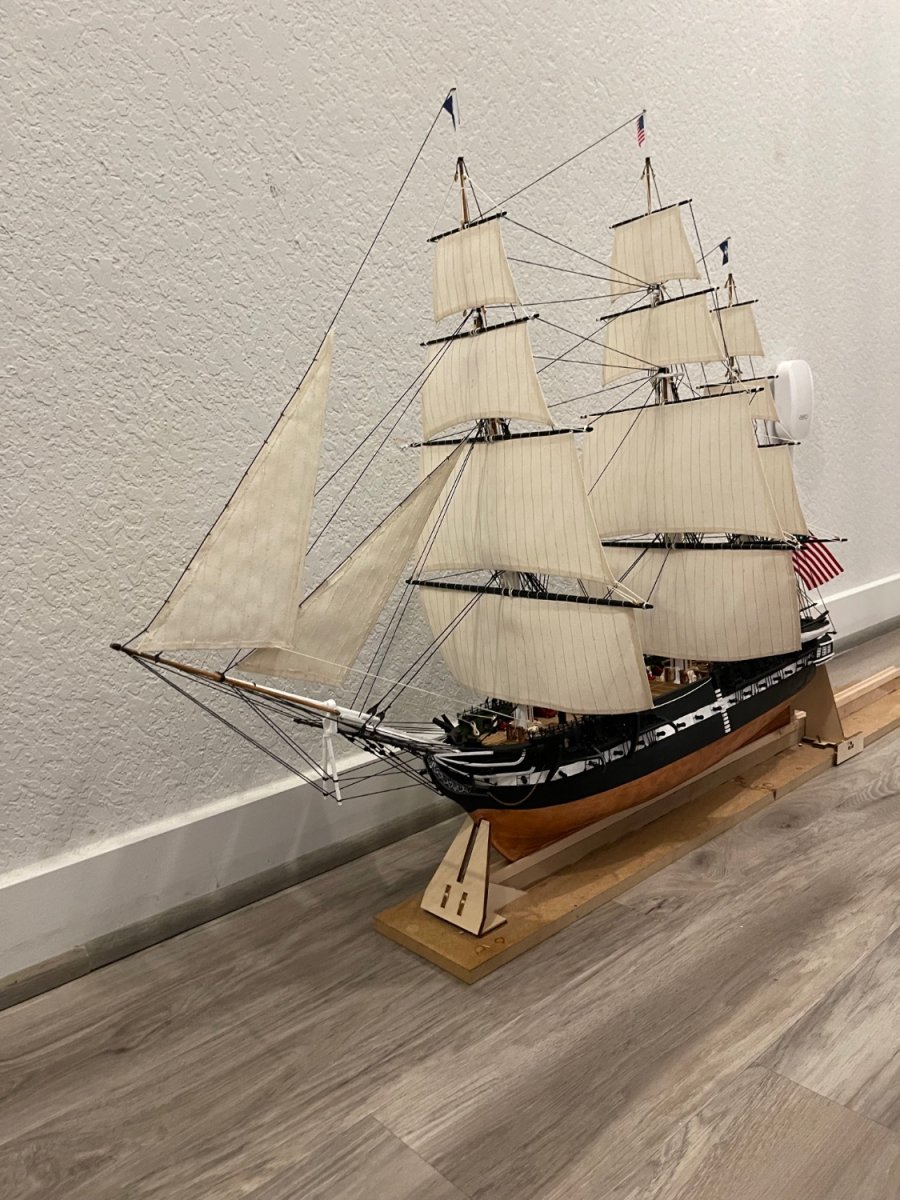
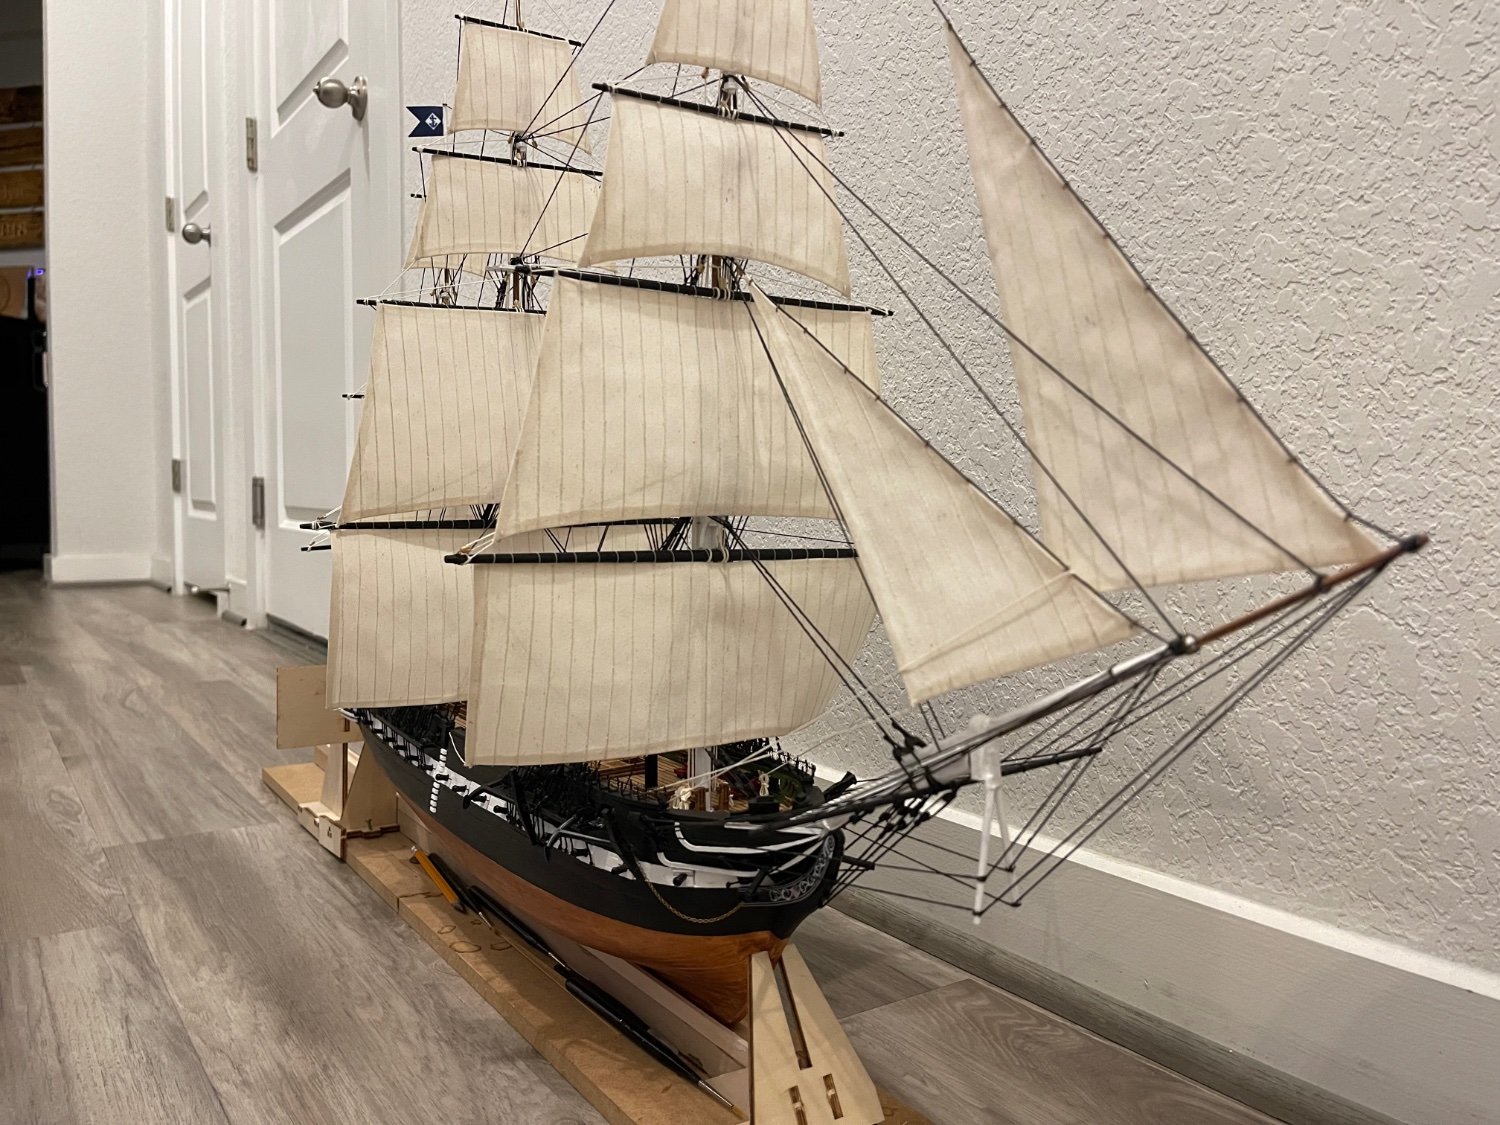
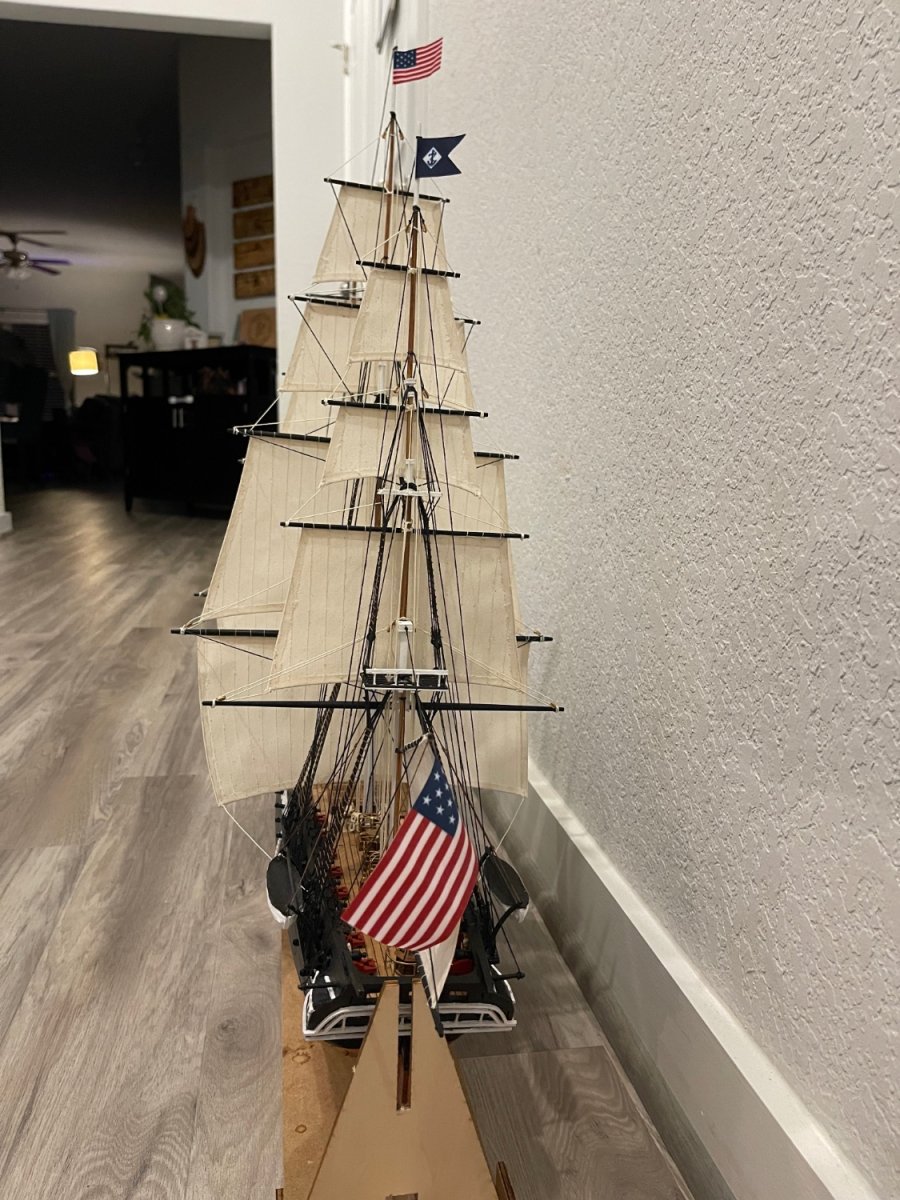
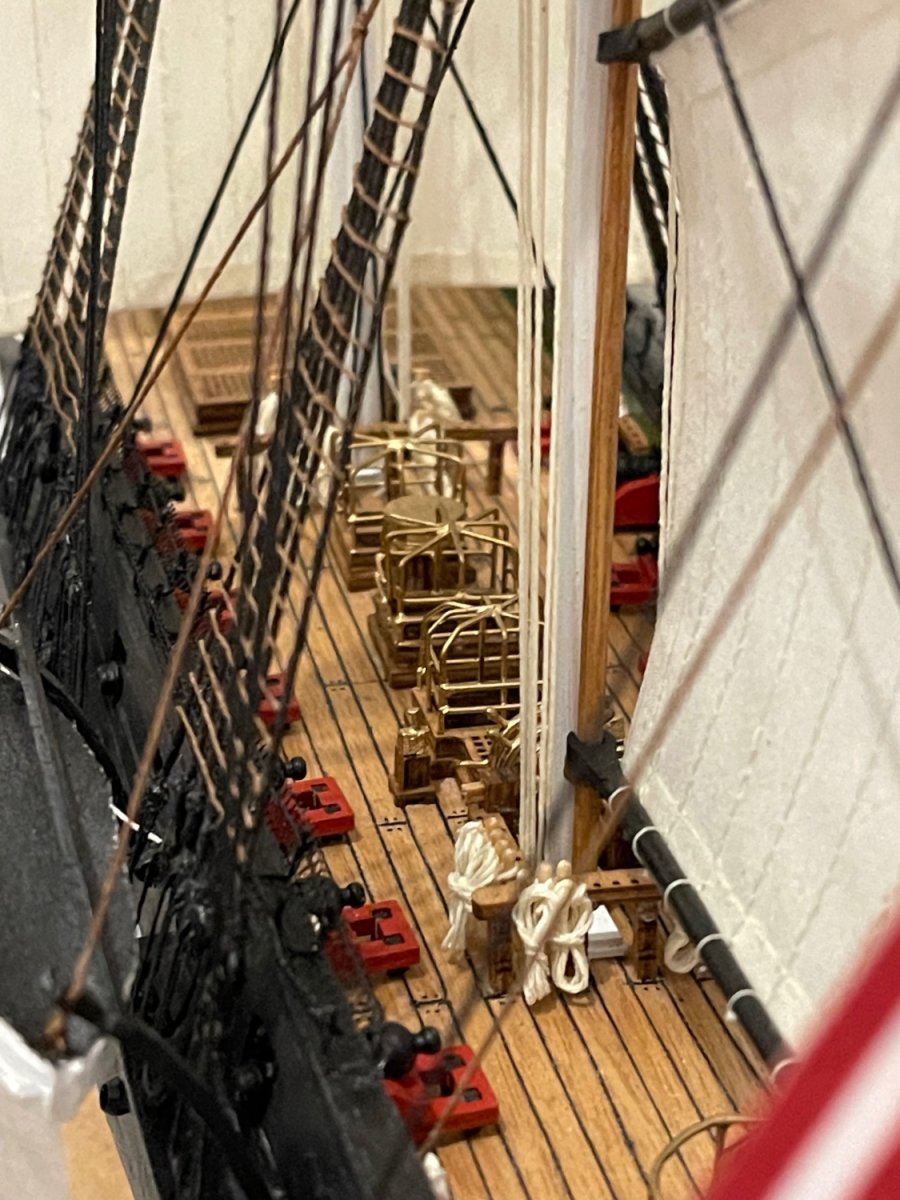
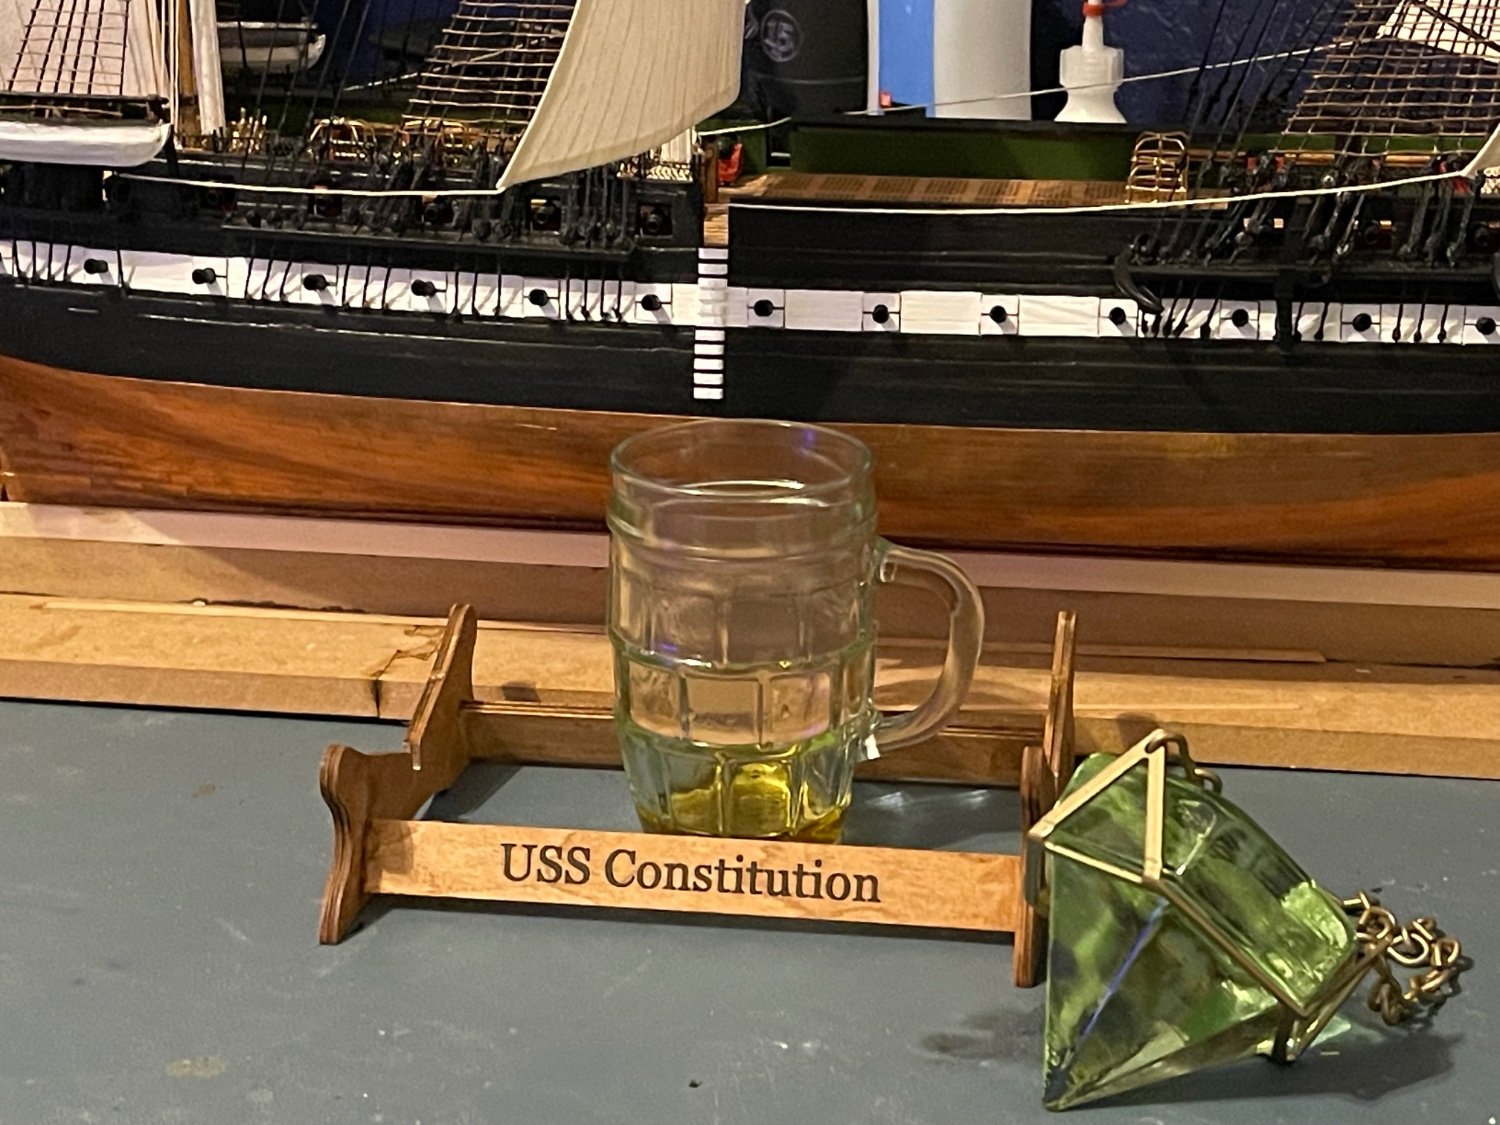
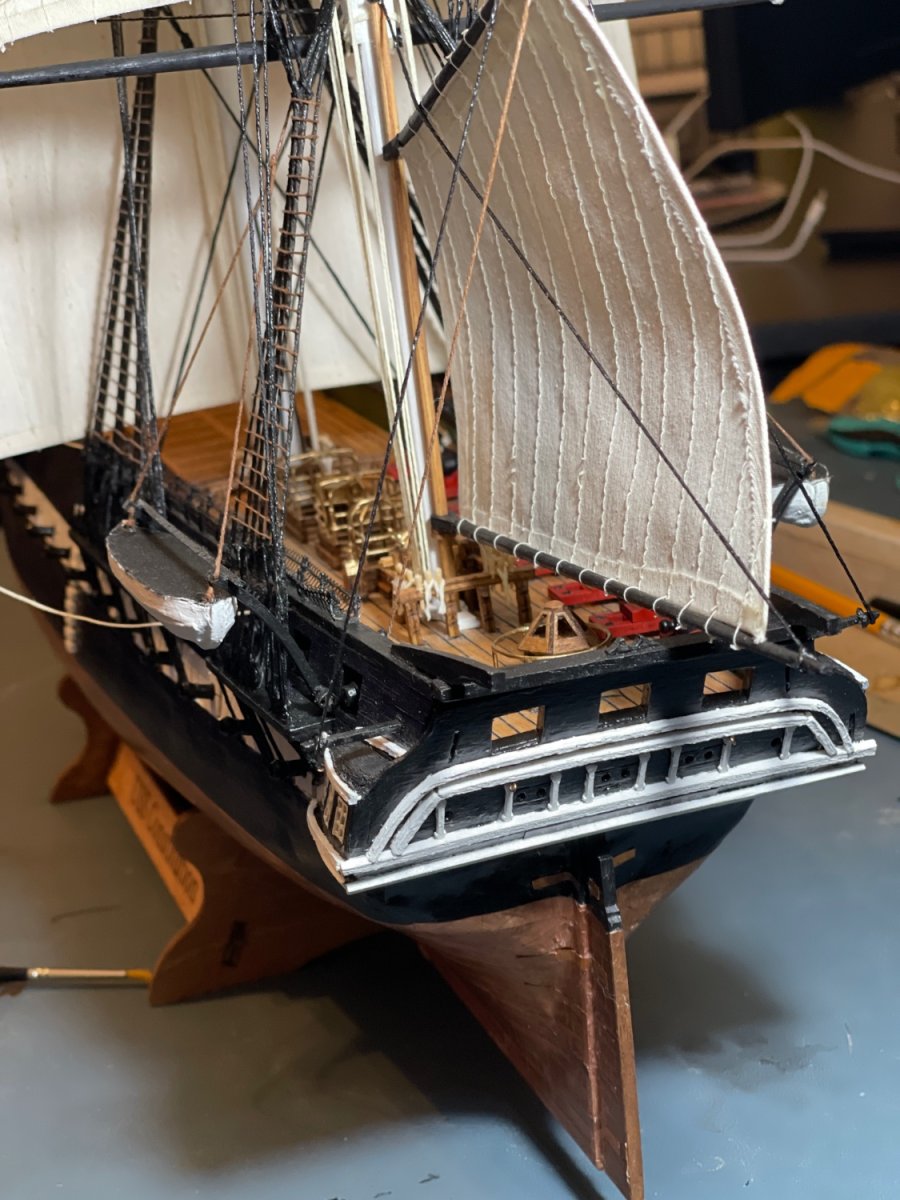
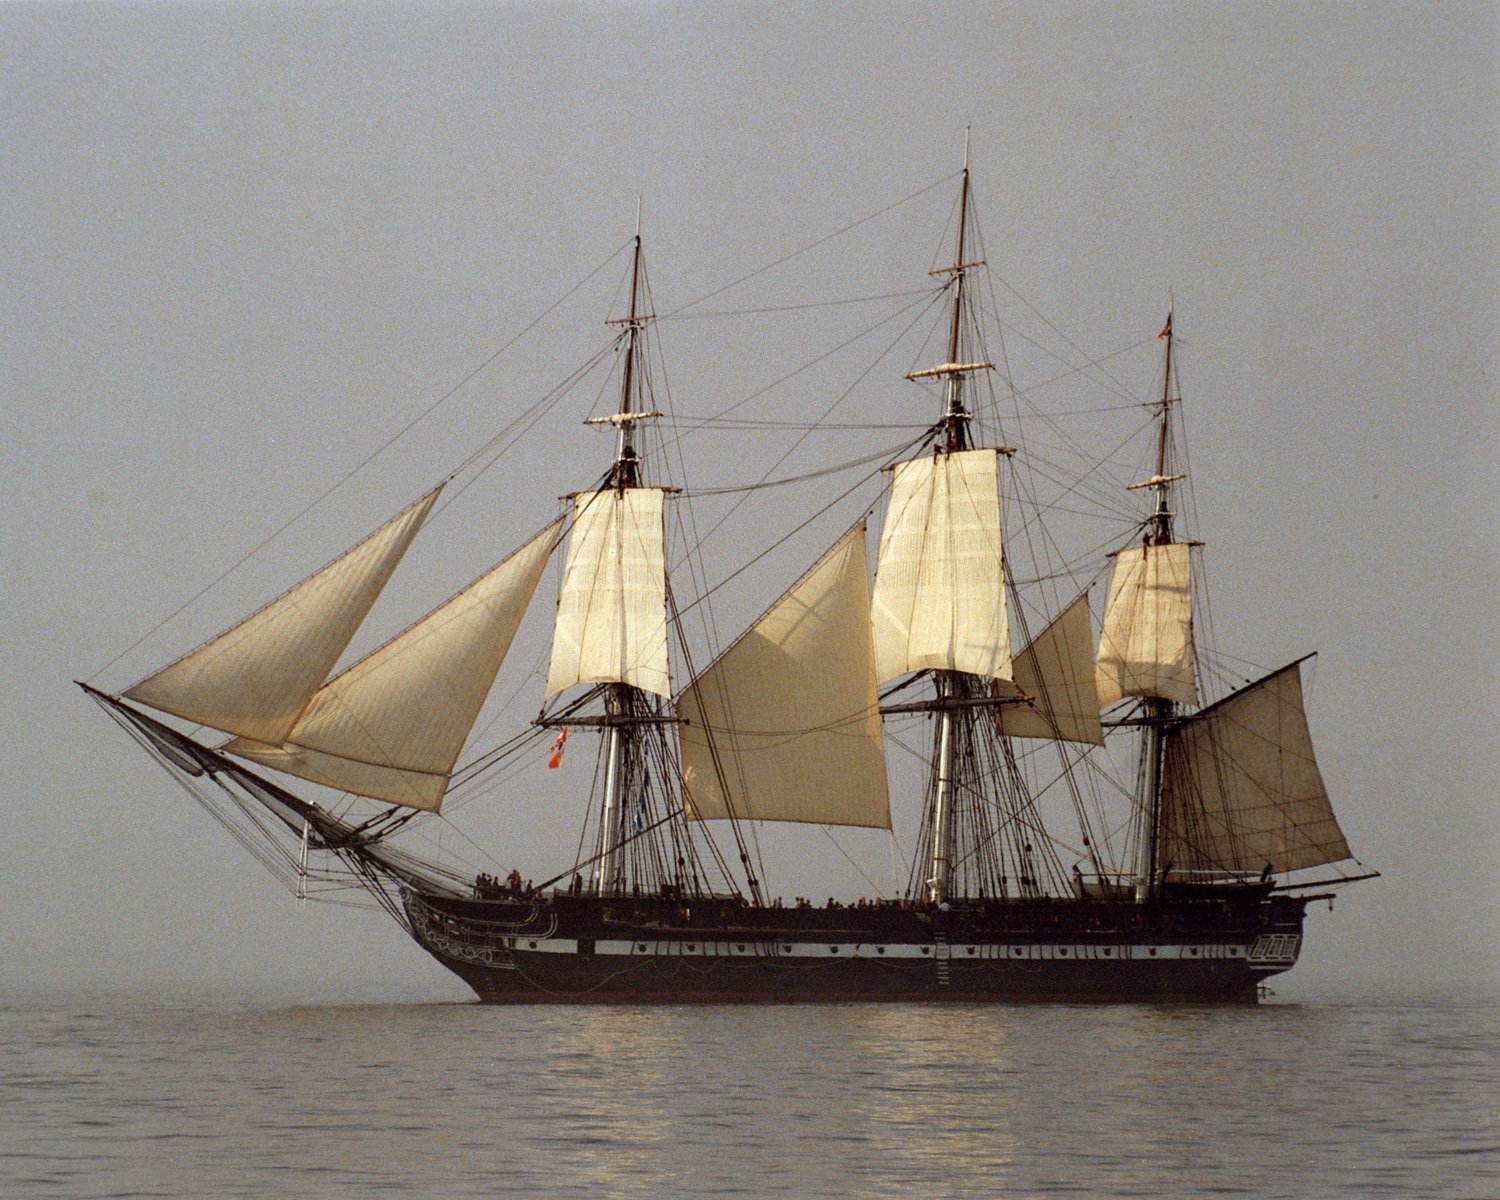
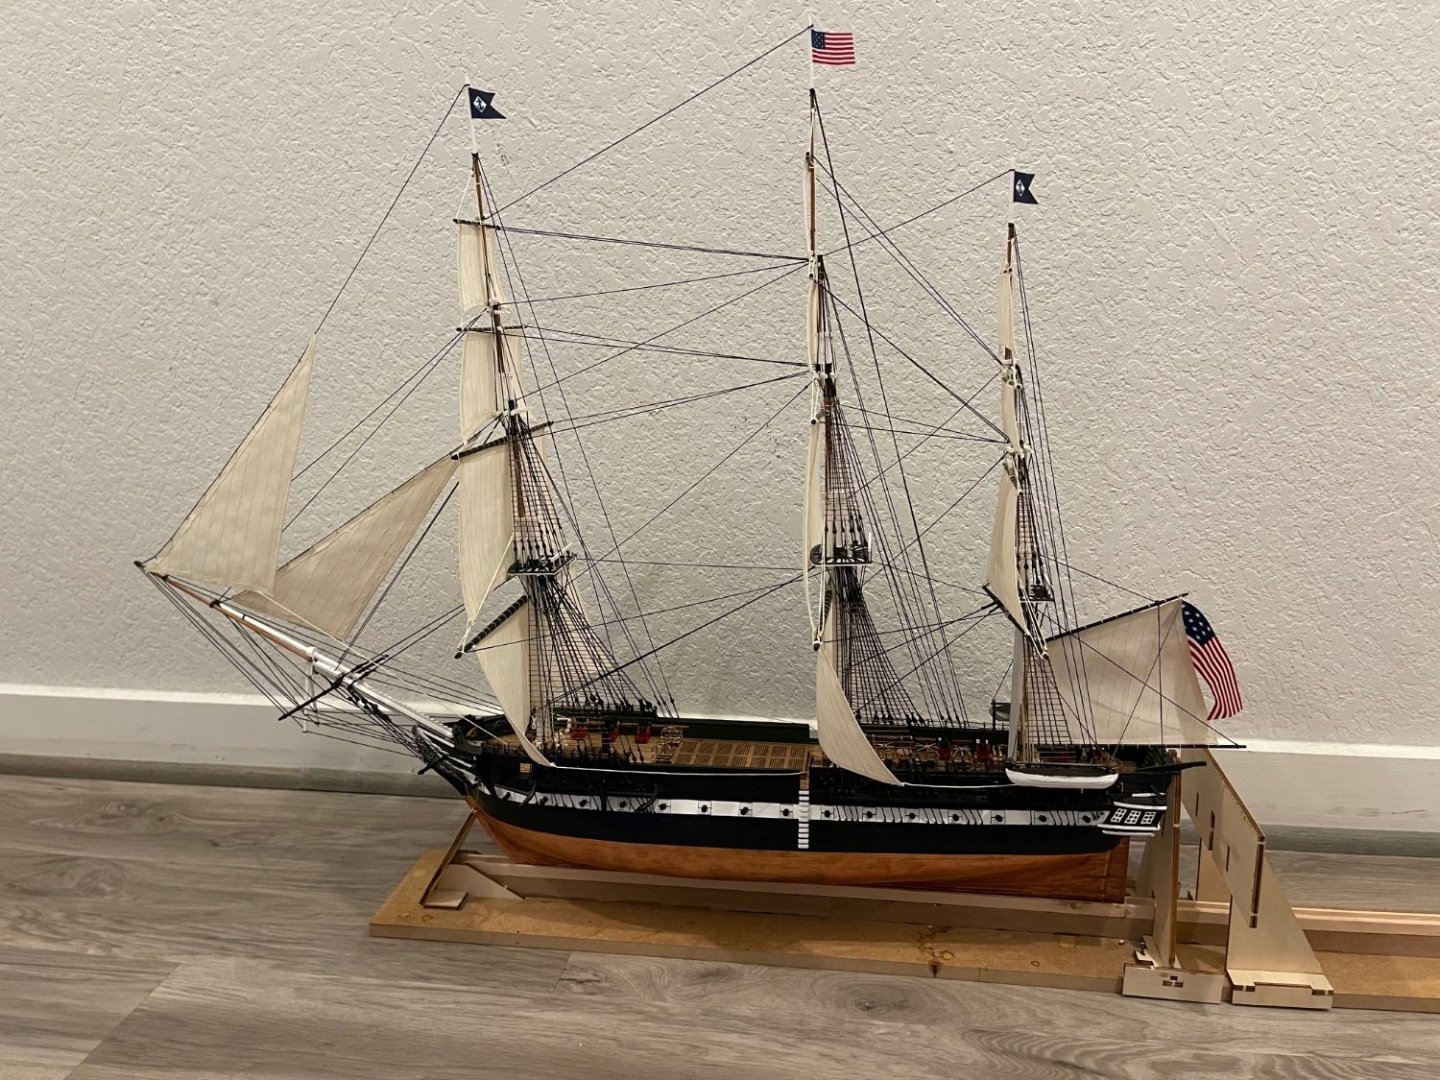
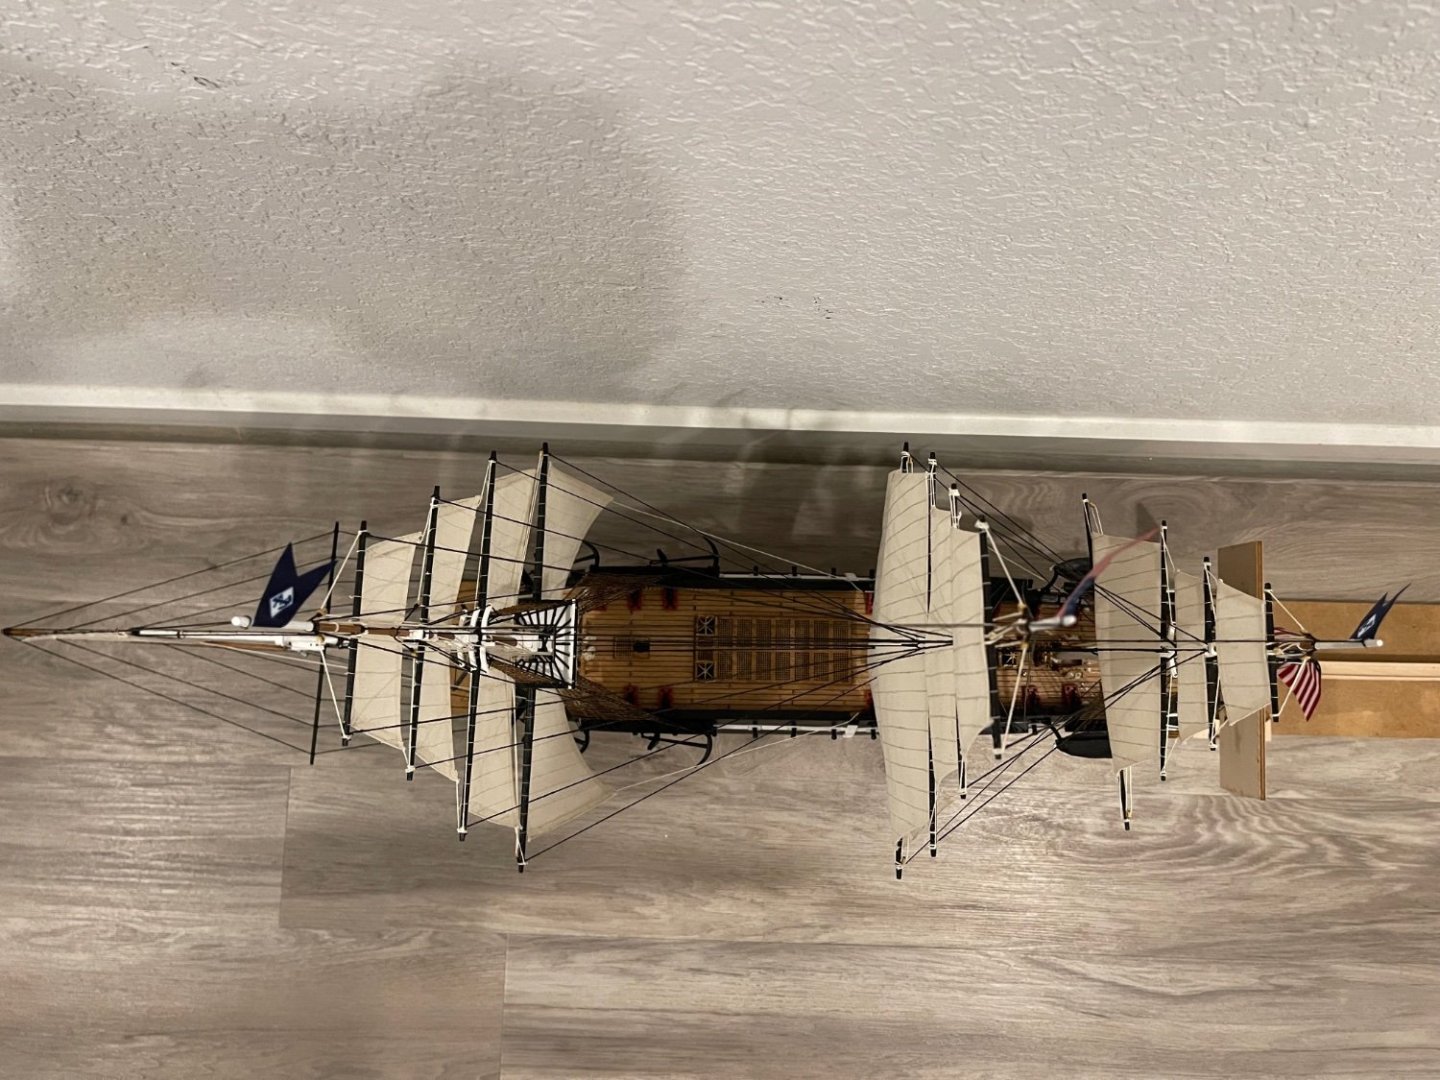
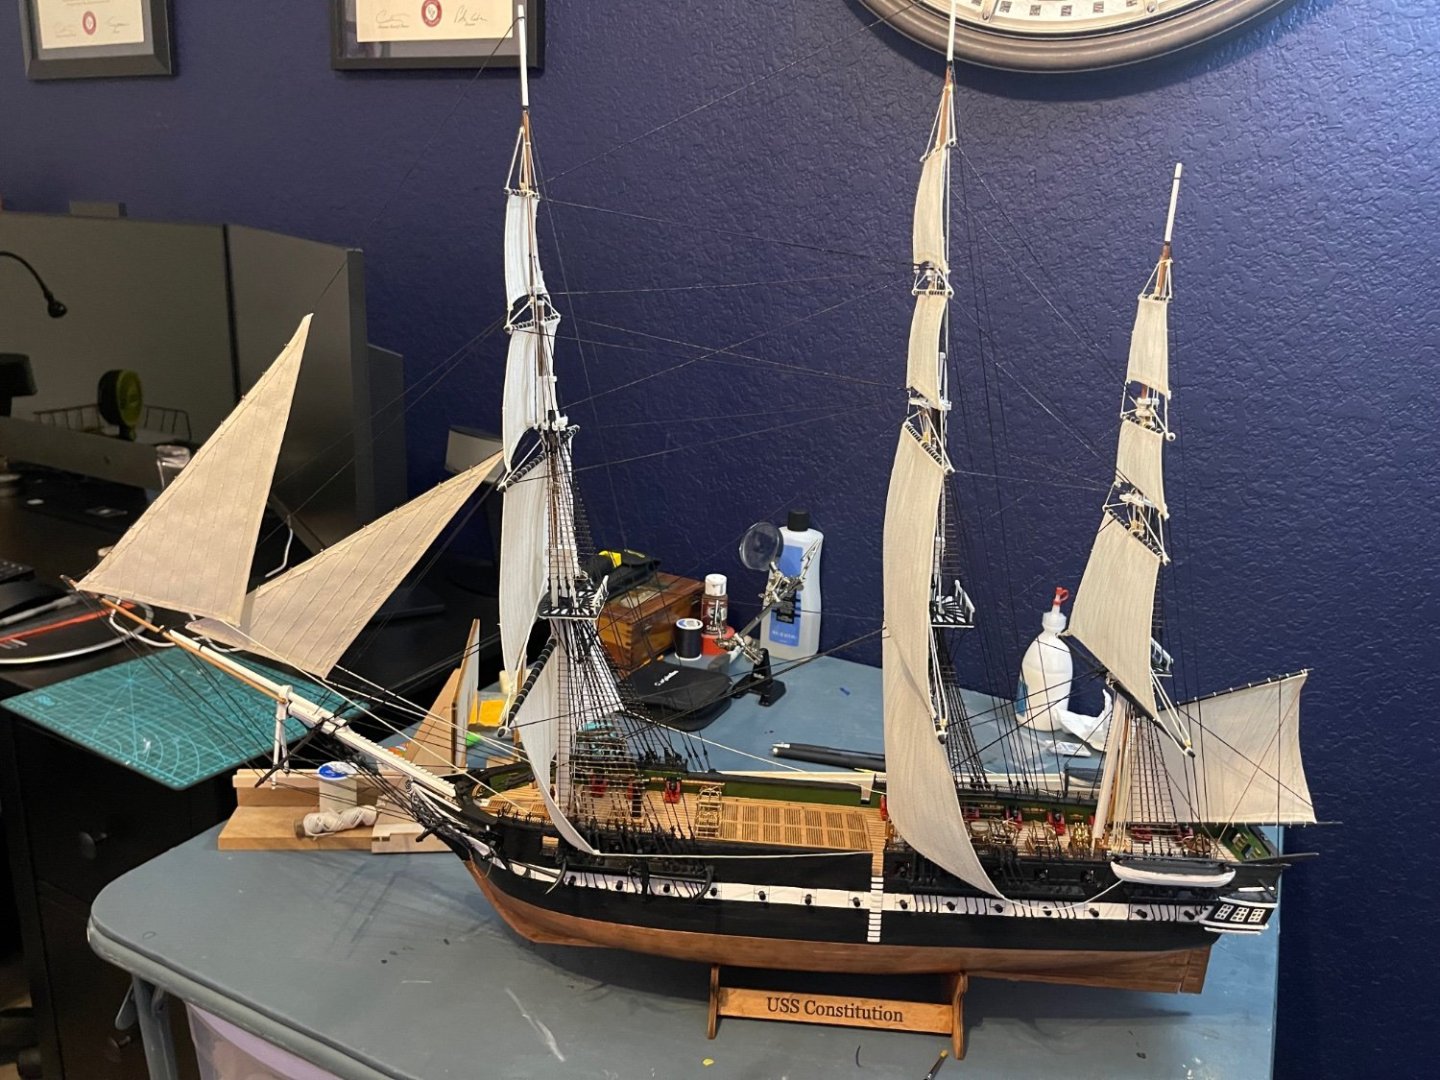
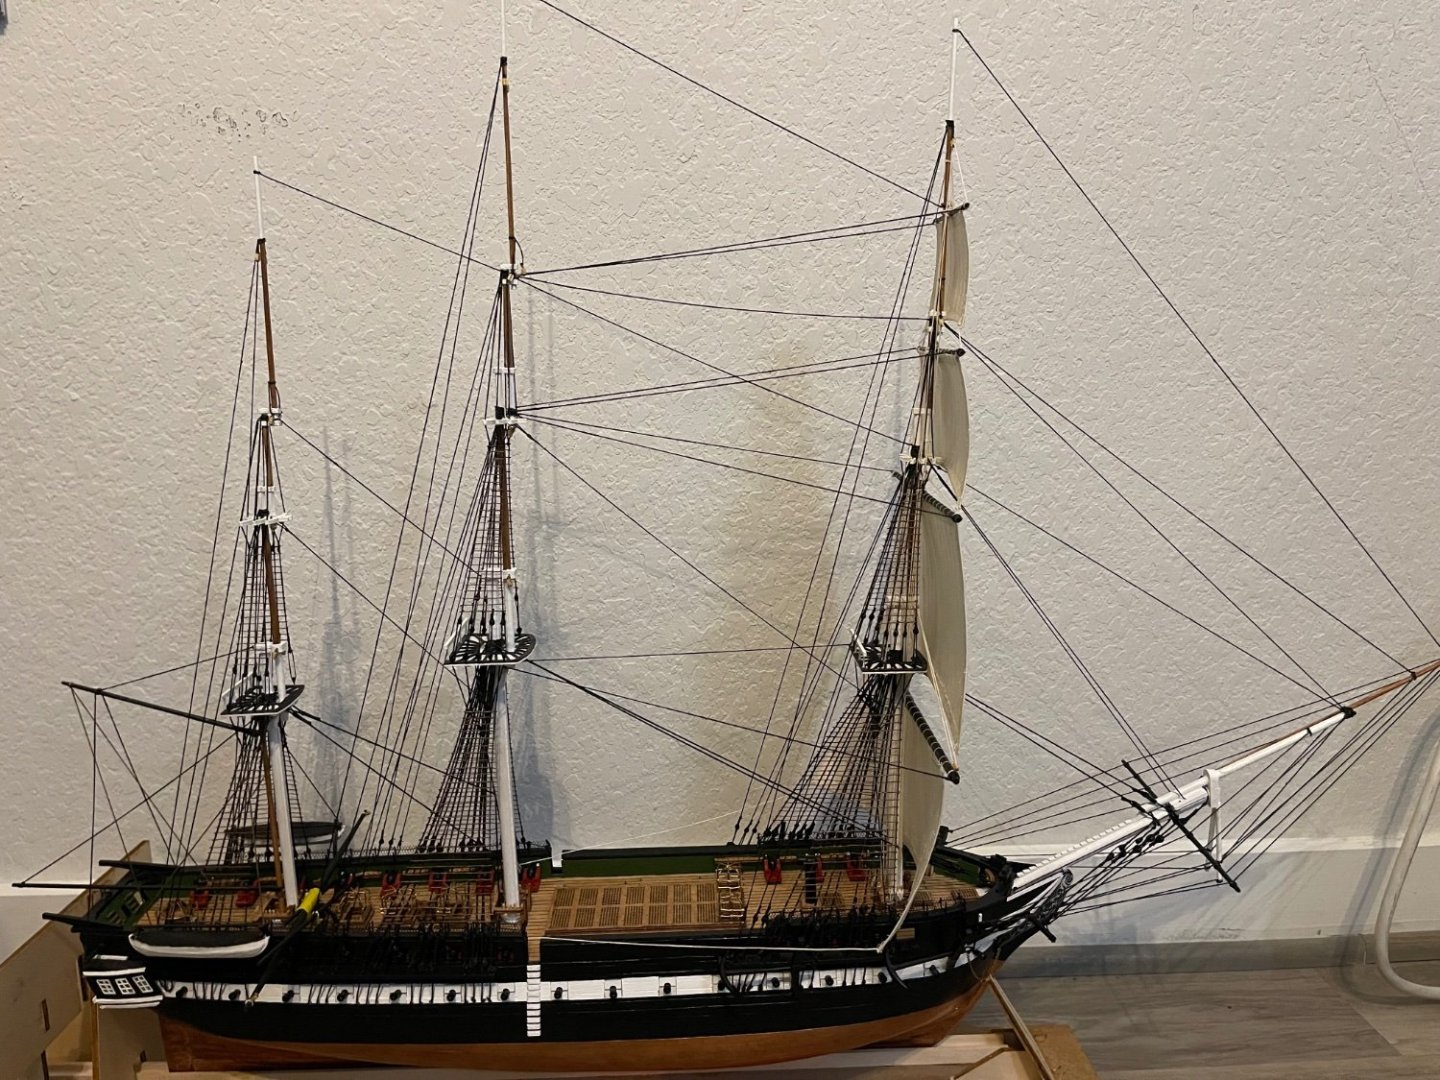
Two years, four months; February 2021 to June 2023. That is how long it has been to complete the Constitution. It could have been 6 months shorter, but I let it sit while I was frustrated with planking. I also laid copper on the hull which took a couple of months as well. I made a jig to make rope hanks on most of the pins on the rail. The kit didn’t come with much thread for overage, but I feel I got enough on there to be more realistic. I have to check my black lines and make sure I haven’t missed anything, but principal work is done. After inspection, all that is missing is to place the ship on its display cradle. Let me know what you think. My last ship was dedicated to my father, but his spirit helped me finish this model, it is to him I have raised a toast in his absence in the last photo. Thank you to my mother, Cathy for her motivating words and support. Thank you to my wife Joscelyn and my family for putting up with the mess.


- 88 replies
-
- 8
-
-
-
- Constitution
- billing boats
- (and 1 more)
-
I did not know that. The more you know, am I right?
-
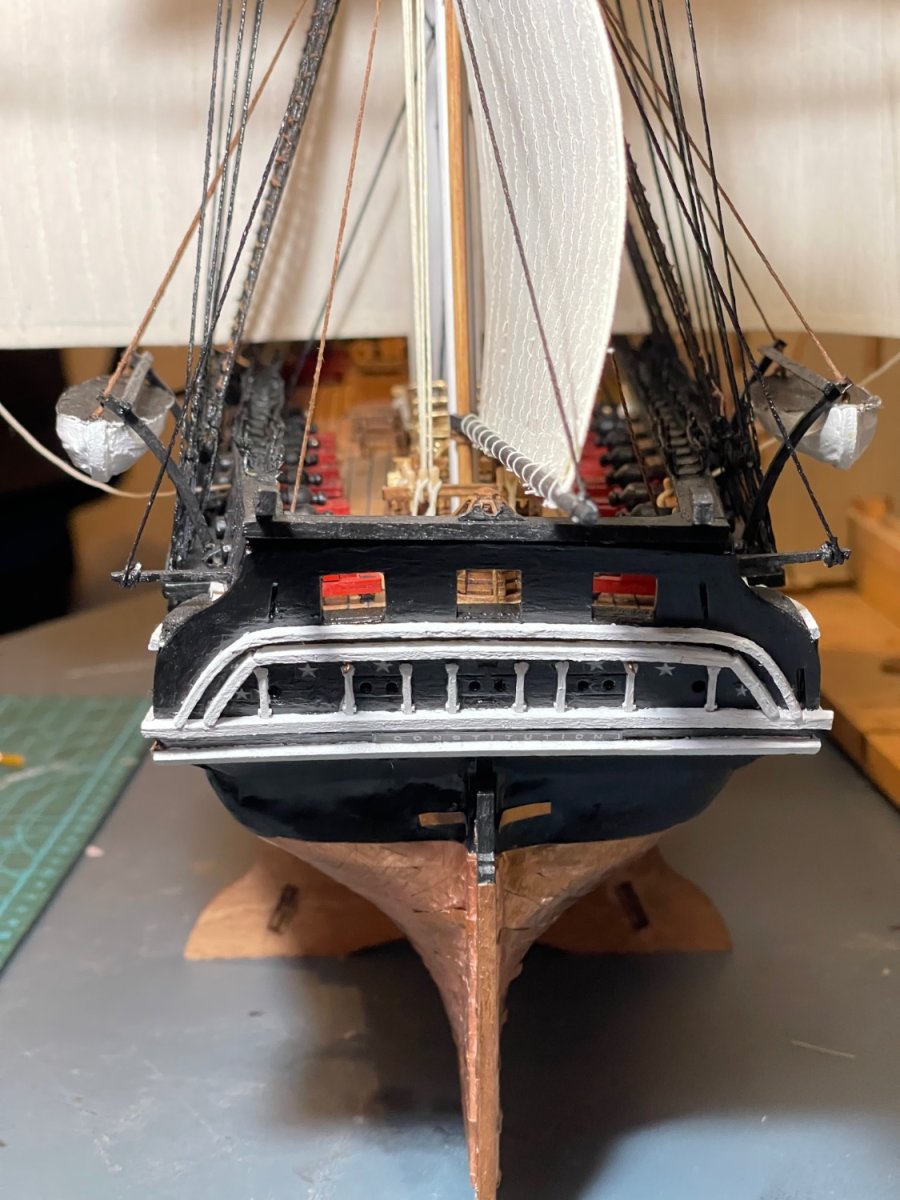
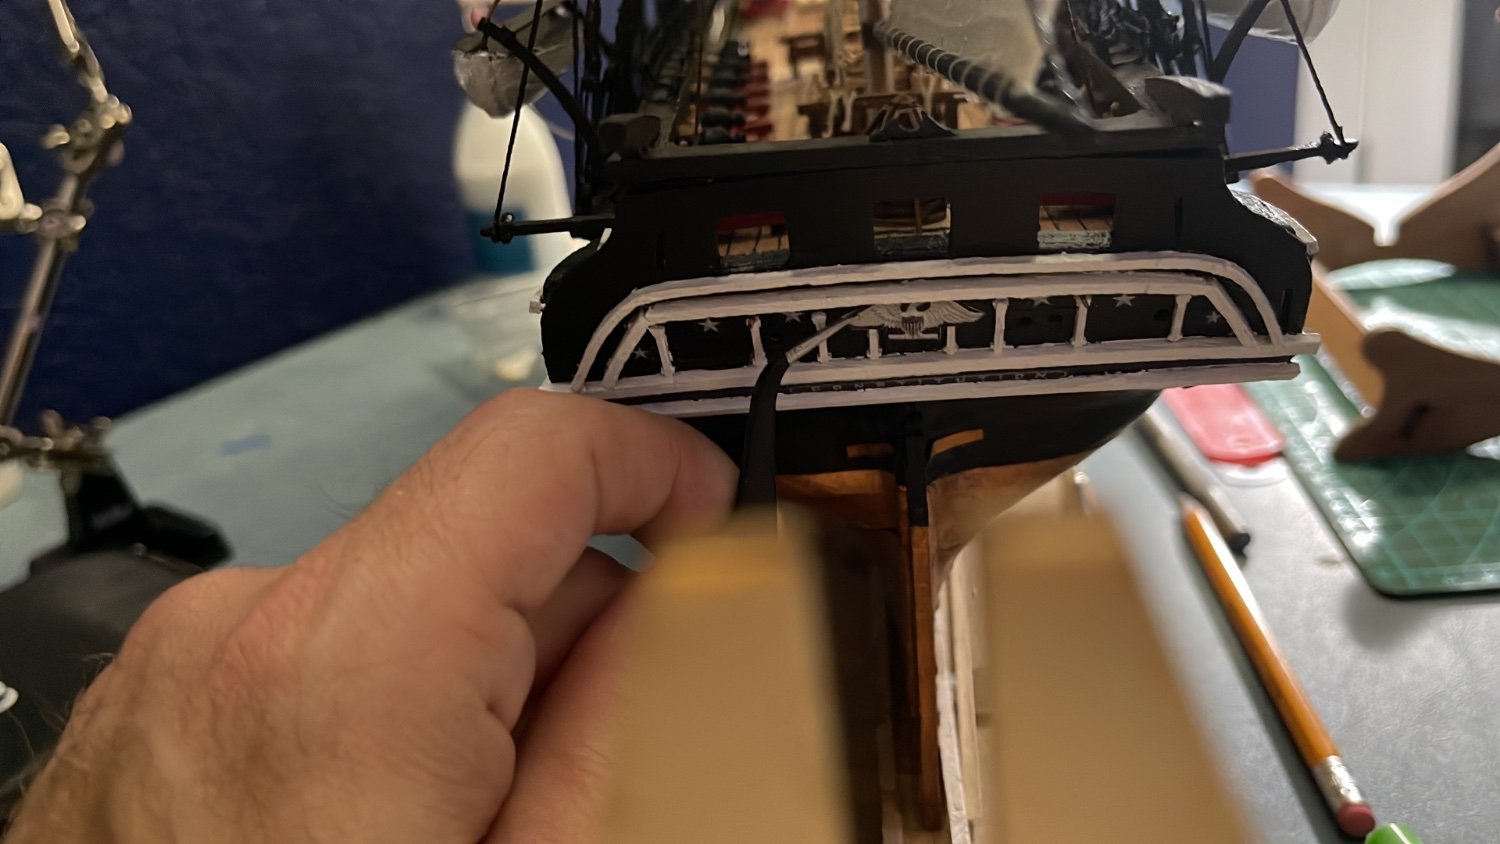
I kind of figured that there were going to be aspects of the model that were going to not be as accurate. Billings is a good company, though there are things that I cannot stand, lack of instructions, descriptions of what to do, inaccurate model details. I figure that I might go ahead and either move it or try and peel off the pilasters... after I finish making the rope hanks. The in-house model doesn't have rope hanks, I figured that I would finish making those (need 40 total methinks). Some of the aforementioned things are why I decided to go with Artesania Latina for my next model (Vasa- most accurate...but also more detailed). Question though Jon... the rings on the stern board next to the stars...what are they for? I have them on my model but I am not certain what they are for...thank you for your illumination and your assistance.
-
Jon, I see what you mean. I looked at the Billin Boats instructions to ensure that I had them installed properly, and per the directions, they are correctly spaced. Now, if I move the middle ones apart, I could lay the Eagle flat, but I would just barely do that. Their in house model shows the white pilasters in the same spot with the white trim just slightly higher...I am definitely not looking at removing the trim. pilasters are a different story...but they are attached with CA; not an easy fix.
- 88 replies
-
- 1
-
-
- Constitution
- billing boats
- (and 1 more)
-
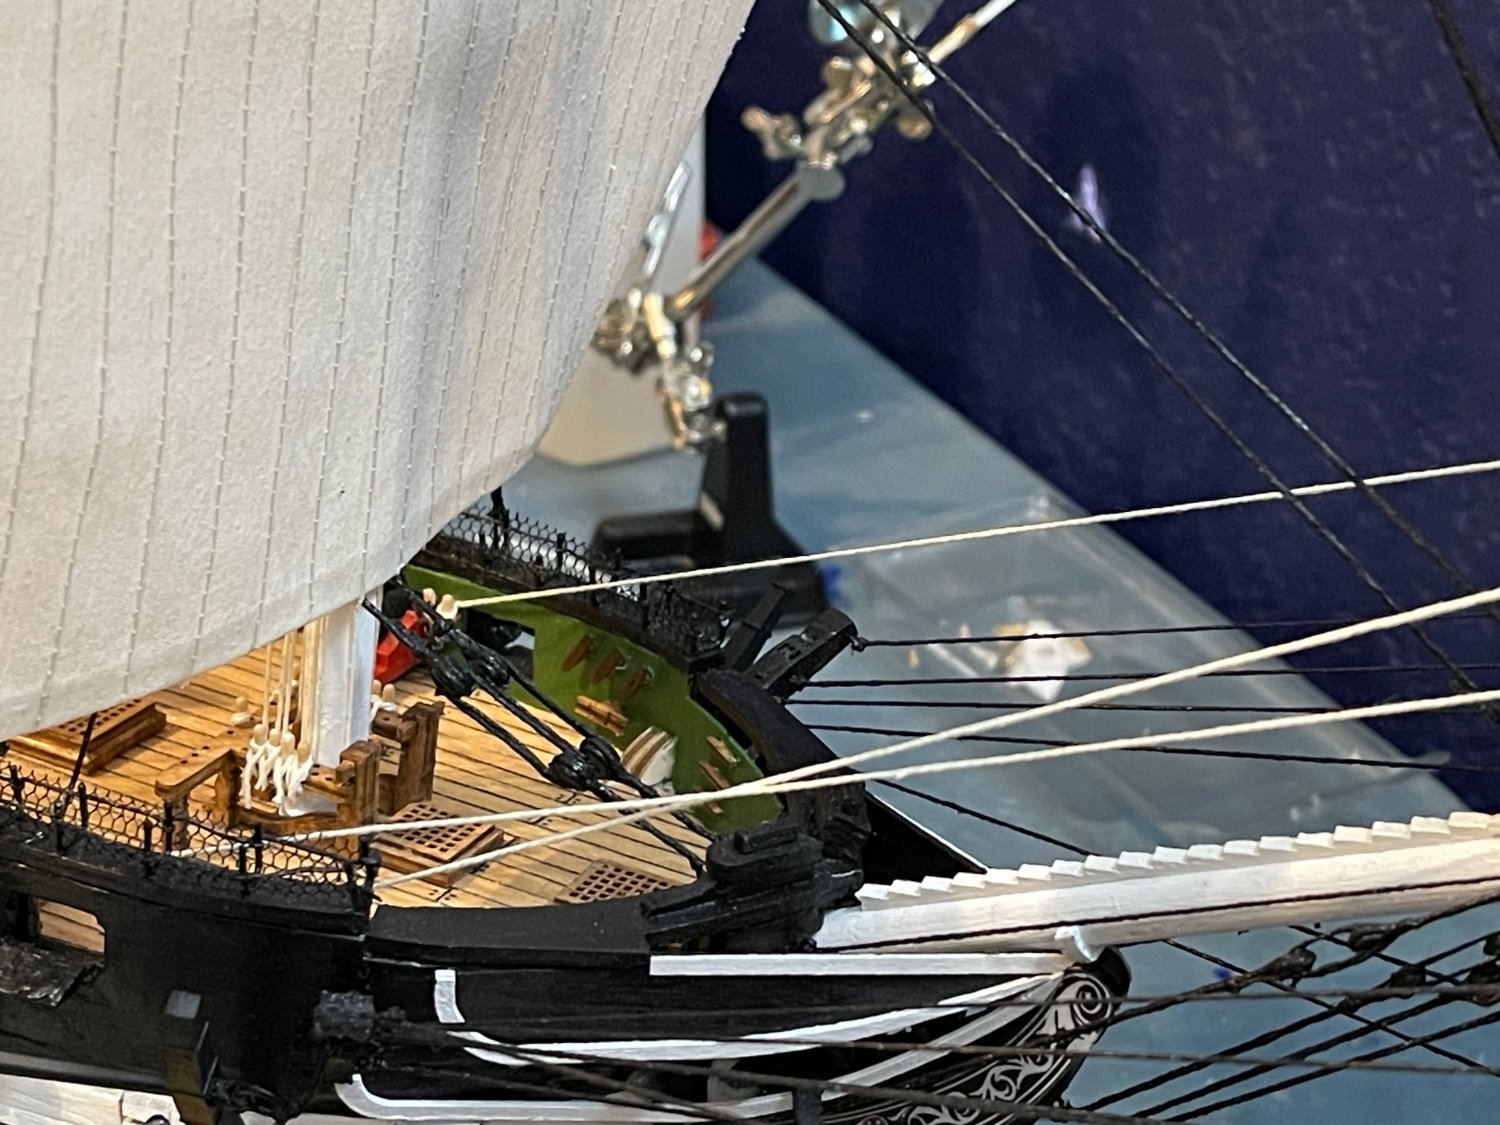
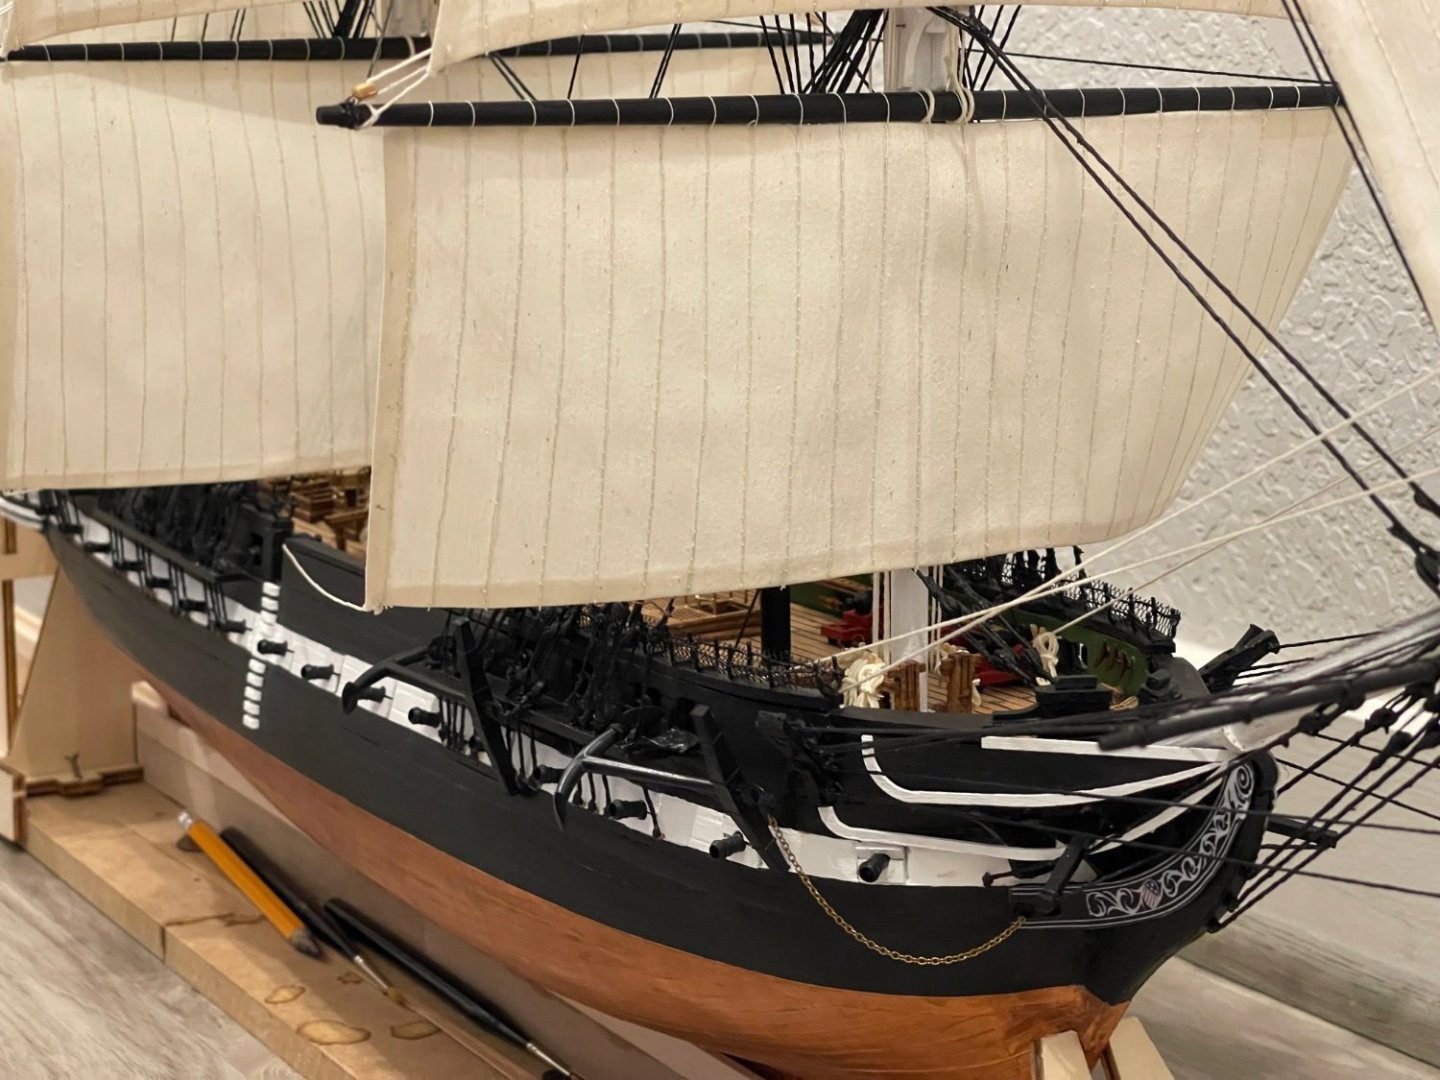
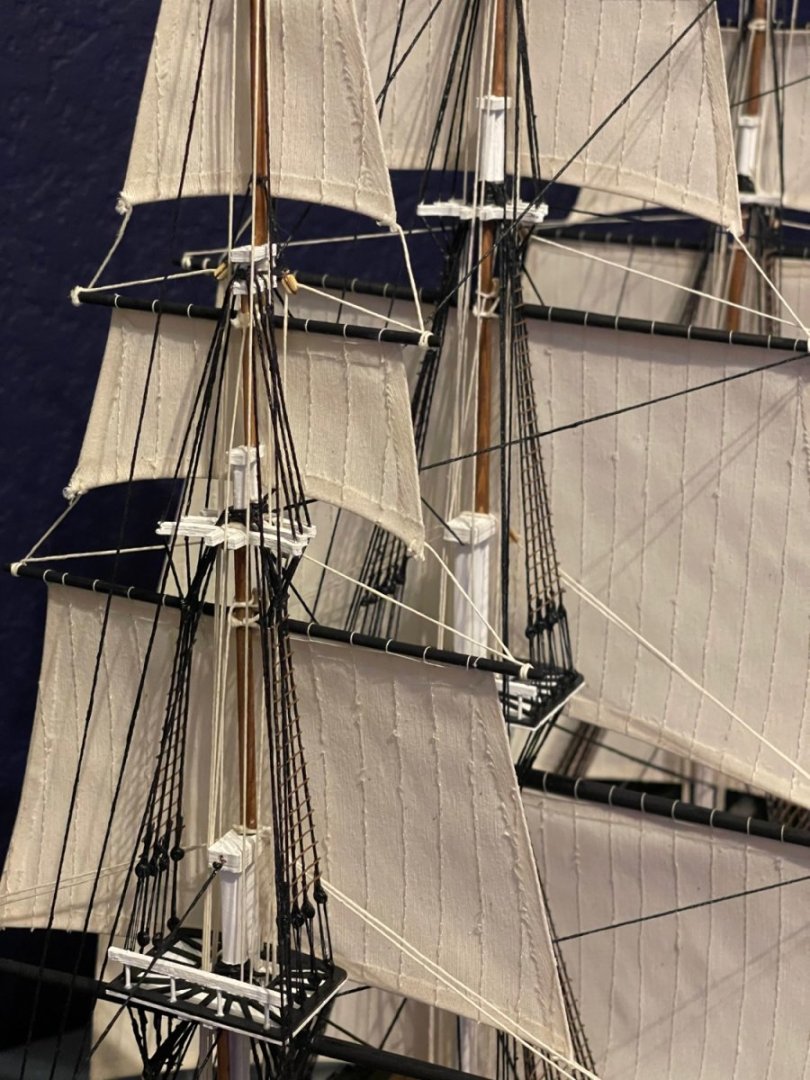
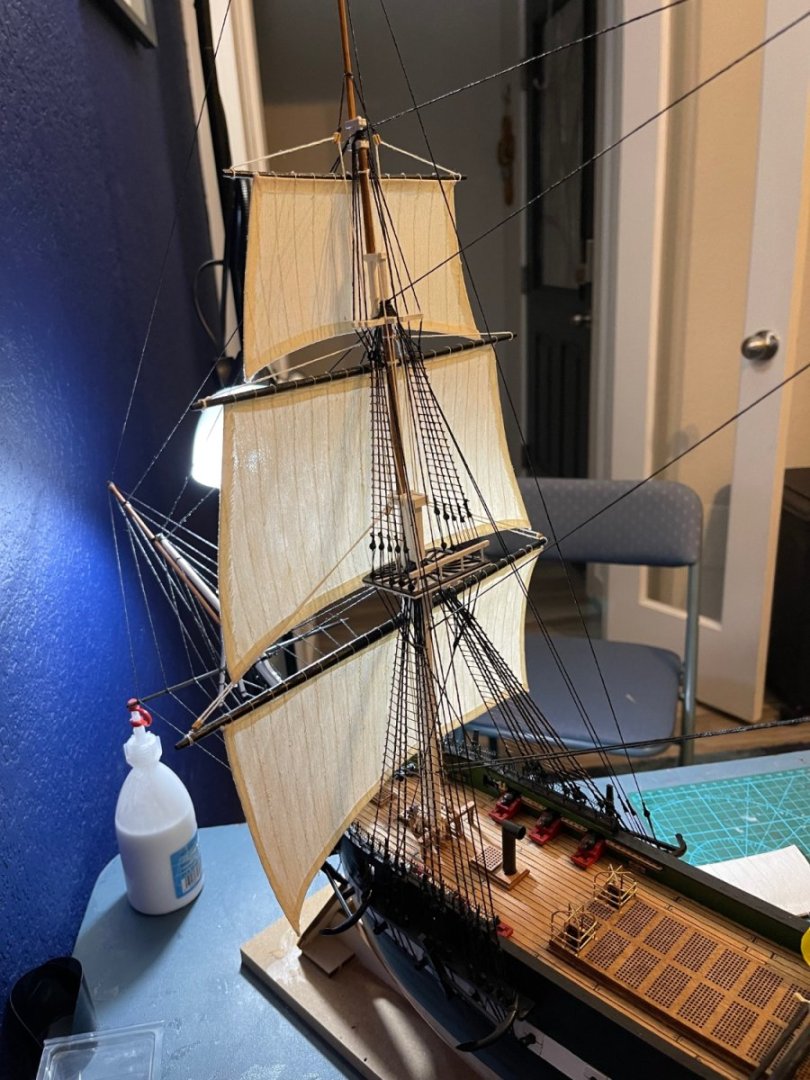
Almost done, all lines on the ship and sails have been affixed. I have polished the copper again with Renaissance wax, checked the fit of the stand, all I really have left to do is rope coils (quite a few), flags, and affix the Eagle to the stern. I do not have enough room to place it…you had to be VERY precise with the spacing of the white trim pieces. So…my thought is to place it on top of the lower trim pieces so it looks like a board carved on the top of the trim. Should I do that or leave it off?


-
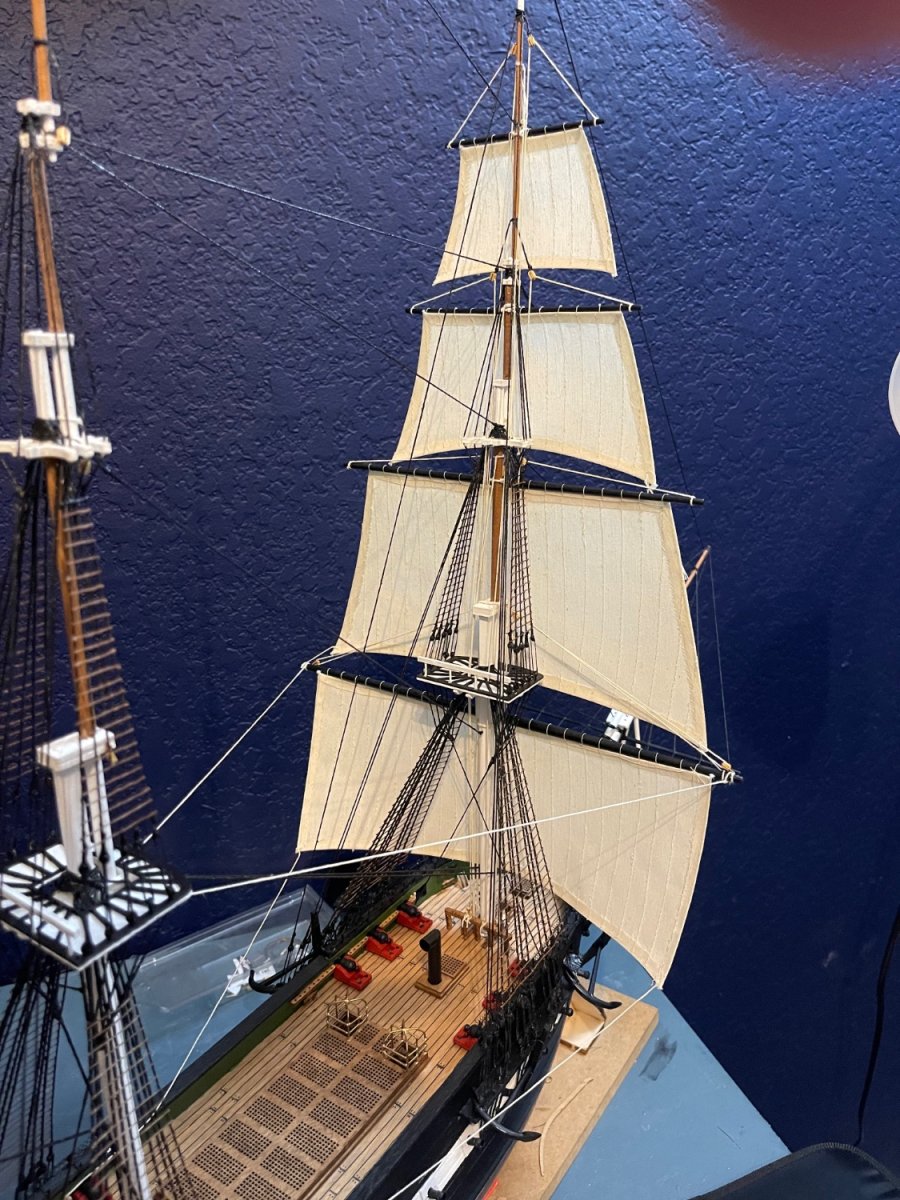
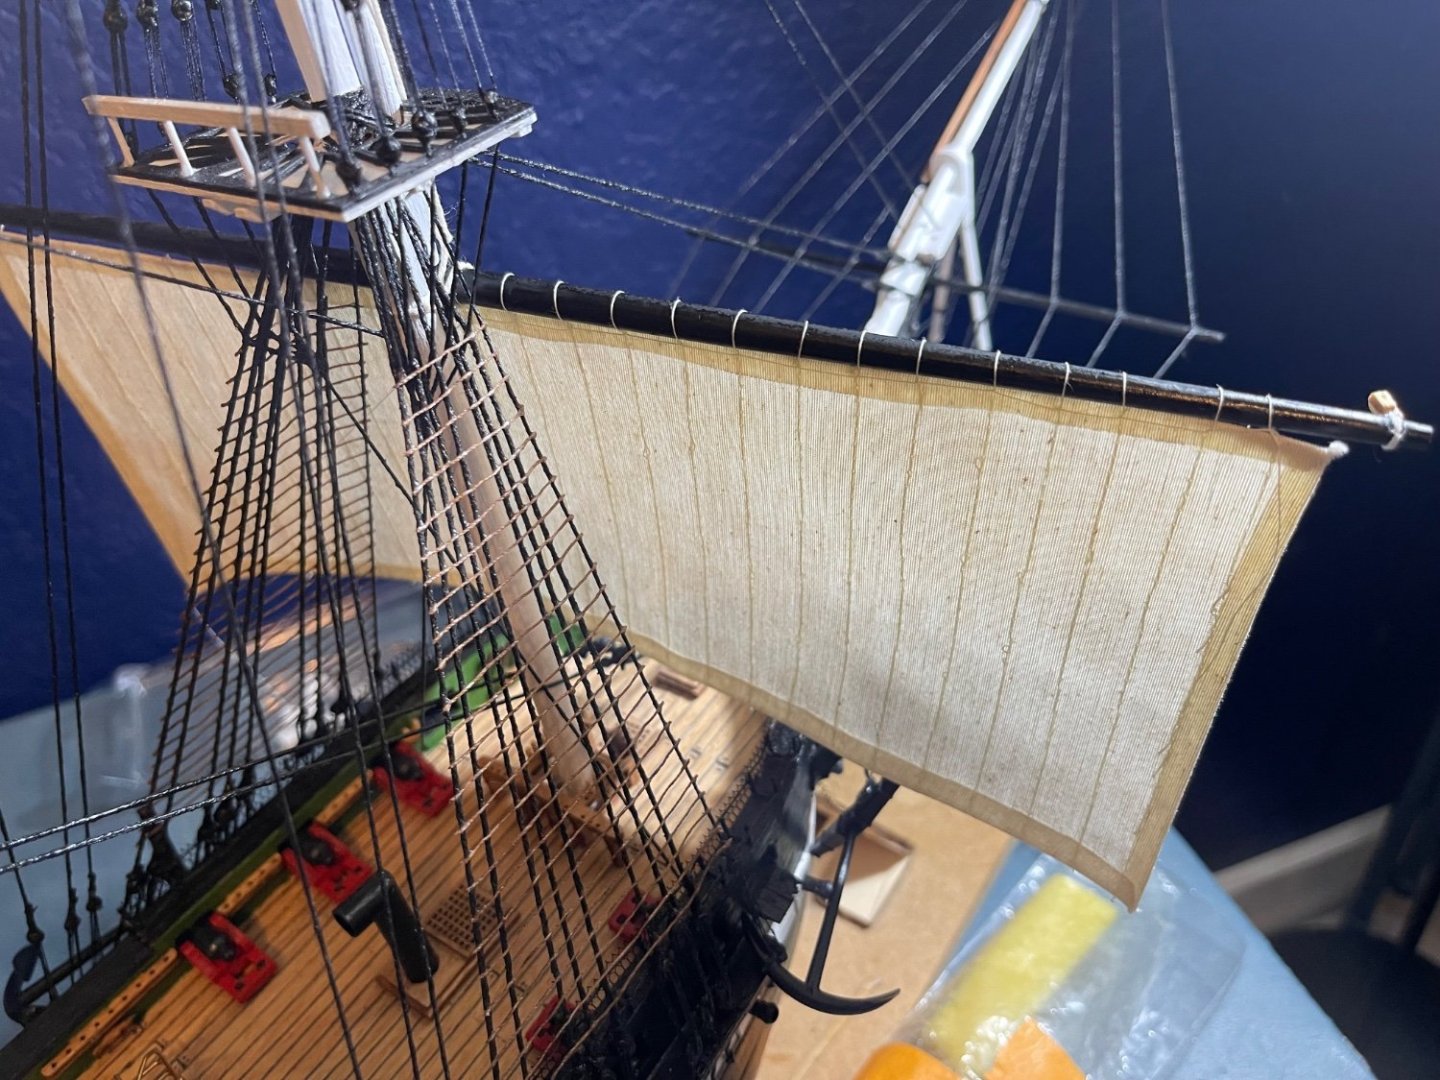
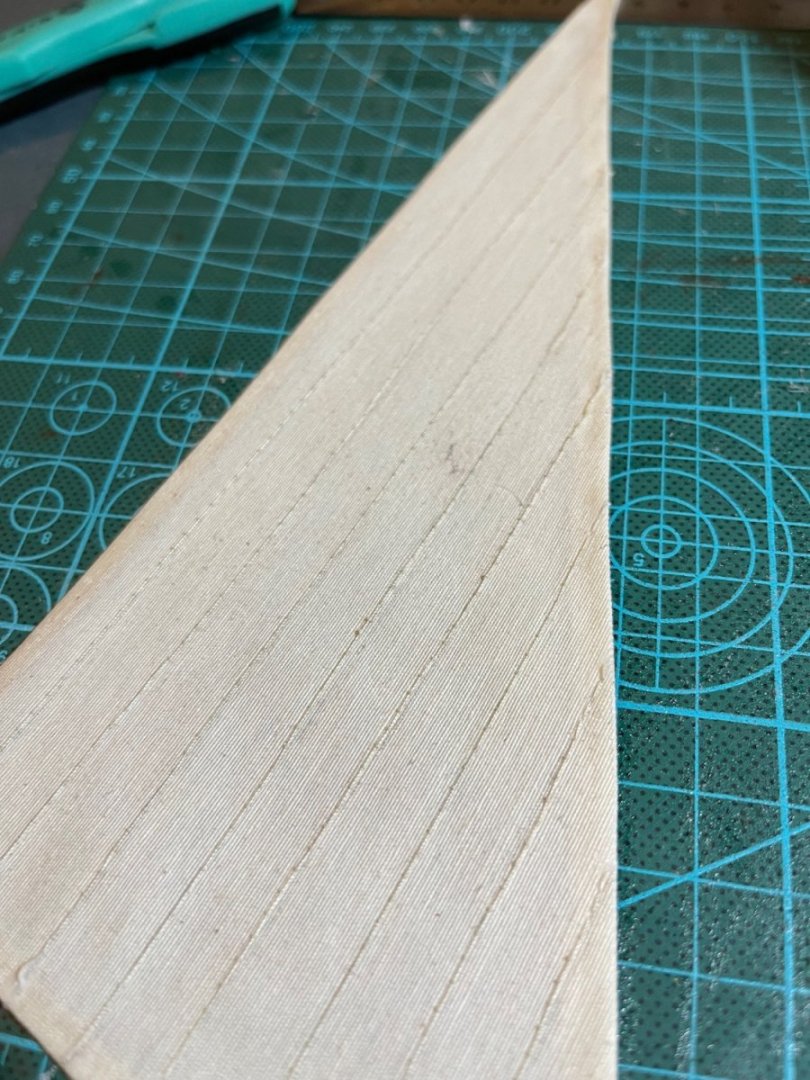
Thanks Jon! I ironed the snot out of the fabric, used a bit of starch after I finished off the stitching so that way the fabric glue I used to hem the sails could act to keep them in a semi-billowed state. It is not as full as I would have liked, but at least they appear to be in a low breeze. Next model will have white glue over a form to shape the sails before attaching them to the yard arms.
-
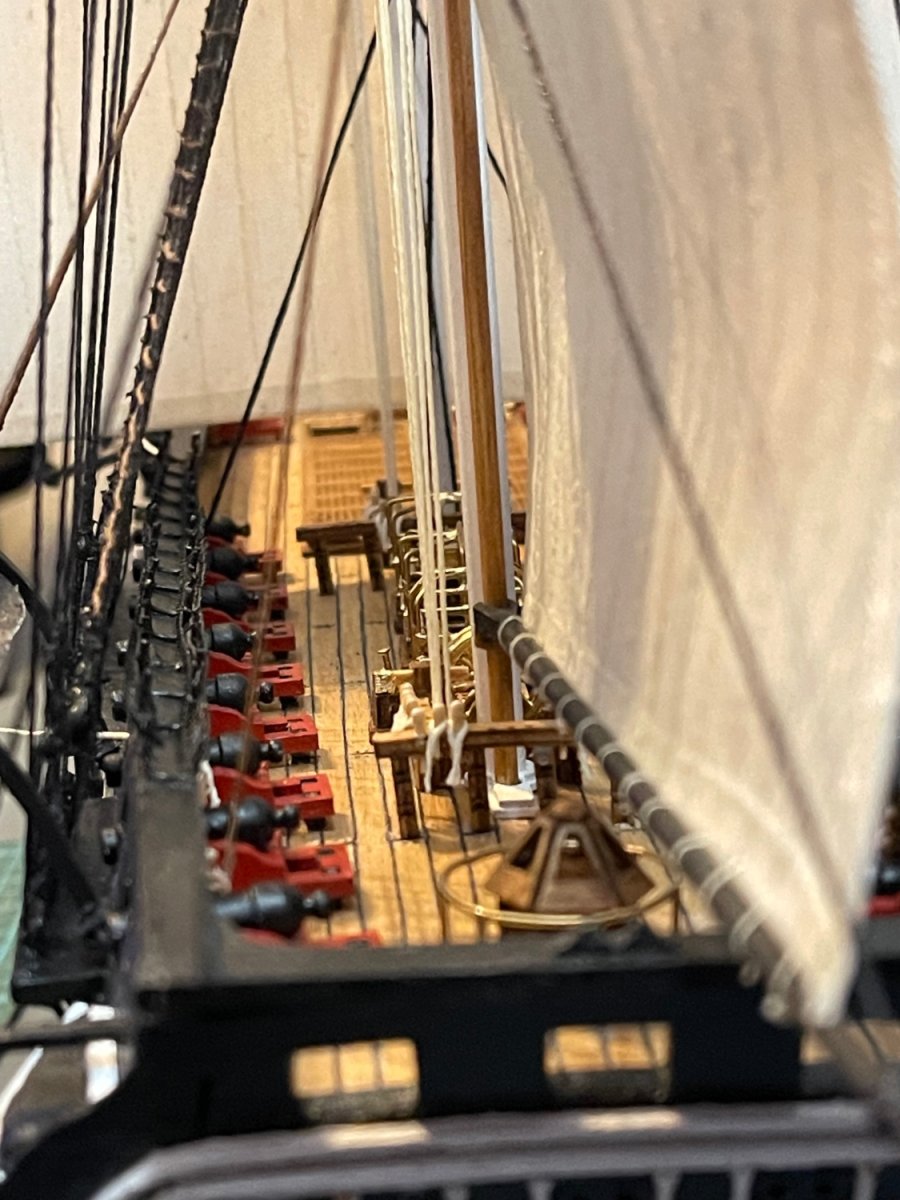
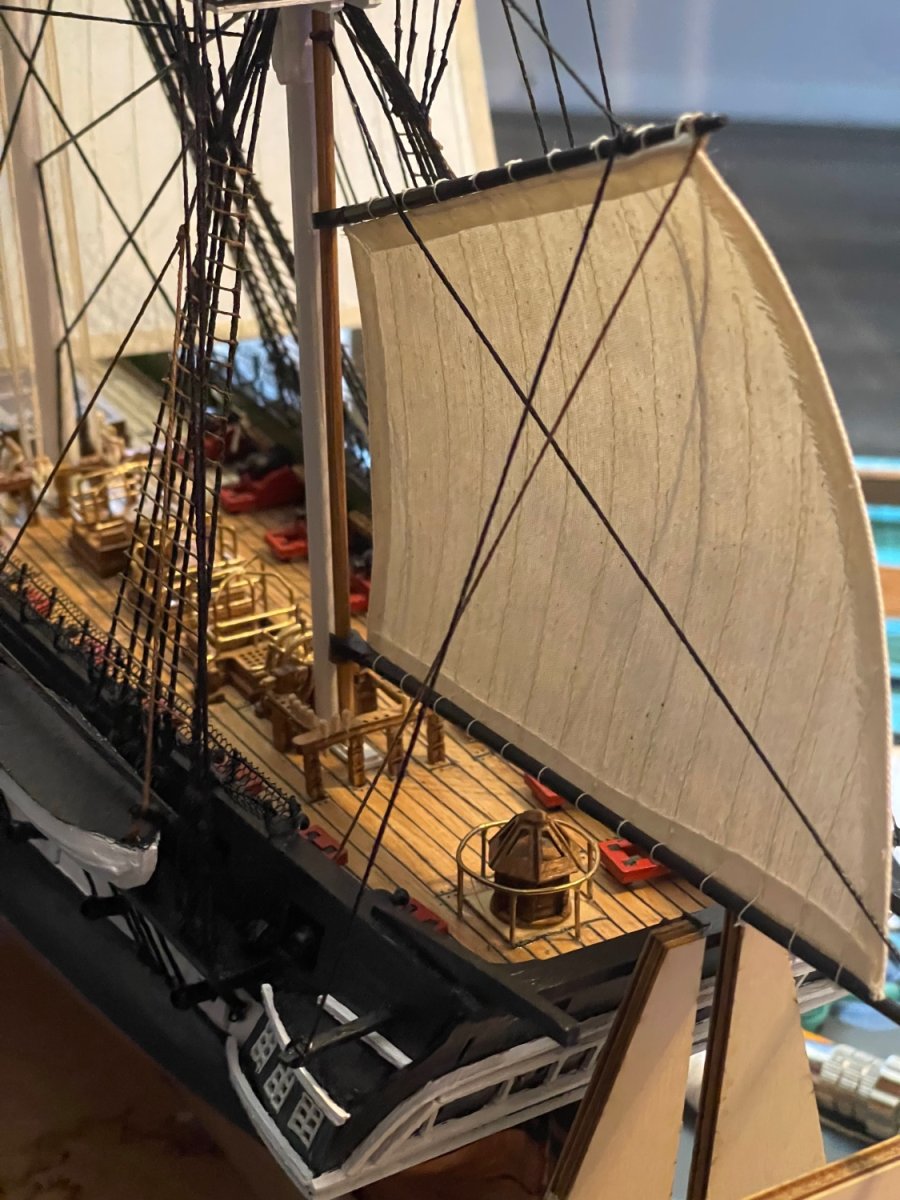
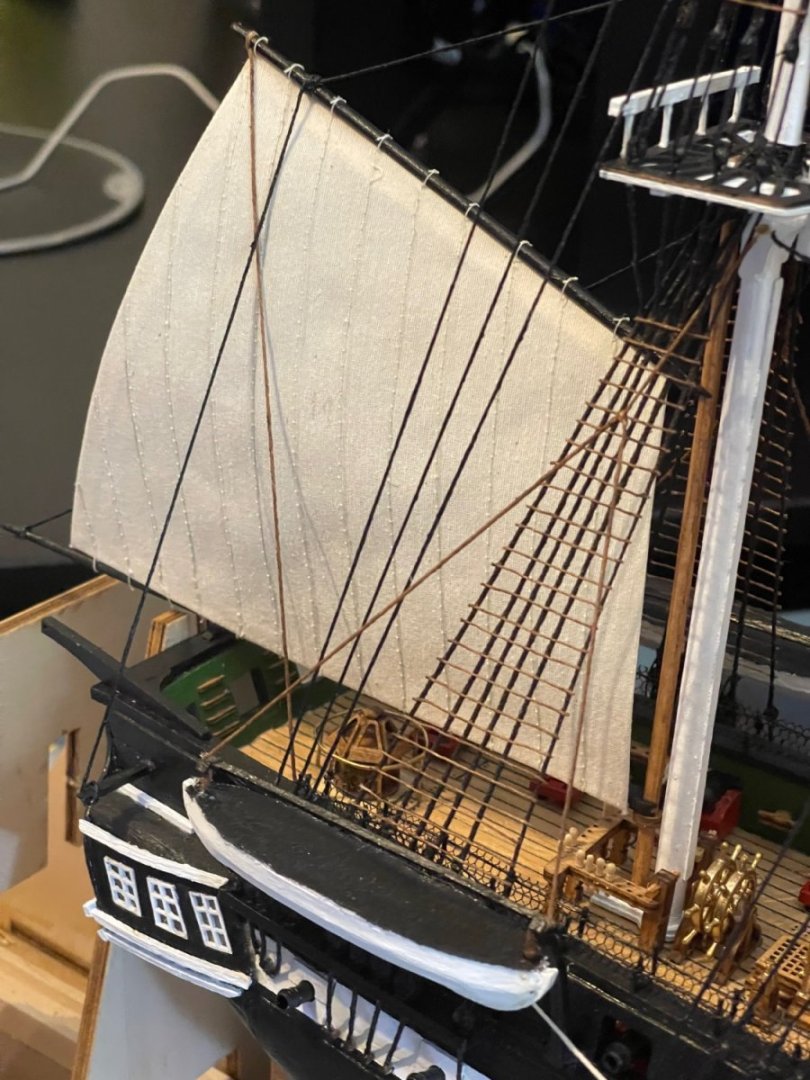
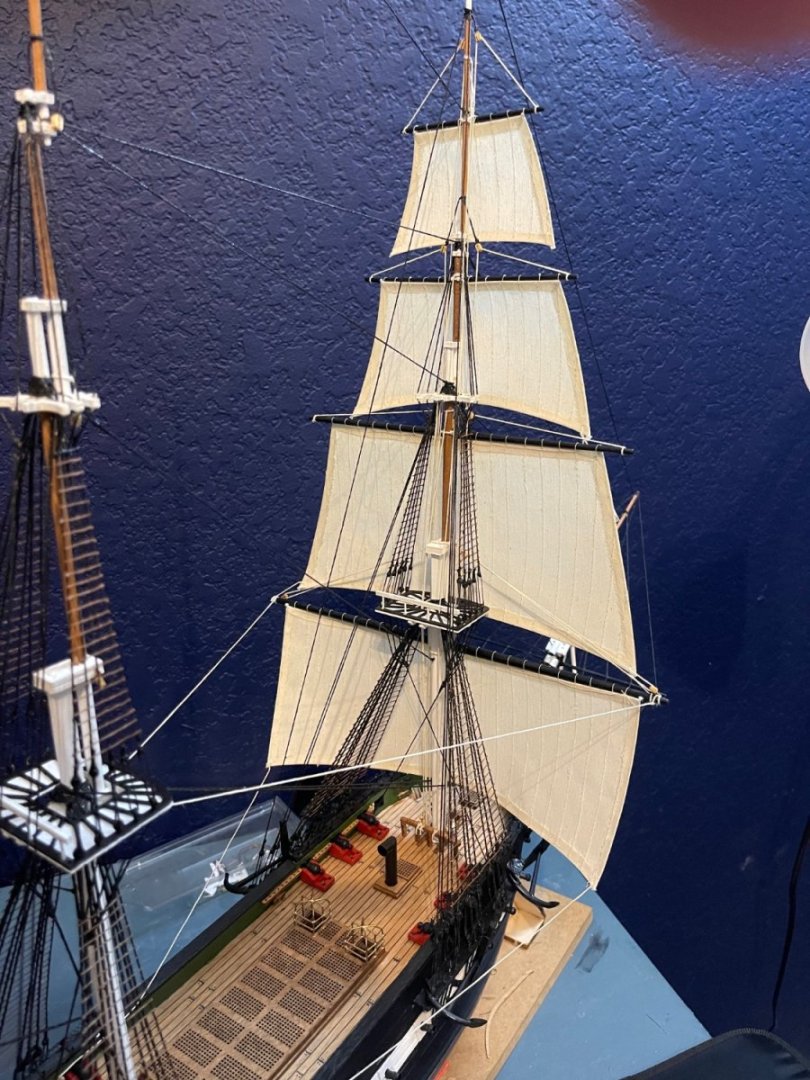
It does not look as though I have completed much work today, but in about three hours, I readjusted the spanker gaff/boom, and attached the spanker sail to the aforementioned pieces. In adjusting the tightness of the rigging lines for the gaff, I had to slightly lower the gaff so the sail appears to be slightly puffed/billowed…I suppose it works to my advantage. What do you think of the work? I have three more sails on 4 yard arms to affix and rig. I have stars and an eagle to affix on the stern. I also need to add rope coils to the ship, and perhaps some odds and ends I may be missing before I can call it completed. Not much more on my punch list.

- 88 replies
-
- 3
-
-
- Constitution
- billing boats
- (and 1 more)
-
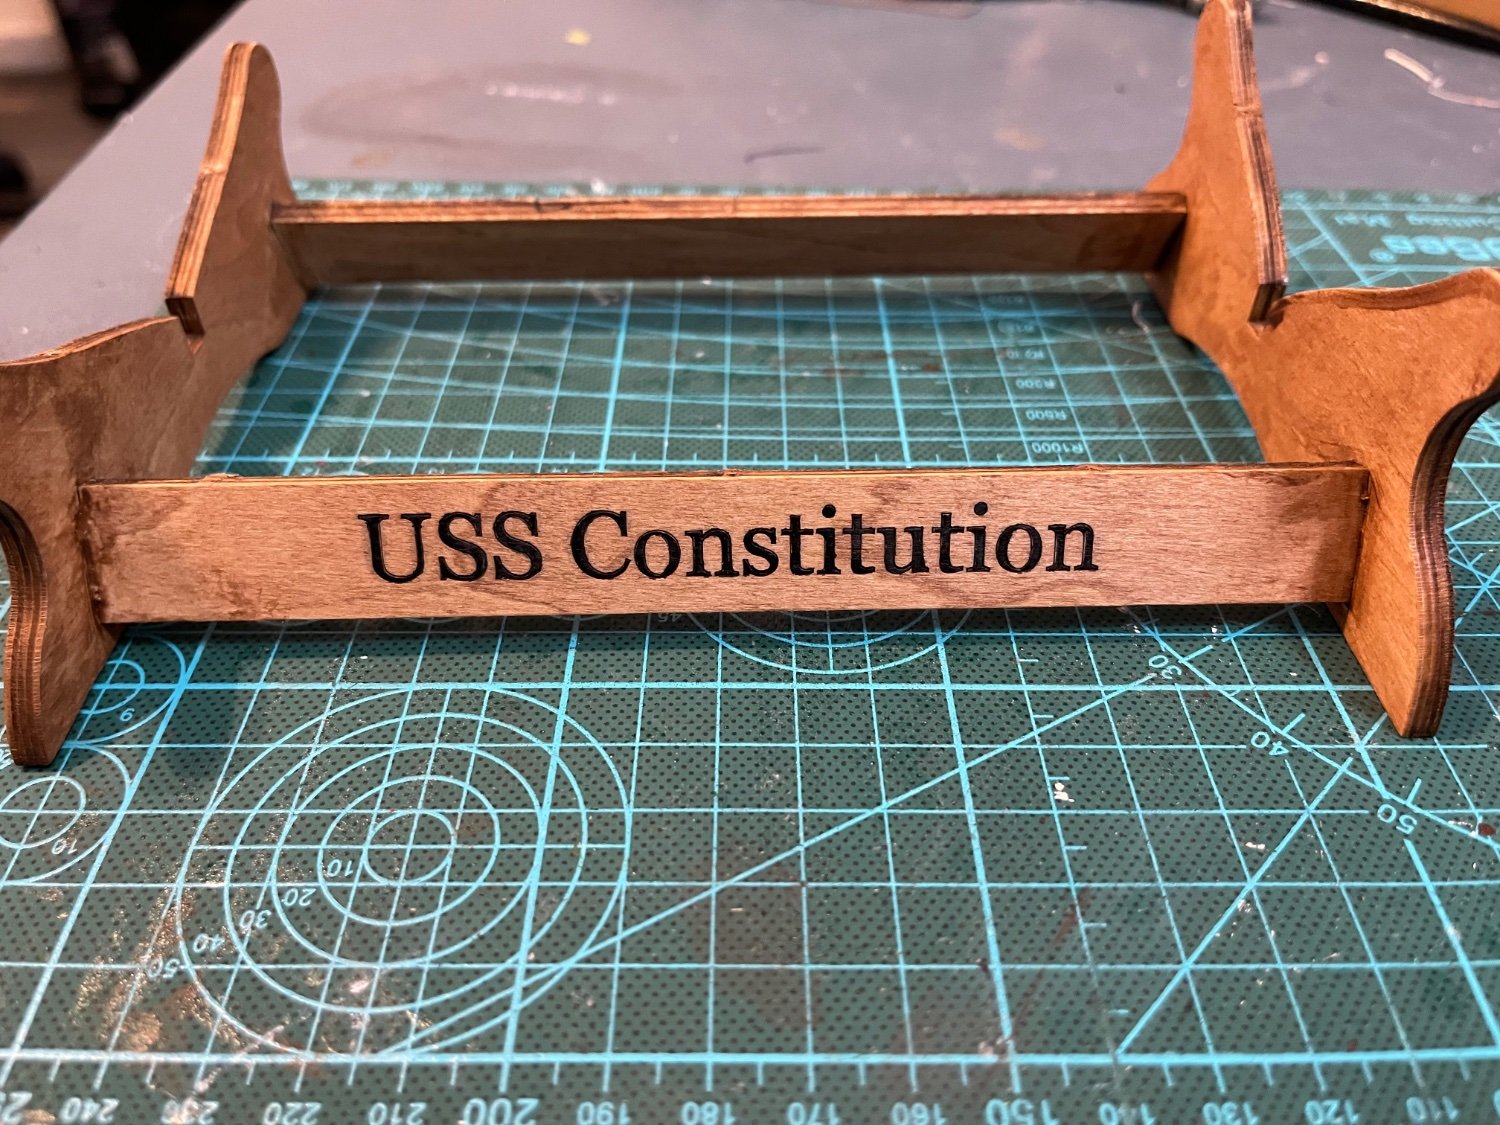
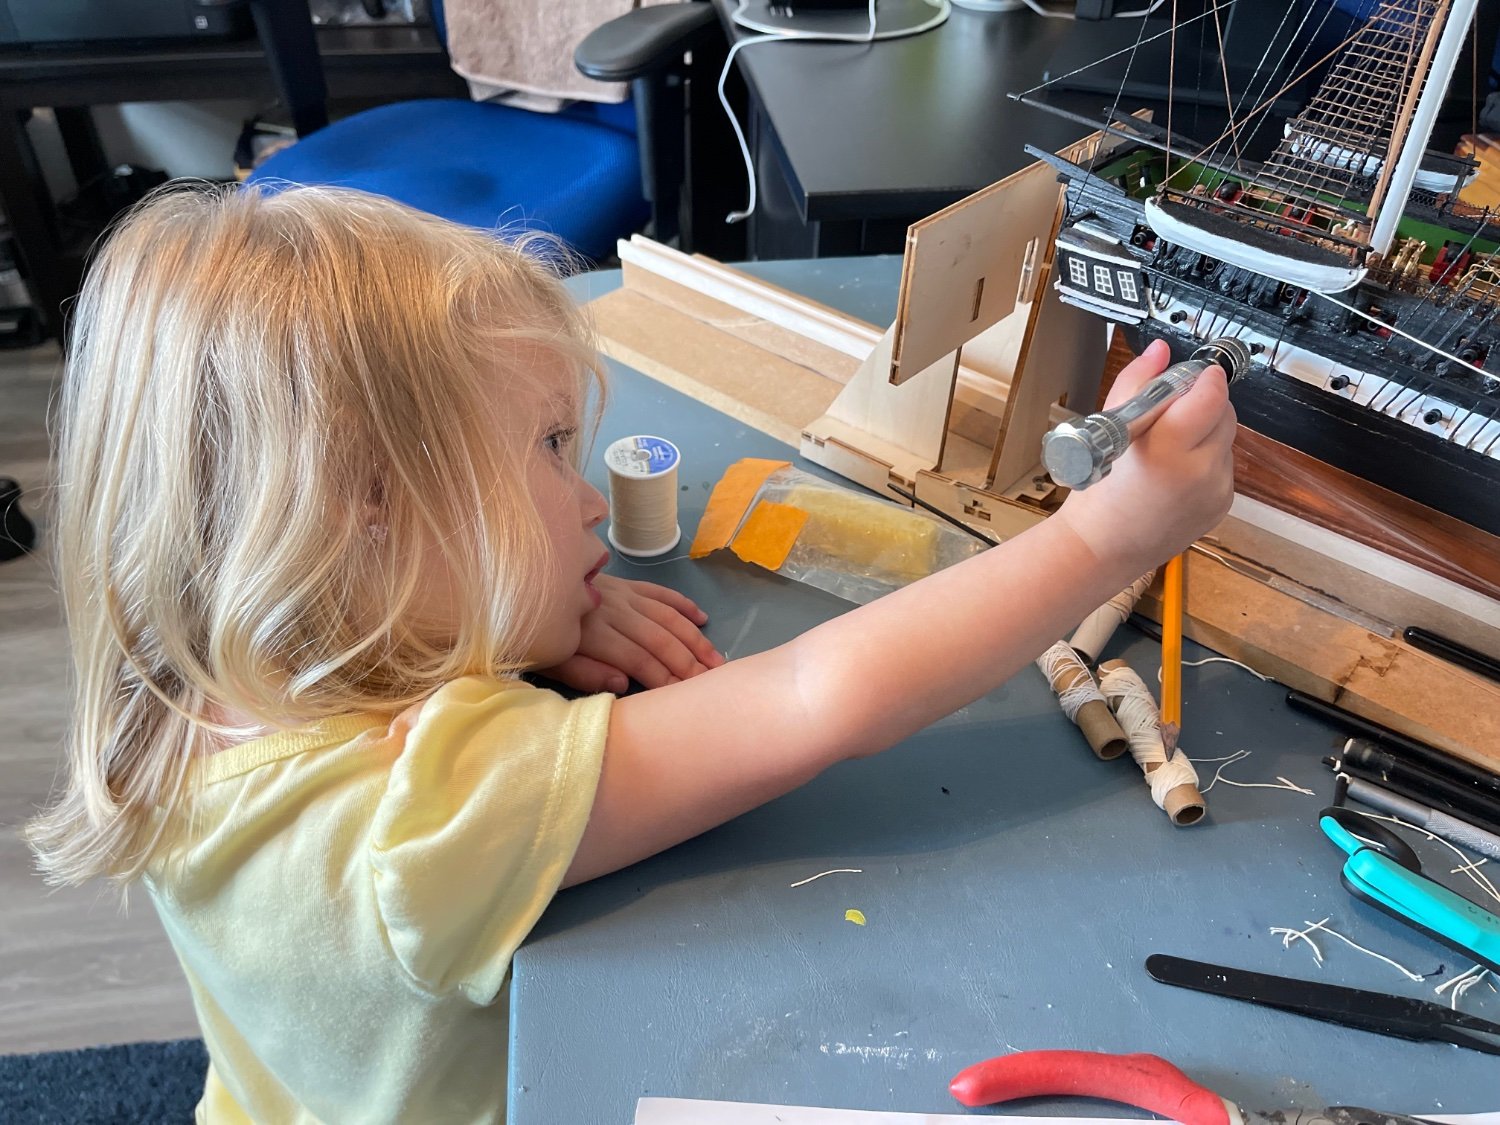
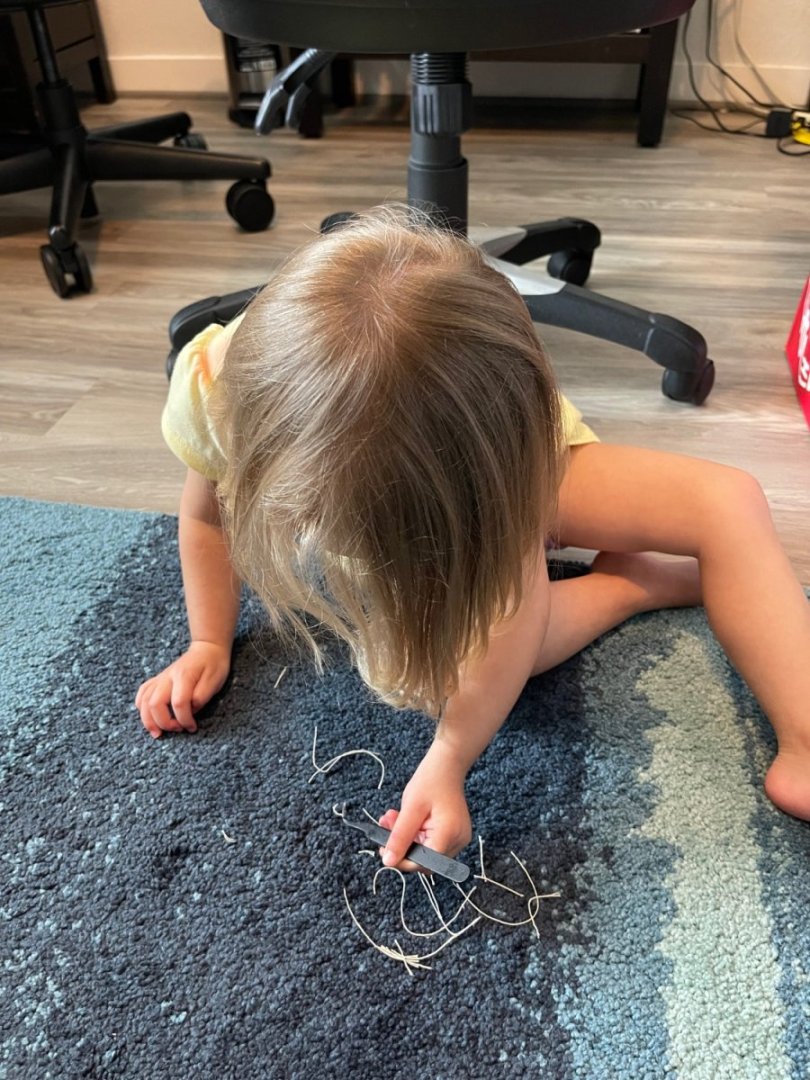
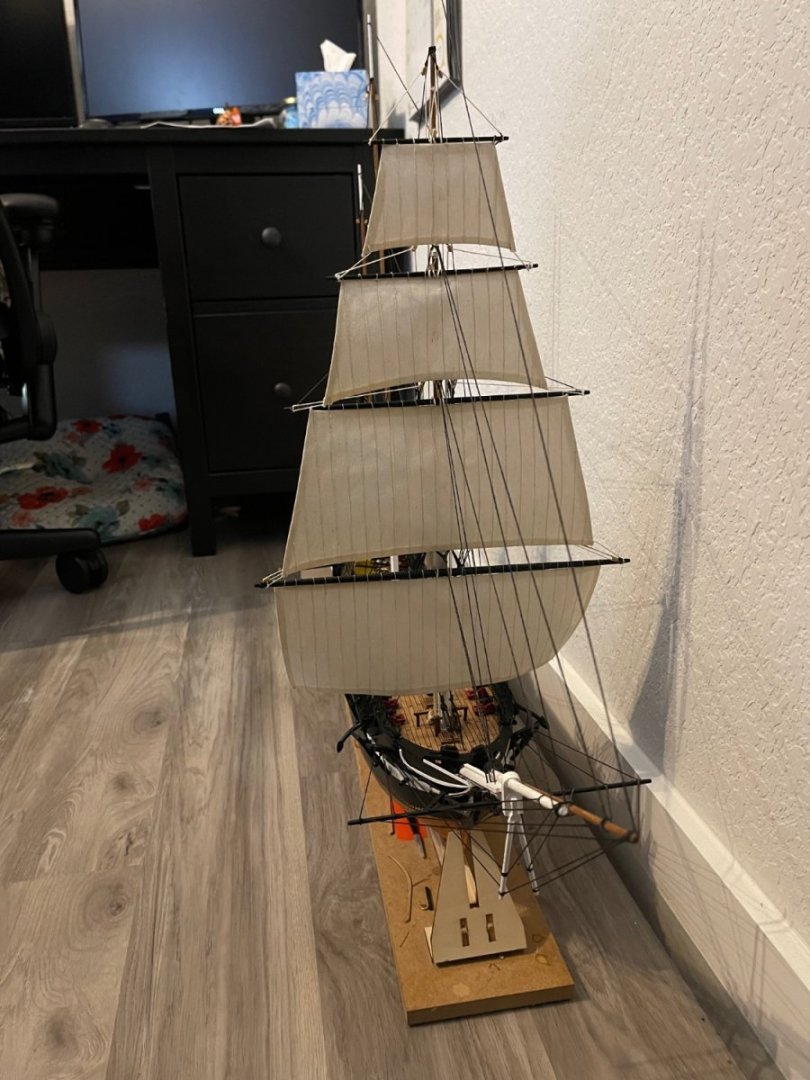
It has been a bit since I worked in the shipyard. End of the school year and vacation have kept me busy. I made a bit of progress today on my model though. I painted the backstays for the mainmast, affixed the upper sails on the mainmast, painted the ship name on the cradle, and got two sails affixed to yard arms for the mizzenmast. I also had a little helper in the shipyard today. My kiddo was very excited to help daddy today. As you can see, she is painting, learning tweezers, and counting the cannon on the starboard side.


- 88 replies
-
- 3
-
-
- Constitution
- billing boats
- (and 1 more)
-
Looks good! I didn’t even realize that there was a plan showing this detail! 😯 My kit doesn’t have the steps in as much detail as yours, but I’m glad I’m looking at mine that I placed mine where I did. I am sure that I could find plans like the one in your above post, but I think I would be spending all of my time looking at the plans and scheming than building lol.
-
Thanks Jon! I certainly had a learning curve on this sewing machine to do the sail bodies, but I worked through it. I haven’t picked up a needle and thread in years BUT it’s good to know I still have some good manual sewing skills. My mother insisted I learn basic mending, button attachment, hemming, etc. It is great to hear that my skills are good considering how good I see your model coming along, it means a lot. You have great construction skills too!
-
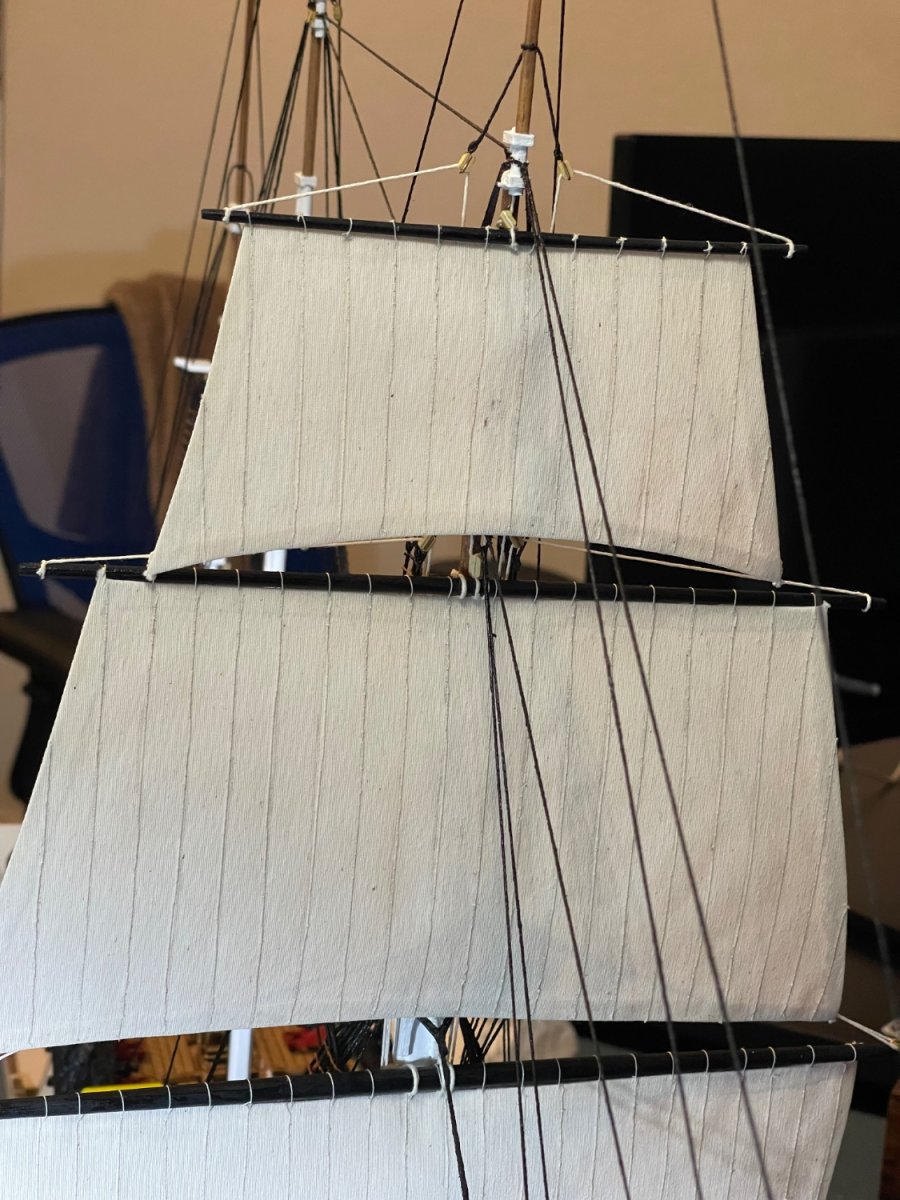
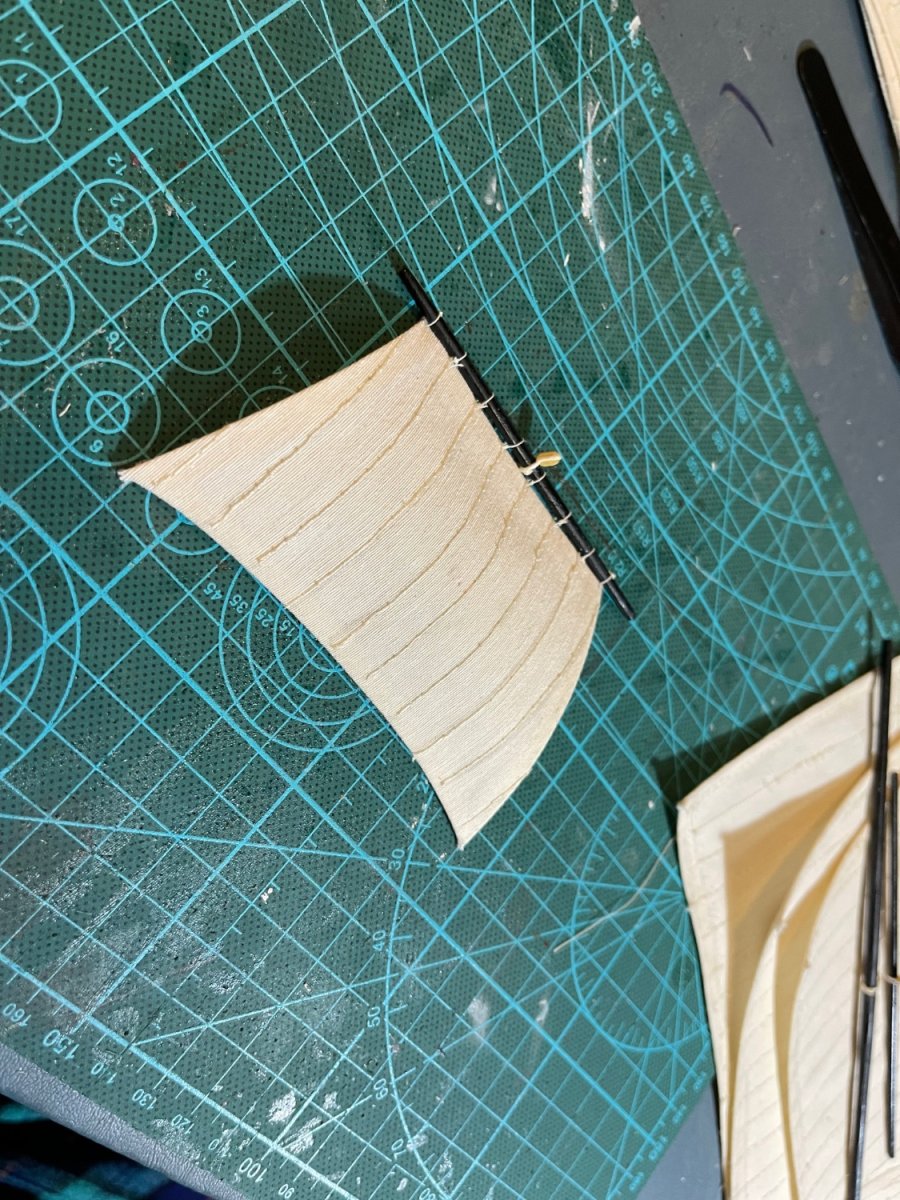
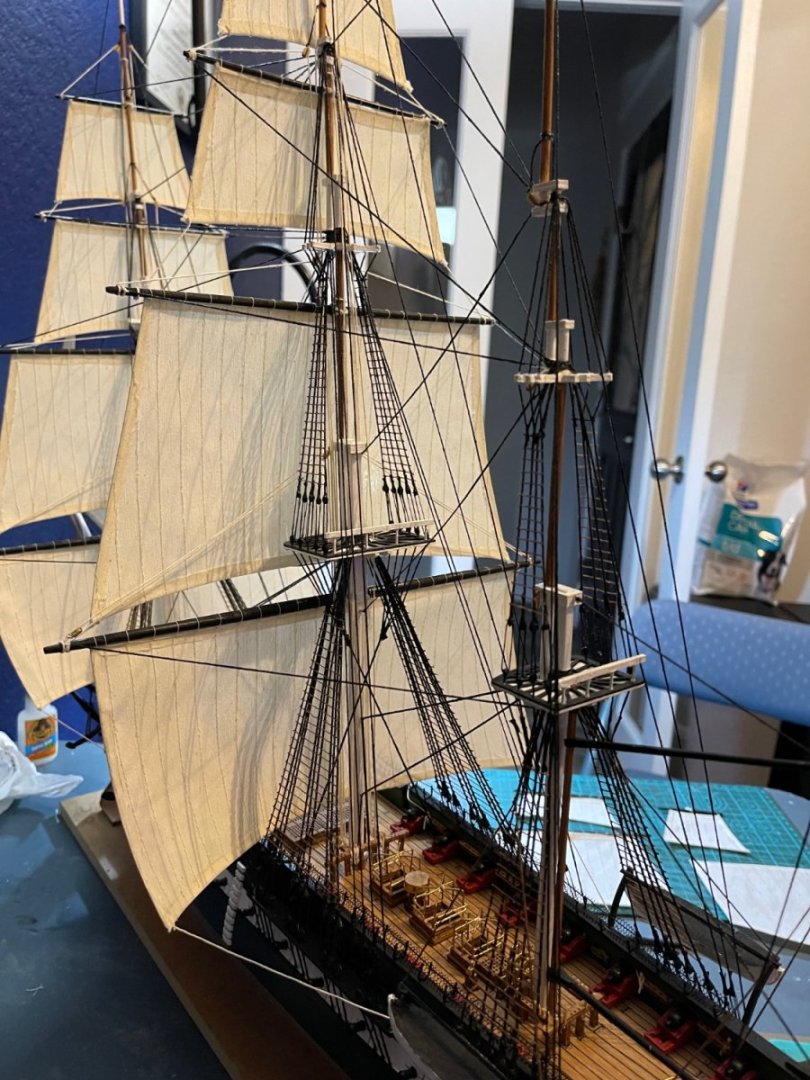
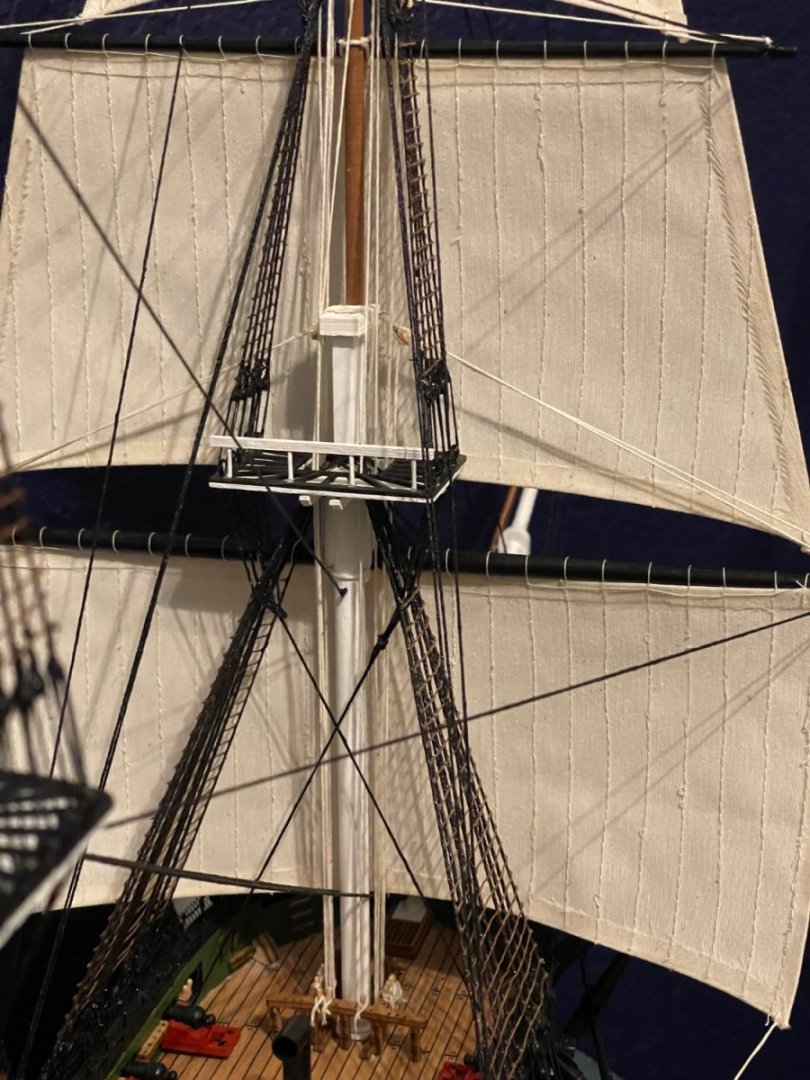
Finally got the sails for the mainmast sewn to the yard arms. Before you say anything, I’m including a closeup of how they are being sewn. It is very hard to go through the canvas sail cloth accurately. The instructions give us this specific stitch, and in replicating it as closely as I am able using the same strong poly thread I used for the rest of the sails. What do you think? I start working on attaching and rigging the mainmast soon.


- 88 replies
-
- 4
-
-
- Constitution
- billing boats
- (and 1 more)
-
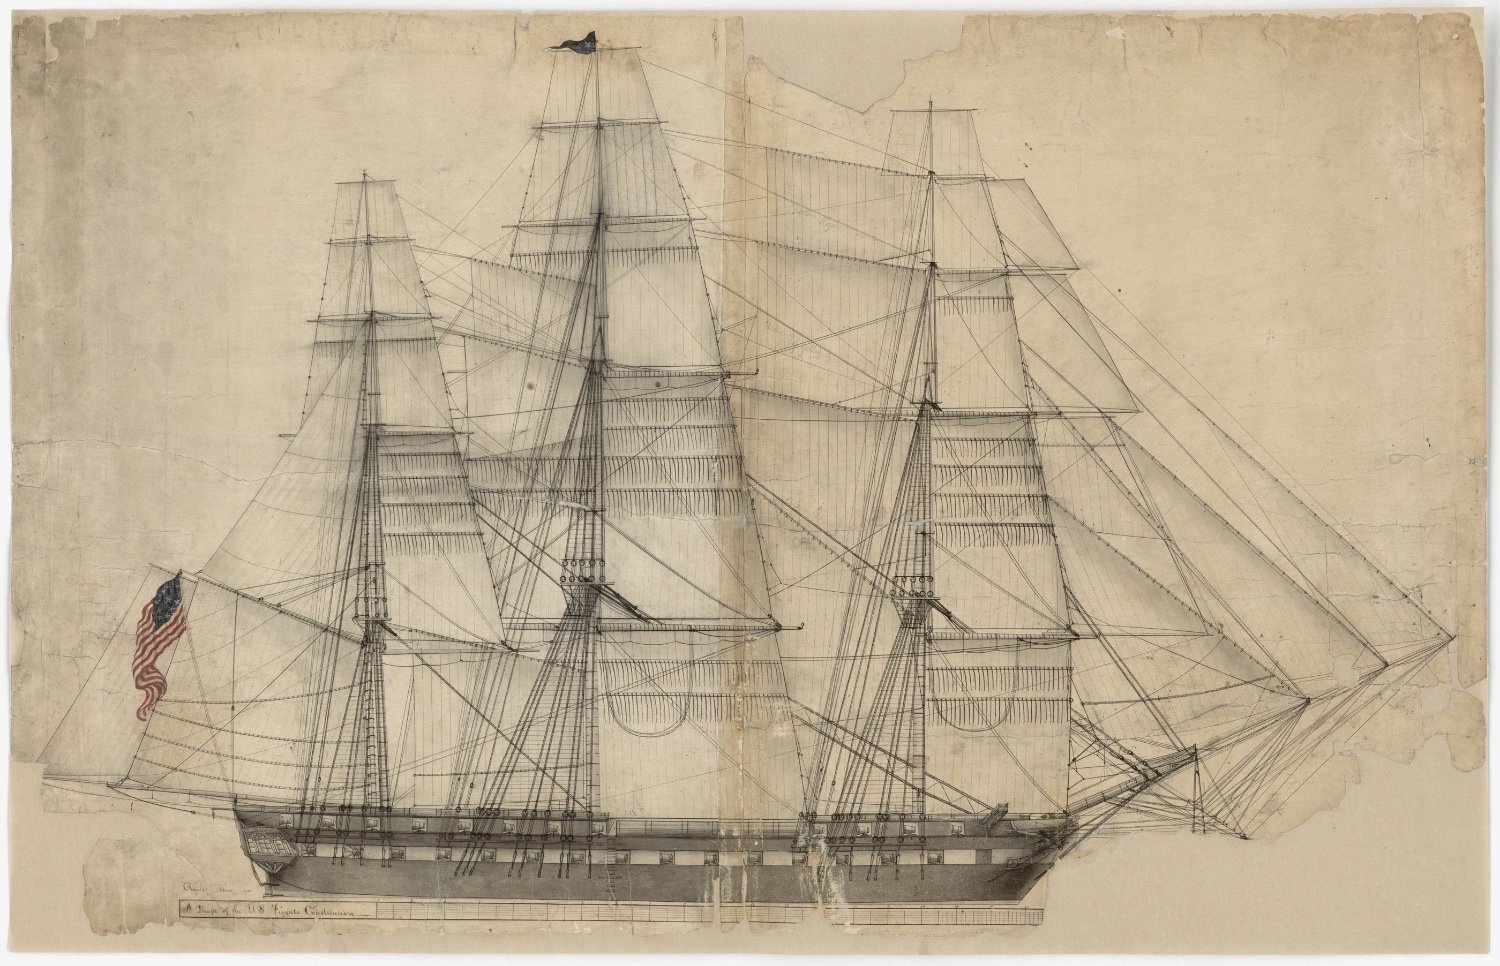
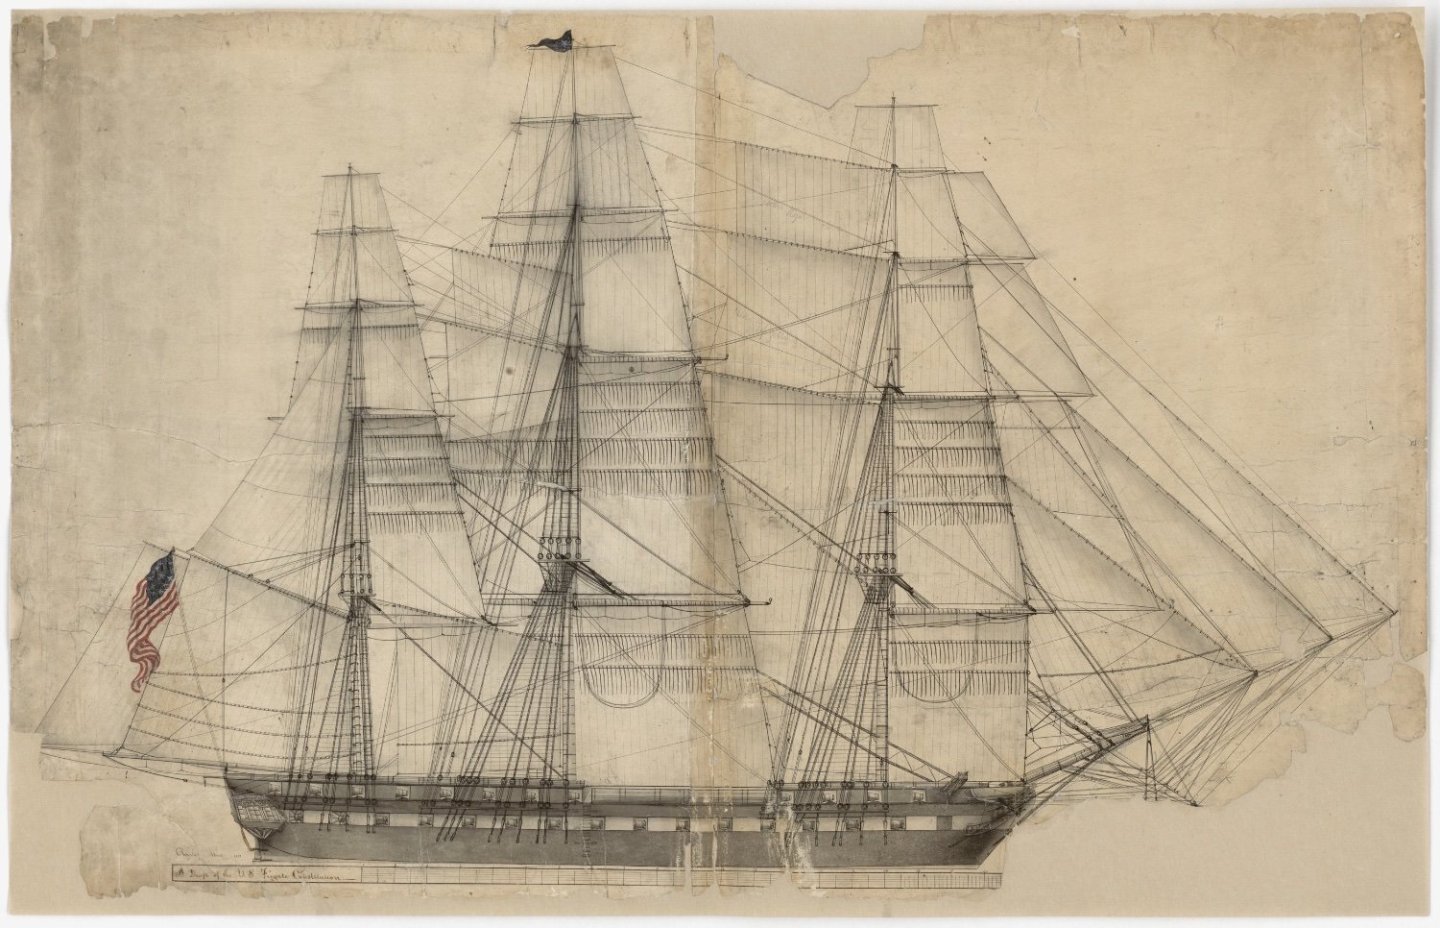
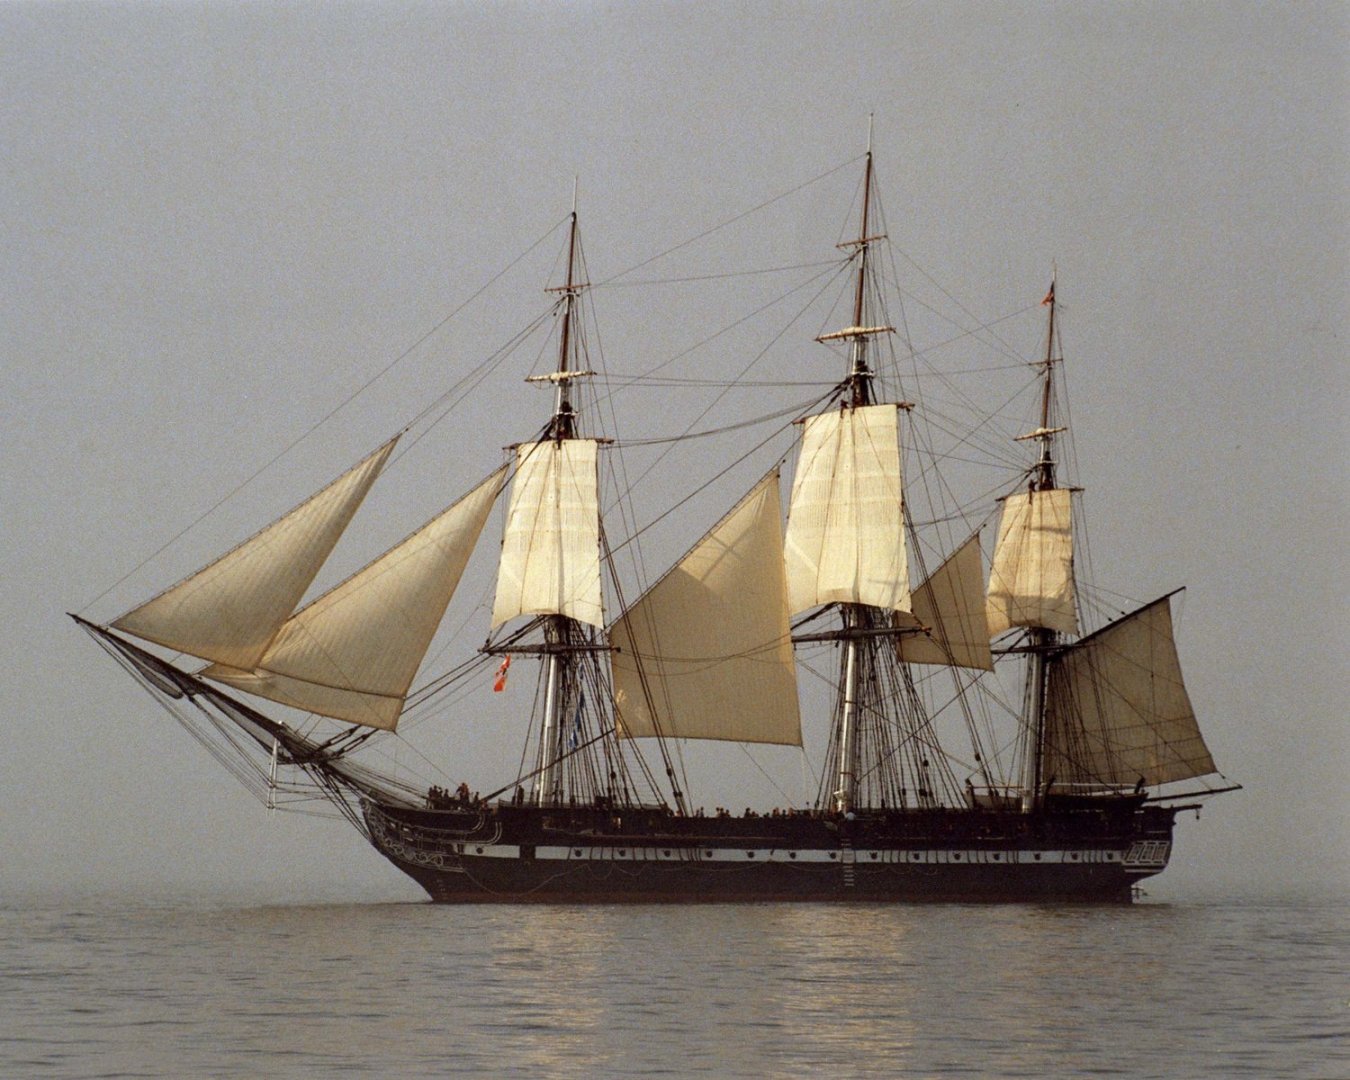
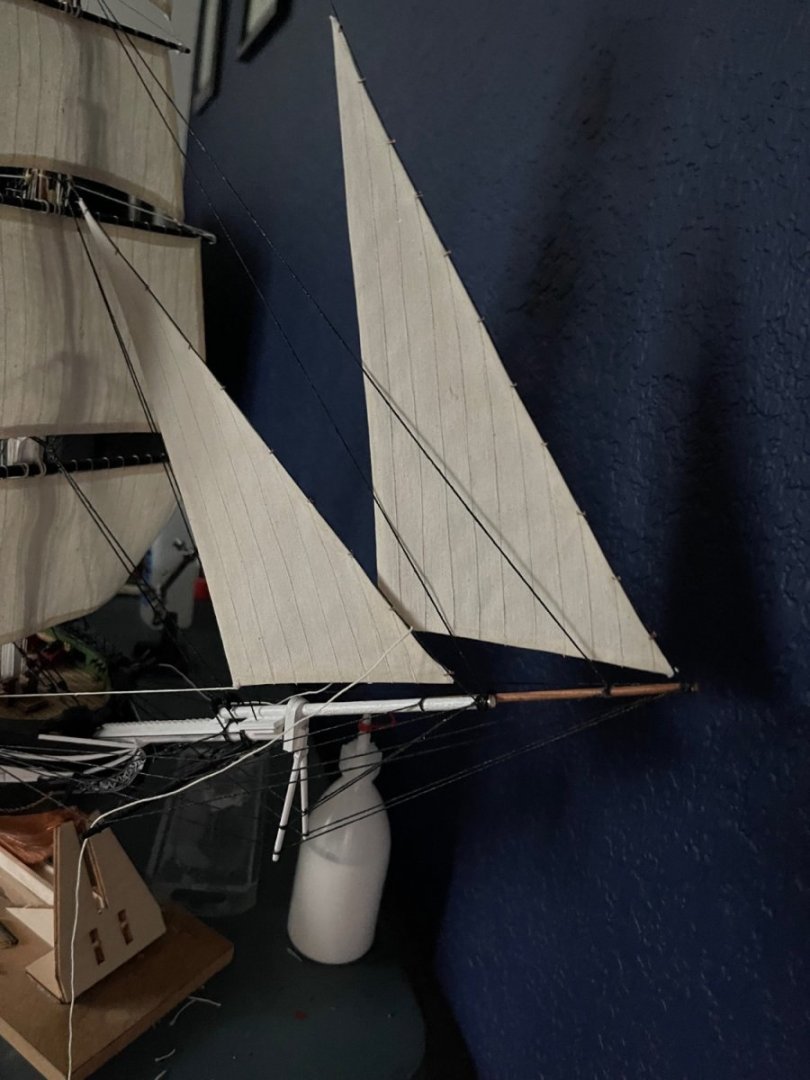
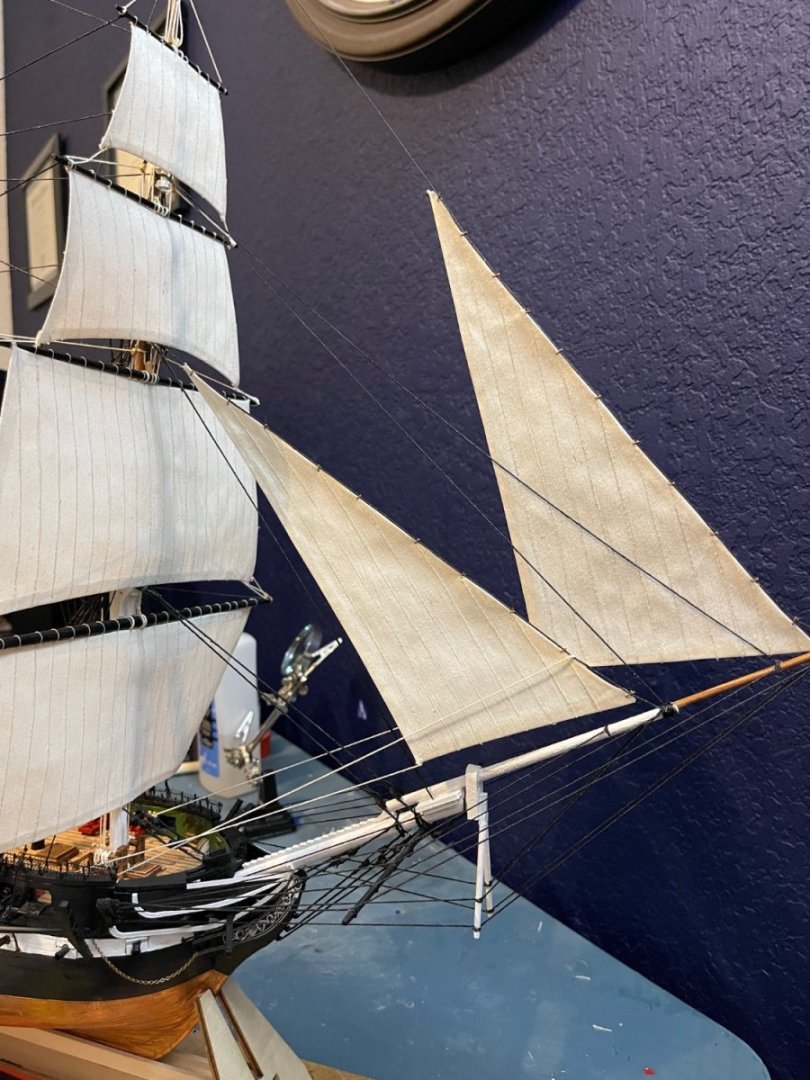
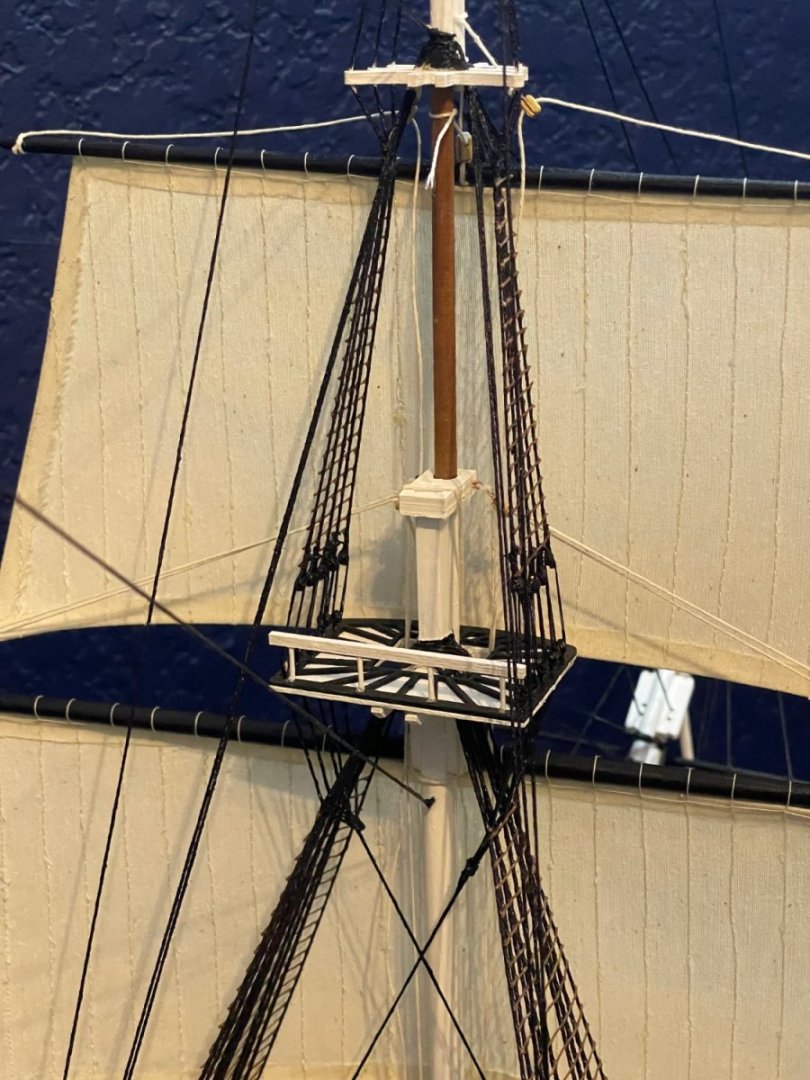
Finished working on the jib sails. It took me looking at the historic ship to figure out how to add the sails, they are attached with metal rings (which I attempted to simulate with copper wire from my kit). I attached the sails using the light coloured string, and it was a bit tricky BUT I like the results. What do you think? I shall start working on attaching the sails to the yard arms for the main mast next before rigging that mast. I am attaching the sail plan from the 1800’s, a view showing about where the lines go aboard ship, and the metal rings that the jib sails are attached to along with my work.


- 88 replies
-
- 3
-
-
- Constitution
- billing boats
- (and 1 more)
-
So it doesn’t look as though I have accomplished much BUT I have finished the mounting of sails on the foremast. I finished the stay lines and painted them black at the suggestion of another modeler. I am debating on leaving the lines for rigging either light or staining them brown (a lot of work mind you). The colour would match the rat lines BUT in looking at the historic ship, there are many lines that are in different stages of aging onboard. I am including a few photos on a neutral background so you can get the scope of the work done so far, and see the lines you may not see in my usual working space. Next up… jibs
- 88 replies
-
- 2
-
-
- Constitution
- billing boats
- (and 1 more)
-
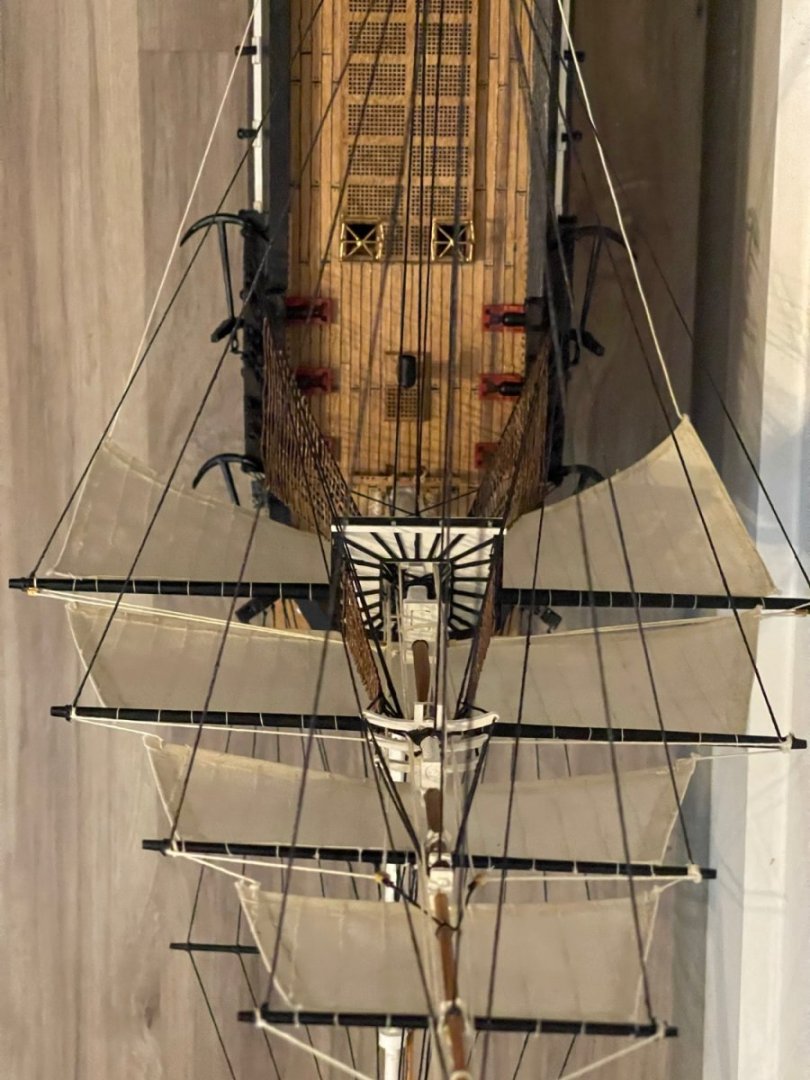
Finally got all four sails on the foremast, now to tack the sail bottoms to the yard arms, whilst also positioning the yard arms to move the sails to port/starboard/neutral. I have already tacked the fore mainsail and topsail. Hopefully, I shall be able to tackle the remaining two tomorrow (using a manual sewing needle to go through the canvas material is slow work). What I decided on at least for the foremast is for a neutral positioning of the yard arms instead of port or starboard in an effort to show off more of the rigging/ ratlines. Also…I figure that should I have to move the ship from a display in one direction, it will be easy to turn it the other direction without looking funky. This is true should direct sunlight reach the paint. Took me a while to figure out what I’m doing (first mast is always the hardest). Now that I have a better idea of what to do and how to do it, I figure it will go a bit quicker and more smoothly. I am attaching a couple of photos, please bear in mind that this is my first square rigged model ship, and not everything is as detailed/professionally done as it ought to be.

- 88 replies
-
- 2
-
-
- Constitution
- billing boats
- (and 1 more)
-
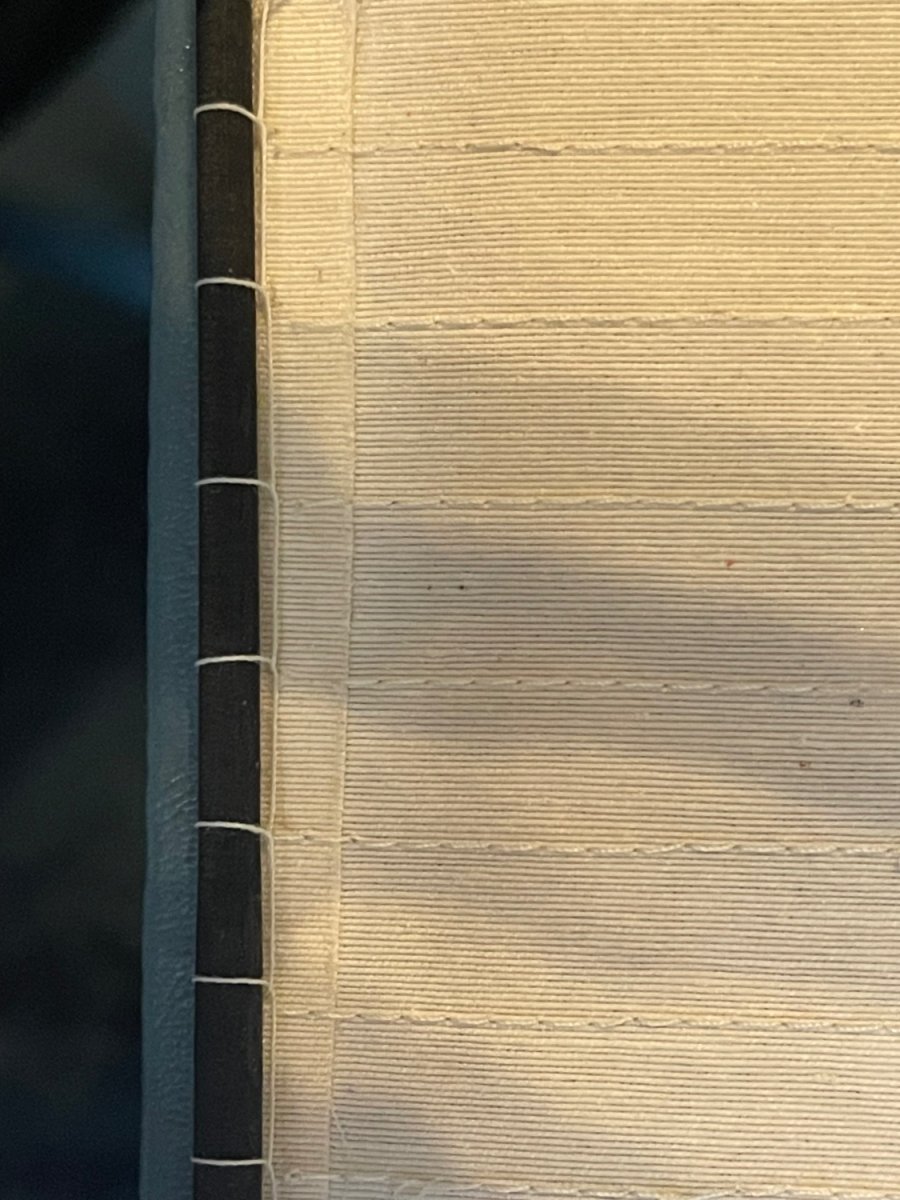
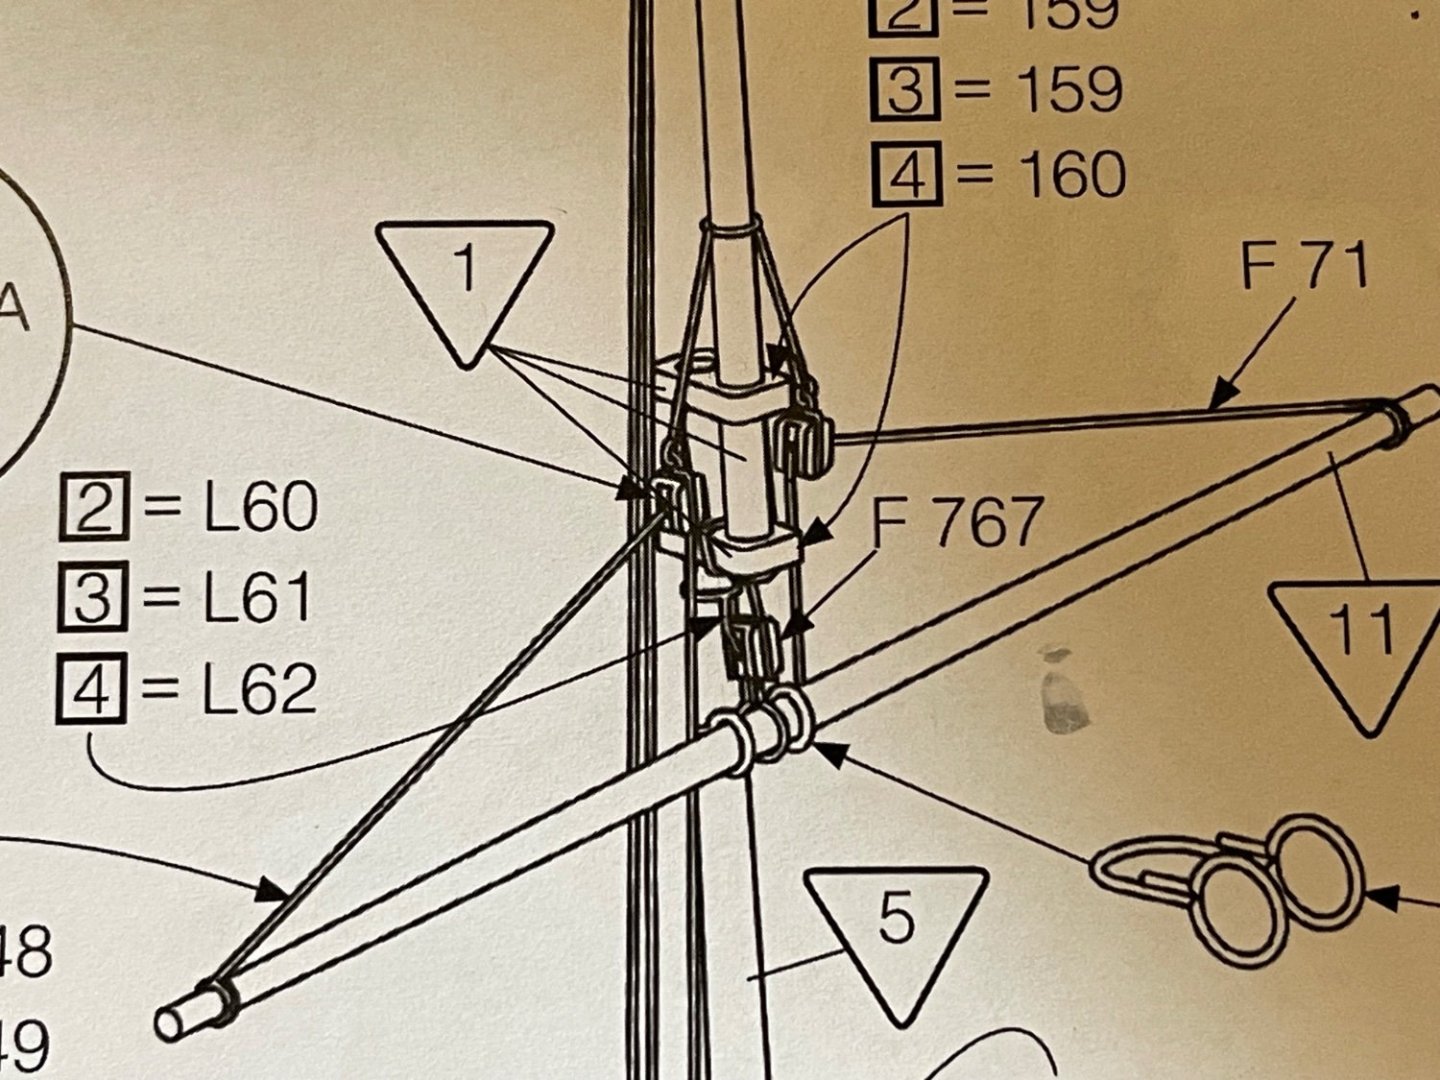
Took me quite a bit of time to put the sails on tin the last couple of days. I know now that I should not put yard arms on until after I have attached the sails. Also, I realized I hadn’t put a line on the rear pin rail, and it took me looking at the mast schematic, the above view, and stern view to figure out how to attach the line. Side note: it seems the BB house model has all of the lines I have placed as black standing rigging thread. I sure hope this was an oversight as every other model brand and photo also of the historic ship shows my current lines as untarred lines (not to mention also that it makes sense not to tar the lines going to the pin rail). Once I place the top most sail on, I shall set the bottoms of the sails and they’ll look fabulous…I mean they look good now…but once I place them at a rakish angle, and place the jib sails on…it’ll look smashing! What are your thoughts?


- 88 replies
-
- 3
-
-
- Constitution
- billing boats
- (and 1 more)
-
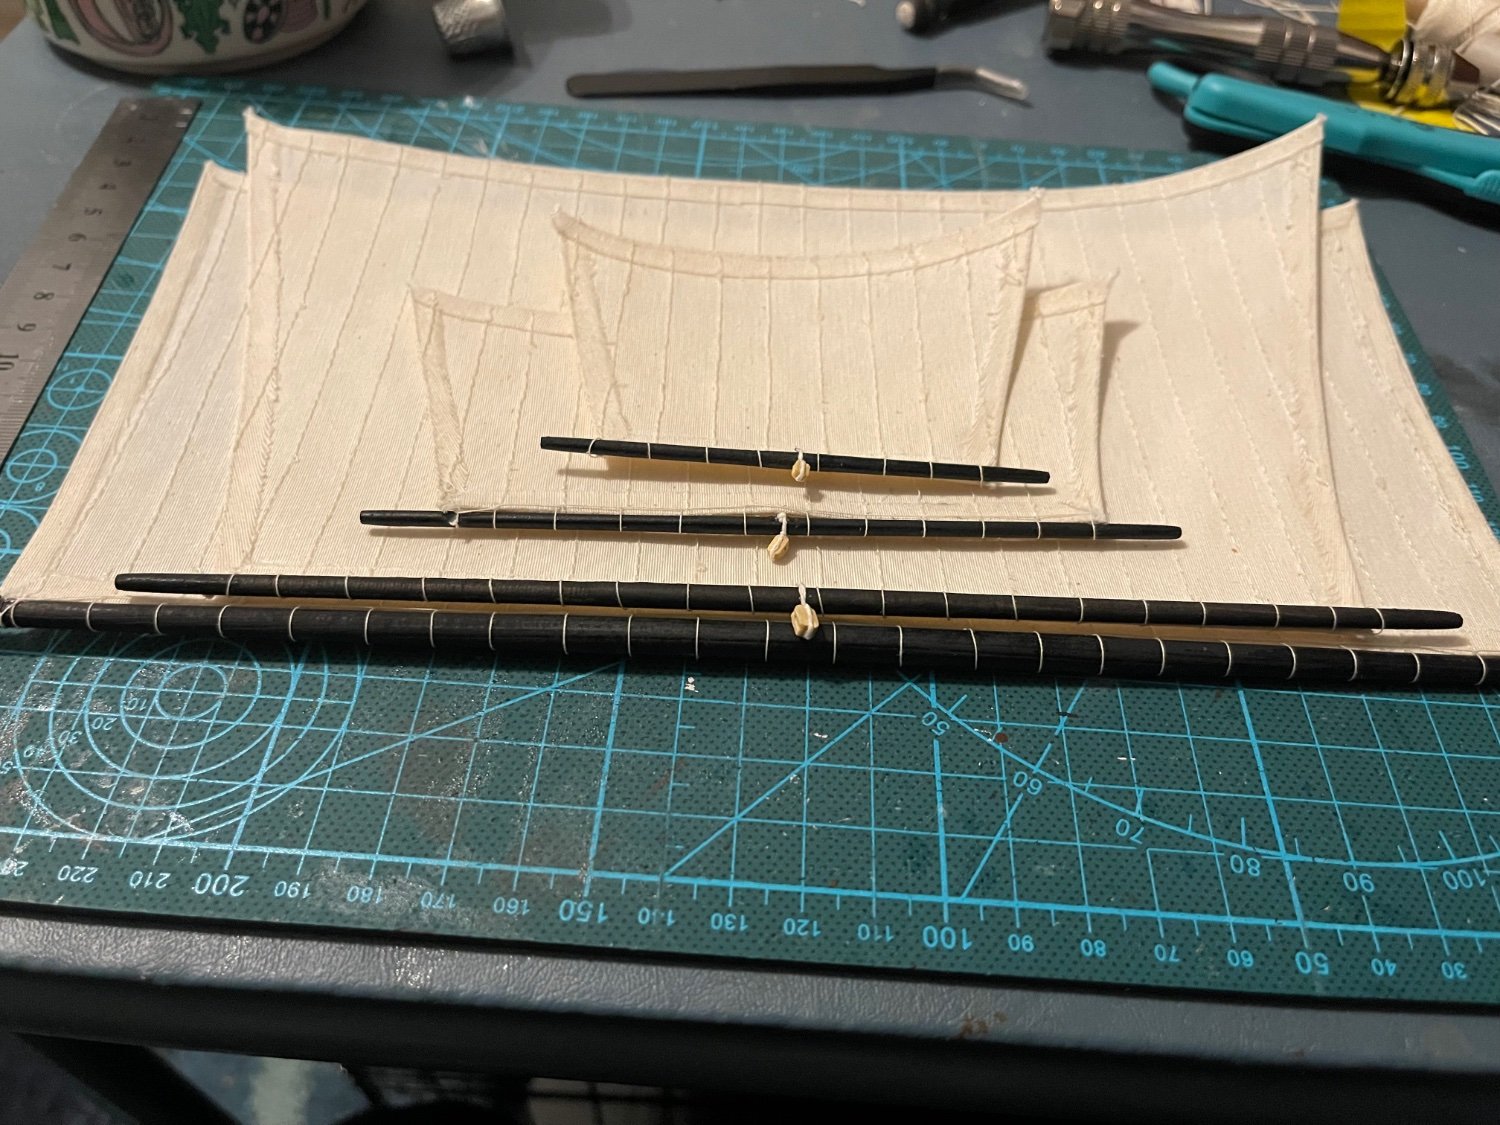
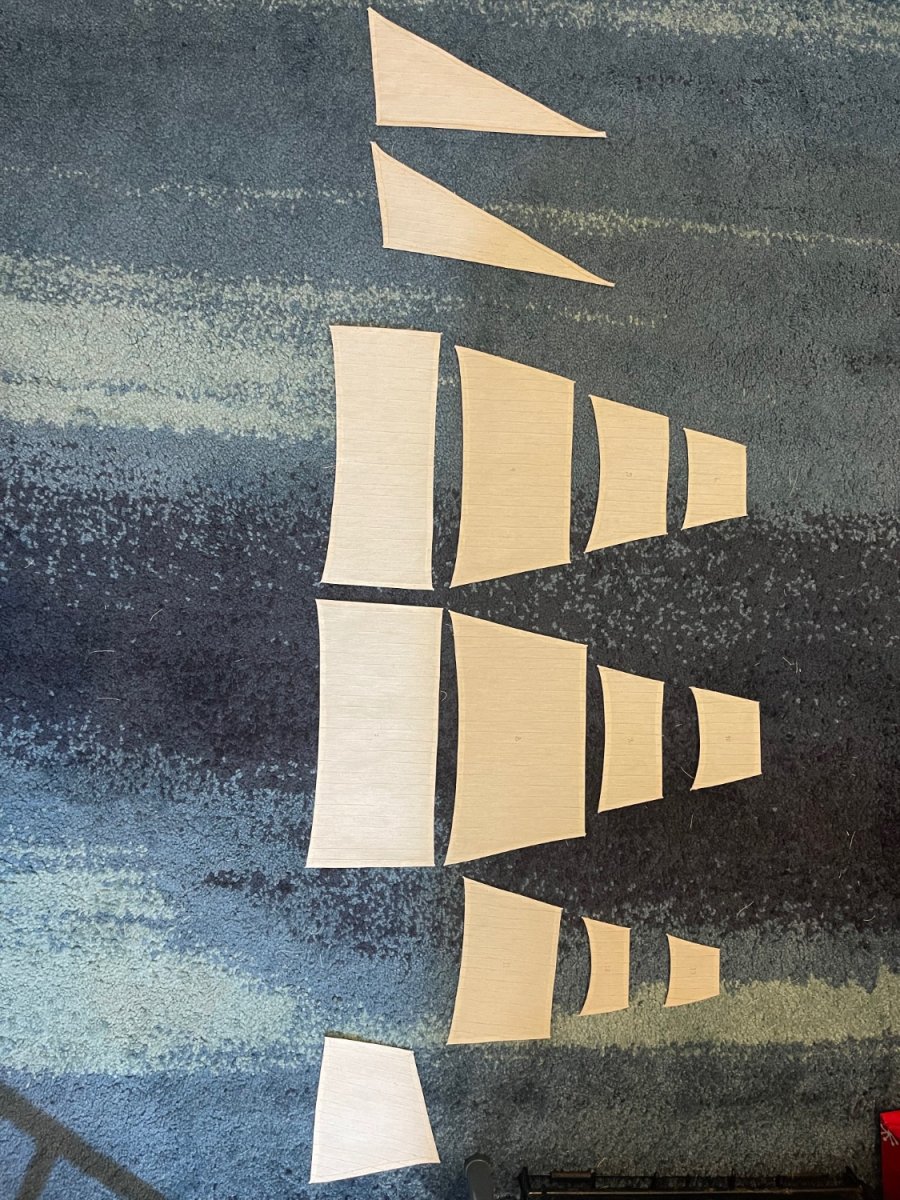
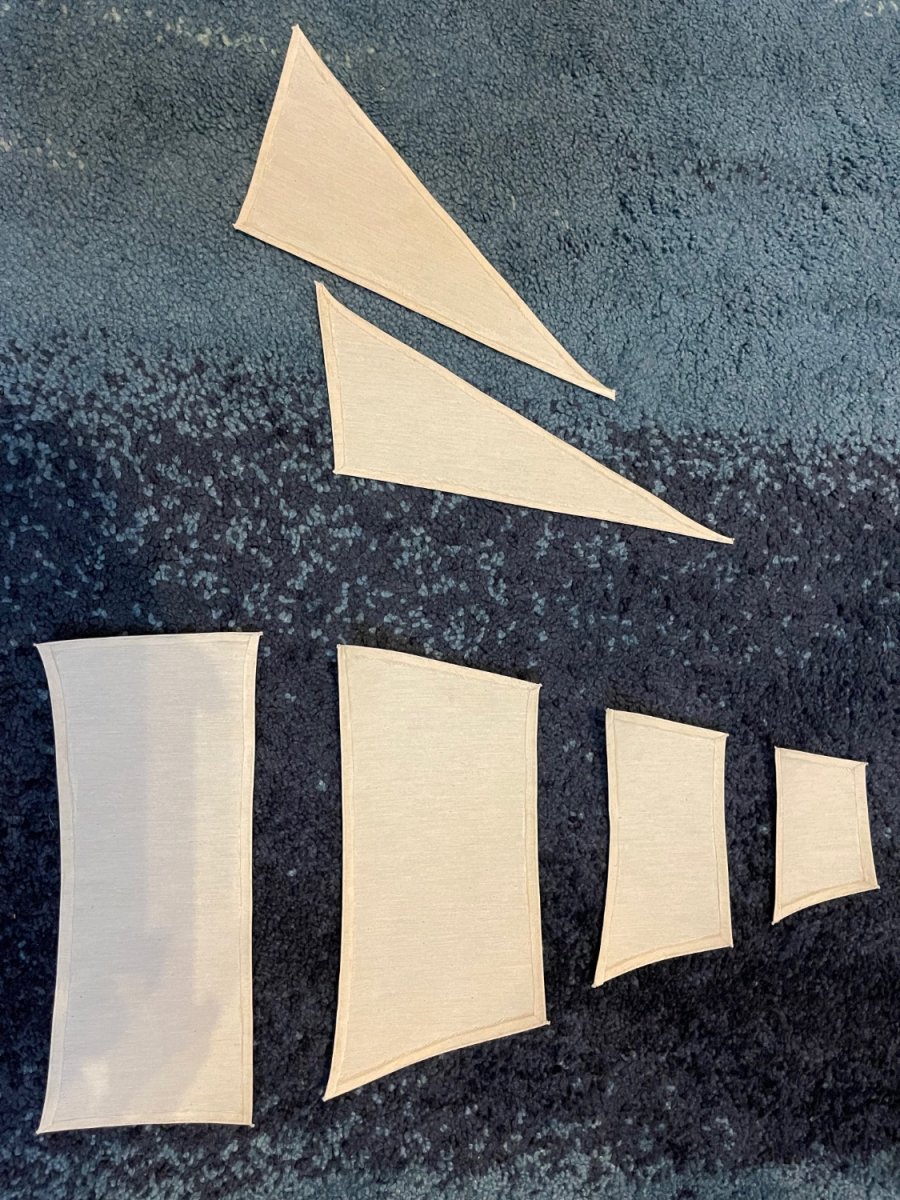
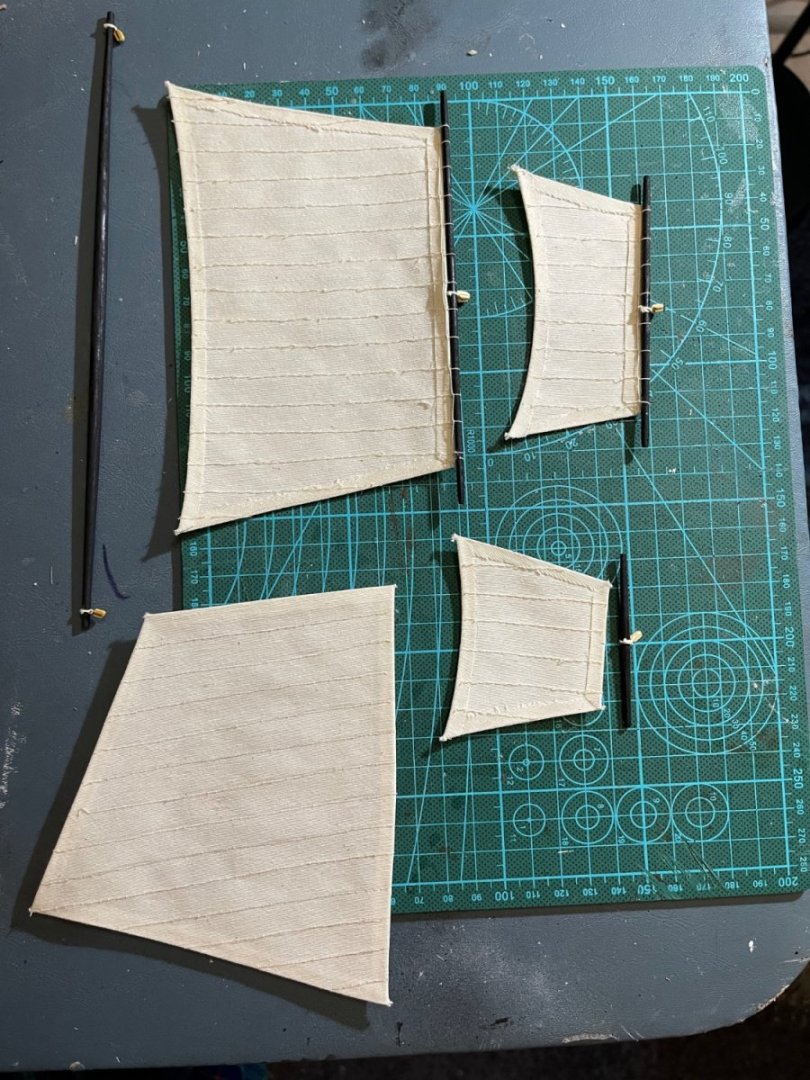
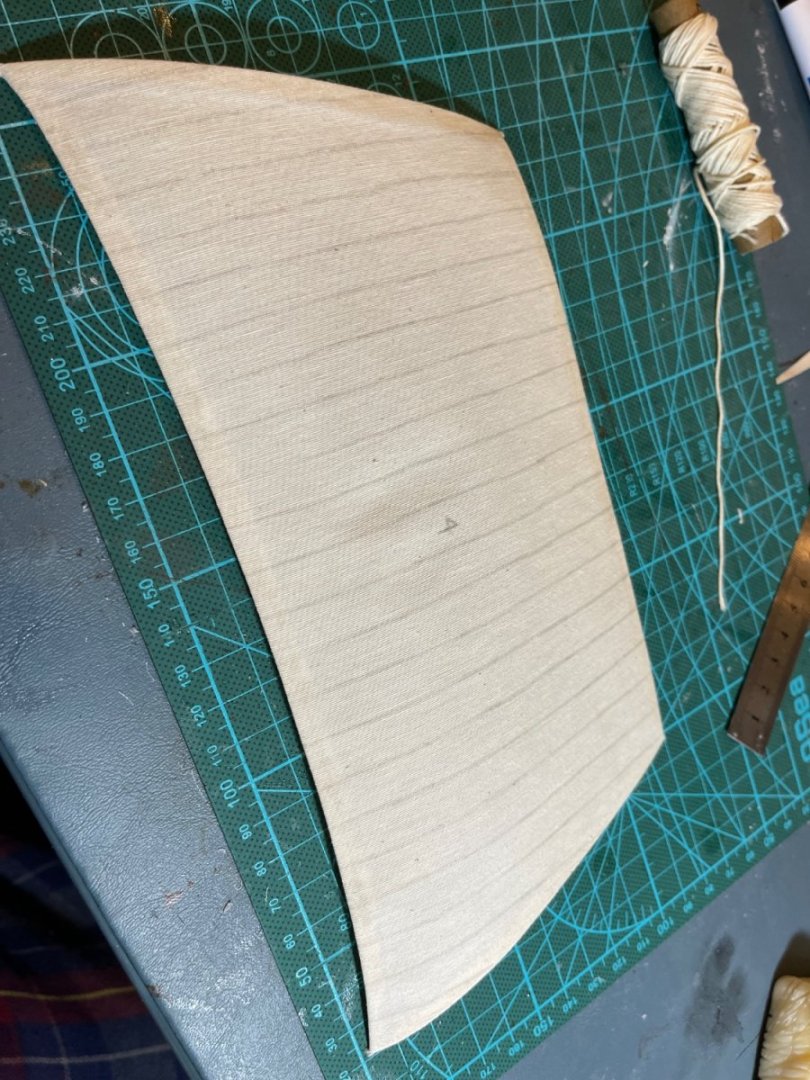
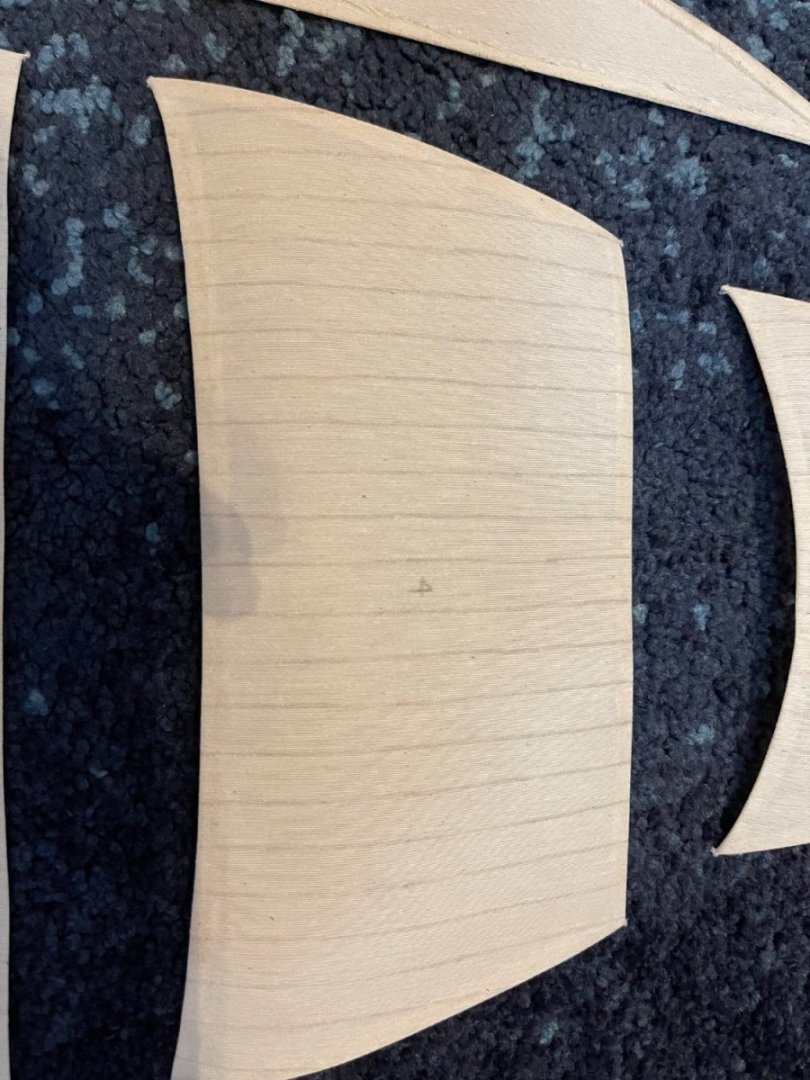
I finally completed hemming and sewing the strips on all 14 sails. I also had to work on the rear stitching of the sails. Finally, I have begun working on affixing the sails to the yard arms. Once that is completed, I can begin rigging the sails to the ship one mast at a time. Included are the sails, had to take the photo at a distance to get them all in one go, and today’s work.


- 88 replies
-
- 1
-
-
- Constitution
- billing boats
- (and 1 more)
-
So sorry to hear about losing the rudder. When my model arrived, I mis counted the anchors, they sent me two instead of four... I didn't find the error until this past October, thankfully they sent me another free of charge. Some of these companies really do a good job about taking care of their builders. I hope this is the case for you.
-
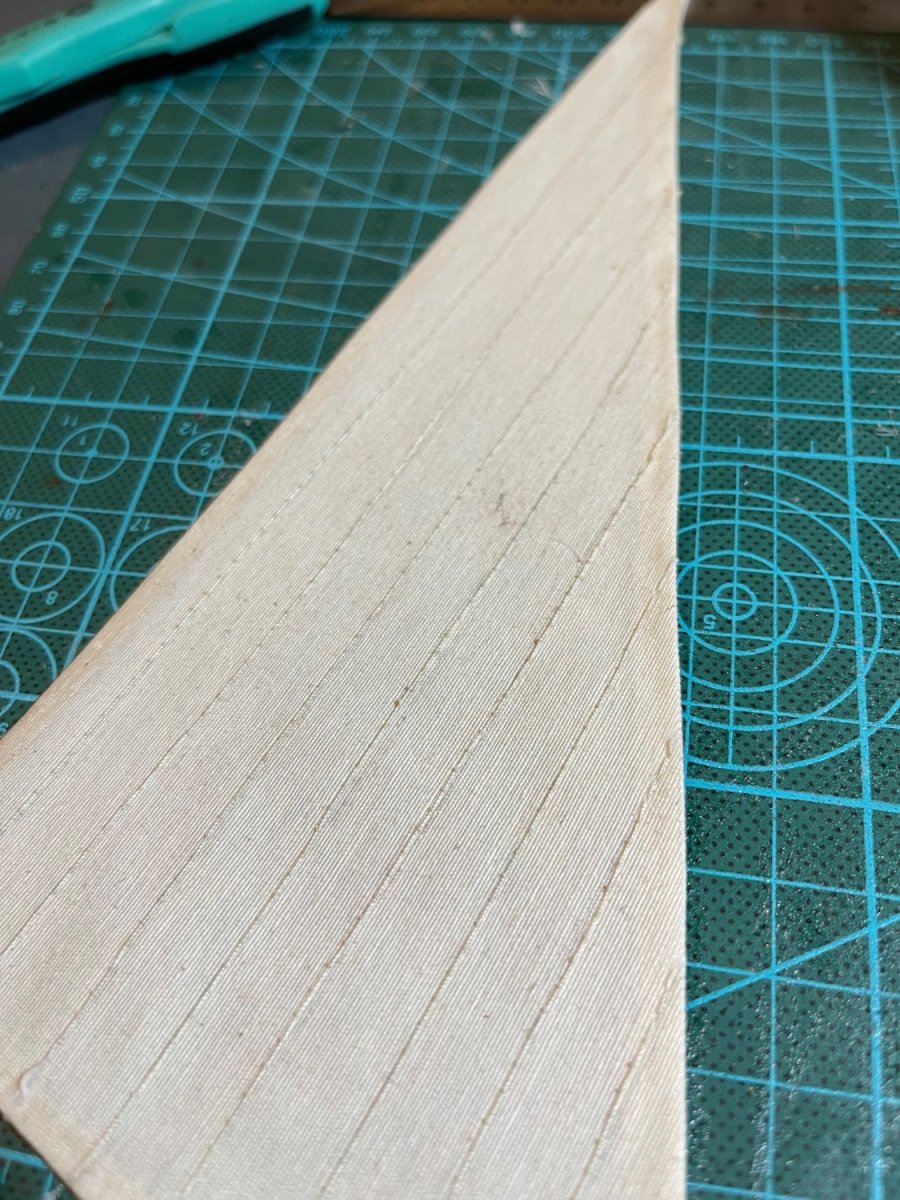
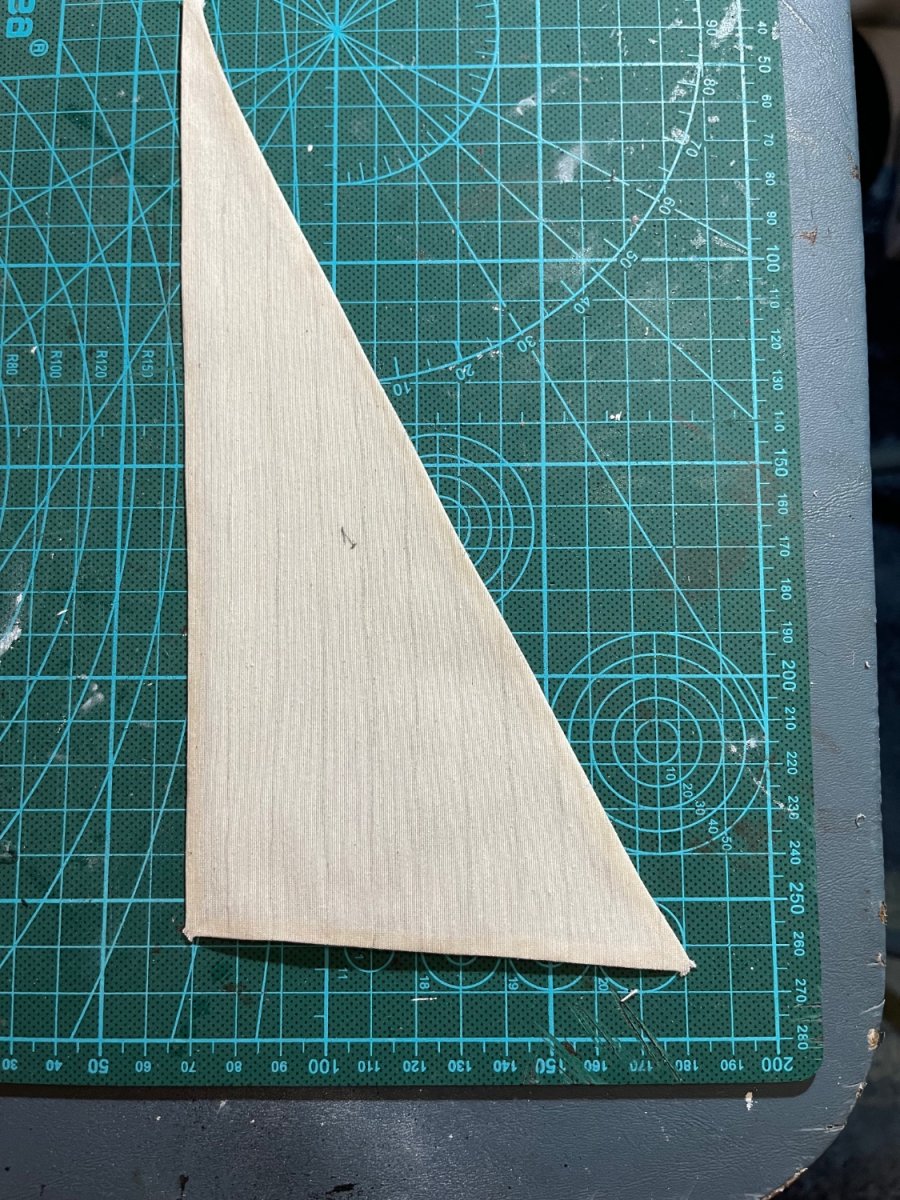
Finally started sewing. I was able to finish the hemming on all 14 sails, and now…the sewing of straight lines. I am quite out of practice, and you do not want to know how many times I had to pull out stitches in order to get my first jib sail looking like this. One down, a baker’s dozen more to go. I chose a natural colour thread or off white/cream to be less noticeable against the sails in display. I’m not sure if this was quite spec, but I like the look. The underside isn’t perfect, but a little white glue here and tucking of thread there, and nobody will notice. I think it’s the machine tension or my hands being out of practice. What do you think?
- 88 replies
-
- 1
-
-
- Constitution
- billing boats
- (and 1 more)
-
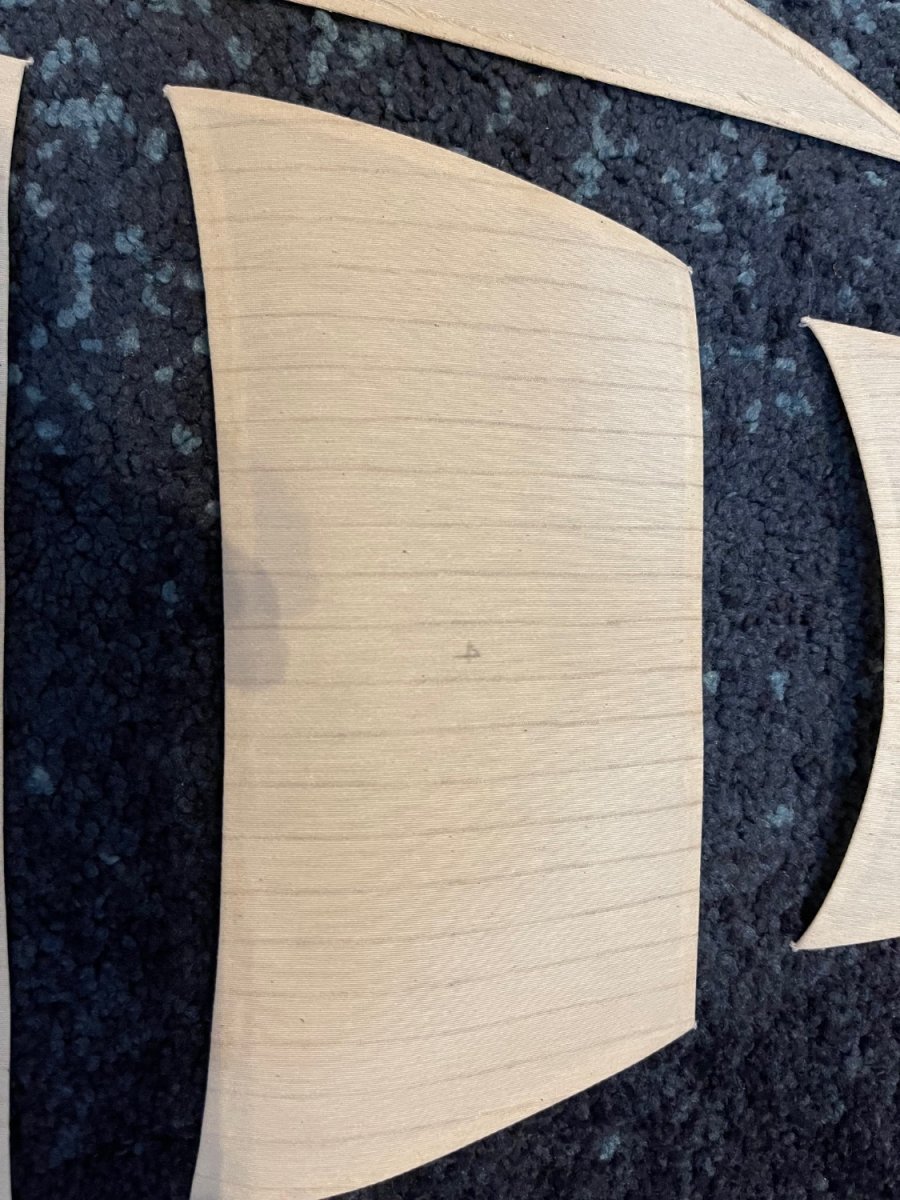
Good evening, It’s been a few days, haven’t been able to work as I had been doing. Though with that being said, I have completed hemming on 6 of the 14 sails for the model. Once the hemming is done, I plan to see the vertical bands on the sails, and then begin on the reef points, still debating on doing the beckets, sewing them around the outside. What have you all done at the 1:100 scale? Has anybody done sails that way using the heavier cloth as I am using? I have attached some photos of my current work.

-
Good morning, Thank you very much for your praise. I only added a few details to the kit that wasn’t already there. Their house model doesn’t have a good amount of sail detail, so I plan on improving that for practice ahead of my next model. What better way than to go ahead and try on something that doesn’t exist? I appreciate your encouragement, it is hard to keep going when it feels like such a large task, and I have a couple of hours every few days to do work. I’ll keep you guys posted on my progress, and appreciate your comments. I have been following your work also, and I have to say your work is much more intricate than mine. I can understand and empathize with the pace of progress. Have a good day sir.
-
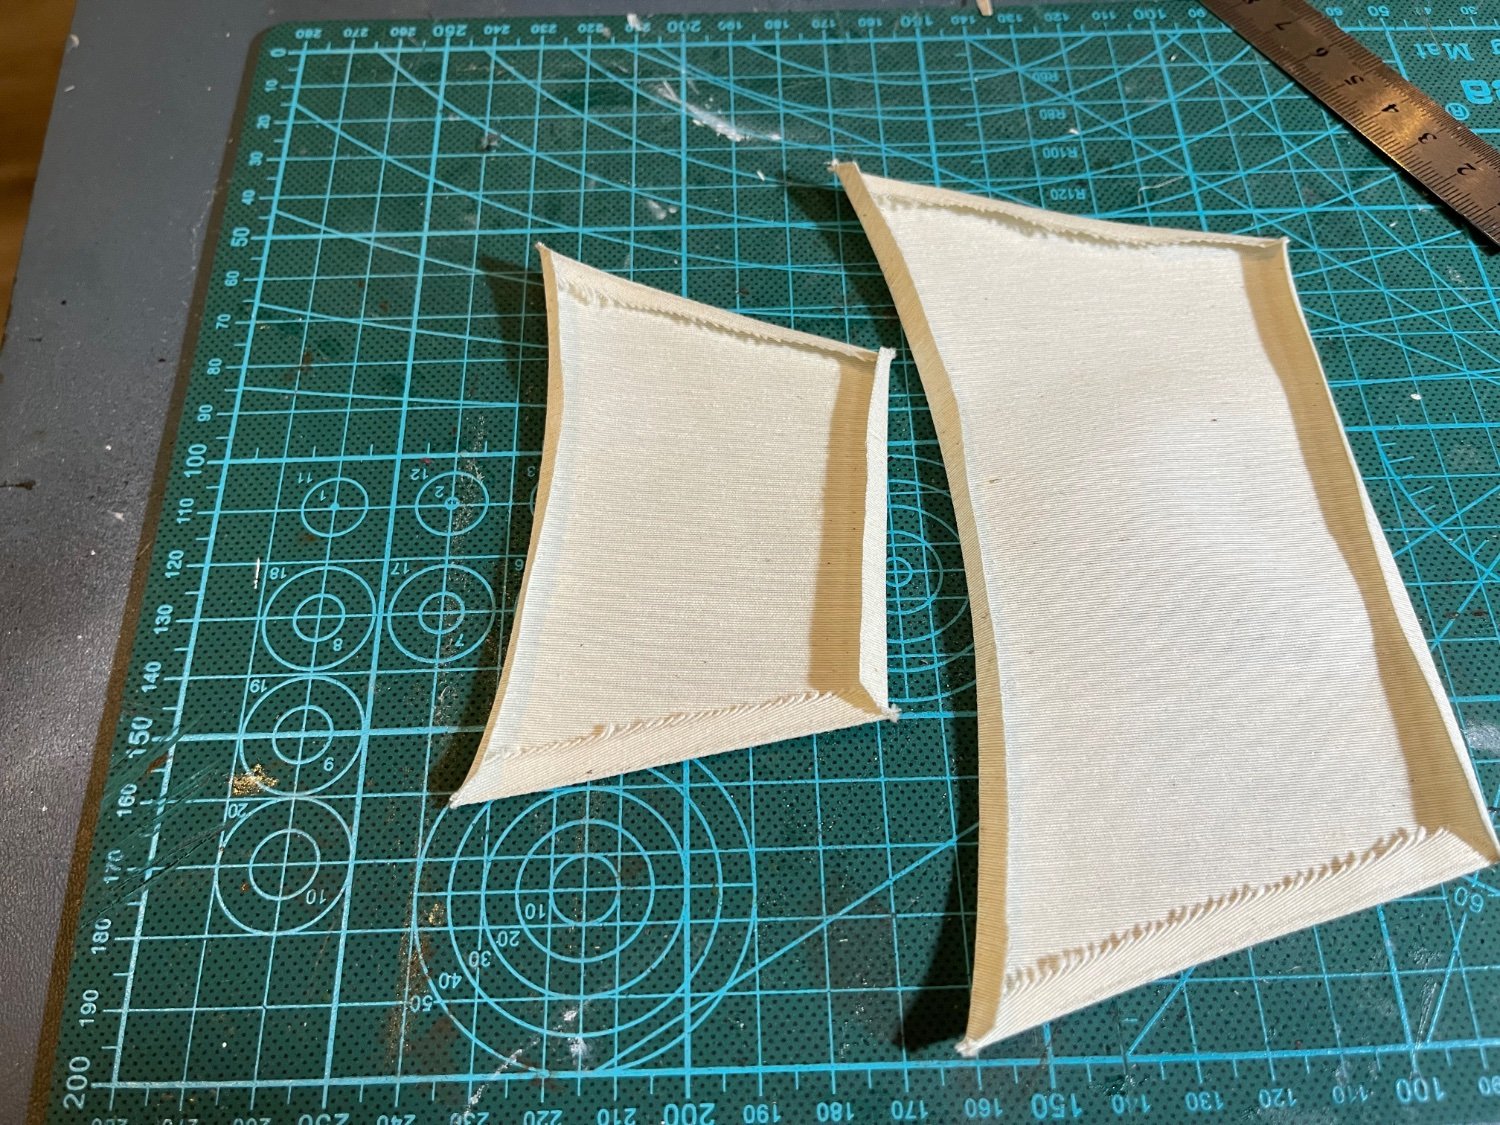
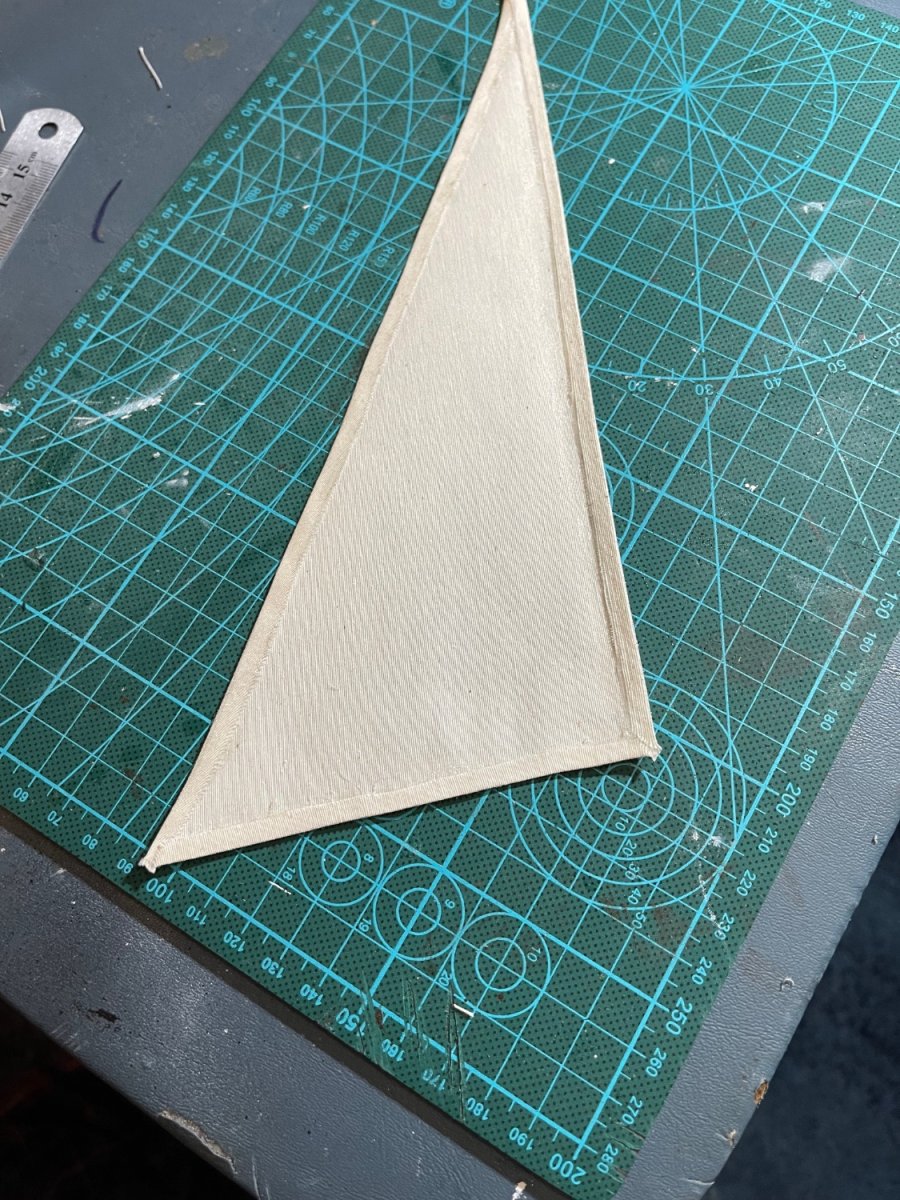
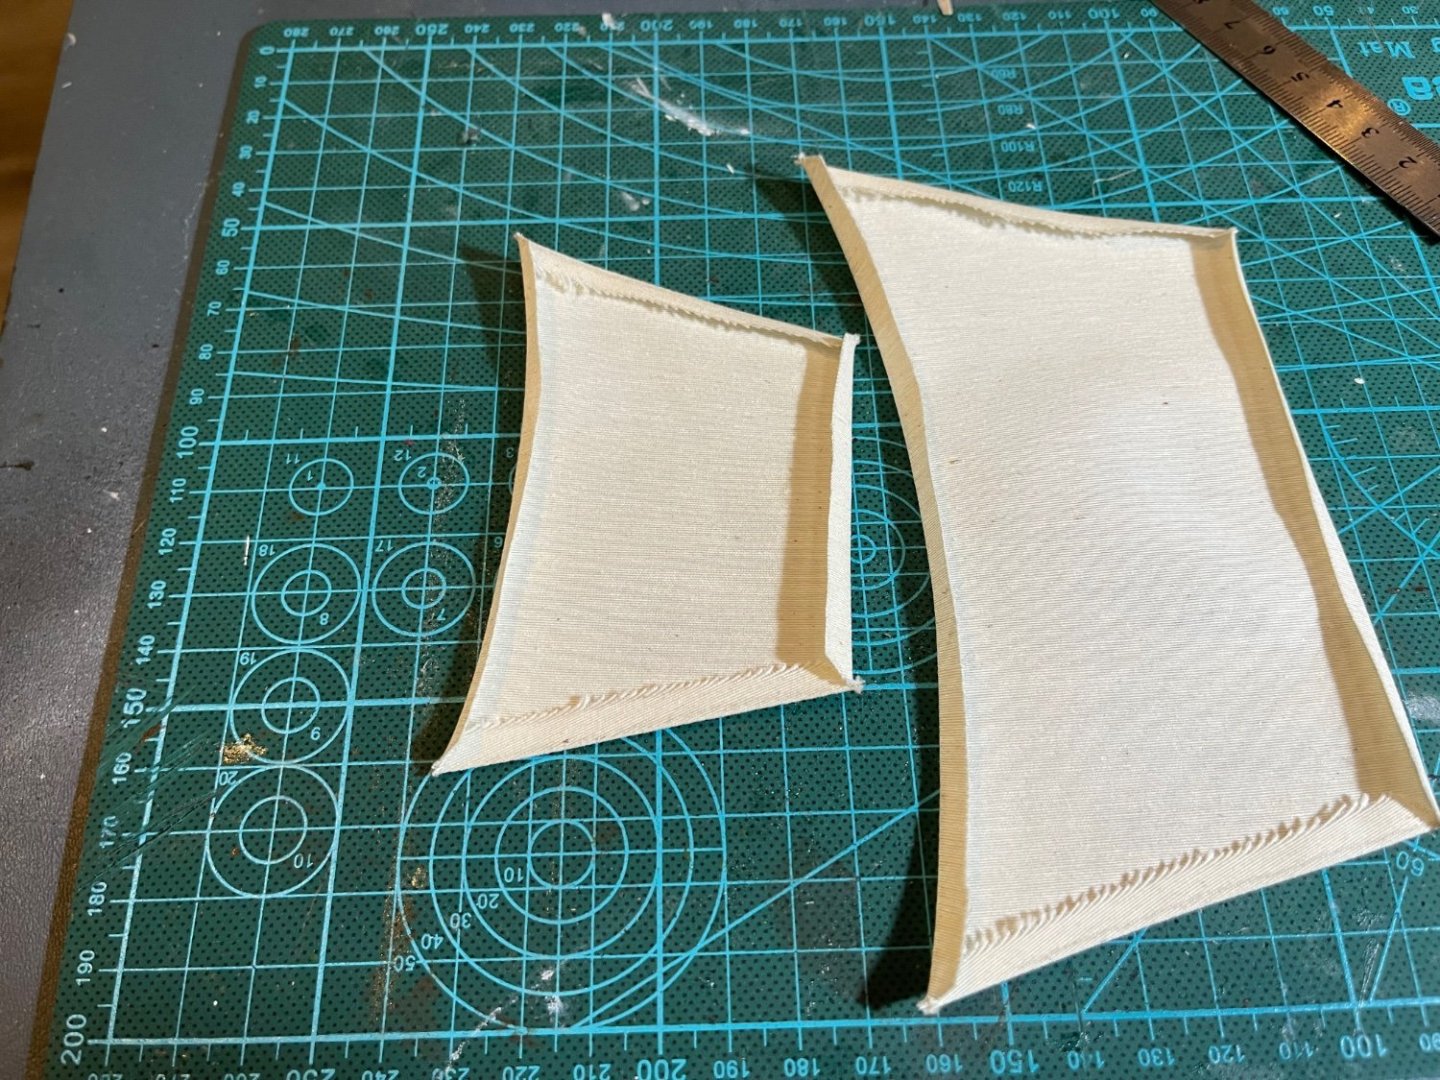
Started working in earnest on the sails. I figured that my sewing skills are not the best. Straight lines I can do for the main portion of the sails. However, that being said, I definitely cannot hem a straight line at the edge of a sail. So…enter the fabric adhesive. I was only able to cut out two jib sails, hot iron the hem folds so they’ll be easier to work with, and complete the gems on one sail. Granted, I only was working on it for an hour and a half, it is still a good amount of progress. I’m sure it will speed up once I have all of the sails cut out and ironed, but it’s a good start. I’m using a fabric adhesive that is flexible, dries clear, but smells like rubber cement while in its liquid form. The results speak for themselves. What do you think?


- 88 replies
-
- 1
-
-
- Constitution
- billing boats
- (and 1 more)