ausf
-
Posts
16 -
Joined
-
Last visited
-
 EricWilliamMarshall reacted to a post in a topic:
Hello from New York.
EricWilliamMarshall reacted to a post in a topic:
Hello from New York.
-
ausf reacted to a post in a topic:
Hello from New York.
-
thibaultron reacted to a post in a topic:
Macro photography on the cheap.
-
thibaultron reacted to a post in a topic:
Macro photography on the cheap.
-
JeffT reacted to a post in a topic:
Hello from New York.
-
JoeHolden reacted to a post in a topic:
Hello from New York.
-
Canute reacted to a post in a topic:
Macro photography on the cheap.
-
Canute reacted to a post in a topic:
Macro photography on the cheap.
-
Canute reacted to a post in a topic:
Macro photography on the cheap.
-
ausf reacted to a post in a topic:
Macro photography on the cheap.
-
Paul Jarman reacted to a post in a topic:
Hello from New York.
-
 ausf changed their profile photo
 -
Macro photography on the cheap.
ausf replied to ausf's topic in Modeling tools and Workshop Equipment
Great points John, thanks. I will definitely look into focus stacking when I use these for actual projects. -
ausf reacted to a post in a topic:
Macro photography on the cheap.
-
Macro photography on the cheap.
ausf replied to ausf's topic in Modeling tools and Workshop Equipment
You got that right. Camera was hooked up to the Macbook and done live view so I could change shutter speed and ISO (can't adjust f stop with the manual lens) and adjust before taking anything. I try to explain to my kids that I had to wait a week for a roll of film to come back before you found out if you even captured anything. -
ausf reacted to a post in a topic:
Macro photography on the cheap.
-
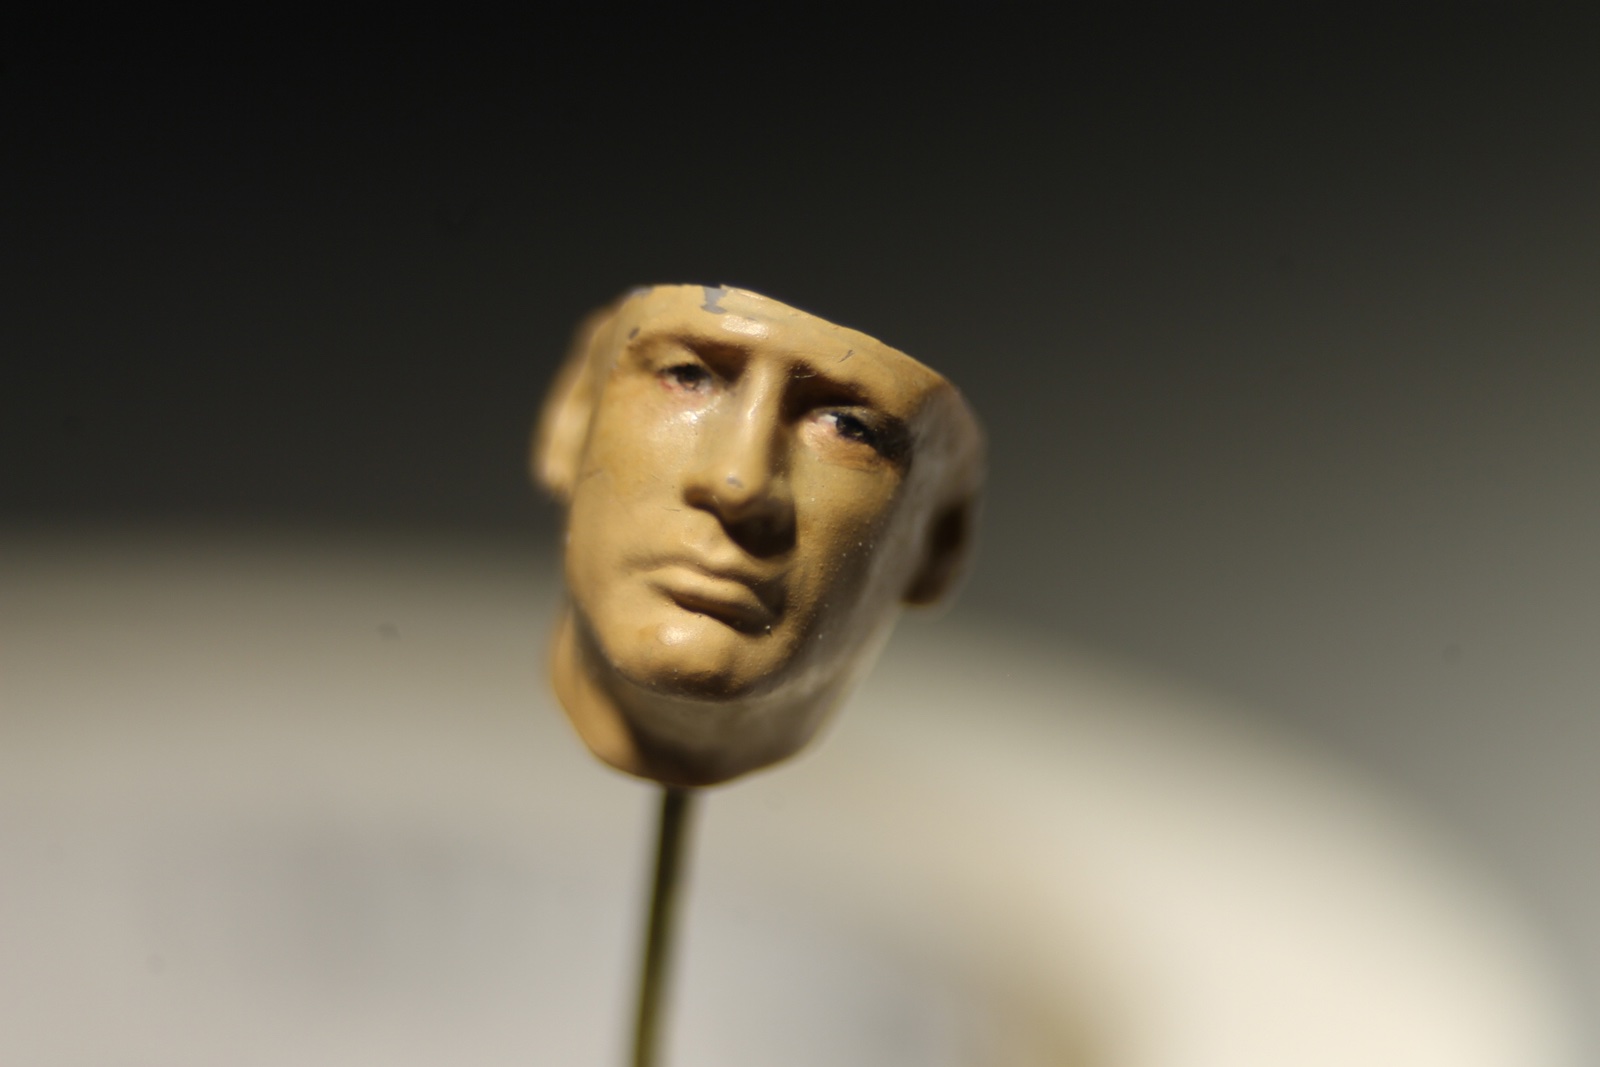
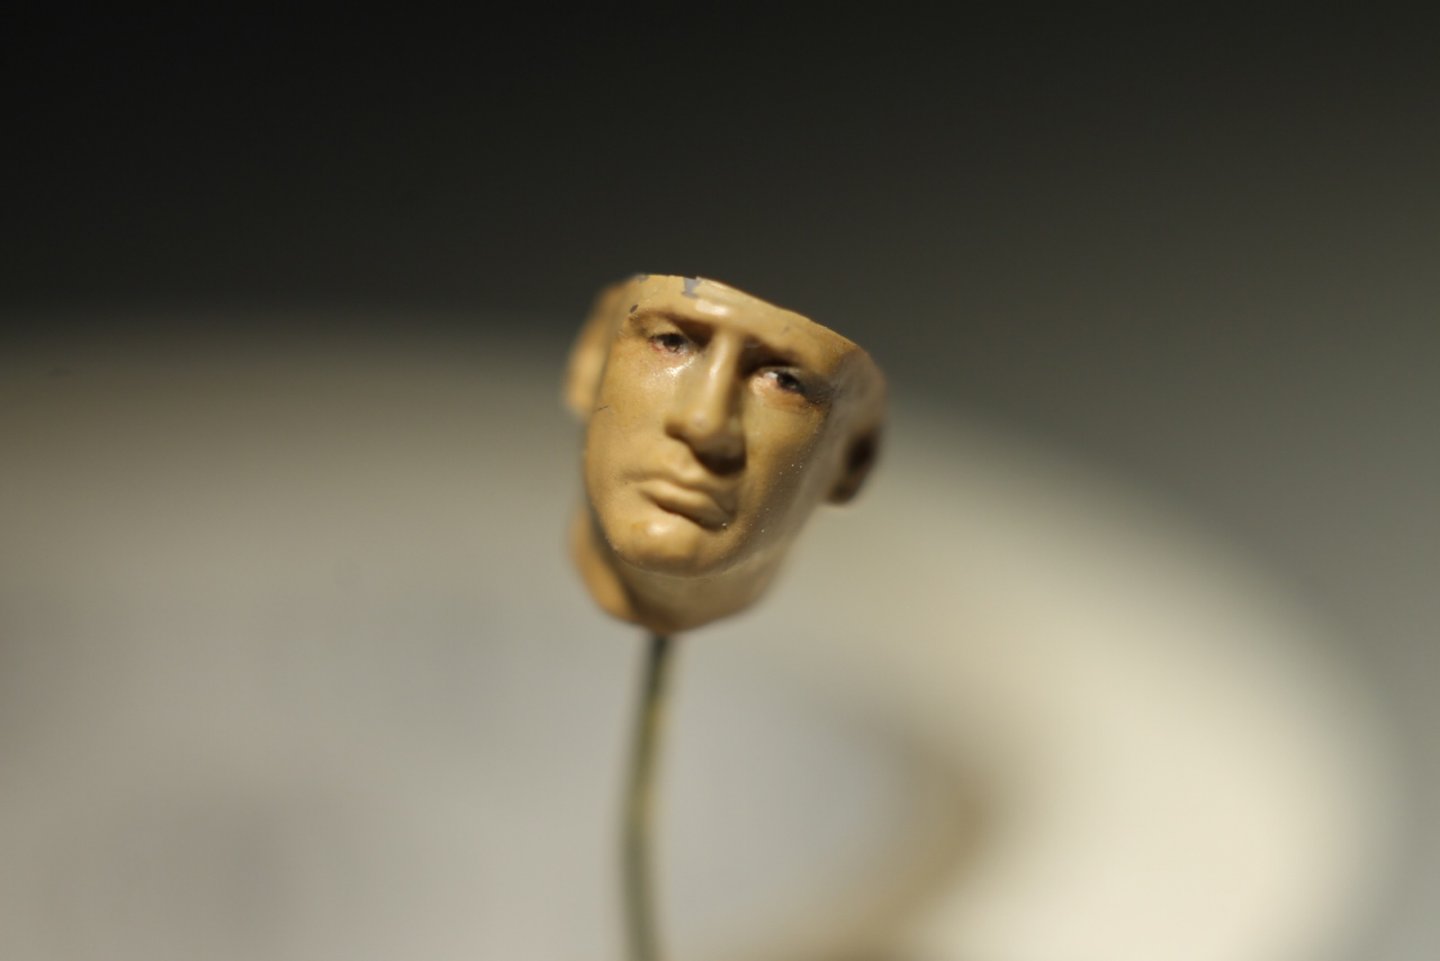
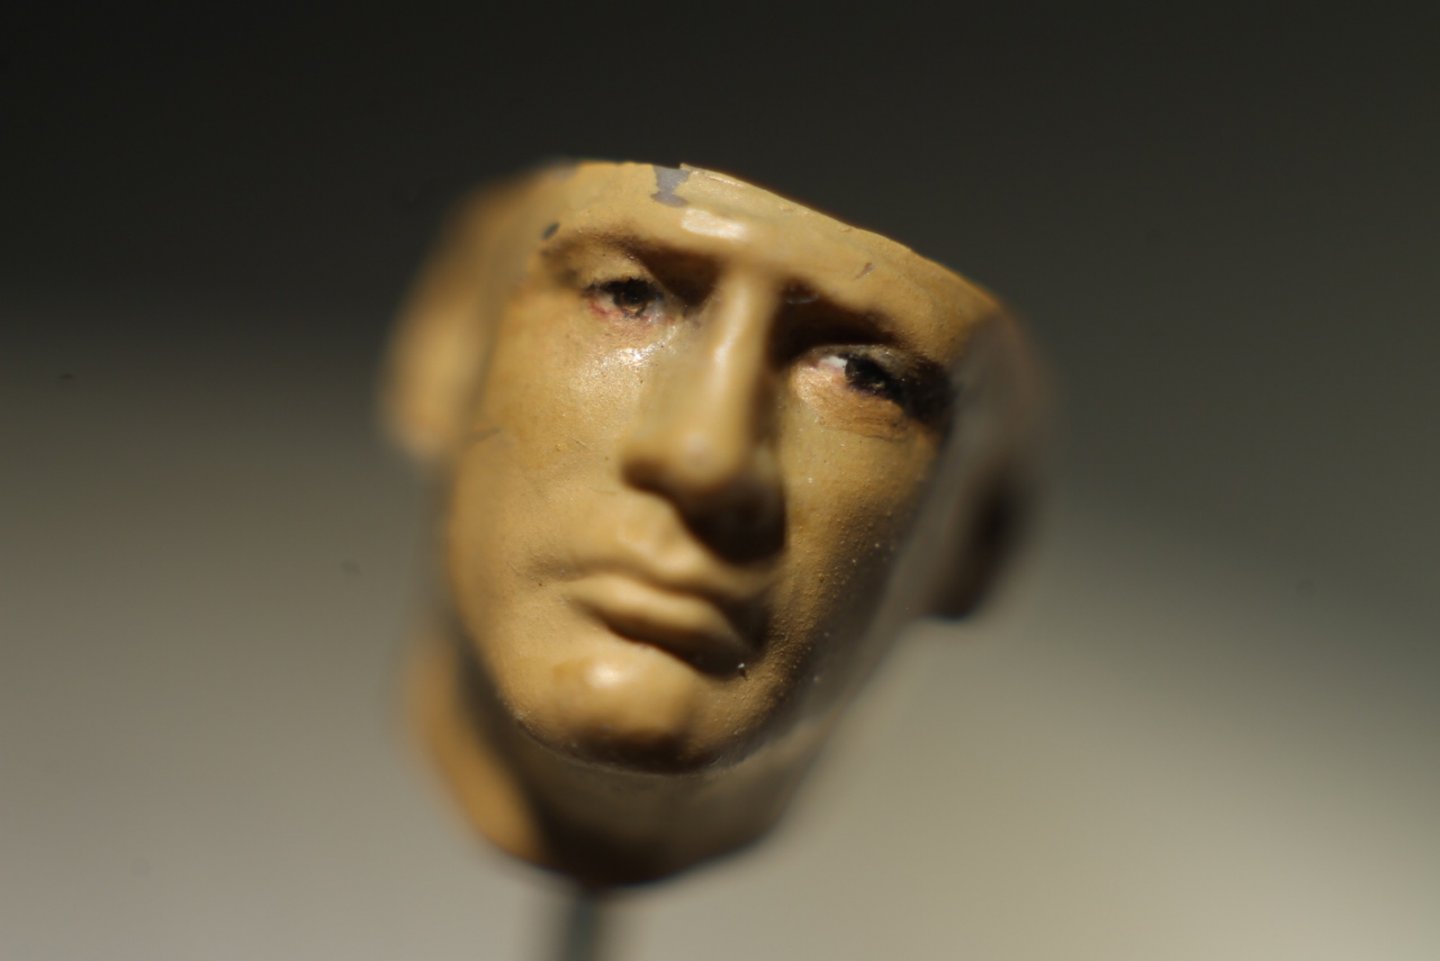
I'm been meaning to get a good macro lens for years, but every time I'd hate to drop serious coin on it. I decided to give extension tubes a go. They're a cheap alternative so I kind of assumed would give cheap results. I'm pretty surprised how well they work. Using an entry level Canon Rebel and a $40 Nikkor-P vintage lens I got for animation, I put the tubes to the test. I bought a set of Kenko, 3 tubes of 12, 20 and 36mm that were cheaper than one Canon branded tube. The idea behind them is they create more distance between the sensor and the back of the lens, allowing you to get closer to the subject. In theory, if you use 50mm or extension with a 50mm lens, it's basically like having the object touching the sensor. I also tried the 50mm lens that came with the Rebel. I grabbed a 1/35 Tamiya styrene head I started but never finished. It was laying in the bottom of the spares drawer, covered it dust and scratched up pretty good, please excuse that. It's lit with my bench work lamp (Ikea), simple LED bulb, no fancy light rig. First photo was the Nikkor 55 mm lens with 12mm of extension. Next is the same lens with all the tubes attached. It destroys the depth of field, but the magnification is pretty damn good, especially for a 50 year old, cheap lens. And finally, the basic Canon 18-50mm lens with all the tubes in place. So, no need to get crazy if you want to take closeups of your work.

-
My first glance I thought Chevelle, but from the angle it looked late 60s boxy and those Chevelles had a single taillight. I had my Holy Grail, a 66 Malibu ragtop, but the frame was cracked. I intended to do a rails up restoration but never had the money when I had the time and then when I had the money, I had no time. It sat in a garage for about 5 years until I parted it out. I bought it in NJ. When looking it over I saw welded plates on the drivers side frame all covered in undercoating. All of those frames rotted in the same spot, even the later ones, so I didn't think it was a big deal. When I was leaving the guy kept telling me to be careful, don't go too fast, claiming he was worried I'd get pulled over without registration/insurance, etc. But as I'm driving home, on the bridge it was handling weird and when I got it home, my buddy who drove me there said he saw the car flexing in the middle. Then I saw the break when I got it on a lift. My original plan was to drive it while working on it, but that put the cabash on it and made the resto way more than I intended. I actually still have the grill emblems and SS flags in the basement.
-
Thanks Paul! I used to sell a lot of figures to your neck of the woods, I know modeling is well represented in the UK.
-
Thanks Steven! The kit is the recent re re re release, it's the same old mold. After I started to amass the refs, I thought about just scrapping that and going wood, but I think it'll be a good test bed on rigging, etc. I certainly will start a thread, I'm all about sharing work and taking criticism and input. No ego here, I'd rather not reinvent the wheel when many of you could easily point out one of the many mistakes I'm about to make. First up I'll be making the cannons, deadeyes and anything else that the kit lacks in detail. Not sure if you guys would be interested in the process of resin casting, but I'll document if you'd like.
-
Thanks John! You mean warm literally right? While I freezing my **** off, you're baking I'd imagine.
-
Tack Per! My son is trying to get an internship in Finland for the summer, if so, he plans on stopping in Sweden for visit and meet family. If you see a confused American with a Huginn and Muninn tattoo, say hi.
-
Thanks Mark!
-
Thanks David. Is that a '68 Biscayne? I used to restore '64 to '66 Impala SS'. My first car at 18 was a '69 with a 396 and 411 gearing for $200.
-
Thanks Jeff. By the way, I'm also a bass player and the album in your avatar was a big influence on that back in the late 70s. Well JPJ still today, was playing Ramble On and Good Times Bad Times last night as a matter of fact.
-
Hello all, thanks for opening the door to me. I'm not a stranger to models, I started in 1970 and besides the normal hiatus from building while in college, etc. I've been active in the craft in some form or another all these years. Currently, I'm a sculptor but previously had a business that made model related tools. My business partner was an avid ship builder and built and sold ropewalks. My youngest son is in his second year at Webb, working on dual degrees in Naval Architecture and Marine Engineering. He had to do a report on design failures and being that we are Swedes, chose the Vasa. It seemed like the best time to get my feet wet and scratch the ship building itch I've had as long as I can remember. I'm going easy at first, to learn the ropes (literally and figuratively), starting with the Airfix styrene kit. I plan on quite a bit of scratchbuilding, using my sculpting and resin casting experience to upgrade some of the kit's shortcomings and flesh out detail. As usual, I have gathered a small library of ref material on it: copies of Architectura Navalis, Young Sea Officer's Sheet Anchor, Ship Model Builder's Asst as well as general Vasa books. I'm looking forward to drooling over your collective work as well as picking your brains as I go forward. Jeff