HOLIDAY DONATION DRIVE - SUPPORT MSW - DO YOUR PART TO KEEP THIS GREAT FORUM GOING! (Only 13 donations so far - C'mon guys!)
×


Capella
-
Posts
138 -
Joined
-
Last visited
Content Type
Profiles
Forums
Gallery
Events
Everything posted by Capella
-
 Makes sense. Thanks, Chimp
 -
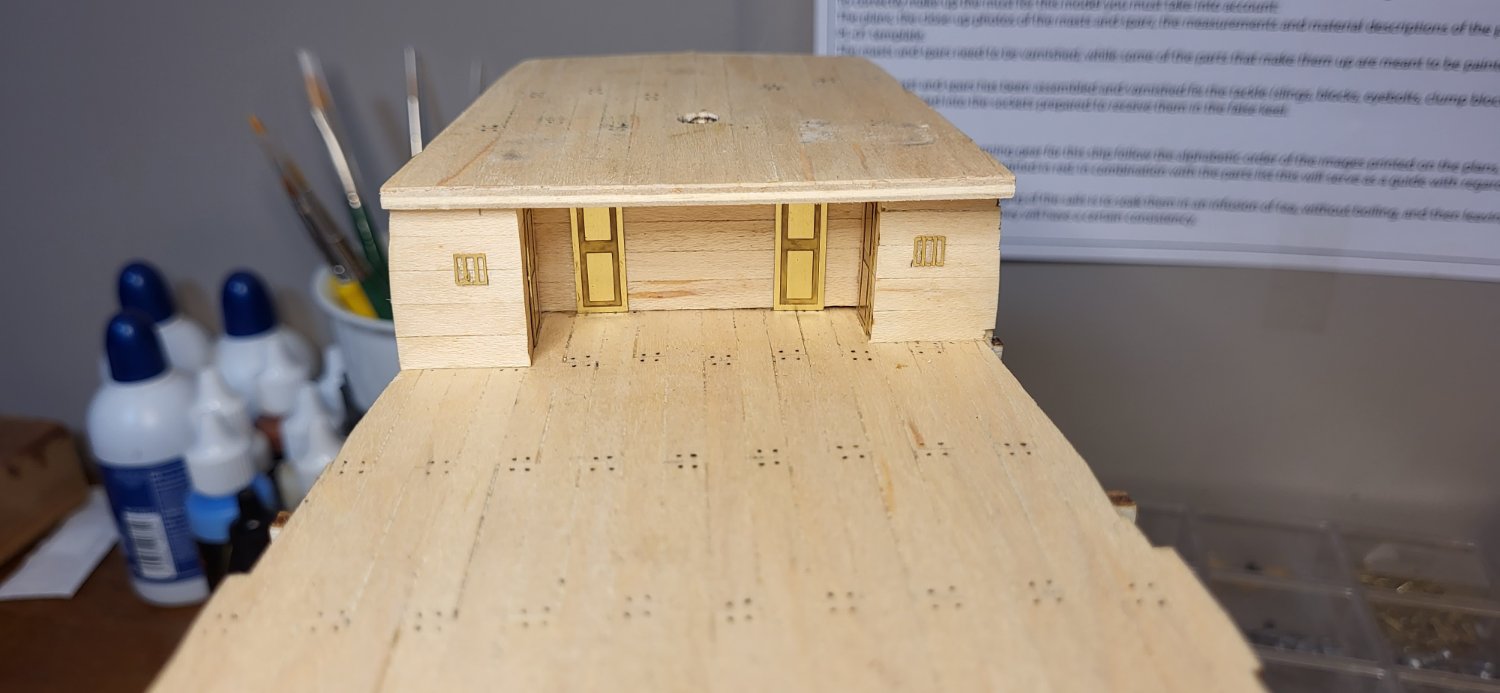
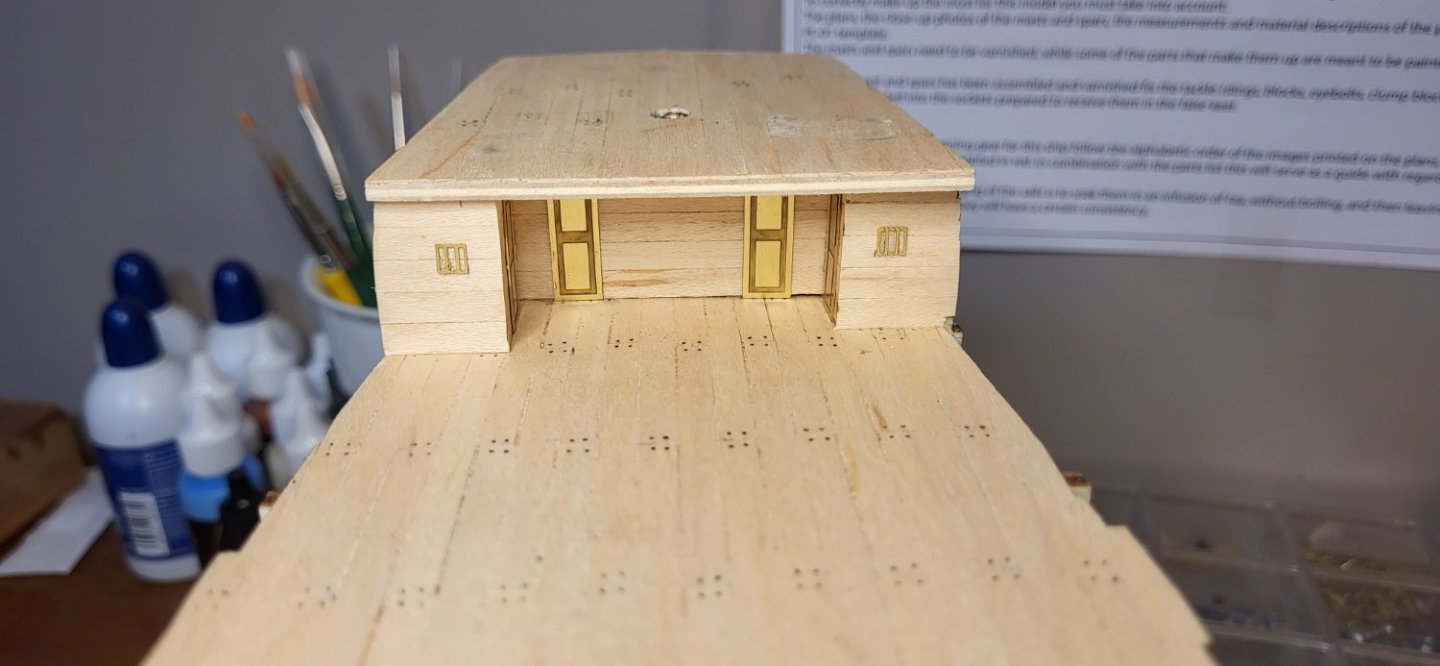
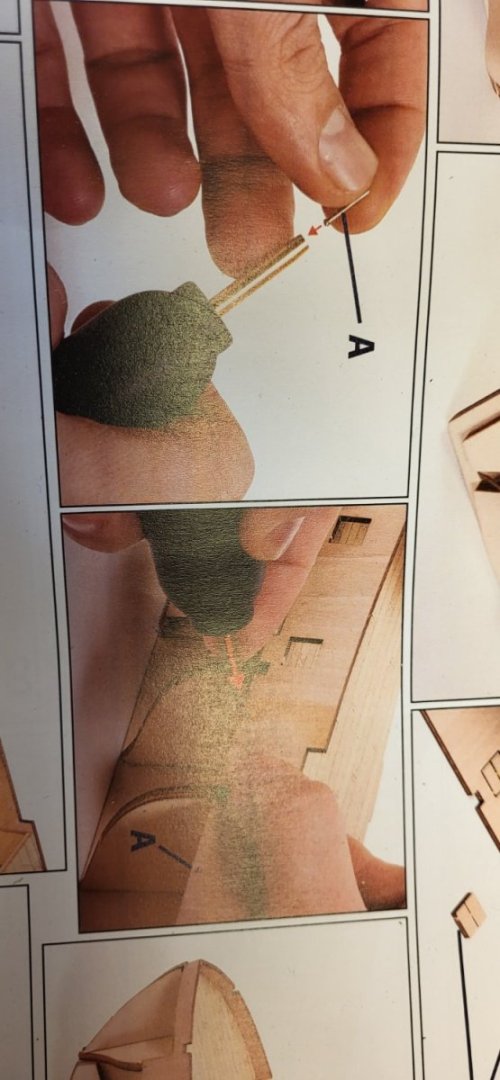
Okay, I got the windows and doors, and the upper fore and aft decks mounted: Next steps are to sand the false bulkheads near the upper decks in preparation for planking, bend and mount the gunwales (not sure if that's the proper name) and plank the gunwales. A question regarding these steps: Sorry. I can't seem to rotate the image on my phone. Anyway there are nails provided with the kit. The pictured tool is a "pin pusher", right? I looked for something similar on Amazon, but came up with a LOT of results - most of which weren't anything close to the tool in the image. Can someone suggest a good, cheap tool like that?

-
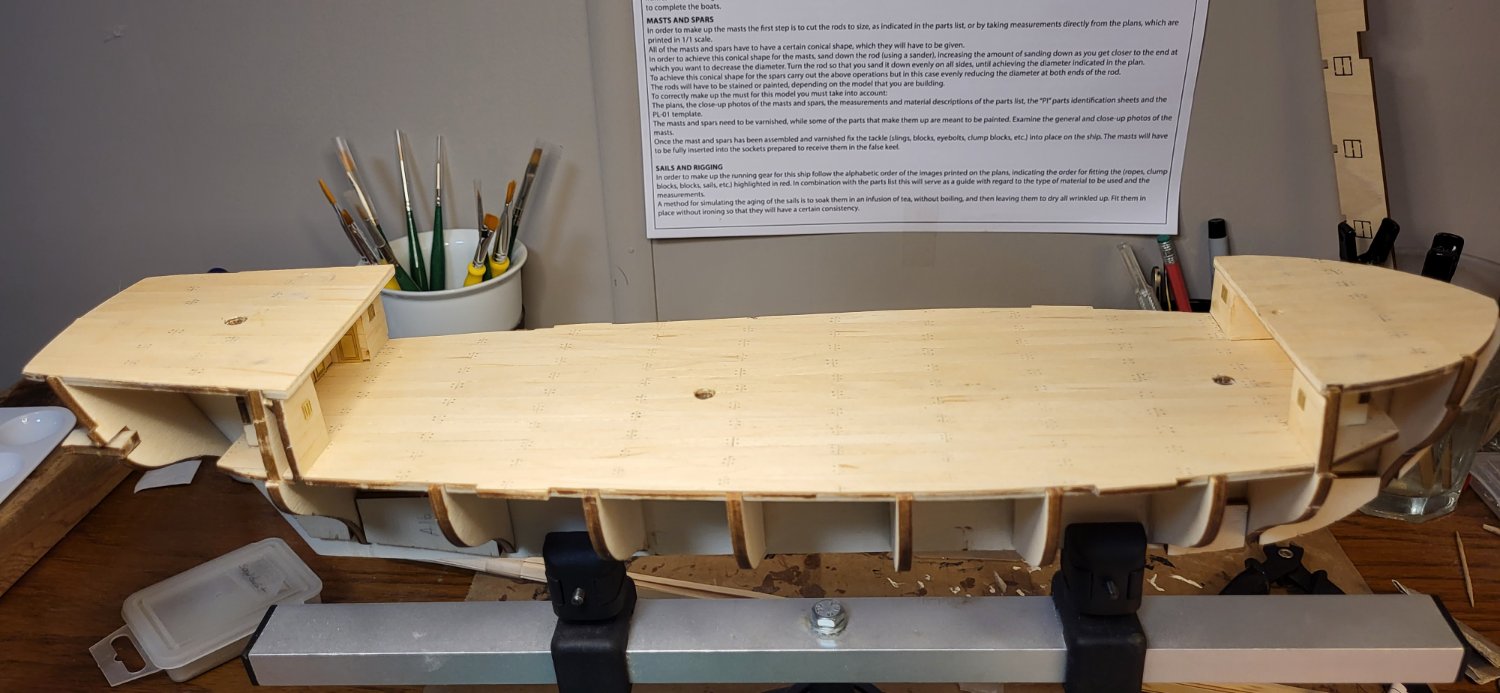
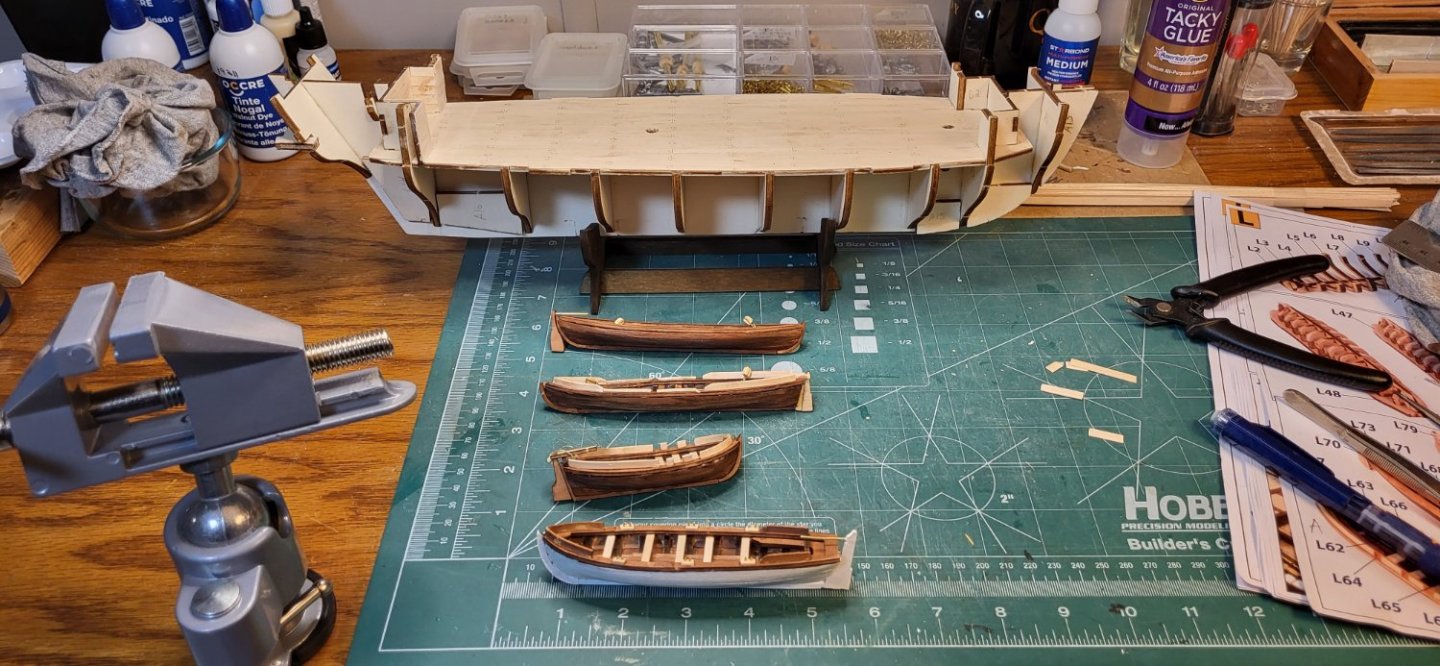
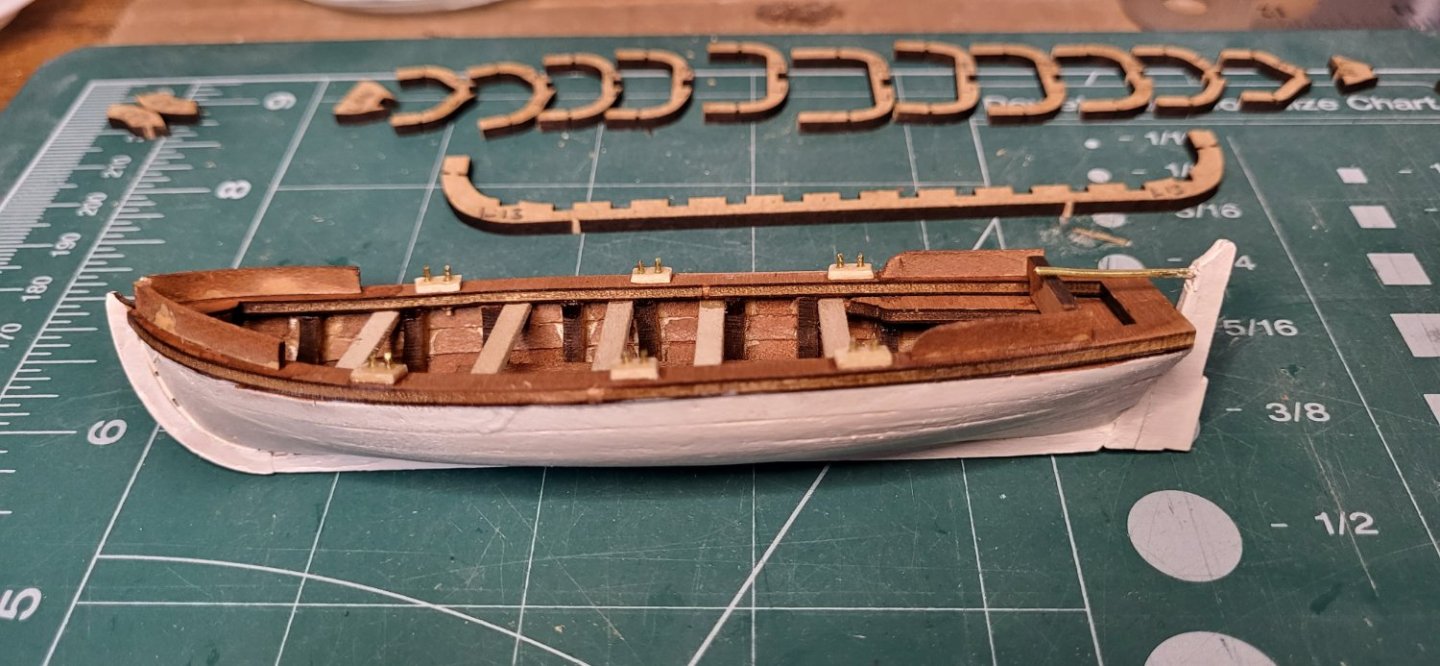
So, my delay in posting another update was because I was waiting on a couple of orders: the much-mentioned Vallejo Matte Varnish for the decks and a small clamp-vise (for a third hand to aid in tying block and similar things). In the mean time, while waiting for those, I finished the launches, mounted the main deck on the hull, and built up the supports for the forecastle and stern decks.
-
Okay - thanks. The pictures helped. I've been using them - I just didn't know they were called that.
-
New term for me! What is it and why do you think you need it?
-
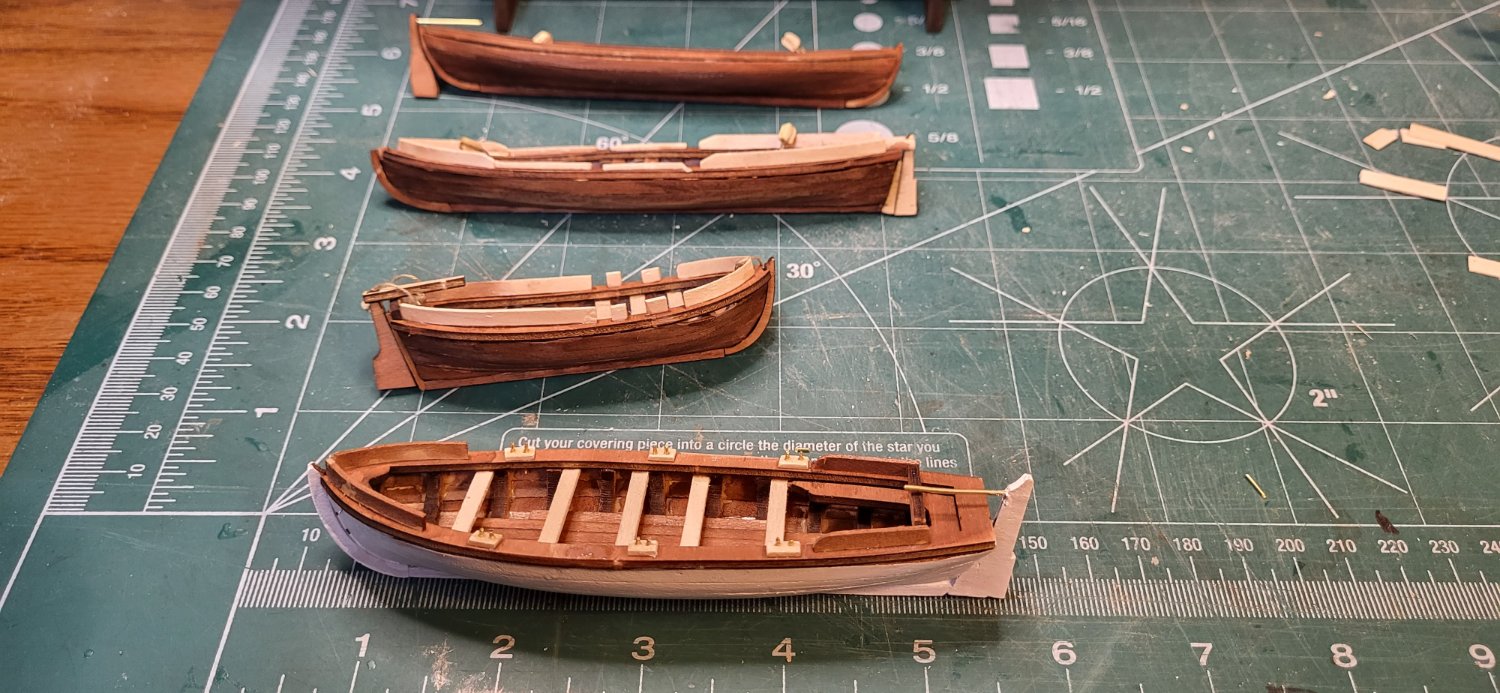
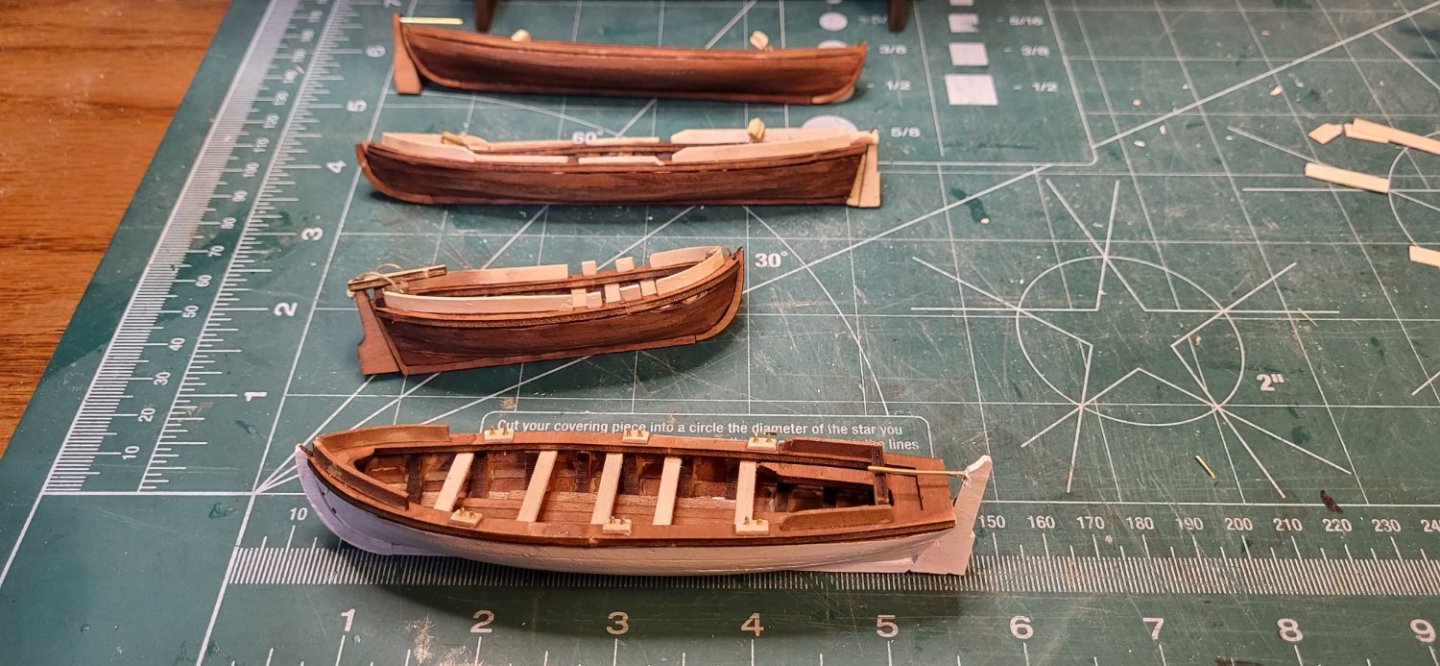
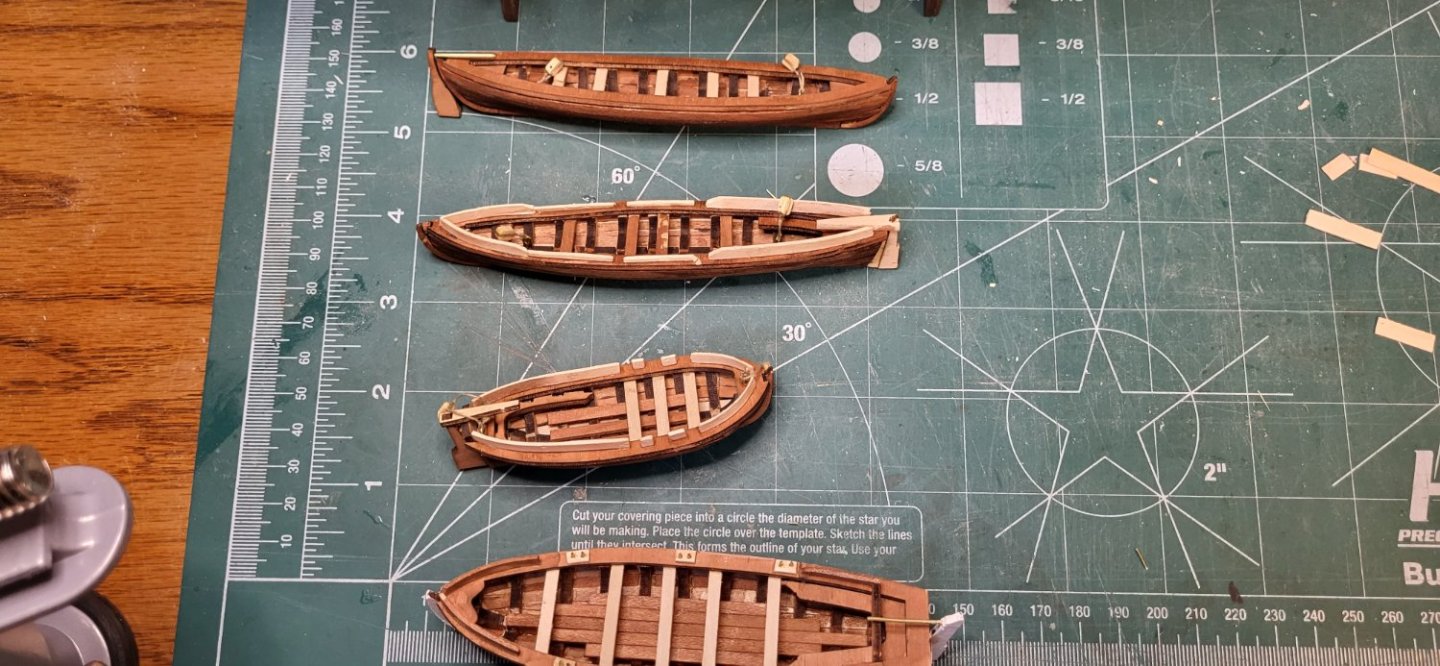
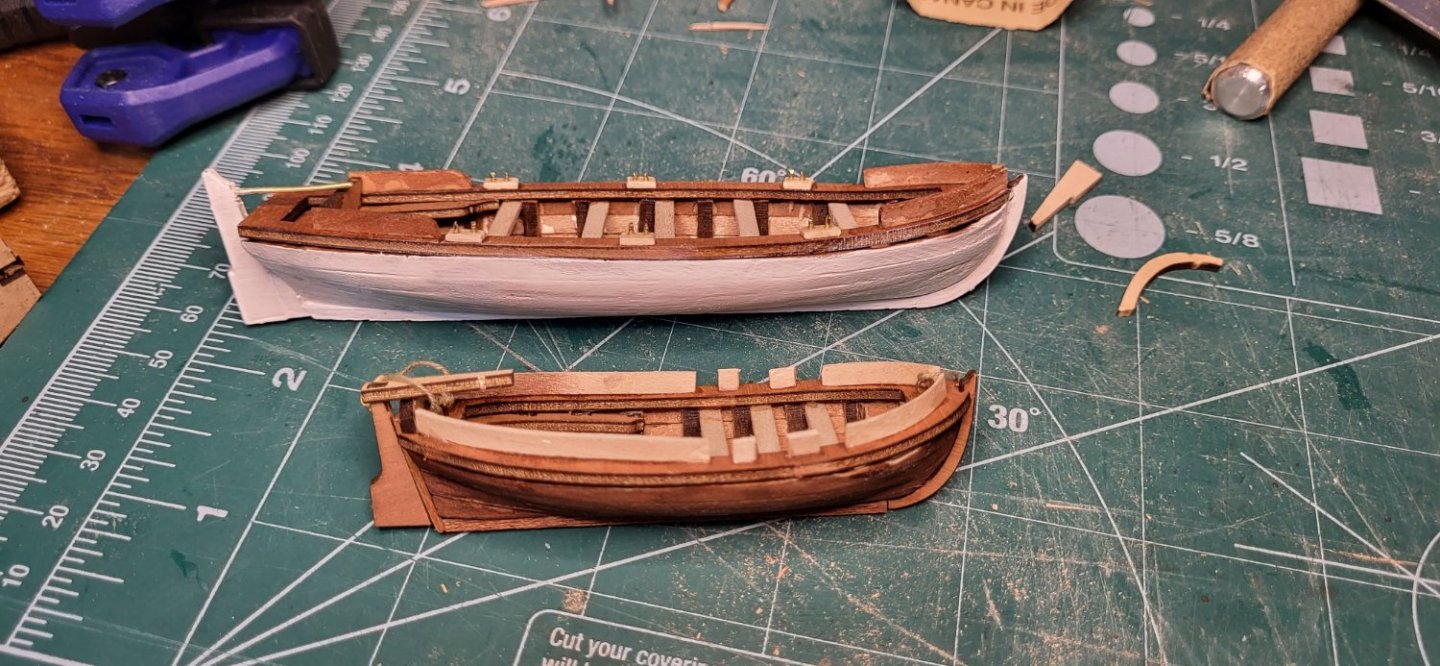
So, my delay in updating my progress was mainly due to waiting for a couple of things that I ordered to arrive: 1) The much-mentioned Vallejo Matte Varnish (side-note: Boris Vallejo is my absolute favorite artist - mainly for his fantasy art - I have two books of his - and had to wonder if the brand was named after him - slim chance, I know, but was wondering...) and 2) a small clamp-on vice to assist as a third hand in things like tying line/tackle on blocks, etc. That turned out to be a helpful purchase! So in the mean time I worked on the four launches, mounted the main deck to the hull, and built up the supports for the fore and aft upper decks. Have a look below. I was glad that the first launch's hull was to be painted white, as I did a horrible job on the hull on that one. I committed myself to using the process of building the launches as a learning and practice experience in preparation for planking the ship's hull (and paying attention to other details that will carry over to working on the rest of the ship). I'm pretty happy with how the two longer launches' hulls turned out - a few minor issues, but it was a good learning/practice experience. Weekend's coming up, so I'm expecting to make some good progress!
-
@LucienL What color stain did you use for the boats?
-
That is indeed a consolation. That's one of the biggest reasons why we do these logs. I've gotten some great help from the plethora of Beagle logs here, myself.
-
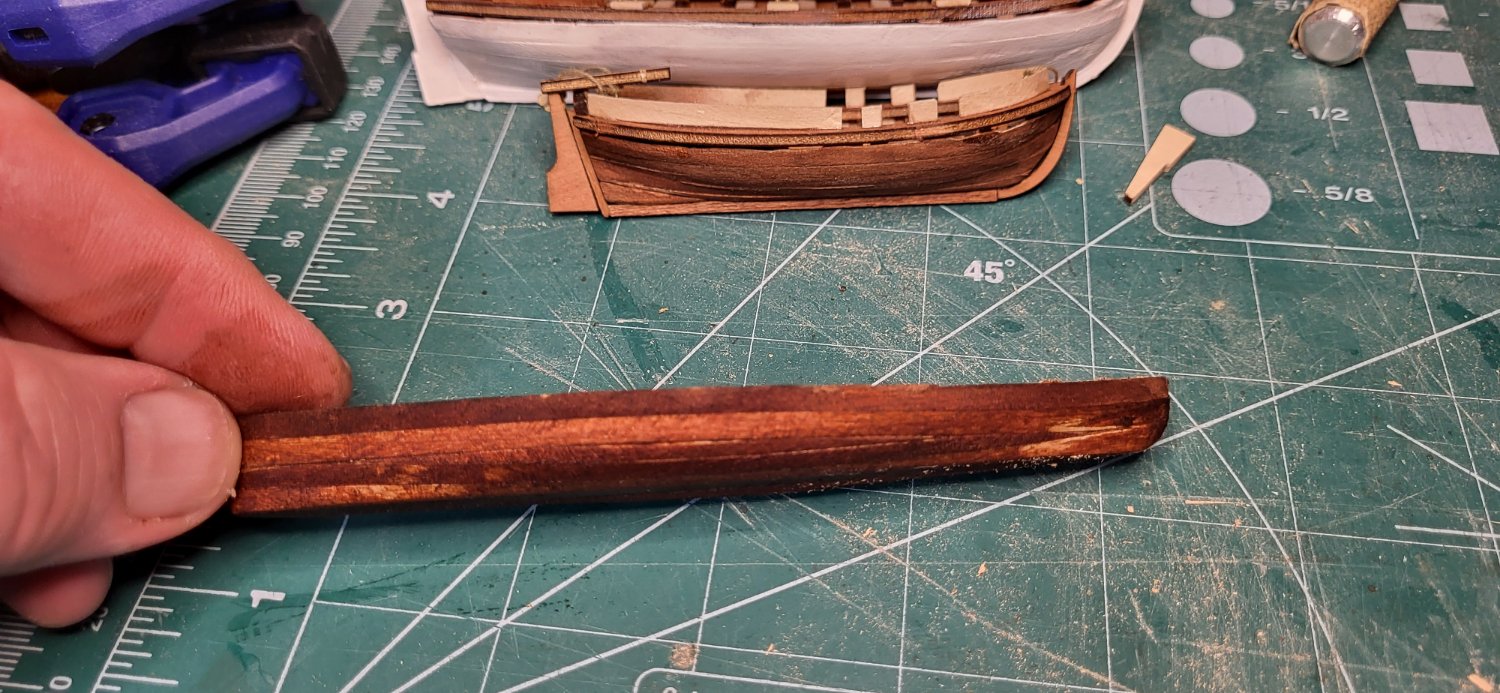
Unfortunately I didn't test the fit before planking. I'll probably try to file the hull and piece to get it to fit, and if that doesn't work, I'll have to make my own. Plenty of scrap wood from the templates...
-
Looks great, Lucien!
-
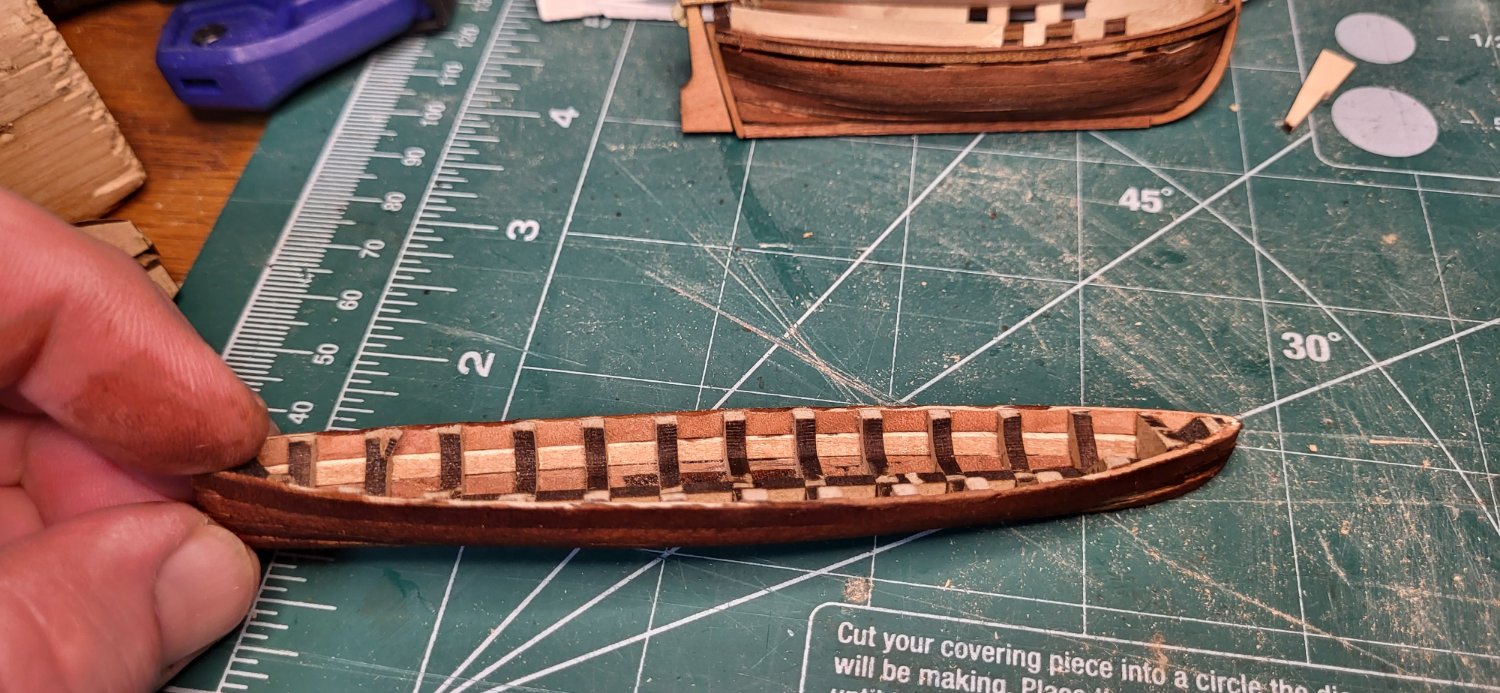
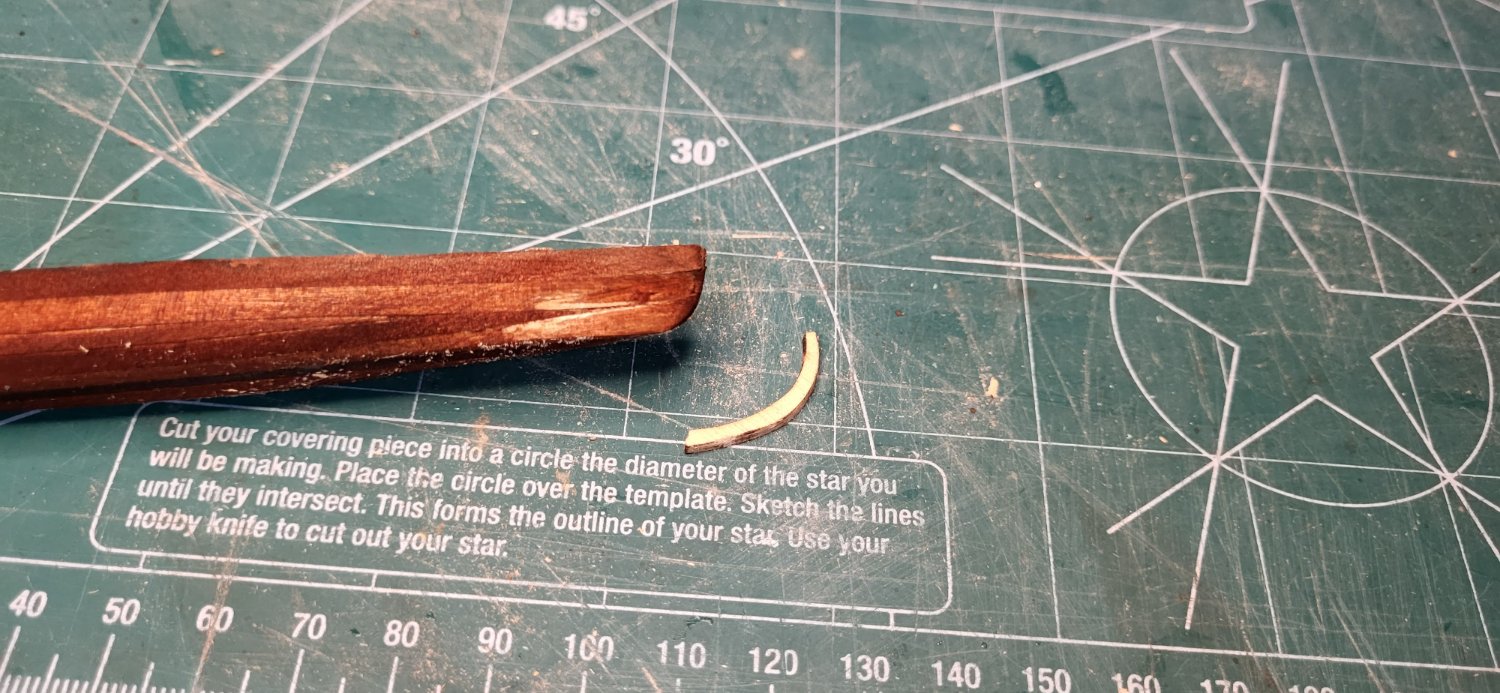
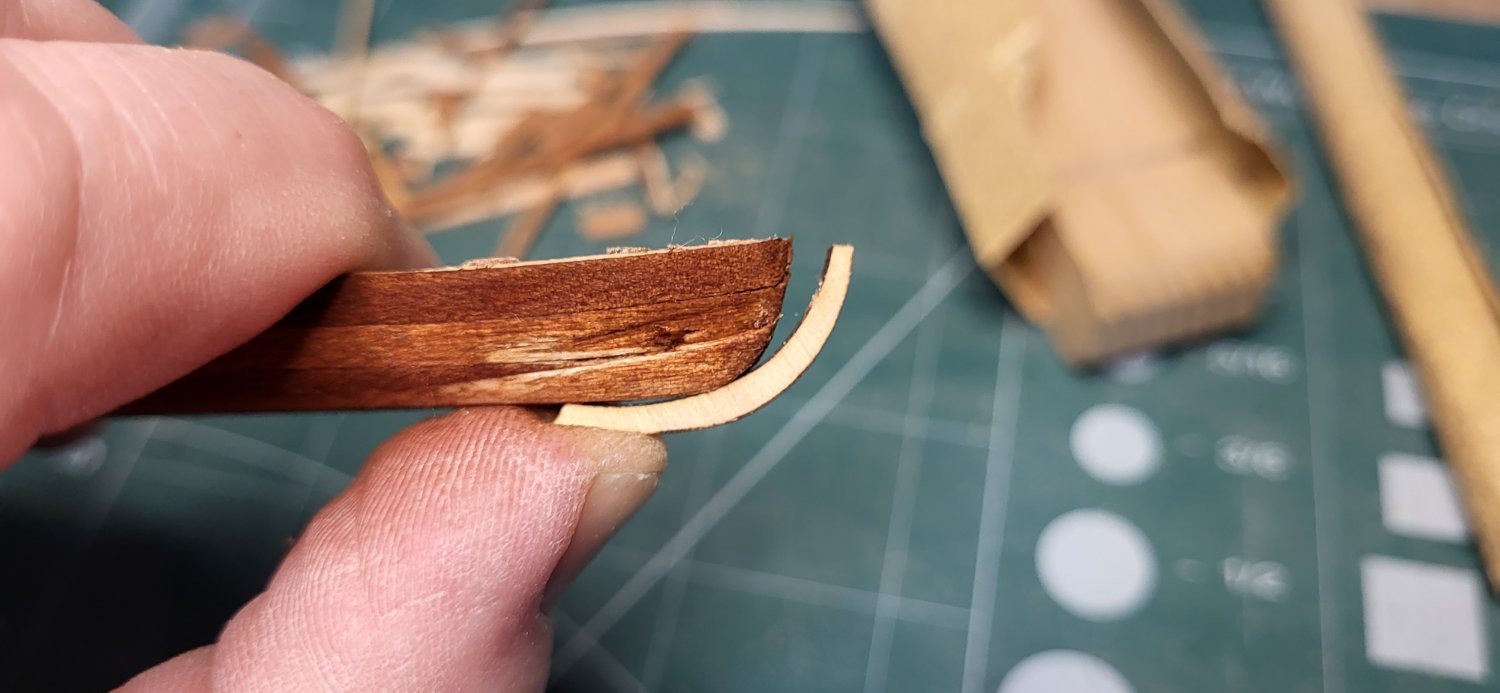
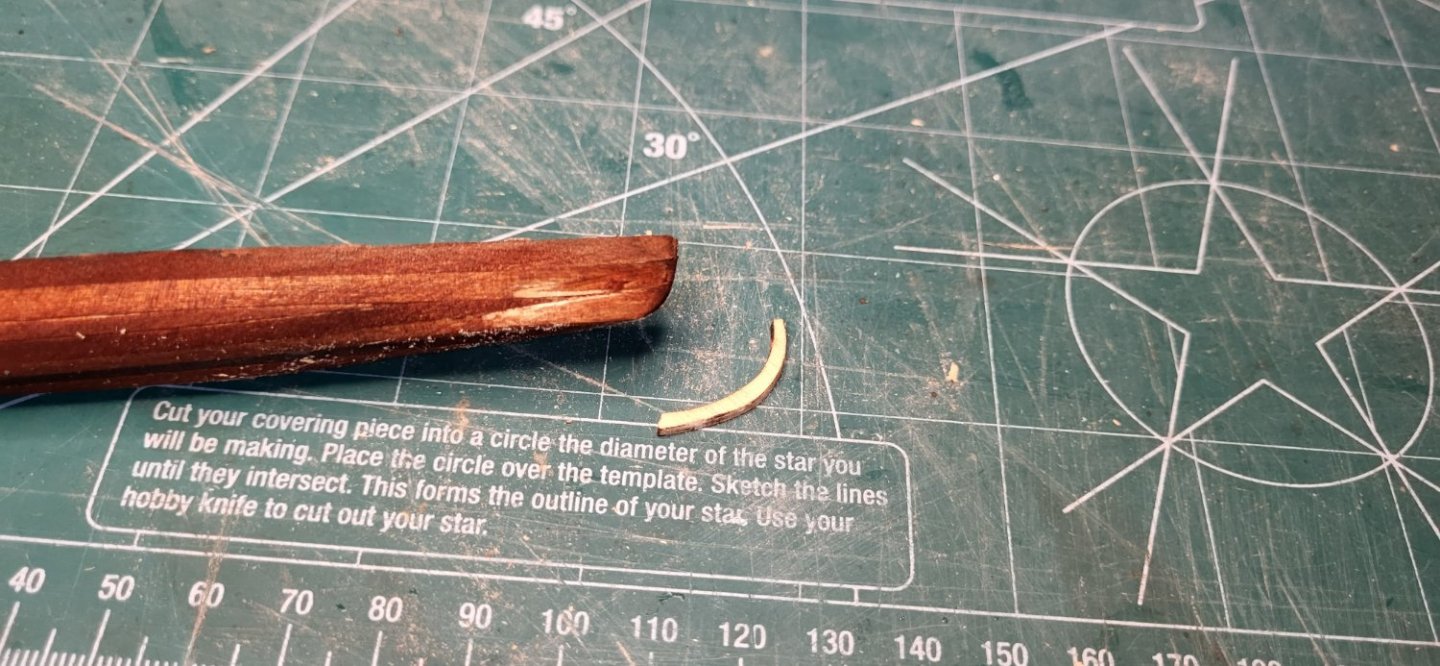
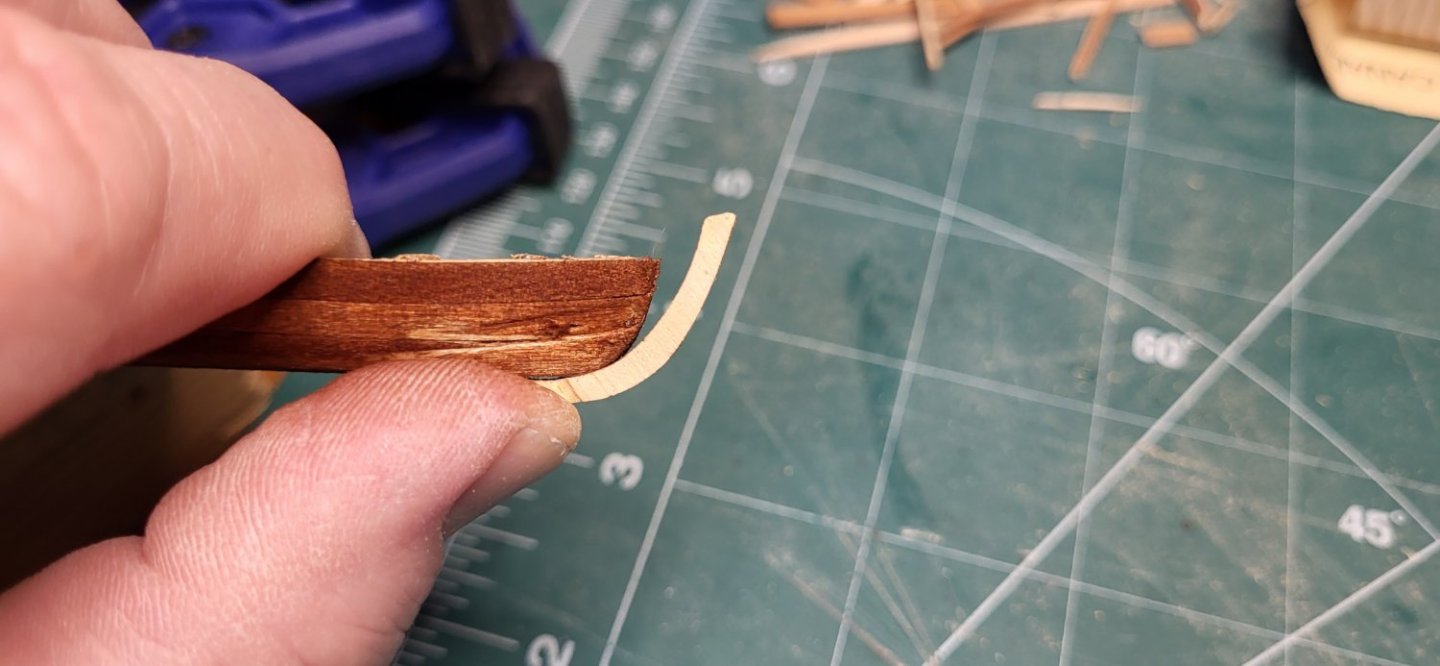
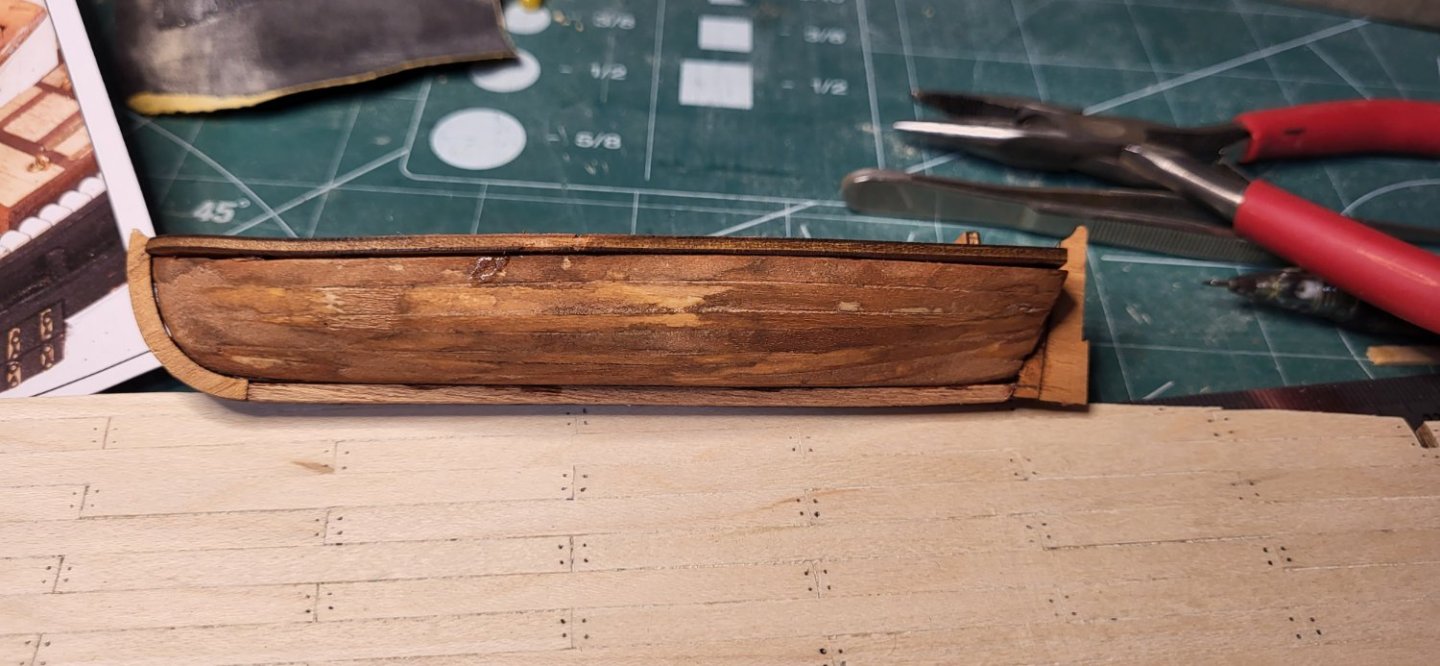
Finally: an update! - And a question.... So, here's the my "K" boat launch (for you non-Beagle builders, that's the first of four launches for the kit, with instructions for it on page "K"). I was very happy with the fact that it was to be painted white, as I really did a crappy job on the hull. 😉 The bottom launch I call "Little Guy" I'm in the process of working on launches B and C (my personal designations) on page L. I started on B, but got a little too gung-ho on clamping it and broke a few of the "ribs", so I took a breath, glued those back into the (mostly) correct positions and started on launch C, which is pretty similar to B. I finished the keel, ribs and planking on C. Pretty happy with how it came out: However, when I moved on to the bottom of the launch I cut out the parts for the rudder and the part in the front that curves up from the keel to the top of the hull. I'm sorely lacking in my period-ship terminology (despite the fact that I served 5 years on a US Destroyer), so here's a picture of the part: Here's the question that I mentioned at the beginning of my post: As you can see from these pics: ... that part doesn't fit against the hull very well at all. The two pics have the part flipped around, so it doesn't fit right in either direction. The only thing that I can think of to do is to file the heck out of the hull and the keel part until the part fits. Any suggestions other than my plan would be greatly appreciated! --------------------------------------------------------------------------------------------------------------------------- Oh, and I have a beef about editing emoticons in this forum on my phone: why can't I get rid of this emoticon? 😄 --------------------------------------------------------------------------------------------------------------------------- I switched to my computer and left the above Mods, am I the only one with this issue? On my phone I was completely unable to delete that emoticon. I got on my computer and was able to select and delete it no problem.


-
Completely agree! 😉
-
Hey, Allan Thanks so much for the info and tips. It is indeed a kit instruction: I'm totally fine with going with what the kit says. Although historical accuracy is very important to many here, I just like the hobby for the enjoyment that I get out of the process of building them and the sense of accomplishment that I get while the model is being built and, of course, the final outcome. I'm sure that eventually I'll graduate to the "dark side" - but only if I enjoy it! 😉

-
Subtle difference indeed! Thanks for pointing that out, Chimp.
-
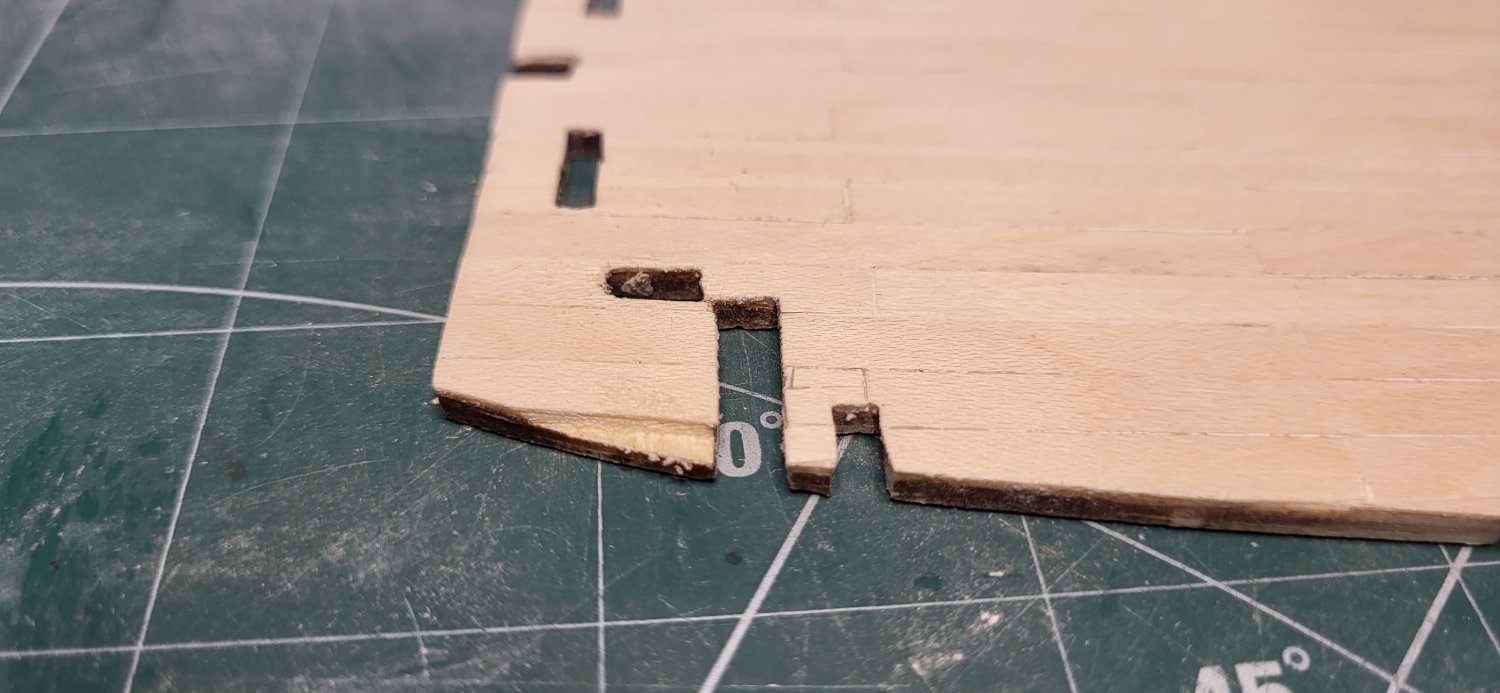
After going through the plans to try to determine if the launch on page "K" was supposed to be painted white, as is the launch on that same page, I decided to go ahead and paint its hull white. So I moved on to the launches on page "L". The first one (L1 through L12) was a pretty simple to put together the keel and "bulkheads". I left that one and moved on to the next one, L13 through L28, but I'm having a heck of a time figuring out which end of the keel is the front and which is the back. It looks completely symmetrical to me. I can tell that the "bulkheads" from fore to aft are slightly different, but I don't see any difference in the keel between the fore and aft.
-
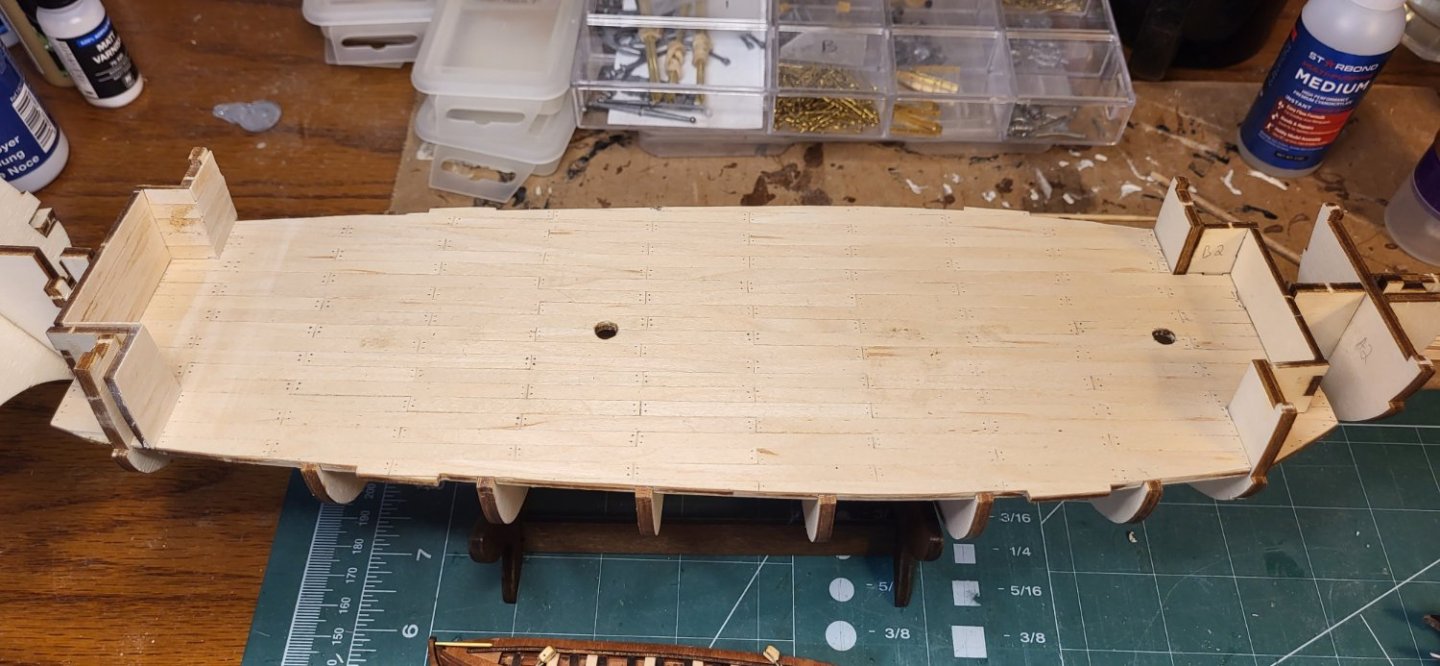
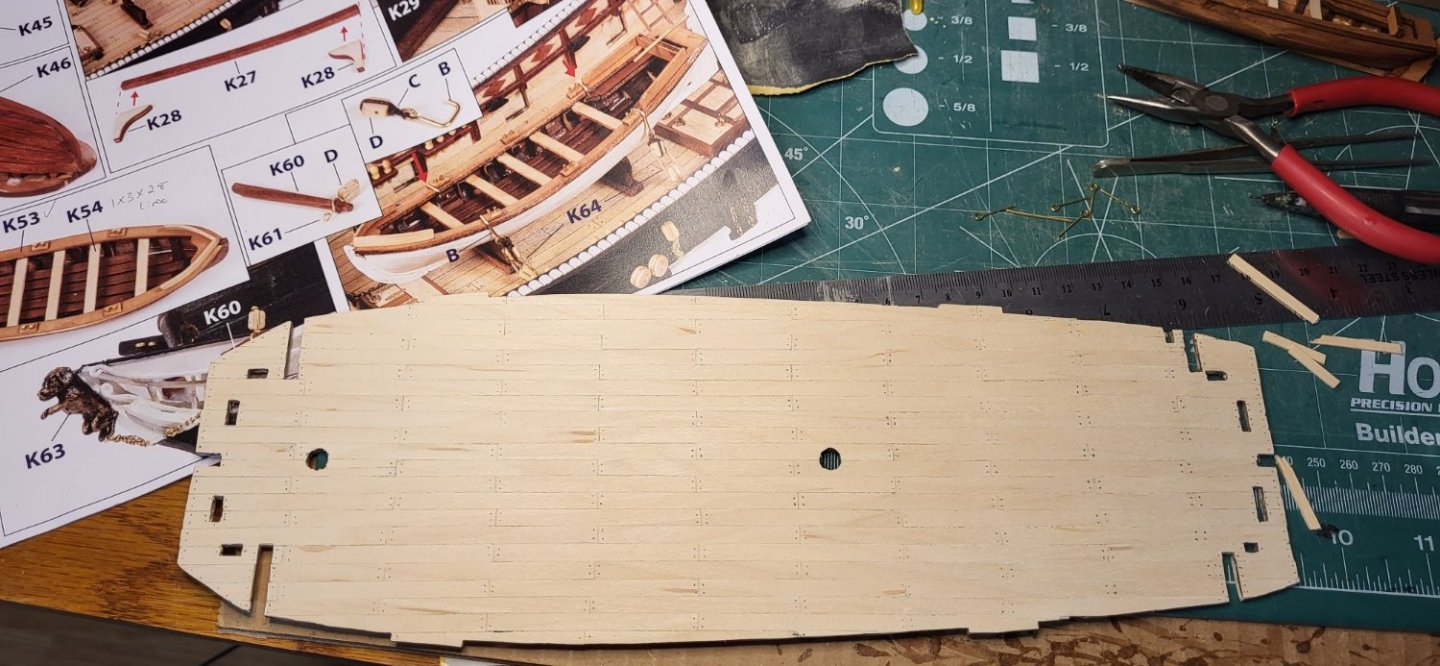
So, here's what I ended up doing with the deck: I'm happy with it. I lined the ends of the planks and pressed light dots for the nails and then sanded the deck to "mute" the dark color of the HB pencil I used. Probably for my next project I'll look into the patterns actually used back then. I've seen lots of discussions about "5-4-3-2-1" (or some such) patterns discussed here about deck planking but I didn't want to get into such details for my second project. So, for you Beagle builders, I've been working on the launch on page K. There's a launch on that same page in the lower right of the page that looks a lot like the launch in the rest of the instructions on that page. Its hull is painted white. Is that to indicate that the launch on that page (K) should be painted white? I hope so, 'cause here's how mine turned out: Pretty crappy-looking hull, if I do say so myself. A bunch of lessons learned building that one! The differences in coloration are mainly due to the fact that I used wood filler, which (obviously) didn't stain the same as the wood.
-
I started outlining the deck planks and placing "nails" with pencil and I'm just not sure if I should continue with this method. Take a look: I don't have the steadiest hand and I'm just questioning if there's another method to do this or if I should just abandon the ouining of the planks and nails. At this point it wouldn't be too difficult to remove what I've done with an eraser and some sanding. Any suggestions would be greatly appreciated!
-
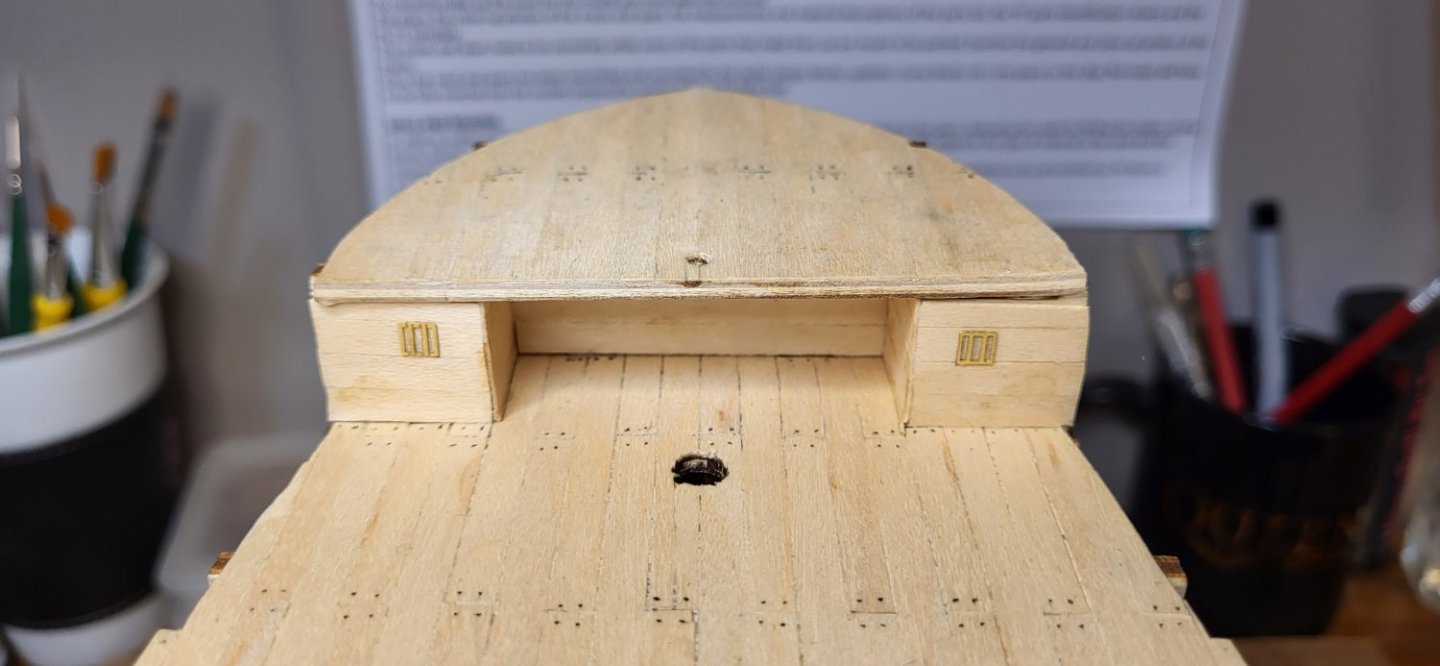
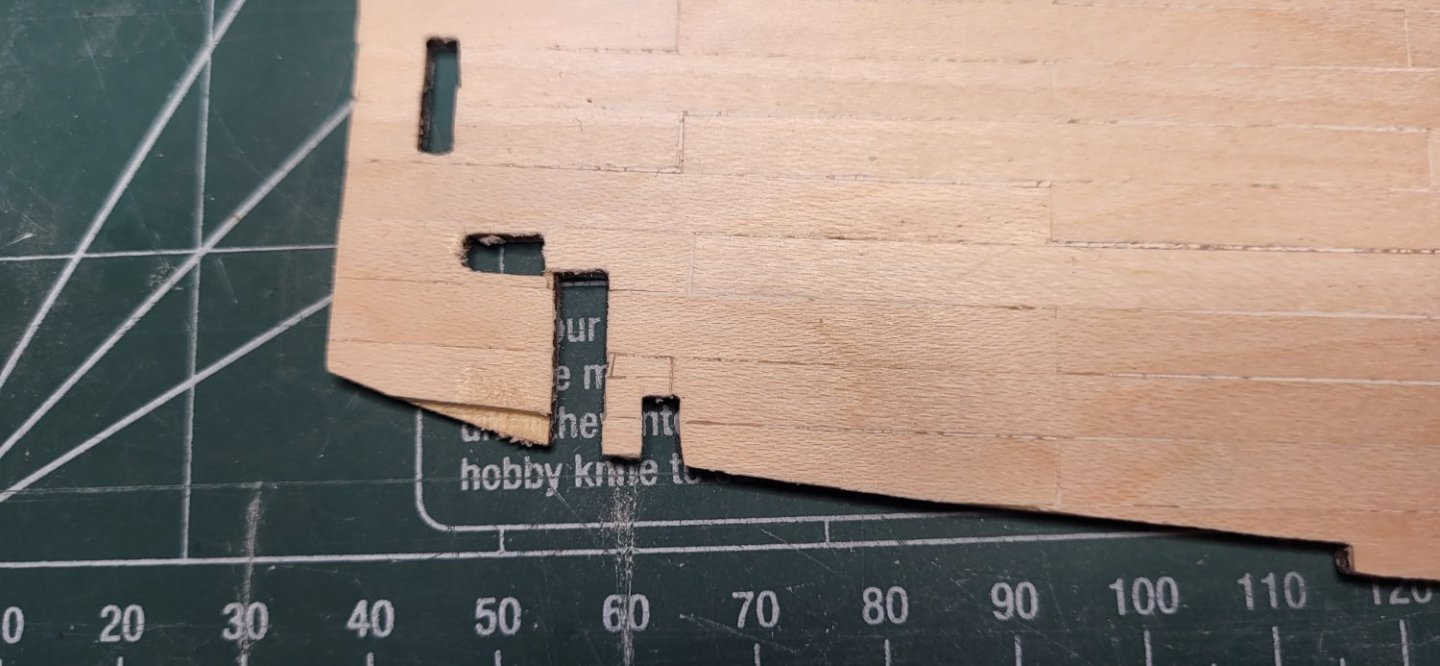
I have a trouble spot that I have a question about: The little triangle of deck planking in the below pictures is only 2mm at its widest on the right and 12mm long. I'm having a heck of a time gluing a tiny plank piece there and getting it to stay. I took a look at future steps in the plans and it looks like the after superstructure will cover it anyway, but I wanted to ask and make sure before I continue on... Looking at page B of the plans, it looks like the aft superstructure does cover that part of the main deck, but I wanted to make sure...

-
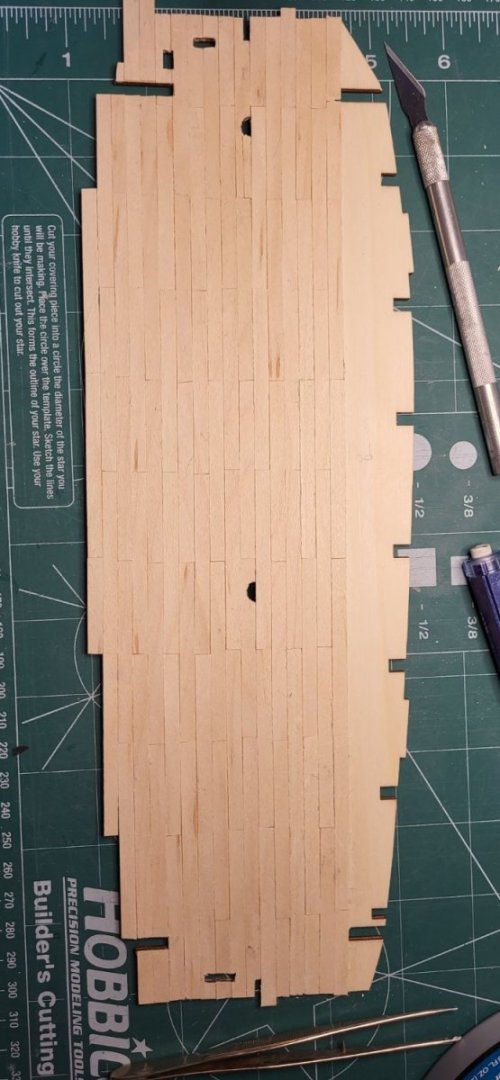
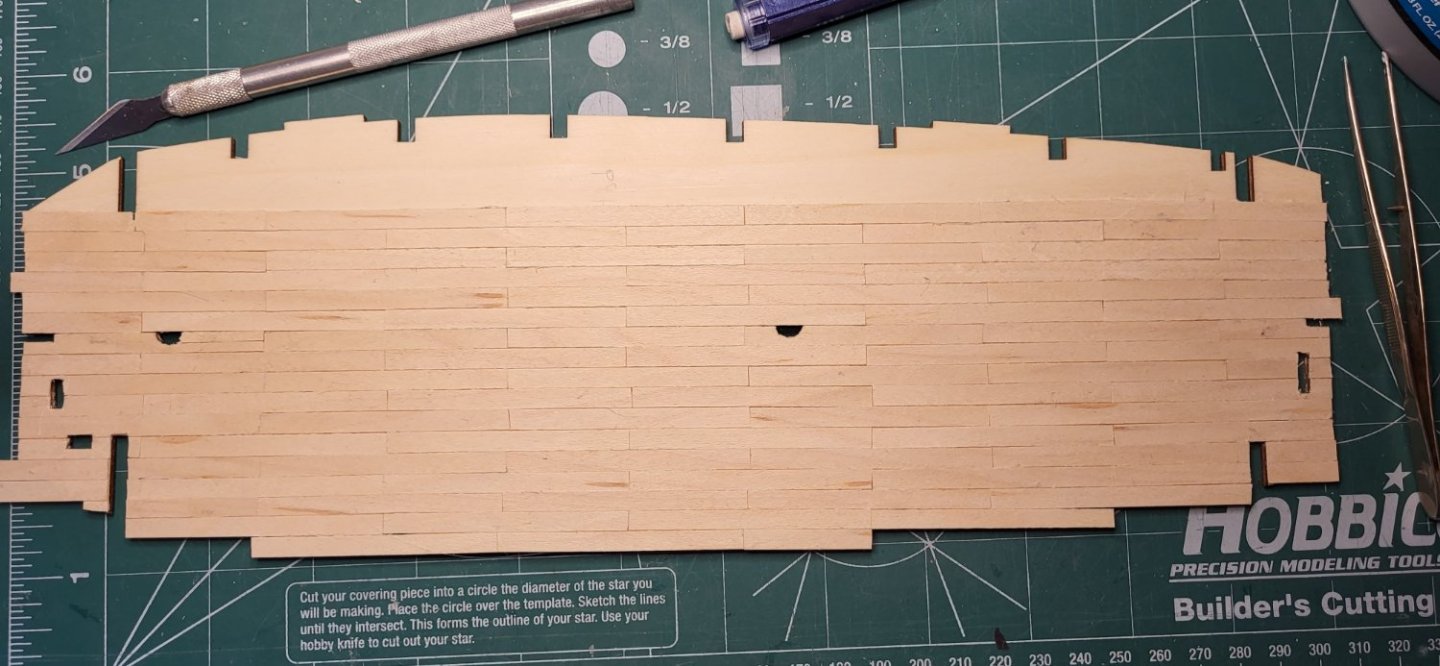
Couple of brief updates on my progress: Planking is done and ready to trim the excess on the edges. The underside of the deck, indicating what to trim and what not to. Trimmed and in the process of sanding. After sanding I'm going to fill the inevitable gaps with wood filler, line the planks and "nails" with a pencil, and then seal with the satin varnish that was included with OcCre's Beagle paint kit.


-
I've just been using the PVA glue that I included in a picture I posted earlier in this log. Thanks for the tip, Ross. I'll look into it.
-
No, actually, I haven't watched them yet. Although I'm pretty early in my build. But I'm sure as I progress, I'll have questions about how to do something, etc, and I'm sure the videos will come in handy then. I've heard good things about the videos.
-
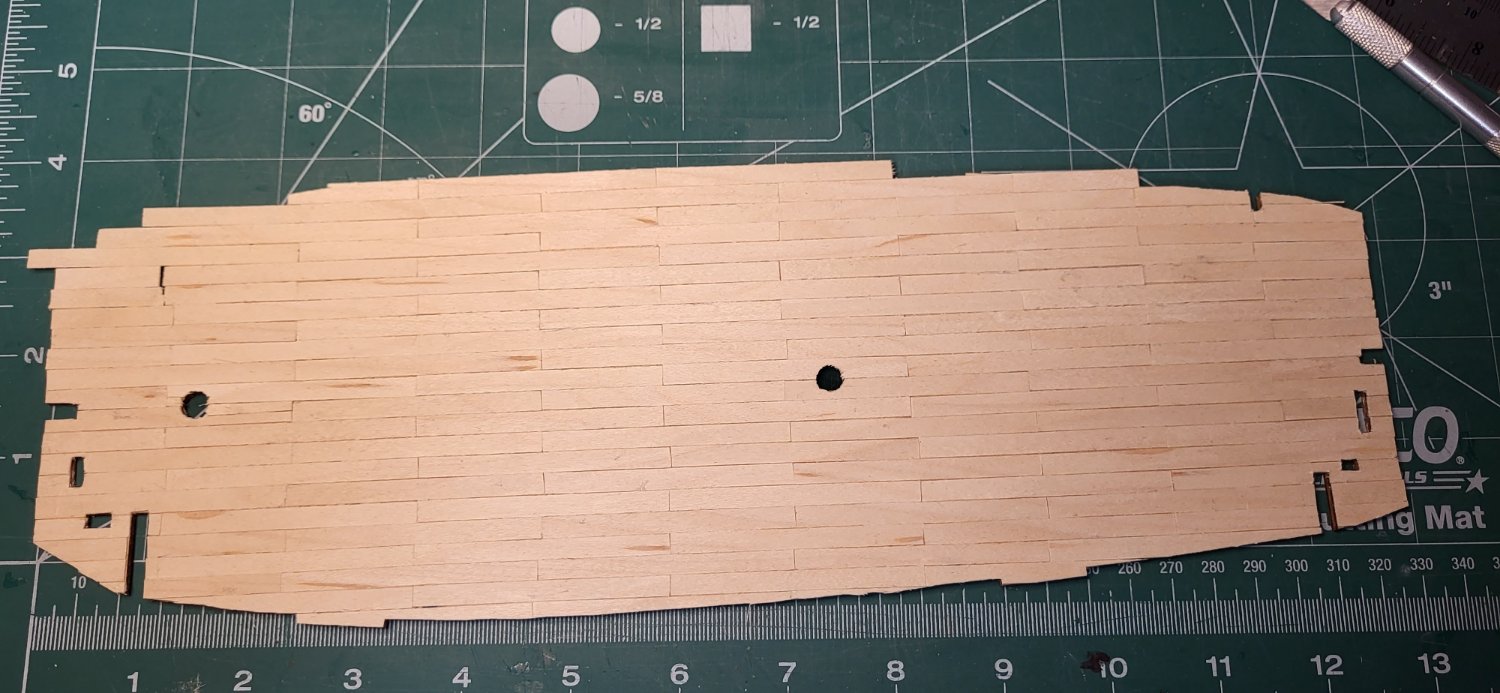
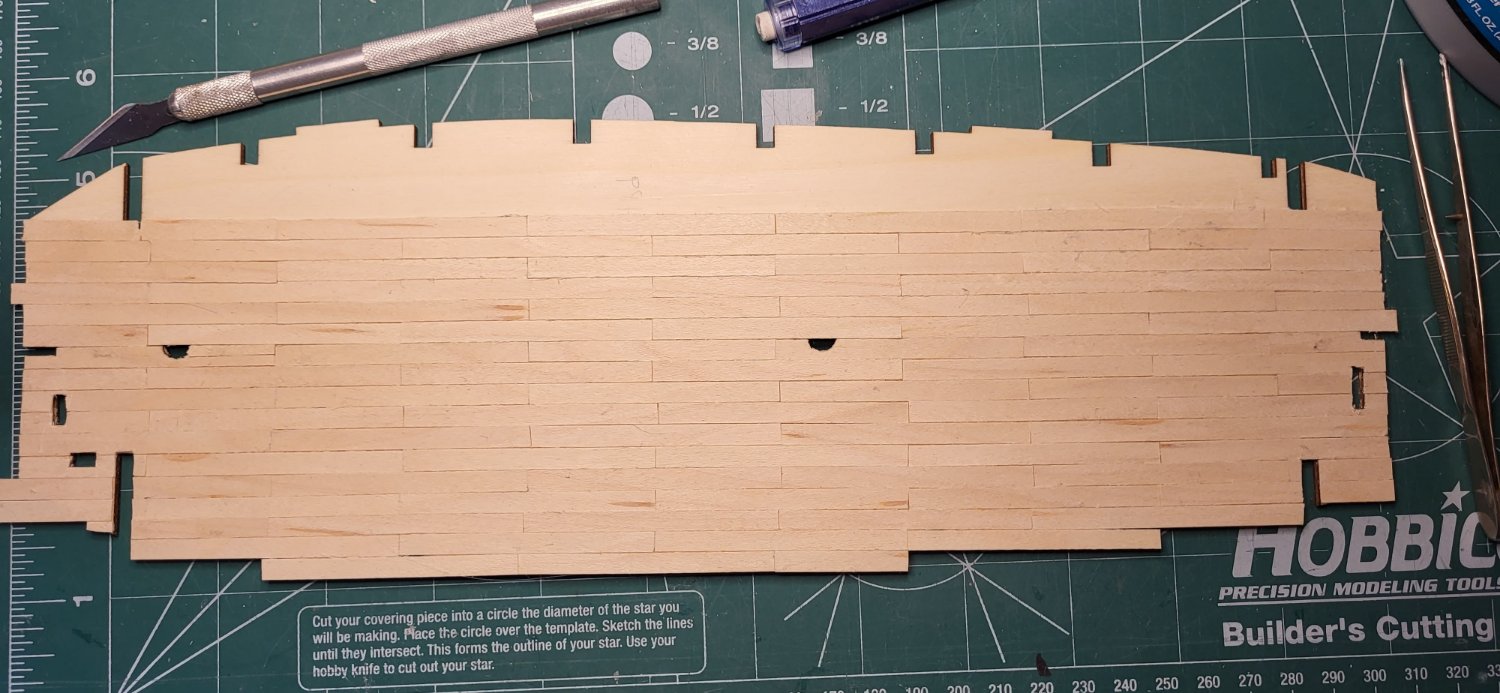
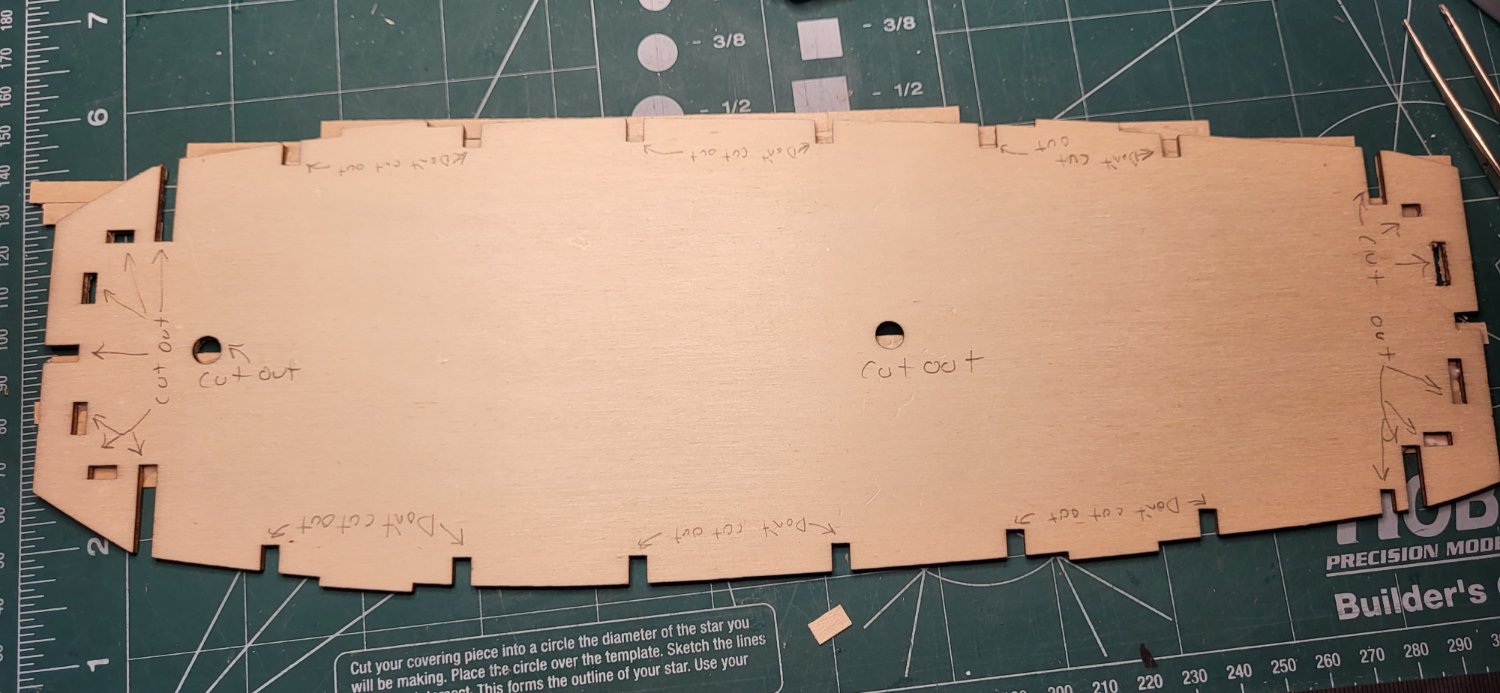
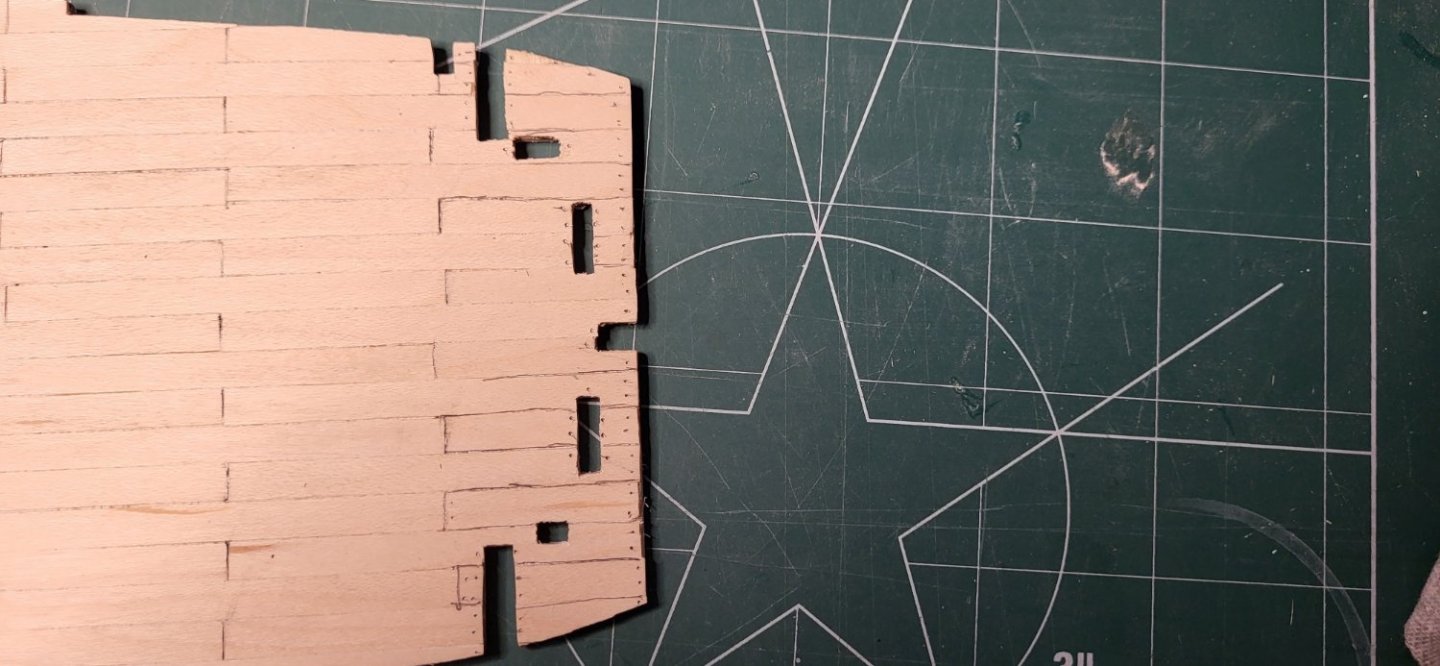
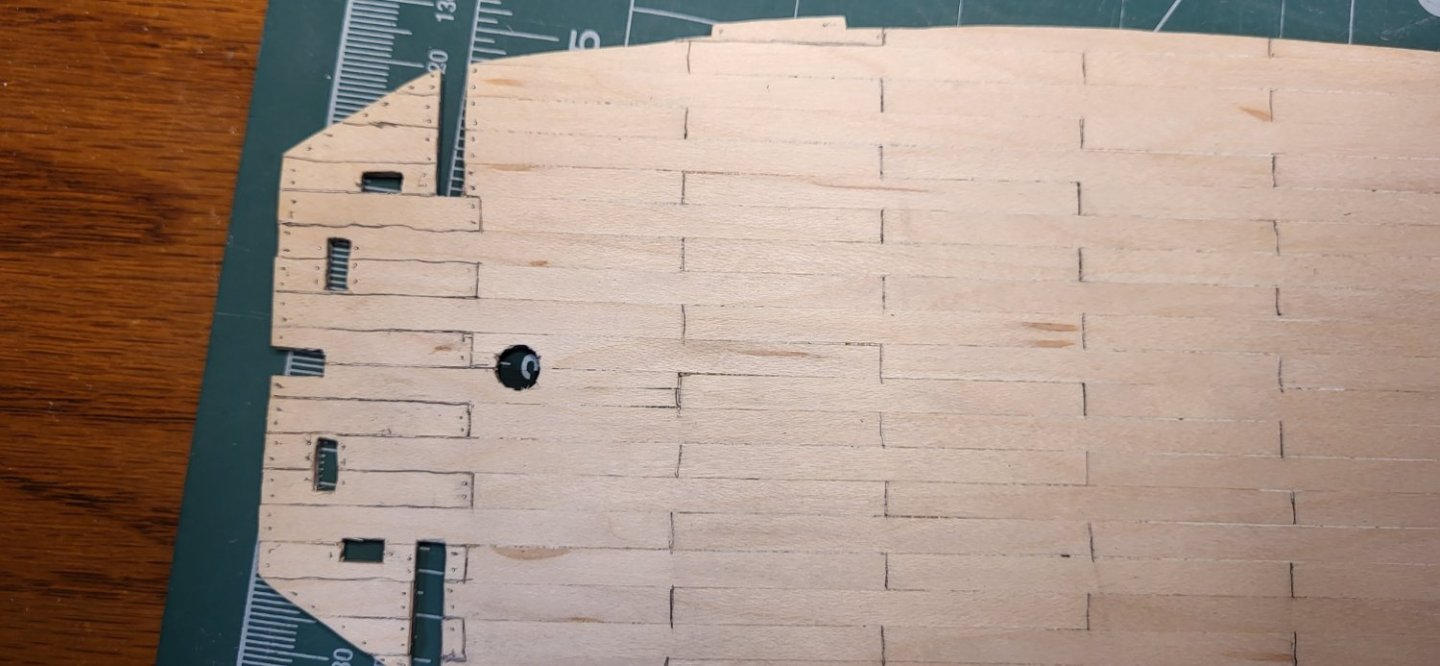
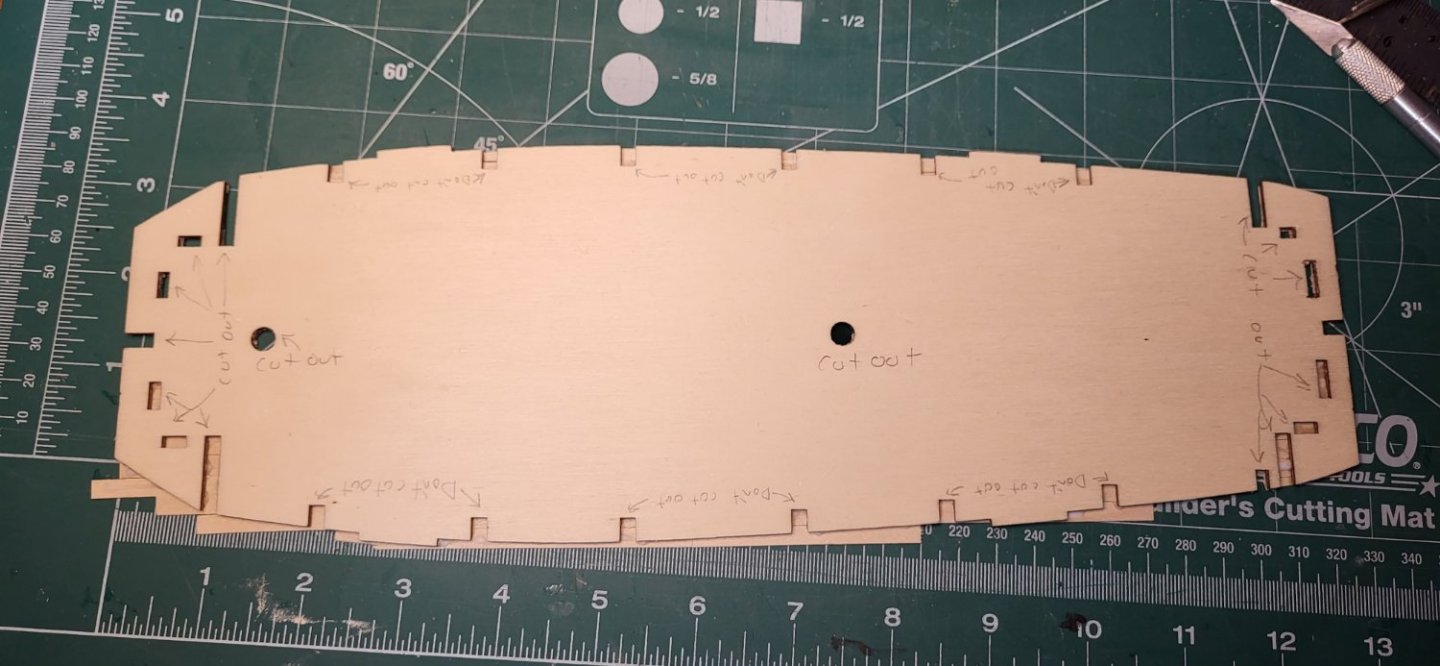
Love the conversations going on here! Thanks everyone for your input and continued encouragement, support and advice! So I'm nearly finished with the planking the deck: (God, I wish I could figure out how to orient my photos in here on my phone, which is where I do most of my posts - sorry for the portrait alignment) Anyway, as I was planking the deck, I realized that some of the notches cut out in the deck do not need to be cut out, so I marked those on the underside of the deck: As you can see I decided to mark which notches to cut out and which not to. Some advice for future Beagle builds... Sorry, guys I got those last two images switched around! Dang technology - and I'm a database programmer!! 🙄

-
How could I go against good, loyal Sam?!
-
Looks great, Lucien! Personally, I'm kind of dreading building those launches mainly because they're so darned small and look like they'll be difficult to work with due to the size. But everyone else's Beagle launches have turned out well, so I'm hoping they just look difficult, but won't be once I get started. (Crossing my fingers that I'm right! 😉)
-
So, @Patrick B I scrolled through your log and found this comment by @RobTBay which got me thinking: Does the species of the wood REALLY matter in the end?? I mean, from MY limited and inexperienced point view, isn't it ultimately just the dimensions and color of the wood in question that really matters? Having said that, I know from personal experience that the hardness of the wood matters to some extent. Case in point: while I was sorting out all of the Beagle kit's planks and dowels, one very light-colored and seemingly "loose fibered" (best way I can describe it) piece of 2mm x 2mm very easily broke while I was handling it. So I suppose different types of wood have properties that make them best-suited for different applications in the context of wood model ship building, but do we, as the assemblers of the kits, need to know that detail? I say to the kit manufacturers, "Just accurately describe and indicate in both the plans AND the parts what goes where."