Krupi
-
Posts
46 -
Joined
-
Last visited
Content Type
Profiles
Forums
Gallery
Events
Everything posted by Krupi
-
HMS Beagle by Krupi - OcCre - 1:60
Krupi replied to Krupi's topic in - Kit build logs for subjects built from 1801 - 1850
I think you are right. I might remove quite a bit of it so the effect is toned down -
HMS Beagle by Krupi - OcCre - 1:60
Krupi replied to Krupi's topic in - Kit build logs for subjects built from 1801 - 1850
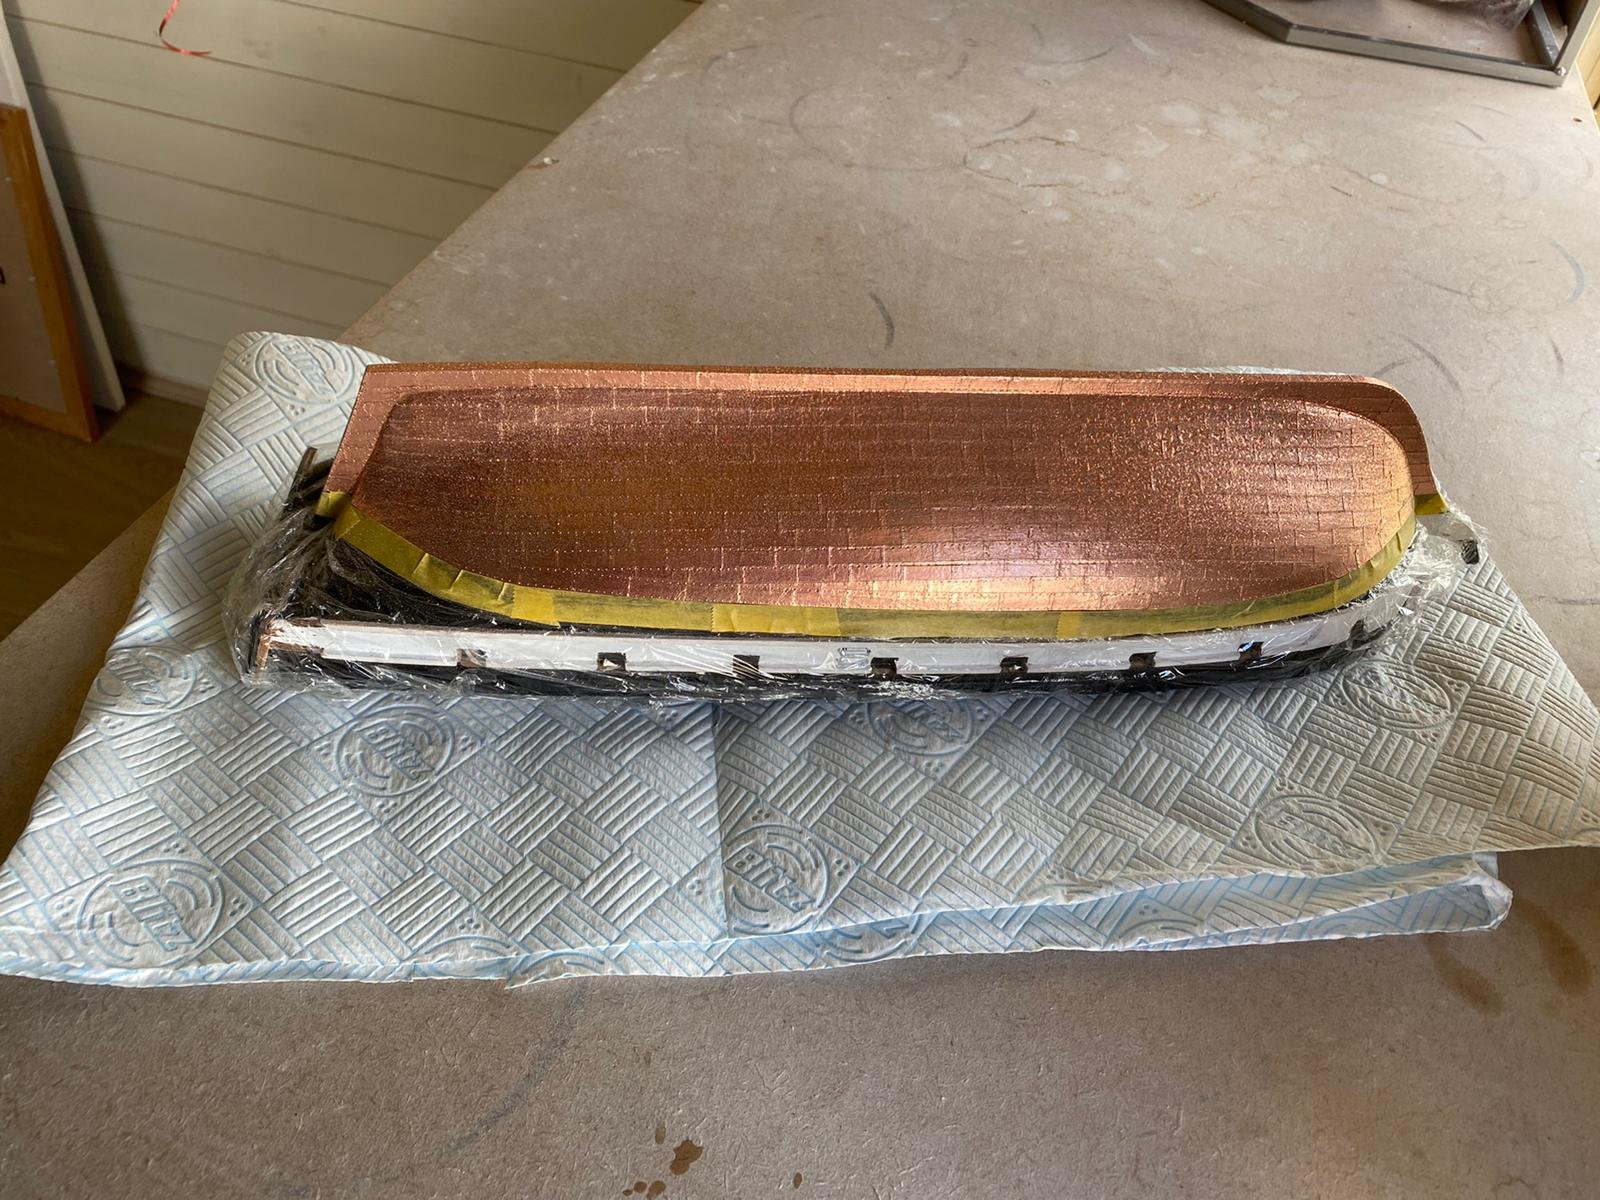
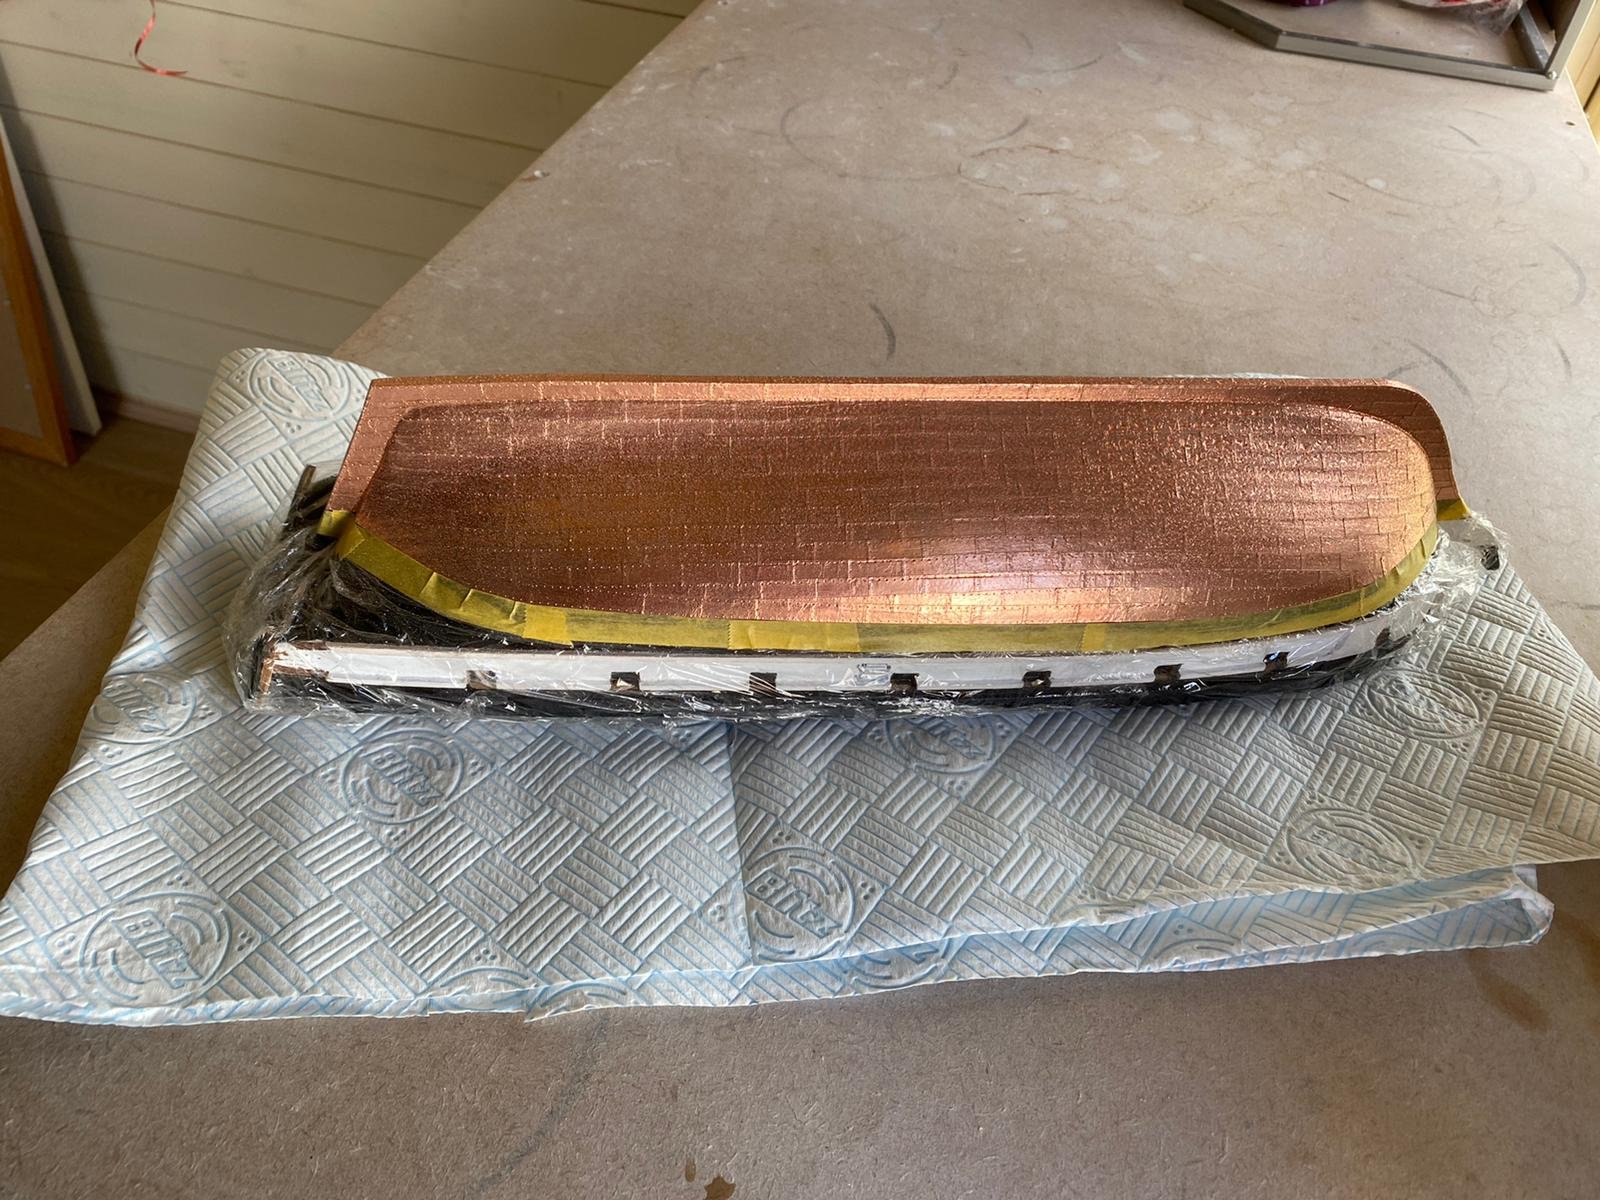
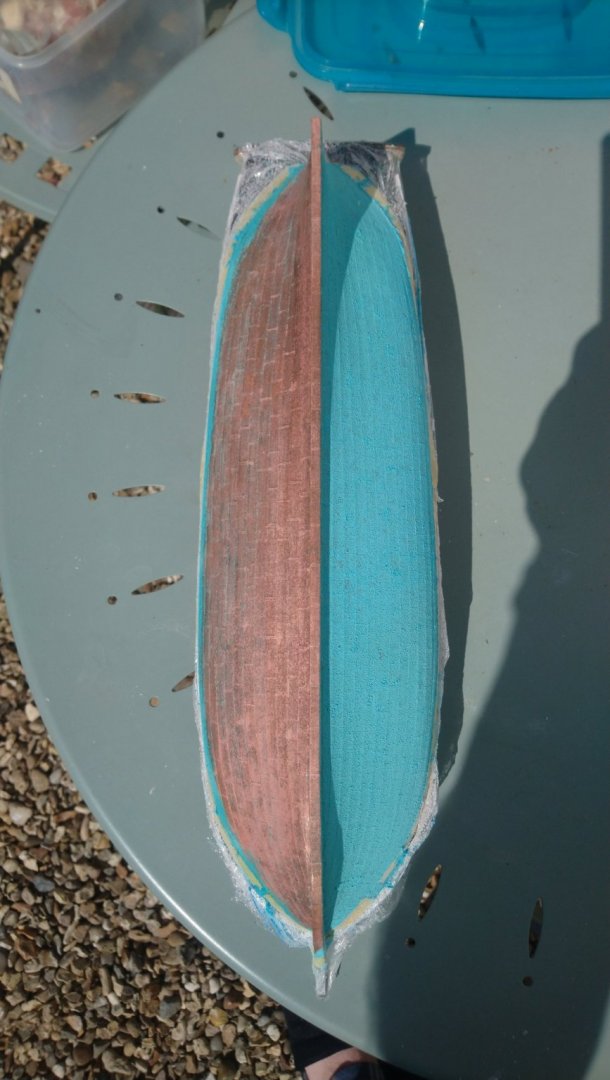
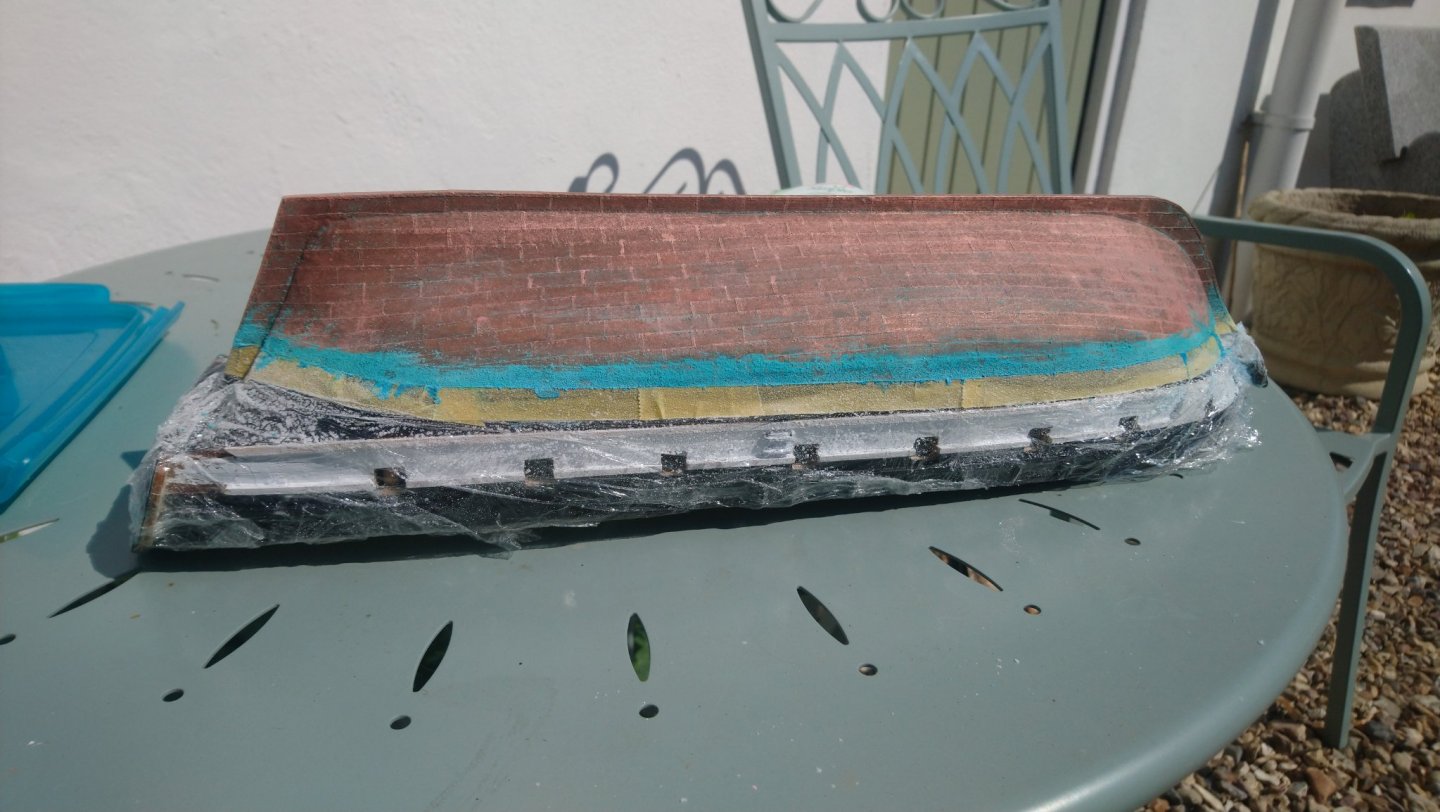
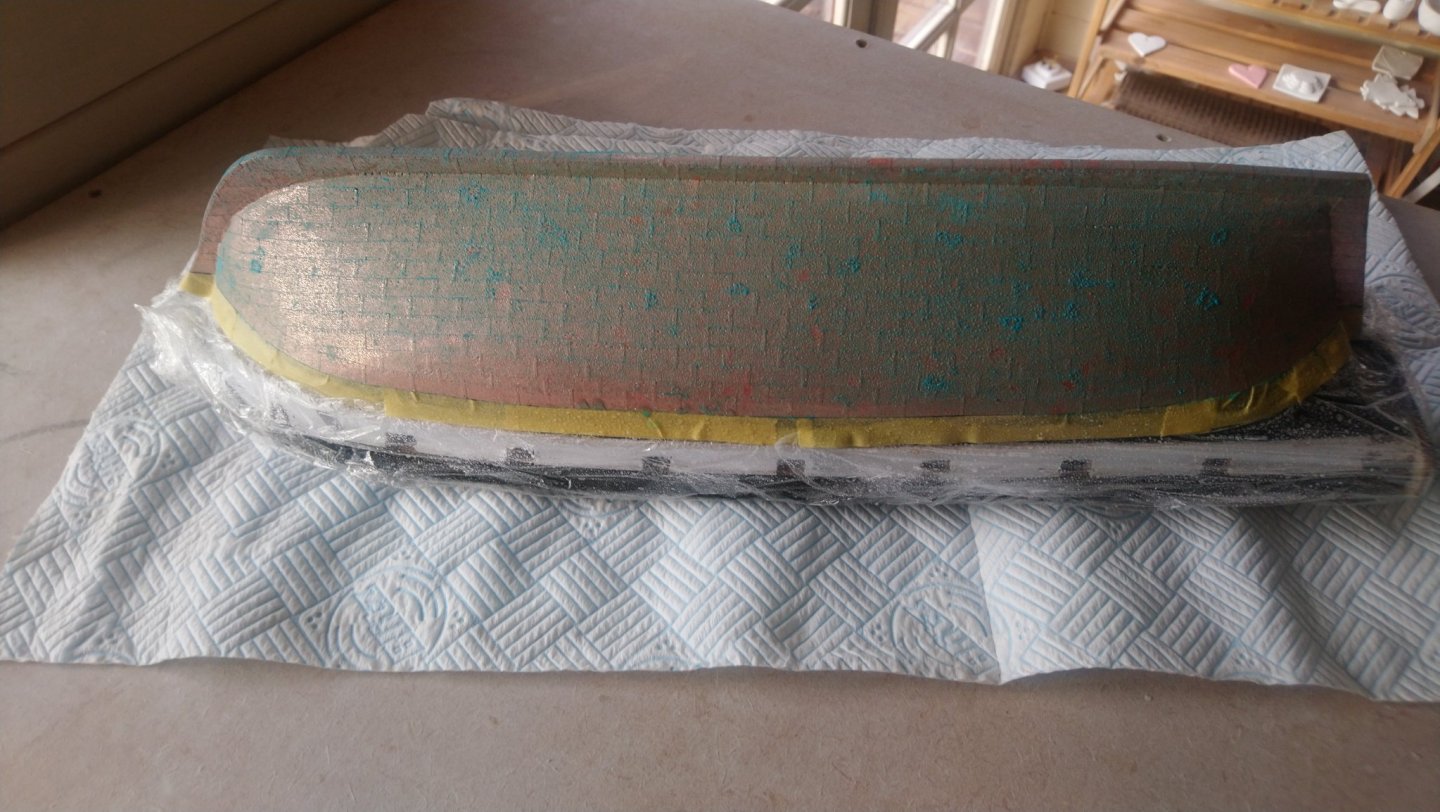
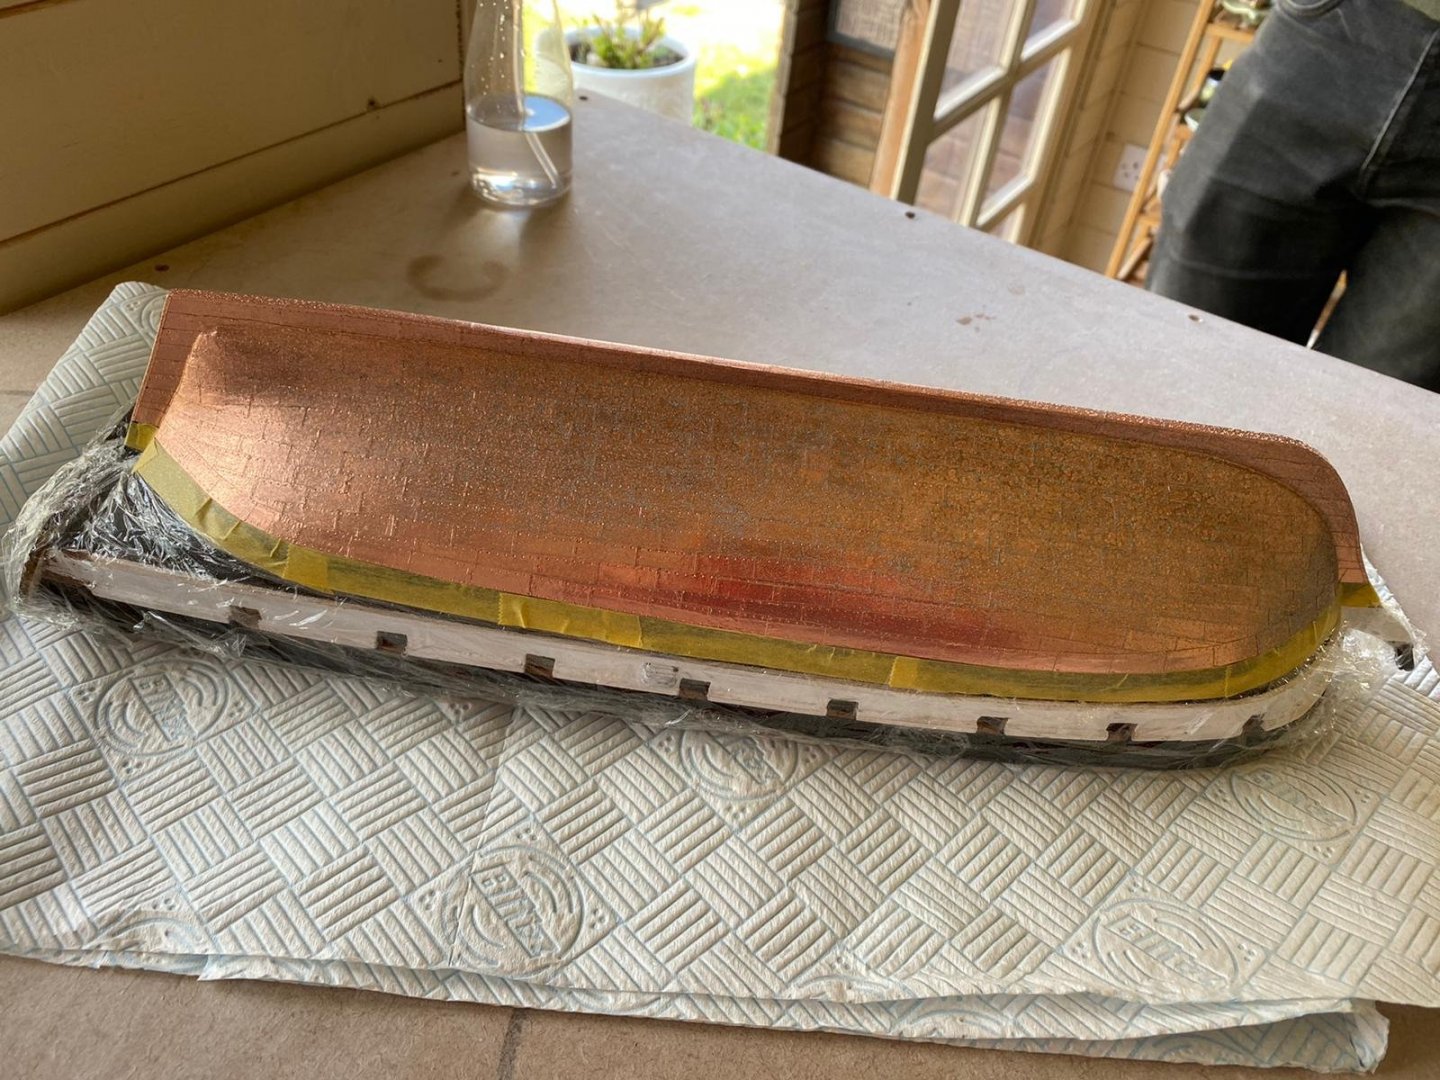
All considered I am really chuffed with the results so far. I have removed the bottom layer with a makeup wipe exposing a lovely worn and brown patina which is shockingly exactly what I was after. Question is now should I leave the top band of green patina. The sealant will reduce the effect somewhat regardless. So thoughts, leave the band or remove entirely what do you chaps think?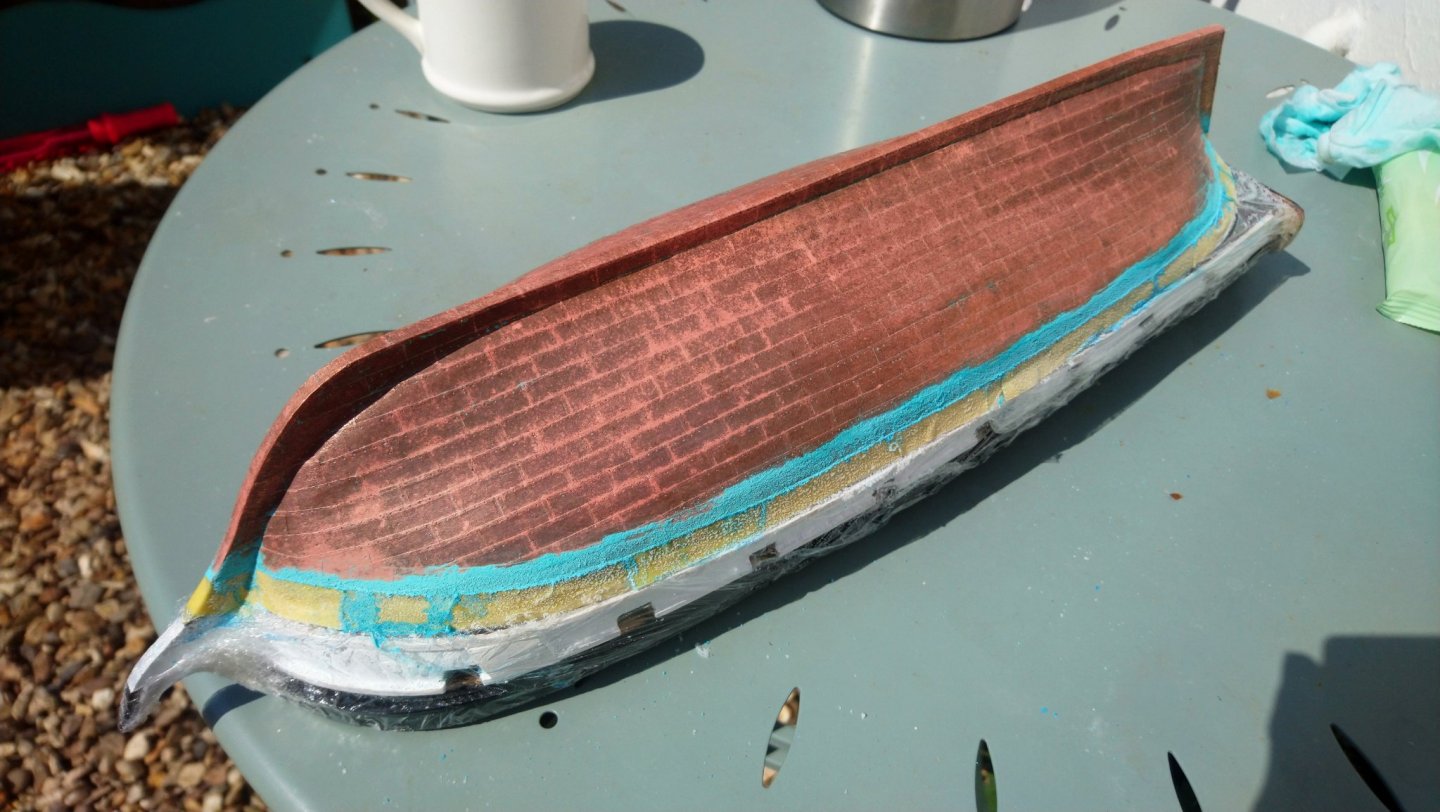
-
HMS Beagle by Krupi - OcCre - 1:60
Krupi replied to Krupi's topic in - Kit build logs for subjects built from 1801 - 1850
Ten hours in and it is looking good, some areas mainly the keel hasn't corroded so much thanks to the vertical position. I am going to leave it overnight and start removing the salt residue tomorrow with any luck by this time tomorrow those areas will have darkened enough for me to apply a layer of sealant.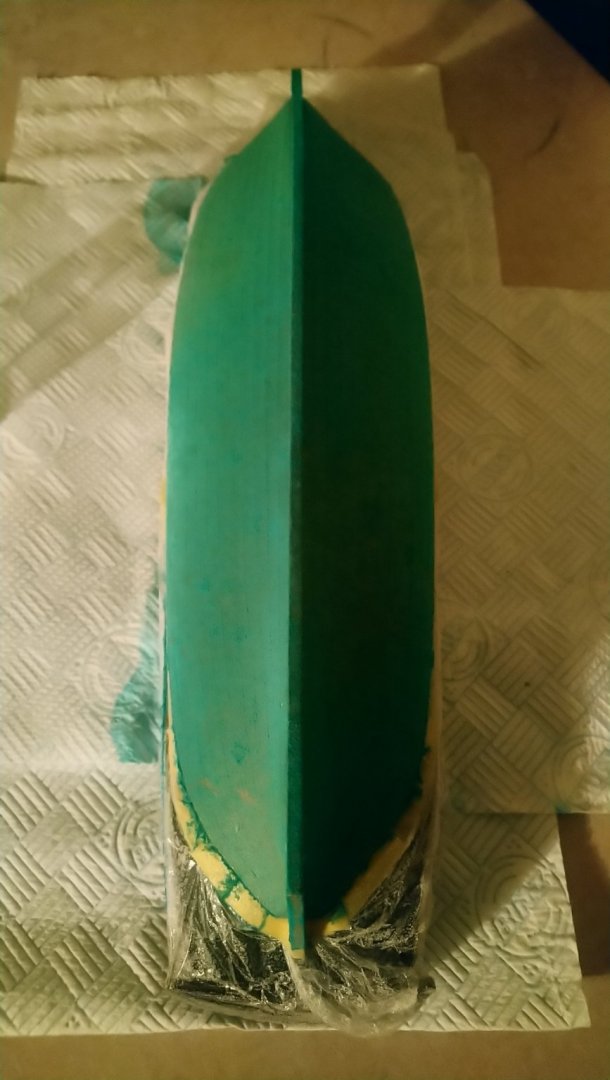
-
HMS Beagle by Krupi - OcCre - 1:60
Krupi replied to Krupi's topic in - Kit build logs for subjects built from 1801 - 1850
Thank you, still a bit worried I will mess it up and have to start again. Slowly does it, with any luck I will be able to put a sealing coat on tomorrow. -
HMS Beagle by Krupi - OcCre - 1:60
Krupi replied to Krupi's topic in - Kit build logs for subjects built from 1801 - 1850
It has been six hours now and I have been misting the hull every hour bar the first three hours and it is coming along nicely. Once the sides have taken the green patina I will gently remove the salt from the bottom which should leave a dark tarnished look.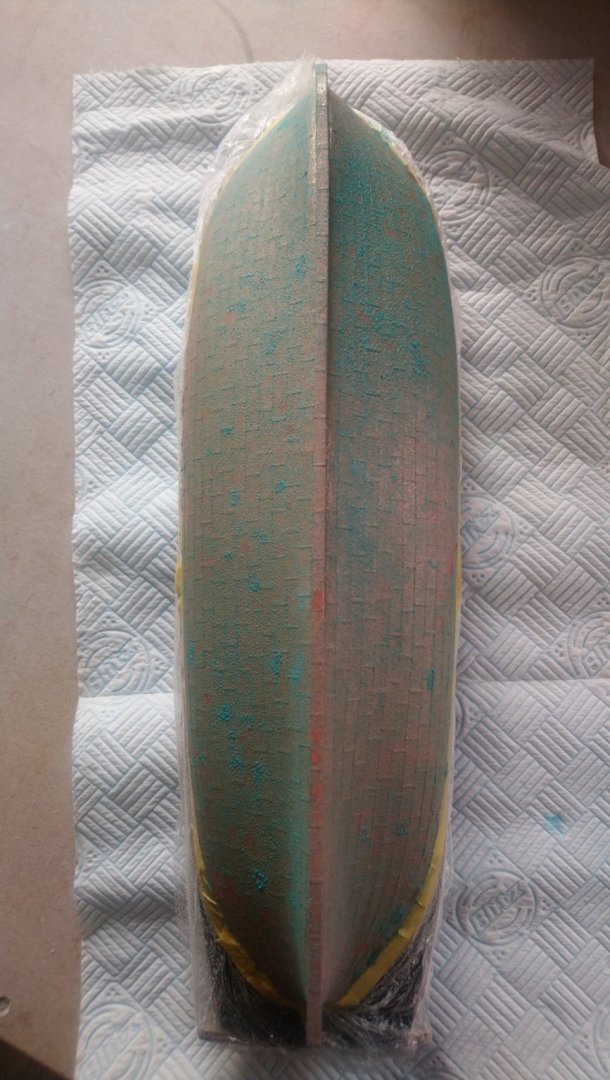
-
HMS Beagle by Krupi - OcCre - 1:60
Krupi replied to Krupi's topic in - Kit build logs for subjects built from 1801 - 1850
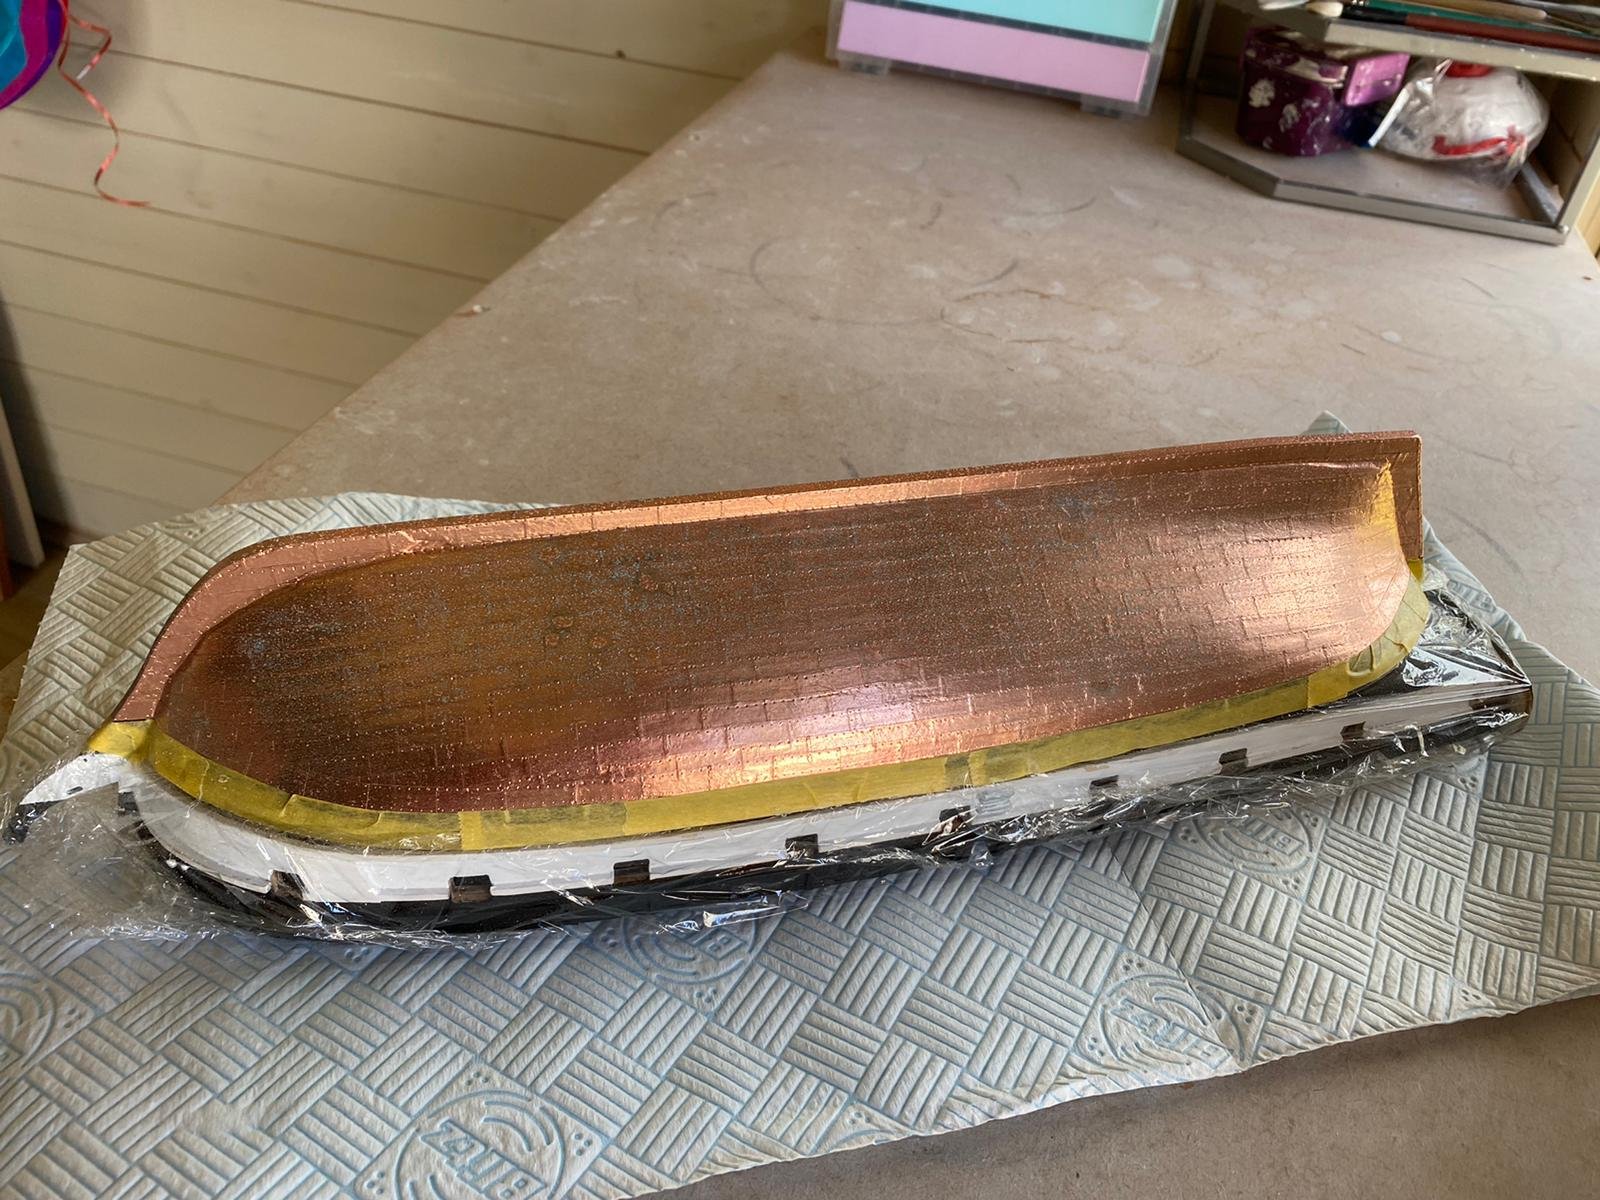
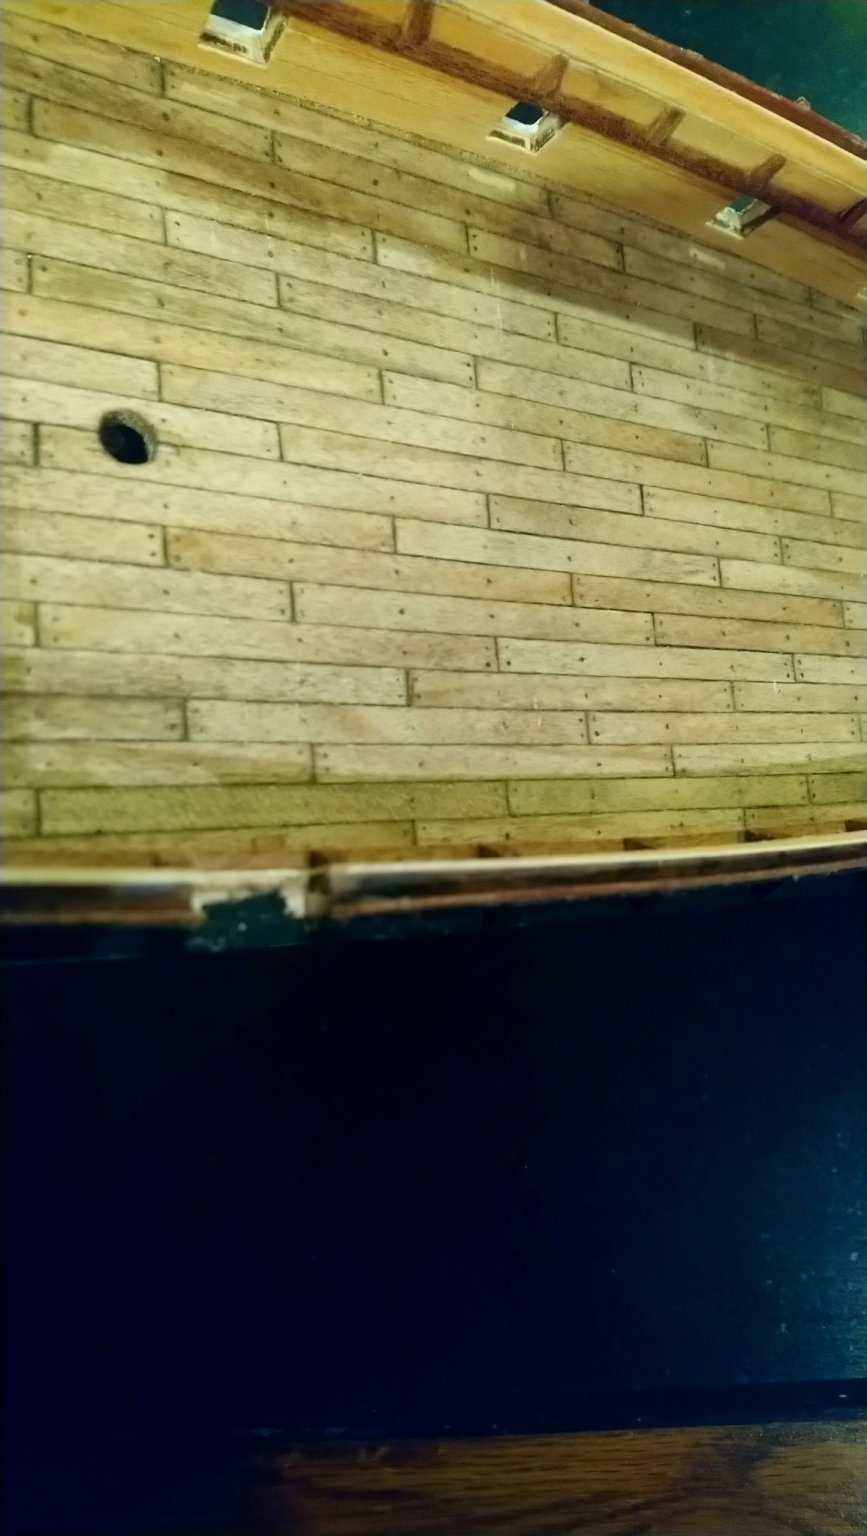
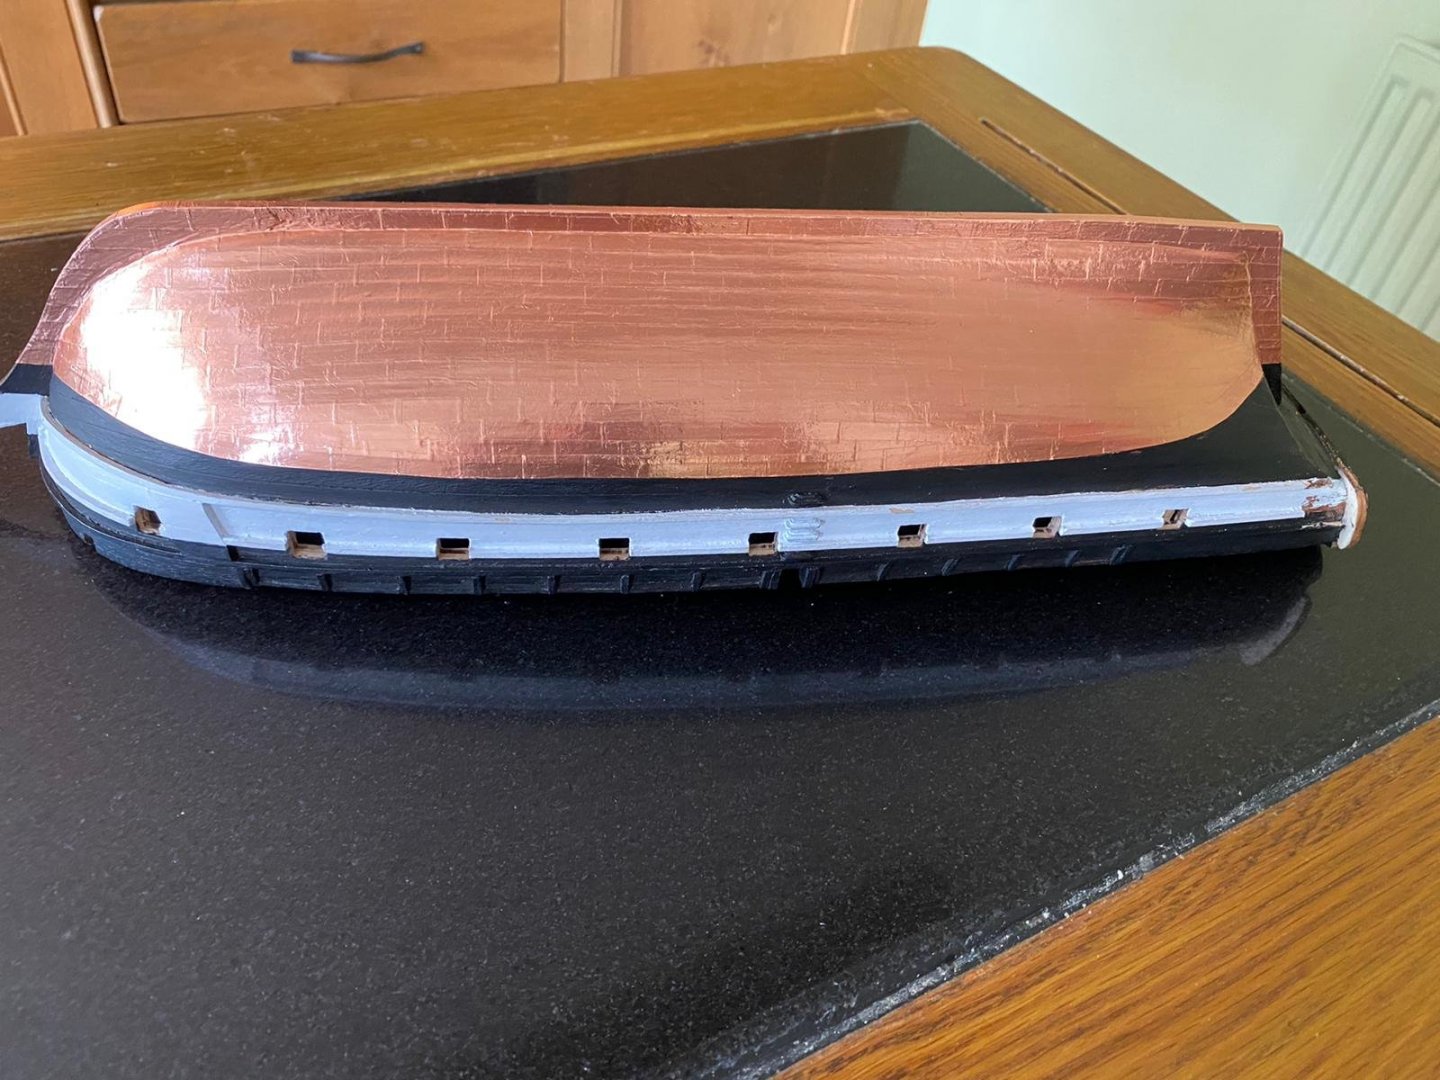
I almost finished the sheathing last night but was one strip short of copper plates, finished it this morning. Before marking After marking Once happy I used cling film and tape to cover the exposed wood and then sprayed/misted the copper with a vinegar and salt solution (roughly 4 parts to 1 respectively) and left the hull in a fairly warm location to aid the reaction. This is hull after 30 minutes, the reaction has started. After about three hours the solution has dried and the reaction is more visible. Time for another misting.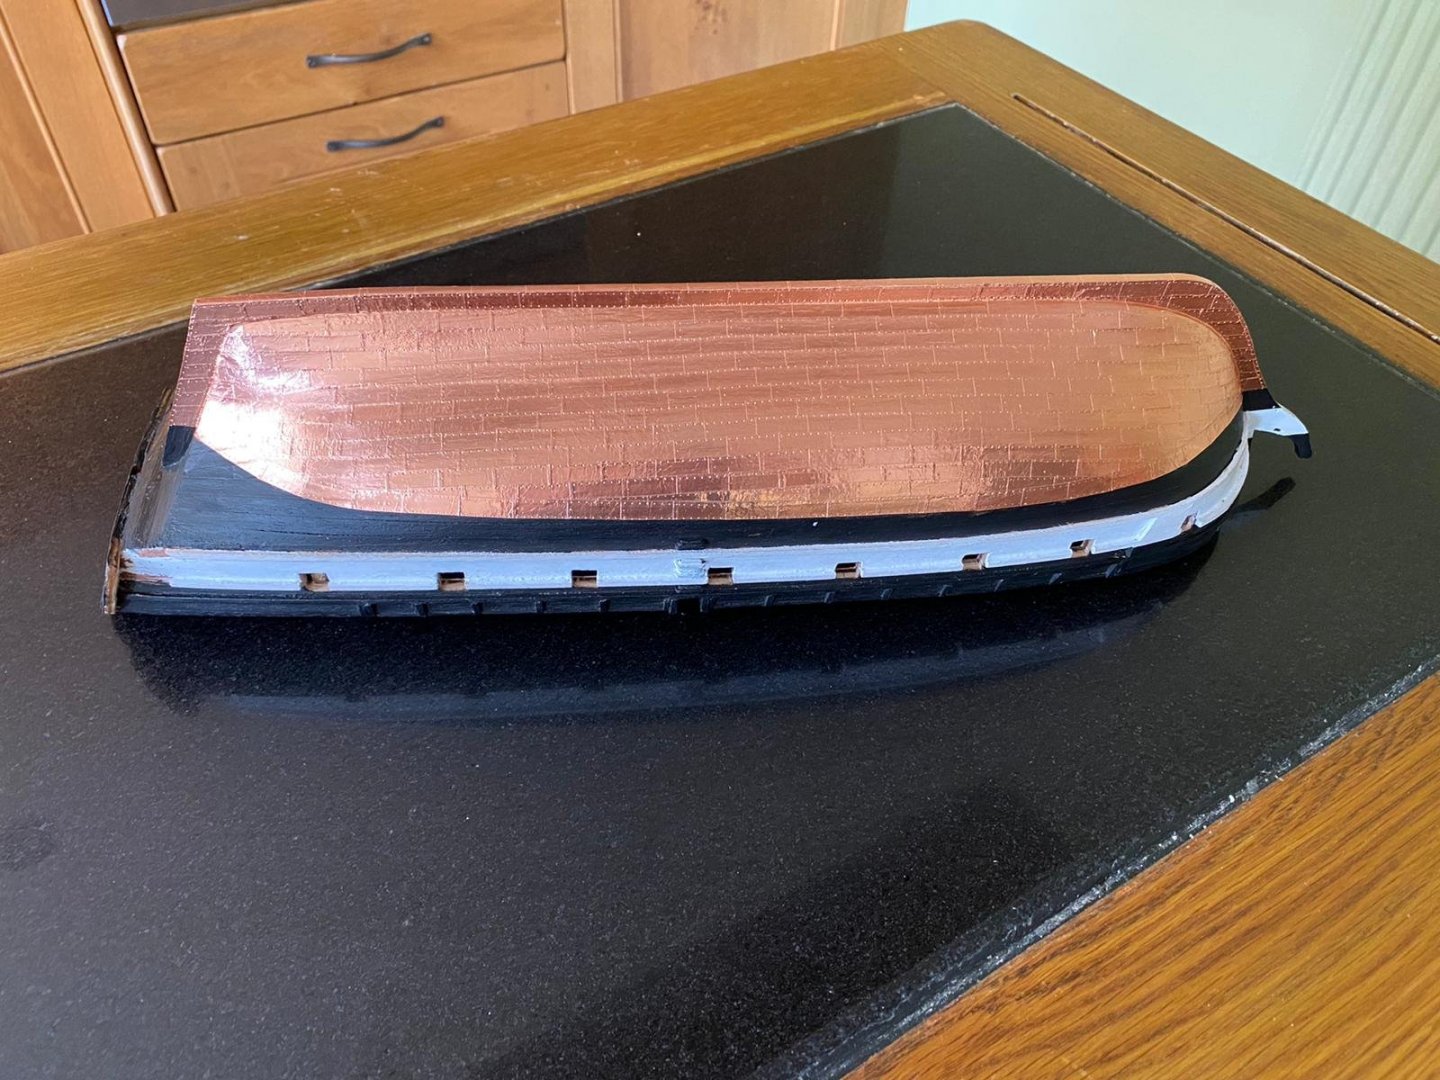


-
HMS Beagle by Krupi - OcCre - 1:60
Krupi replied to Krupi's topic in - Kit build logs for subjects built from 1801 - 1850
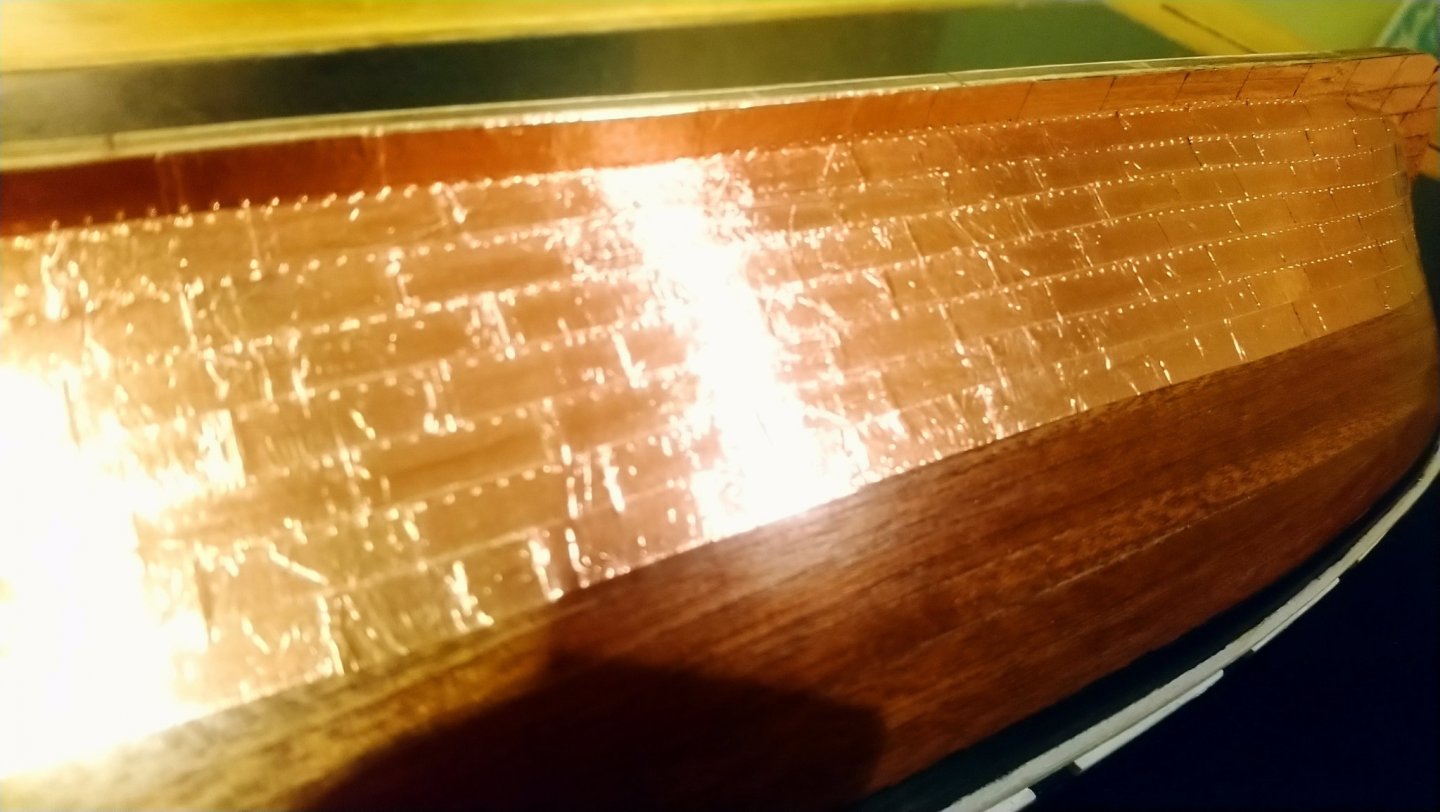
So after running a few experiments I have finally come up with a decent process for the patina. I was then experimenting with rivet heads on the copper strips, I tried making a jig to stamp them in but I didn't like the effect. I purchased a pounce wheel with the thought of running down the strips before attaching them however I have found using the pounce wheel after the copper strips were attached gave the best results and was by far the easiest method.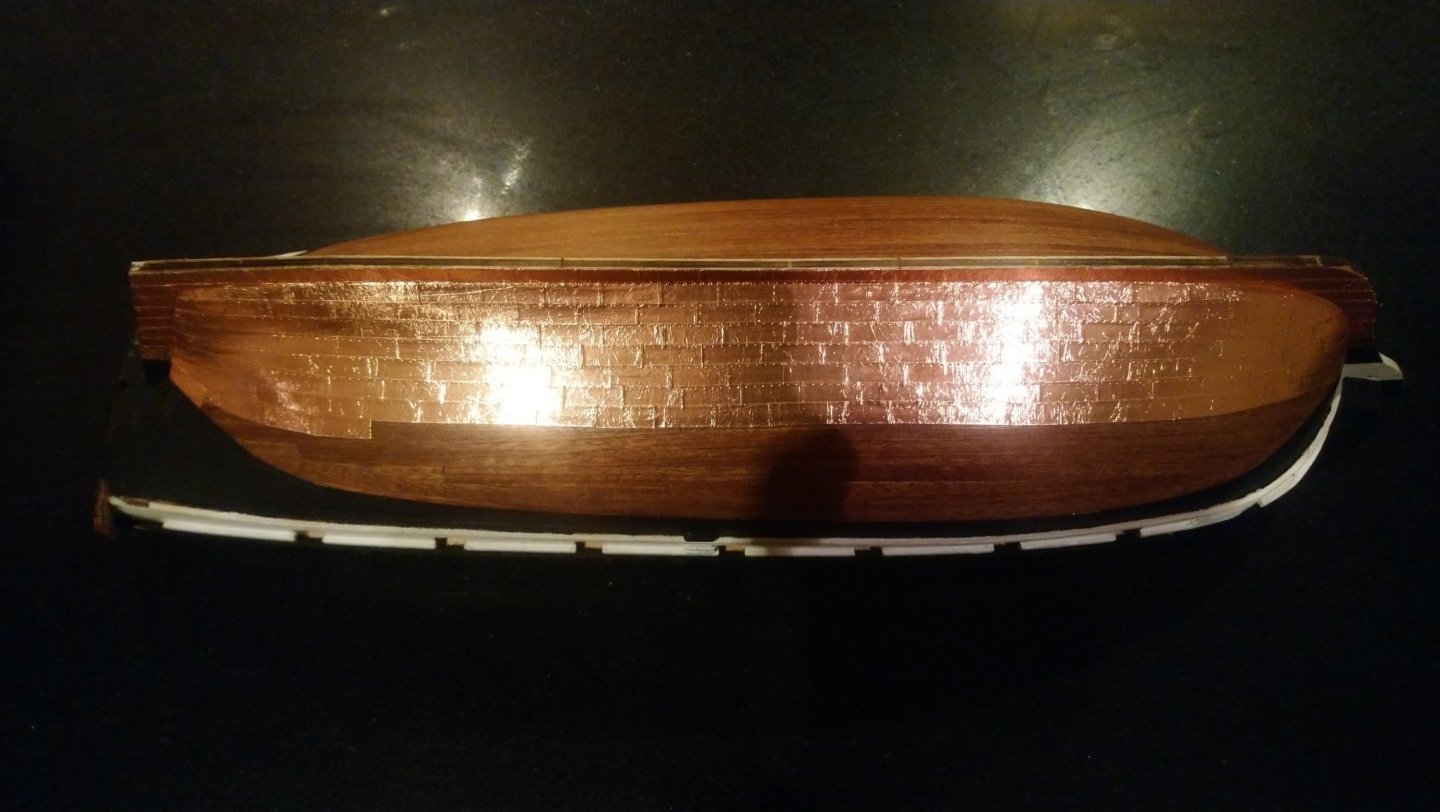
-
HMS Beagle by Krupi - OcCre - 1:60
Krupi replied to Krupi's topic in - Kit build logs for subjects built from 1801 - 1850
The cutty shark technically isn't pure copper plated, by the time they built it Muntz metal was used which is a copper alloy that has a golden colour to it. It is a copper zinc alloy which improved upon the benefits of copper plating and was much cheaper. https://en.m.wikipedia.org/wiki/Muntz_metal -
HMS Beagle by Krupi - OcCre - 1:60
Krupi replied to Krupi's topic in - Kit build logs for subjects built from 1801 - 1850
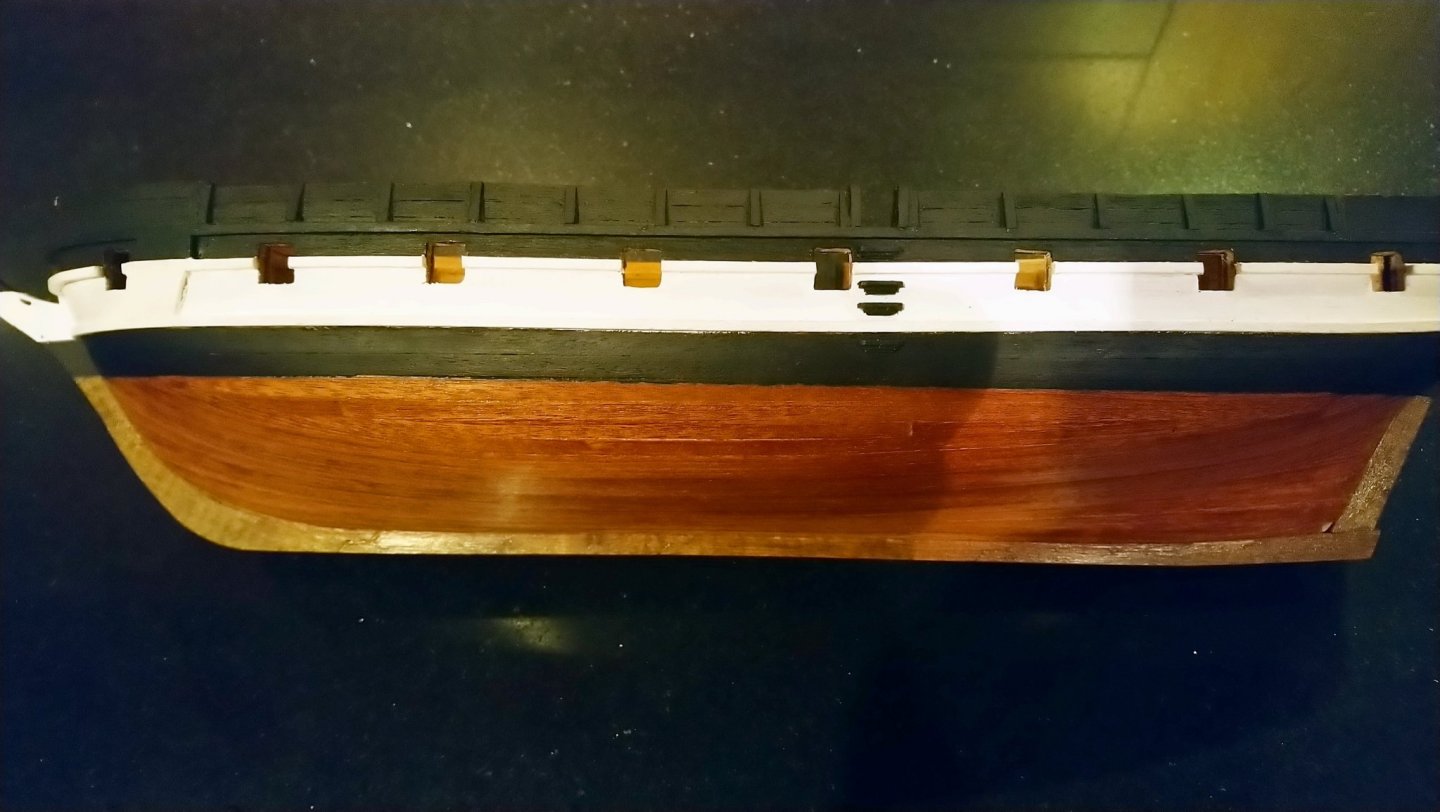
It turns out that the top band of copper plates have been painted with a anti fouling paint hence the video in the dry Dock. I wonder why they don't apply this to the rest of the copper? It seems like the copper has also being quite regularly replaced apparently in 1995 so that is 20 years of corrosion and they didn't replace the copper on the rudder in the 2015 restoration.... So realistic weathering of the hull depends on how old you want the hull to look? I think a band of green along the top and a dull brown for the submerged area would be a realistic depiction. Eventually, thanks to the oxygen in the sea water the whole of the hull would be covered in a green patina. -
HMS Beagle by Krupi - OcCre - 1:60
Krupi replied to Krupi's topic in - Kit build logs for subjects built from 1801 - 1850
This investigation by Humphry Davy suggest that a top band of green patina and a dull red in the water is what is expected. https://www.jstor.org/stable/107708?seq=1#metadata_info_tab_contents The USS Constitution might have been in the water for so long that the whole hull now had the green patina...? That doesn't explain why the top band still has a shine to it. Apparently before the latest dry docking where they replaced the copper the last time it was dry docked was in 1992 so I will try and find some pictures. -
HMS Beagle by Krupi - OcCre - 1:60
Krupi replied to Krupi's topic in - Kit build logs for subjects built from 1801 - 1850
Thanks chaps, I don't for a second believe that the movement would keep the copper bright, regardless it would be corroded by the sea water... Perhaps a moving ship would corrode at a slower rate? I have found a video of the USS Constitution being brought into dry Dock, interestingly it is the opposite of what I had imagined... The exposed copper has retained some shine and below it has a green patina? https://ussconstitutionmuseum.org/2015/05/28/constitutions-dry-dock/ Looks like I will need to continue researching. -
HMS Beagle by Krupi - OcCre - 1:60
Krupi replied to Krupi's topic in - Kit build logs for subjects built from 1801 - 1850
That looks great LucienL, I am still going for a green patina but only for the top two/three rows of sheathing the rest I was going to brown like yours. How did you achieve it, I was going to test a Baking Soda method? -
HMS Beagle by Krupi - OcCre - 1:60
Krupi replied to Krupi's topic in - Kit build logs for subjects built from 1801 - 1850
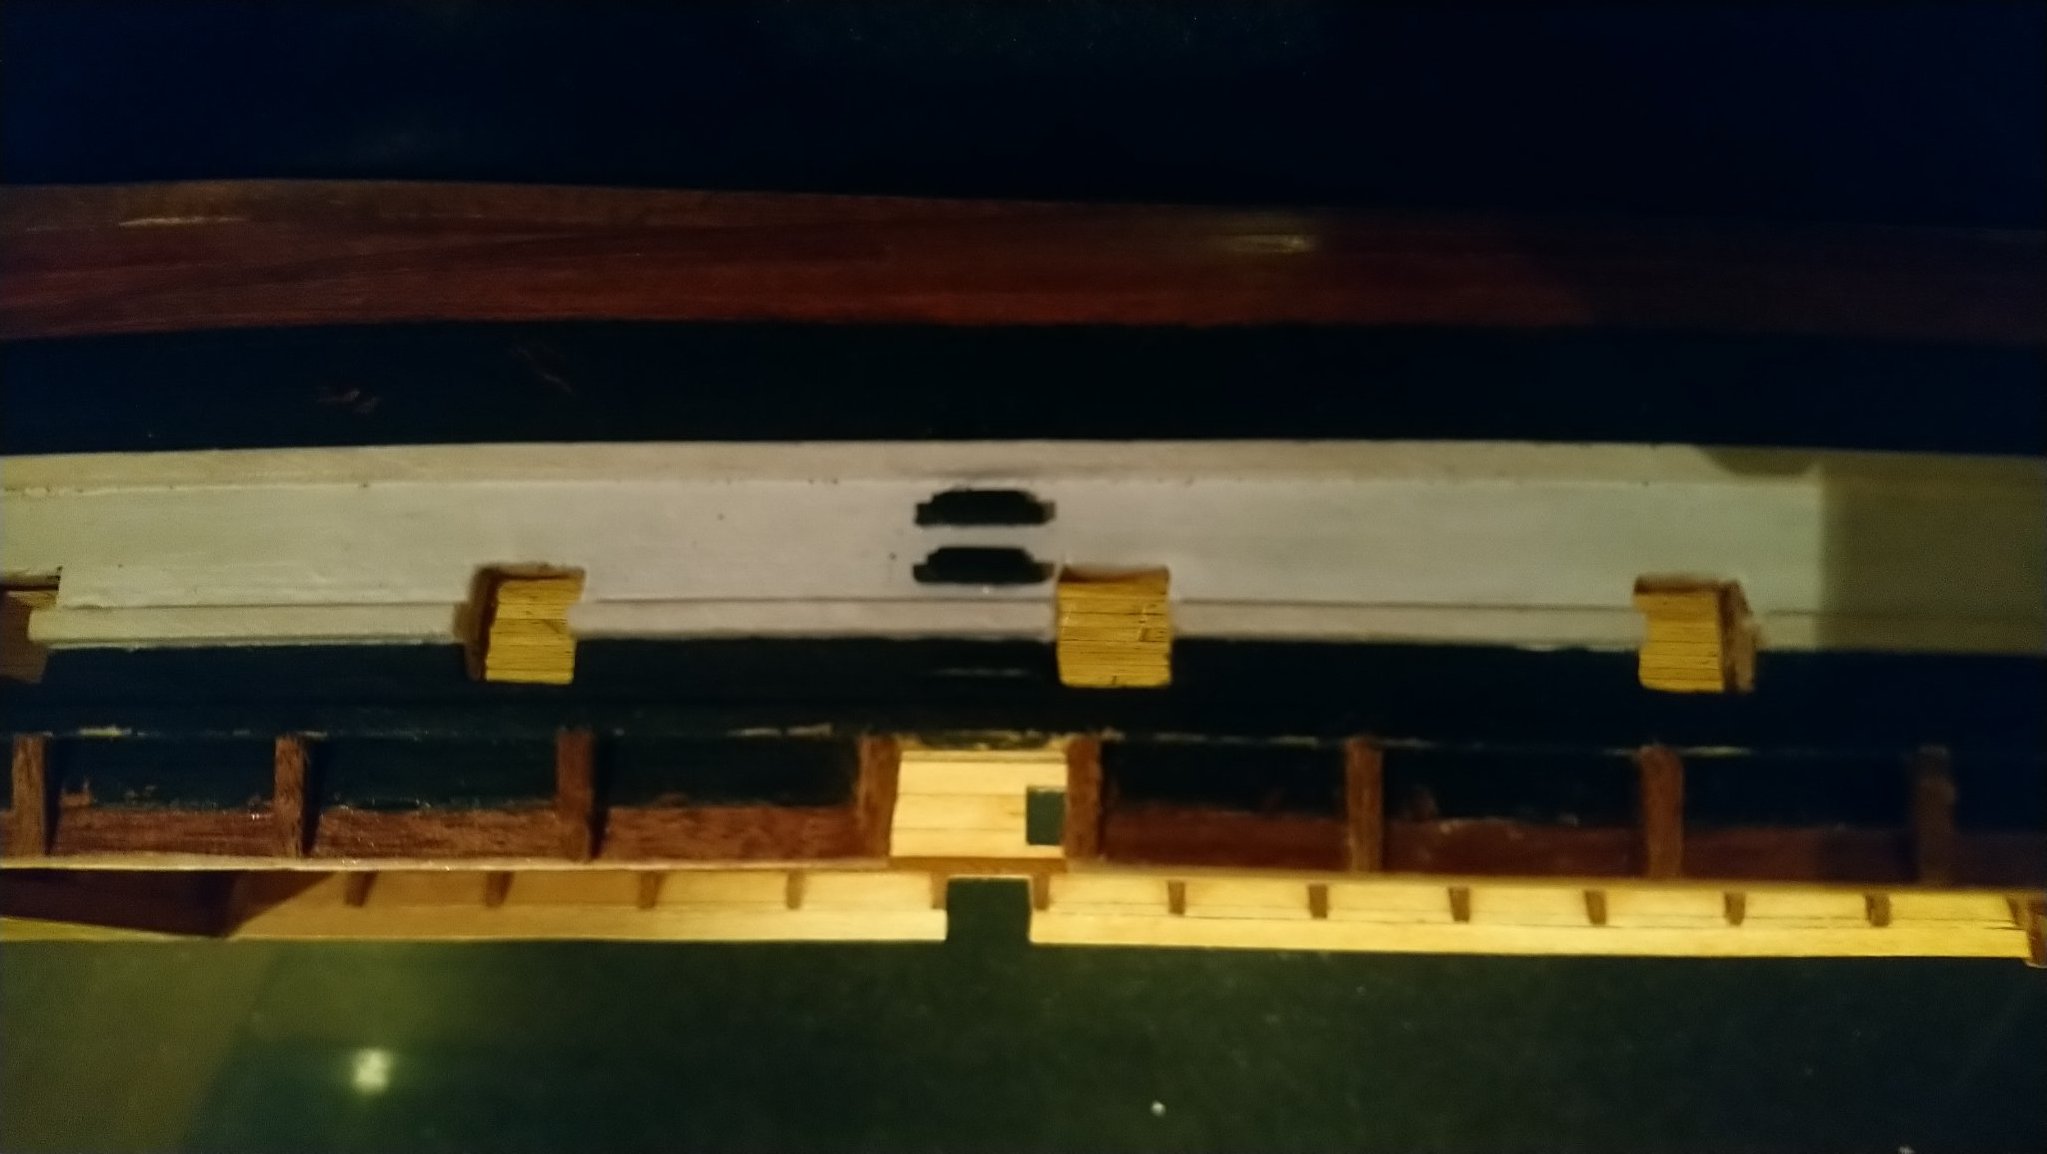
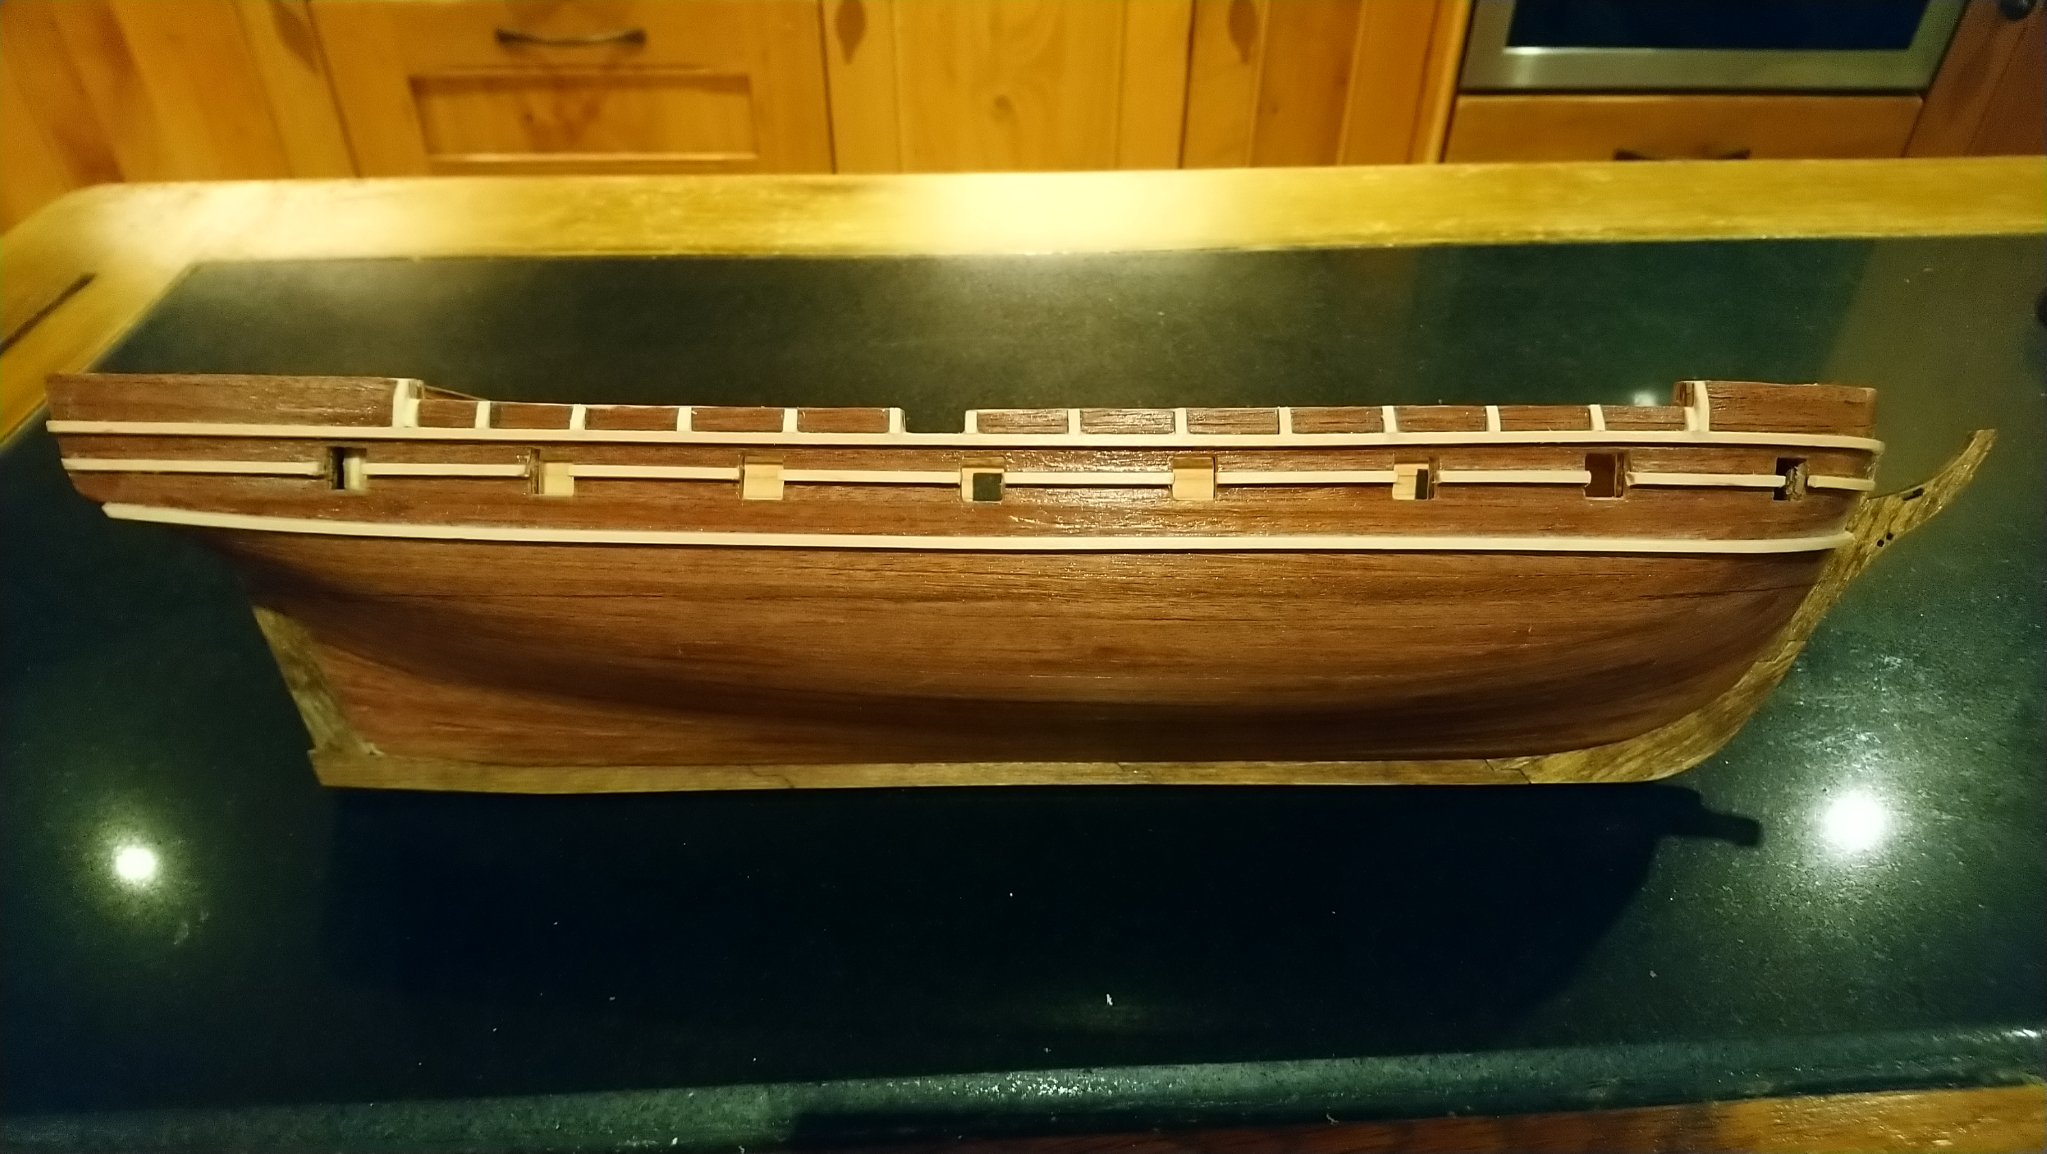
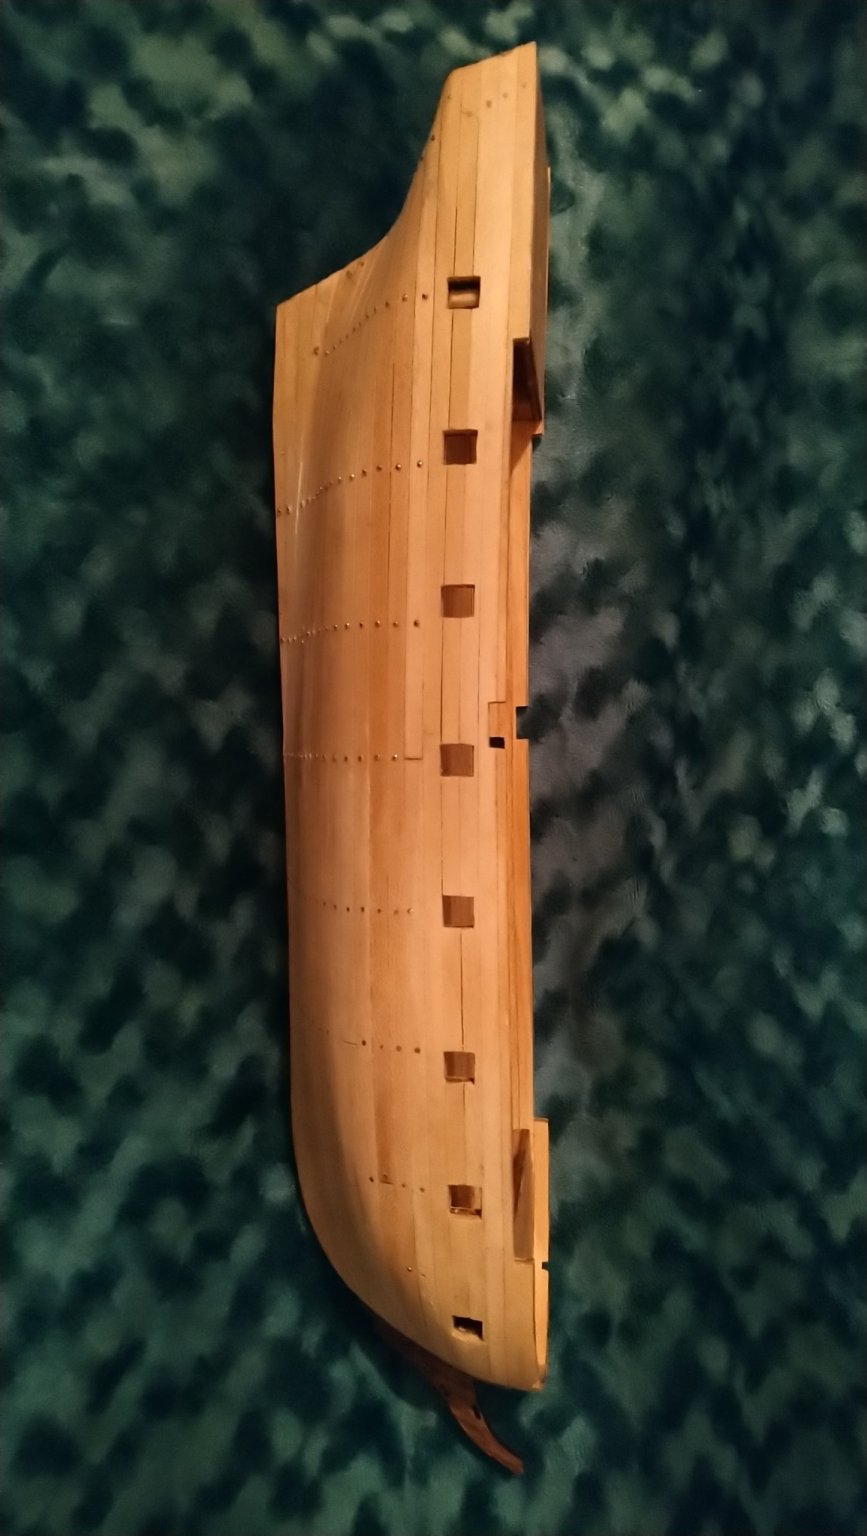
Hey chaps it has been an absolute manic few weeks at work so progress has been a bit slow. I was in the process of painting and attaching the strips, having no idea what the strips were I did a bit of research it turns out they are meant to represent the hammock stowage rails. Unfortunately I really didn't like Occre's interpretation of the the hammock stowage so I decided to throw away the strips and go my own way. I did a bit of research and I managed to get hold of a few images from a book on the the anatomy of the Beagle... This is there interpretation of the rails Obviously the model is completely different to Occre's interpretation, no real tumblehome for example also the kit is a bit different from Occre's own advertising images around the rails in particular. Anyway to achieve this it meant going back a few steps... I ended up removing some of the strips. I then used a few spare 0.6mm thick cuts to make the sides of the rails and replaced the rails I had previously created with longer versions going the full height of the rail, both on the inside and outside. P. S. I also fashioned some gangway steps.

-
HMS Beagle by Krupi - OcCre - 1:60
Krupi replied to Krupi's topic in - Kit build logs for subjects built from 1801 - 1850
That shouldn't be a problem, the first attempt I wasn't aiming for a consistent patina. The second test should be more consistent and closer to what it would be like on the hull. I could paint it but I would rather have an actual patina. -
HMS Beagle by Krupi - OcCre - 1:60
Krupi replied to Krupi's topic in - Kit build logs for subjects built from 1801 - 1850
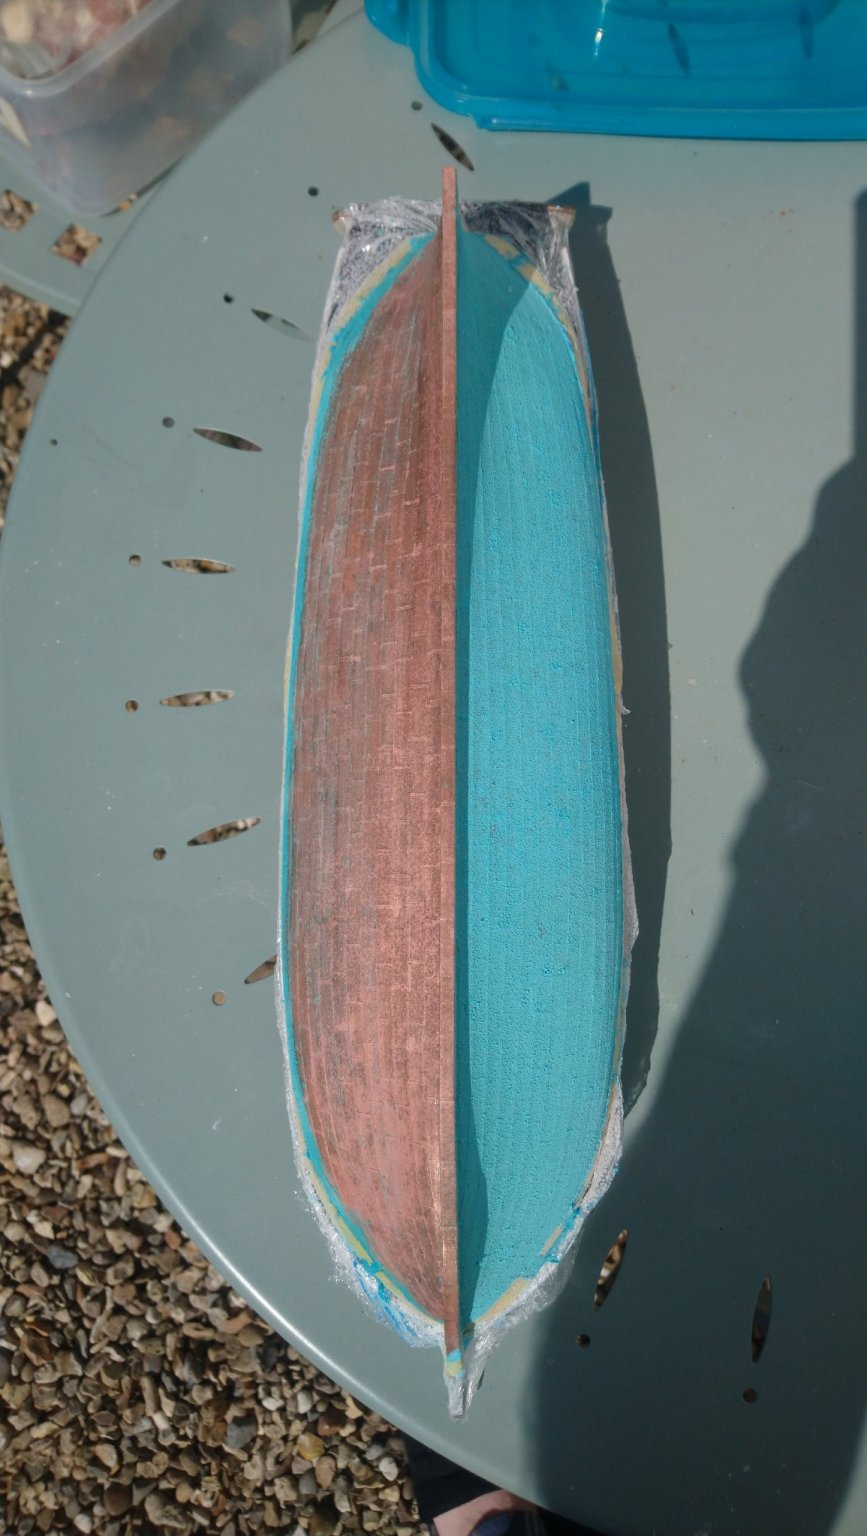
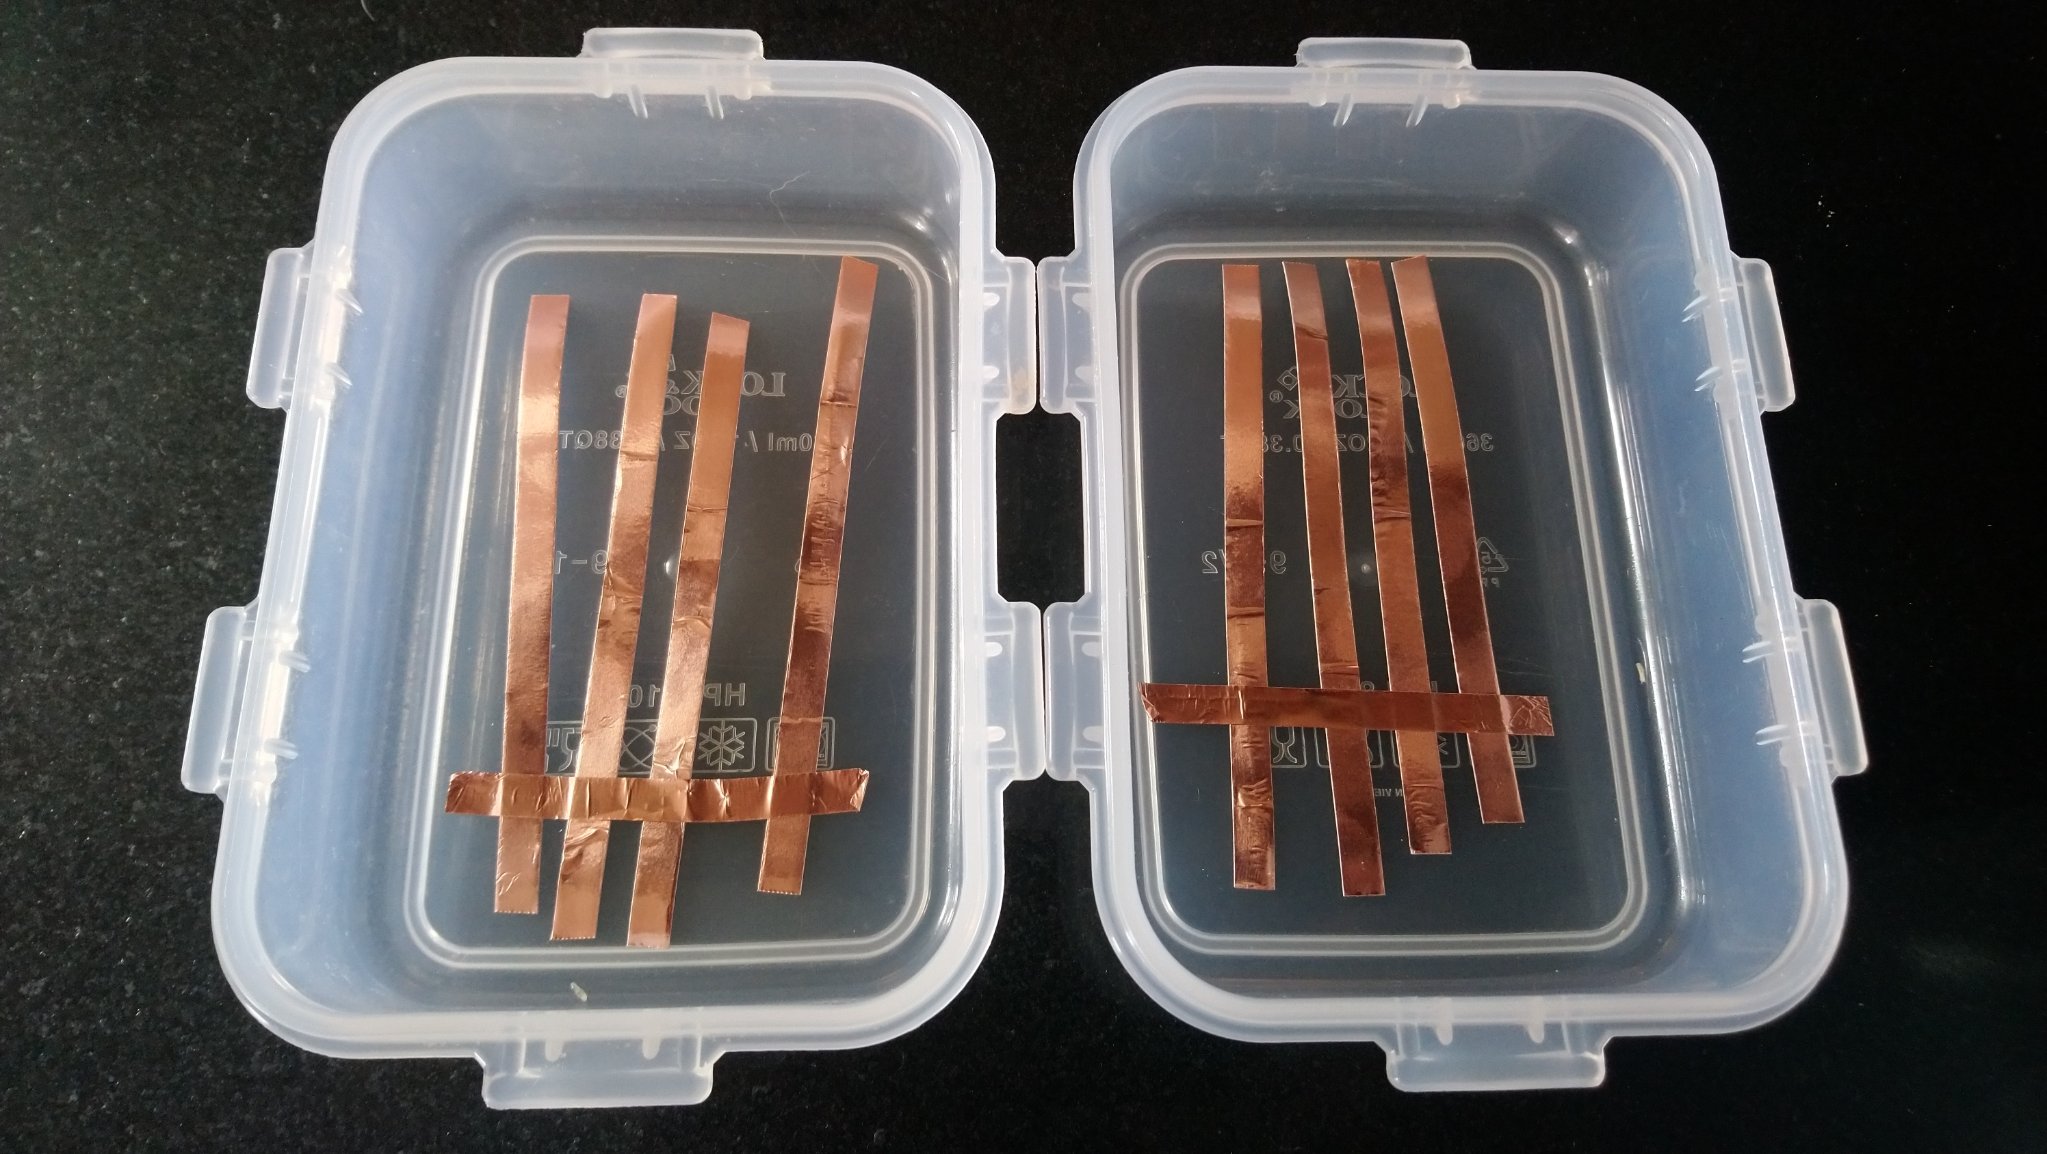
Test No. 2 This time I actually stuck them down overlapping as per the actual sheathing process, the first time they were simply held in place by one strip which allowed the backing material to soak up the salt vinegar solution and attack both sides. I think I might have to look for some thicker tape I can't imagine using this stuff on the hull it marks too easily.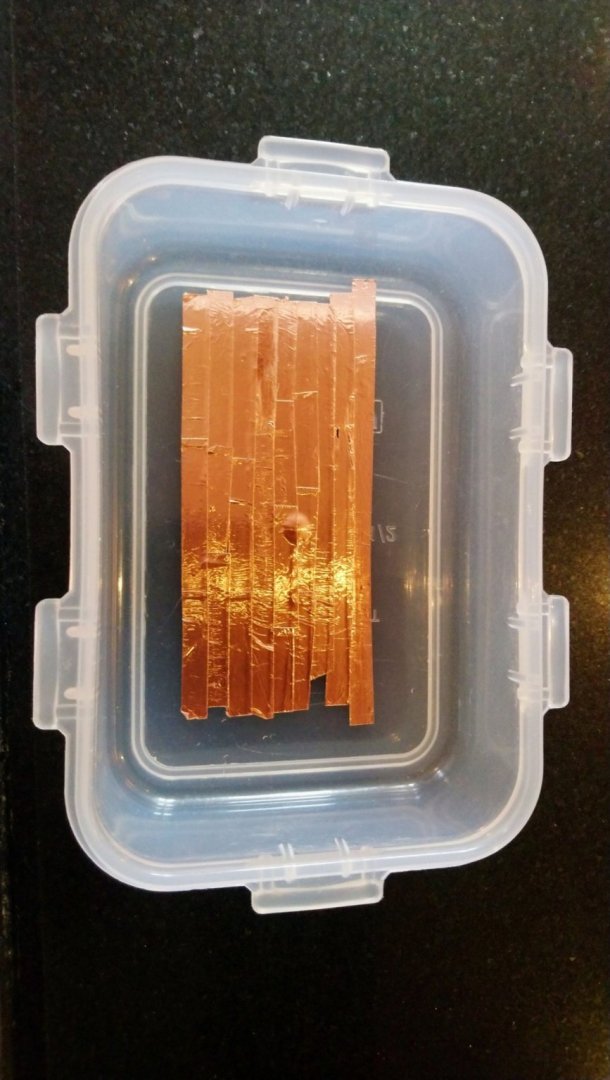
-
HMS Beagle by Krupi - OcCre - 1:60
Krupi replied to Krupi's topic in - Kit build logs for subjects built from 1801 - 1850
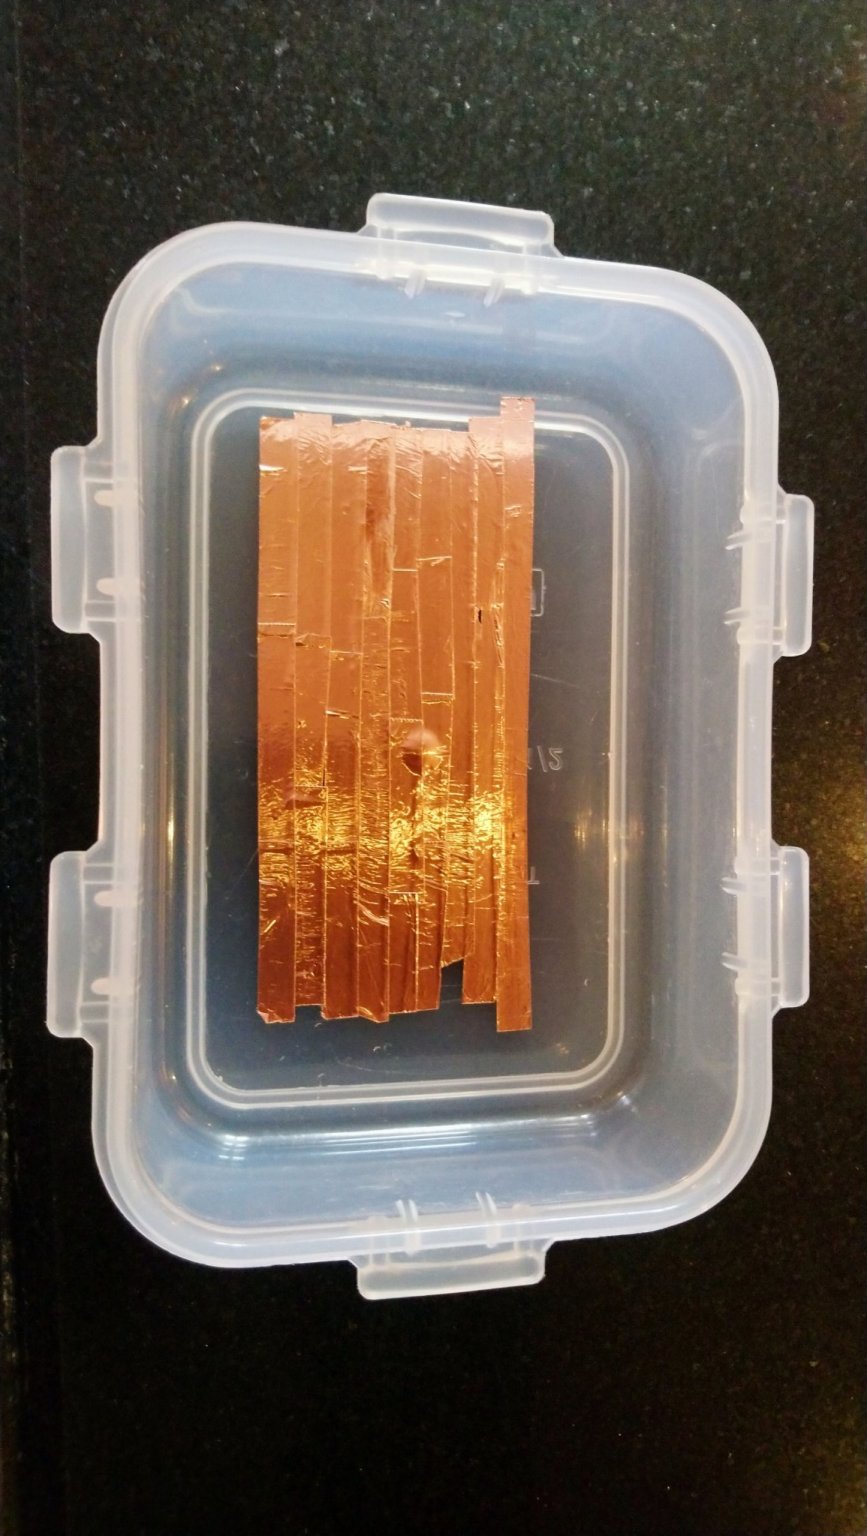
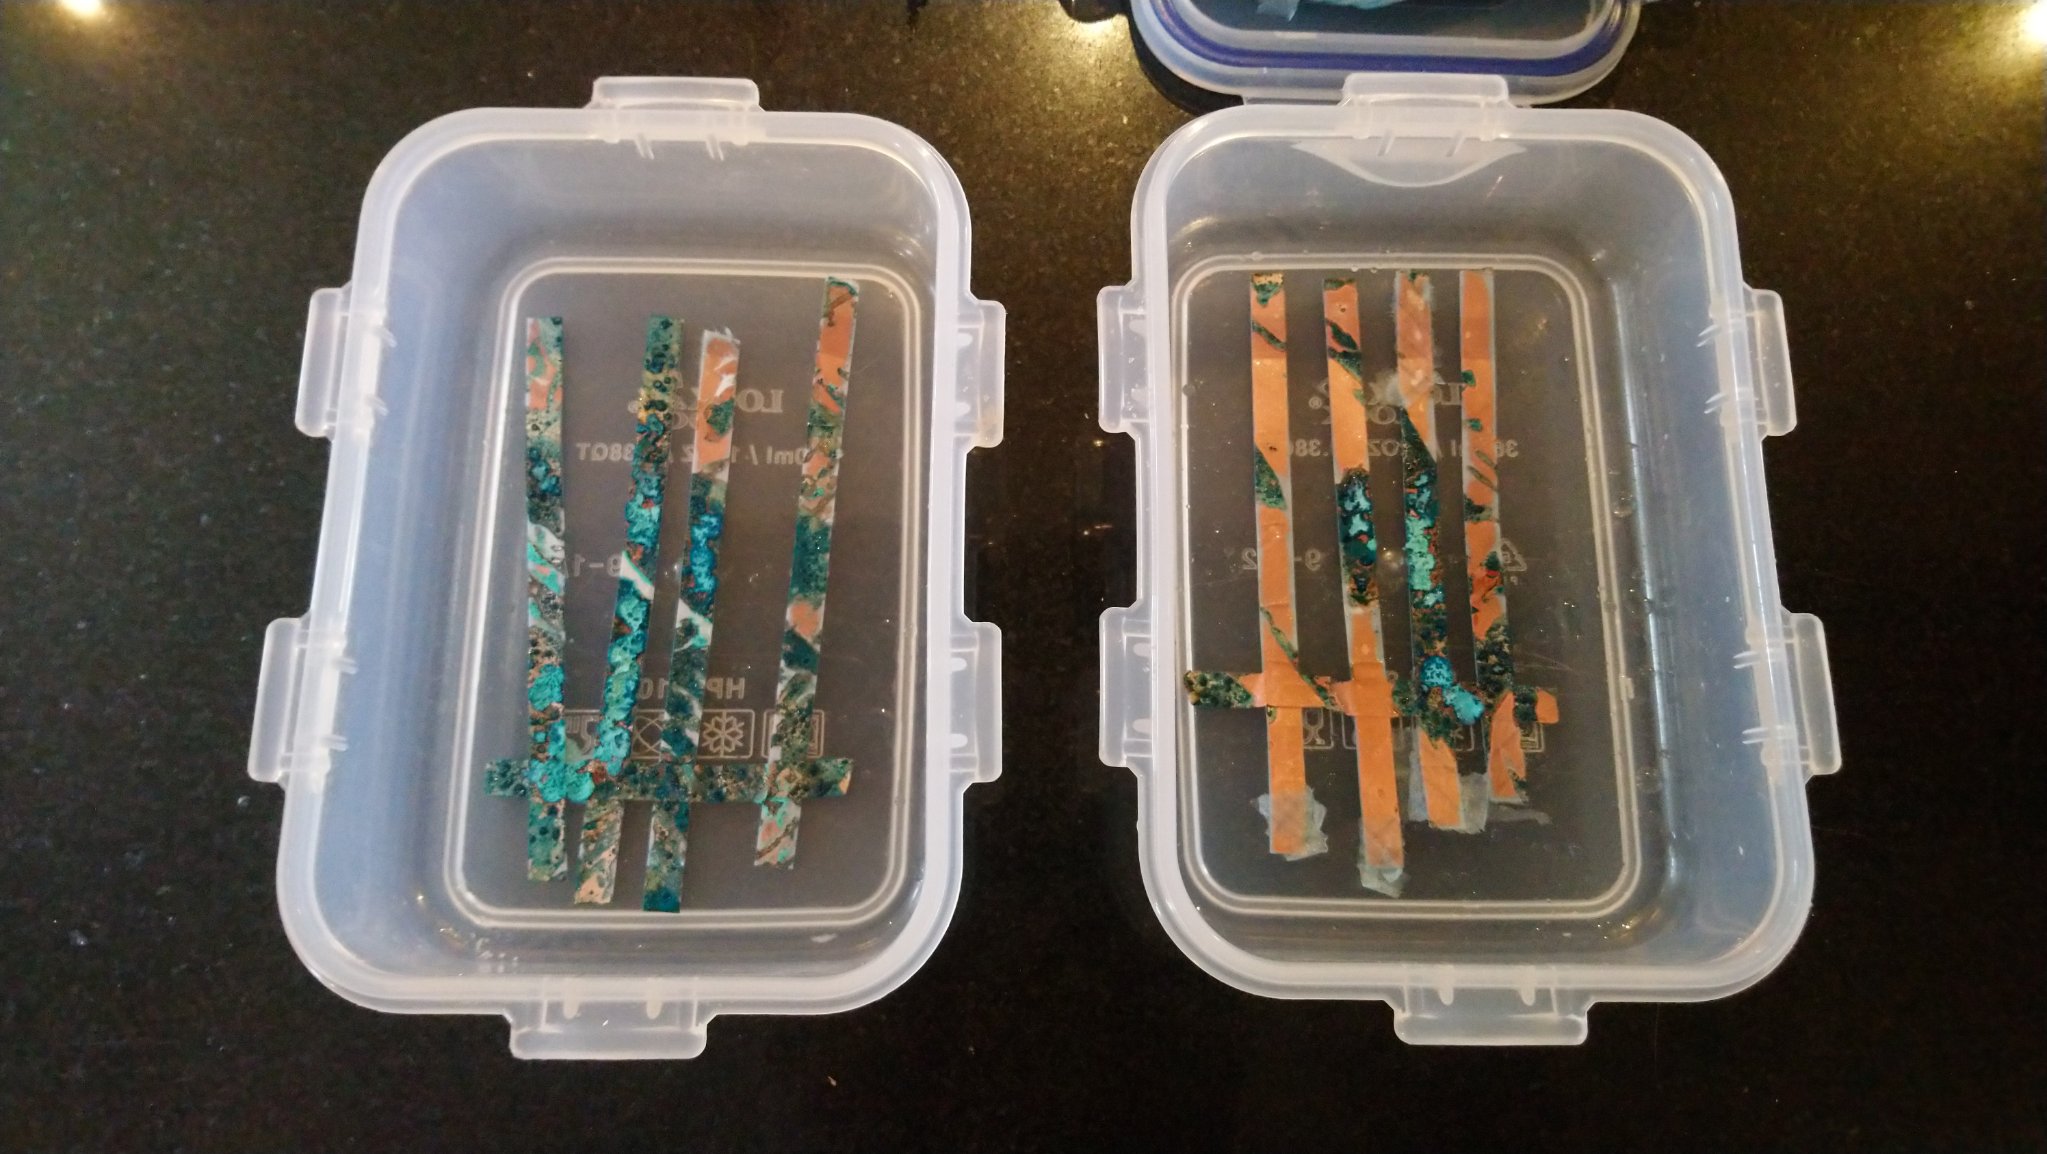
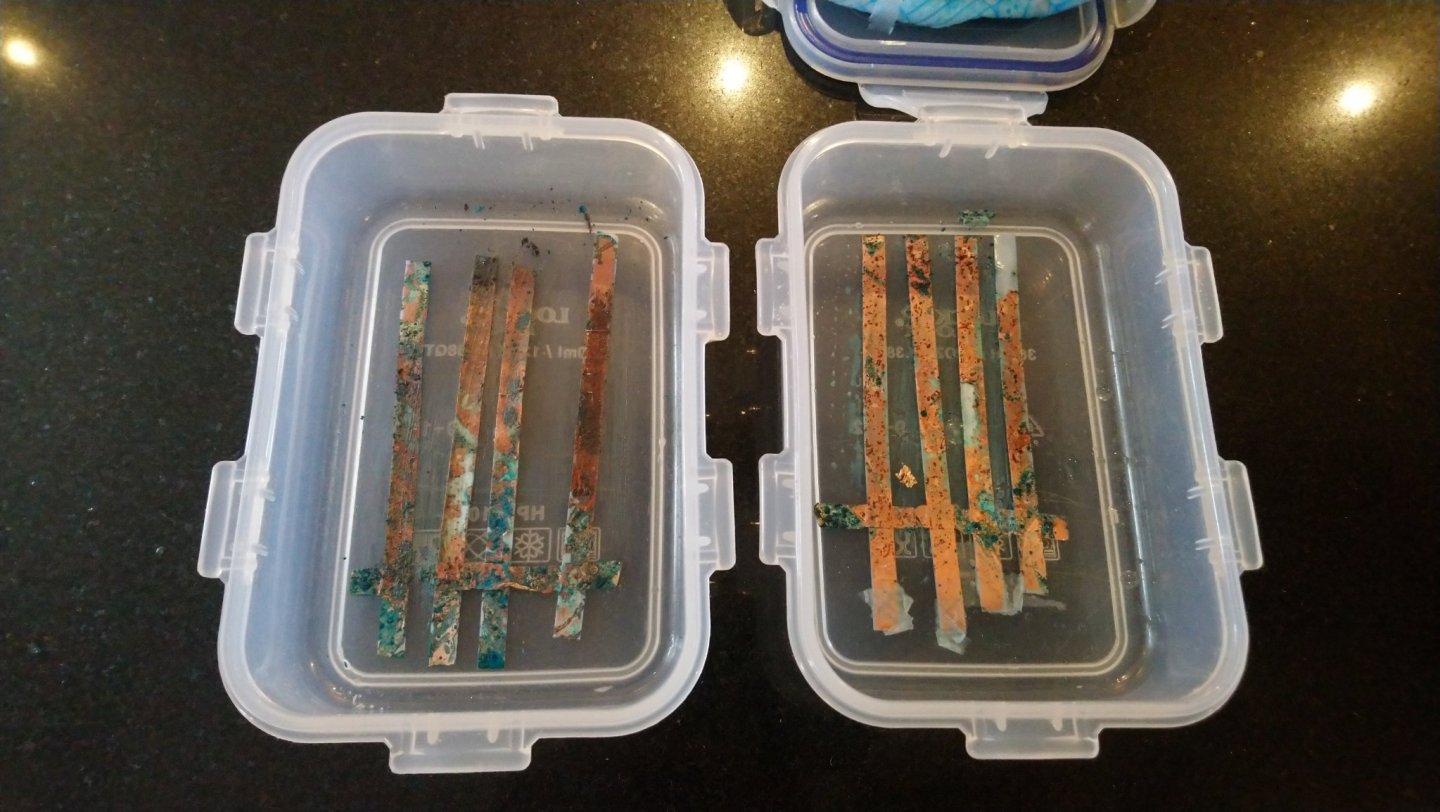
So the good news is that the copper tape is actually copper the bad news is that the copper is so thin that leaving it for 24 hours was enough to absolutely obliterate it. It looks like I won't need to worry about sealing it in a box (right box) as the sealed example just aided the reaction time. The second image is after I have tried to lightly rub the surface flat. I will try six hours now however I am debating if this tape is too thin to achieve a patina, certainly it will need to be sealed afterwards.
-
HMS Beagle by Krupi - OcCre - 1:60
Krupi replied to Krupi's topic in - Kit build logs for subjects built from 1801 - 1850
I almost did the same thing, I warped one set in the wrong direction by mistake so had to scrap them.... I am sure no one will notice I expect 99% of the time only one side will be on display unless you have it as a centre piece. -
HMS Beagle by Krupi - OcCre - 1:60
Krupi replied to Krupi's topic in - Kit build logs for subjects built from 1801 - 1850
I Looks great. It is a good idea, it was quite easy without but it would certainly make forming the shape easier. This is my first wooden model and I was anticipating the hull to be the hardest part however now expect the rigging to be the most tedious part. -
HMS Beagle by Krupi - OcCre - 1:60
Krupi replied to Krupi's topic in - Kit build logs for subjects built from 1801 - 1850
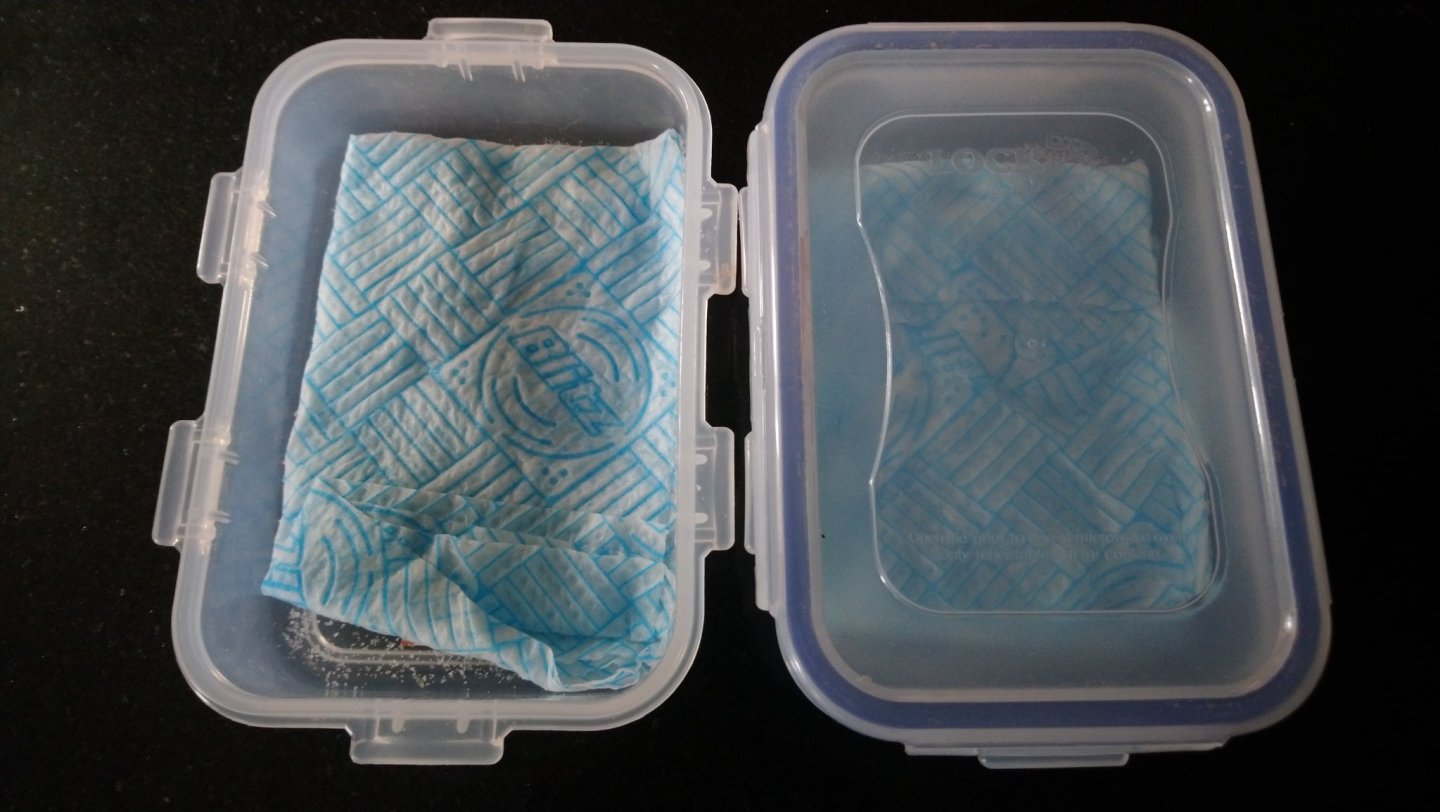
From my understanding it was always copper bottomed, however it was re sheathed or added to prior to Captain Fitzgerald/Darwins expedition. I have decided to go with the copper foil method myself. In fact I have just started an experiment with salt and a white vinegar soaked paper towel to see what the patina would look like. One pot is sealed and the other is not, I will check in a day or two to see how it is coming along. Hopefully it is not copper painted tape... https://www.bbc.co.uk/news/amp/business-56330378
-
HMS Beagle by Krupi - OcCre - 1:60
Krupi replied to Krupi's topic in - Kit build logs for subjects built from 1801 - 1850
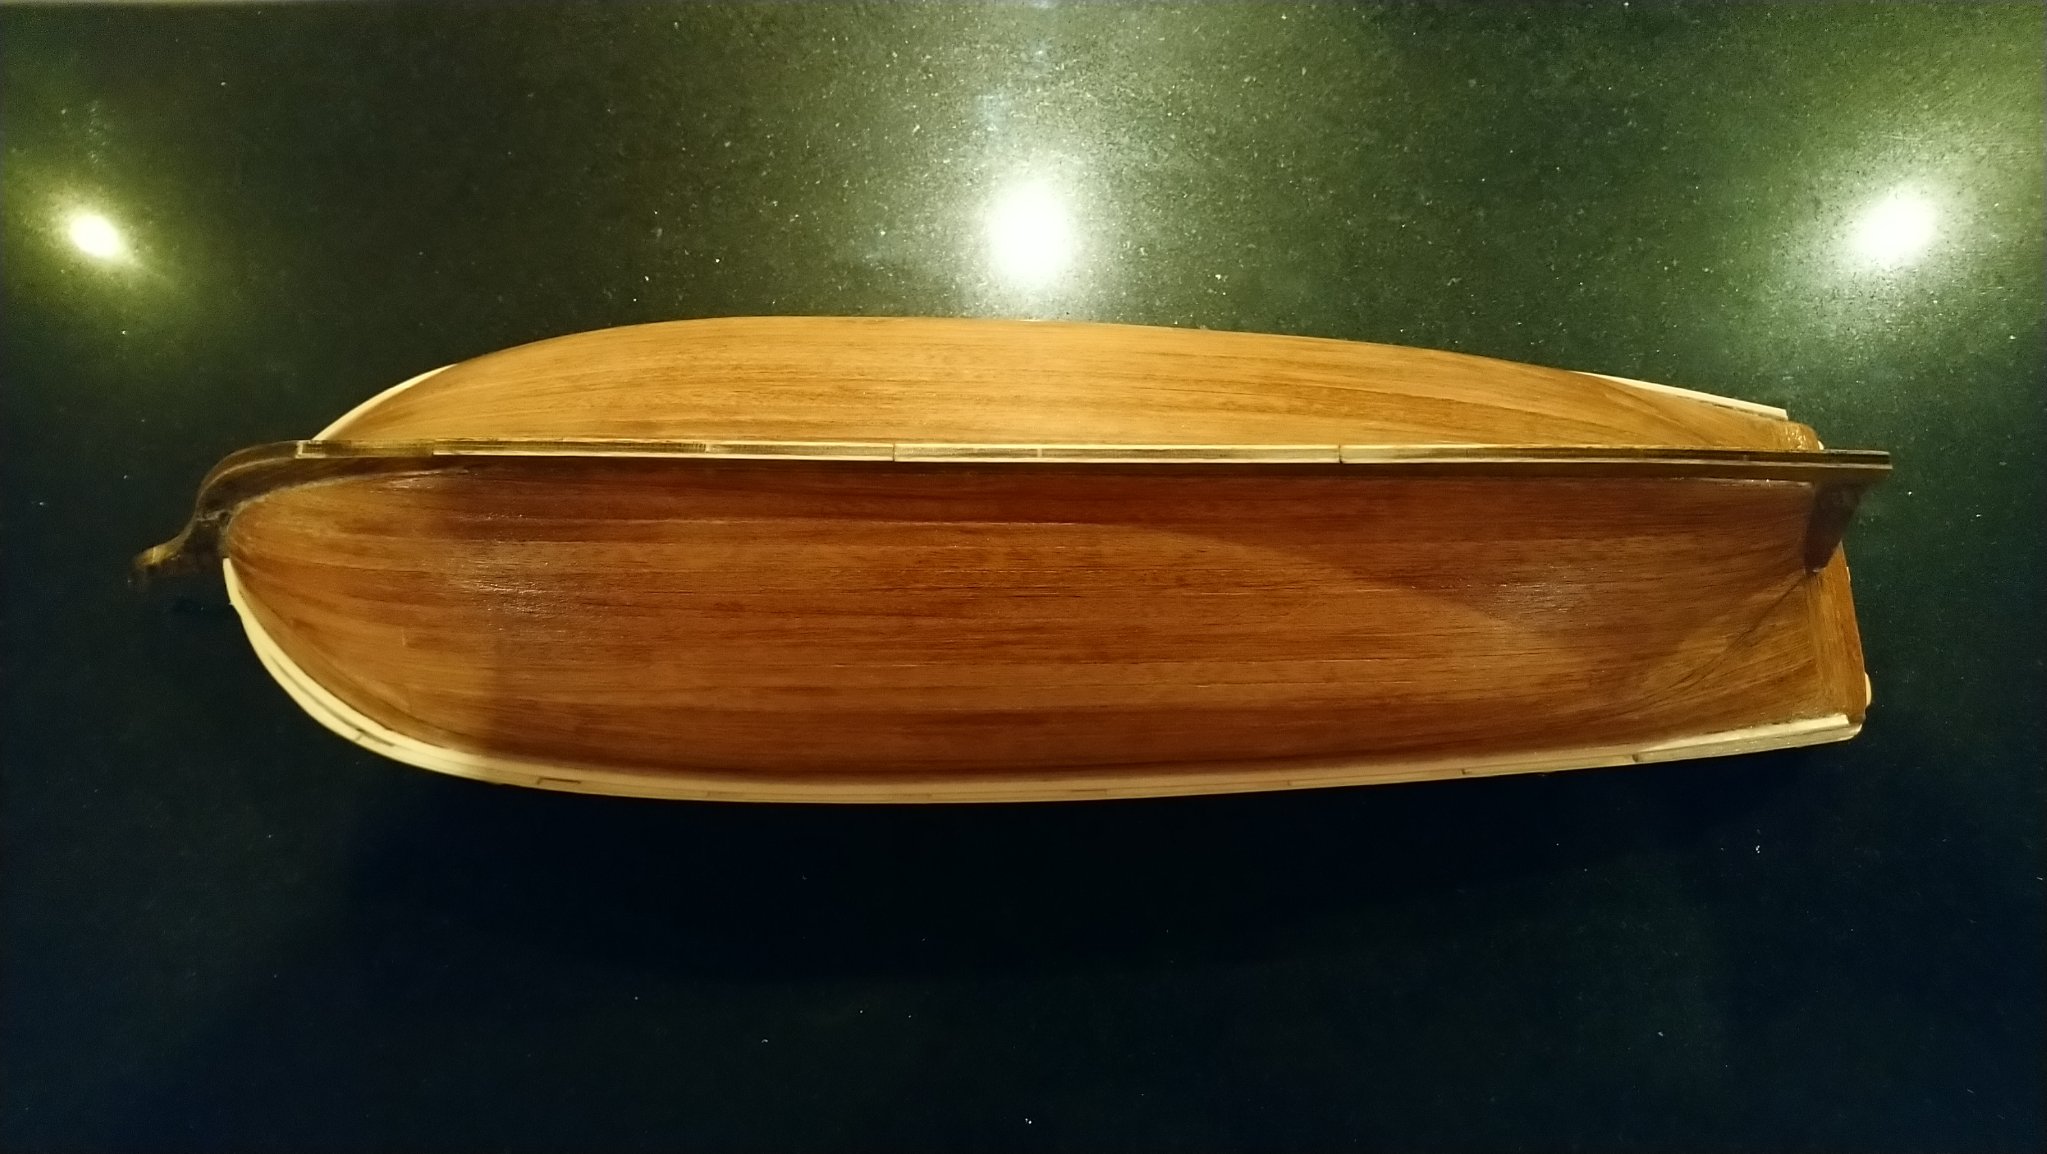
I had a busy week at work which impacted progress somewhat. I have now done the ribbons... Unfortunately I have just realised I completely forgot to do the three strips at the front. I have just used the sand and sealer as well 😕 I have to say after just one coat of sand and sealer the hull is looking really nice, it almost seems a shame to paint it and copper sheath it now....

-
HMS Beagle by Krupi - OcCre - 1:60
Krupi replied to Krupi's topic in - Kit build logs for subjects built from 1801 - 1850
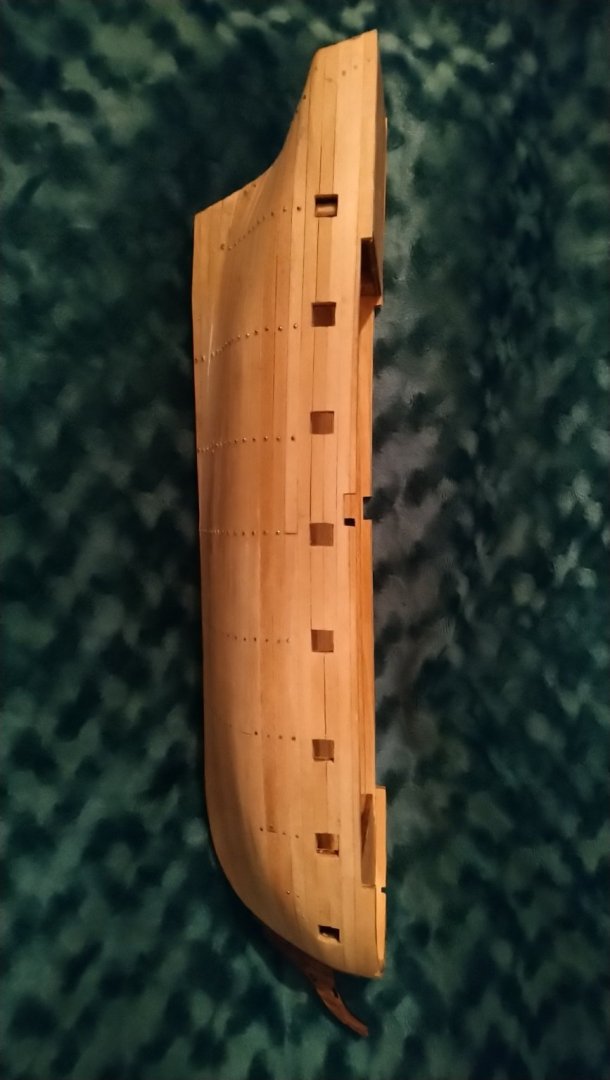
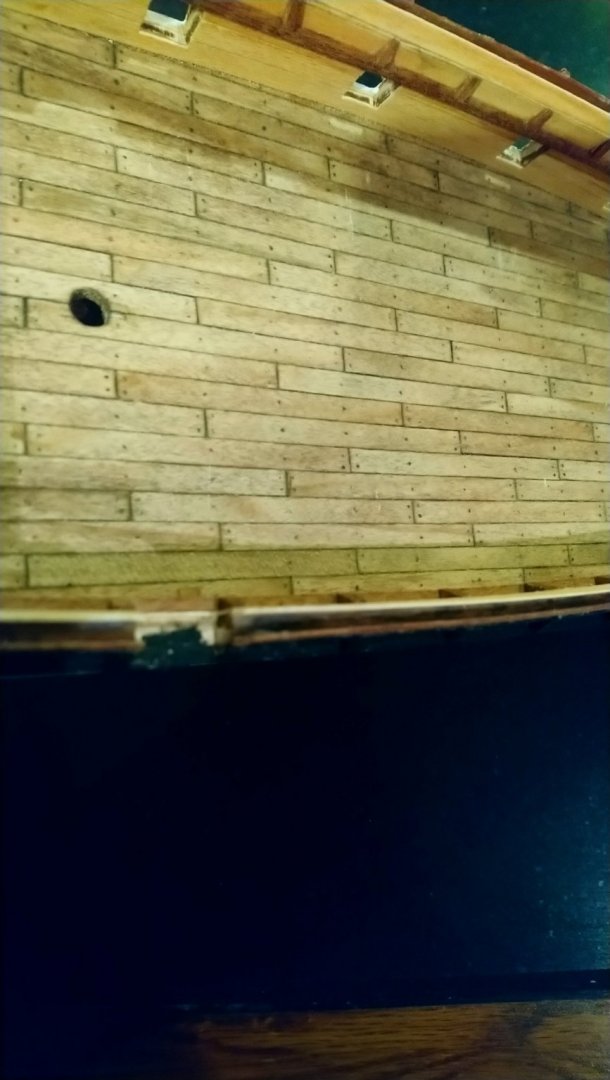
Nice work. However having sanded down the hull with pins still in place I can tell people that it was a non issue. I thought it might be quicker to remove the nails but on reflection I actually think it would be quicker to file them flat opposed to pulling them out individually. The only potential benefit I now see for removing them after the hull plies have set is in case the nails come loose during sanding causing issues further down the road, that said they are essentially glued in place by the vanner plies. Speaking of which I am close to completing.... Annoyingly I missed a small gap between the strips on one side however as I am planning on copper sheathing the hull I am not going to rework the area.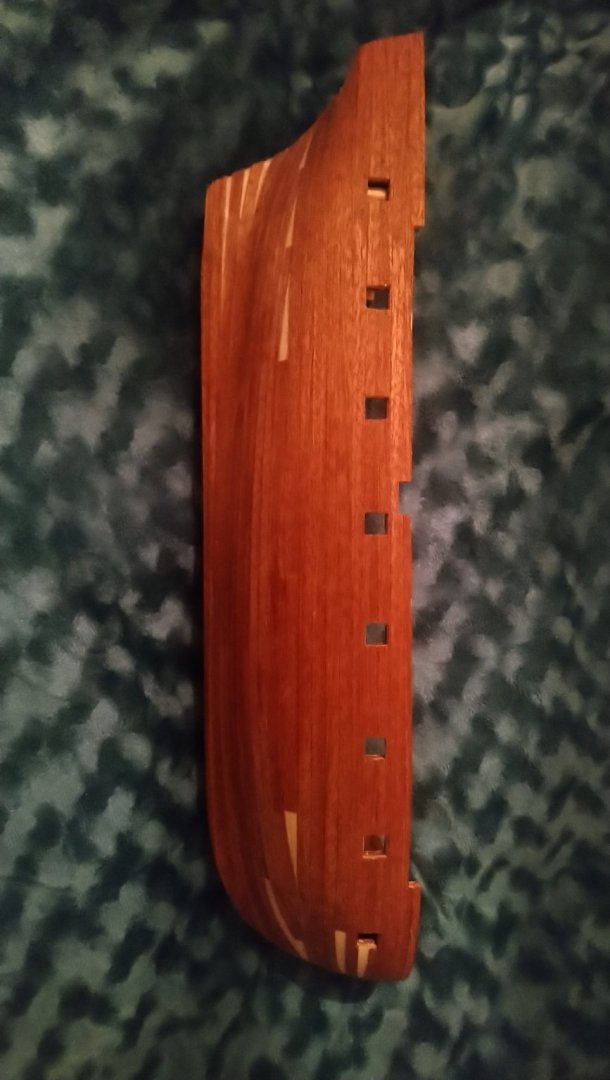
-
HMS Beagle by Krupi - OcCre - 1:60
Krupi replied to Krupi's topic in - Kit build logs for subjects built from 1801 - 1850
Thanks Cathead I will crack on with the PVA. -
HMS Beagle by Krupi - OcCre - 1:60
Krupi replied to Krupi's topic in - Kit build logs for subjects built from 1801 - 1850
Thank you, I hope I can do the ship justice. I am having so much fun I am already debating about making a scratch built frigate of the same scale. -
HMS Beagle by Krupi - OcCre - 1:60
Krupi replied to Krupi's topic in - Kit build logs for subjects built from 1801 - 1850
Started sanding, really happy with the results so far. Tested the forepeak and it was a nice snug fit ☺️ Need to sand the second half down then on to the vaneer. I am wondering how to glue it, some seem to prefer Superglue others PVA.