


Giorgos
-
Posts
166 -
Joined
-
Last visited
Content Type
Profiles
Forums
Gallery
Events
Posts posted by Giorgos
-
-
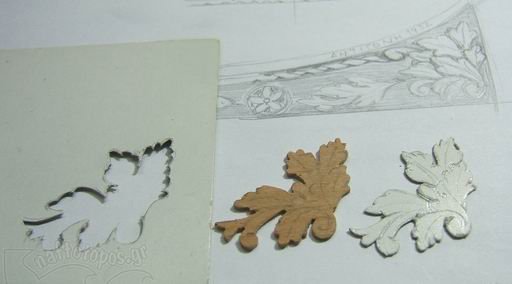
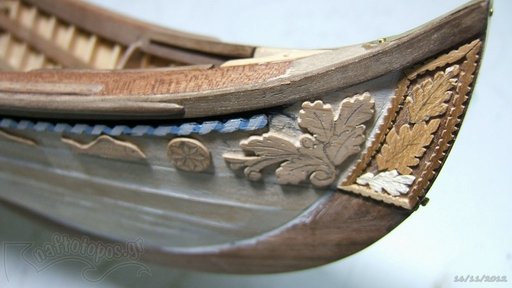
I think I haven’t mentioned it but most of the small items were not glued in their final position and that because I wanted to painted them easily……
The colors were chosen according to the descriptions of the book, photos of same vessels of our days and my own aesthetic….
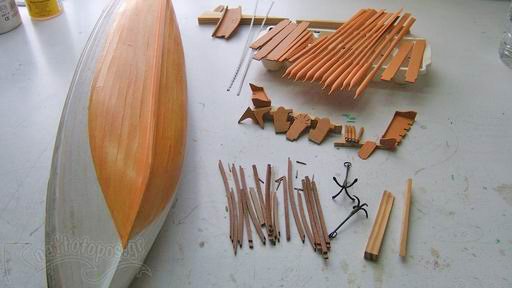
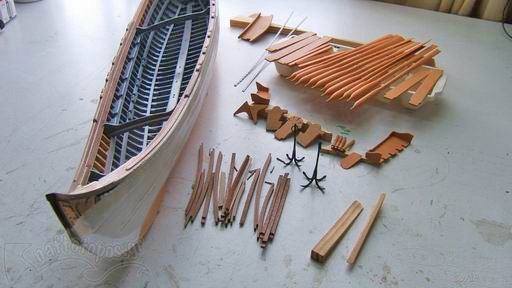
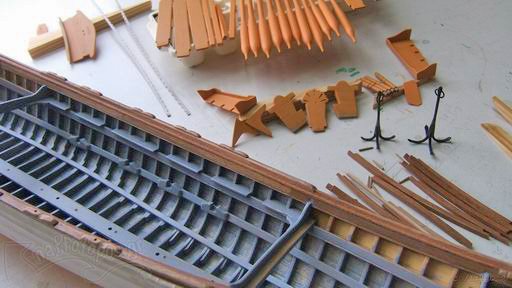
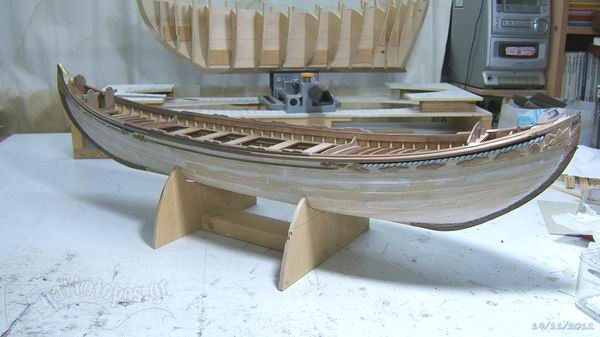
I think next post should be the last one with the vessel completed…
Thanks
- aykutansin, SailorGreg, Anja and 2 others
-
 5
5
-
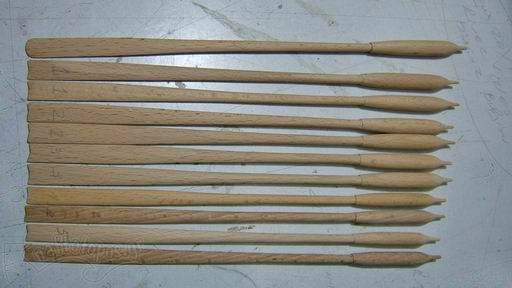
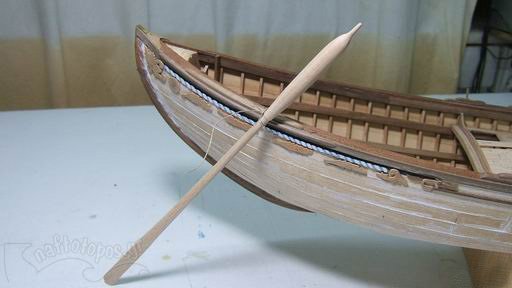
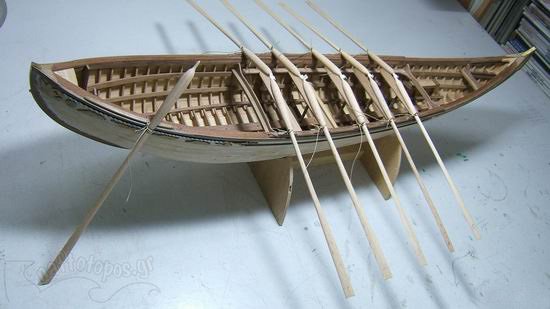
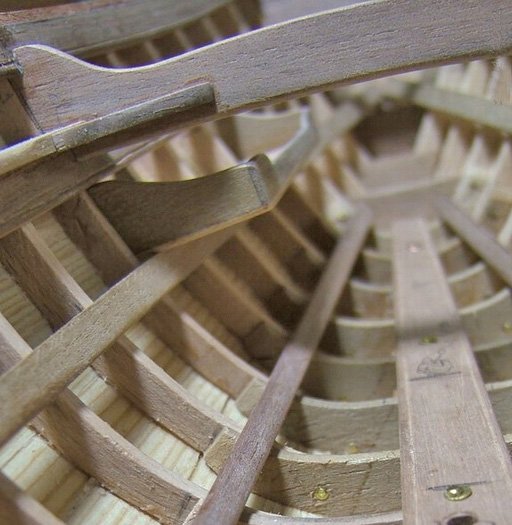
I reached the point to deal with the oars.
The vessel didn’t have the usual rudder with the tiller, but it was handled by another oar, attached at the stern.
The ends of the oars was shaped in a particular form, that I suppose, were giving the maximum result. (It reminded me duck's foot...!
 )
)
- aykutansin, Anja and mtaylor
-
3
-
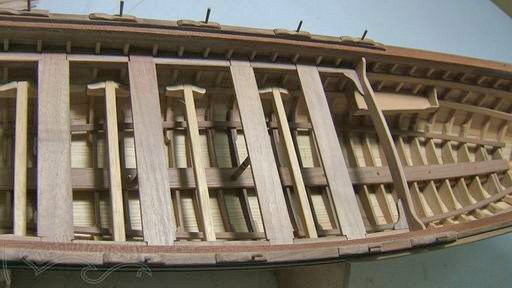
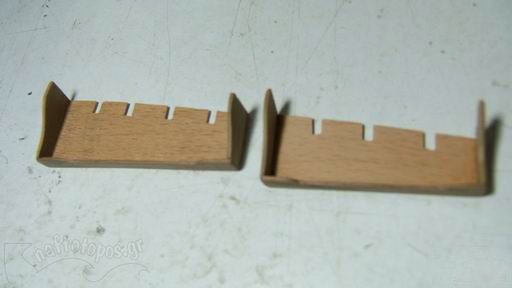
According to the book but also from other sources, beneath the seats of the oarsmen, there were removable balks.
These balks were used to step on them while they were rowing, taking some help to this effort.
So I had to build them….
Thanks
- Anja, mtaylor, popeye the sailor and 2 others
-
5
-
-
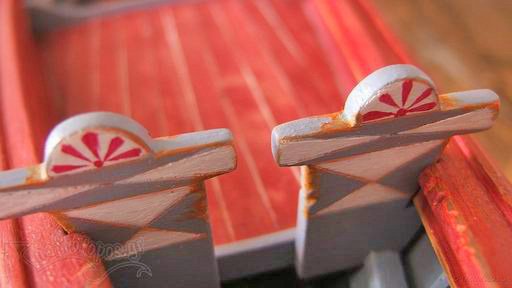
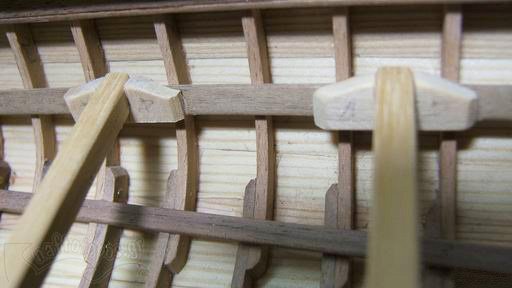
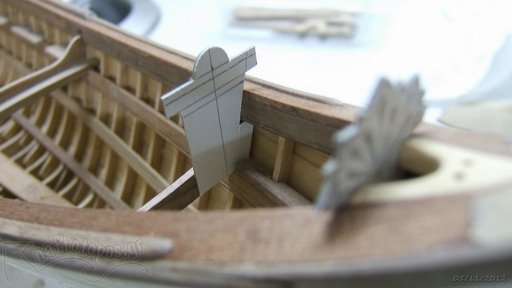
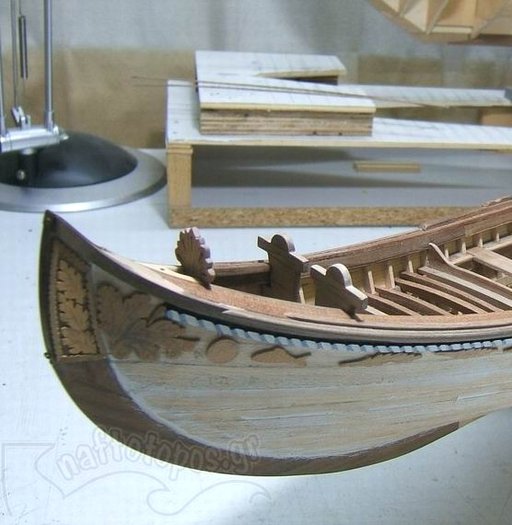
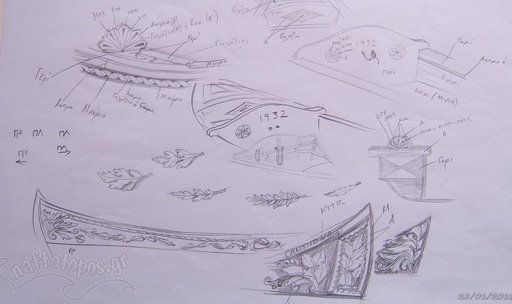
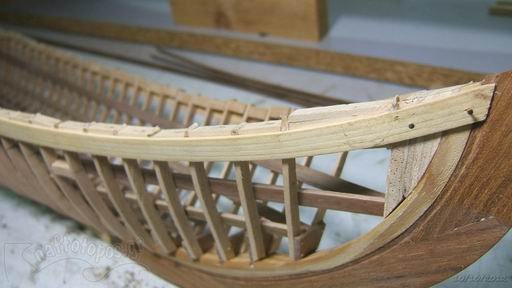
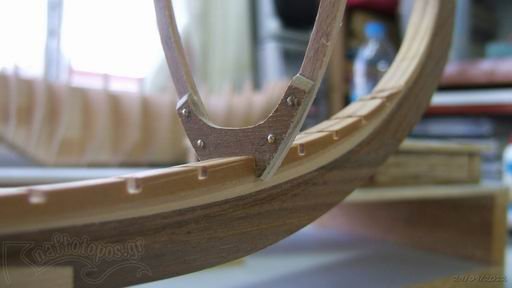
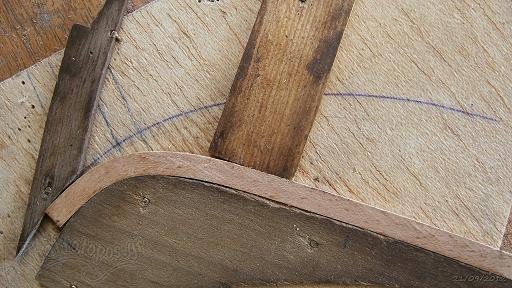
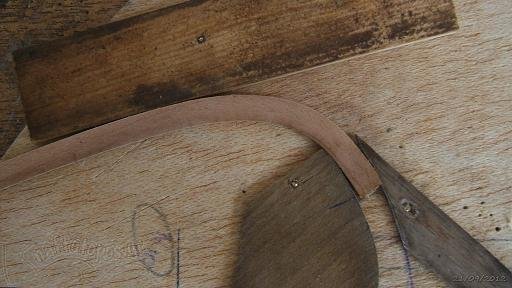
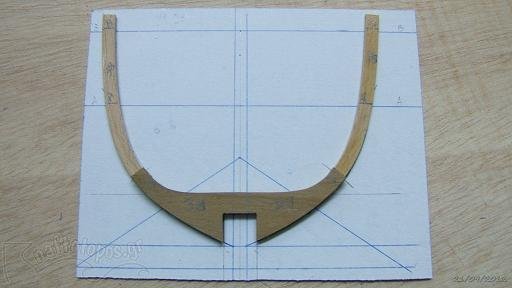
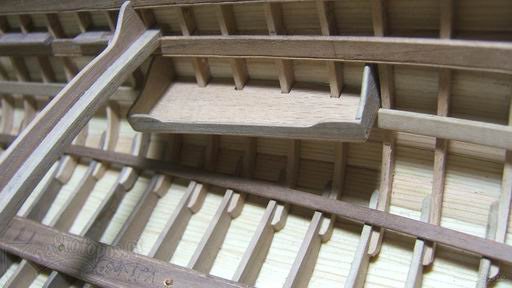
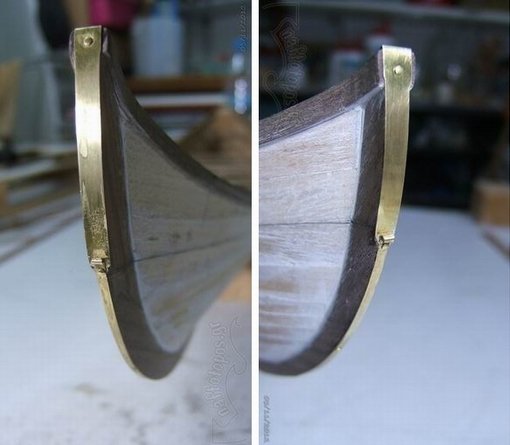
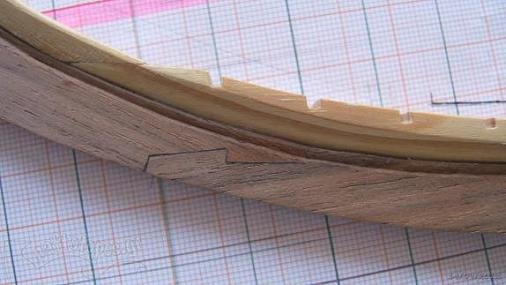
The bitts and the counter (shaped as palmette) behind the prow.
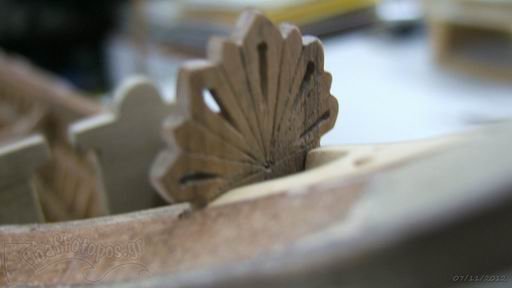
........................
Thanks
- Anja and aykutansin
-
2
-
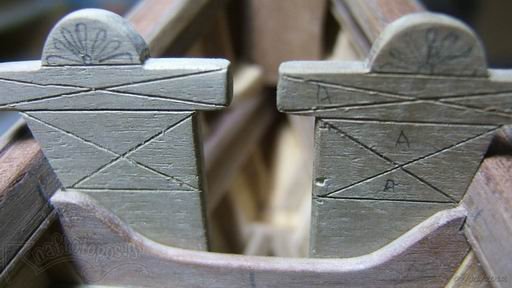
Hi.
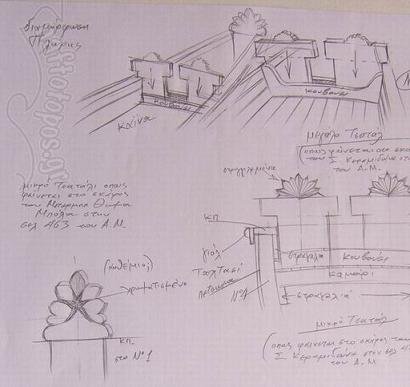
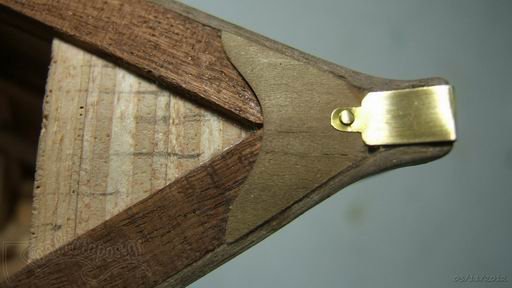
The inner arrangement combined with the decoration, was a matter I had to paid attention.
These elements would highlight the specificity along with the character of the vessel.
Besides the decoration outside the bow and the stern post, there was an inner counter and some unusual shaped and decorated, bitts.
Once again some drawings were considered needed.
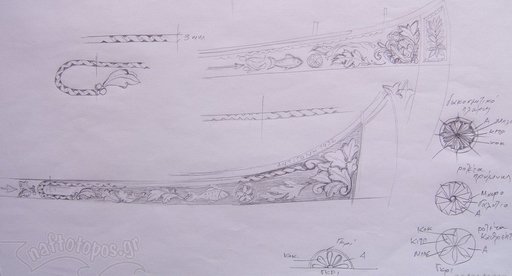
From the paper to the wood...
-
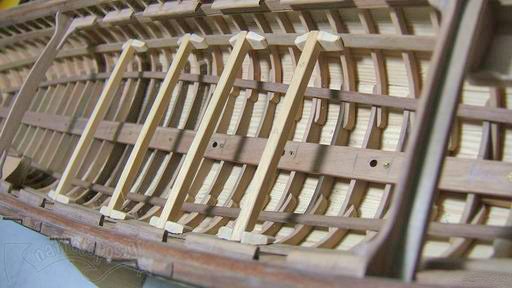
Reaching the time to be dealing with the inner of the boat, I thought that some sketches bases on book descriptions, would be helpful...
Then I built the seats for the oarsmen and the beams for the covered part of the stern.
Thanks
- aykutansin and Anja
-
2
-
-
Hi all.
@ Mark, I don't know how someone could be defined as "speed builder", but since the matter of time has been set, I have build this model within 120 days…
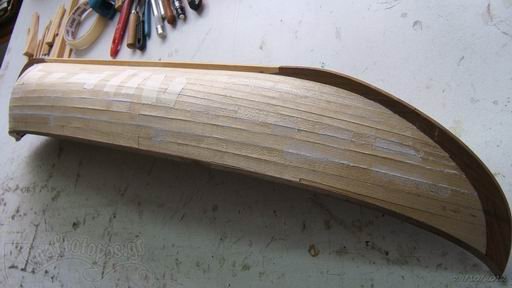
Ok Some more fast work, since last time…

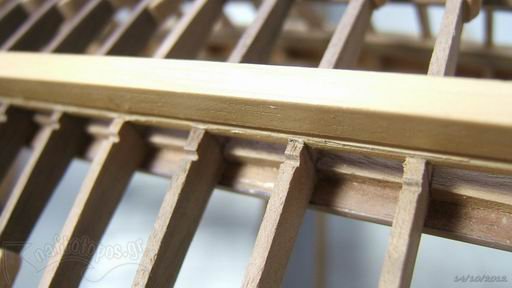
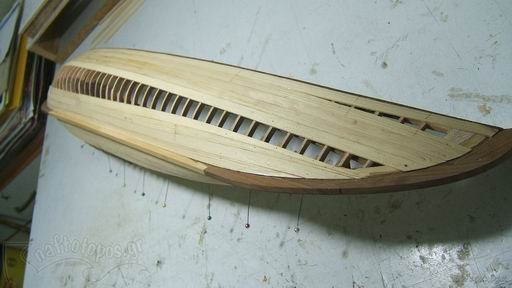
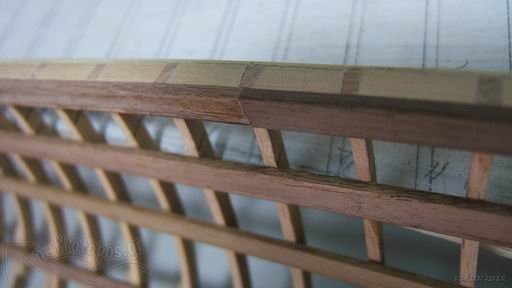
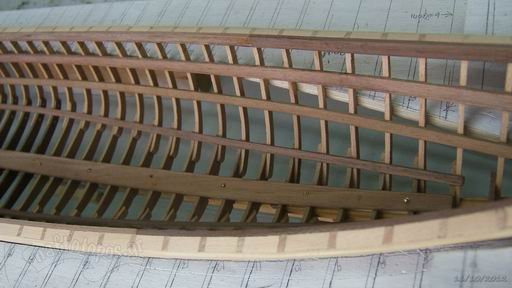
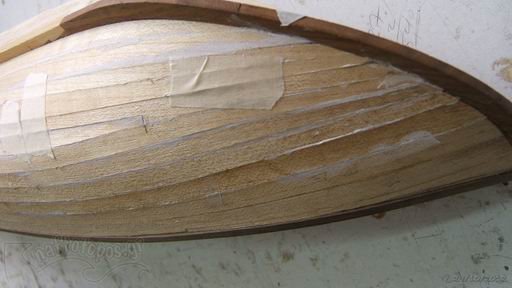
I placed the gunwales on topsides and the second plank of the first planking.
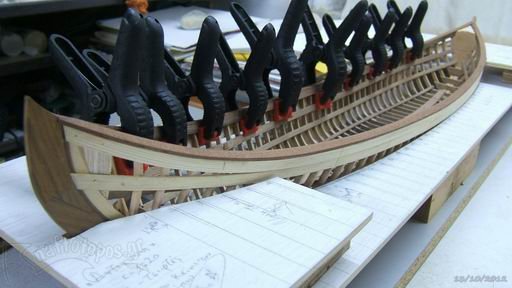
Before I start placing planks at the keel, I couldn't resist to shape the "limber holes" on the floors.
Then I was ready to go with the planking,
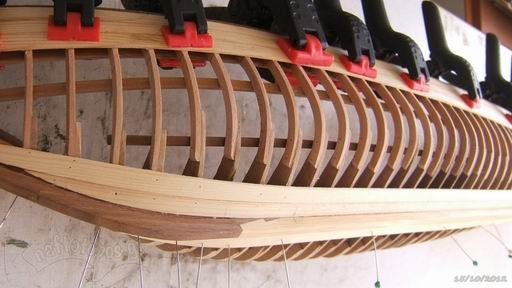
to the end of it…

Thank you
- Piet, Anja and aykutansin
-
3
-
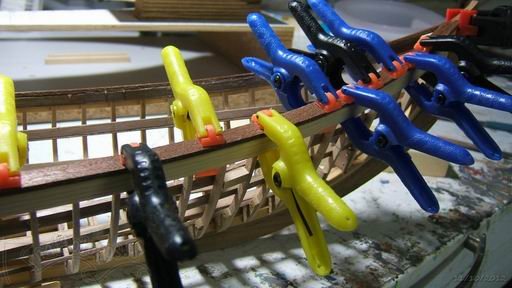
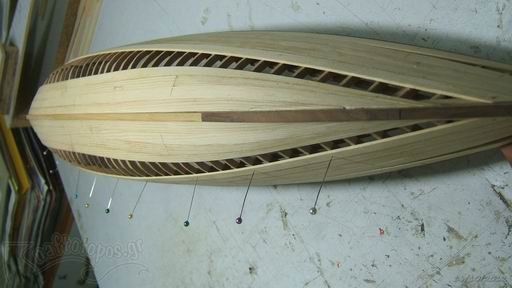
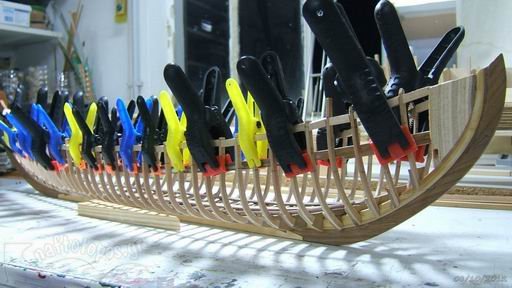
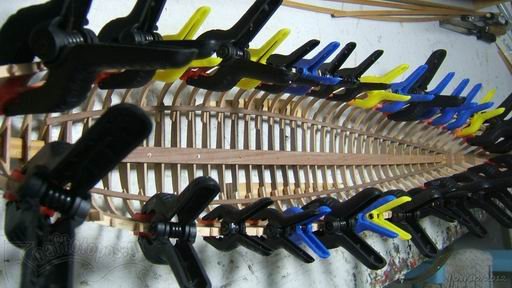
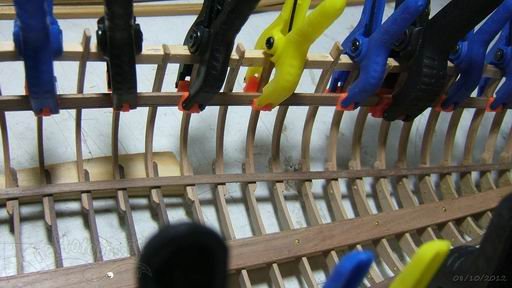
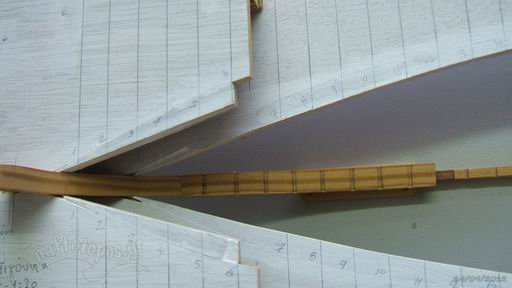
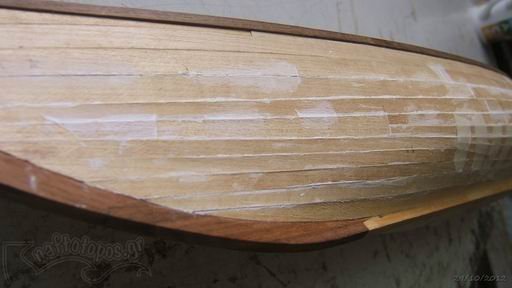
Starting the first planking, I placed the first on each side plank and at the level of gunwales.
At this point I decided to leave the small balks at their positions, between the frames, so I shaped them properly.
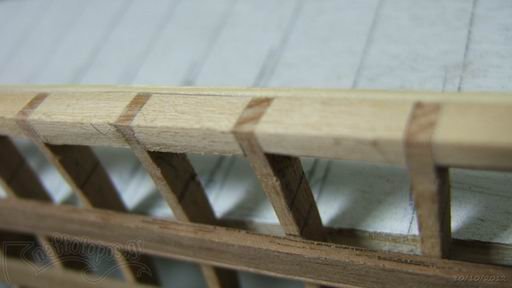

Then, from inside the hull, I placed a plank on them and so they were covered.

Thank you
-
Anja, you caught me...

Yes the model is already built and is exhibited in 3w.naftotopos.gr.
I'm just transferring here the English version of that built log and that's why the fast work, that some mates have noticed.
Thank you all and I hope your interest, won't be affected by this revelation…
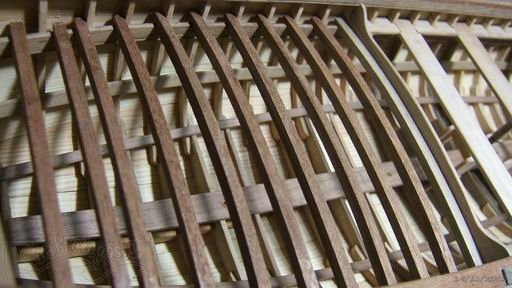
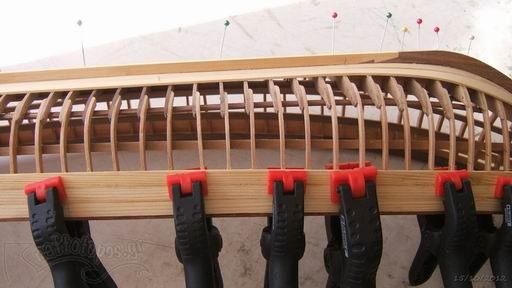
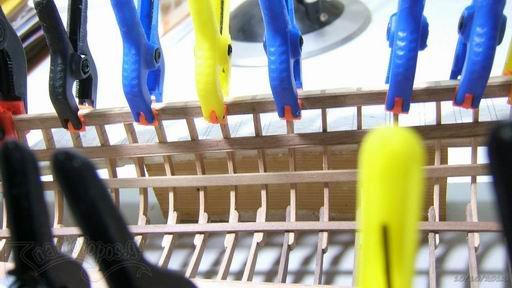
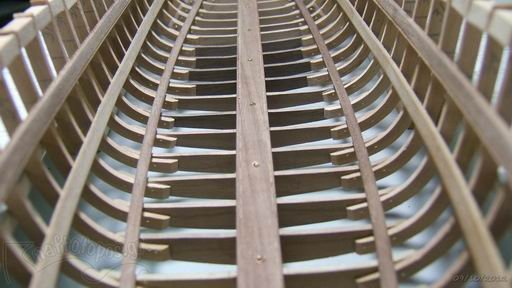
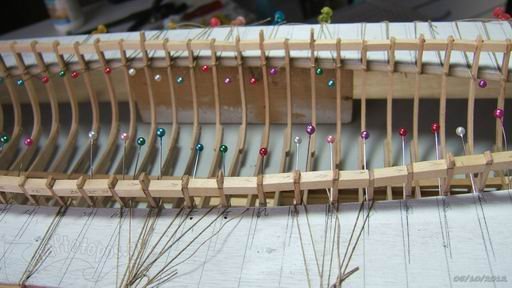
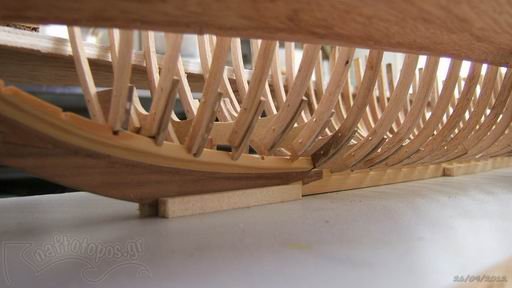
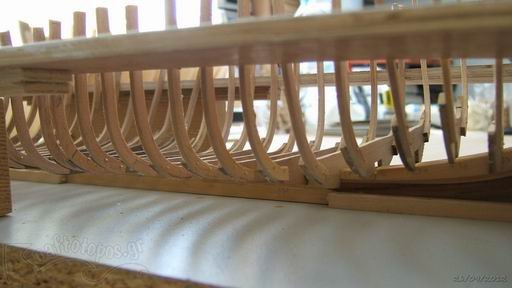
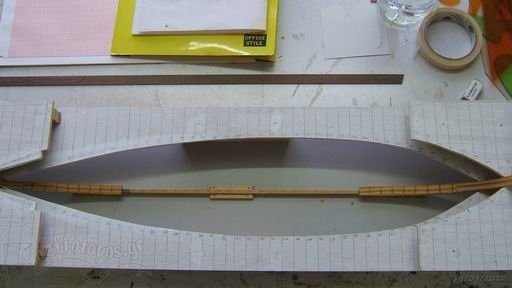
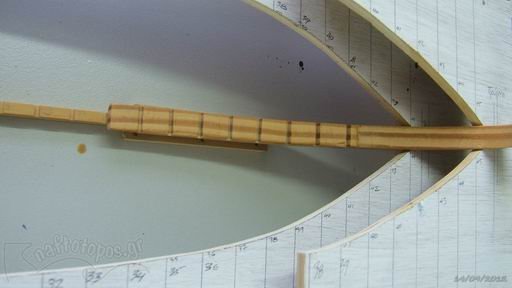
Ok. Back to the model, I took it out of the jig and I placed two more stringers at each side of the hull. By this way the construction became stronger.
-
I placed also small balks between the frames on the keel and at the same height with the floors.
With the inner keel and some “bolts”, the whole construction was secured.
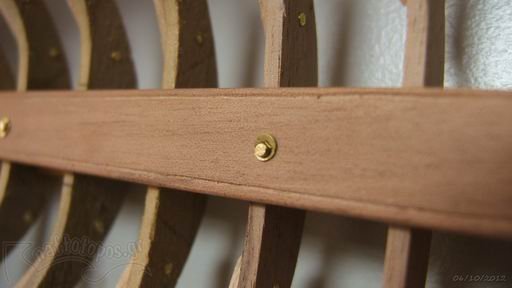
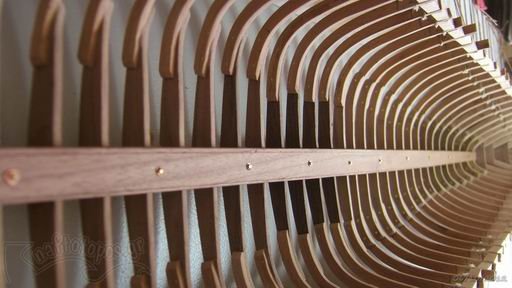
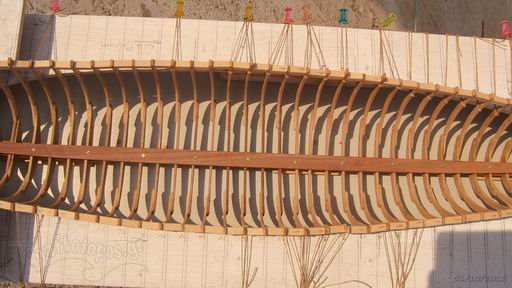
Finally, at the connection point between the floors and the futtocks, I placed two stringers (?) and let the glue dry…
Thank you
-
Thanks for your comments mates...
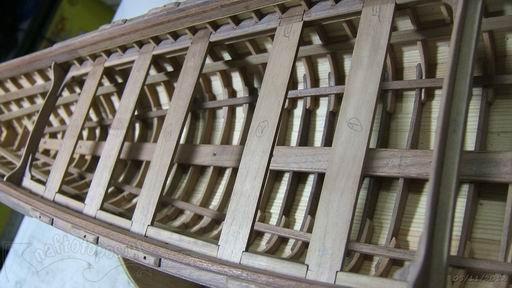
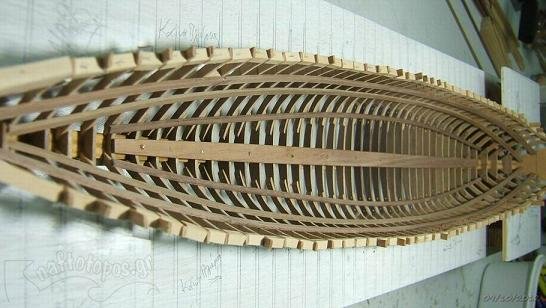
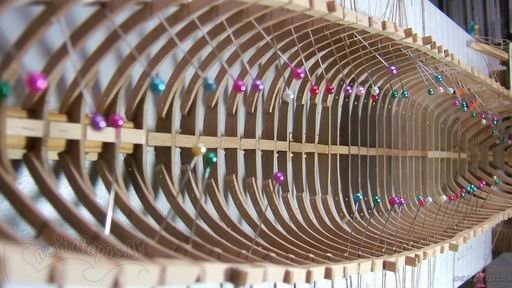
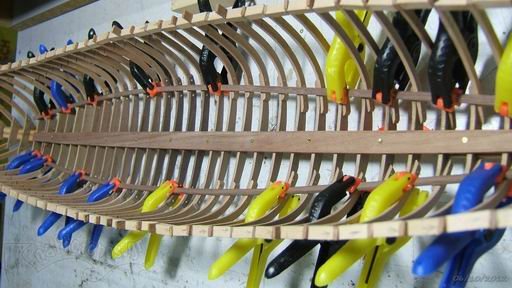
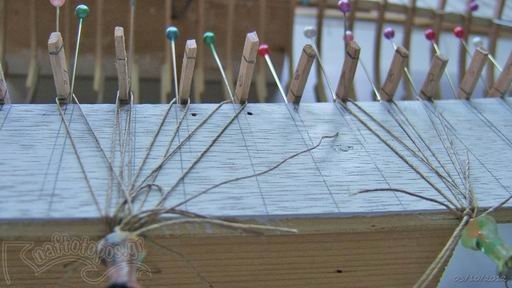
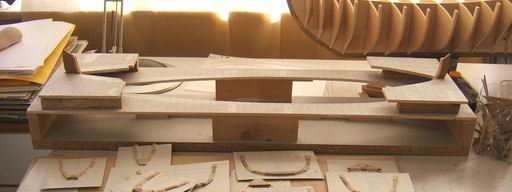
I put the hull back in the construction jig and I started stabilizing the frames.
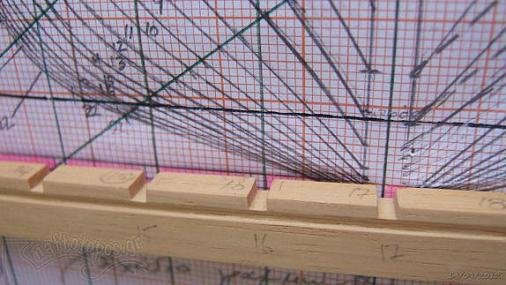
Using pins and pieces of string, I set the distance between the frames and held them in the proper position.Then securing that distance, I cut small balks, in same dimensions and placed them between the frames, at the level of gunwales.

-
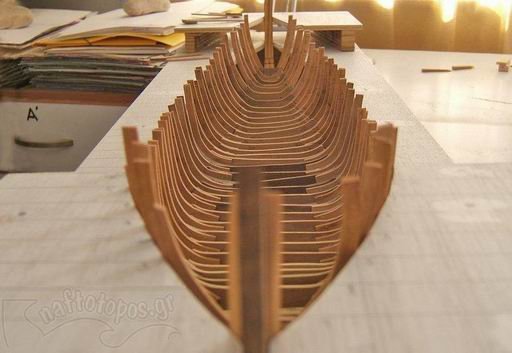
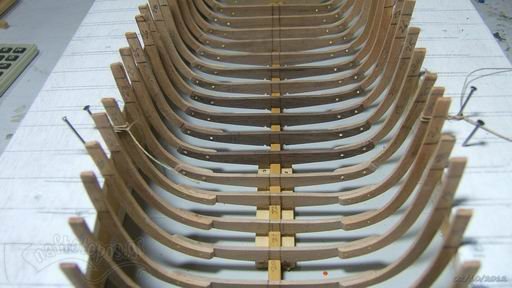
After the construction of the jig, I took the frames out of their numbered cardboards, and started placing them on respective positions on the keel.
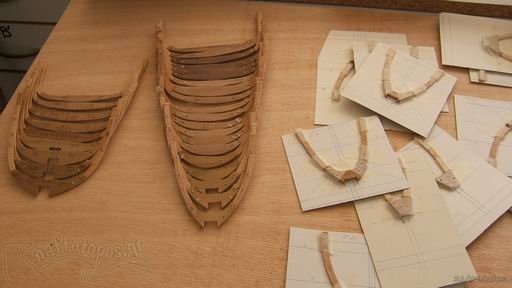
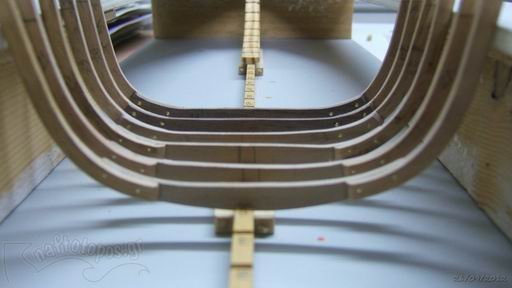

When I finished with the frames on the keel (without been stabilized), I carved two additional aprons (by solid wood) for the stem and stern posts and on which some of the hull planks will be supported.
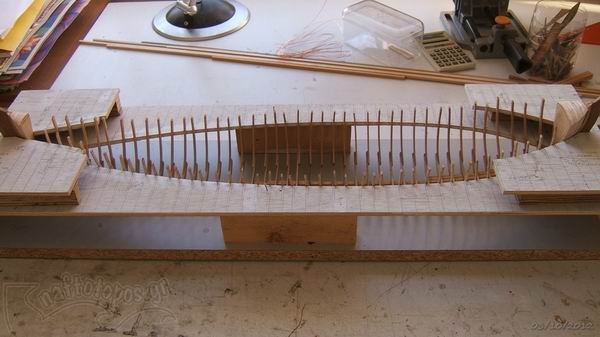
In an impulse to see the result …I took the model out of the jig…

Thank you
- aykutansin, Anja and mtaylor
-
3
-
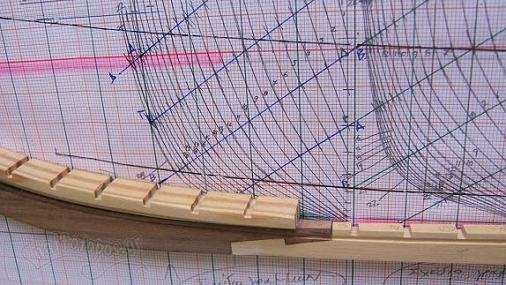
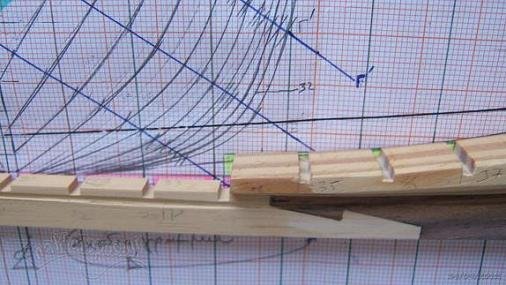
Hi.
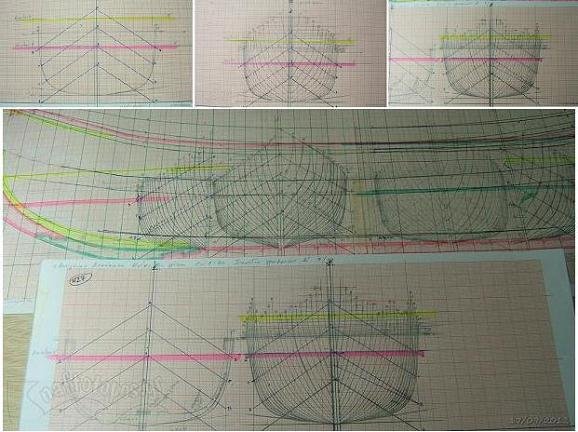
Proceeding with the construction jig, on model's side plan and related to hull’s lines, I drew two colored lines, a red and a yellow.
With these lines, I defined and set the levels of the construction jig.
So the jig was constructed by spare wooden plates and with three levels (wooden plates).
The first level is the supporting base, the second one identified as the main hull line (above the waterline), while the third level was partially constructed only at the edges of the jig.There was no need to be a complete third level and that because the side curvature of the hull.
Ending the construction, on the upper surface of the plates, I made pencil marks, pointing the positions where the frames had to be set.
Then I took the keel with the stem and stern post and I placed them in the jig, aligning the keel with two small pieces of wood.
I have to point out, that I made the construction jig in fact with only one level, because I will use it, not to compose the frames inside of it (since that’s already made), but as a help placing and stabilizing the frames on the keel.
-
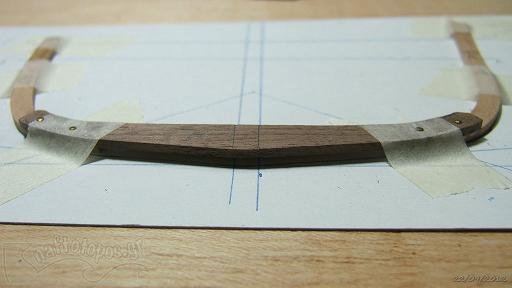
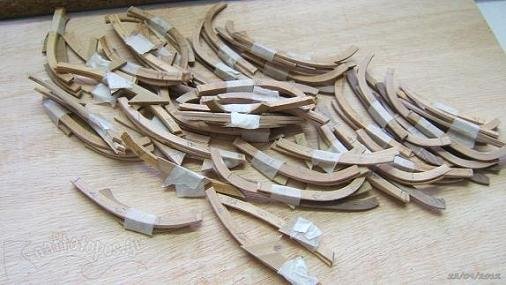
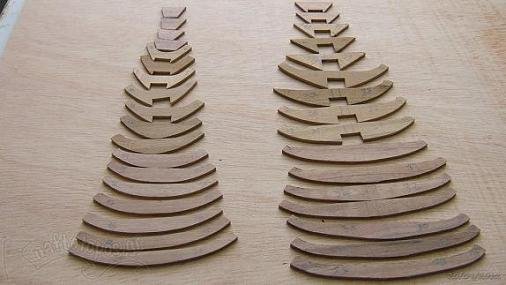
Some futtocks had to be convinced to follow the plan…but all went well.
After composing all the frames, I placed them on numbered cardboards and let them waiting, since I had to prepare the construction jig.
Thank you
- popeye the sailor, dafi and Anja
-
3
-
Thank you all for your comments and for following my log.
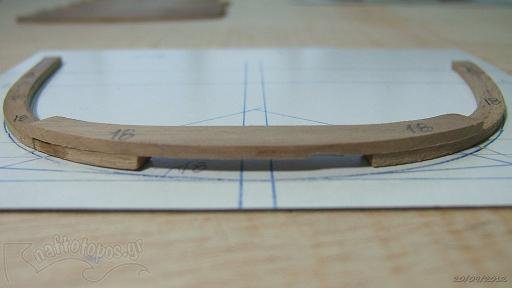
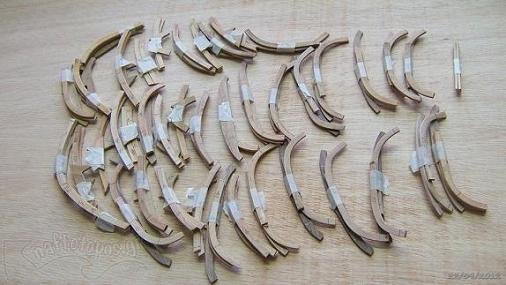
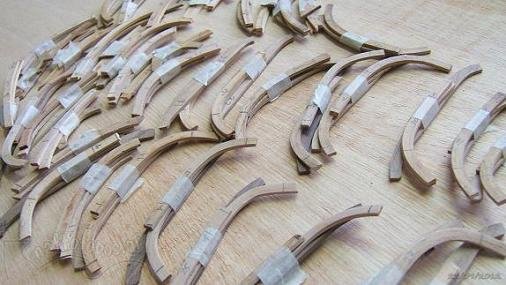
Having cut all the pieces, I composed each frame with its parts, using white carpenters glue and small nails.
Also here, the work was enough.
-
keep cutting....
Thanks
-
I start cutting......
-
Hi.
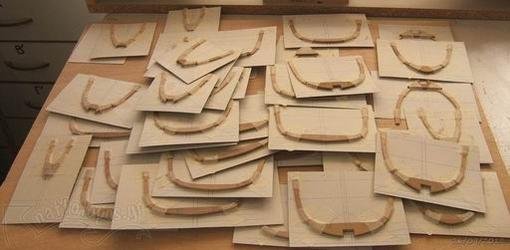
Following the same way as for the stem and stern post, I transferred the details of the frames from plan to sketches (too many sketches…) and I set the shape of the floors and the futtocks.

Then I start cutting pieces from beachwood that will be components of the frames.
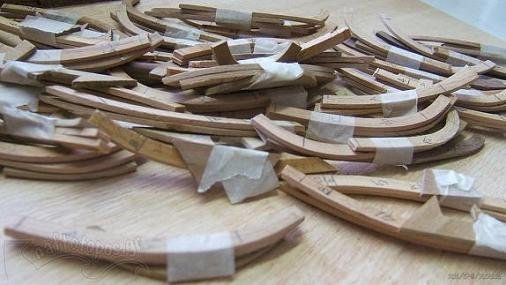
It was quite enough work because, reminding you, the hull has been designed with 44 frames and each frame with 3 pieces…
In order not to lose the pieces of each frame, they have been numbered and tied together with some tape.
-
-
For the keel and the apron (I hope it is called so) I used wood of ramin.
...............................................................
-
Hi all and thank you for your kind comments.
Anja. I will go with the version with the oars since it was more common in use, besides I think a sail would "dominate" and would cover the model and that's what I wouldn't like it.
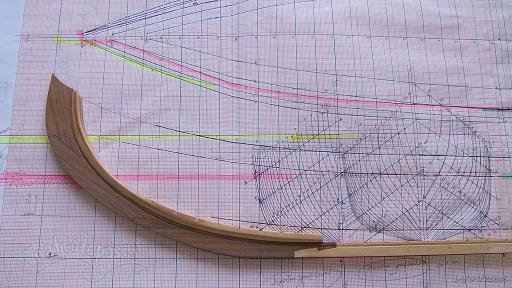
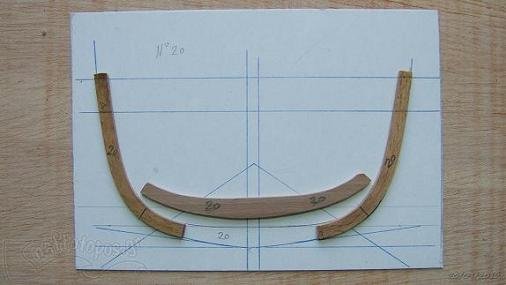
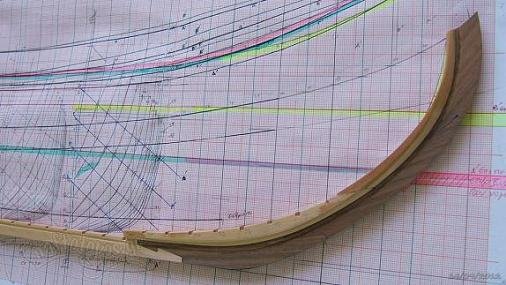
Well, I have started with the stem and the stern post, which details have been transferred from plan to a sketch and then I shaped them partially by walnut wood.
................................................
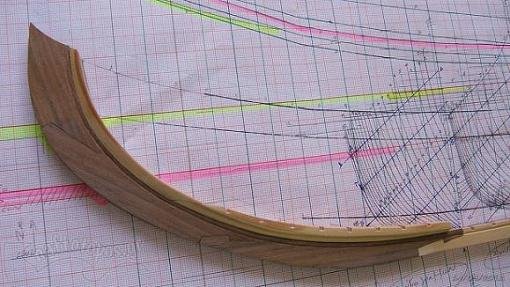
...............................................................
-
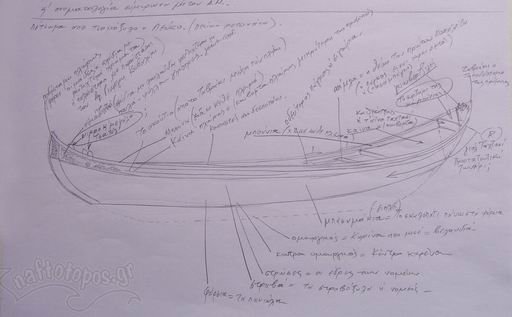
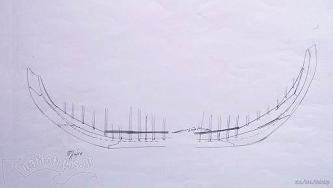
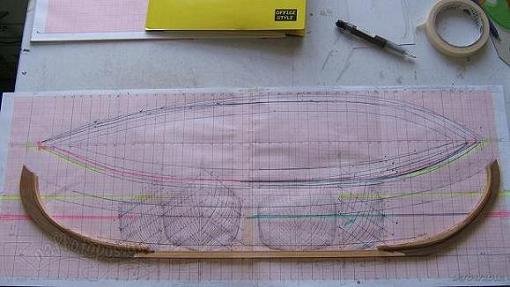
Although I had the plans of the vessel, I preferred to proceed by redrawing the model, a practice I use to follow for all my models.
....................
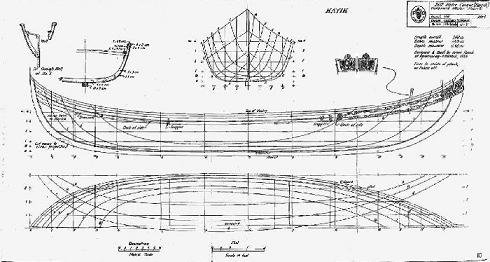
By redrawing a model, I think I can understand better the lines of its shape and maybe feel some of the first idea of its construction…
Watching many old and new photos, I made quite a few drawings (3-4) I must say, before I eventually choose the final. …
....................
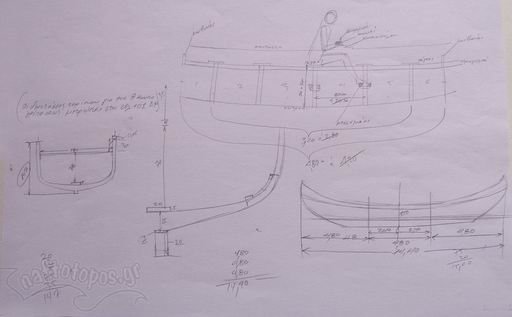
The model will be in 1:20 scale, in a length of 720 mm and 135 mm width.
It will be an open model with 44 frames and will be built by the use of a construction jig.
What follows promises much sawdust…
Thank you
Gripos-kaiki by Giorgos - FINISHED
in - Build logs for subjects built 1851 - 1900
Posted
Reaching the end of this built log, at first I would like to thank all of you who had the kindness to follow me in this journey and certainly the MSW.com for its hospitality.
I would like to thank also the team of 3w.naftotopos.gr for their support and the information that they provided me to accomplish this model.
Finally I would like to thank Thanasis who made this presentation and gave me the chance to show you some of the past of my country.
I named the model “Antigone” ( the name of the Island, of Princes' Islands) and I devote this model to the author of the book Mr Akila Mila but also to those unknown fishermen, who by serving these boats, they were composing part of our Naval tradition.
Photos of the model in the gallery http://modelshipworld.com/index.php?/gallery/album/370-gripos-kaiki/
Thank you